240260280z
Free Member
-
Joined
-
Last visited
Everything posted by 240260280z
-
 http://southjersey.craigslist.org/pts/2278866238.html
 -
Remove hood. Use one of the tilt accessories on the engine lift. Watch the transmission tunnel area as you lift and tilt and slide the assembly forward.
-
There is a check valve on the brake booster hose. Did you remove the brake booster hose where it connects to the intake or at the booster?
-
If you have a spark problem, be sure to check distributor rotor and cap too.
-
You can momentarily hit the injector's pins with +12V or +9V battery to fire them. The click from the solenoid in each injector should be the same. You can also flow a fluid through the injectors at a fixed pressure and open the injector for 10sec and measure the flow in a graduated cylinder.... or just swap your injectors from 123456 yo 654321 and then re-read the plugs after a few miles to see if the problem moves.
-
You can feel if you have a spark by pulling each plug wire off one at a time while idling an noting how far away the plug wire is from the top of the plug when the spark jumps. Try to measure maximum distance on all plugs. Forget the tech with the tablet analyzer, these engines are very crude and easy to diagnose with your senses.
-
Put a ZX distributer on it for smoother high rpms. As well, many seem to favour Mikuni carbs over webers. You may wish to research this further.
-
Here is a similar that were on a January 1970 that we brought back to Canada from California:
-
Do all of your injectors have the same colour of plastic and same part numbers (if visible)? Something simple like mismatched injectors could be the problem. My Z had 3 different types of injectors when I picked it up from the previous owner. Did you have a chance to confirm that you have a spark on plug #6?
-
keeping checking this search tool for north east... try datsun and 240z as objects http://www.jaxed.com/cgi-bin/sd.cgi?cat=pts&fil=datsun&state=XNE&submit=go
-
You may also wish to clean the connections at the dropping resistors and at the ECU for good measure:
-
Yeah Kammy is great guy! He actually shows a full tune up in that procedure. I believe the datsun maintenance interval instructions are to do a valve adjust with each oil change thus the grouping. I think he may also do timing too. Not a Z but I like this guys go/no-go technique on a Honda S2000 using feelers: http://youtu.be/dwjbGPYGlyo
-
Here is a few tests to try that are fast and easy and can tell you a lot: 1. Pull wire off each plug while idling one at a time and note drop in engine revs and sound. It should be same for all cylinders. (make sure you have good wires or you can get a shock. Leather gloves may help). Also feel/listen for the spark snap as you put the wire closer to the plug to ensure it is firing. 2. Touch with finger on injector body and feel for its internal solenoid clicking or stick a long screwdriver on each injector body and listen with ear to handle of screw driver... or use mechanic's stethoscope to hear clicking. Note any duds. 3. Pull wire off each injector while idling one at a time and note drop in engine revs and sound. It should be same for all cylinders. You can also swap injector wires between adjacent cylinders to see if plug colour changes. For example if you swap injector wires between #5 and #6 on your motor then #6 plug turns black then you have a problem with the signal on the injector wire #6. 4. If you have a spark problem, inspect rotor and contacts in distributor cap to ensure wear and carbon build up on all contacts.
-
I did it a few months and documented: http://www.atlanticz.ca/forums/index.php?topic=3010.msg16642#msg16642 I used black silicone for sealing and spark plug grease for lube. You should be able to do it today
-
If you go with resonator, make sure it doesn't stop-down the flow. I would recommend a glass-pack to tame the drone while cruising. It is sad that MSA has not addressed this by now. Check this out: http://atlanticz.ca/zclub/techtips/exhaust/index.html
-
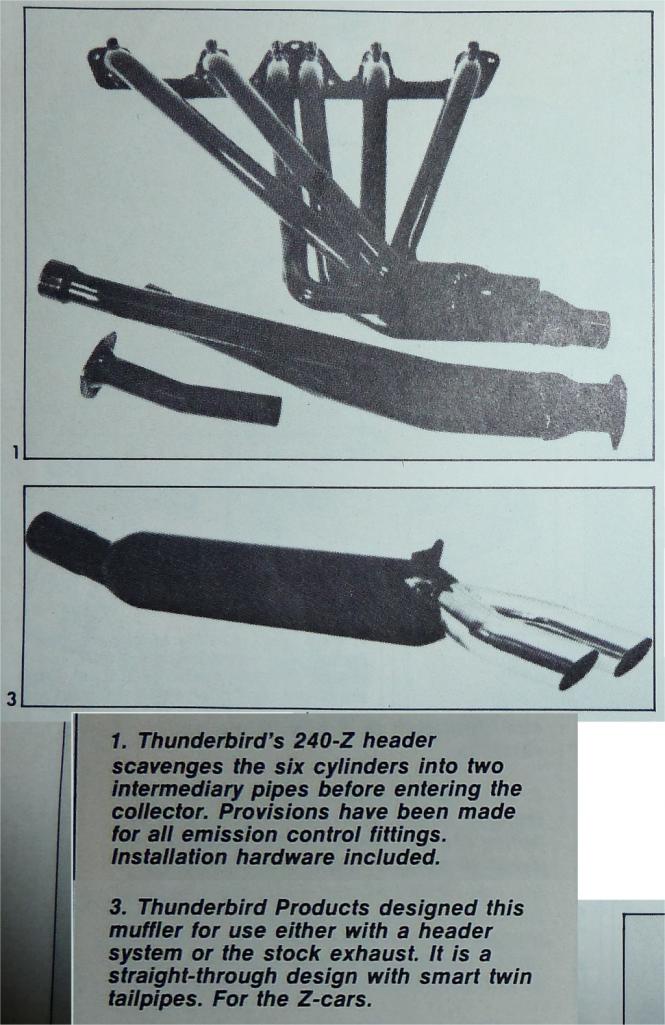
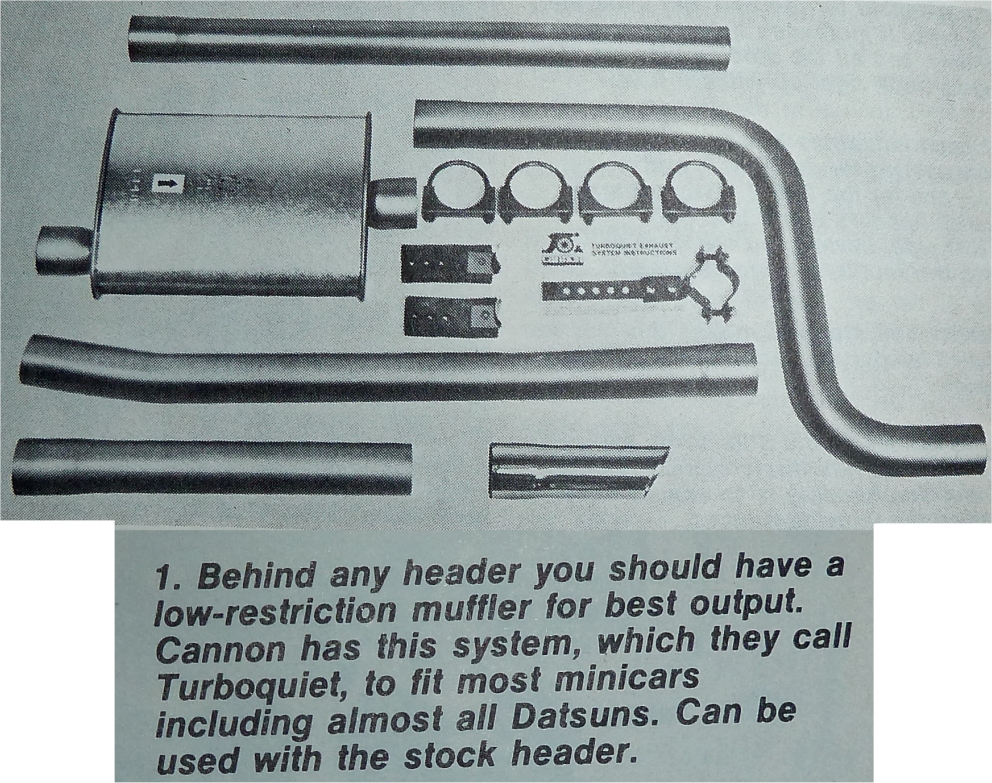
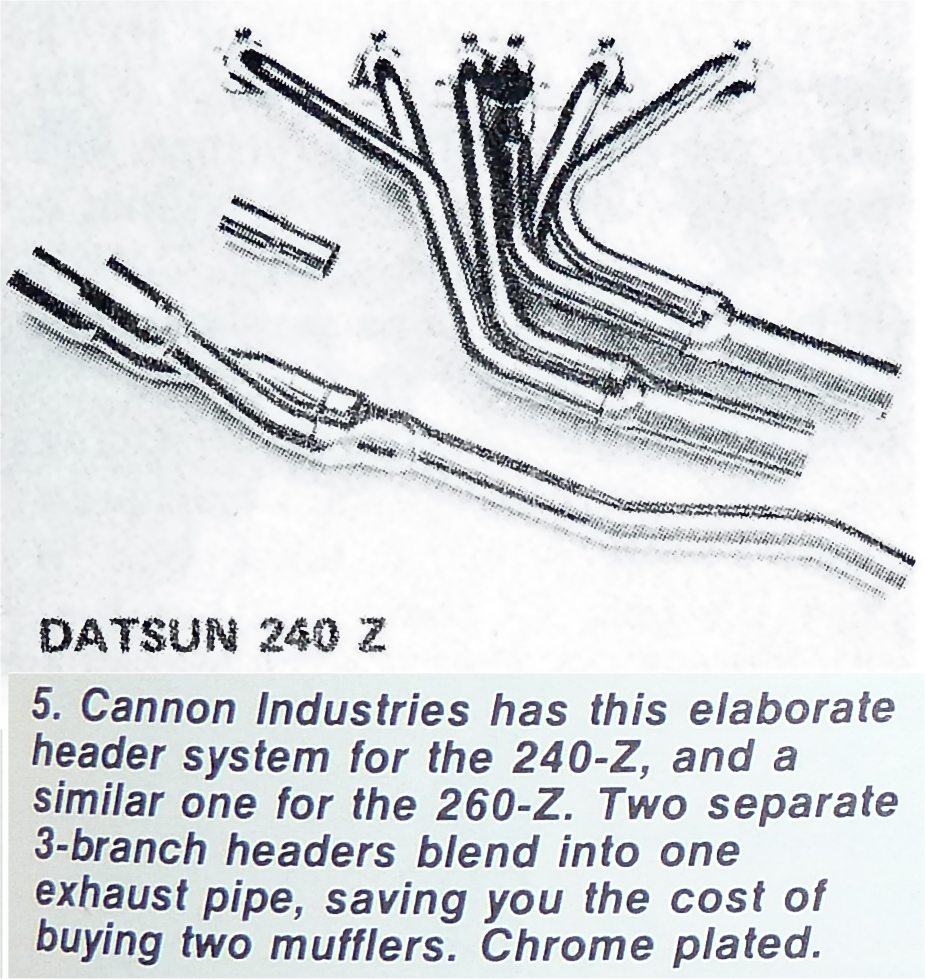
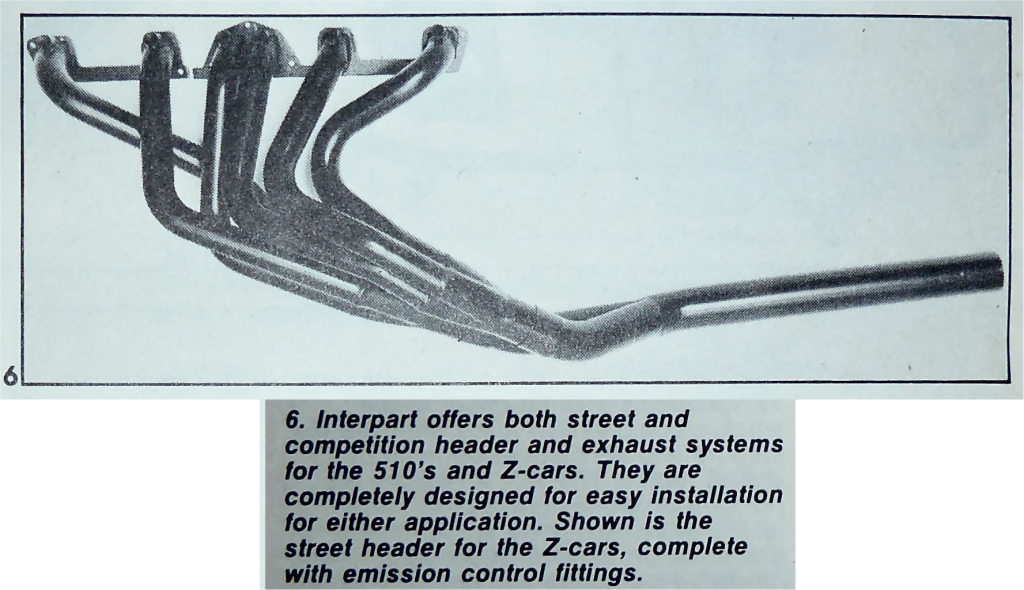
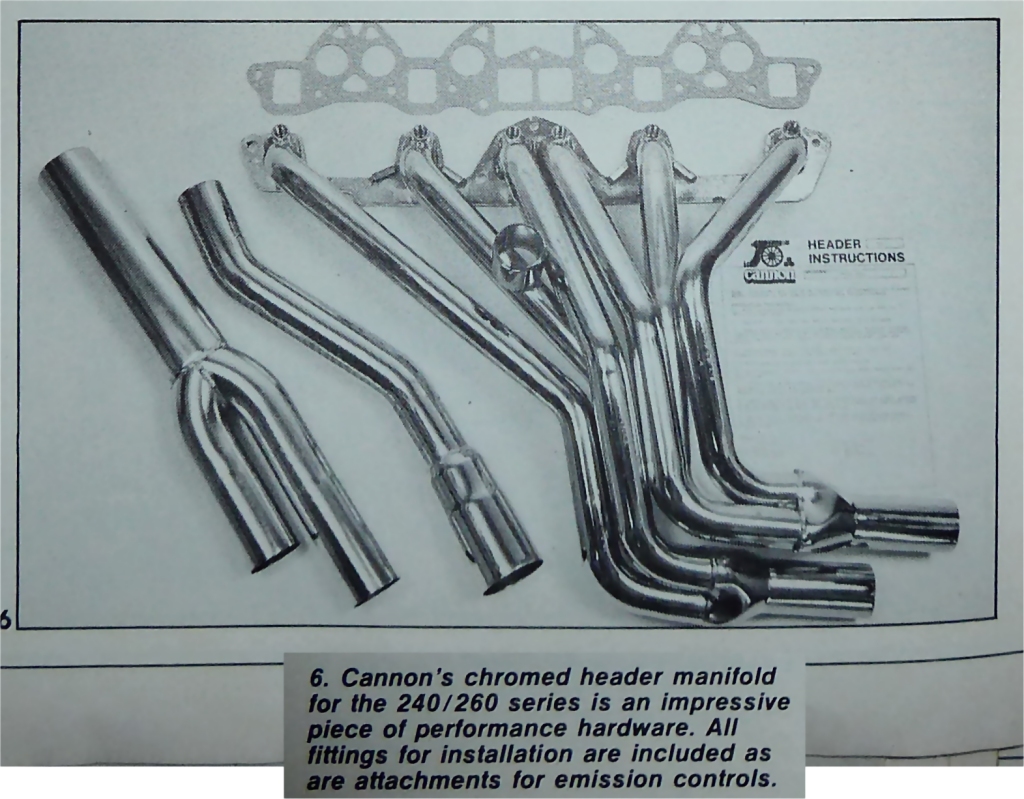
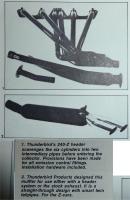
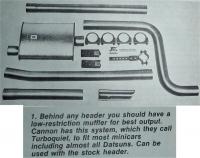
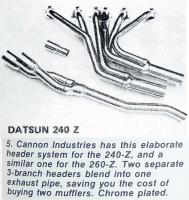
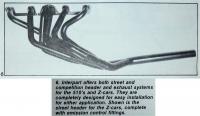
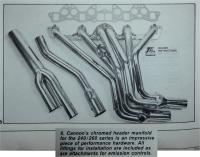
Pics from and old book I have
-
Great! I am back in NJ on Monday and can drop by next week end. Looking forward to seeing it.
-
Lots of info here: http://atlanticz.ca/zclub/techtips/EFI&fuel.htm I always tuned by my senses. For AFM spring tension I would hold the motor ~ 4000 rpm then manually move the wiper a few mm CW and a few mm CCW to hear the motor sound and rpm change. When the tension is correct, the airflow will keep it in the sweet spot. I don't have a CO2 meter and there are no emission tests here so I just set the AFM bypass screw to 5 full turns in (on my 77 it has 10 full turns to fully closed). I assumed Nissan/Bosch engineered it for a midpoint default setting like most good engineers would. I now have an LM-1 O2 Sensor and will take some measurements in a few weeks and report back to the forum
-
For a 77 280z with L28 10° is stock setting. What is your ride and motor details? This may help with swap: http://atlanticz.ca/zclub/techtips/distributor/index.html I also recommend a rebuild/refresh: http://atlanticz.ca/zclub/techtips/distributorrebuild/index.html
-
Look up the shop BMC in Pheonix http://hammondsplains.com/z/zworld/bmc/index.htm and get it O-ringed or DIY http://www.iskycams.com/pdfcatalog/2004-05/page16.pdf
-
FYI when I refresh old Z's that sat for a long time, before cranking, I always take off the oiler tube and spray carb cleaner through each inlet and also back flow through each individual cam oil hole until it is degunked and flows well. Simply using the straw of the spray can up to each hole works fine. A plugged hole will wreck a cam. Follow this up by removing the plugs and turning by hand at the damper to ensure the engine in not seized. Finally, oil the cam and rockers then crank the motor with no plugs in to watch and ensure all oil holes flow.
-
Heating the rod with a hot air gun may help expand it enough. Also try freezing the pin to expand and contract both.
-
http://www.picturetrail.com/sfx/album/view/1803105
-
Like this?

-
For balancing the carbs here are a few quick and dirty methods I use when I don't have a flow meter or WB A/F meter: Setting Idle 0 Assume good plugs, valve adjustment, no vacuum leaks, good fuel pressure and float levels set correctly. 1. Remove air box 2. Warm up car and remove all linkage connections so that the carb's throttle plates are resting on their set screws. 3. Adjust each set screw so that the suction felt when you put your knuckles against the throat of each carb and feel the air flowing between your fingers is the same on both carbs. 4. Stick you head down between both carbs and listen to the intensity of air whistling sound from each carb. It should be the same amplitude 5. Repeat 3&4 until happy and your rpms are 600-800rpm (exact rpm should be suited to your taste and performance when moving from stop or what the FSM states... your call baby) Setting Off Idle 6. Reconnect linkage 7. Make sure the screw from the fast idle servo is not pushing on the throttle rods (that screw is the one next to the front carb). 8. Turn the fast idle screw at the center of the linkage (way up high) so that the car is idling ~ 3000 rpm 9. Adjust the balance screw on the linkage (next to the back carb) so that the air flow is the same in both carbs (as you did in 3&4 above) You can also observe the point at which both throttles open when you push the main linkage. The balance screw should be set so that both throttle plates open at the same time. Setting Mixture 0. Warm up car 1. Screw both jets all the way up to the top 2. Screw the jets down 2.5 turns (default starting point) 3. Take the car for a run and listen closely for popping in the exhaust (rich), popping in the intake (lean) and note power 4. Screw both jets up or down 1/2 turn and take another run to see impact. 5. Repeat 3&4 and do 1/4 adjustments until you are happy 6. Take the car for a spirited 30min drive with plug wrench then while driving fast on a long stretch, hit clutch, kill motor then pull over to side of road, look at all plugs and compare colour. If there is a difference between the front 3 and rear 3 then the fuel jets need tweaking. Adjust the darker 3's carb by turning up the jet to lean the mixture a 1/4 turn If all plugs are too dark then turn both jets up 1/2 a turn. 7. Repeat 6 until you are happy. All plugs should be the same colour and very light brown. Listen for popping out the front to tell if you go too lean. Don't worry, you can take your time and do this leisurely over a couple of days to fine tune and colour match your plugs. Power and Timing 1. Fill up with premium gasoline 2. Advance timing to 10° BTDC 3. Grab a 10mm wrench 4. Take car for a run and note power 5. Pull over and use 10mm wrench to advance timing a bit (turn distributor clock wise) Don't worry about a timing light 6. Take it for a run and note power increase and listen for pinging under load (try acceleration on a hill to force a load) 7. Repeat 5&6 until you are happy with balance of power vs. pinging 8. Check plugs again. You may need to add more fuel to get the last bit of power 9. Make note of timing at idle using a timing light. Follow Up 1. Turn each jet up and count turns. Record these numbers for future reference then turn the jets back down. 2. Measure timing with a timing light at idle with no vacuum advance and at 3000 rpm Record these numbers. Aim for 36 to 38 maximum degrees at 3000rpm. 3. Measure engine vacuum and record number. 4. Measure air flow (with proper device) and record numbers 5. Measure O2 with WB at idle and at various RPM's underload and record numbers. 6. Re-balance carbs at idle and 3000 rpm's with airflow meter. 7. Adjust jet height using WB O2 sensor. 8. Close mouth of each carb (one at a time) set rpm to 3000 and run rough on one carb and measure with WB. Compare both carbs and strike balance. (AF ratios should be the same and rpm's the same when running on one carb) 9. Do the "lift each piston 1/16" and compare how engine behaves as well as "Norm's lift each piston fully to disable" trick to also compare each side to the other's behaviour. 9. Measure 02 with WB at various rpms' under load and select or augment needle to taste. Repeat 9 until happy with WB and butt dyno performance. 10. If you have the luxury of a dyno then use it. 11. Once jets and needles are set Blueprint (measure evertyhing) including depth of jet from bridge of carb with vernier caliper's depth gauge.