.JPG.cfcada9cf1c1b502df3f5f2f2ca3ff36.JPG)

SteveJ
Free Member
-
Joined
-
Last visited
Everything posted by SteveJ
-
 The seats aren't too bad to DIY. I've done a couple of sets myself. You can get foam and covers from Classic Datsun Motorsports.
 -
Philip, don't start rumors, especially ones that aren't true. ::
-
Yeah, you need to pay me a visit. ::
-
Matt, if you're not working this weekend, feel free to bring it over to my place, and I'll see what I can do to help you.
-
No duct tape. Get this: http://www.ebay.com/itm/2X-1157-2057-2357-Socket-Adapter-Harness-Wiring-For-Front-Turn-Signal-Light-Bulb-/191257441226?pt=Motors_Car_Truck_Parts_Accessories&hash=item2c87d4f3ca&vxp=mtr And a couple of sets of weatherpack connectors: http://www.amazon.com/Delphi-Packard-Weatherpack-Terminal-16-14/dp/B004E4RNBW/ref=sr_1_2?ie=UTF8&qid=1417634611&sr=8-2&keywords=weatherpack+3+pin Much cleaner
-
Drive it over here and I can wire in a replacement socket until you get a real replacement.
-
I bought similar lights from another person in the Far East. They are the same size as stock. You will want to waterproof the backs.
-
I knew I could count on you, Bruce. Make a video of it.
-
Of course, I just want to see it so I can take it apart. Hey, Bruce, make your way over to his place and grab that part.
-
Let me know if you need a third hand. I may be able to squeeze some time in on the weekends to help. Plus, if I drive the Z, it gives you a reference if you have any questions on assembly.
-
You may be able to download a manual: http://manualocean.com/dive~sun-1500-engine-analyzer-manual.pdf
-
I believe Zed Head is correct. Look at part 18 in this link: http://www.carpartsmanual.com/datsuns30/DatsunZIndex/Electrical/Meters/tabid/1664/Default.aspx. Where exactly did your friend find this part?
-
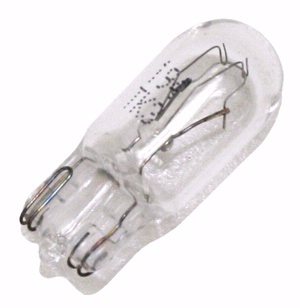
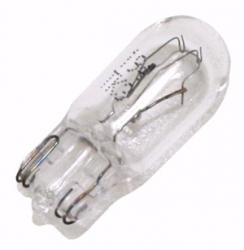
Thanks for posting a picture. It's a BA7 bulb. Here's a source: https://www.superbrightleds.com/moreinfo/ba9s-ba7s/ba7s-led-bulb-1-led/10/#/attributes/16.
-
My previous post was a little premature. I played with the timing some tonight and went to re-tune the carburetors after dropping the timing down. The rear carburetor was weak again. Following Mr. Warner & Mr. Pilgrim's suggestion, I attack the rear carburetor with starting fluid and heard the RPMs increase when I sprayed around the insulator between the manifold and carburetor. All four nuts were loose. I tightened the nuts and finished adjusting the carburetors. The rear behaved much better.
-
Do you have the old bulbs in hand? If so, I could probably tell you the type. Could they be 194s?
-
So, here's the update. I replaced the plug wires last night and ran the engine today. I found the rear carburetor wasn't pulling as much air, so I increased the air flow to match the front. I did a test that Philip showed me that he called the "equally $h!++y test" and found the rear carburetor was pulling its own.
-
Sure, mention that AFTER I tell my wife that we need to cut back on spending.
-
Yeah, I wouldn't turn that down. How difficult was it to get it delivered to your house?
-
I have a set of the taller Race Ramps with the detachable ramps. They are very nice to use and don't slip easily with the Z even though I have a painted garage floor. However, if you need to lift your car to do the brakes, I think a scissor lift would be much better.
-
If you're on Facebook, look up the Georgia Z Club and like the page. I can get your pictures posted there. Also join Georgia Datsun Owners. The user here that goes by the name of Metalmonkey47 (http://www.classiczcars.com/user/29114-metalmonkey47/) is an admin for that page and can get your membership approved. That can give your car some good exposure.
-
I would expect different compositions of long-chain hydrocarbons & aromatics between regular and premium, so I wouldn't be surprised by differing smells.
-
Now, have you been able to find the inline fuse? It may be that you need a female connector with the inline fuse to connect these two wires. I haven't ever traced out the actual wires myself, though. It doesn't show that connector in the 71 supplement, either. You can probably get the correct female connector from Vintage Connections.
-
I don't have a spare, but as I offered before, you are free to come over and take measurements. Someone somewhere has a fastener that would work.
-
Yeah, Philip was showing me that on Saturday.
-
The black/white wire should have 12 VDC when the ignition is in the RUN/ON position. If it is not connected to the green wire in any way, you won't get power to the fuel pump. Can you post a picture?