


Dr. 240Z
Free Member
-
Joined
-
Last visited
Everything posted by Dr. 240Z
-
 Nice looking rims
 -
Likewise, Ron, thanks so much for sharing your insight with us.
-
For the Do-It- Yourself owners check out S30 posts on this topic contributed by CZCC member, EScanlon.
-
Hi, My order has arrived (Maine) already. It was promptly shipped and the bars were well packed. The bars look beautiful and if they fit as well as they look, I'll be delighted. I should note that a very easy to follow instruction sheet accompanied the bars. Hats off to Randy!!
-
Just a suggestion: Check/replace the coil before all else
-
Hi, It's not too likely that this console is the original as it looks quite different than that of my Z. Like yours, my Z has a 1/71 production date and, as the original owner, I can attest to the originality of its console. I hope you elect to restore your Z and keep us updated with posts/pictures. George
-
Hi Blue, Some random ideas: Lots of electrical outlets Good sized air compressor Lots of lighting Overhead storage units which can be cranked up and down Air exchanger Cheers, George
-
Philip, Where do you find this stuff? Amazing!!
-
Philip, Is there a Japanese to English translation of the info at: carryback.com?
-
Philip, Is there a Japanese to English translation of: Æ’KÆ’Å’Â[Æ’WÂ@Æ’LÆ’Æ’Æ’Å Â[Æ’oÆ’bÆ’N ????
-
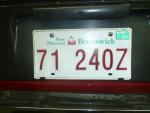
The VIN (12,043) confirms that yours is a Series 1....No question about it
-
By way of suggestion, replace both lamps with Cibie lenses and quality H4 bulbs...You will be amazed!! There's lots of good info here on CZCC.
-
Happy Thanksgiving to you too, Blue
-
Sorry to read about your 'bad' news. I experienced some of the same with my Z's cam this time last year. From that experience I'd like to suggest that you look into using/use an oil additive, ZDDP, going forward. A 4 ounce bottle, which costs around $6.00 (ebay), may prevent a repeat heartbreak...."we love our cars!"
-
Further to the last post, if you power it up and it still will not retract (you hear the electric motor running, but there is no retraction of the mast) it's very likely that the plastic/nylon cord that drives it from within has broken. This happen to mine a year ago and I replaced the drive cord with whipper snipper cord. That said, it works great again. FYI: I posted a detailed account here on CZCC of how I fixed mine. Hope this is of value to you. George
-
Consider using 3M's 8119 'Weatherstrip Adhesive' (black). I HAD the exact same issue and this product resolved it completely.
-
25mm on my 1/71 Z....not sure if it is OEM
-
Here's a cut and paste from a post I made a few months ago - I hope it is of some value to you. Follow these steps: 1) Remove the driver's seat and place cushions in front of and behind the front of the seat support cross member for comfort. 2) Lay on your back and slide forward so that your head is up against the clutch and brake pedals. 3) Using your left hand, reach up and remove the two wing nuts that screw onto the two threaded posts which support the tachometer. 4) Carefully push the tachometer forward so as to remove it from the front of the dash. 5) Once it's out of the front, make a drawing of what wires go where in the rear of the tachometer. 6) Remove the wires and then remove the tachometer completely out of the way. 7) Using a stubby Philips screwdriver, reach through the hole in the dash for the tachometer and remove the two supporting screws that hold the rheostat in place. 8) Unplug the two wires to the rheostat and remove the plastic knob on the stem. Now remove the rheostat via the same hole as you used to access the two Philips screws. 9) Reverse steps 1 through 8 to install the new rheostat and re-install the tach.
-
Hi, z boy mn As per my earlier entry, please check out Dave Irwin for the wiring harness as he makes them. Daniel Stern purveys great lenses (Cibie) and H4 bulbs Cheers, George
-
Hi, As a suggestion, send your questions by email to, 'Dave', at: wolfin32z@yahoo.com Cheers, George
-
-
Yes, it the correct emblem on the pillar for a 1970. Missing is the emblem on the rear hatch...should be one on the lower right corner Cheers, George
-
Sorry, e-tek....It doesn't reflect the era of your Z...needs to be more defining and enhance the value of your fine workmanship
-
Coil good? Kind of looks 'tired' in the picture
-
"is there a trick to fitting it"....Not sure about a 1972, but on a Jan.71 placing the left panel is easier if you start by removing the rear (center) panel for more/better access. Hope this helps, George