Everything posted by siteunseen
-
Hanging RPM
Hey I forgot about a possibility. The TPS, little black box above the BCDD attached to the side of the throttle body. You could pop the cover off and see if 1 of the contacts may be stuck or unplug it and see what happens too. I didn't know you could do that until I read Blue suggest that to somebody. Good luck, I'm just throwing stuff out there.
-
Hanging RPM
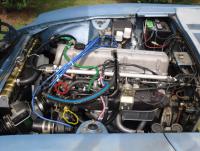
BCDD under the throttle body. Unplug and see if it quits. Small black wire off the BCDD butt connects into a small white wire going into the wiring harness. B boost C controlled D deceleration D device If you deleted the EGR and BPT there's a vacuum hose on the side of the BCDD that needs to be plugged with a small bolt, circled in yellow in the picture.
-
1976 EFI Overhaul
1/4 turn valve on the AAR, genius! Looks like you may have a newer ZX distributor wired in too, I just did mine. Now to the fun part, driving the tires off.
-
Question on swapping out to E-12 80
All I can say is Wow! Fire jumps from the end of the plug wire boot to the tip of the plug almost 1/4". Before I did it I checked and I had to have the boot over the tip to fire the plug. Raining now so I can't do any burnouts but I'll do one in my living room tonight. Thanks for the Tech Tip Blue!
-
Question on swapping out to E-12 80
I've cleaned the inside of the distributor up good and lightly sanded the tips of the rotor and the magnets. Should I put dielectric grease on anything inside? I have a new button and cap. Thanks for any replies.
-
fuel injector problem?
I bought those ^ connectors too. It takes a while to do but it's worth it. I had 1 or 2 old ones that would just fall off the injectors, cracked pretty bad.
-
Well here is my 78 280 Z build
You got a helluva deal, I paid $700 to R&R a '01 Camry motor a couple of months ago, it came out from the bottom. White interiored cars are scarce, keep the pictures coming! Here's a good deal on a common to Zs wheel, Wheel Details - Discount Tire Direct
-
RPM drops to 500 RPM when car is parked with engine on or during traffic lights!
That might be something too, valves need adjusting?
-
L28 block with an E88 head good or bad idea
Is it this one? OZDAT.com Engine Design Utility I couldn't open your zip without downloading something.
-
RPM drops to 500 RPM when car is parked with engine on or during traffic lights!
Sounds like your alternator is bad or the belt is loose. Or it could be a bad battery. Put a volt meter on the battery terminals while it's running, mine reads 14 volts at least. You can also see if a screwdriver will stick to the rear round center of the alternator, like a magnet, while it's running. Or something isn't grounded too good.
-
Goob's 72 Franken-Z
That's a heck of a lope, sounds great!
- Tax Day sucks.
-
Hot-start issue with EFI - who has it, who doesn't
Could his fuel pump be overheating? Maybe clean and re tighten the terminals.
-
Coolant temp / fuse wiring problem
You could use a reducer like these, R & M Distribution - EEXD Brass Reducers. They're at my Lowes building supply locally.
-
not going past 4100 rmps while driving
Wrong, wrong wrong, it was my bedtime! That cover is under the spare tire tool kit. You'll lift out the fuel gauge sending unit, about a foot deep.
-
April showers bring idiots flowers
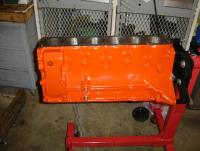
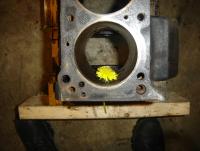
Got excited and busted a sleeve. Luckily it was going to be a spare that I'd move around the rest of my life, lemonade? The Chevy orange is the newer one. That'll have to be vatted off.
-
not going past 4100 rmps while driving
Gas tank's not all that bad, thanks to Blue again. Z Tech Tips Ball and Socket Compression Rod (AtlanticZ.ca) Uh Oh! It says ball and socket but it's the tank renewal. Take the sending unit cover off, under the spare tire, and see how cruddy the tank is, 1st!
-
front air dam
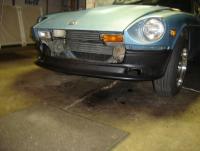
Yes it was a heap big box! $166.99 to my front door.
-
not going past 4100 rmps while driving
It ran good for awhile when you replaced the fuel filter? Sounds like you've got a messy gas tank. I would put a filter between the tank and the fuel pump and get another metal fuel filter up front. Keep an eye on the clear one at the tank to see how quick it dirties up. Blue has this write up on how to do it, Z Car Tech Tips Fram G3 Filter Installation
-
front air dam
I got a Xenon from Jegs for my 280. Urethane and bendable. I really like mine and that's the cheapest I found, MSA is $220. Here's the 240 one, Xenon 3124 - Free Shipping on All Orders @ JEGS Here's the same one at MSA, Motorsport! Urethane Air Dam, With Brake Cooling Ducts, 70-8/74 240Z-260Z - The Z Store! Nissan-Datsun 240Z-260Z-280Z-280ZX-300ZX(Z31/Z32)-350Z-370Z Parts
-
Hot-start issue with EFI - who has it, who doesn't
-
resetting odometer - any better ideas than with a drill?
Most of my adventures start with those words and end with "Mom I'm OK but you need to come to emergency room". It's easier asking for forgiveness than permission.
-
resetting odometer - any better ideas than with a drill?
I hooked a Dremmel to a motorcycle odometer once. It started clicking them off pretty good so I went upstairs to get a beer or something. Came back and the gauge was full of smoke, the plastic bits had melted. $200 for a used gauge cluster that had 2,000 less miles than mine.
-
Hot-start issue with EFI - who has it, who doesn't
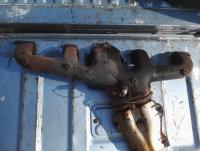
The people at Nissan realized the big 'ole exhaust manifold wasn't too good an idea. This is stock on a '82 ZX. A whole lot less heat holding cast iron! Oh yeah. I've got a ZX fuel injector fan somebody can have. The twice pipes that go over the valve cover is missing, fan and bracket only. Free, if someone wants to pay shipping. It works off my battery charger.
-
I'm in uncharted waters
Have you tried this Craigslist search engine, SearchTempest Online Classifieds Search - All the Classifieds. One Search..


