jfa.series1
 Subscriber
-
Joined
-
Last visited
Everything posted by jfa.series1
-
 Enrique and Dave, Thanks for the feedback. This morning I remembered I have the 1971 FSM Supplement PDF on my PC and gave it a check. Dave - just as you said, the supplement graphic for the dash connectors shows the "provision" for the fog light switch in one of the main bundles running across the top of the dash, the pointer shows it at the junction for the hazard switch set. I will get into the wiring later today and post my findings, with any luck I can get a pic or two. As to the relay caution and guidance, that was my plan all along and I appreciate the reminder. Thanks, Jim
 -
While my dash is out and all the other wiring is fully exposed, I am trying to follow EScanlon's tech post on adding fog lights to a early Z - link below. I want to have this in place should I later decide to hang a set of fog or driving lights on the front. http://www.classiczcars.com/forums/showthread.php?23465-Wiring-Fog-Lights-on-the-Early-Z I found the red and black pairs at the front of the car. I also found the green and black/white fuel pump pair and connector he referenced in the dash harness. That is the end of the "finds"! There is no sign of a red and green/white pair with a connector. All of my dash wiring is fully accounted for, no orphans in sight. My FSM says they are a red and red/green pair at the switch connector, no joy there either. The FSM diagram for the various dash connectors has the fuel pump connector but nothing for fog lights. Does anyone know what connector and wire colors carry the front red and black pair on the main harness thru the firewall? I suspect they have changed colors at this point and are mixed into a multi-prong connector. If I can pick them up at the firewall connector, there should be no problem with tracing them further along. Thanks, Jim
-
What a tremendous opportunity for you and your daughter, you may have budding gearhead on your hands. Do take lots of pics all along the way, be sure and get that little girl in them so both of you can relive the journey in the future years. And of course, we are all jealous as all get-out over anyone who can get two 71's at the same time. Good luck and have fun. Jim
-
Here are some others: Banzai Motorworks - http://www.zzxdatsun.com/ New Datsun - http://www.new-datsun-parts.com/index.html Autohaus AZ - http://www.autohausaz.com/index.html Black Dragon - http://www.blackdragonauto.com/ Hope this helps, Jim
-
If you cleaned and/or painted the hinges, good chance the pivot points are dry and providing a bit of resistance that prevents the hood front from fully dropping into position. Try lubing all the pivots with a drop or two of light oil, or - if you have it, a spritz of aerosol dry lube (commonly used for guns and reels). Dry lube leaves a "teflon-like" coating, does not attract and hold grit. Jim
-
Here is link to the photos of my floor pan refurb. As our moderator says, it is all in the prep. I used the POR-15 products to clean, neutralize, then protect the exposed metal. I had some oil-based paint tinted to match the car and applied that for the final finish - not that any of it will be visible after the insulation went down and the carpet will finish it off. But... at least I know it looks nice down there. http://s572.photobucket.com/albums/ss168/jfarnett986/2%20Floorpan%20Refurb/ Jim
-
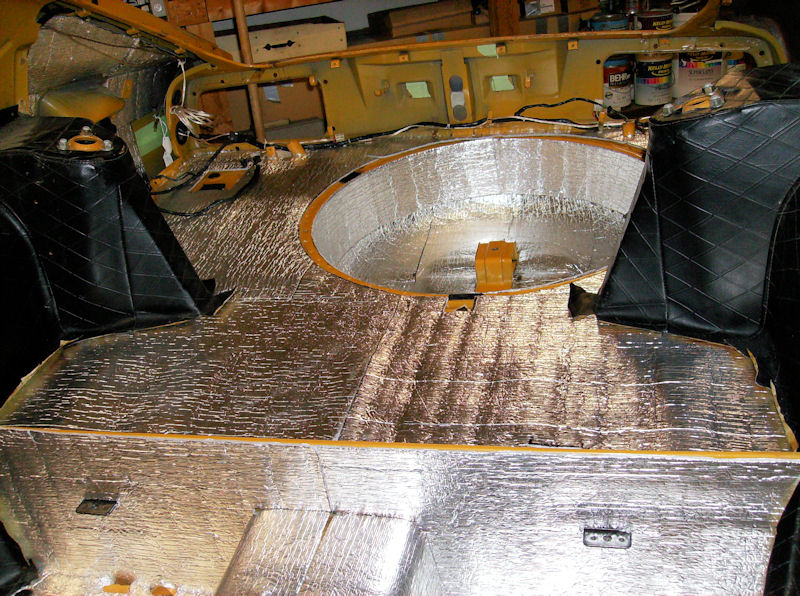
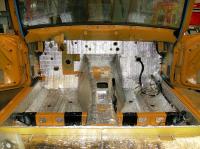
I cannot speak to the peel-and-stick but be cautious in using bubble foil. It will break down from heat over time and it will crush everywhere you apply any weight. An option I located and used is 1/4" closed-cell polyethelene foil. It will not break down or crush, and it provides a R-factor of 15.7 and noise reduction of 19dBA. The product name is Prodex, I bought it from this site: http://www.insulation4less.com/Default.aspx Here are a couple of shots of my interior. I used 3M spray adhesive to install it. Jim

-
Have you checked with Courtesy Nissan? Jim
-
I am also doing a total resto and getting fairly close to the finish line. If you will pm me your email address, I will send you the spreadsheet I have maintained throughout the project. I started with a "needs" section and added to it as I identified something to be replaced - car section by section as advised above. The "needs" area allowed me to research sources and compare prices. As I purchased an item, I removed it from the "needs" and entered it in the "purchased" area with source and cost info. I also maintained a list of supplies and consumables - that has added up to over $1k during the project. Don't neglect to carefully bag & tag everything that comes off the car - immediately as it comes off. Even one screw should be in a baggie with a identity tag inside with it. You can see a bit of my progress in my "garage". Good luck - you are beginning an adventure that you will remember a long time. Jim
-
The roller mounts to the top edge of the outer shell, under the chrome strip with the rubber blade, about 7-8 inches from the back end of the door. You should see a notch on the inside of the door to receive the roller. It's function is to press the window against the fuzzy strip and keep it from rattling around as it goes up or down. The rollers are specific to left and right side doors. Jim
-
Here is another source for very authentic interior soft parts, Seatz Mfg. In addition to seat covers and carpets, he has the diamond fabric made up for the tranny tunnel and rear wheel arches, pebble grain strips for the inside rockers, and more. I already have his seat covers and soon to order the 5-piece looped carpet set to complete my interior. The contact is: Bryan Rolfe Seatz Manufacturing 800-235-8974 http://www.seatzmfg.com/seatz/index.htm Hope this helps. Jim
-
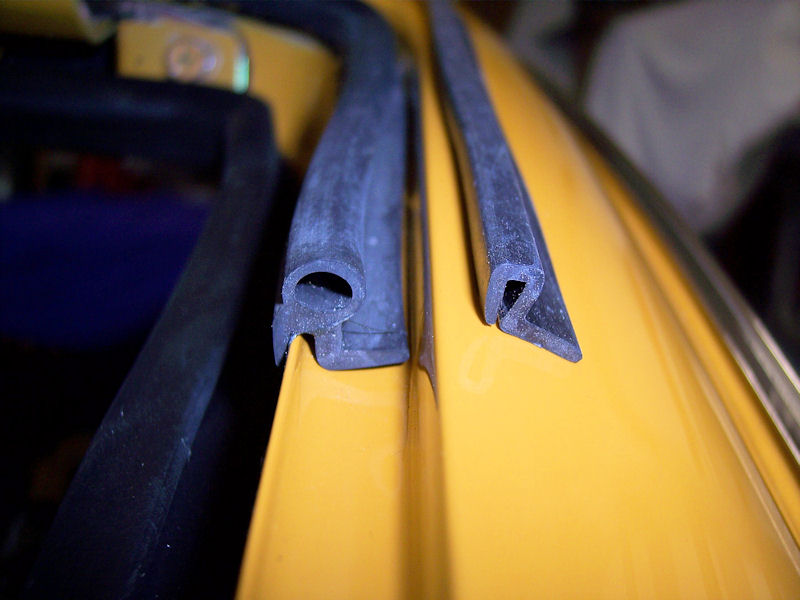
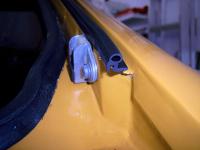
I recently ordered the hatch outer upper and side w/s pieces from MSA. After getting the upper piece installed I moved to the side pieces. That is when I noticed they did not have the same tubular cross-section as the upper piece. I checked and could see there was no way the flat side piece was going to contact the hatch flange, there would be no effective seal. I contacted MSA with my concern, they assured me these were the correct side pieces and had been shaped like this for some time. I gave it some thought and went back to MSA with a request to RA the side pieces saying I would order two additional upper pieces and fab my own side units. The RA was quickly approved and we swapped parts. The two new uppers were a net increase of $6. Here are a couple of shots, one showing the comparison of the "official" upper and side piece profiles, the second is my newly installed "unofficial" side piece that provides full contact all the way down. Jim

-
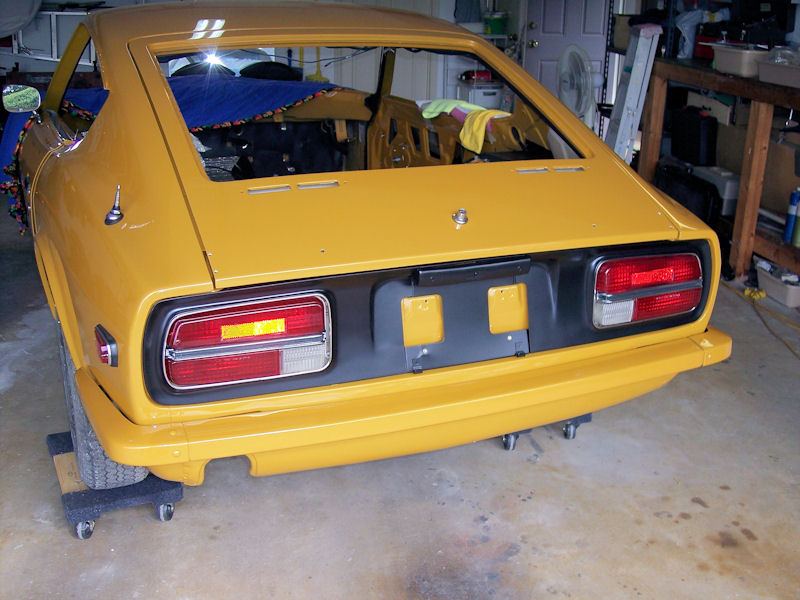
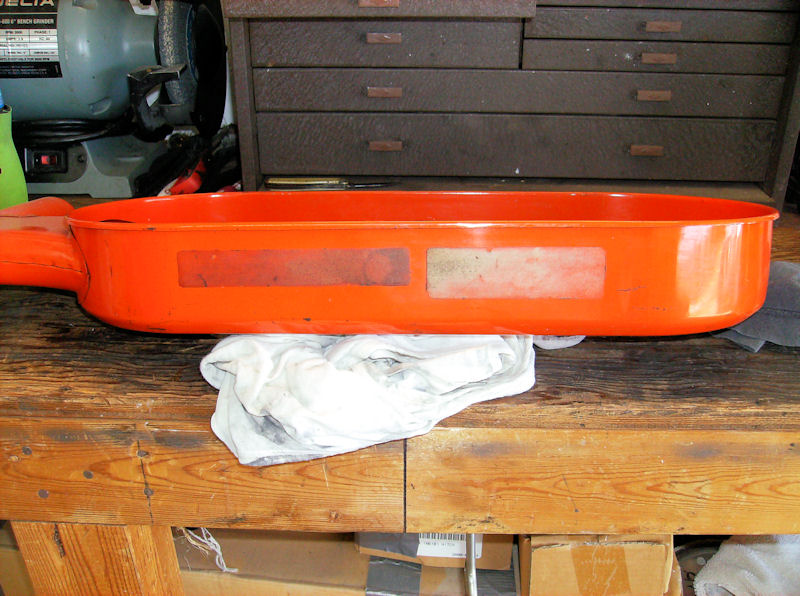
As promised back when this thread was started, here is my "minimalist" approach to the rear bumper topic. Agreed there is no more / no less protection (read NONE!) than the fully stock version. To me, having this piece in place reinforces the horizontal lines across the rear of the car. FWIW. Jim

-
Check out this discussion. It should cover most of what you need, but get back to us if you still have questions. http://www.classiczcars.com/forums/showthread.php?41893-Front-Fenders
-
This car is a Series 1. They were produced until about mid-January 1971, all had the flow-thru air on the hatch and the 240Z "Wings" emblem on the "C" pillar. Beginning about September or October of '70, the cars were titled as 1971's. Estimates range from about 16,000 cars to perhaps 19,000 cars as Series 1's. My car with a 12/1970 build date is titled as a '71. The listing does not provide the VIN for confirmation
-
The fenders are pretty much the mounting point for everything else on the front end... so they will be the last thing off. Break the electrical connections and remove the side marker lights and the cowl lights. Start with the bumper, then the center valance, then the valance corners. Next would be the headlight buckets or sugar scoops- be very careful not to break the small threaded posts (lots of rust eater first!). I recommend you get the headlight retainers off but they can come off with the fenders. Probably the inspection lids next if not already off. Zip bag & tag all your fasteners right as they come off each part, not when all is done. You are finally ready to get the fenders off. Good luck! Jim
-
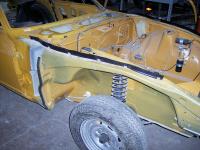
+1 on time for replacement! When you get your "new" fenders, take some time to clean and prep the undersides before installing. The same goes for the exposed inner fenders and unibody frame shown in your pictures. Get rid of all that surface rust. I personally like the POR-15 products: Marine Clean for removal of grease and dirt, Prep & Ready (formerly Metal Ready) to kill the rust and treat the metal, POR-15 paint for permanent protection. Don't just spray and rinse on the degreaser product - get in there with a scrub brush to knock loose everything. Don't overlook installation of two new weatherseals at the rear of the fenders, actually one on the splash shield (picture) and one on the fender bulkhead. I used a generic product from Autozone - 5/16 X 3/4 closed cell foam, it was a perfect fit for the gaps. Hope this helps. Jim
-
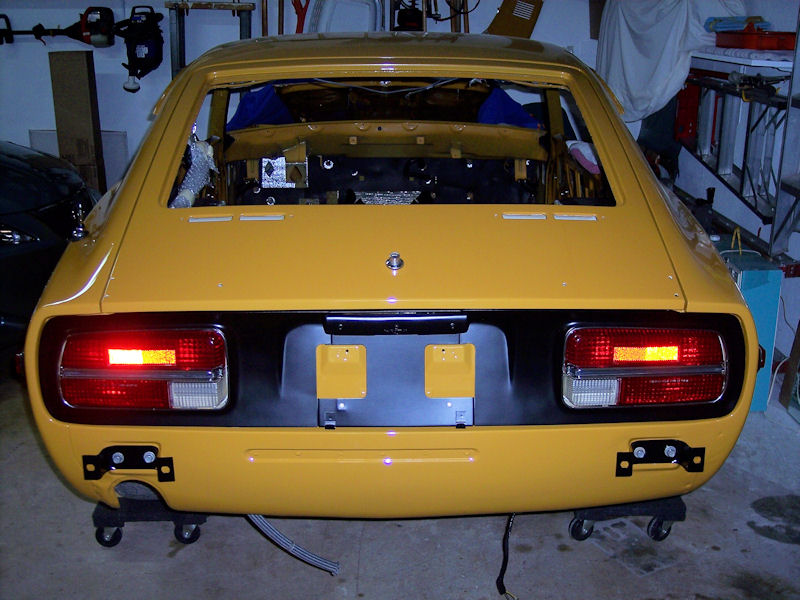
Thanks for the comments. On the paint question, the products used are all Matrix brand. I have a note in to the painter for additional details but he has not yet got back to me. Here is what I have so far. Just prior to painting, the car was sprayed with a sealer, product unknown. The primer is MP3 catalyst primer. The color coat is Matrix base coat, topped off by MS42 clearcoat. There are two coats of color, hand sanded between coats, also two coats of clear. The finish was color sanded, then buffed with three levels of progressively finer product, topped by a polish. I don't know what process or program was used to determine the color mix - one of the questions I have in. As to time on the project, technically it is 12 years. But... there is a significant time break I will explain. I disassembled the car in 1999, fully expecting to stay with it to completion. "Life" intervened just after the car was apart and I did not get back to it until early 2009 after I retired. The saving grace when I resumed was the care I took during the teardown. Every screw, bolt, small part, ...etc. was bagged and tagged right as it came off the car. Several bags have only one screw and its washers with a paper tag inside. Every electrical connection was marked with a string tag prior to being unplugged. As I identified a part for replacement, I immediately logged it into a spreadsheet. As I rehabbed items, I also logged replacement needs. Later when it came time to shop, I was able to set up columns of price comparisons by vendor next to each item needed. Here is a picture from yesterday, it show two of my personalizations for the car: the rear finisher in satin black, and the rear bumper - fully slicked, and finished in body color. The front bumper is likewise finished, it and the grill - also satin black, won't go back on until after the engine goes in. I try to keep a few progress shots updated in "My Garage". Jim

-
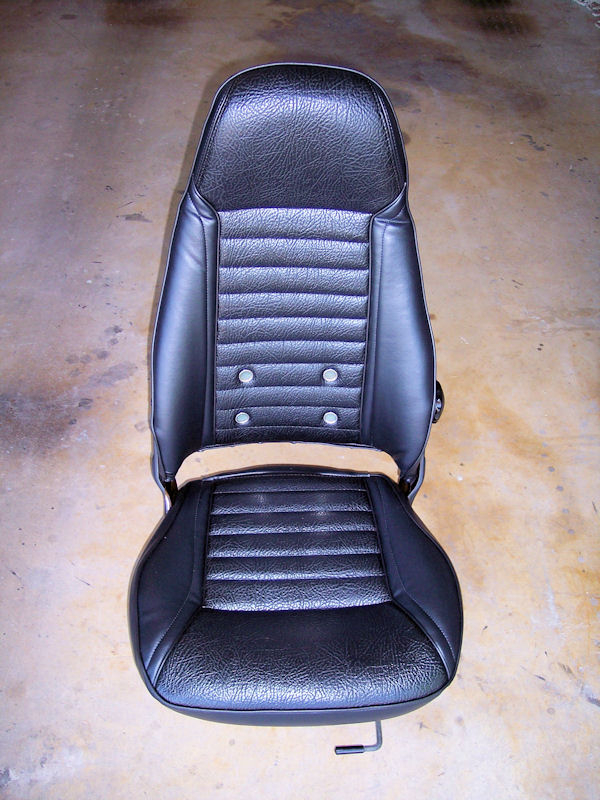
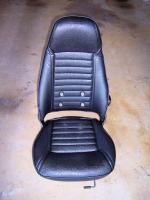
You got it. Factory seats are like this (altho this is not original, it is resto quality). Jim
-
At first glance, it is a very nice looking car. It looks like it has been a garage queen since it was purchased - no TX registration or inspection stickers on the windshield, still has the CA plates. That raises the question of WHY? The bent clutch pedal is weird, how the heck did that happen? The rust on the back bumper might suggest the car was regularly exposed to salt air - a thorough inspection of the underside on a lift is in order, plus rooting around under the carpets. There was no "factory" A/C for the Series 1 cars, only aftermarket and they were not real effective. A complete replacement might be required. With all the updates, if the car checks out mechanically and visually, it might be a good buy - even at $7,500. But, be prepared to put more money in it.
-
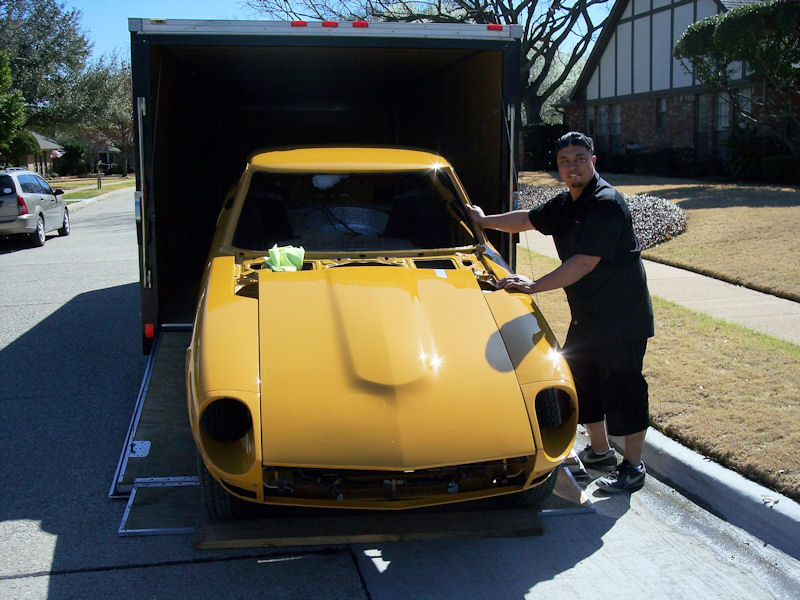
40 years ago today I purchased my car. Gee - seems like just yesterday, NOT! Too many miles on this body to feel like a 29 year old again. Although it did not start out to be a "forever" car, the memory of turning loose a beautiful '66 Mustang 2+2 way too soon has always been in my mind and I vowed to not repeat that mistake. Of course, if I had kept the Mustang, I probably would never have had the Z. Maybe things work out for the best! The car is getting a full restoration and just recently returned from the paint shop (that's the painter in the pic). Reassembly is underway, on the road again by summer is the goal. Jim


-
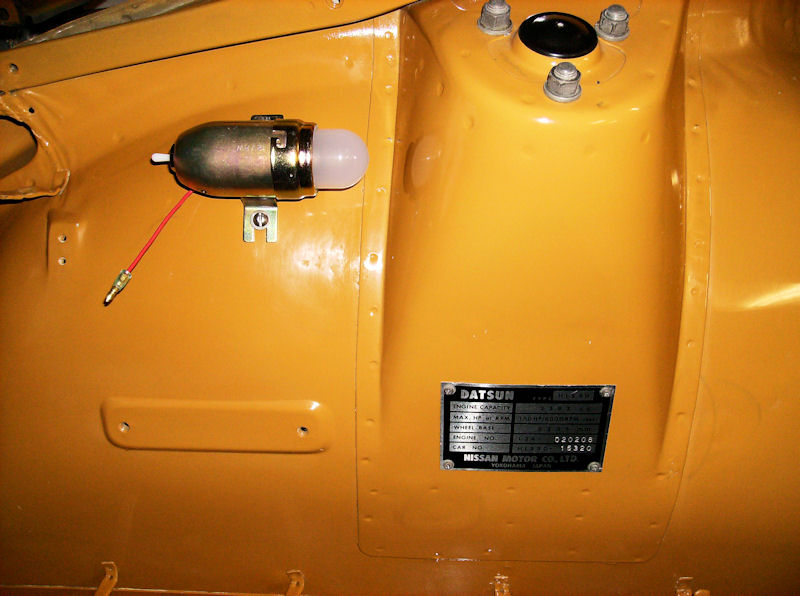
Inspection light as requested. Jim

-
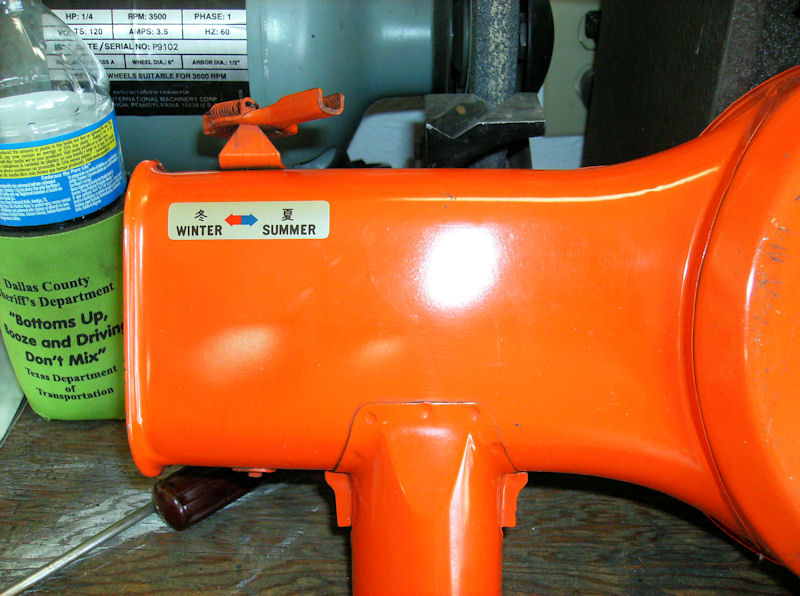
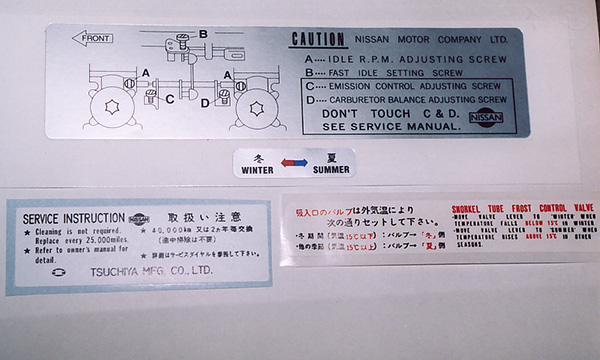
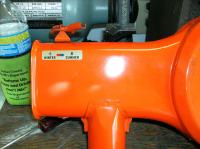
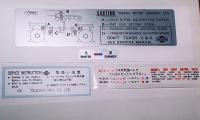
Hey Tony - Here are the pre-restore shots from my air filter box. The decals are shot but the placement is clear. Note that it does not have the silver decal for adjusting the carb screws, just 2 of the 3 big ones in the Banzai DE-04 set. By the way, I purchased the set from Mike, they are fantastic - as are all his products. Jim

-
This is generic stripping I picked up at Autozone. Nissan originally used open cell foam for the two fender seals (not the welt seal along the top of the inner fender), which can hold water and lead to rust. This is closed cell foam, 5/16" X 3/4". It filled the gap nicely when the fenders went back on. I used the same product on the fender bulkhead closer to the door hinges. Jim
-
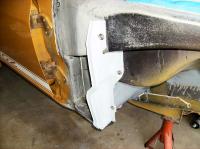
Since you mention the mud flap, it sounds like you are missing a splash shield. This is the part the small front mud flap attaches to and it has the first of two fender weather seals on its outer edge. It bolts to the inner fender. In the first picture, you can see the splash shield with new weather seal installed. I don't recall seeing them at any vendor, probably a junk yard visit or purchase from someone stripping out a car. Hope this helps. Jim