Mikes Z car
Free Member
-
Joined
-
Last visited
Everything posted by Mikes Z car
-
 If I am interpreting this thread correctly my car also sometimes clicks. It is a steady rhythmic click about one or two clicks per second on my car and doesn't seem to be related to RPM or whether the car is moving. With the great ideas here I will be in a better position to analyze it if it does it again. I initially interpreted it as a thermal click but that made no sense to me. I thought it was coming from the starter area or passenger footwell area.
 -
Hi all, I sprayed all interior channels of the rear frame rails and interior of wheel wells of a 240Z with two cans of Transtar amber anti corrosion material using existing holes where possible. The front frame rails are more likely to rust but I had already sprayed the interior of the front rails on my car. A thread describing how I did the front frame rails is here: http://www.classiczcars.com/forums/body-paint-s30/40048-two-frame-rails-tc-rod-there-floor-between-them.html The Transtar amber anti corrosion material I used is described on another blog here: Hatch anti corrosion interior passageways - Blogs - Classic Zcar Club 240Z rear frame naming convention I used (is there some standard for this?): Preparation of the four crossmembers: 1. Front two crossmembers- I had to drill two 5/16" (or 8 mm) holes behind the seats on the floor, one behind each seat to access the two crossmembers right behind the seats (what I am calling front crossmembers). Right side -passenger side in U.S. shown -other side prepared in the same way: These two holes could have been made under the car to avoid having holes in the floor behind the seats. 2. Middle crossmember- I had to enlarge an existing slot at the bottom of one of the shock tower braces on the floor with a large screwdriver to allow access to the interior of what I am calling the middle crossmember. Only one slot needed bending to access most of this crossmember, that one slot can be bent back later if desired, I left it bent open for possible future sprayings since it won't show when I put the shock tower vinyl back down: I also enlarged a slot on the floor inside the tower braces on both sides of the car to gain access to a two inch long portion of the middle crossmember on both ends of it. The slot I used is closest to the back of the car inside the brace, see the two drawings immediately below for further clarification. This step possibly could have been skipped but I like to spray everything. These two enlarged slots will never be visible in the car. Total of two slots INSIDE the braces were enlarged, one slot on each side. >> 3. Rear crossmember- Removed rear plastic interior side panel finishers (not my car- thanks to whoever has this car): Spraying operation (tip- cover spray nozzle and top of can with a ziploc bag when spraying as wand tends to pop off can sometimes- prevents getting Transtar on your car or hand): 4. Front crossmember right side (both sides done the same way): Spraying inboard from access hole Spraying other direction, toward side of car 5. Middle crossmember: I sprayed the middle crossmember by inserting the wand into the slot I enlarged slightly with a screwdriver. See step 16 below for more info. I also sprayed inside the last two inches of this crossmember on both sides of the car by inserting the wand into an enlarged slot inside each tower brace. See step 2 above for more info. Top of picture is towards front of car. 6. Rear crossmember (spraying towards middle of car from both sides): Right side Left side 7. Frame rail right side (left frame rail was sprayed in the same way): Spraying forward from access hole Spraying toward back of car 8. This drawing shows drilled holes location, one of the slots that needed prying open a bit and access for rear crossmember. It does not show the tower brace slots inside the brace that I enlarged for that detail see last two drawings in step 2 above.: 9. Existing holes and "walls" in the rear frame (I used the front four existing holes for spraying both frame rails at the sides of the car, vinyl on shock tower was peeled back for access to middle holes): Preparation details: 10. For spraying the two front crossmembers behind seats on the floor I drilled a 5/16 inch hole (8 mm also would have worked) in line with an existing hole in frame rails and 40mm from the front edge of the existing frame rail hole. A 5/16" (or 8mm) hole is just large enough to allow the transtar wand with its 360 degree brass spray head to fit through. 11. I pried open the floor sheetmetal slot a bit at the shock tower brace bottom by twisting slightly with a large screwdriver to give access for spraying the center crossmember. I also pried open the floor sheet metal hidden inside the brace itself to access a two inch long closed off area on both ends of the middle crossmember. Although I did this someone else might want to skip it. 12. I removed the side finisher panels immediately in front of the tail light finisher panel to gain access to the rear most crossmember. 13. I peeled the vinyl up from the floor on the shock tower braces to allow access to an existing hole in the floor to spray the inside of the side frame rails. 14. I poked a hole in the bottom of a trash bag and taped the hole in the bag around the holes I would be spraying into to prevent getting spray on the interior of the car should a wand be pulled too far out of a hole while spraying is in progress. Notes: 15. The Transtar plastic spray wand can get kinked when spraying the side frame rails forward of the rear wheels. I actually broke an old wand practicing for the actual spraying and realized the frame rails that go forward and down from the shock towers make two turns, kinda tough on the stiff plastic wand. To minimize the chance of breaking a wand I inserted it gently until it met resistance at the second turn a few inches from the front crossmembers. I pulled the wand out and then inserted it into the existing hole behind the front crossmembers to spray the bottom part of the side rails just behind the seats. This existing hole is 40mm towards the back of the car from the two holes I drilled for the front crossmember. This bottom part of the side frame rails behind the seats is only about 4 inches long so after the wand goes in about 4 inches there will be felt resistance as it tries to turn up towards the shock tower. As soon as I felt that resistance I stopped inserting the wand as I had already done the portion of the frame rail the wand was trying to turn up into from the shock tower hole. 16. The center crossmember didn't want to let the wand go through the bent slot more than a few inches at first with the spray head on it so I used a wand with no spray head that used to come with the spray wand set from Transtar. The wand set I bought 26 Mar 2014 did not have a white third wand with no spray head however a brass spray head could have been cut off the 2nd wand that came with this recently purchased wand set and that headless wand used then. I used the old headless wand I had from the earlier wand kit purchase. I finally did get the wand with the 360 degree brass head to insert the full length of this middle crossmember, I just had to gently keep trying by trying different entry angles and by gently twisting the wand back and forth. Didn't want to kink the wand with brute force. 17. There is a blockage in the rear most crossmember in the middle that is maybe 6 inches long. To get around that I used a headless wand as that is skinny enough to go through the blockage and followed up with a wand with the brass 360 degree head on both side inserting it gently as far as it would go. The 360 degree head has a spray that sprays forward as well as spray towards the sides so the coverage is more than 360 degrees. 18. I made a mess, this project is a great job for the street as the Z frame has many joints for the Transtar spray to flow out of before it becomes waxy non moving anti corrosion material. ******************************************** While I was at it department - (sung to the tune of that old Beatle's song "I should have known better"): I also sprayed the interior of the wheel wells since they tend to rust and were accessible with the finisher panels out. After that since I had some Cosmoline handy I painted with a brush all metal I could reach including hidden areas not covered with transtar material. The Cosmoline I have is fairly thick and would not have flowed into the seam the way the freely flowing Transtar material did so I used the Transtar material first on the seam followed up by Cosmoline painted everywhere behind the finisher panel. If I had had no Cosmoline handy I could have dipped a brush into the Transtar spray by spraying the transtar on the bottom of the wheel well first. Left side of car wheel well. Right side done the same way.
-
This is a very old thread but the diode idea also works for a radio shack power antenna model 12-1330A. I pulled the interior panel over the antenna off today and a PO had put in that model of radio shack power antenna. The PO had never connected the power up/down leads to the antenna. With the diode the antenna works fine.
-
Remembering from when I took the dash out of my parts car there are two screws, both at the very bottom of the dash, one on each side of the dash a few inches from each side of the car. The screw points up. Might need a mirror to see it.
-
HermanM, Could you see if you can catch the street address? I am looking through my old files, not sure I know what the plate was but I believe in California you keep the same plate when the car changes owners. If I can find the old plate in my records that would tell me if it is the same car. The VIN would too, I would have to write to the owner and ask about that, I do have a record of the VIN, HLS30-41545, an 8/71 car.
-
HermanM, Are any of them painted a dark blue? I sold a 240Z in Sacramento back in 1985, still hoping to find it. That car was originally orange but got painted blue by the next owner. Mike
-
Here are a couple of screen captures from 5 Star Day: I hope this is considered fair use, I am not all that knowledgeable on copyright laws. I think I saw that movie a while back. The pictures aren't in HD though so some detail is lost. Saw a white 240Z yesterday, first time I have seen that one, it wasn't too far from my house. Saw a 280ZX in the JY.


-
Not only extra points at the concourse but admiring glances at your great pictures and appreciation for your sharing!
-
275 Z and K car owners are now headed for your house, ready for the pool. We are at 45 with light rain so can't complain at all.
-
I have wondered for years if there was a cheap alternative. What did you discover? I have wondered if it might be possible to slather (this would not look nice) (isn't slather a nice word?) black silicone rubber all over an existing one with holes.
-
In my understanding a problem with short lived LEDs is that the designer typically selects too low of a series resistance so the LEDs are driven with too much voltage (and therefore too much current) shortening the life quite a bit. That doesn't help much as there isn't an easy way to know which LEDs are being overdriven as far as I know just from reading the specifications. LEDs are supposed to last 100,000 hours similar to a transistor life if not overdriven though I would enjoy seeing a response from fastwoman or anyone else with possible alternative viewpoints on that.
-
One drink adds 5HP.
-
I can't help think that if a quart of motor oil in the tank on every oil change would stop the tank from rusting that that also would help stop ethanol corrosion.
-
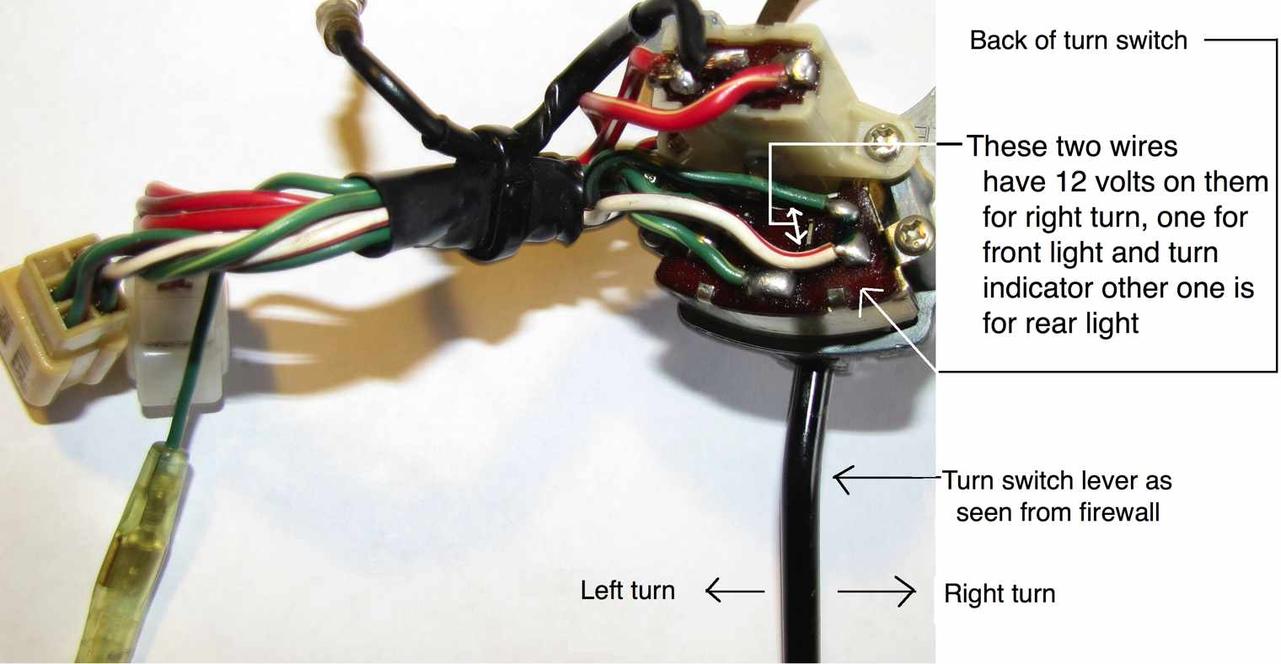
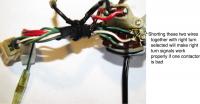
What if the two wires on the turn switch for a right turn that go to the front light, the turn indicator and the rear light were temporarily shorted at the turn switch with a flat blade screwdriver with the ignition on and right turn selected while an assistant watched the front right light (and others) to see if all of the lights are now properly indicating a right turn. If all three of the right turn lights now work (including the indicator light) wouldn't it mean one of the contactors is bad on the switch. Is that Correct? Leaving the wires shorted would be bad as it would cause extra current to flow through the remaining good turn switch contactor.
-
This may or may not help with checking the switch. The picture immediately below is the backside of a turn signal switch, probably from a 1/1970 car. The wire colors may vary. Click to make readable. The picture below shows six contactors on the inside of the turn signal switch, three on the left and three on the right. The two contactors for right turn are the two lower right ones. One of the contactors feeds the front right light and the right turn indicator and the other contactor goes to the rear light. I don't know which ones does which. Click for animation.

-
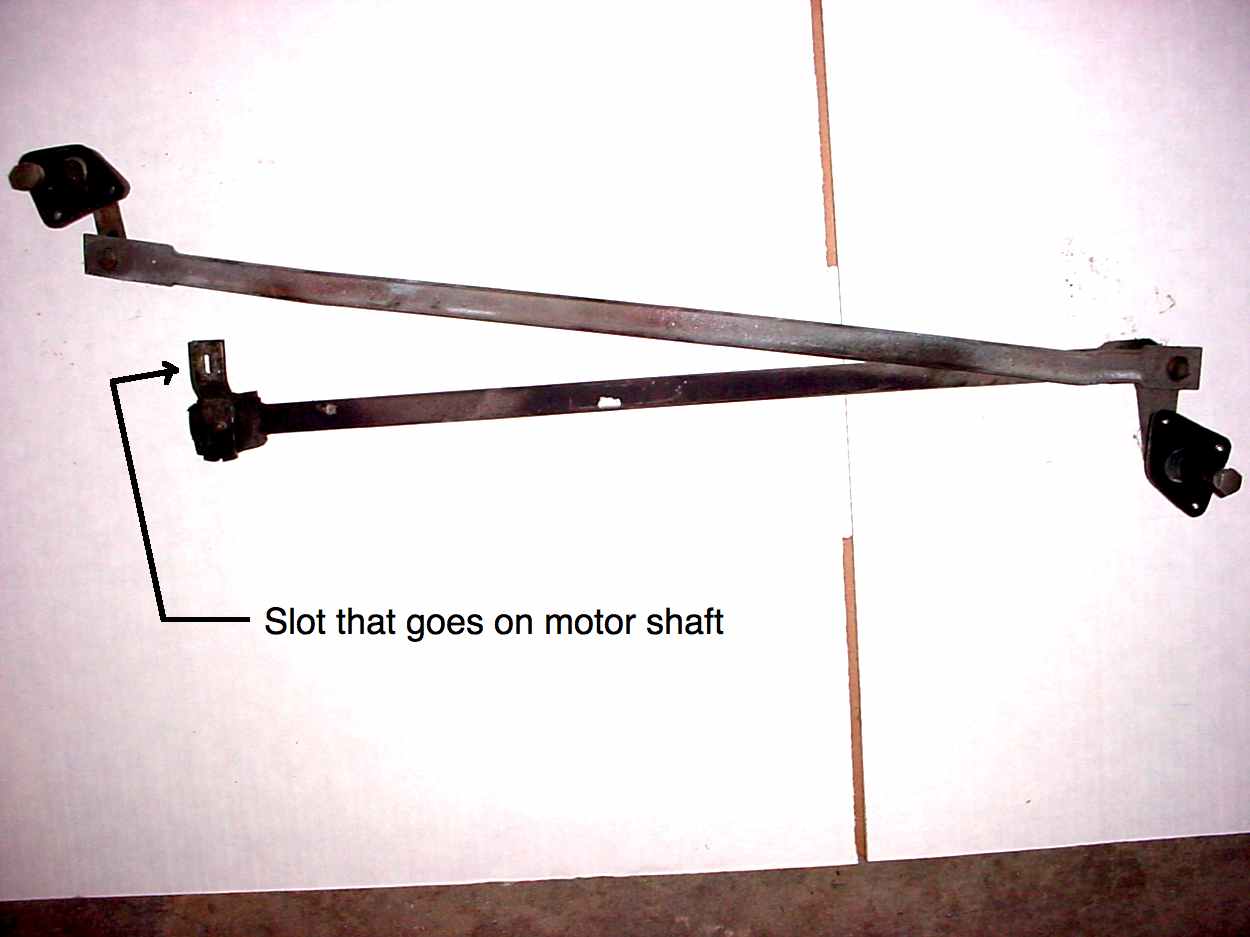
I wonder if putting the slot on the end of the linkage that goes on the motor shaft 180 degrees out would cause the wipers to park pointing up?

-
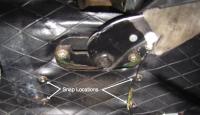
You are welcome TimsZ. Here is a thread that describes sources for the front carpet snaps, I just checked and they are the same size as the ones for the ebrake boot. There may be other threads on snaps. http://www.classiczcars.com/forums/interior-s30/50860-carpet-snaps-source-footwell.html
-
This is where the snaps are on a 1/1970 car. Looks like they are just riveted to the vinyl. I found new snaps at thrifty hardware that fit the front carpet snaps, from eyeball they look like the same size used here.
-
I had a clip that would not work that I got at the auto parts store because the wire was a bit too large in diameter and would bind in the two slots so when I put the handle on the clip would not spring closed, then the handle would fall off. (edit later- On my car the slots the clip would get stuck in was the ones on the handle) Would some kind of measurement assist you such as a caliper measurement of the depth to slot or something else? Though I am volunteering to help someone else may have a better idea and could provide better information.
-
If the slots are cut too close to the handle I wonder if either the recessed area in the crank could be slightly drilled out or maybe the end of the part on the door could be ground off to let the clips get closer to where they need to be?
-
A powerful magnet waved around just off the floor sometimes helps me find small metal parts. I usually put the magnet in a ziploc bag or wrap it in paper to keep metal particles from sticking to it that might be hard to get off. When I have the presence of mind to think of it in advance, I take small parts apart in the shower after I cover the drain. A clever spring can still vault over the shower door but not usually.
-
We FINALLY got a break today from the gray skies and below freezing inversion. It hit mid 40s today and is sunny. Yahoo!
-
I was wondering if it got pulled loose from the gauge light rheostat on the bottom edge of the dash since it doesn't seem to have a connector on it.
-
I wonder if the paint color is 918 orange? Looks darker to me though in the picture.
-
Now that I see how bad it is elsewhere I don't dare complain about our high of 27 today and light snow that so far is not sticking. Drat. Mike in Idaho