


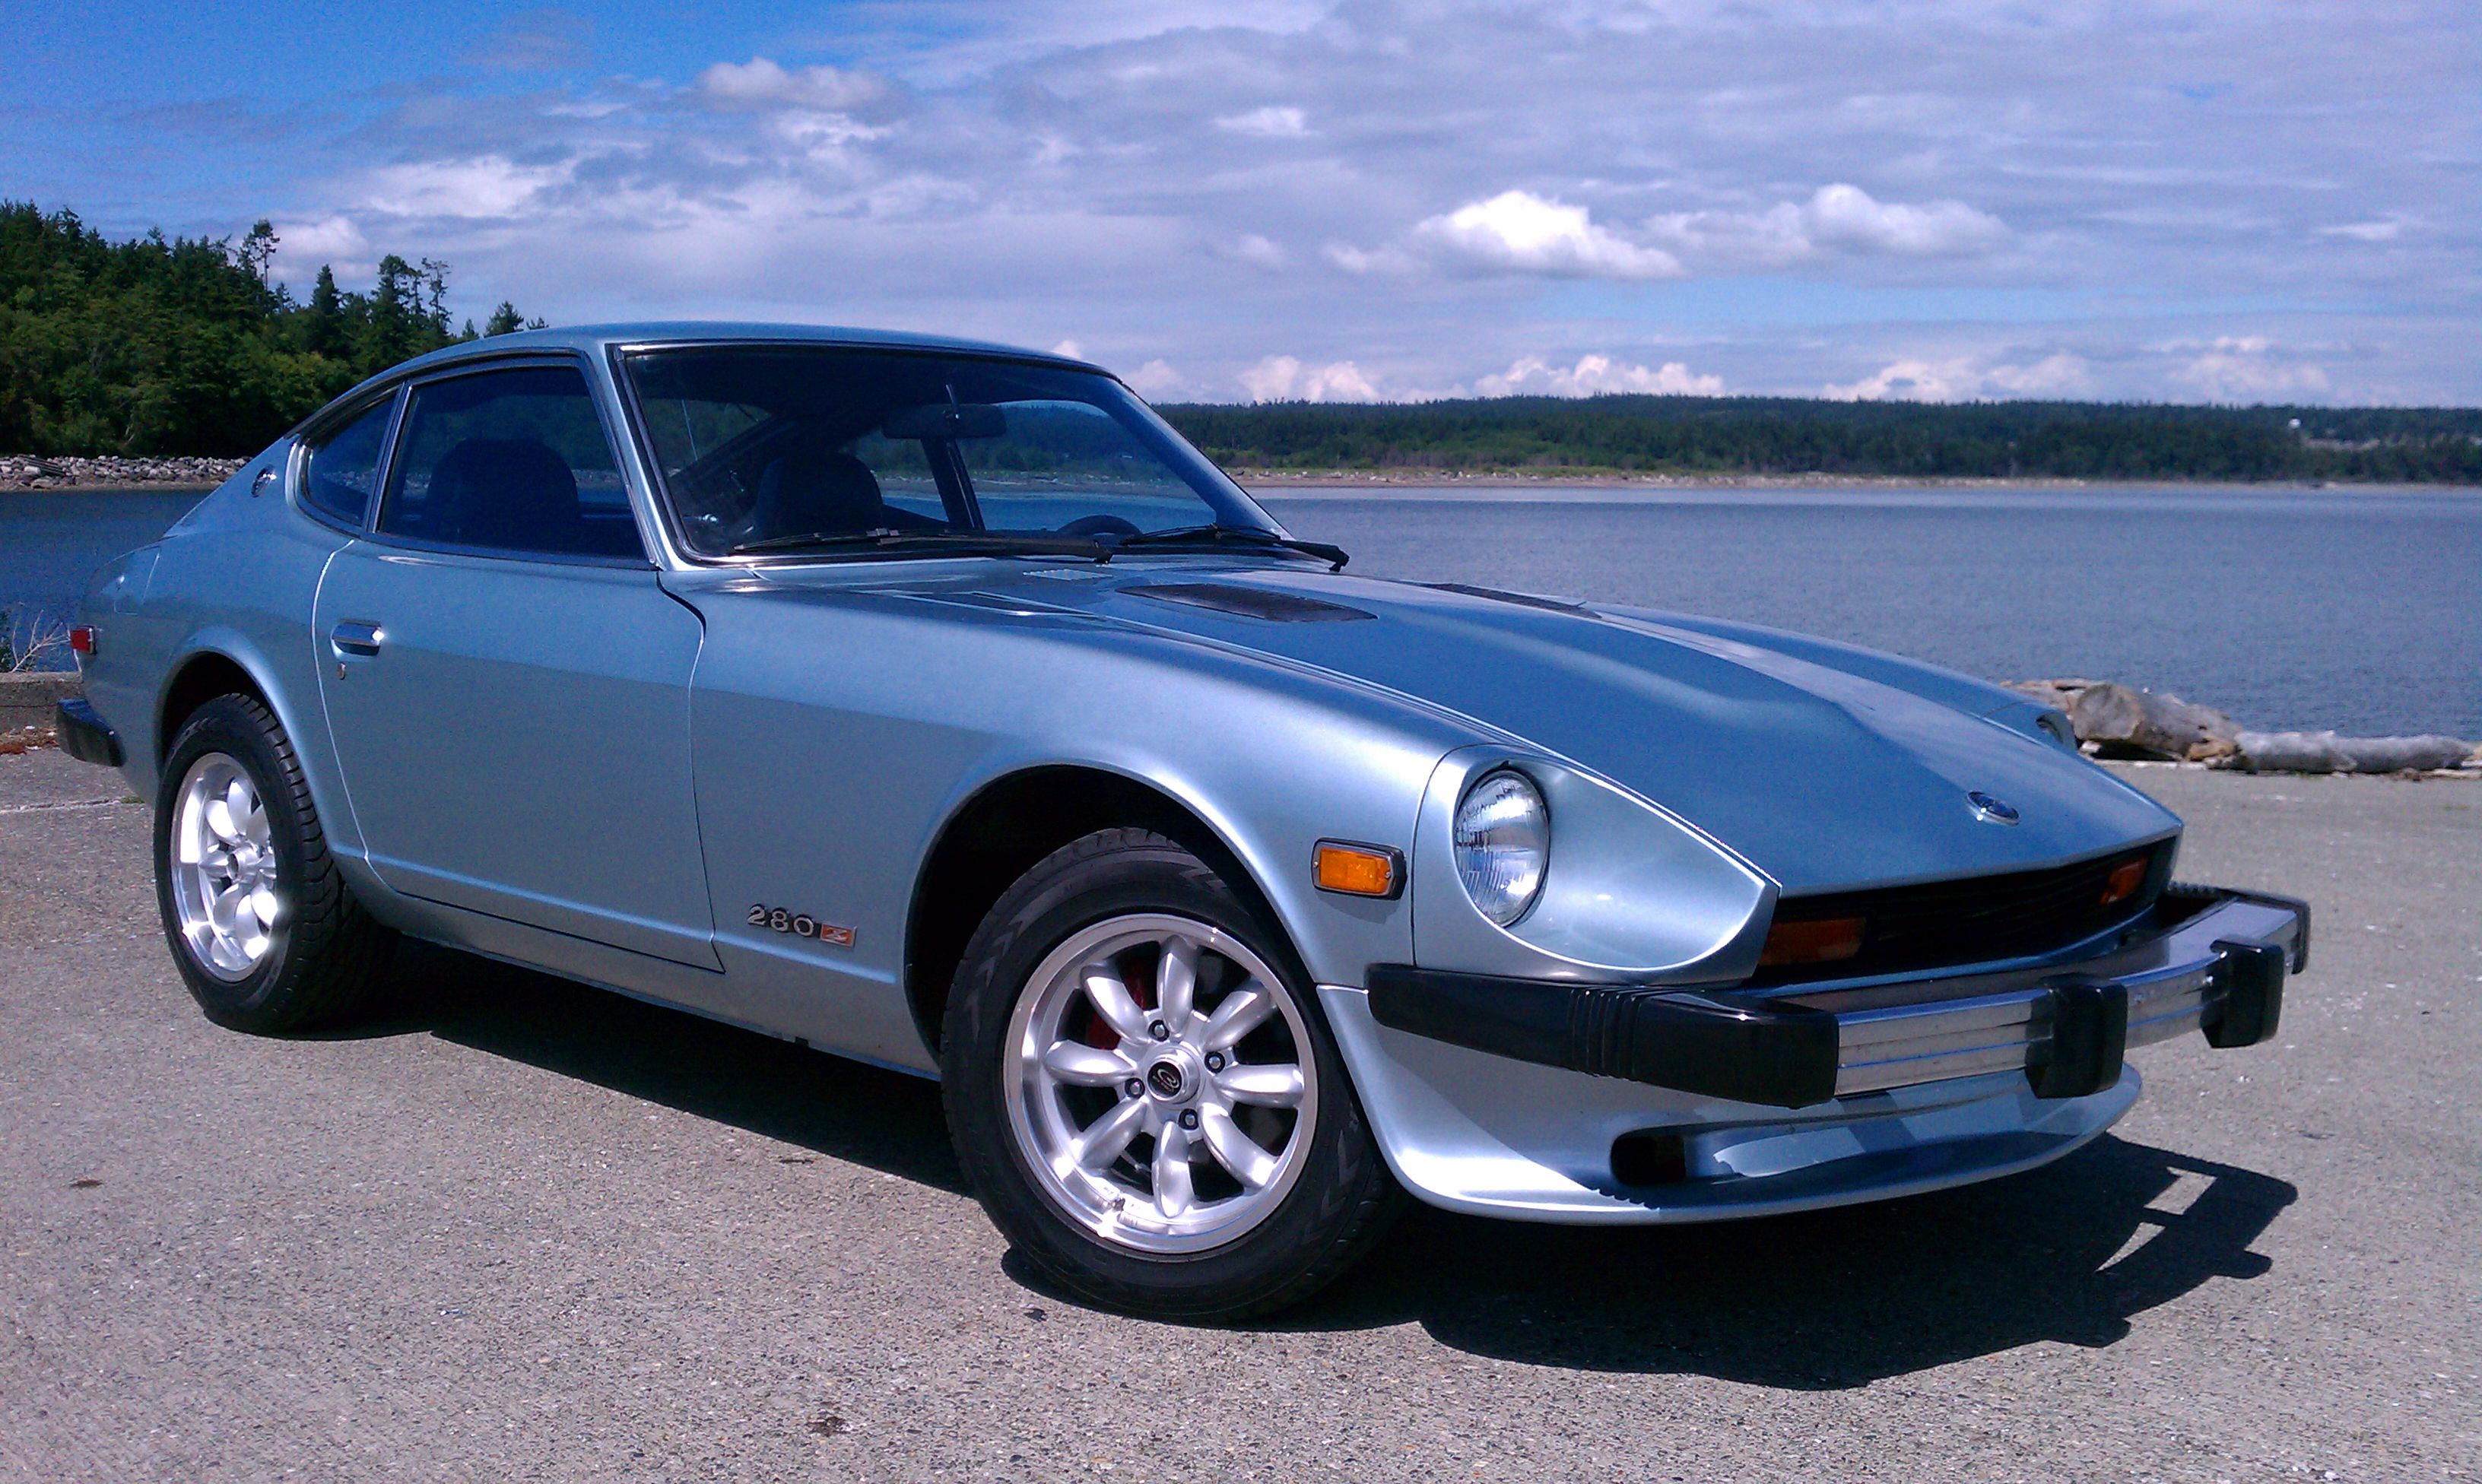
ea6driver
Community Member
-
Joined
-
Last visited
Everything posted by ea6driver
-
Ok..thanks for clarifying that. I do see what you mean. I just guess that interpreting wiring diagrams is not one of my strengths. Lots of good info you (and others) have posted in this thread.
-
So White is right side speaker out and Black/Red is left side speaker out. Thats interesting. And it would make sense I guess that each speaker would need its own wire driving it for a stereo system. However, that setup doesn't match the FSM wiring diagram description. The 78 FSM wiring diagram shows both speakers being driven by the Black/Red bullet connector wire. In fact, it doesn't even show the White wire. I'm guessing this is another example of a diagram not being updated to reflect system upgrades from the original configuration.

-
Thanks for that...I see your point....at least now, with the photos I posted in this thread, forum members can clearly see the wire scheme/colors on the two connectors on the radio-side of the sub harness (I've also heard it referred to as a radio pigtail harness). Too bad I still couldn't figure out what the function of each of these colored wires is...
-
Thanks for the compliment...I also saw that same schematic in my FSM....but I was somewhat confused since the schematic didn't exactly match the actual configuration in my car...and I know my car hasn't been altered from original...so I thought it would just be more useful if I posted what was in the car. Specifically, notice how that schematic shows the connections at the radio as a 6 + 2 plugin vs. the 5 + 3 config. in my car. I'm not sure why the difference....maybe the clarion radio setup was different? Anyway, hope all this helps...good luck!!
-
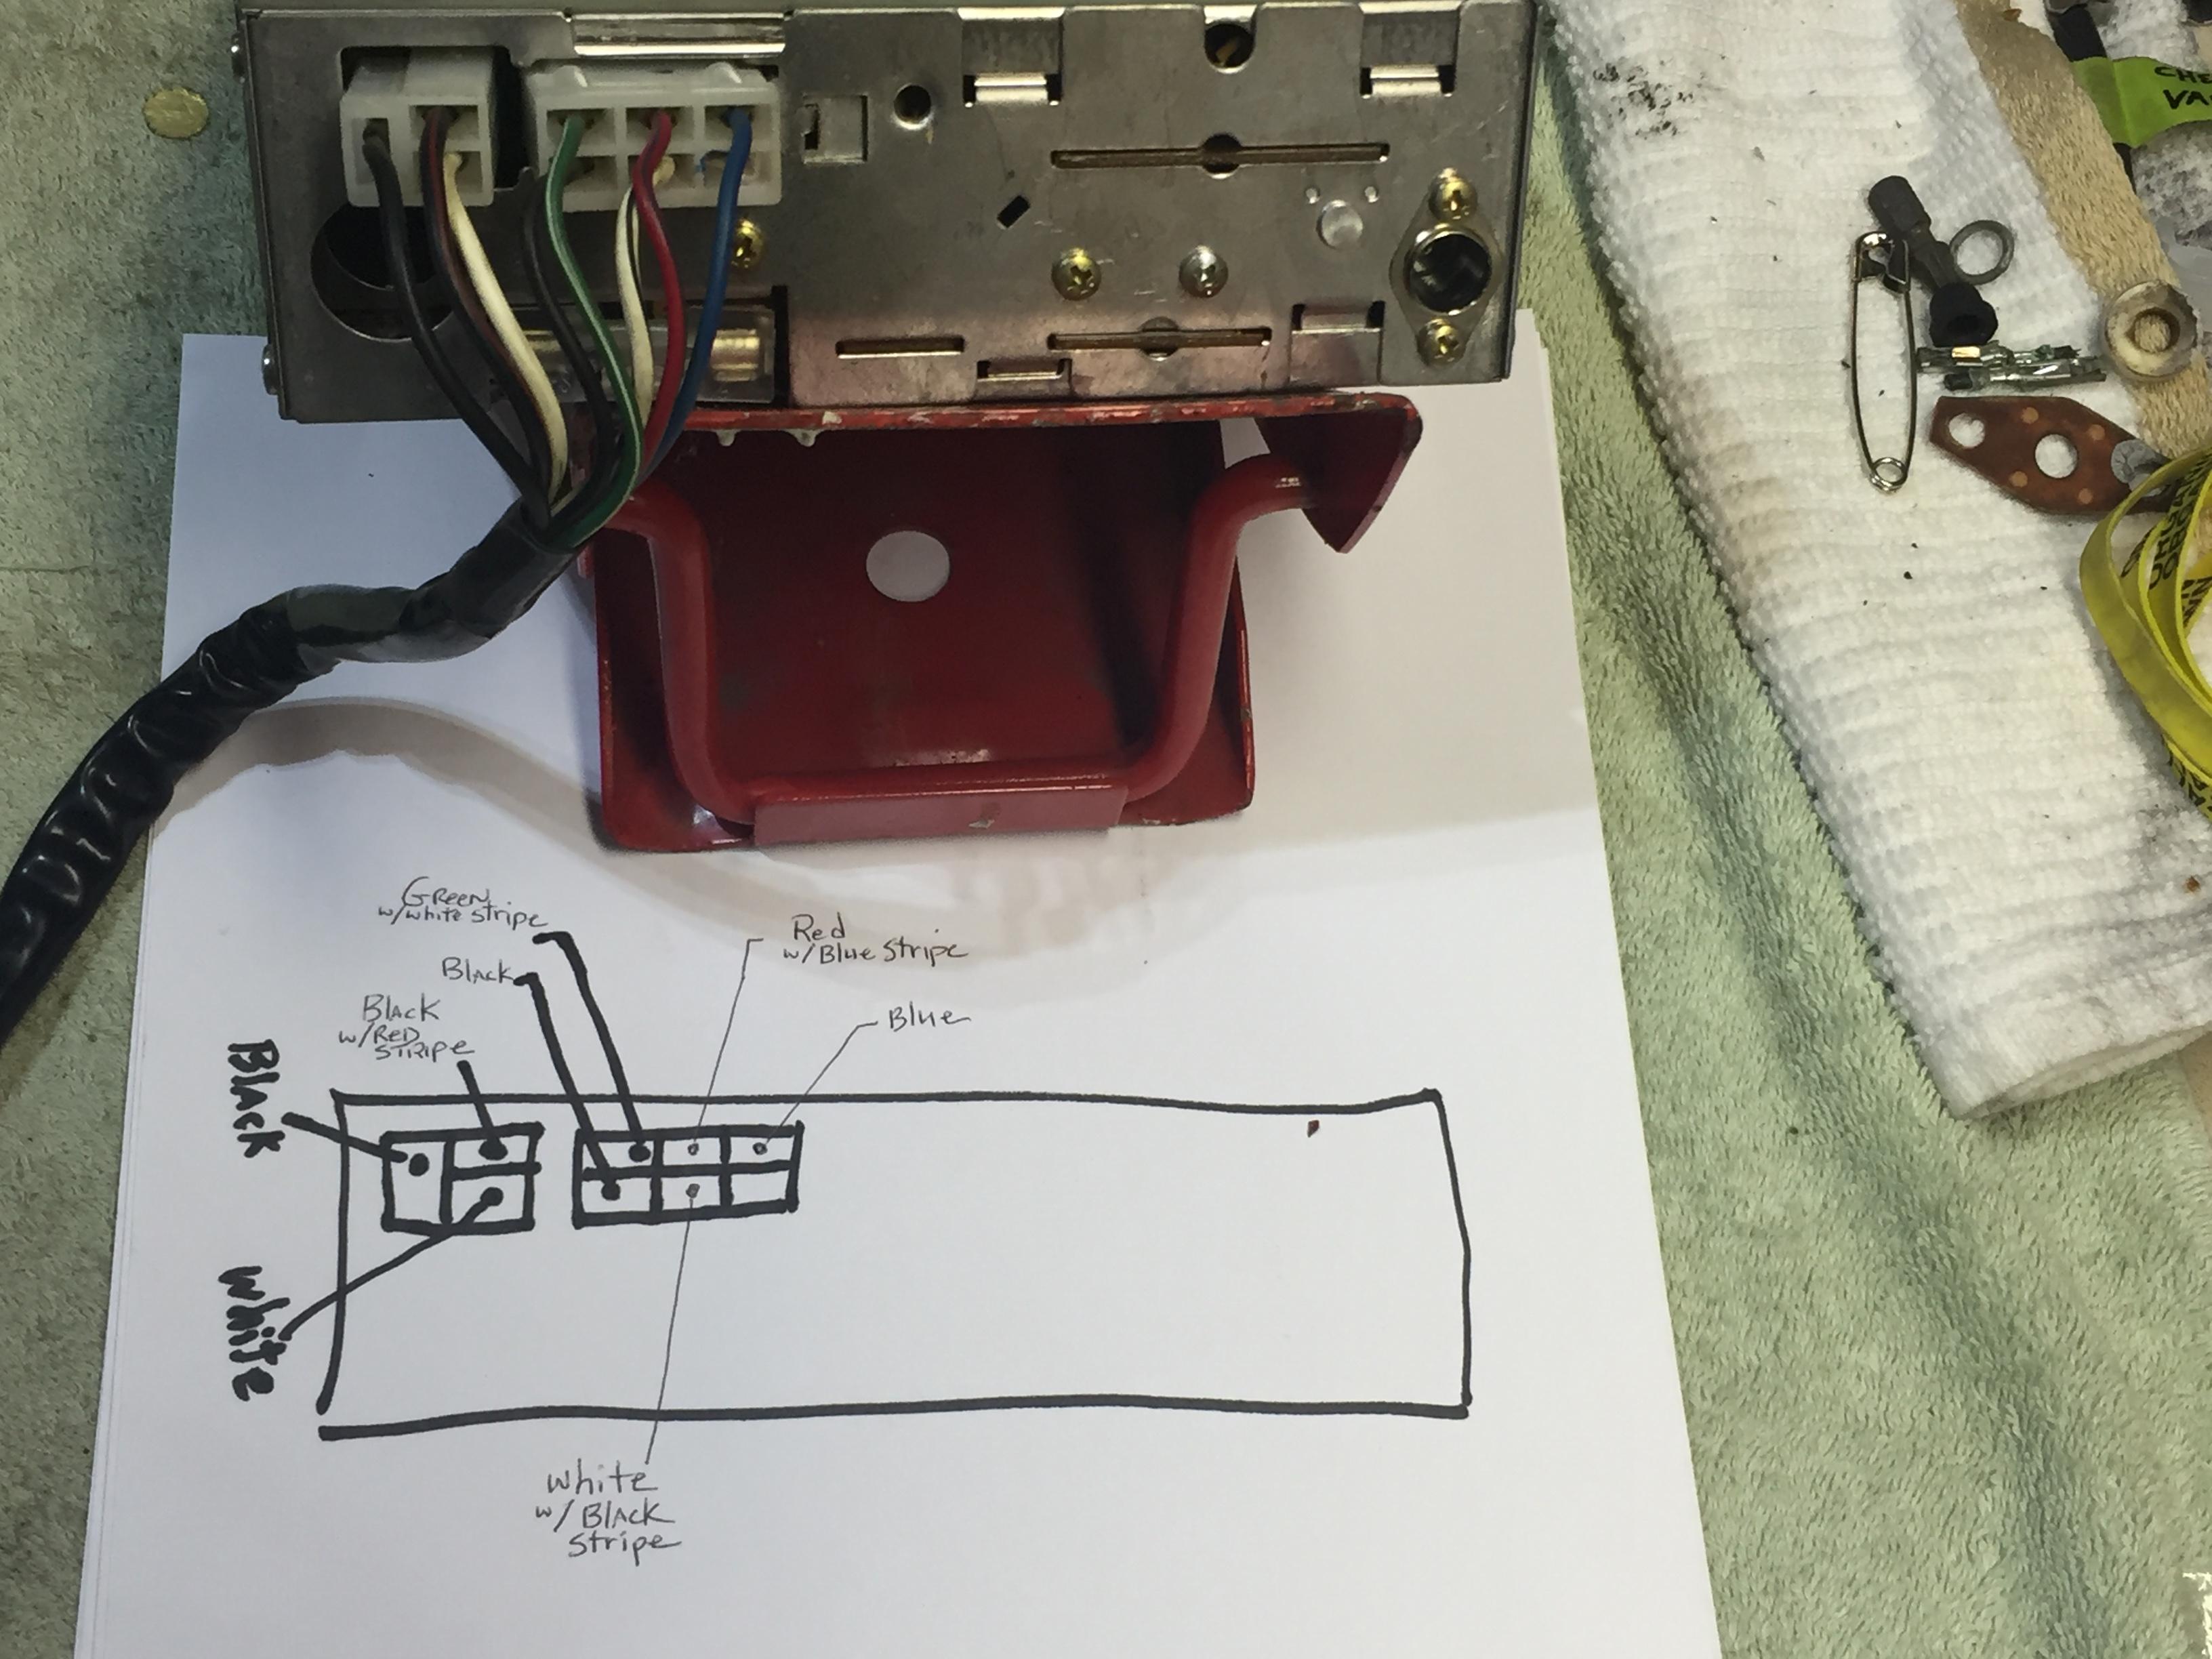
And just so there's no confusion over which radio connections we're discussing here....here's a pic of the front side of the radio...Hitachi KMS-2411Z

-
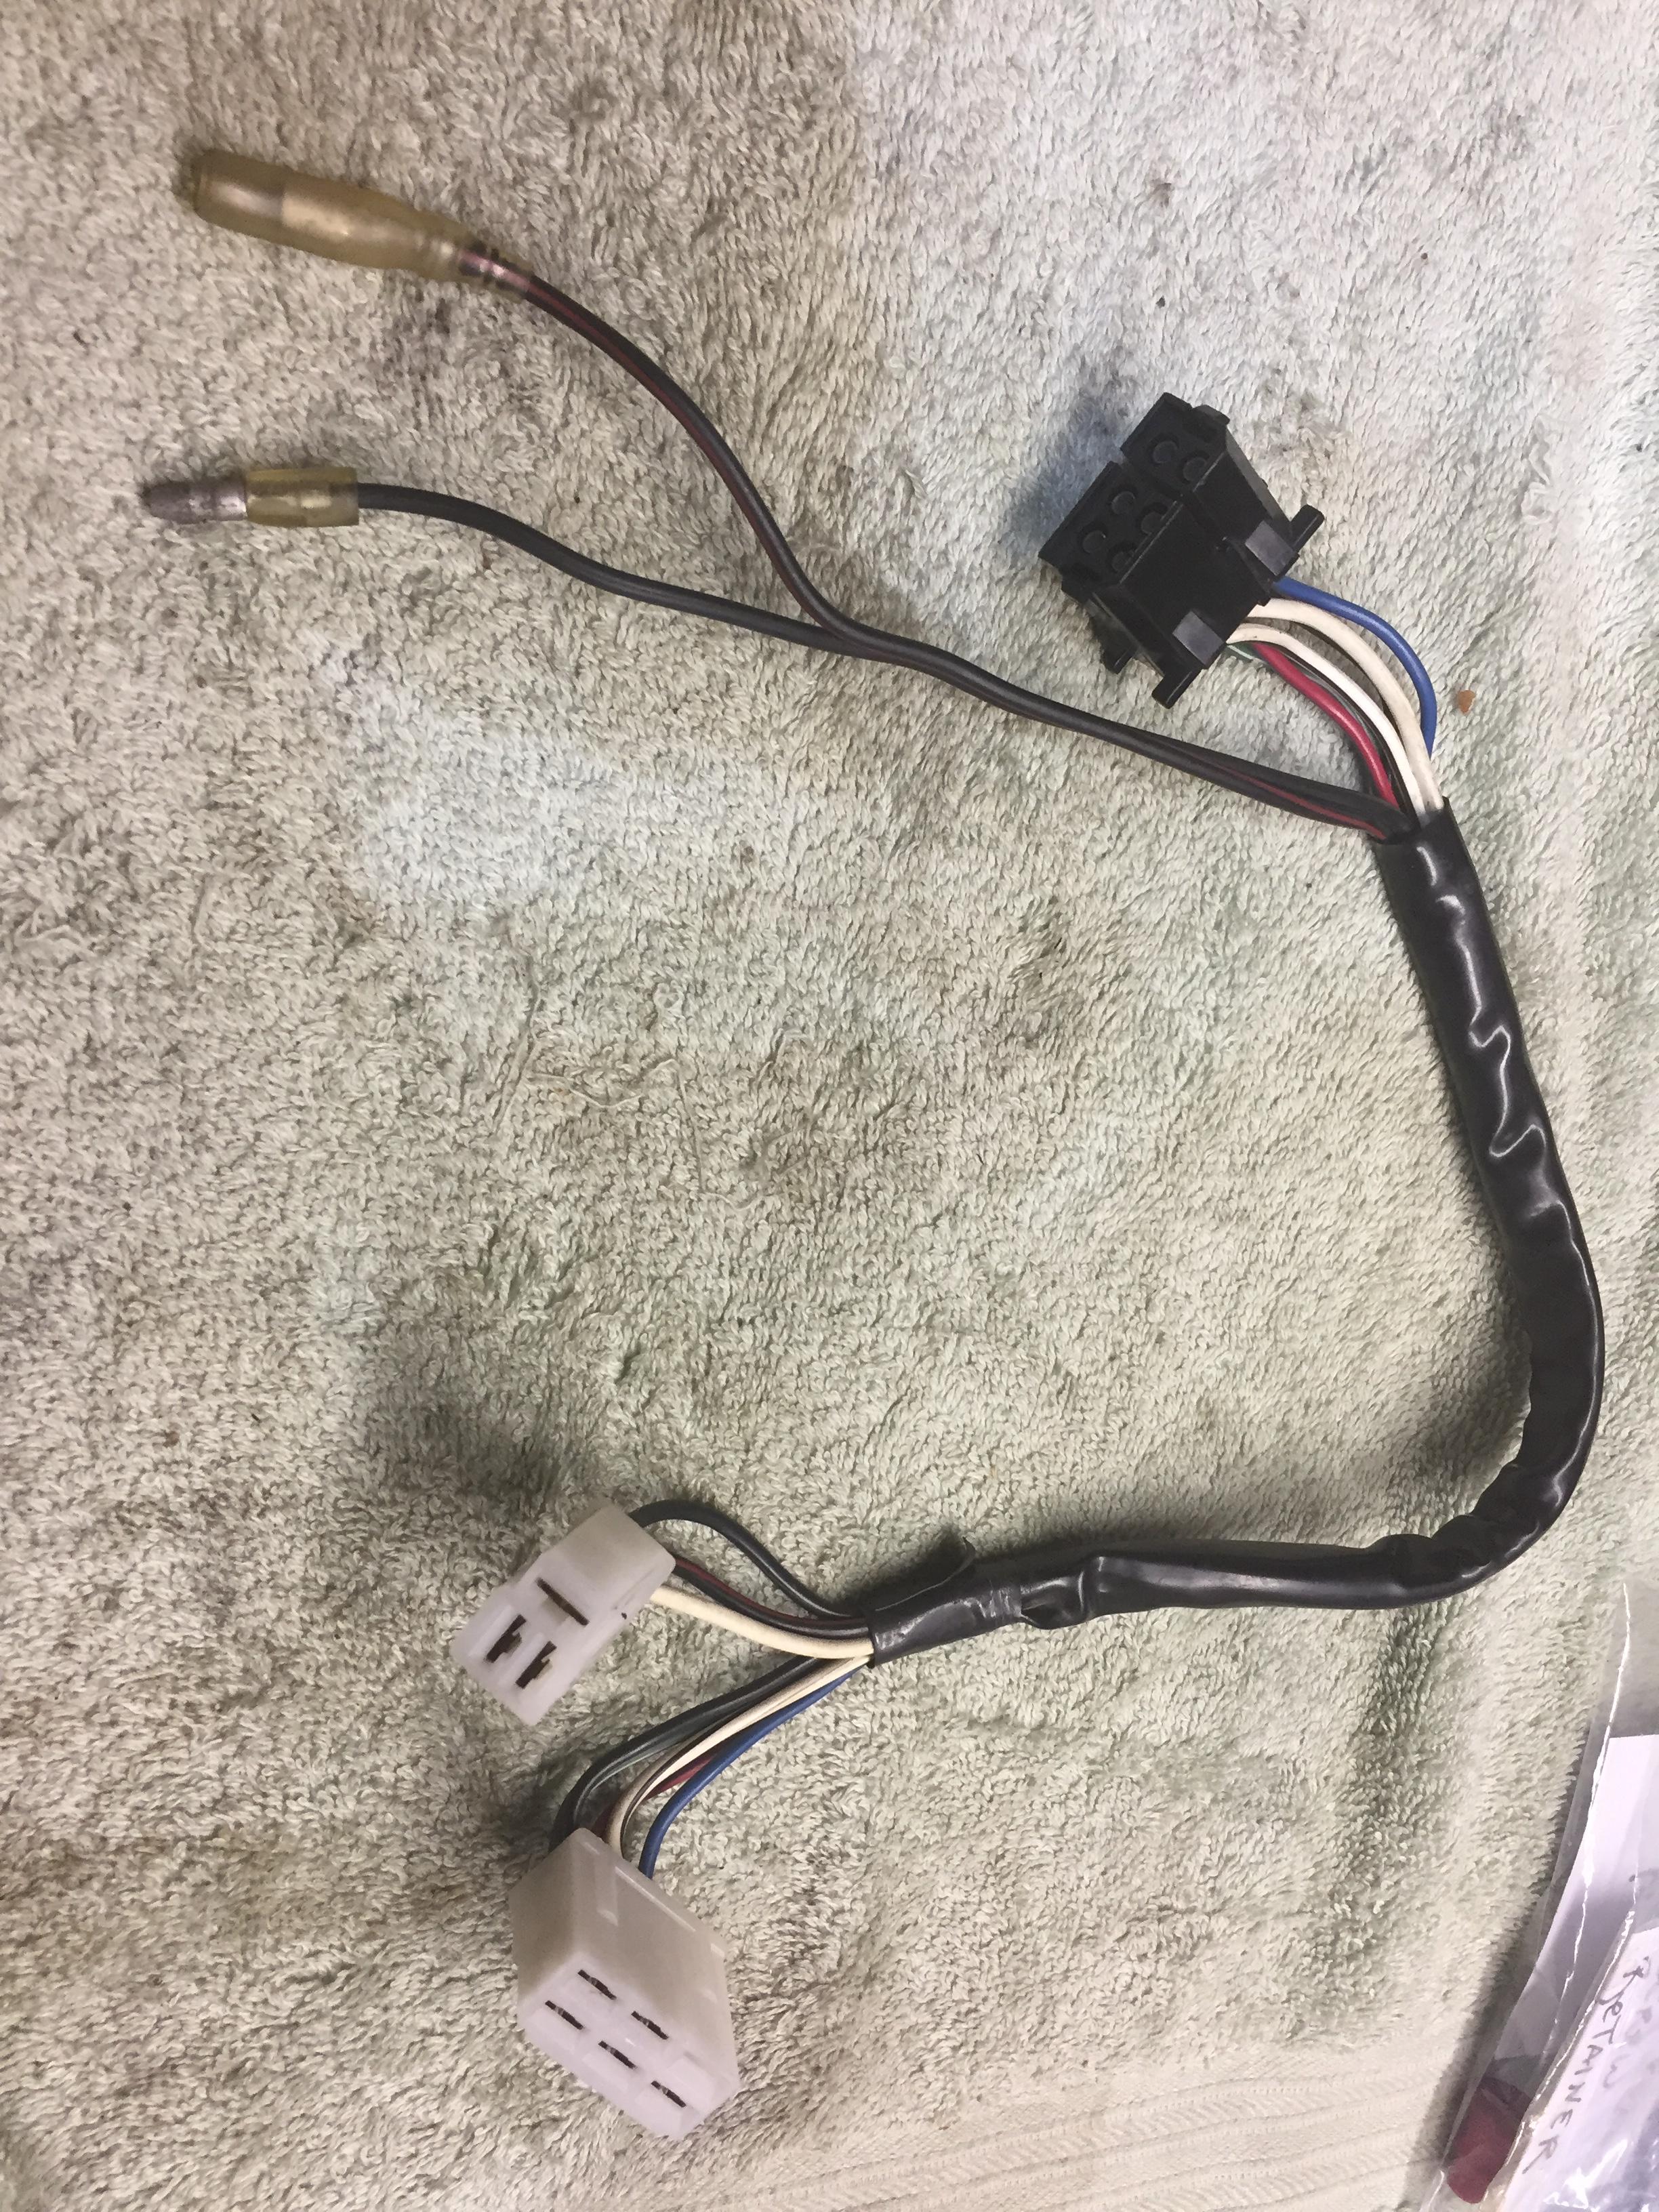
And here's the car-side connections of the radio sub harness. According to my FSM the speakers are the wires that are Black & Black w/ Red stripe....although I haven't tried to confirm this in my car

-
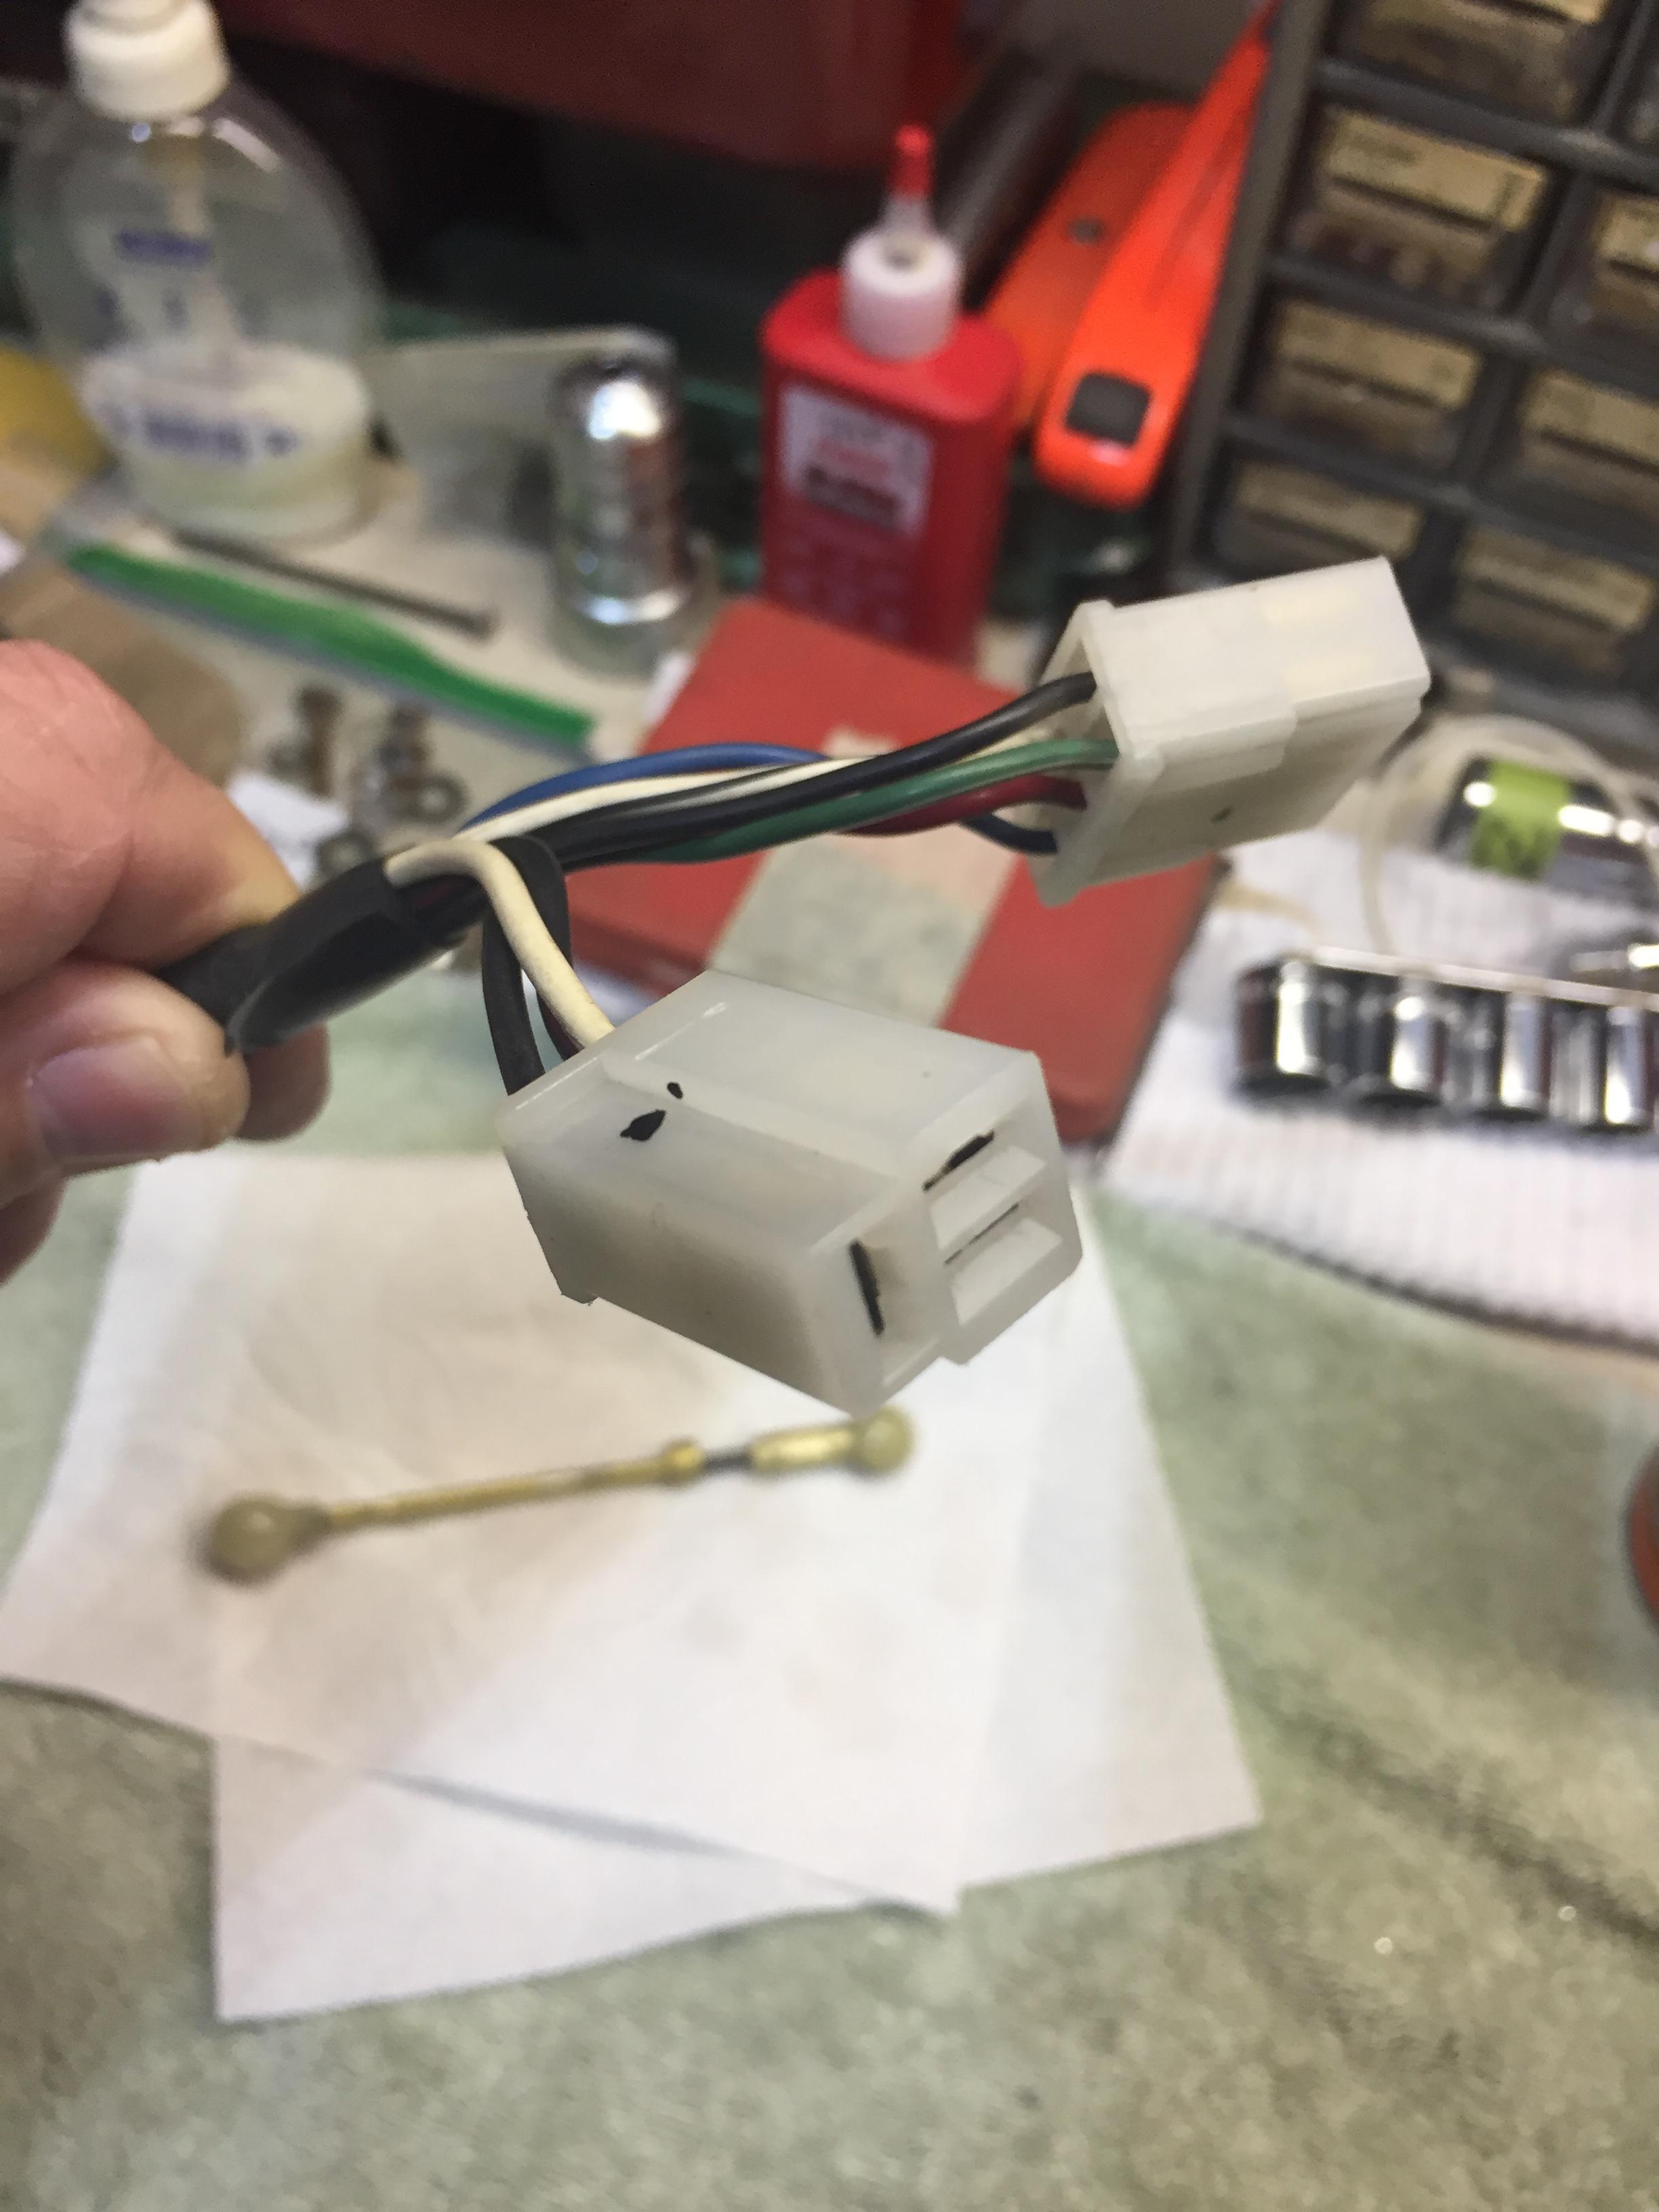
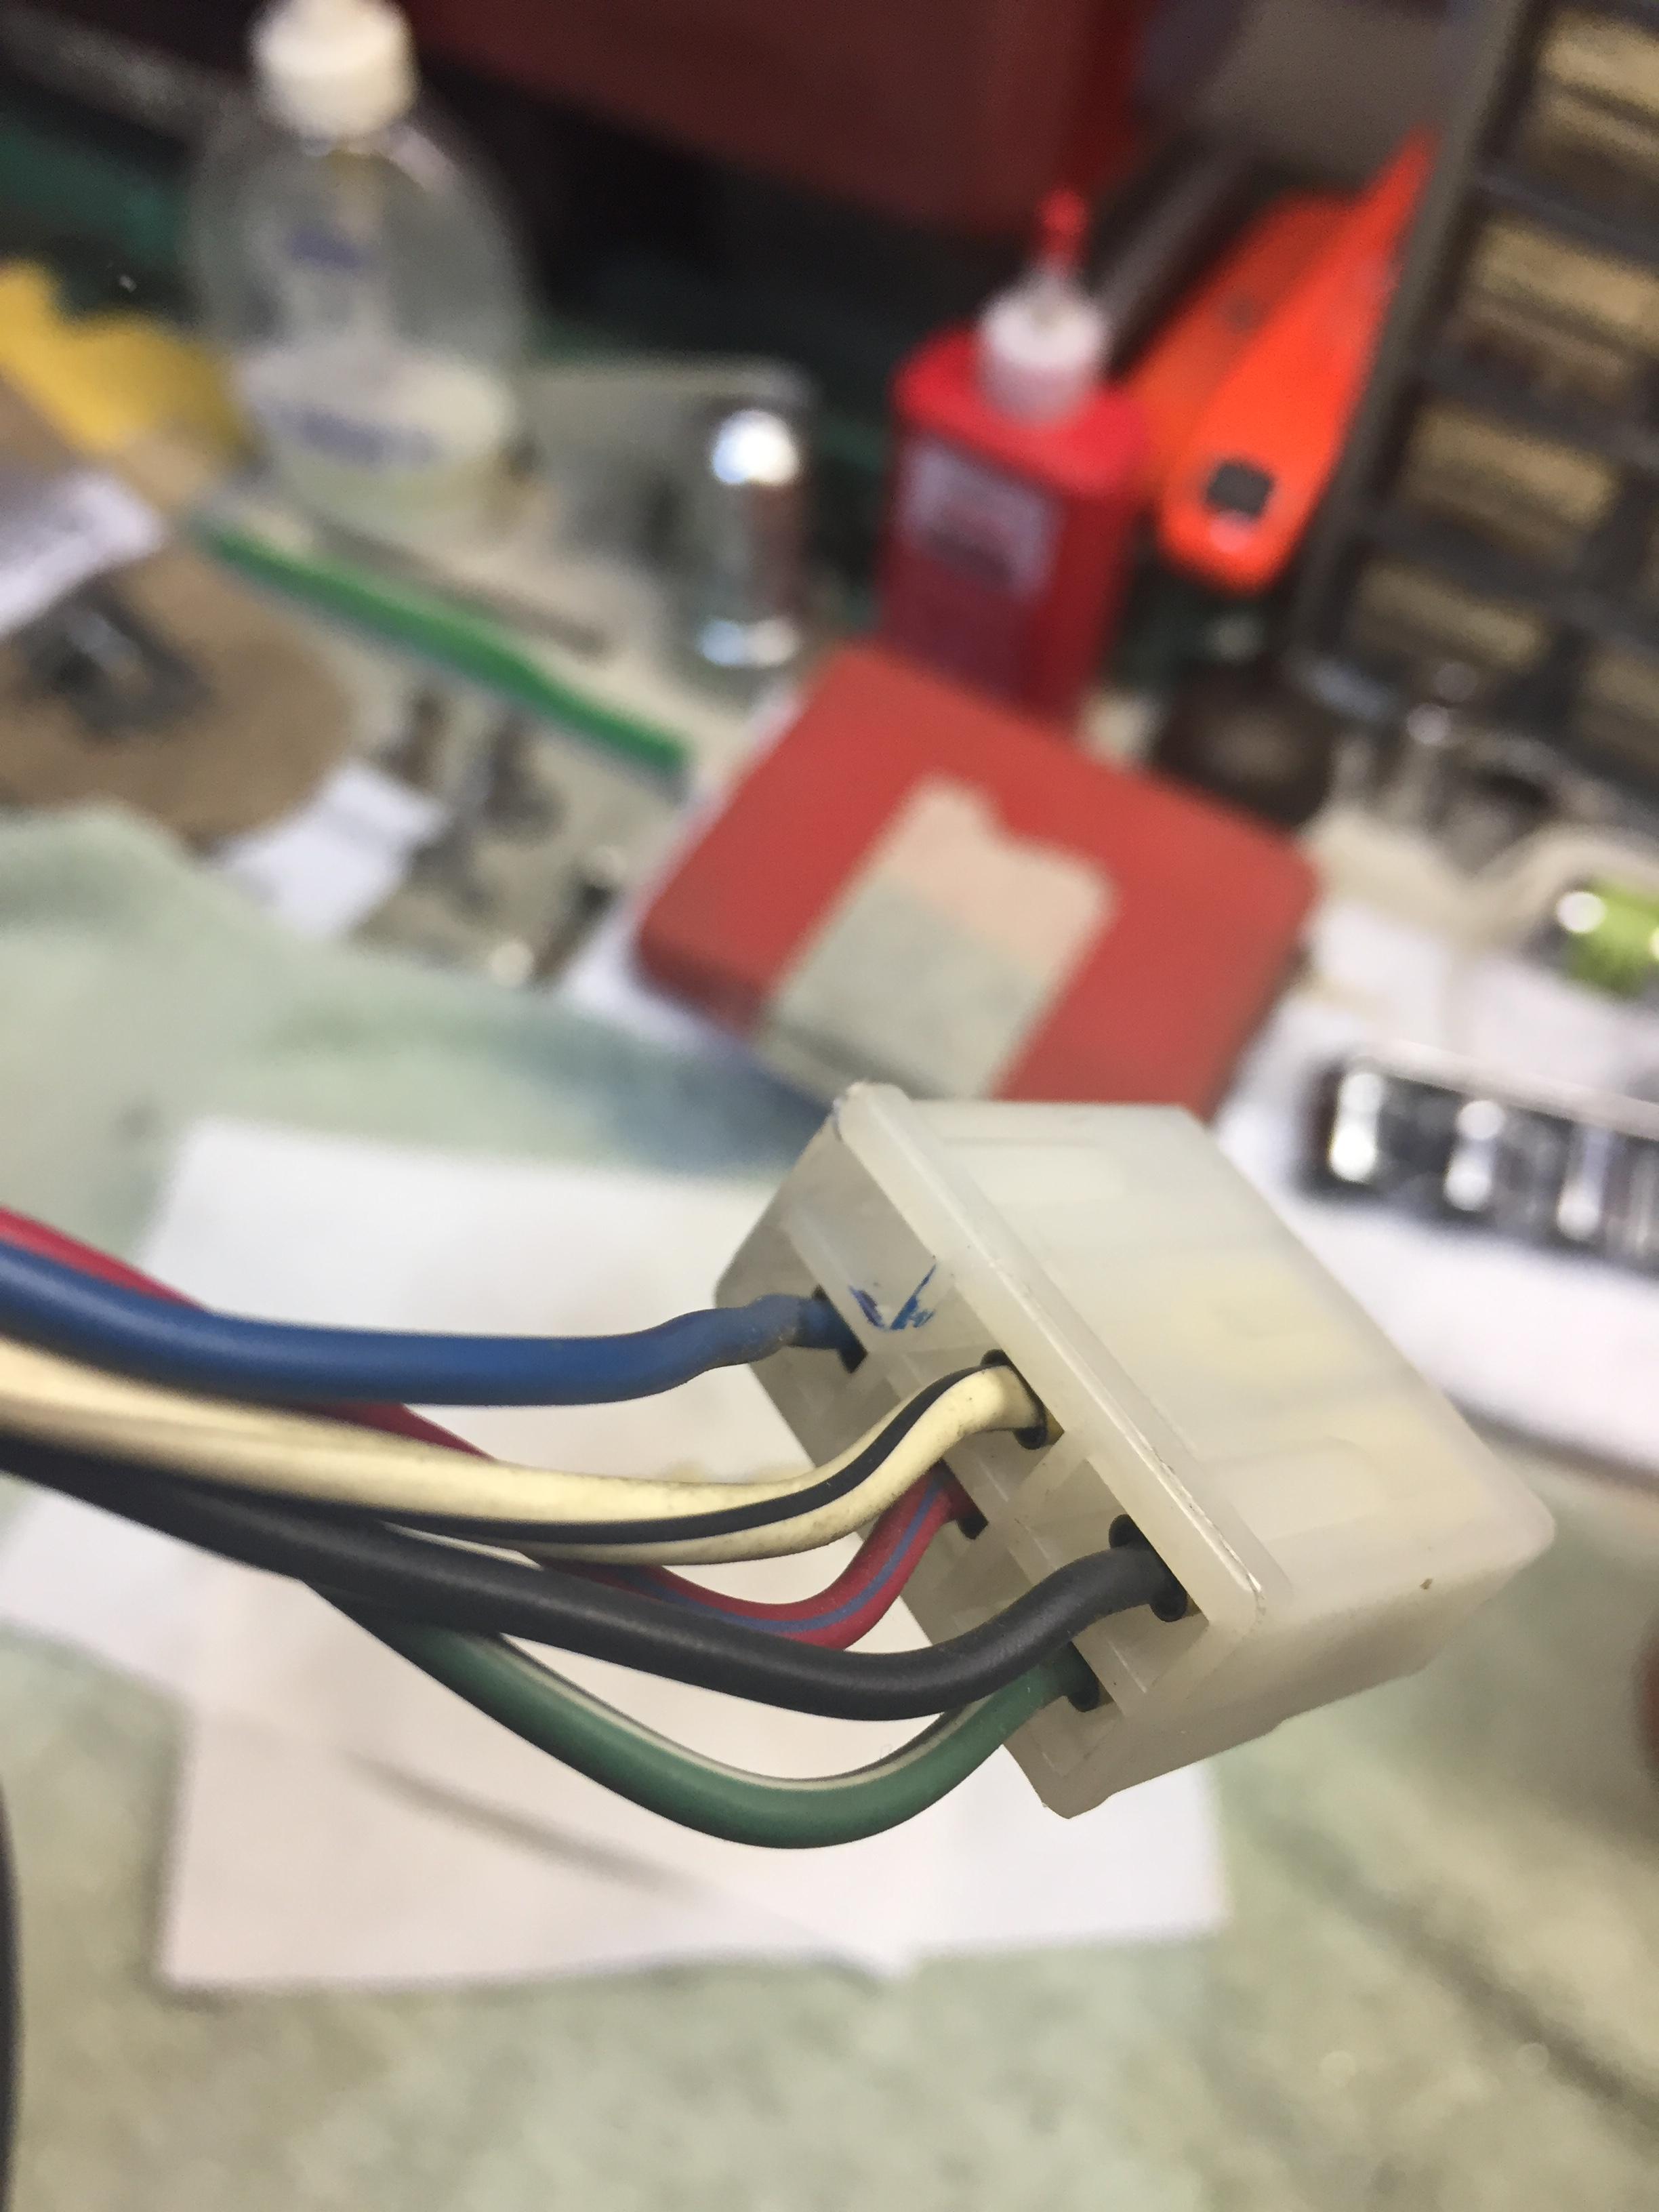
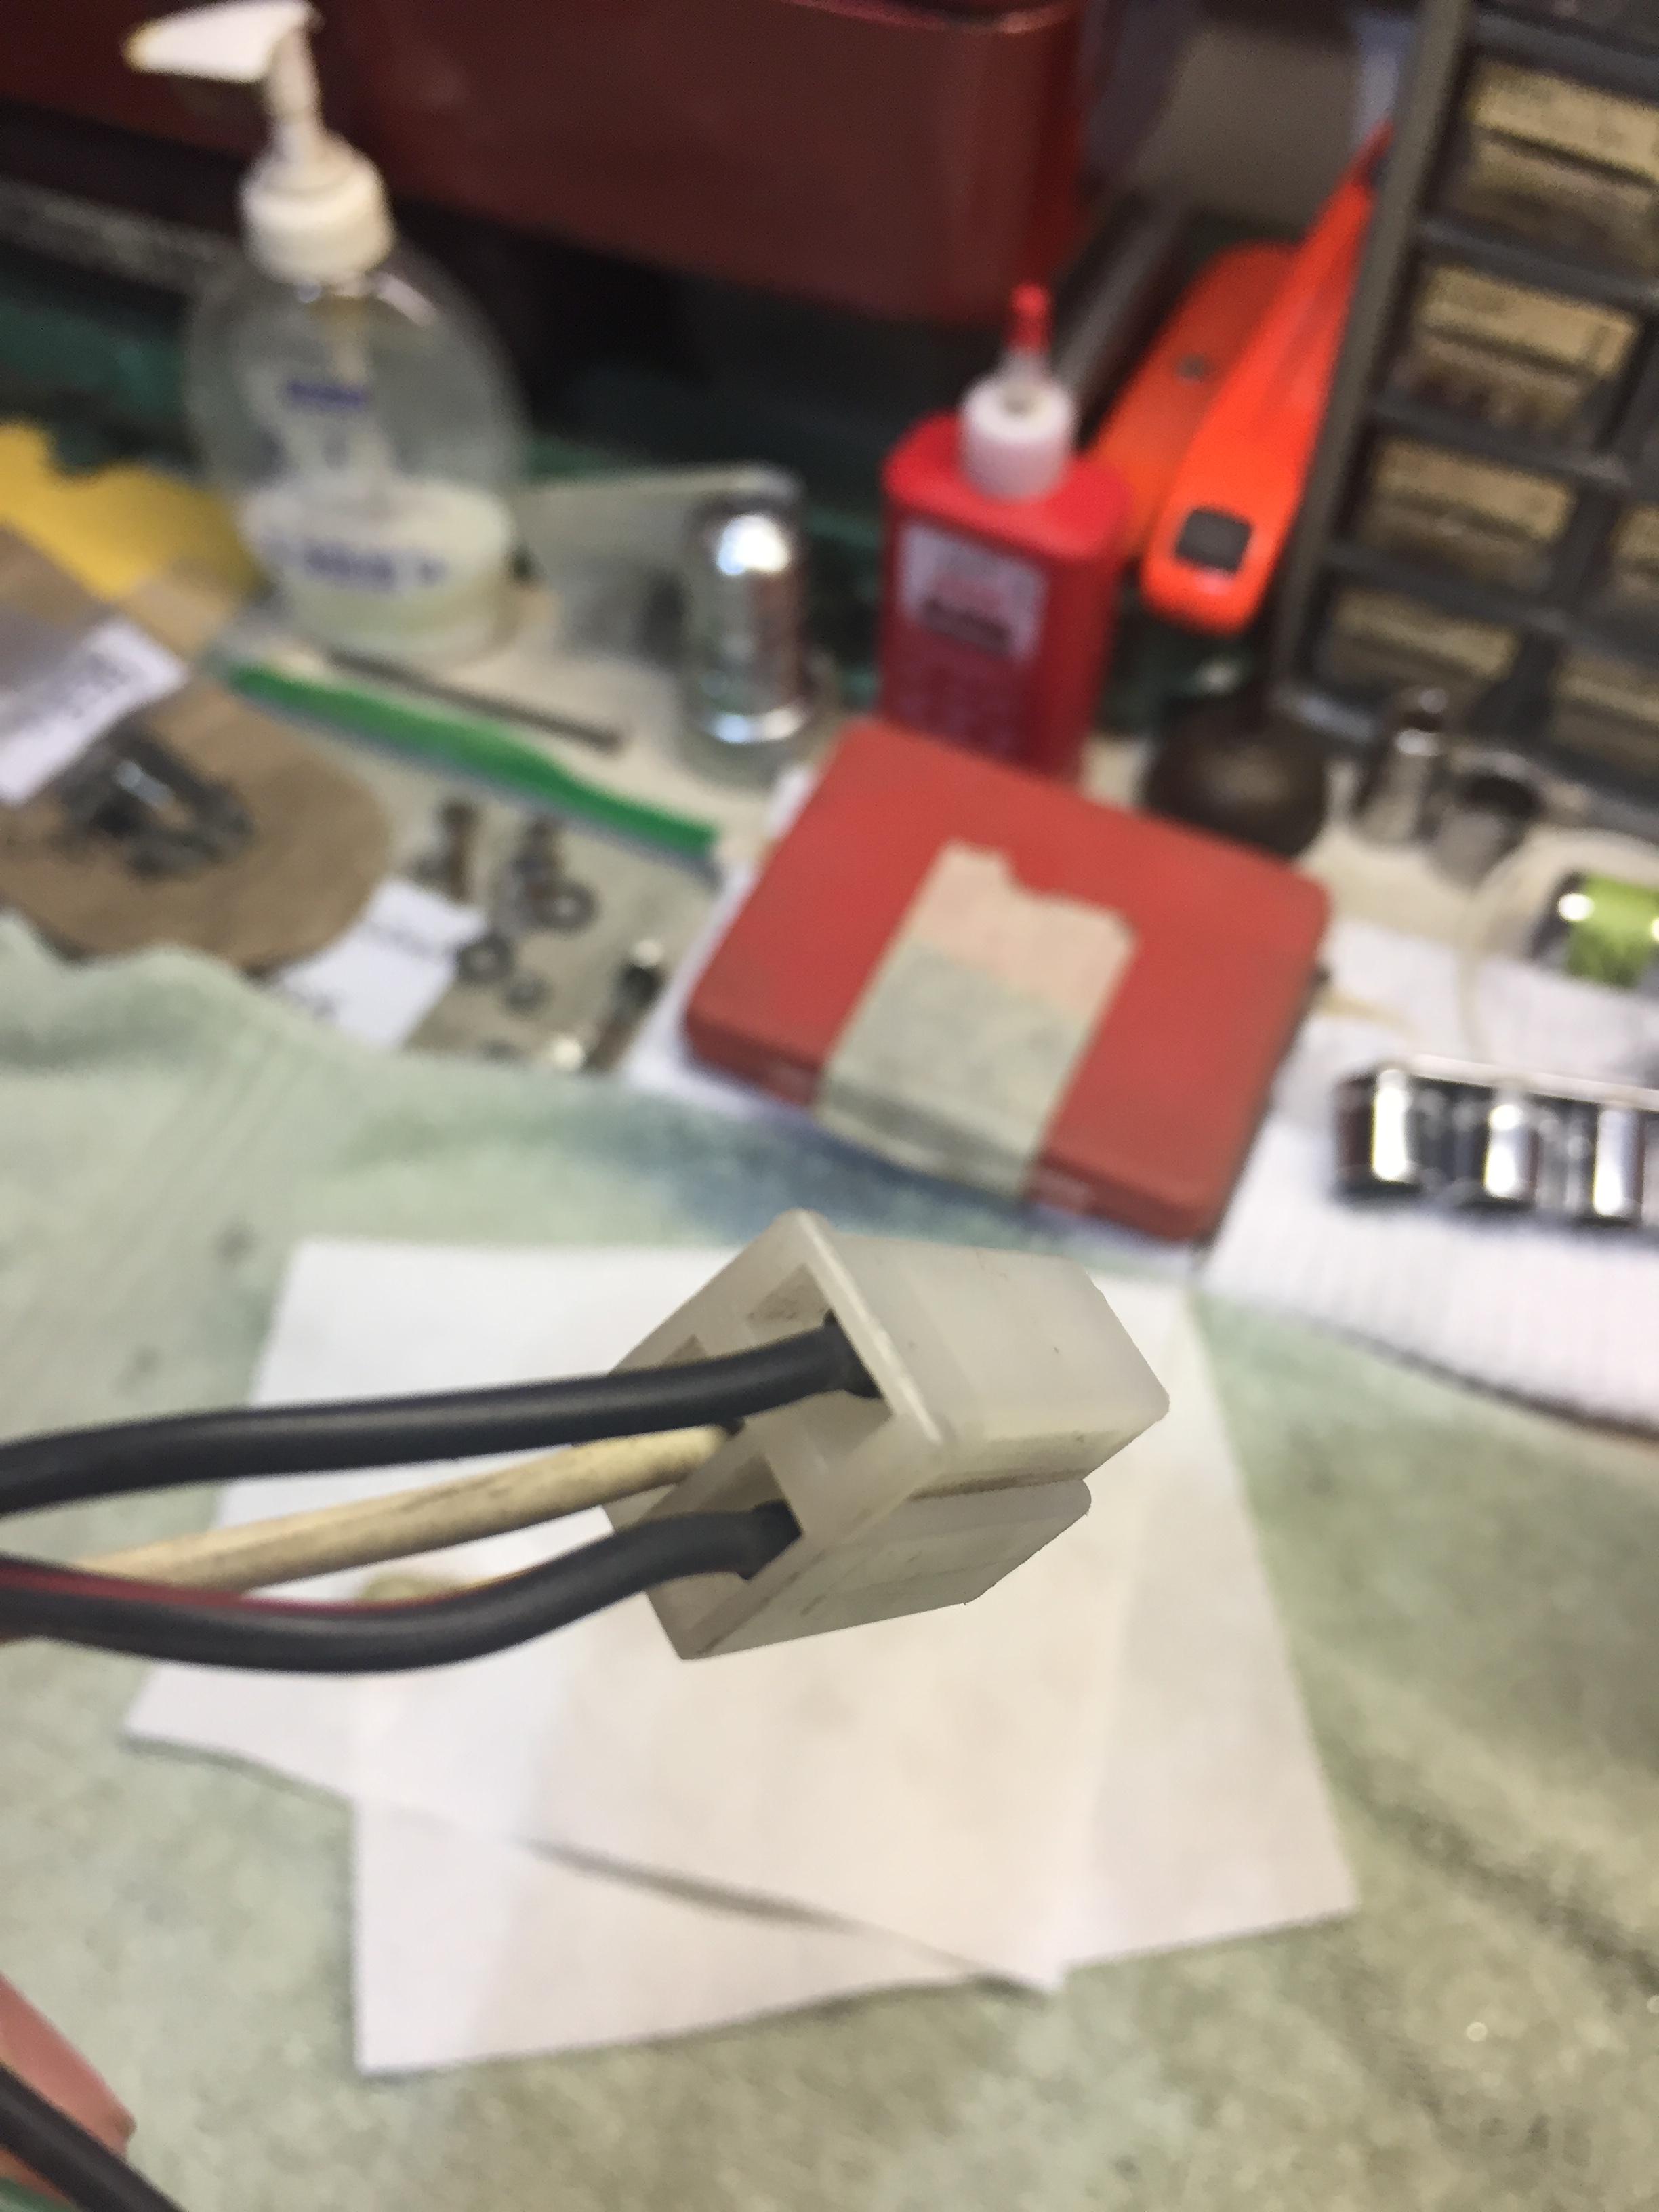
Here's a photo that shows specifically which color wires connect to each of the "spades" in the back of the radio. Note that on the 6 pin connector that the lower right position is unused...at least in the hitachi radio in the 78 year model Z. So there are 8 wires that connect into the radio. The other end of the "sub harness" has the wires grouped together differently...I'll post a photo of that end of the sub harness below...

-
The 3 pin molex is not for the power antenna...the power antenna is a completely separate connection that extends directly from the power antenna switch (mounted to the right side of the radio in the 78 year model) to the main console/dash harness. However, that separate antenna molex connector is very similar (if not exact) to the 3 pin molex connector that plugs directly into the back of the radio.
-
Thats a photo of the complete "sub harness" that connects the radio to the main console harness
-
Also, as you can see from the photos, the 6 pin connector only uses 5 of the 6 wire positionsThese photos show which color wires from the sub harness I mentioned above connect into the 3 and 6 pin connections in the back of the radio....is this what you need?


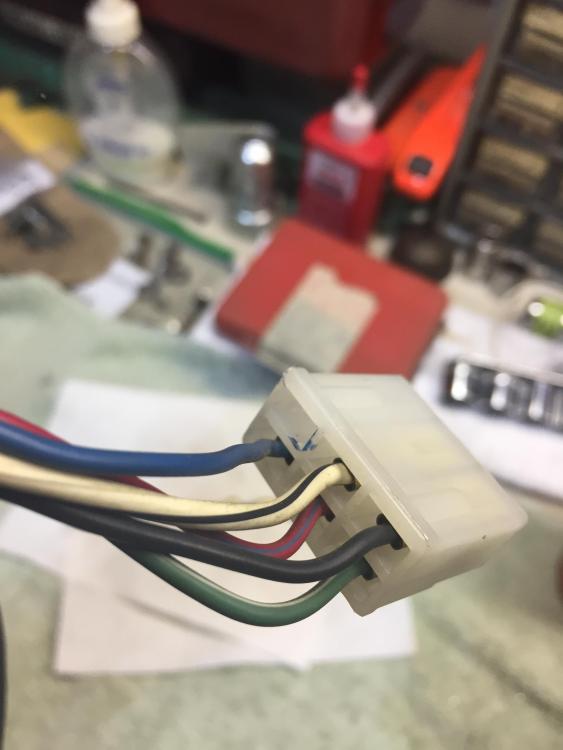
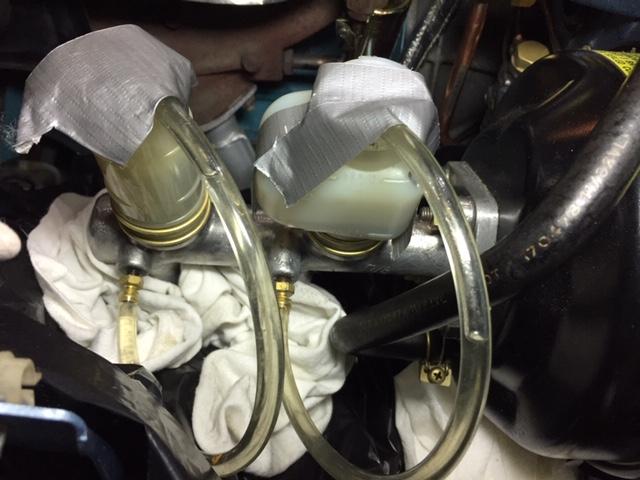
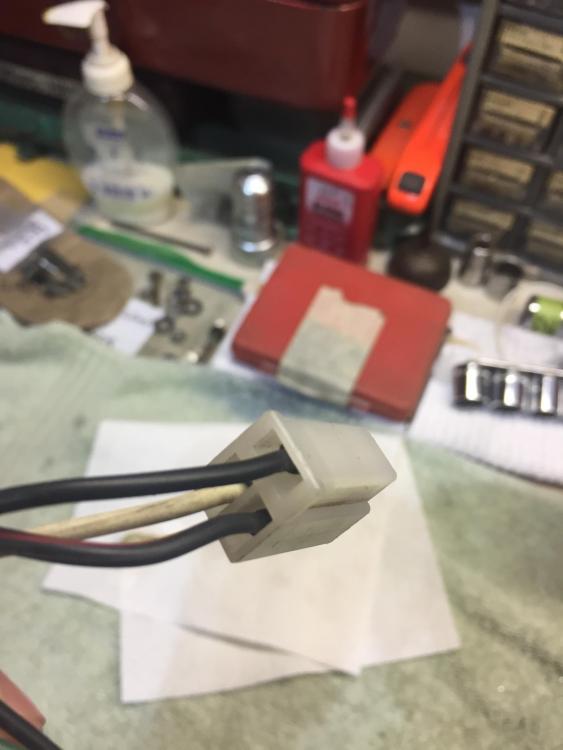 yes....it's a Hitachi KMS-2411z (make and model number)...still looking for the photos that might help youMy 78Z has the original radio and doesn't use the 5 pin DIN connection. It does use both the 3 and 6 pin "molex" connections. My radio model is a KMS-2411Z. The original set up uses a "sub harness" that connects the radio to the main console harness. These sub harnesses can be hard to find since many owners simply discarded them when they installed aftermarket sound systems. Give me a little while and I think i can come of with a few photos of the set up showing the wiring scheme.One day later.... So I spent the afternoon trying to figure out this problem. After checking all the basic connections, I finally decided to start disassembling the components to check them out individually. The first component to come out was the brake master cylinder. Upon disconnecting the two brake lines from the bottom of the master cylinder, I immediately noticed that the brake lines were blocked/plugged up with the remnants of paper towel. Apparently, in my haste to reassemble everything I forgot to remove all of the paper towel pieces that I had used to plug up the lines/ports while everything was apart. After a few hours of blowing out lines with compressed air and taking apart the master cylinder I'm pretty sure that I've now successfully removed all the offending material. I feel like Homer Simpson....DOH!!!! A self imposed headache for sure. My wife said that I shouldn't confess to this mistake on the forum...but I felt obligated to disclose what the solution was to the problem that I originally posted...maybe it will help someone else out sometime down the line... I'm feeling confident that tomorrow the brake bleeding job will go much easier!78 280Z Background....about a year ago I completely disassembled everything in my engine bay so I could repaint the bay, refurbish all the engine compartment components and then reinstall it all. I'm finished up with it all now...the last remaining task before getting the Z back on the road is bleeding all four brakes. Video Player is loading. Play Video Play Unmute Current Time 0:06 / Duration 0:19 Loaded: 100.00% Stream Type LIVE Seek to live, currently playing liveLIVE Remaining Time -0:13 Playback Rate 1x Chapters Chapters Descriptions descriptions off, selected Captions captions off, selected Audio Track Fullscreen This is a modal window. Beginning of dialog window. Escape will cancel and close the window. Text ColorWhite Black Red Green Blue Yellow Magenta CyanTransparencyOpaque Semi-Transparent Background ColorBlack White Red Green Blue Yellow Magenta CyanTransparencyOpaque Semi-Transparent Transparent Window ColorBlack White Red Green Blue Yellow Magenta CyanTransparencyTransparent Semi-Transparent Opaque Font Size 50% 75% 100% 125% 150% 175% 200% 300% 400% Text Edge Style None Raised Depressed Uniform Dropshadow Font Family Proportional Sans-Serif Monospace Sans-Serif Proportional Serif Monospace Serif Casual Script Small Caps Reset restore all settings to the default valuesDone Close Modal Dialog End of dialog window. Advertisement So today I jacked up the rear, removed the wheels and started the process by trying to bleed the left rear brake. Video Player is loading. Play Video Play Unmute Current Time 0:00 / Duration 0:19 Loaded: 100.00% Stream Type LIVE Seek to live, currently playing liveLIVE Remaining Time -0:19 Playback Rate 1x Chapters Chapters Descriptions descriptions off, selected Captions captions off, selected Audio Track Fullscreen This is a modal window. Beginning of dialog window. Escape will cancel and close the window. Text ColorWhite Black Red Green Blue Yellow Magenta CyanTransparencyOpaque Semi-Transparent Background ColorBlack White Red Green Blue Yellow Magenta CyanTransparencyOpaque Semi-Transparent Transparent Window ColorBlack White Red Green Blue Yellow Magenta CyanTransparencyTransparent Semi-Transparent Opaque Font Size 50% 75% 100% 125% 150% 175% 200% 300% 400% Text Edge Style None Raised Depressed Uniform Dropshadow Font Family Proportional Sans-Serif Monospace Sans-Serif Proportional Serif Monospace Serif Casual Script Small Caps Reset restore all settings to the default valuesDone Close Modal Dialog End of dialog window. Advertisement As an aside, before I started this "refurbish" process, the brakes were working perfectly...very firm, even braking from all four brakes. Using a Motive Products Power Bleeder, pressurized to 15 psi, I was unable to get a steady flow of brake fluid from either rear brake bleeder port. Additionally, when I tried pushing the brake pedal it was very firm...as in I could barely push it down at all. Next I connected clear tubes to both of the master cylinder bleeder ports an stuck the other end of the tubes into the reservoir (see photo). I opened the bleeder screws and was easily able to pump the brake pedal, circulating brake fluid from the bleeder into the reservoirs. So, the question is, why is the brake pedal so firm with the master cylinder bleeder screws closed, but not with the bleeder screws open? I'm thinking 1) the brake master is malfunctioning 2) there is some kind of blockage preventing brake fluid from flowing freely from the master cylinder to the rear brakes...perhaps a problem with the NP valve (proportioning valve). Eager to hear your ideas.
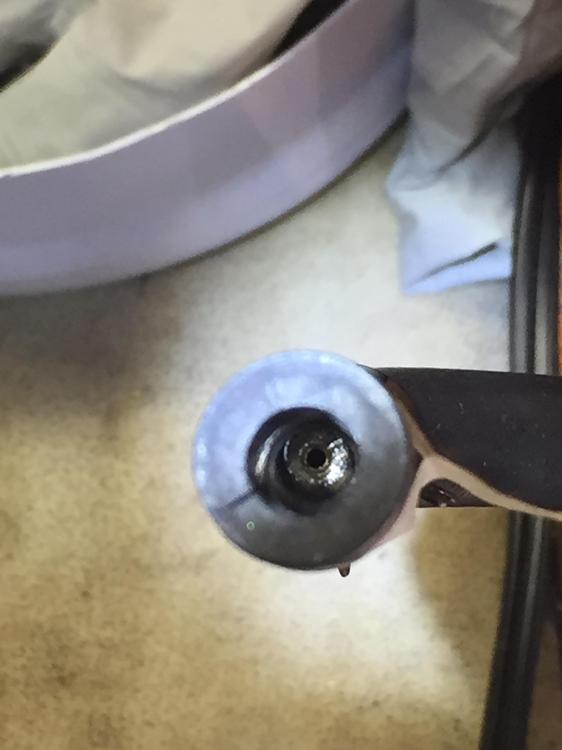
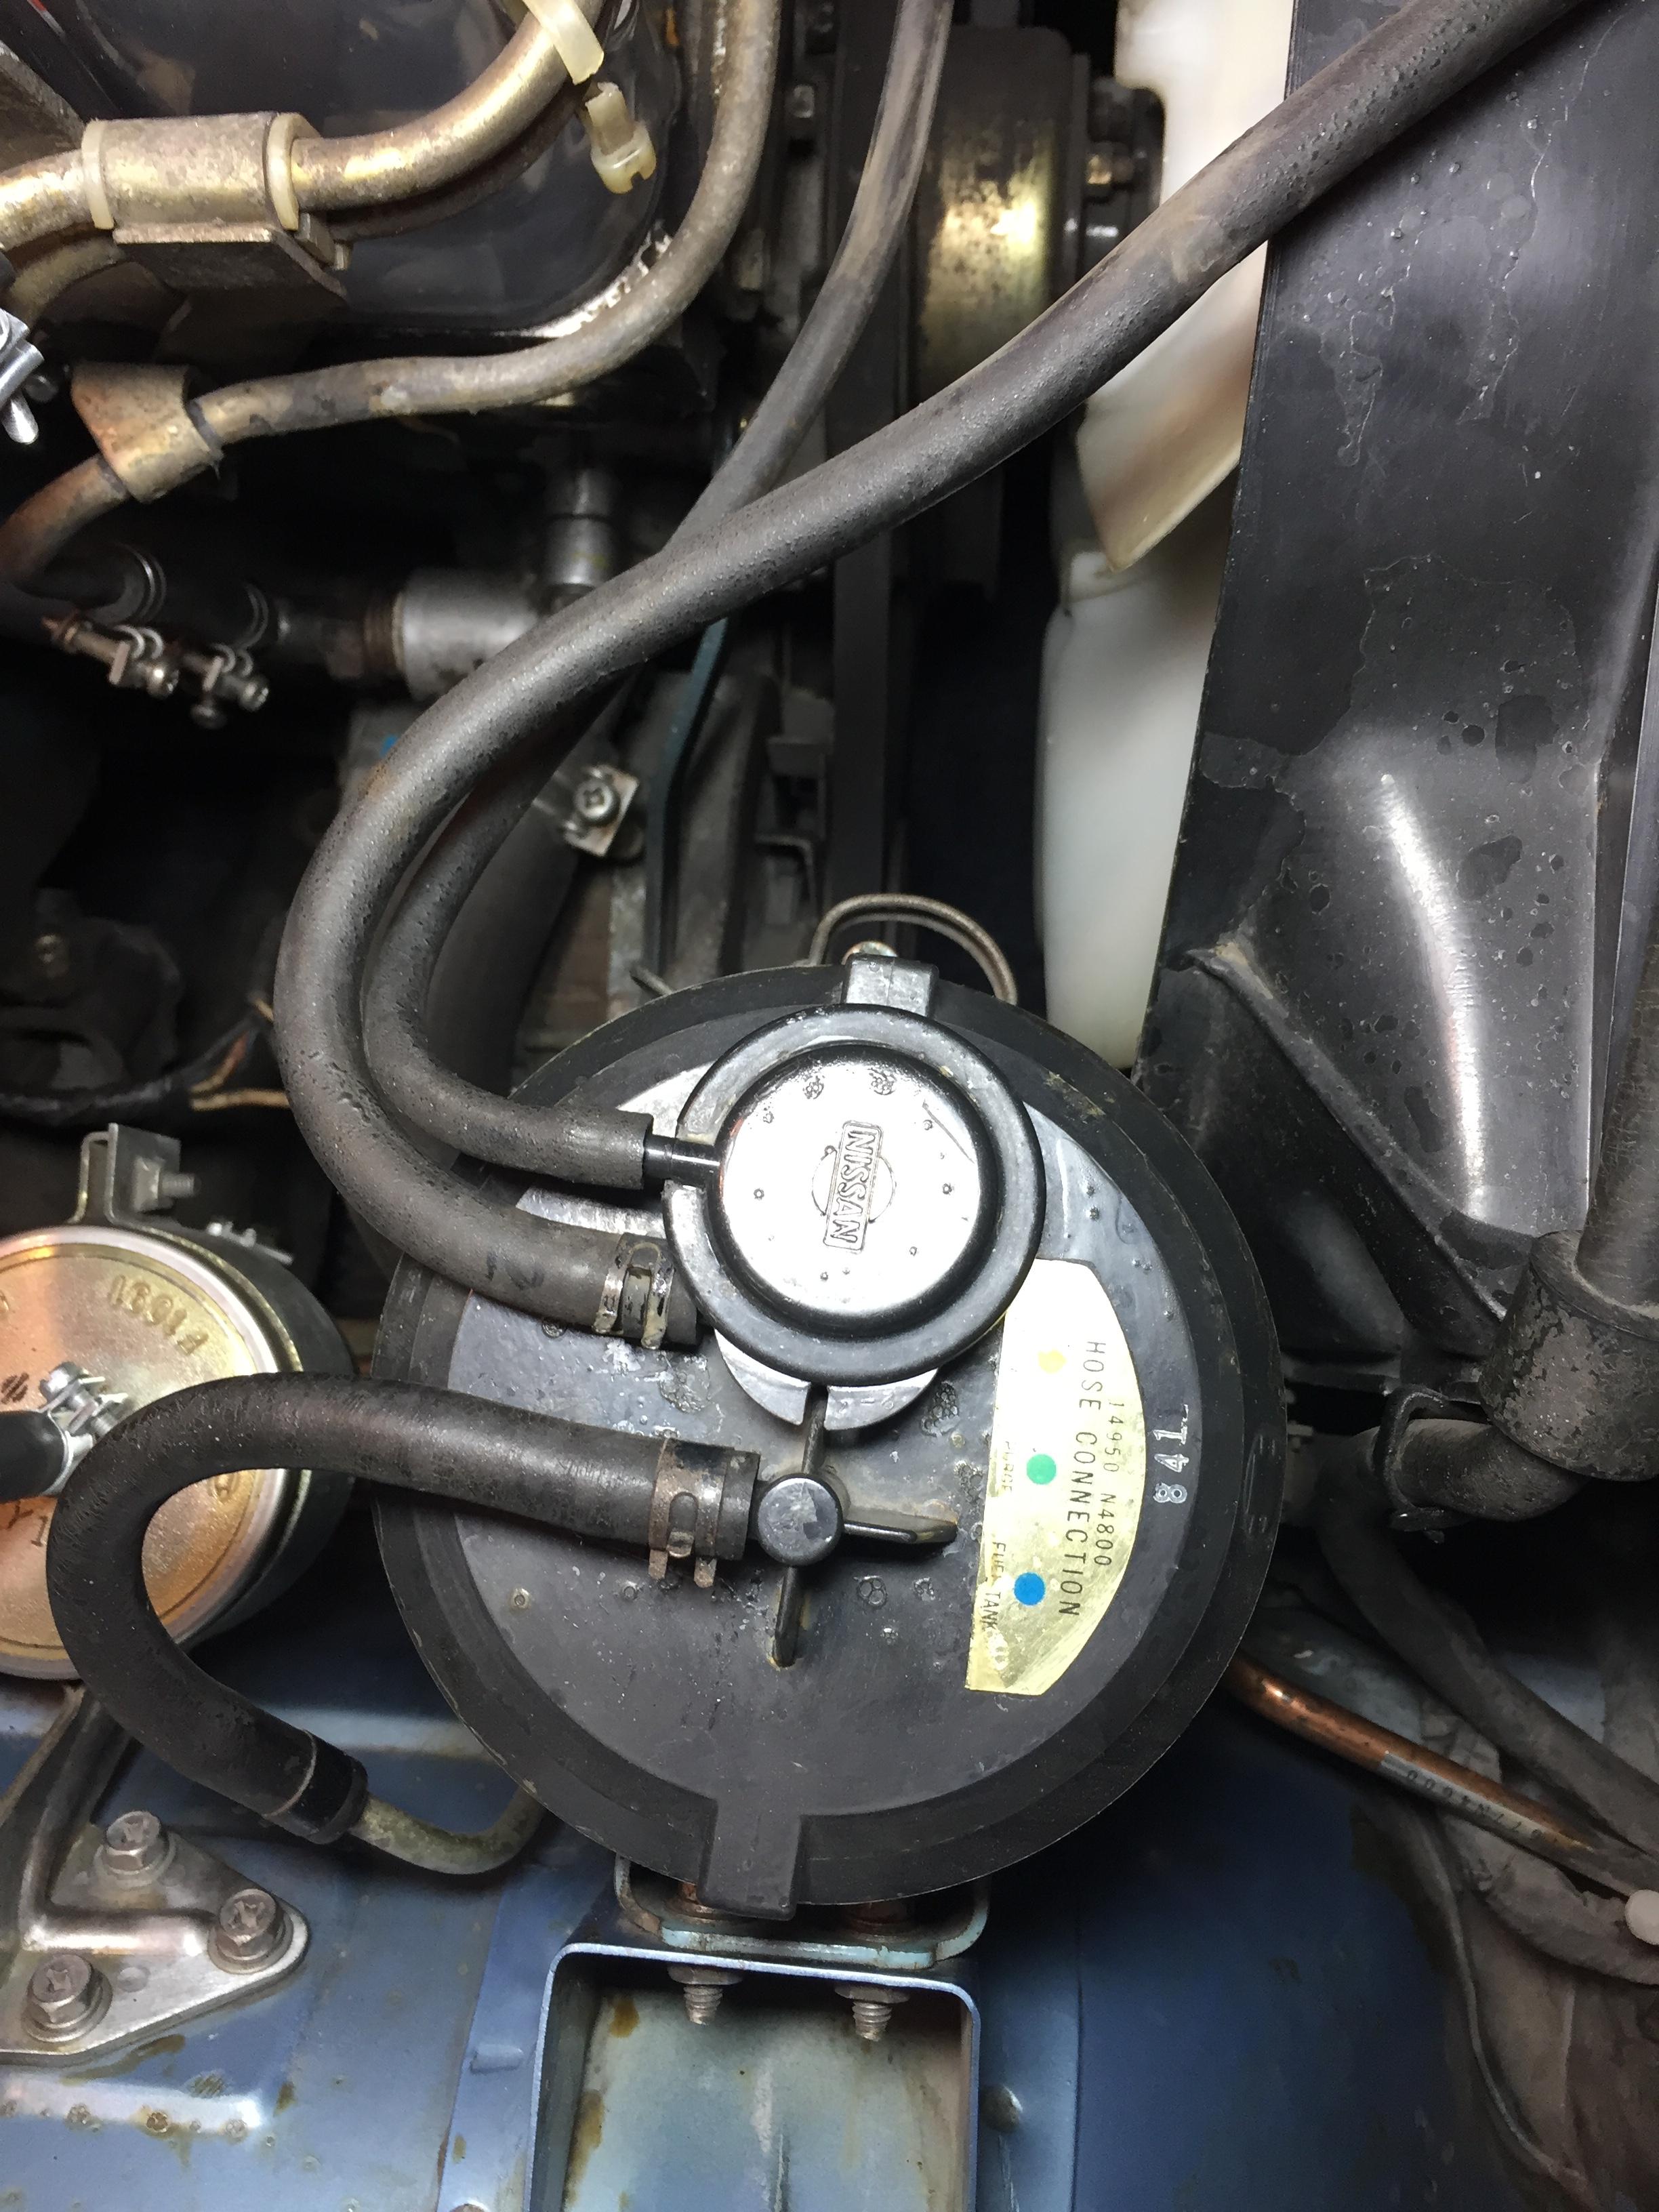
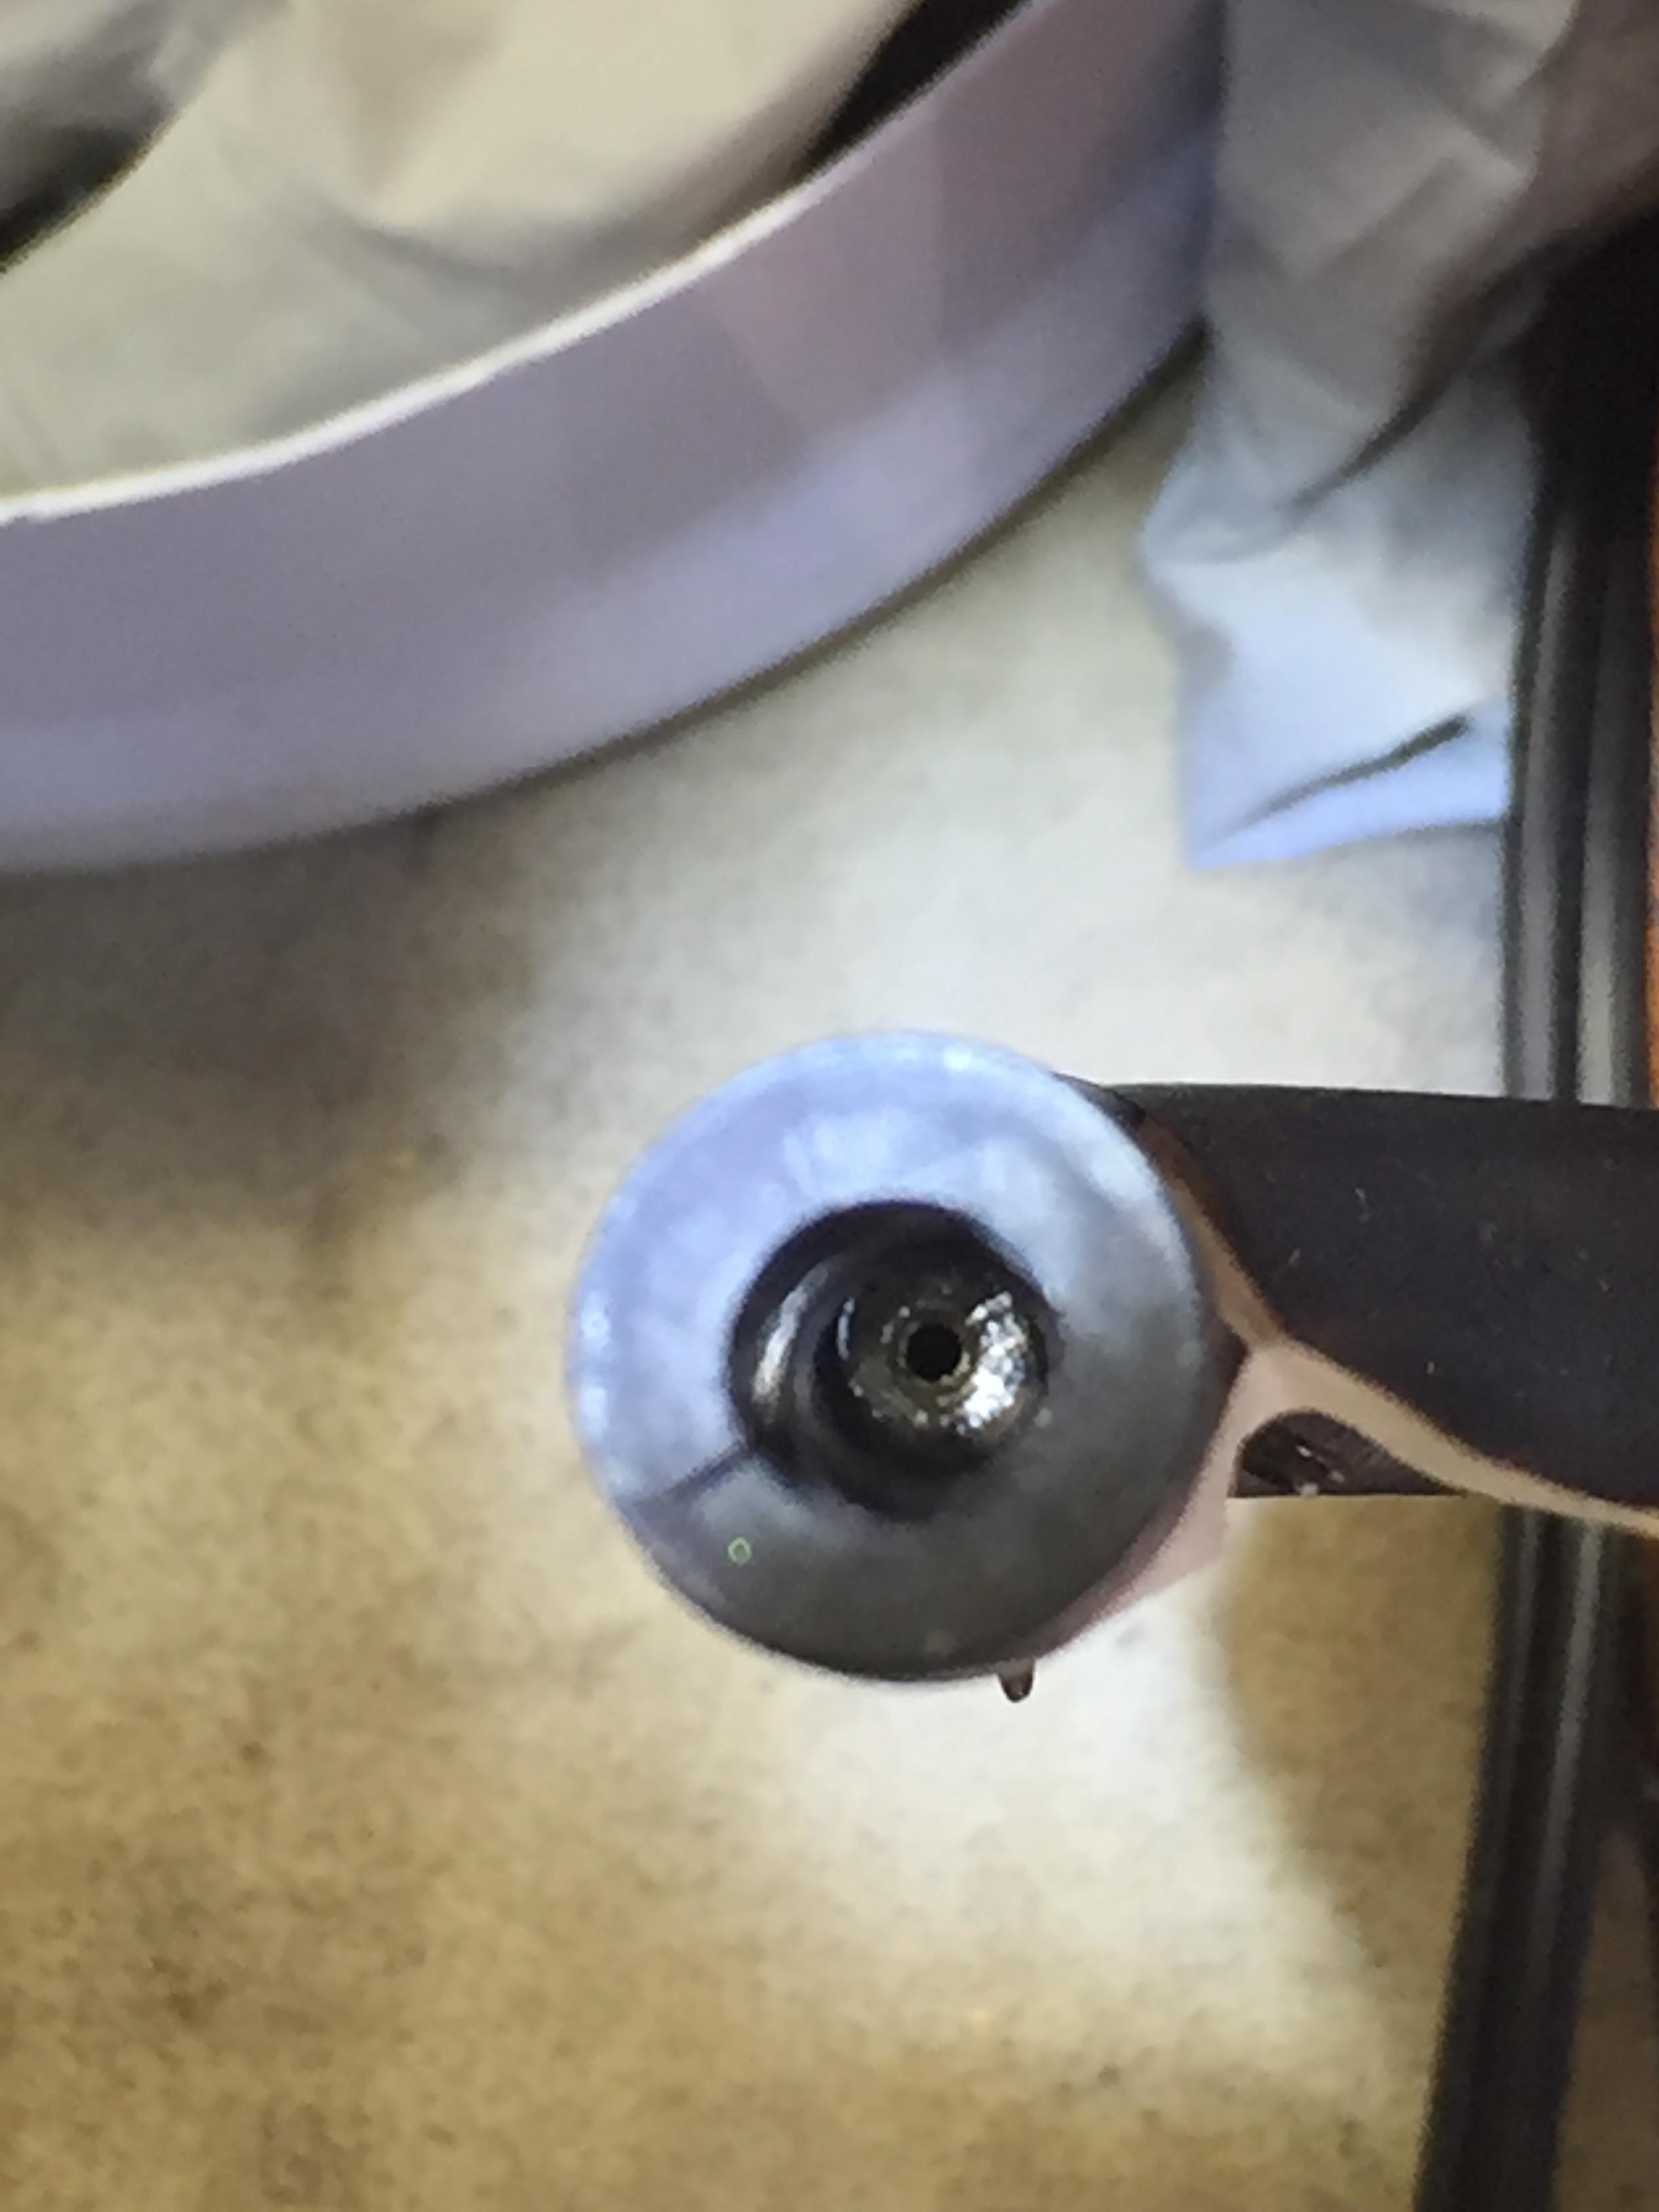
 Wow! Thank you for that not so obvious Z emissions systems lesson Captain Obvious! I always try to do some research before posting a question on the forum, but I admit, there wasn't a chance I was gonna discover that answer. I'm just glad you didn't find that diagram in the 78Z FSM! Until your response this morning I didn't think we were gonna get a likely answer to this orifice mystery...My hat's off to you sir!Yeah...after blowing and sucking on both ends...it seems like it's just a "restrictor" because I encountered the same amount of resistance no matter what....either that or, if it is some kind of check valve, then it's broken.It's a 78. I purchased it in 1980 from the original owner so I'm pretty sure it's the original factory hose. Thanks for that insight.I was reinstalling all the hoses leading to/from my carbon vapor canister today and I noticed something interesting. The short hose that connects to the steel line leading back to the fuel tank isn't simply a rubber hose. In the attached photo, i'm referring to the rubber hose connected to the canister port labelled by a blue dot (Fuel Tank). As I was about to reinstall it I thought I'd blow into it just to make sure that it wasn't clogged and, surprisingly, I felt resistance that seemed like a clog. Upon further investigation, I discovered that there is an obstruction in the hose that seems purposeful. This obstruction seems to be metallic and has a small hole through the center of it (see photo of hose end). I couldn't find any reference as to the purpose of this hose restriction anywhere. Could anyone shed some light on exactly what this is? What is it called? What is its purpose? Sorry if Fuel Injection isn't the best place to post this question...It was either here or Engine/Drivetrain. Thanks!


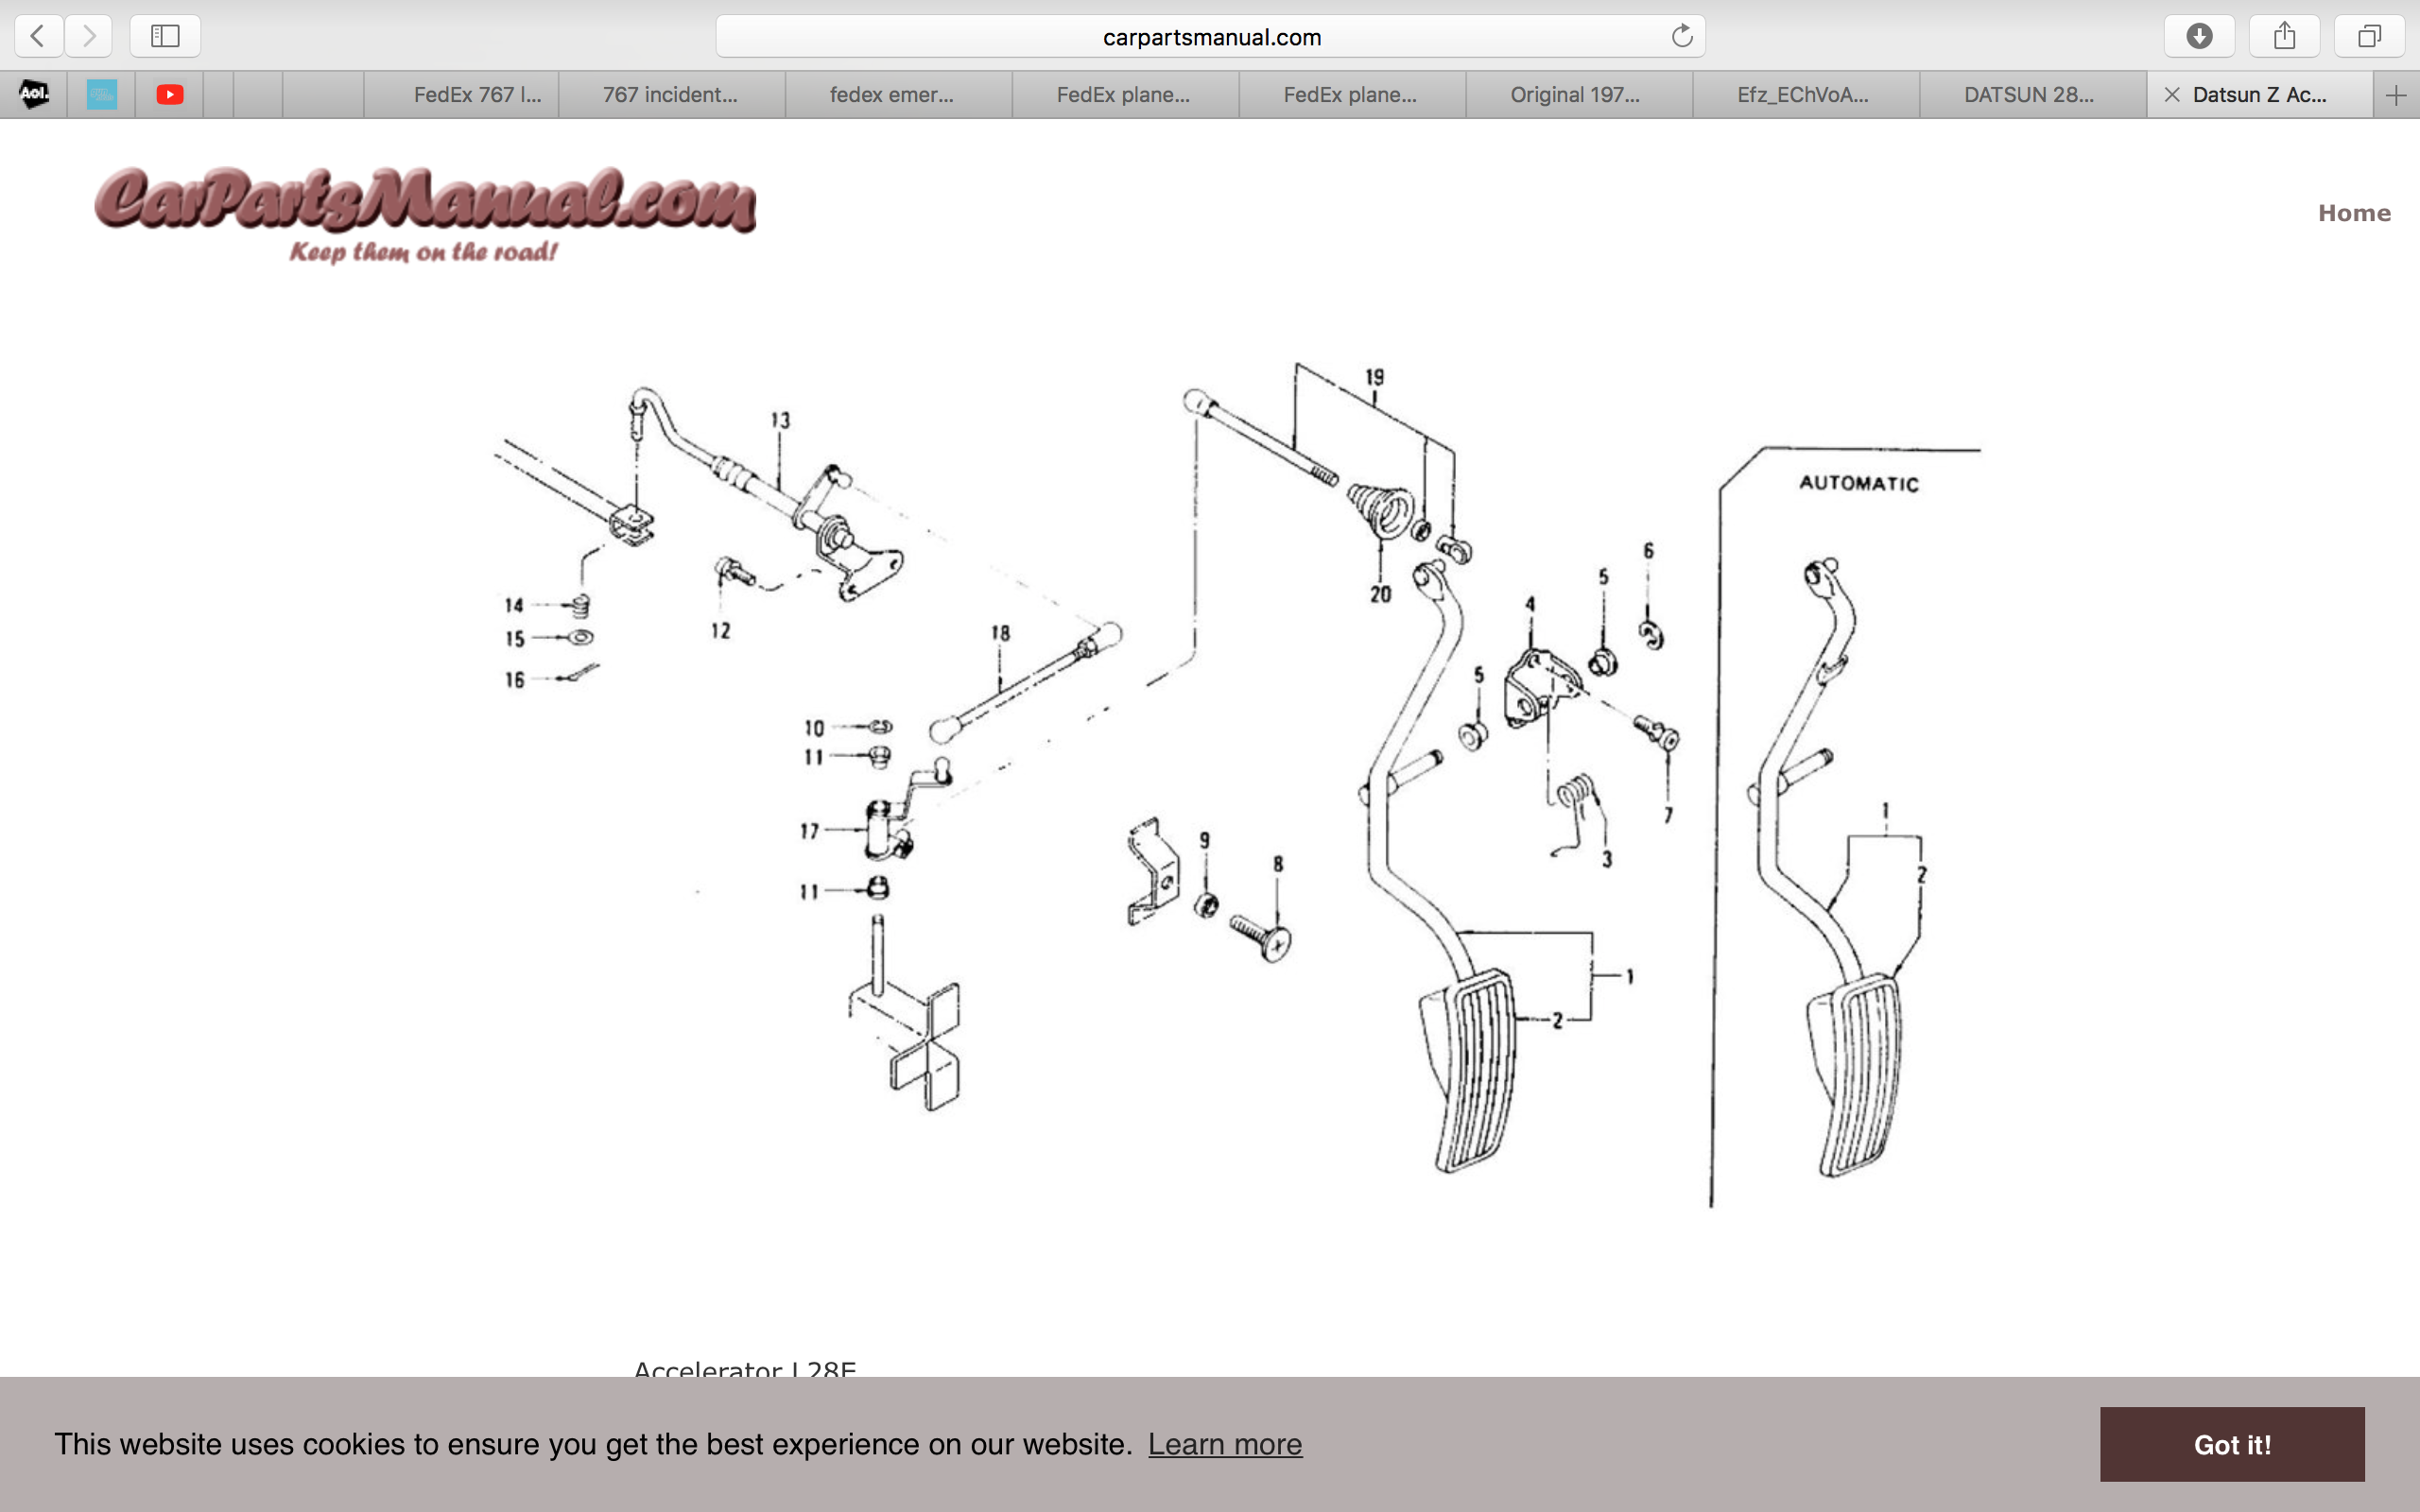
 Hi Dmuzial, I have a 78Z manual, and had this same problem about a year and a half ago....actually started a thread in the Engine and Drivetrain section since I originally ran across the problem when installing the diff...you can see it here: Lots of good responses to my questions by the forum members. Bottom line was that some of the drawings in the FSM were copied from previous year models and are incorrect. Like you, I initially installed the bar with the bushing cylinders aft of the mustache bar (per the FSM diagram) only to discover that I couldn't get the forward diff mount to line up correctly. It all worked out good once I reversed the bar so that the bushing cylinders were forward. Love this forum...never fails to get you back on track with whatever Z problem you're tackling at the moment!Thank you for that addition to this puzzle. So...it seems as if that collar was installed the same way on both yours and mine. Perhaps we have a trend going here. I don't understand the reasoning behind this installation option, but, unless I hear differently from another member, I will likely go with this option!Hmmm...hadn't thought about that. Hoping another forum member can shed some additional light on this....Cause we now have 3 possible installation possibilities for this mysterious little metal collar!Here's the diagram for the '78...unfortunately it doesn't show the little metal collar either...
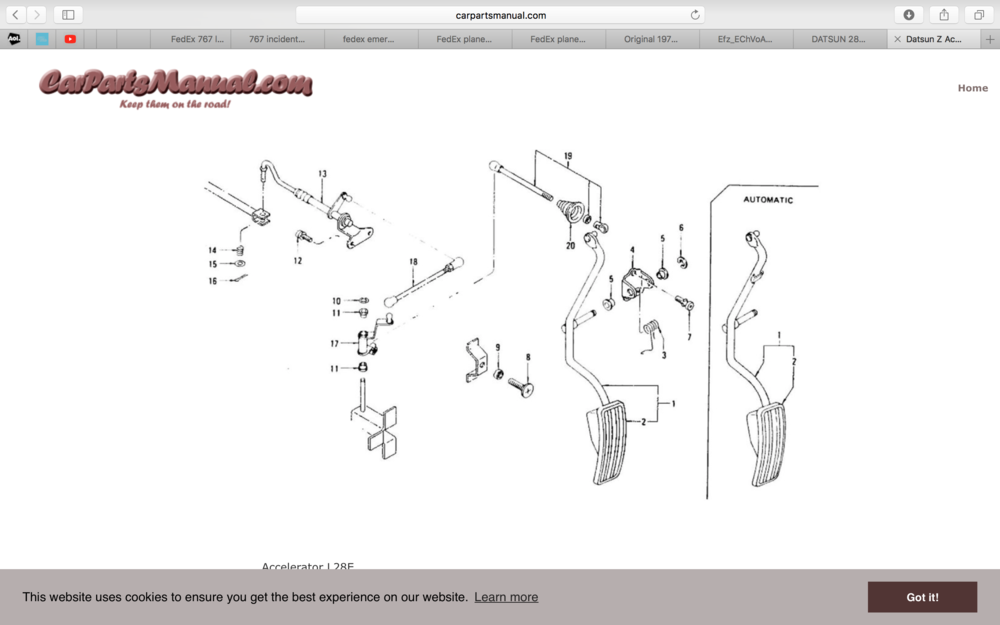 Very interesting...that parts diagram says it's applicable up to Nov '74.....mine is a 78 and it does appear that there are differences...I'm going to try and find a similar parts diagram for the 78 year model and see if that definitively answers the question. Thank you.







Important Information
By using this site, you agree to our Privacy Policy and Guidelines. We have placed cookies on your device to help make this website better. You can adjust your cookie settings, otherwise we'll assume you're okay to continue.