Leaderboard
-
inline6
 Subscriber
 3Points1,282Posts
 -
conedodger
Free Member3Points12,513Posts -
JDMjunkies.ch
Free Member1Points637Posts


Popular Content
Showing content with the highest reputation on 07/22/2024 in all areas
-
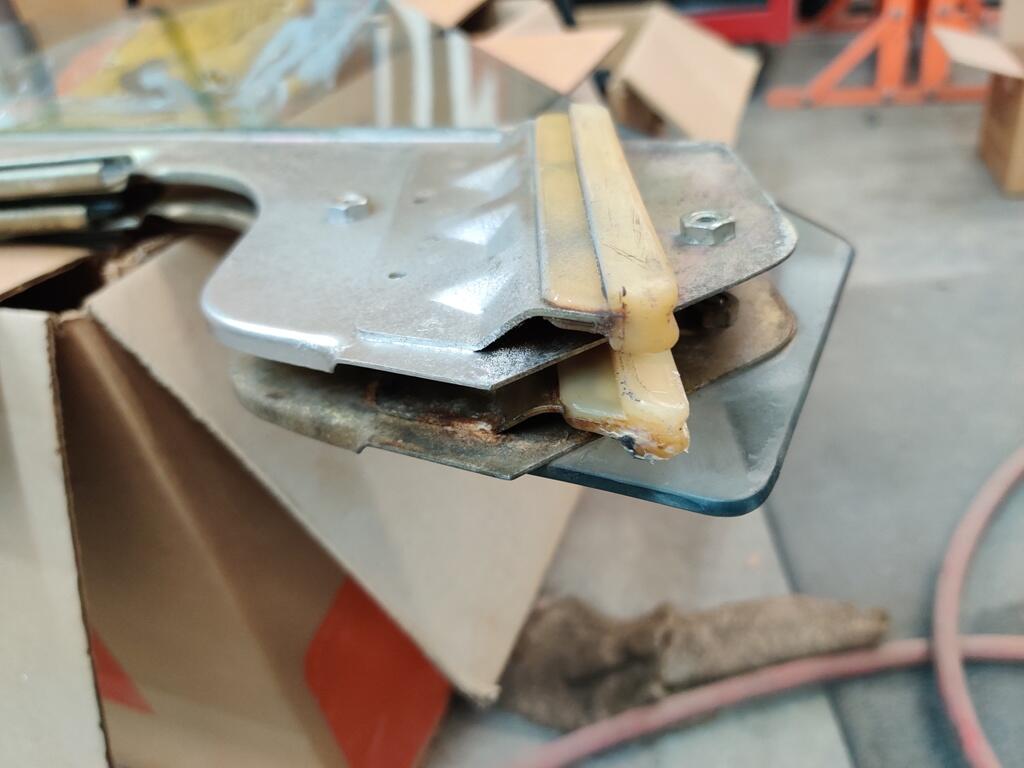
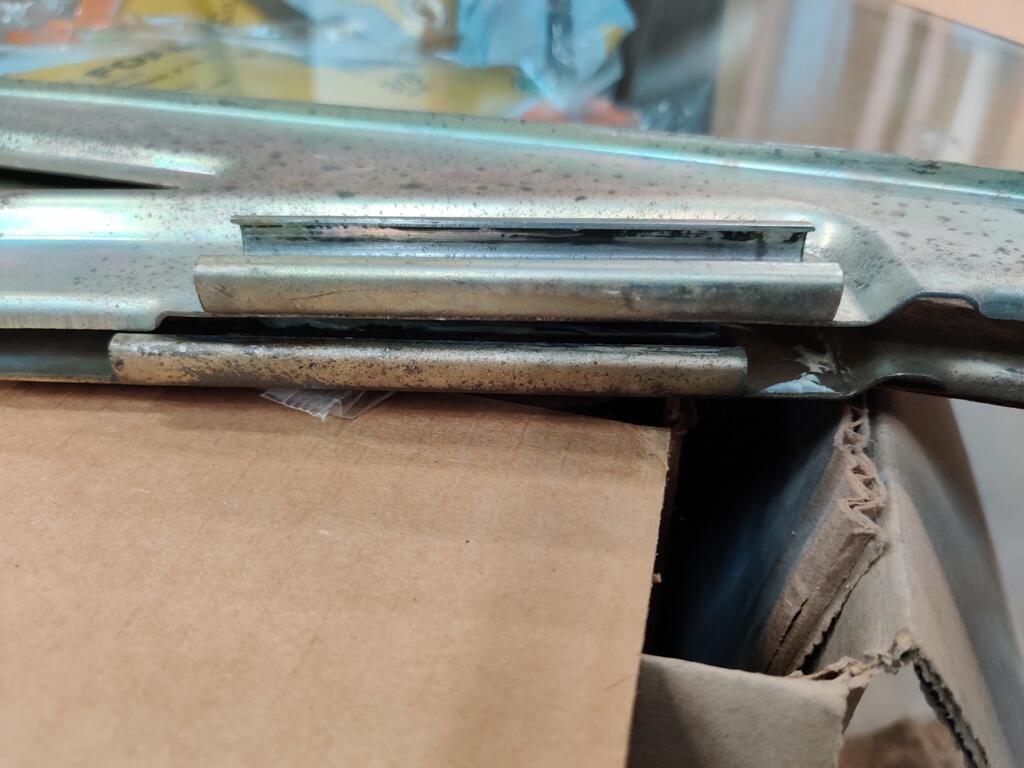
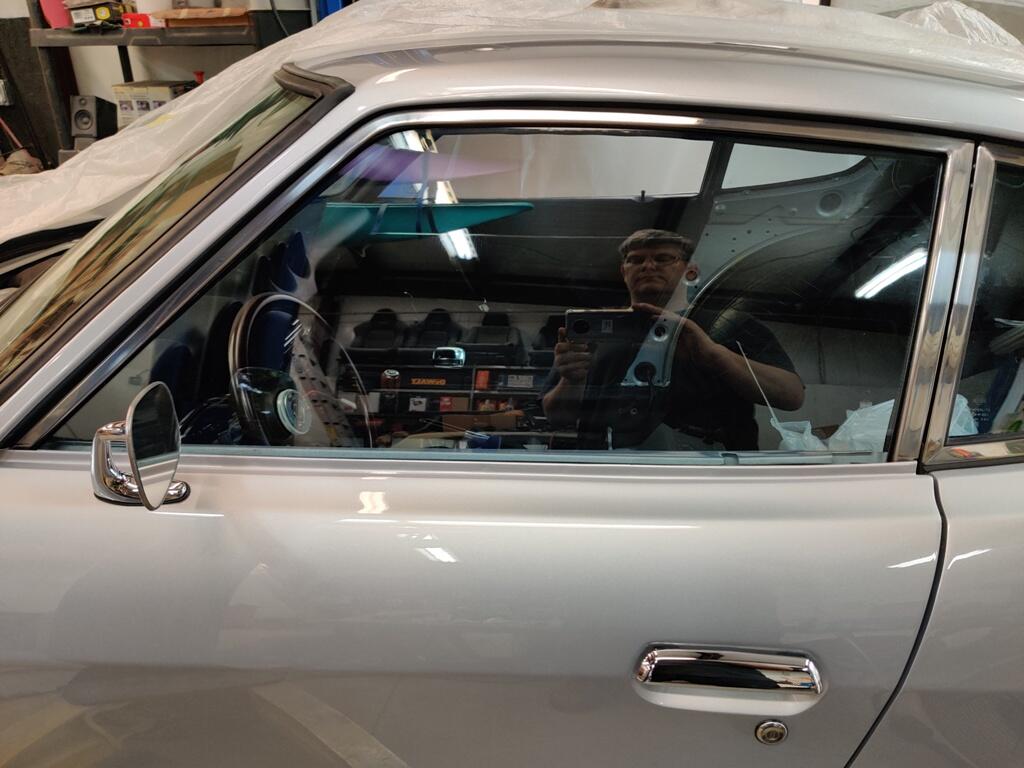
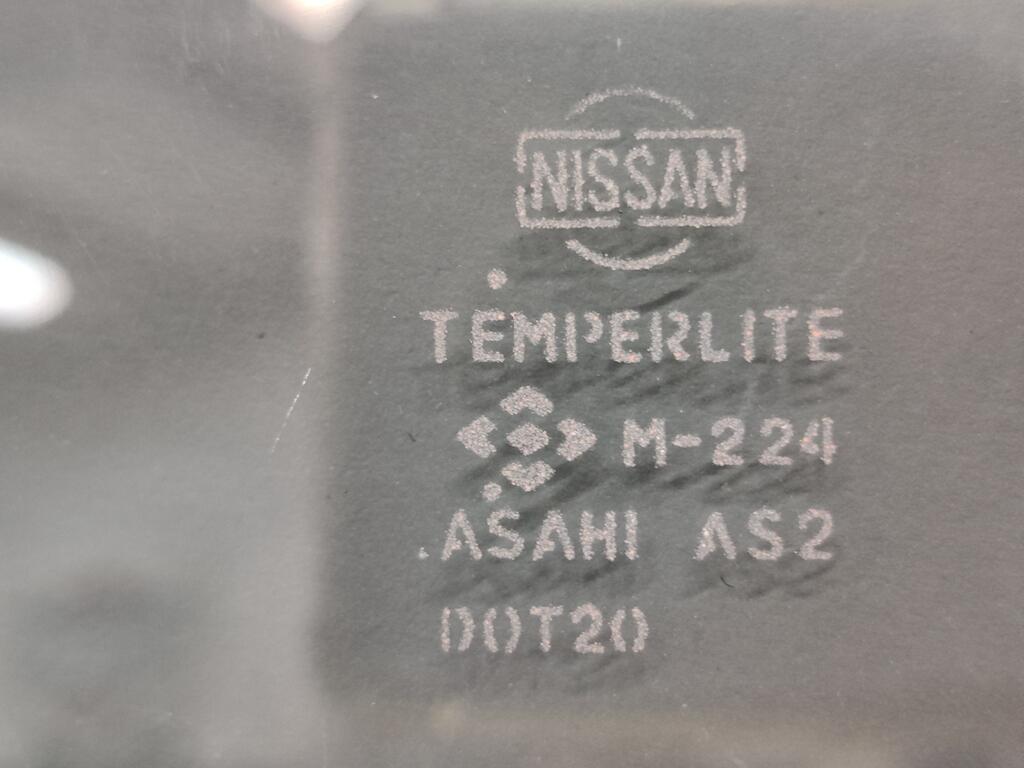
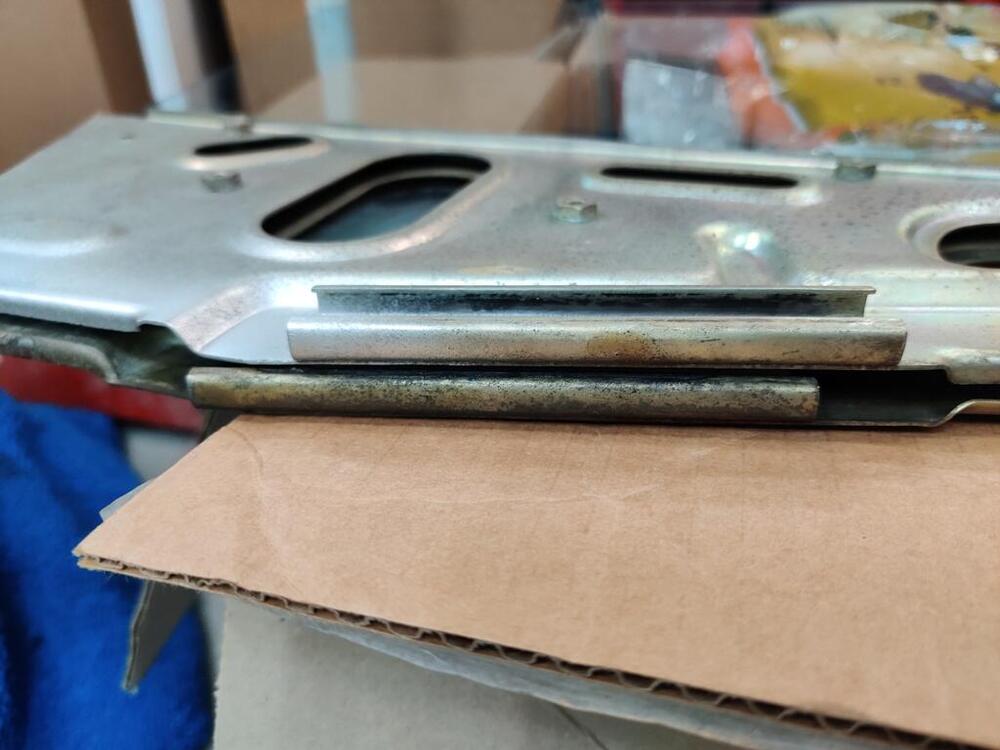
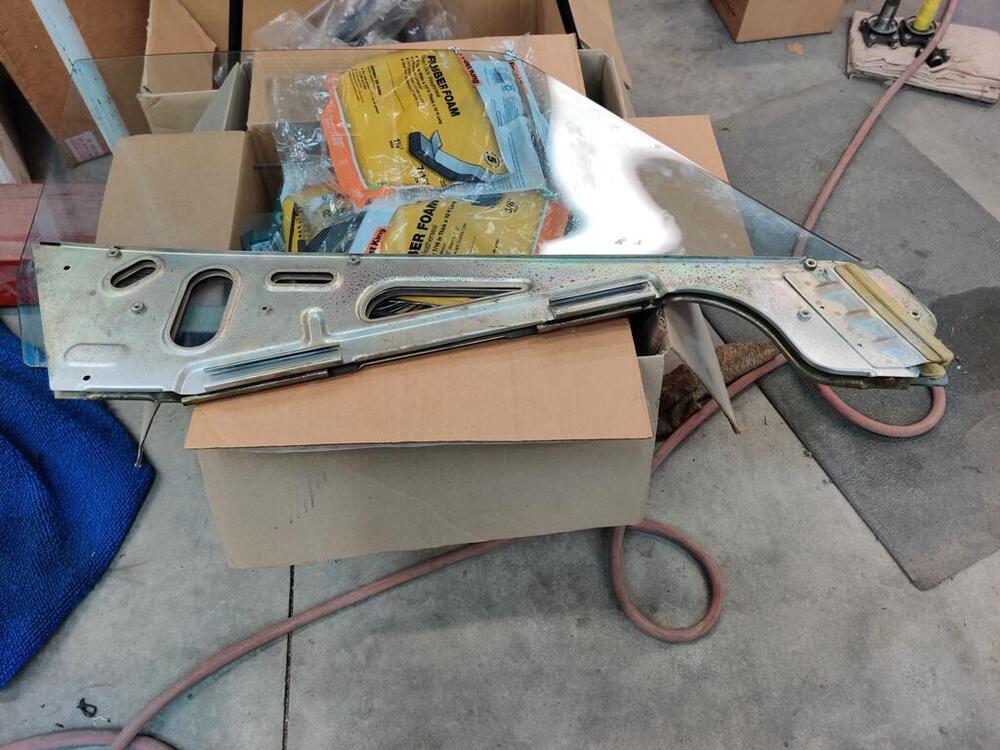
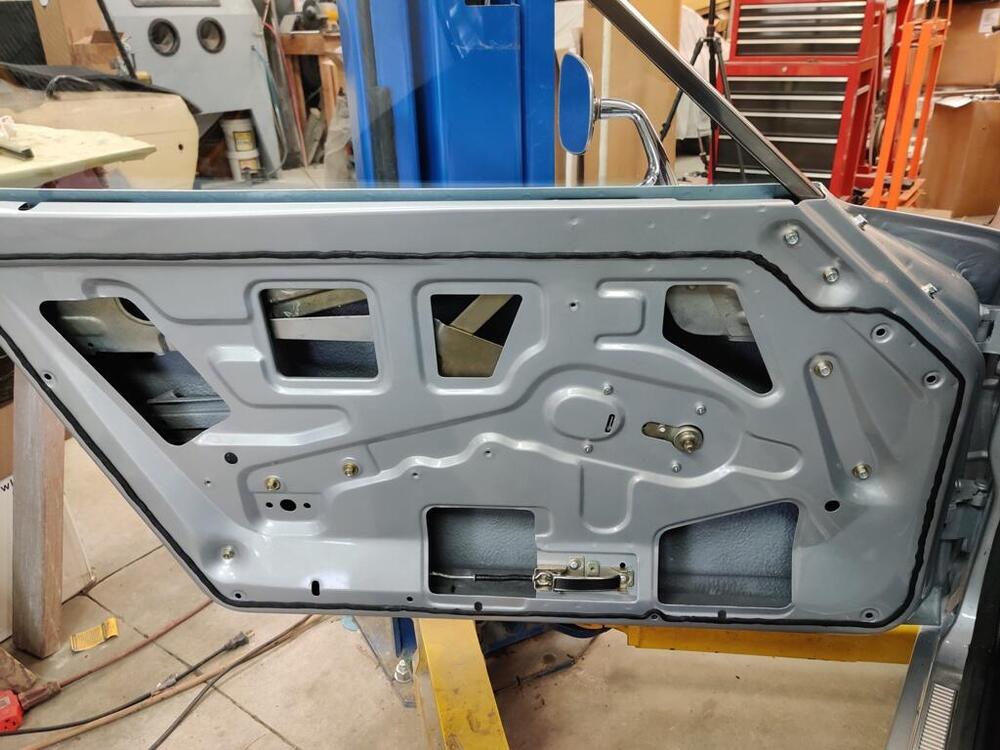
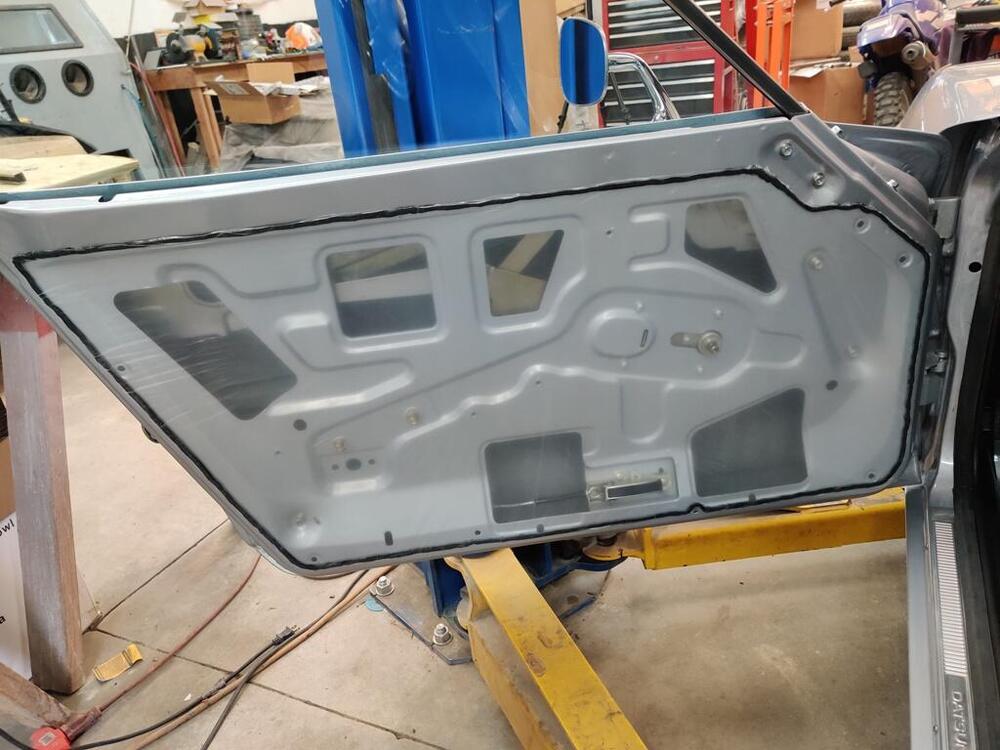
I didn't keep track of the hours closely, but I am going to say it took something around 10 hours of work to remove the scratches and restore the shine to the left door window. Thanks again to @Patcon for helping me source a left door glass with a date on it that is "in the ball park" for my 6/71 car. There were several deep scratches as well as some pitting which I was mostly successful at removing. I don't know if anyone else has the stomach for putting this much effort into removing scratches on glass, however, I think I should be honest in case future readers want to give it a try. The most aggressive disc in the kit is "a beast". It will quickly remove glass... and put nasty swirl marks in your glass in the process. Use it only if you have really deep scratches. The green discs (middle grit) are quite aggressive. Use these for light scratches and minor imperfections. The blue discs are quite fine. You will burn through them at a pace of 5 to 1 vs. the green discs. It is hard to see when you have sufficiently polished out the scratches from the green discs. Attack the glass at a 90 degree angle from when you use the green disc. It will be easier to see when you have removed those scratches if you do this. This https://glasspolishshop.com/polishing-repair-compounds/cerium-oxide is effective at polishing the glass back to a good amount of clarity and shine. If found that the Eastwood polishing buff was better than the polishing pad that was included in the pro polishing kit I bought: https://glasspolishshop.com/glass-restoration/scratched-glass-repair-kits/pro-glass-scratch-removal-kit-xnet-system. I think the Eastwood felt buff was harder than the one received in the kit. And using it, I believe the cerium oxide was utilized more effectively on the glass. With a softer pad, I think the cerium oxide was not pushed as hard against the glass, and therefore, did not polish as effectively. After so many hours of neck wrenching work, the scratches have been removed from the glass (except those very close to the Temperlte etching). When sighting down the glass at a sharp angle, you will be able to see slight waves or undulations. The finished product looks a bit like bodywork that was not done perfectly. Glass does get removed after all, and because it is so hard relative to primer or filler on a car body, it is exceedingly difficult to remove scratches and keep the glass perfectly flat. Anyway, there it is - the info you would like to have about attempting to remove scratches from glass. It takes a lot of effort, many hours, and though the final result may remove deep scratches, the final result will leave you with some slight waviness in the glass, and not the same level of smoothness as the factory finish. In other news, the window support is different from the 1971 vs. 1975 cars. Here are a few pictures which show that the regulator channels are in different locations. This makes using a 75 window in a 71 car not work. After I finished work on the left door glass, I installed it in its frame/support and installed it in the left door. Order of operations is: Install stainless steel frame (with glass channel weather strip already installed. Then window glass. Then front glass glide. Then regulator. Then rear lower guide for regulator wheel. After I confirmed rolling the window down and up was as it should be, I installed the 3M product for holding the vapor barrier in place. This product is very tacky. So, it sticks to the door, and the plastic vapor barrier to it, extremely well. Next, I will put the door panel clip receivers in place. I will need to cut the vapor barrier in a couple of places (around the window roller and the door release) and I will need to glue in place a couple of rubber seals before I can put the door panel on.


 3 points
 -
The repeating theme of this build is definitely "two steps forward, one step back". Whenever i start to work on something, i realize there is much more work required than expected. Remember that nasty weld on the LH Door upper front in the previous post? I thought it just needs a bit of an attack with an angle grinder and some rust protectino primer. Well - once i started grinding, i realized it was a pretty cheap repair from the past, and once some of the covering layers were ground down completely, rust appeared underneath. So it seems like it was just a simple "patch-up" work rather then a proper repair. It's just a small area and i expect it to be no big deal for the bodyshop to fix, but yeah, another small little area with an hour or two of paid labour required. Even if it's only a small area, which most people wouldn't be able to see, it would hurt my heart to just leave it like that. Also it would be just a matter of years before rust bubbles appear in that area. so better fix it now! I kept up my motivation and decided to install the hood tension rods instead (yeah, i thought i'll sand them only before they go to the paintshop). Before: And after: It honestly took me a minute to figure out how this al goes in, but then it was a fairly easy install, even with the hood and hinges already installed: Now i can work with the hood open safely again and do not need any supporting bars or anything and don't have to fear it falling on my head. Obviously, the hood allignment from the bodyshop is completely off now with the tension rods installed. thats why i do this - so it can be aligned and corrected PRIOR to painting. Next i hope to be able to work on the front fender area. some smal tasks are pending there 🙂1 point