Leaderboard
-
inline6
 Subscriber
 6Points1,282Posts
 -
conedodger
Free Member4Points12,513Posts -
EuroDat
Free Member3Points3,309Posts -
Richie G
Free Member1Points254Posts


Popular Content
Showing content with the highest reputation on 07/06/2024 in Posts
-
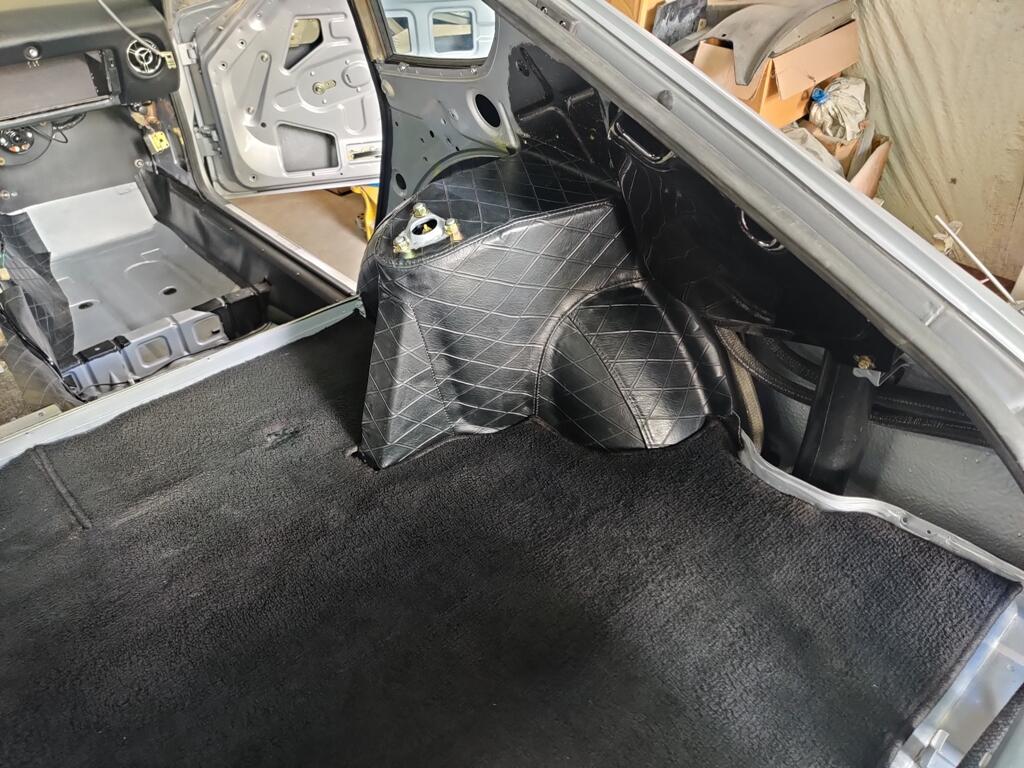
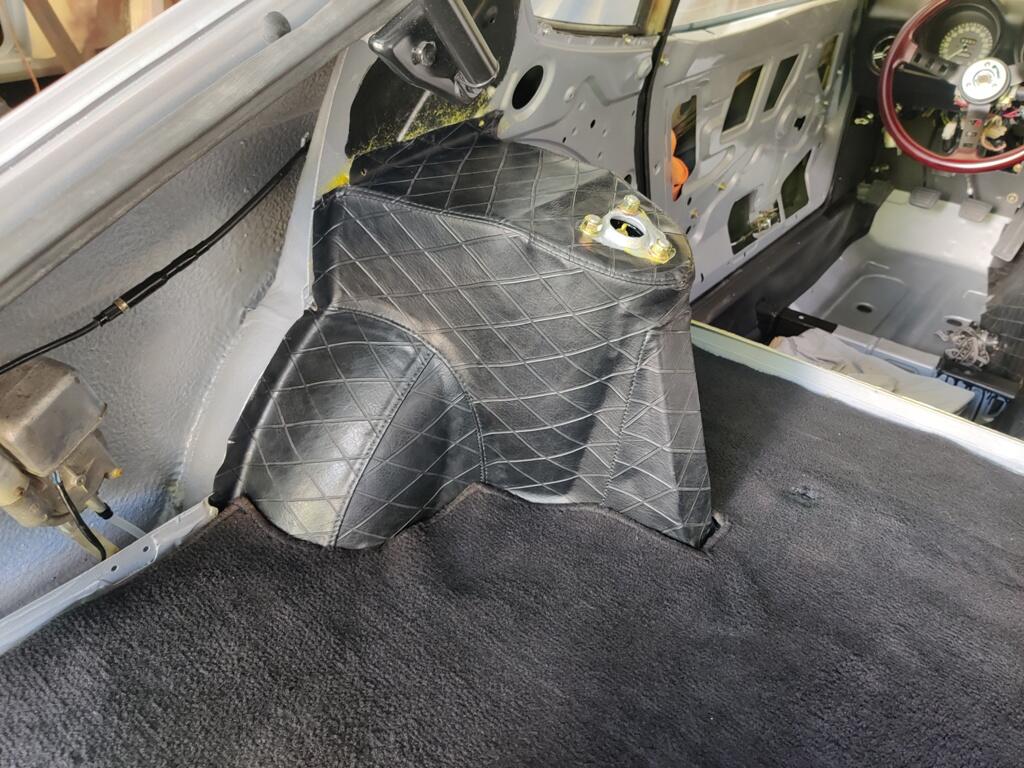
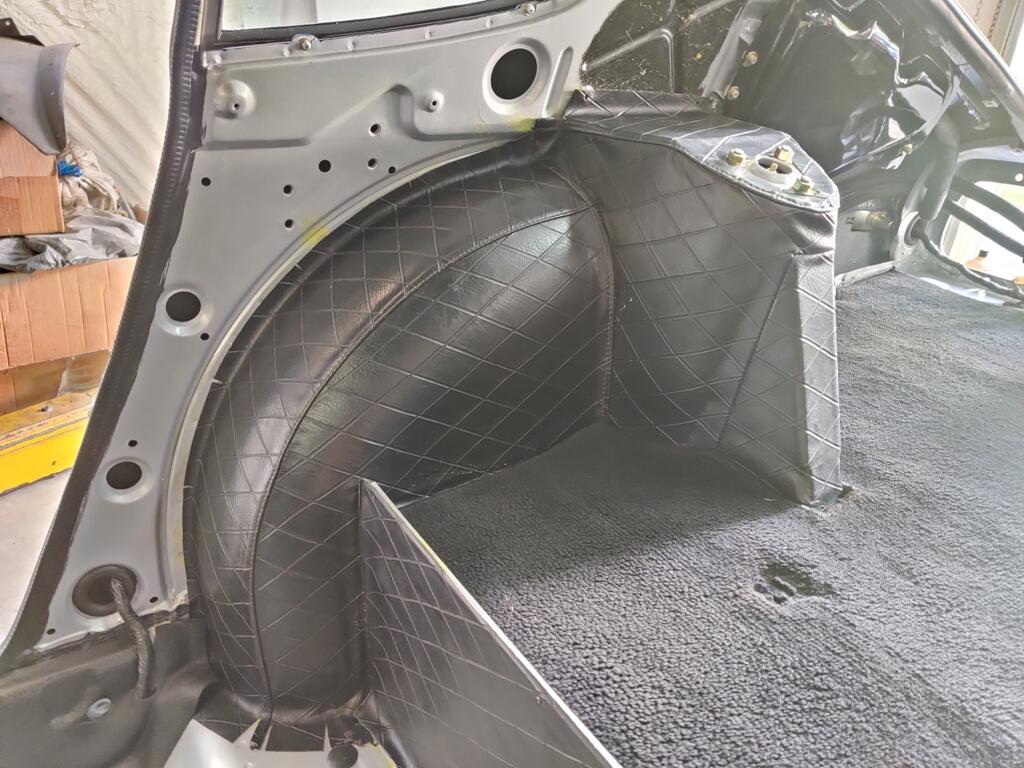
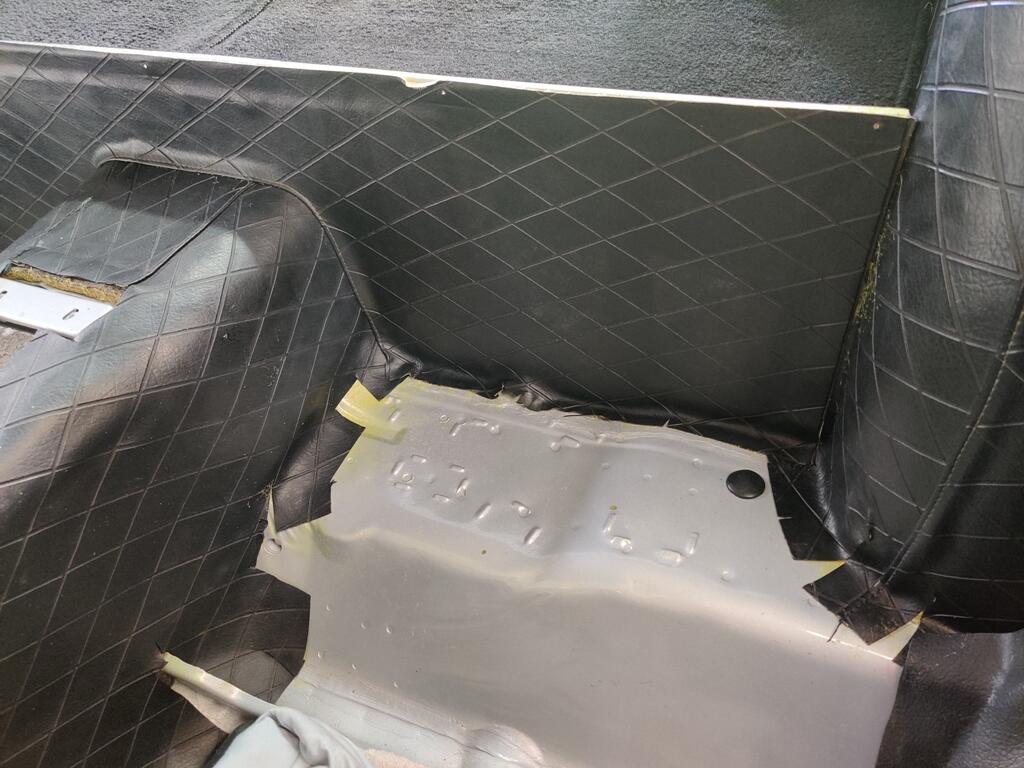
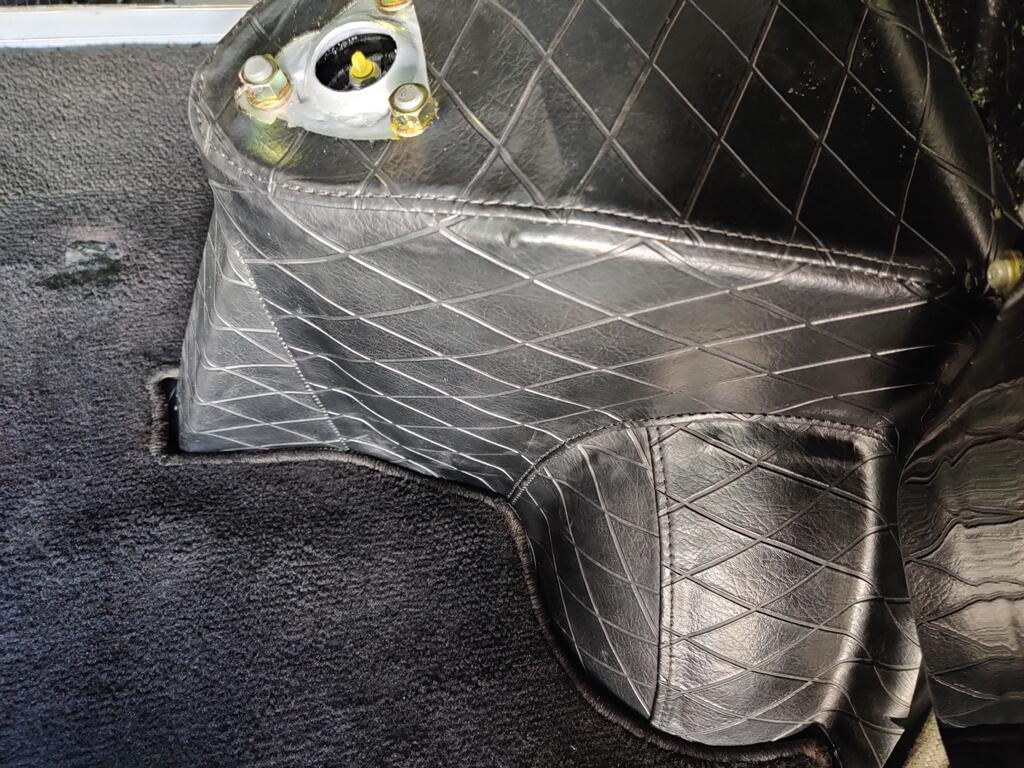
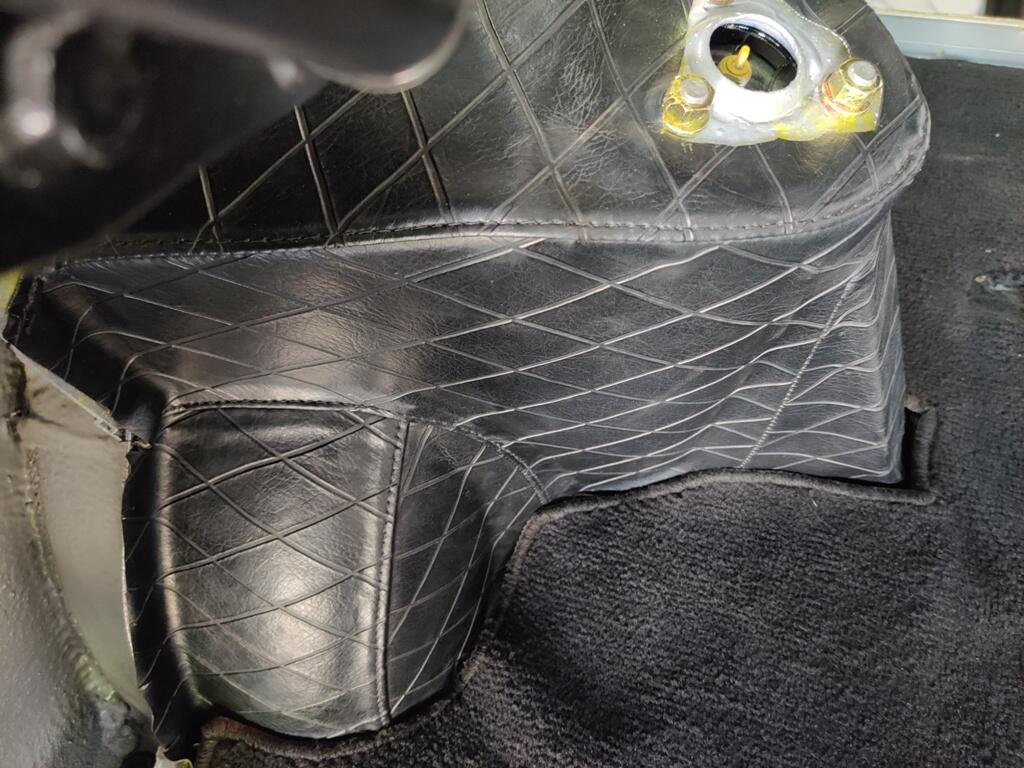
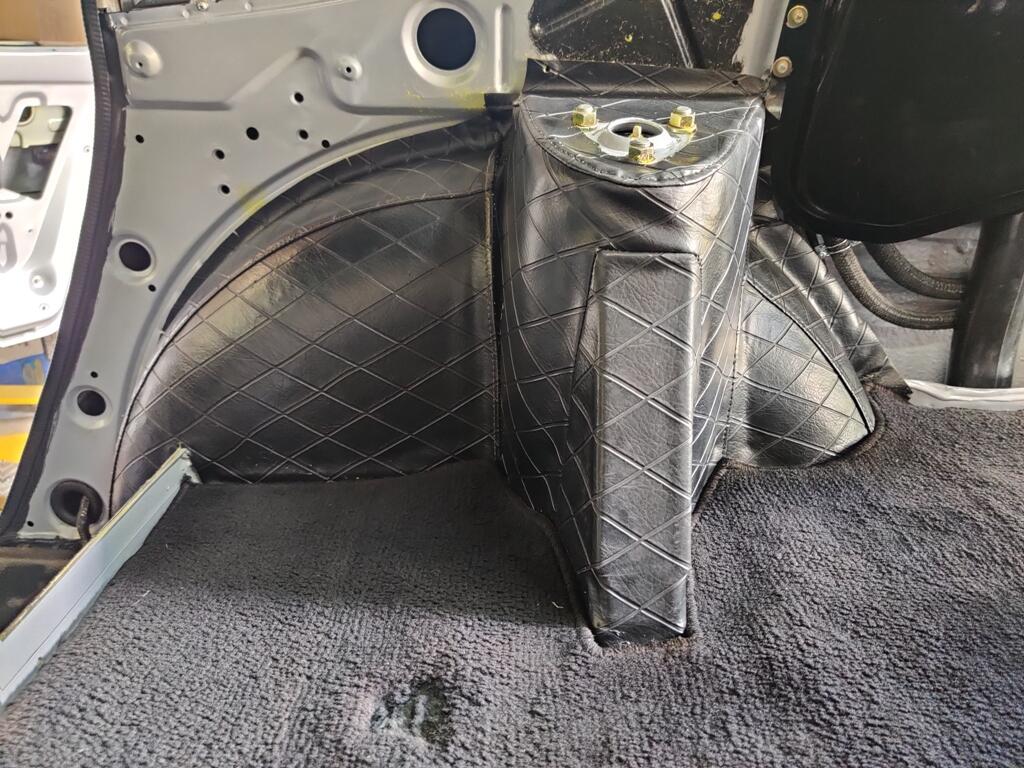
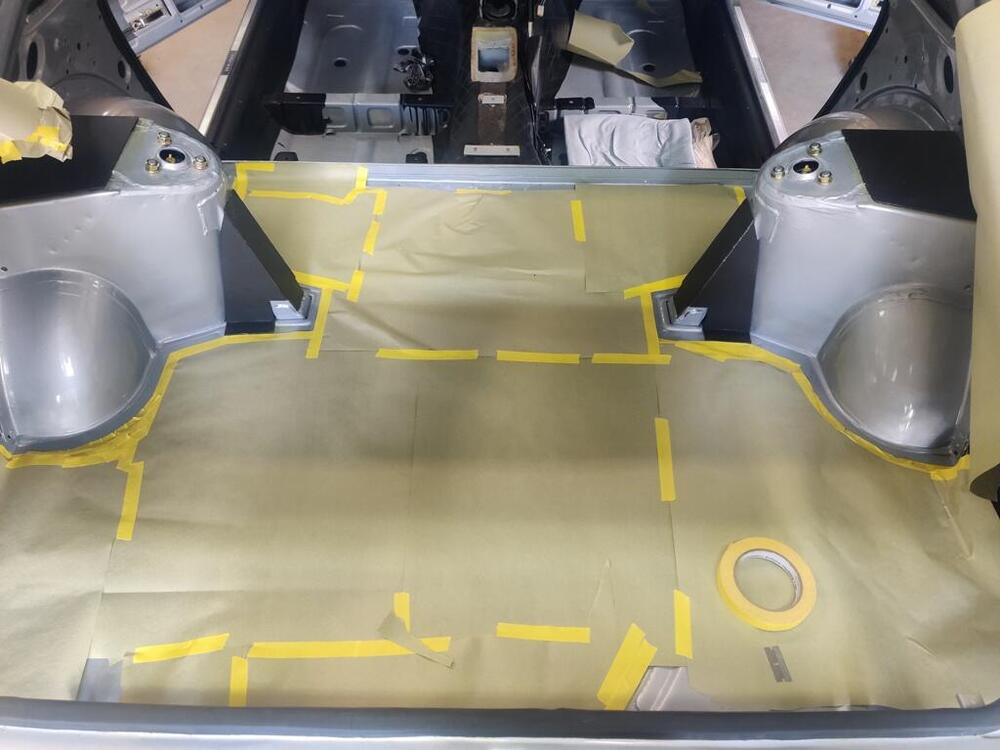
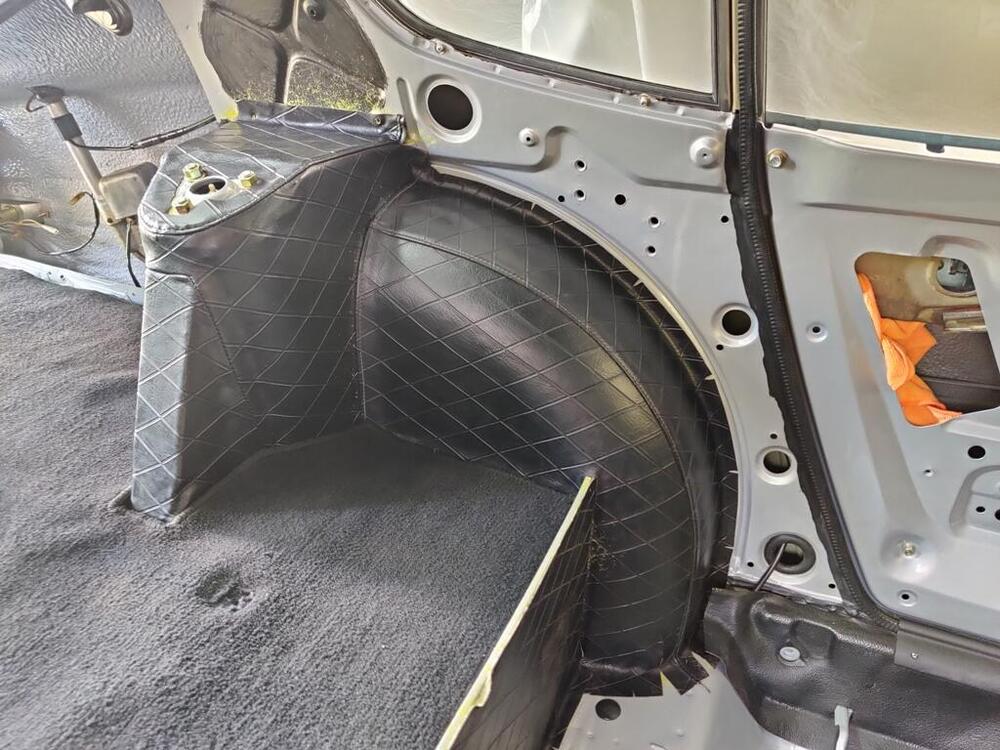
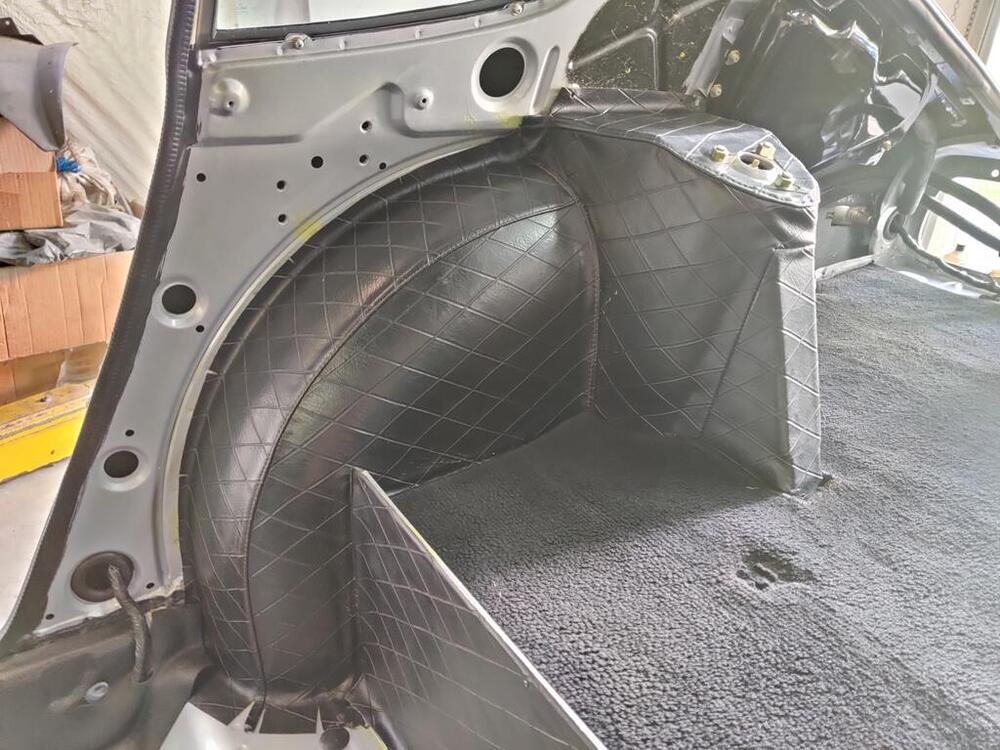
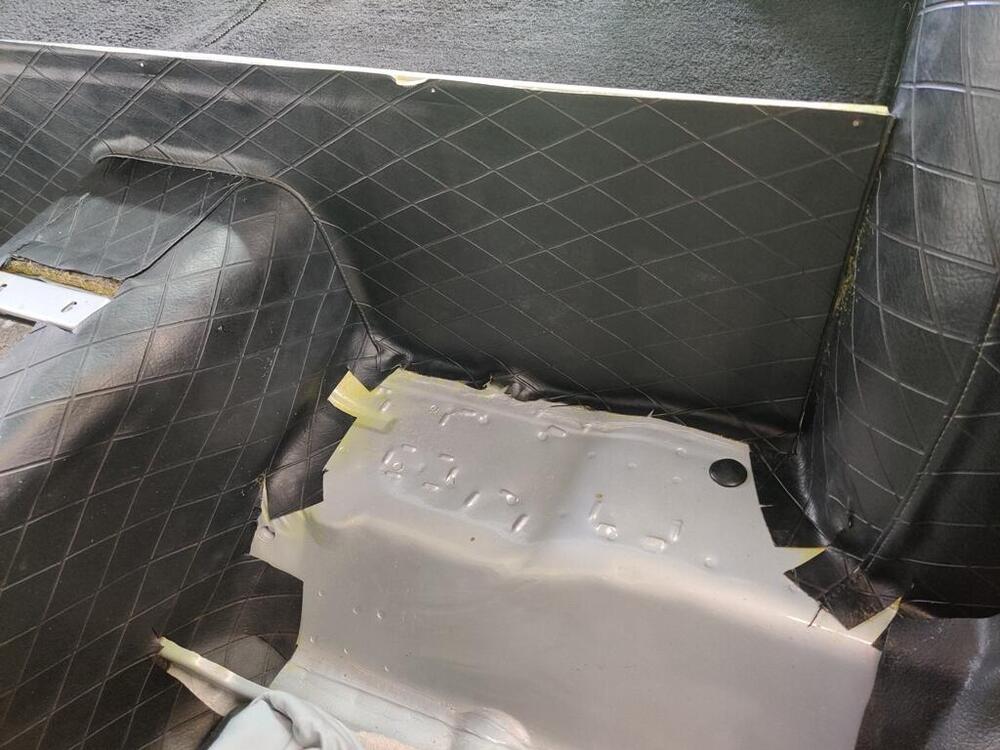
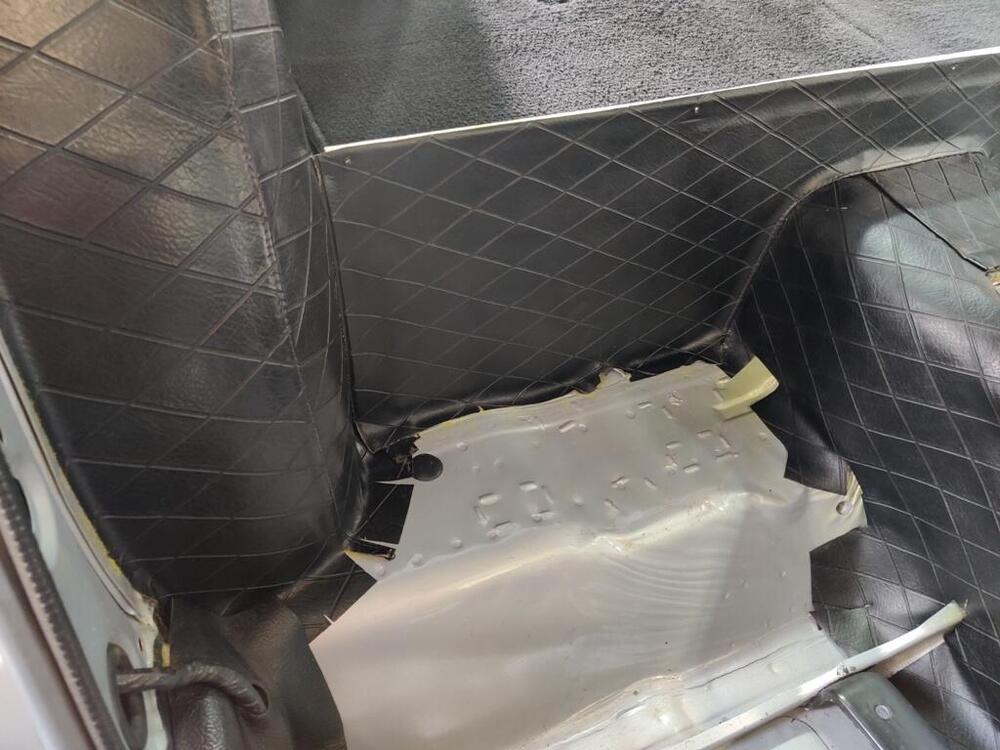
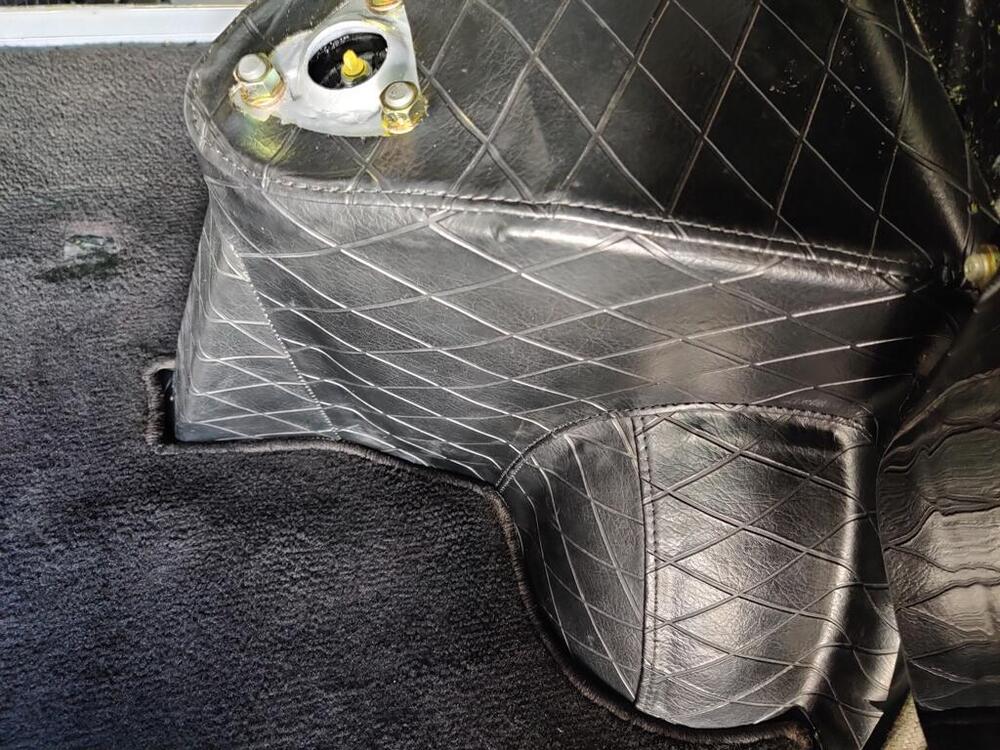
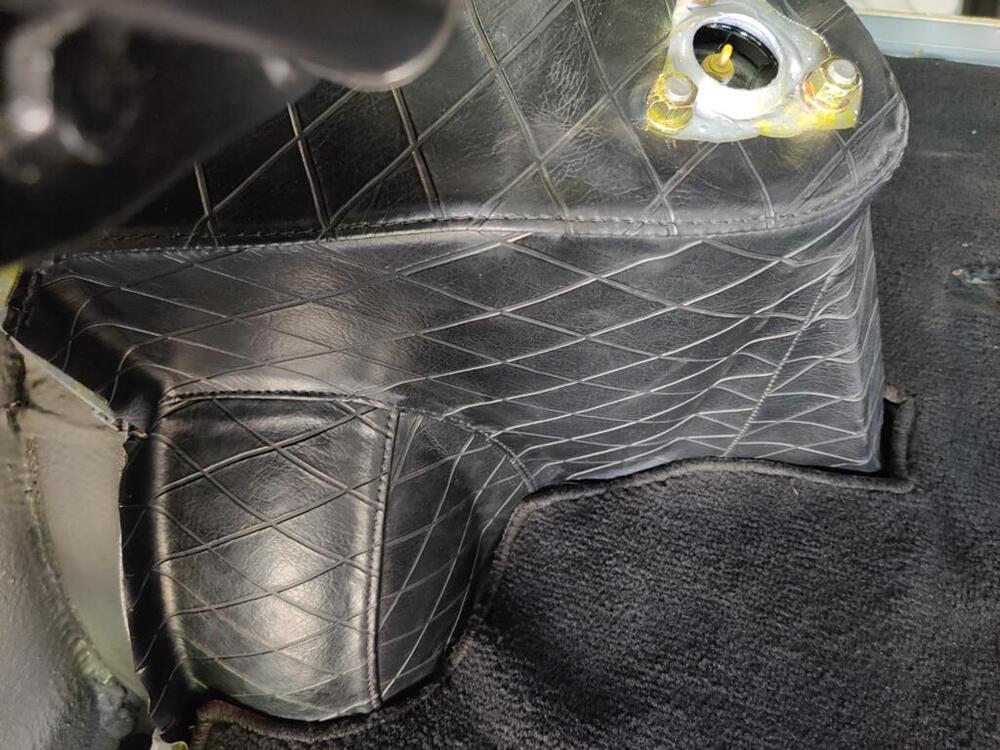
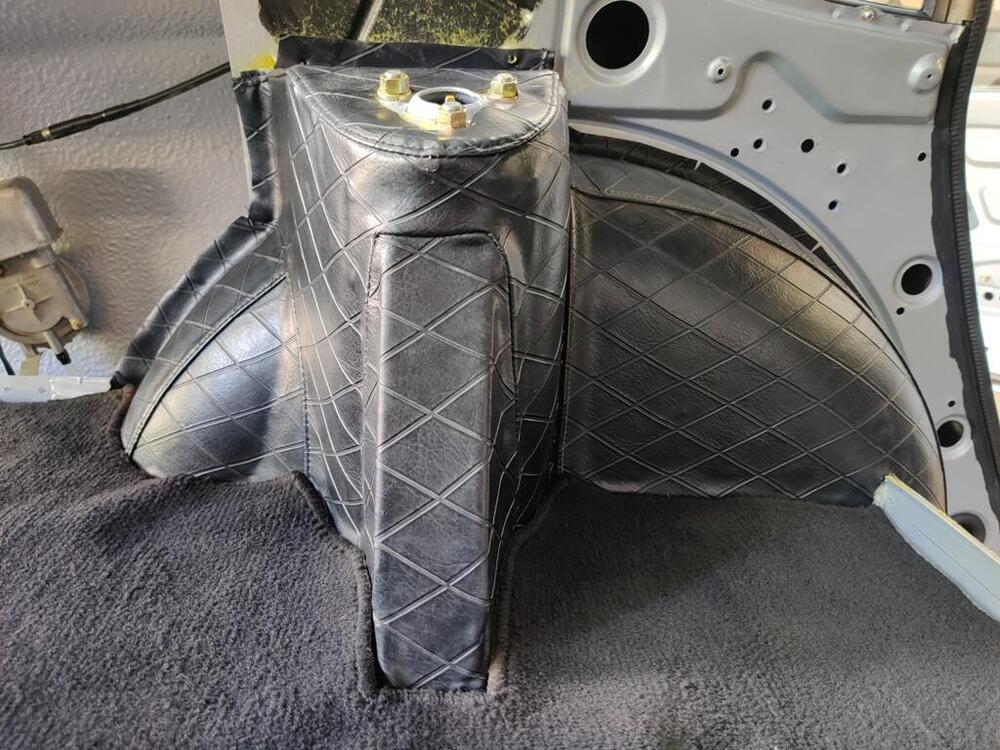
The time has come for me to install the rear tower and wheel well interior trim. The reproduction pieces have a "shallower" diamond imprint. I prefer the original. These pieces are often damaged, I think from putting in and retrieving things out of the rear hatch area, Objects nick and slice the vinyl, especially on the inner most portions that protrude. For the rear strut tower pieces, I took three complete pairs which I had accumulated over the past few years to a local auto upholstery shop. There, we determined the best sections for use. I left them with instructions to pull them apart as necessary and to re-stitch one complete pair using the best sections from the lot. Another "issue" I have noticed looking at 240z's over the years is that the vinyl covering the rear strut towers, if removed, often looks terrible when it is put back in. Whether, the wrong adhesive is used, or the installer lacks the necessary skills, or something else, the result often falls short vs. the other restoration work done on the car. So, as I started yesterday with my plan, one that included having all of the remaining diamond vinyl glued into place on the car before the end of the day, I knew I was in for some long, and stressful hours. First, I used Wesley's Bleche-White (an ancient bottle) to clean the backsides of the vinyl trim. Over the years, the white (I assume cotton) backing wicks up water and collects dirt with it. Wesley's Bleche-White that you can buy today appears to be a different chemical composition (based on a few minutes only) of searching online. The one I have appears to be the original stuff. I was amazed at how much dirt came out of the backside of the vinyl. I rinsed them thoroughly and then hung them outside in the GA heat to dry. While they were drying, I taped up parts of the back hatch area to protect from glue overspray. I once again used the Landau contact cement. When it is 90+ degrees, this stuff dries a bit quicker. That, and the very odd shape of the strut vinyl trim parts makes installation very challenging. On the first one, I struggled a bit because I didn't get the alignment right and it kept sticking to itself. With each passing second, the glue got drier and drier and more sticky. I screamed some obscenities and tried helplessly to reposition it without pulling it back off completely. Within two minutes, I realized I had failed, so I pulled it off completely. One important thing to note about contact adhesive is that it can be reactivated by applying more. So, before it dried even more, I grabbed the gun and went with a bit of a different plan. Instead of lightly coating the entire inside of the vinyl as I did before, I only sprayed the top (horizontal) section. I resprayed the corresponding top of the strut tower. Then, I positioned the top section so that the triangular cut out for the upper strut mount bolts was in the right location. From there, I put my attention at the portion of the top surface of vinyl that presses up against the inner quarter panel. I aligned the holes (those that accept the black plastic trim clips) that were in the vinyl to the holes in the inner quarter panel. I pushed the part contacting the inner quarter panel against it firmly. When I was sure those holes lined up, I lifted up on the triangle cut out area and pulled the vinyl taut as I repositioned the top (horizontal) section. You have a bit of work time, but you have to move quickly. At that point, I had only the top section in place, but the alignment looked good. From there, I lifted the other sections up so that I could spray glue onto the backside of the vinyl and onto the metal strut support structure. I applied more glue in areas where the factory workers had. Flat expanses got less, areas of transition from one surface to another, got more. From there, it was less challenging. I focused on getting the backmost section located properly against the inner quarter panel, making sure to put some tension on it as I pressed in into place. This is necessary to keep wrinkles from forming. I did have to lift back up some and reposition, but not a lot. Anyway, for the second one, I copied my successful second effort on the first. It went well. I still have some glue overspray, and the white haze that you see on the black vinyl to clean off. I think the white haze came from the Westley's Bleche-White, but it comes off. These pic were catching a lot of afternoon sun as well, so the black looks like it is washed out a bit, but it isn't. I think it will look nice when all cleaned up.


 5 points
 -
3 pointsHi guys, Just quickly dropping in to let you know, I'm still around. I'll read through the thread in more detail later the weekend.3 points
-
I know that you can take the overspray glue out of carpets and stuff with a light oil like sawingmachine oil, take a rag with some oil and you can rub it out.. no.. not rub one out, i said rub IT out! 🙊 BTW, nice job! Looks very good. Are those towercovers 2 pieces? So one piece is front wheelwell and the other the rest like the tower and the smaller rear wheelwell? (I believe i have the tower and rear wheelwell parts in my parts cellar.. i sure hope never to do that job though!)1 point
-
1 point
-
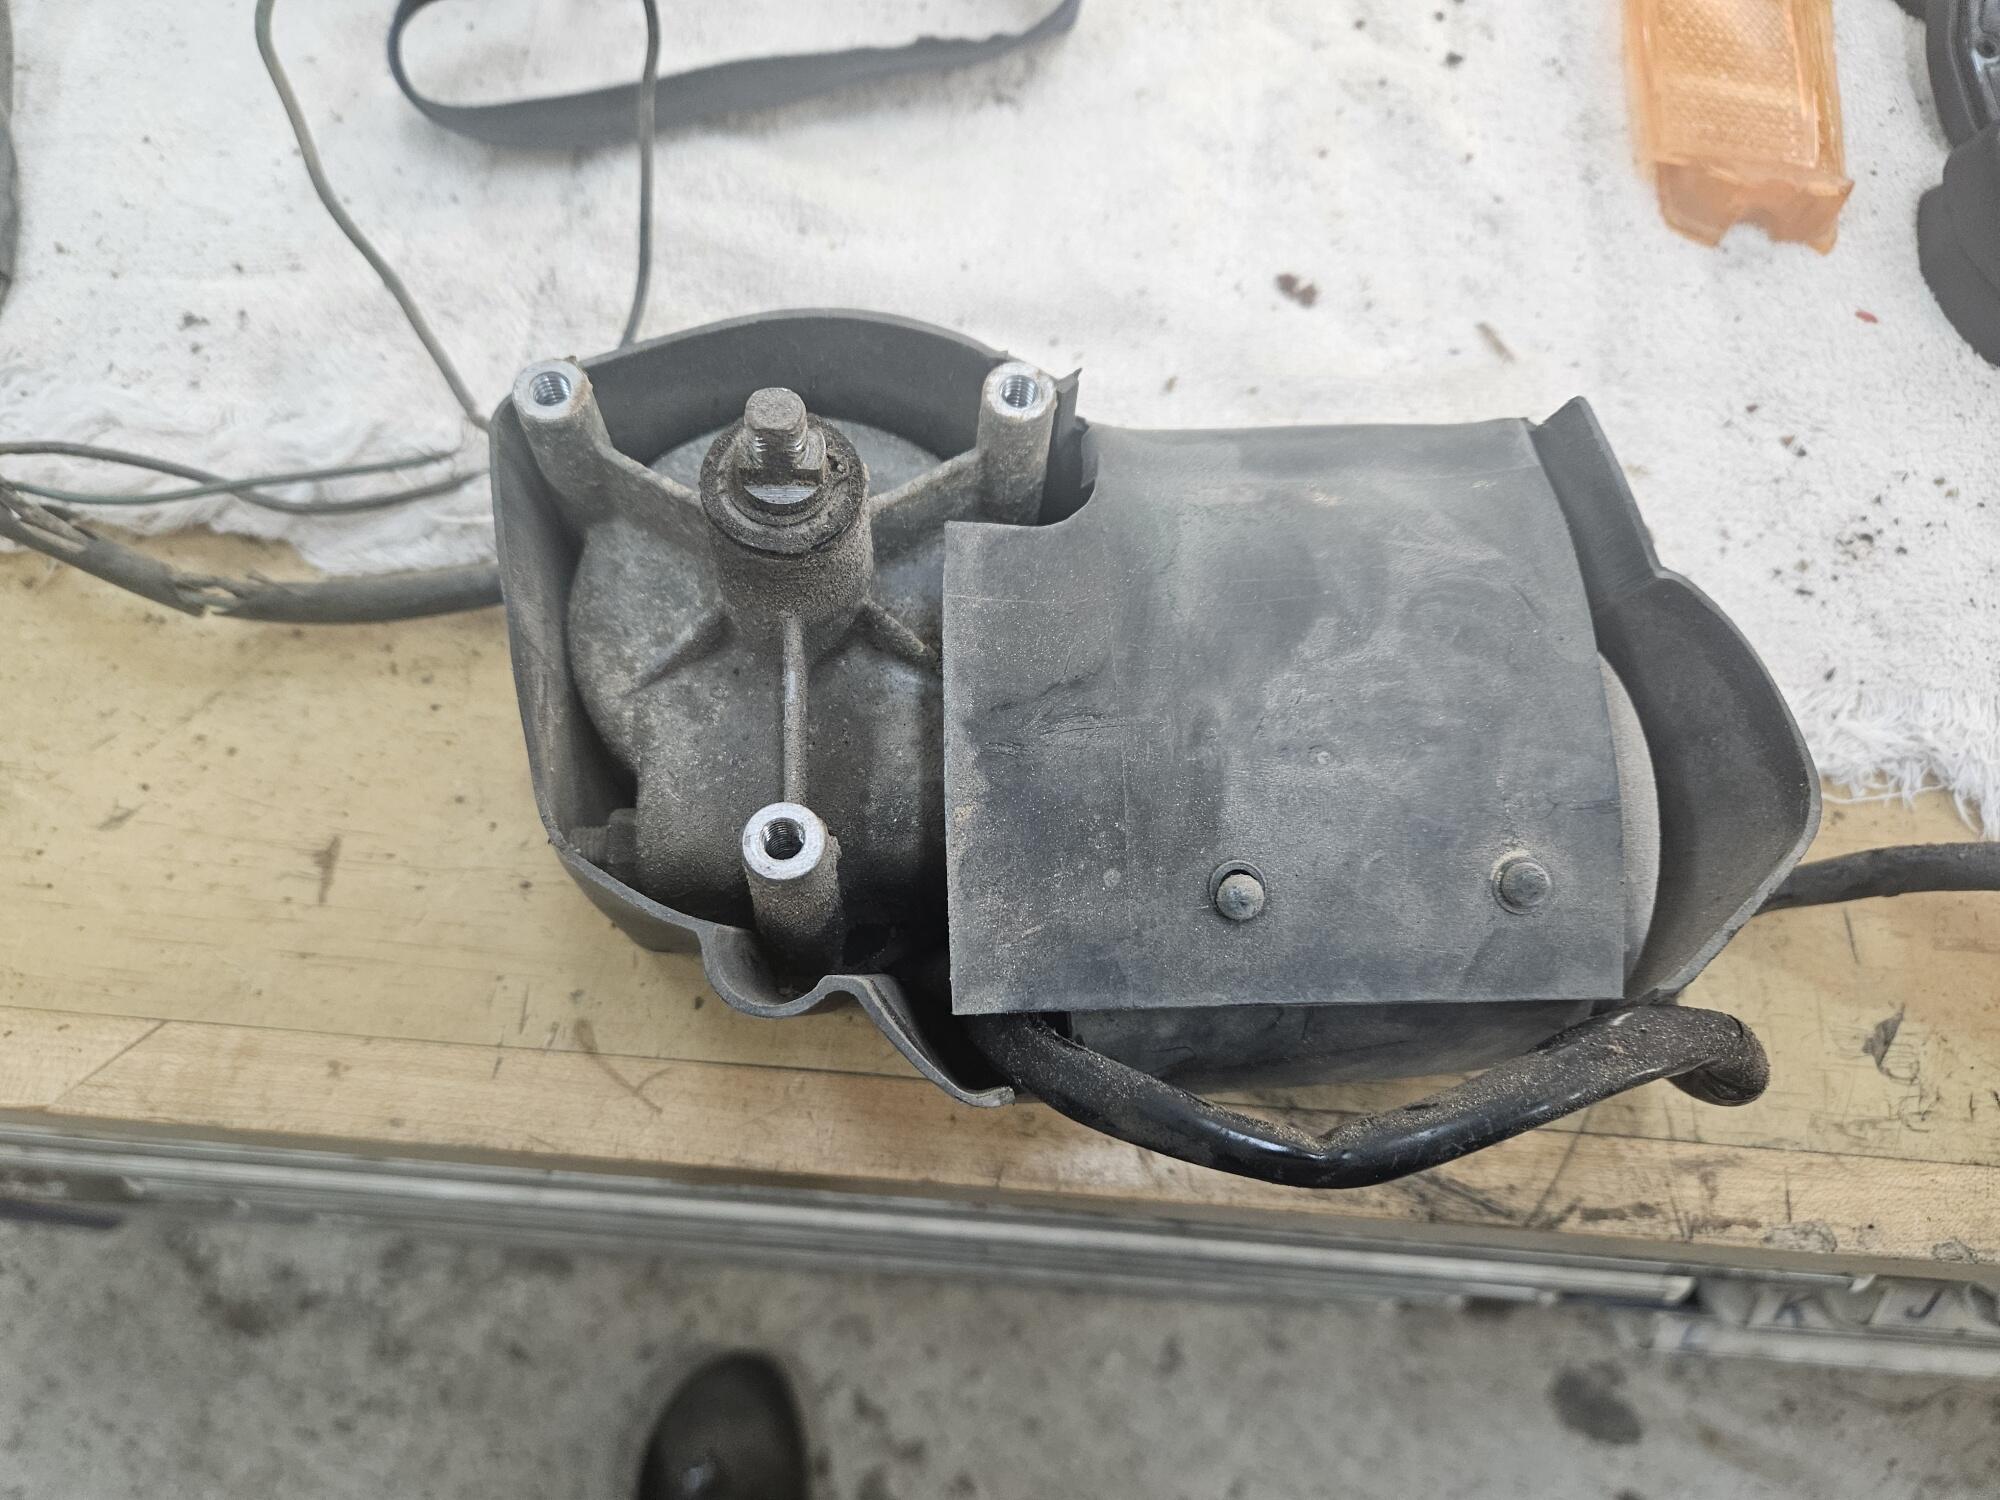
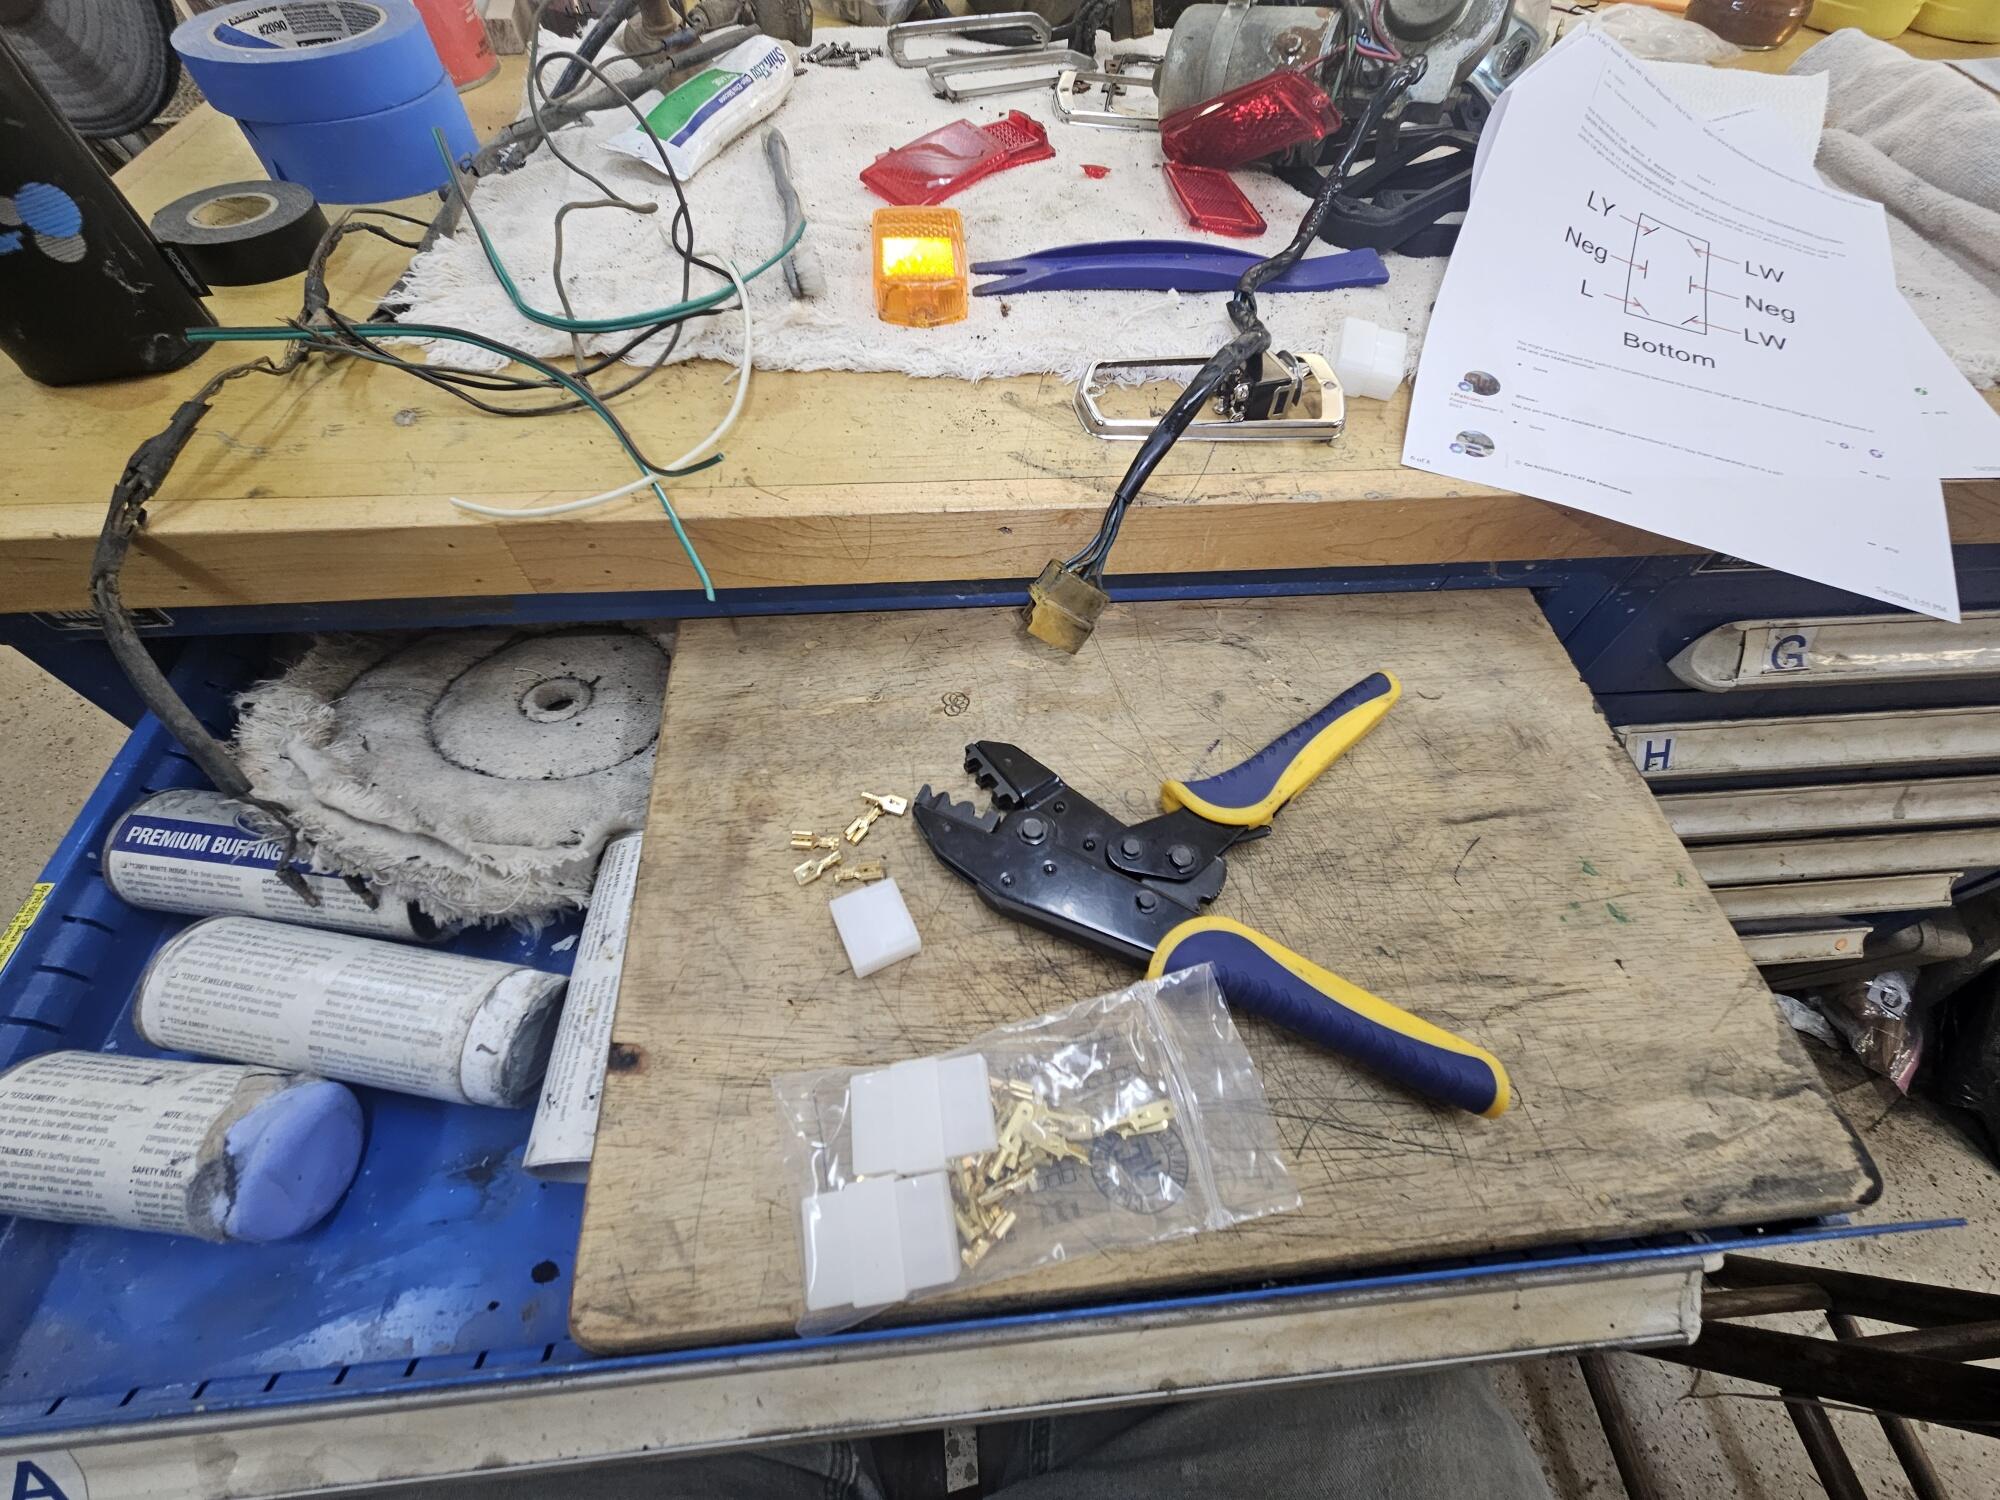
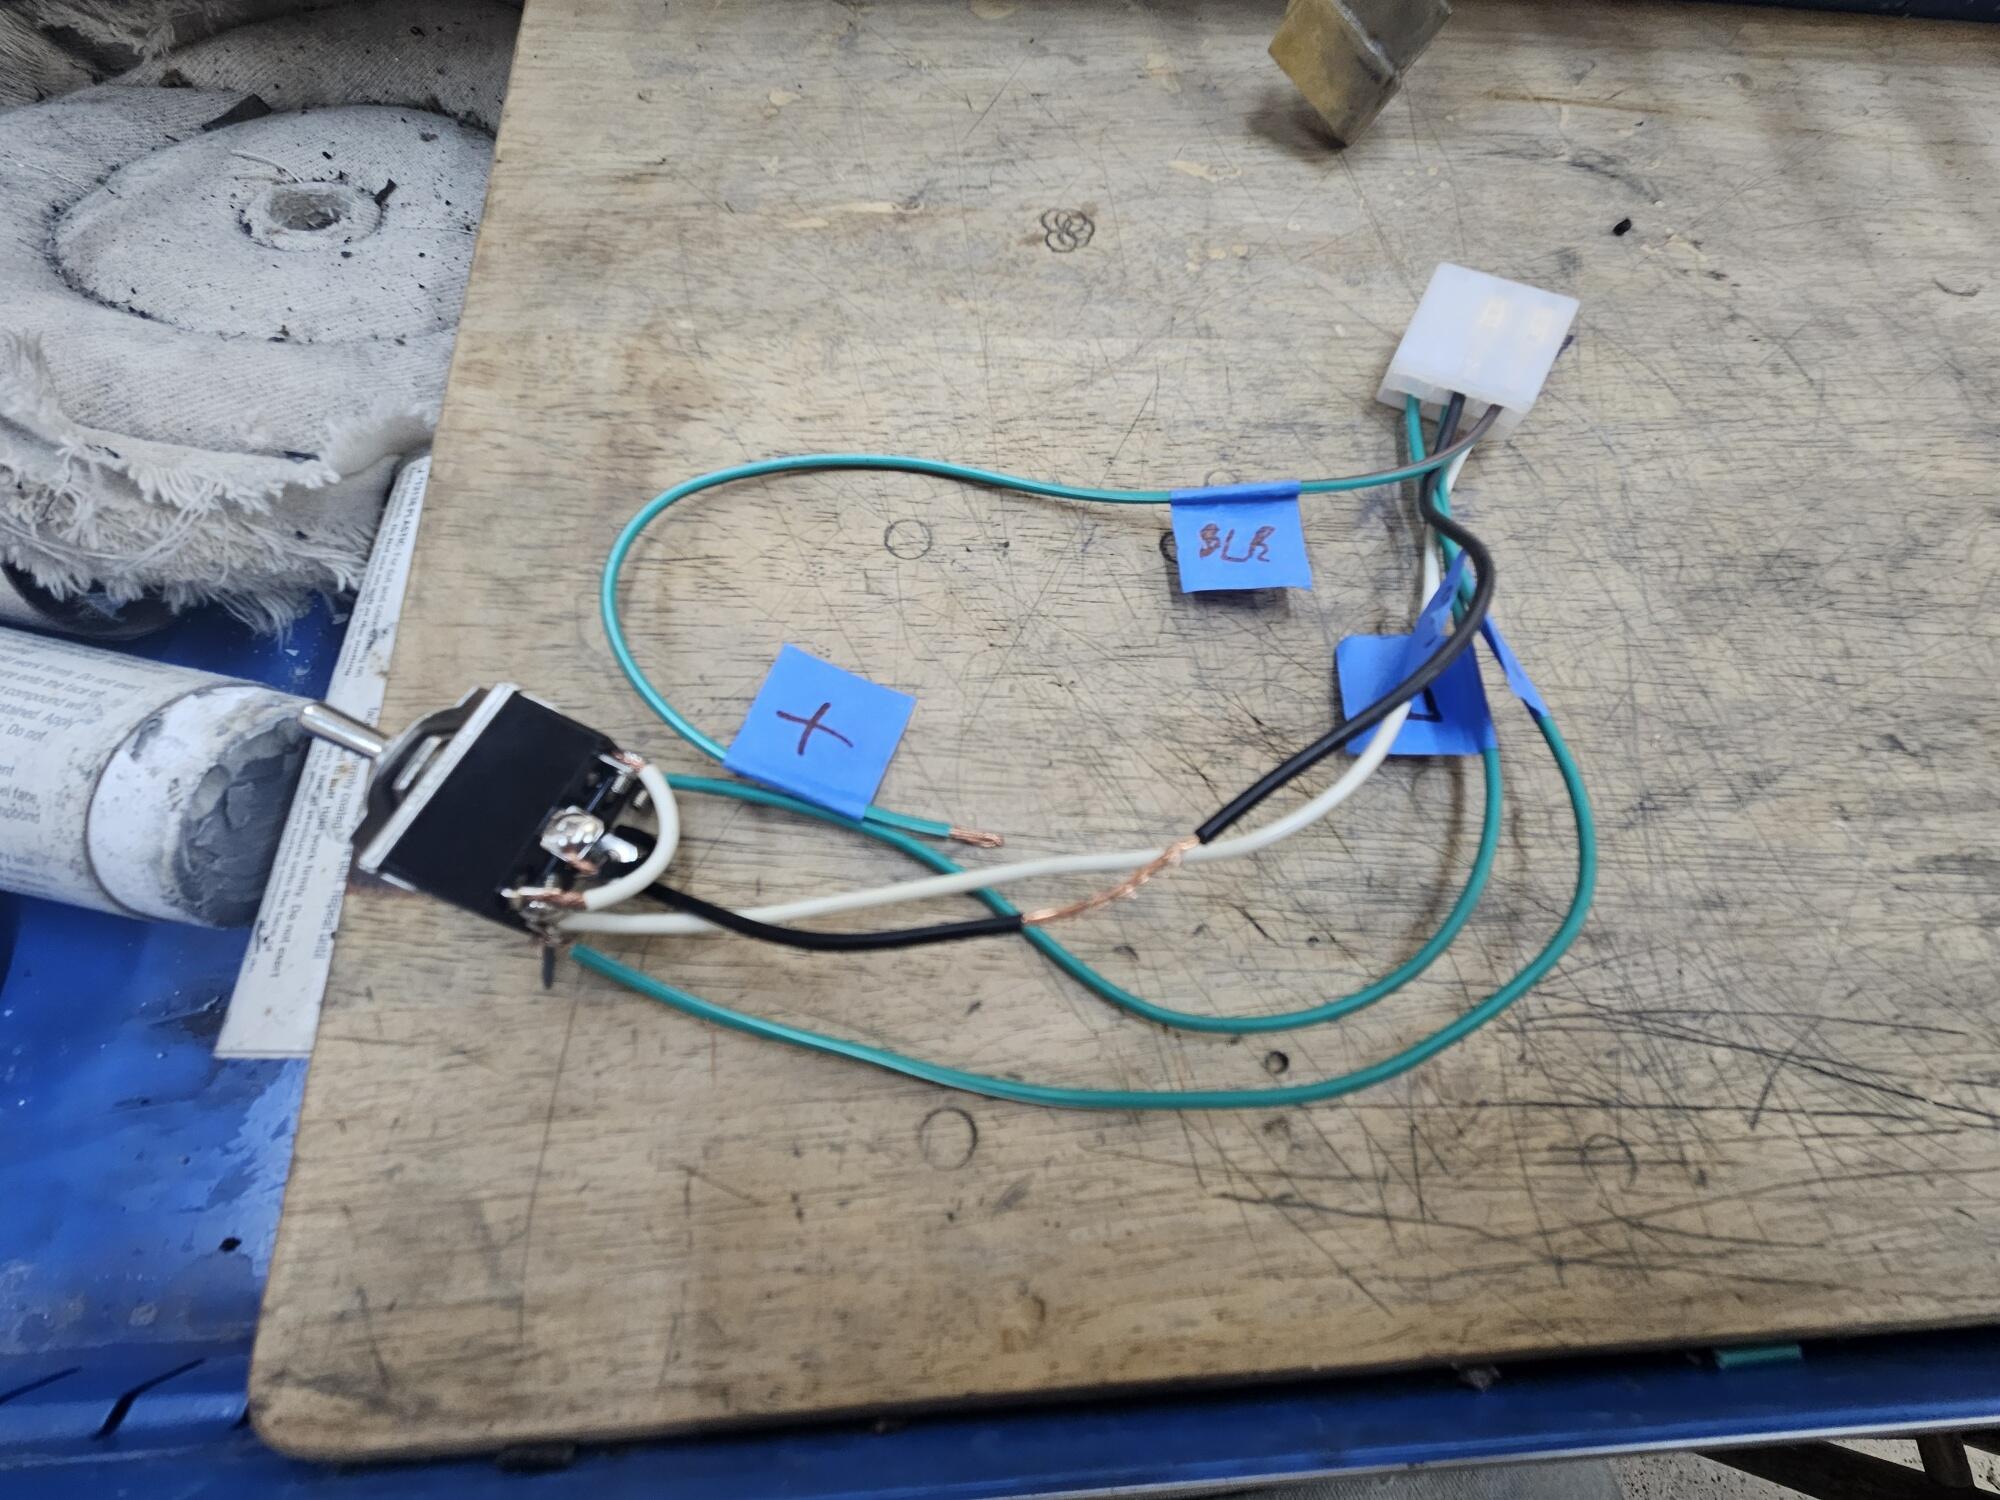
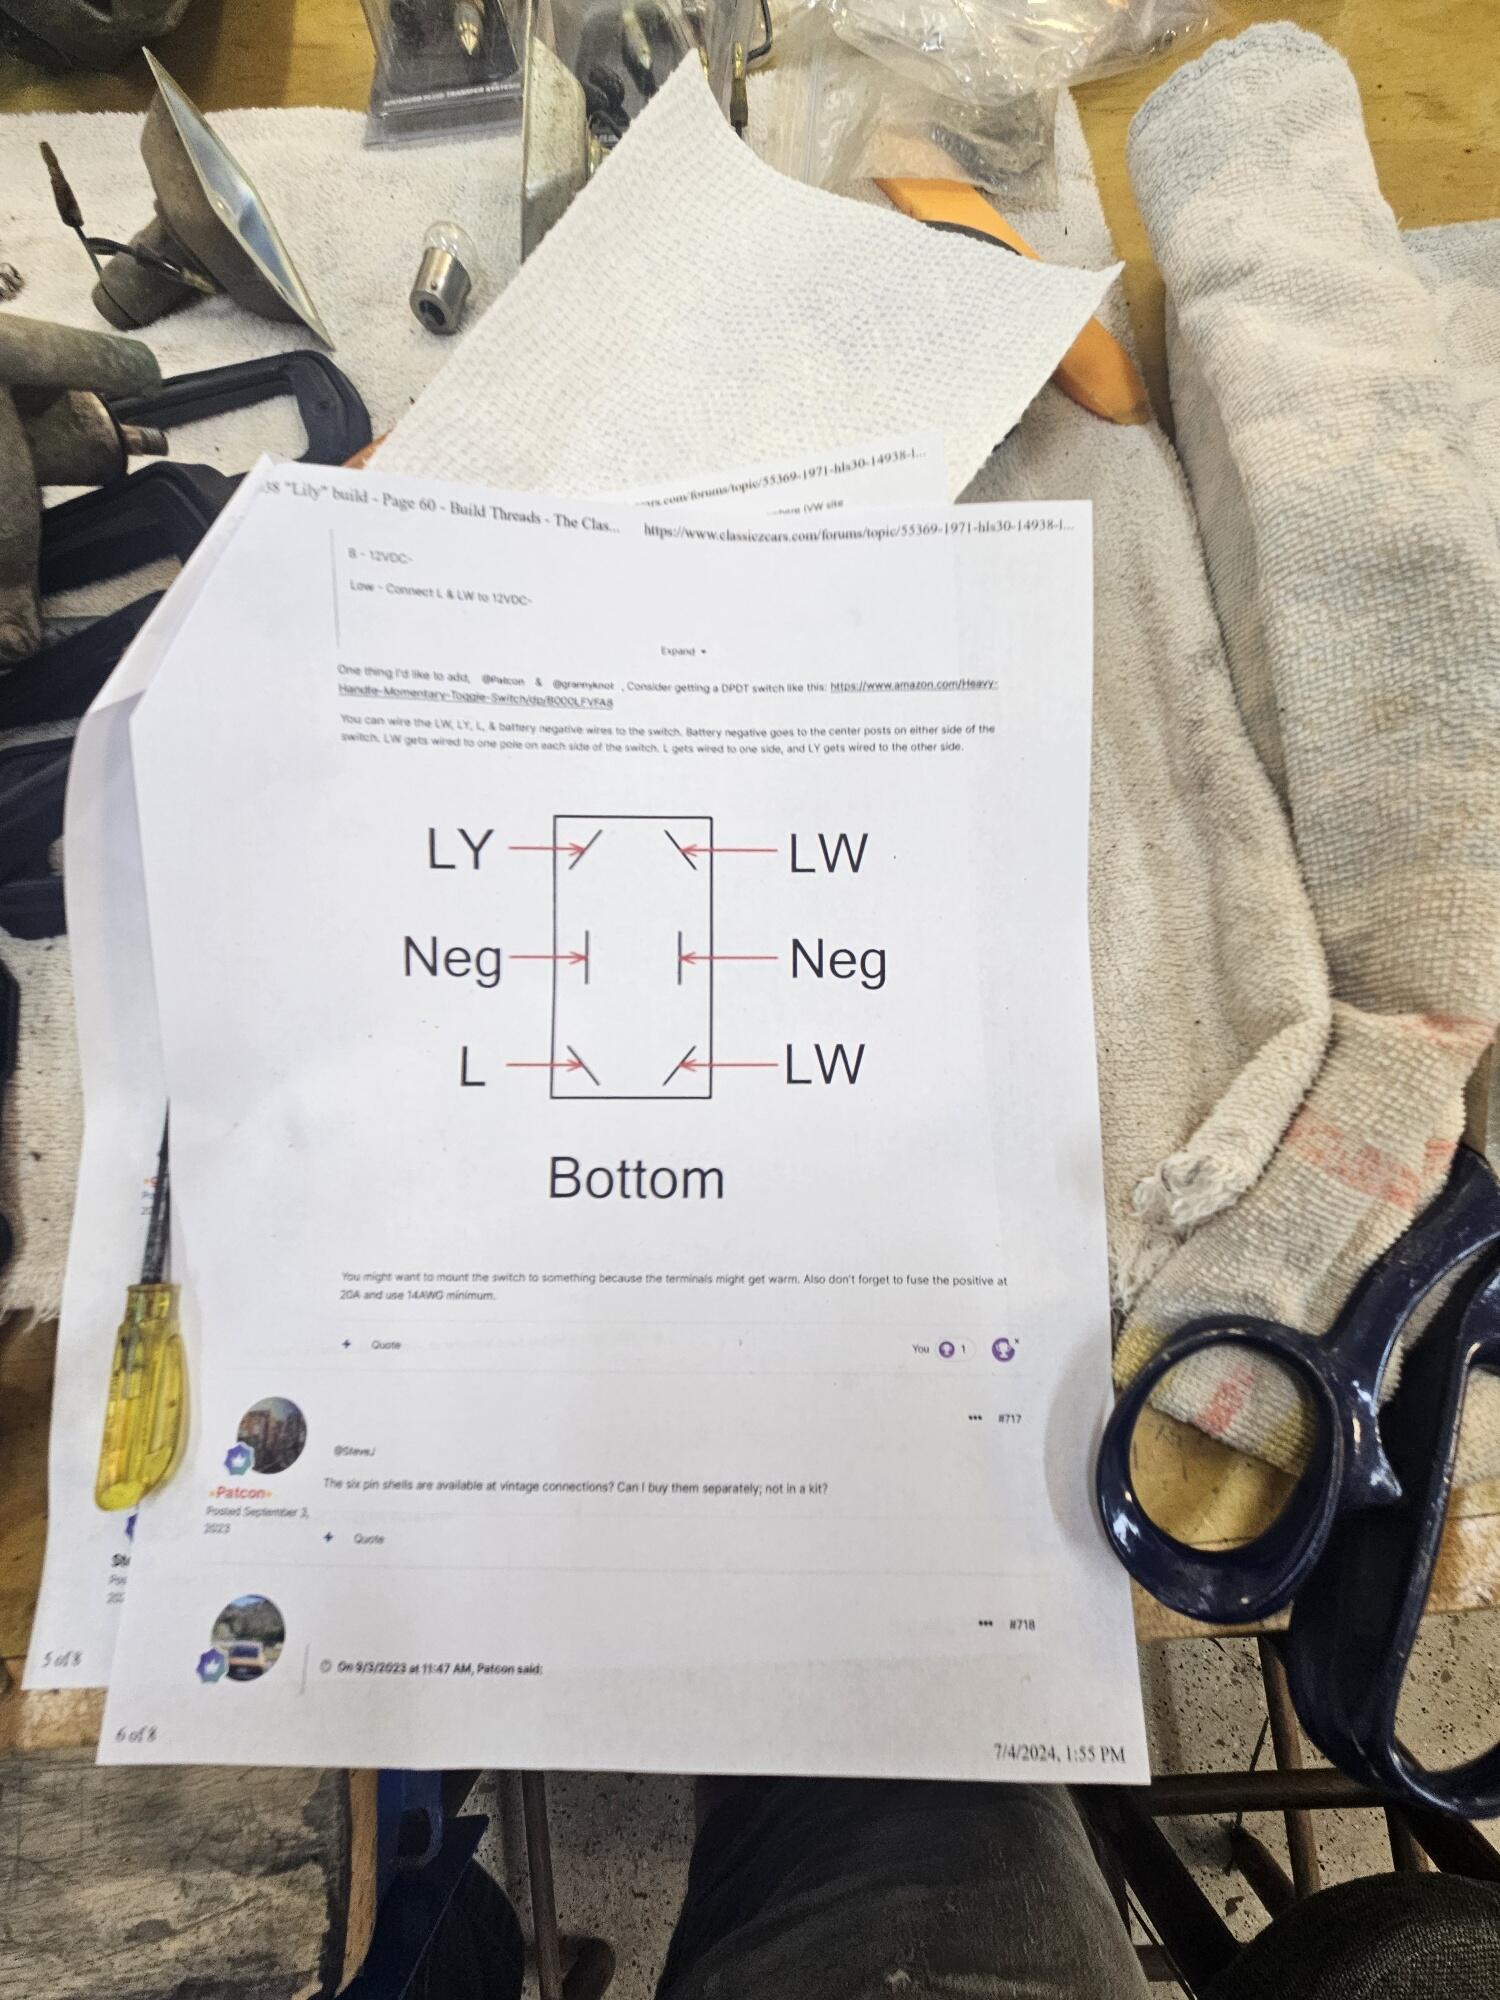
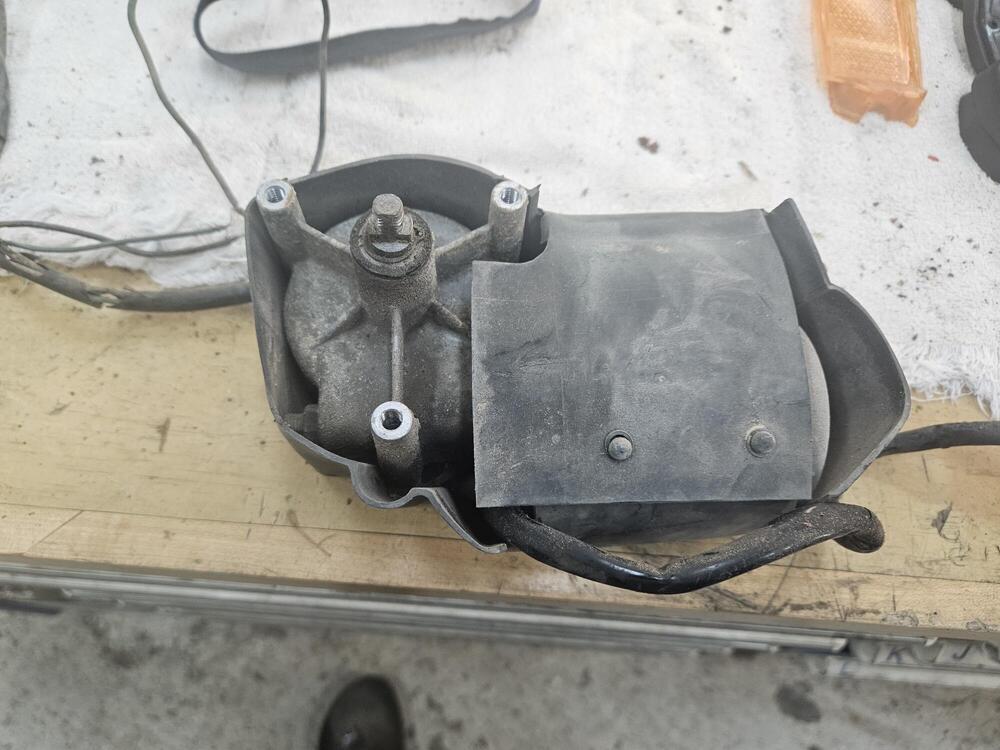
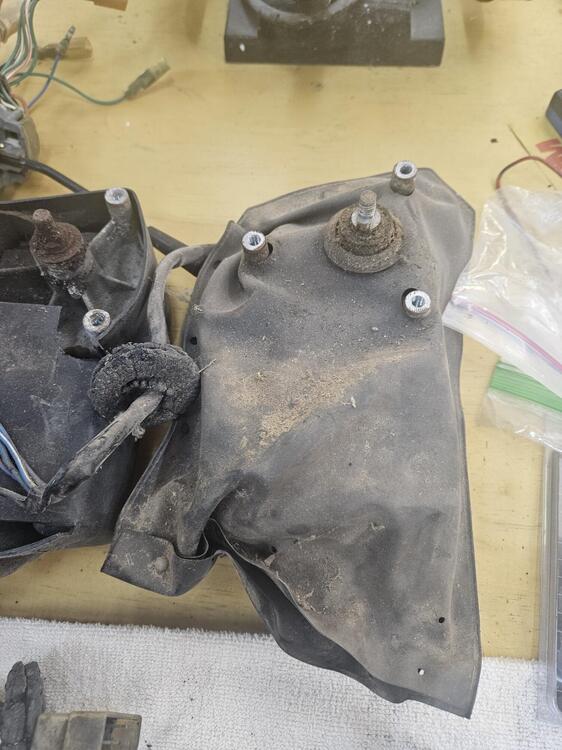
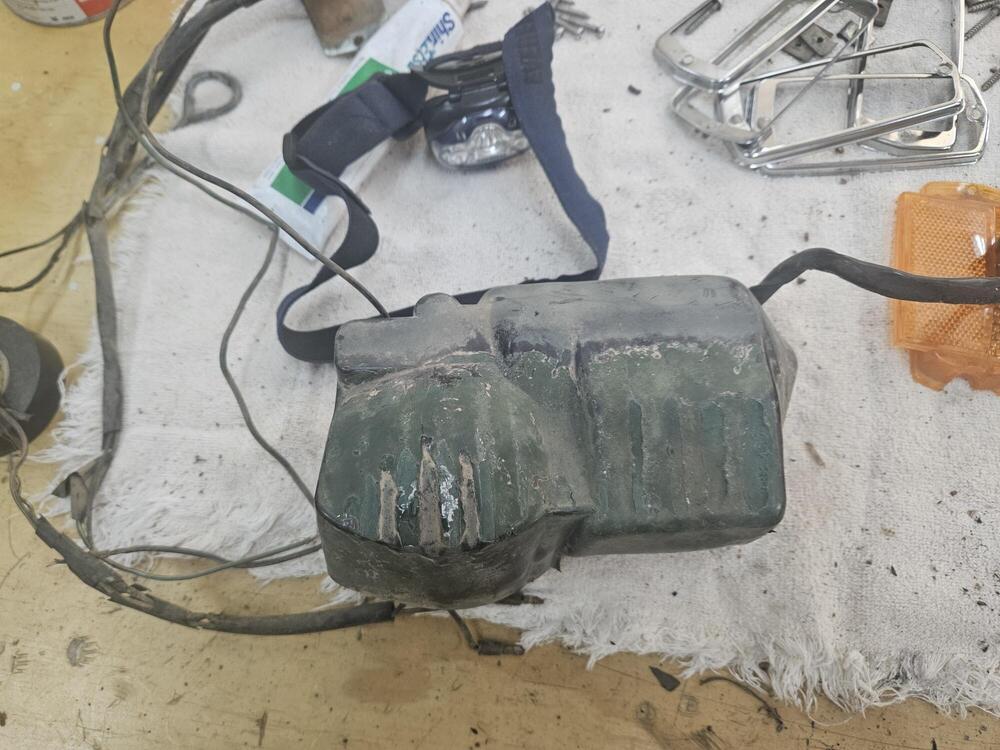
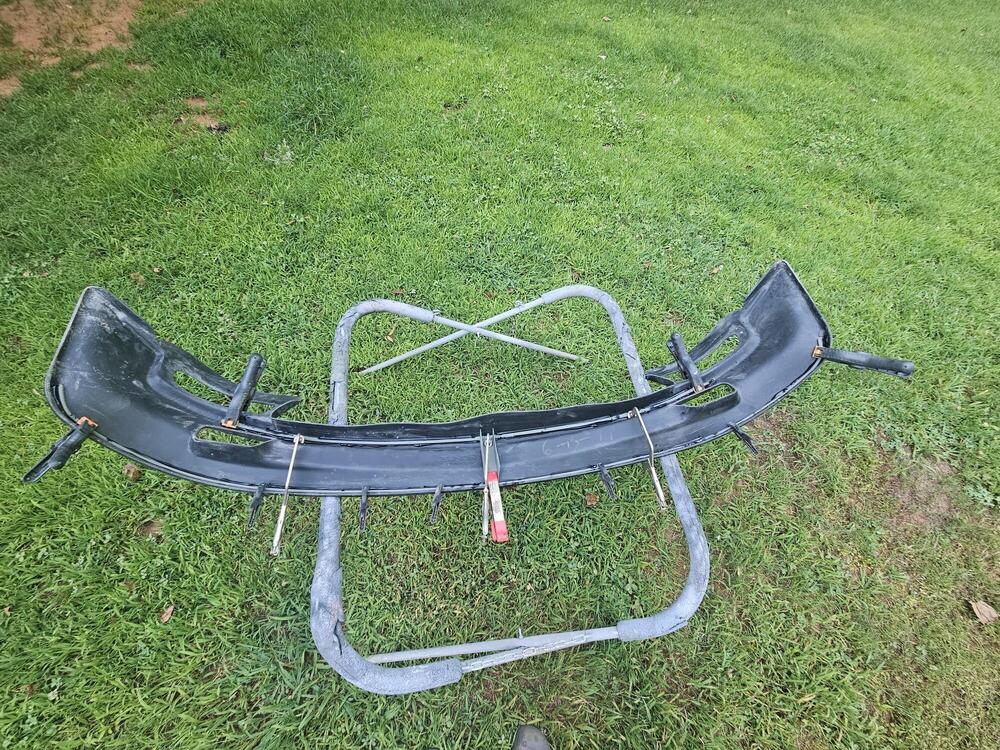
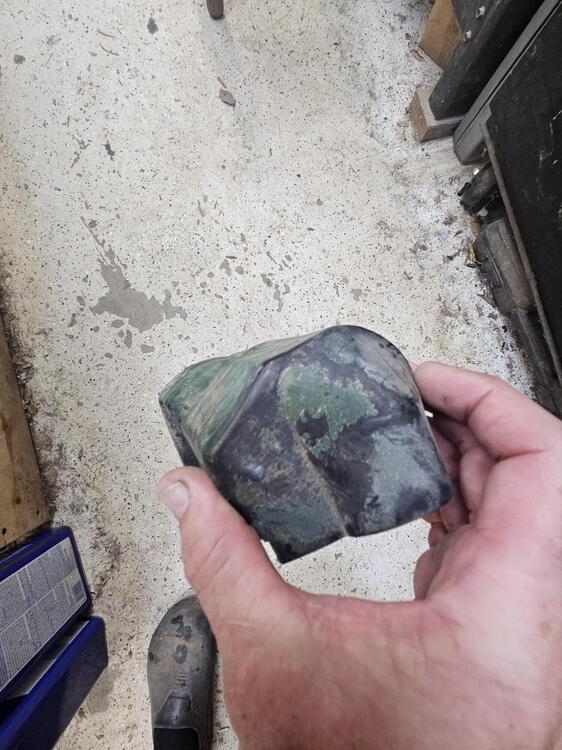
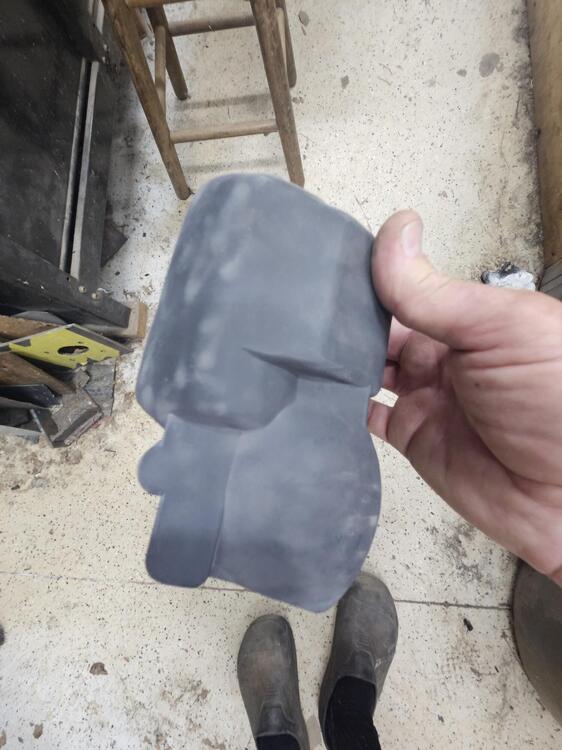
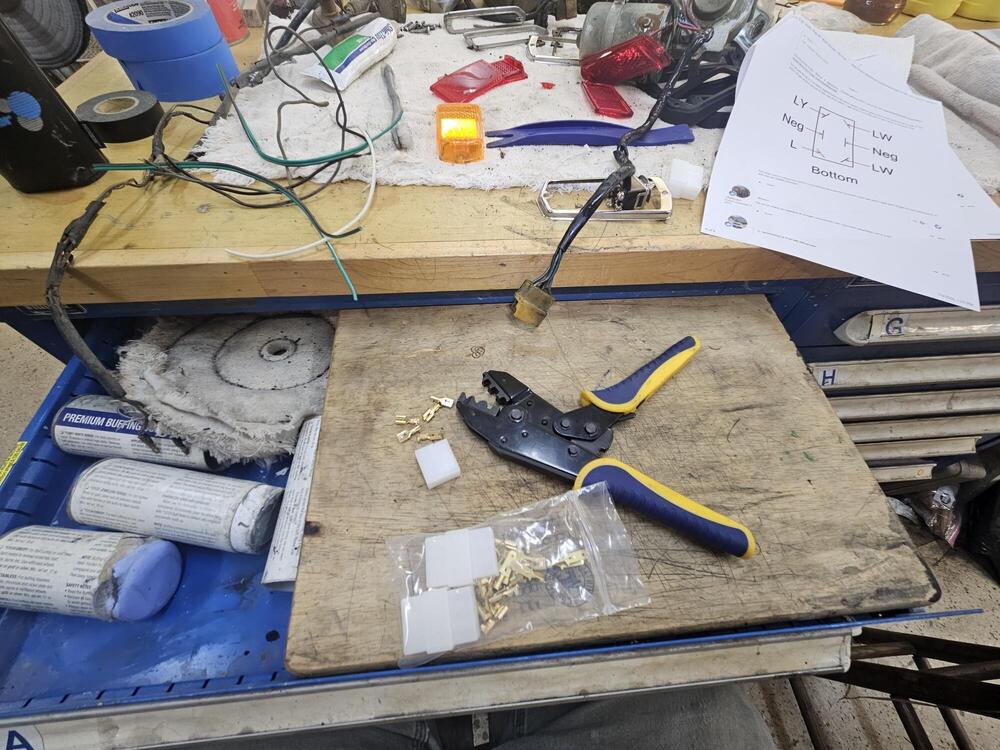
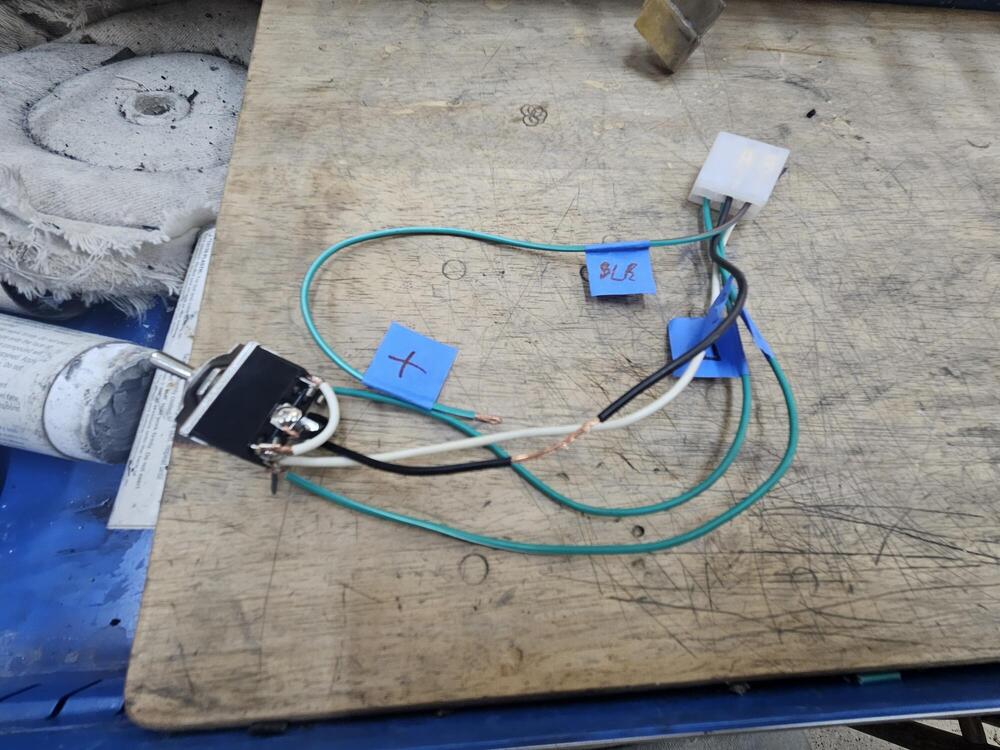
1 pointSo in the shop yesterday and today Still working on running lights. Pulling together the best parts. Buffing and washing Finally found the wiper motors. I haven't been able to find them. I knew I had at least 3 but I couldn't find them. So frustrating!! I looked through the shop several times. Shelley helped me today and we were very thorough. We found them right near the work bench almost under my feet. I hate the tunnel vision that comes with age! ;( So here is the wiper motor that came out of Lily It has a hard shell on it instead of a bag like this one The BrownZ also has the hard shell, so I believe that is correct. When Lily got a green repaint they painted the cover. It had a lot of paint on it. Put it in the bead blaster. It came out ok. Better than paint. I treated it with some Meguiars after this... I also worked on the air dam & the frame. I primed the frame the other day Looks like I bought it in 2011 !!! I measured some center marks Then I used some 3m Urethane and glued the frame in. Hopefully it holds. I haven't decided if I'm going to try to correct the wavy area. If it was TPO I would cut it and plastic weld it, but it's Urethane and I'm not sure I can repair the seam if I cut it... I also made up a wiper motor test switch based on SteveJ's instructions. I had to go back 20 pages in the thread to find it!! I didn't know of a good way to just search this thread. Some vintage connections and some scrap wire So of the 3 wiper motors I have, the one out of Lily is the only one that works. The others click but don't turn. The test switch is cool because the park feature and everything works! Thanks Steve! I also got the drivers seat in. At least for now. I'm hoping to bleed the brakes tomorrow Overall a good day in the shop...


 1 point
 -
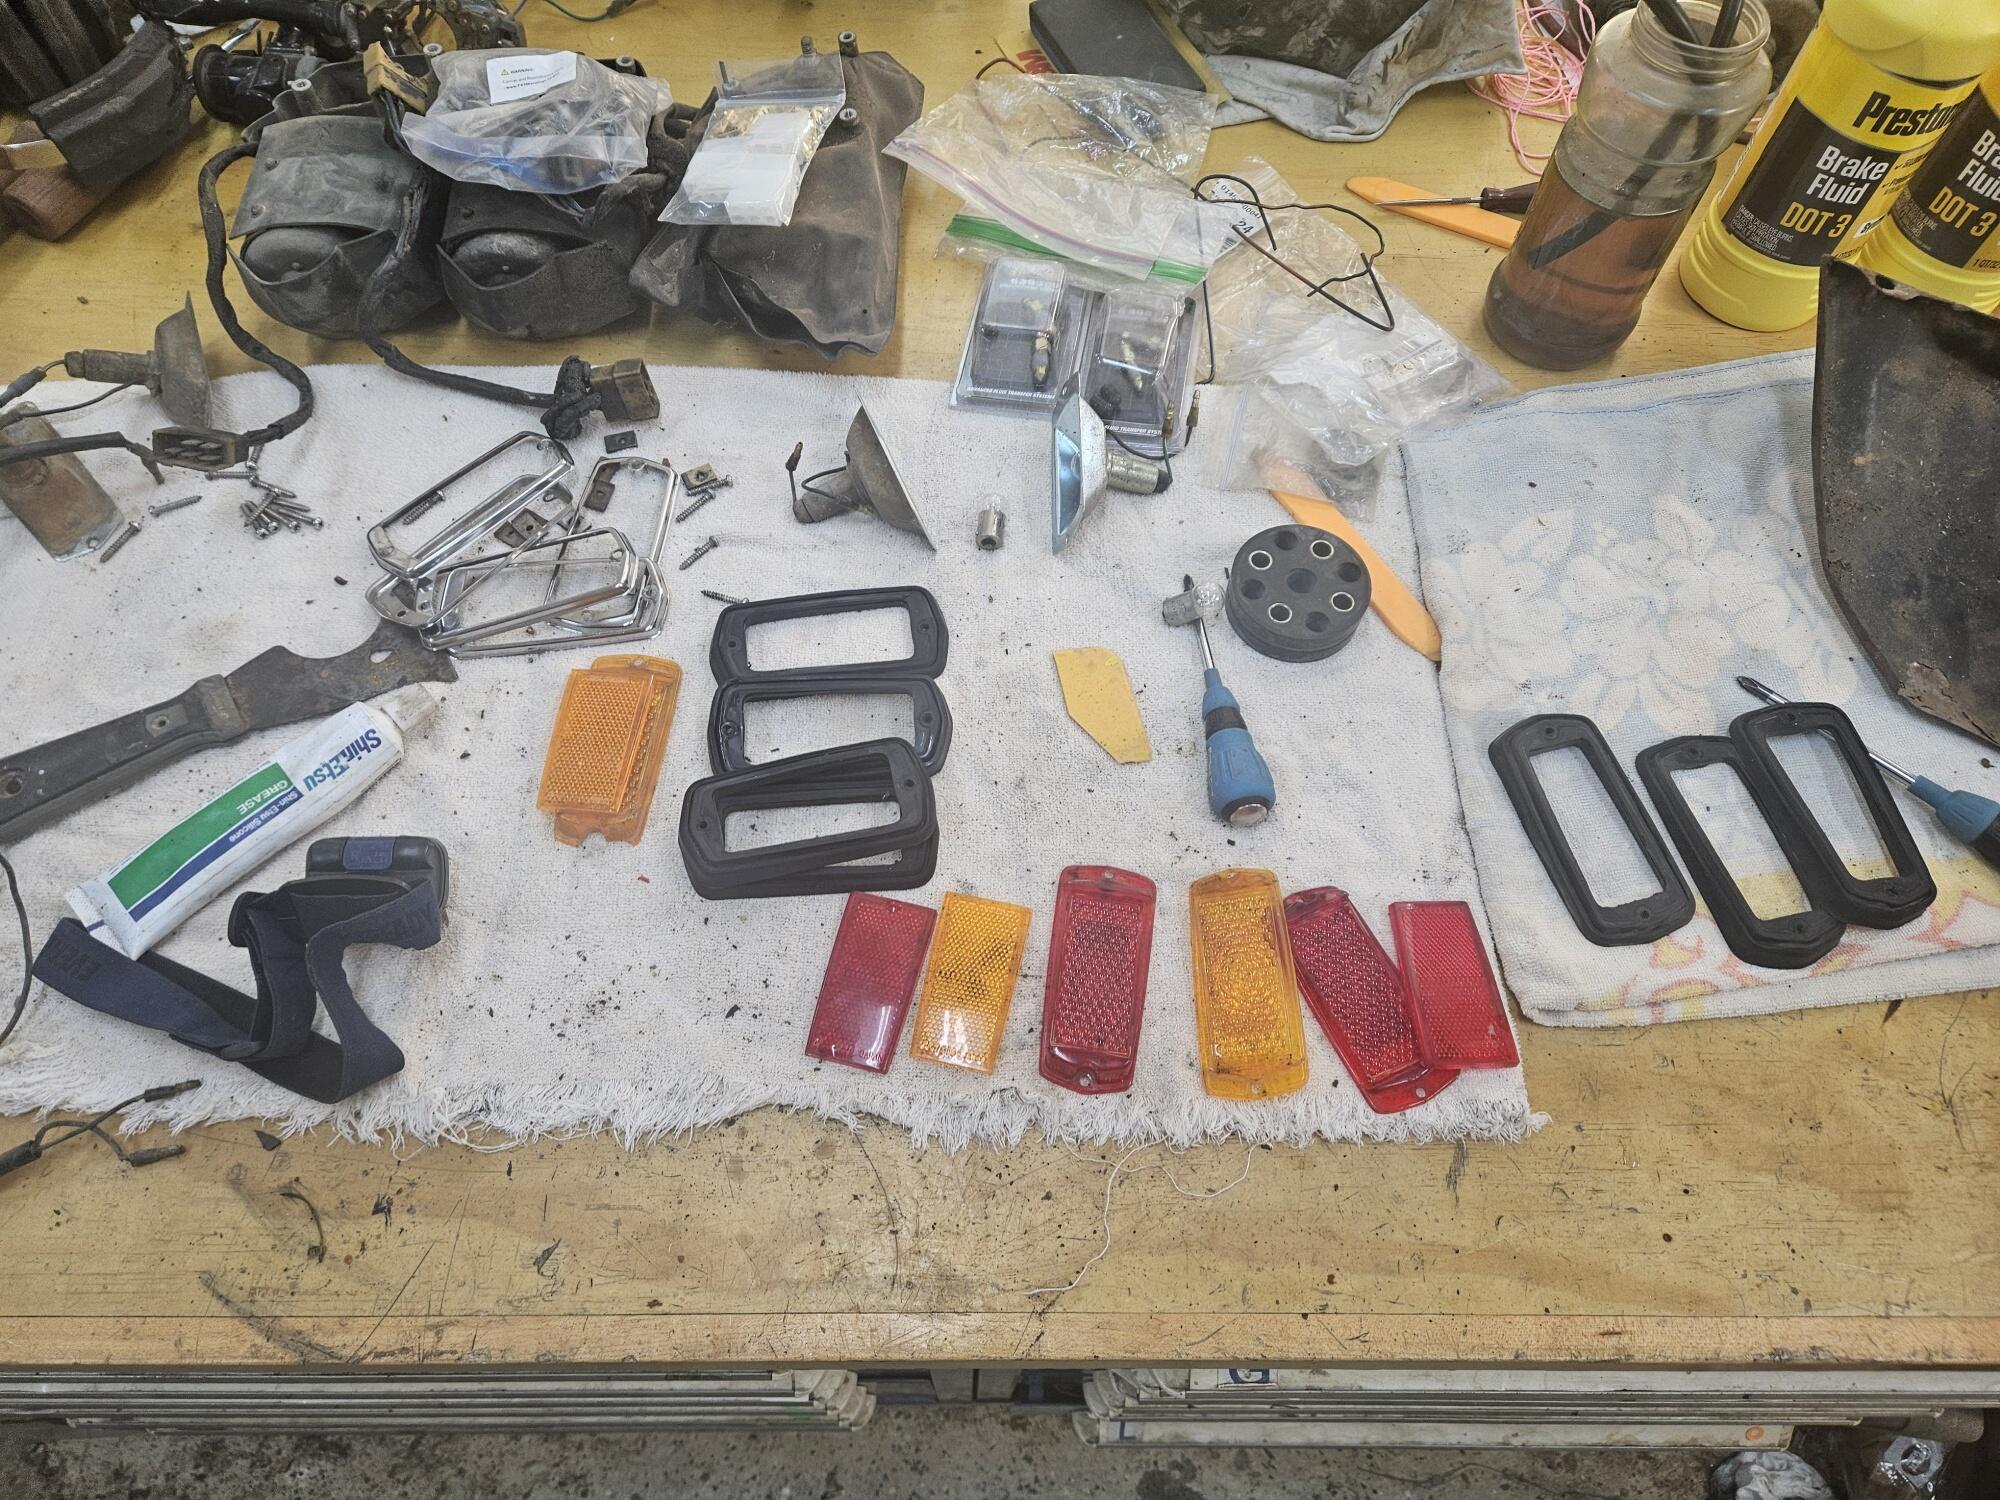
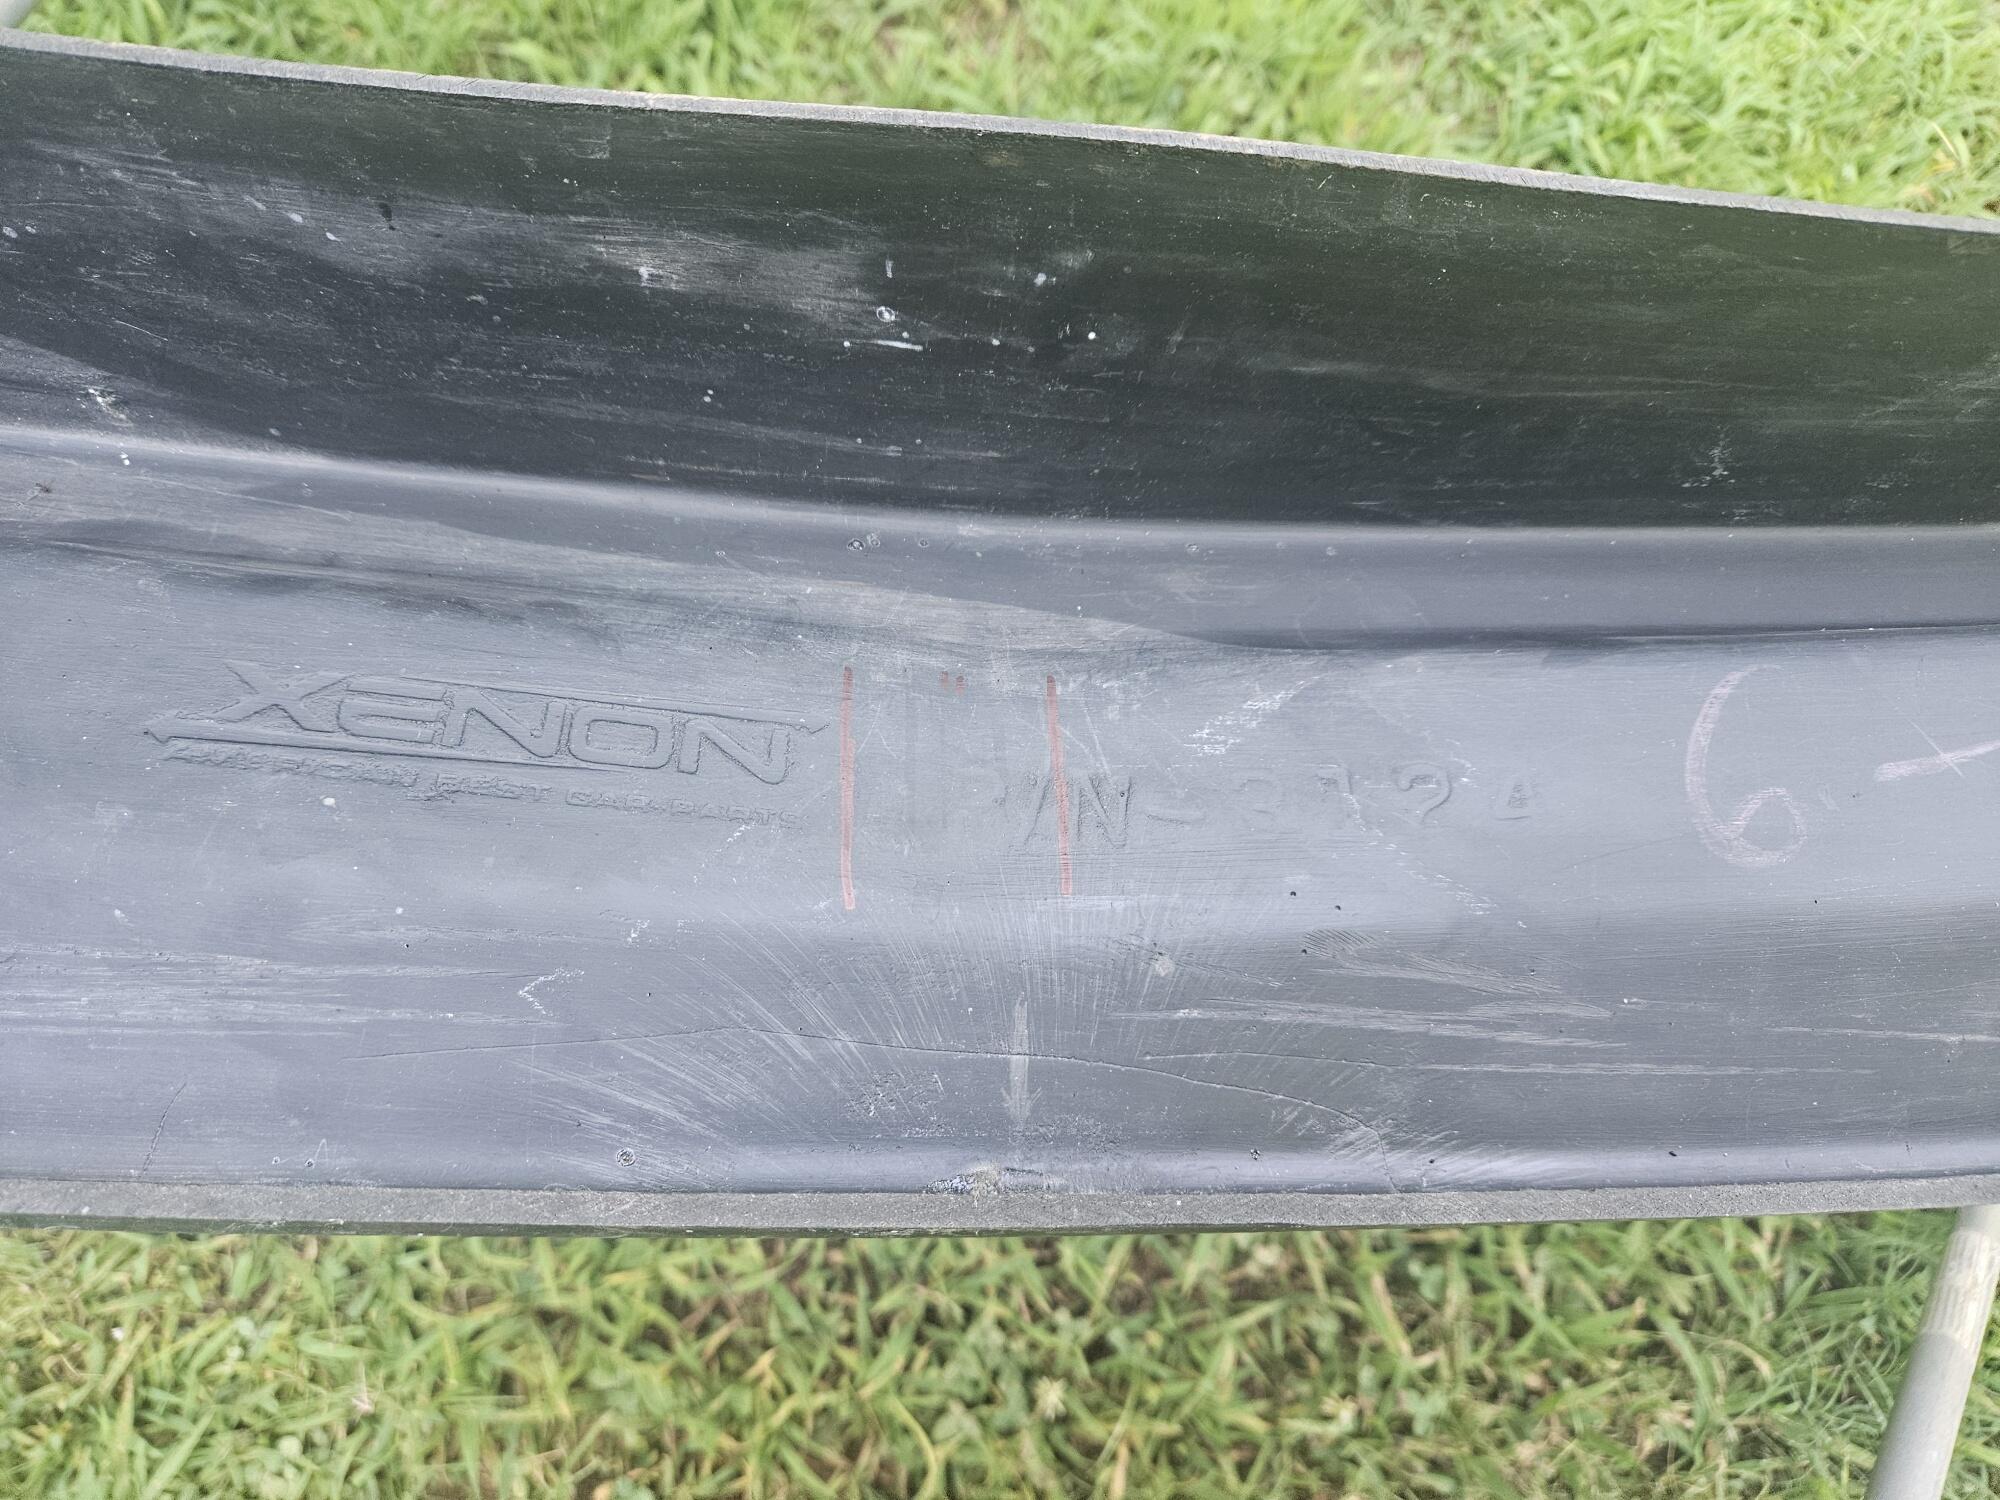
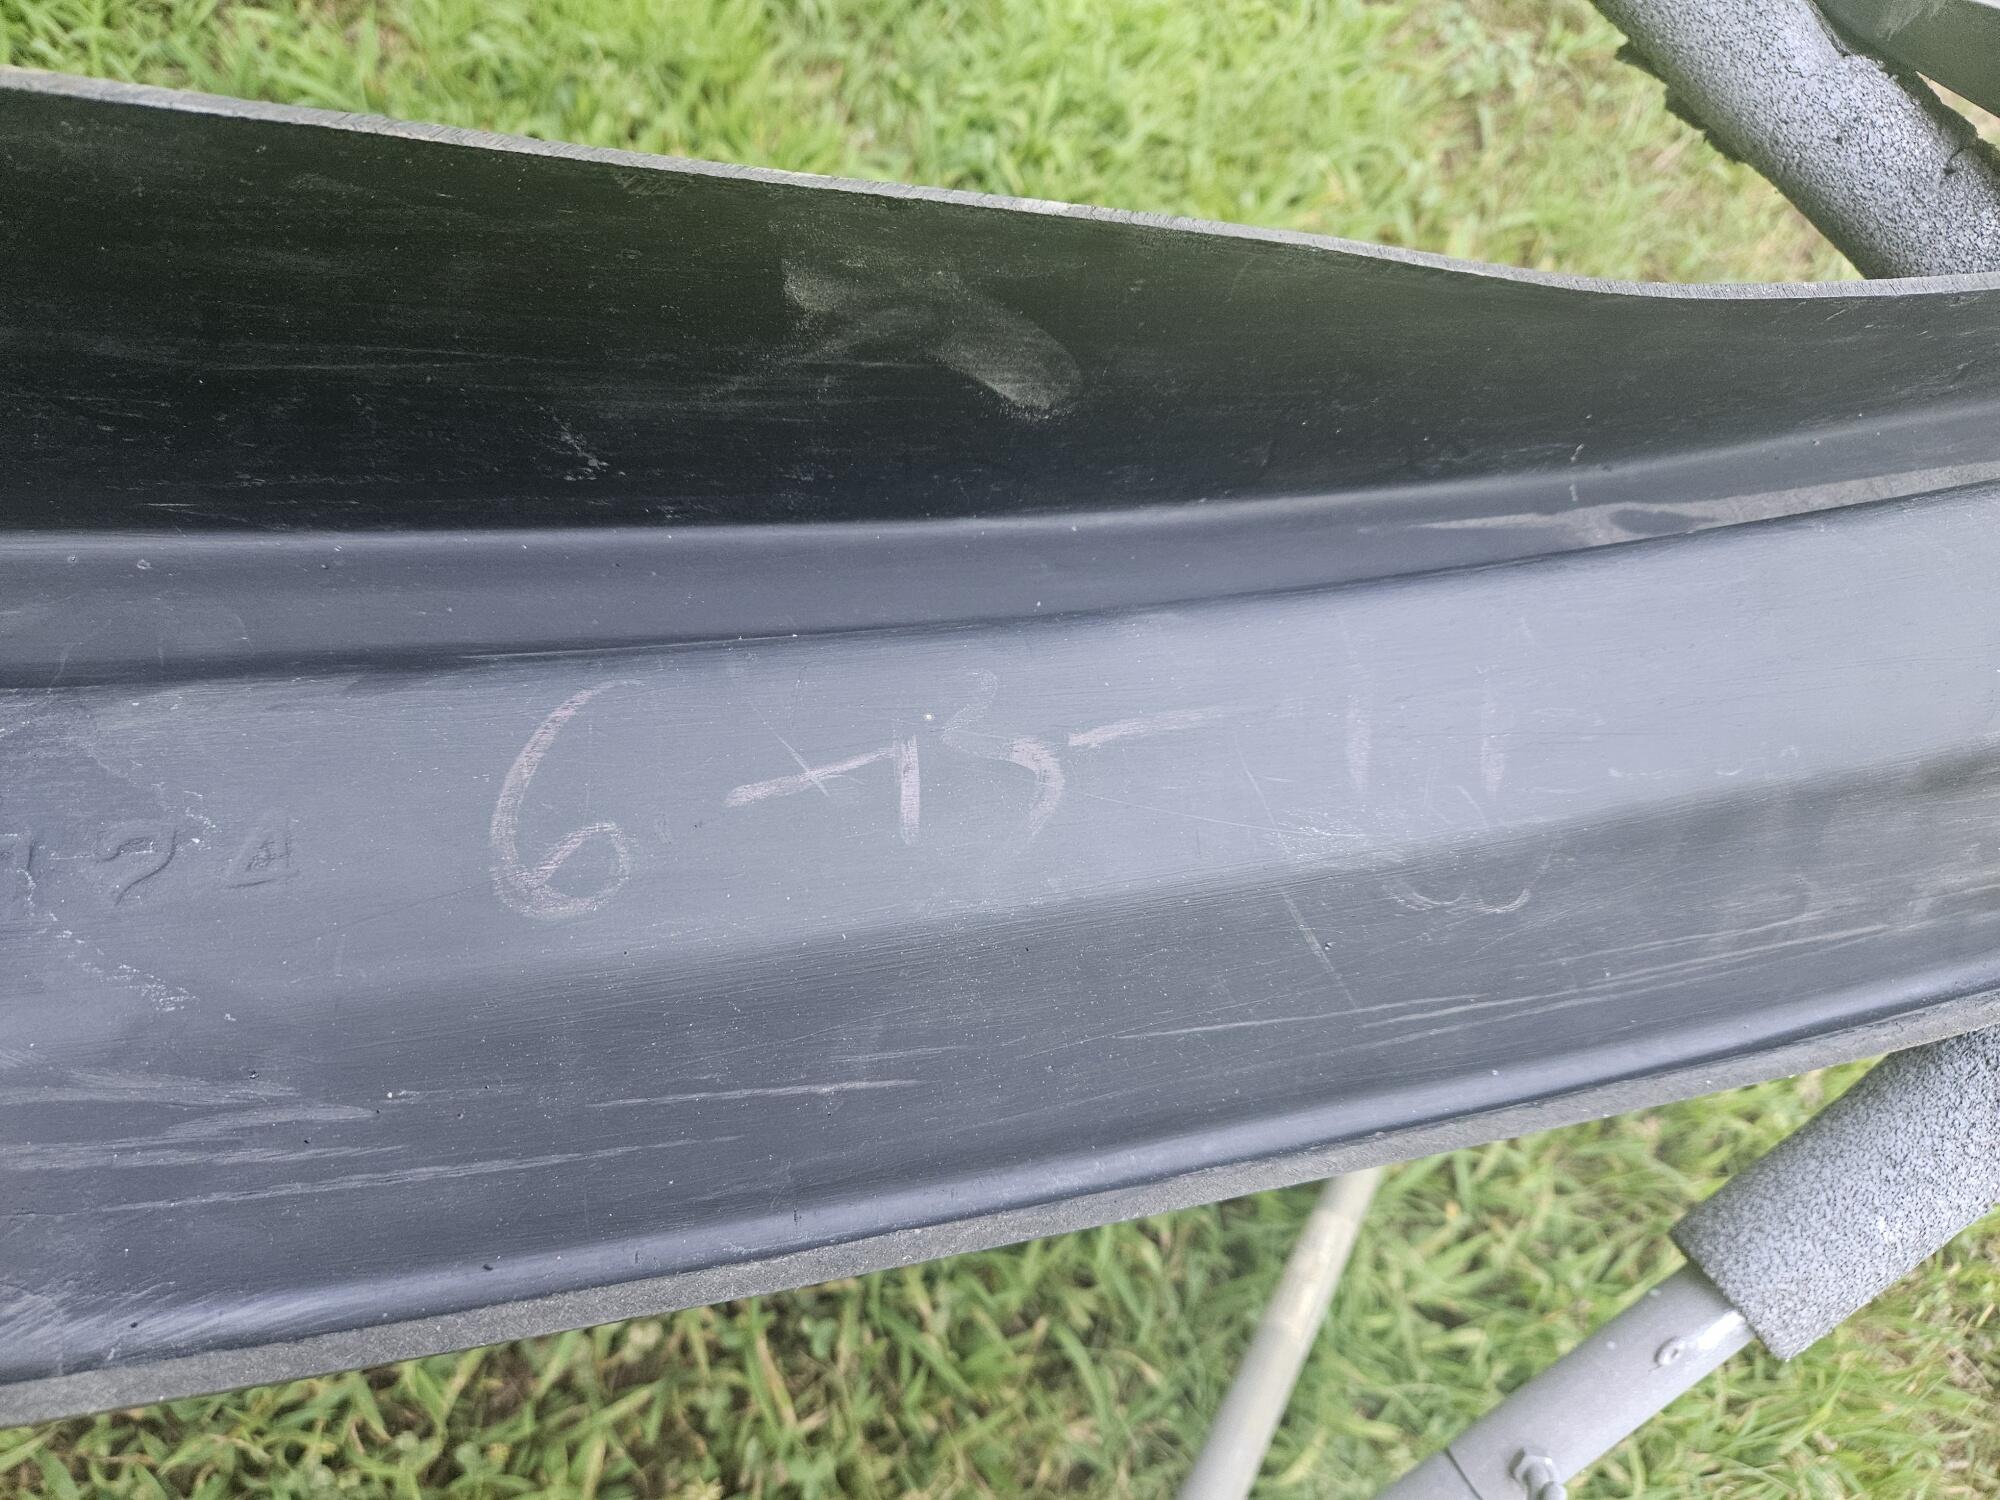
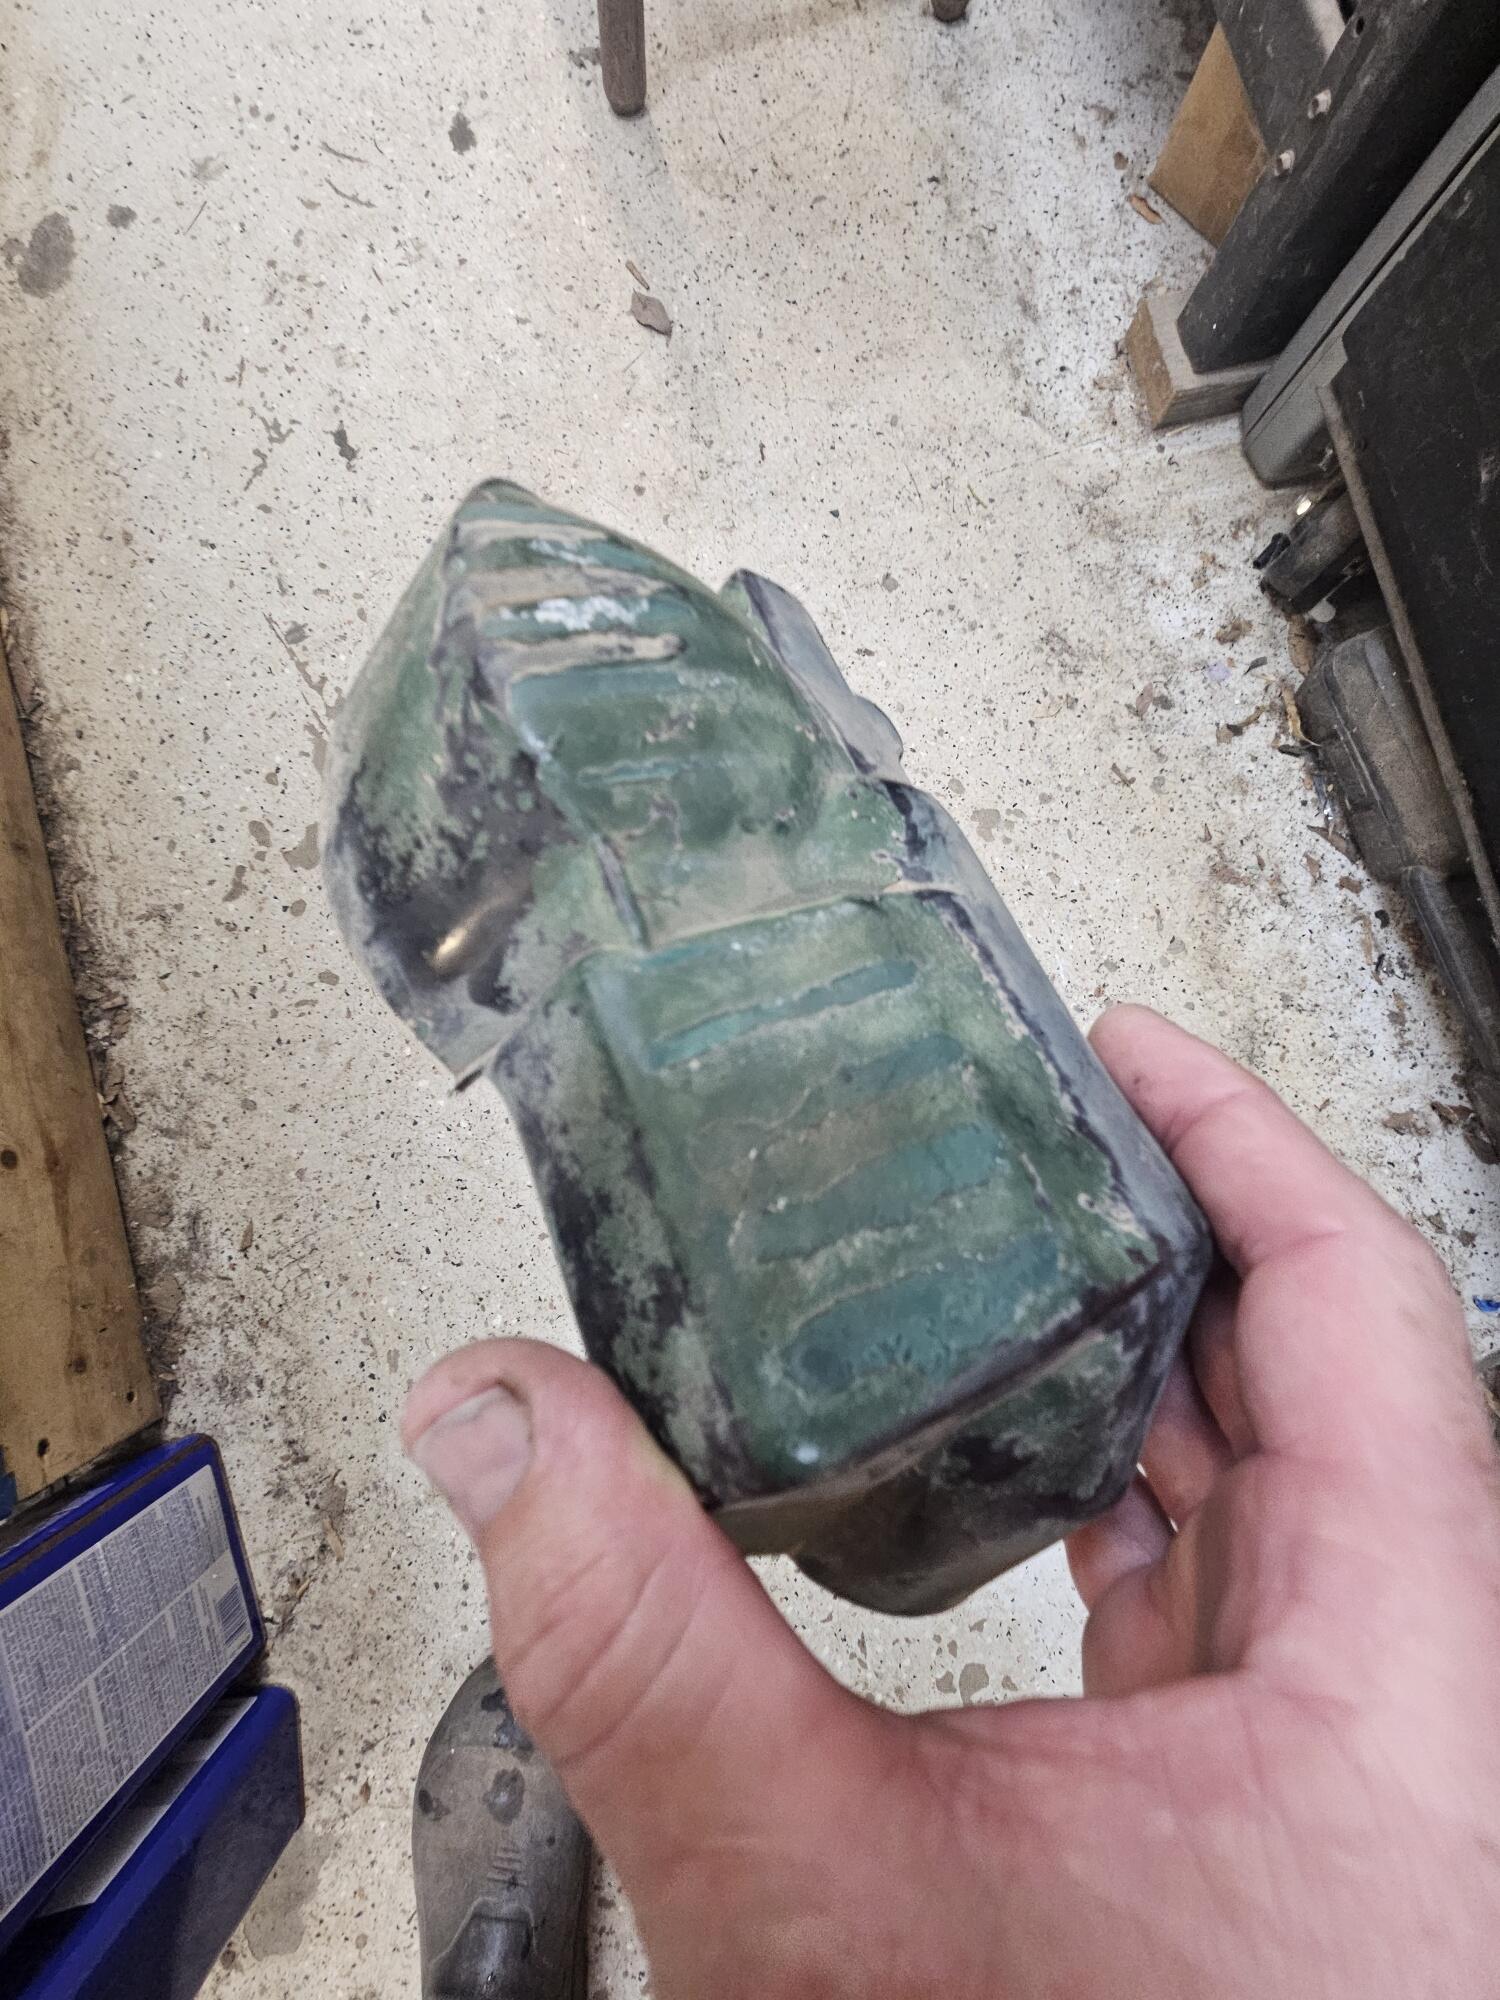
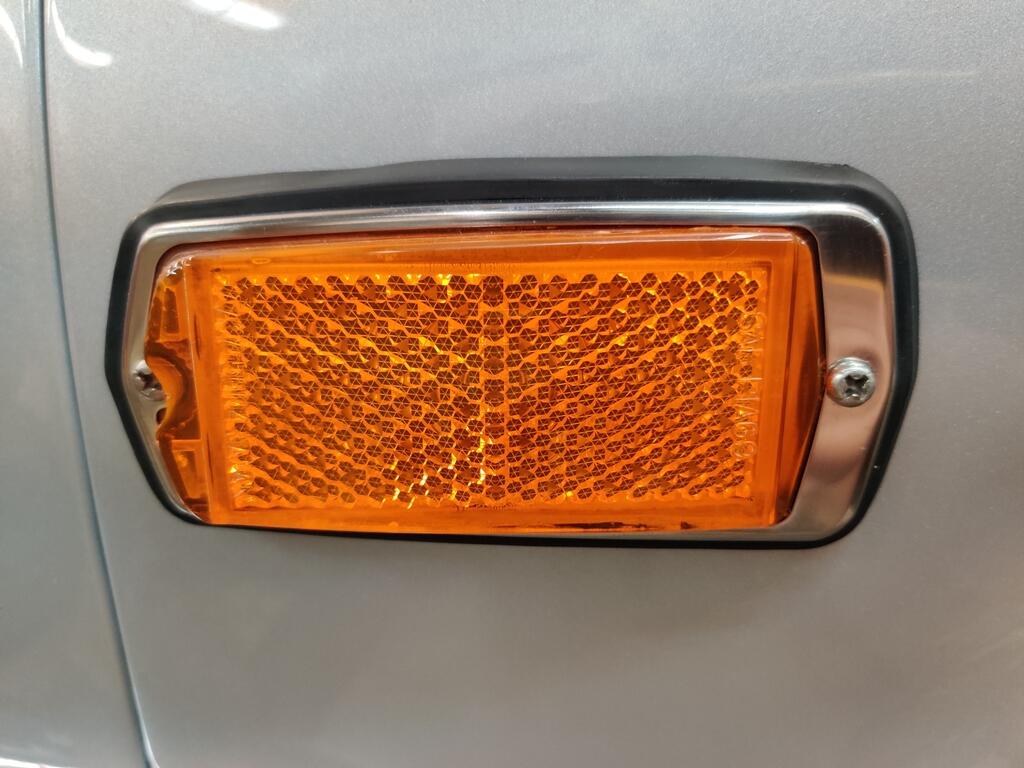
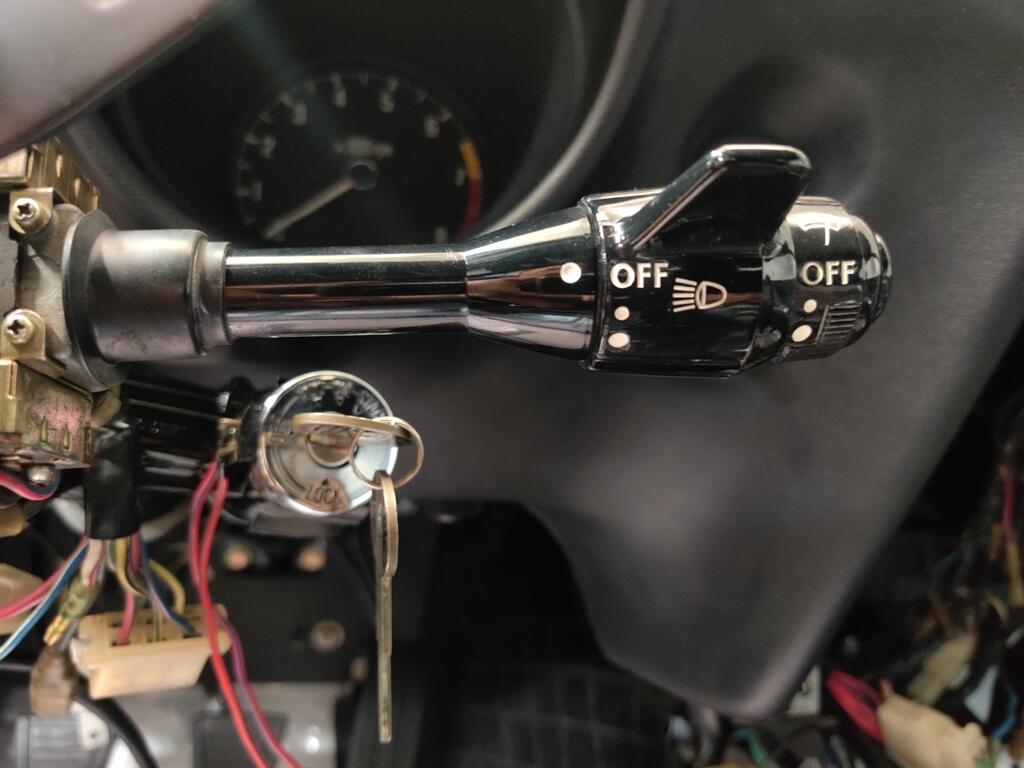
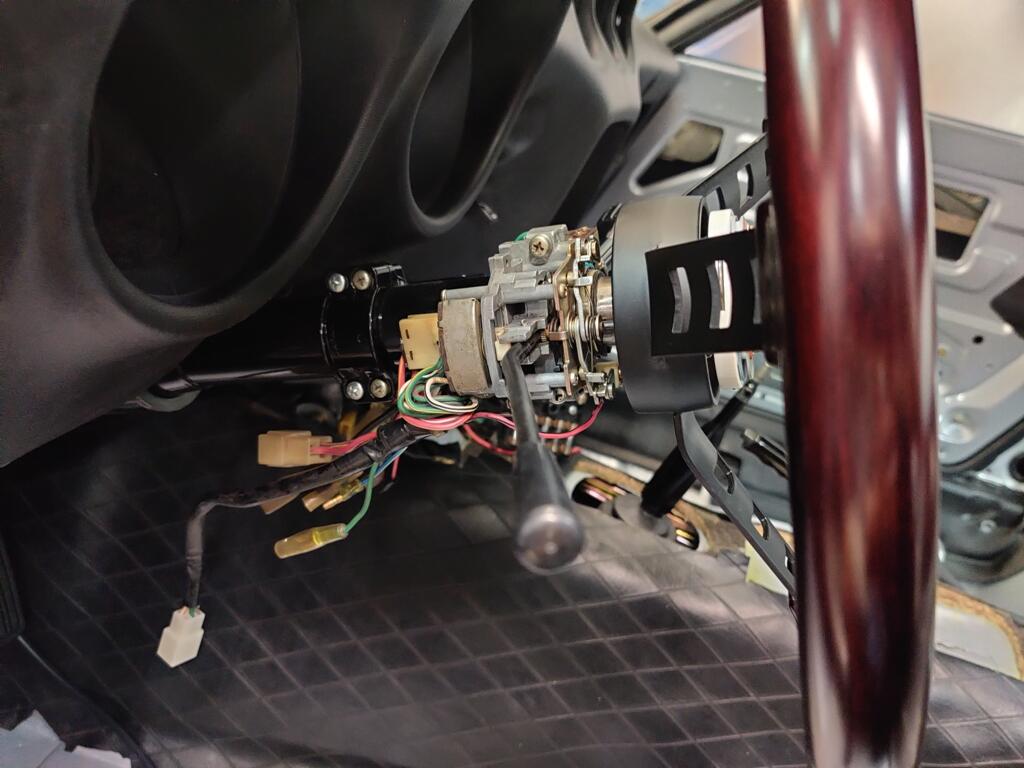
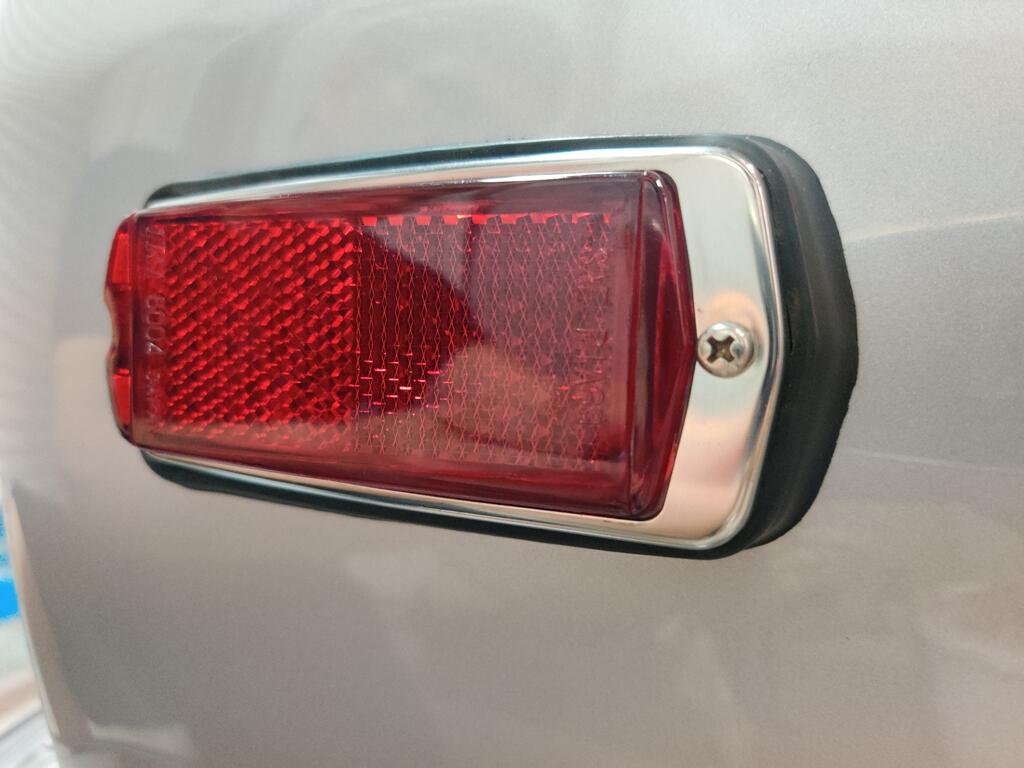
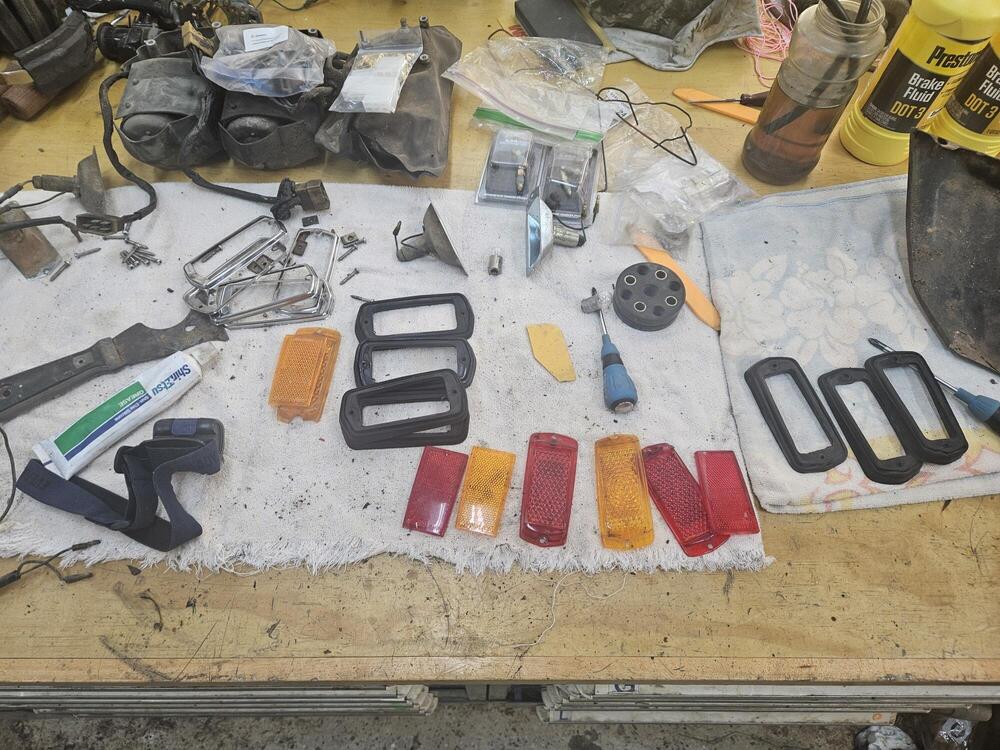
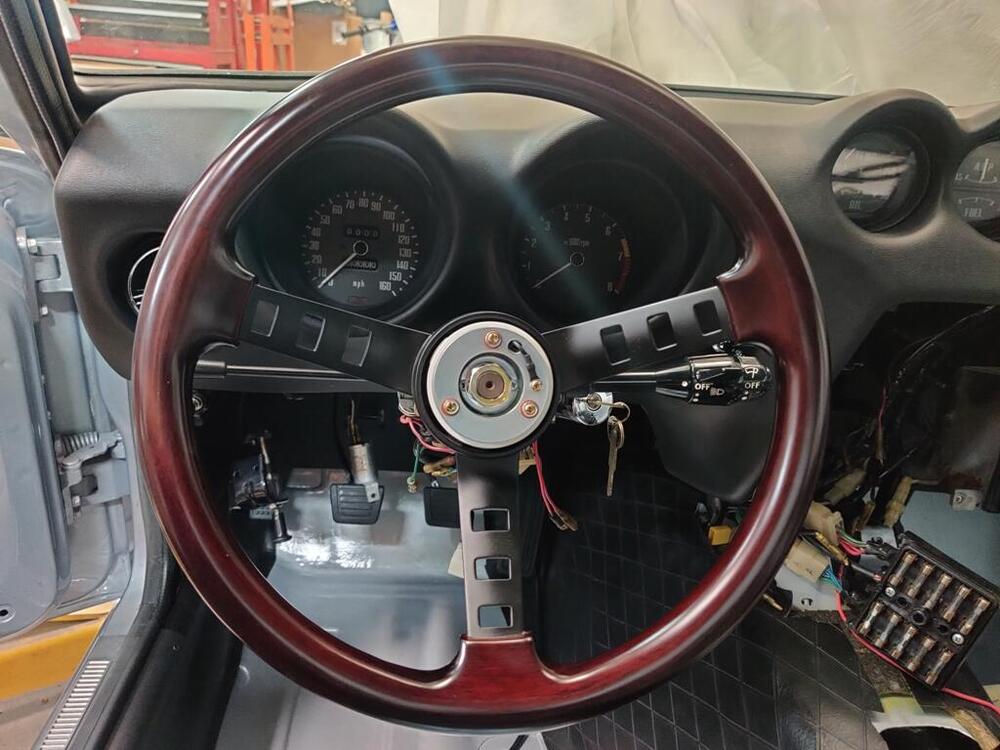
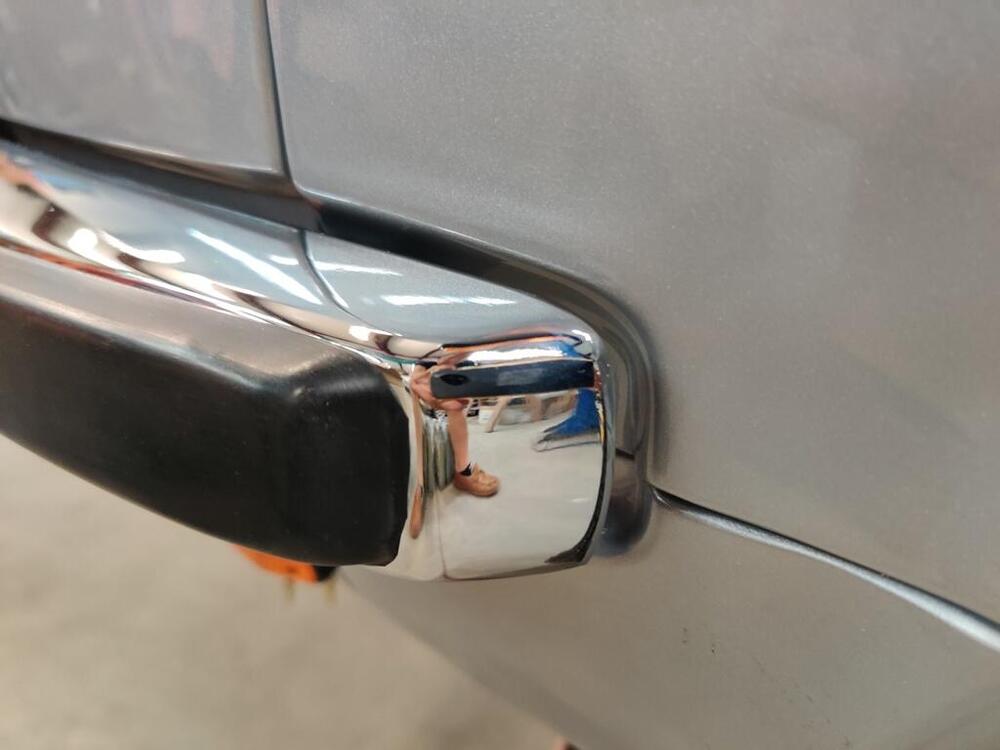
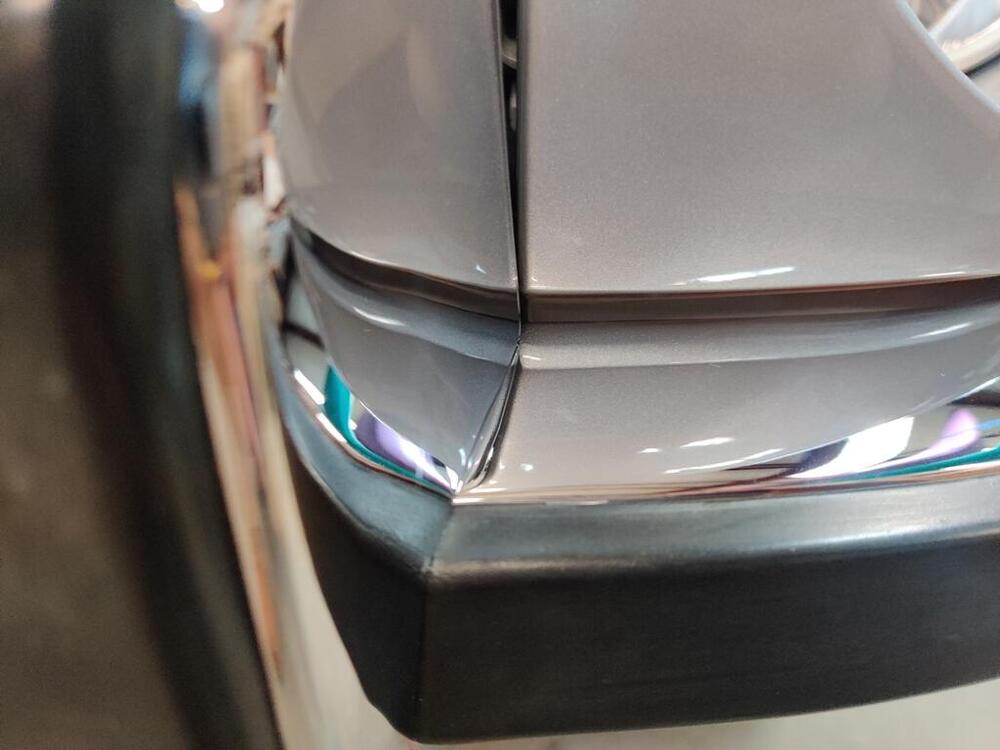
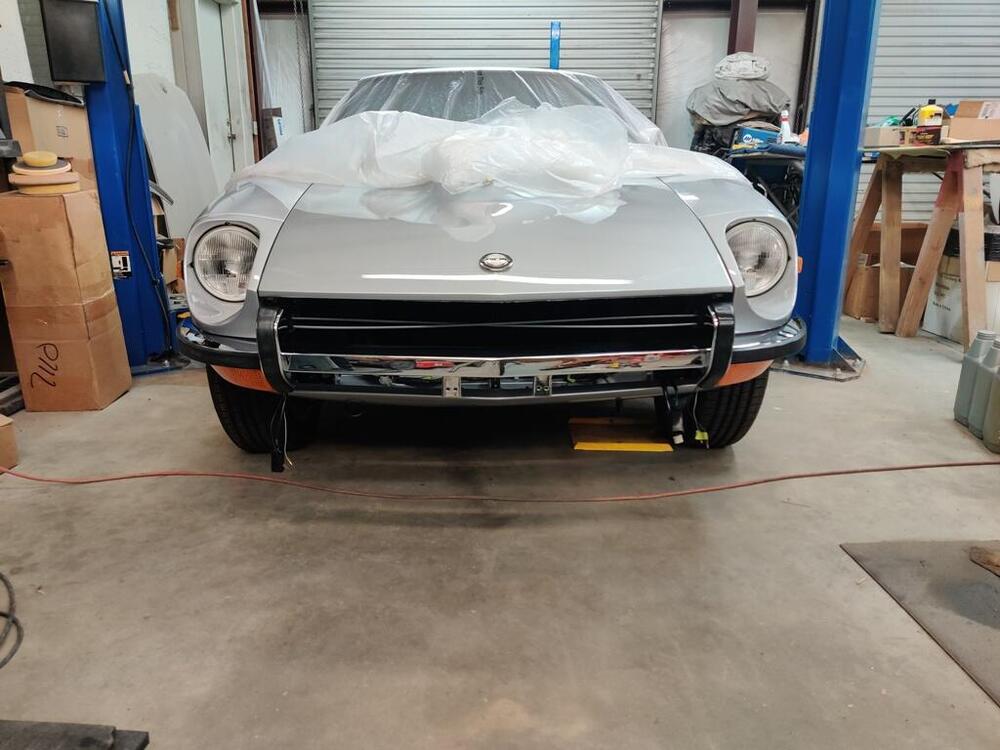
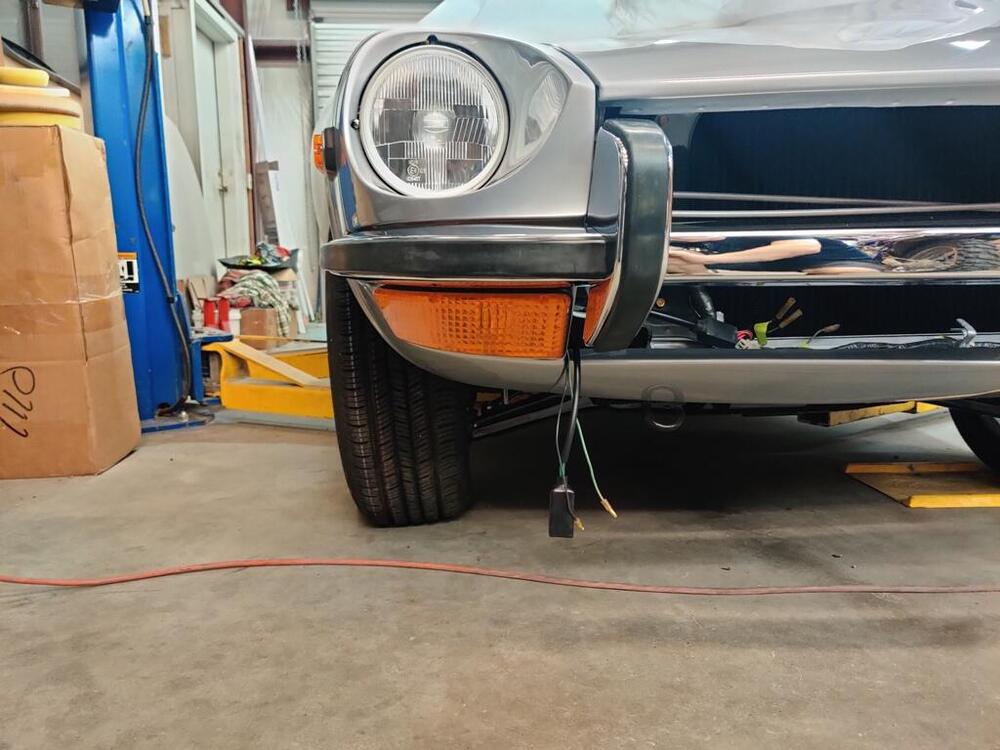
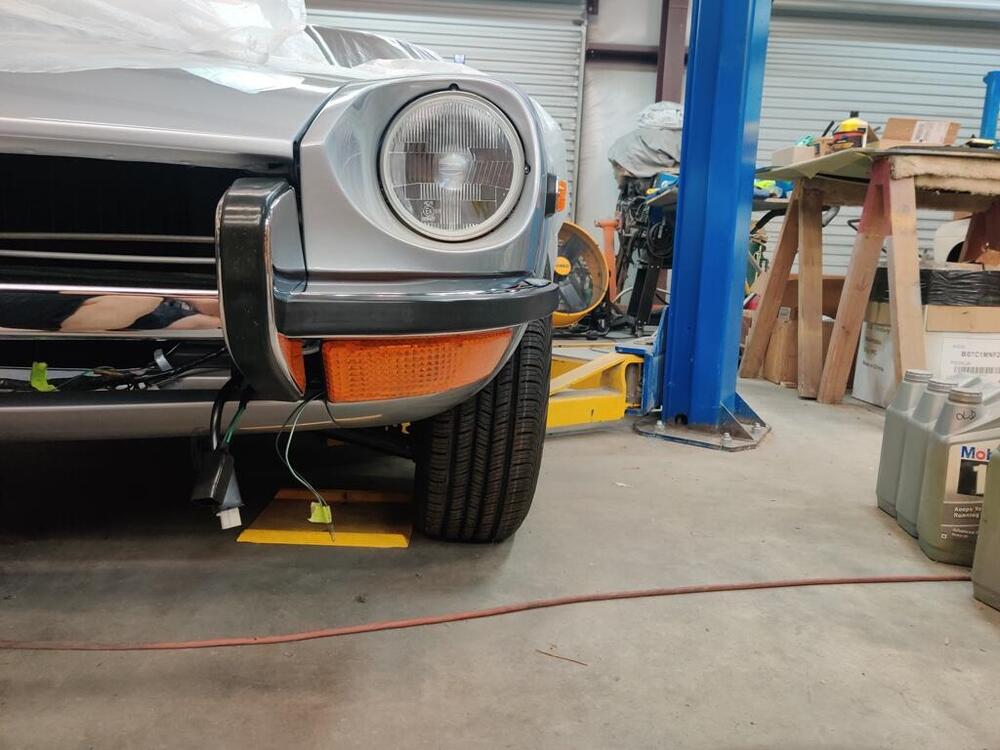
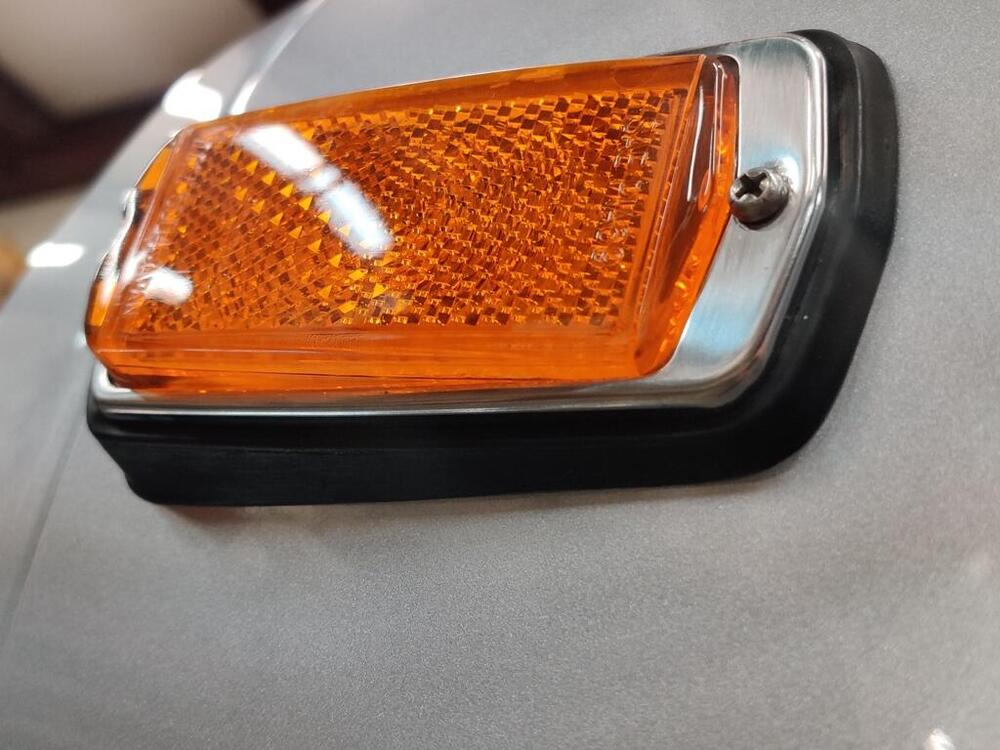
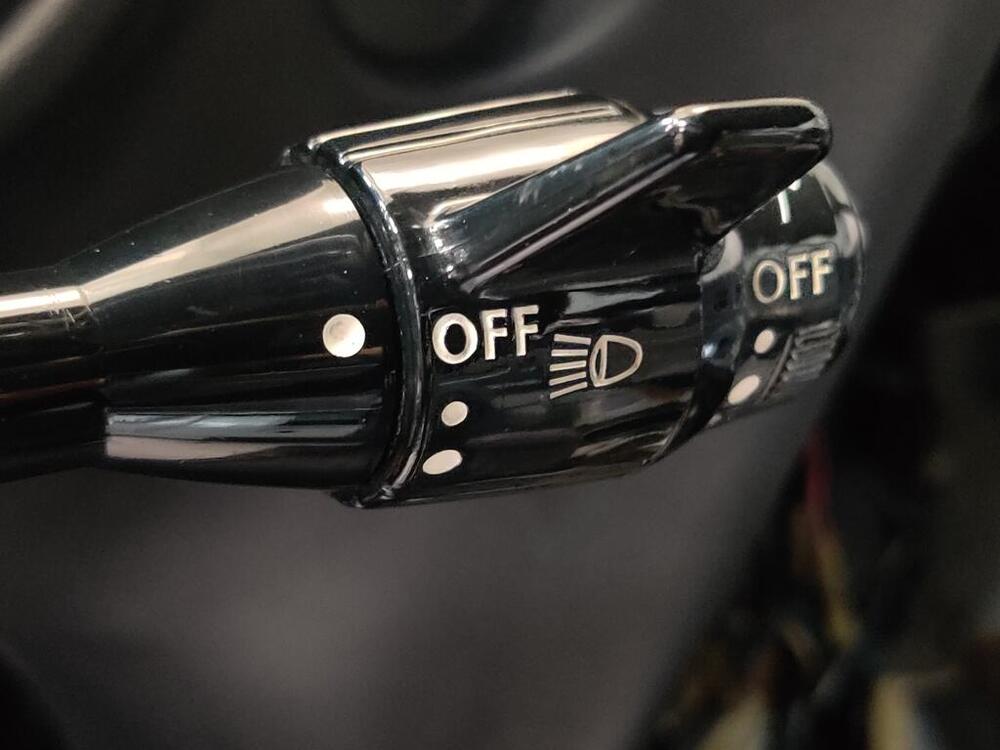
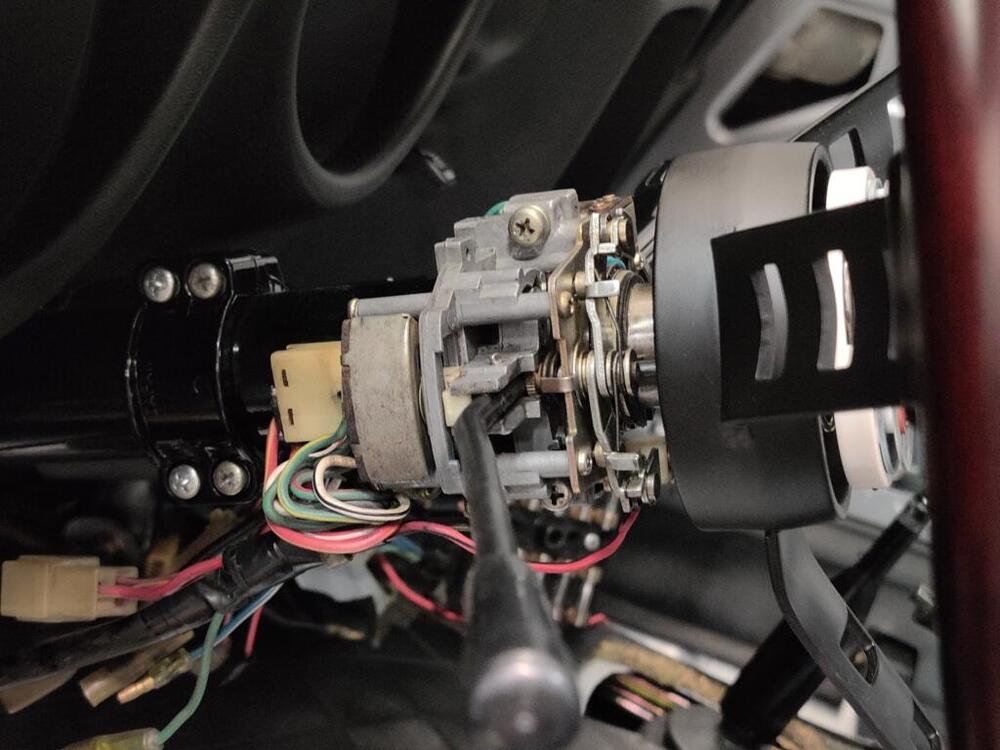
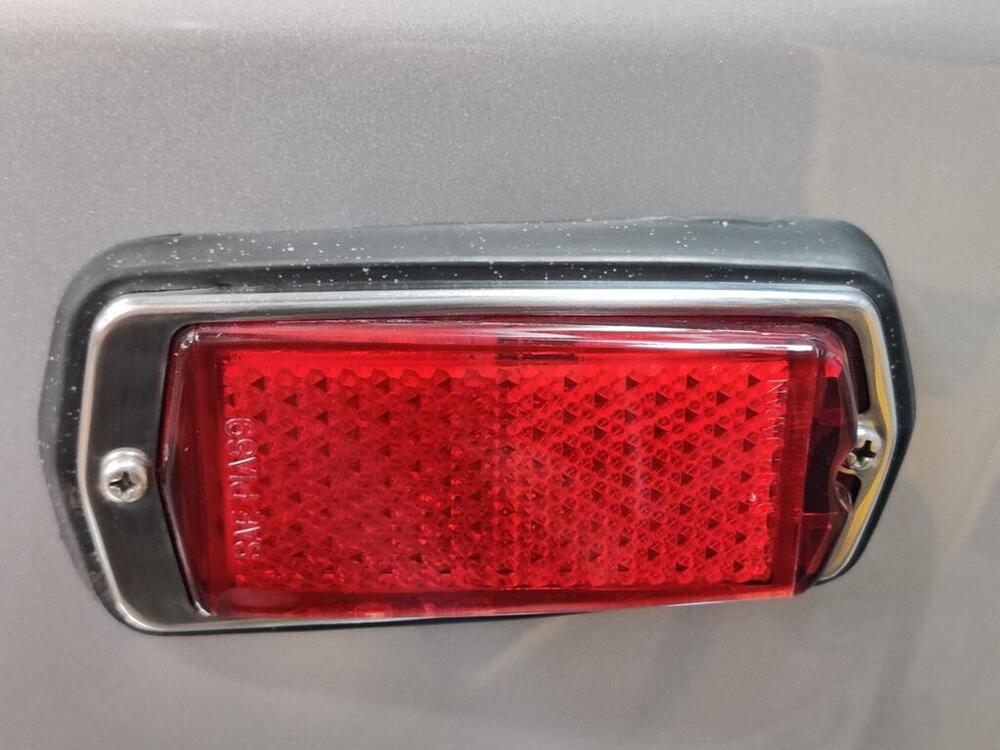
The front bumper is now fully fitted. One thing that is odd to me is how the over riders fit. The natural fitted position of these is such that a minor tap is likely going to push them into contact the fiberglass head light buckets. I've only taken the time to look at pictures of a couple other 240z's and it seems to me that the correct fit aligns these just inside the grill opening. I also am unsure what the correct depth of mounting the bumper is. I have room to slide it out a tad if that is more correct. The way I have it now, the closest part of the over rider to the body is at about 1/4". When setting the bumper height, I went for an even amount of space above the front turn lamp and below the body recess in the headlight bucket - "centered" in the recessed area: I like the replica competition steering wheel. It is a little smaller in diameter than the original, which I like. And it has a thicker grip diameter, which is nice also. However, it has less dish (so less depth). Without a seat to sit in, I can't tell if that will be an issue. I don't want there to be an ergonomics issue where hands and arms don't fit comfortably when my feet are the right distance to the pedals. Because it has less depth, the rim sits further away compared to the stock rim - I'd say about 1.5 inches less depth. And because of that, the turn signal stalk has to be bent back some. When I put the wheel in place, the end of the stalk was only about one and a quarter inches from the back of the rim. That is not enough clearance for free hand movement on the steering wheel. The distance between the stalk and the stock steering wheel is about 2 and 7/8" inches. I think after bending the stalk a bit, I have about 2". I will give that a try and adjust further if necessary. Replica competition wheel with wood rim... rebuilt headlight combination switch... cleaned and polished surfaces Turn signal stalk depth... cleaned and rebuilt turn signal switch assembly... Front side marker Front and rear side markers after cleaning polishing and installation


 1 point