Leaderboard
-
Captain Obvious
Free Member6Points10,081Posts -
HusseinHolland
Free Member4Points1,031Posts -
bartsscooterservice
Free Member3Points1,900Posts -
Yarb
 Subscriber
 2Points1,935Posts


Popular Content
Showing content with the highest reputation on 09/24/2023 in Posts
-
3 pointsthe oem 240 belts are almost none to find anymore, i'll use the 280 one then, I bet it was more flexible when new haha, it became stiff, like old people3 points
-
3 pointsI doubt the difference in length really matters. I just wasn't sure if you were going for a complete stock result or not. From a functional standpoint, I think you'll be fine. I haven't even really thought about until this thread came up. So the good news is my diff isn't clunking, but I haven't looked at it since I put it in. Maybe checked it once to make sure everything looked OK, and then completely forgot about it. So... I'm guessing it's fine?3 points
-
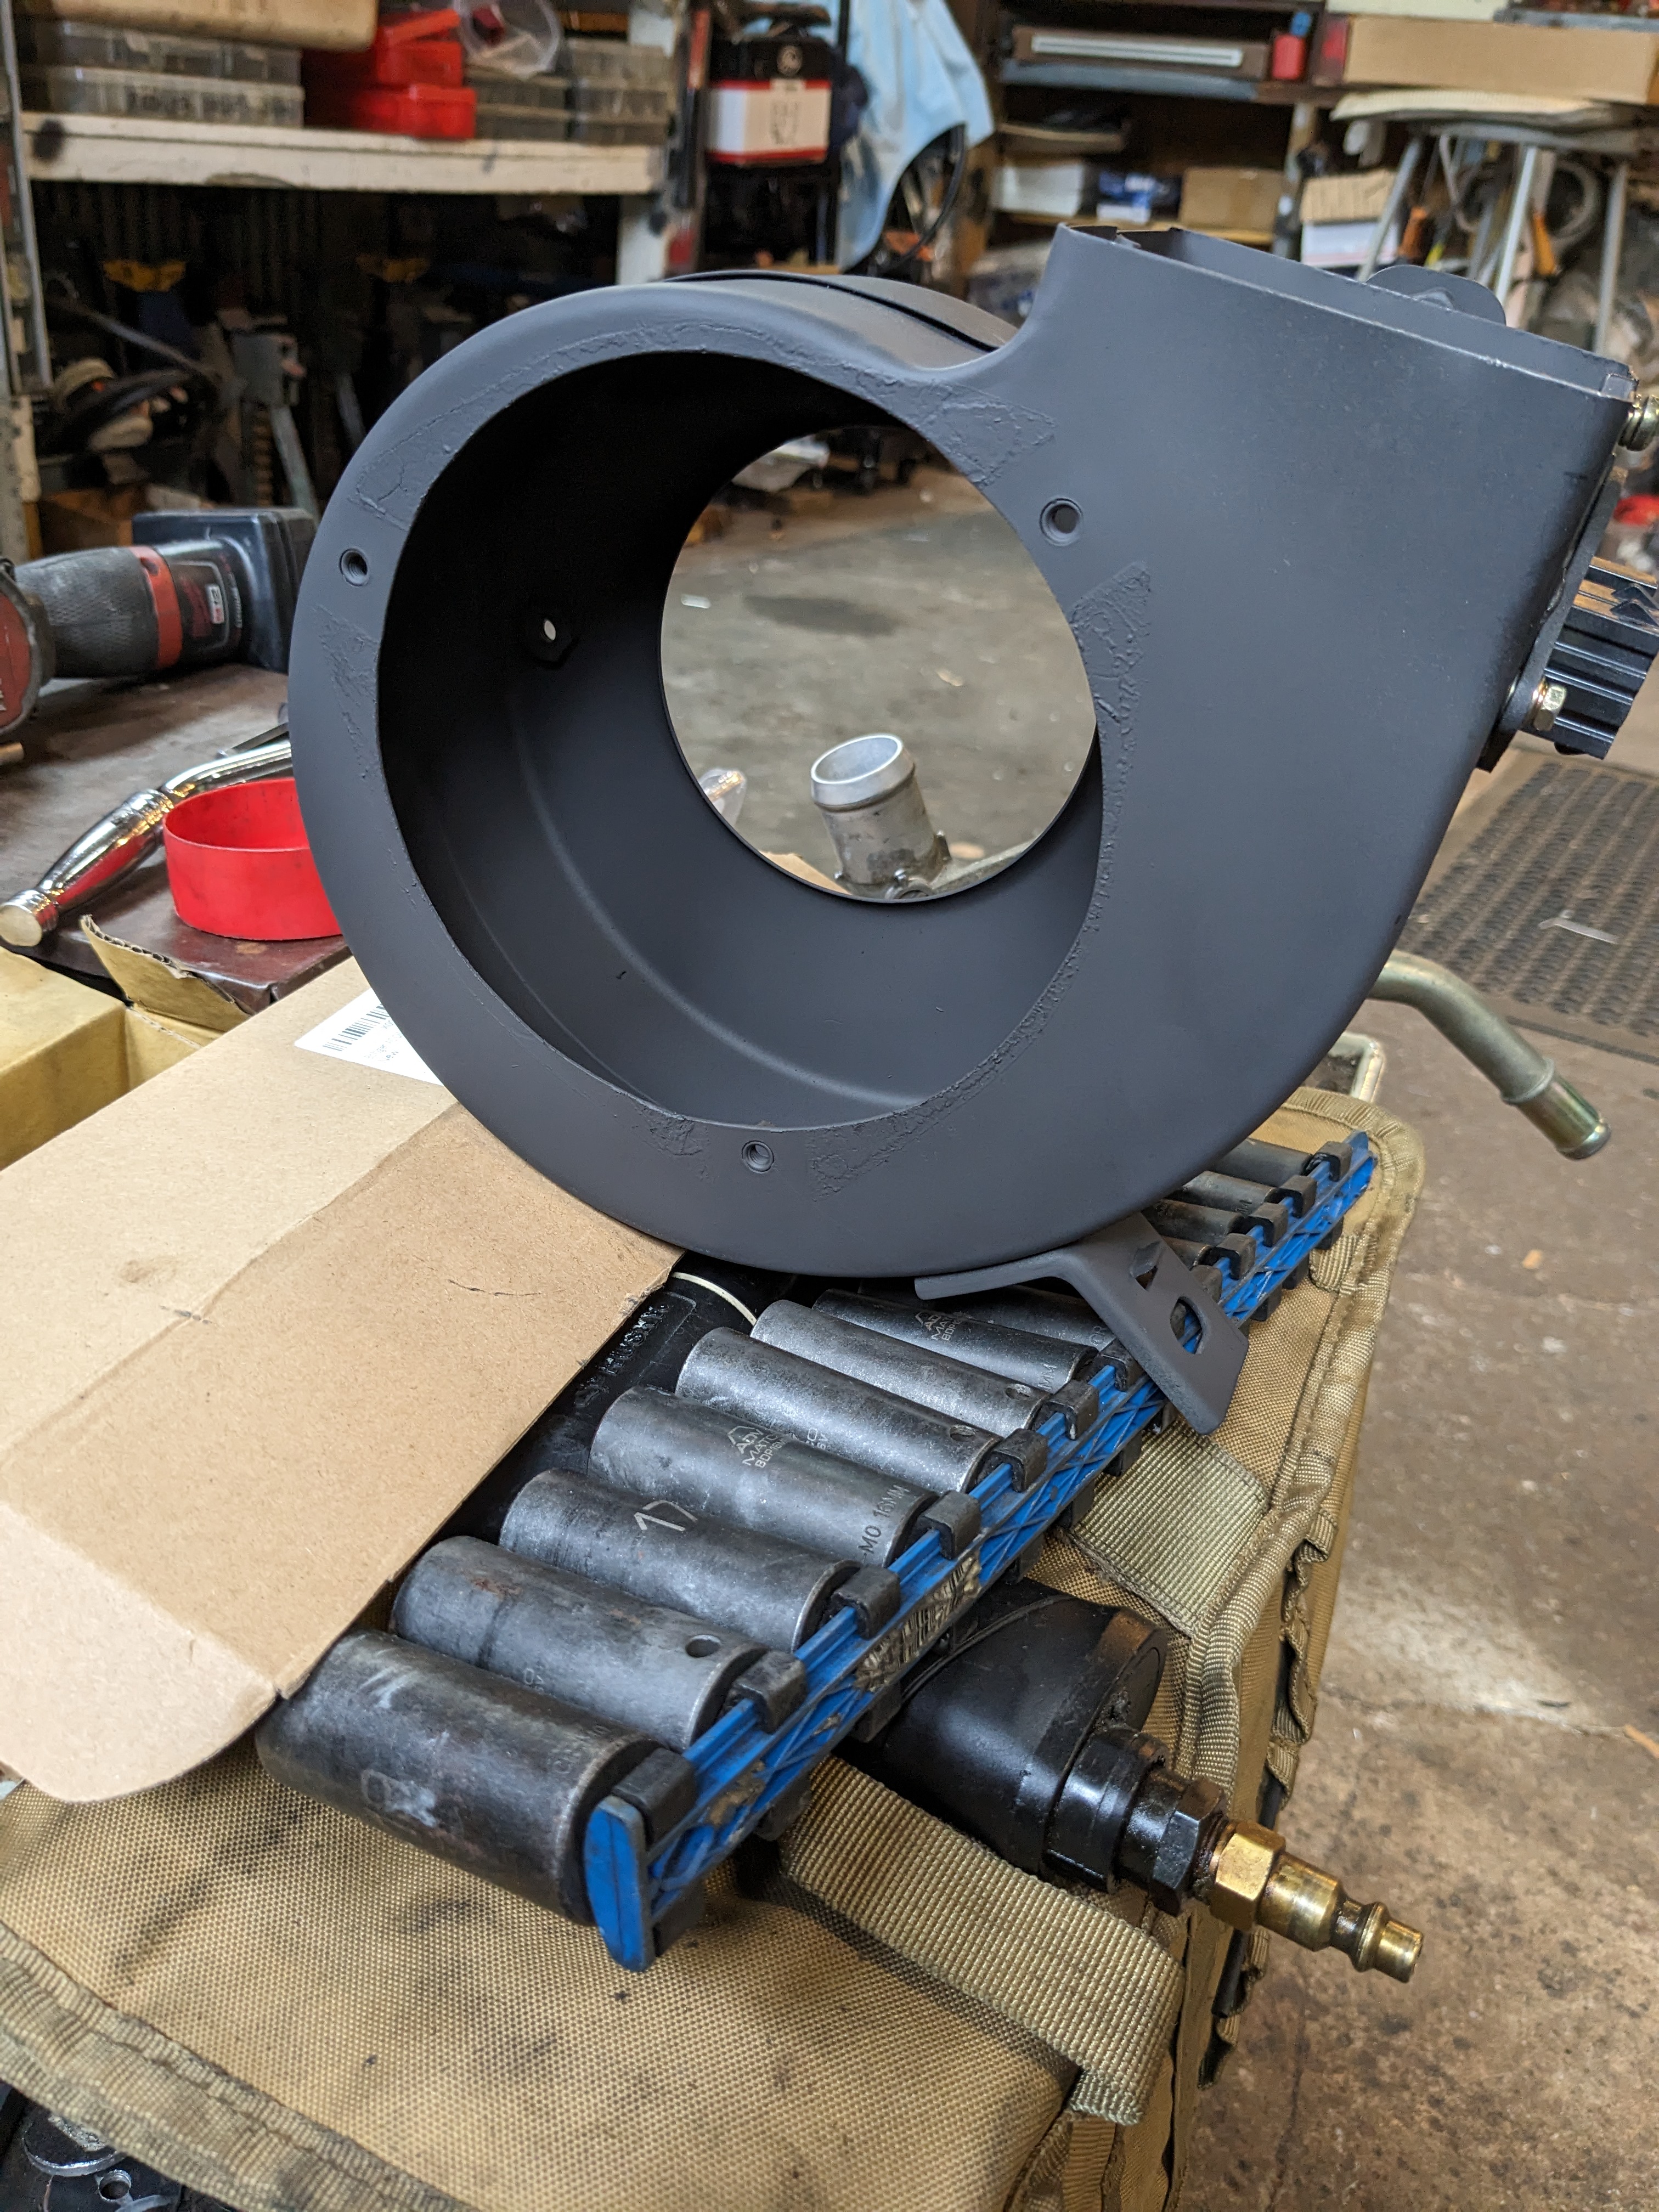
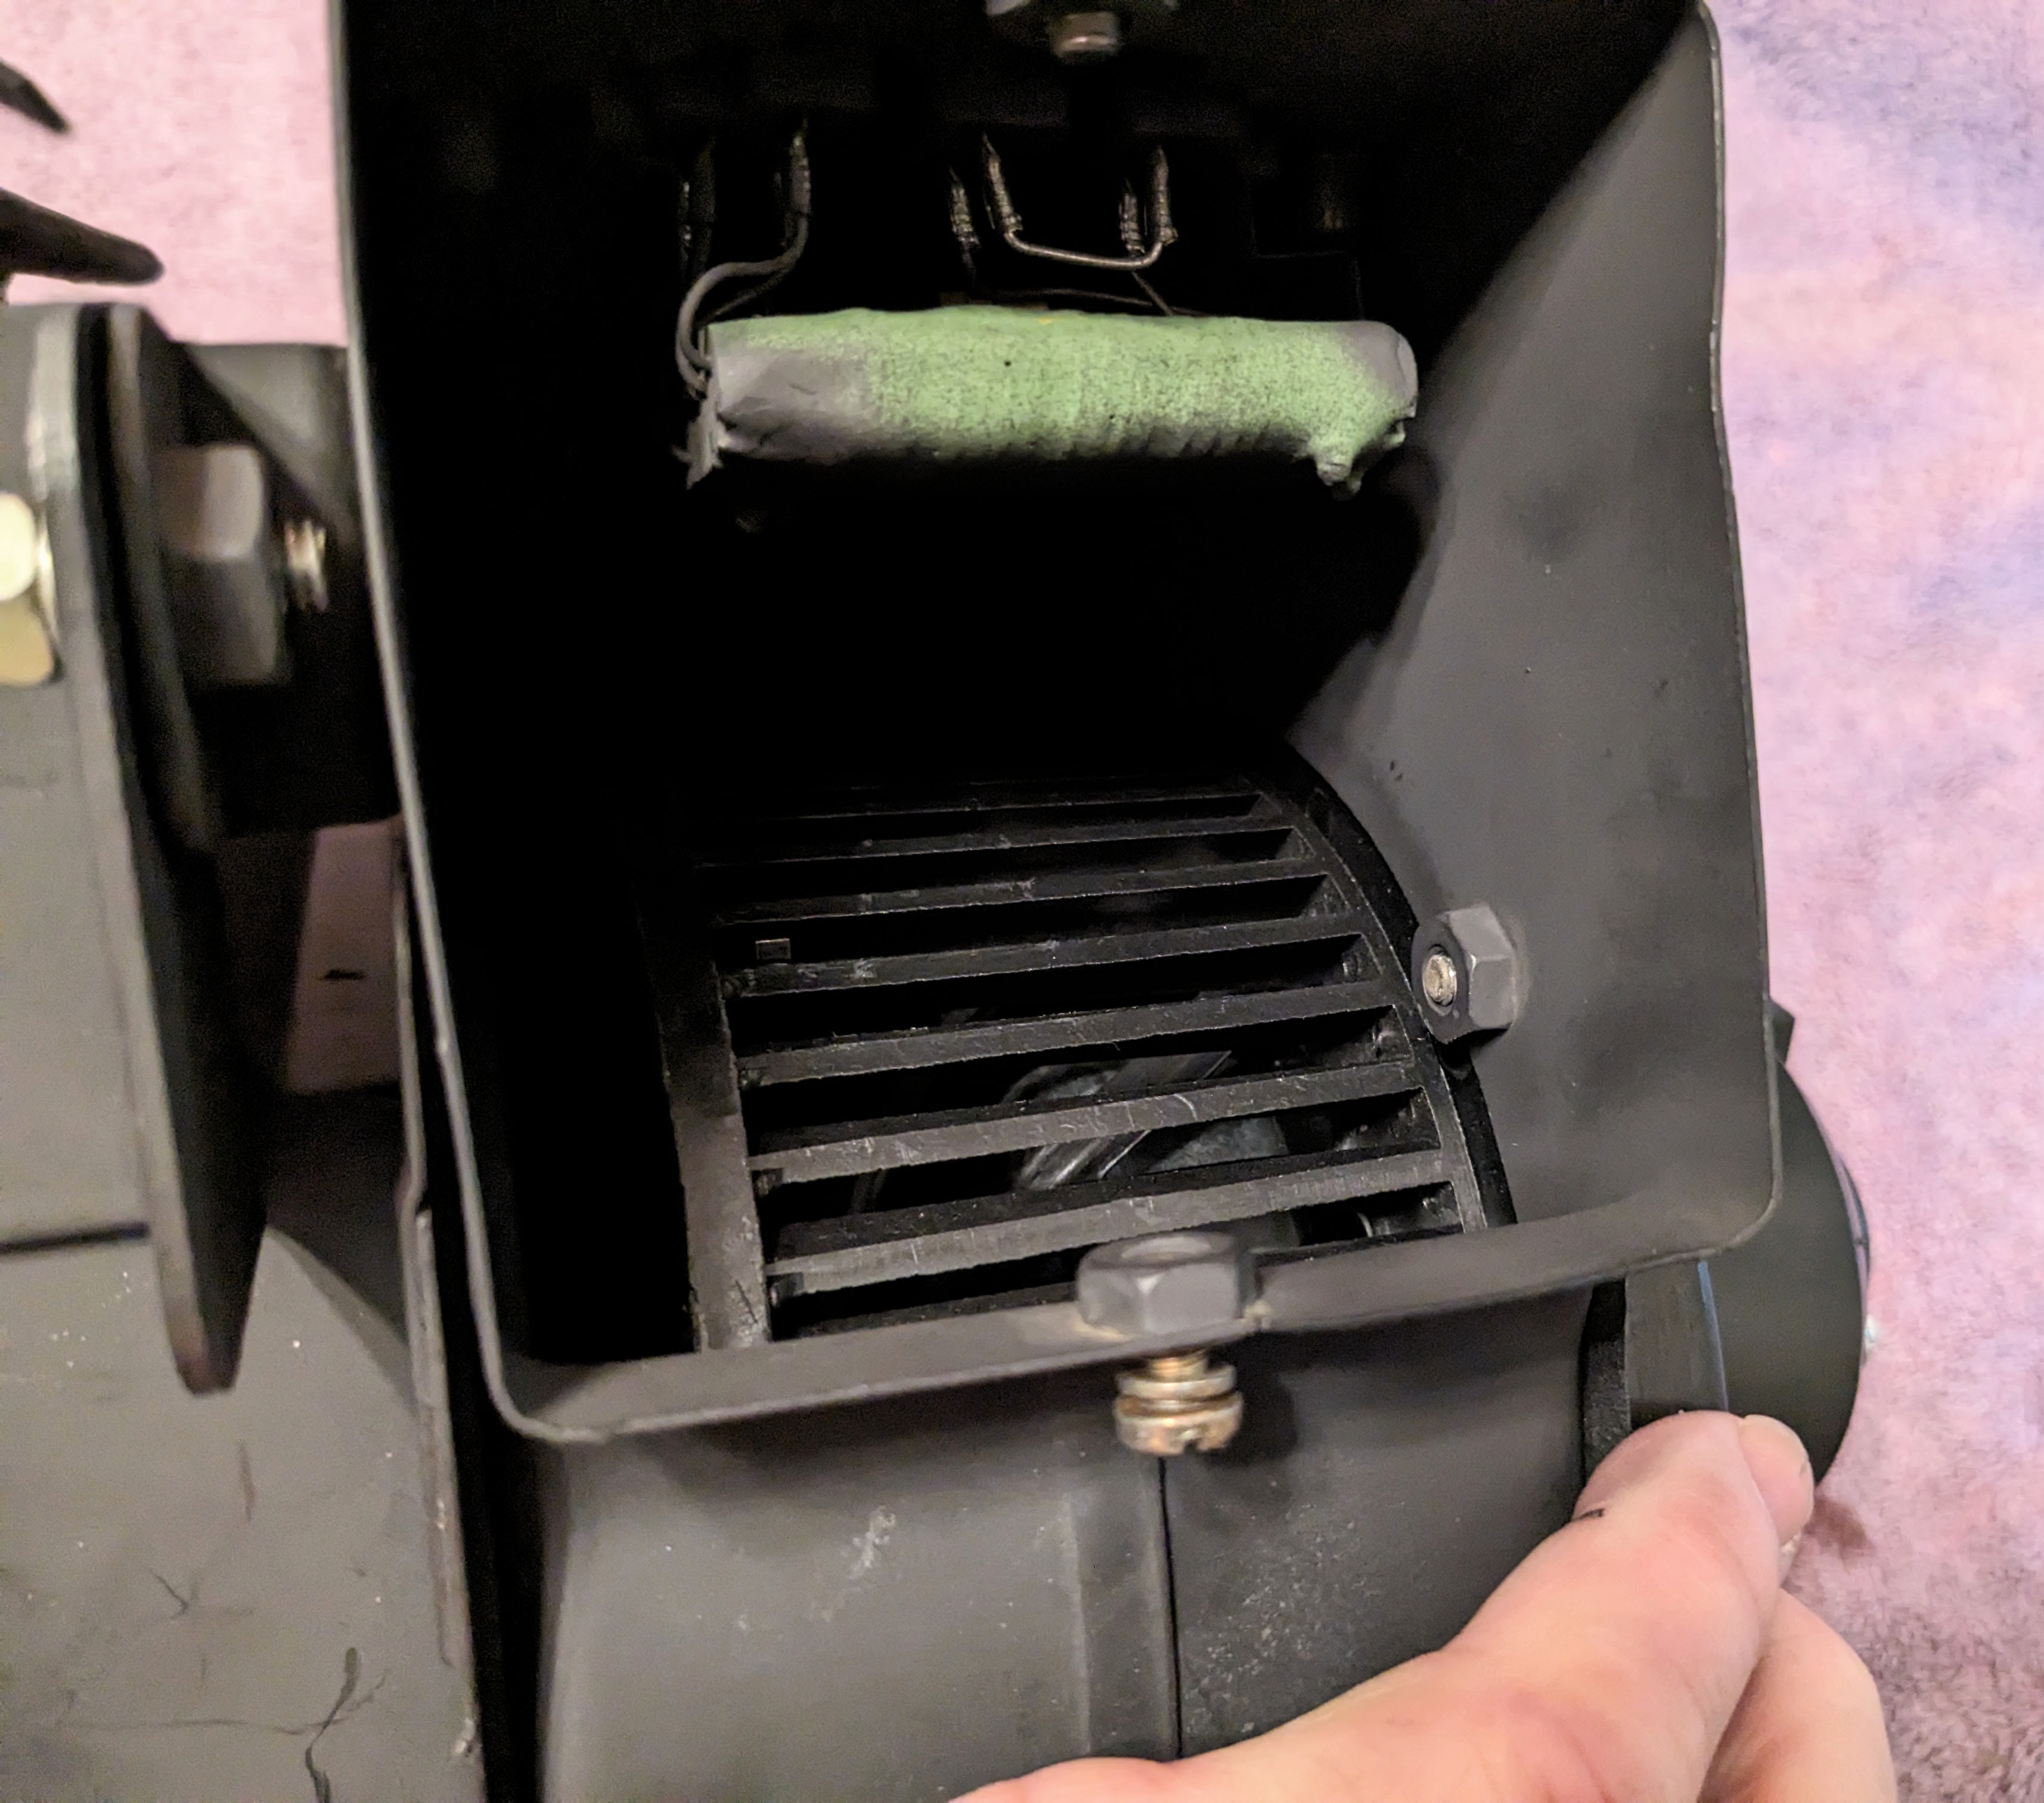
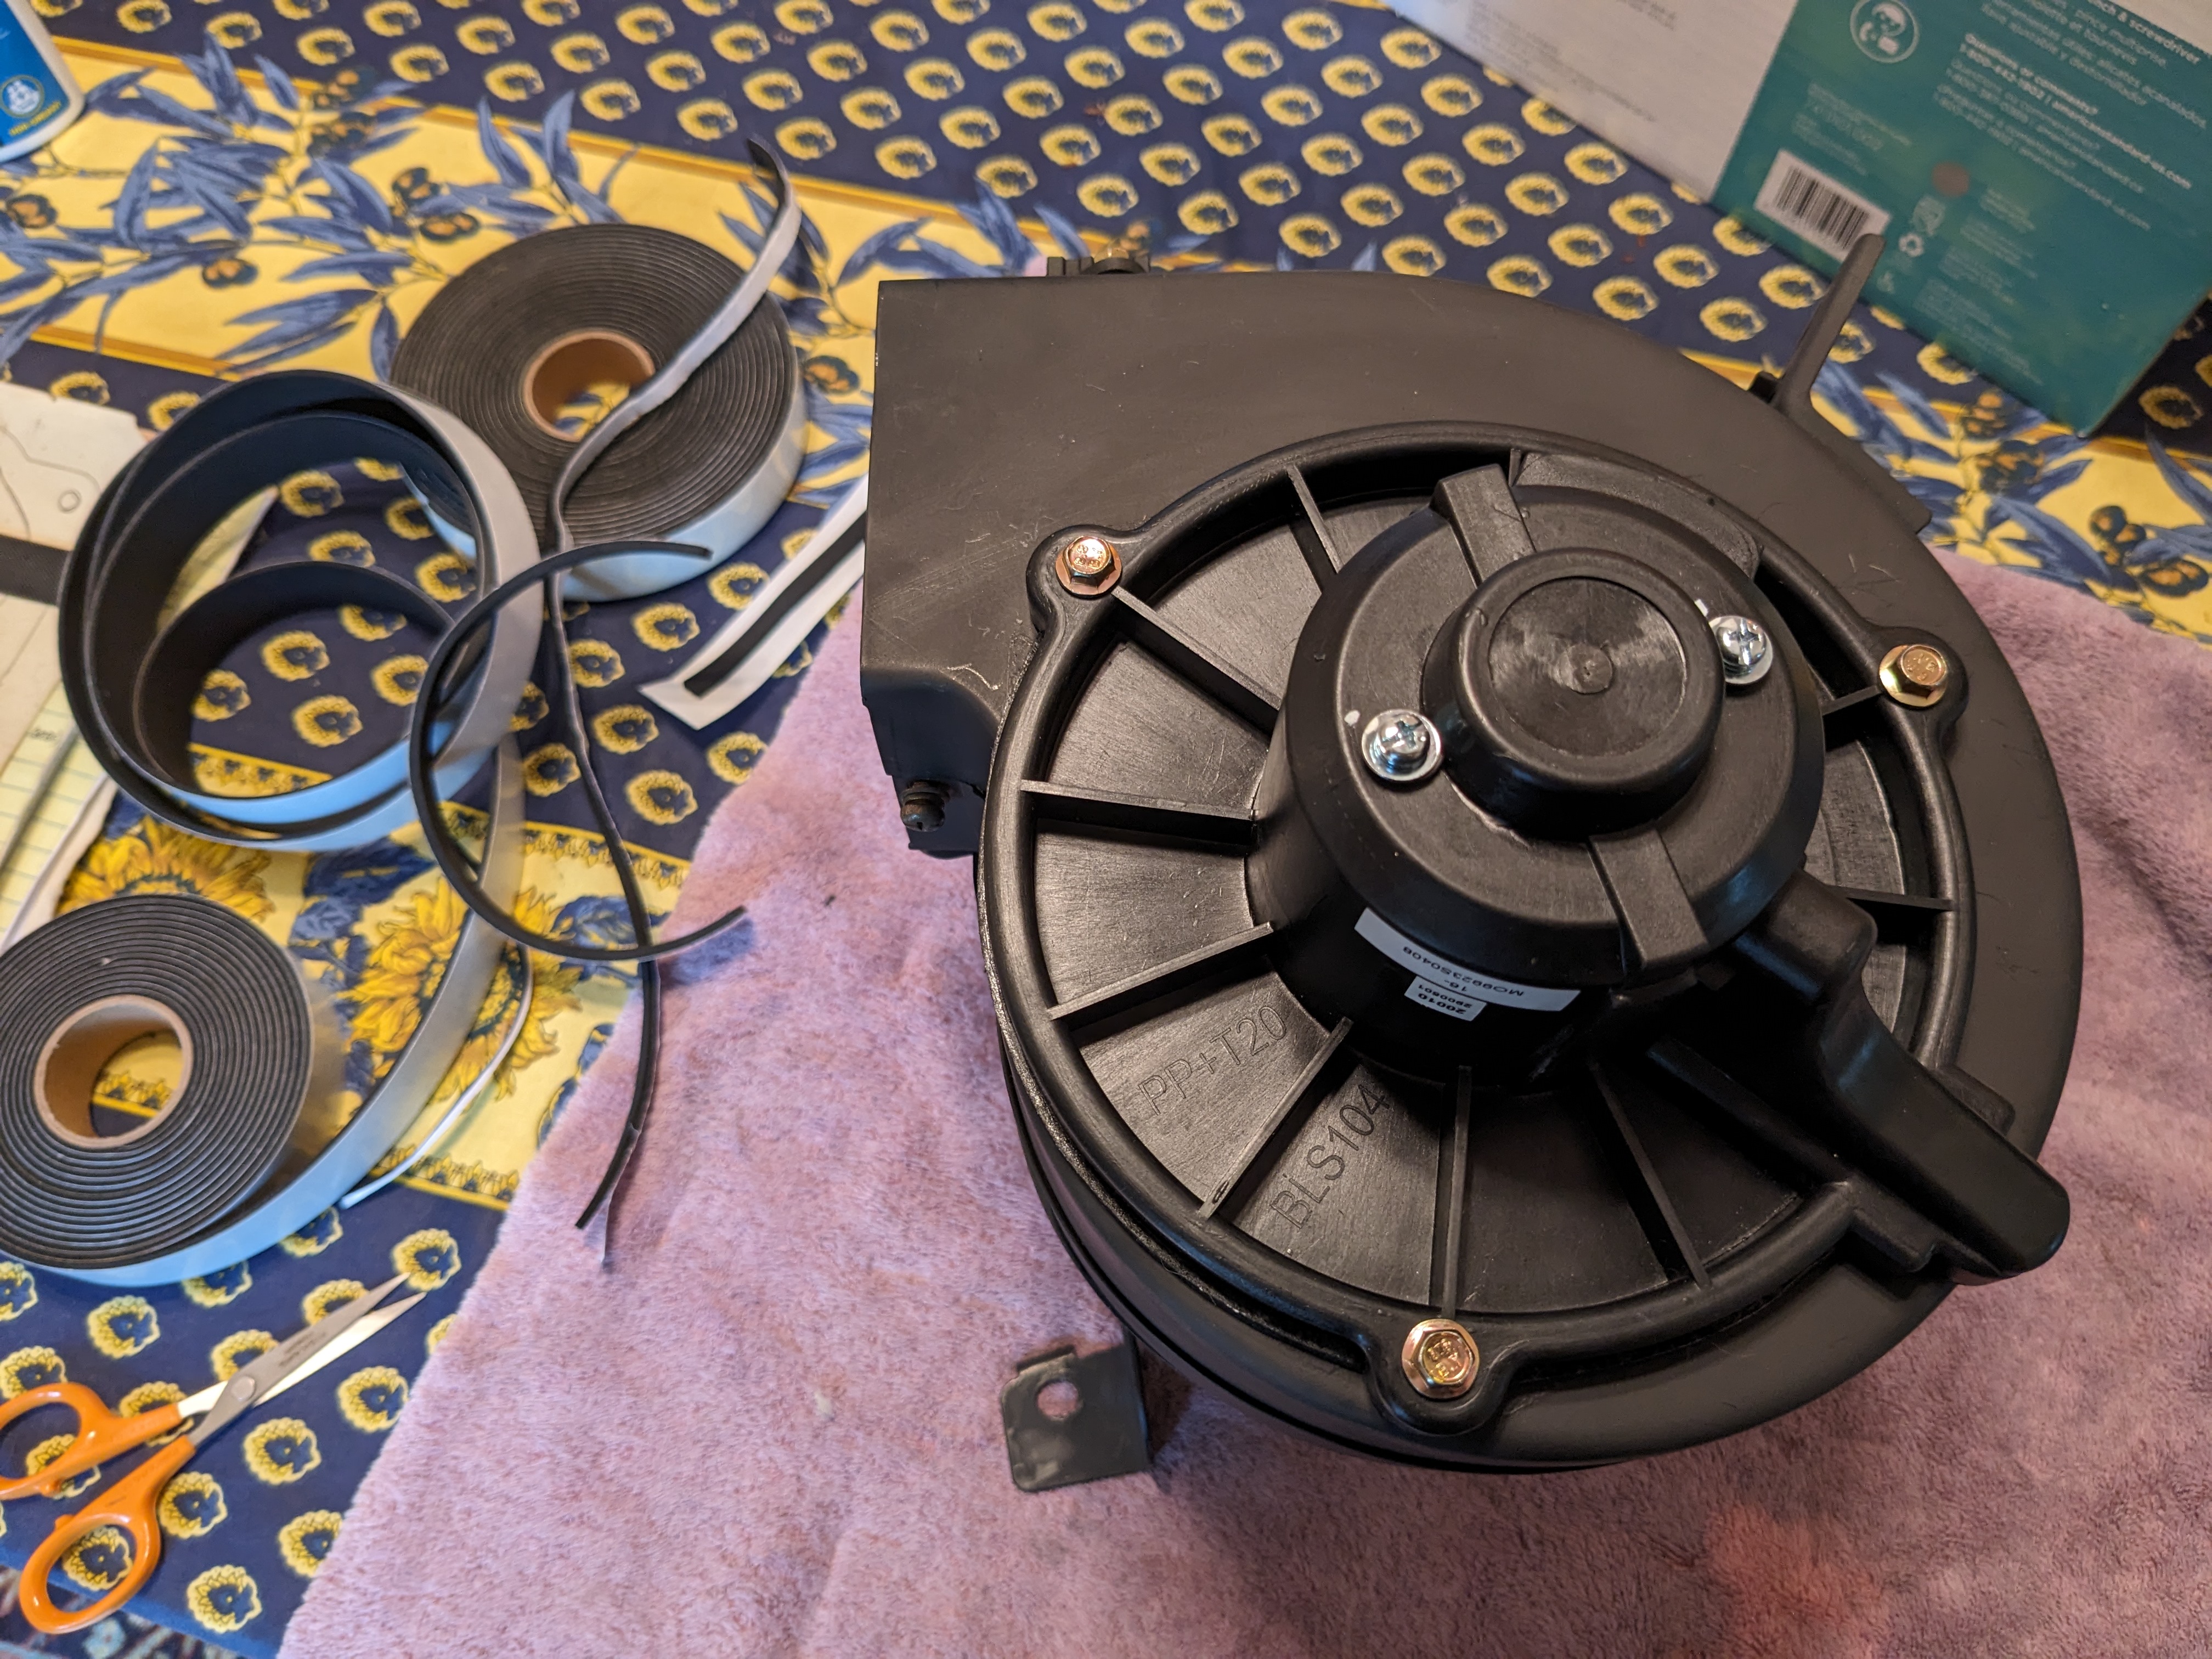
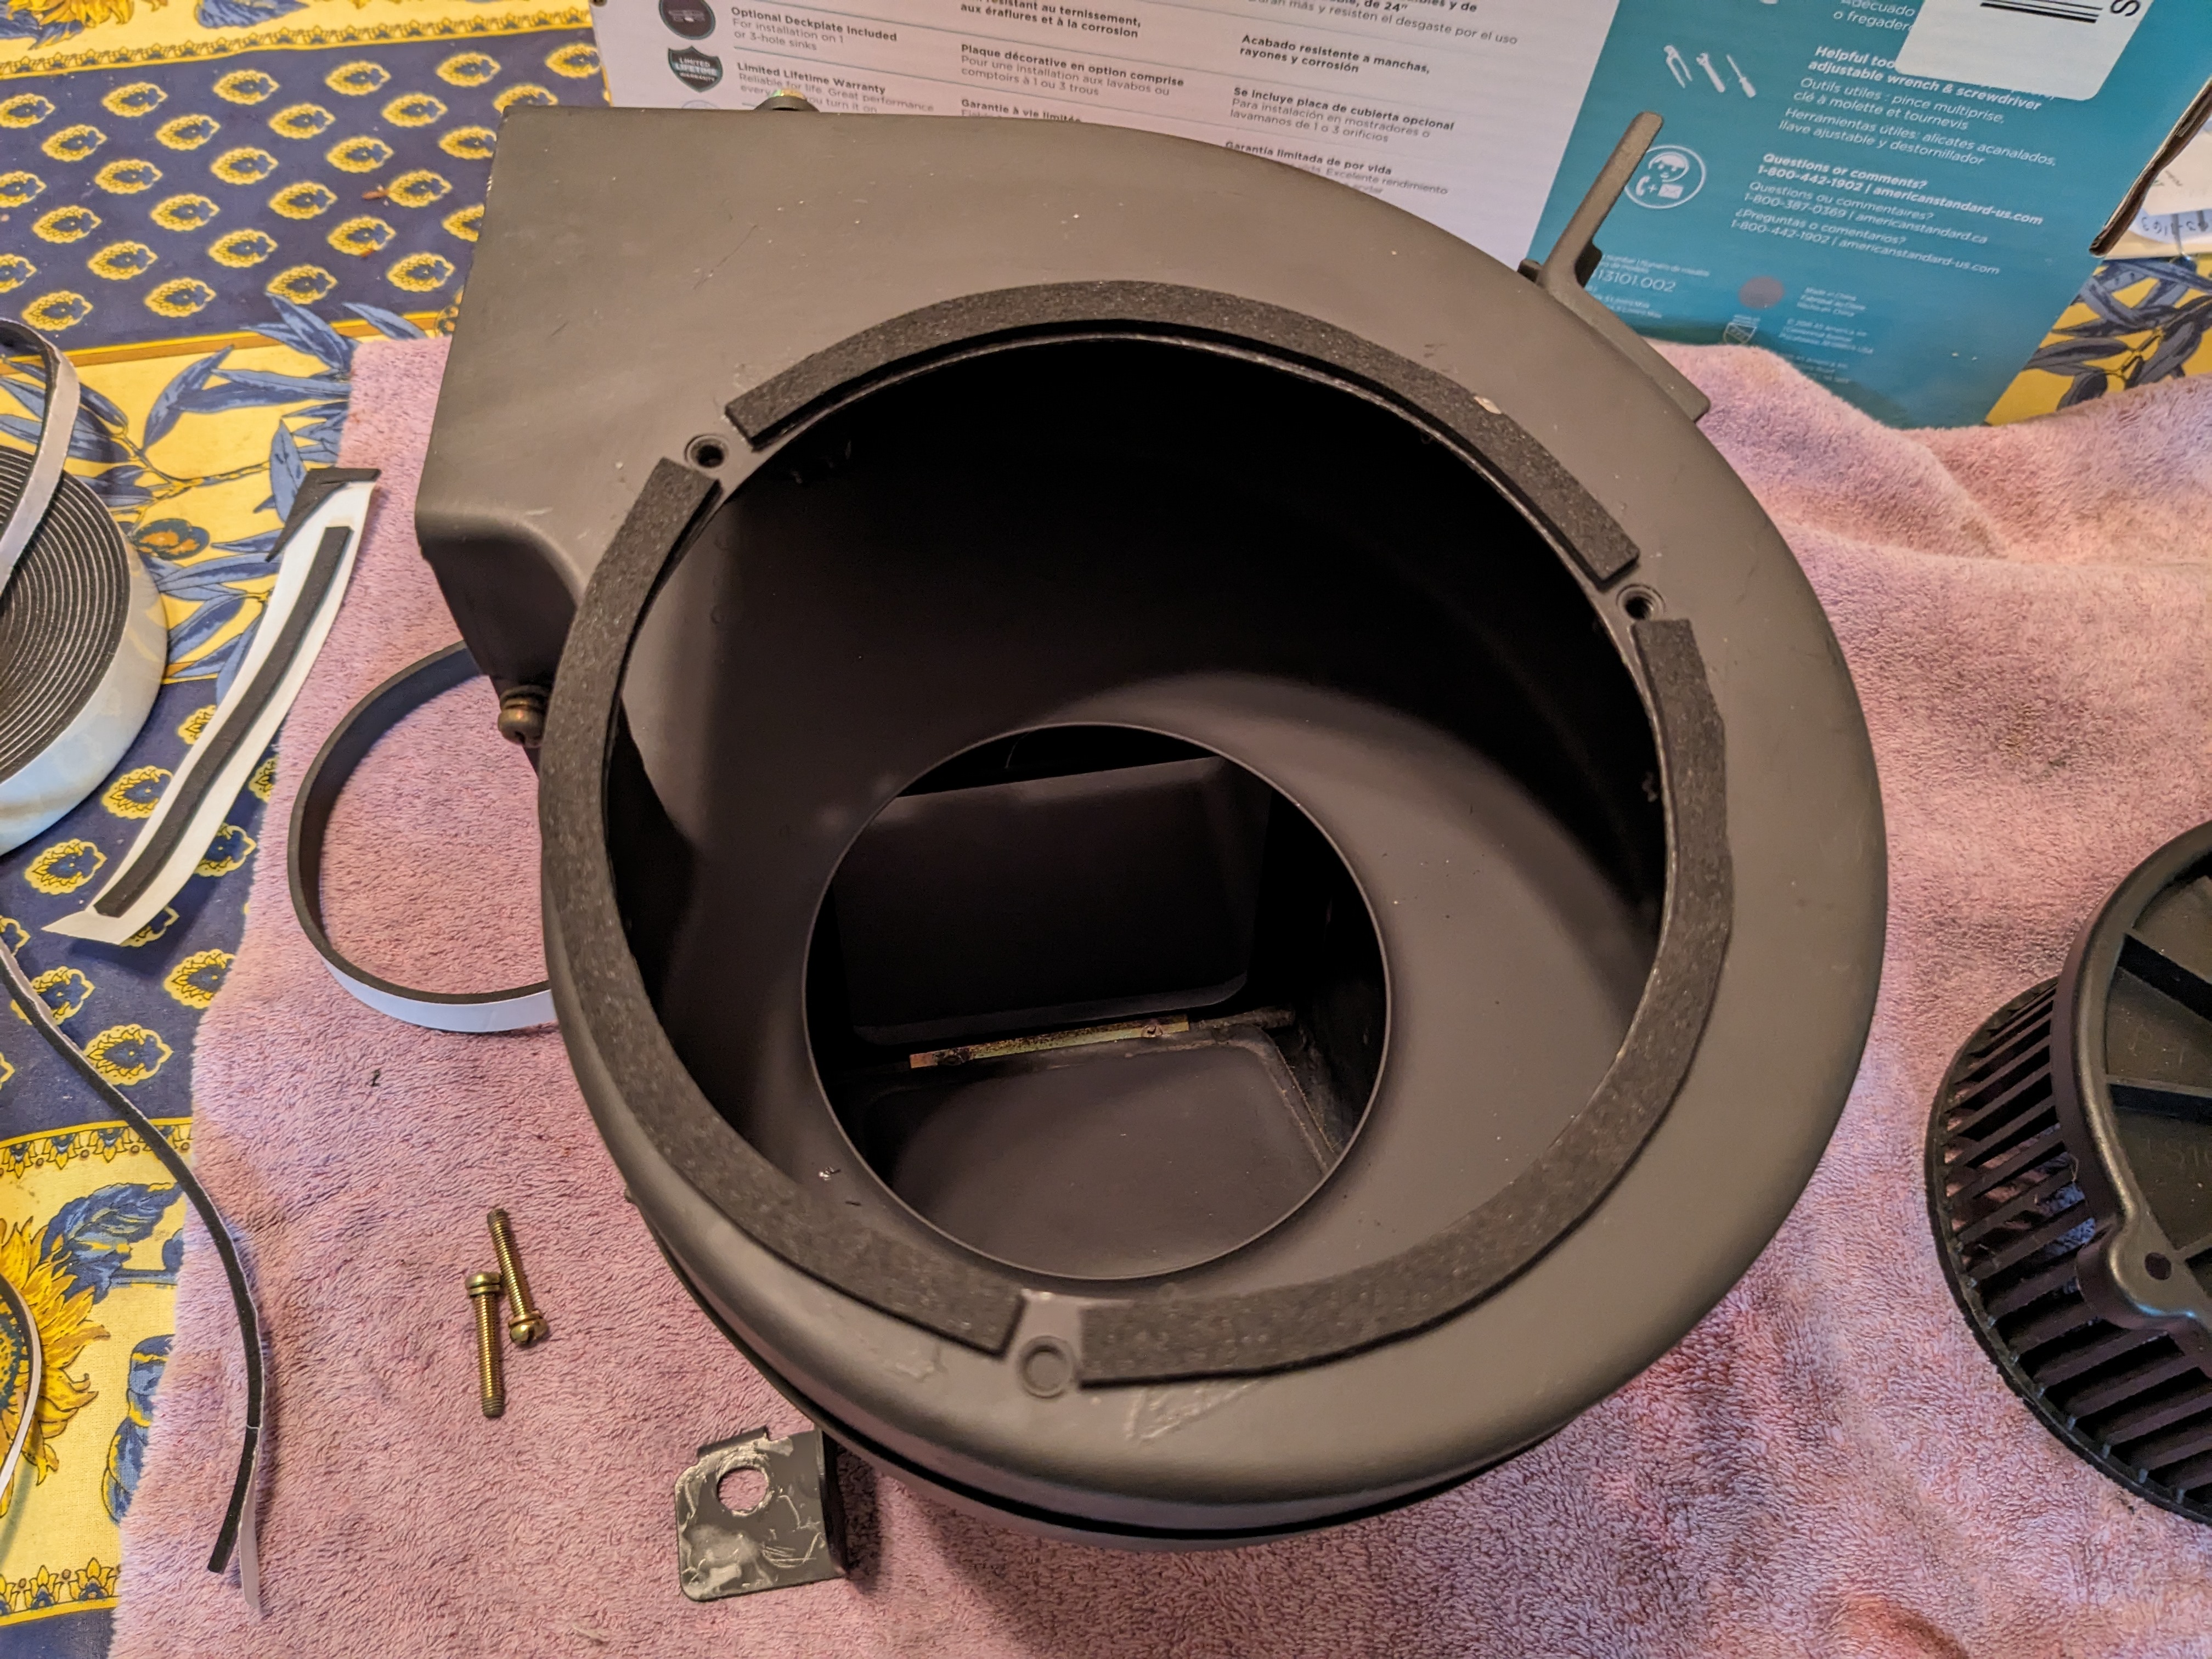
3 pointsprepped & painted The blower needs a cushion - I put closed cell foam on the housing first - that didn't work so I transferred it to the lip of the blower motor outer flange The stock bolts were too long now, so I switched to shorter M5 hardware. Bolts line up with stock holes, no mod to casing required squirrel cage offset


 3 points
 -
Actually I didn't do anything quite so glamorous. I've got my electronic idle air control valve wired "backwards" and I'm using the stock BCDD cut control signal to open it once the car starts moving. So when the car is below 10 MPH and the BCDD disable signal is high, my idle air valve closes. And when the car is above 10 MPH, the idle air valve opens up a little to reduce manifold vacuum when coasting. Now because of the way I'm doing it and the simplicity of the way I'm using the existing circuitry, I didn't have a lot of adjustability. I have the idle air valve "almost as closed as I could get it" when powered, and that also dictates how much the valve will open when it IS unpowered. So I get an effective 3-400 RPM boost off idle once the car is moving. At idle, I add the leakage past the idle air valve plus the air bypassing the idle speed control screw, and I get my total idle air. If I coast to a stop in neutral, I can see the switch close and the idle air valve close and the RPM's will drop from 1200 down to 700-ish where I want my idle. It's not glamorous and it's relatively unadjustable, but it was simple.2 points
-
Car is back on the road..... Yesterday we - - installed the new clutch slave - swapped out the strut rod bushings - swapped out the steering rack bushings I was hoping for a more stable feeling but it wasn't as drastic as I was hoping. Tim M1 point
-
1 point
-
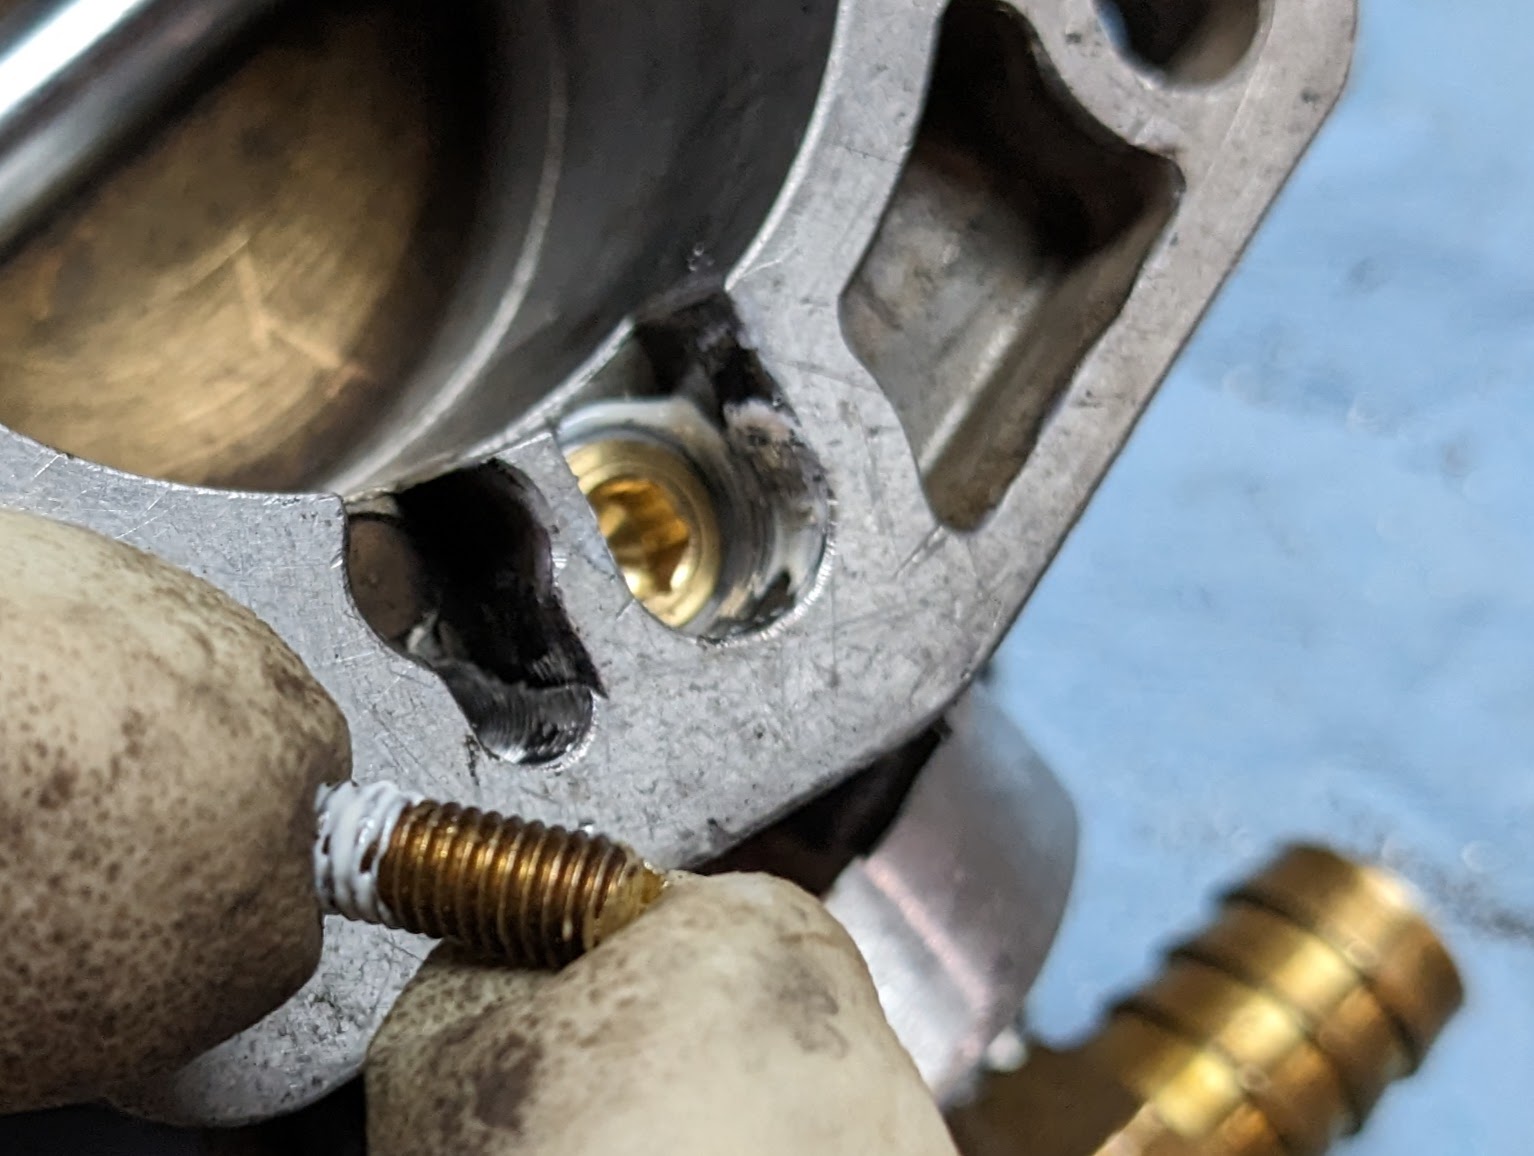
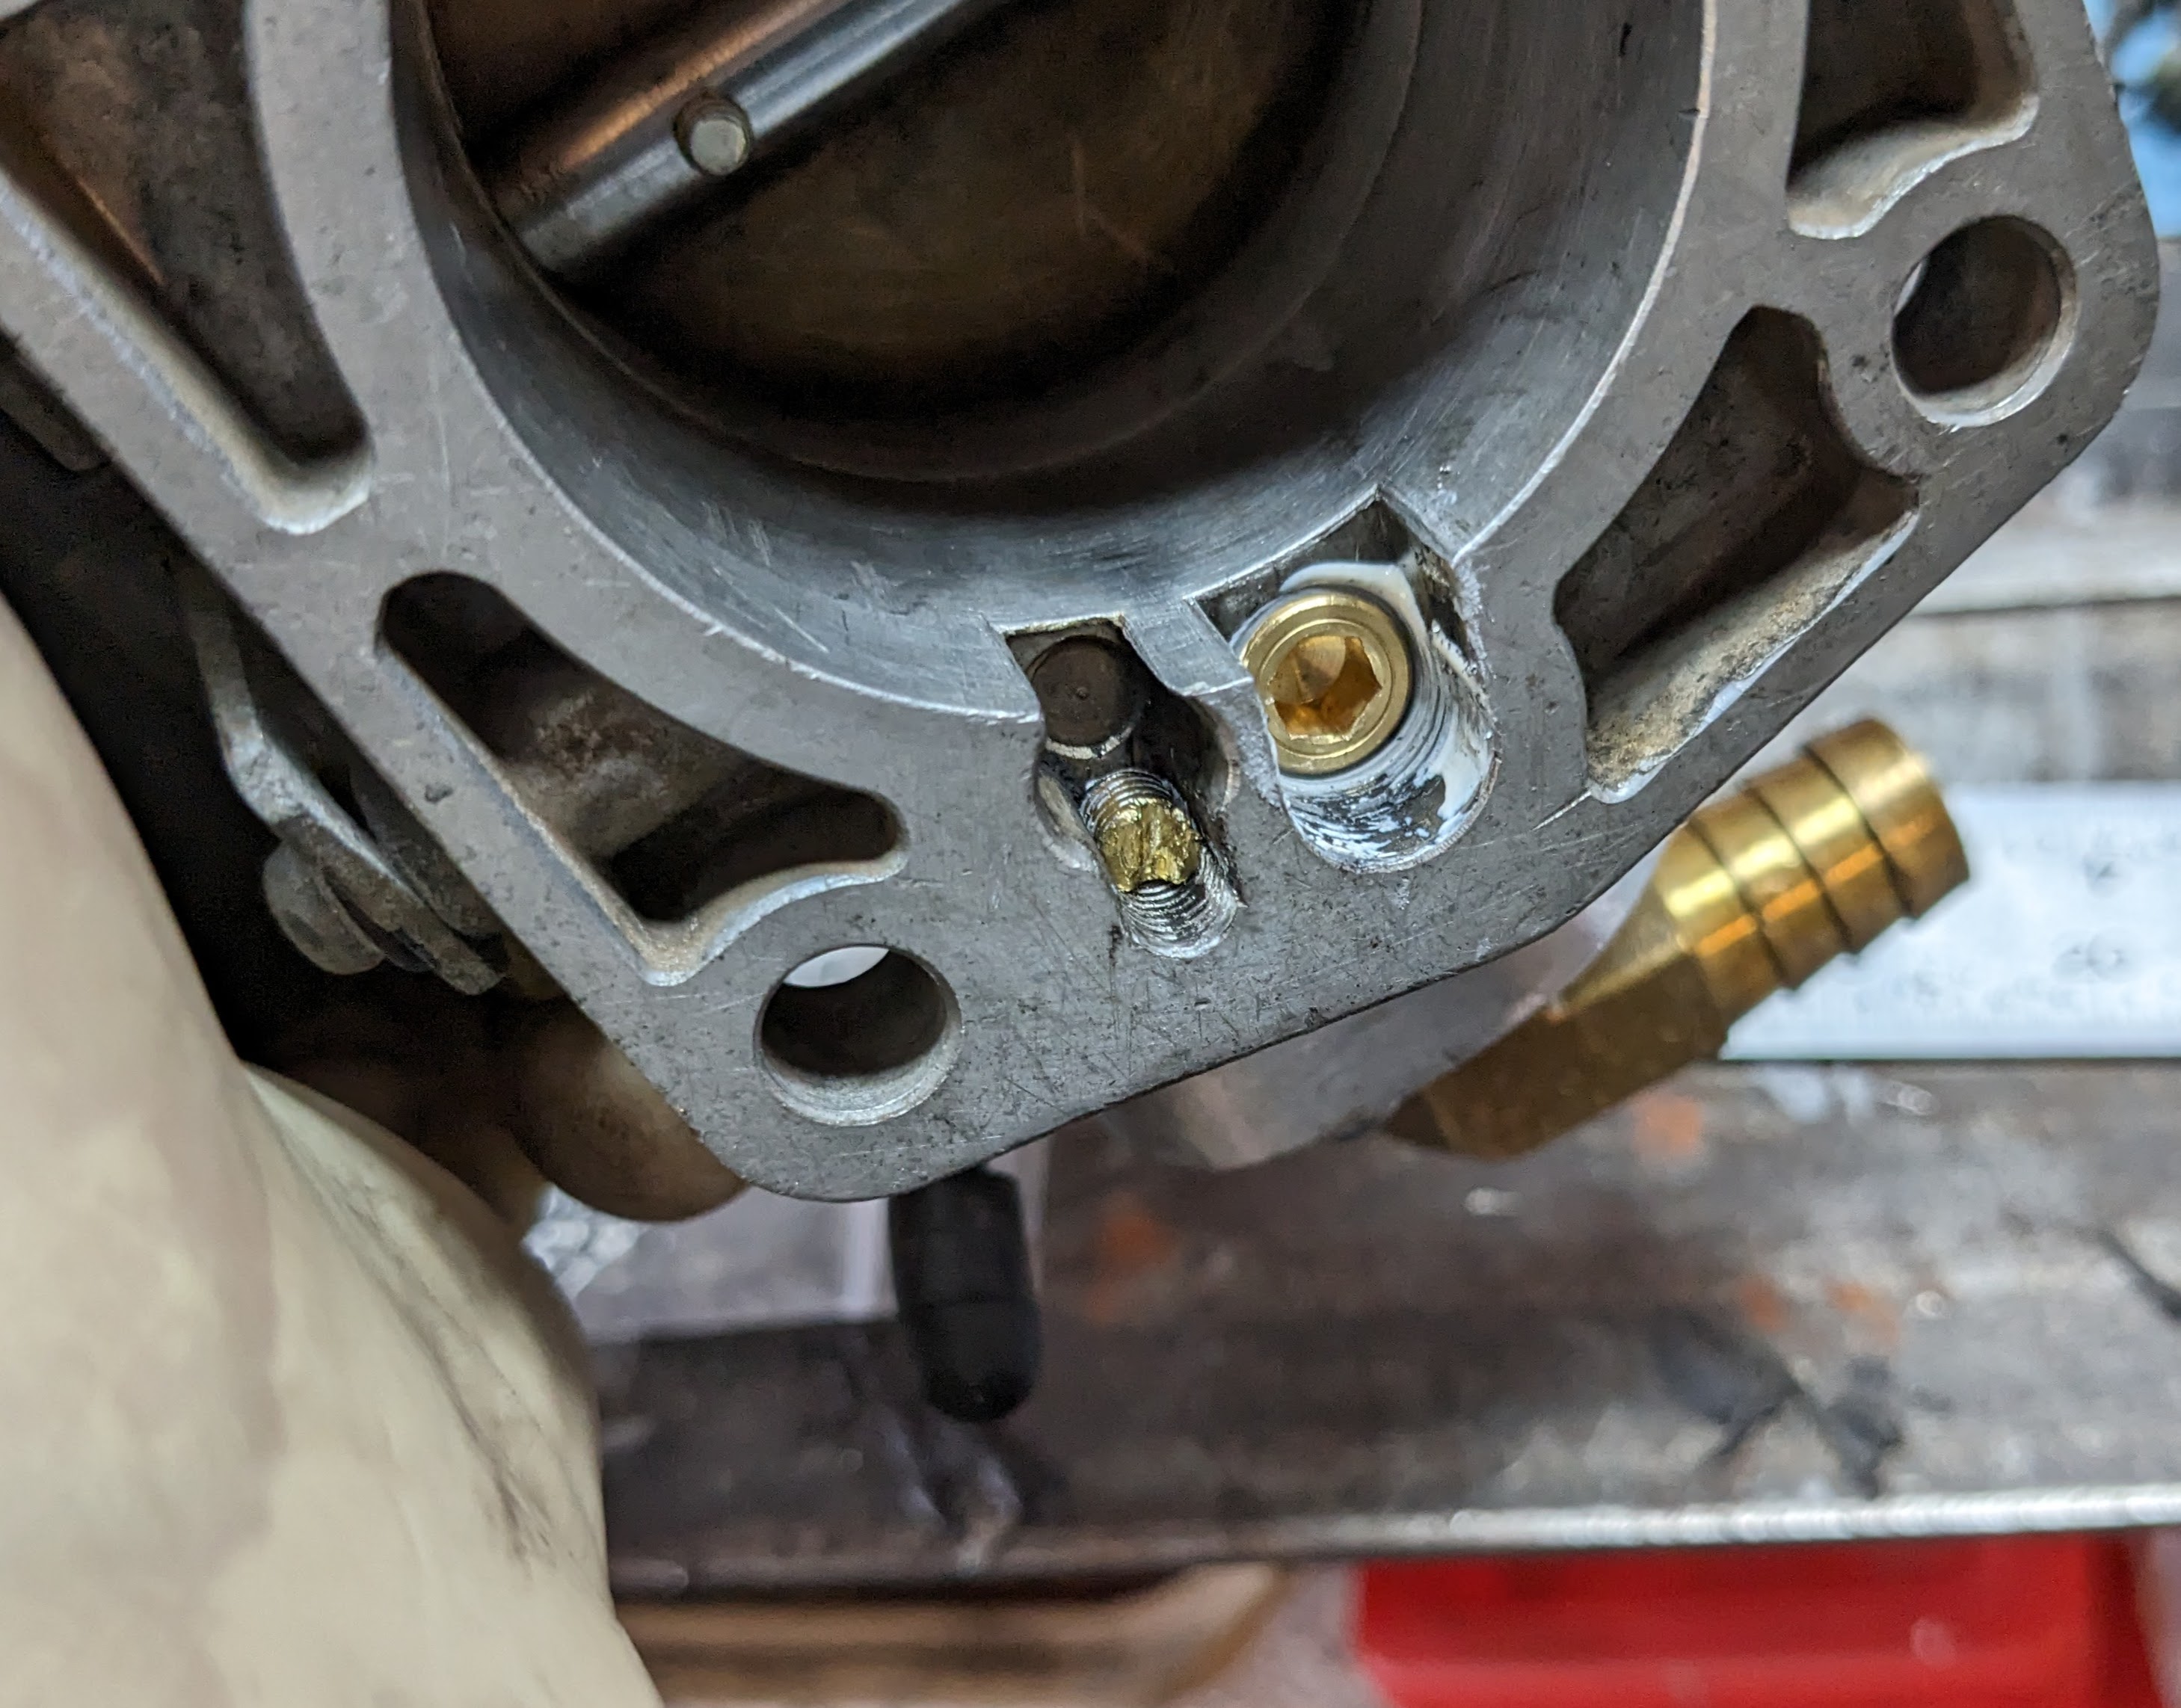
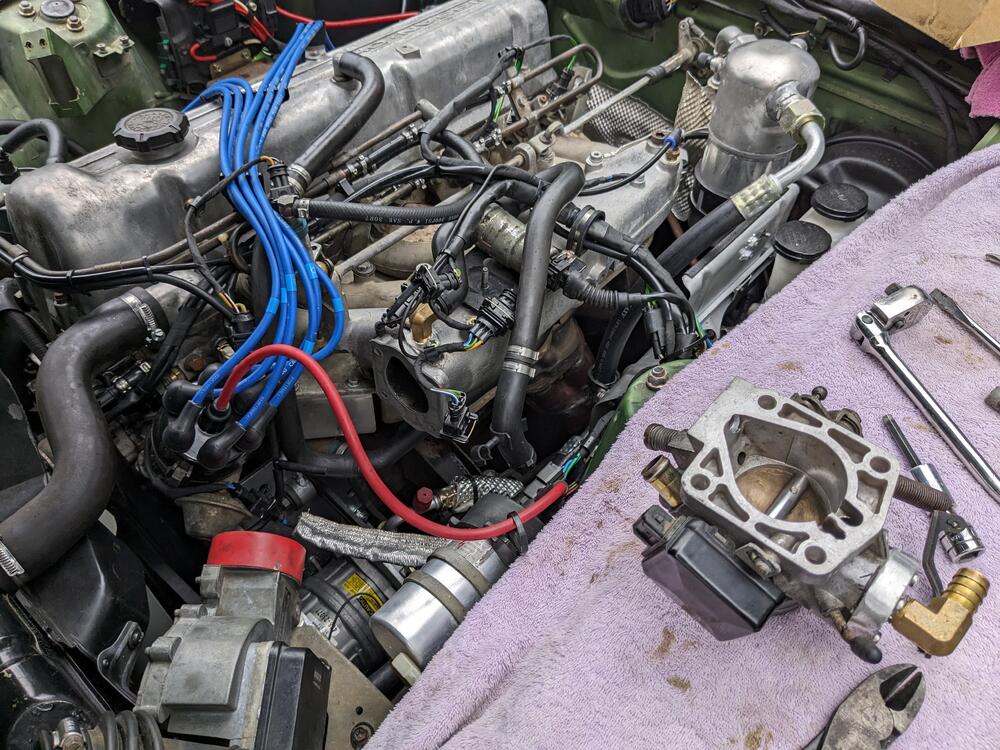
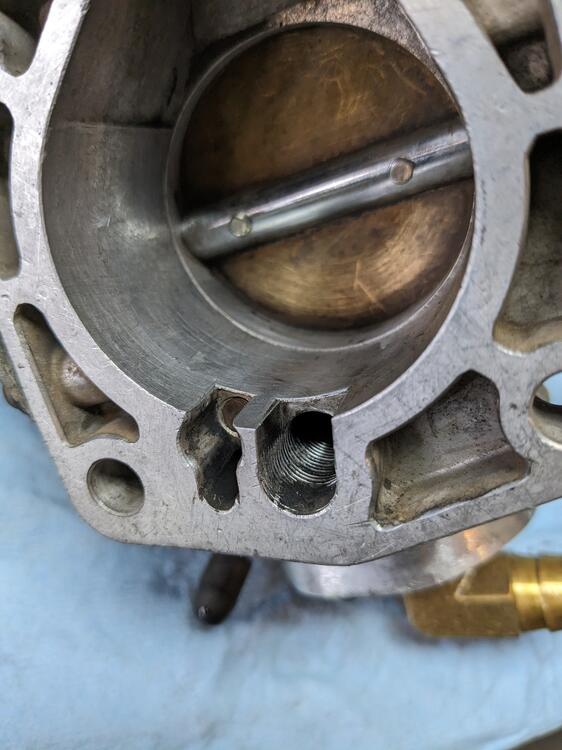
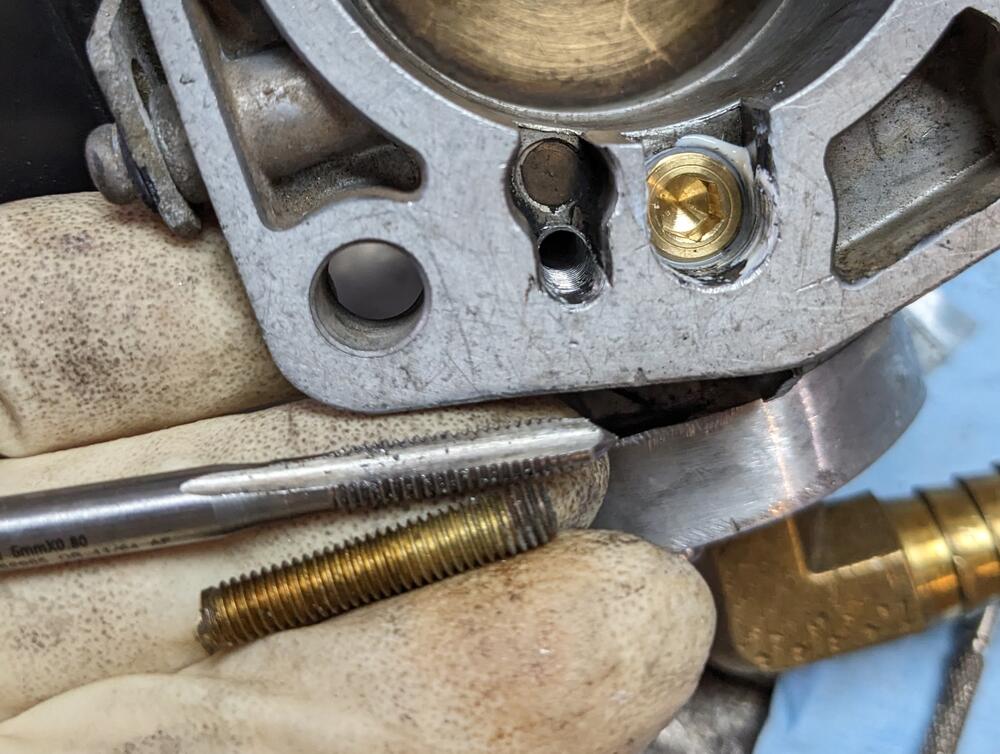
OK - so I had a break in the rain this morning, so I was able to remove the TB during one clear patch, address the ports I hadn't closed off, then get it back on during another break in the rain Larger port I tapped with 1/8" NPT thread sealant on plug tapped smaller port with M5x1, used the snapped off stud from the ignition ballast to make a plug done Back in. Ran the motor - don't have the tach installed, however the rpm's felt much more in line. A little low perhaps, so I ran it to normal op so I could check the base setting. With CIS, the easy way to do that is close off the low vacuum tube from TB to the IACV. It stalled out, so base was too low. Opened the idle thumbscrew a couple turns (I had completely bottomed it out) & got the idle what felt around 750. Releasing the tube, the idle motor cycles & the idle rises to what feels like 850-900 range. I will set it more accurately once the tach is in, but it feels good. Motor revs freely & returns to idle.


 1 point
 -
1 point
-
Nice, That was a good tip someone brought up on the forum. What a fantastic resource we have here. Nice work friend.1 point
-
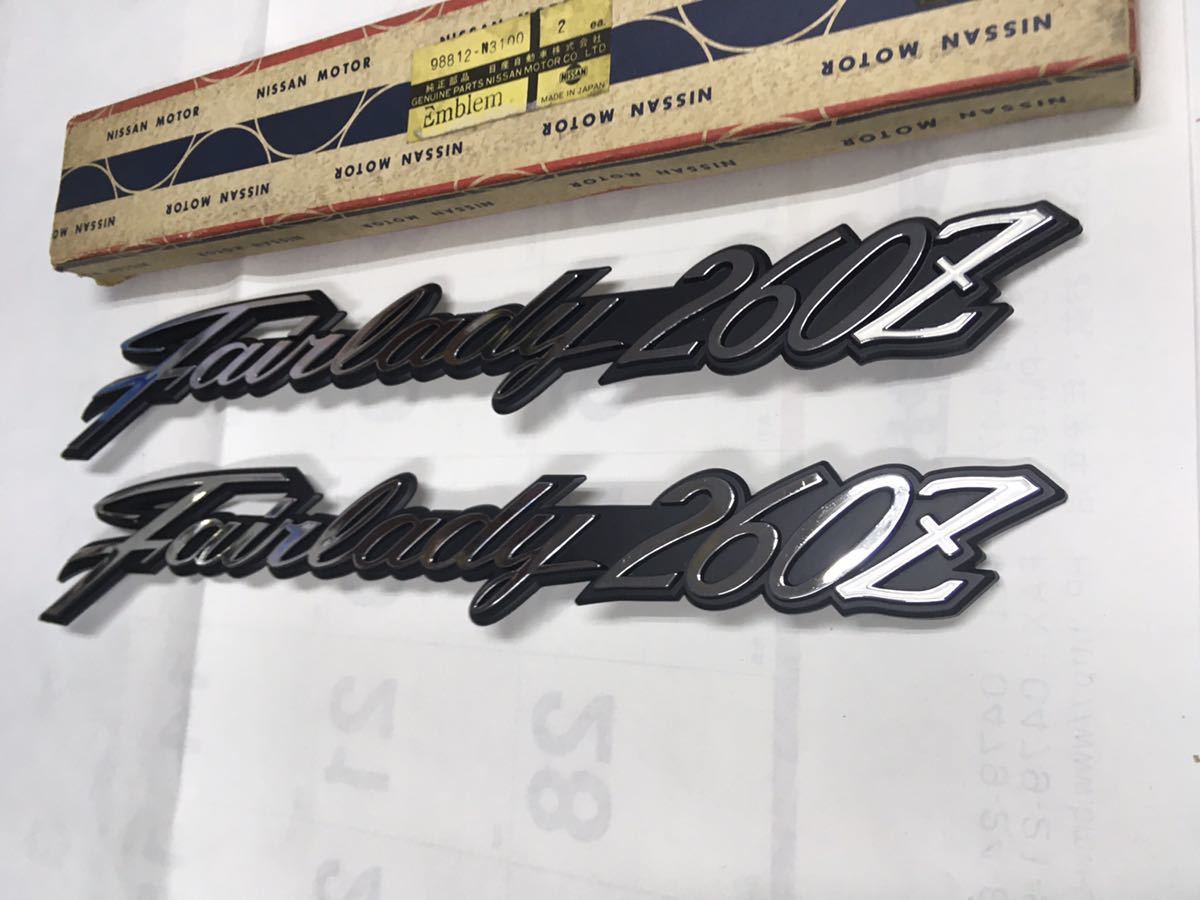
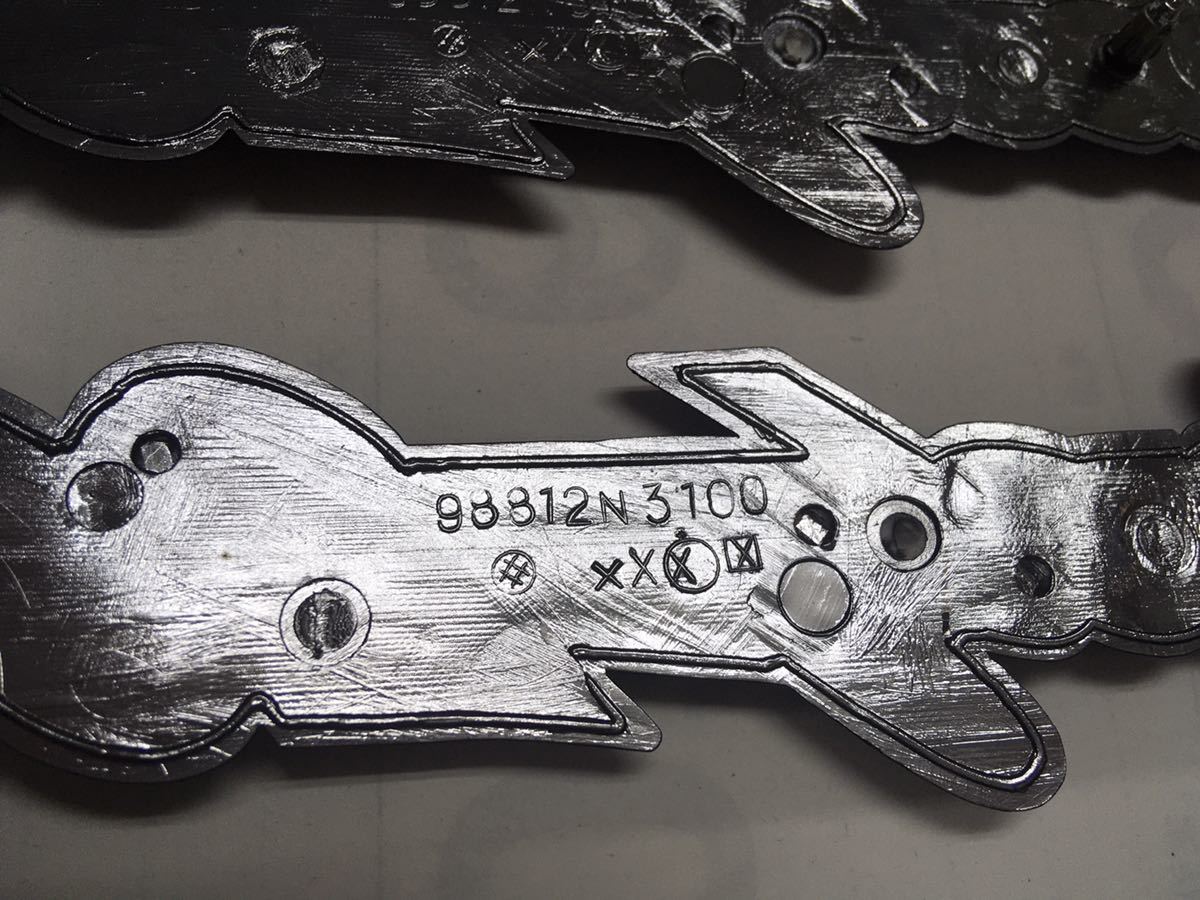
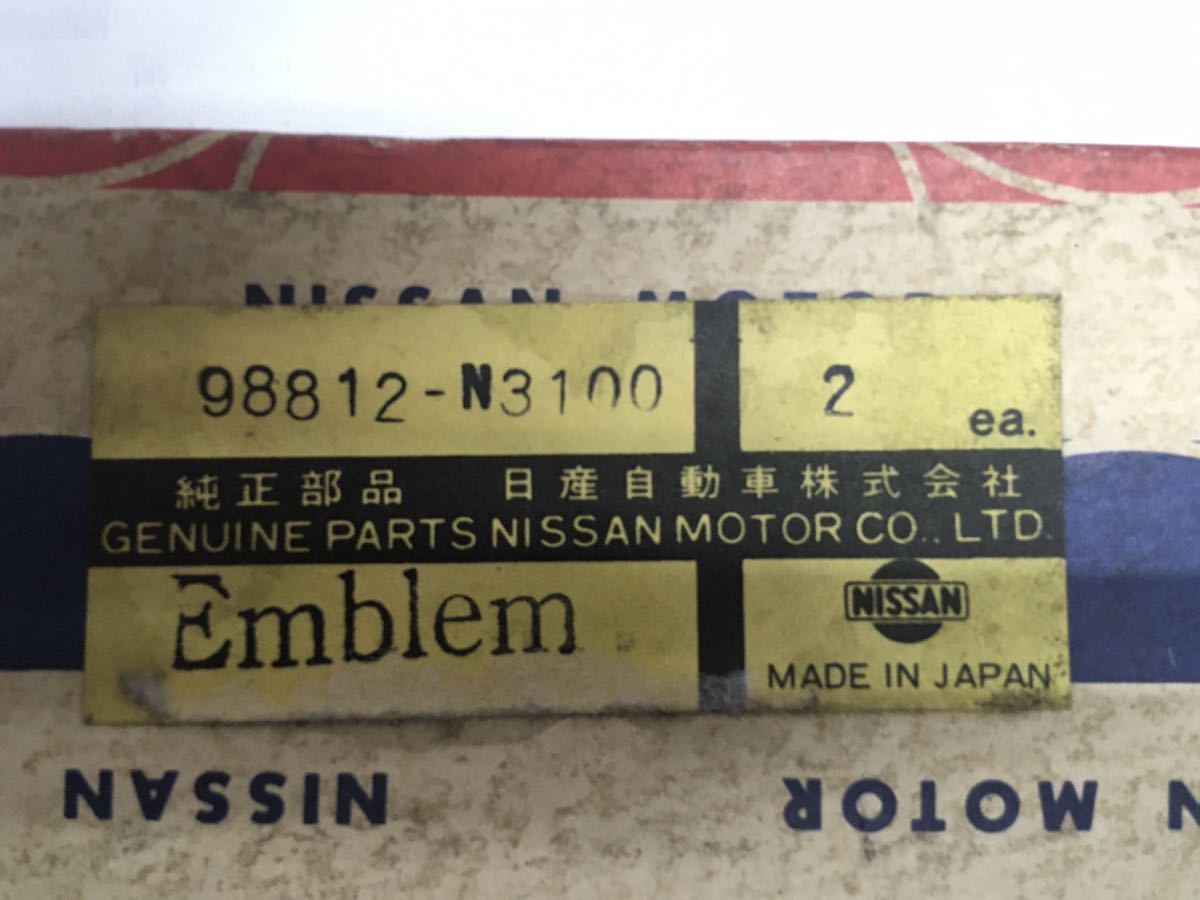
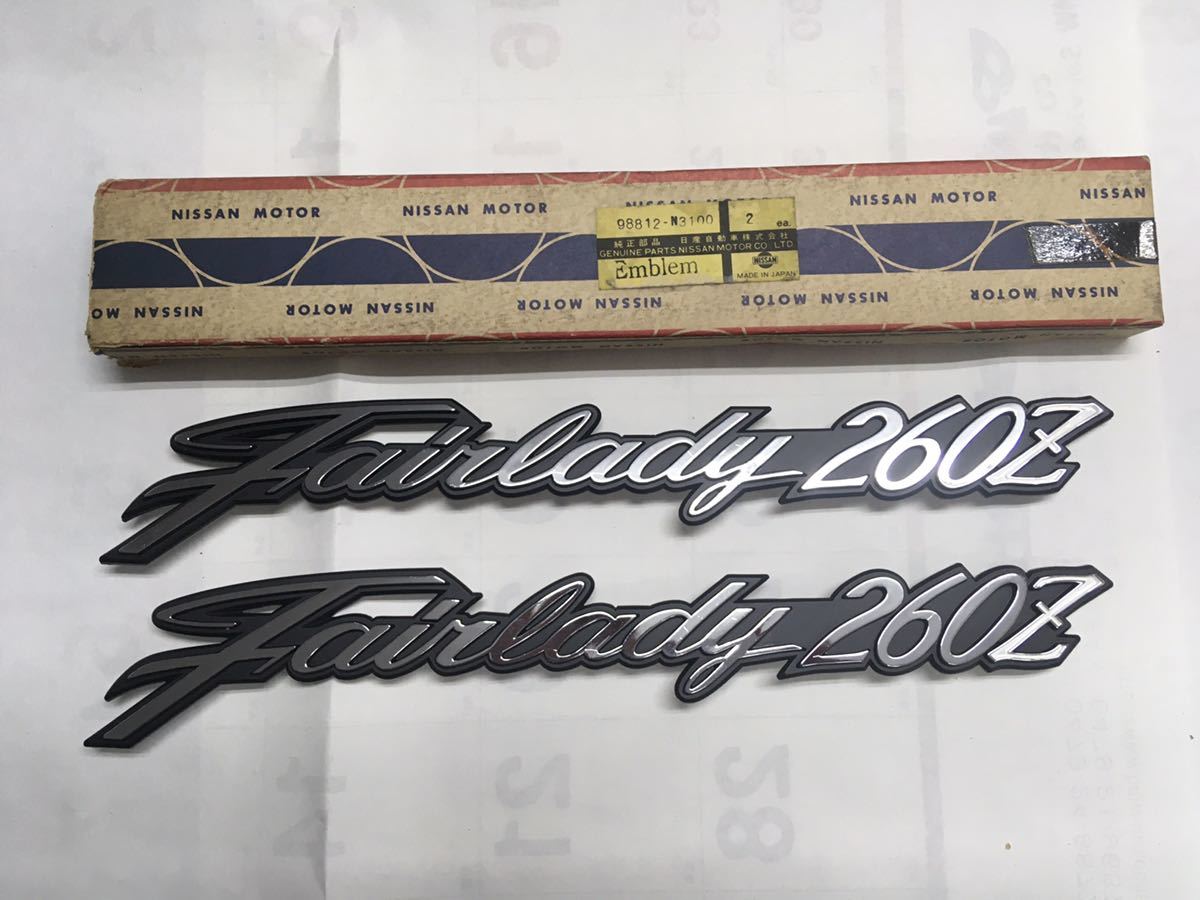
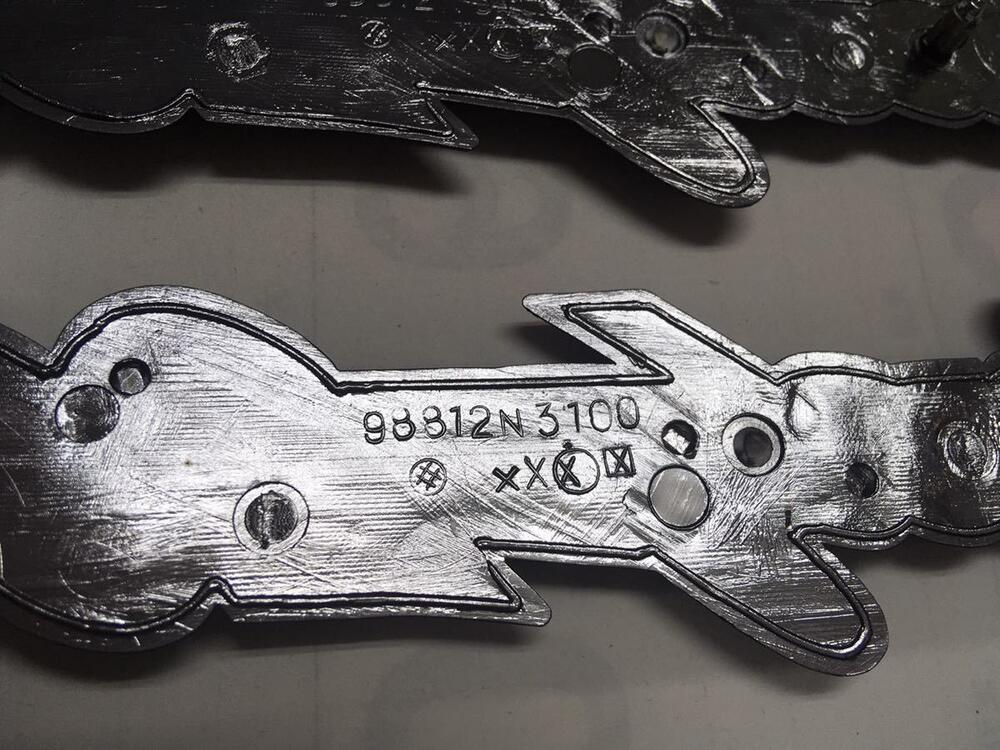
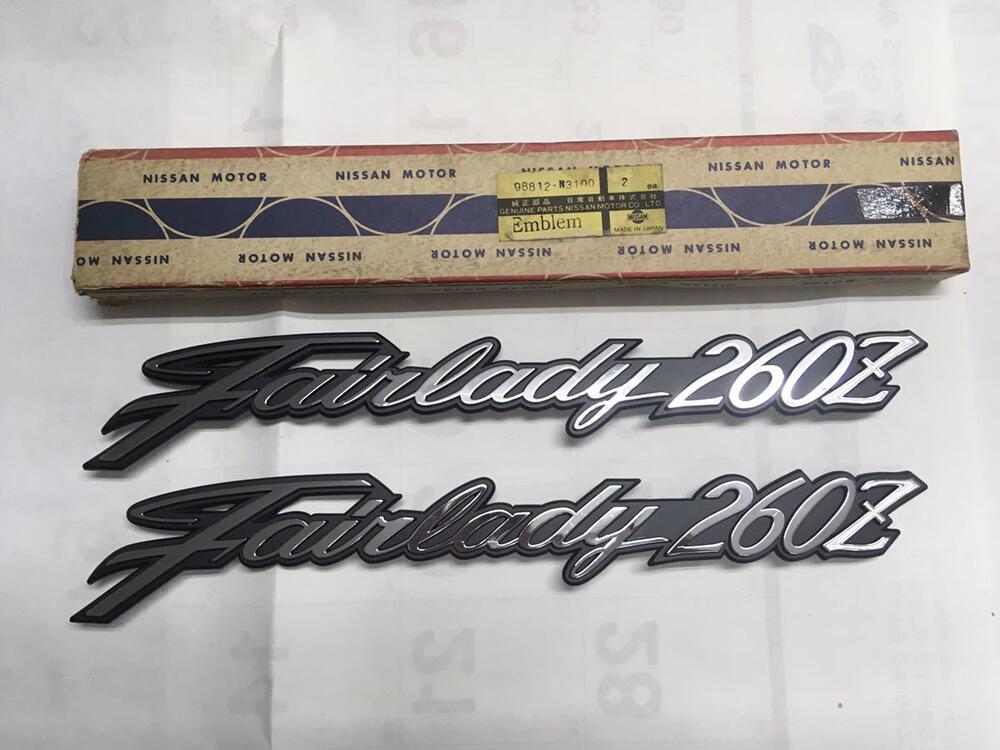
1 pointThis carries on from a old thread; https://www.classiczcars.com/forums/topic/22164-260z-in-japan/#comment-188206 As HS30-H says in the thread, the Japanese market 260z sold cars were recalled, so I presume anything specifically related to this model, the Fairlady 260z, wouldn't have sold in any great quantity. Well, I spotted these on Yahoo auctions Japan a few weeks ago, and I presume these are for this recalled model;


 1 point
 -
1 pointThere are no 100% answers to this question. Lots of anecdotal evidence, but no robust guidelines. Statistical populations of three. A classic example of 'YRMD' (your results may differ). All I can say is that if it all goes wrong for you, your last thought will be, 'F__'. Your wife may have a different comment .1 point
-
1 pointI have welded three tanks in the past and never had any explosions etc. My advice. You plan to POR it afterwards and that is what I did on all three tanks with a similar treatment. The tanks needs to be cleaned before you coat it, if you do that first you will, 1. Clean and prep the inside of the tank, 2. Remove all fuel residue so you can cut it open without any danger to yourself. Just make sure the cleaning solution is water based. My second piece of advies is to cut a section out of the top of the tank directly above the damaged area. Make it big enough so you can get good access to the areas needing work. A weld repair on the top side will not be visable later and less likely to leak if you have a pin hole.1 point