Leaderboard
-

Av8ferg
Free Member7Points1,538Posts -
camaro-guy
Free Member2Points16Posts -
mailnome
Free Member2Points164Posts -

siteunseen
Free Member2Points15,115Posts


Popular Content
Showing content with the highest reputation on 02/26/2022 in Posts
-
3 pointsThose bolts were a pain. You need little hands to get in there, like many things on the Z.. I didn’t use plastic washers between the air dam and body but maybe that’s a good idea. My Air Dam isn’t fully tightened up yet. I wanted it off the ground before one of my kids hit it with a bike or skateboard doing tricks. I’ve got crap all over the place from this car, and I need to start putting it actually on the car. I have parts that I’ve put away that I can’t find now. Like new emblems and interior pieces. One day they’ll show up. Next step is to instal the heater box, get the heater hoses hooked up and get the dash in. OBTW, in a moment of stupidity, I needed to move the car out of the garage. Didn’t have time think it through not if it would start with the entire dash out and associated harnesses disconnected. I started the car only to get a nice splash of coolant shoot out the two hoses that connect to the heater core. Made a nice mess. I ended putting a fitting connecting those hose together and that solved that. Nice green puddle on the garage floor from that….duhhh. This is what happens when you have so many projects in work and forget where you left my off. Sent from my iPhone using Tapatalk3 points
-
3 pointsI also got my freshly painted front air dam and hood grills on.

 3 points
 -
2 pointsDollied the car to the shop yesterday and went ahead and pulled the motor, trans, and gas tank while there was an open lift. Everything came out easy, just a little short fight with the trans. All that was needed to remove. Everything else had been previously removed. I haven’t been under this car on a lift until now. Could be better, could be way worse. Nothing I didn’t already see and it actually looked better than I thought. The frame rails are rough, but only on the bottom and the metal I could see inside looked great I wasn’t sure about pulling the tank, but I was curious if it was hiding rot. Sent from my iPhone using Tapatalk2 points
-
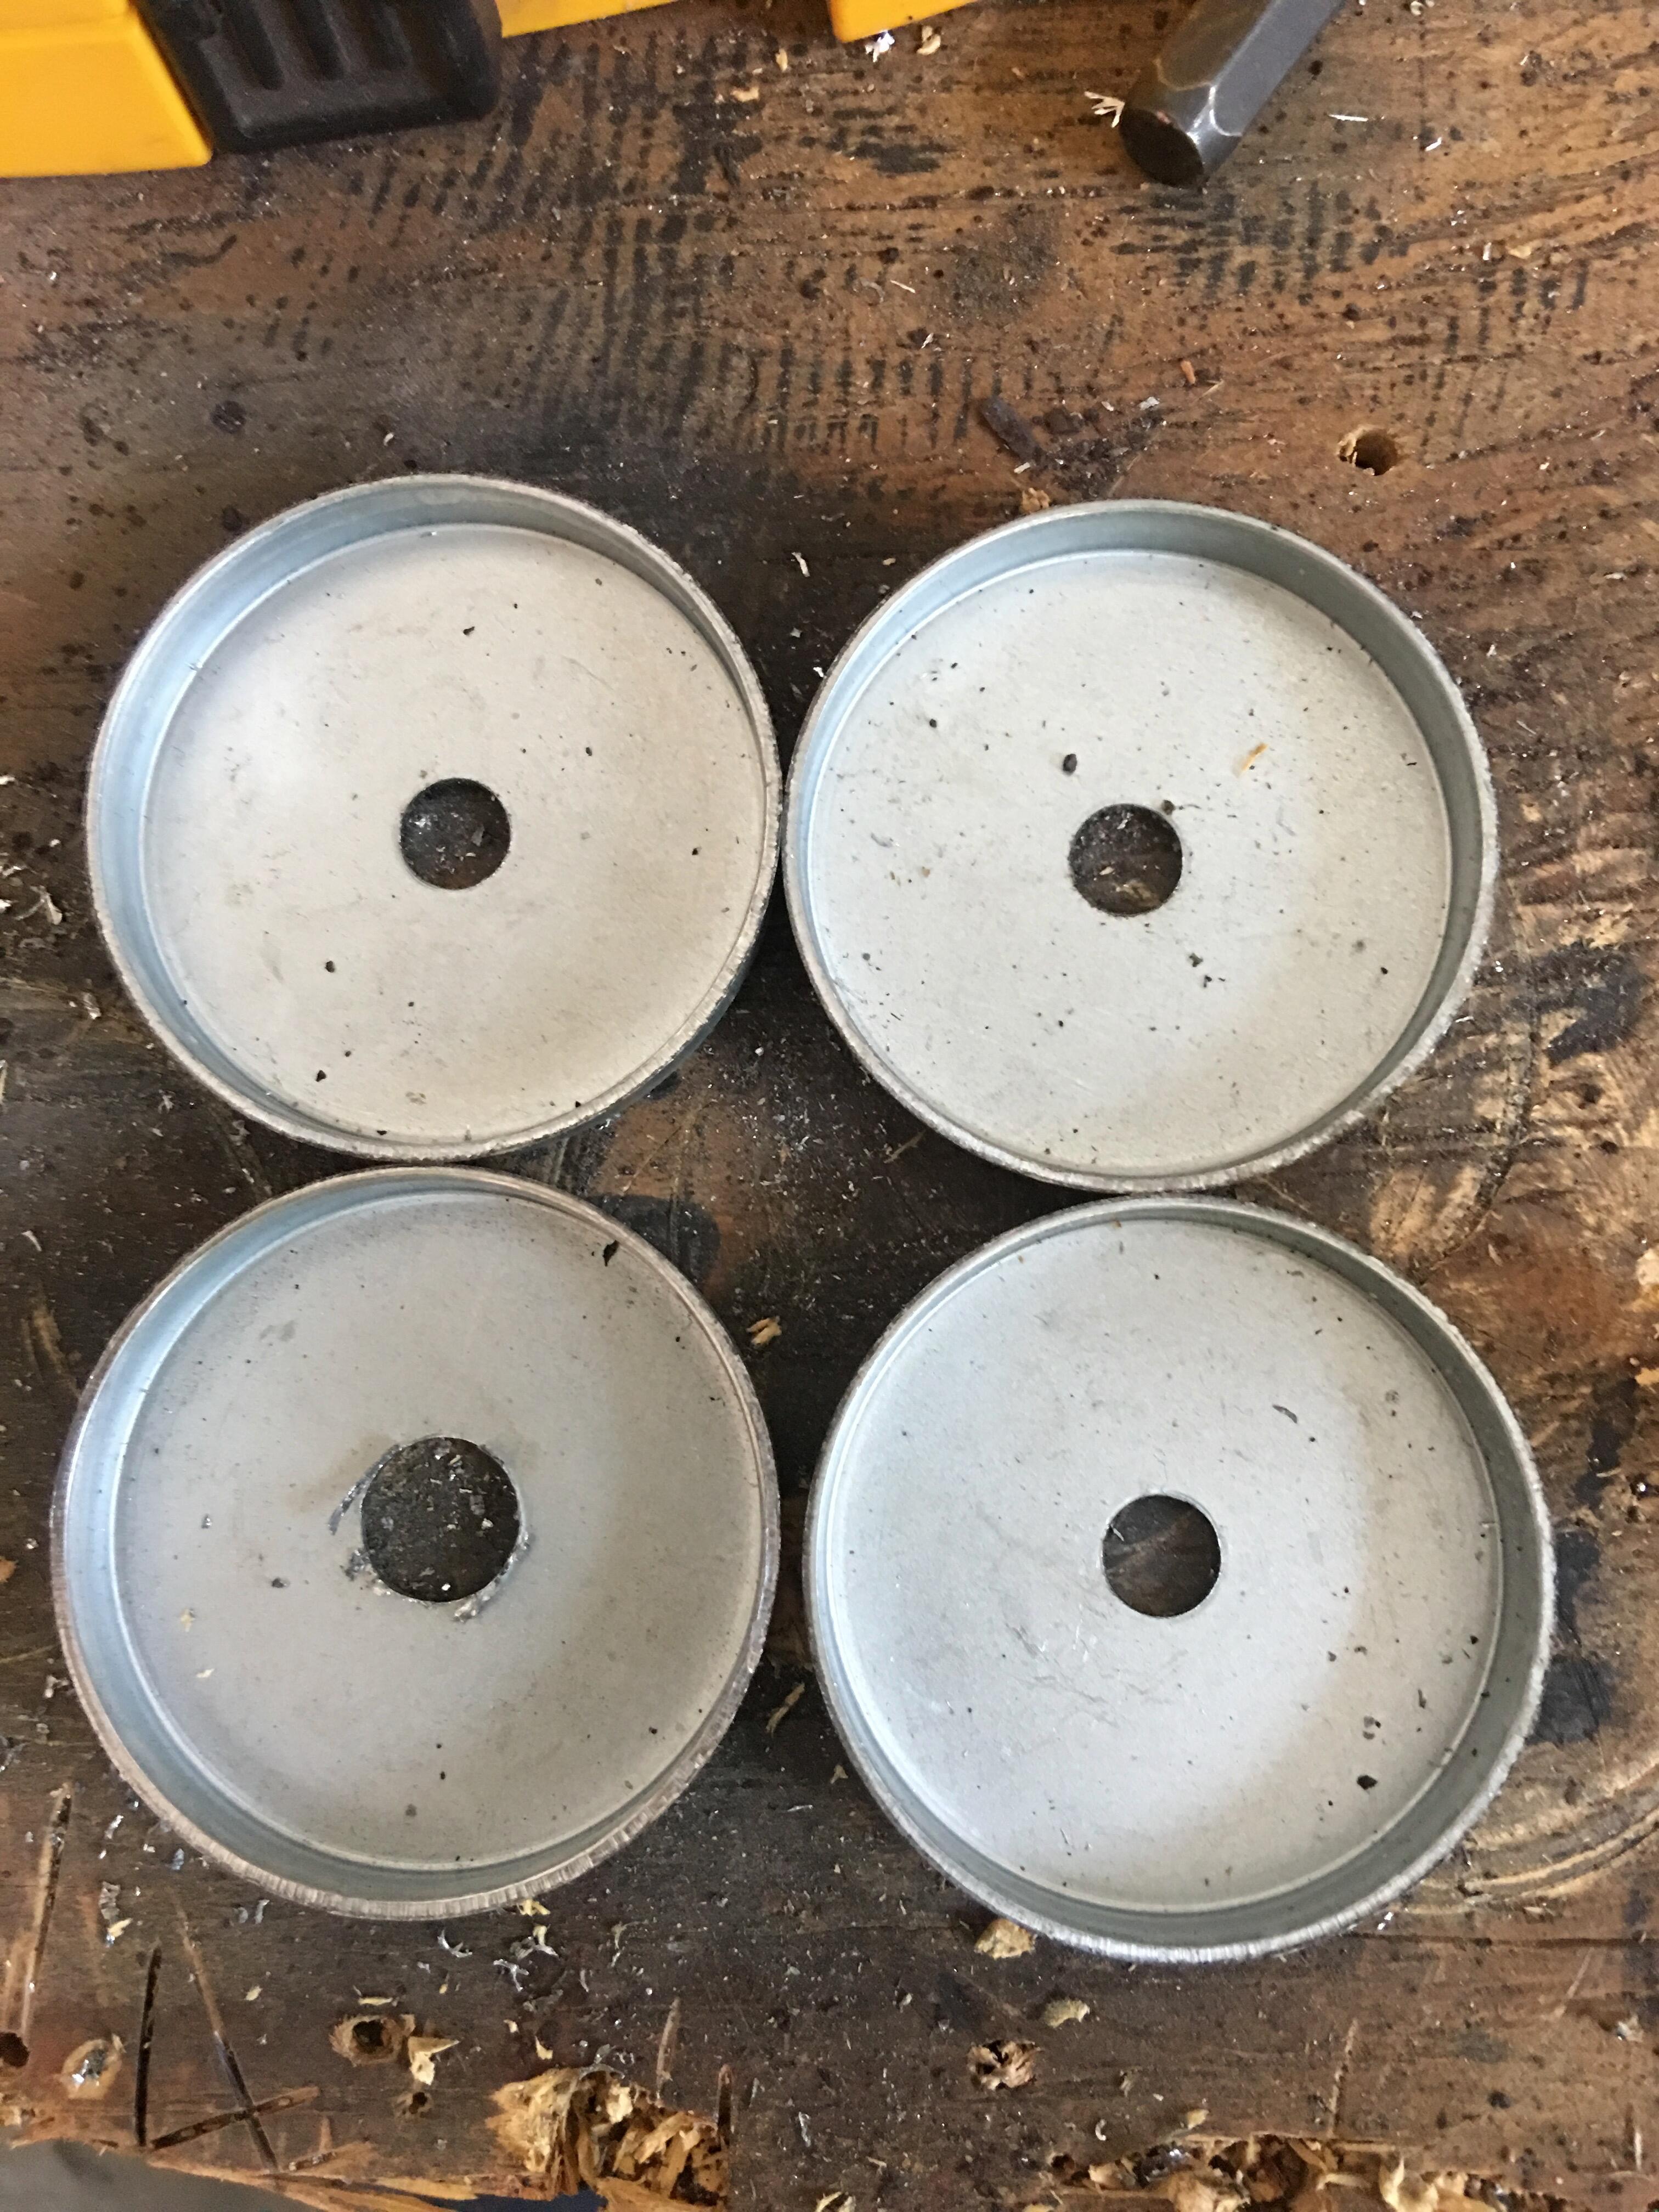
TJC1969, The knowledge here is amazing! Finding pictures or examples of these cups was very difficult. Once I had gotten all my answers from everyone here, I ended up cutting out a section and welding in a new section with a hole already pre-drilled. I then used the cups I found laying in my garage. The cups had to come off my first generation Camaro (1967-1969) or off my sons 67 Chevelle. They were almost perfect circumferance wise and just required the hole in the center to be drilled out to the proper size. I welded them in place and reassembled. The car has been on the road for a couple of years now. No problems whatsoever. Since the car is a daily driver for my son, I did not want to take a chance of one of those bars snapping, so we went with rubber on both sides. I hope this helps. I will look for more pictures to post. Camaro-guy
 2 points
 -
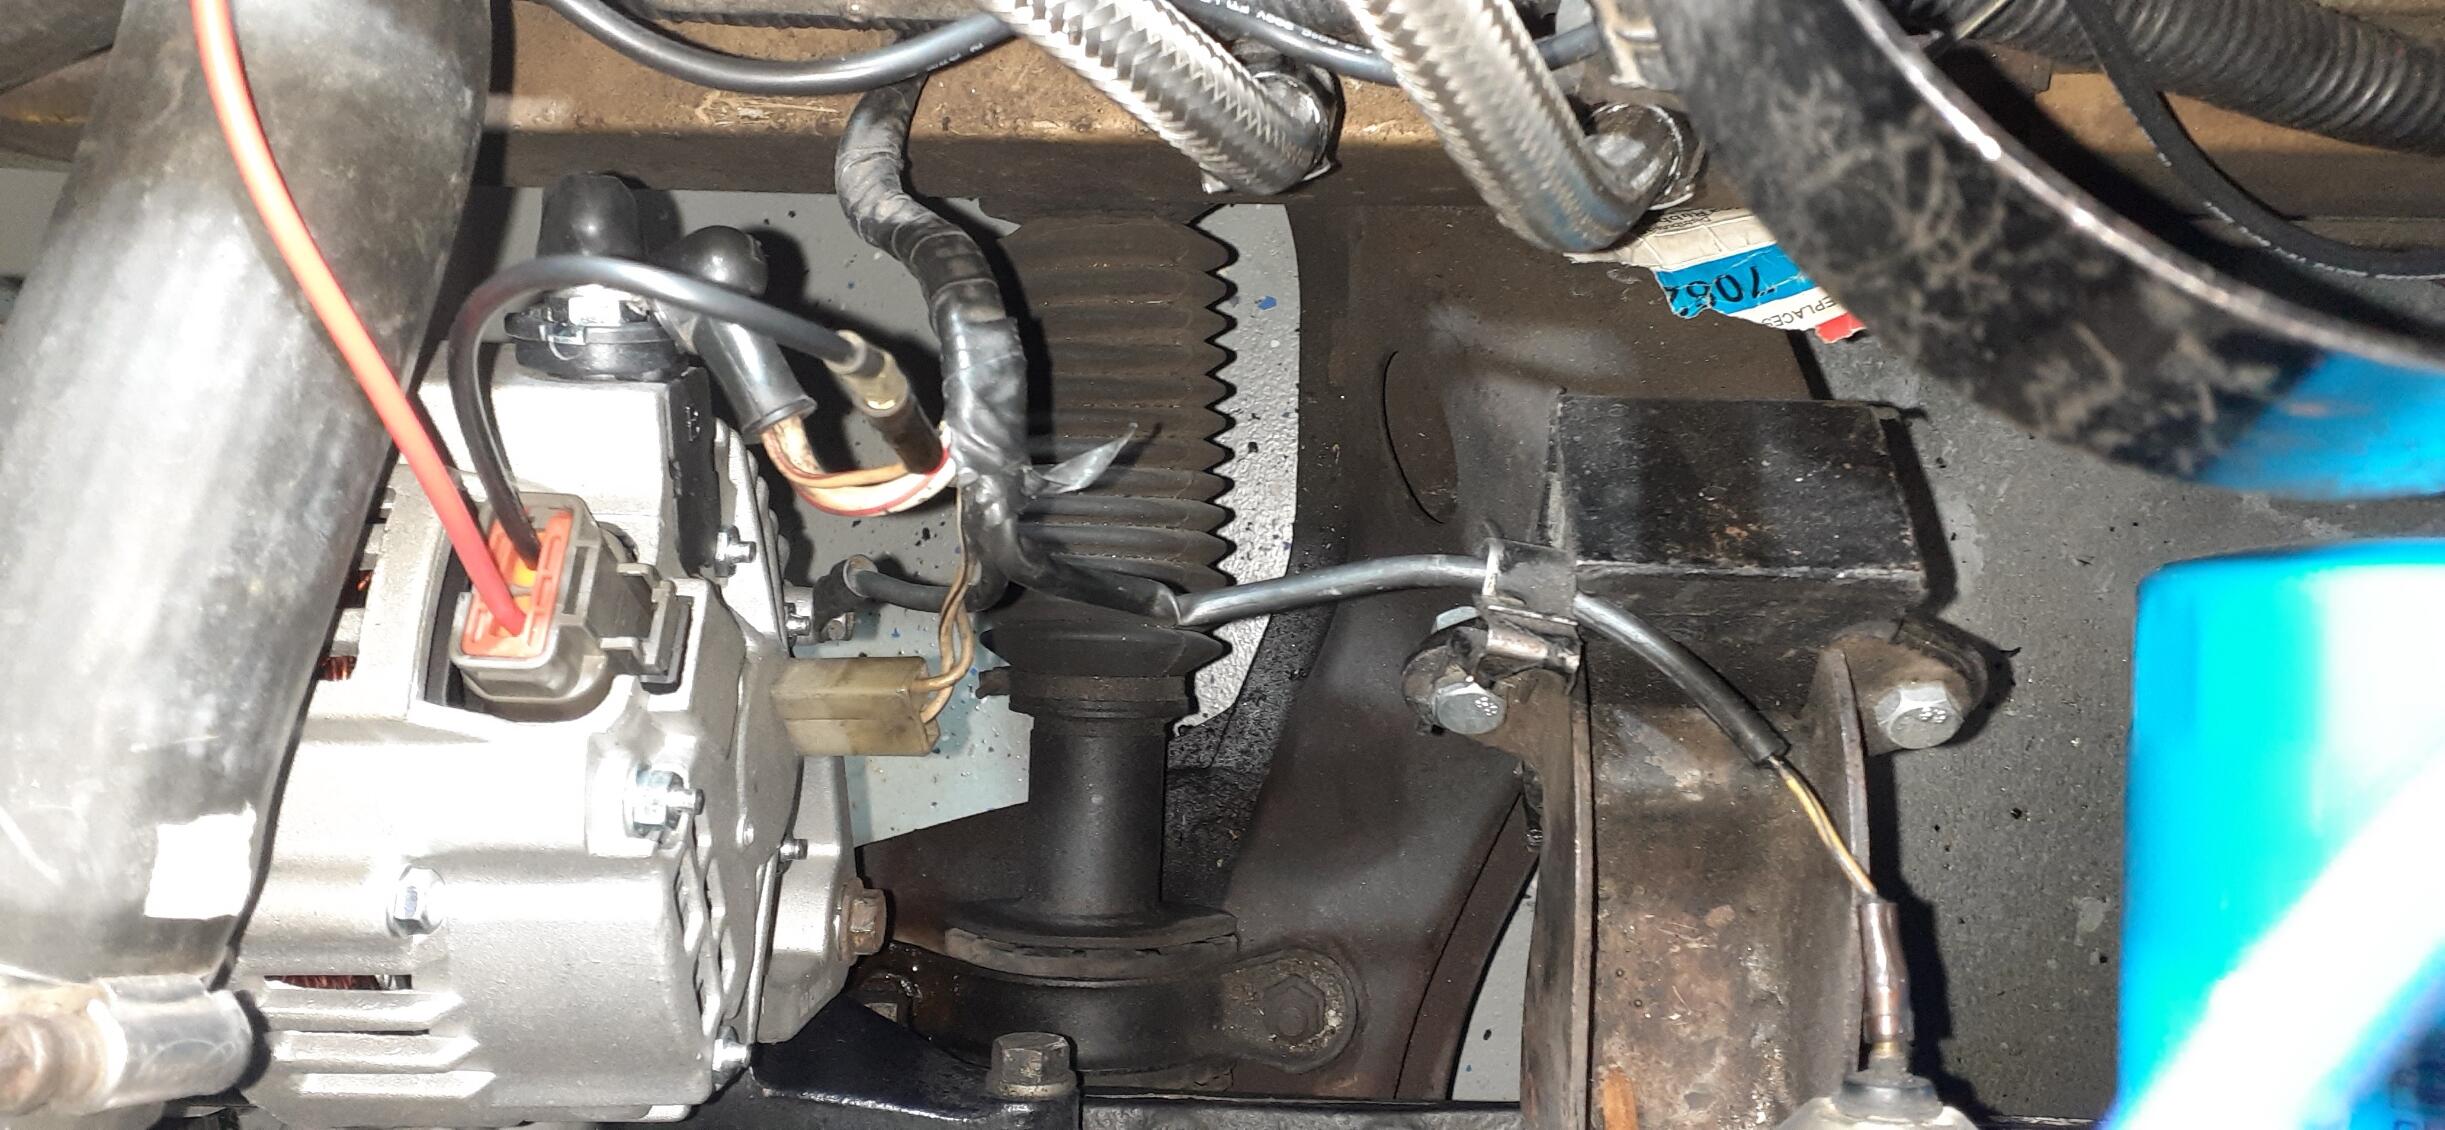
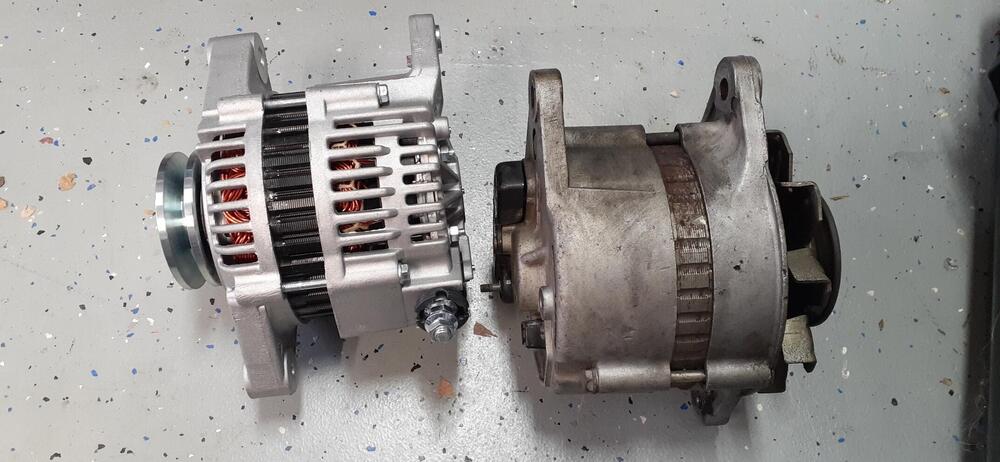
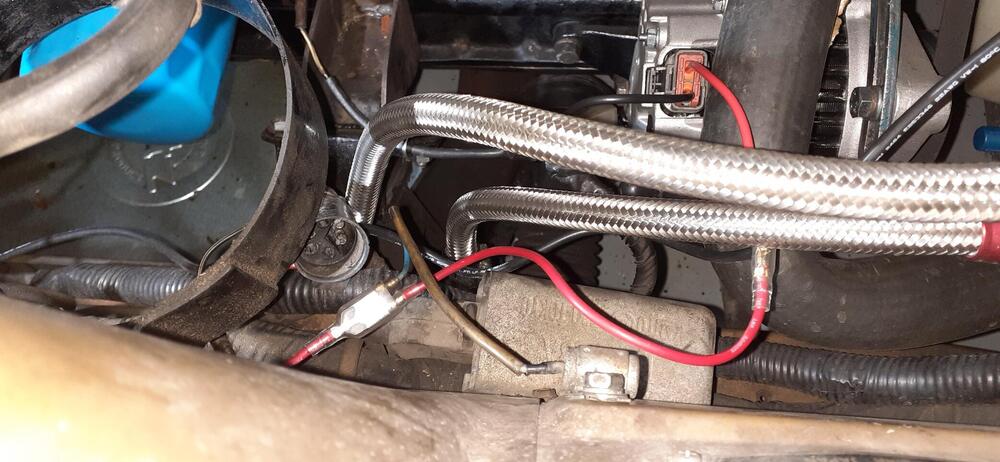
1 pointI haven't been happy with the charging system in the 260Z for a while. At startup, the alternator output was fine, but after a while of driving, the voltage would drop down to only 12.8VDC many times. It was time to explore options. Since I converted the carburetors into throttle bodies for the Patton Machine GM TBI fuel injection, I wasn't using the neutral (yellow) wire from the alternator for the fuel pump relay #1. That meant I didn't have the limitation a stock 260Z owner would have. (Of course, I could have worked around that one if needed.) Because I like experimenting on my projects, I decided to look into the Nissan Frontier 70A alternator. Since I didn't feel like paying ZCarDepot $150 for their setup, I searched RockAuto and found a new SKP for $86.79 (minus 5% discount and plus tax and shipping) alternator for a 1999-2004 Frontier 4 cylinder. On Amazon, I found the pigtail for the alternator $10.99 + tax. I took out the old voltage regulator (still a points style - Sorry, @Dave WM, I didn't try to adjust it first. It looked bad on the bottom to me.) and found the bottom side full of helicopter seeds and somewhat corroded. I tried some different bullet lugs to see if I could connect wires to the engine harness to run to the pigtail. That was a no-go. However, I found some alternatives. The white/red wire to the alternator positive had a smaller white/red wire with a female bullet to connect to a condenser on the old alternator. I would prefer to have a different sense wire, but it would work. Then I noticed that the condenser at the VR was connected to the black/white wire. There was my switched source. I would just need to make a small jumper harness to connect the pigtail and condenser to the black/white wire. For the most part it was a matter of removing the old alternator and installing the new one. I did have to replace the lug on the white/red wire because the positive post on the new alternator was much larger. That was no big deal, though it took some time to enlarge the hole on a 1/4" lug to make it fit on the M7 (or M8?) post. I shot some video that I need to edit that may help others with the swap. I'll see how it turned out and post a link. Here the Frontier alternator with the 260Z externally regulated alternator. Here's how the wiring looked when I was done with the installation. Here's the pigtail on the alternator going to the positive post for sensing voltage.
 1 point
 -
1 pointCovers are available from MSA: https://www.thezstore.com/page/TZS/PROD/12-4355. Make sure you create an account at MSA (http://www.zcarparts.com/) and enter your ClassicZCars member number to get a 10% discount on a lot of different parts. You can find your member number by going to your profile on this site. It's in the URL.

 1 point
 -
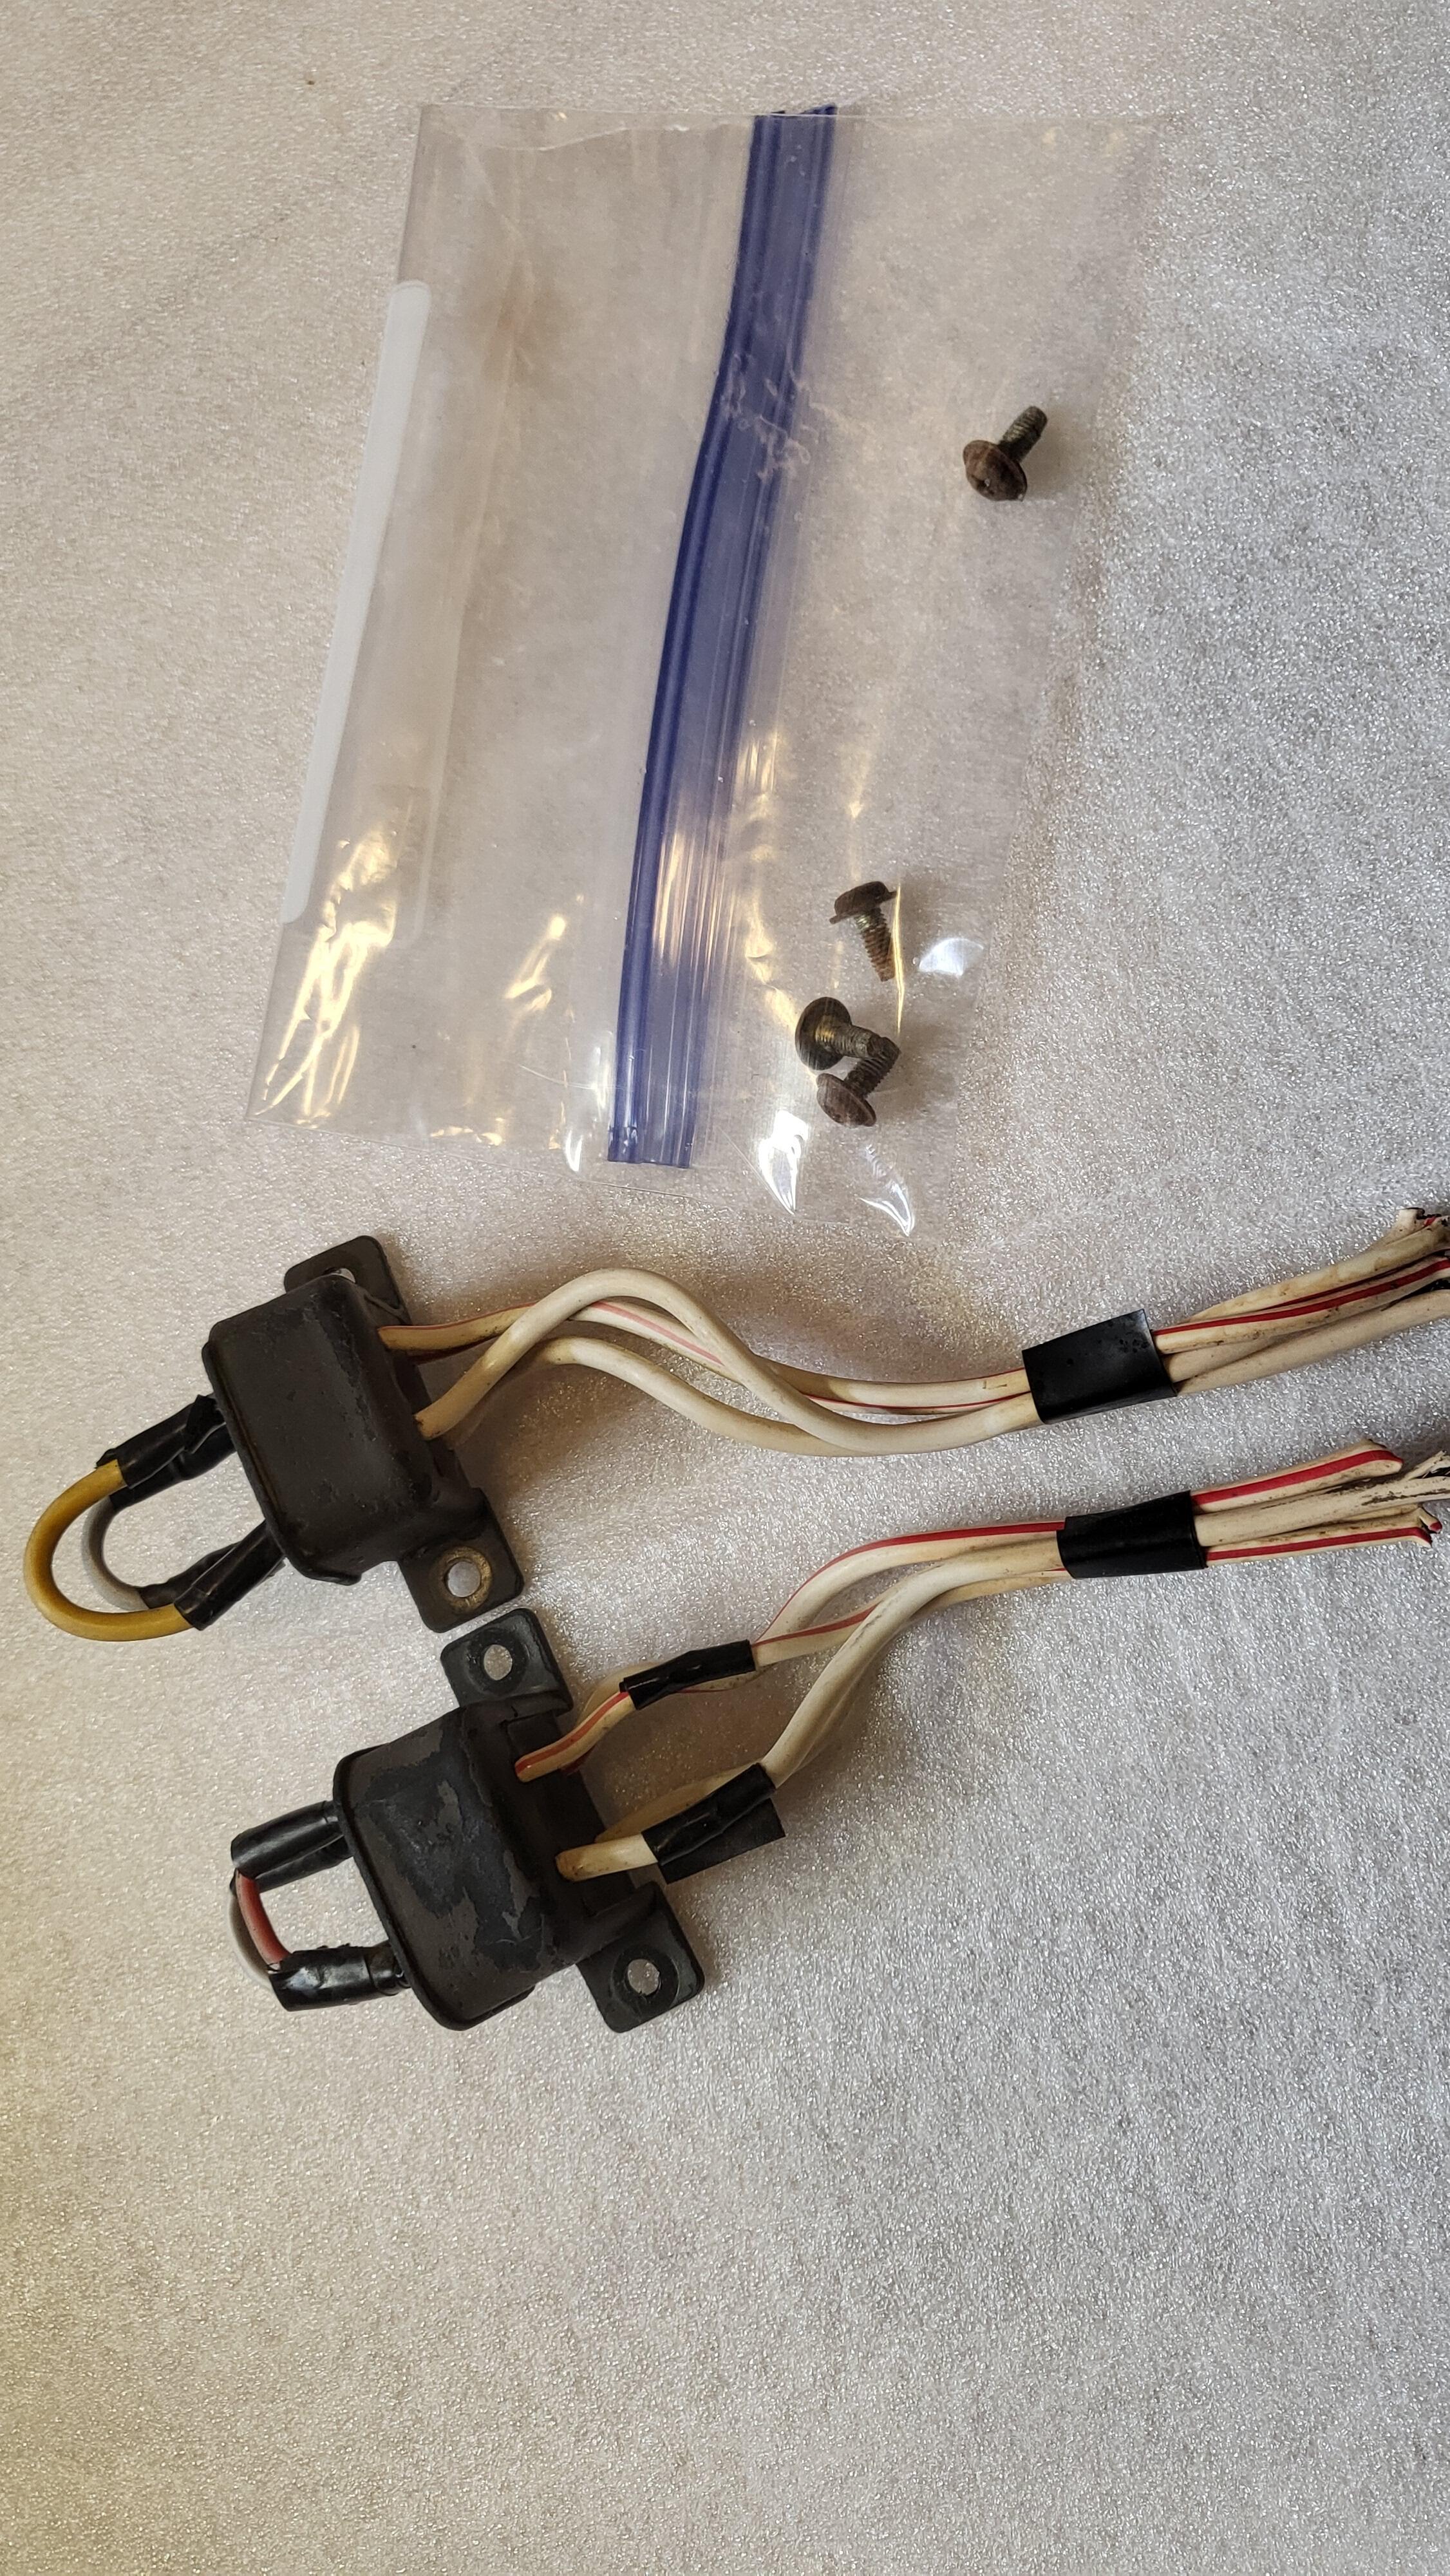
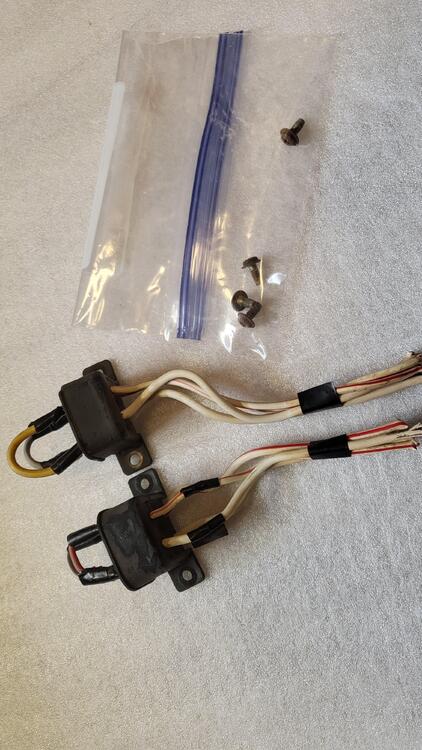
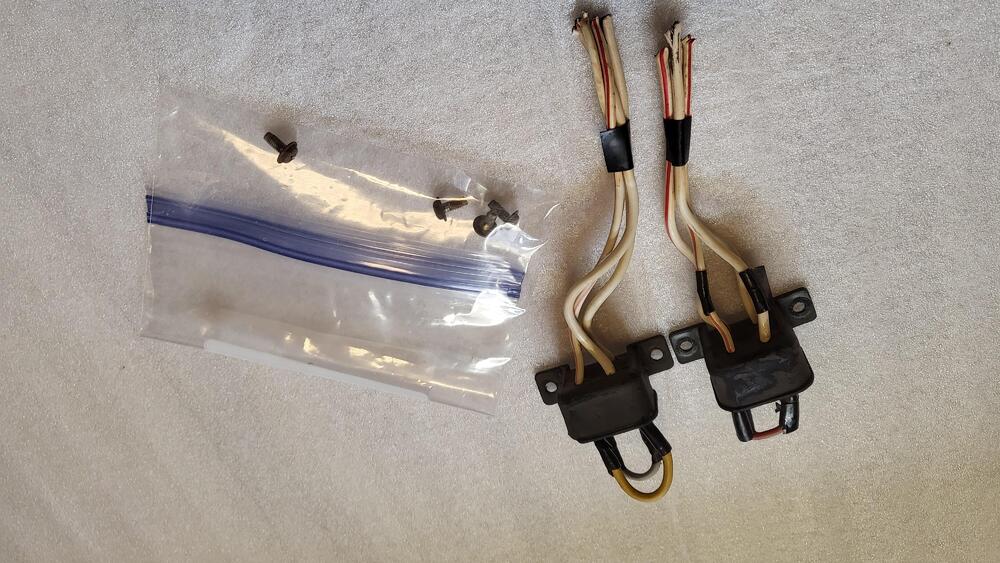
1 pointPulled the two fusible link assemblies from the 78 parts car today. One was 100% intact - no cover. The other had a broken mounting tab, repaired it with super glue, should be fine, also missing cover. Includes 4 proper relay cover mounting screws. I would replace the fusible links and clean their connections. $45 including USPS shipping, pm if interested ...
 1 point
 -
1 pointYeah yours is better than mine was. Wish I could find pictures. At least the weather stays out of it now. My frame rails and body panels are still pretty rough. It's got the drivetrain and suspension of a 21 year old sailor on liberty in Bangkok and the body of a geriatric haha.1 point
-
1 pointOh yeah, it would rub the paint unless you put some type of cushion in between. I did that on those 10mm bolts on the top left and right side where the spoiler attaches to the metal close to the headlights. I used those flat rubber fender washer looking things from Lowe's. Did you have as much fun as me attaching those two bolts? Those were a pain in my rectum.1 point
-
1 pointThanks Cliff, I remember you saying that in a previous post. I’m wondering if this would damage the new paint in the center valance with it rubbing on the air dam? I was going to look into attaching an 1” aluminum strip inside the air dam and attach turnbuckles to the center mount on the radiator crossmember. I was going to mock this up and post it on the forum. Won’t get to it for awhile with all the other stuff Im doing on the car with higher priority. I’ll take a look at how that center valance sits in there and see if it’s the best option. Sent from my iPhone using Tapatalk1 point
-
I had one break with the hard PU on the back and realized that the bushing on the back restricts the motion of the tip of the rod as the rod itself moves up and down with the control arm. This puts a big load on the stress riser at the bottom of the threads and causes the metal to fatigue and break. The rubber bushing is actually formed so that it allows a wide range of motion, up and down and sideways, of the rod but still controls fore and aft motion.1 point
-
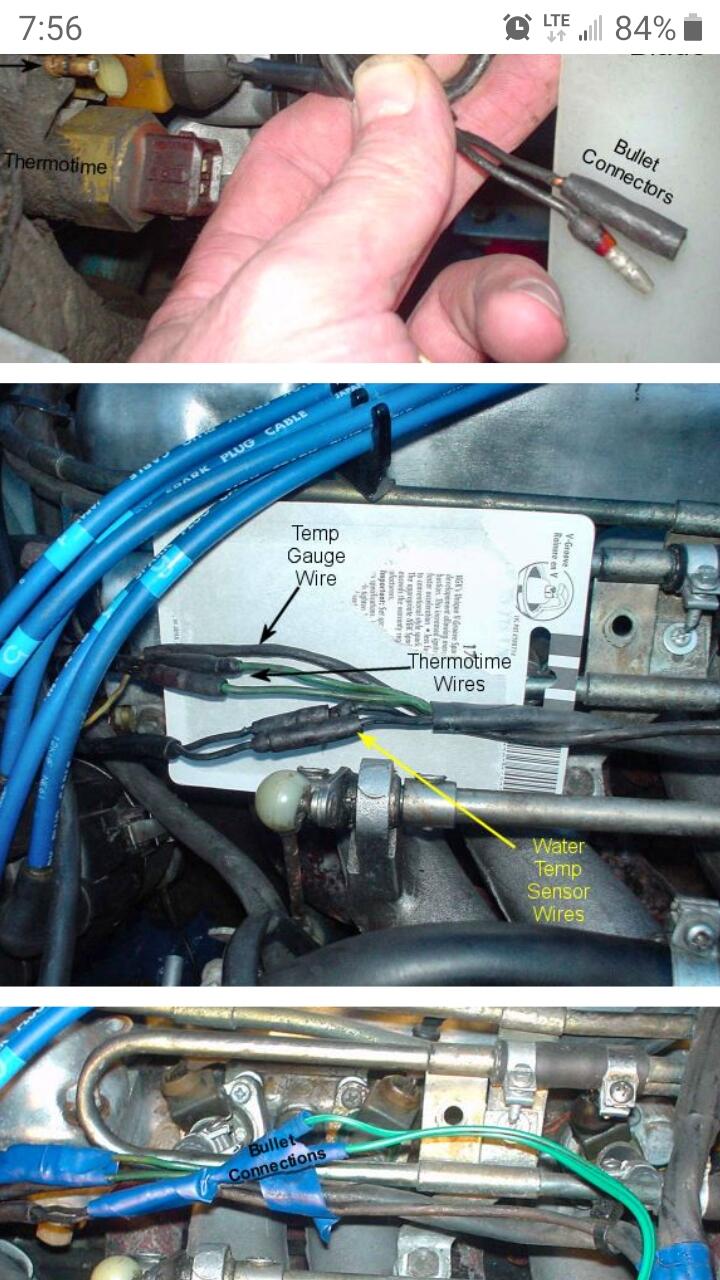
Has anyone mentiond the cold start injector? Sometimes they add too much fuel on warm up. The fuel sensor bullet connections are also suspect.
 1 point