Leaderboard
-
Captain Obvious
Free Member6Points10,081Posts -
ToolBoy
Free Member3Points118Posts -

Diseazd
Free Member2Points3,362Posts -

christoffel
Free Member1Points63Posts


Popular Content
Showing content with the highest reputation on 07/11/2020 in Posts
-
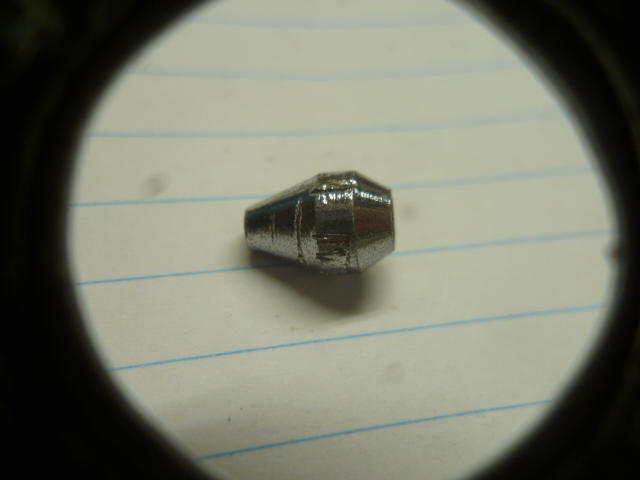
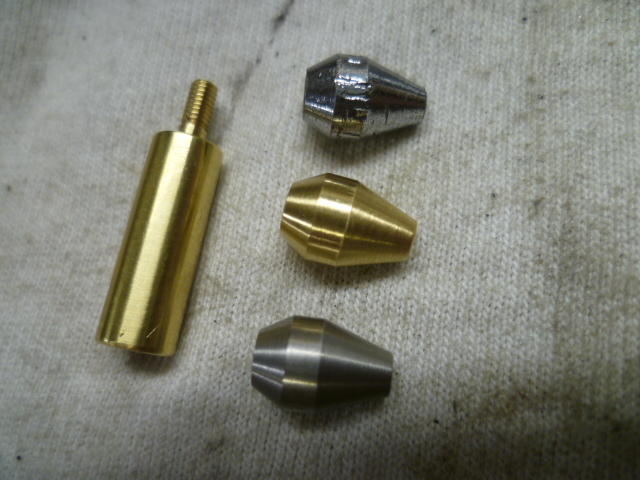
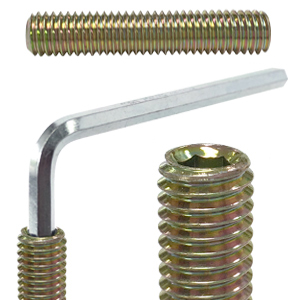
2 pointsSo @Zup, I got your chewed up (what used to be an) antenna tip Perfect for my experiments. The first thing I can tell you is that it's chrome plated brass, not stainless. And I expect this to be the case for those antennas on ebay. Why is that important? Couple reasons: First, it means the prospect of buying something similar off ebay and taking a dremel to it isn't going to work unless you plan to send it out for new chrome plating afterwards. Second, it means that the "color" is different than stainless. Now unless you think some judge at a concourse show is going to dock you points for having a stainless antenna tip instead of chrome plated........ With all that said, it was tropical storming today and I had some time in the shop. Here's some pics: I had some other antenna here from a later year that I could mess with too: I made two proof of concept tips. One brass, and one stainless: The stainless would look better if I polished it. I didn't bother with that. Would still look different than chrome plating, but closer.


 2 points
 -
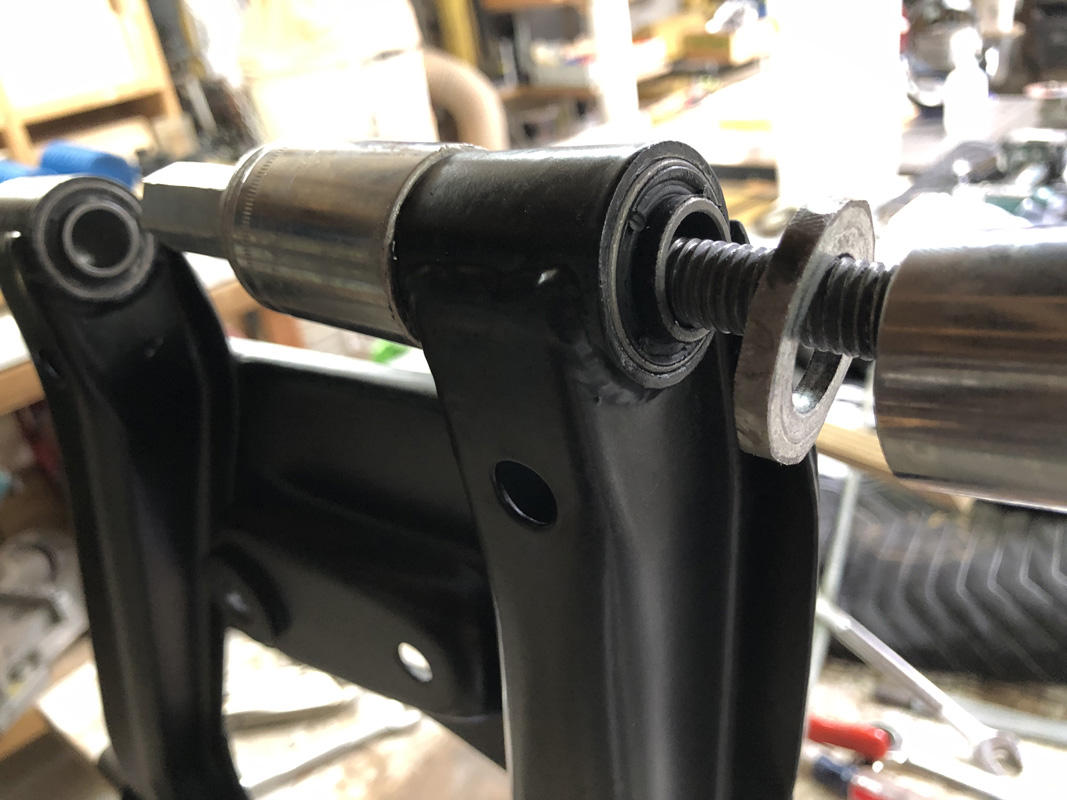
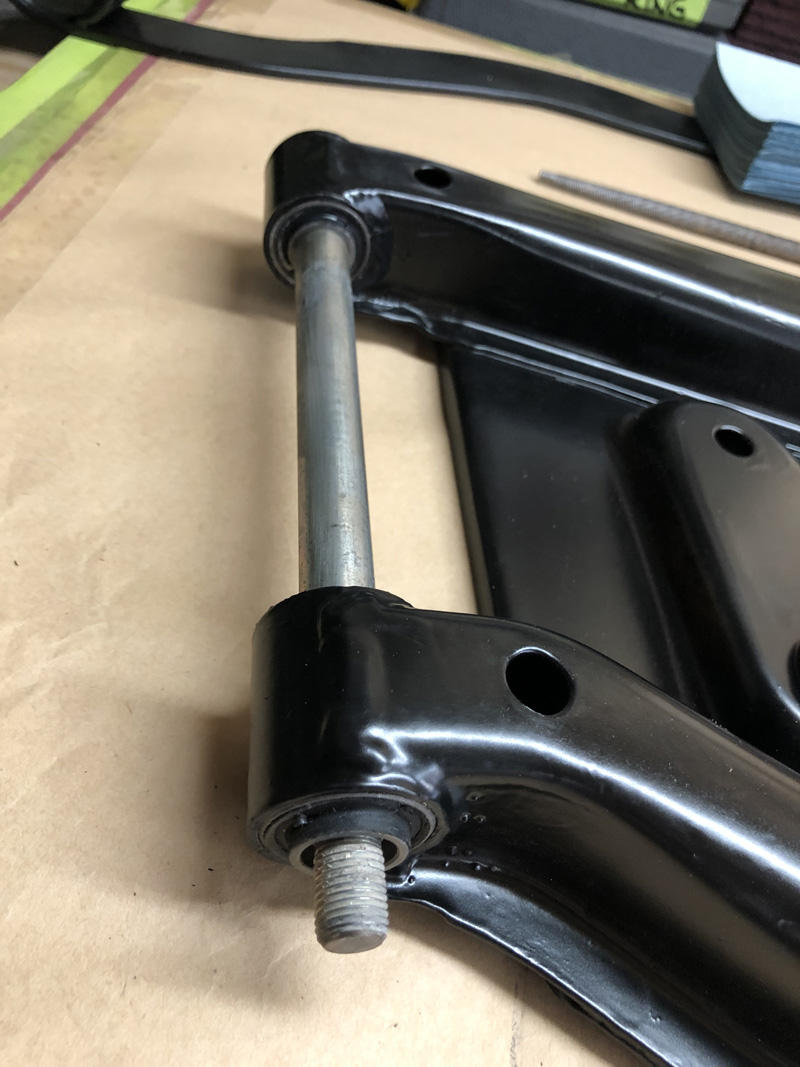
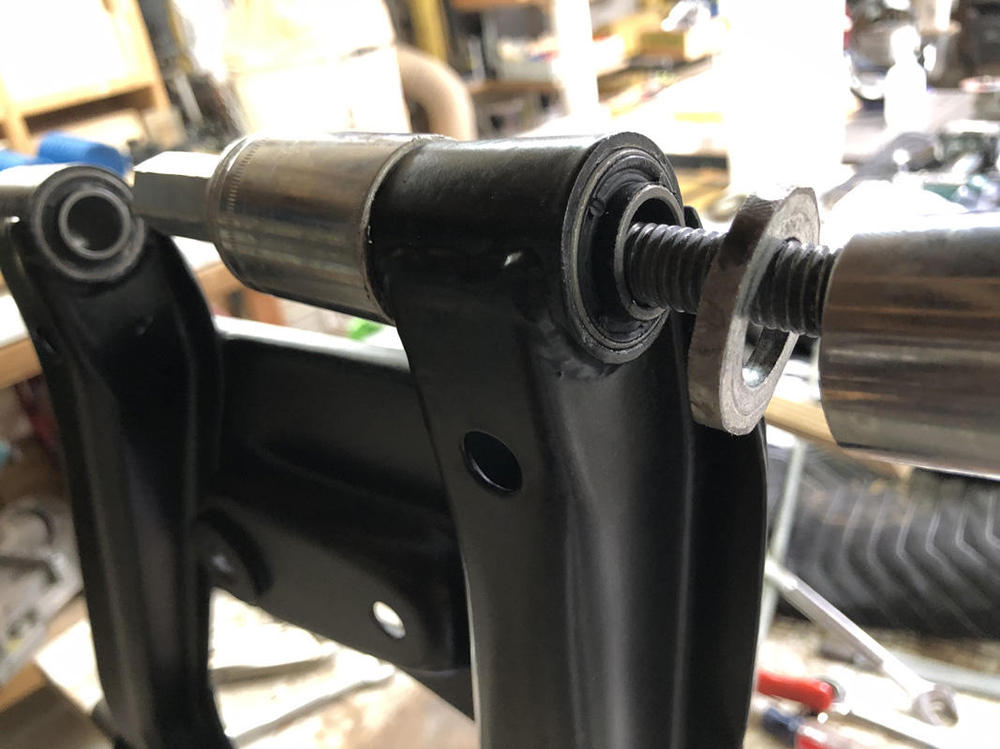
2 pointsHey Capt. Obvious, Just finished pressing the rear control arm bushings a few minutes ago and wanted to say thanks for passing that info along 2 weeks ago. They went in perfectly and are spaced exactly for a nice press fit in the strut housing. Definitely would not want to back em out and do it twice. Thanks again!! . . . Andy
 2 points
 -
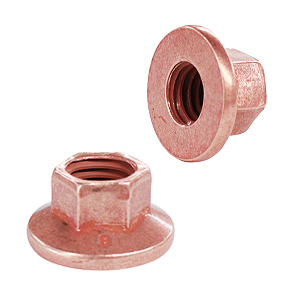
1 pointhttps://www.belmetric.com/hex-with-flange-c-3_51_53/ncf8x10w-copper-flange-nut-wide-flange-p-10435.html?zenid=sahrhmsei24sc6bg2gtlshqhn1 And these babies have 10mm heads! For those tight places around headers and such or at the very least https://www.belmetric.com/jis-small-wrench-c-3_58_2280/nj8x12ylw-jis-nut-yellow-zinc-p-205.html?zenid=sahrhmsei24sc6bg2gtlshqhn1 I also like these studs they have. Easy to insert and remove. https://www.belmetric.com/m8x125-coarse-thread-c-9_71_1840/s8x45fylw-allen-drive-stud-yellow-zinc-p-15201.html?zenid=sahrhmsei24sc6bg2gtlshqhn1
 1 point
 -
1 pointAaaah. . . The forensic aspect of obsessively restoring and ultimately understanding a 50 year old sports car. Will be a real thrill to finally drive this sucker with what I'll know by the time she's road worthy.1 point
-
1 pointWell I hadn't thought much about a sales prospect, but I didn't hate making these. However, I didn't make the internal threads yet* as I did not have the correct tooling. I've got that tooling (special taps) on order and if that tapping process doesn't turn out to be a disaster, then I could probably be convinced to make a couple for sale if people need. Of course, that tapping process (especially in stainless) could still turn out to be a disaster. I'll let you know after the taps arrive. * The astute viewer might ask "Then how does it look like your brass tip is threaded onto the antenna in your pic???" The answer is... I drilled it out so it just slips over the threads. Proof of concept for outside shape only. I'm not really worried about tapping brass. The stainless concerns me more.1 point
-
1 pointYeah, I think someone missed a detail somewhere. Everything about the whole situation would make much more sense for the bushing to be symmetric. Assembly process would be foolproof because you wouldn't need to pay any attention to which direction it went in. and the documentation wouldn't have to mention anything about it because it just didn't matter. On the prototyping floor... "Hey Boss. I'm putting these bushings in and when I do that, I can't get the strut casting in between them. What are we going to do?" Boss says : "Hmmm... I'll let engineering know." Engineering says : " Oops. We'll need to either:" a) Change the strut housing design to reduce the width. b) Change the rear control arms to increase the span between the bushings. c) Change the bushing so things fit together without interference. And "changing the bushing is way cheapest and easiest to change, so lets do that." Draftsman/Designer says : "I can't shorten the outsides of the bushings because we need that length for the rubber washers. Should we eliminate the rubber washers and make the bushings symmetric, or should we make the bushings asymmetric and keep the washers?" Lead Engineer says : "Crap (in Japanese). I really want to keep those washers. Make the bushings asymmetric and make sure you let documentation know about the change because they'll have to describe how to put the bushings in correctly!" And that last part never happened. I wasn't there for any of it, but that's how I see the whole thing.1 point
-
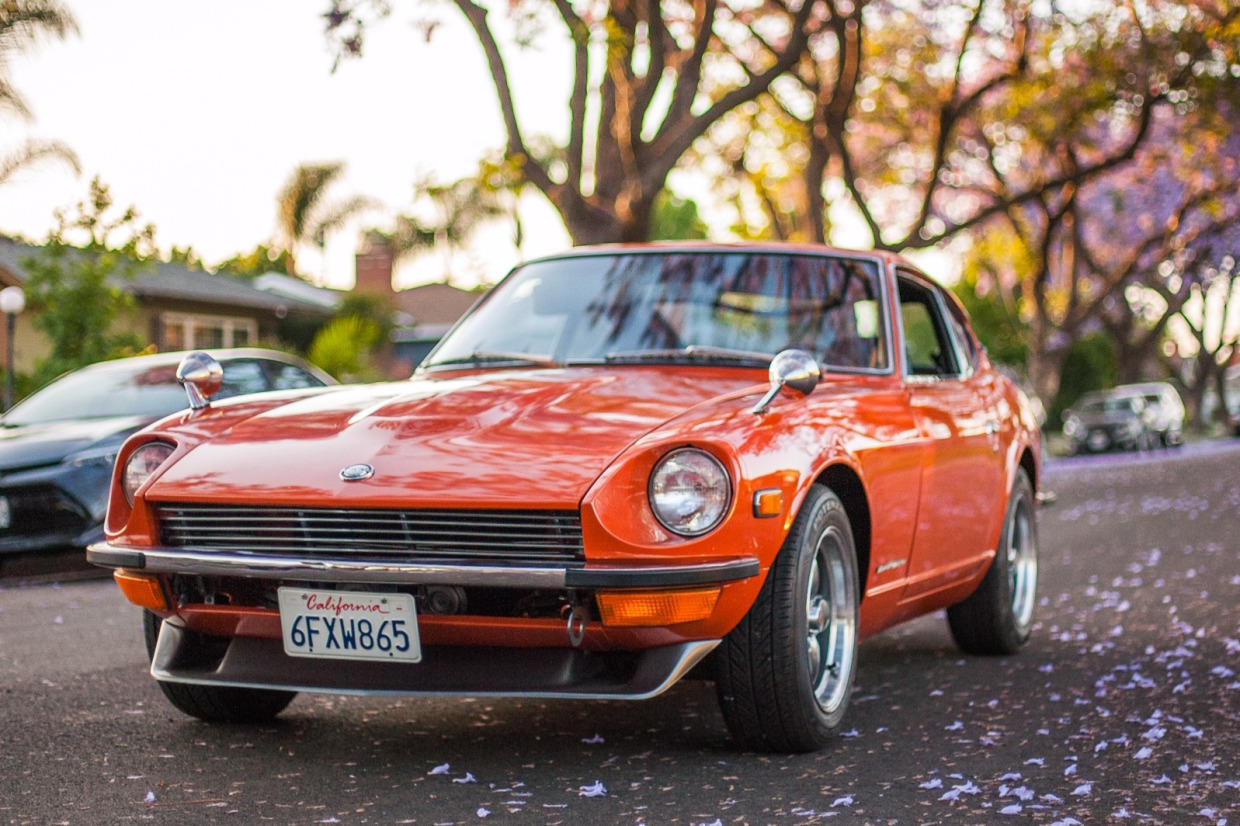
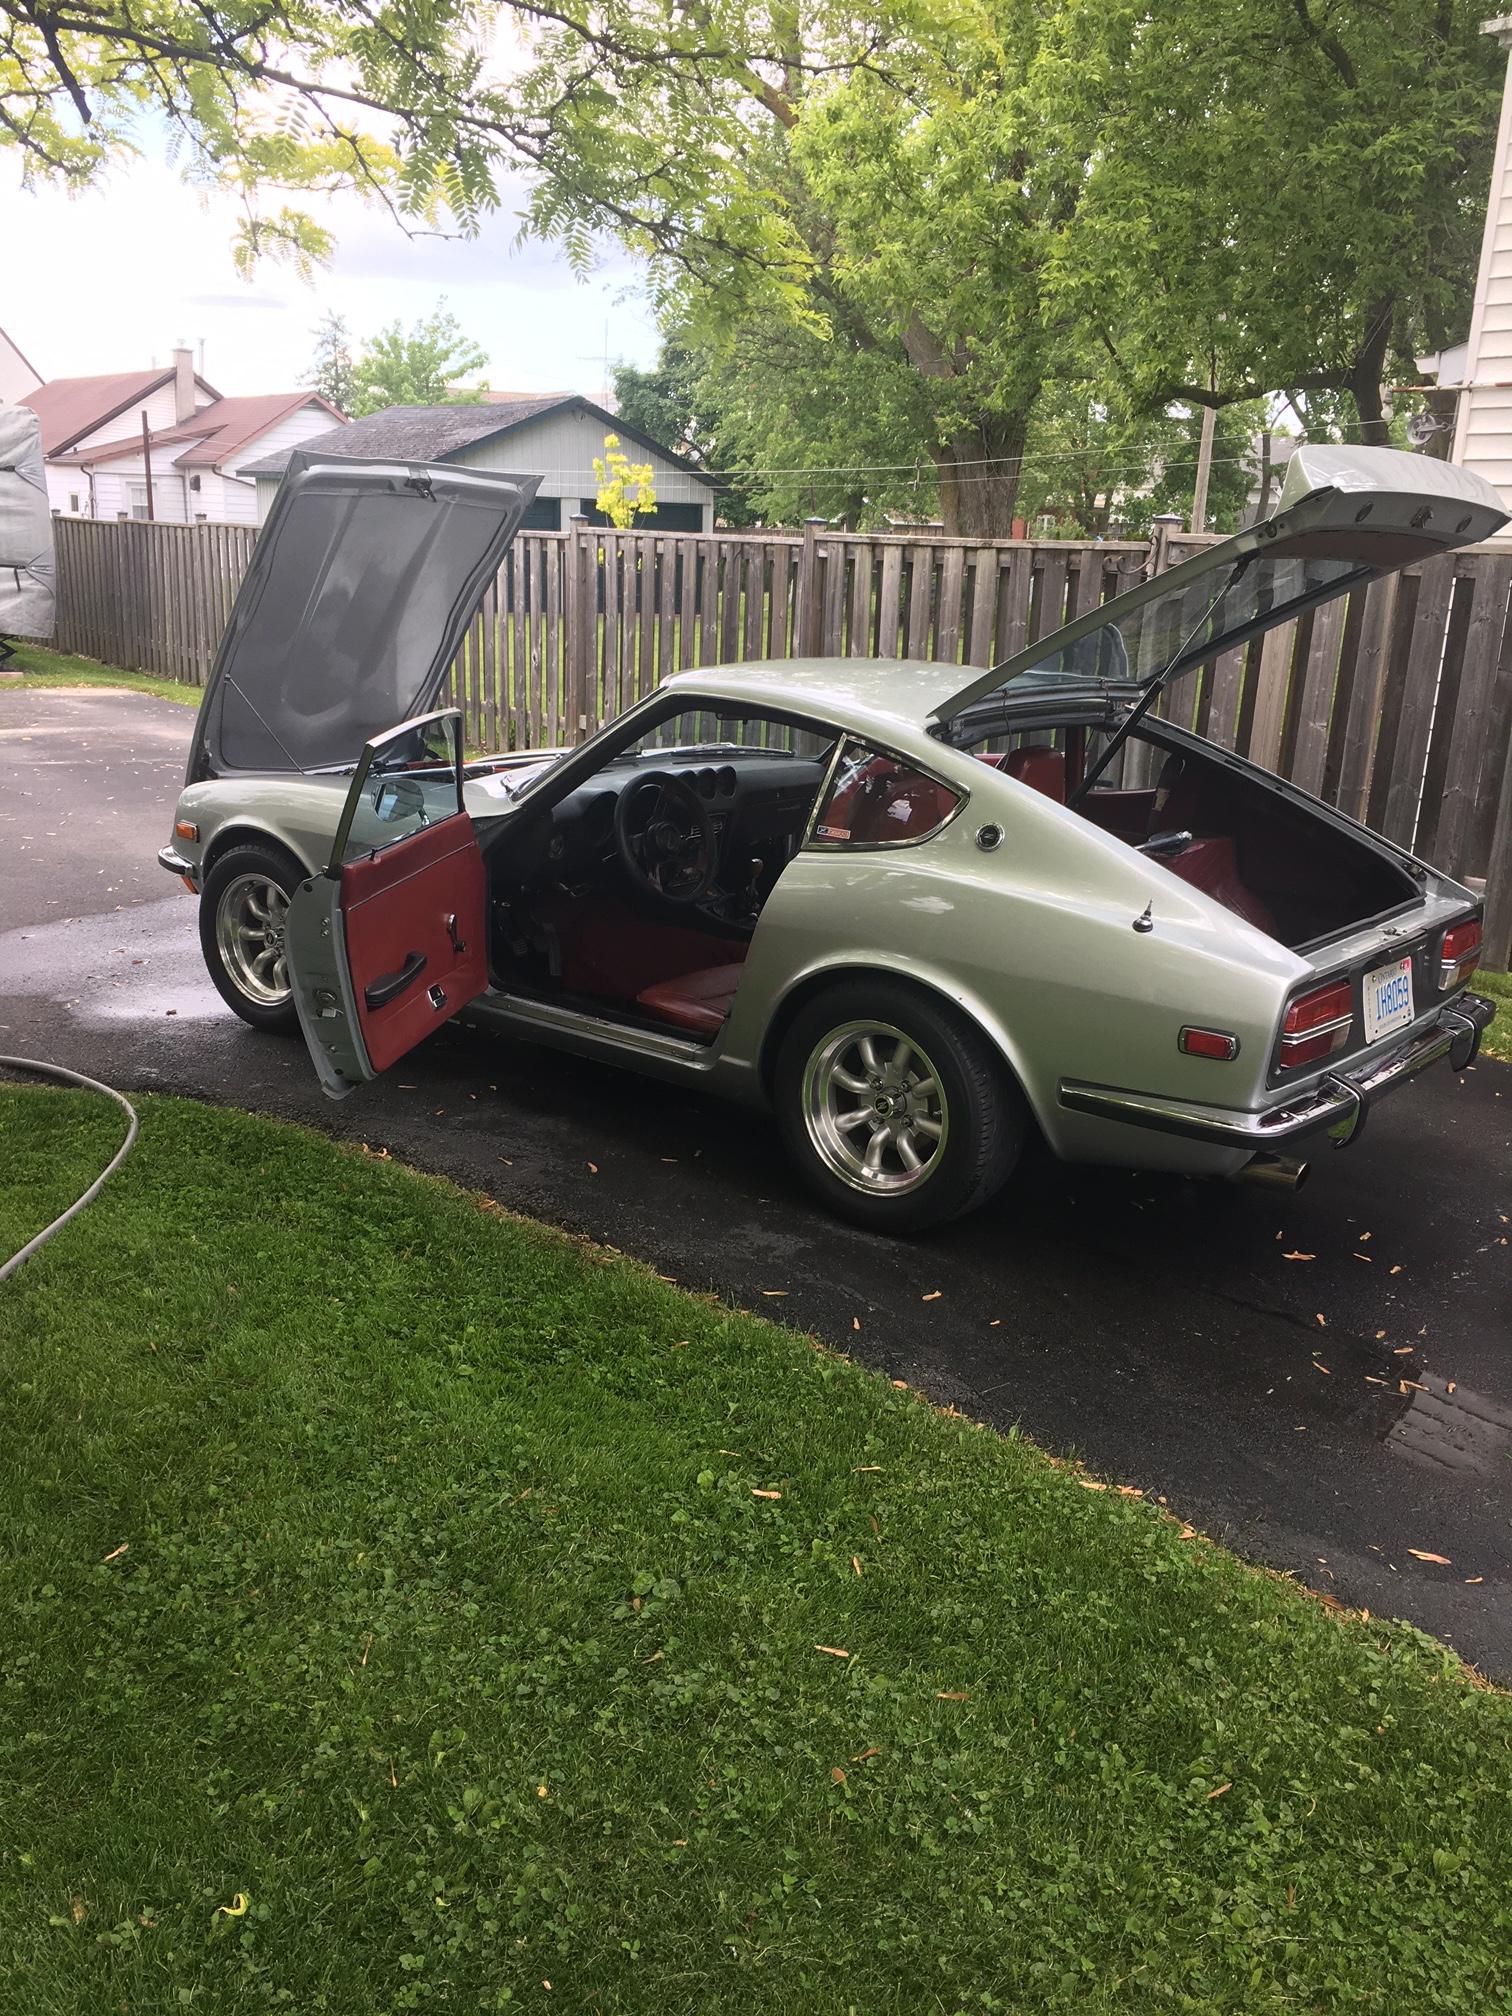
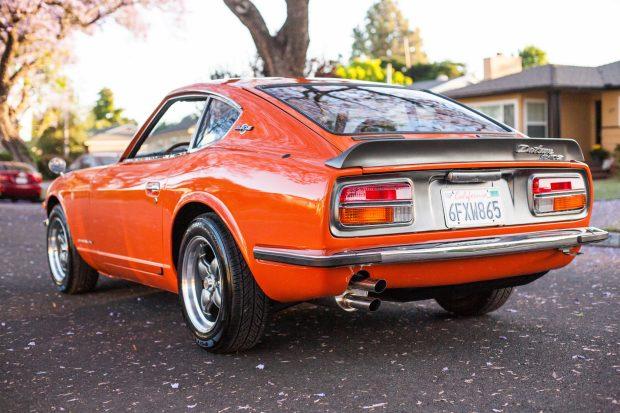
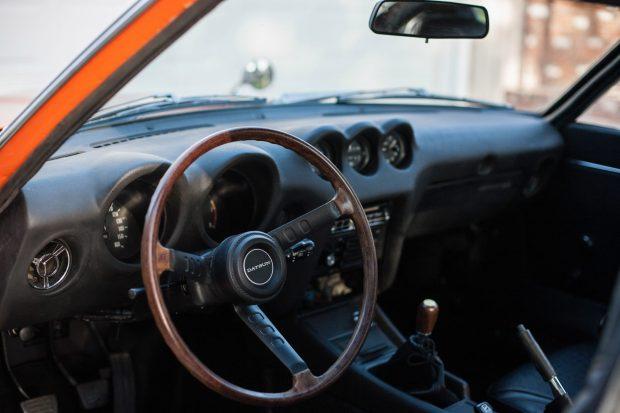
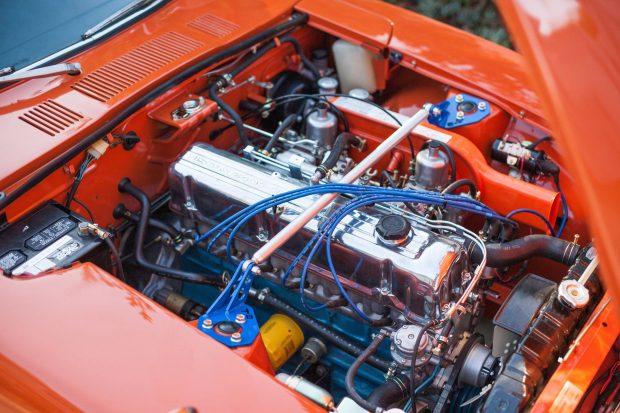
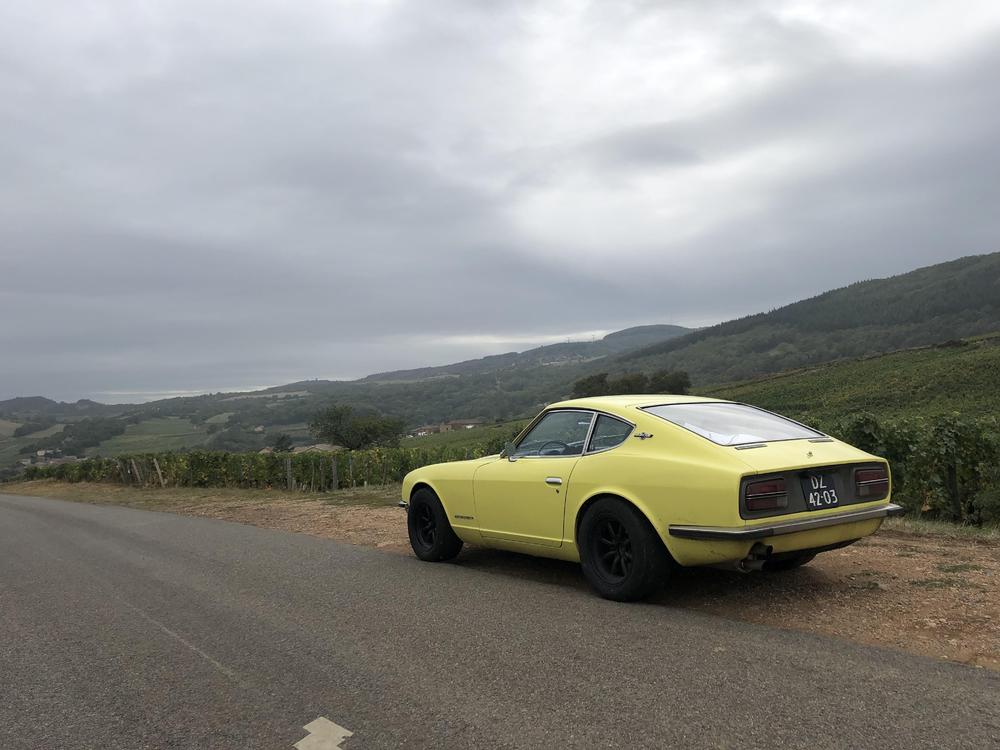
This beauty had a had a complete cosmetic and mechanical refurbishment. Here's the link: https://bringatrailer.com/listing/1970-datsun-240z-55/

 1 point
 -
1 pointThan you make four out of four people now to support the theory of being designed that way. Thanks for the data point. Such a small difference though. It screams "oops" at the factory that they fixed by modifying the bushing.1 point
-
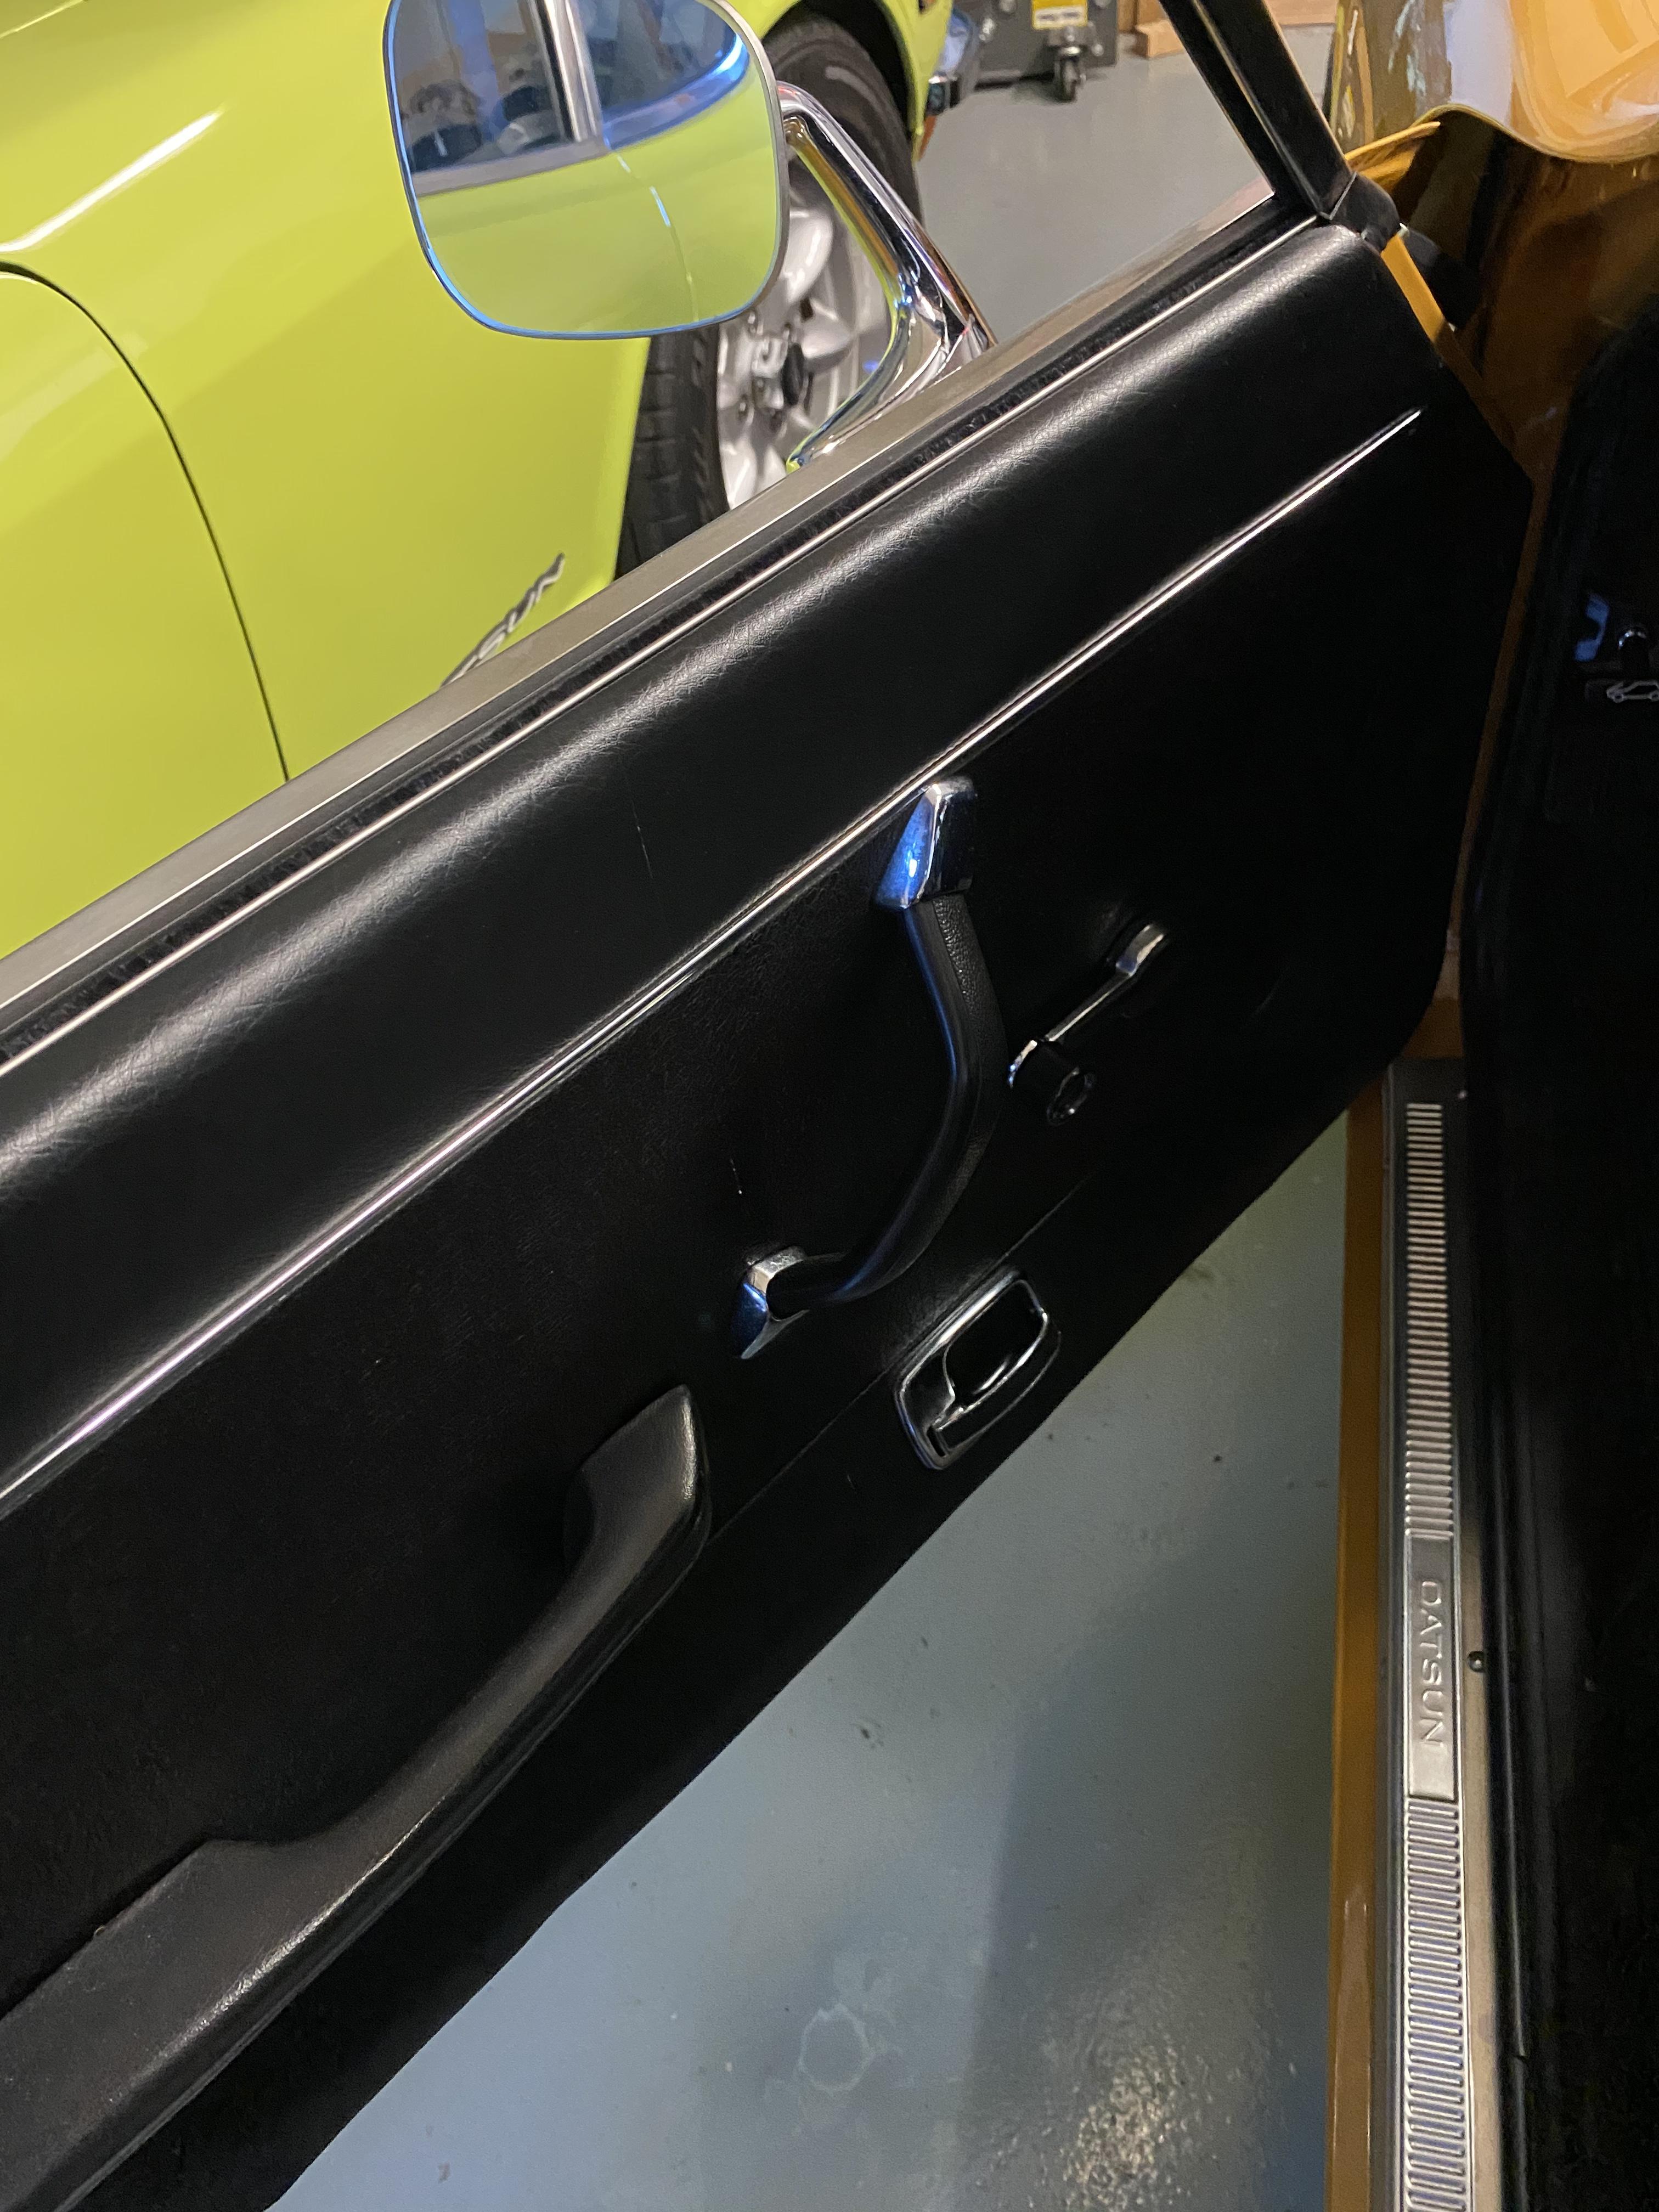
Sorry dutchzcarguy.....you are “the man” Site is “the boy”! Same for you Alan....makes sense.....my door card was meant for a “right hand drive” Z. What I get for not reading the whole thread. I stand corrected!1 point
-
Yeah, I bought a set of OEM door cards sometime back that had the holes for the pull handle on the driver side. All doors have the receiver threads for the bolts that hold the pull handle on (at least my early 71 did). I just attached a new pull handle and was done. It’s a nice addition and I always wondered why the set was cut for the driver side handle. Anyone know the answer? @Carl Beck BTW....nice job in picking that out Site.....very observant!.
 1 point
 -
@w3wilkes @madkawThanks for your feedback. It is just from wich perspective you look at it. We restore several 1969 production US cars and European cars, These cars come with tanks that have the connections like the tanks we produce. Also the cars produced for the Japanese market (including the Z432), the UK , Australia and the rest of the world came in this configuraton (without the vapor connections) A lot of people I know in the US said that this configuration would fit them also, because they delete the vapor system. For the US market cars we restore to a "as it left the factory"level, after the tanks are produced, we simply ad the connections and we have the tank the car came with when new. Till now most orders came from the US, but also Japan (for a Z432) and the rest of the world. I have a 1970 919 color 240Z I use as a daly driver, and this car I run with triple Mikuni's so I don't need the emission and vapor stuff at all on this car.
 1 point
 -
My, we have a lot of criticisms here. I appreciate the clarity. I did my research with the help of Nissan's library and lots of interviews. If there are issues, I am taking notes. Yes, the Datsun Z432 name was an error, but I think "15 years of mistakes" is a bit harsh, HS30-H. Write your own book, then.1 point
-
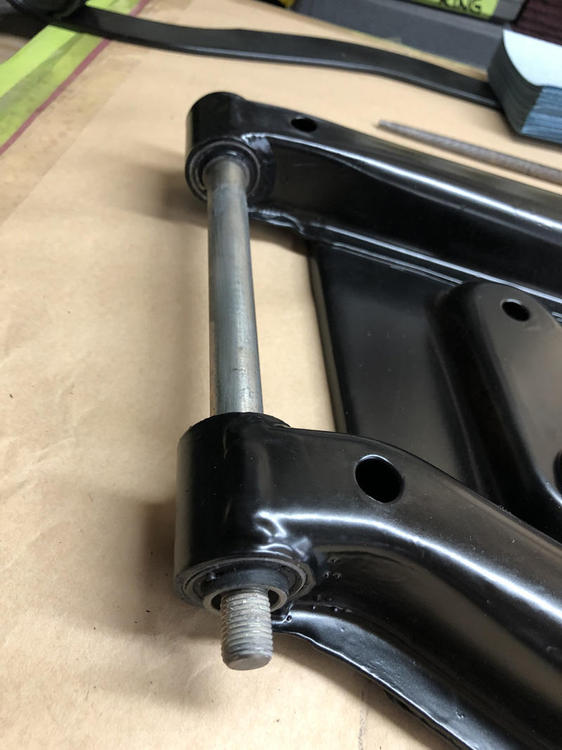
1 pointHere's some discussion about the insertion of those rear outboard bushings in this thread: https://www.classiczcars.com/forums/topic/55369-1971-hls30-14938-lily-build/?page=2&tab=comments#comment-525861 From that other thread: I also found a tiny bit of asymmetry with the rear spindle pin bushings as well. I don't know if it was designed that way, or if it was an accident, but I found a slight difference in the distance the metal collars stuck out of the new rubber bushings. One side was longer than the other, and all of them were consistent (as though it was done on purpose and not an accident). I put all four of them in such that the smaller distance was inward towards the strut body and the longer portion was on the washer and nut side. I found that with the bushing pressed into the center of the control arm receiving cylinder, the distance between the two bushings worked out to almost exactly the width of the strut knuckle casting. I found that if I reversed the bushings and centered them, I ended up with a gap where the strut knuckle fit. Of course, it was a small gap and would have easily clamped down as I tightened the spindle pin nuts, but I figured if I didn't have a gap in the first place, that would be better. Also, putting the longer end on the outside allowed more room for the rubber sealing washer. Don't know if all the aftermarket bushings do that, but I bought Raybestos 570-1030 - There are two bushings per box, so two boxes per car. If you squint right, you can see the asymmetry in this pic. See how the center sticks out farther on one side than the other: I found I liked the fit better with the short sides inboard towards the strut body. I found that if I reversed the bushings and centered them in the arms, I ended up with too small of a gap where the strut knuckle fit between the two bushings. Of course, since it's just rubber, I could have forced the bushing centers apart a little and forced the strut body between them, but I figured if things lined up naturally without having to do that, it would be better. With the small sides in, when I centered the bushings in the receiving cylinders in the arms, it worked out almost perfect such that the distance between the two bushings was very very close to the width of the strut housing. Seemed to perfect to be coincidental. So I don't know if they were really designed to be that way, but it worked for me. And if you're seeing the same small difference on OEM bushings as I saw on aftermarket MOOG, then I'm starting to believe it really might be intentional.
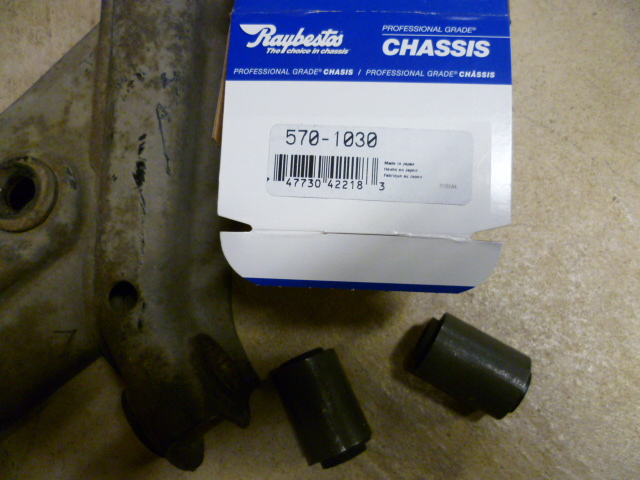 1 point
 -
1 point