Leaderboard
-
disepyon
Free Member3Points121Posts -
sweatybetty
Free Member2Points1,119Posts -
grannyknot
Free Member1Points5,158Posts -
LeonV
Free Member1Points2,270Posts


Popular Content
Showing content with the highest reputation on 10/26/2016 in Posts
-
2 points
-
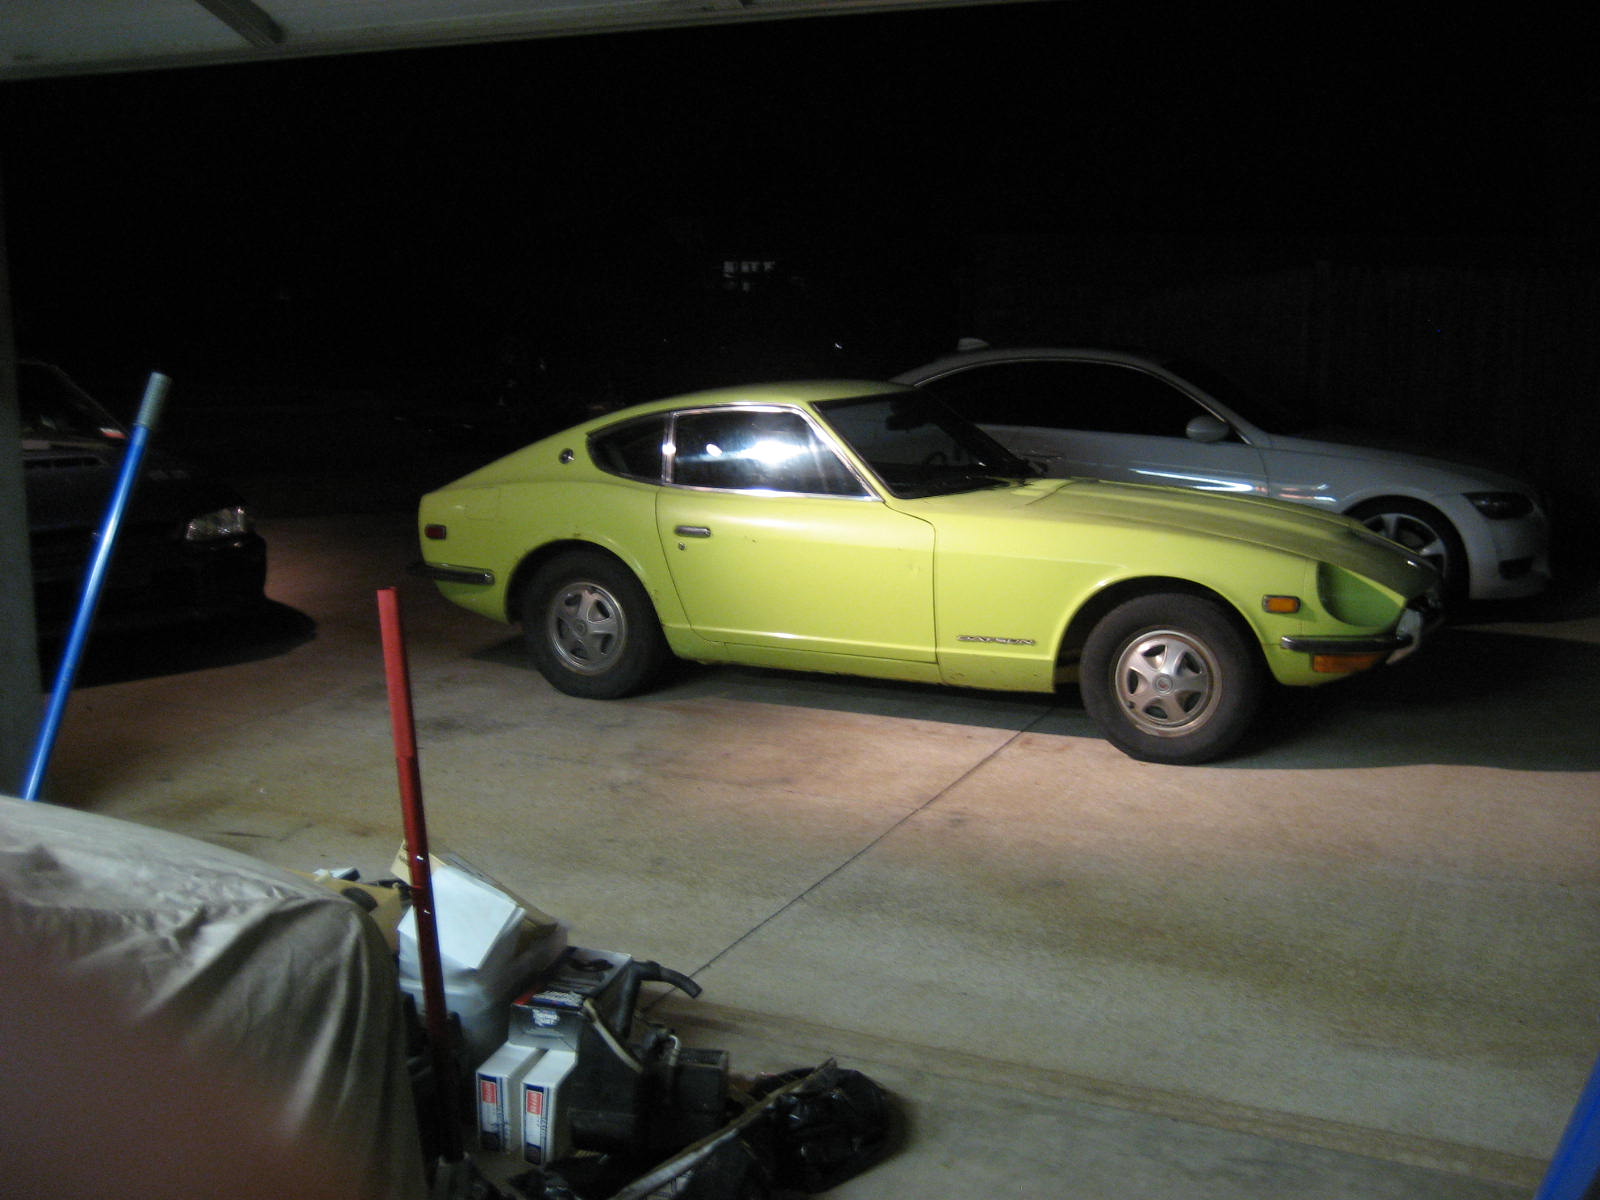
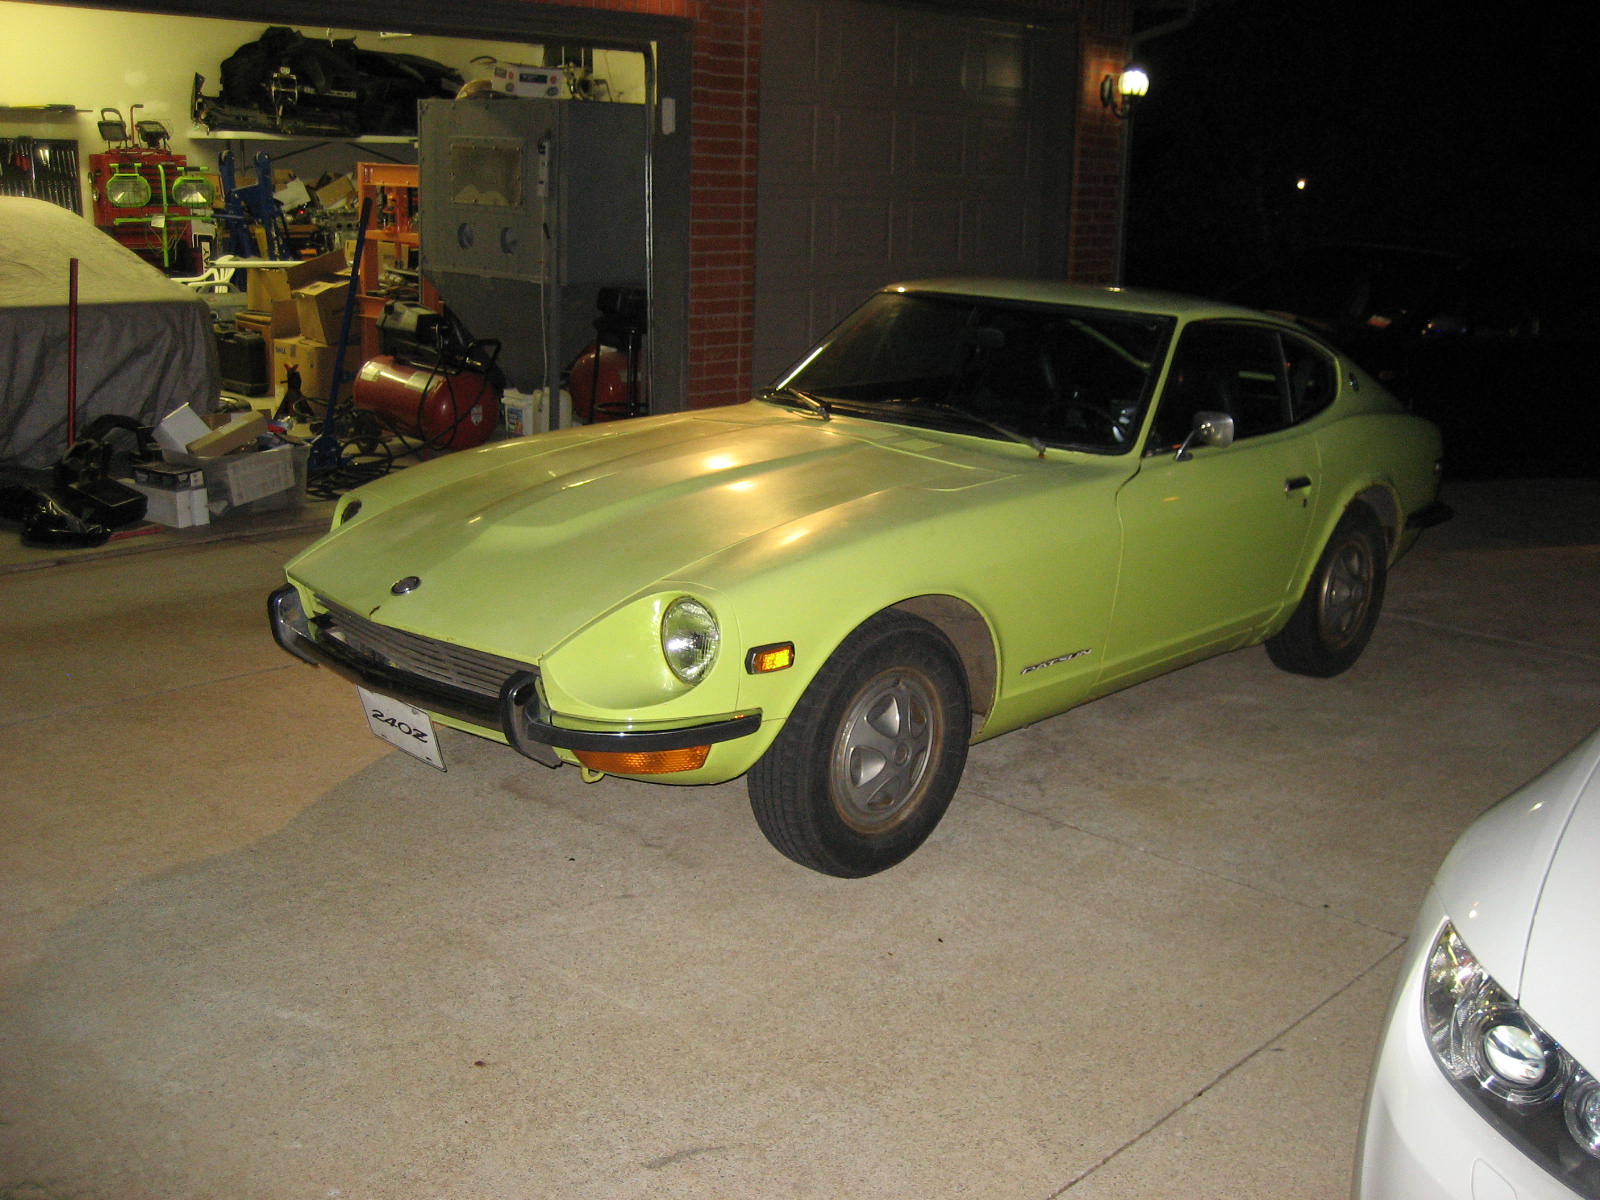
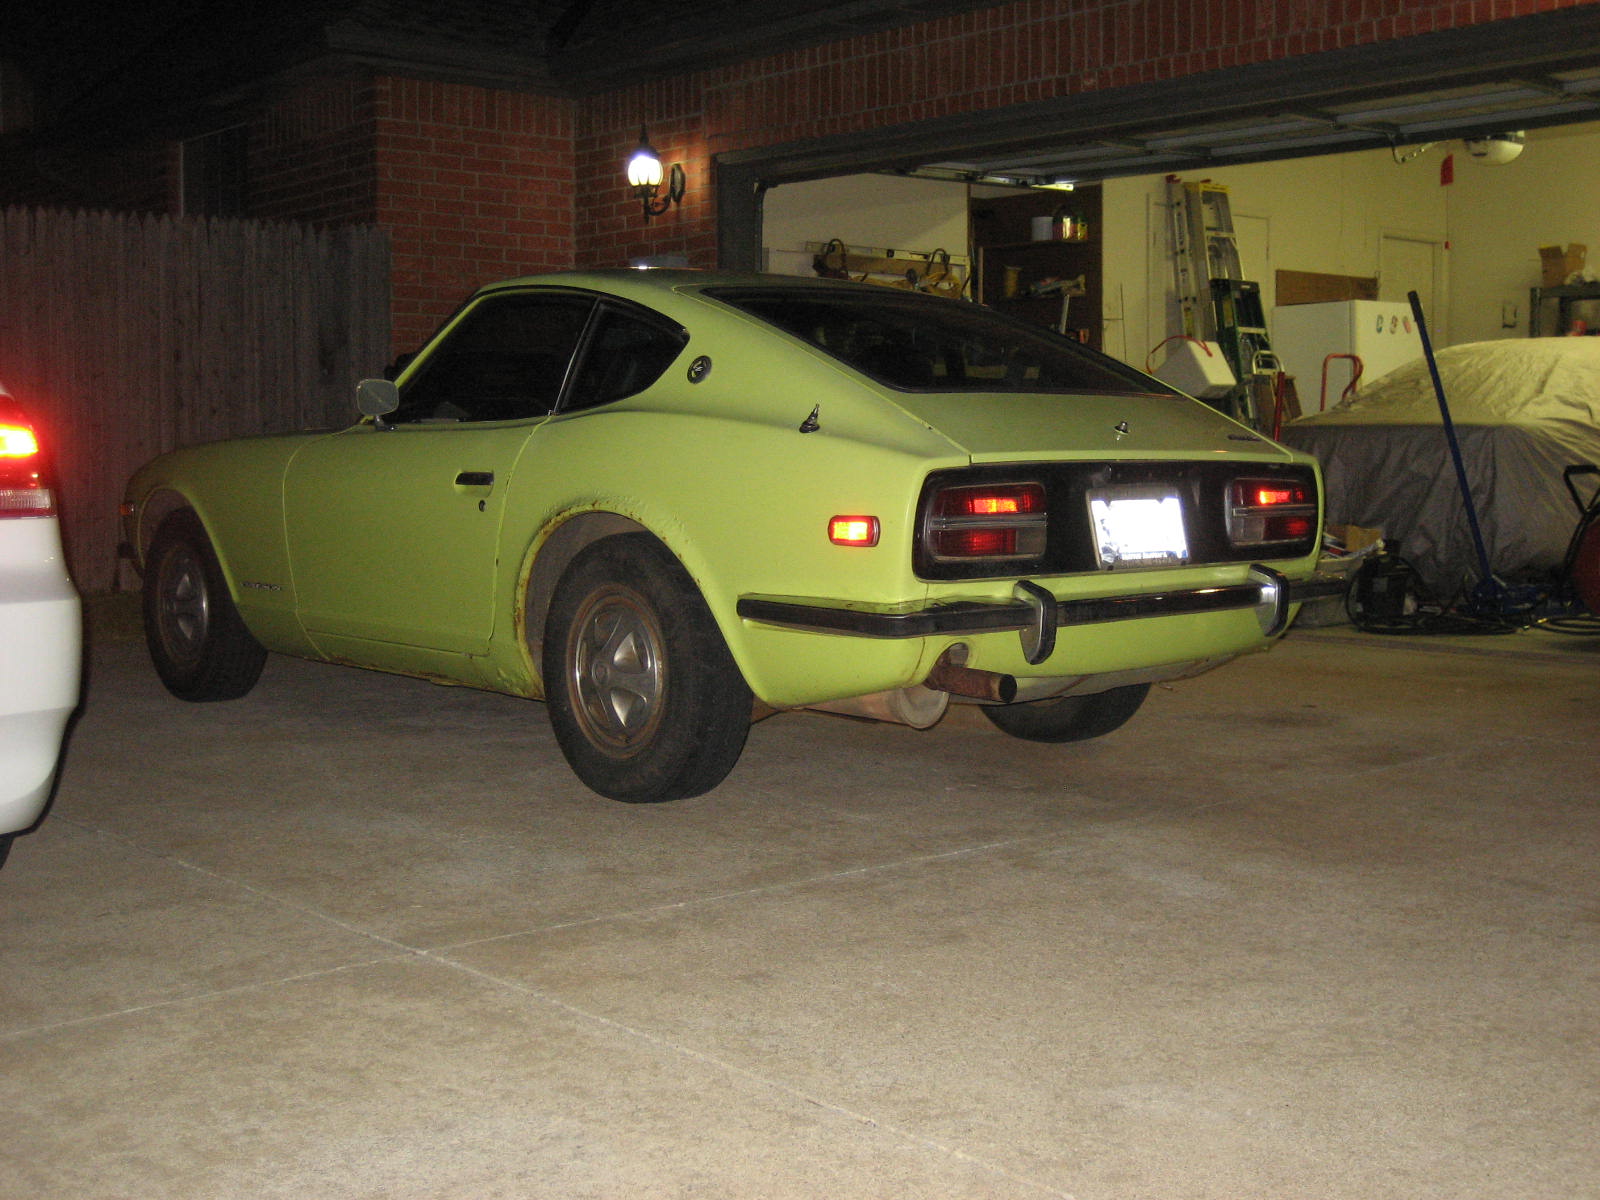
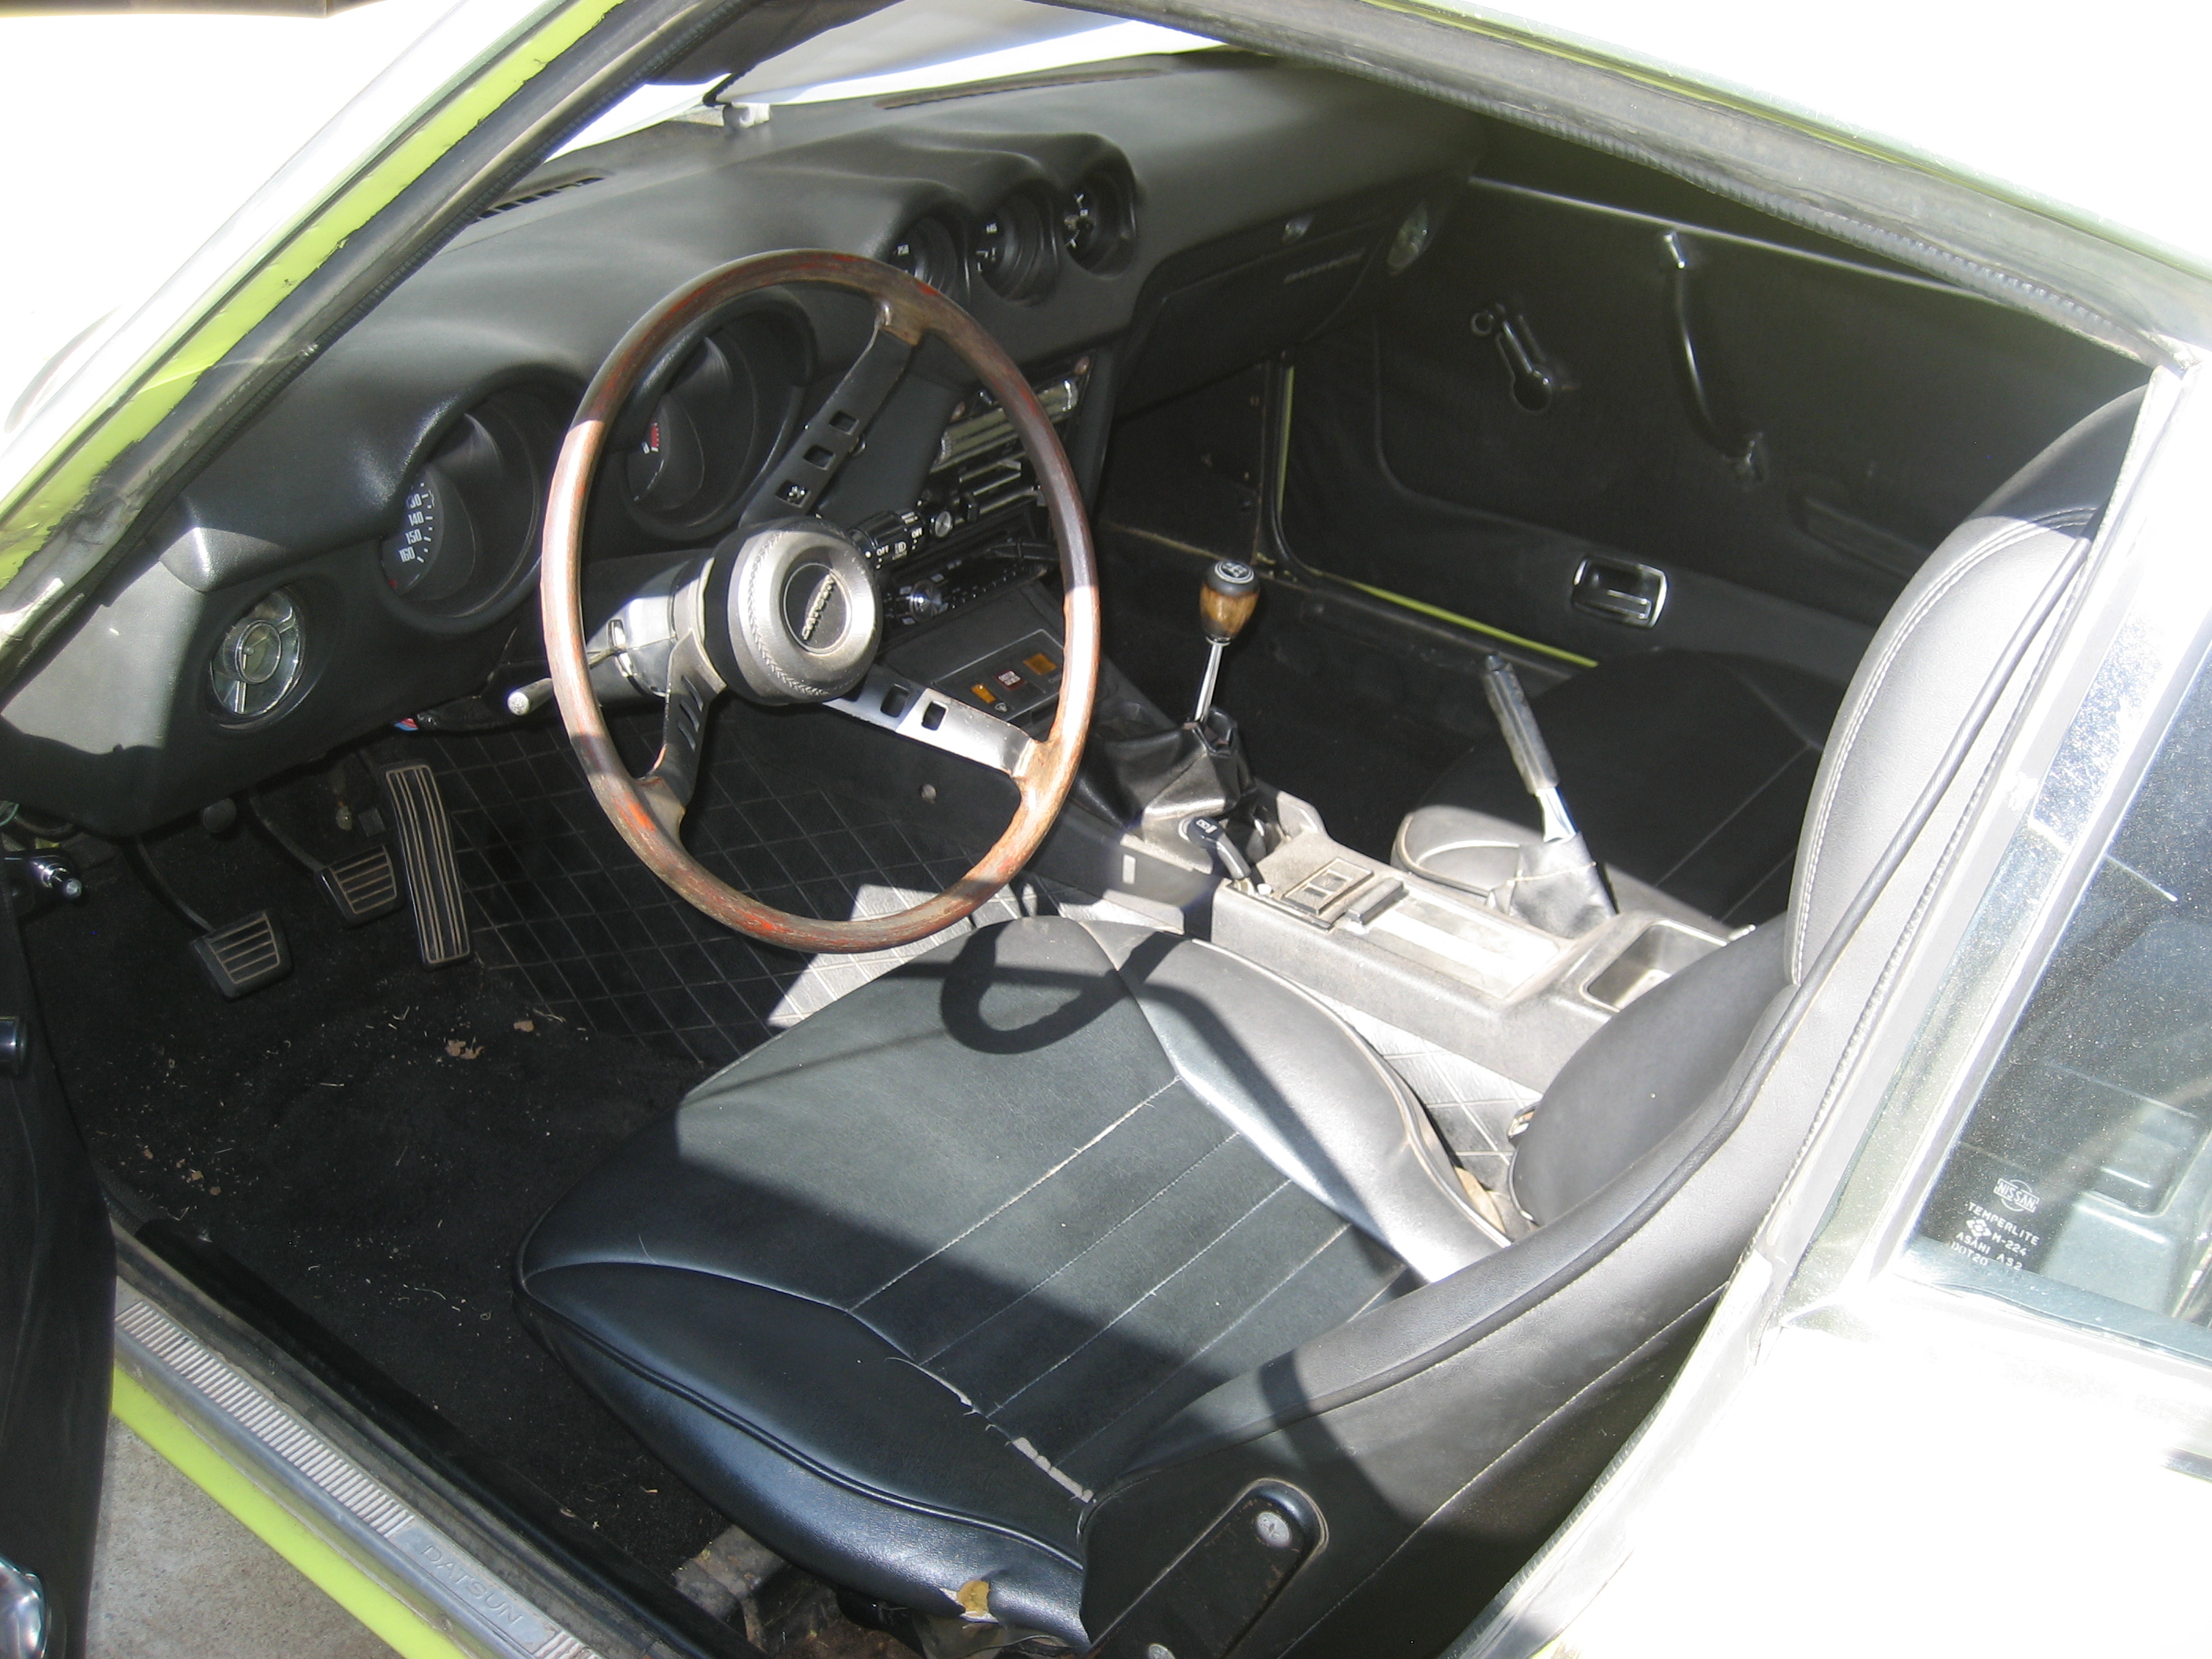
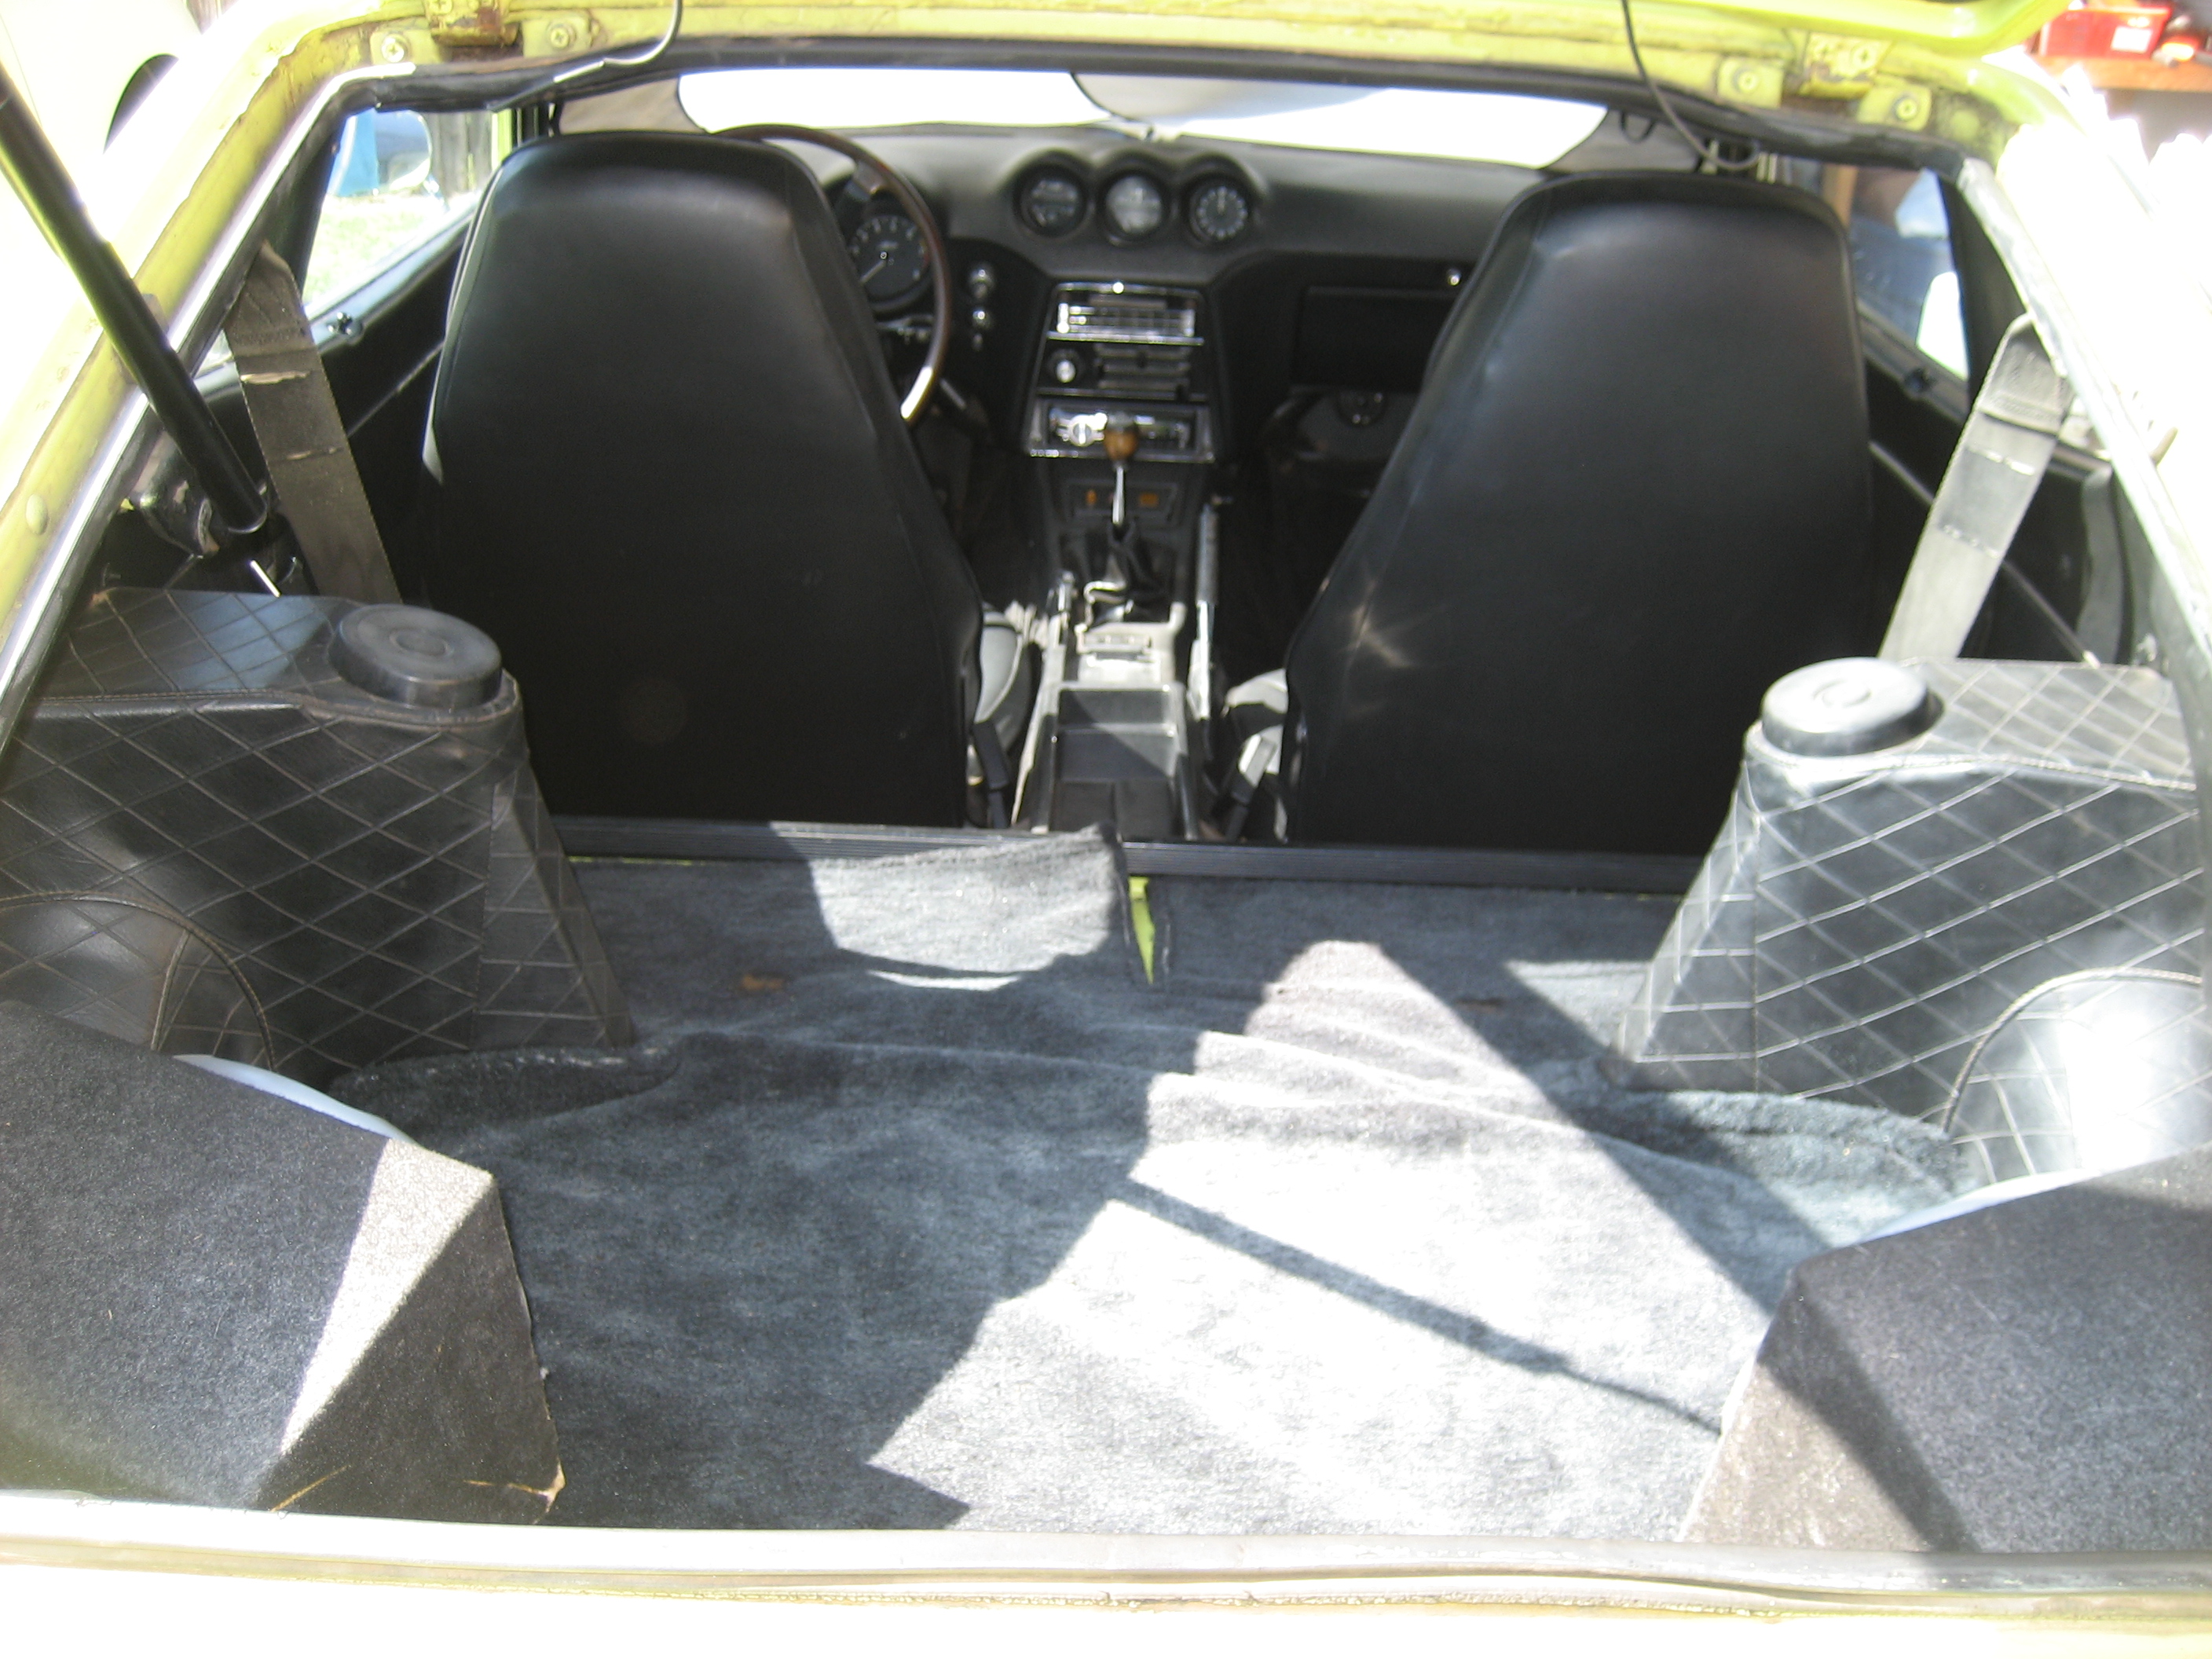
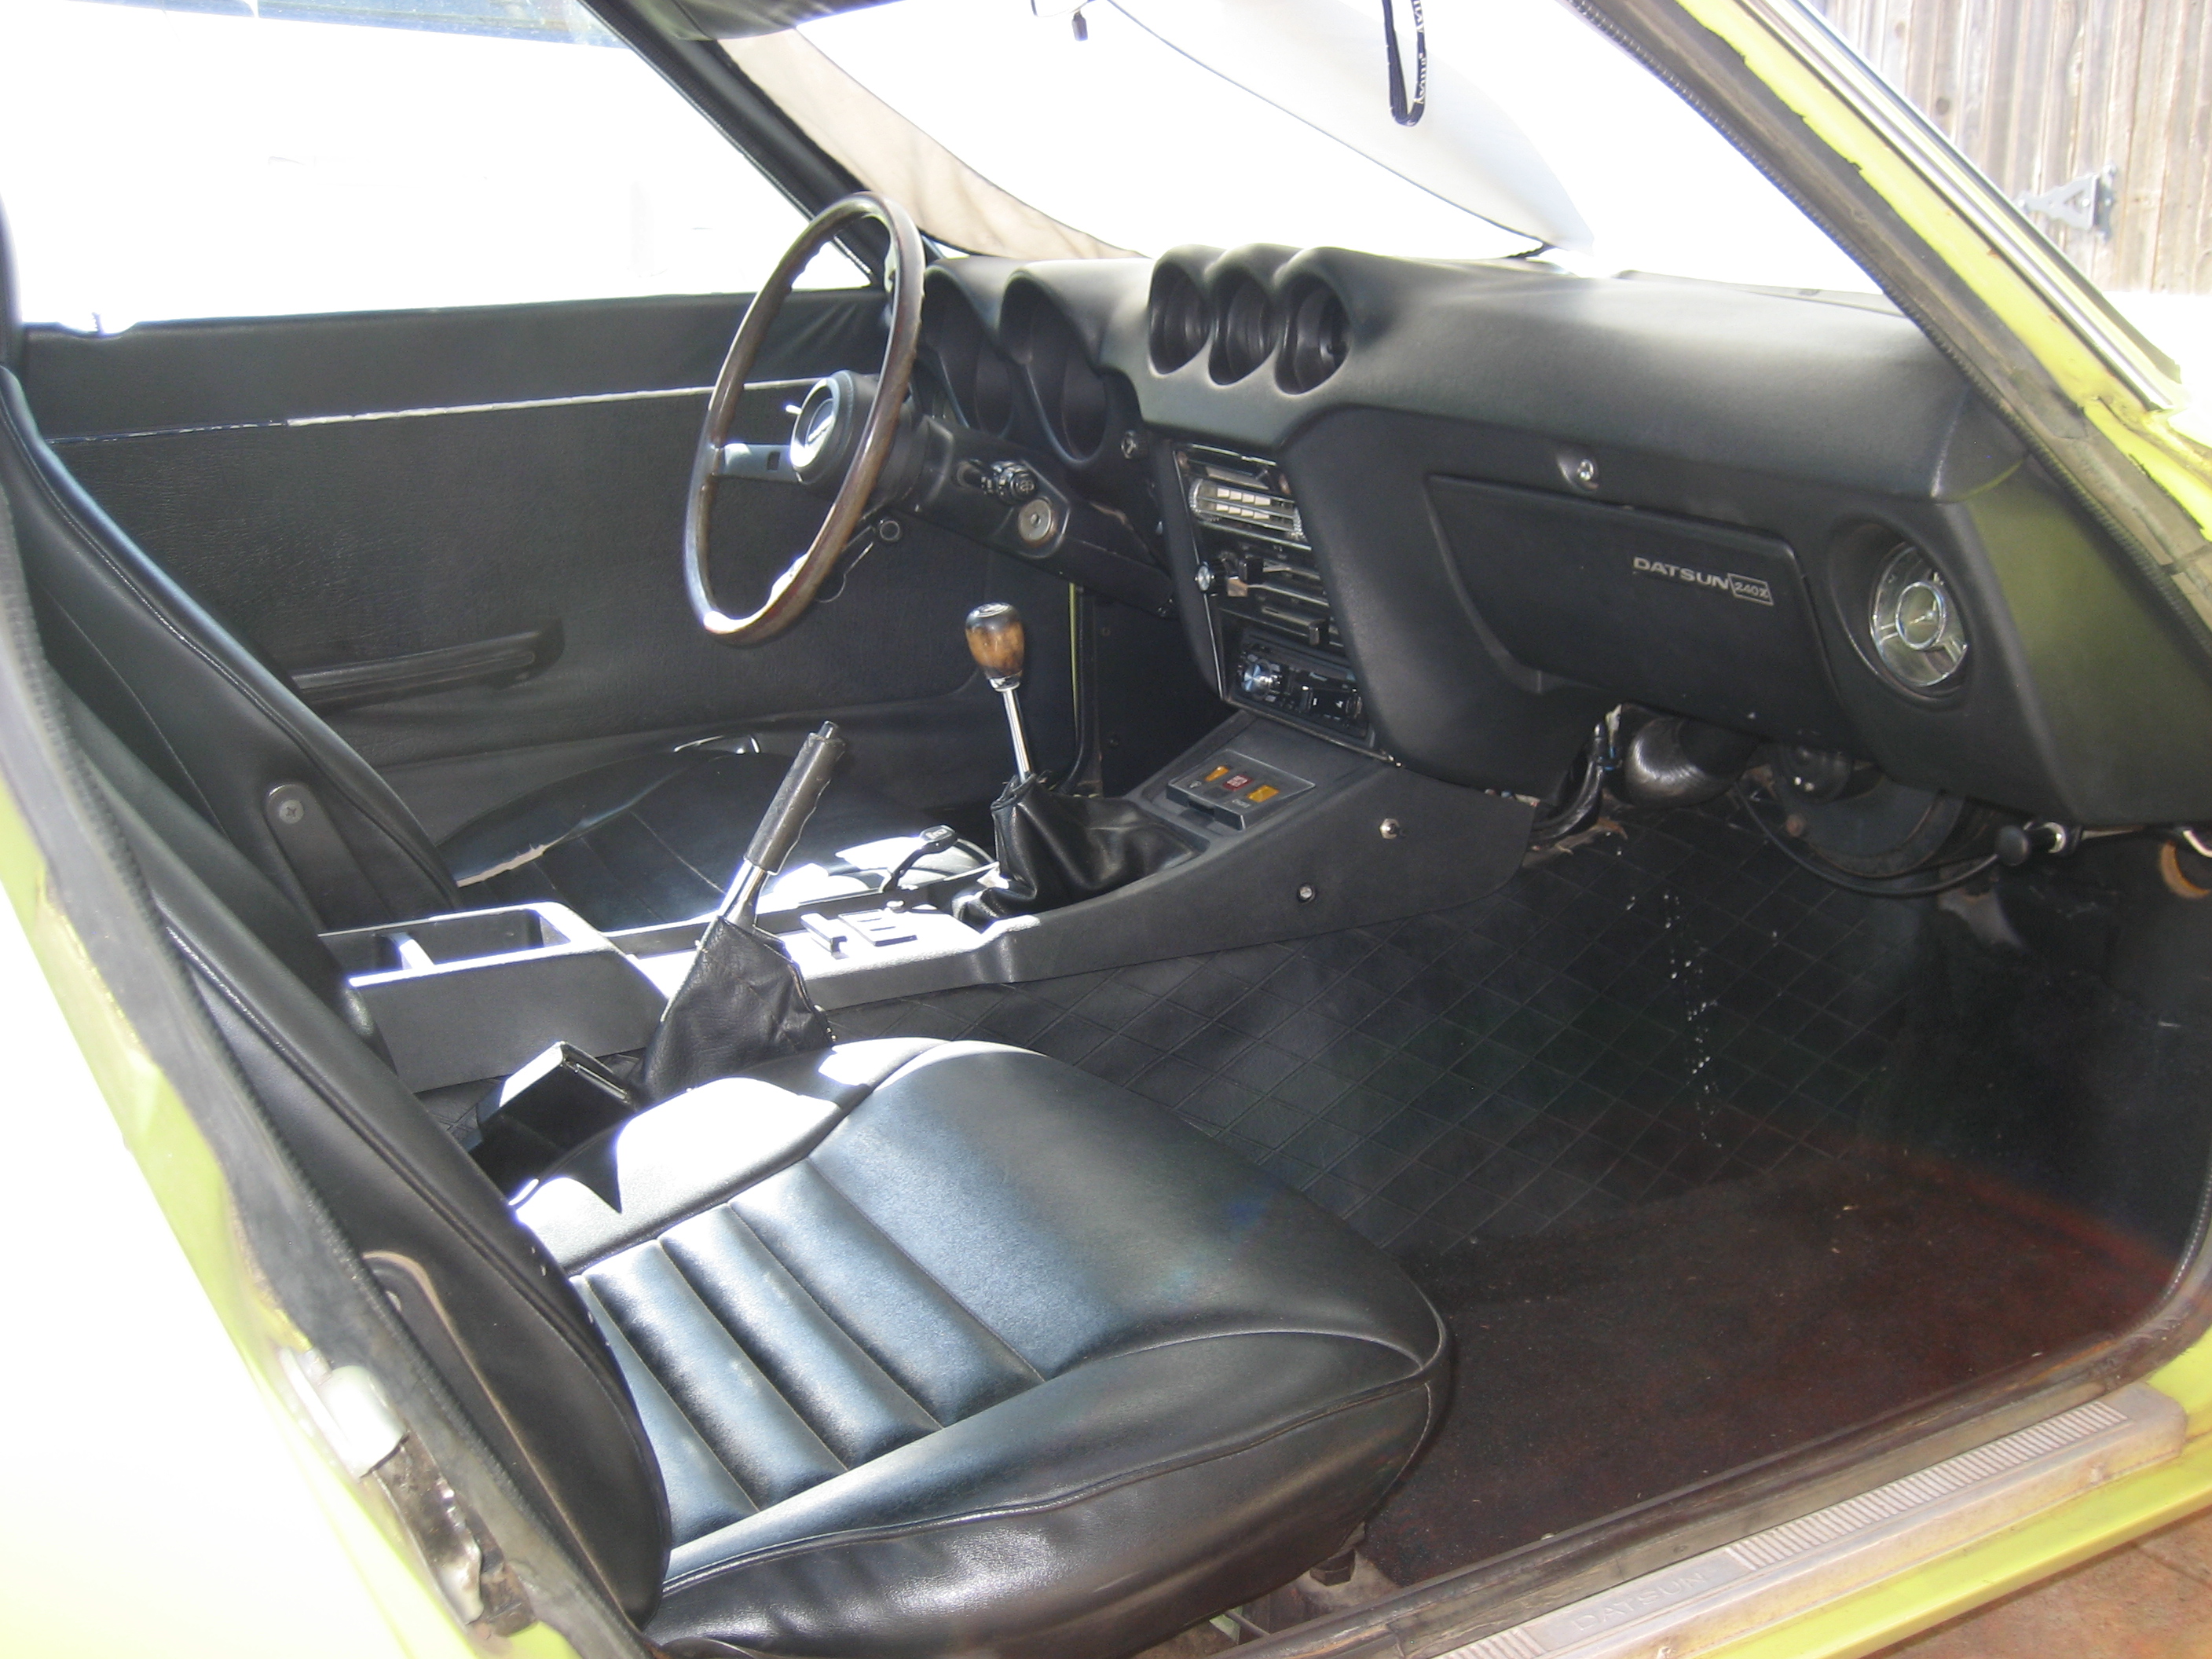
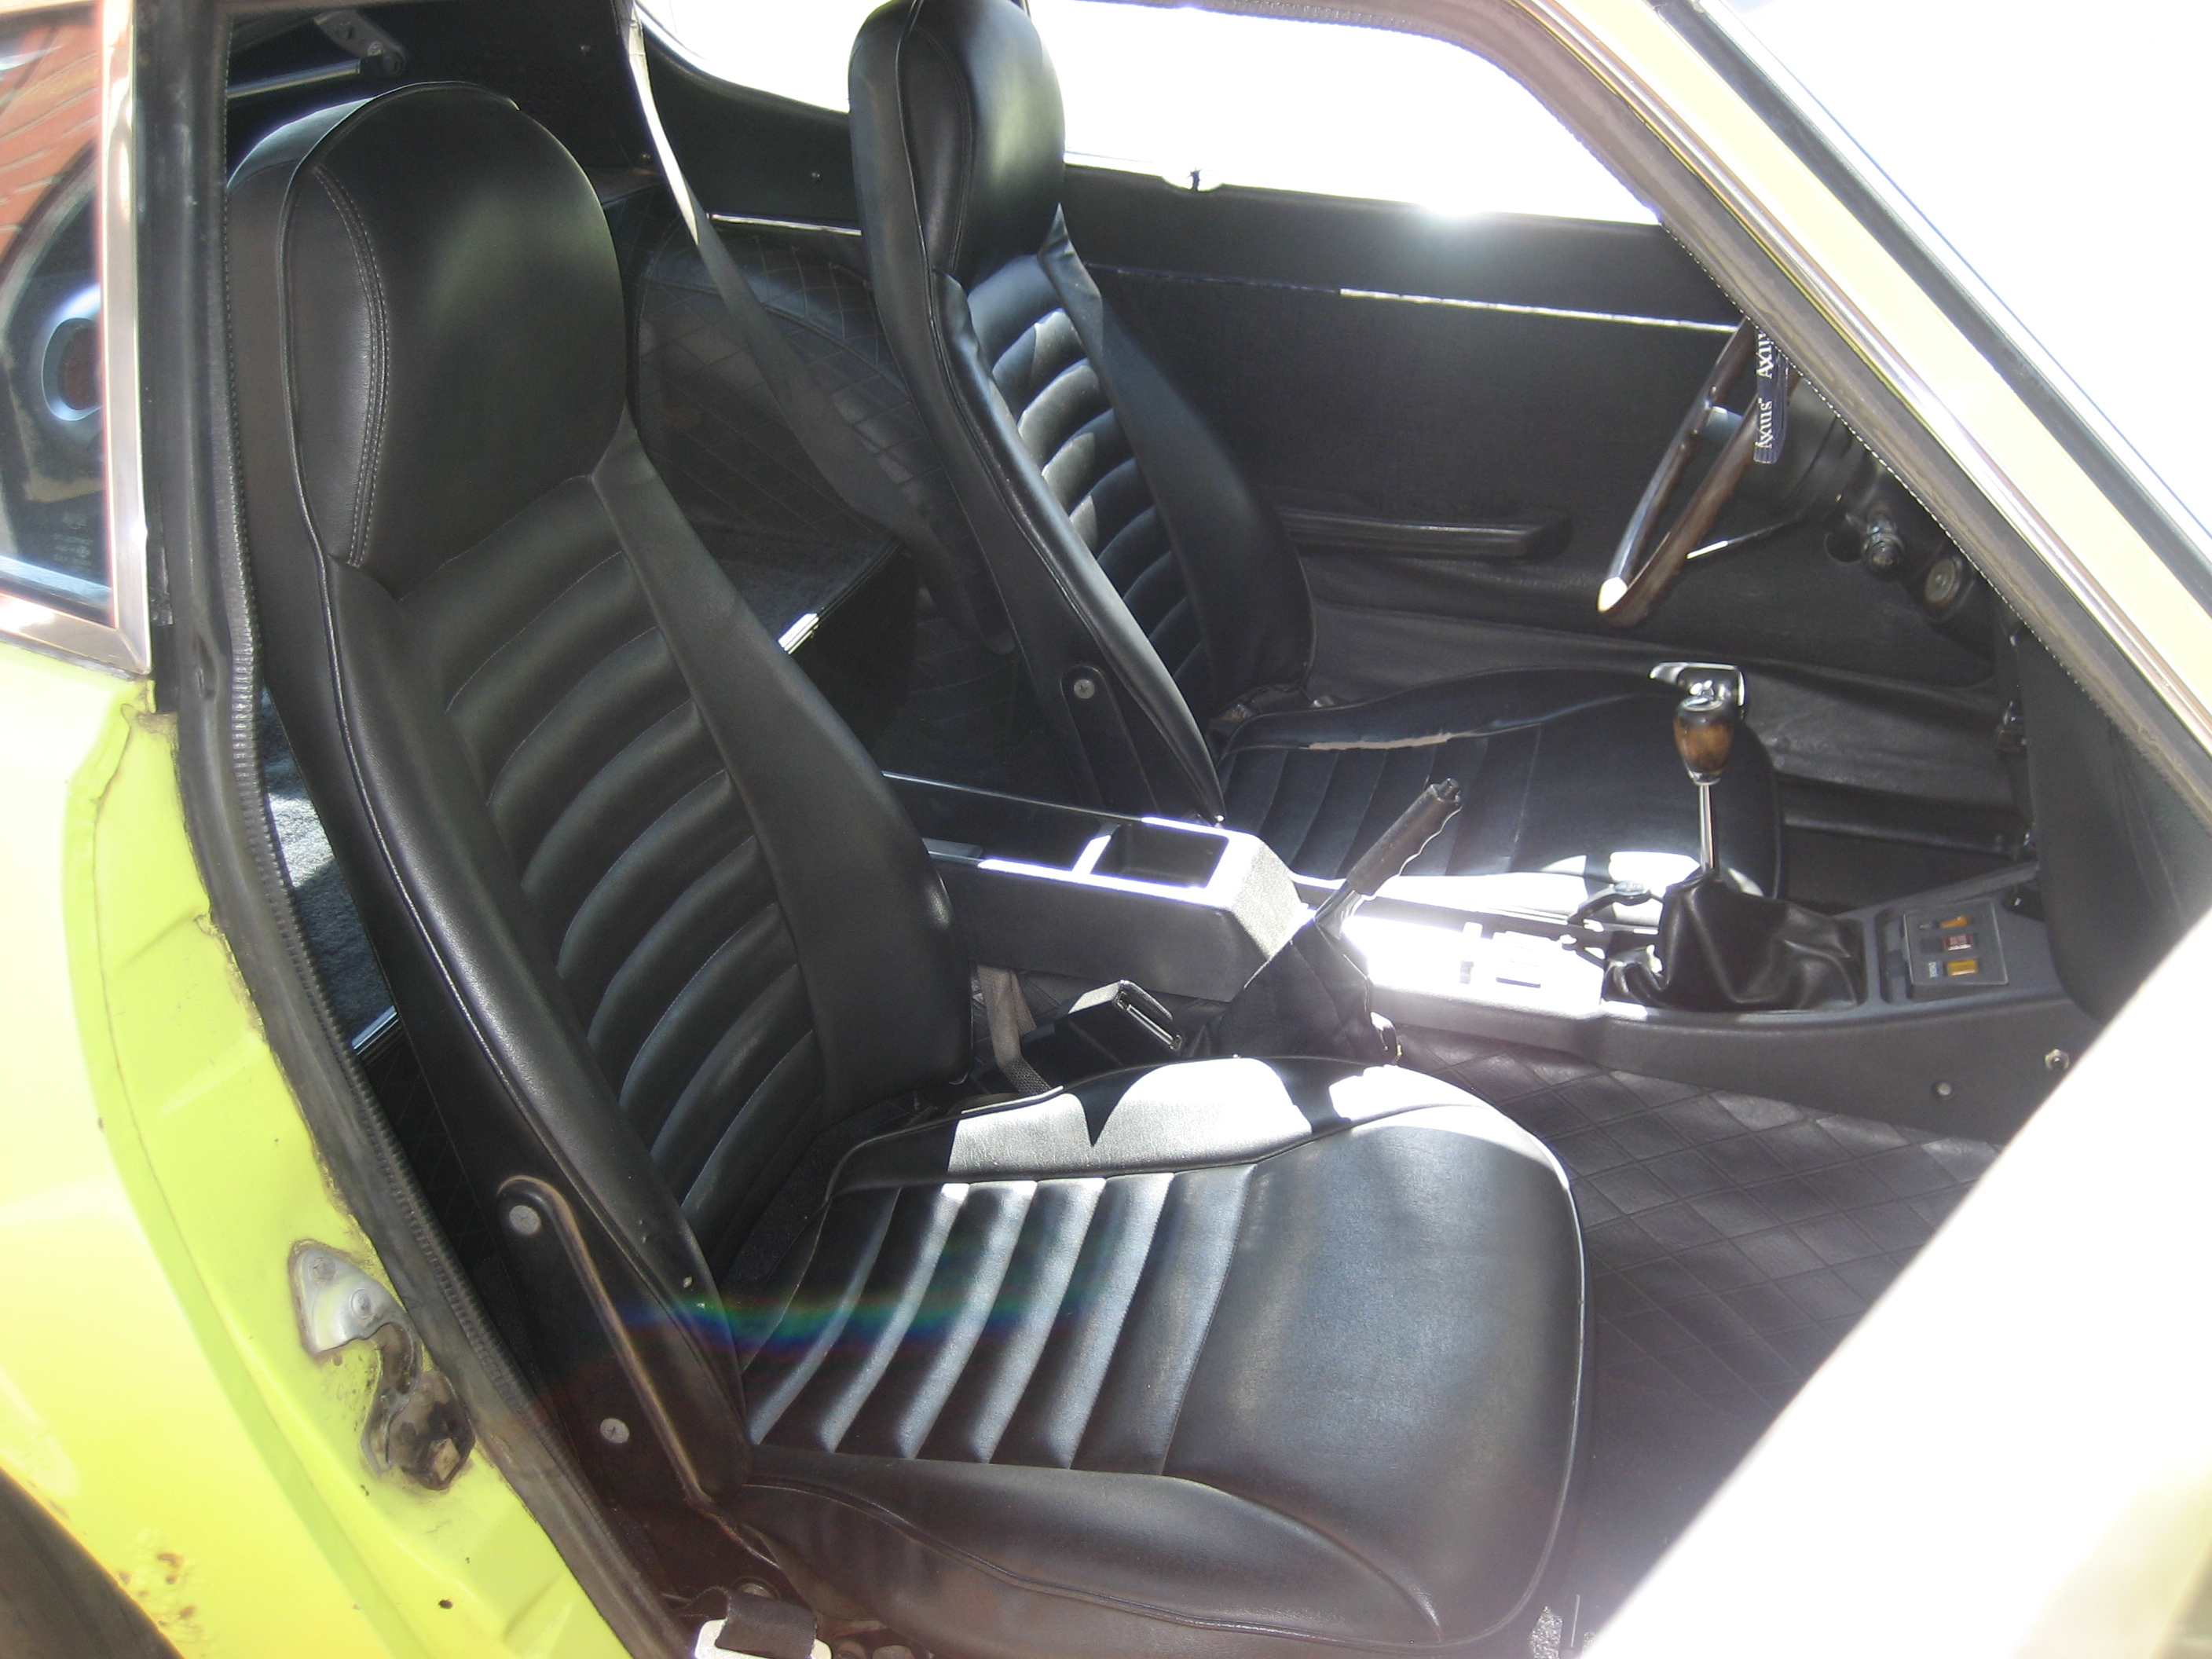
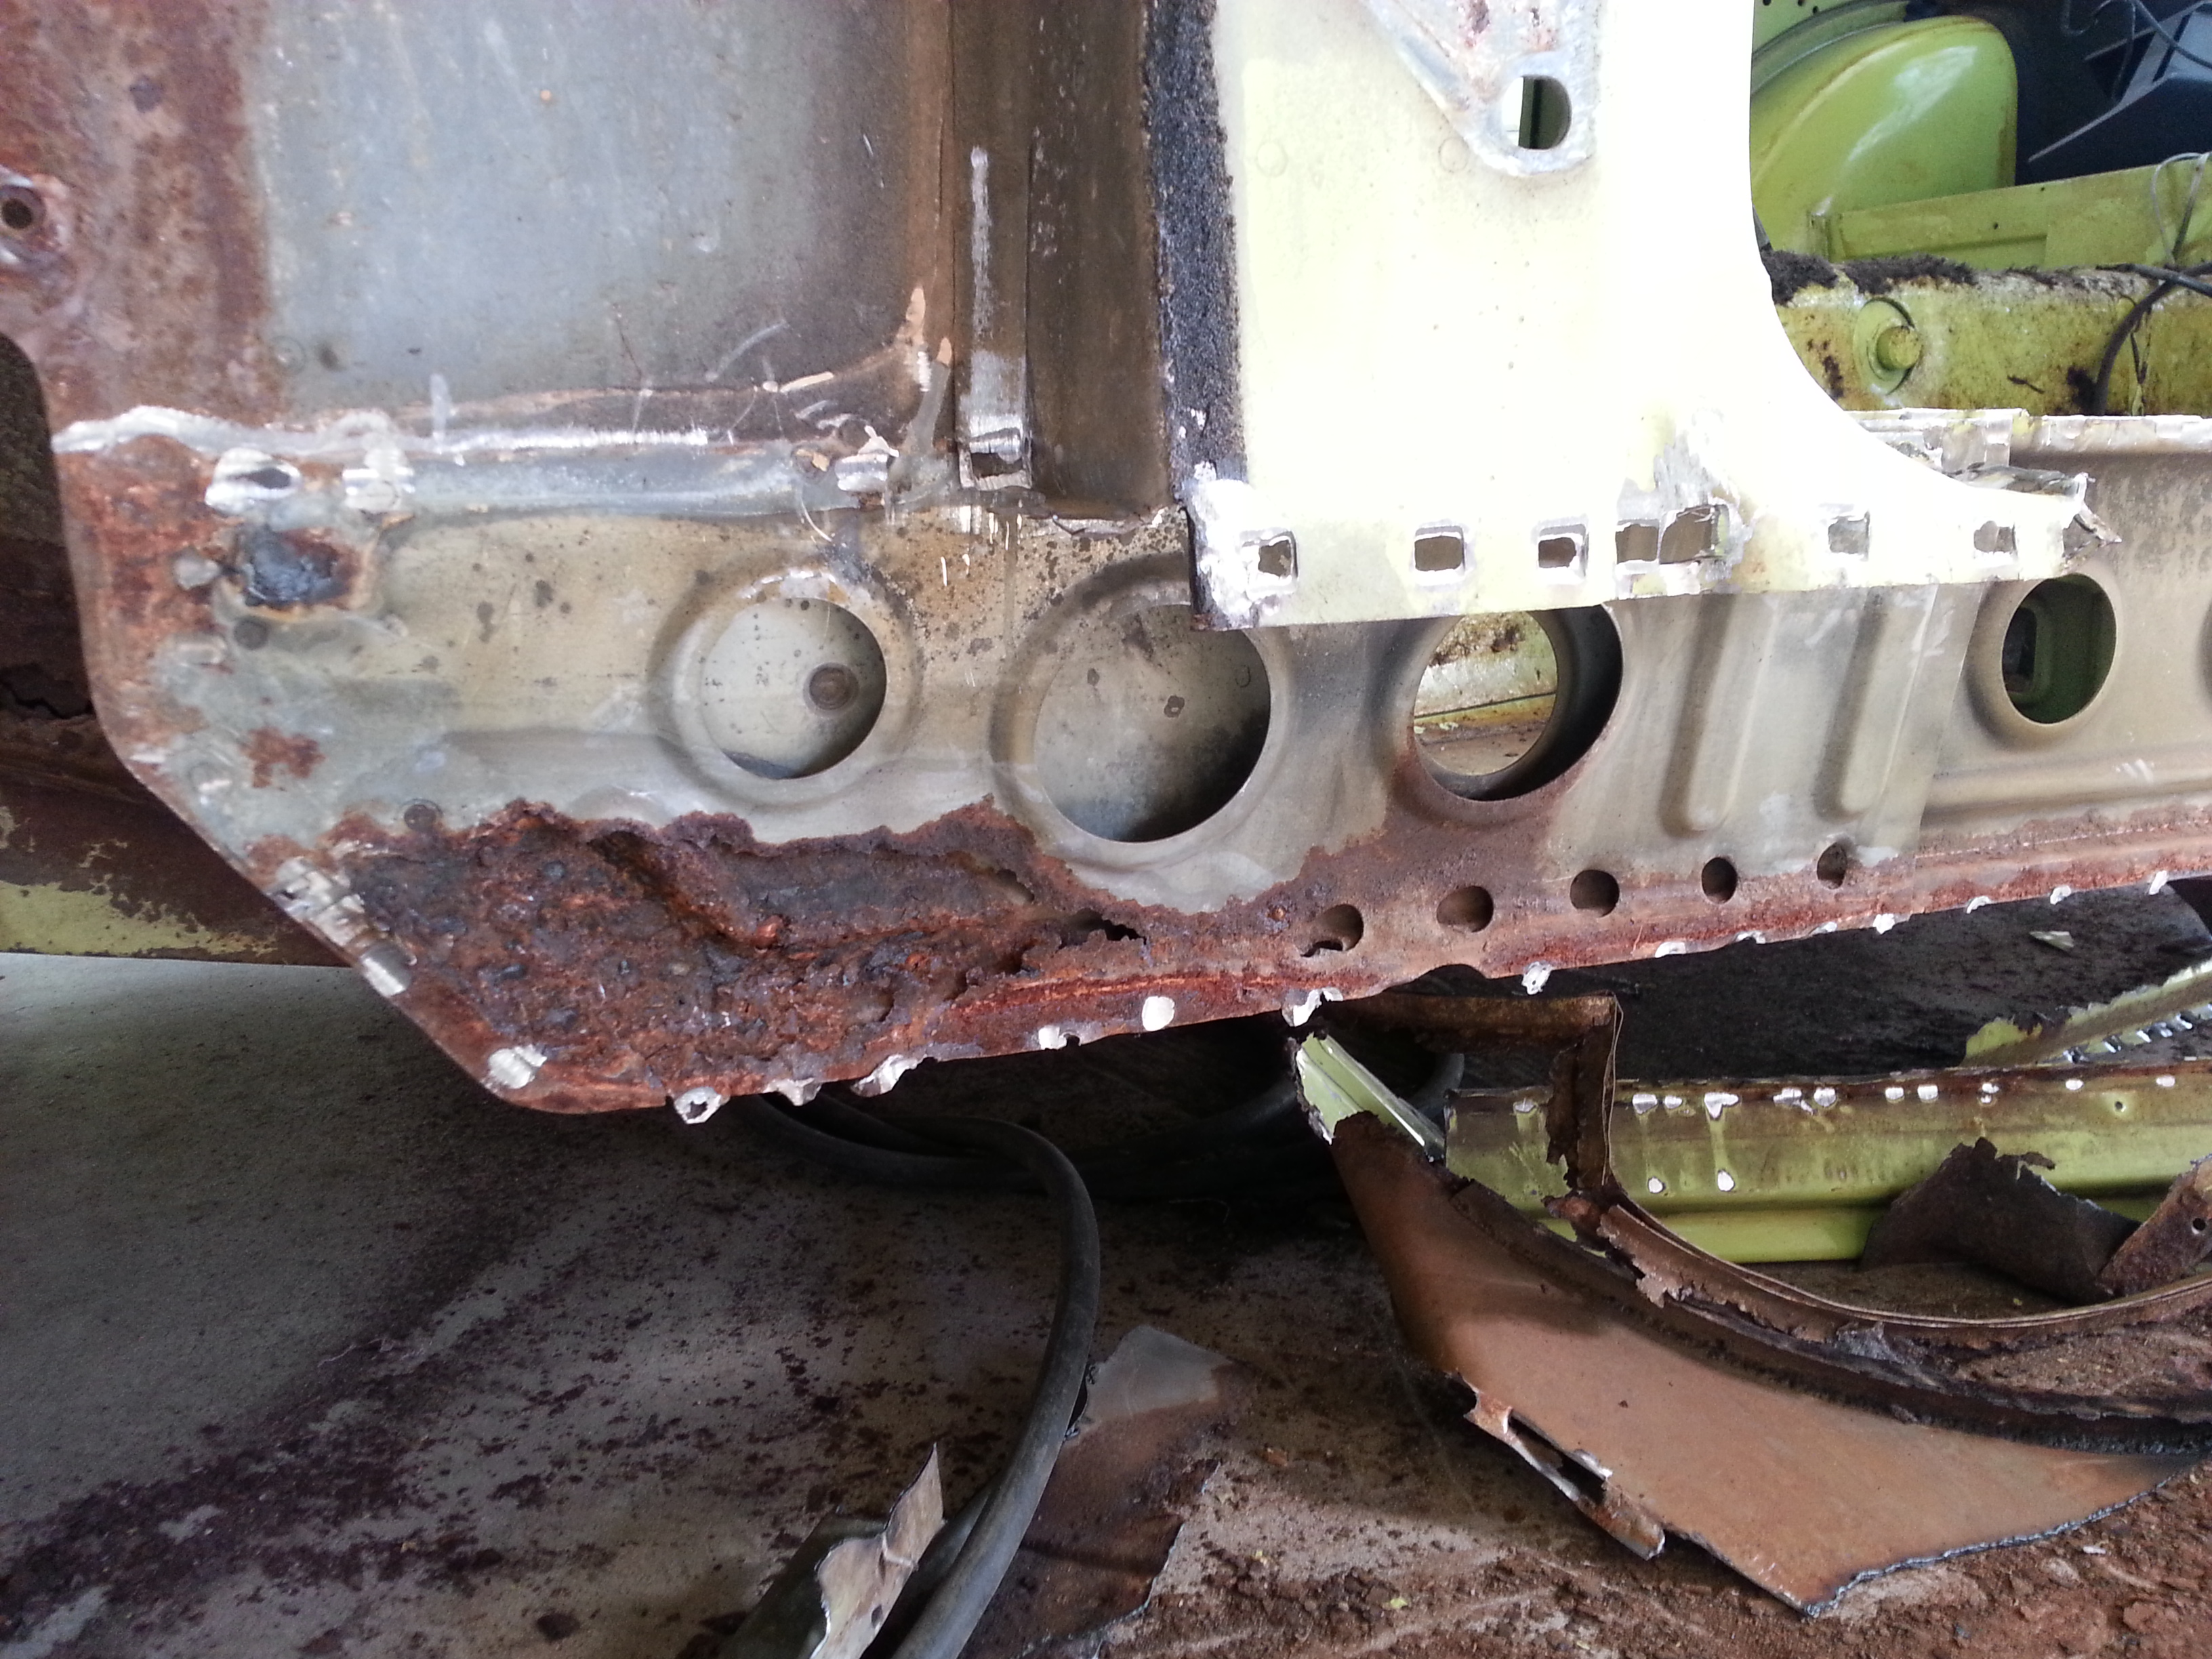
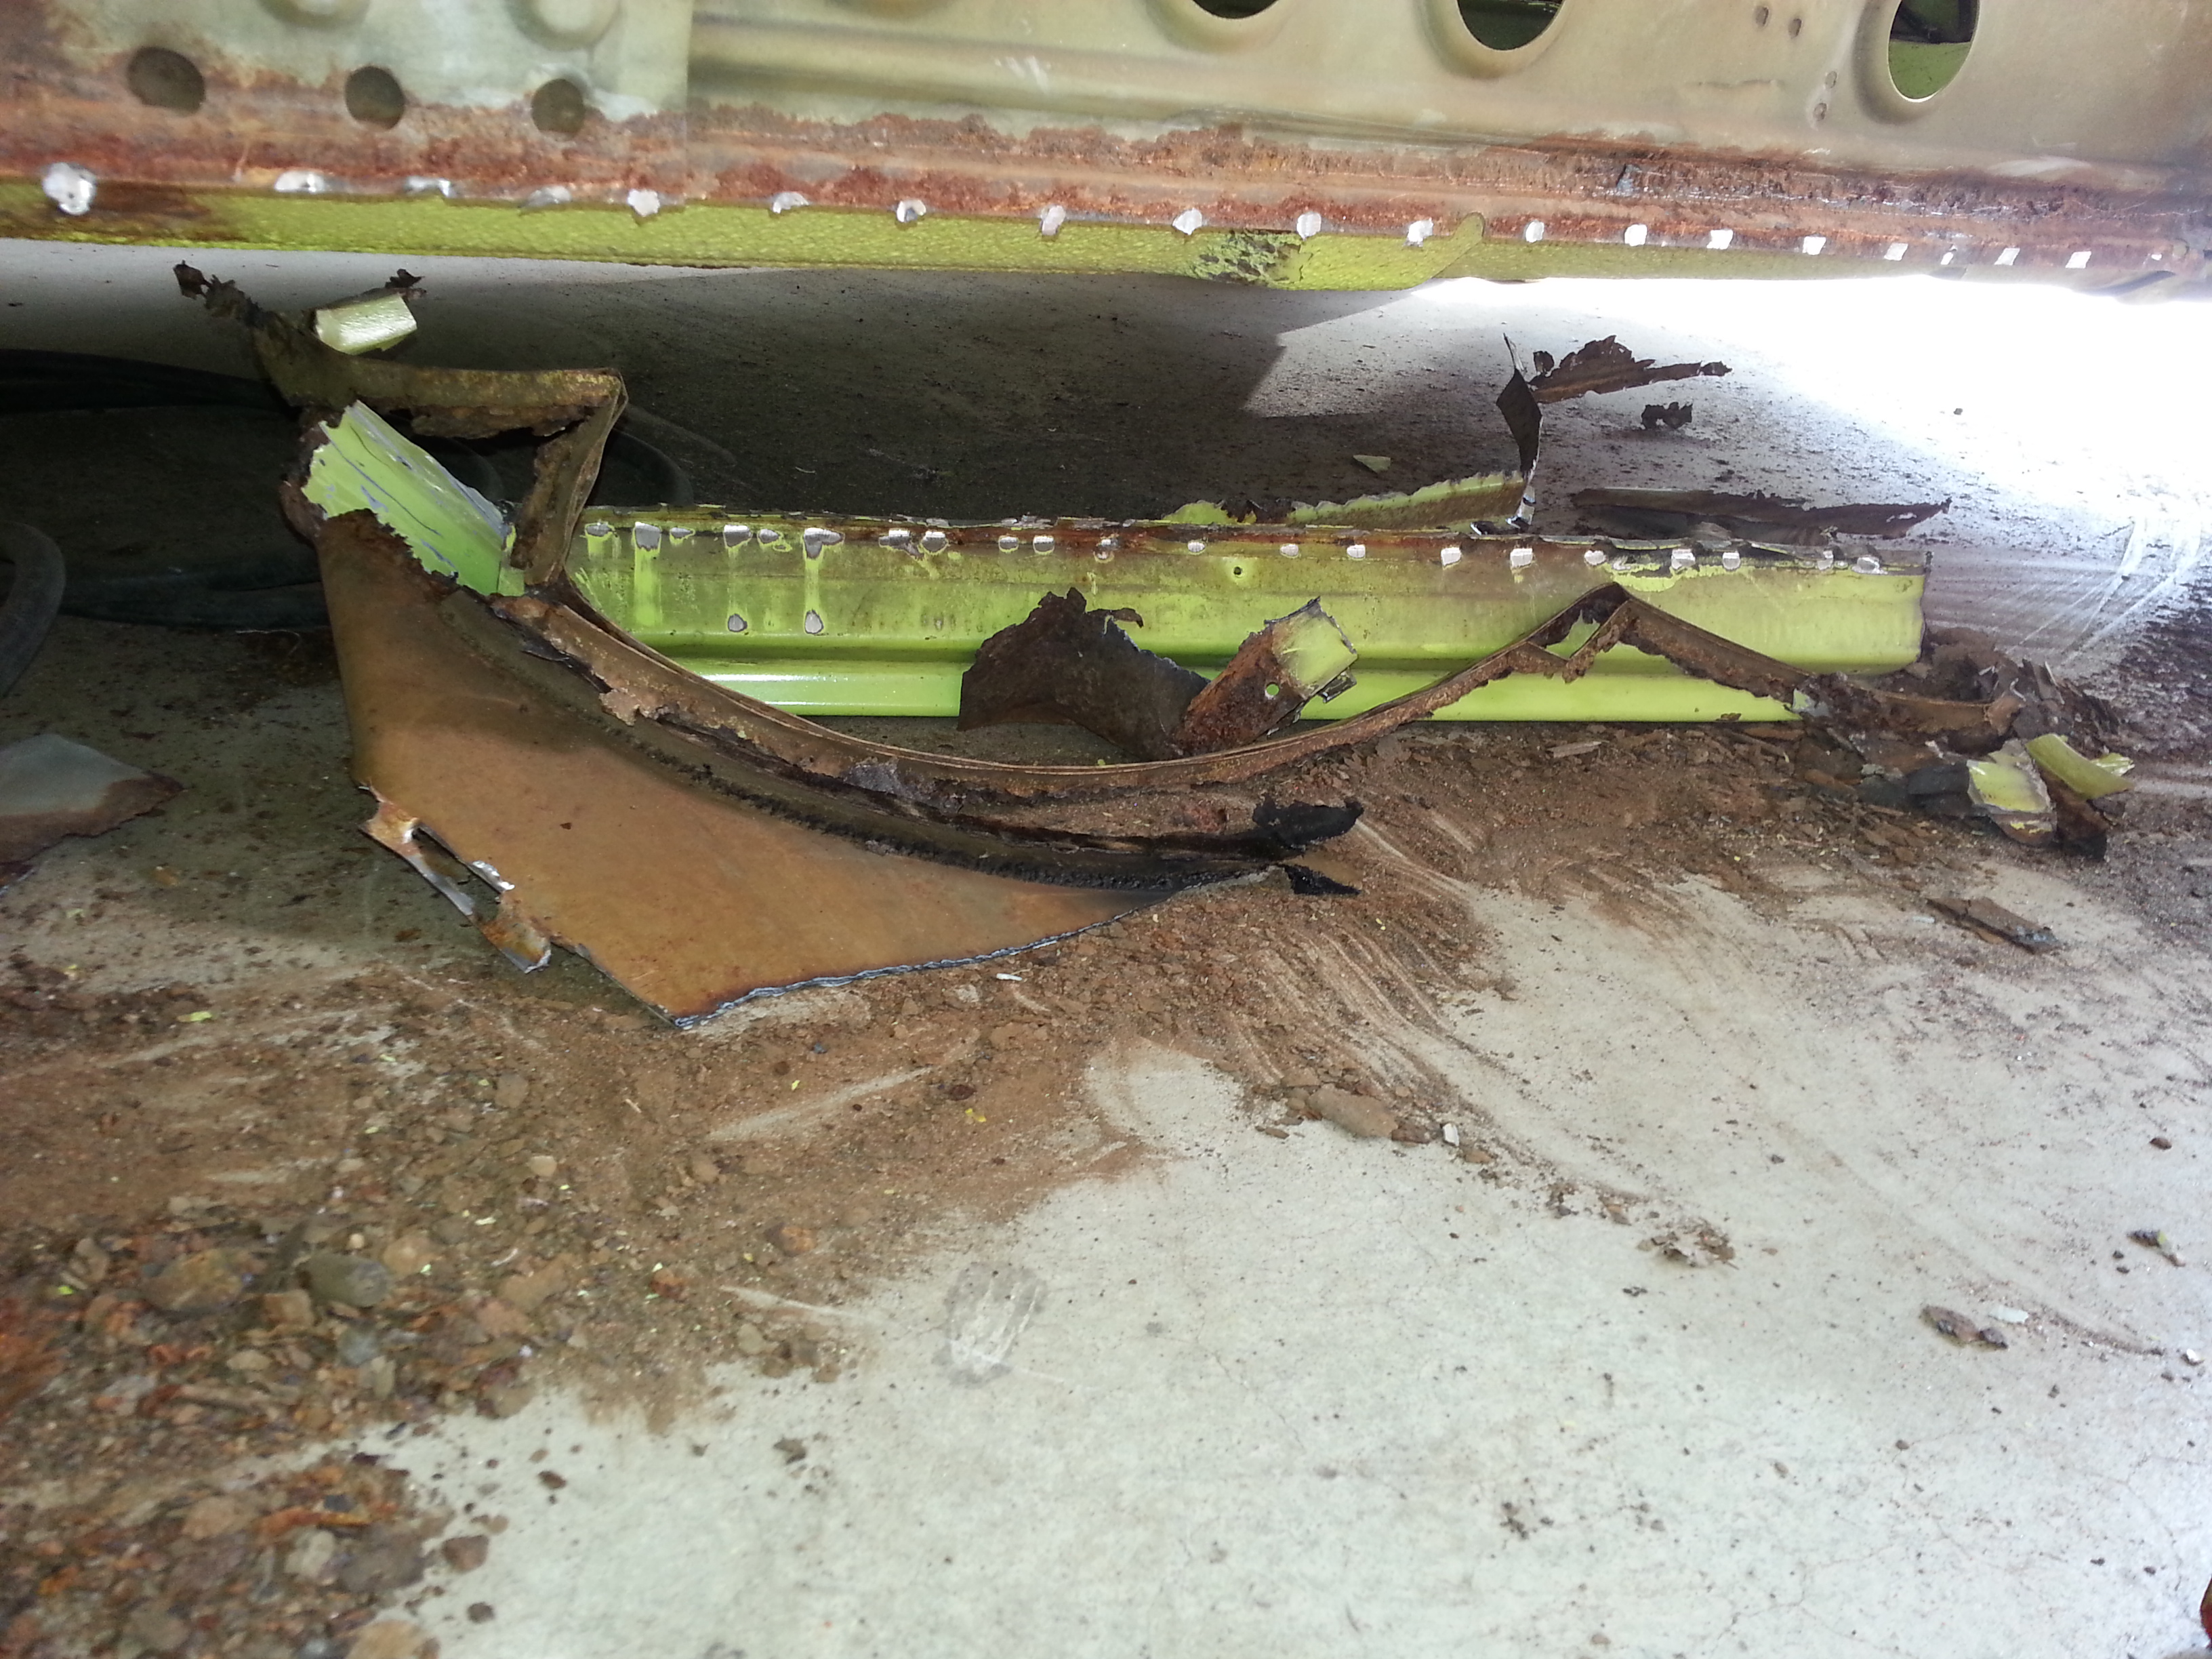
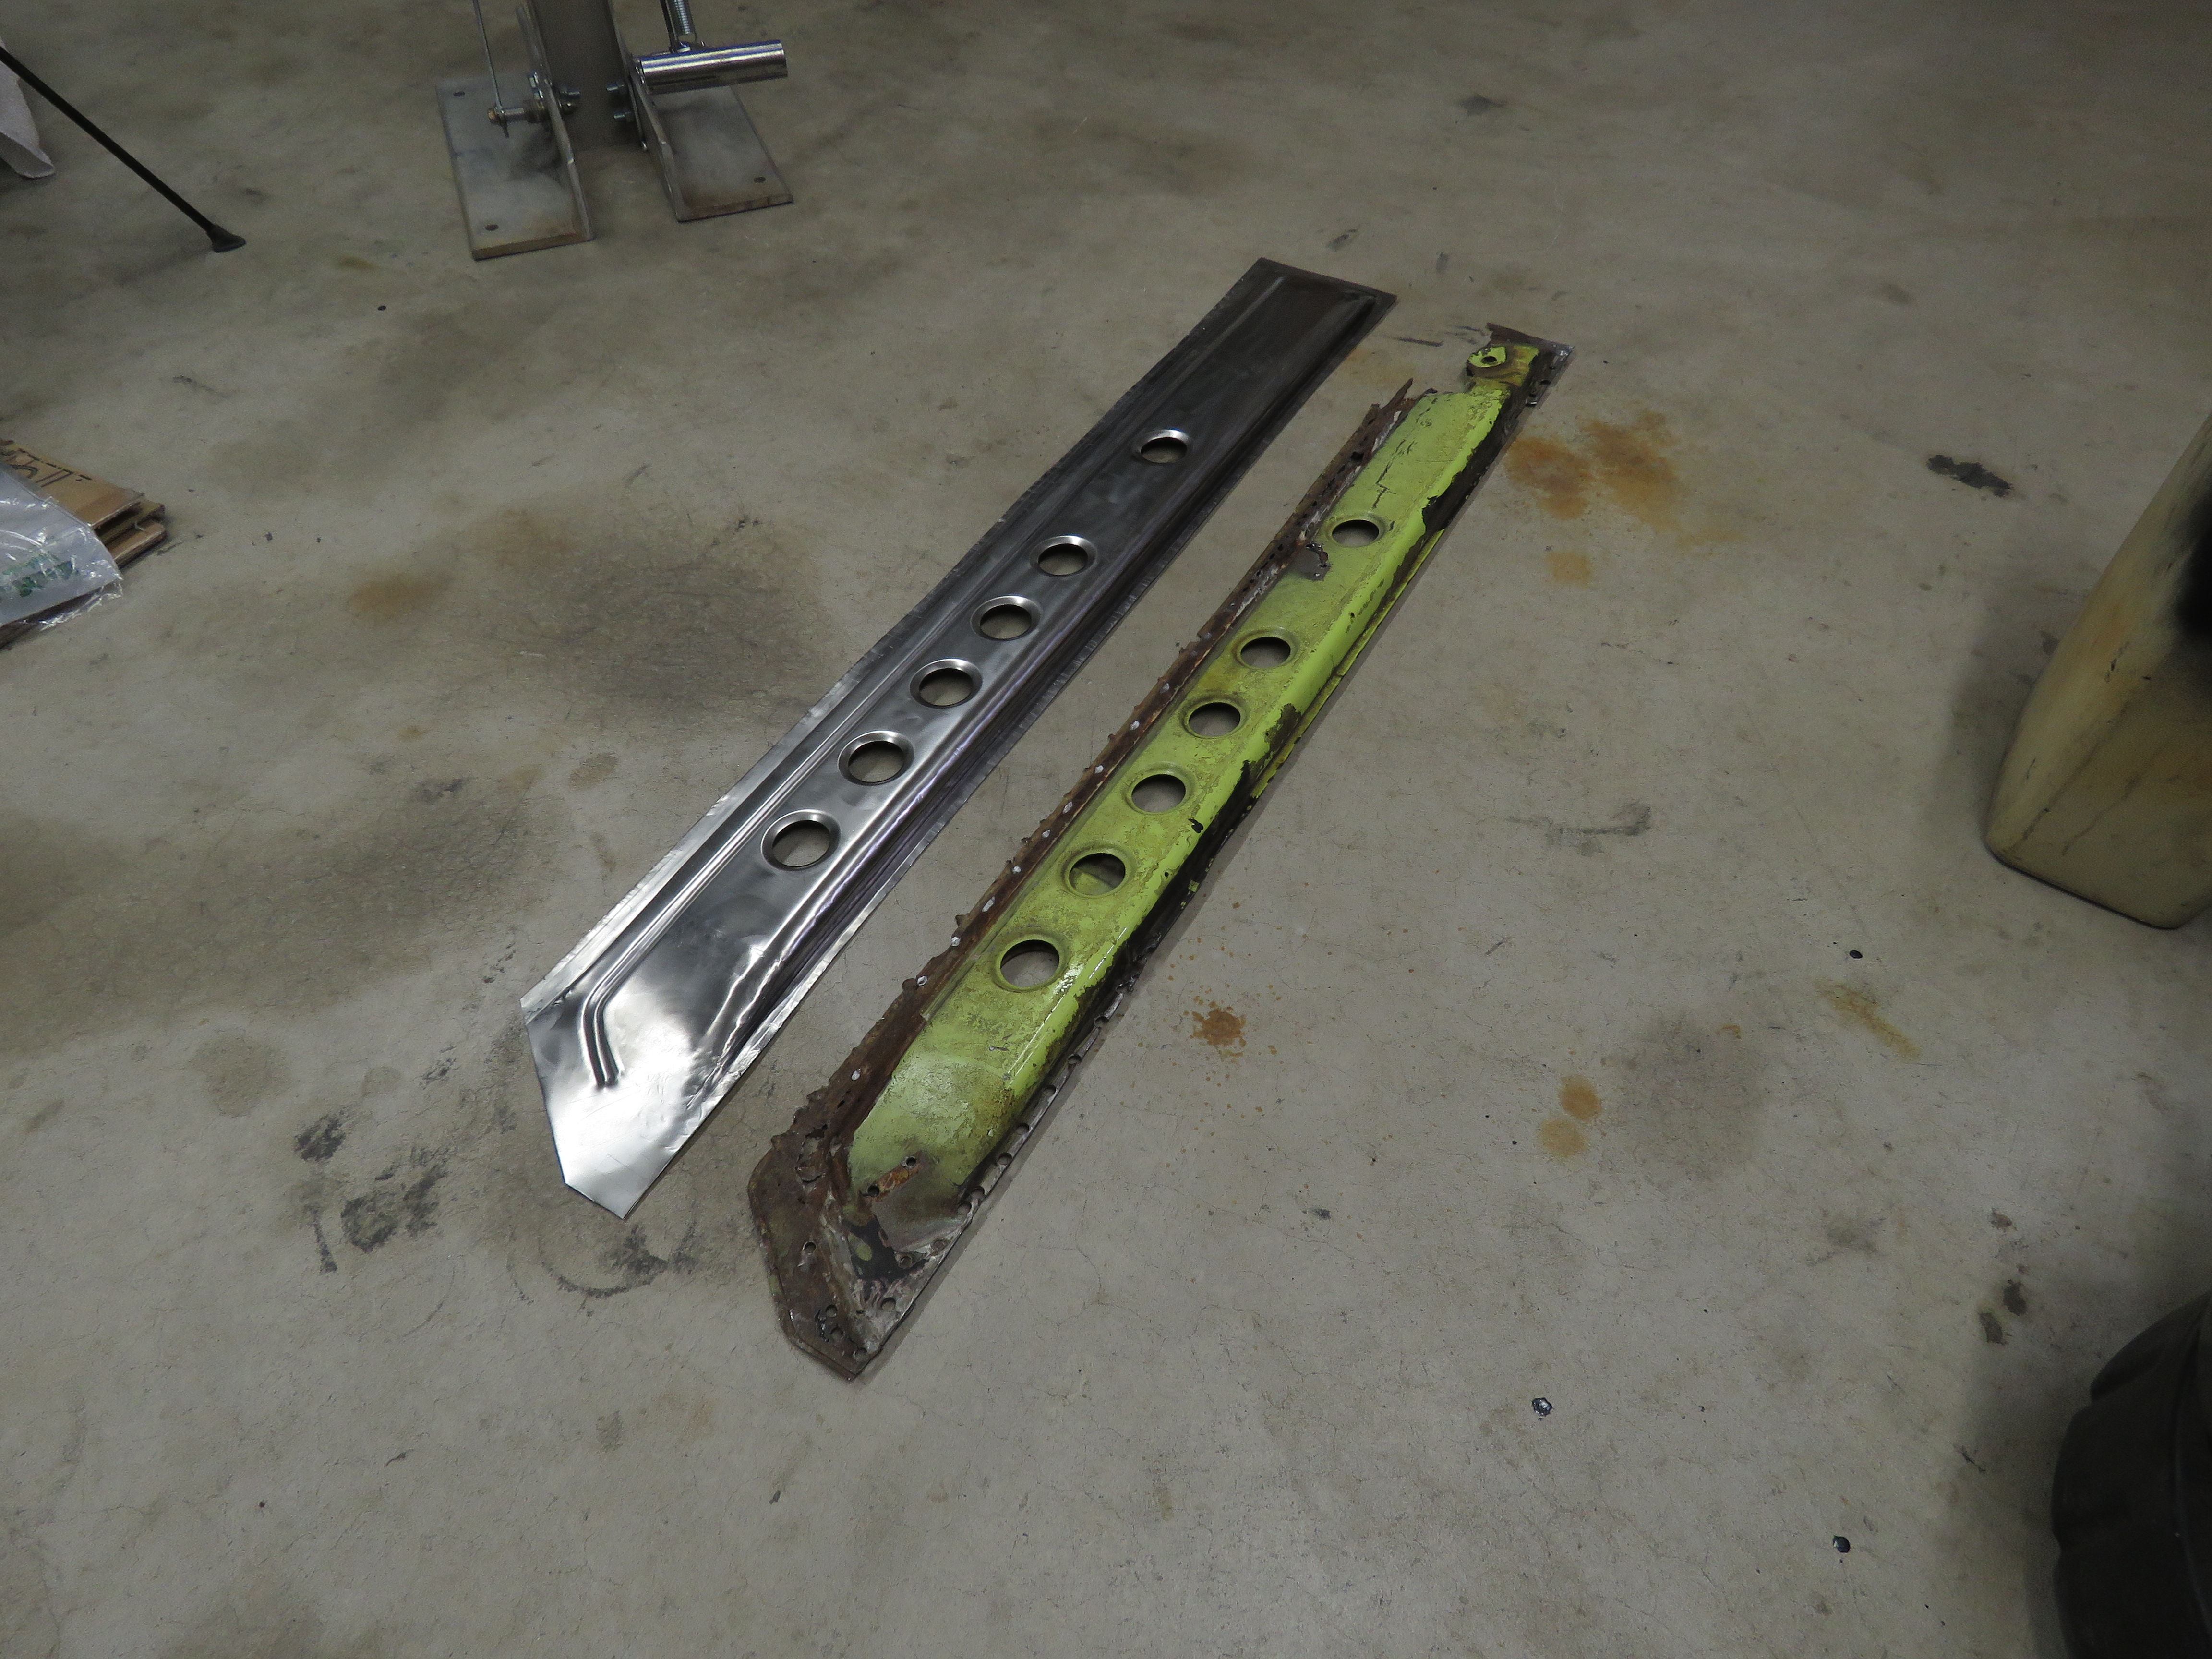
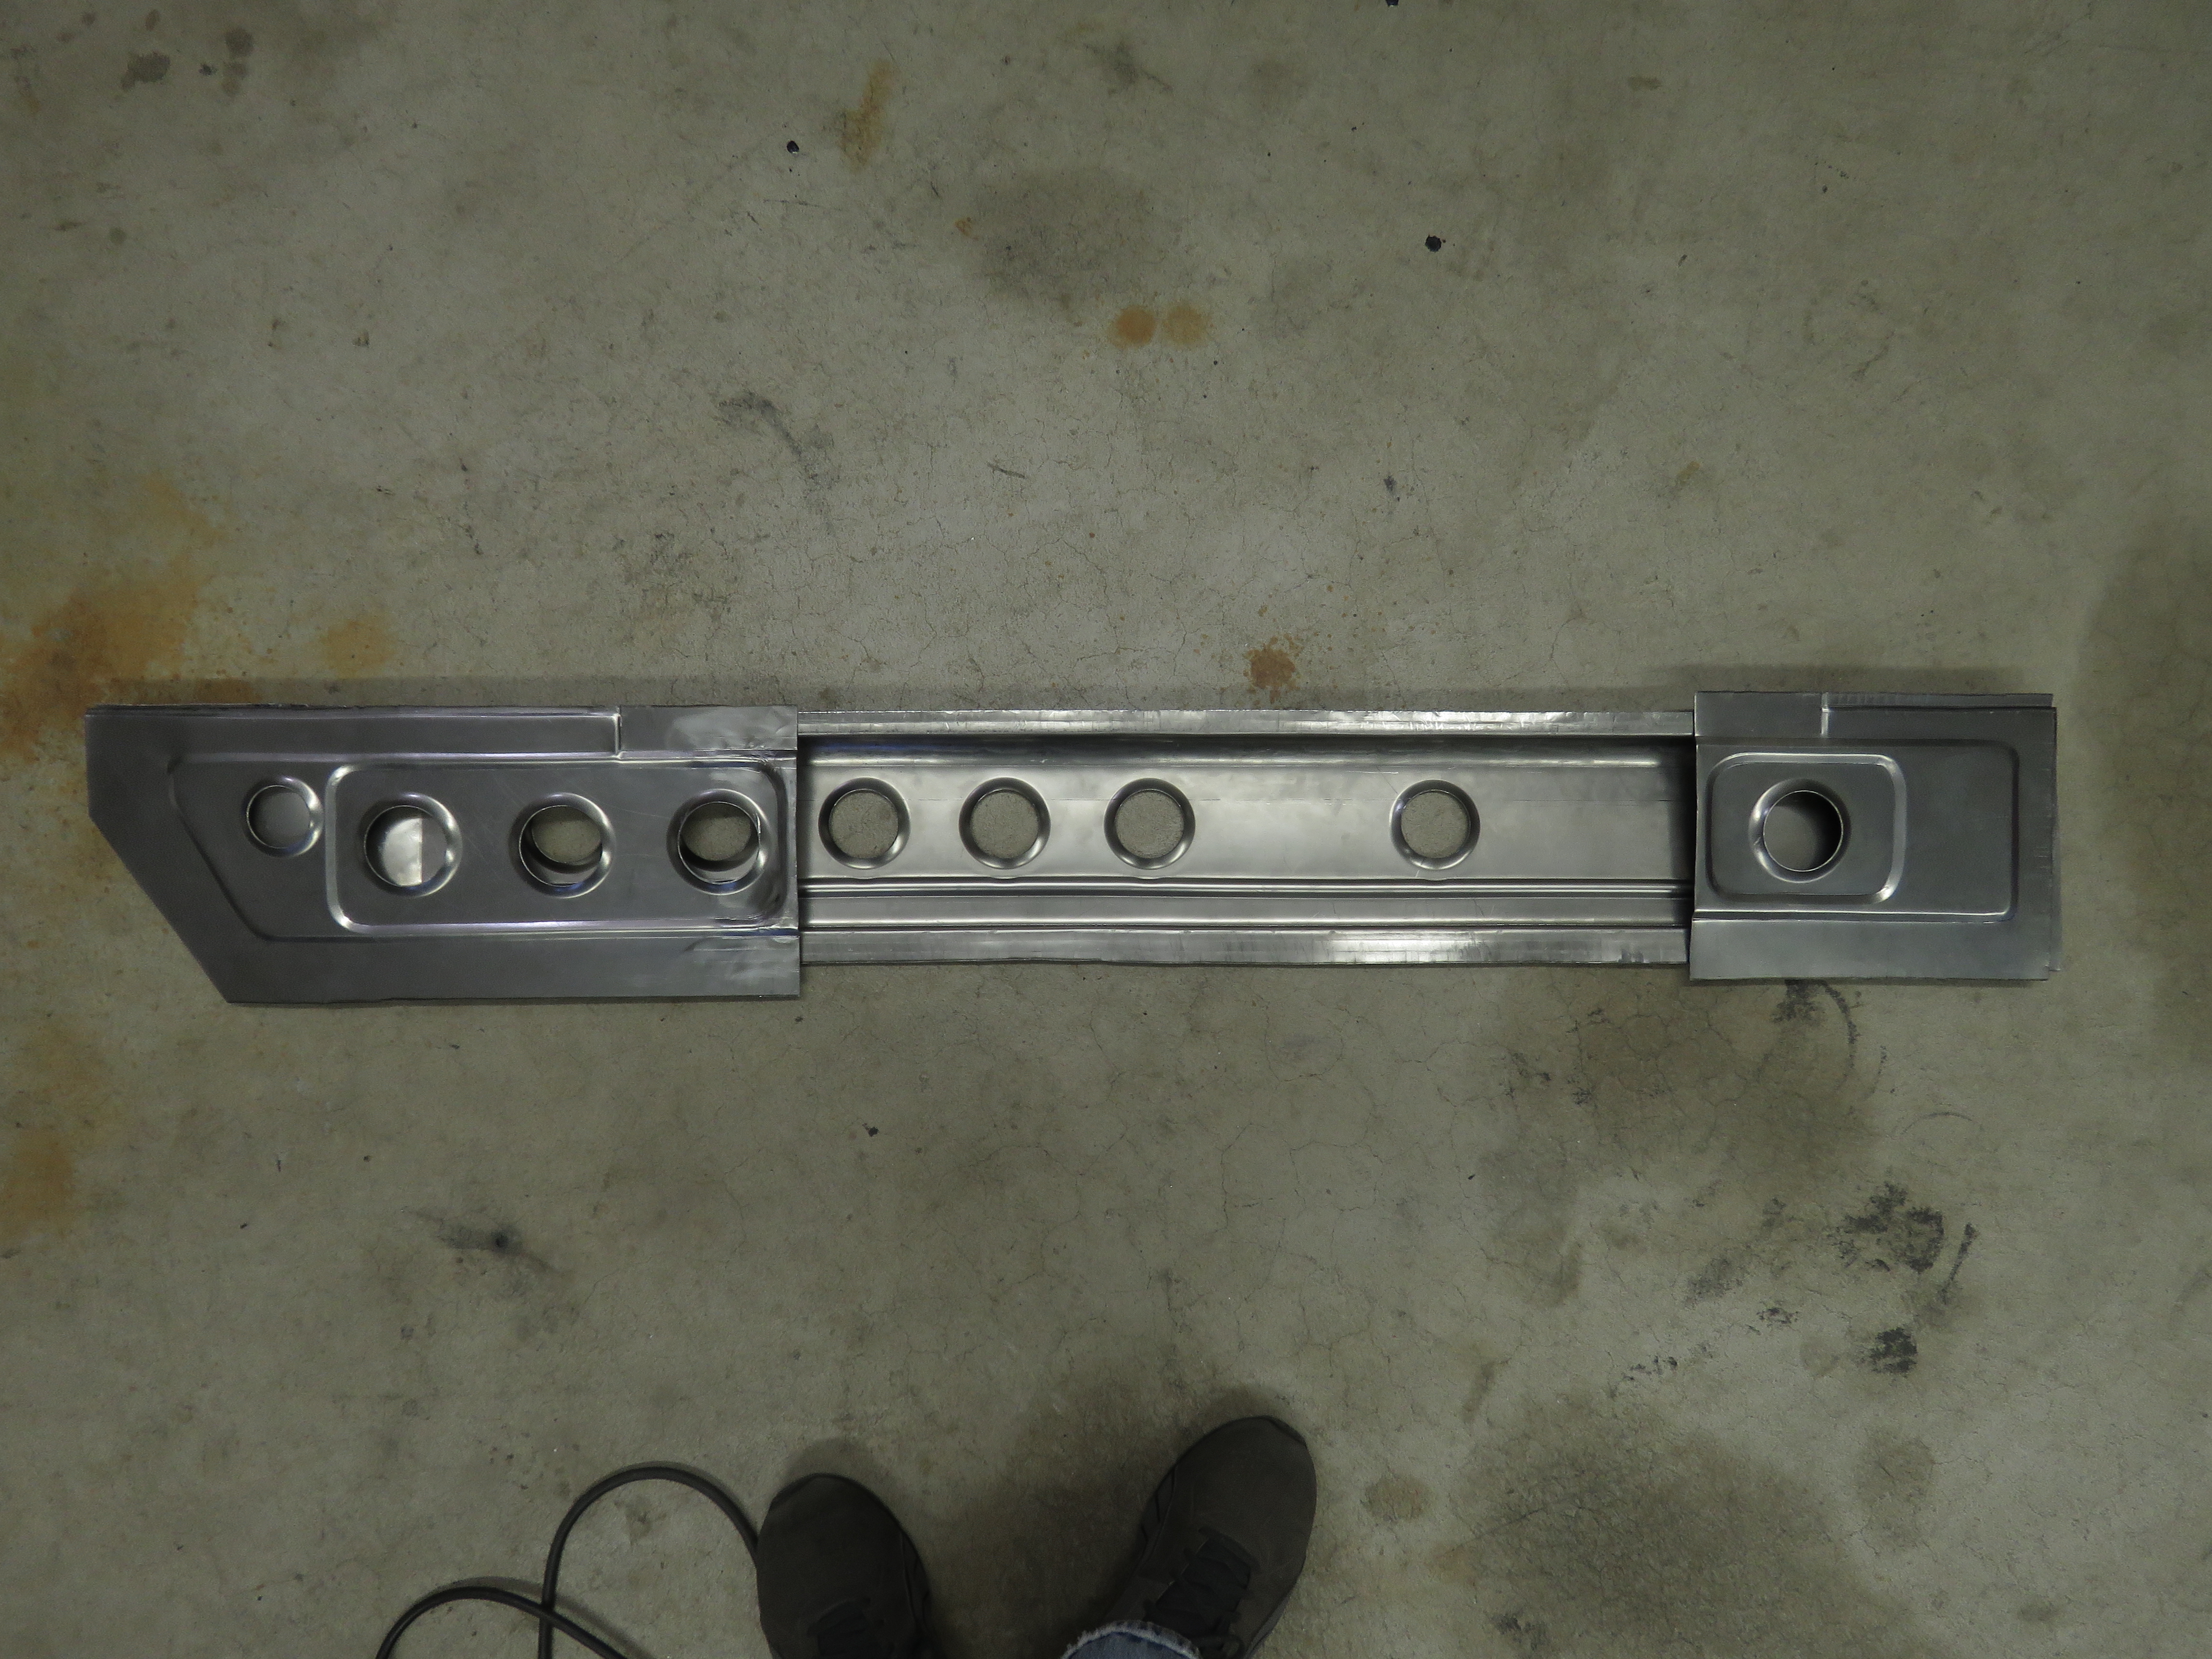
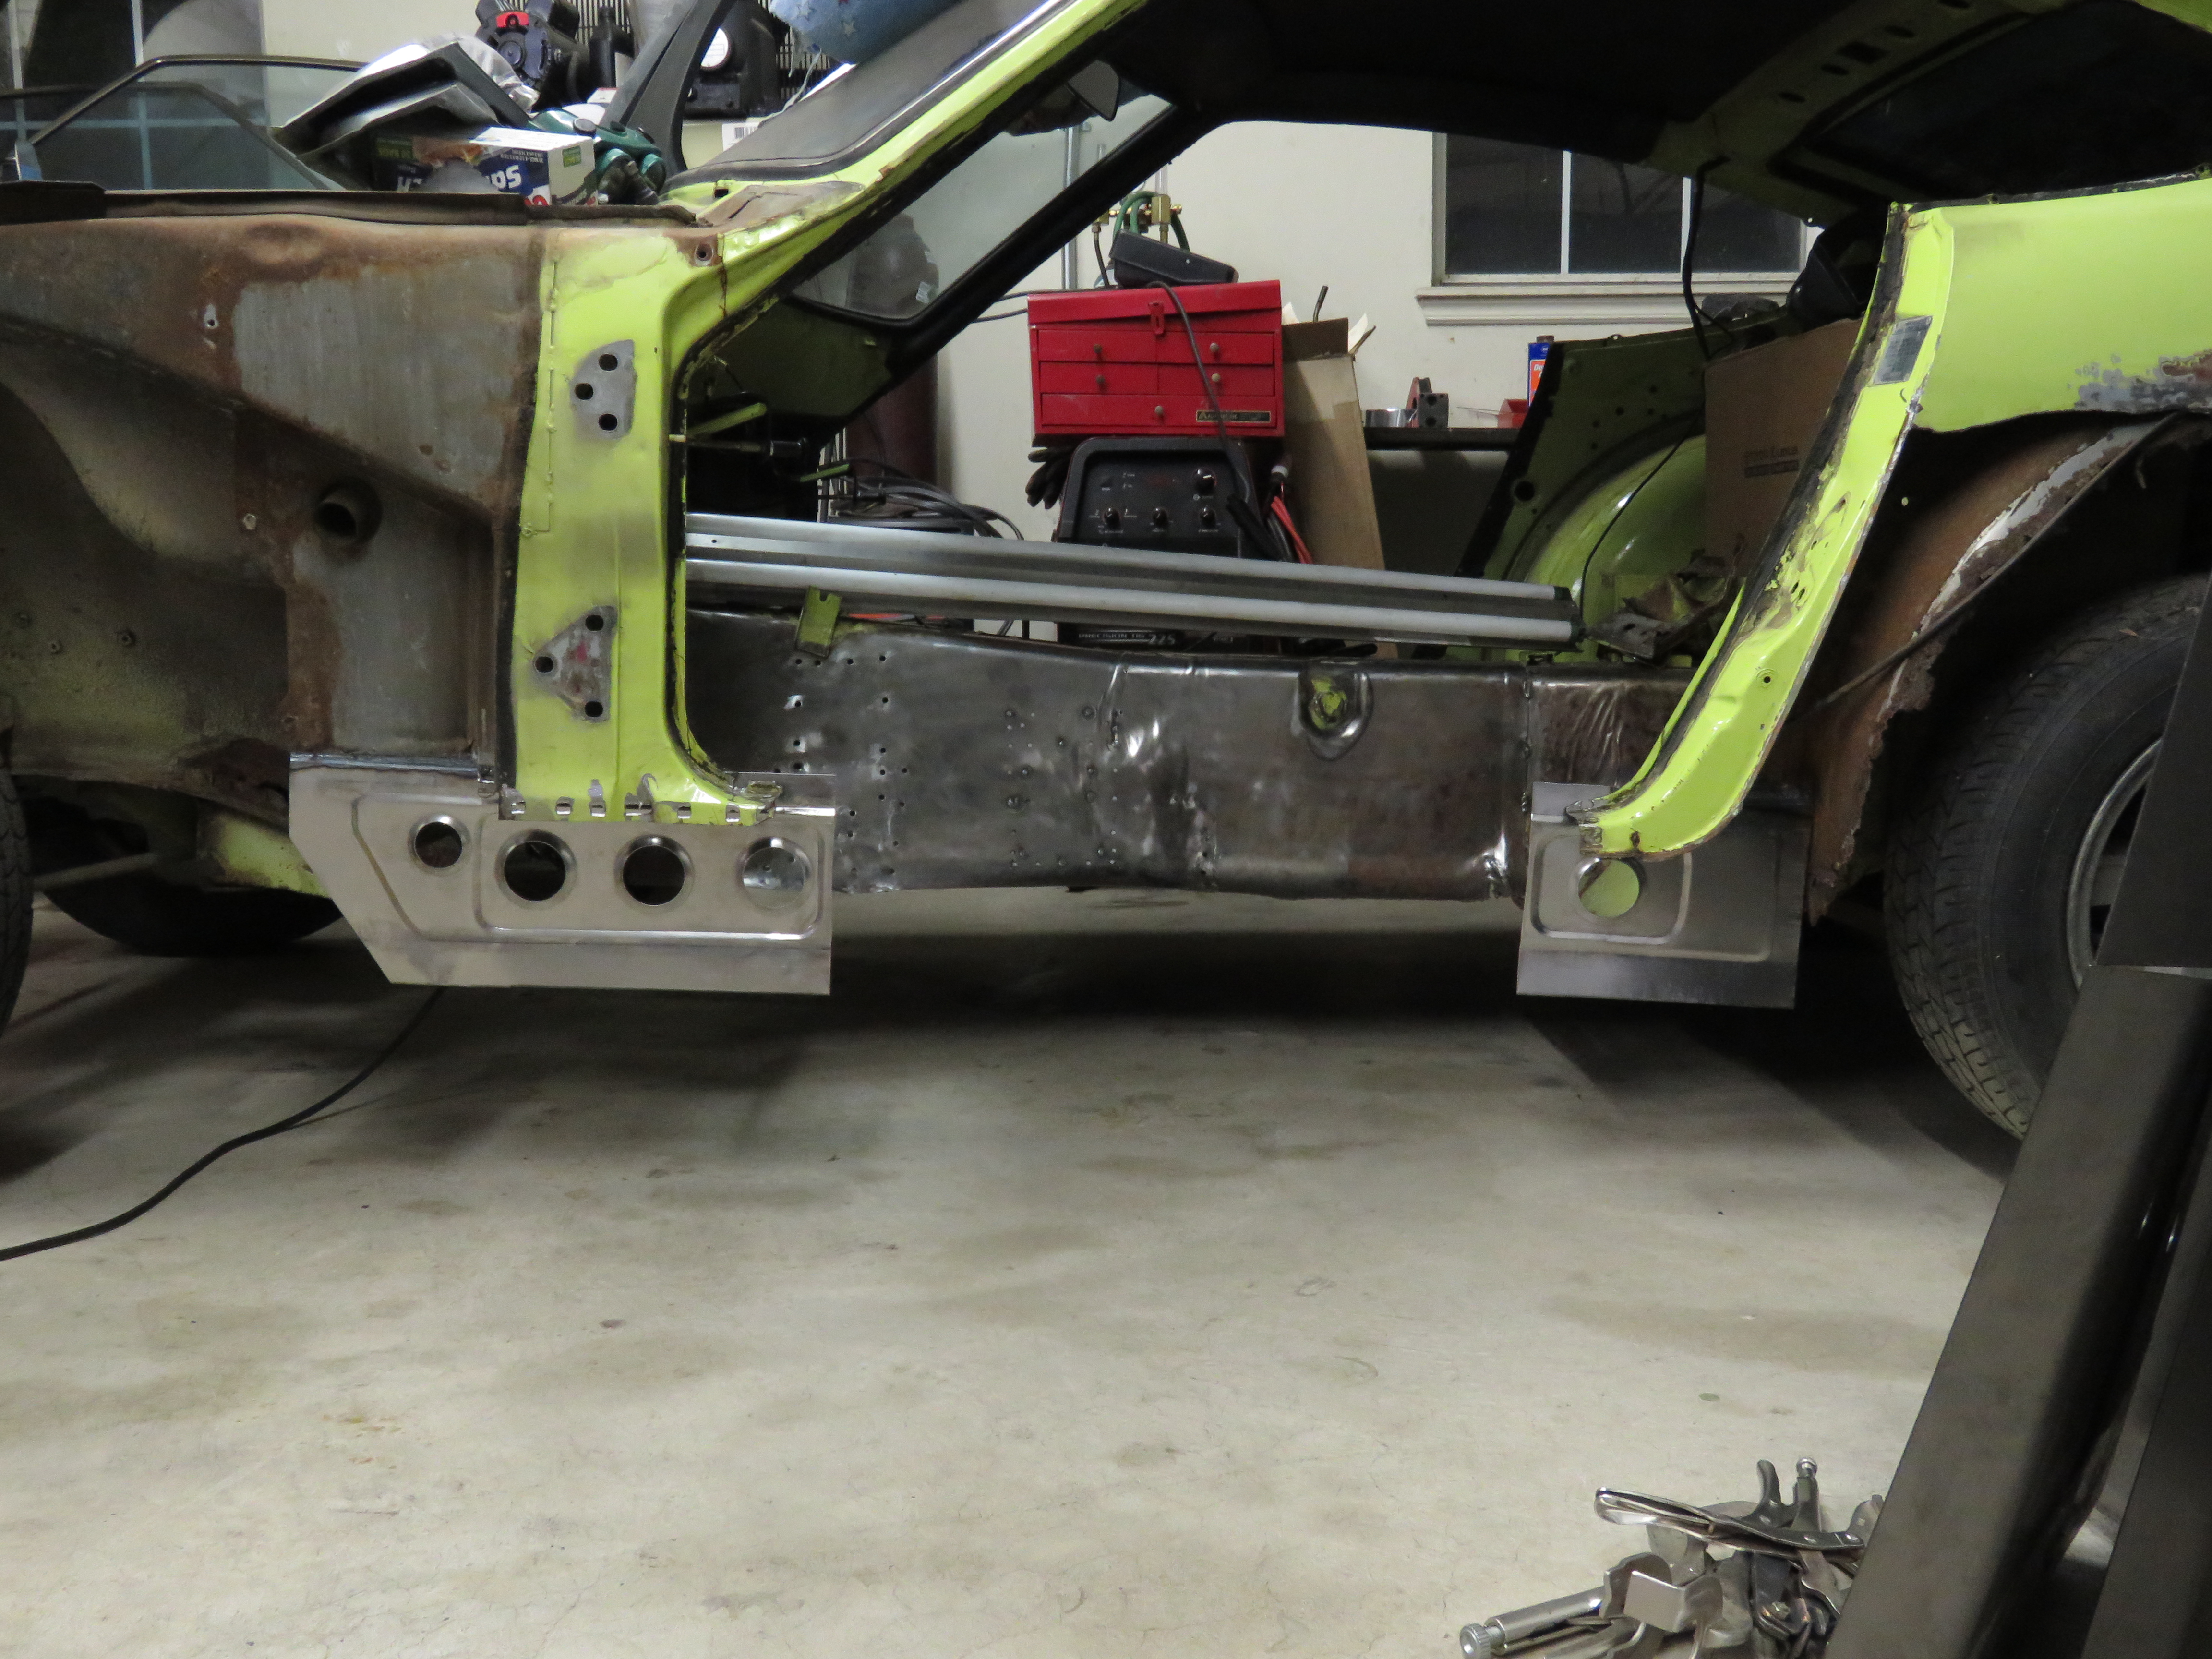
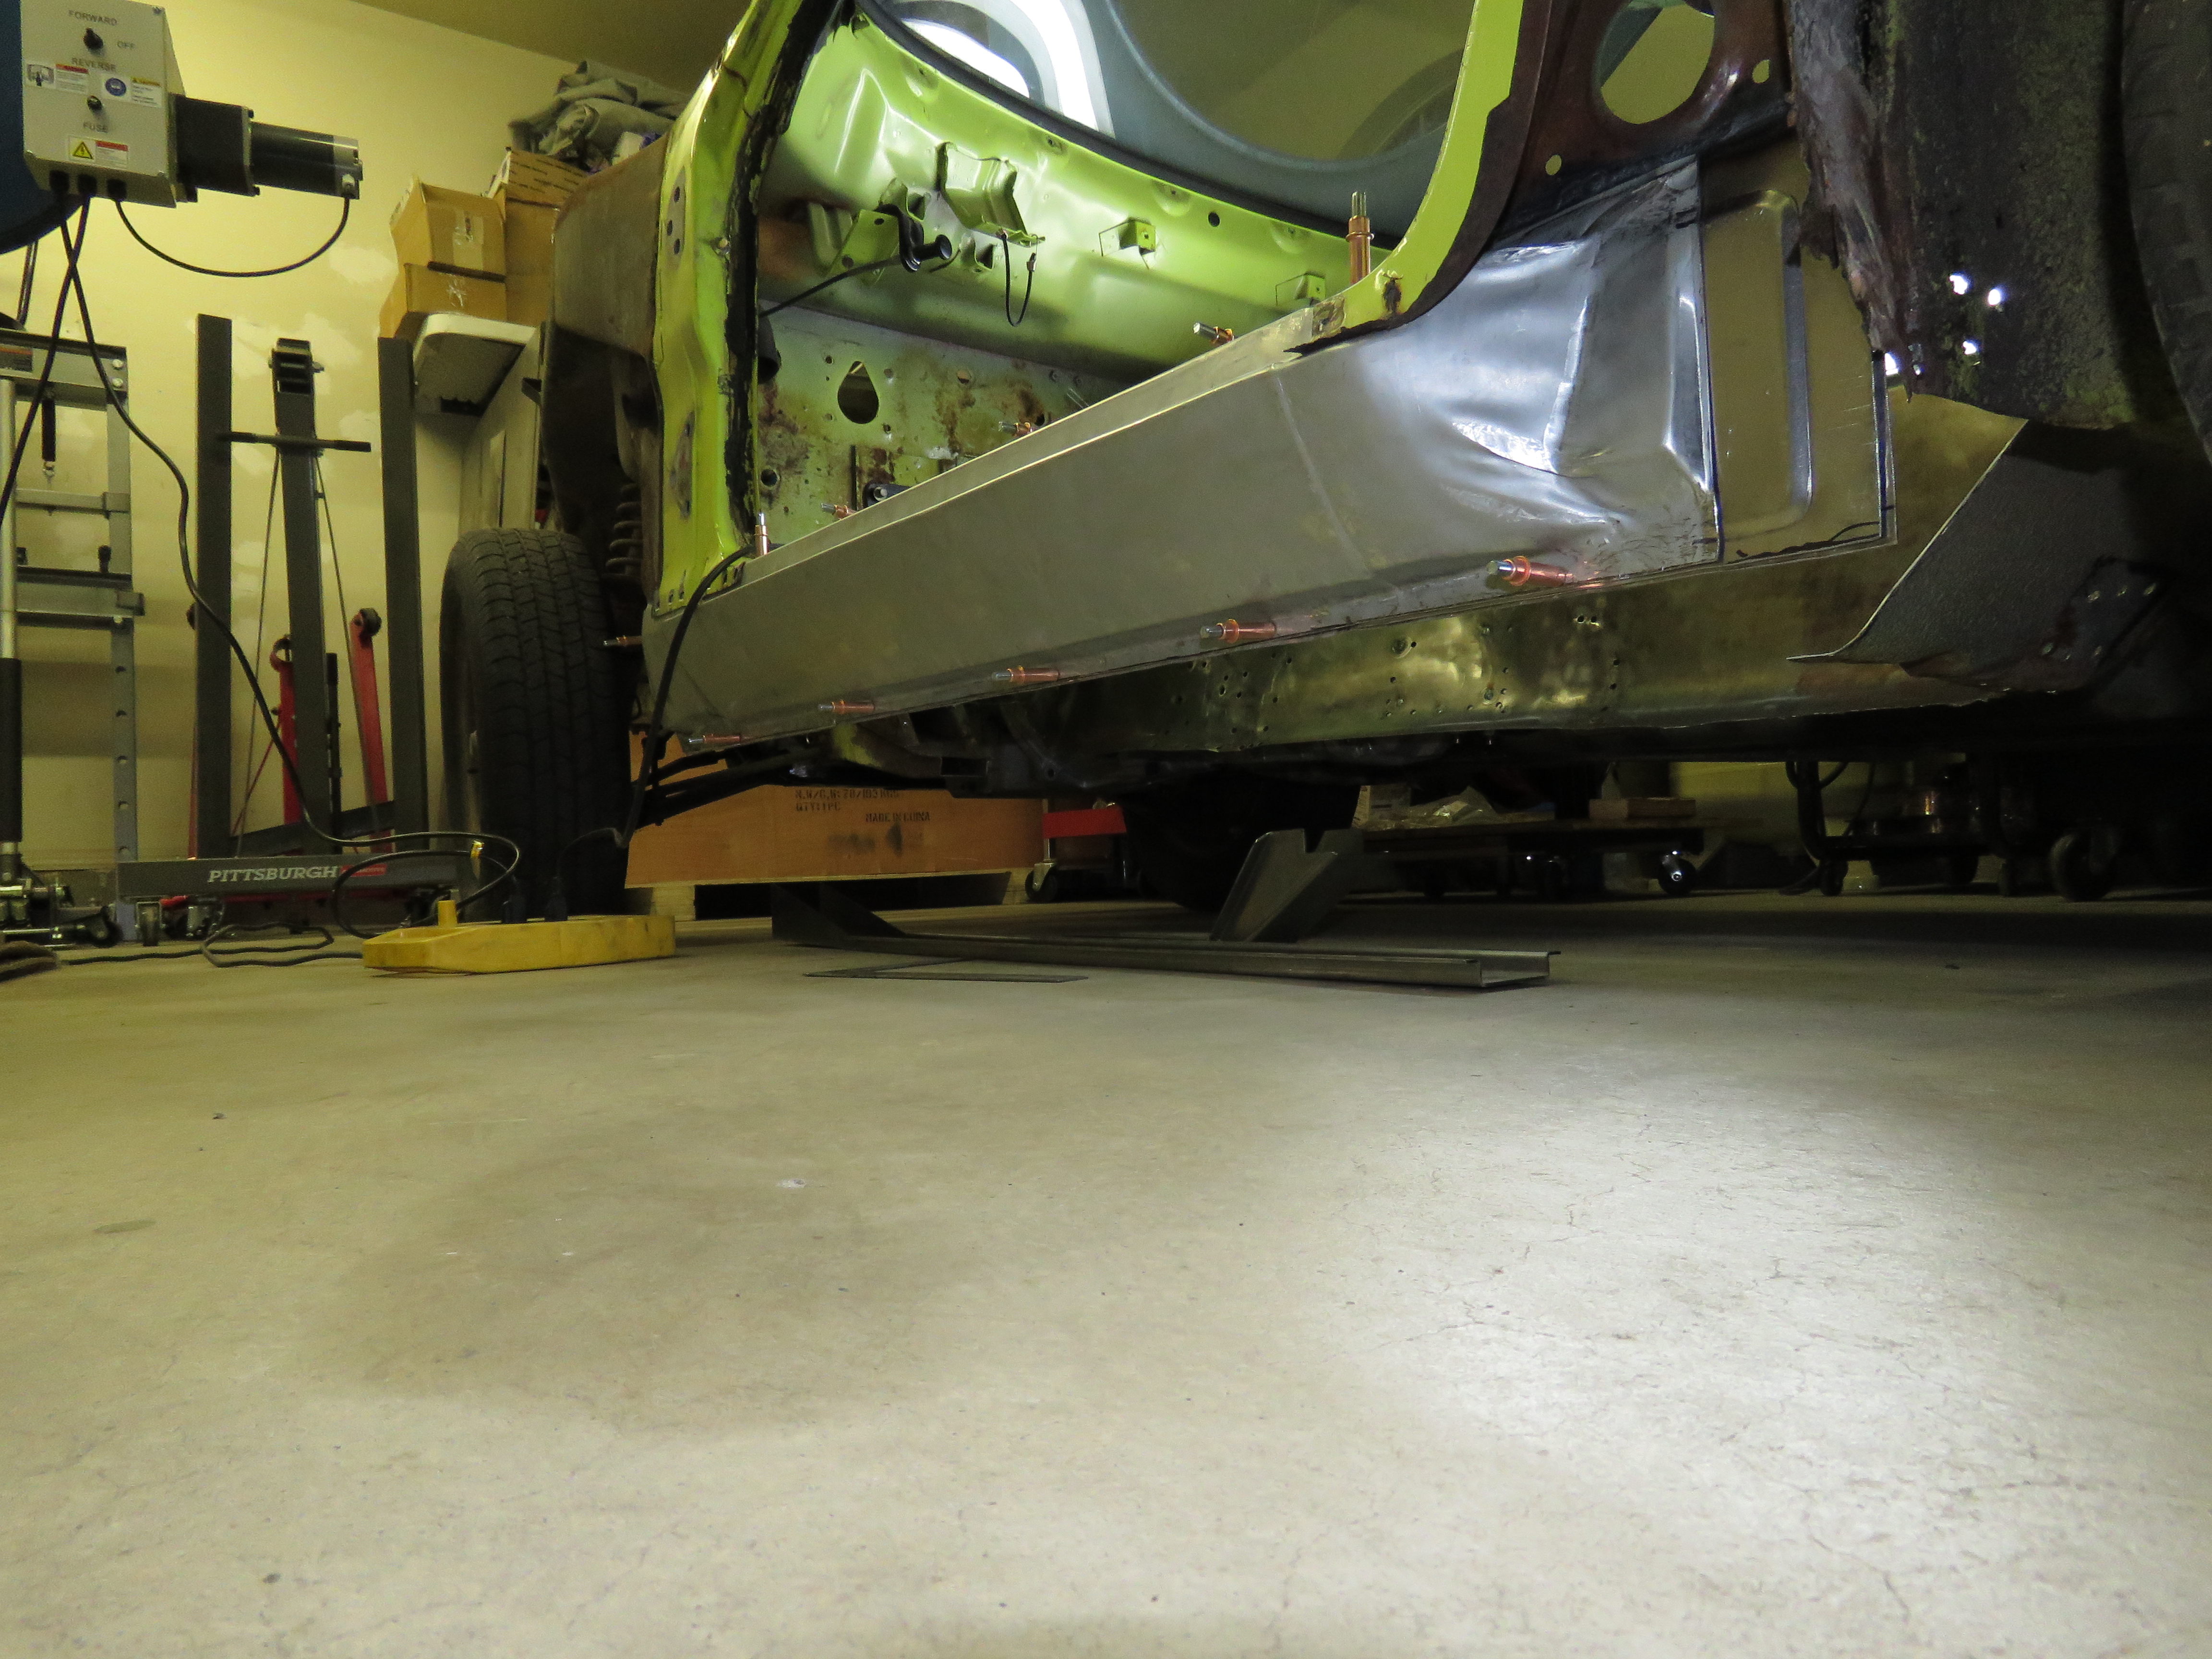
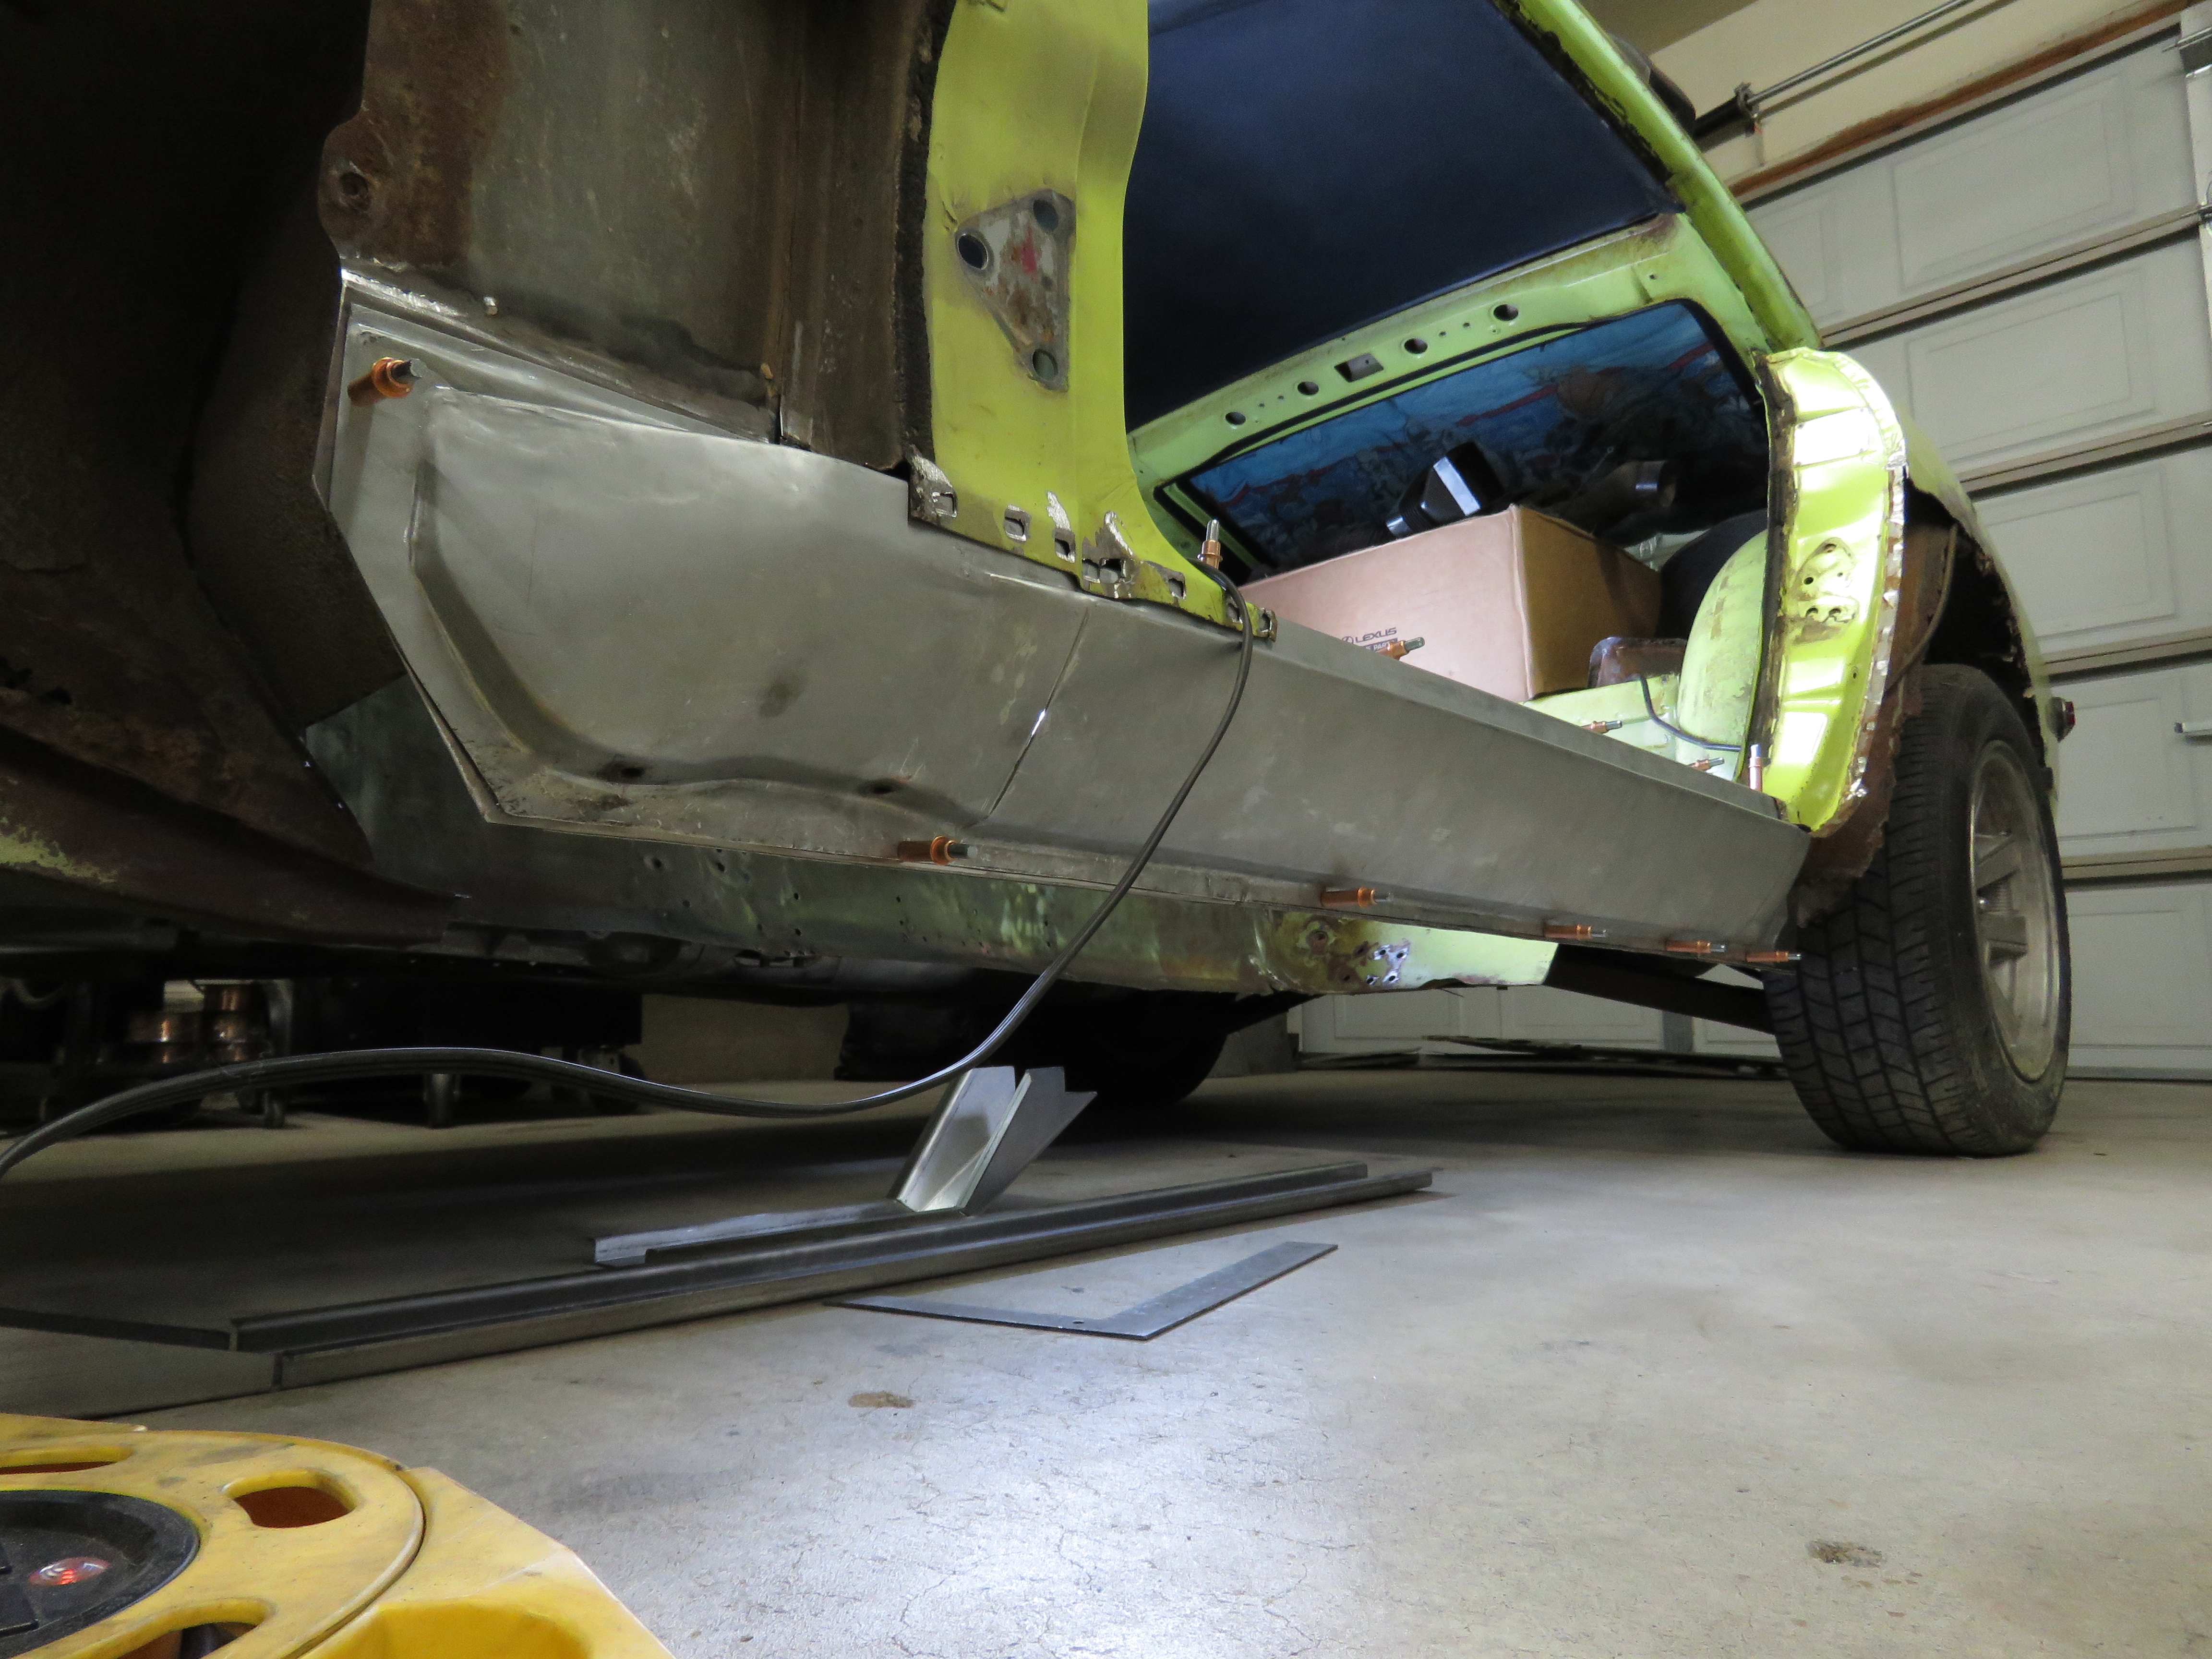
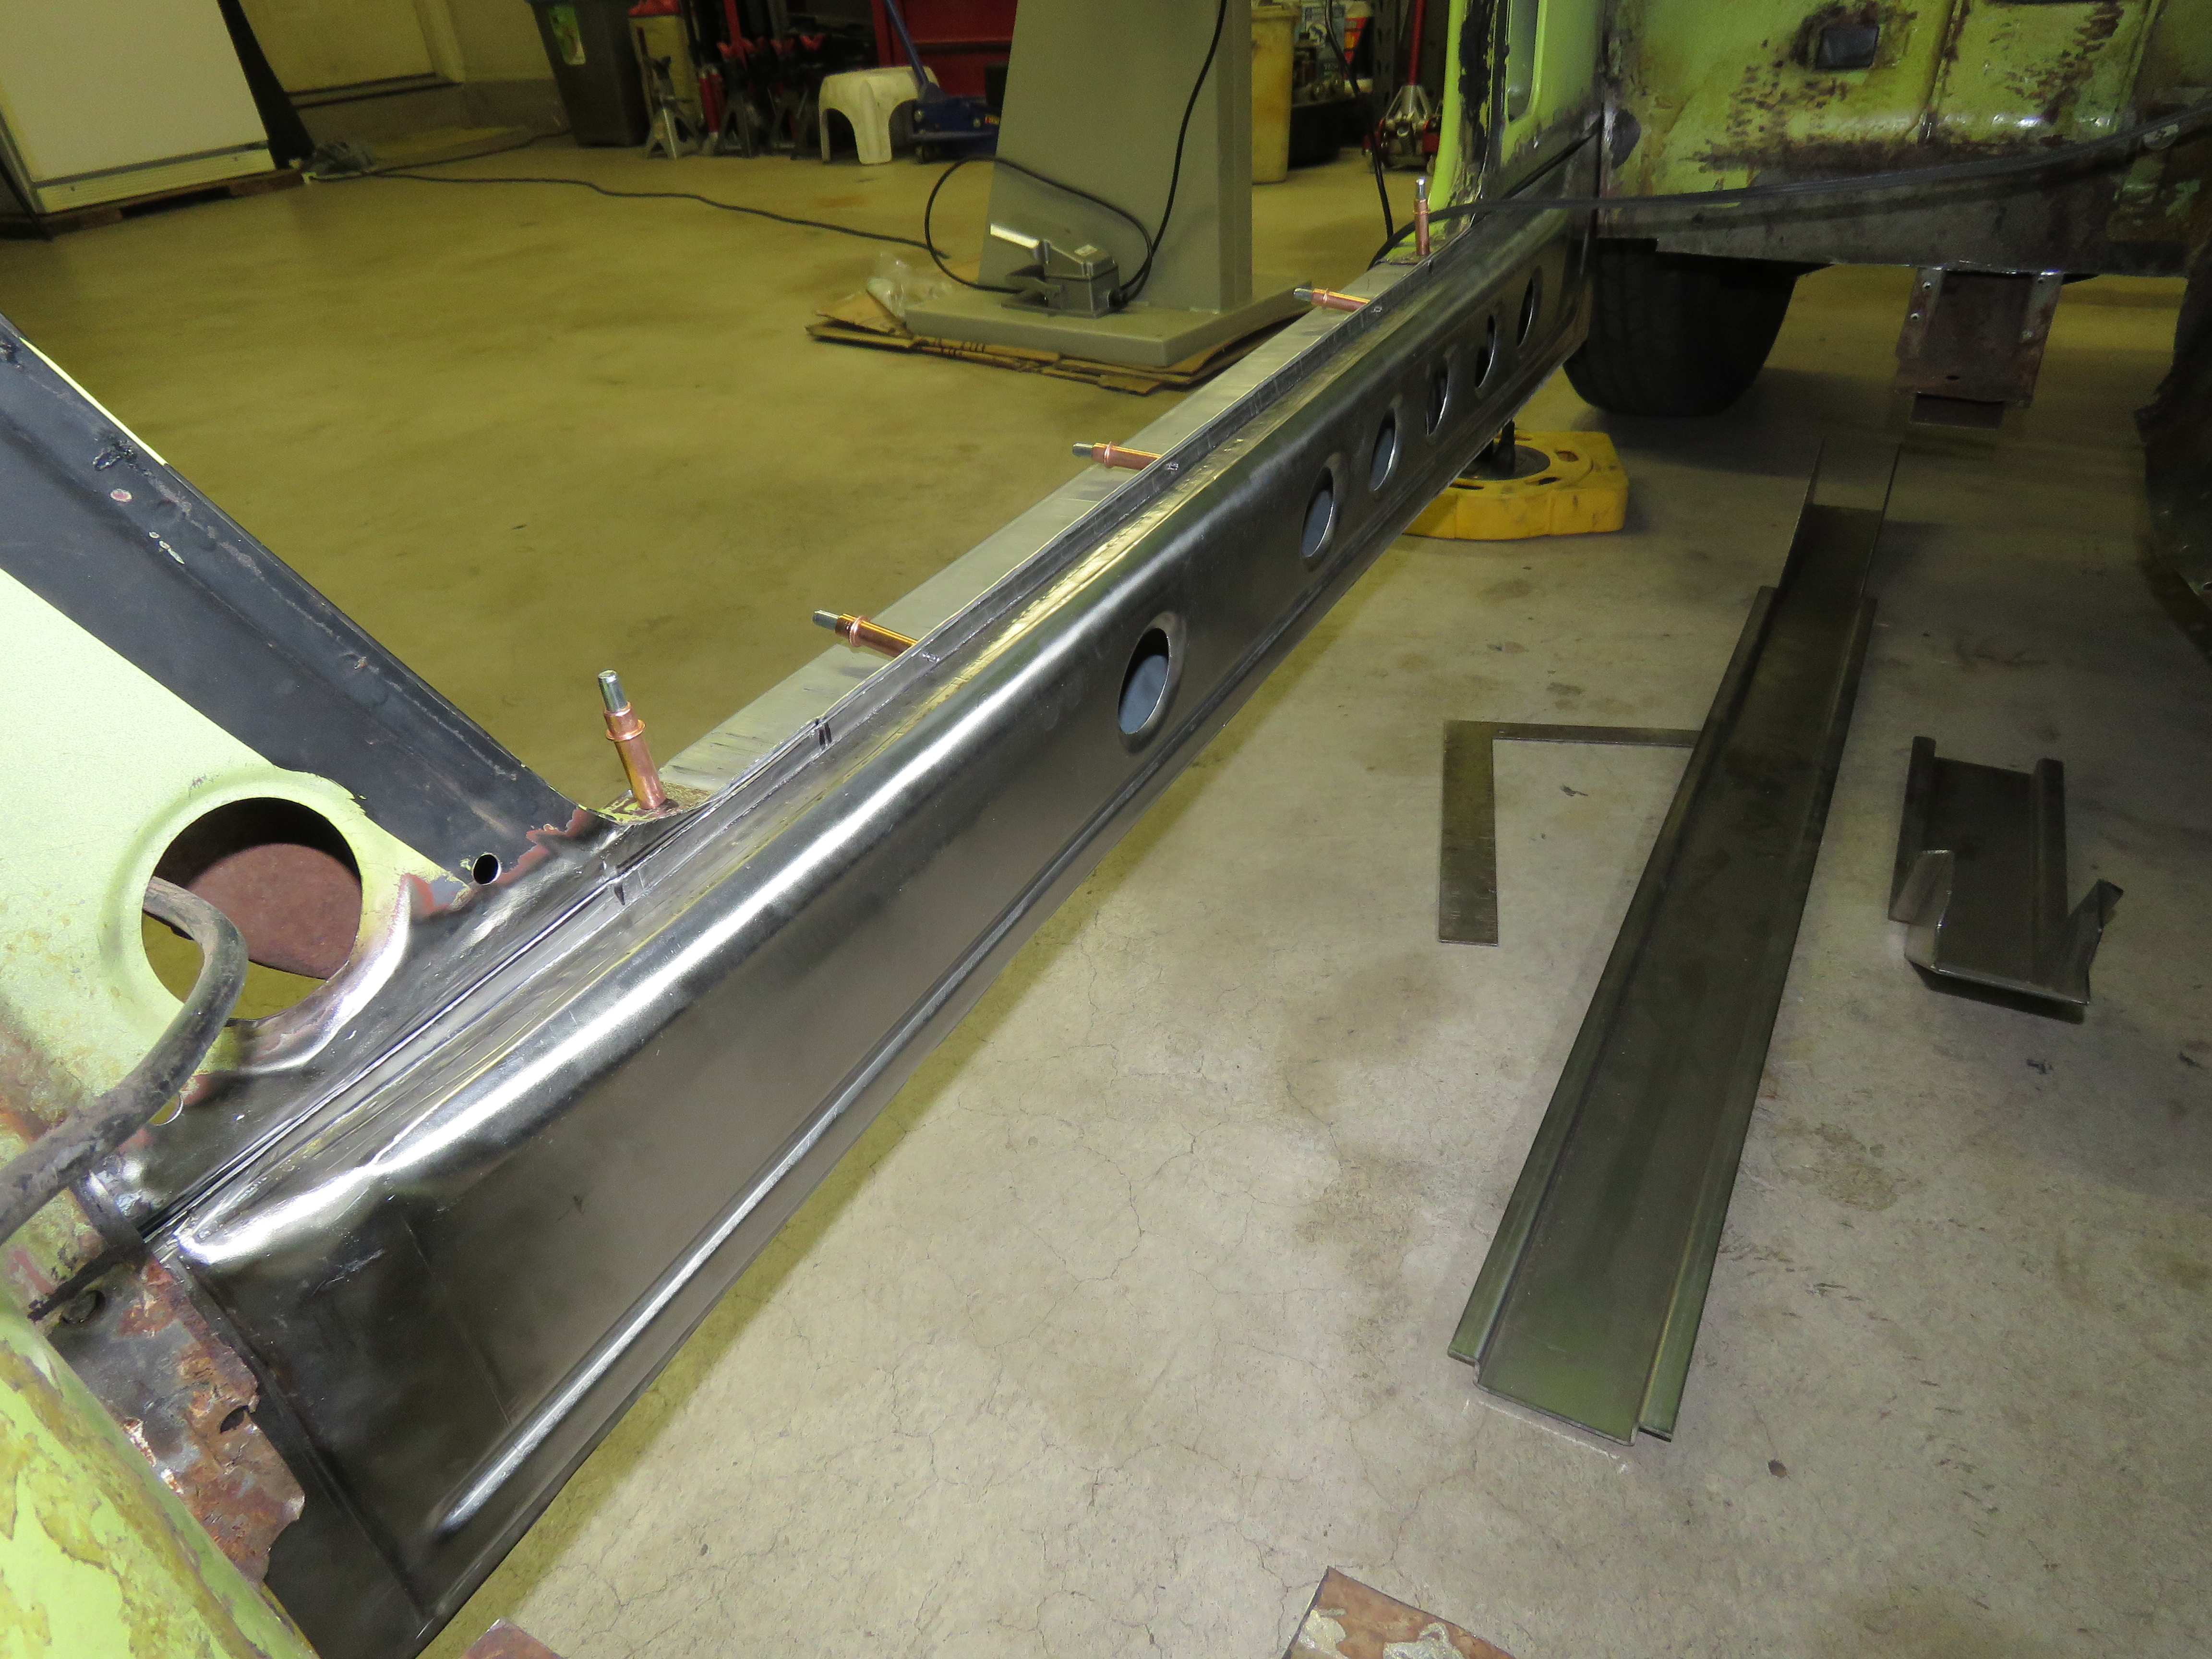
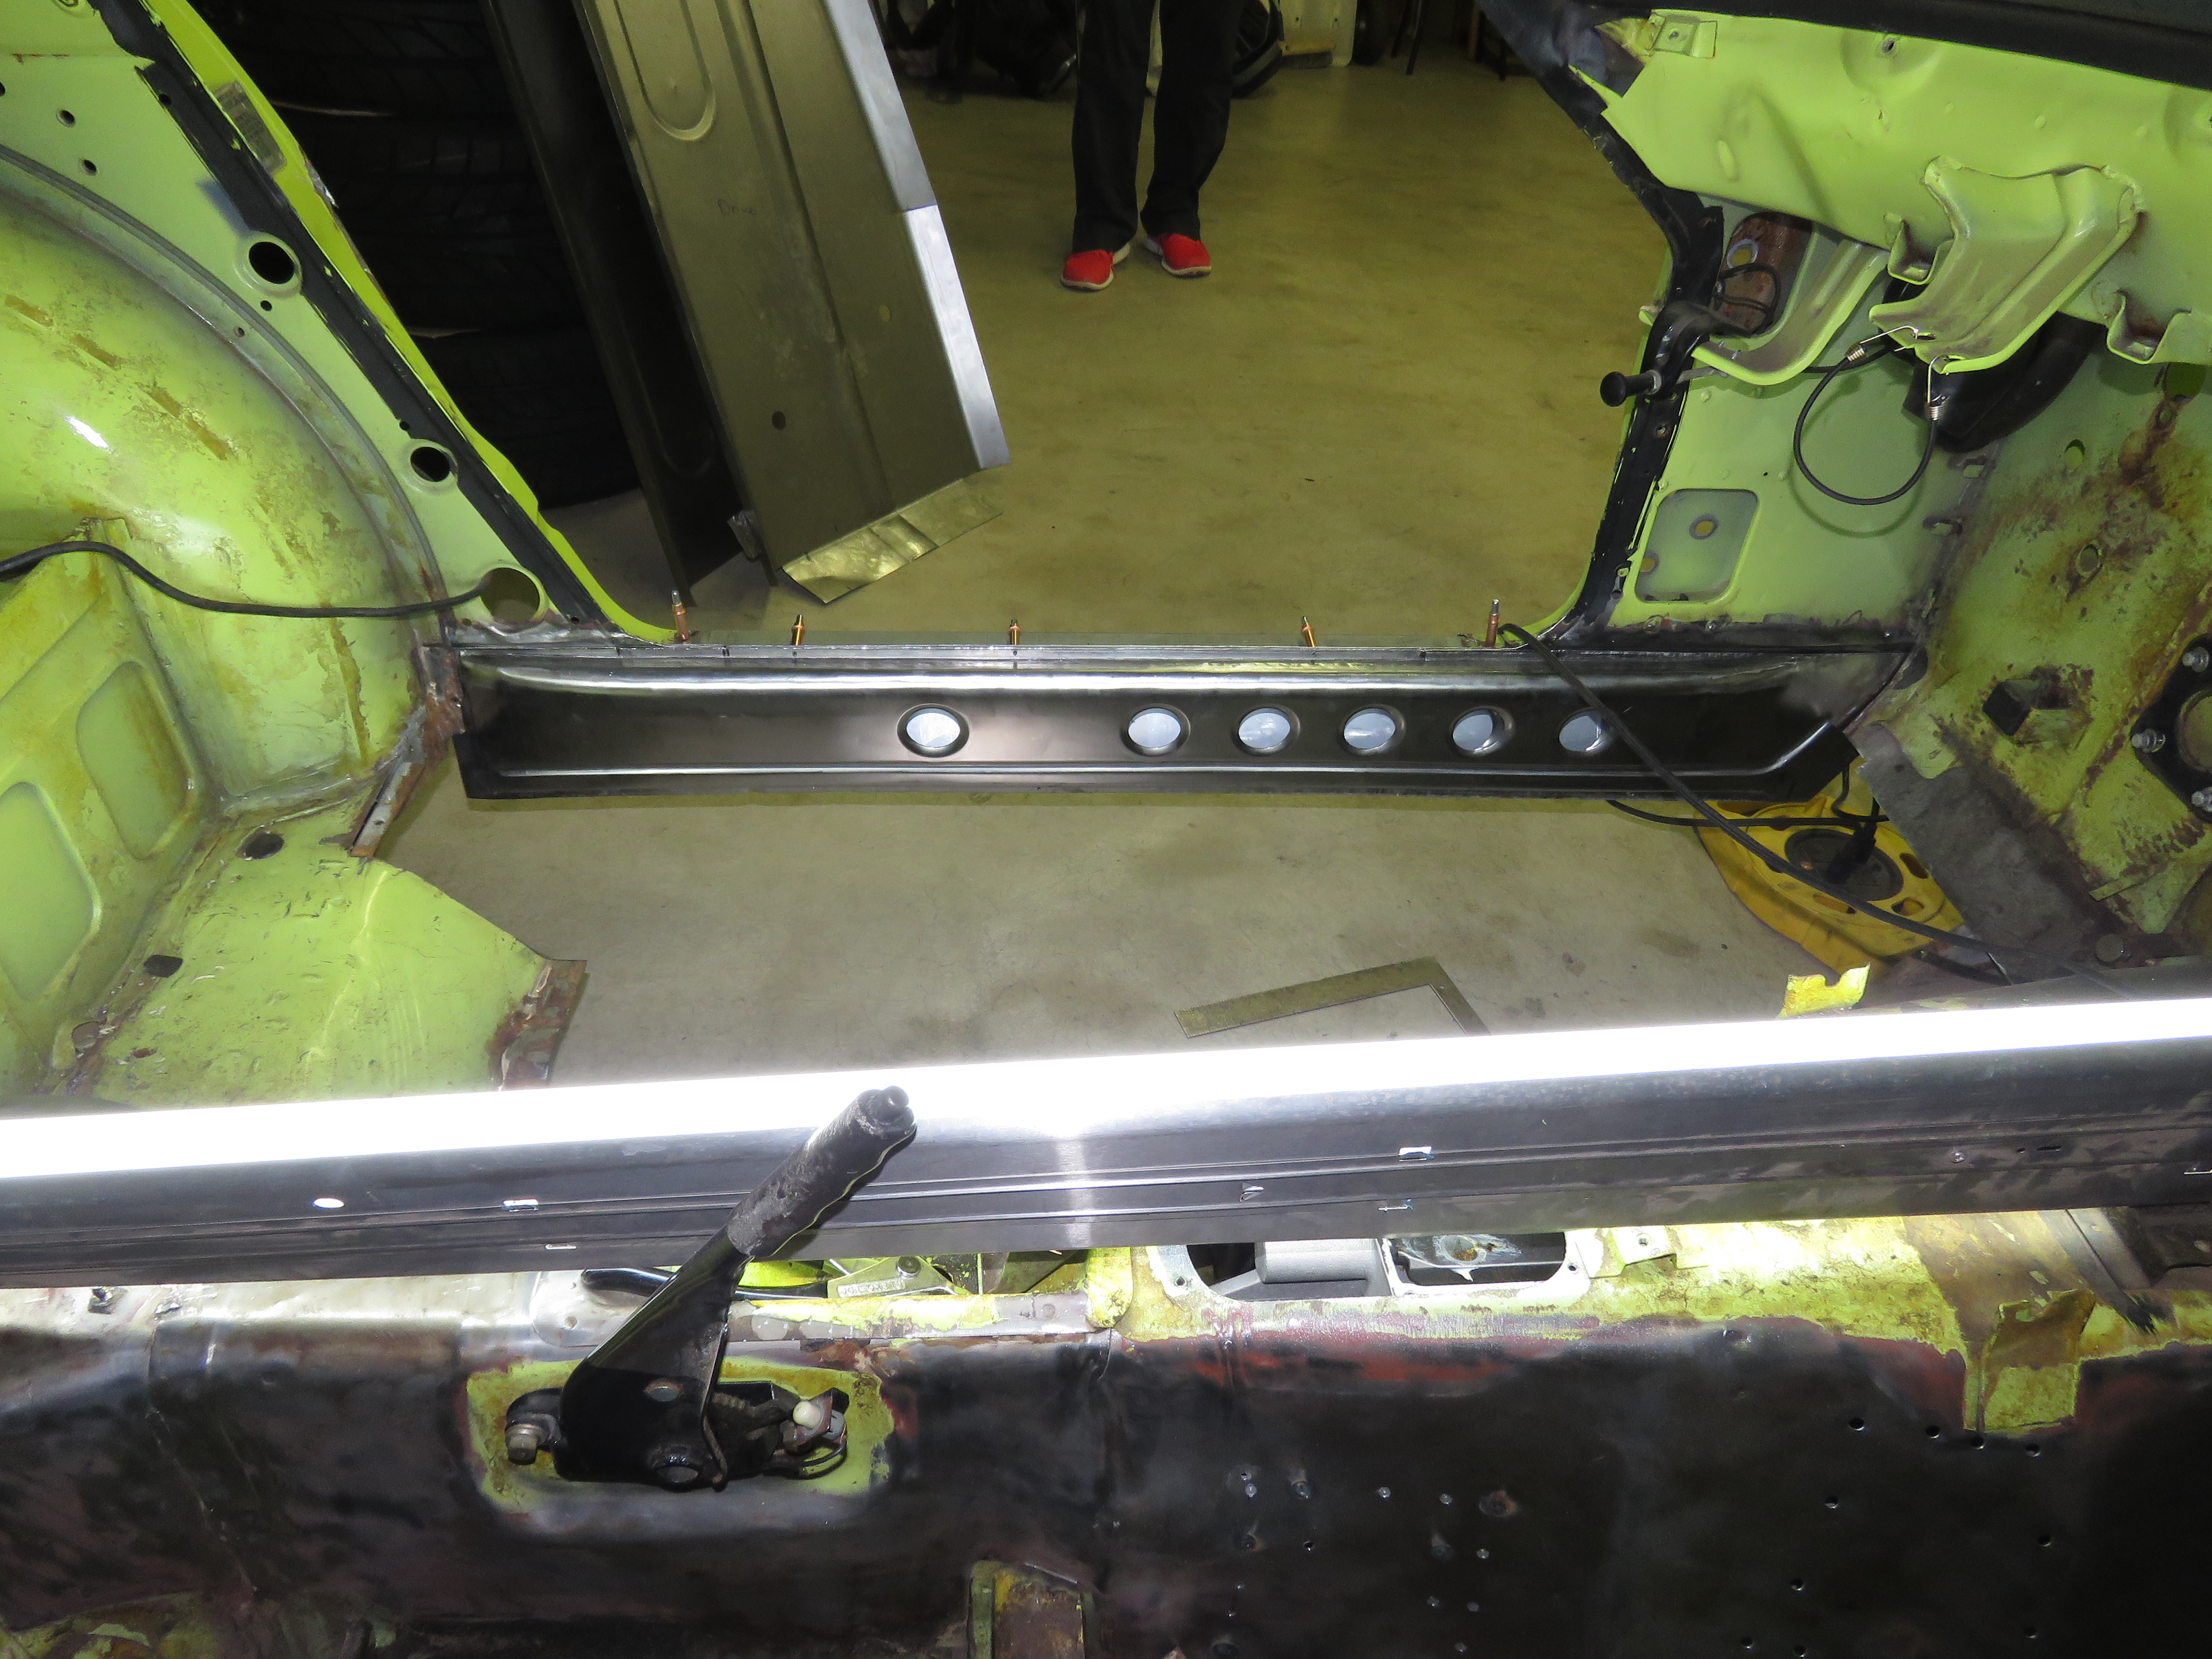
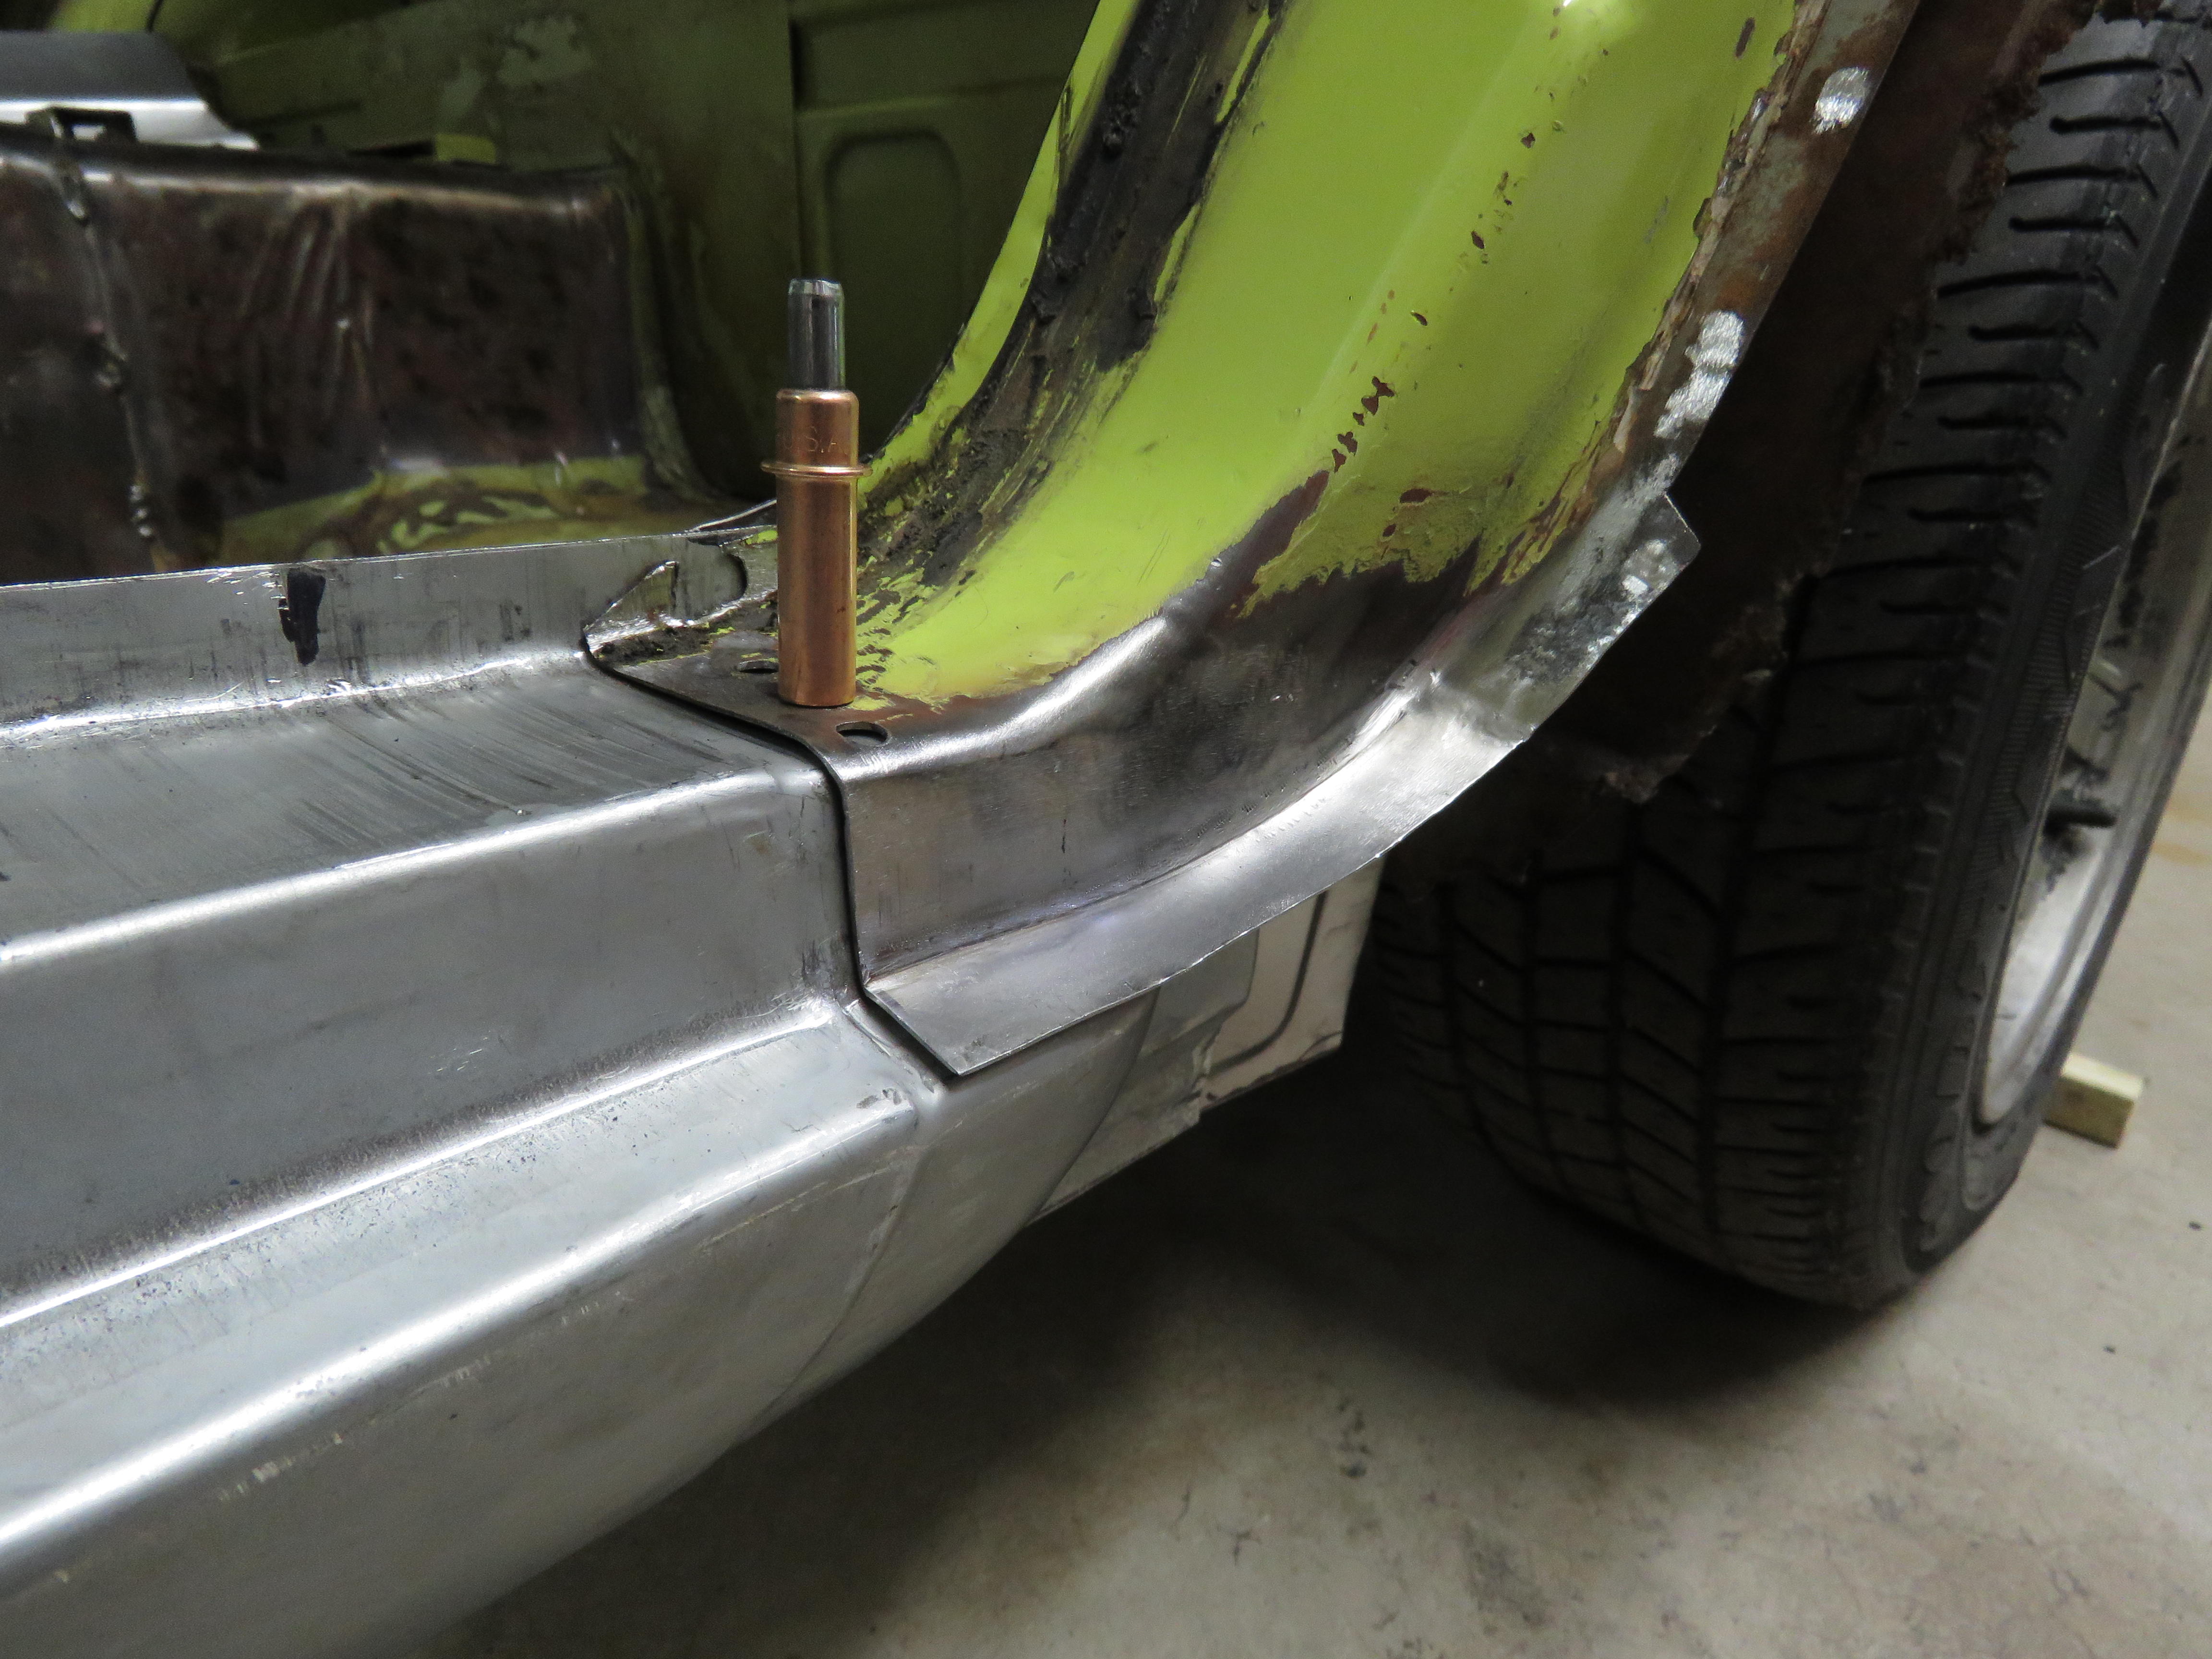
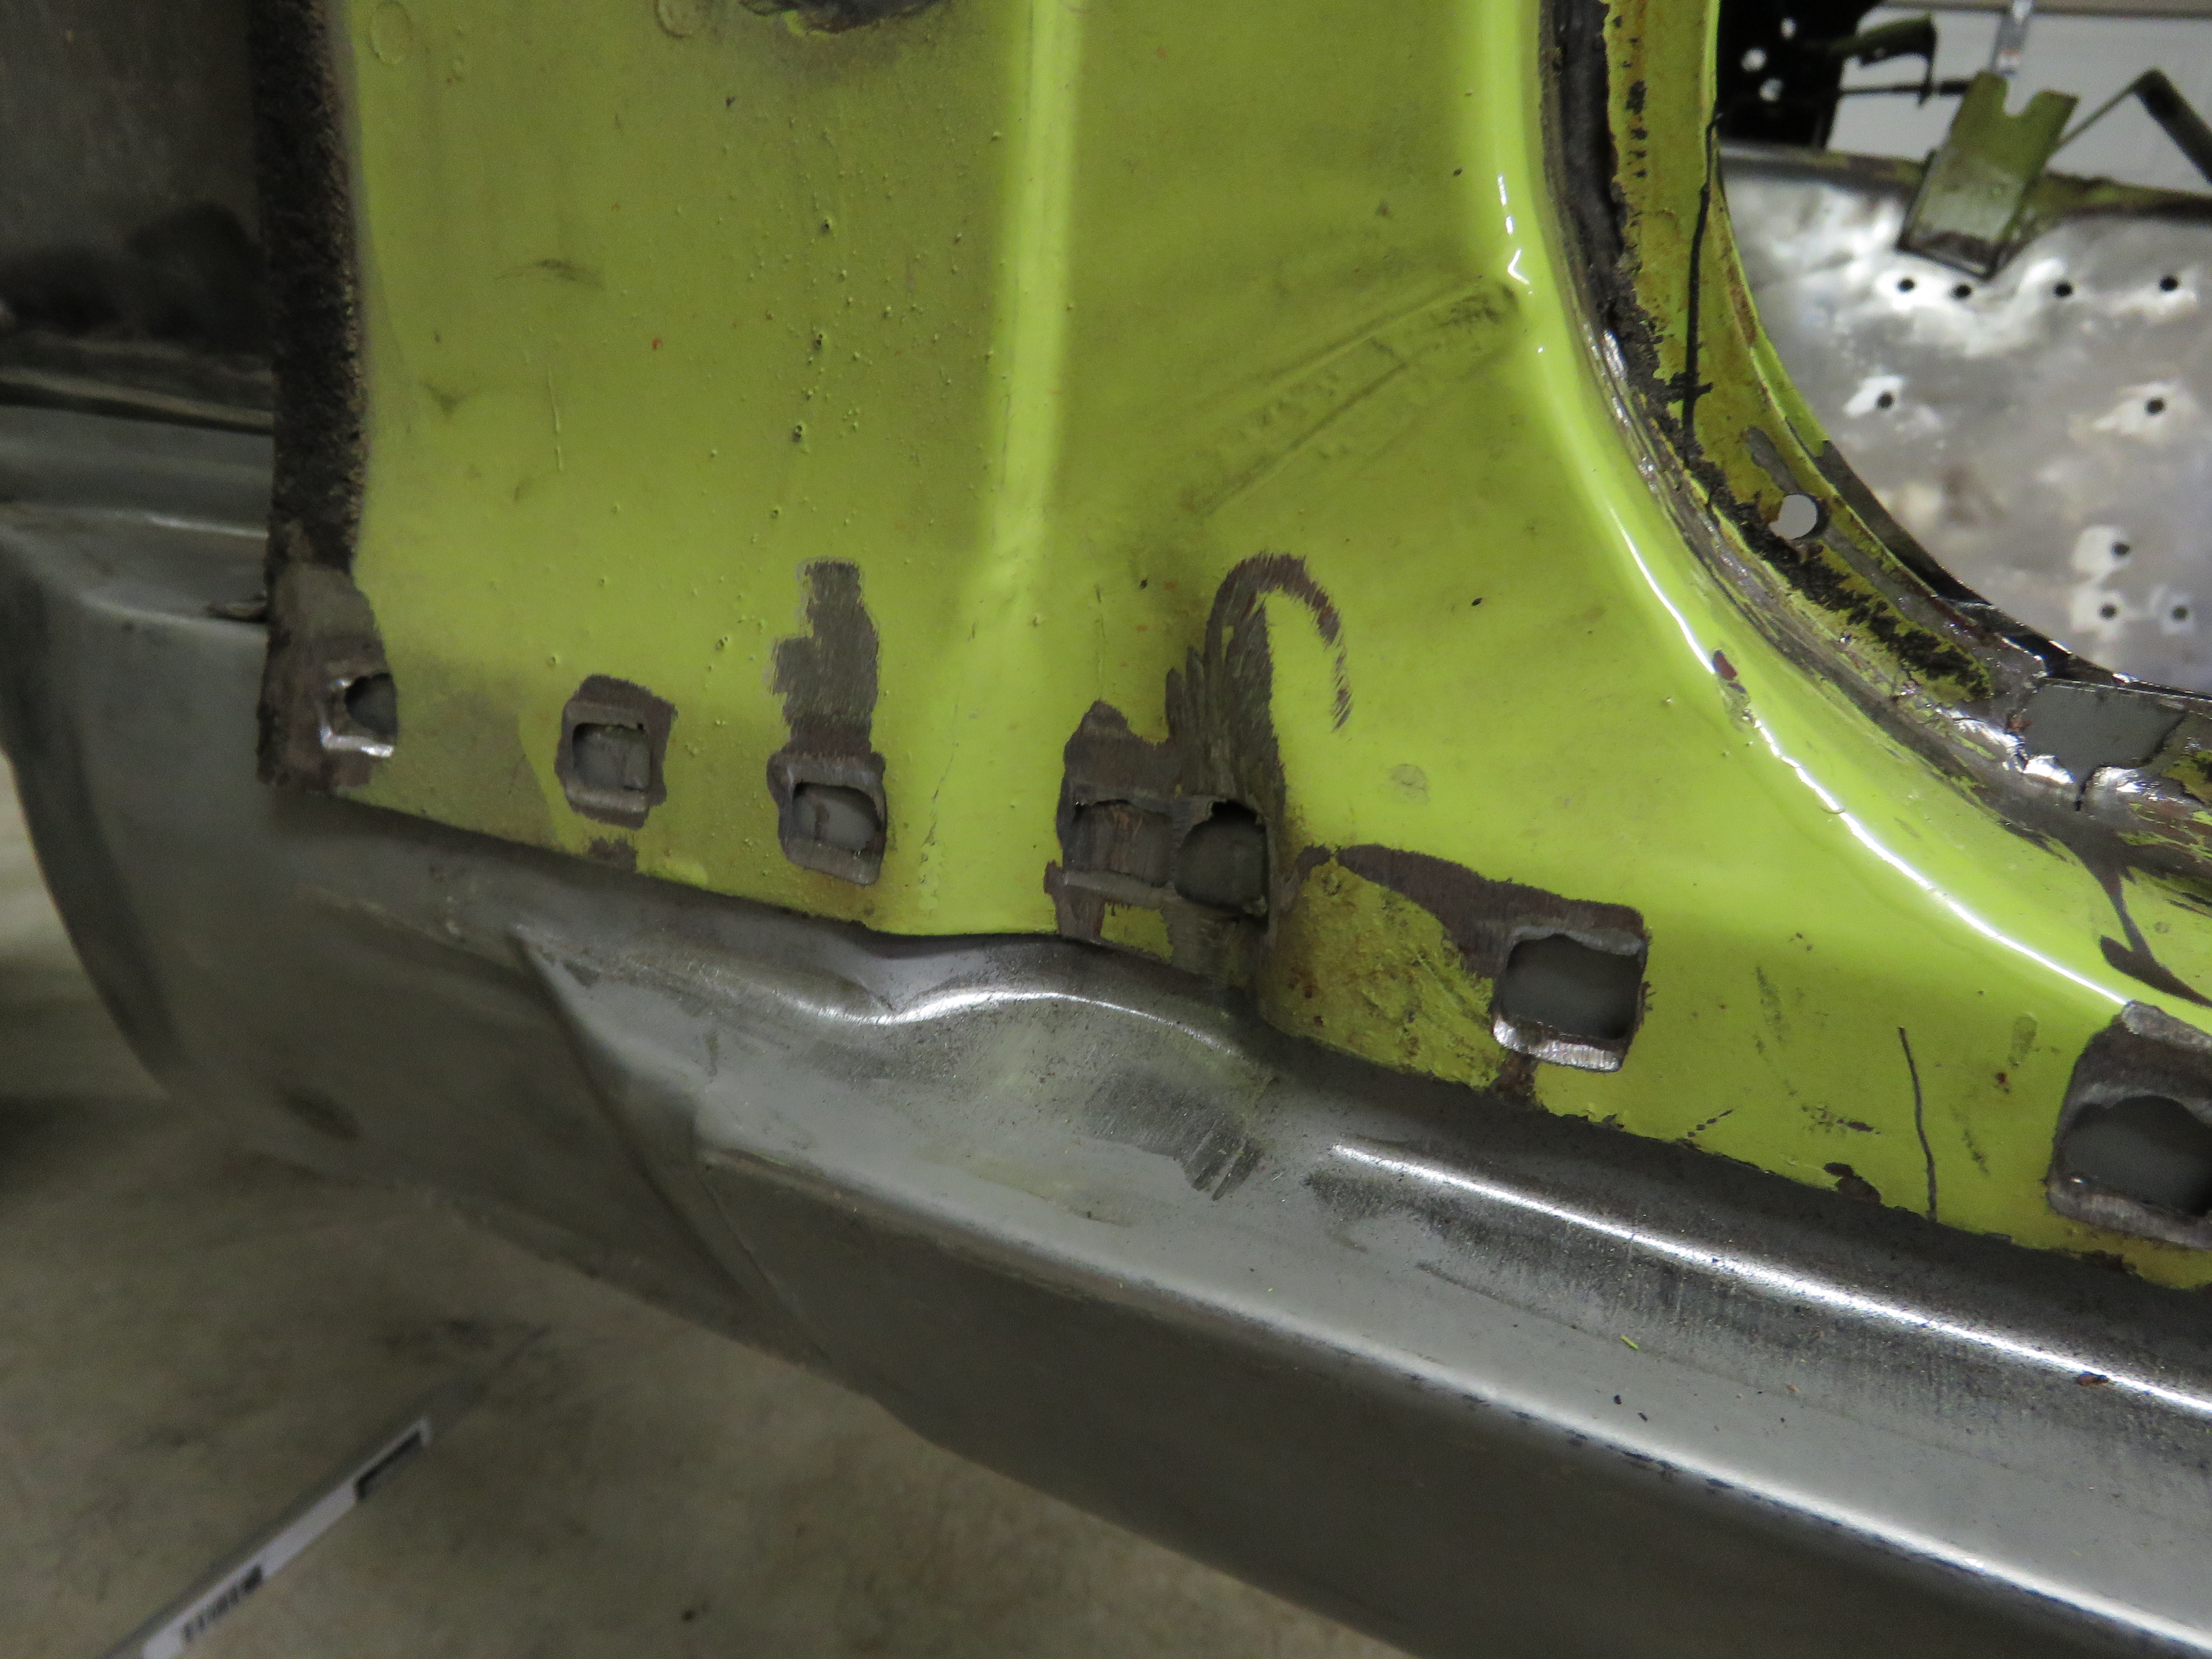
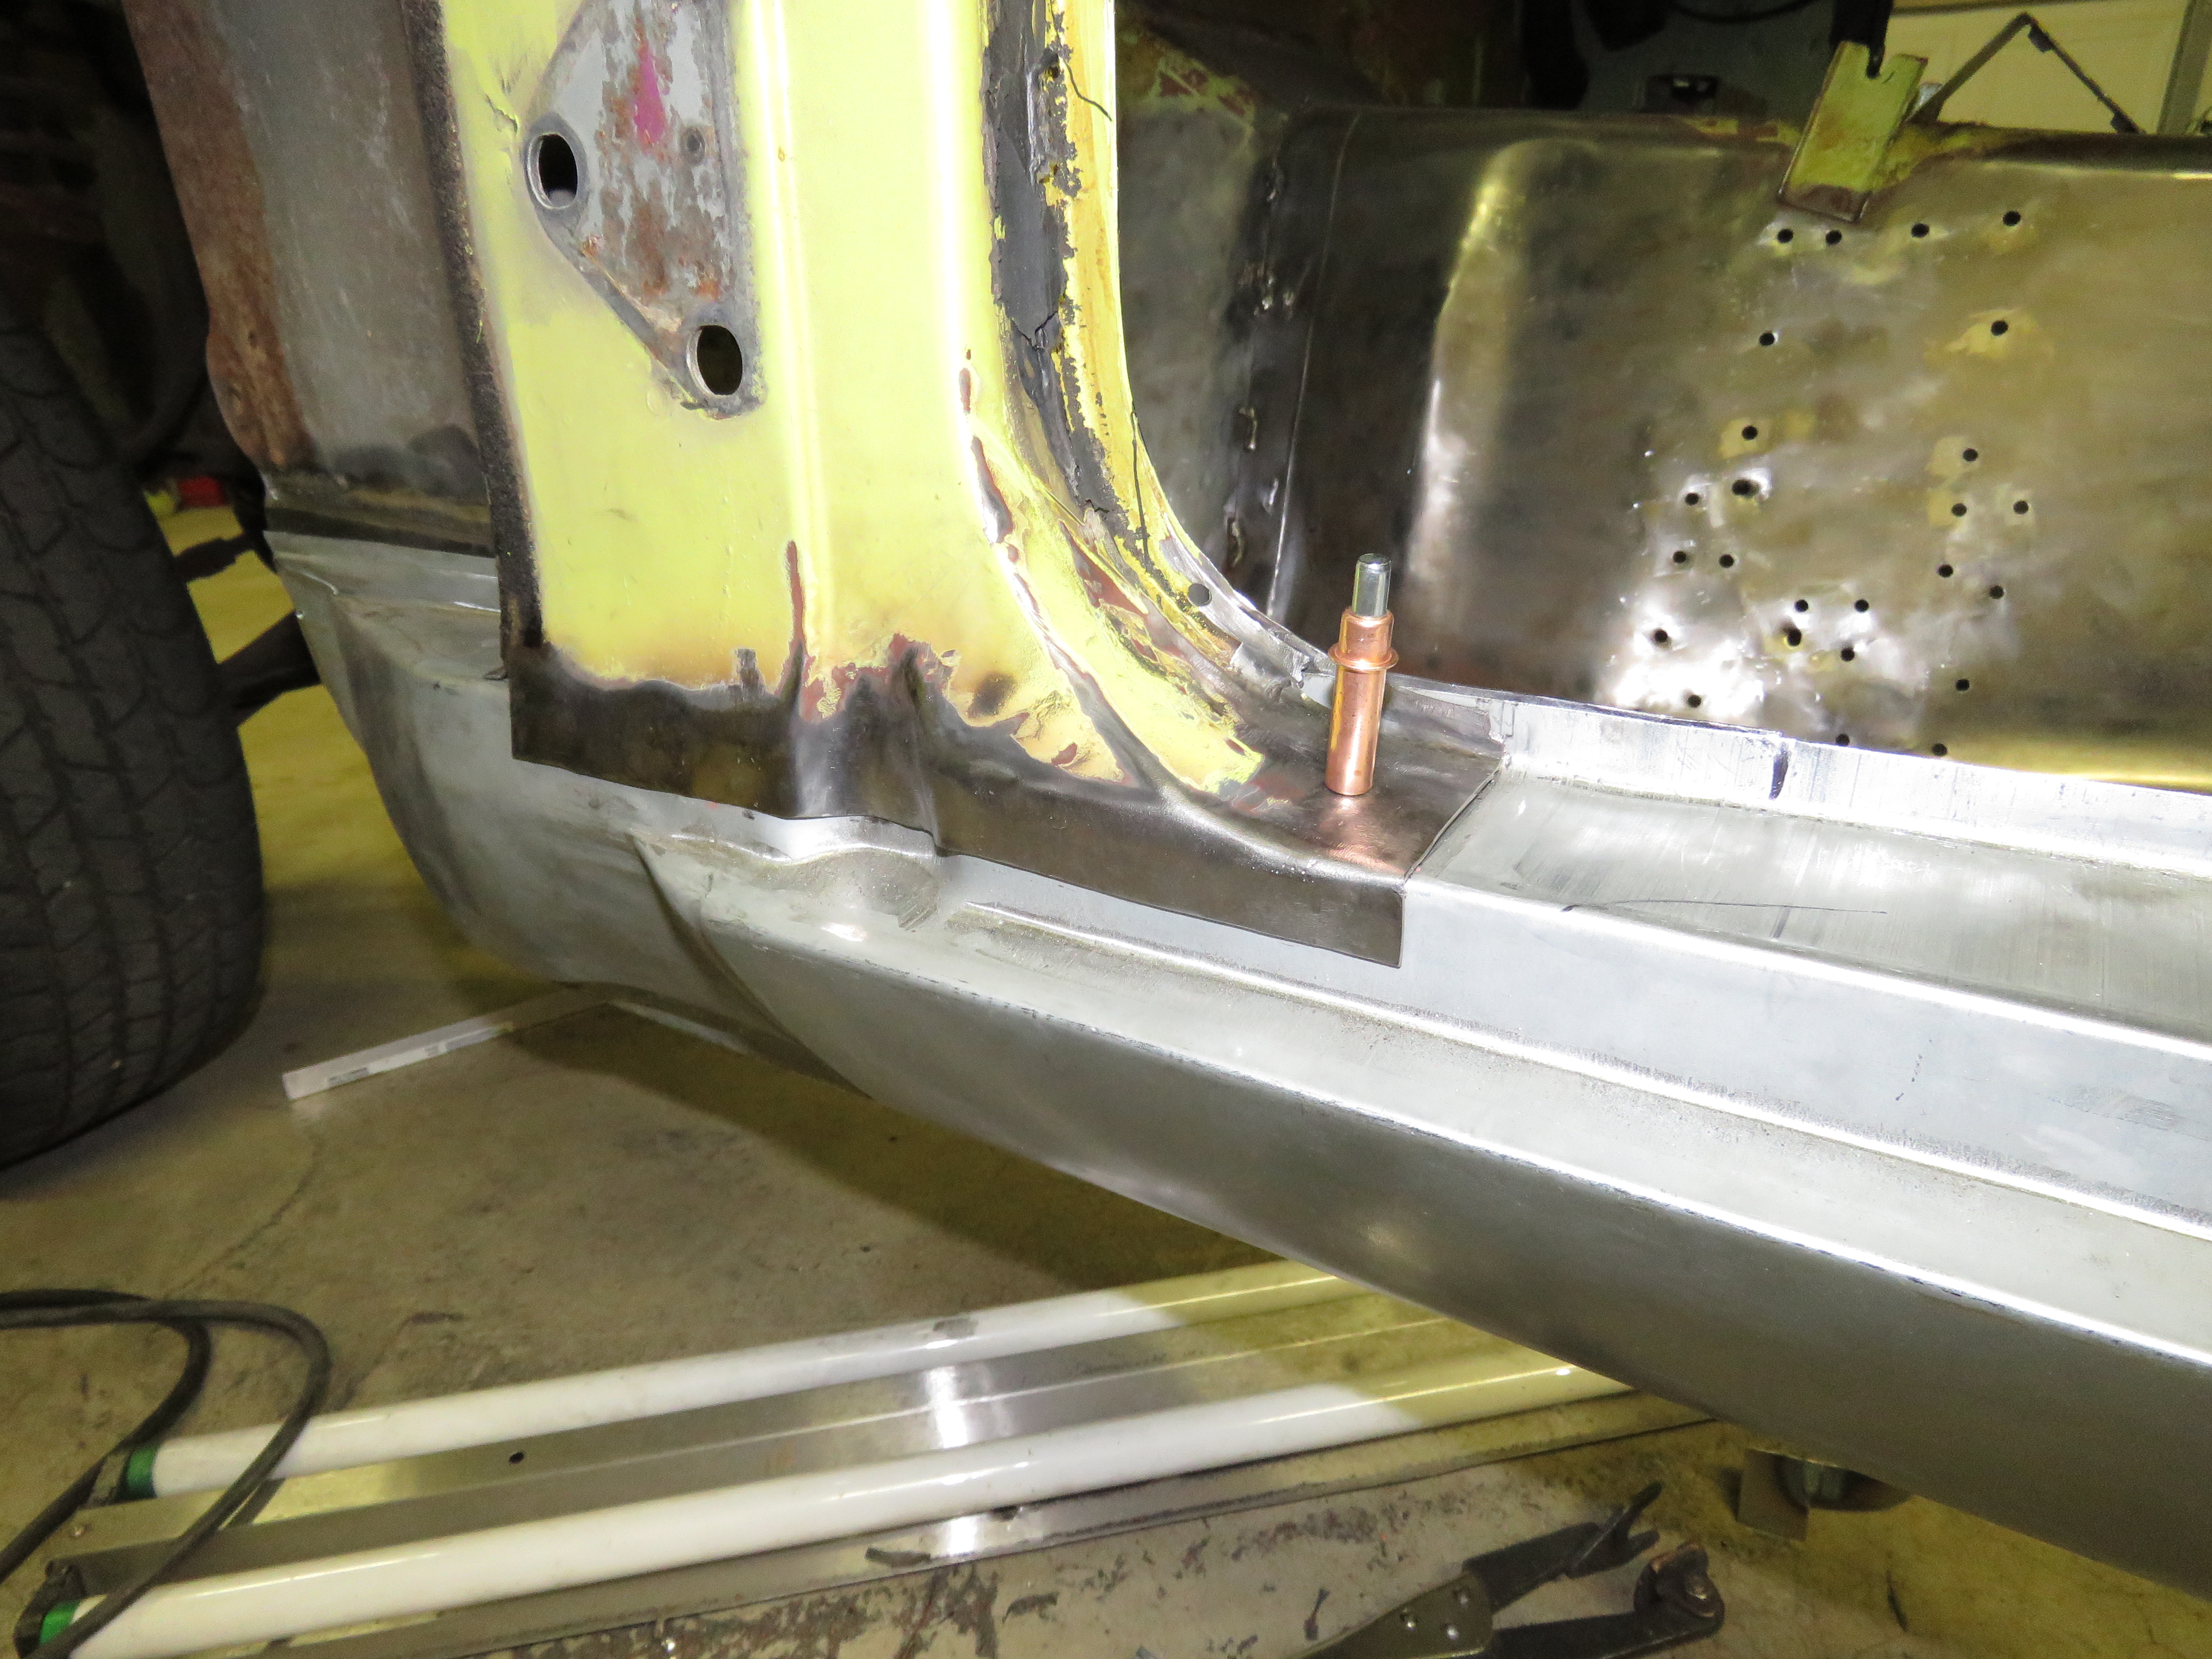
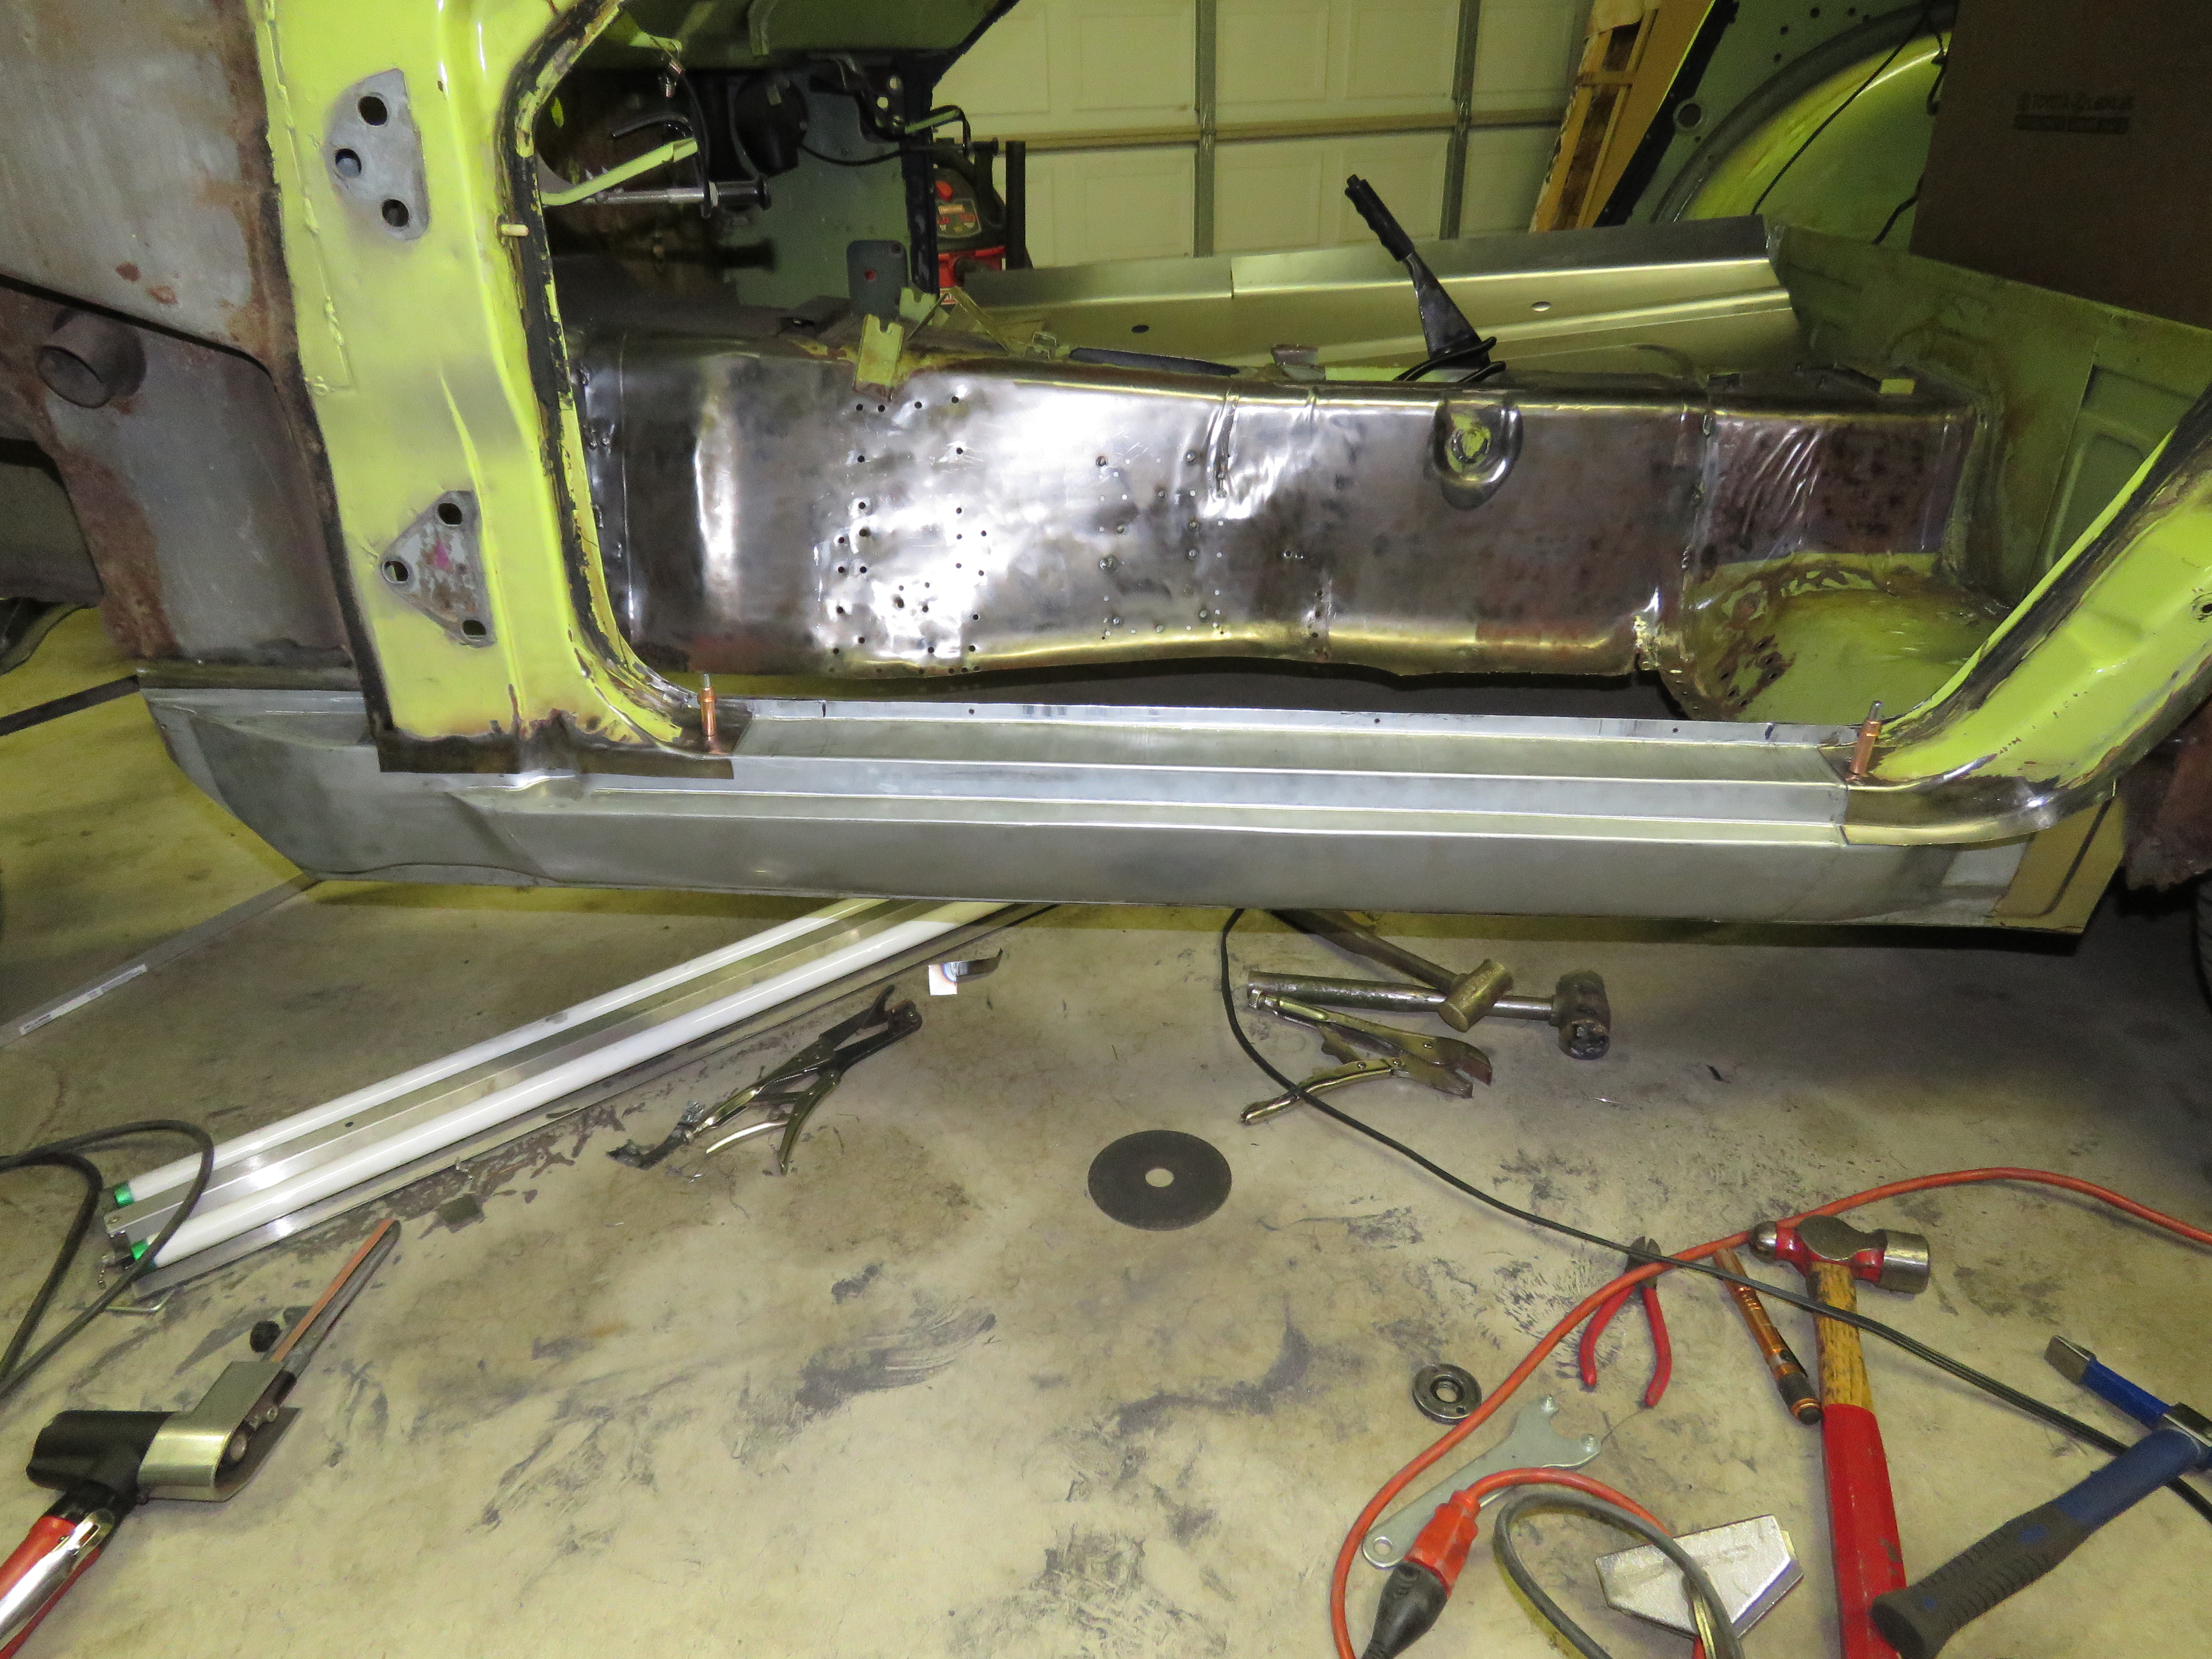
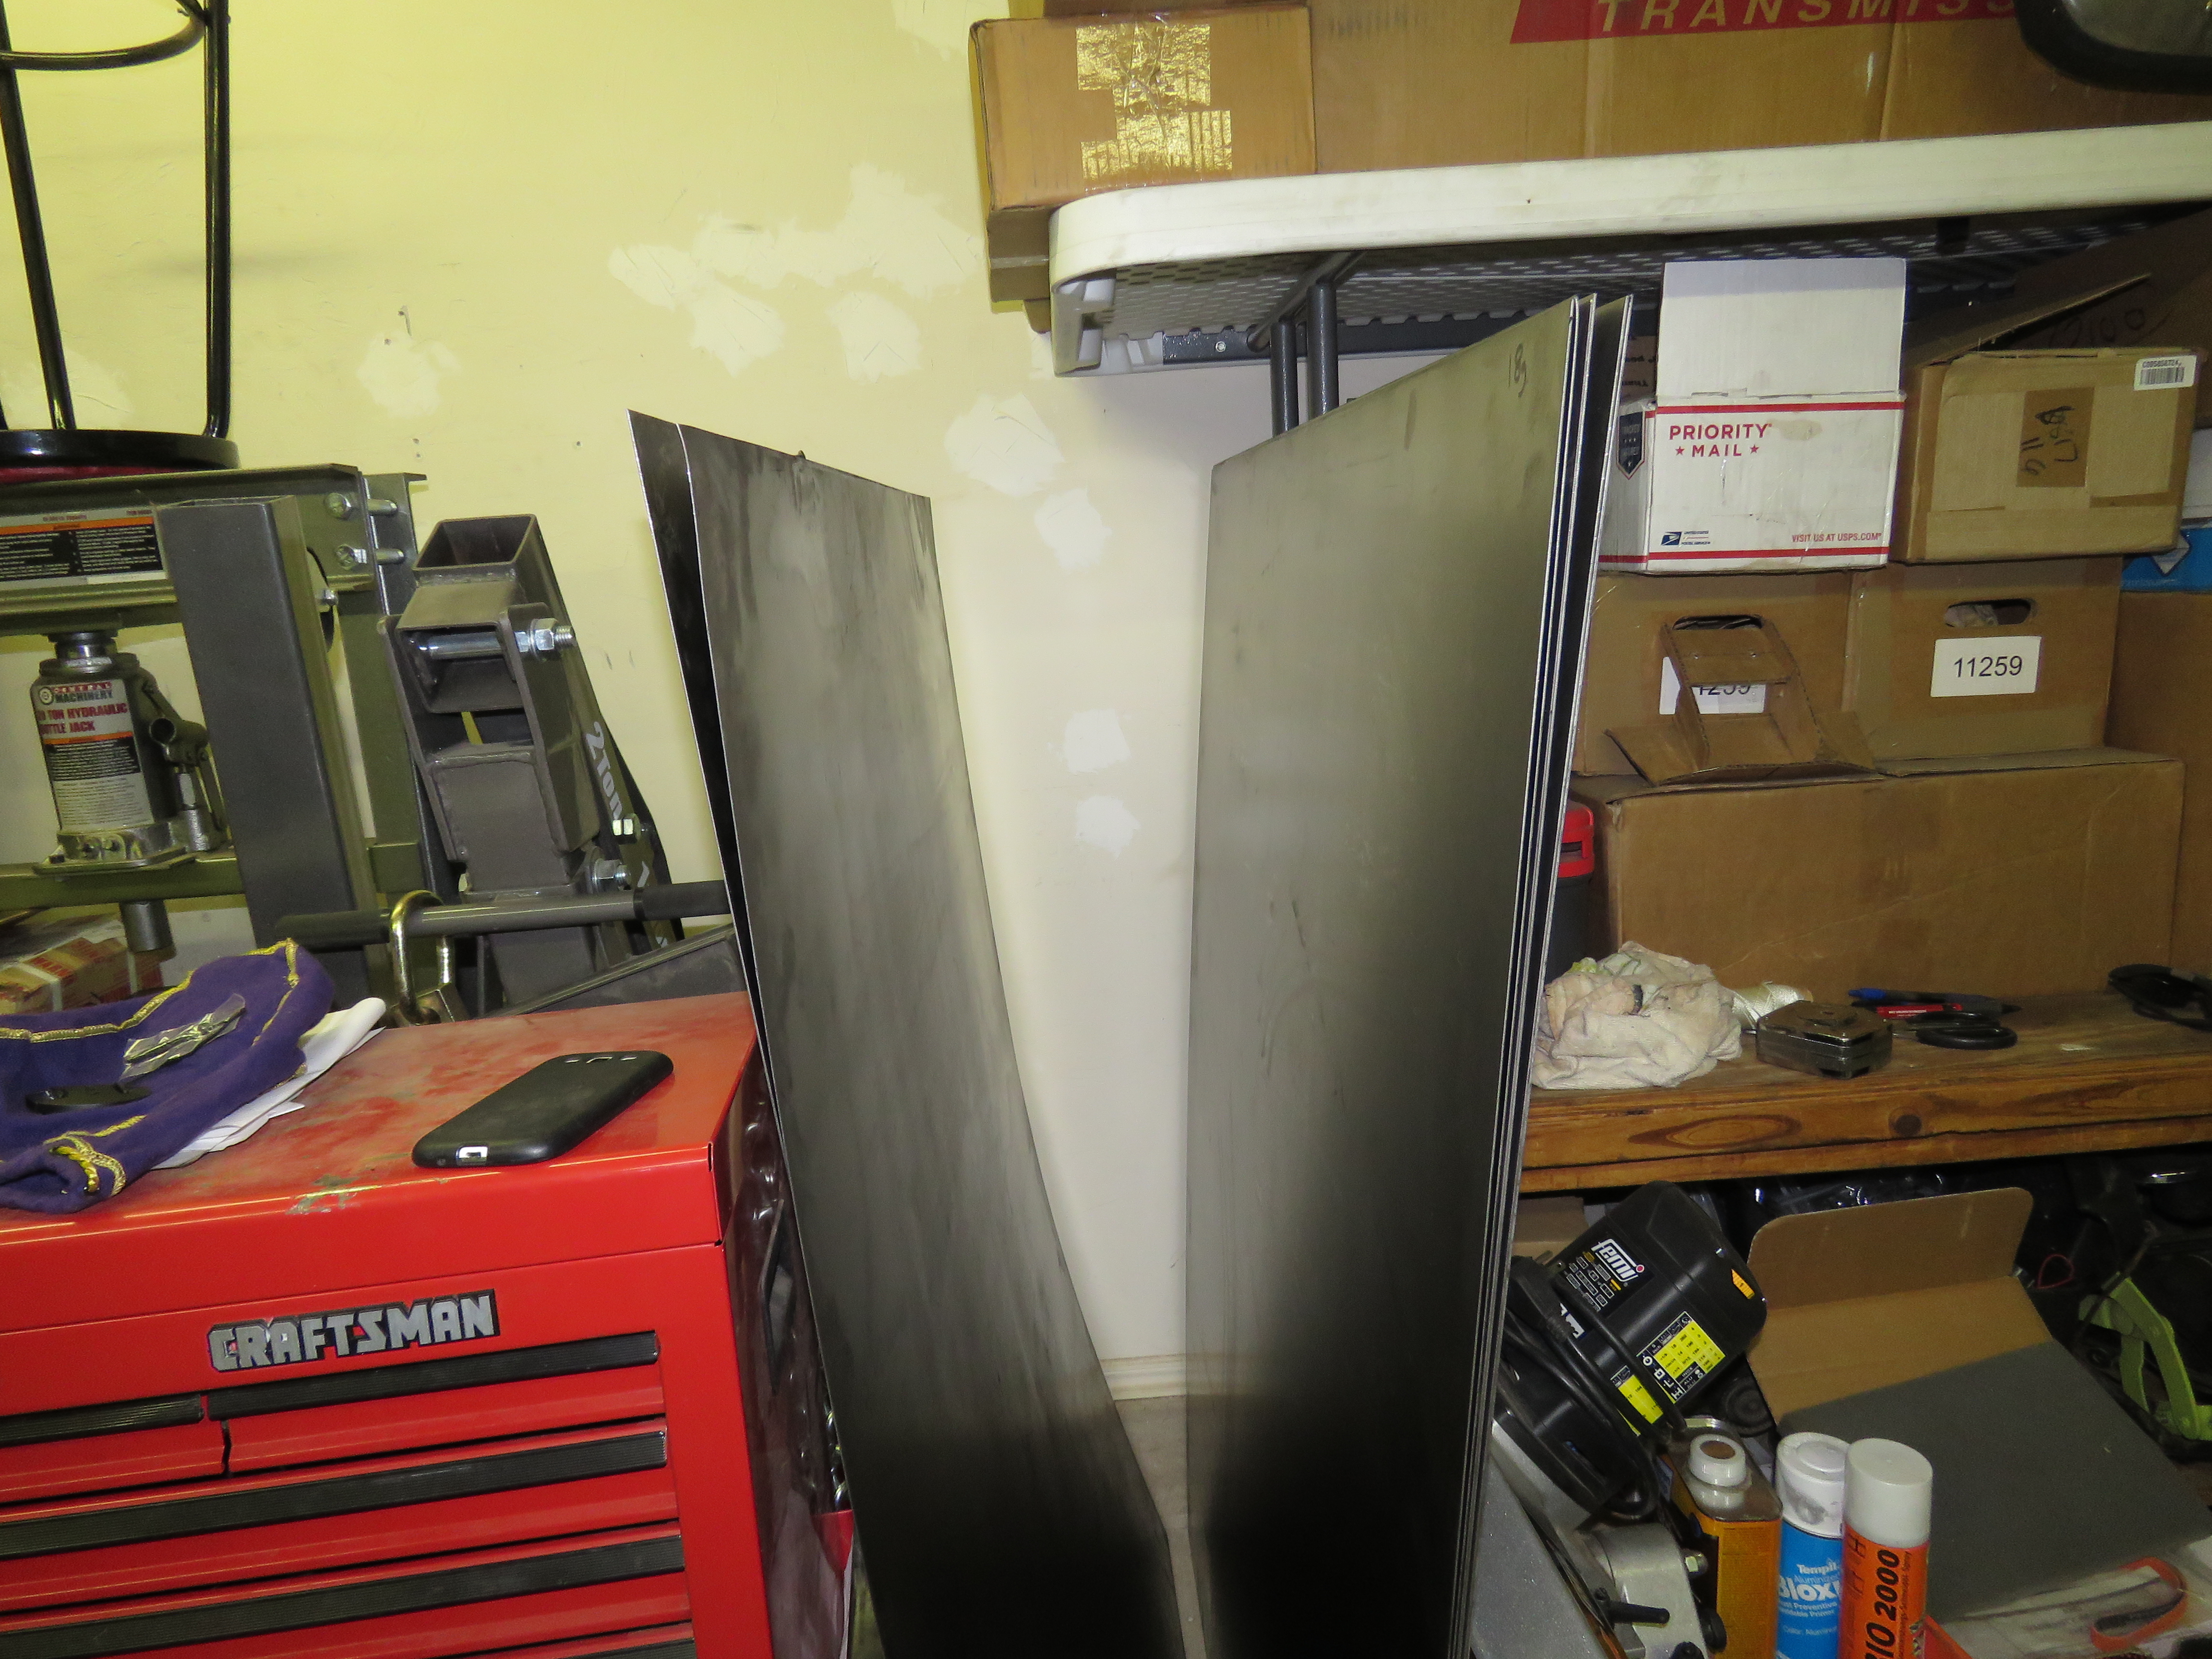
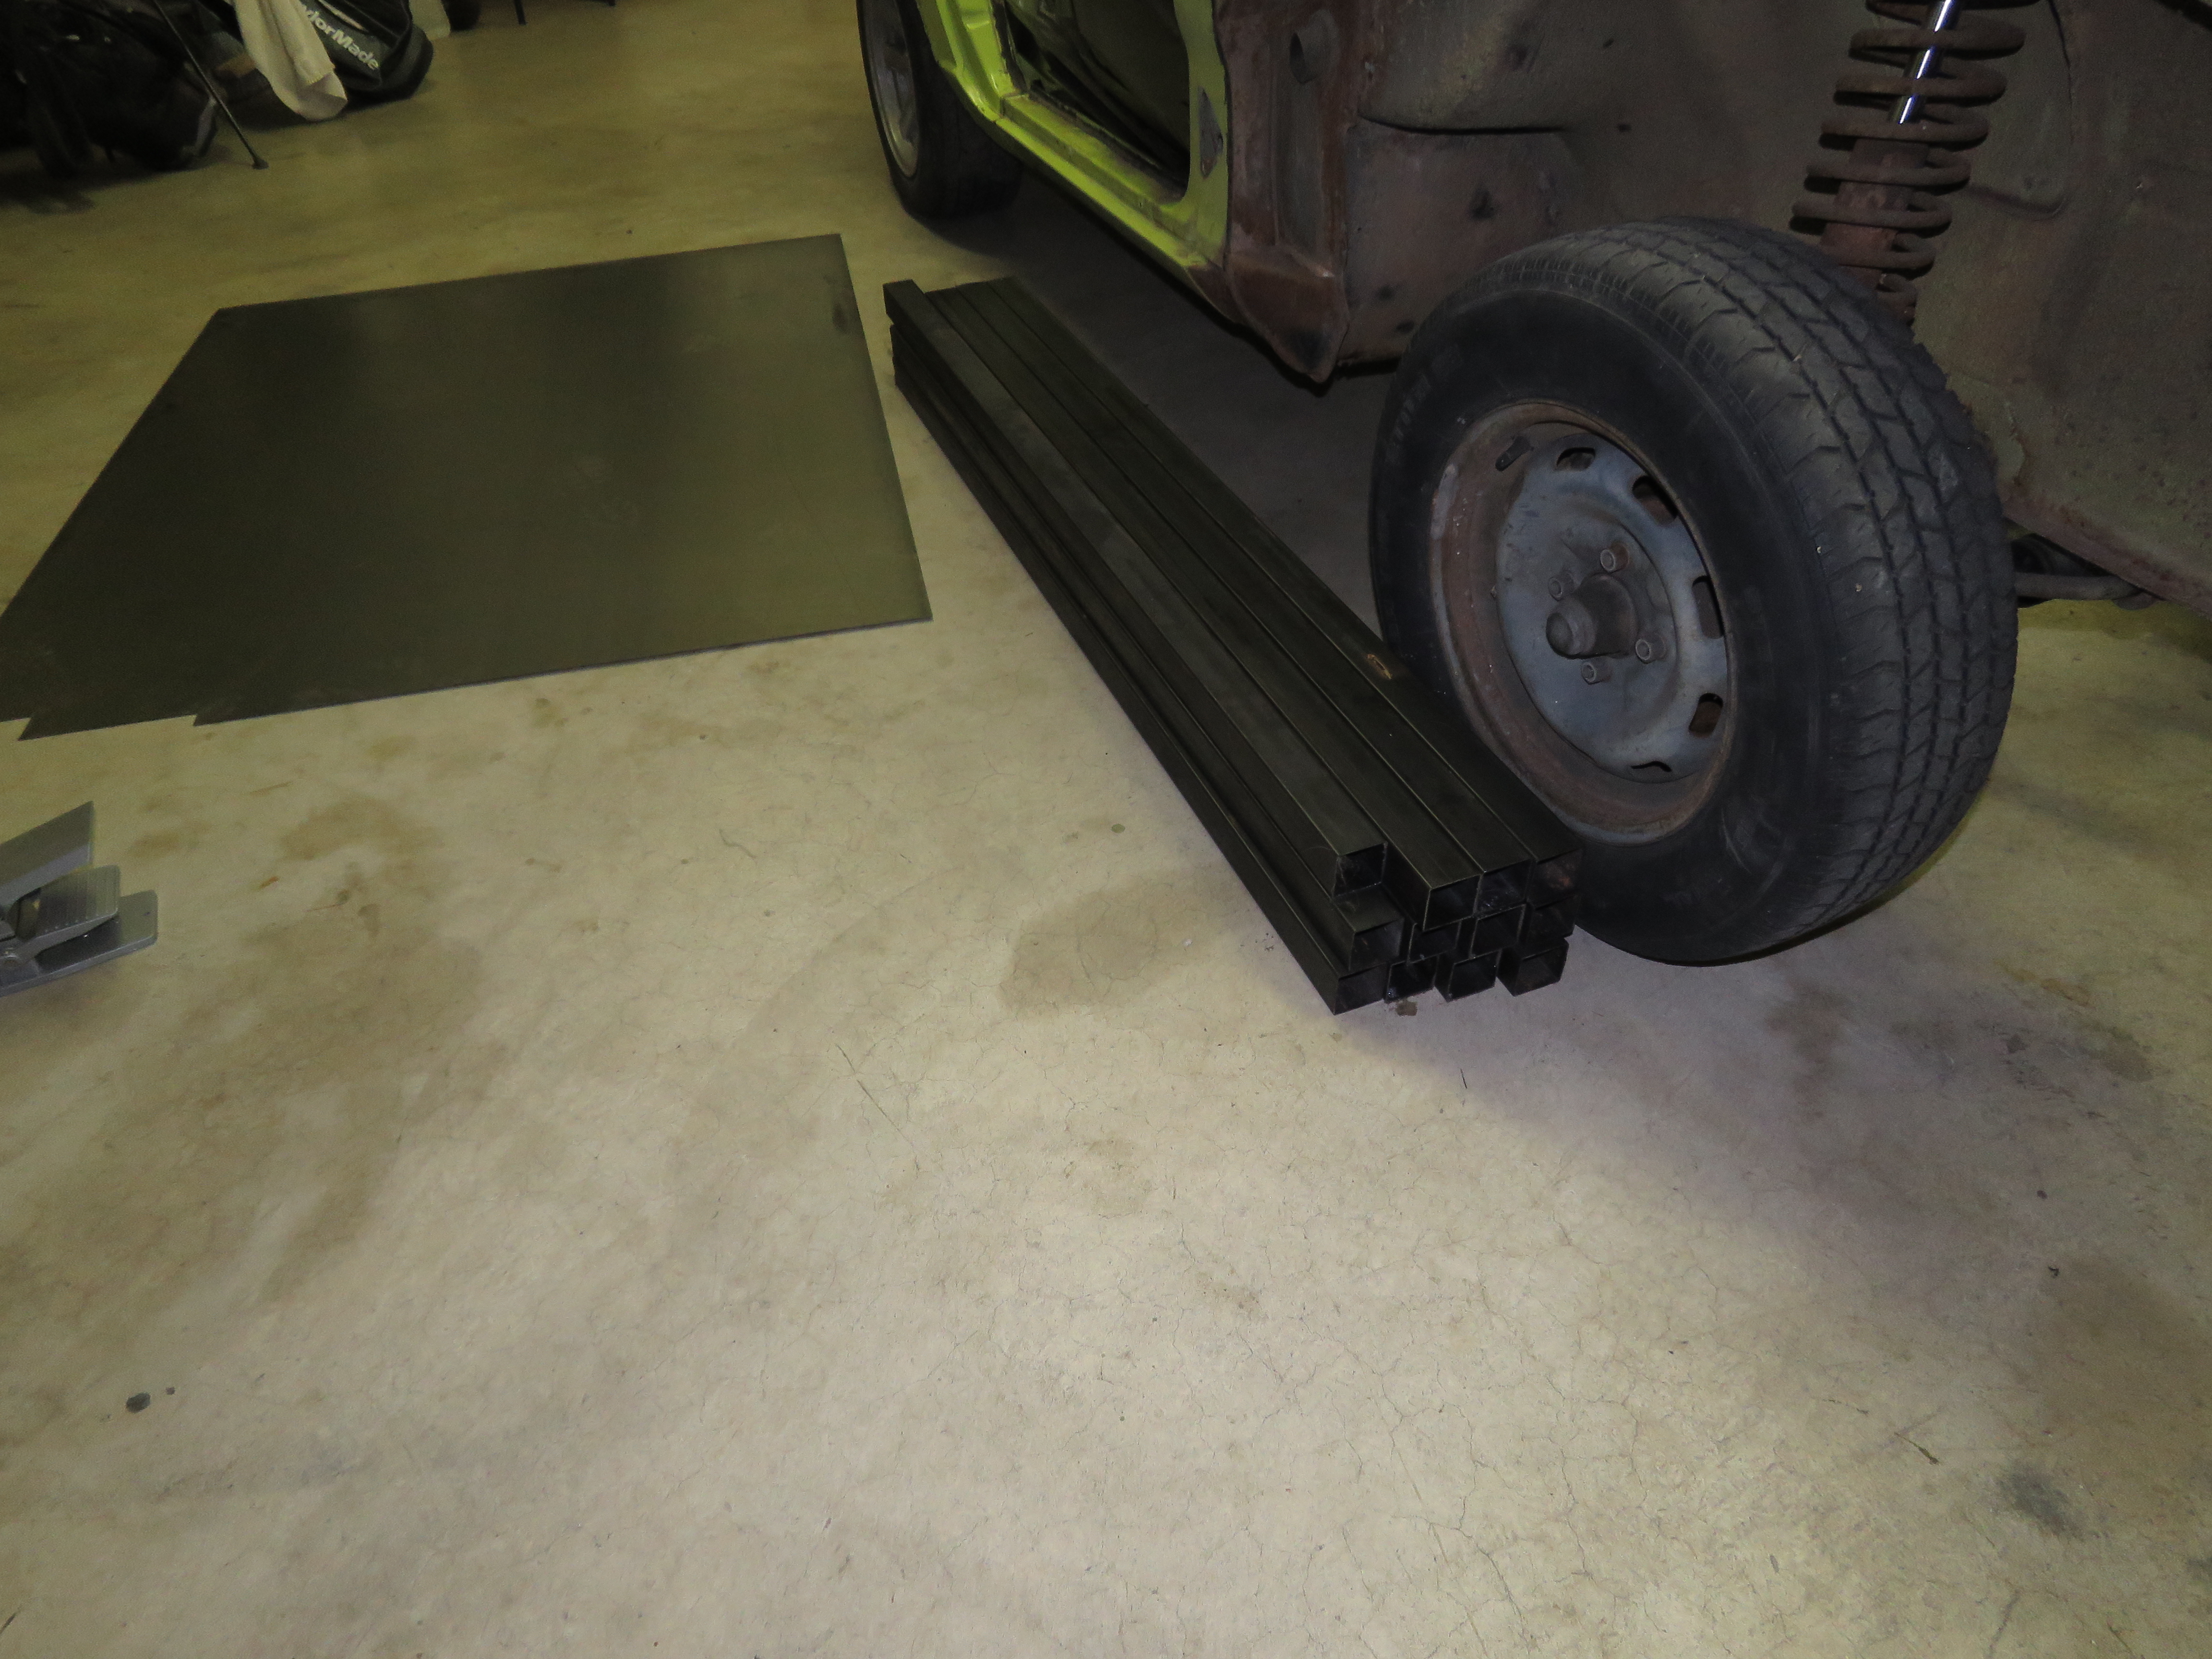
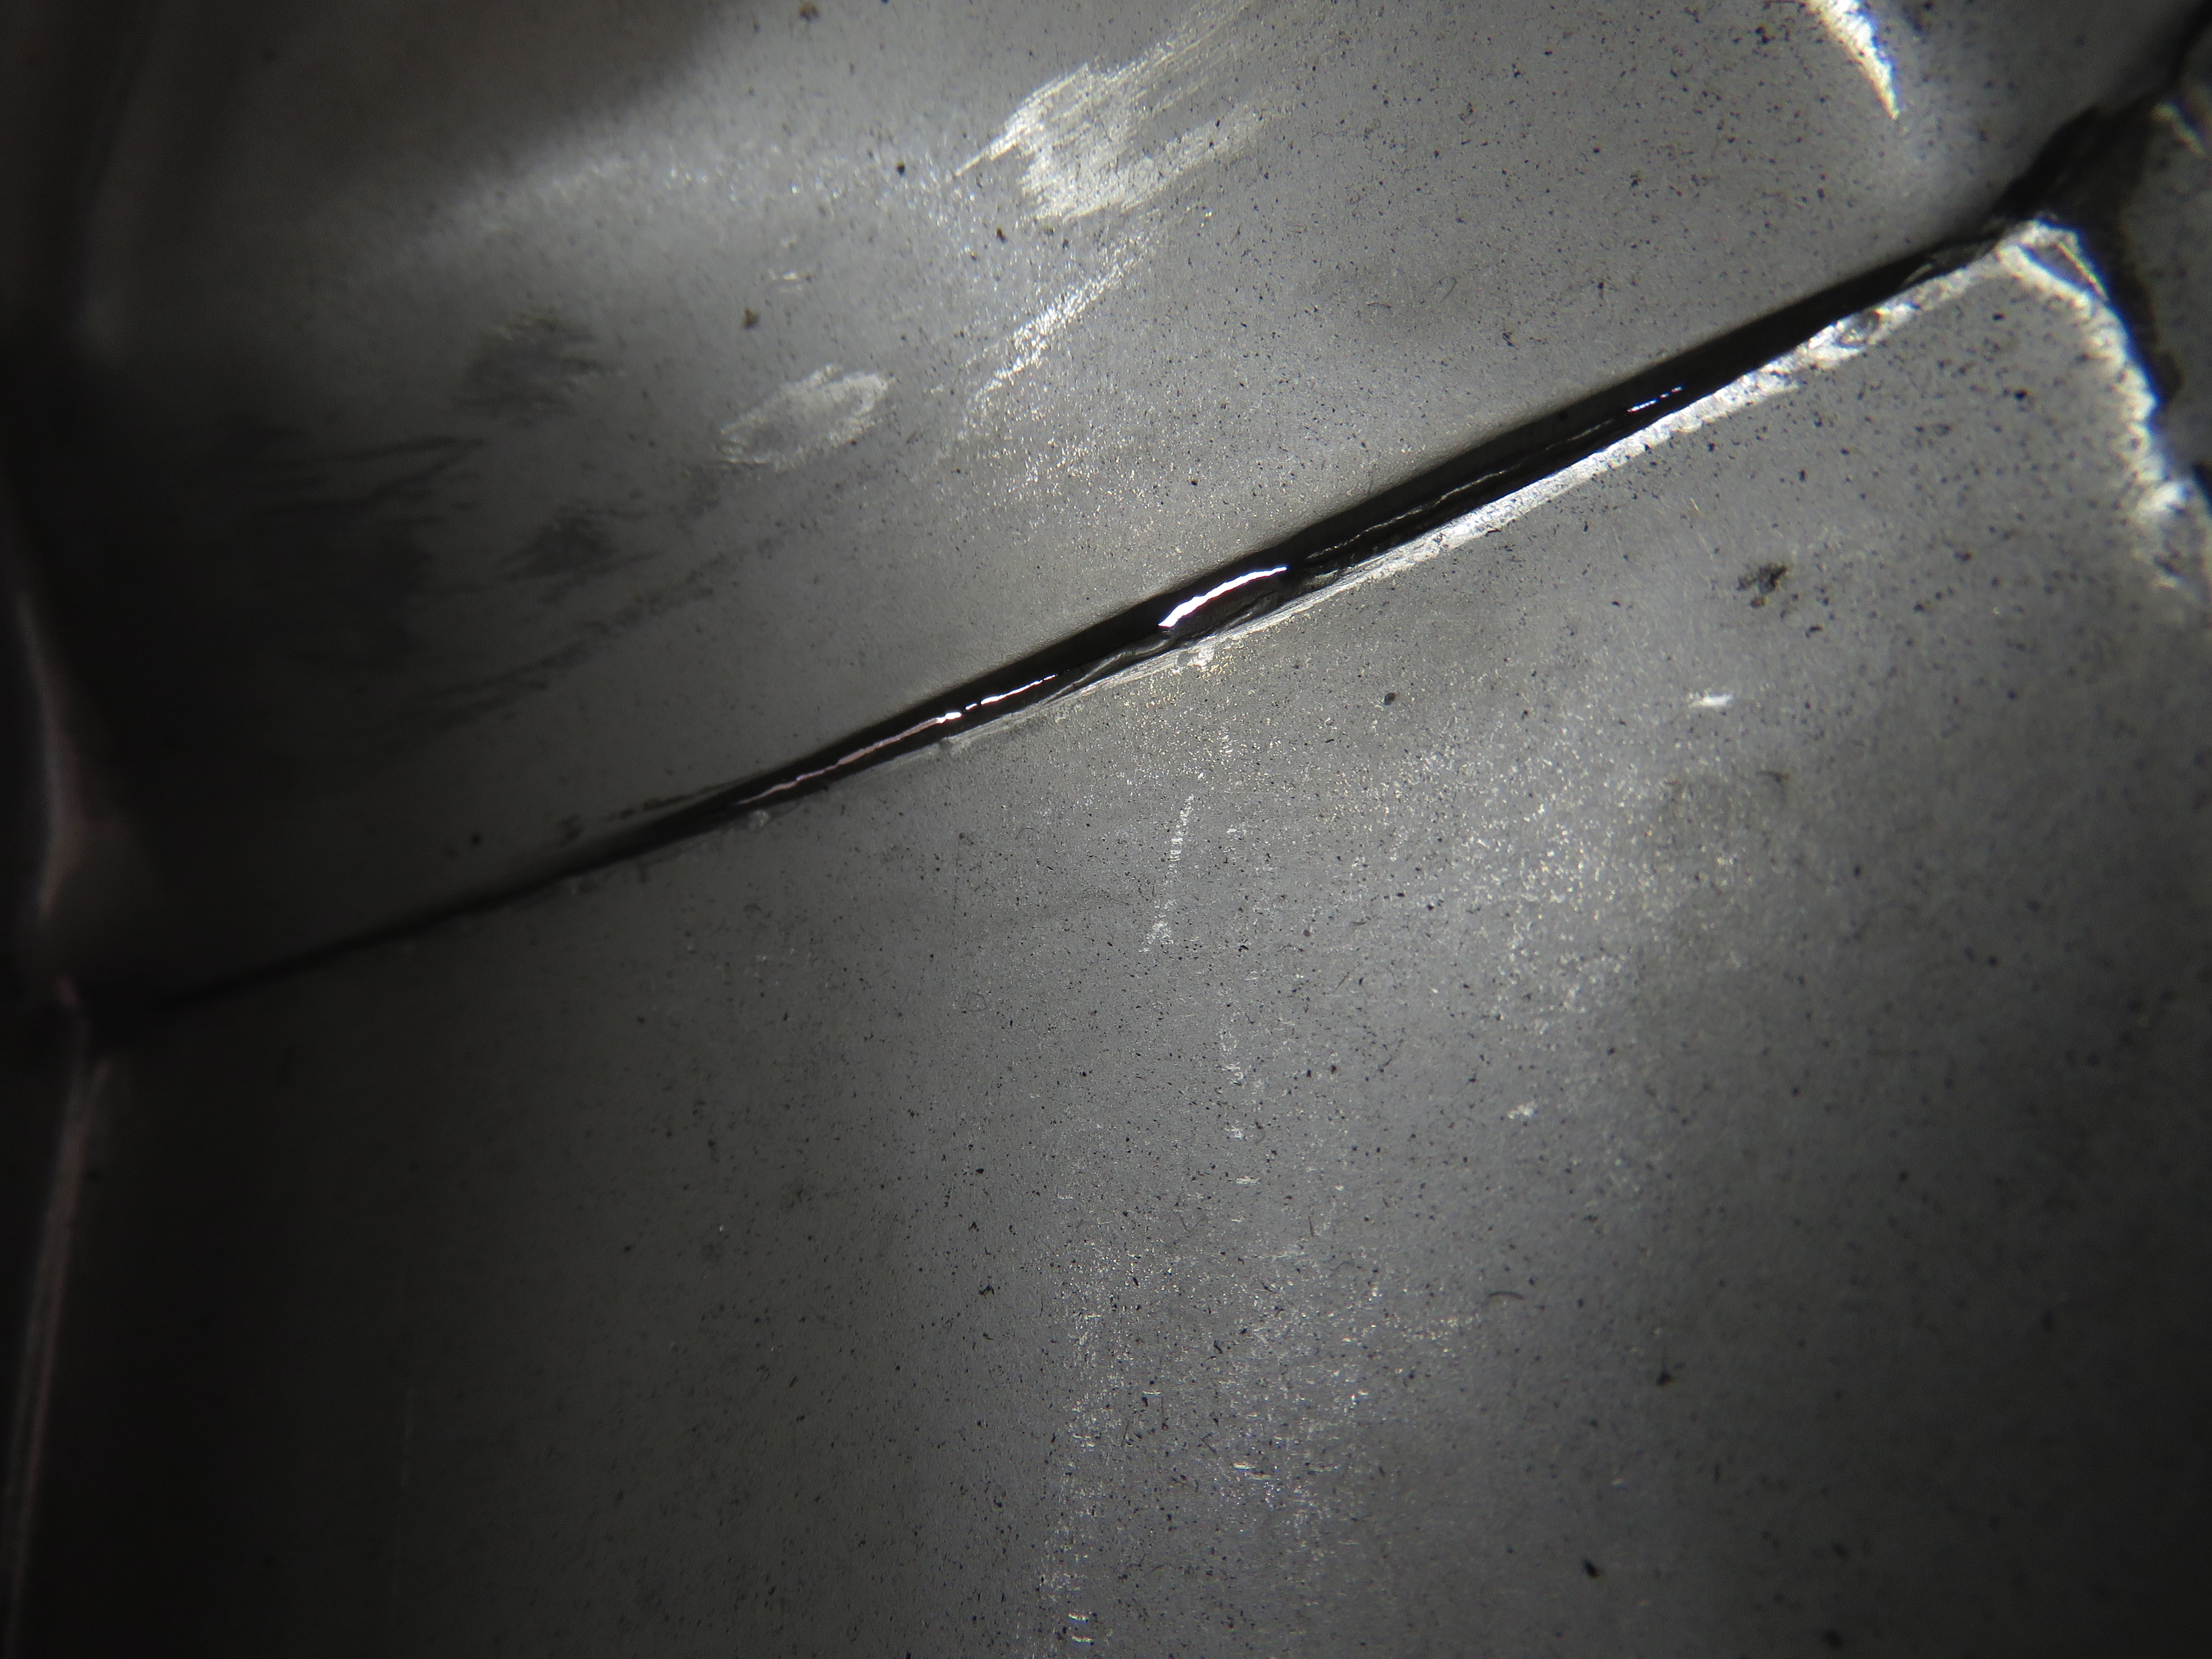
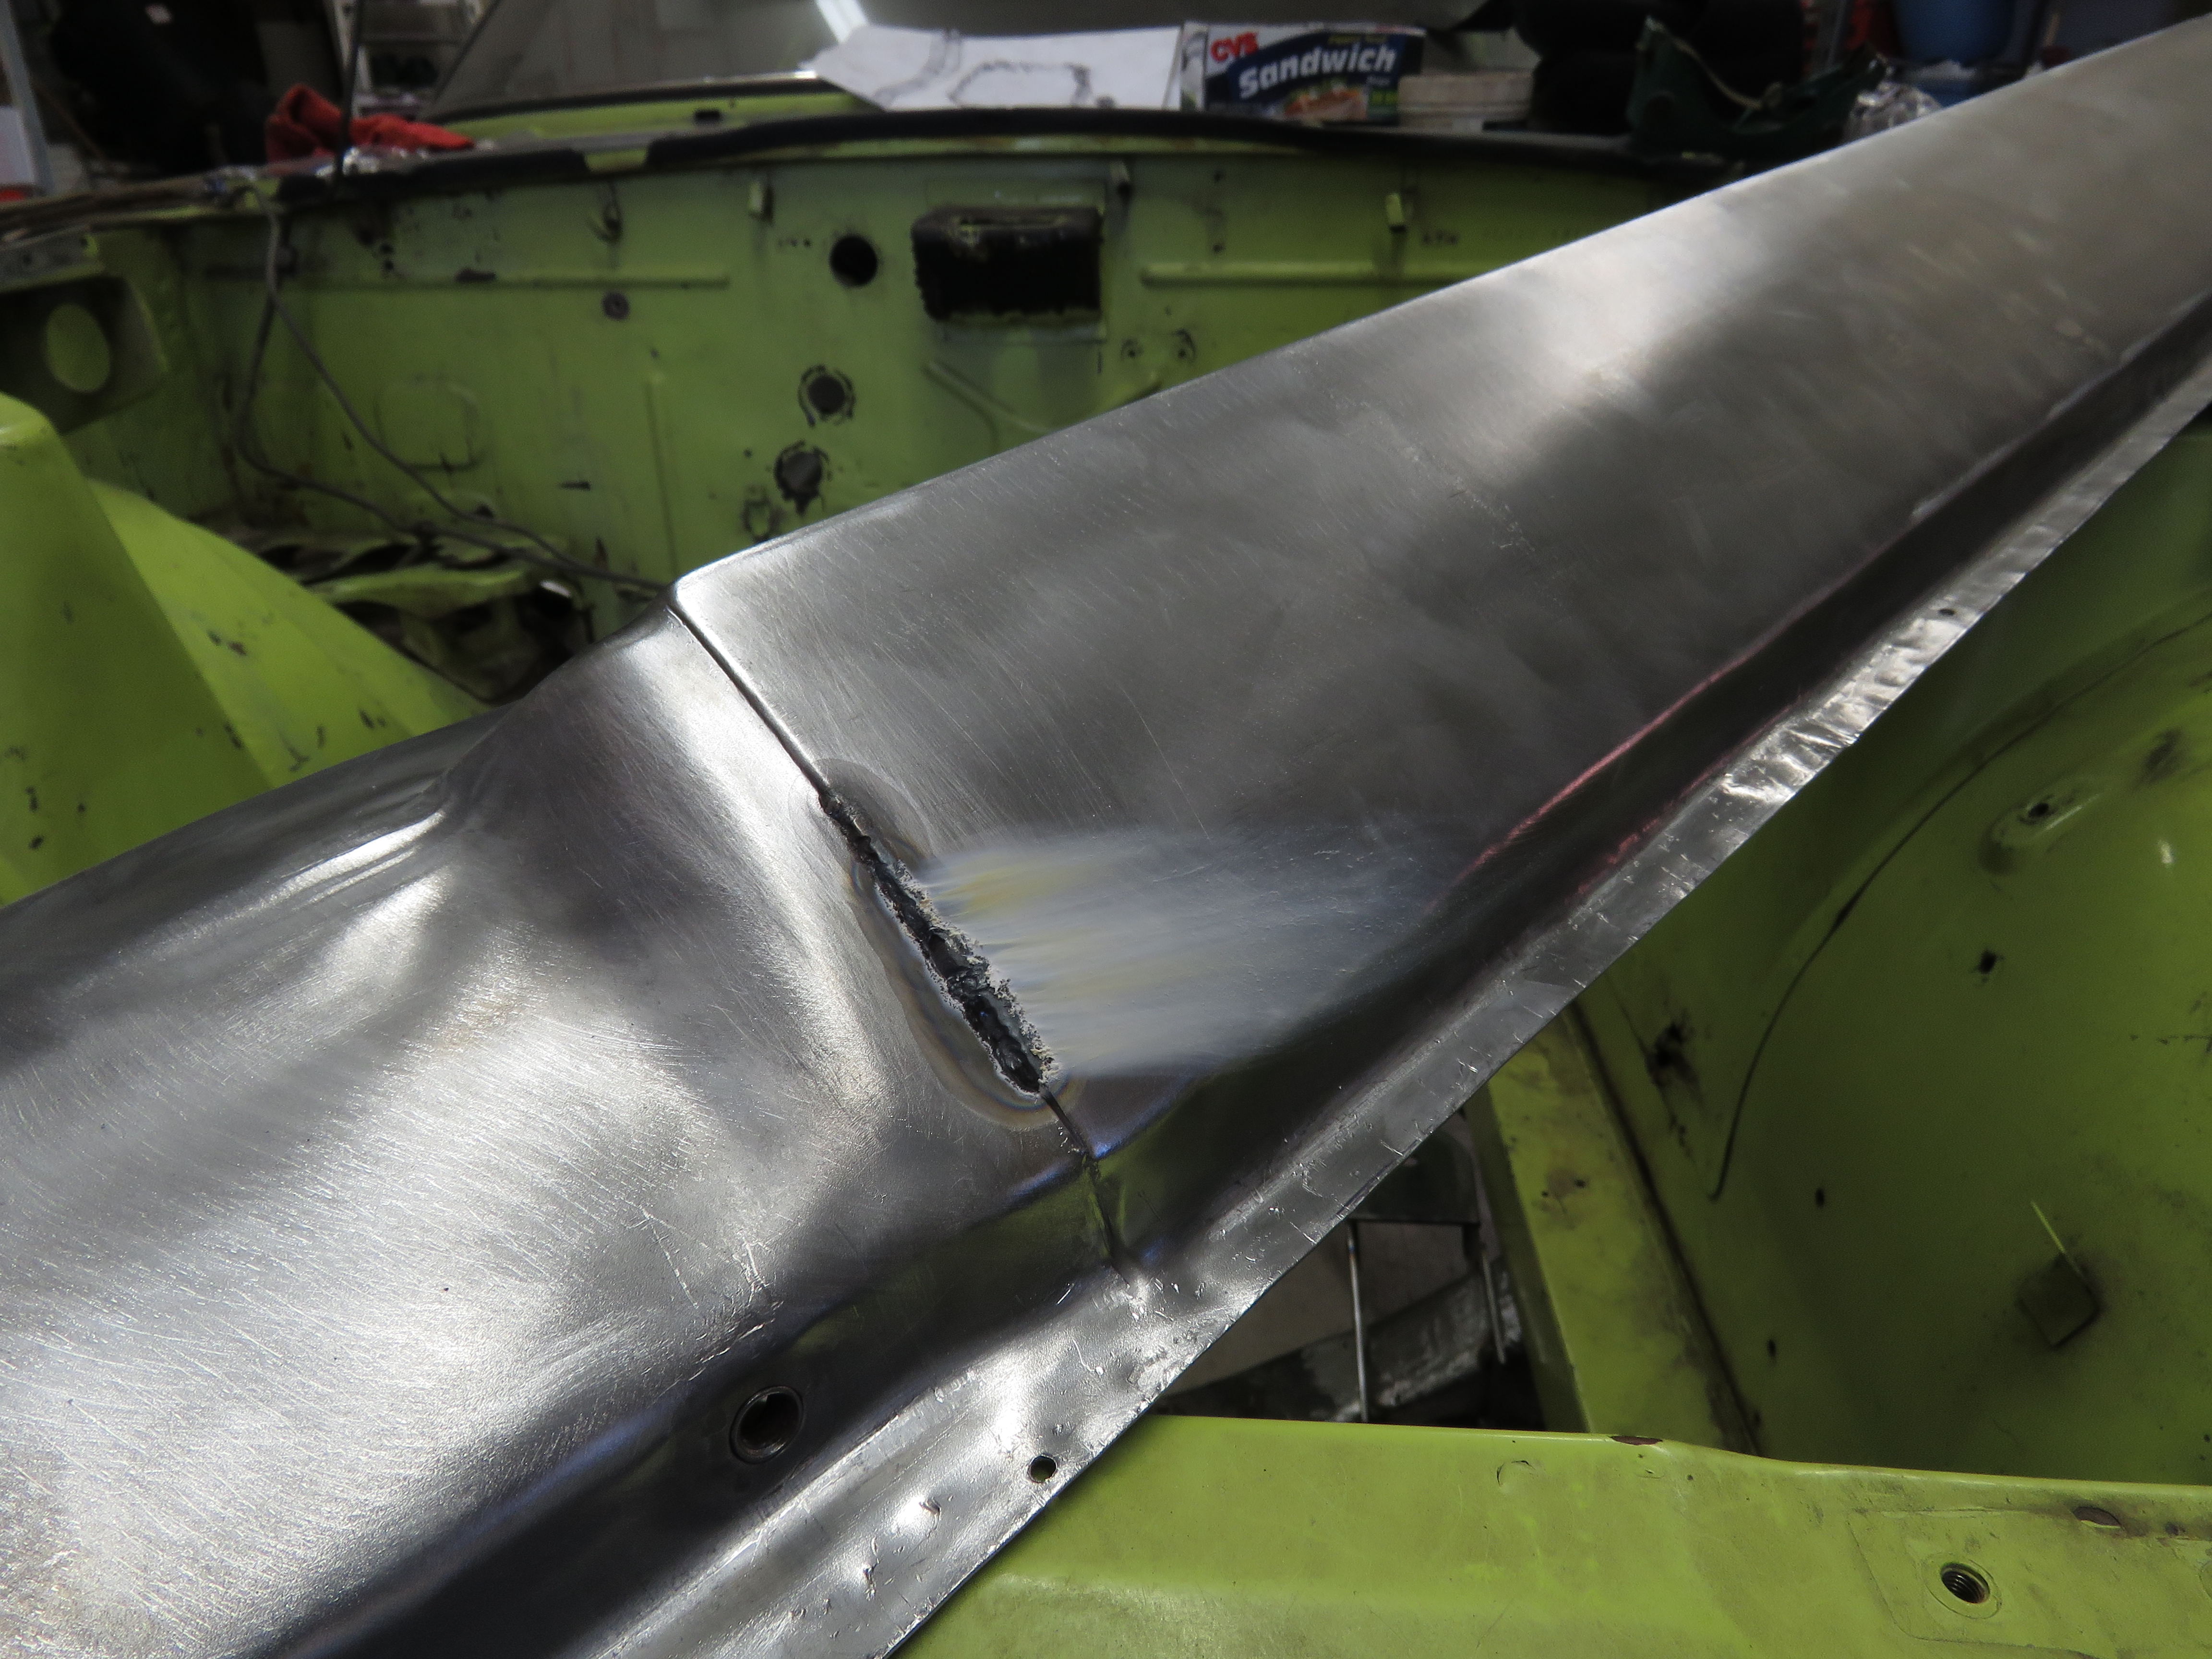
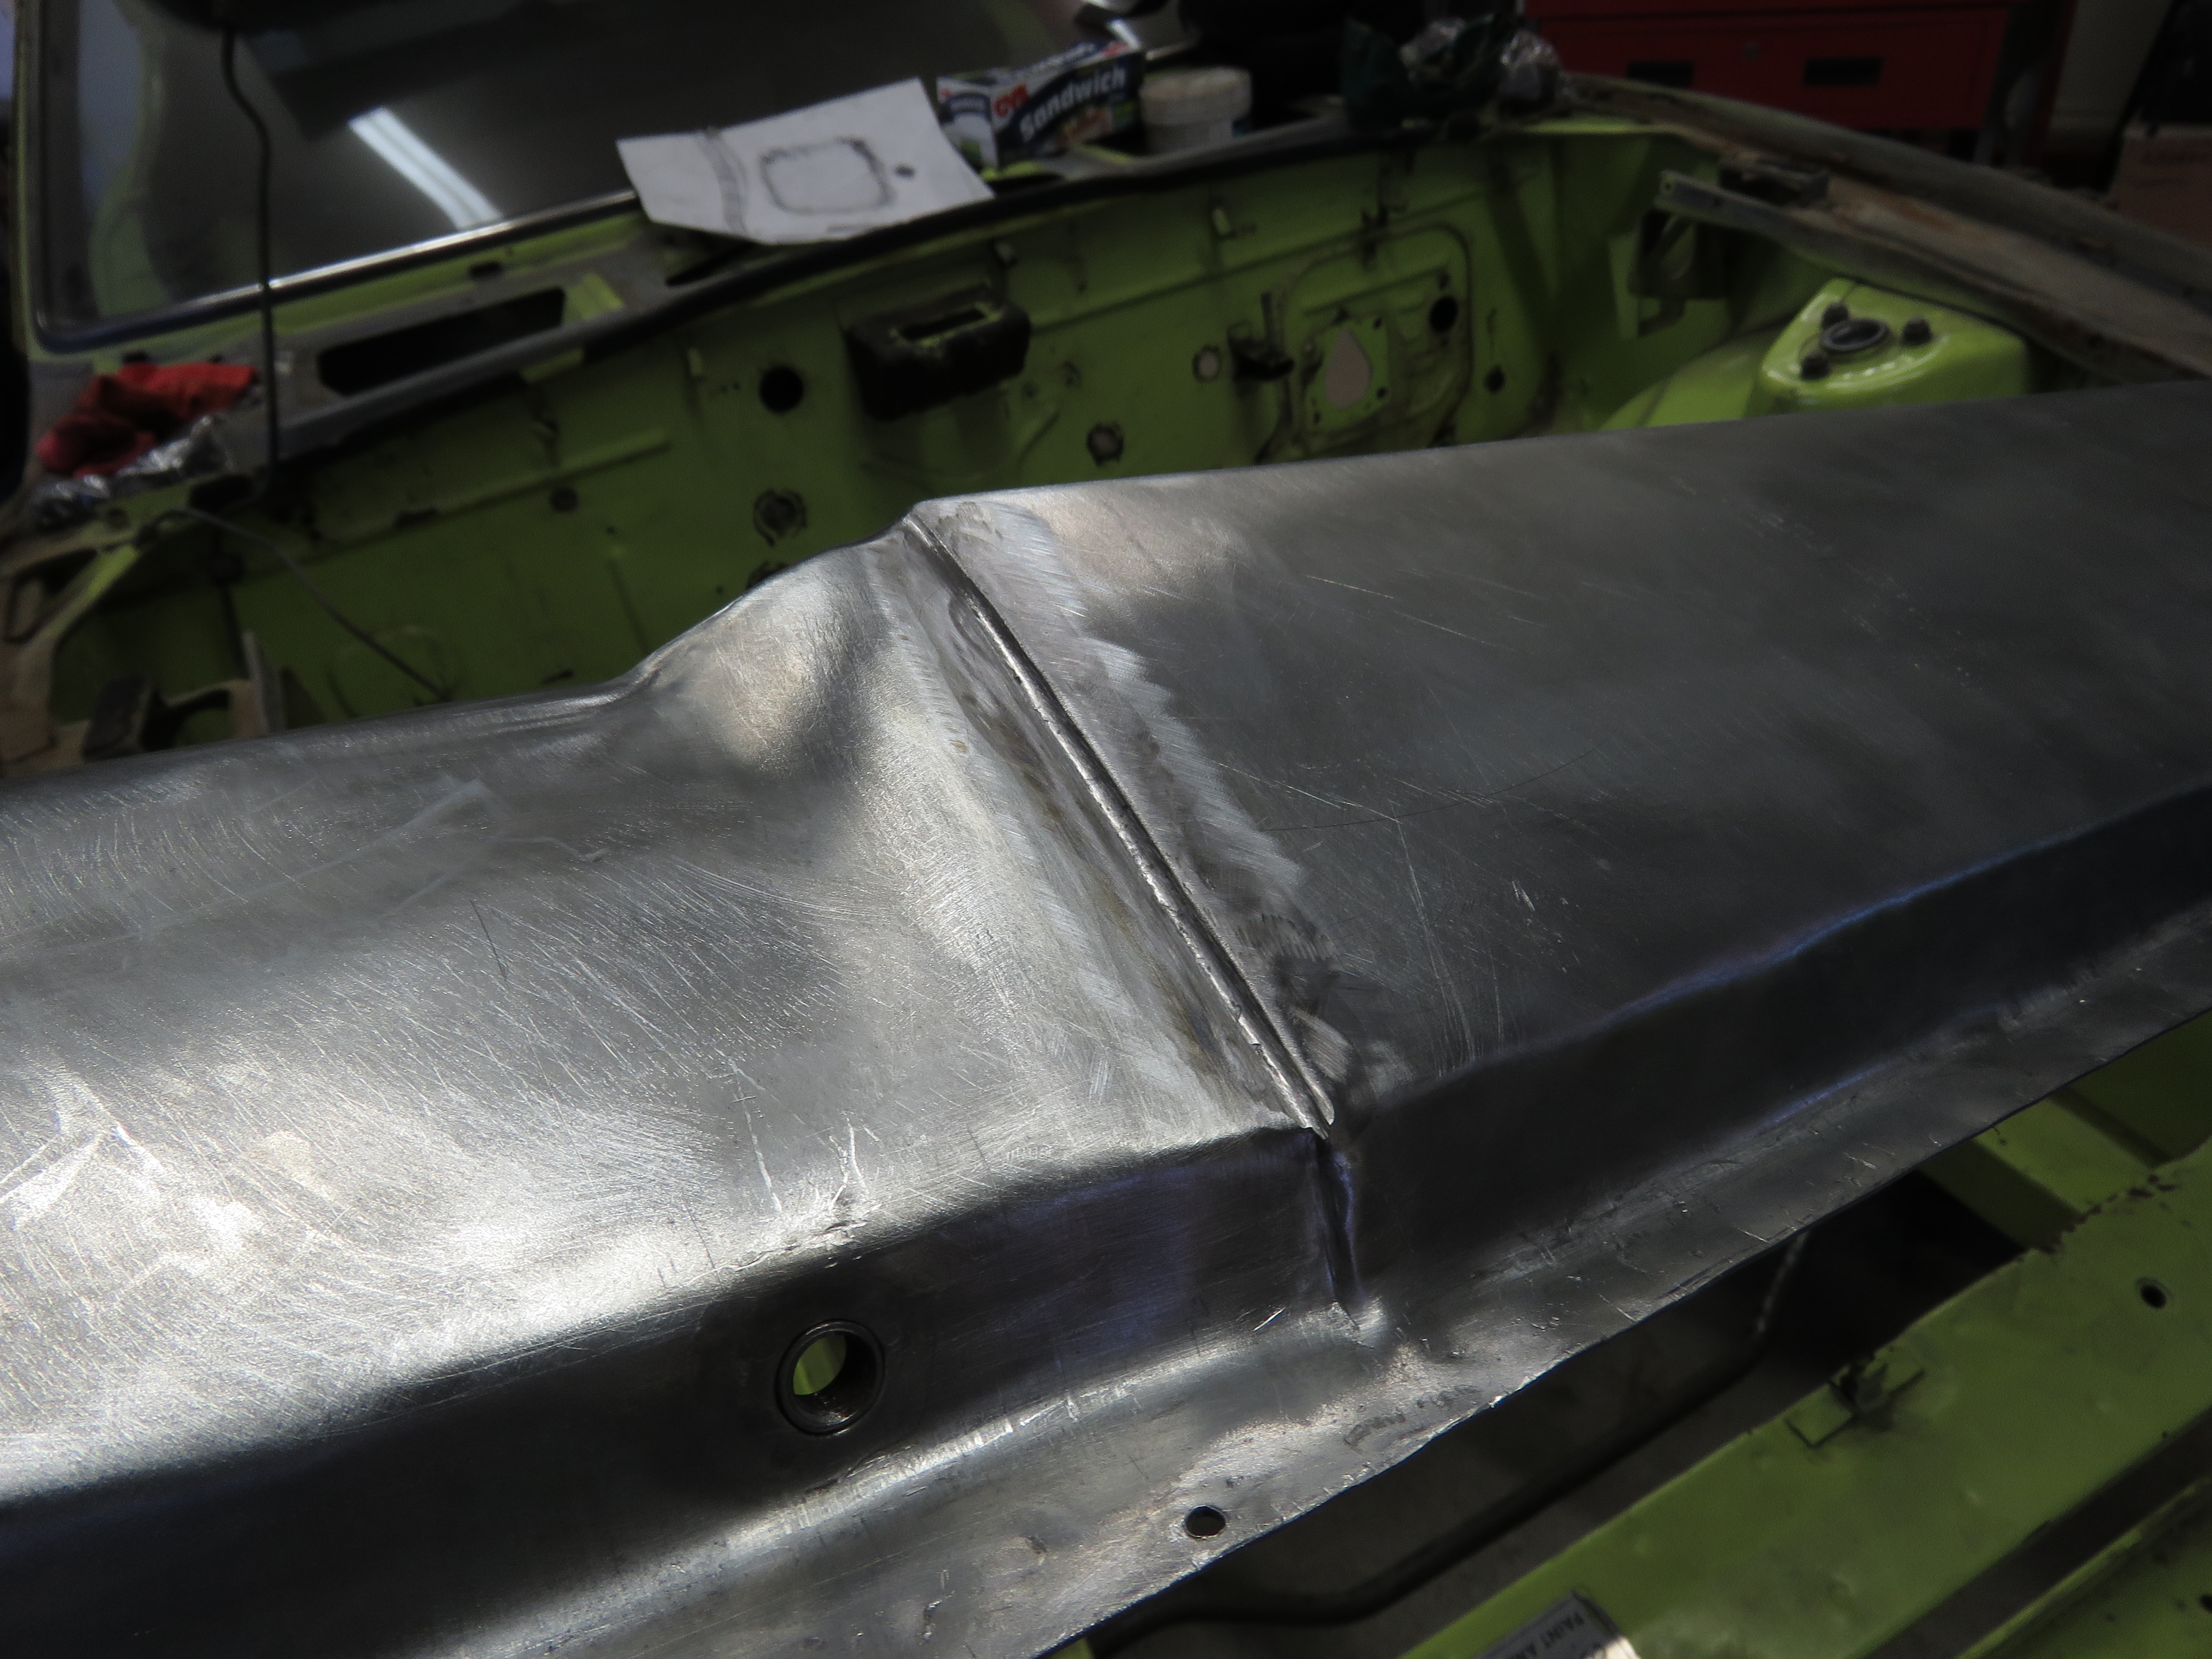
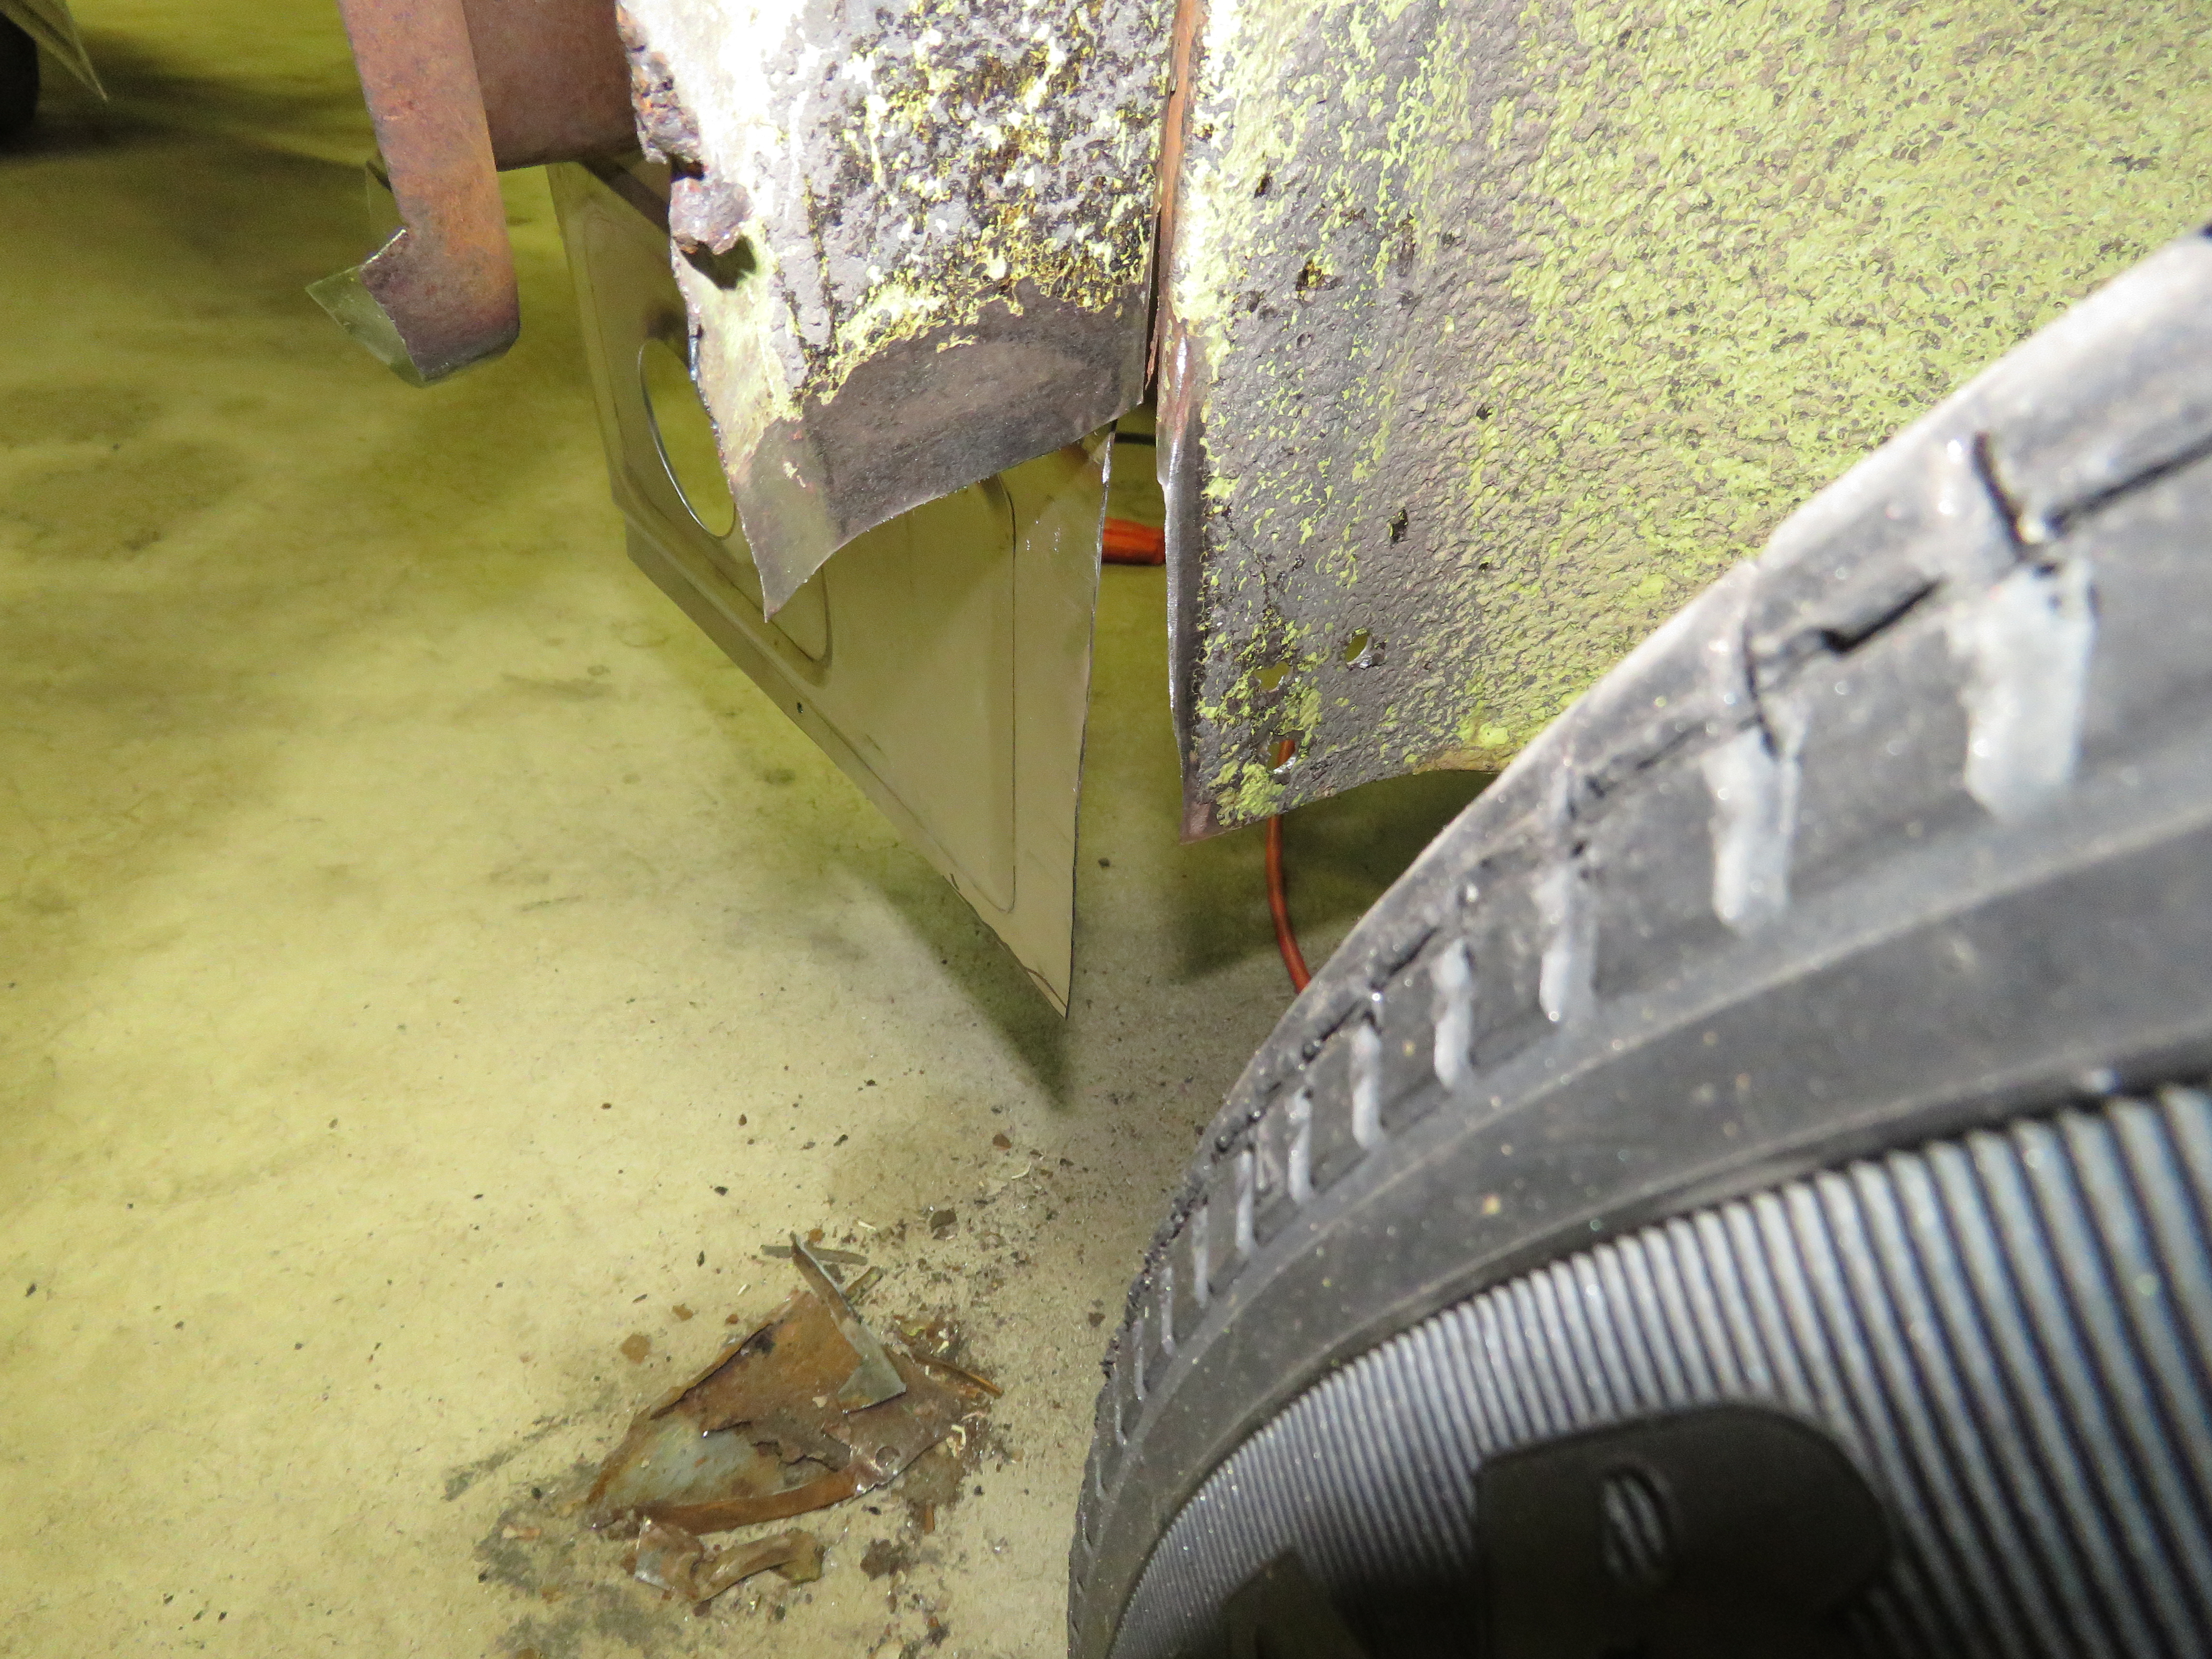
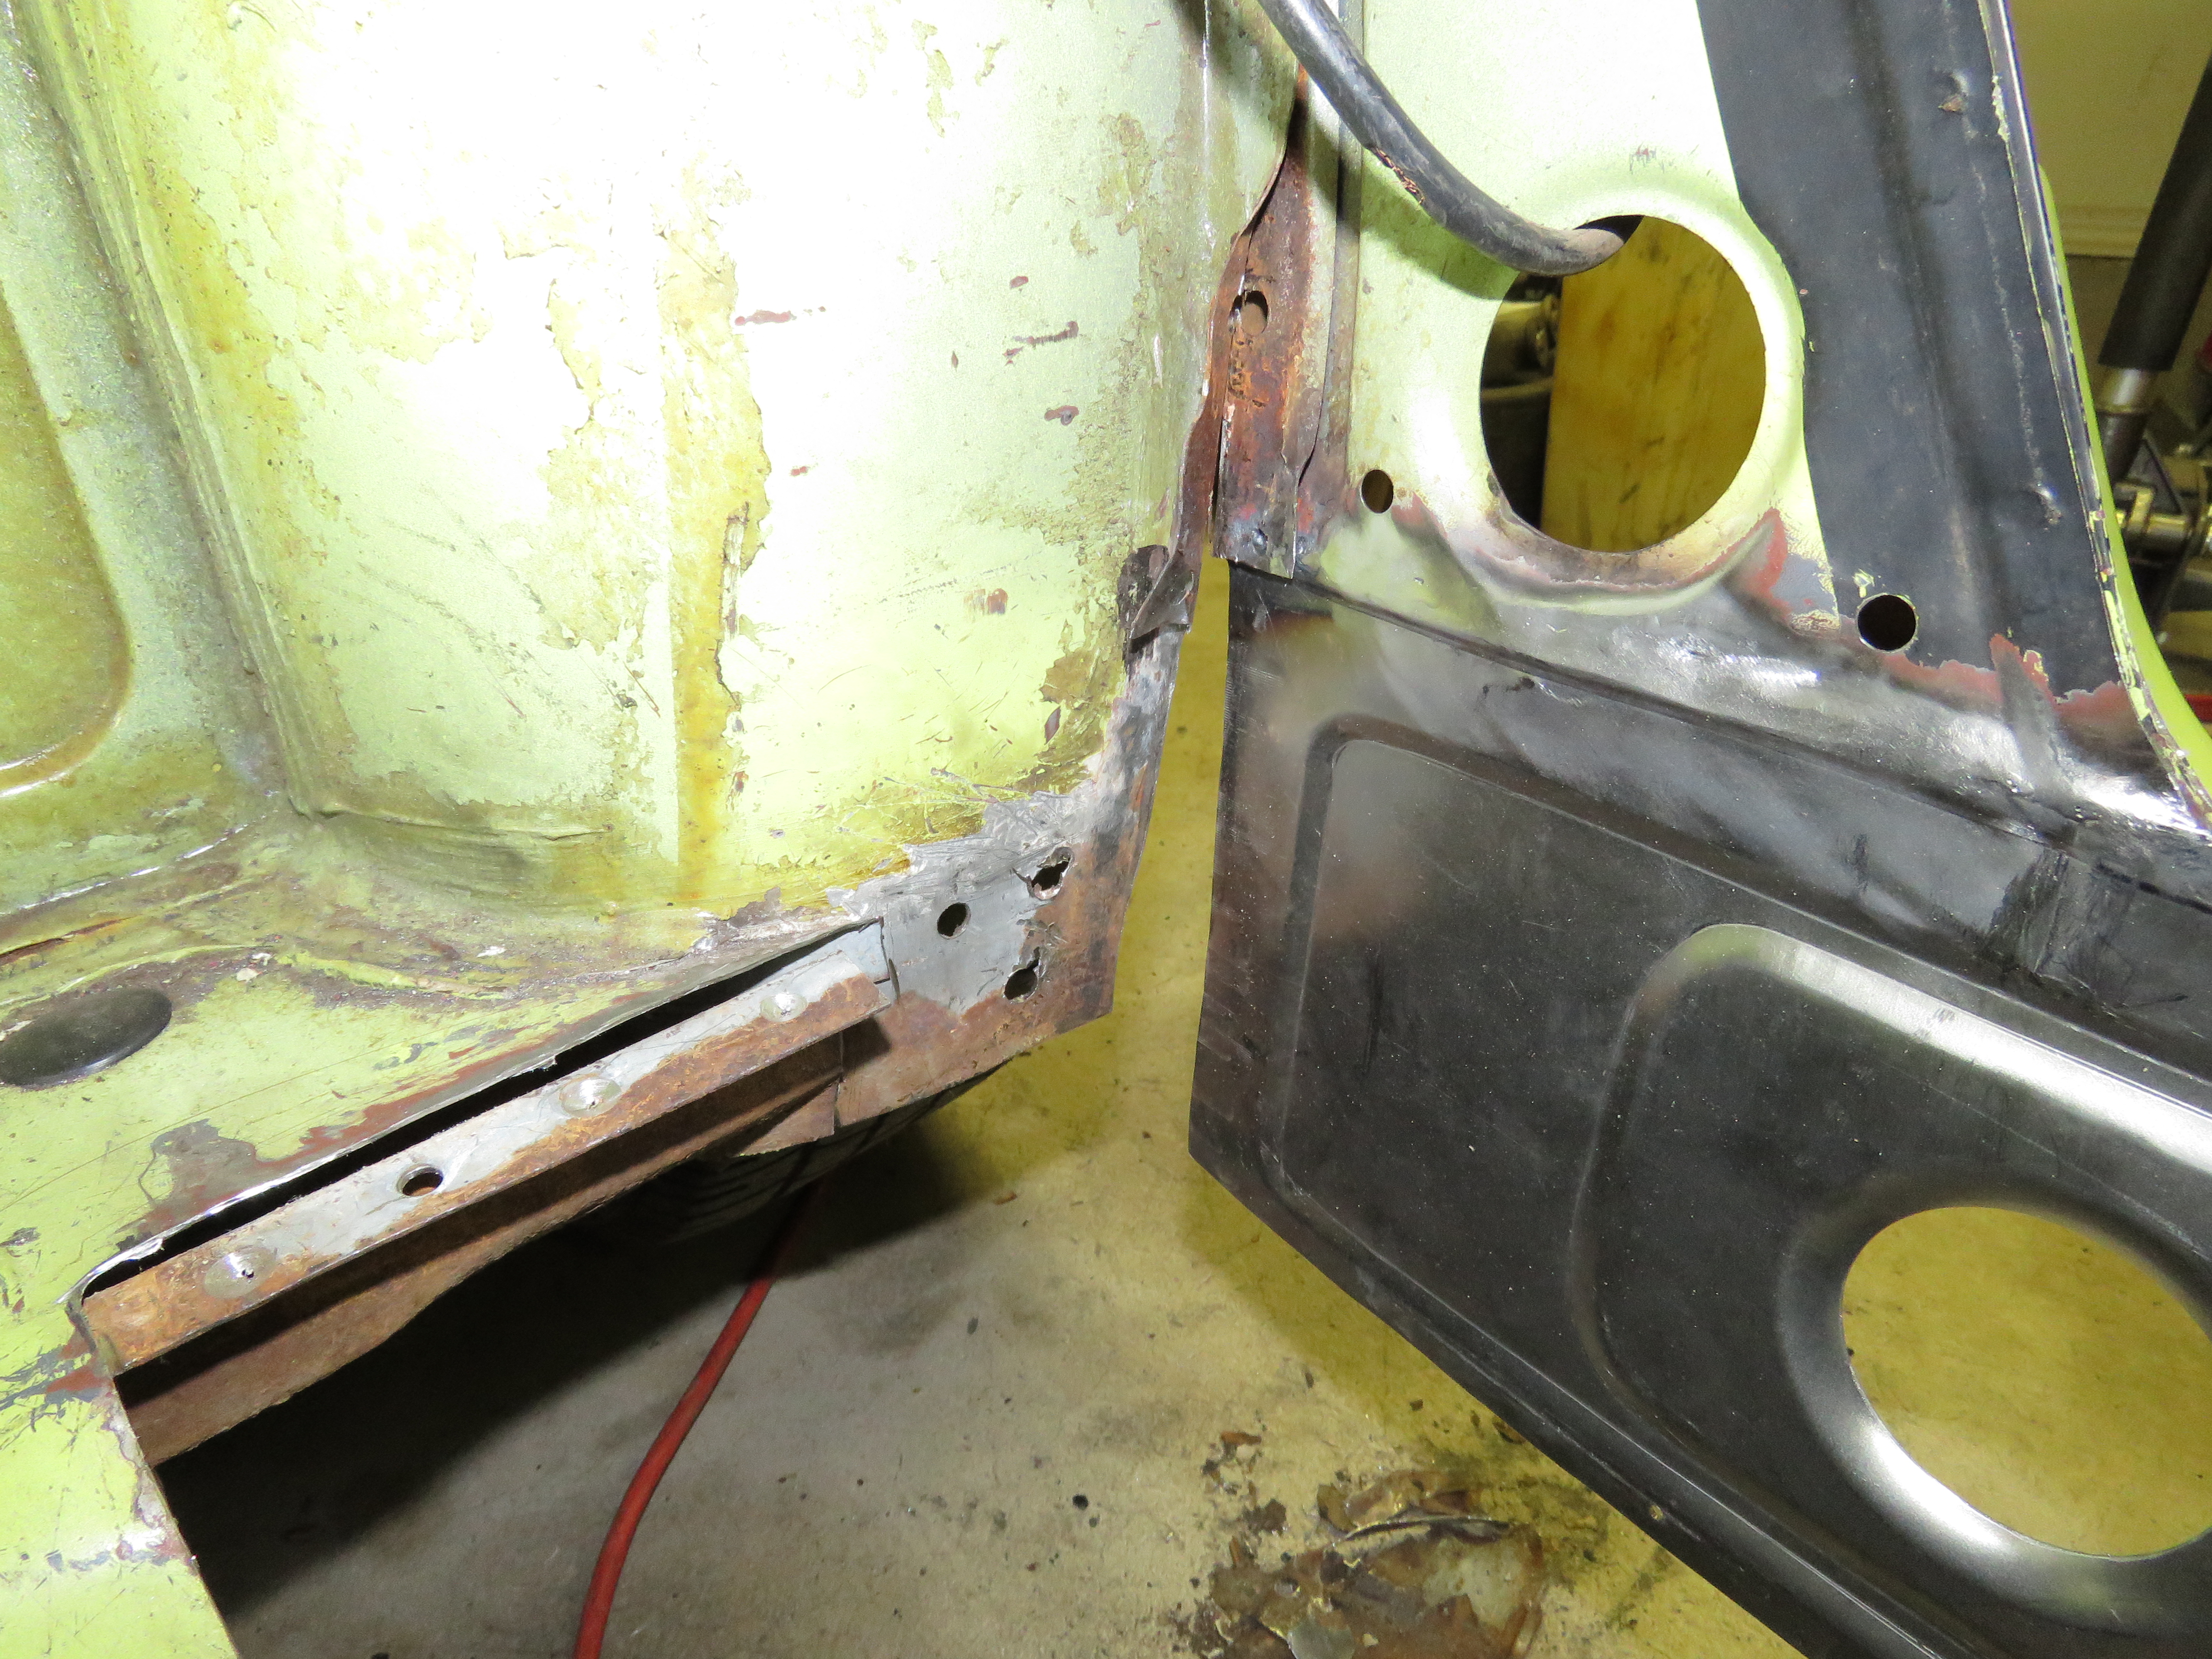
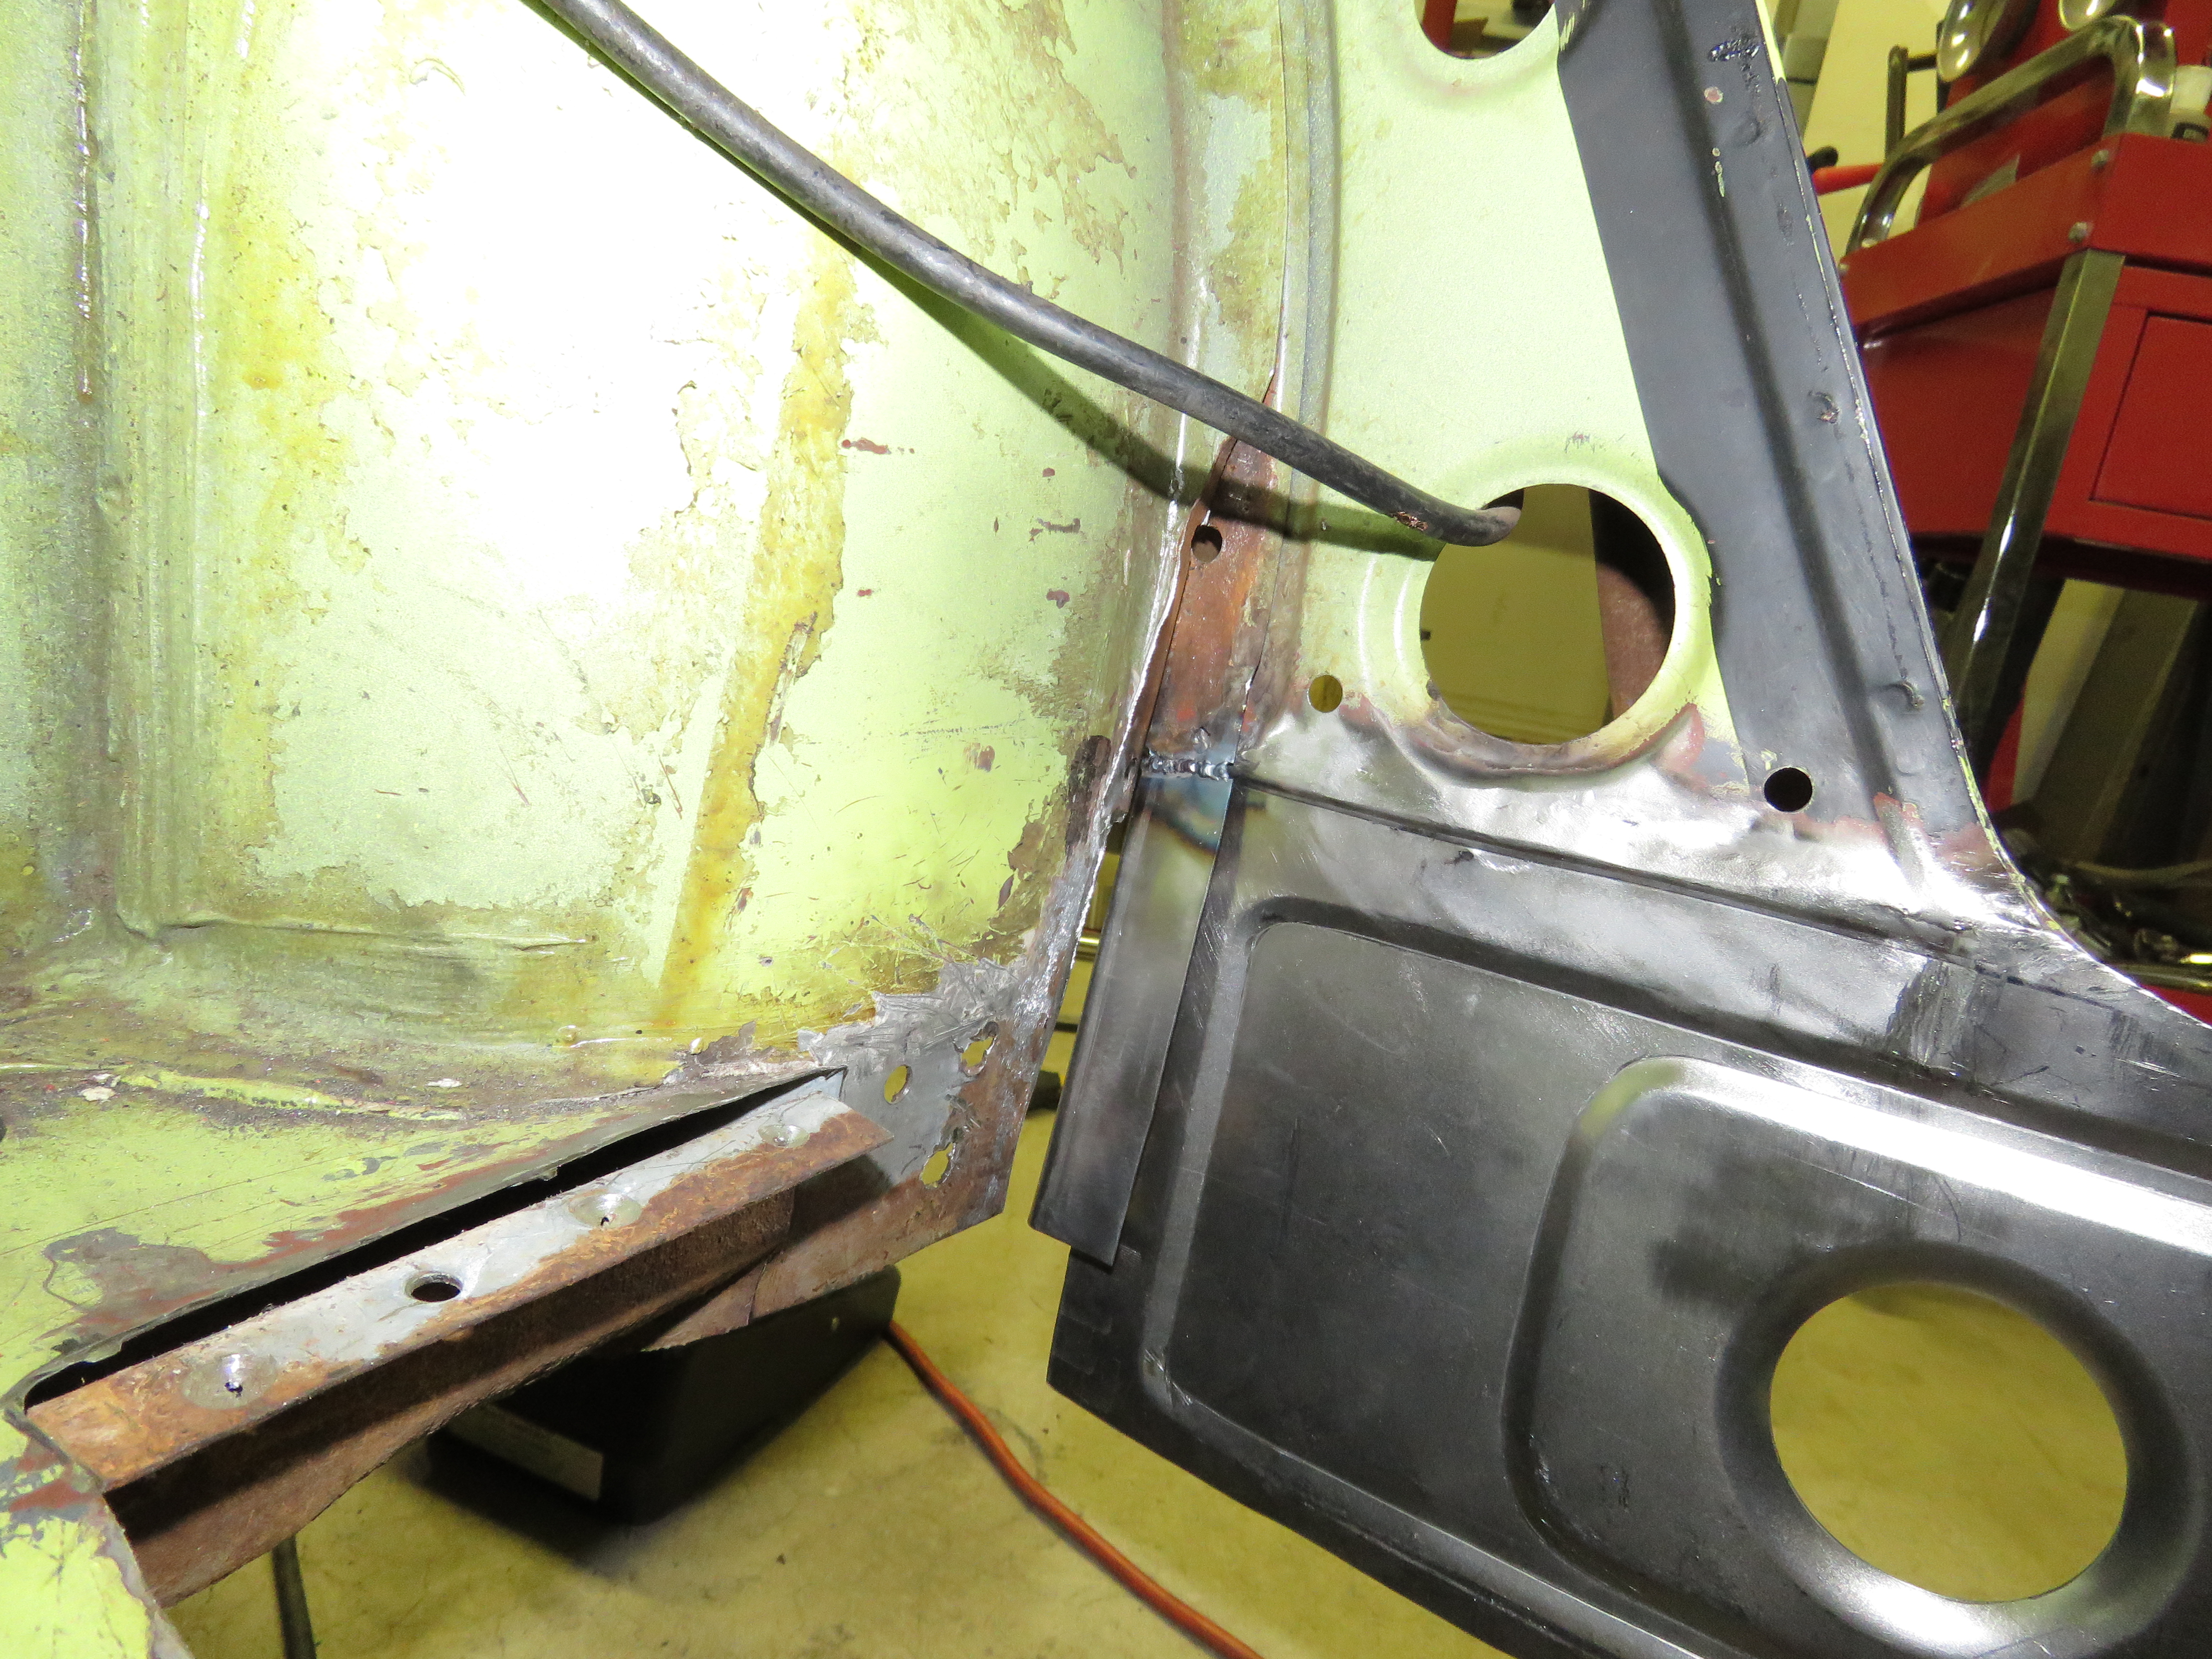
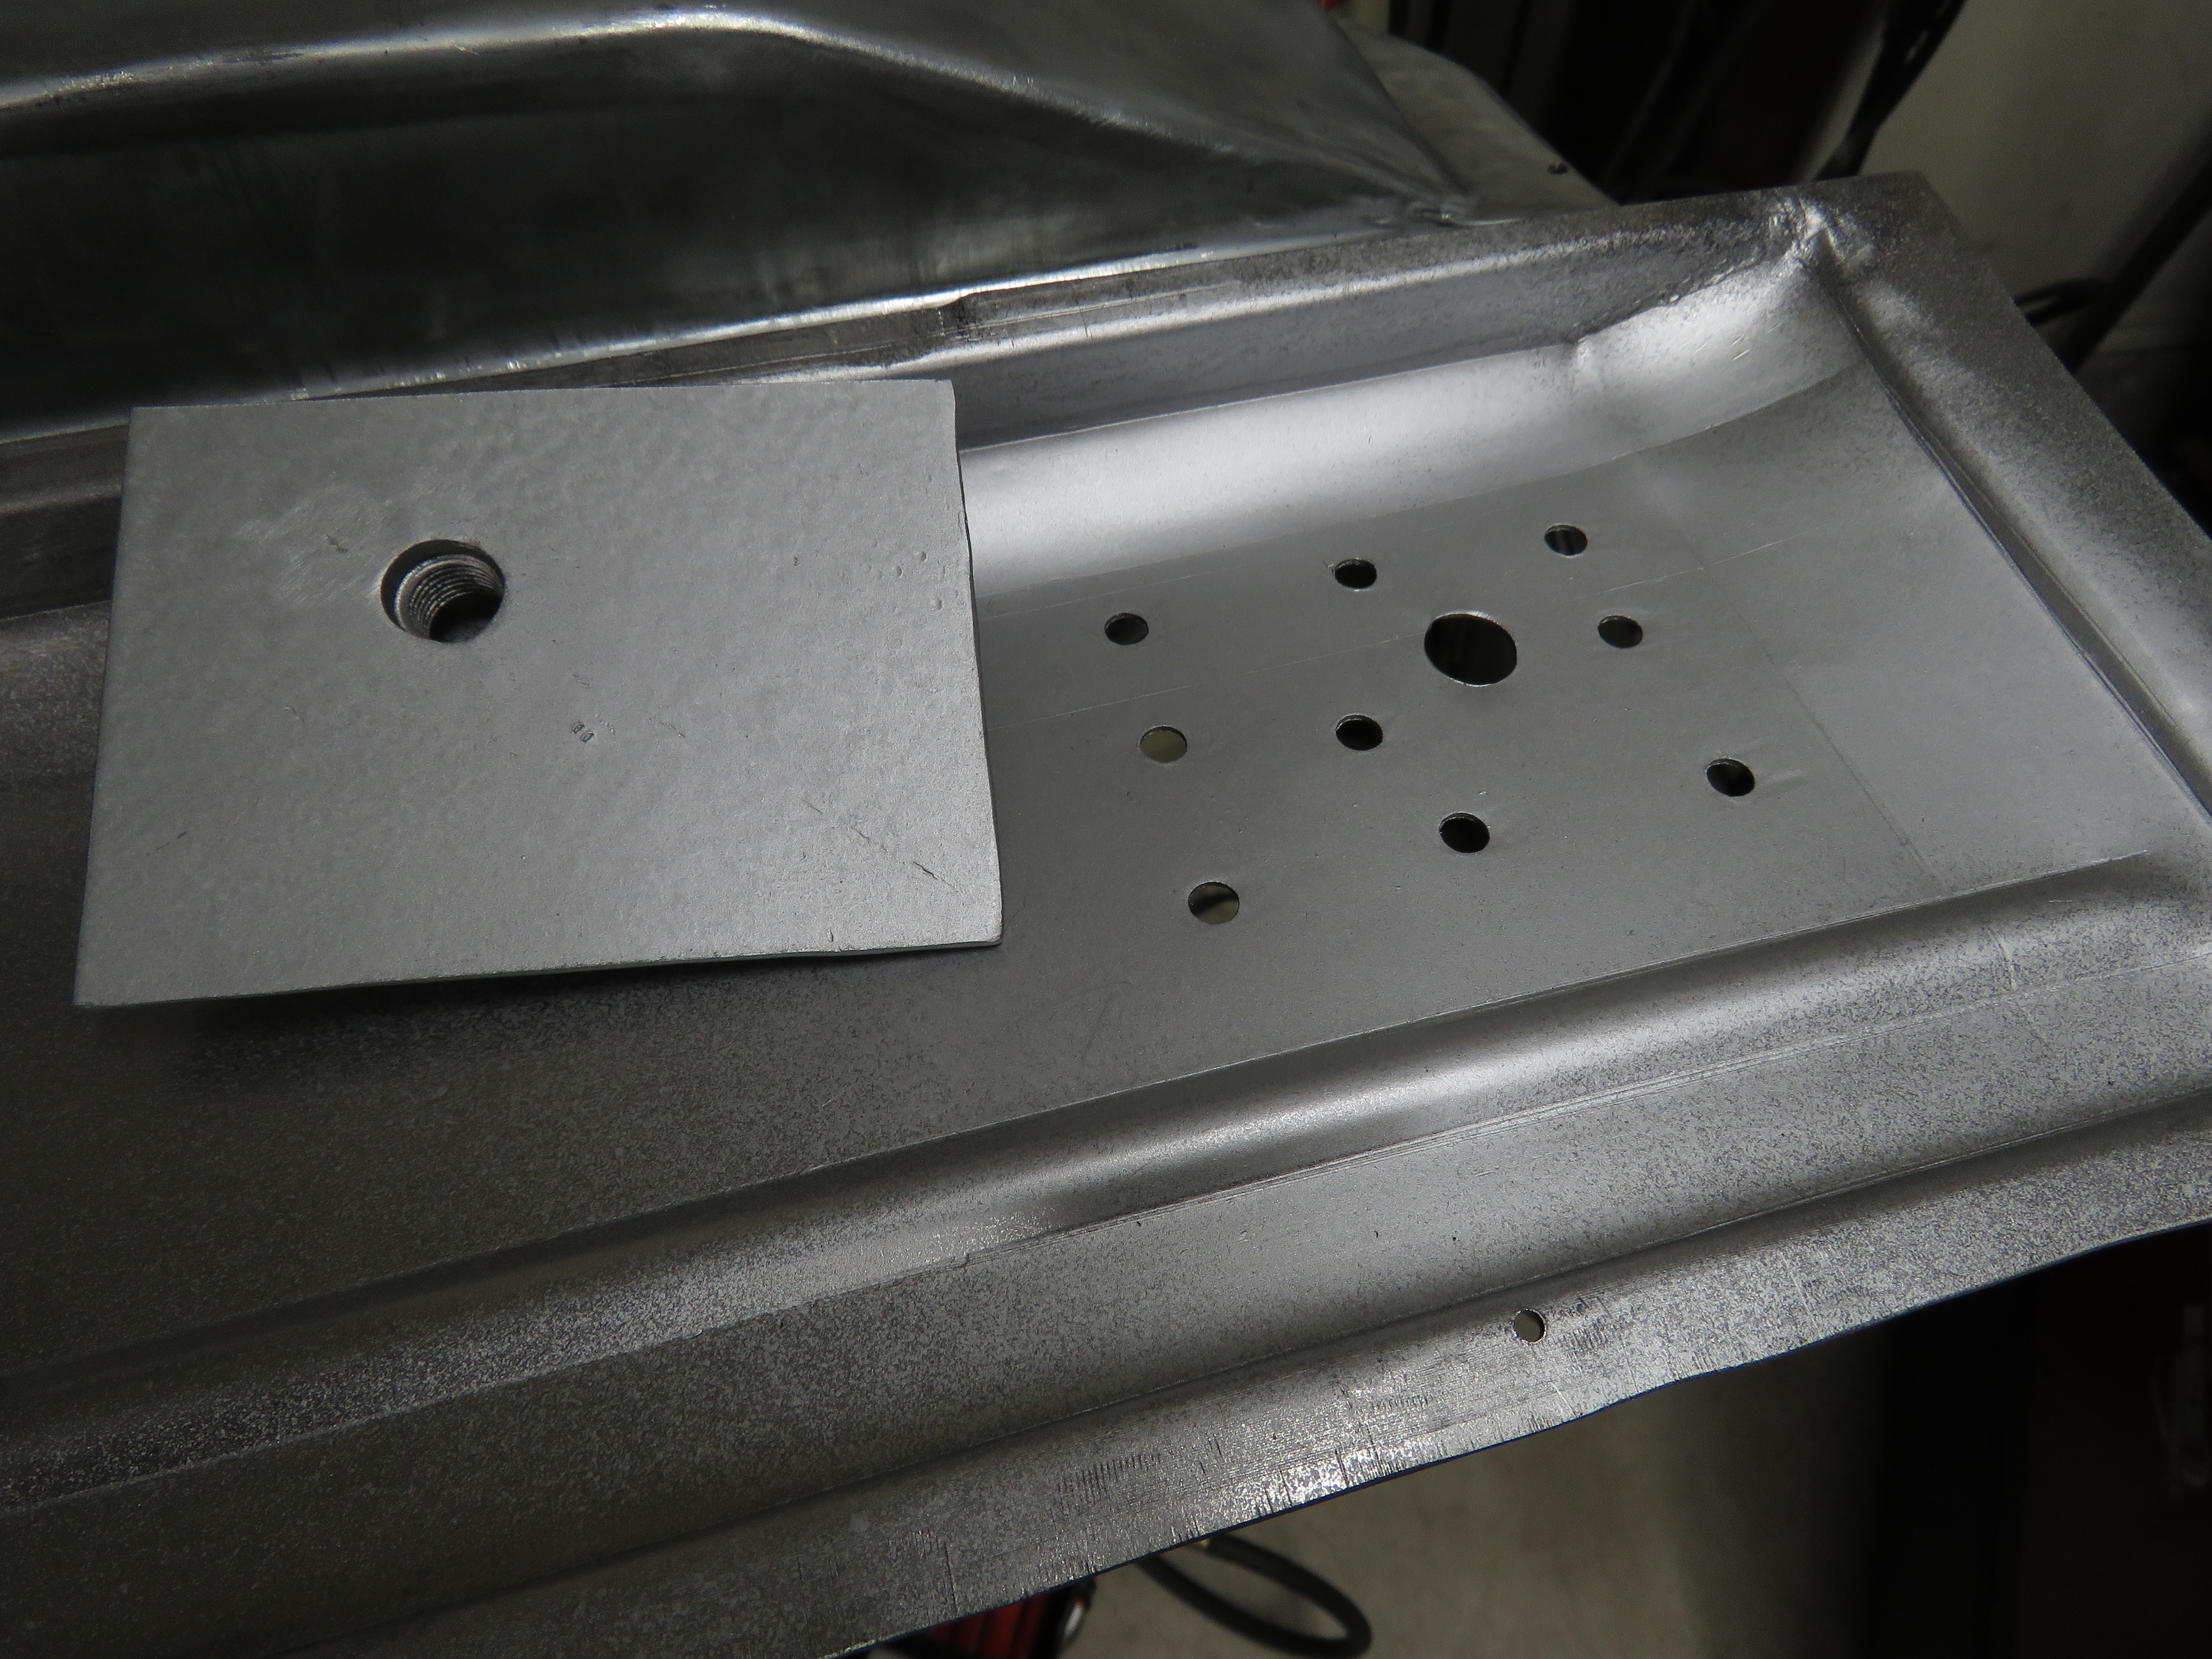
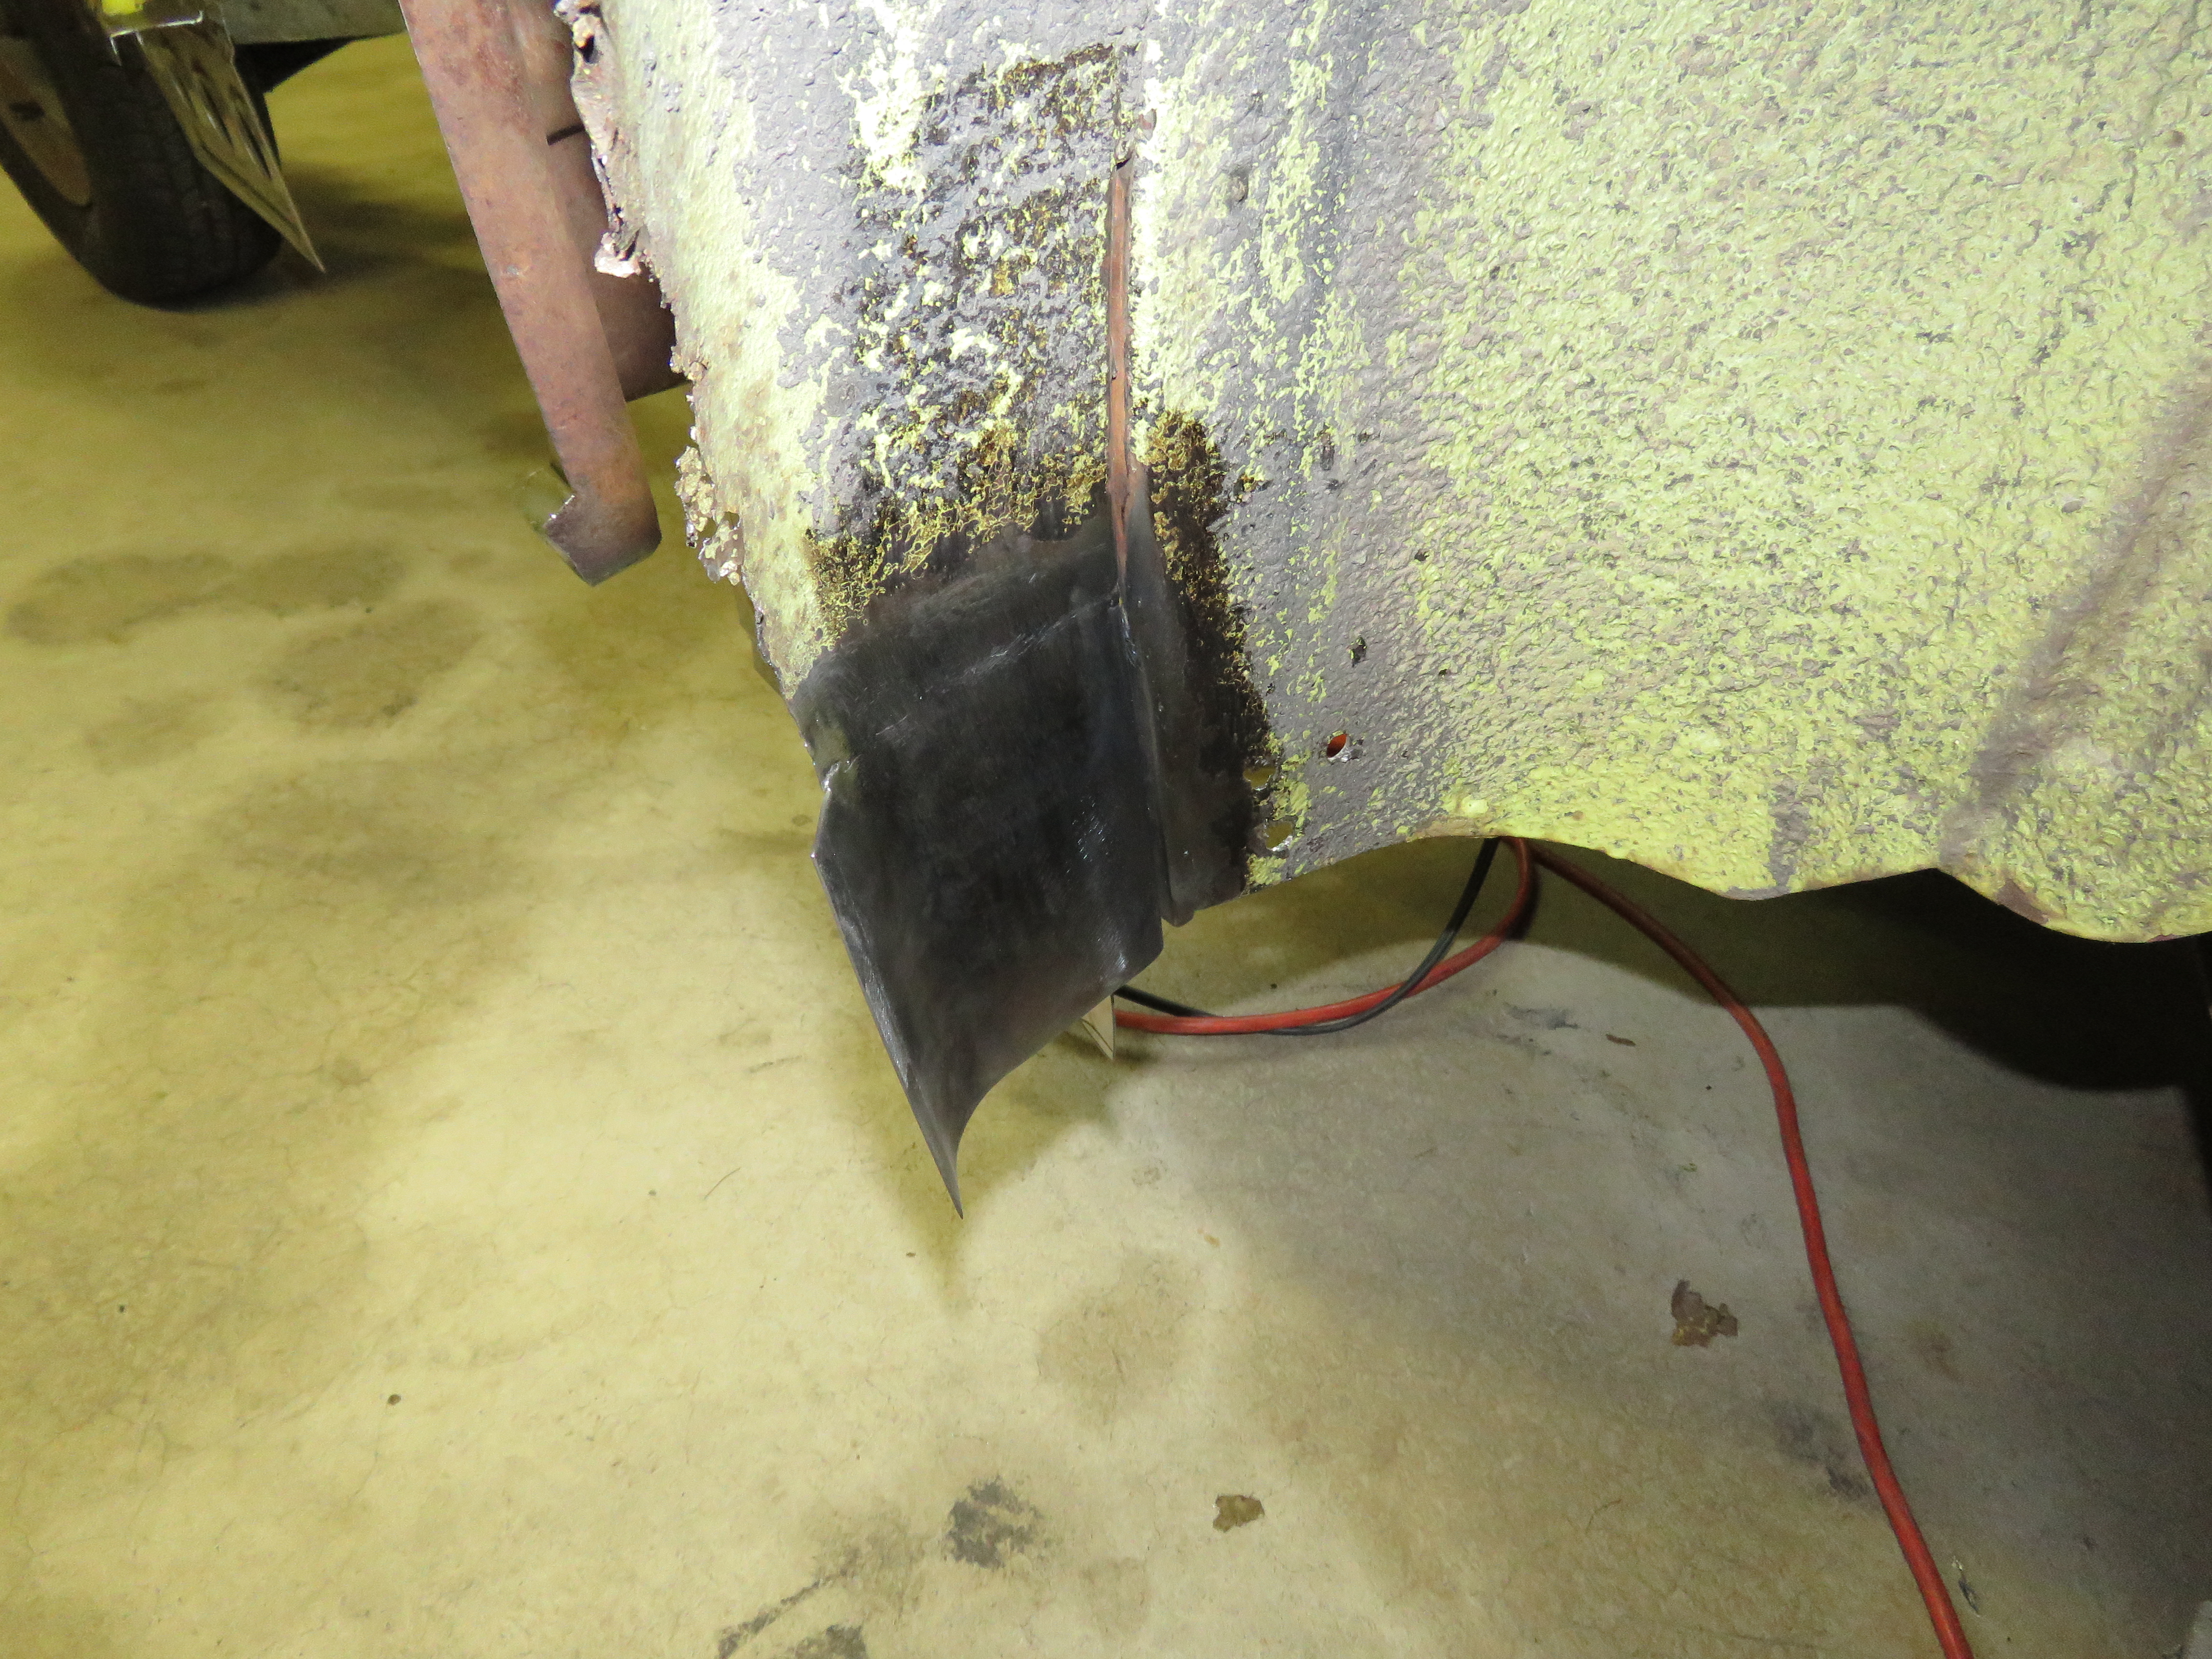
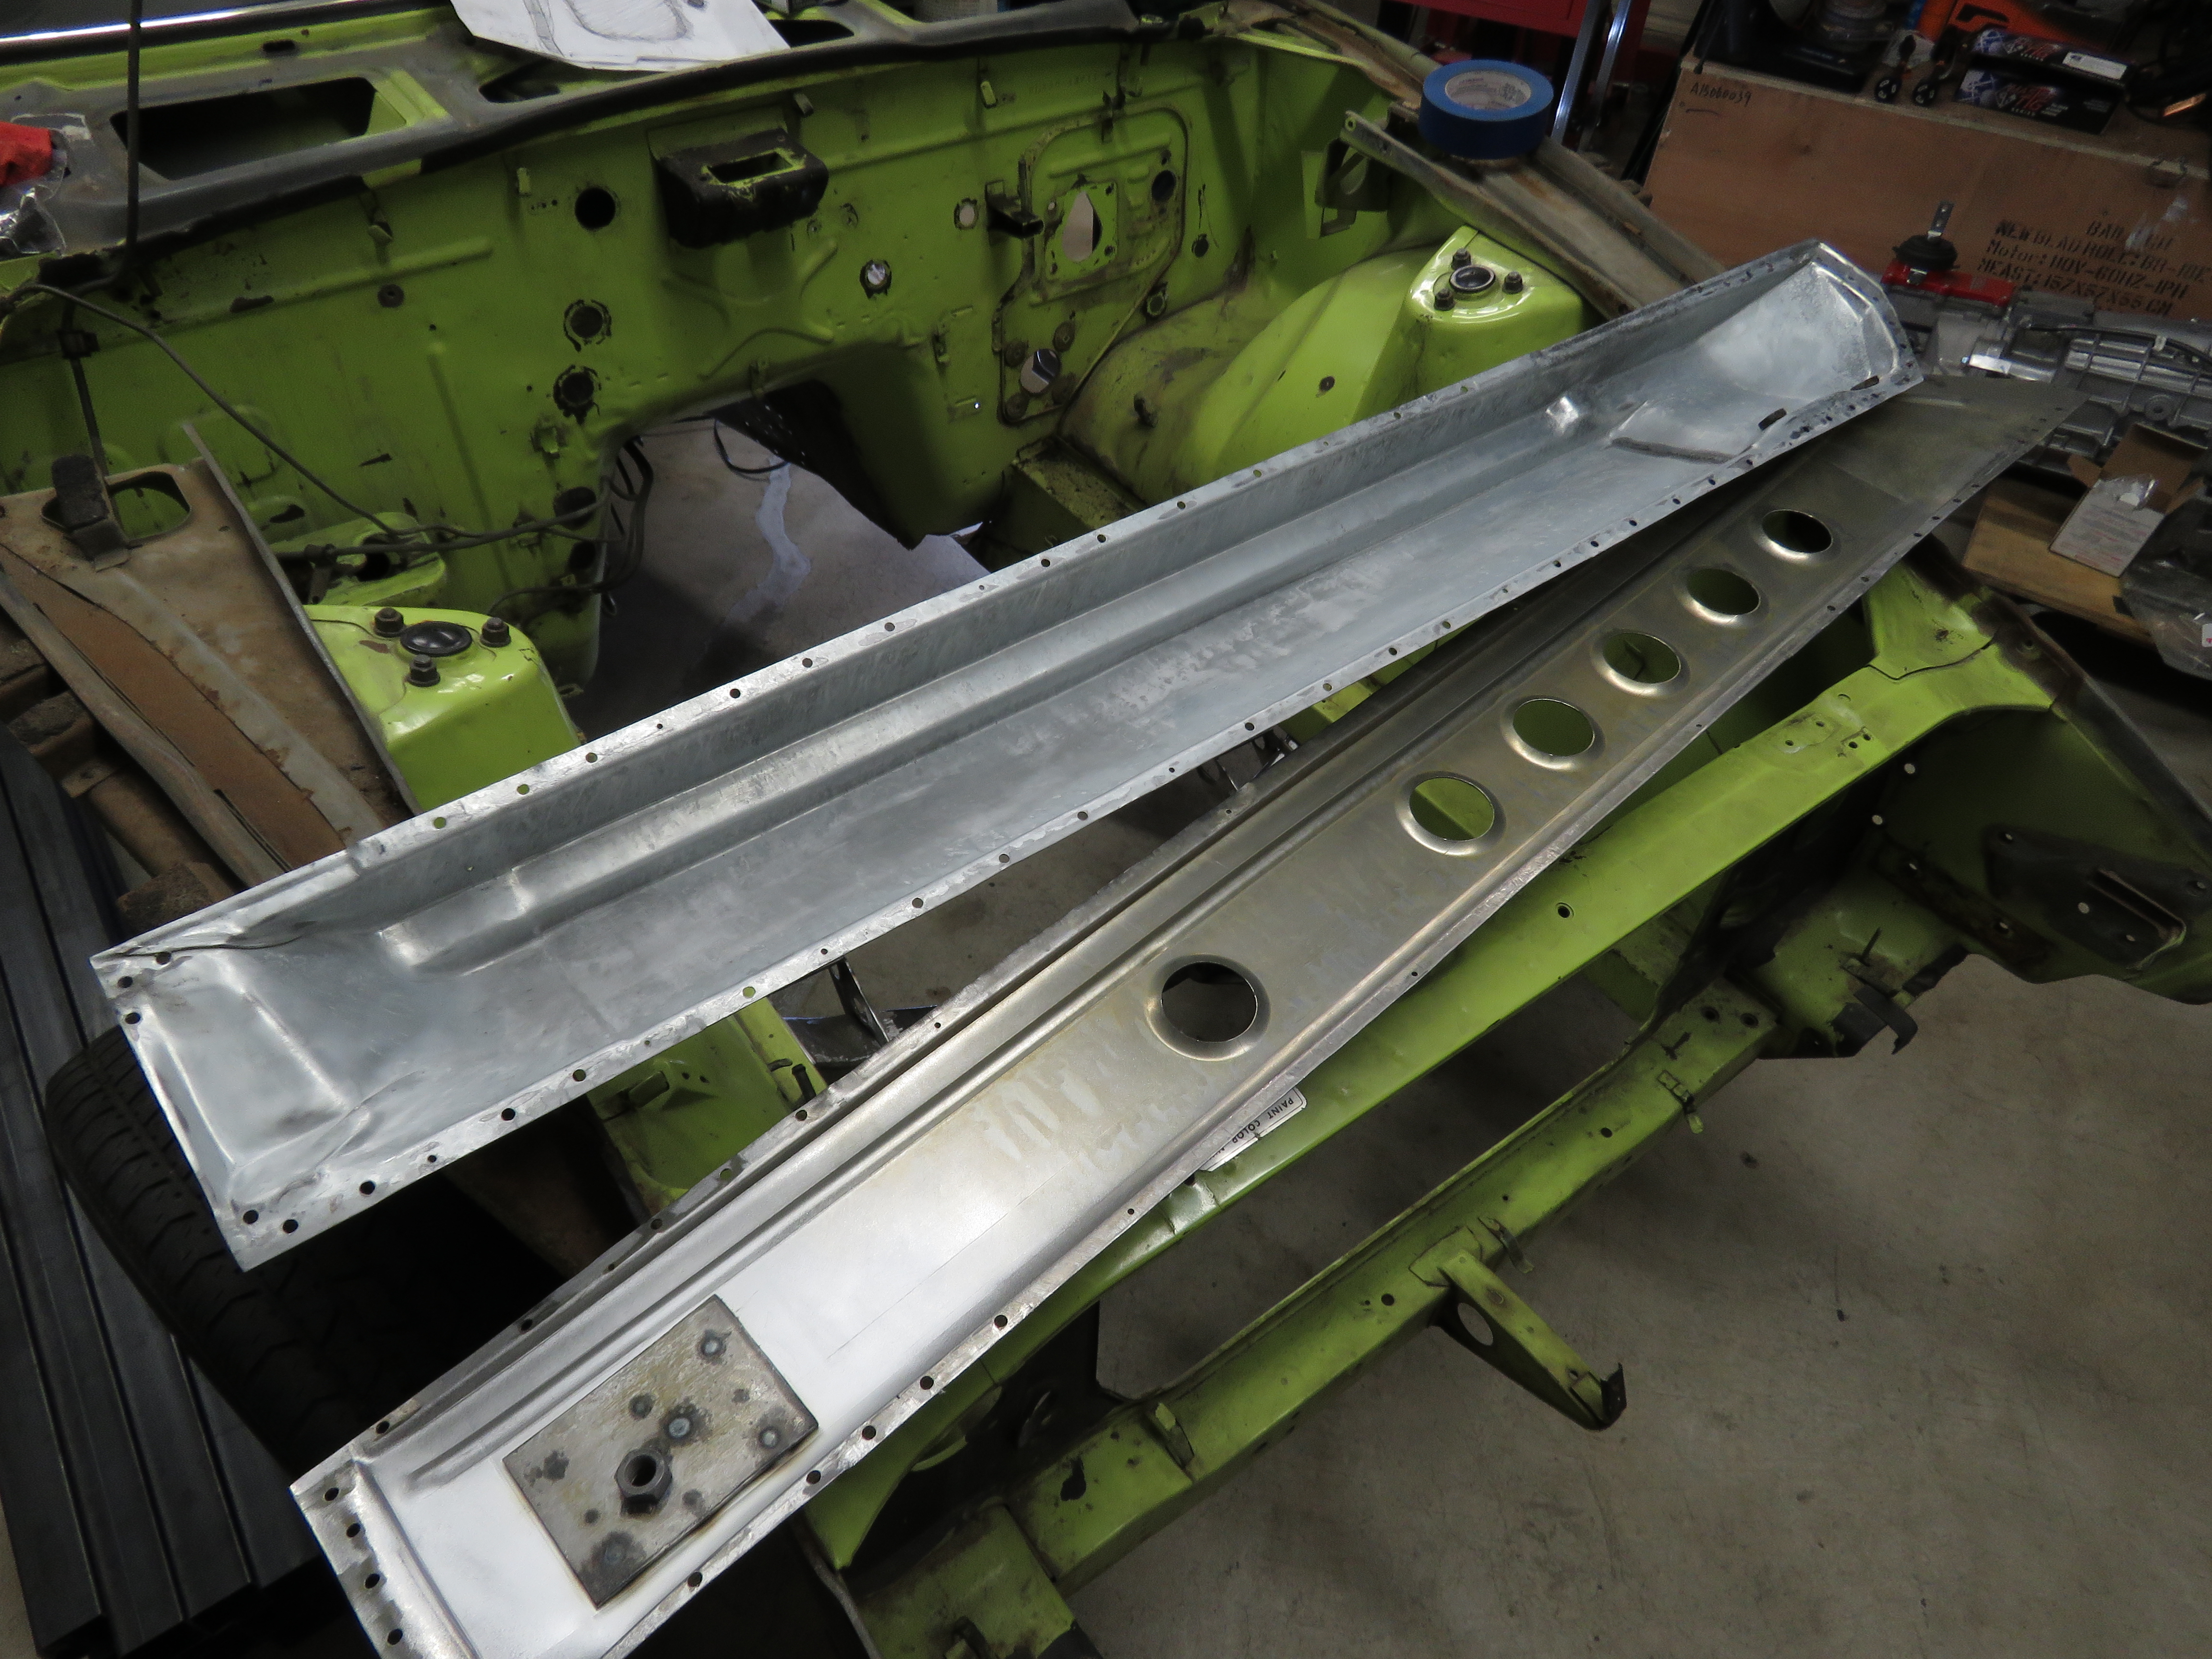
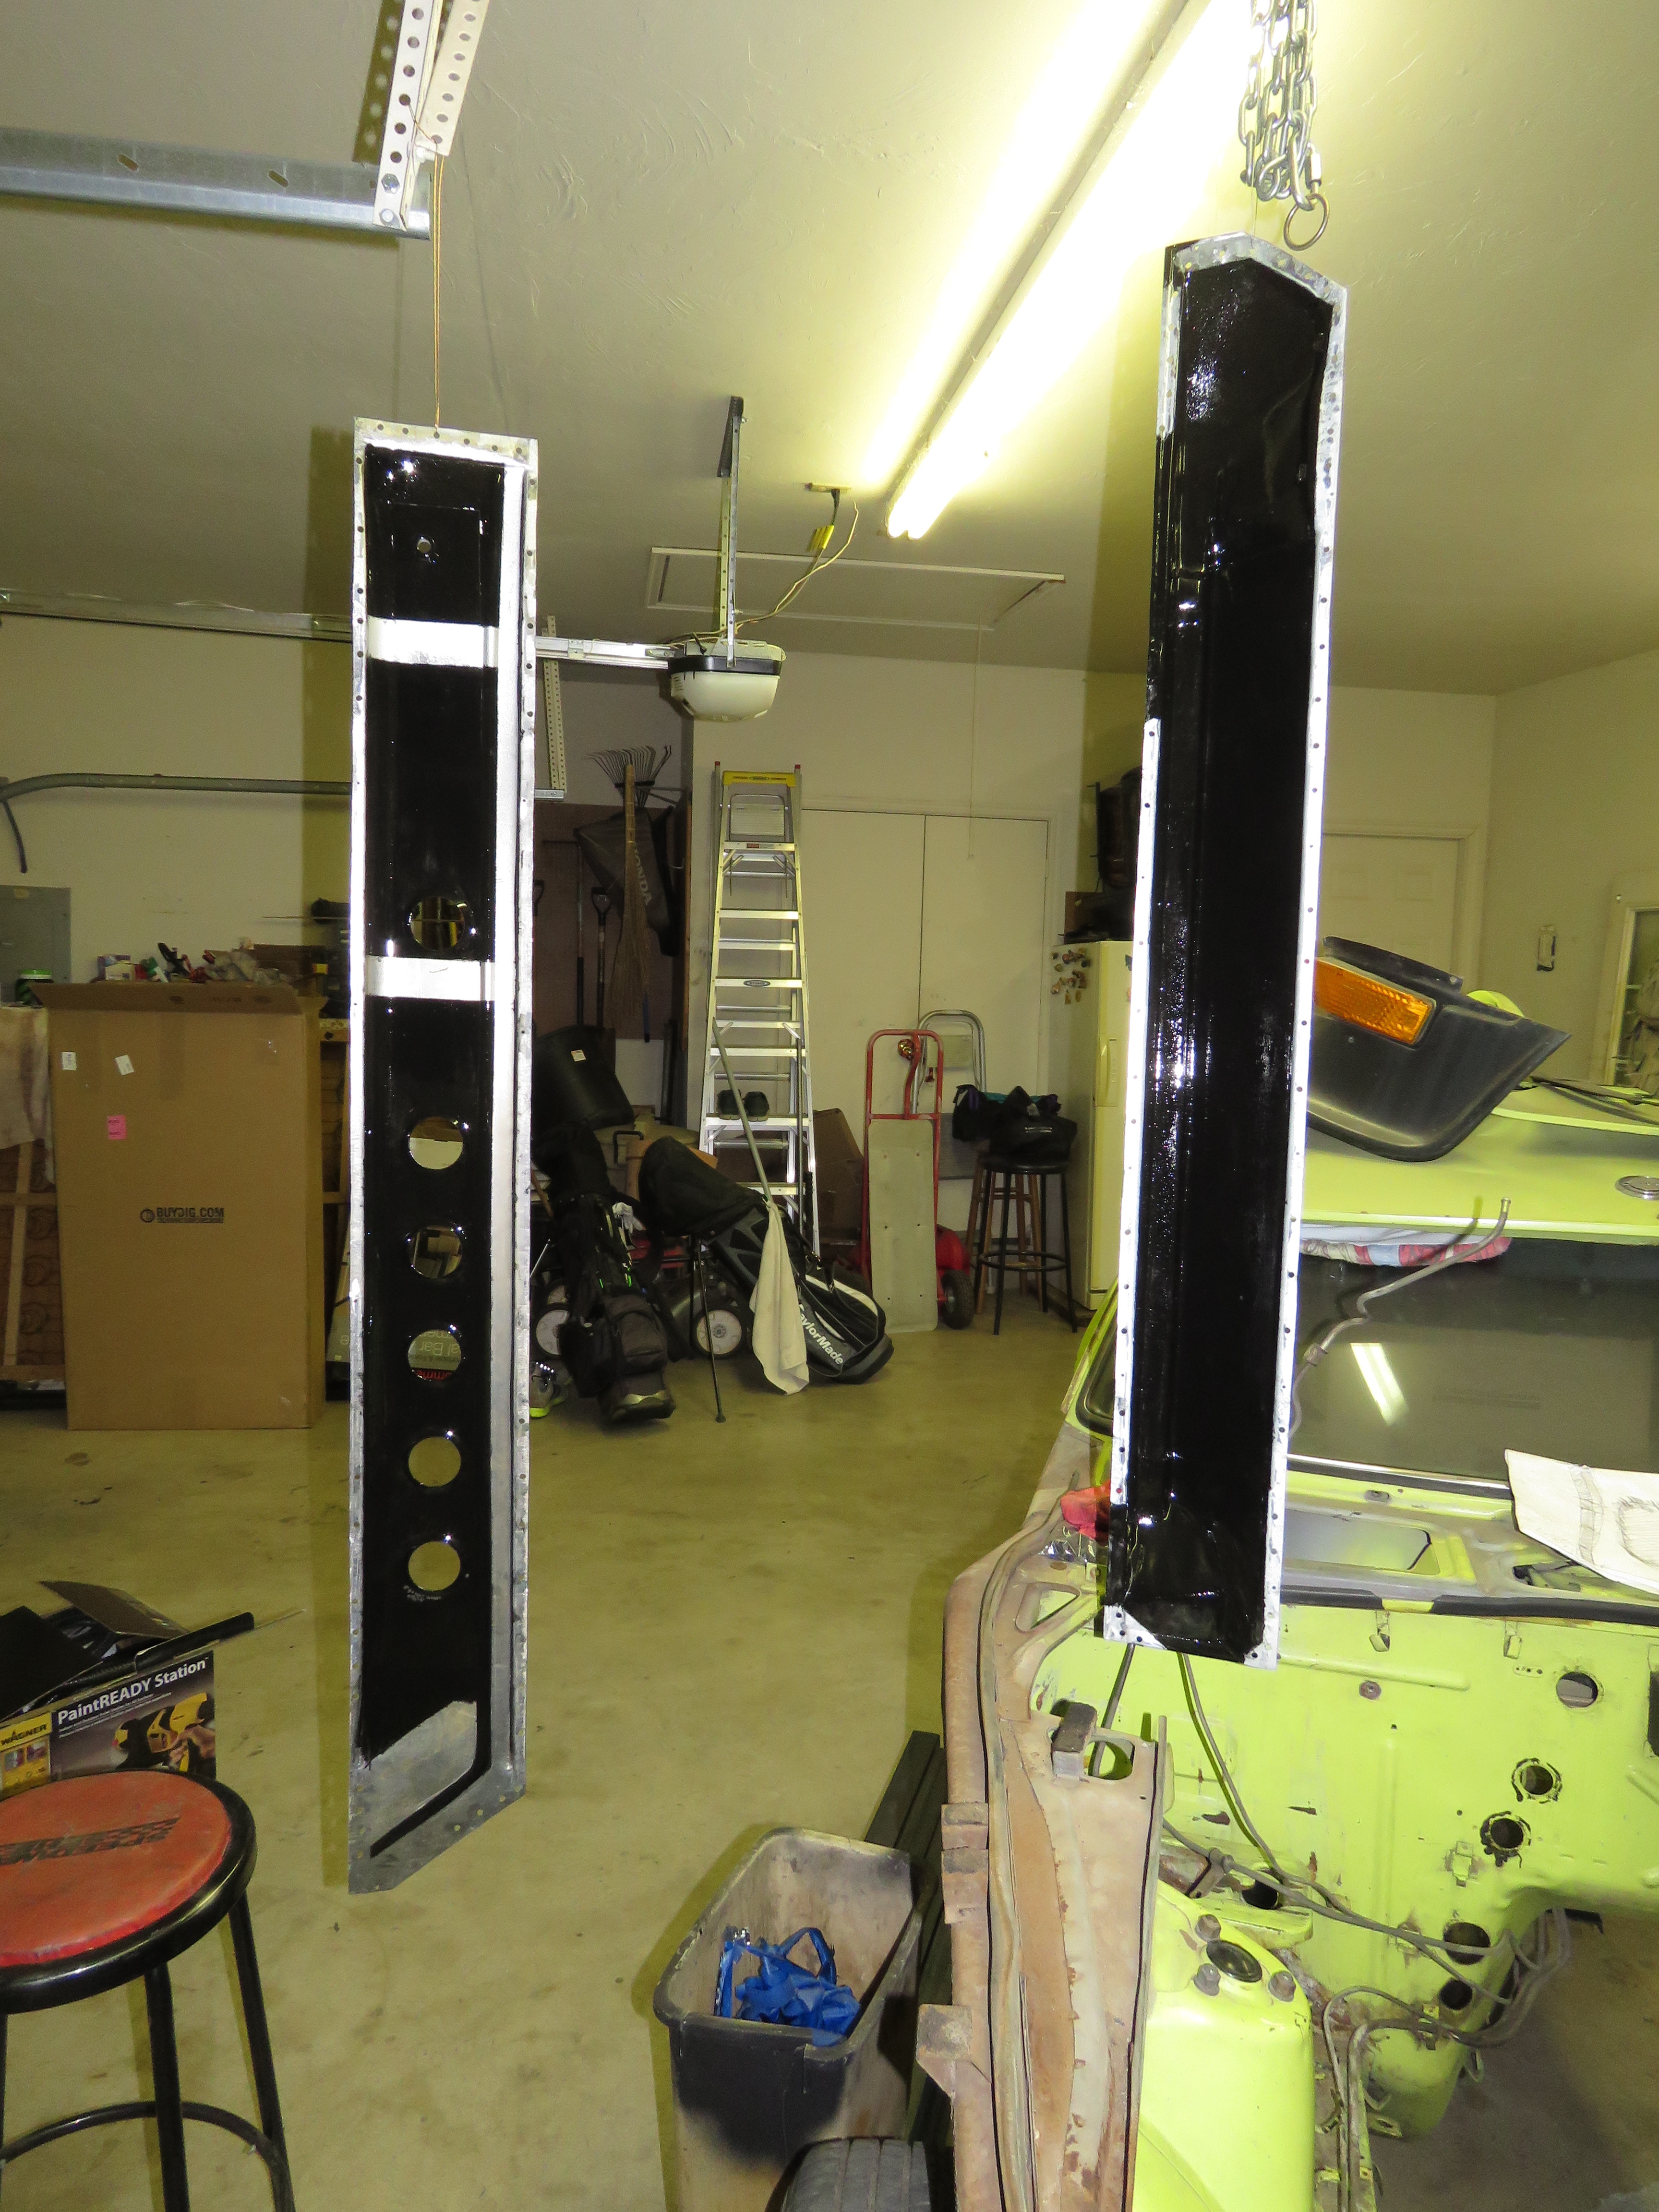
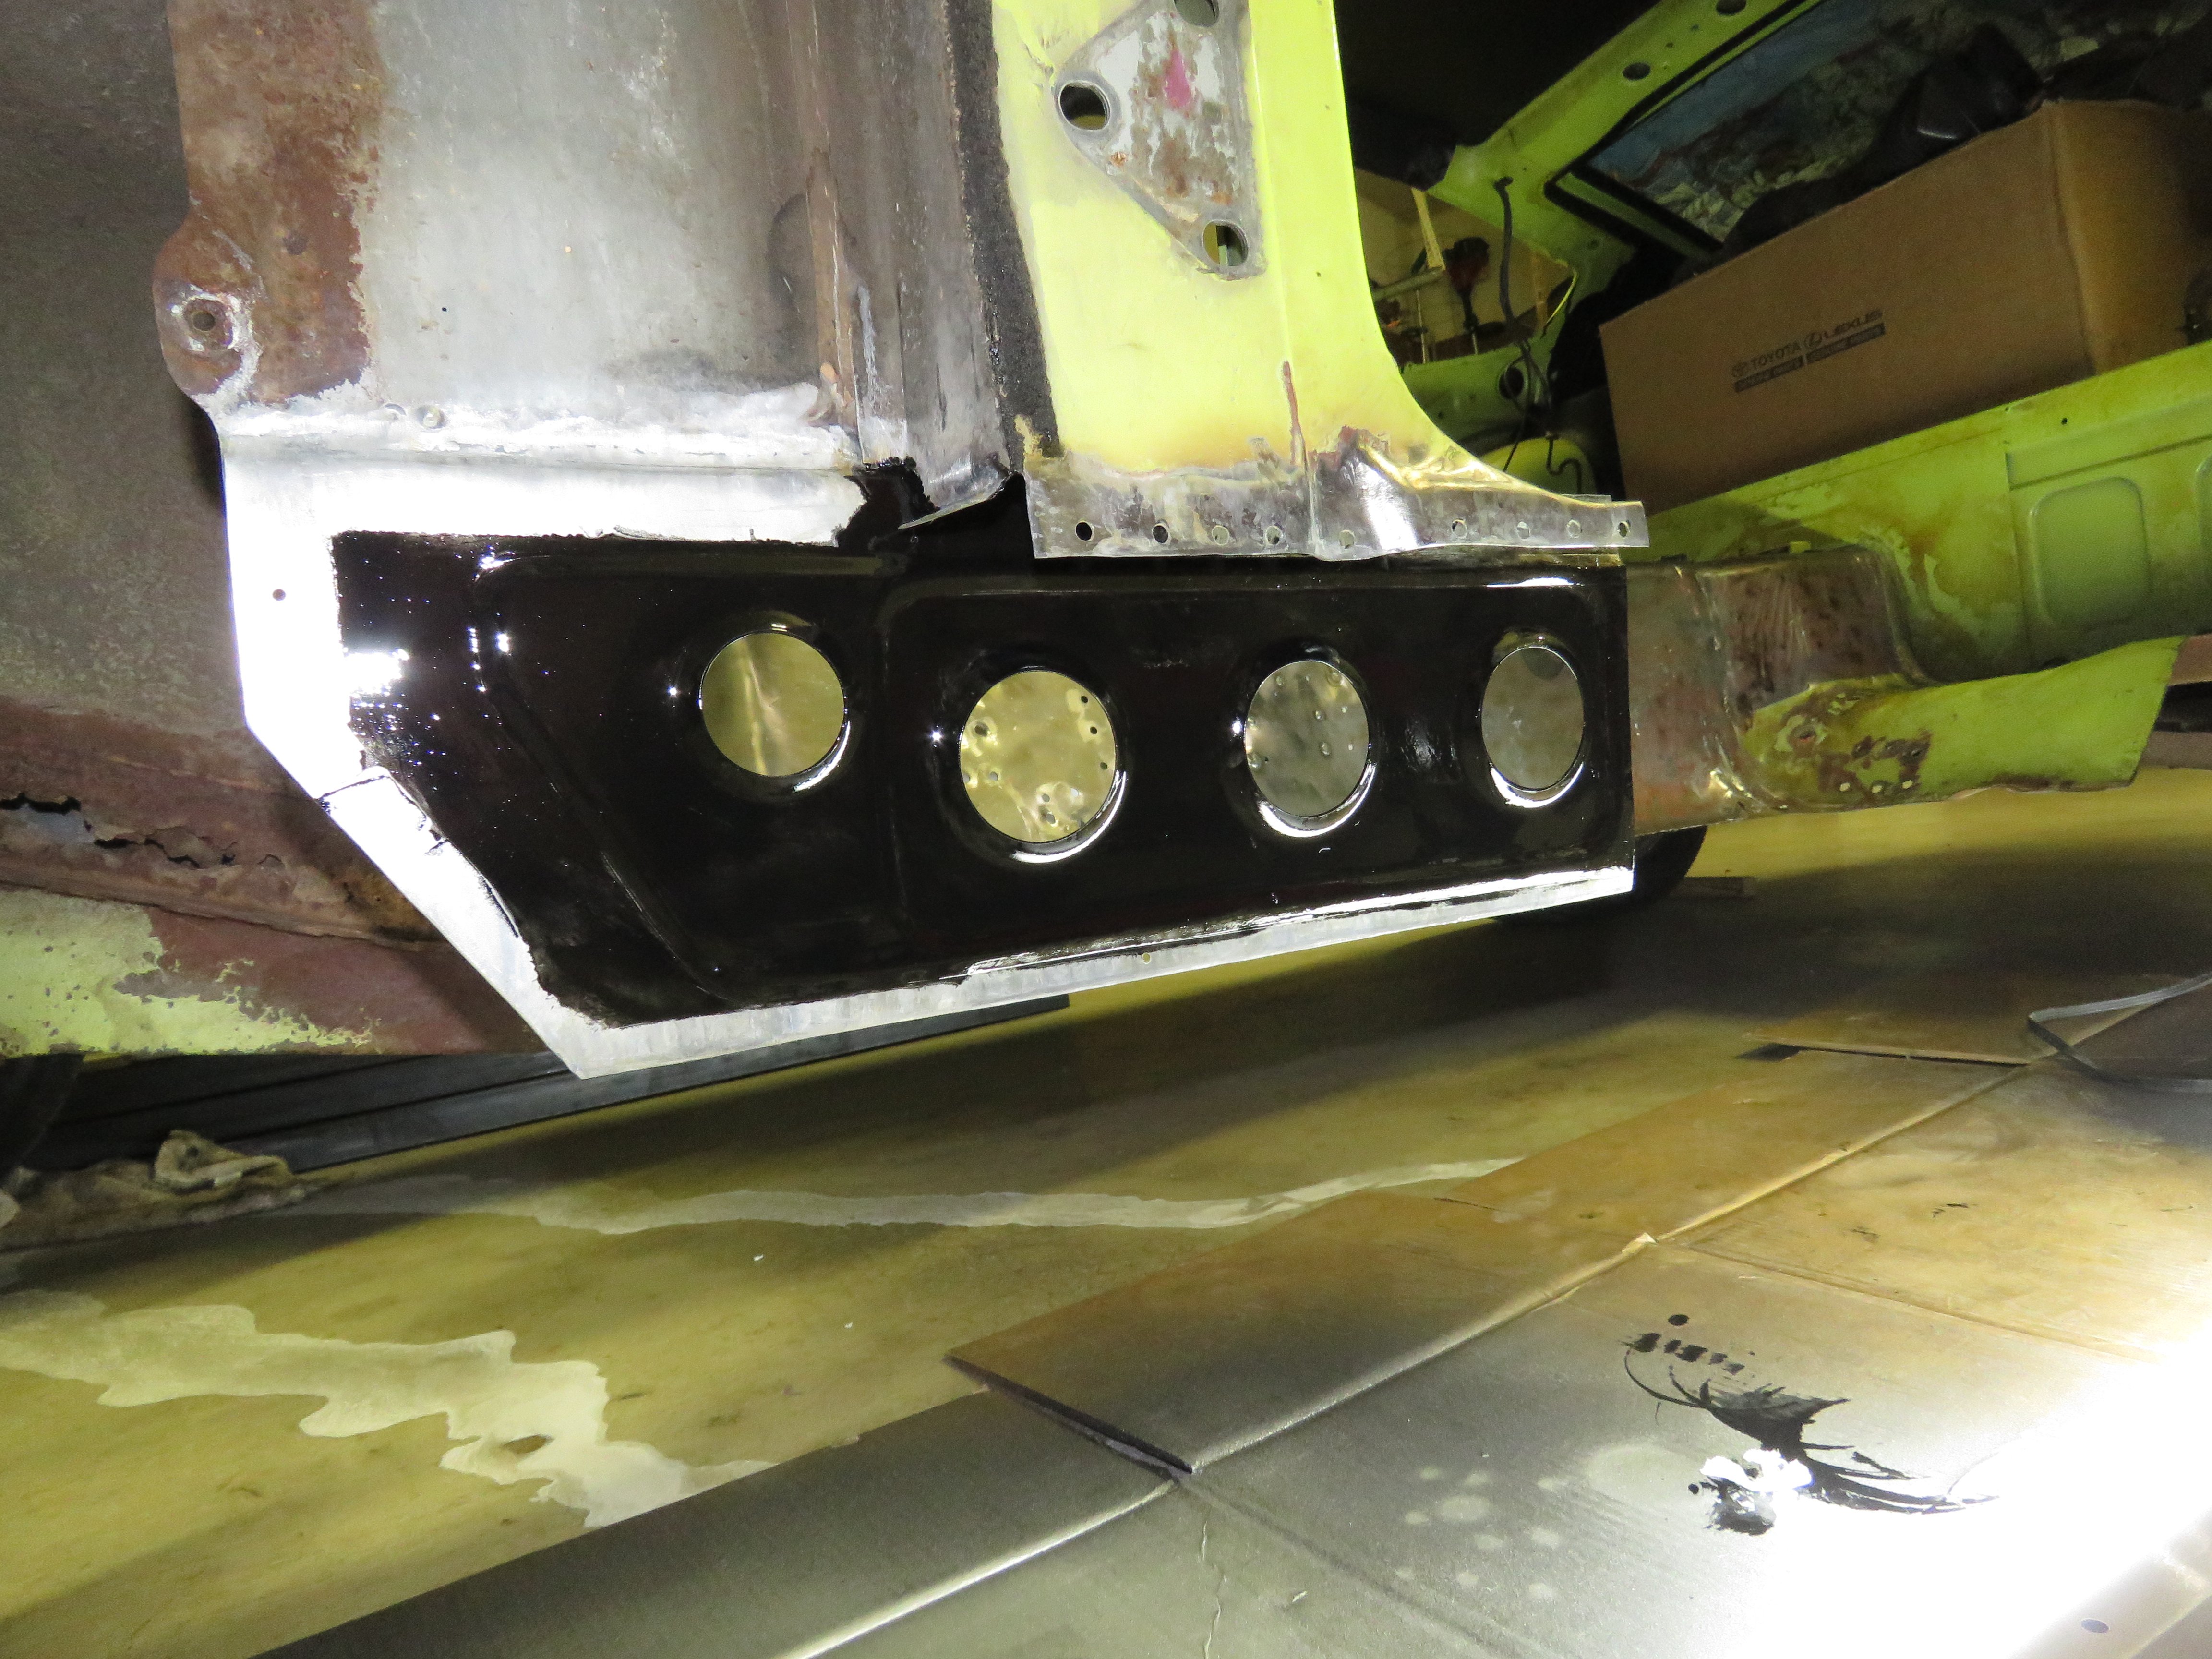
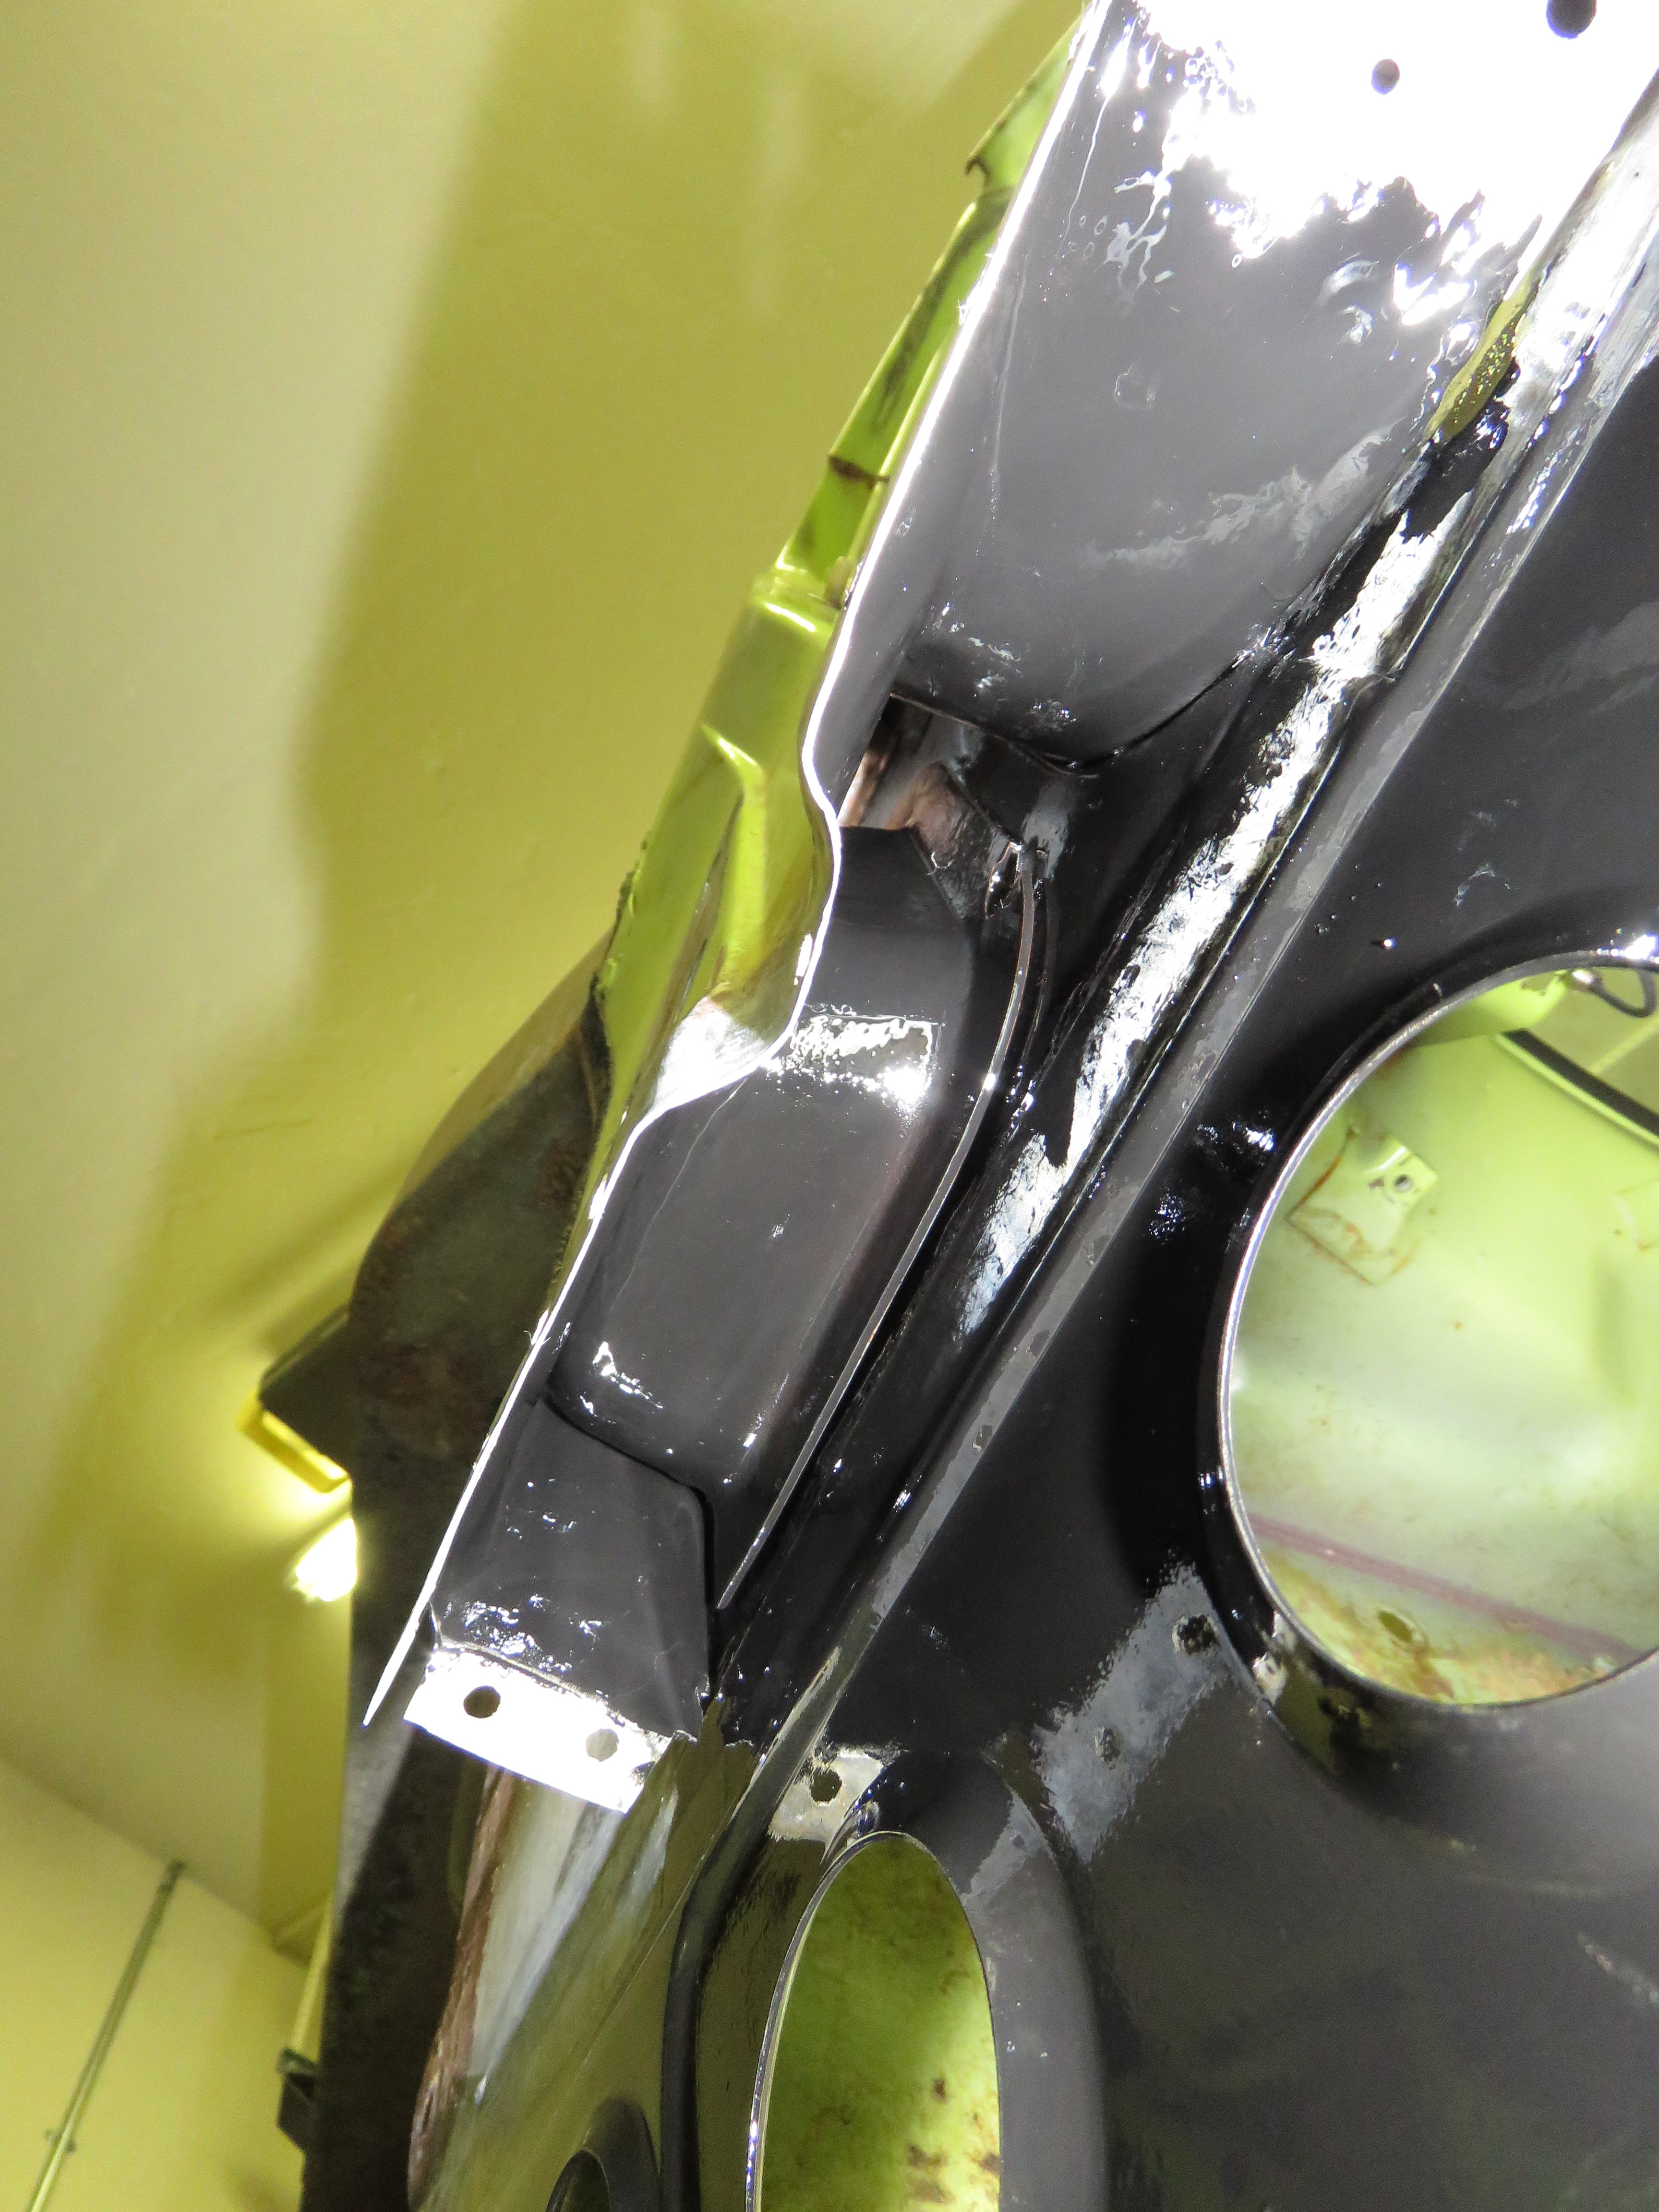
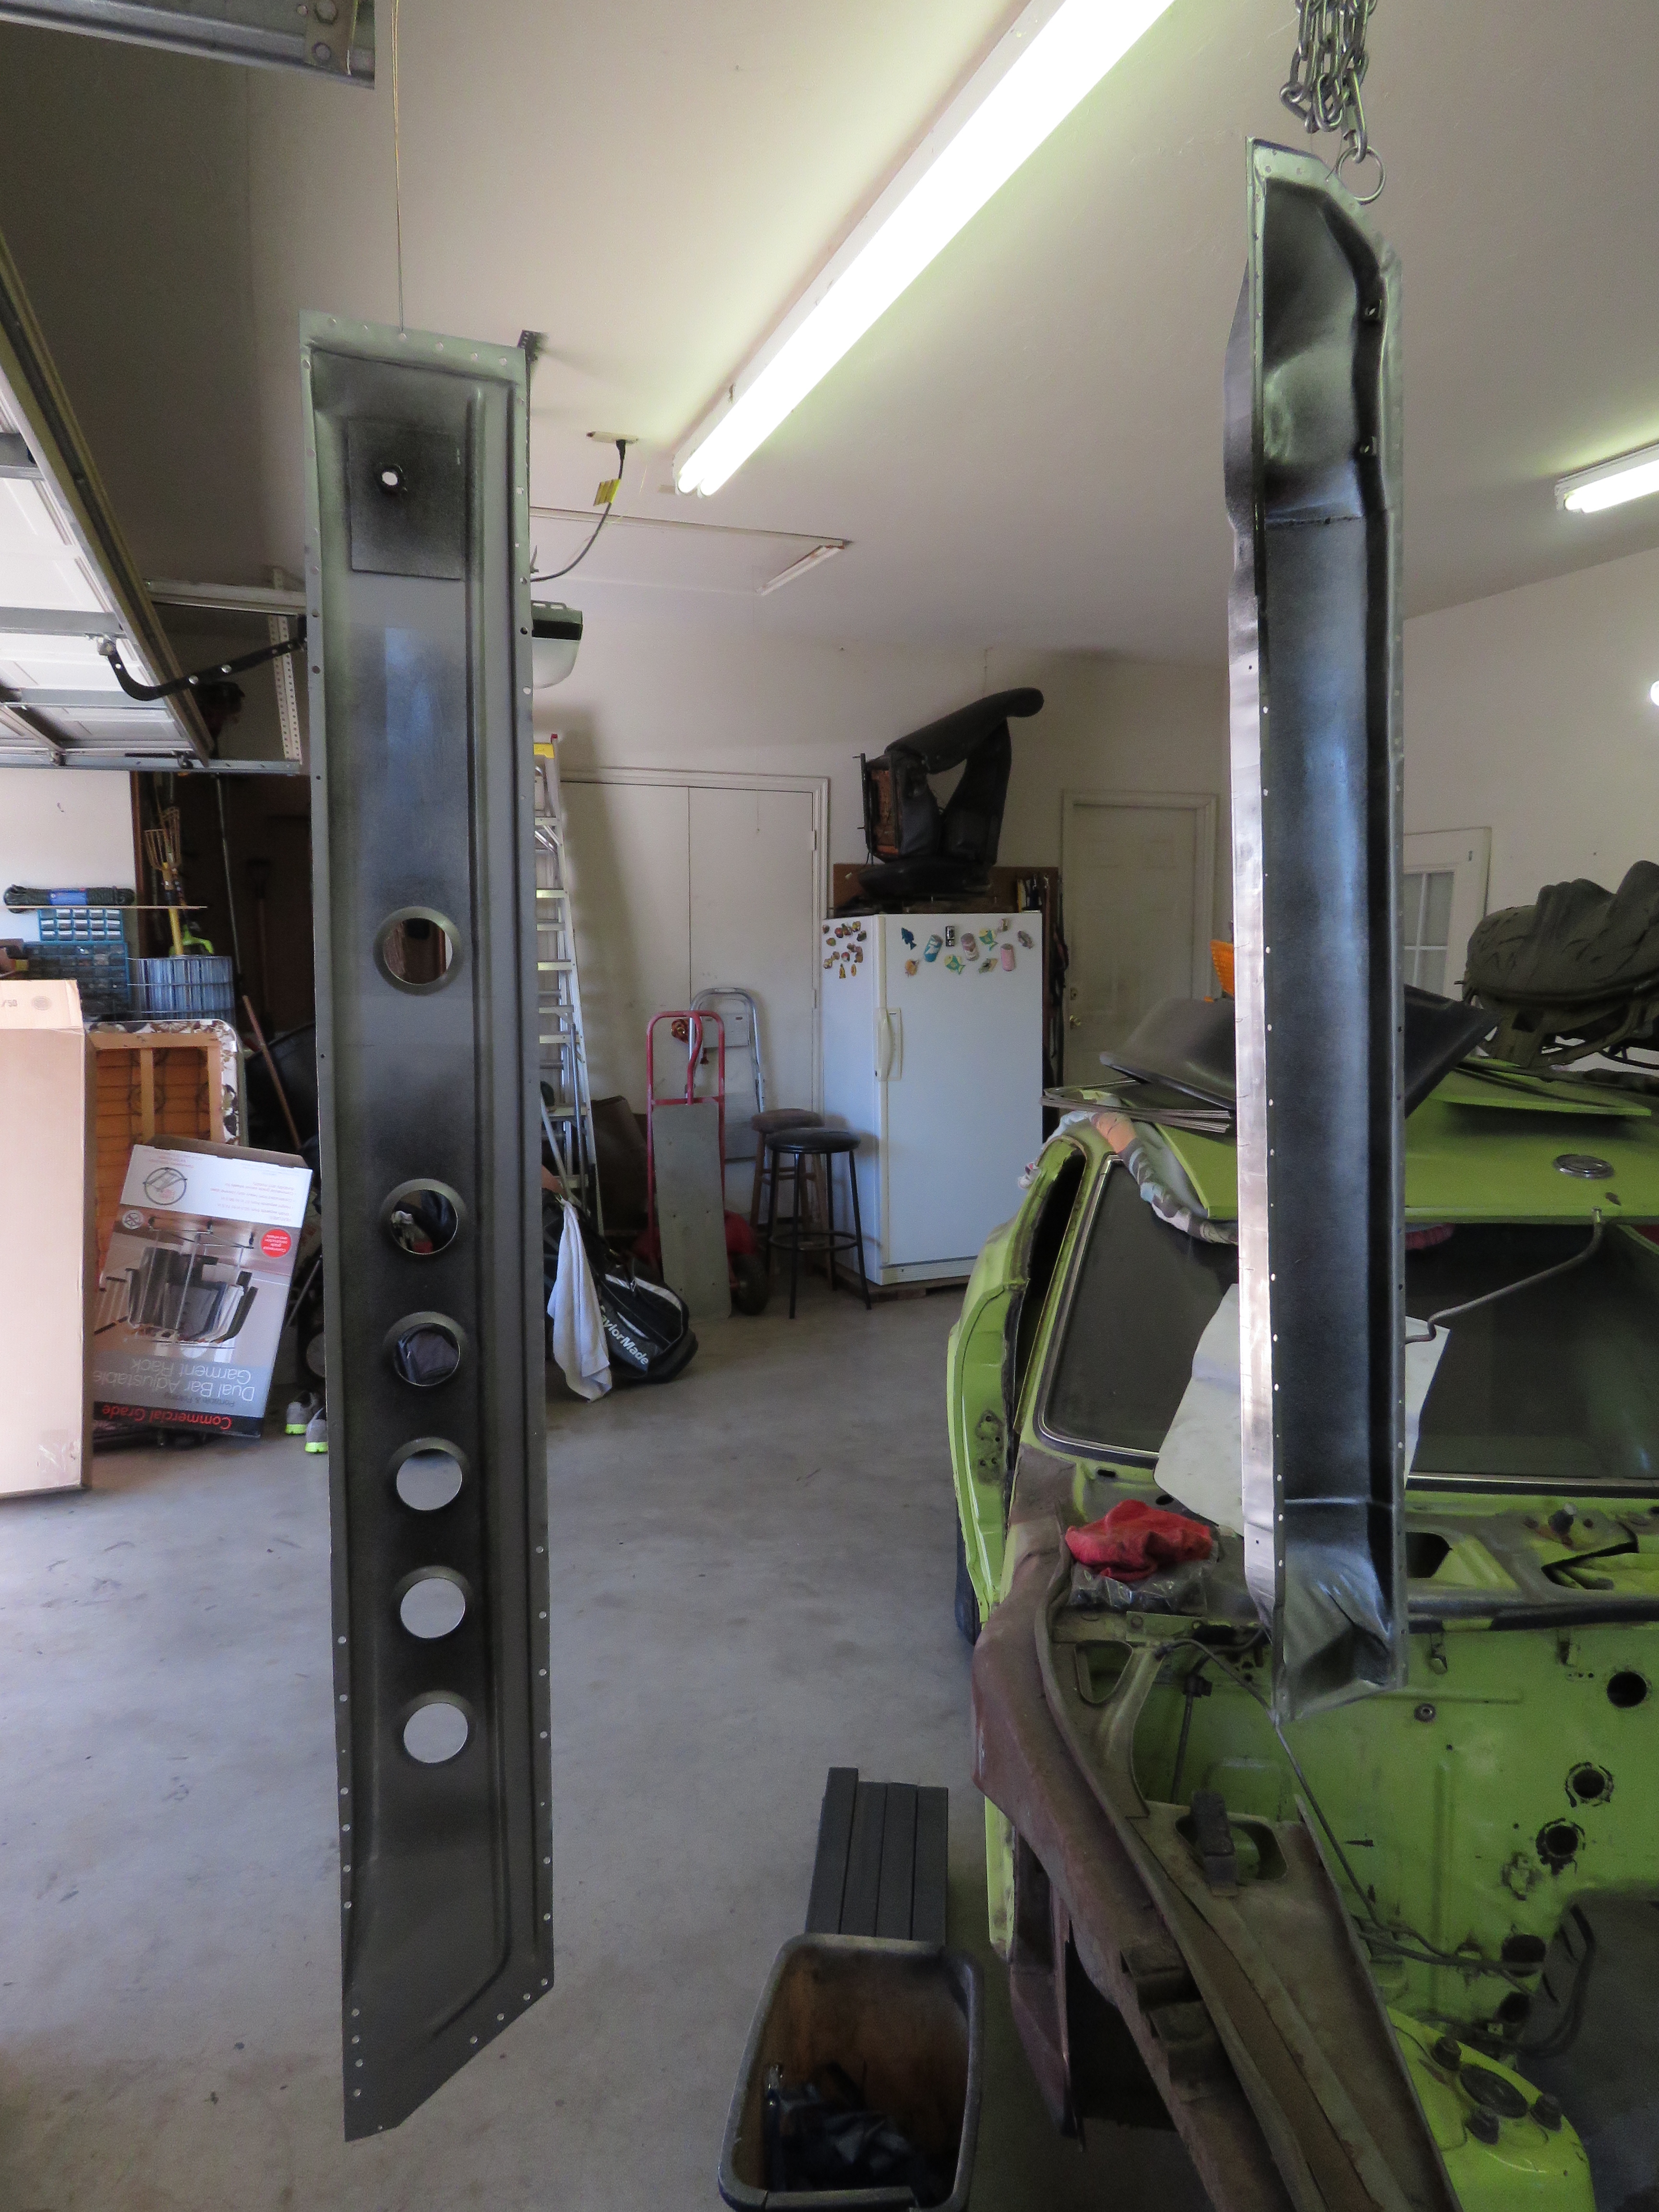
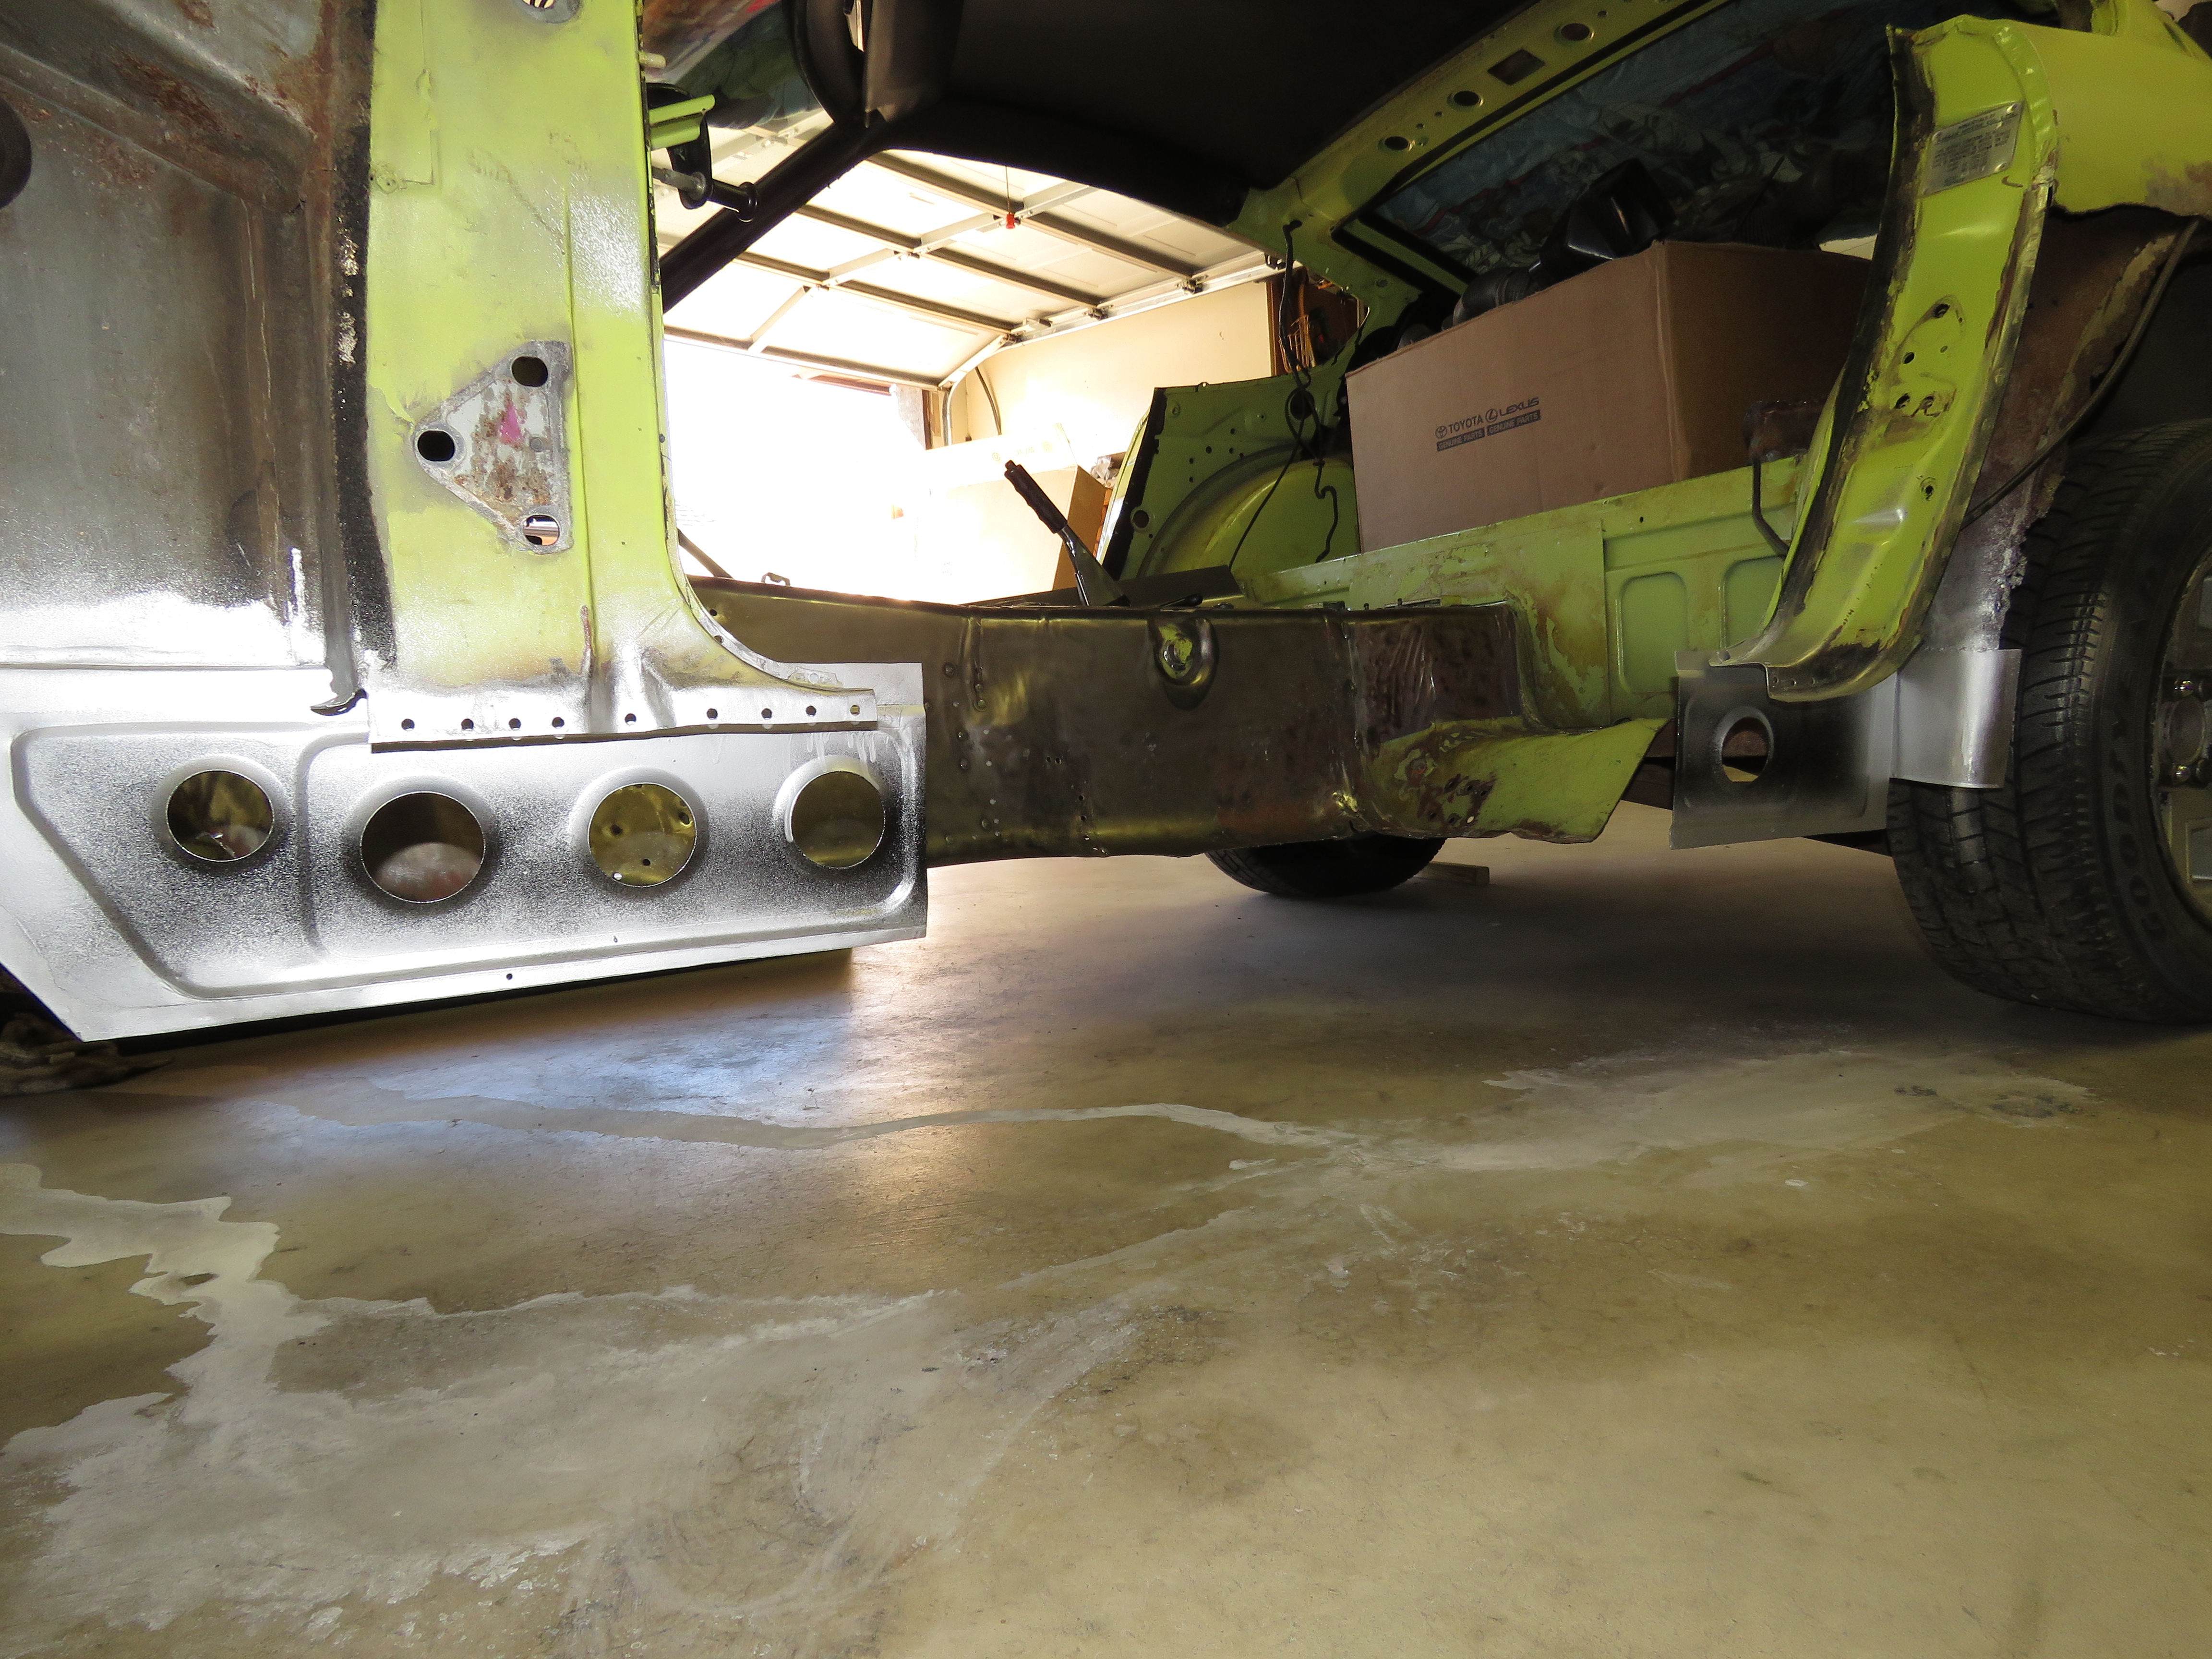
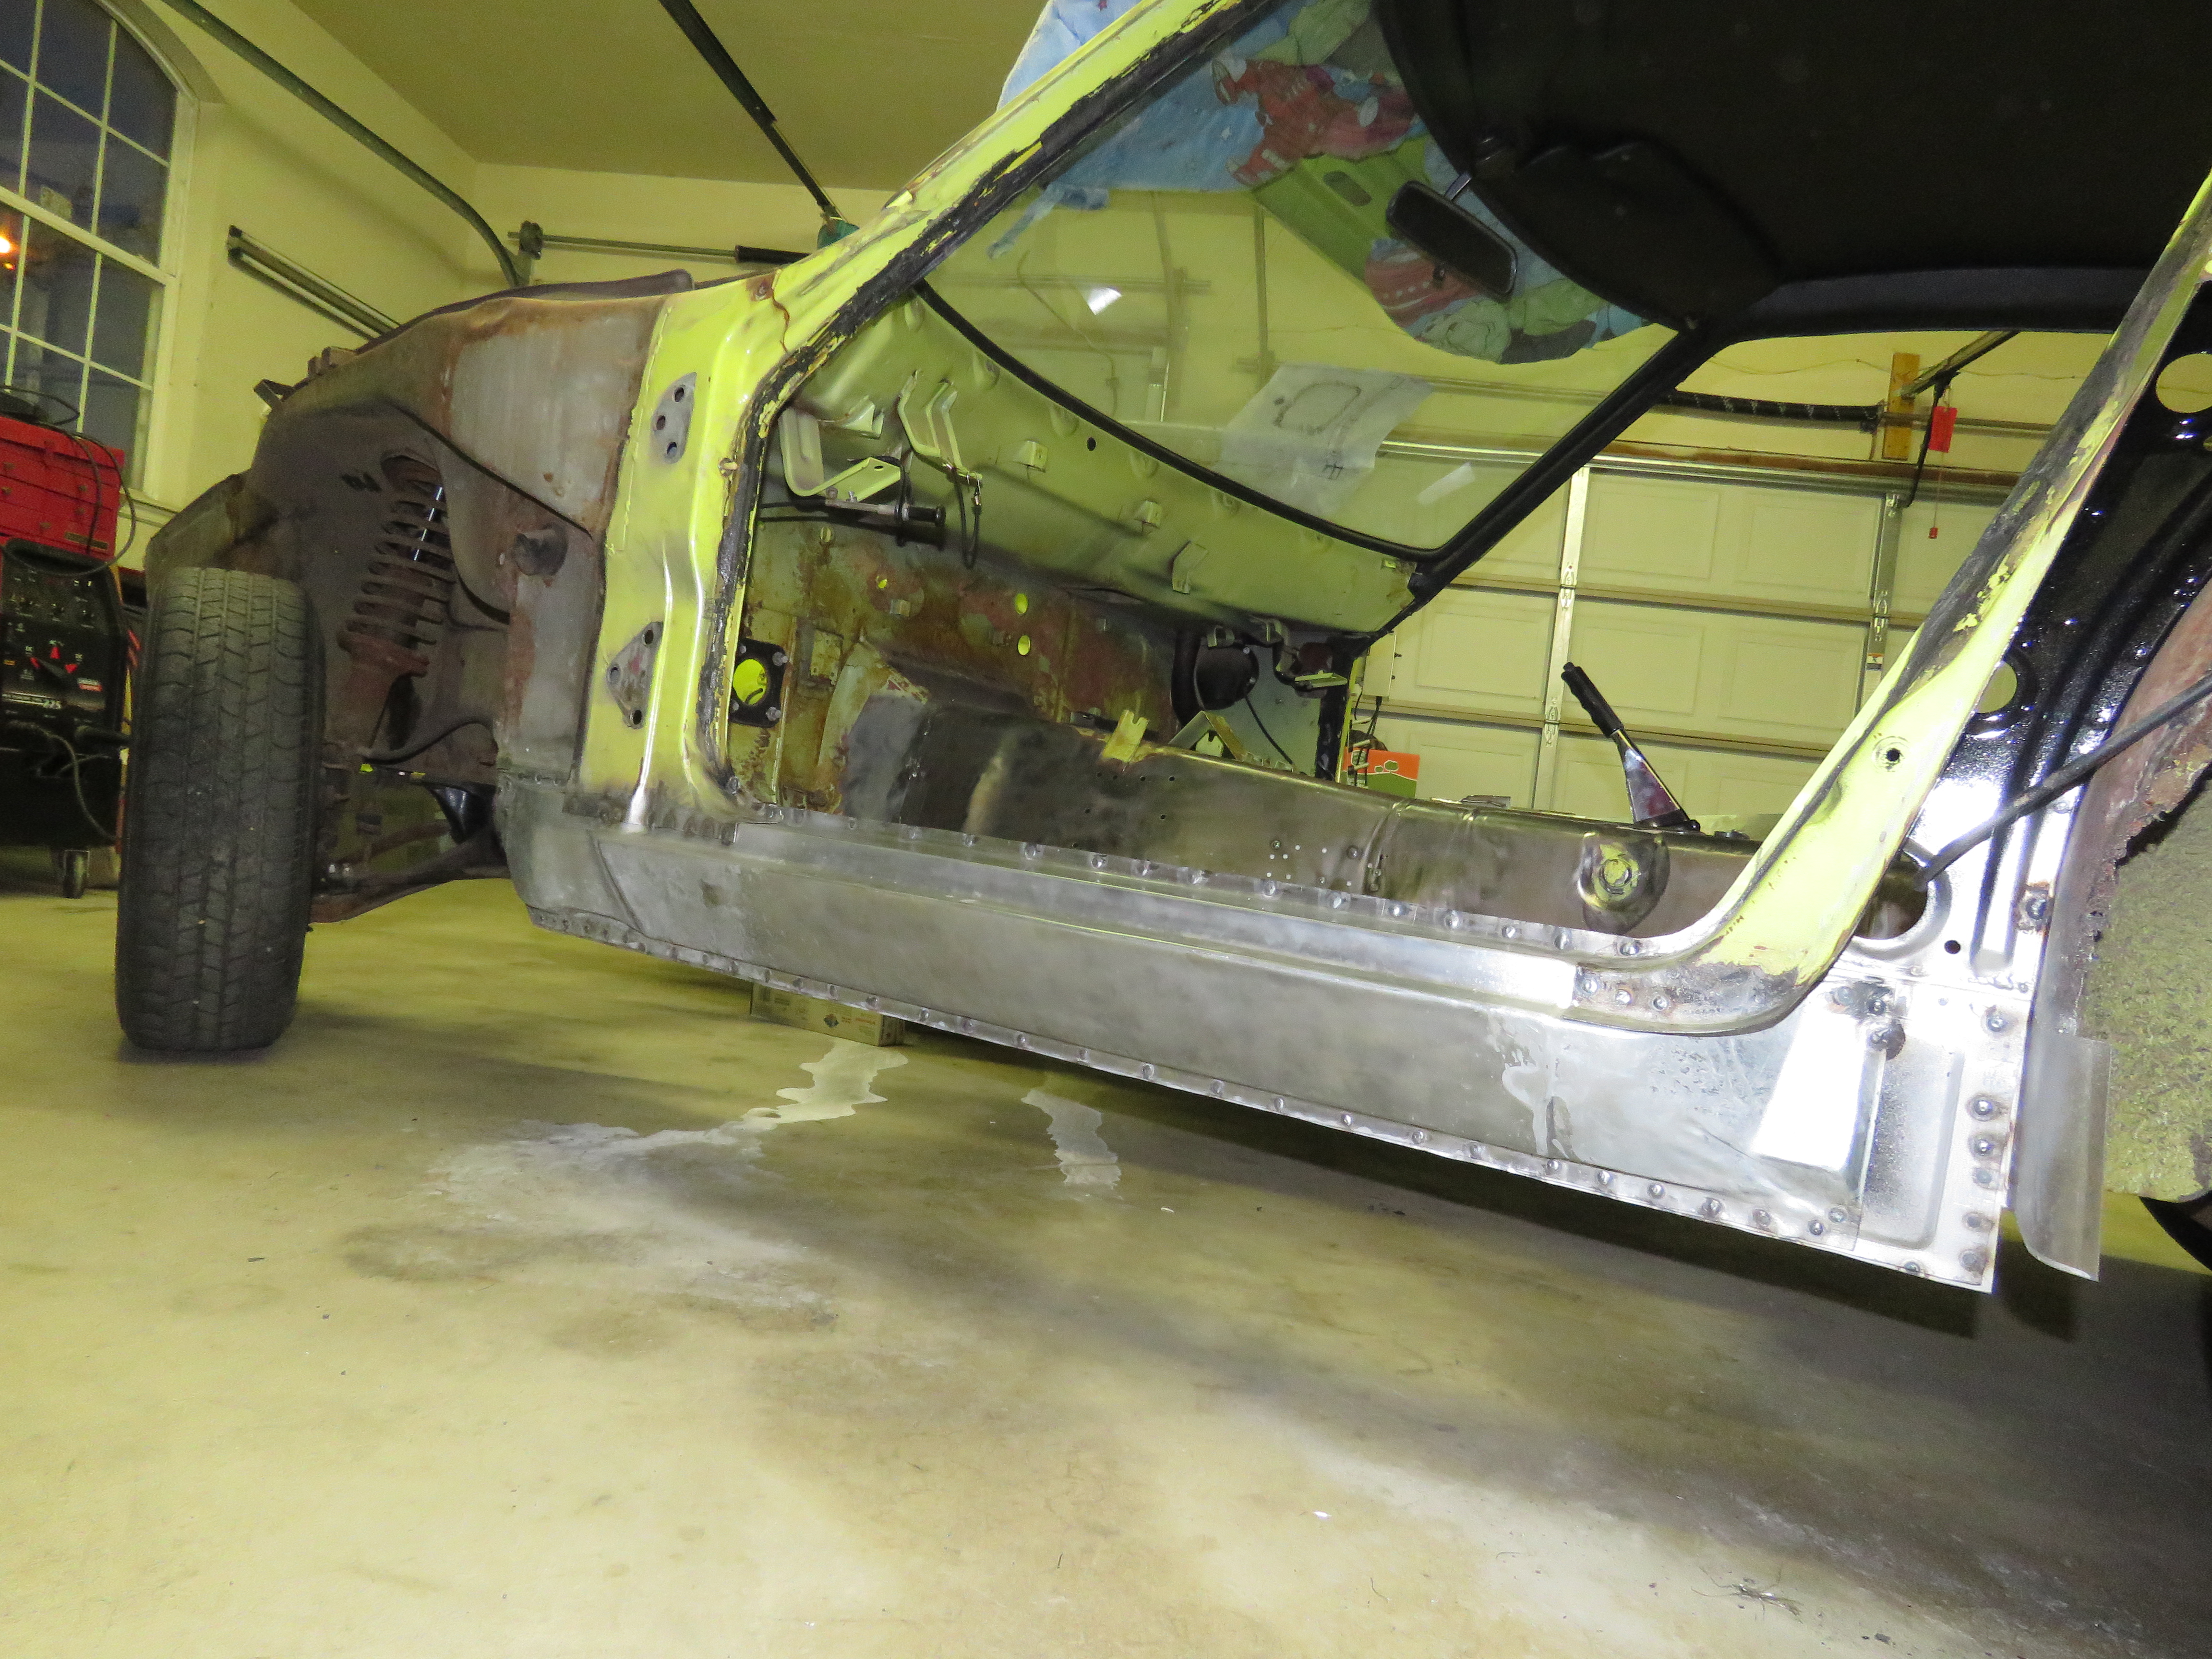
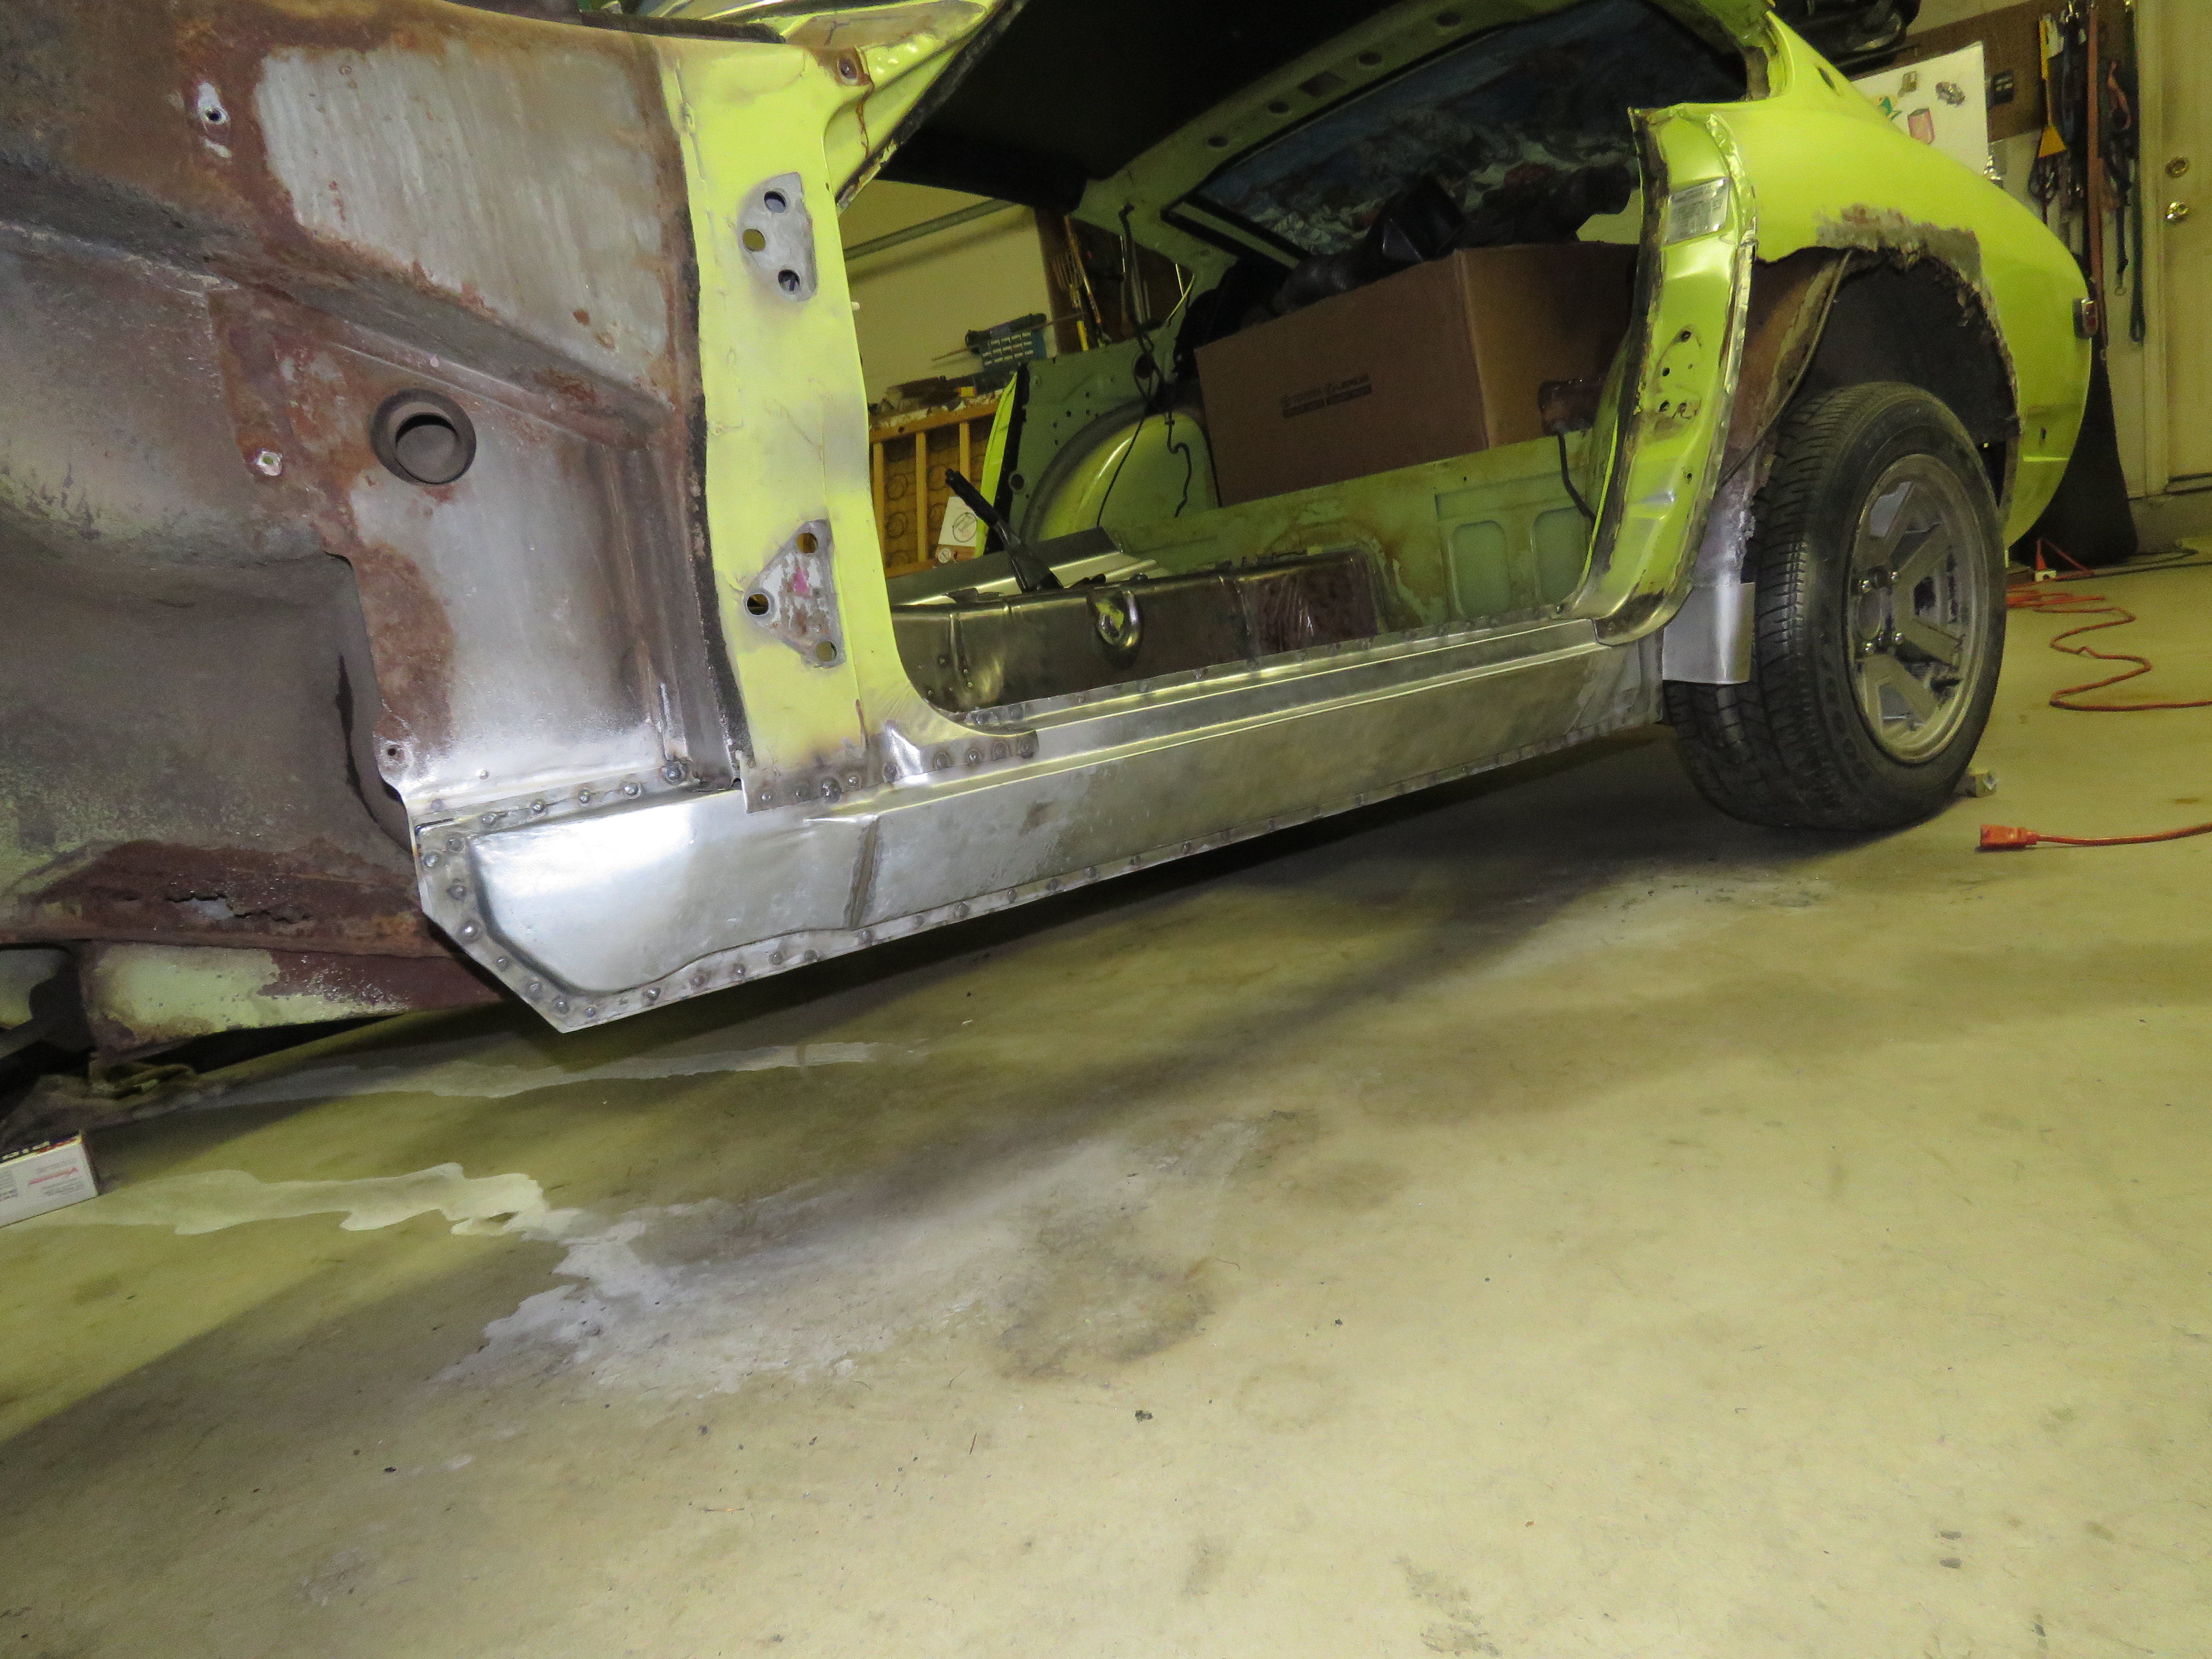
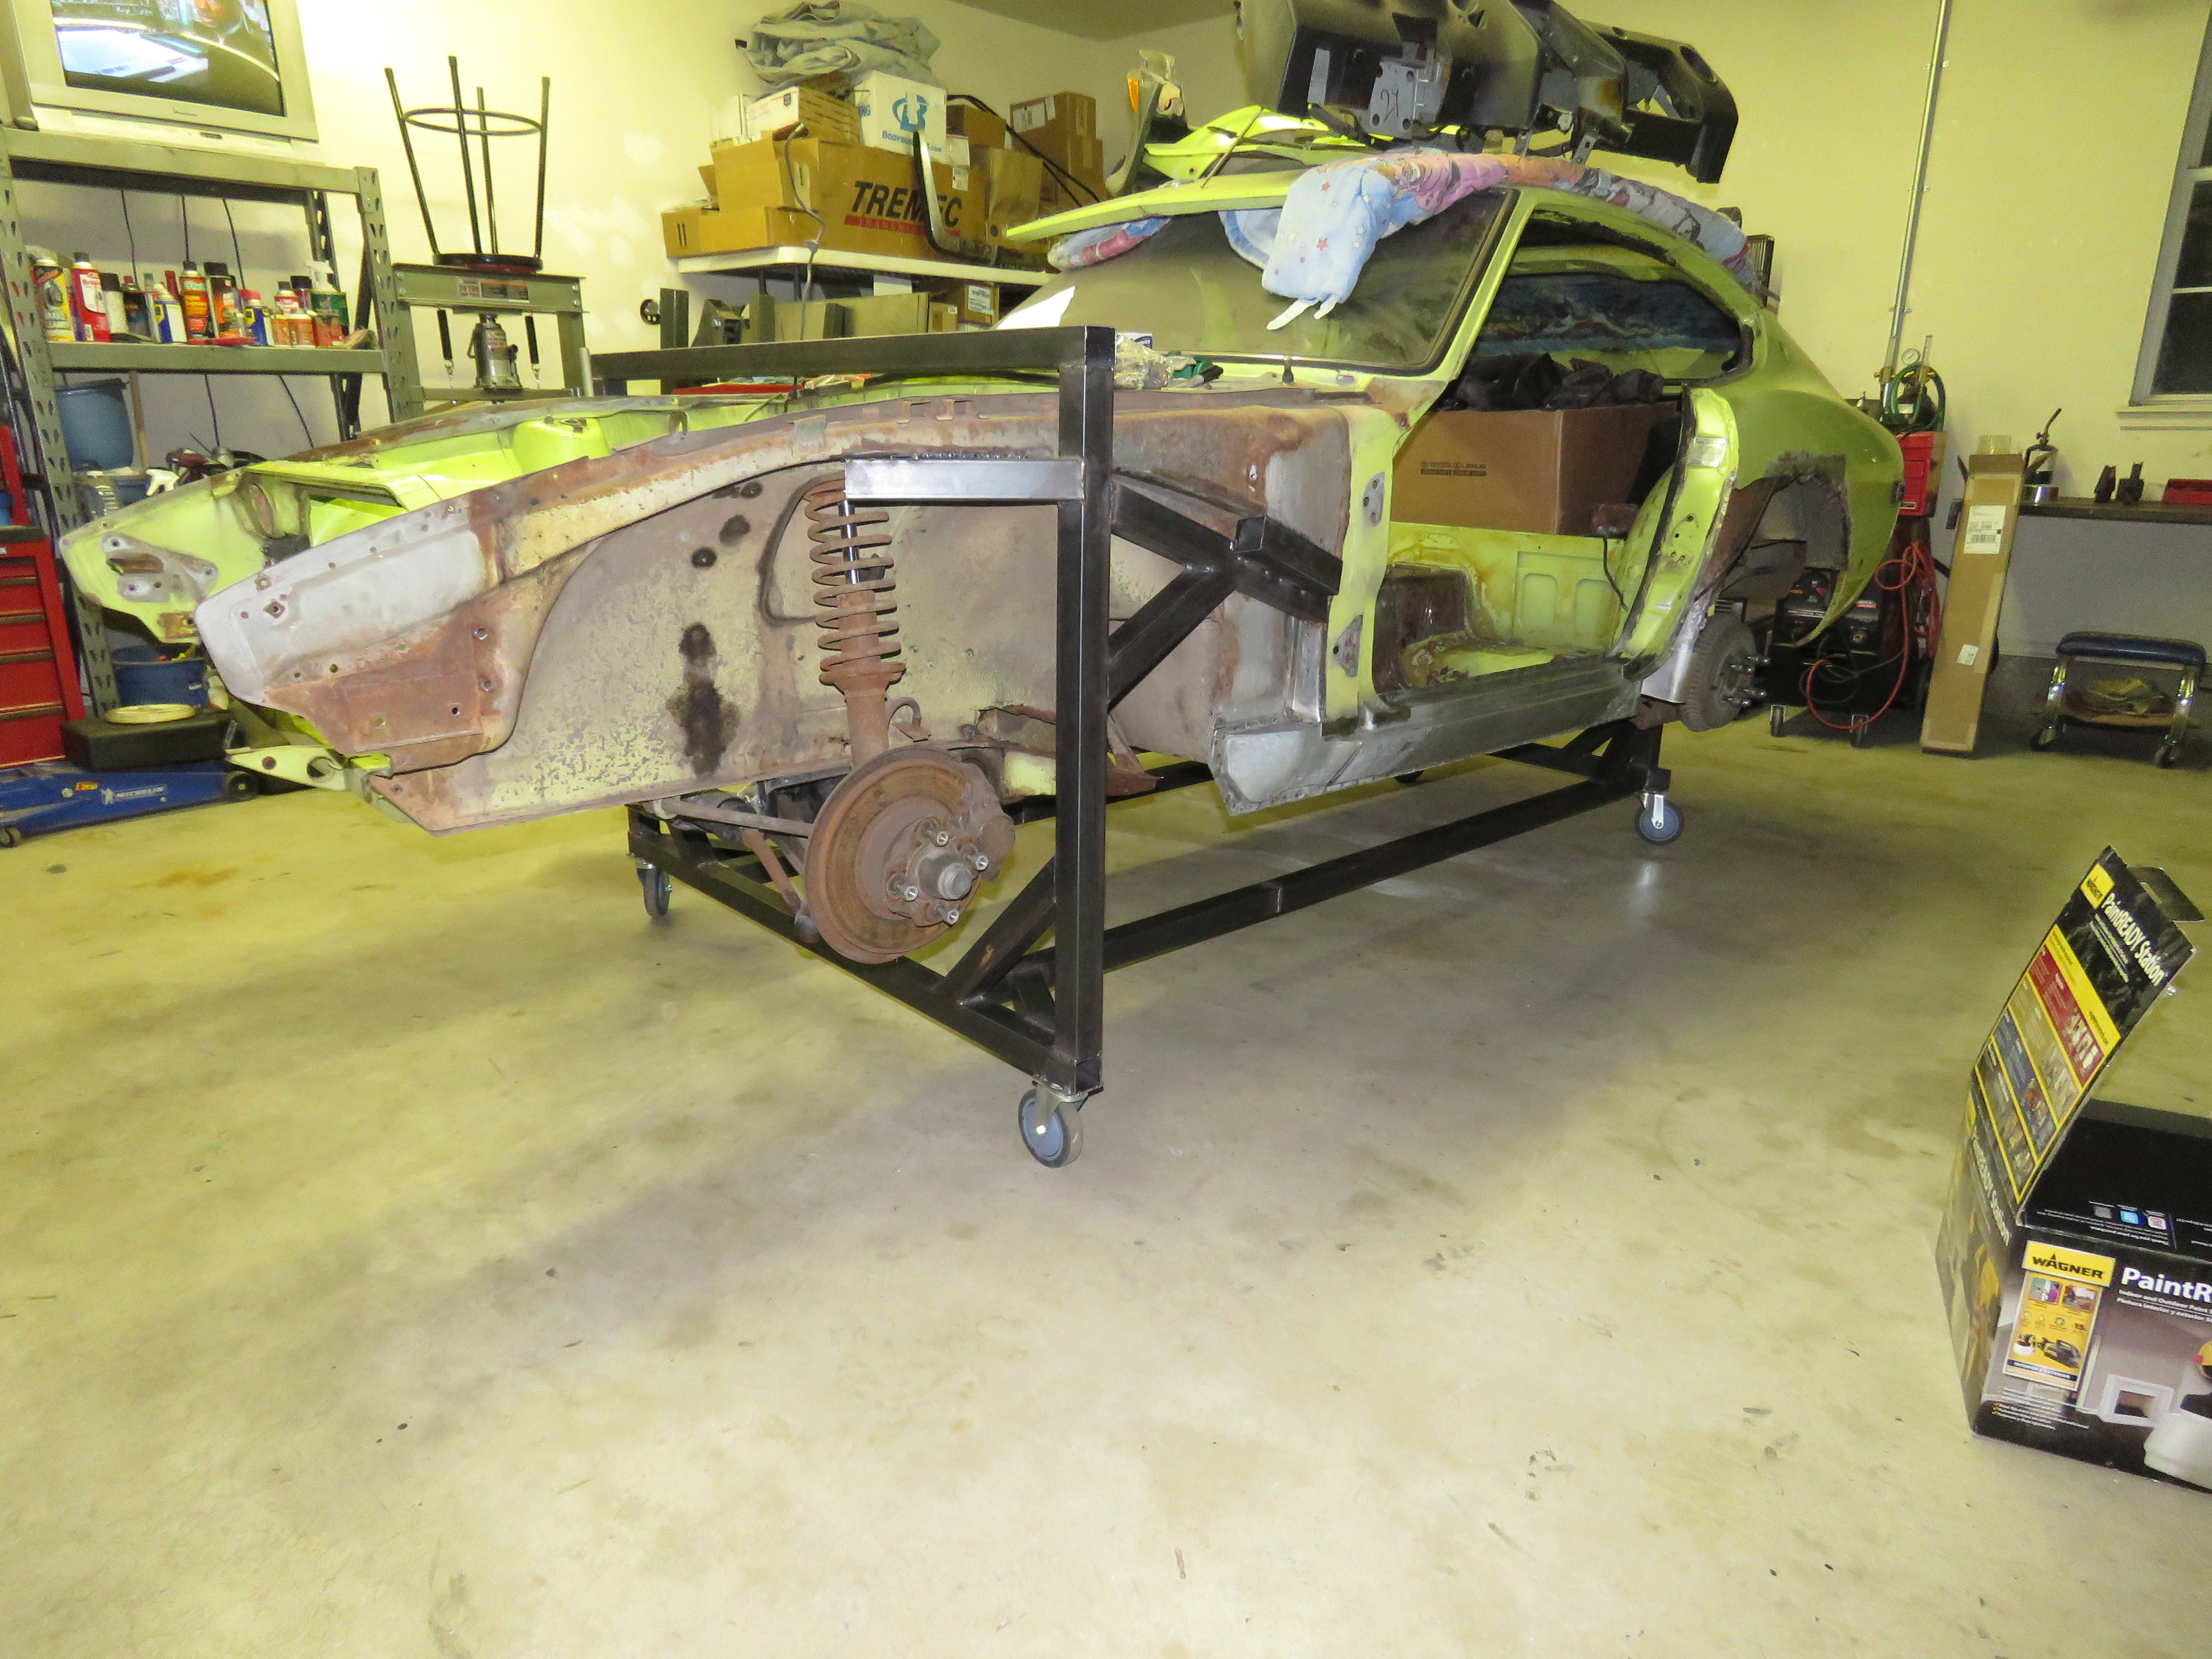
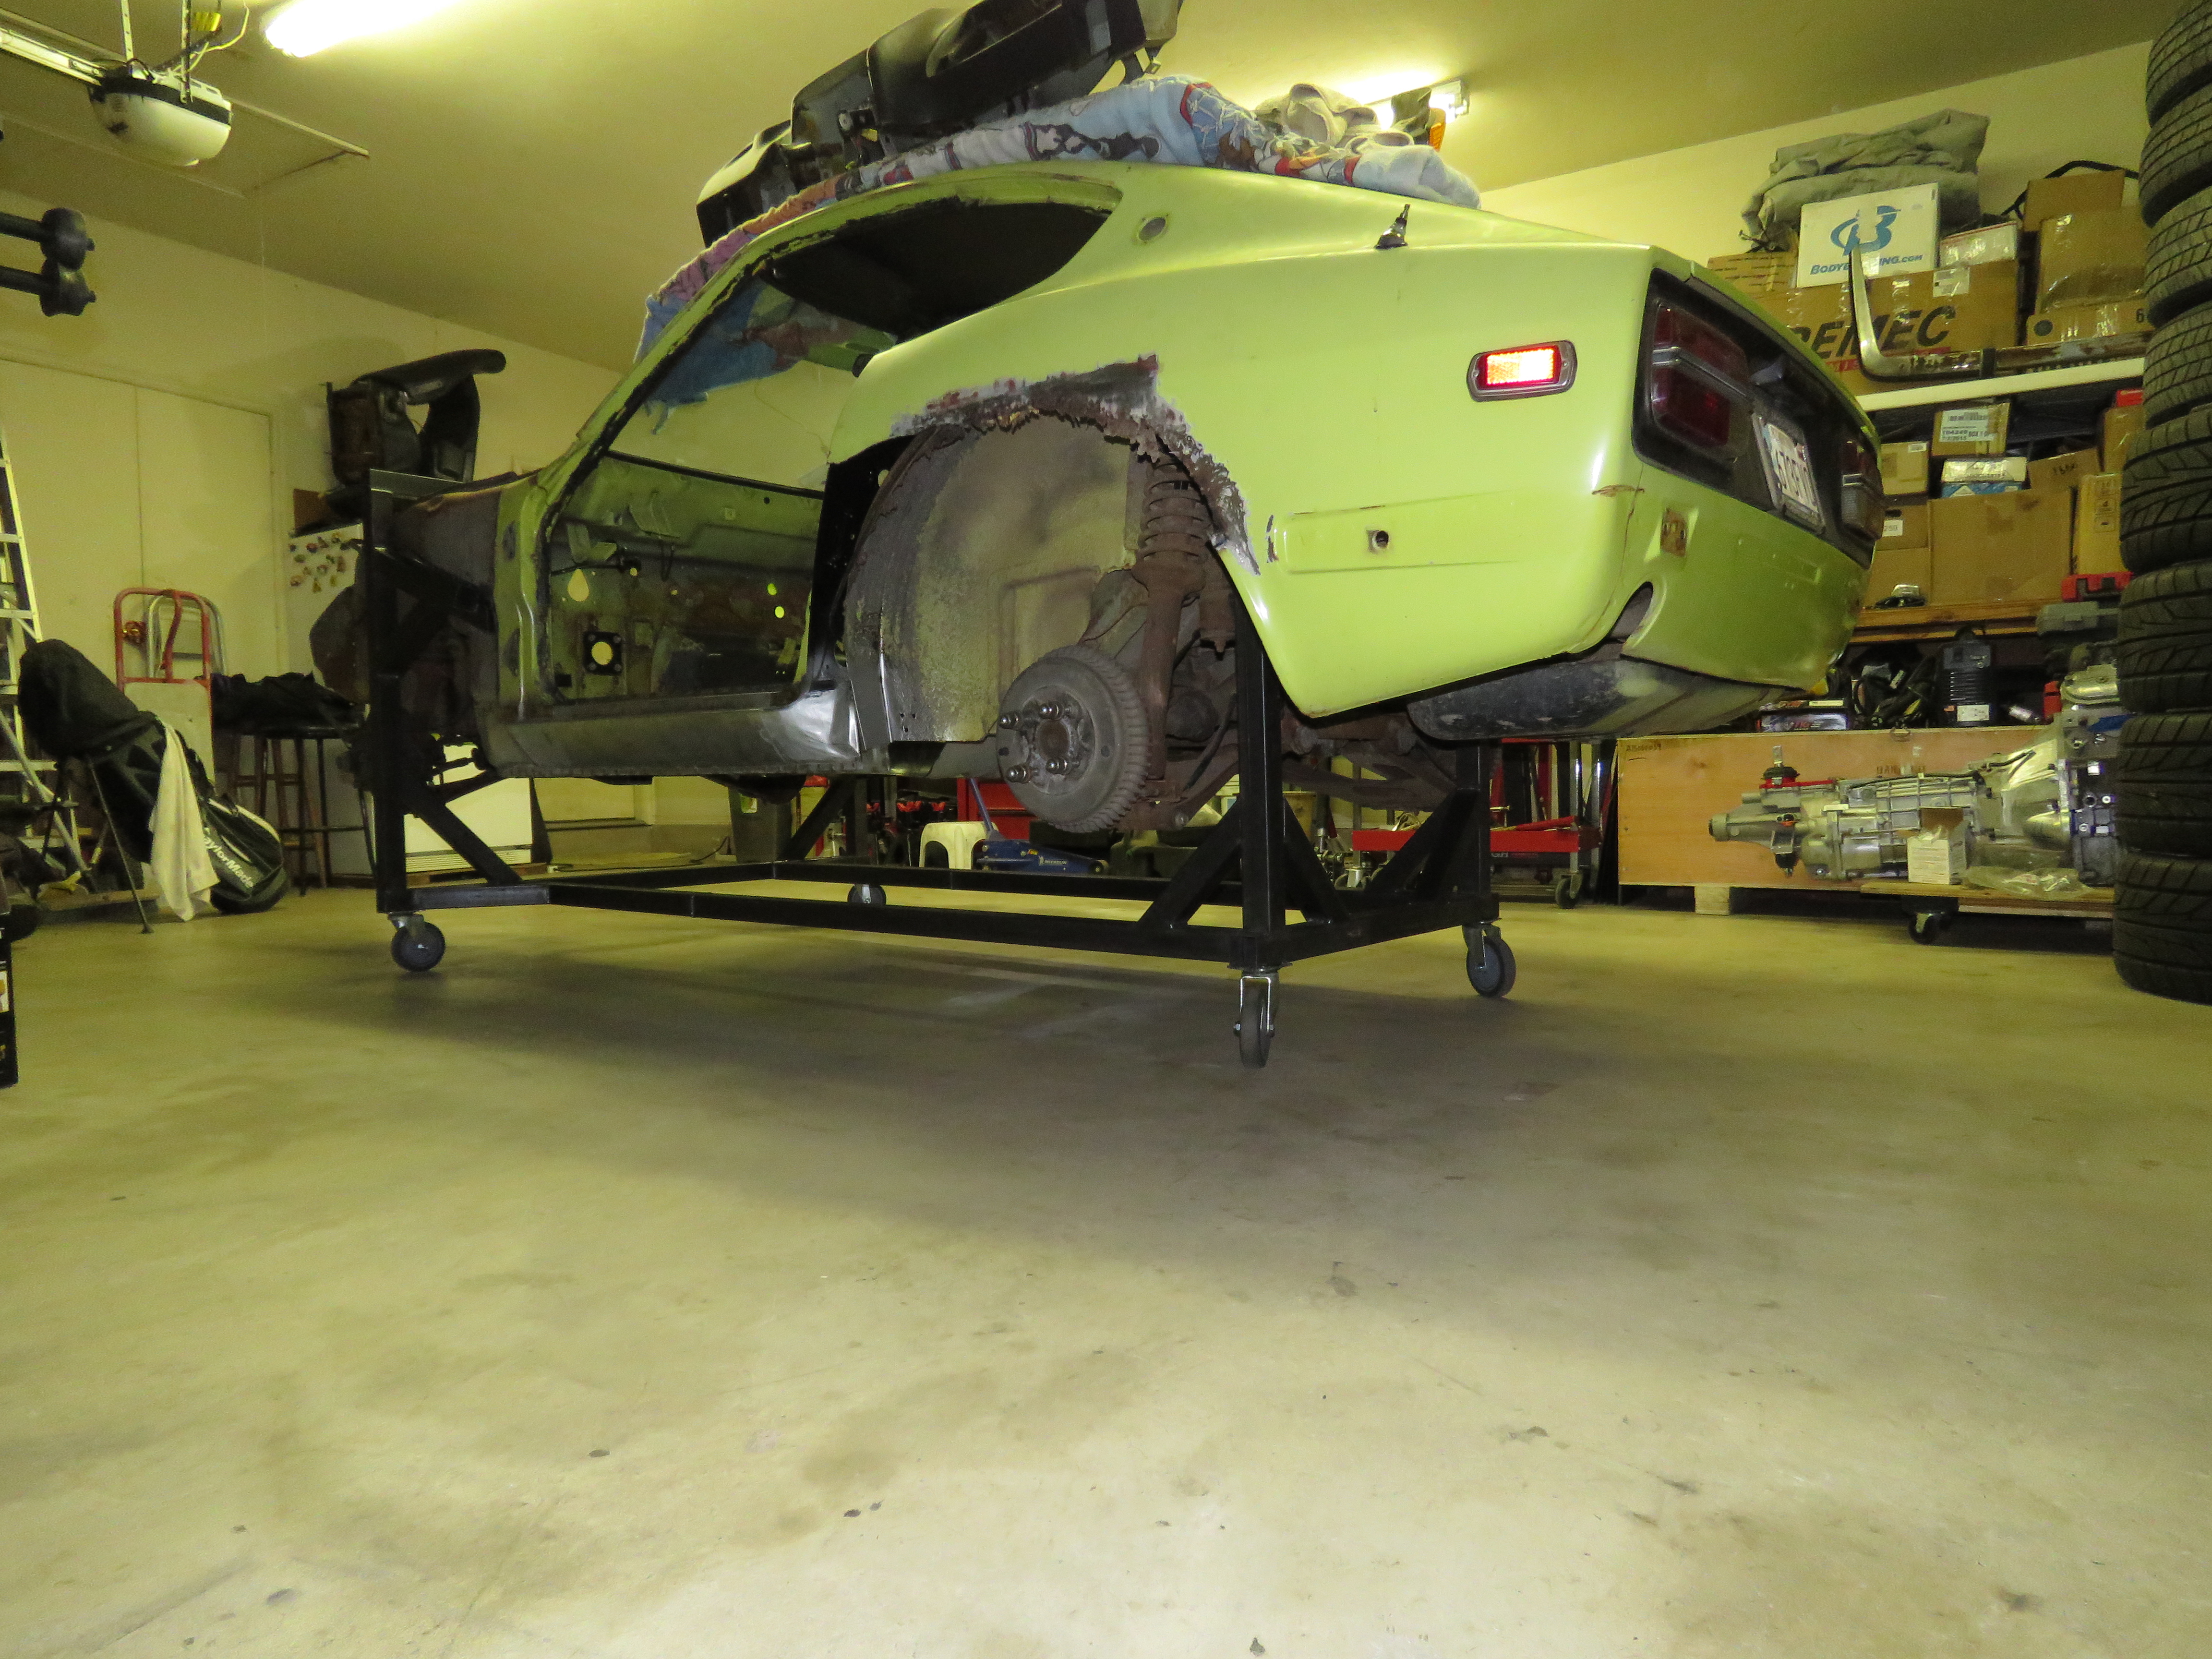
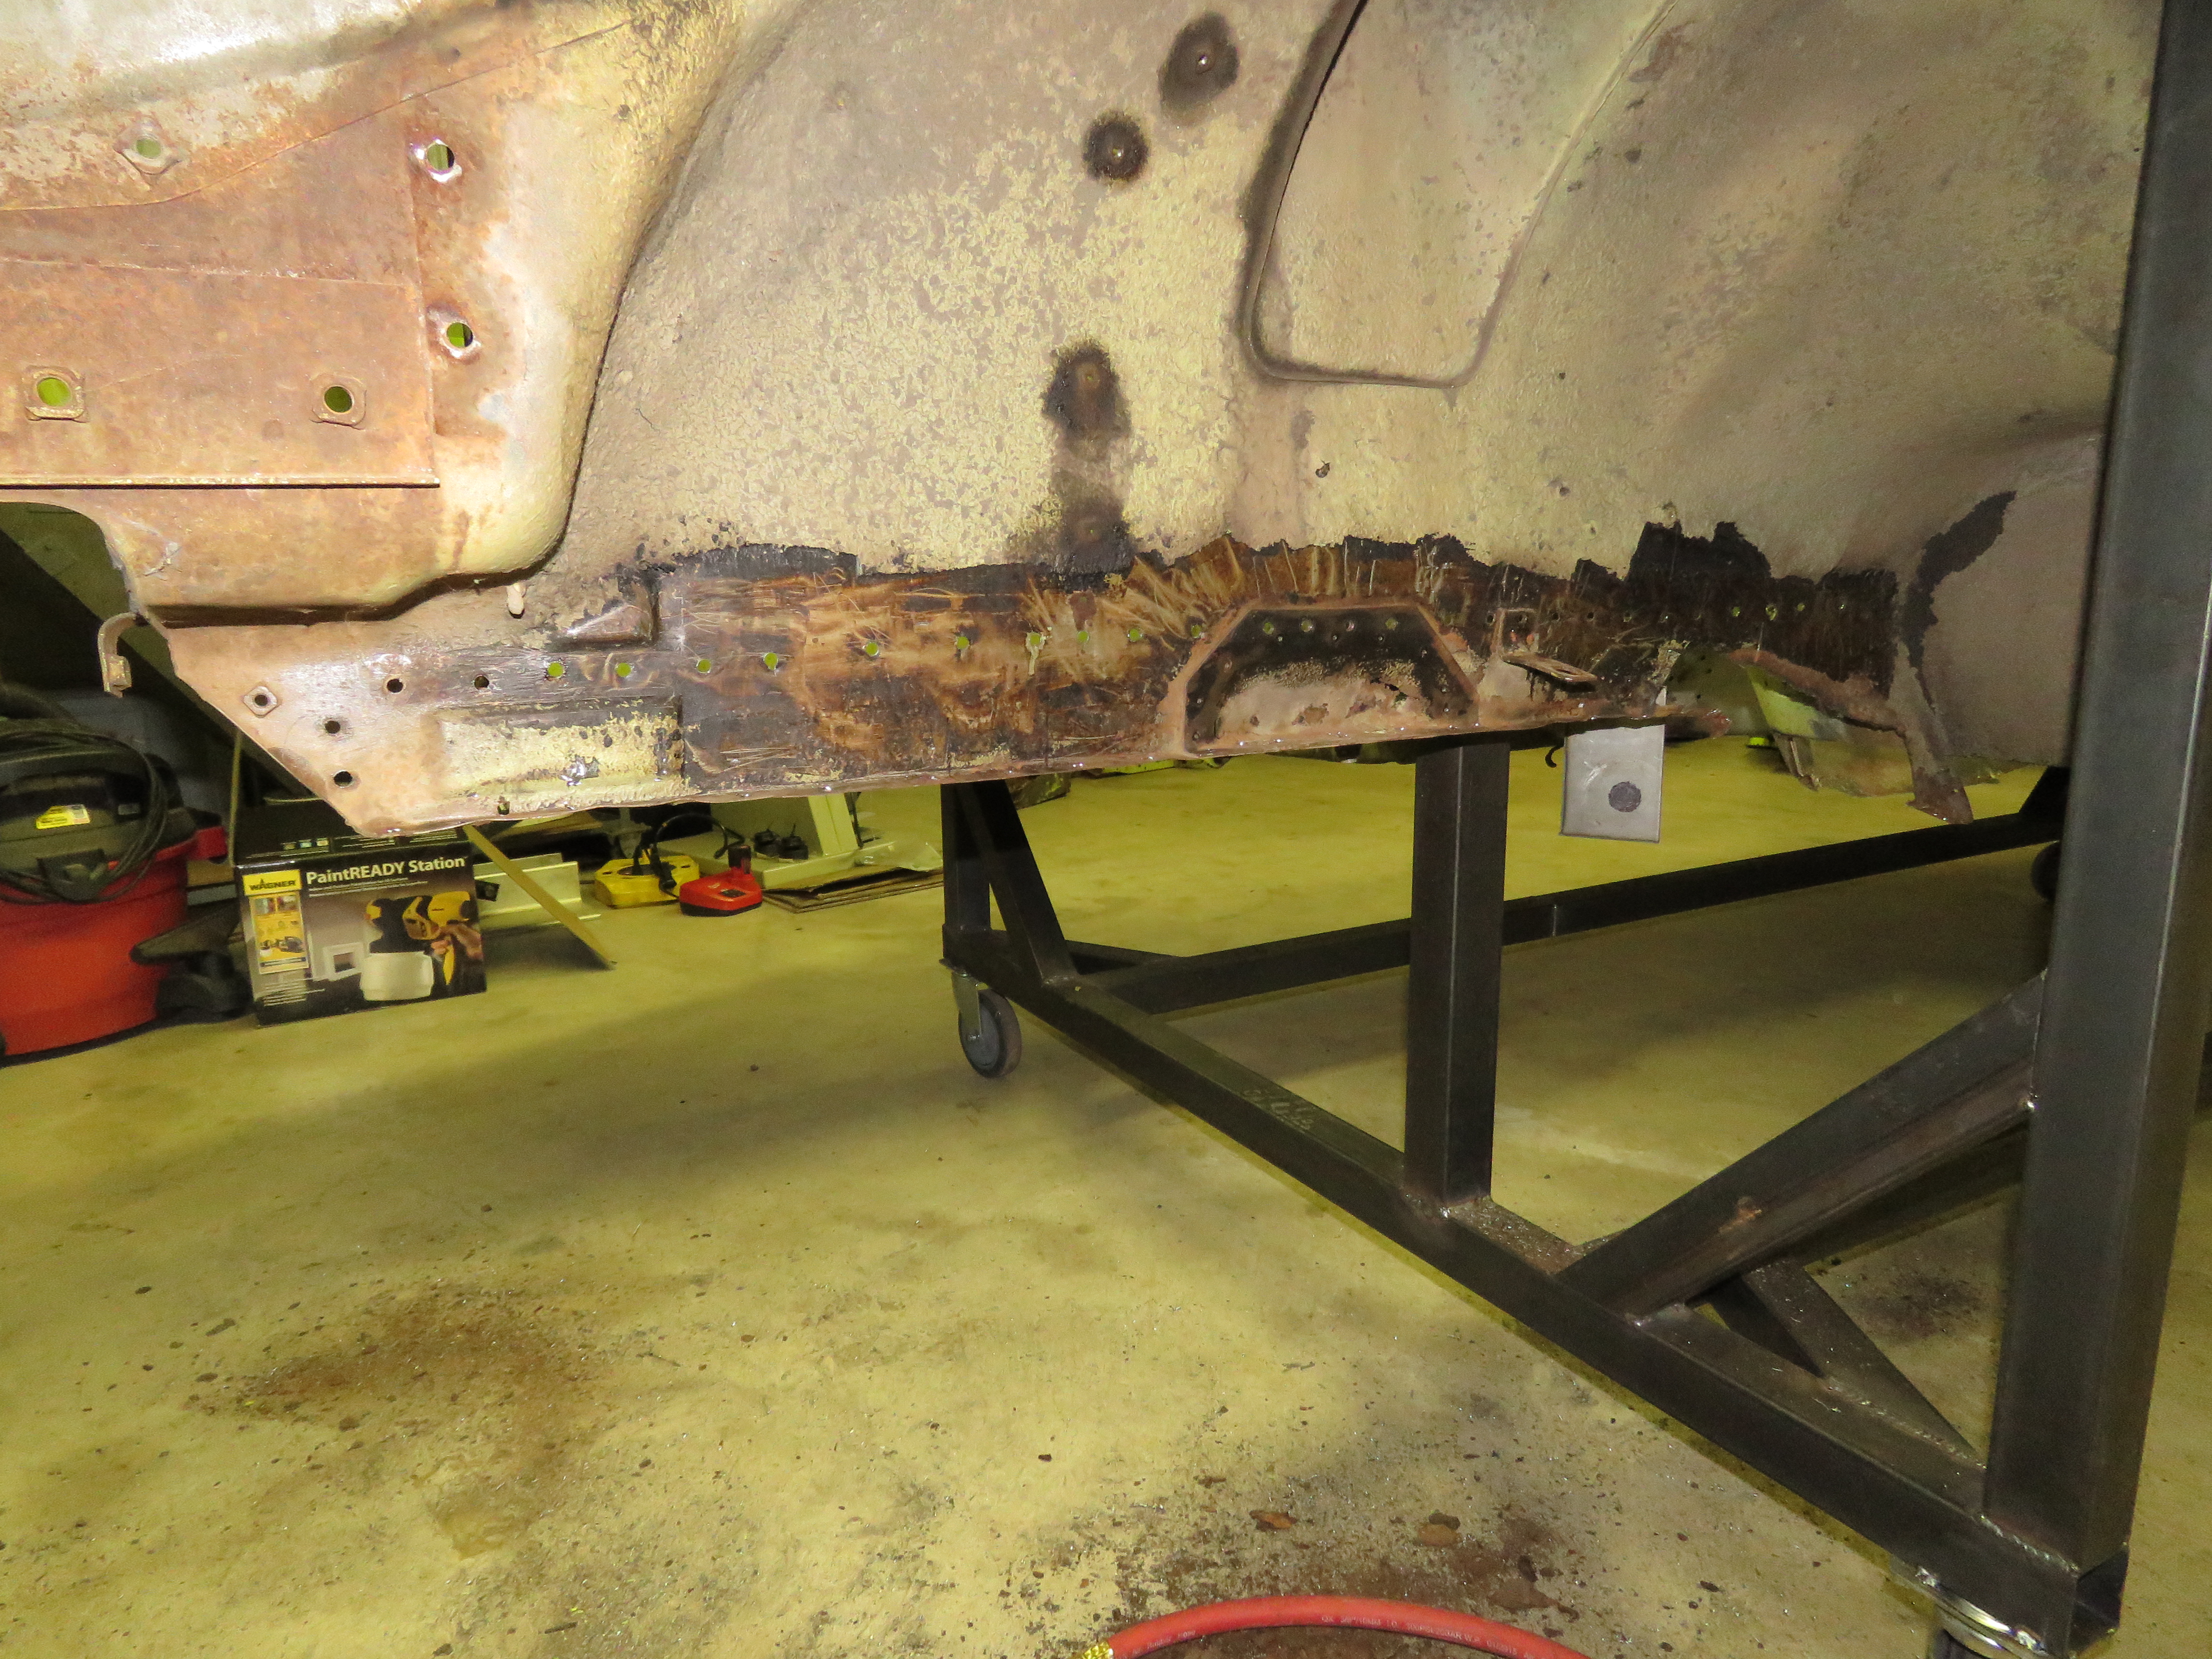
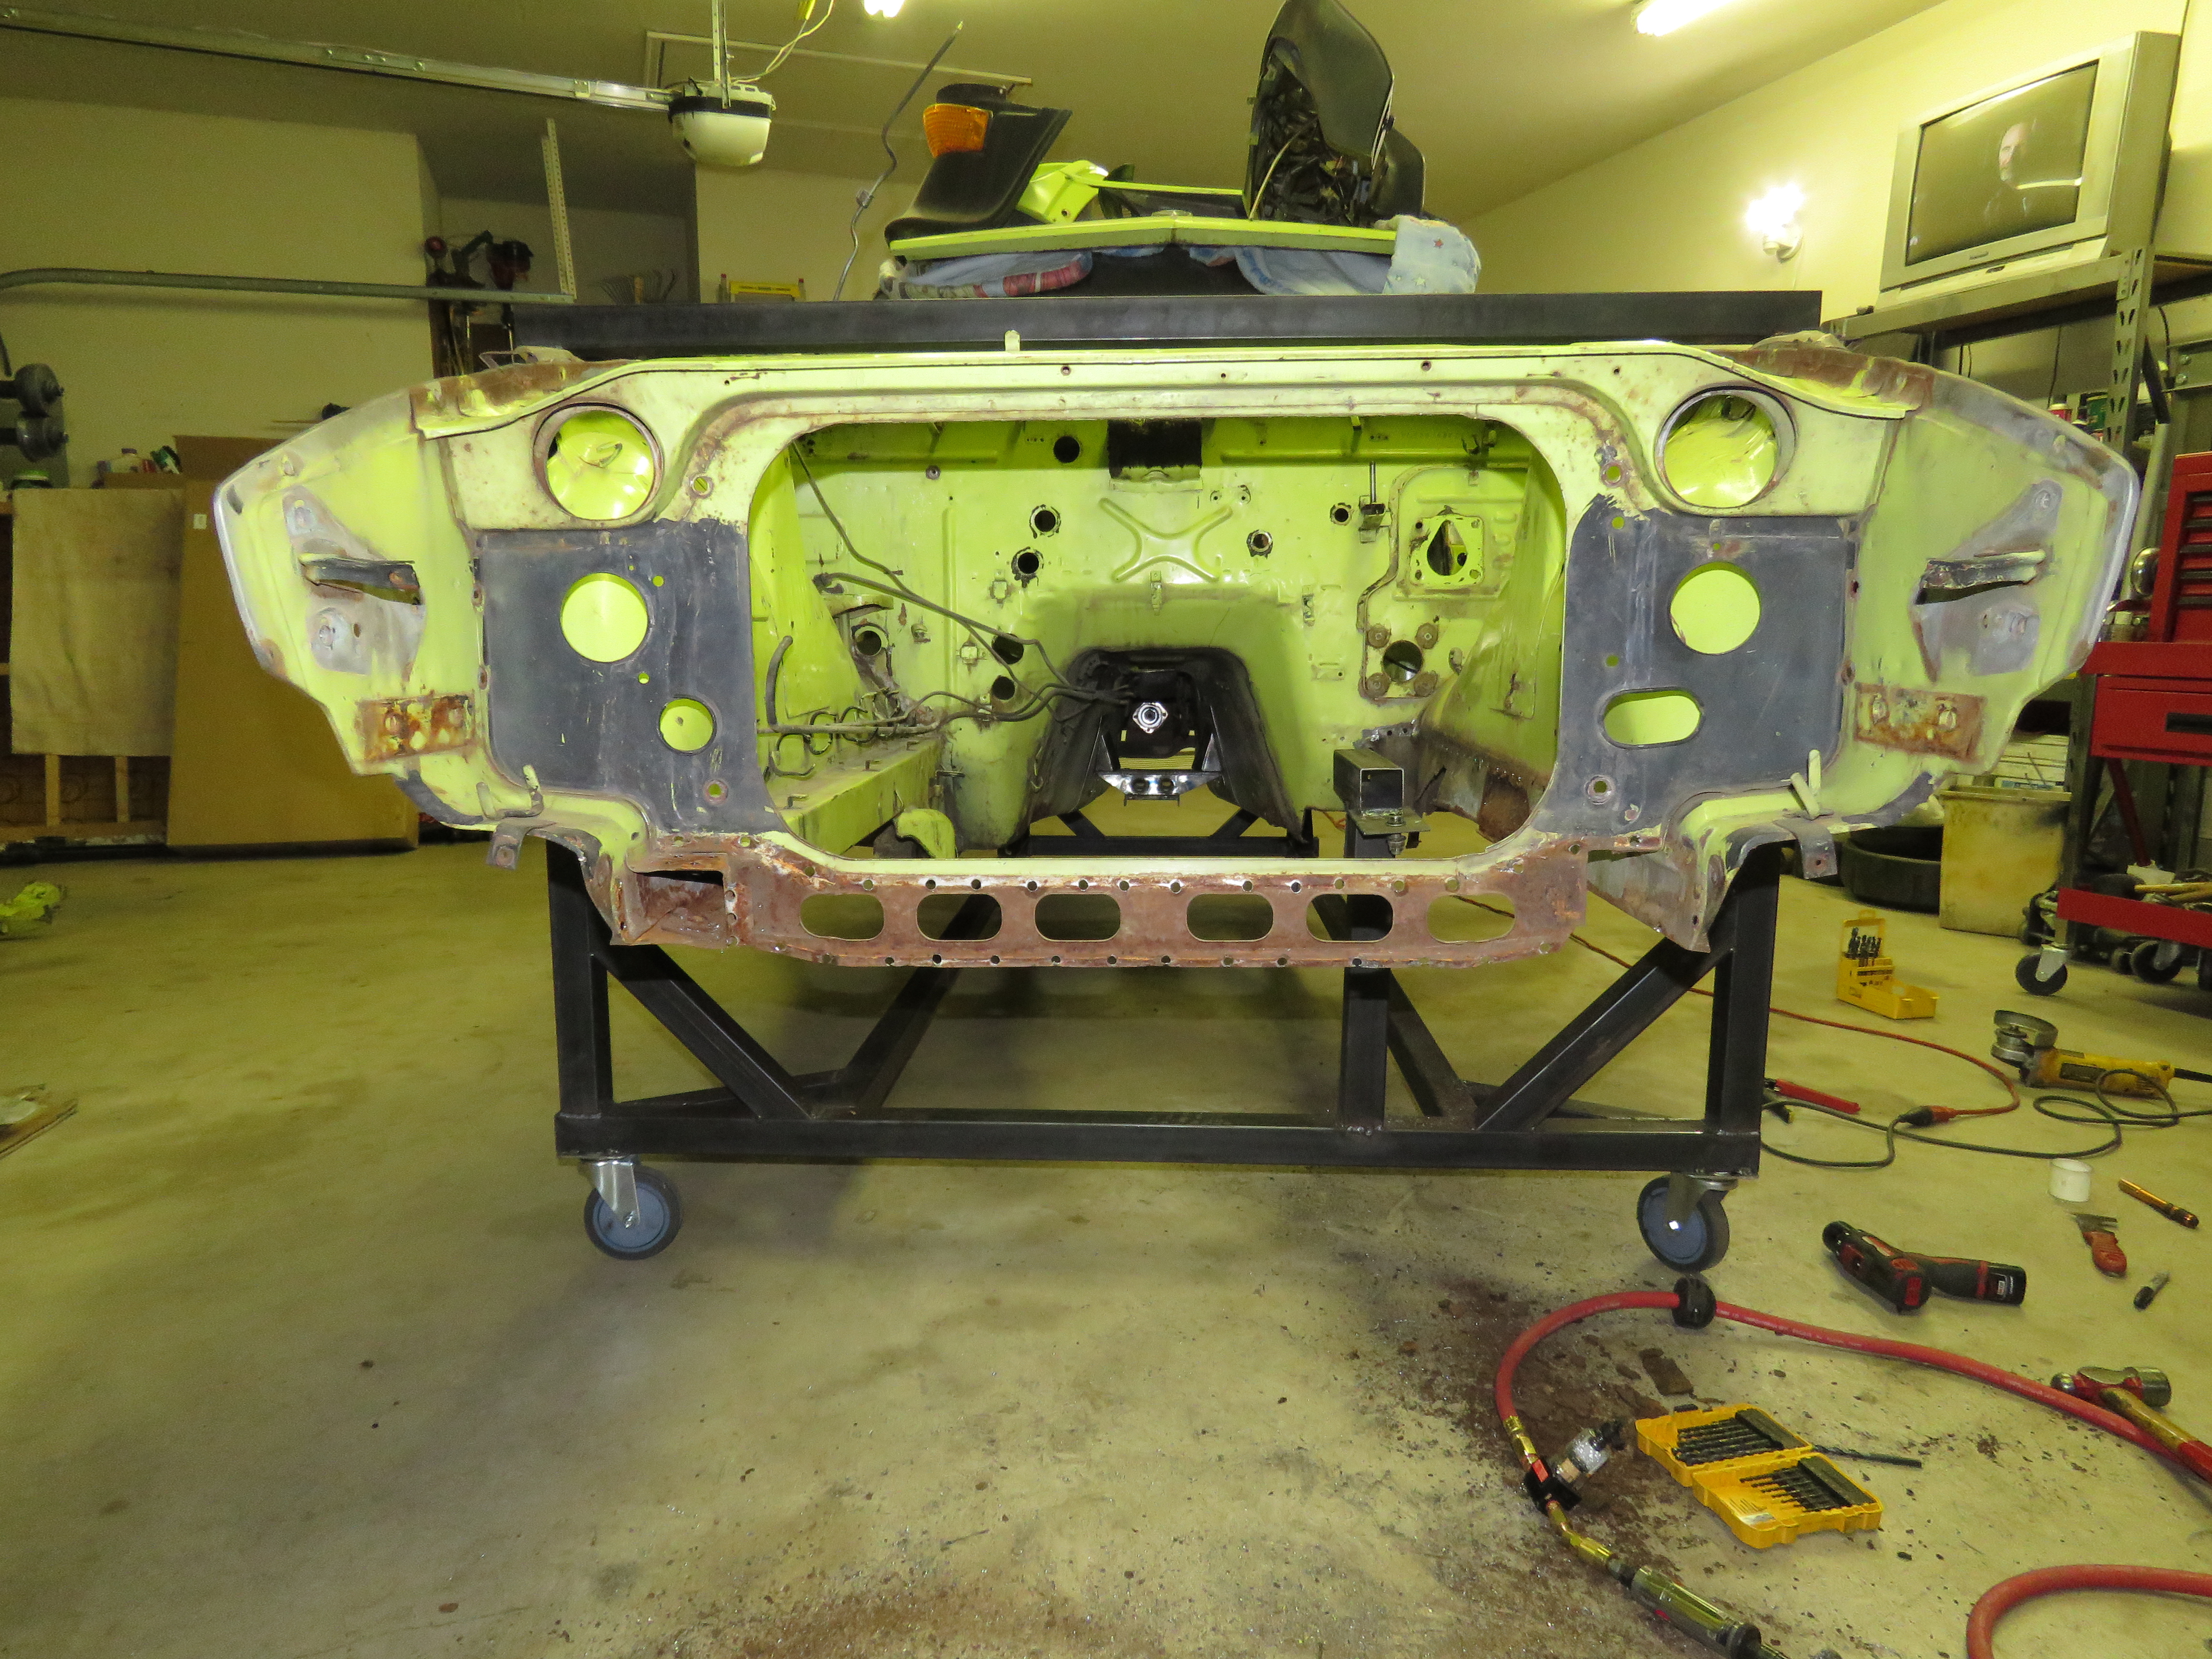
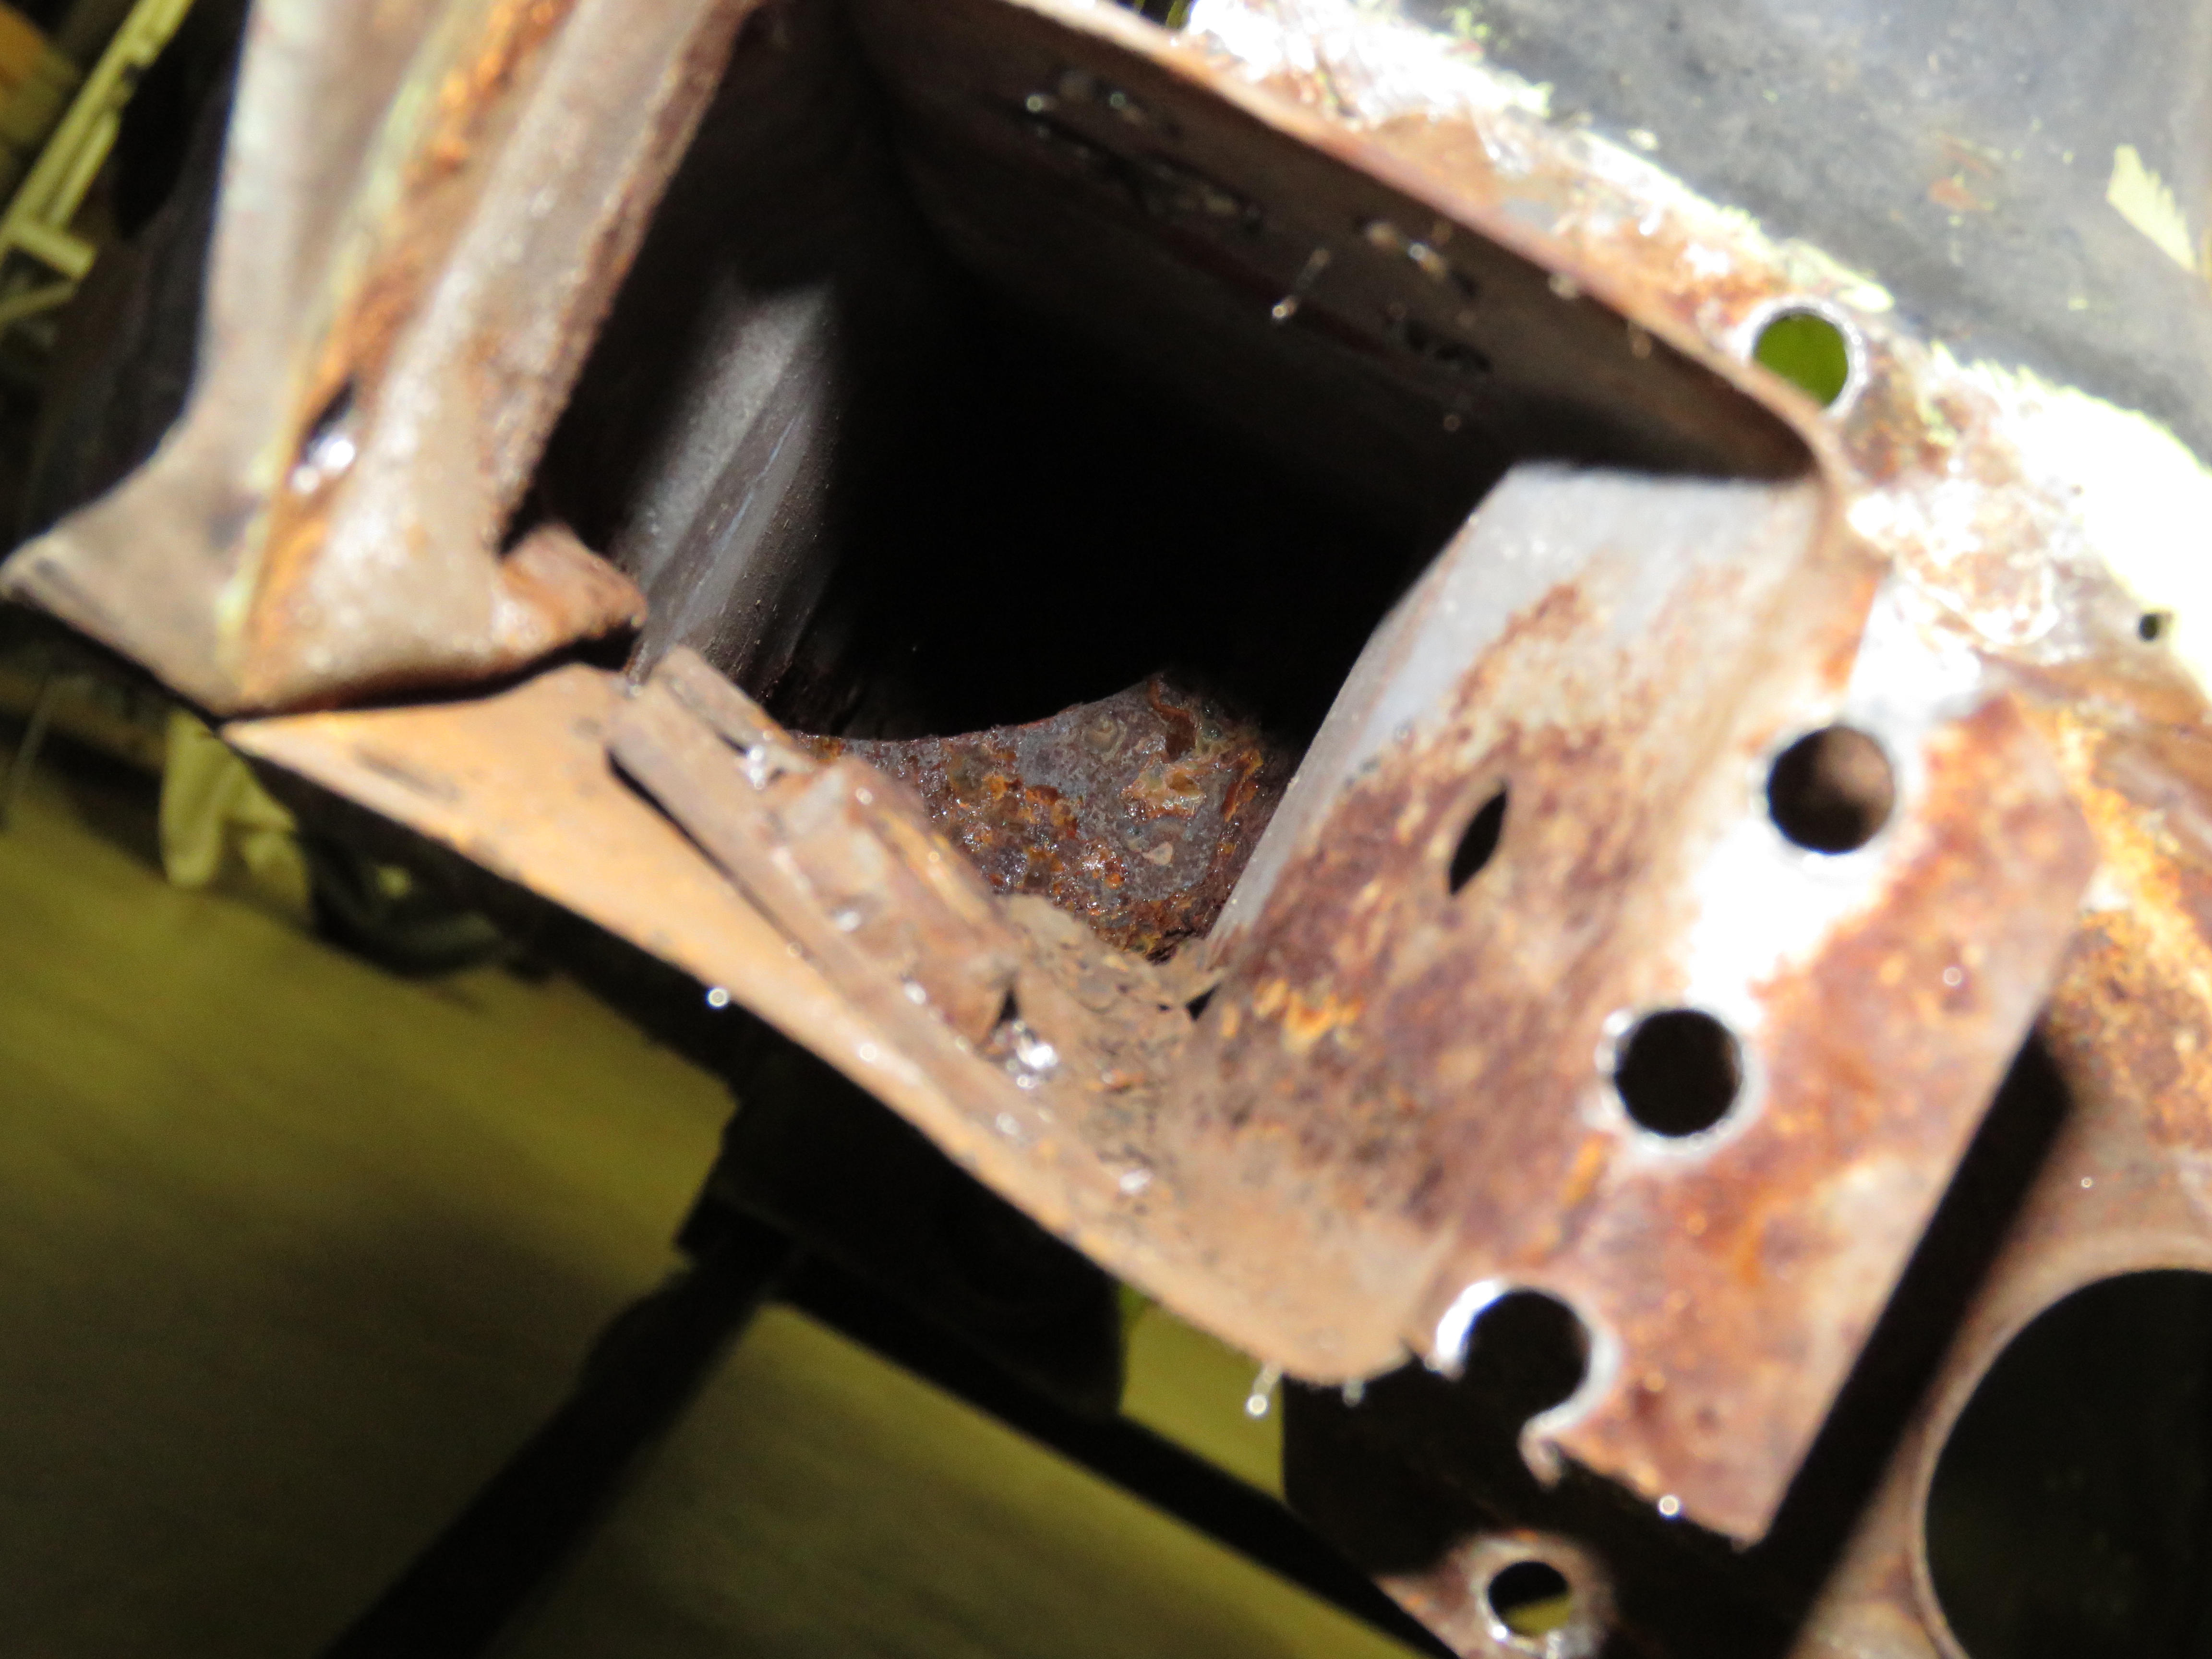
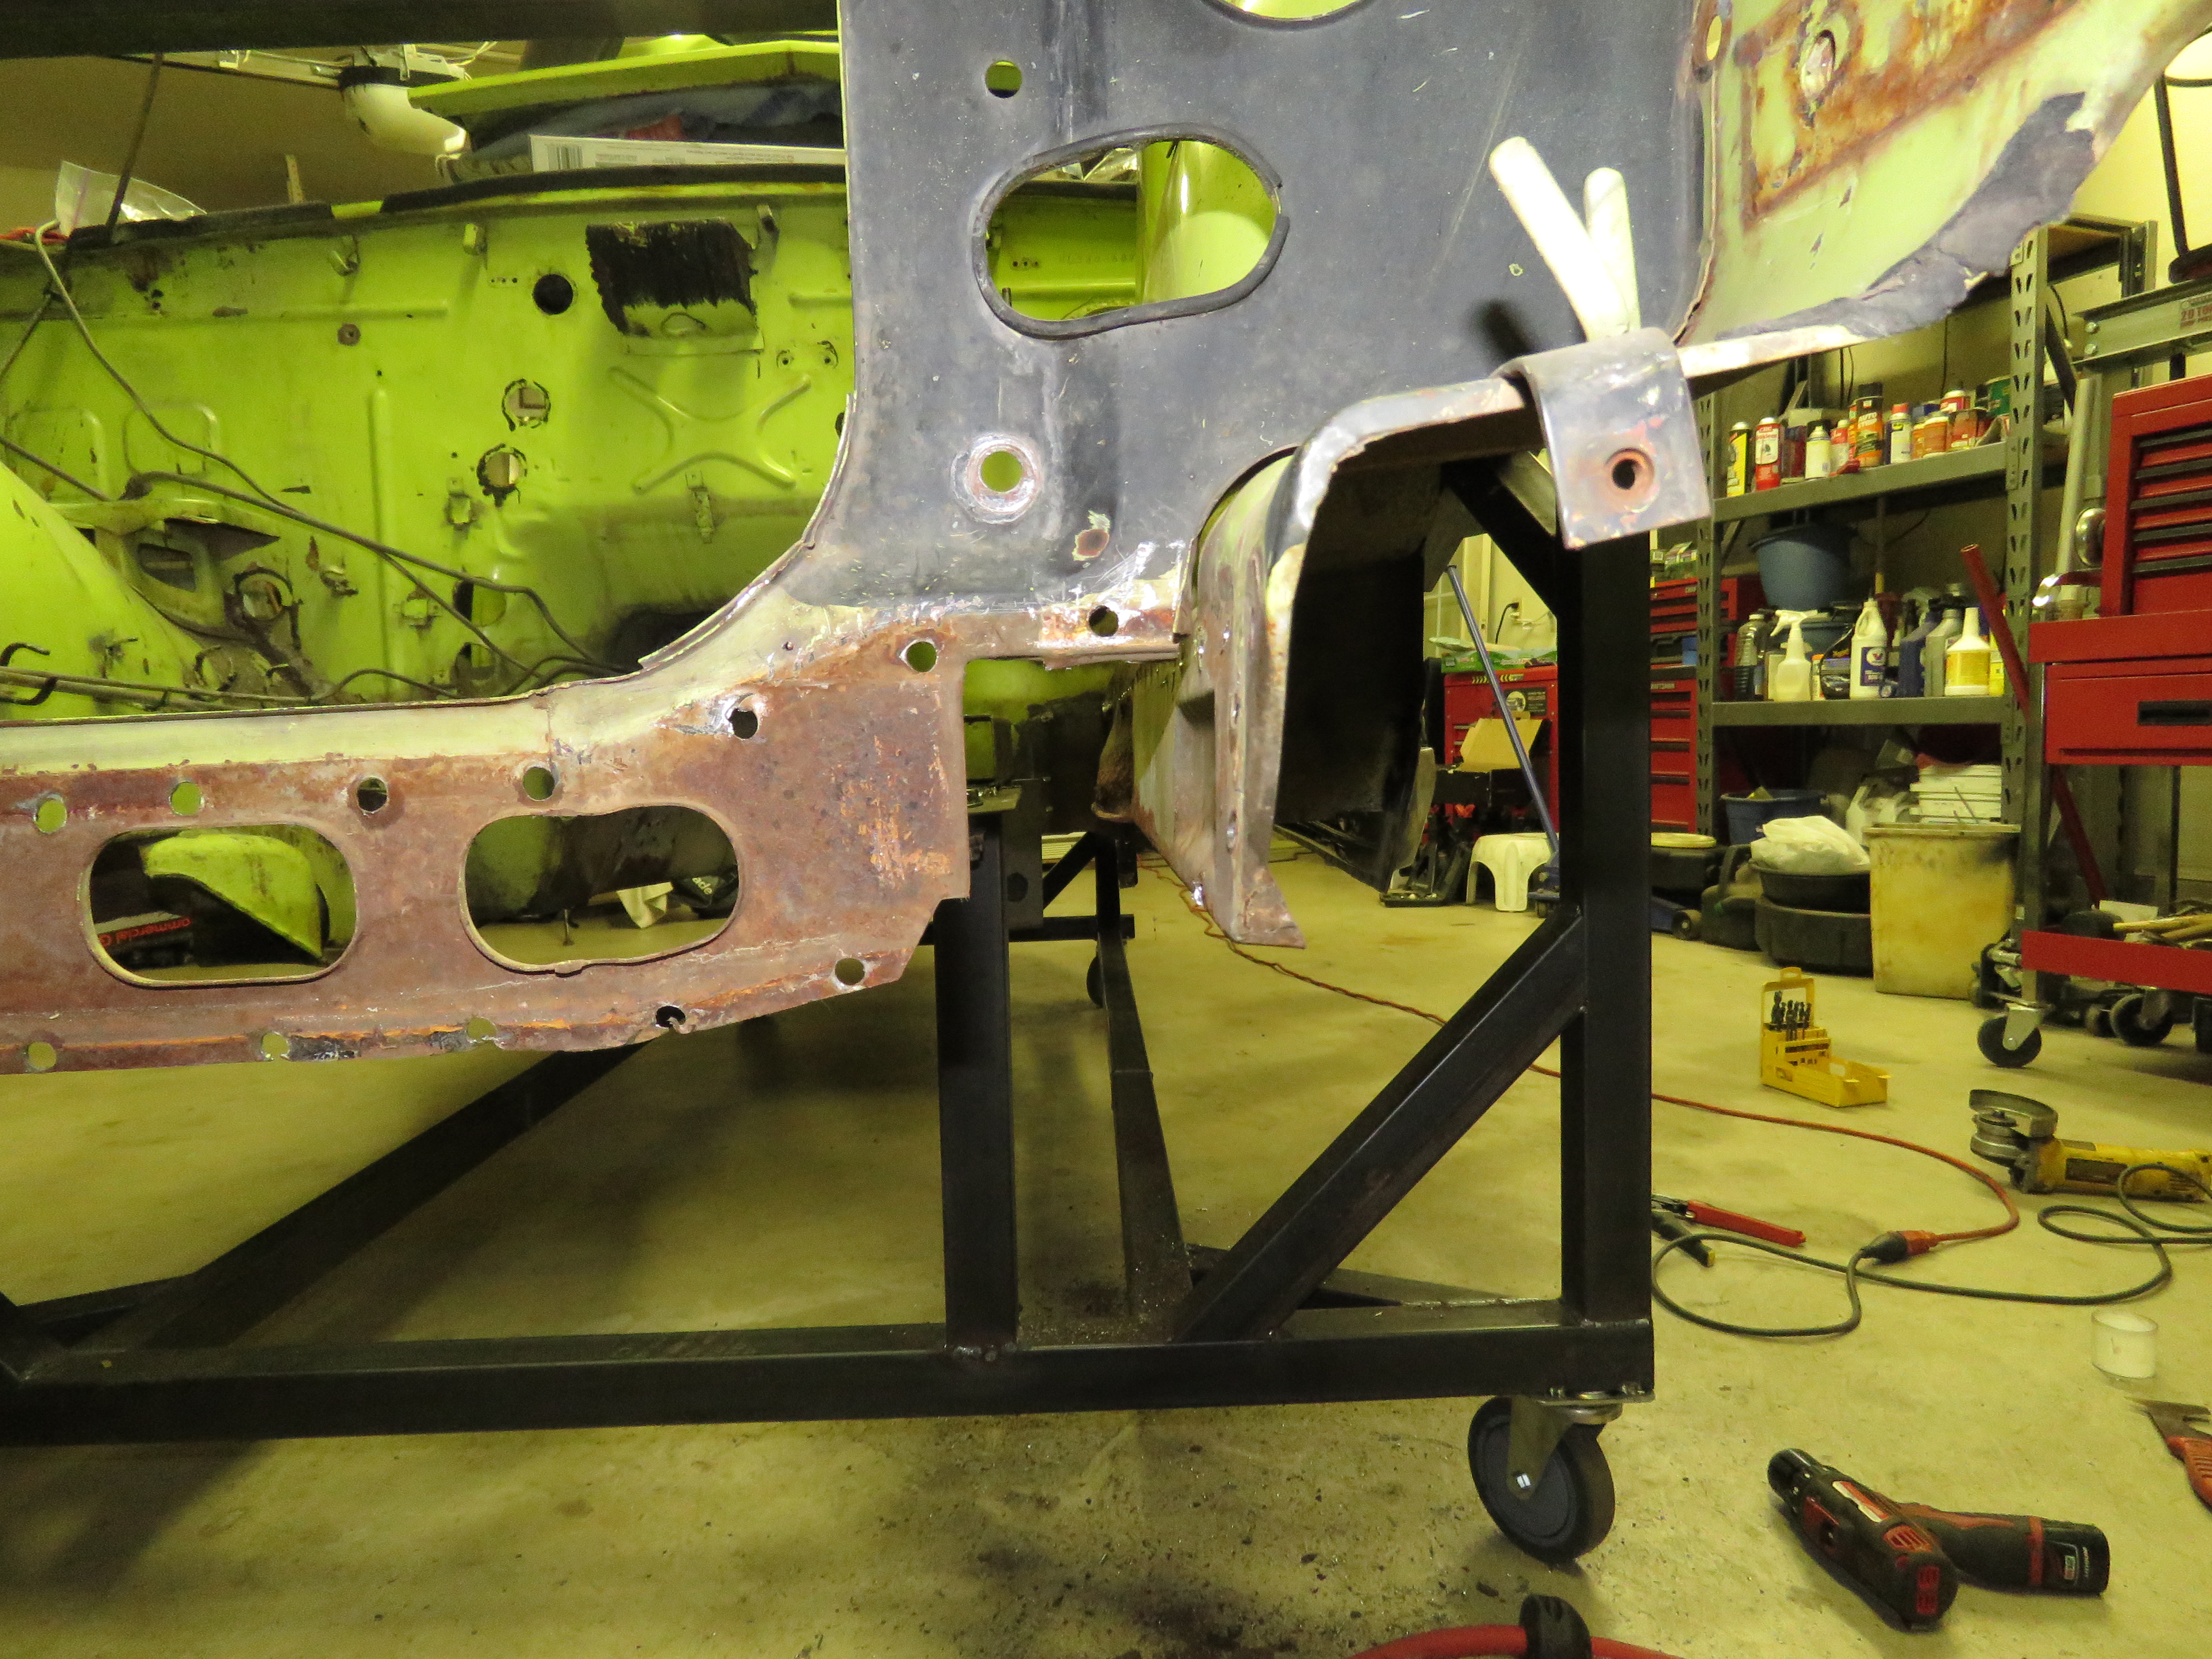
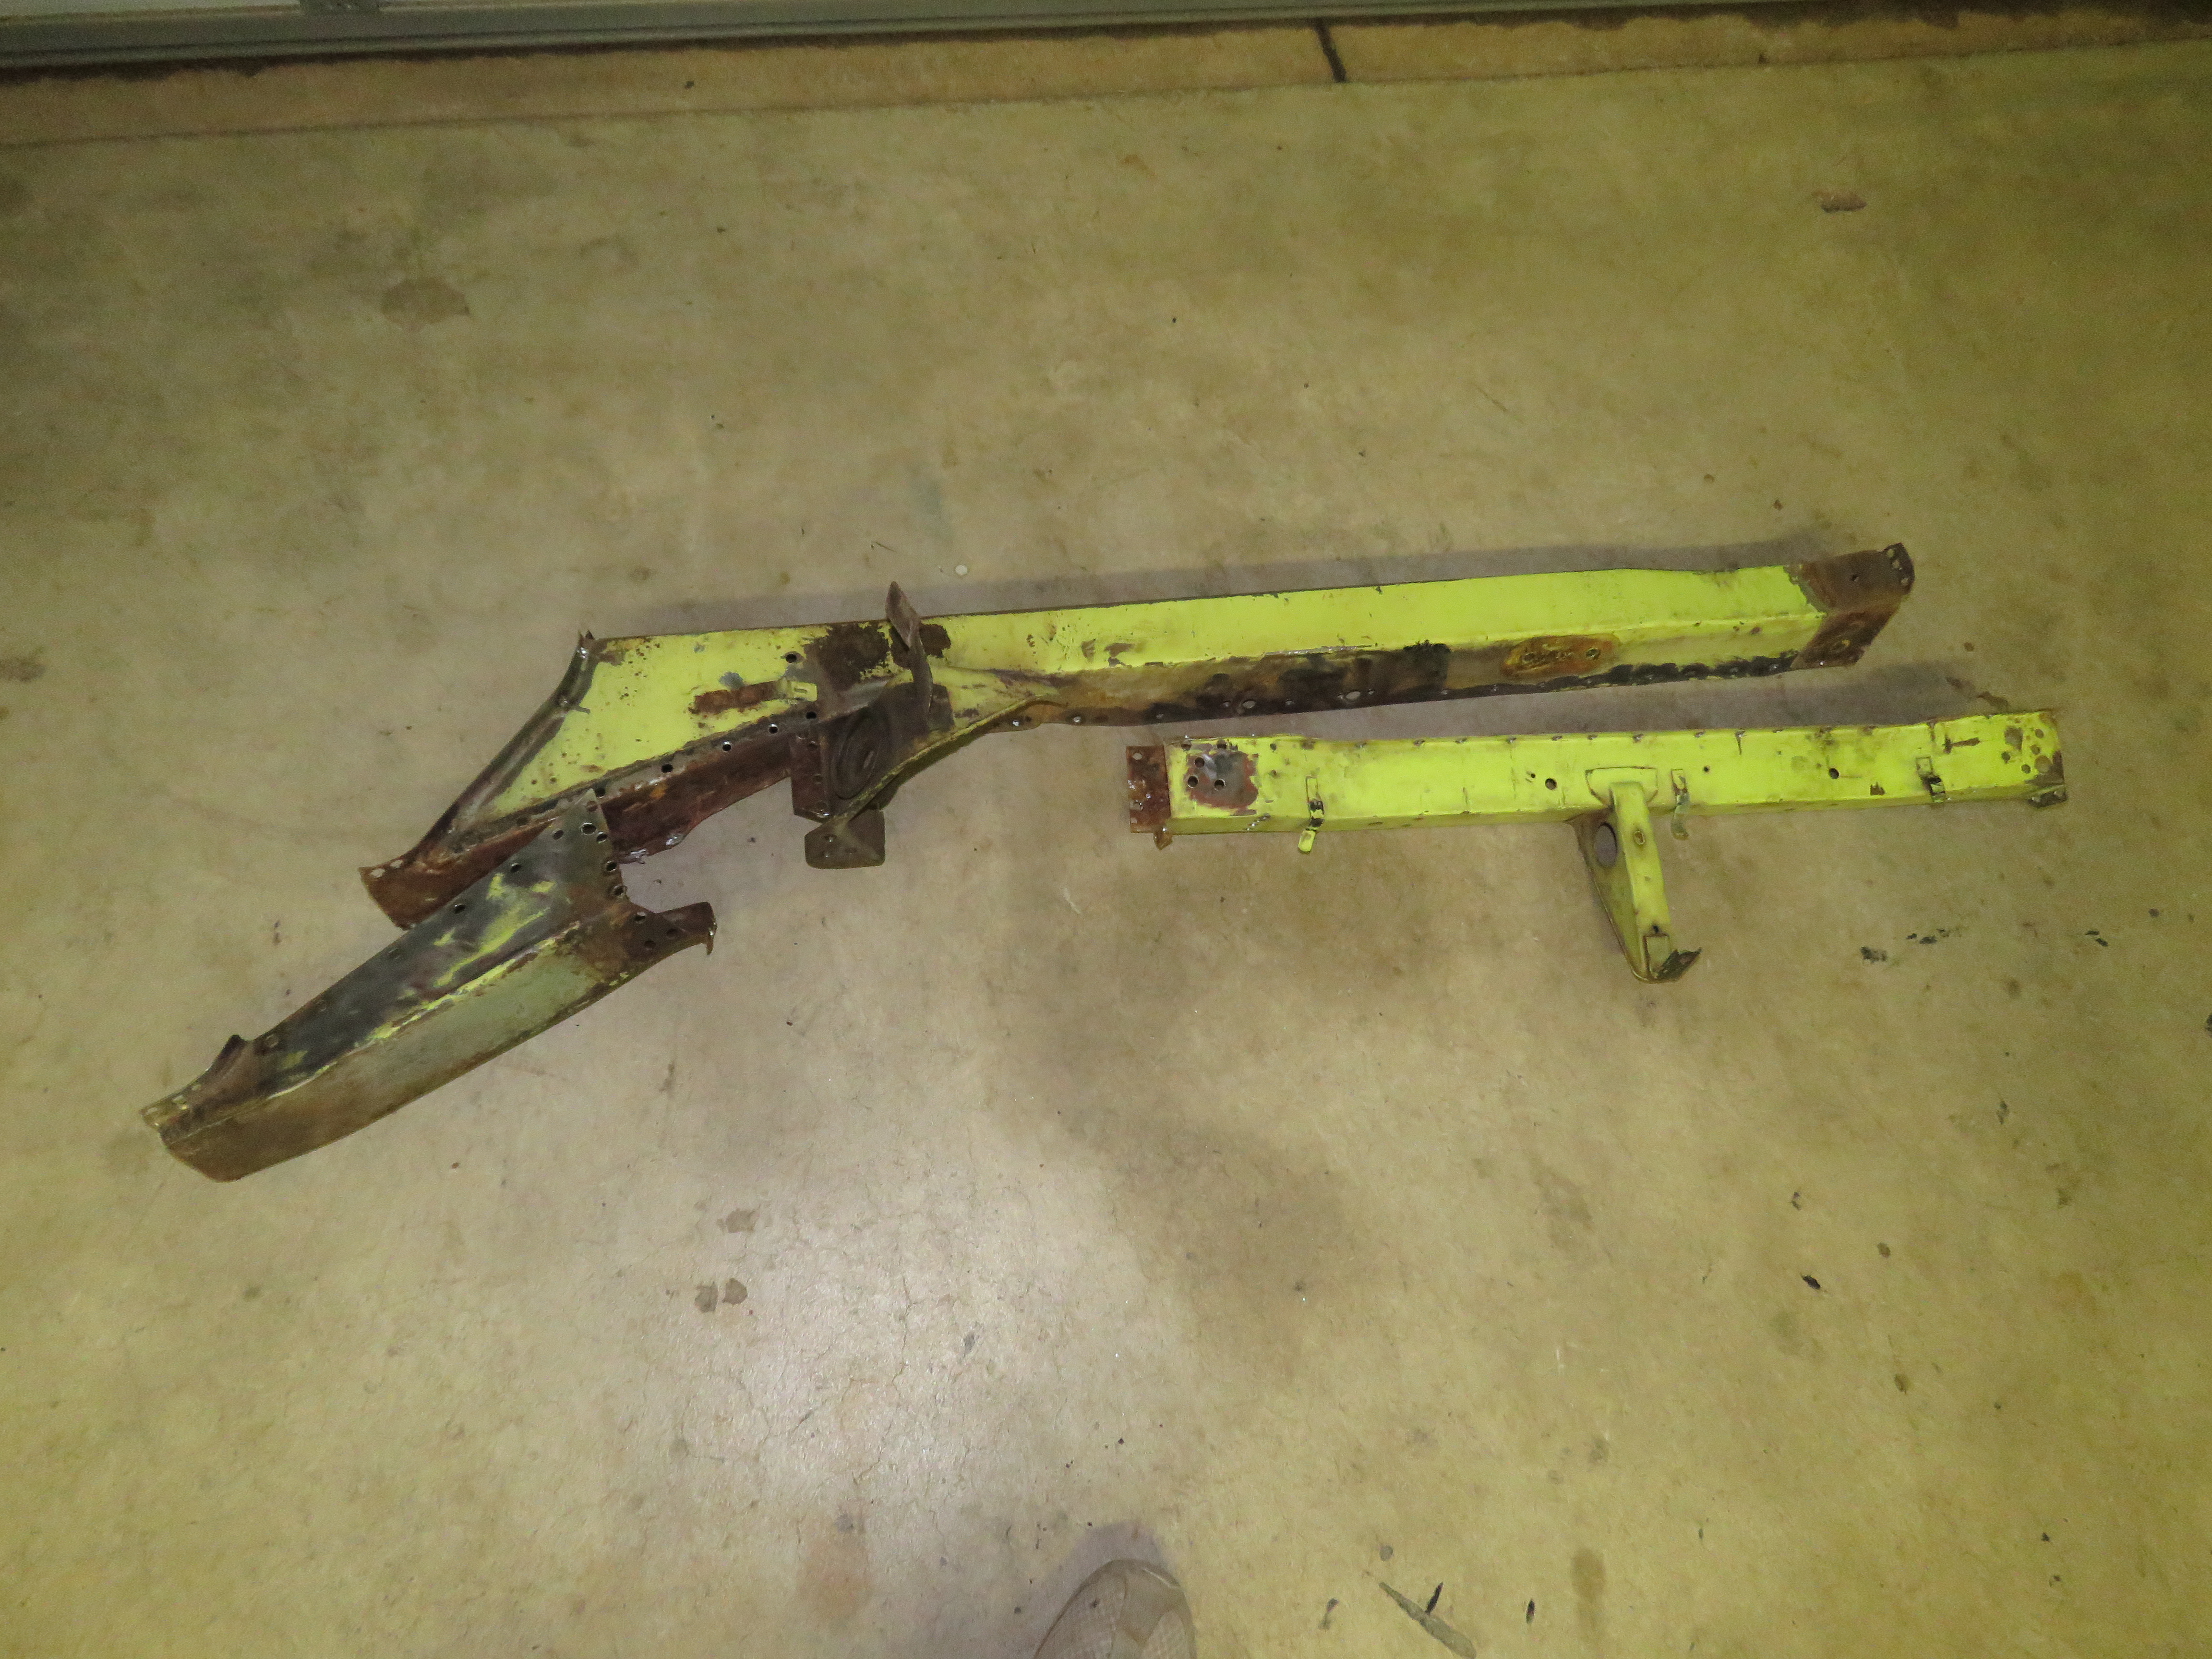
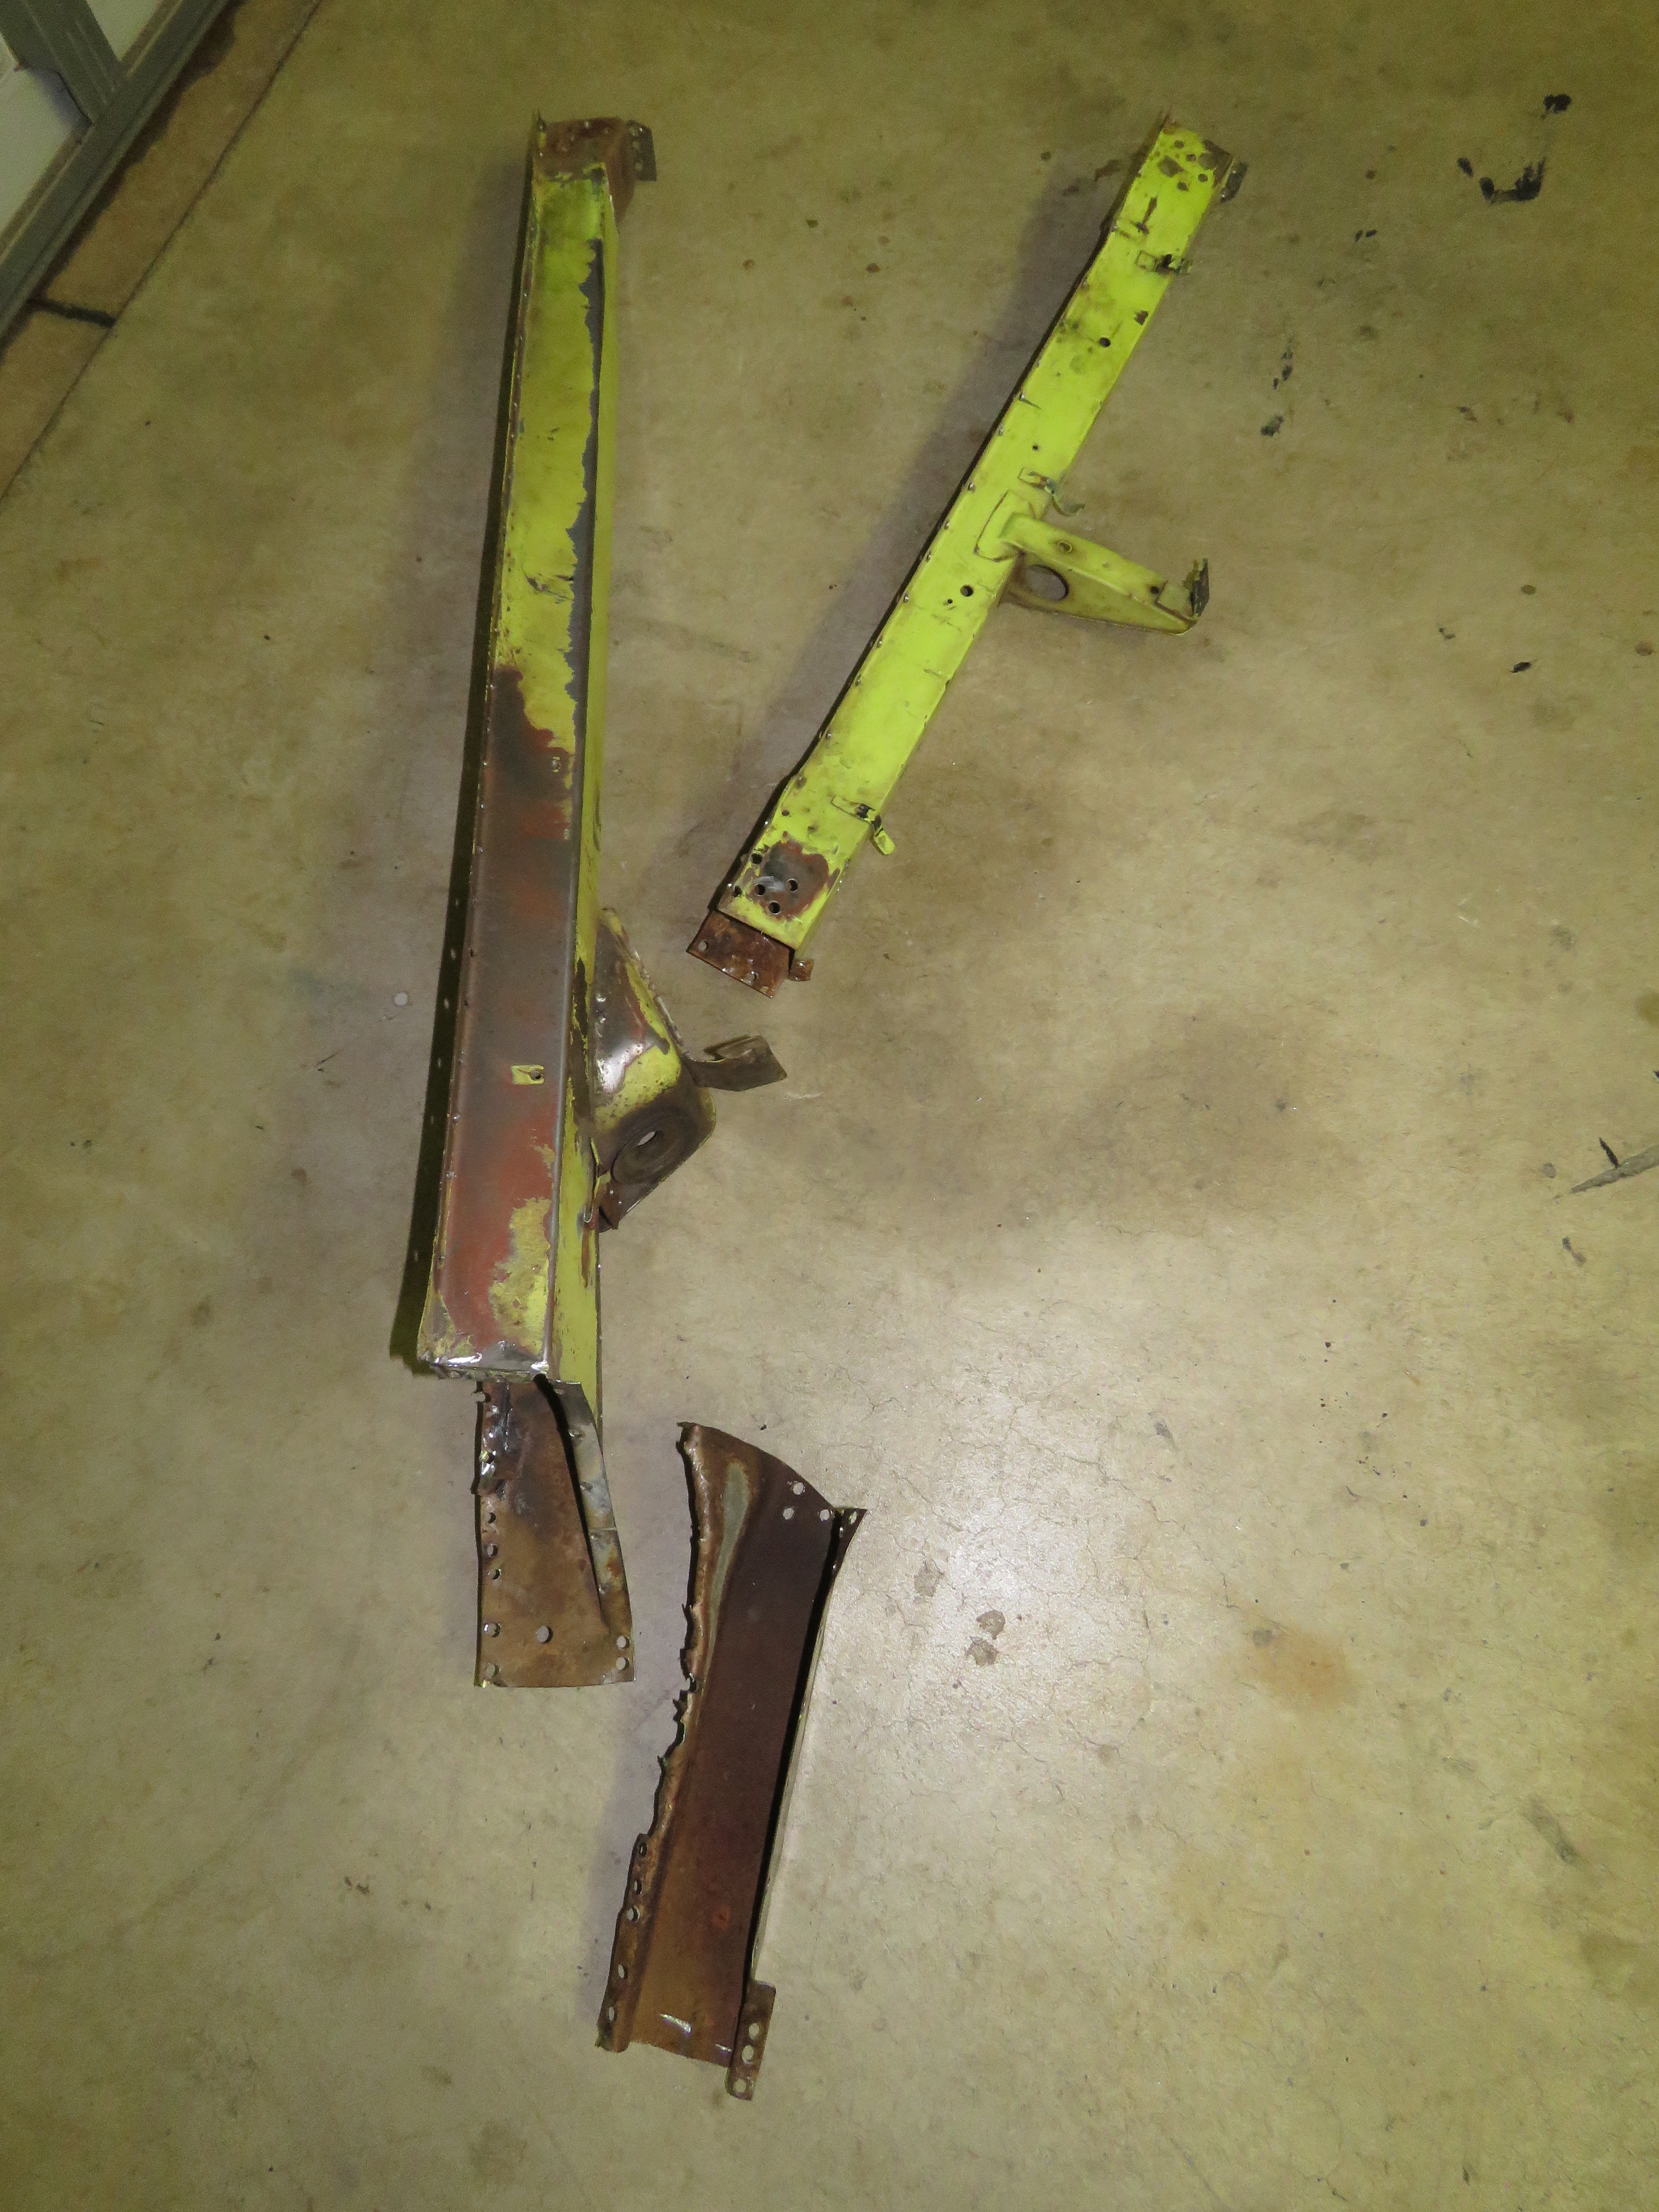
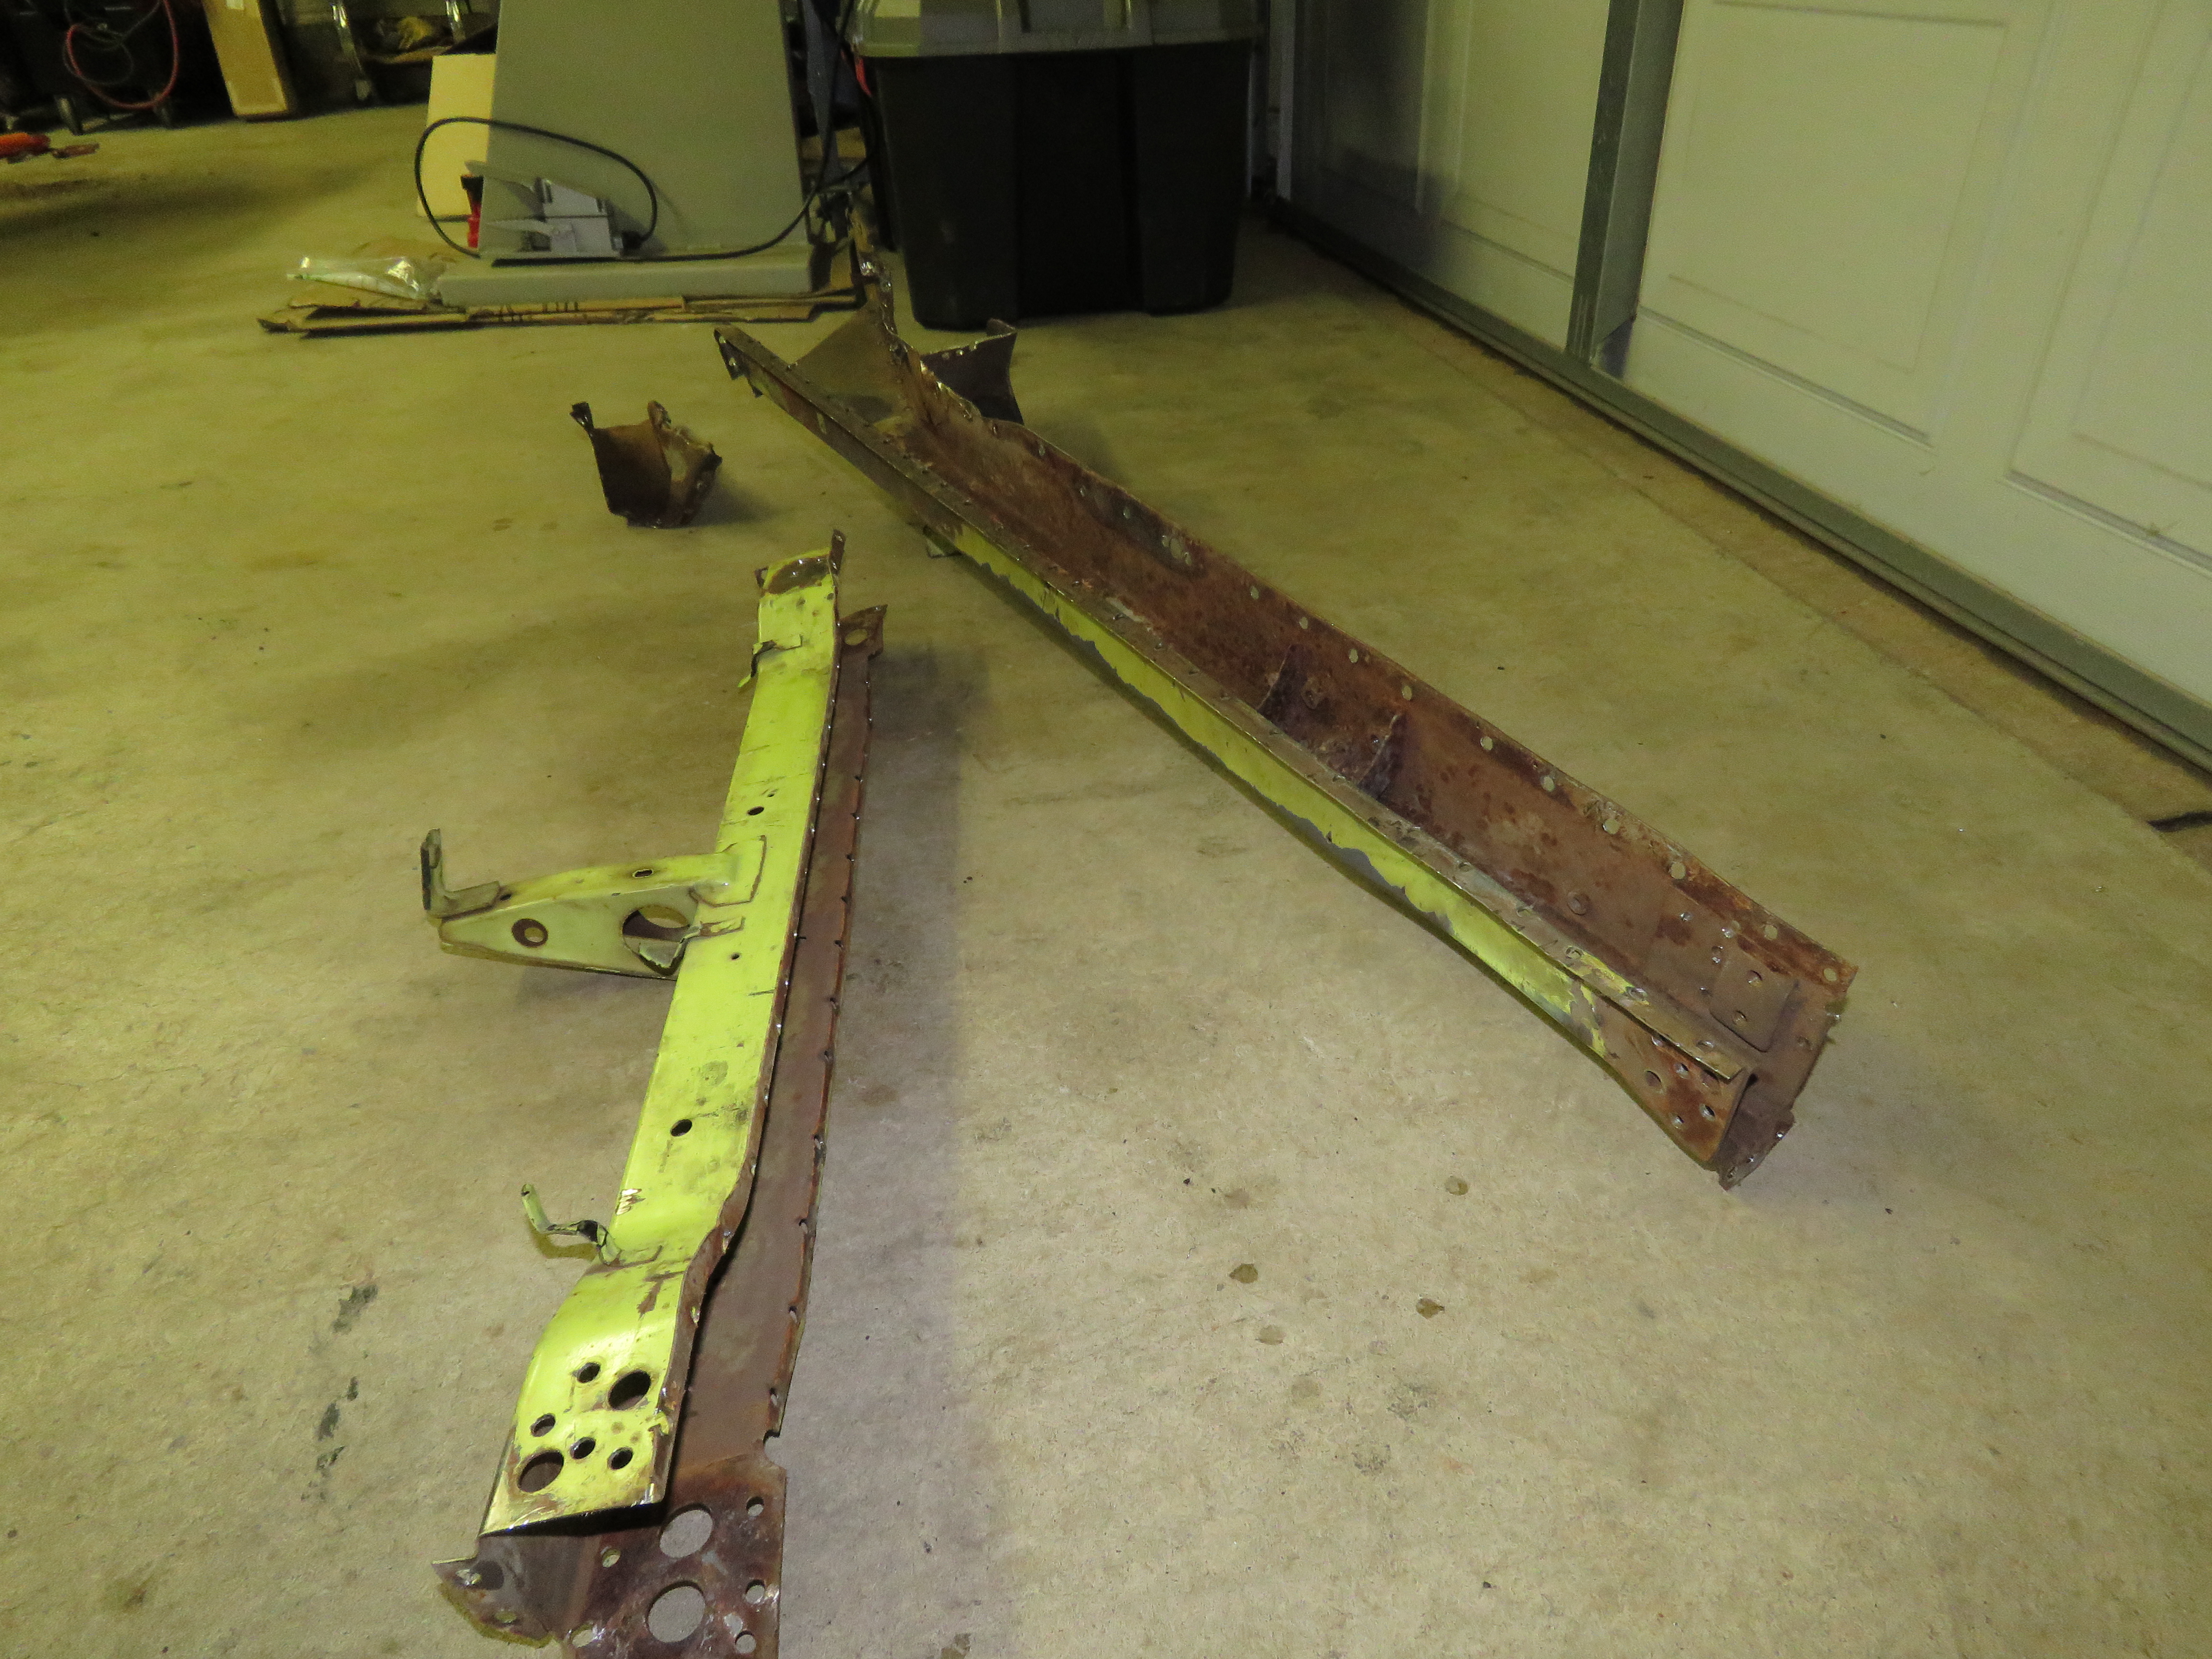
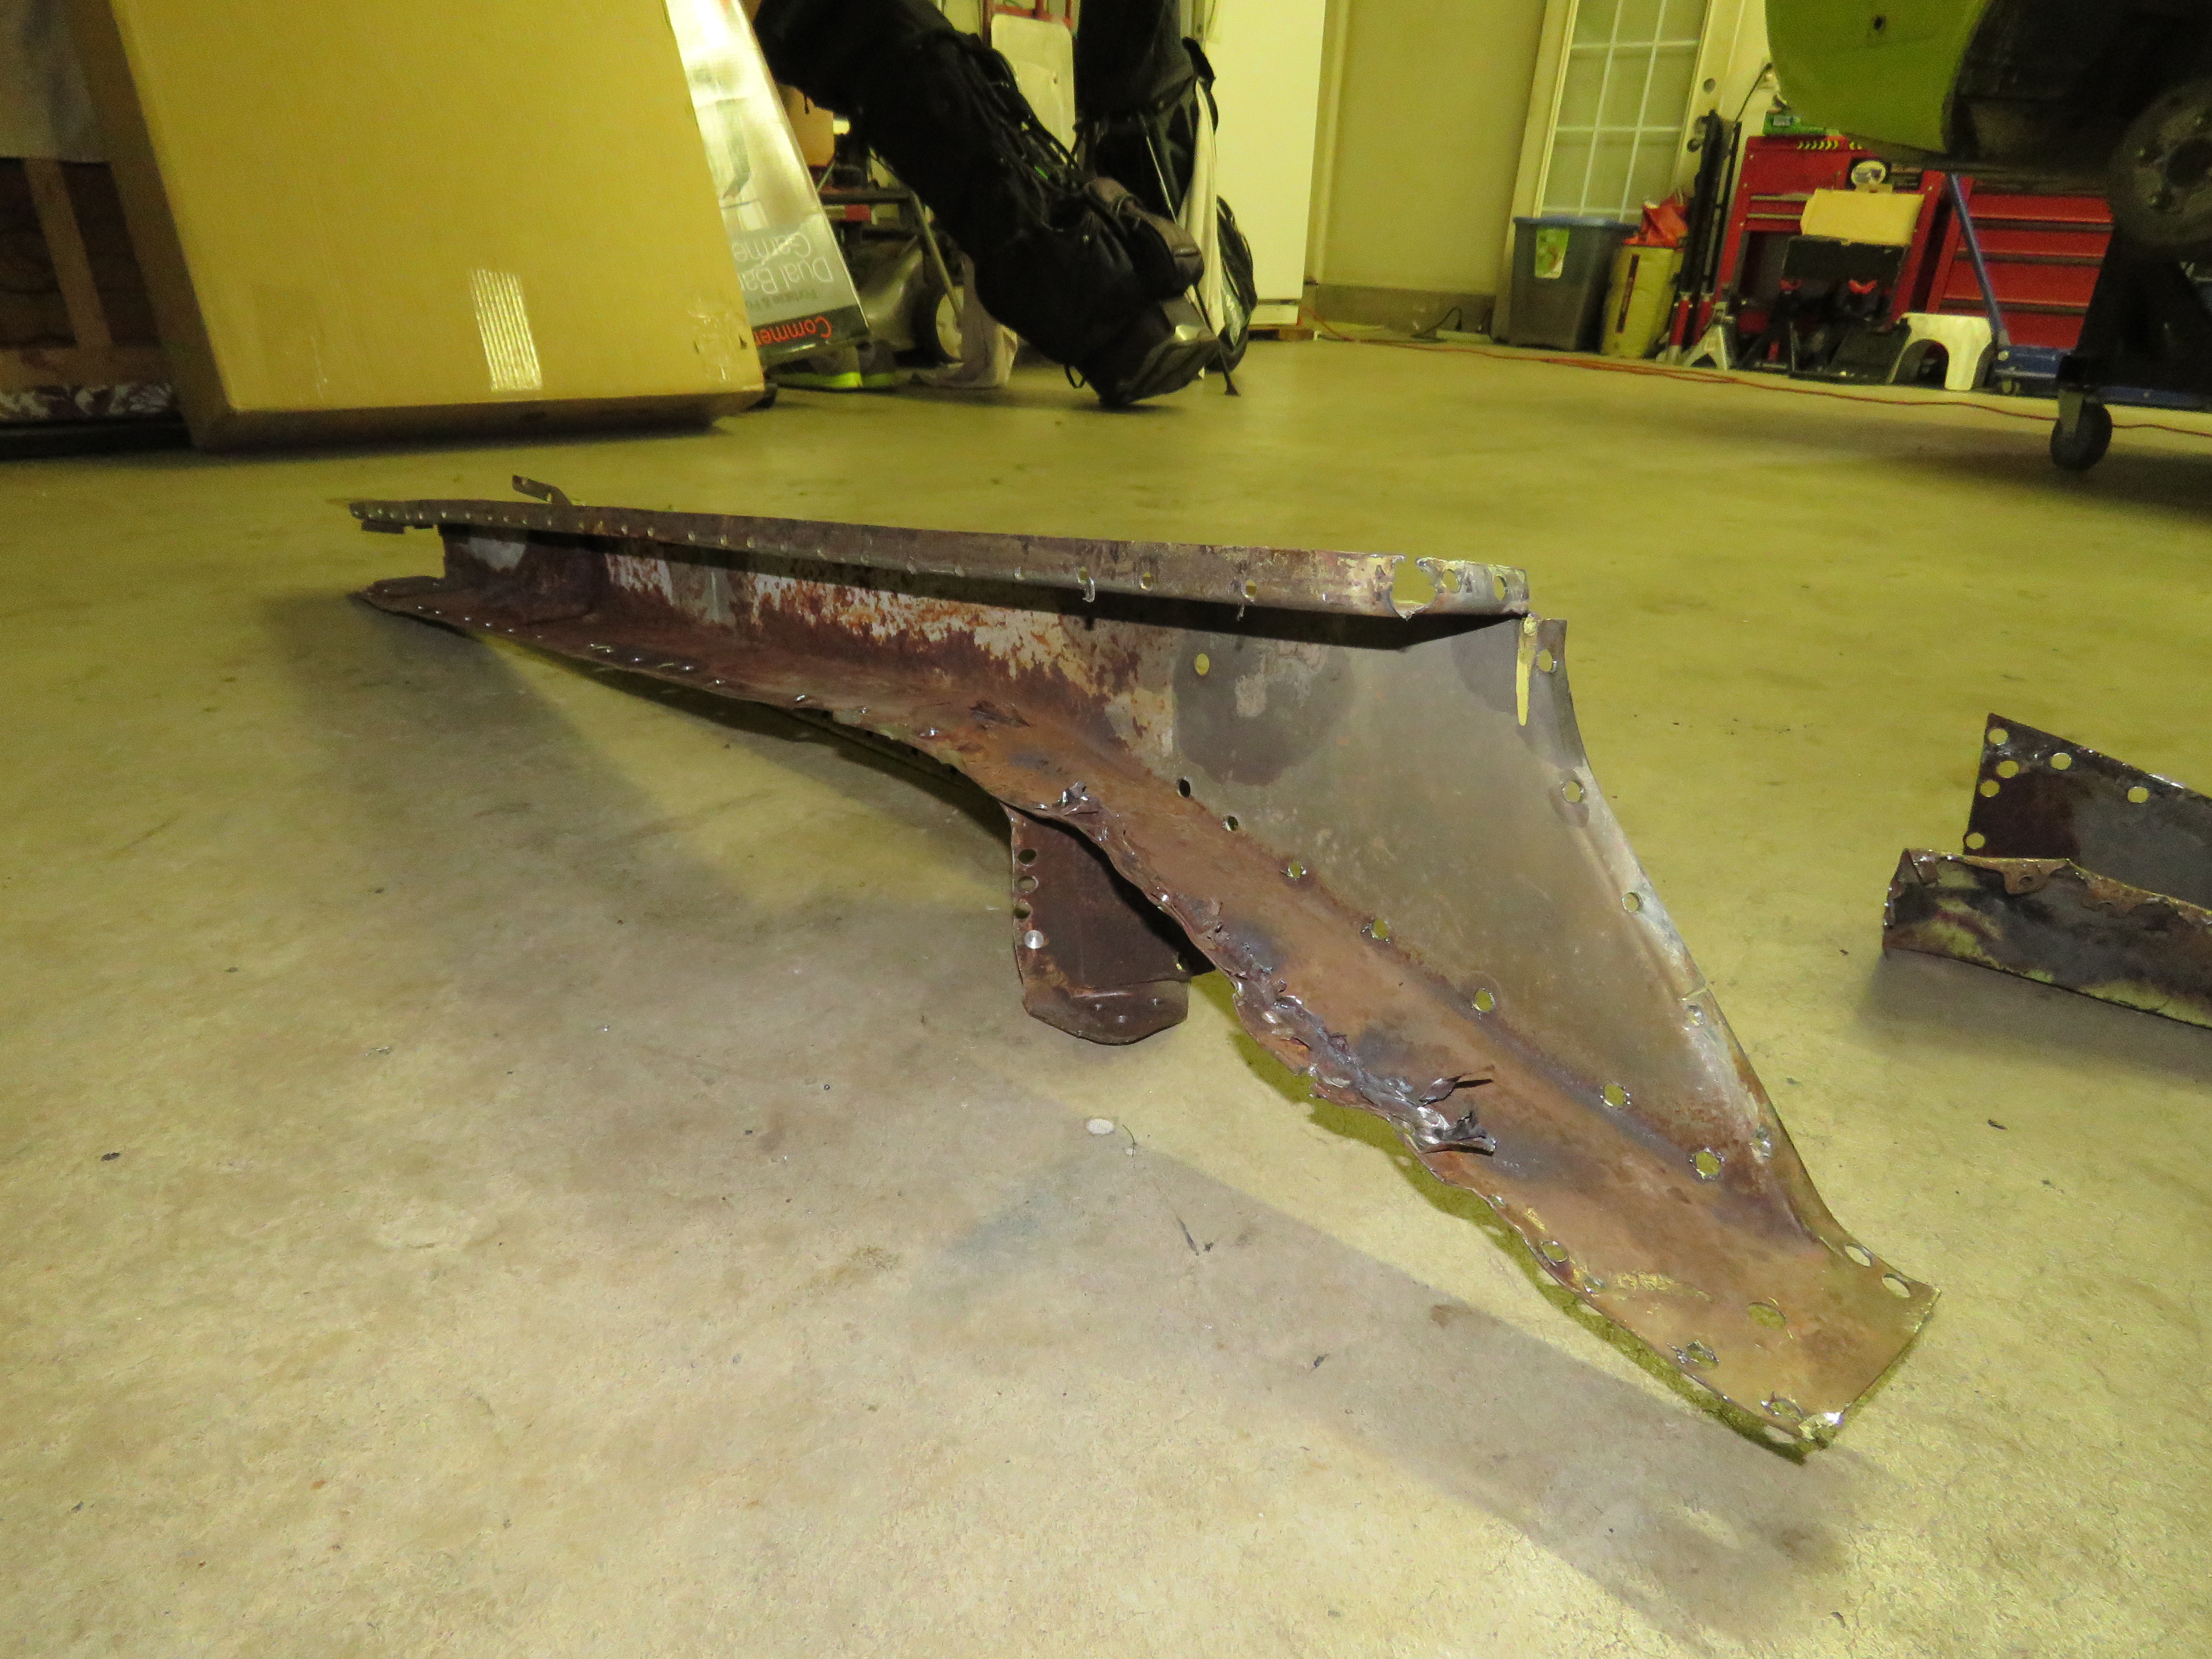
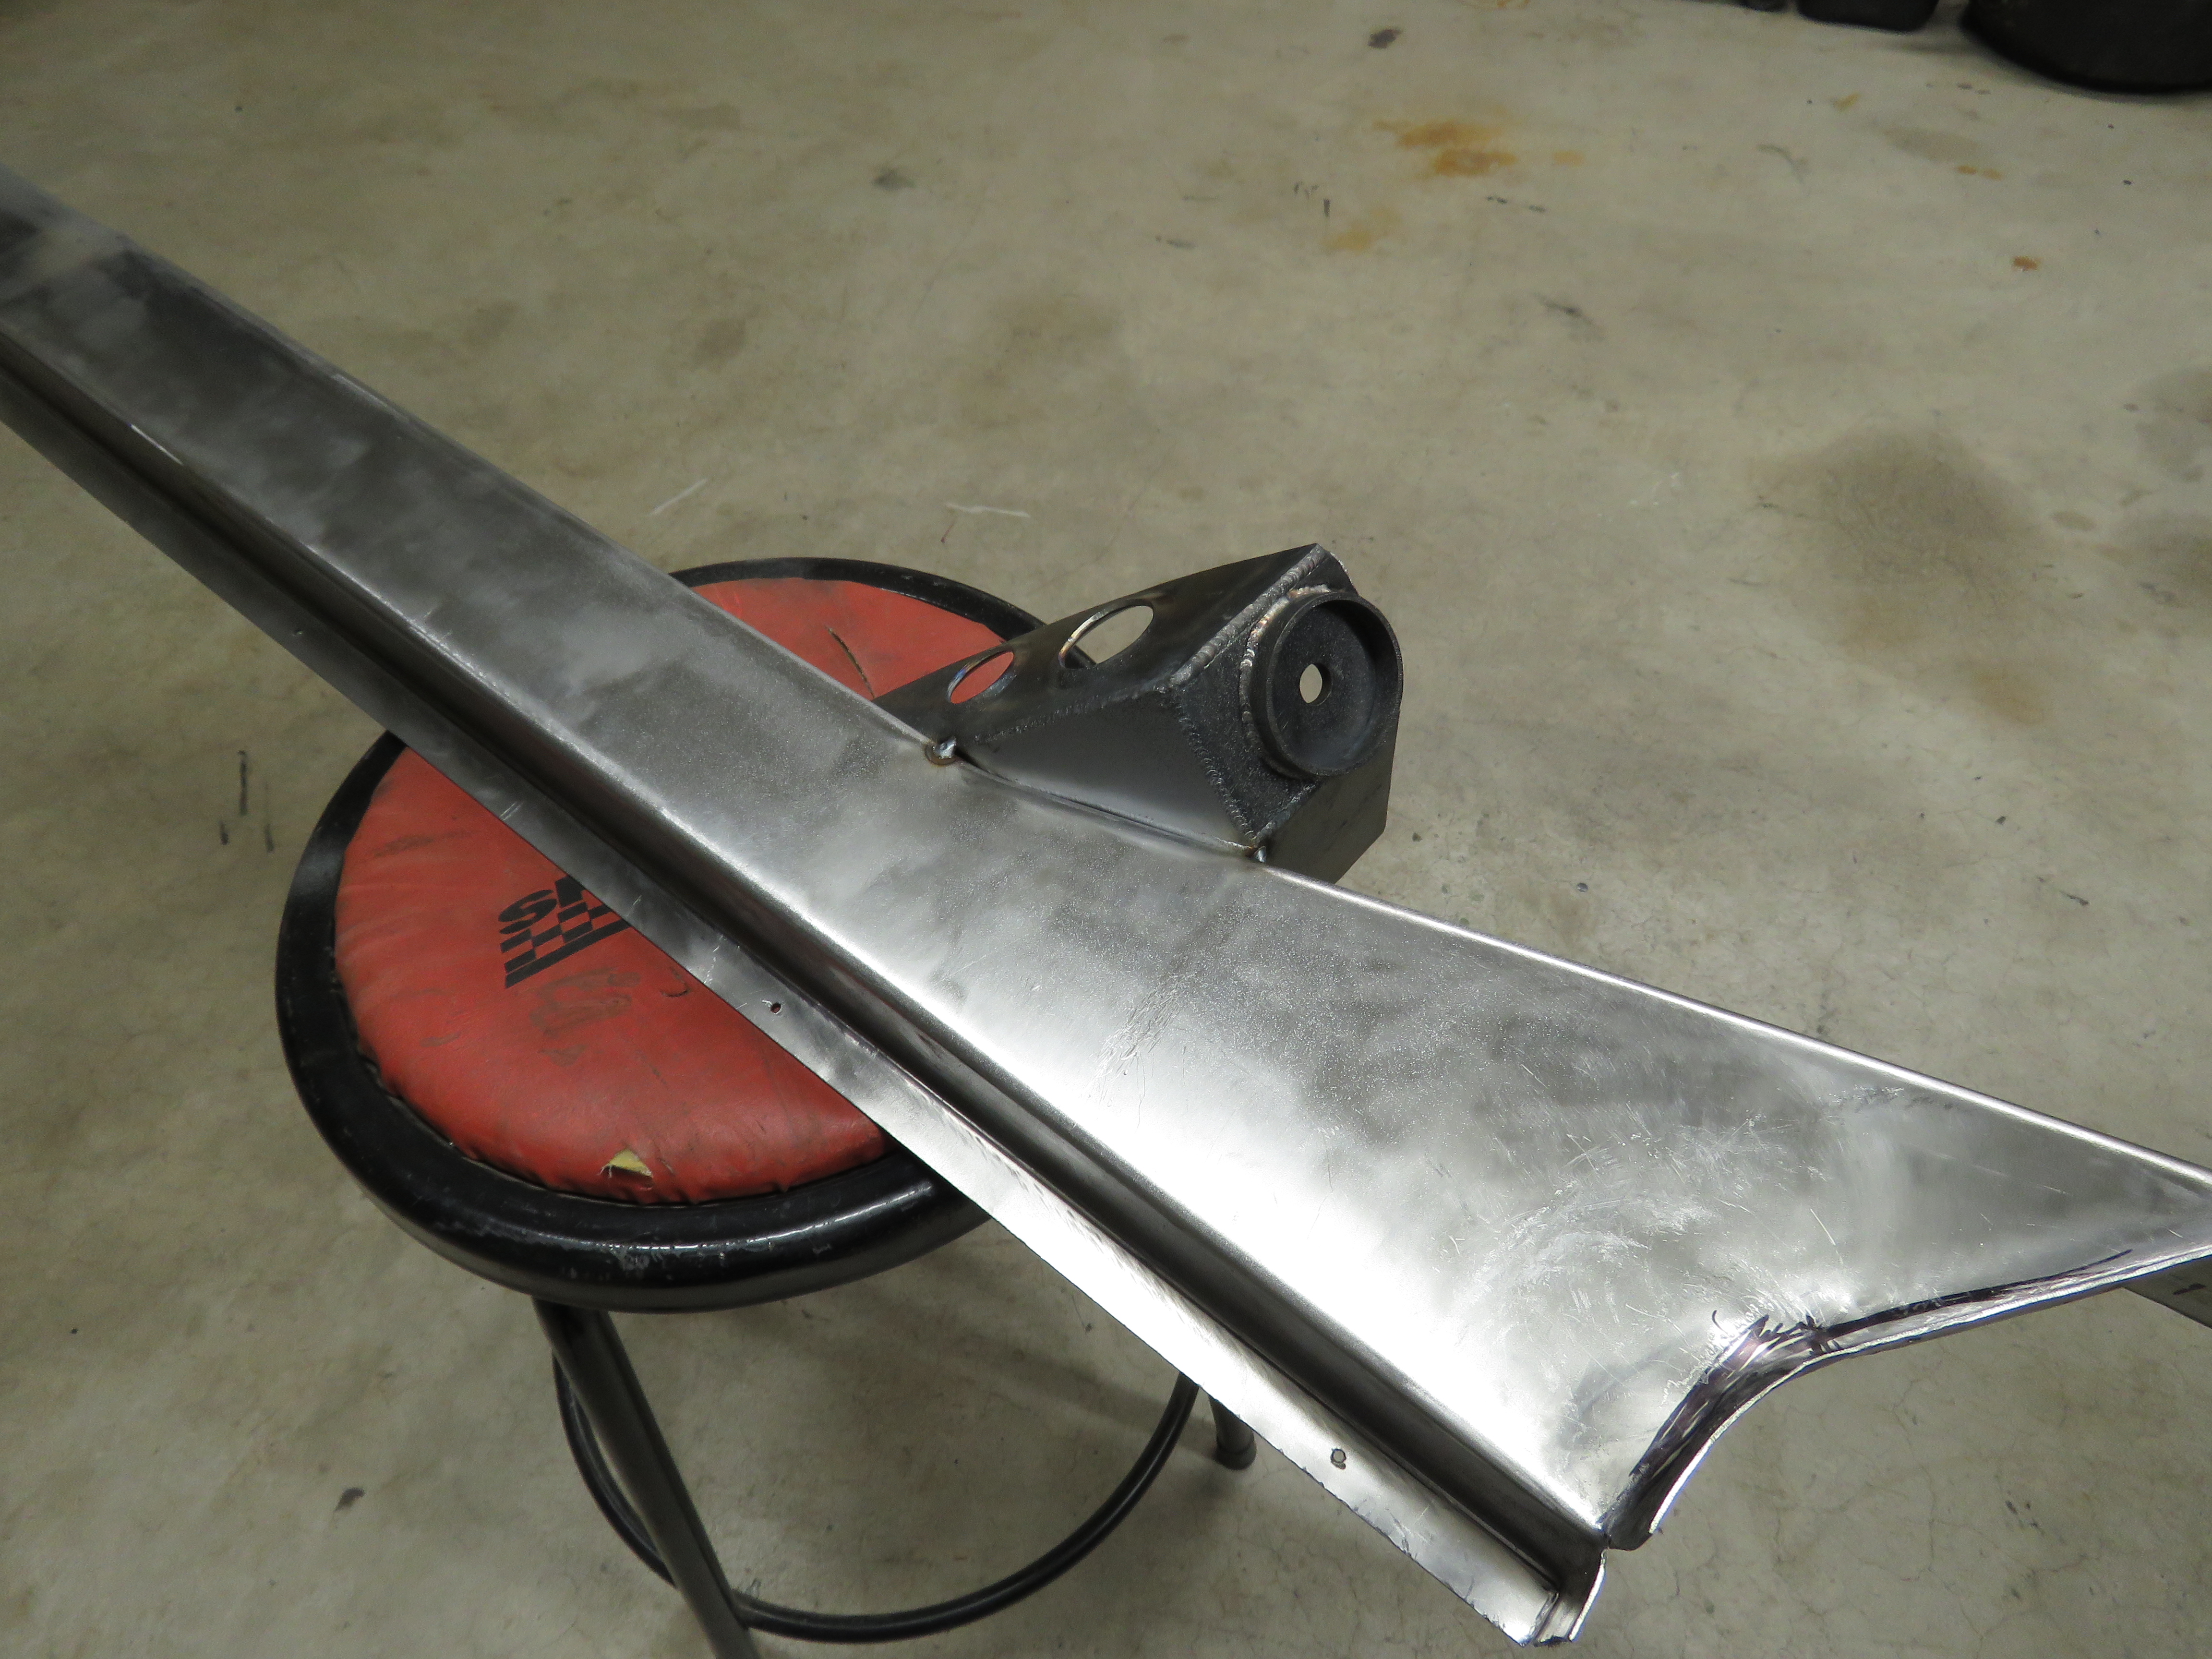
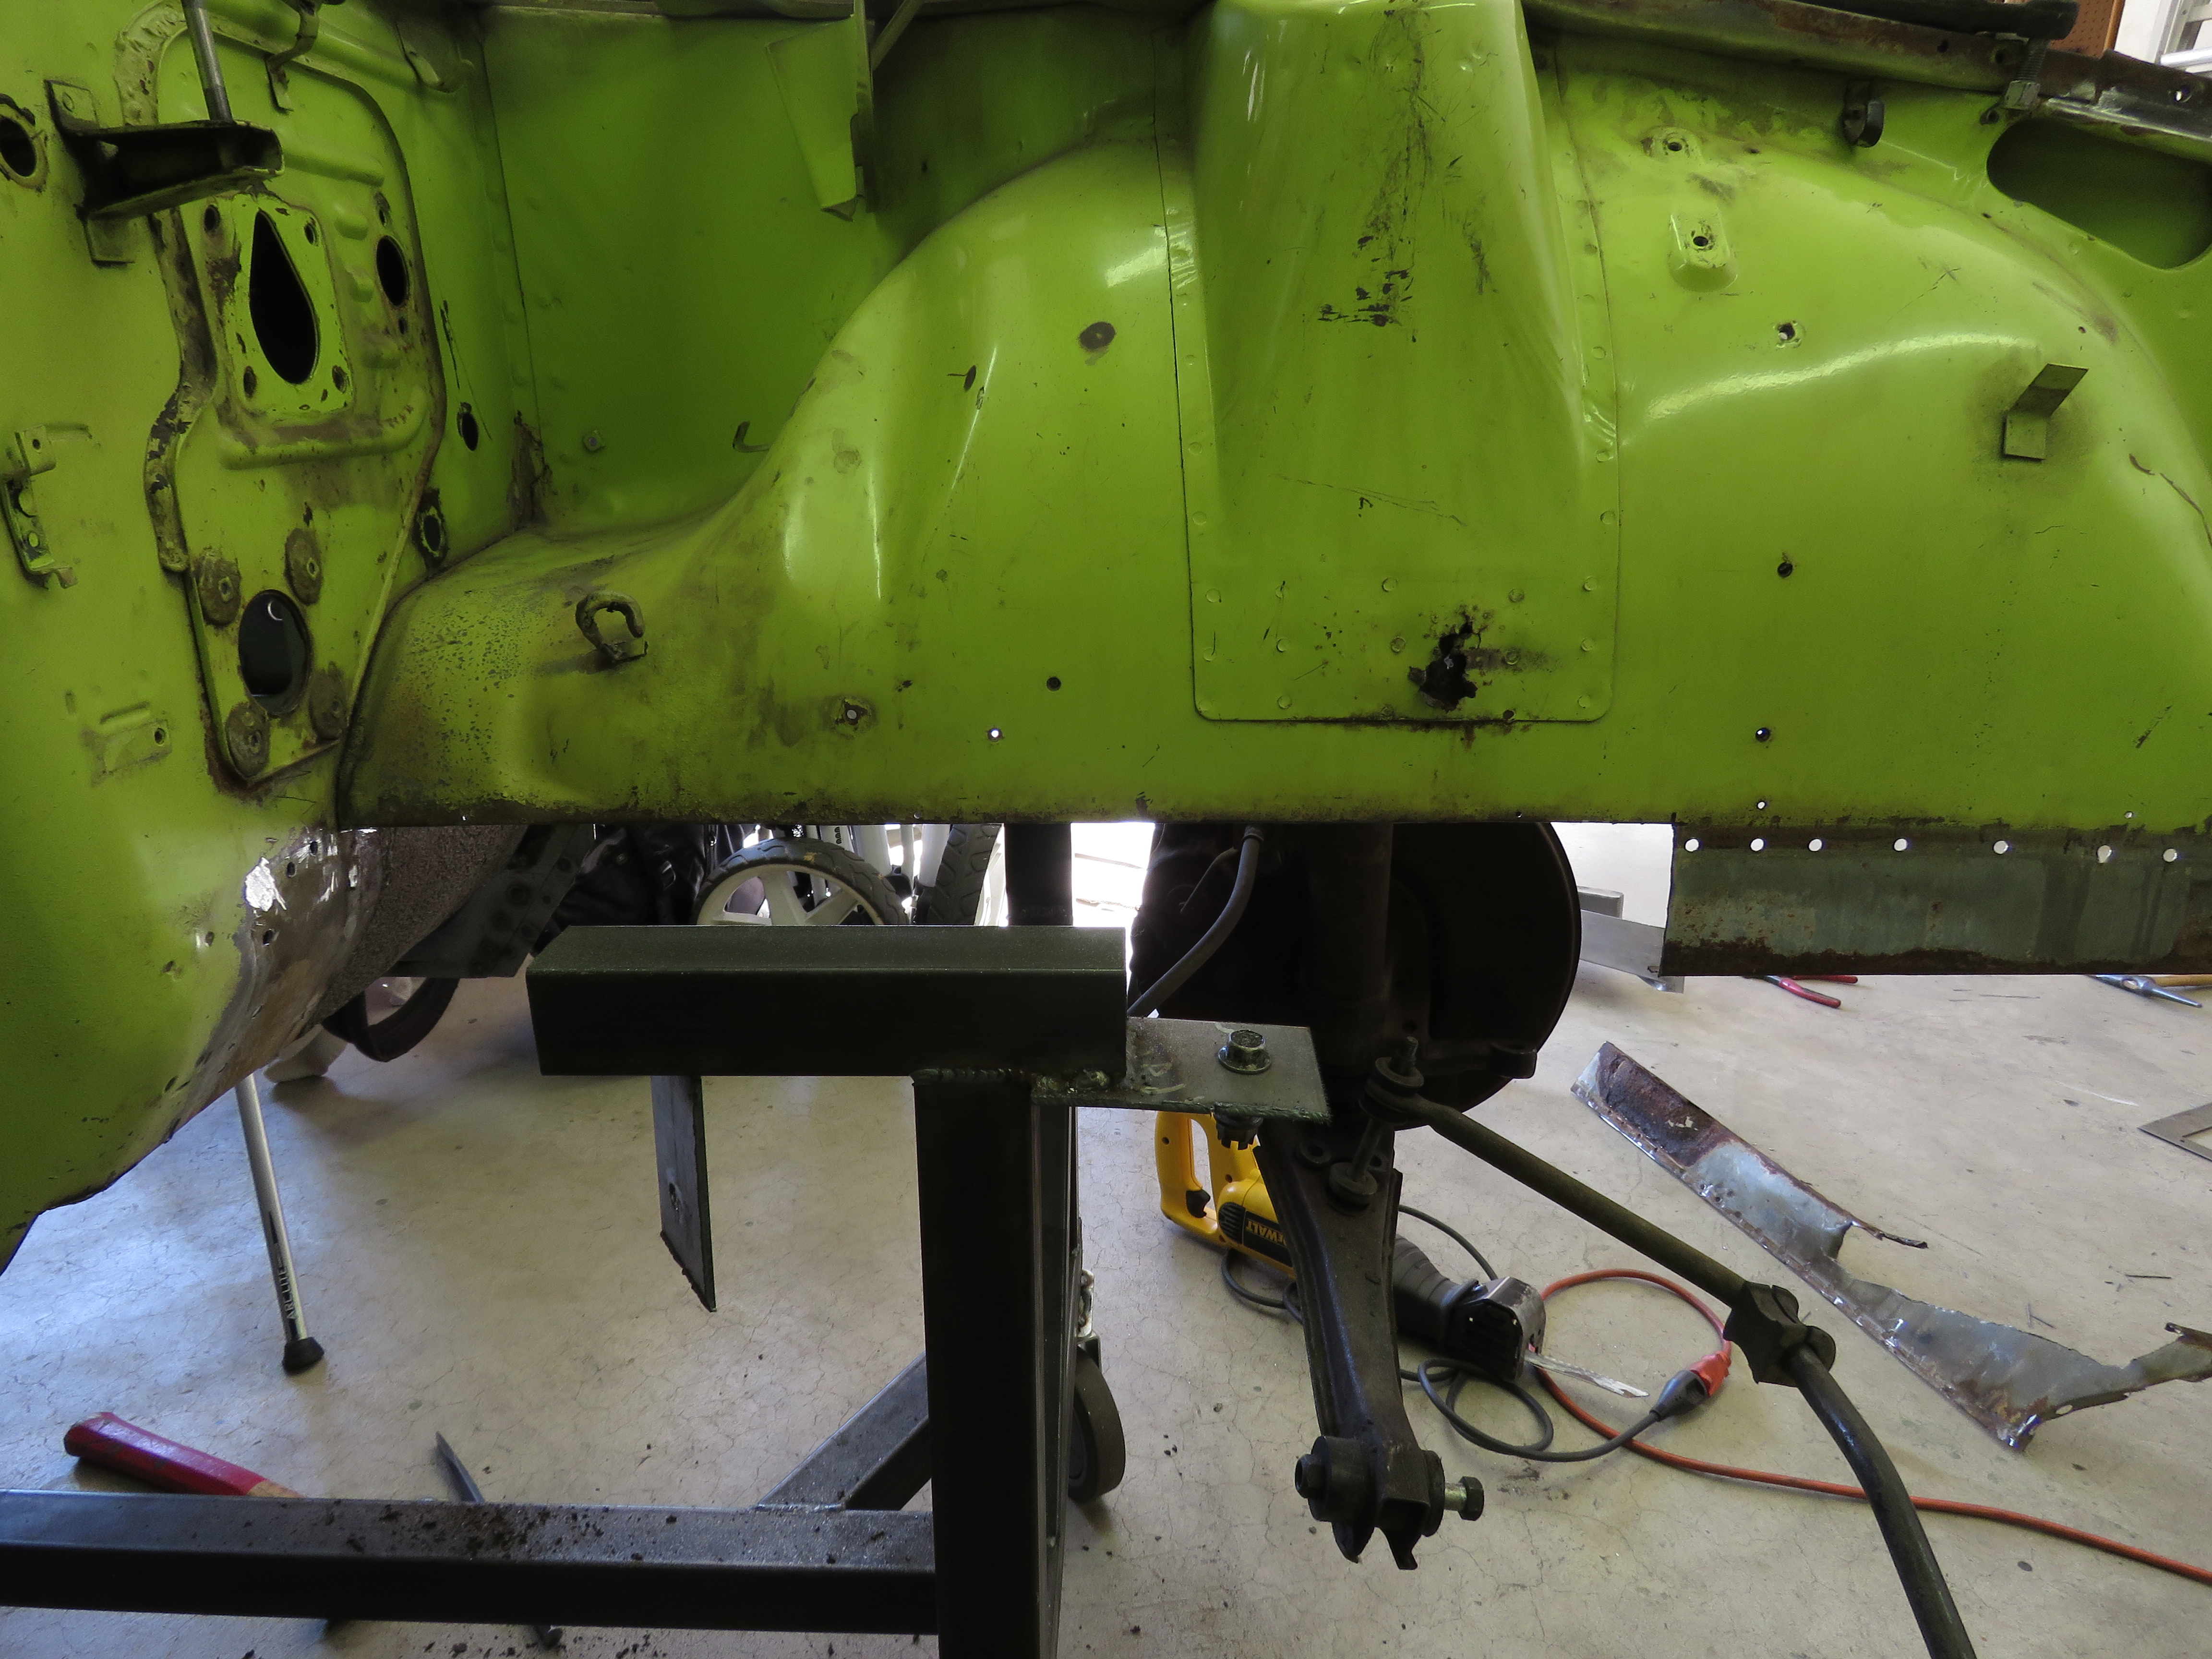
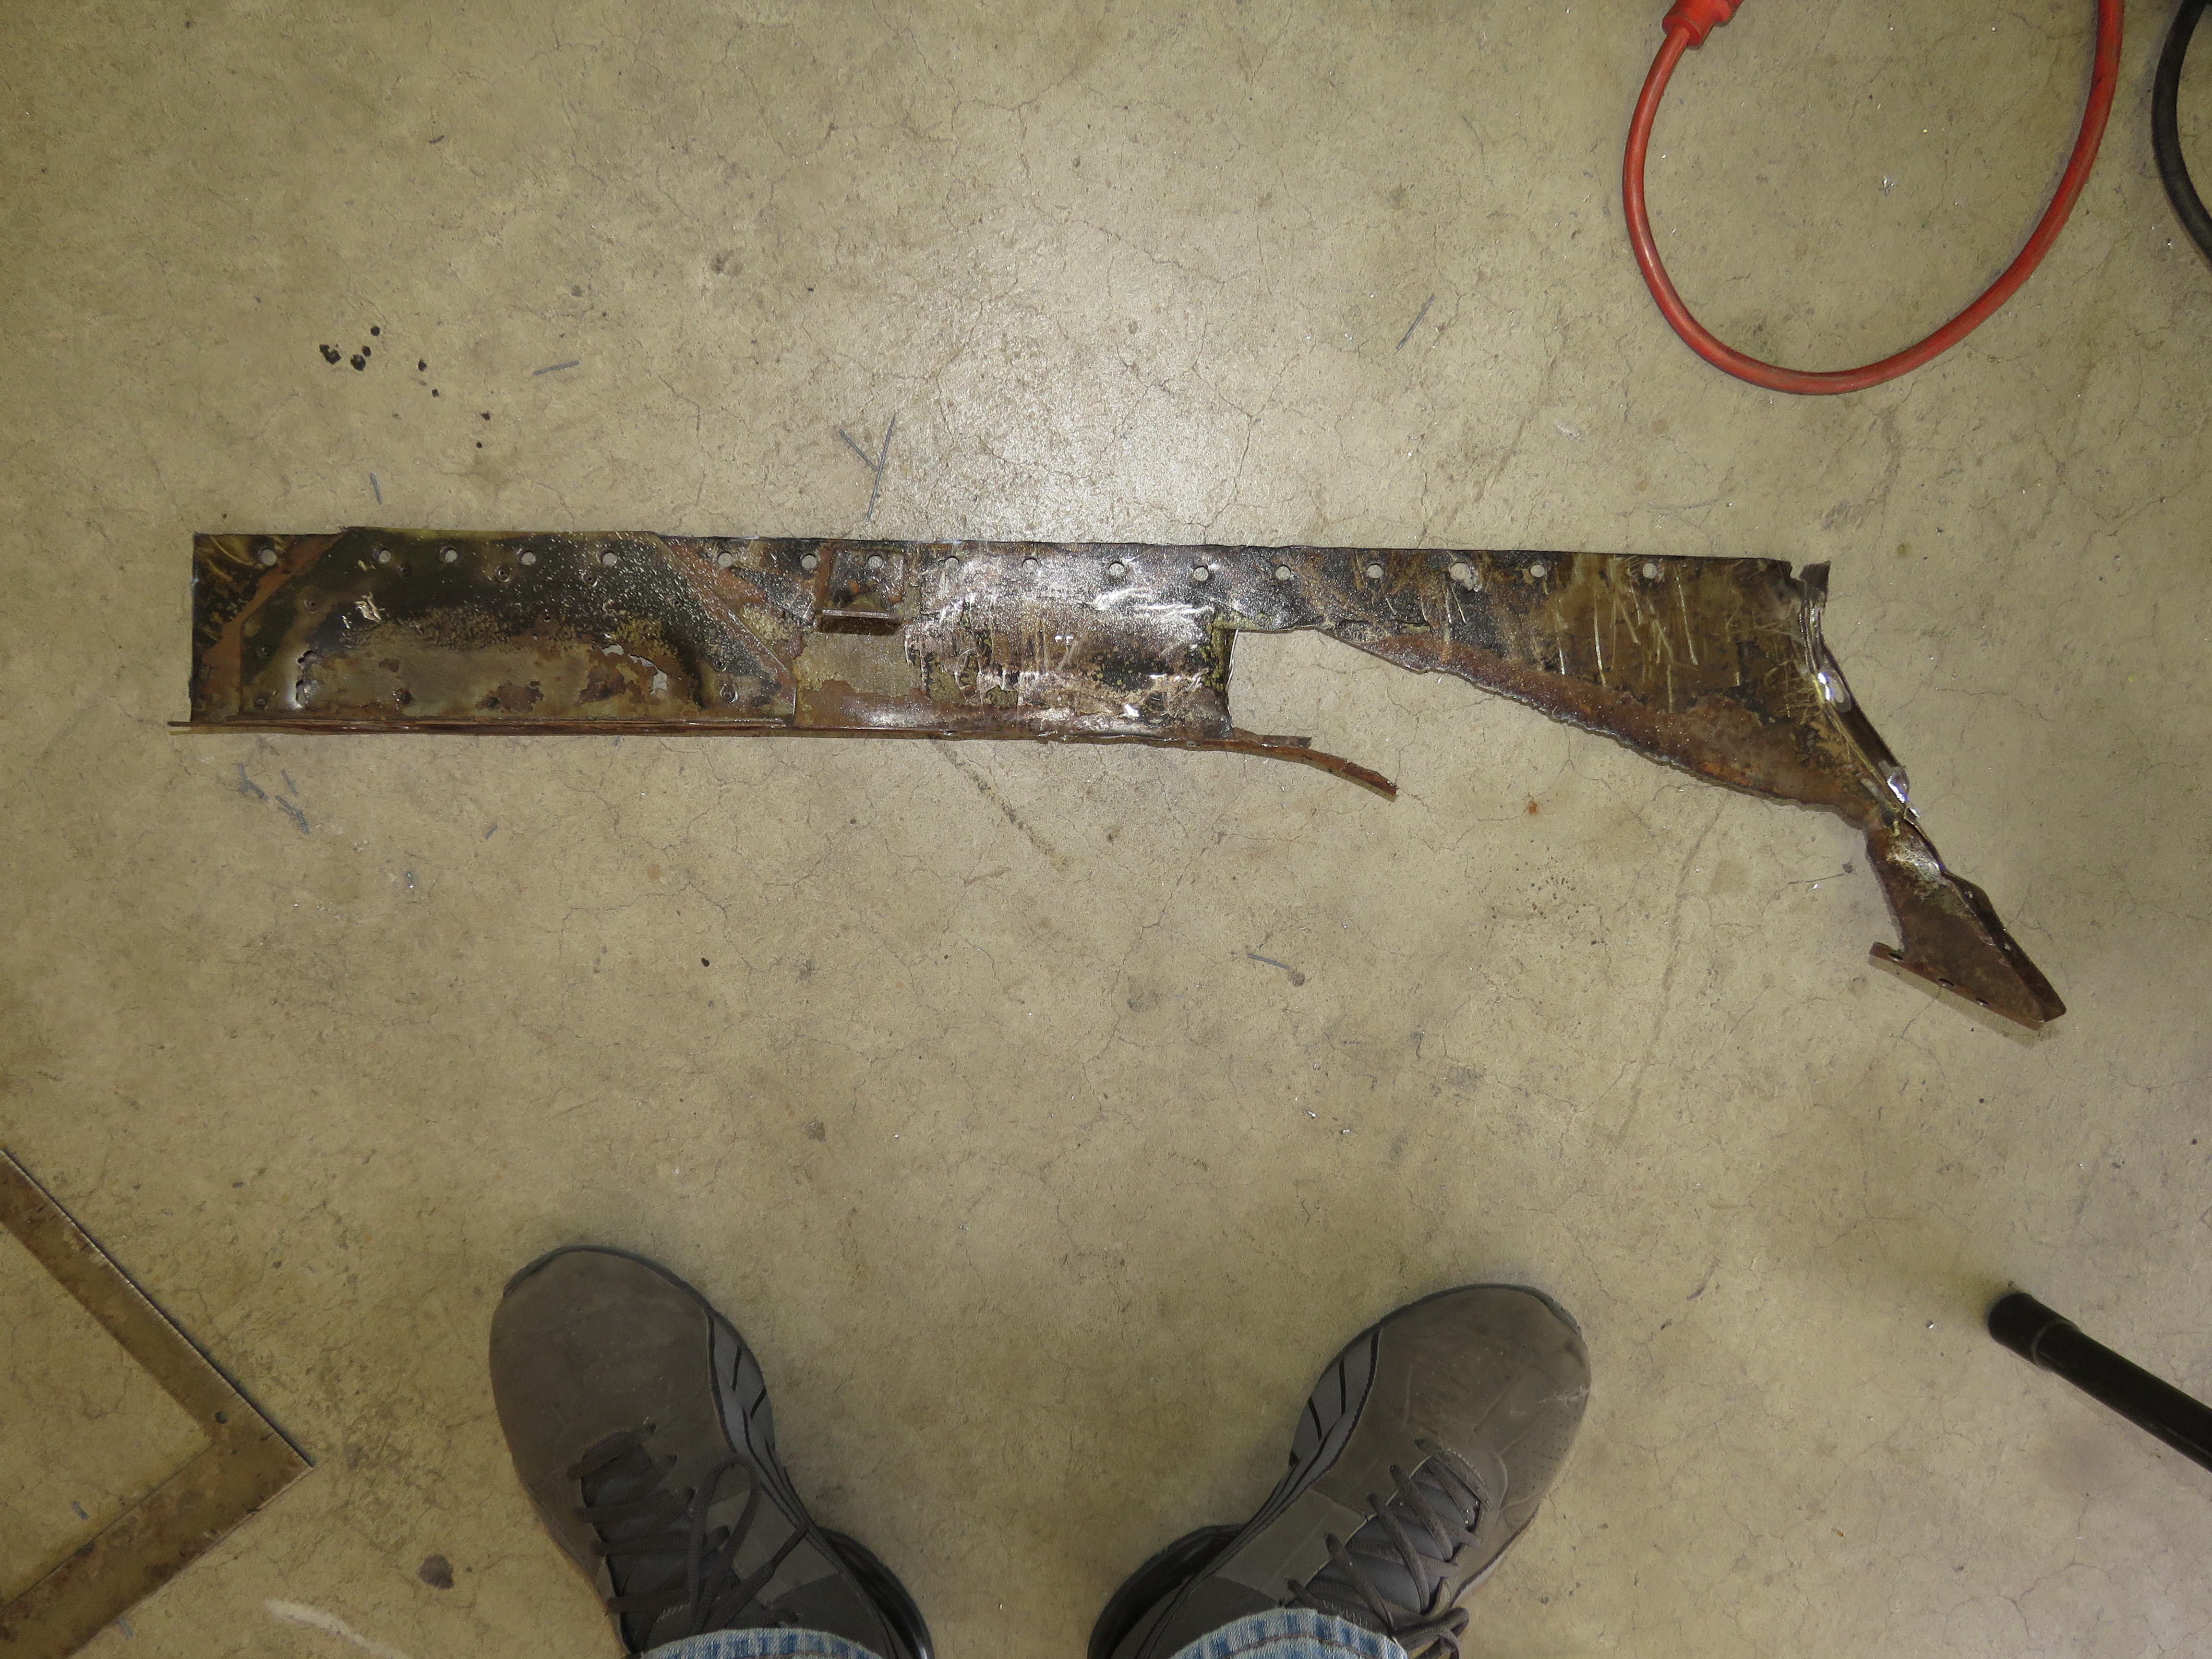
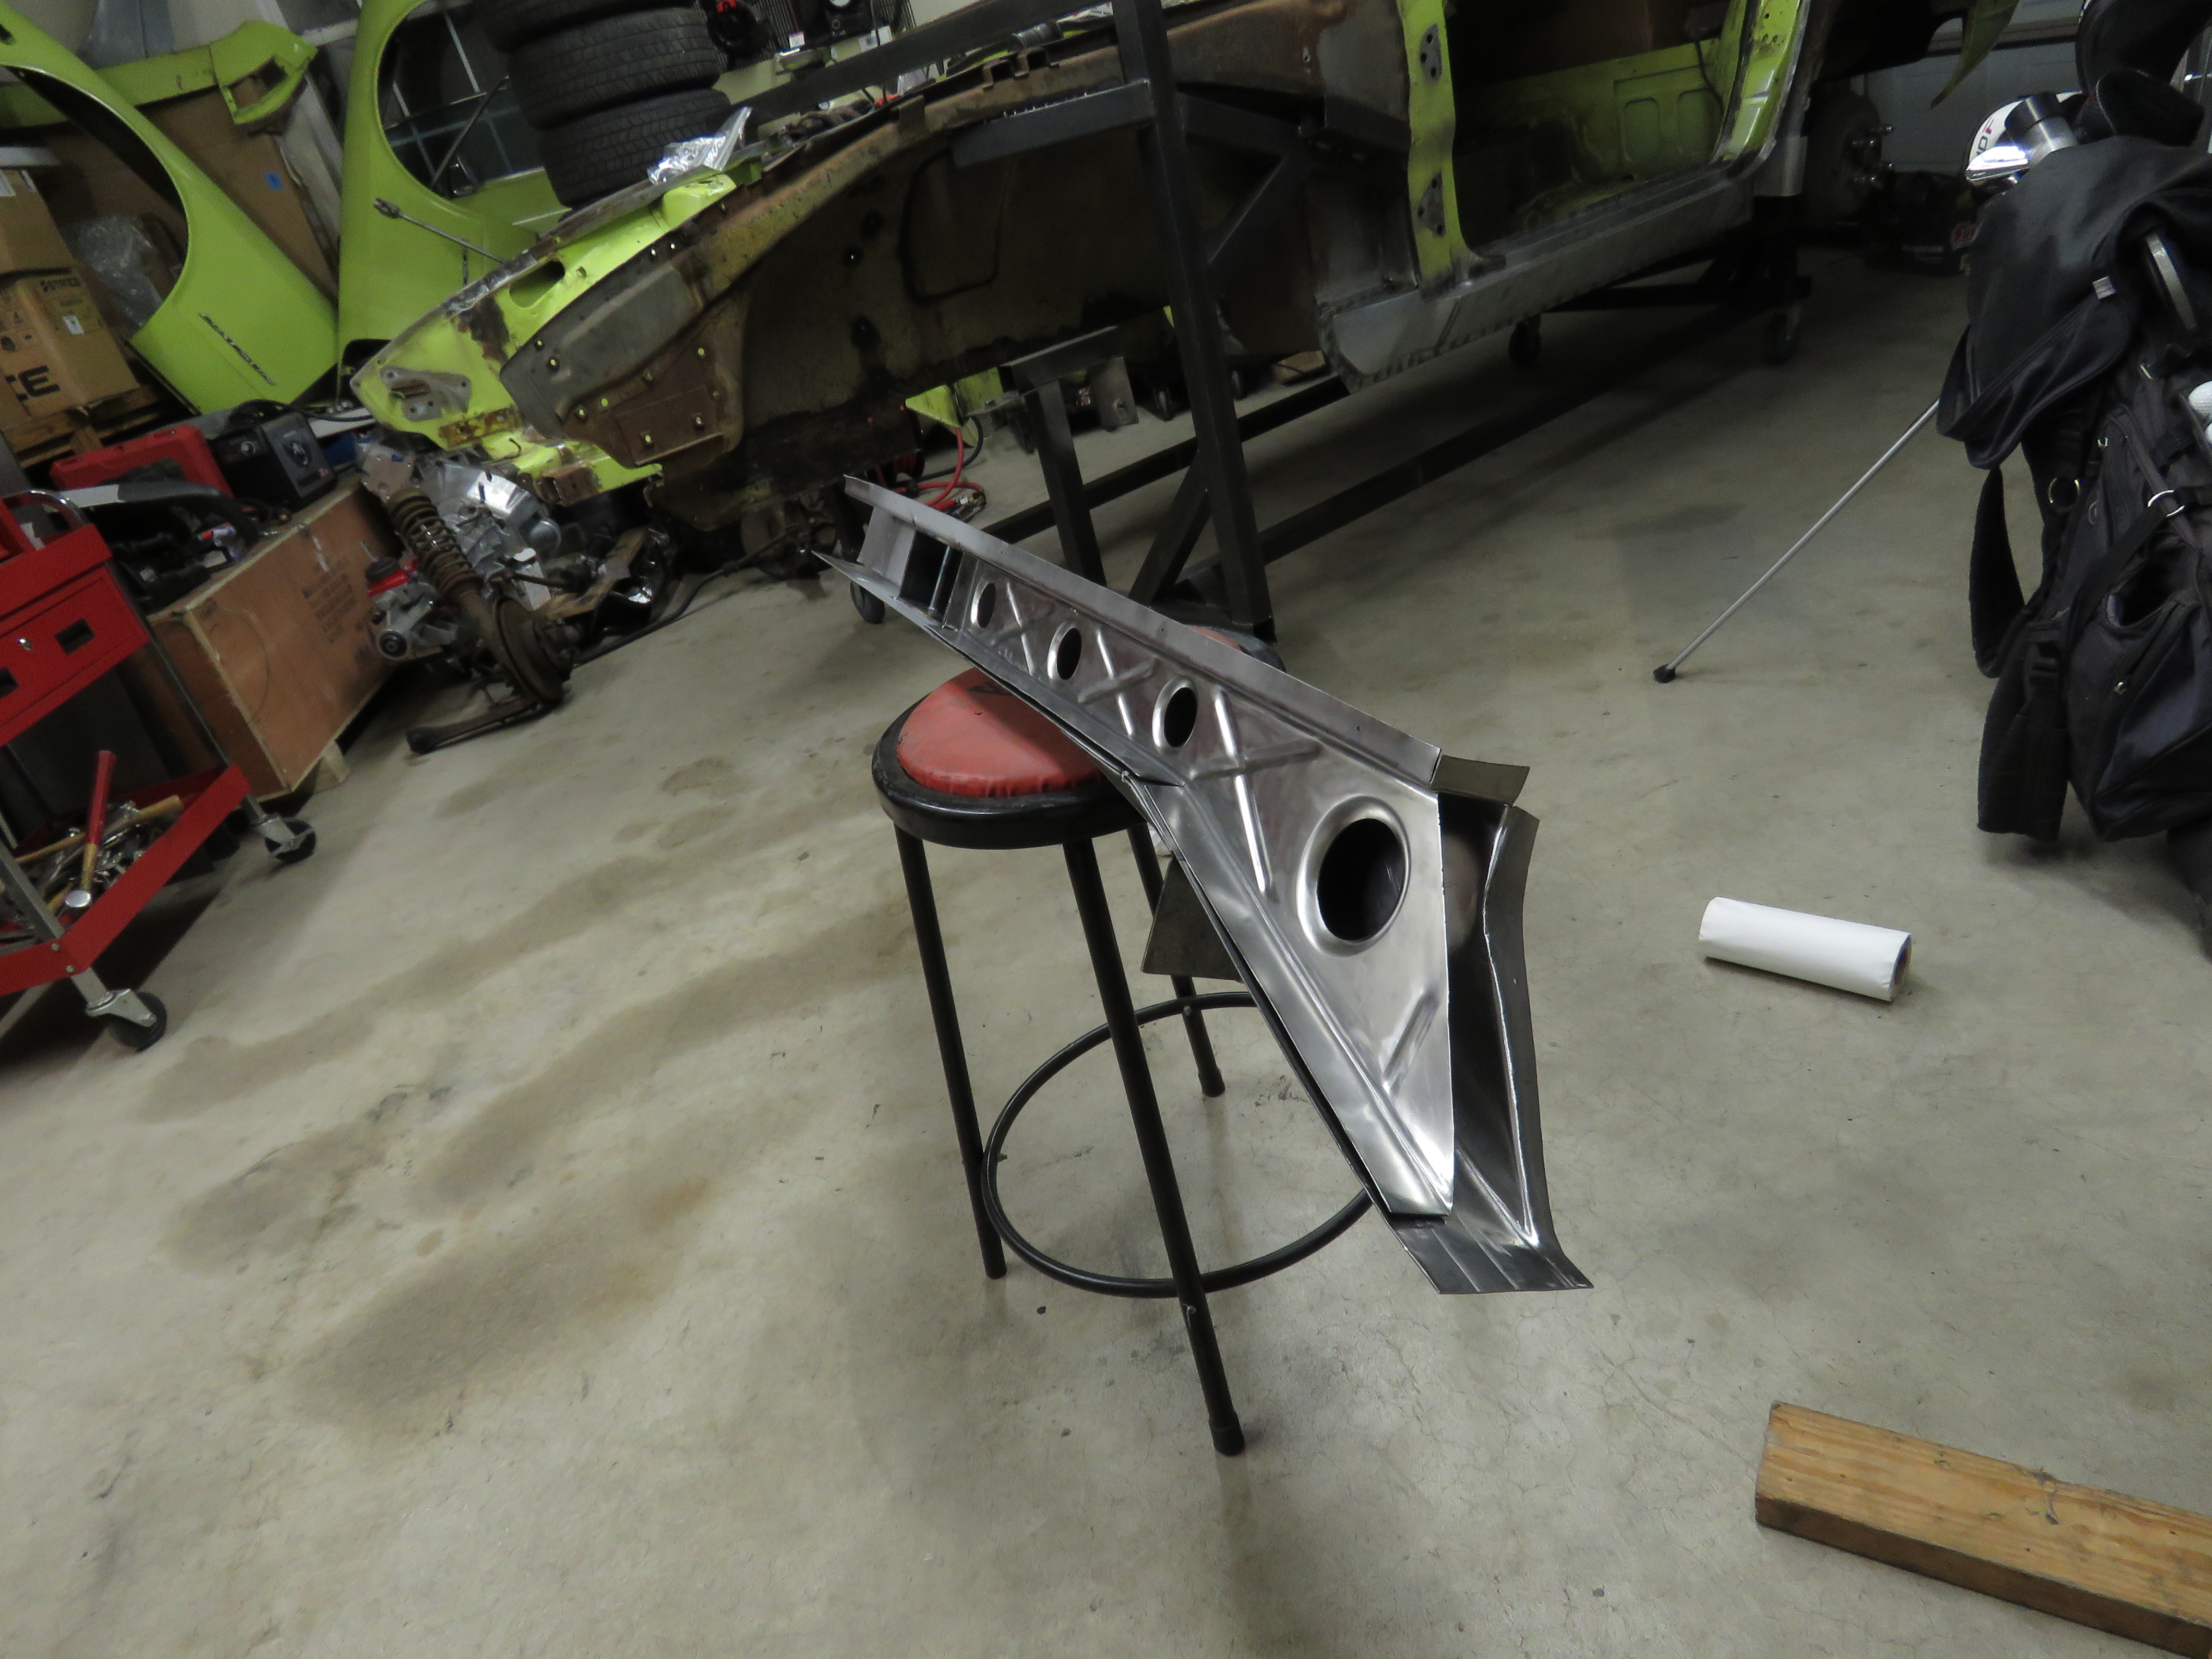
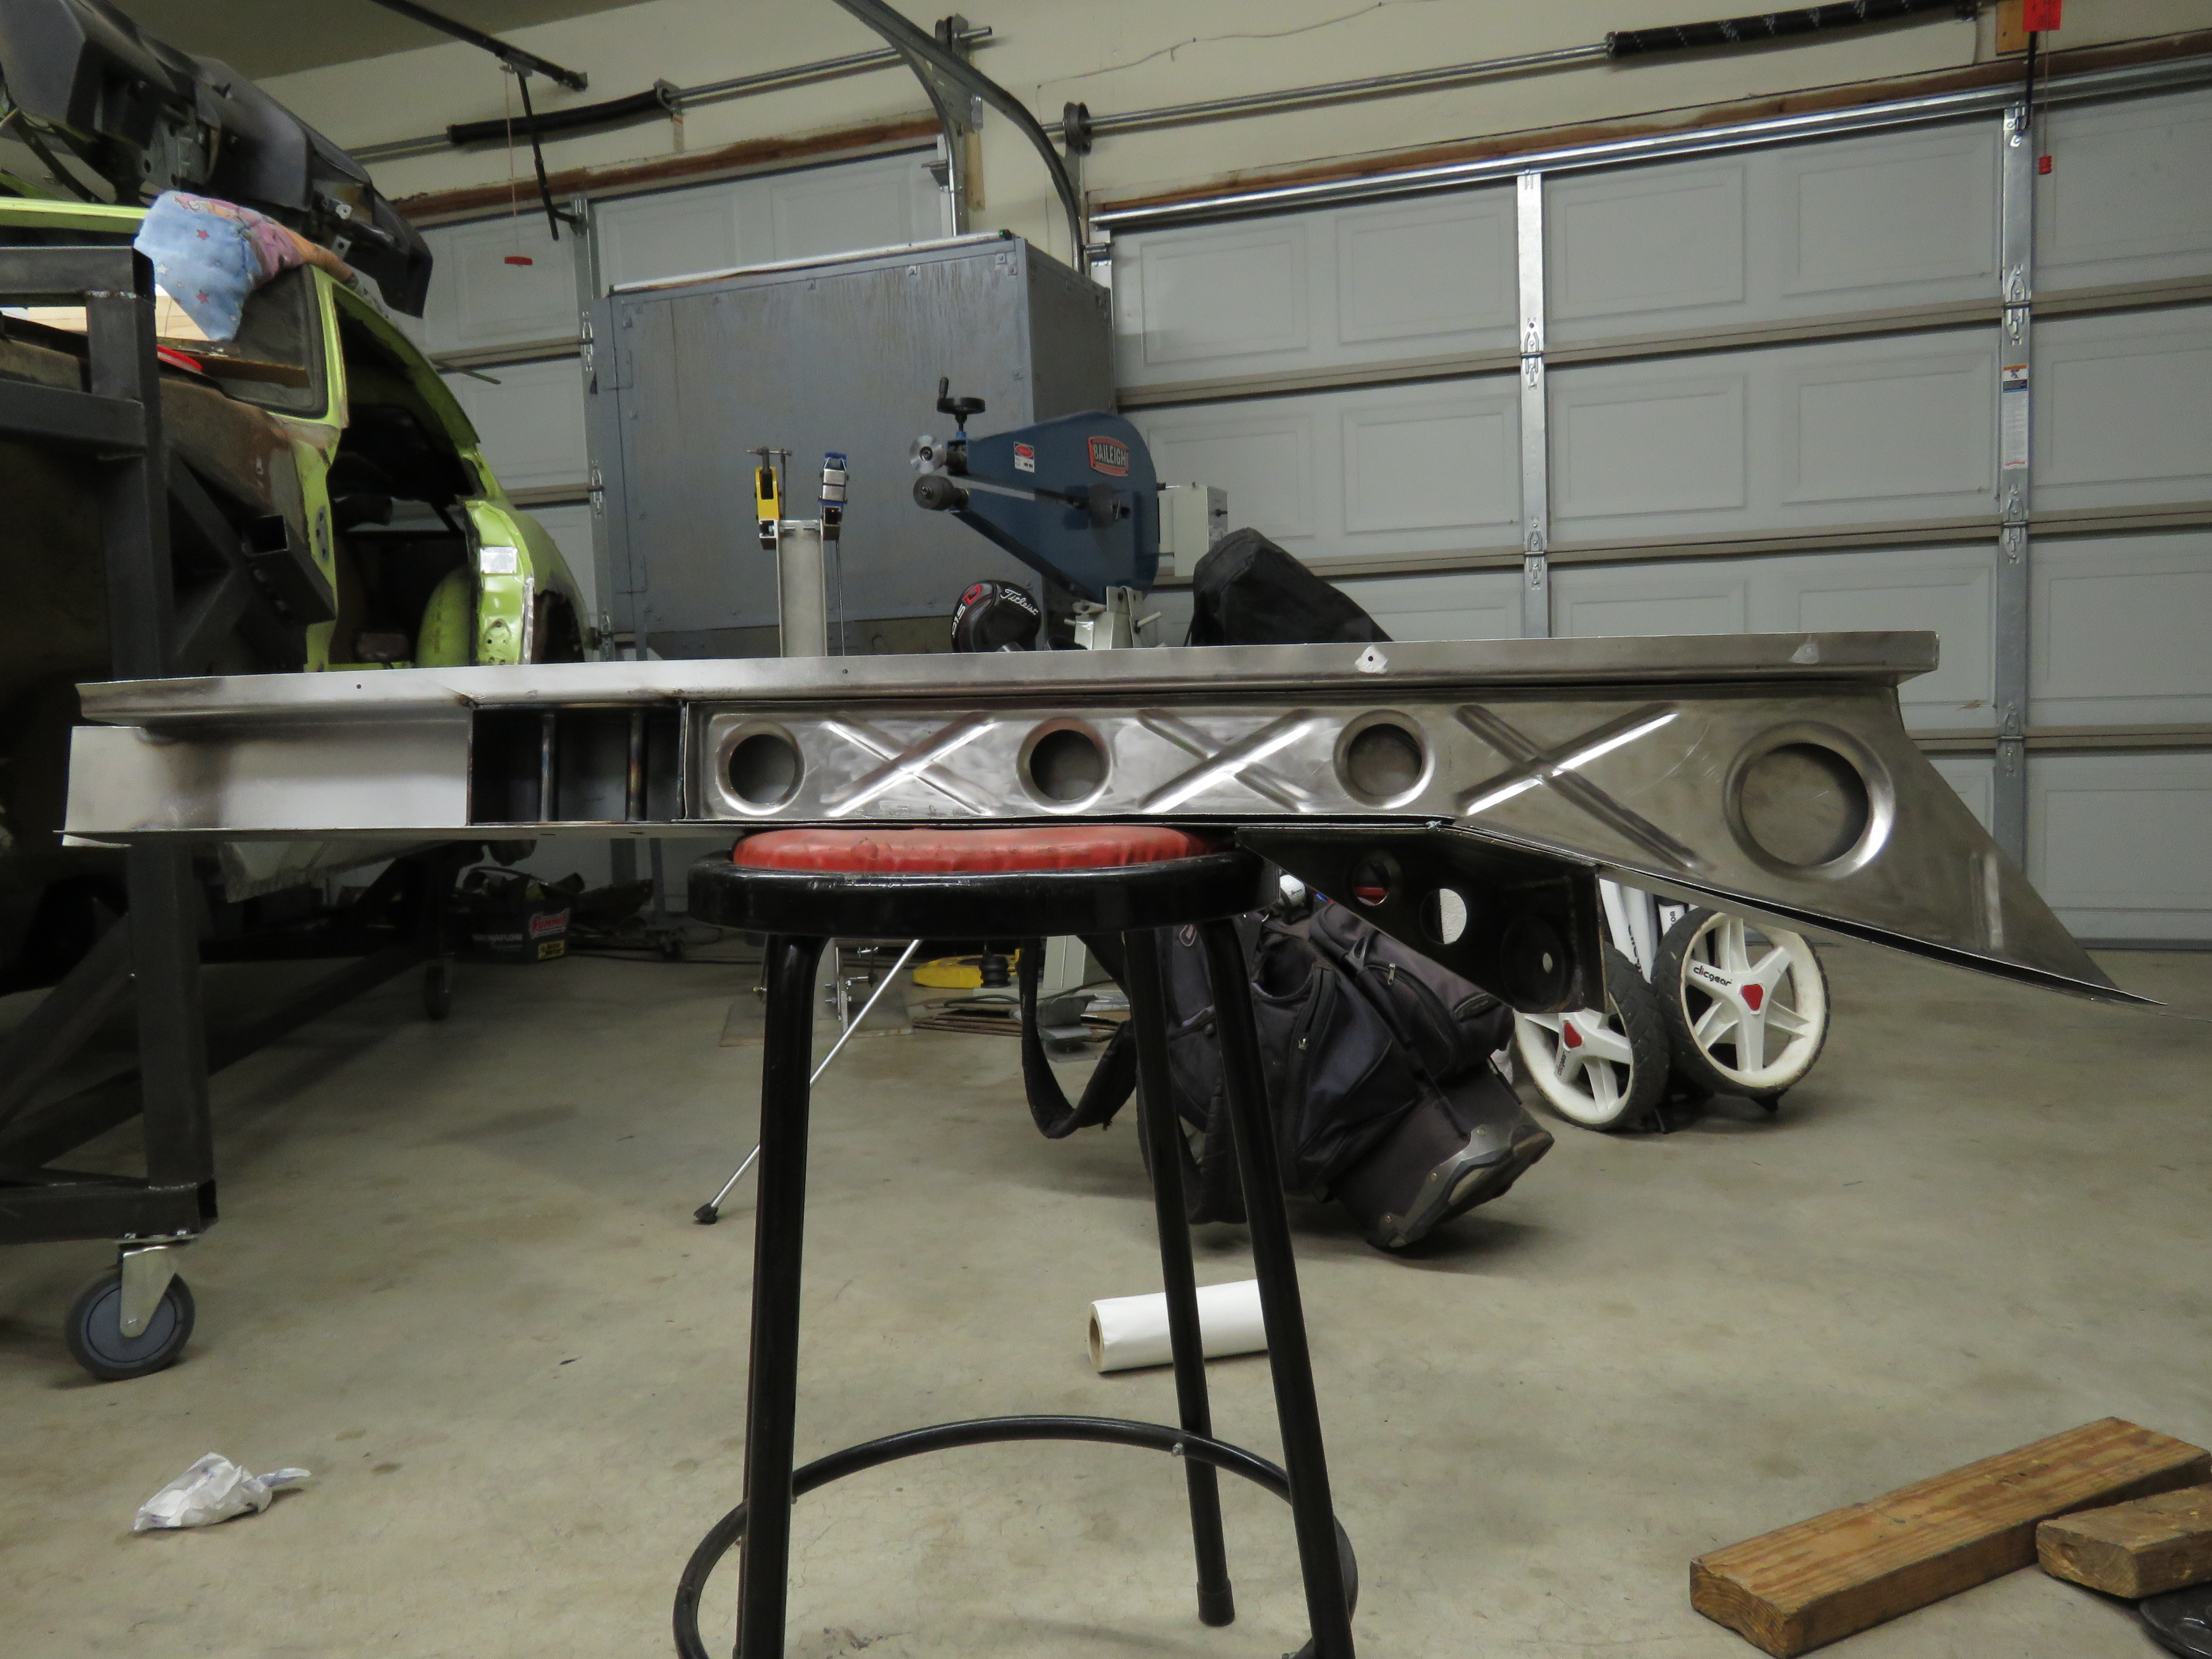
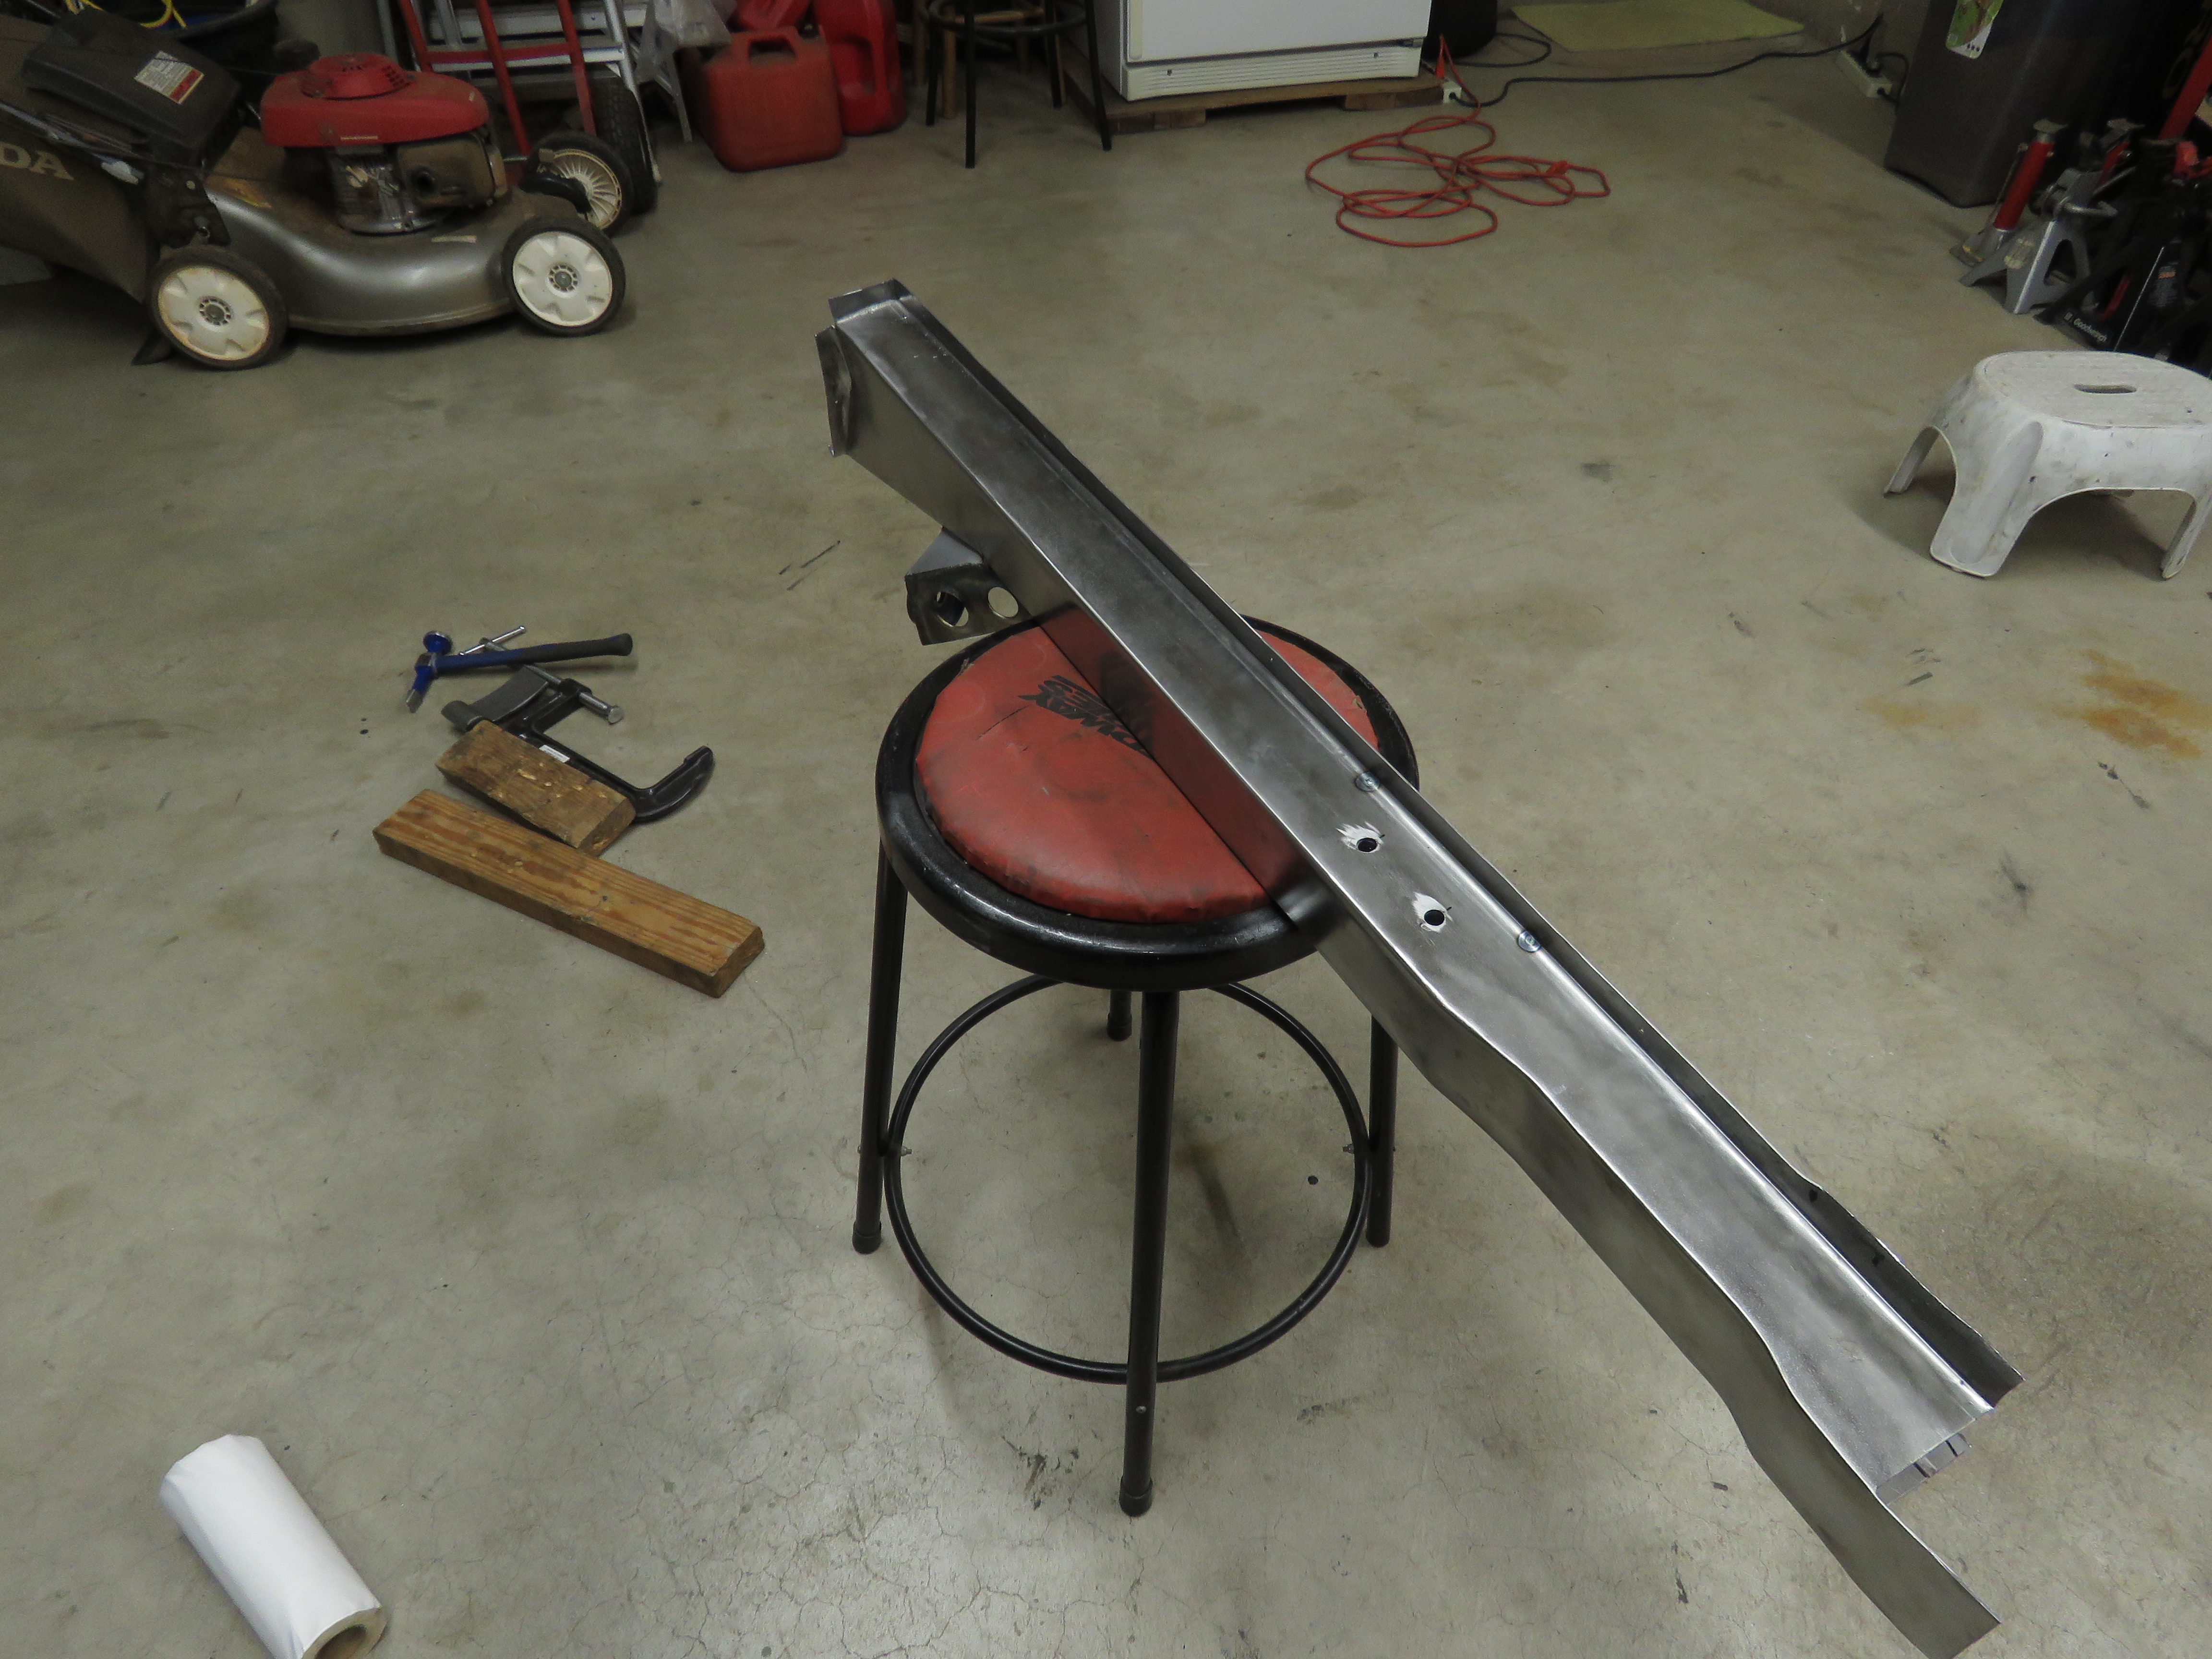
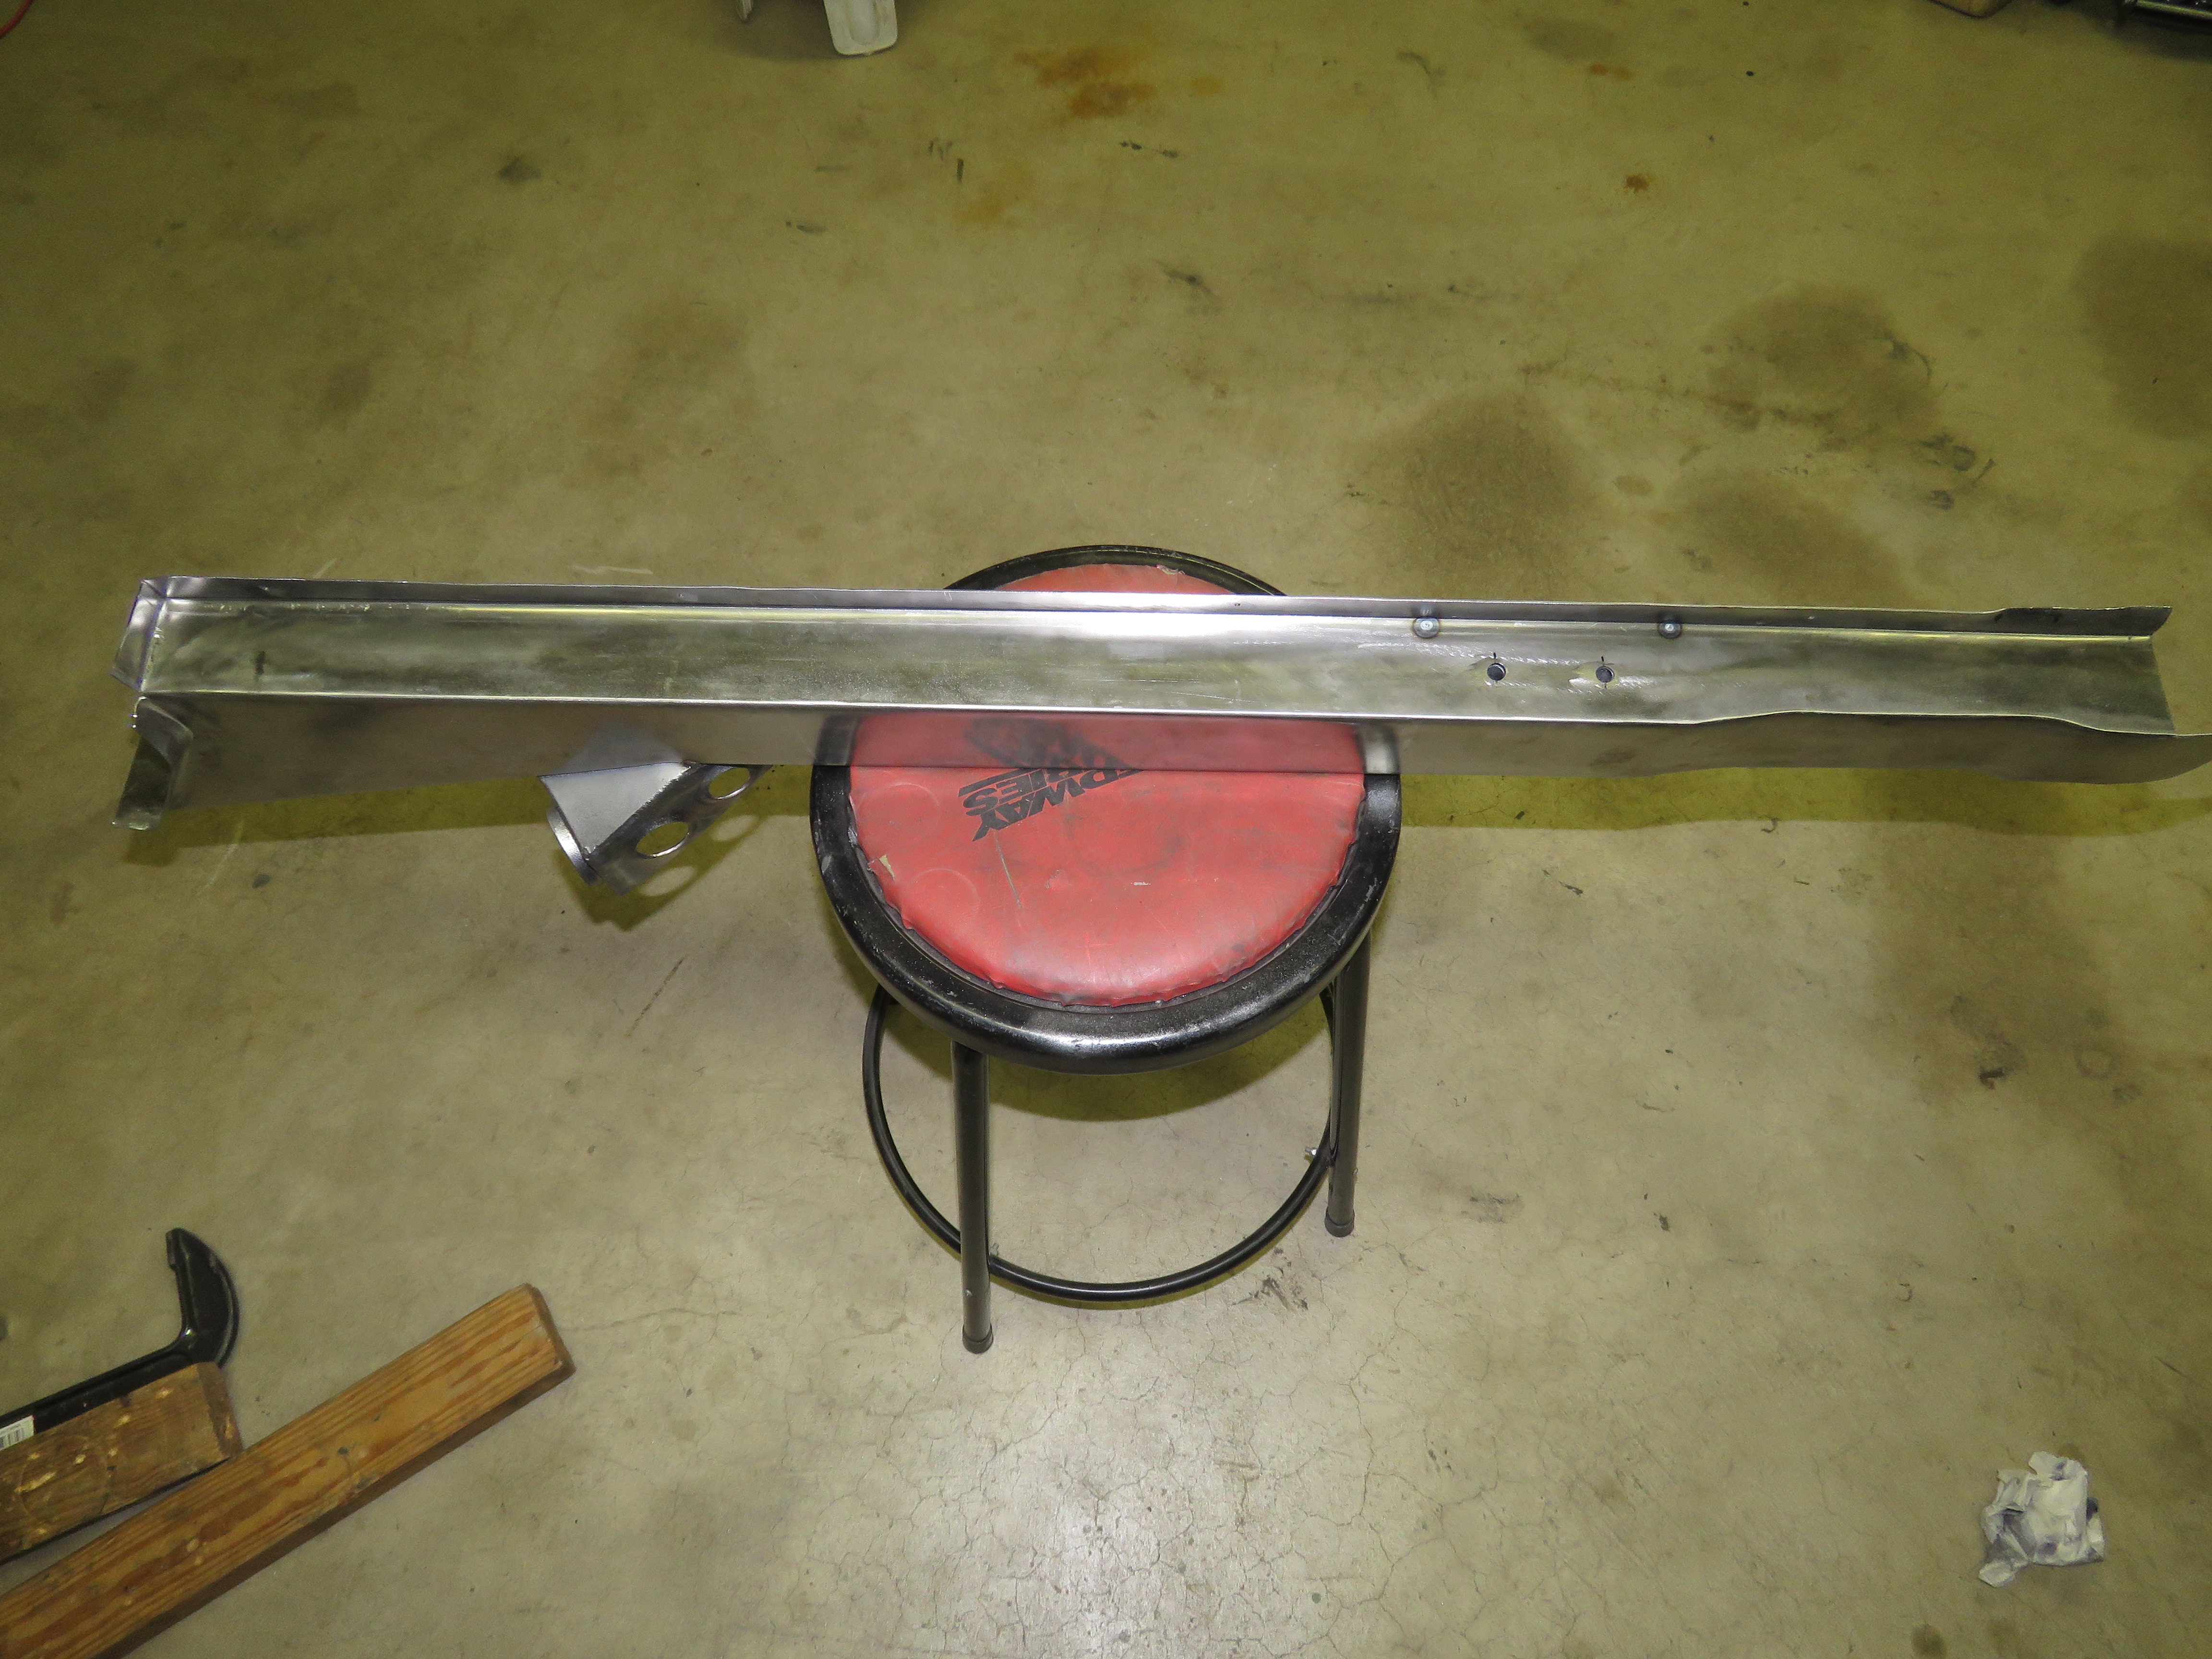
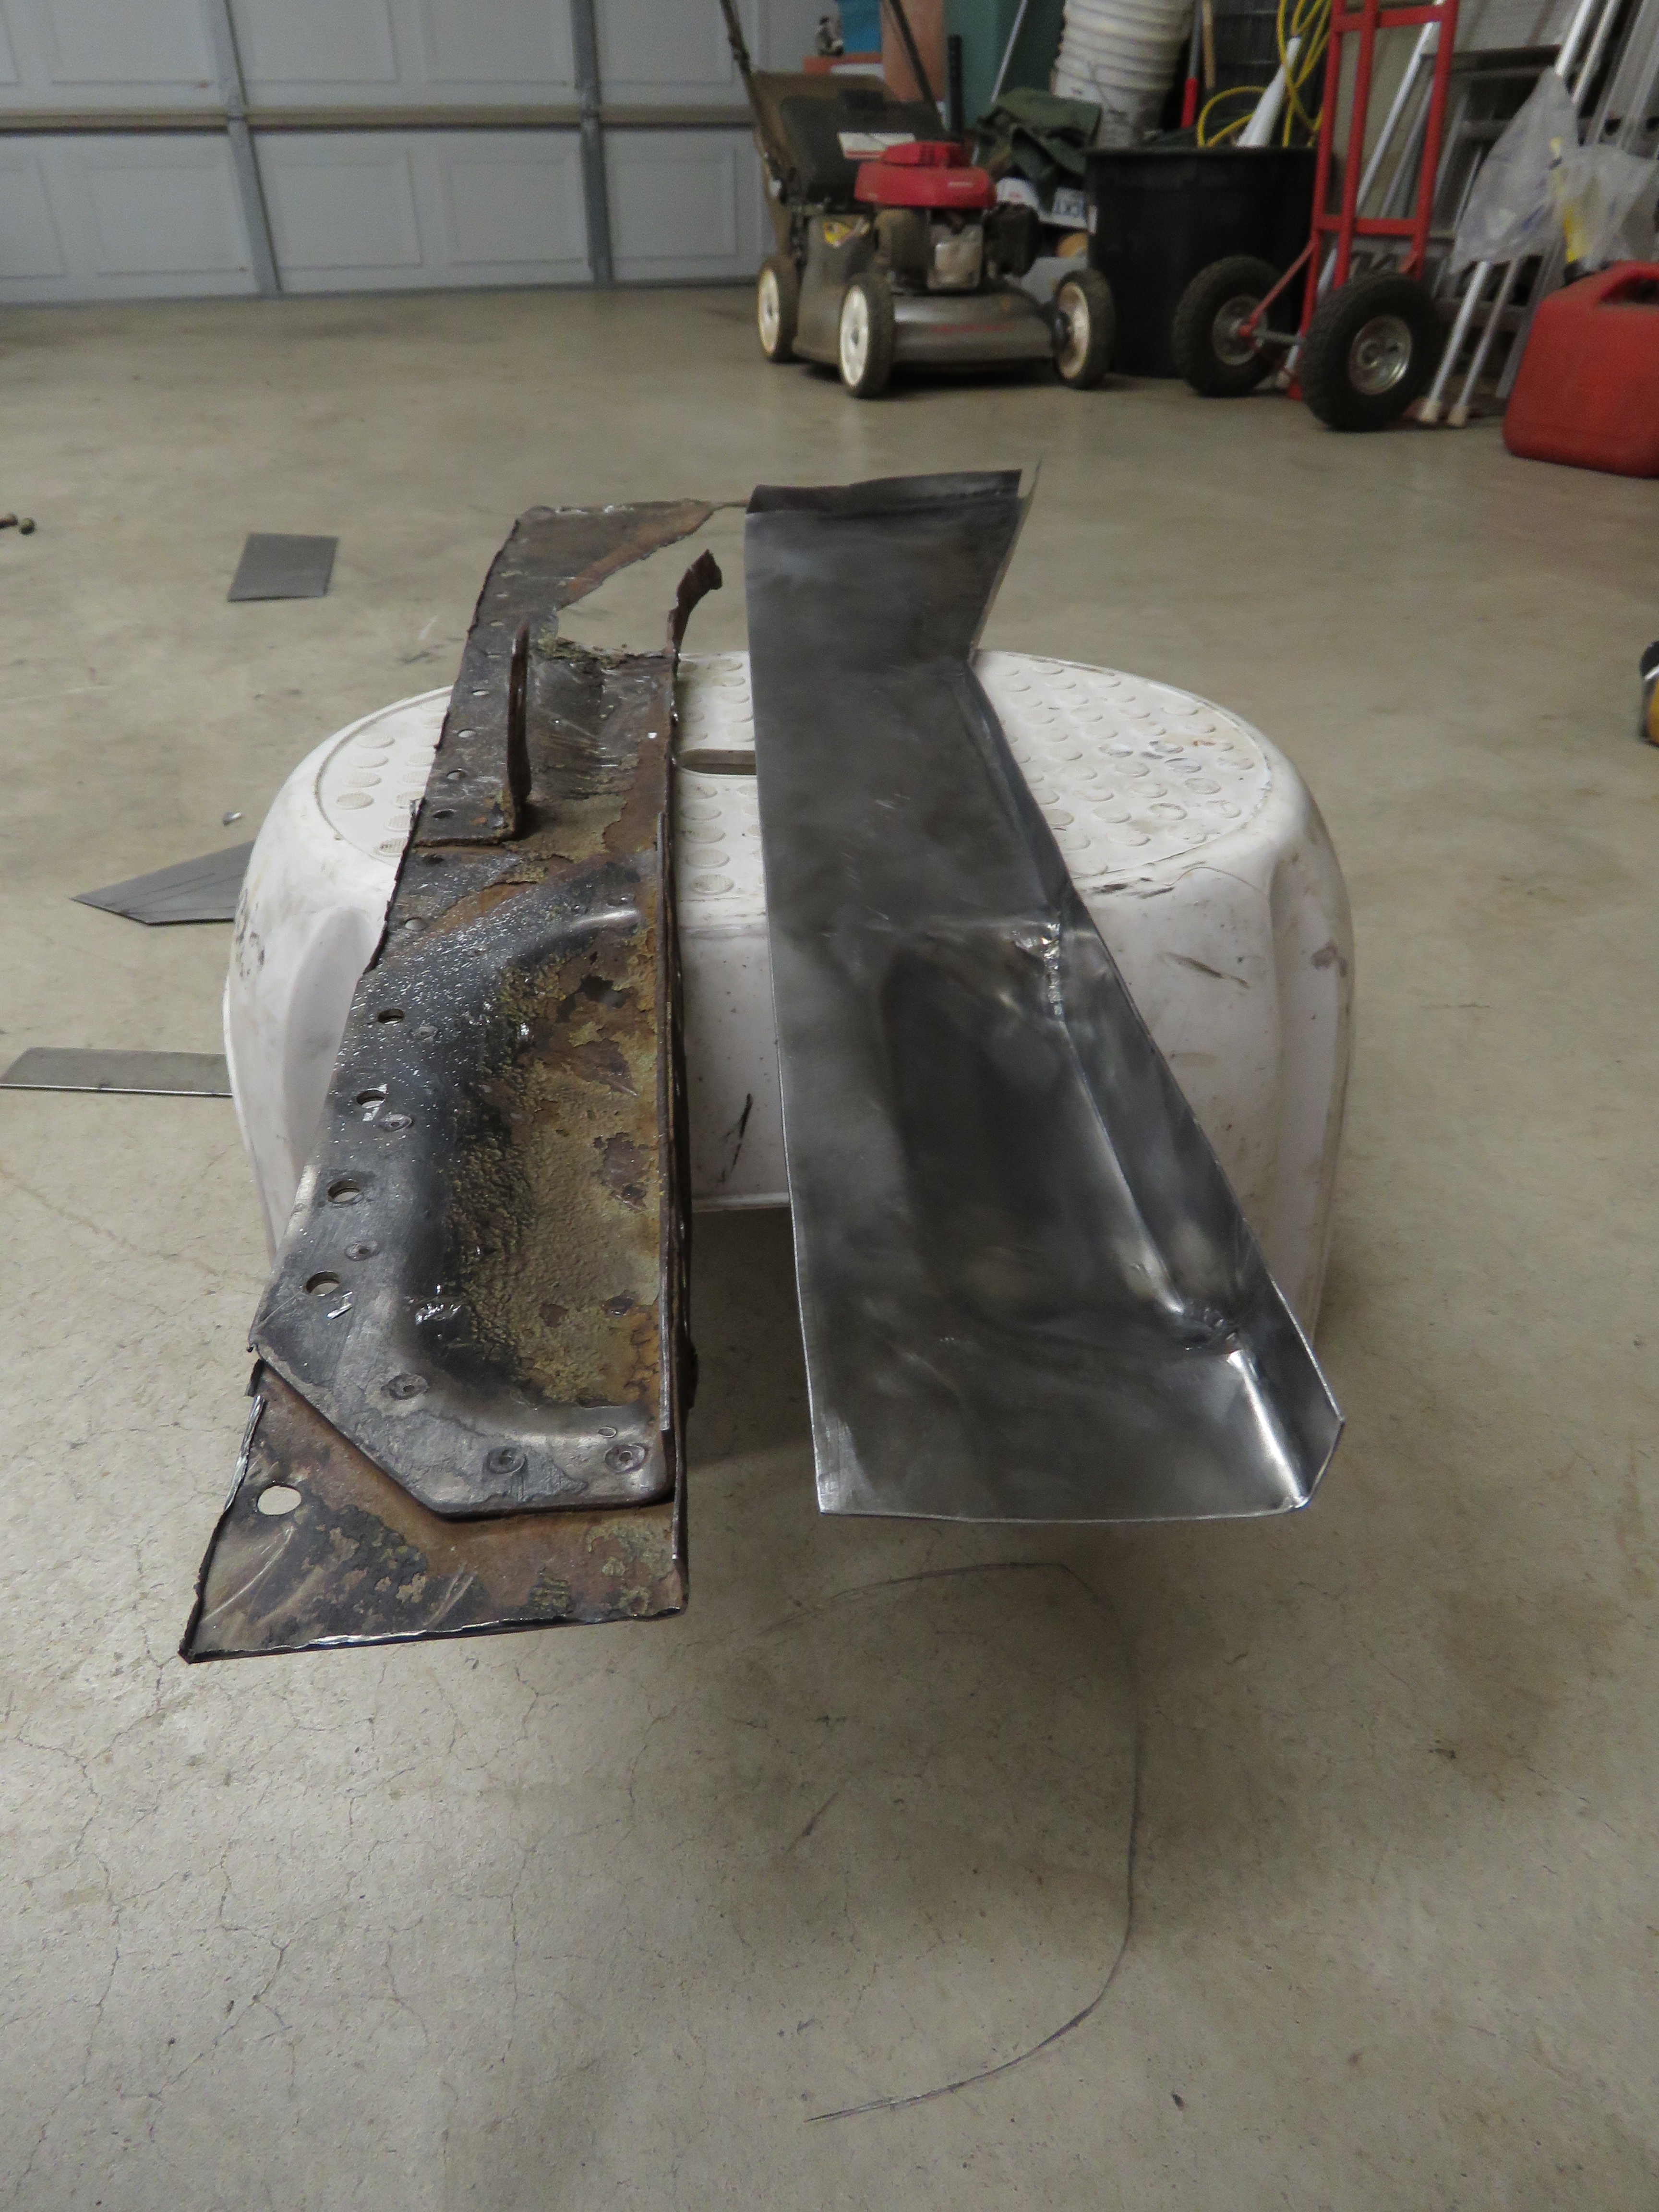
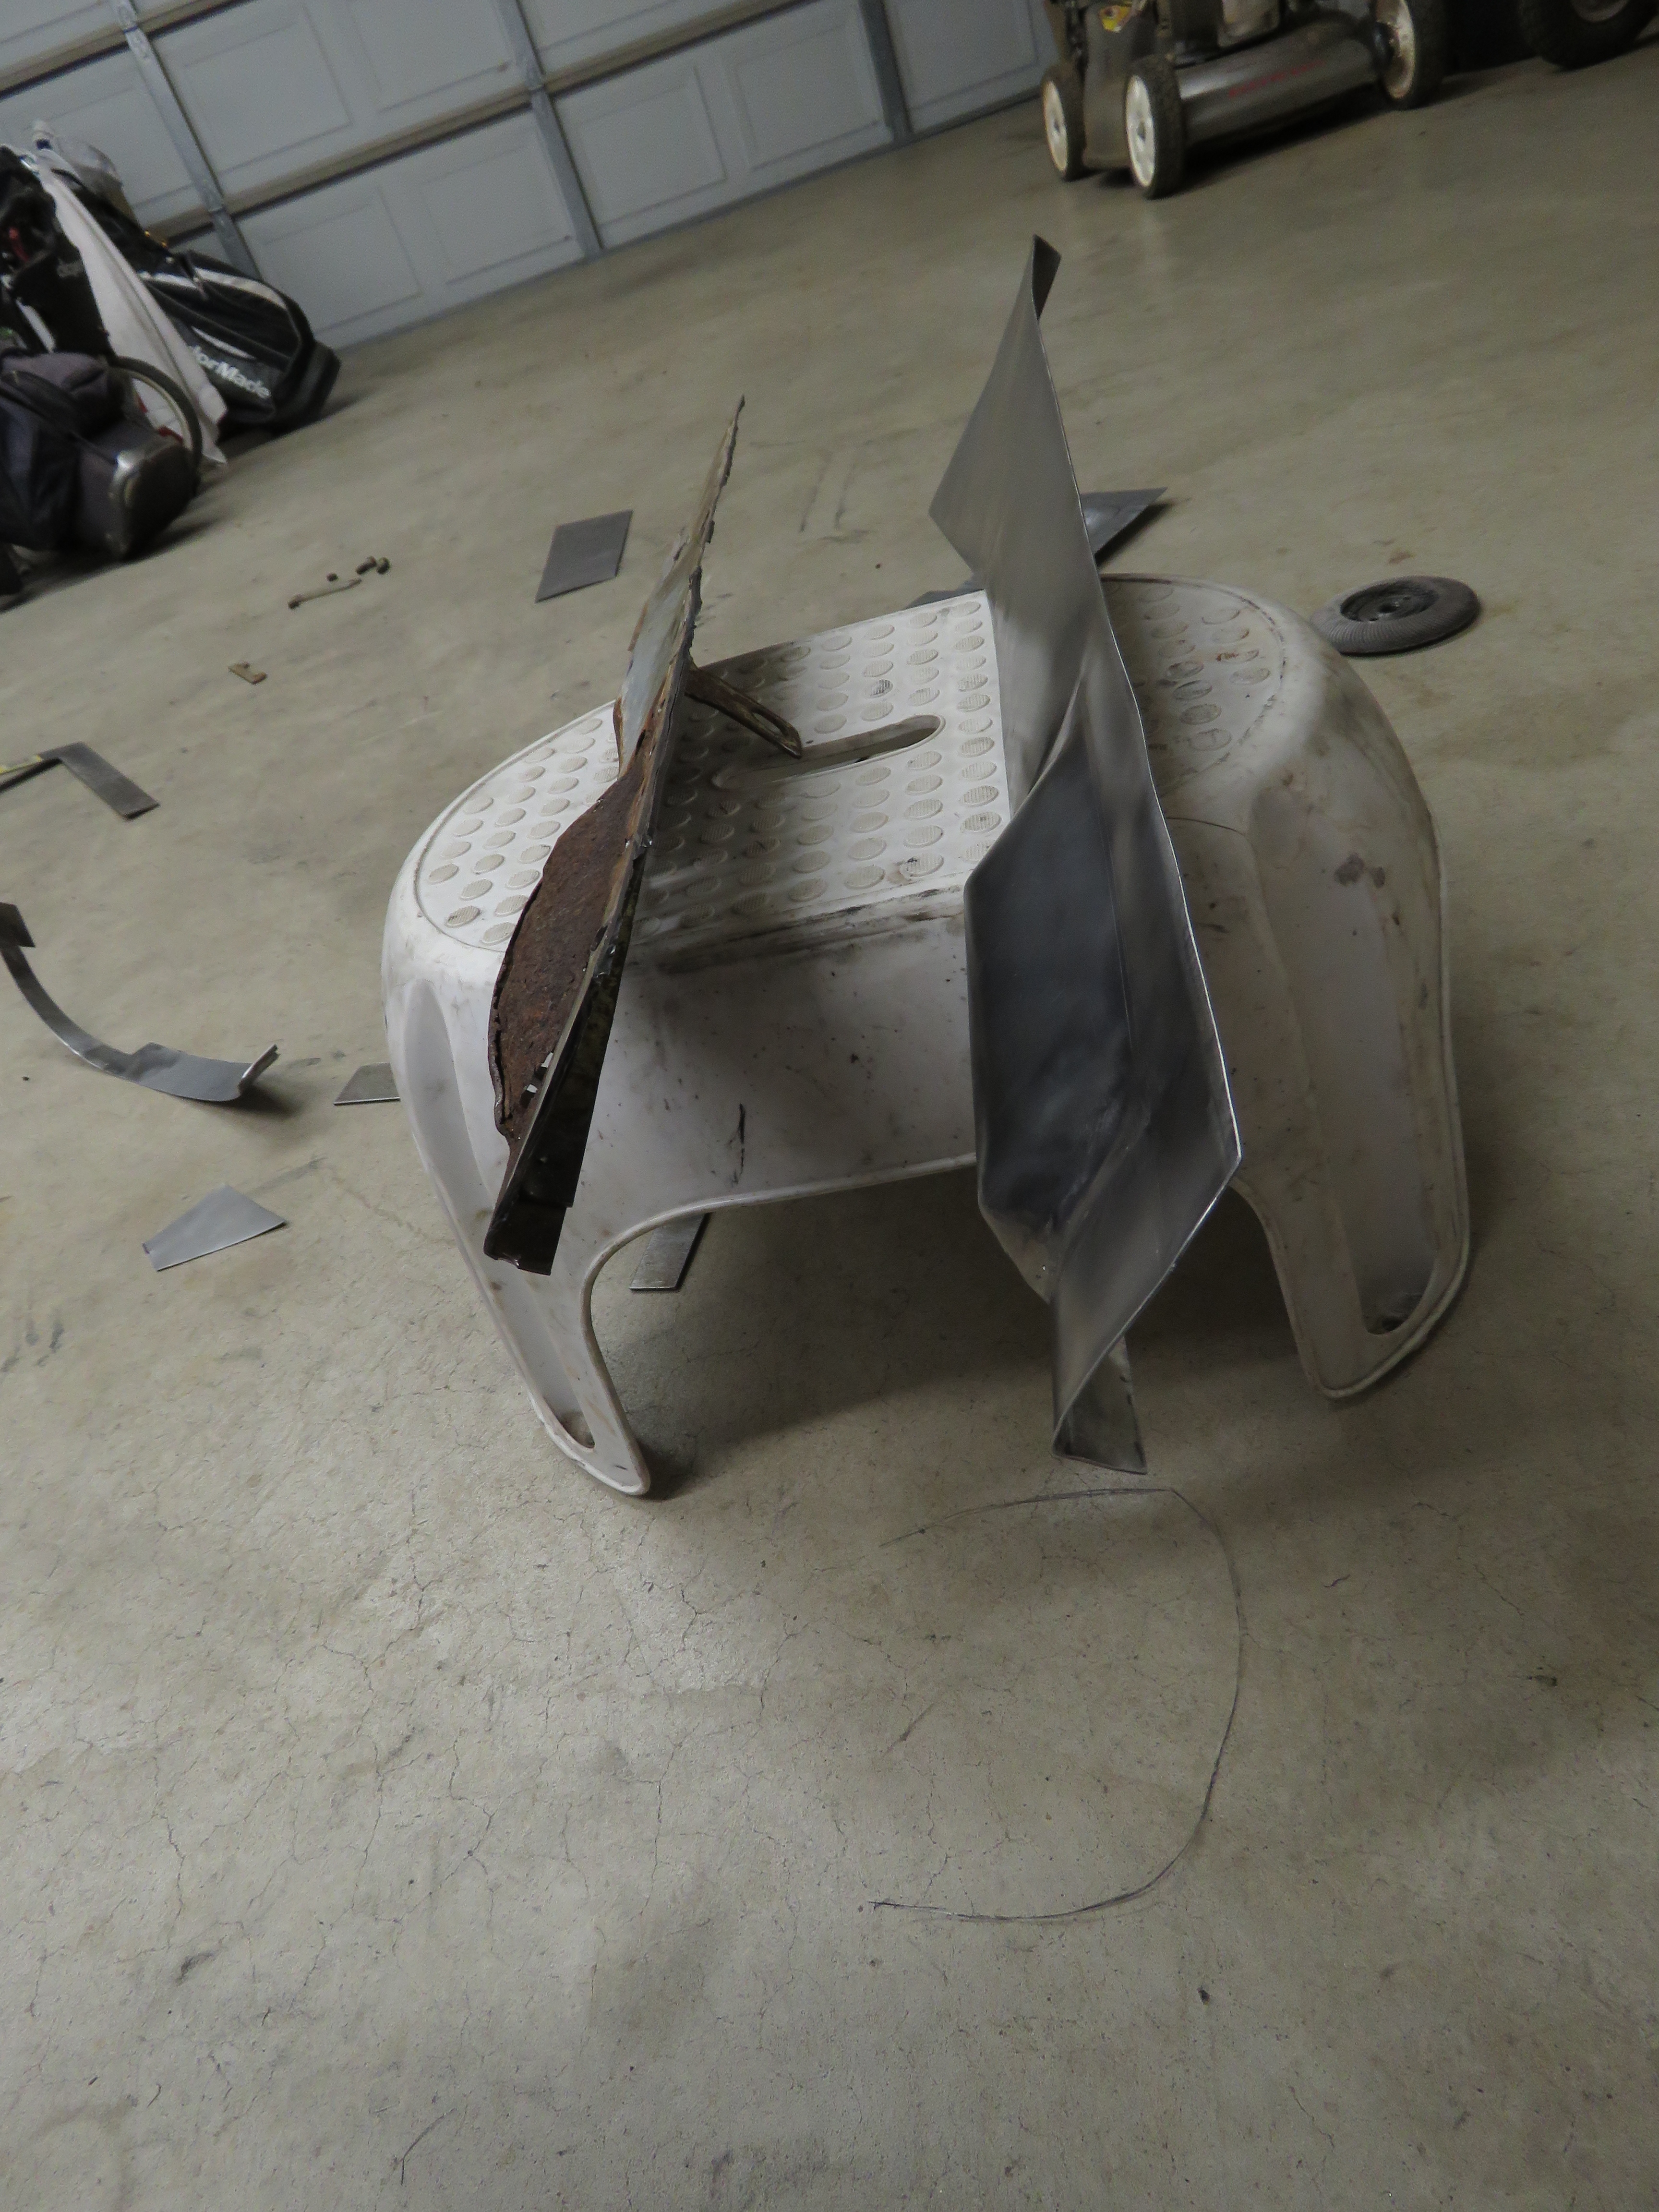
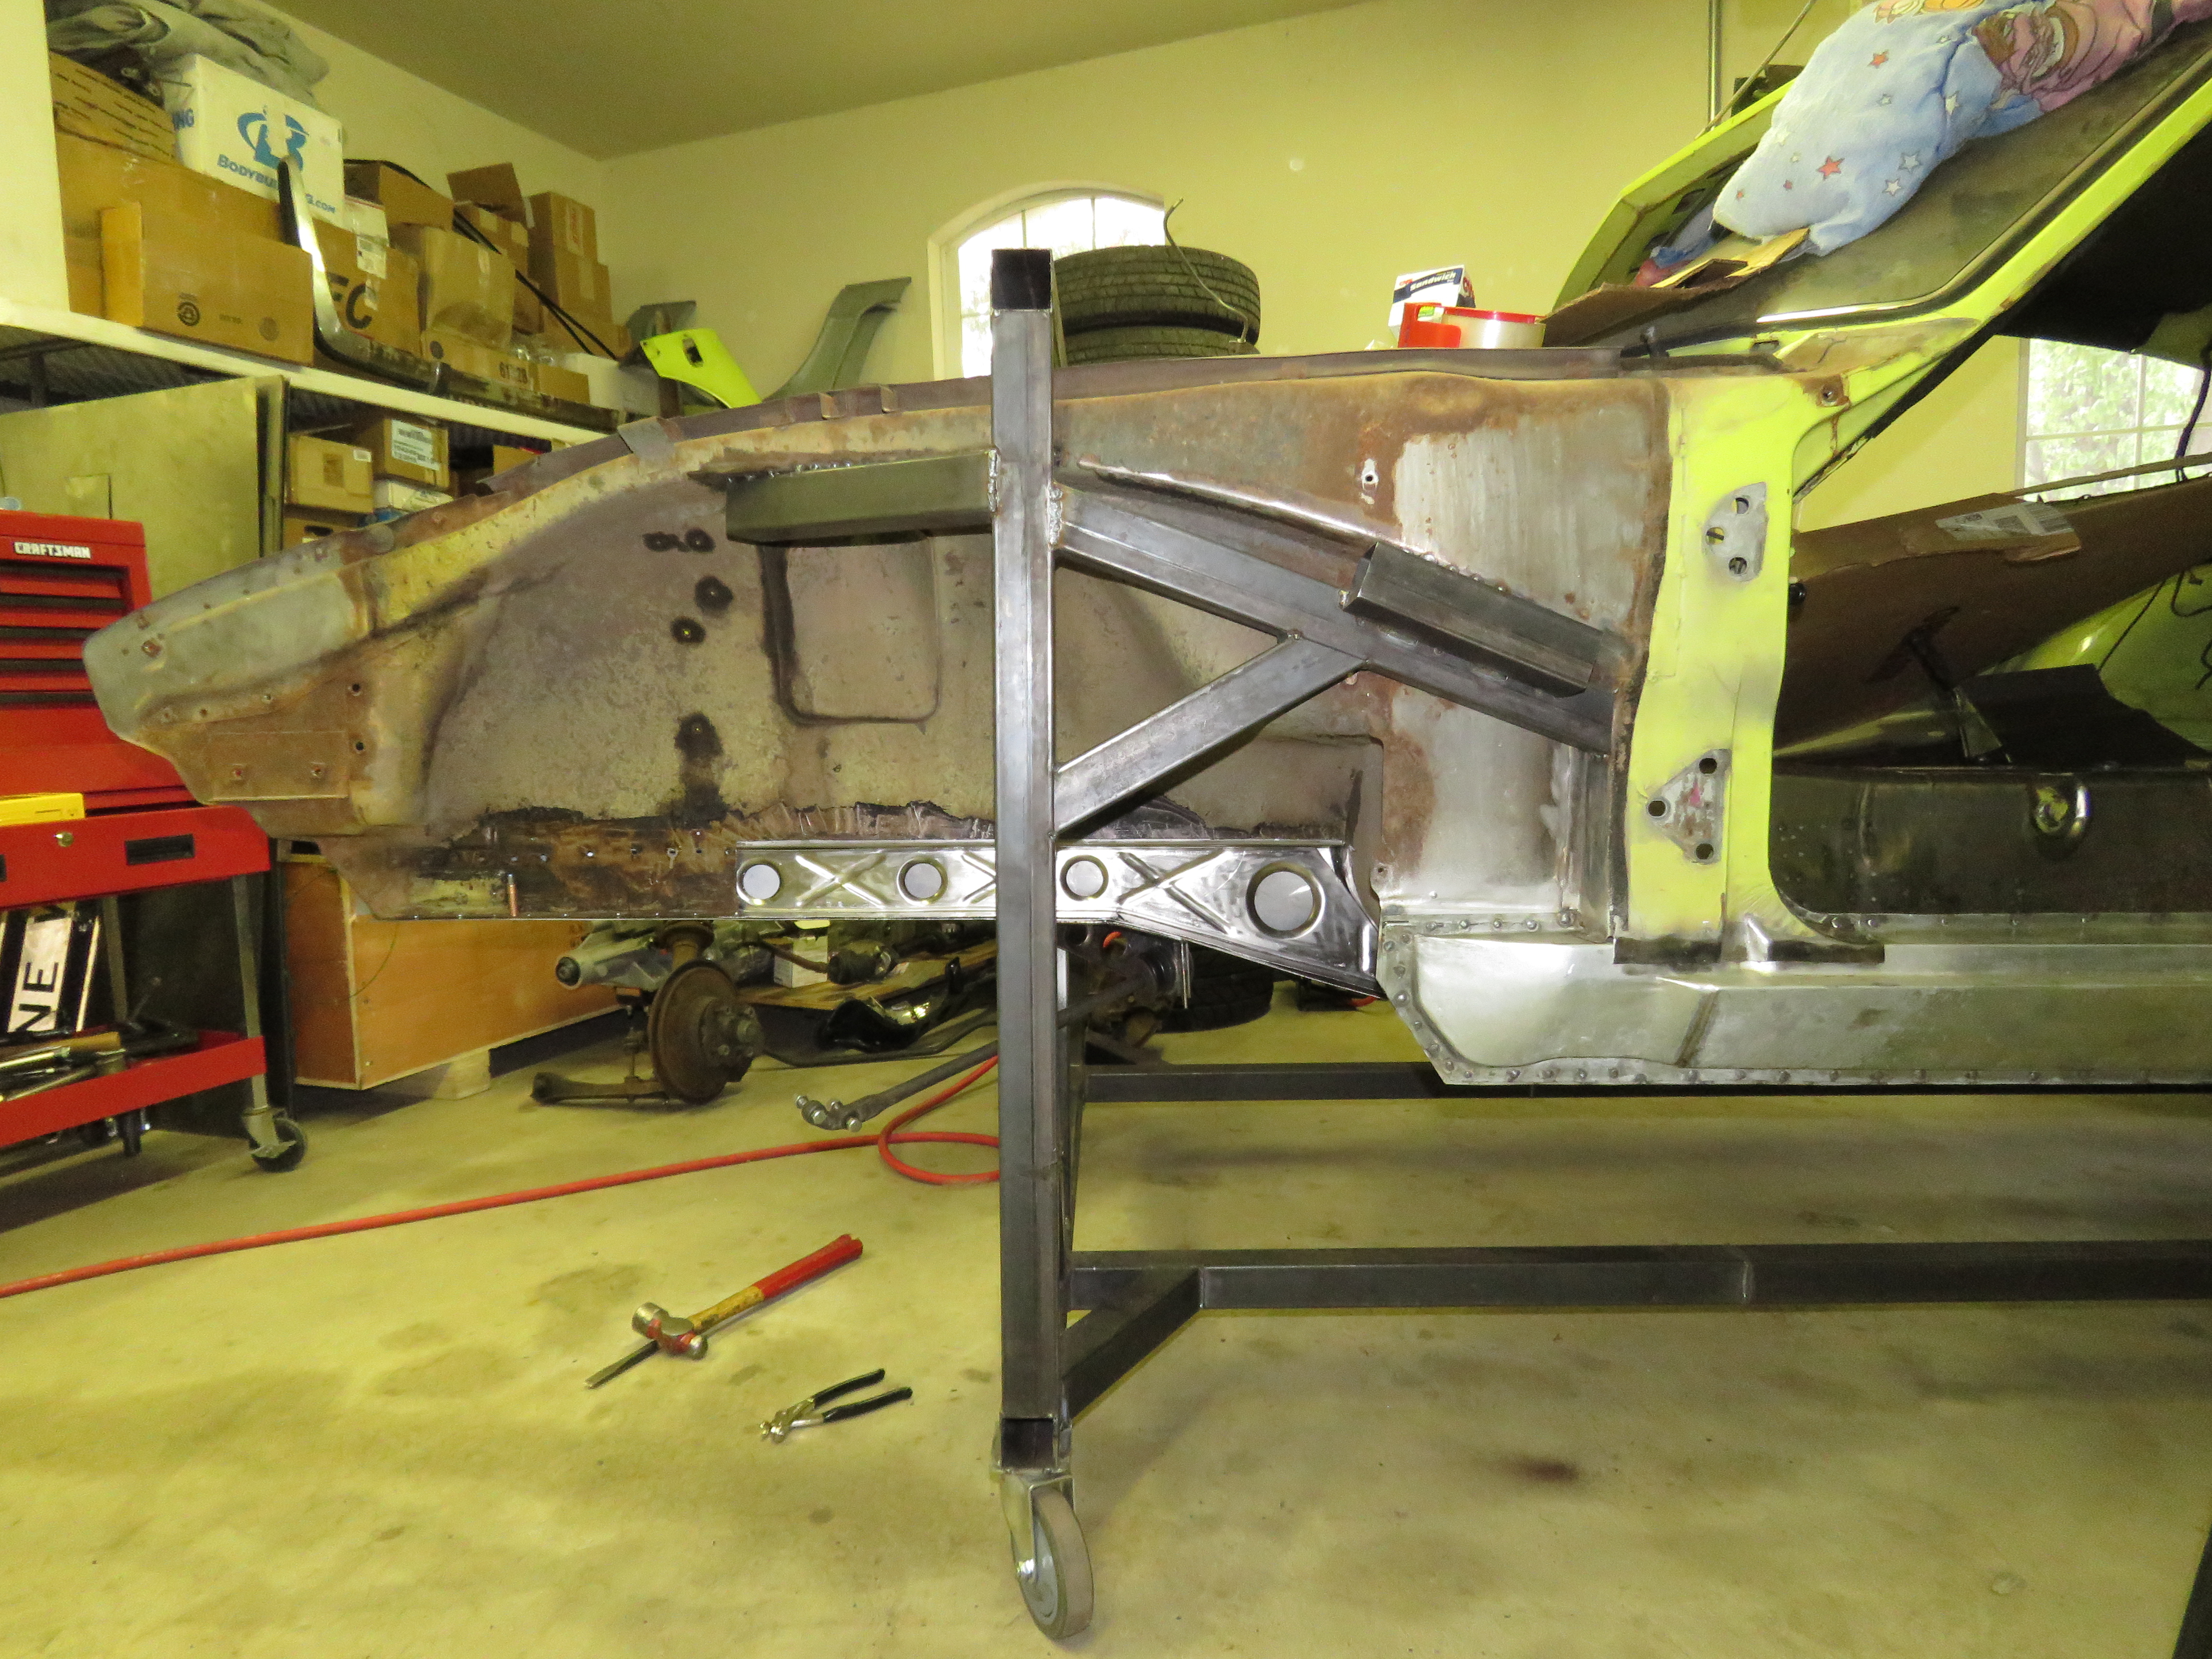
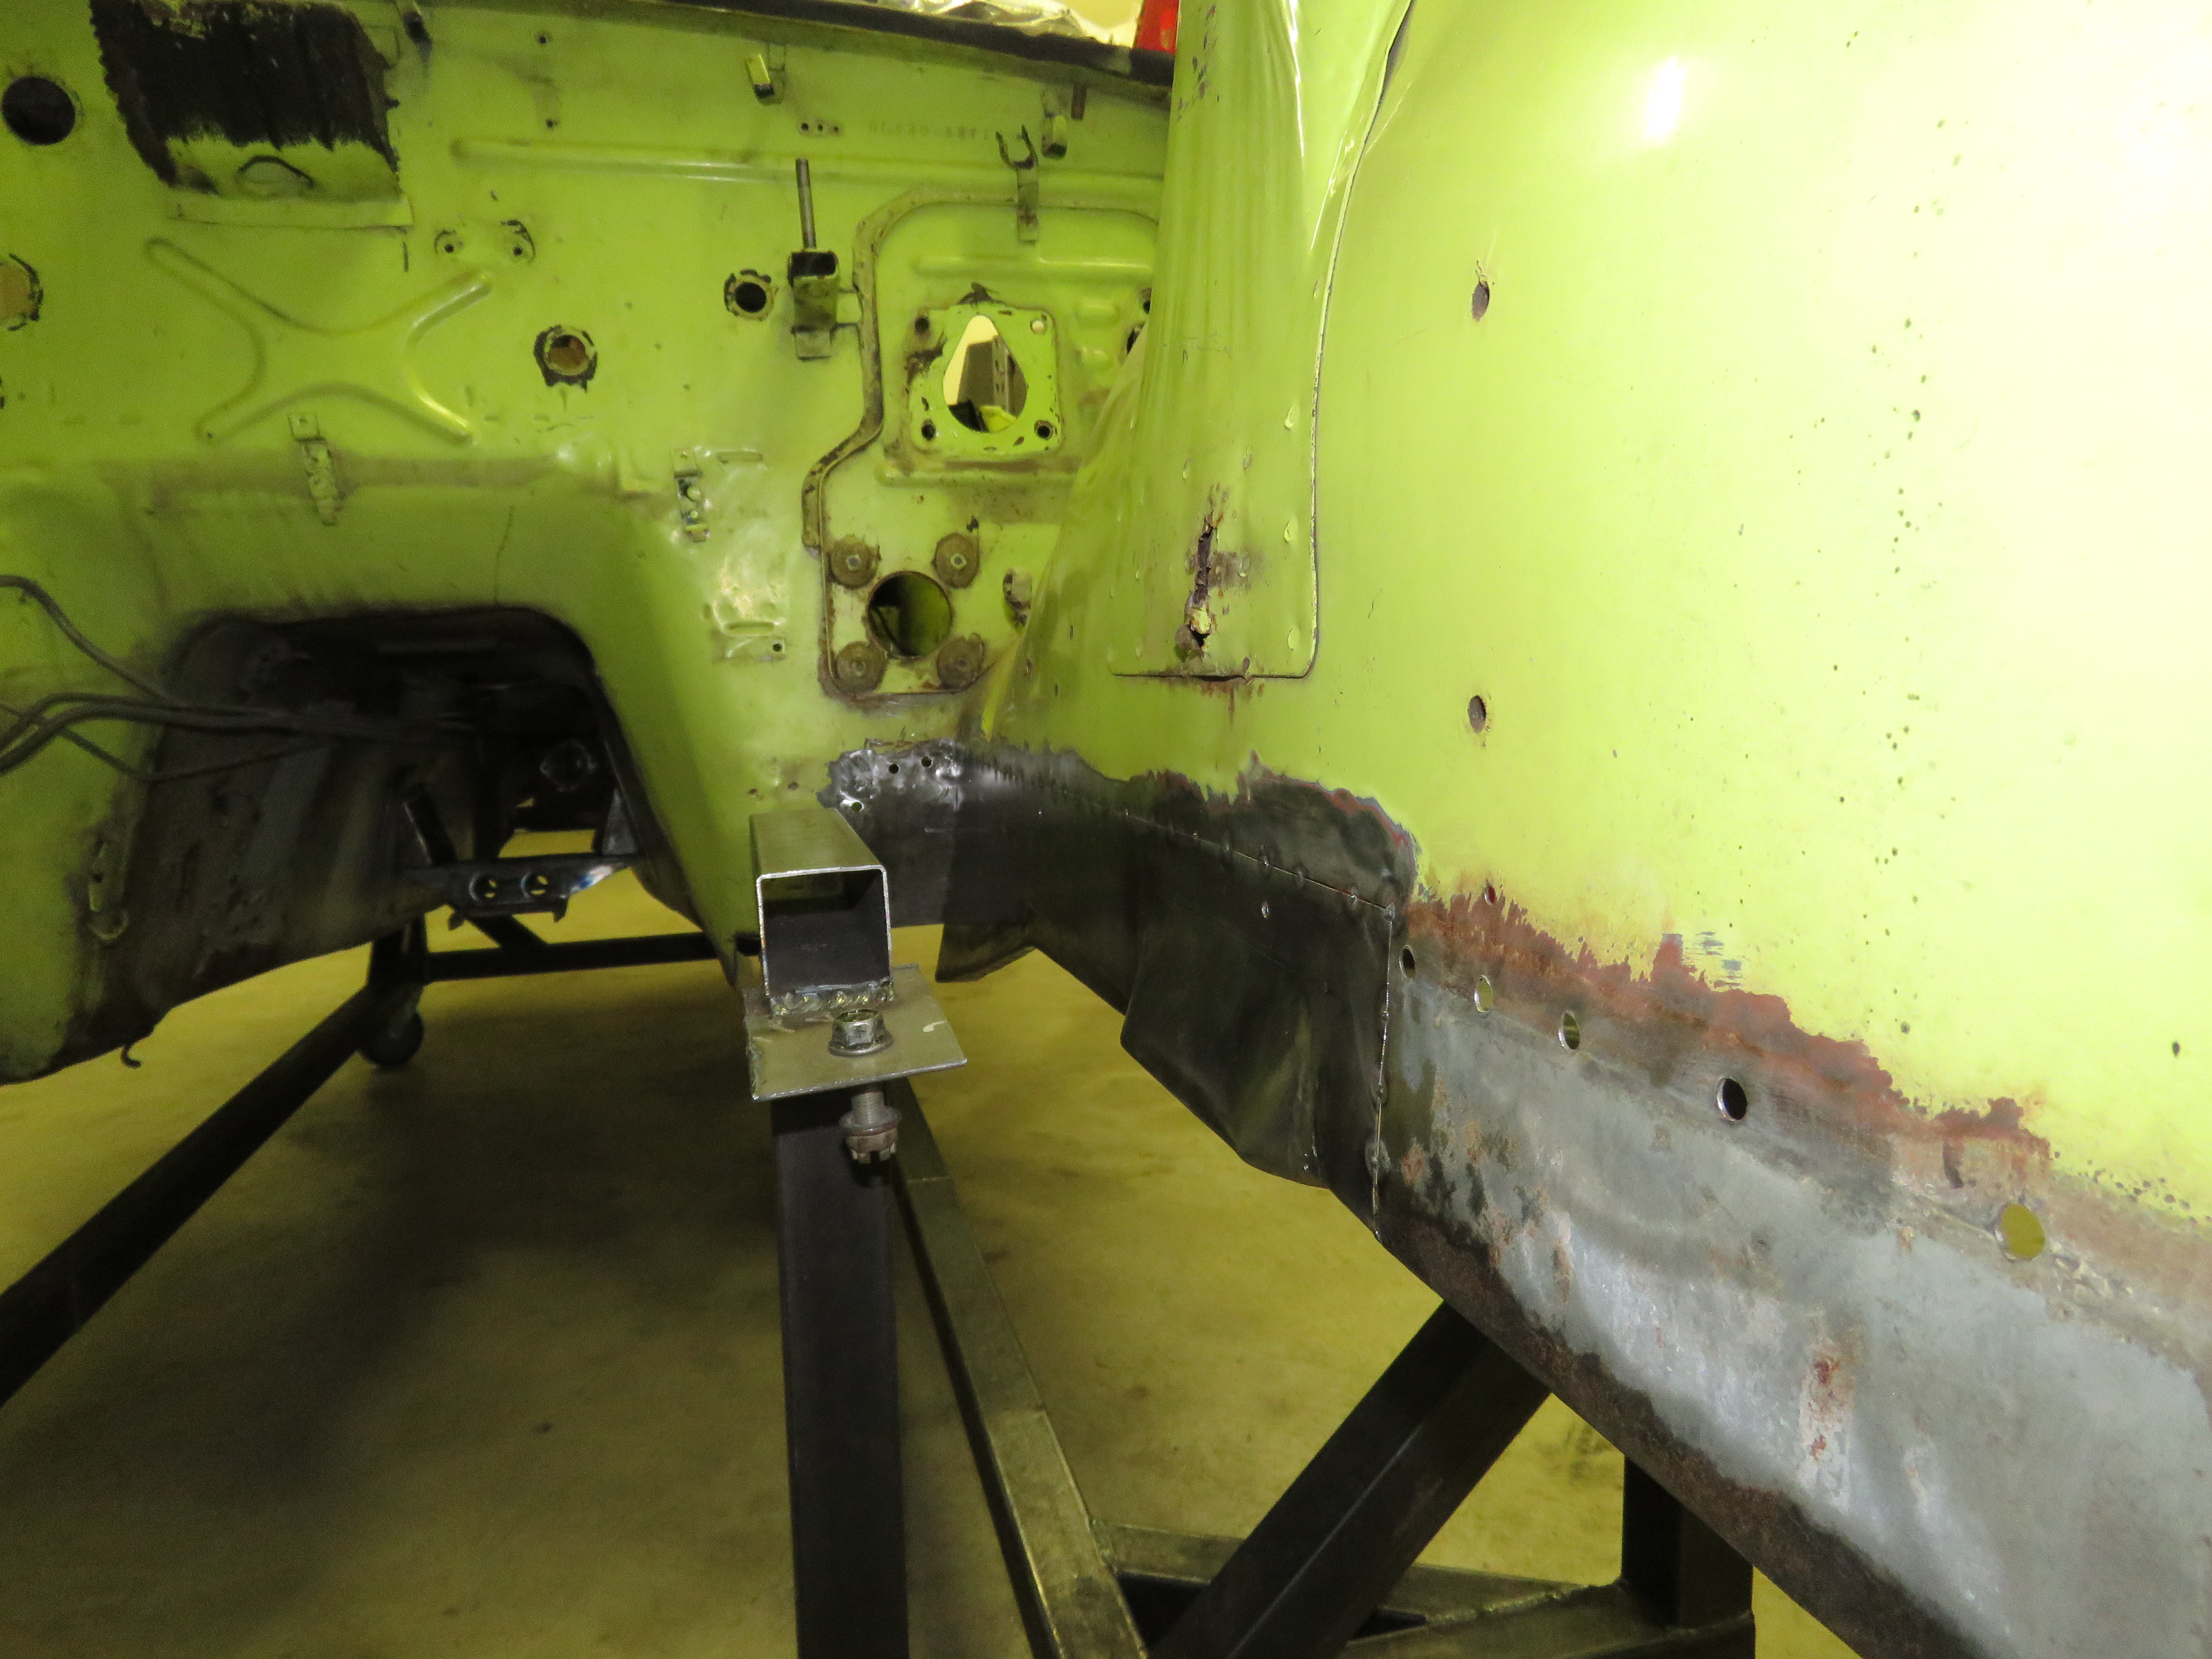
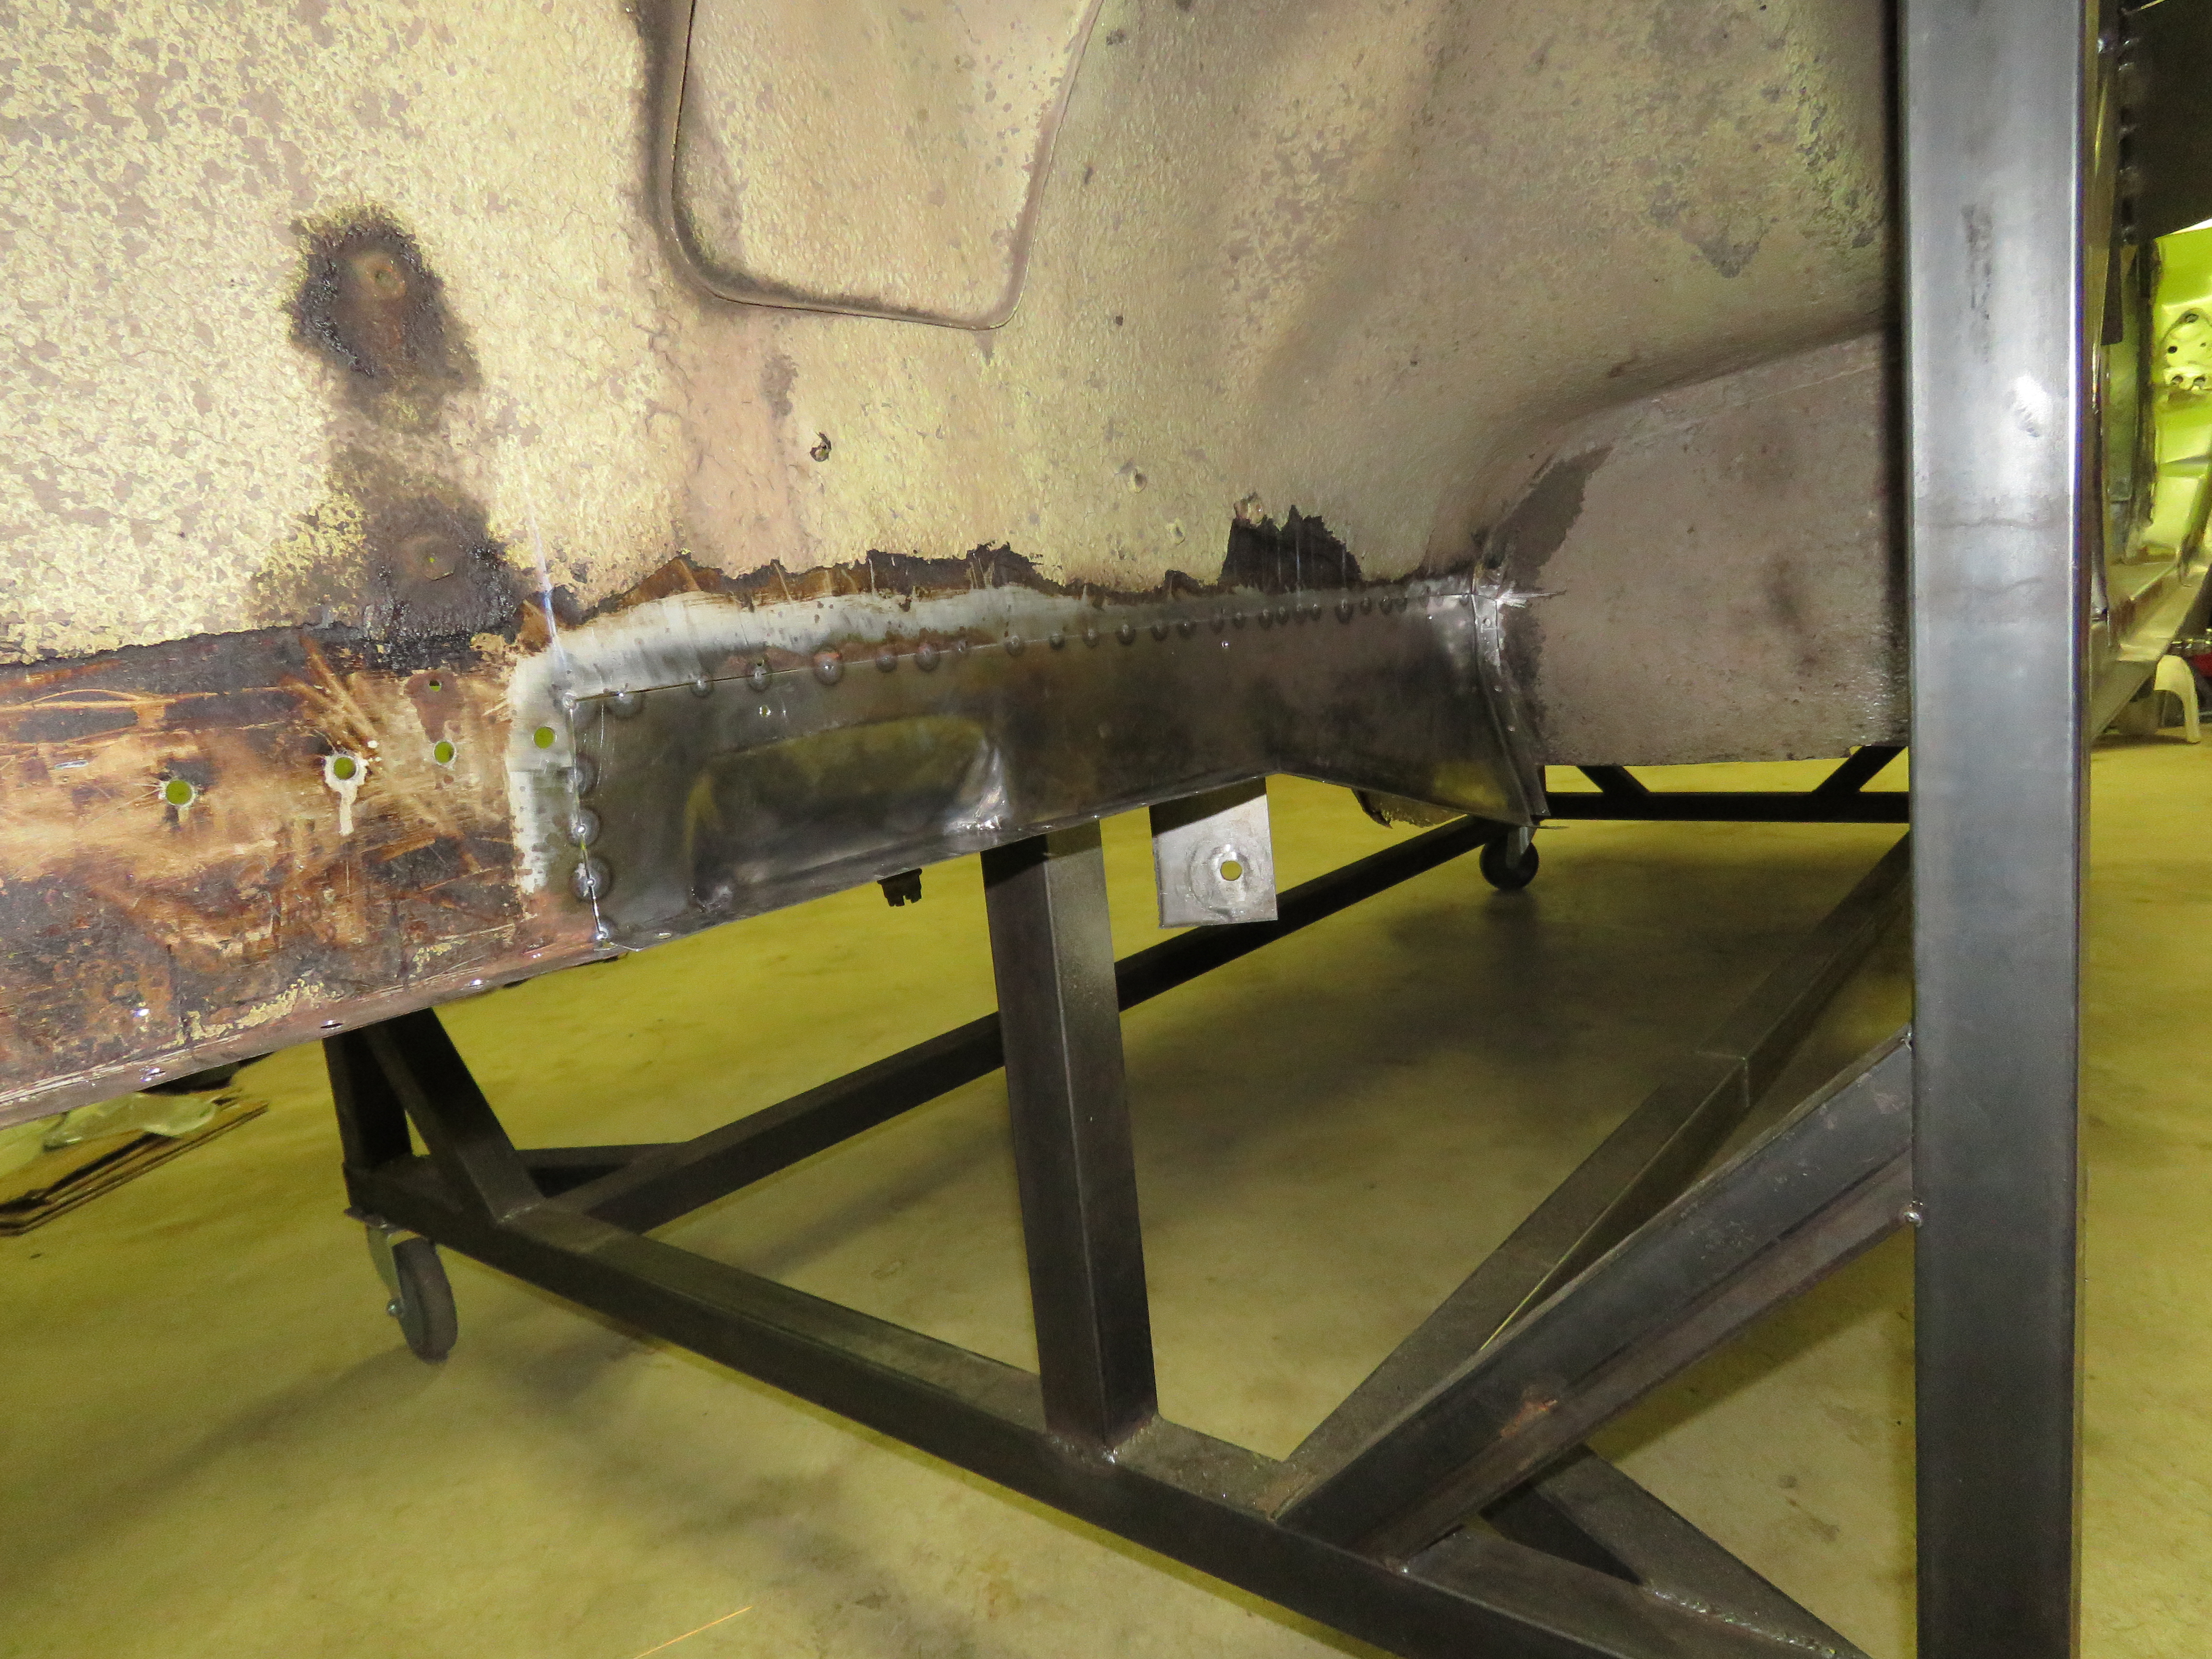
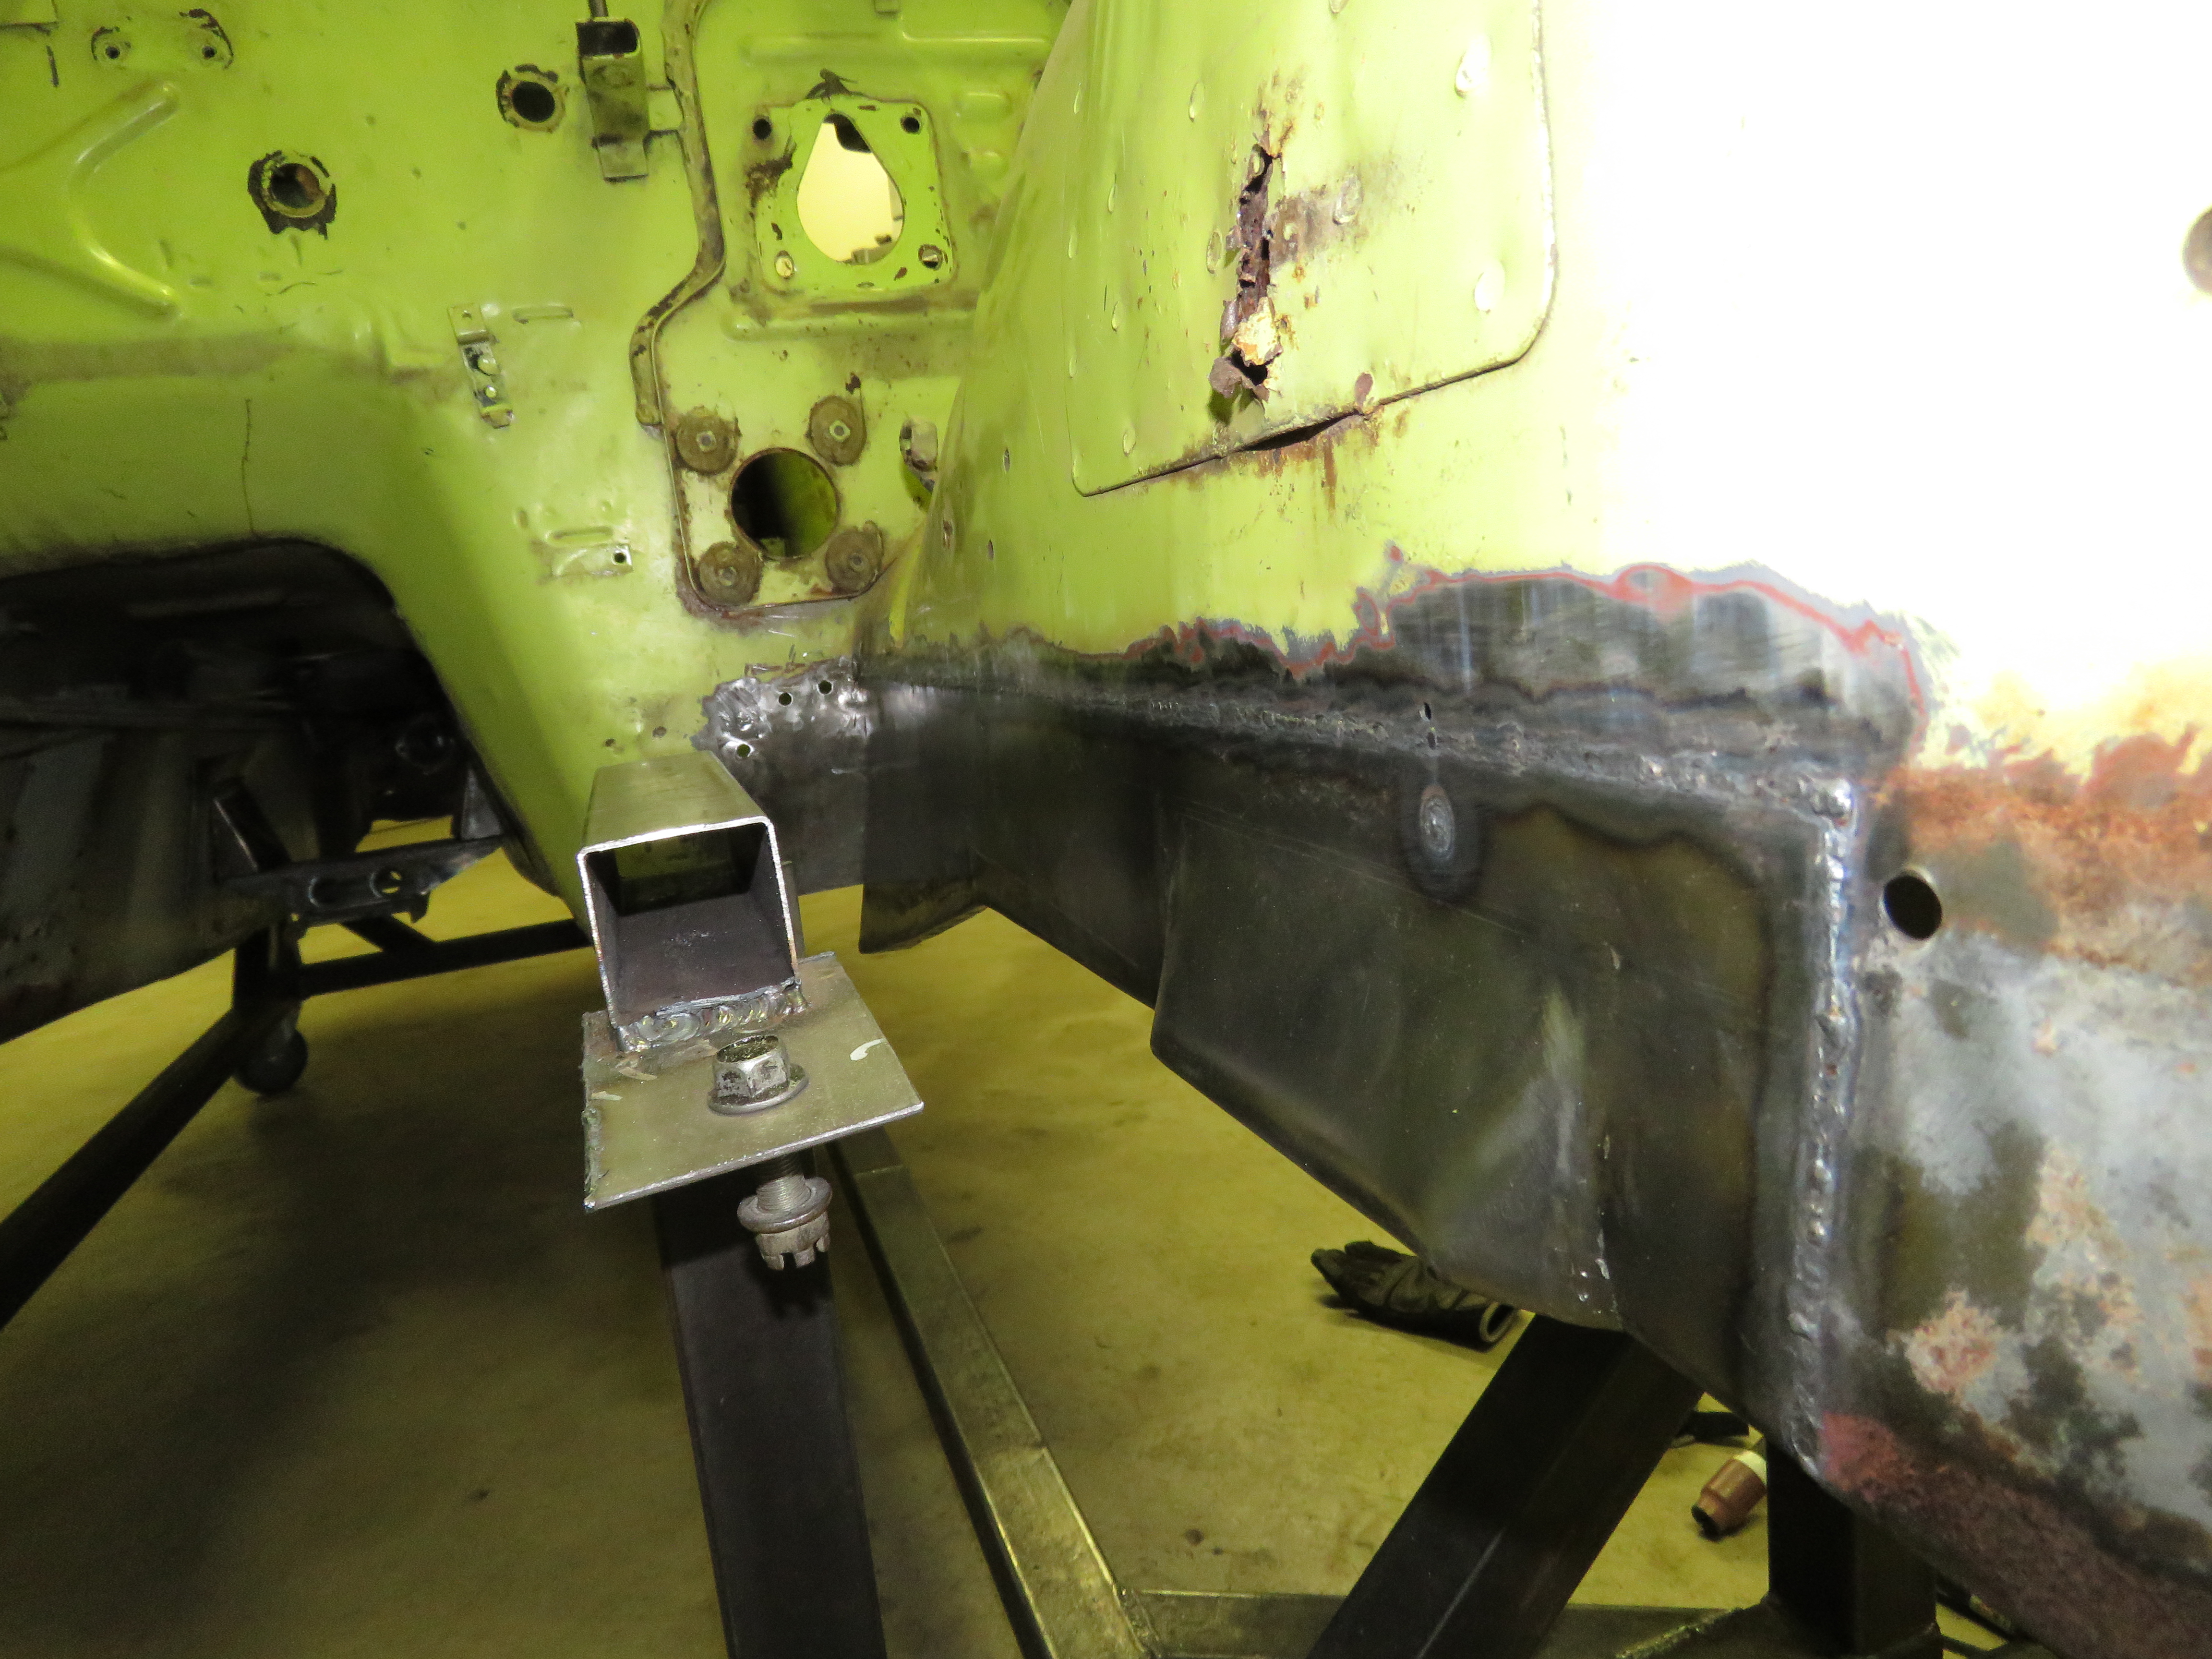
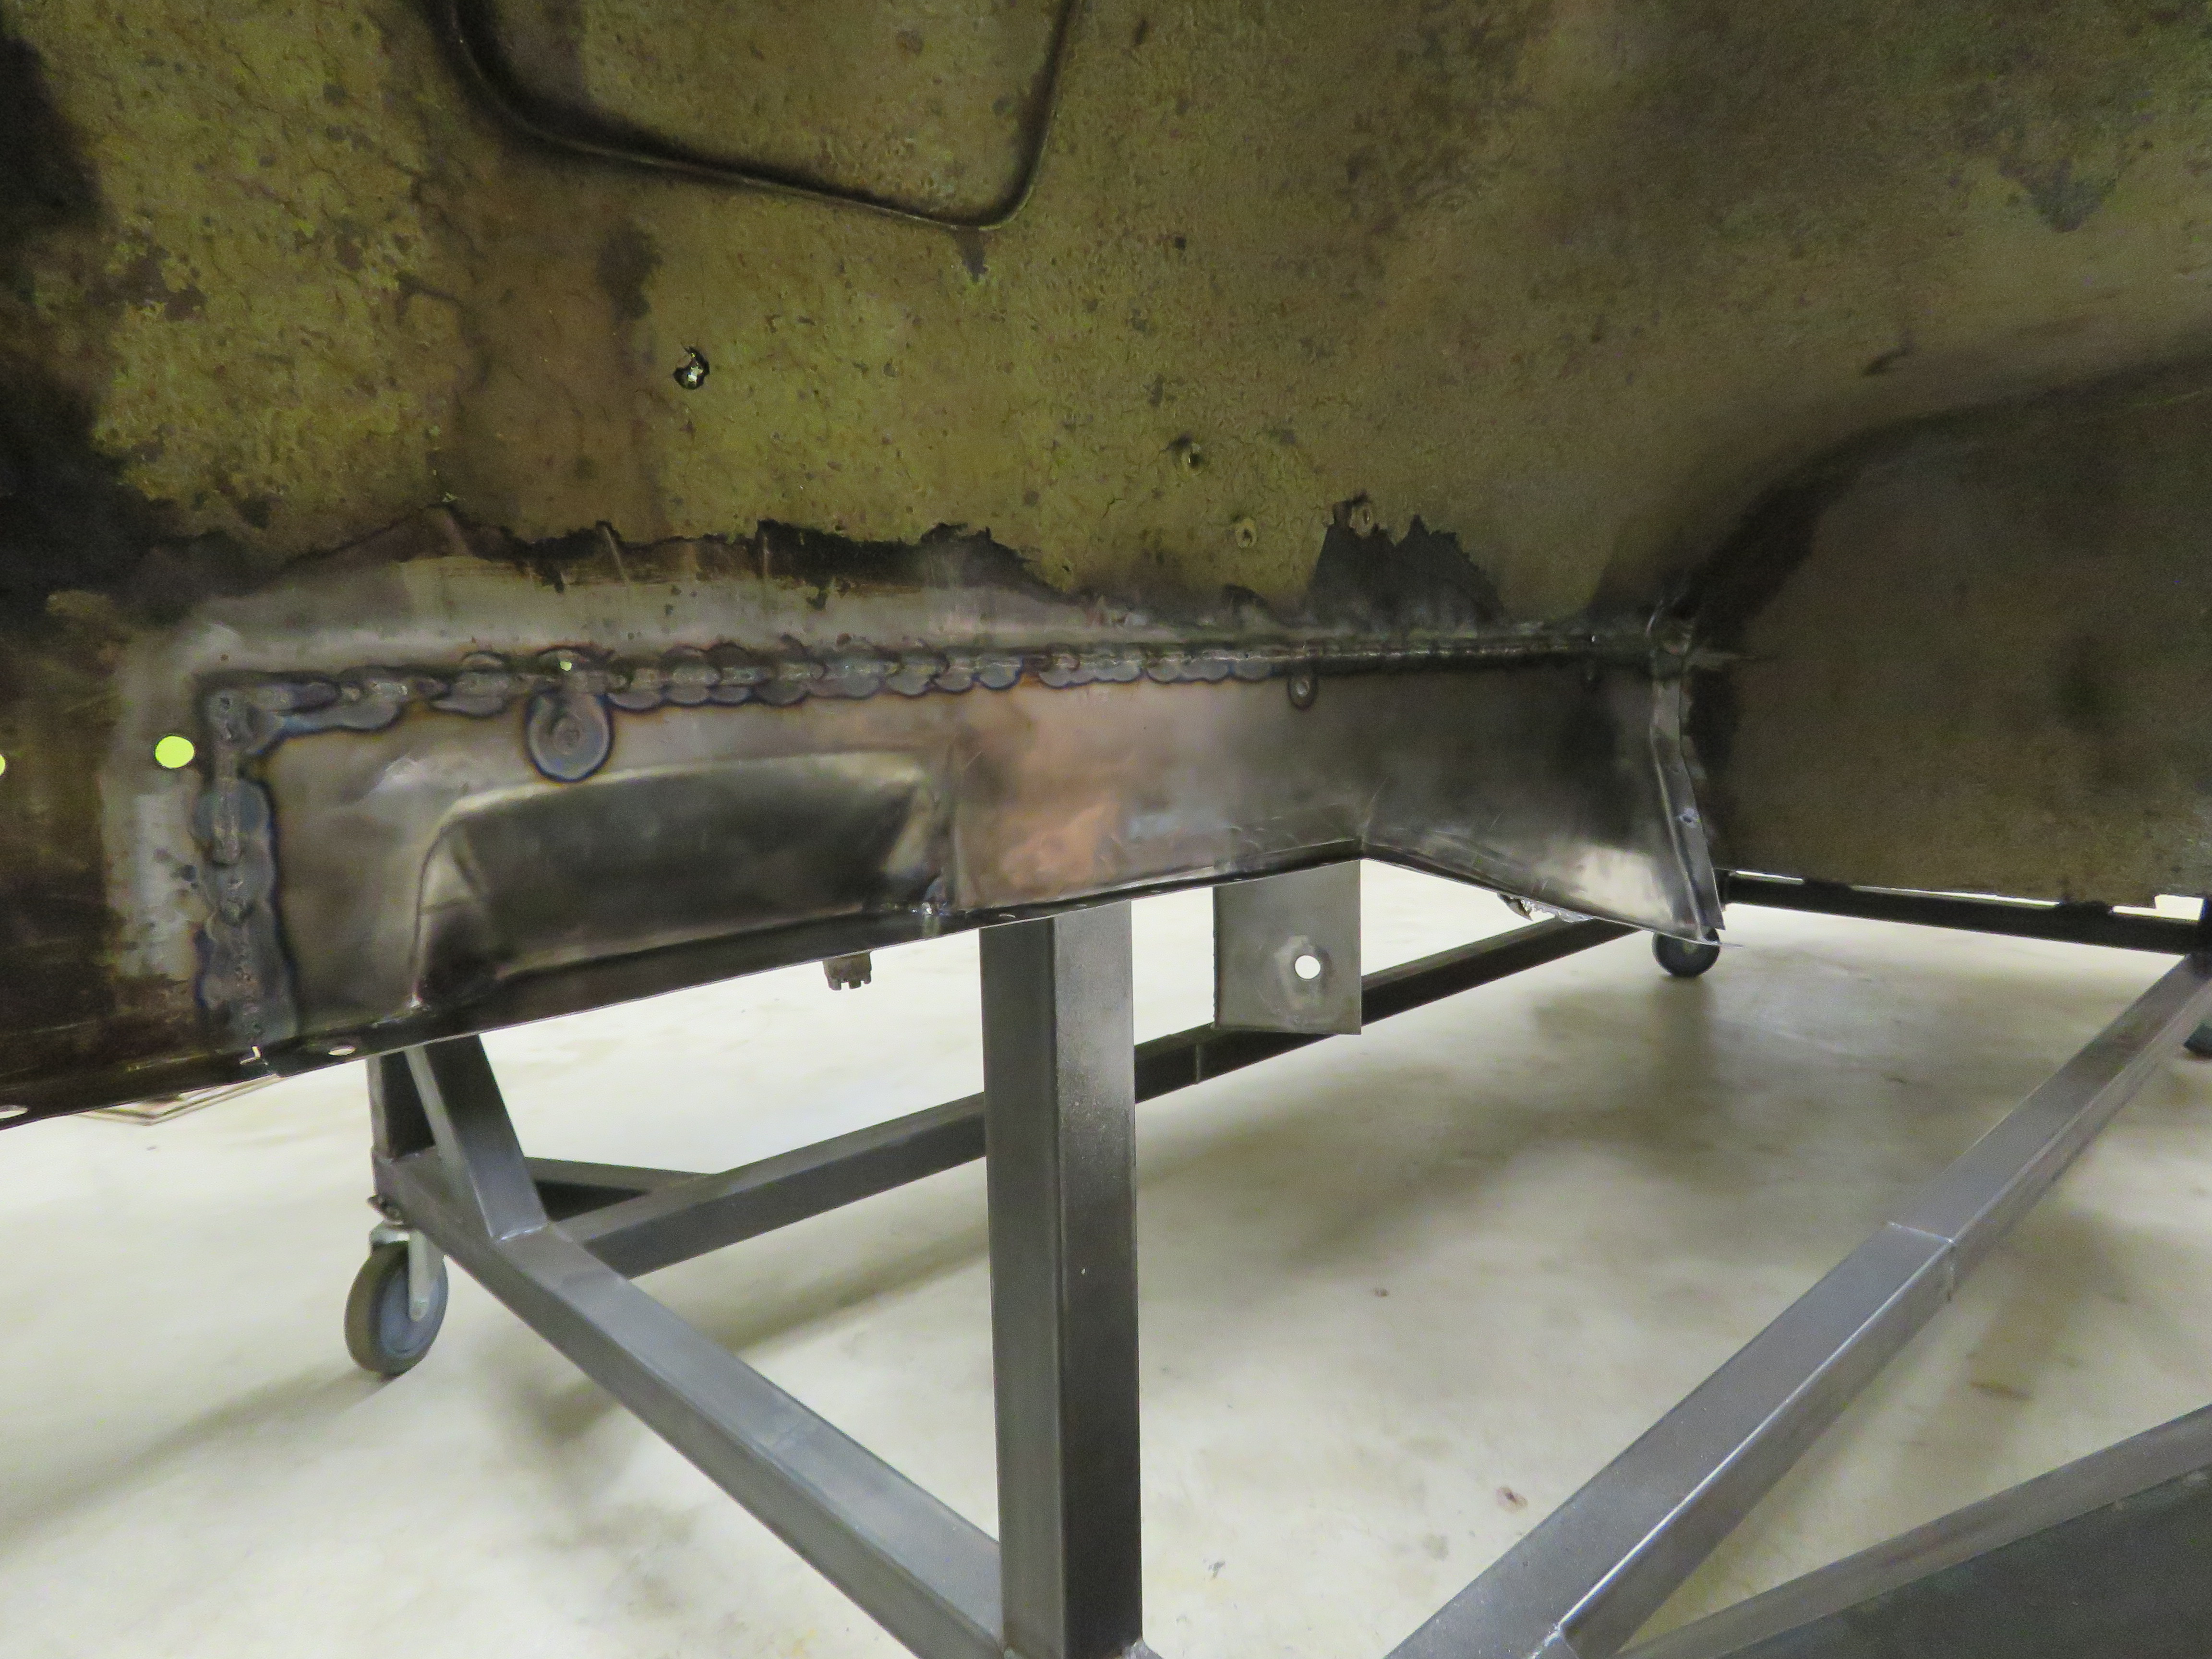
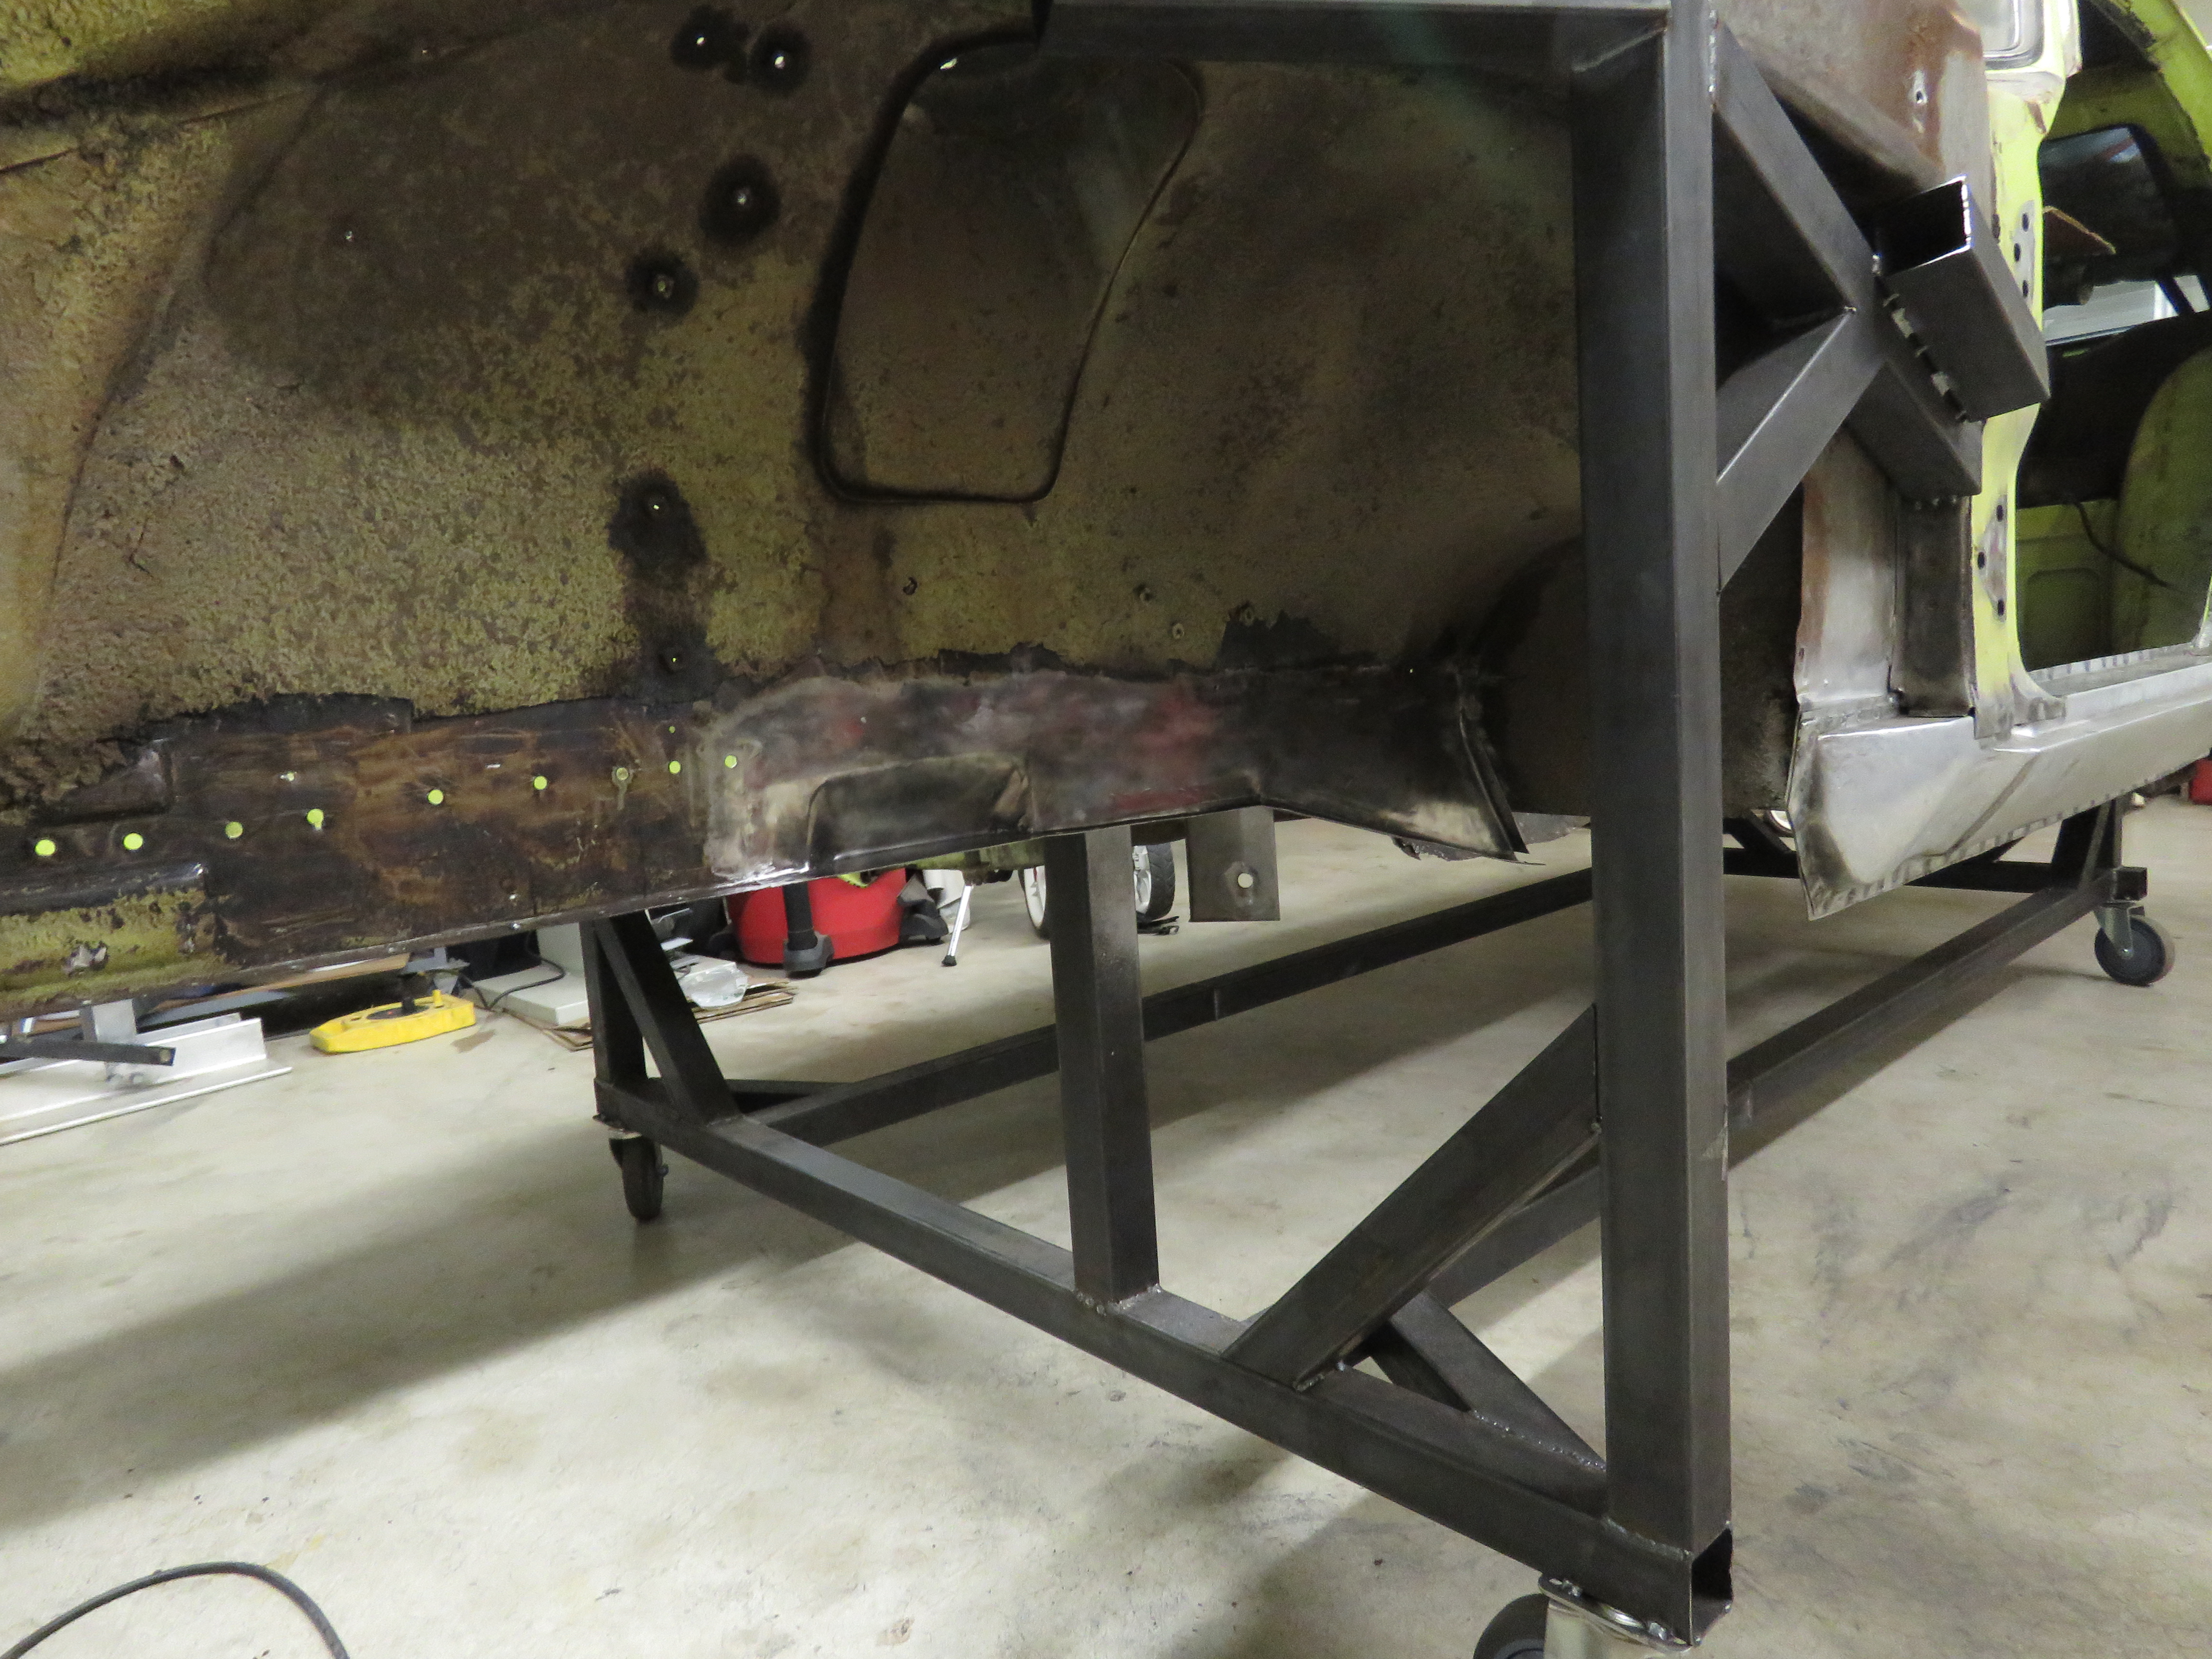
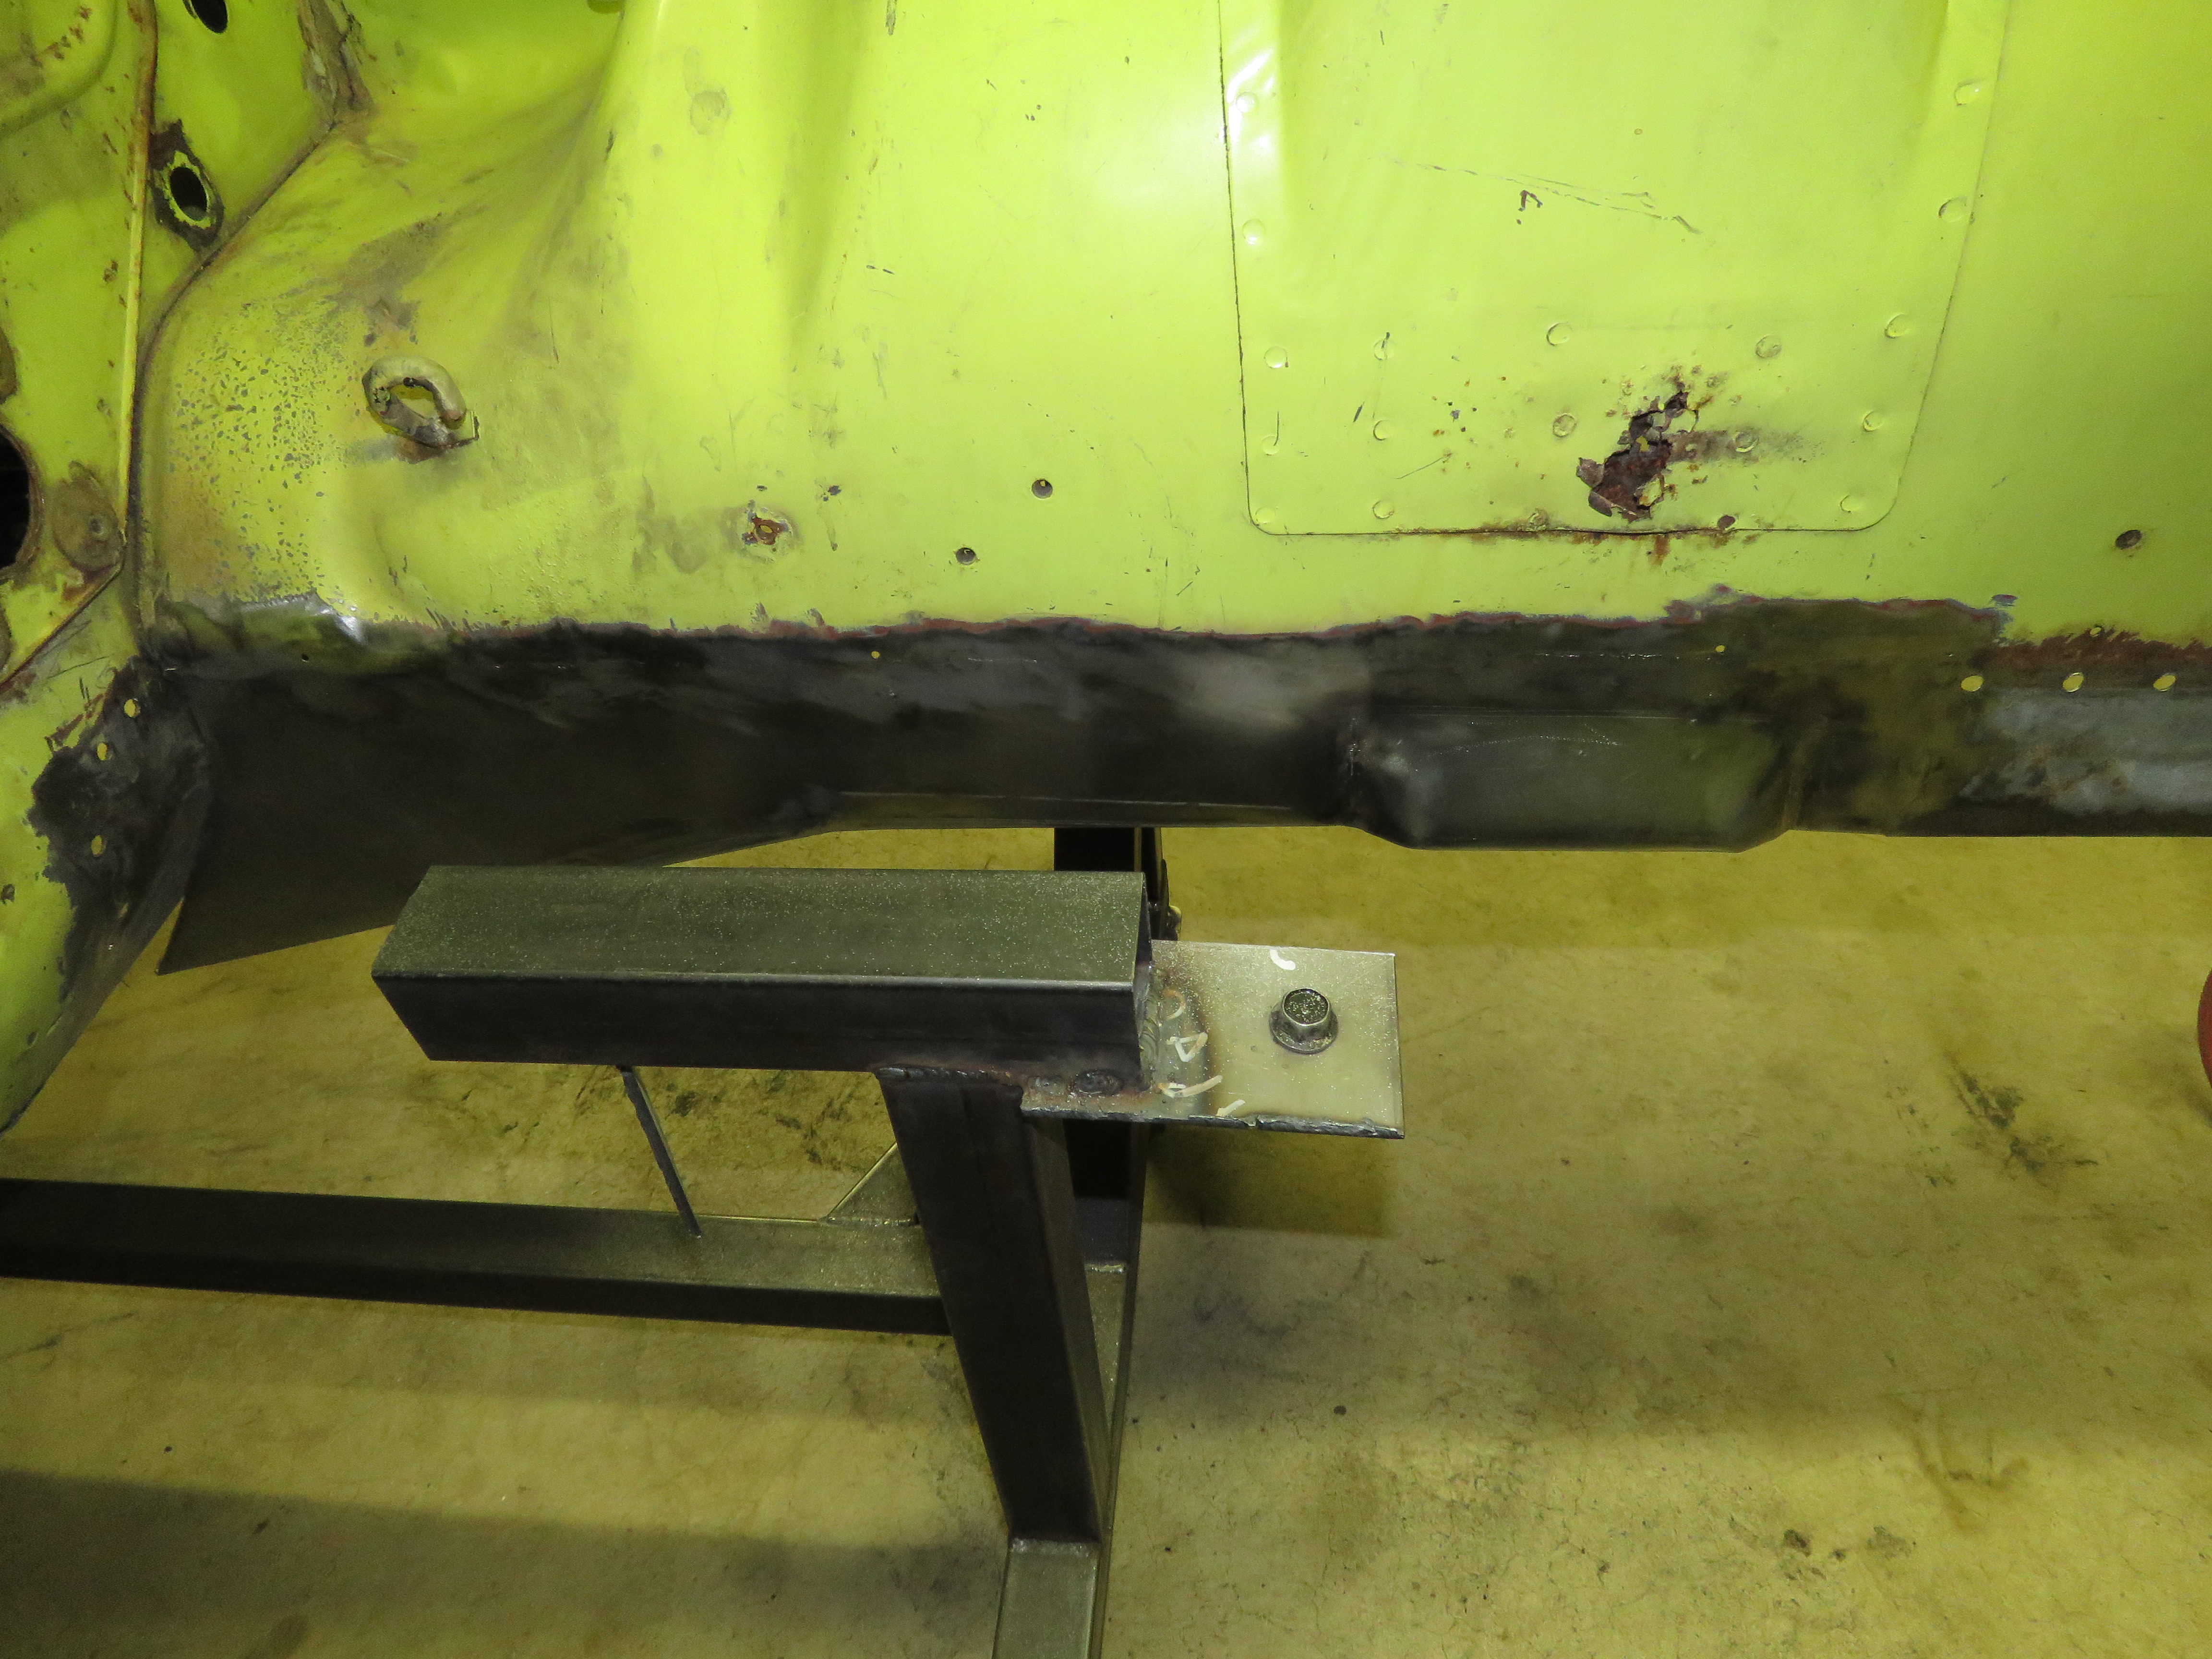
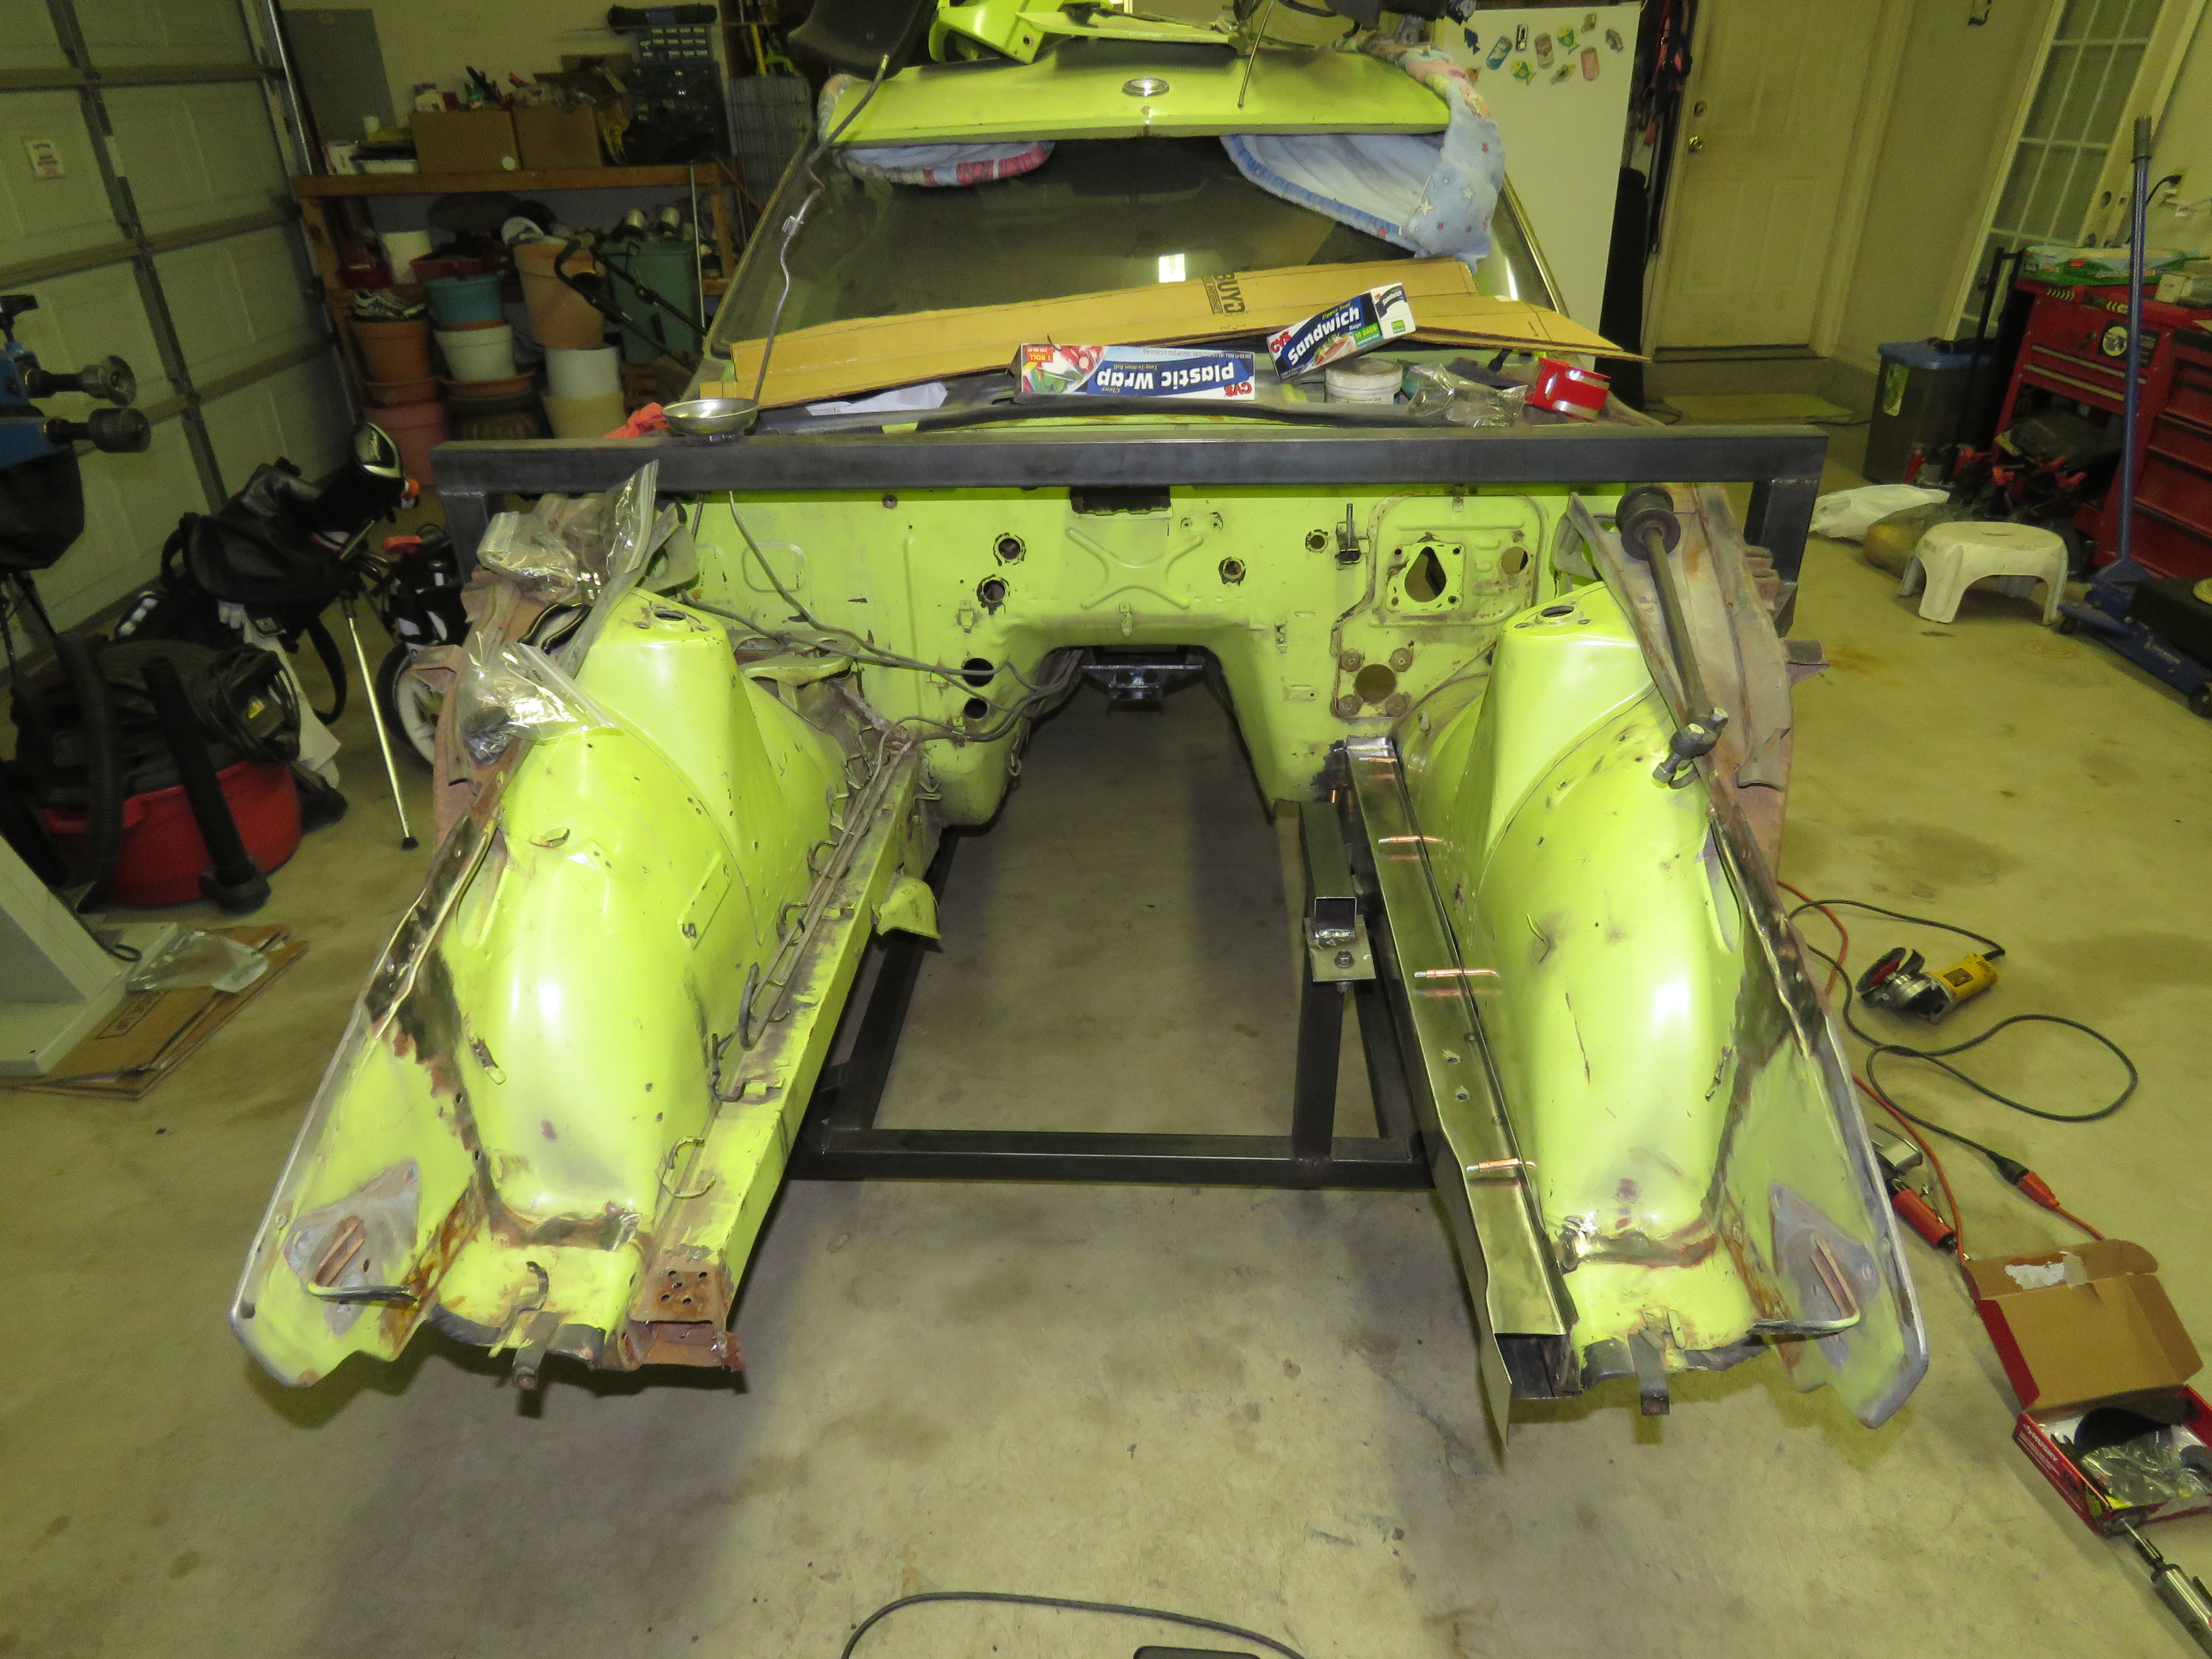
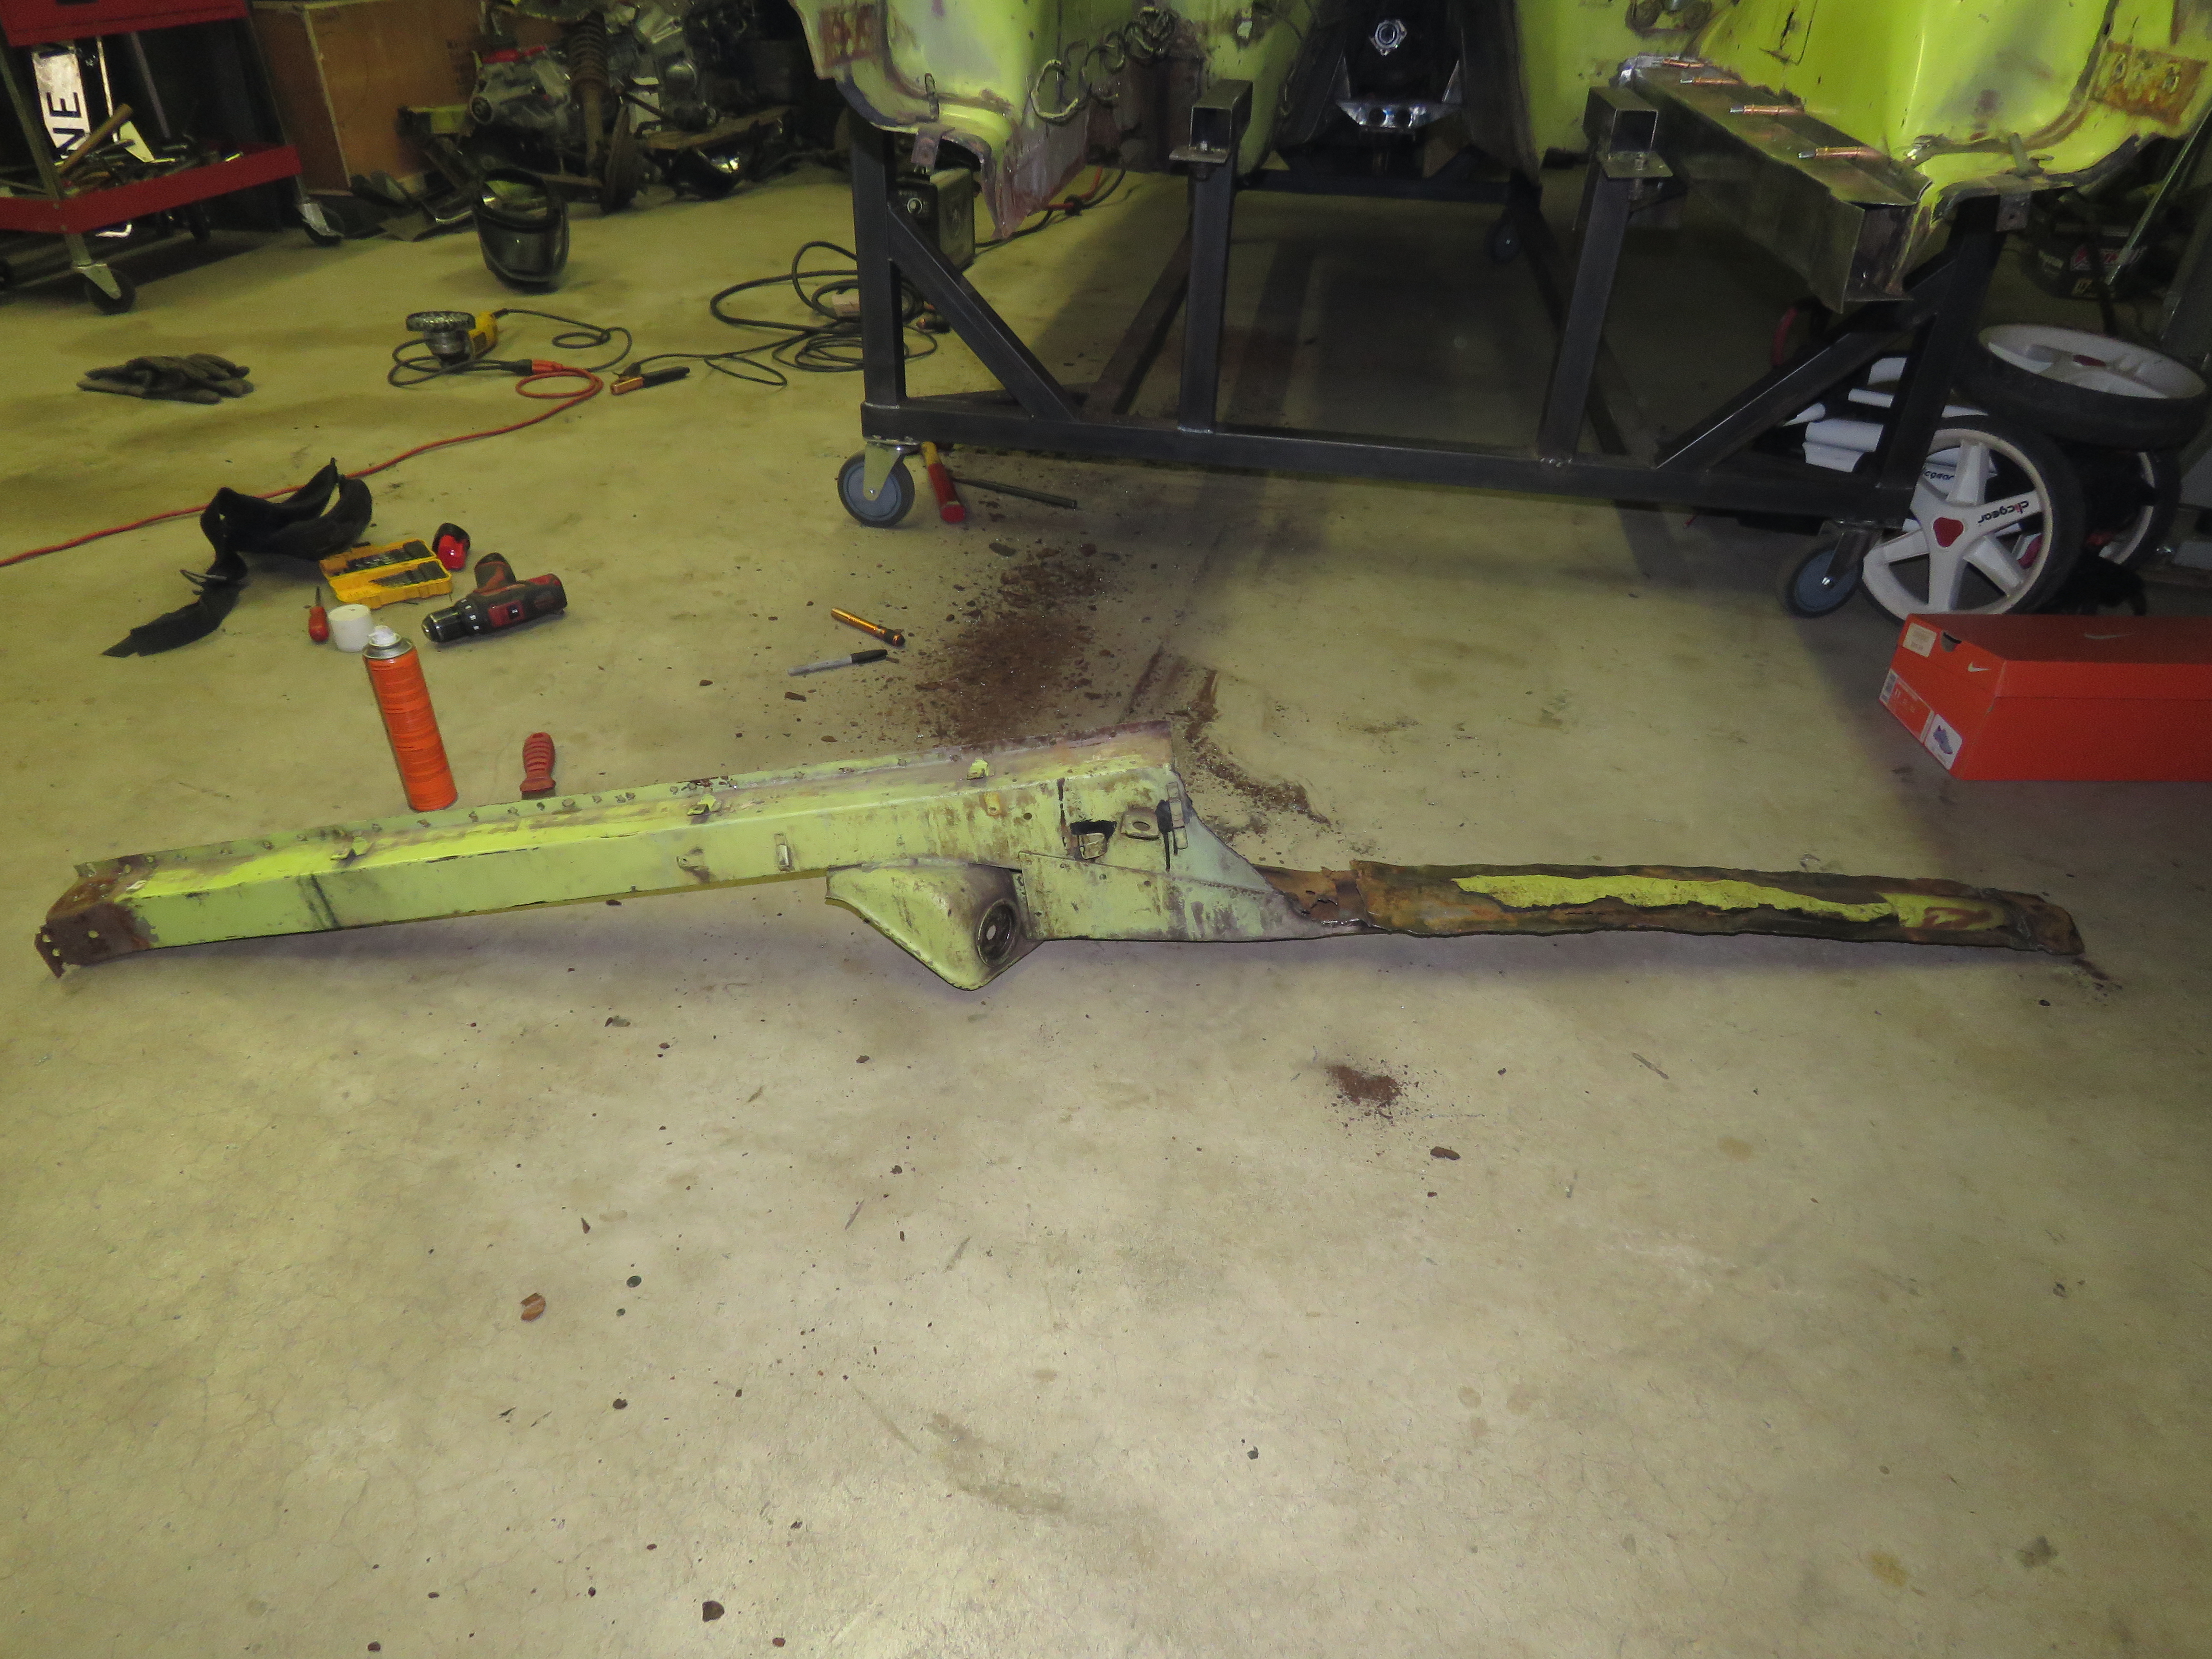
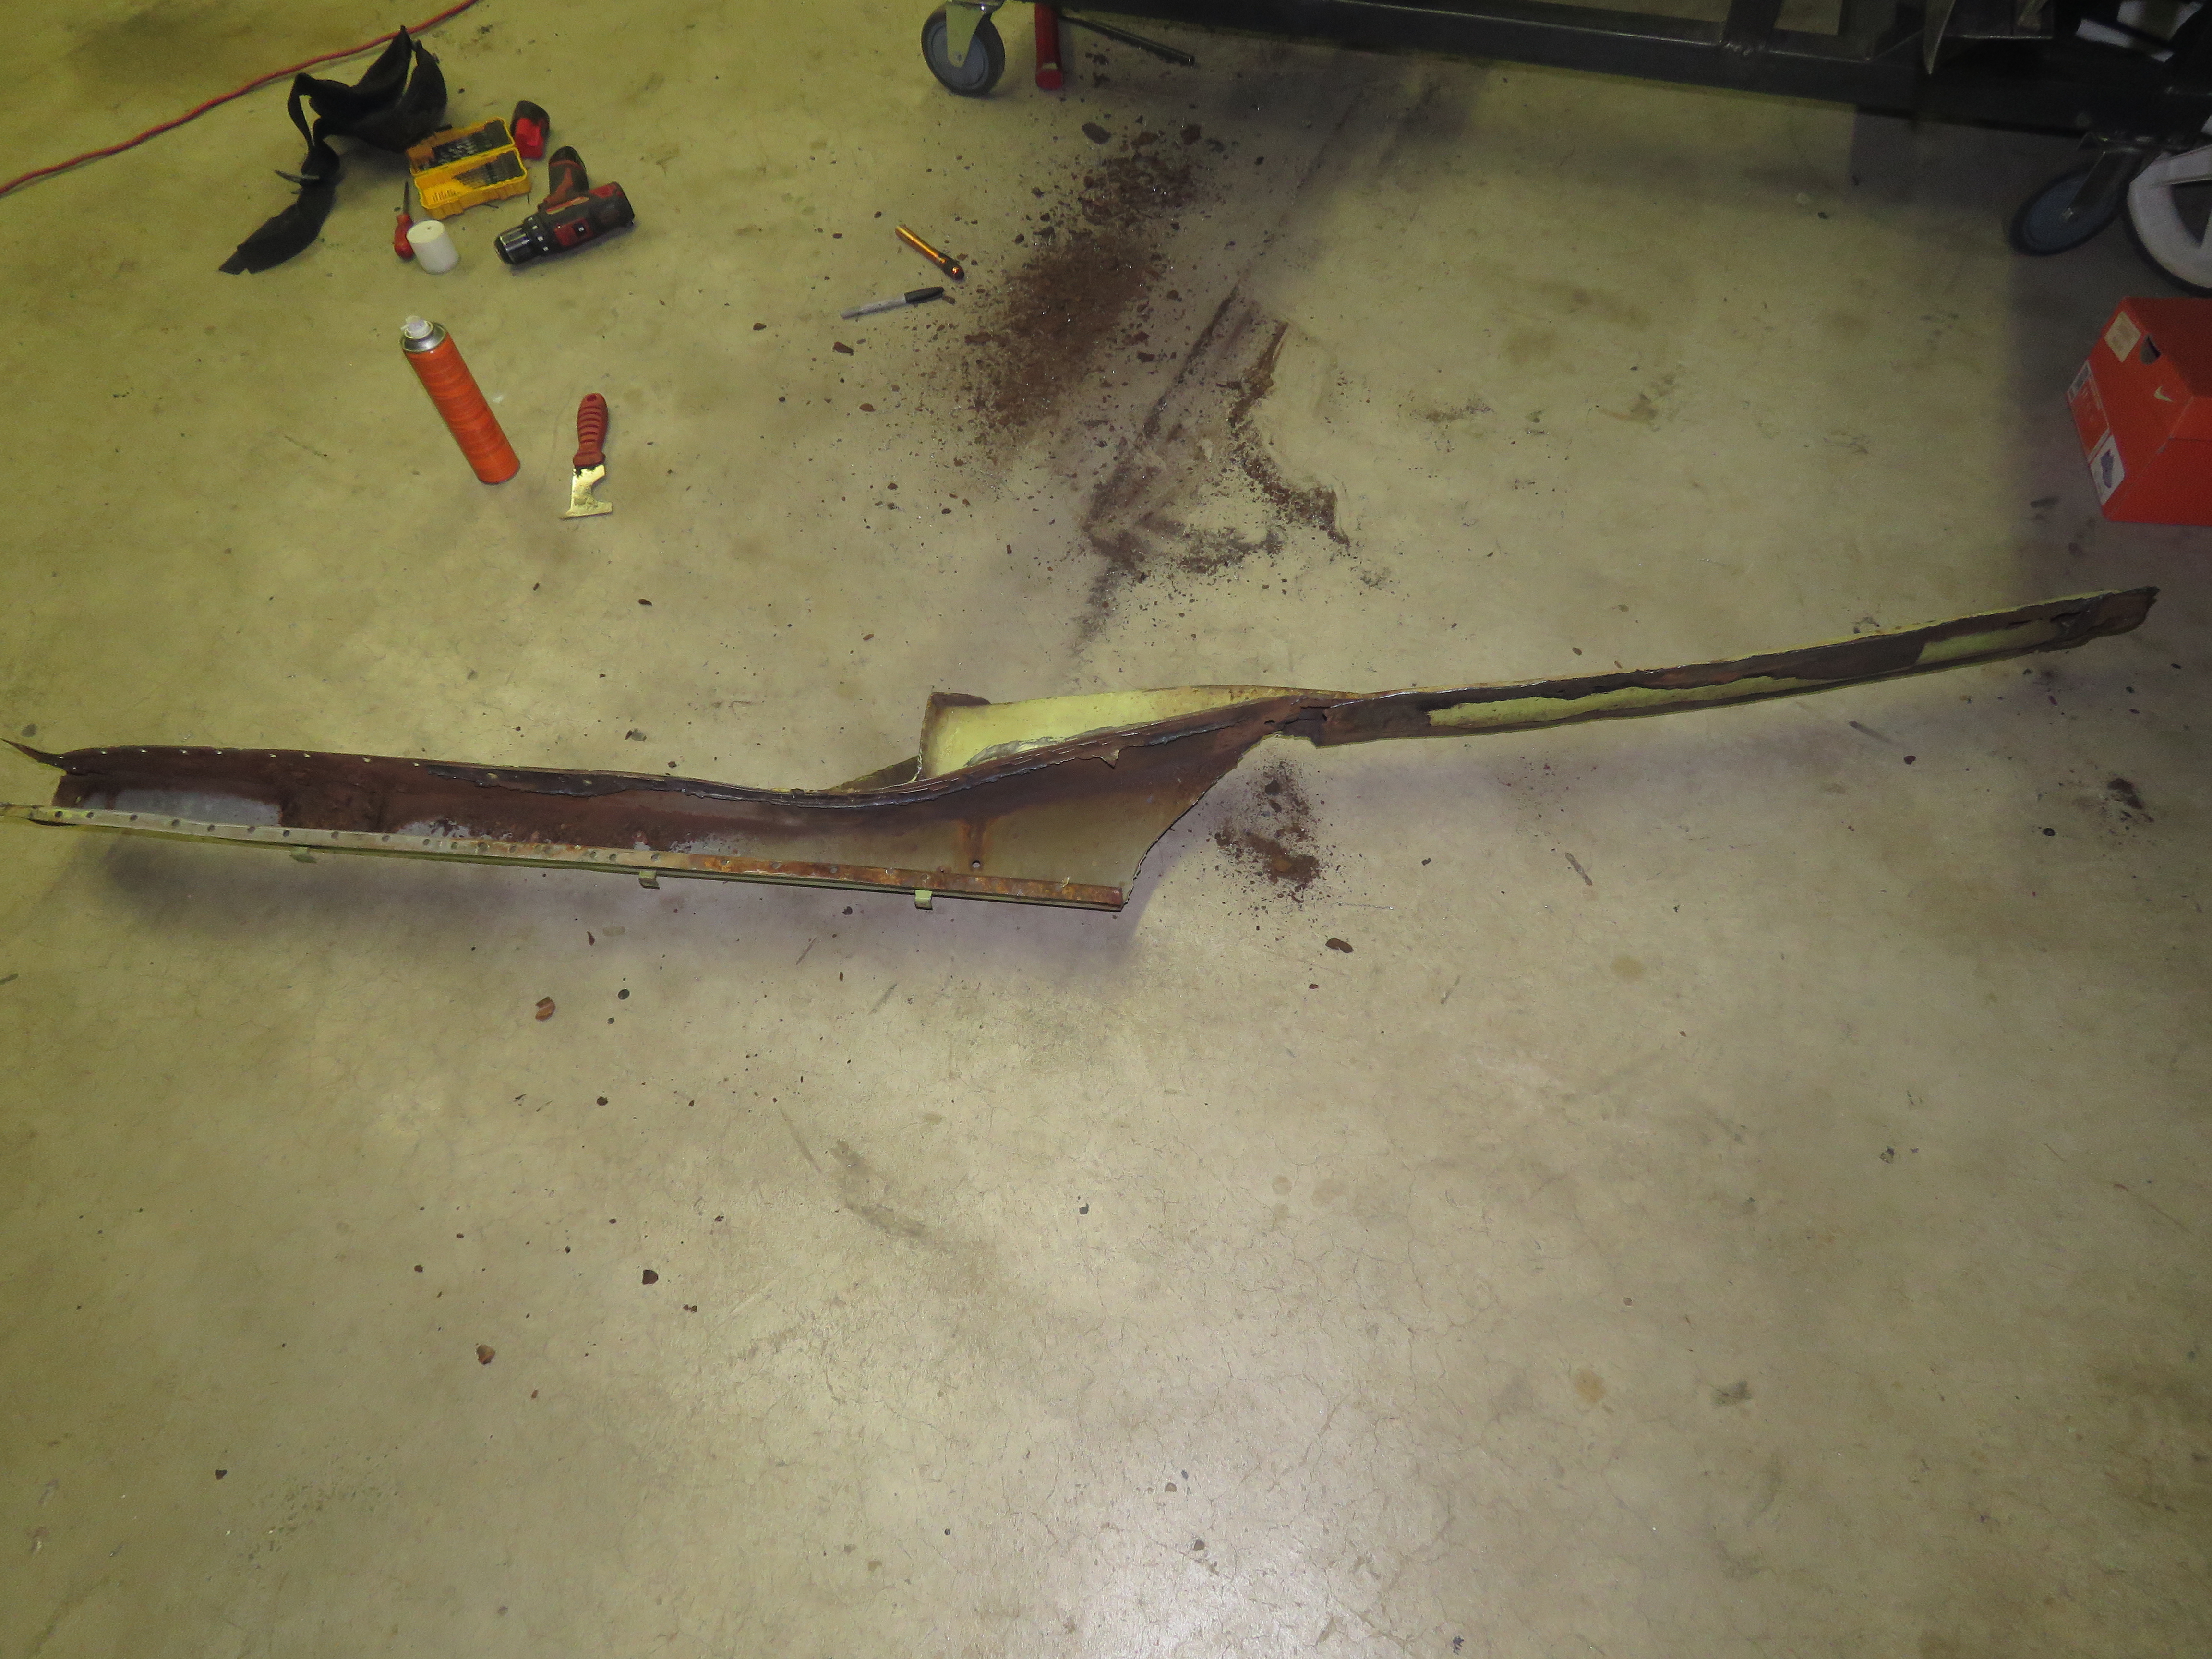
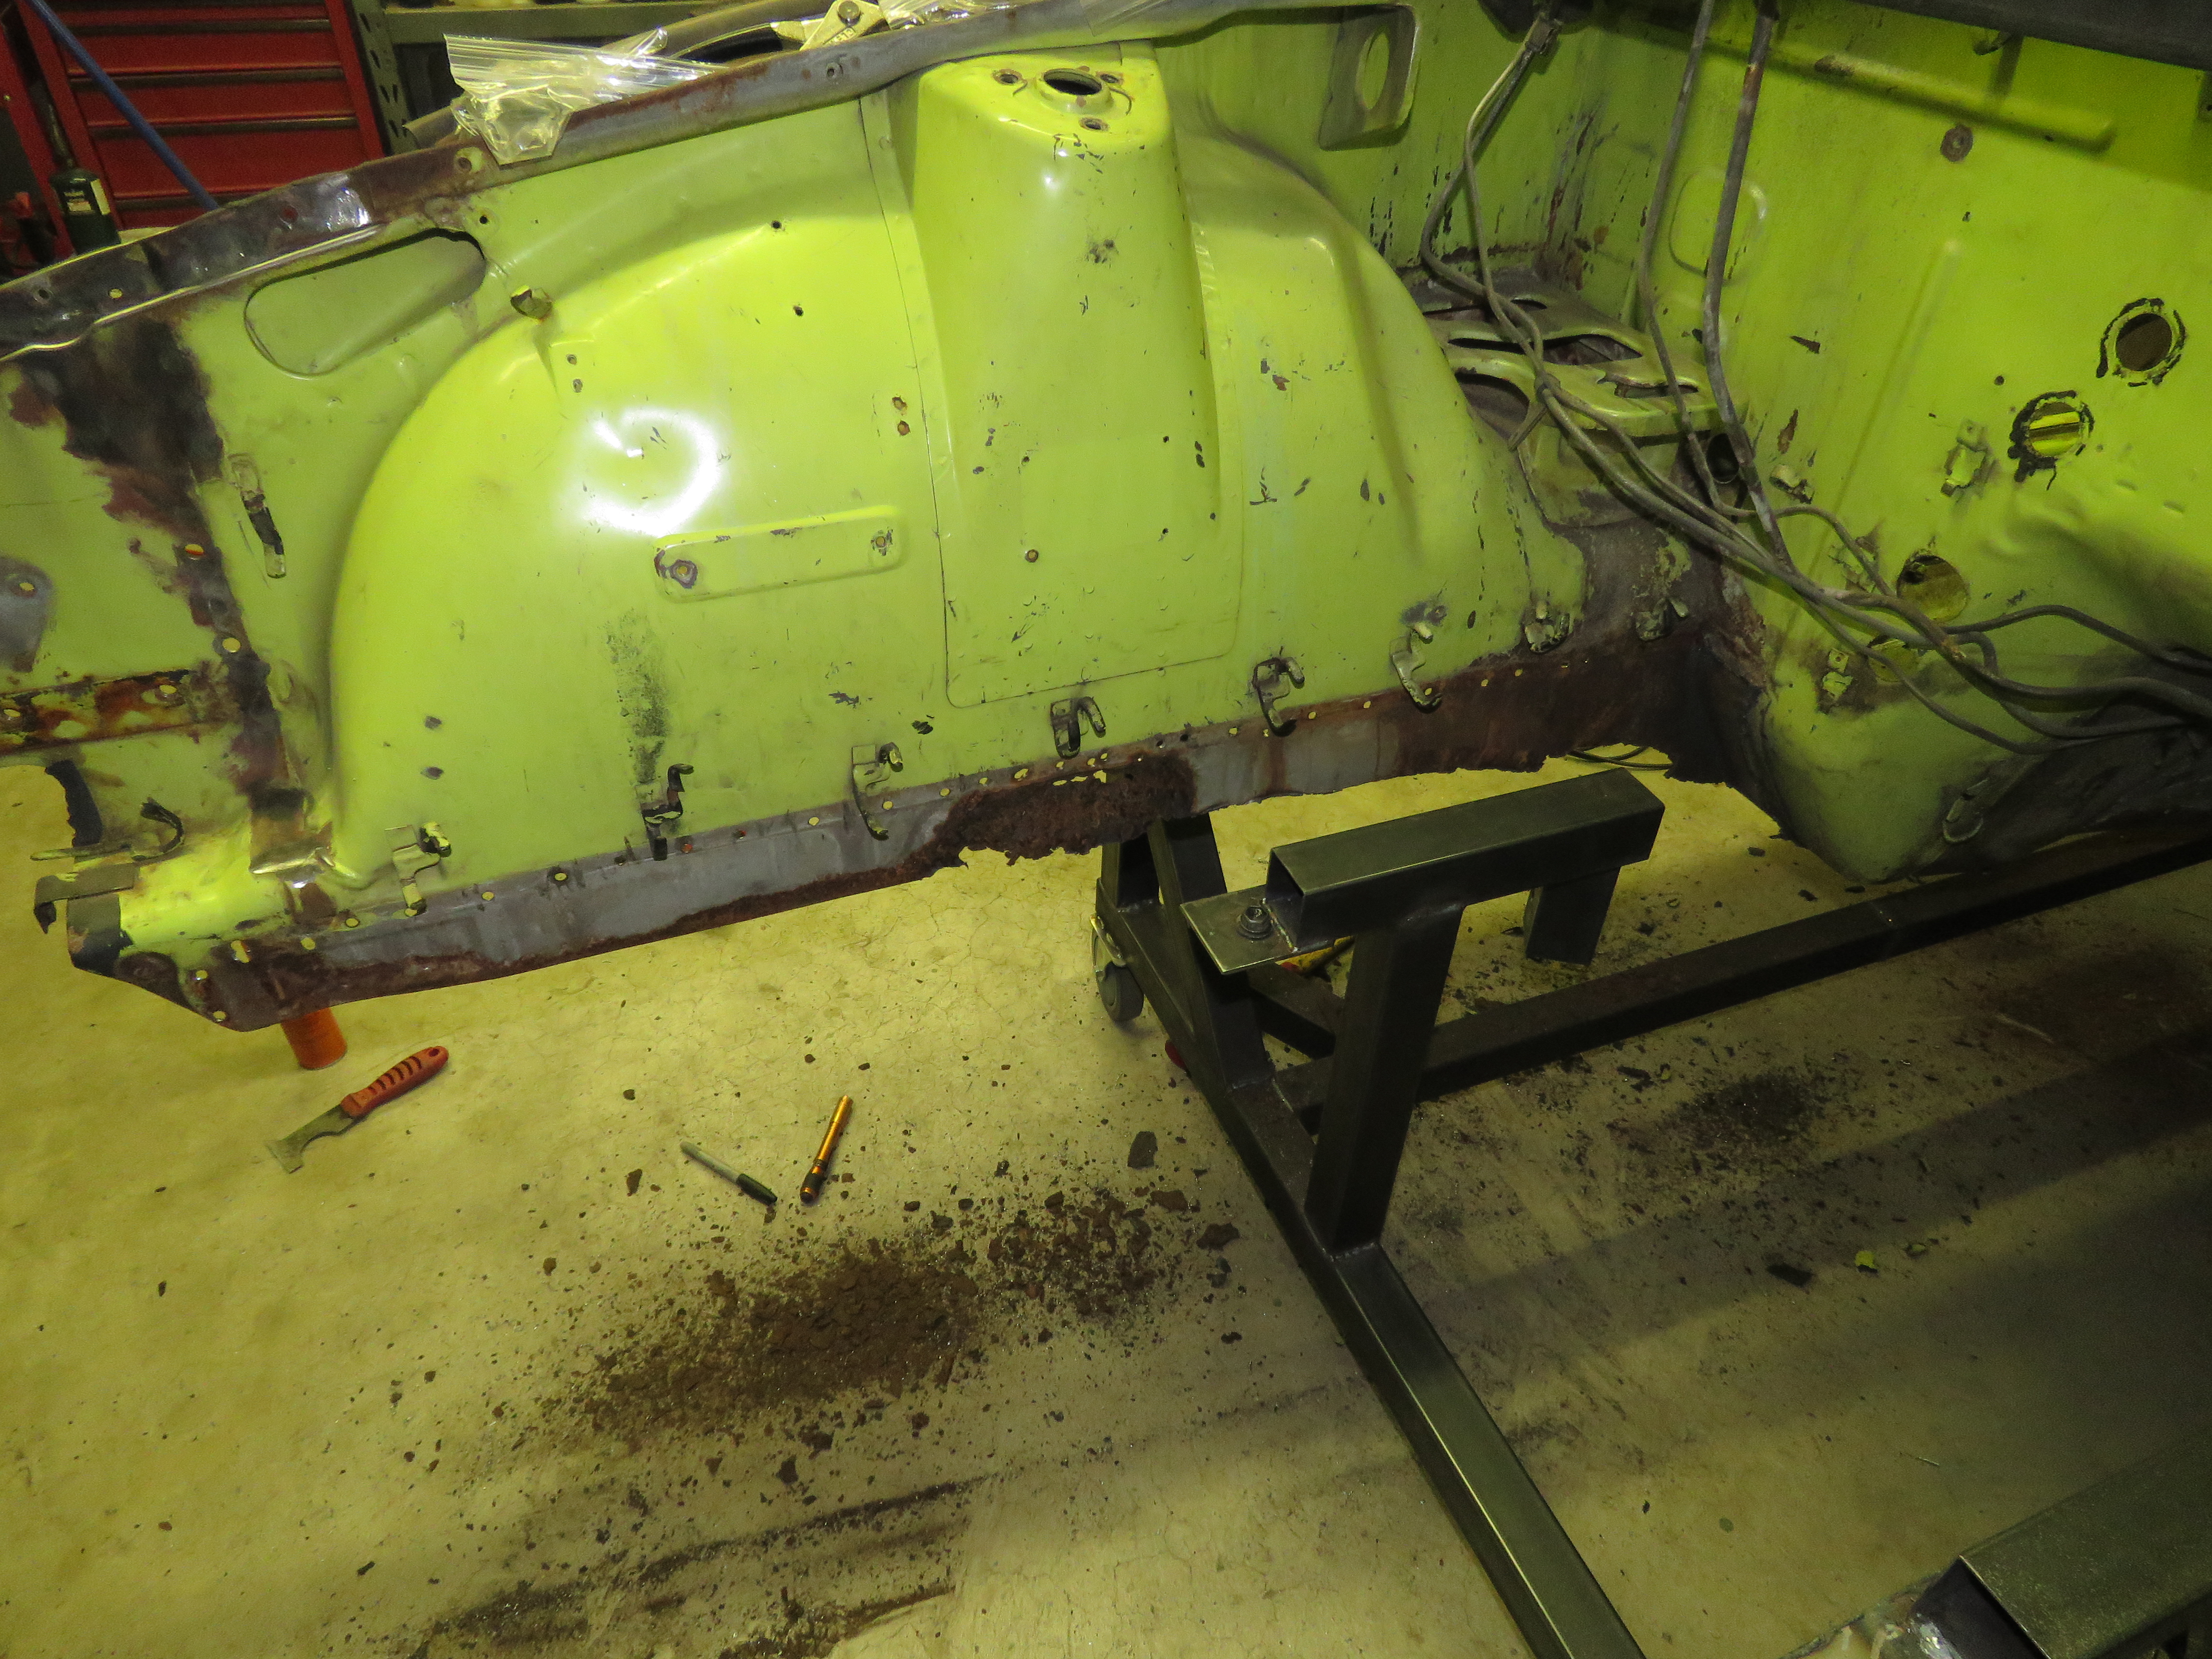
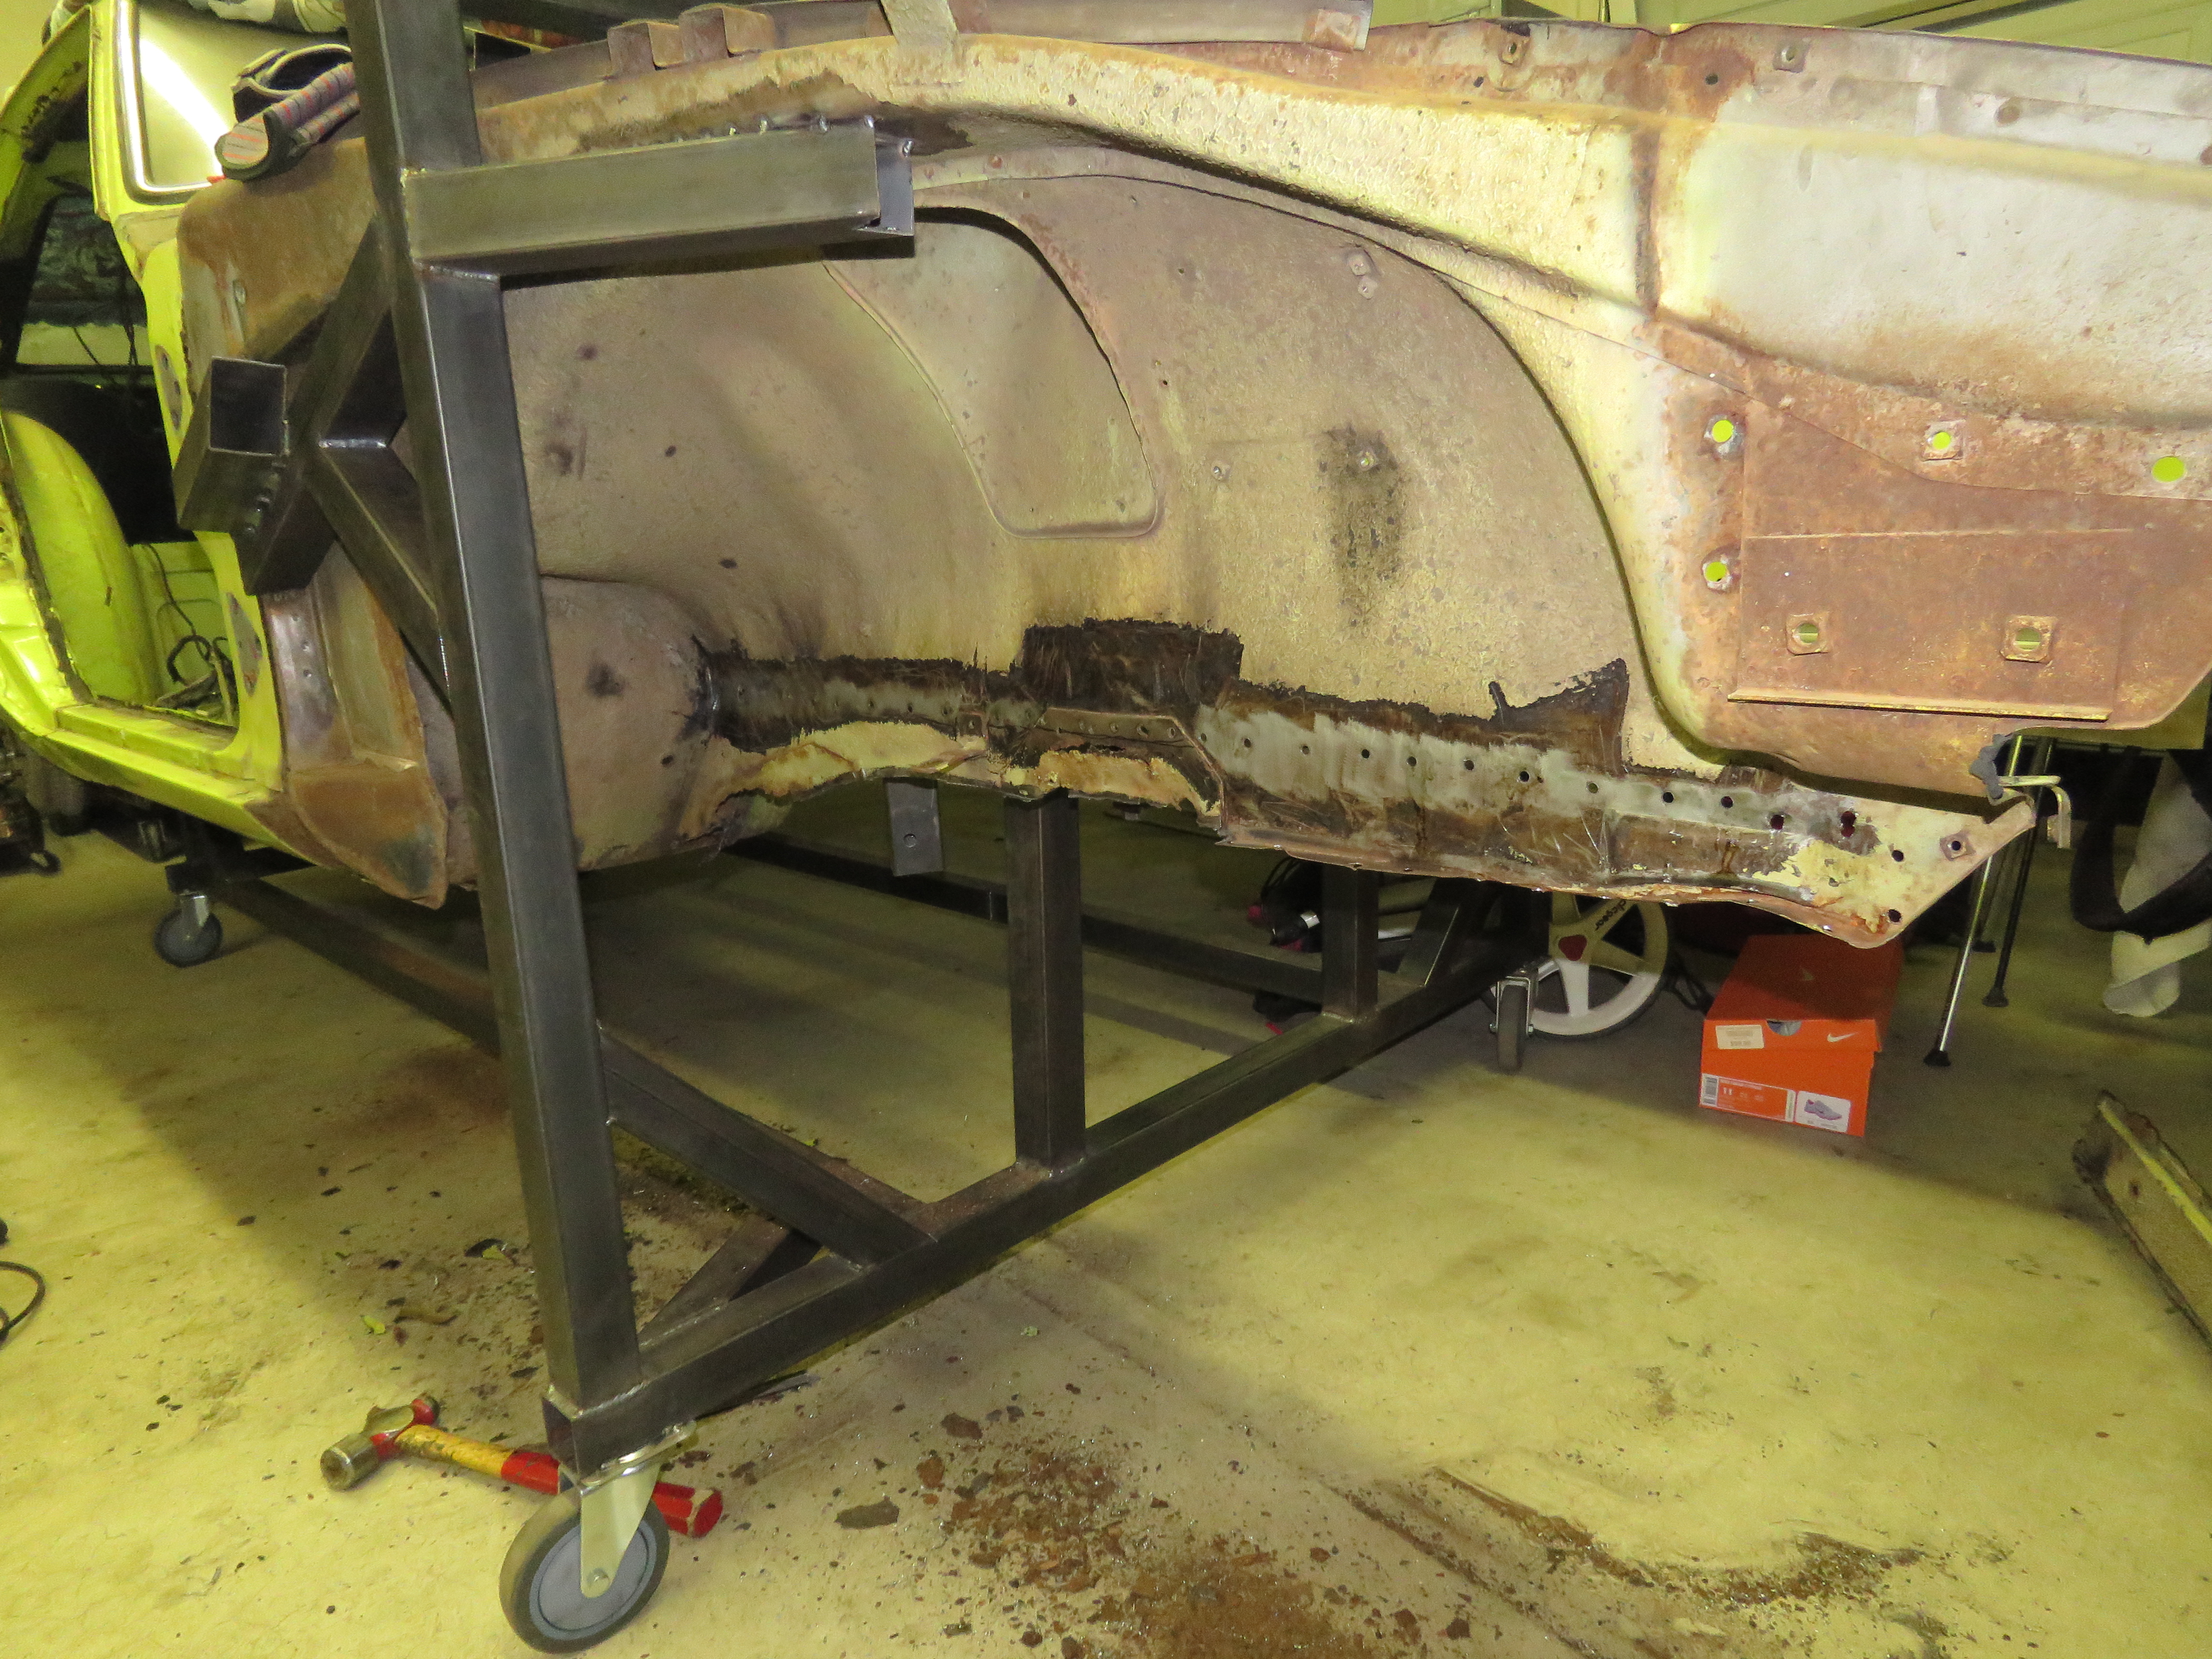
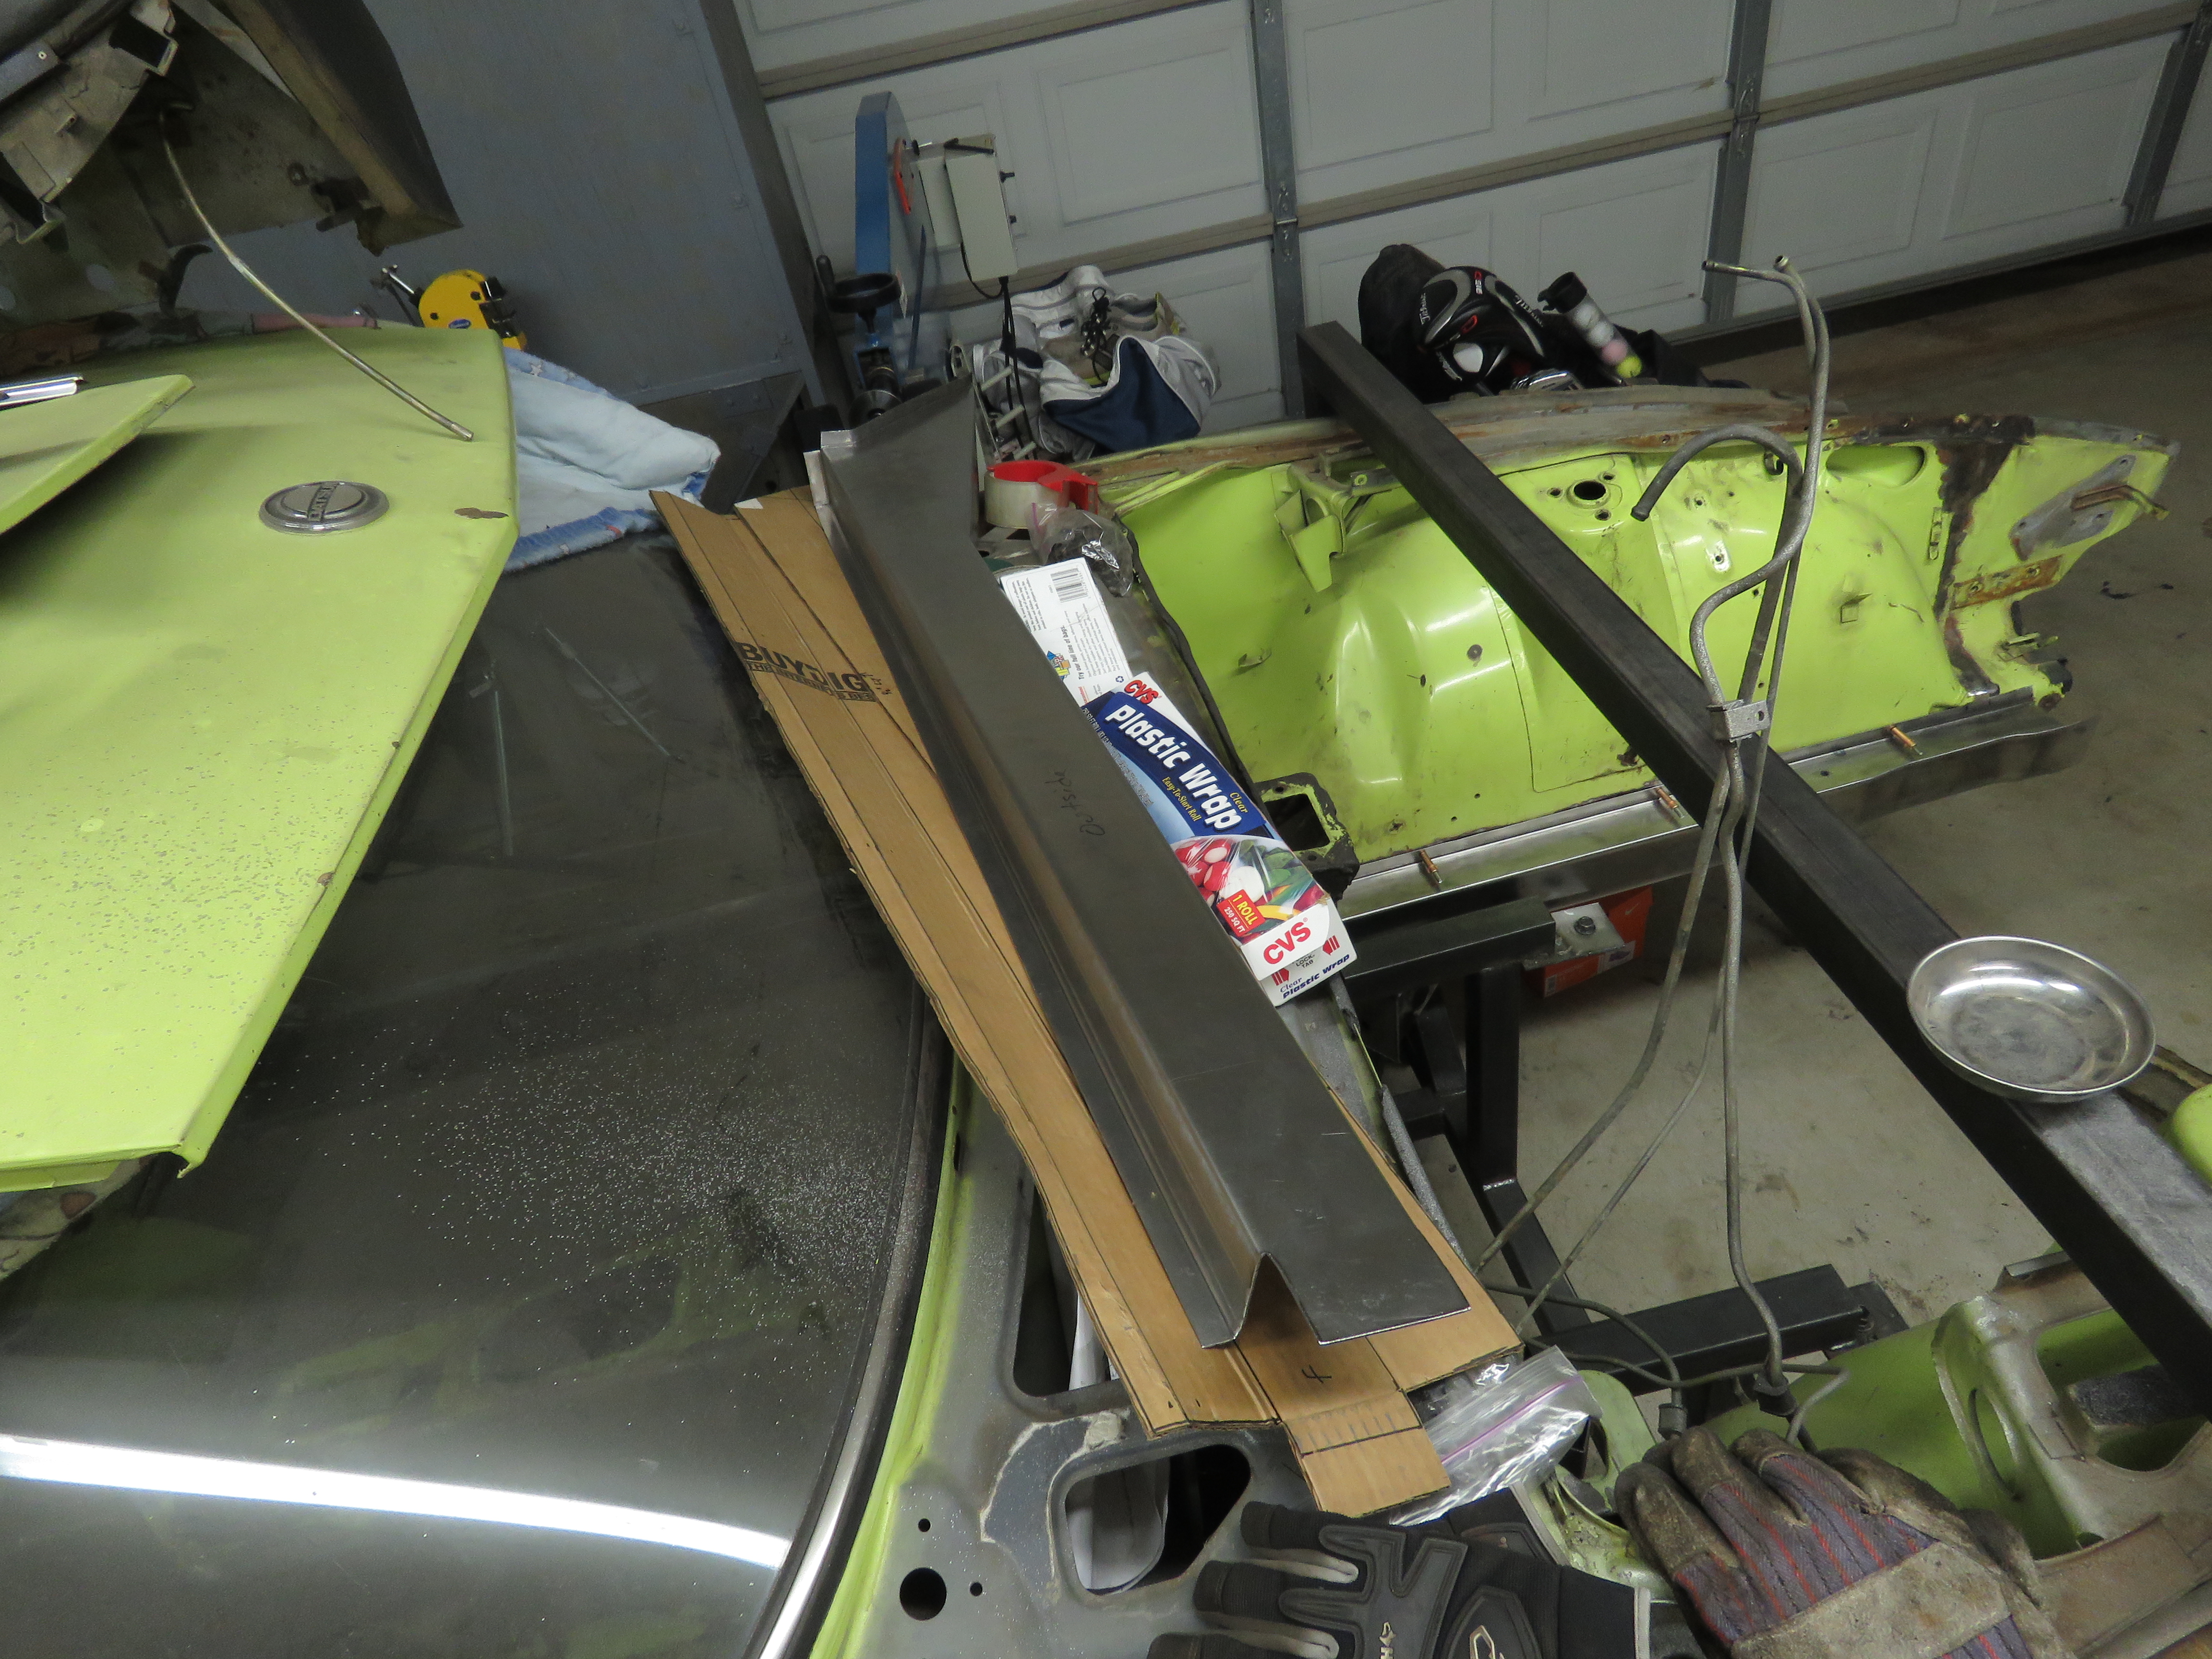
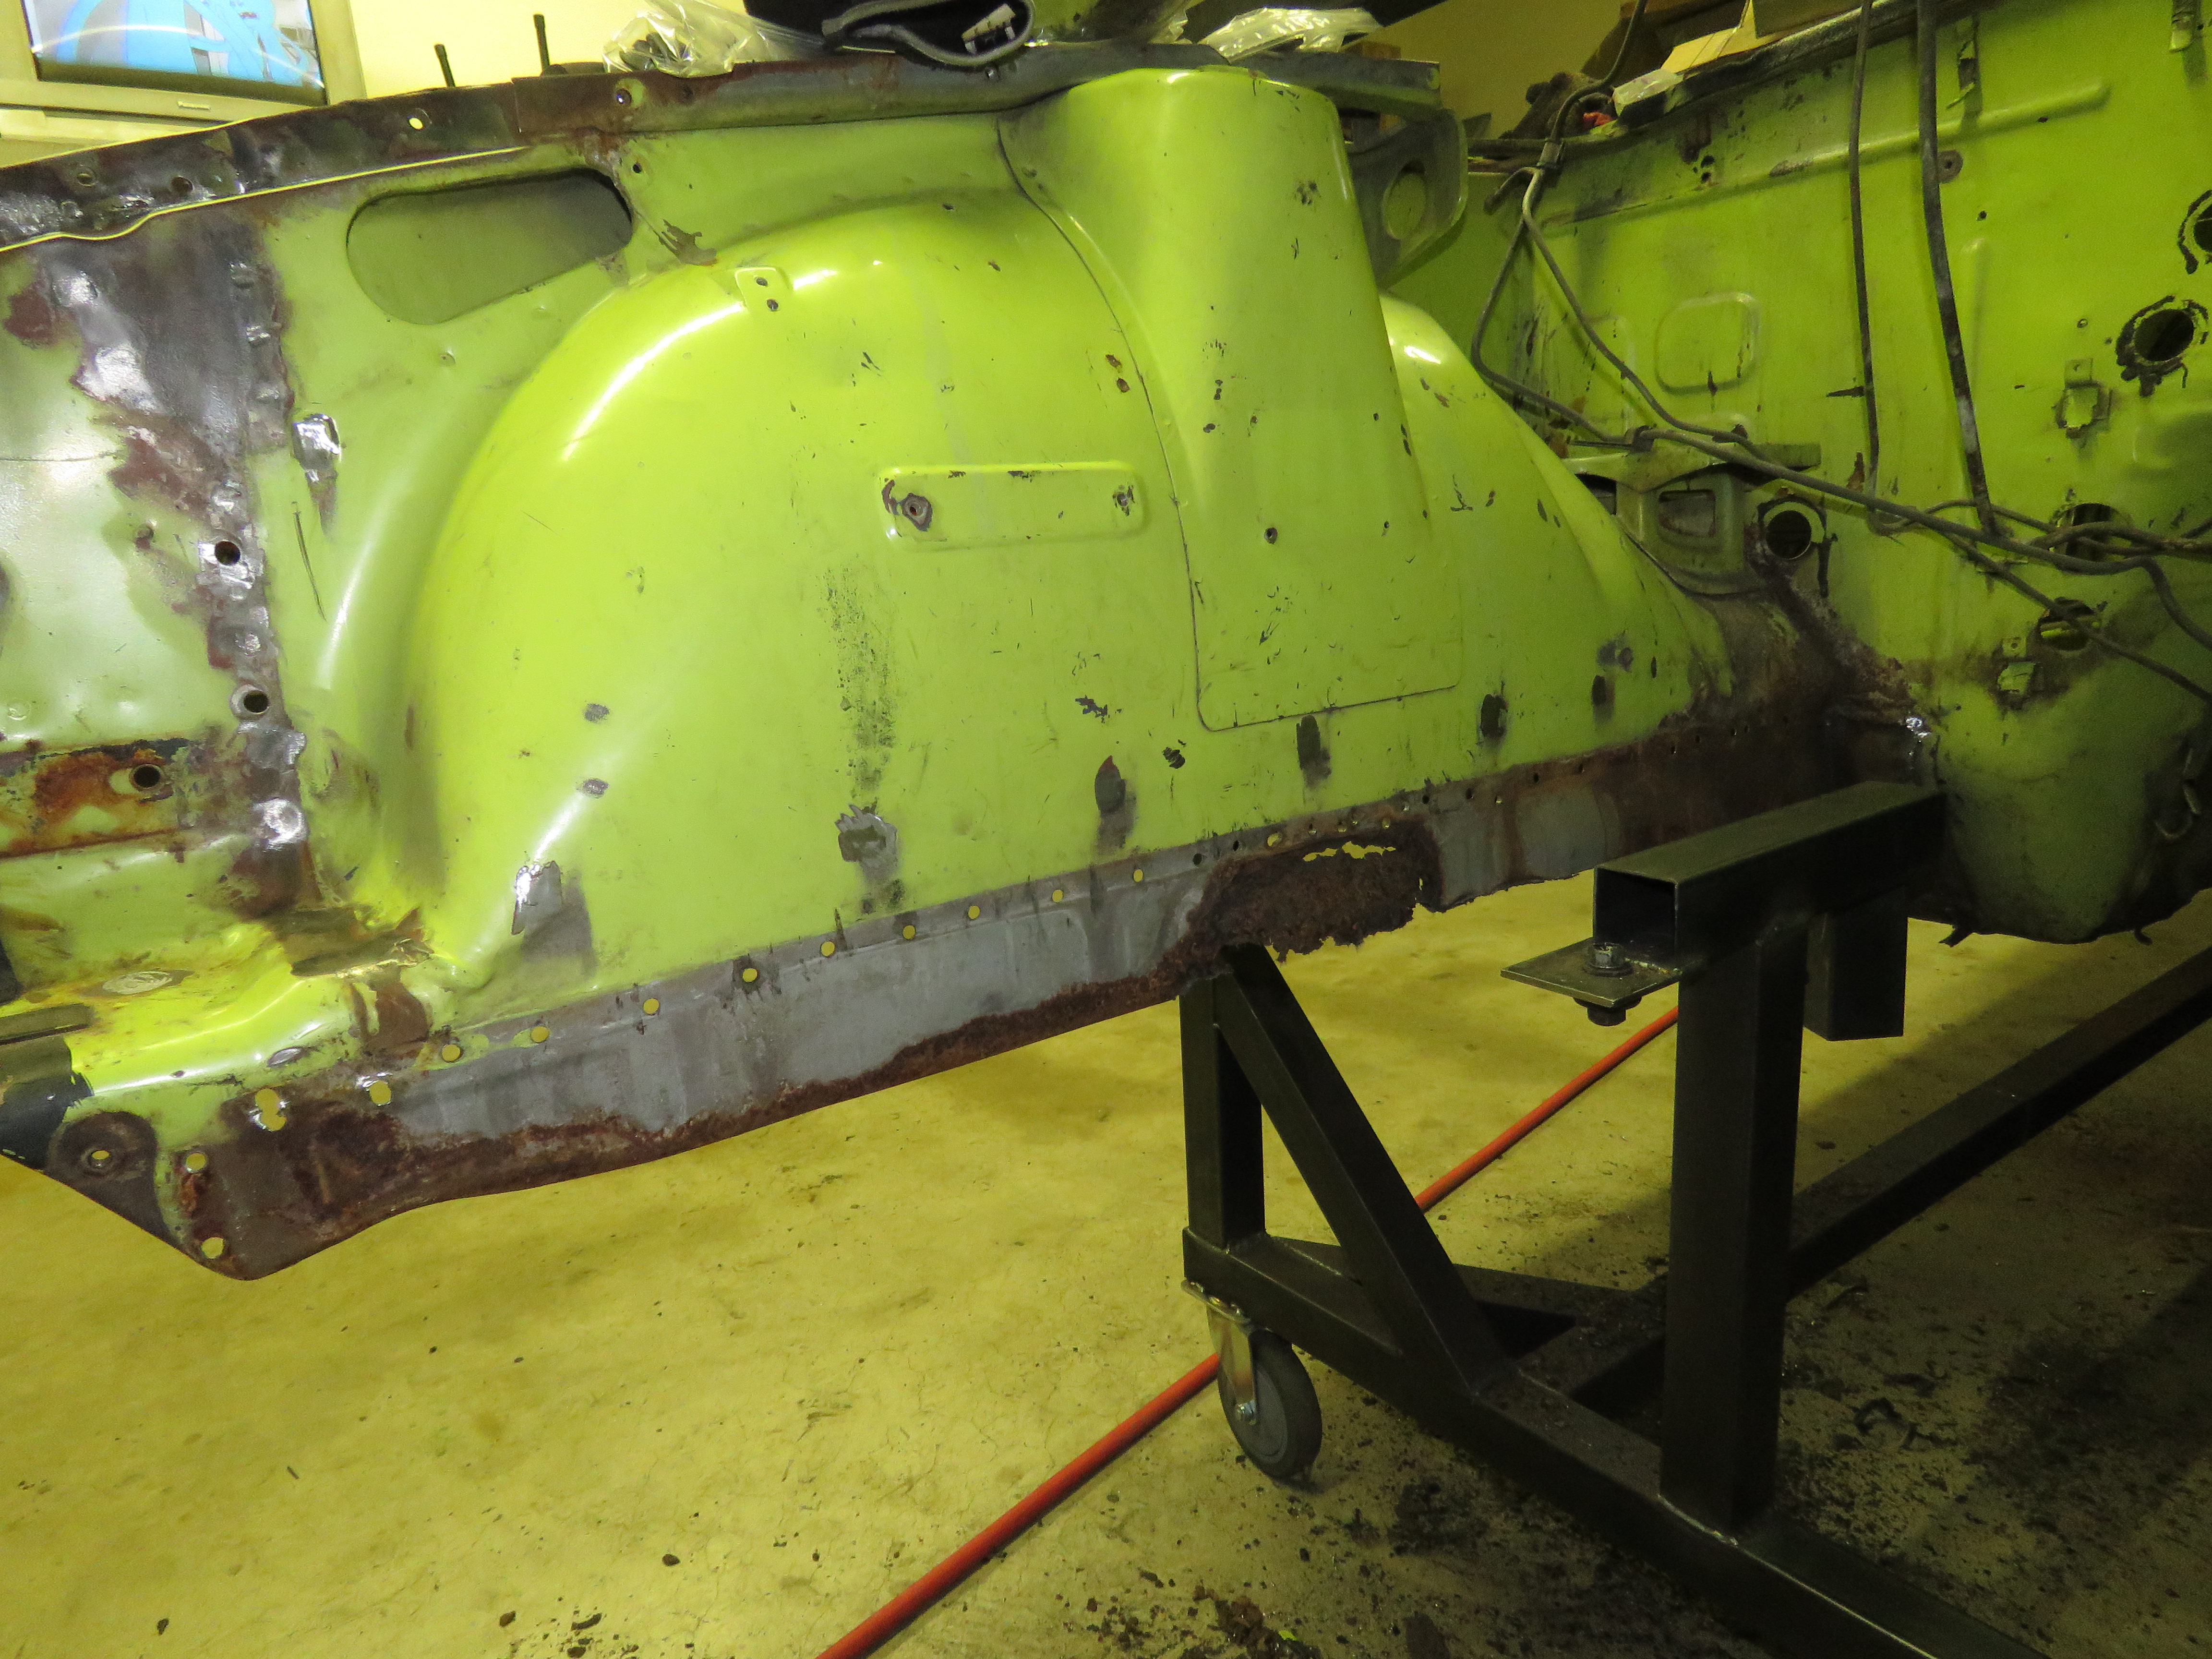
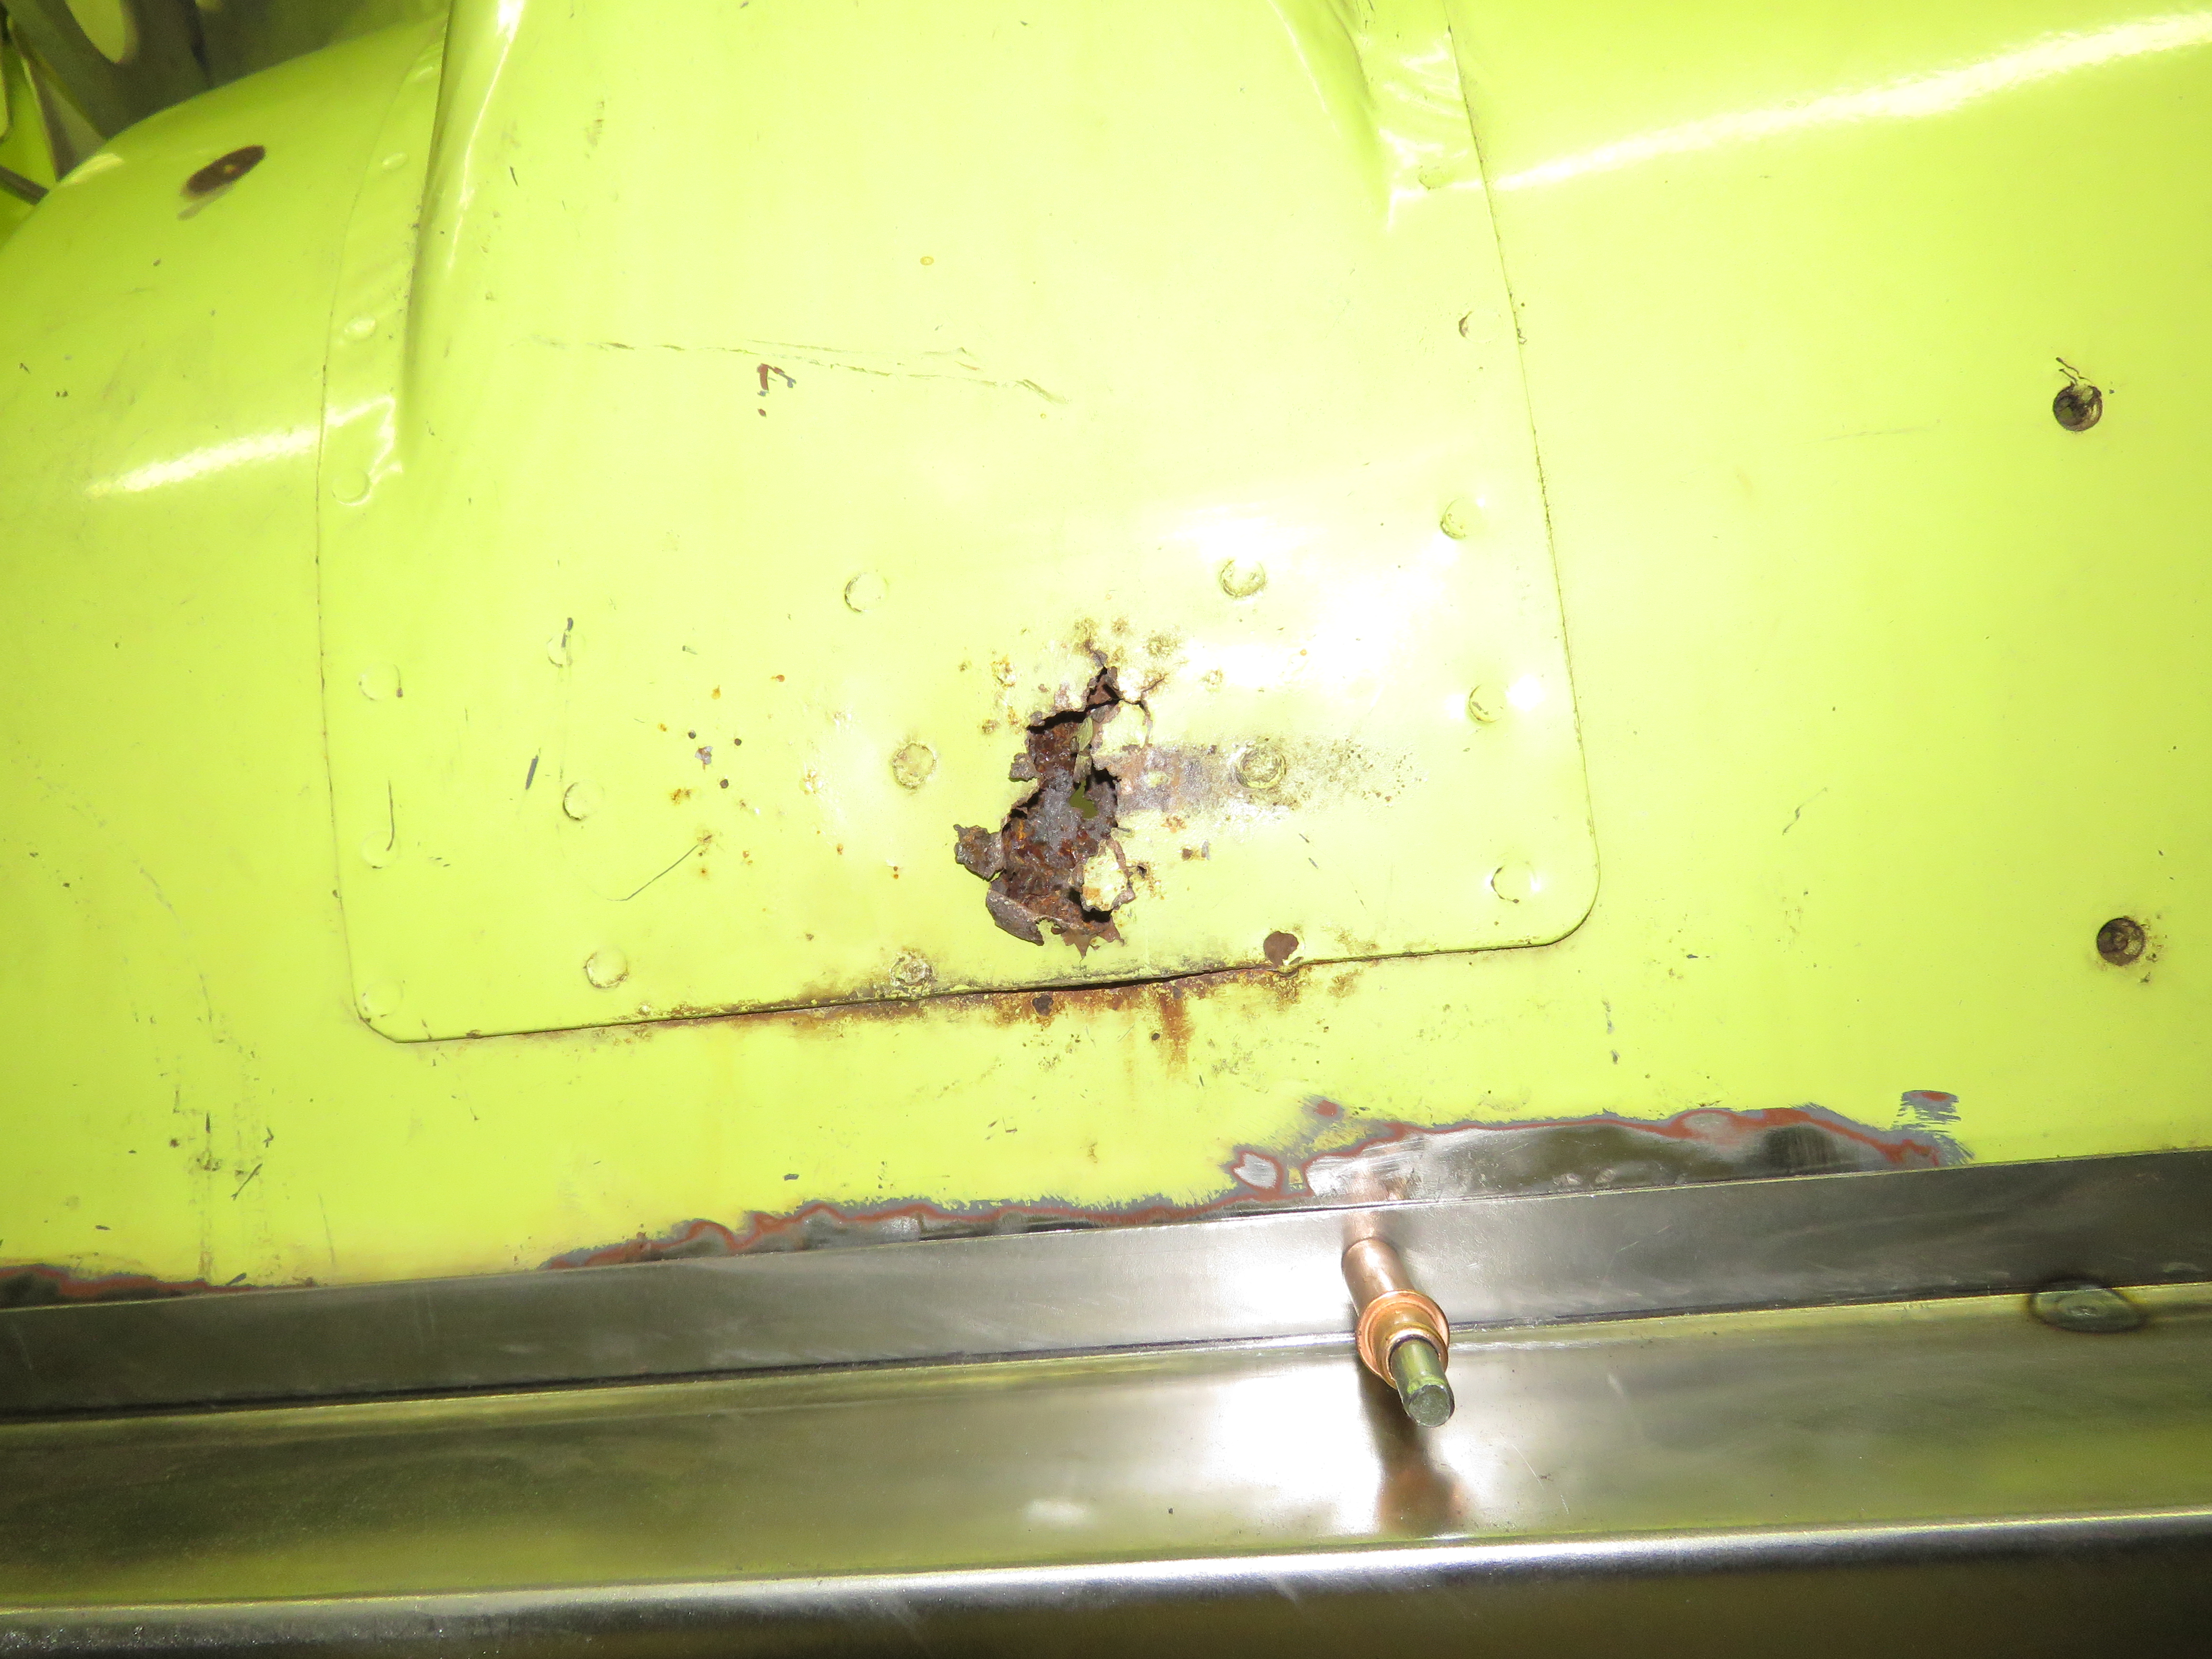
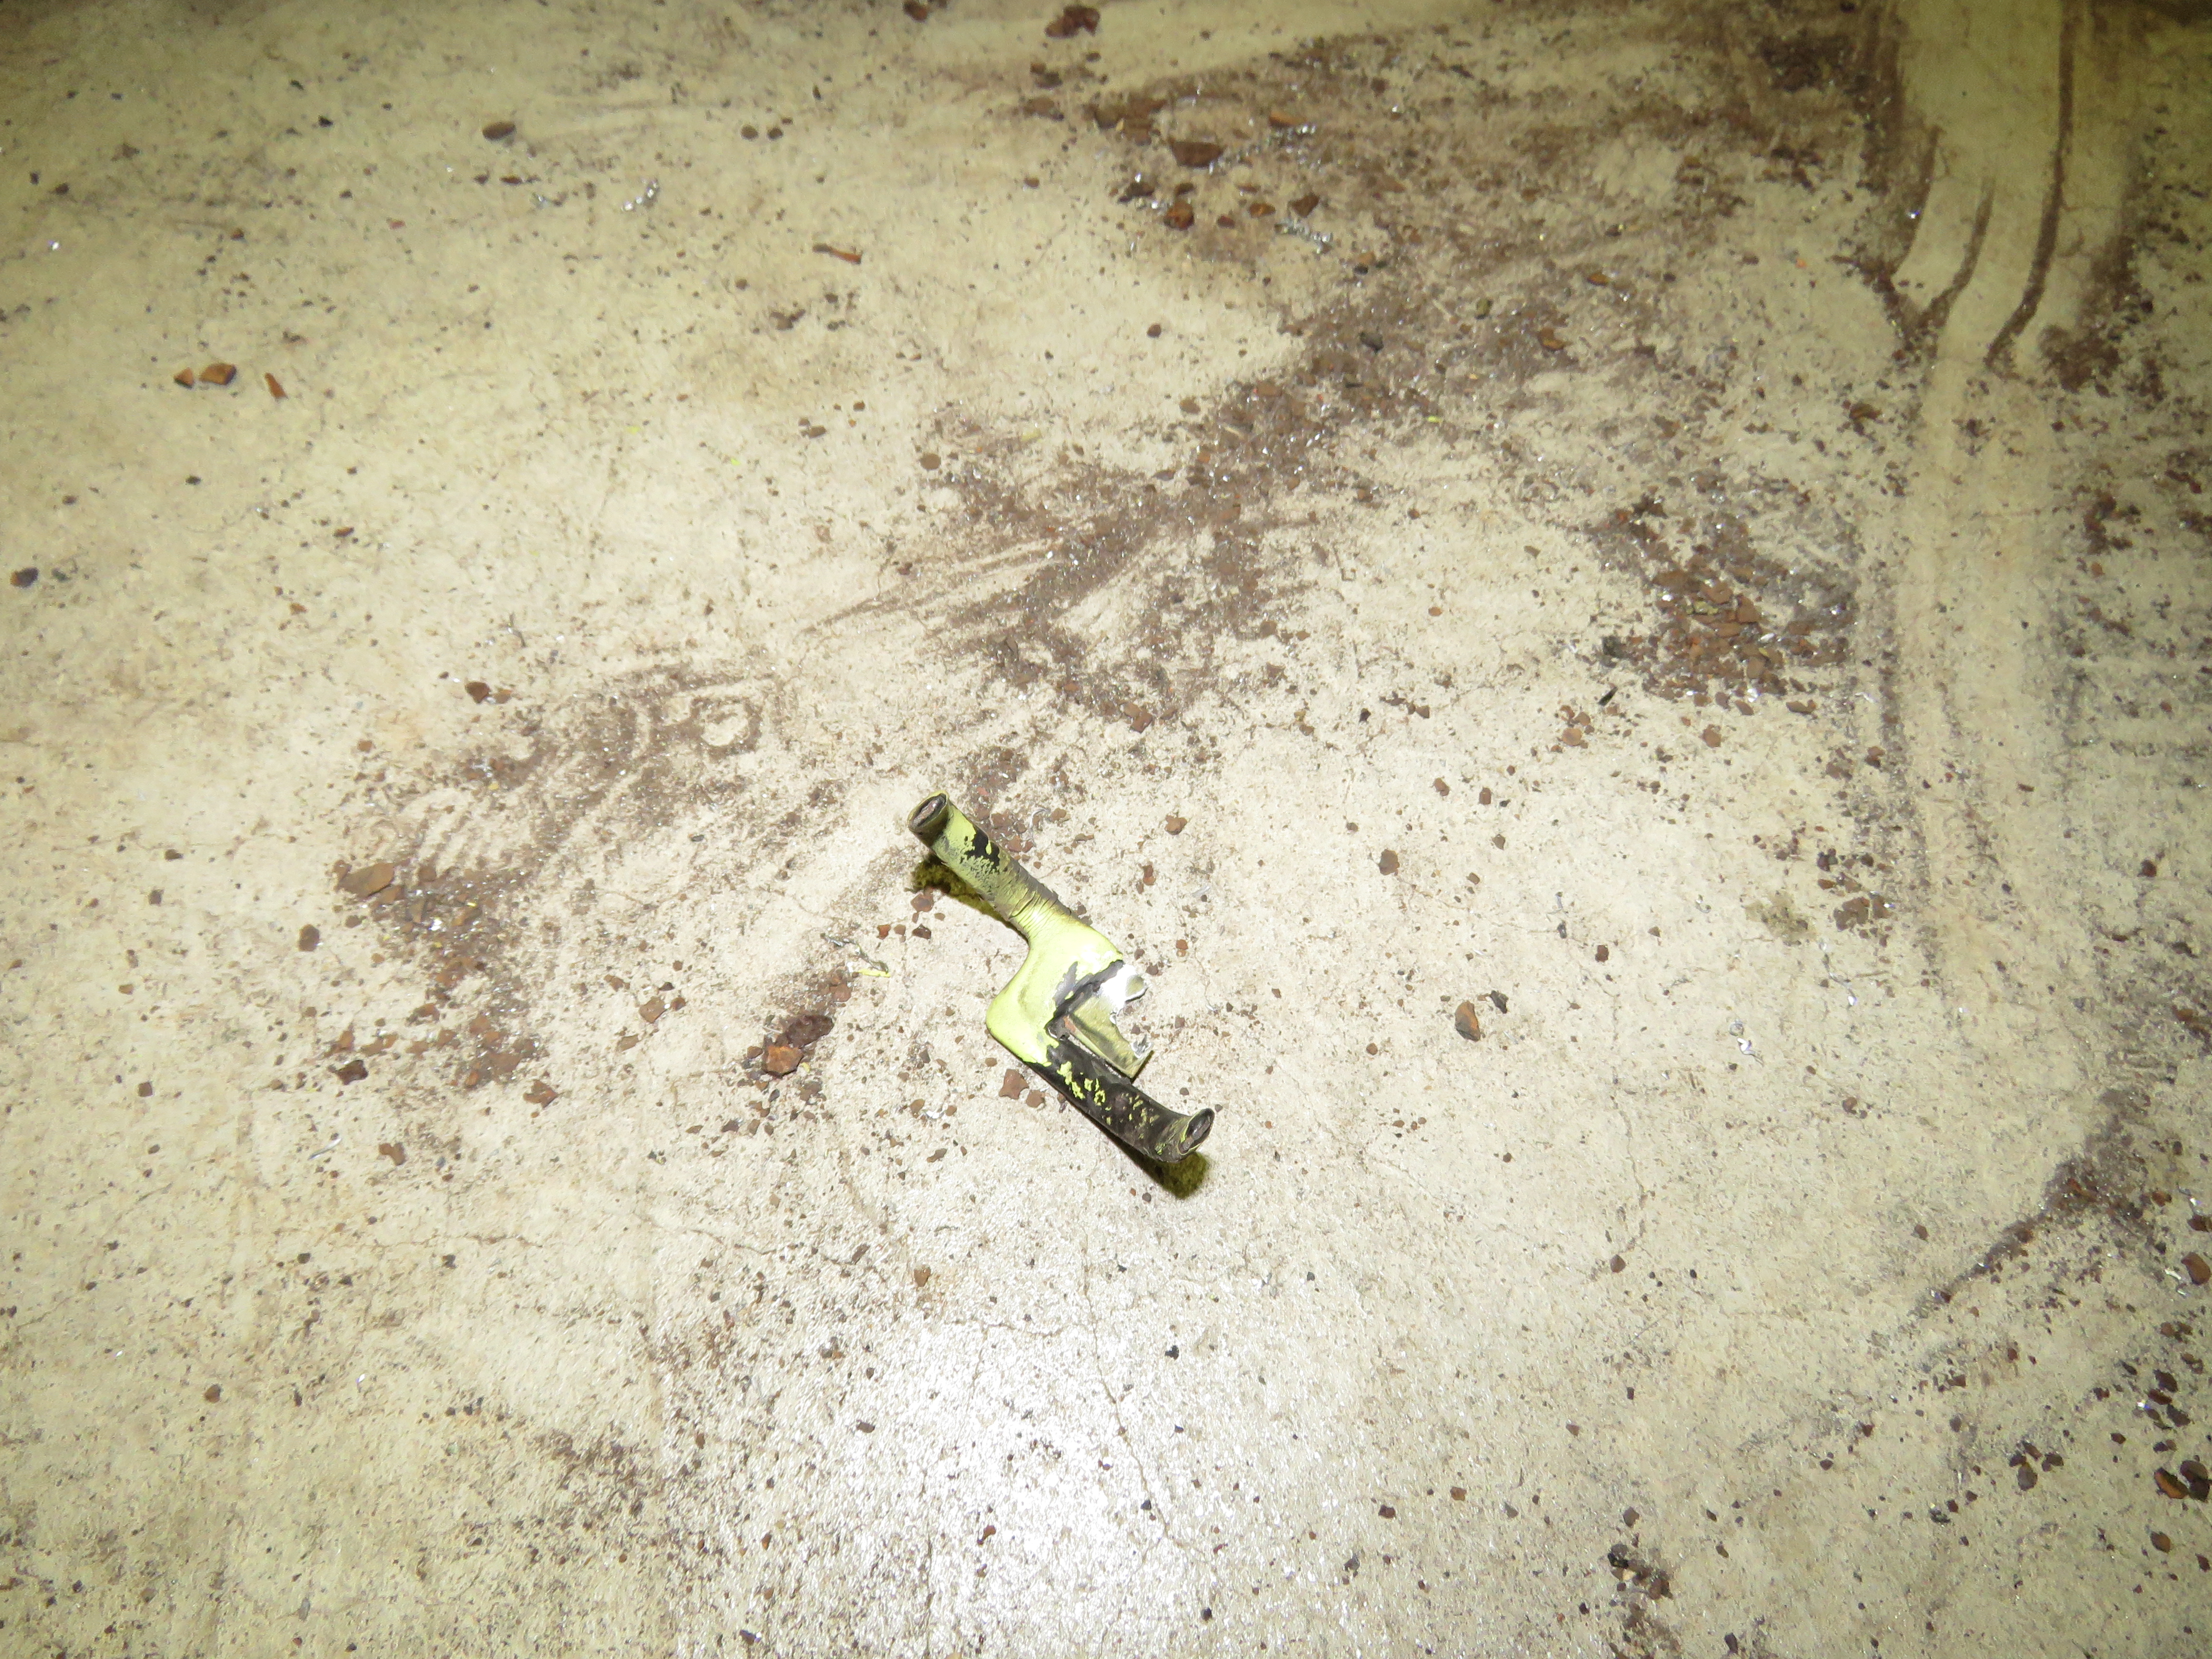
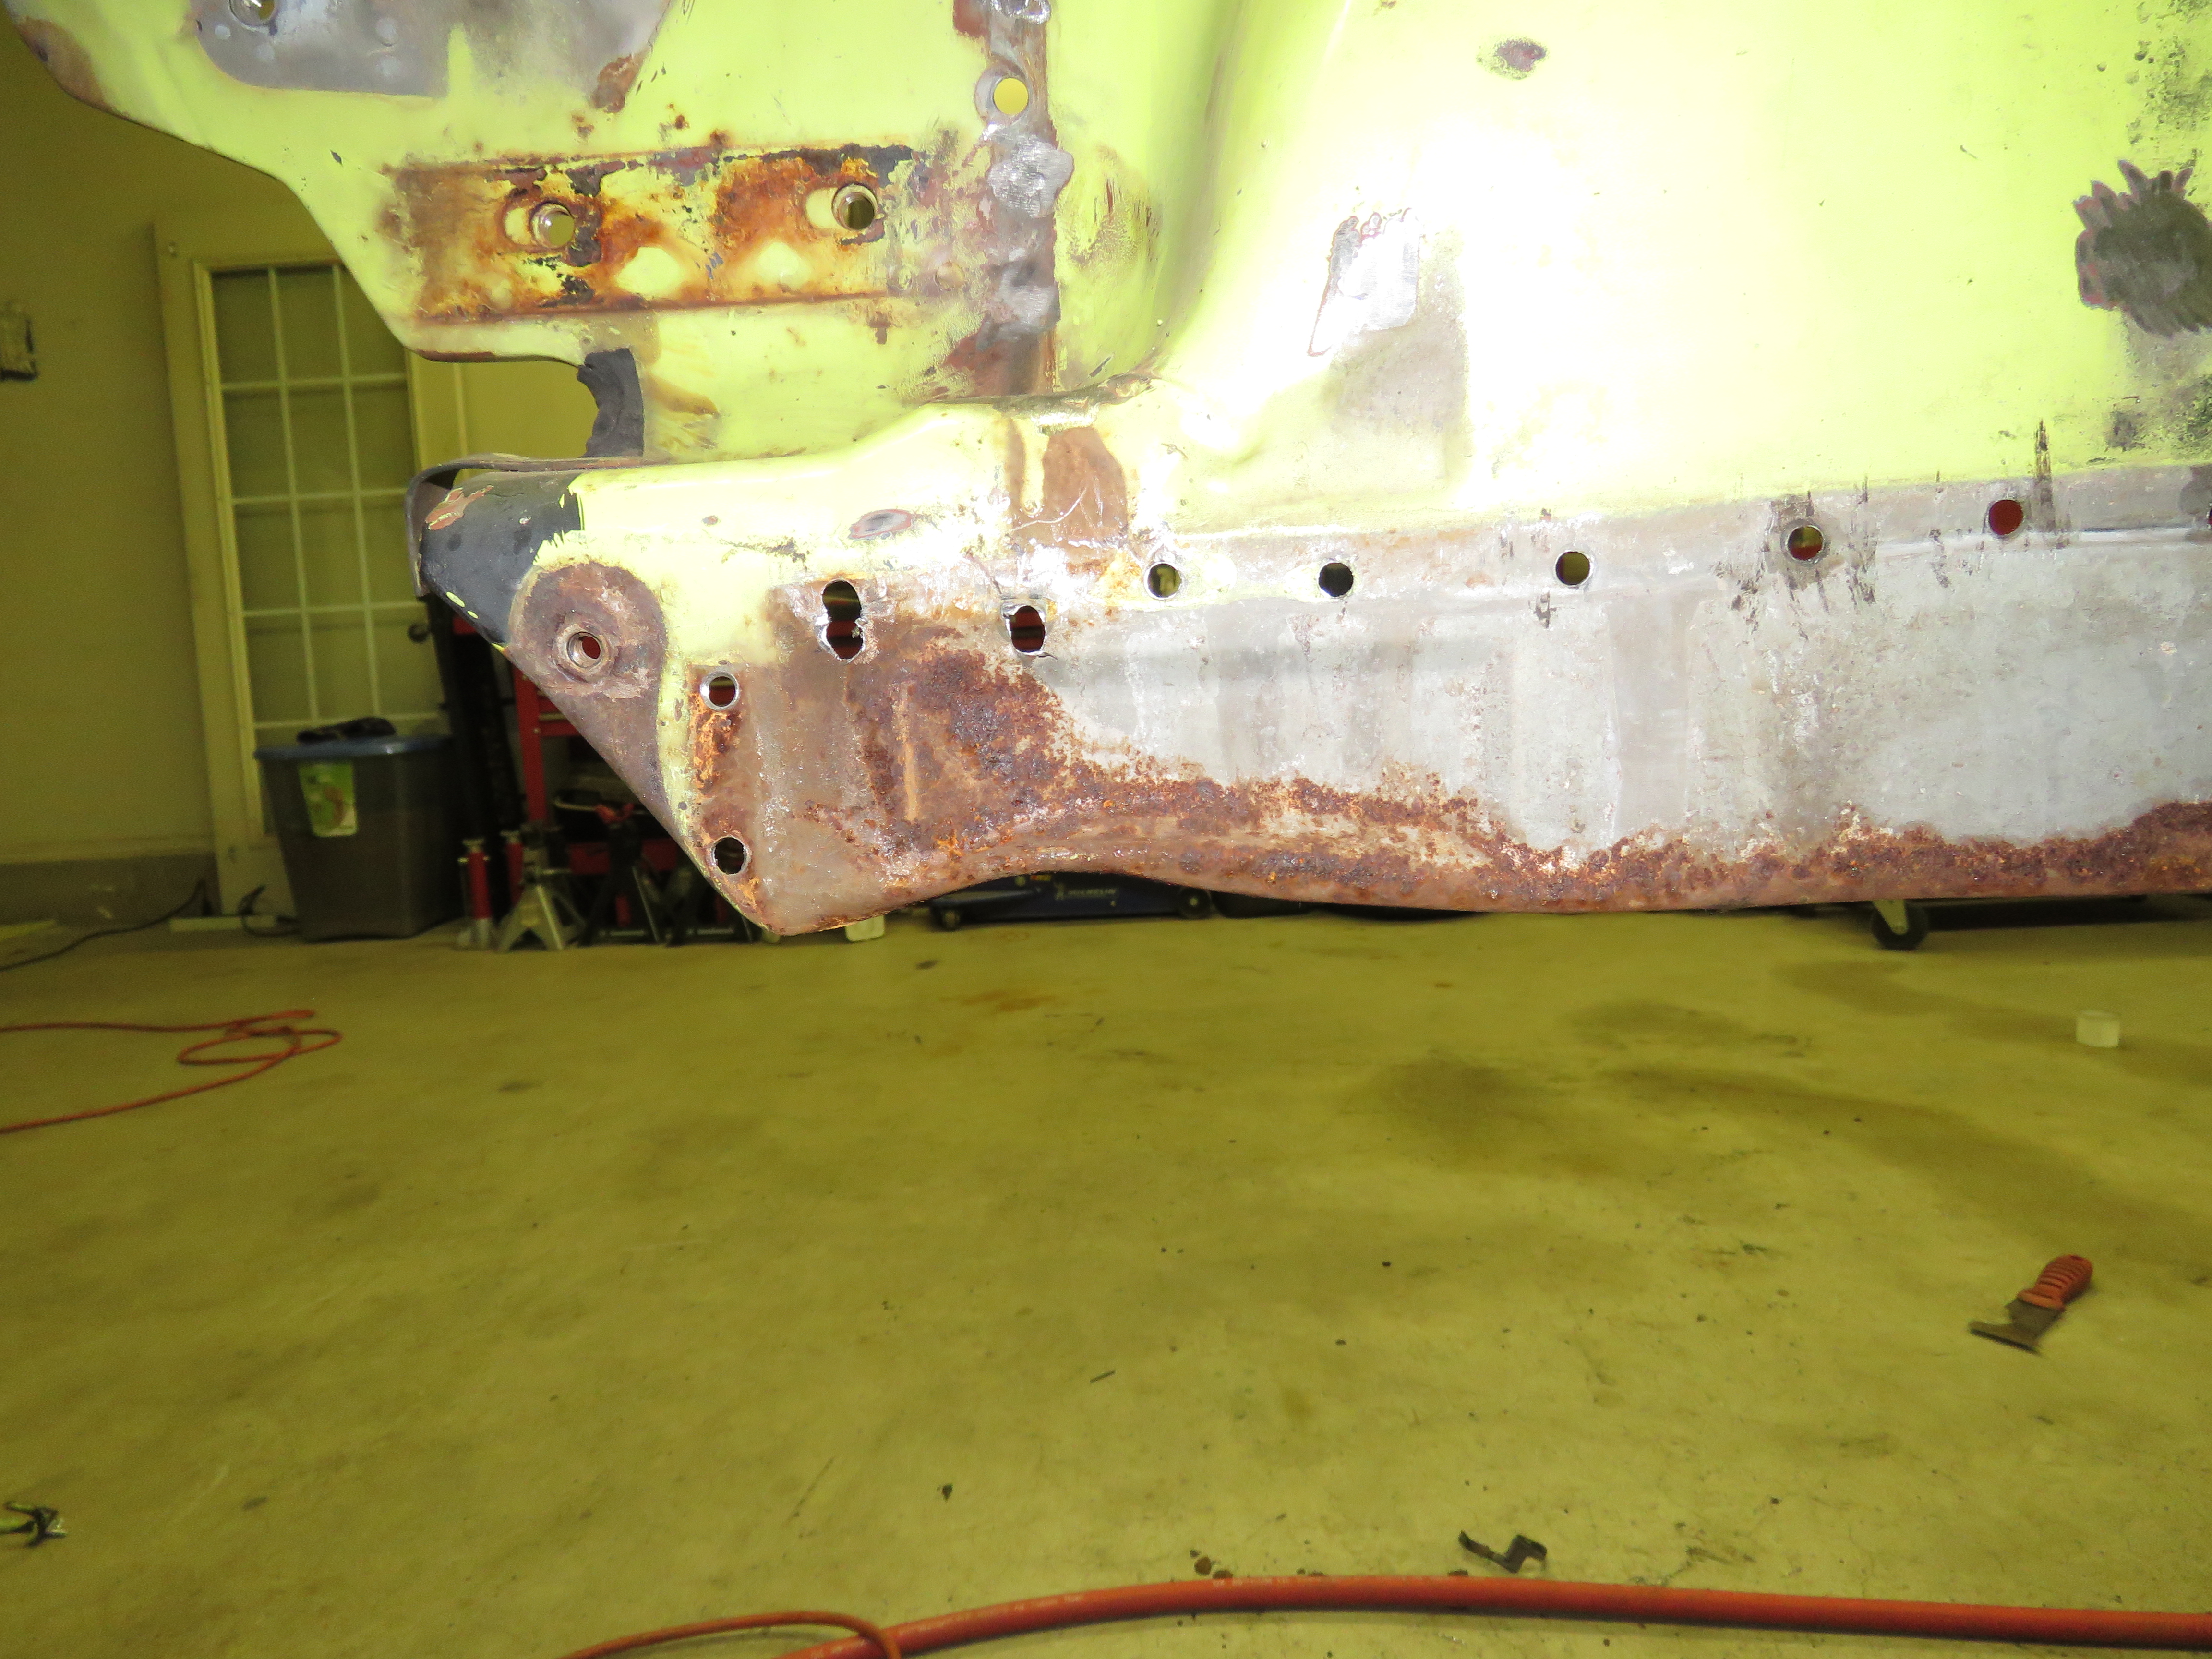
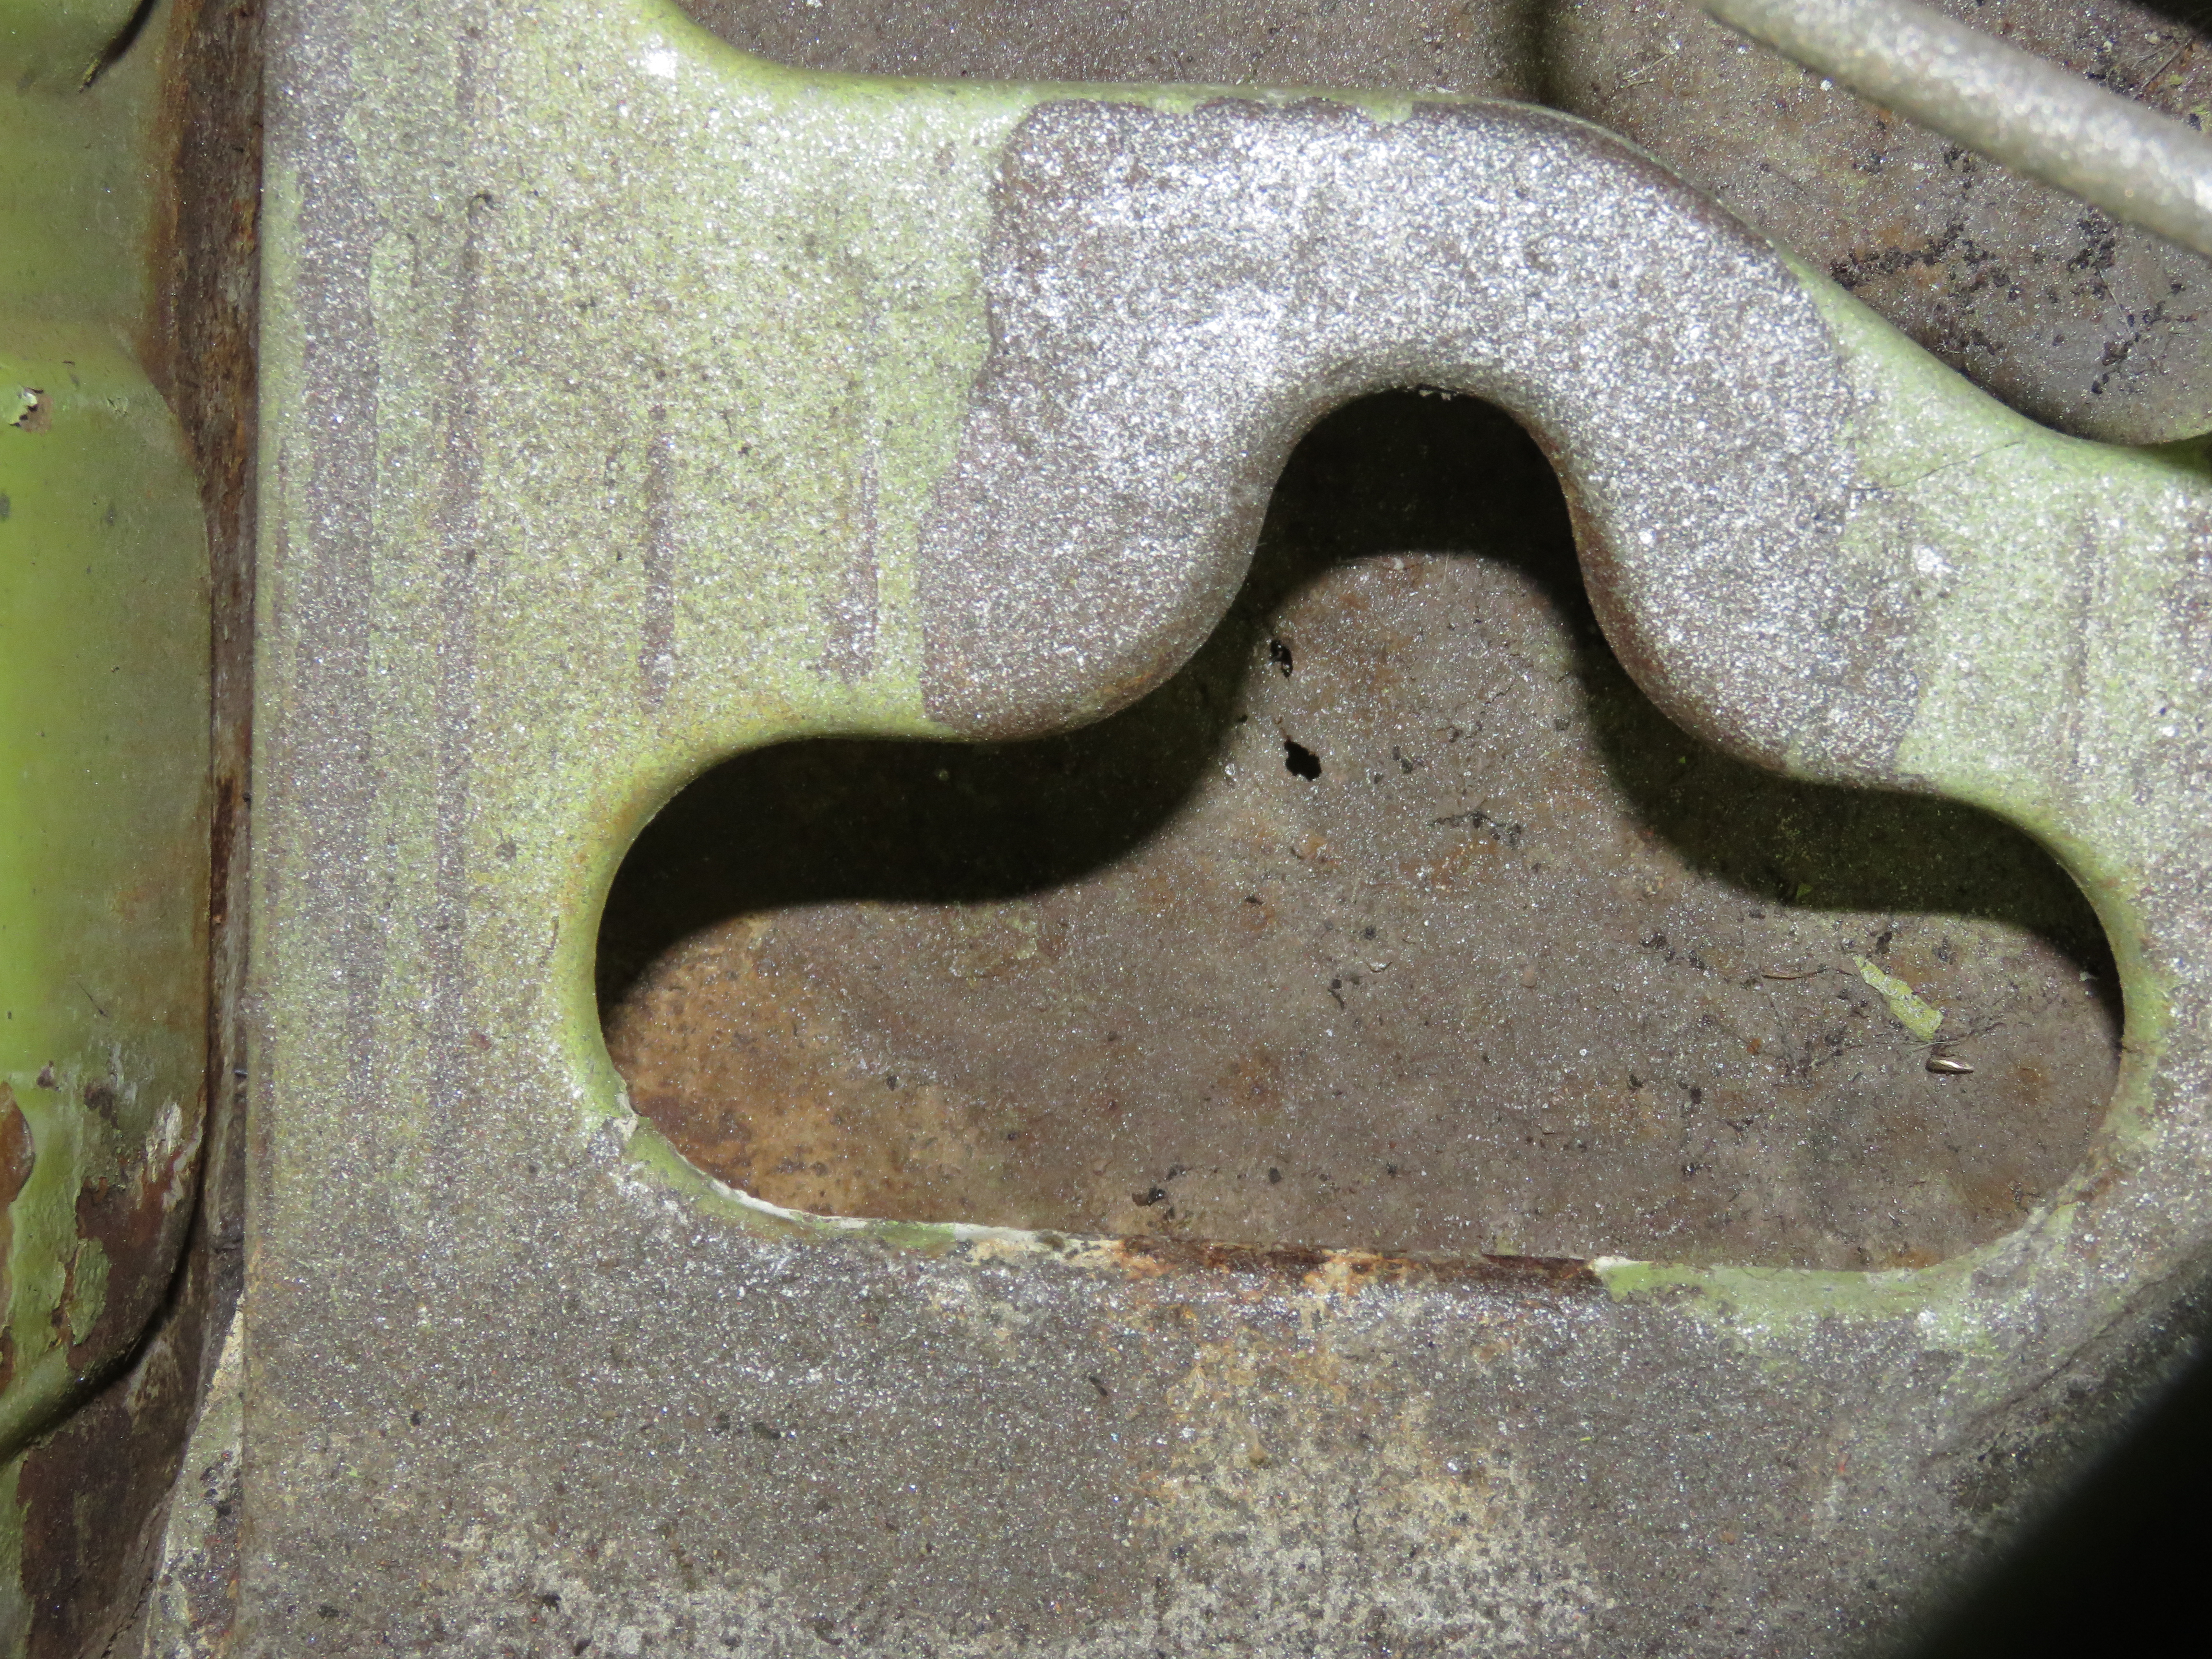
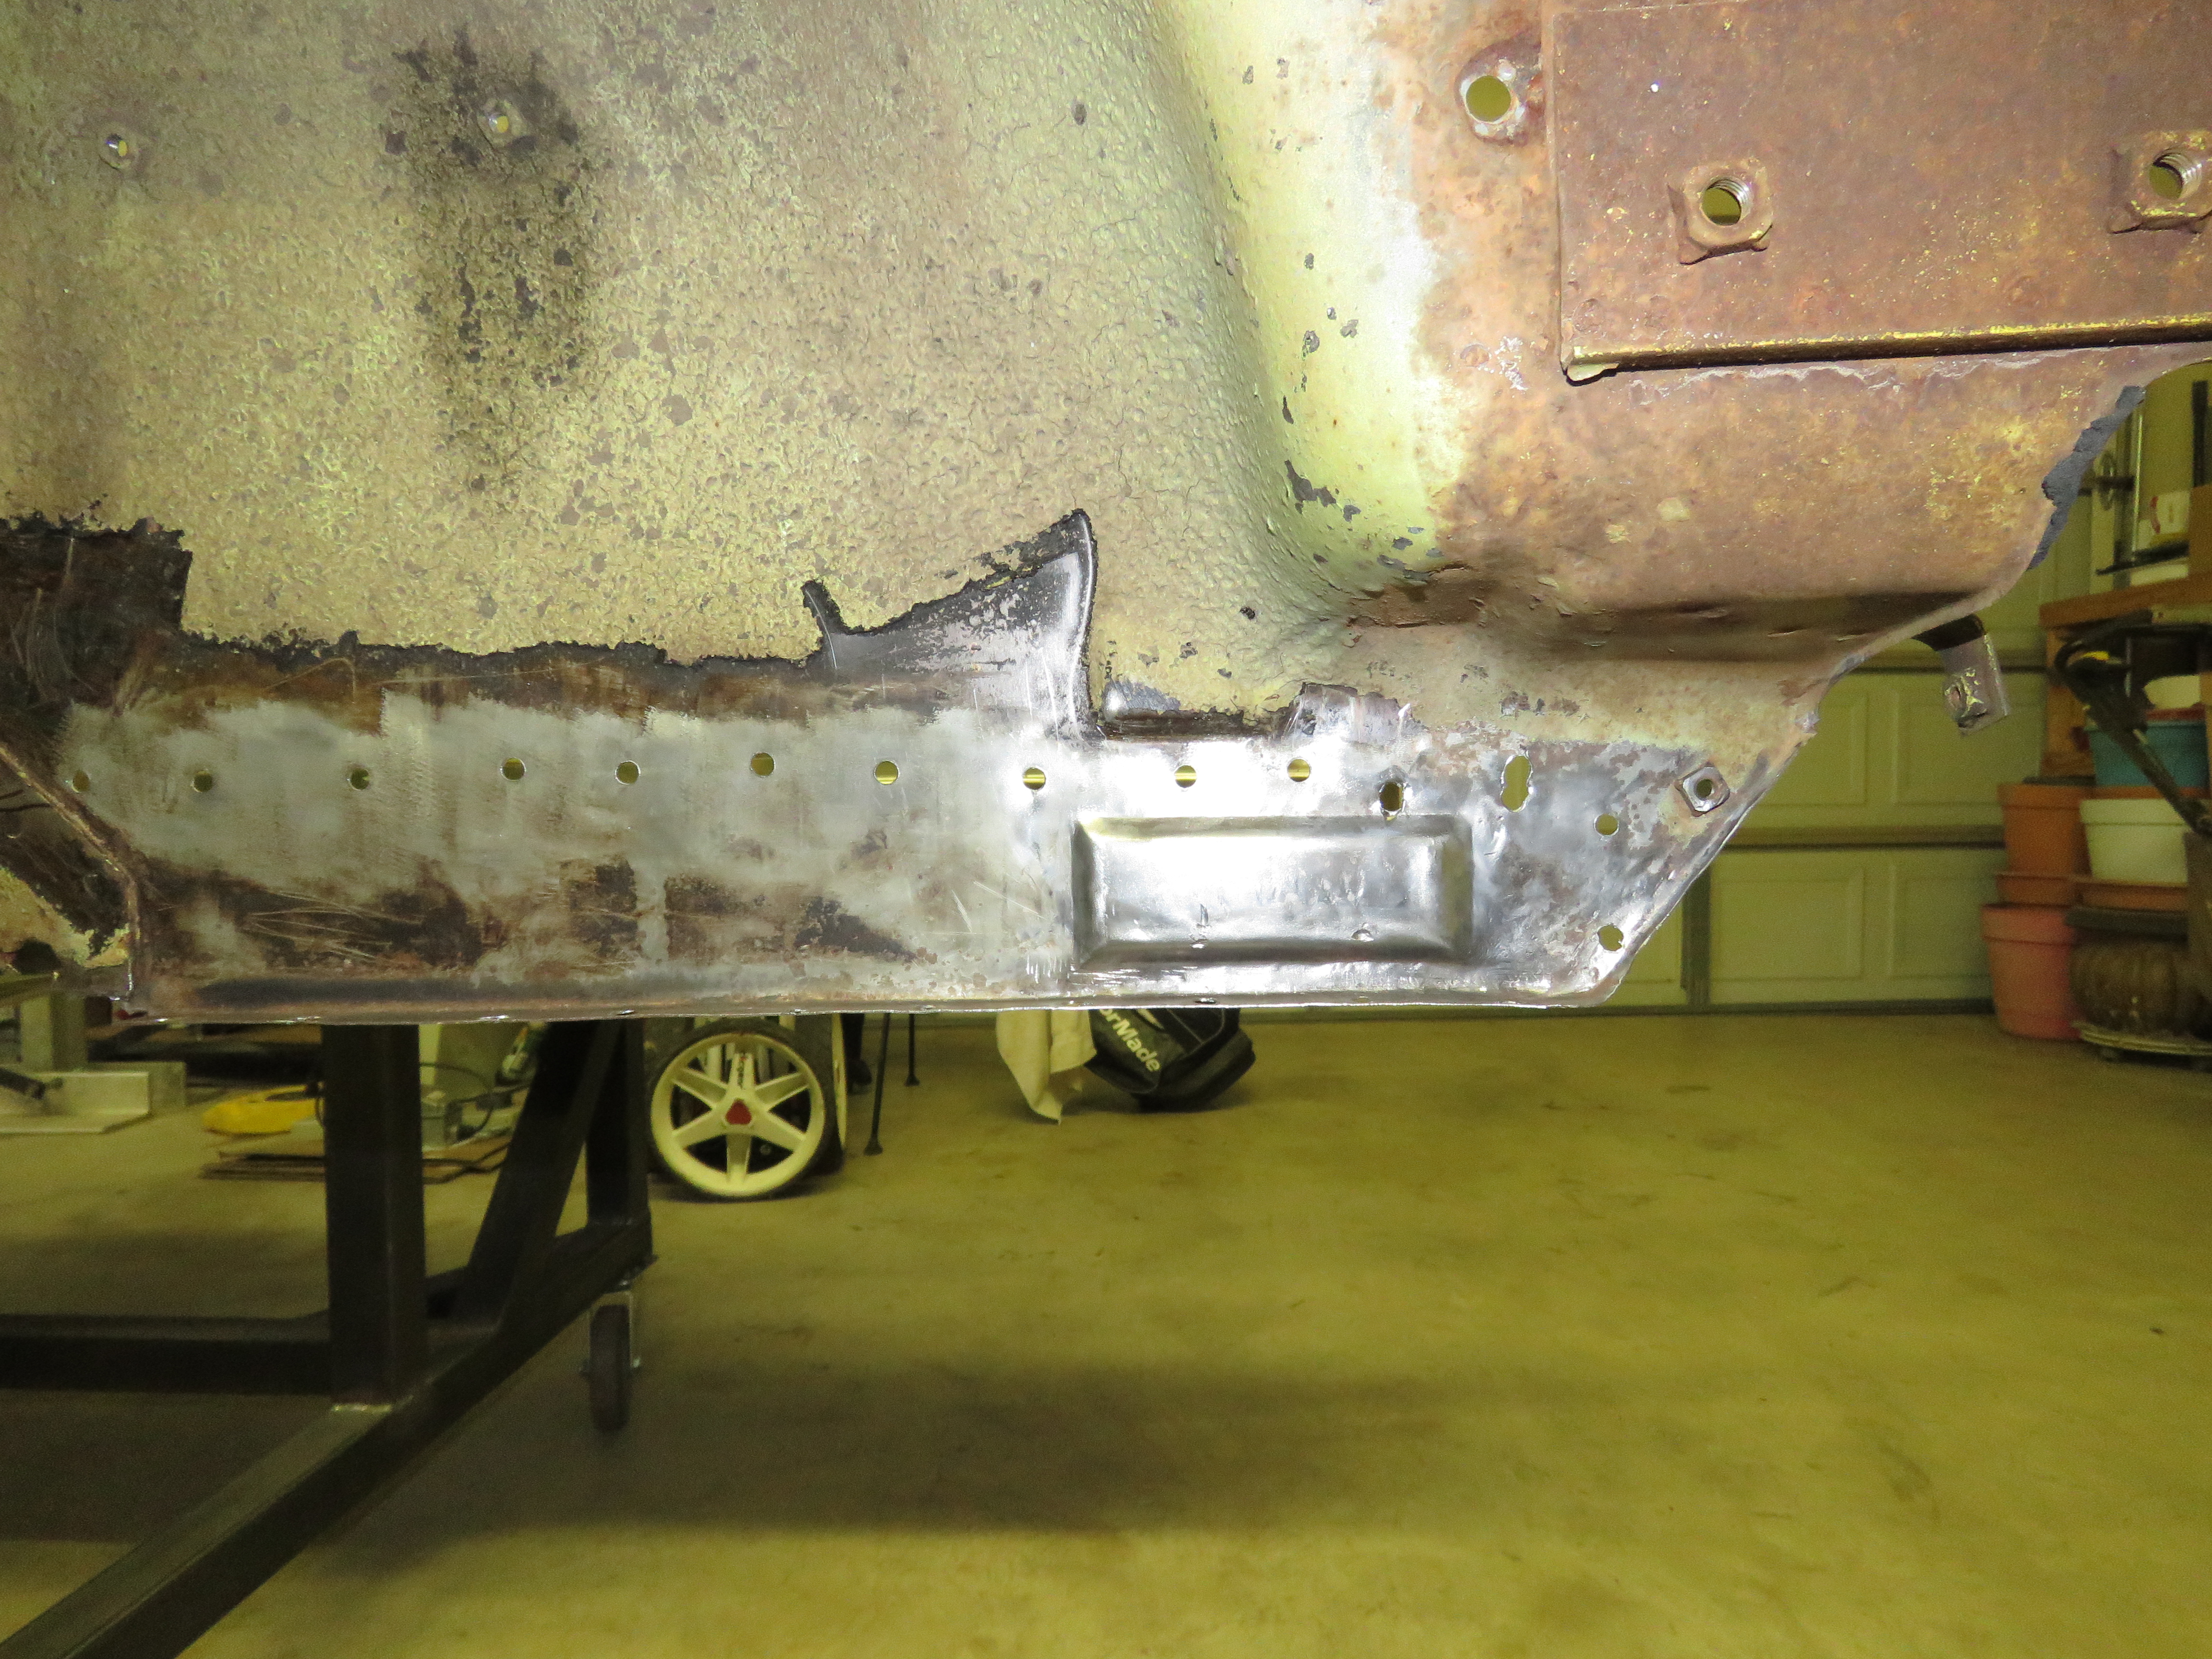
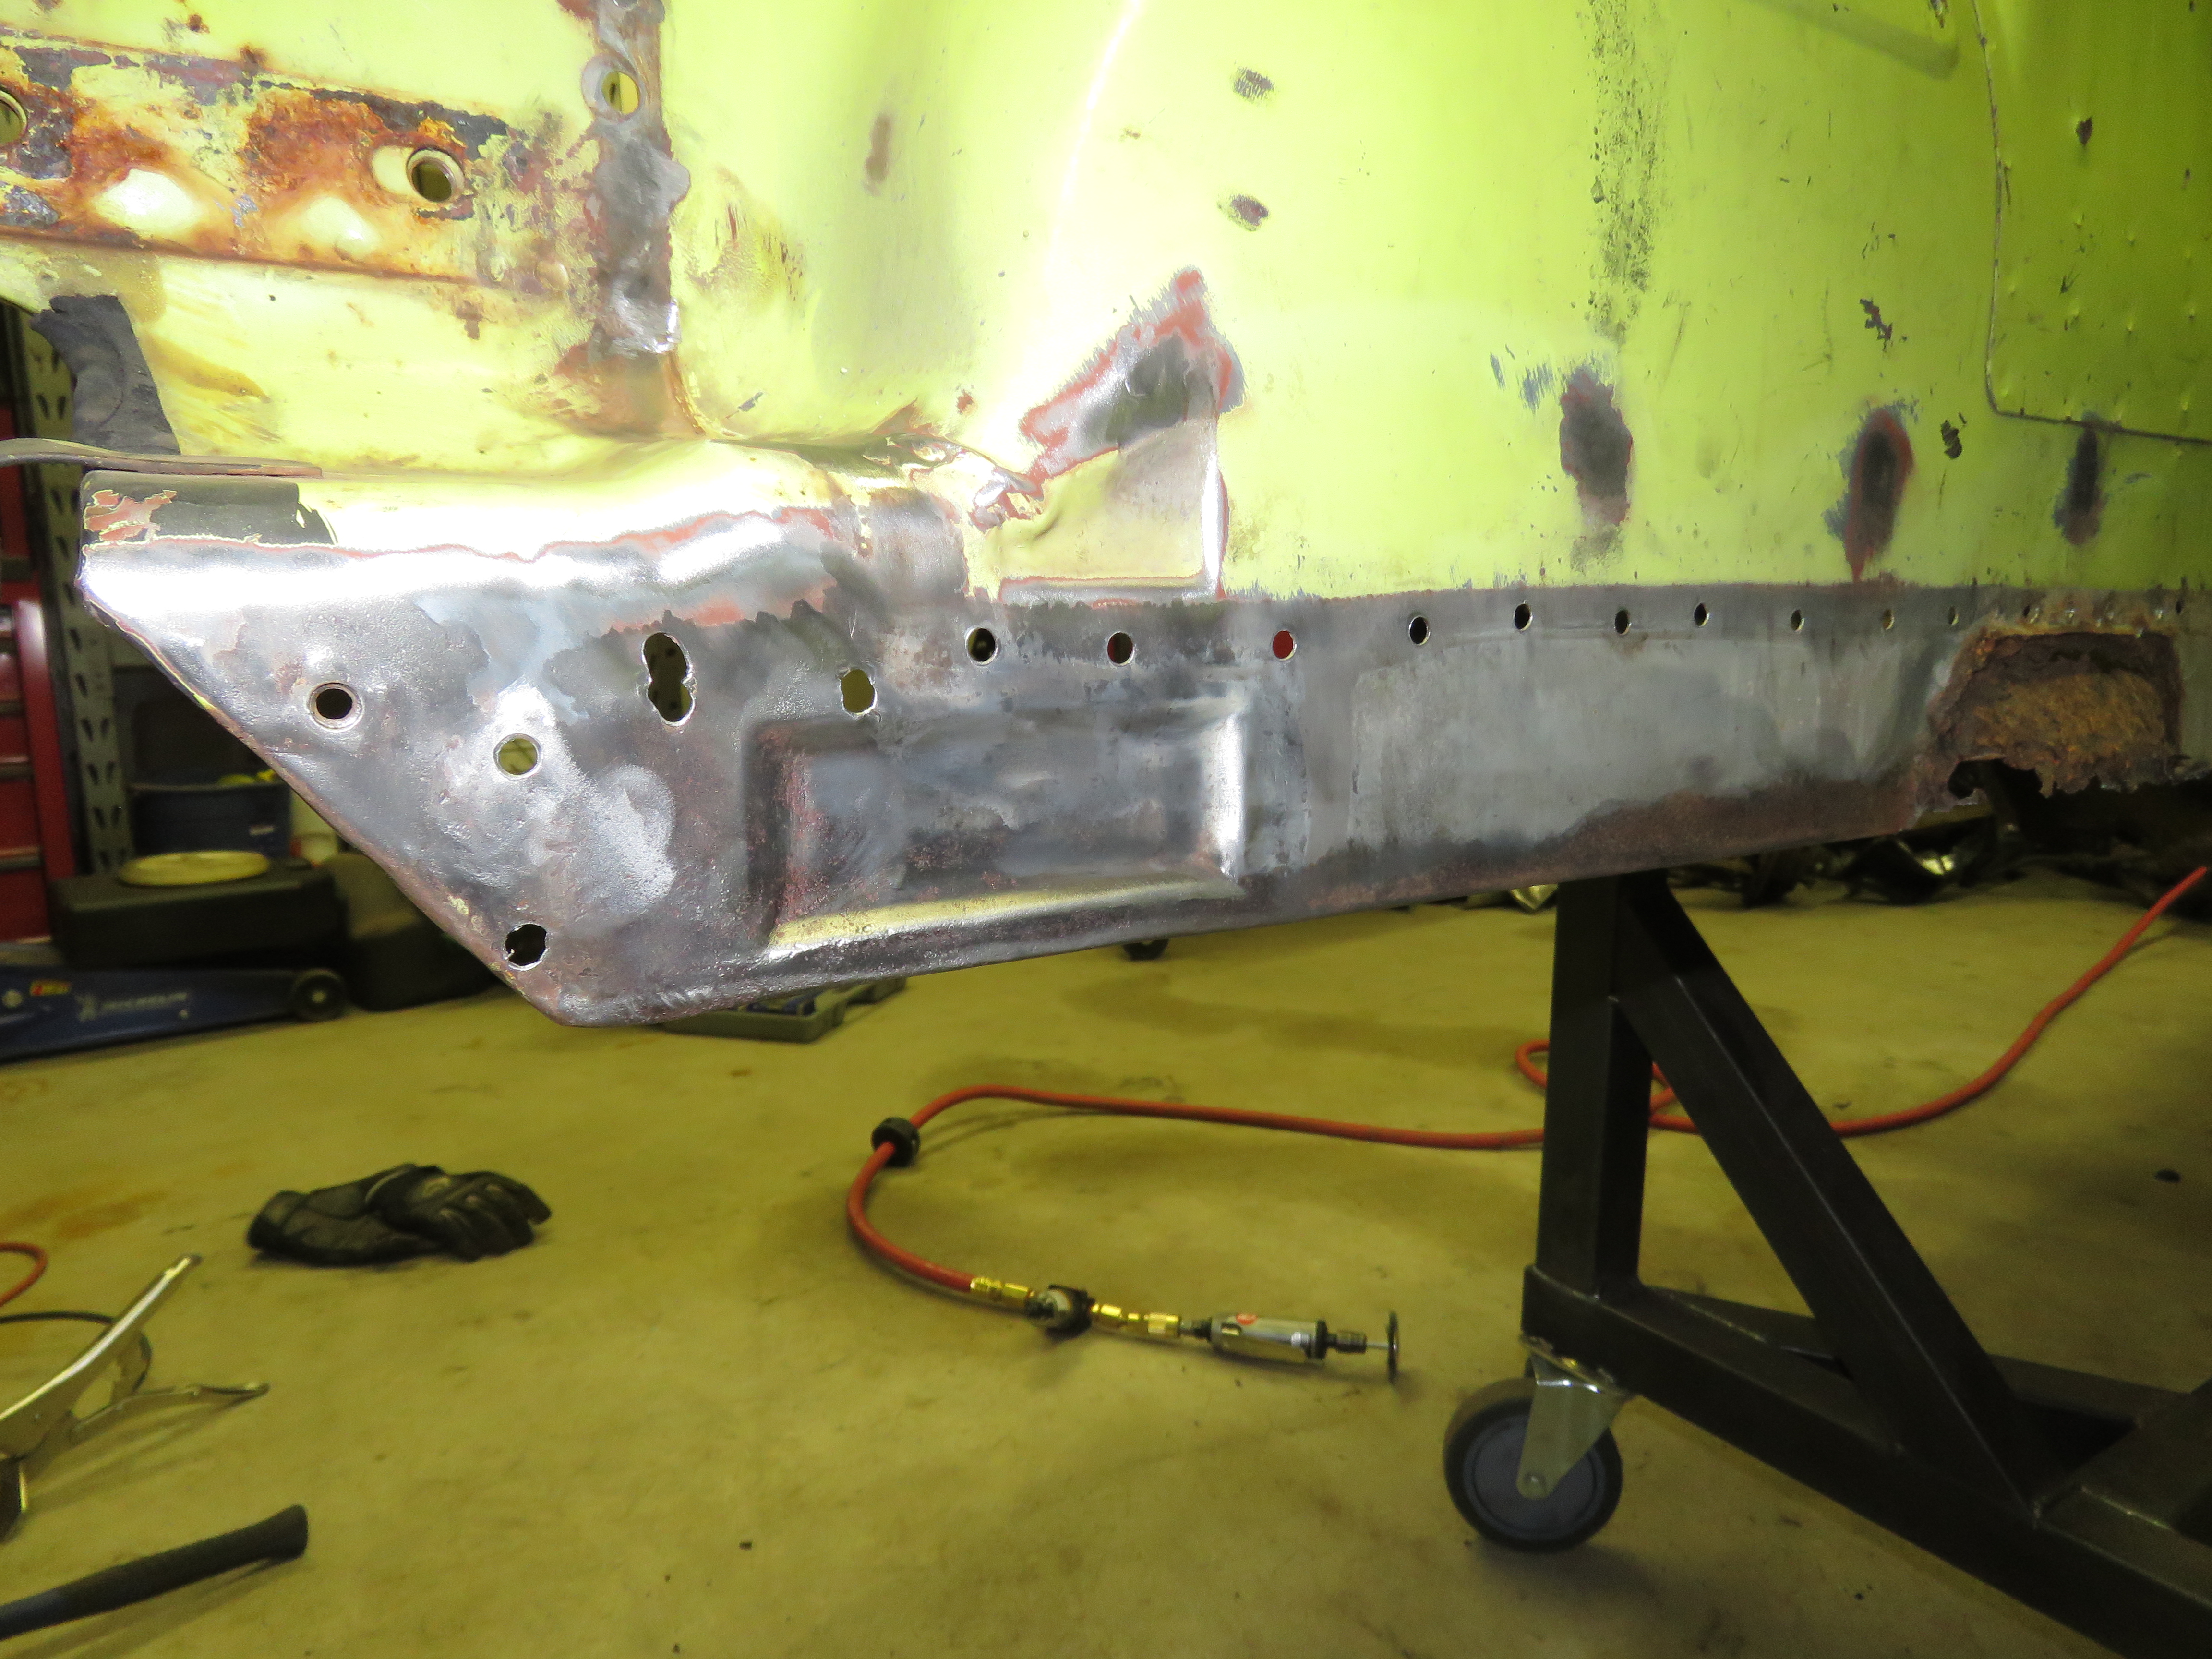
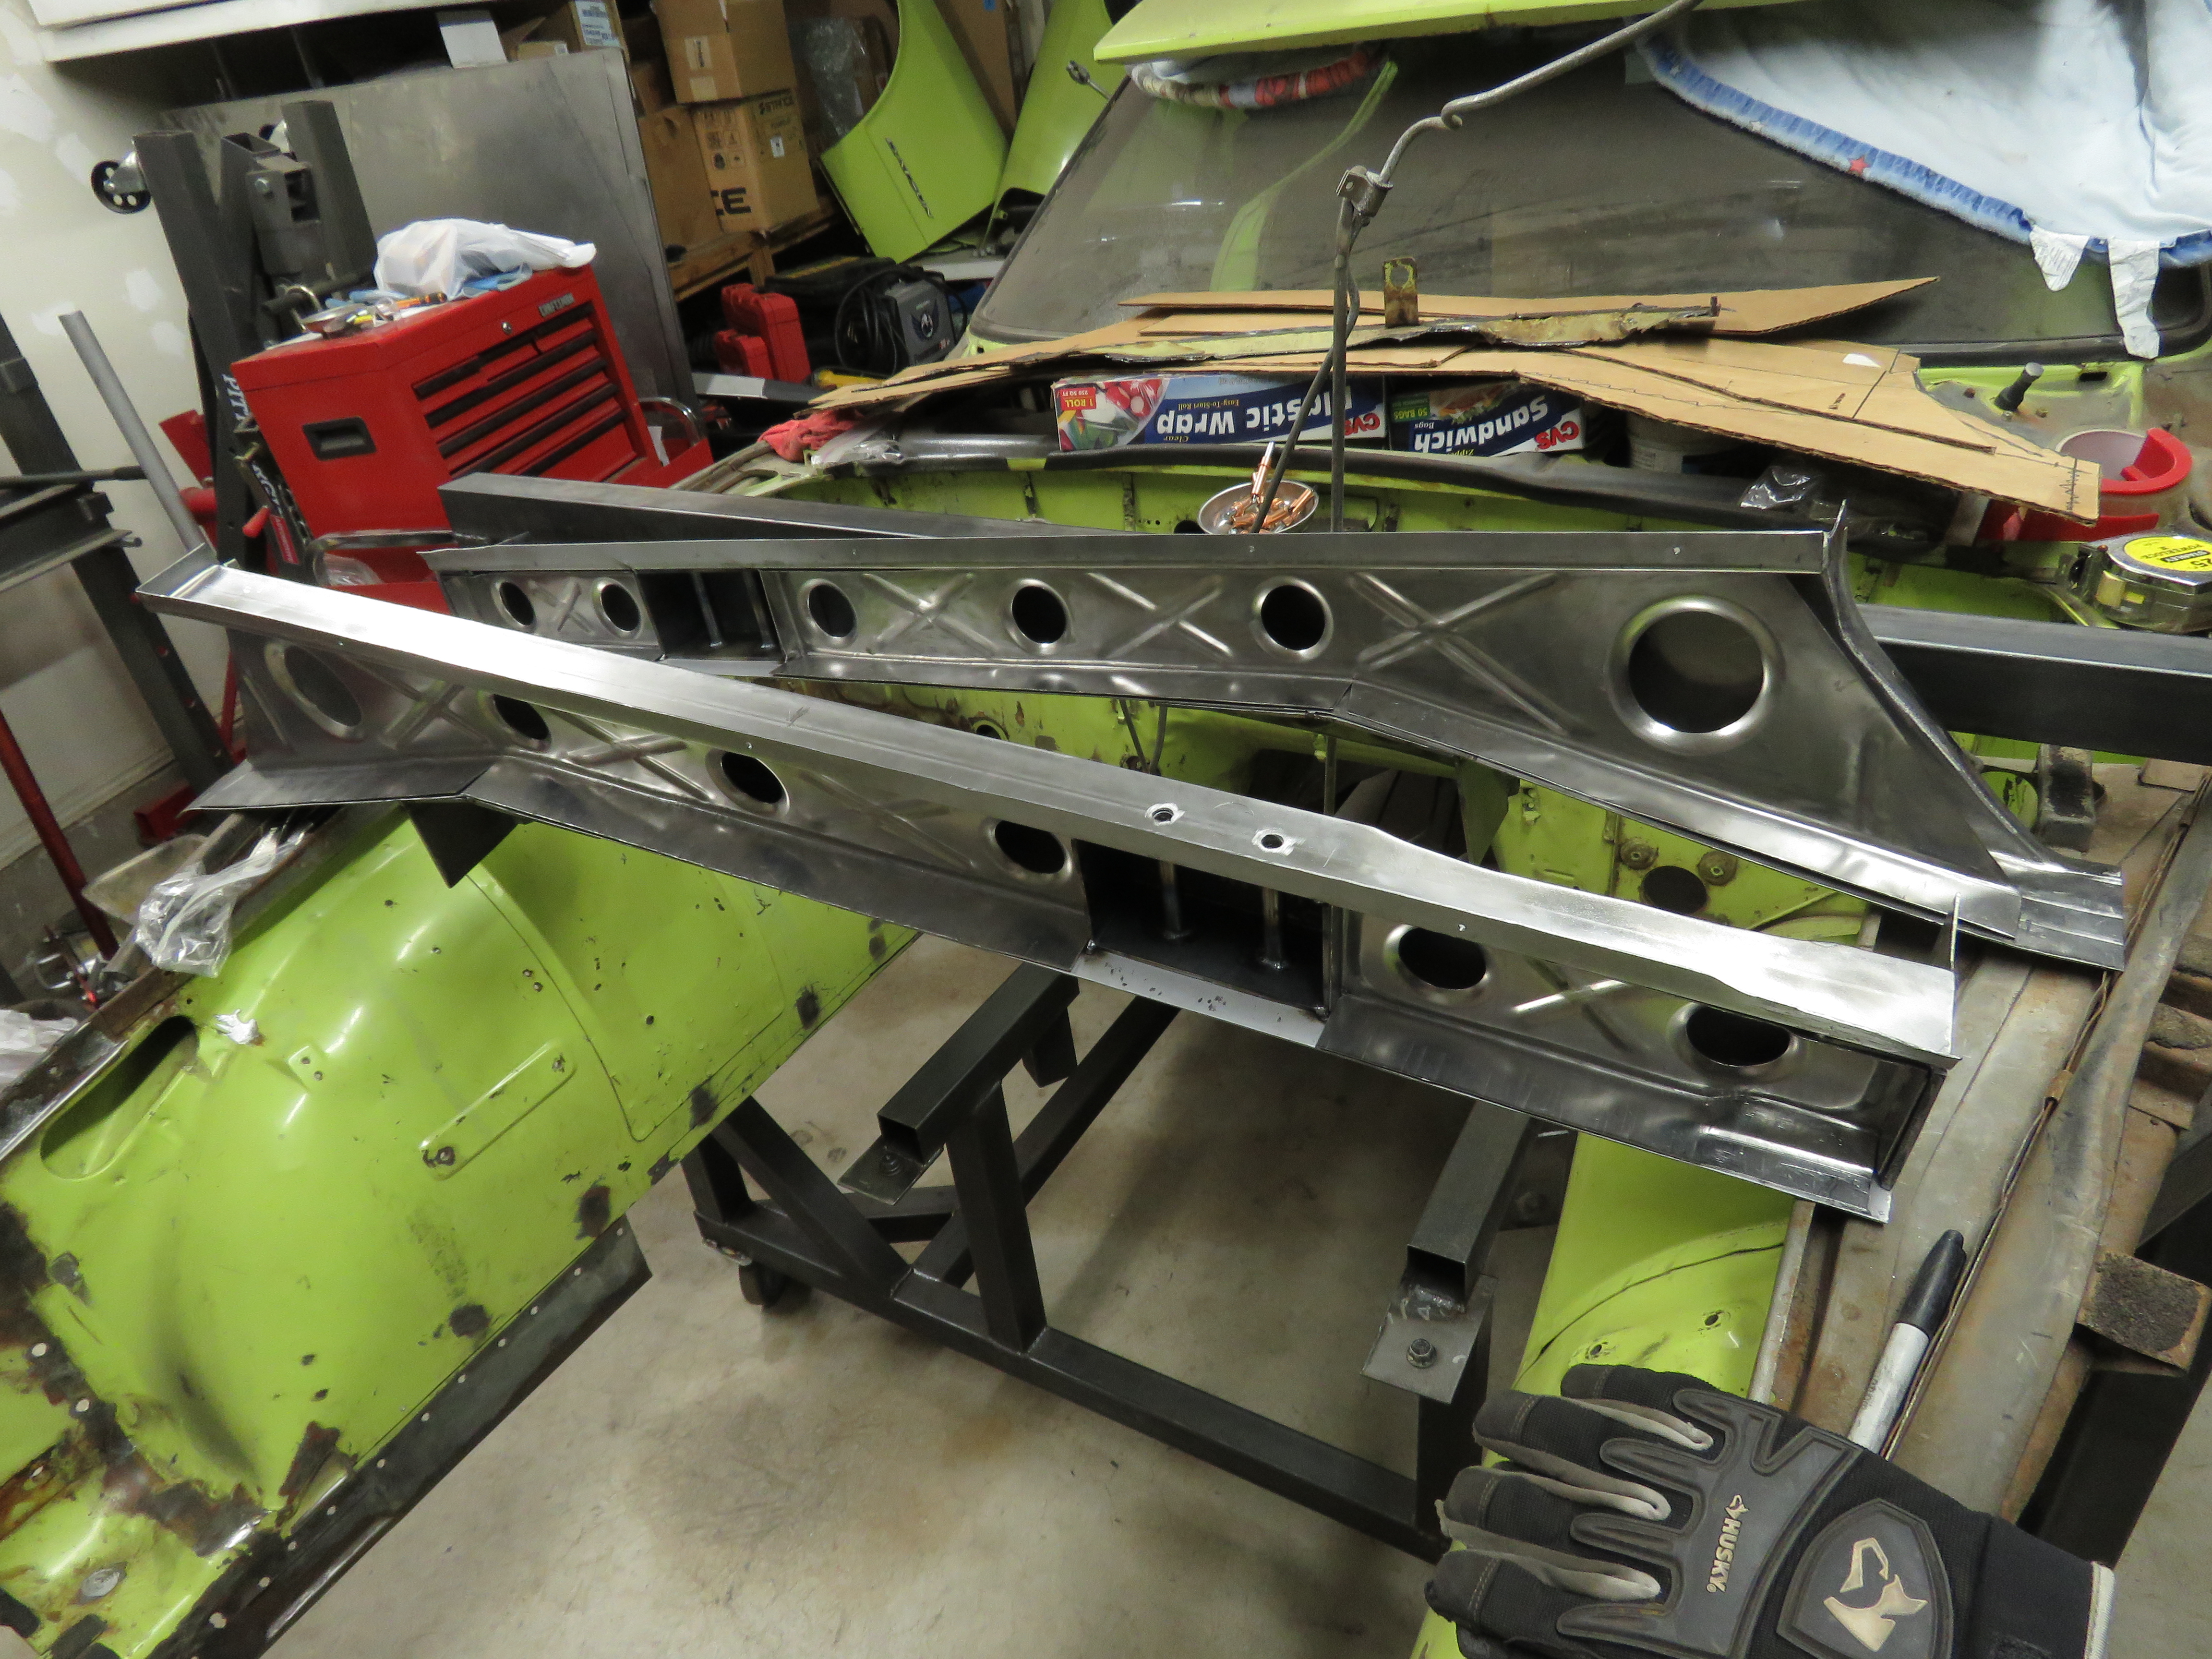
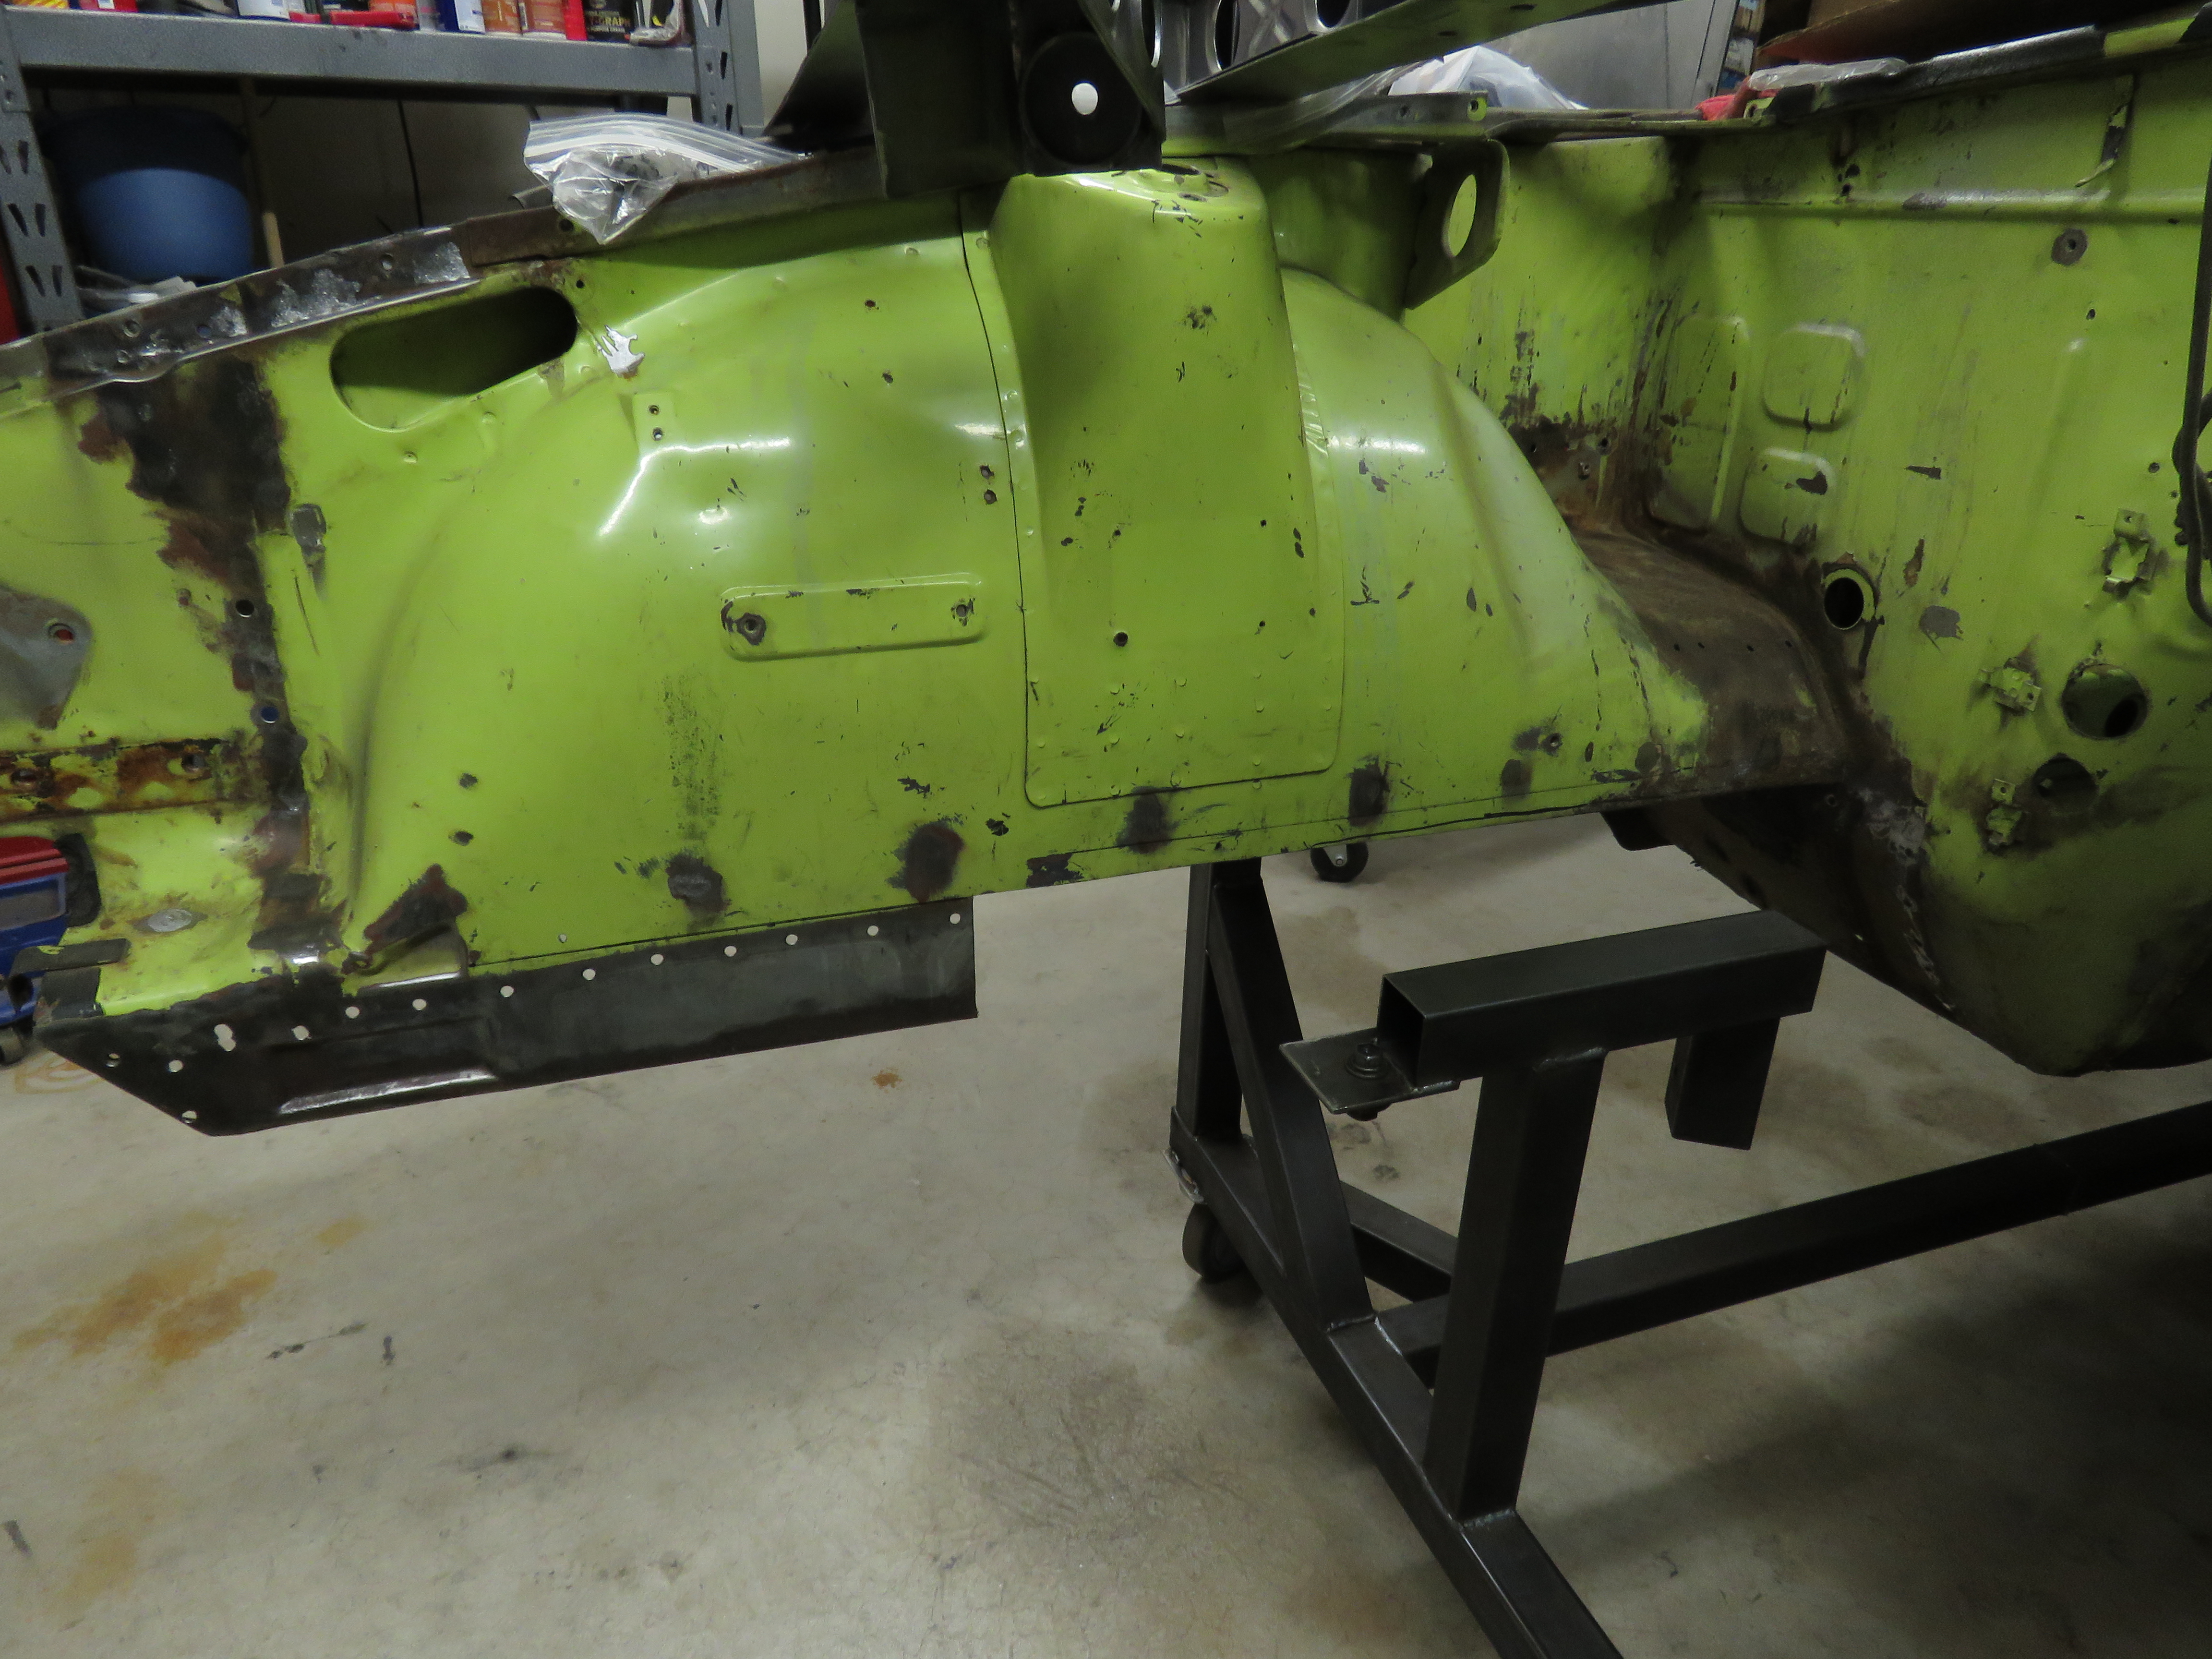
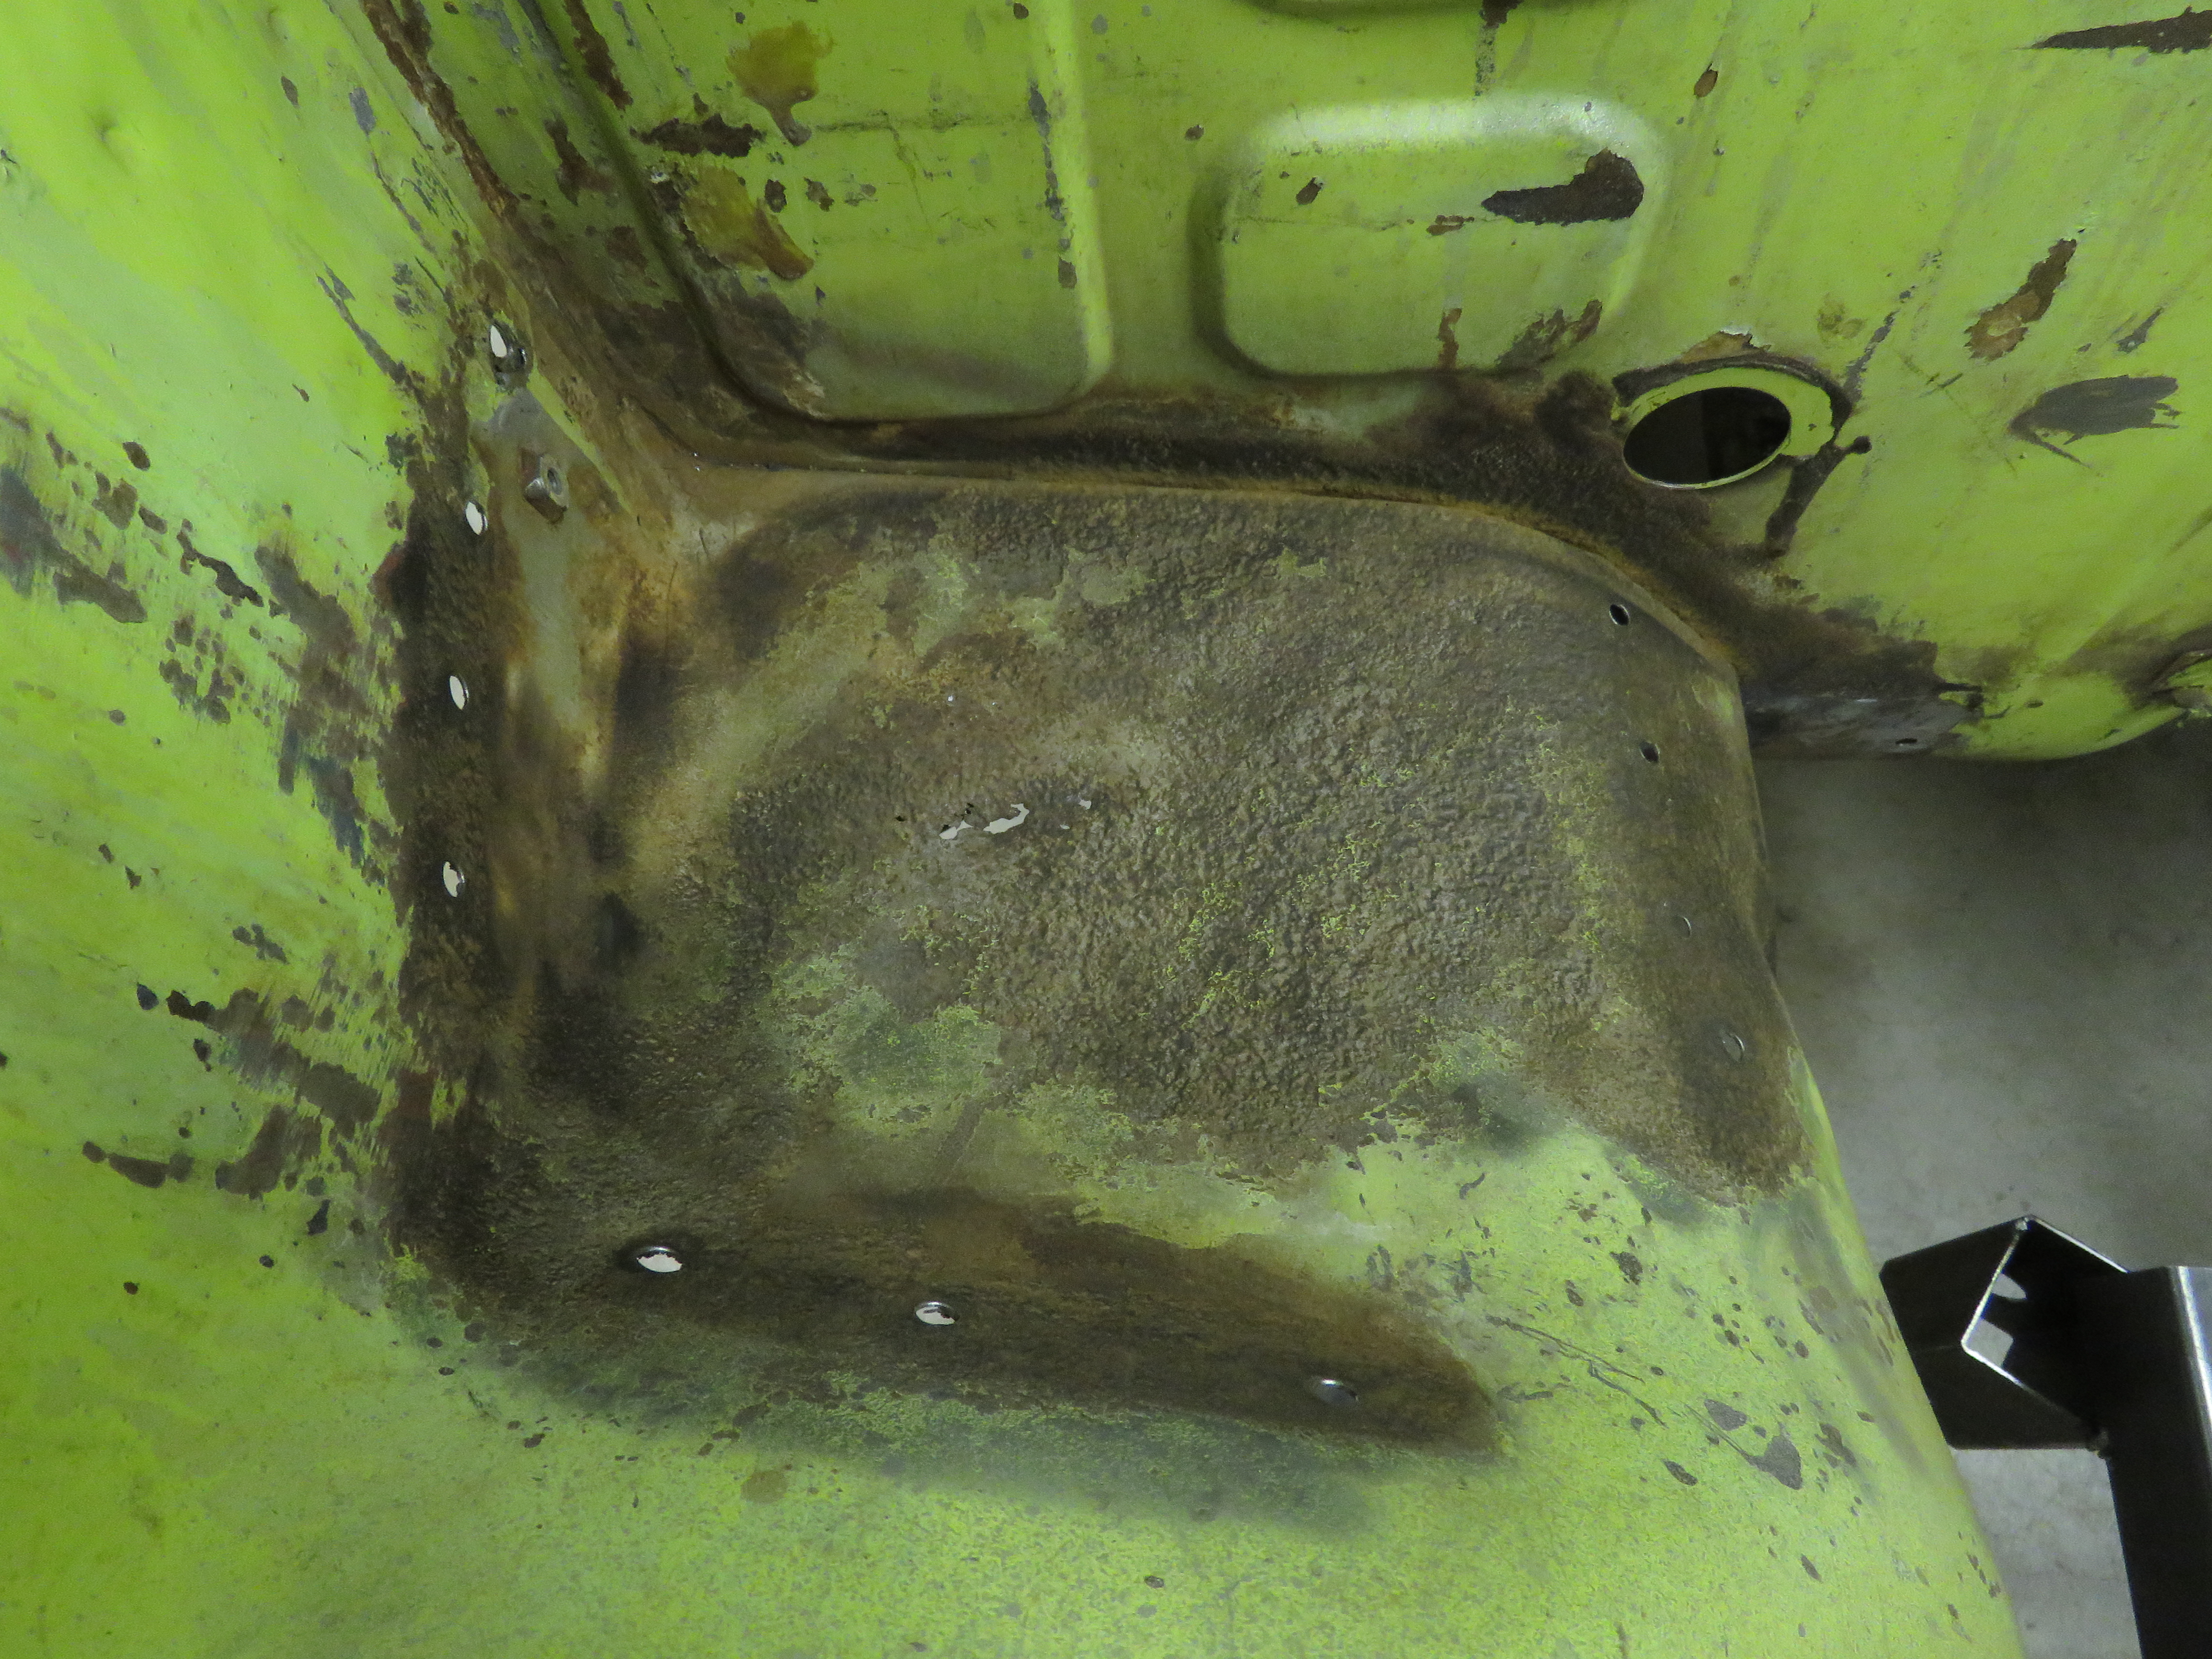
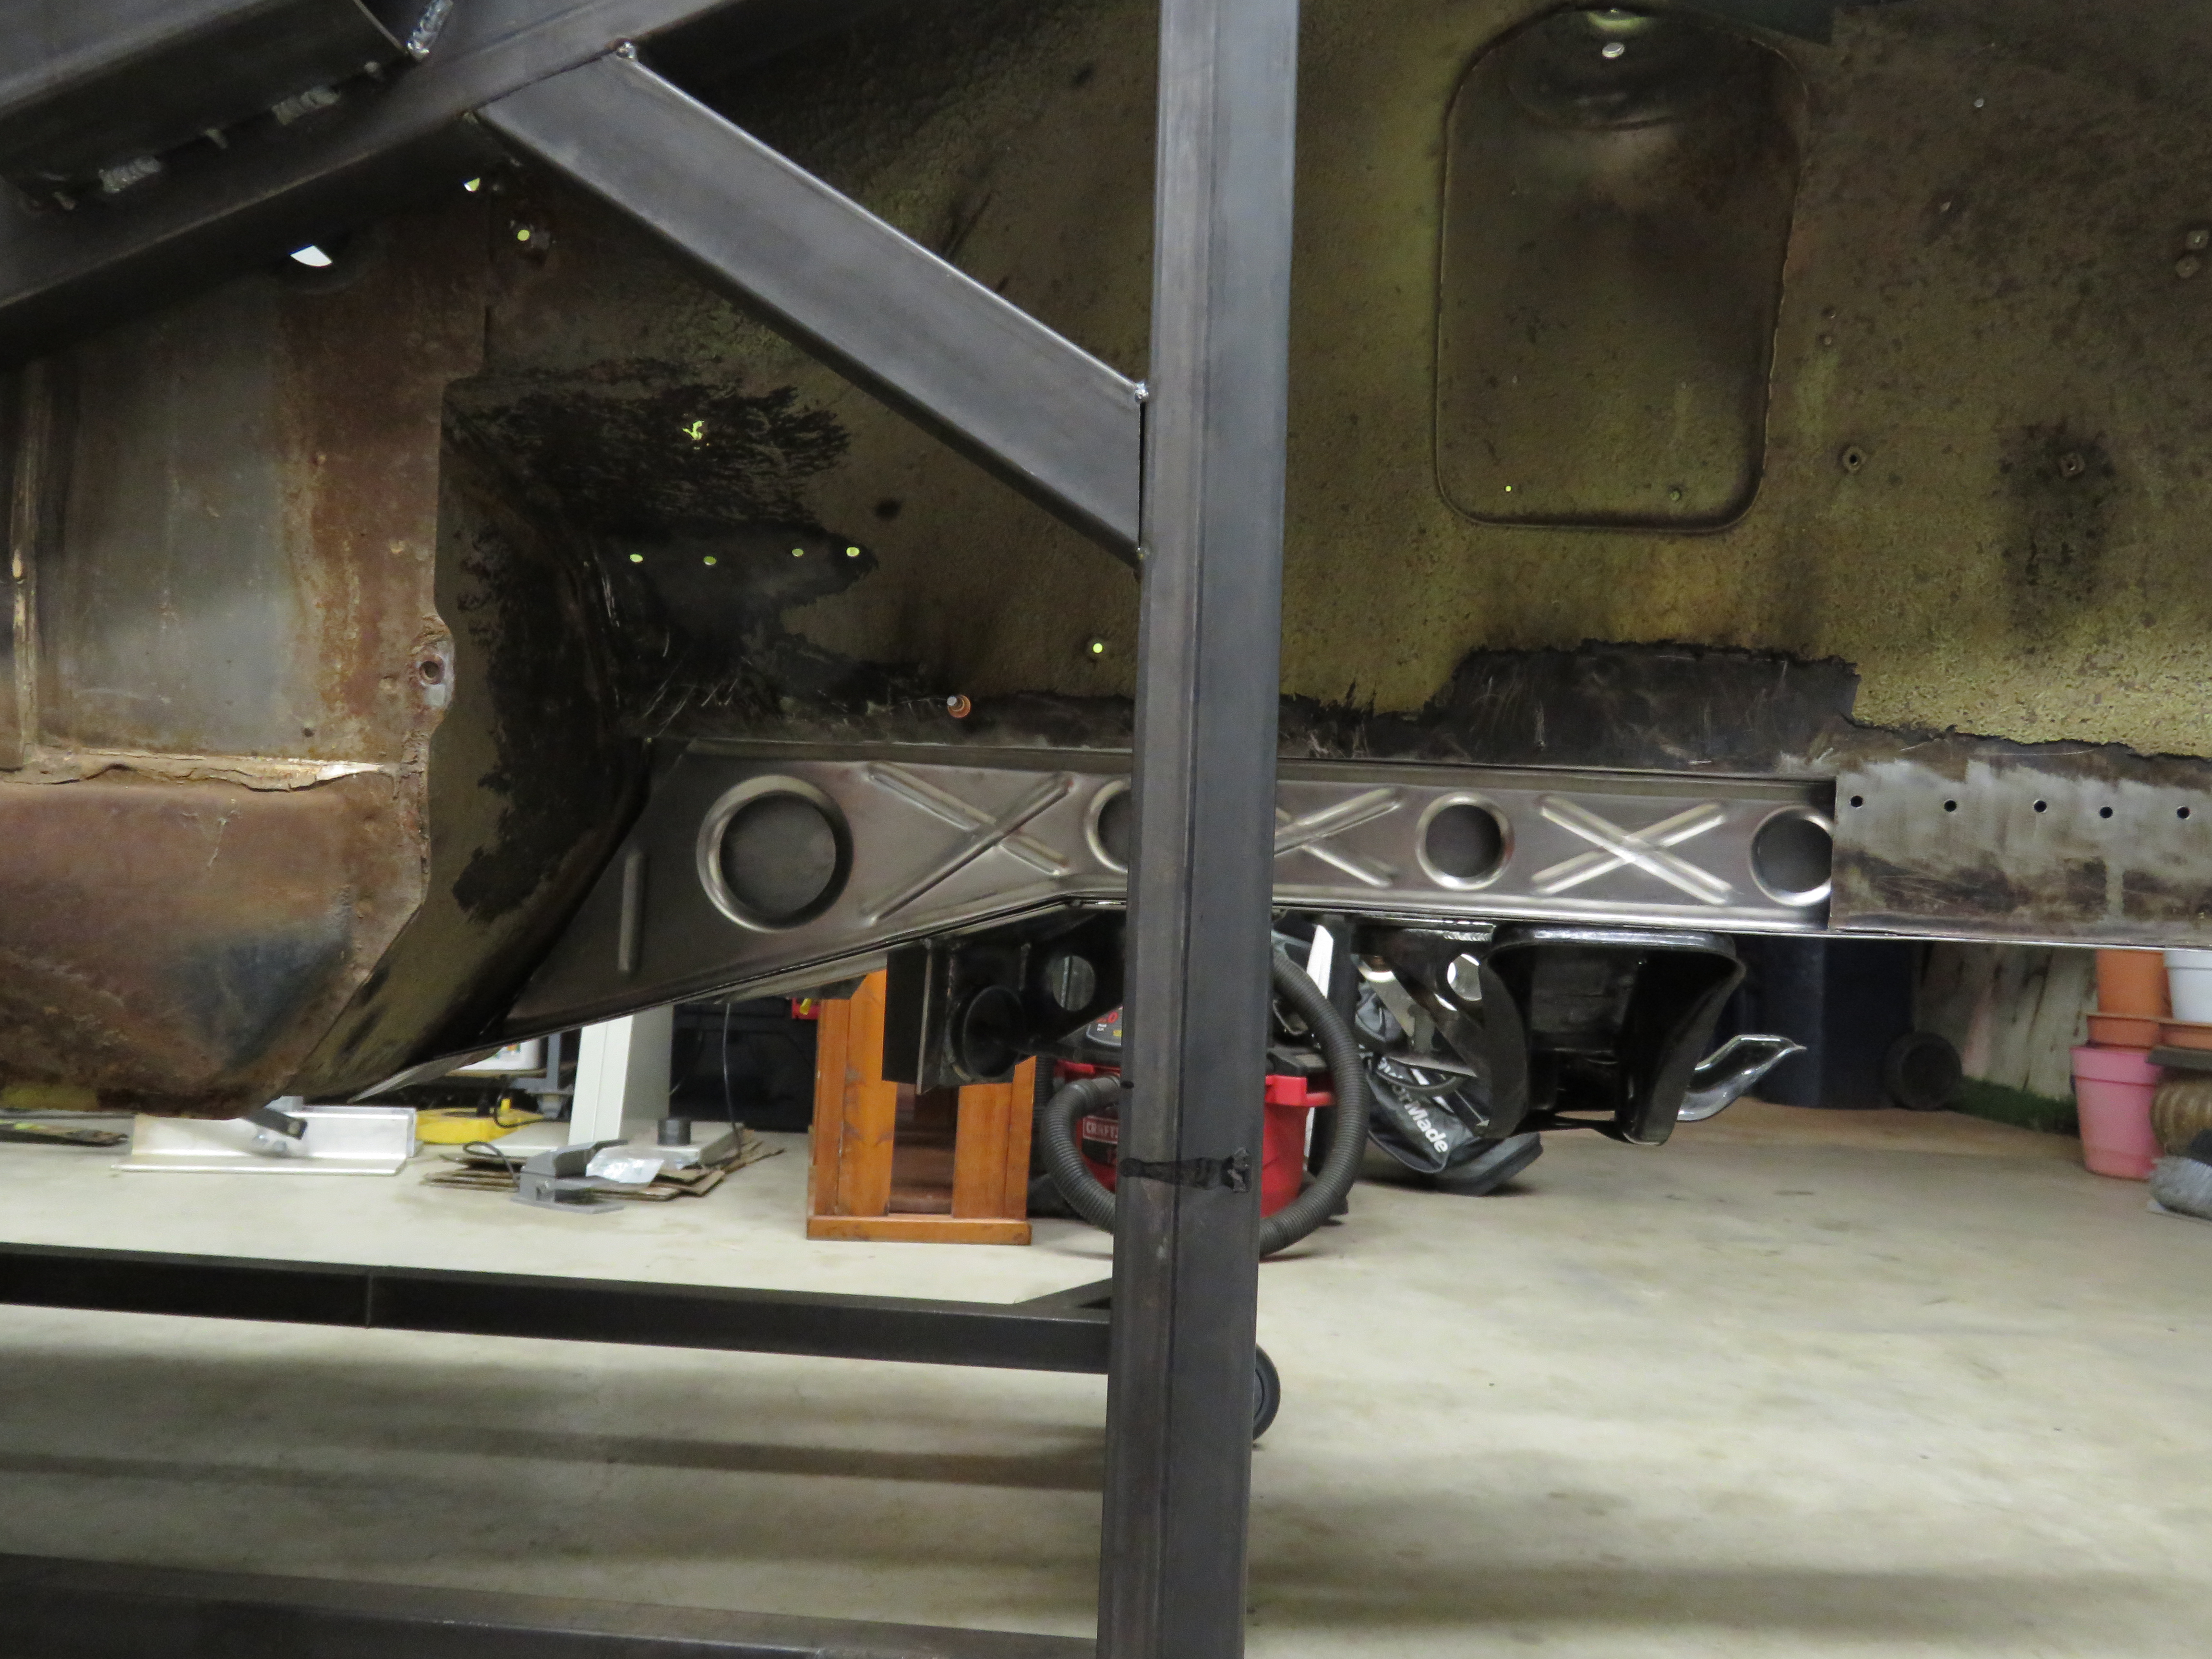
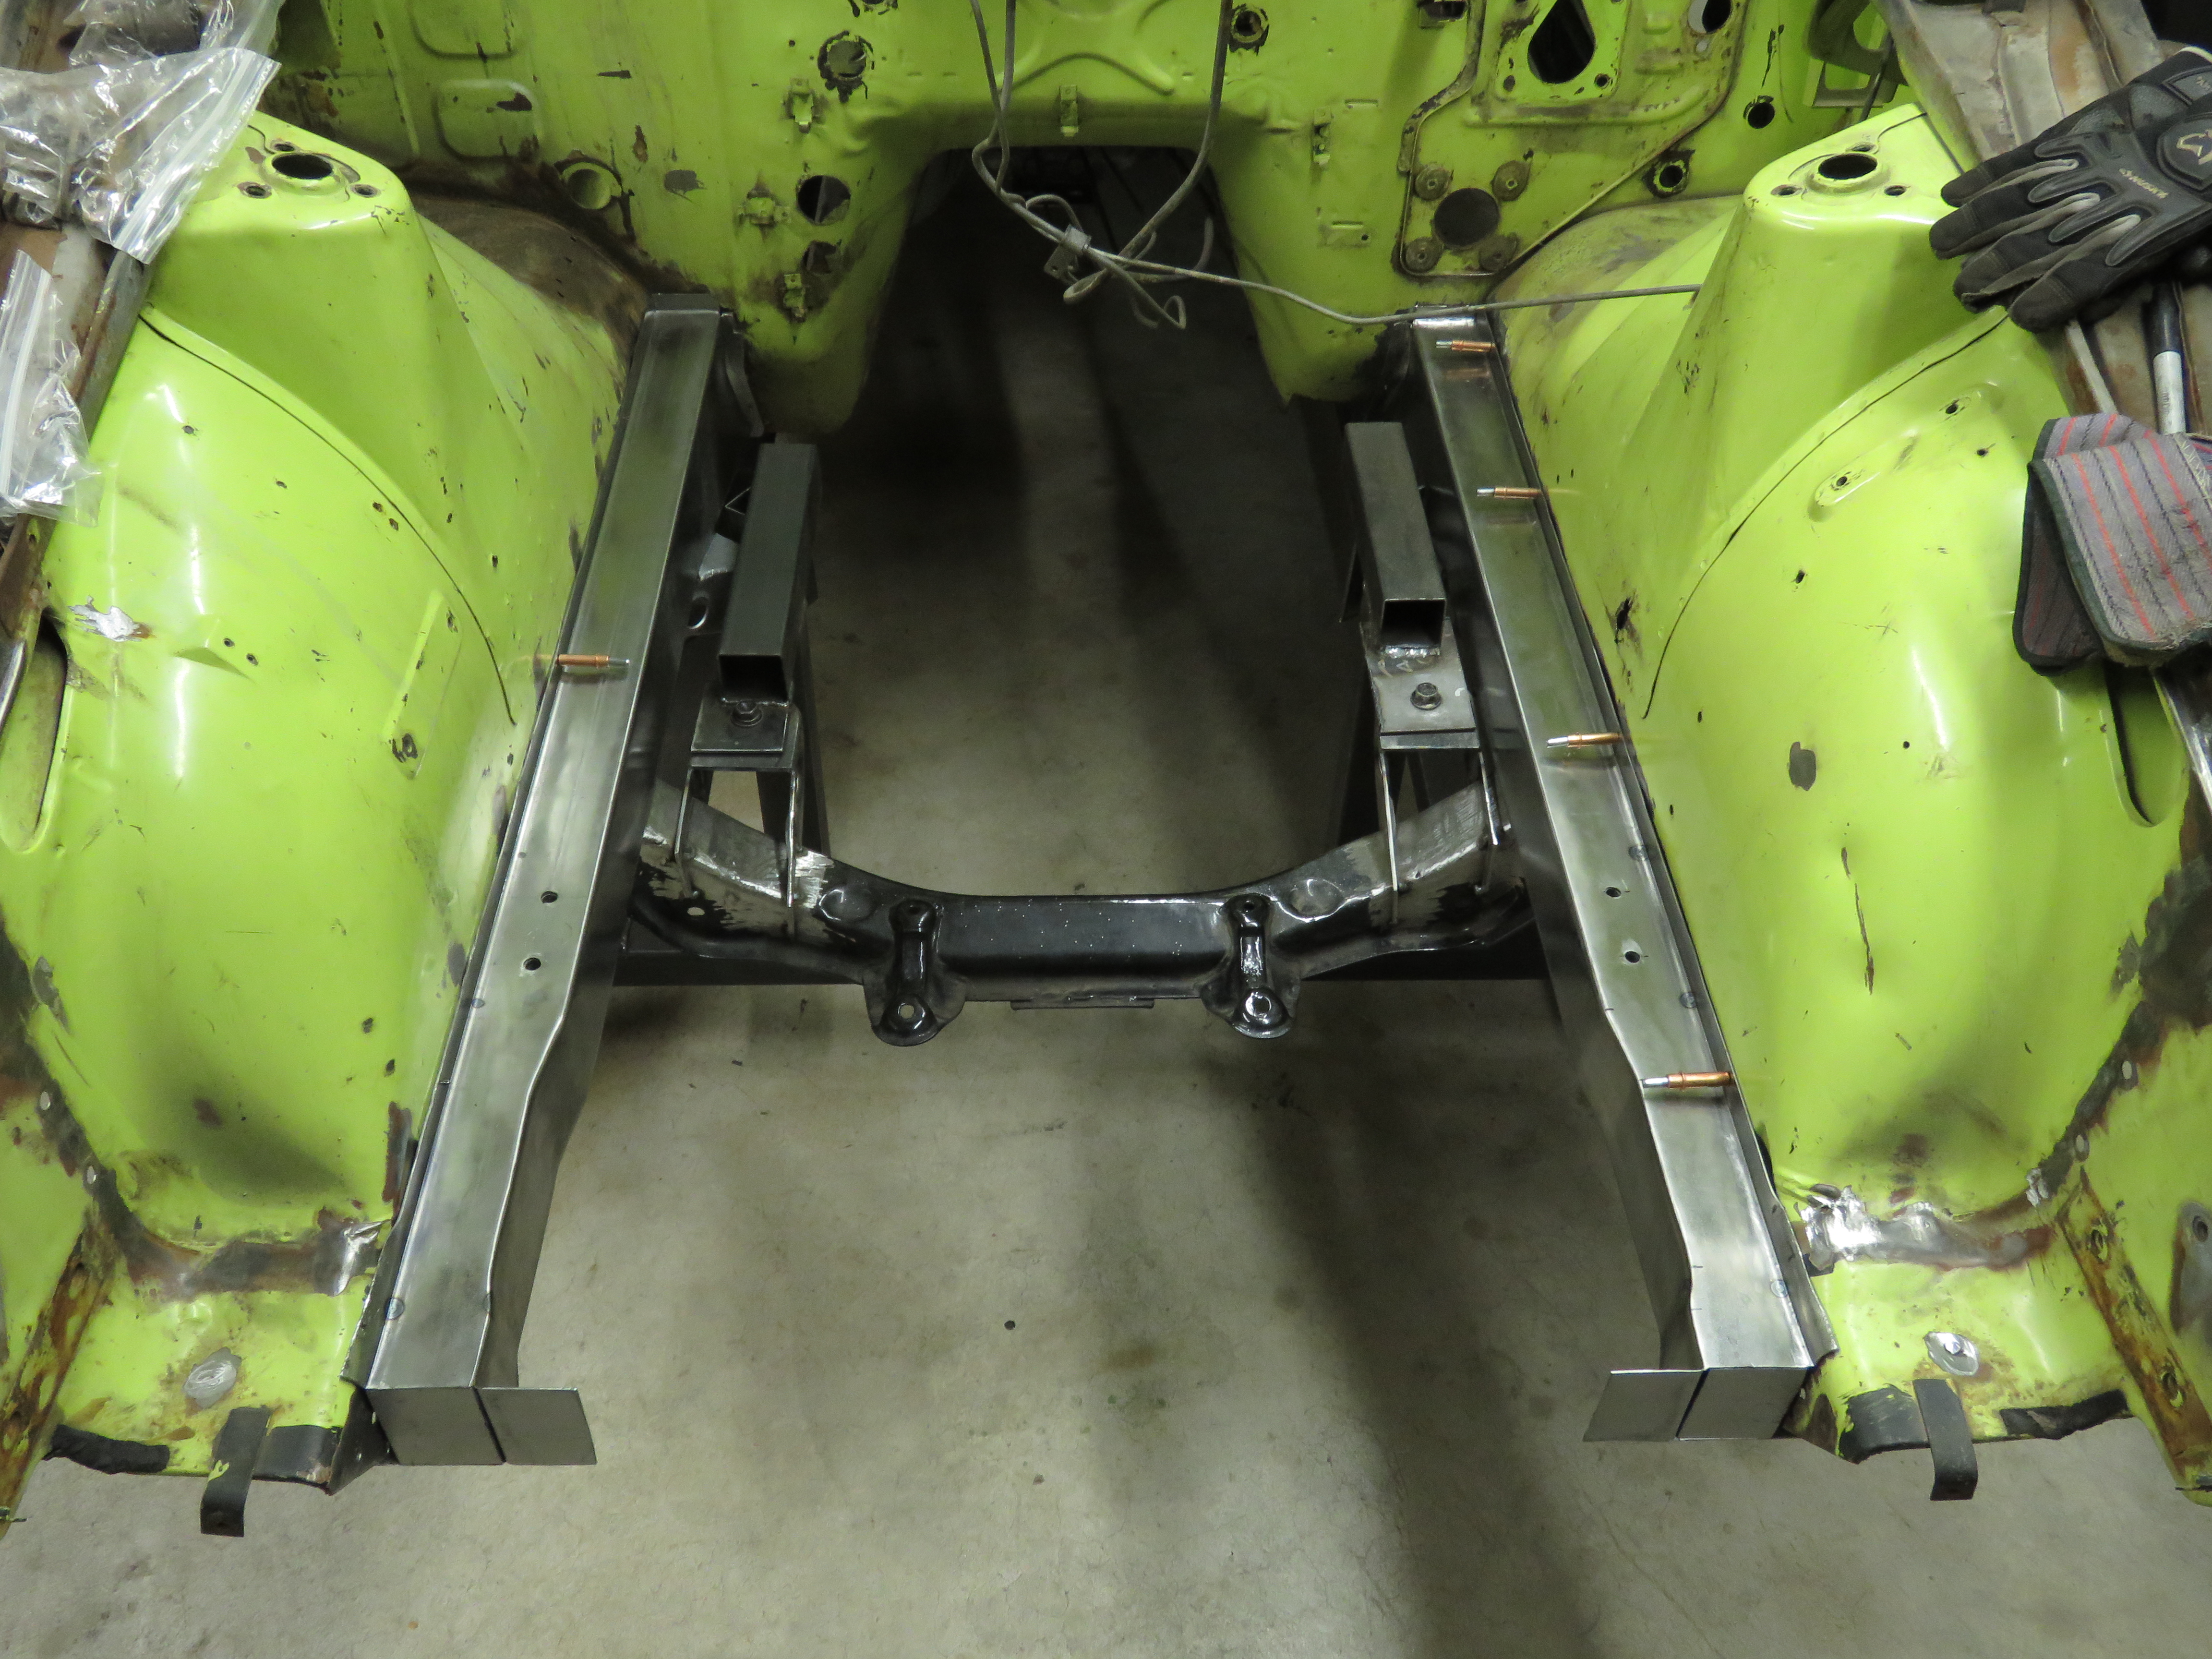
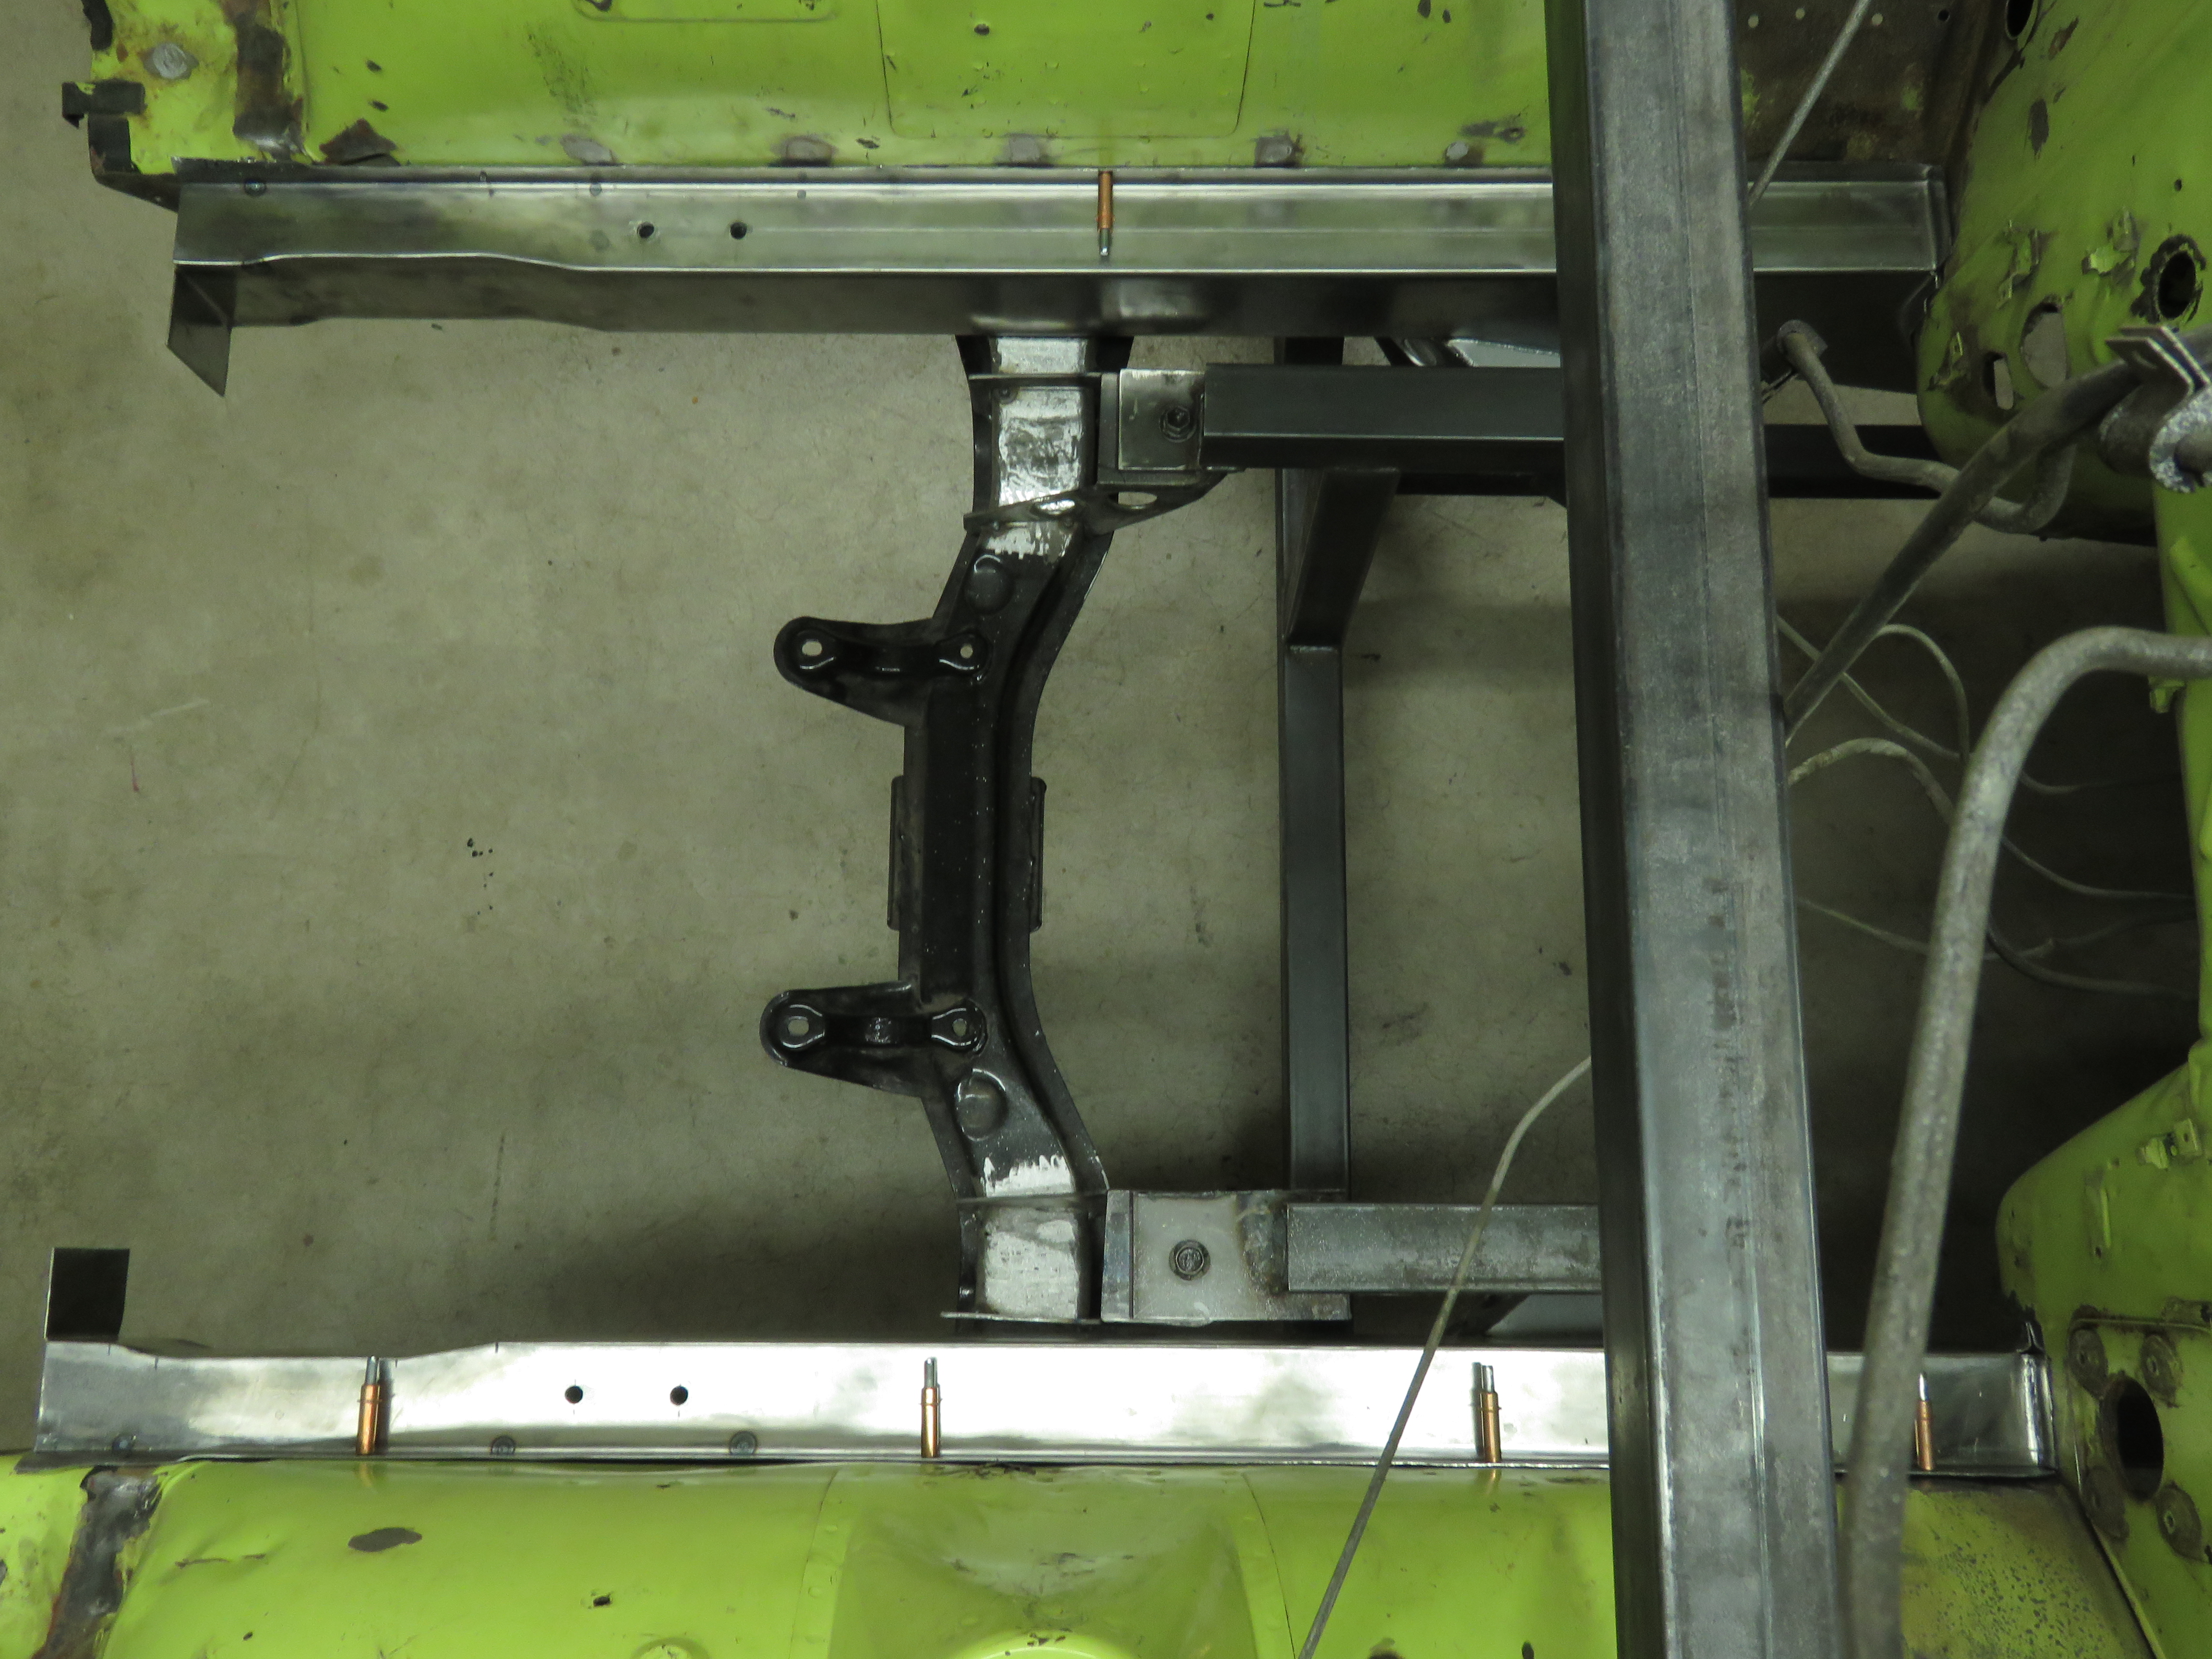
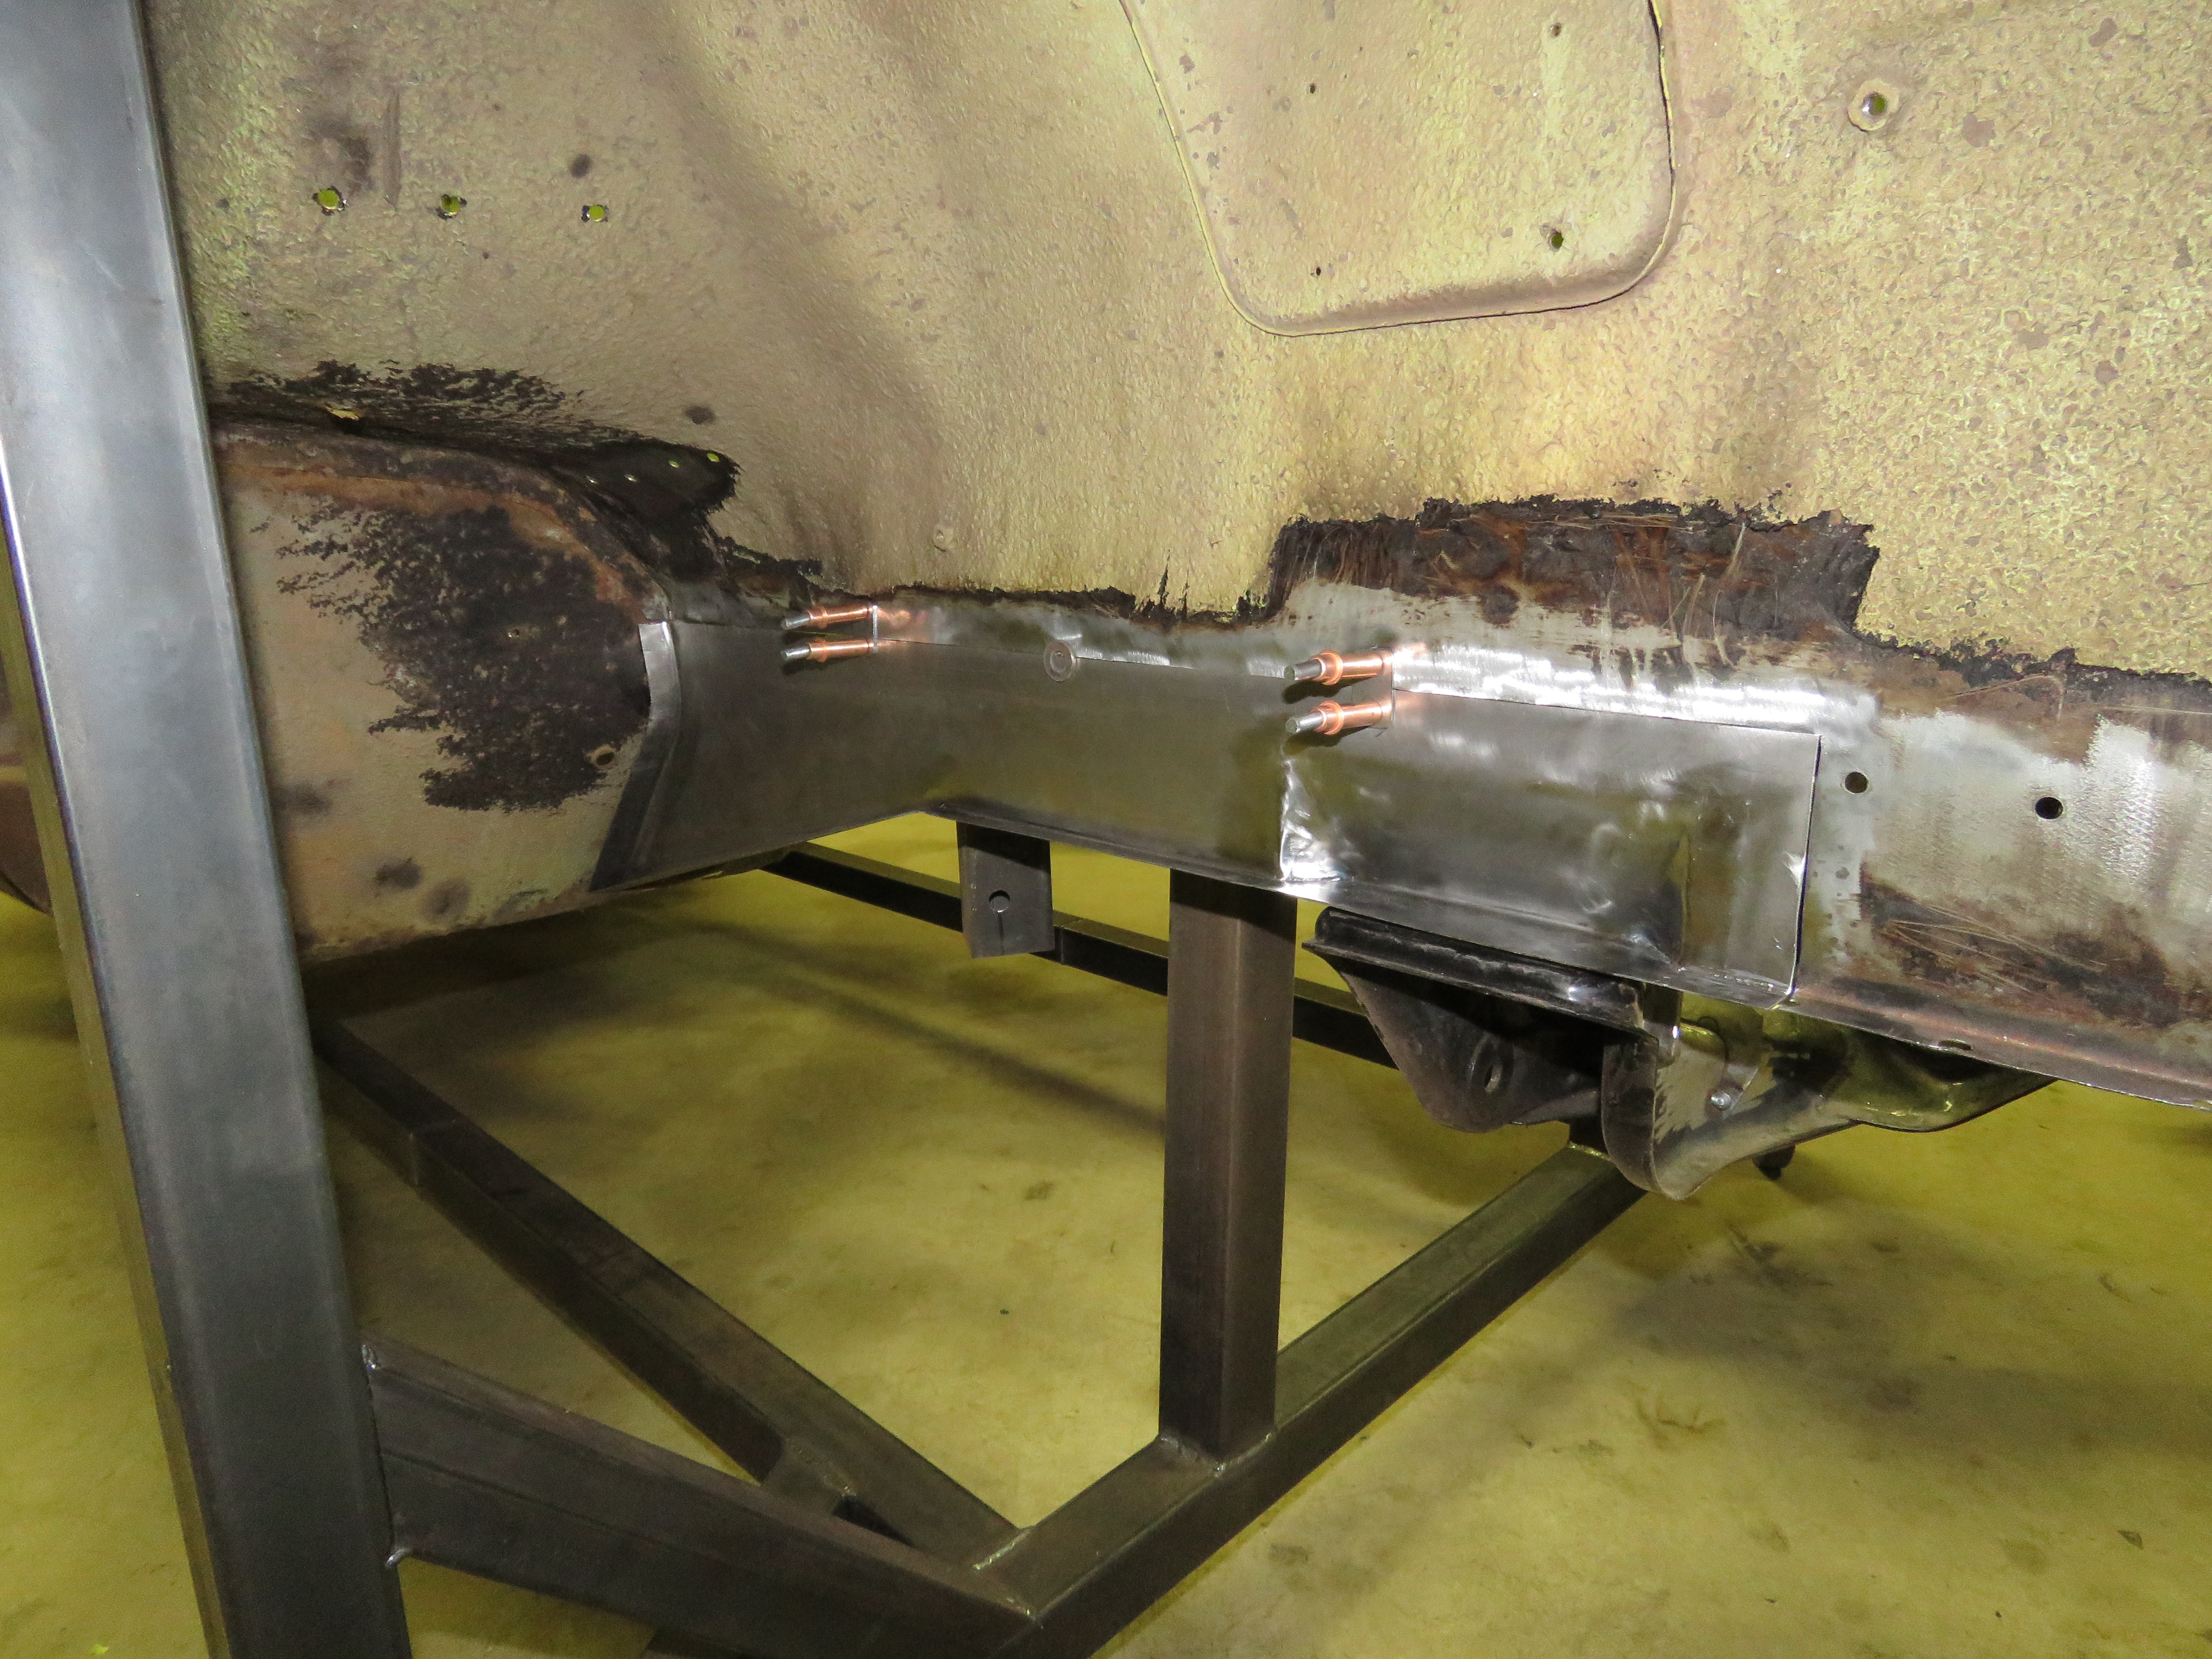
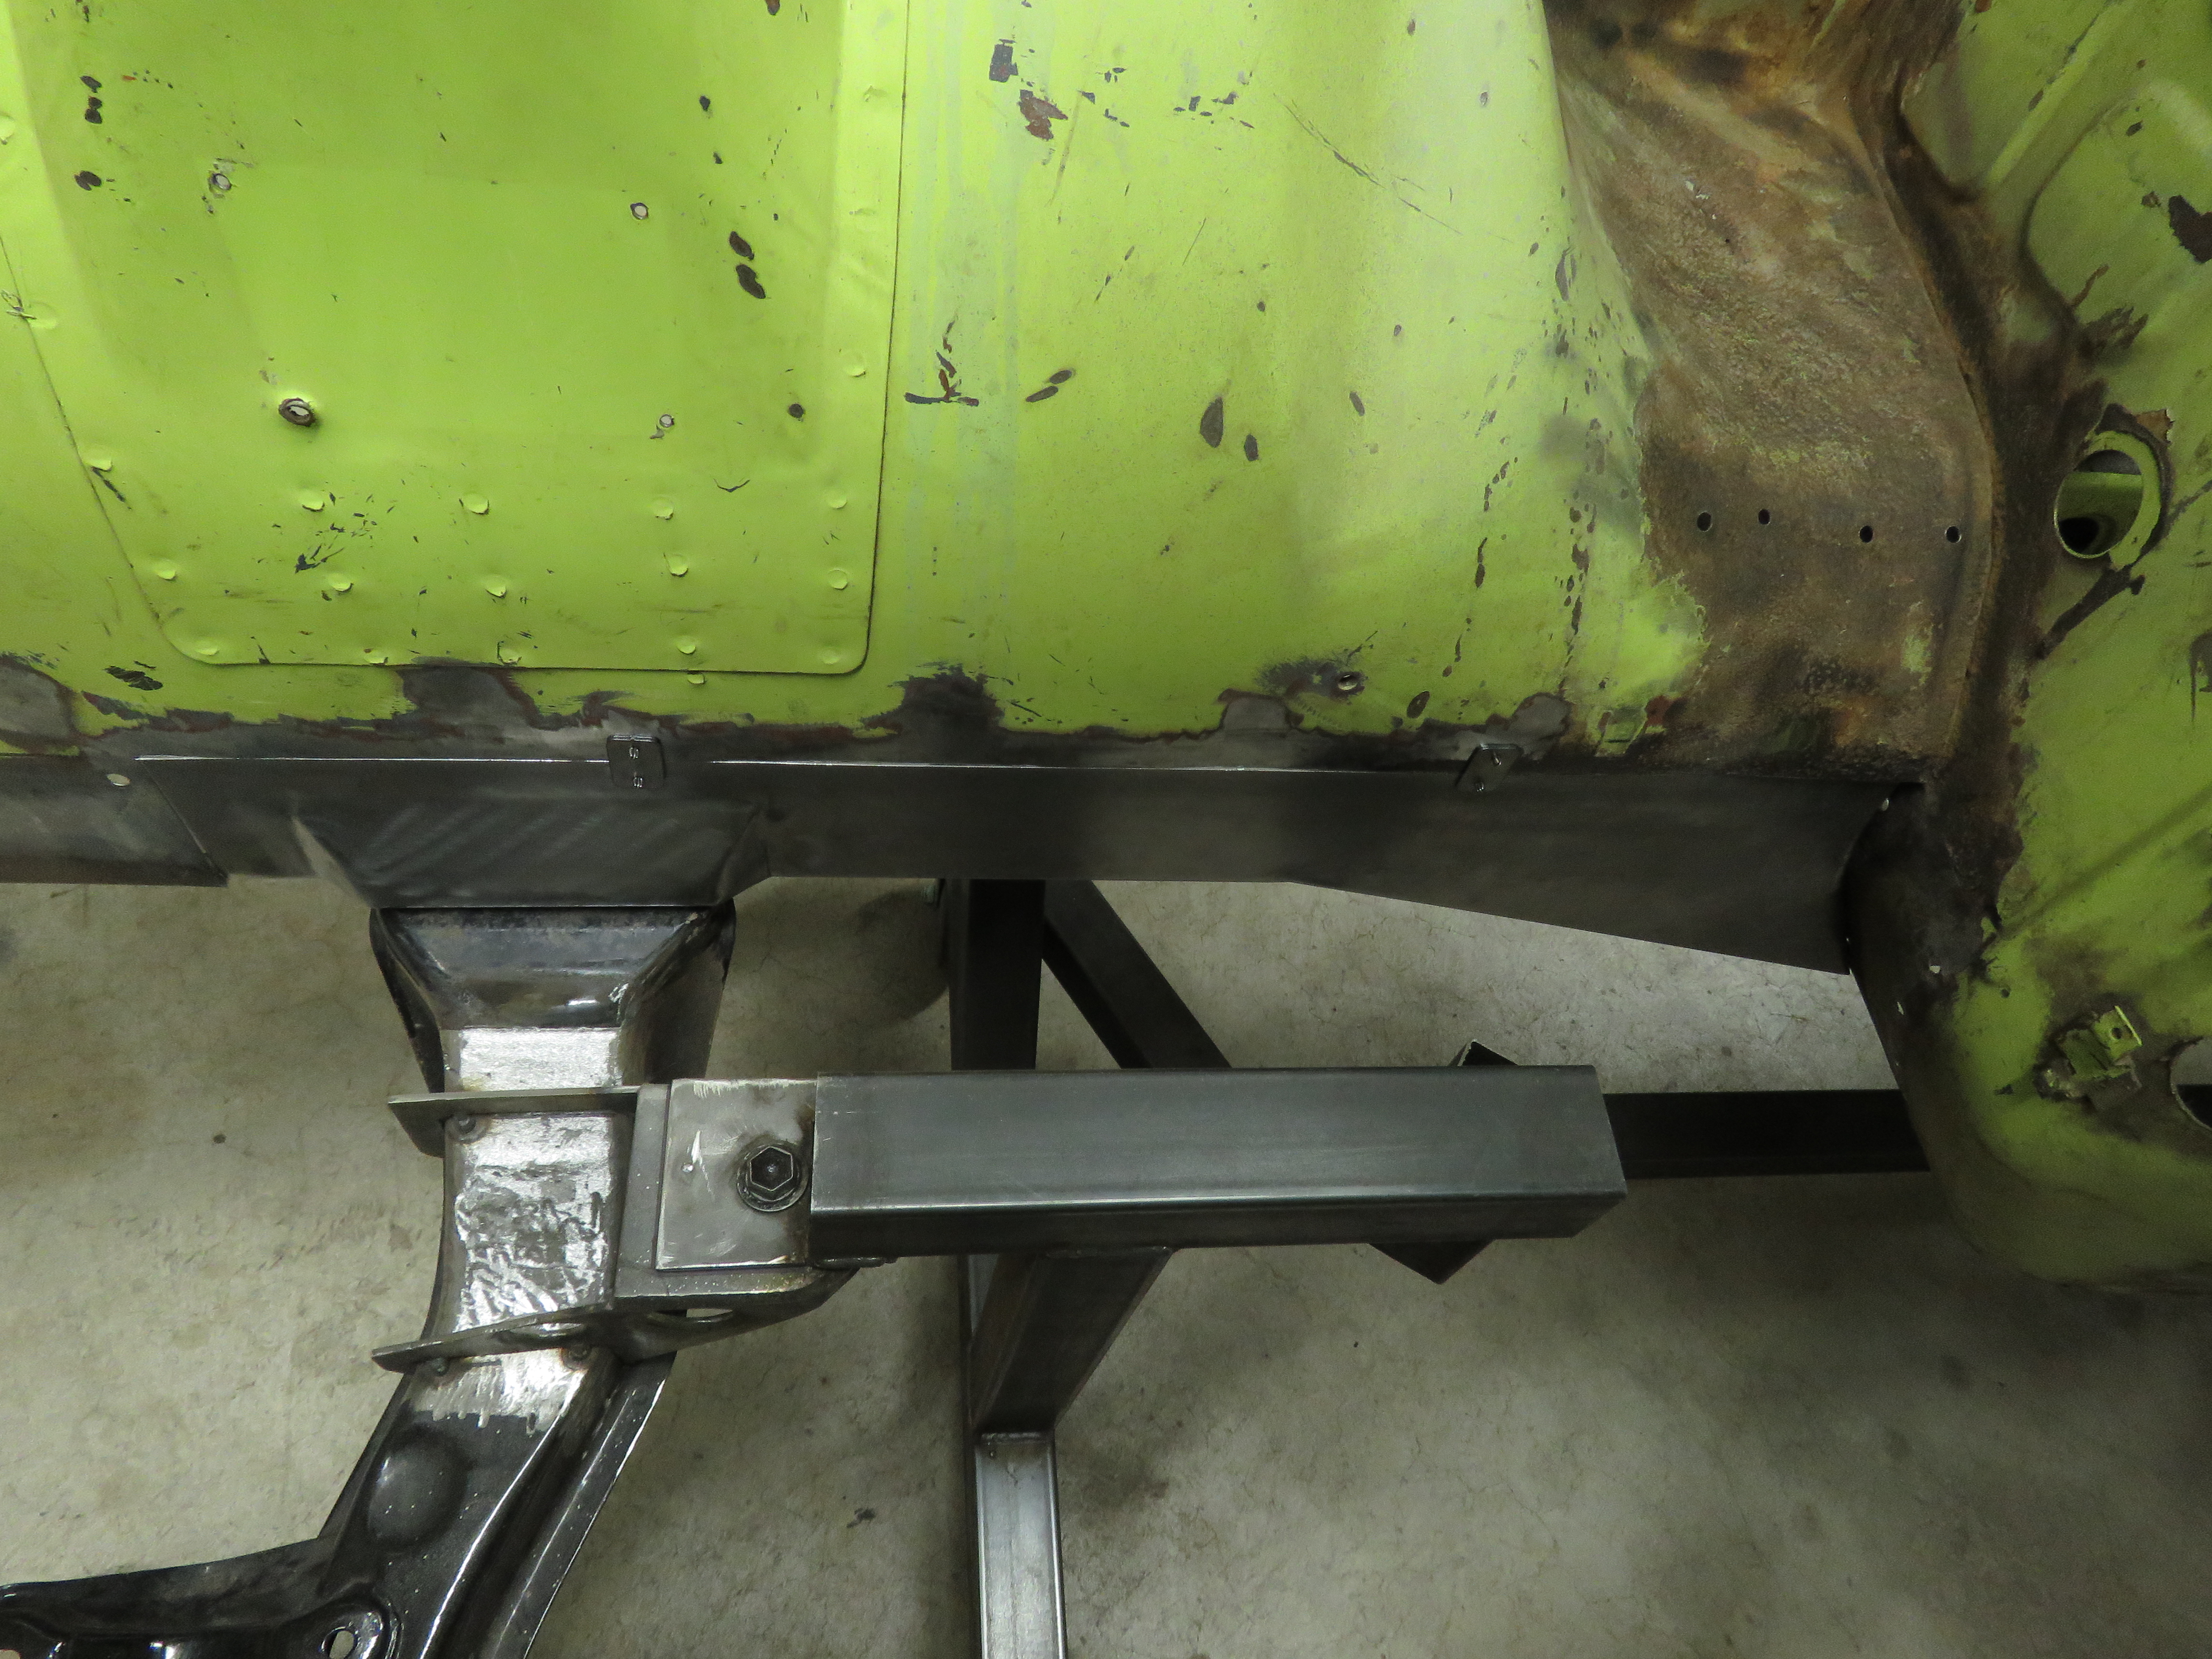
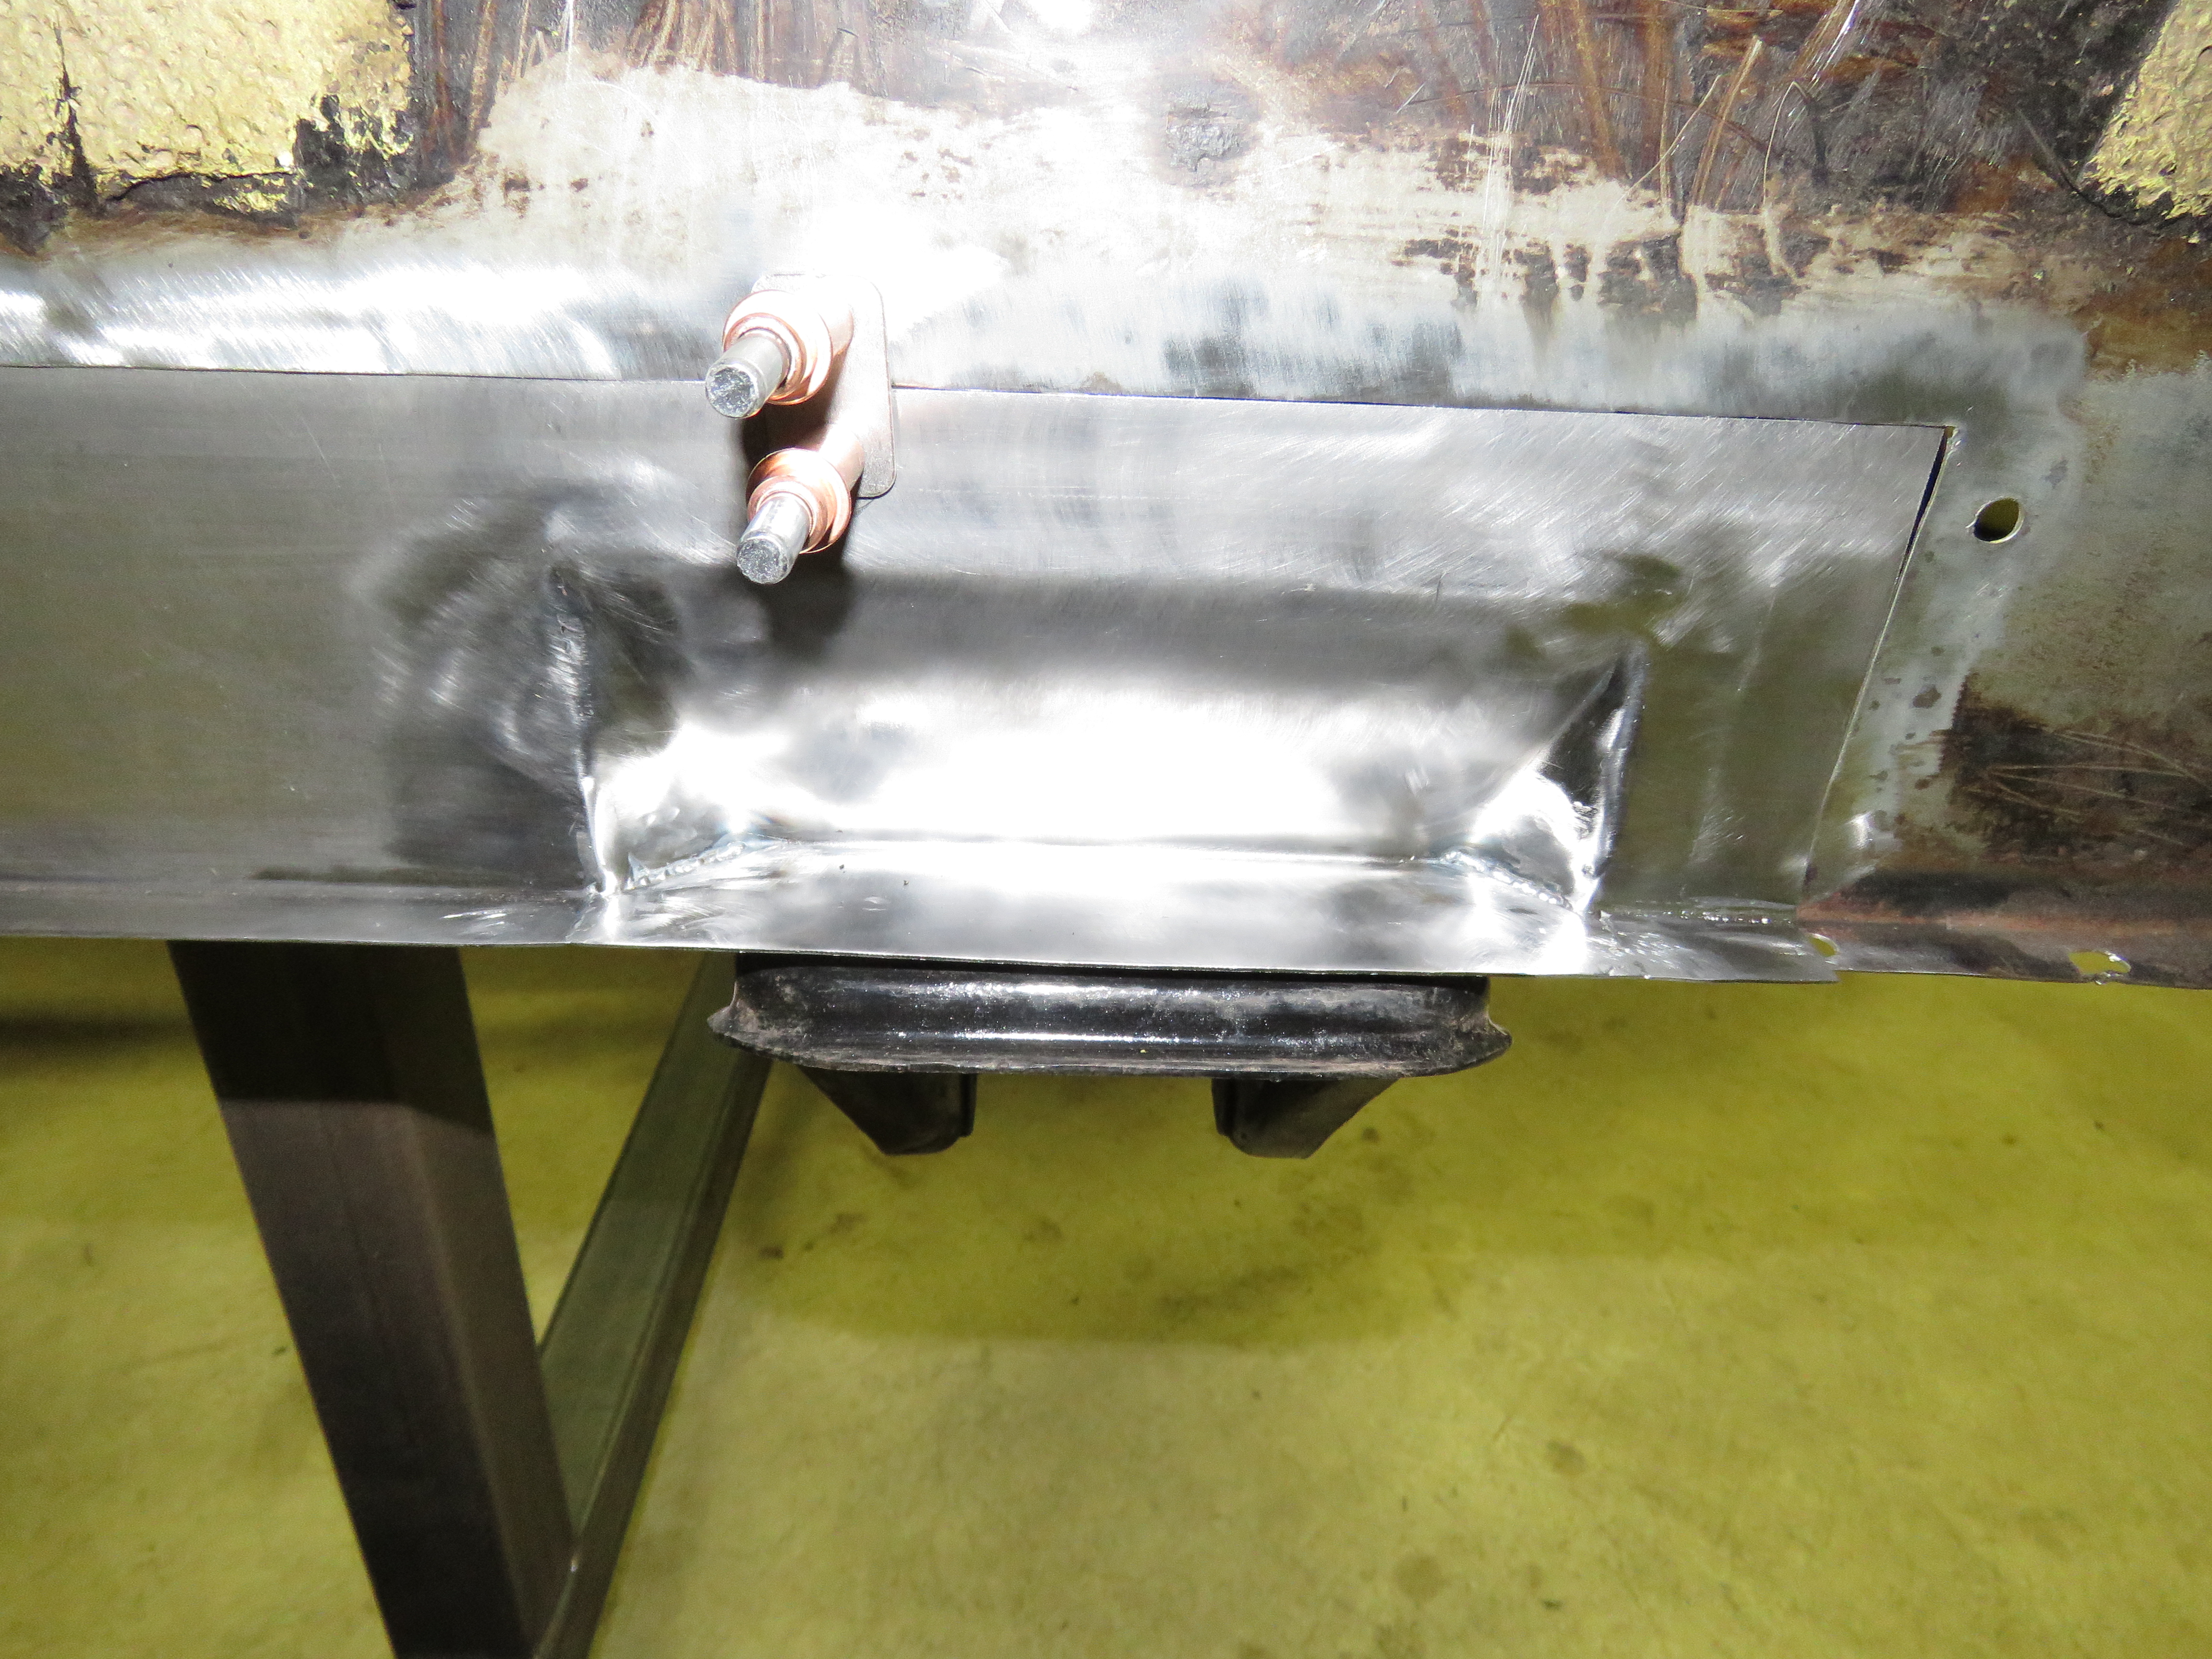
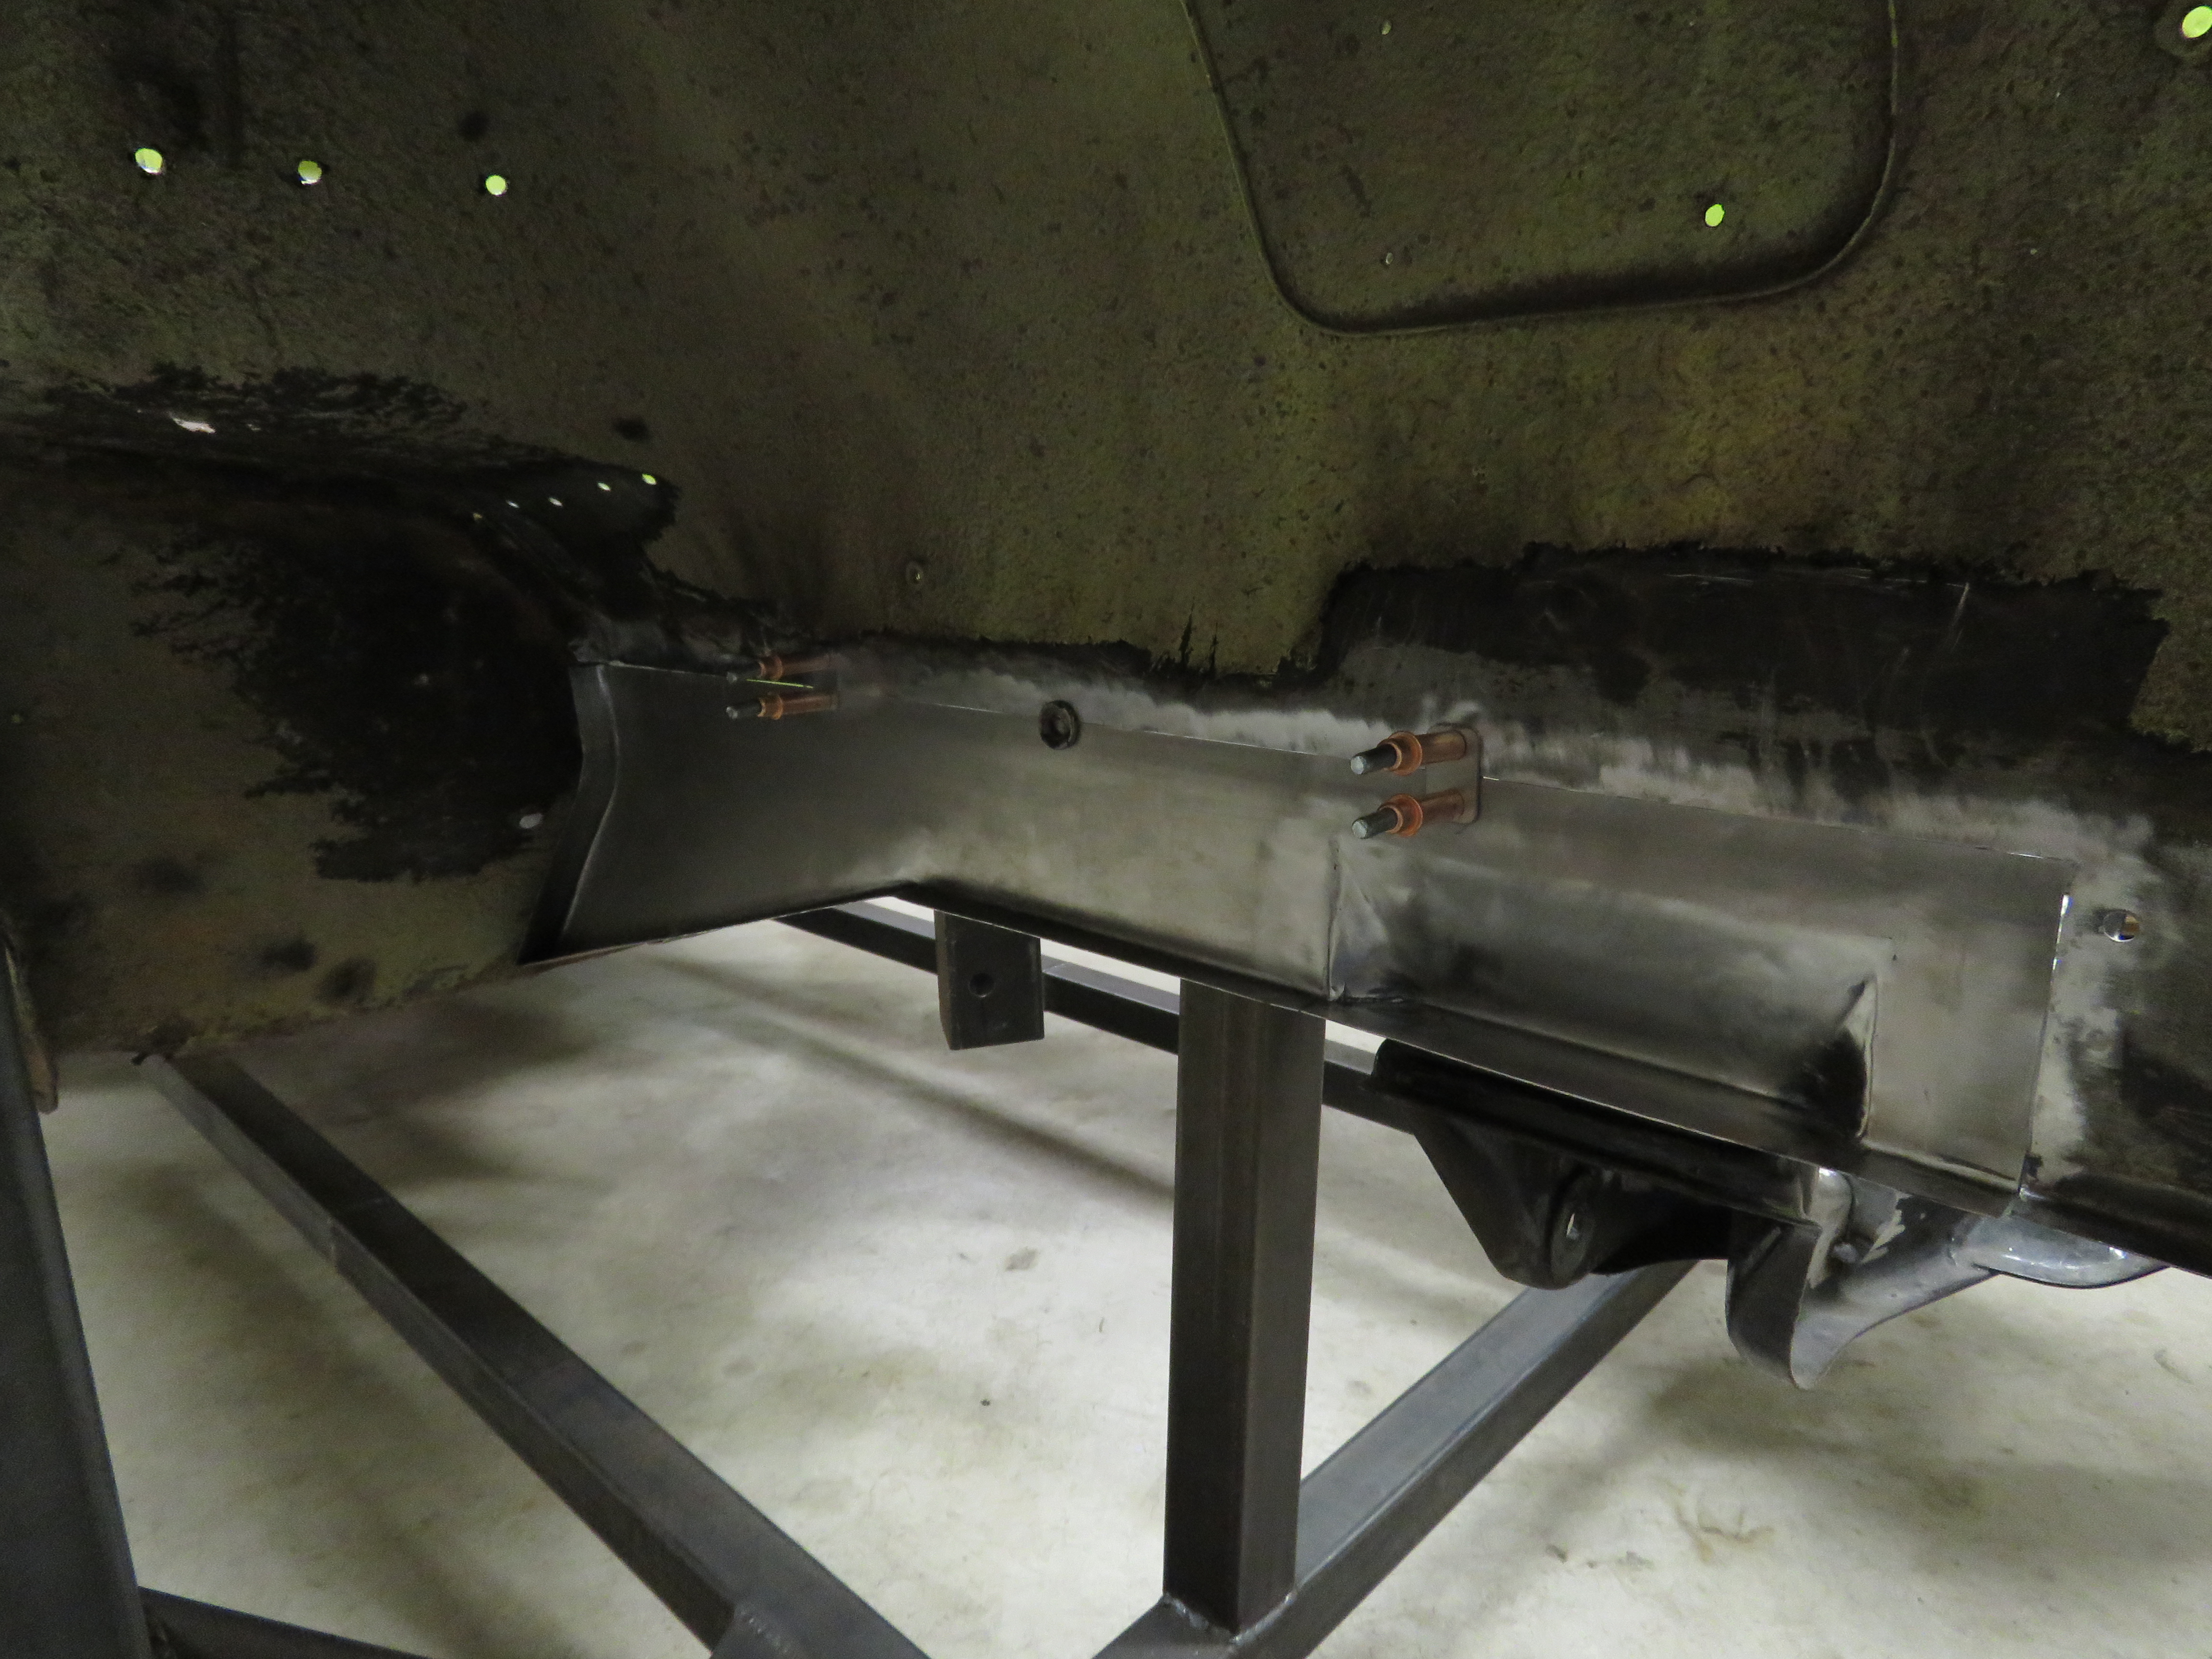
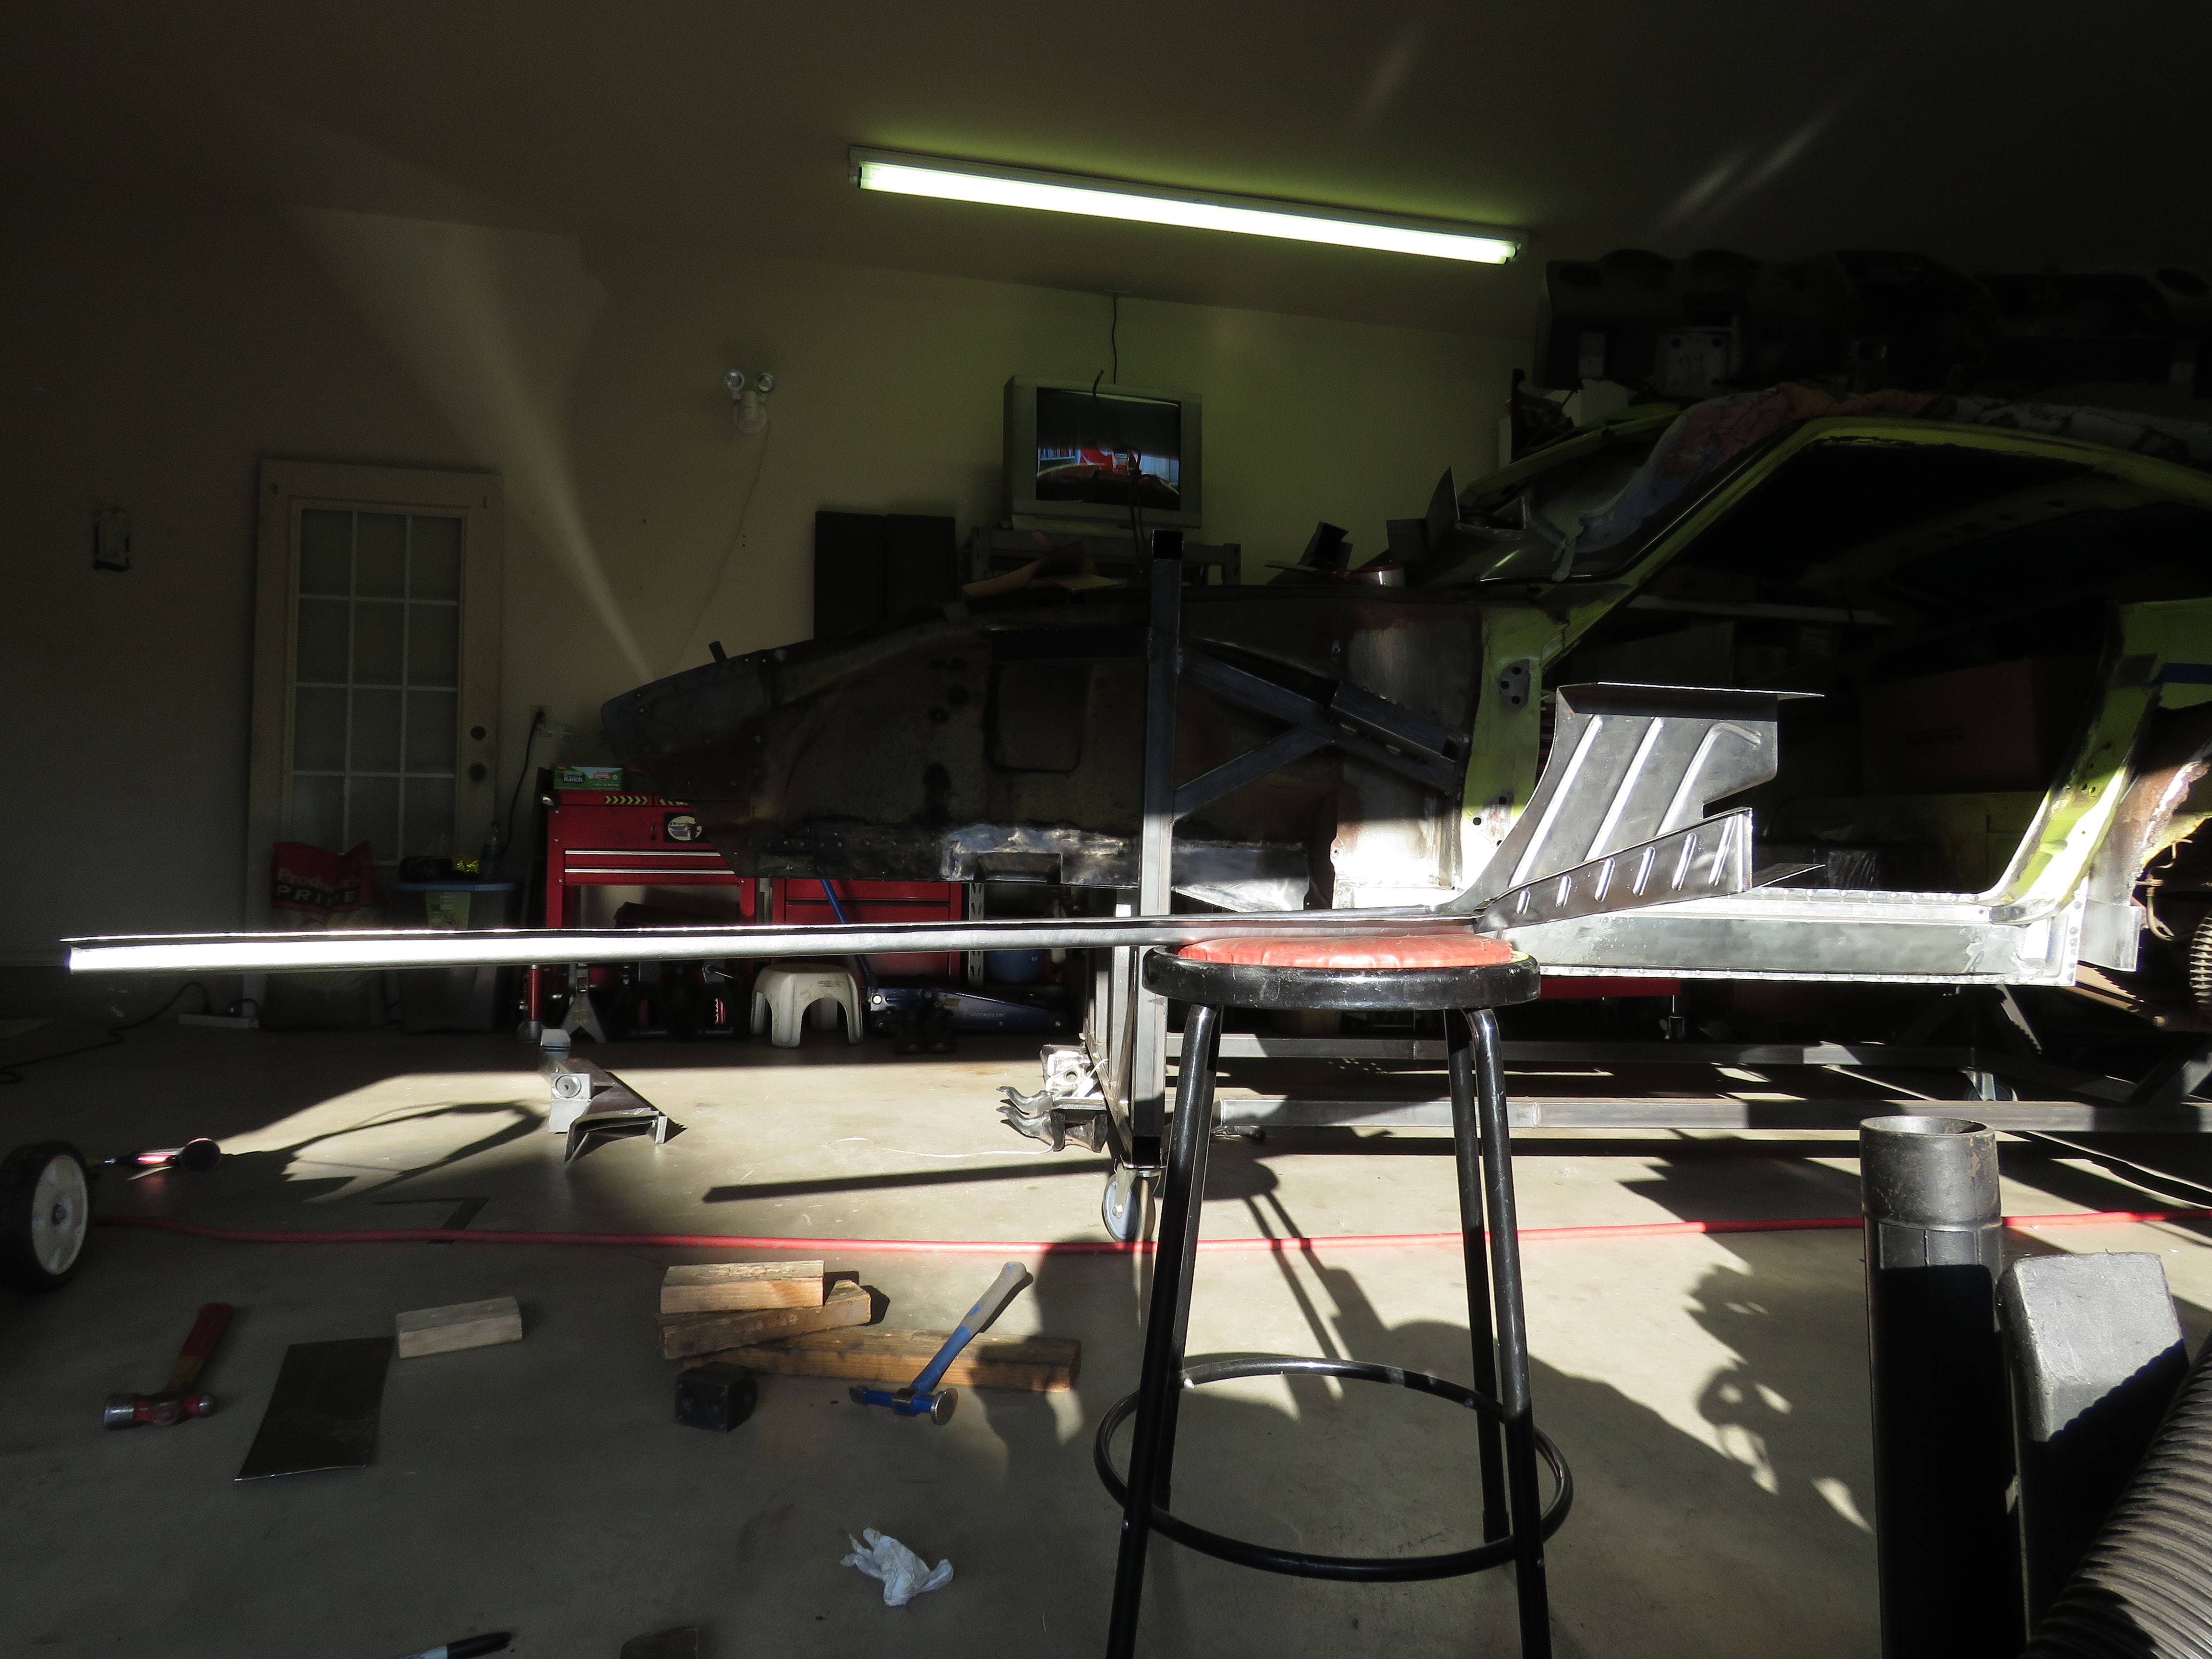
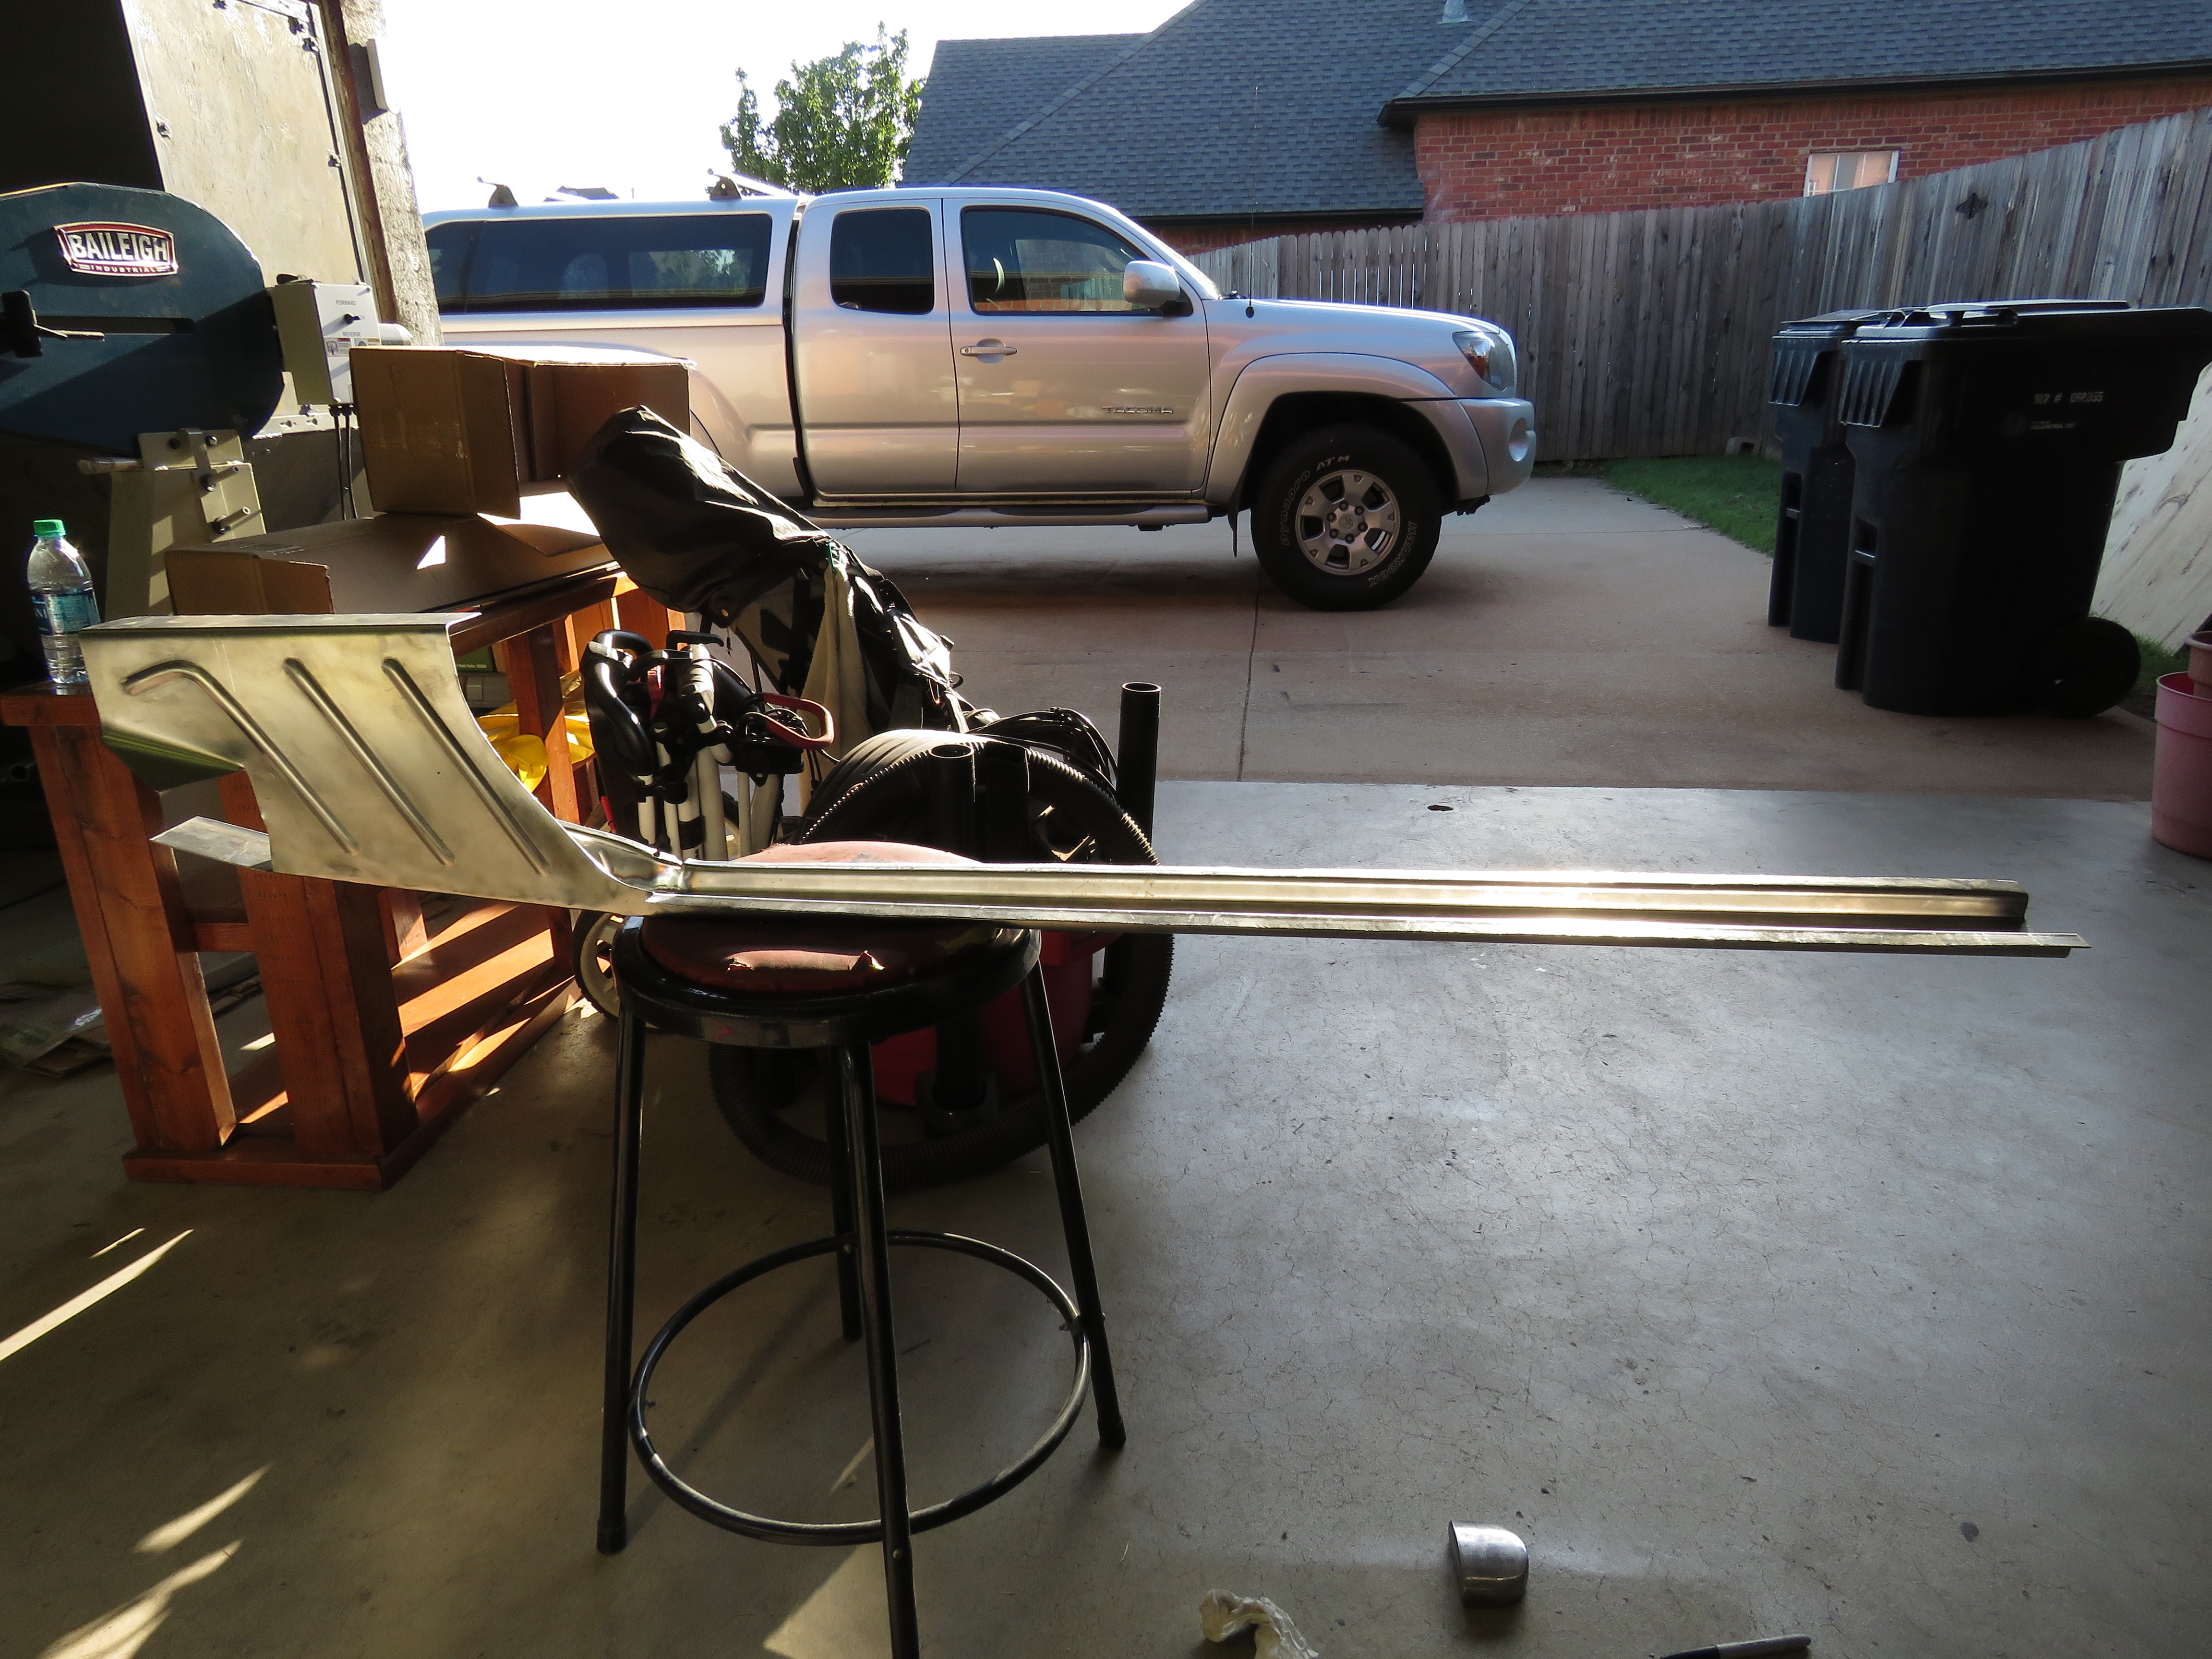
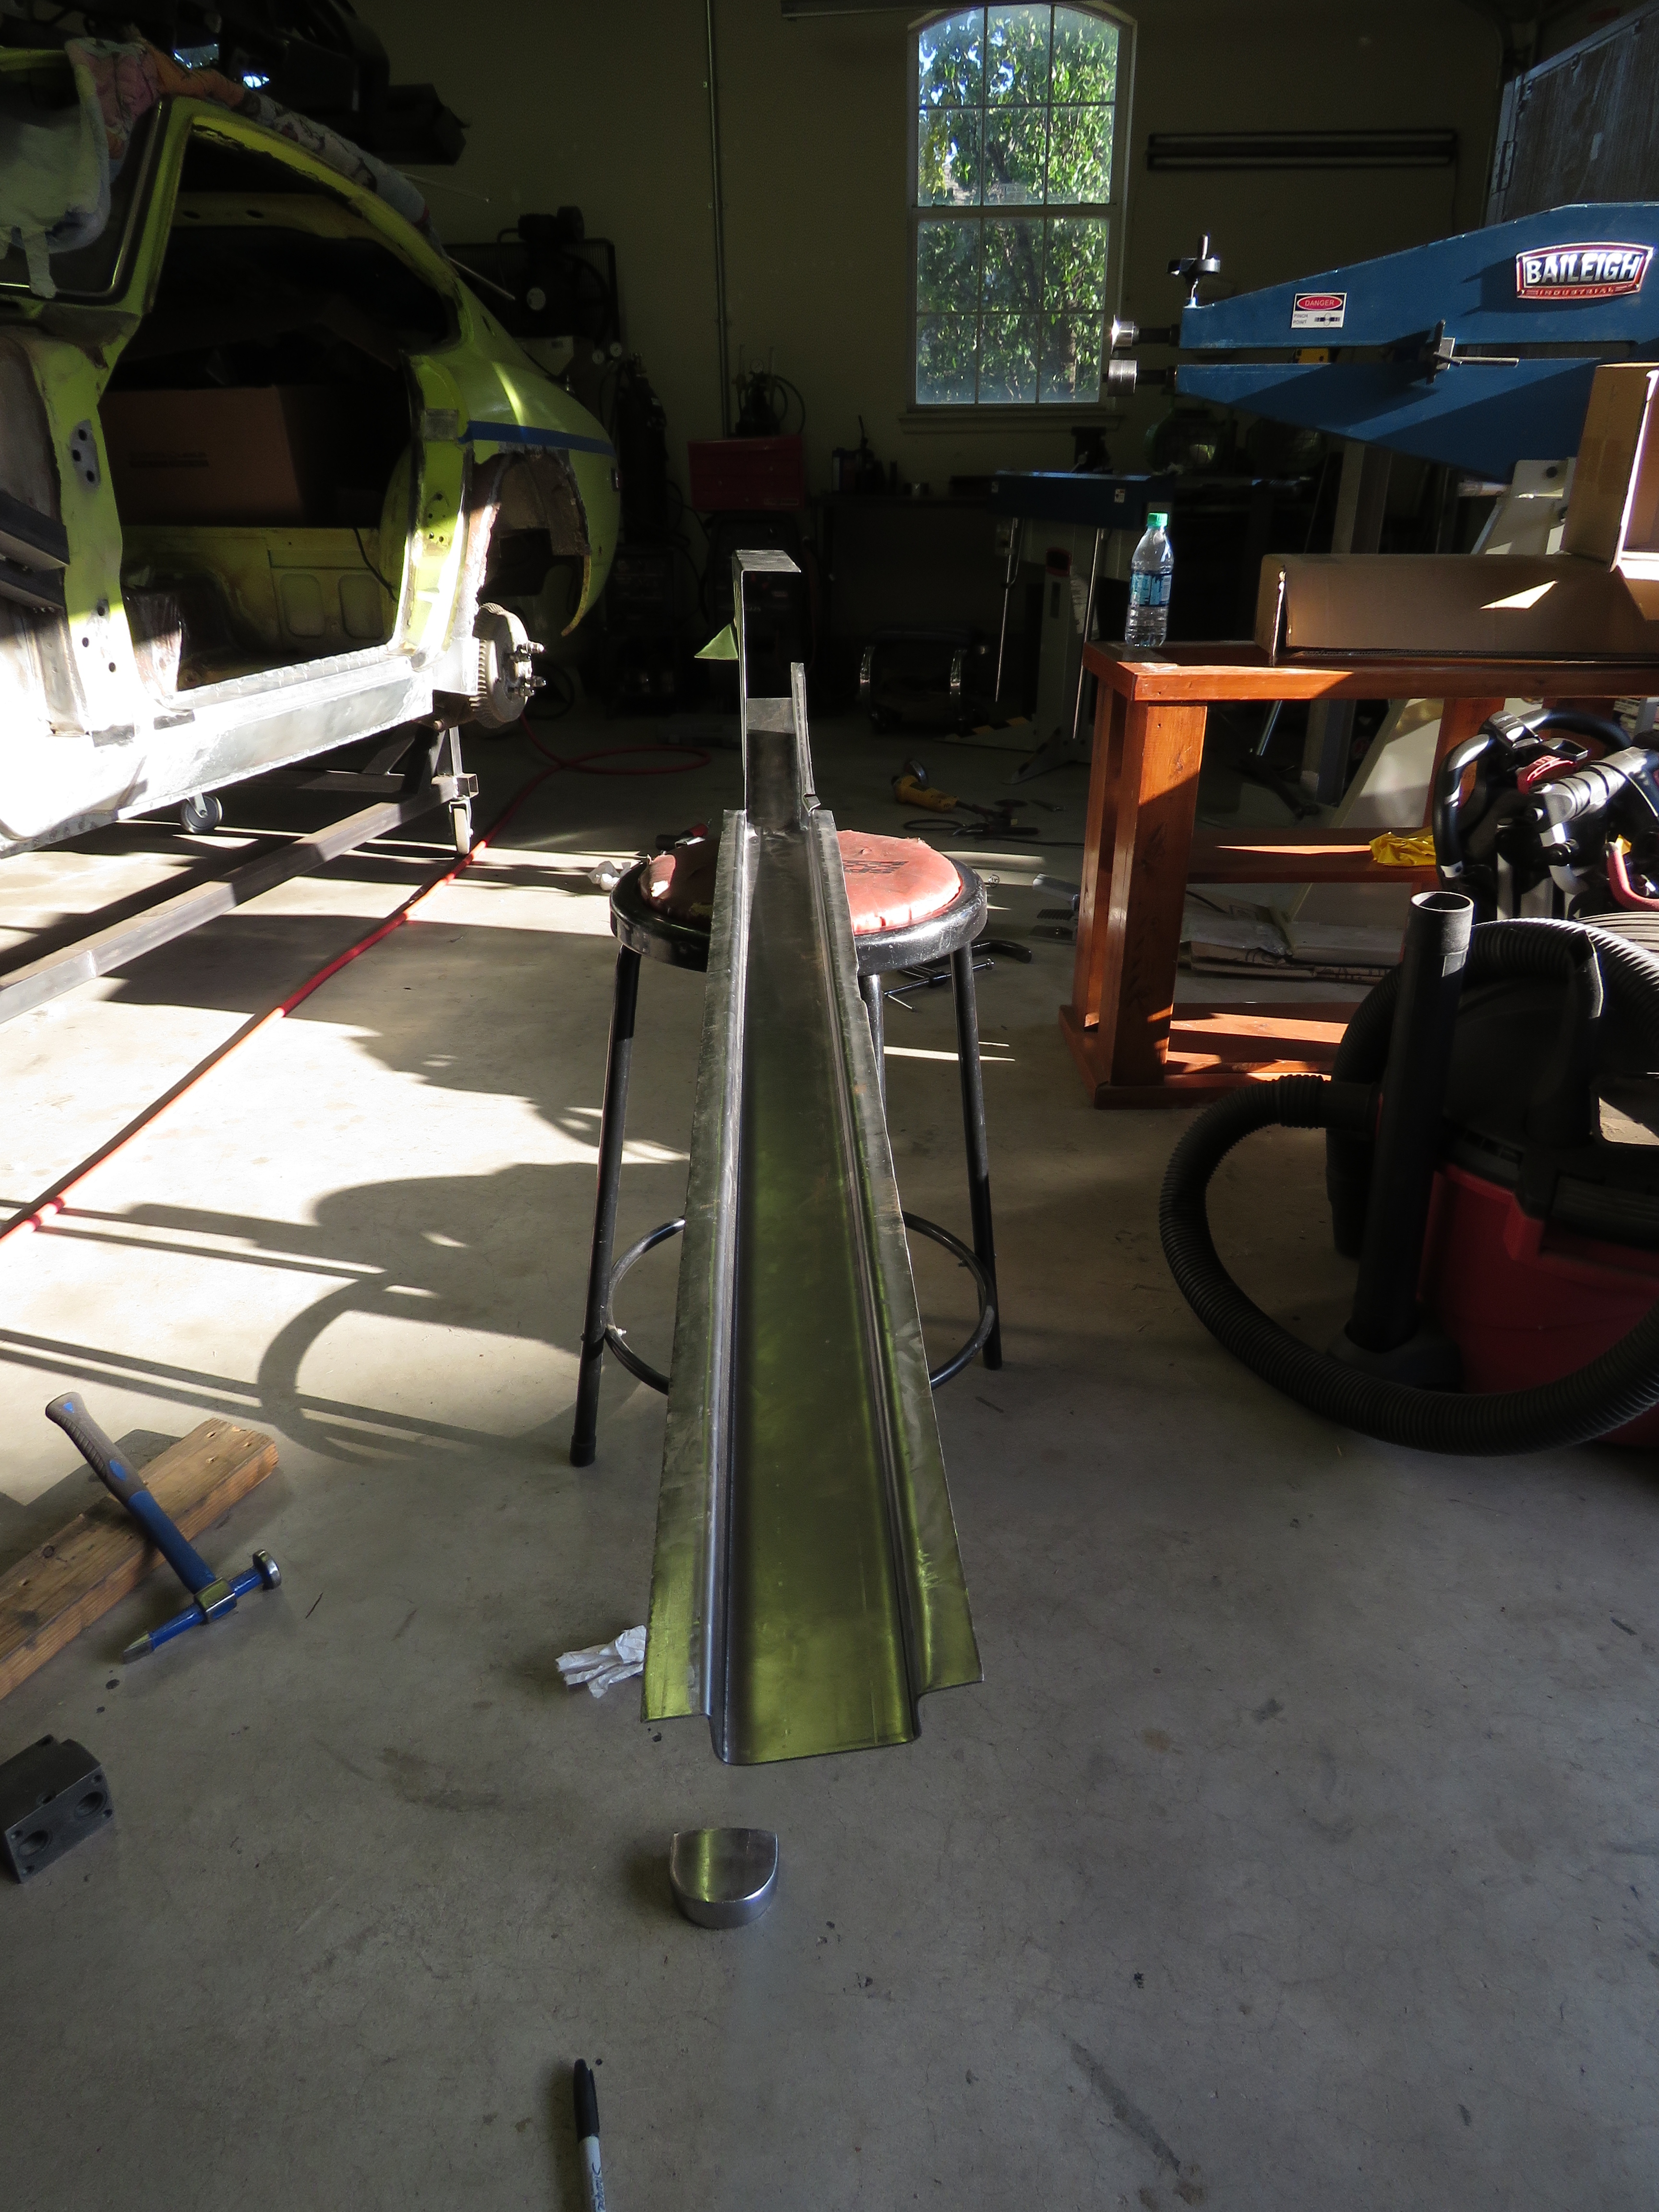
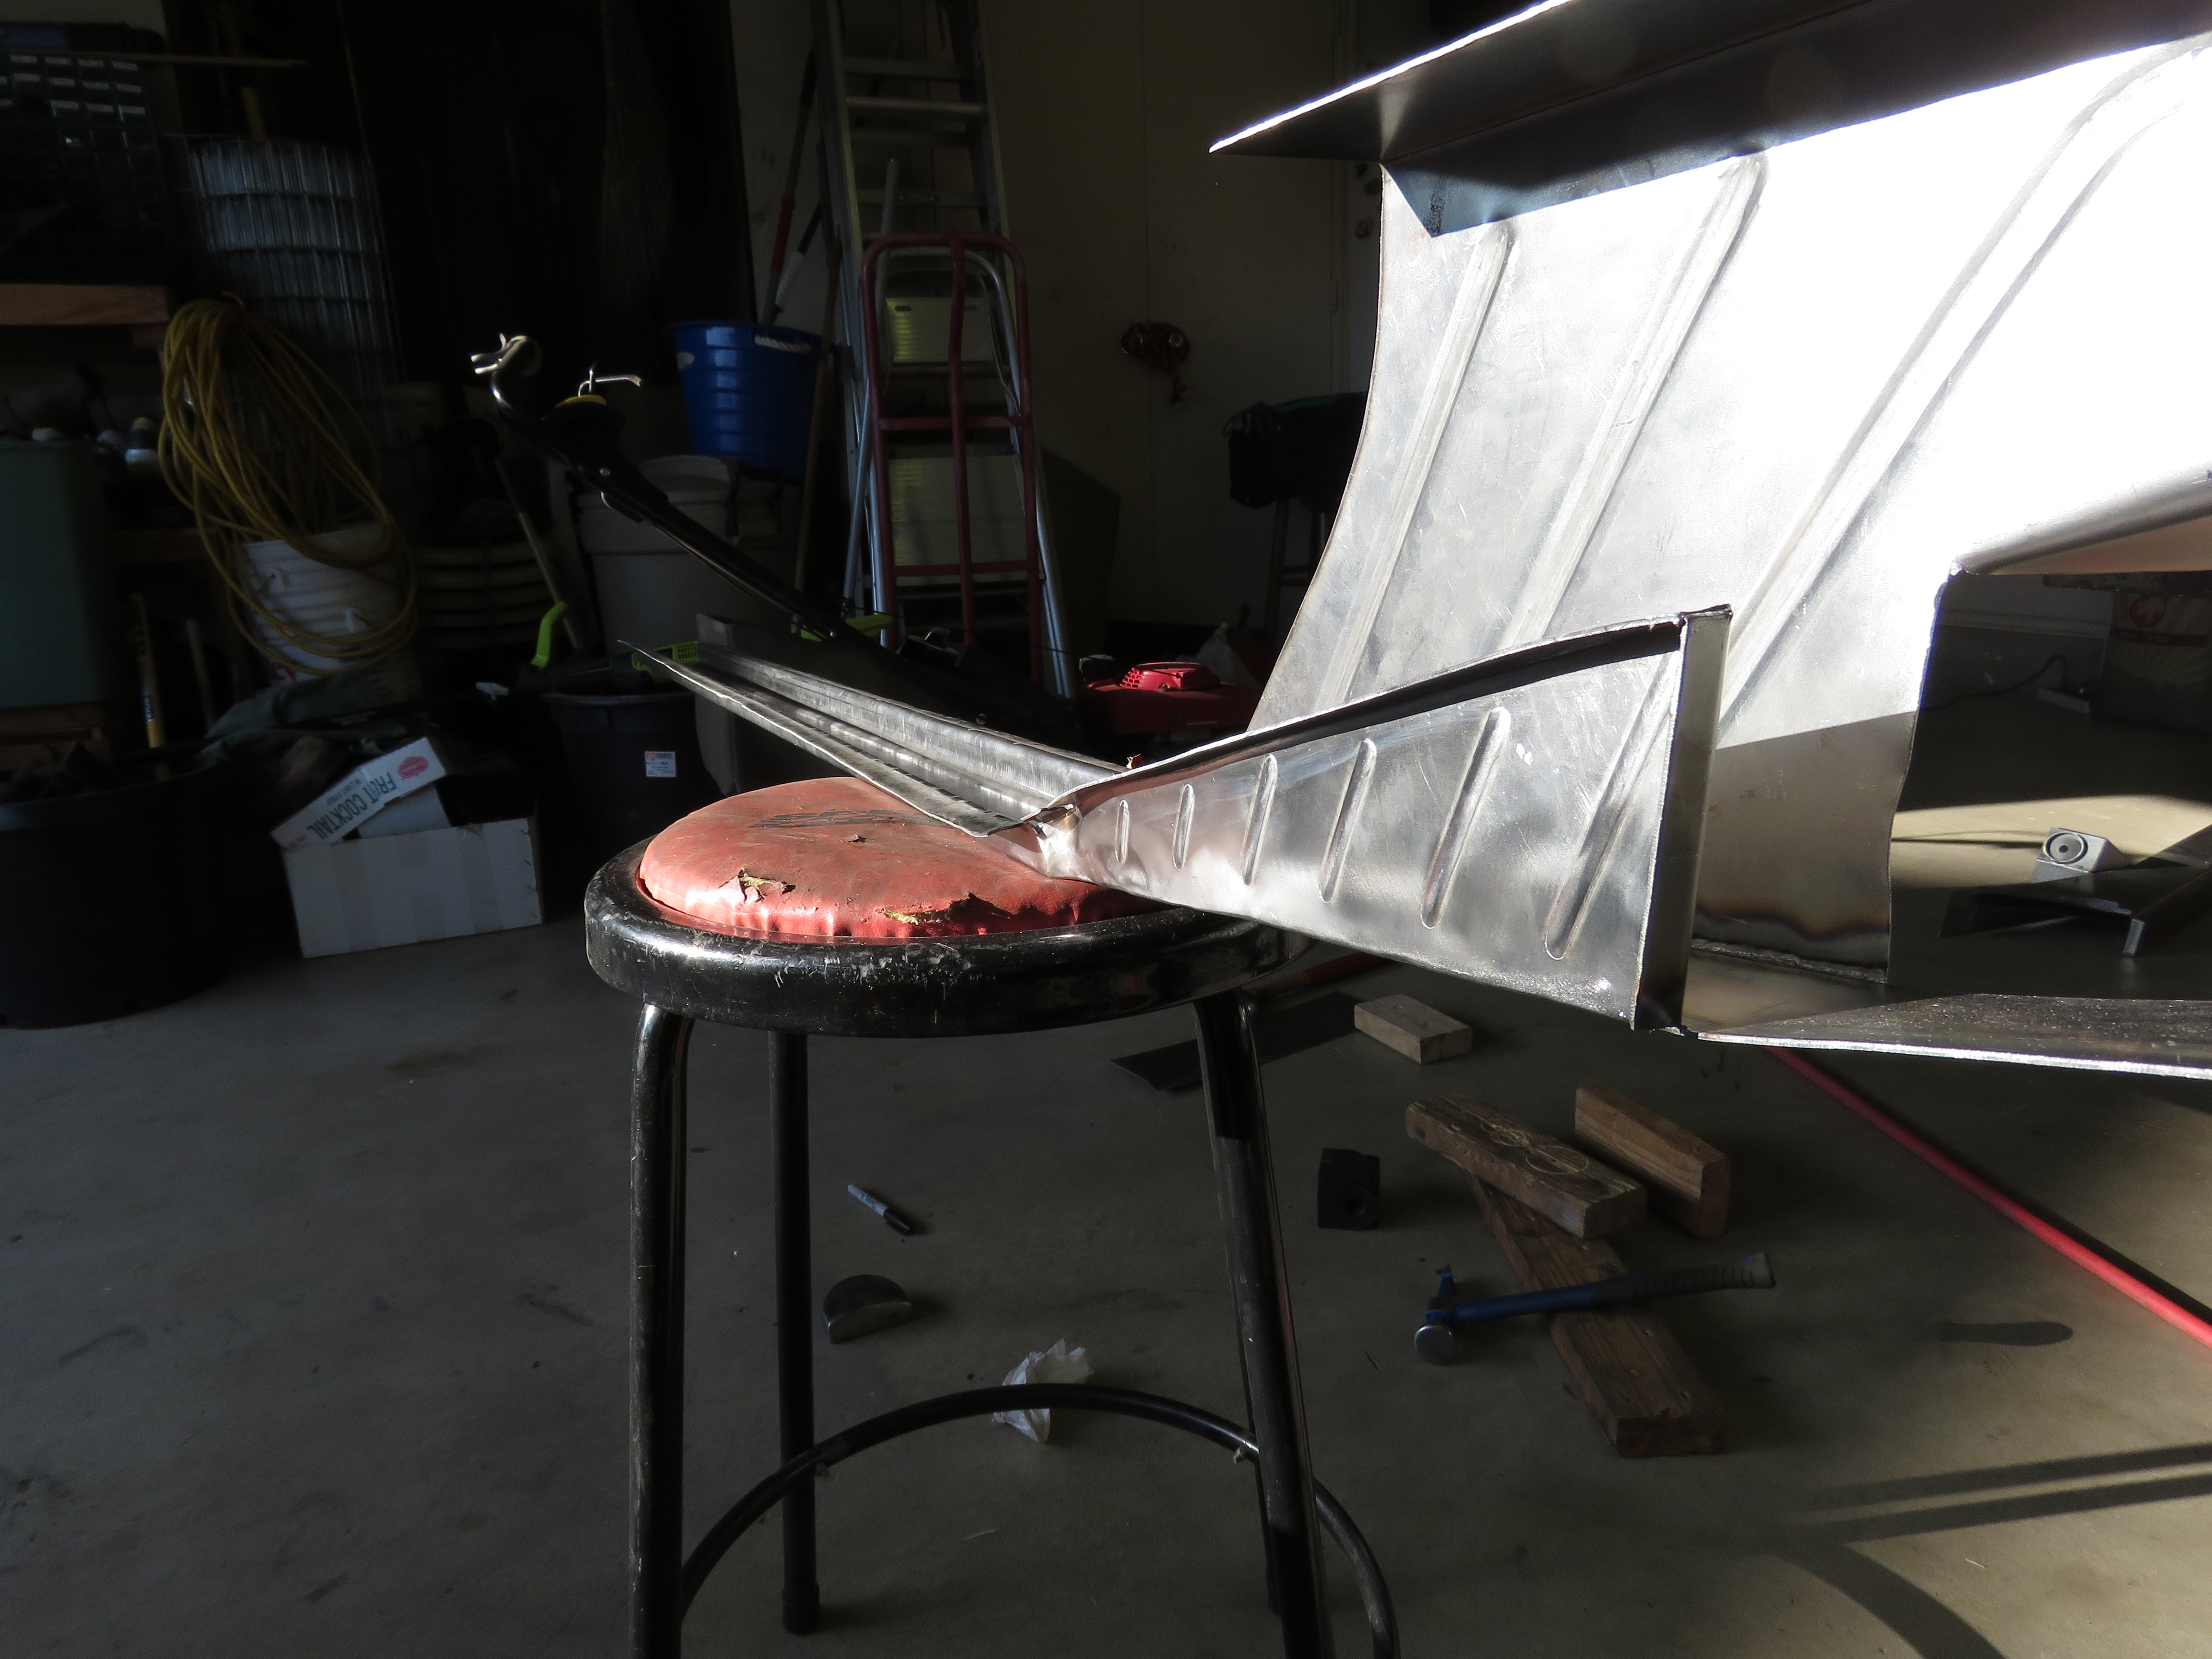
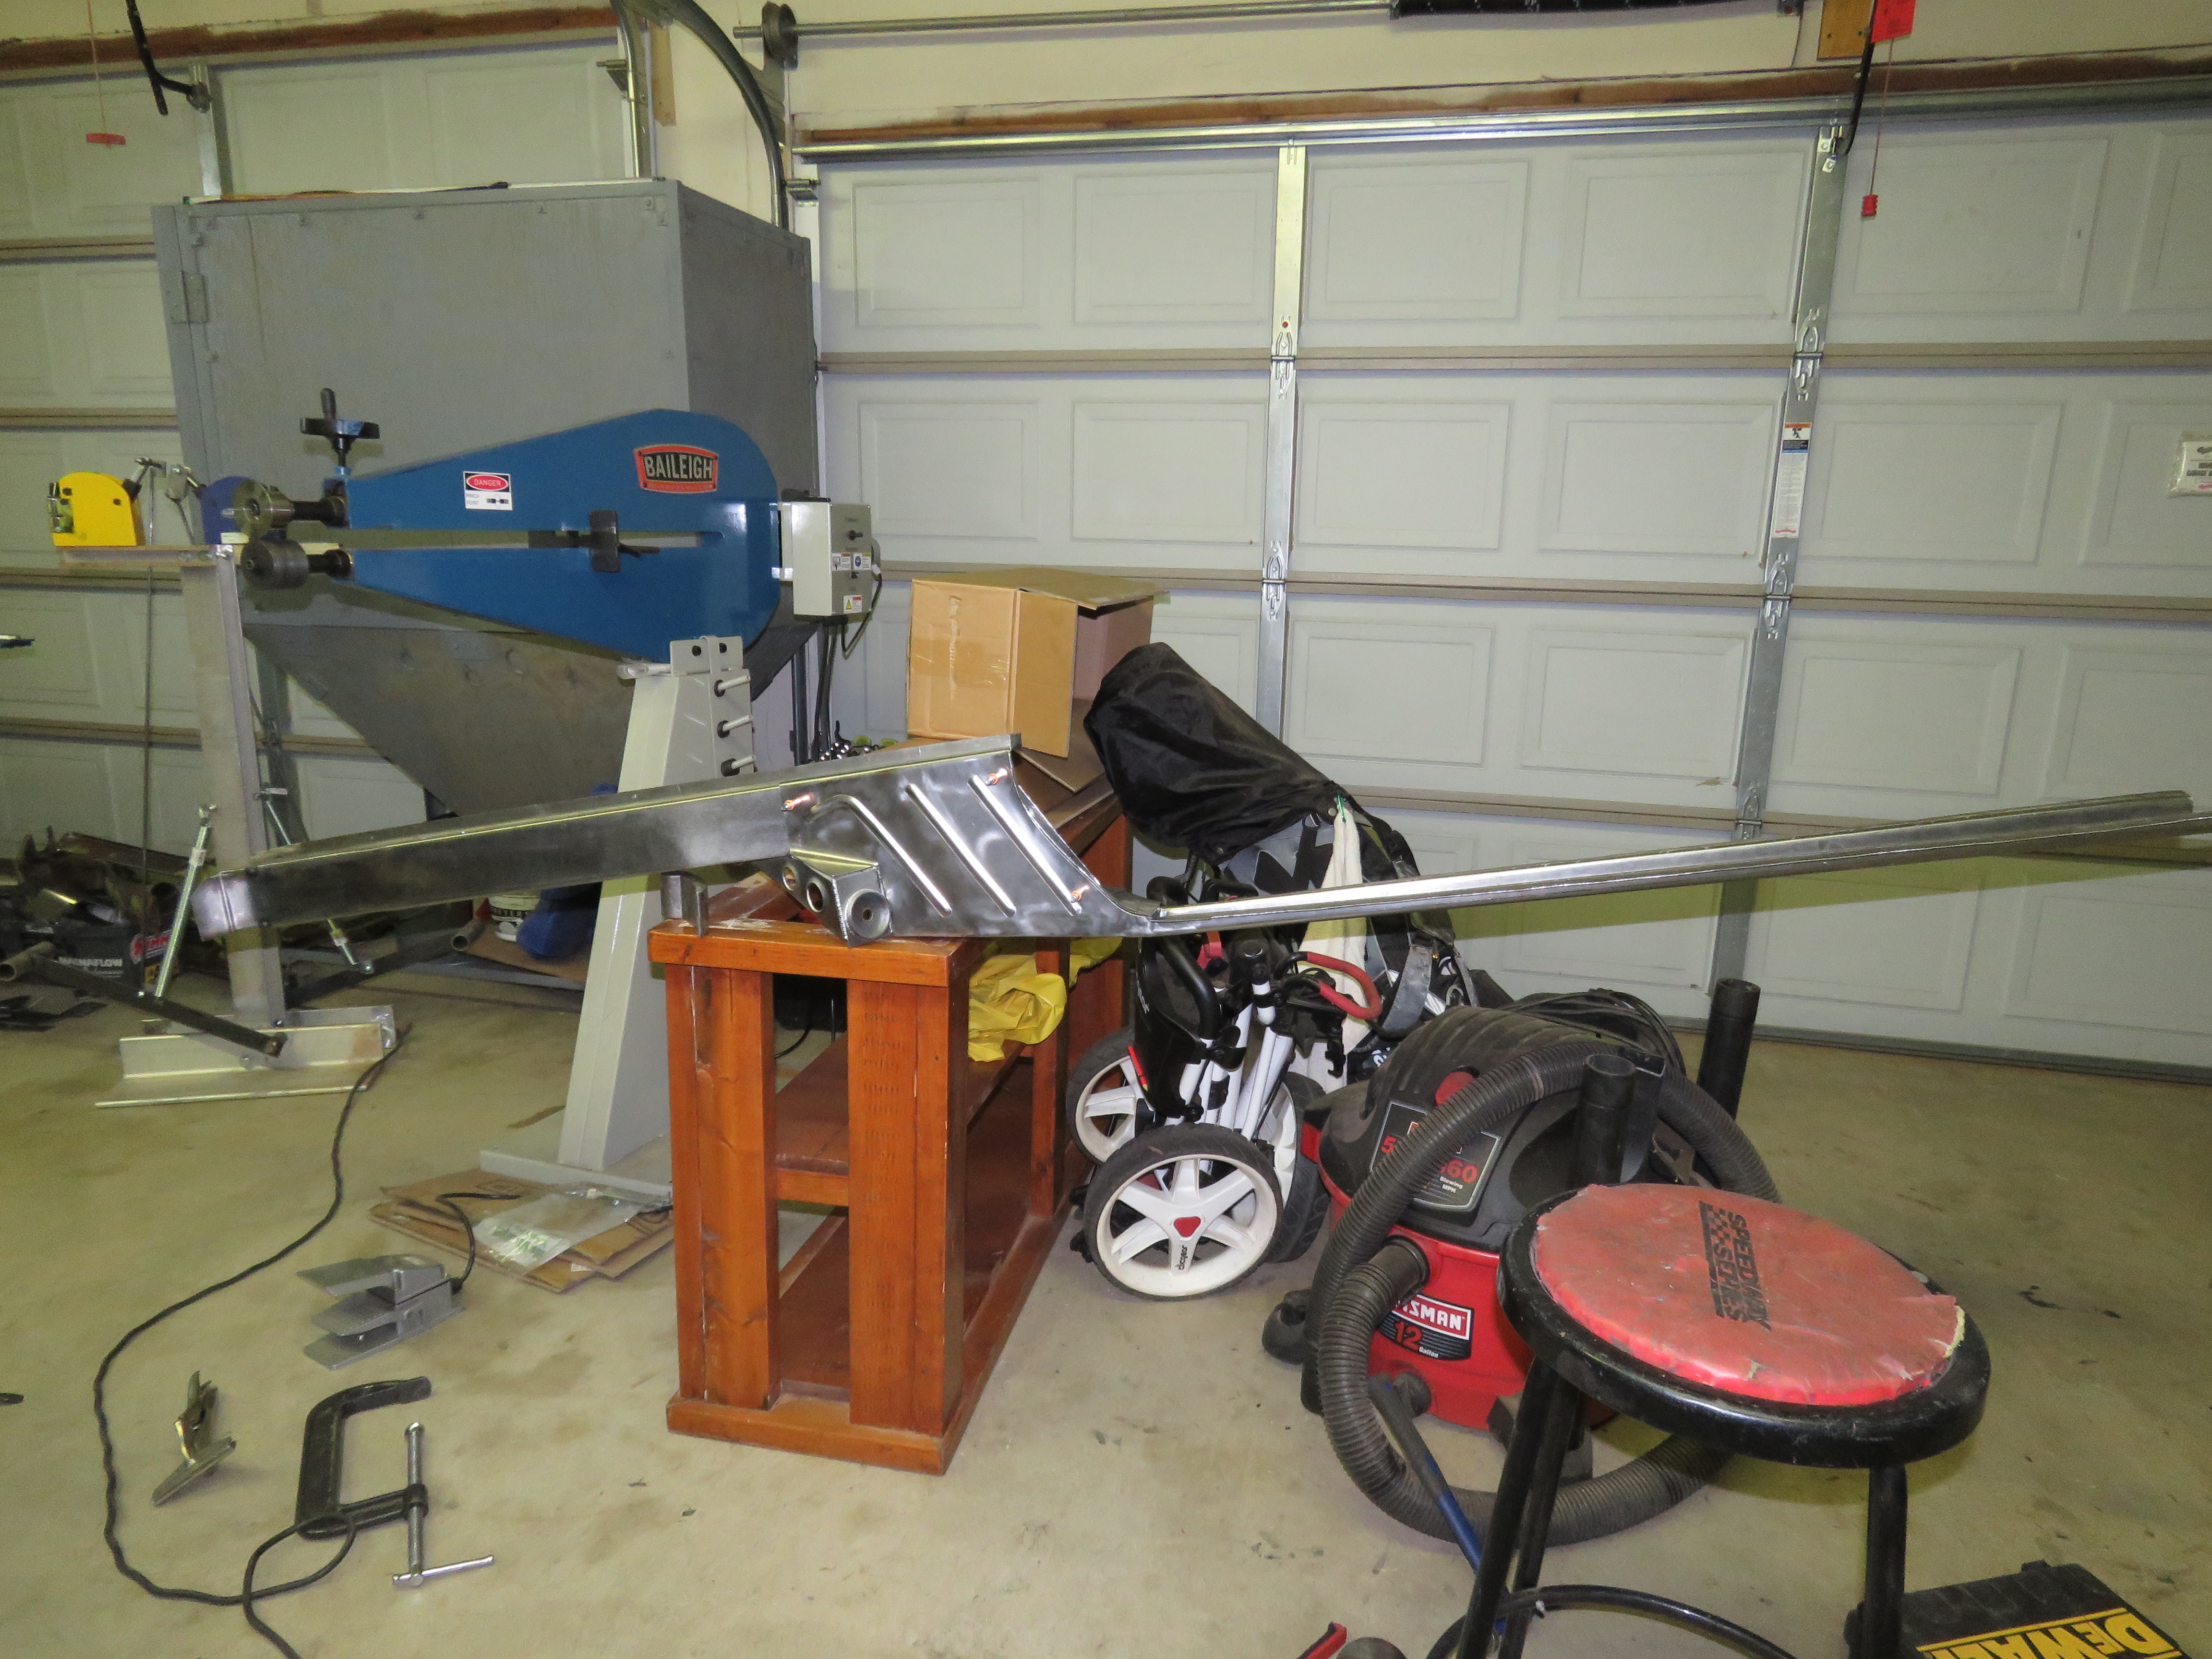
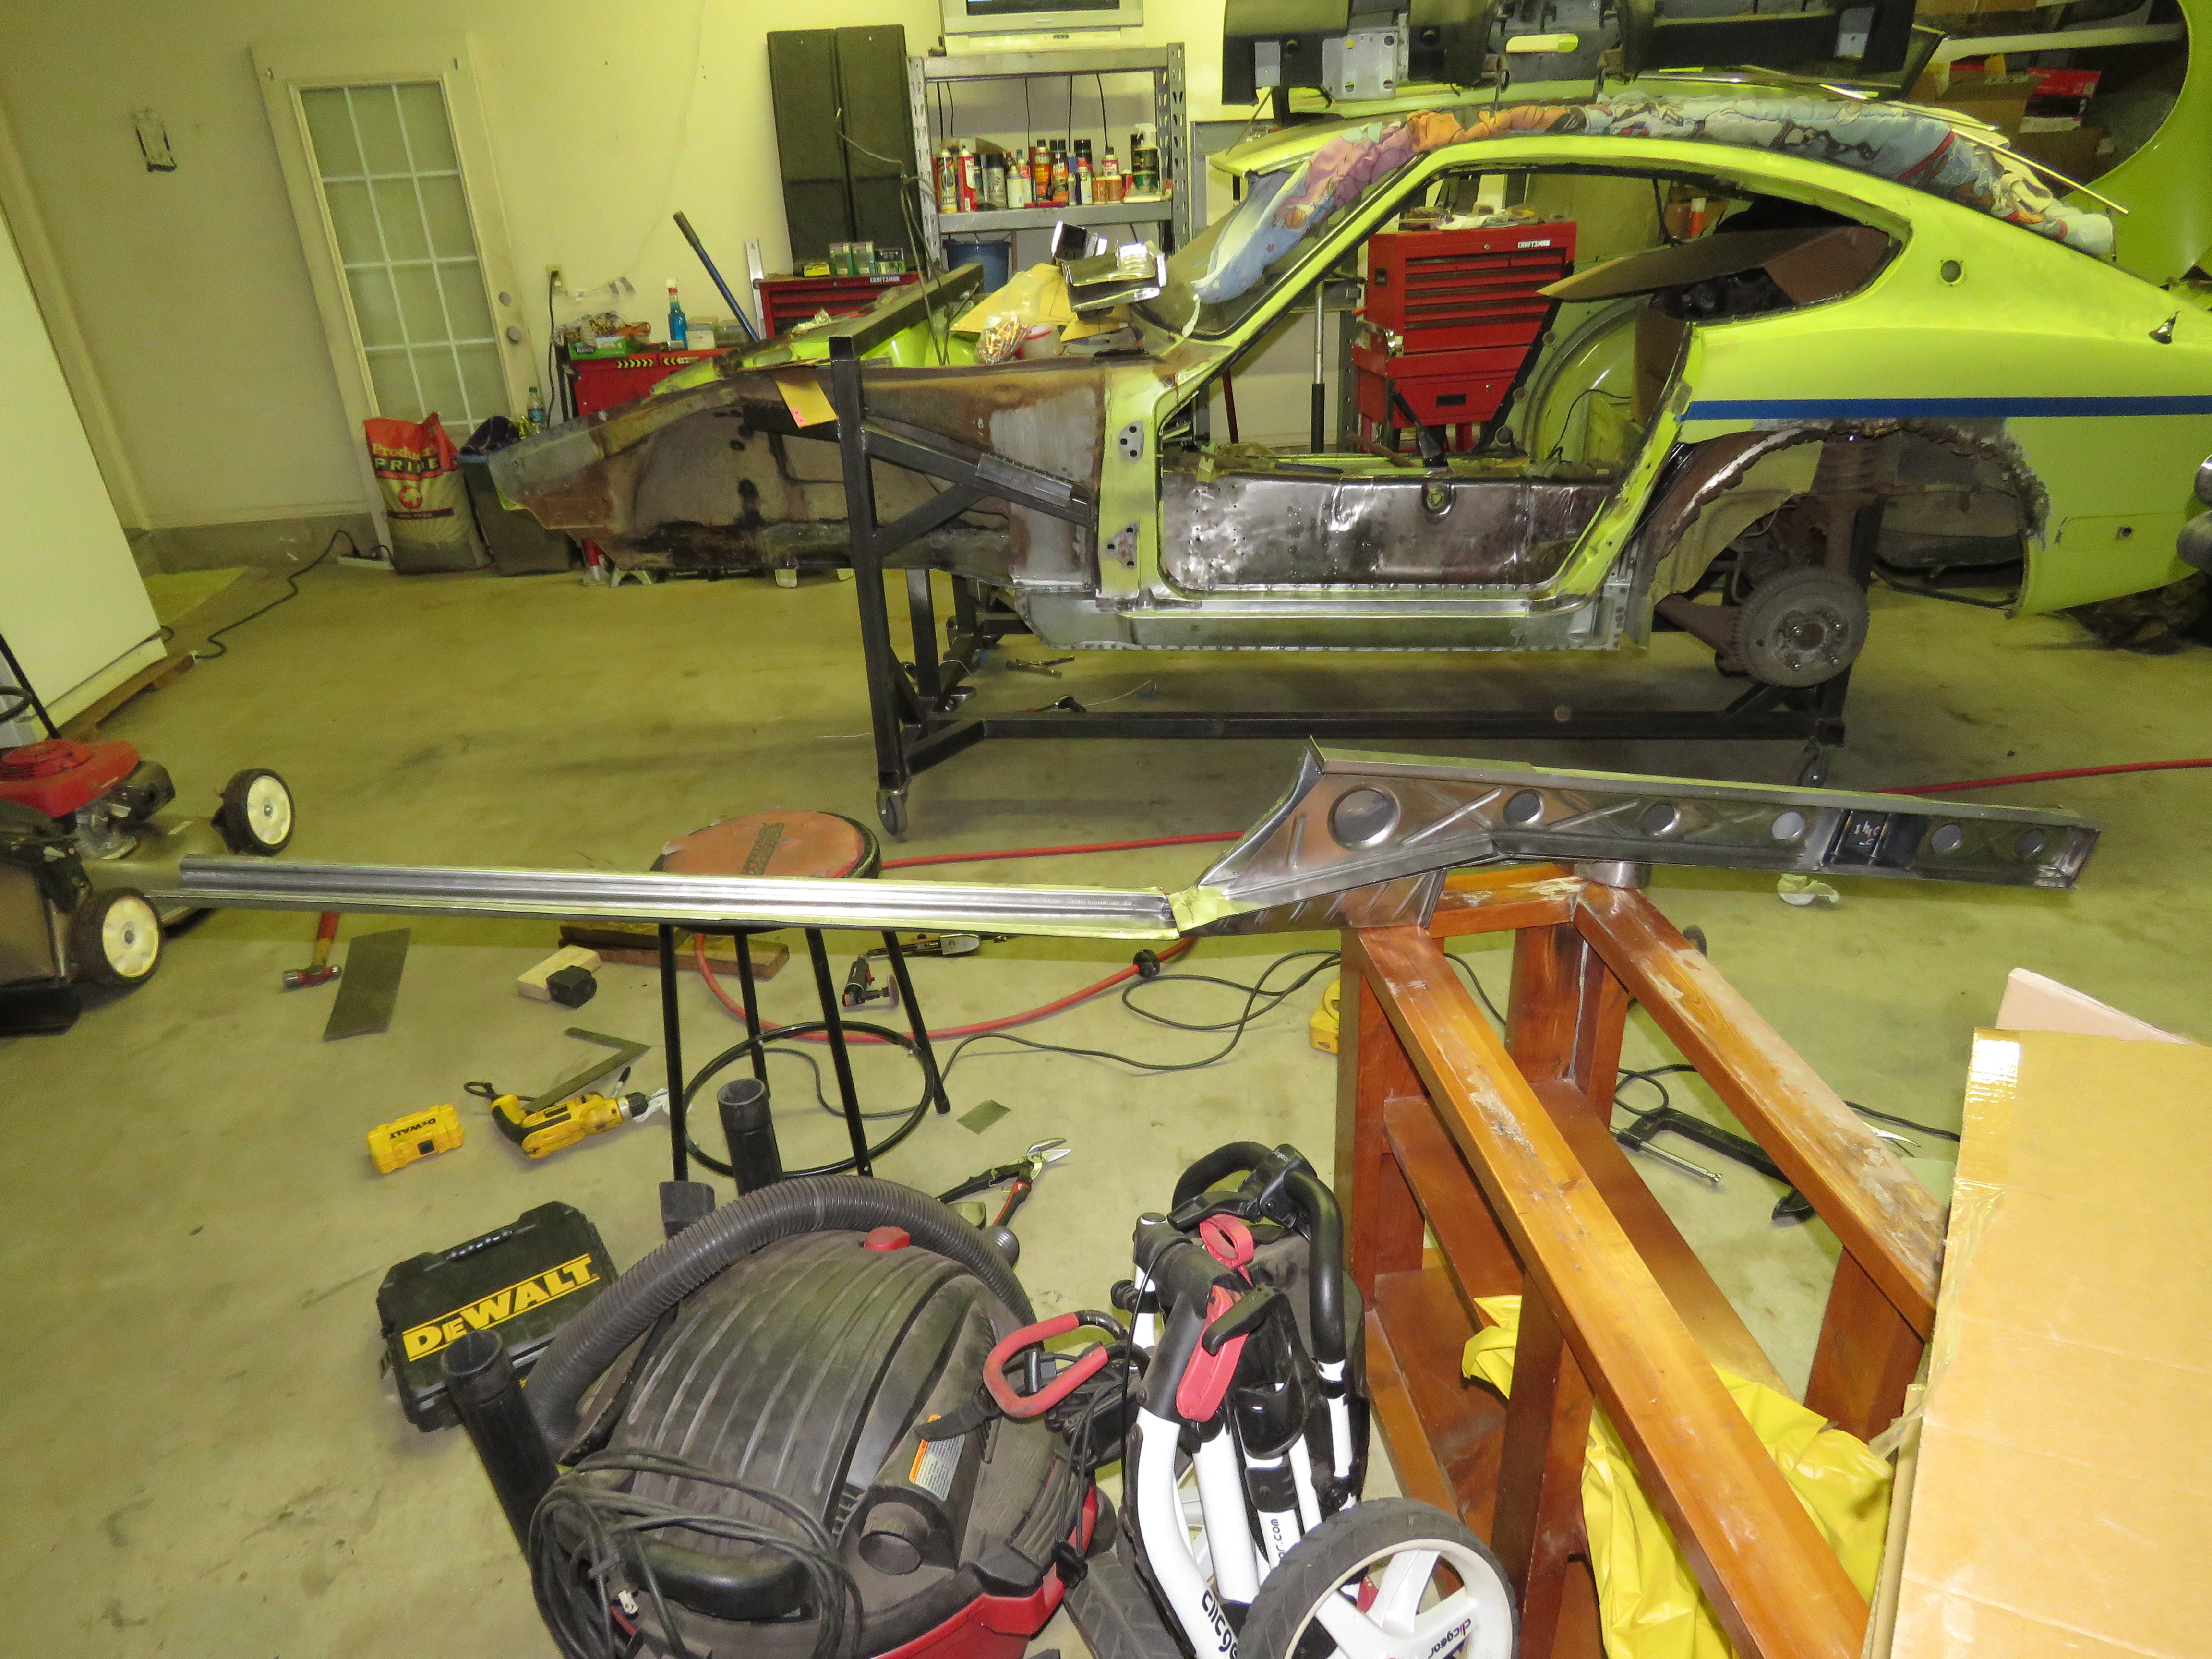
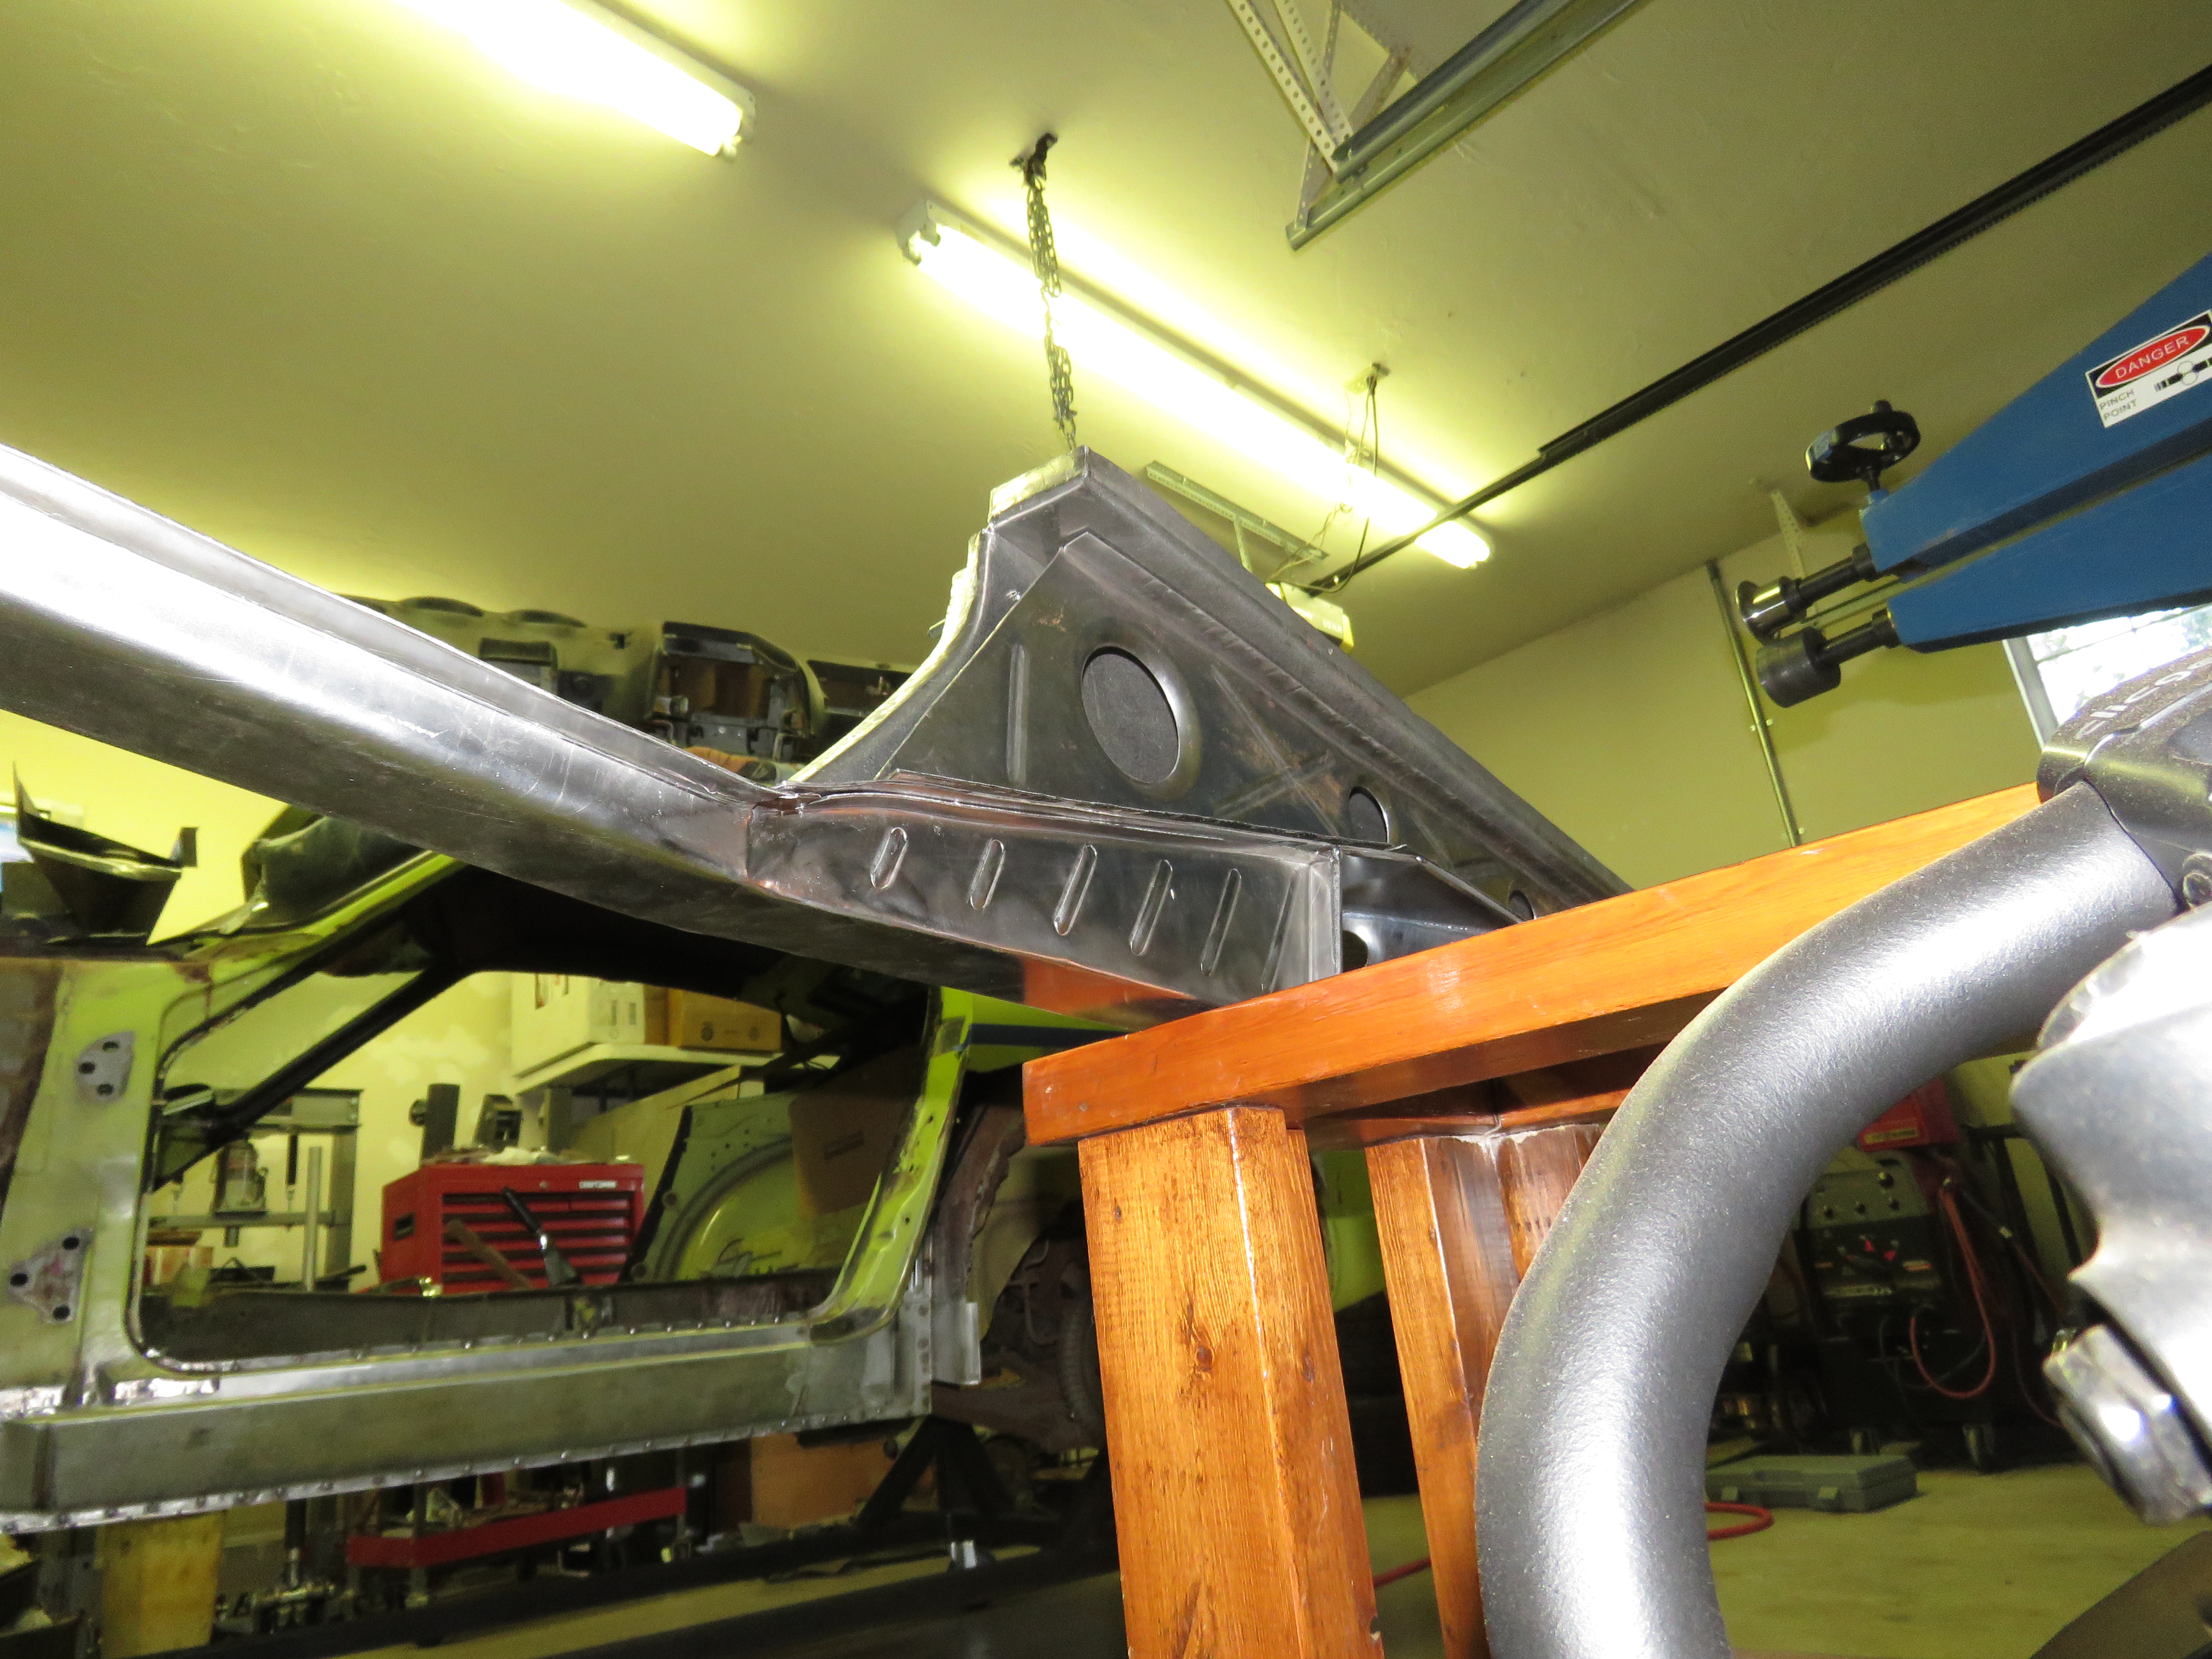
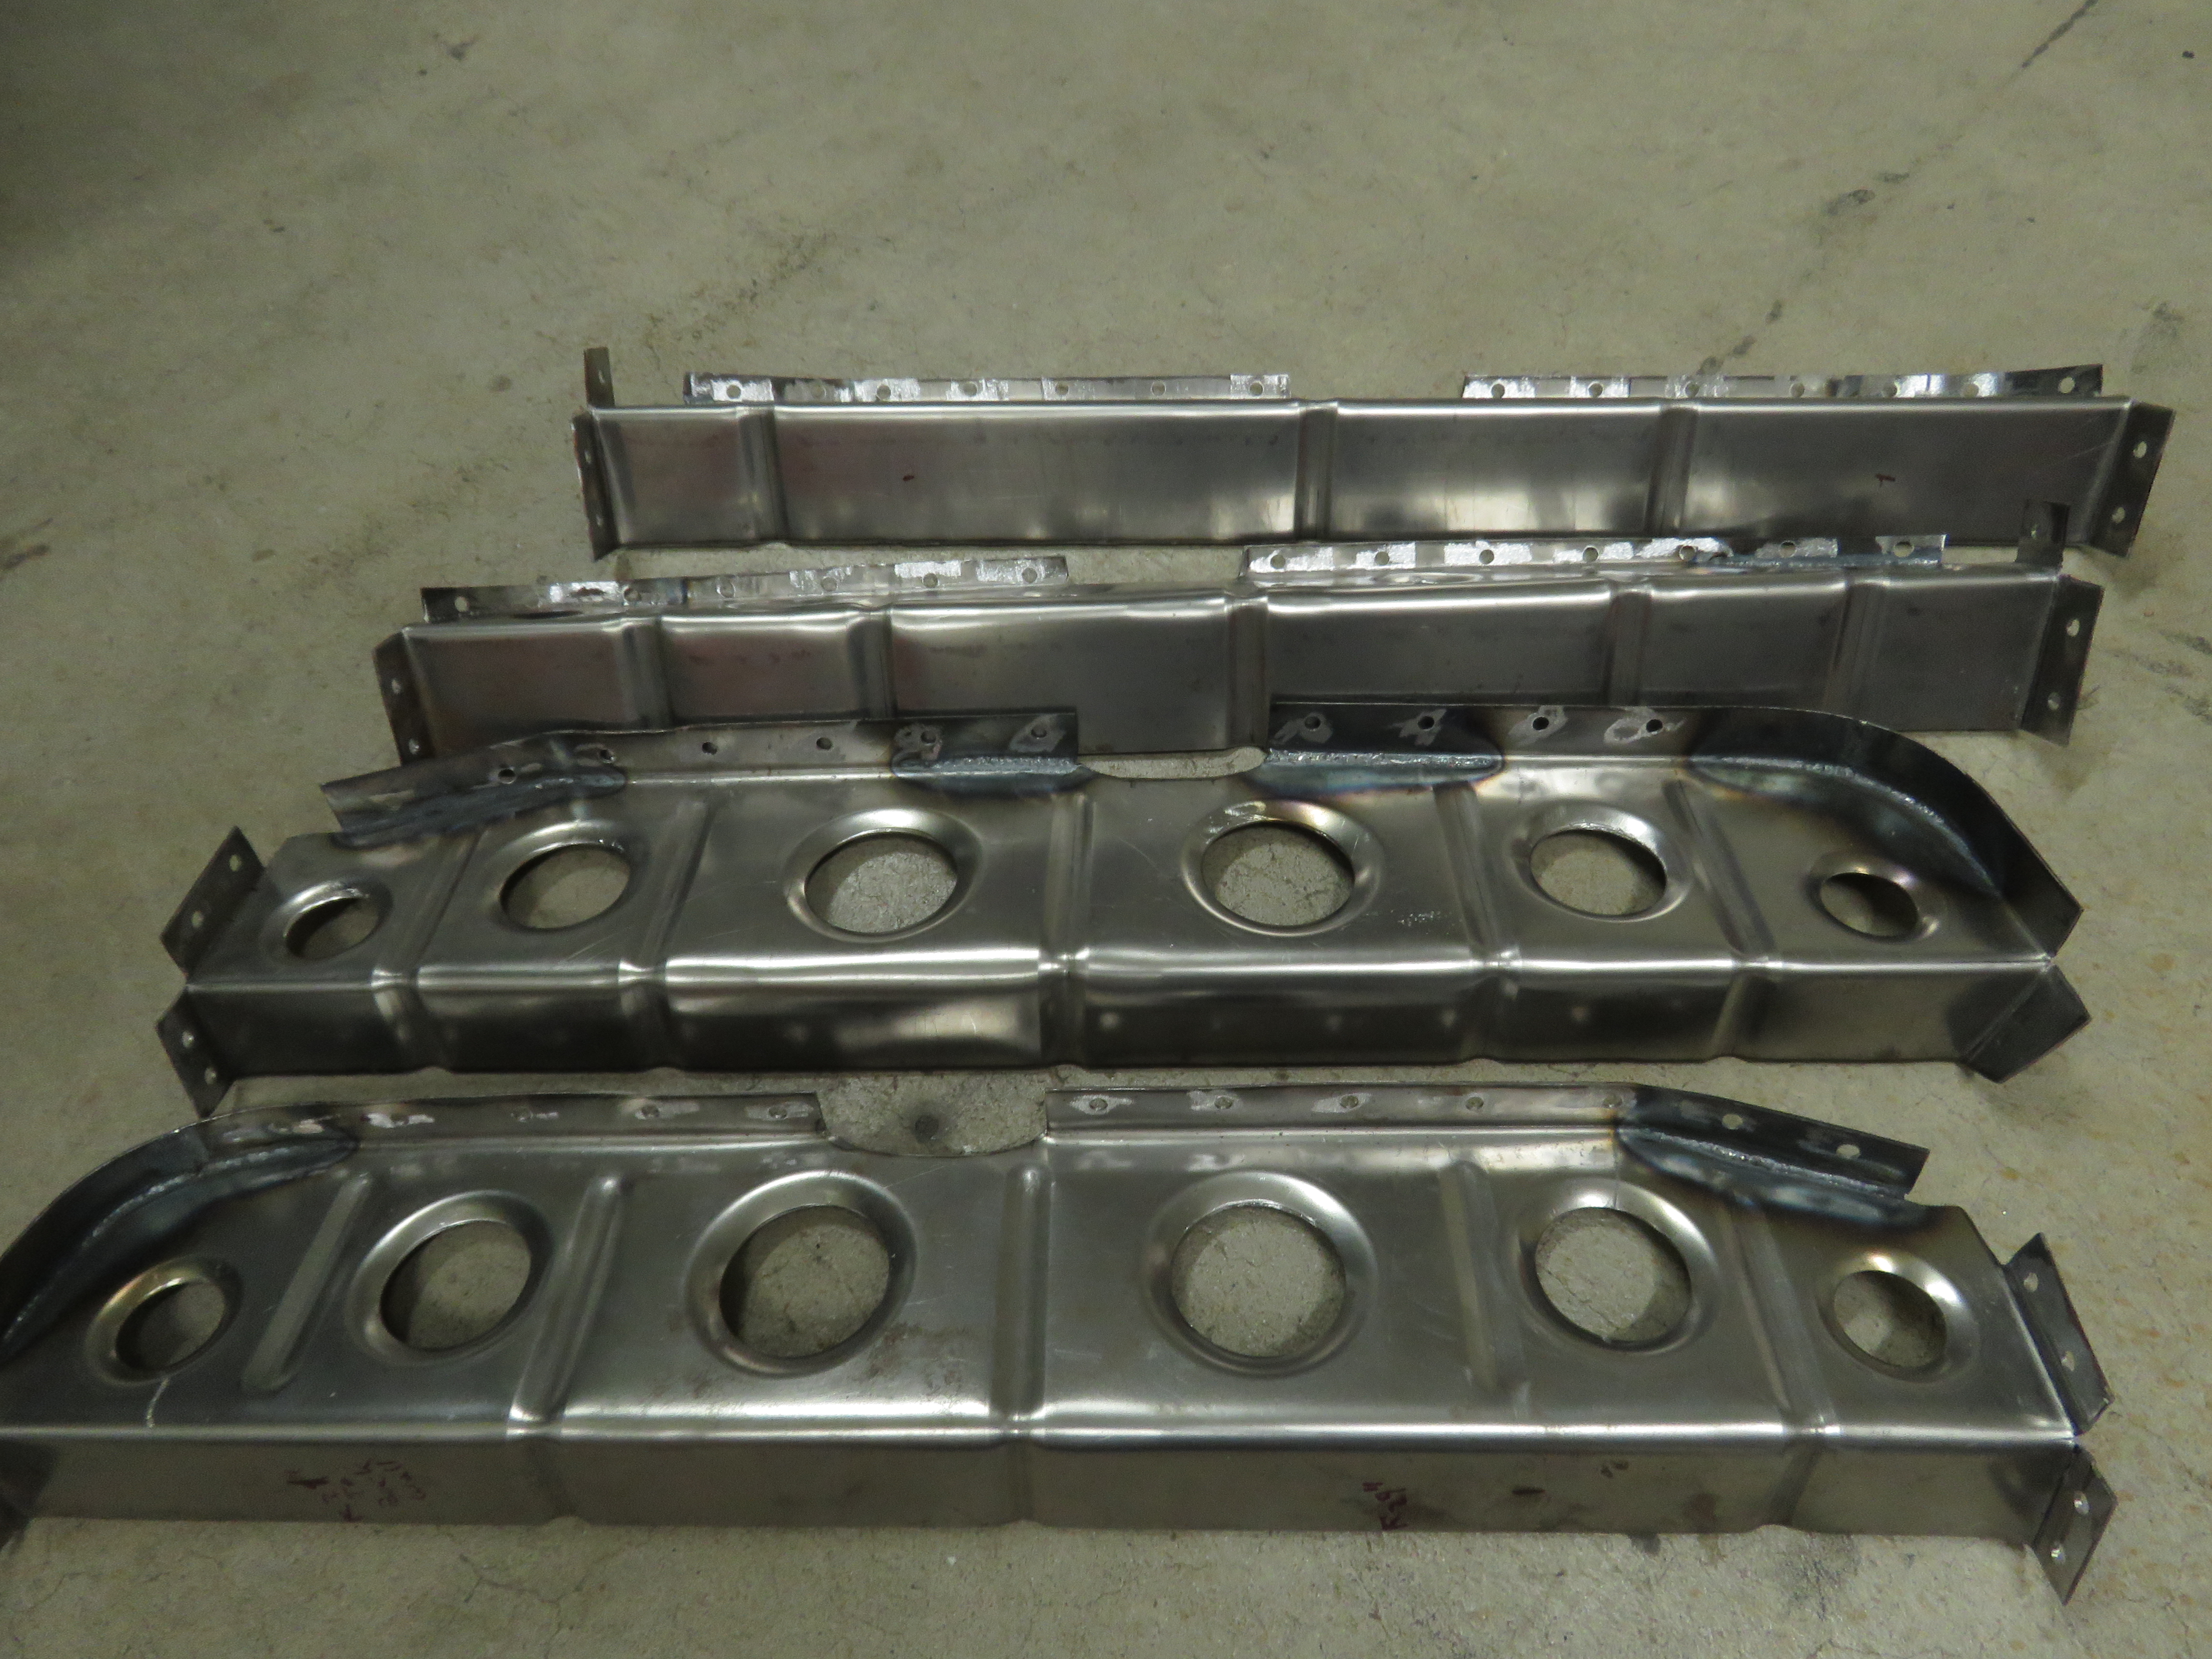
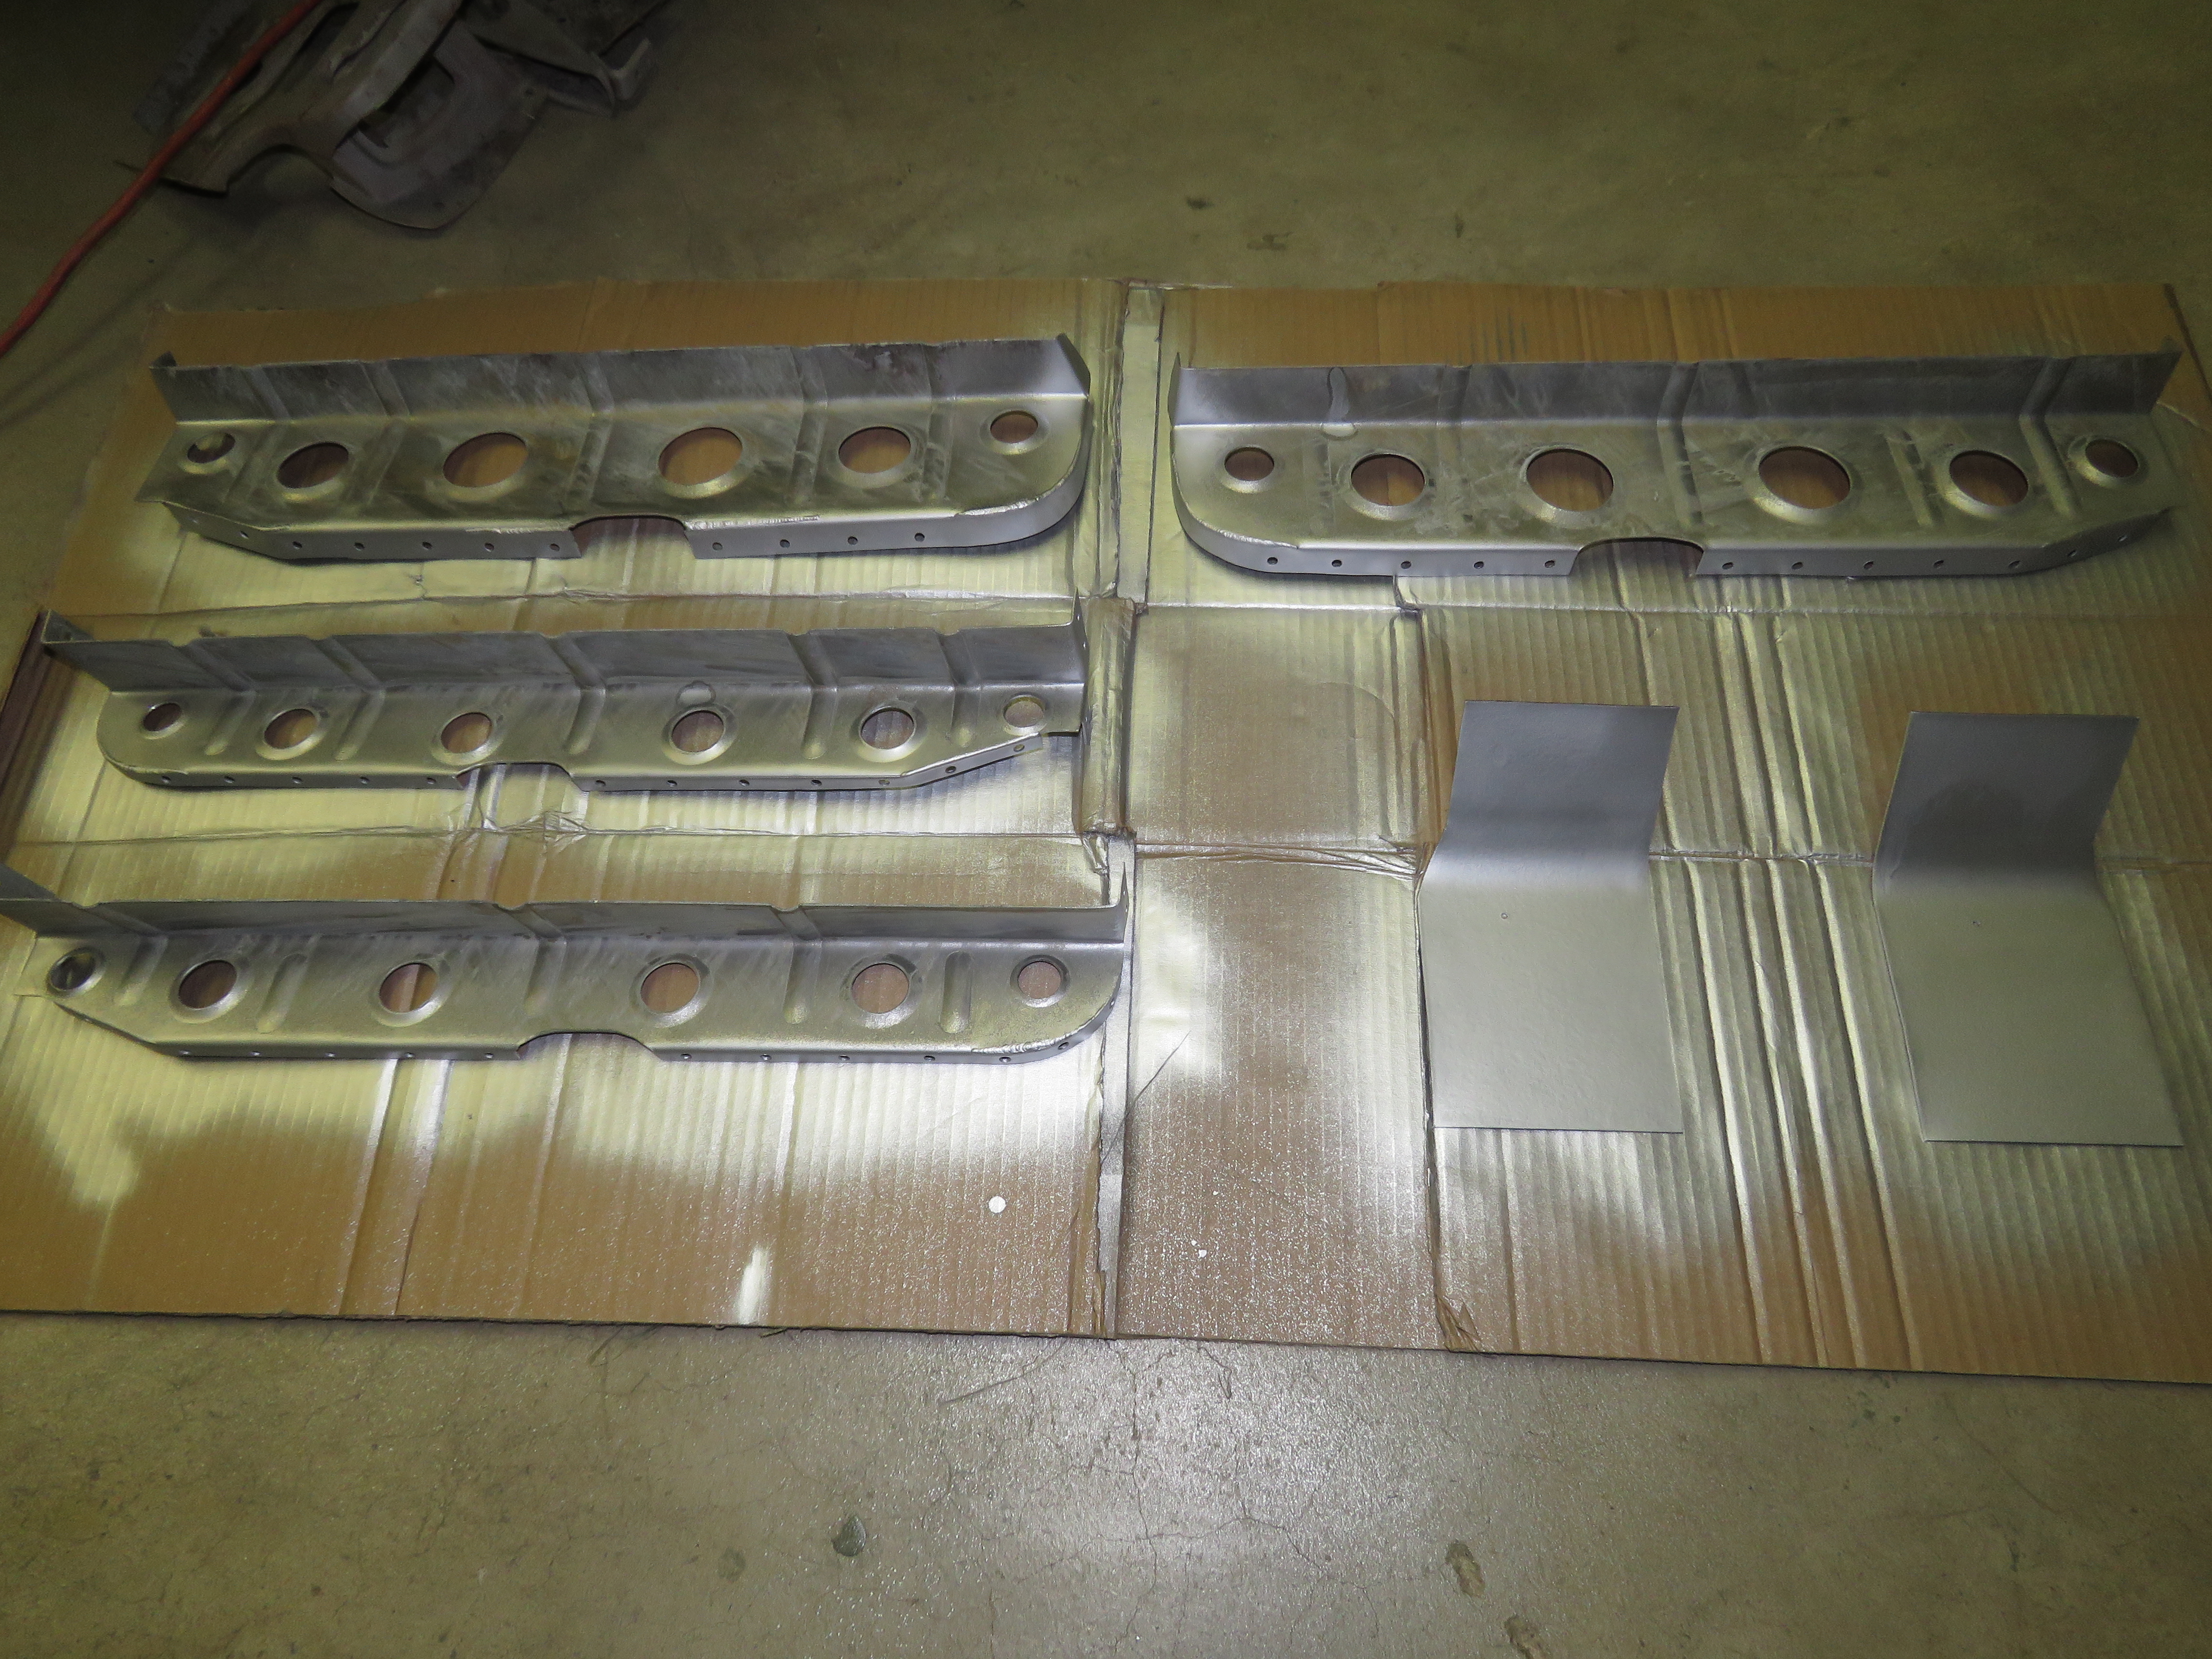
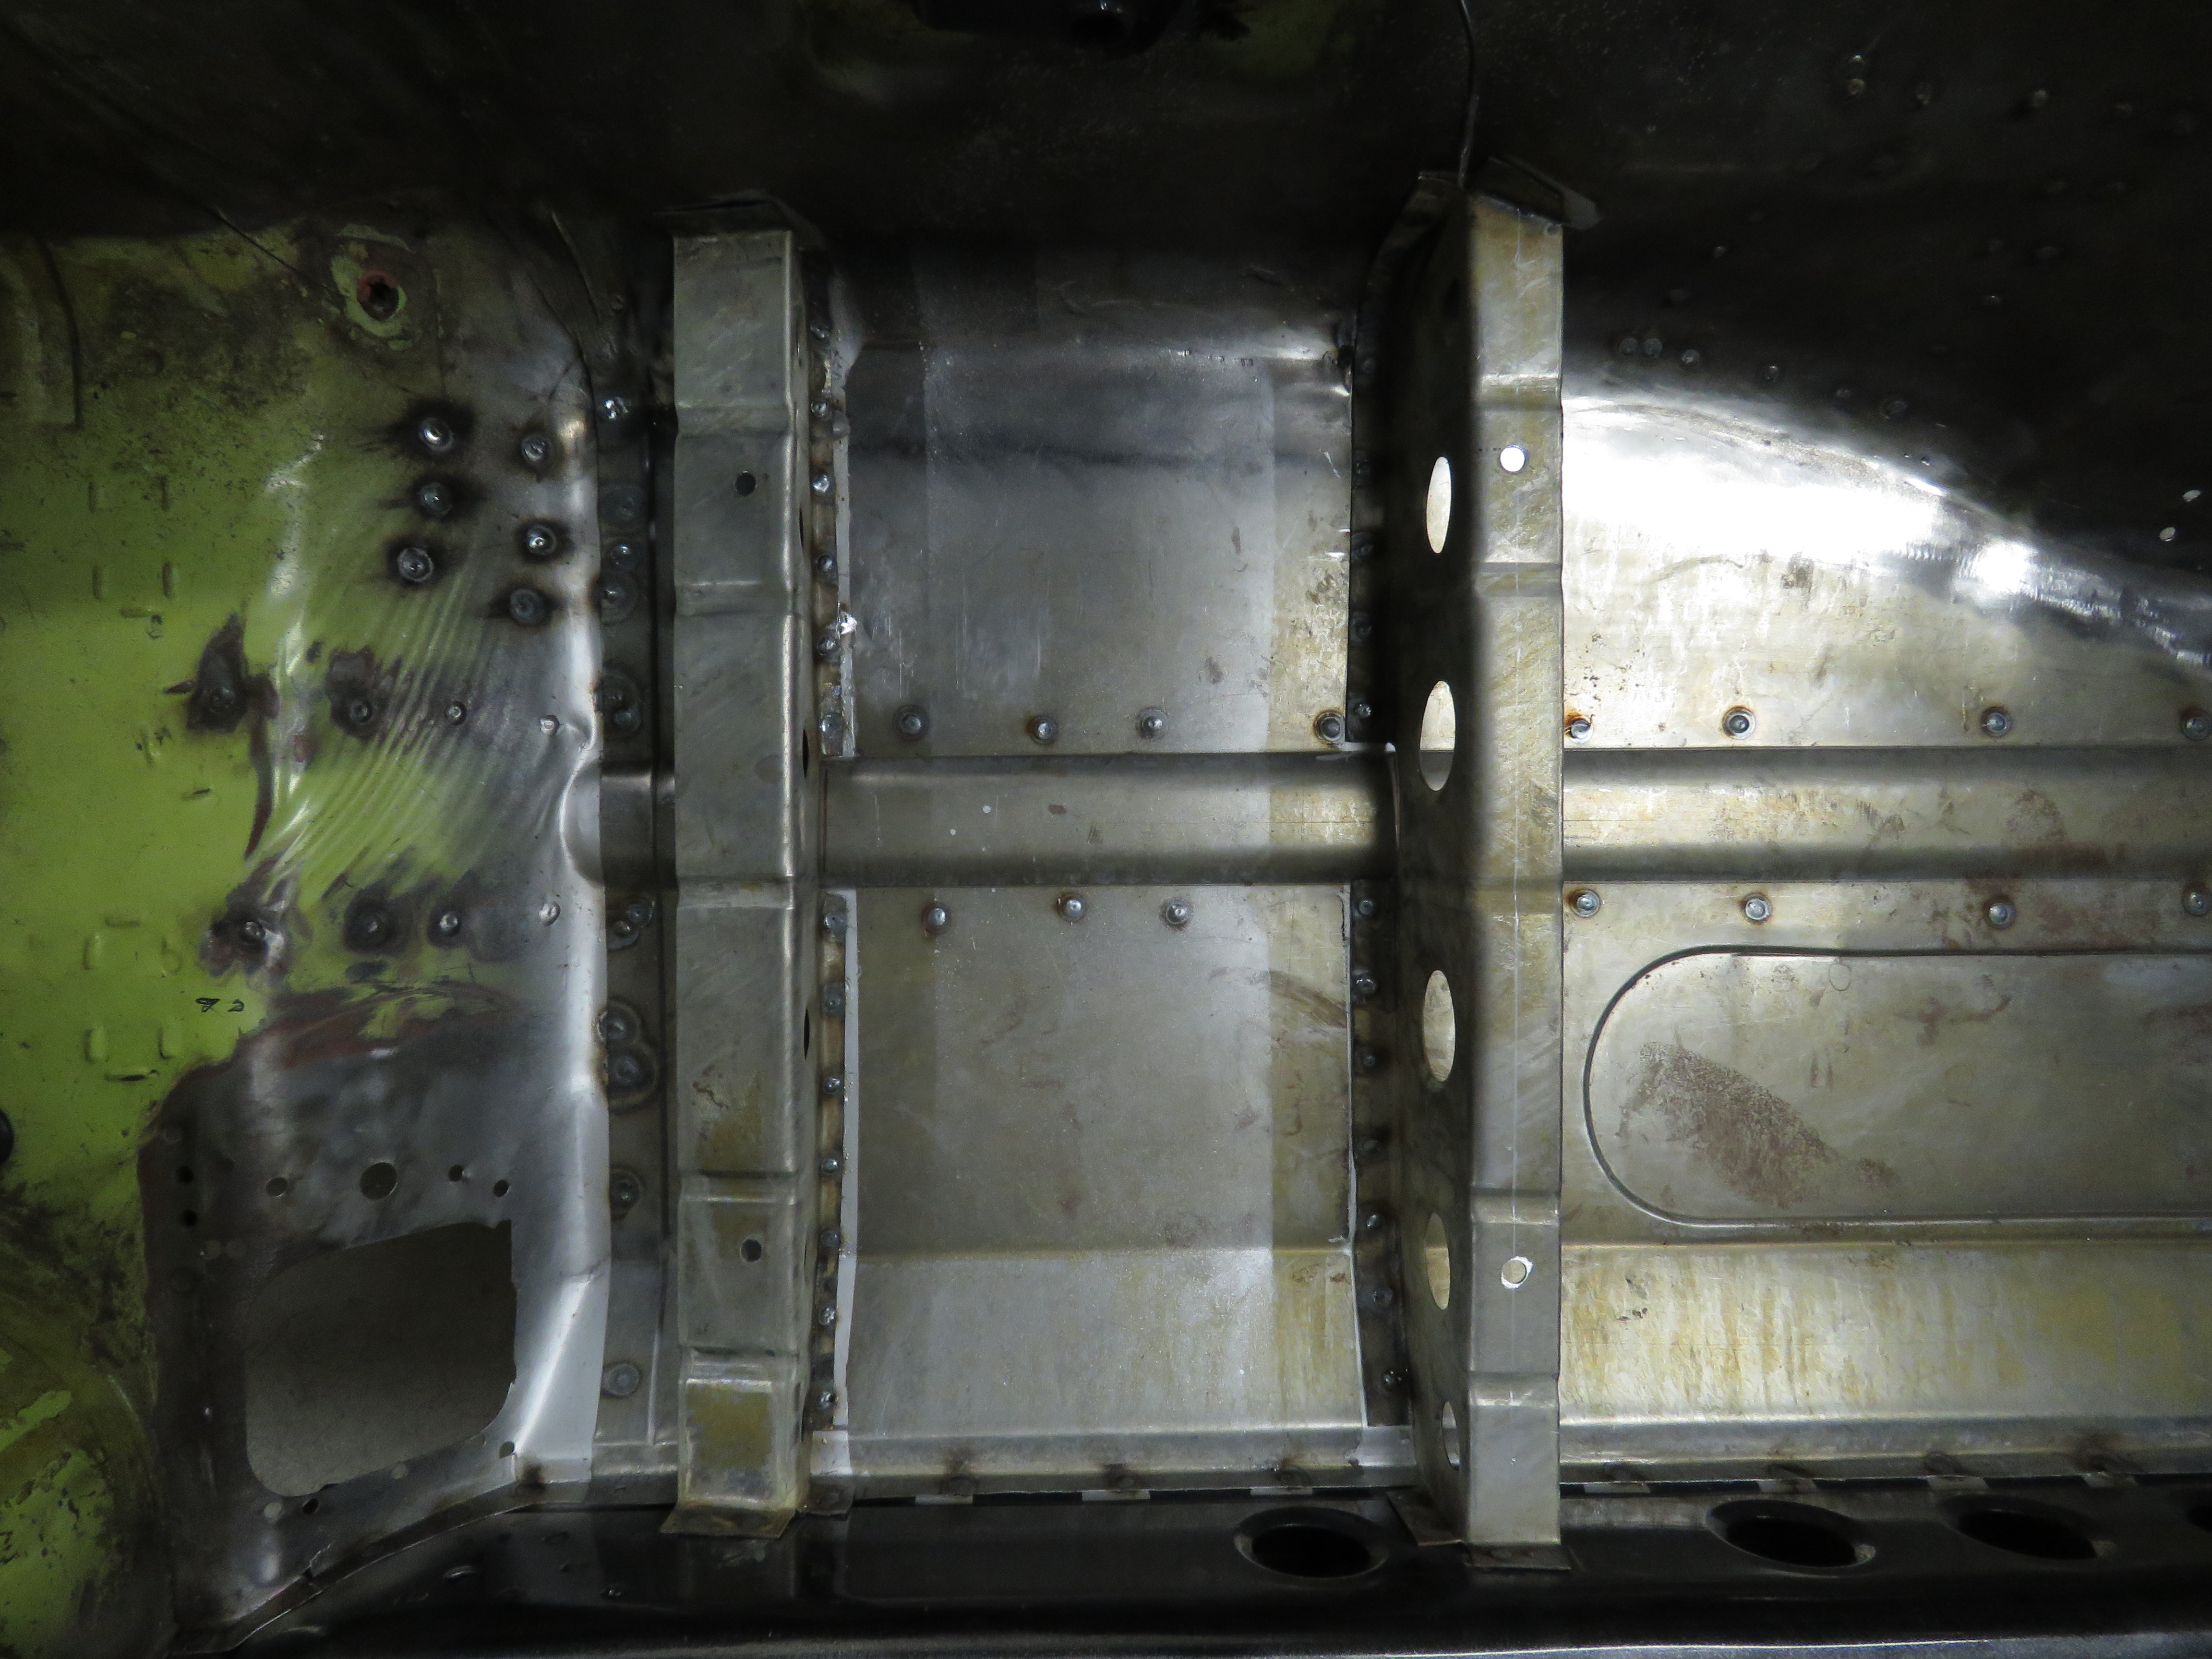
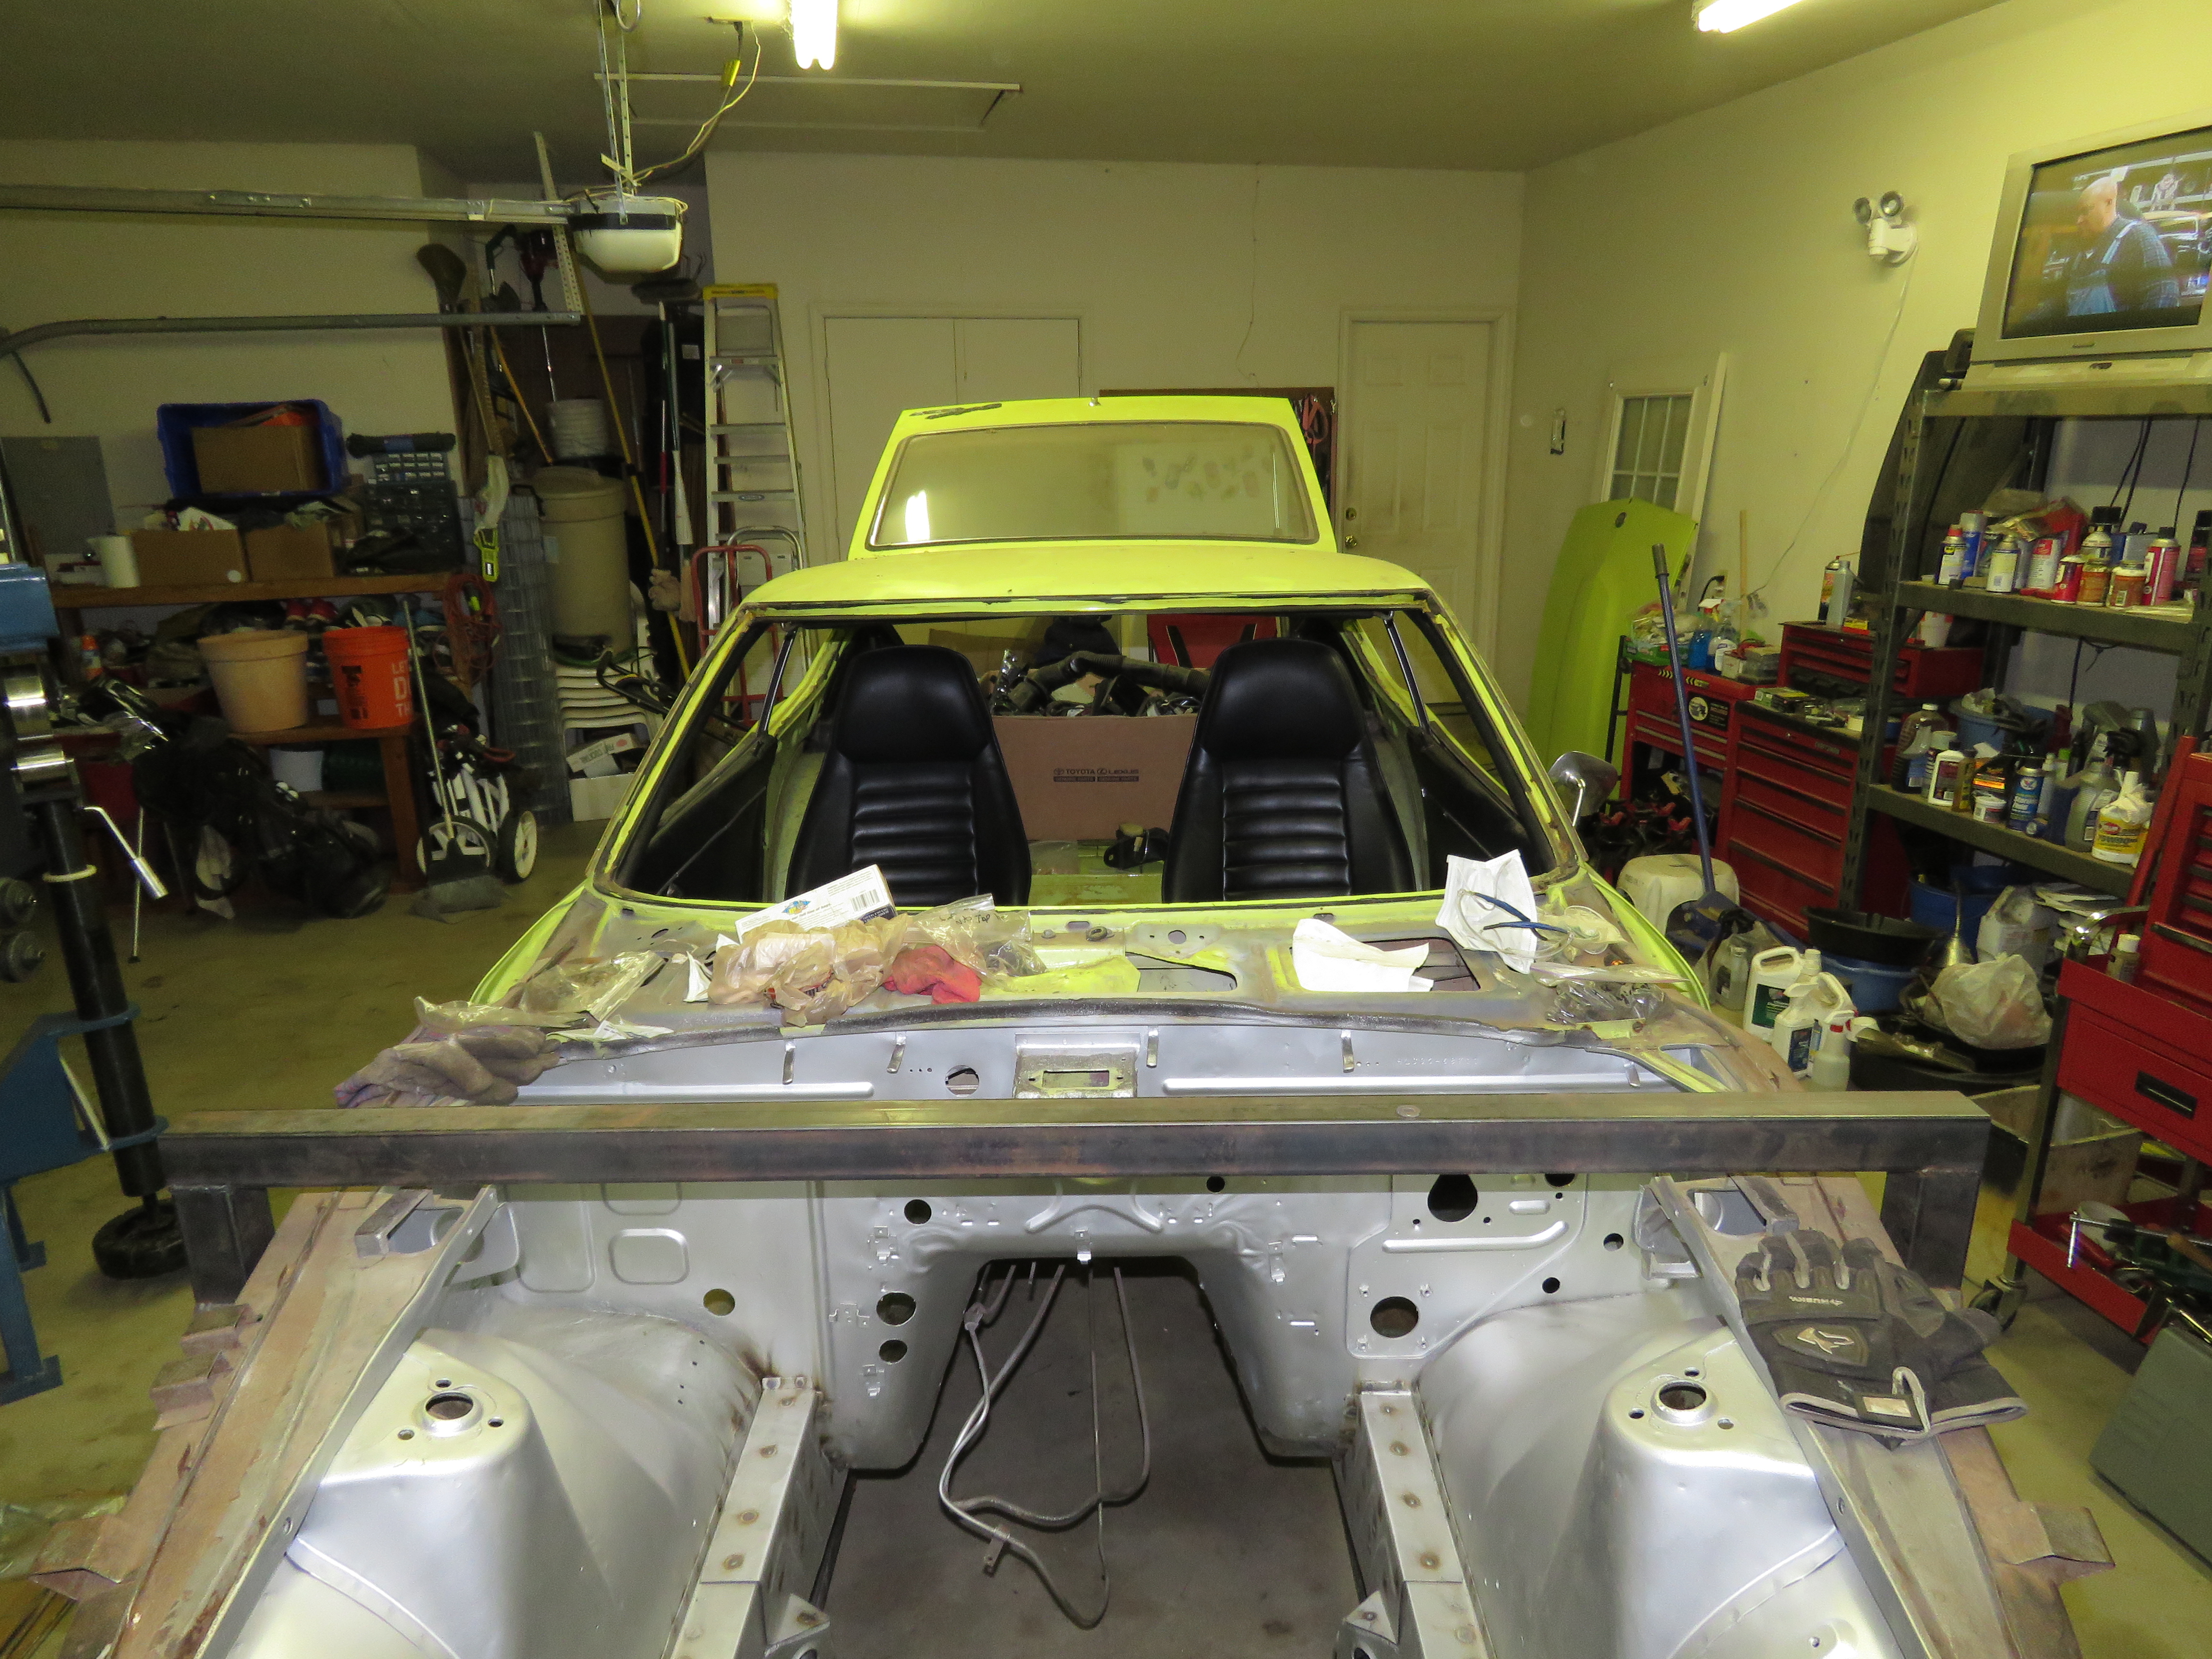
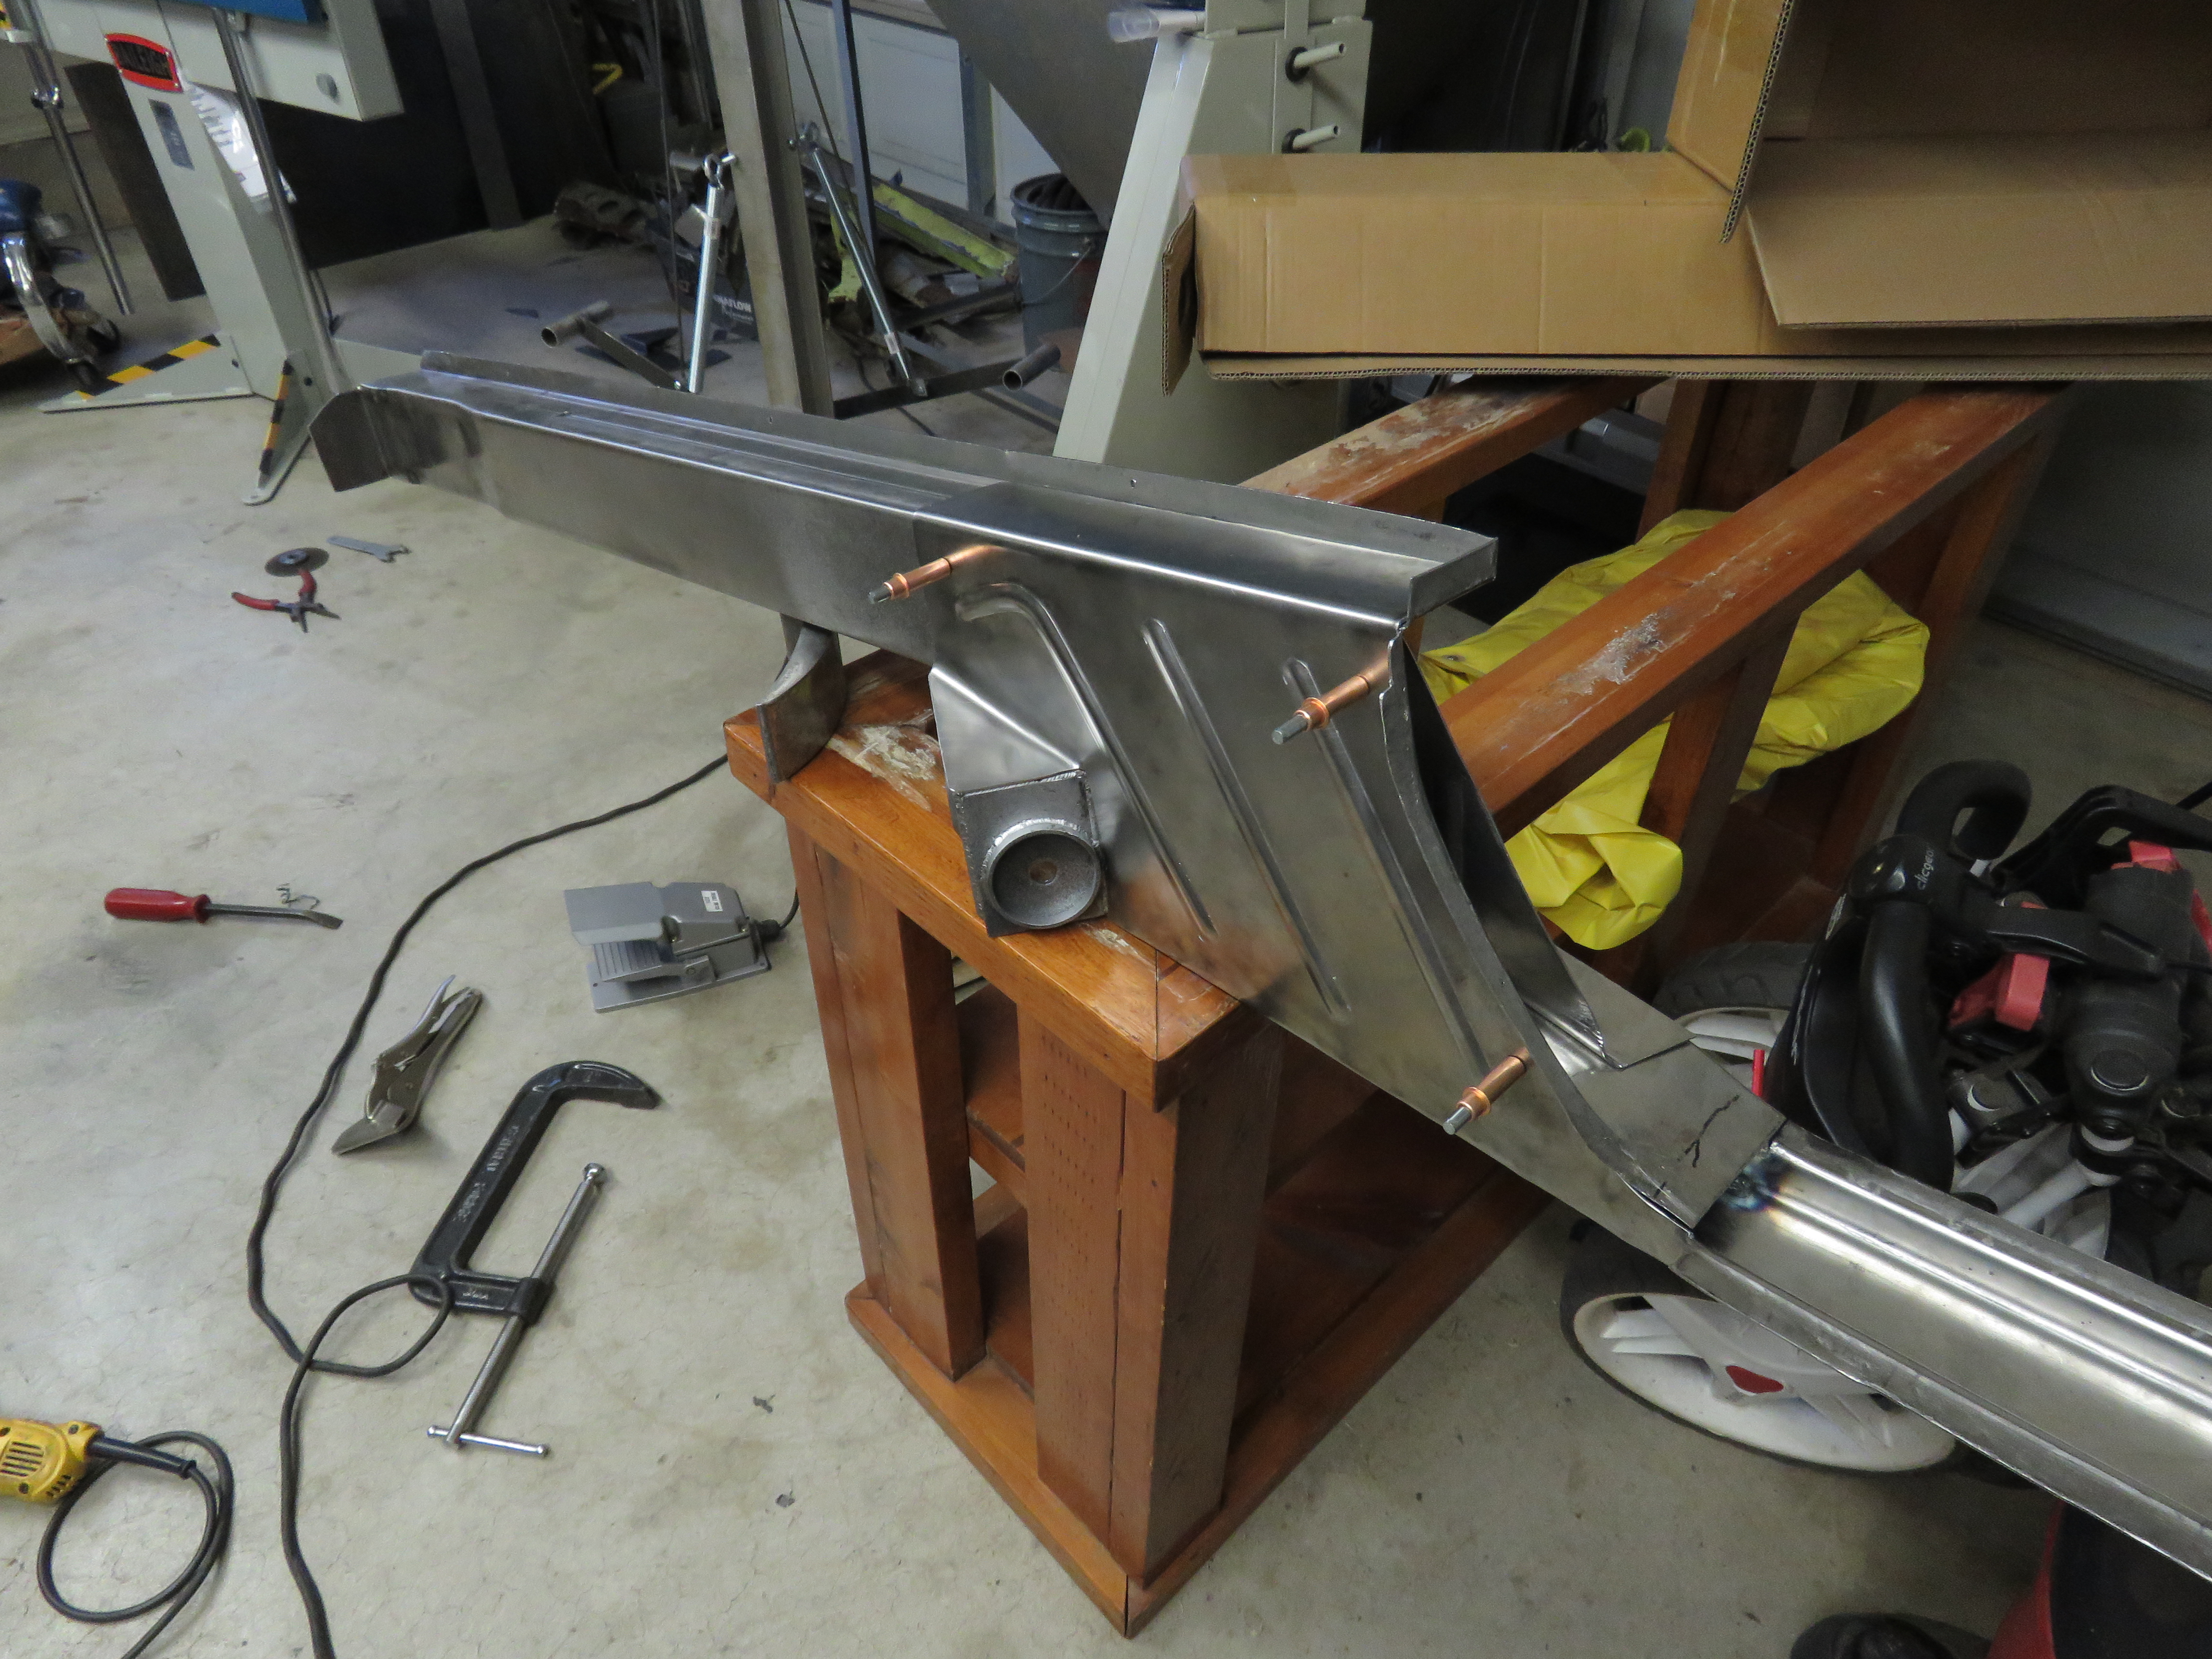
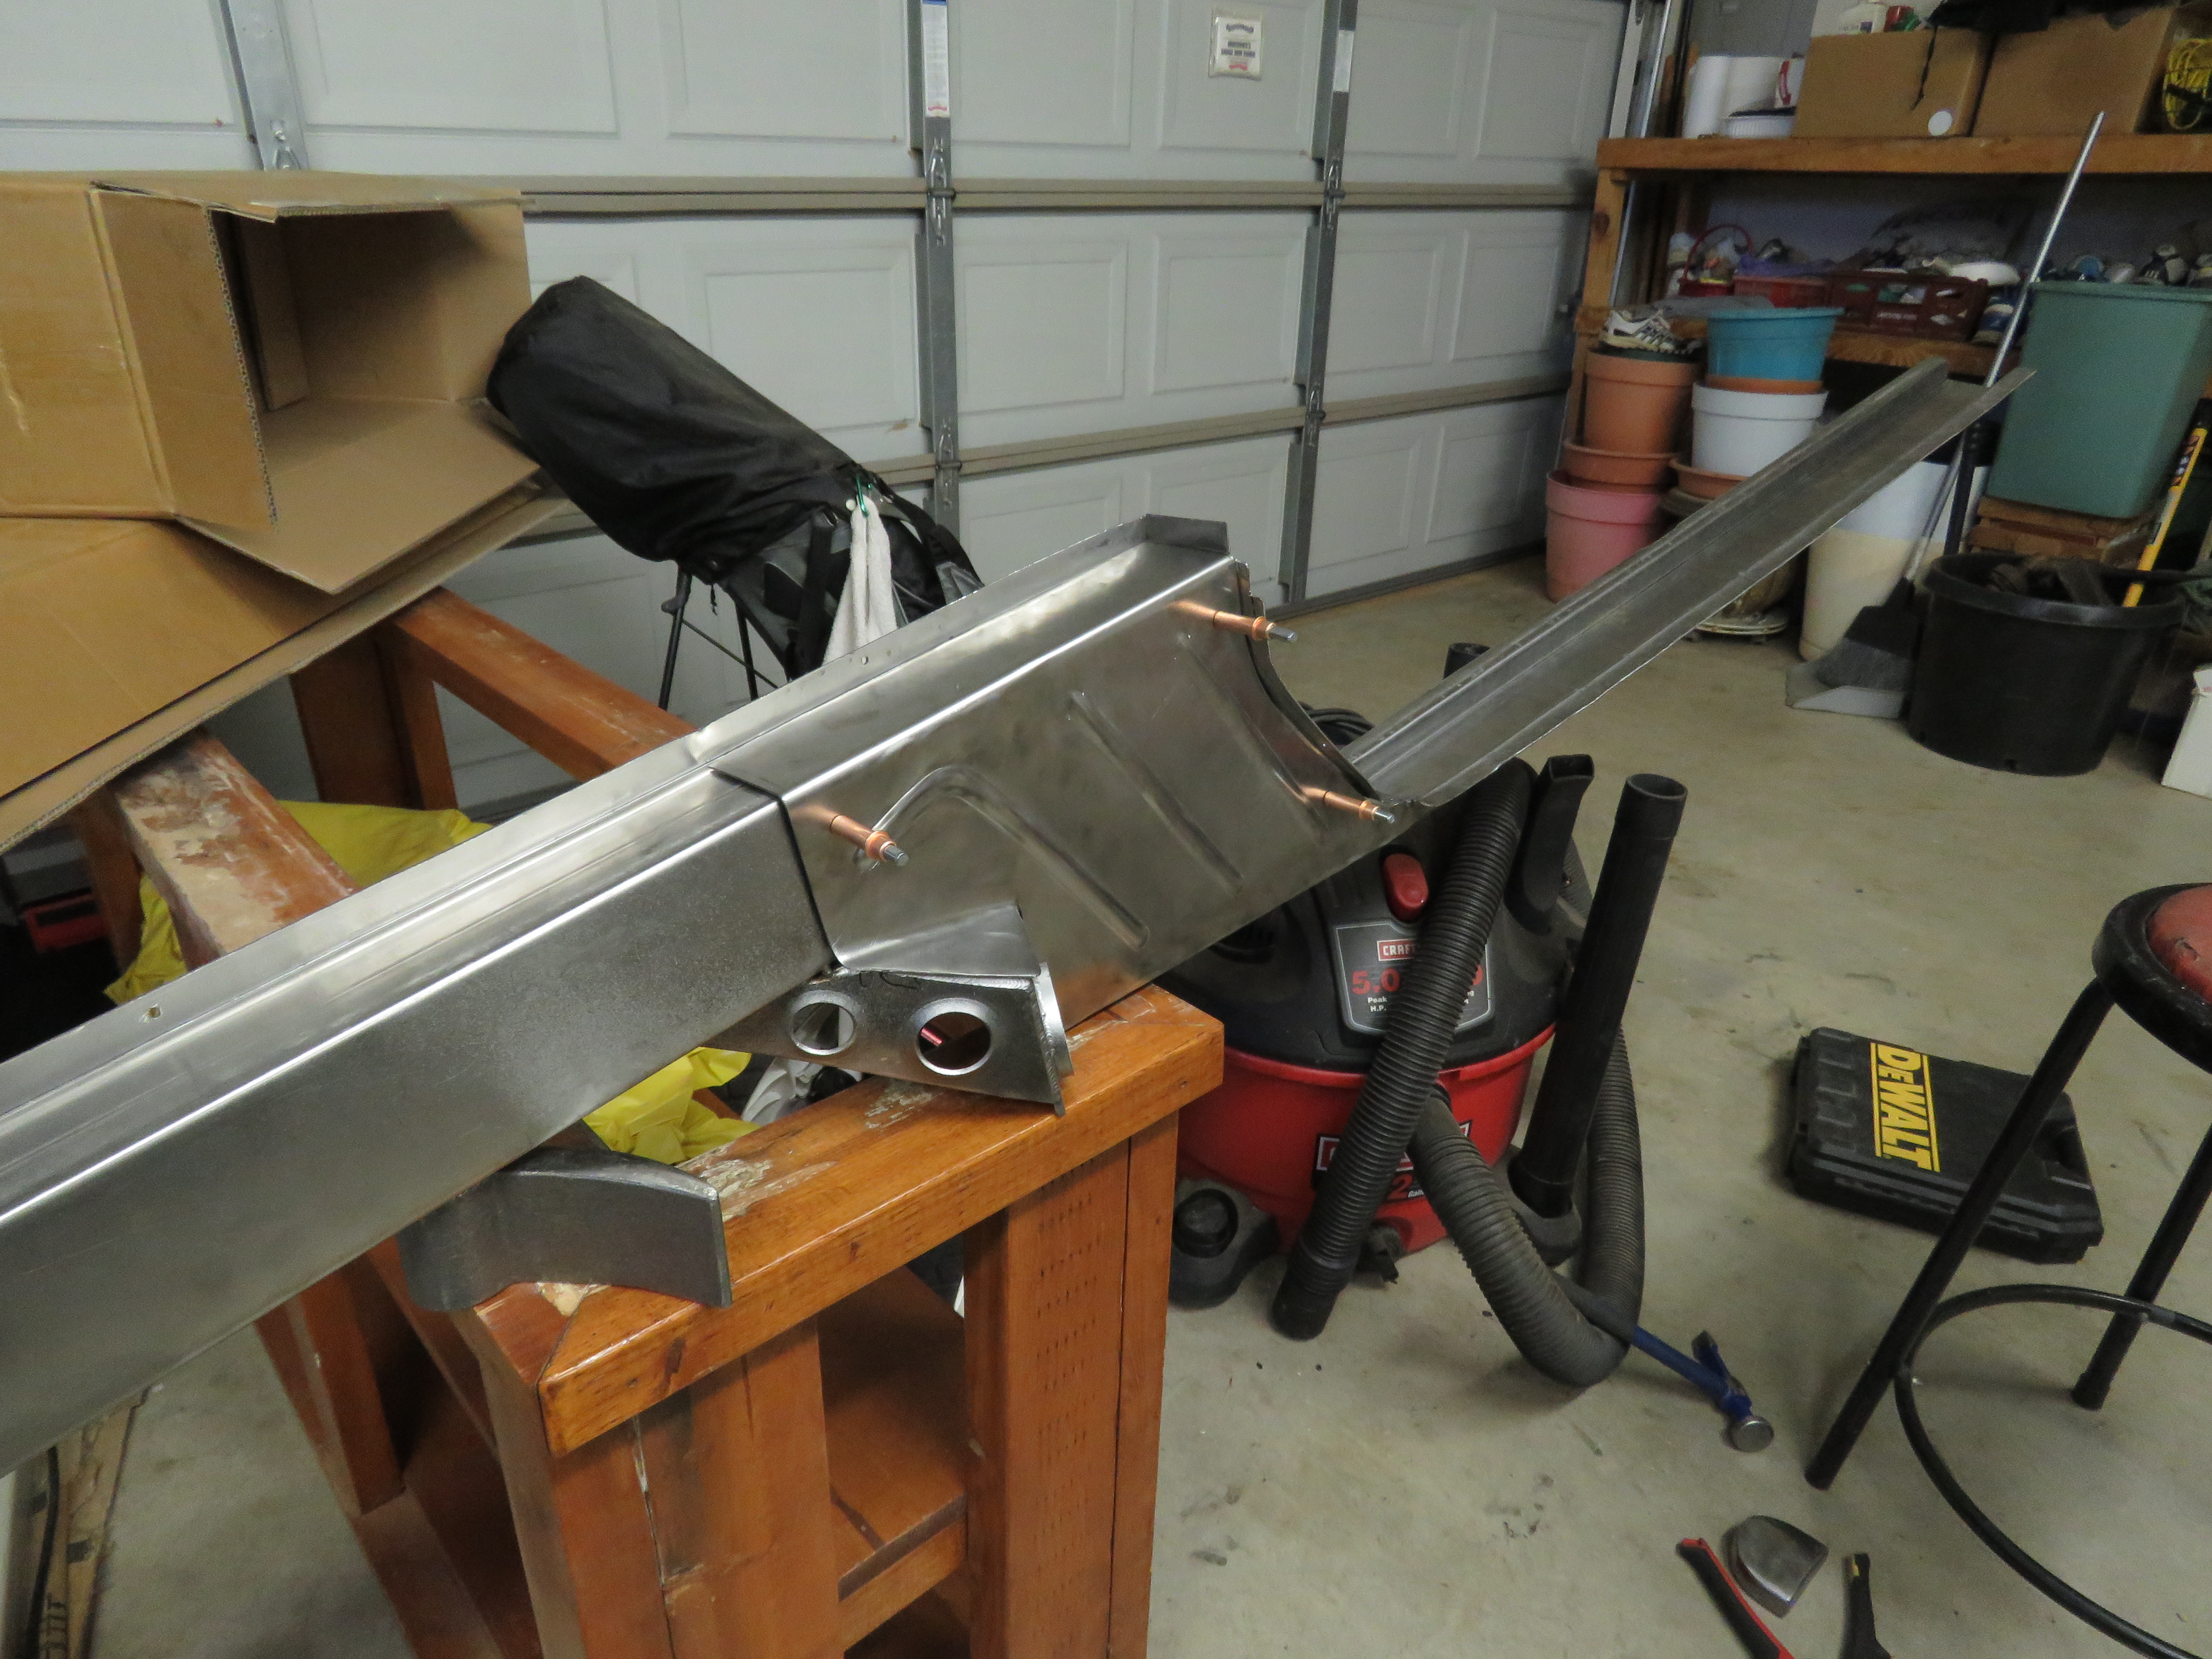
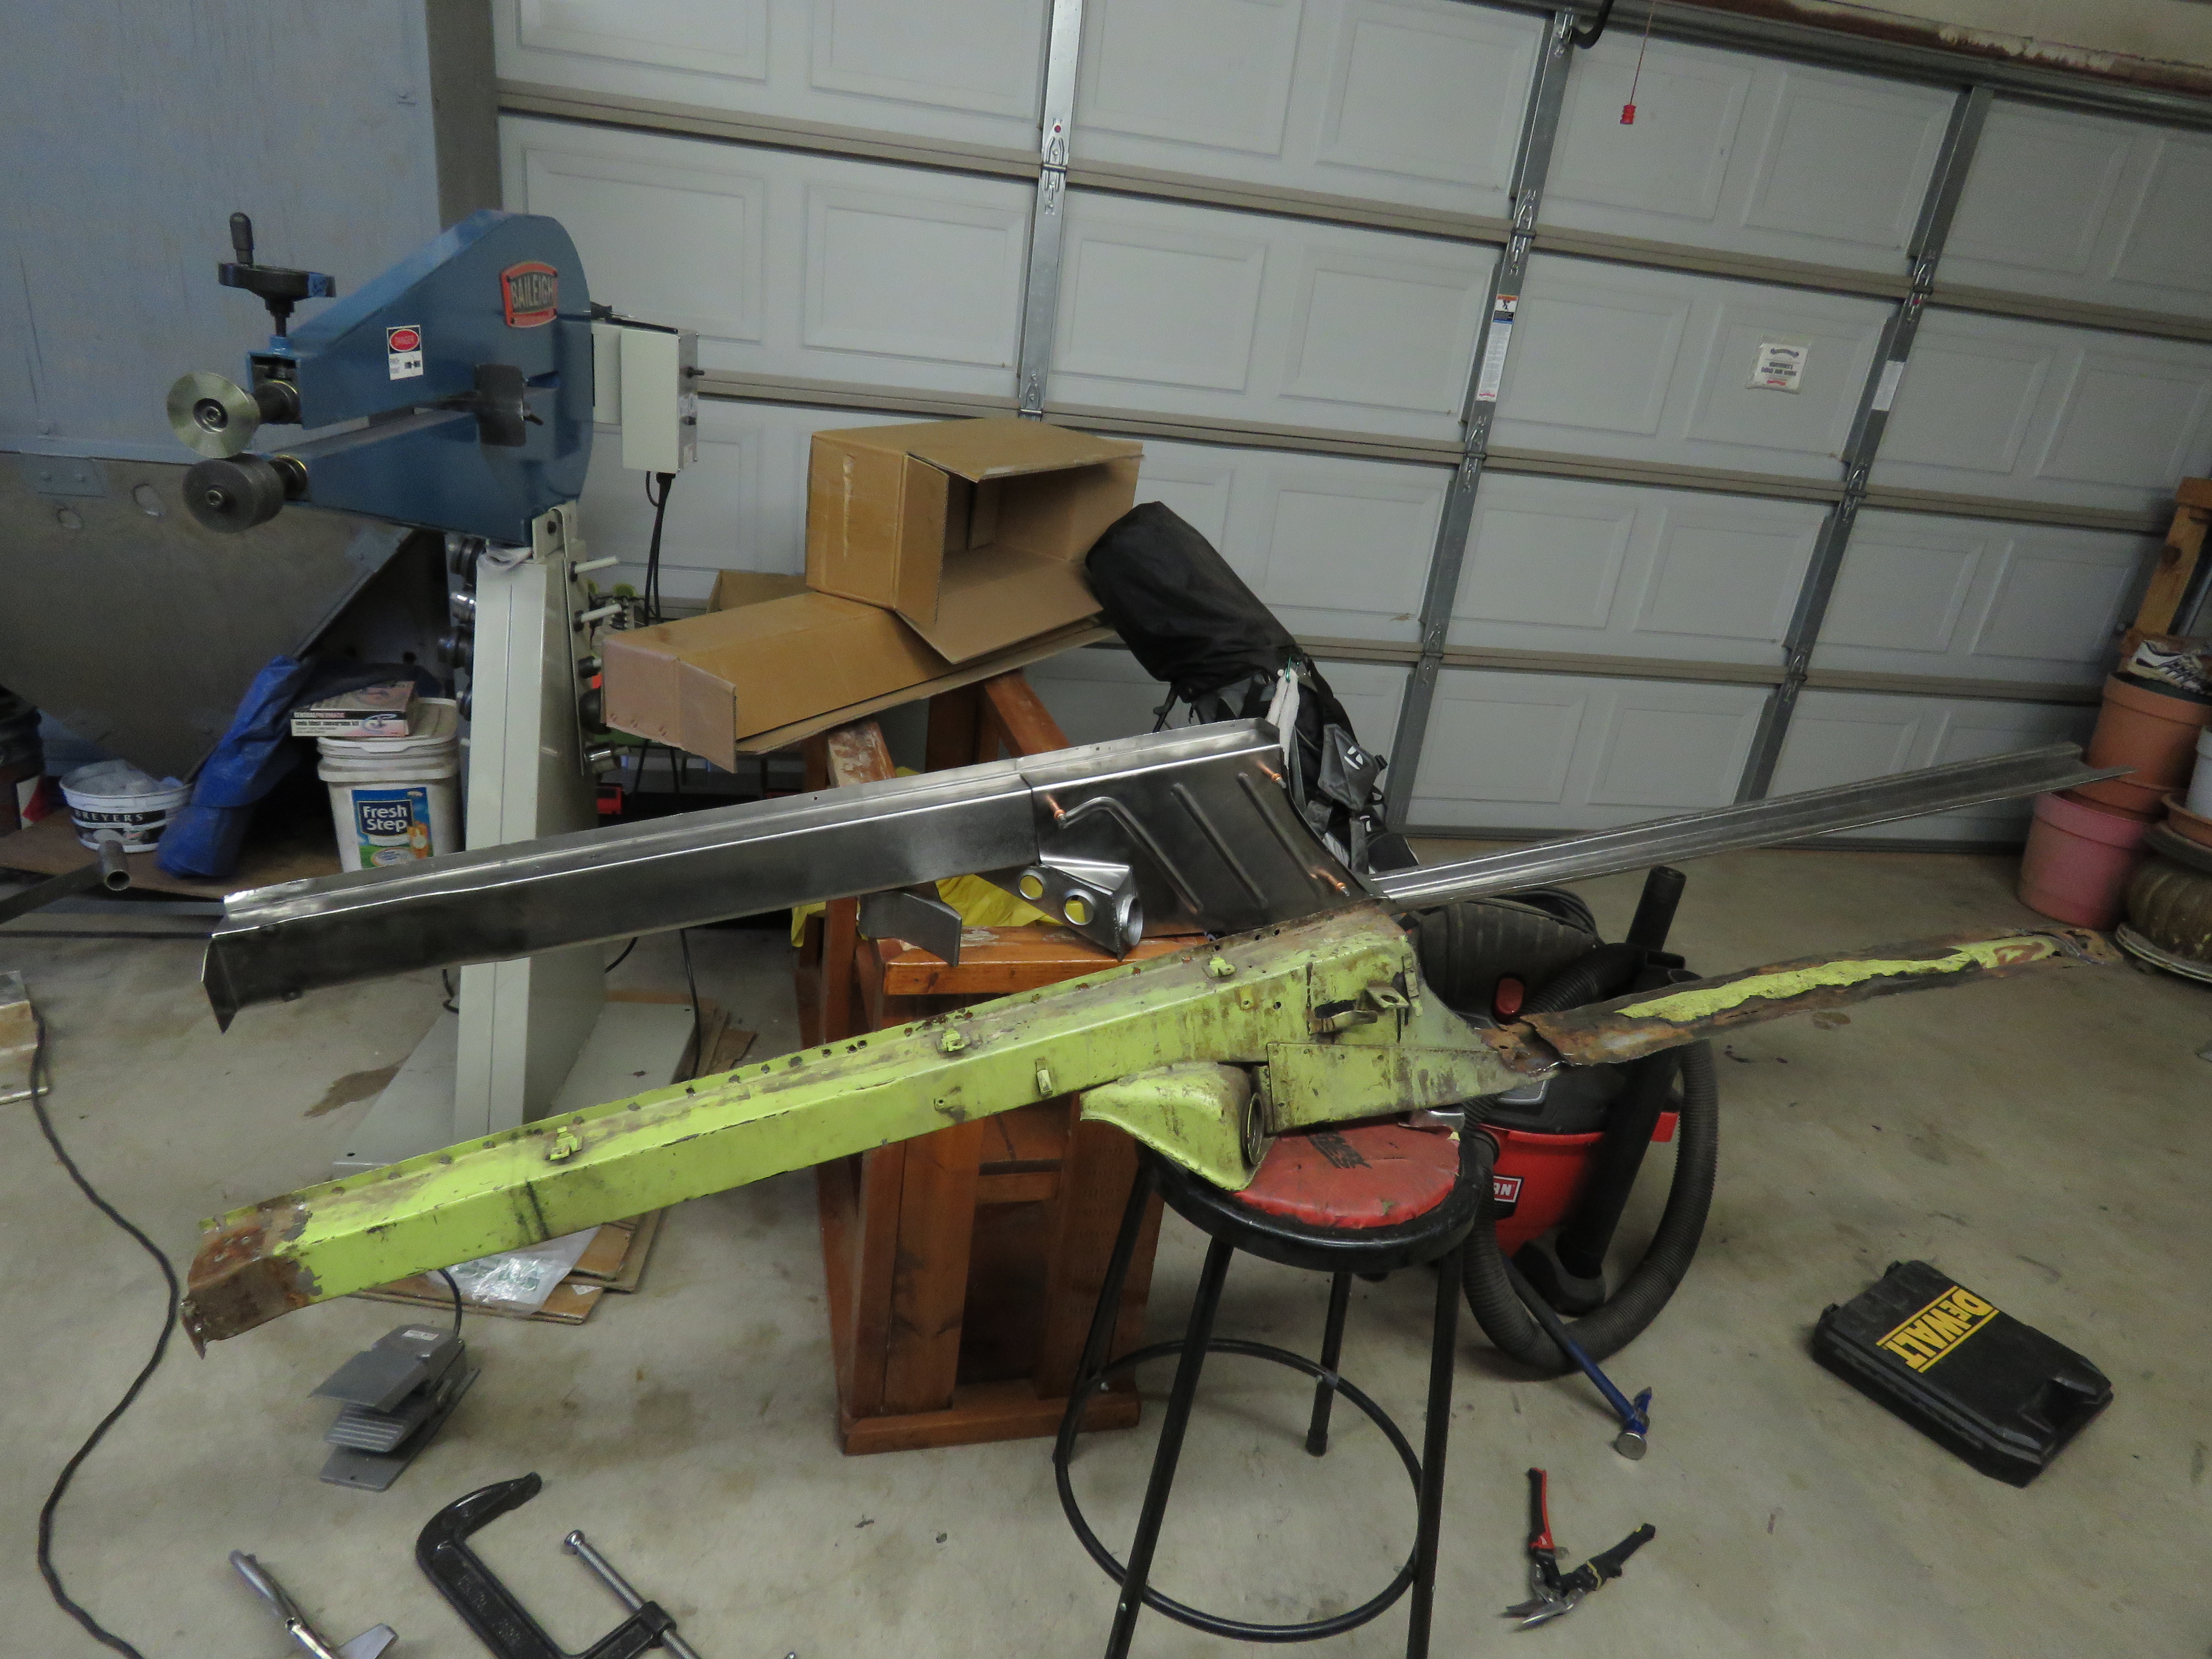
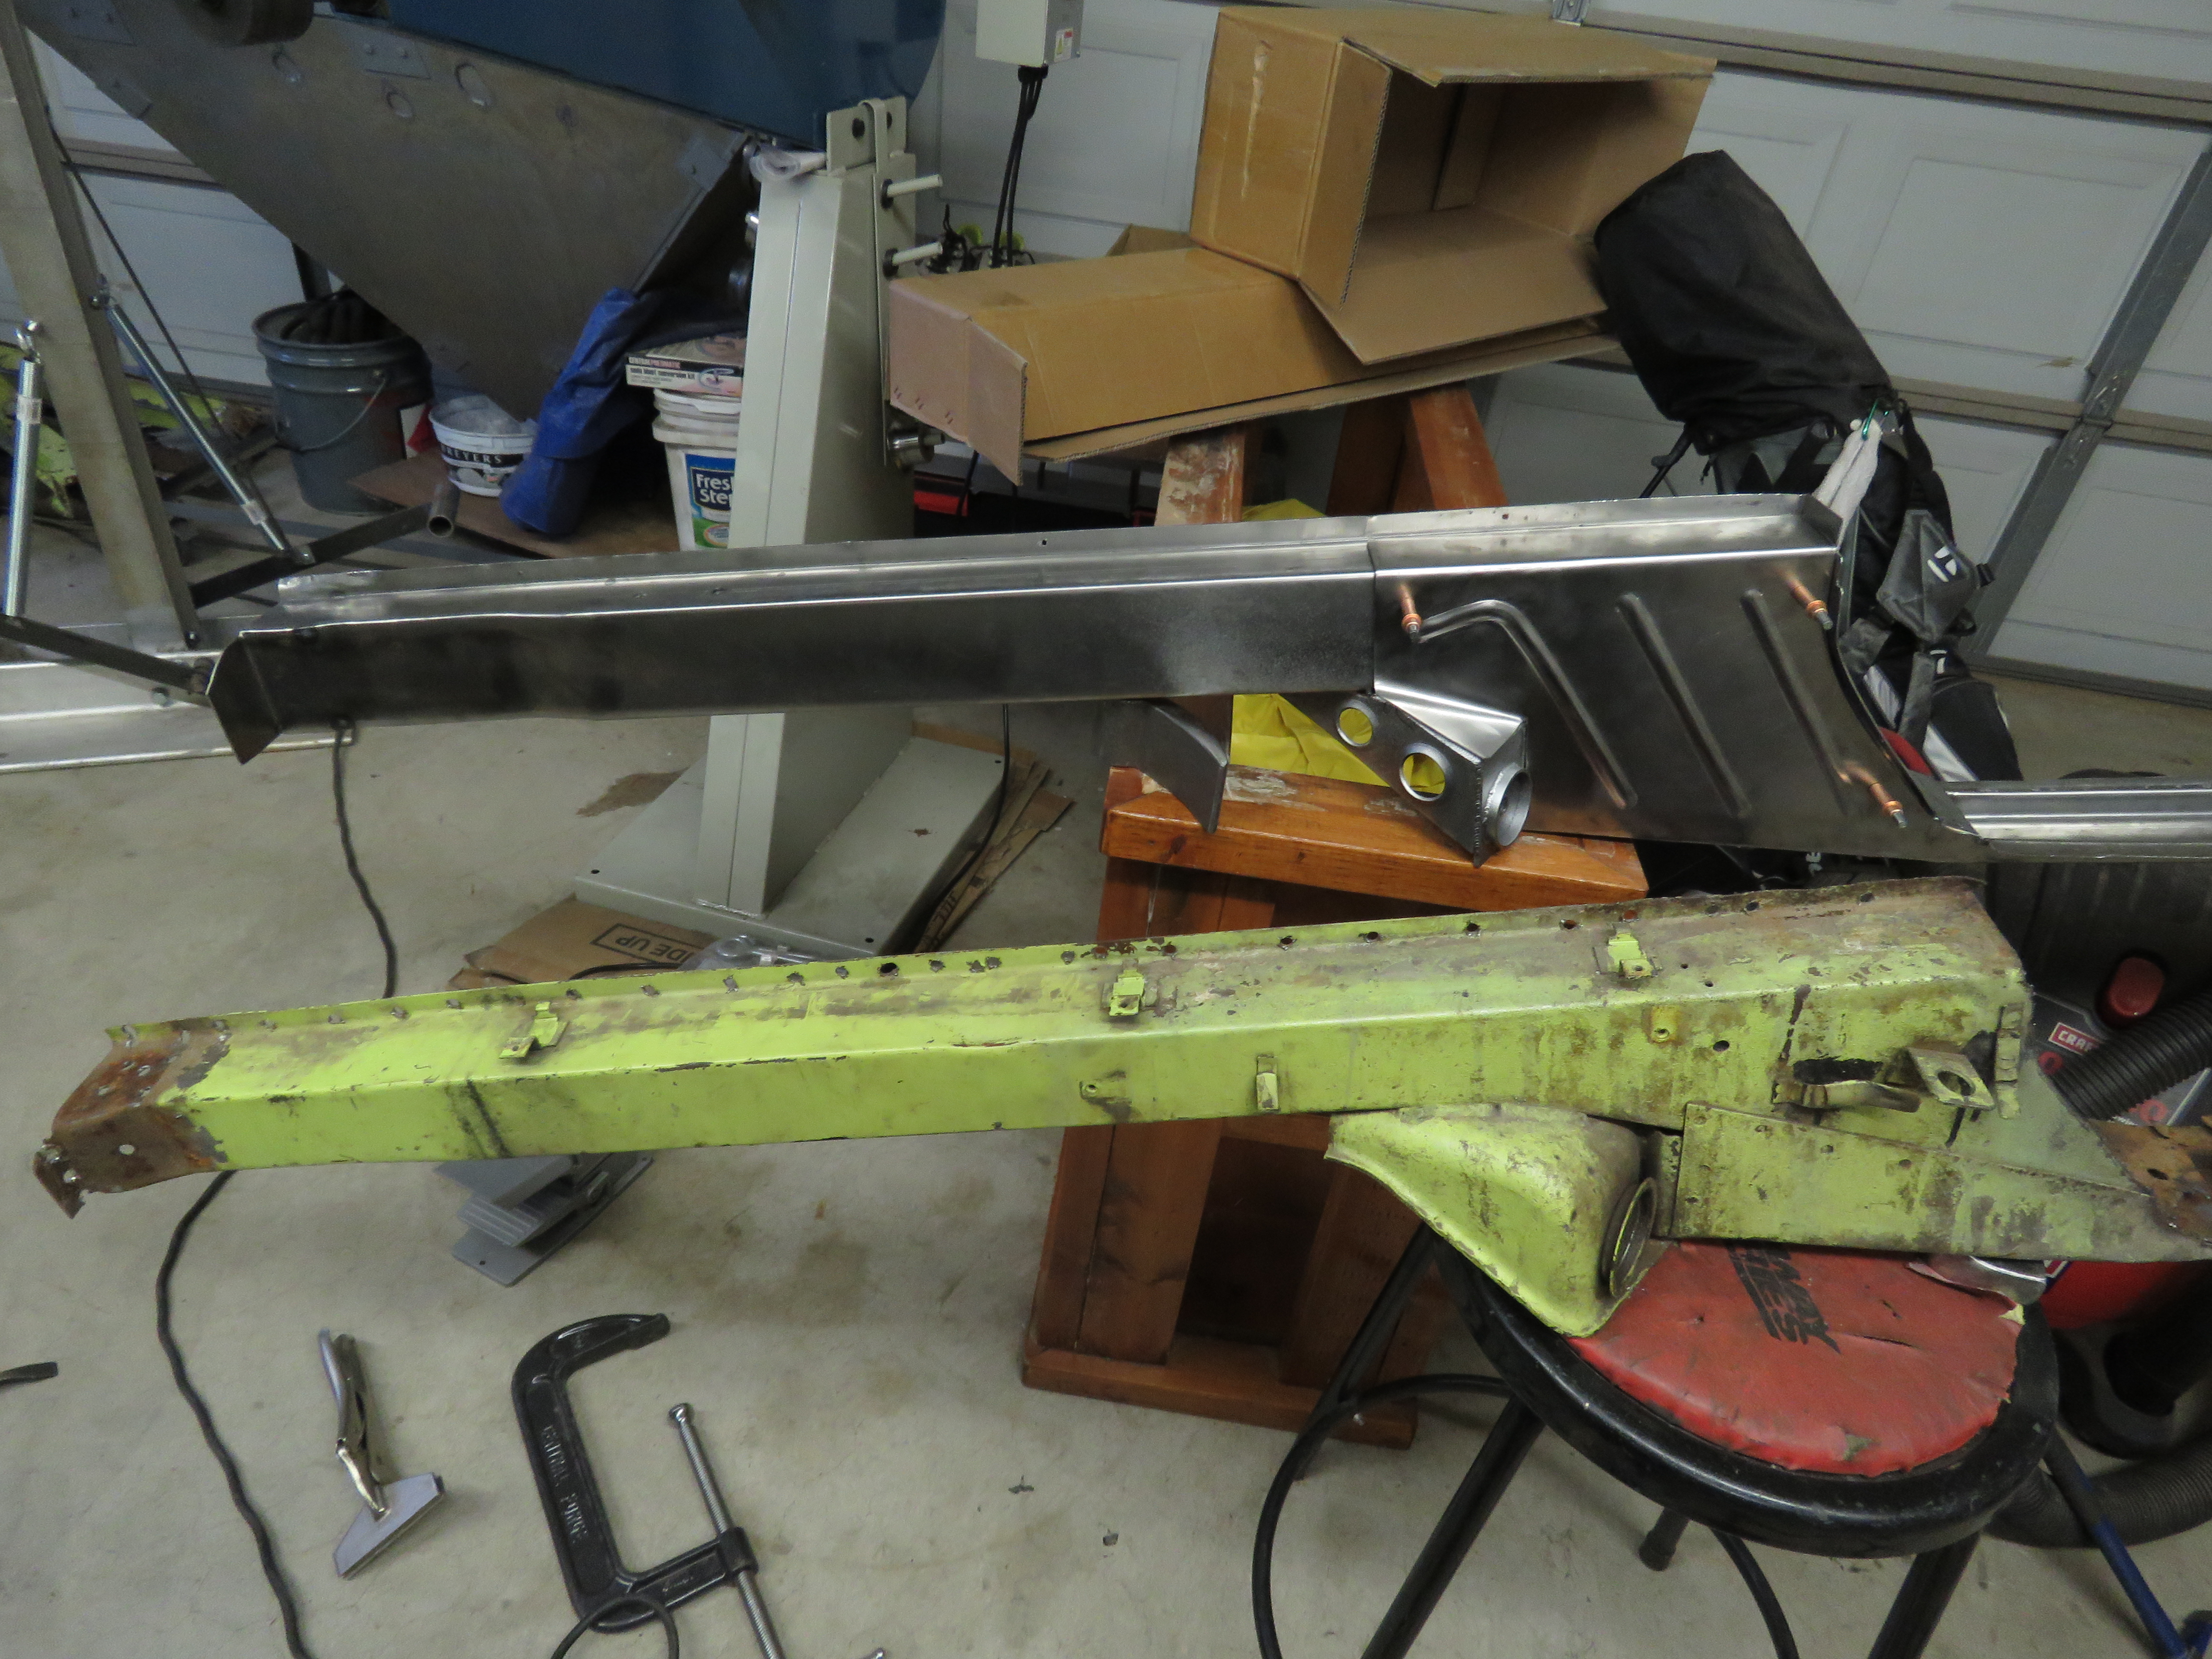
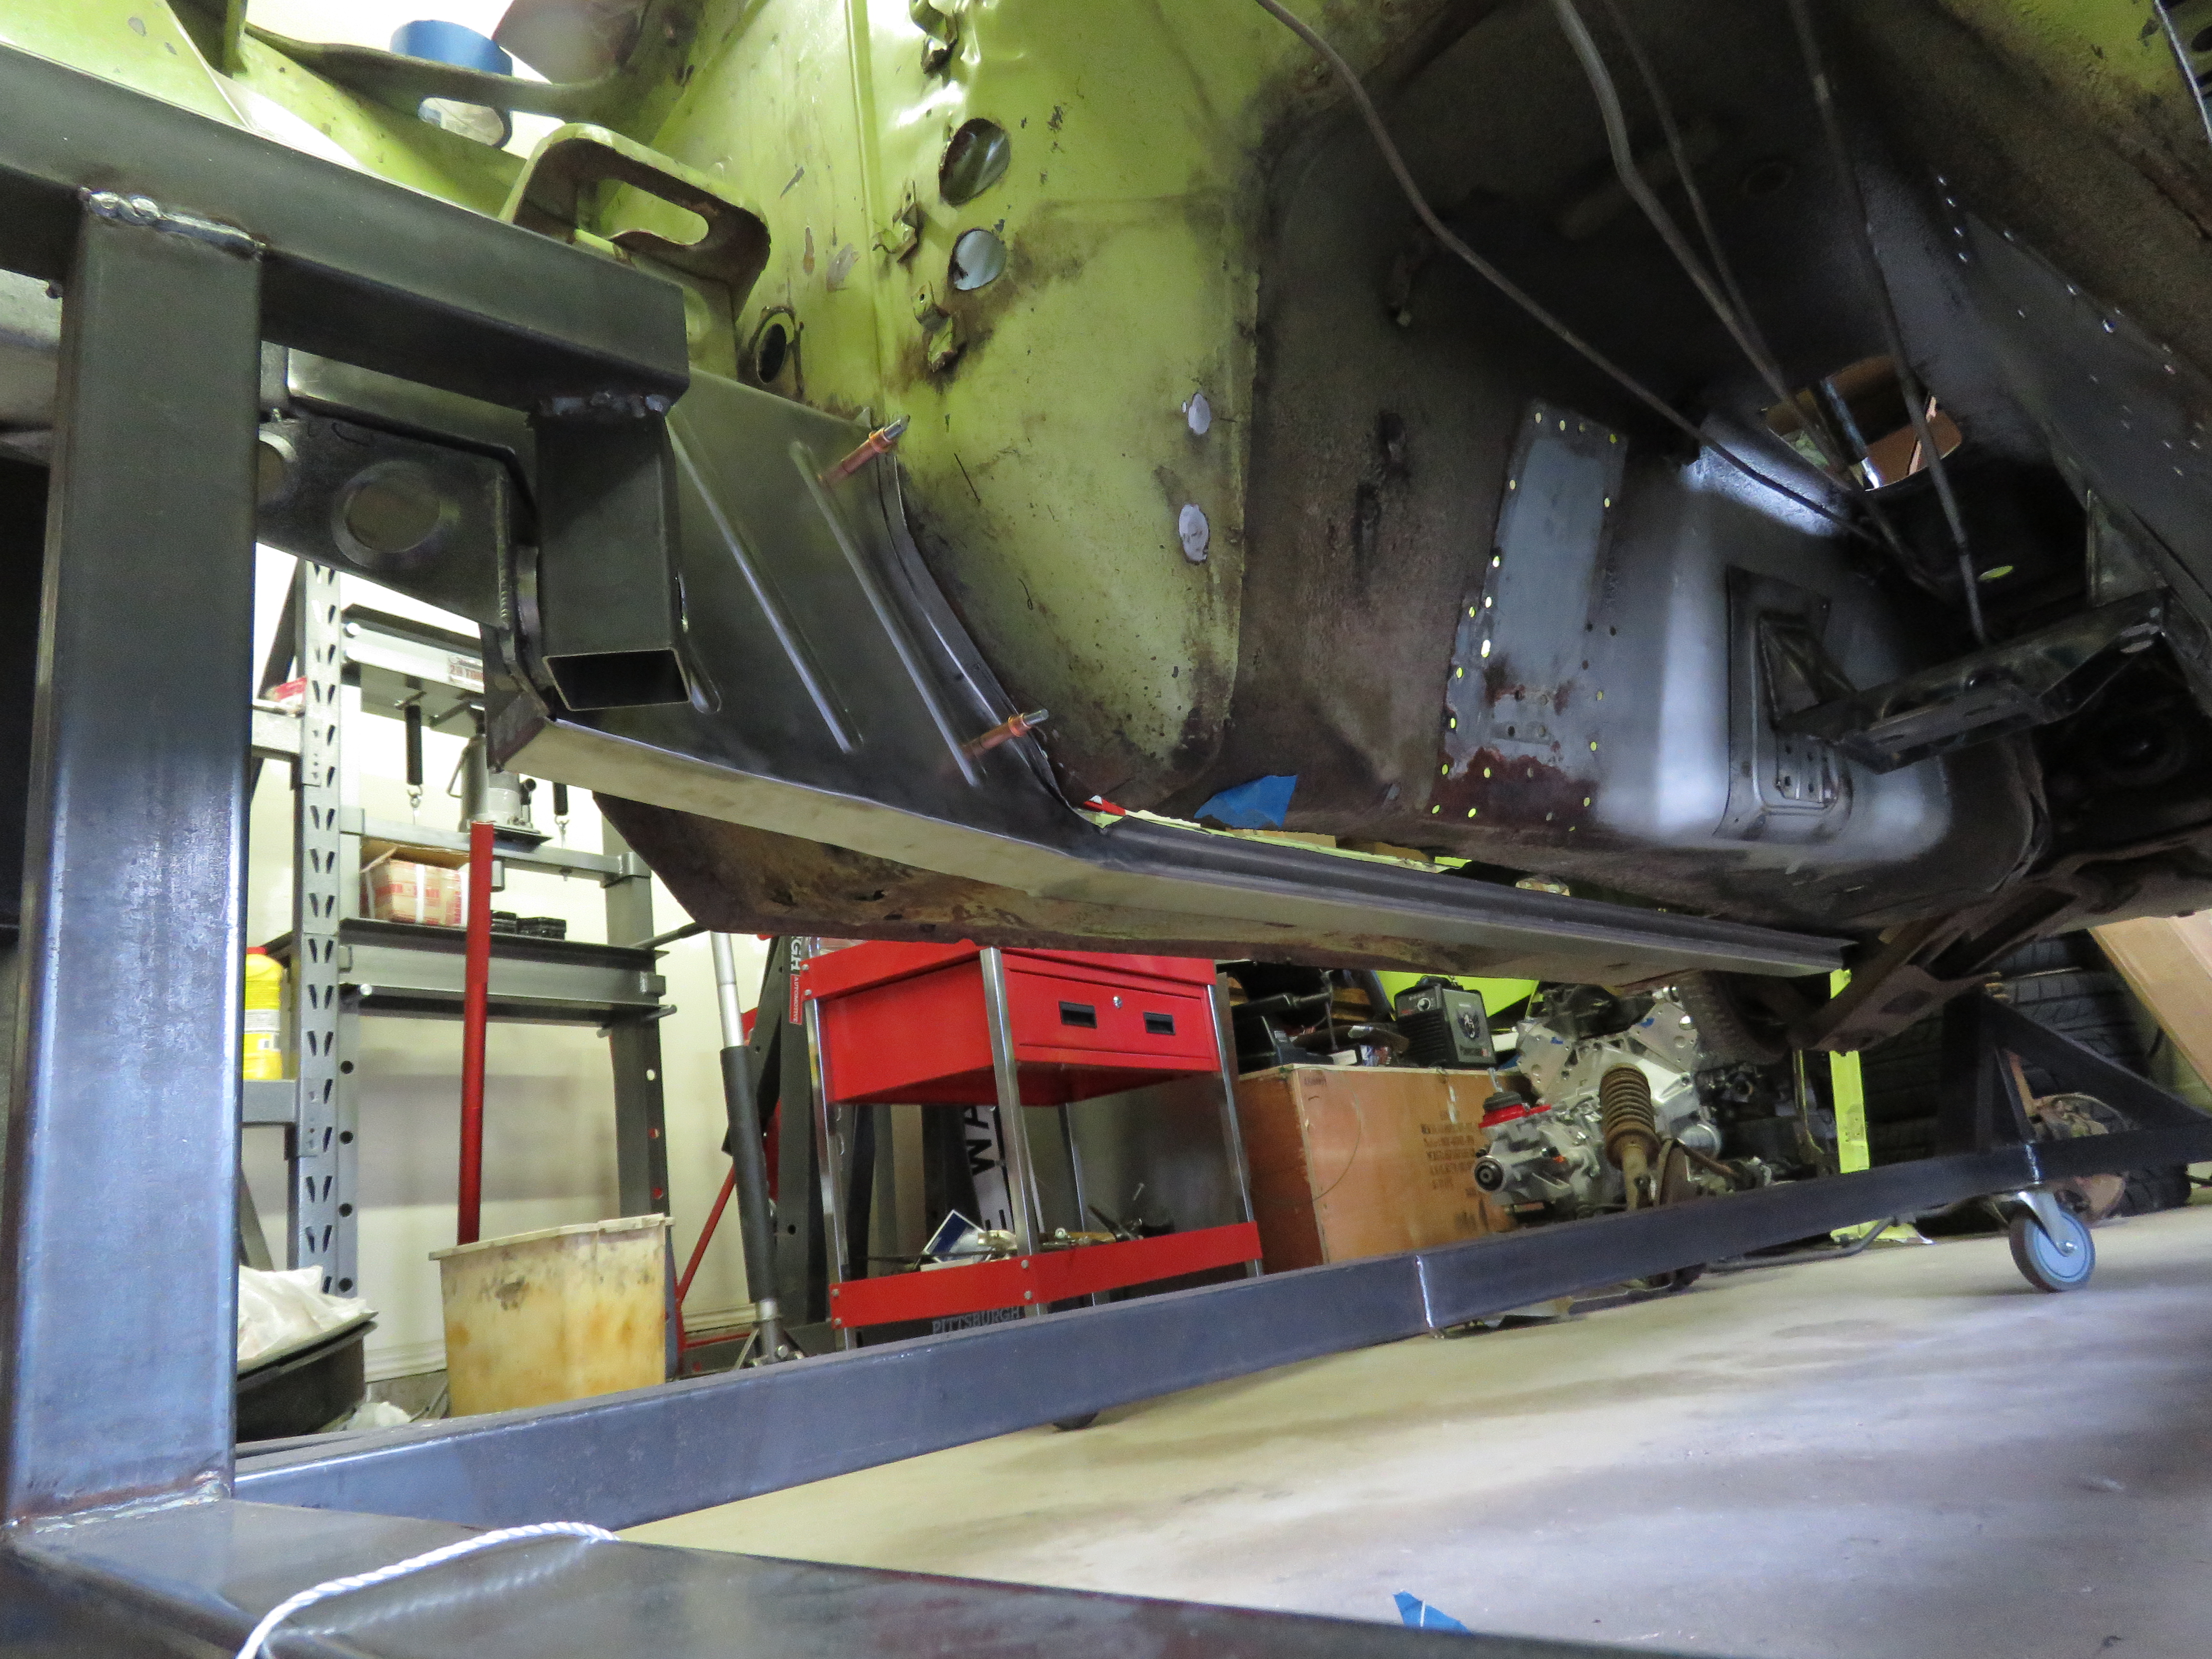
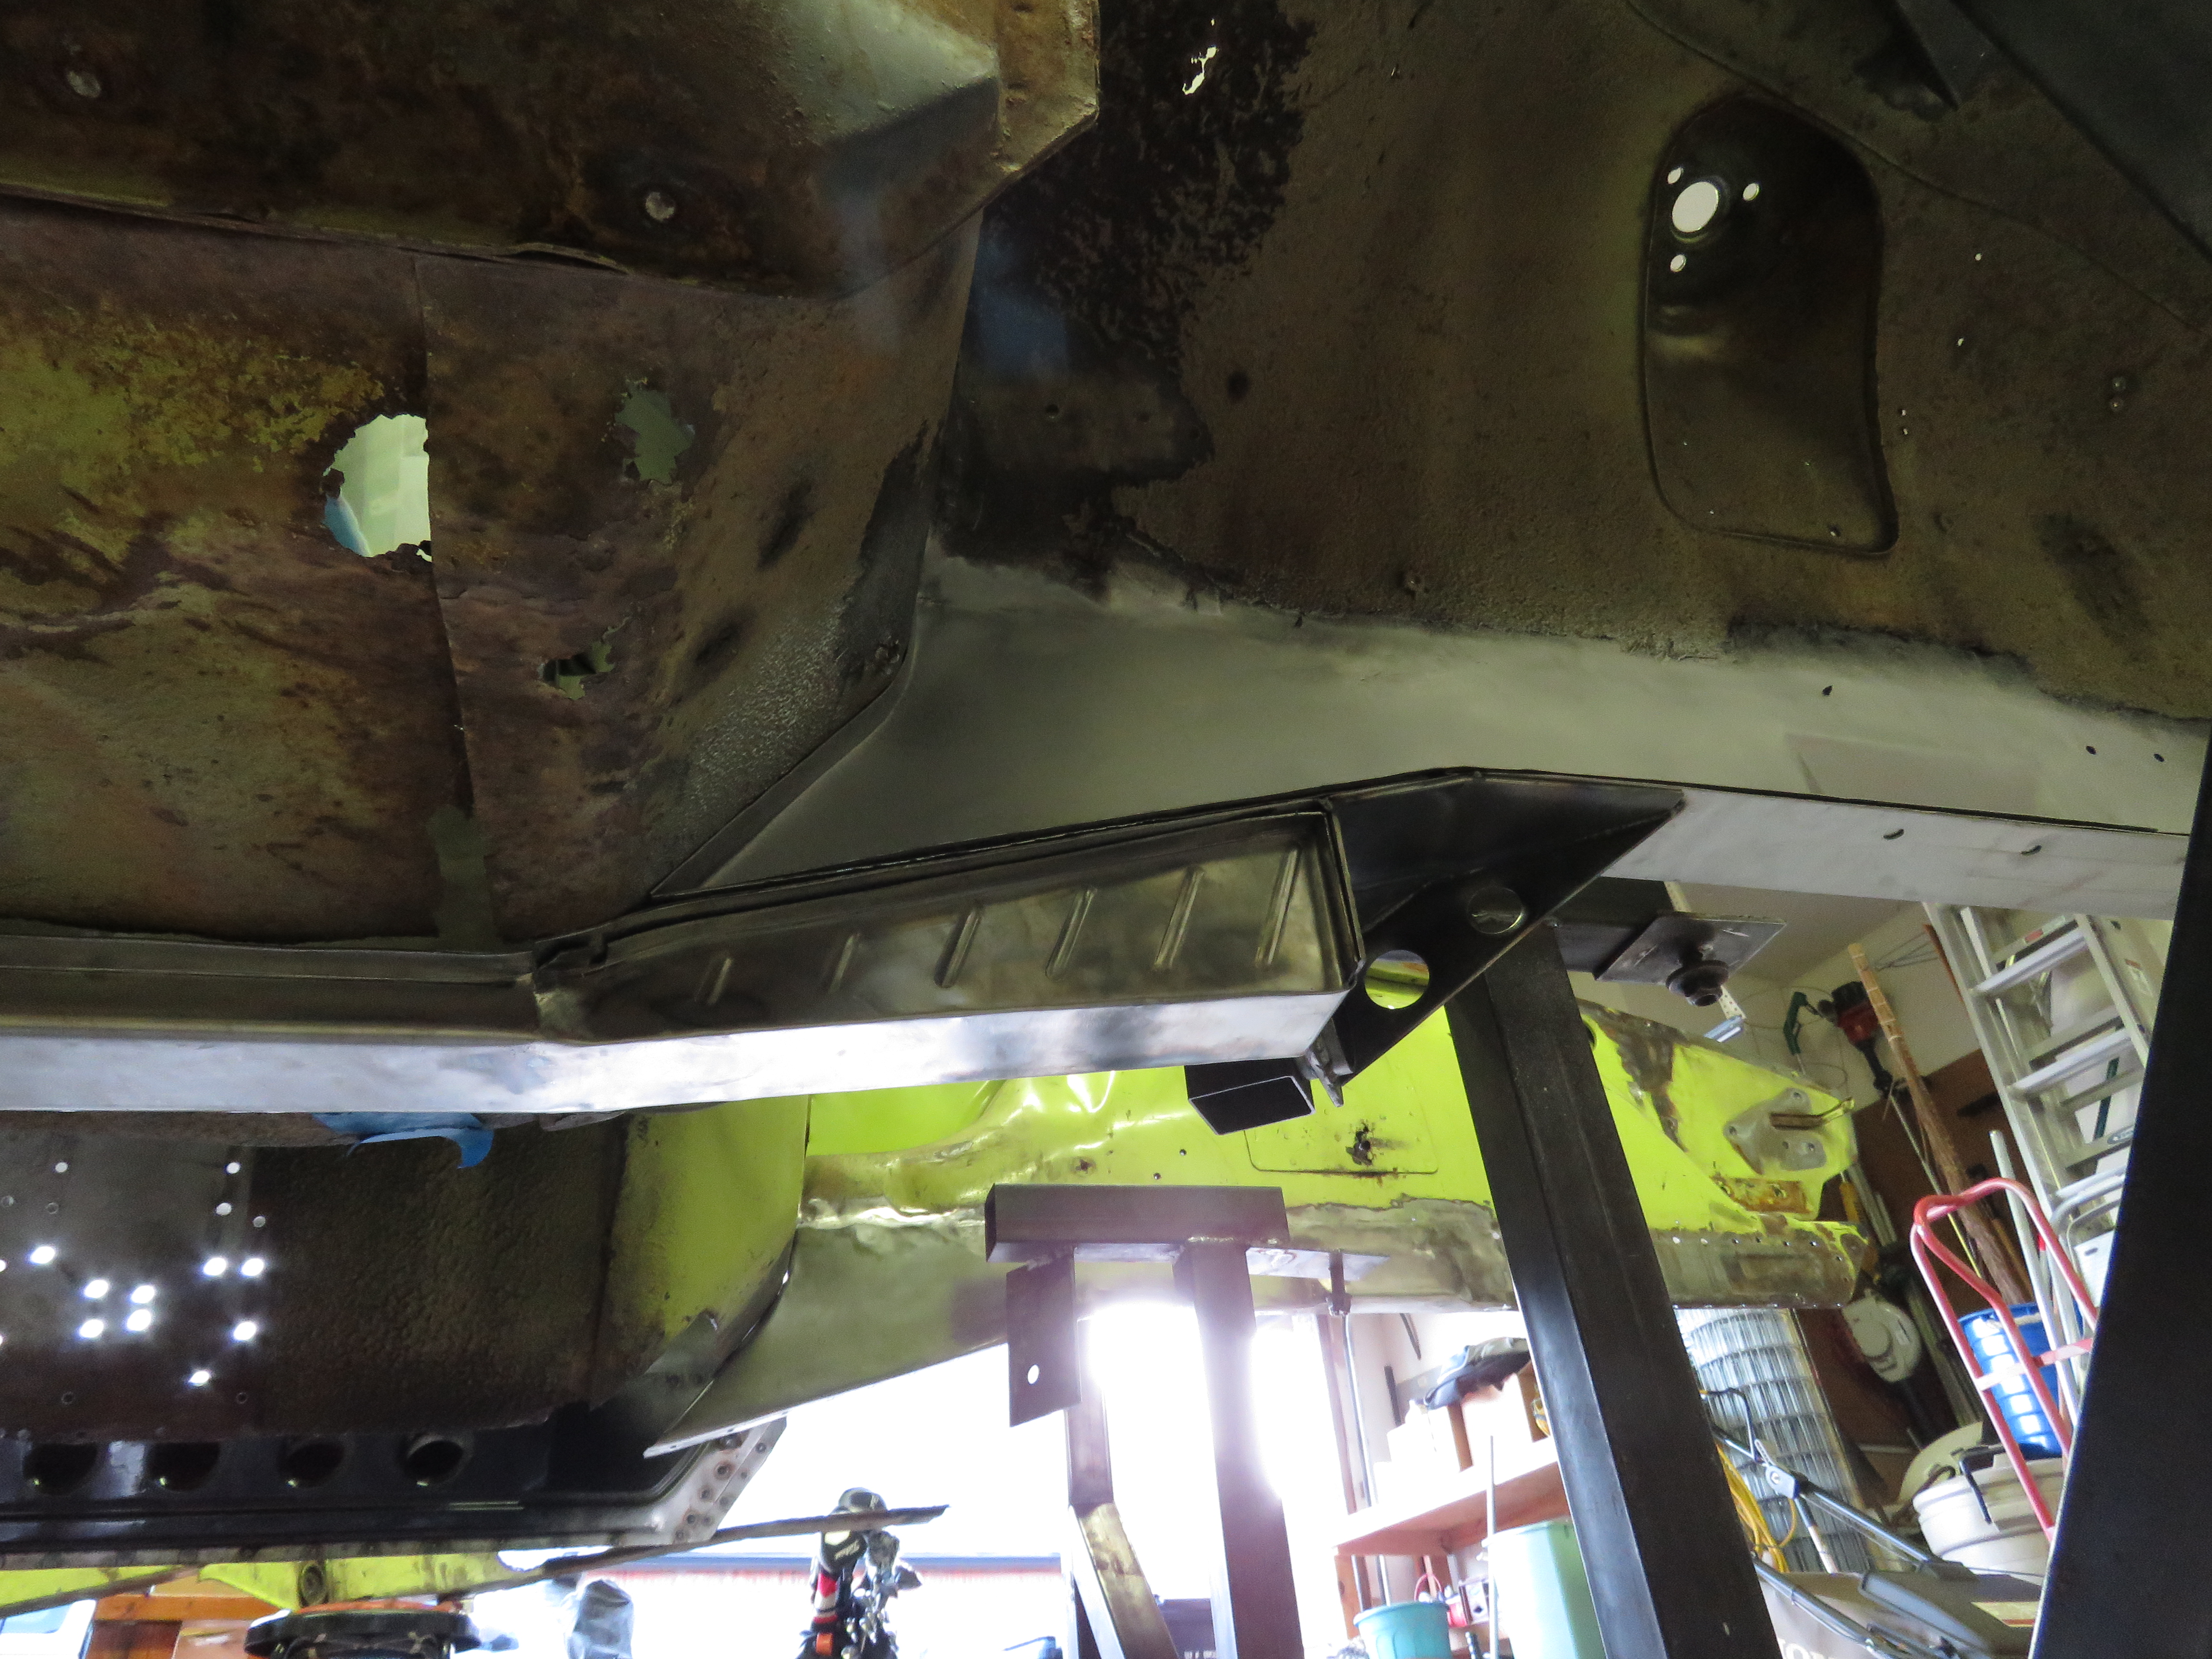
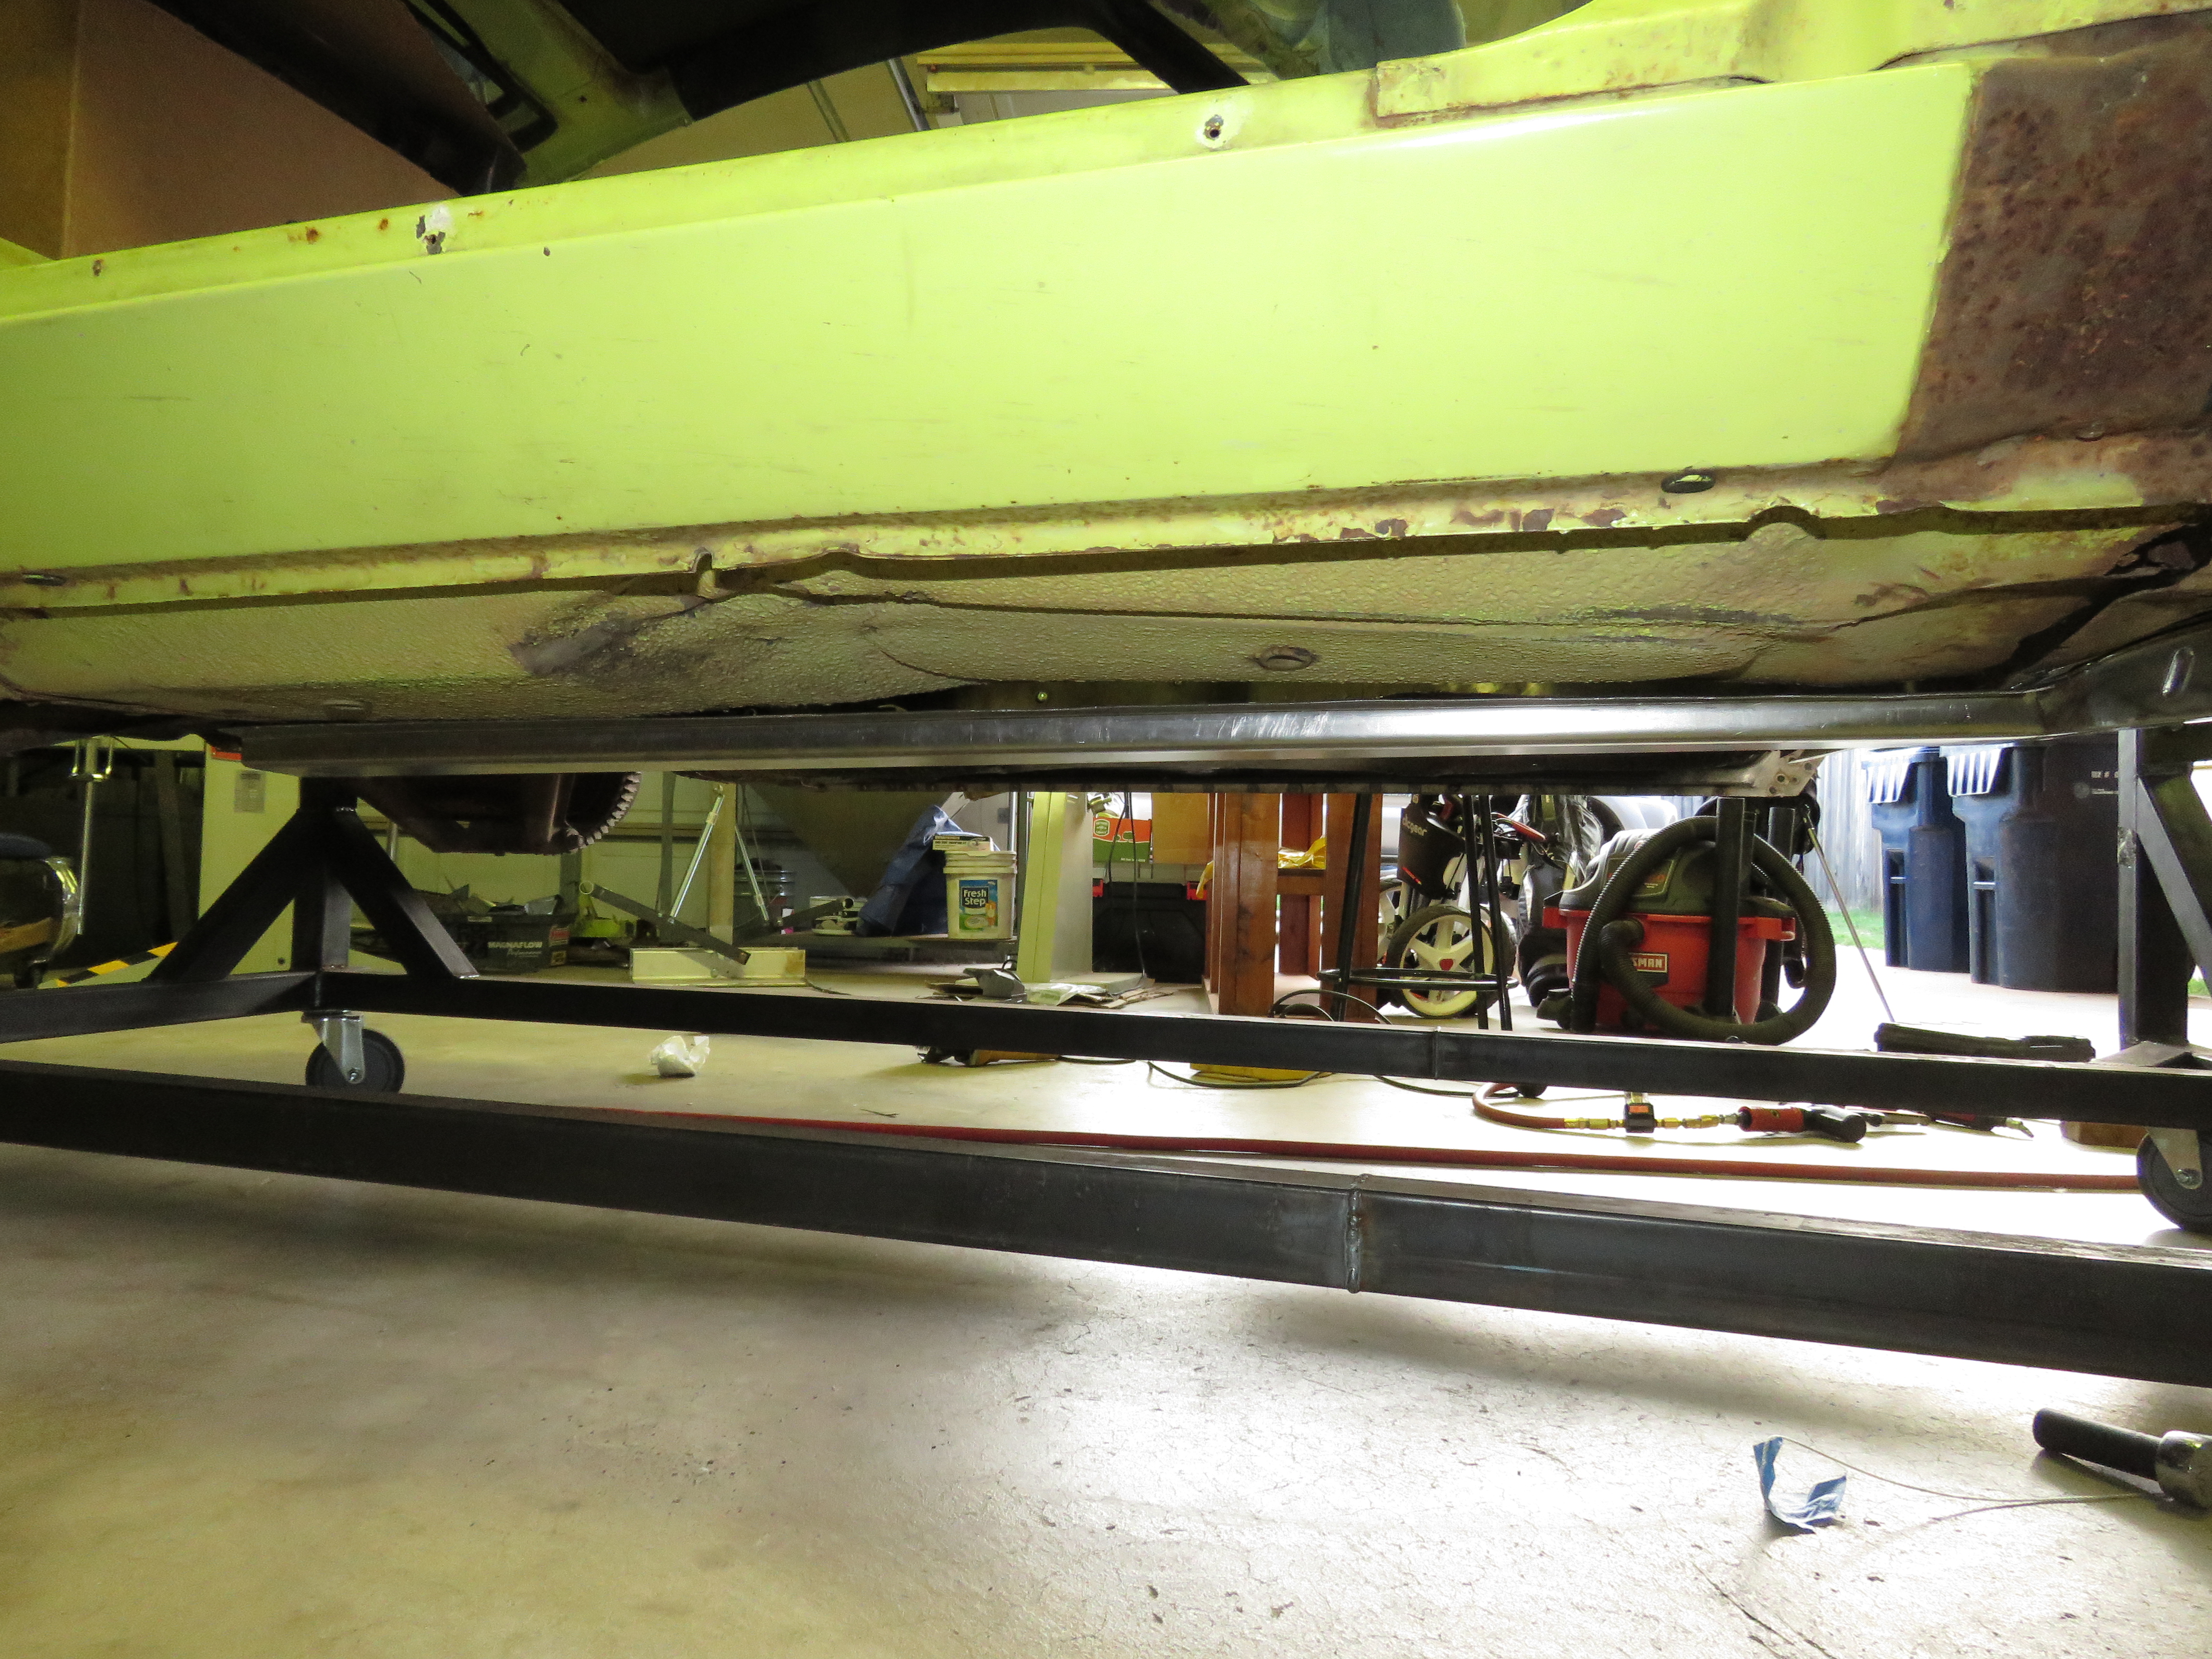
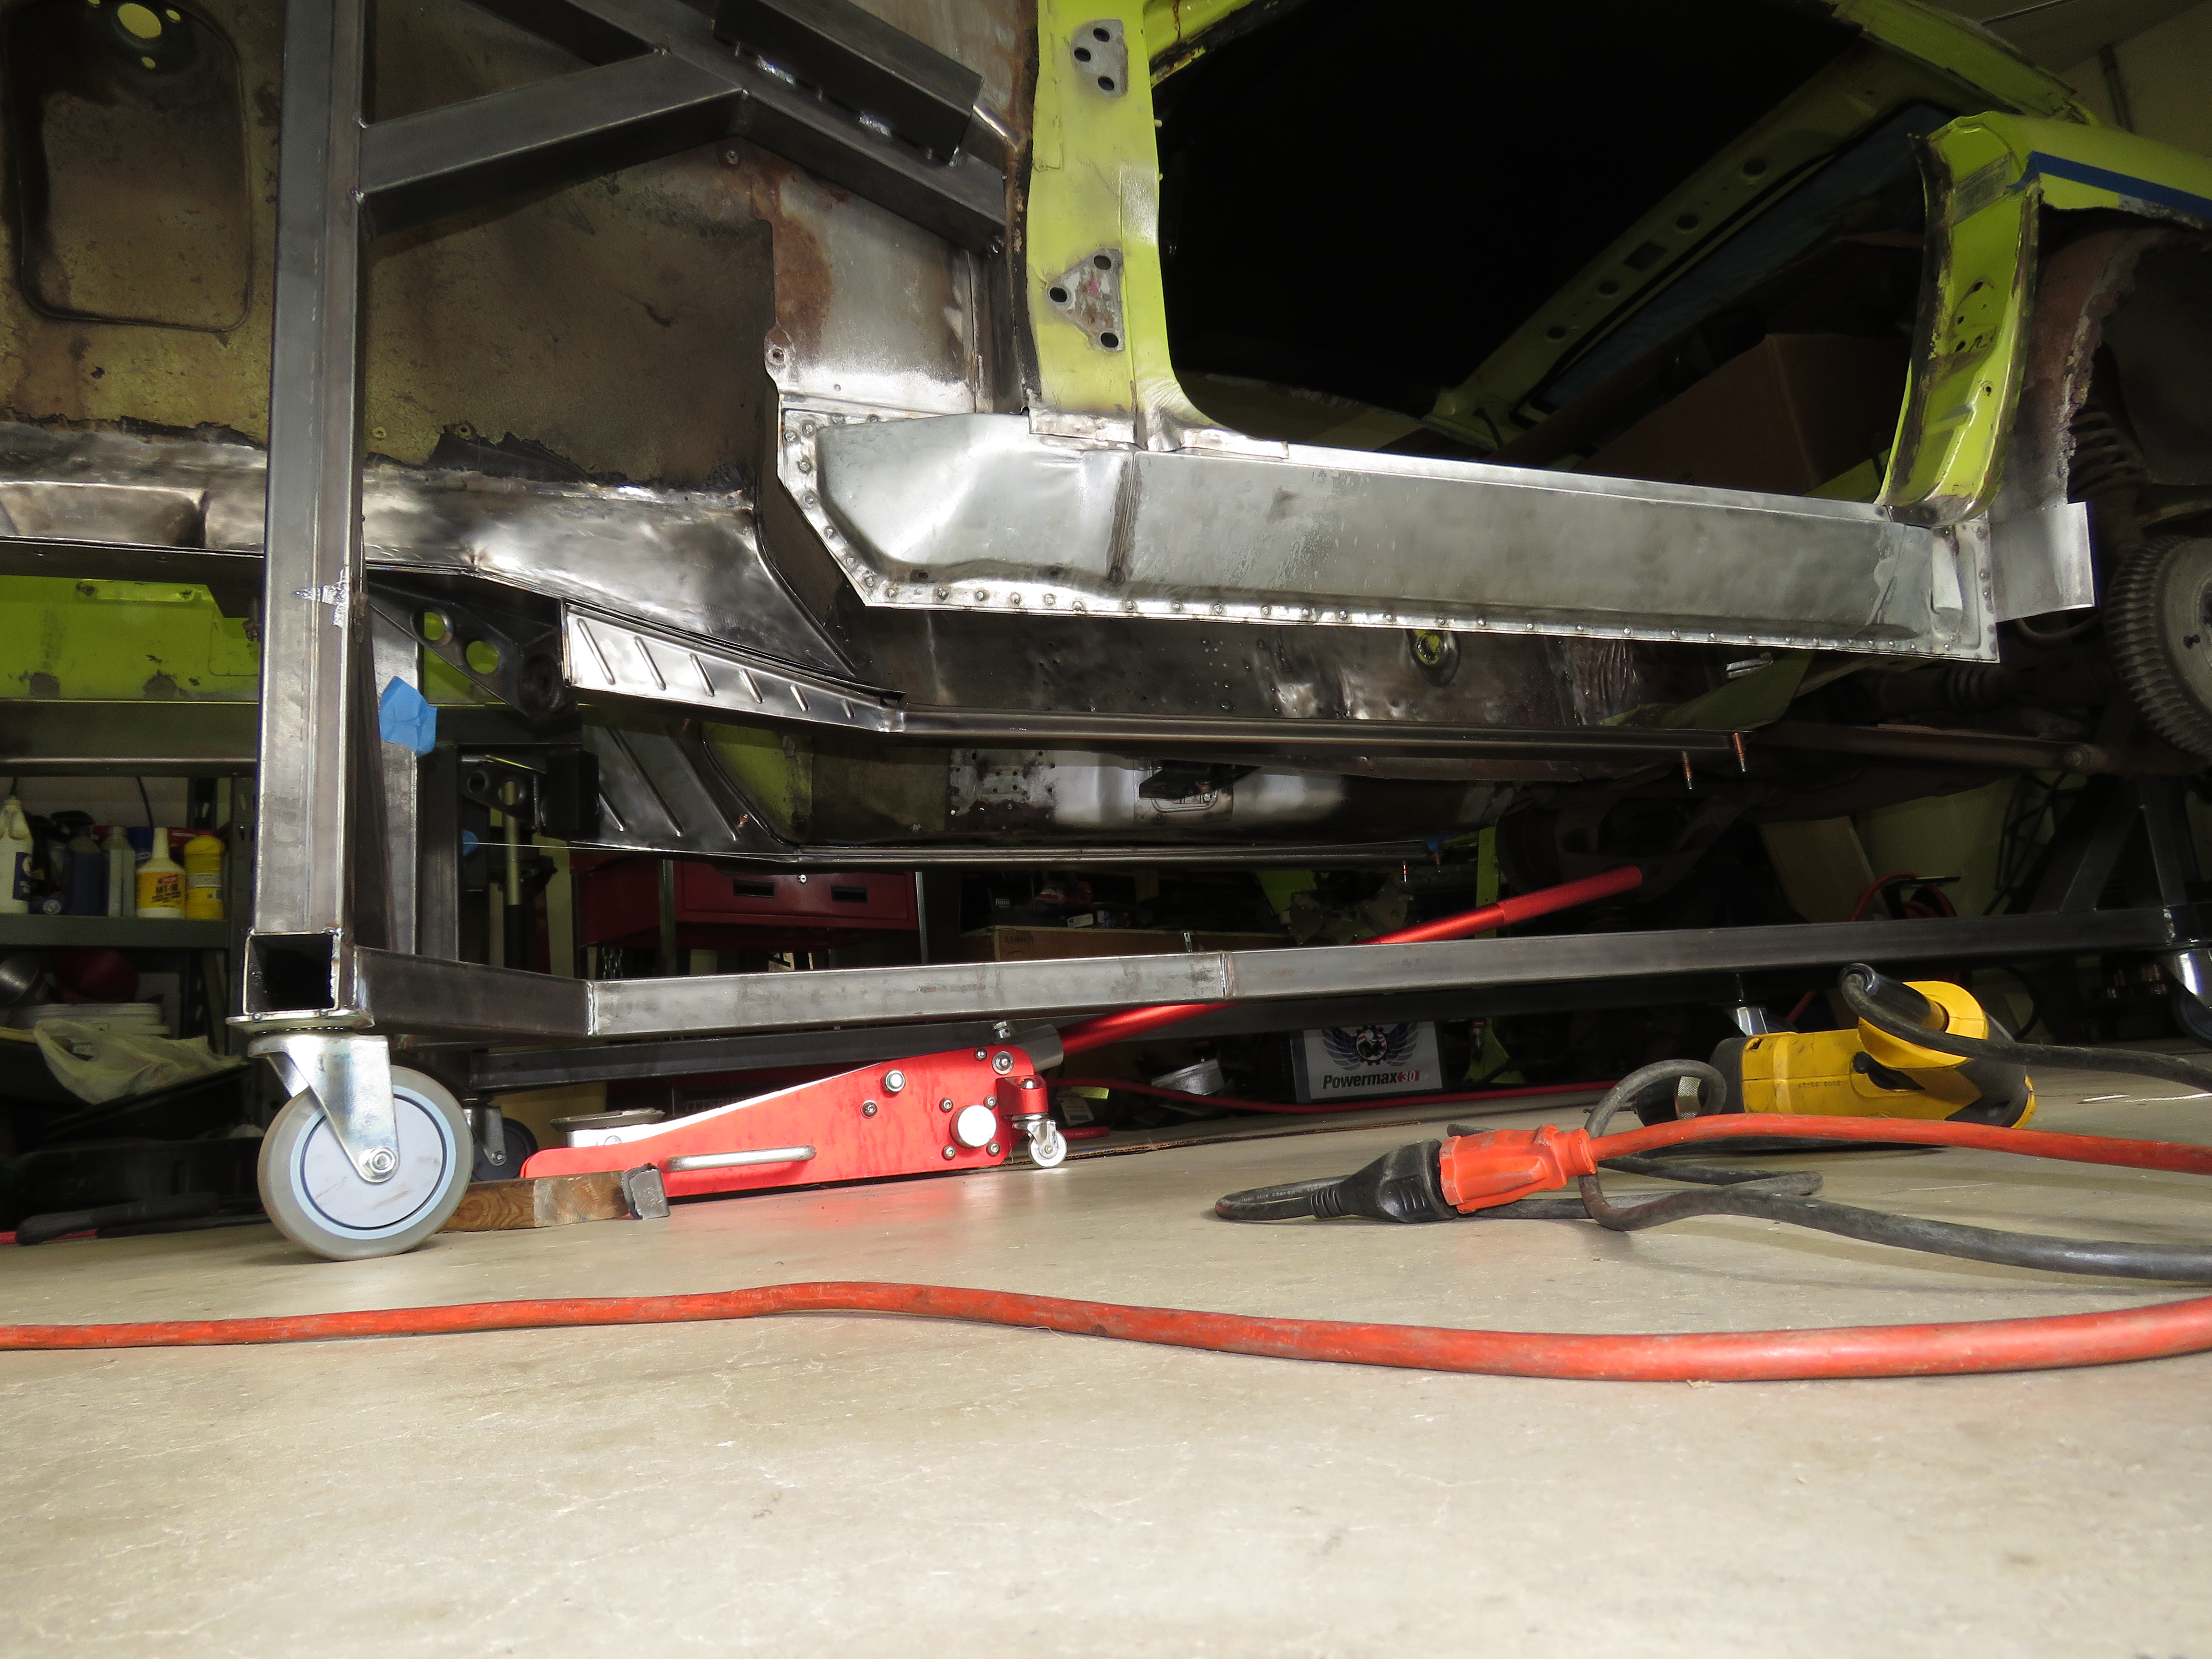
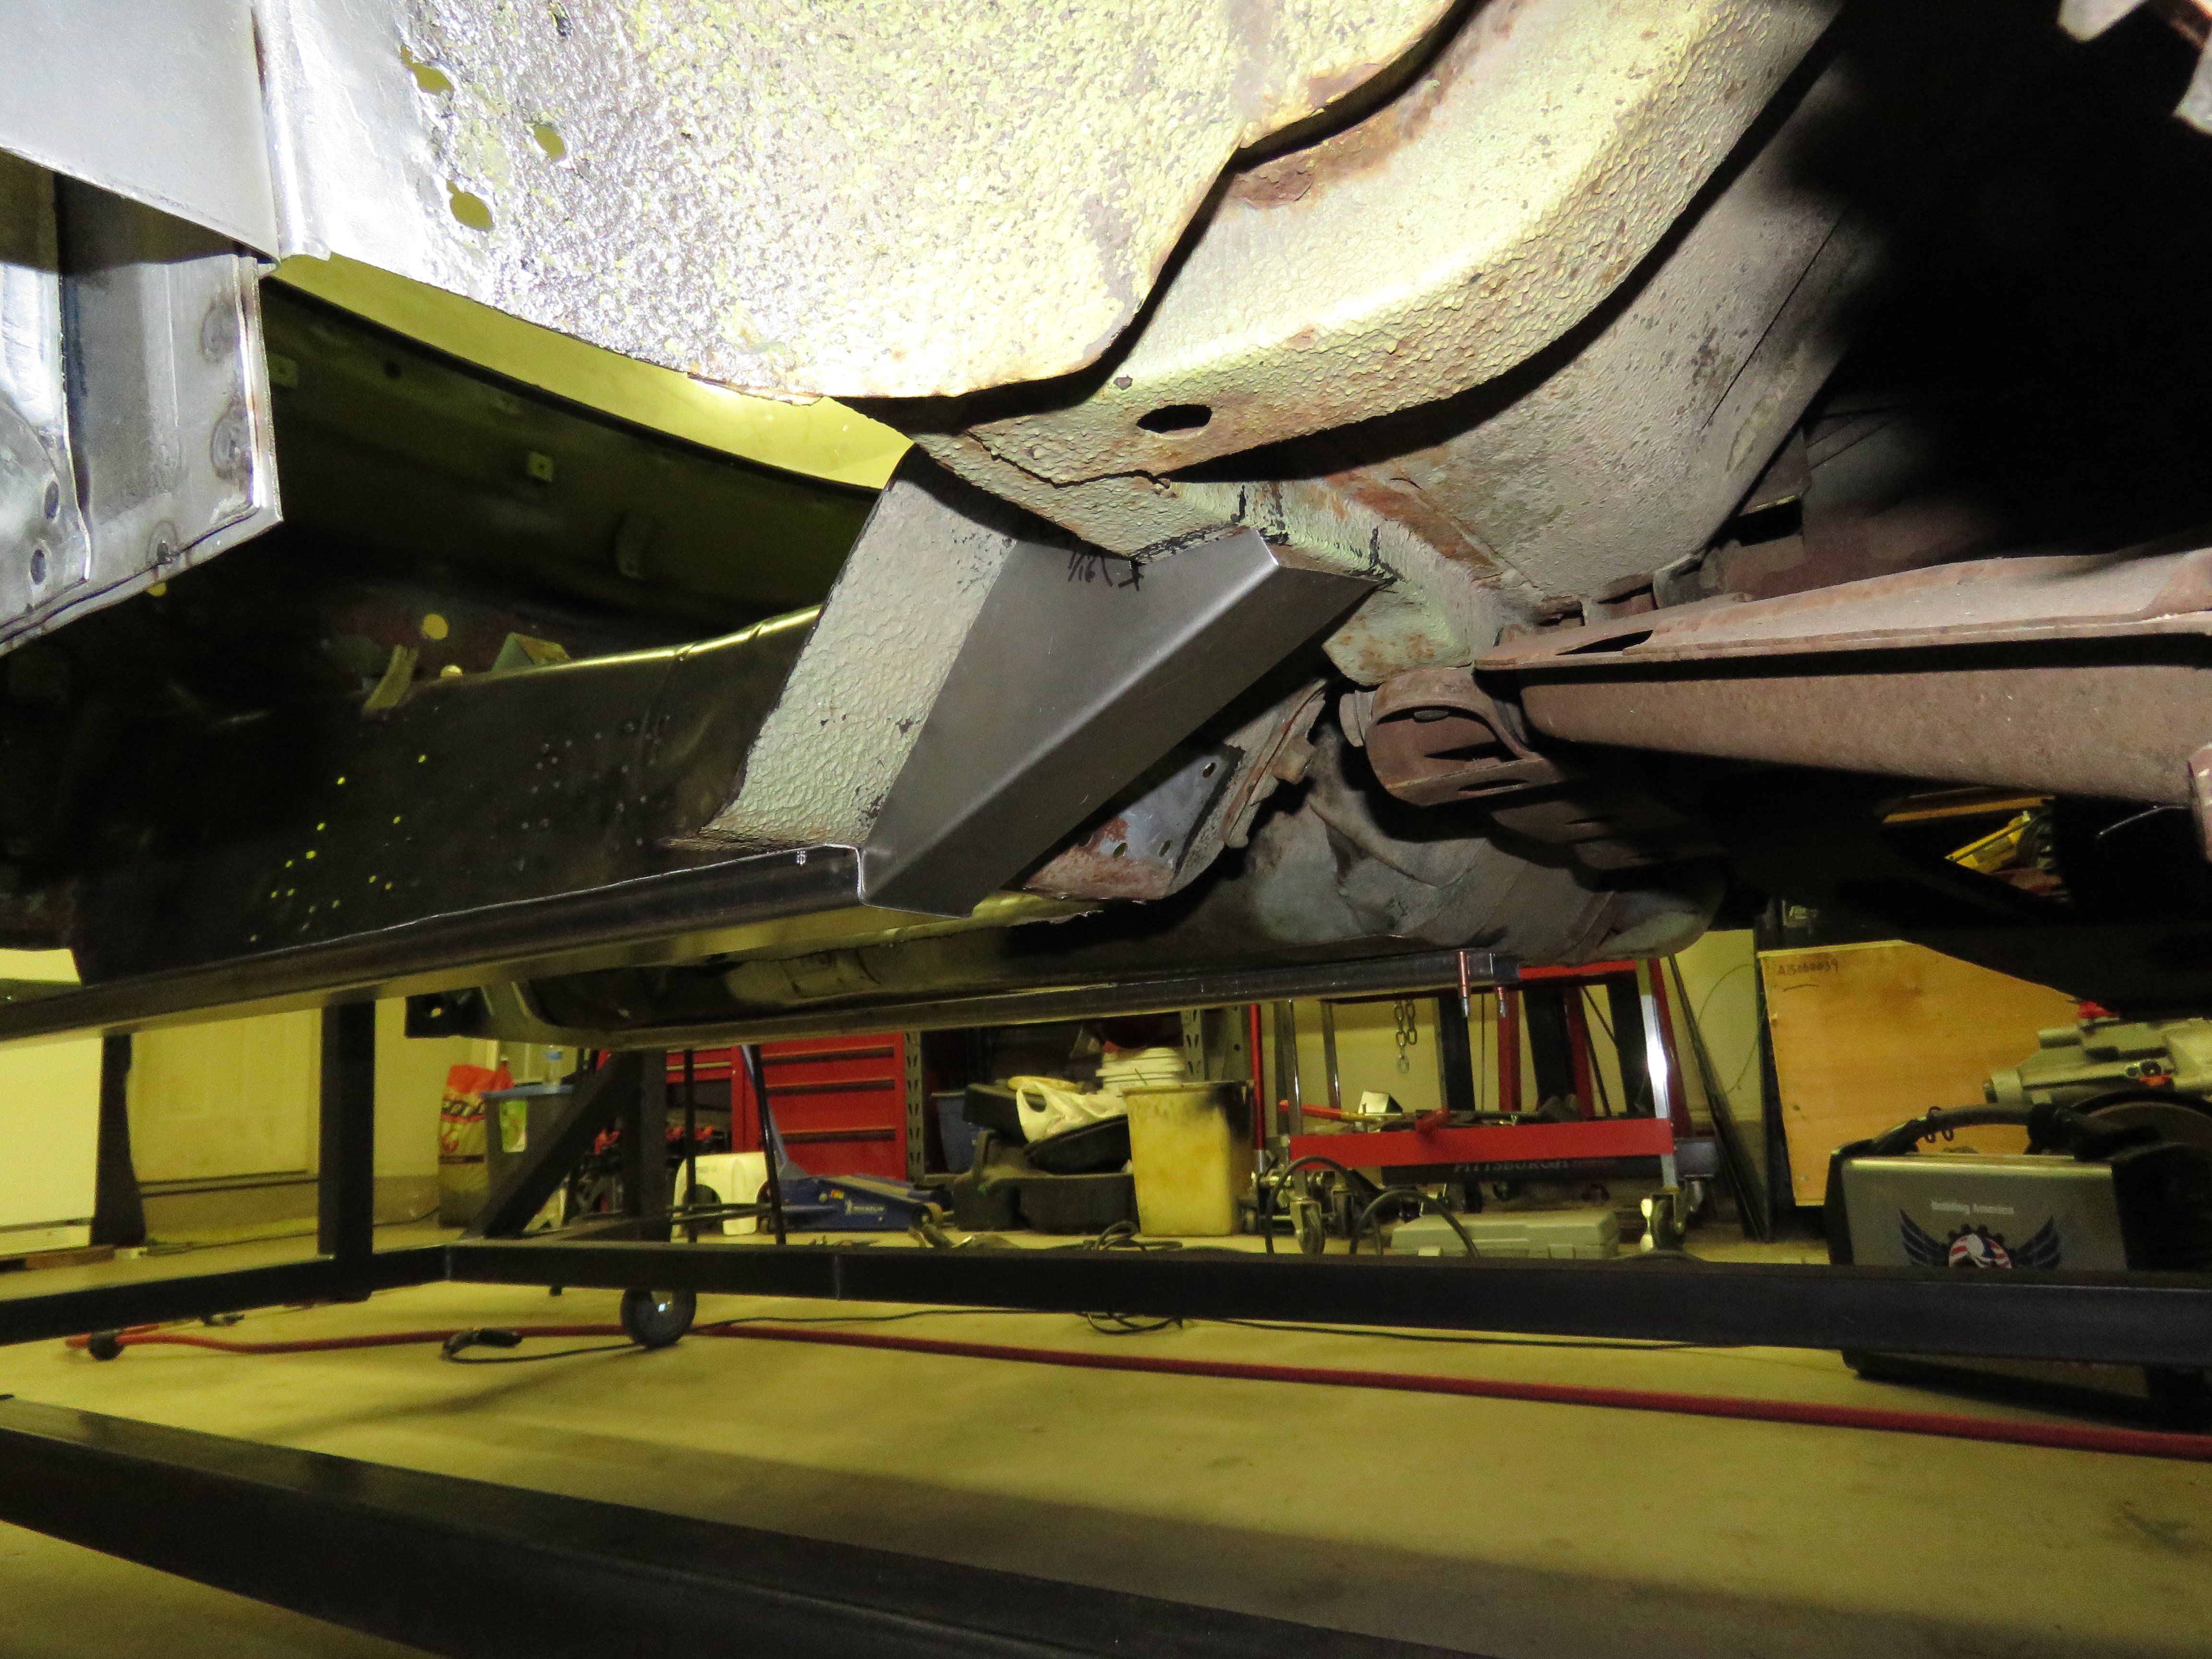
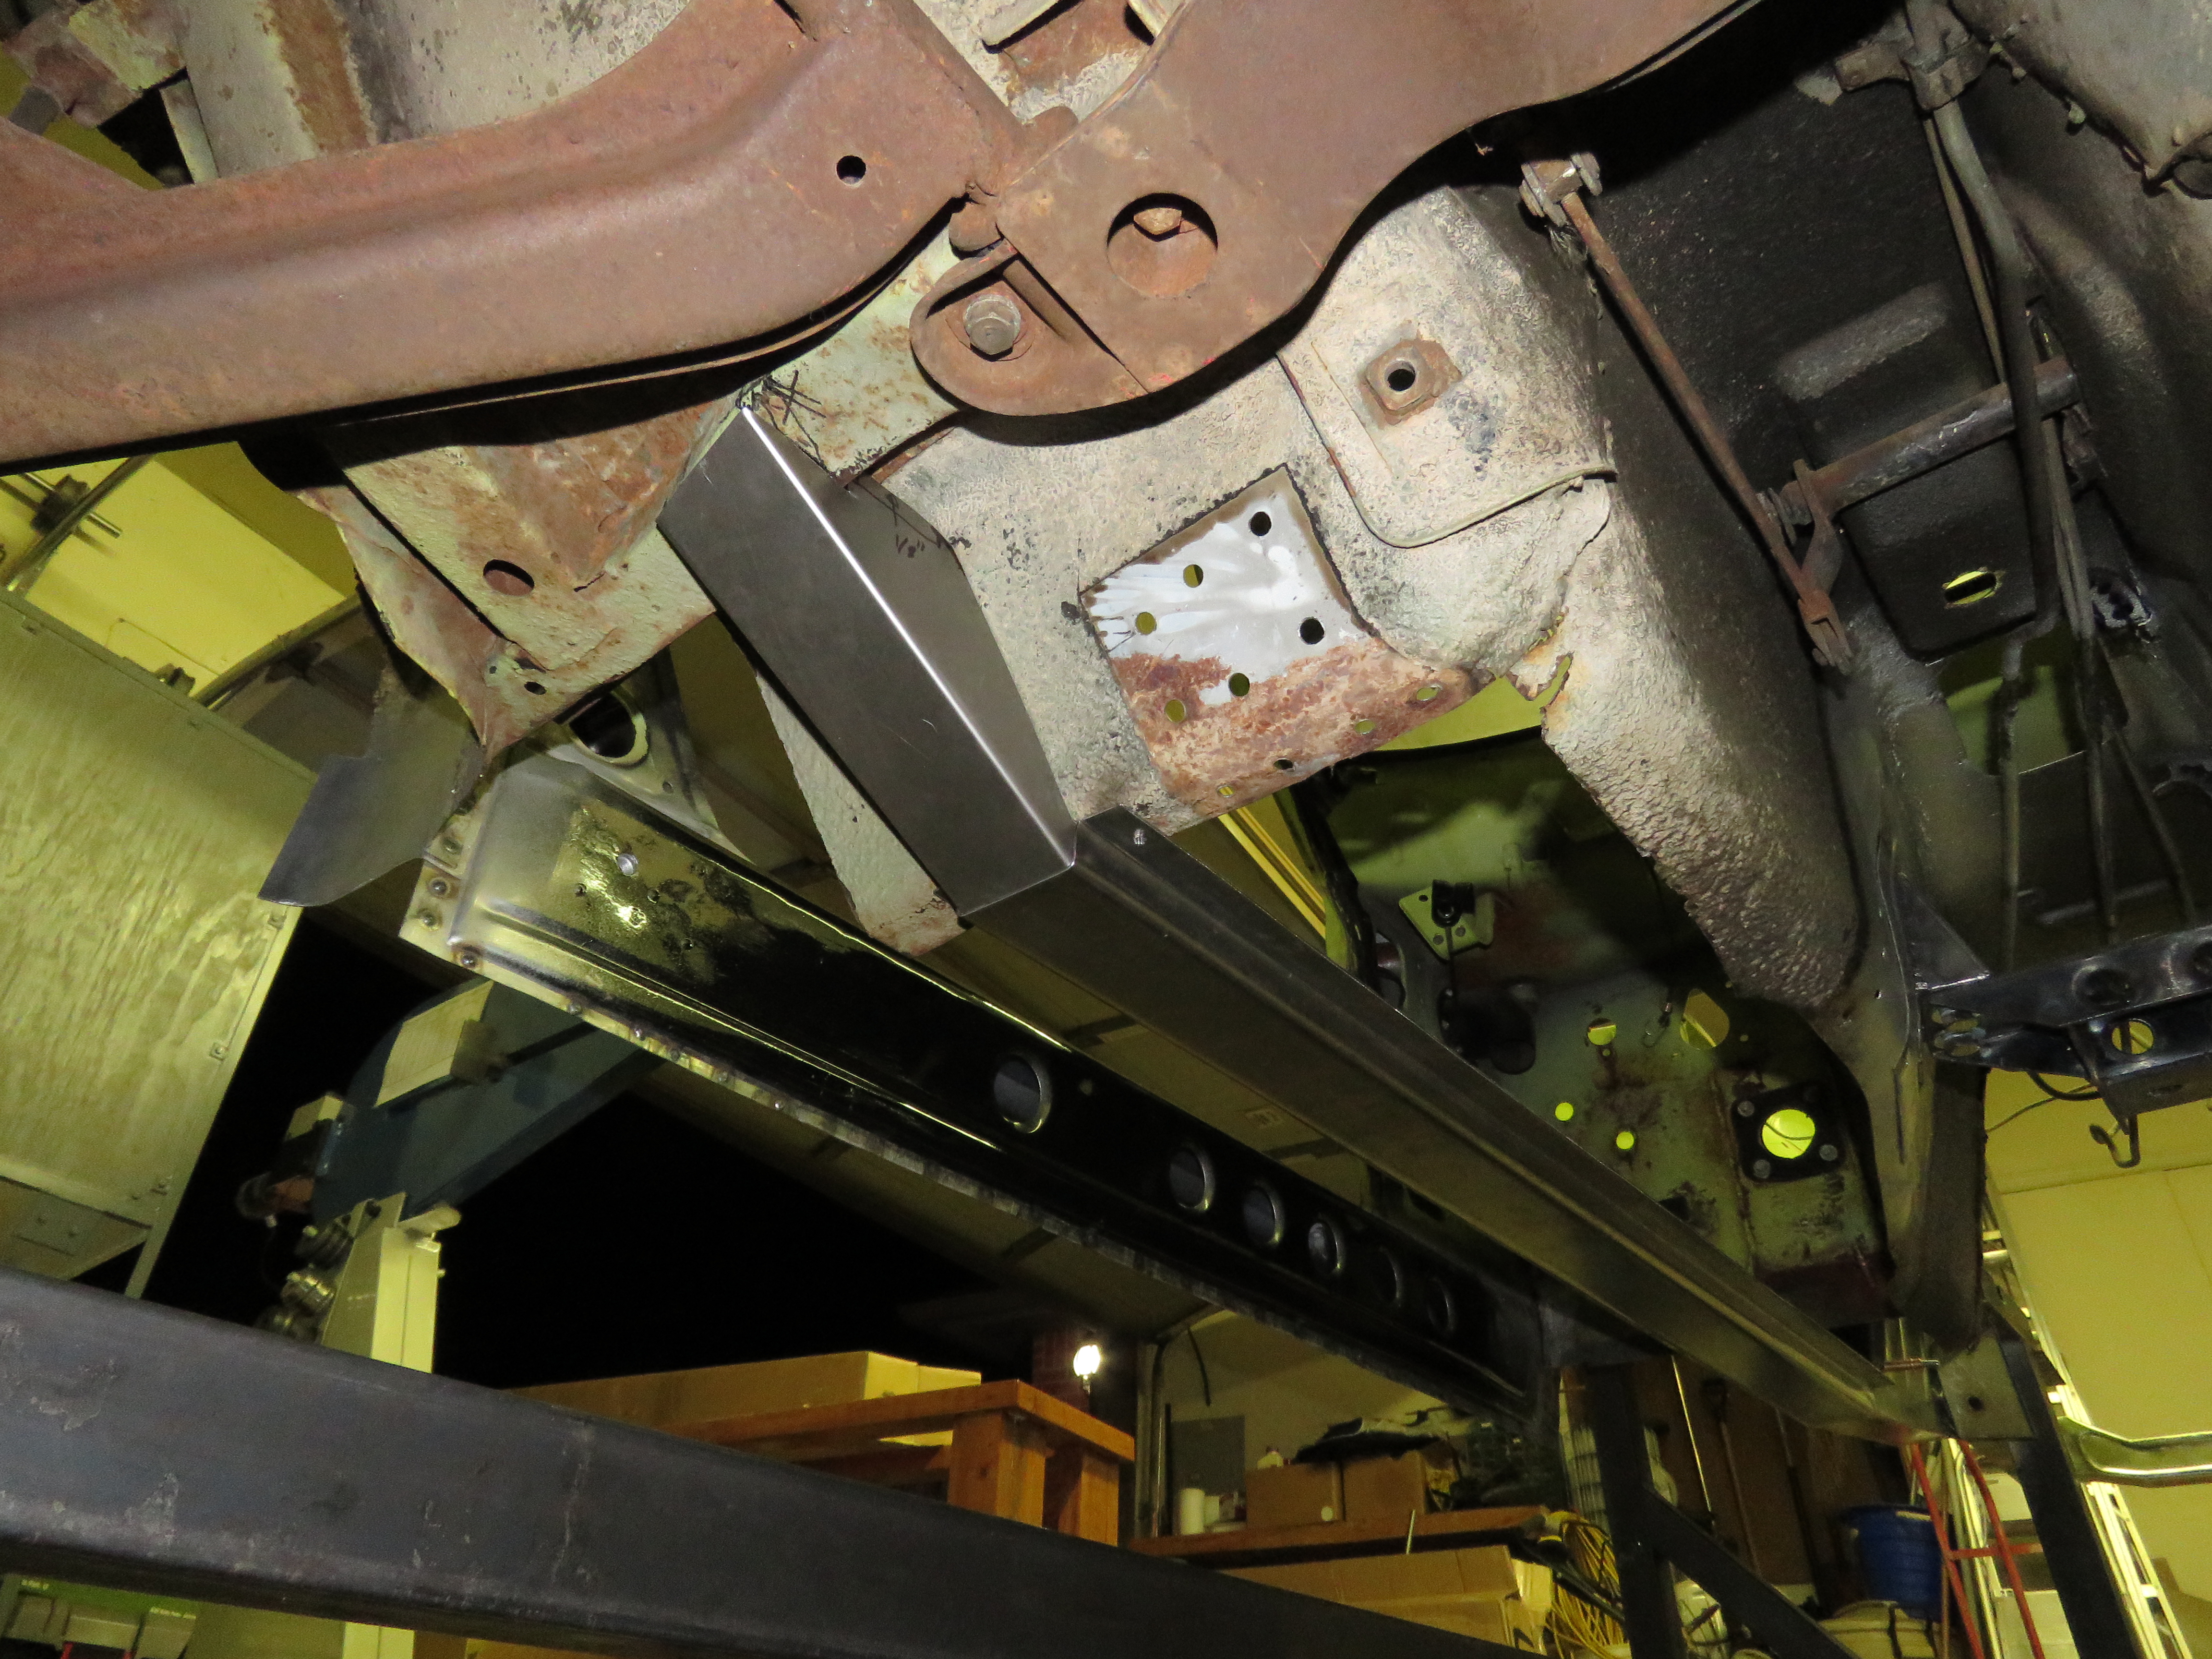
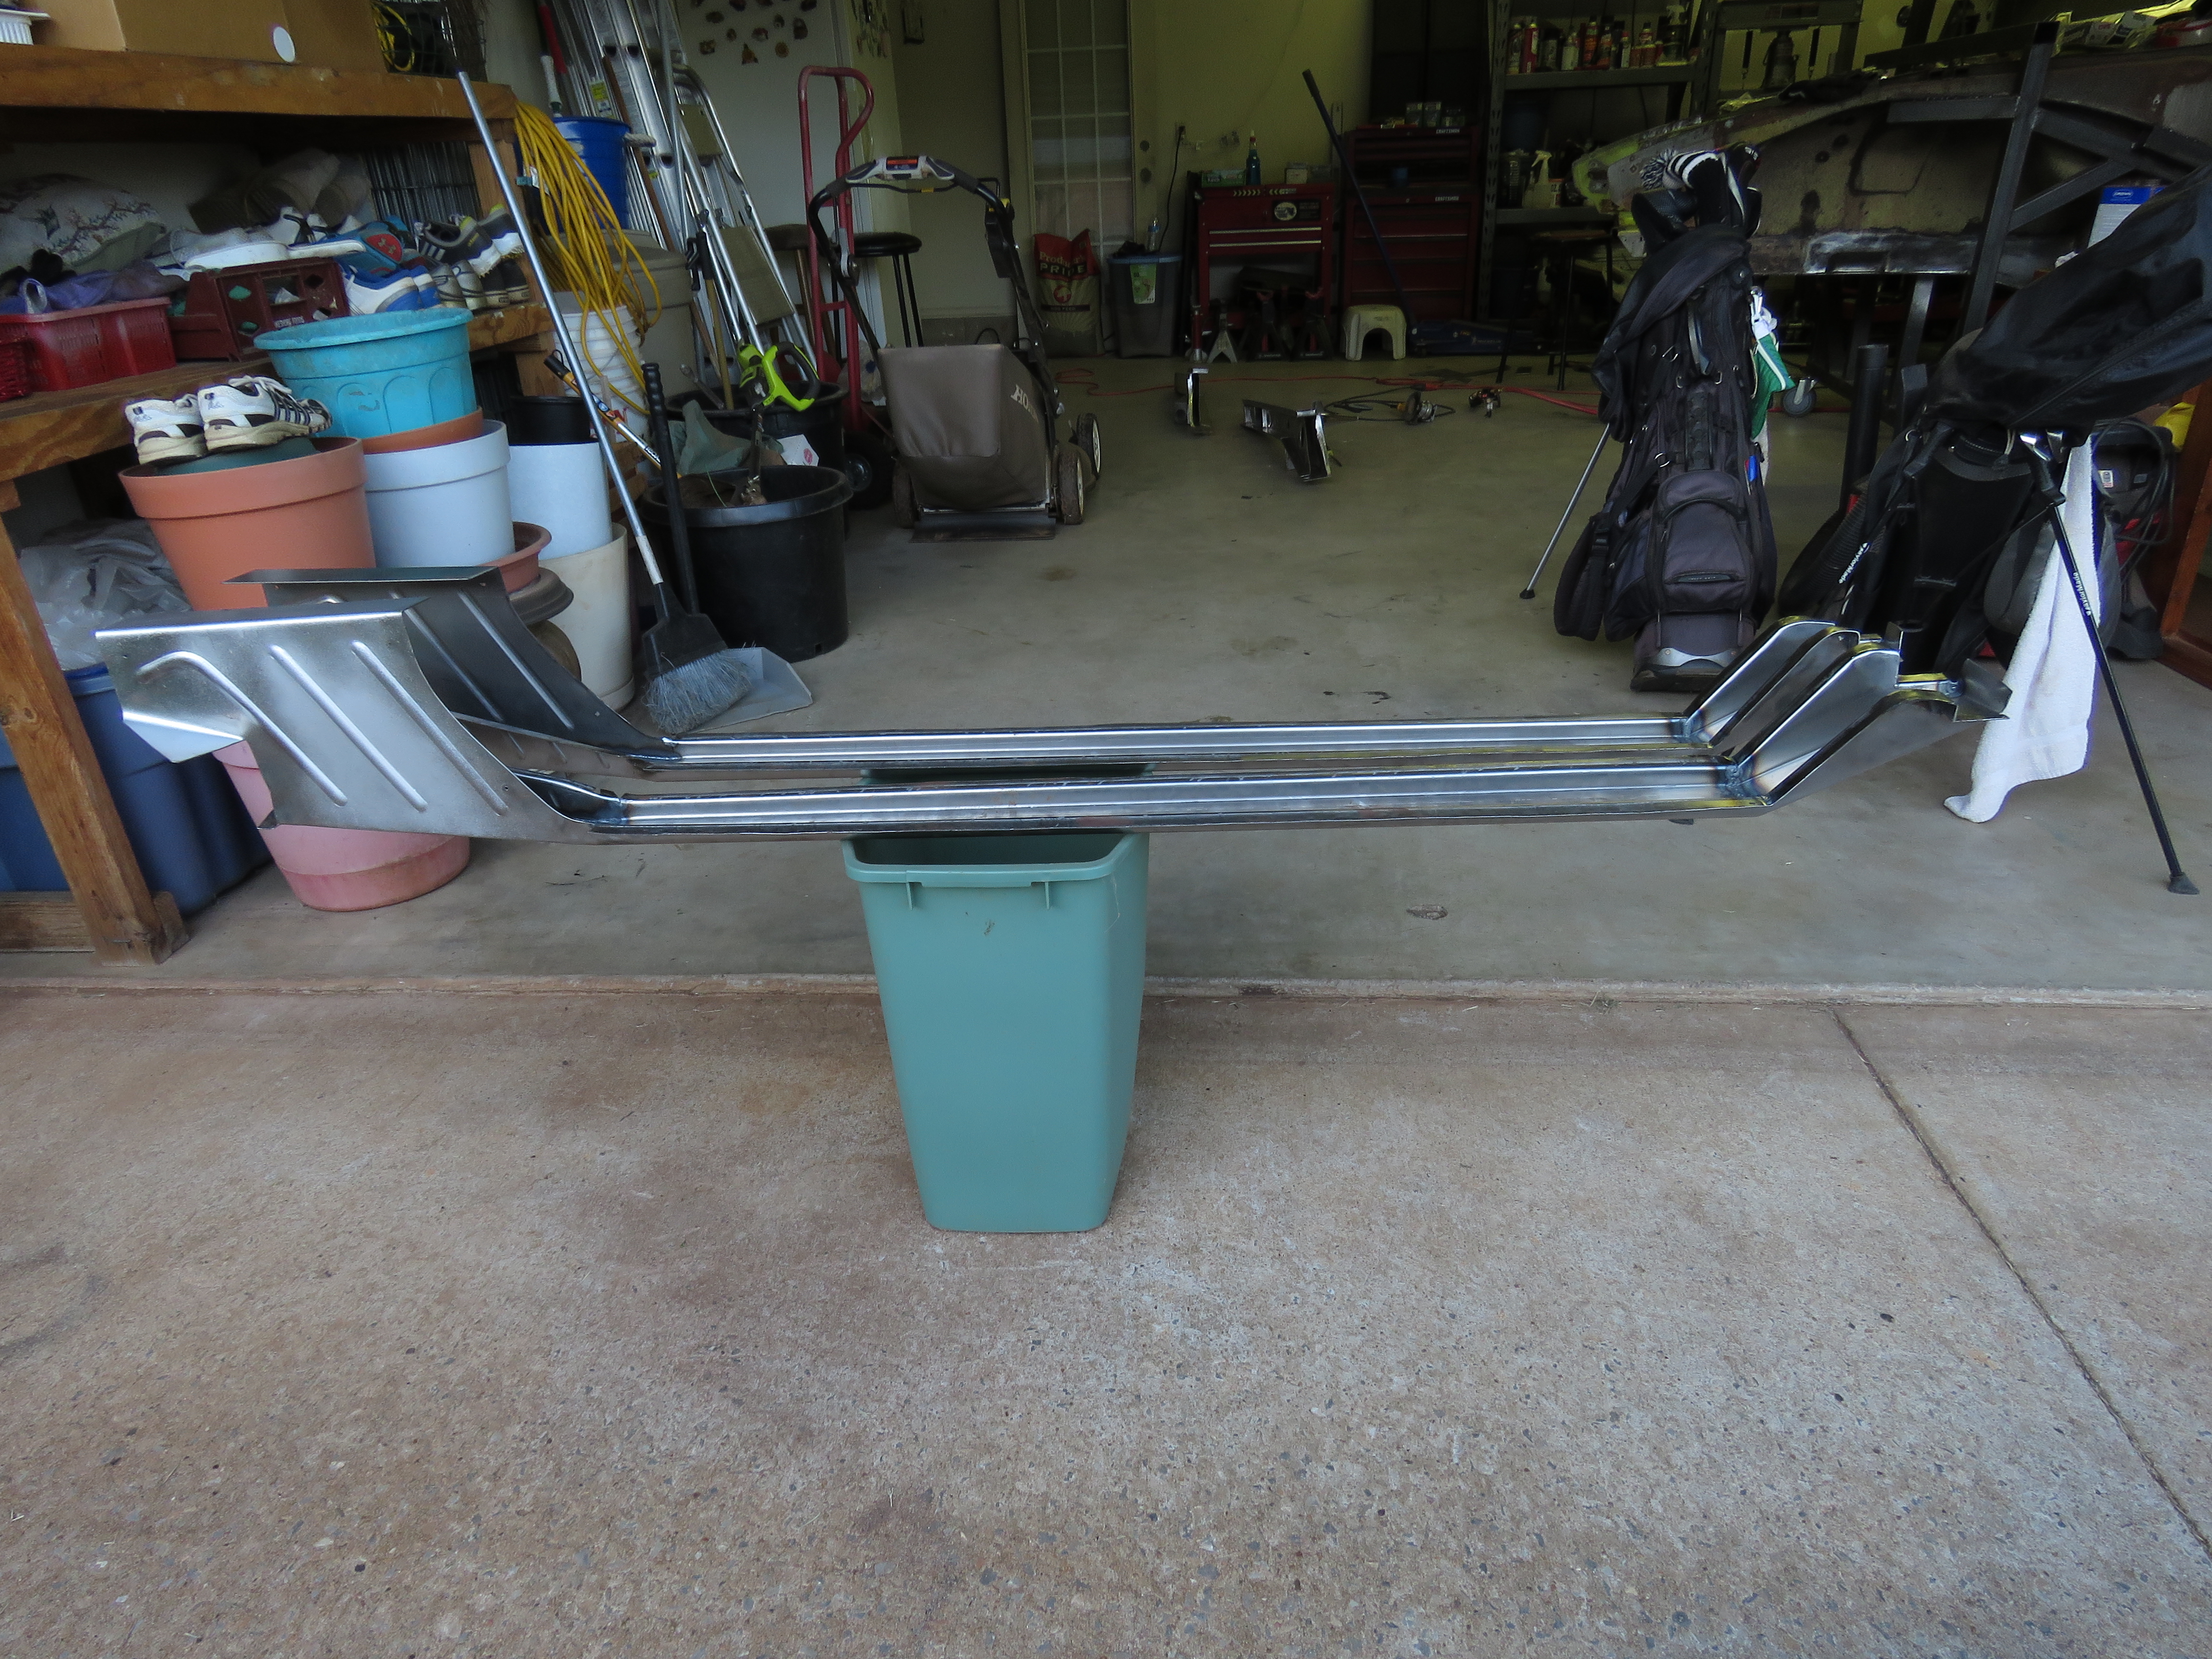
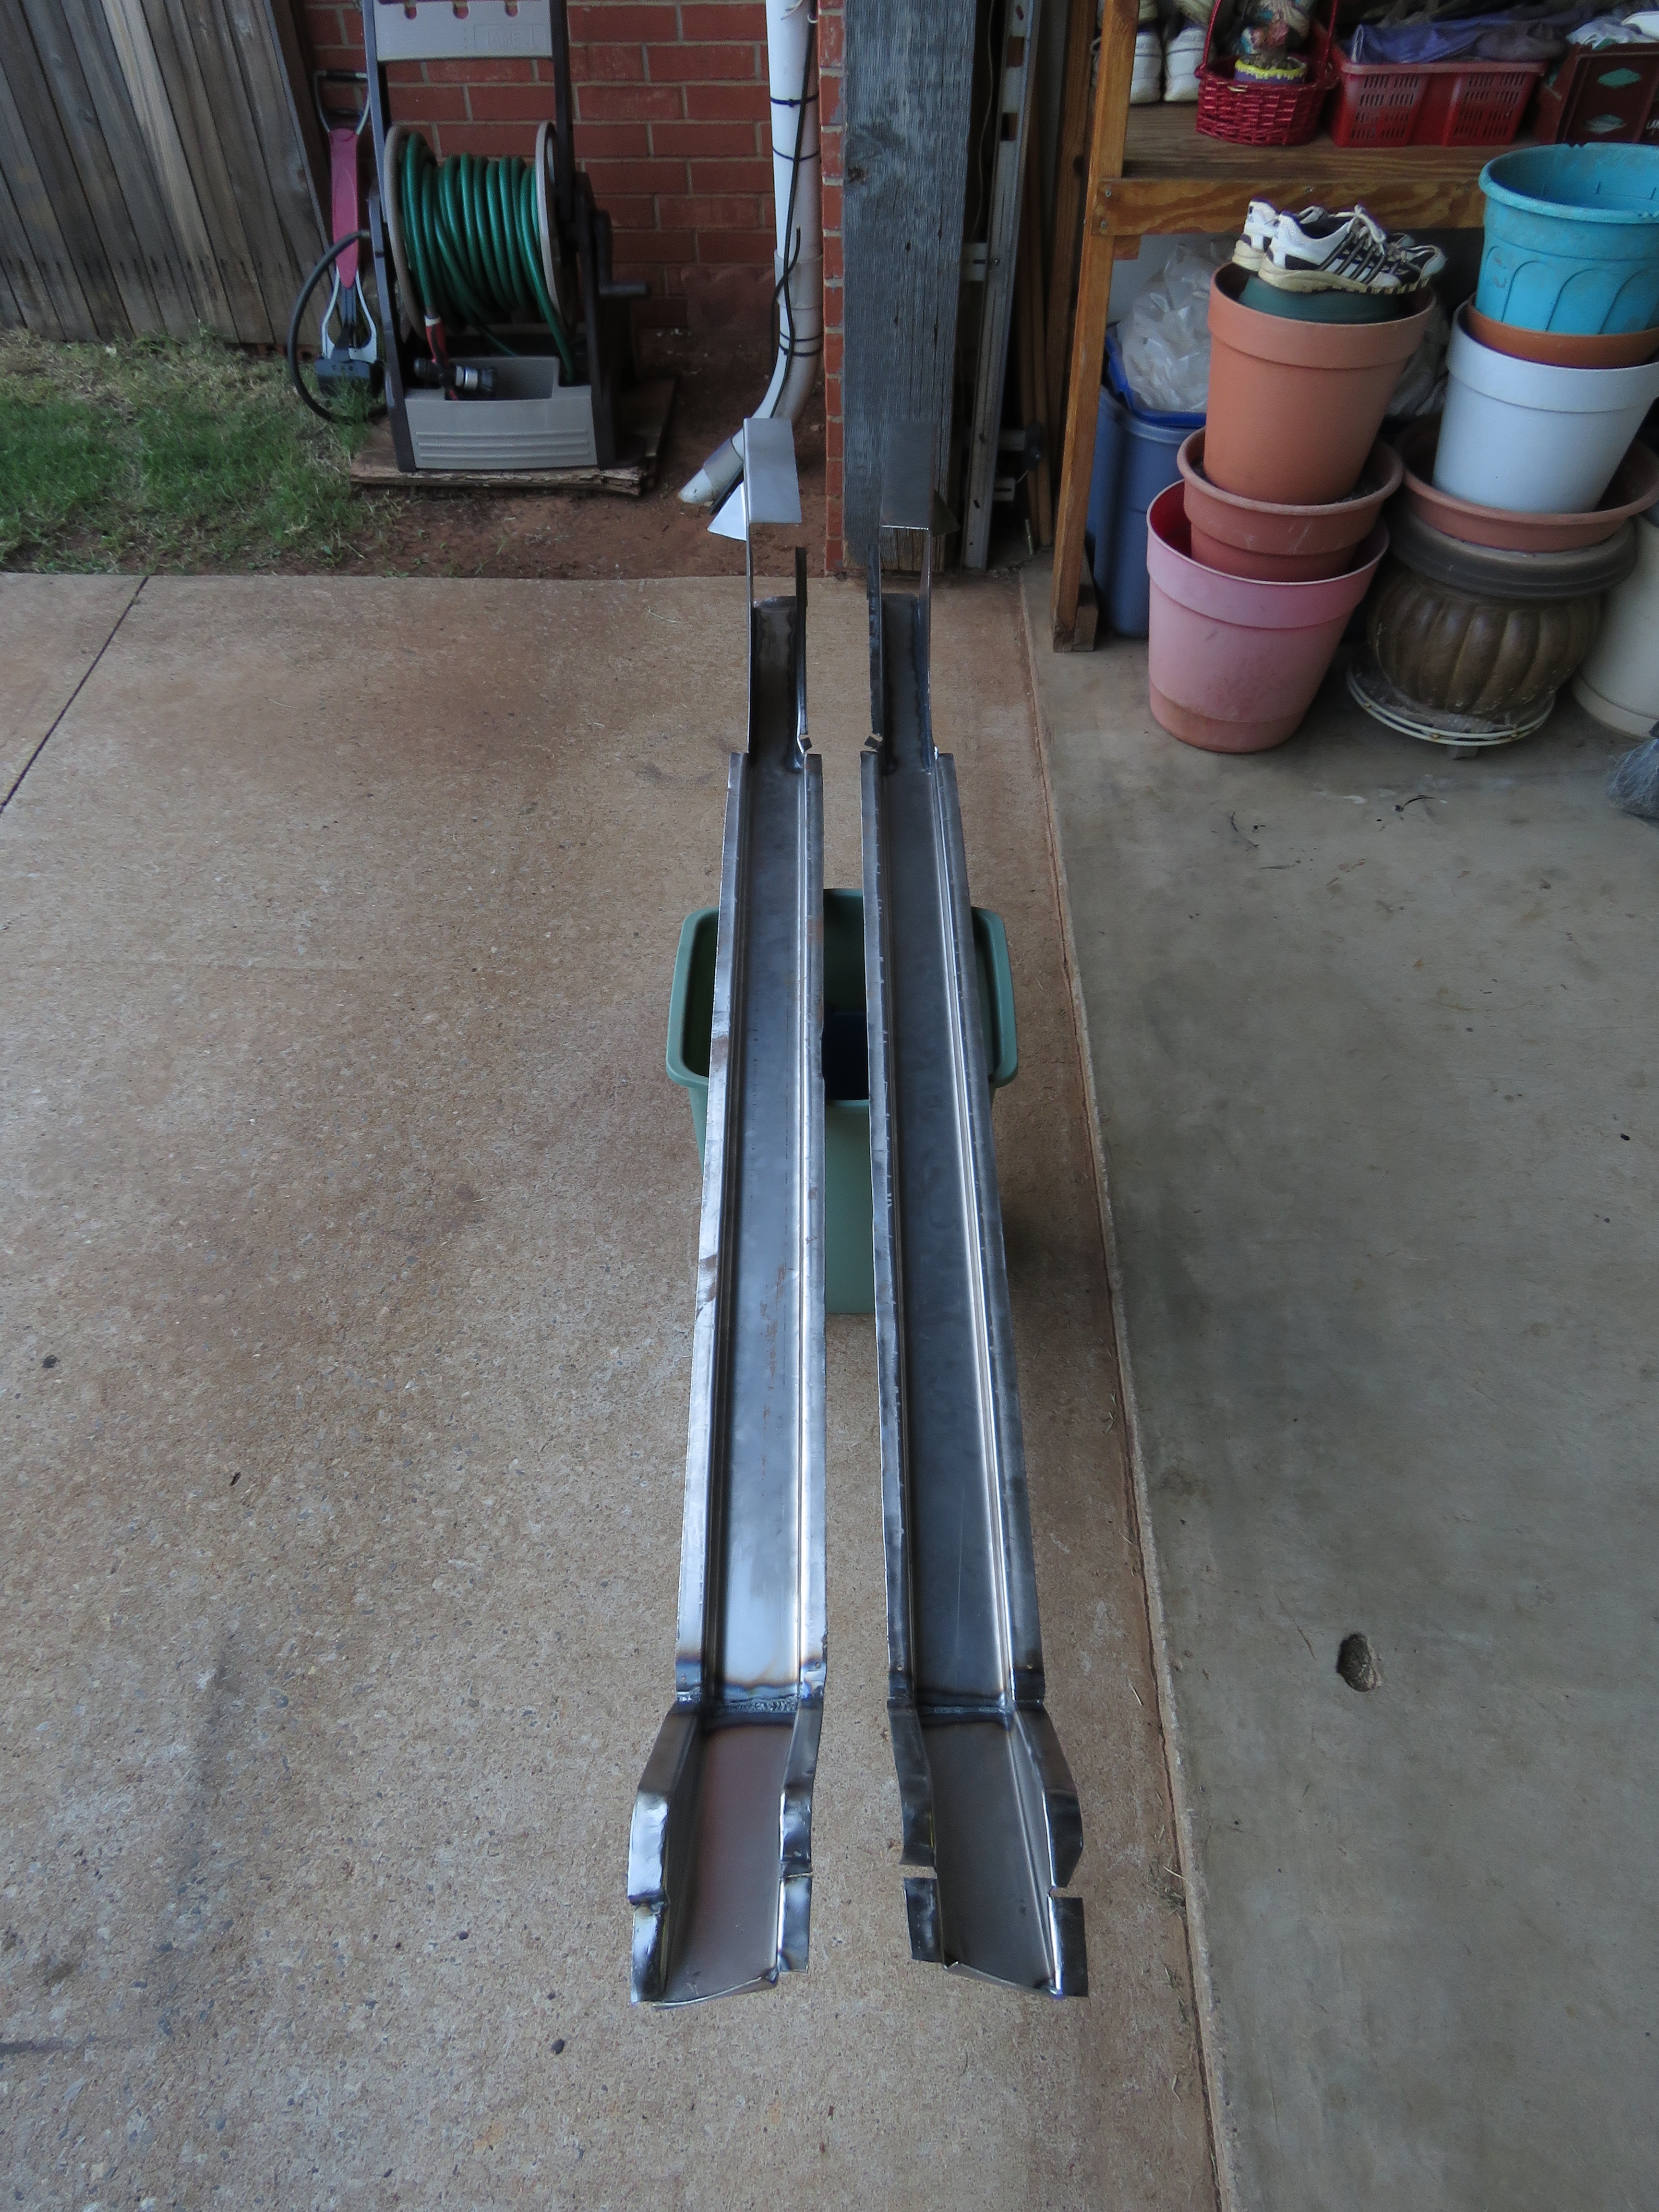
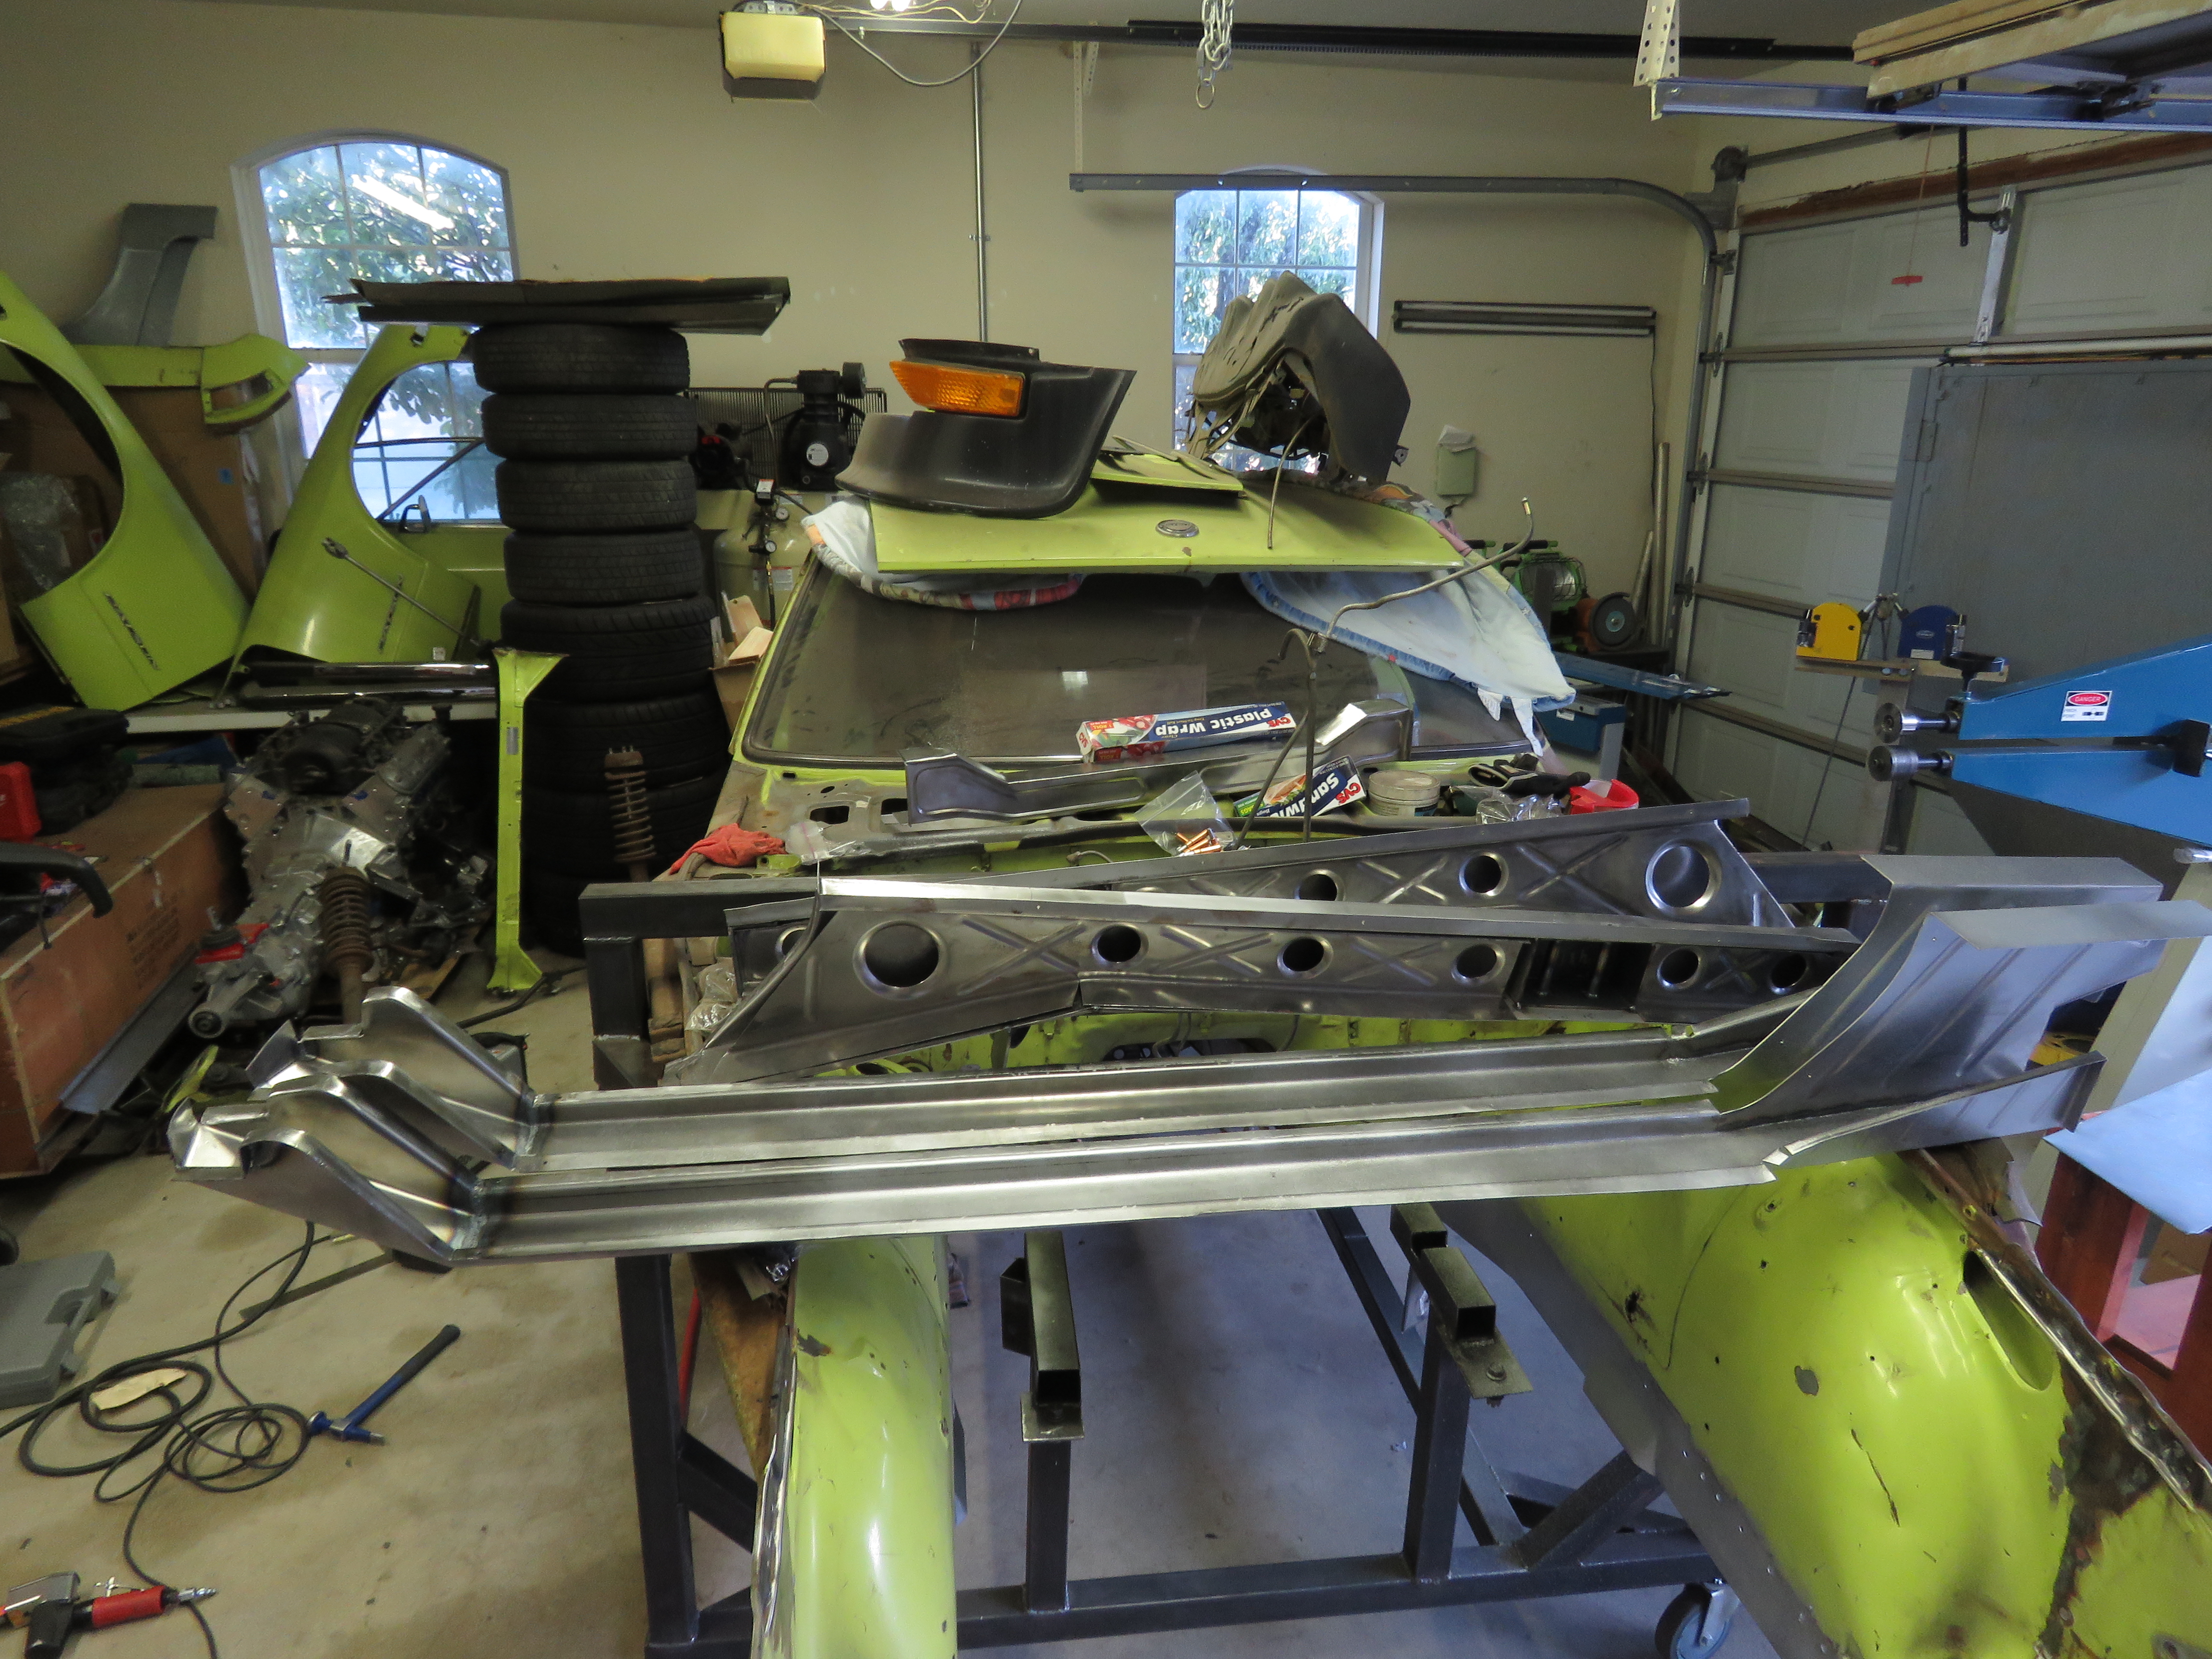
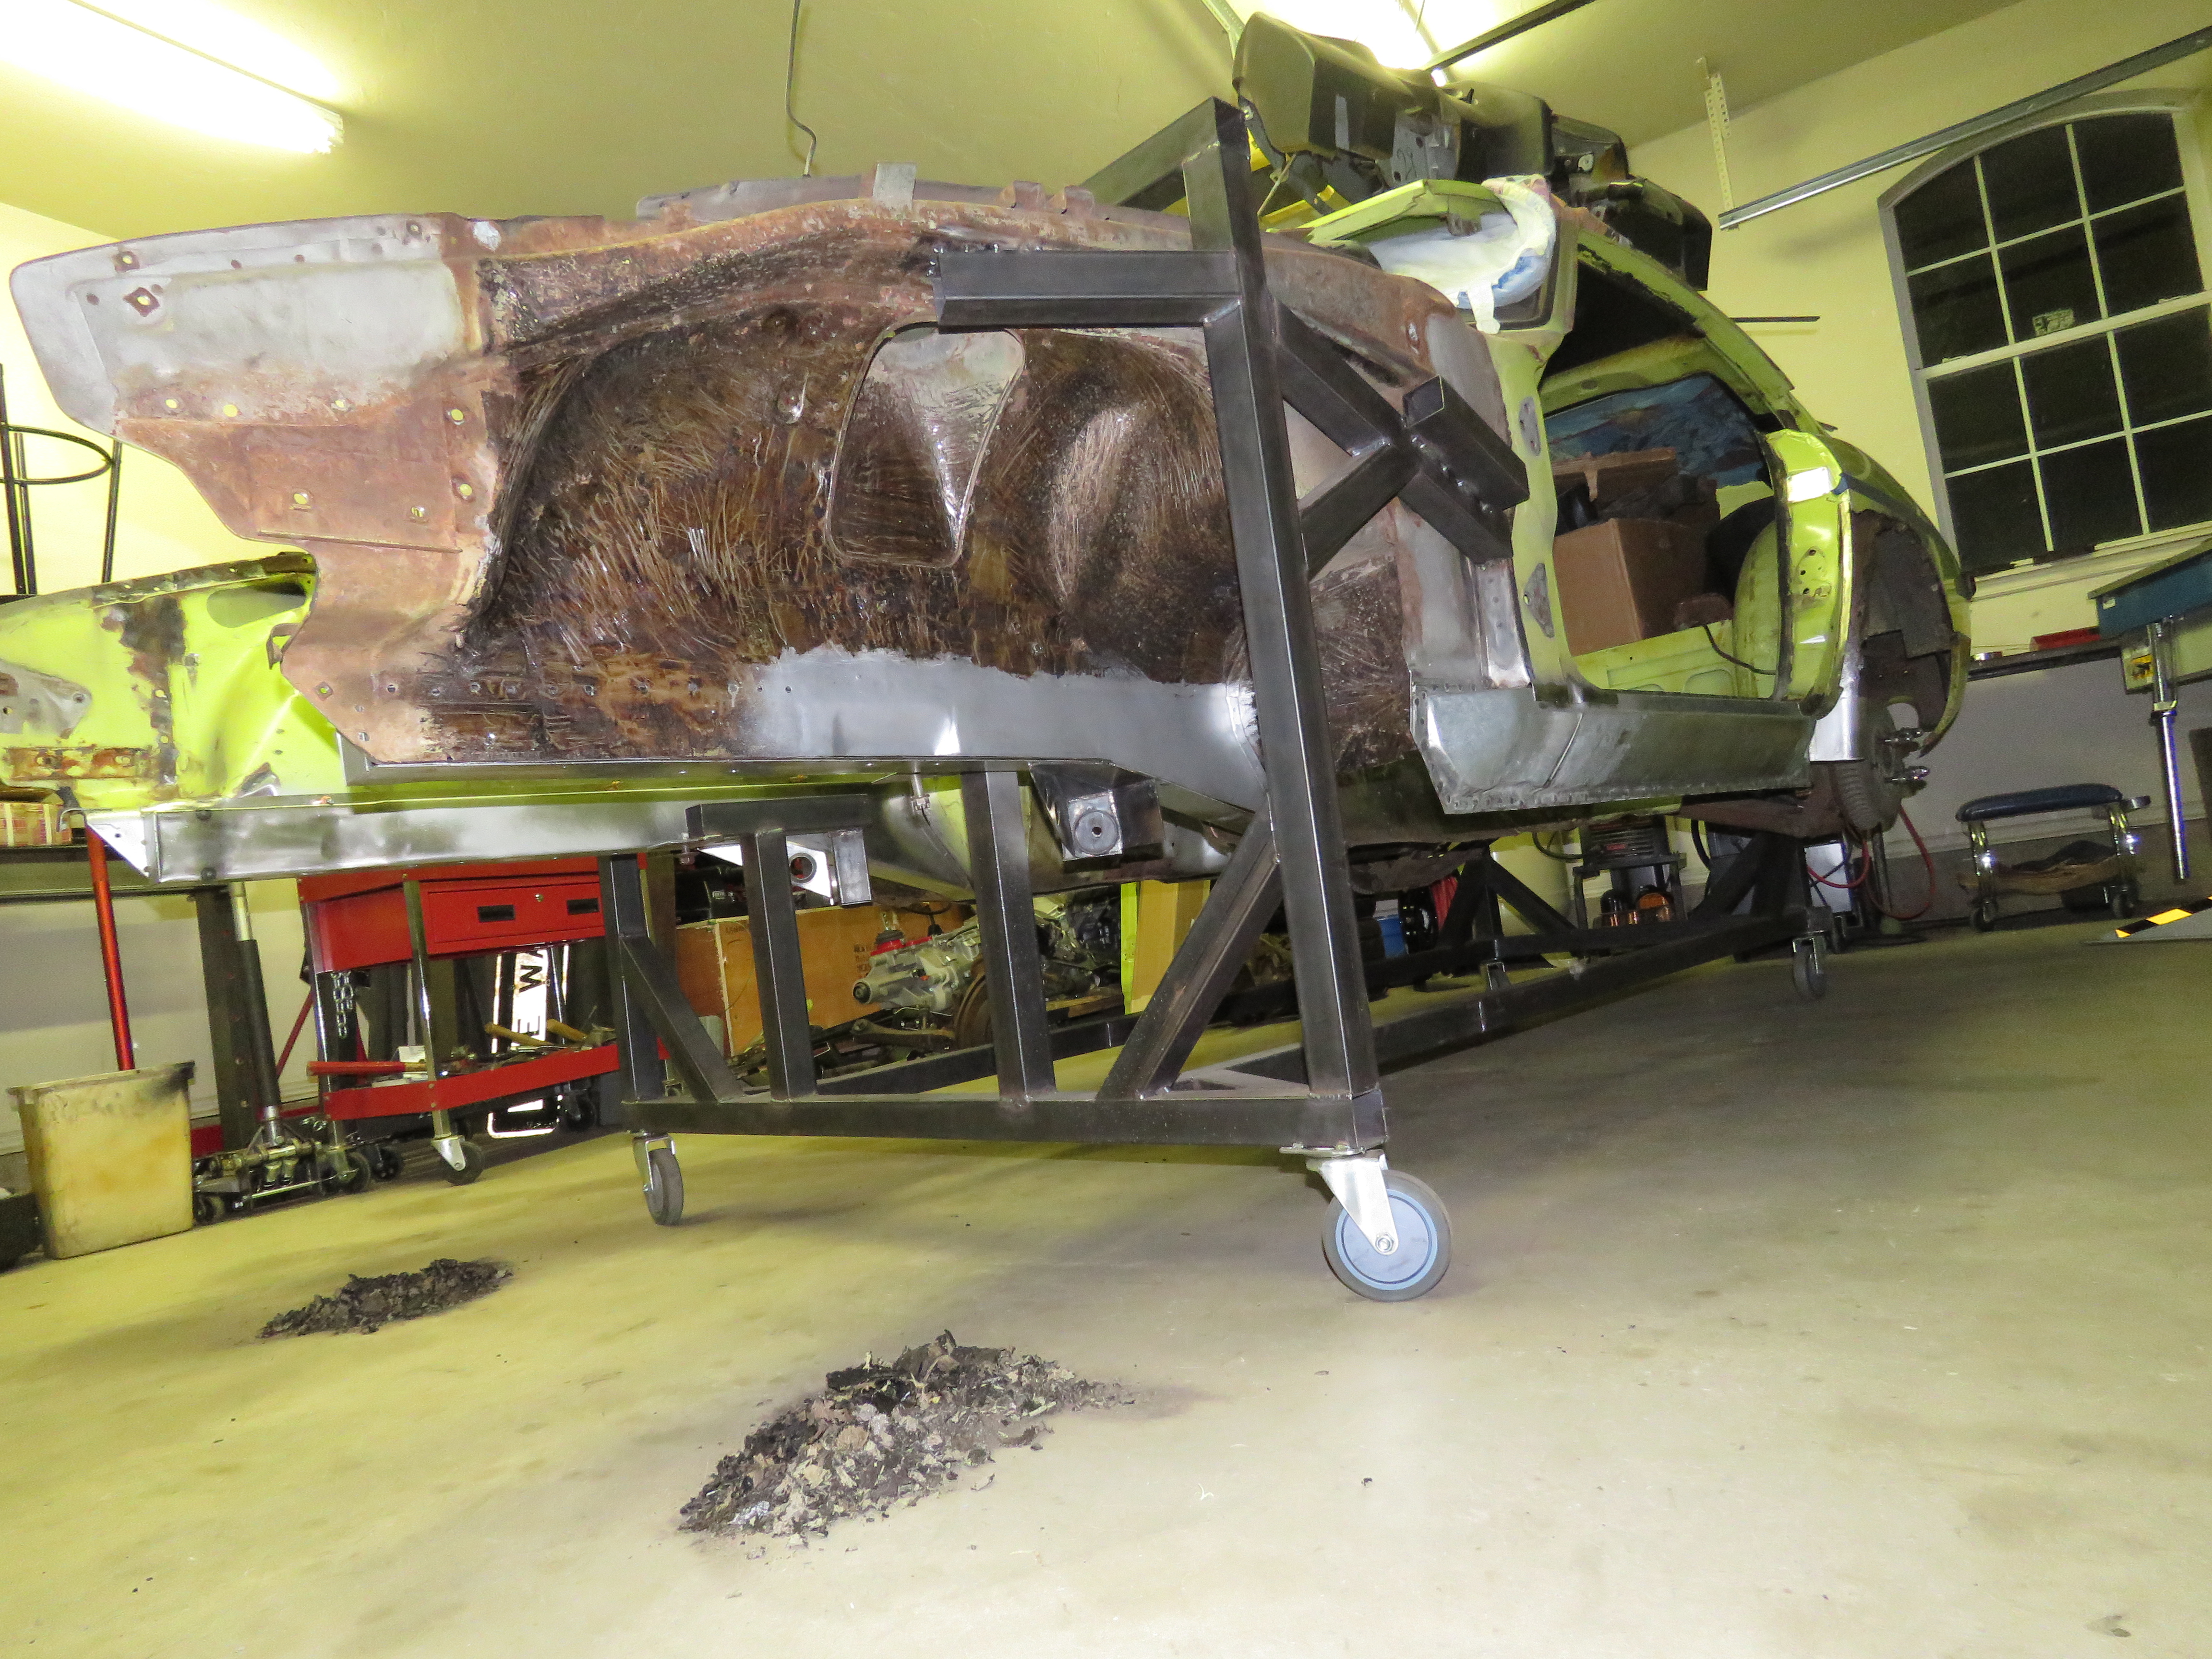
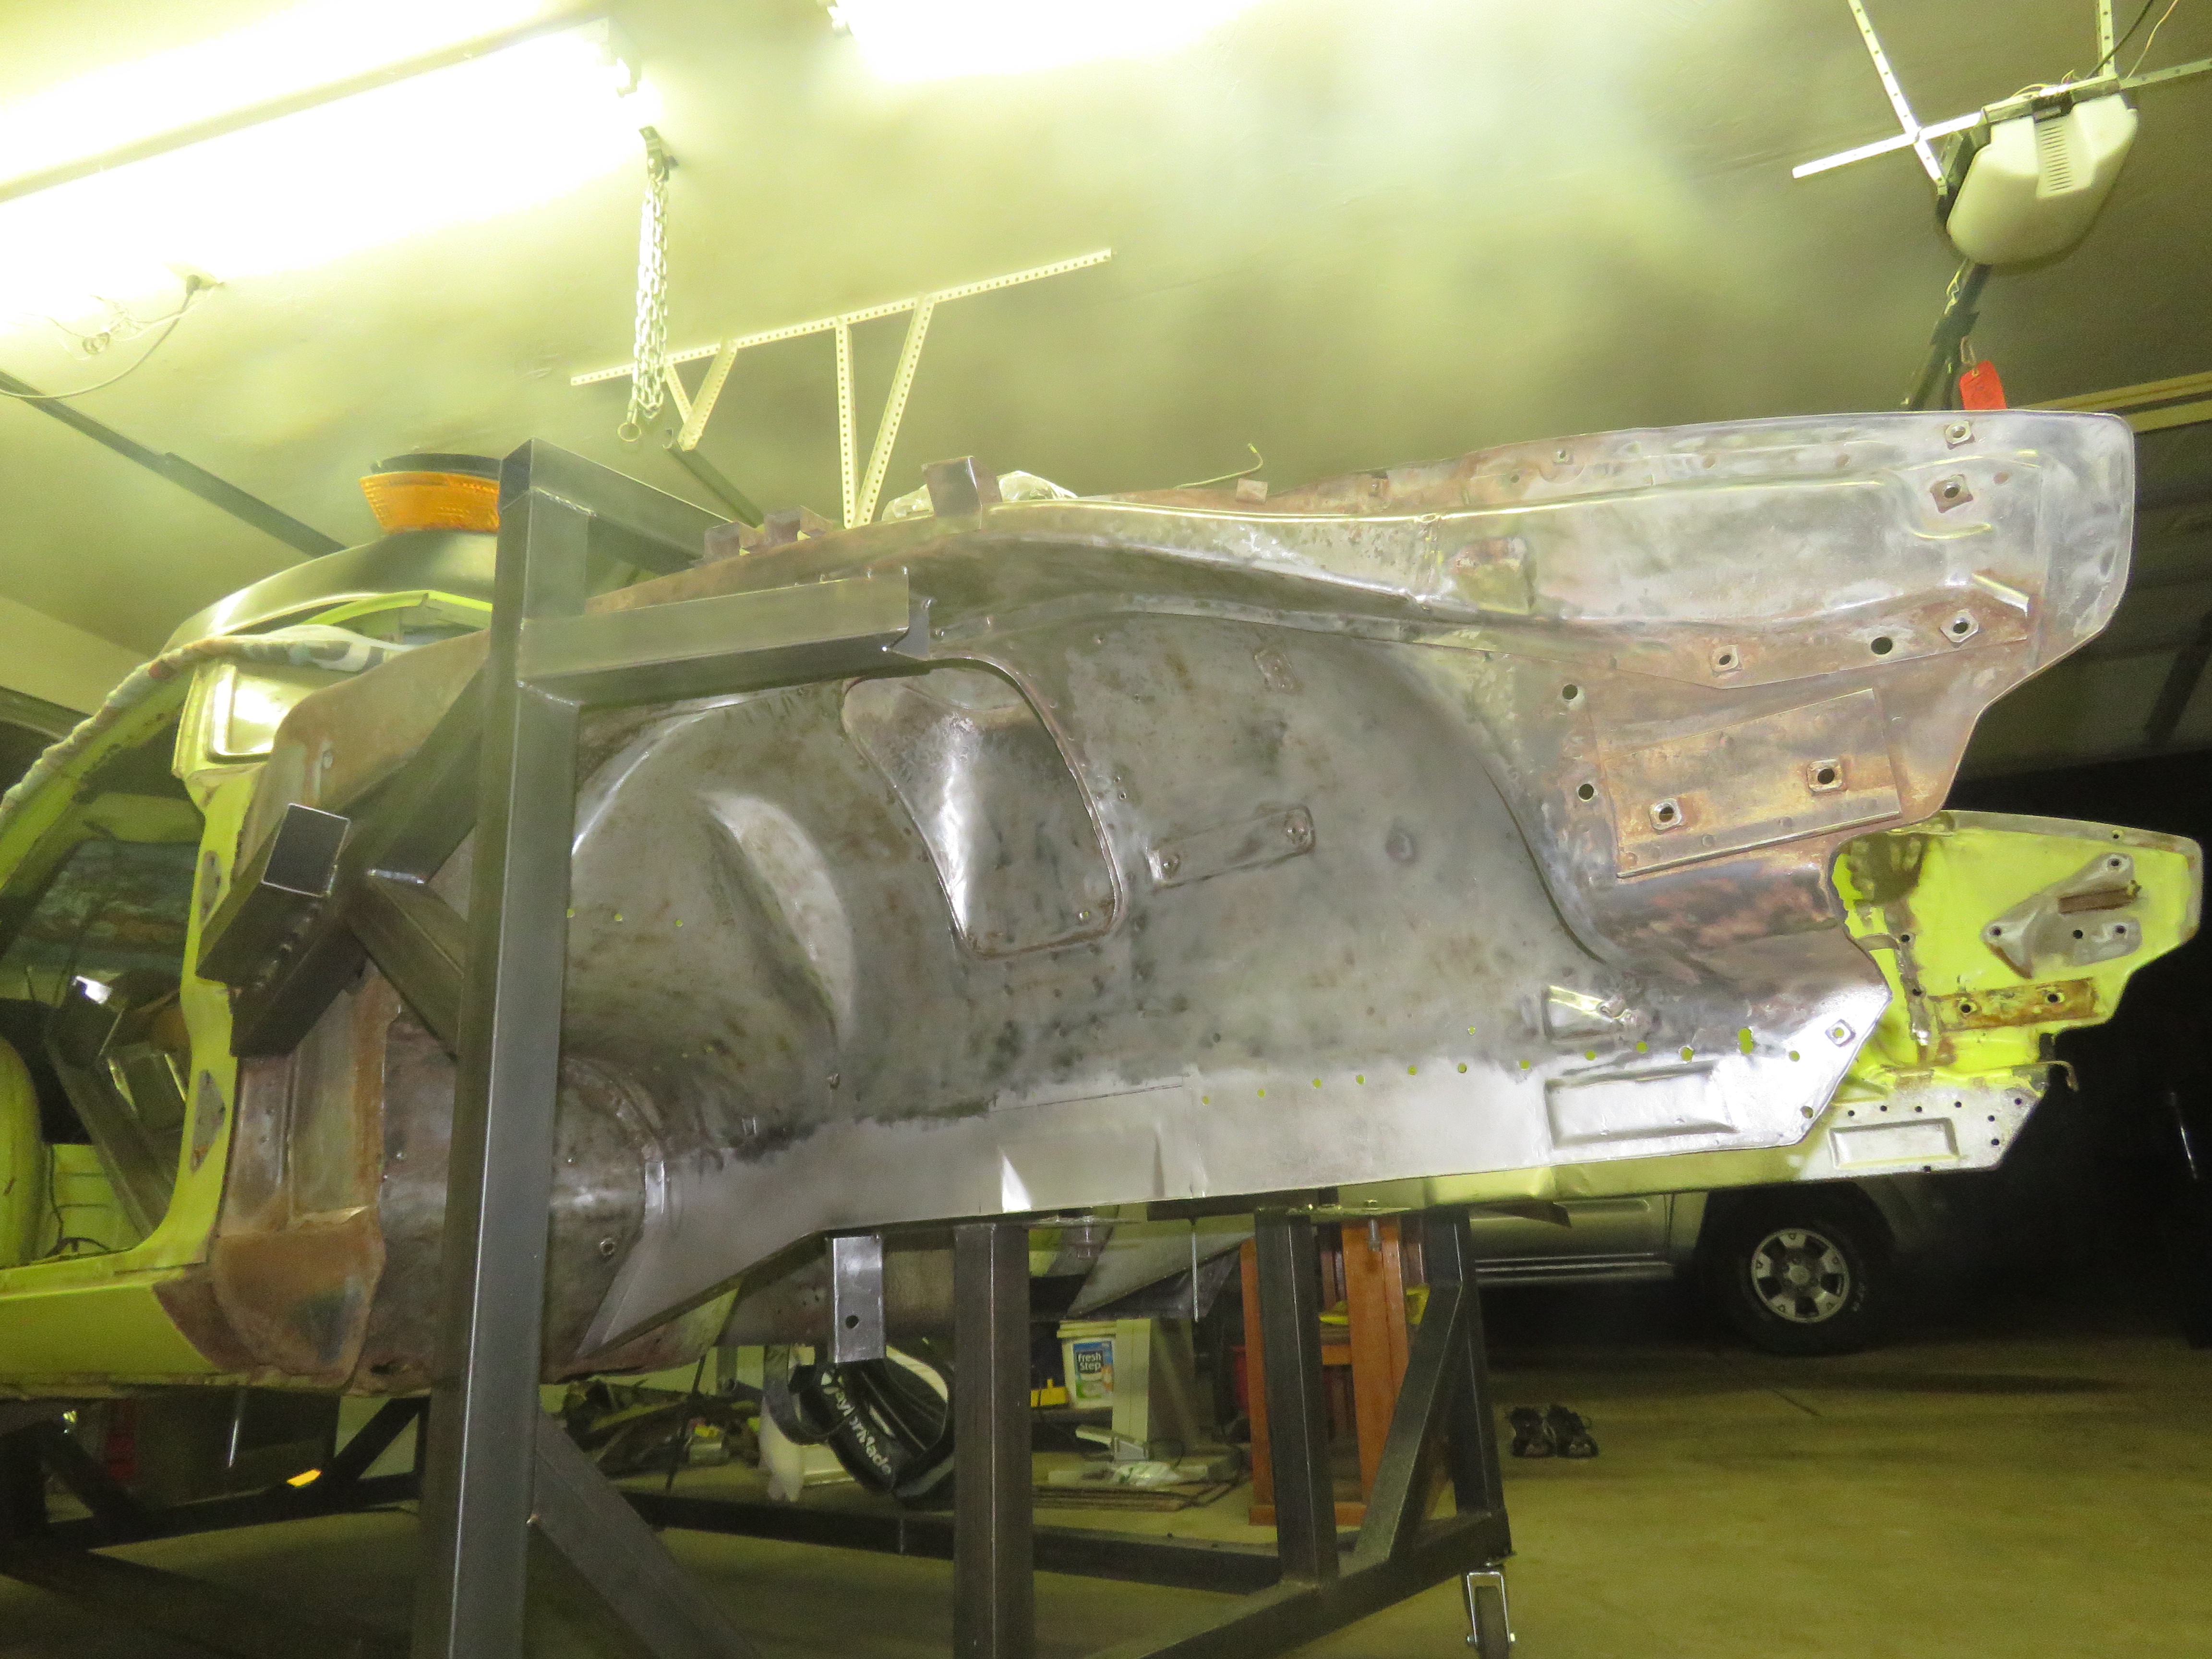
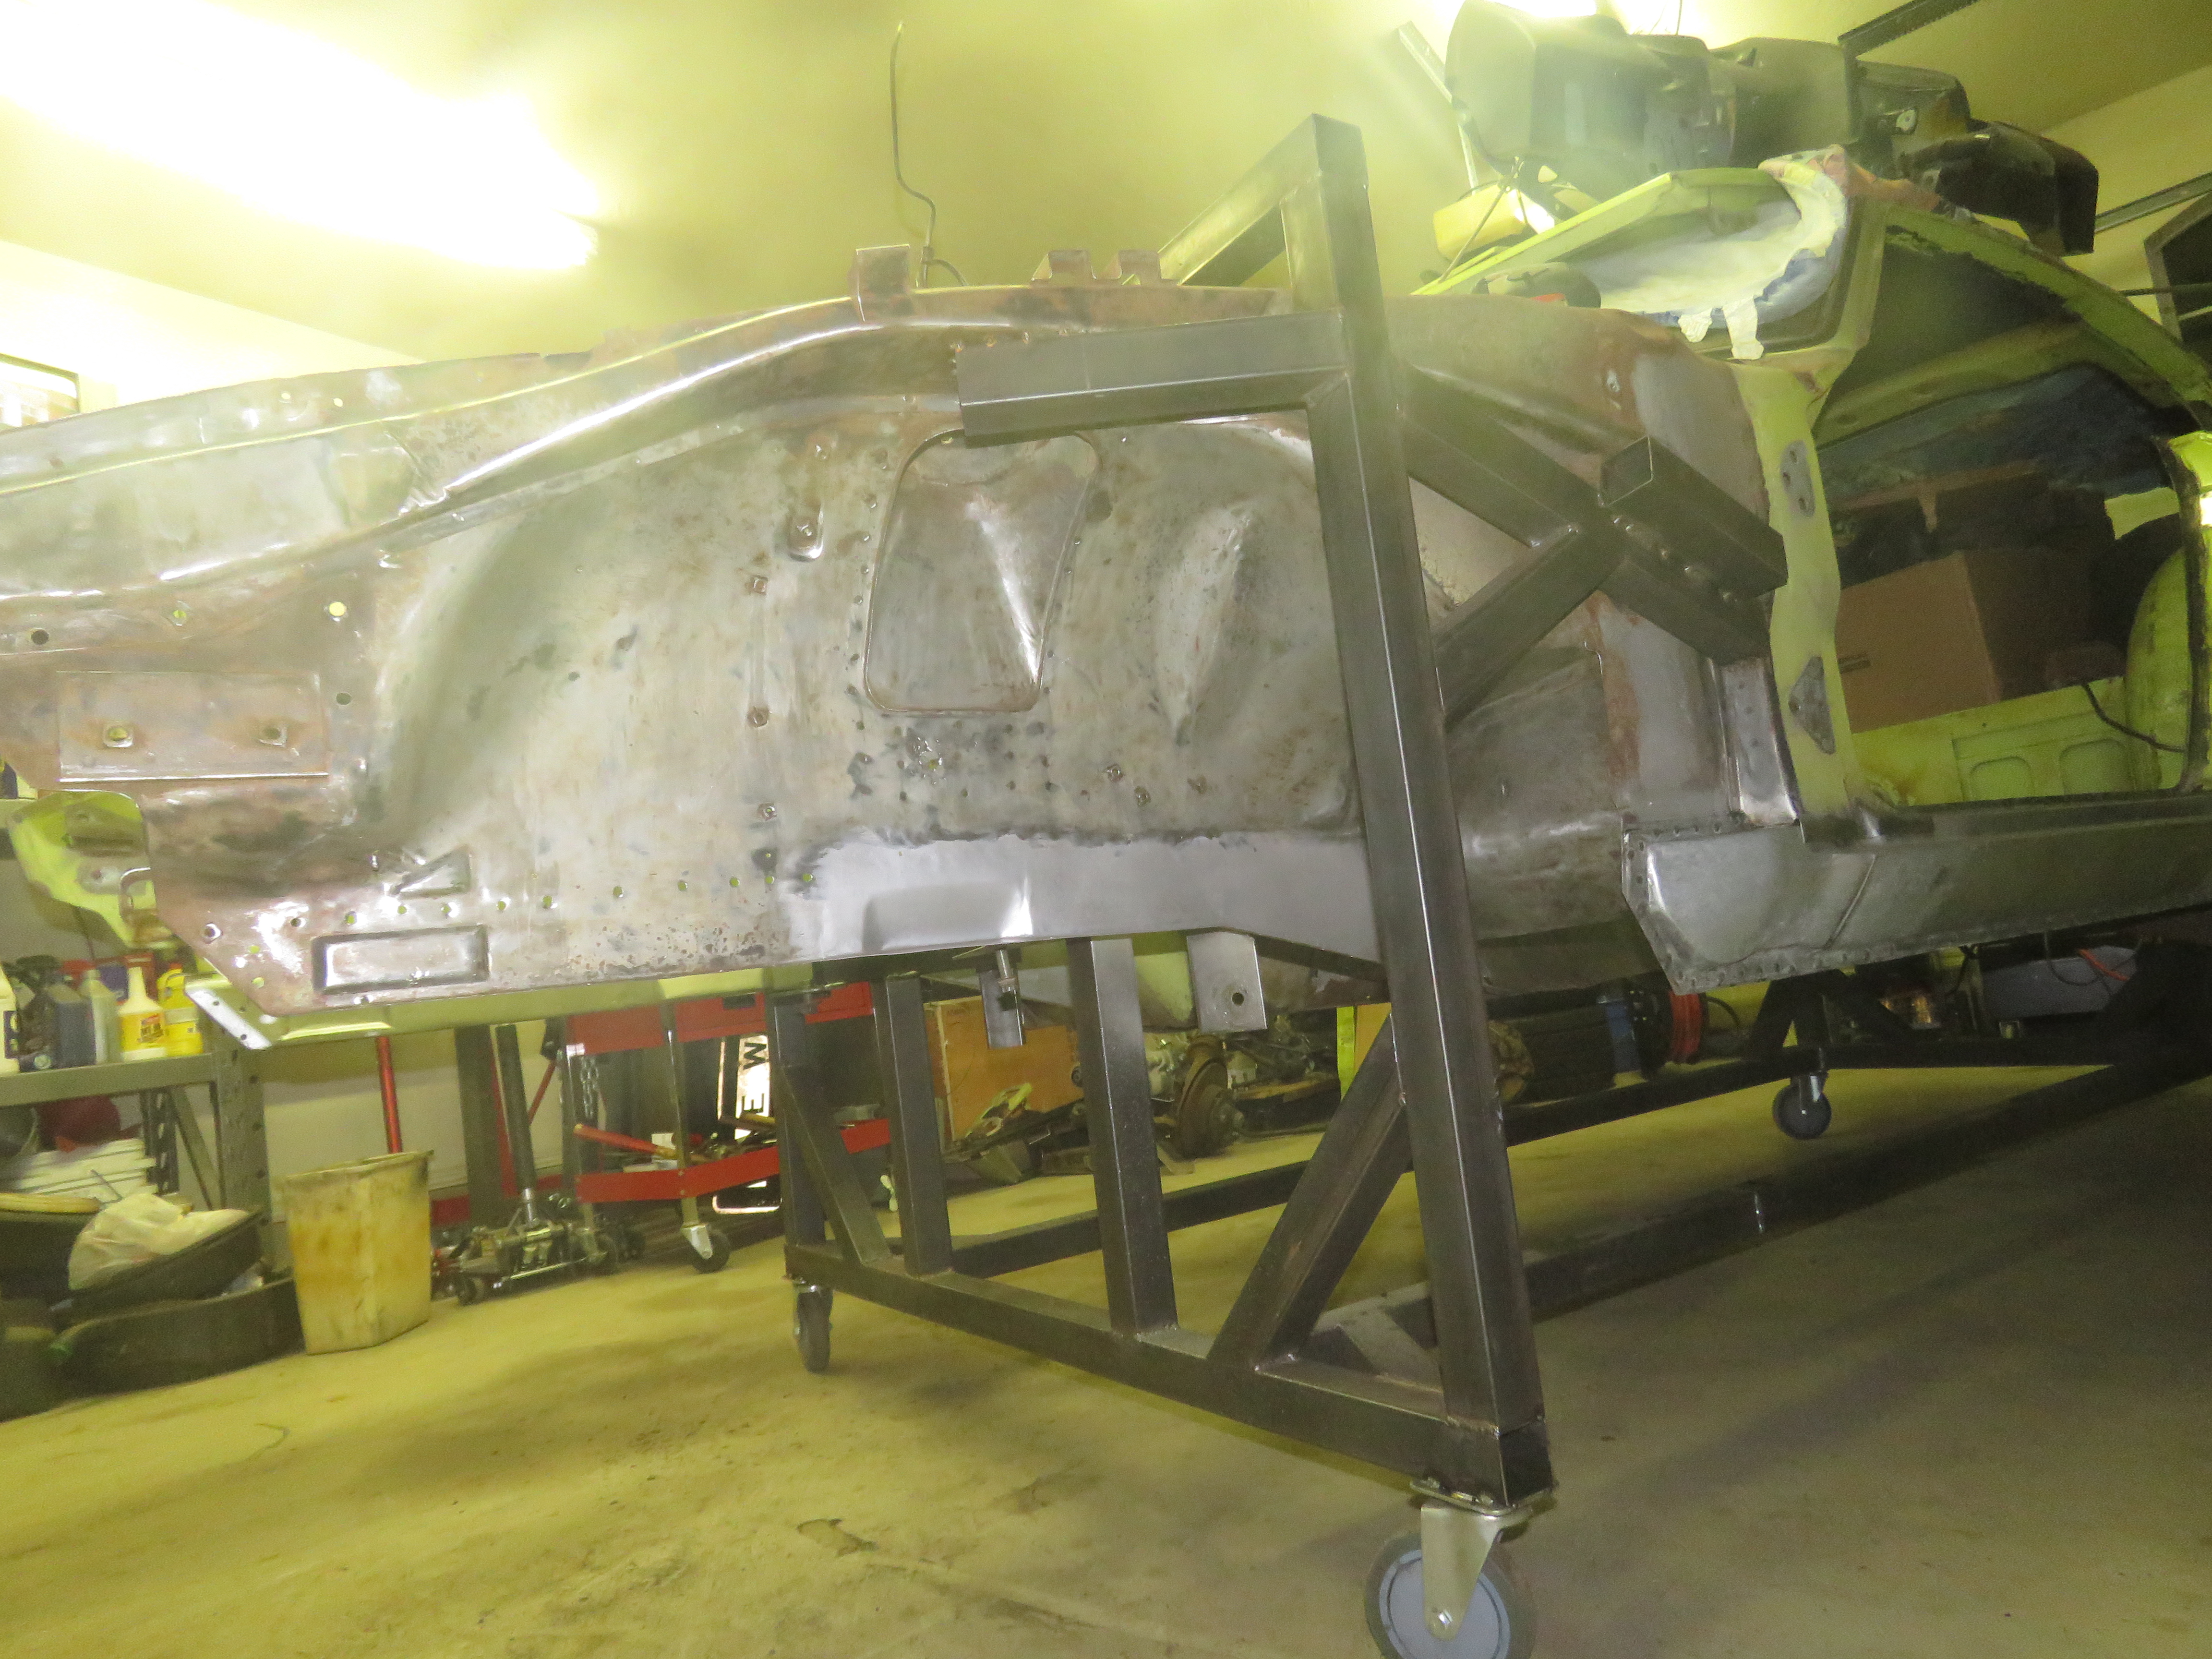
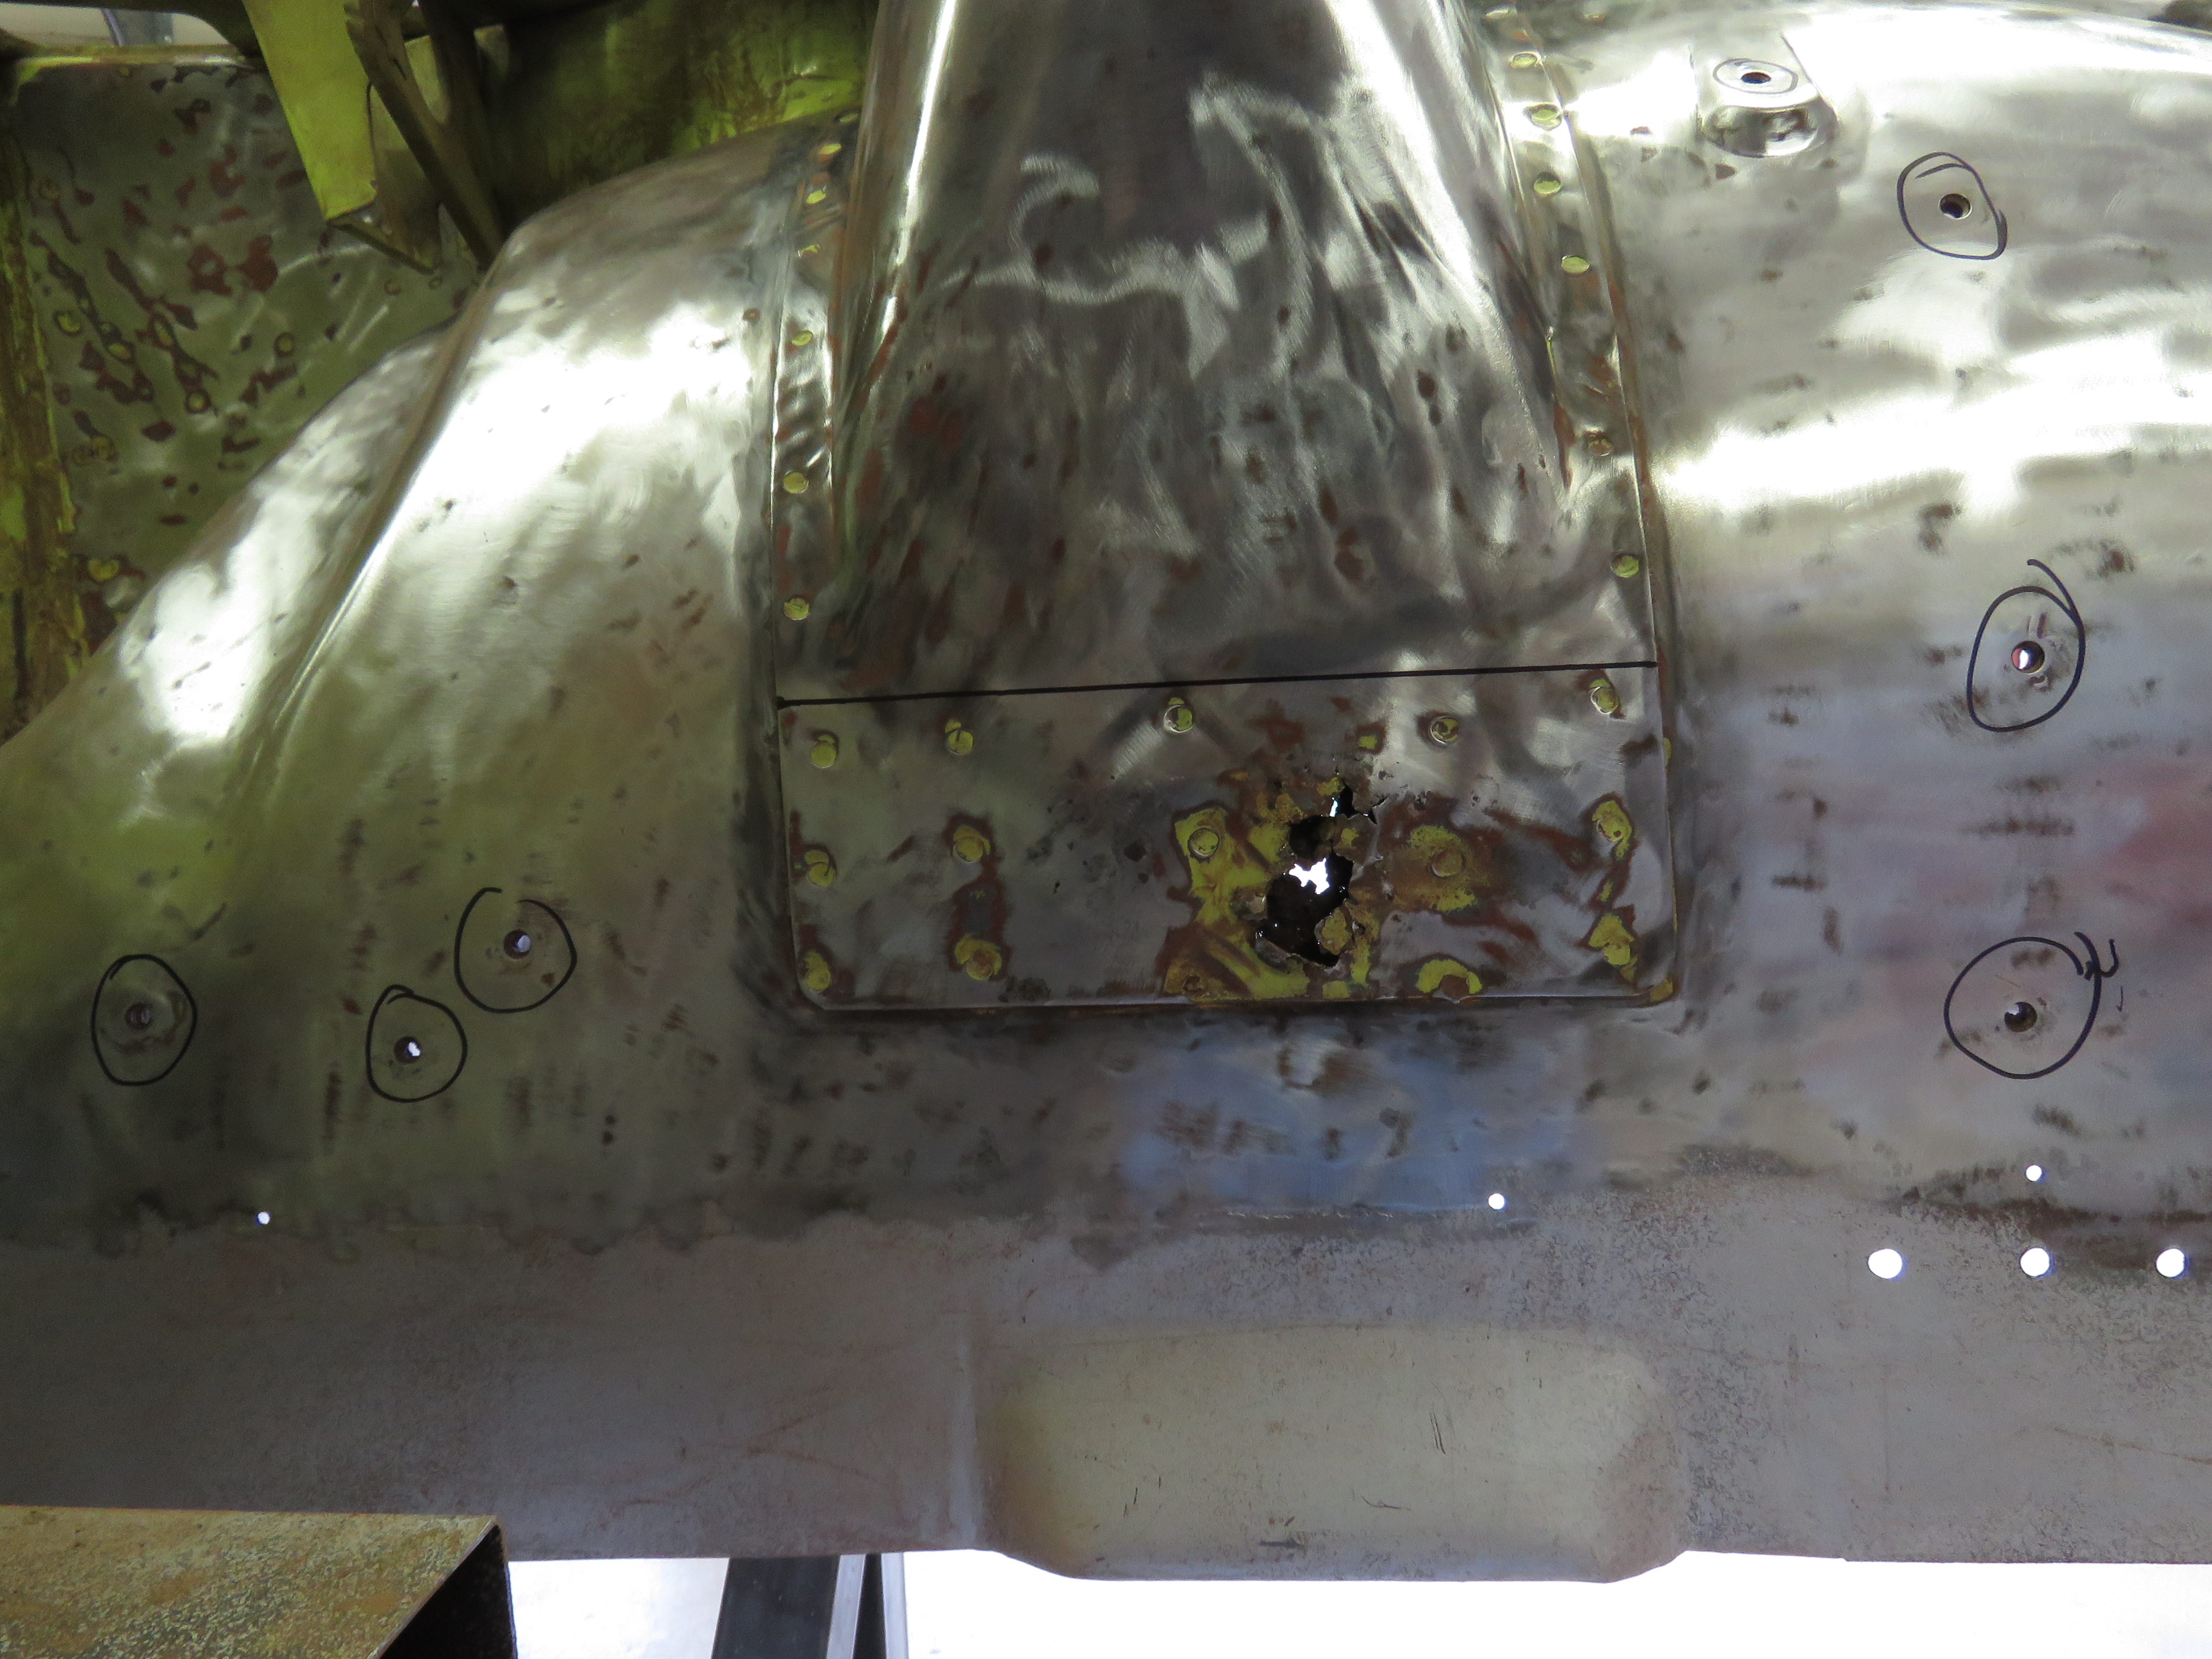
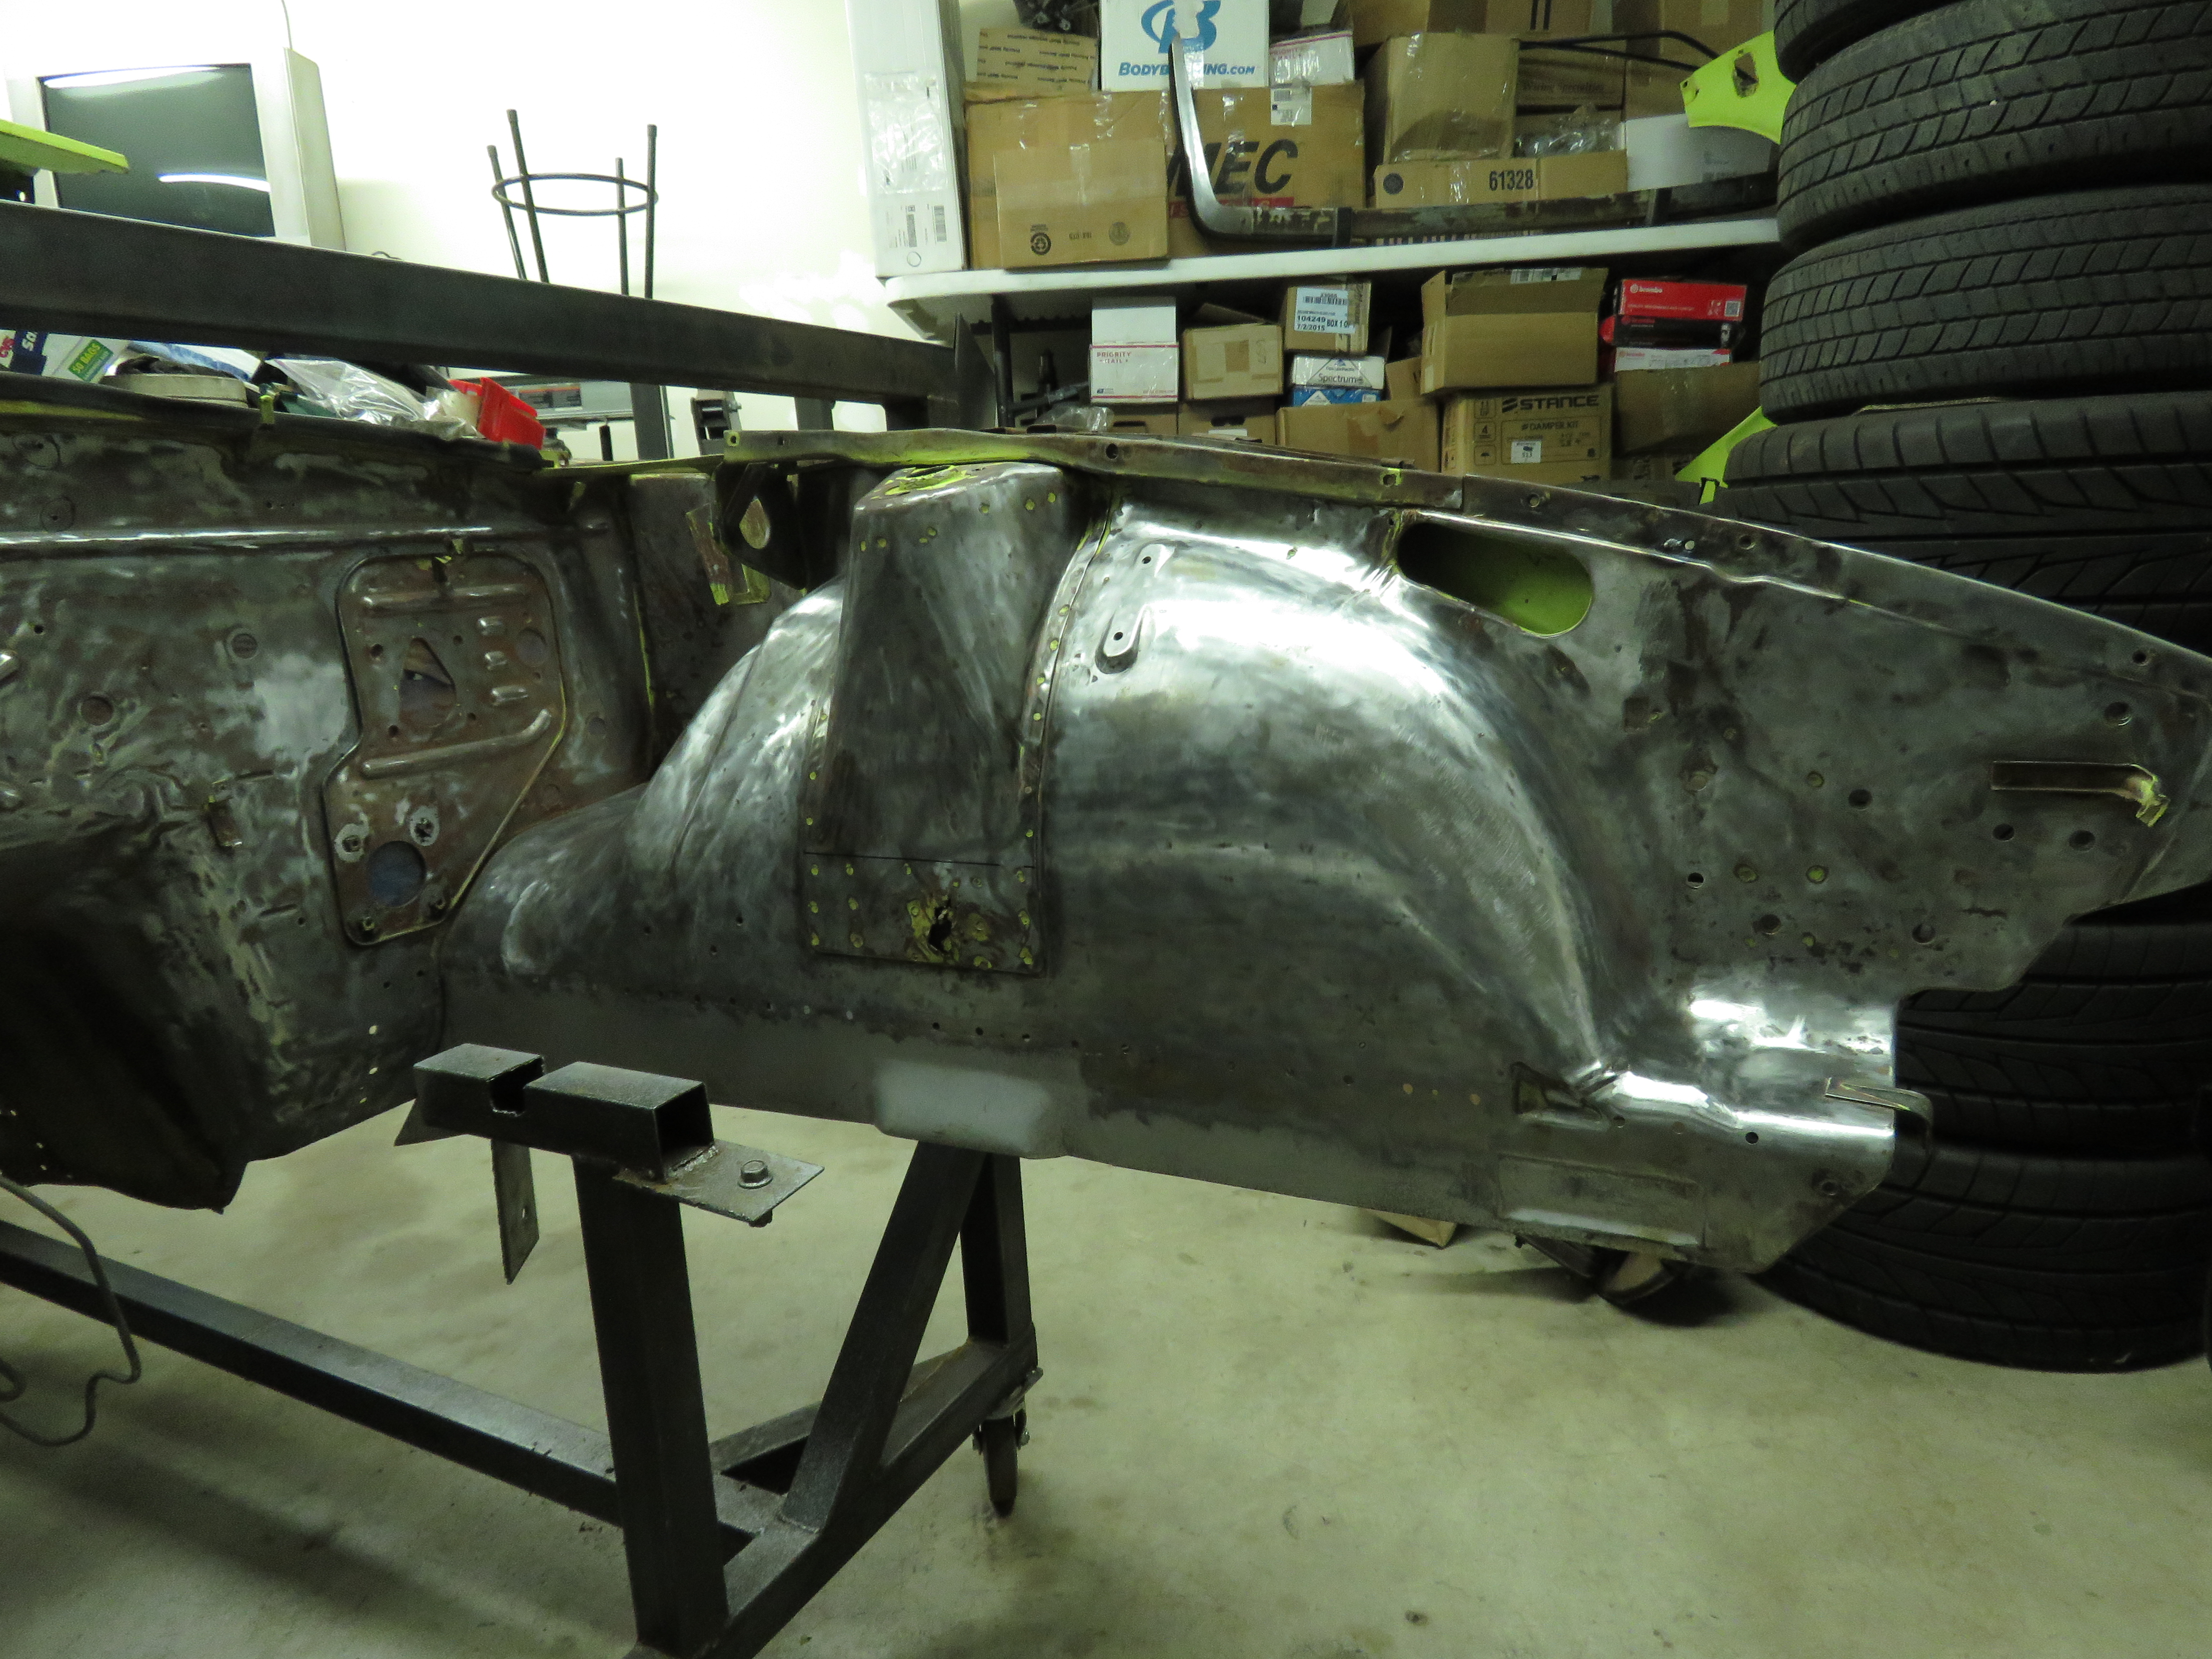
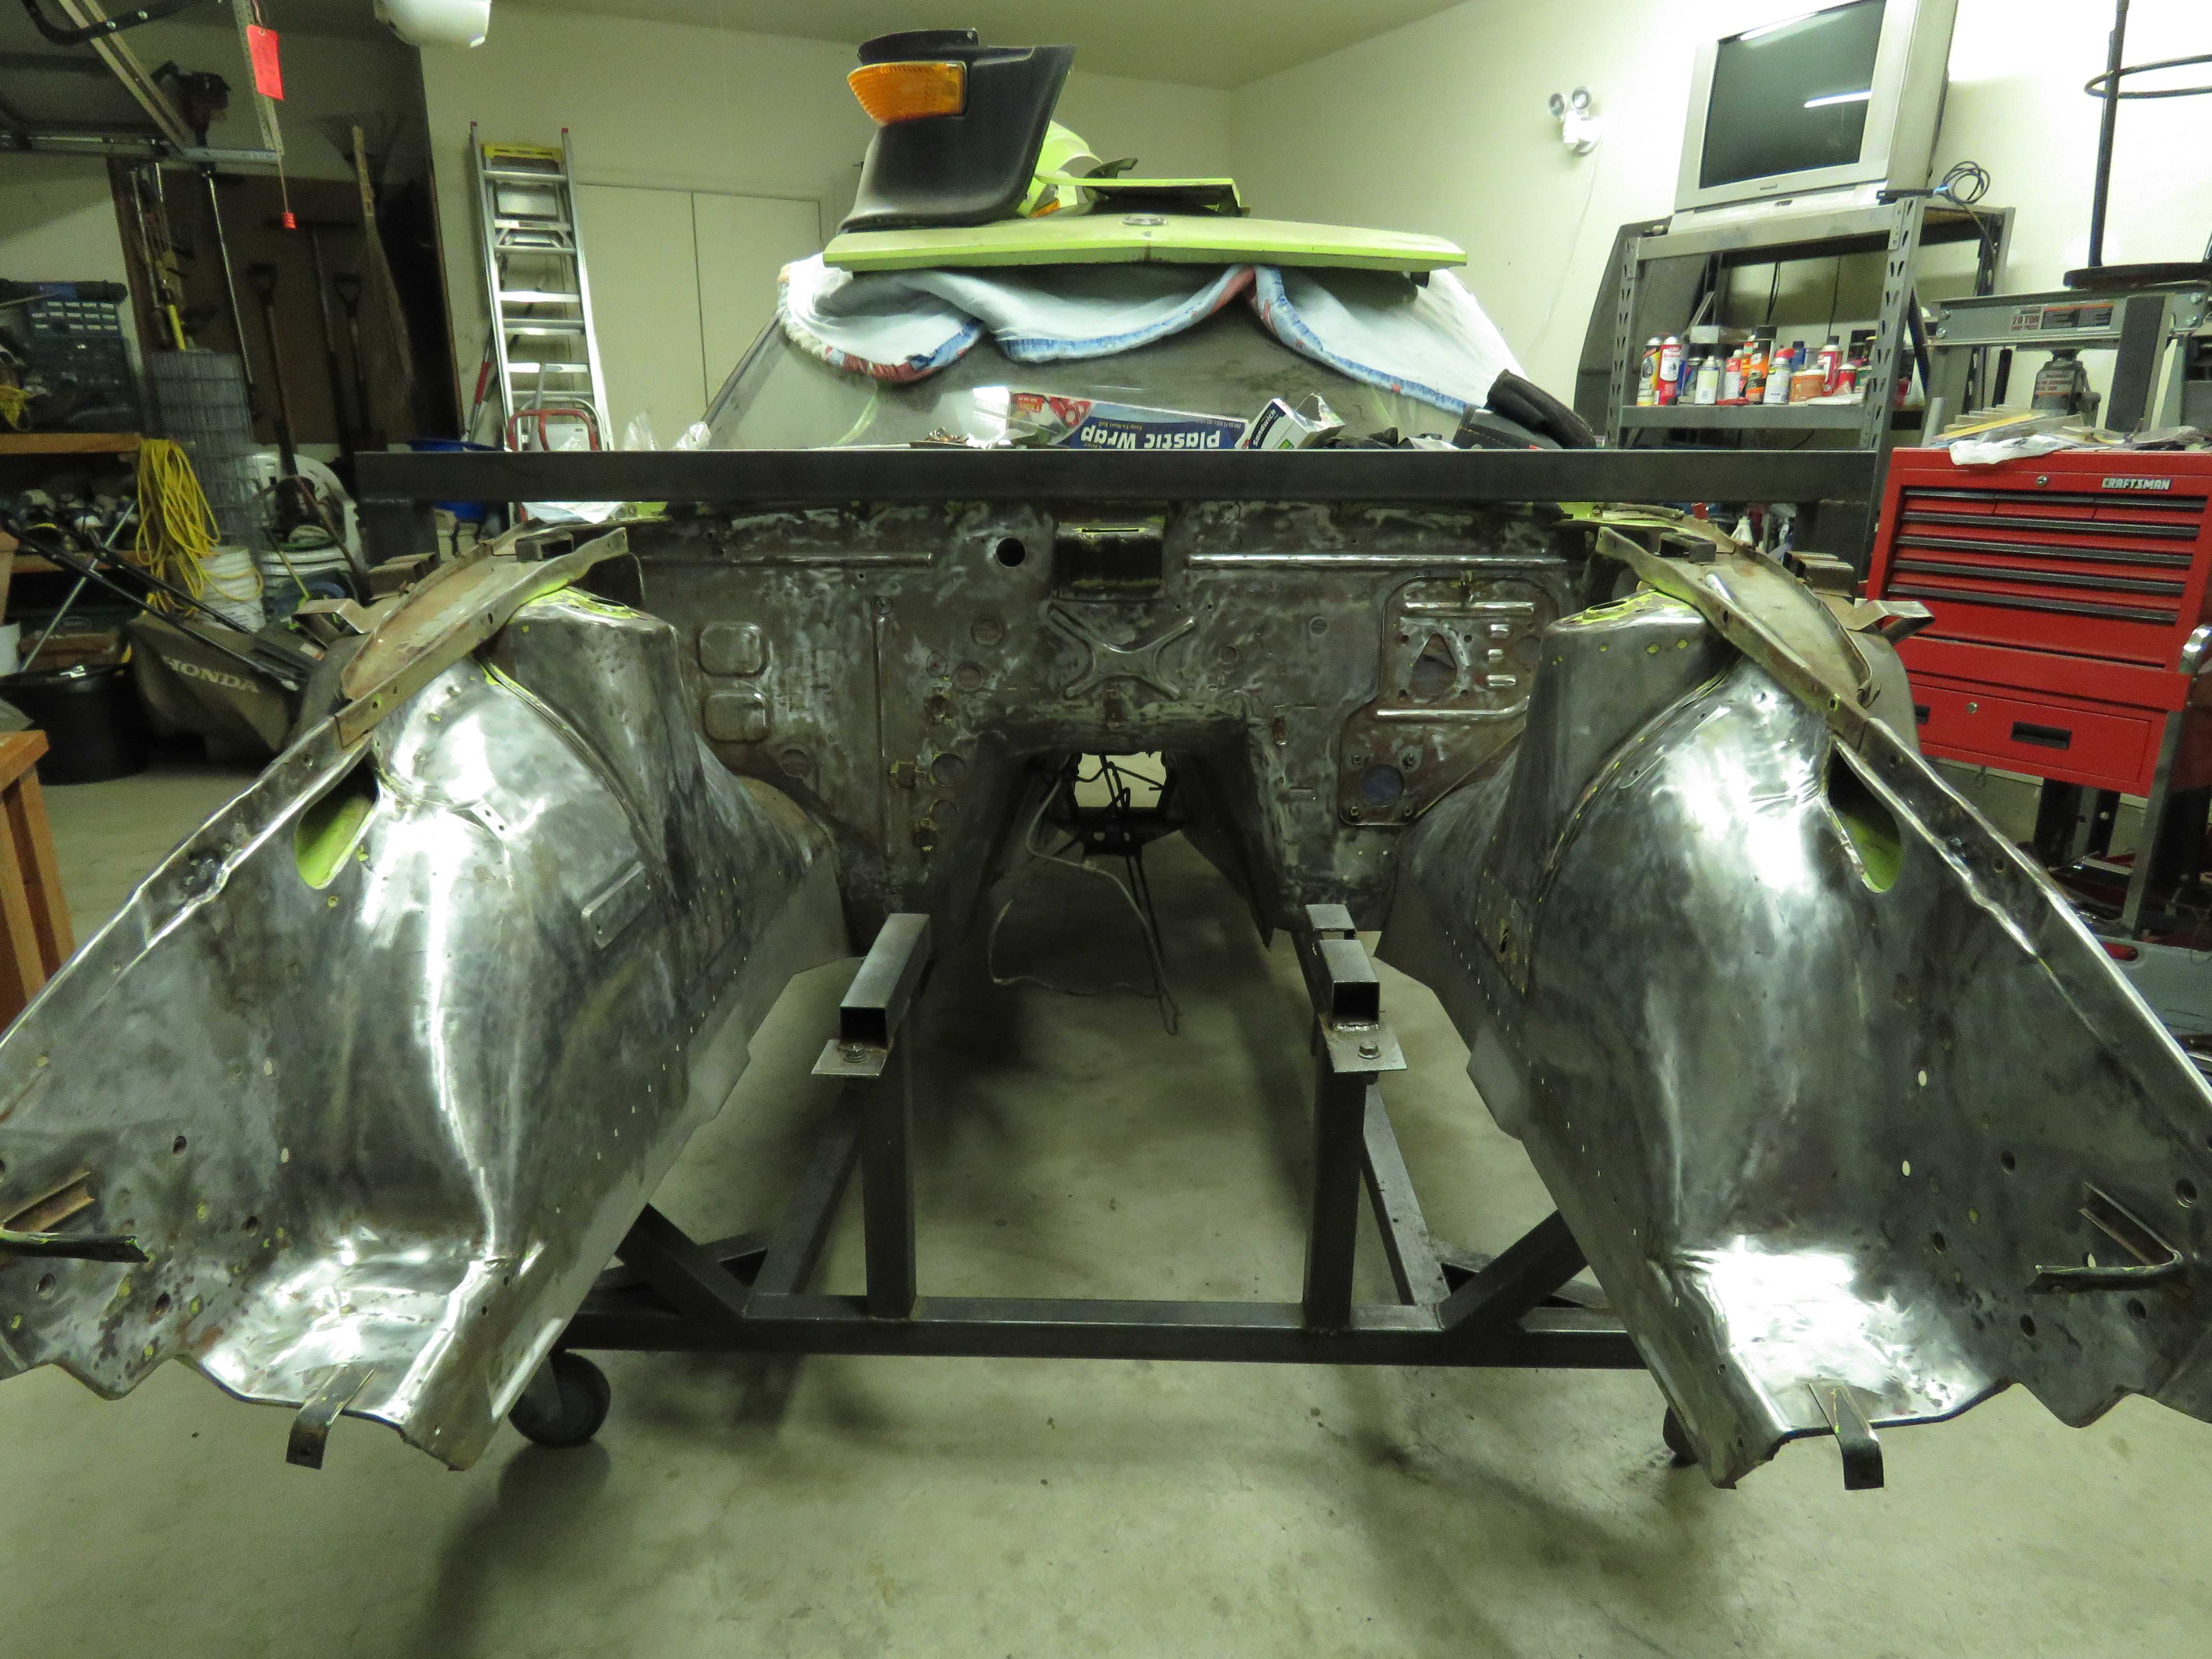
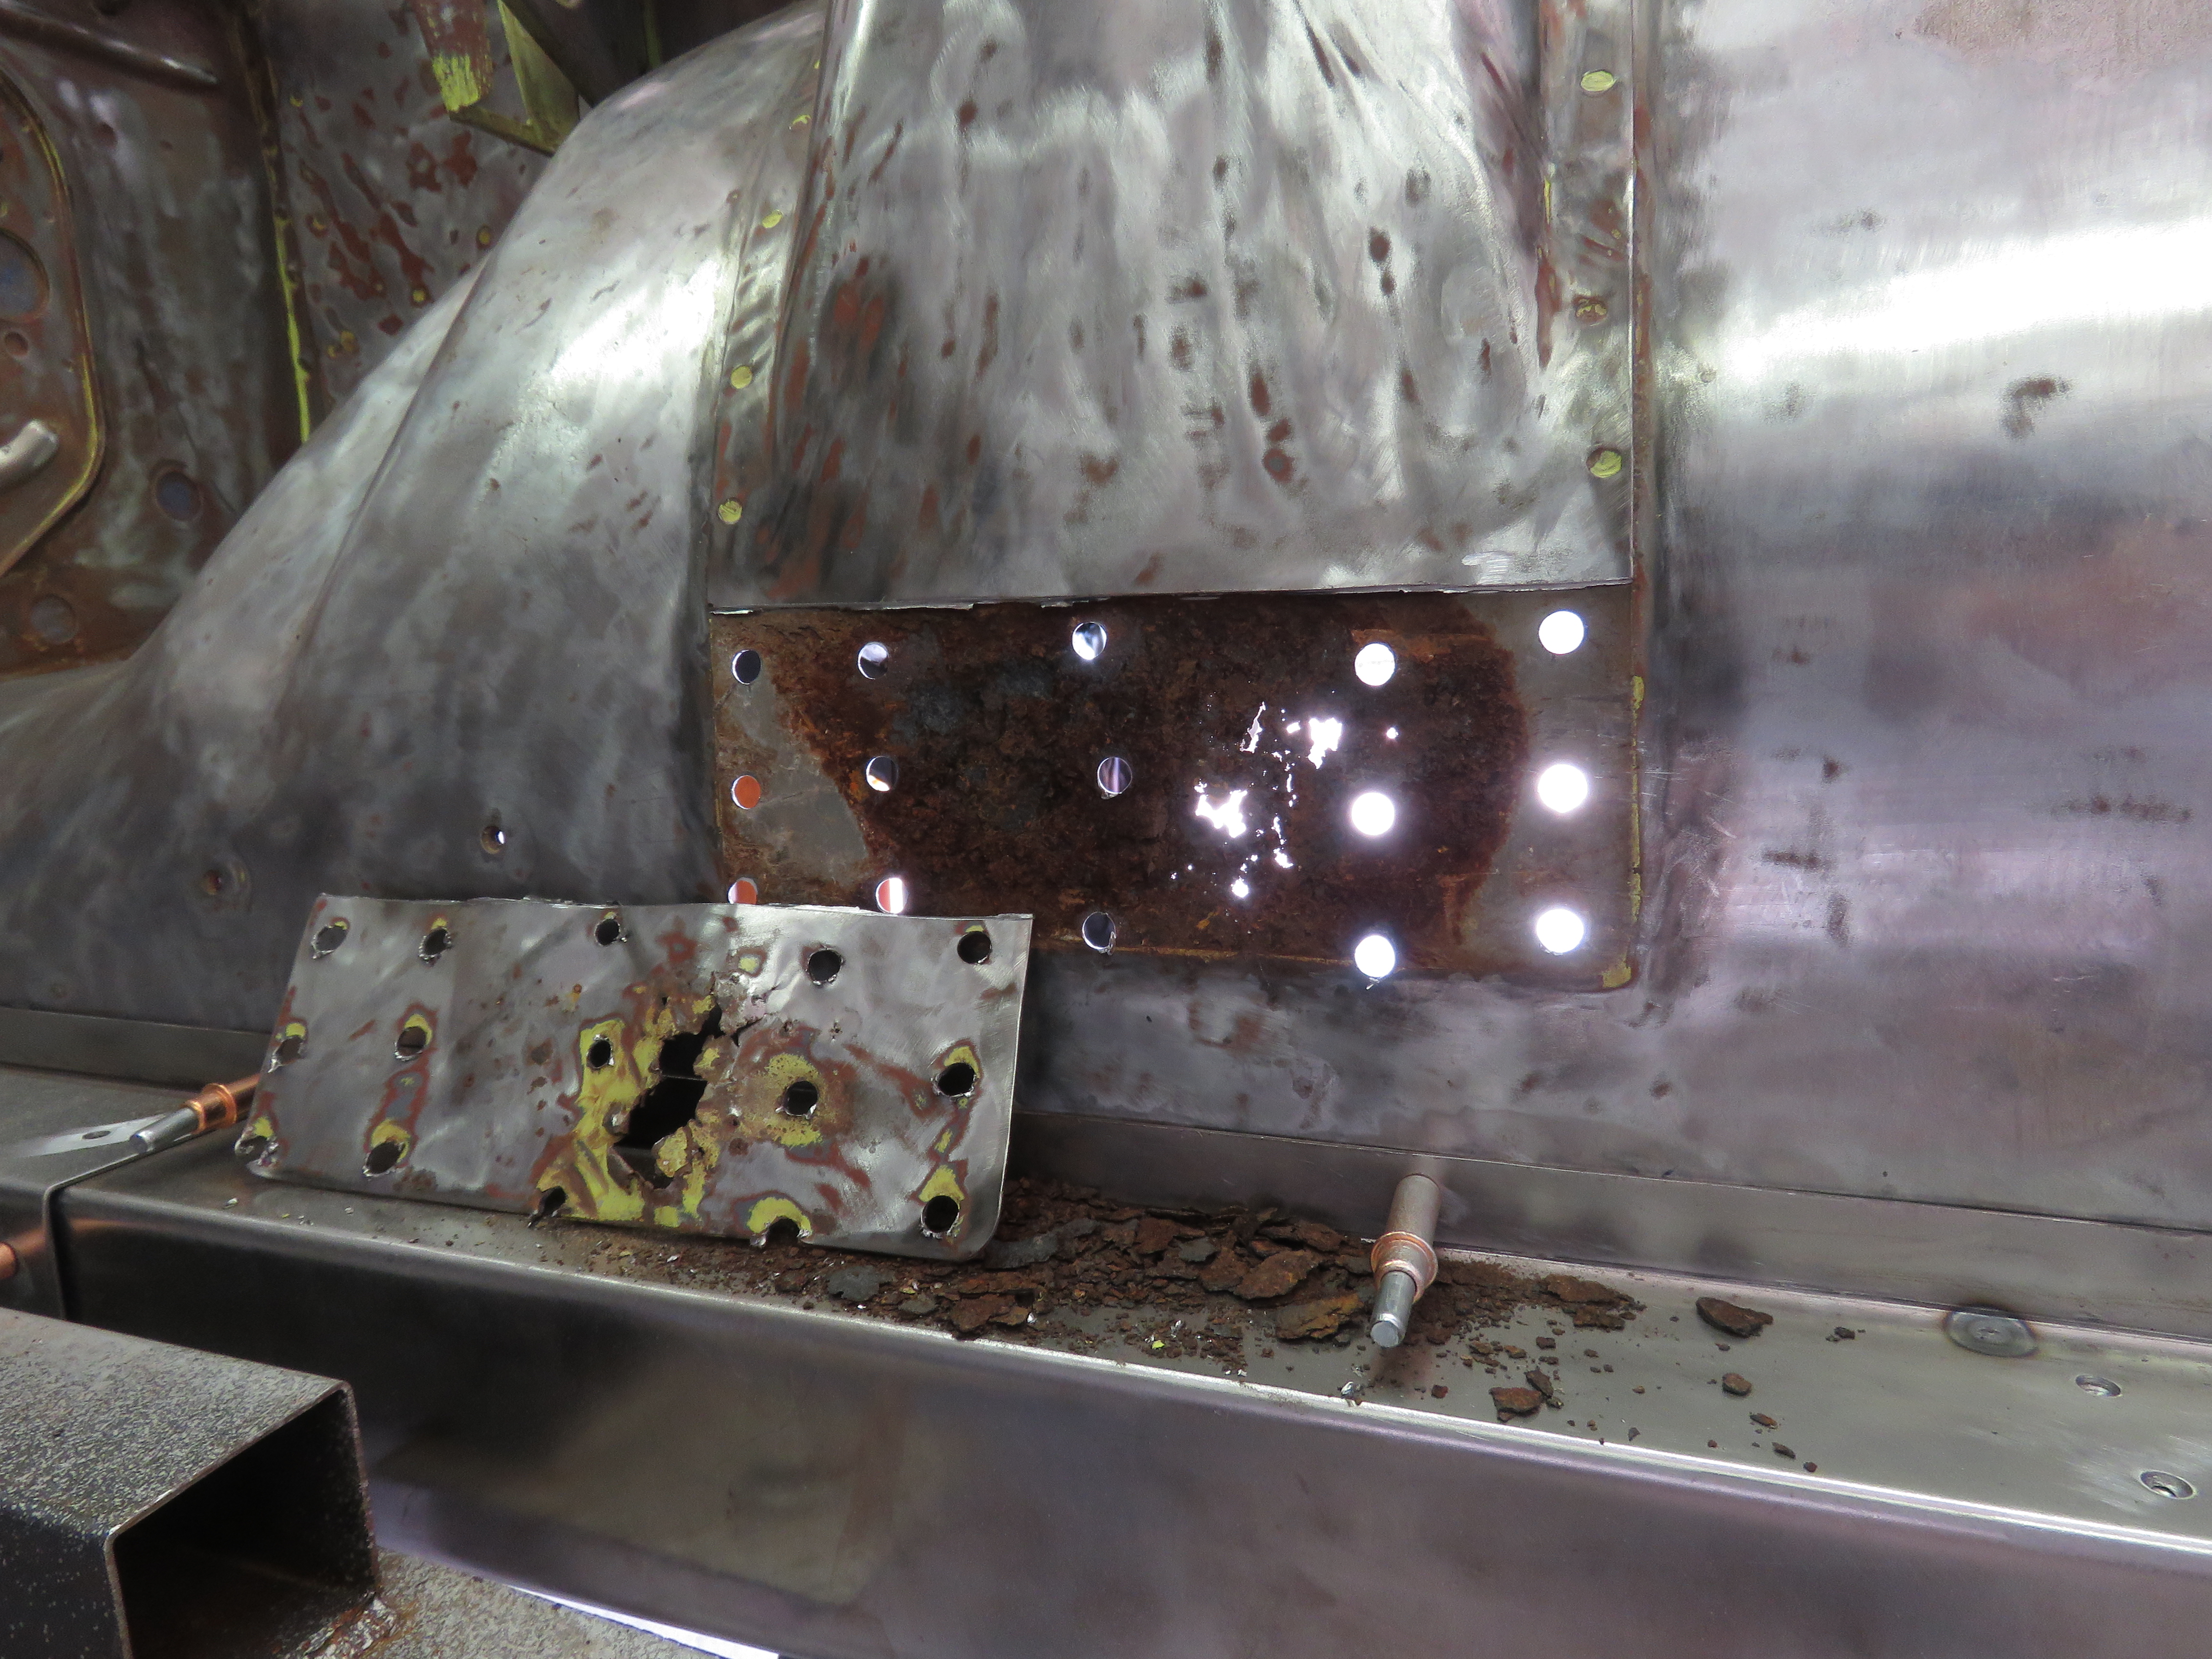
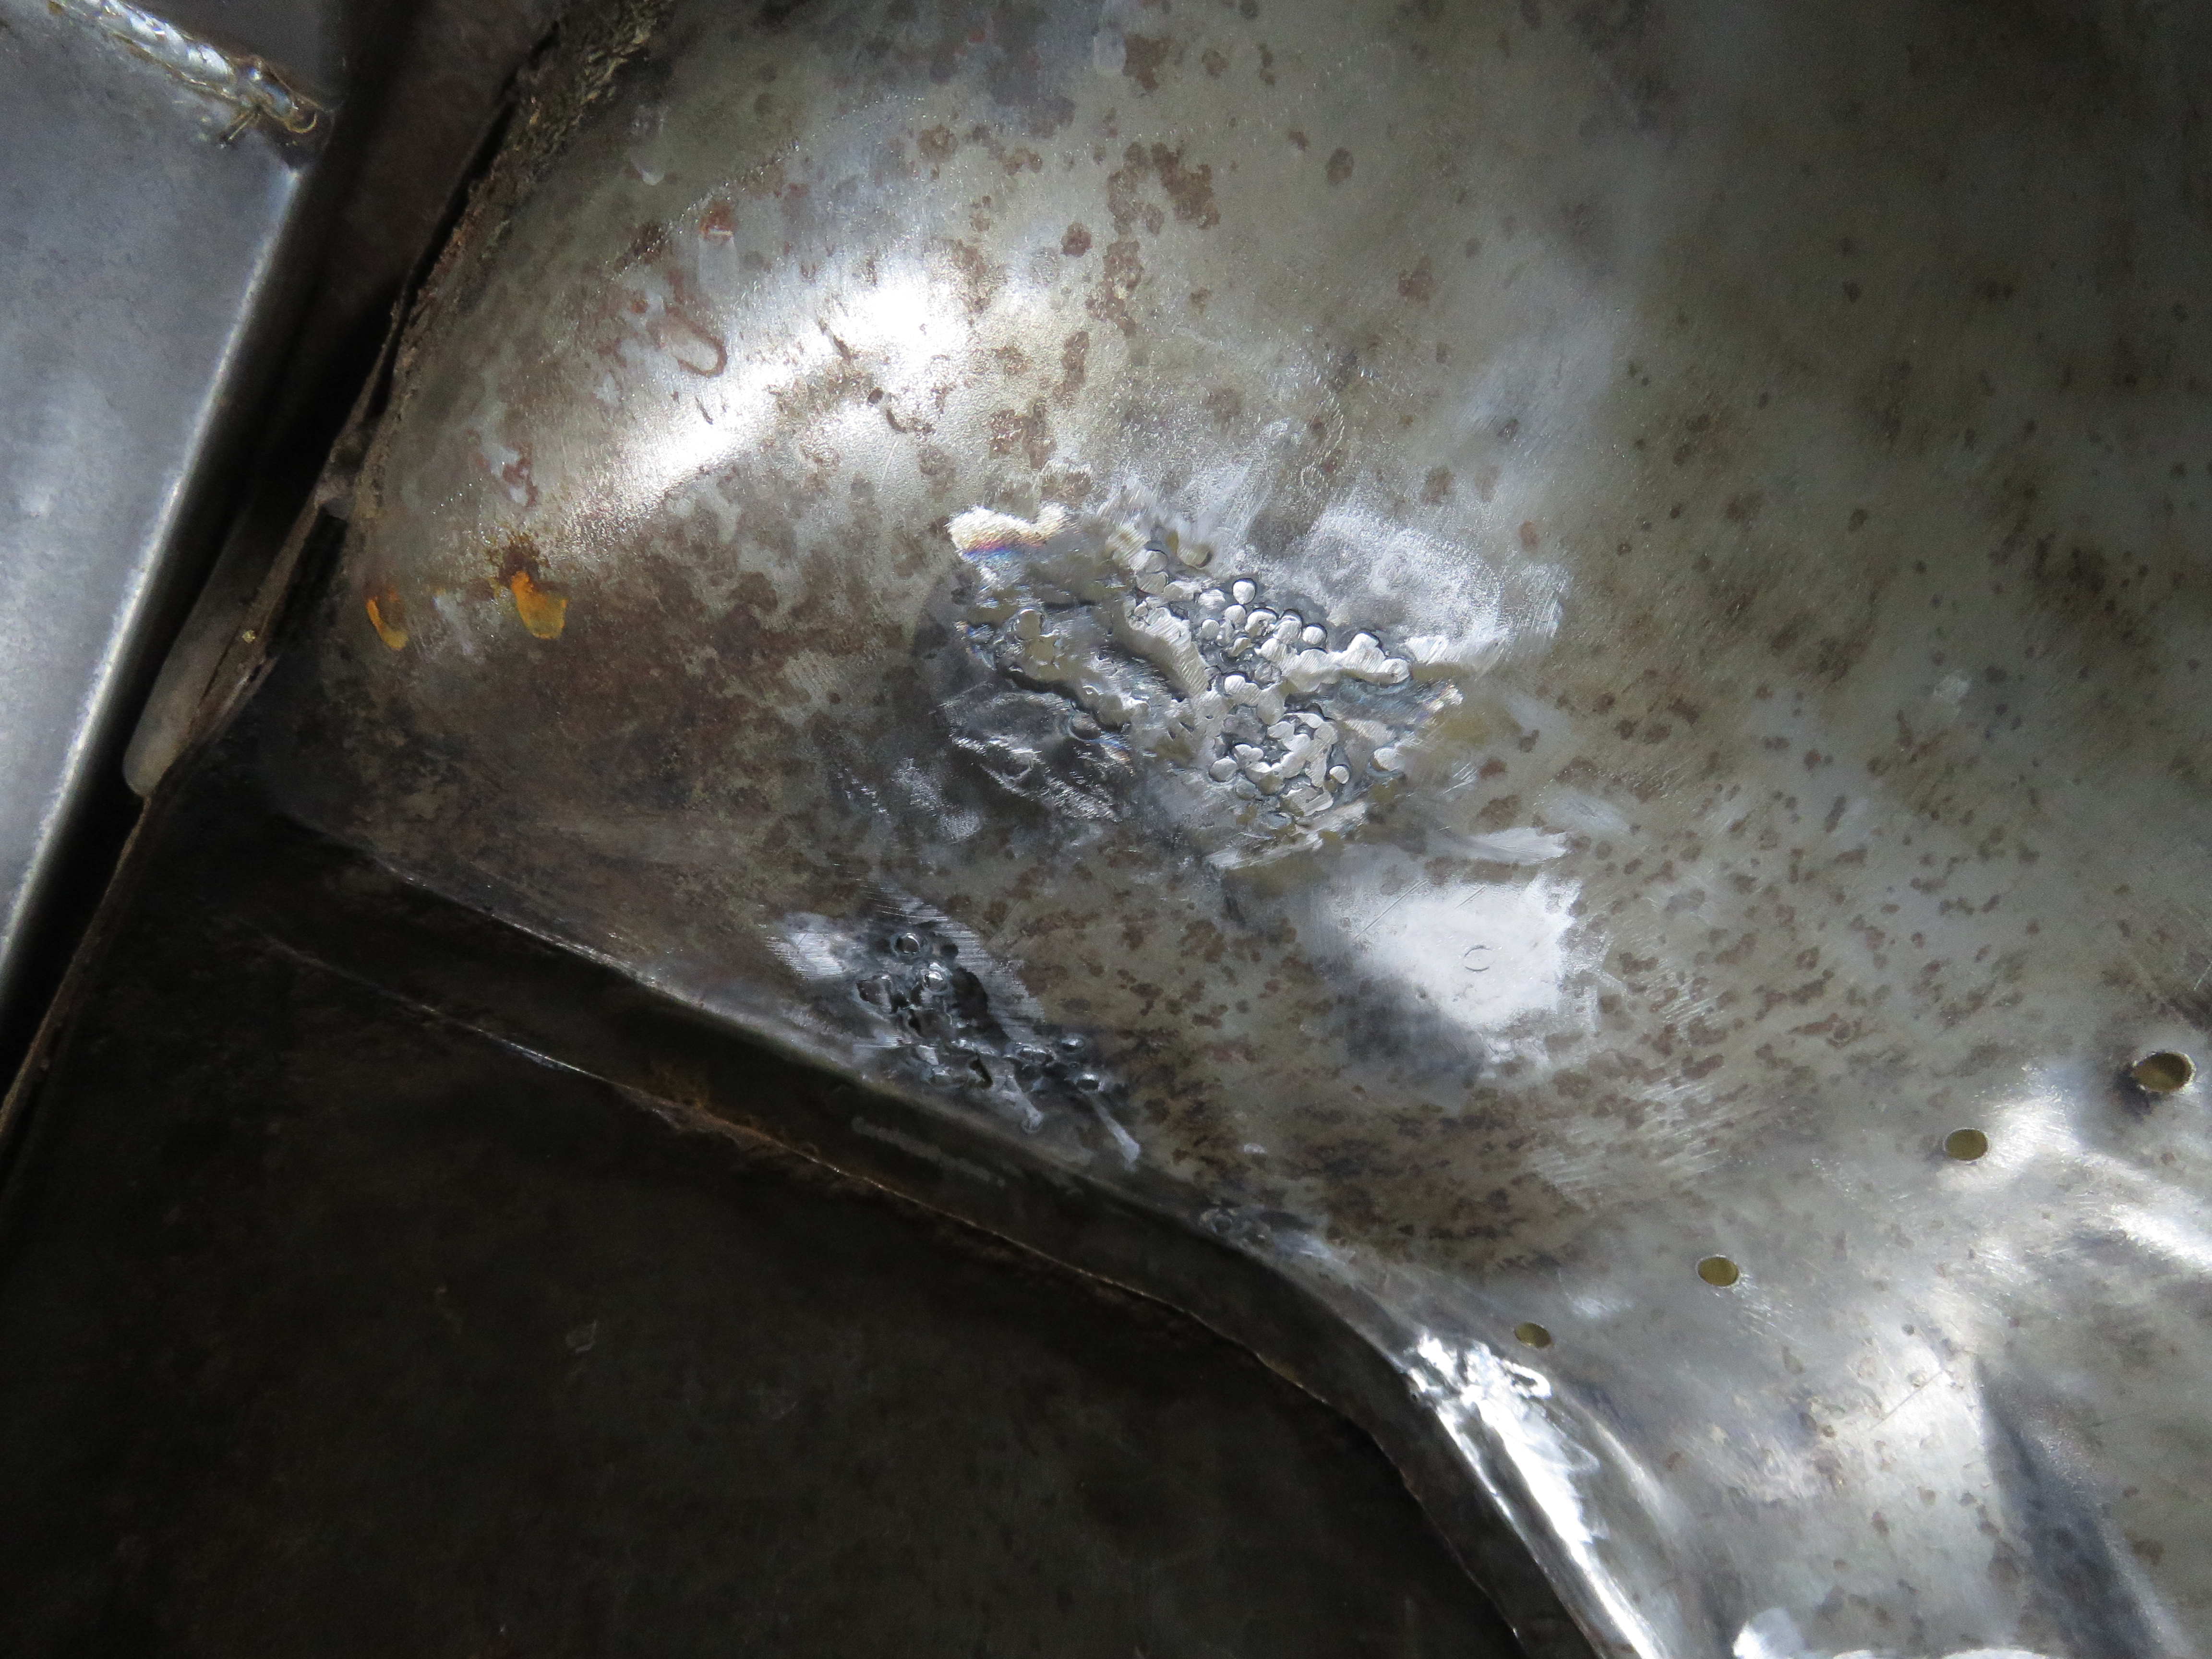
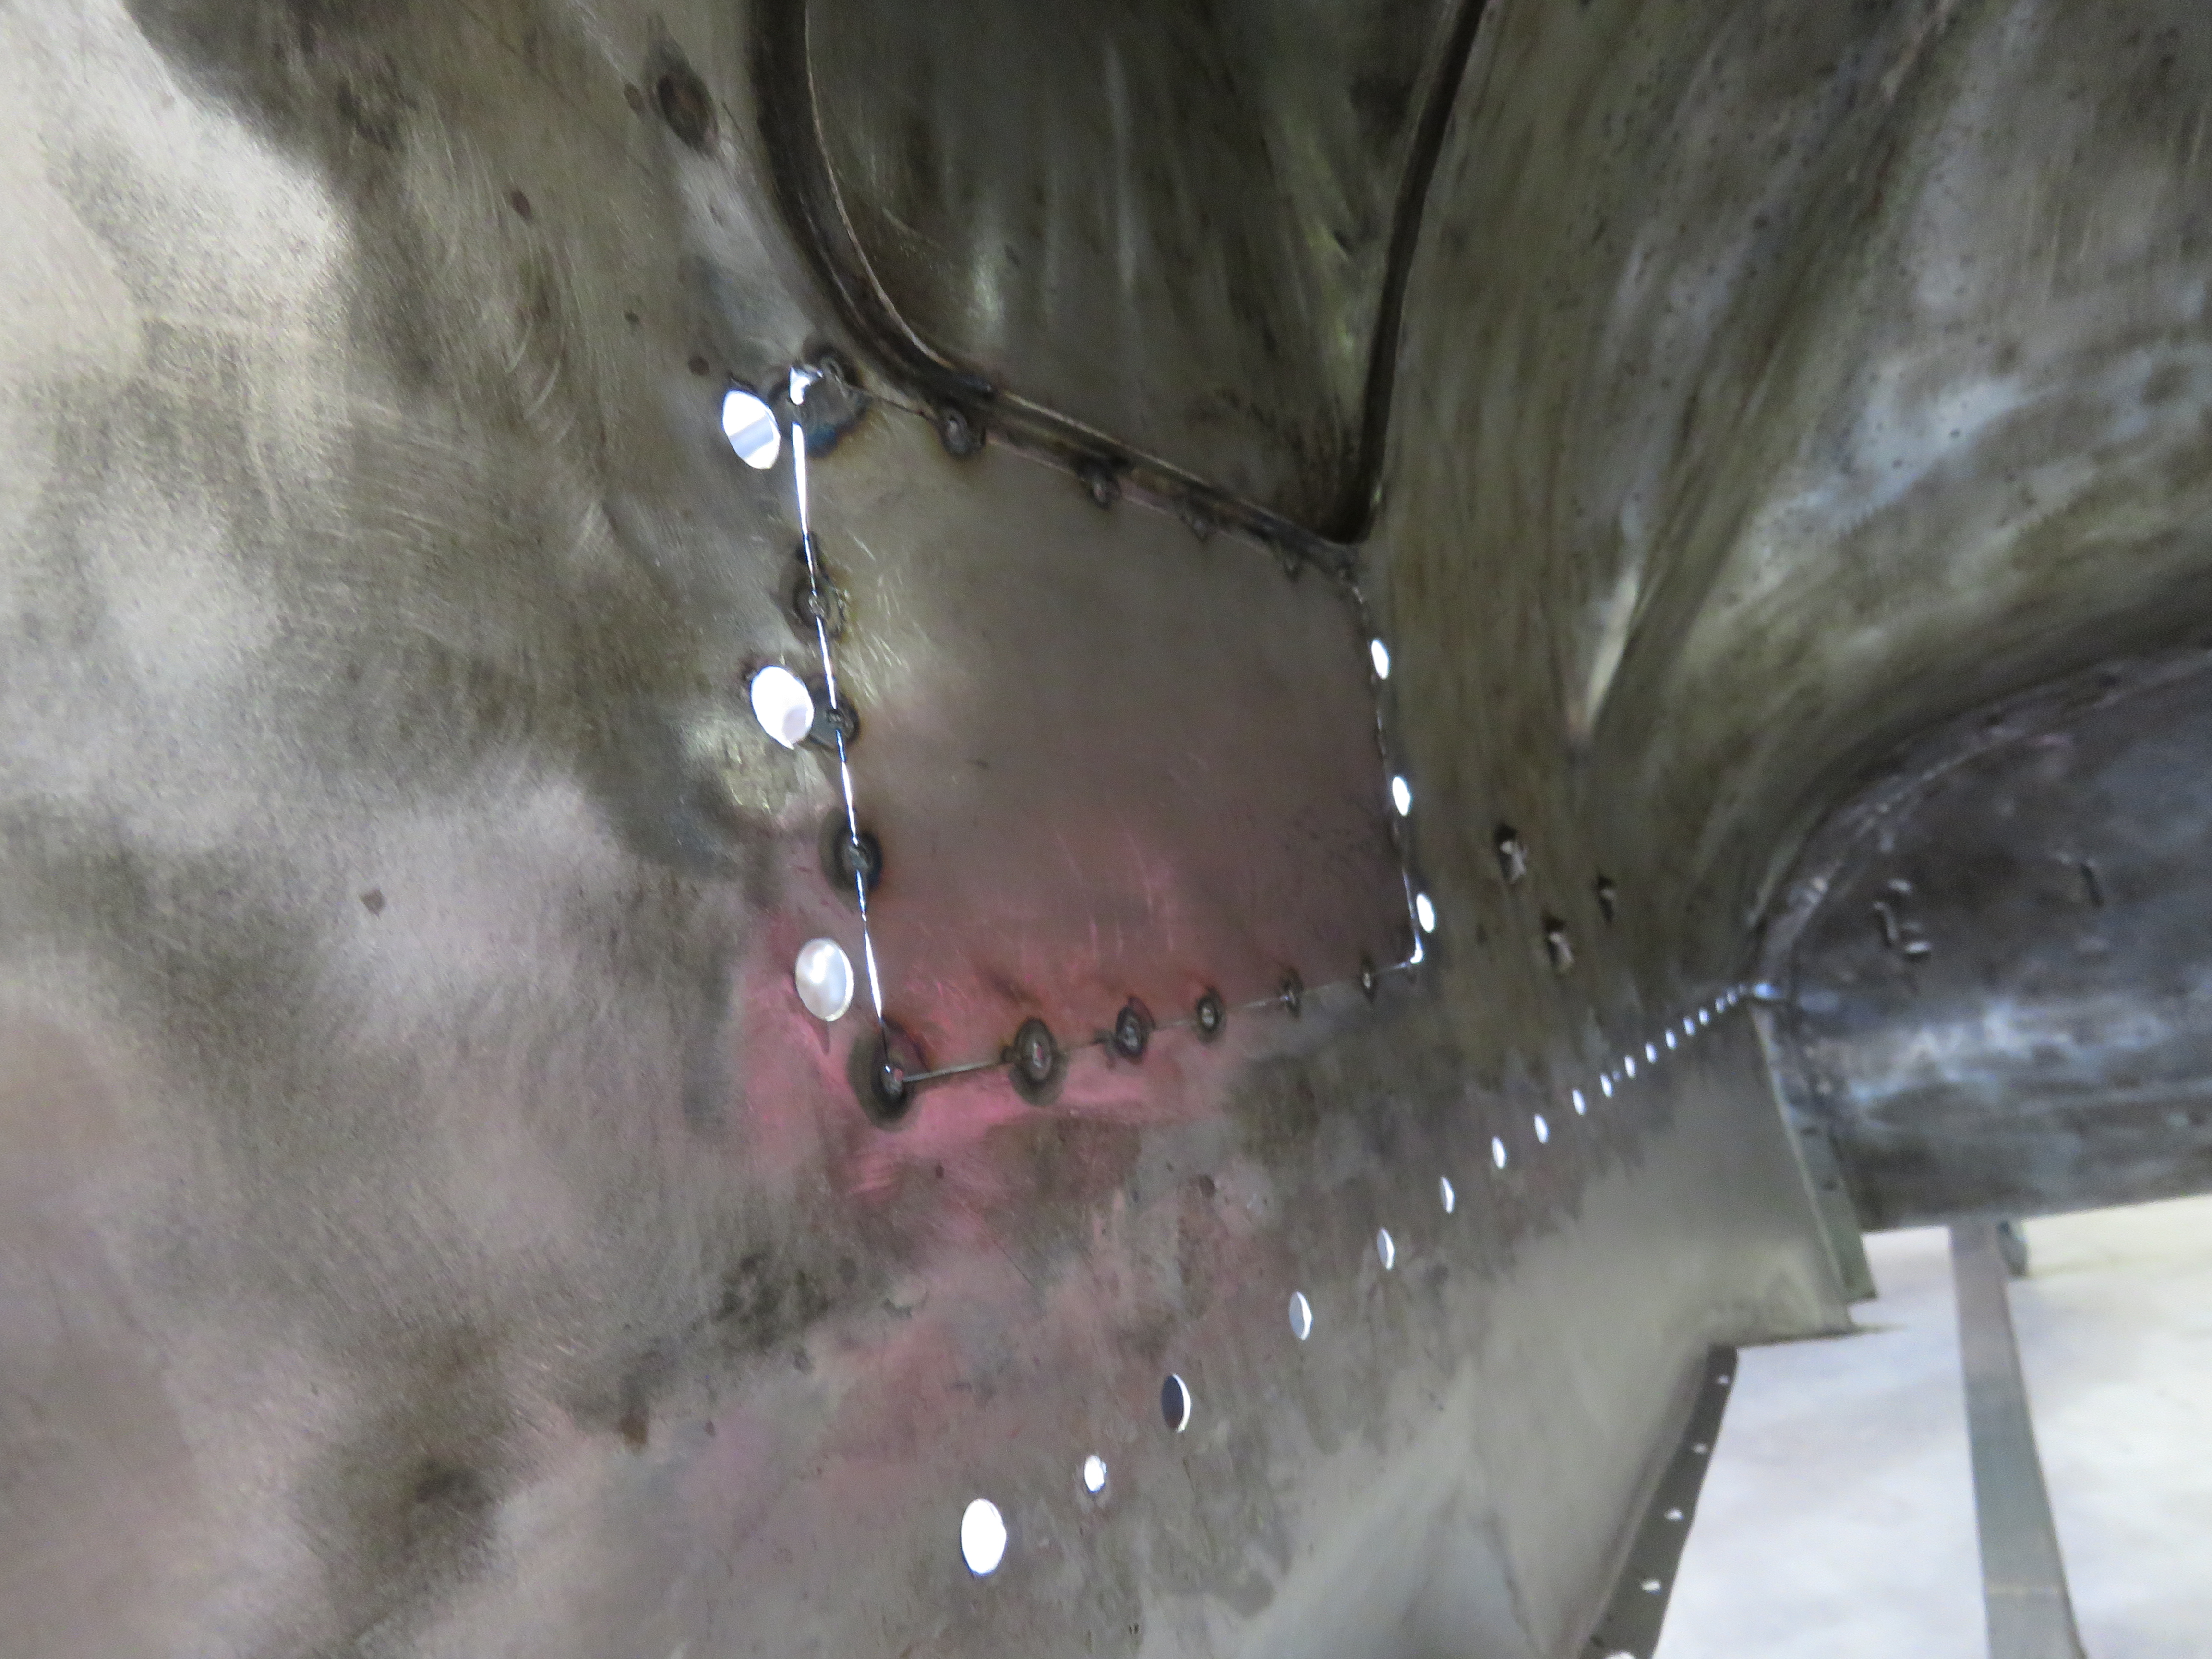
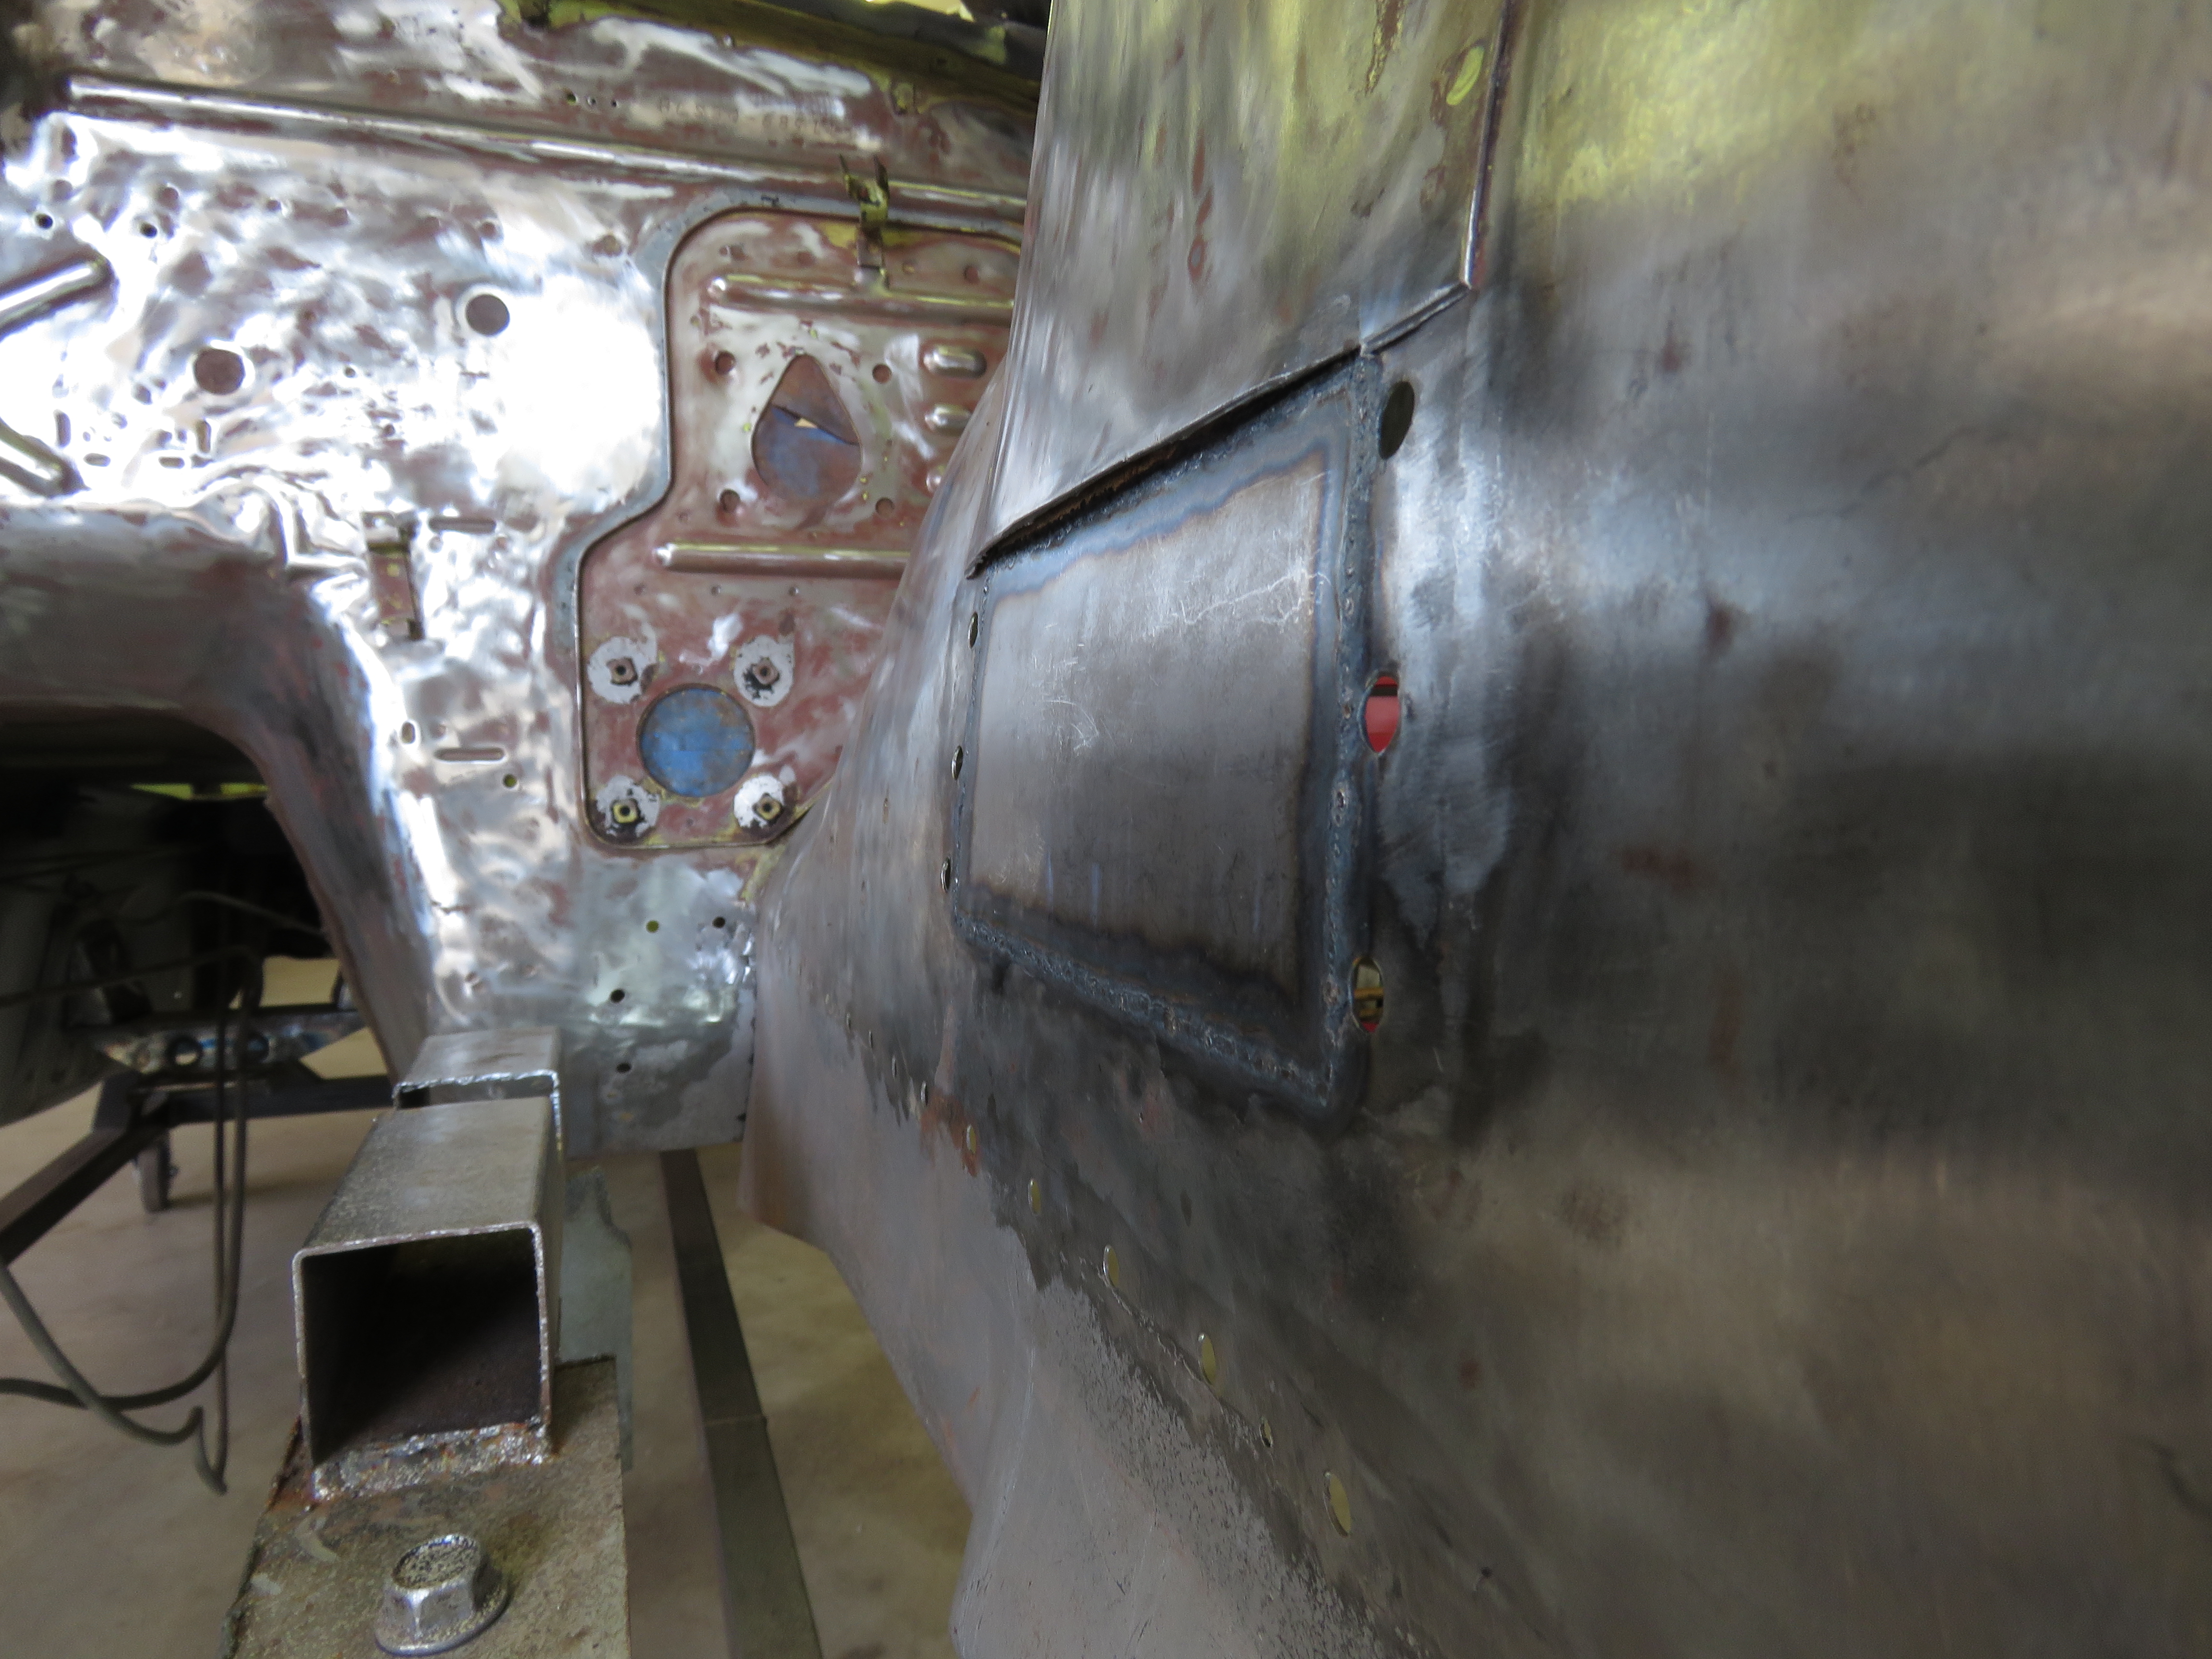
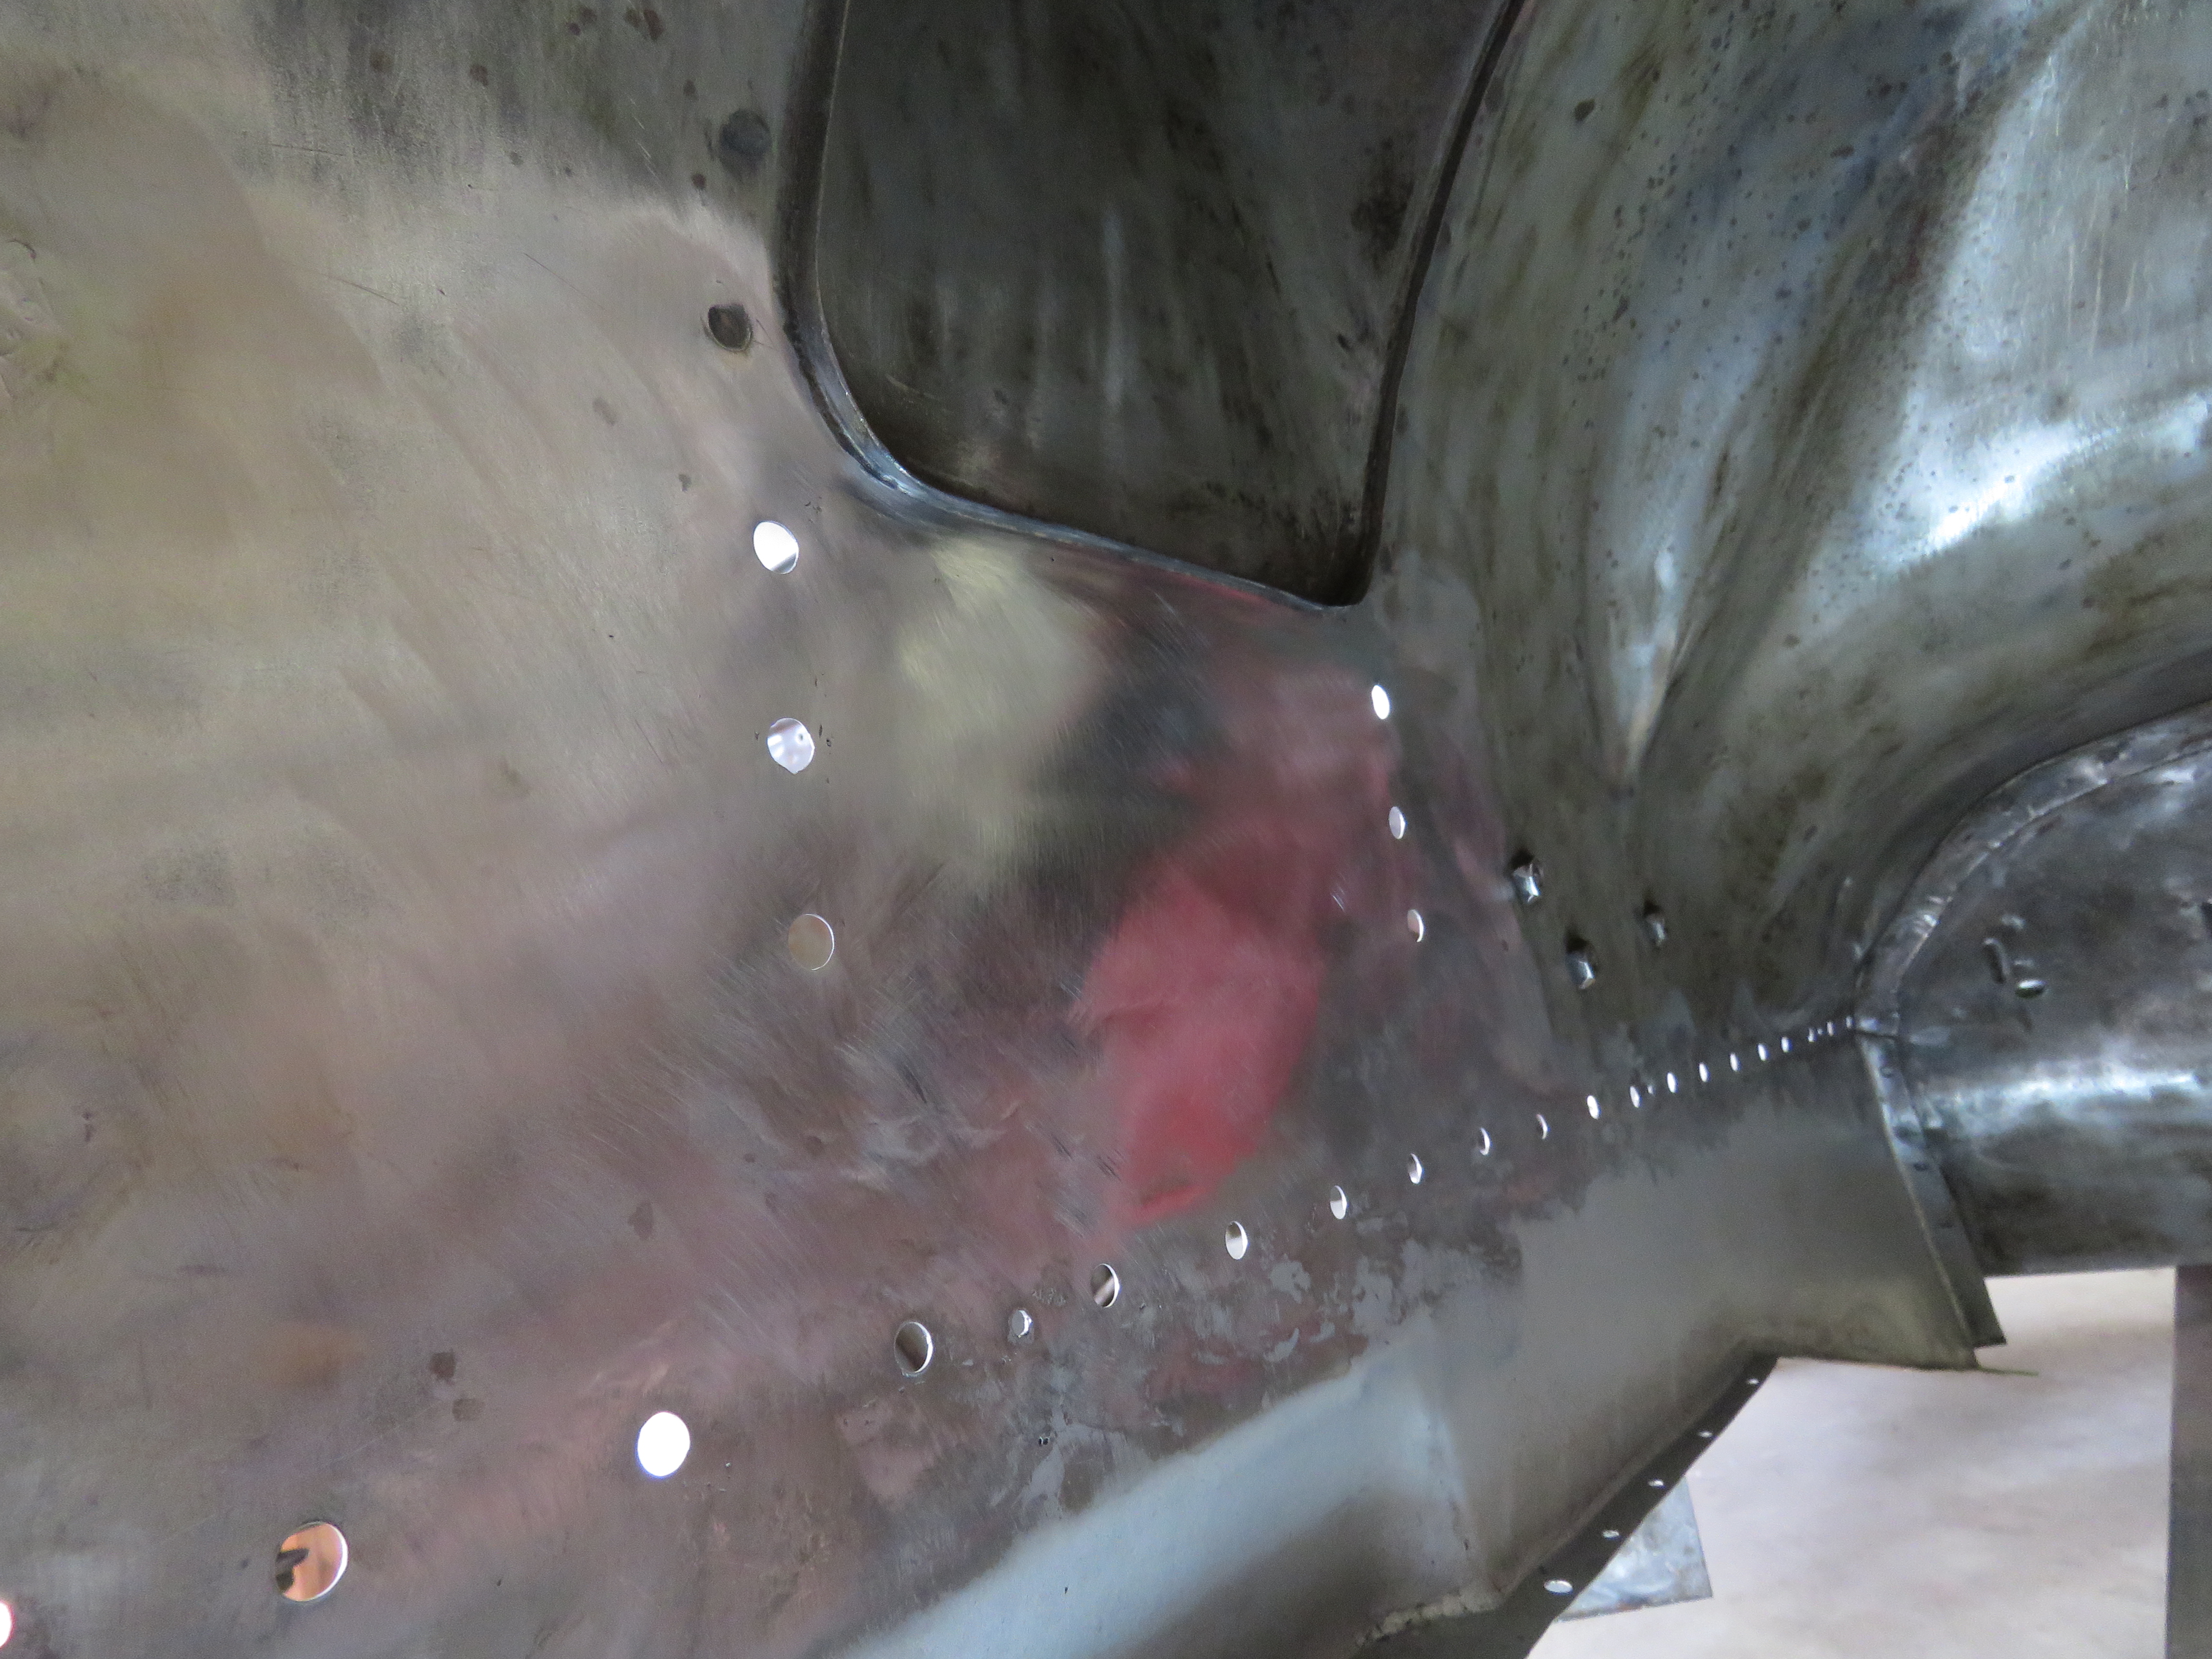
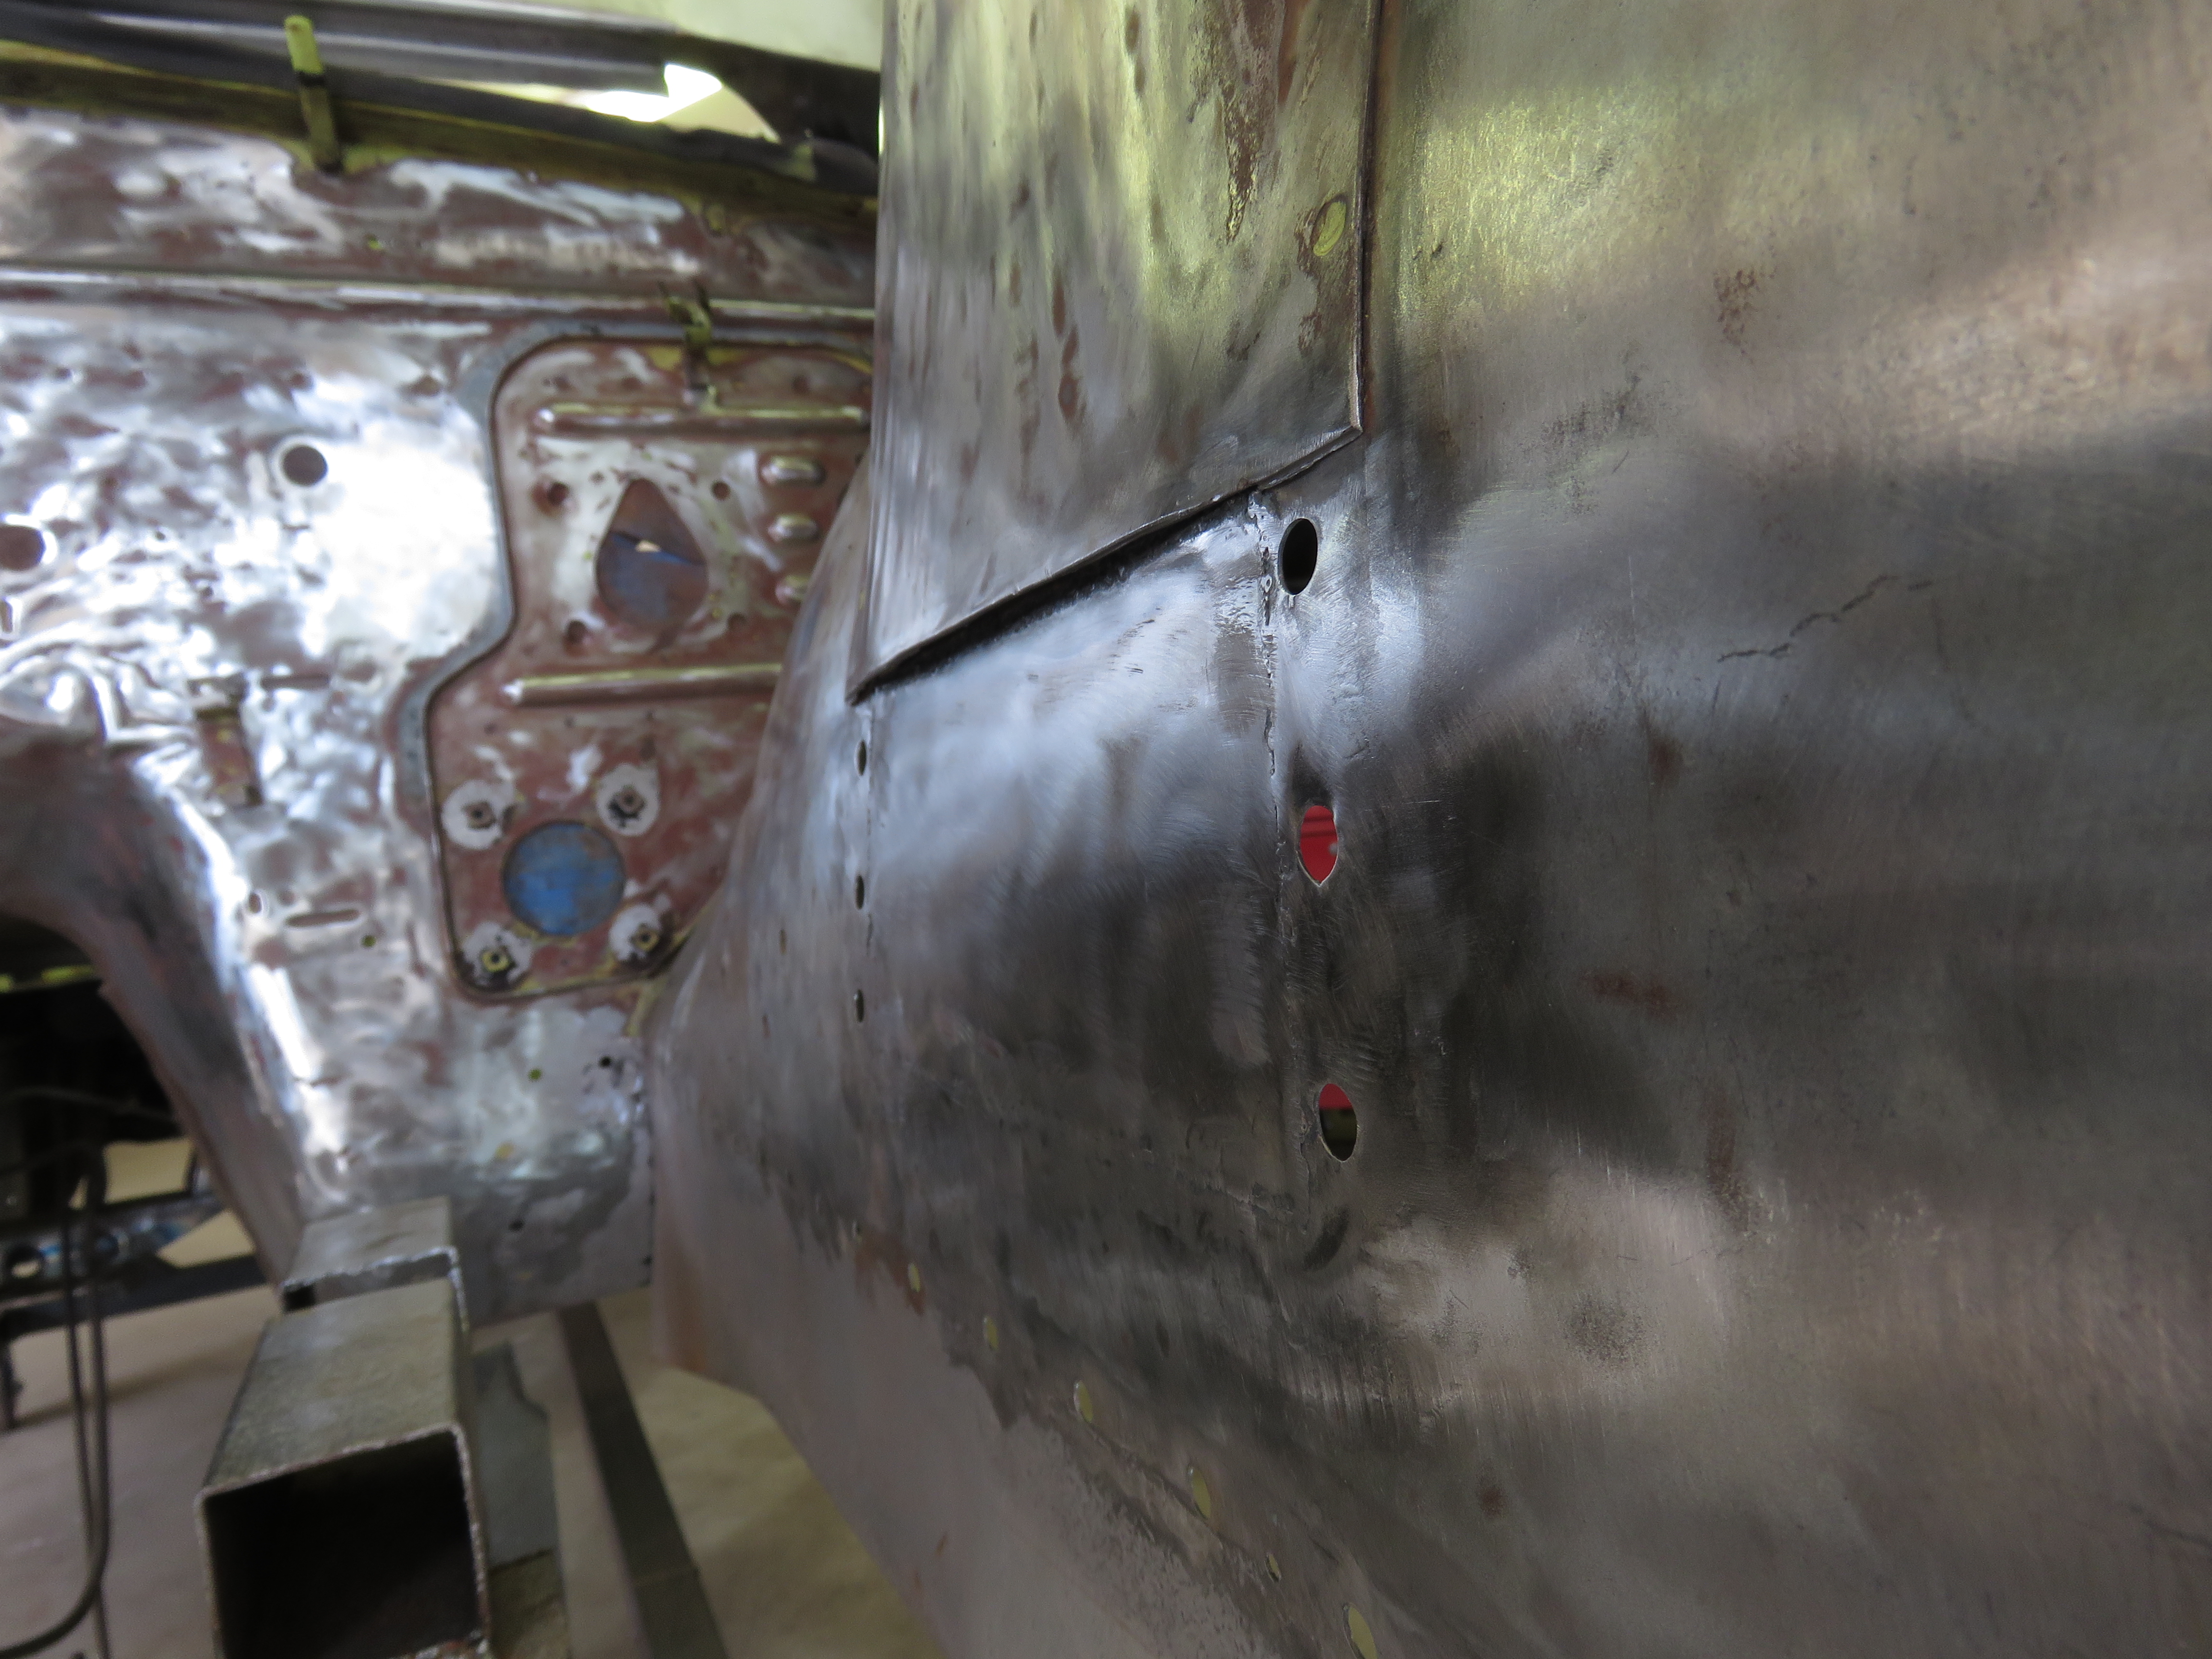
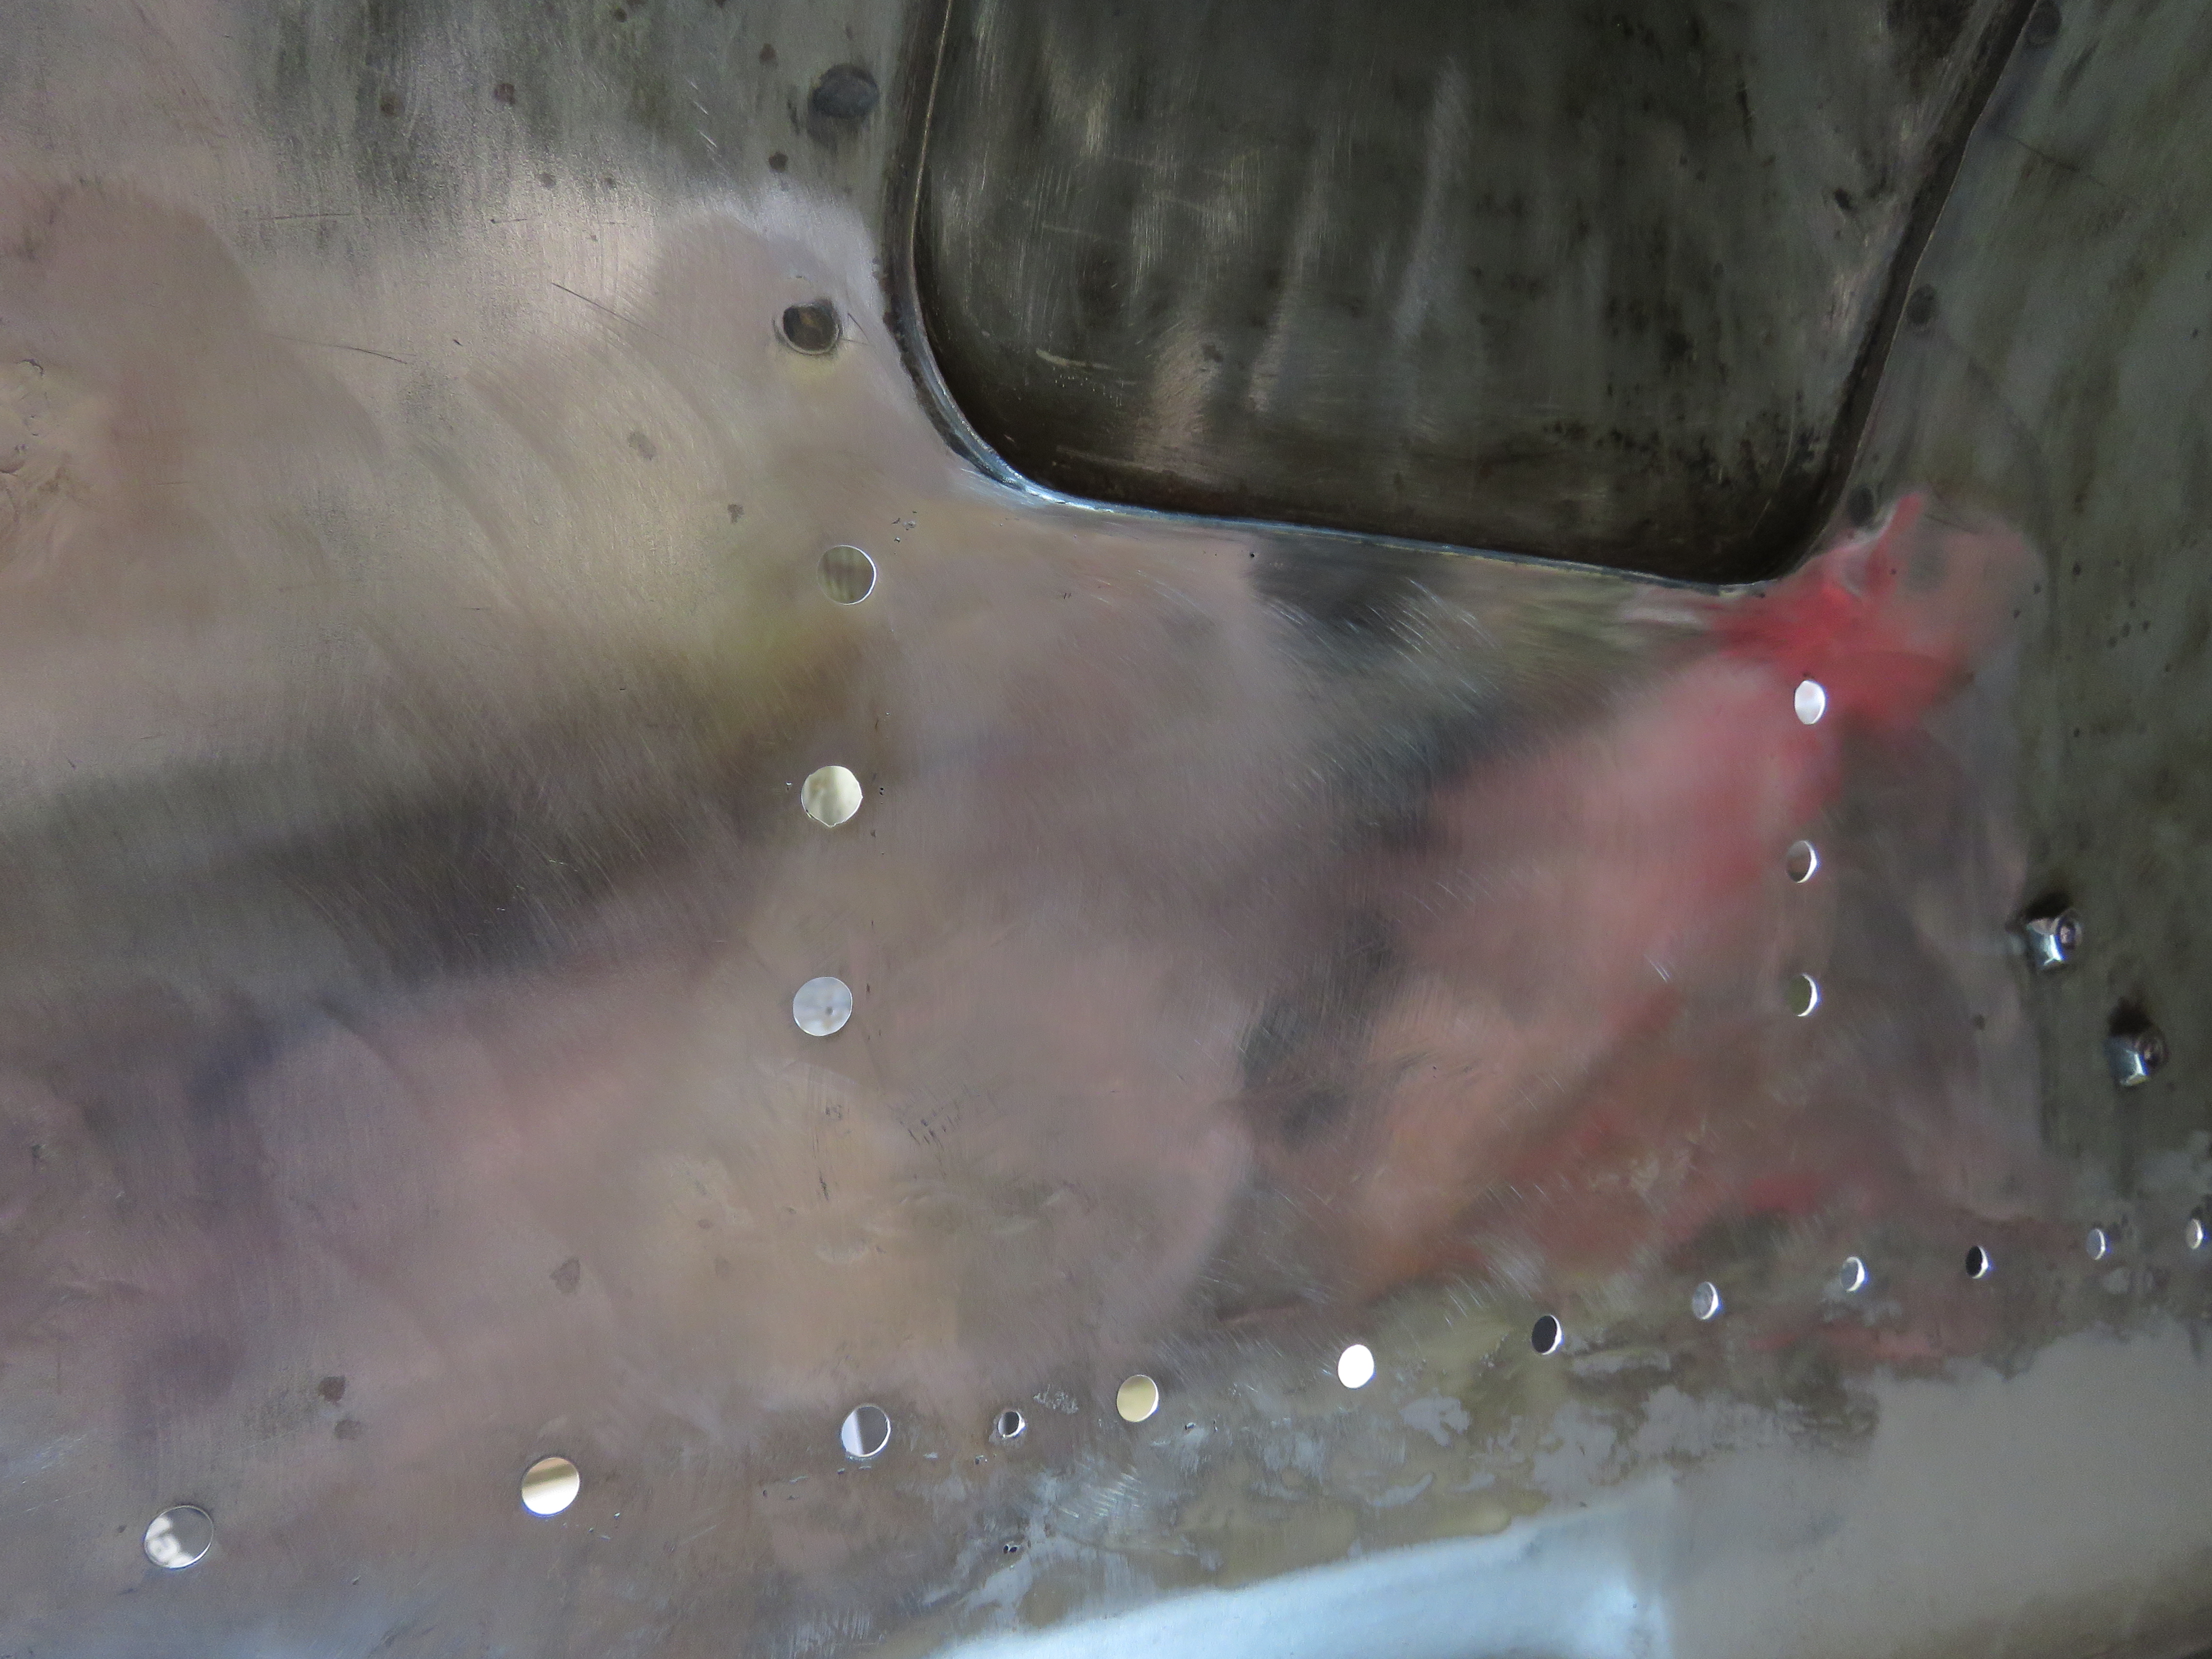
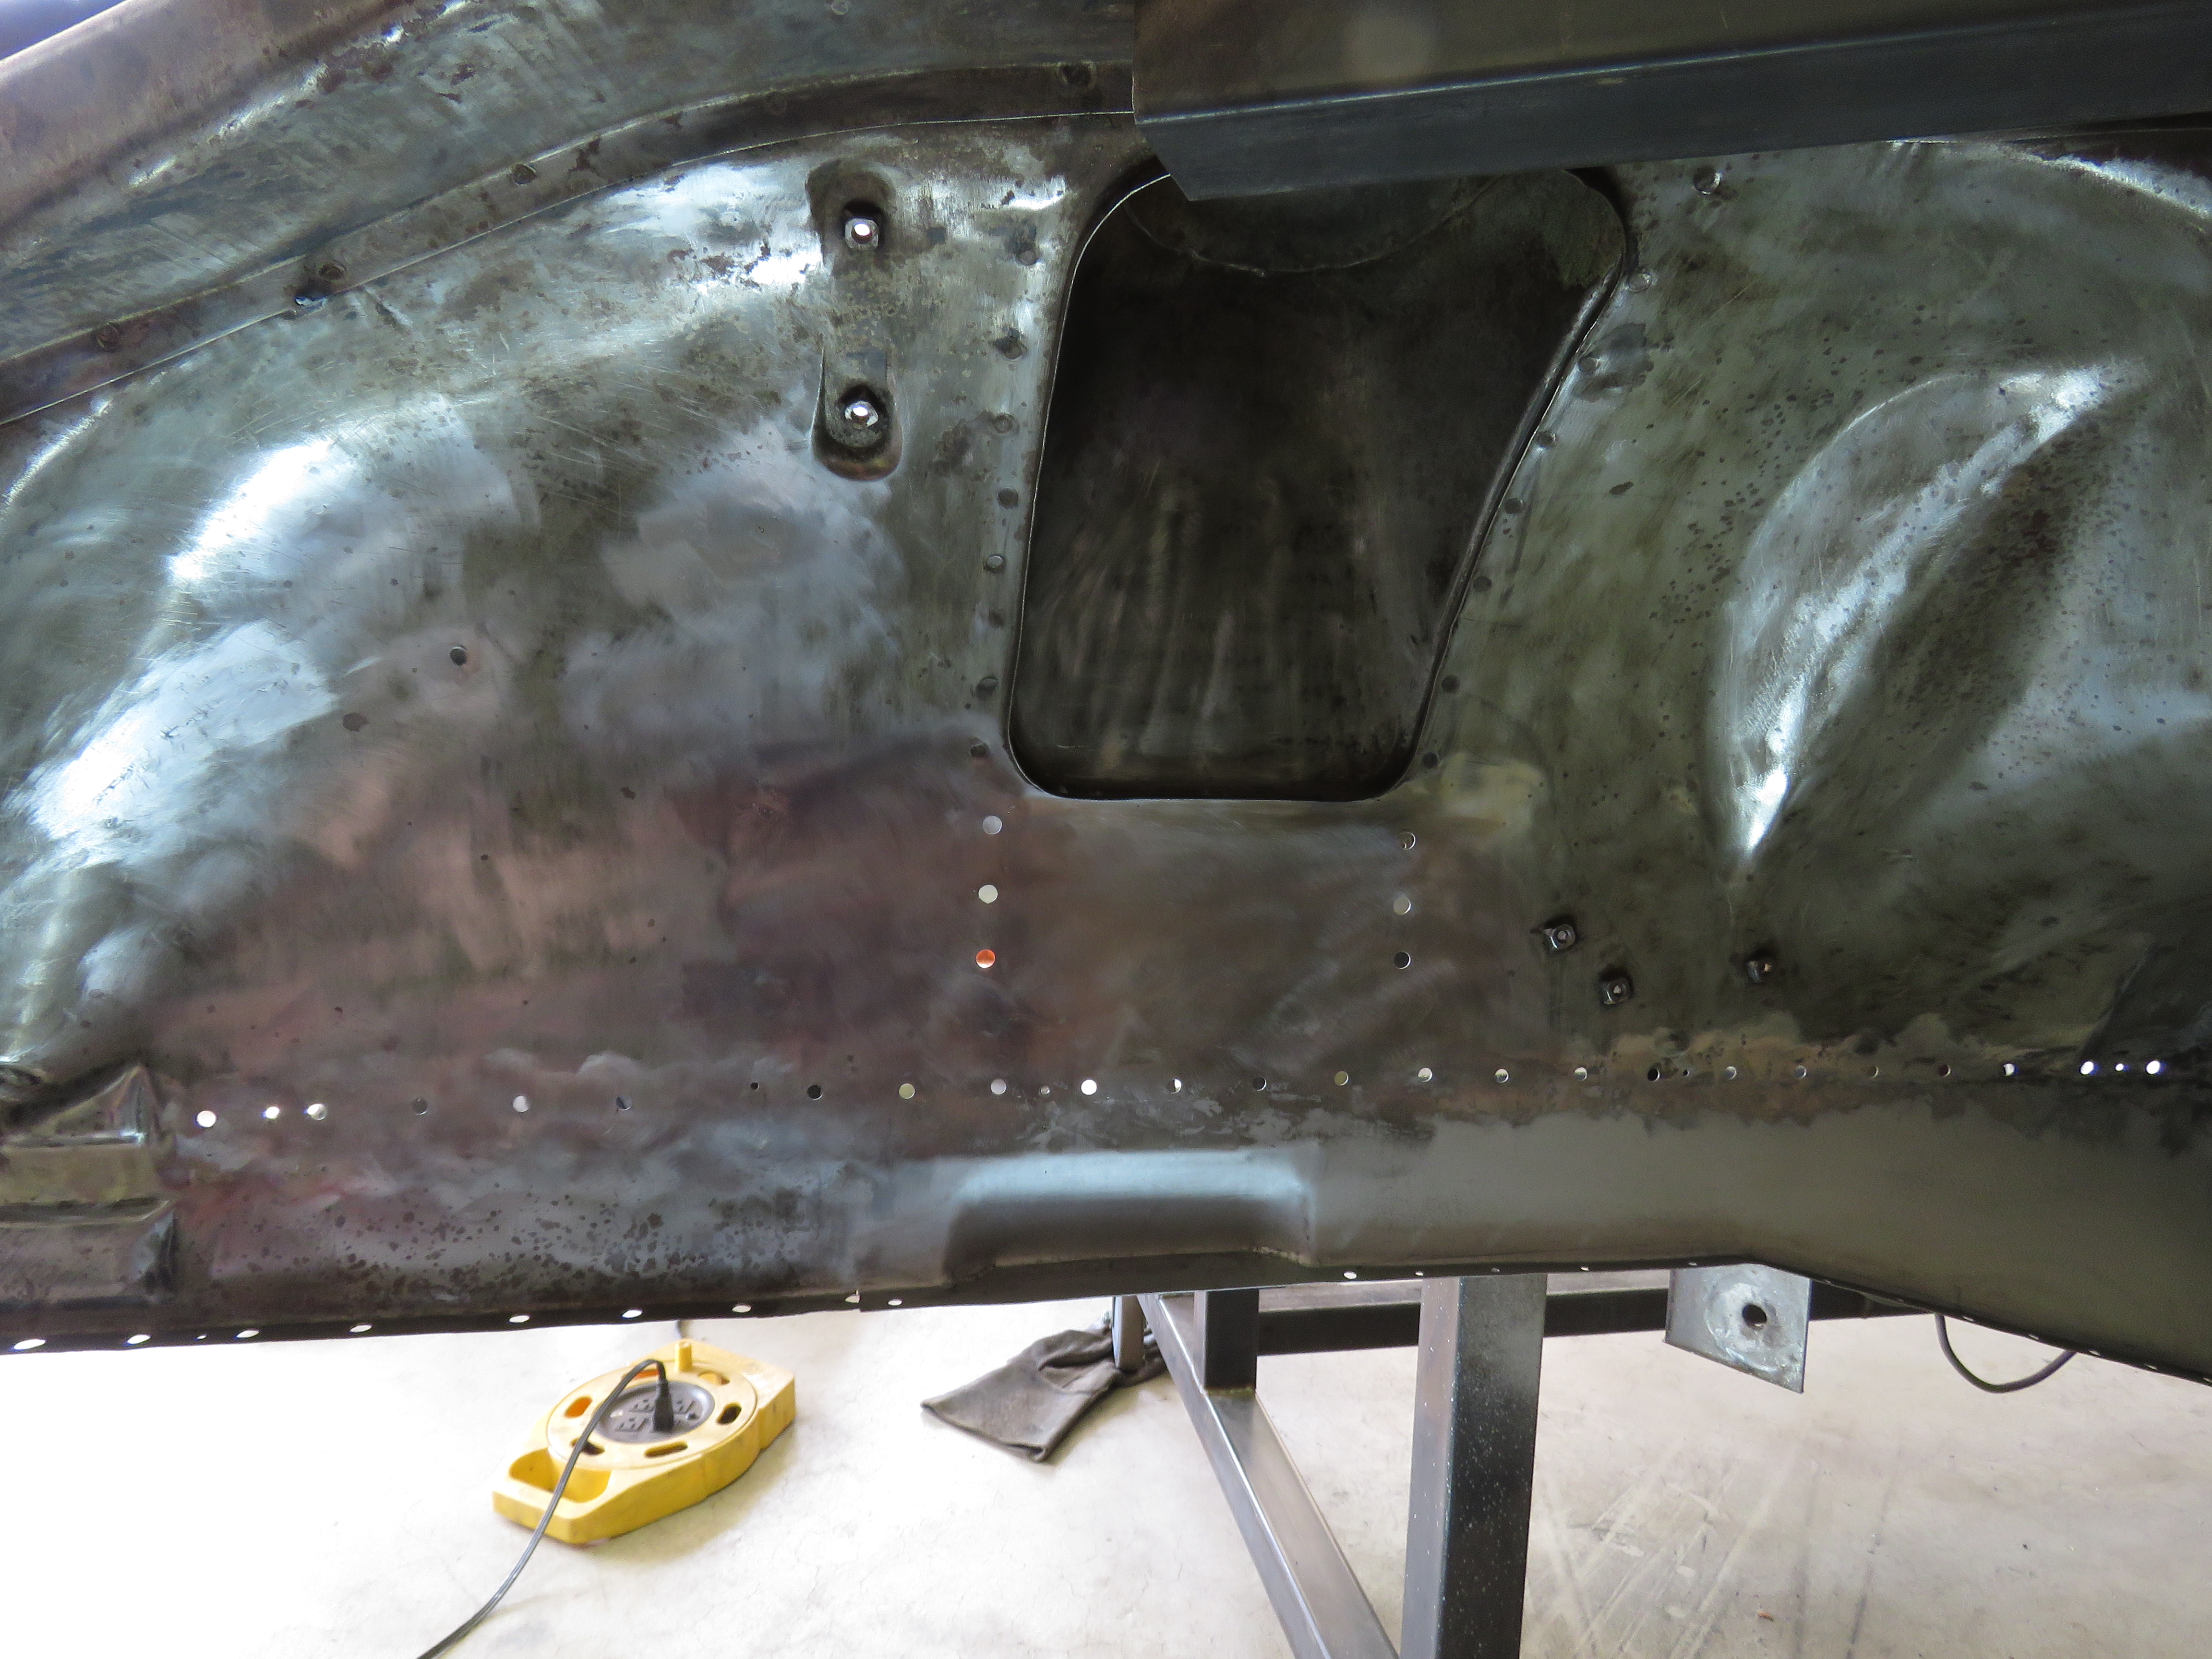
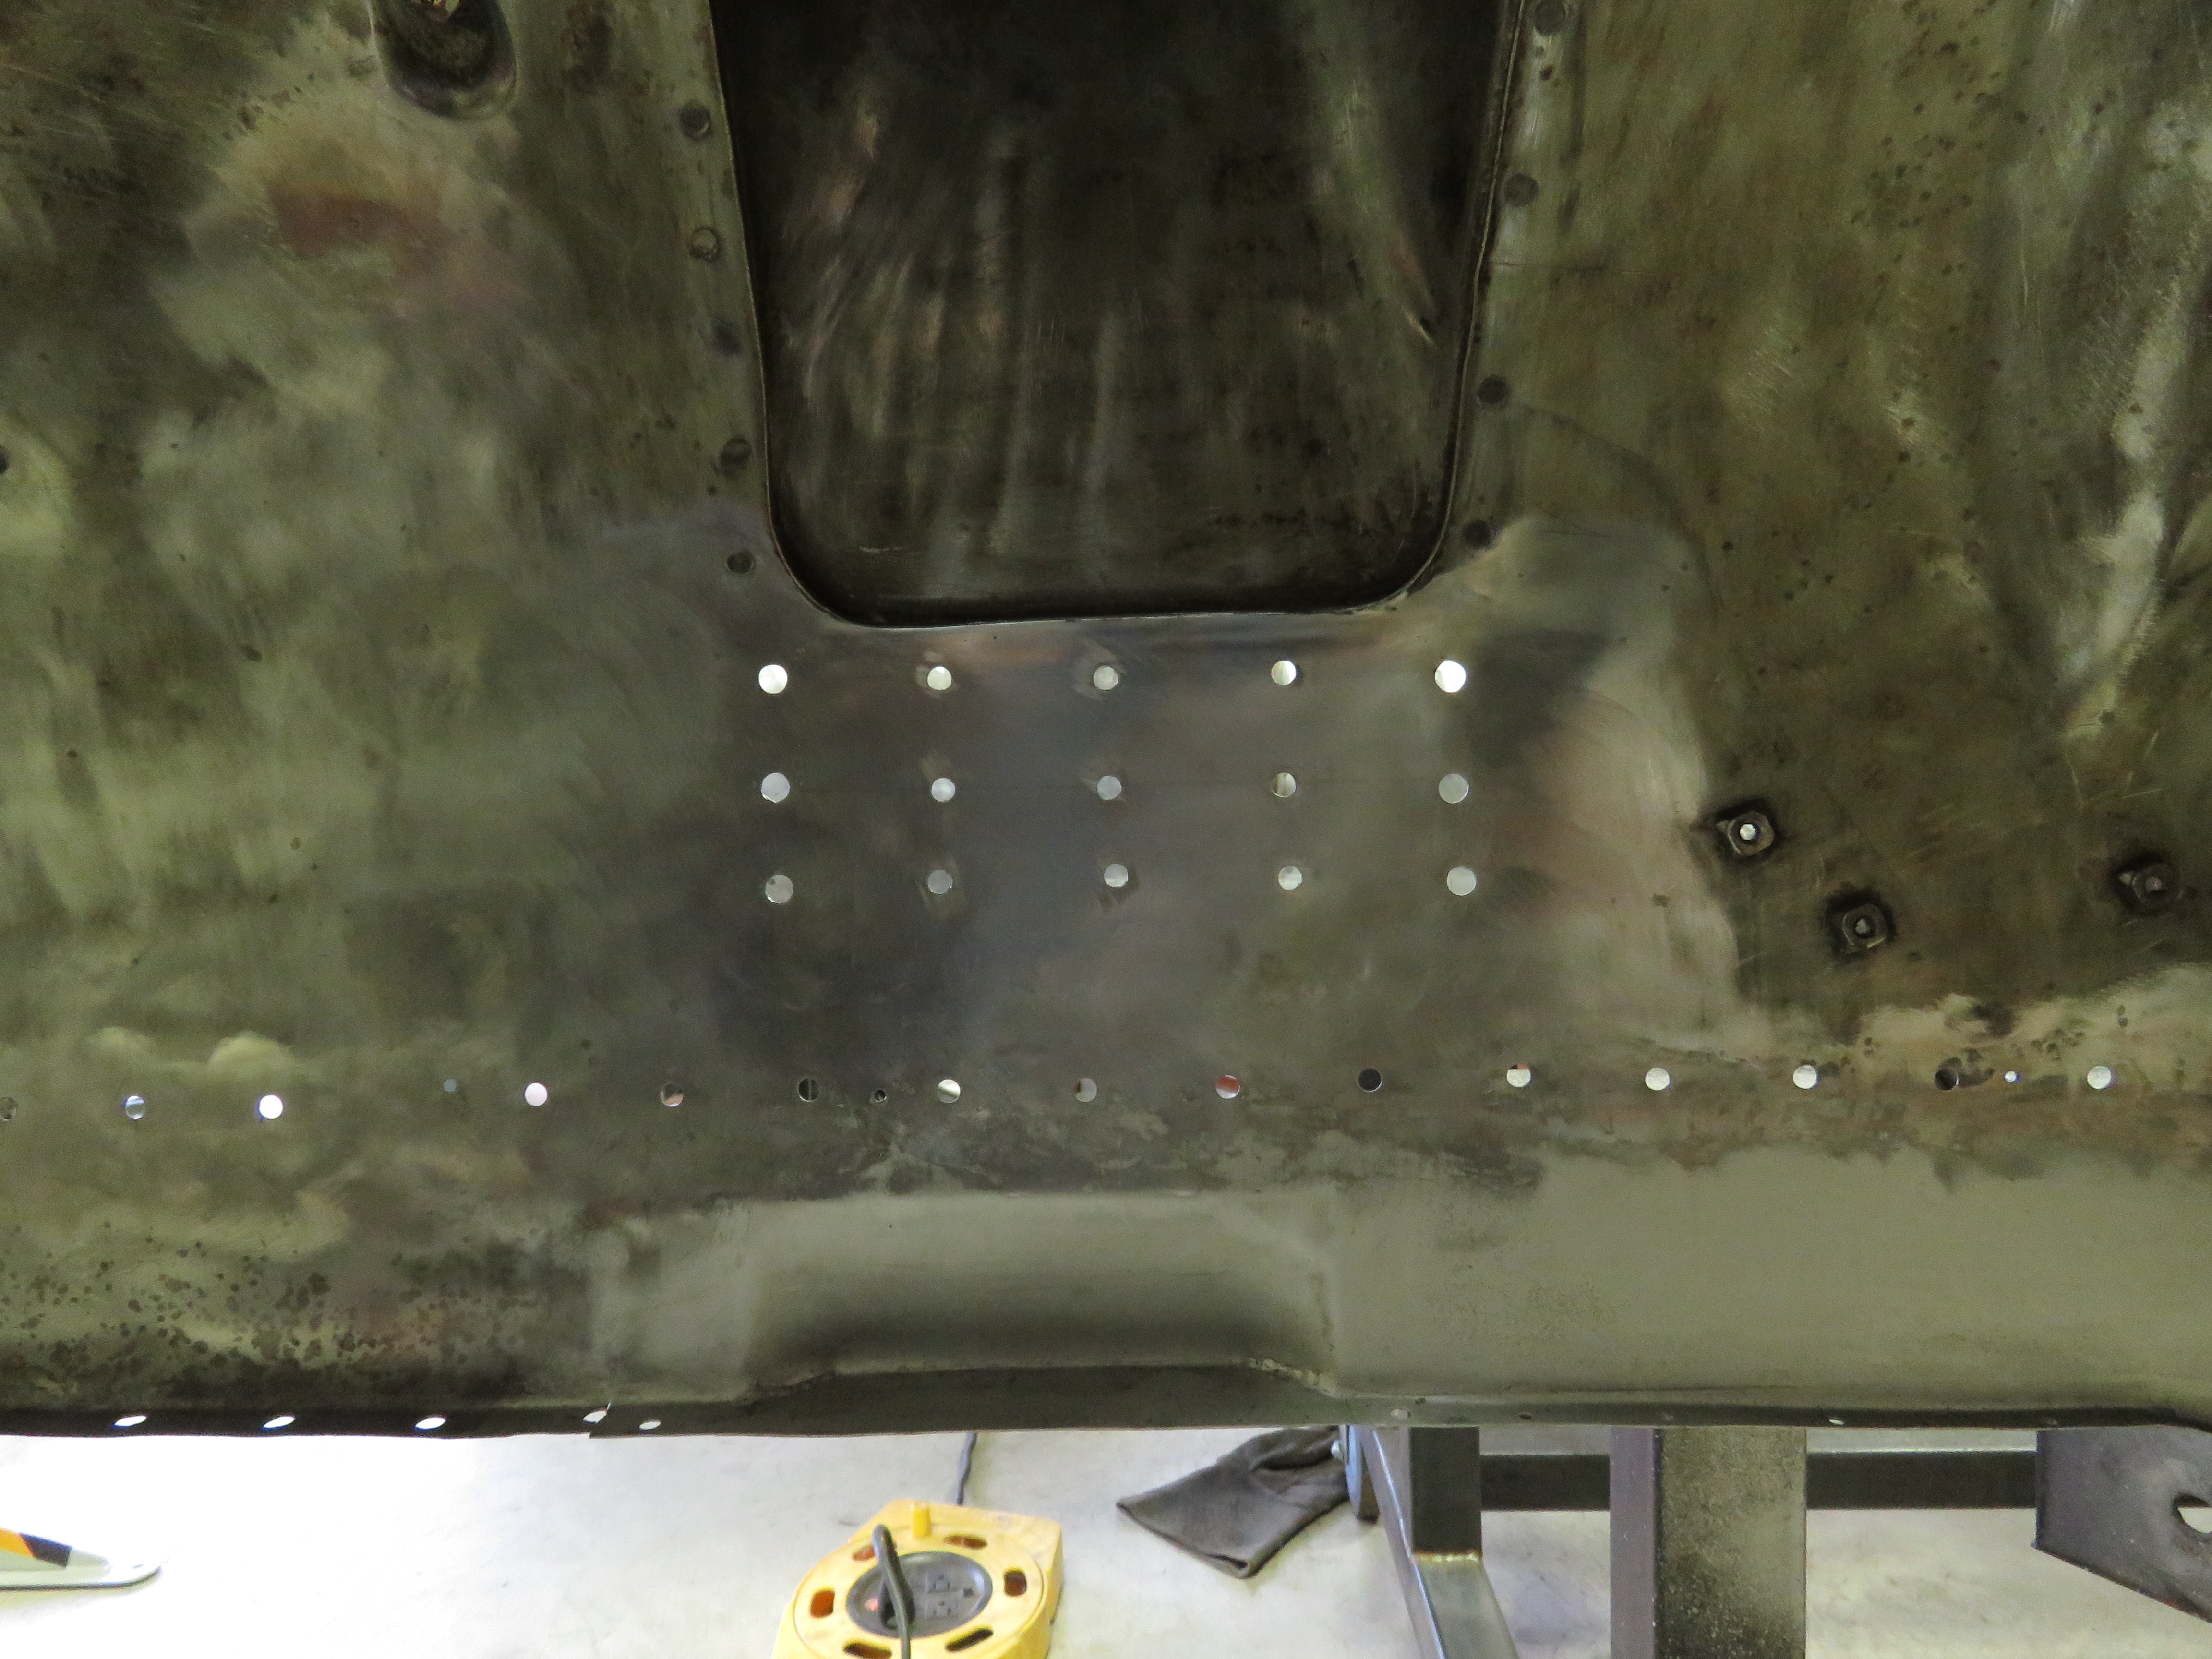
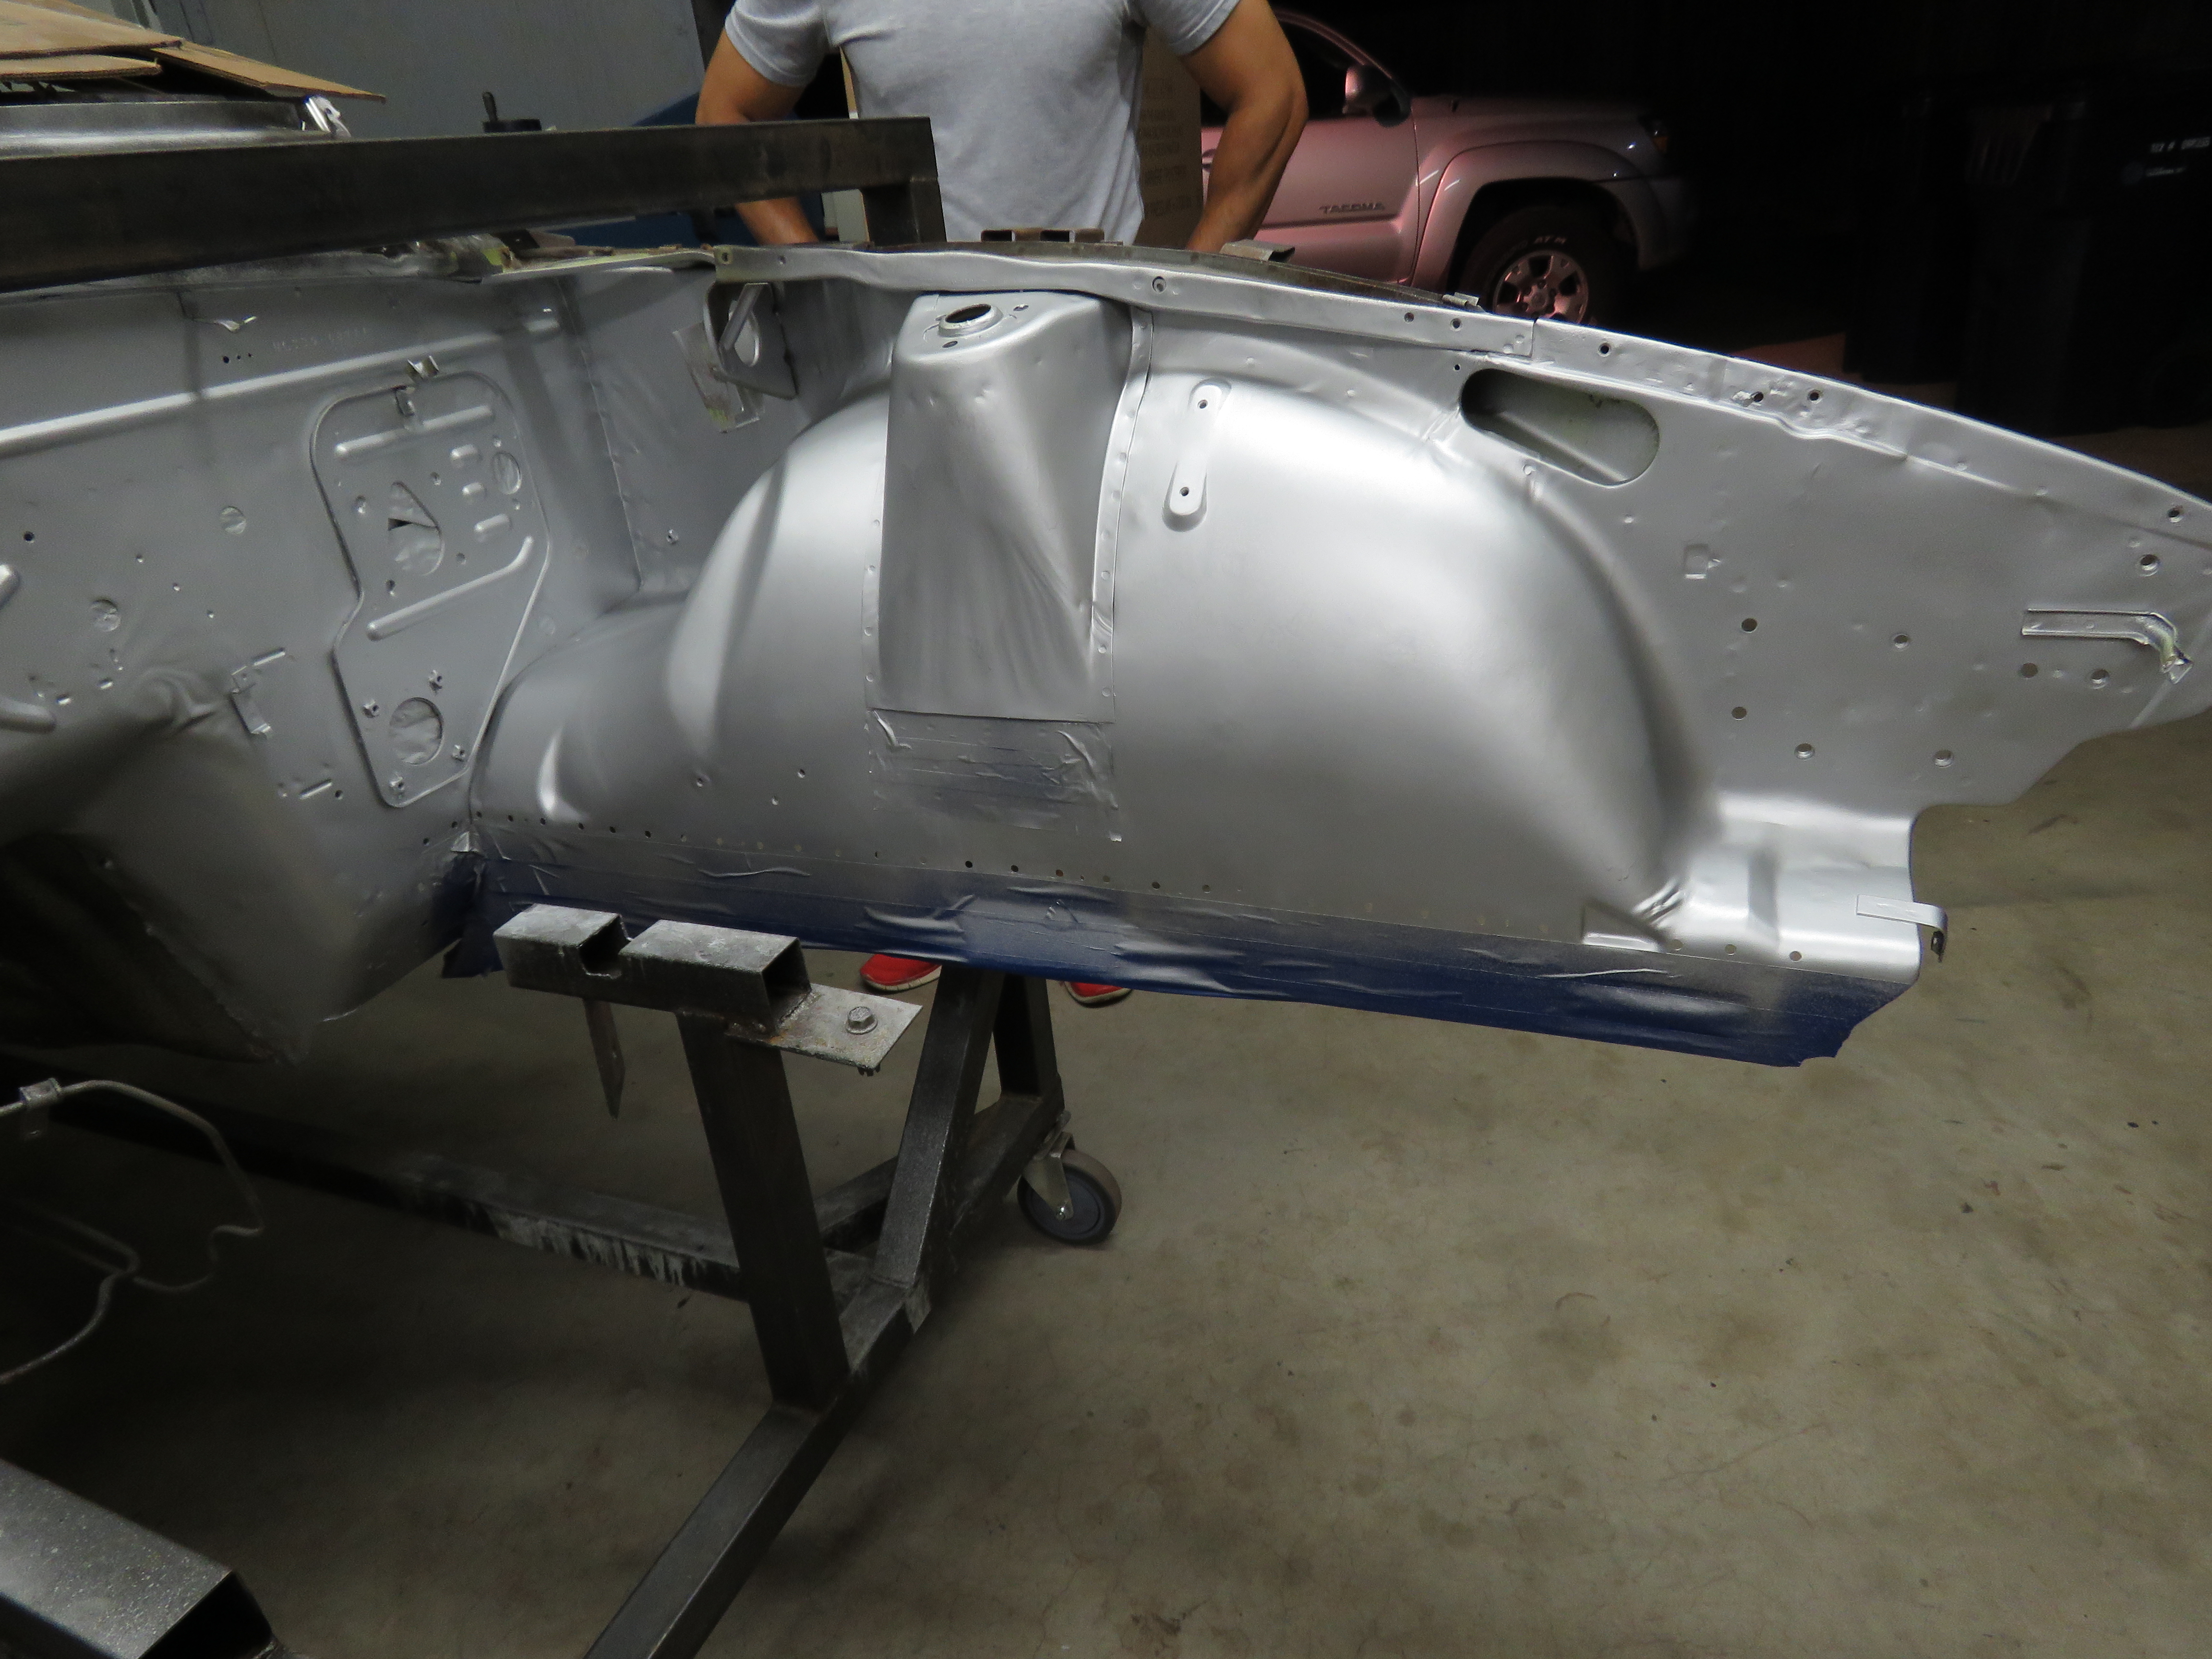
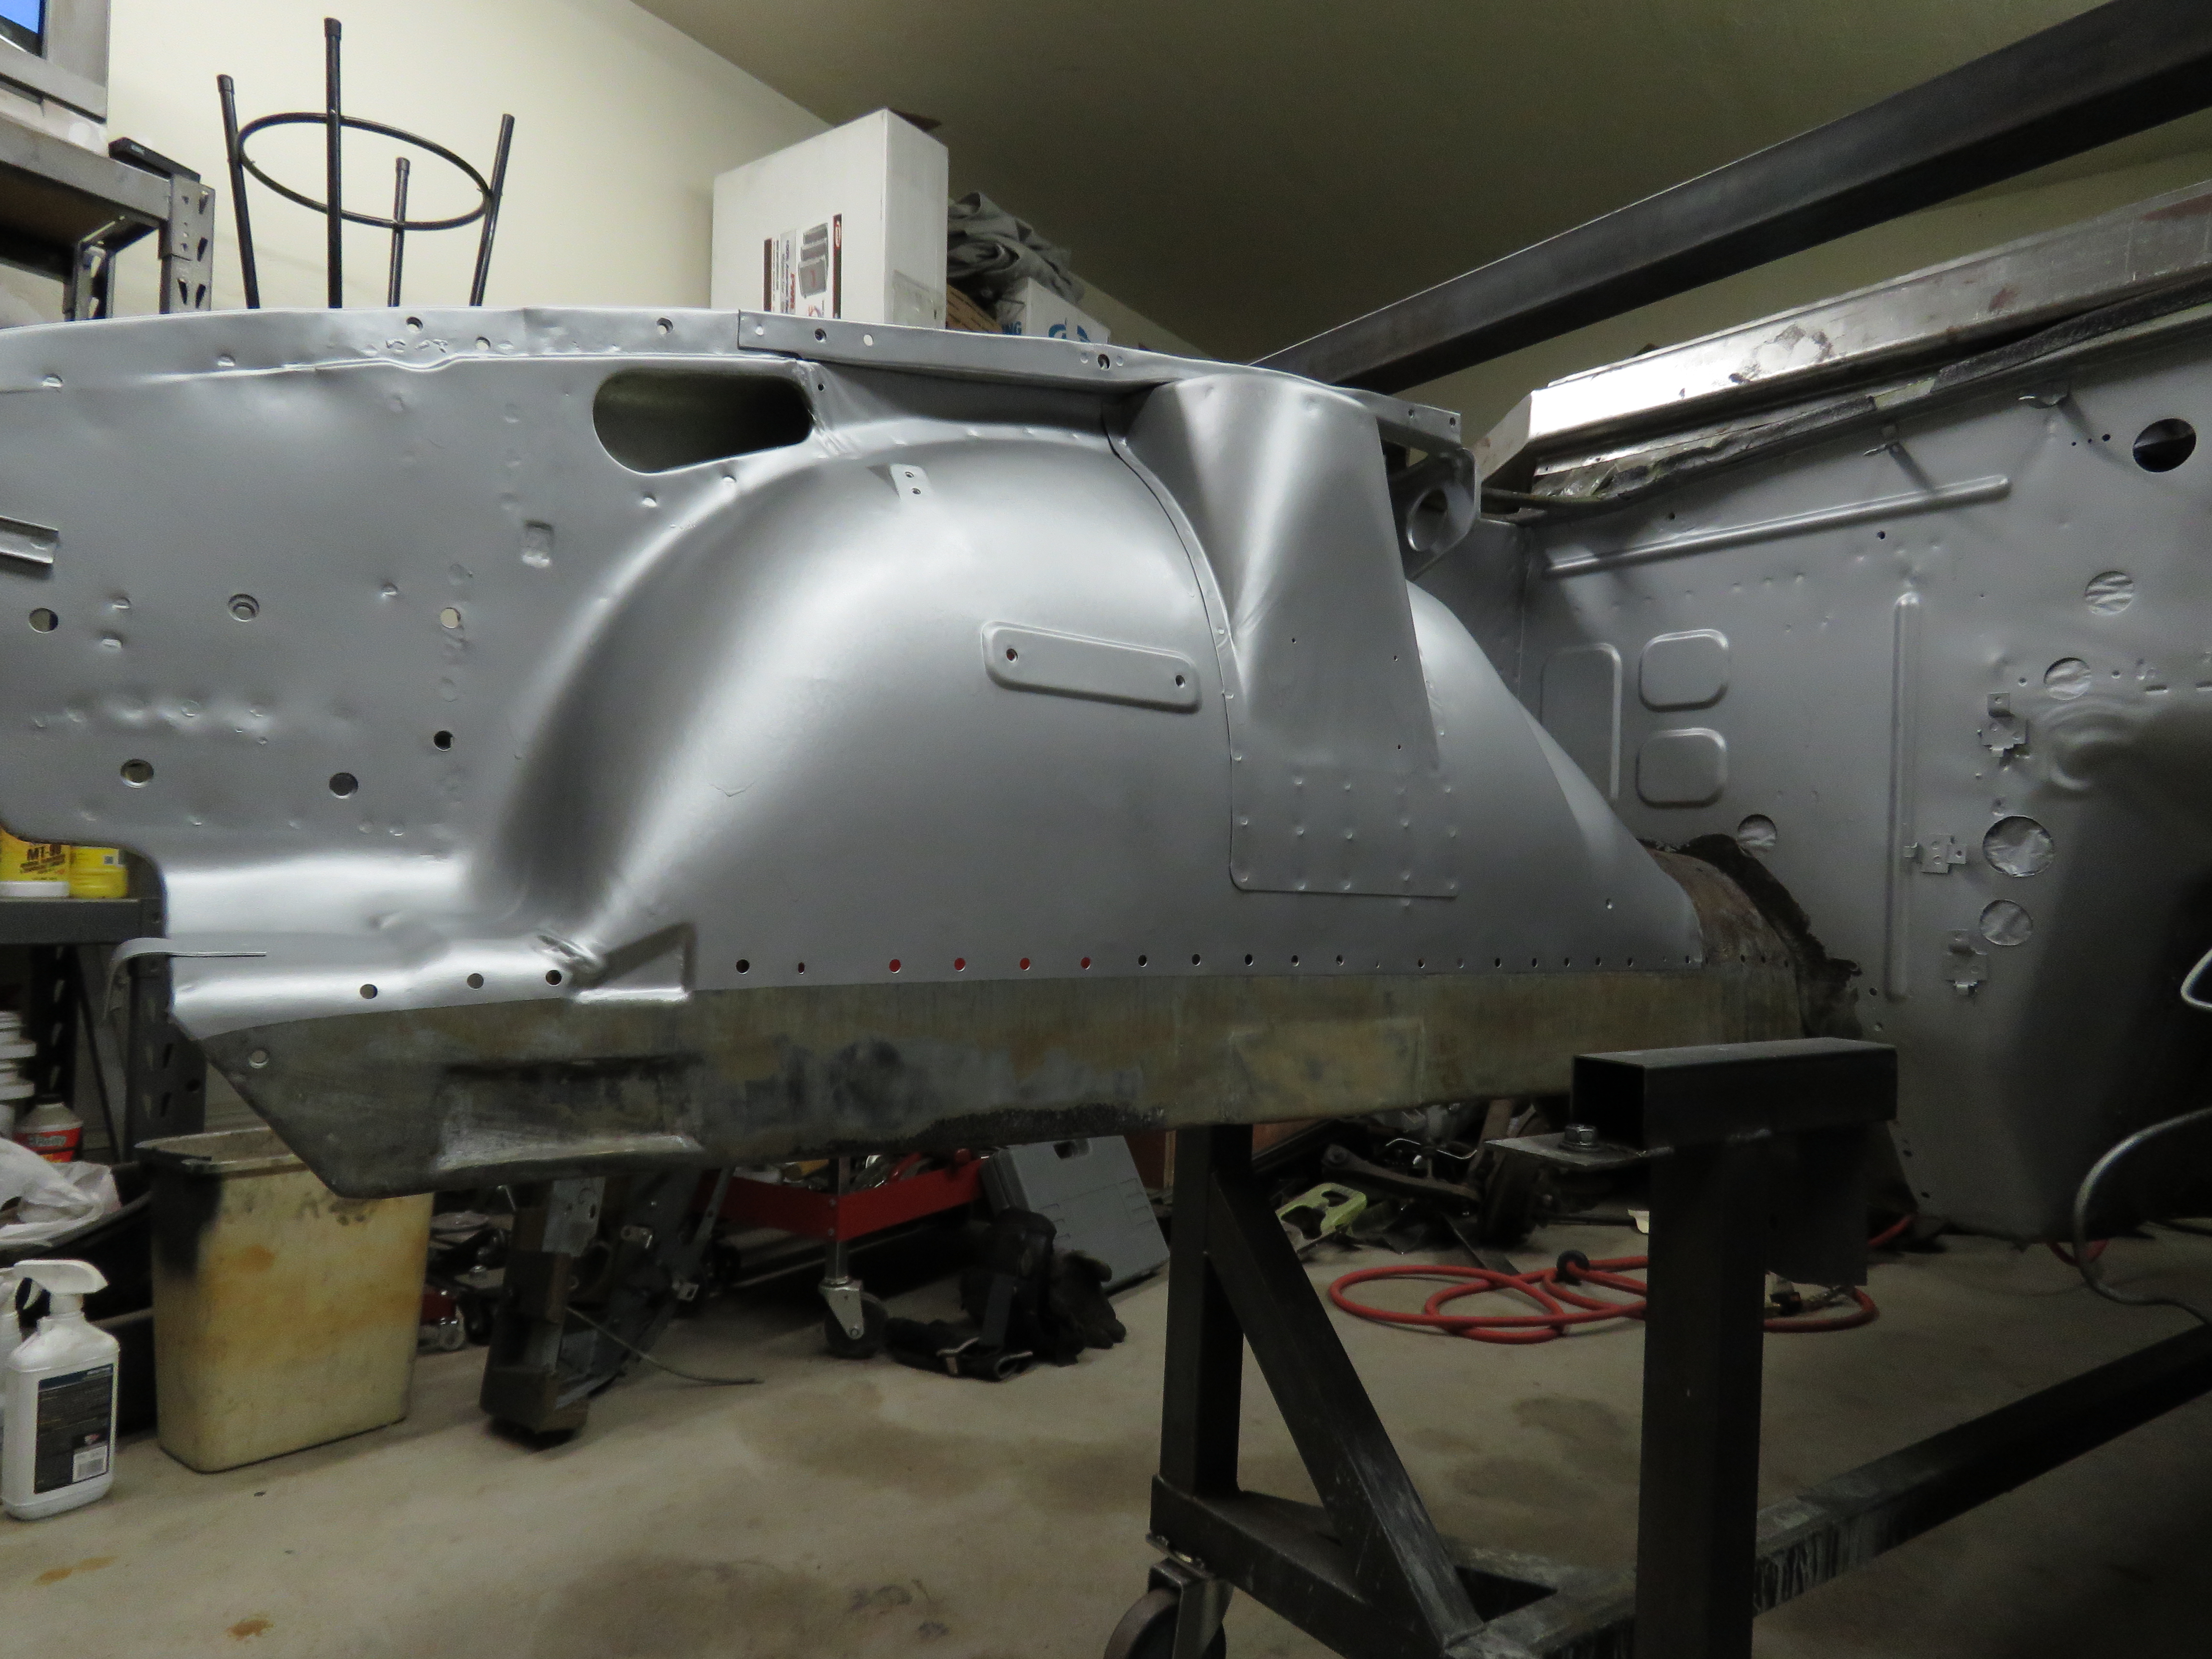
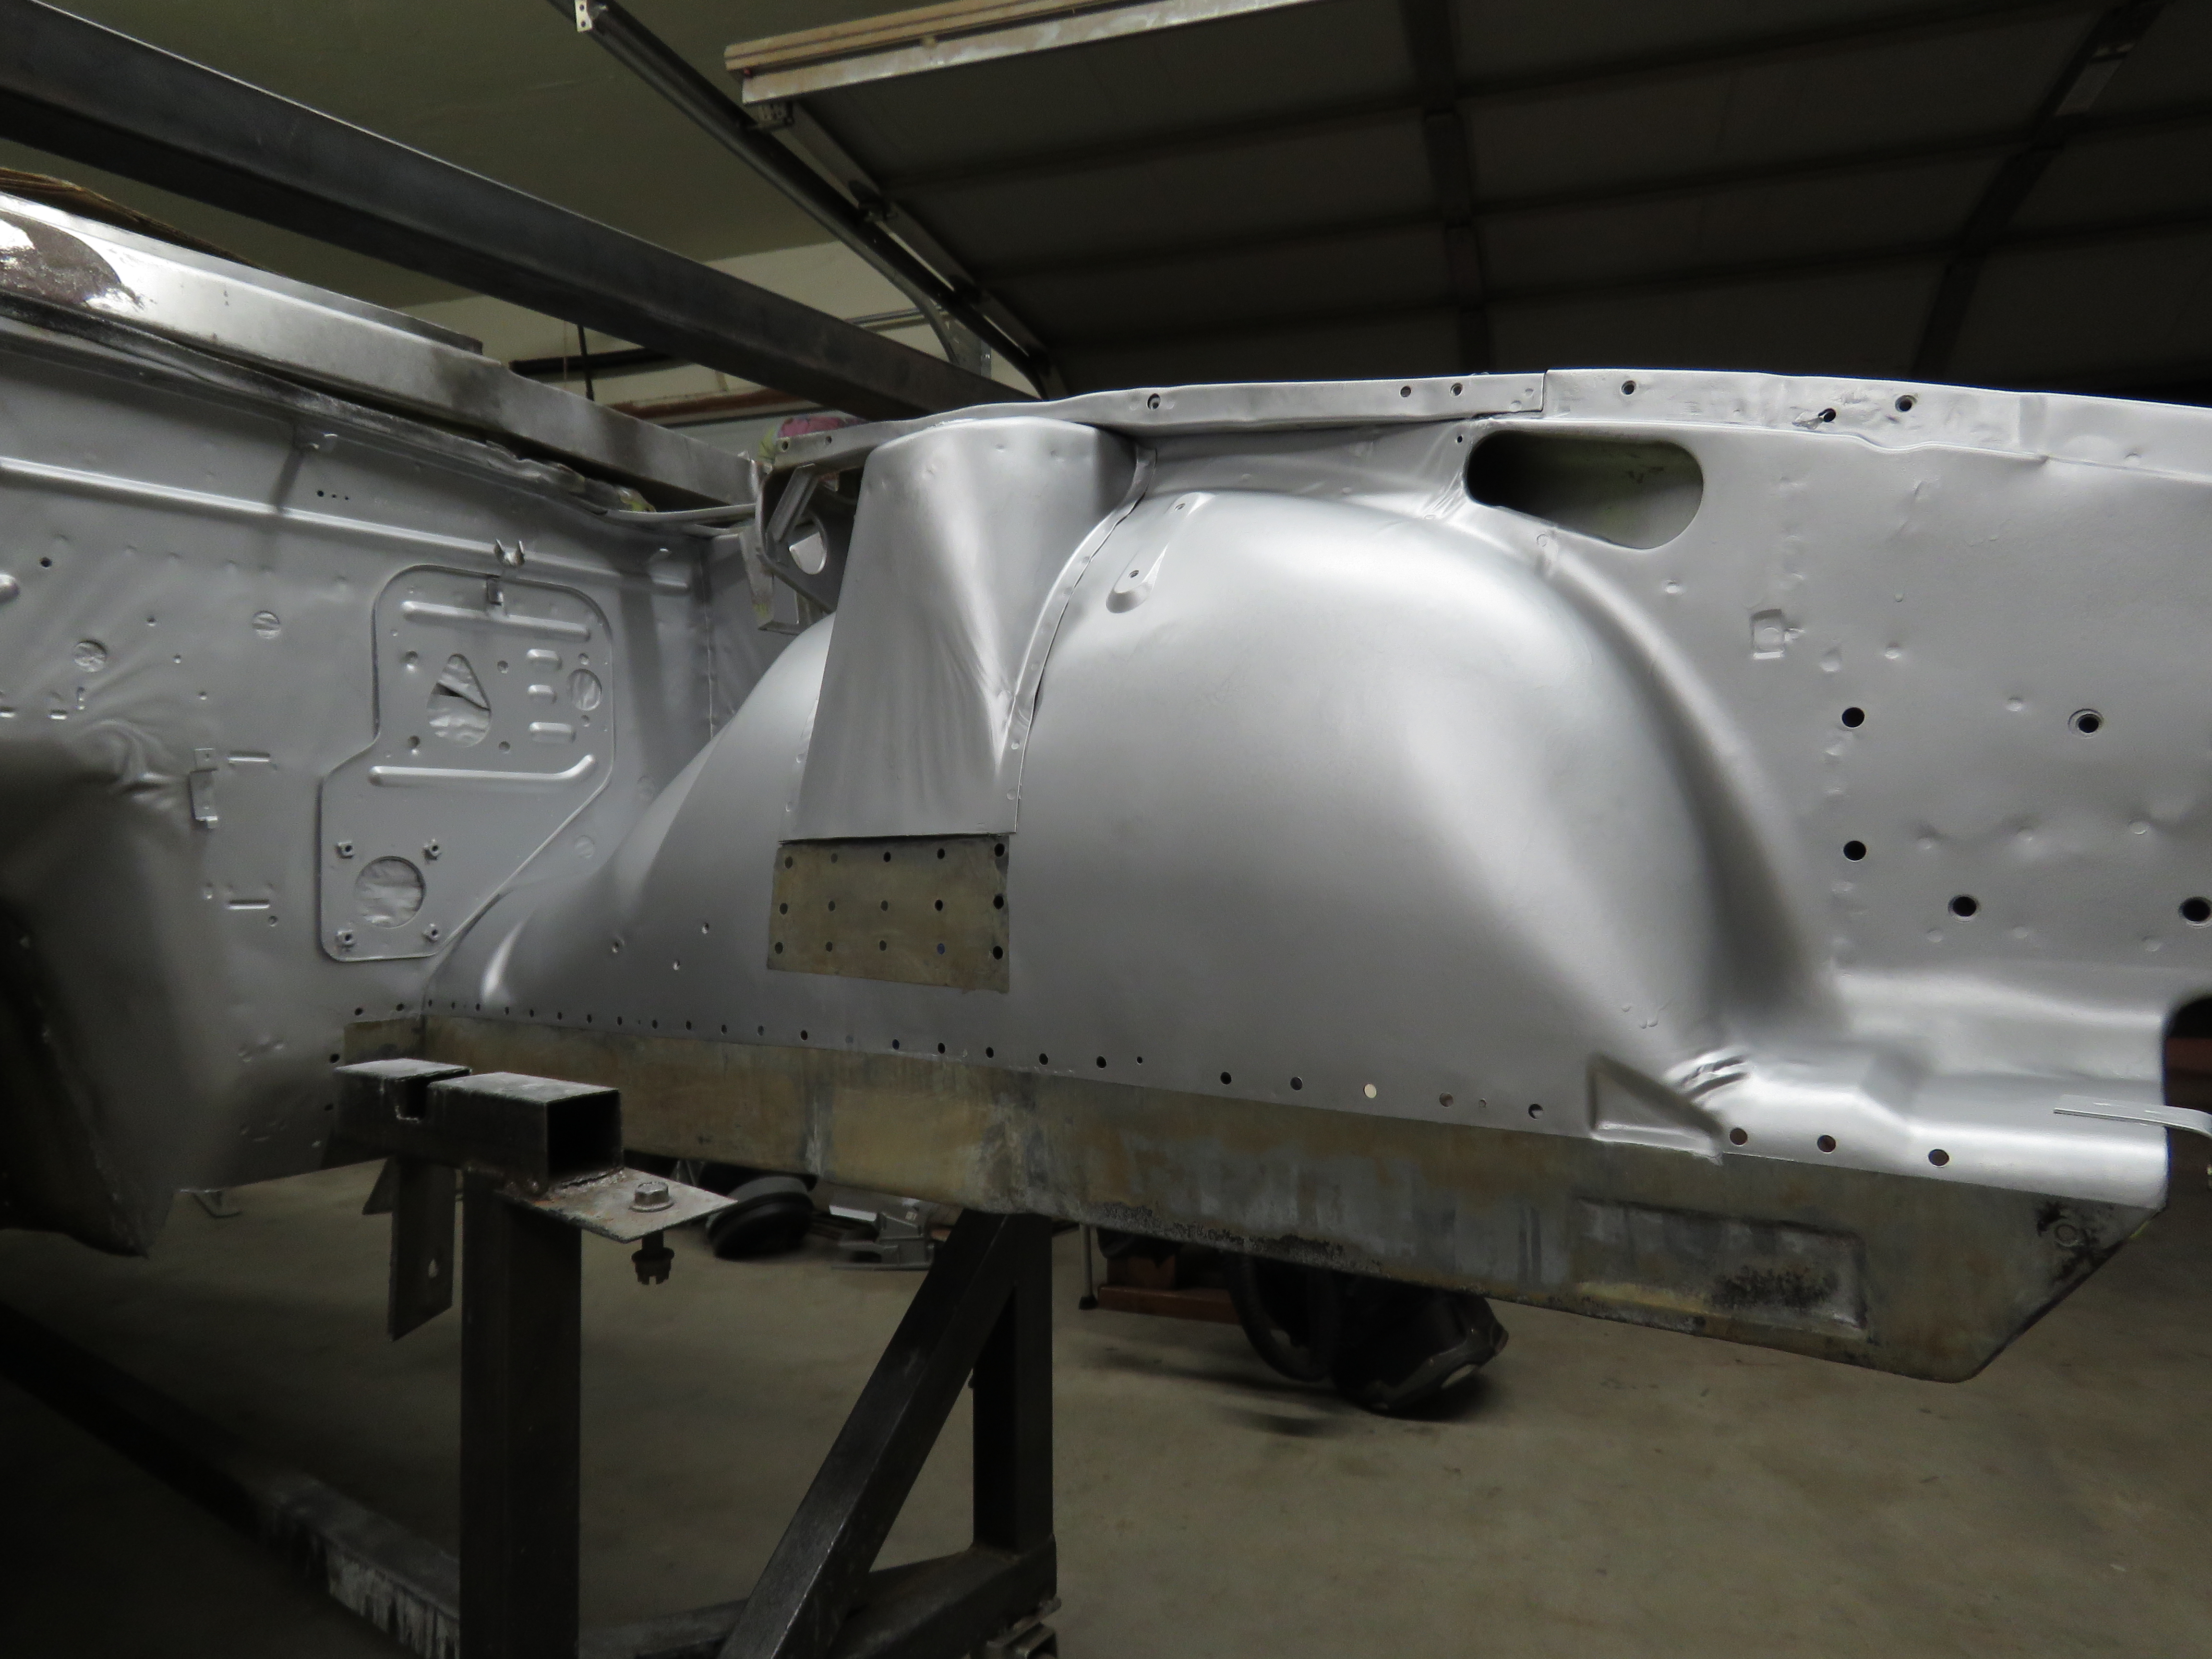
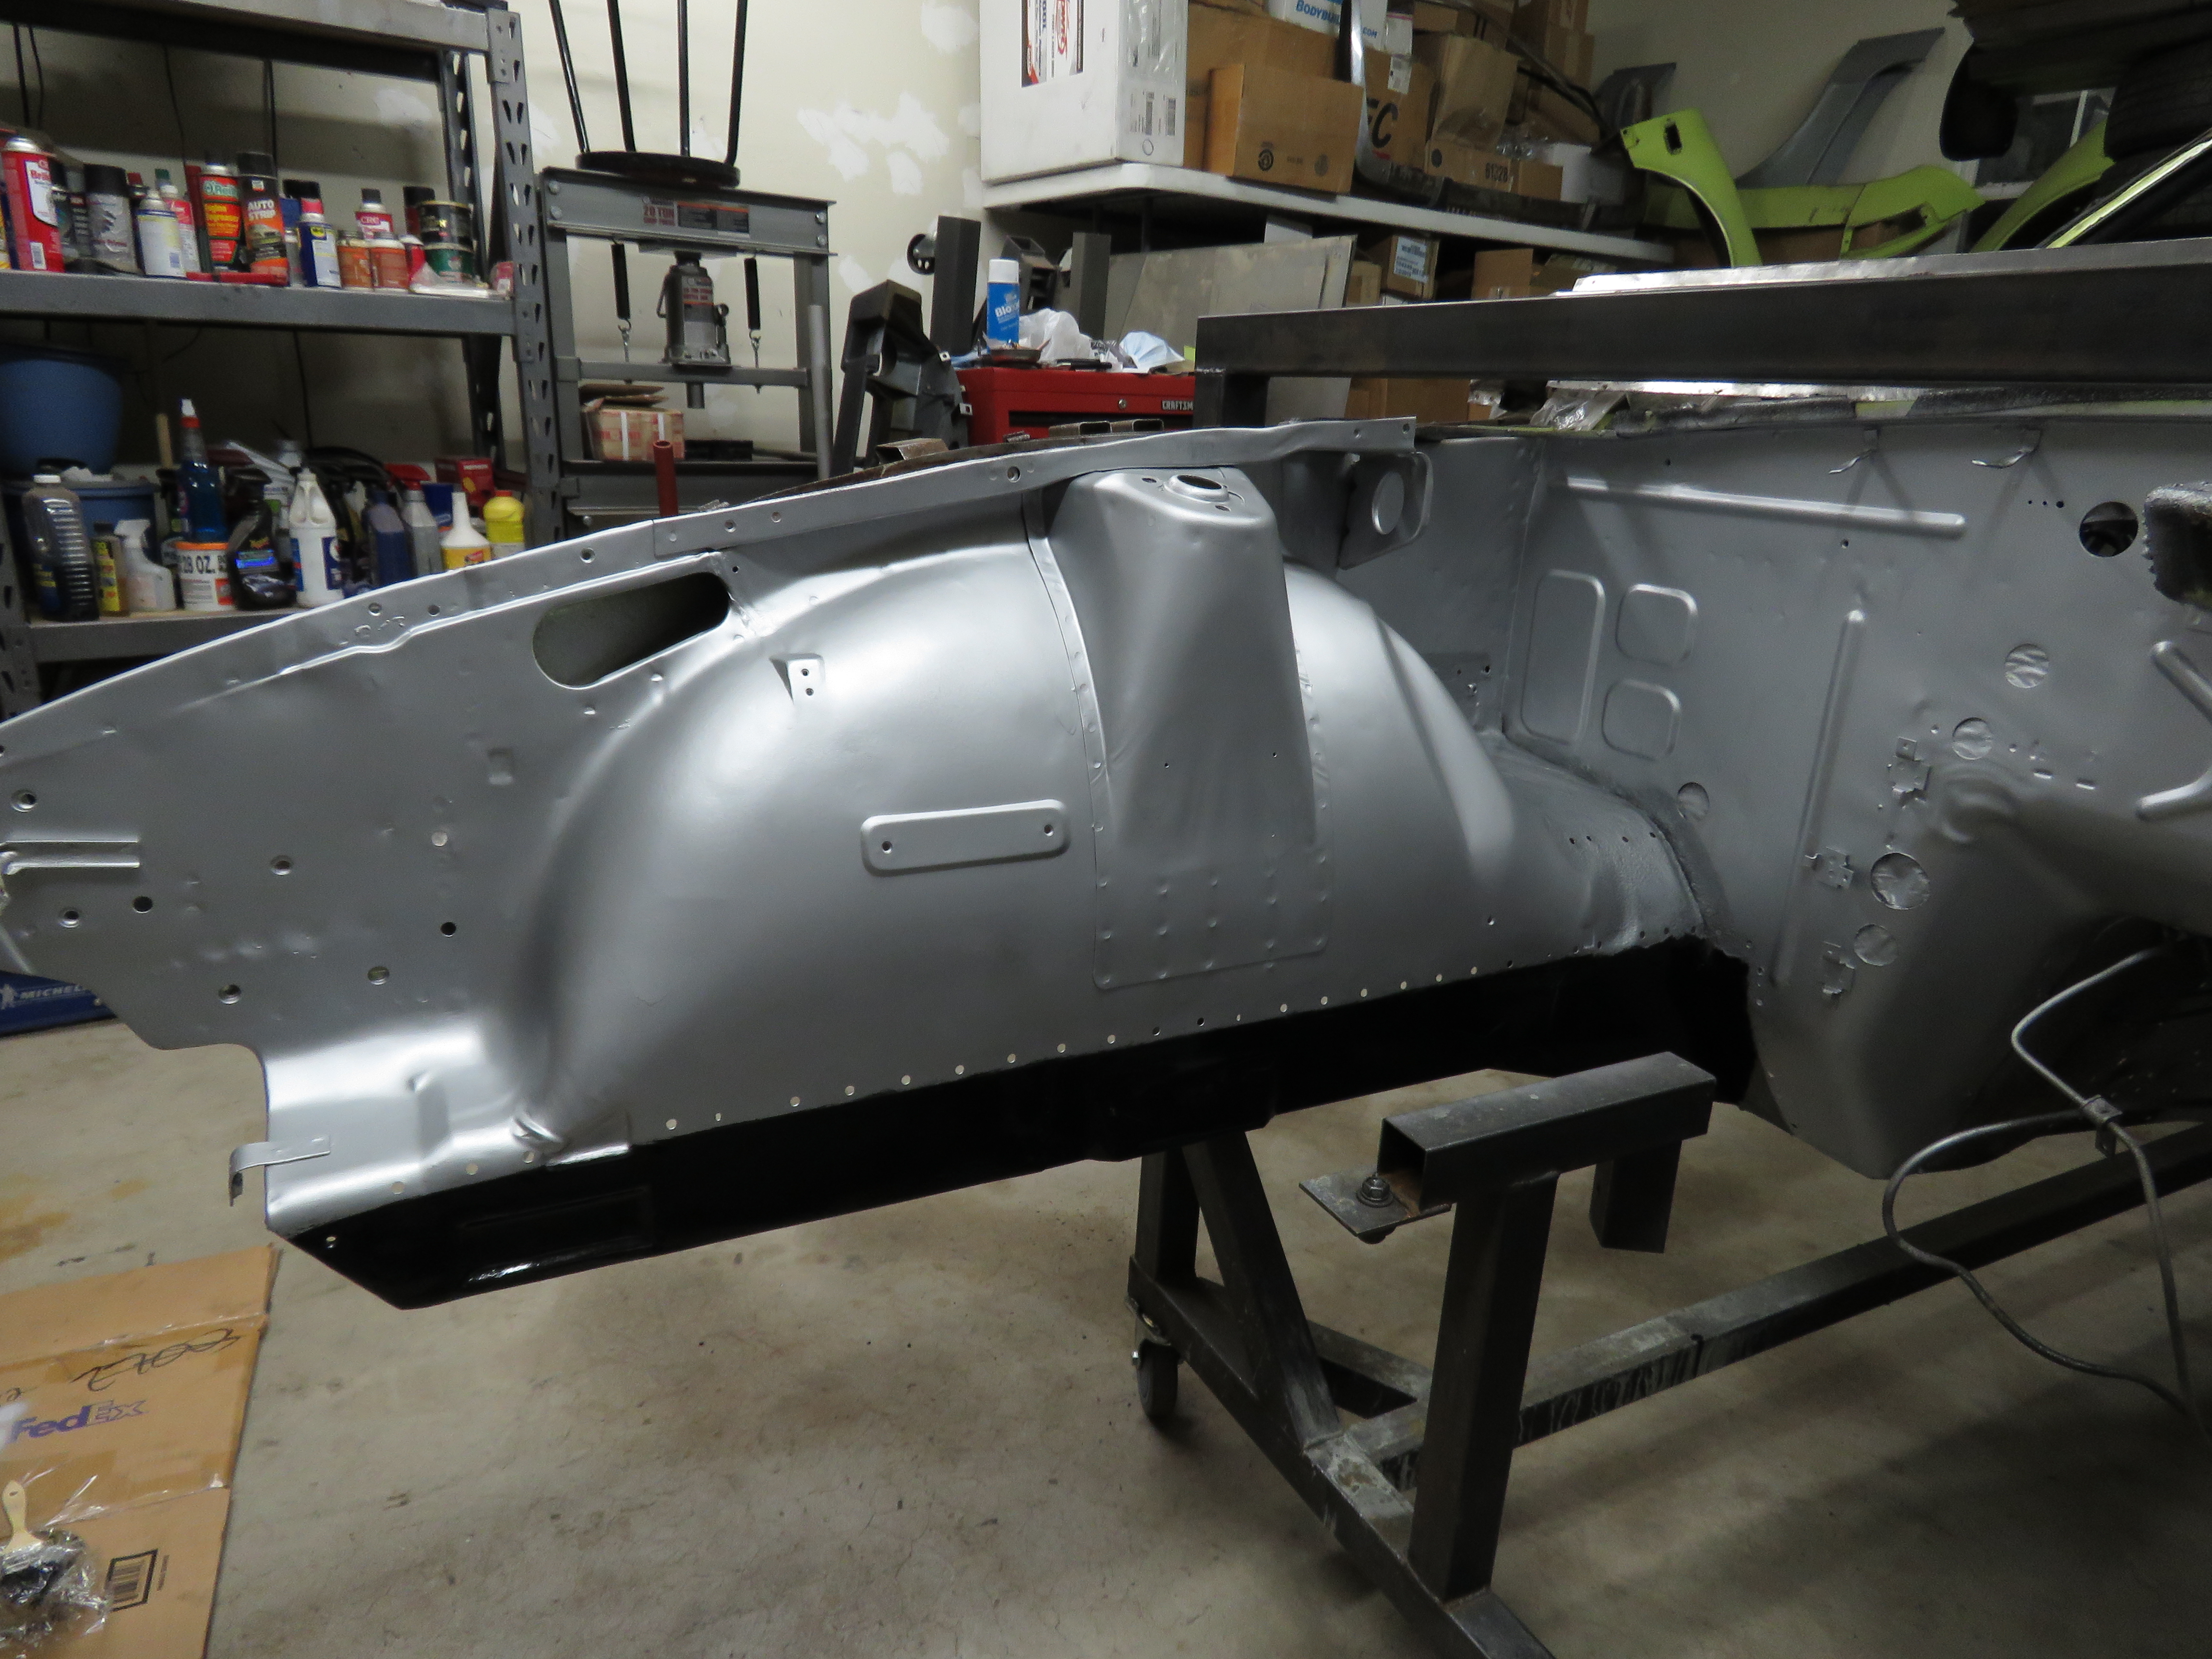
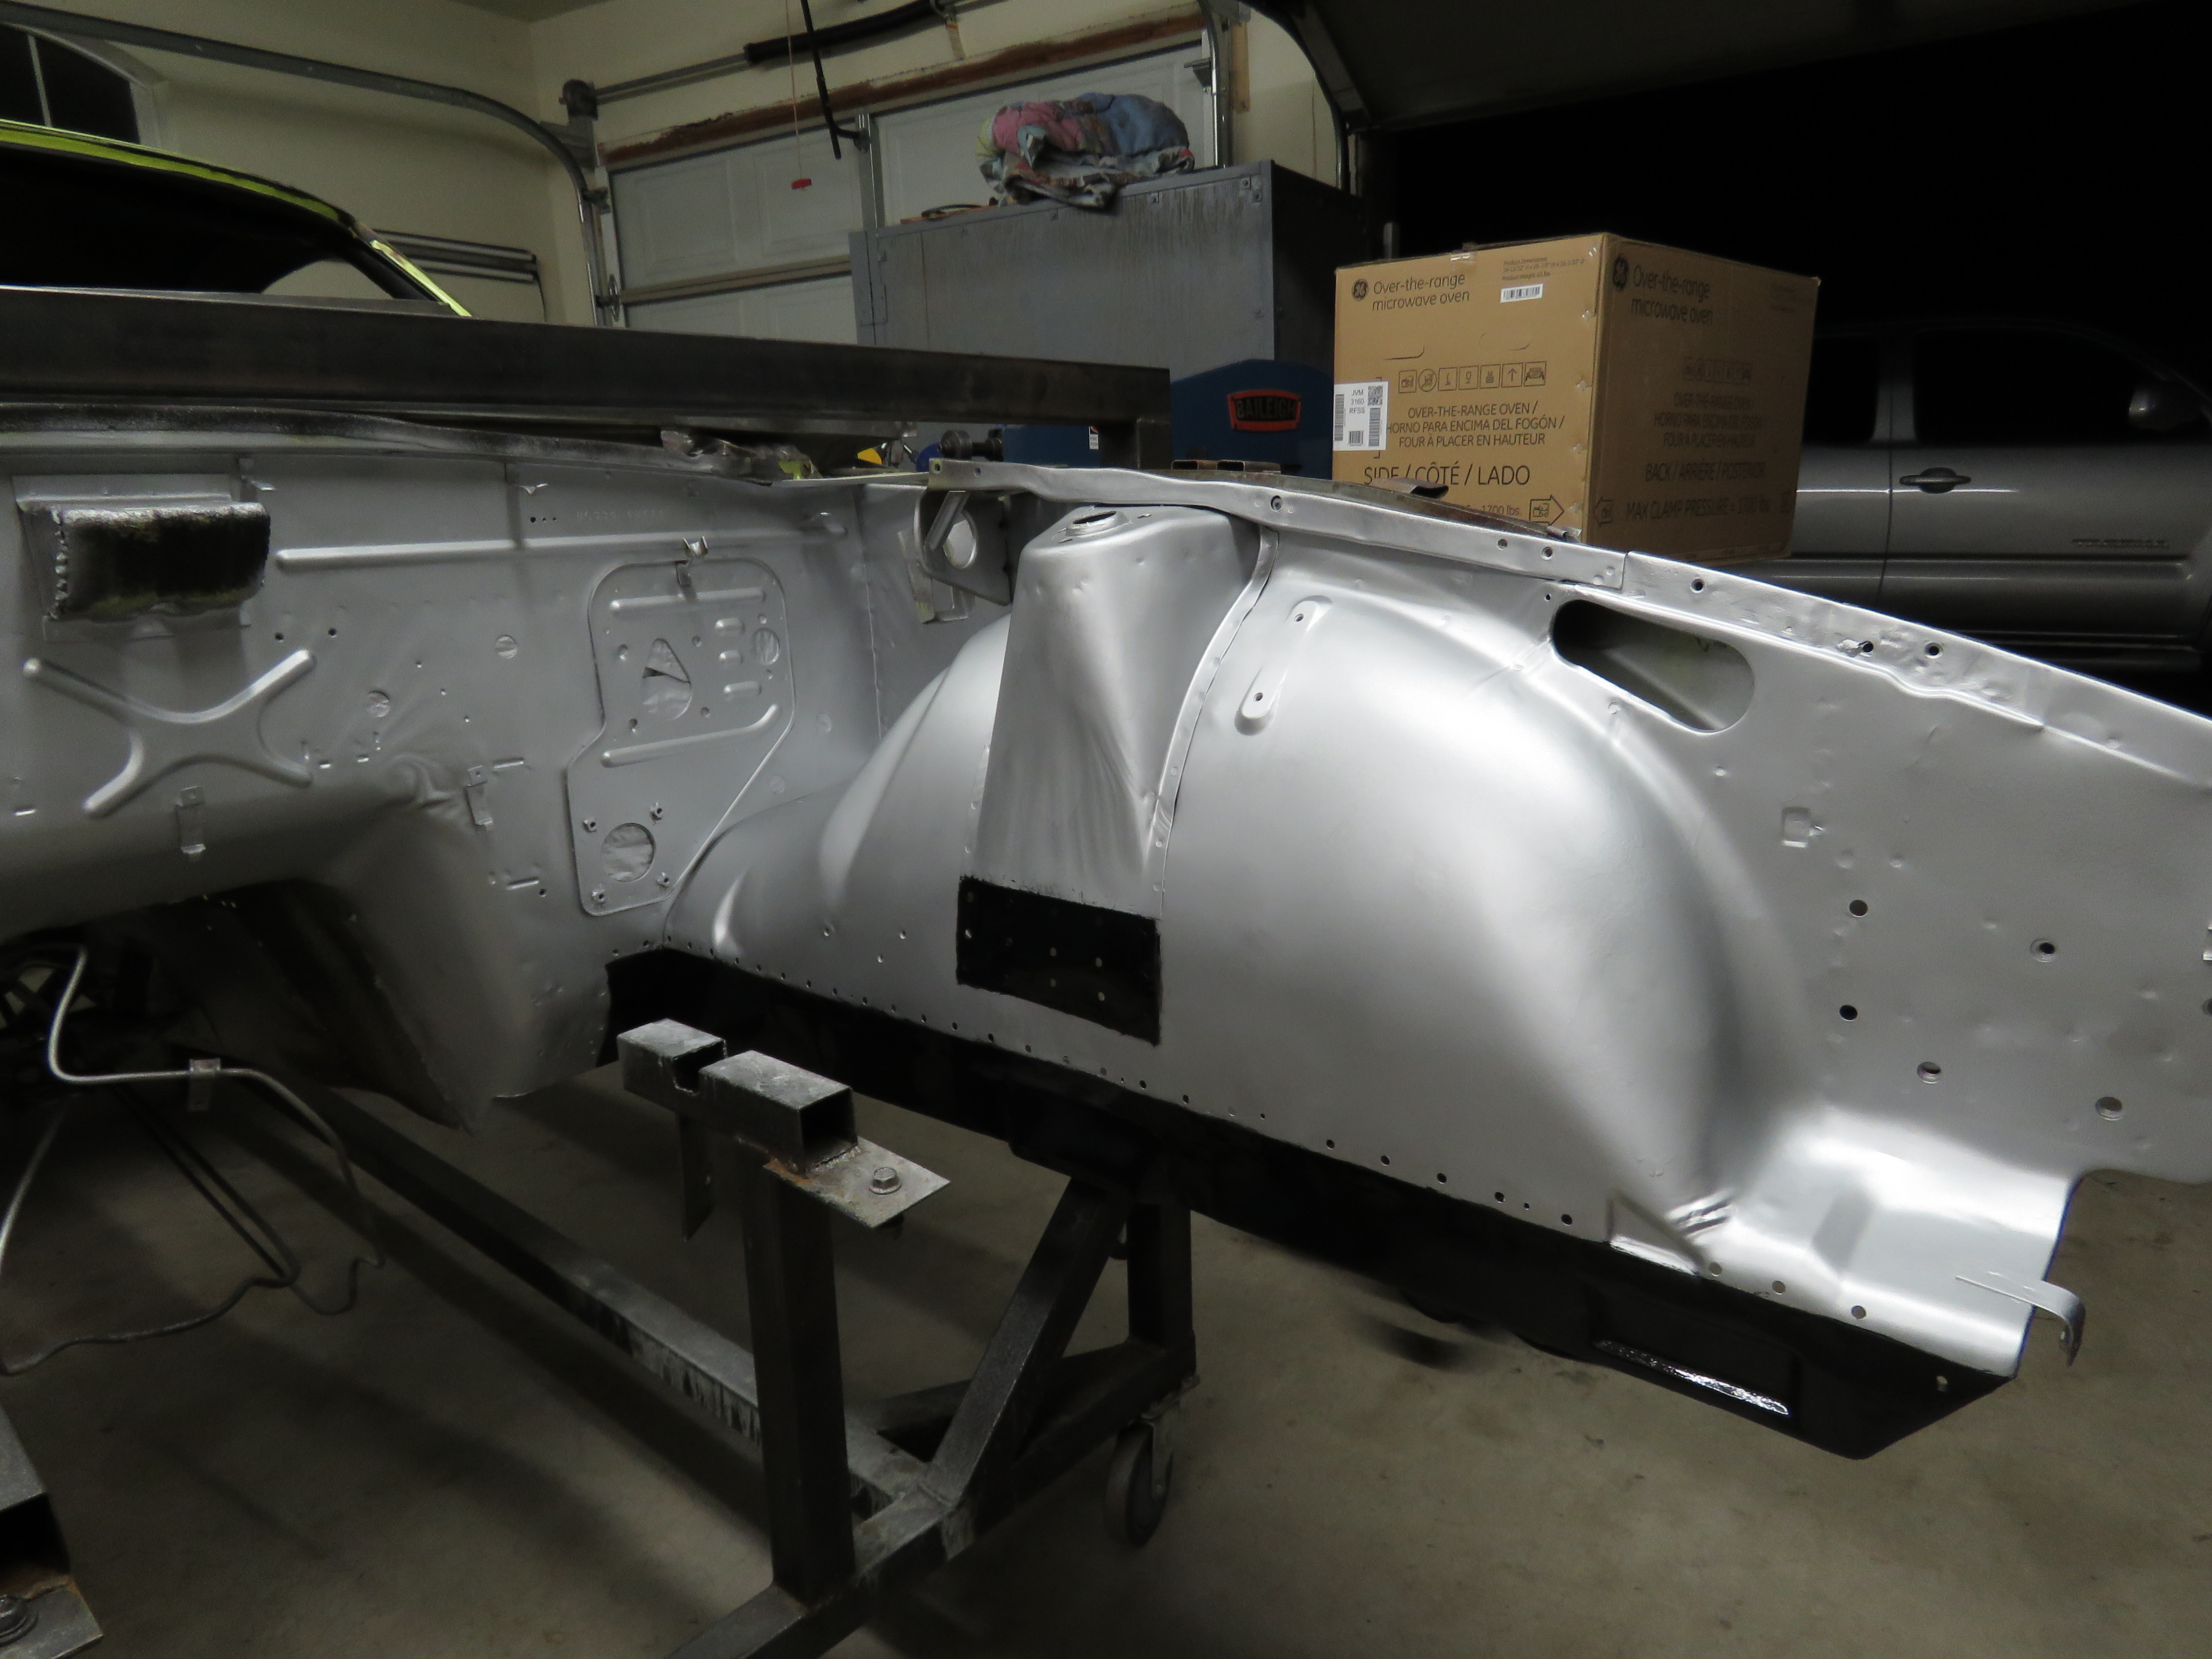
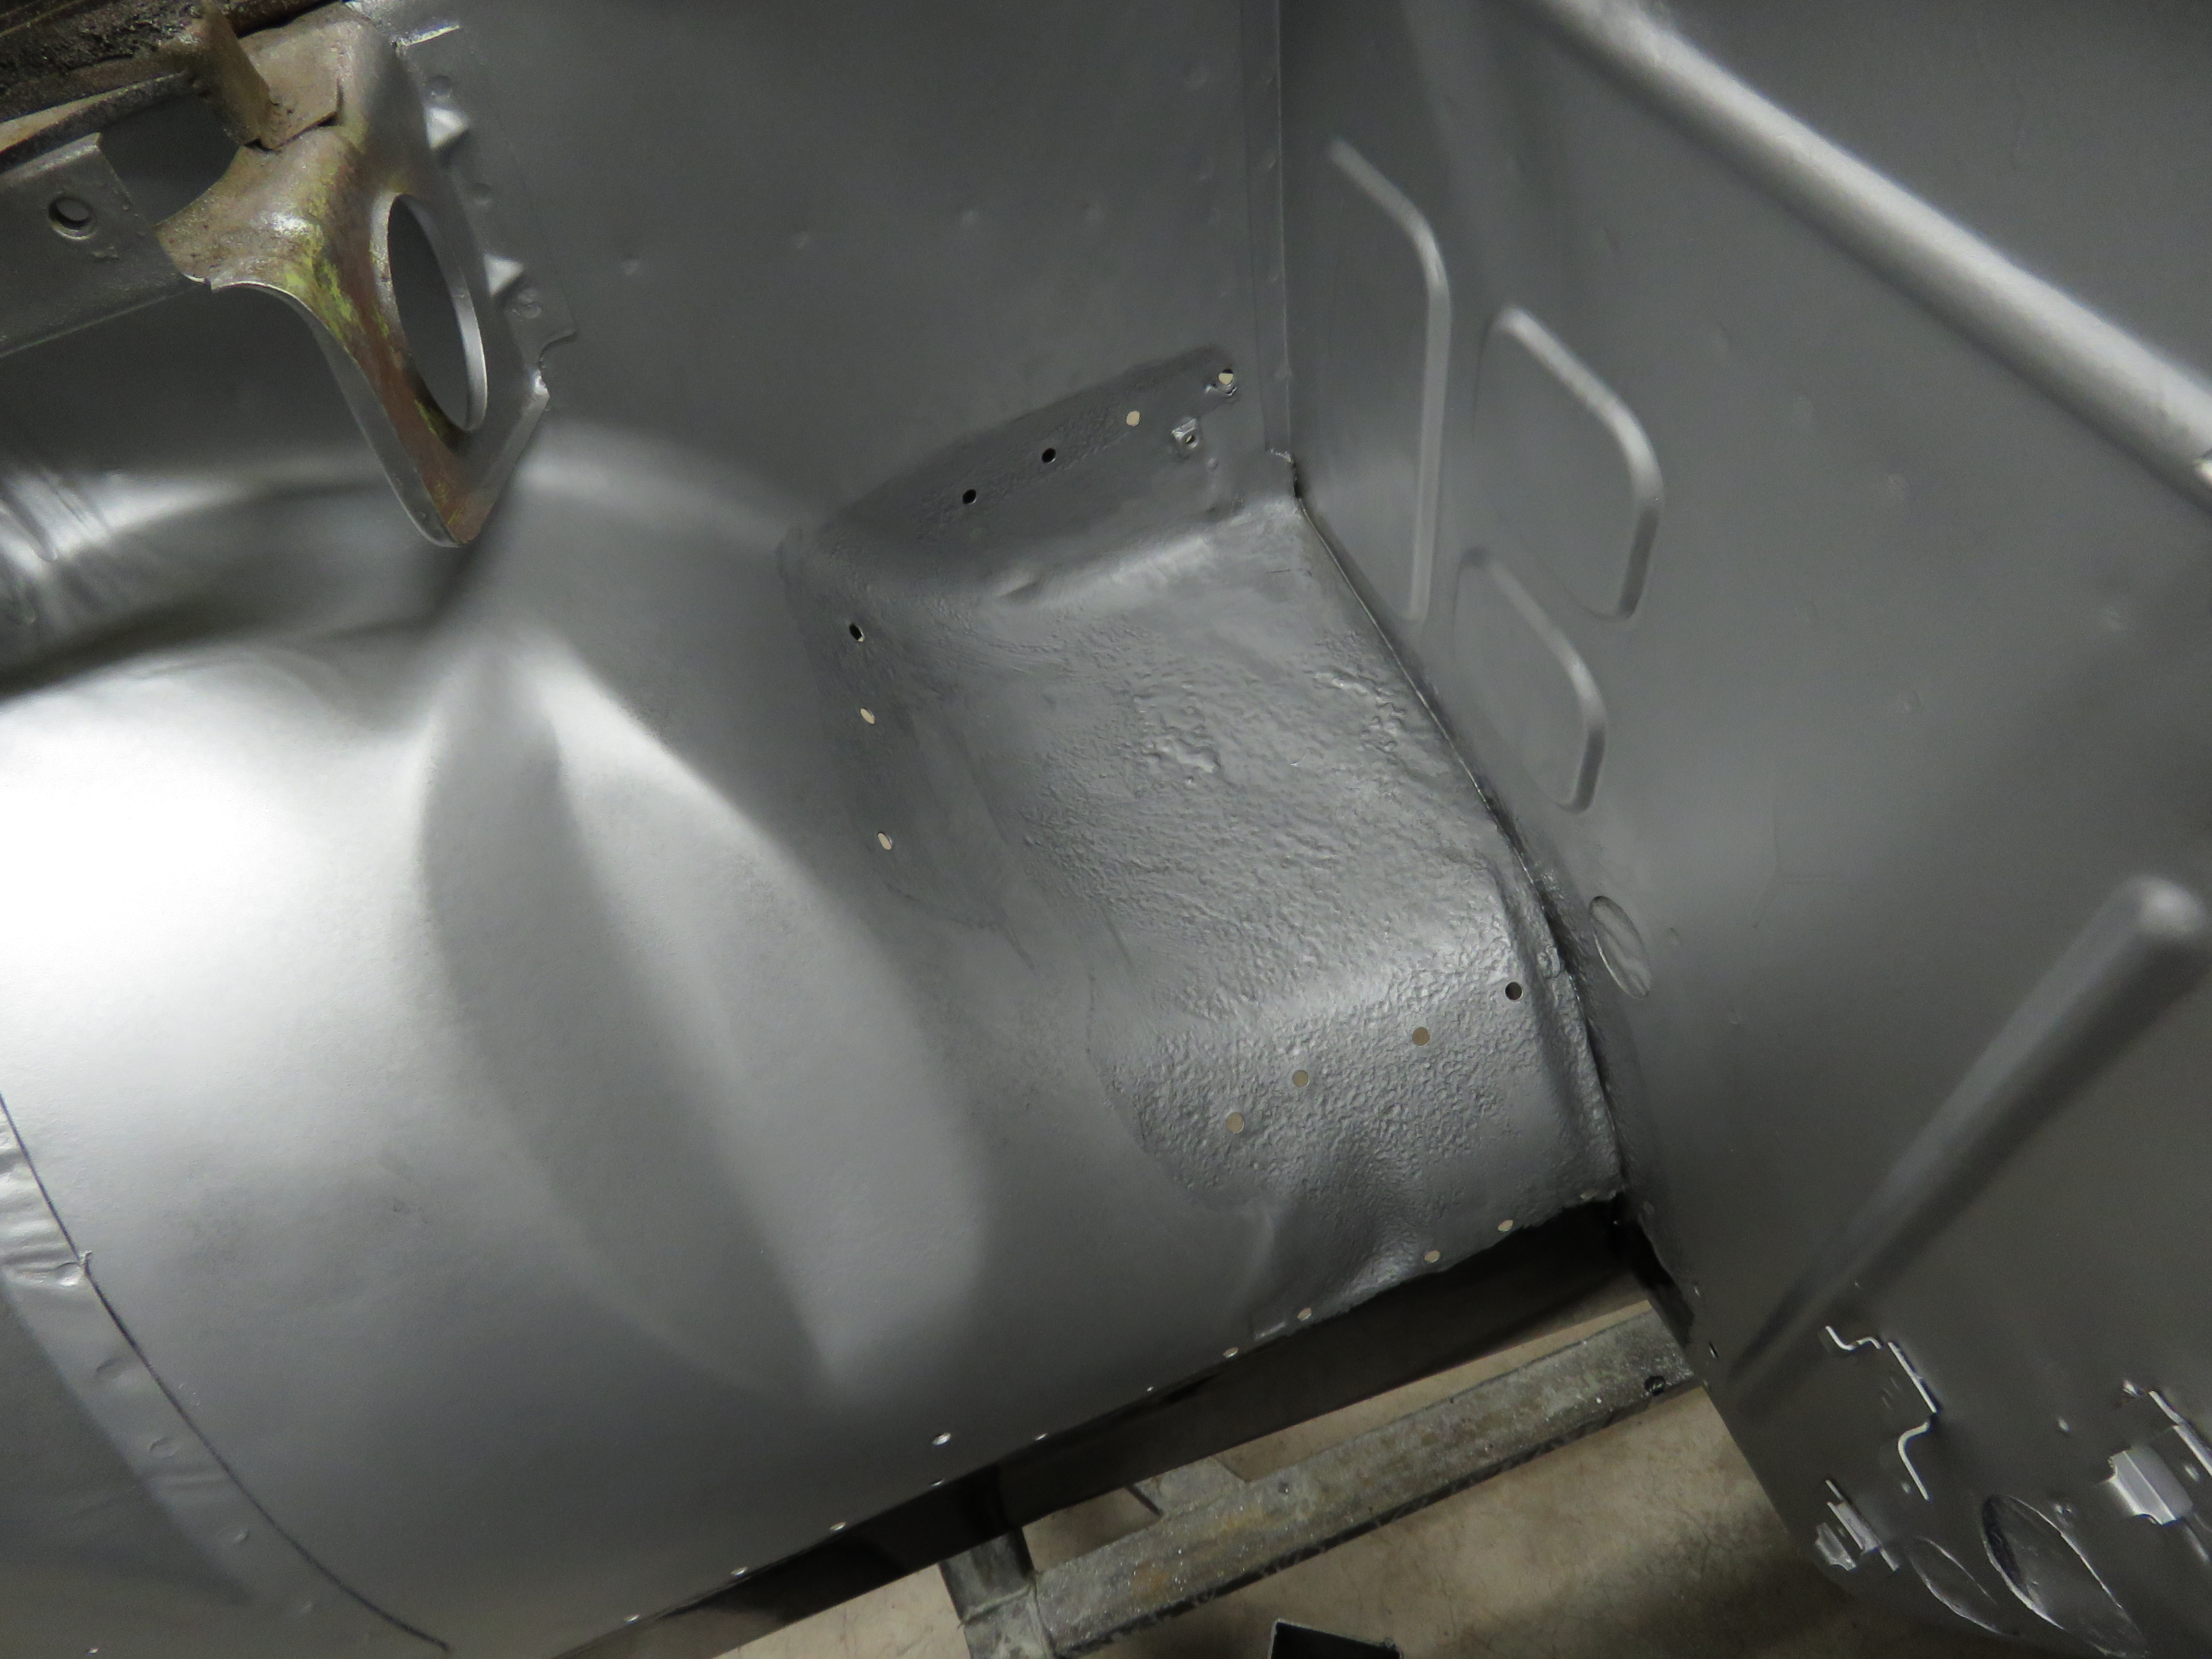
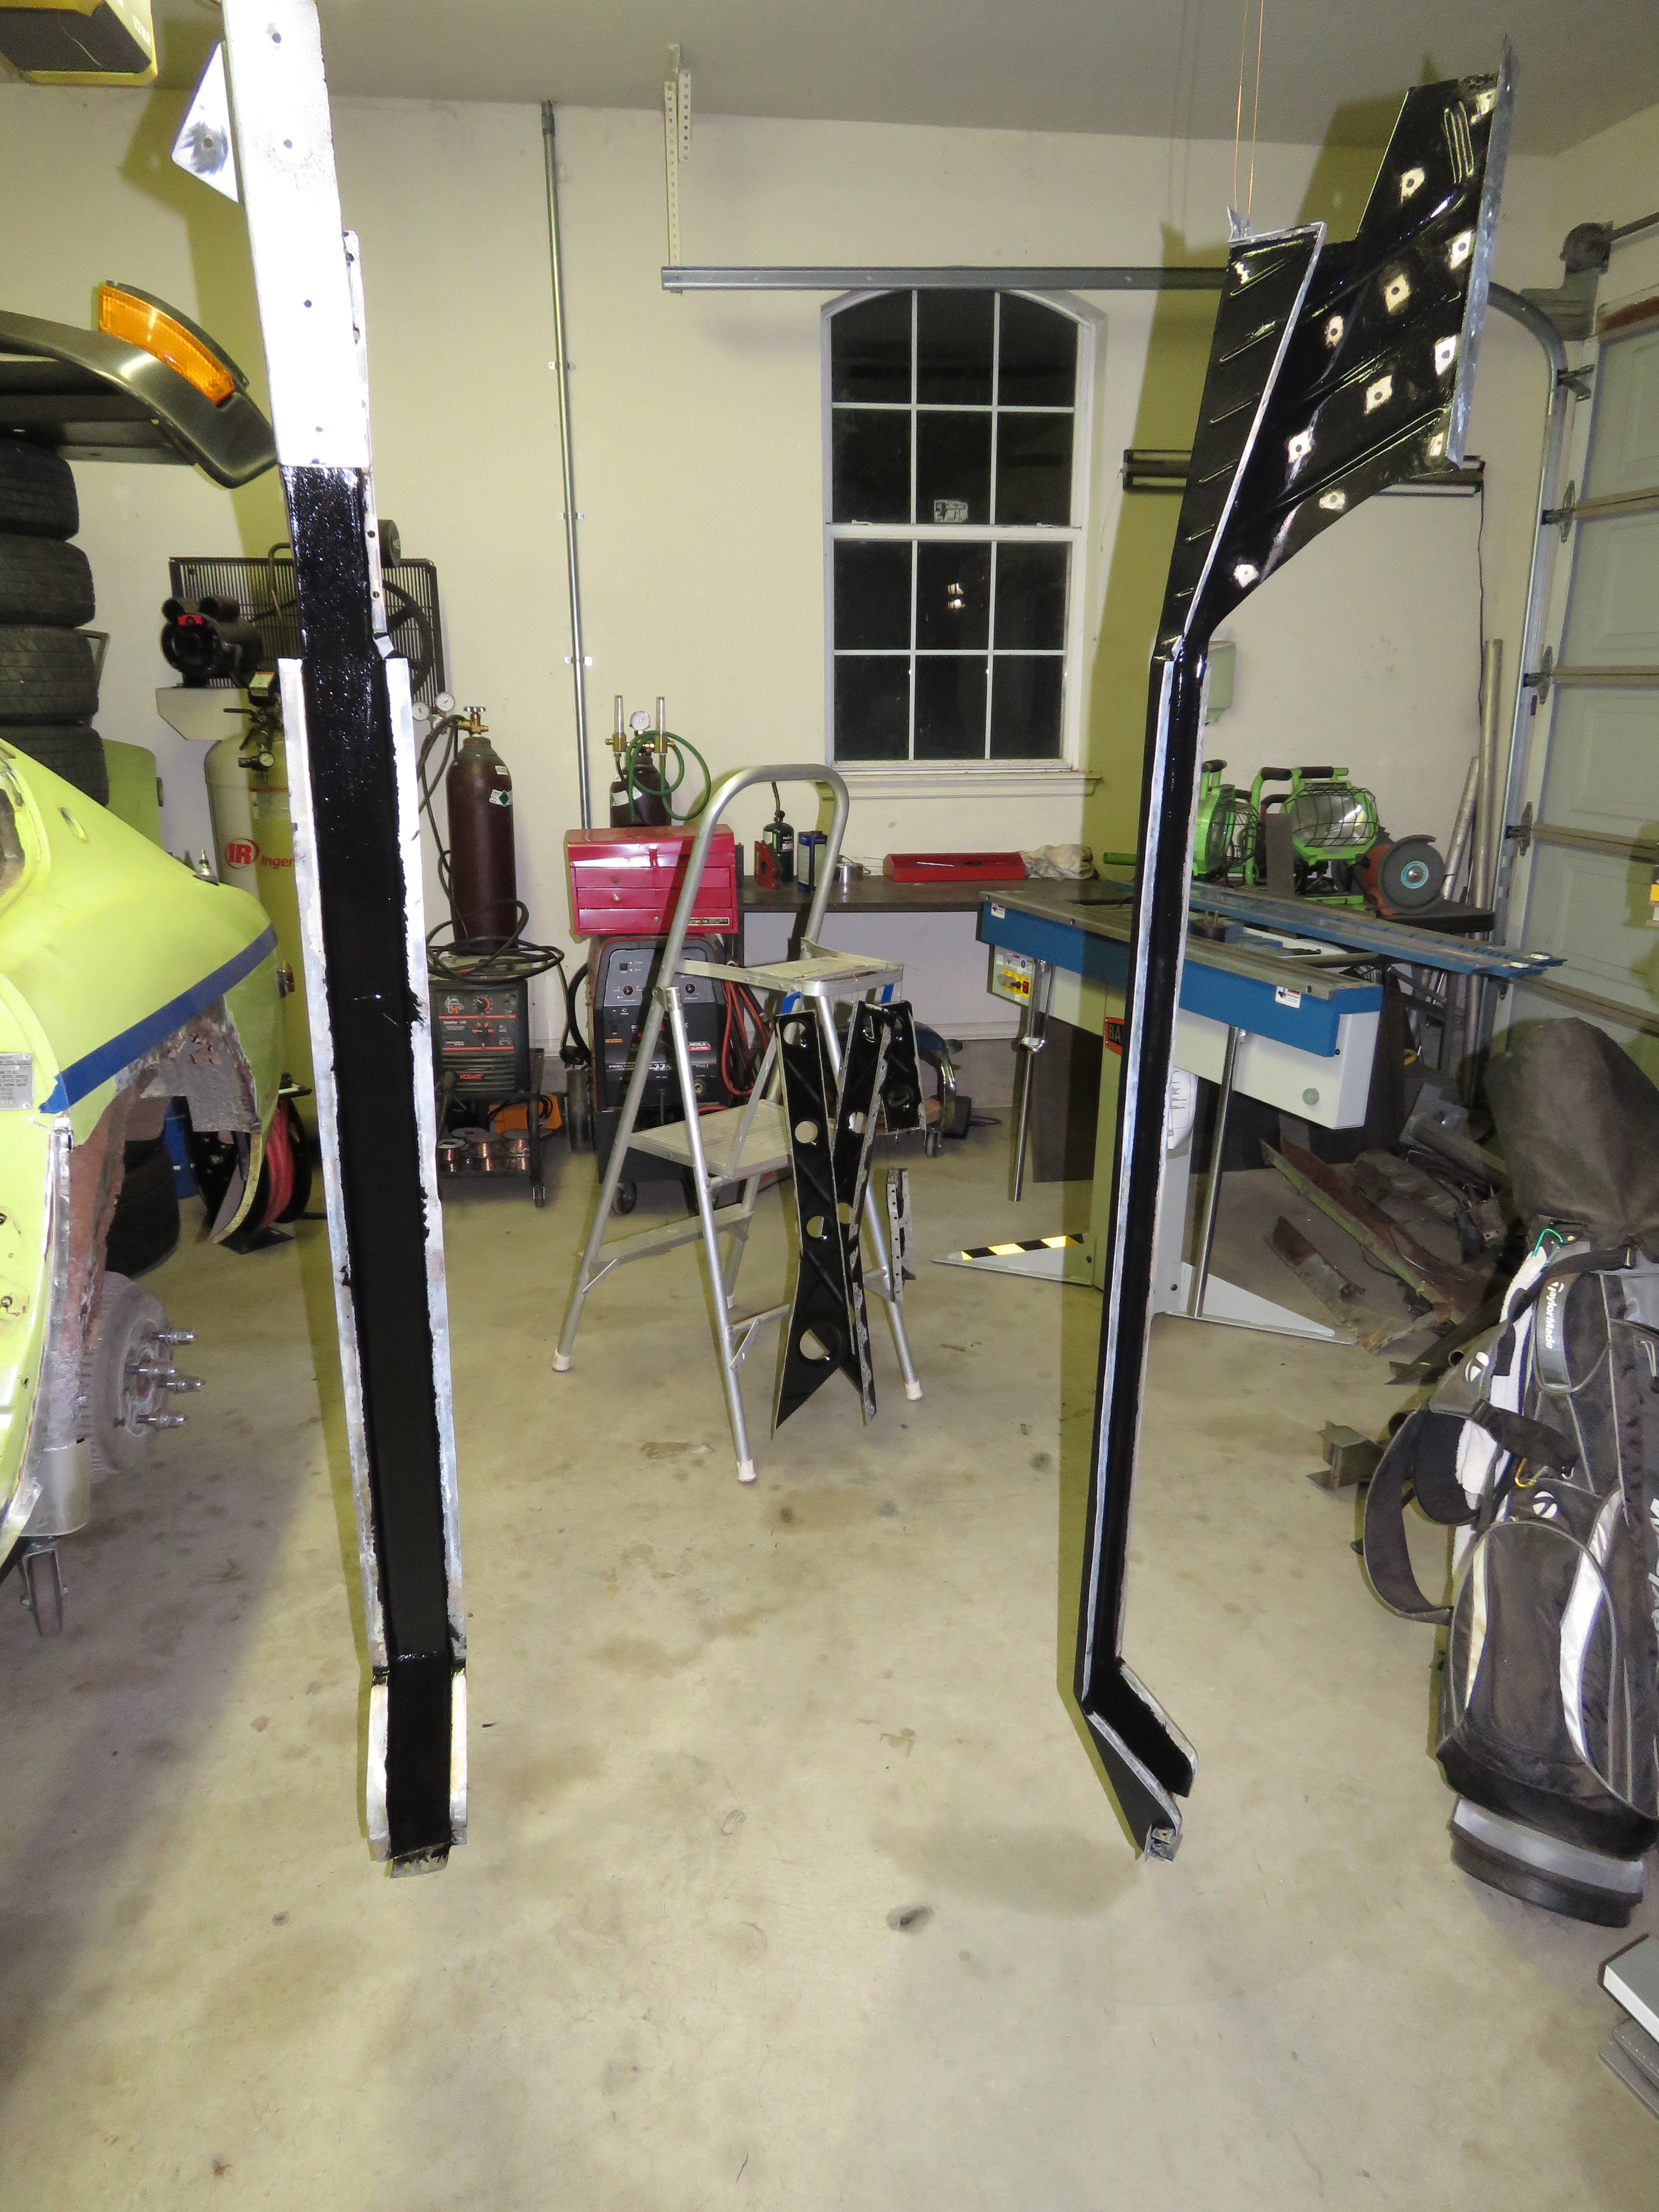
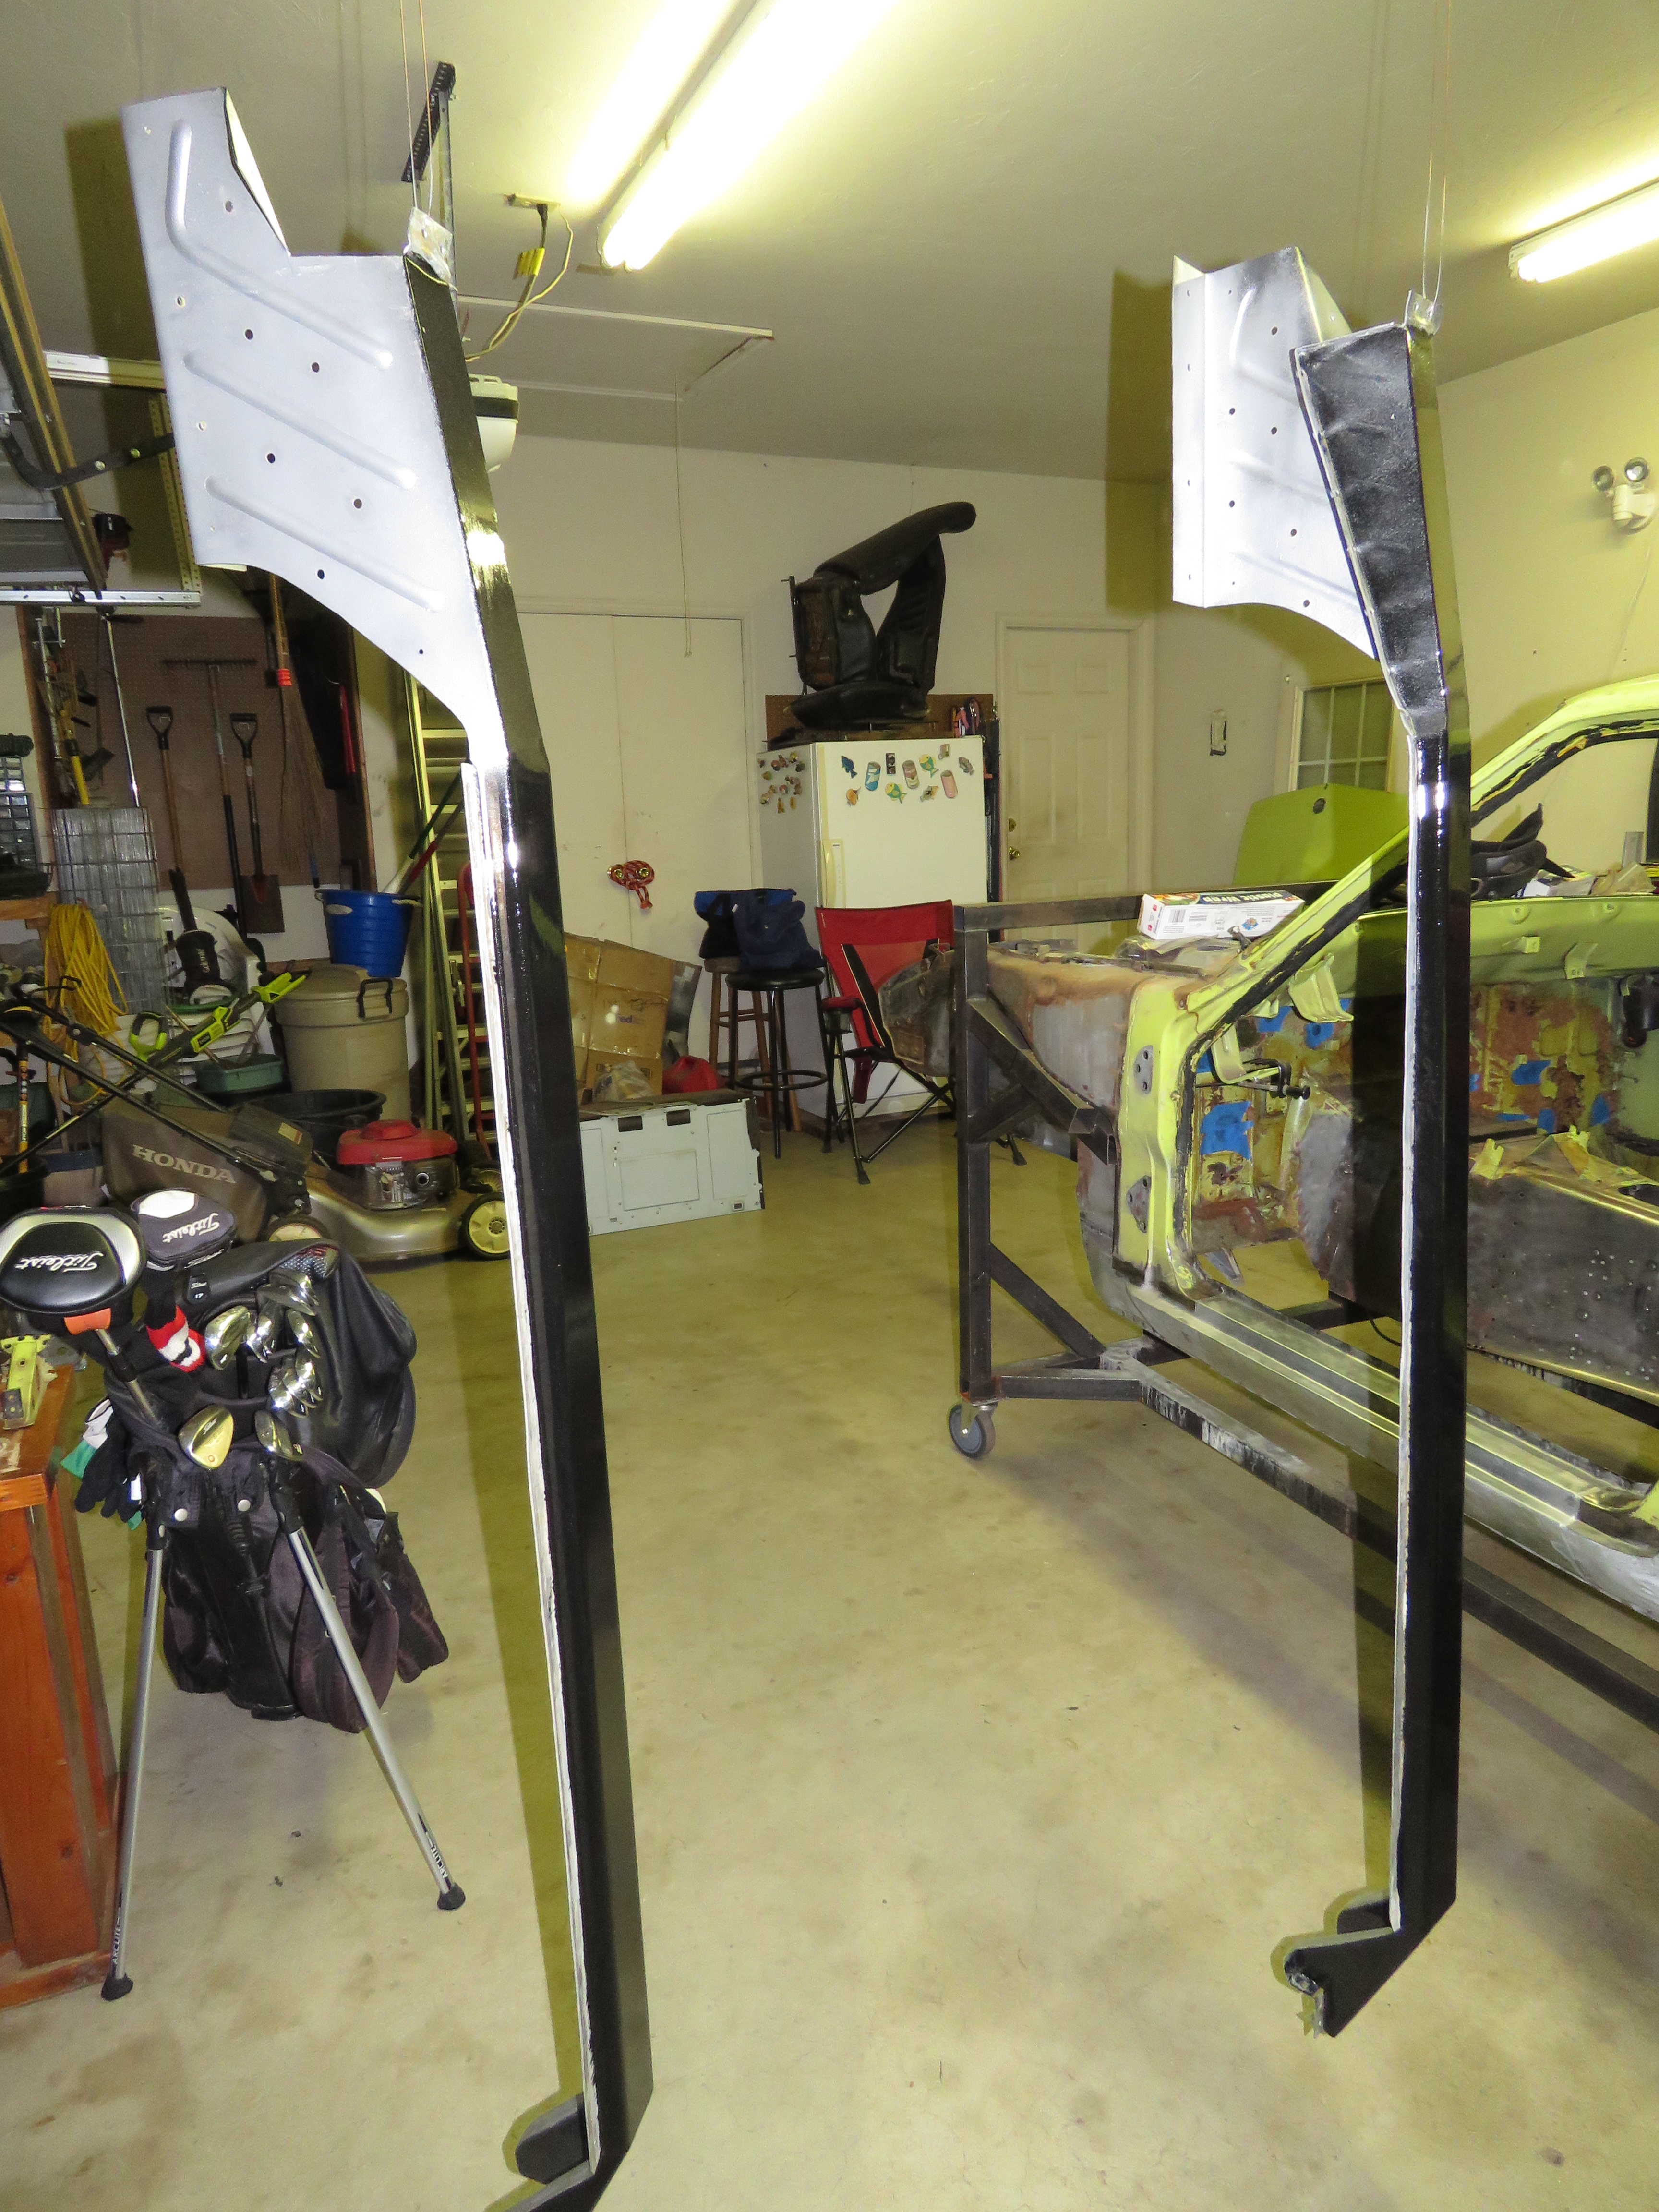
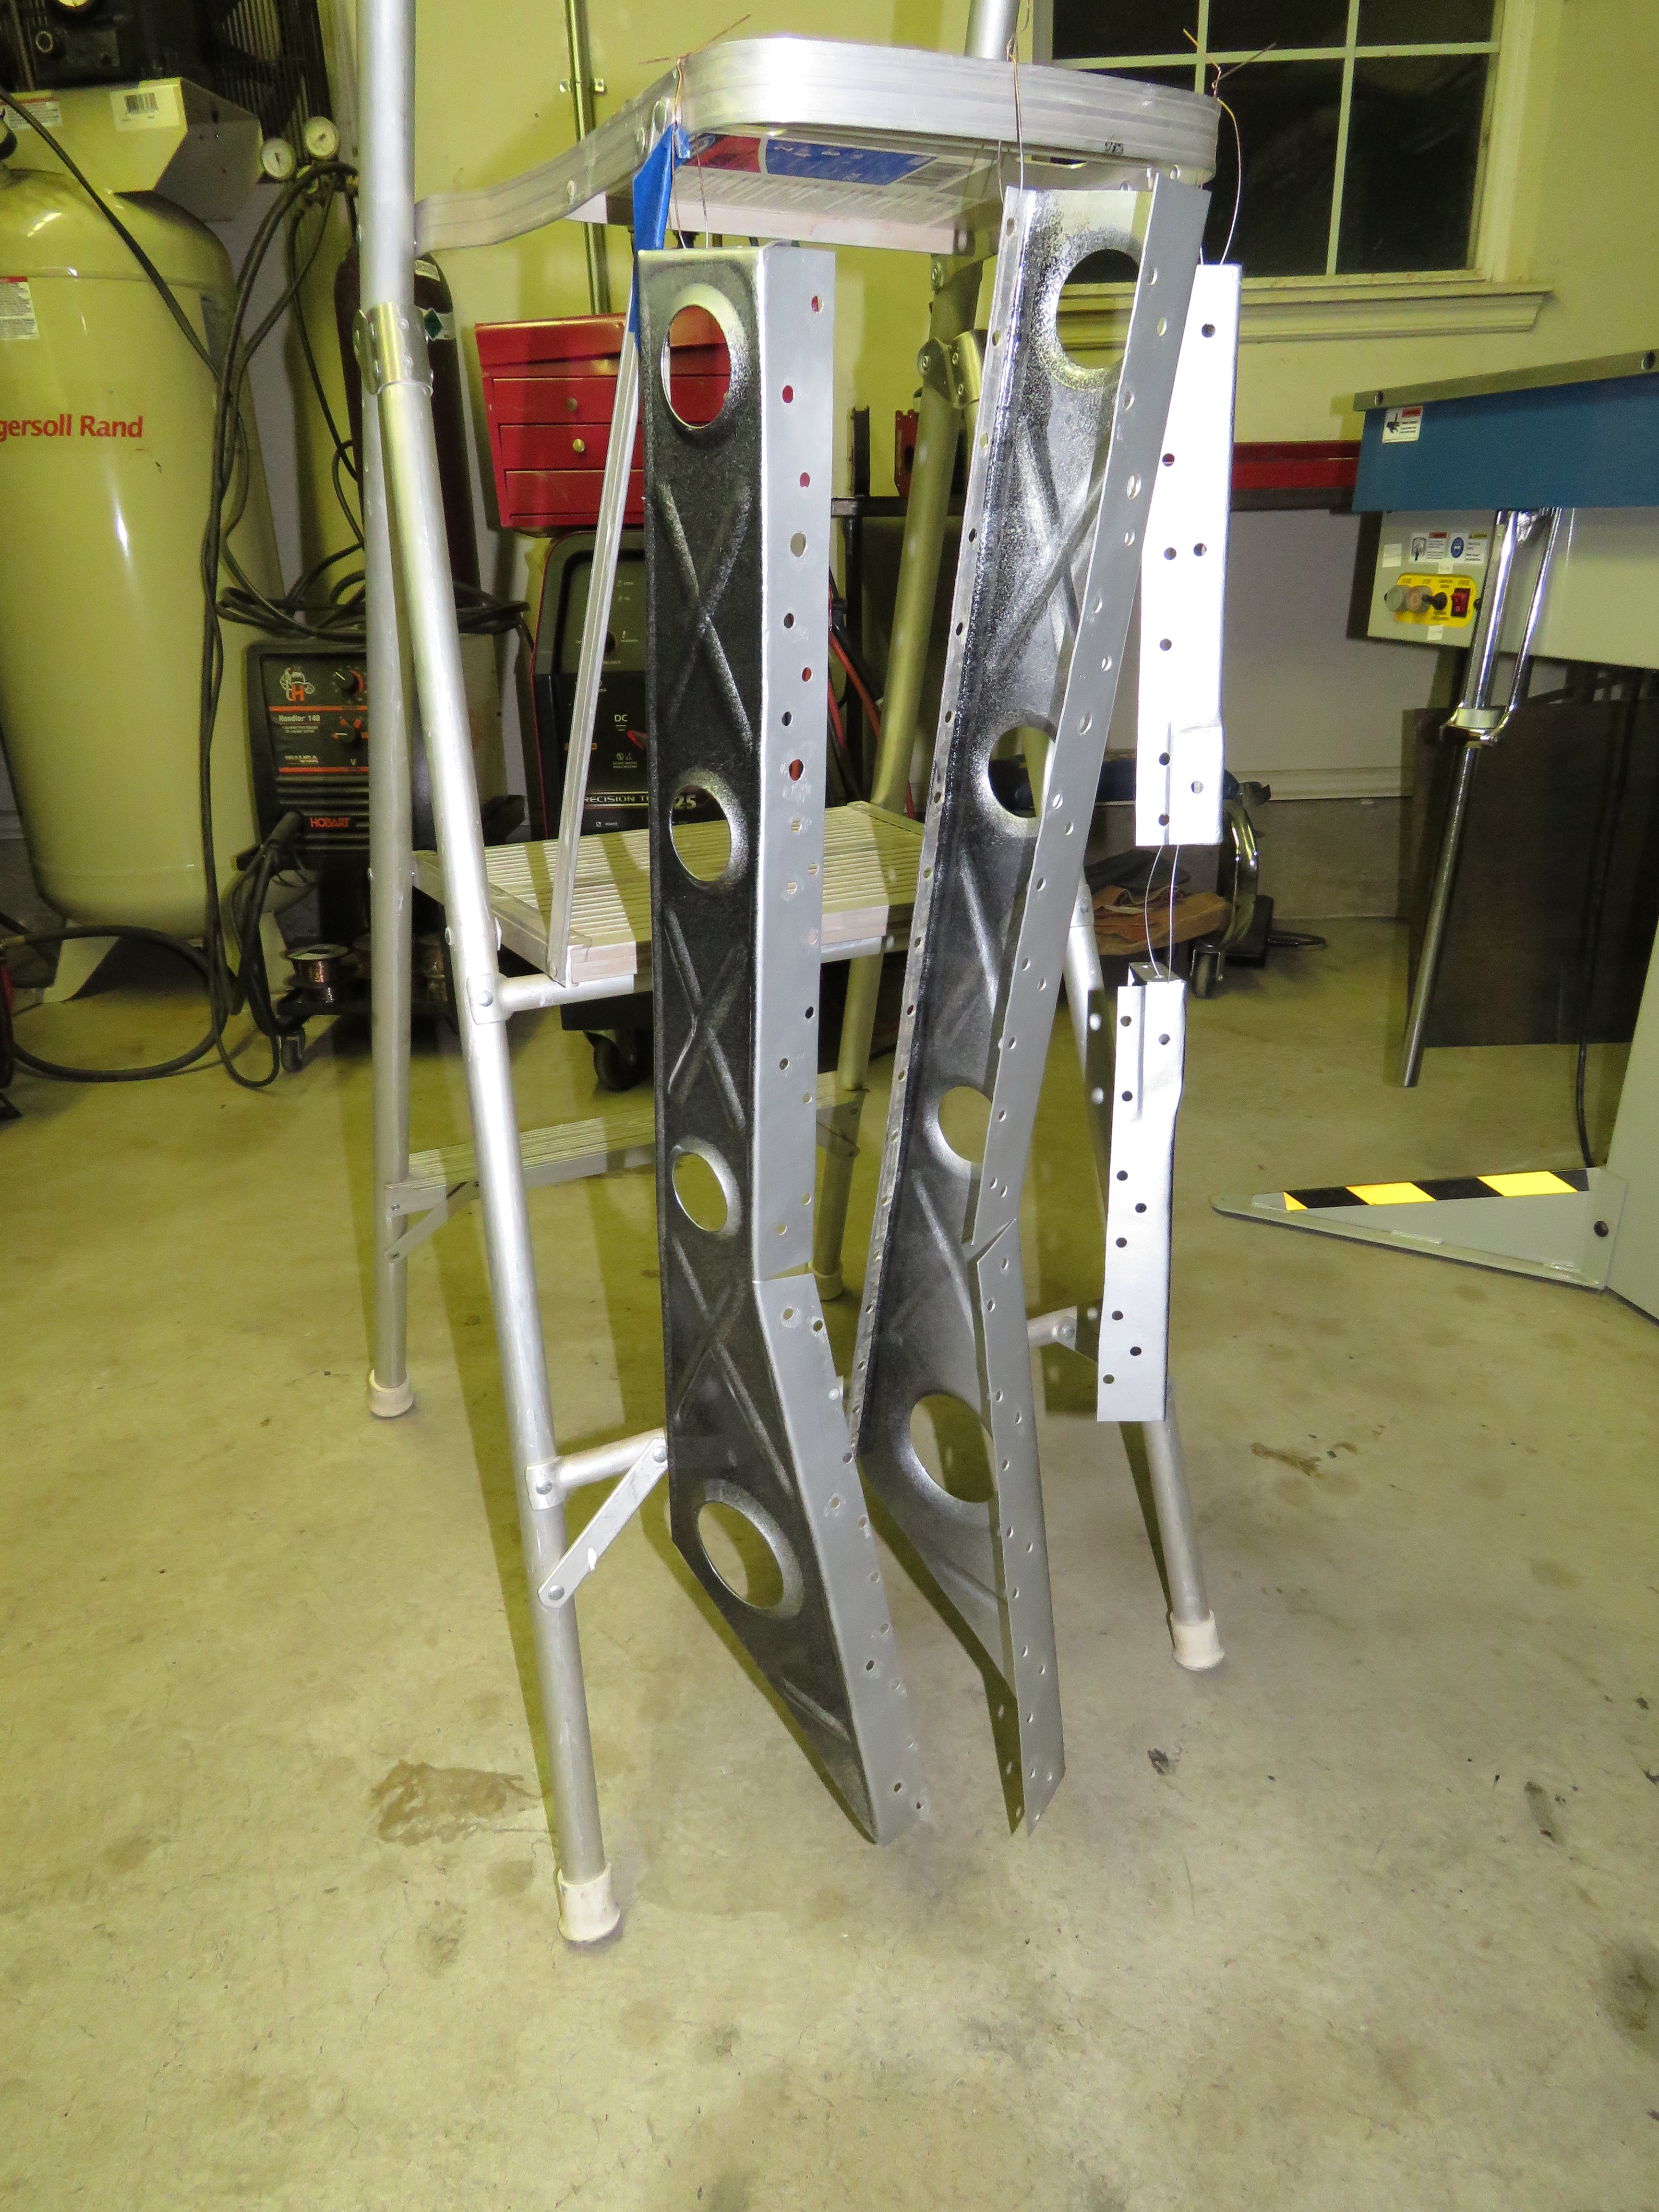
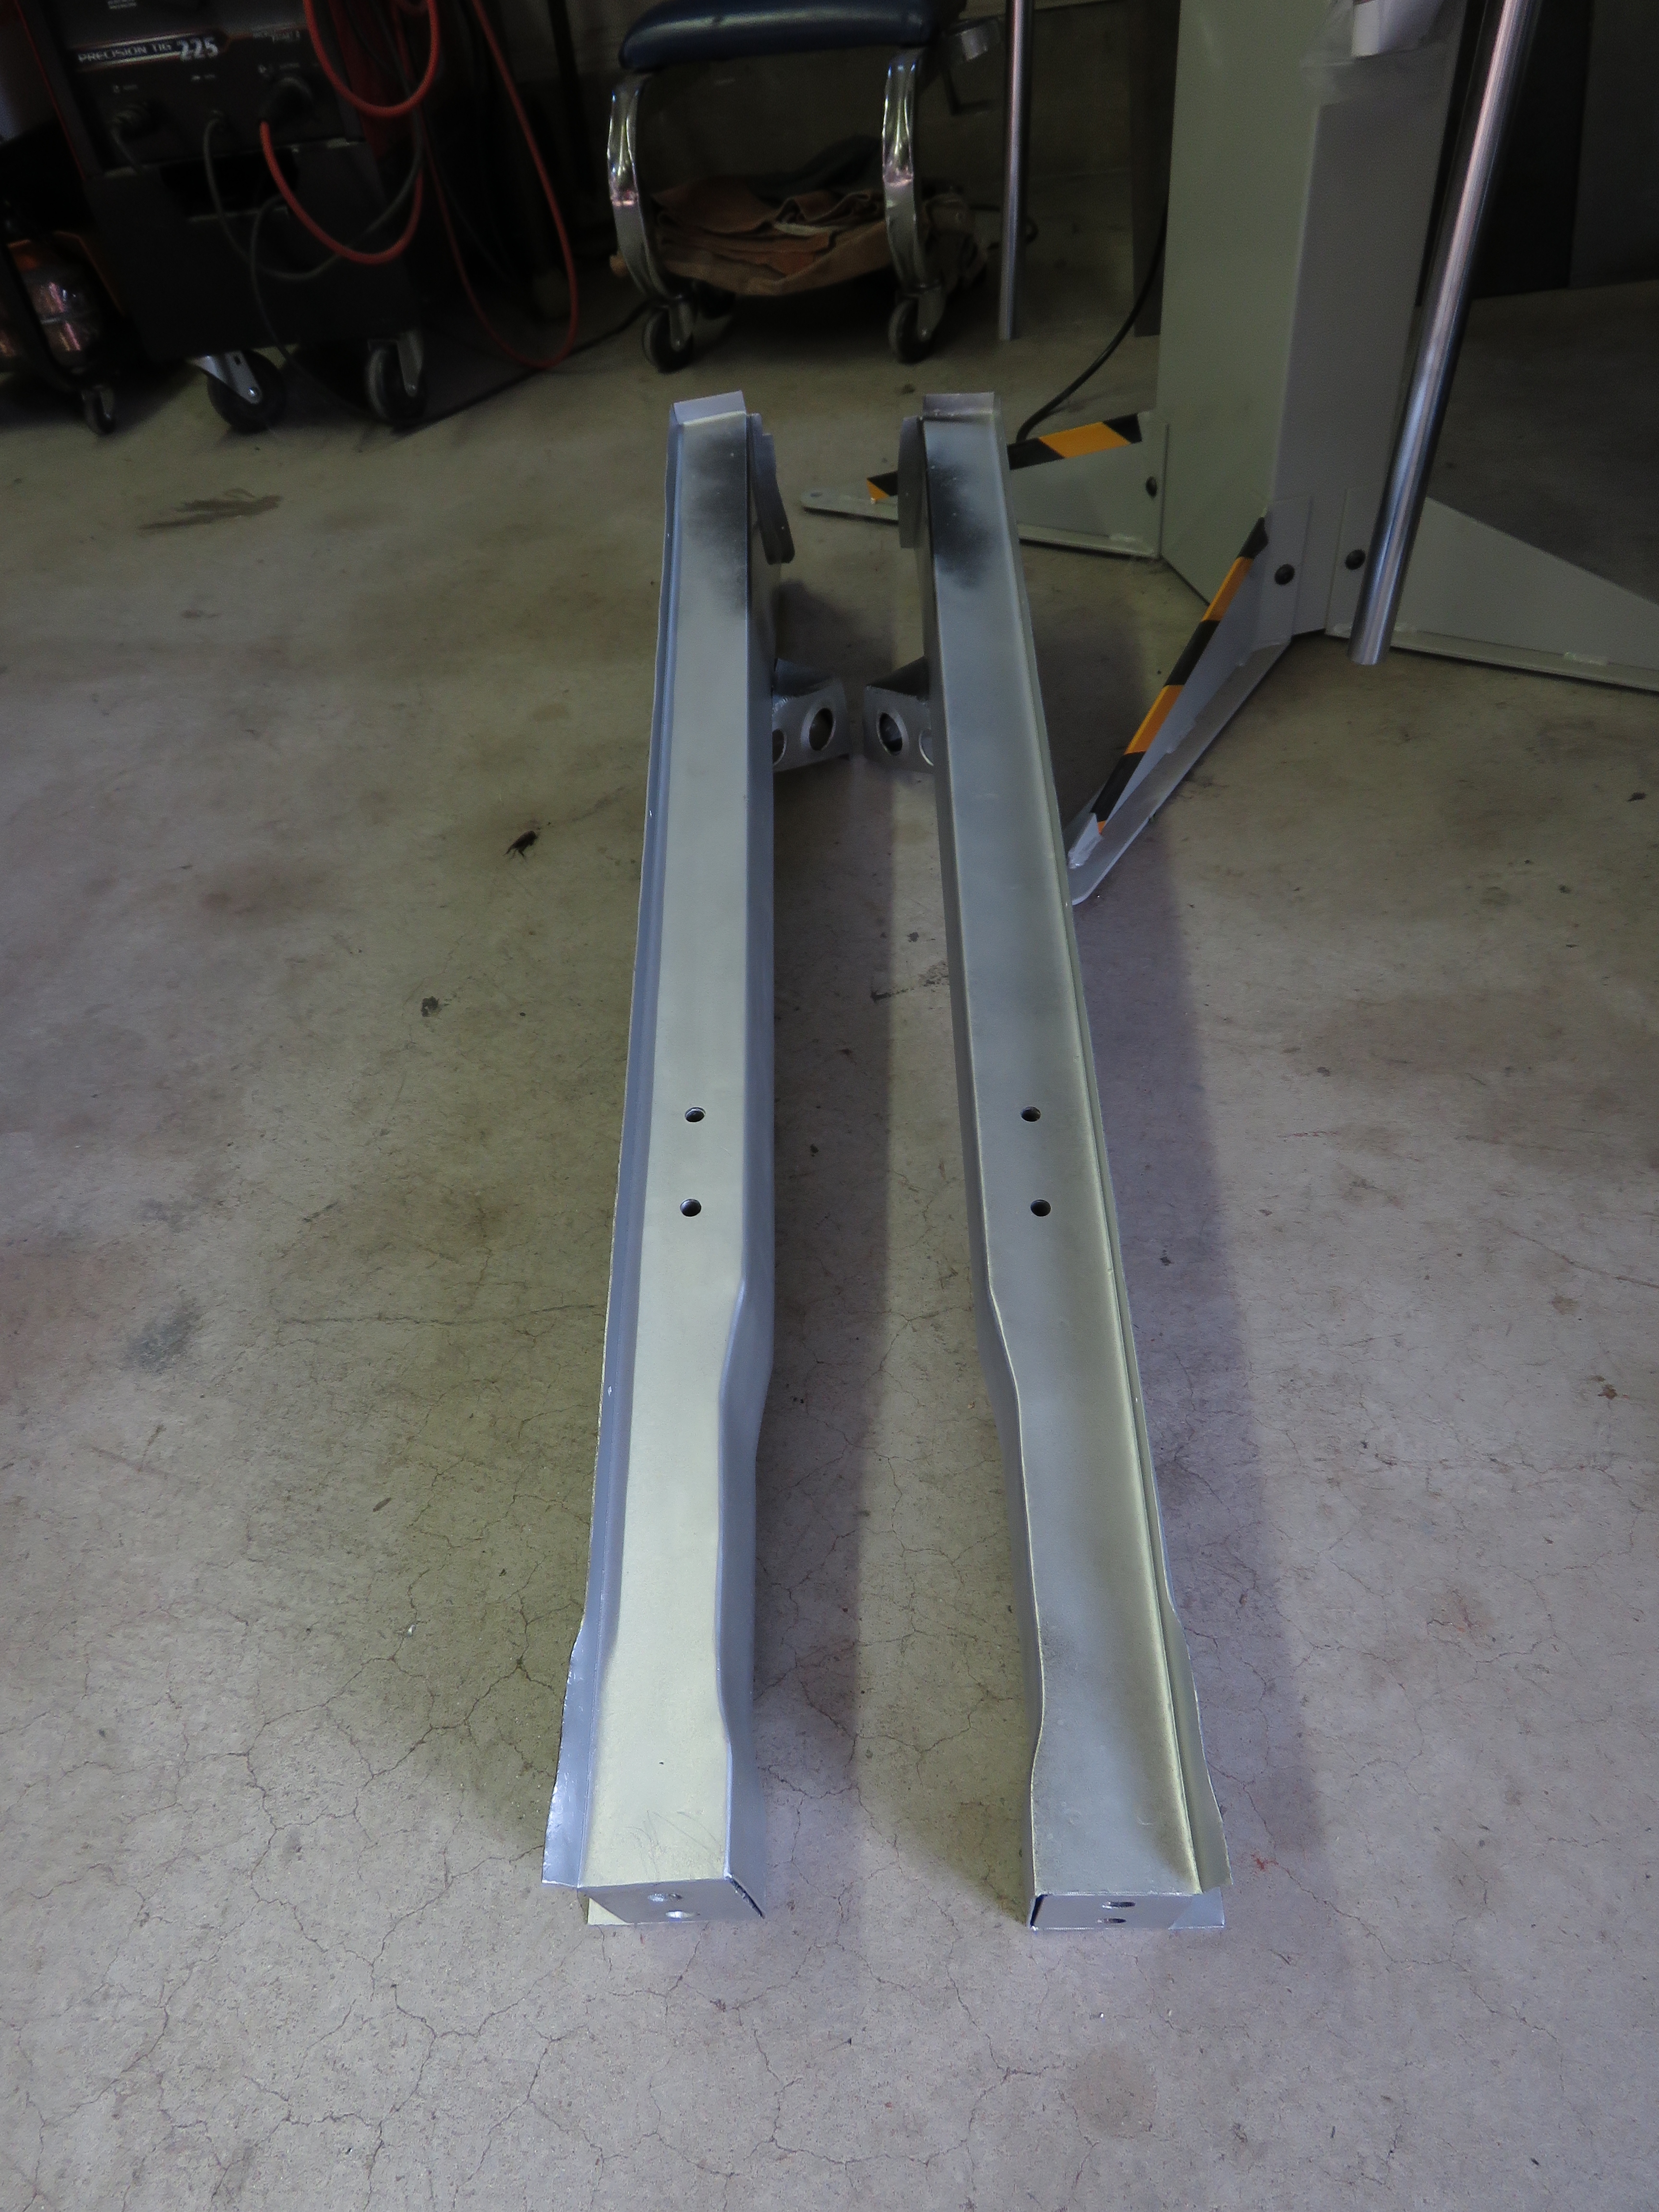
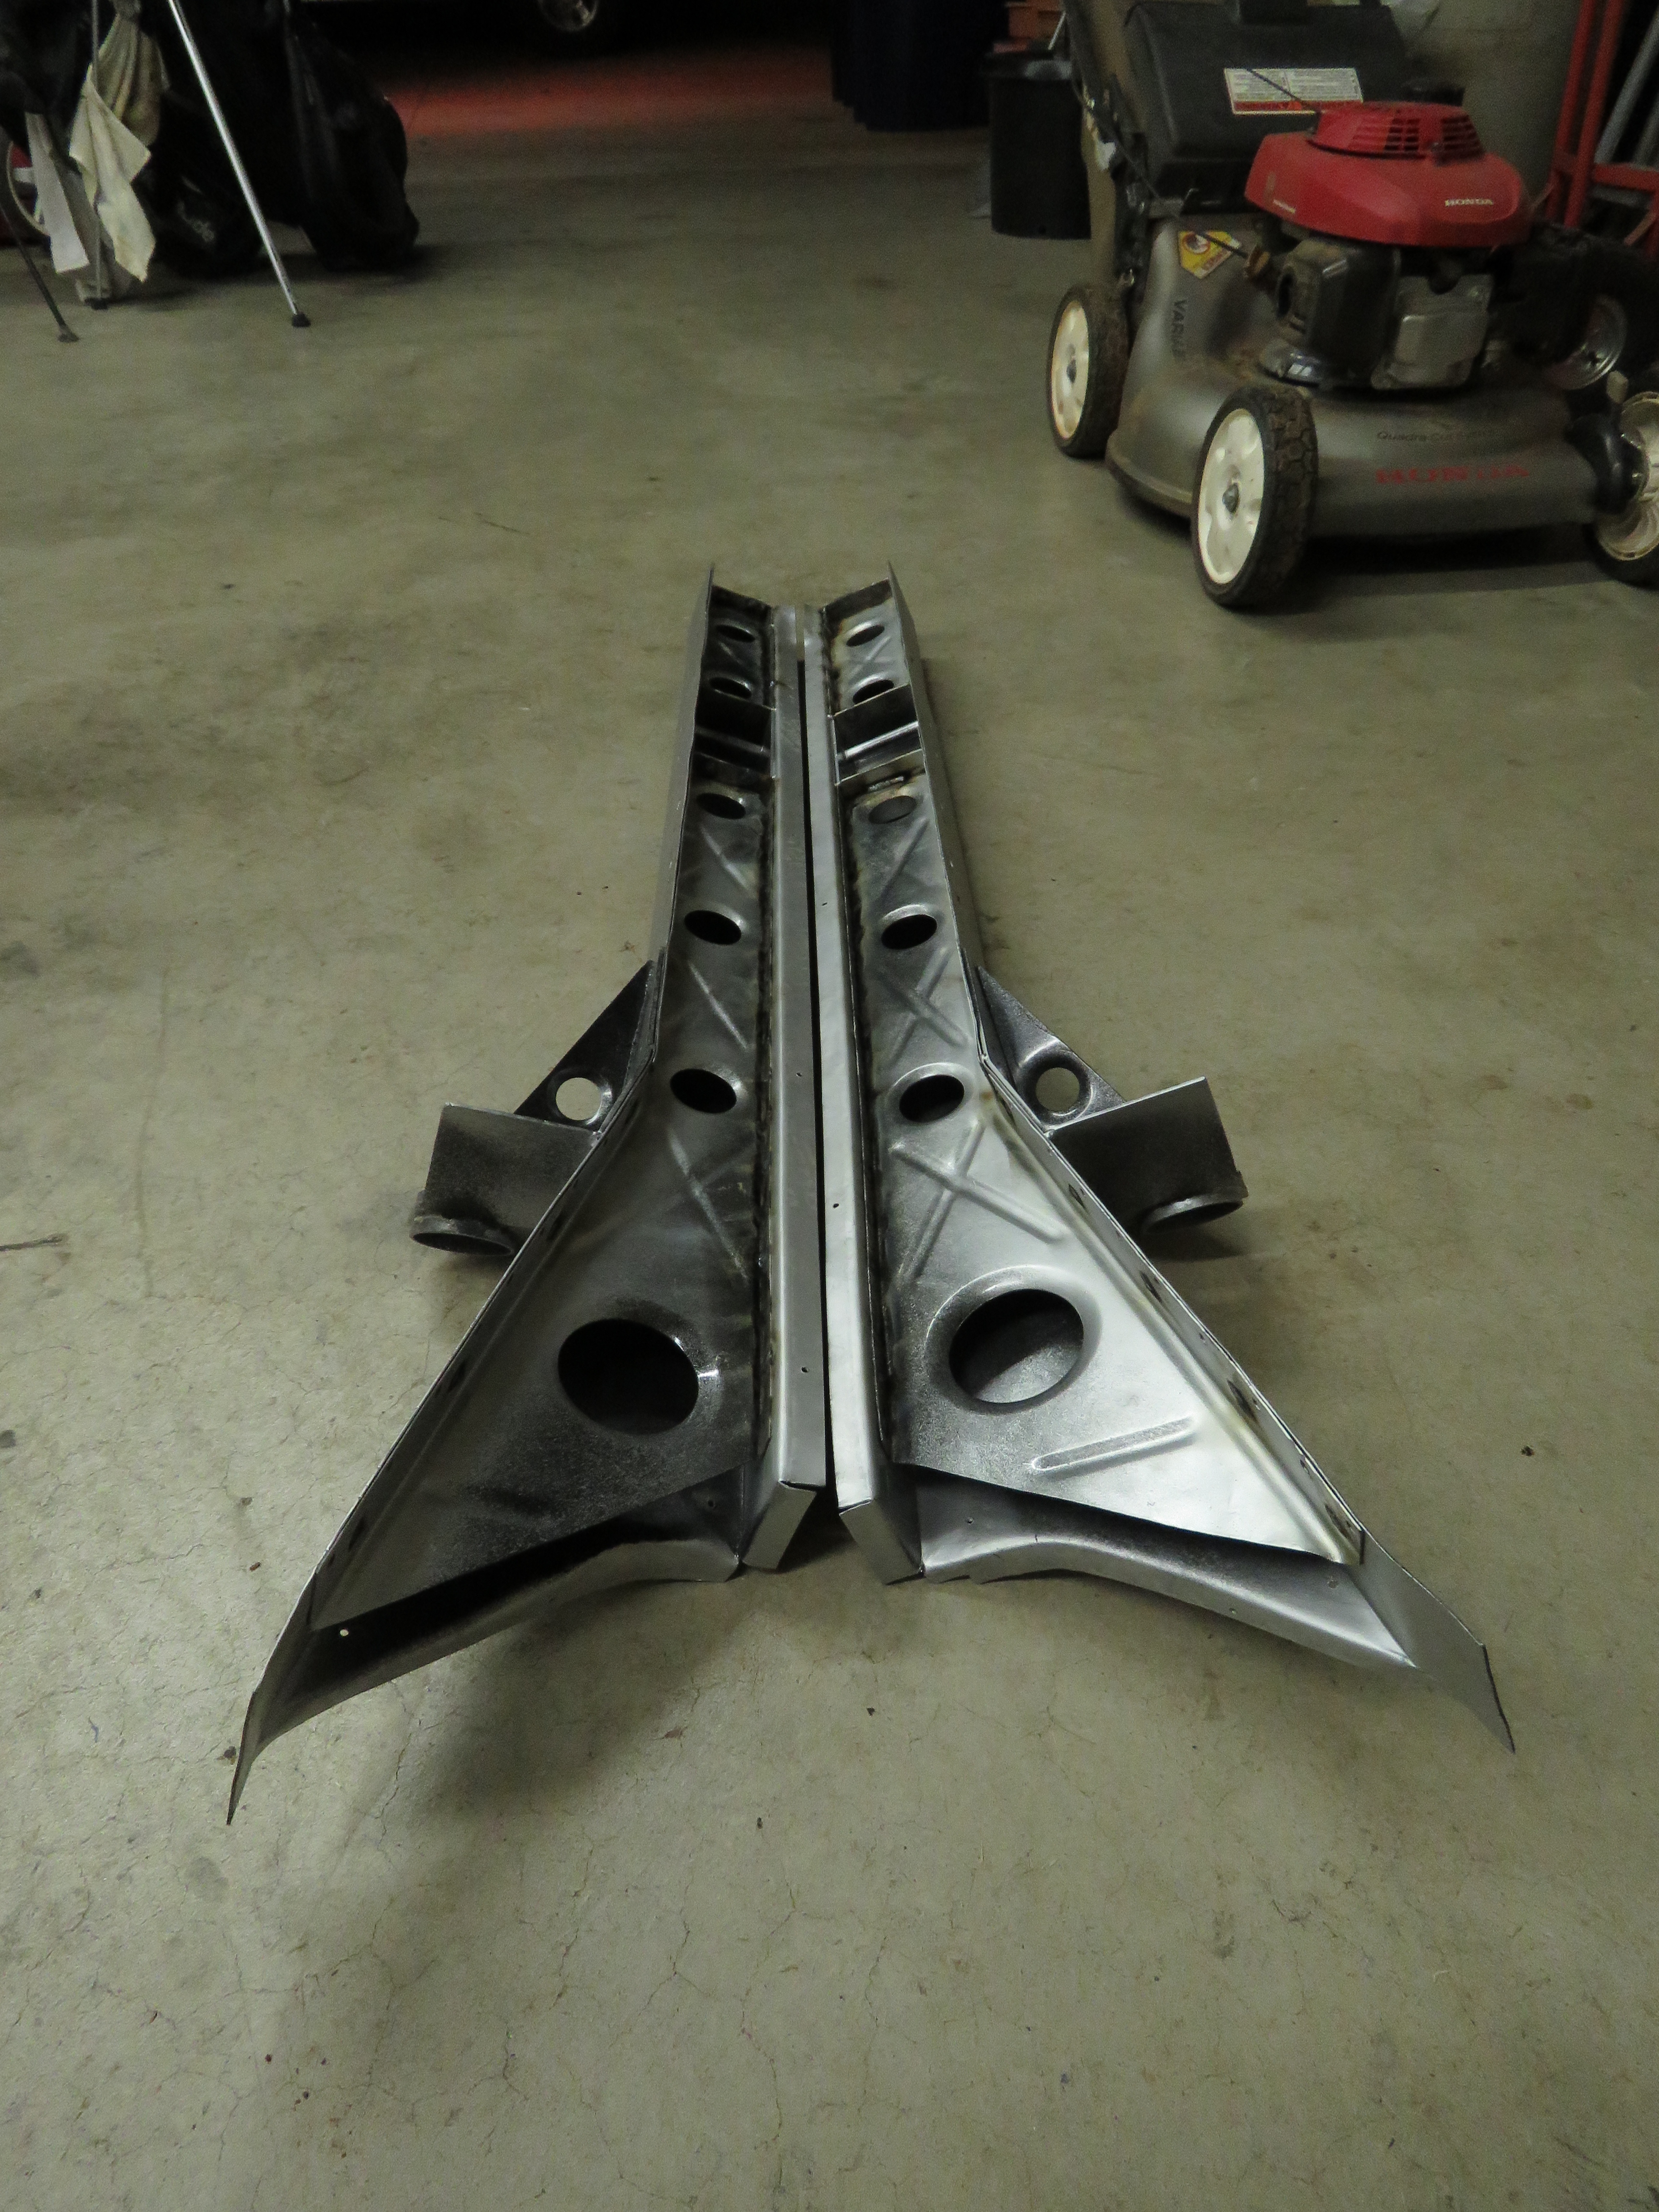
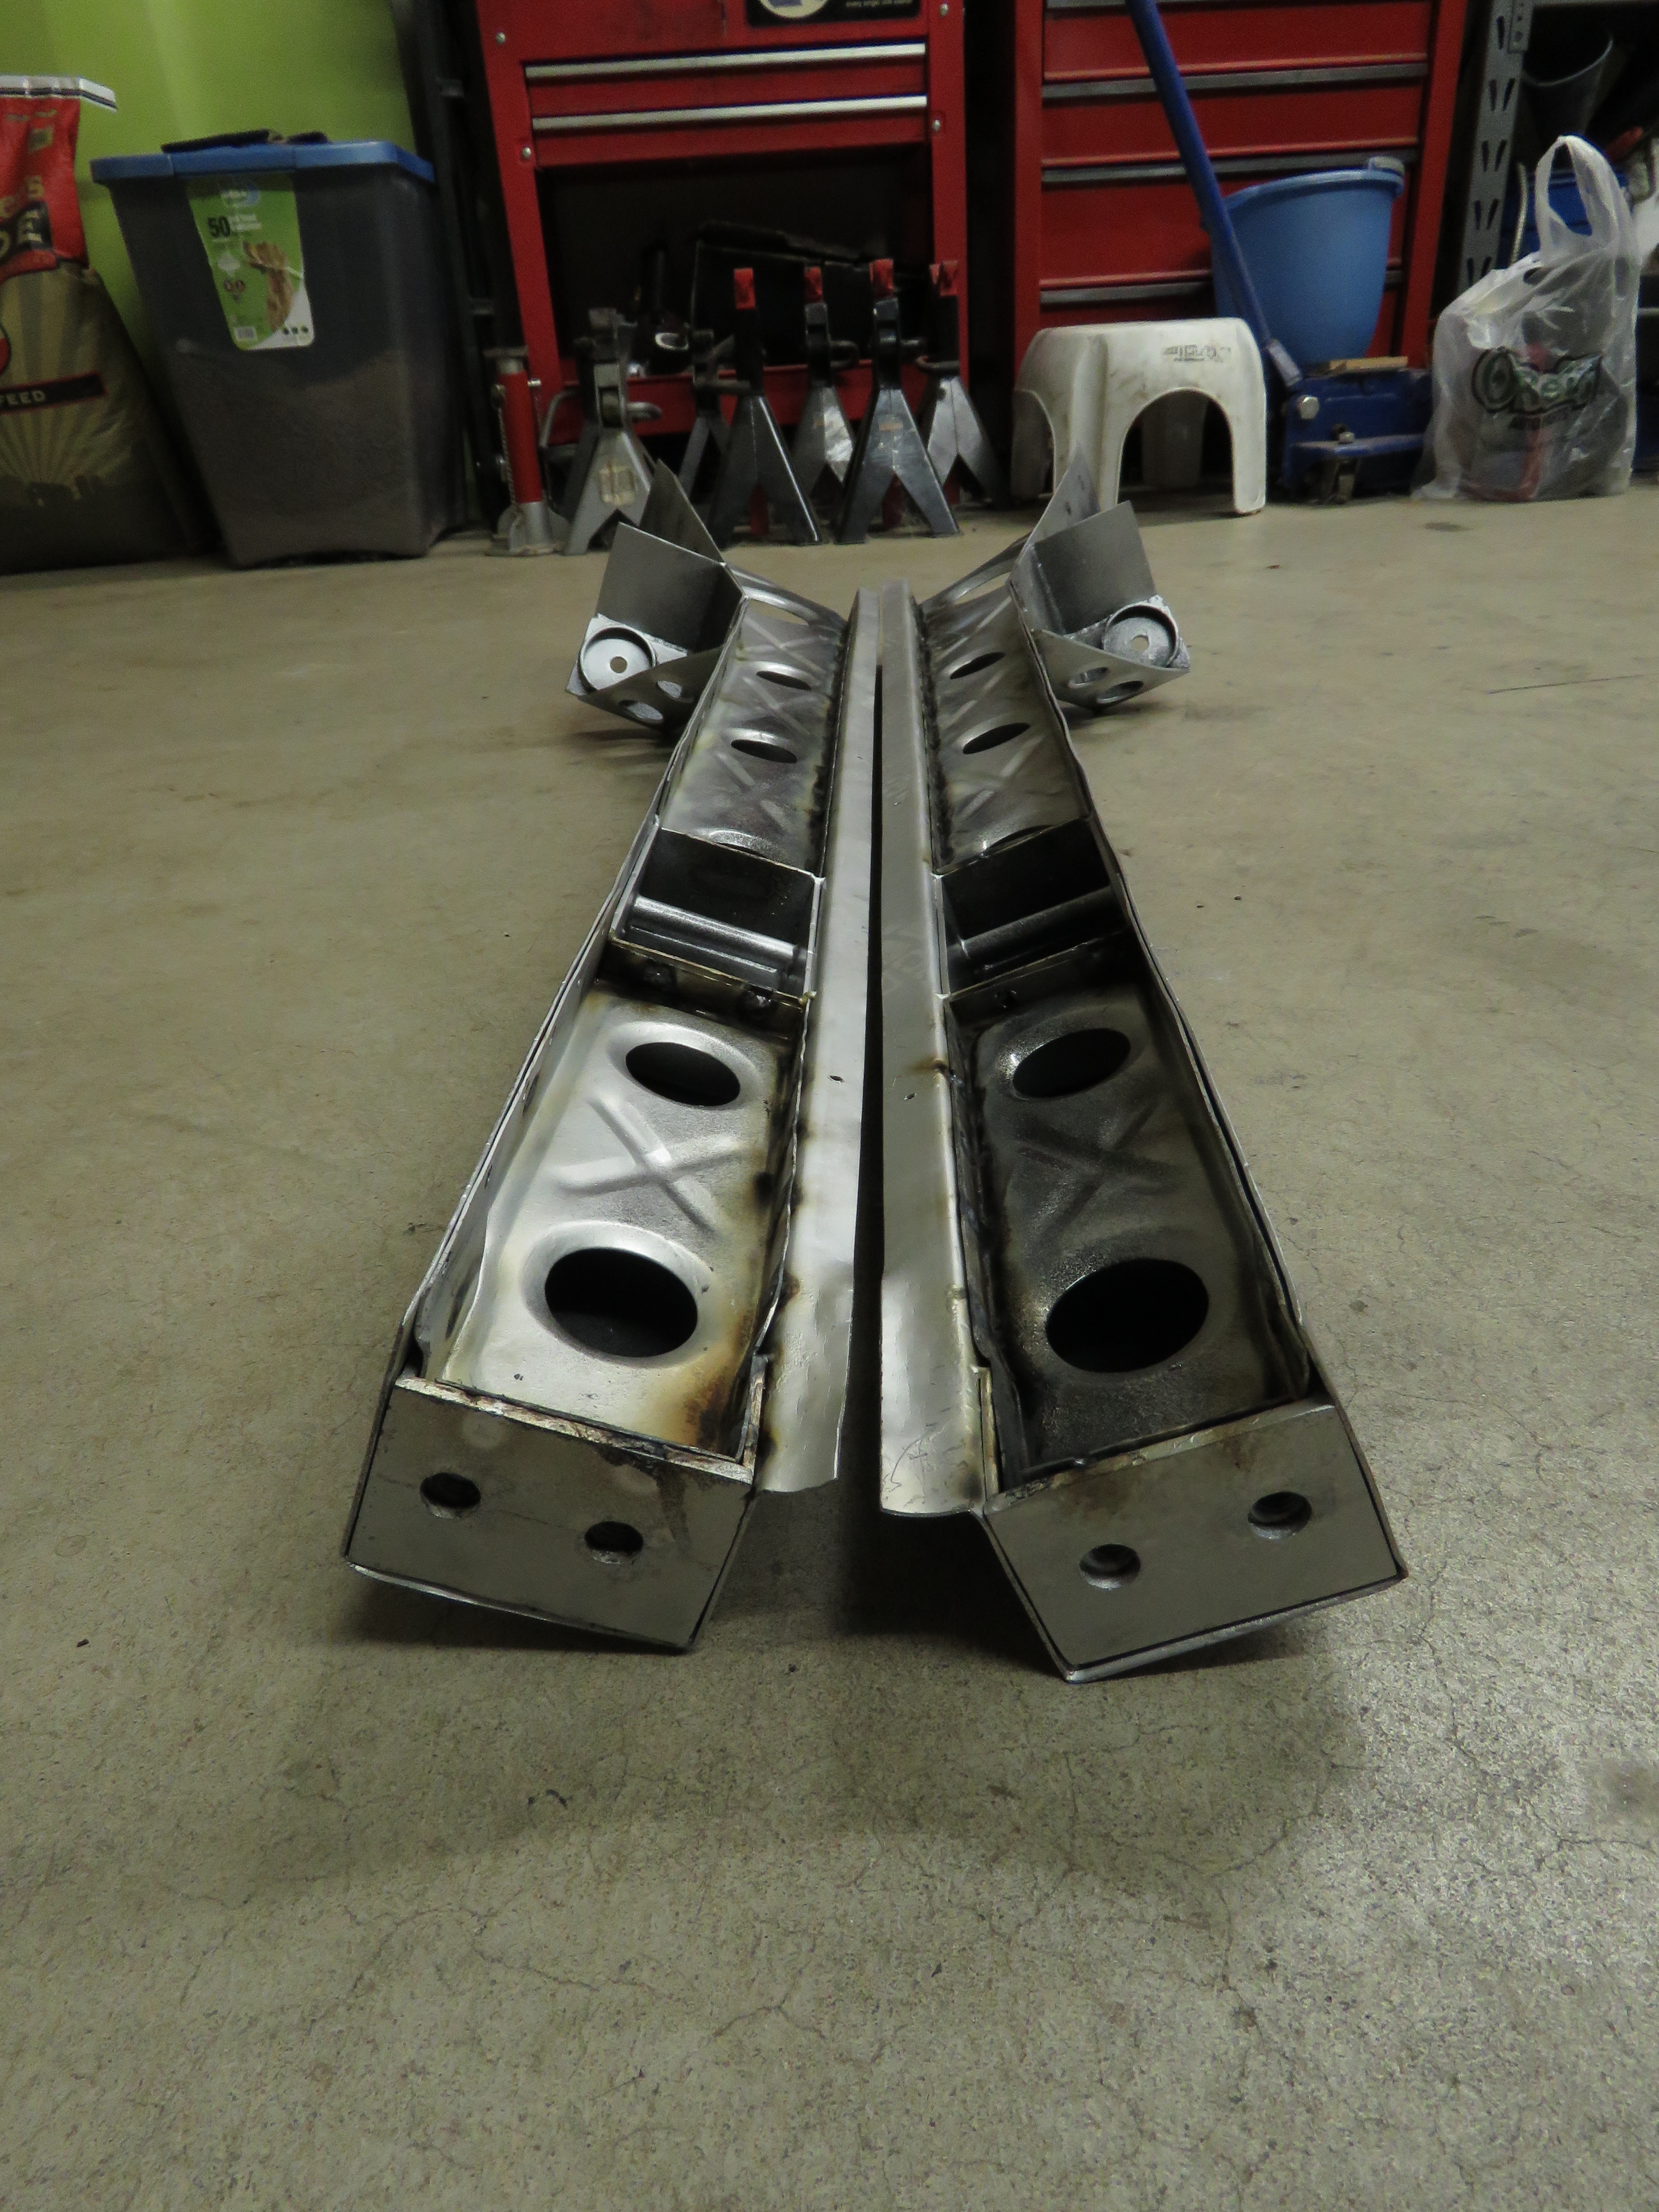
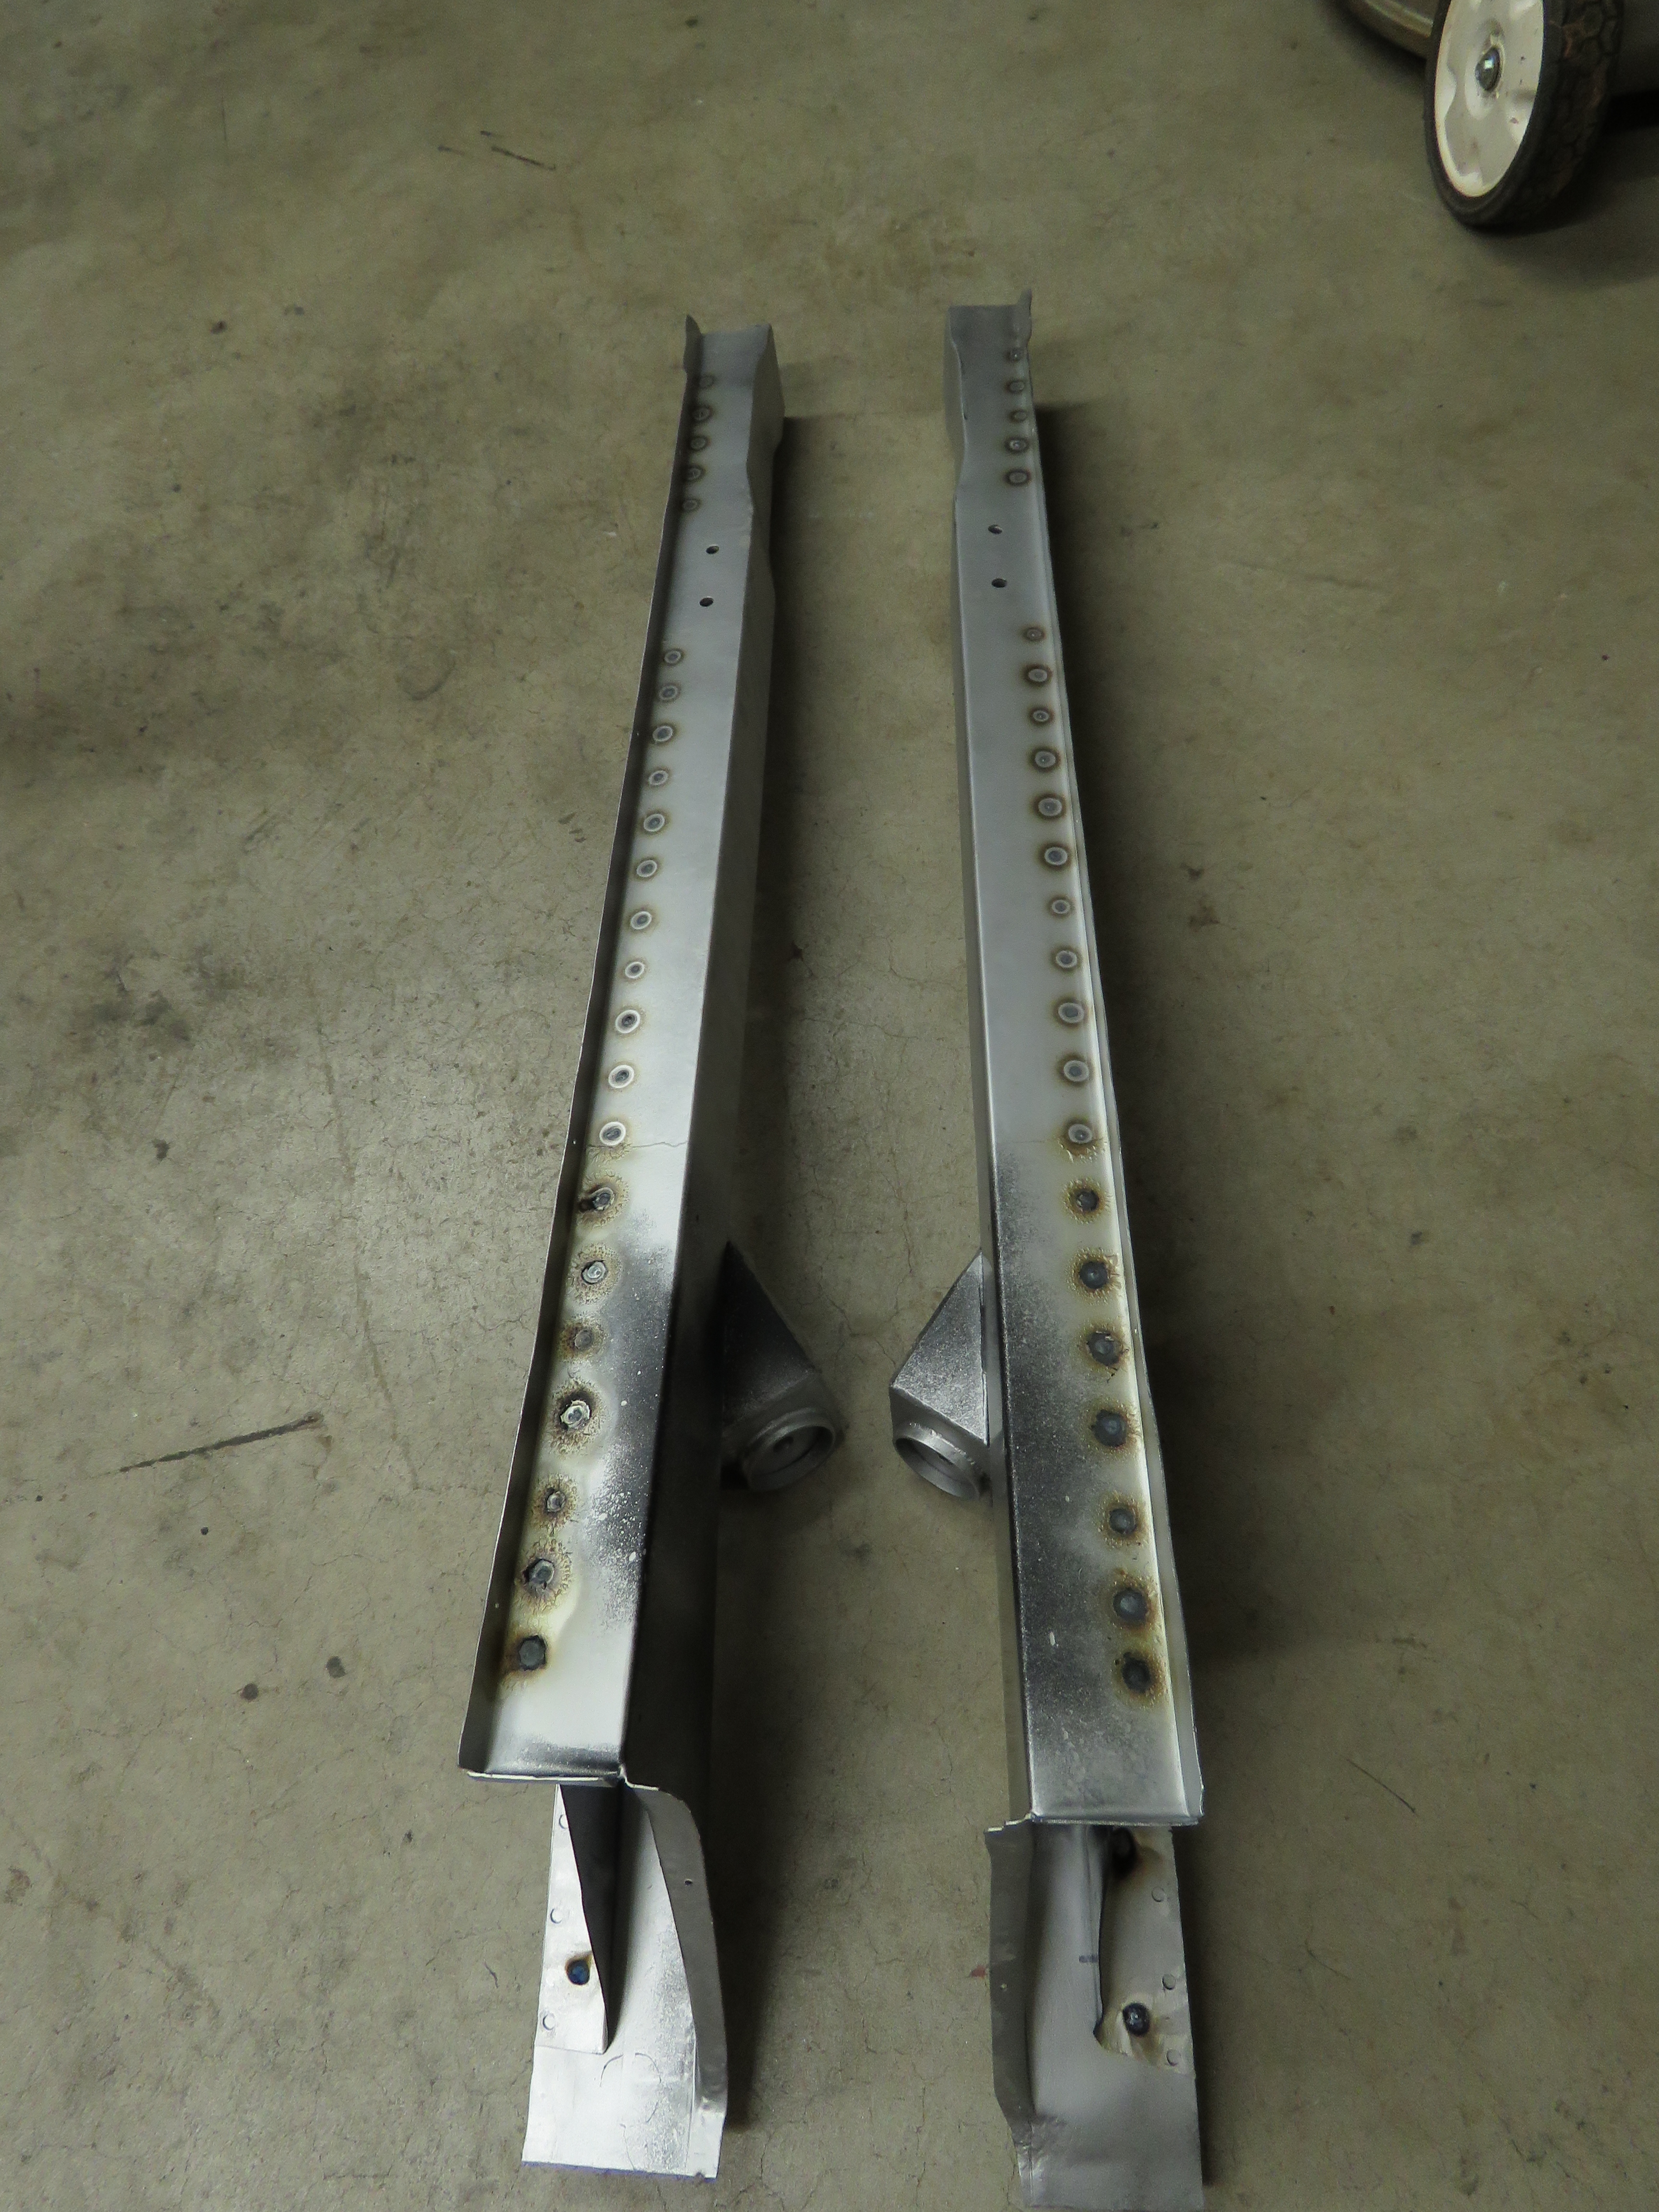
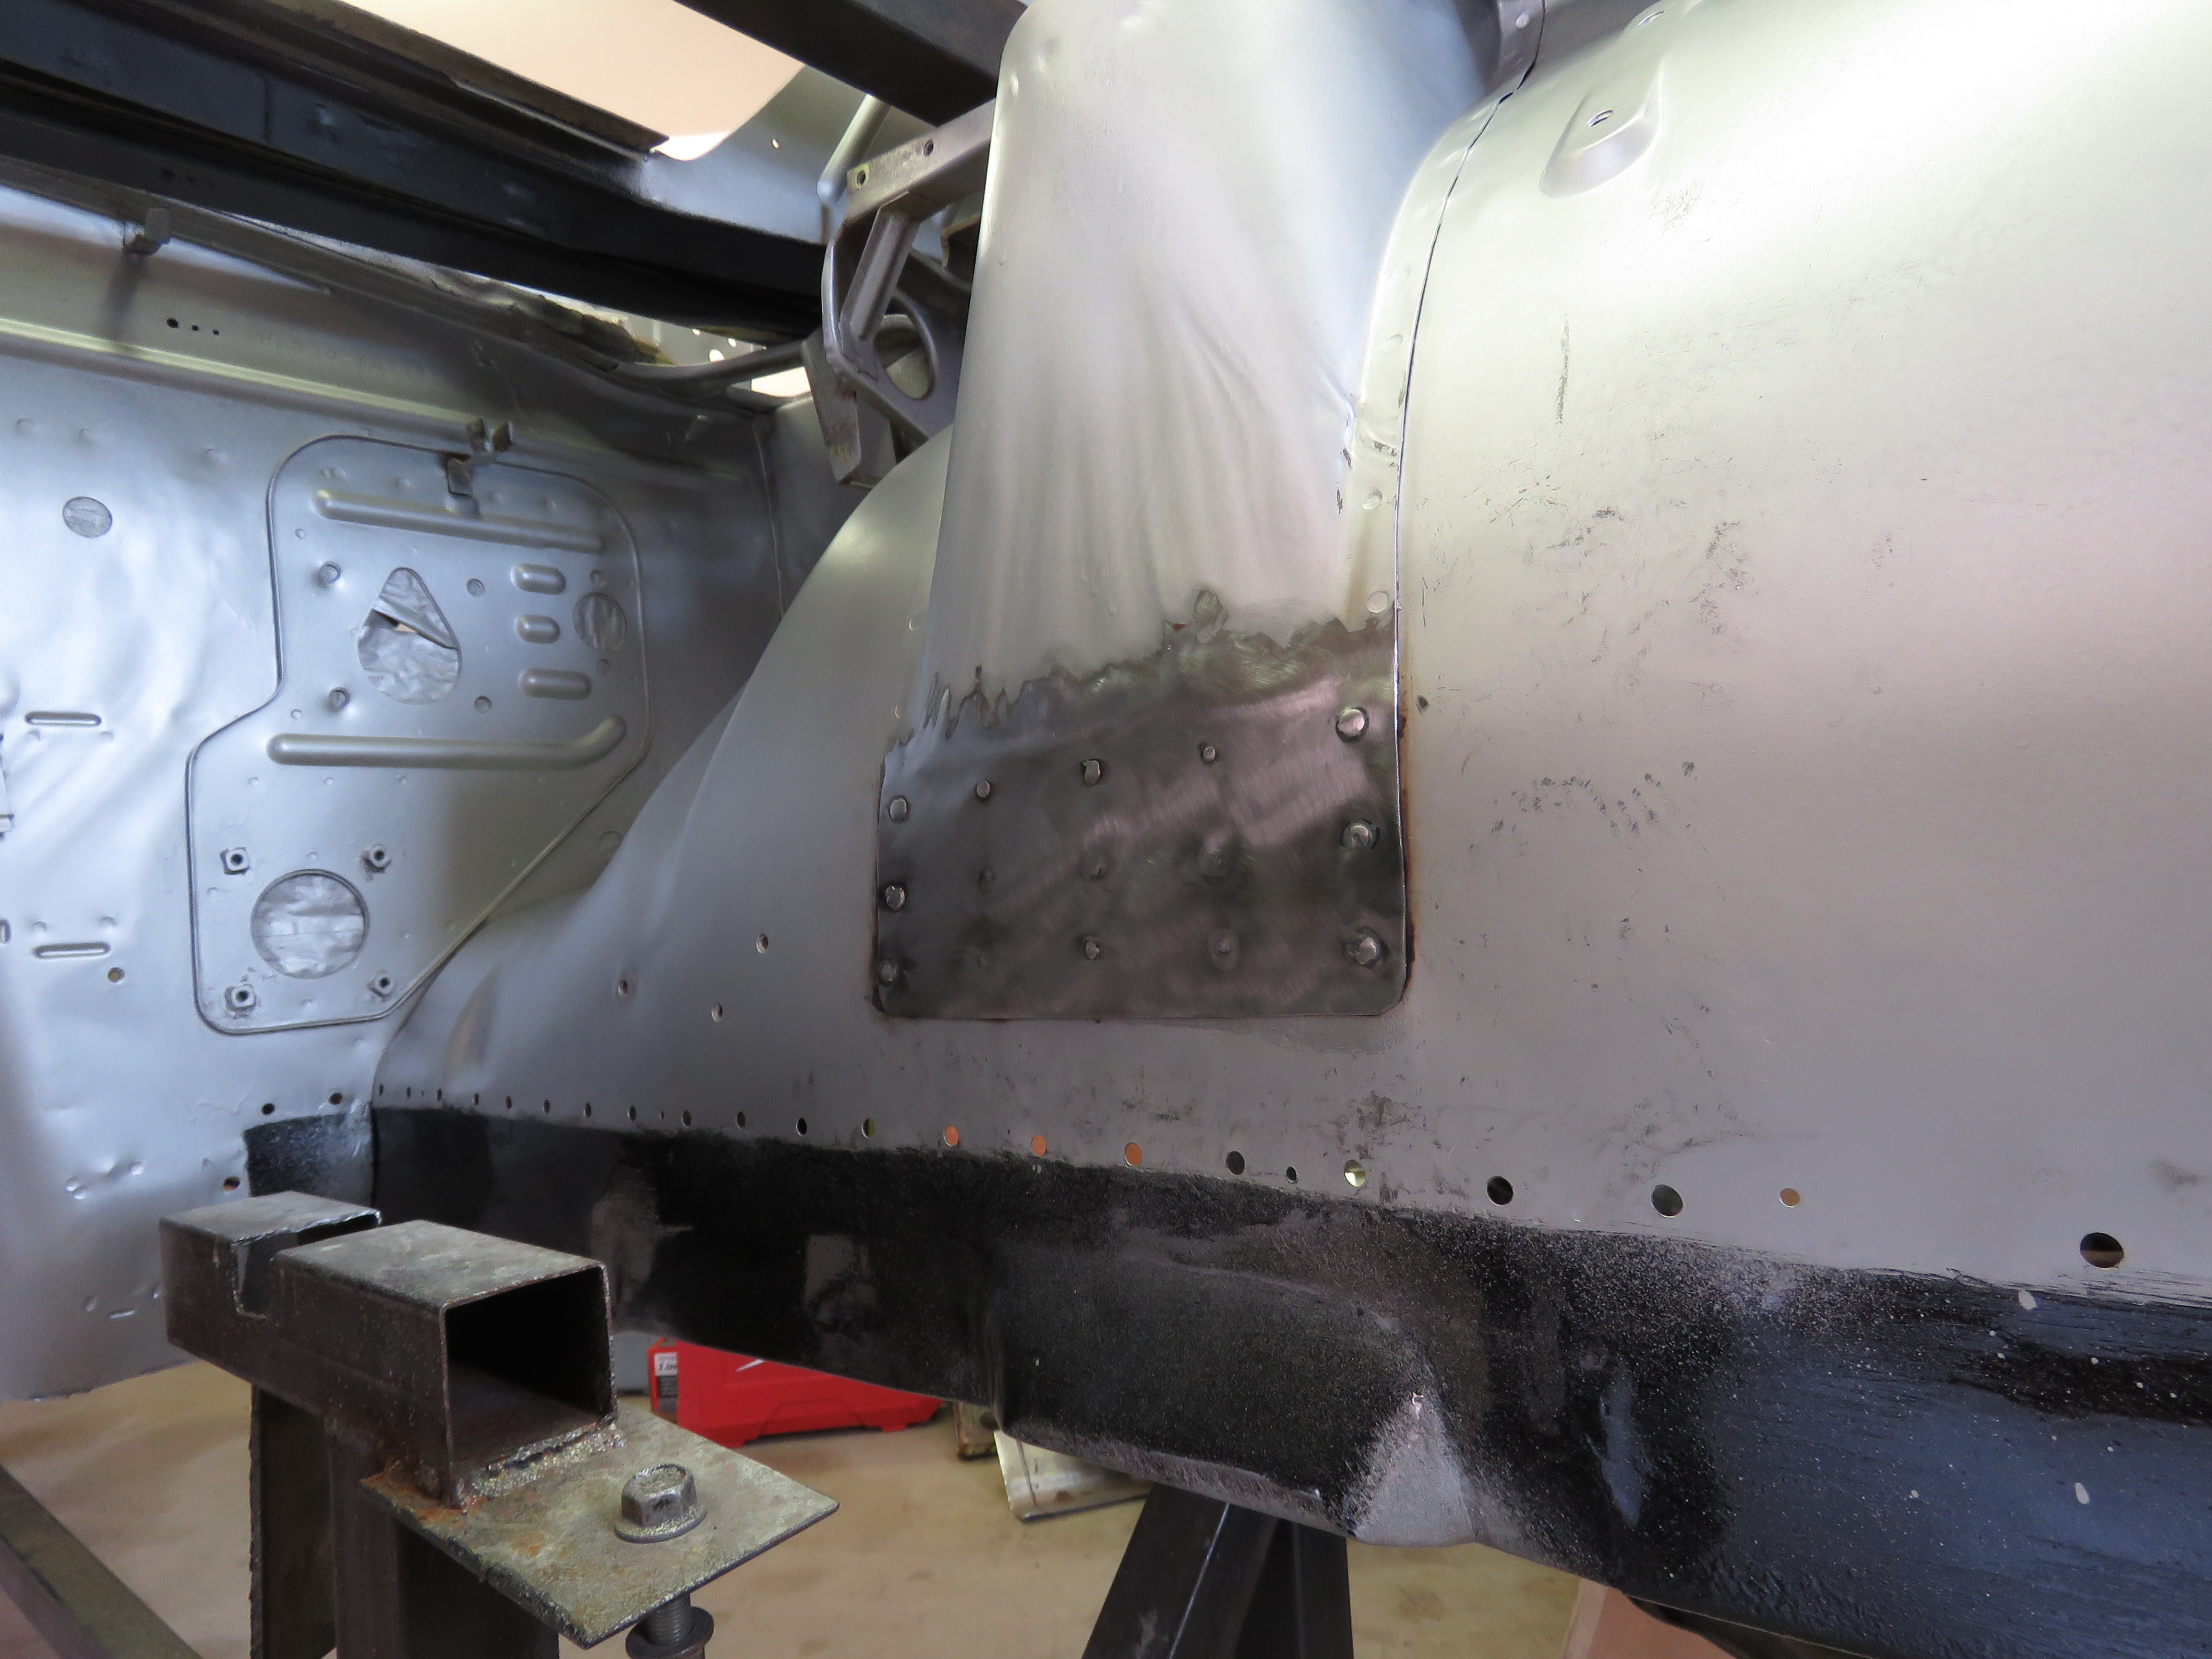
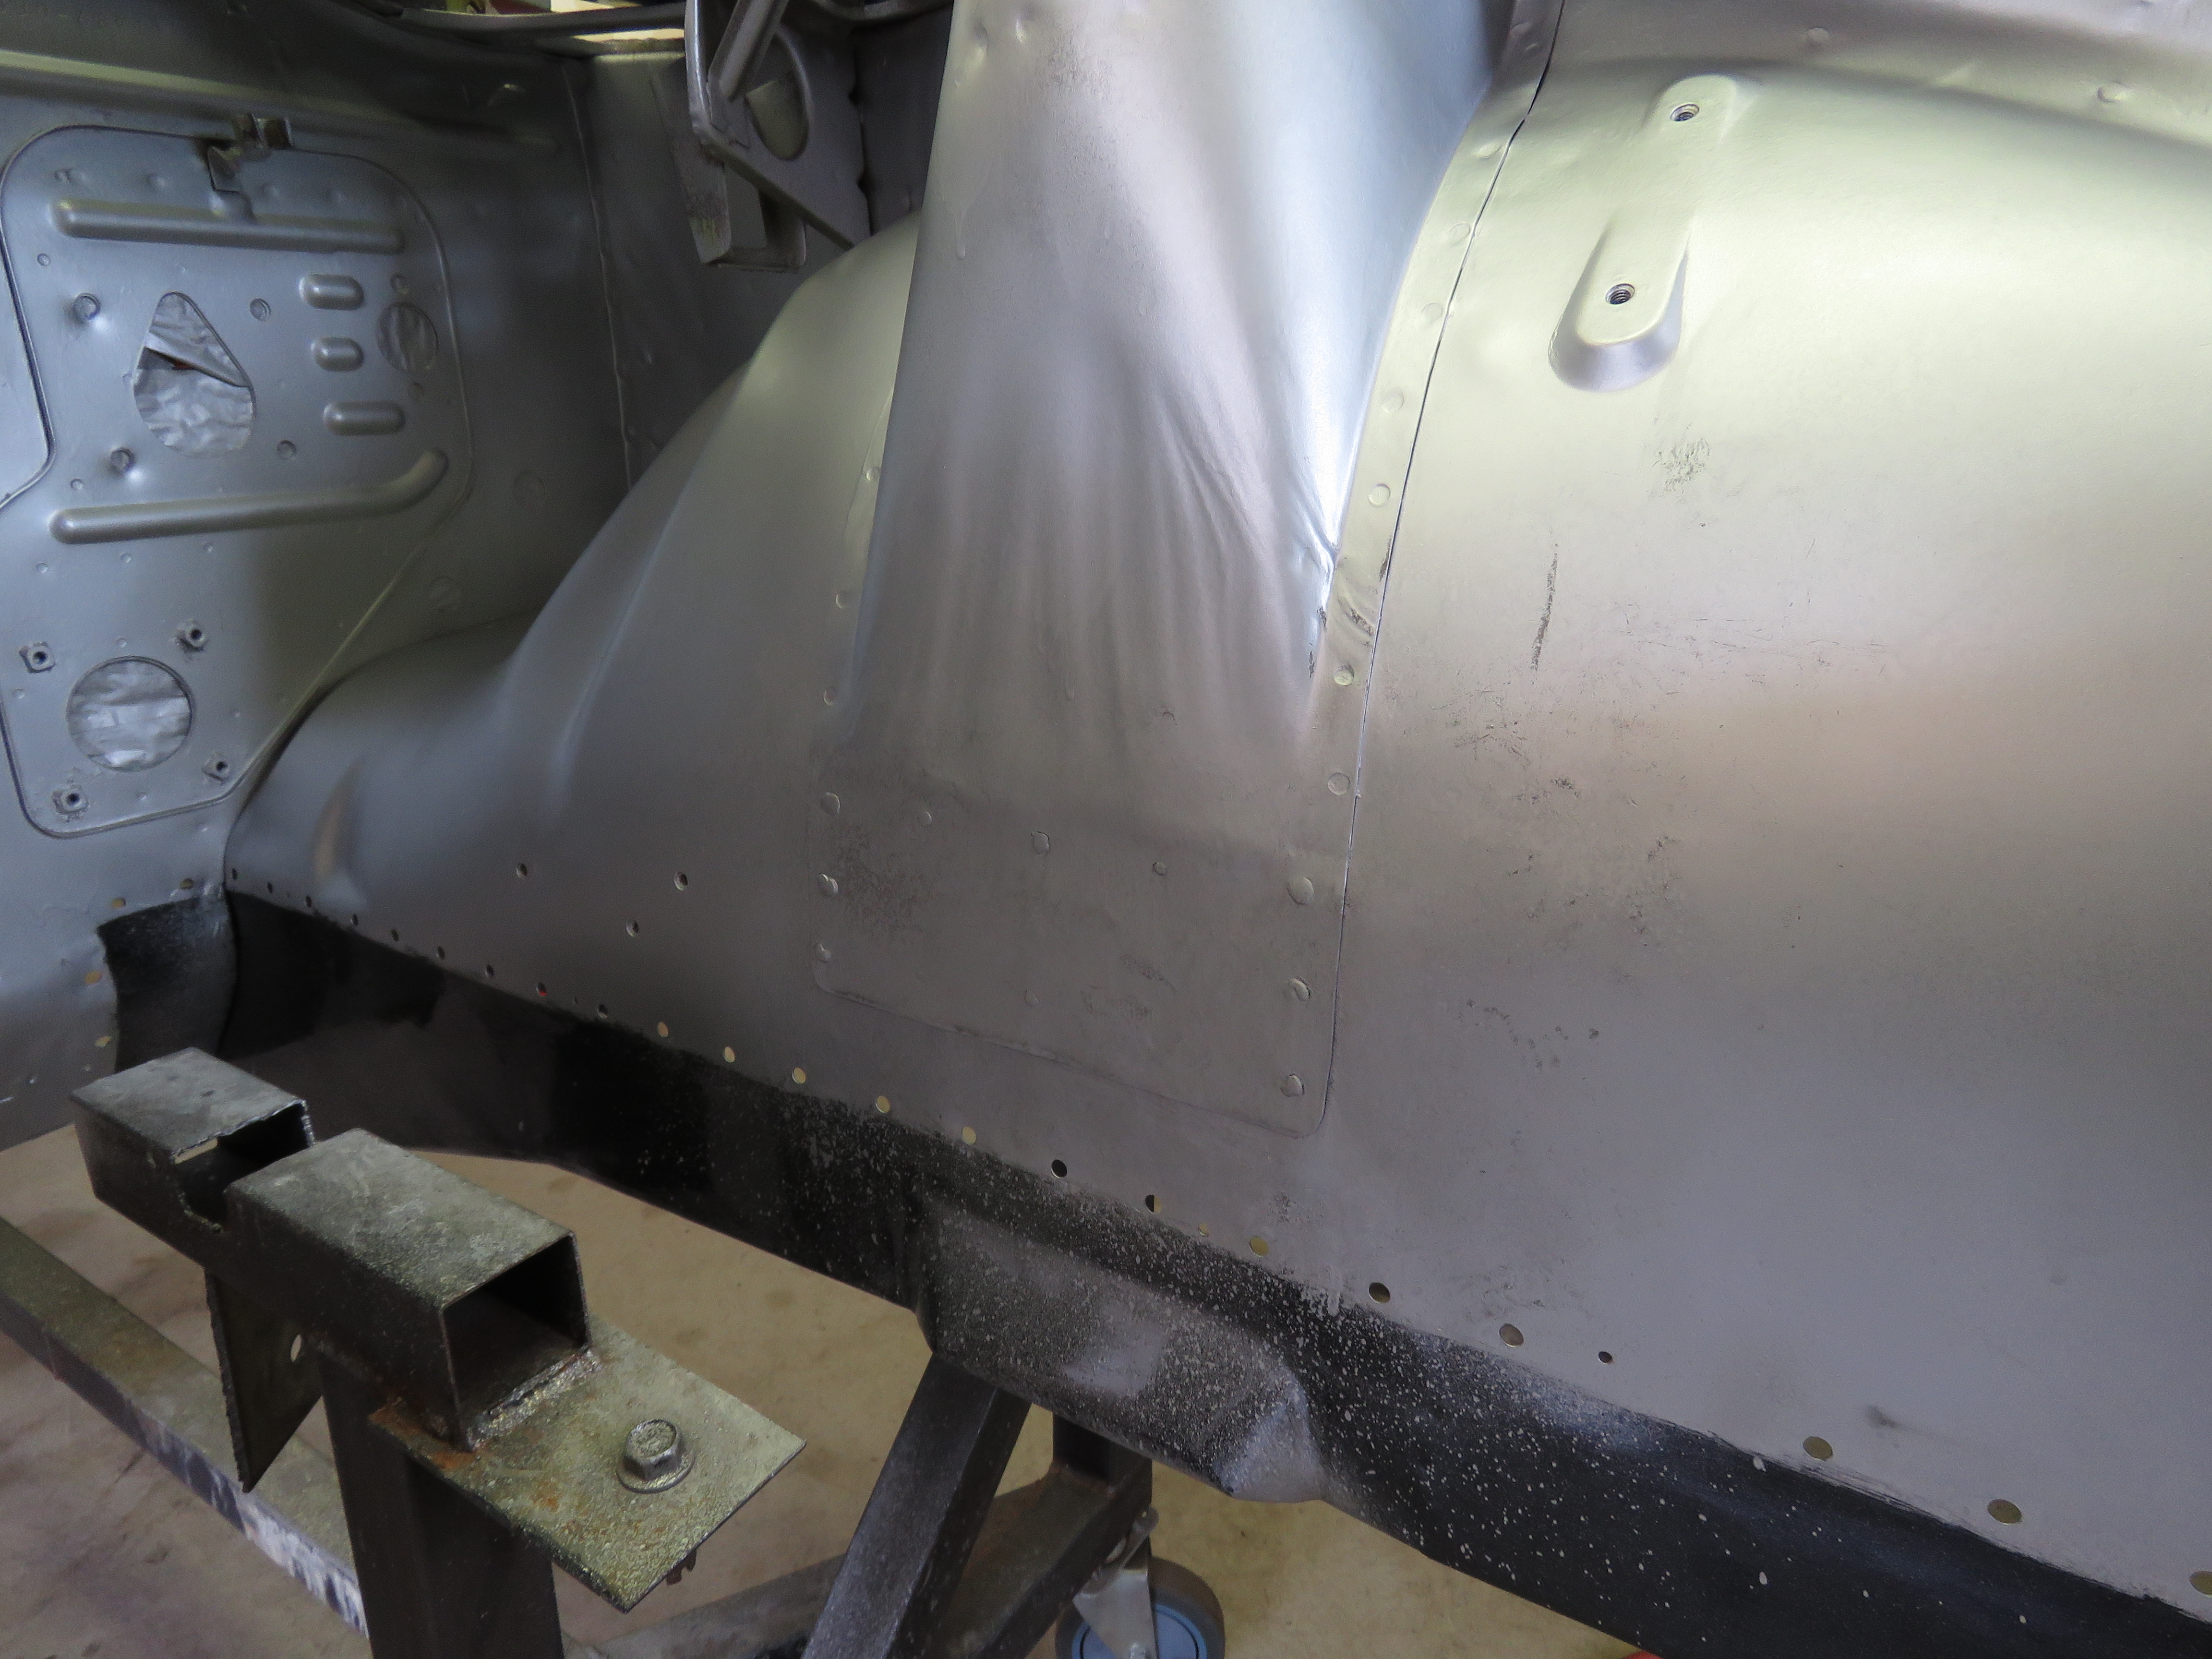
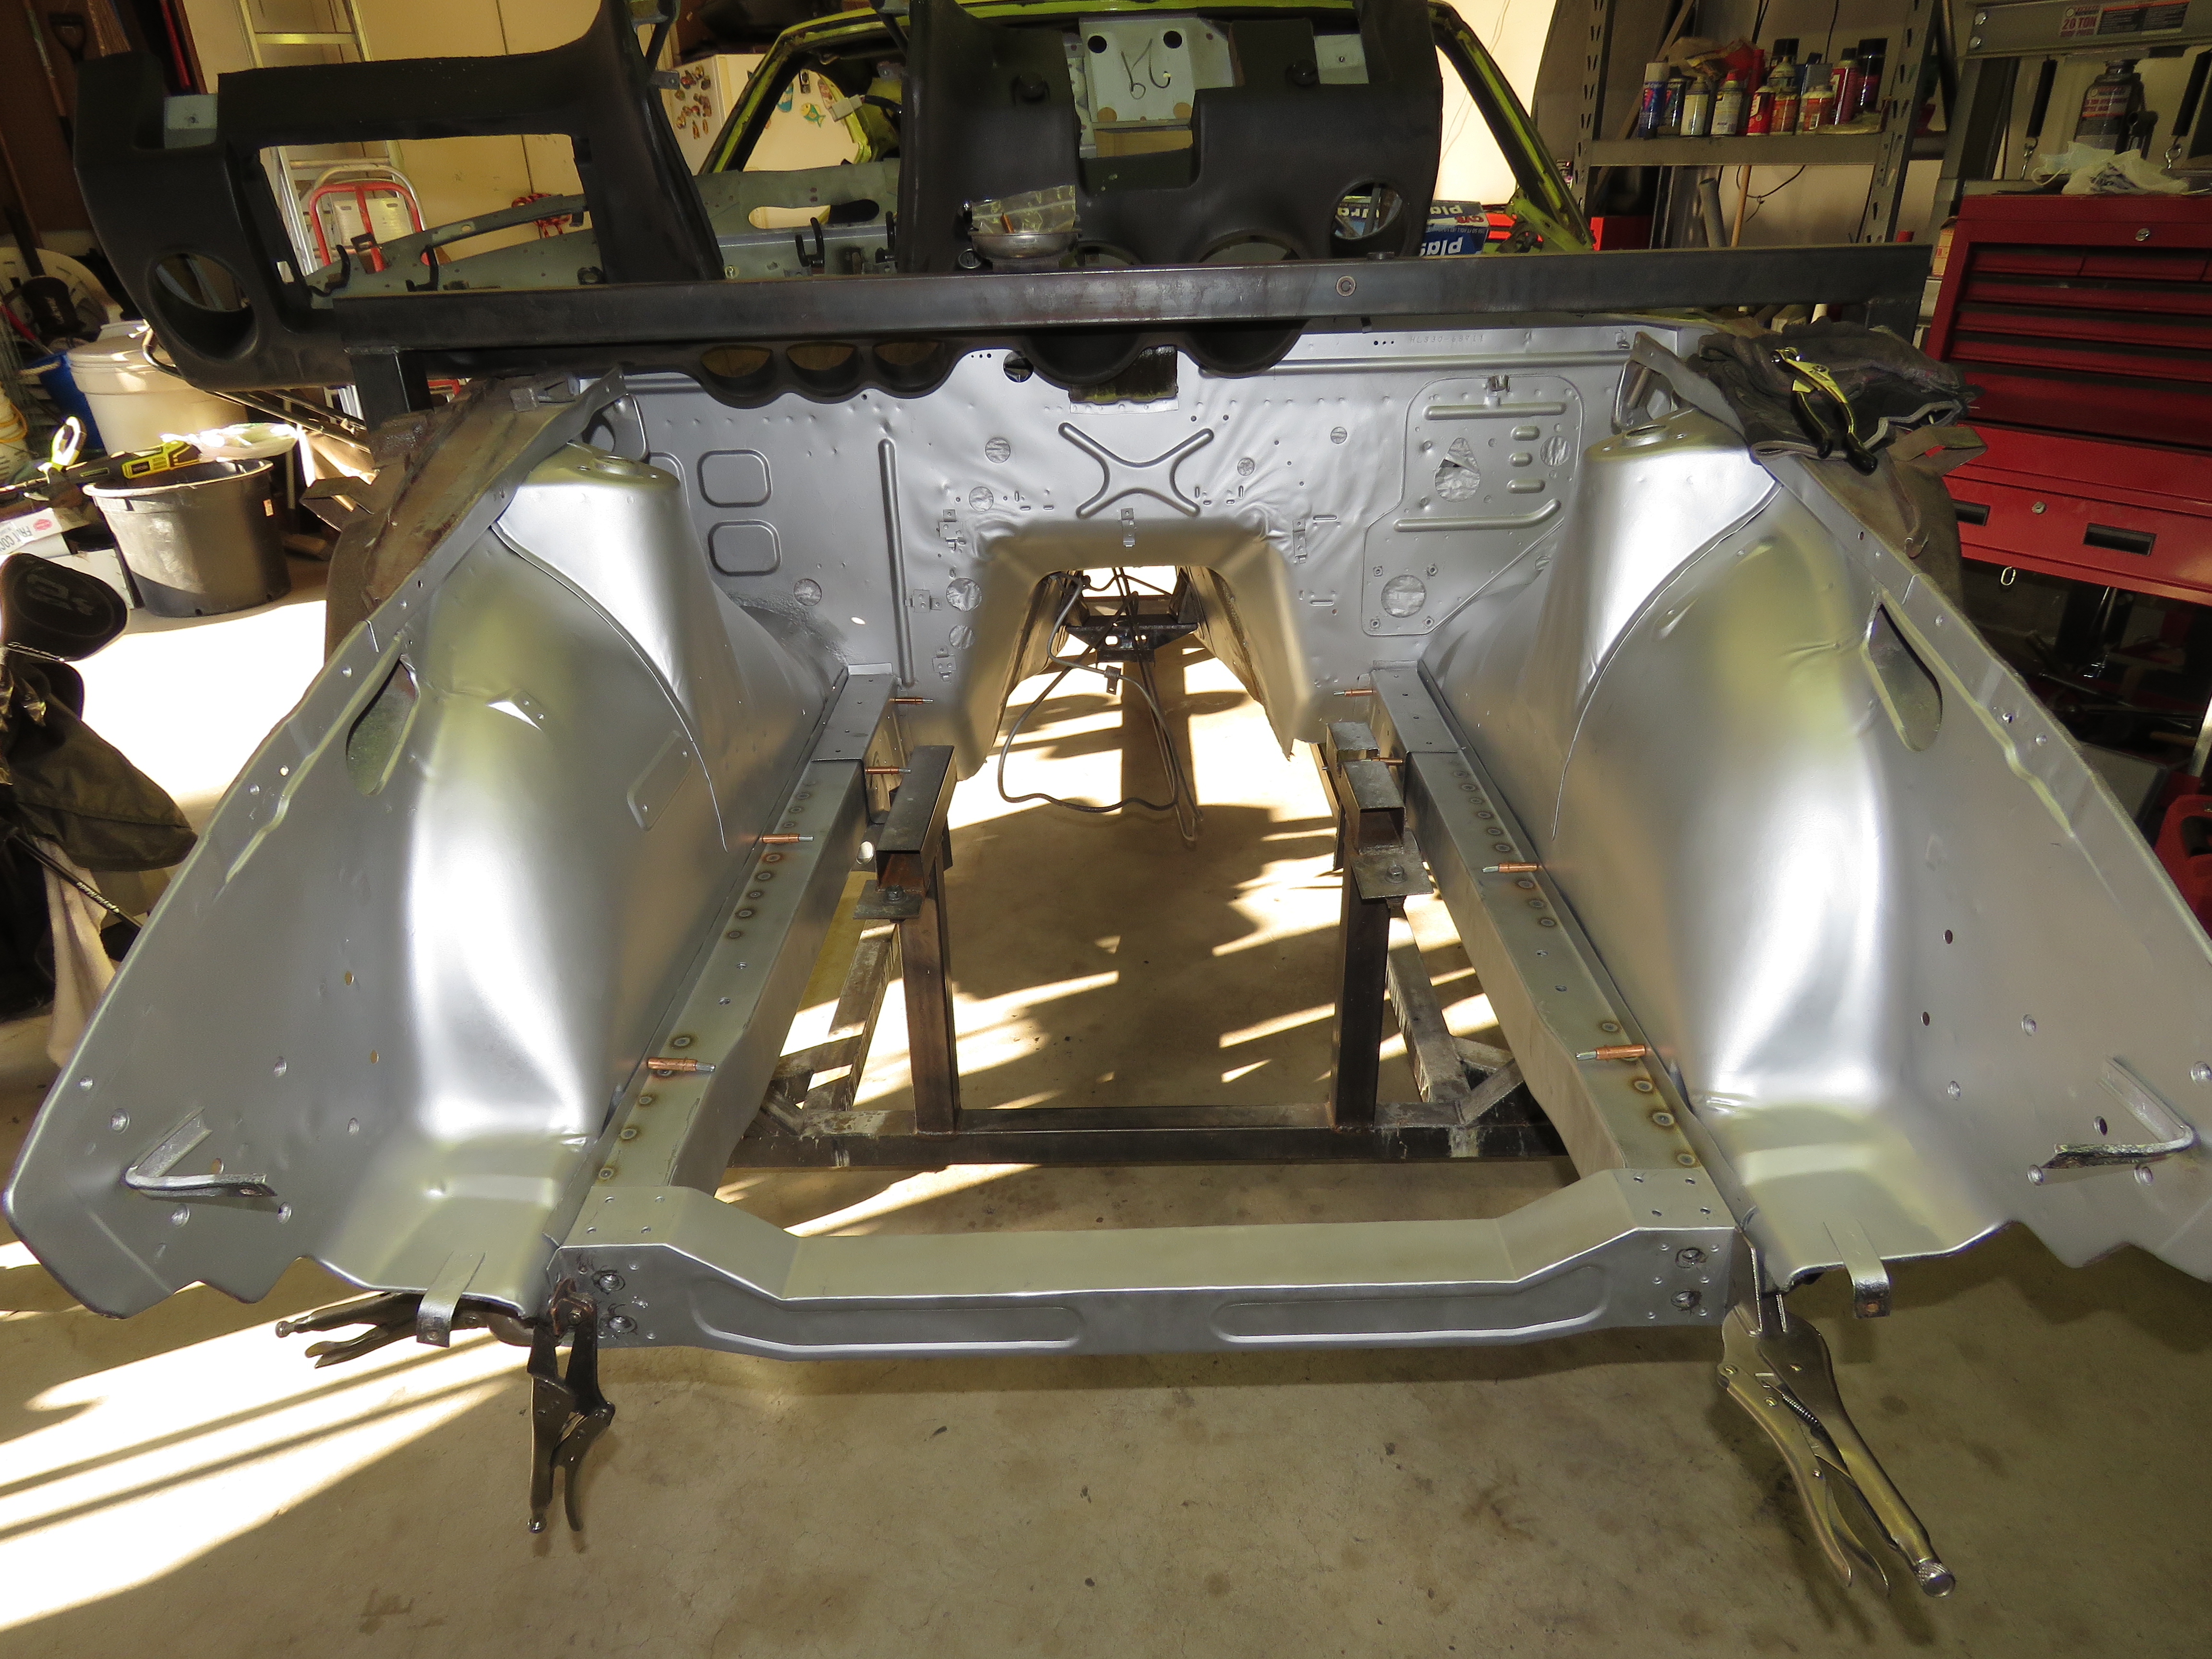
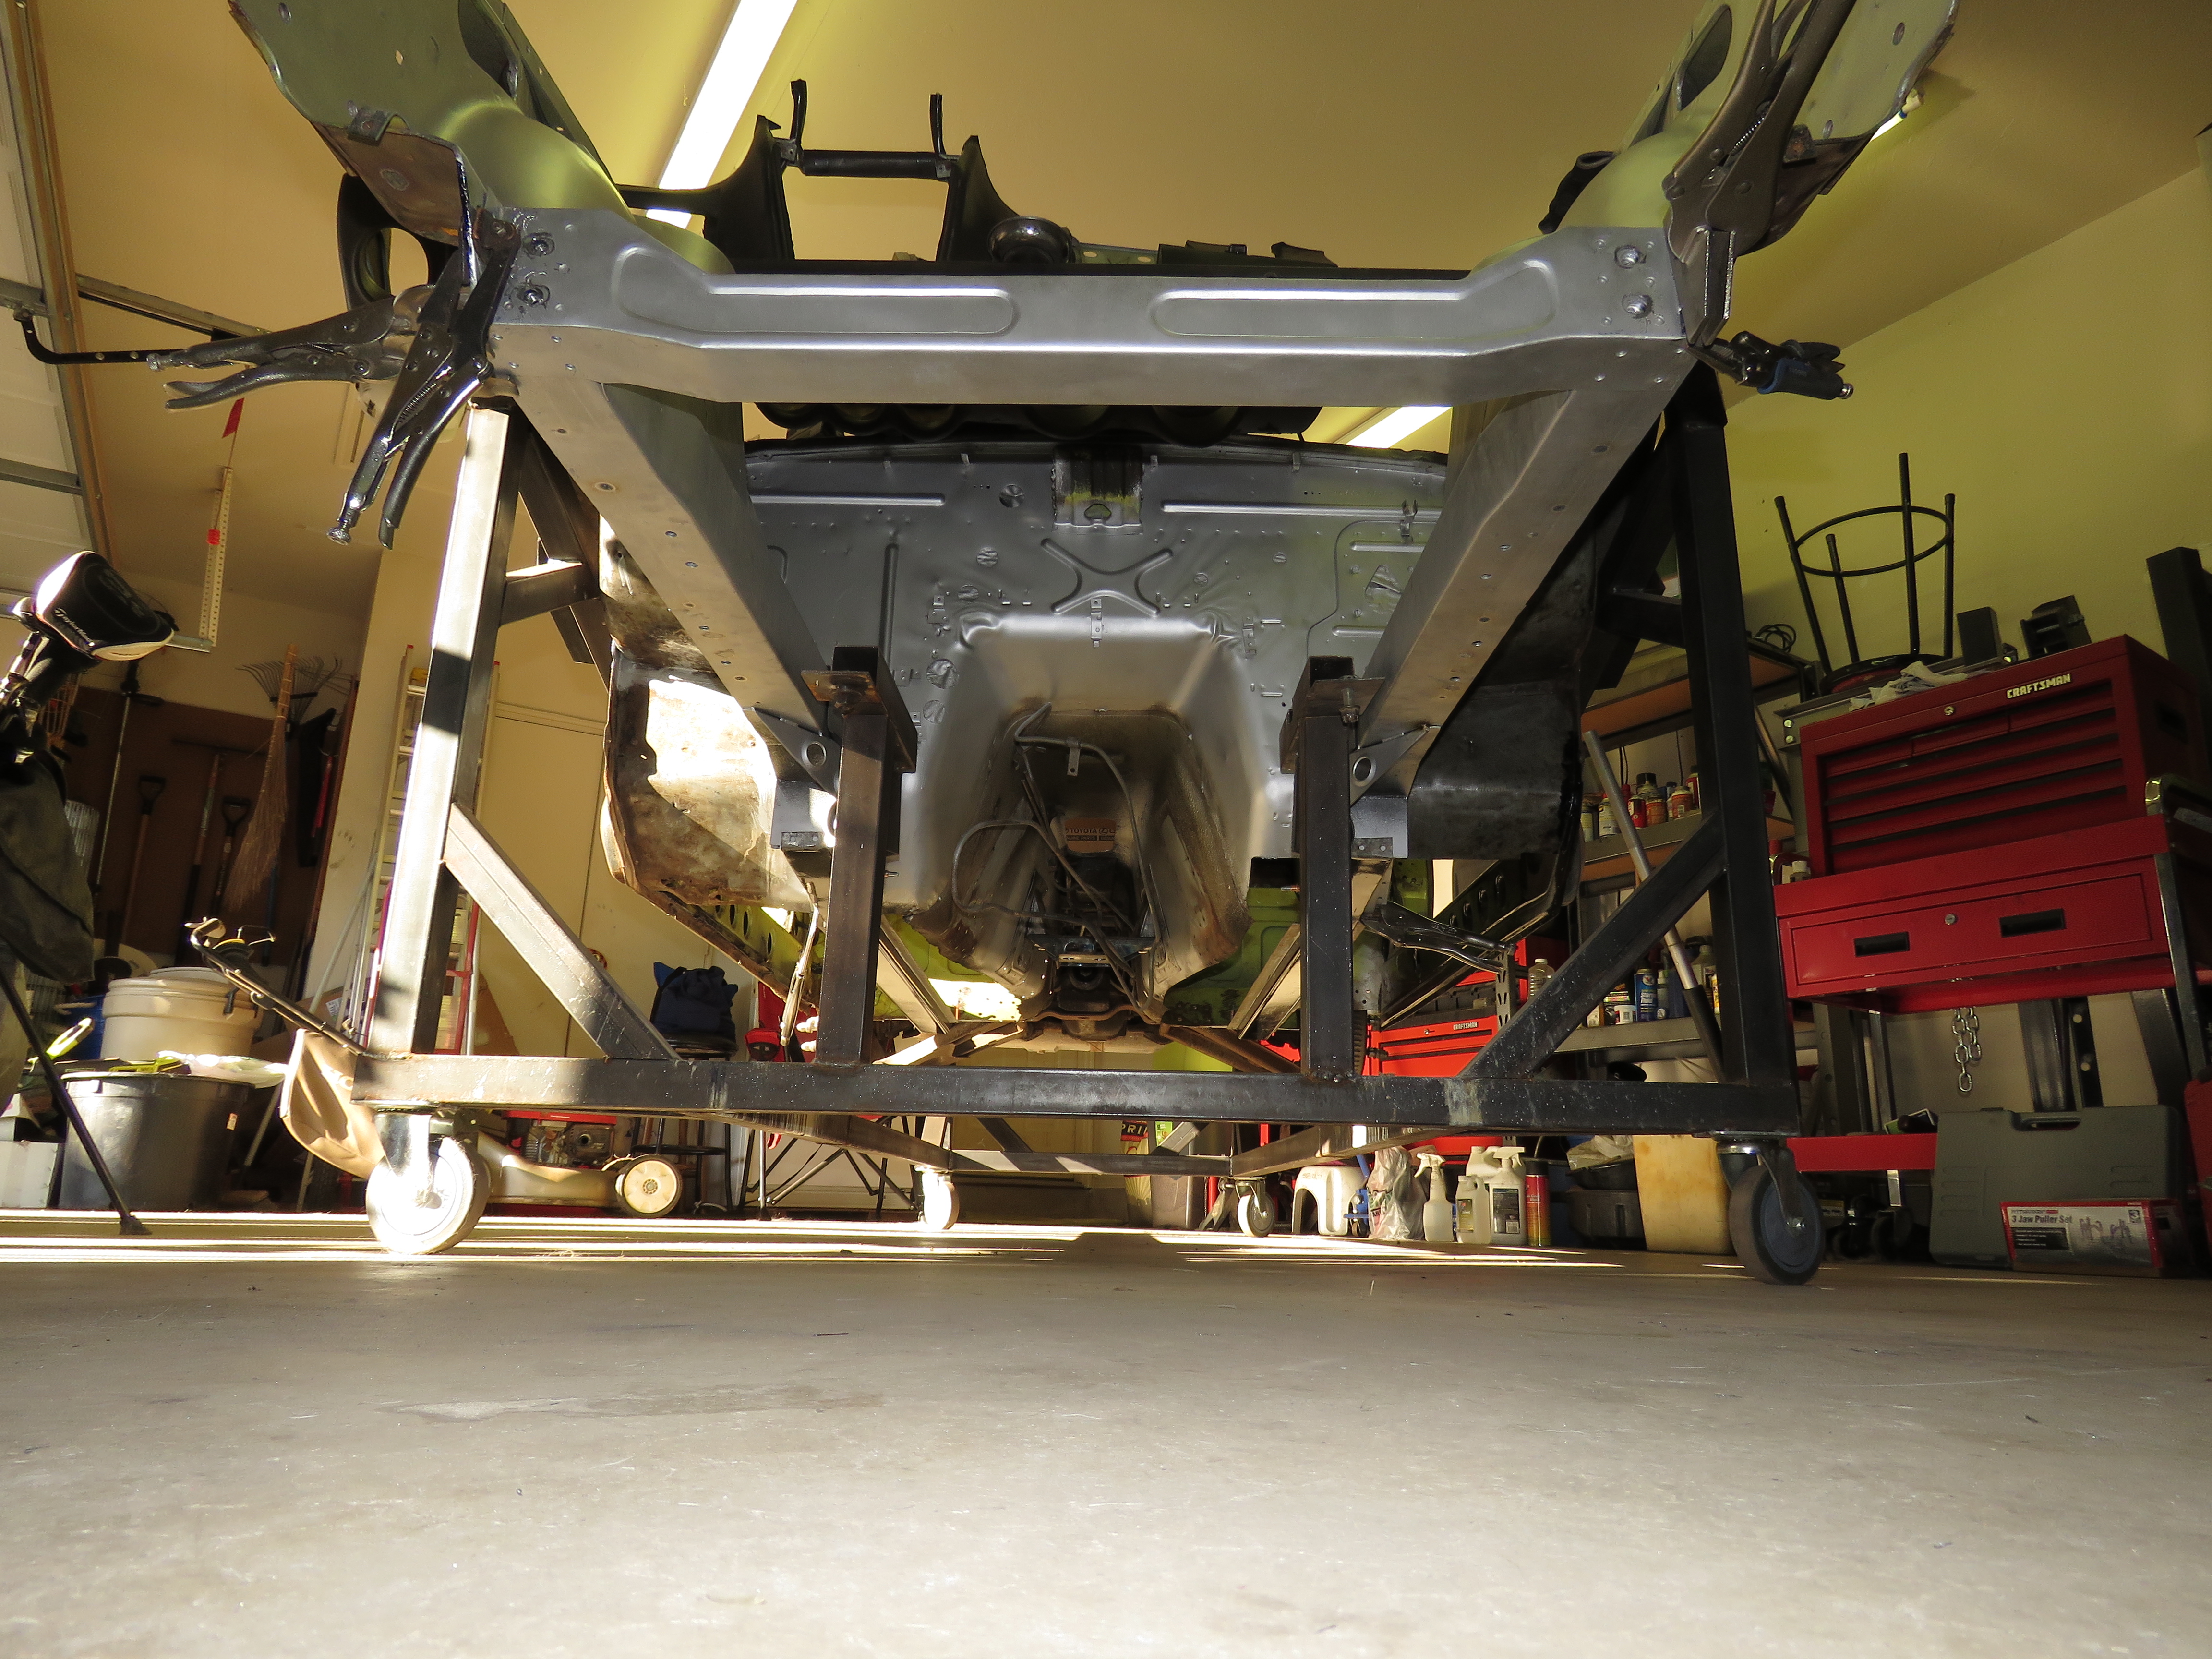
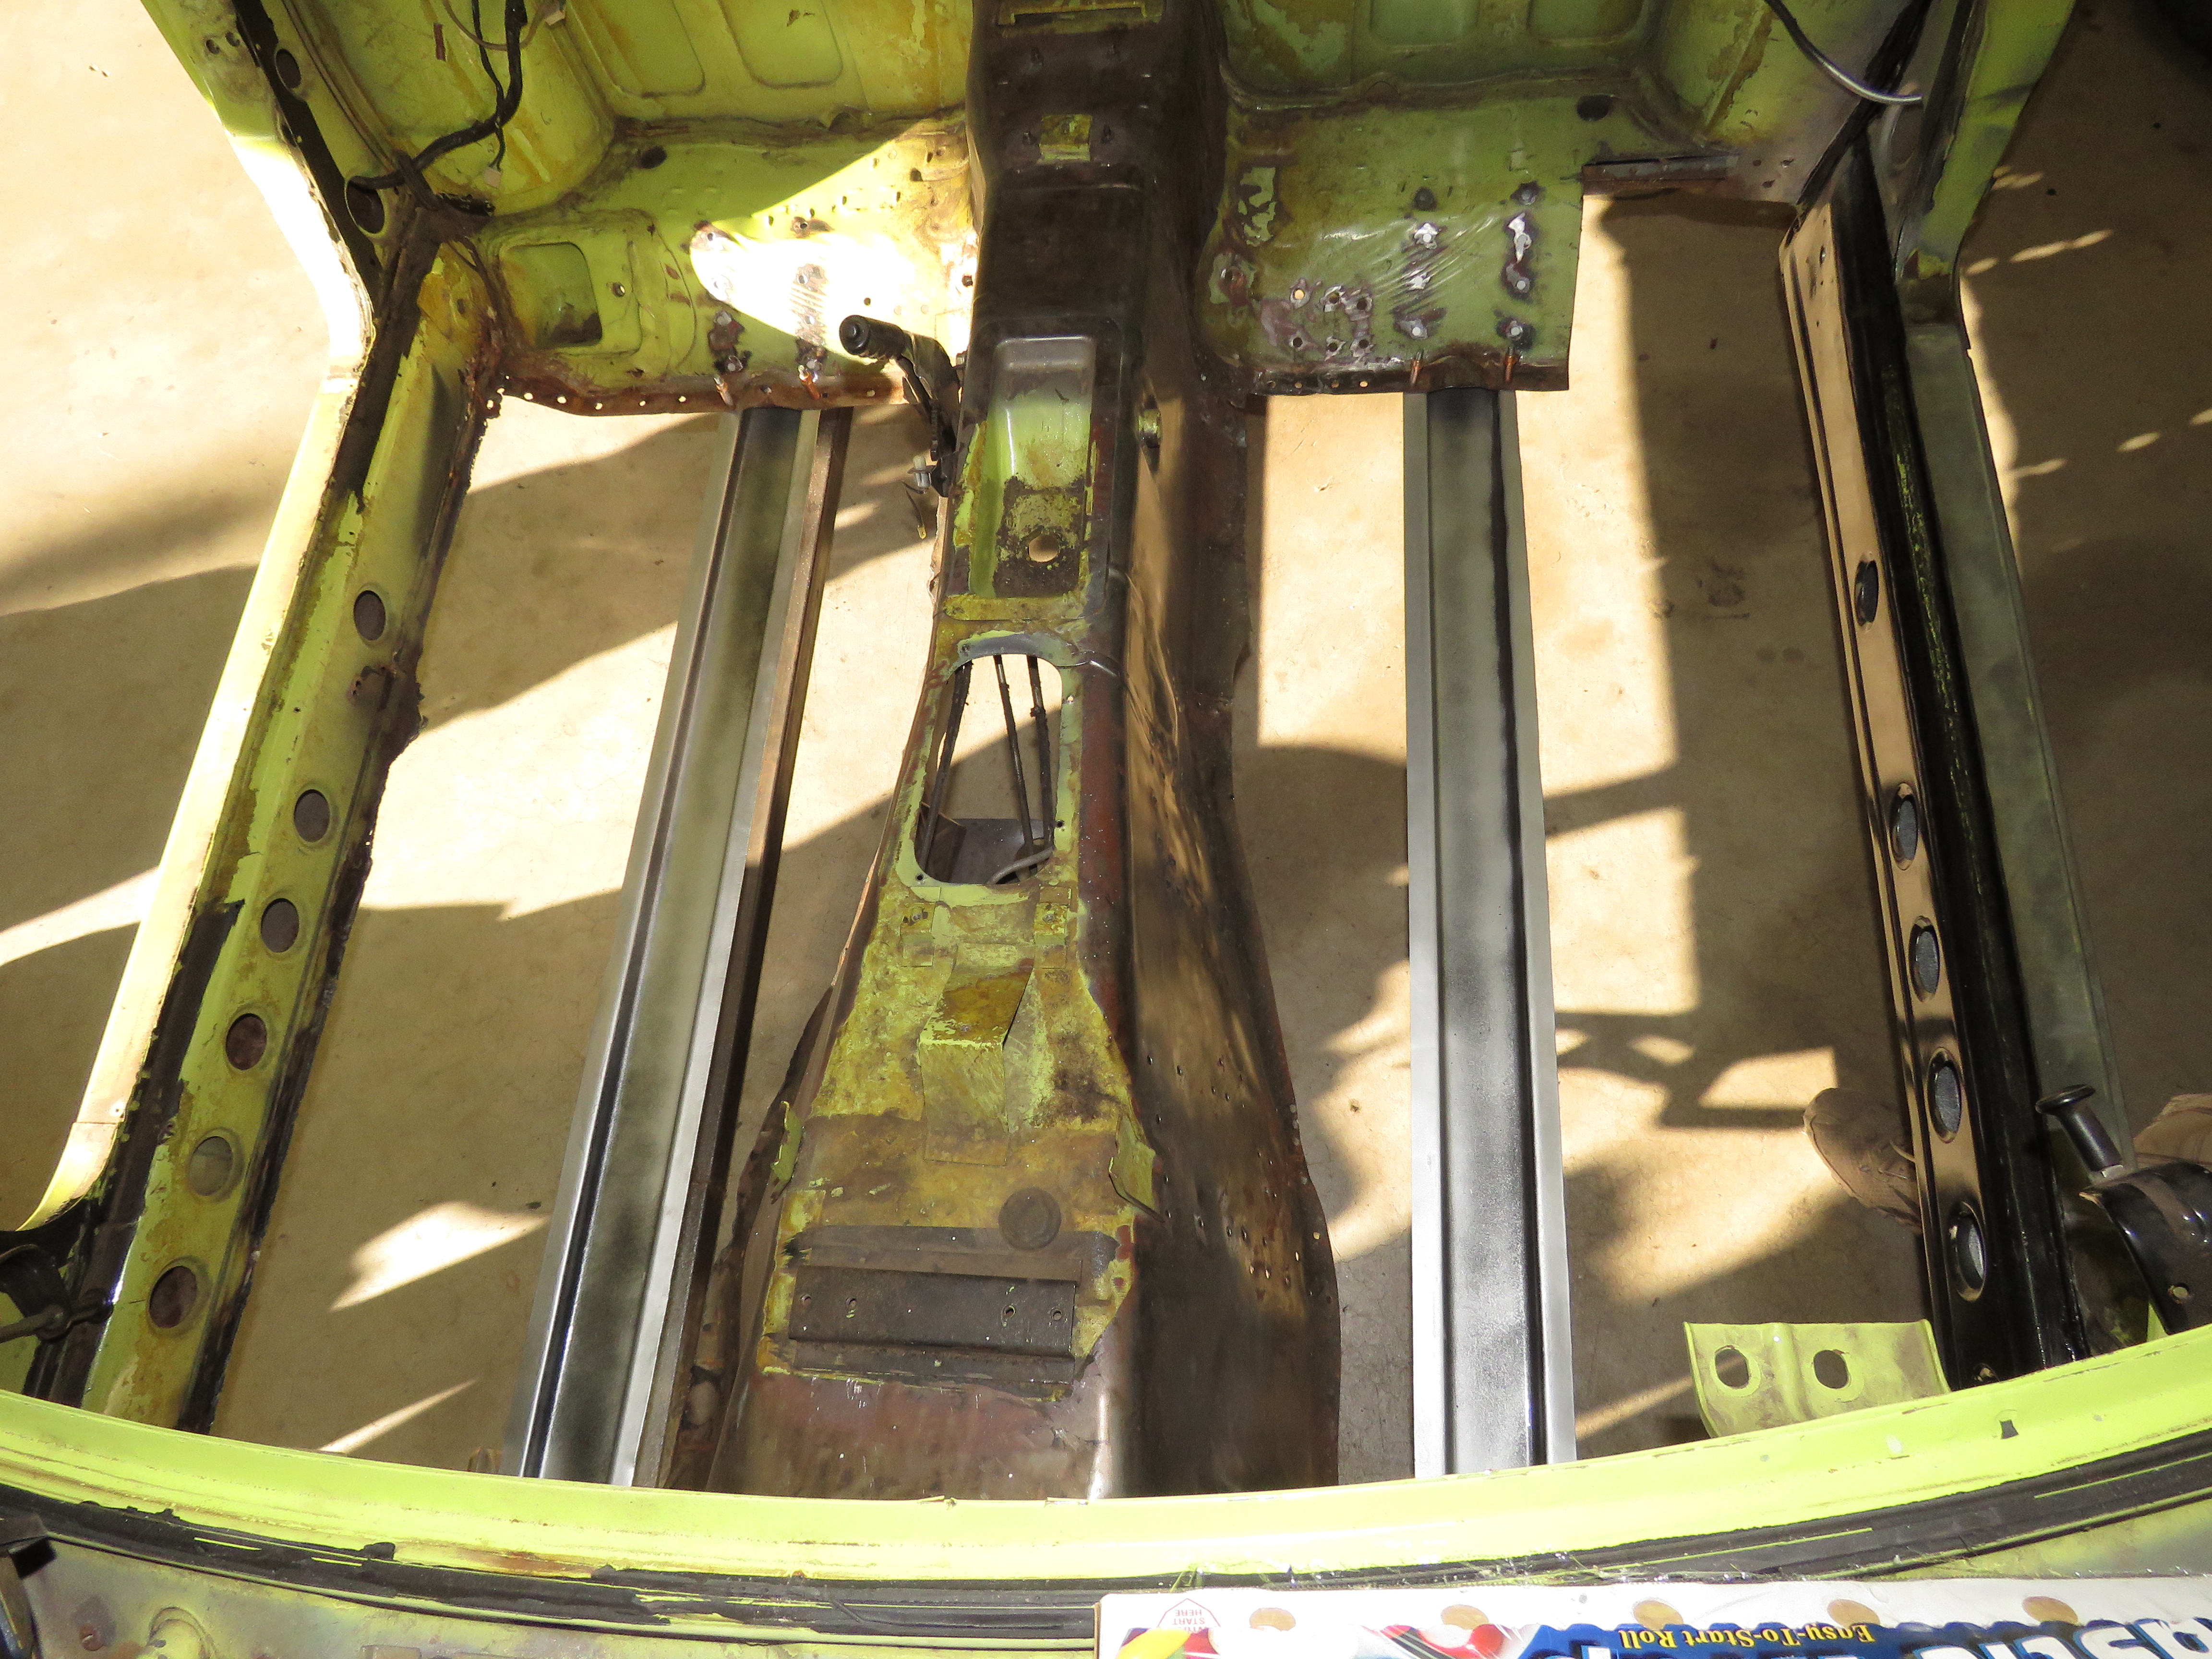
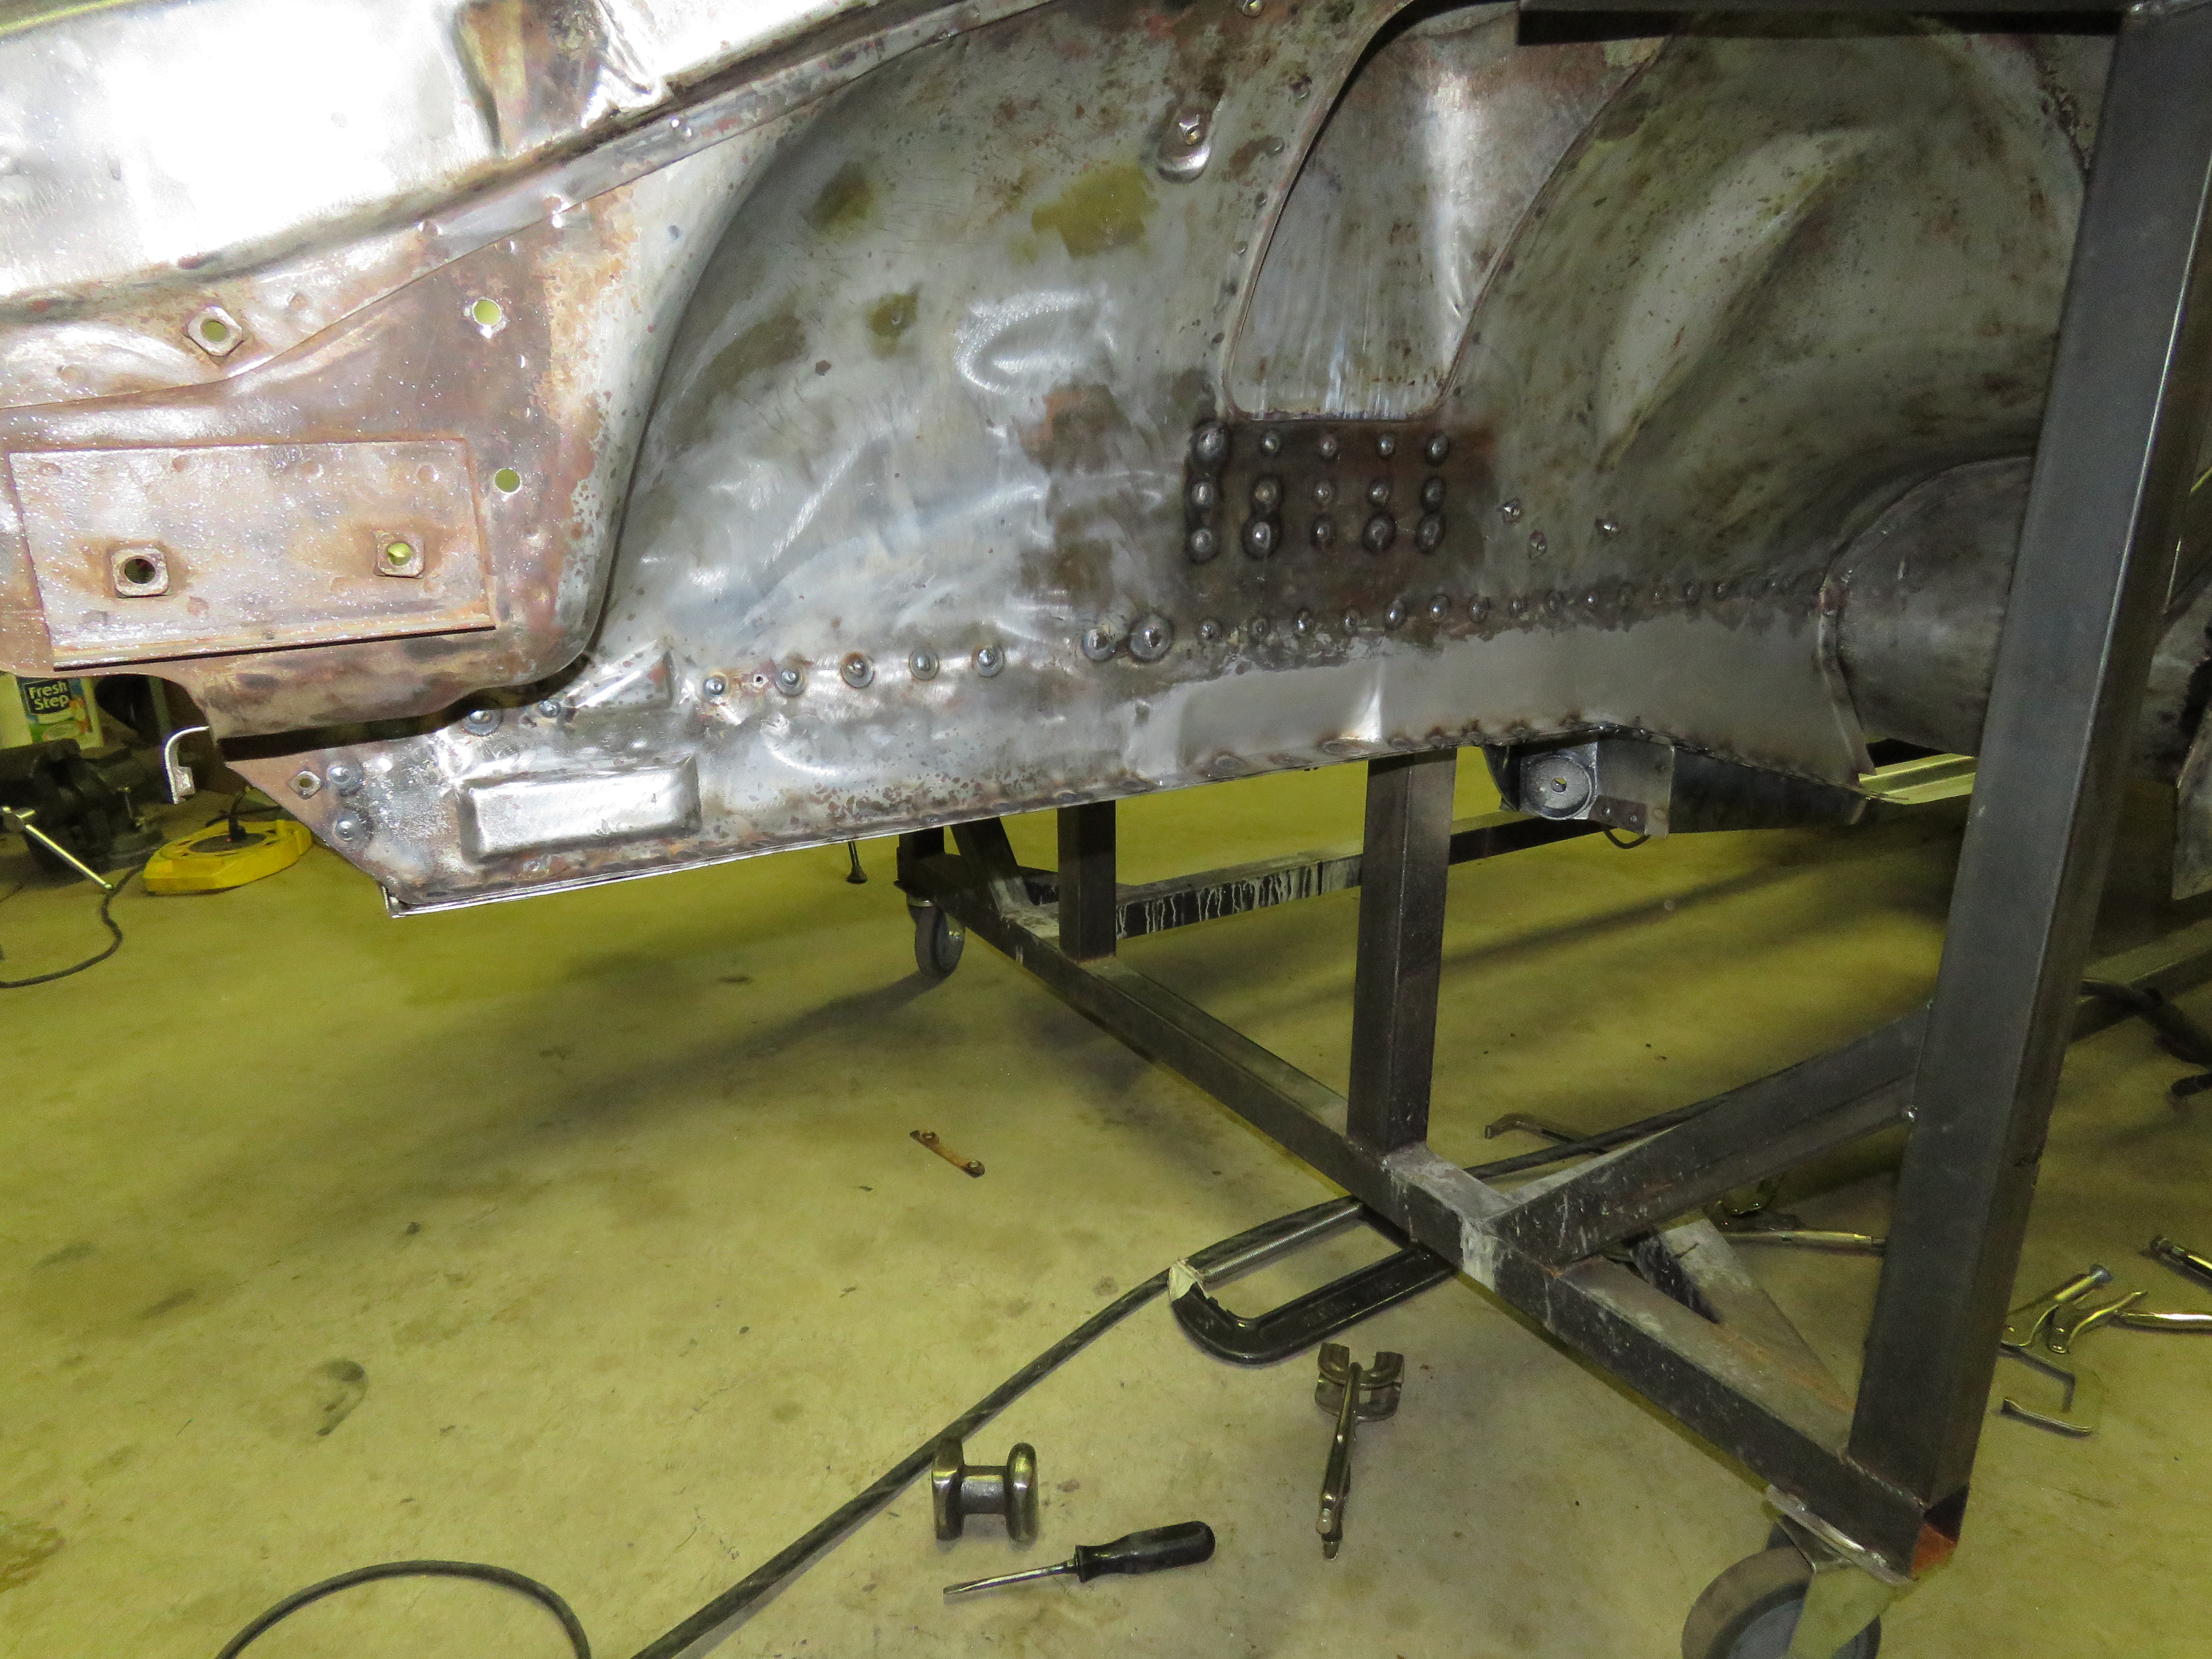
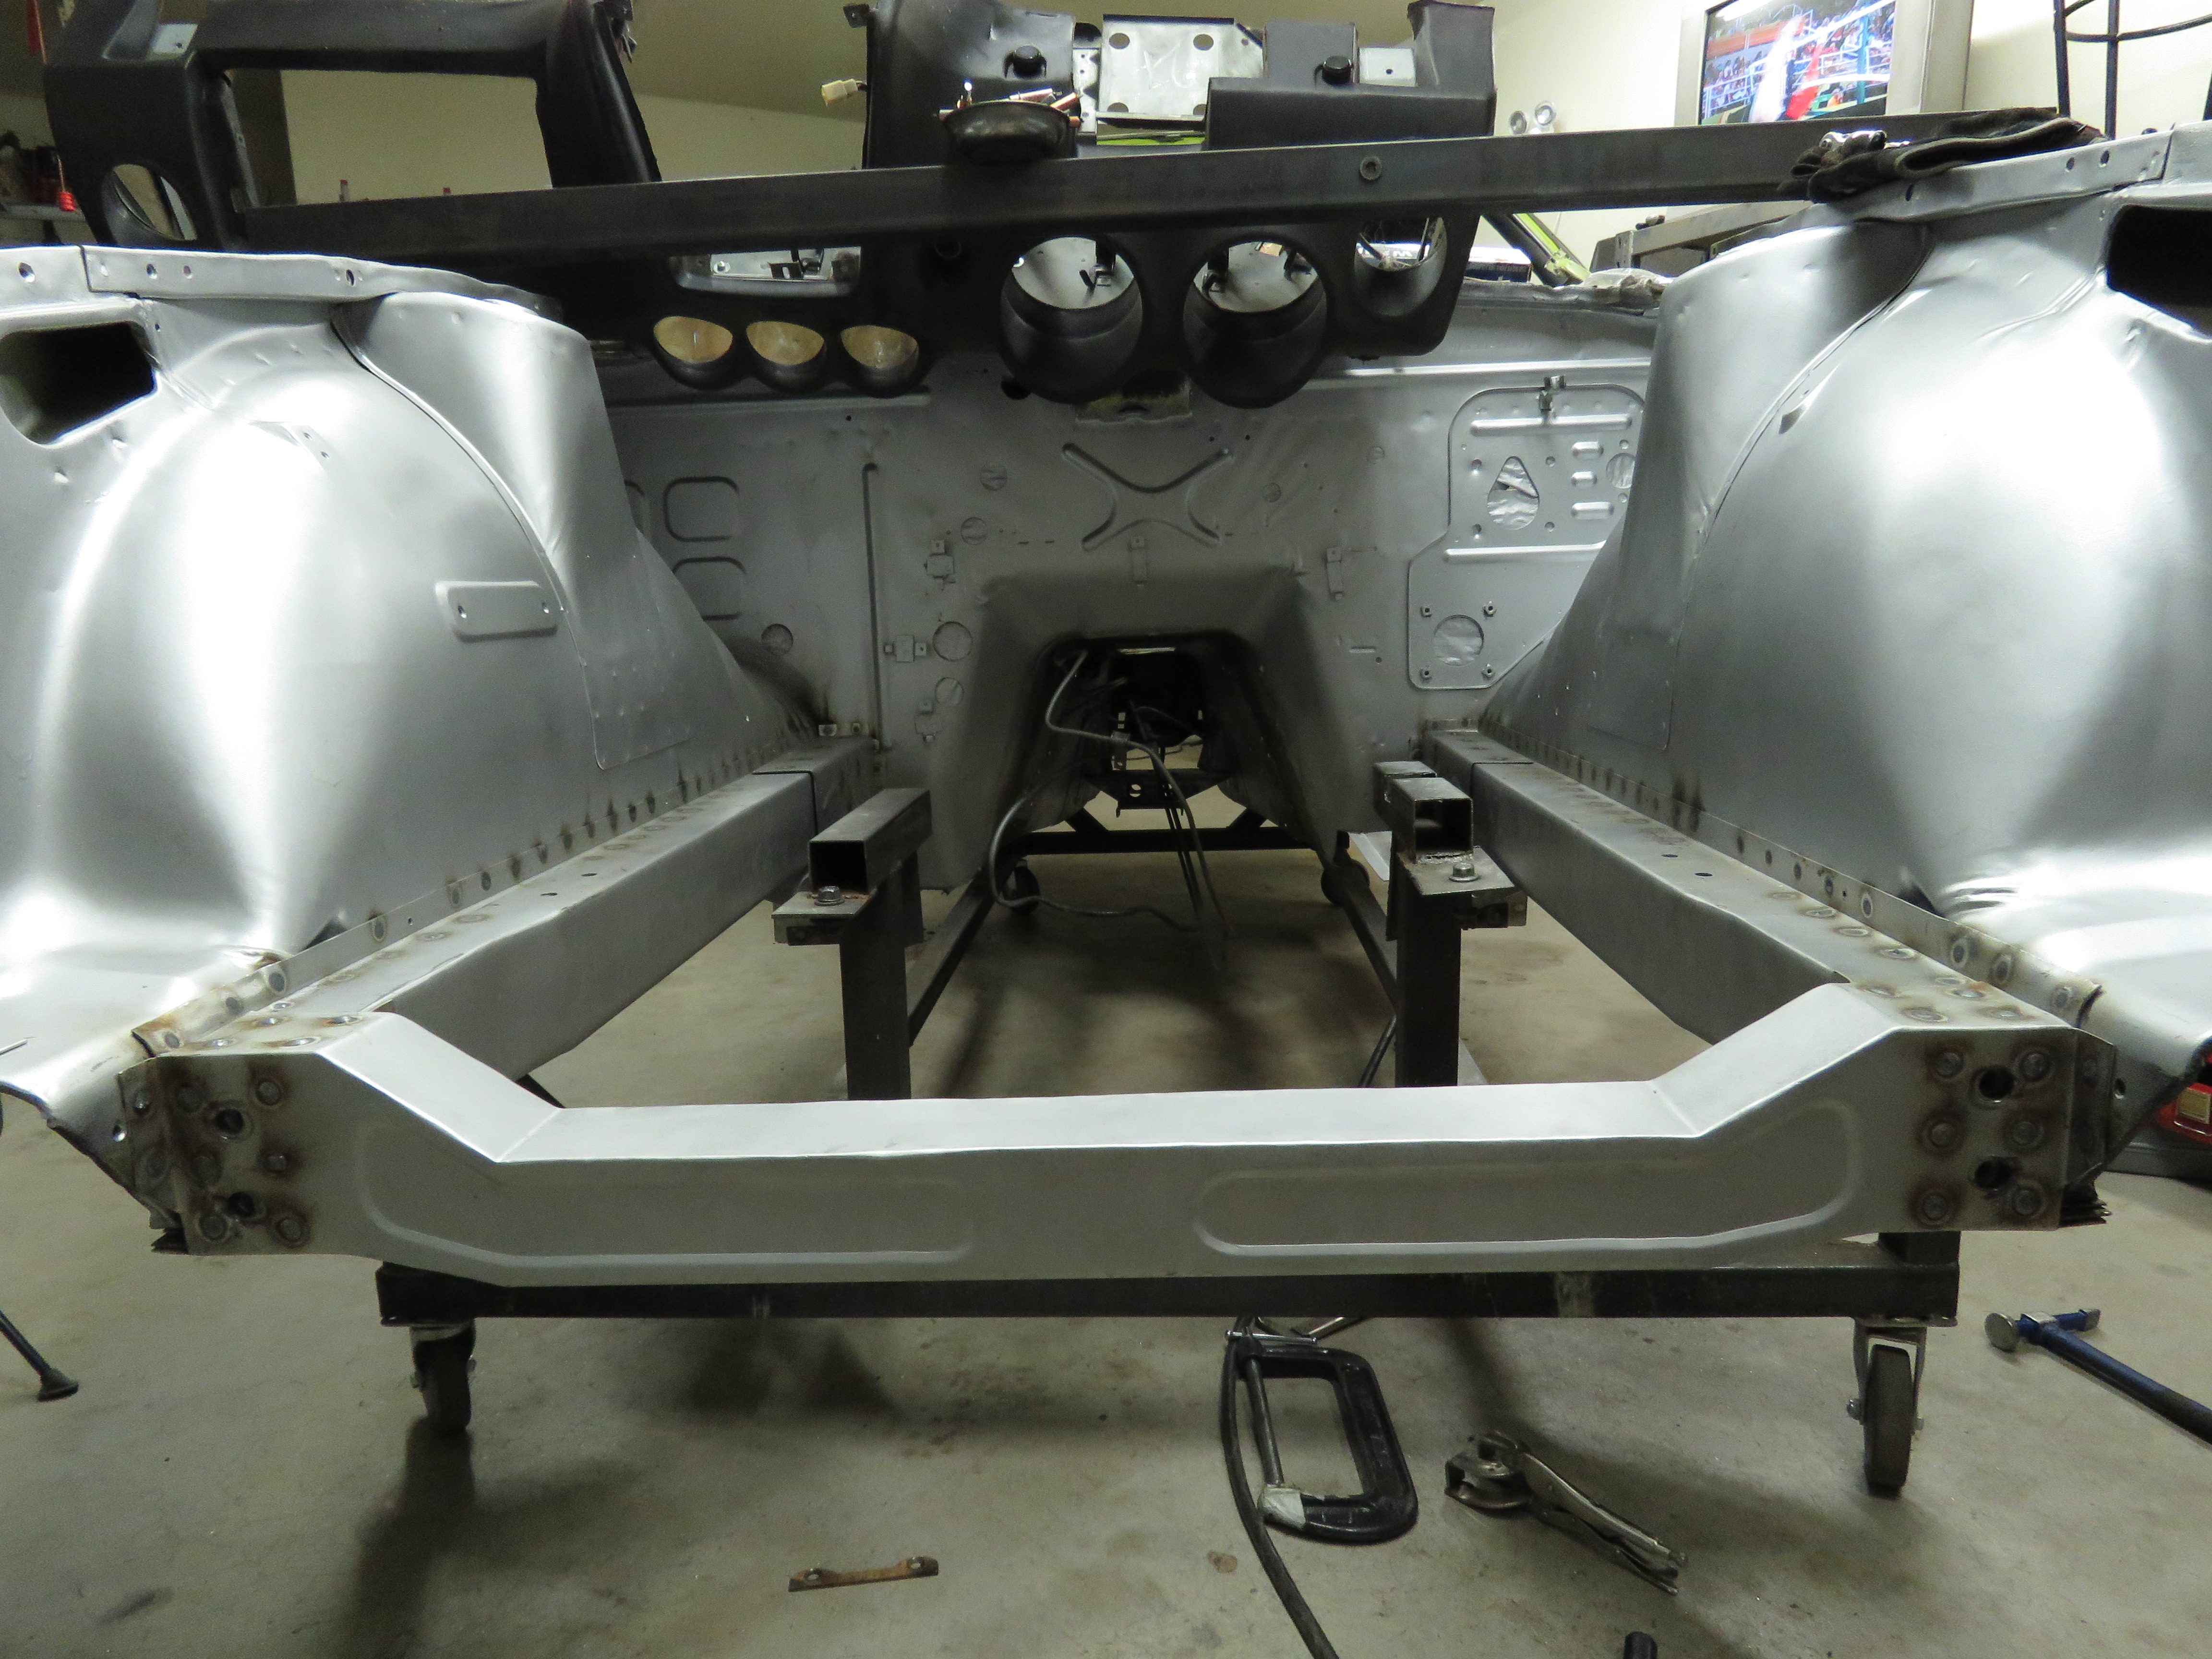
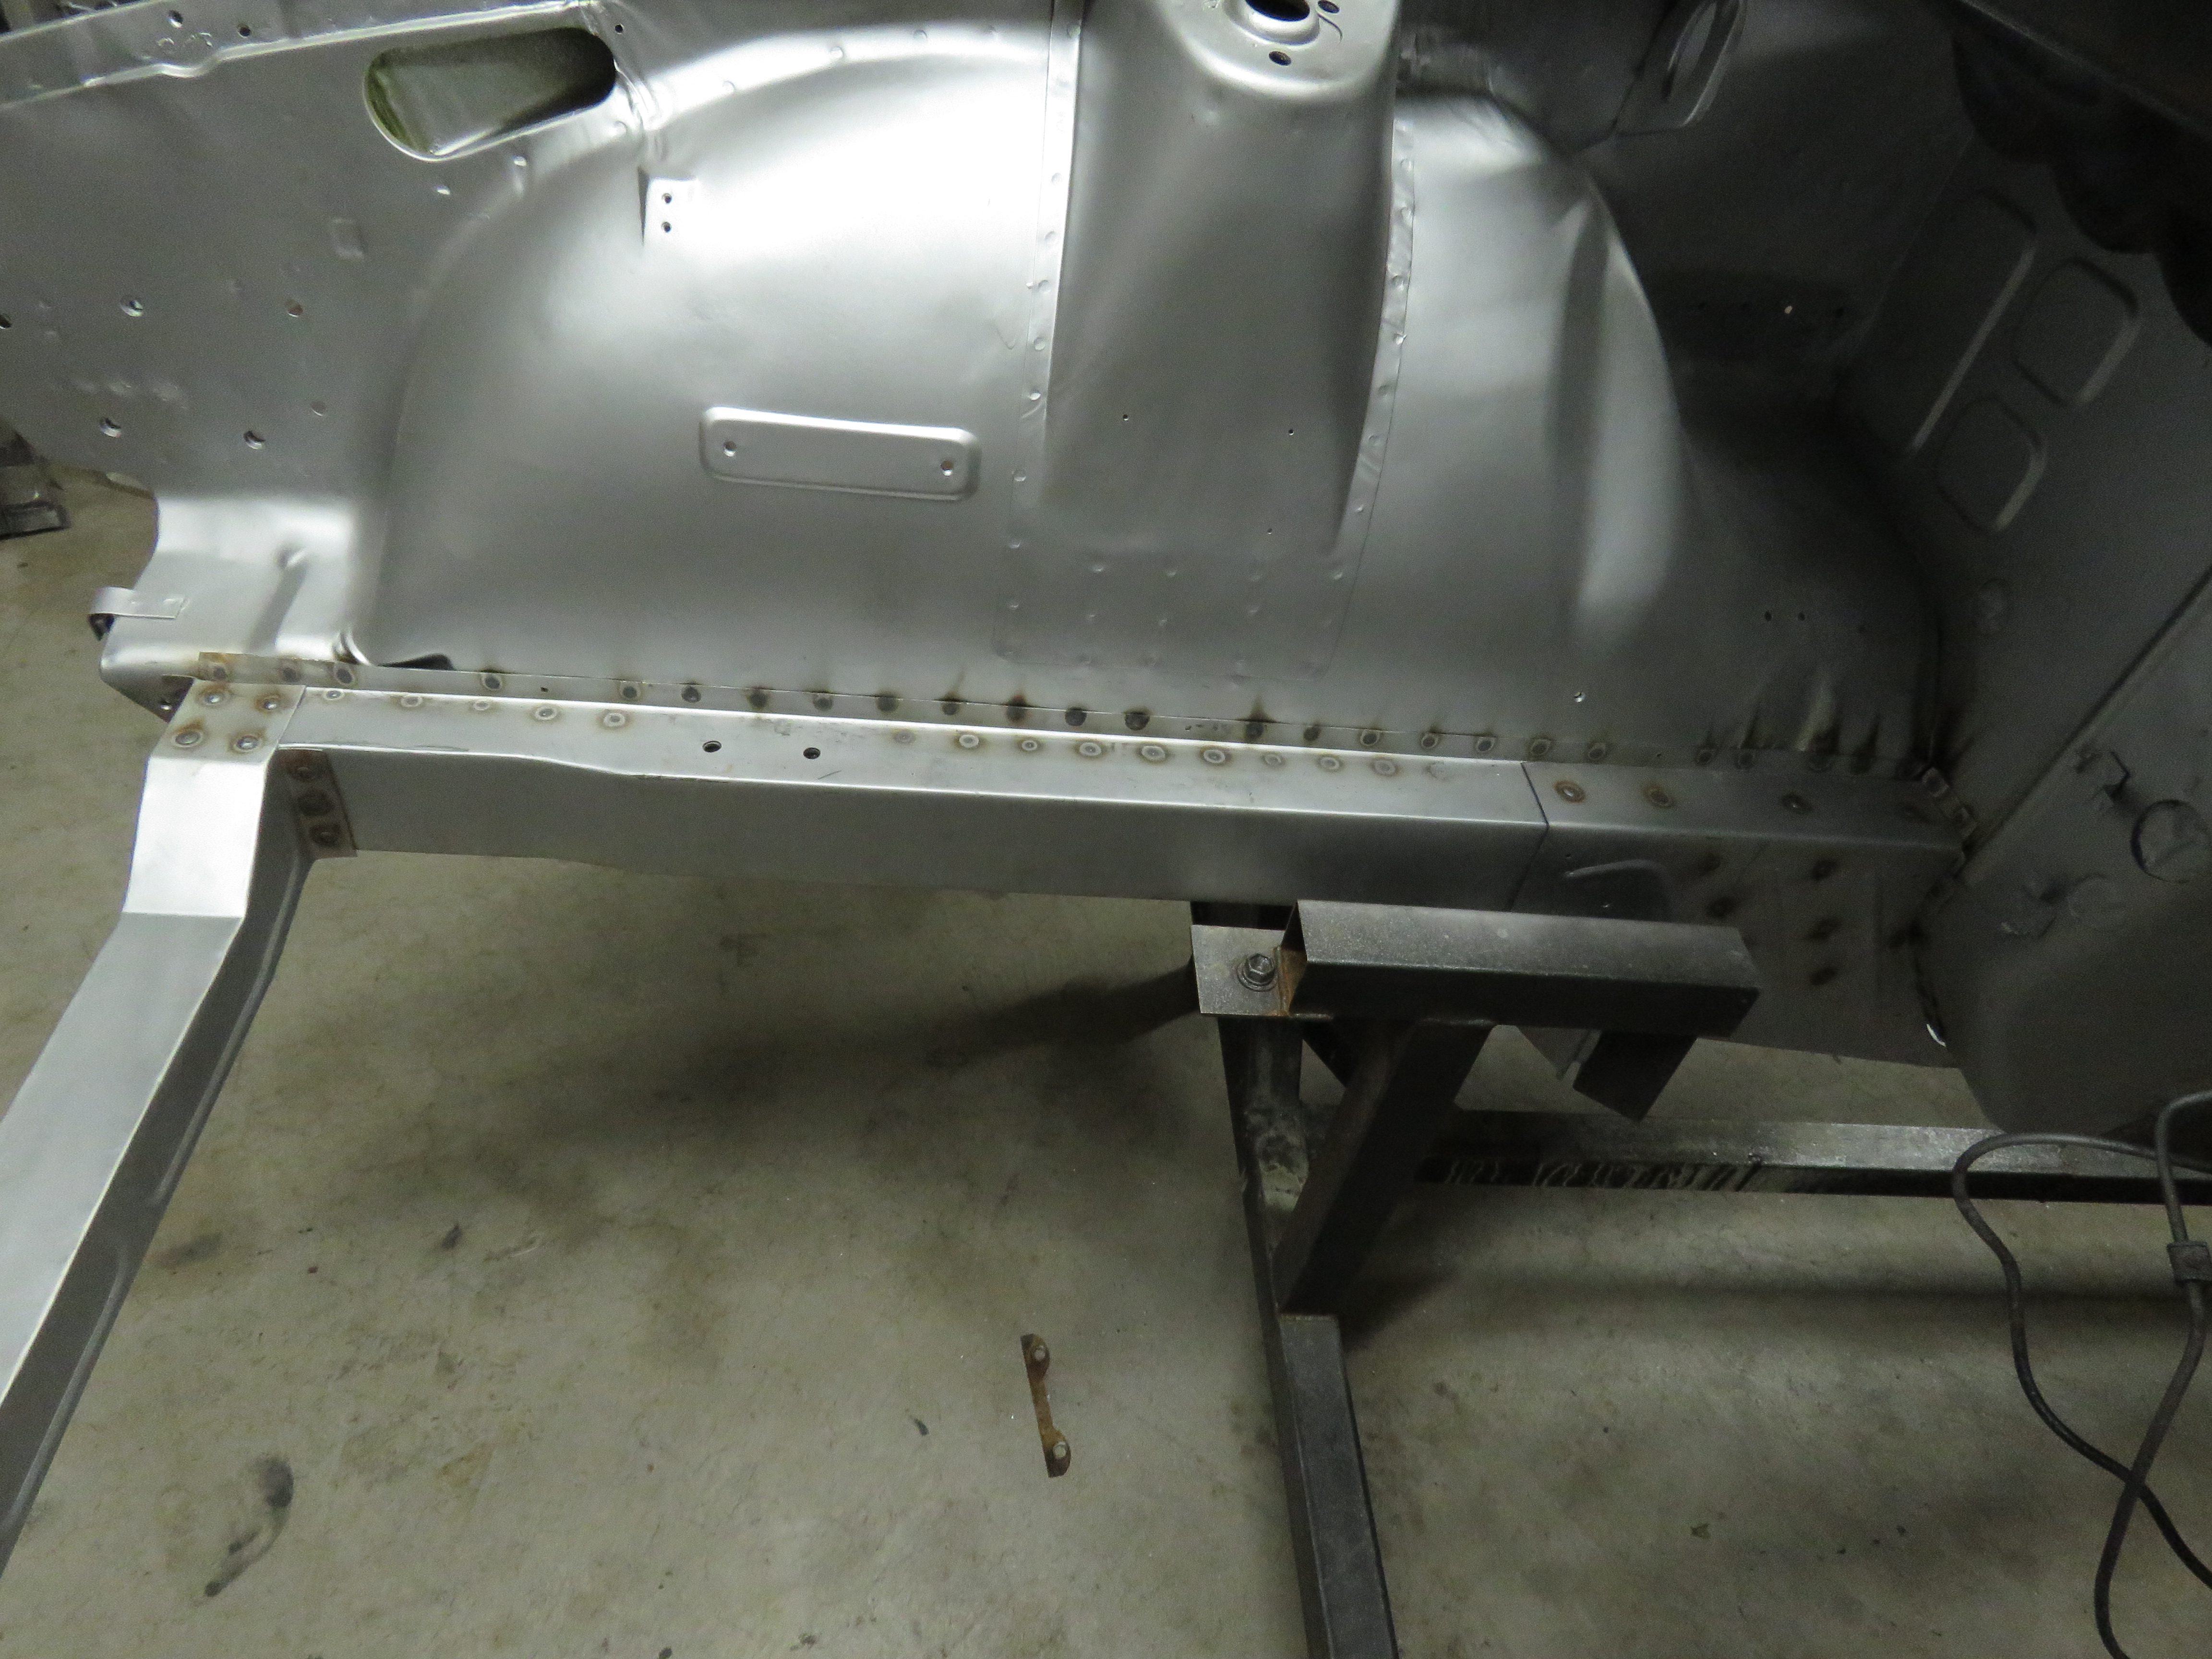
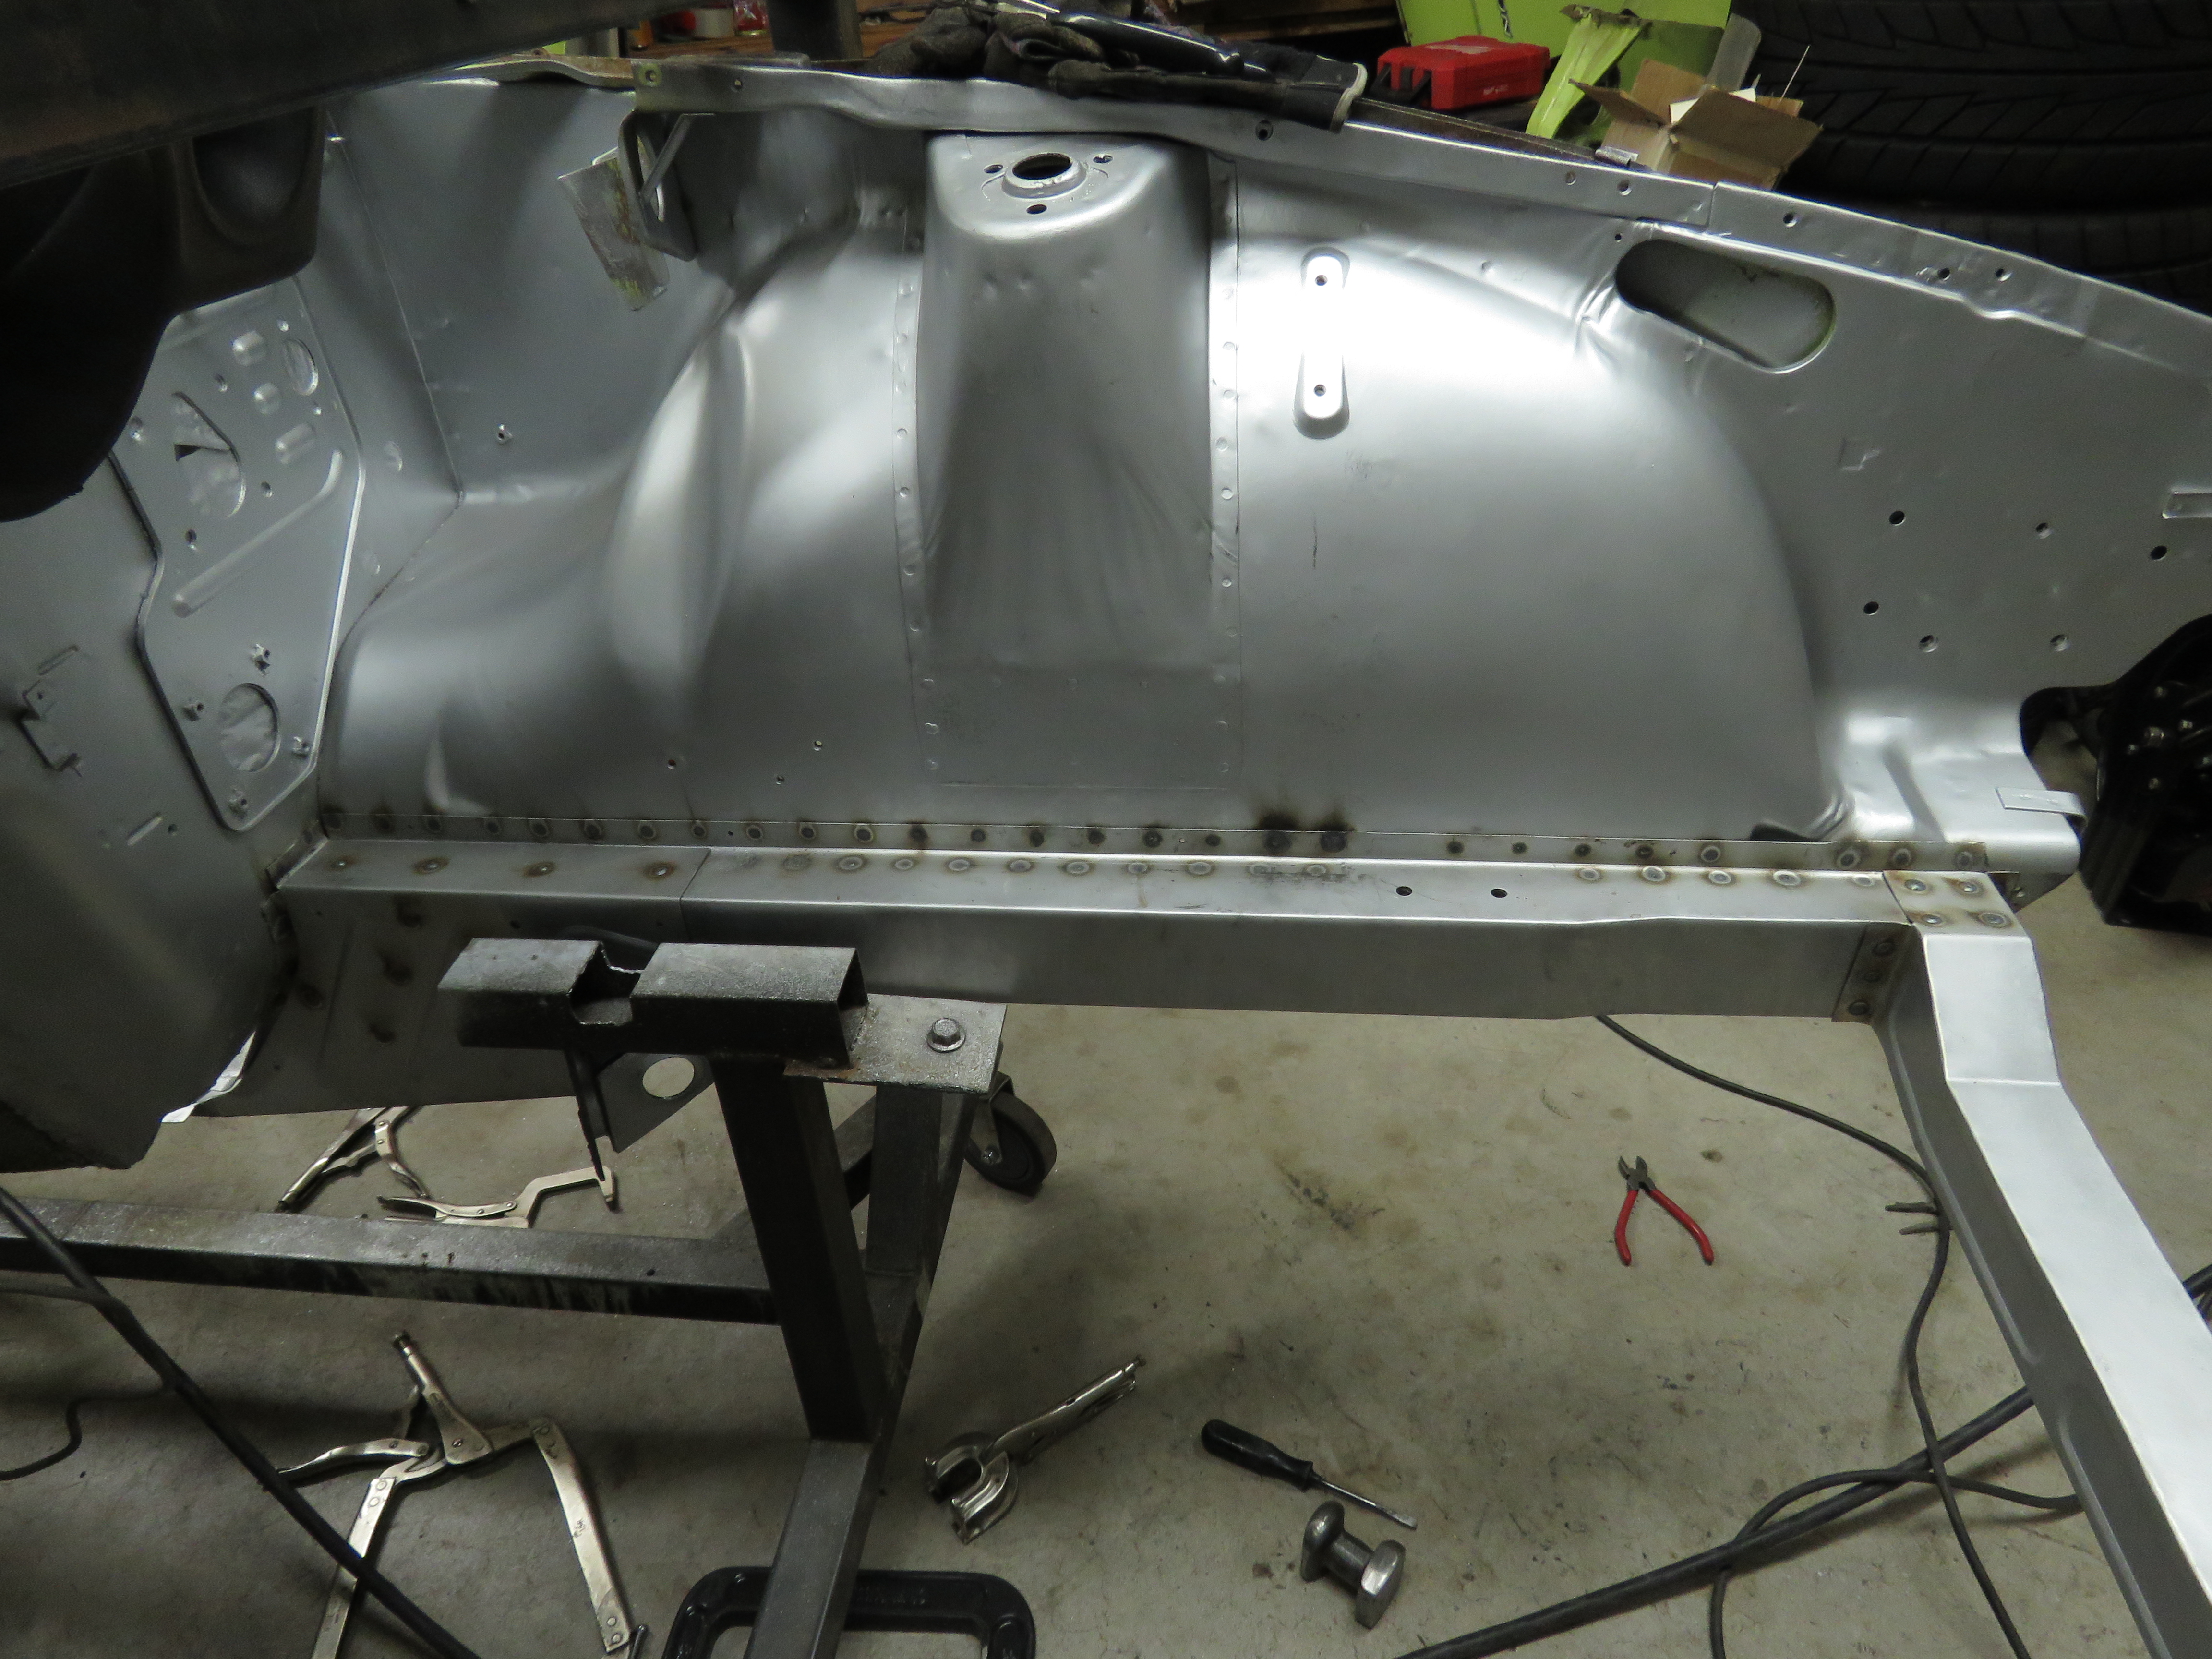
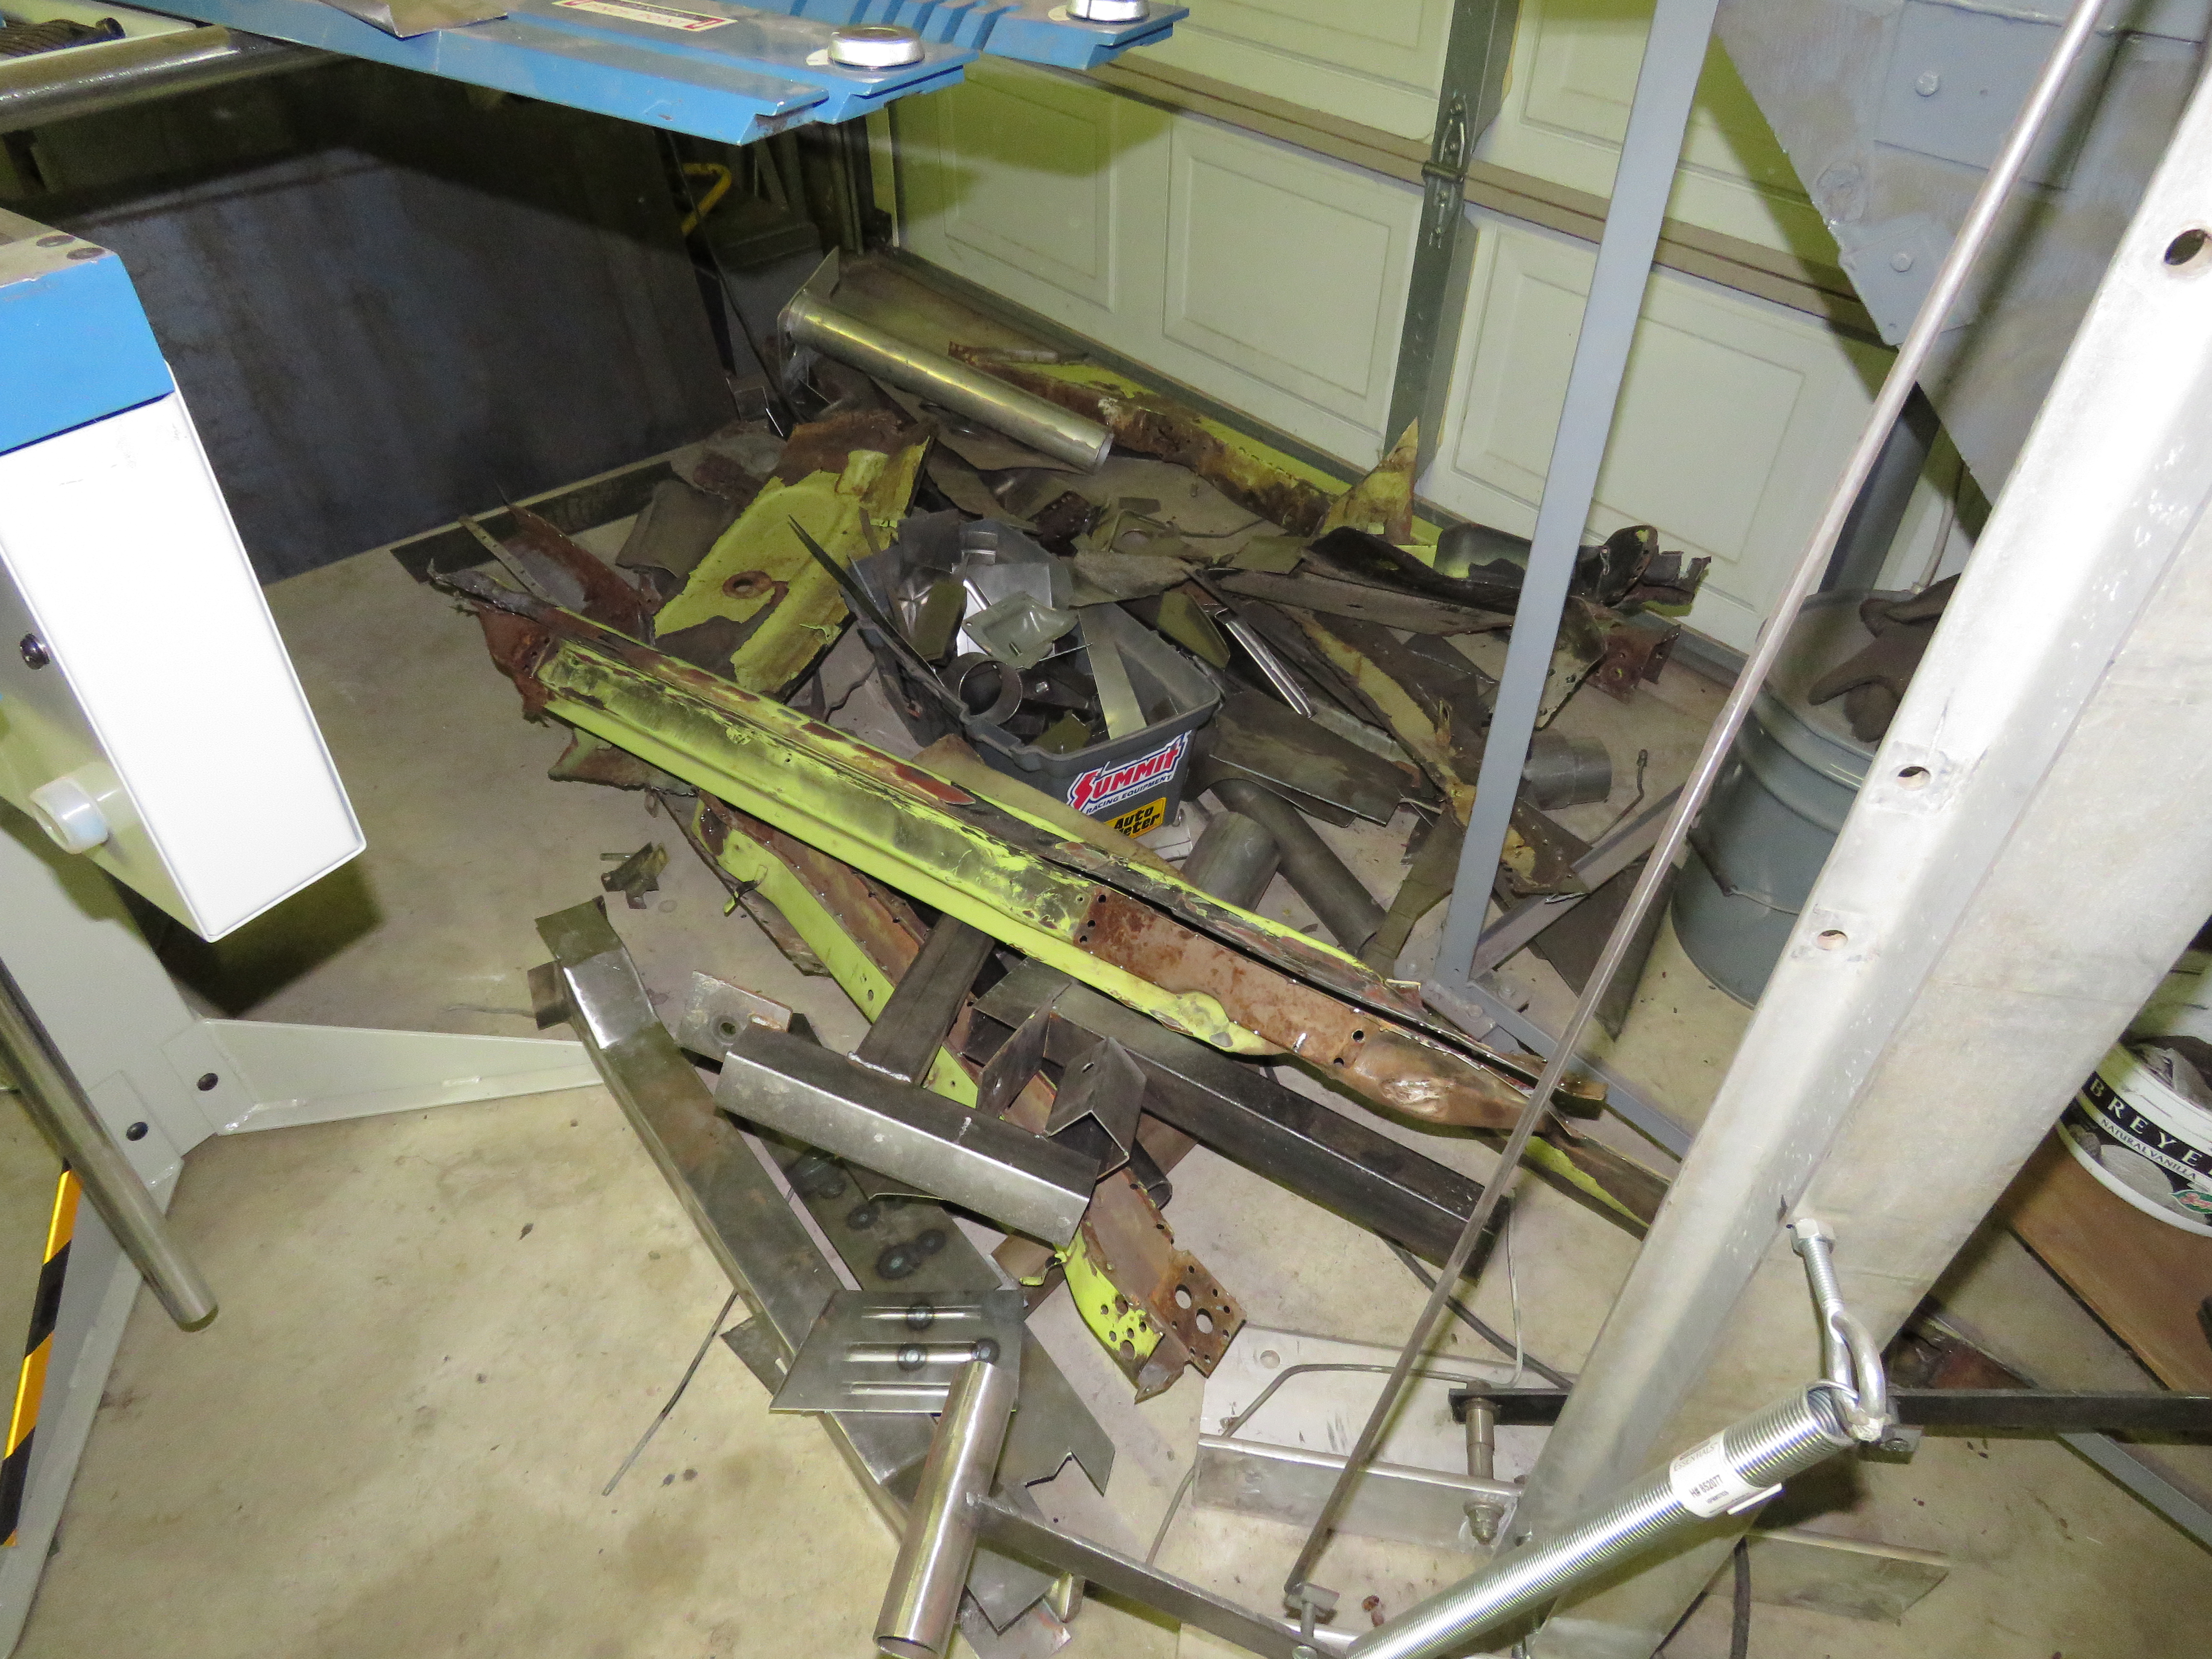
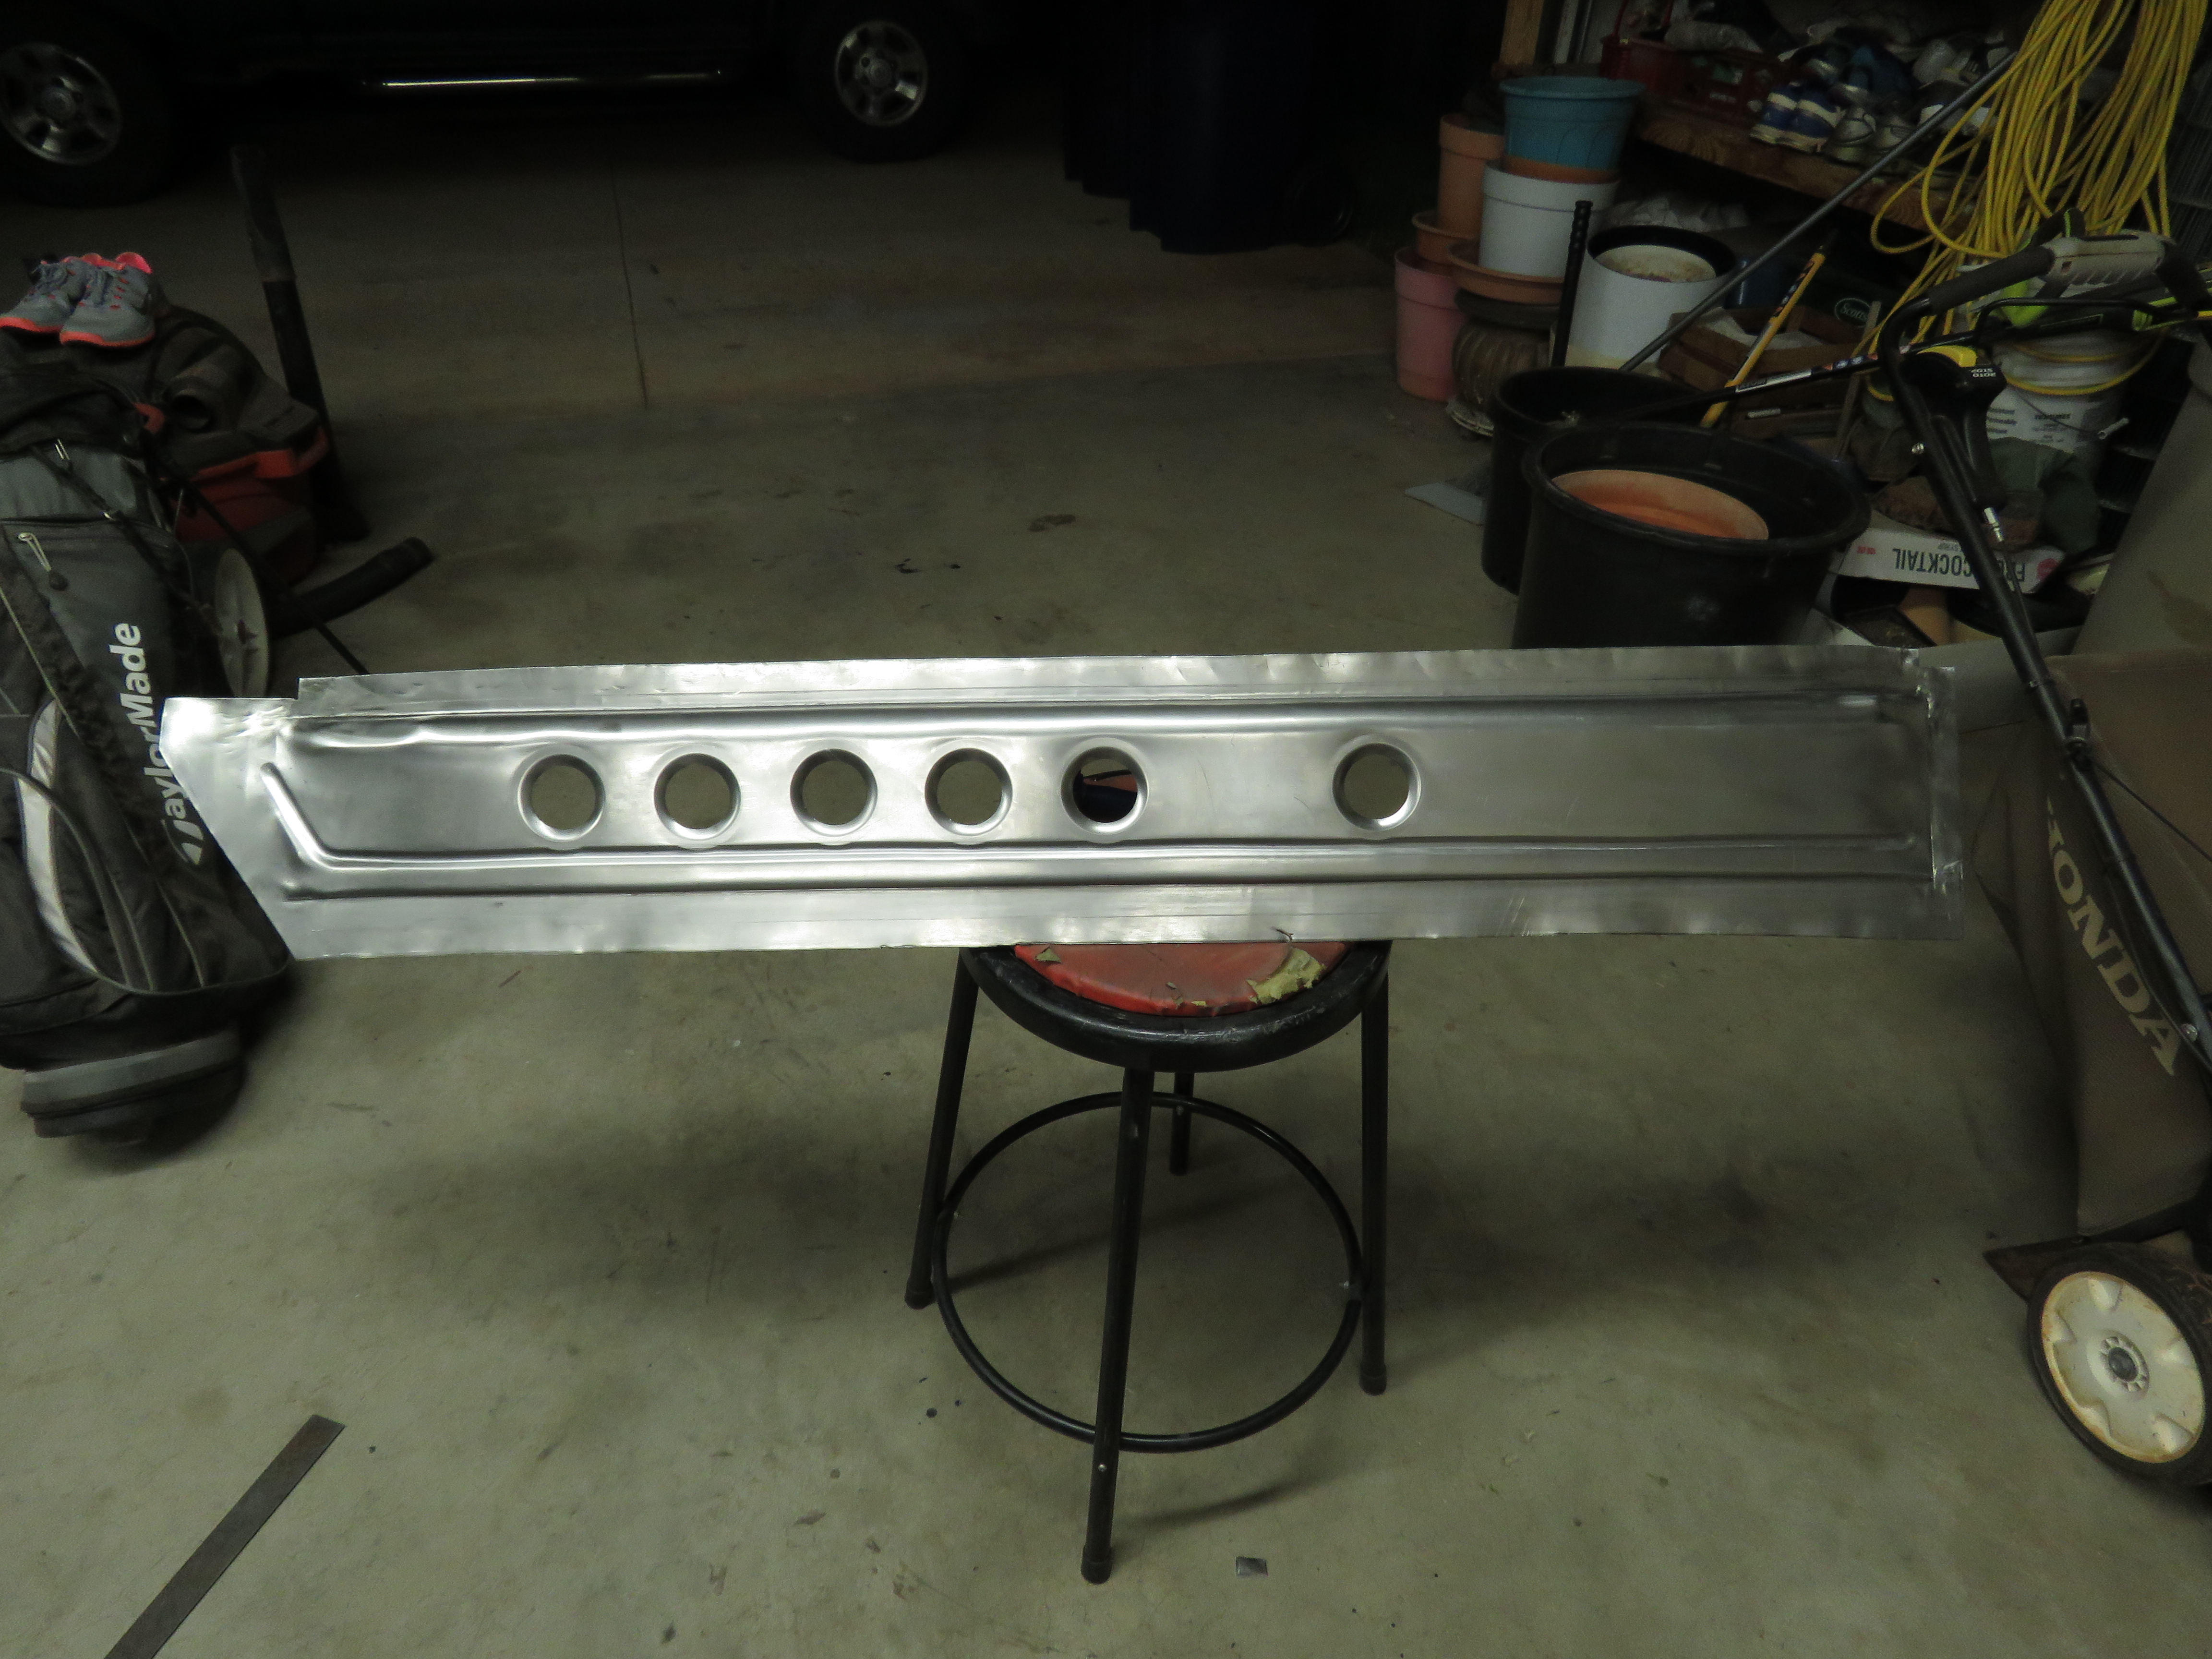
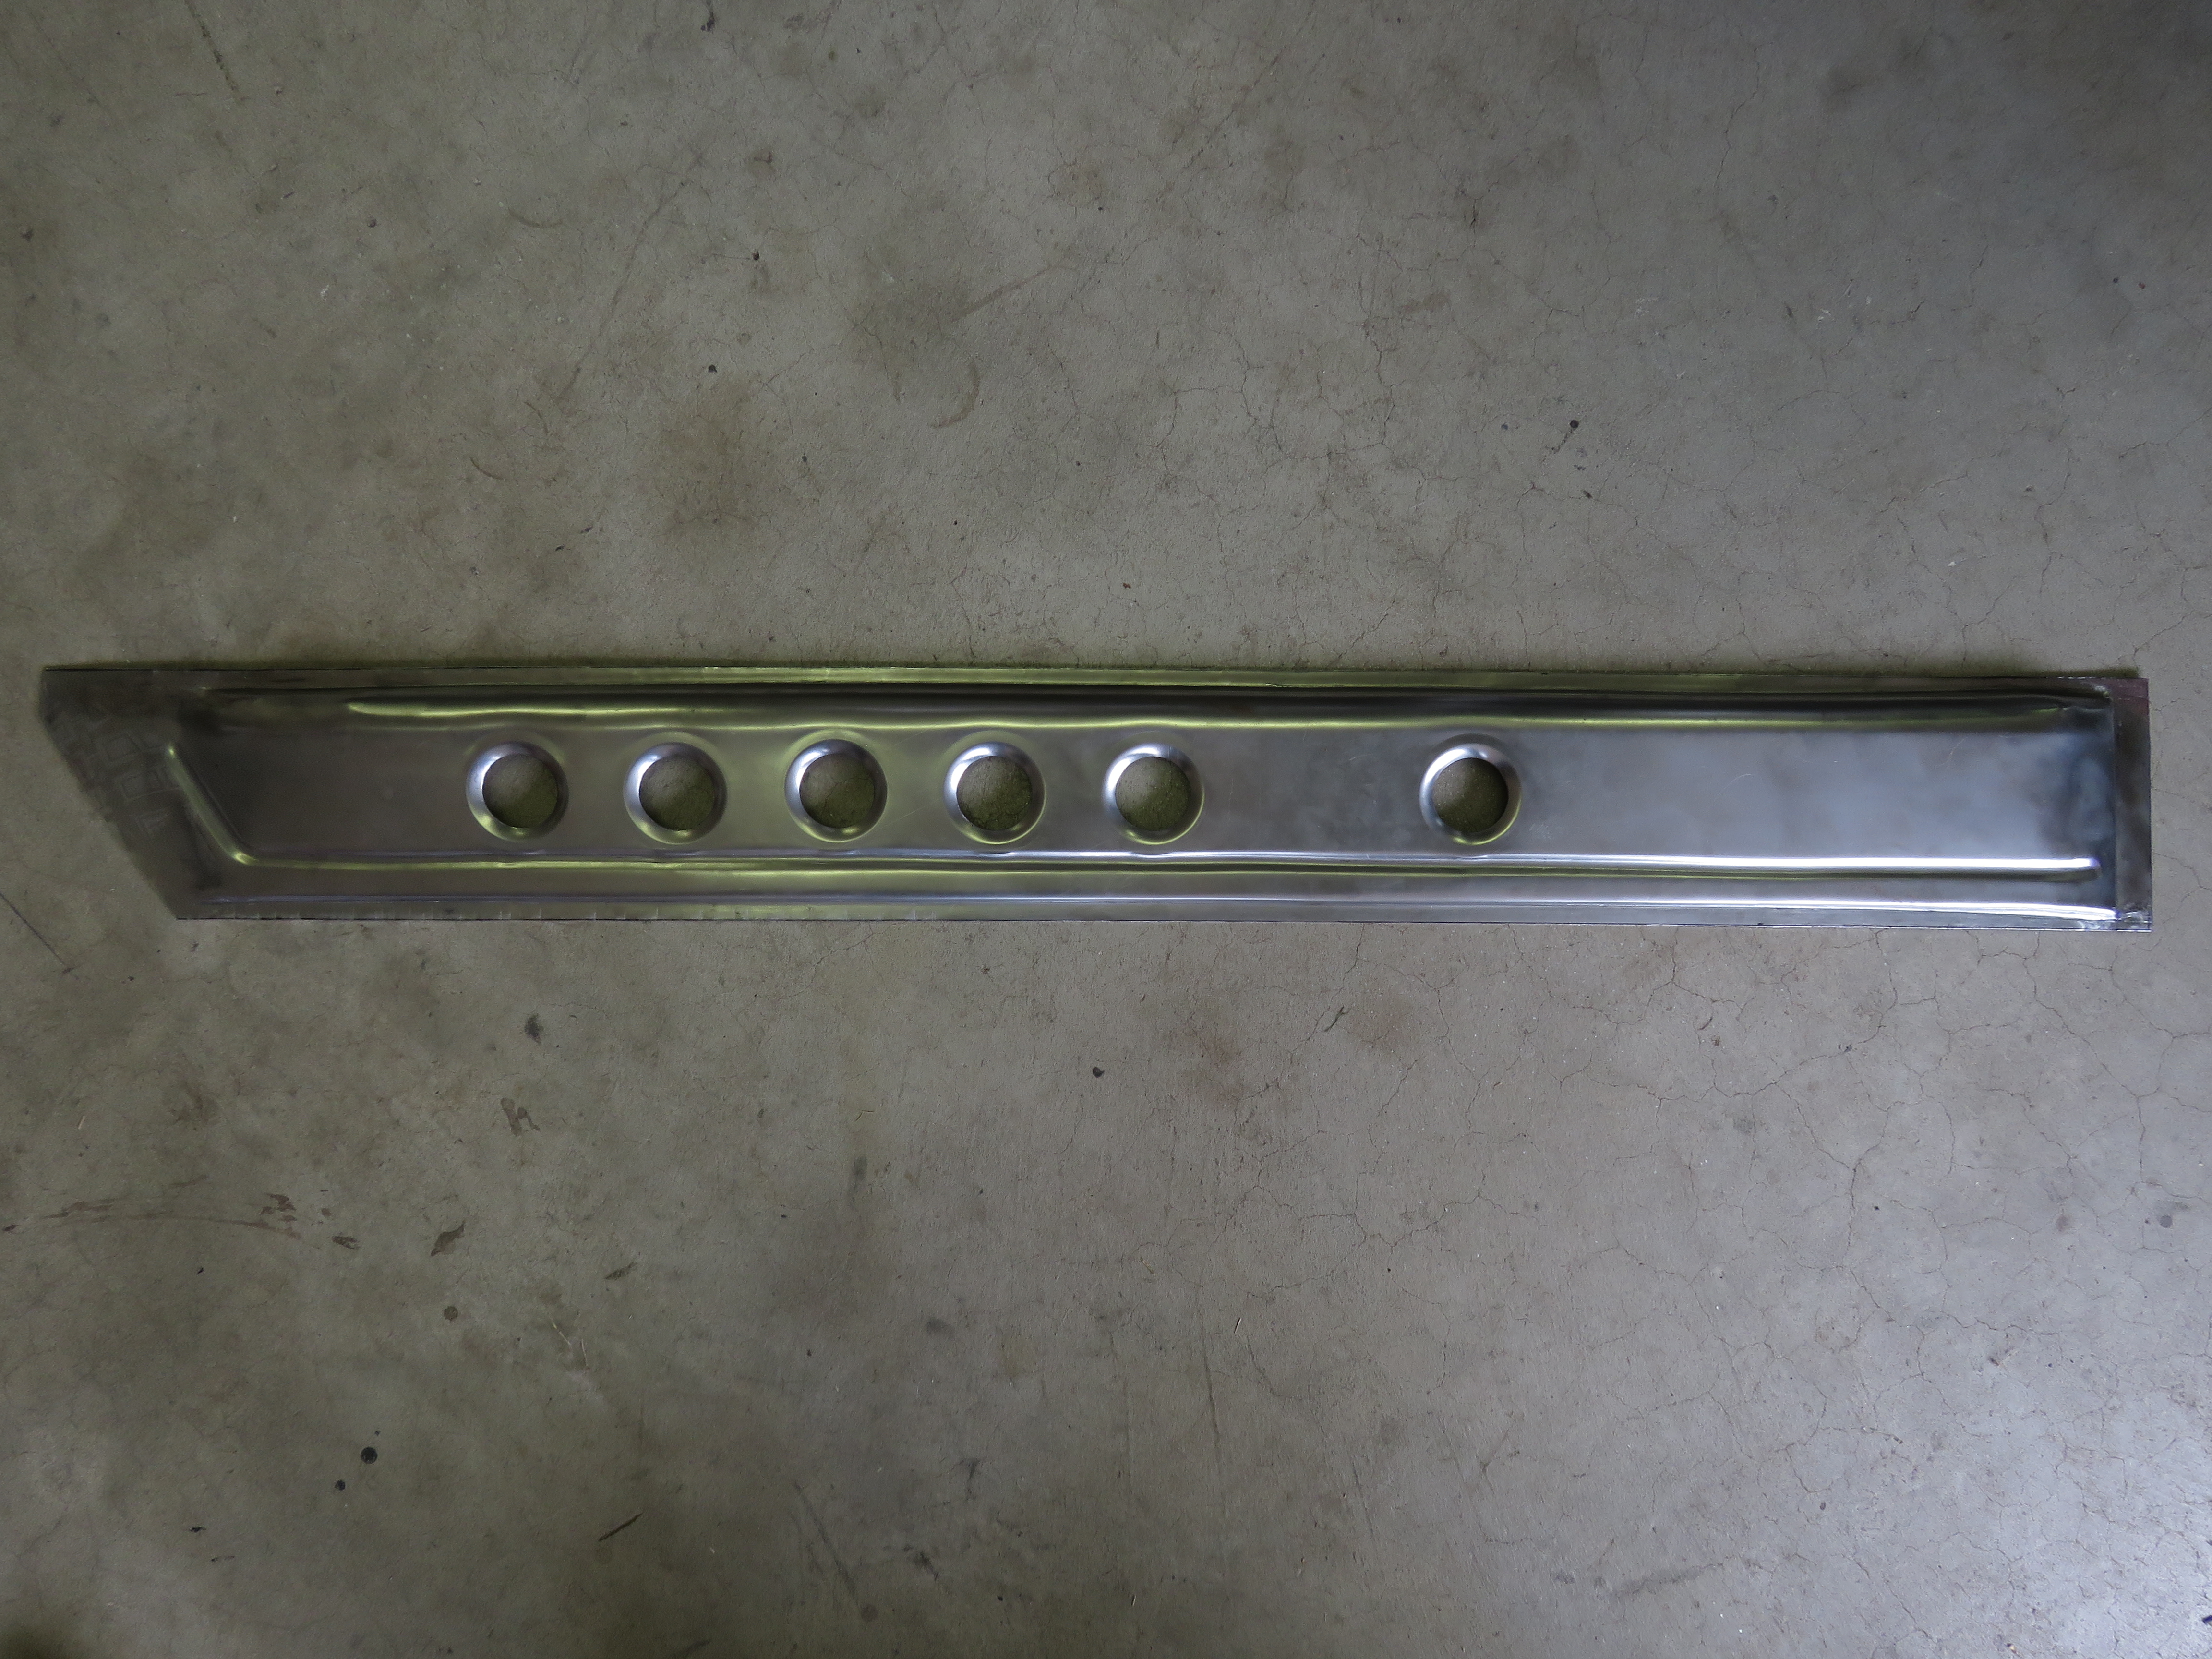
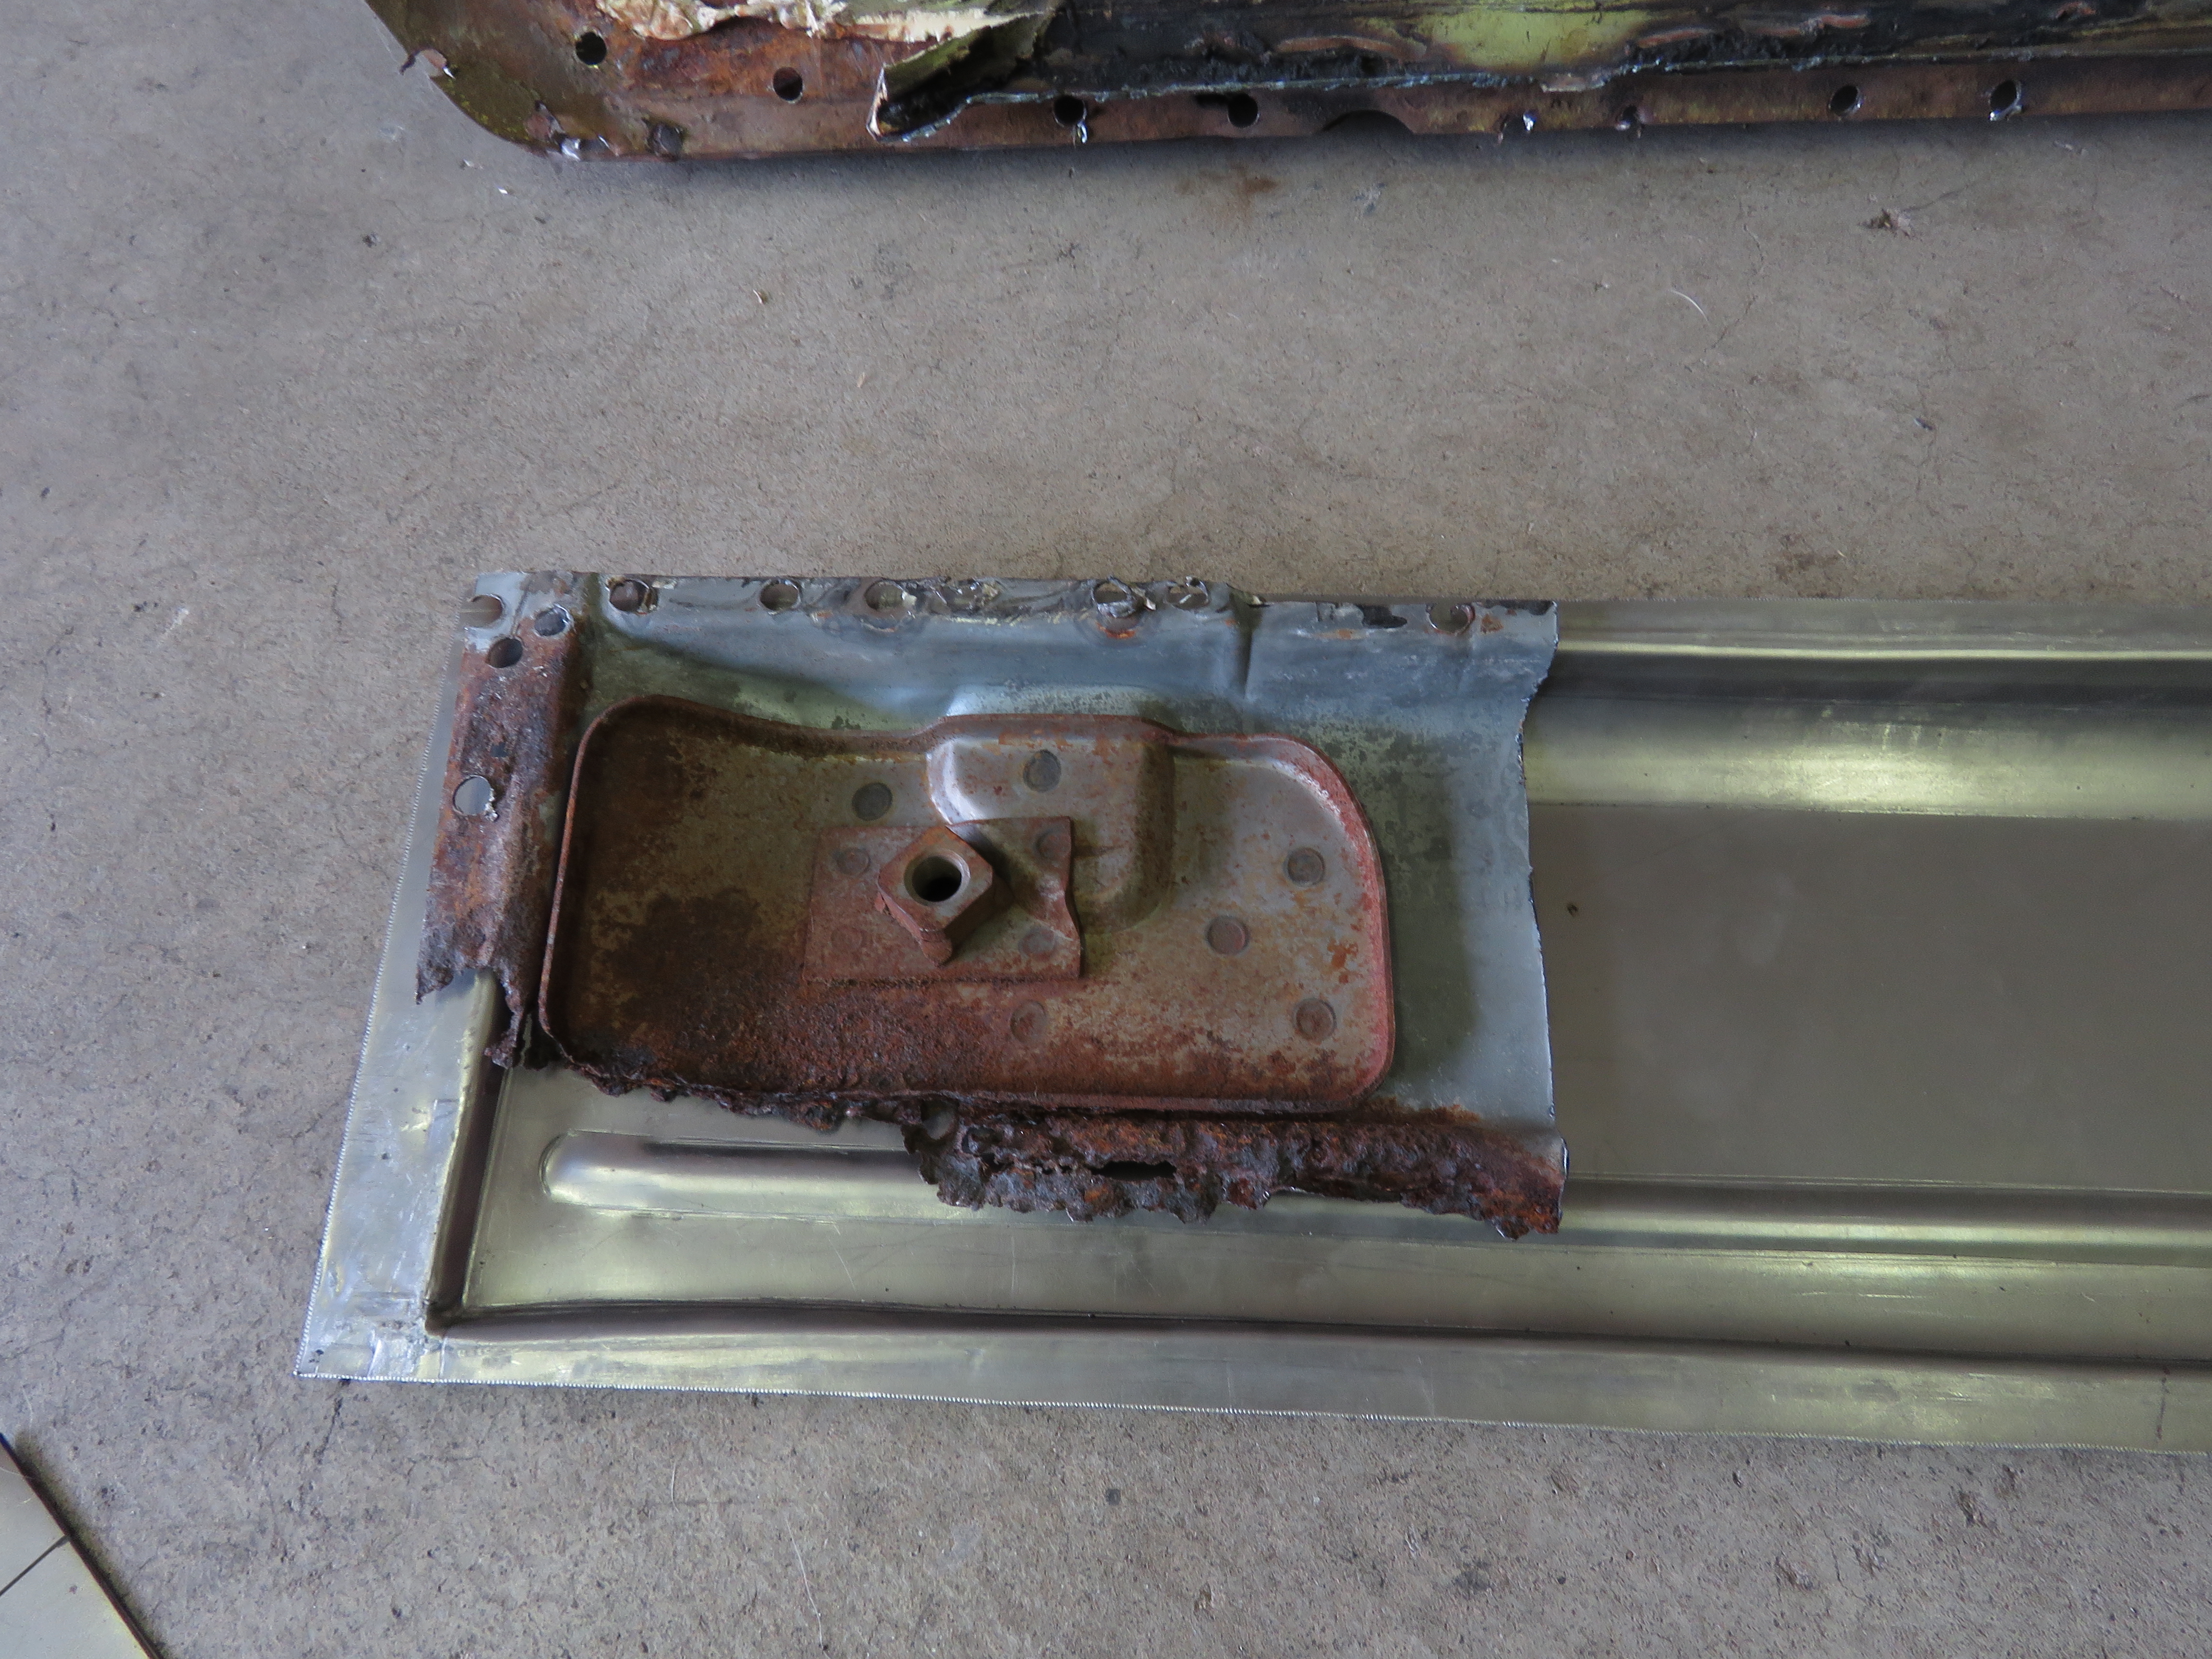
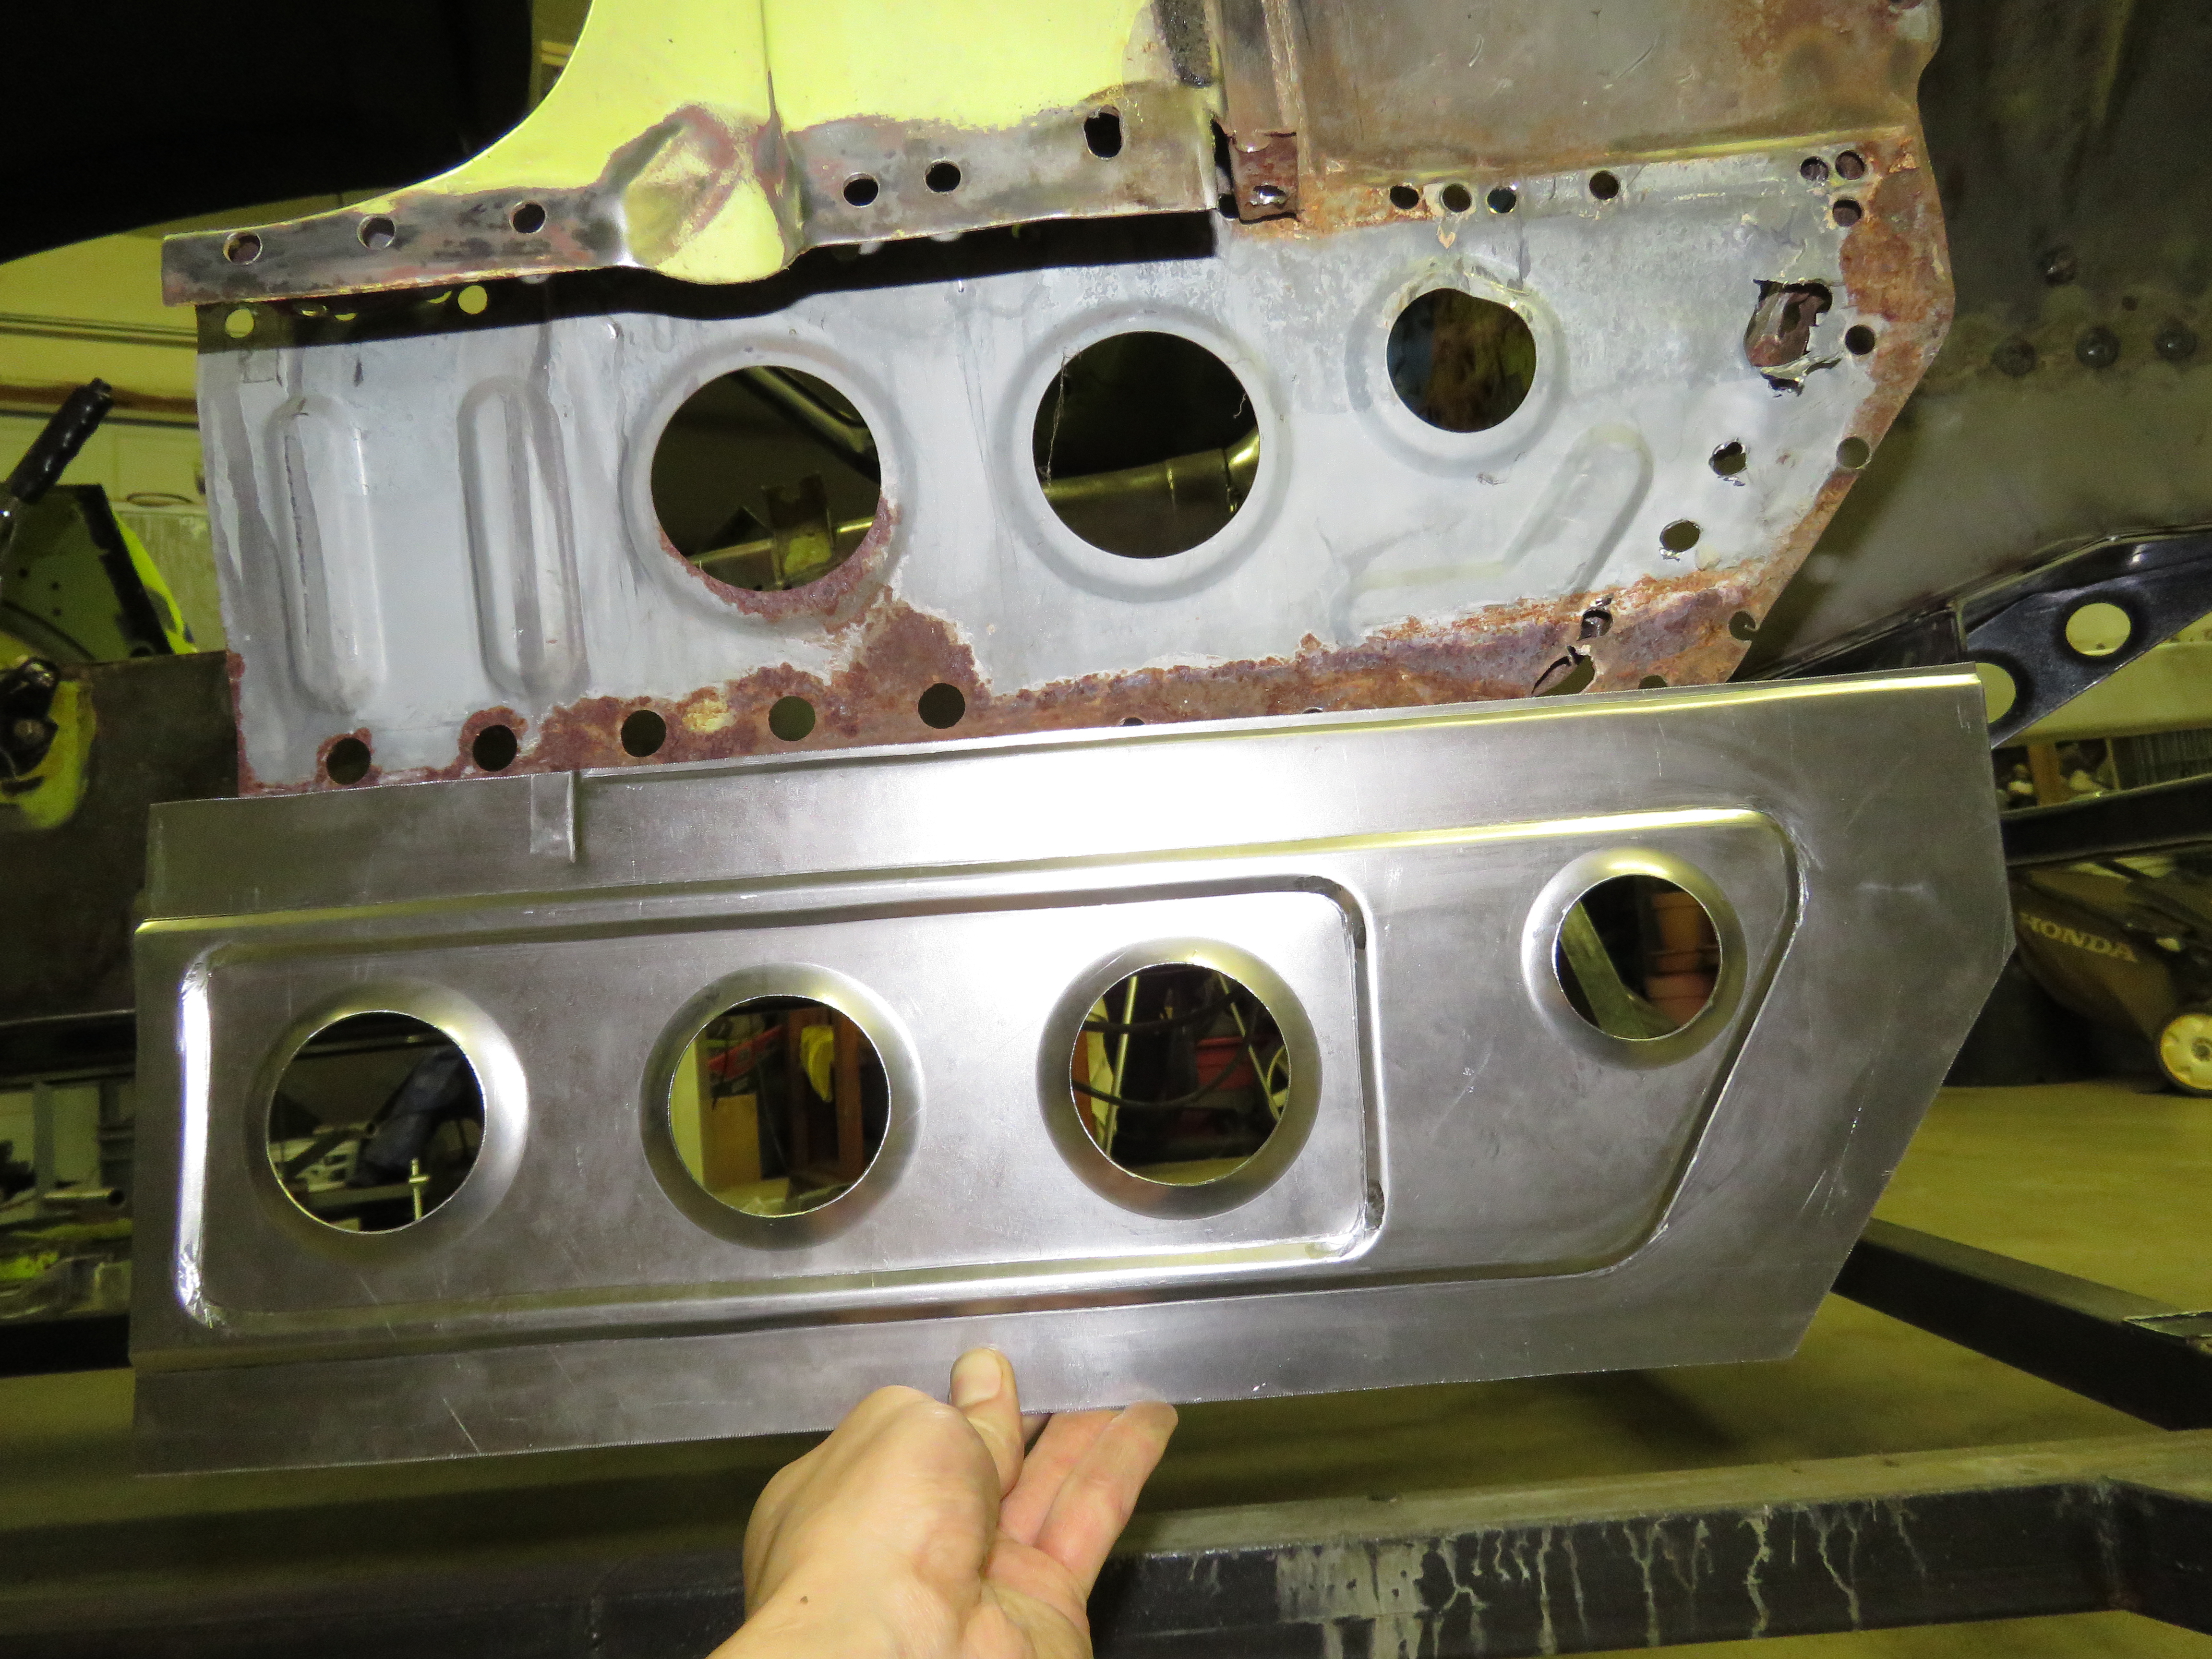
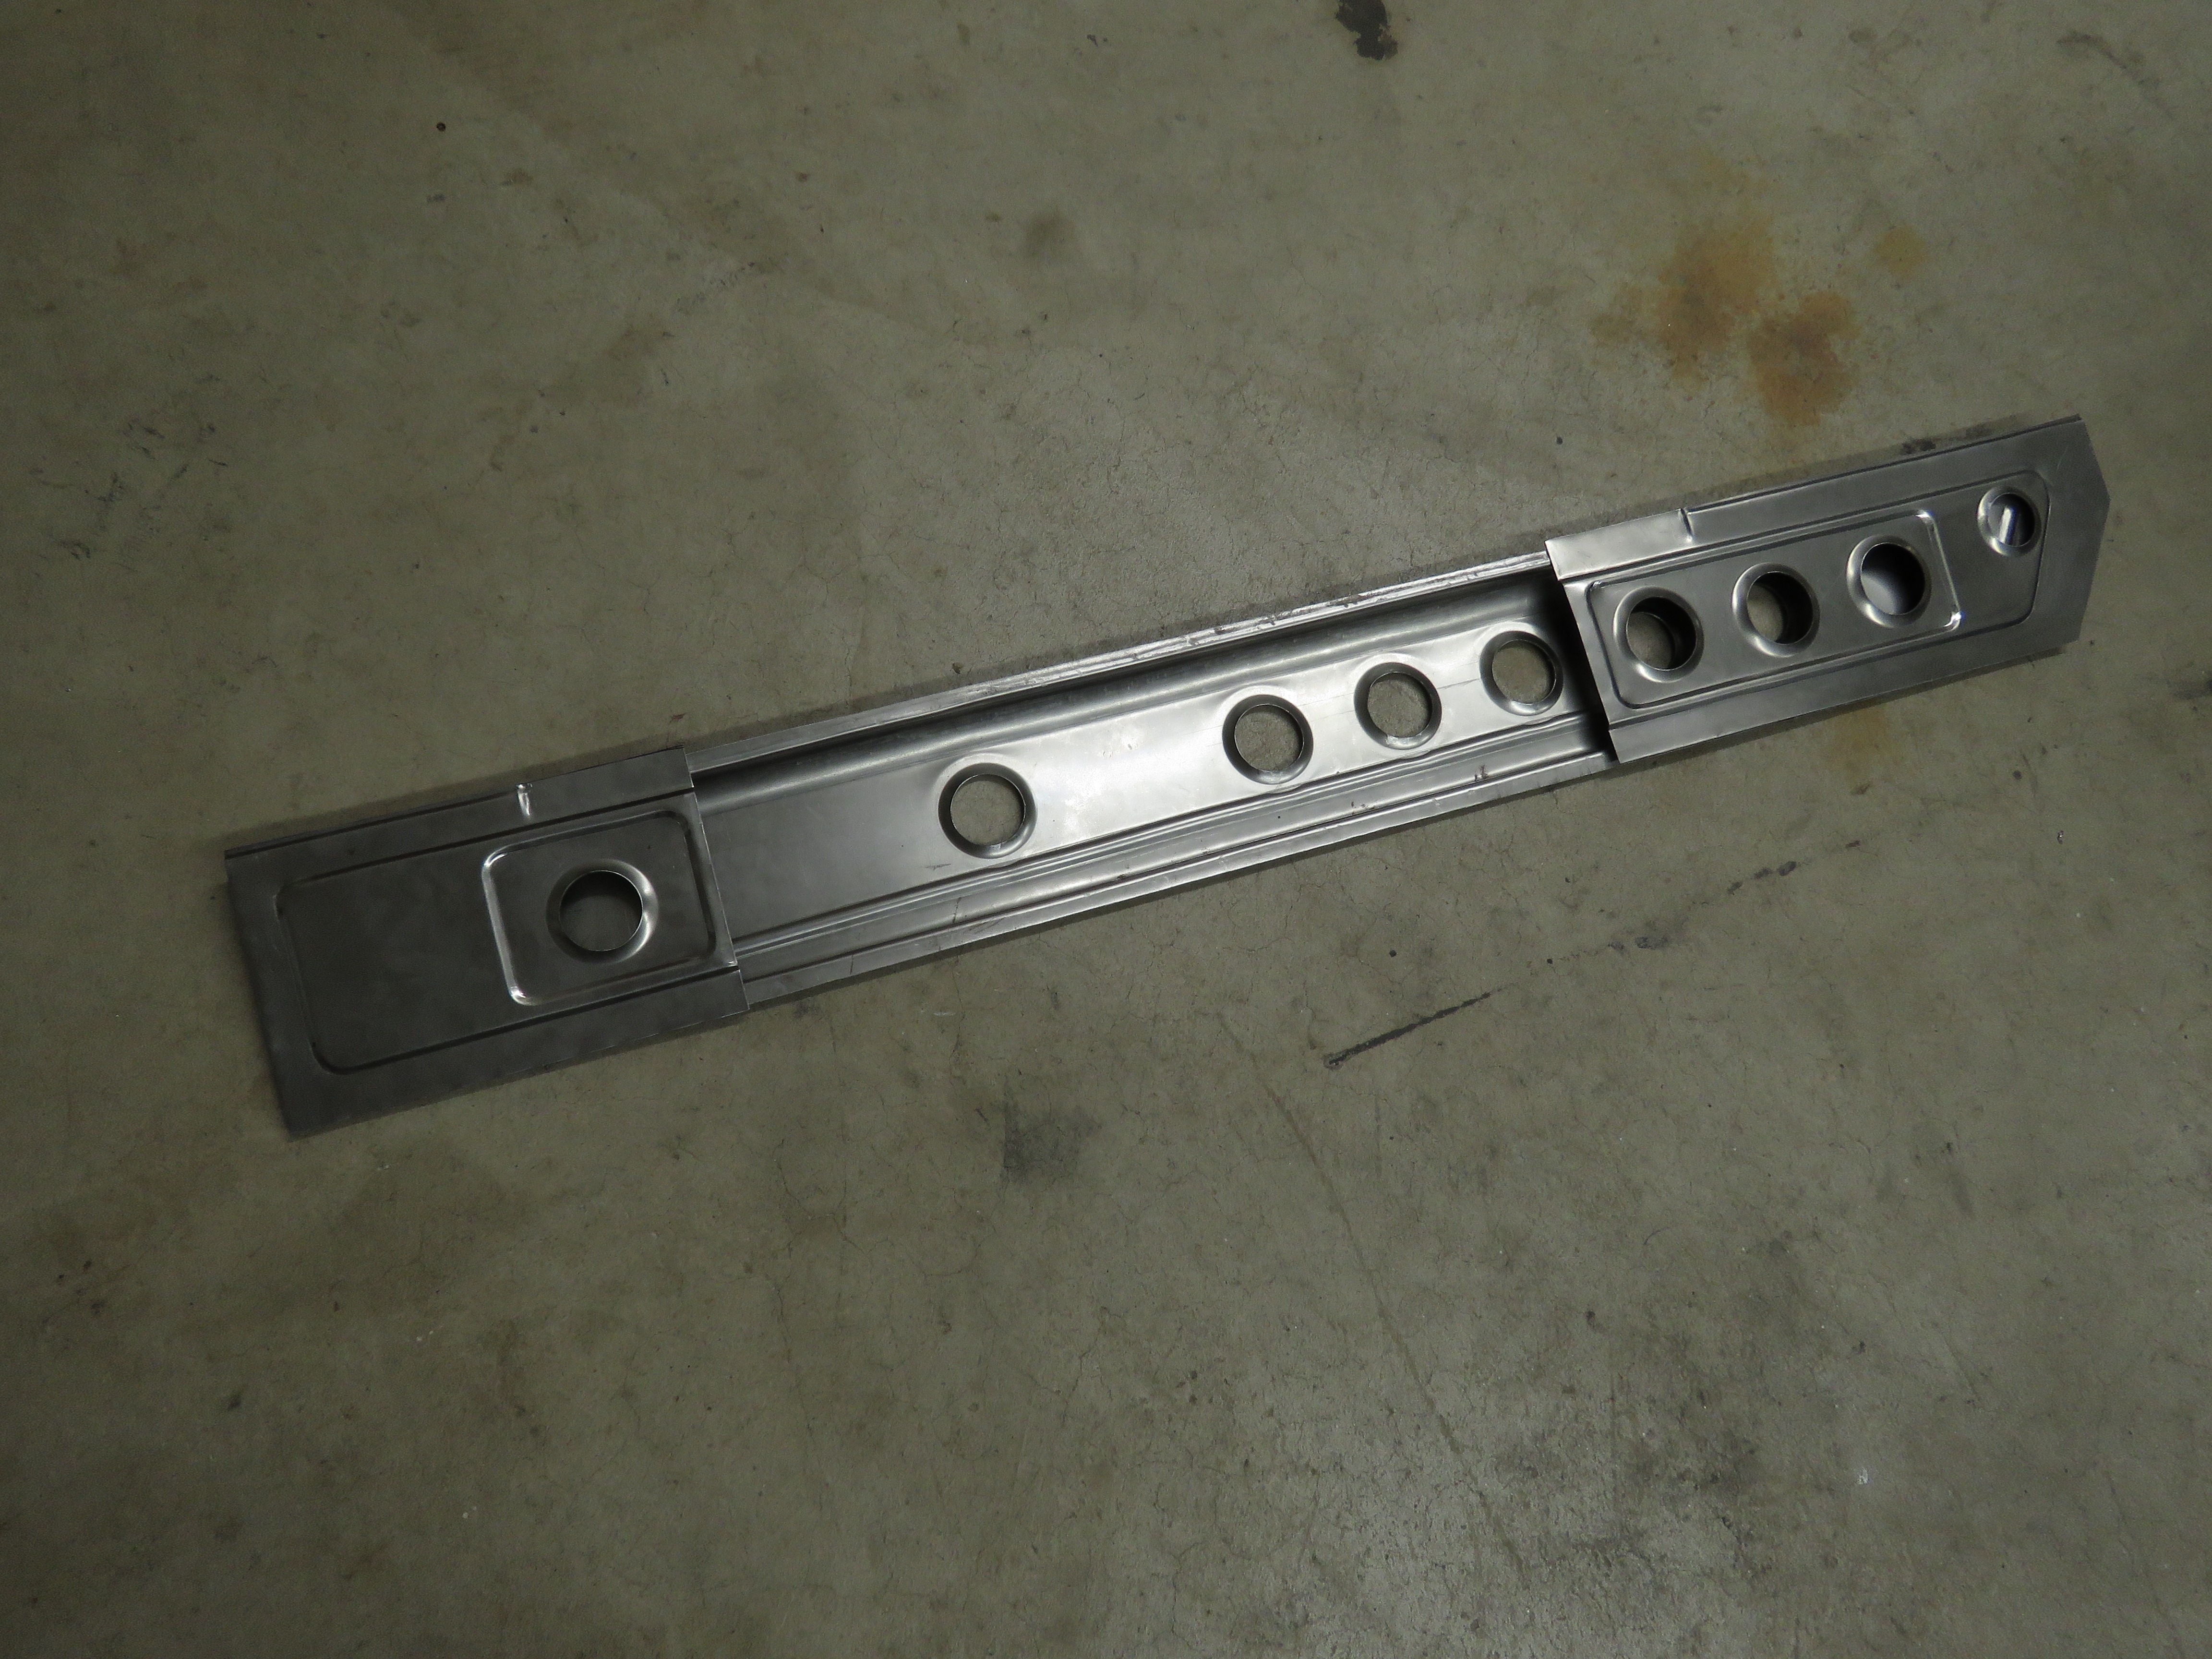
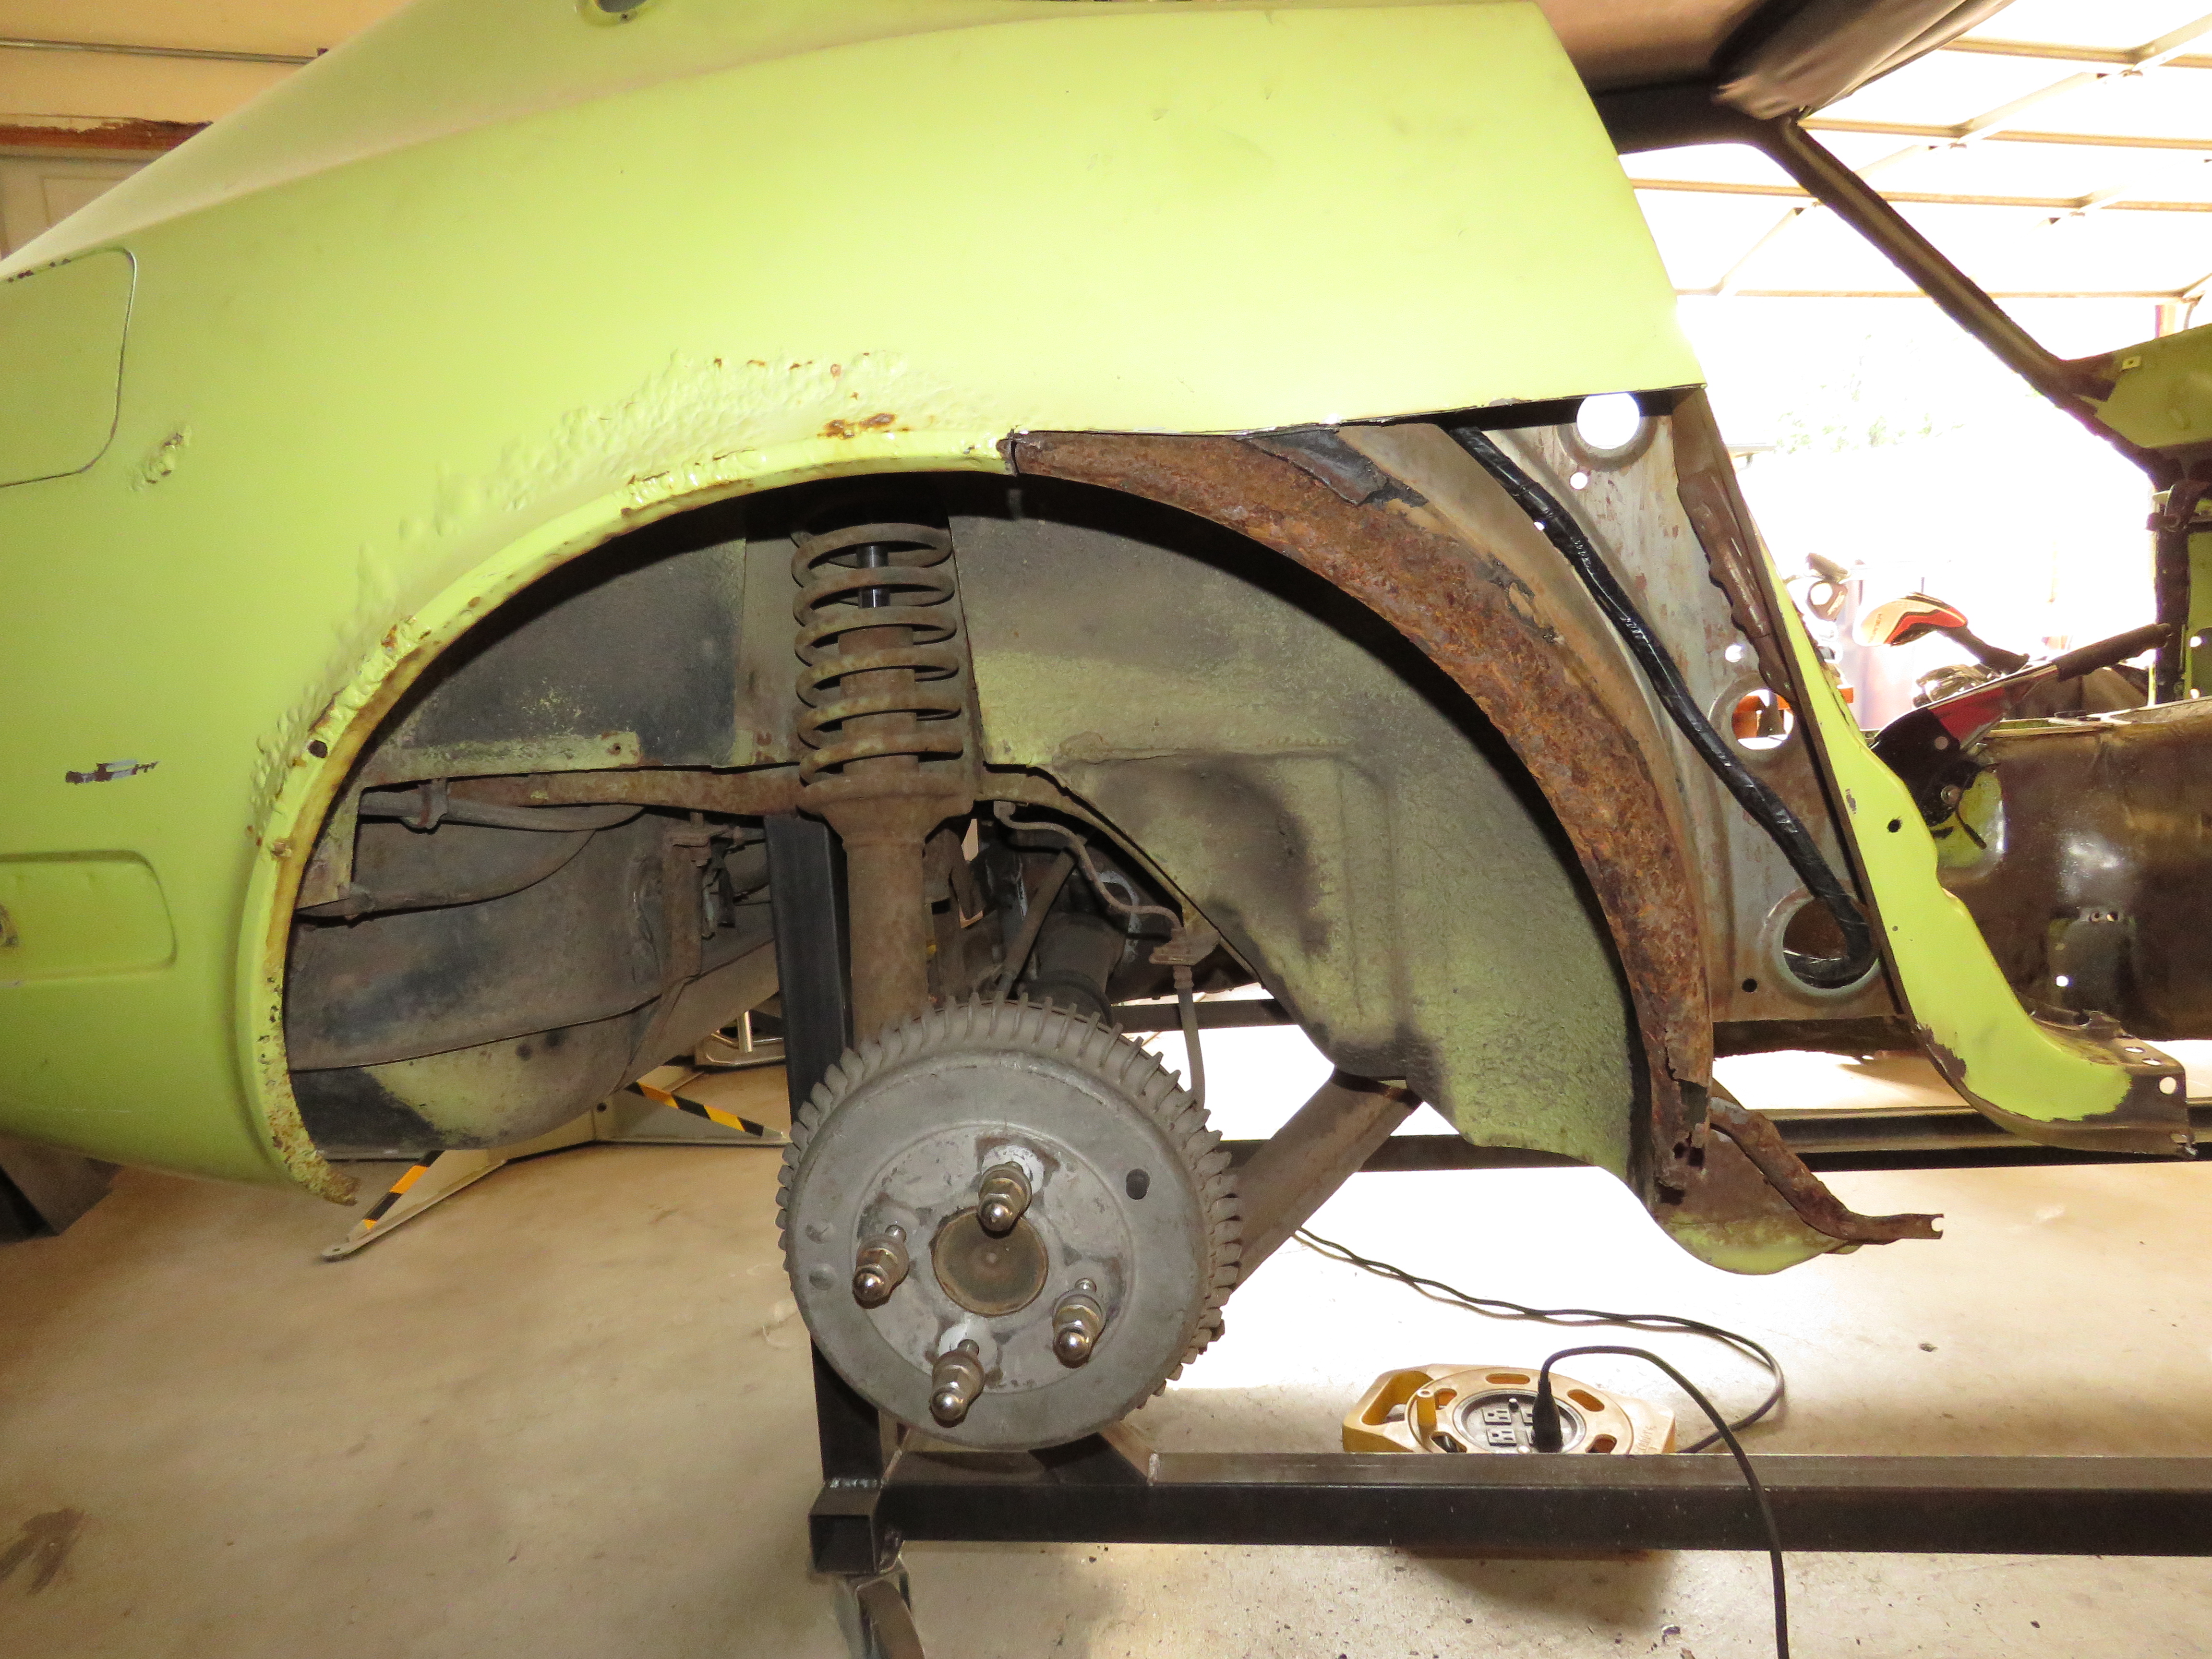
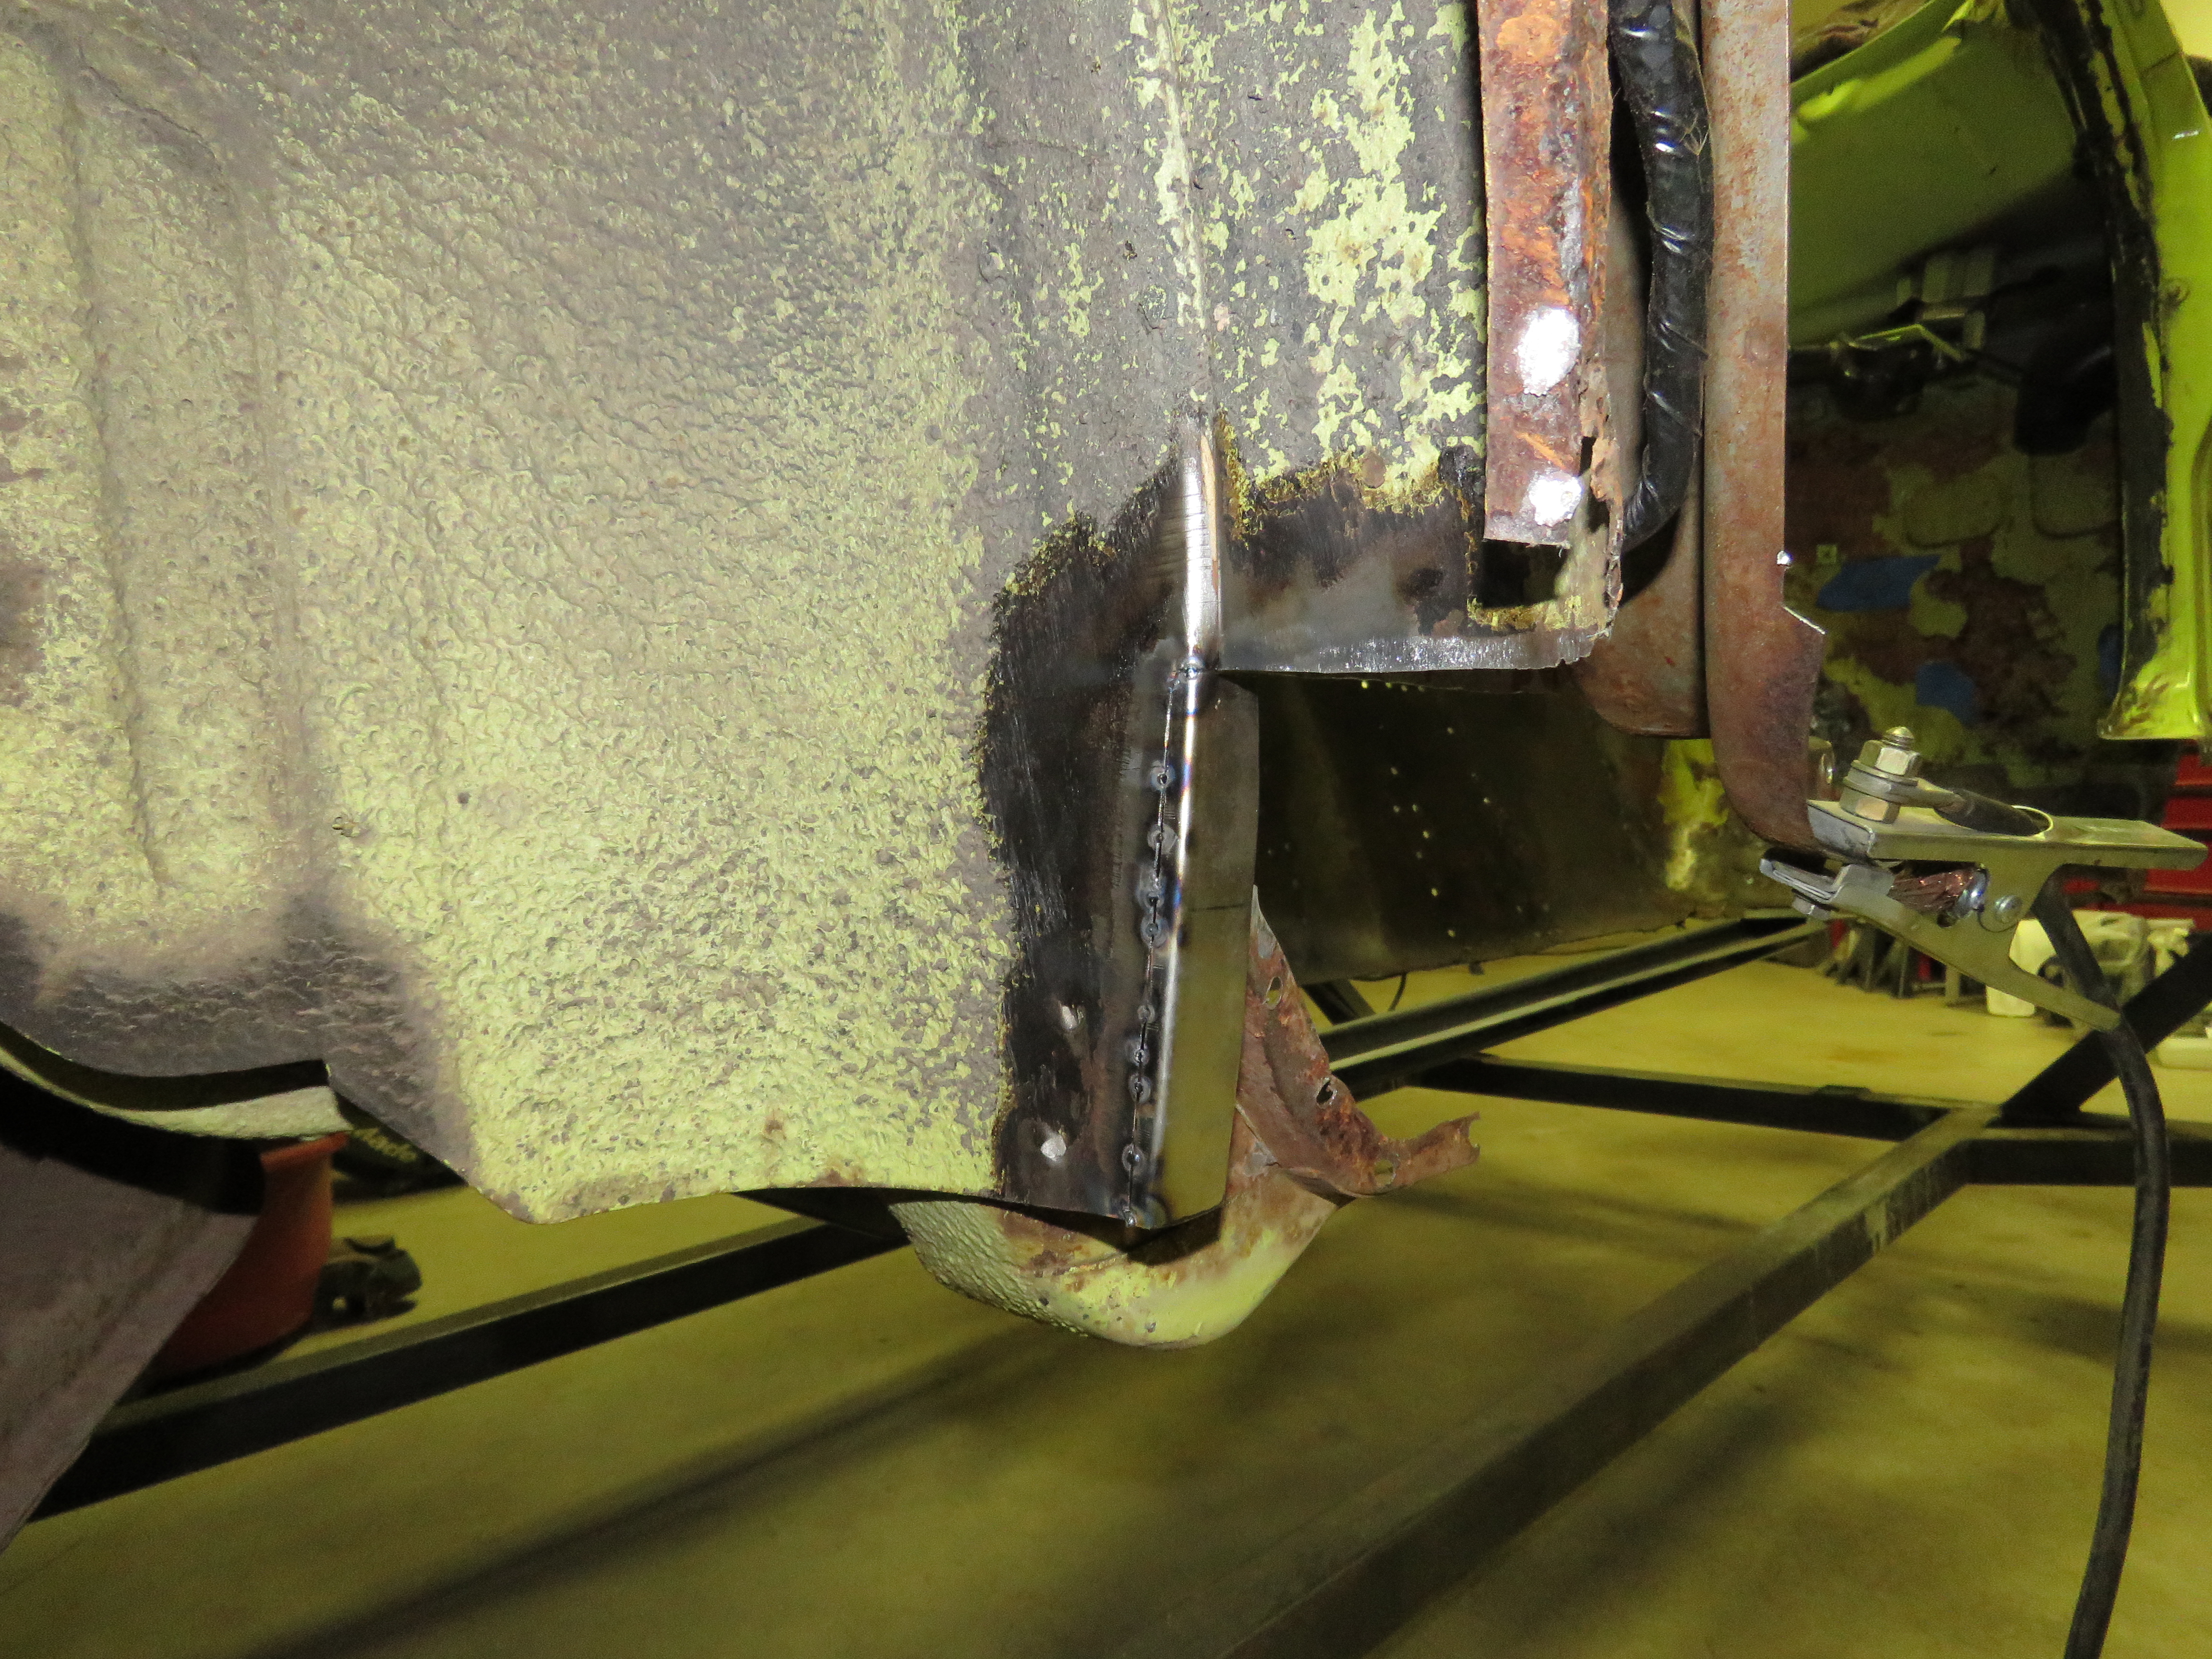
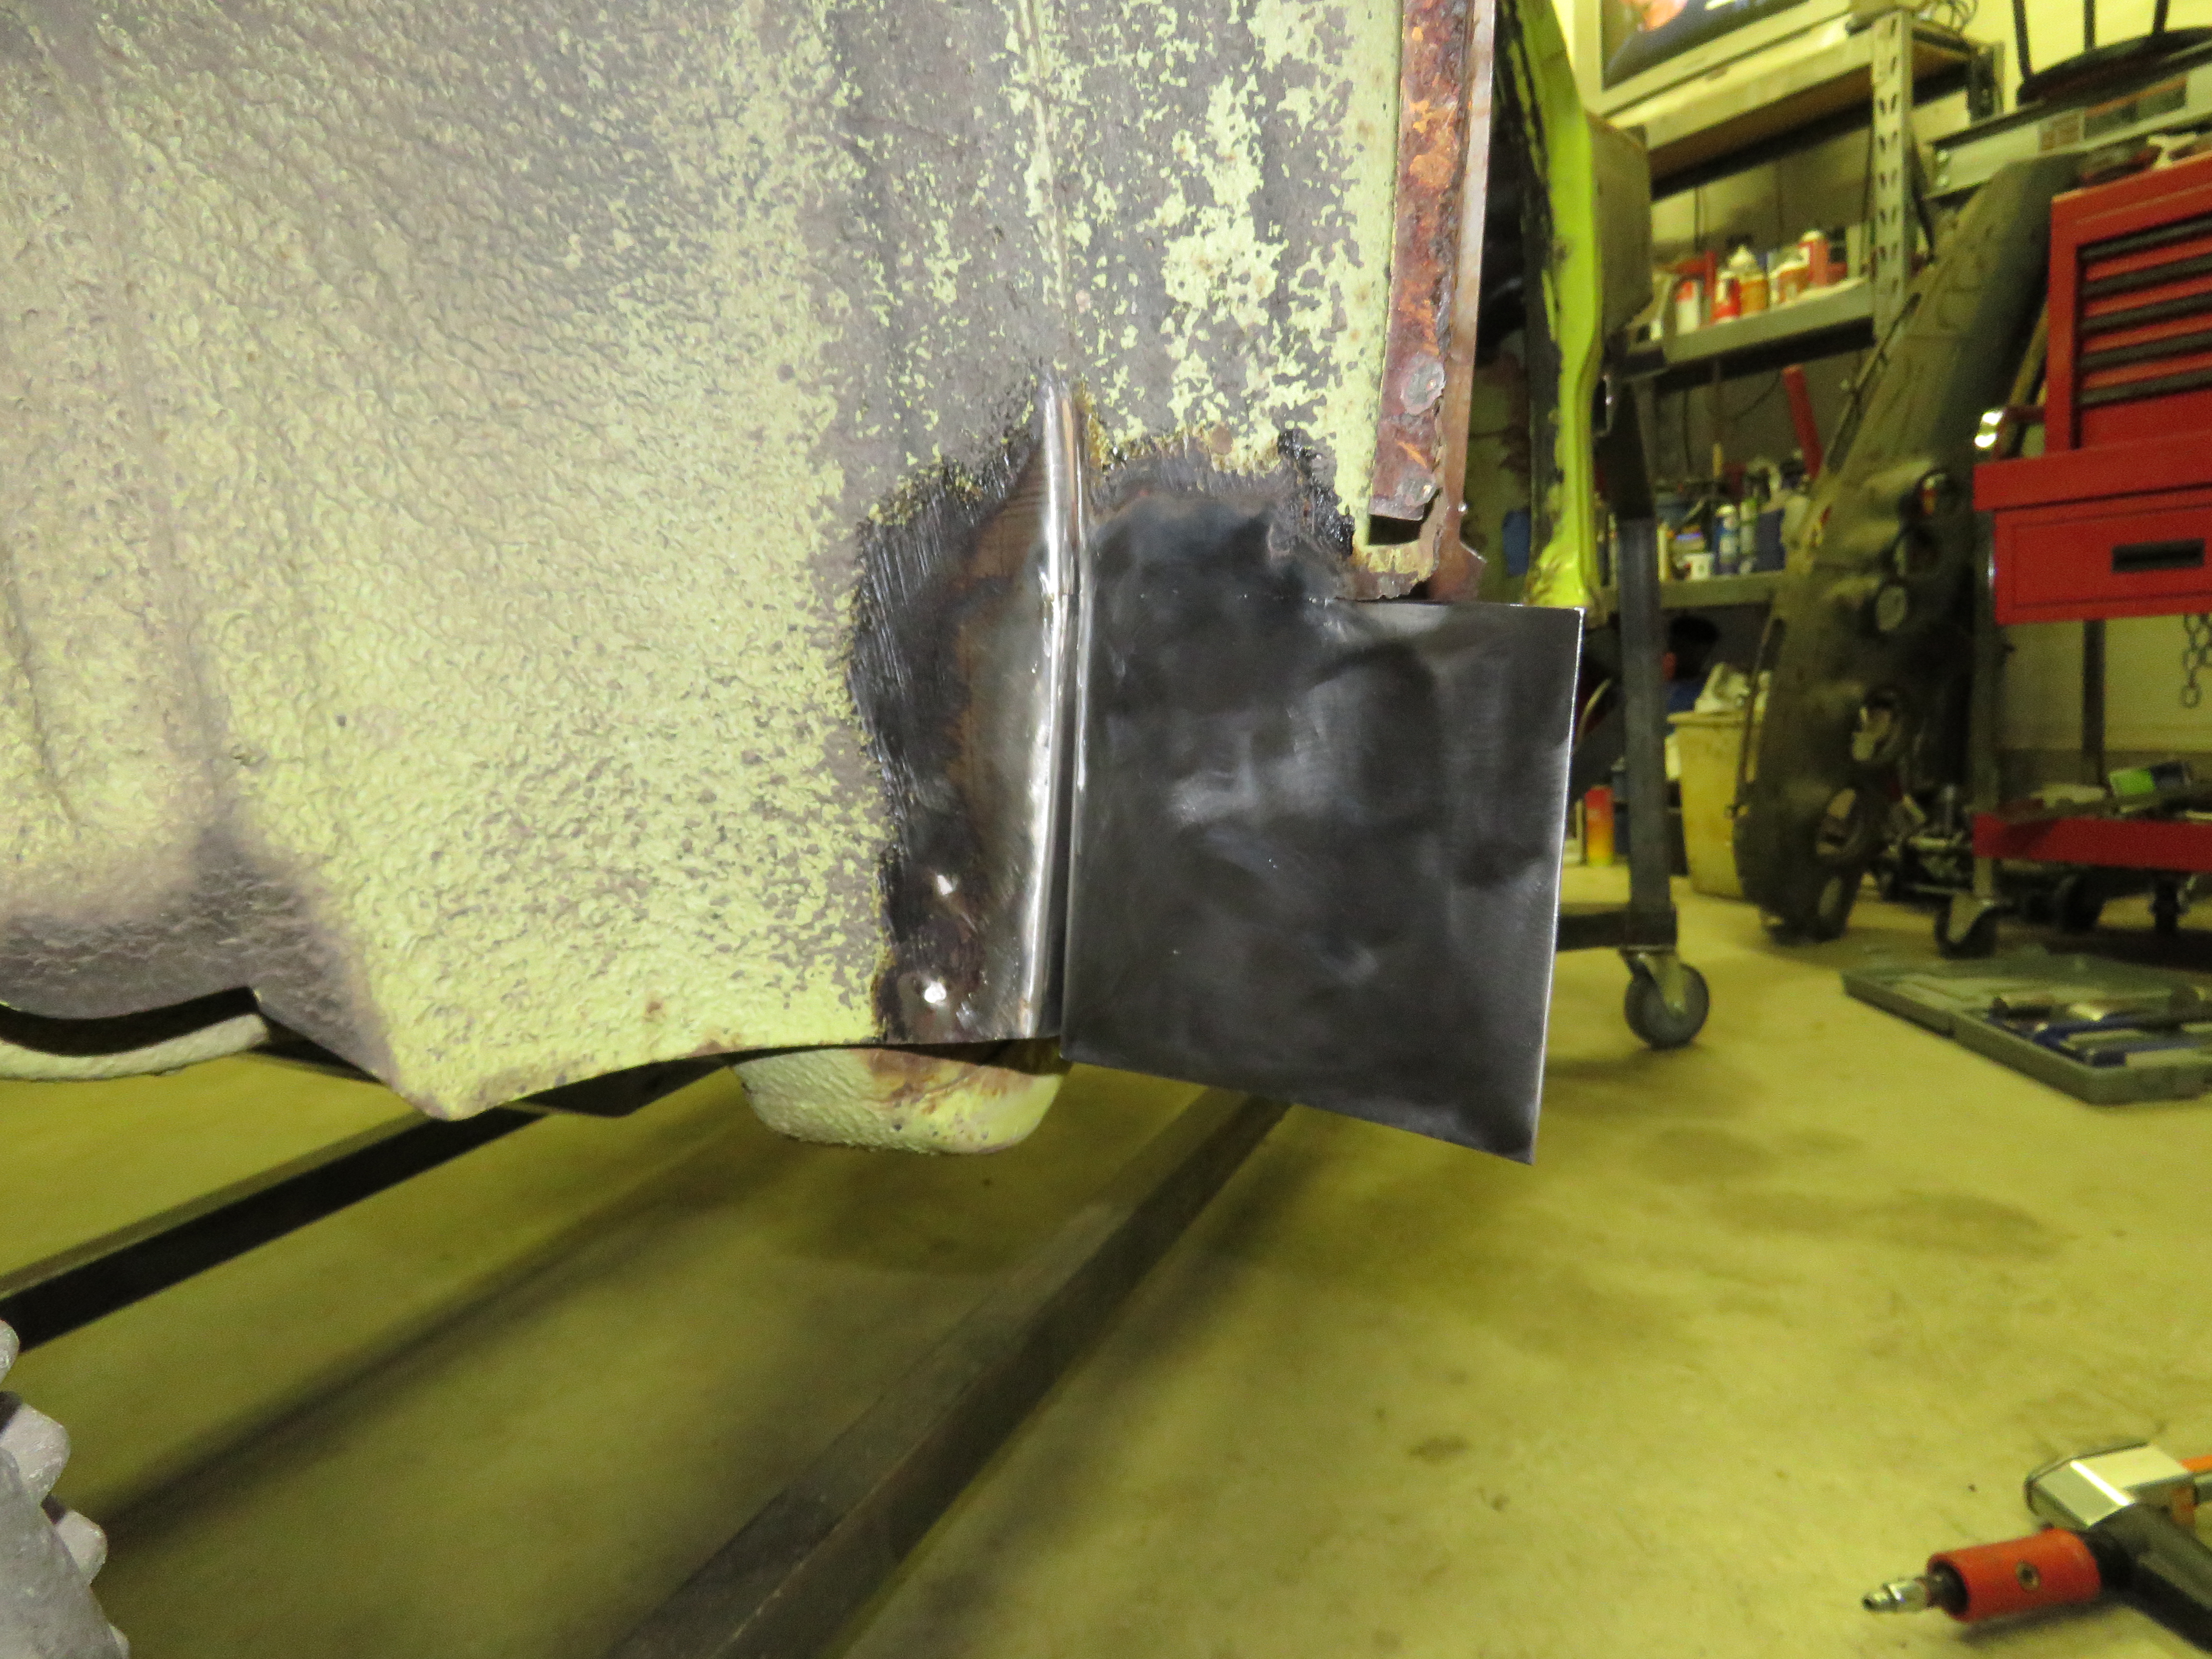
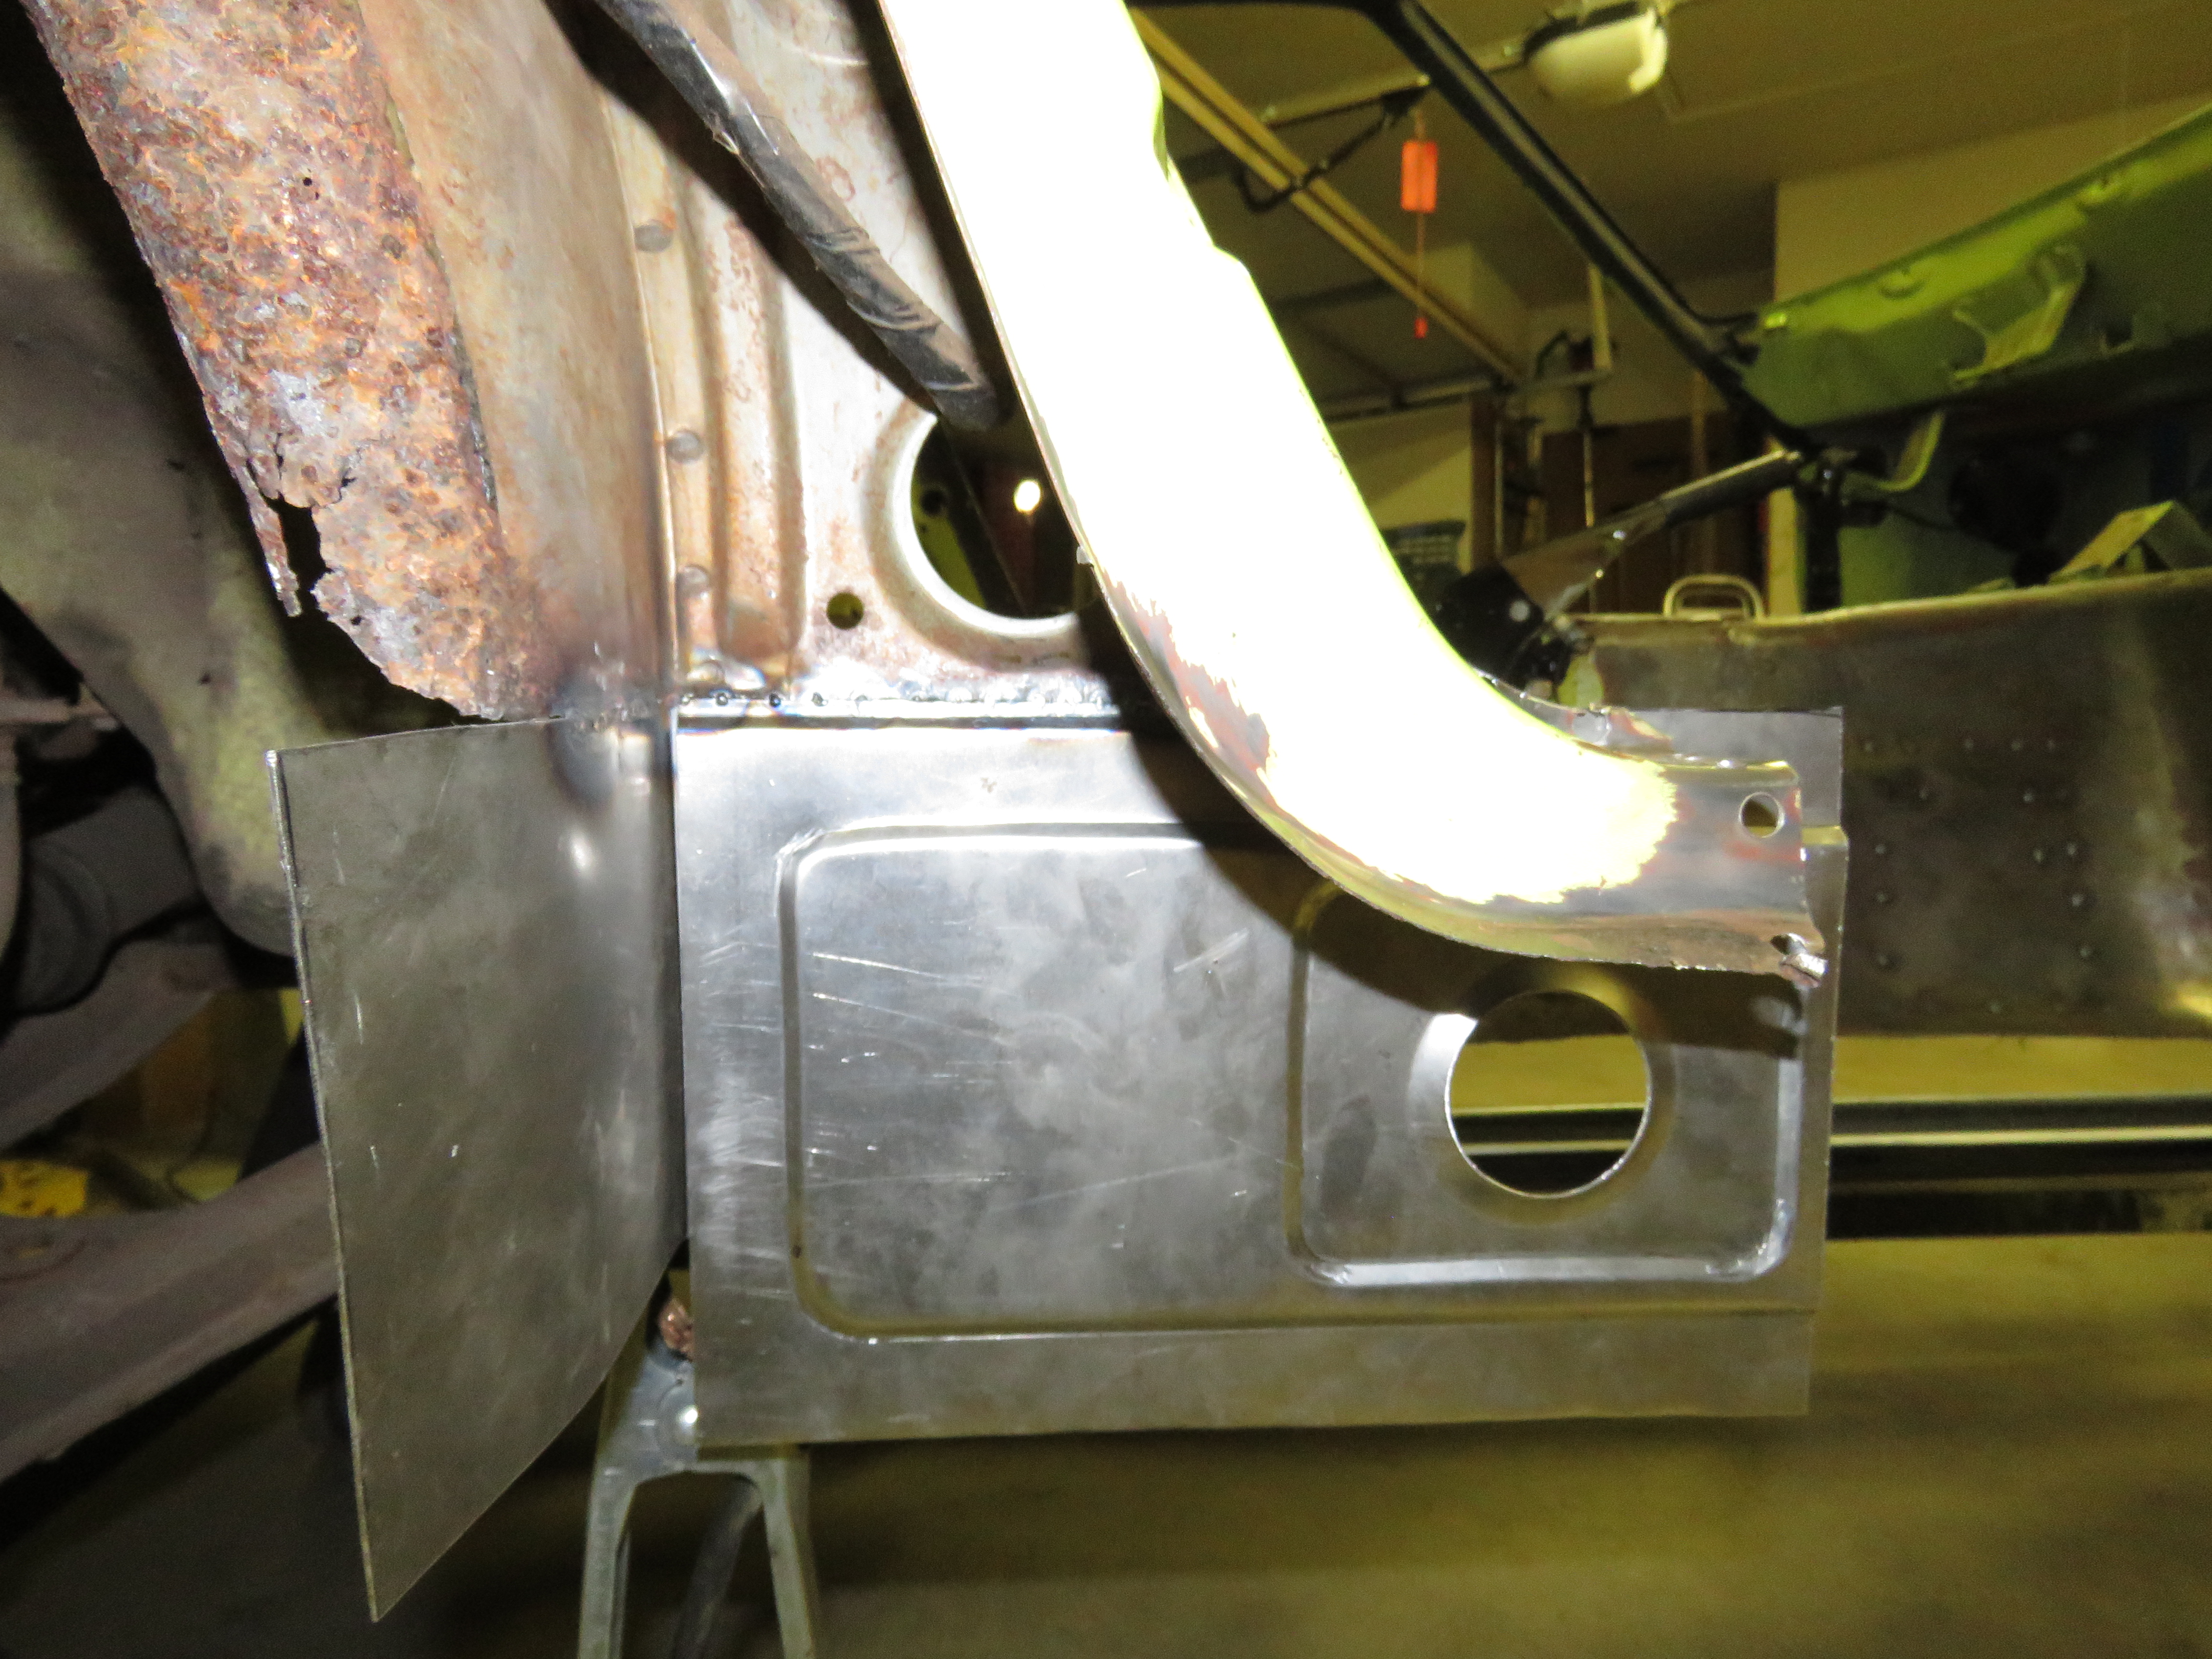
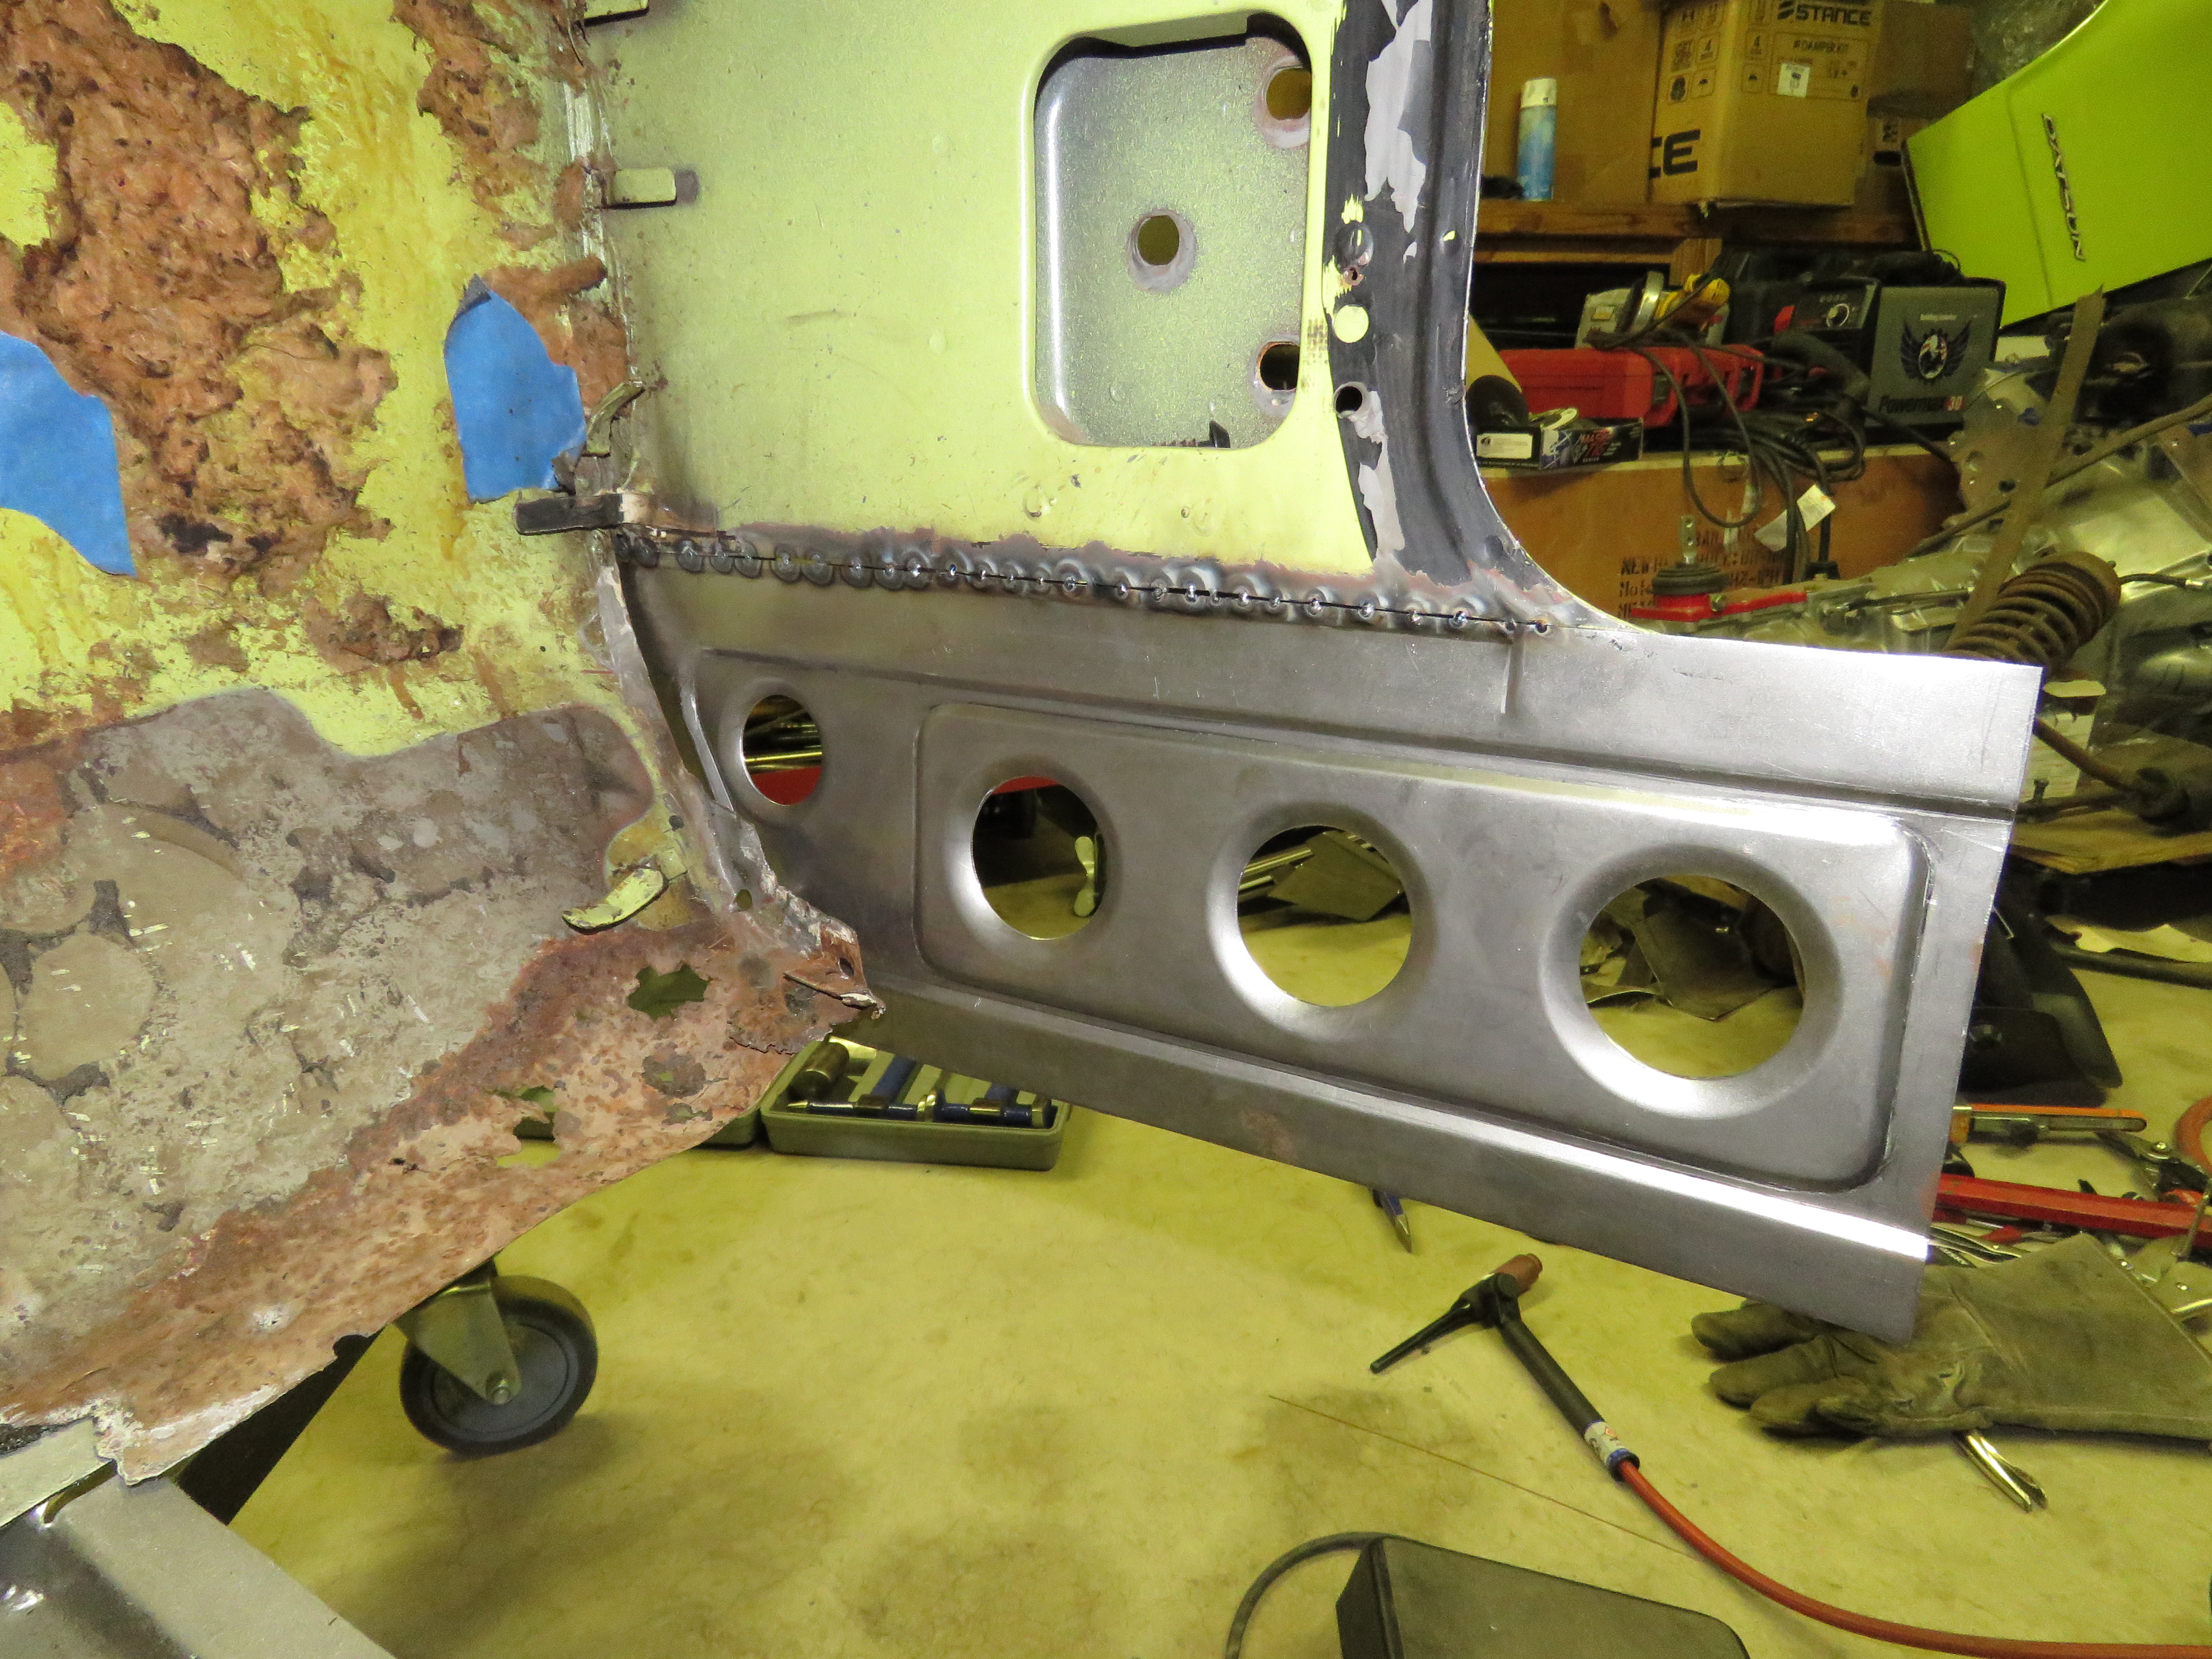
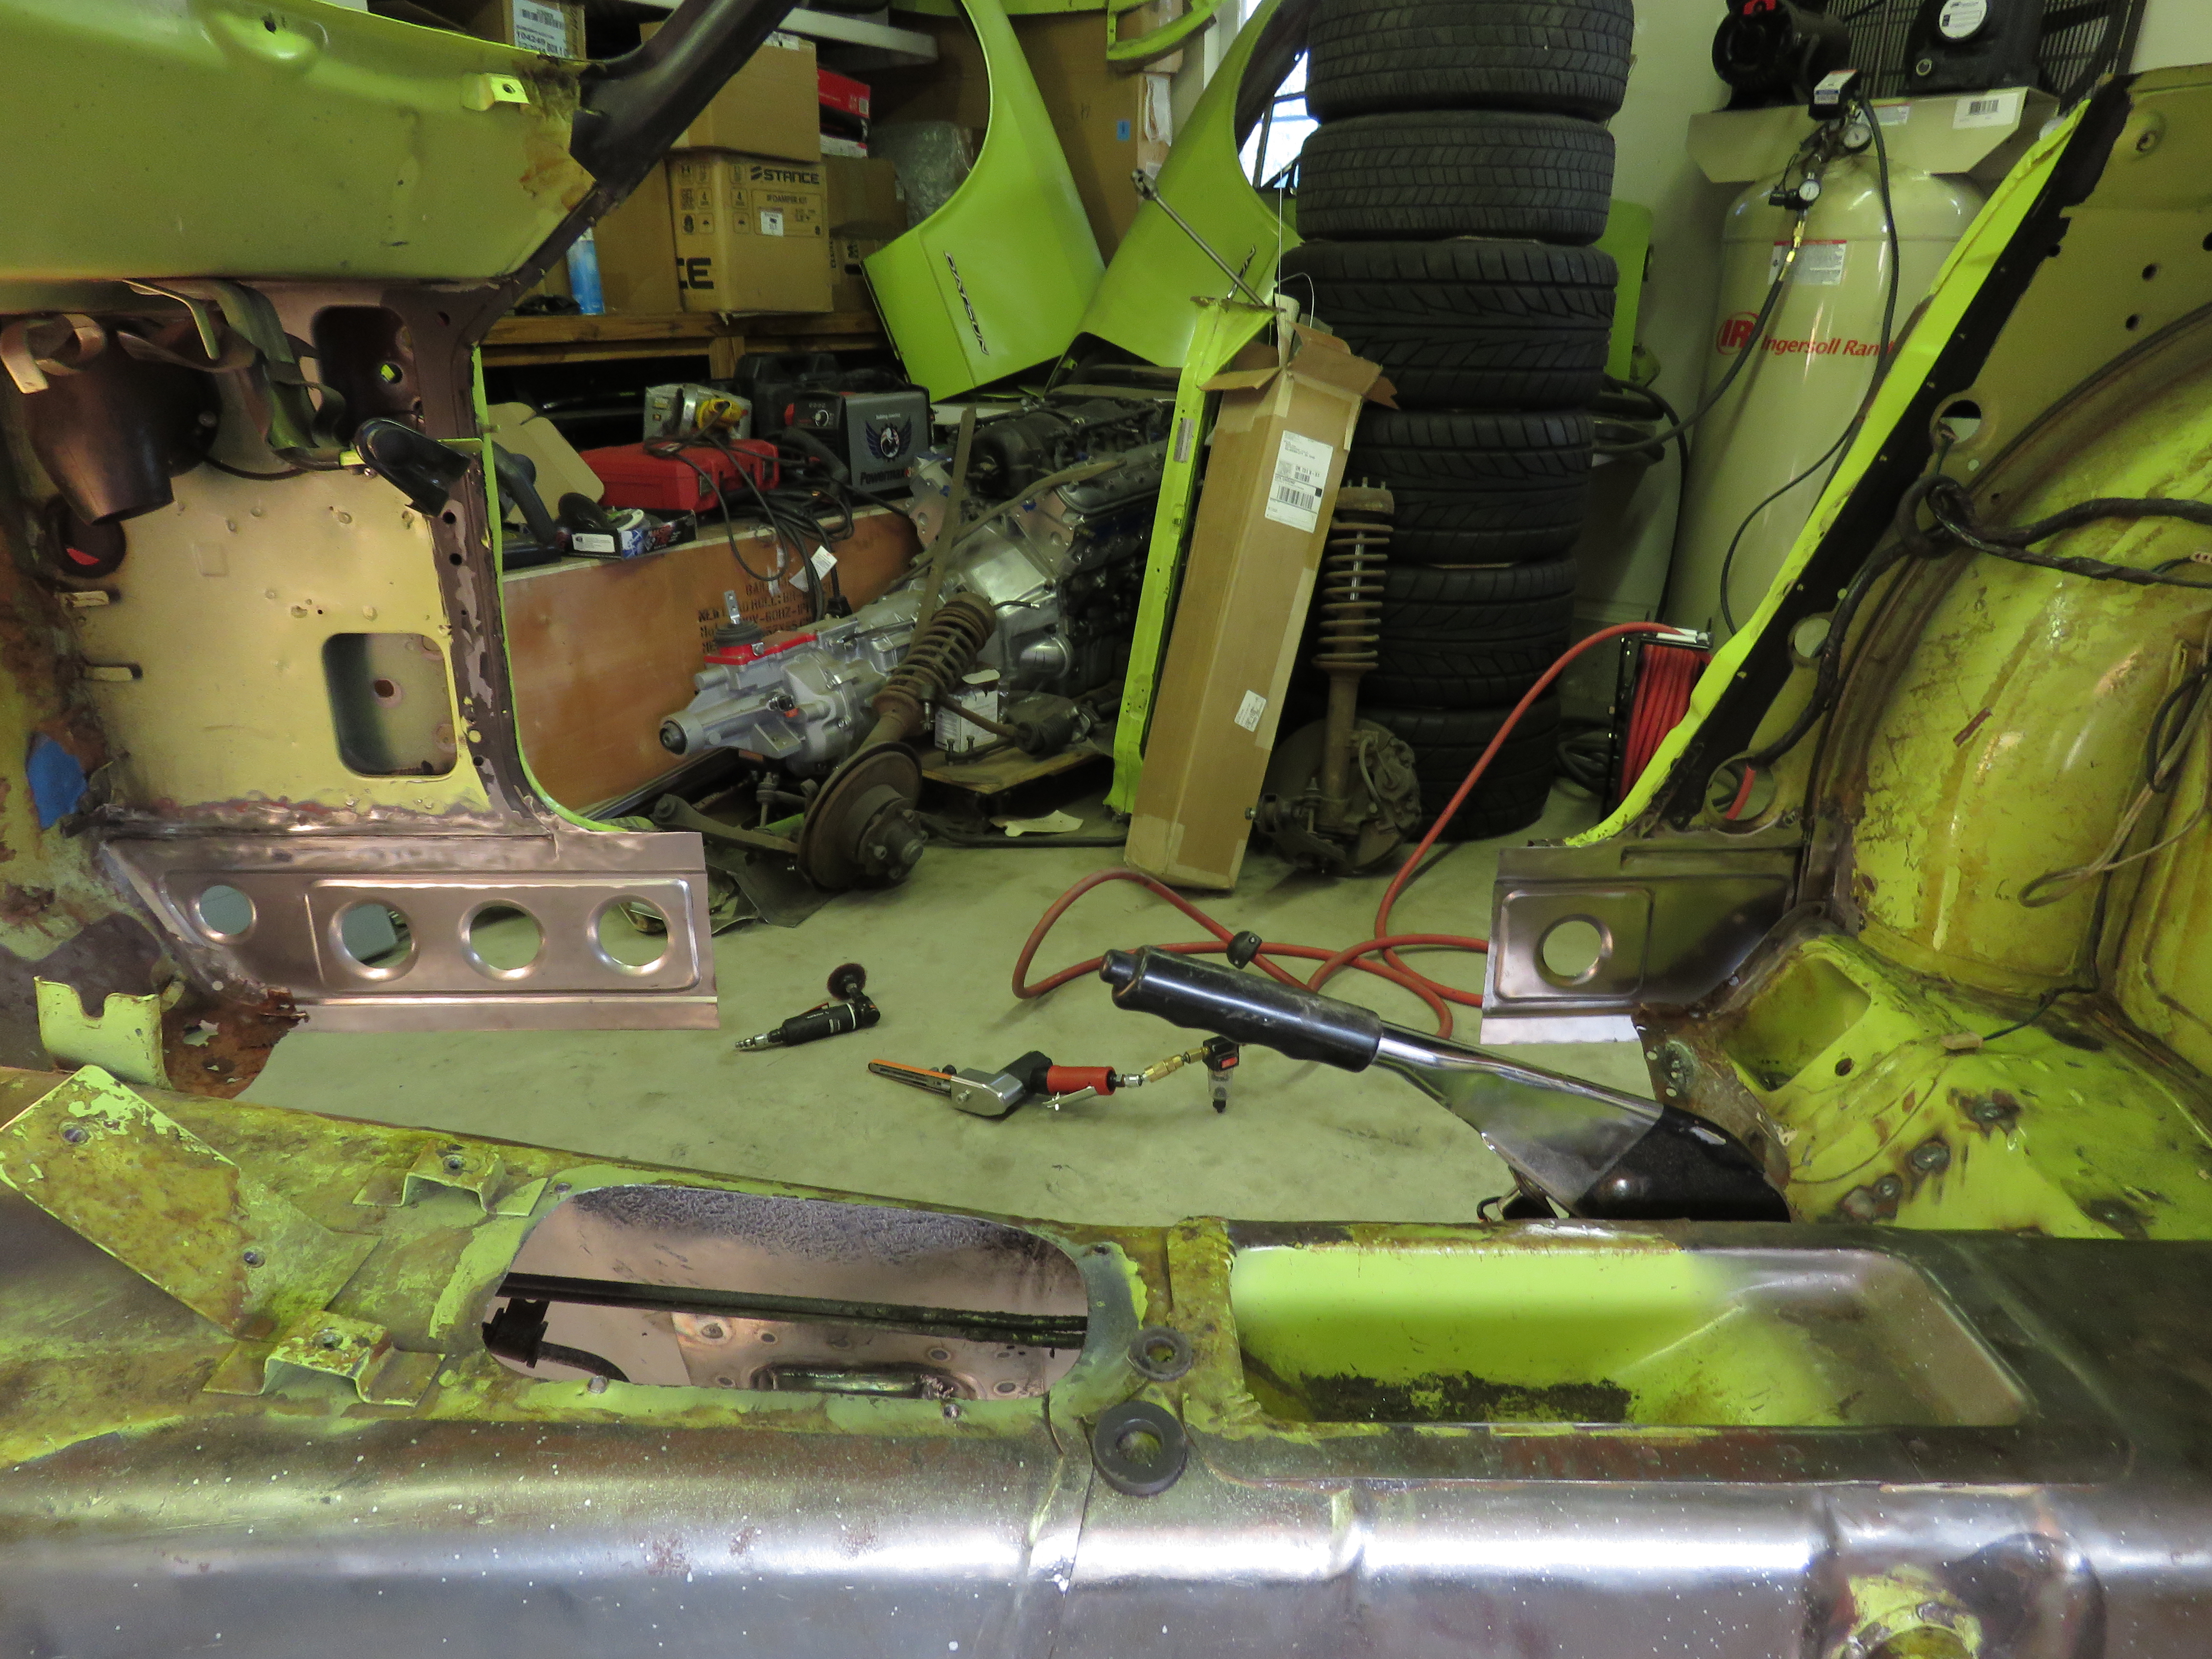
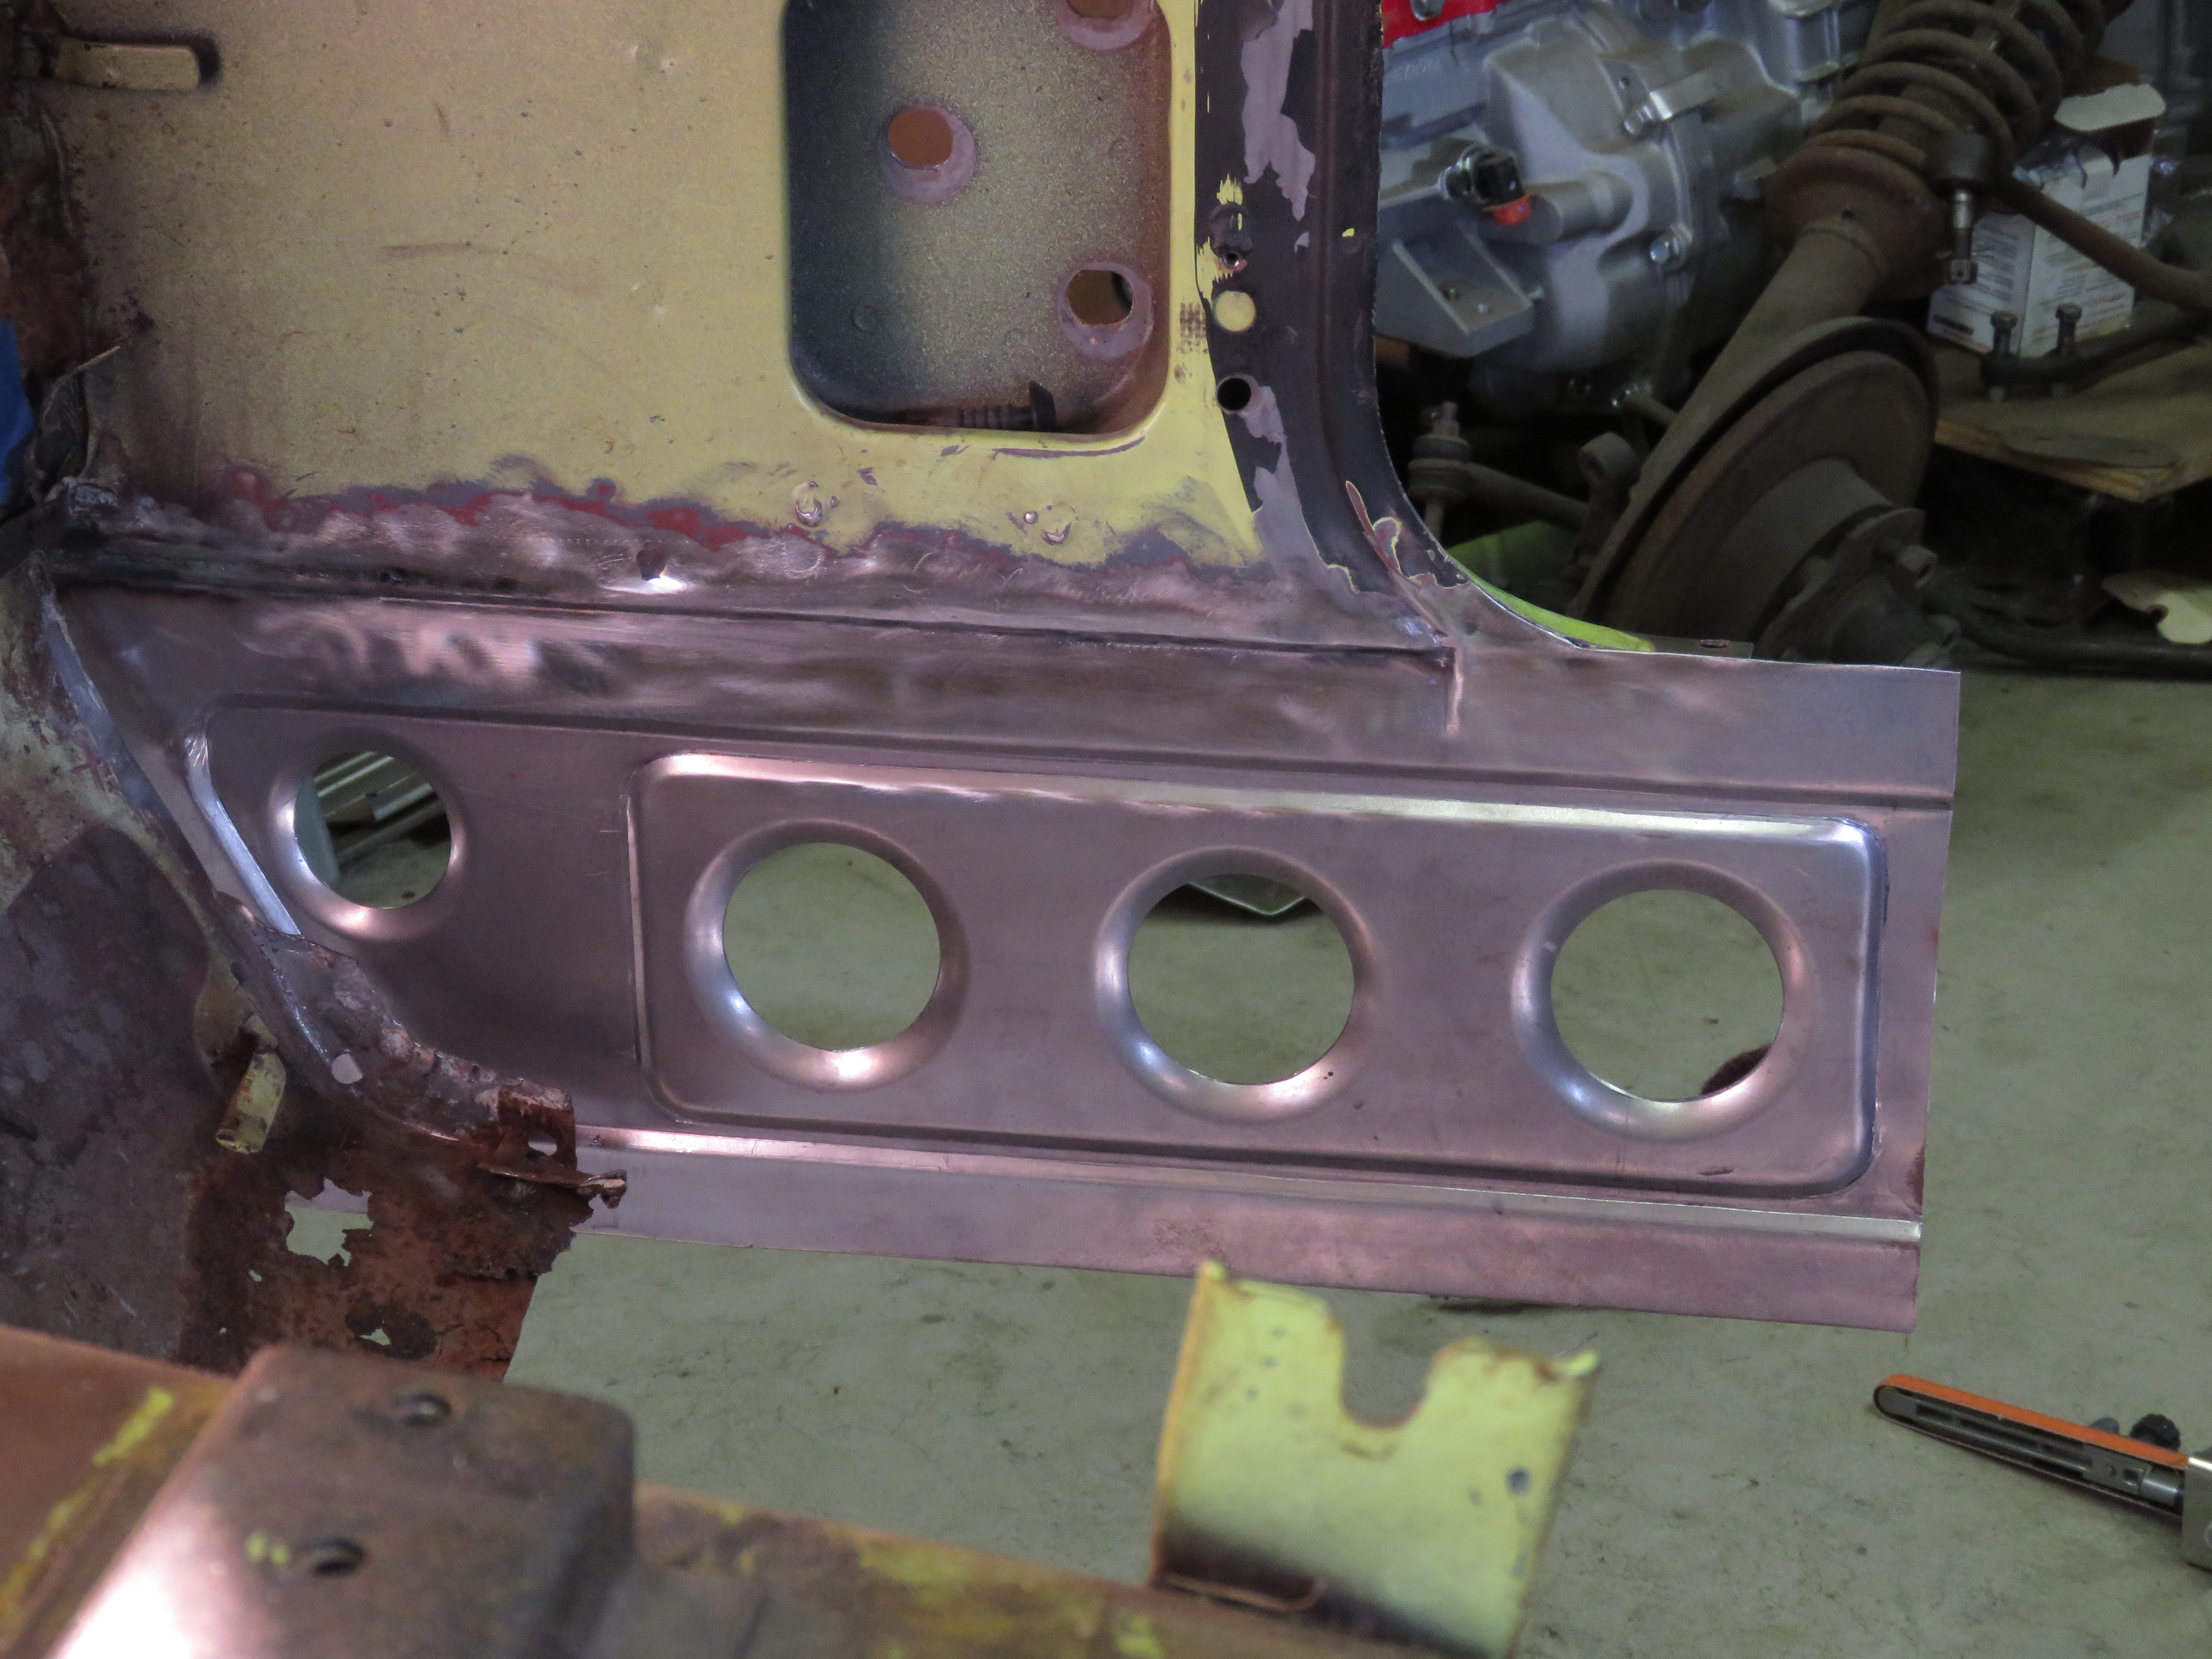
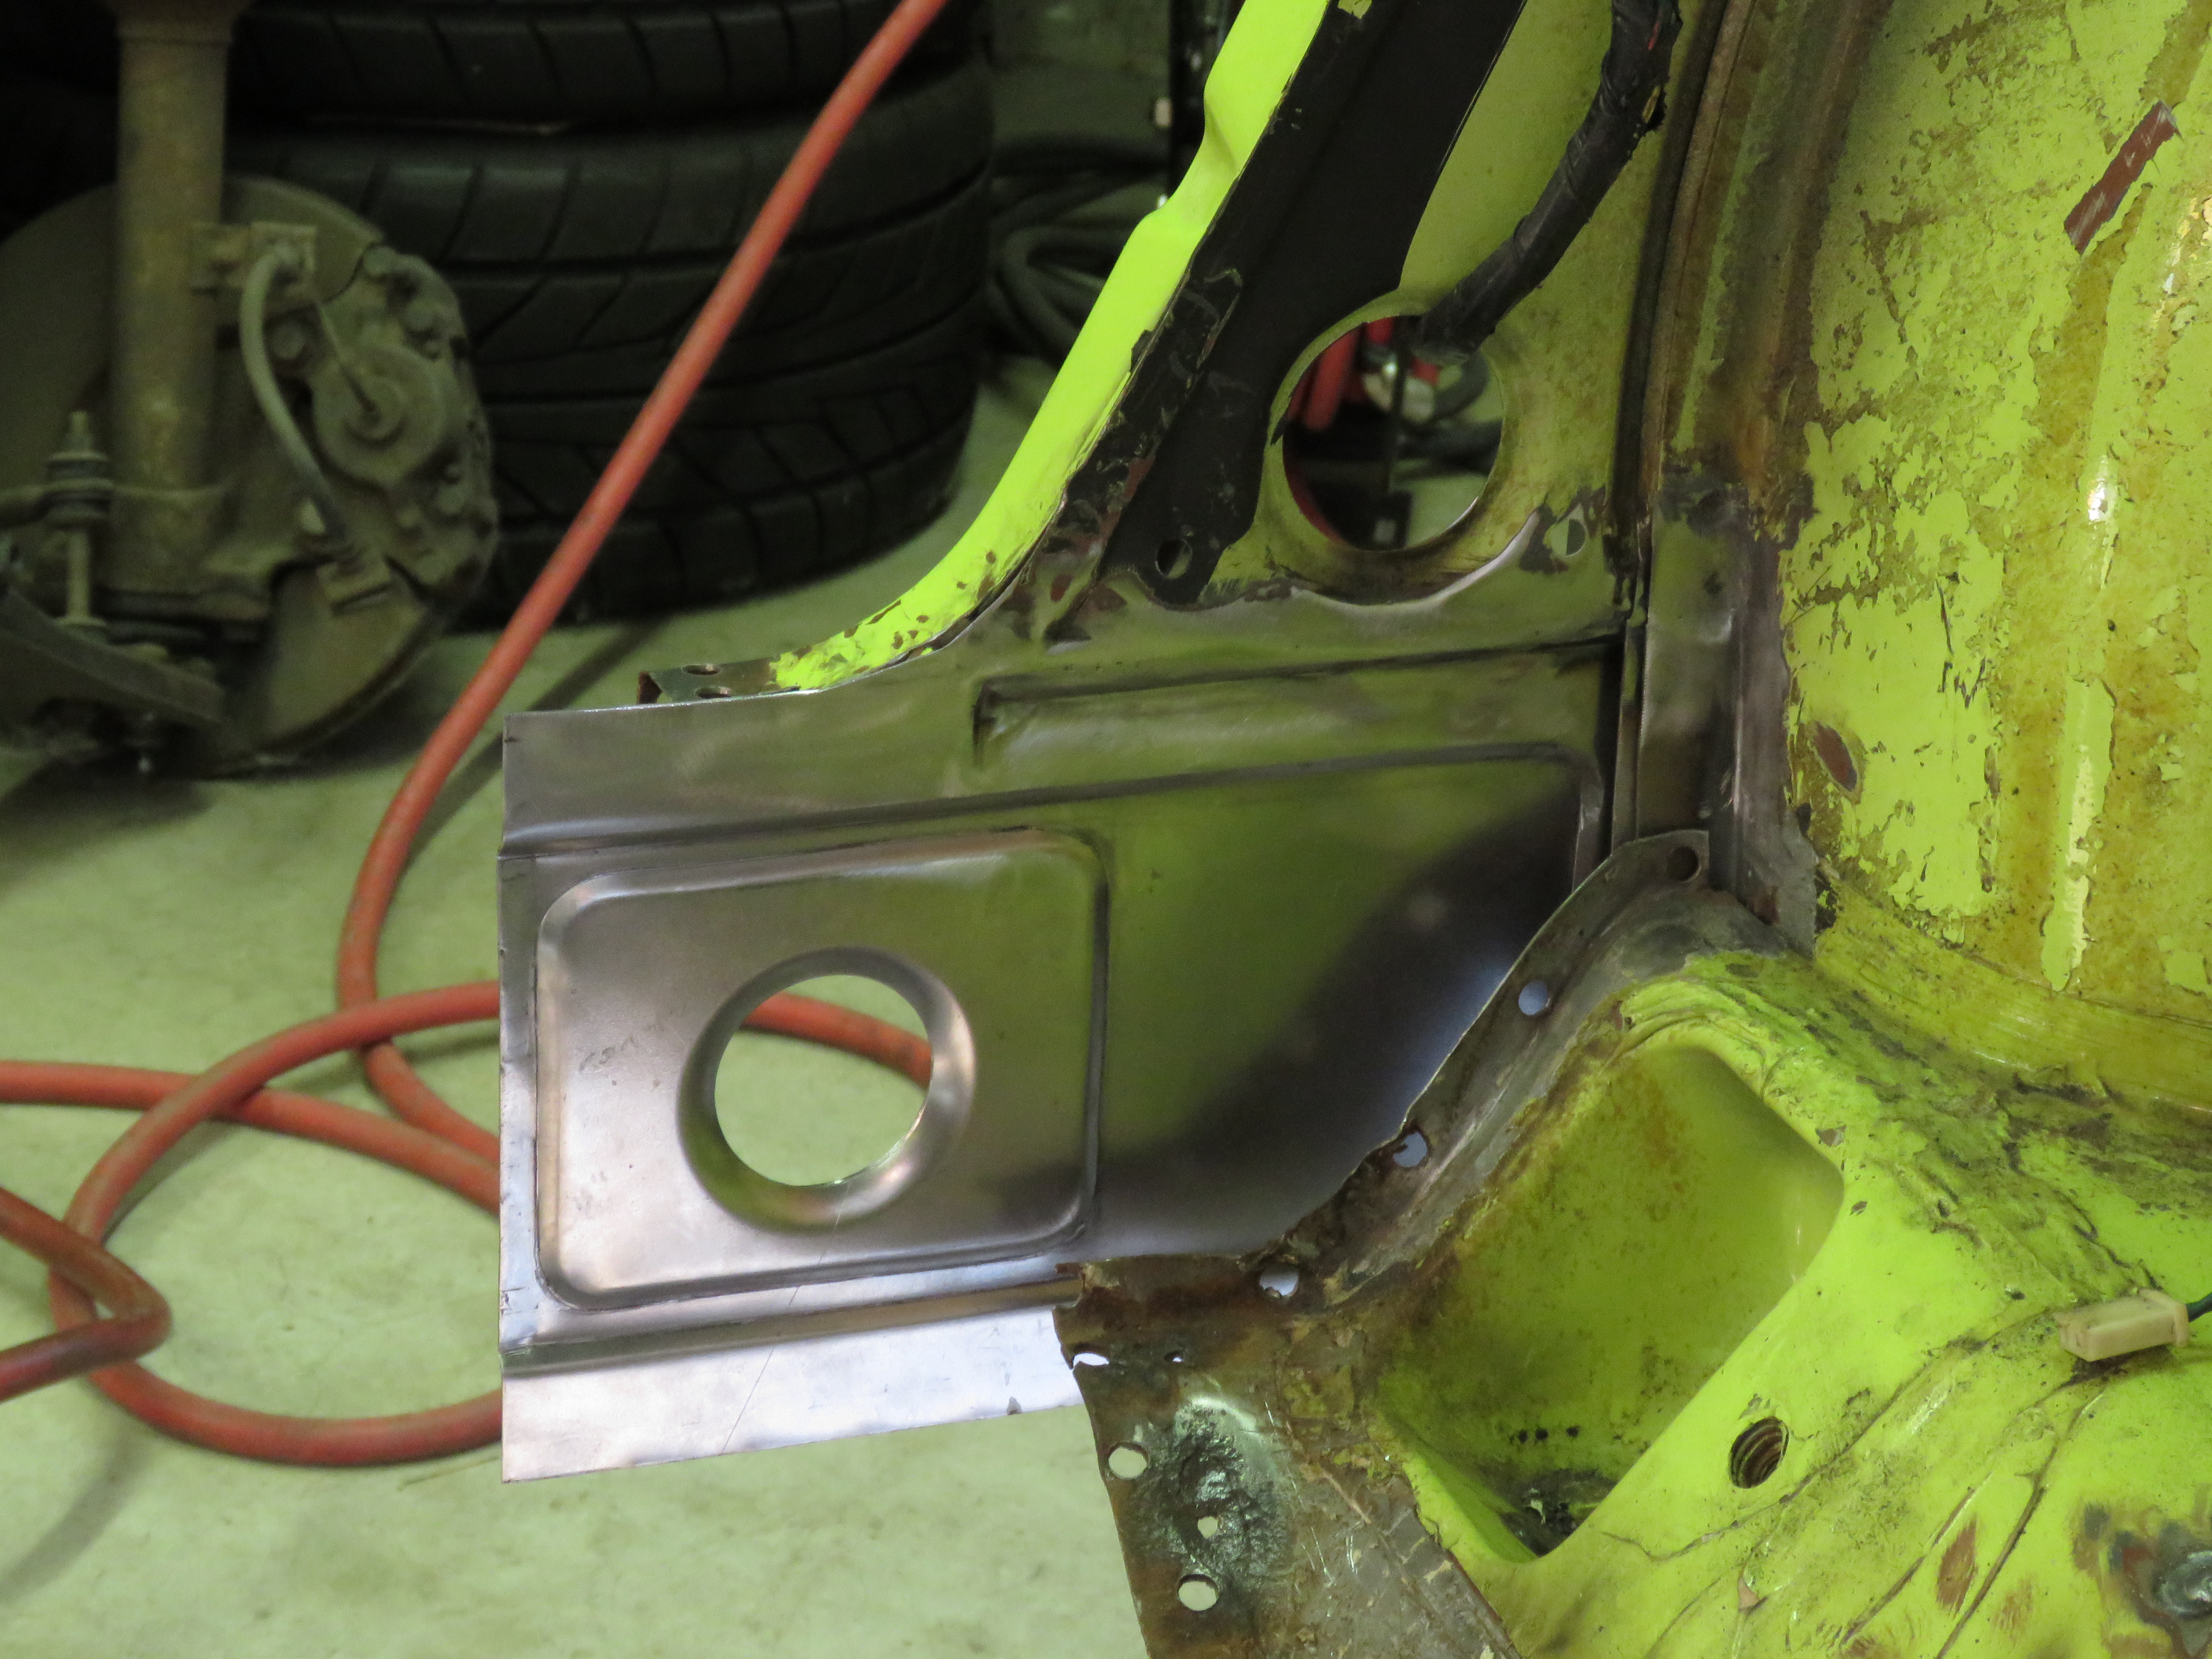
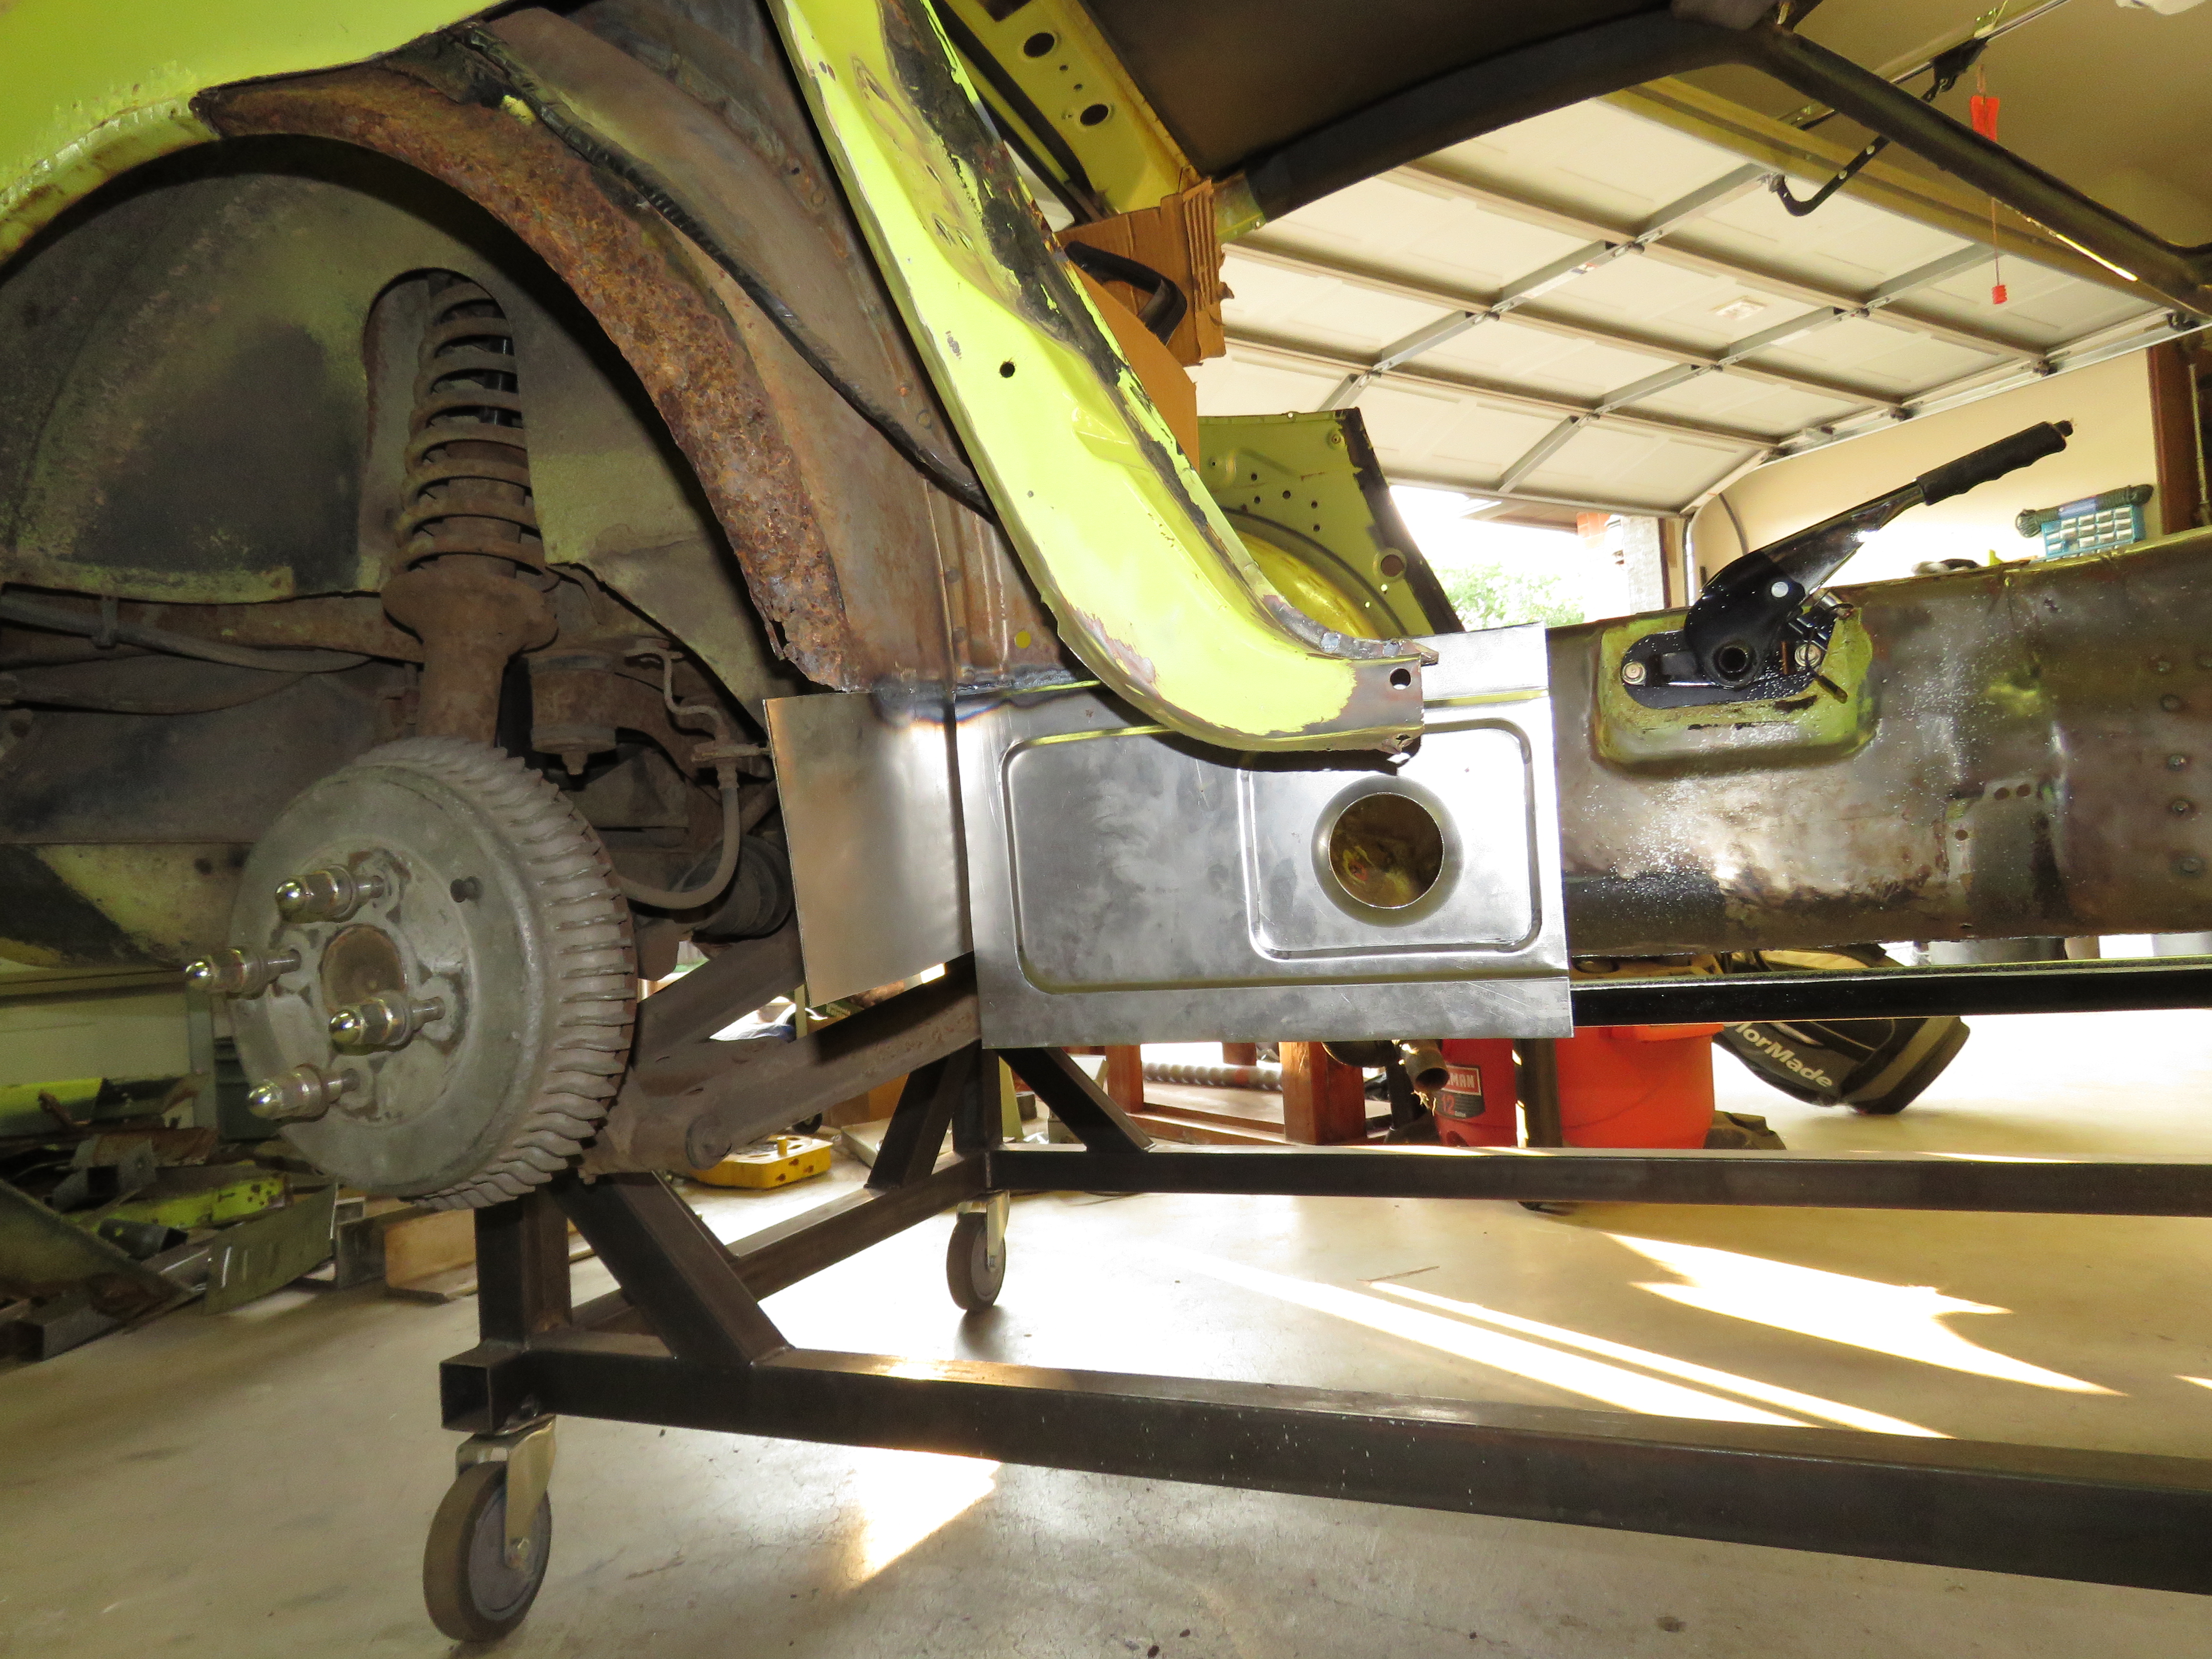
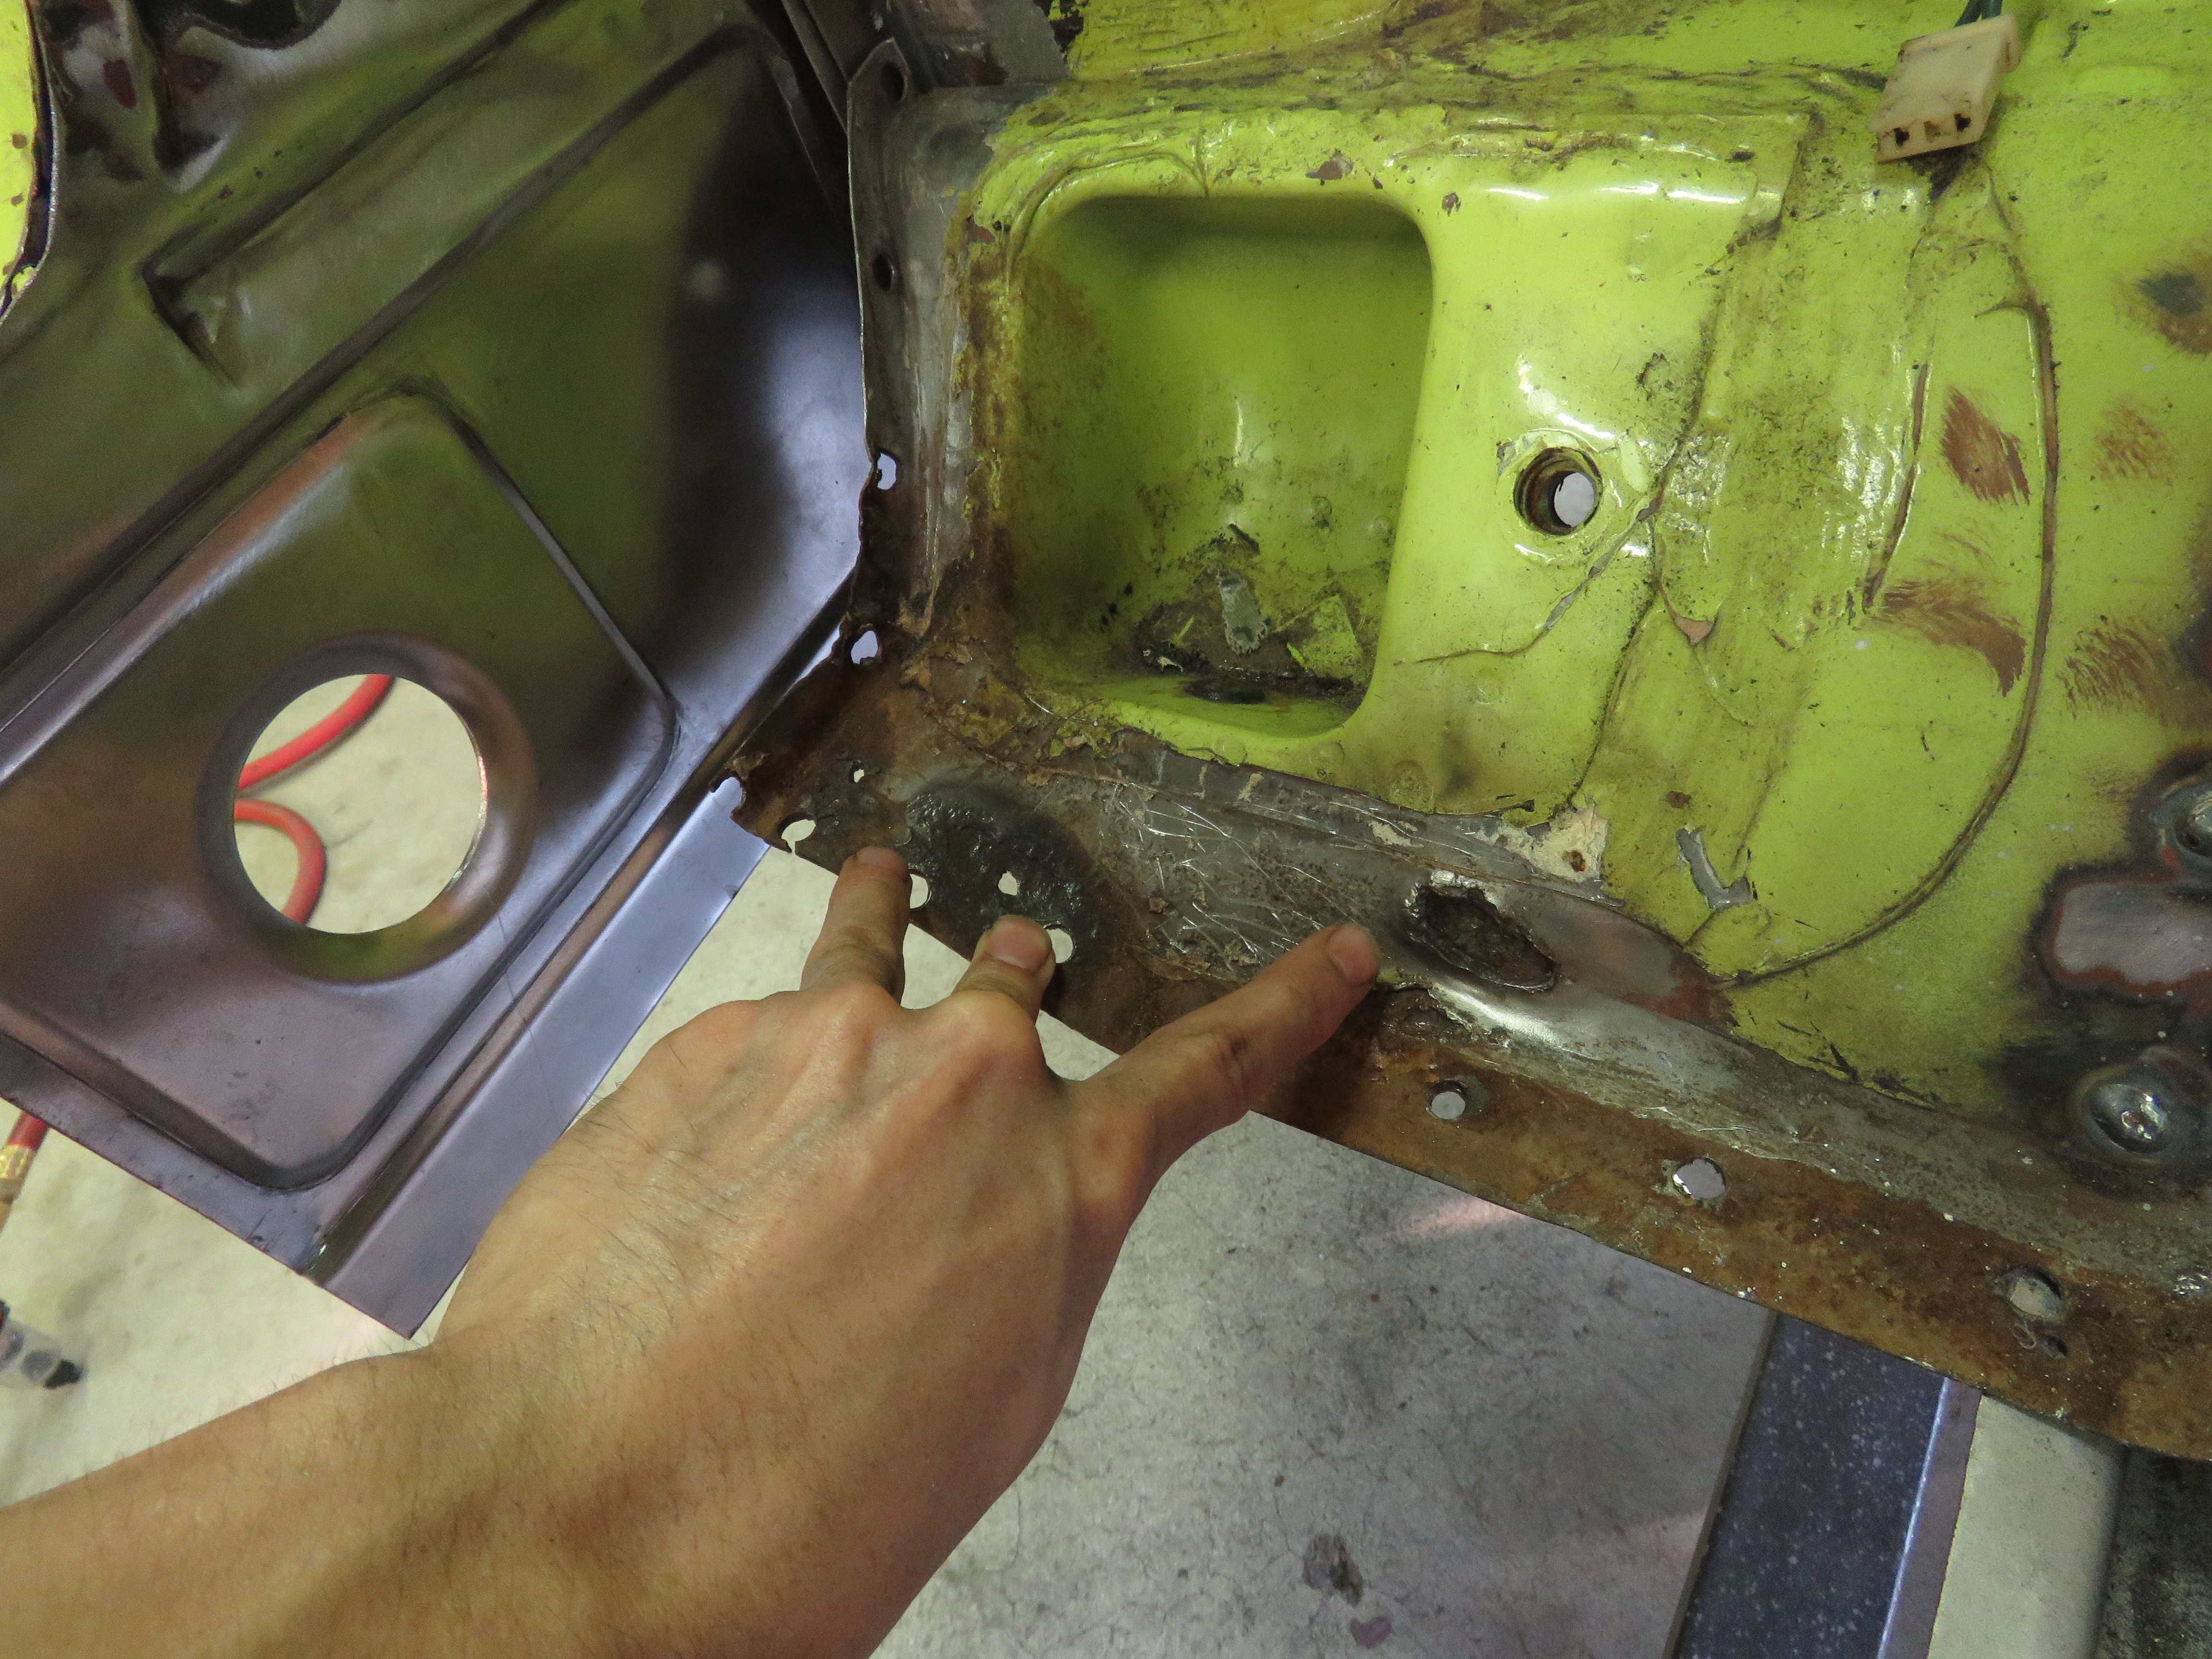
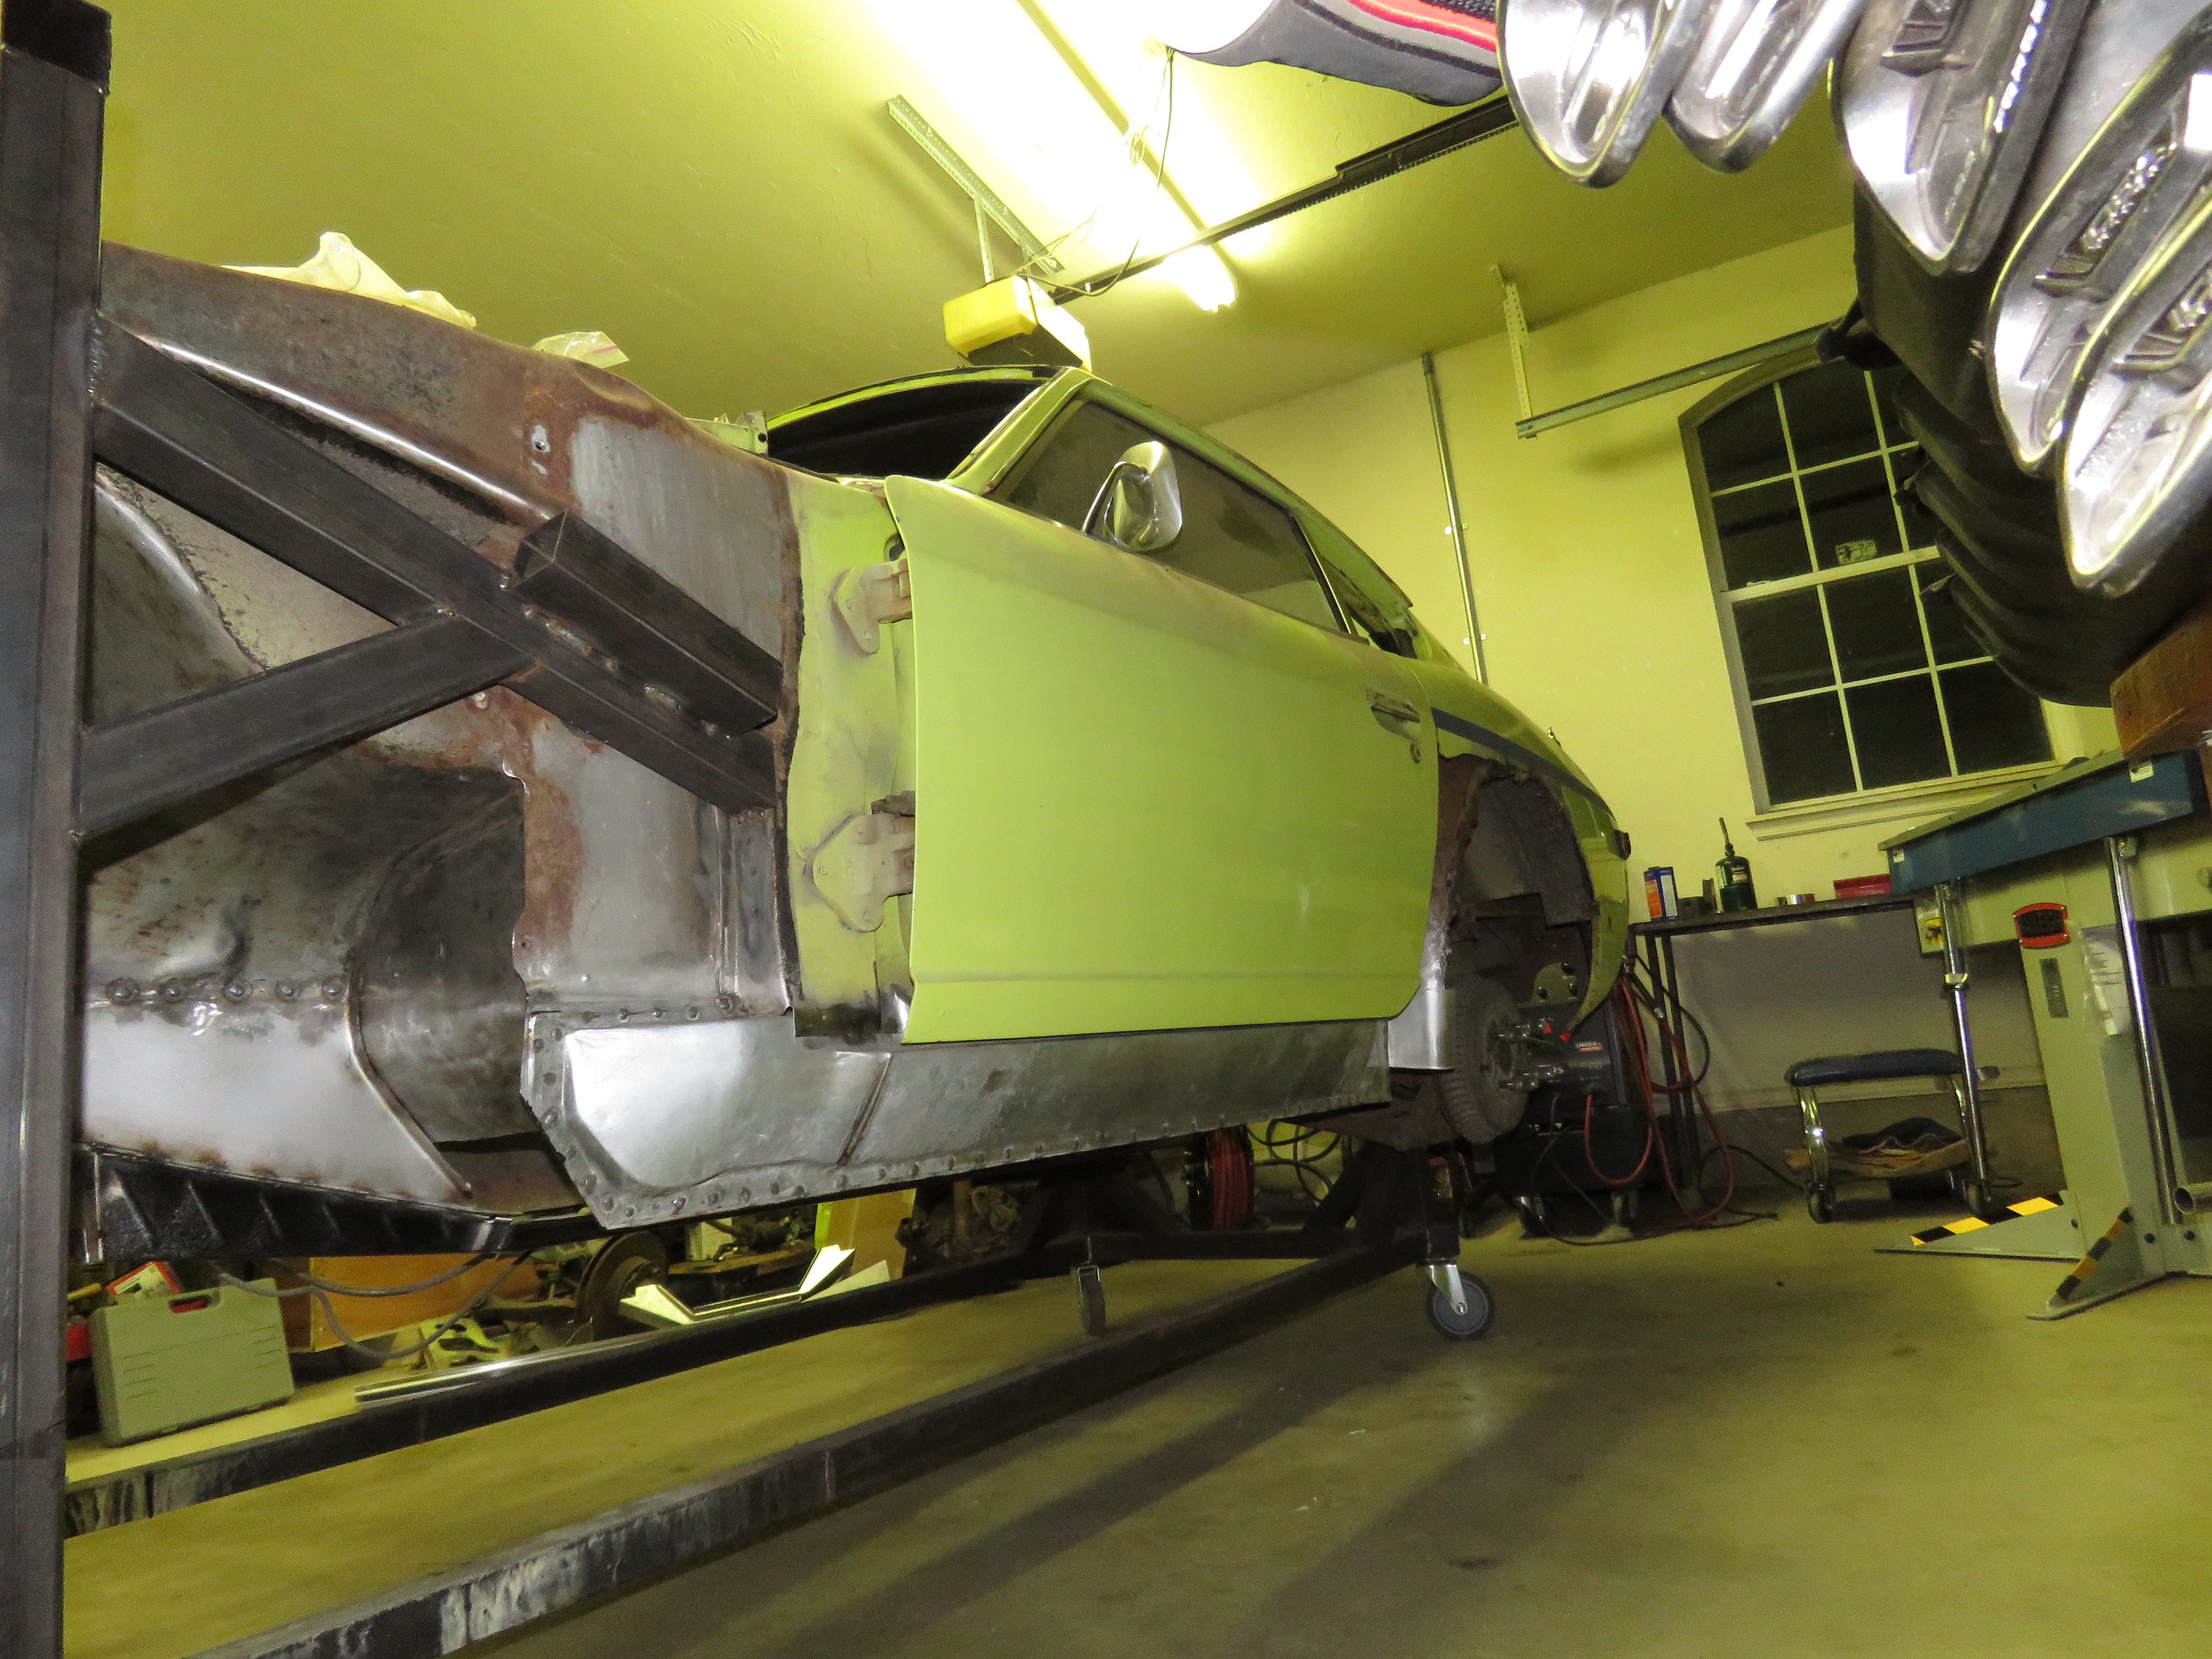
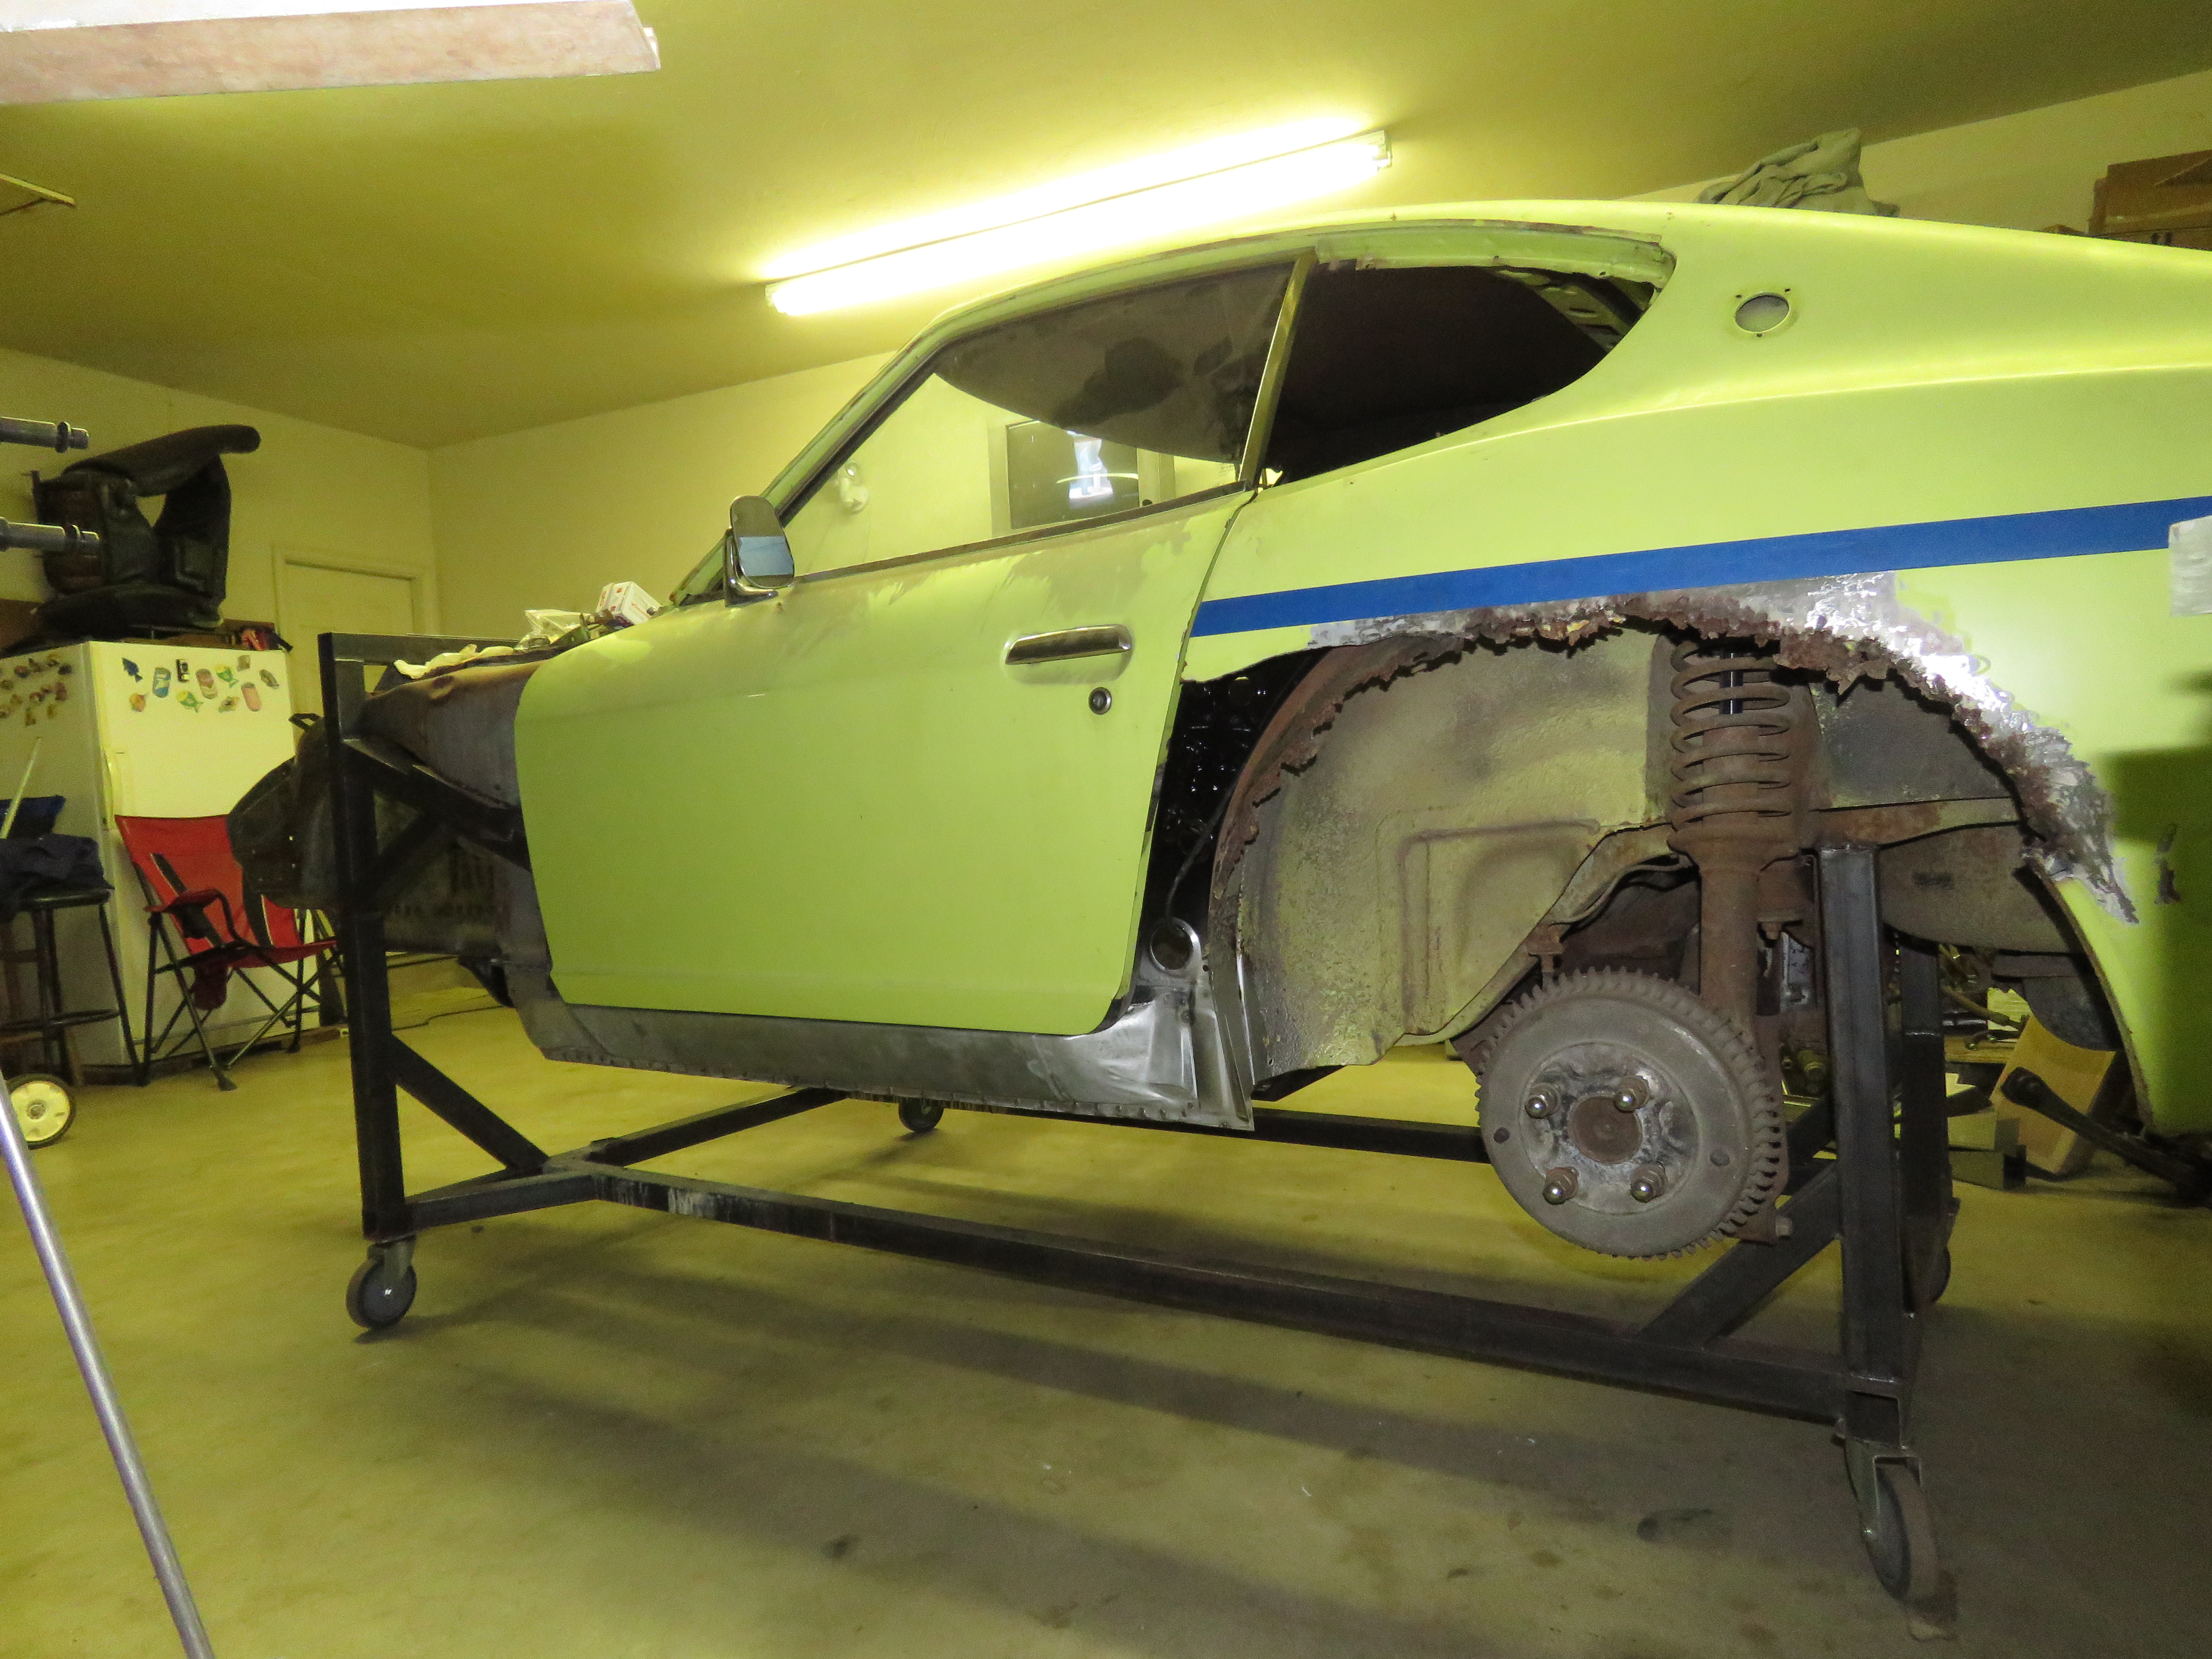
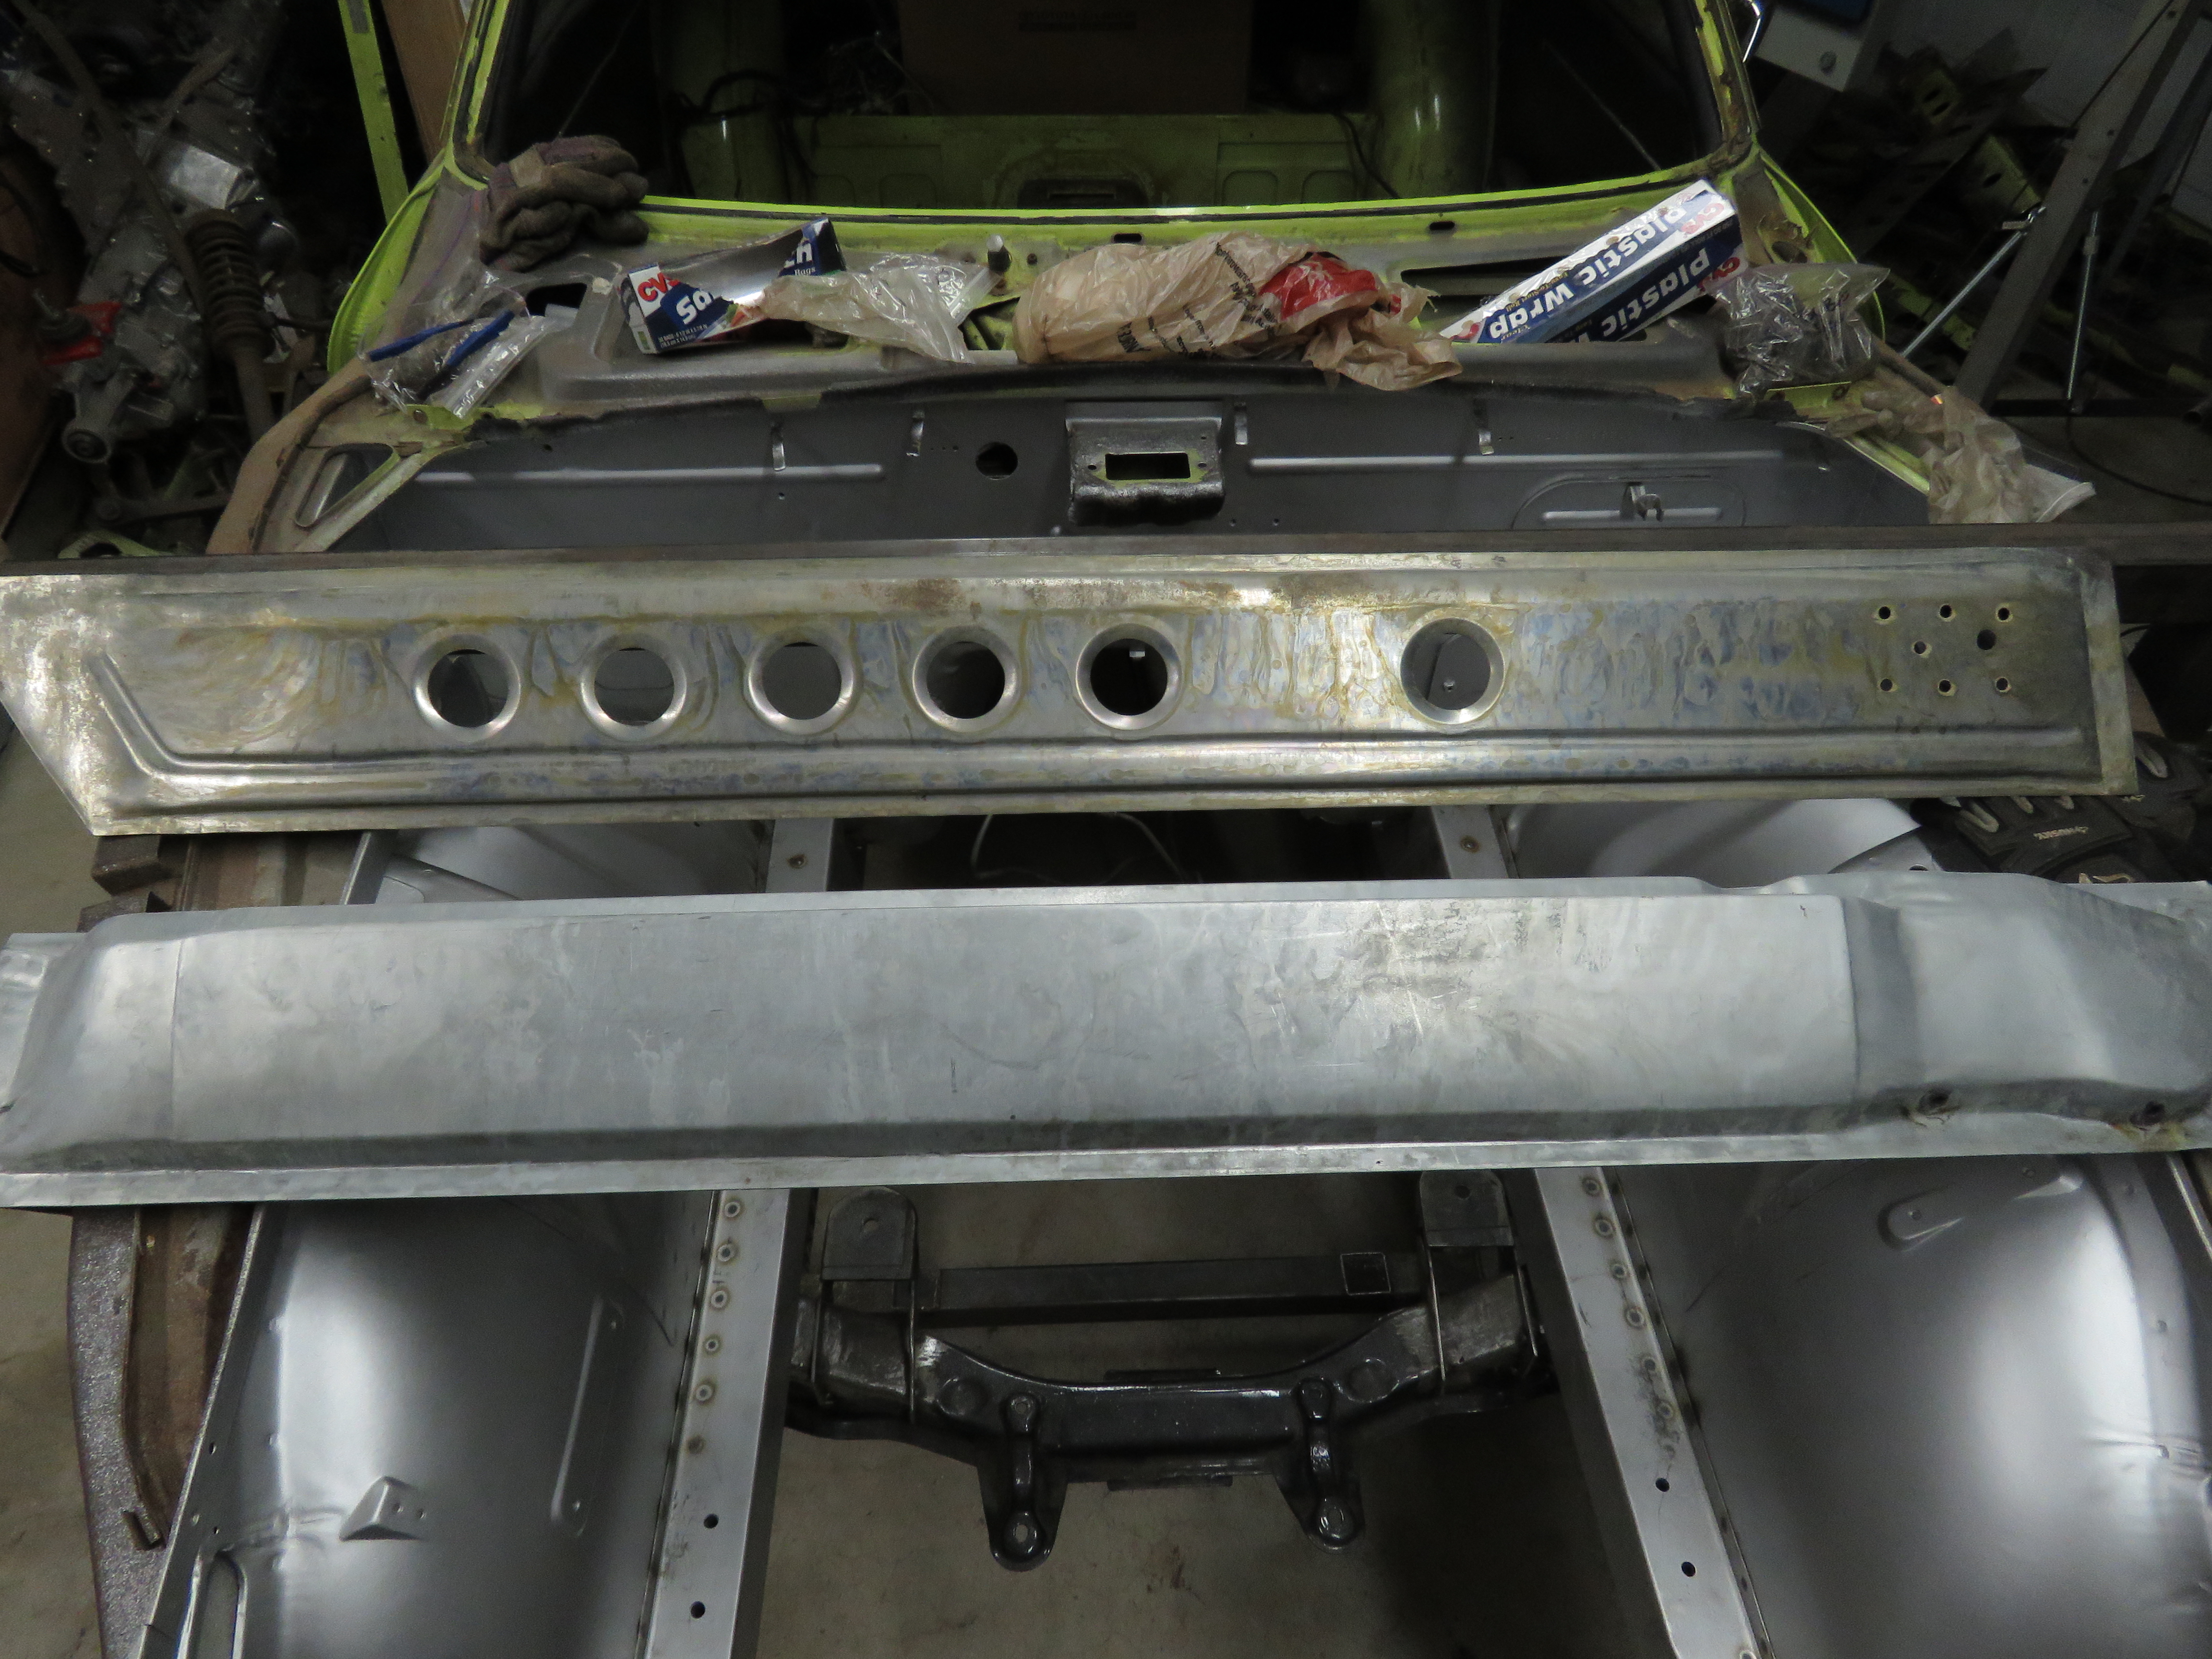
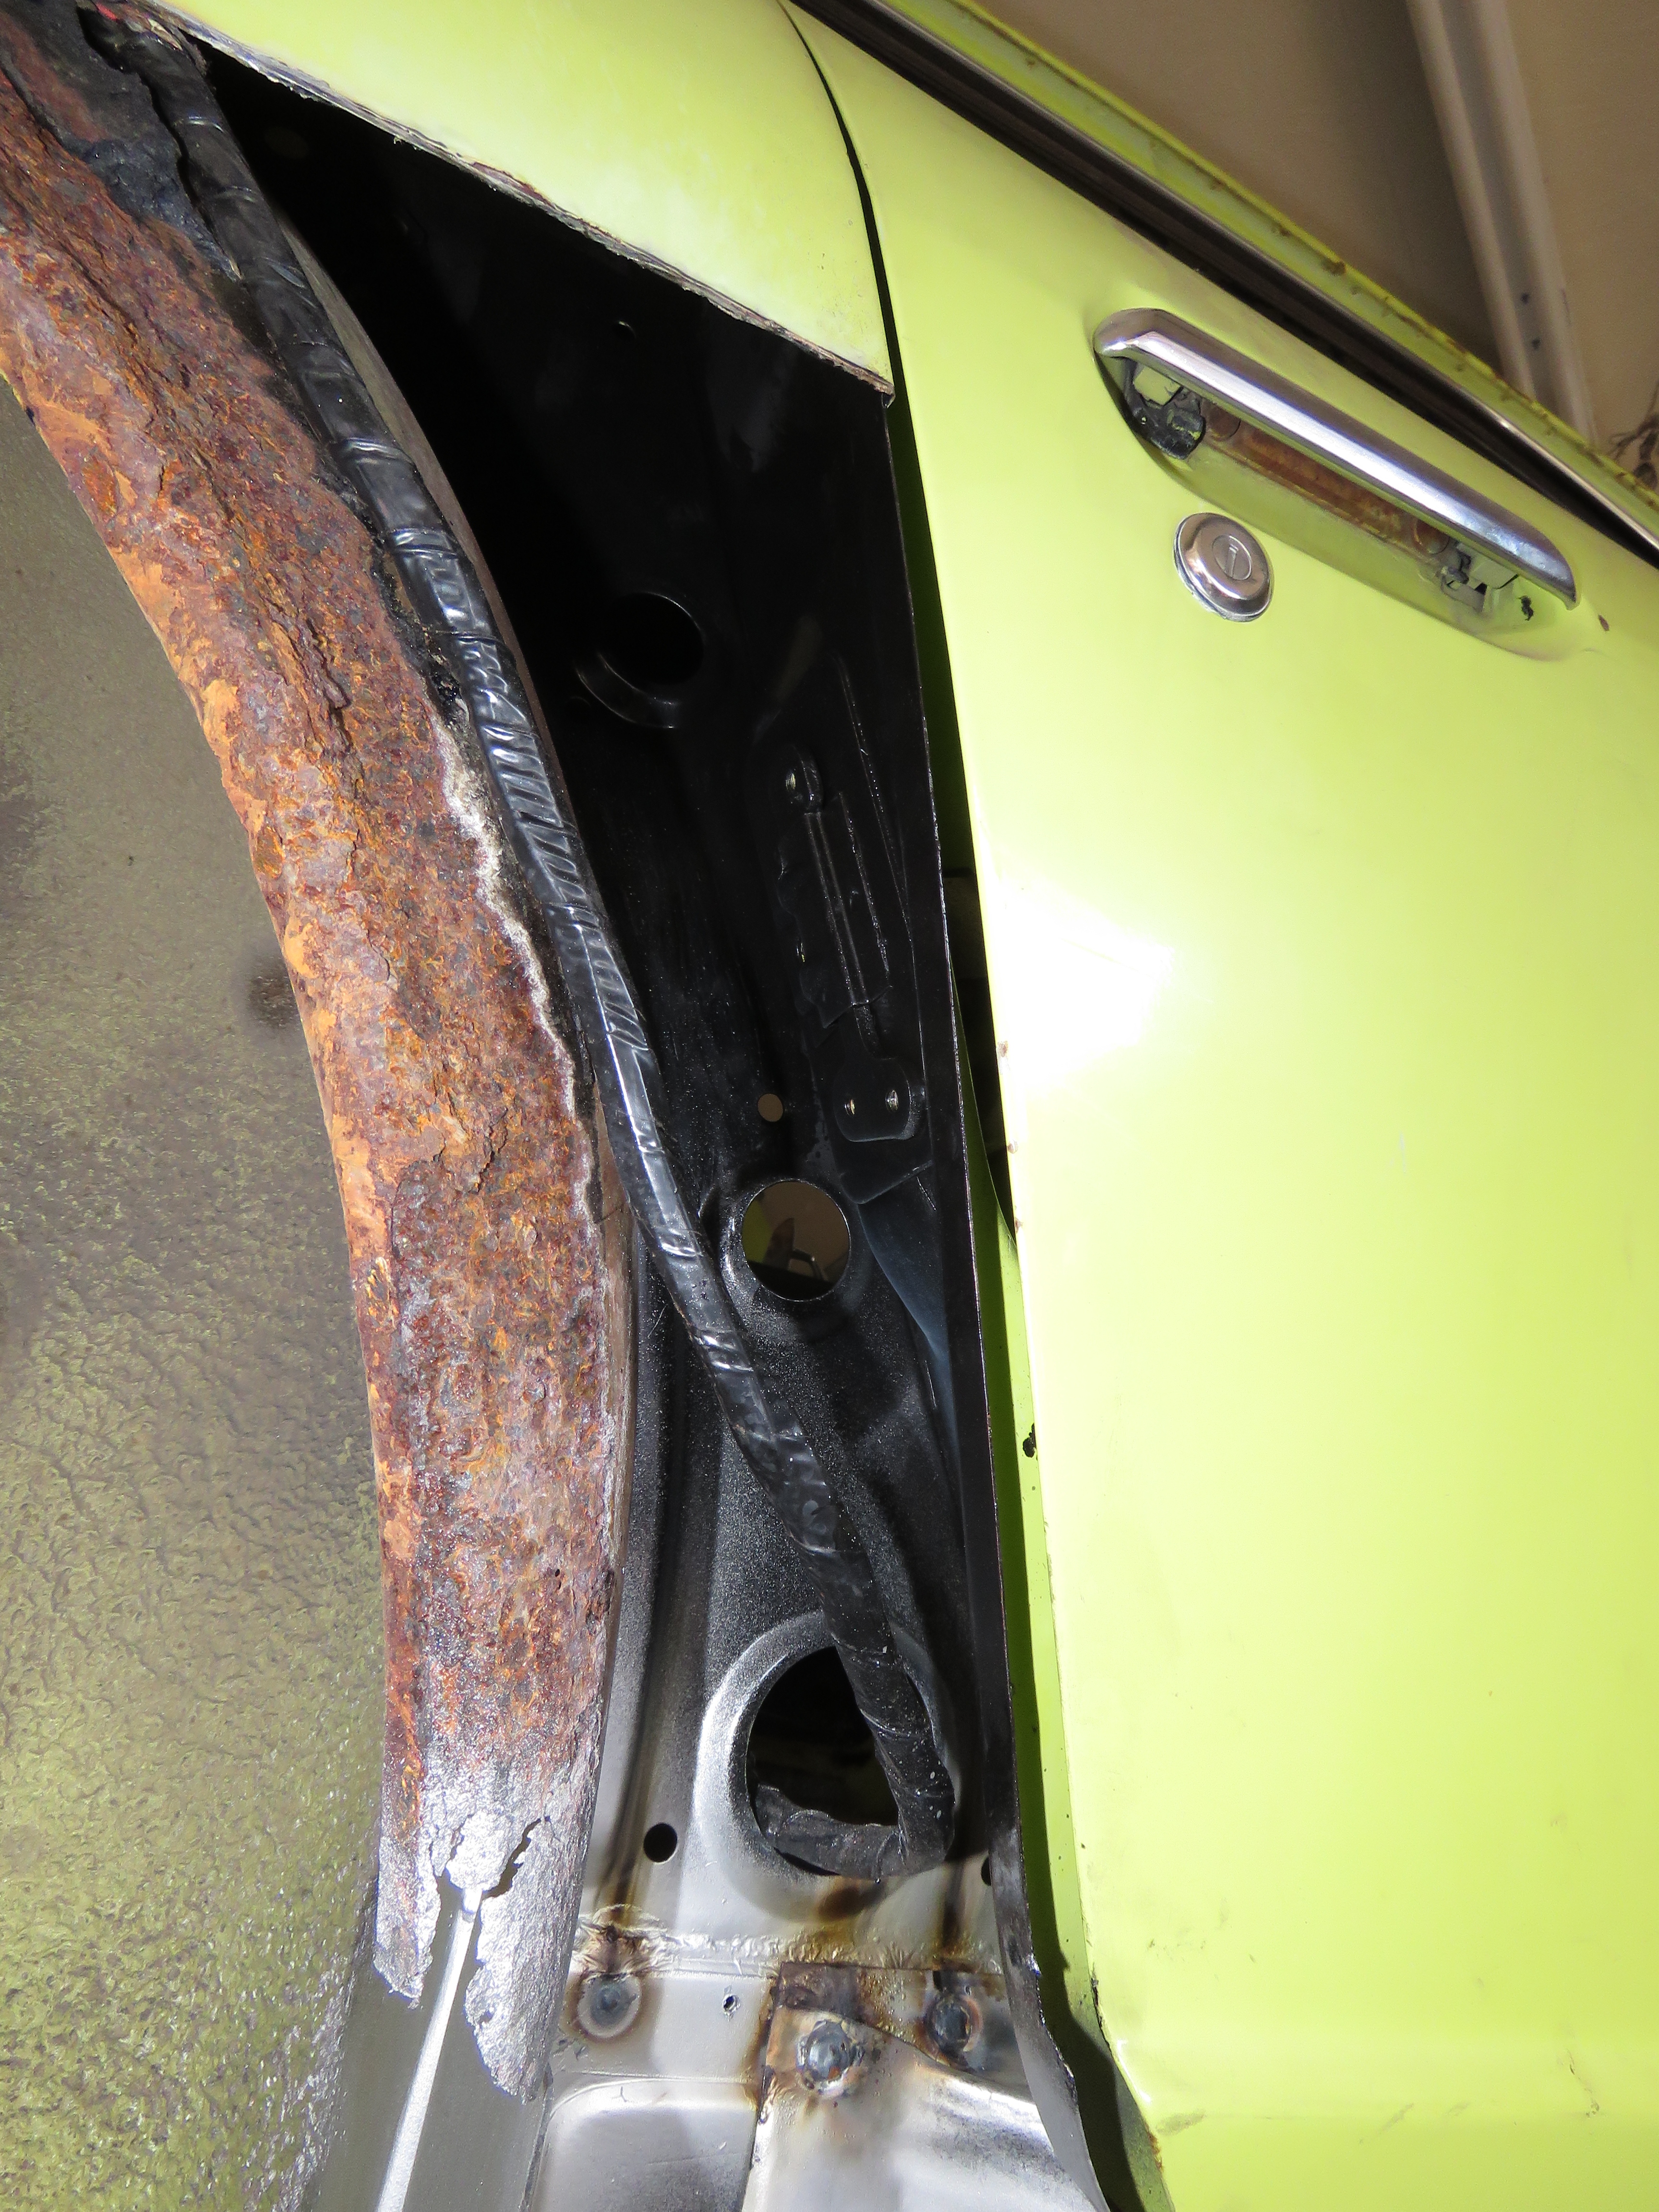
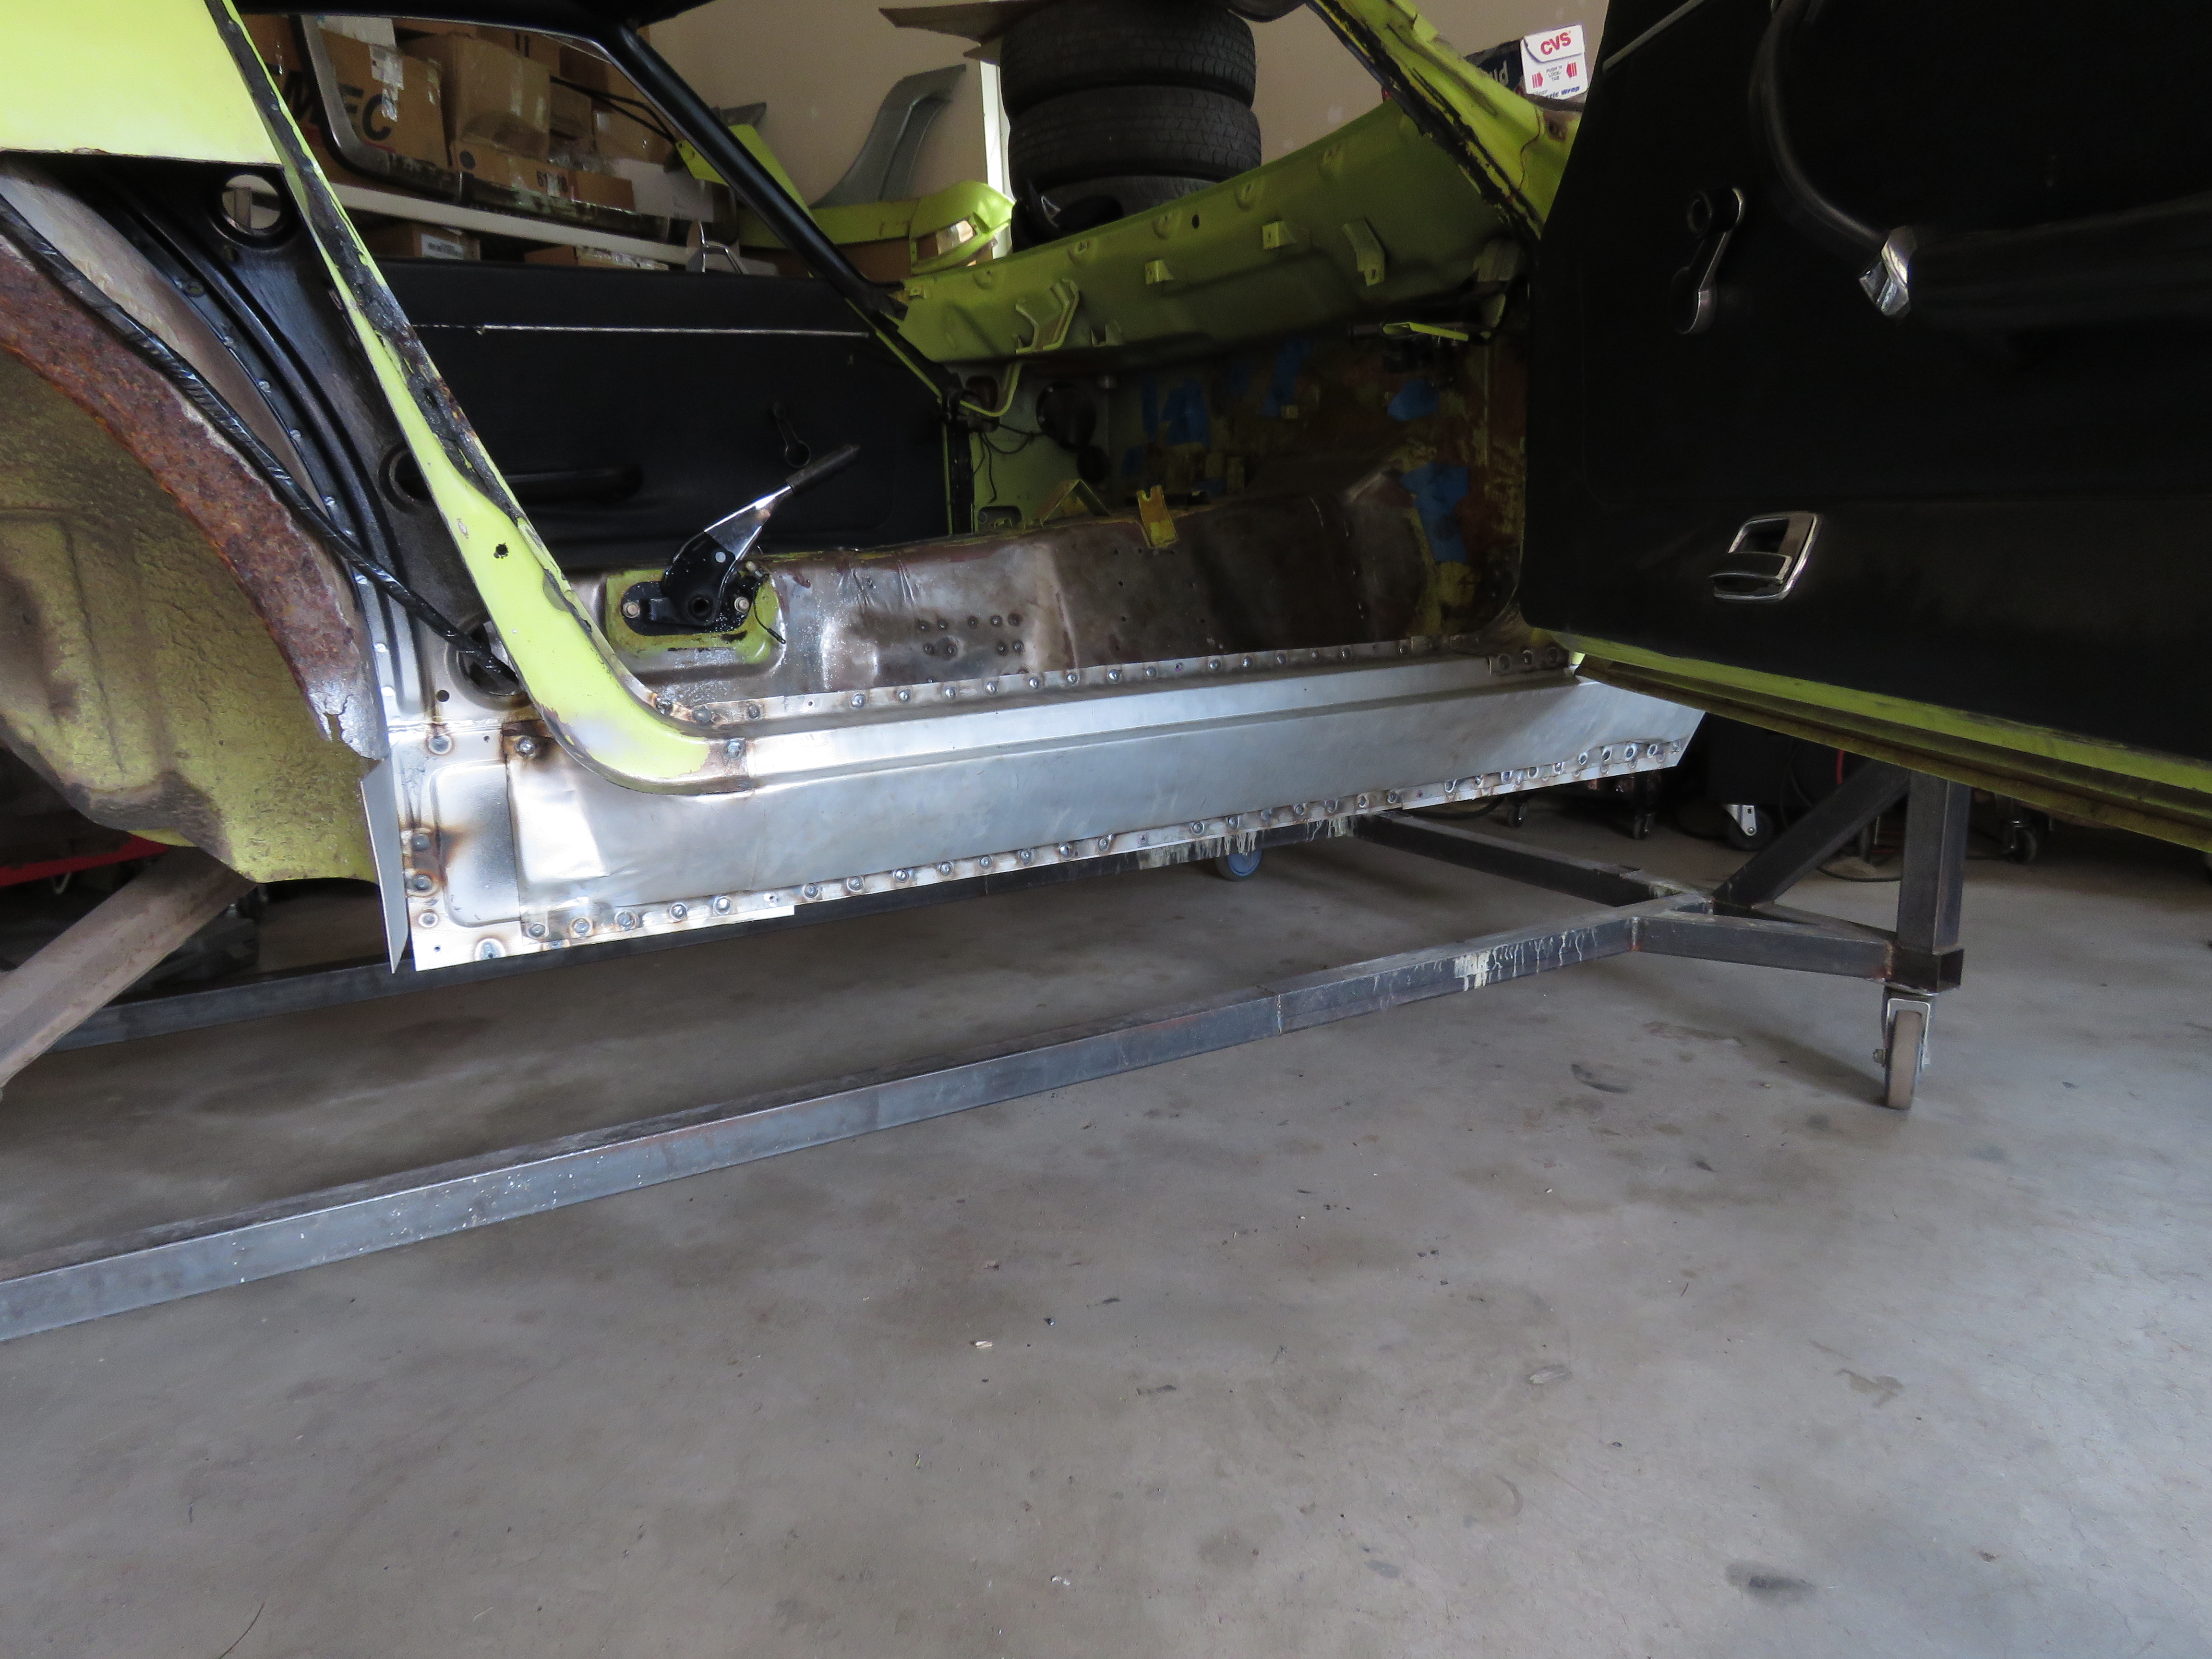
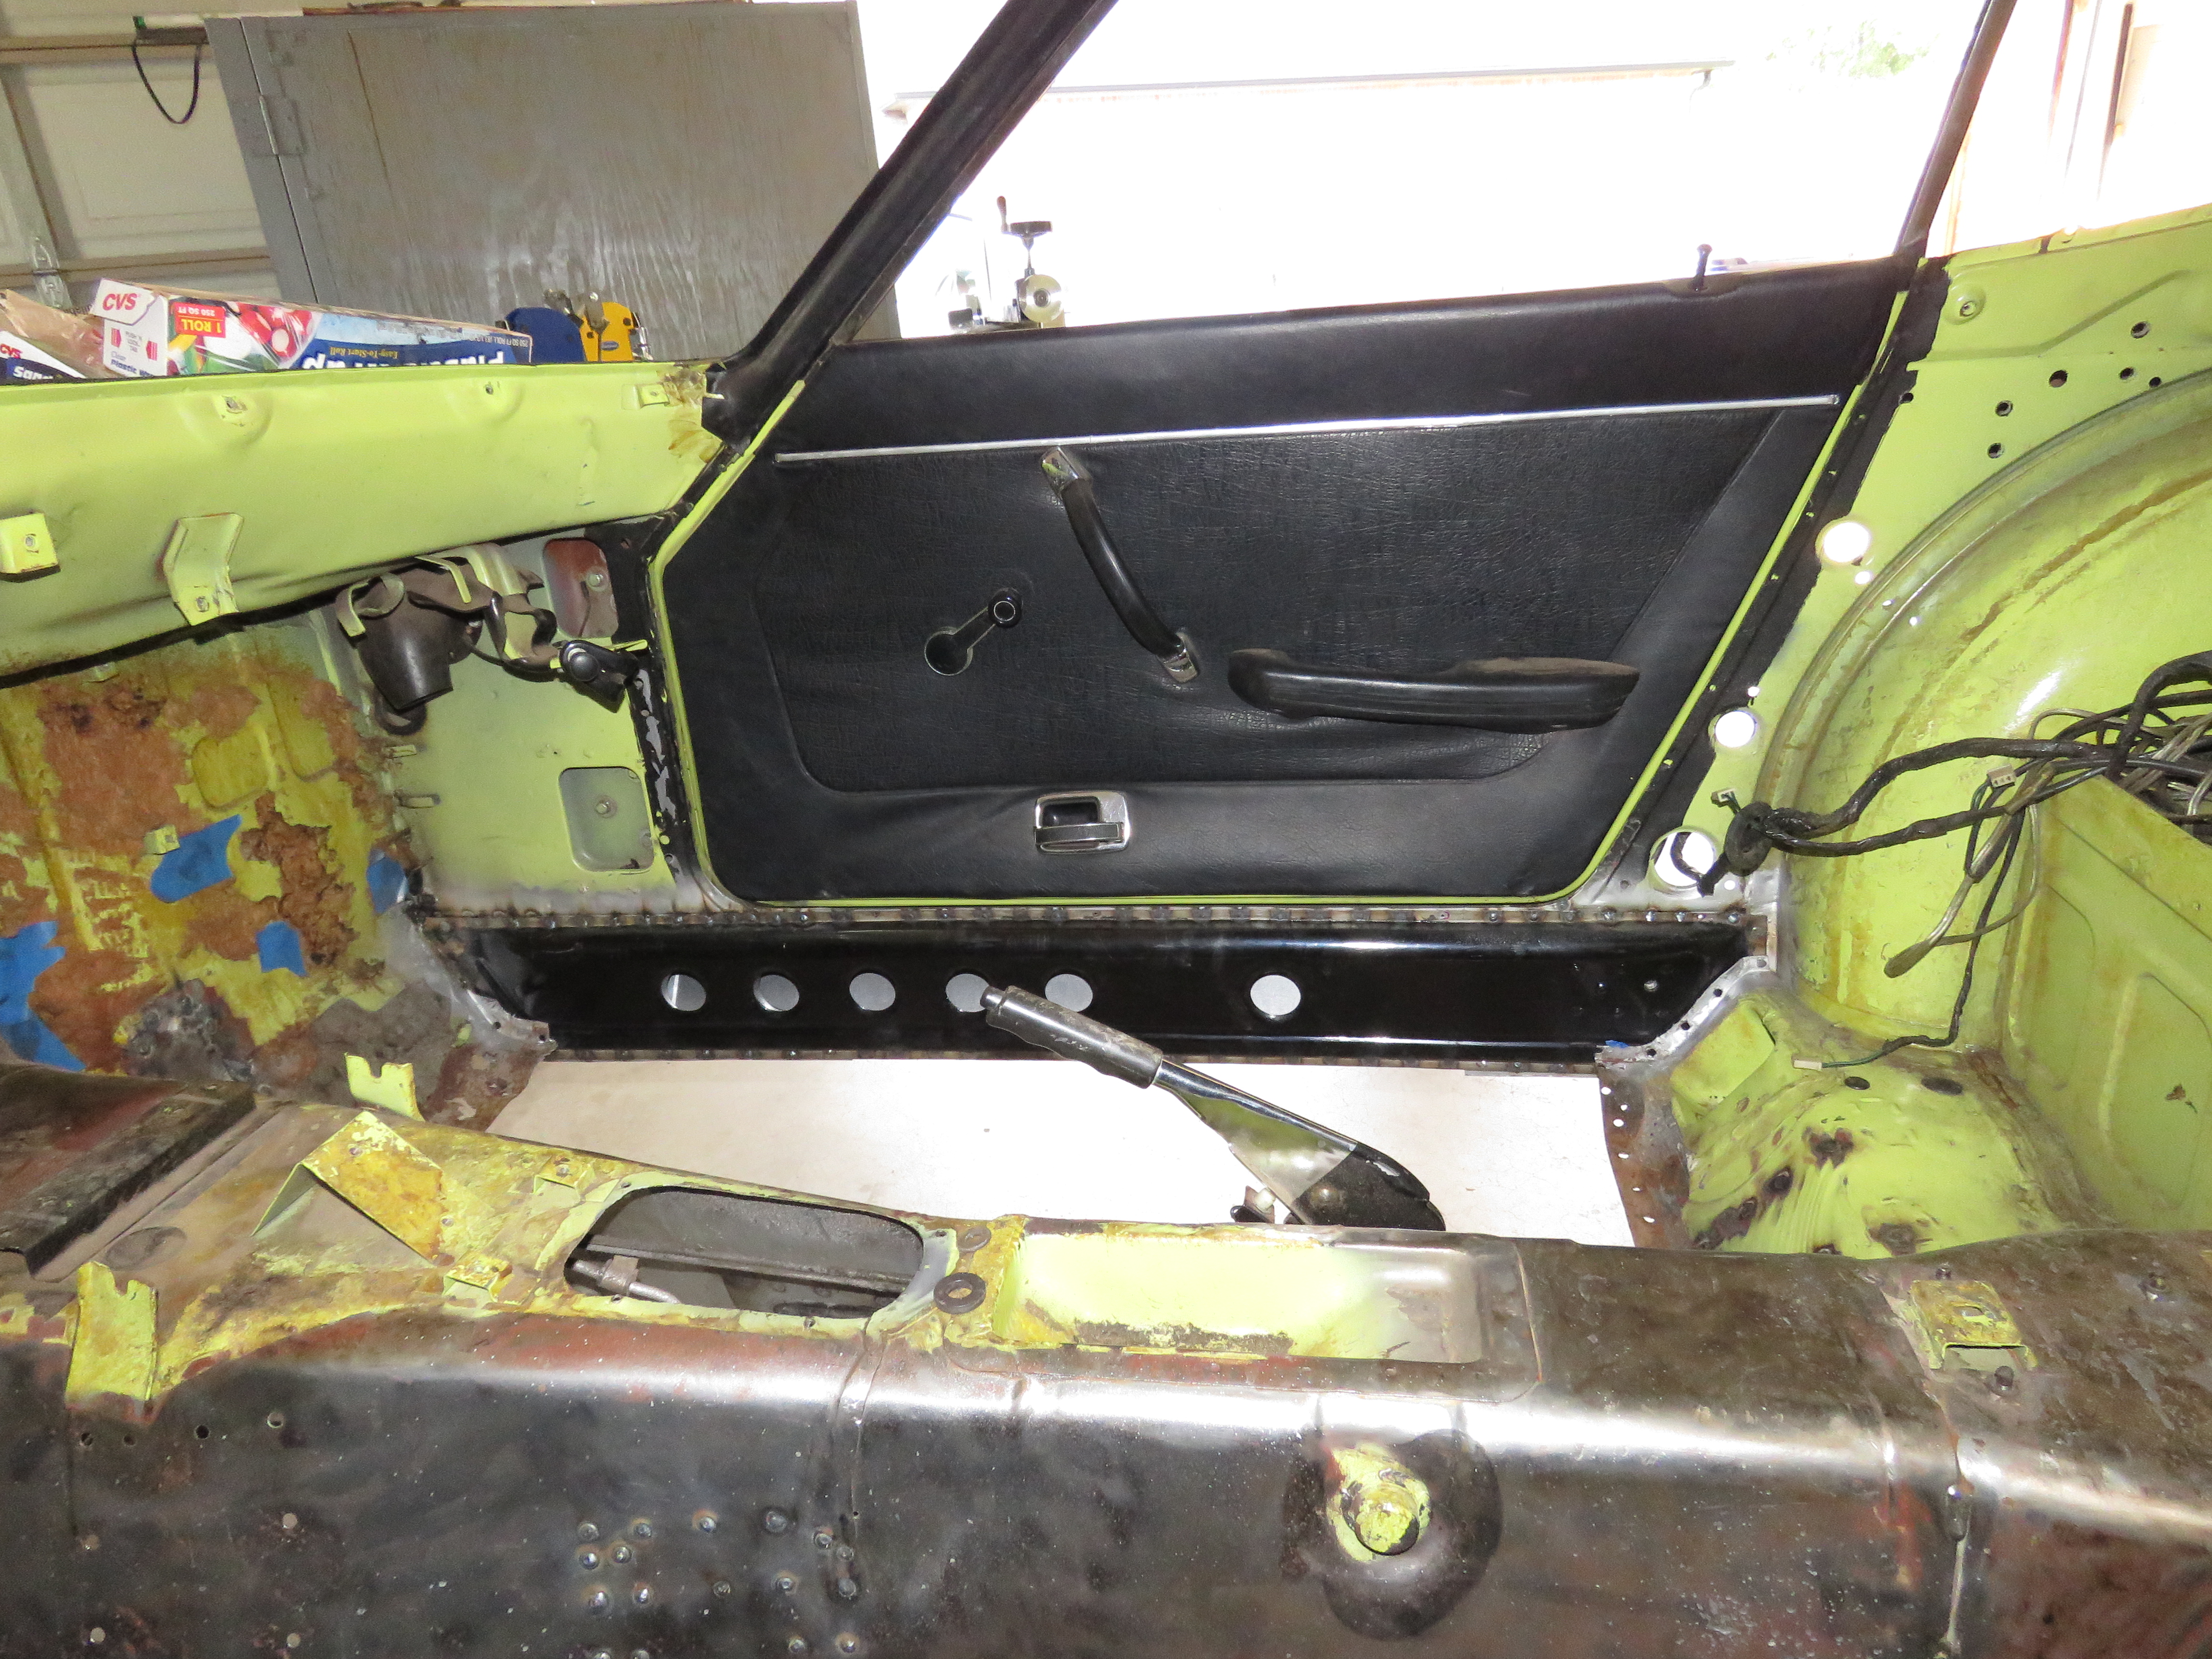
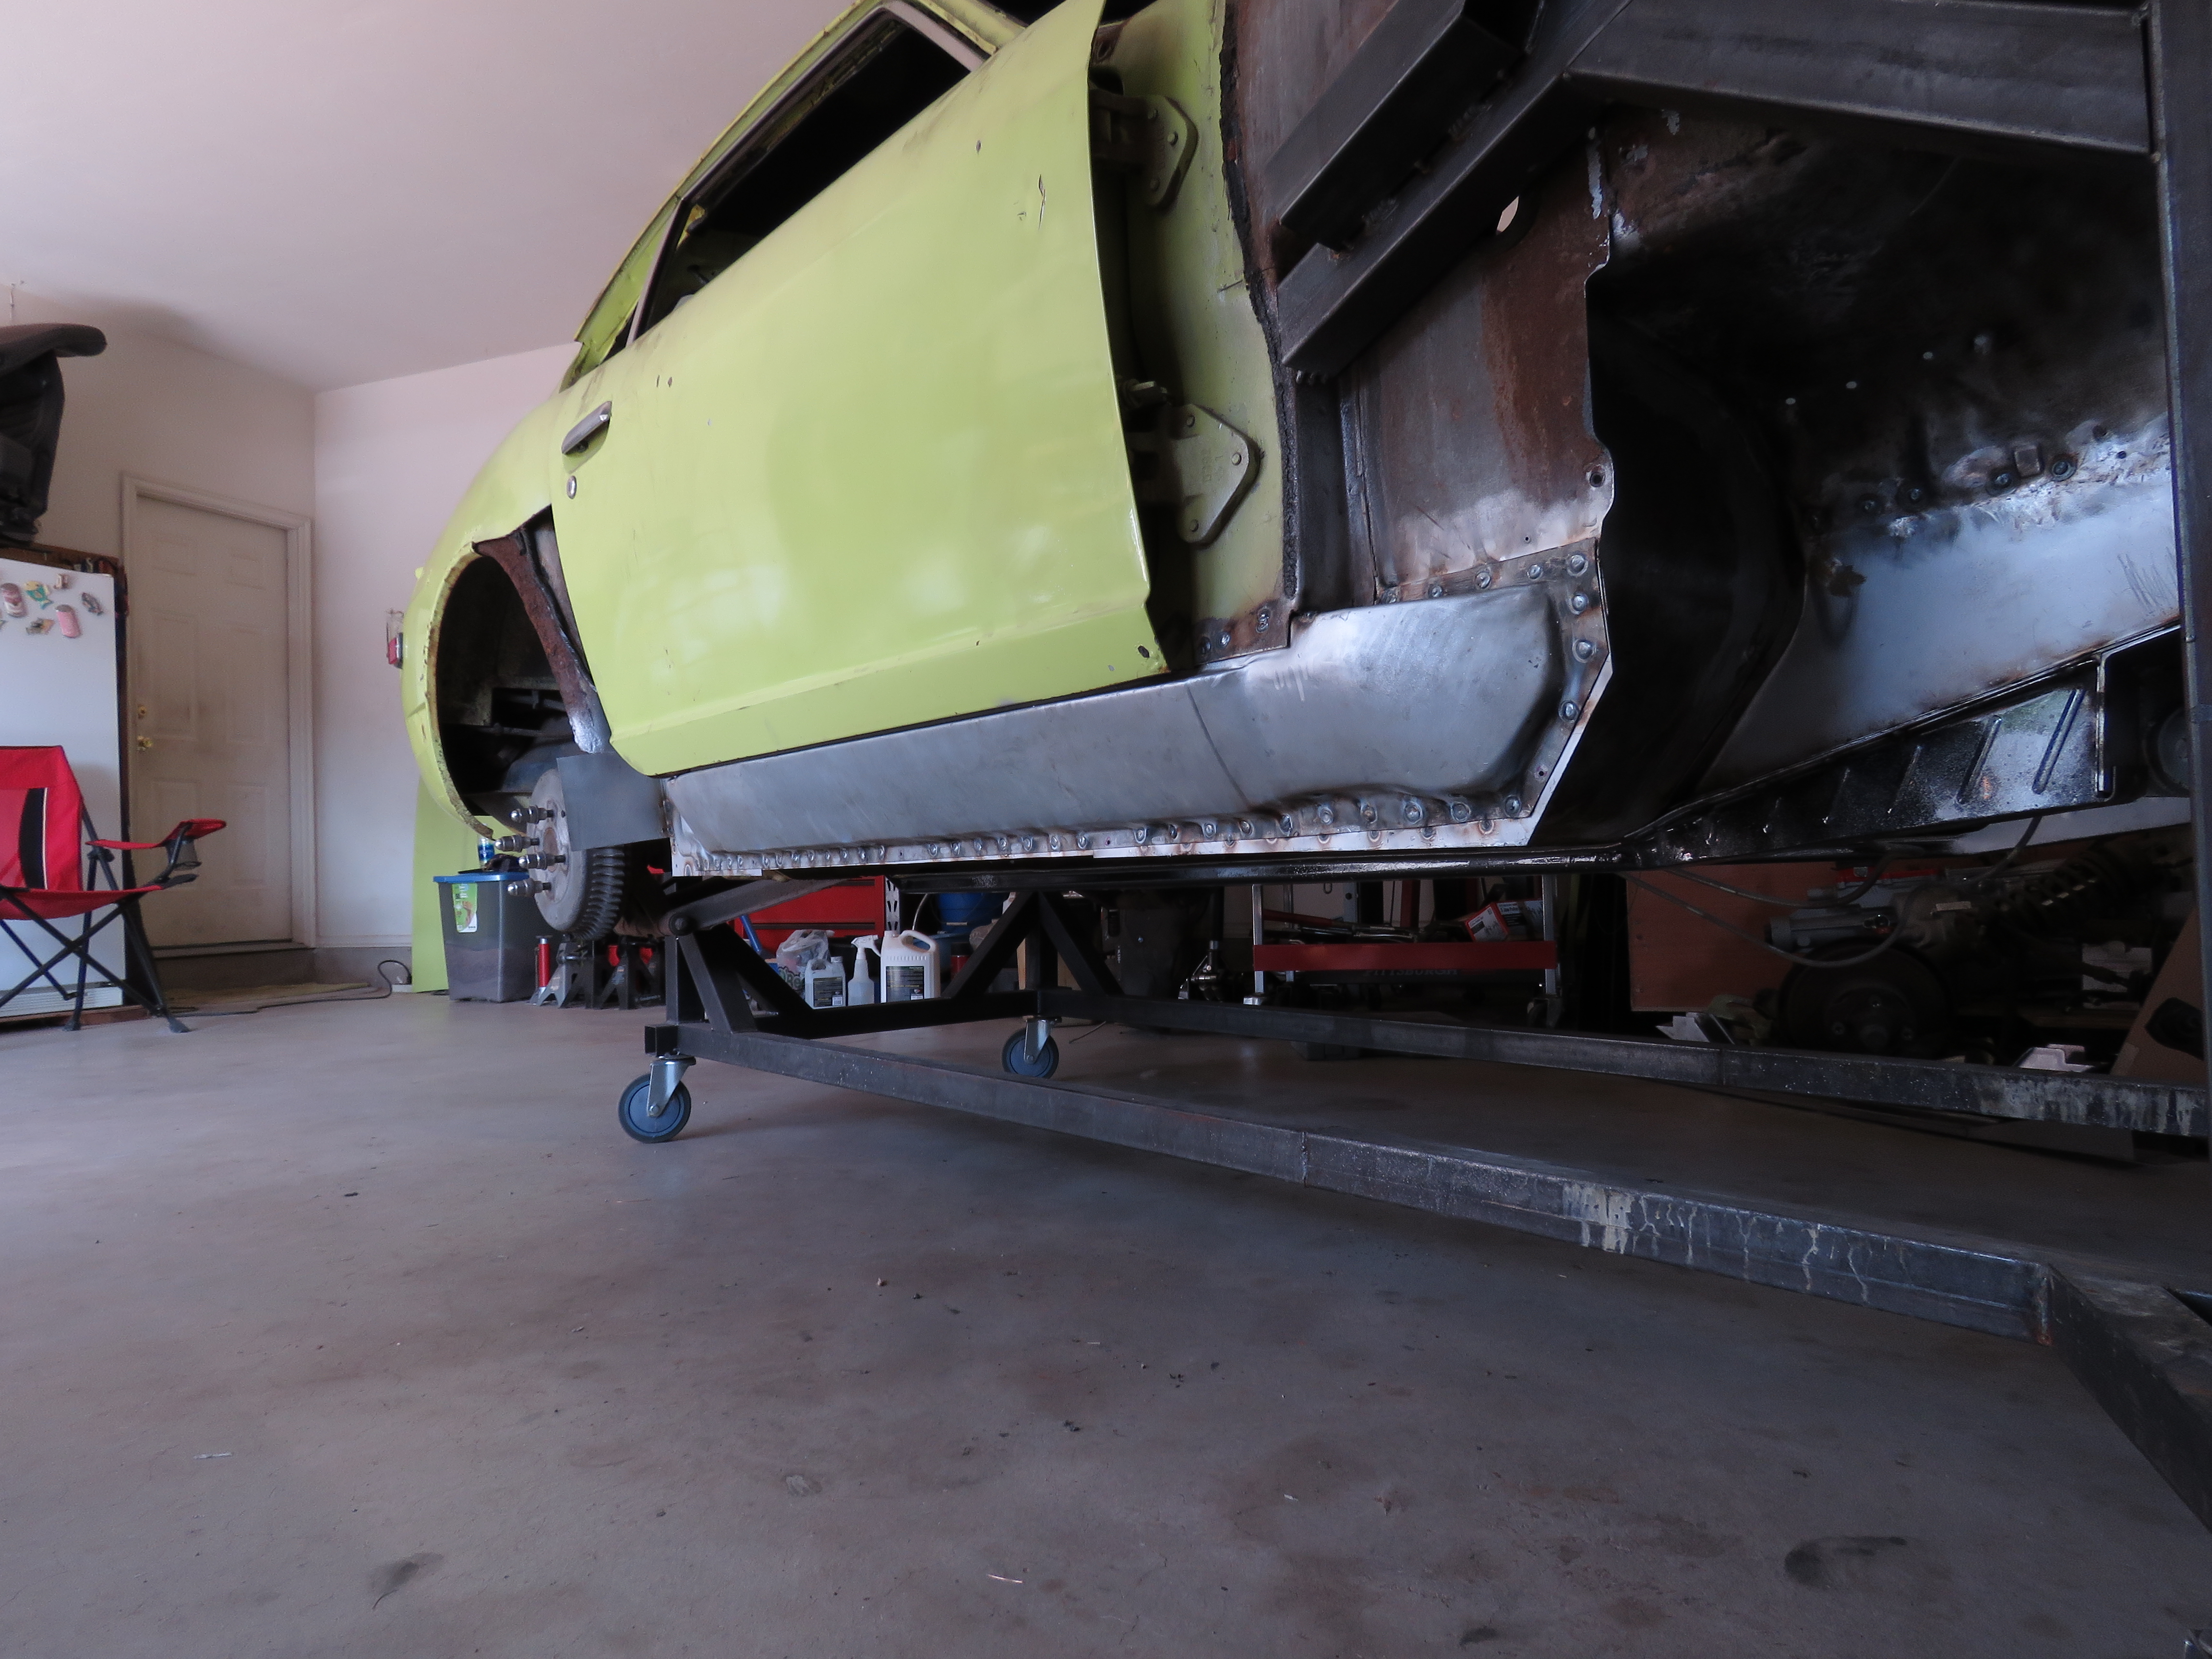
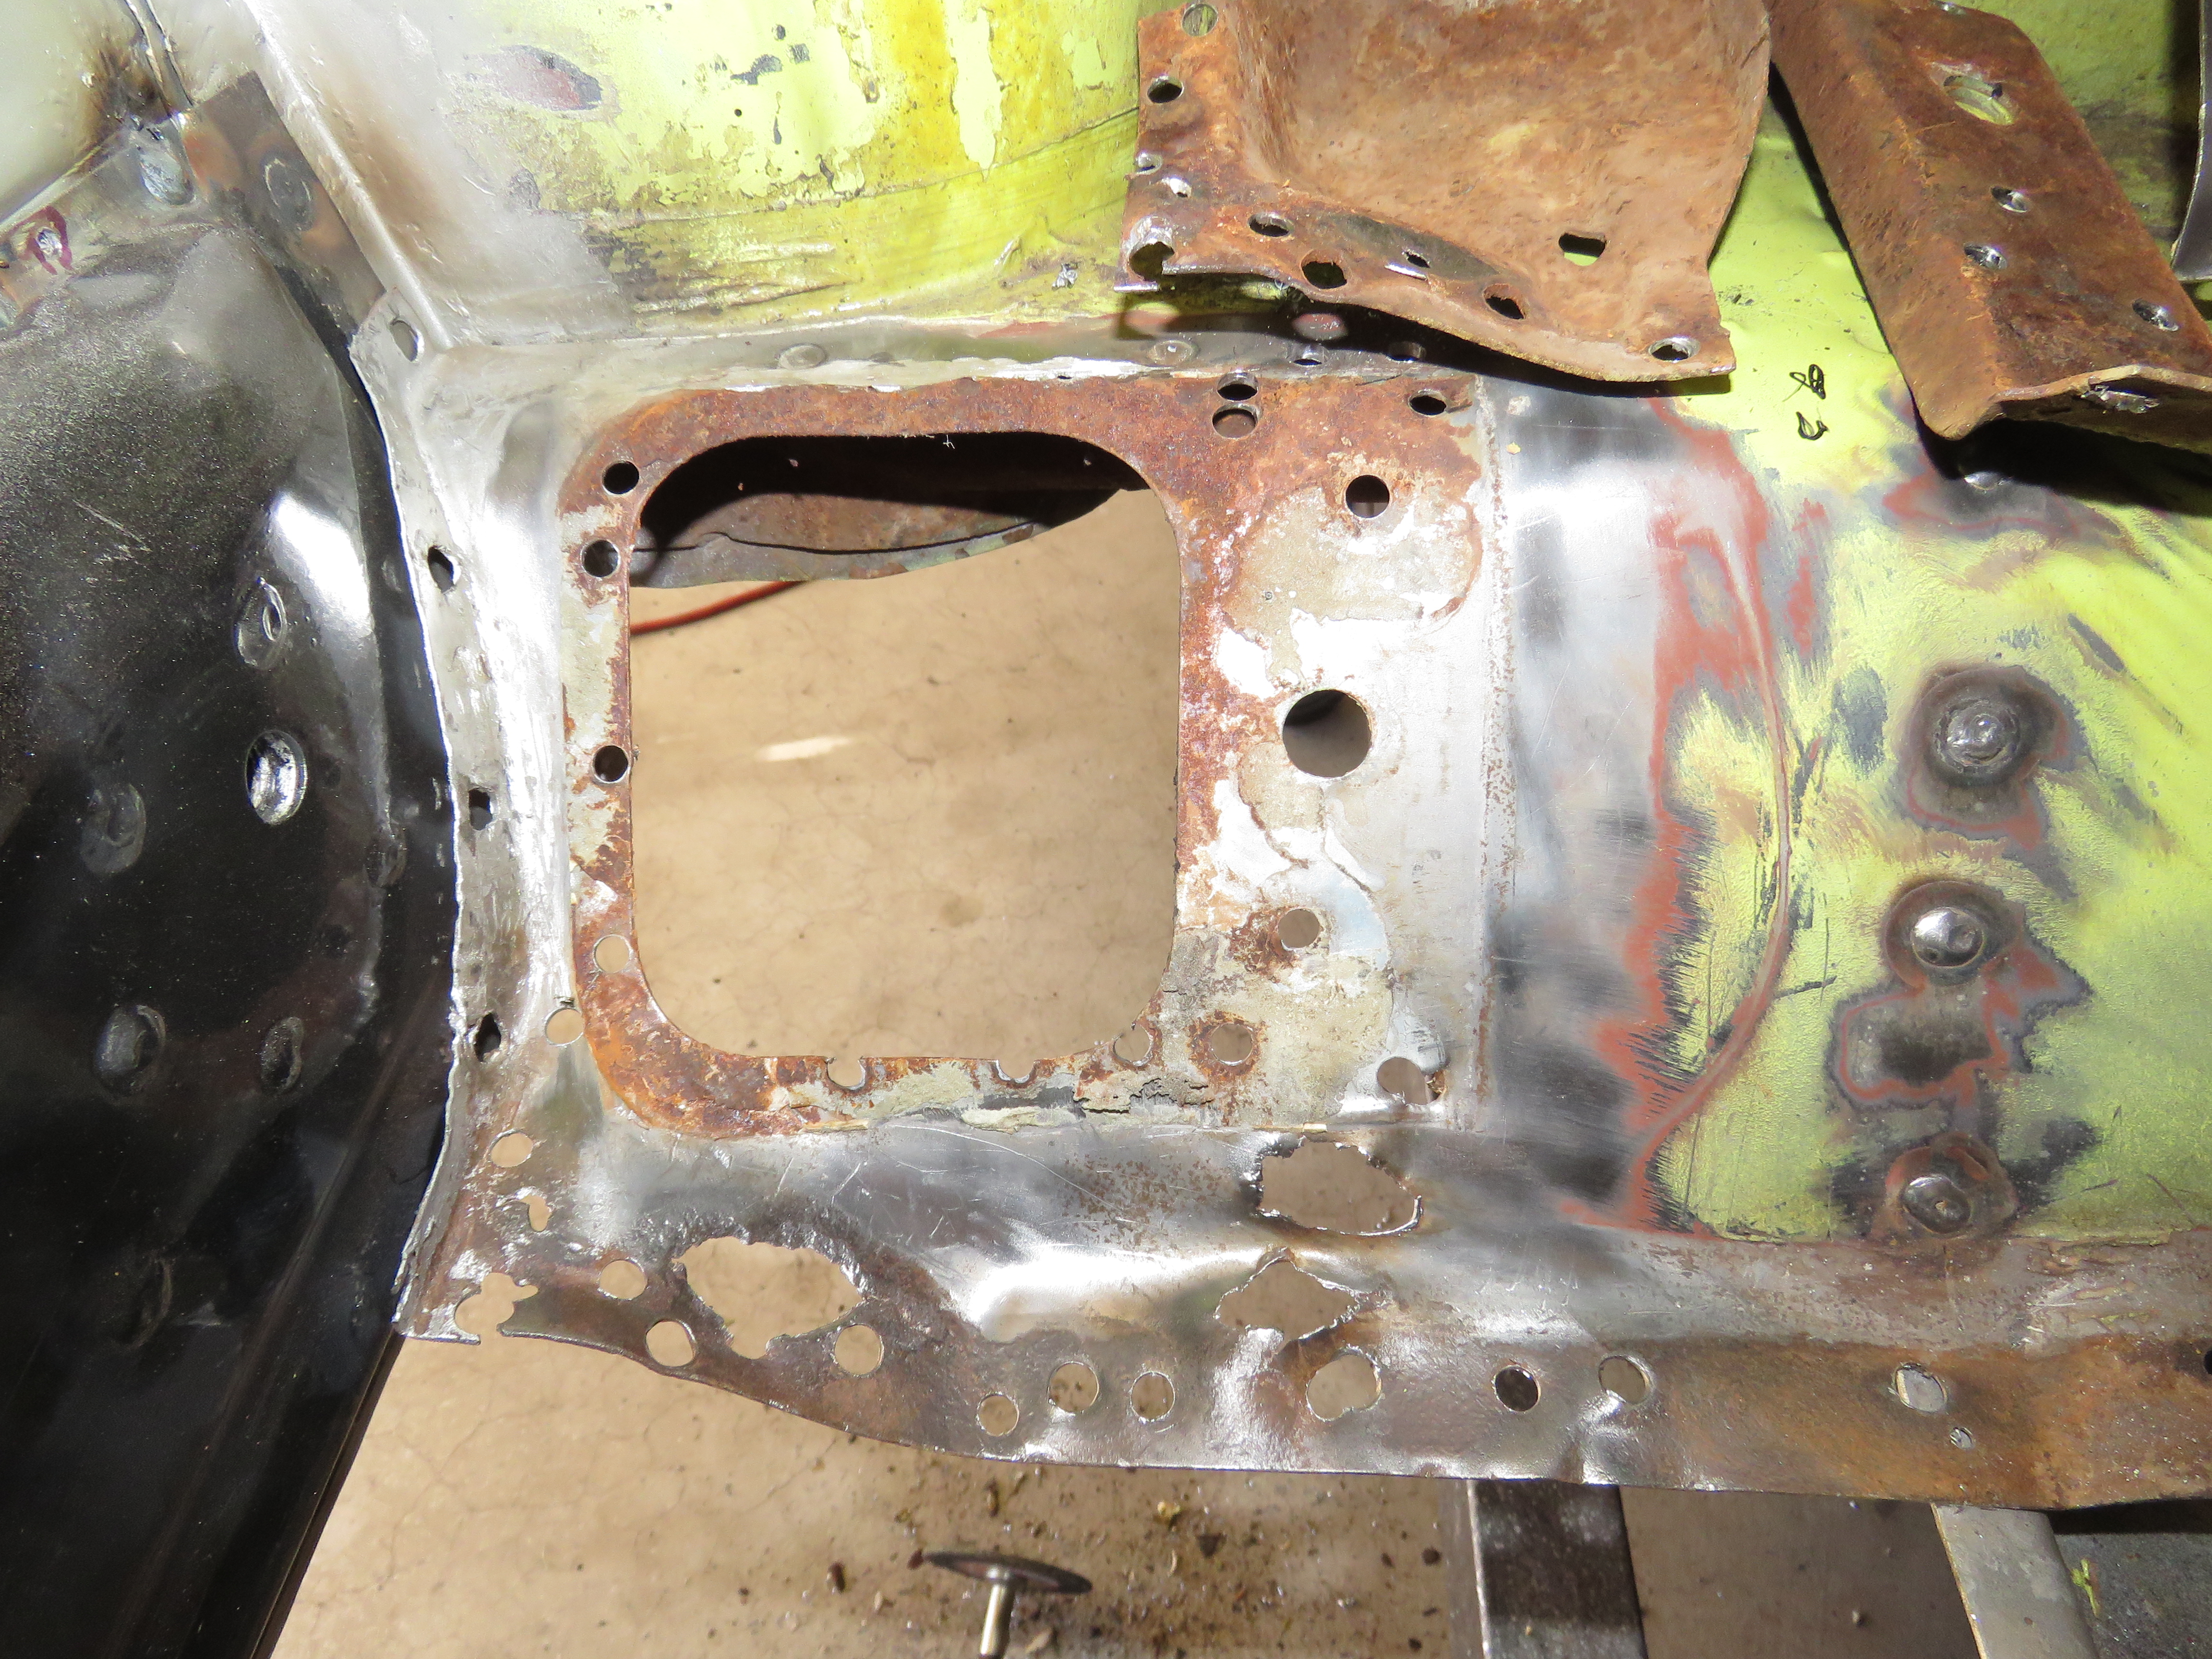
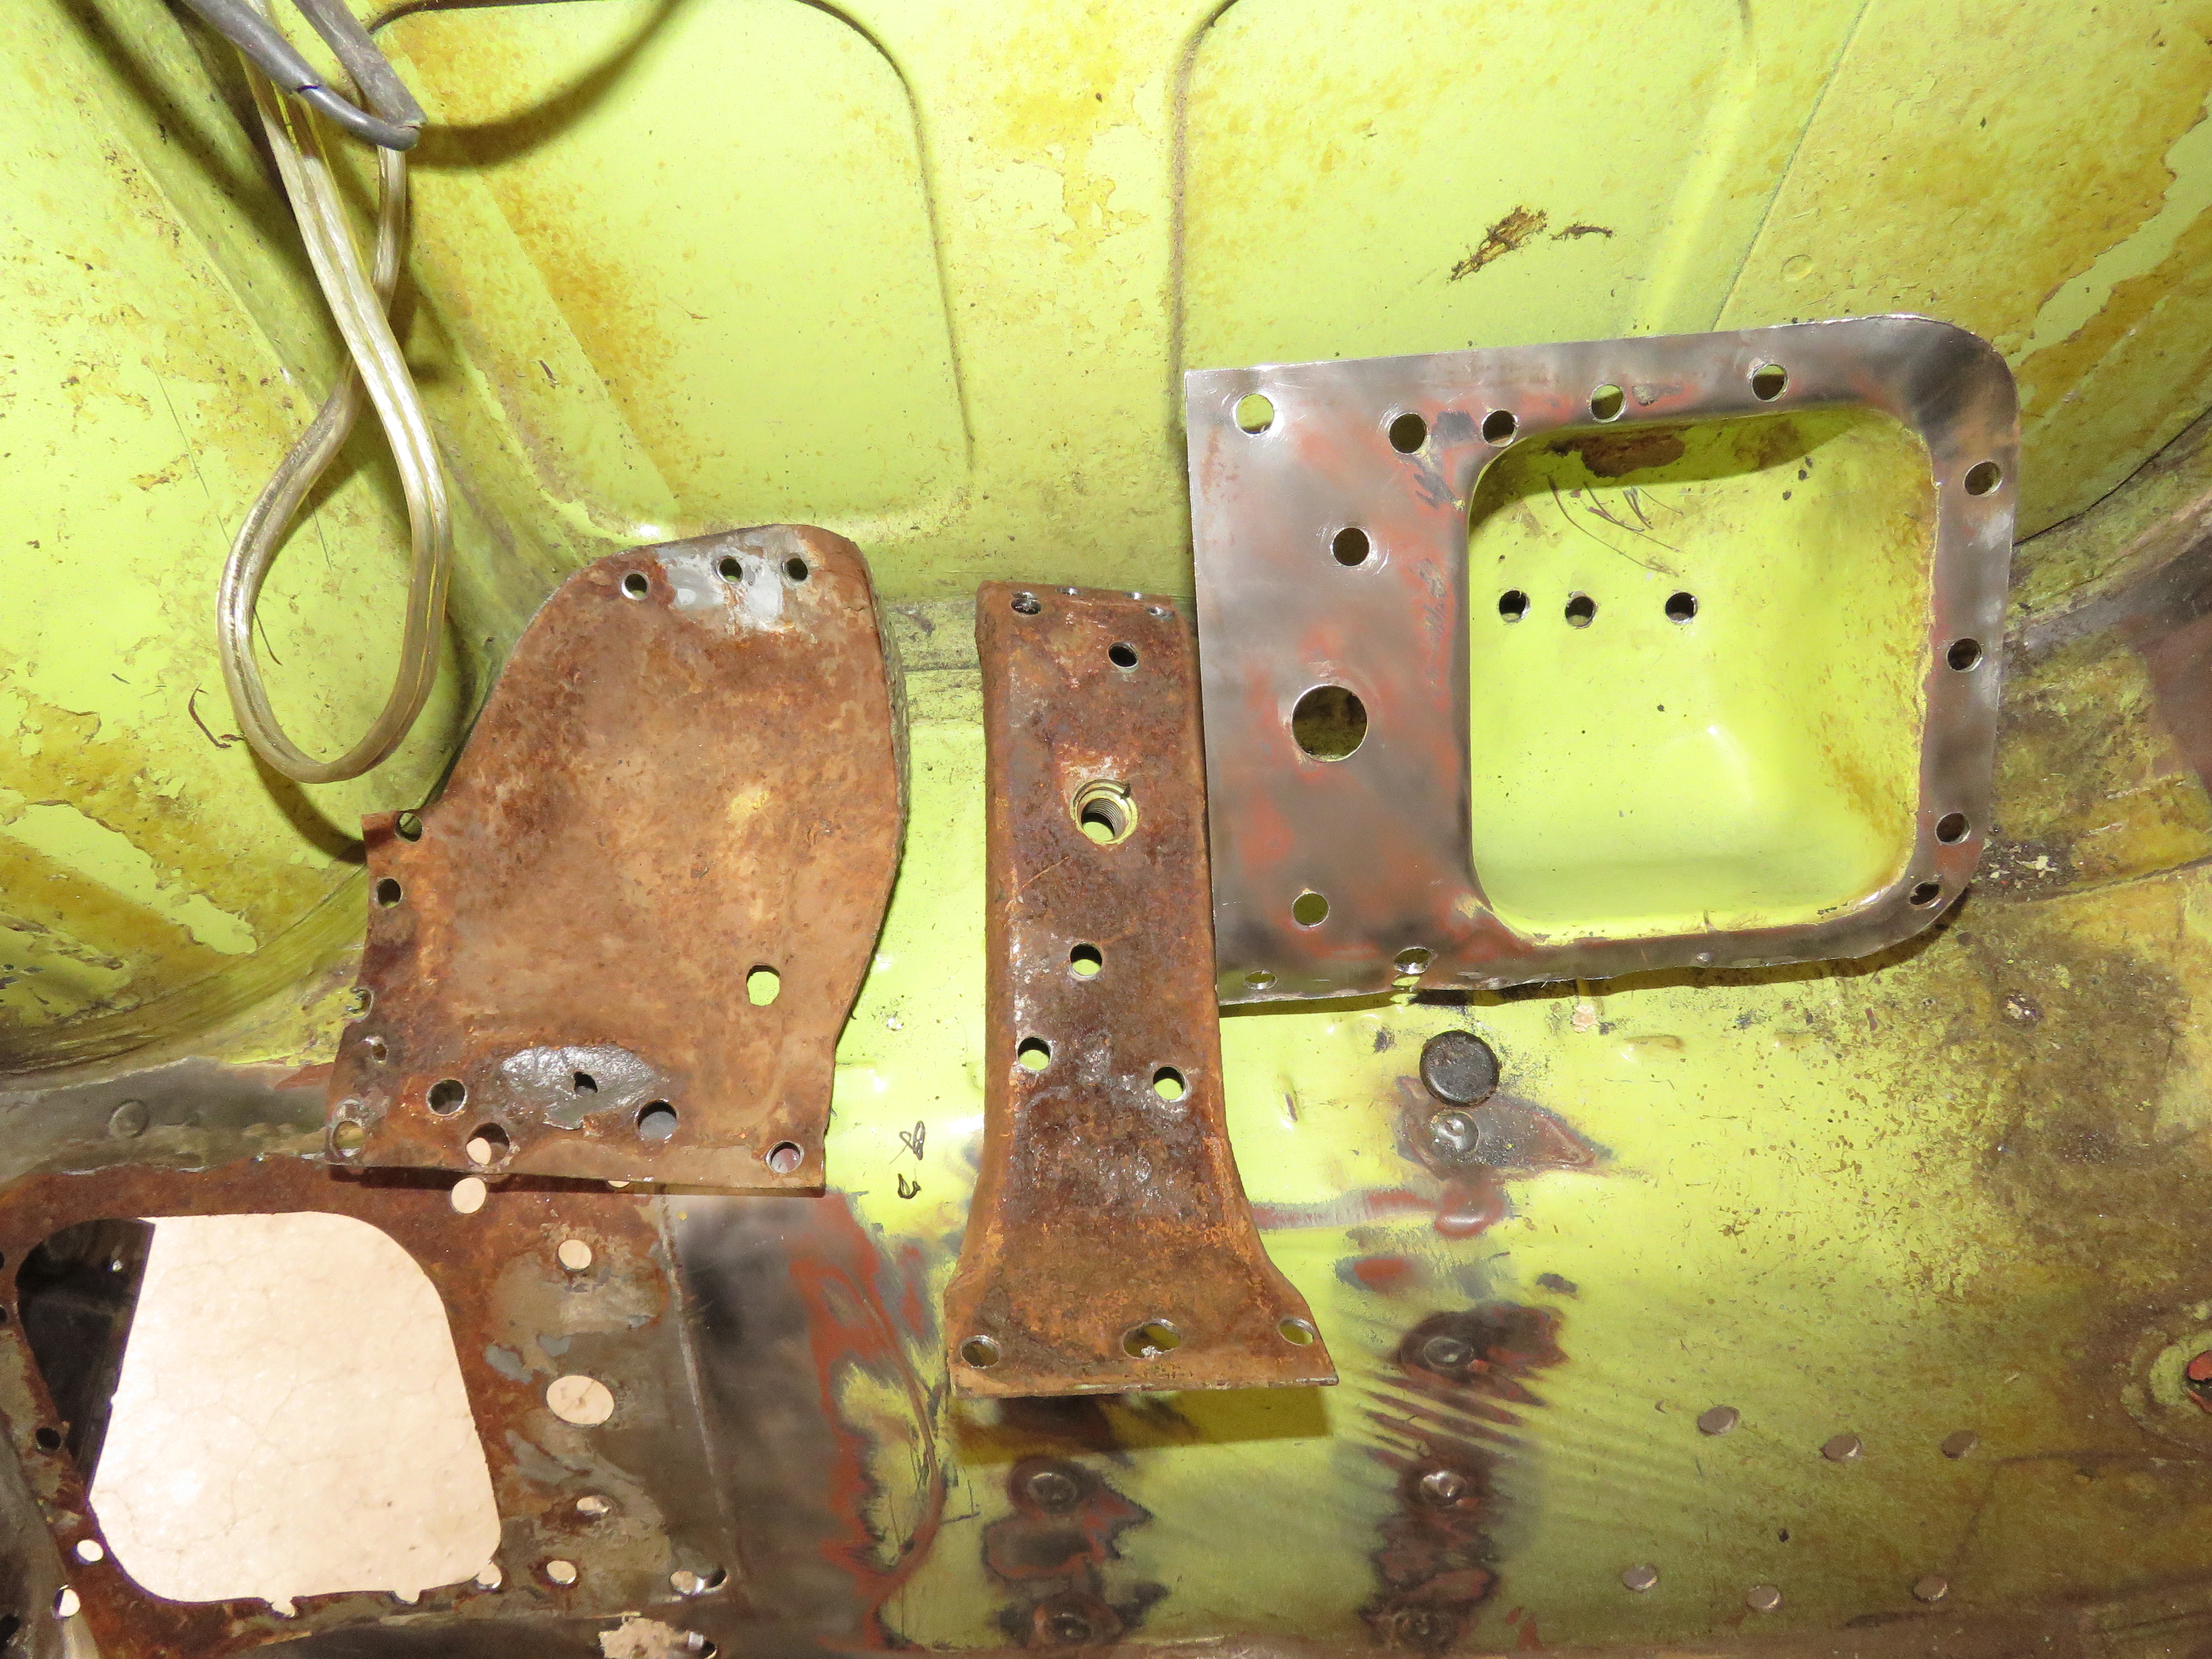
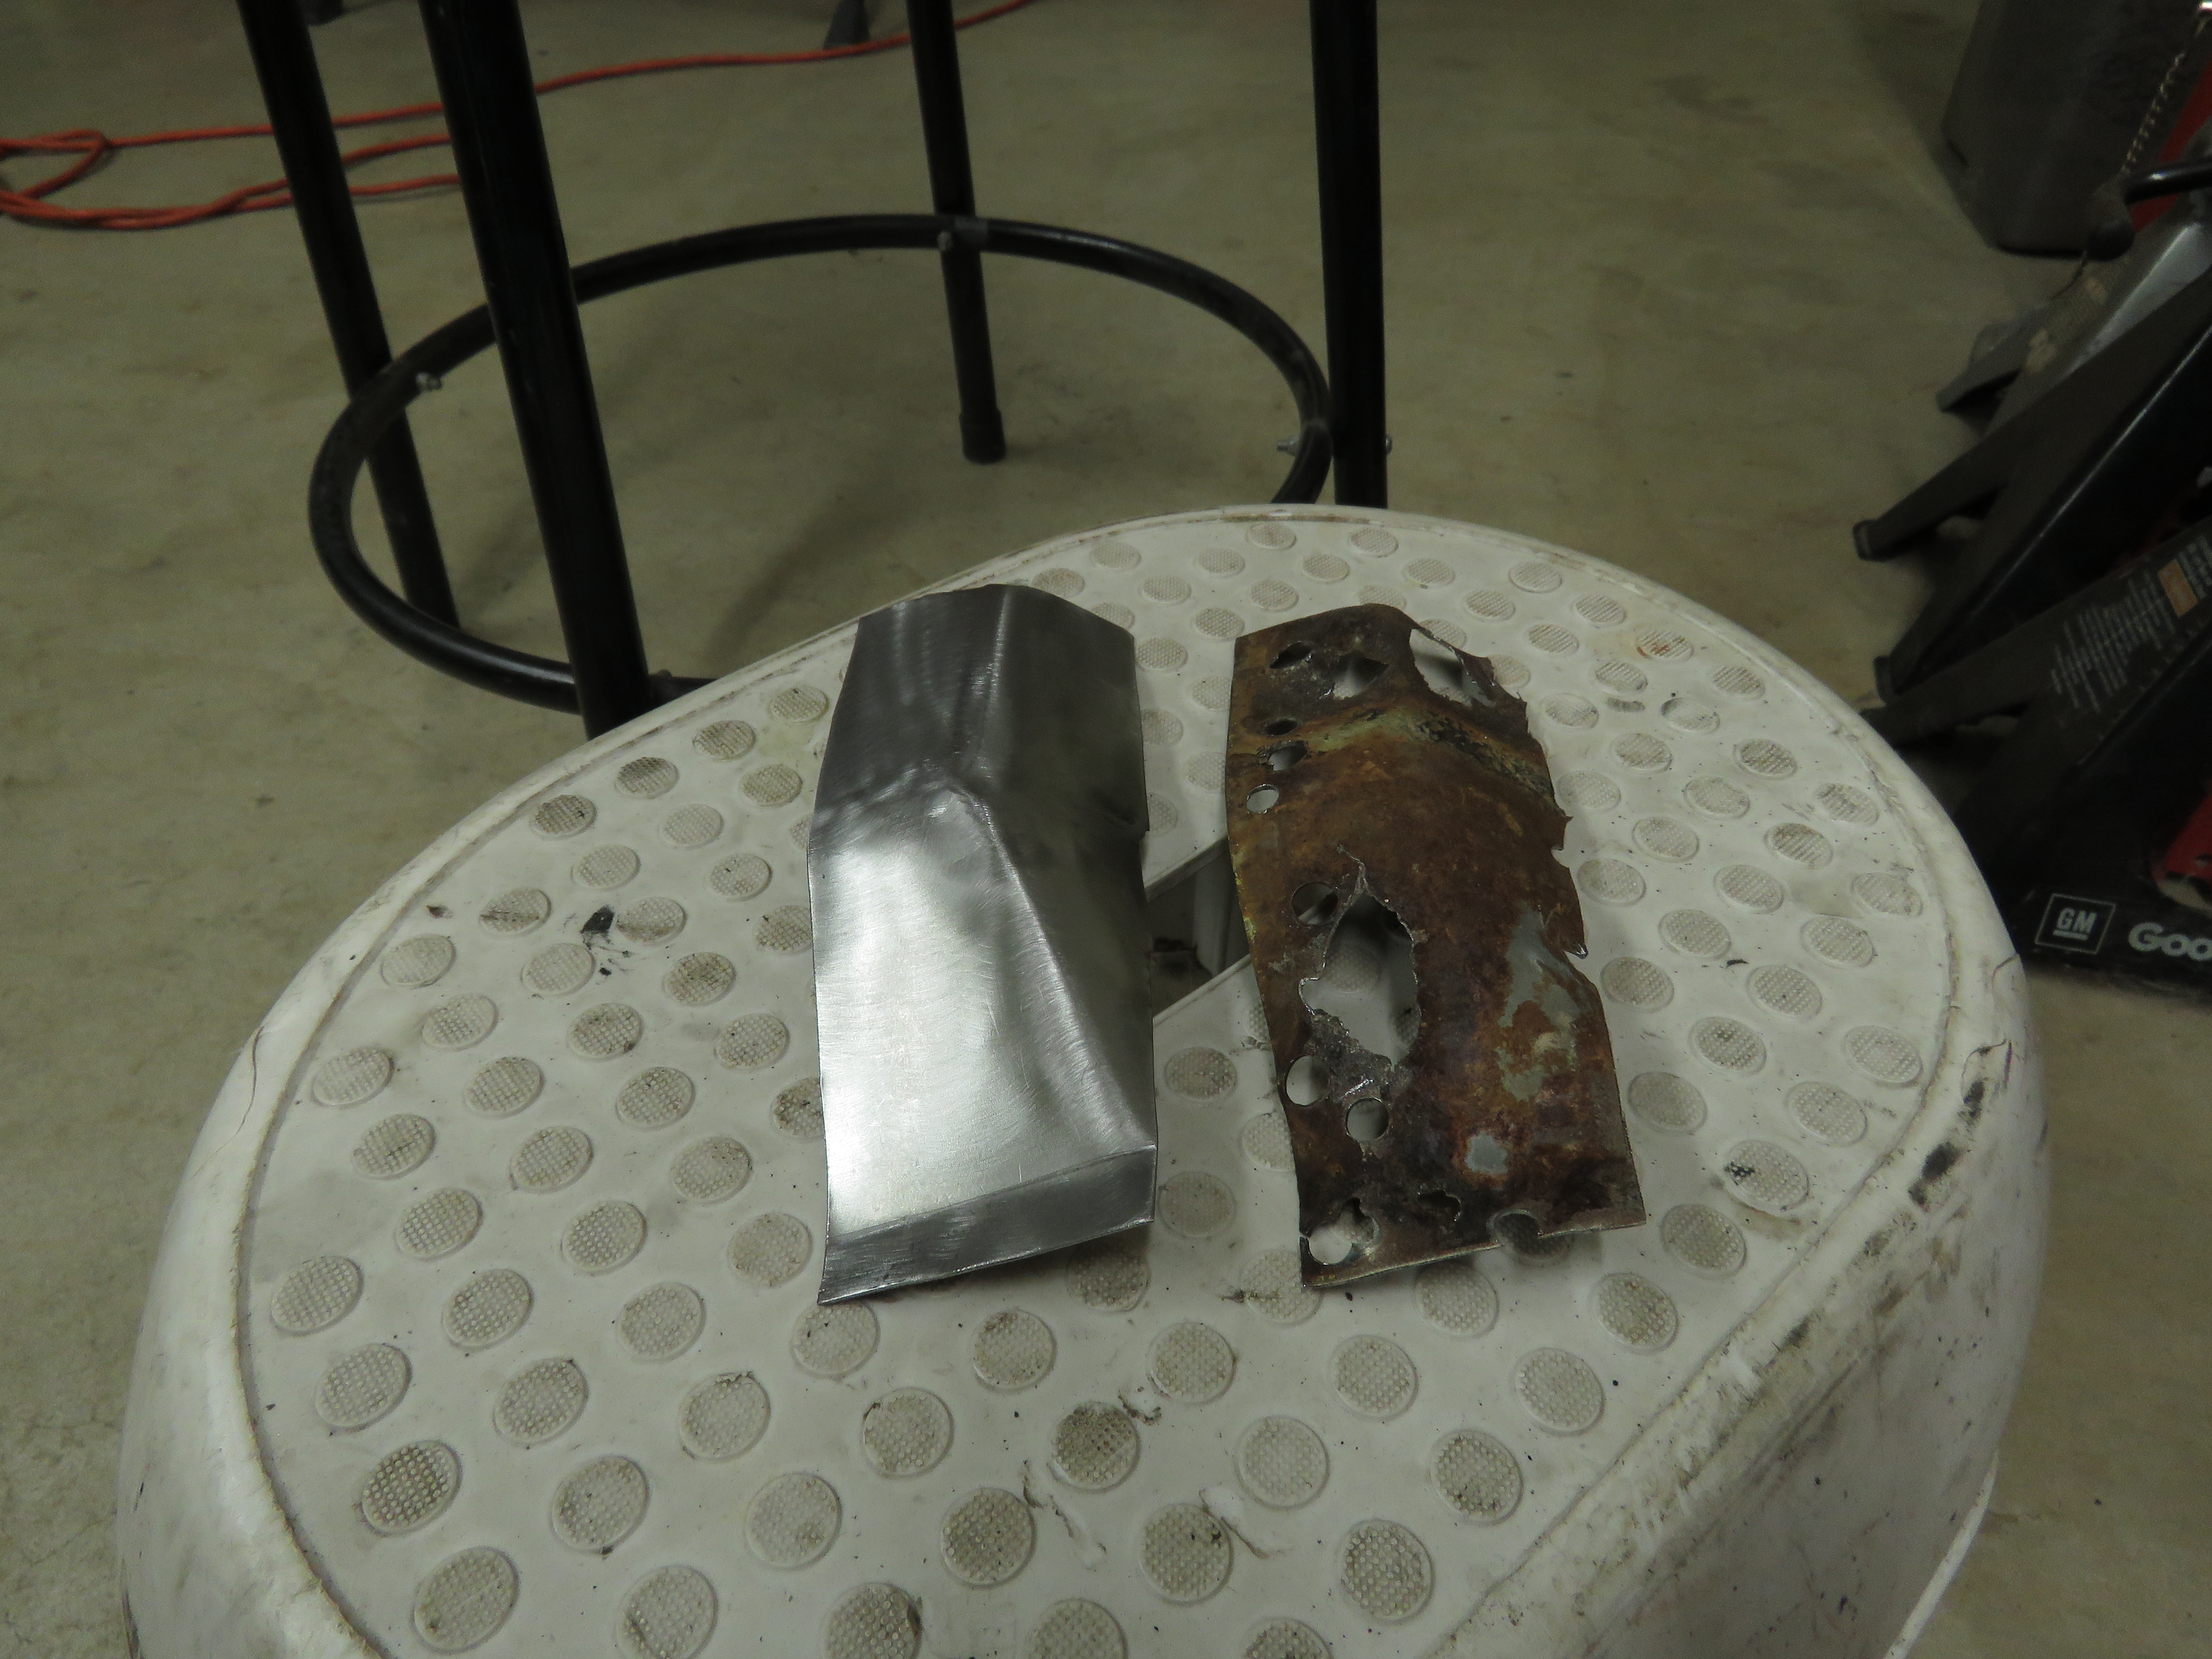
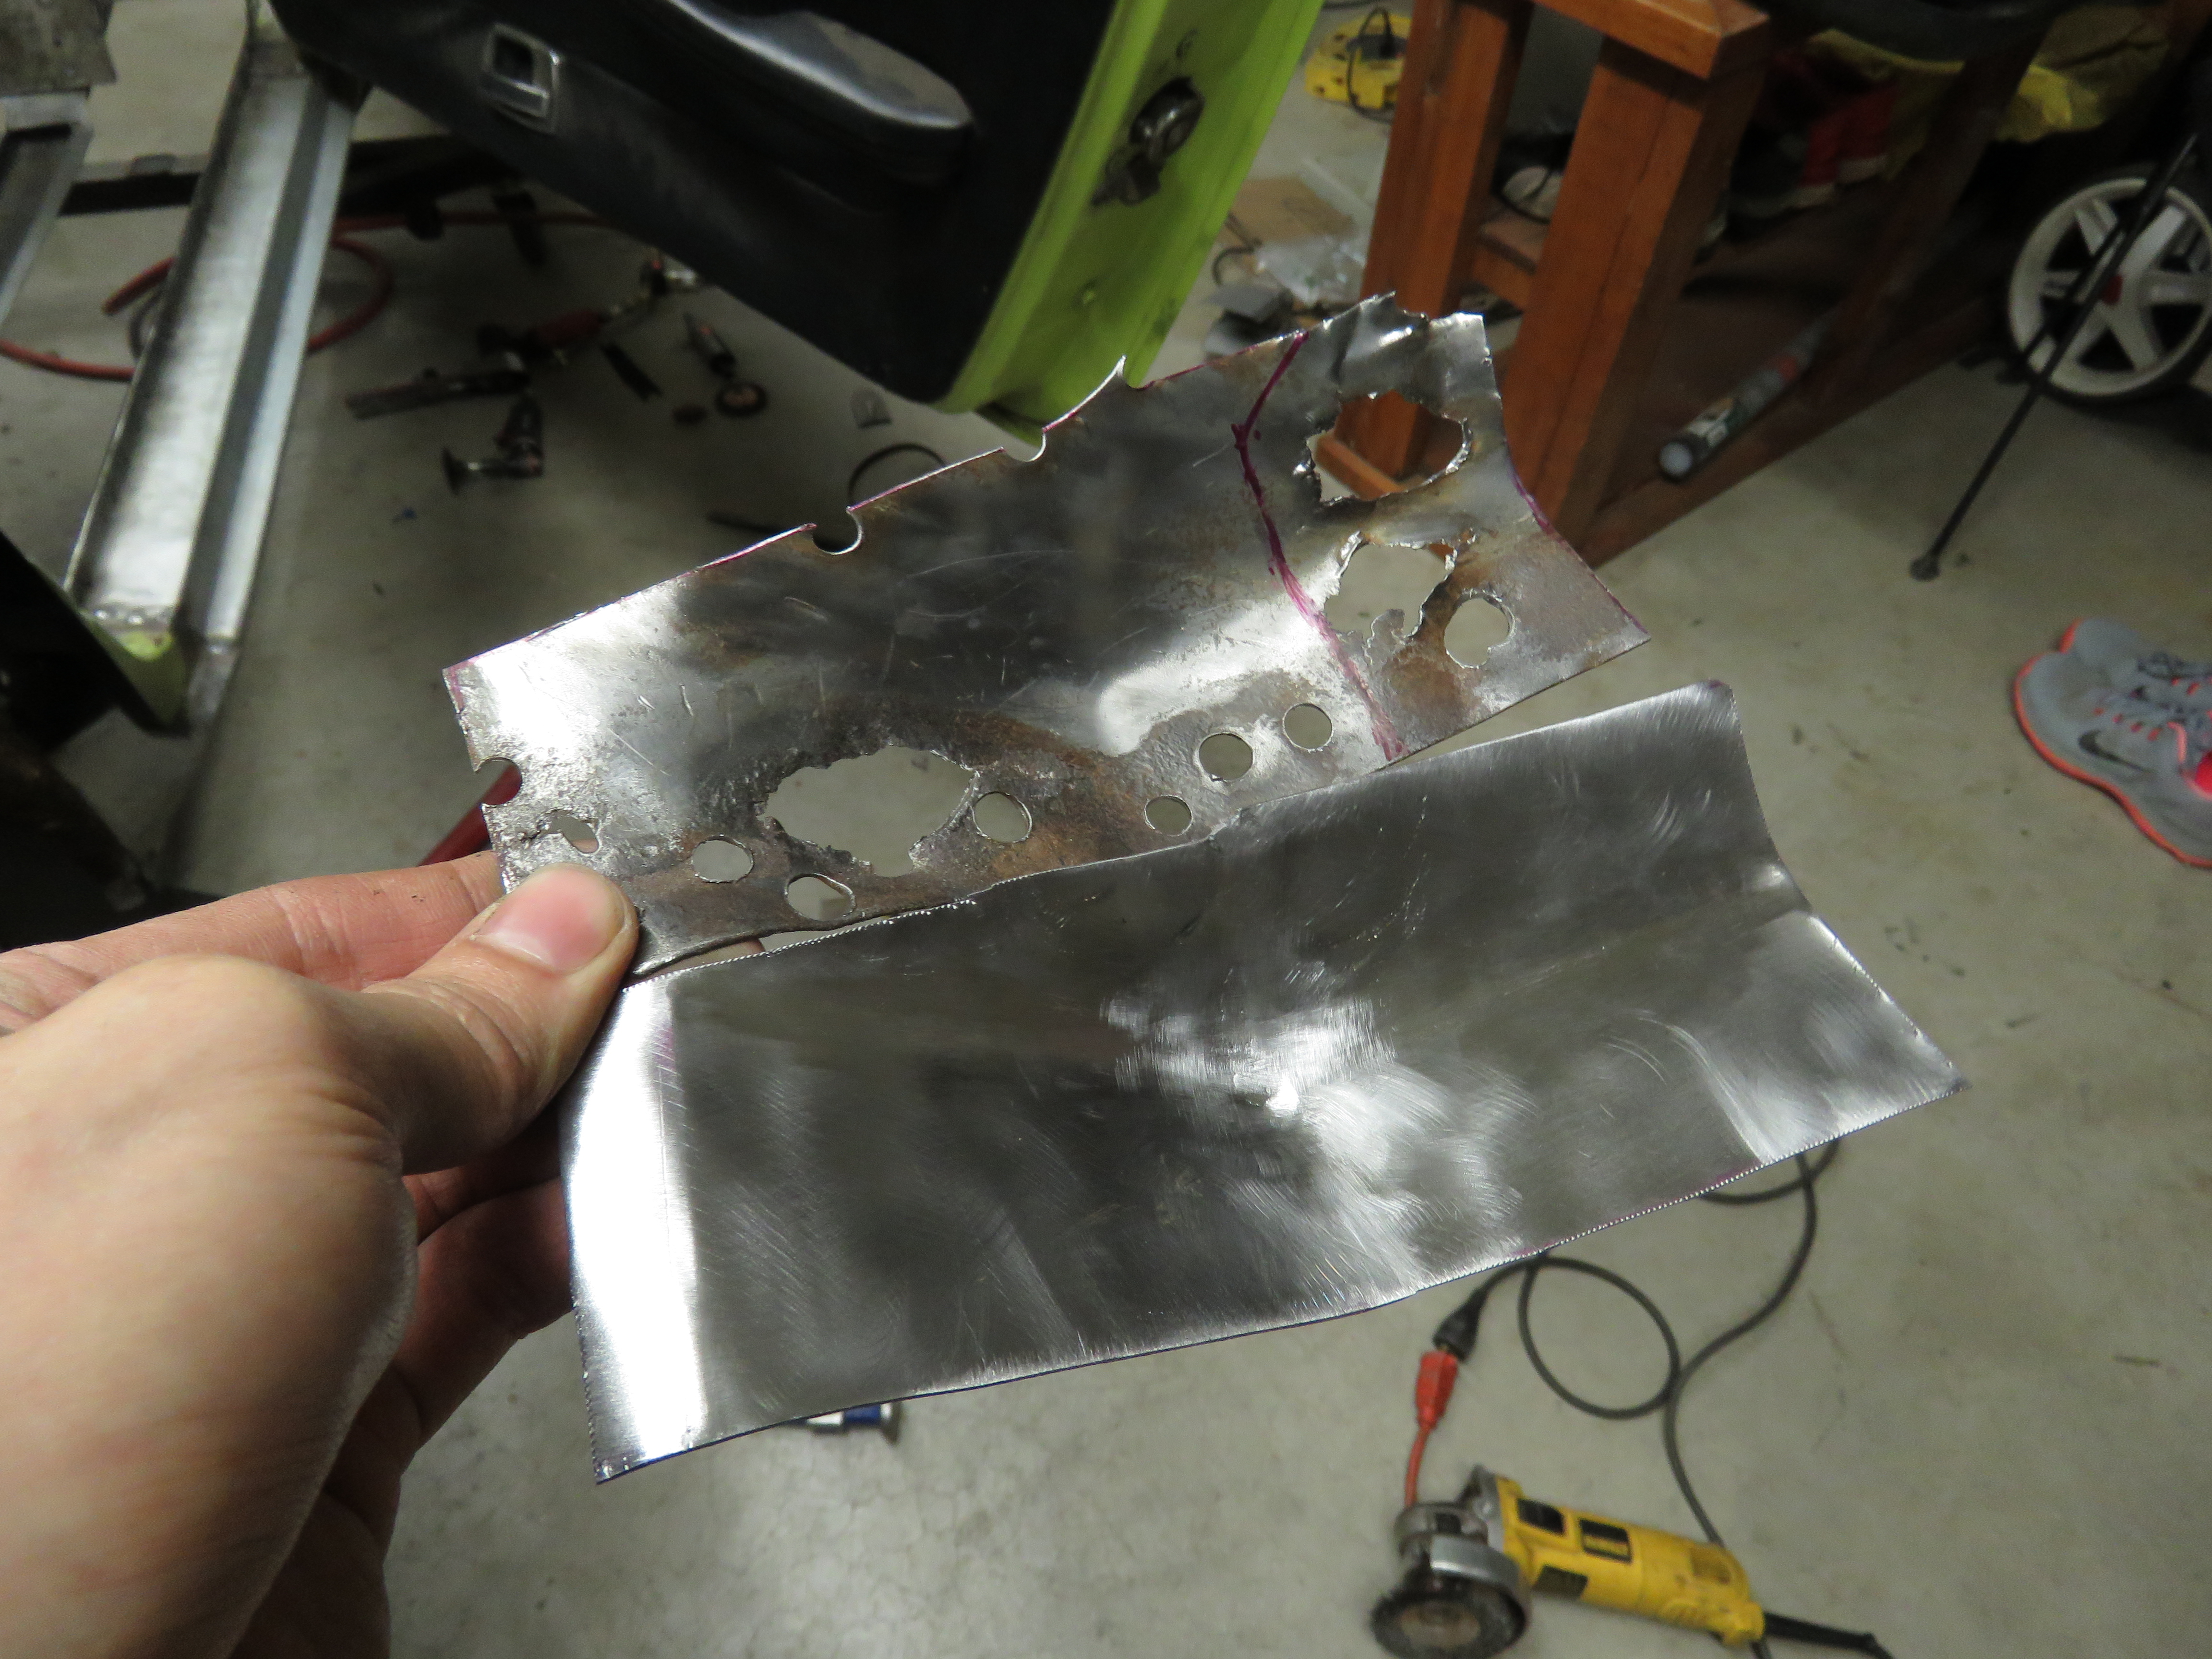
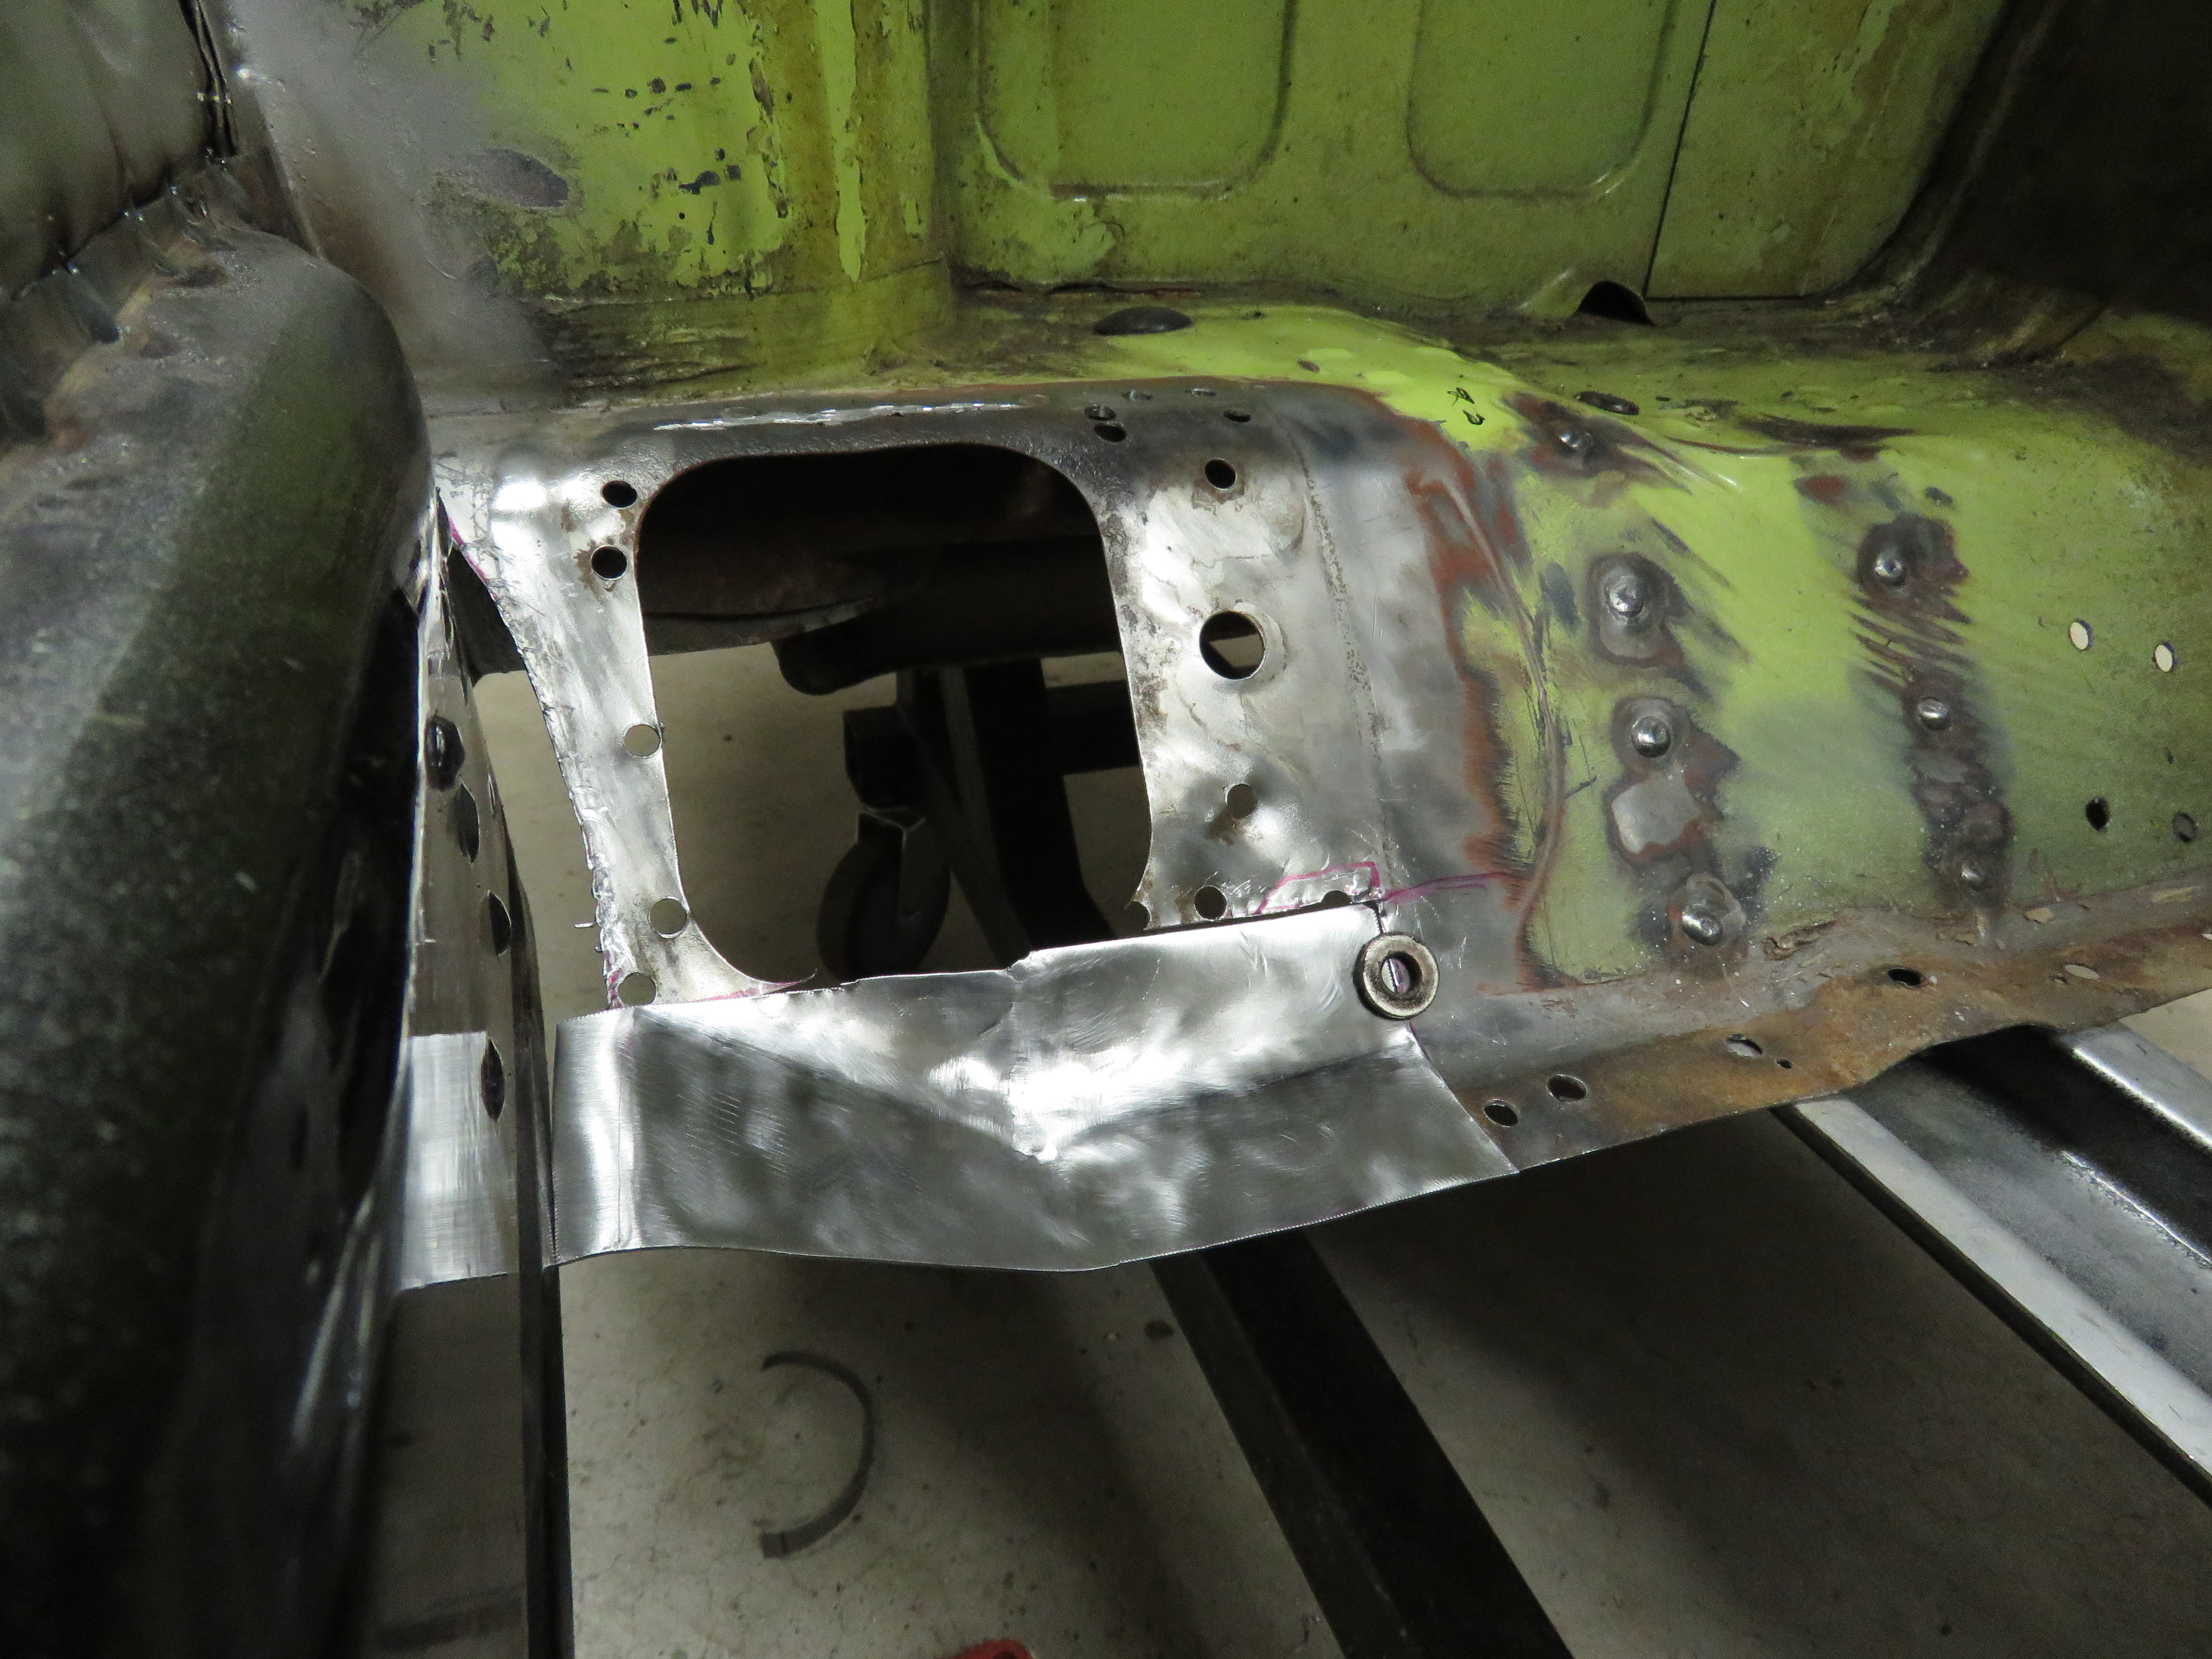
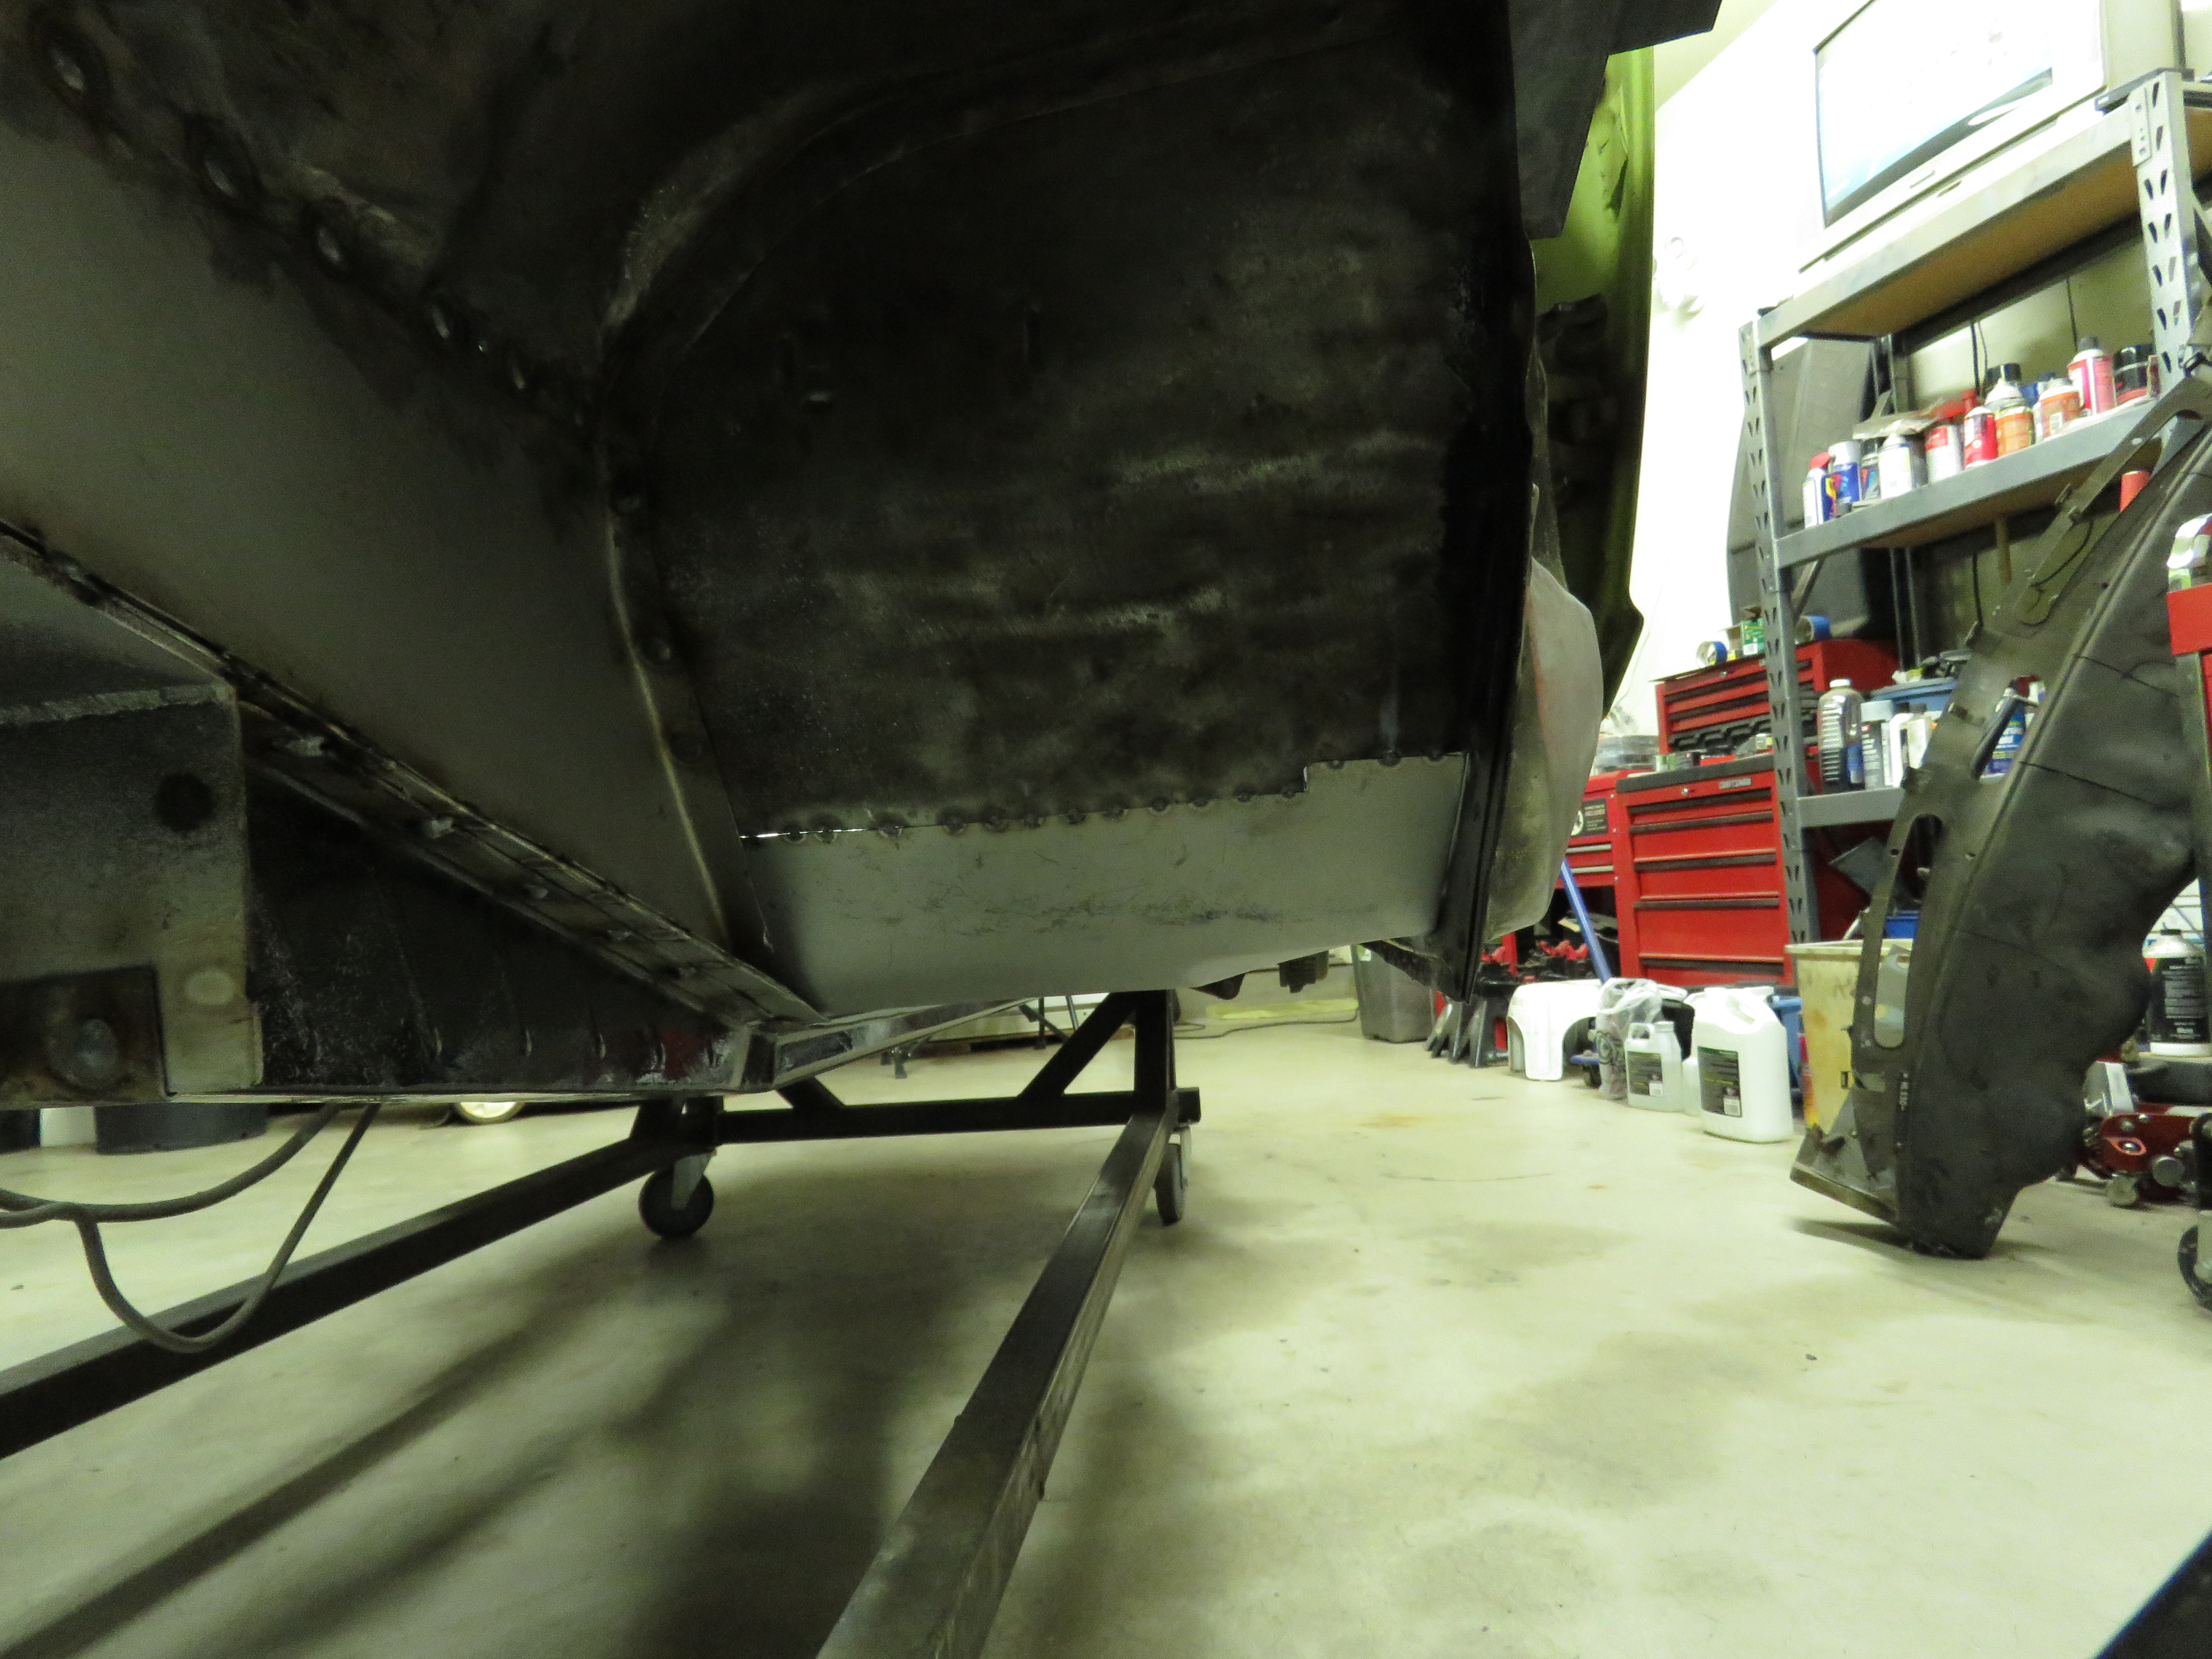
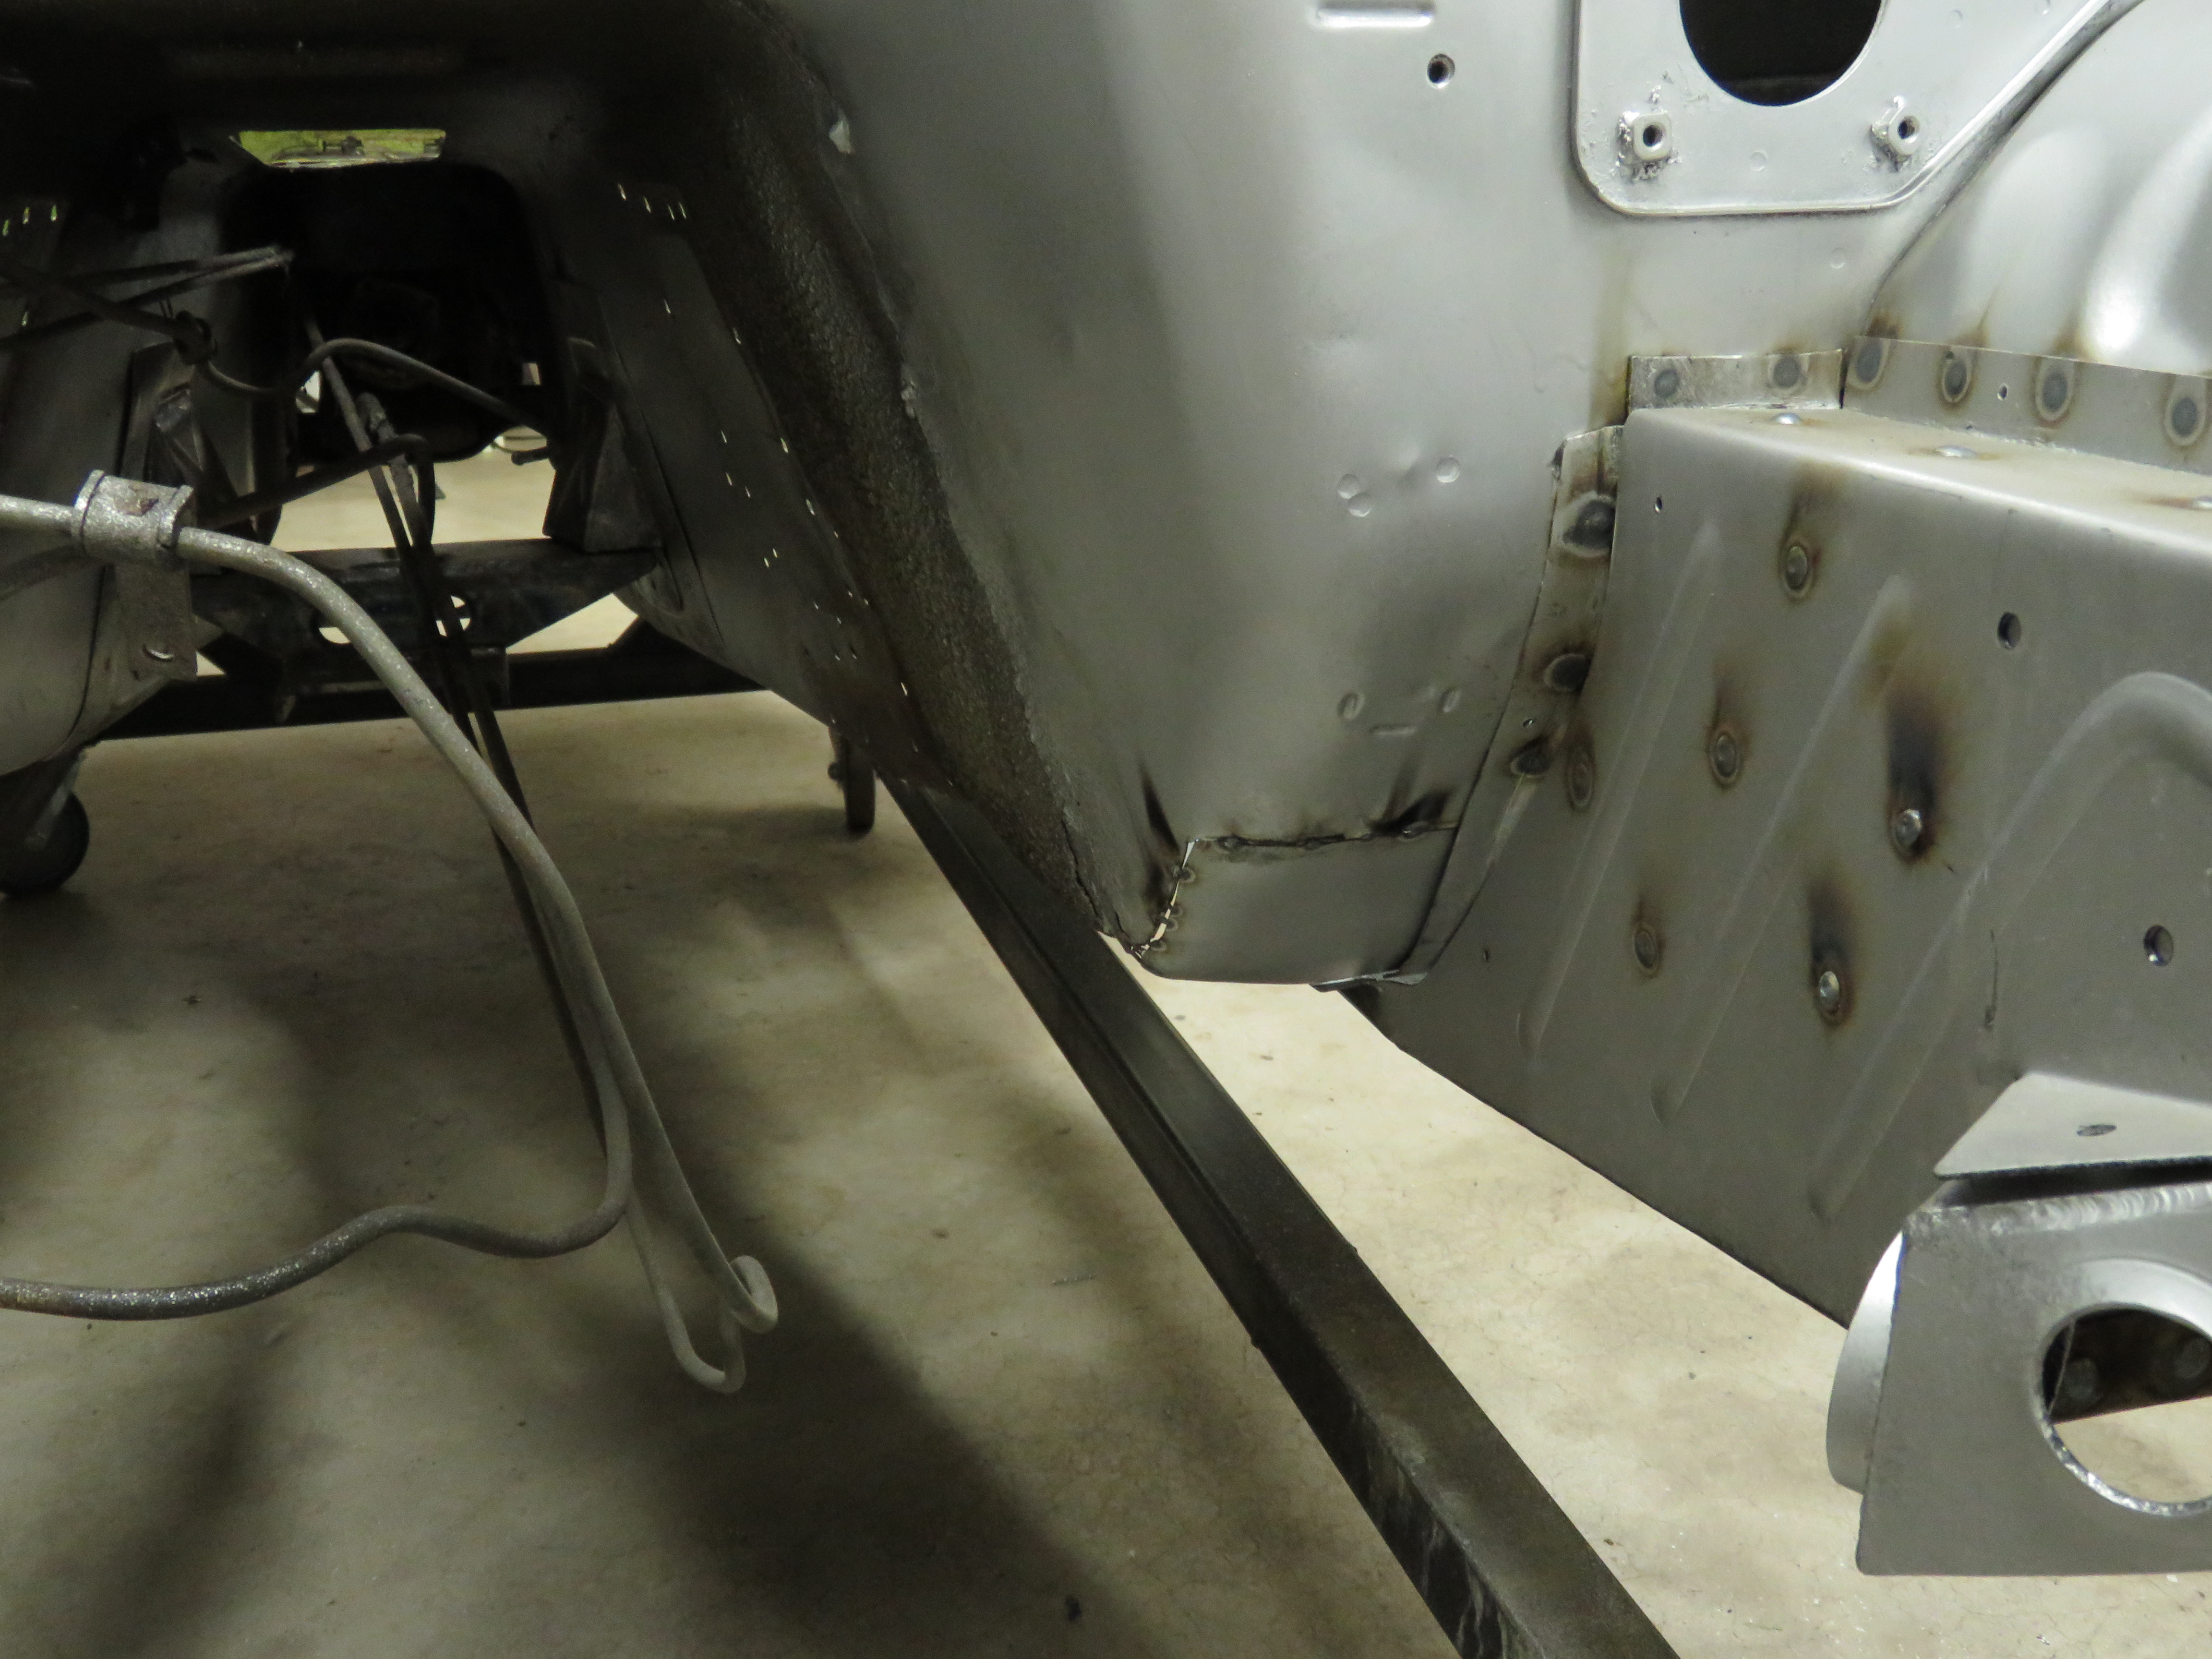
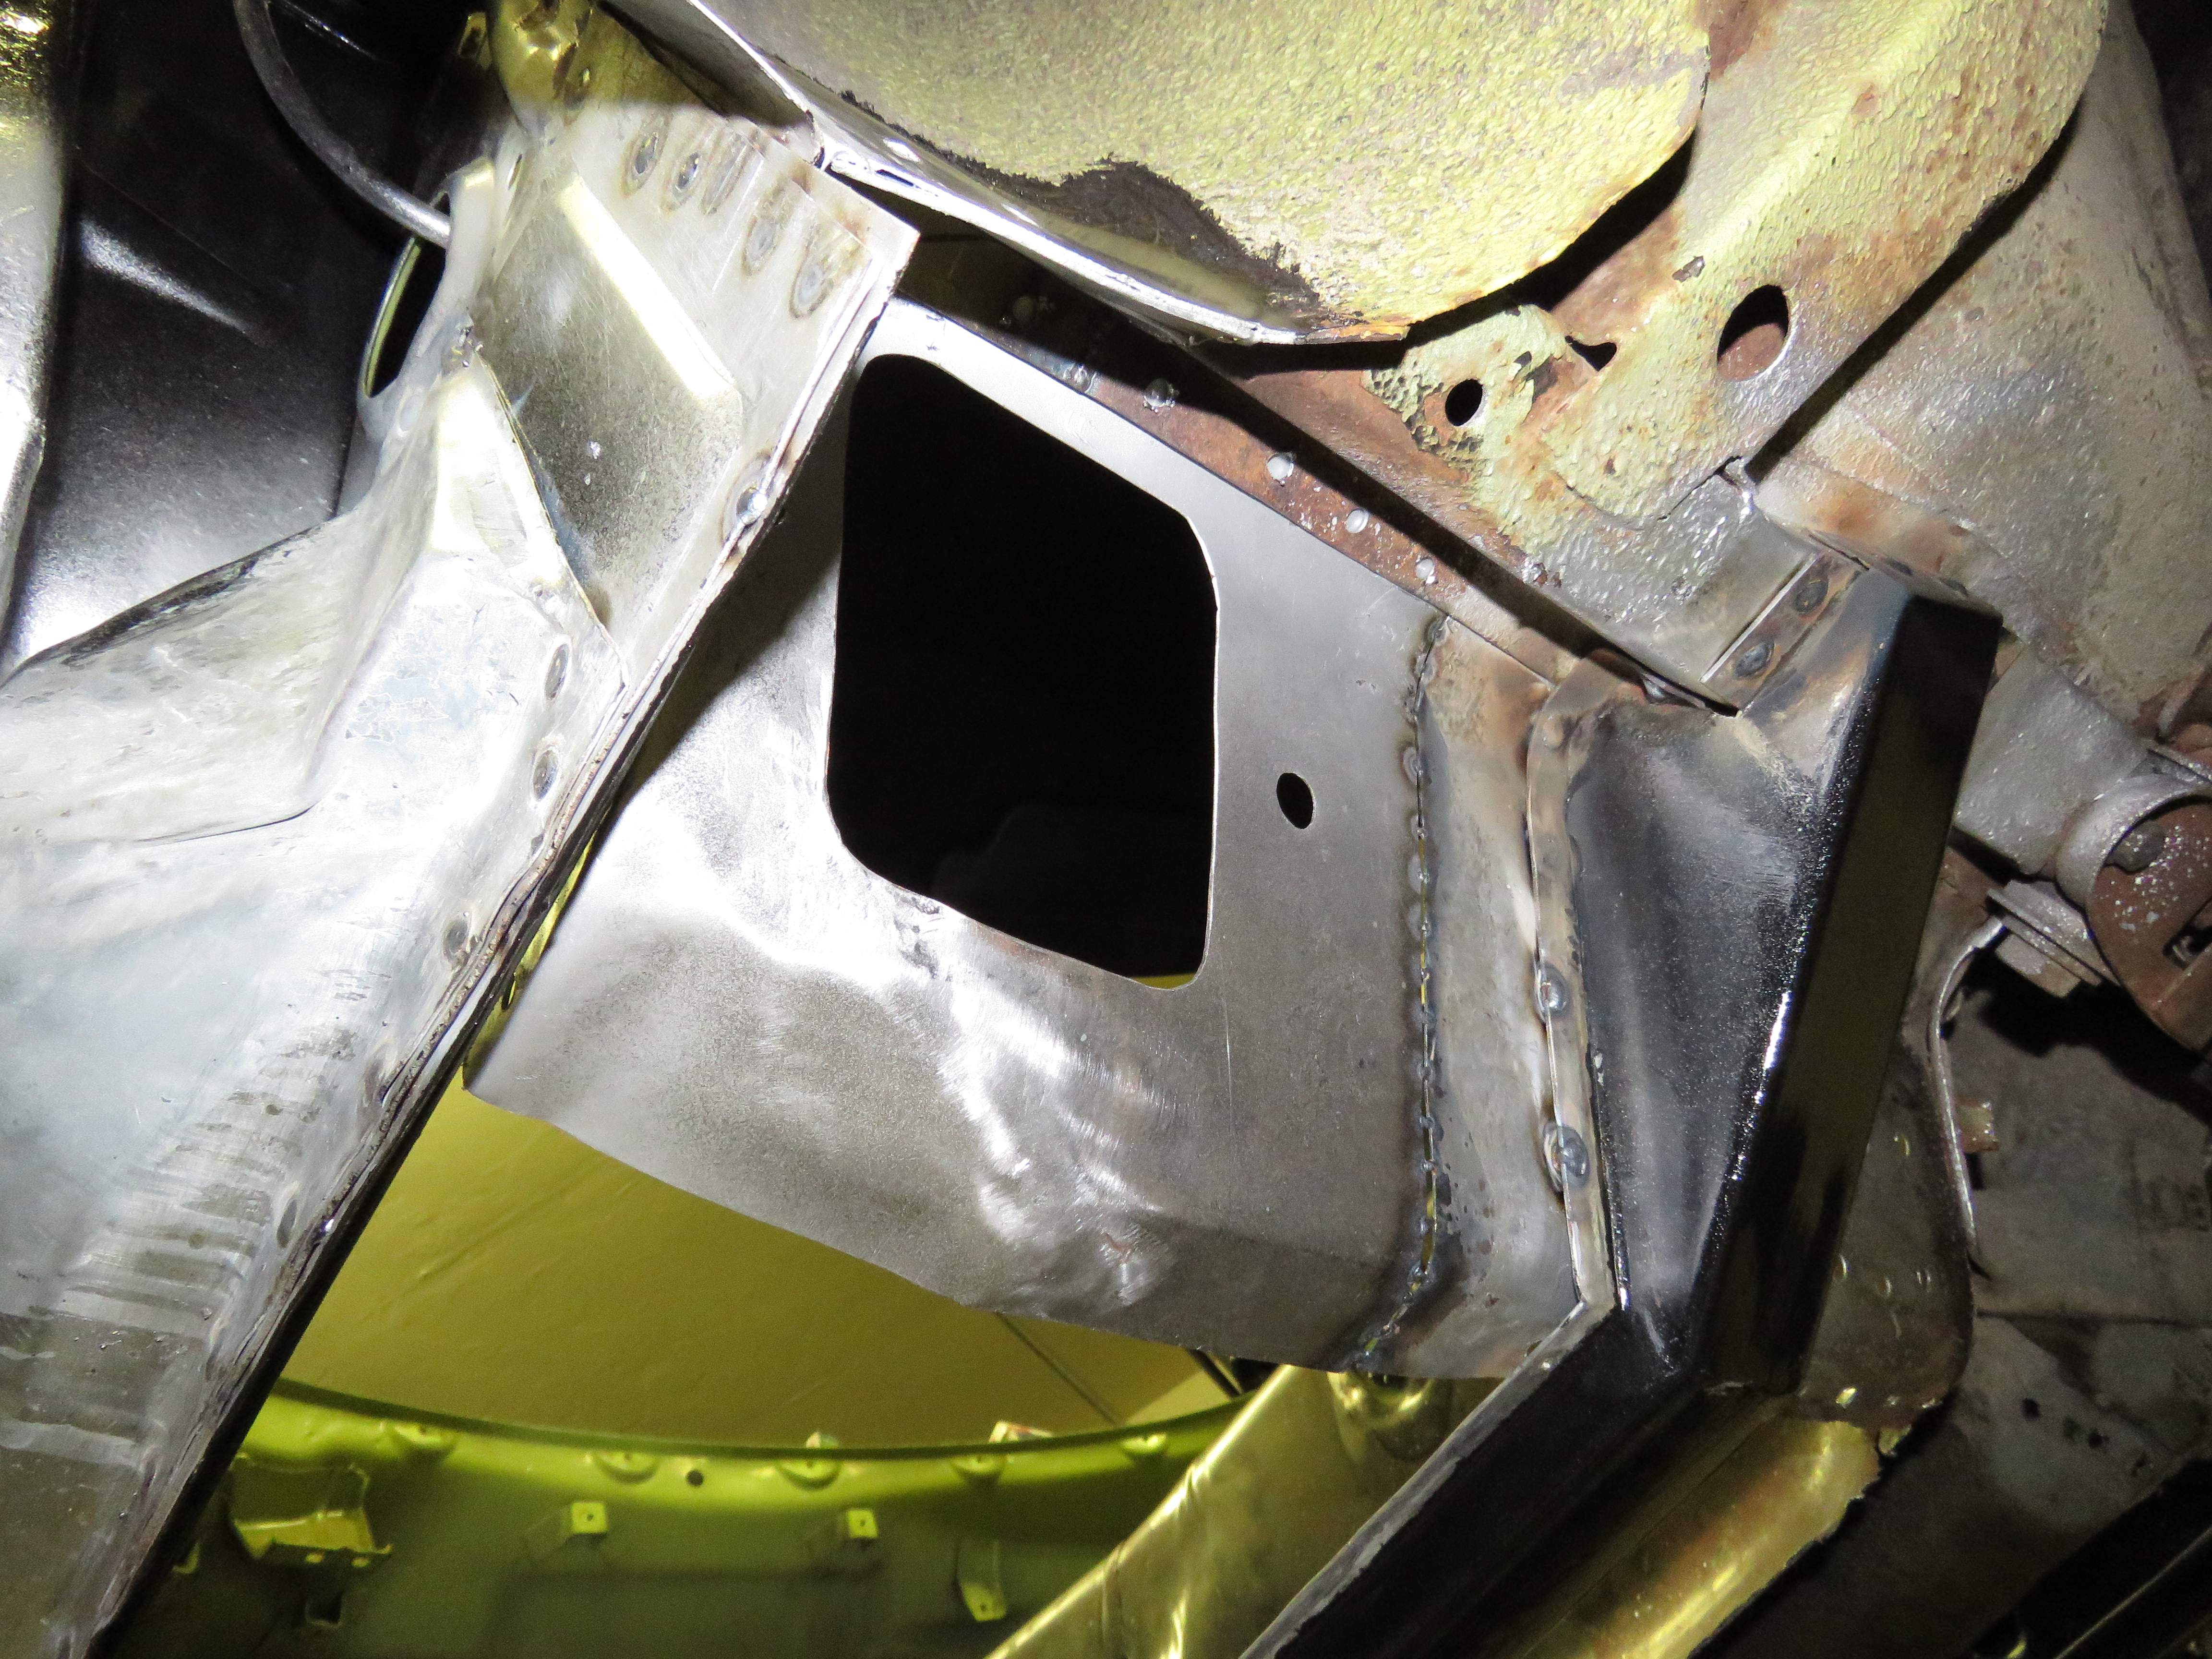
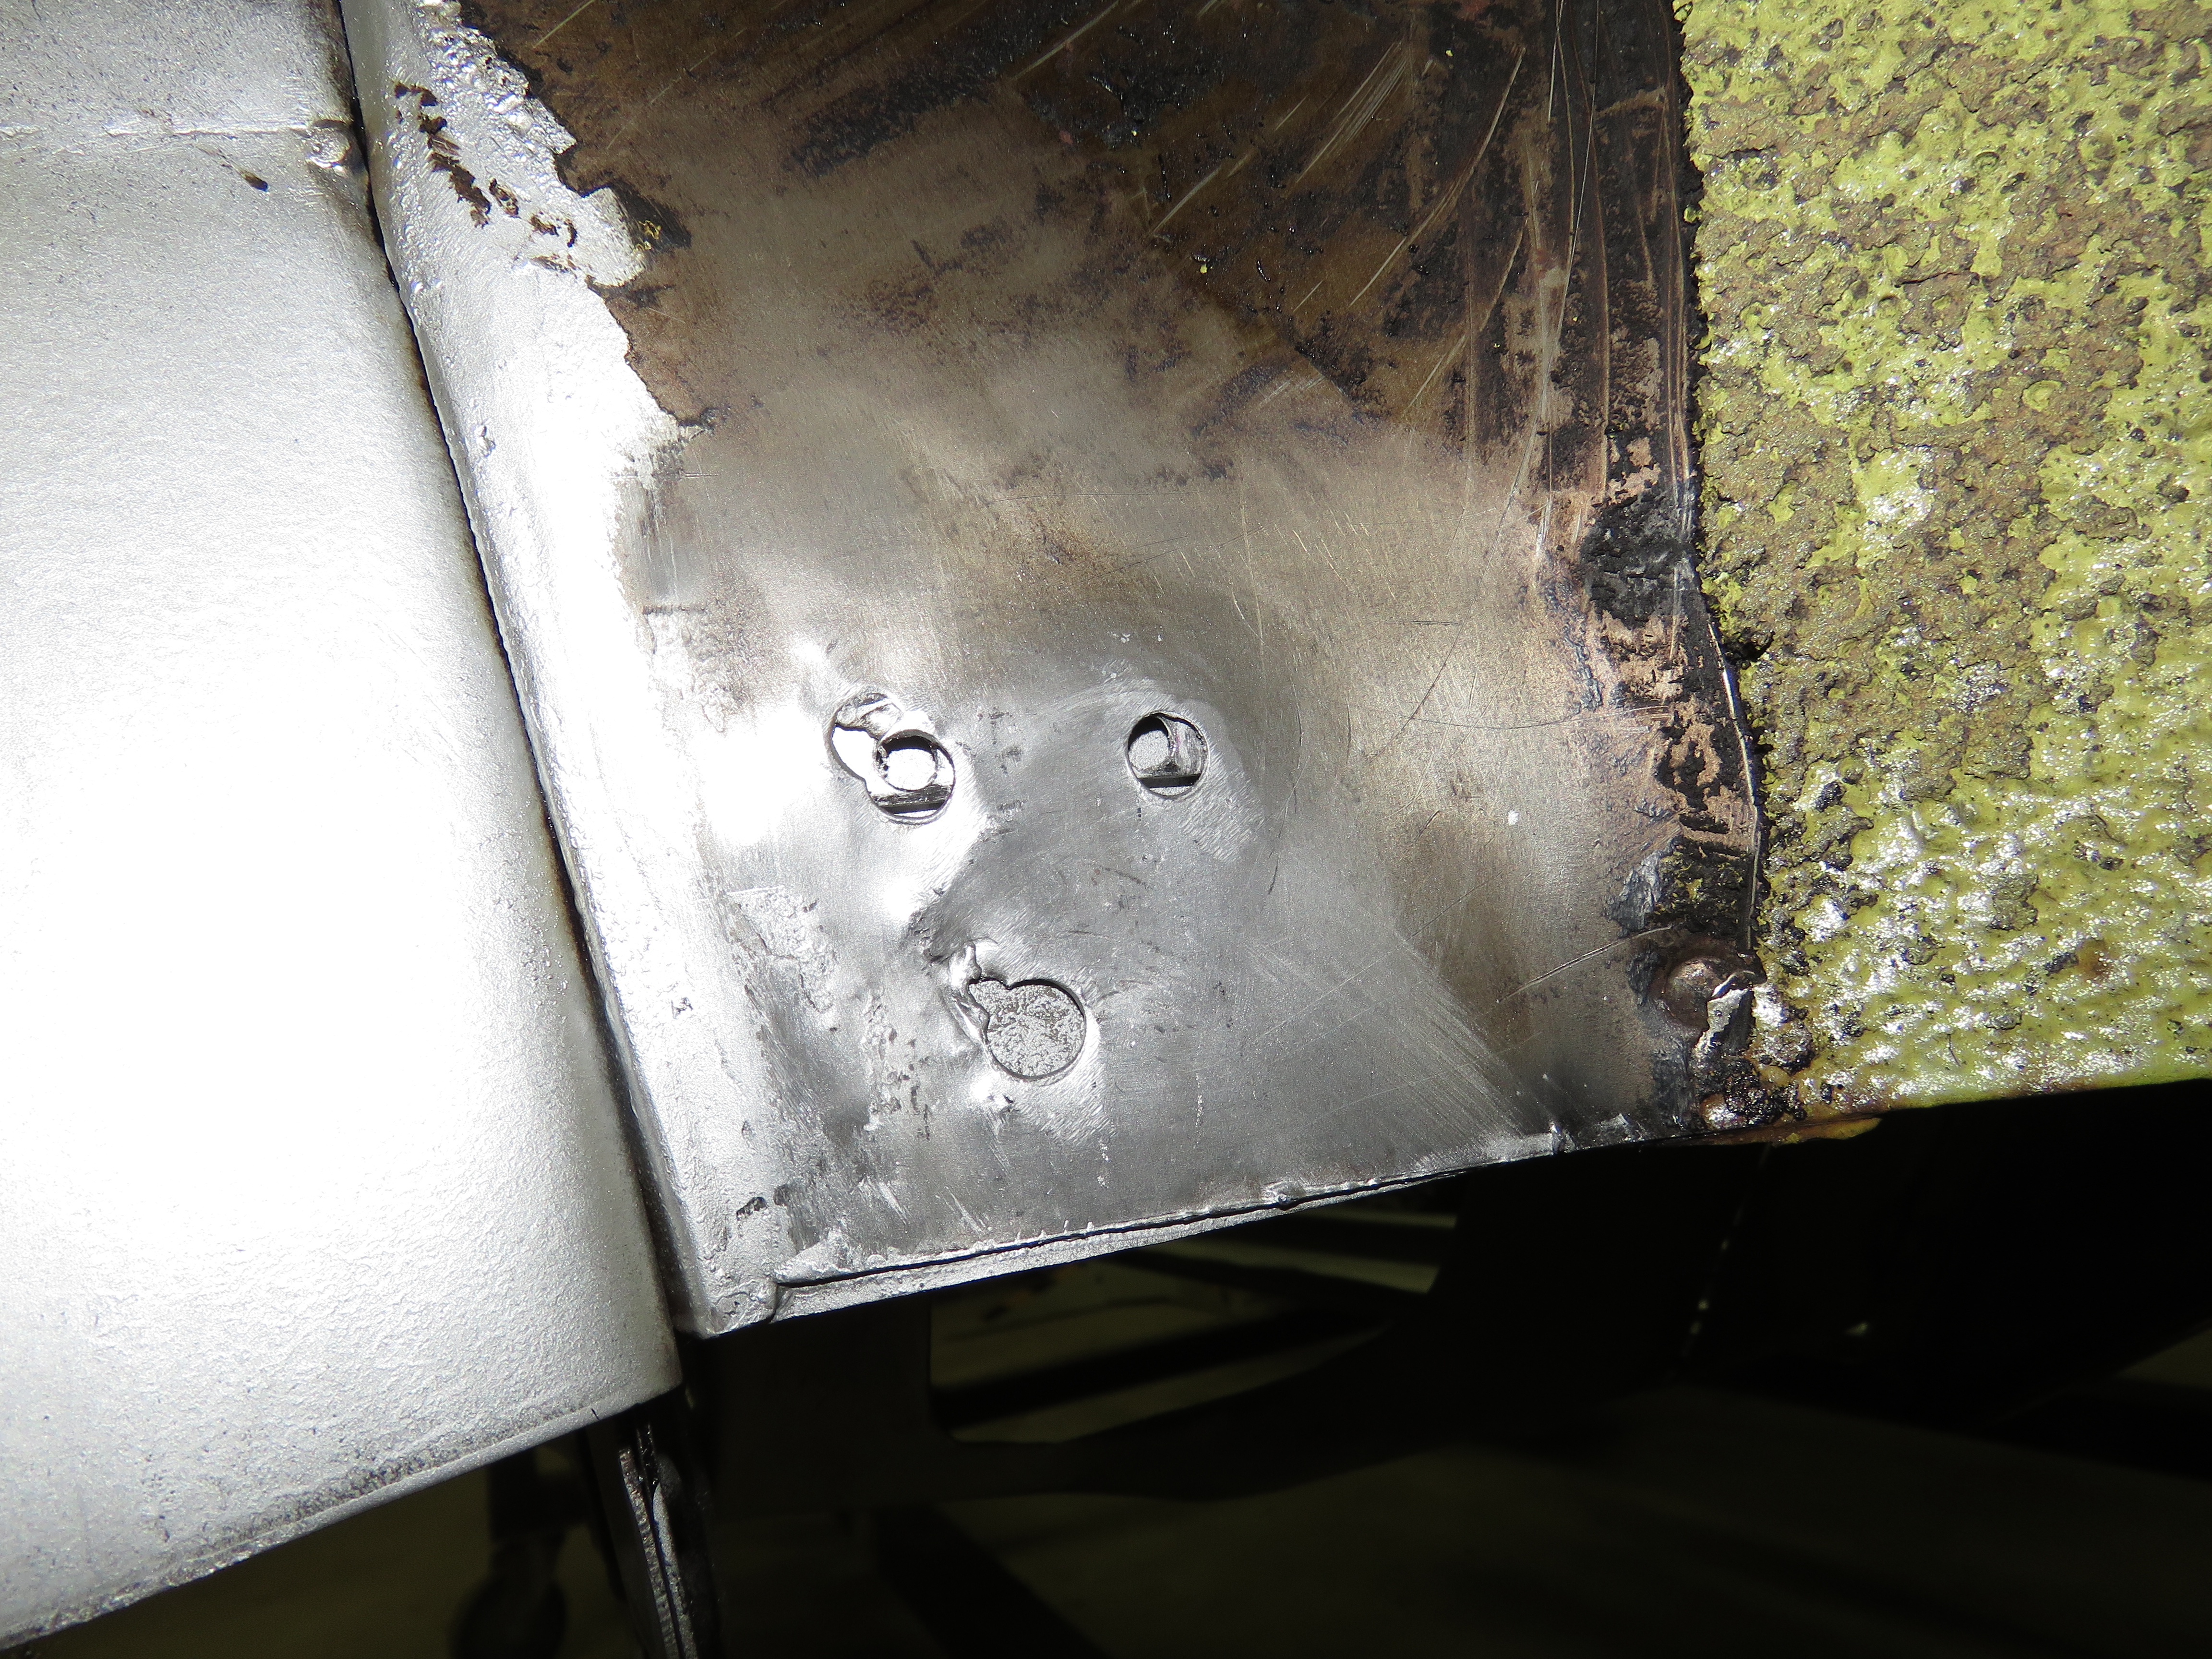
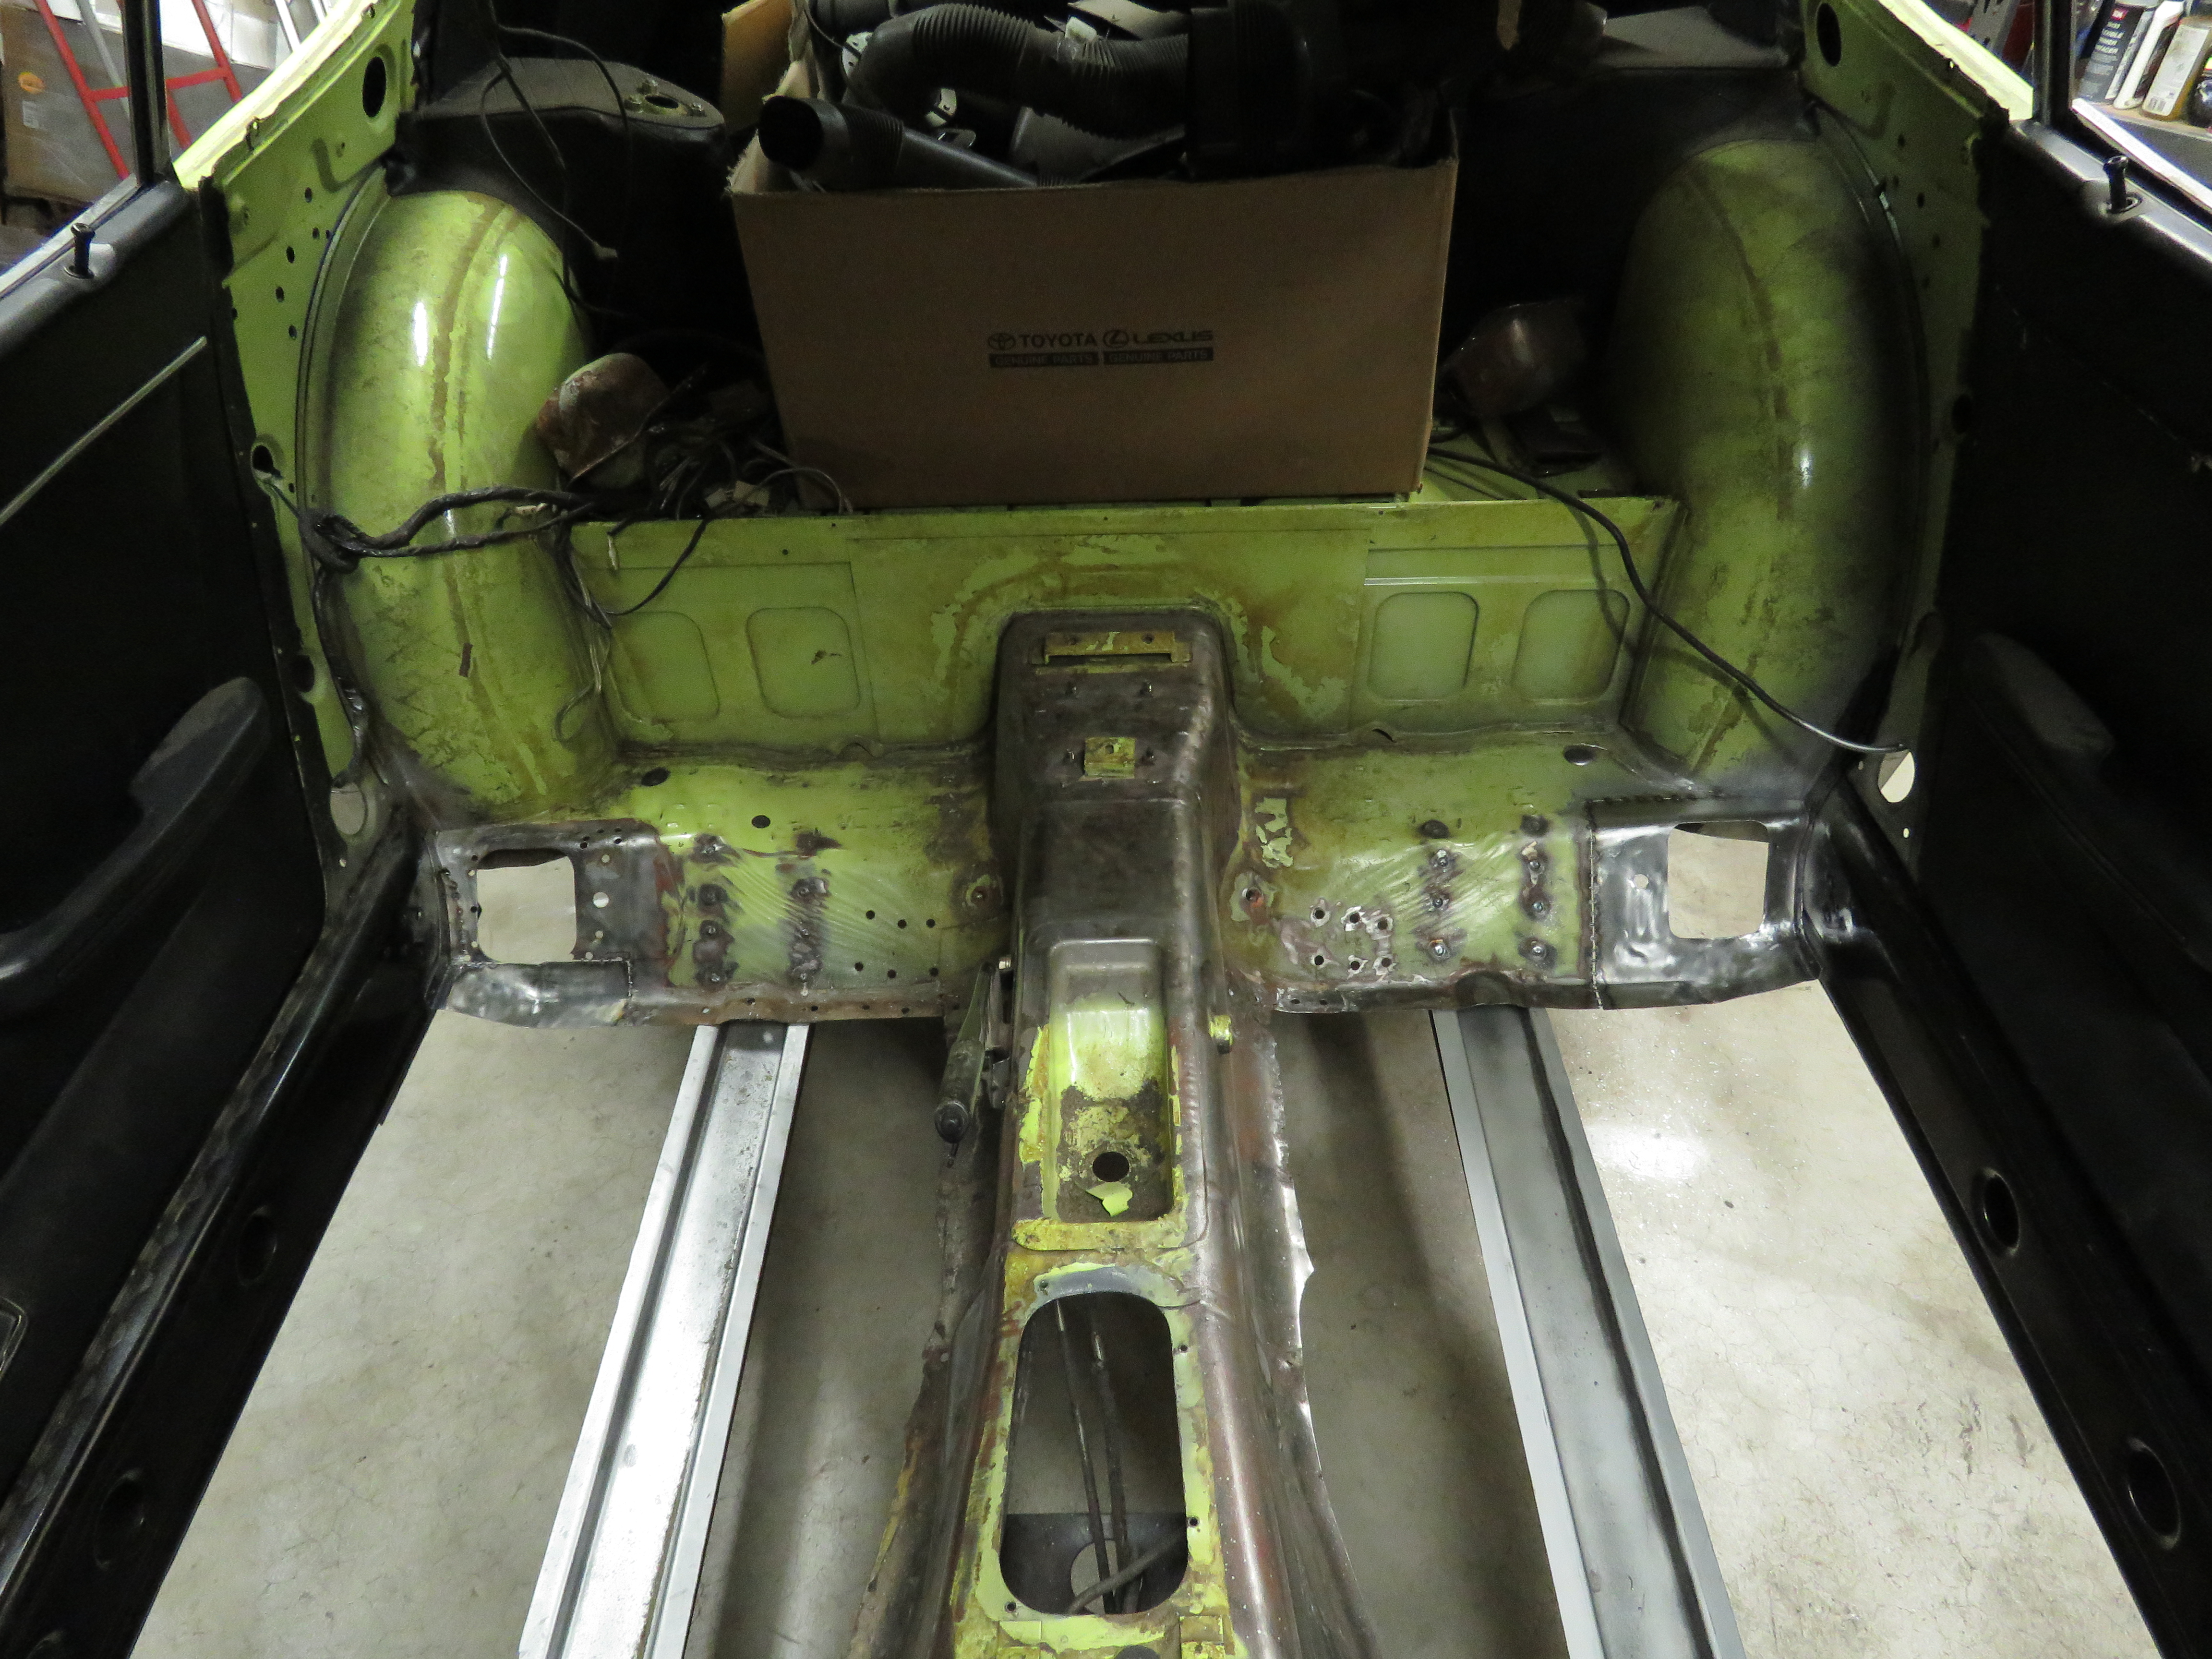
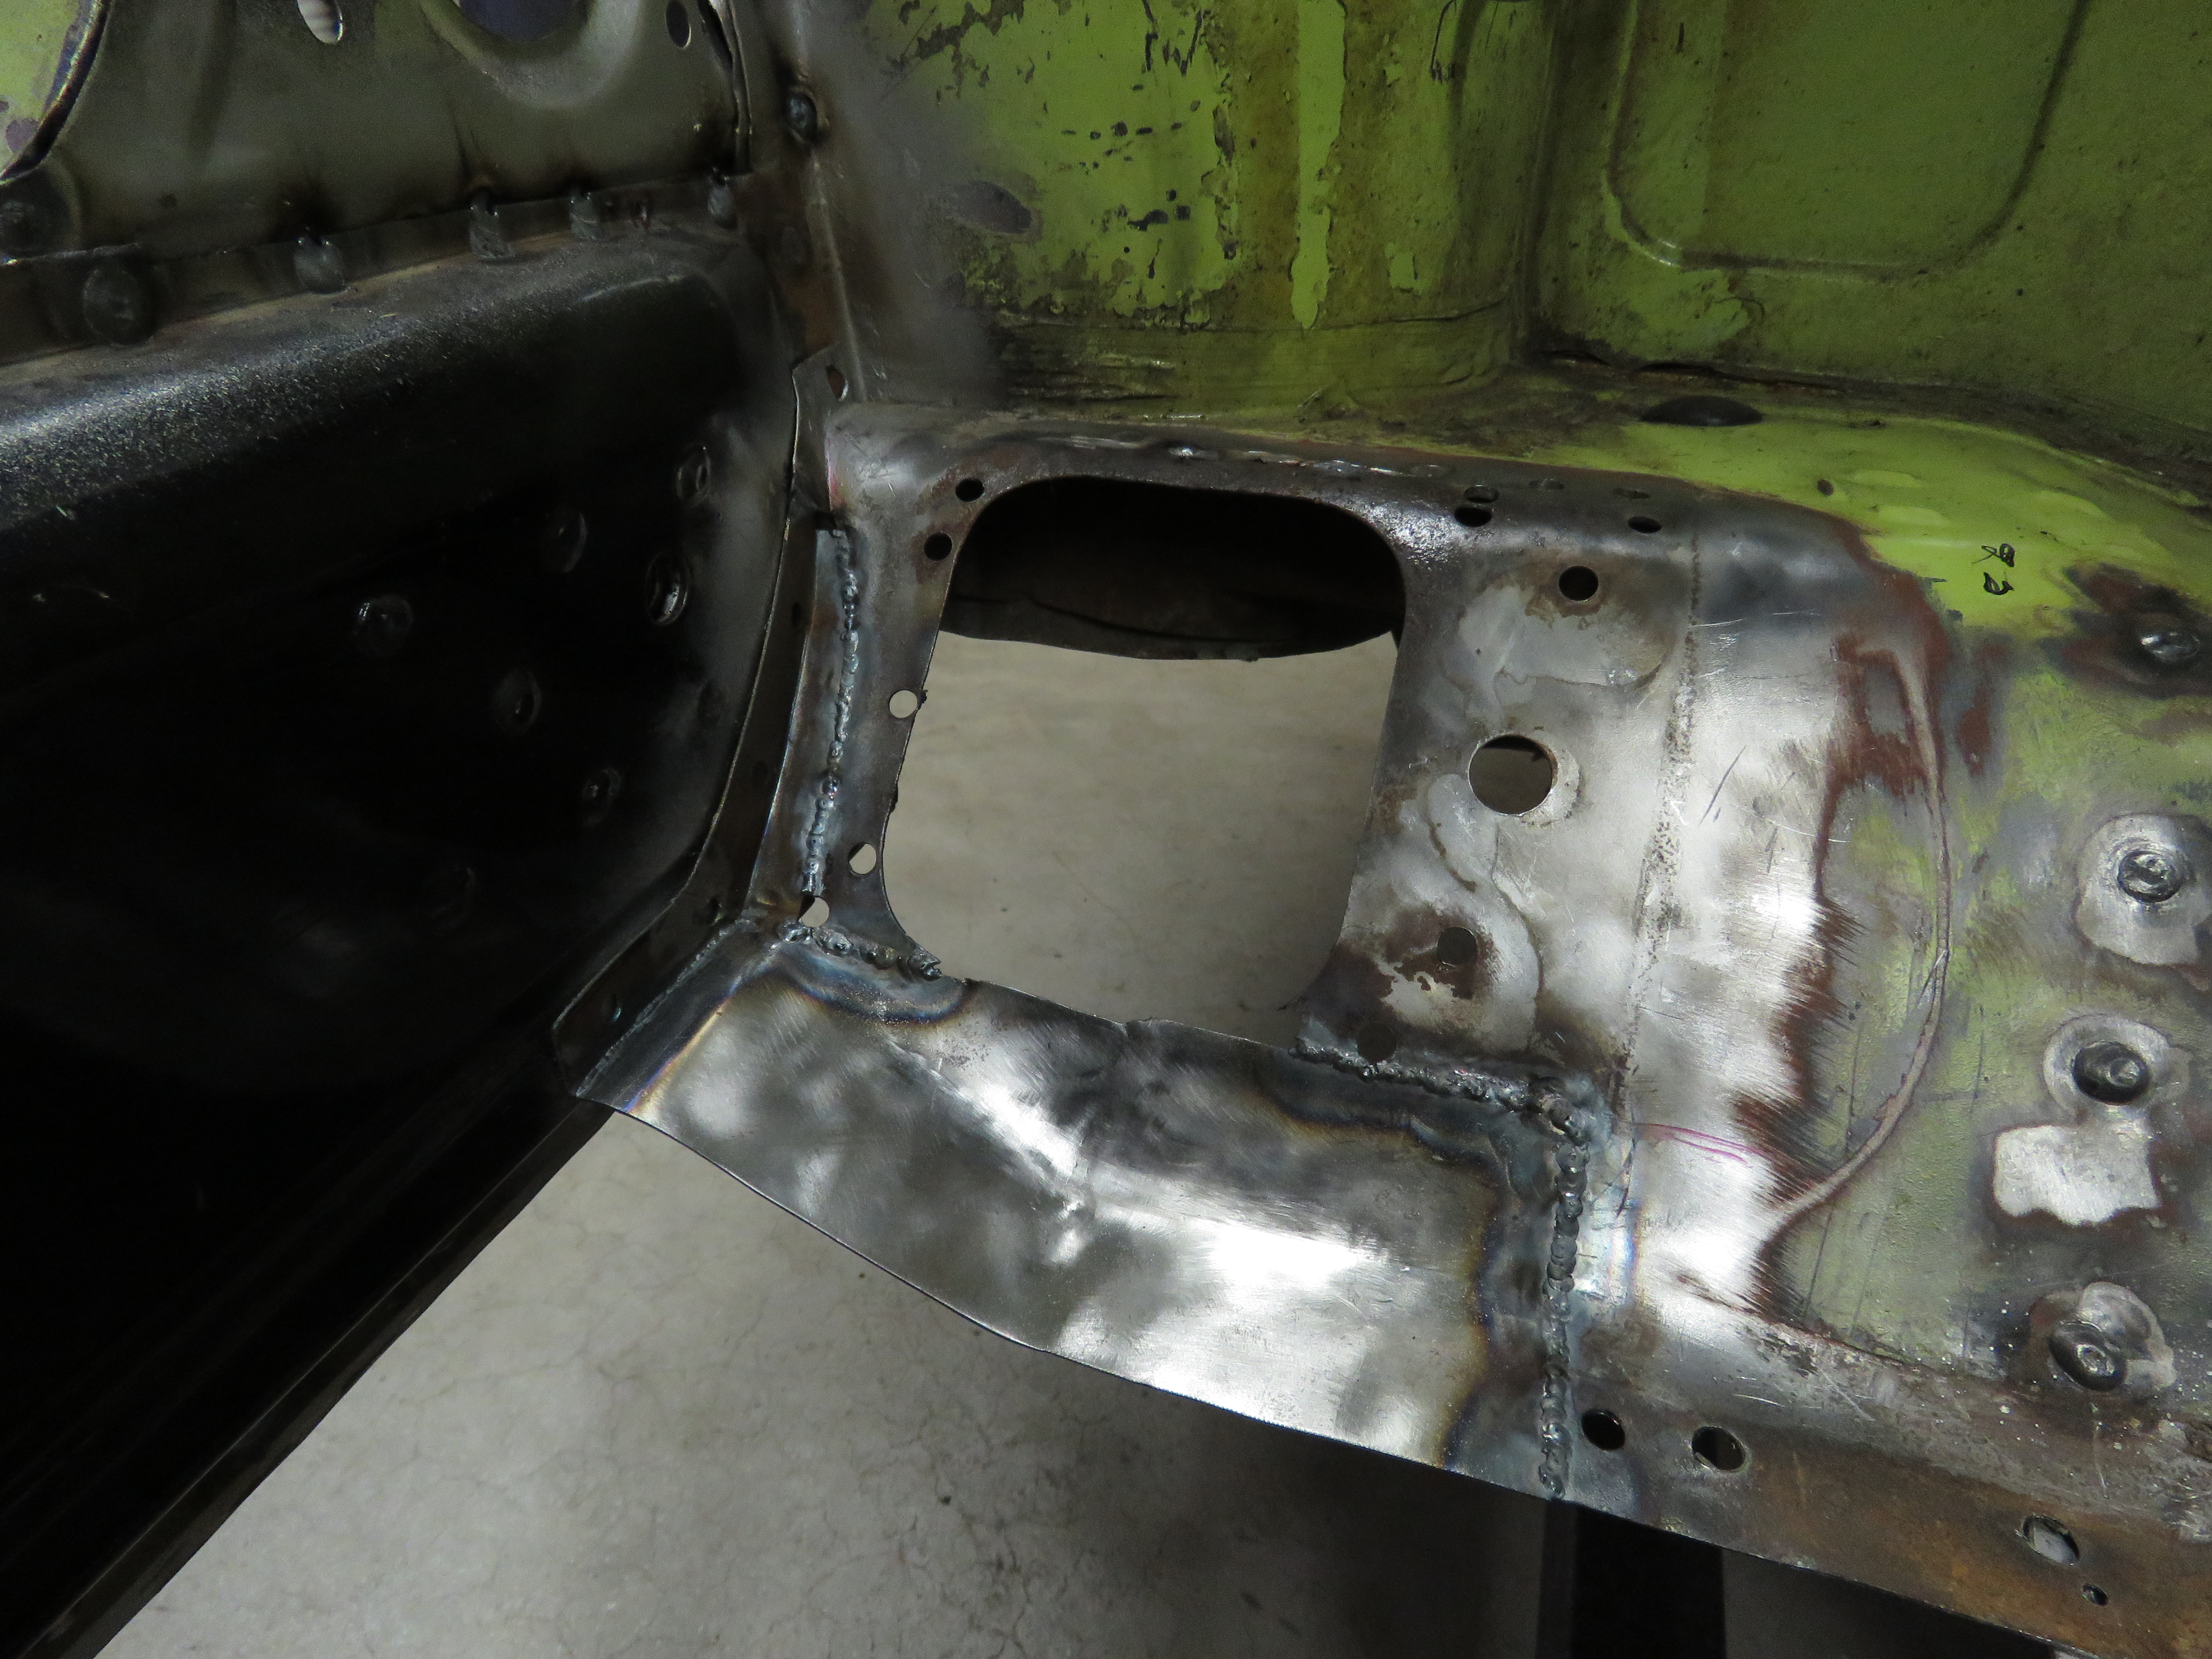
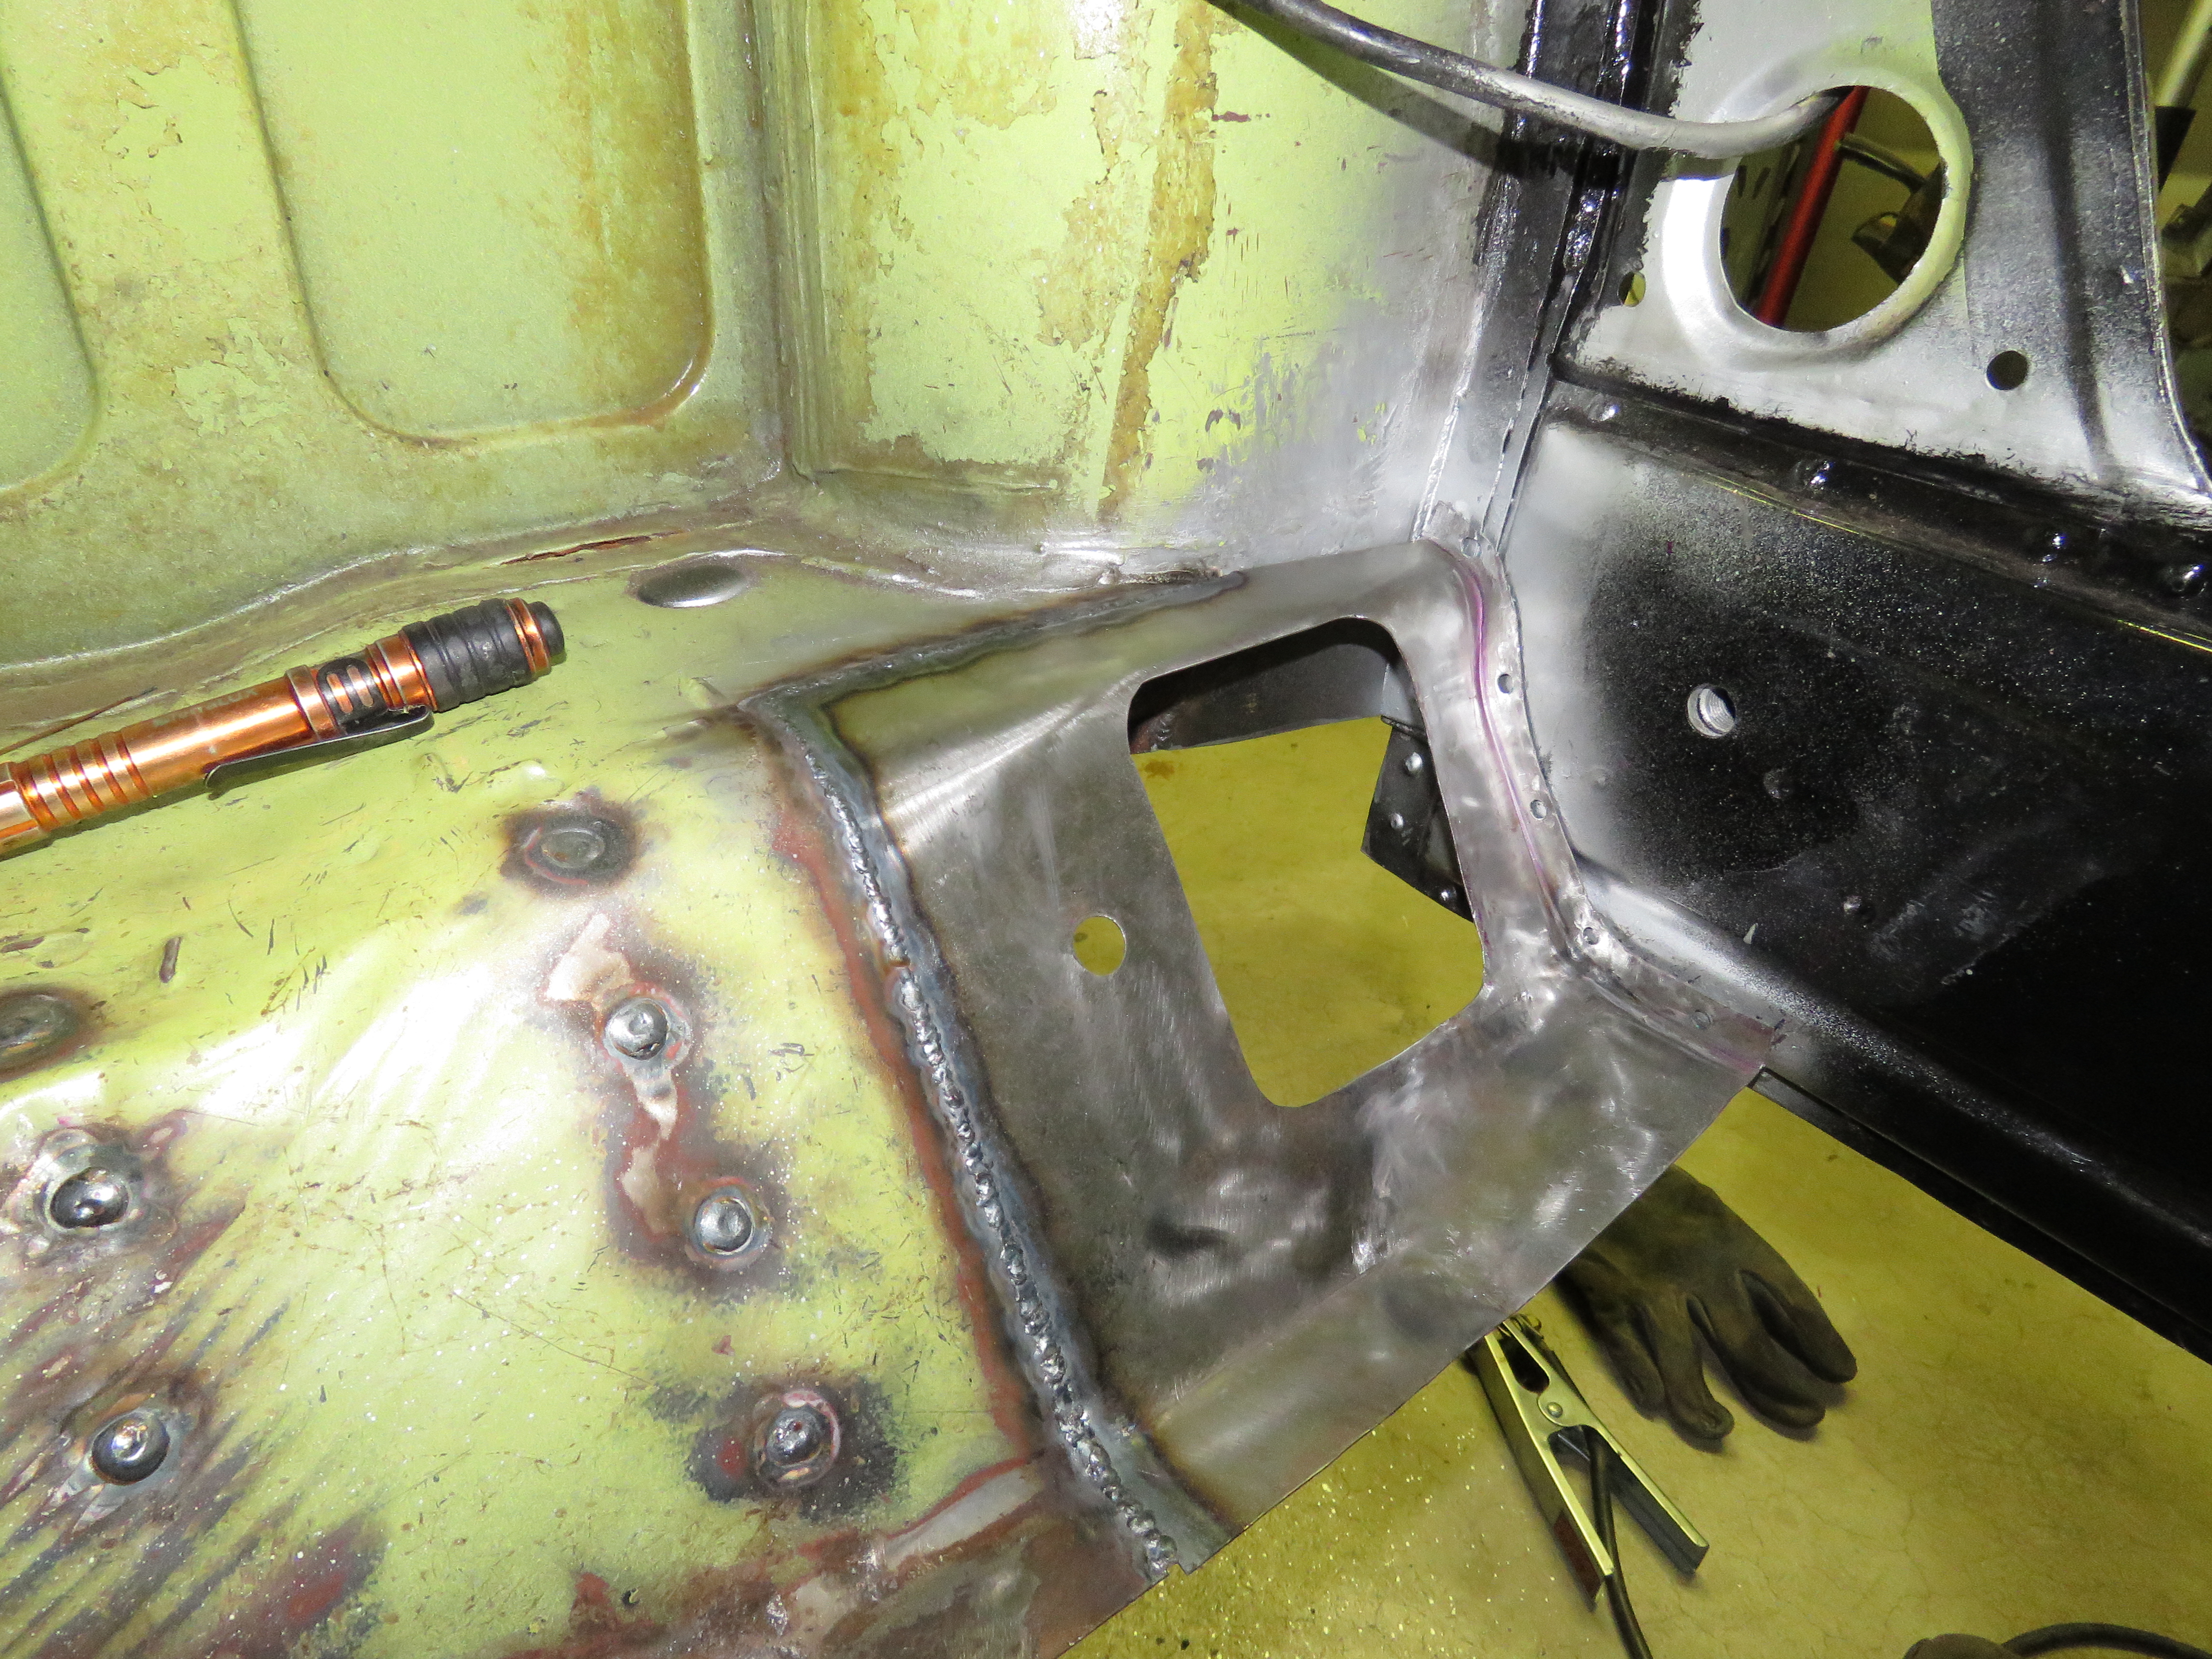
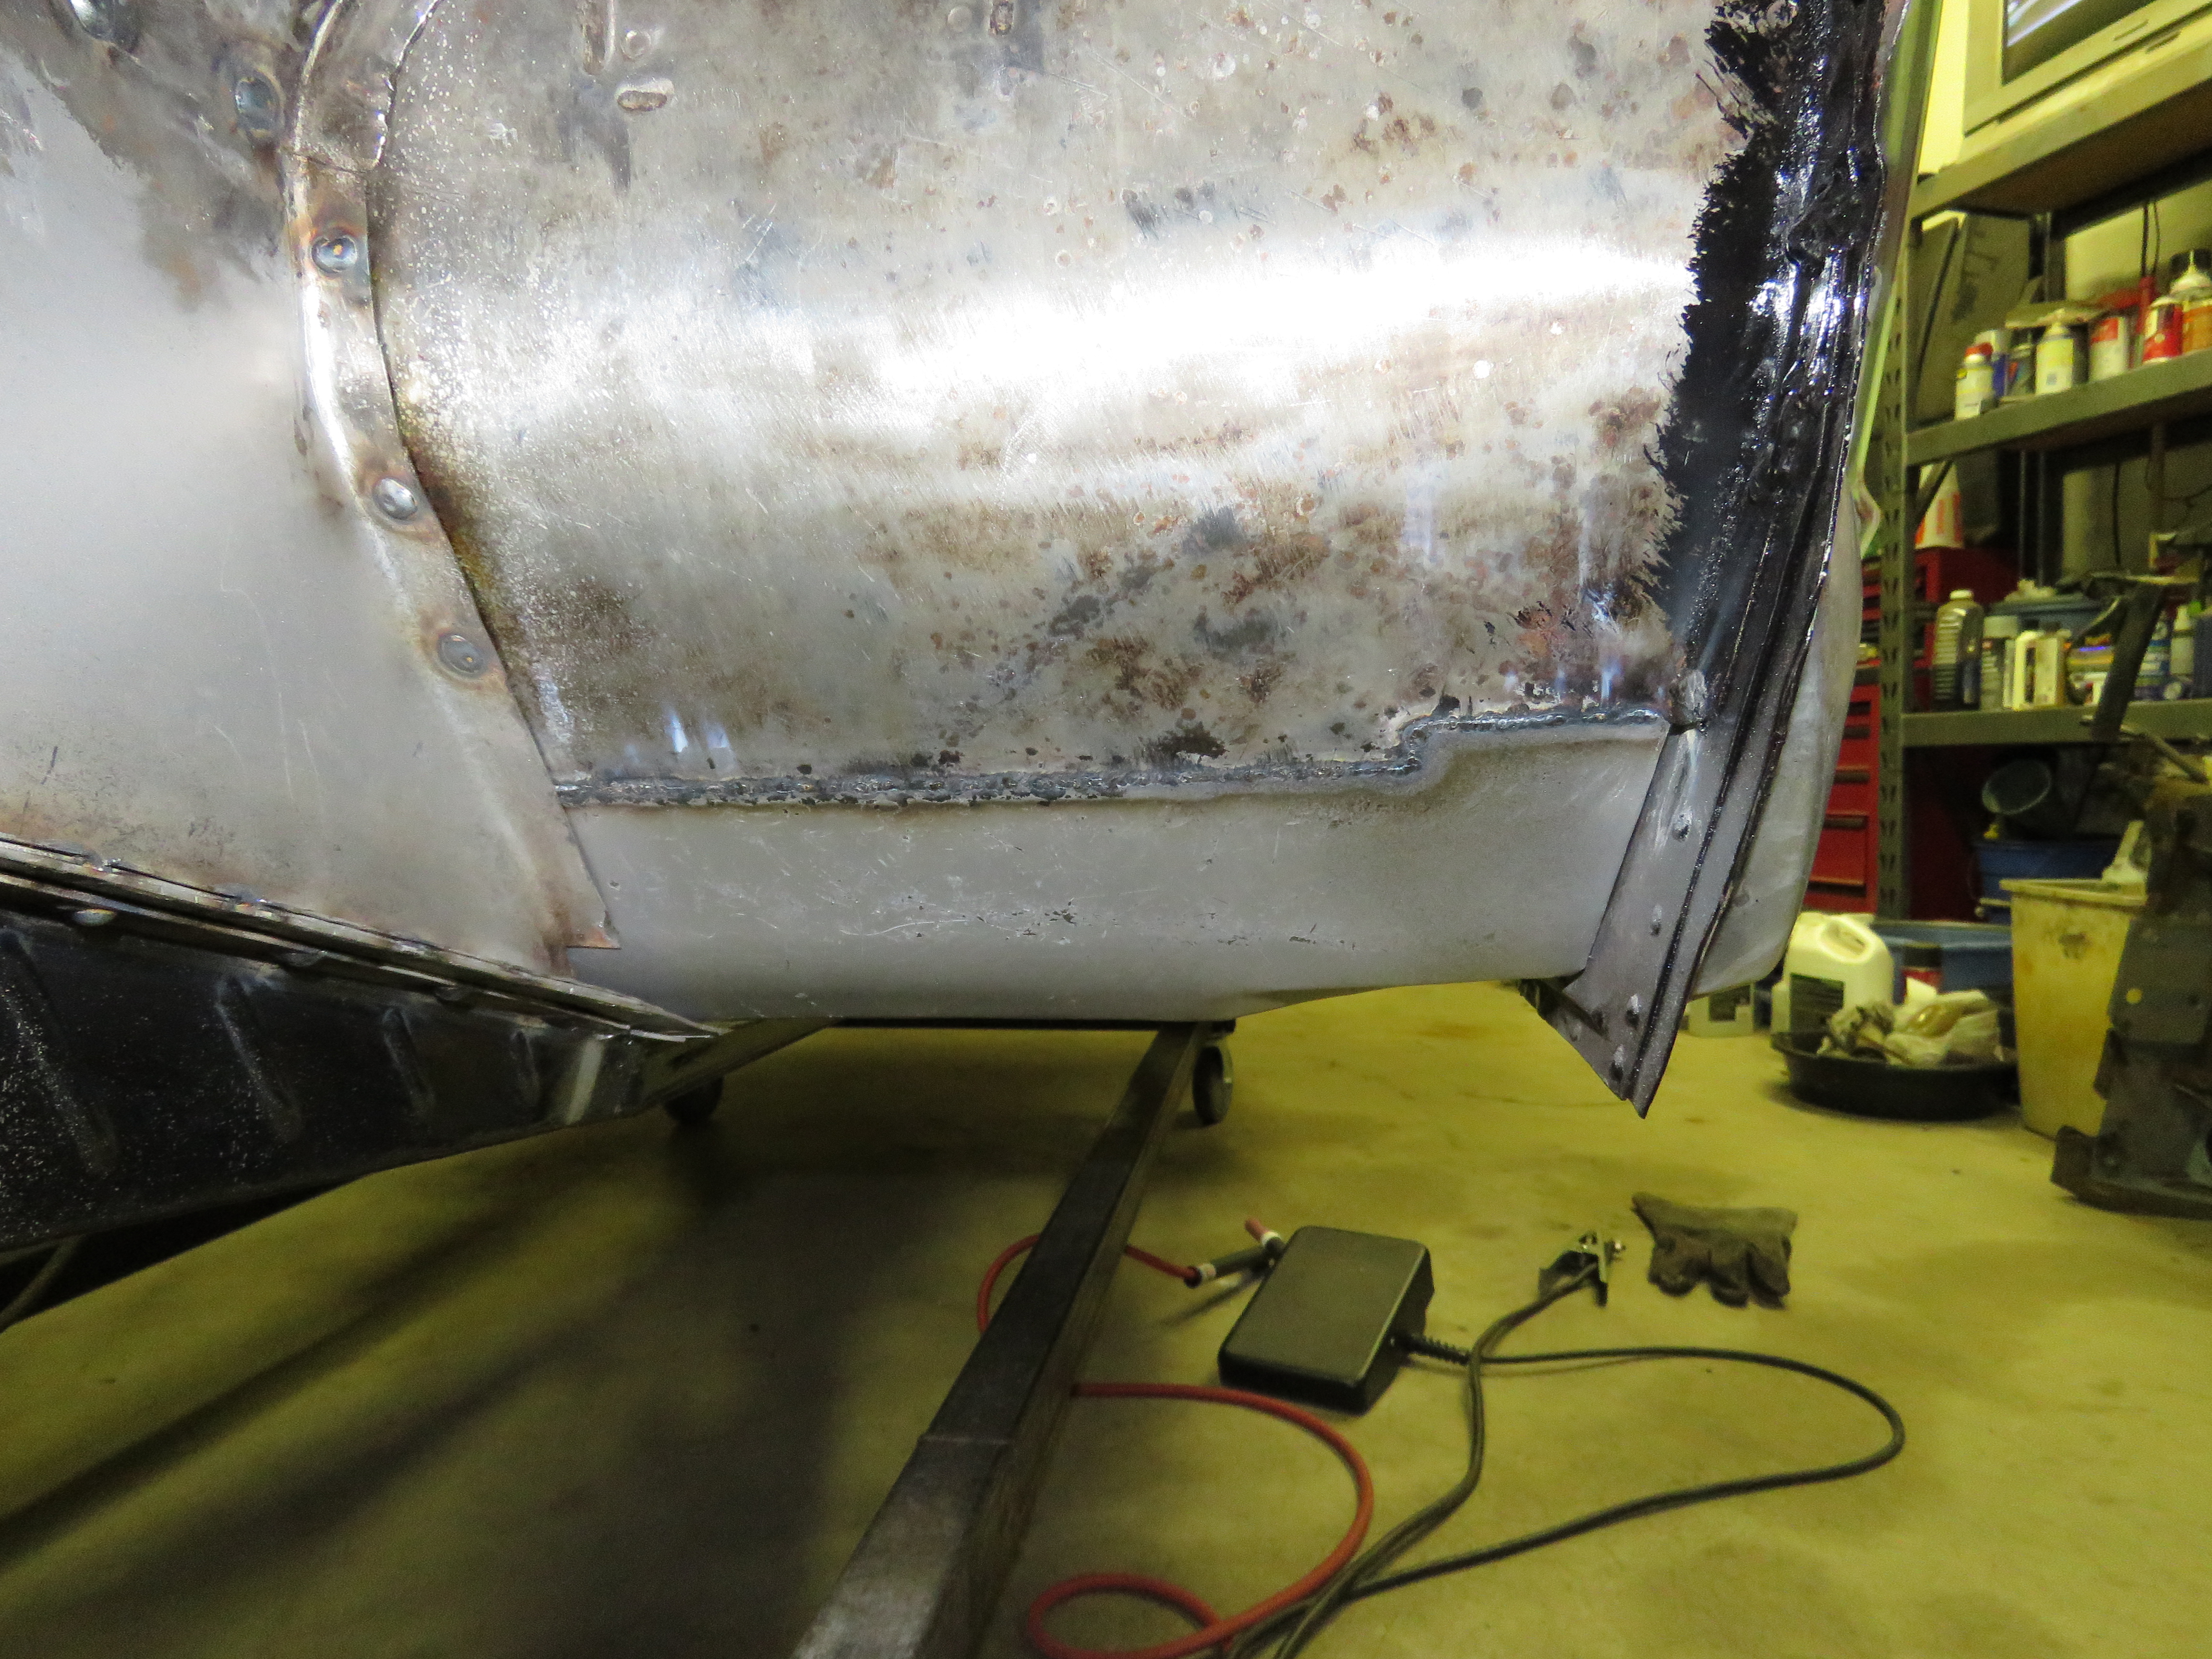
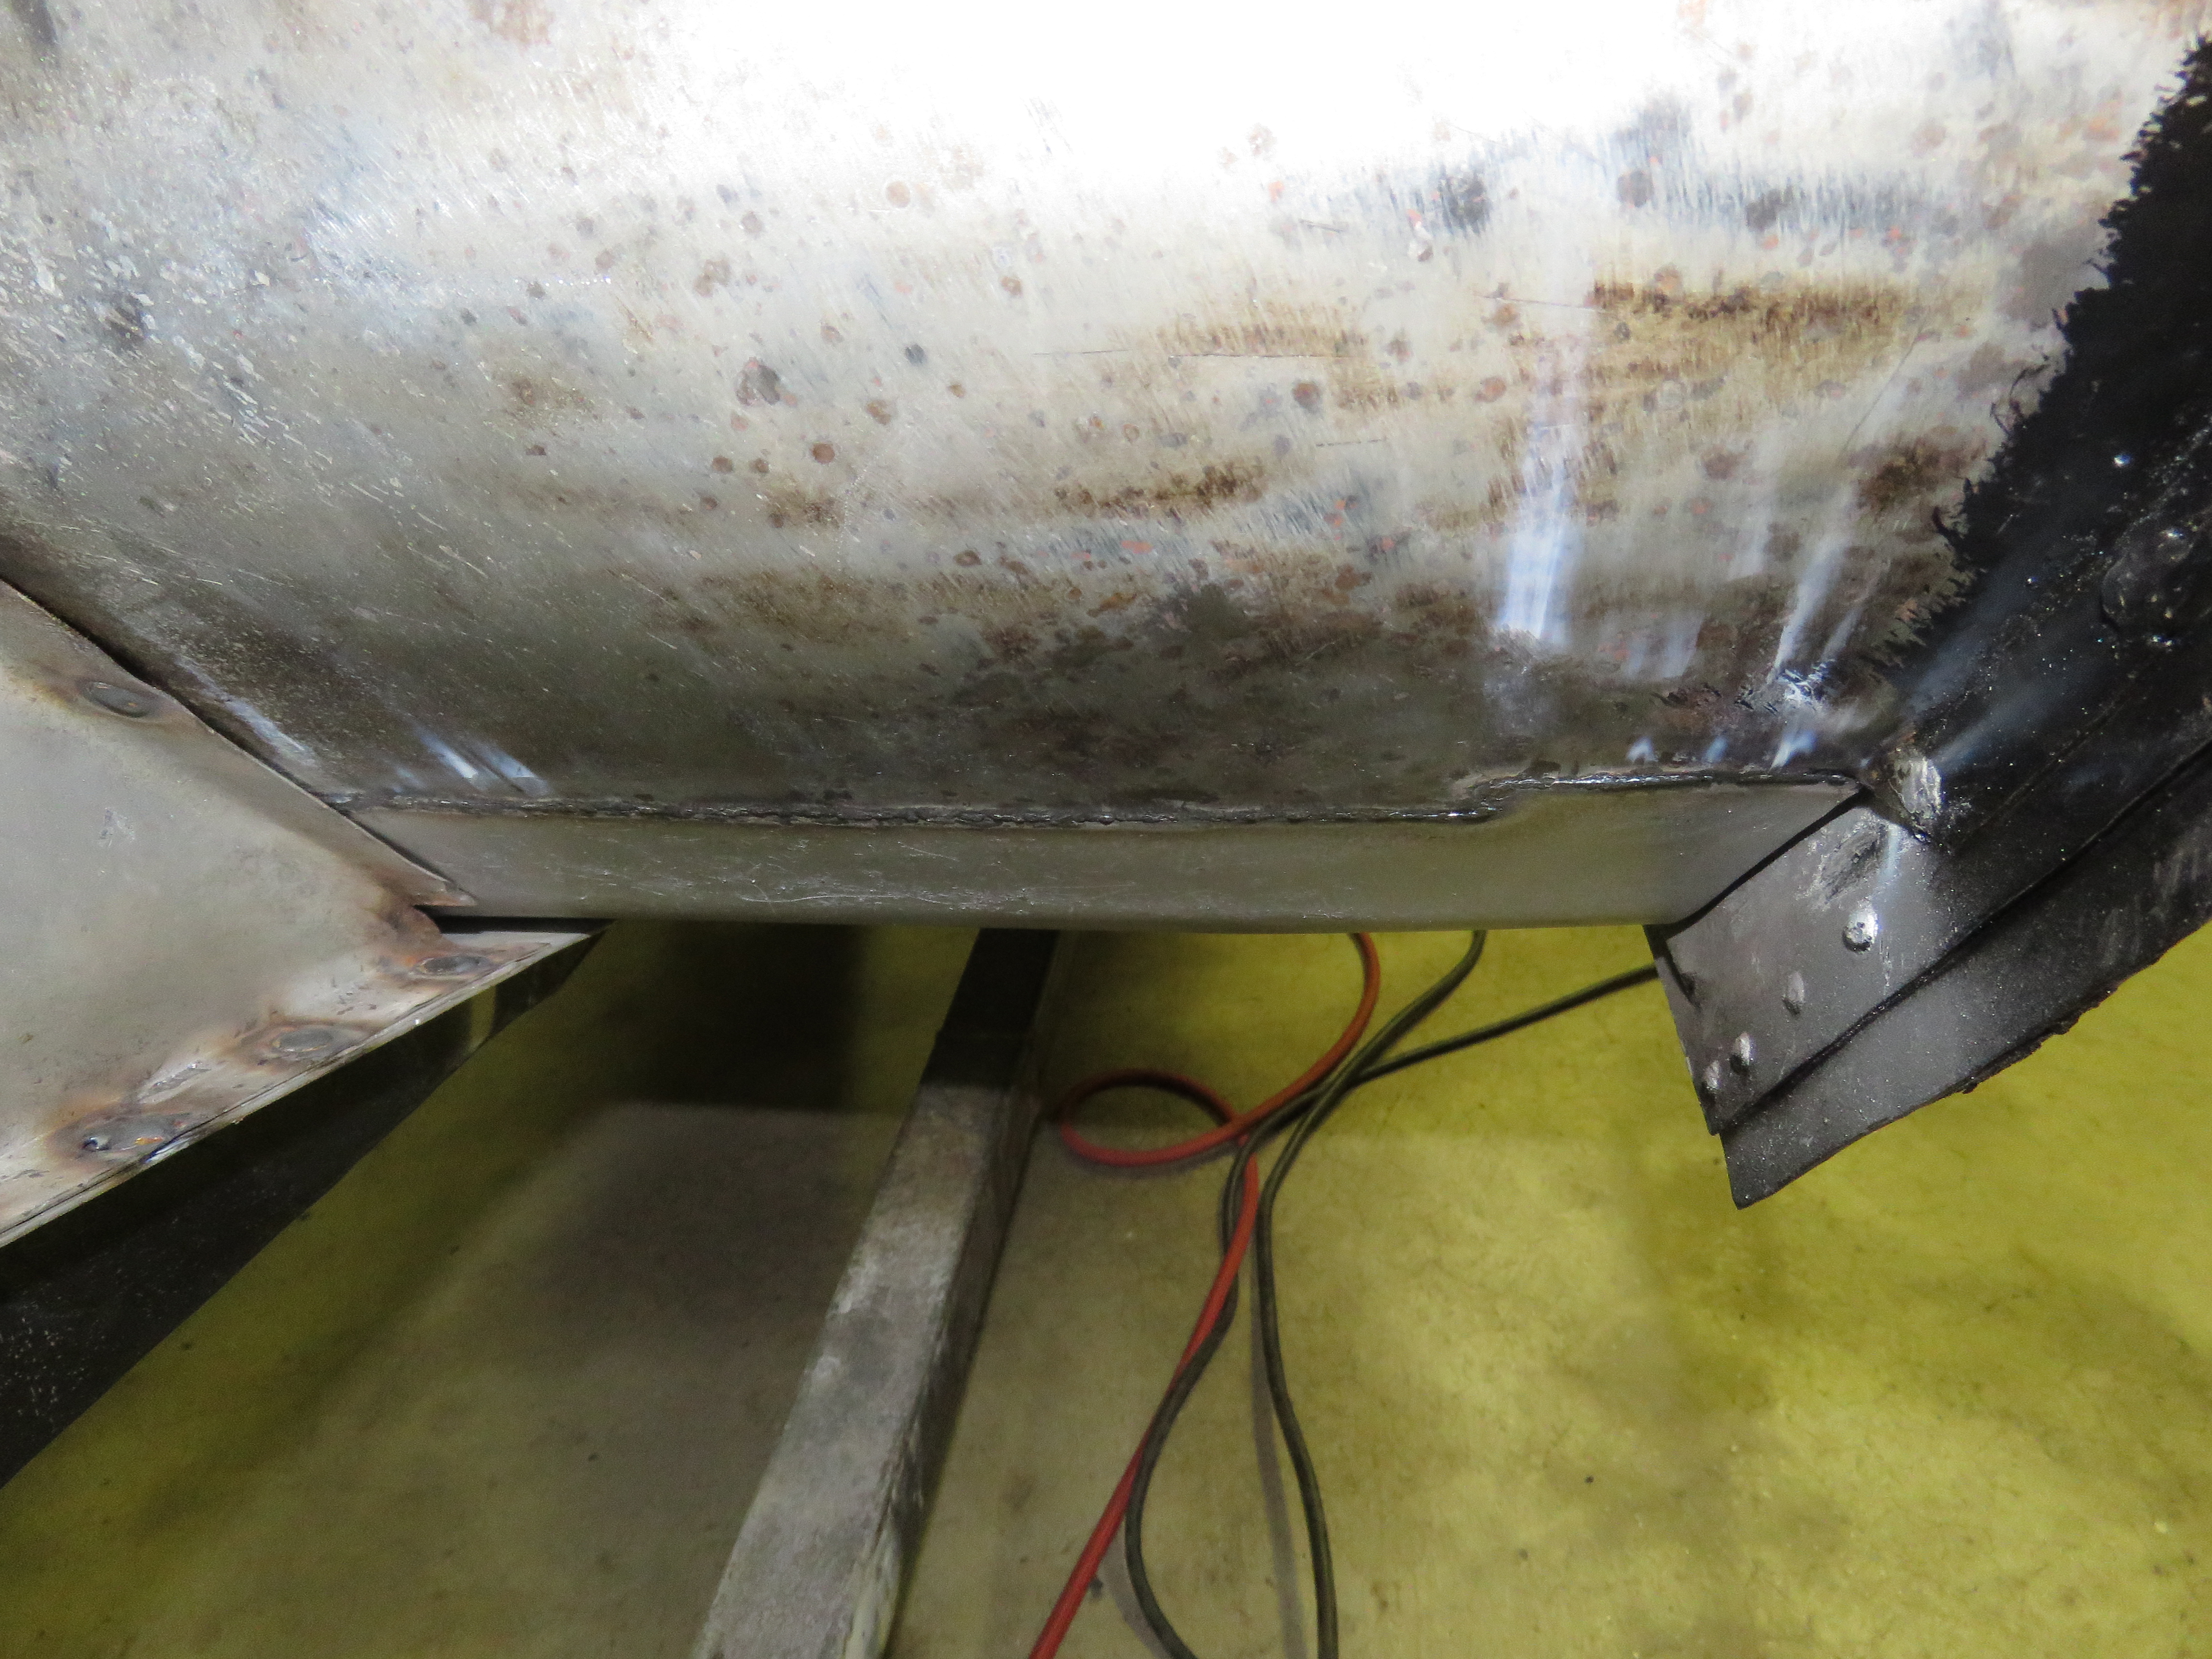
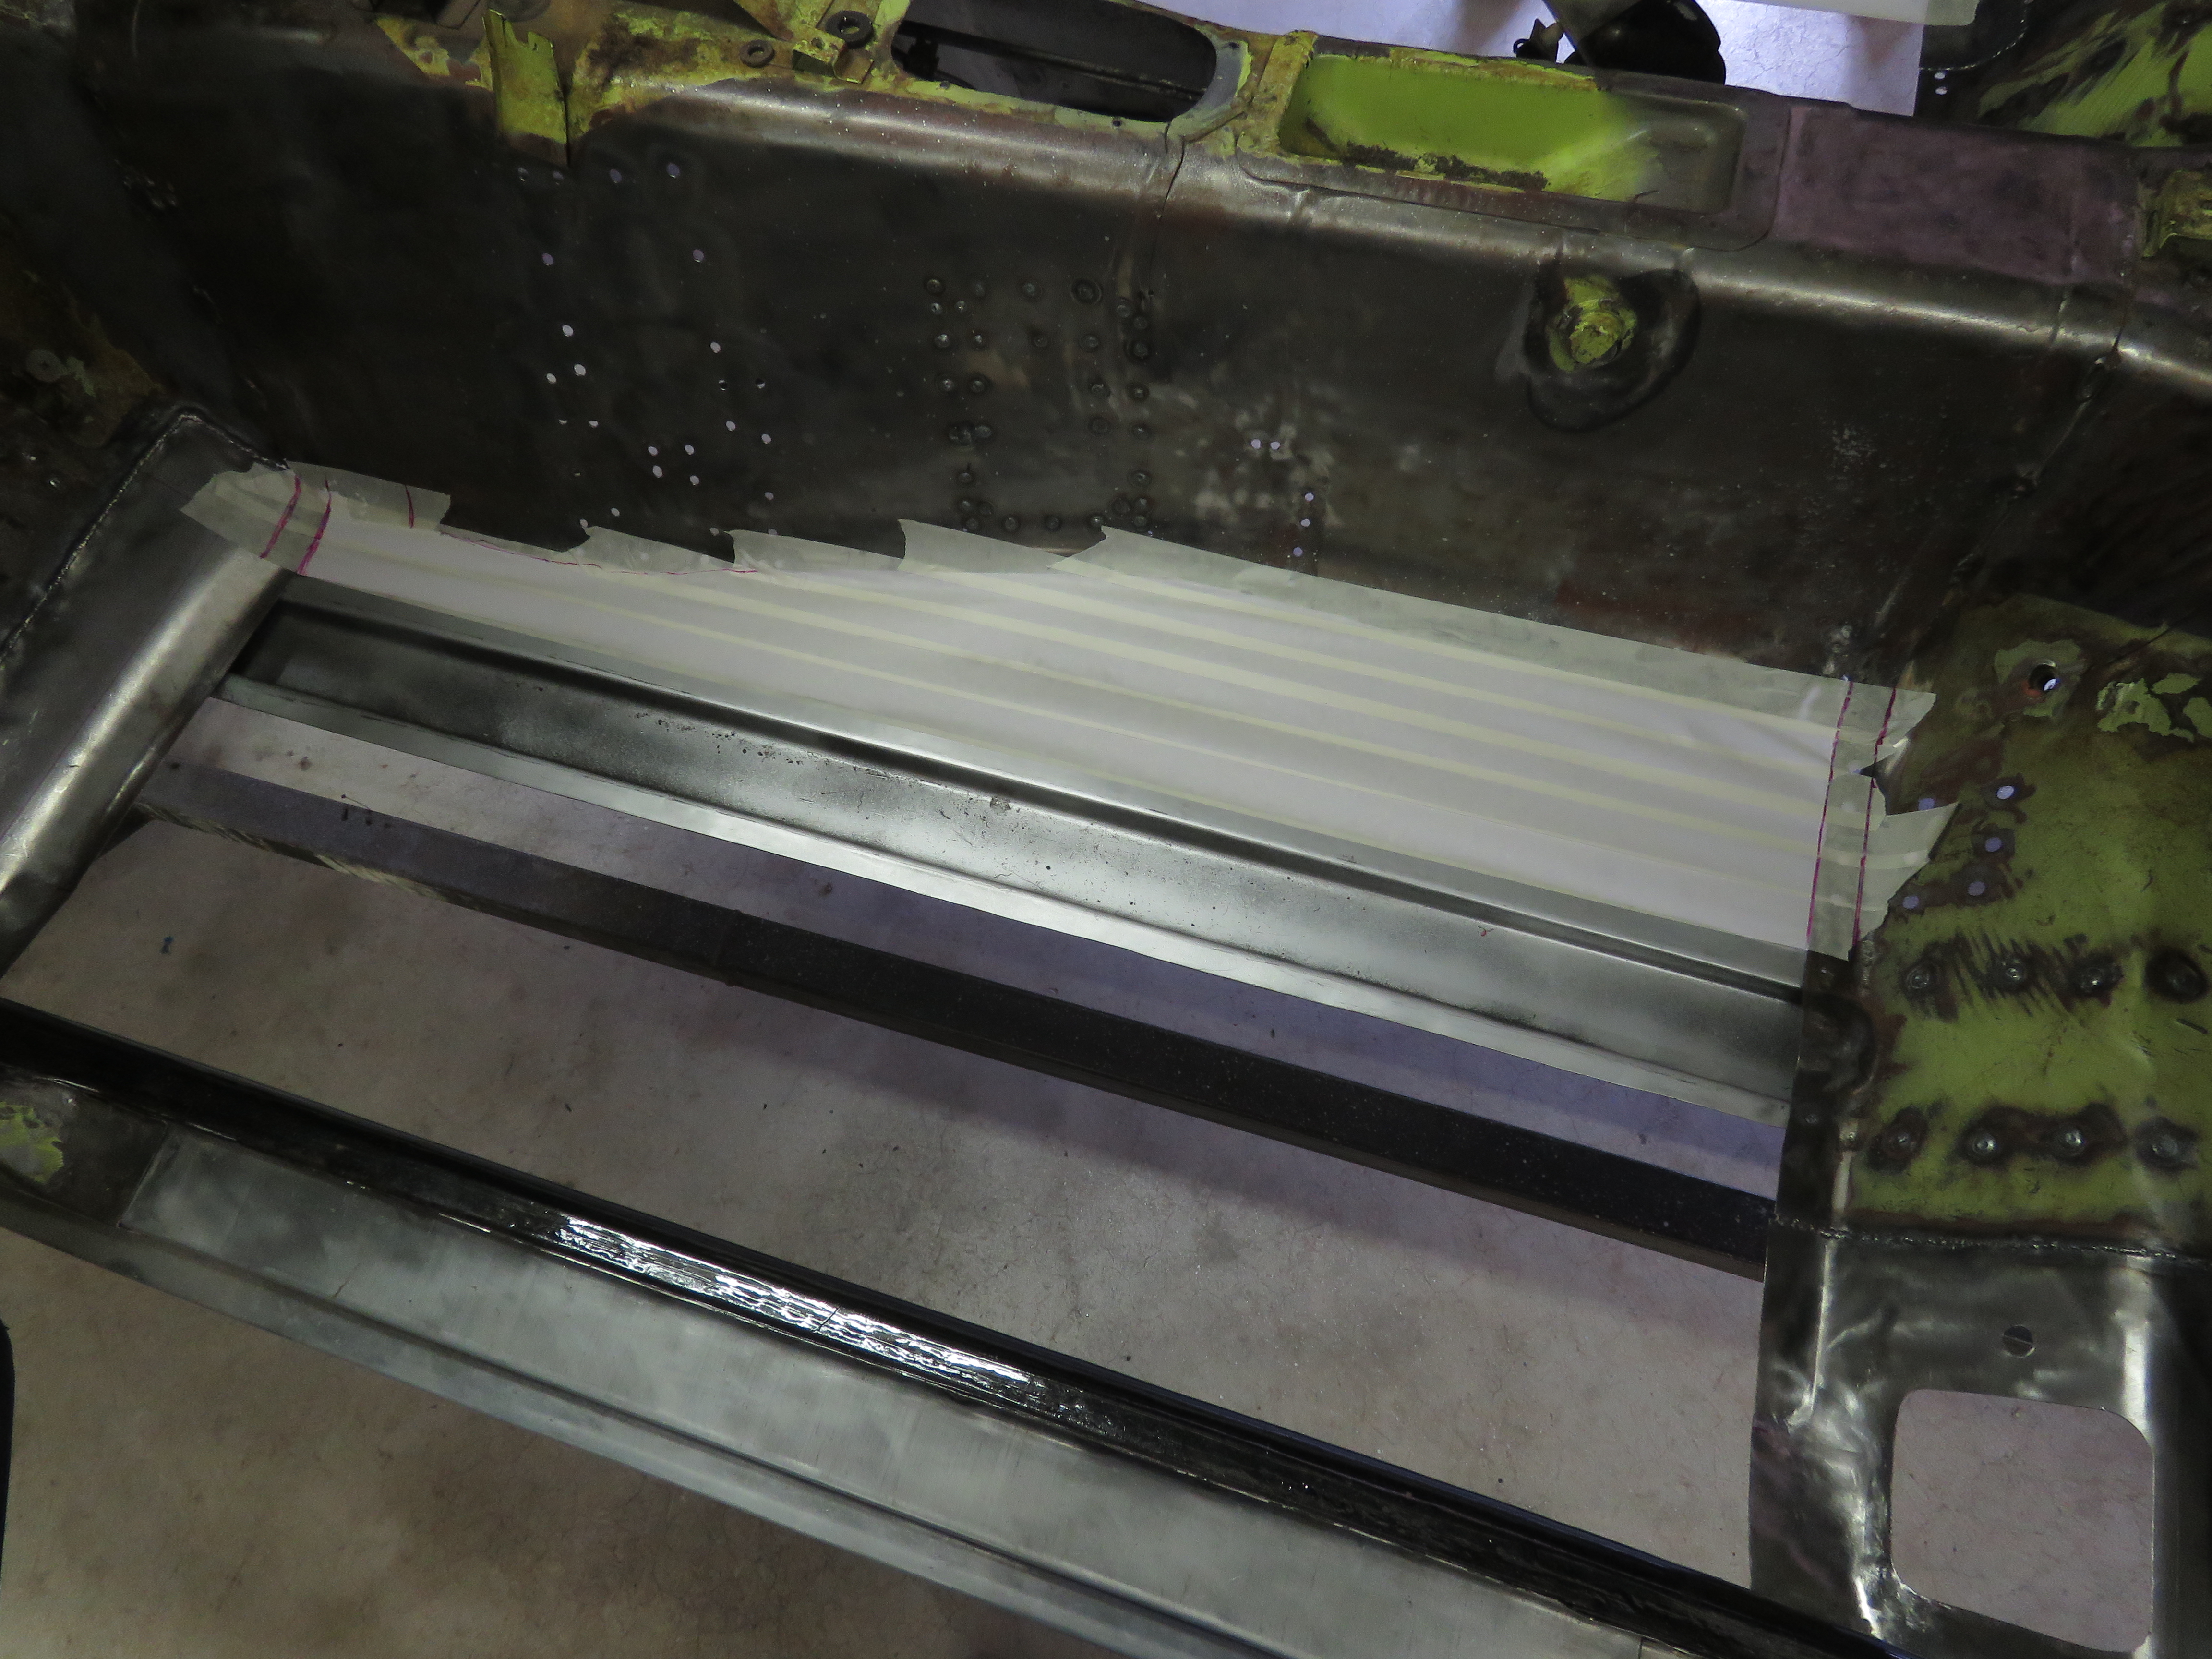
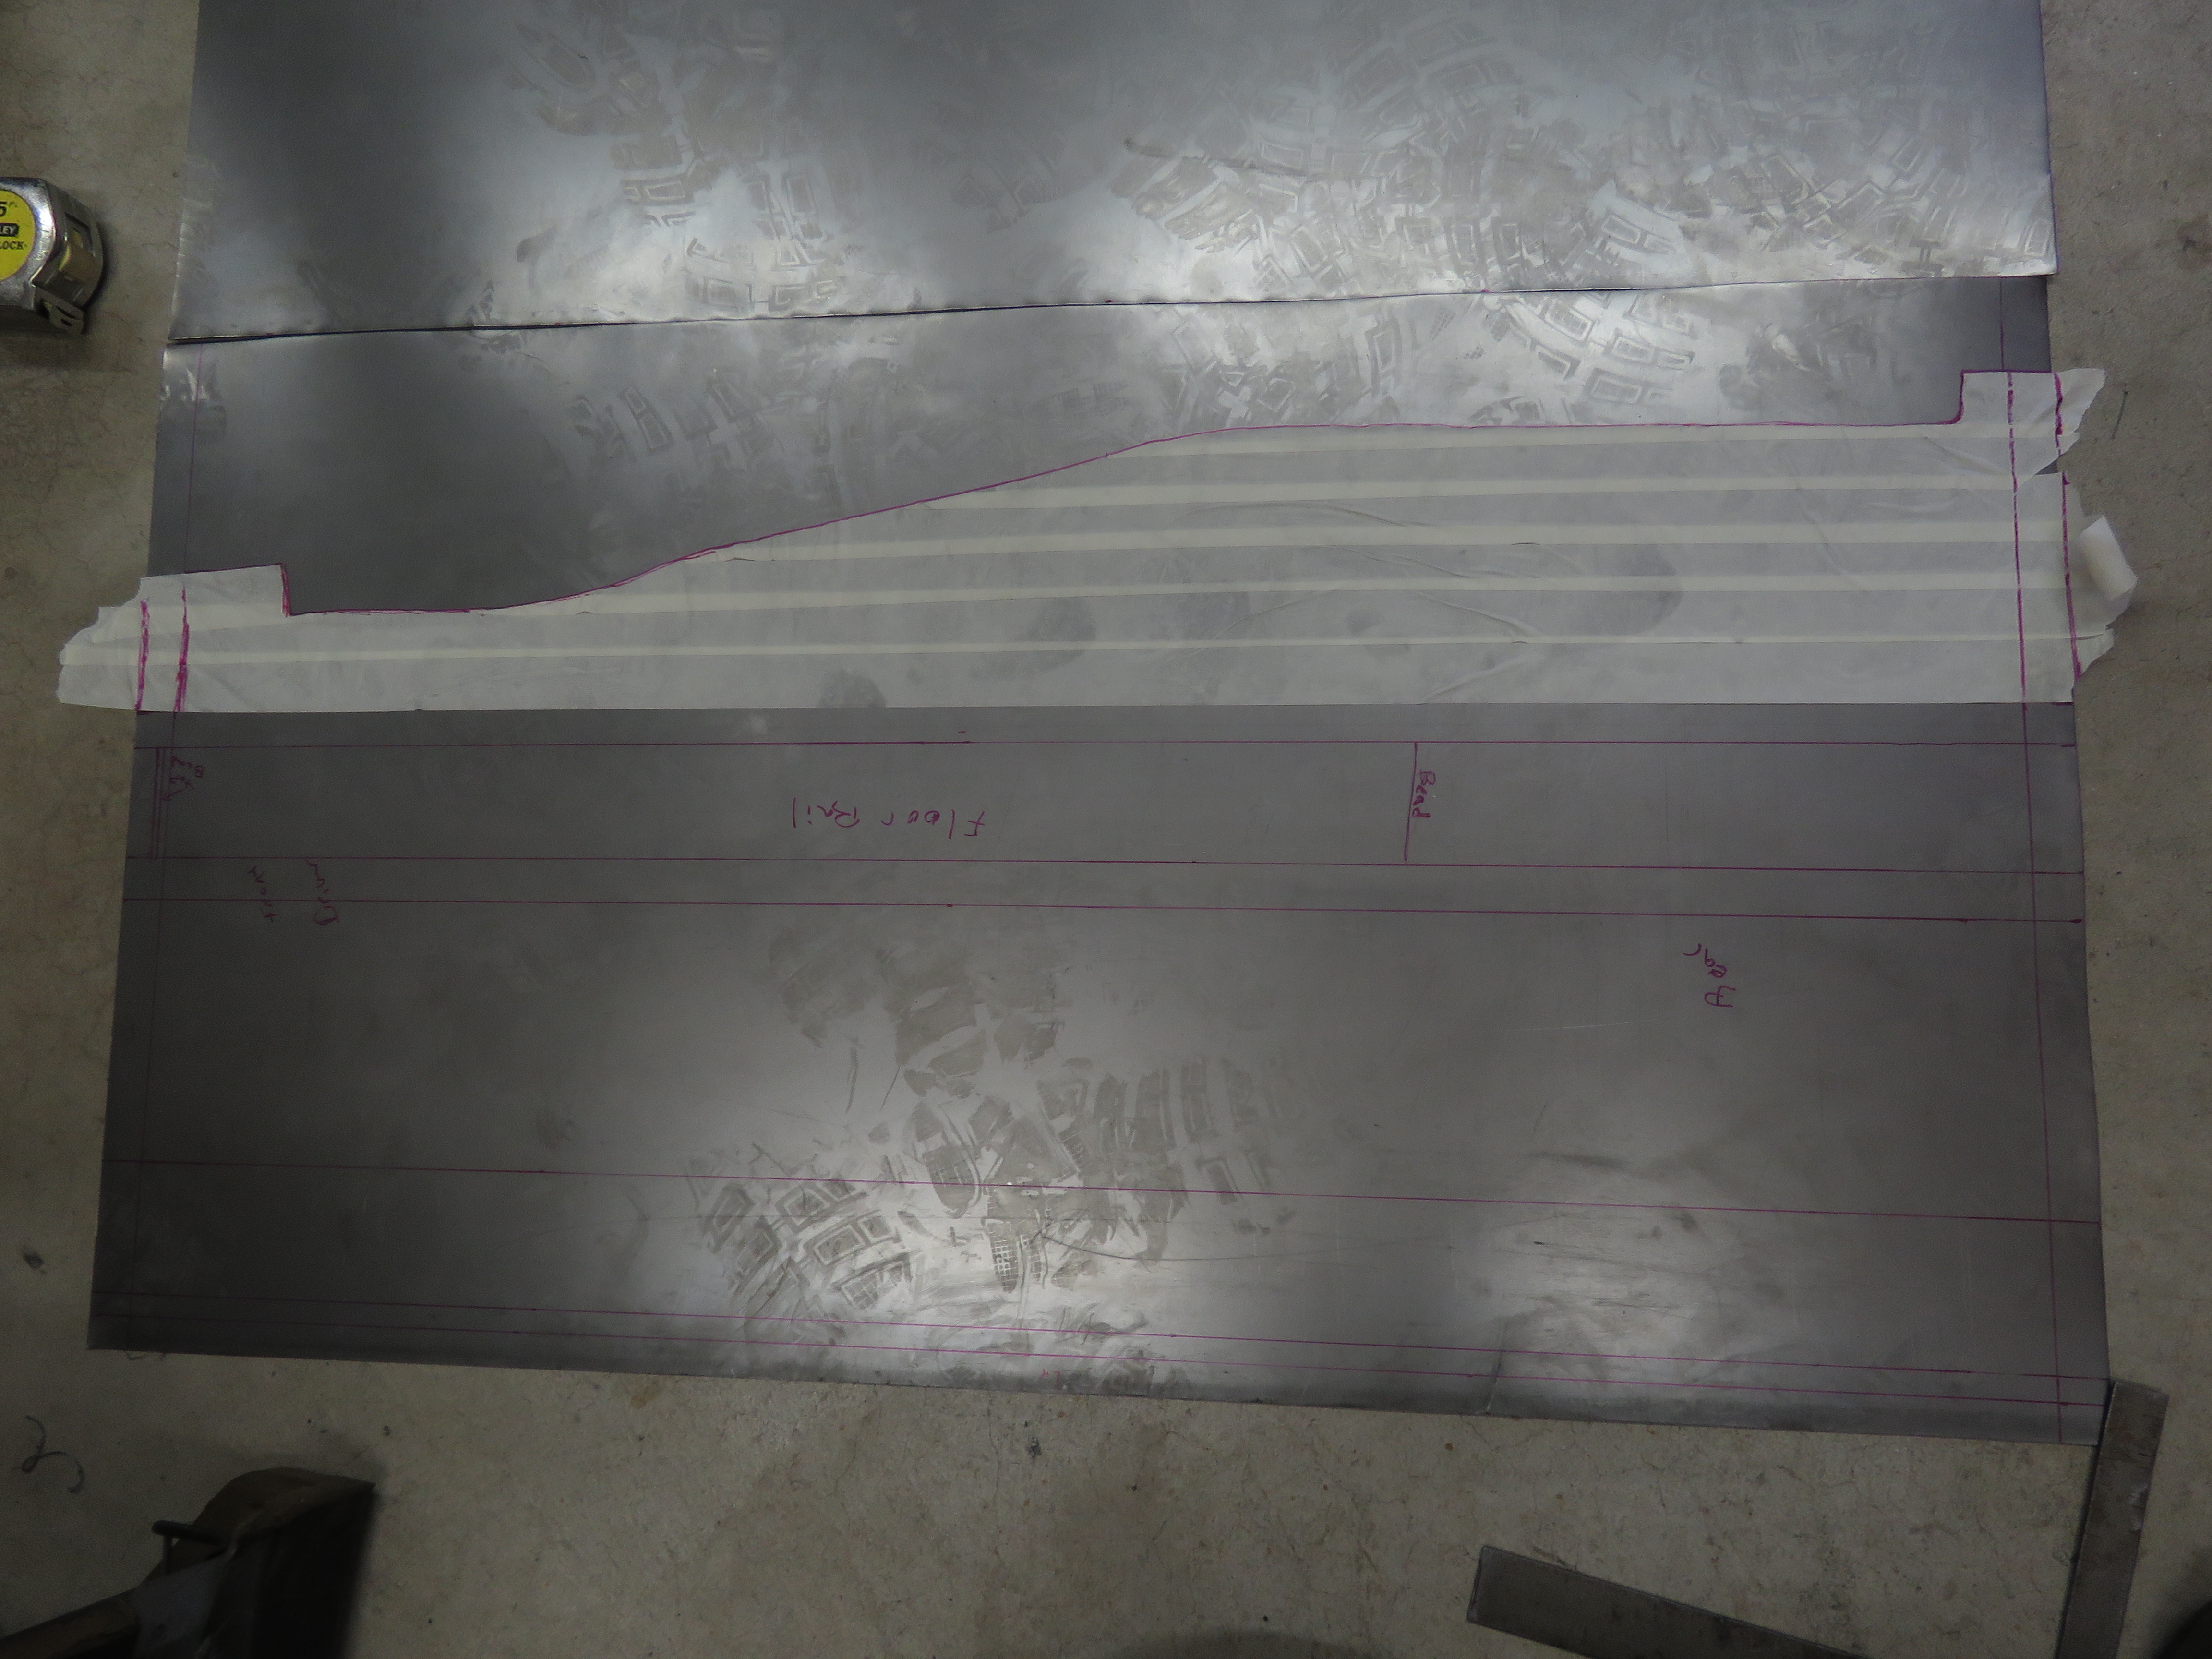
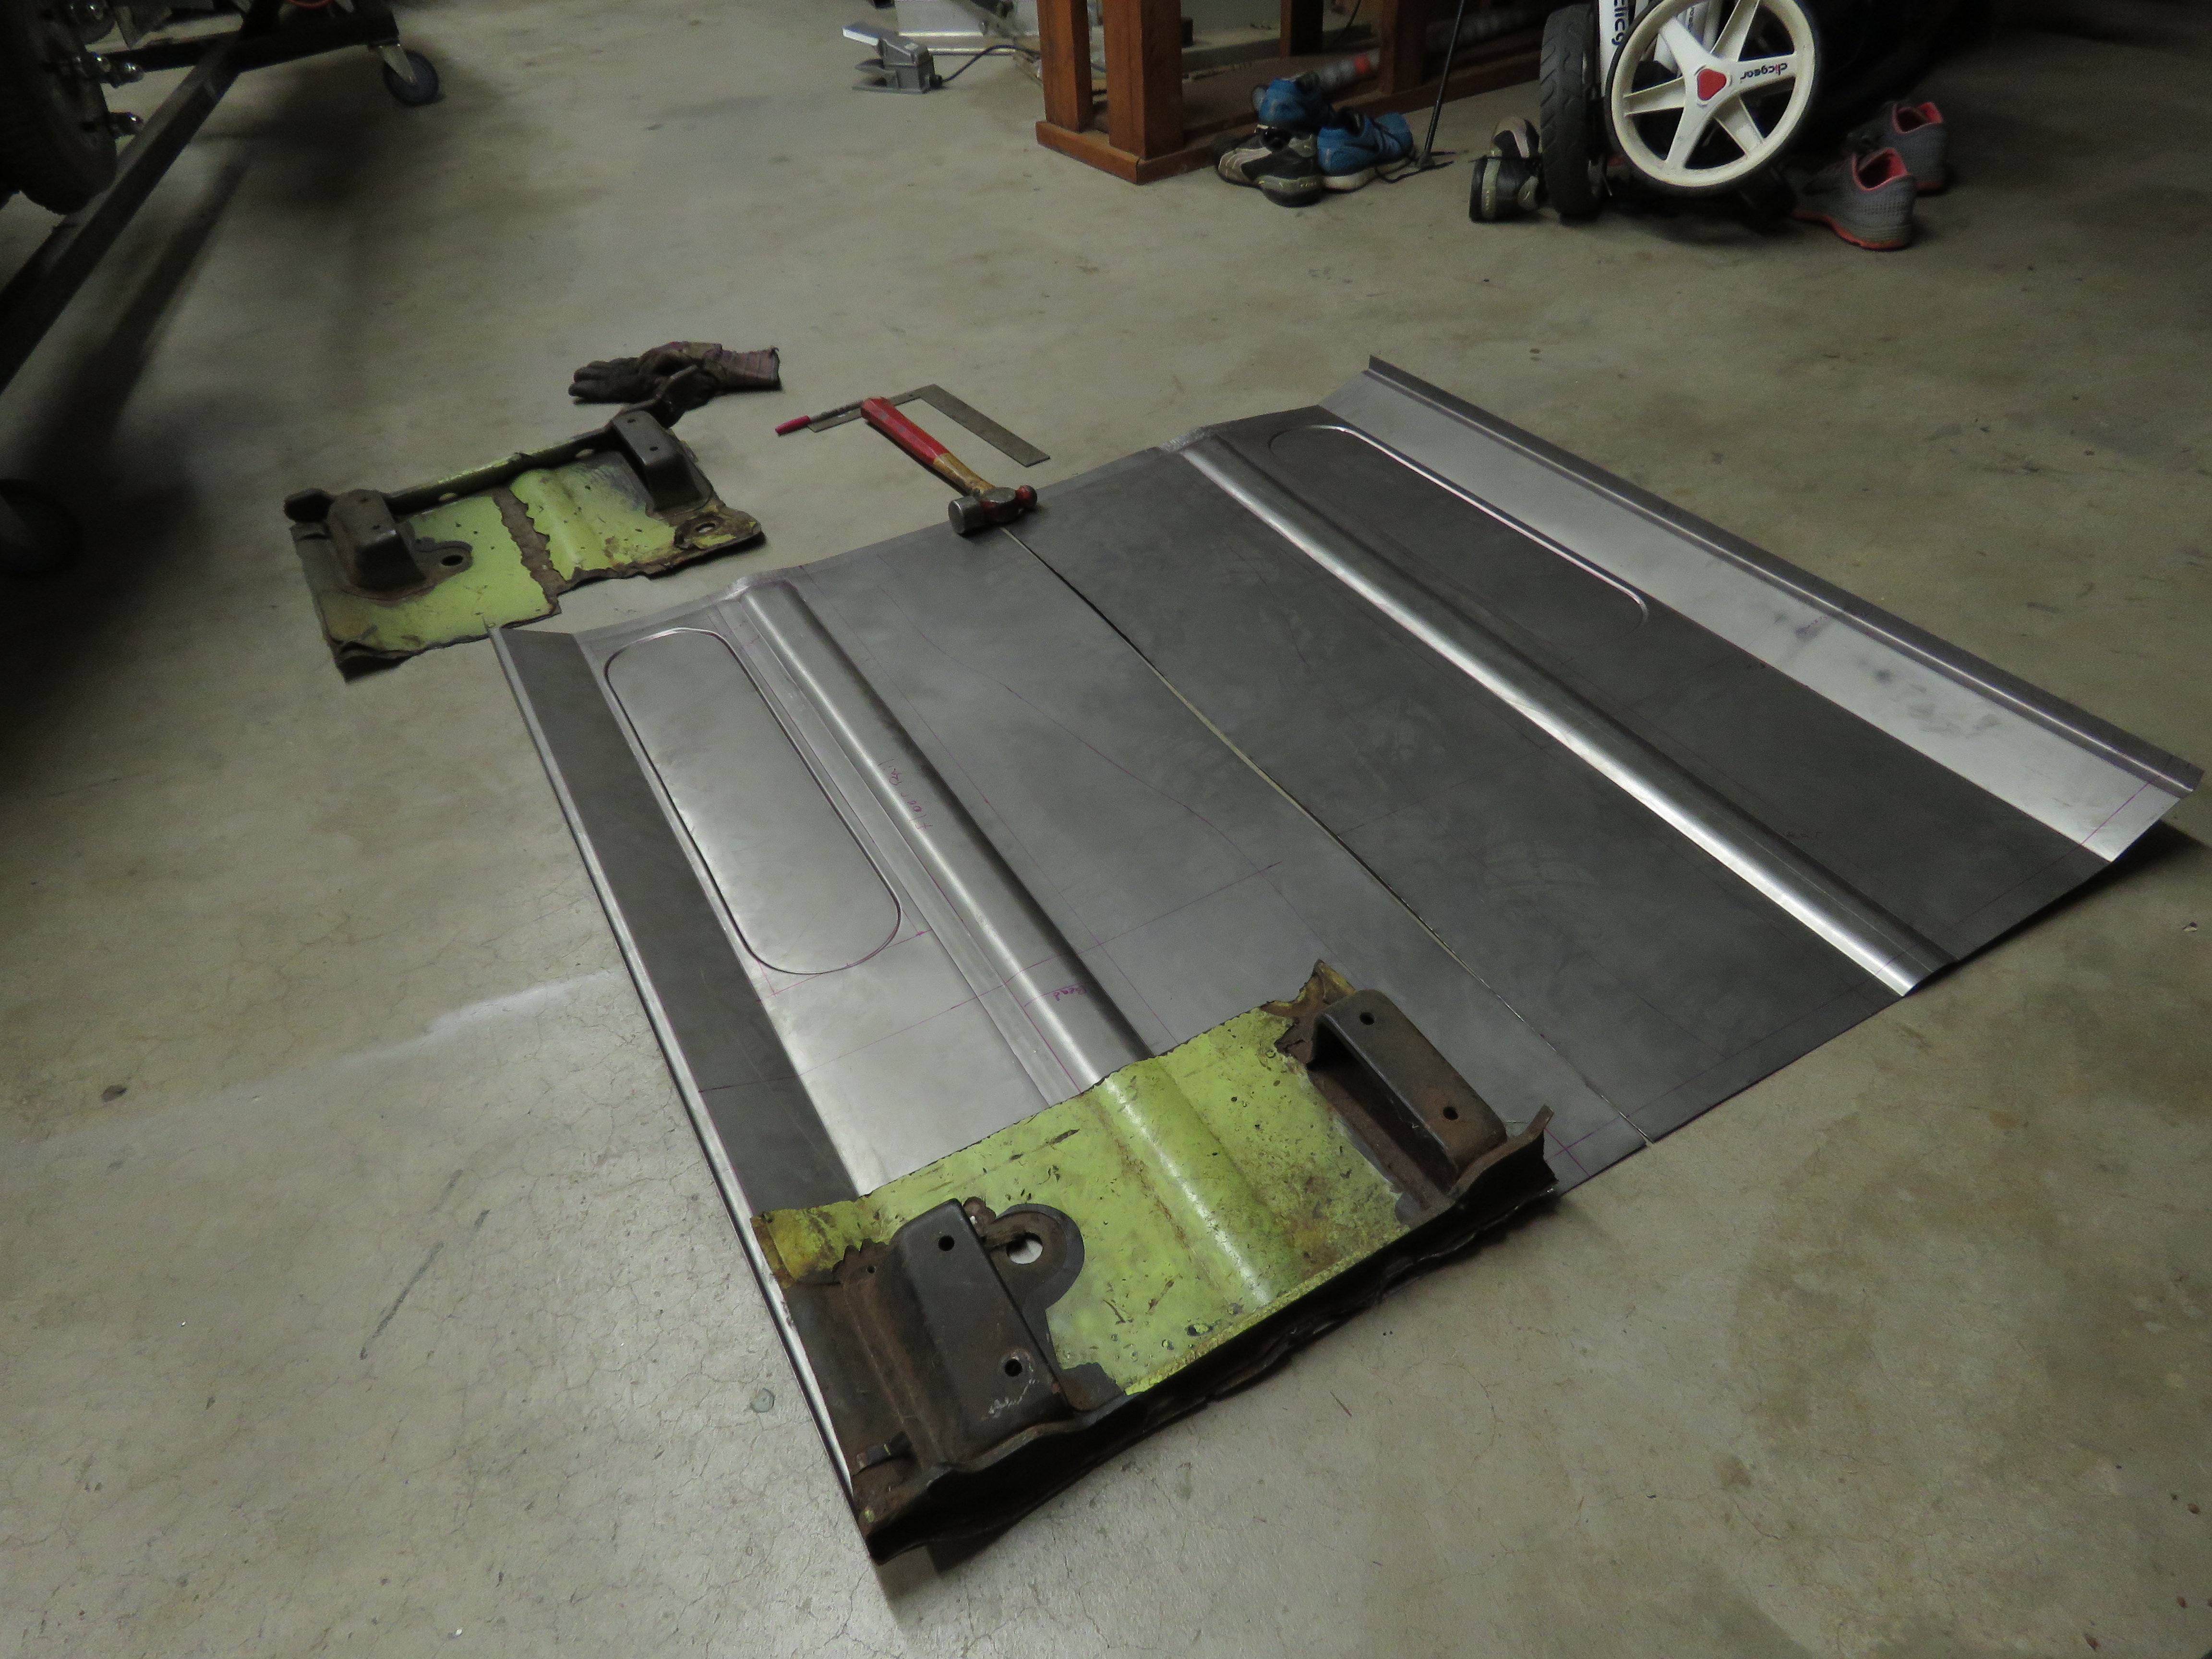
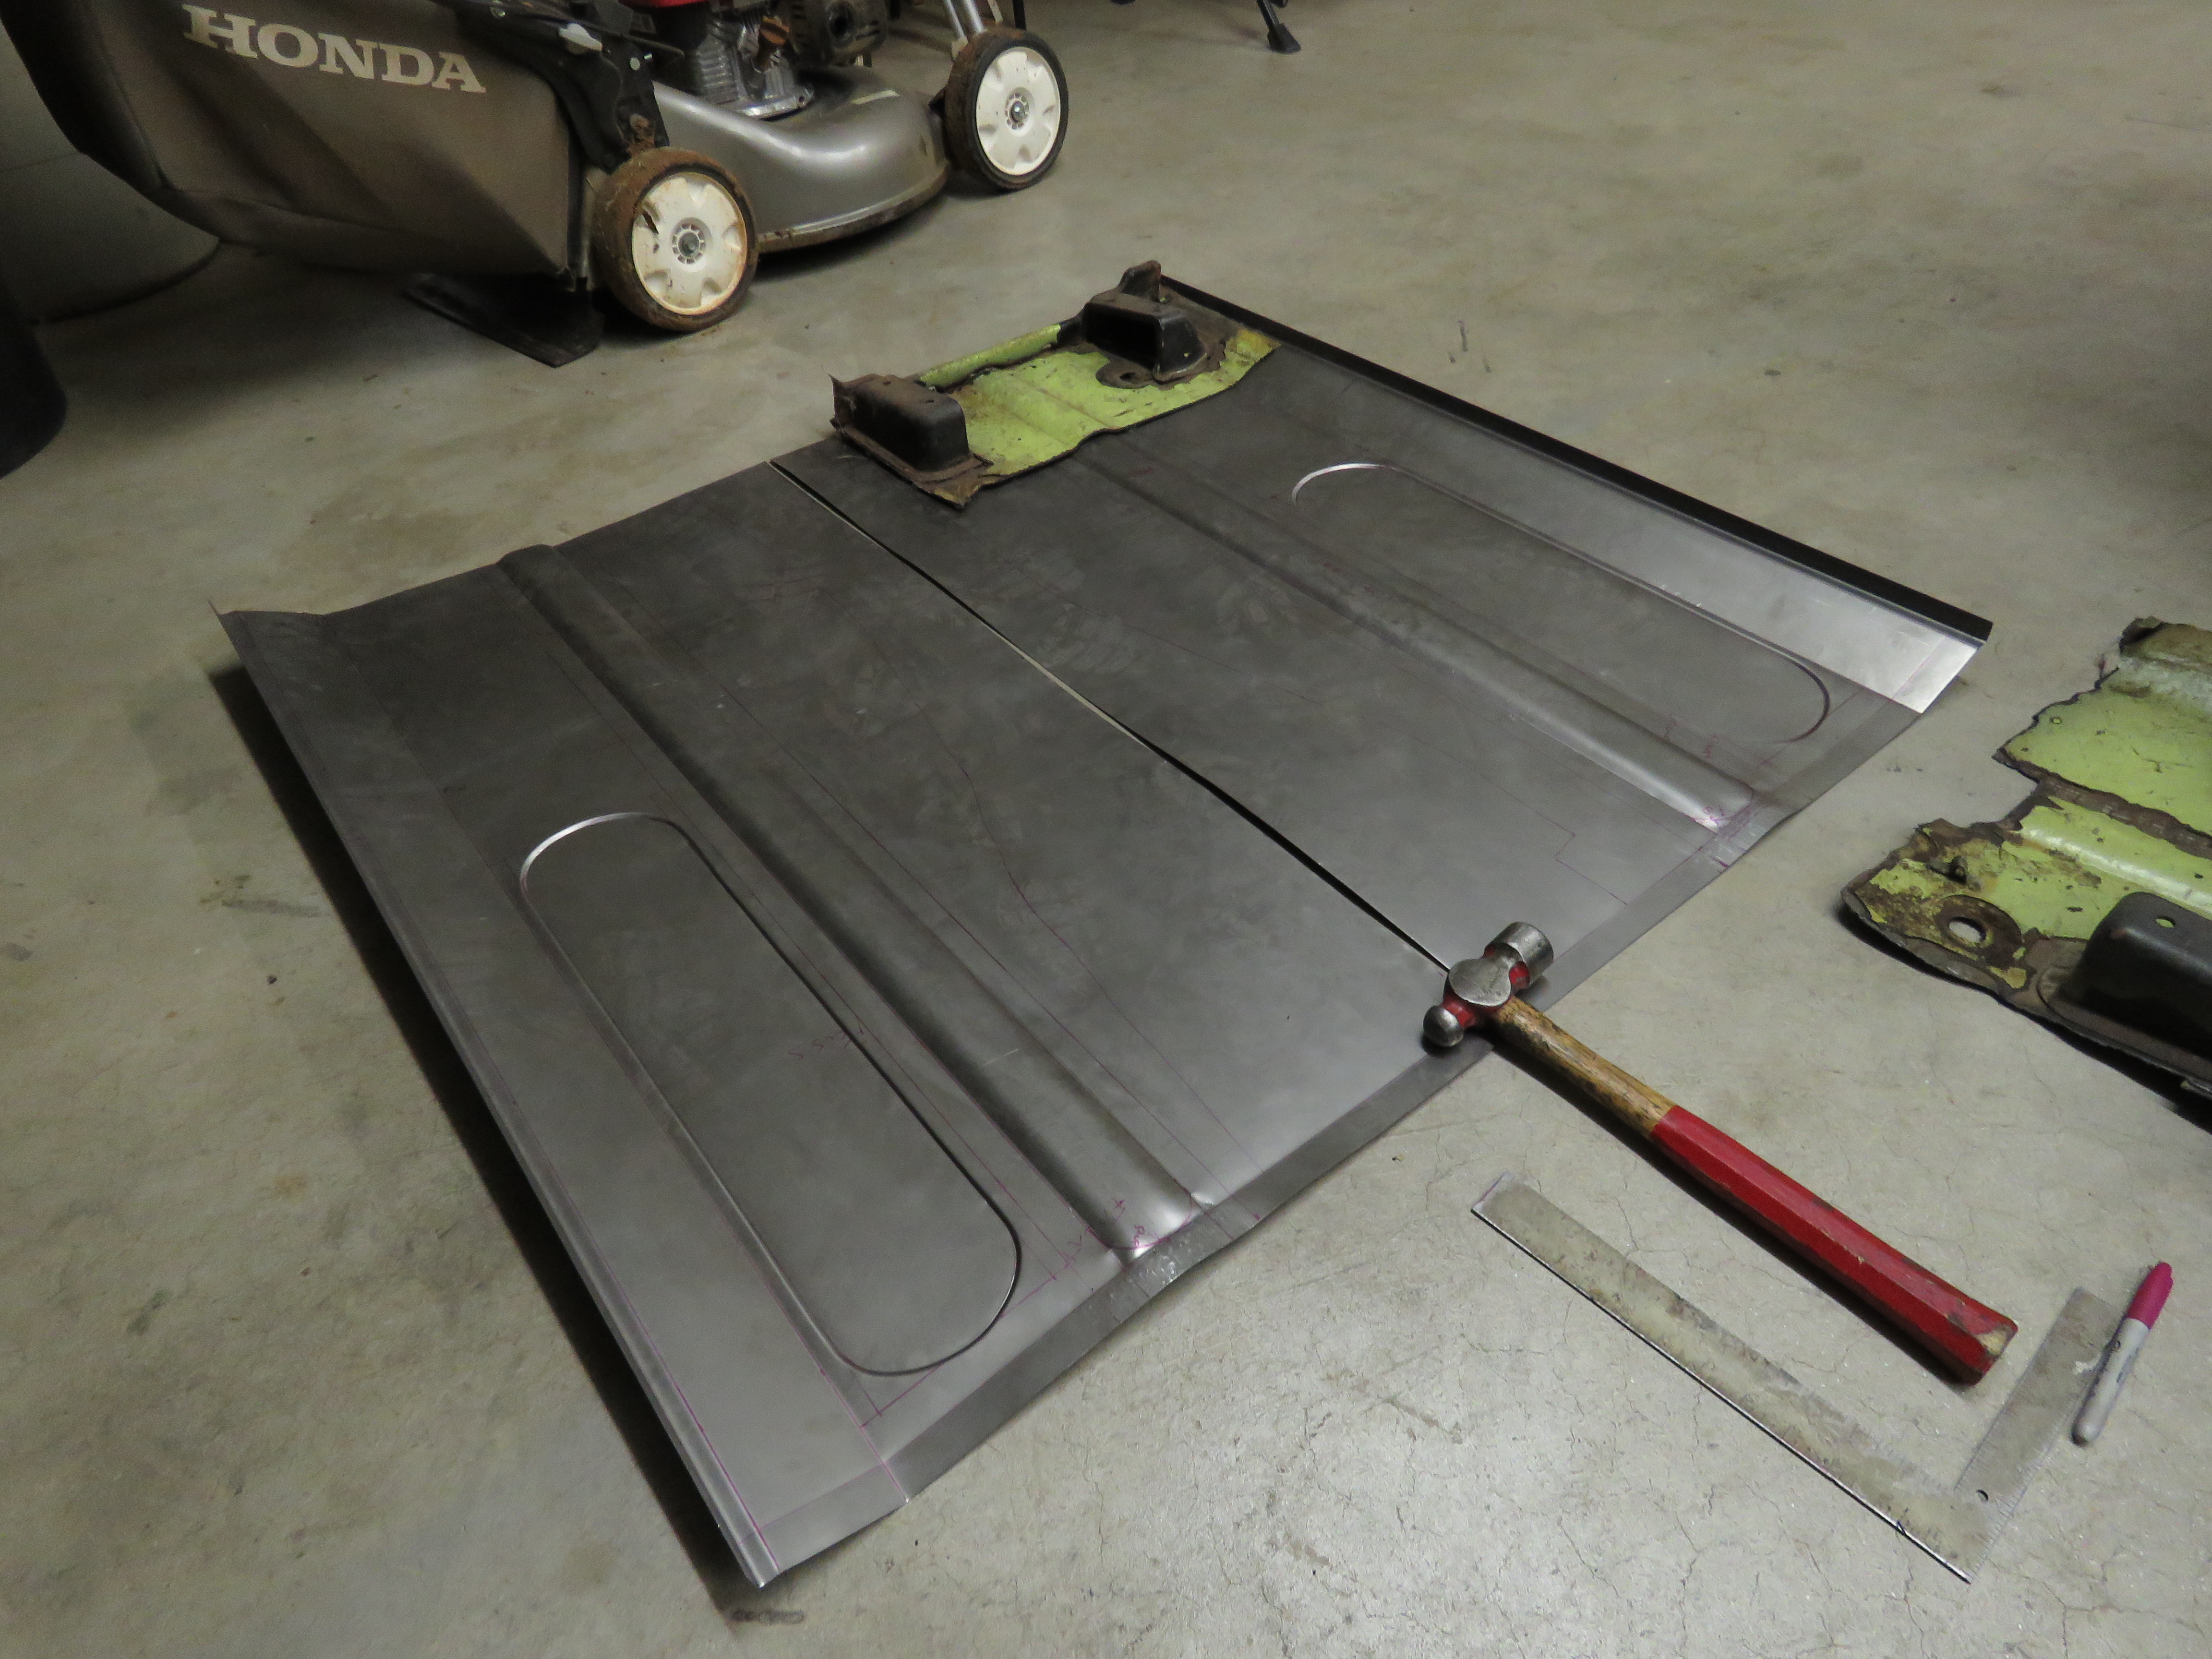
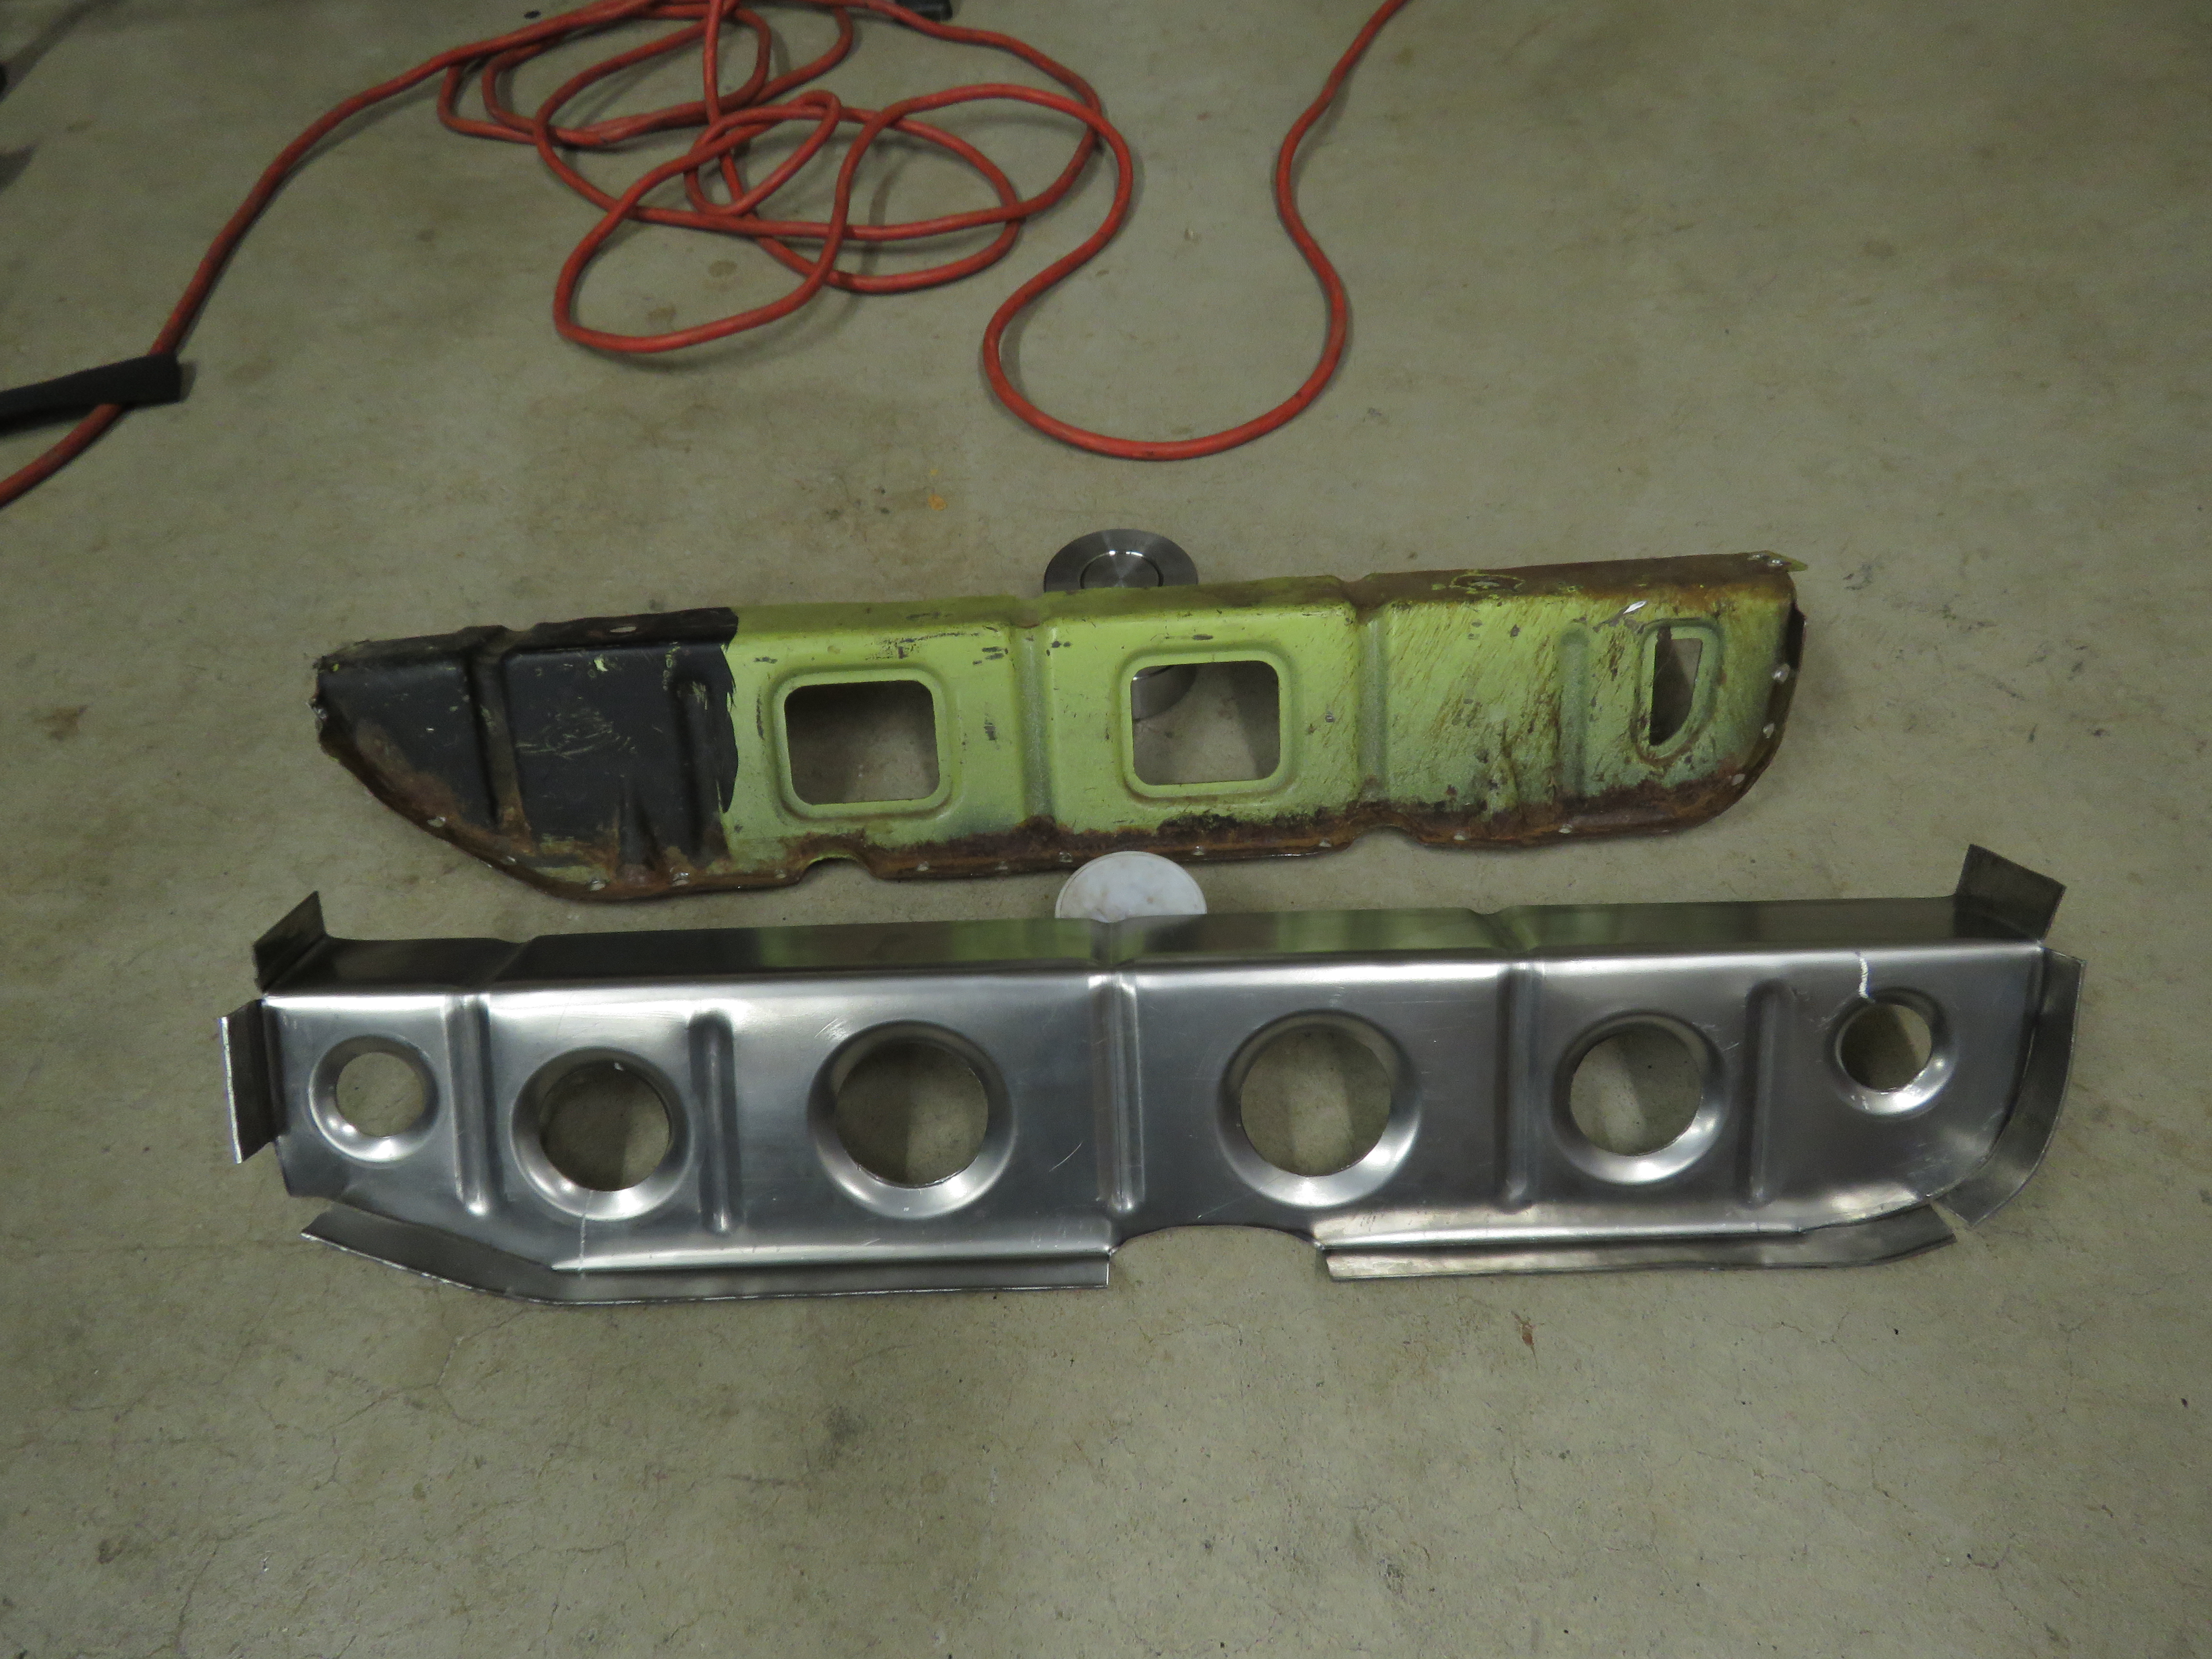
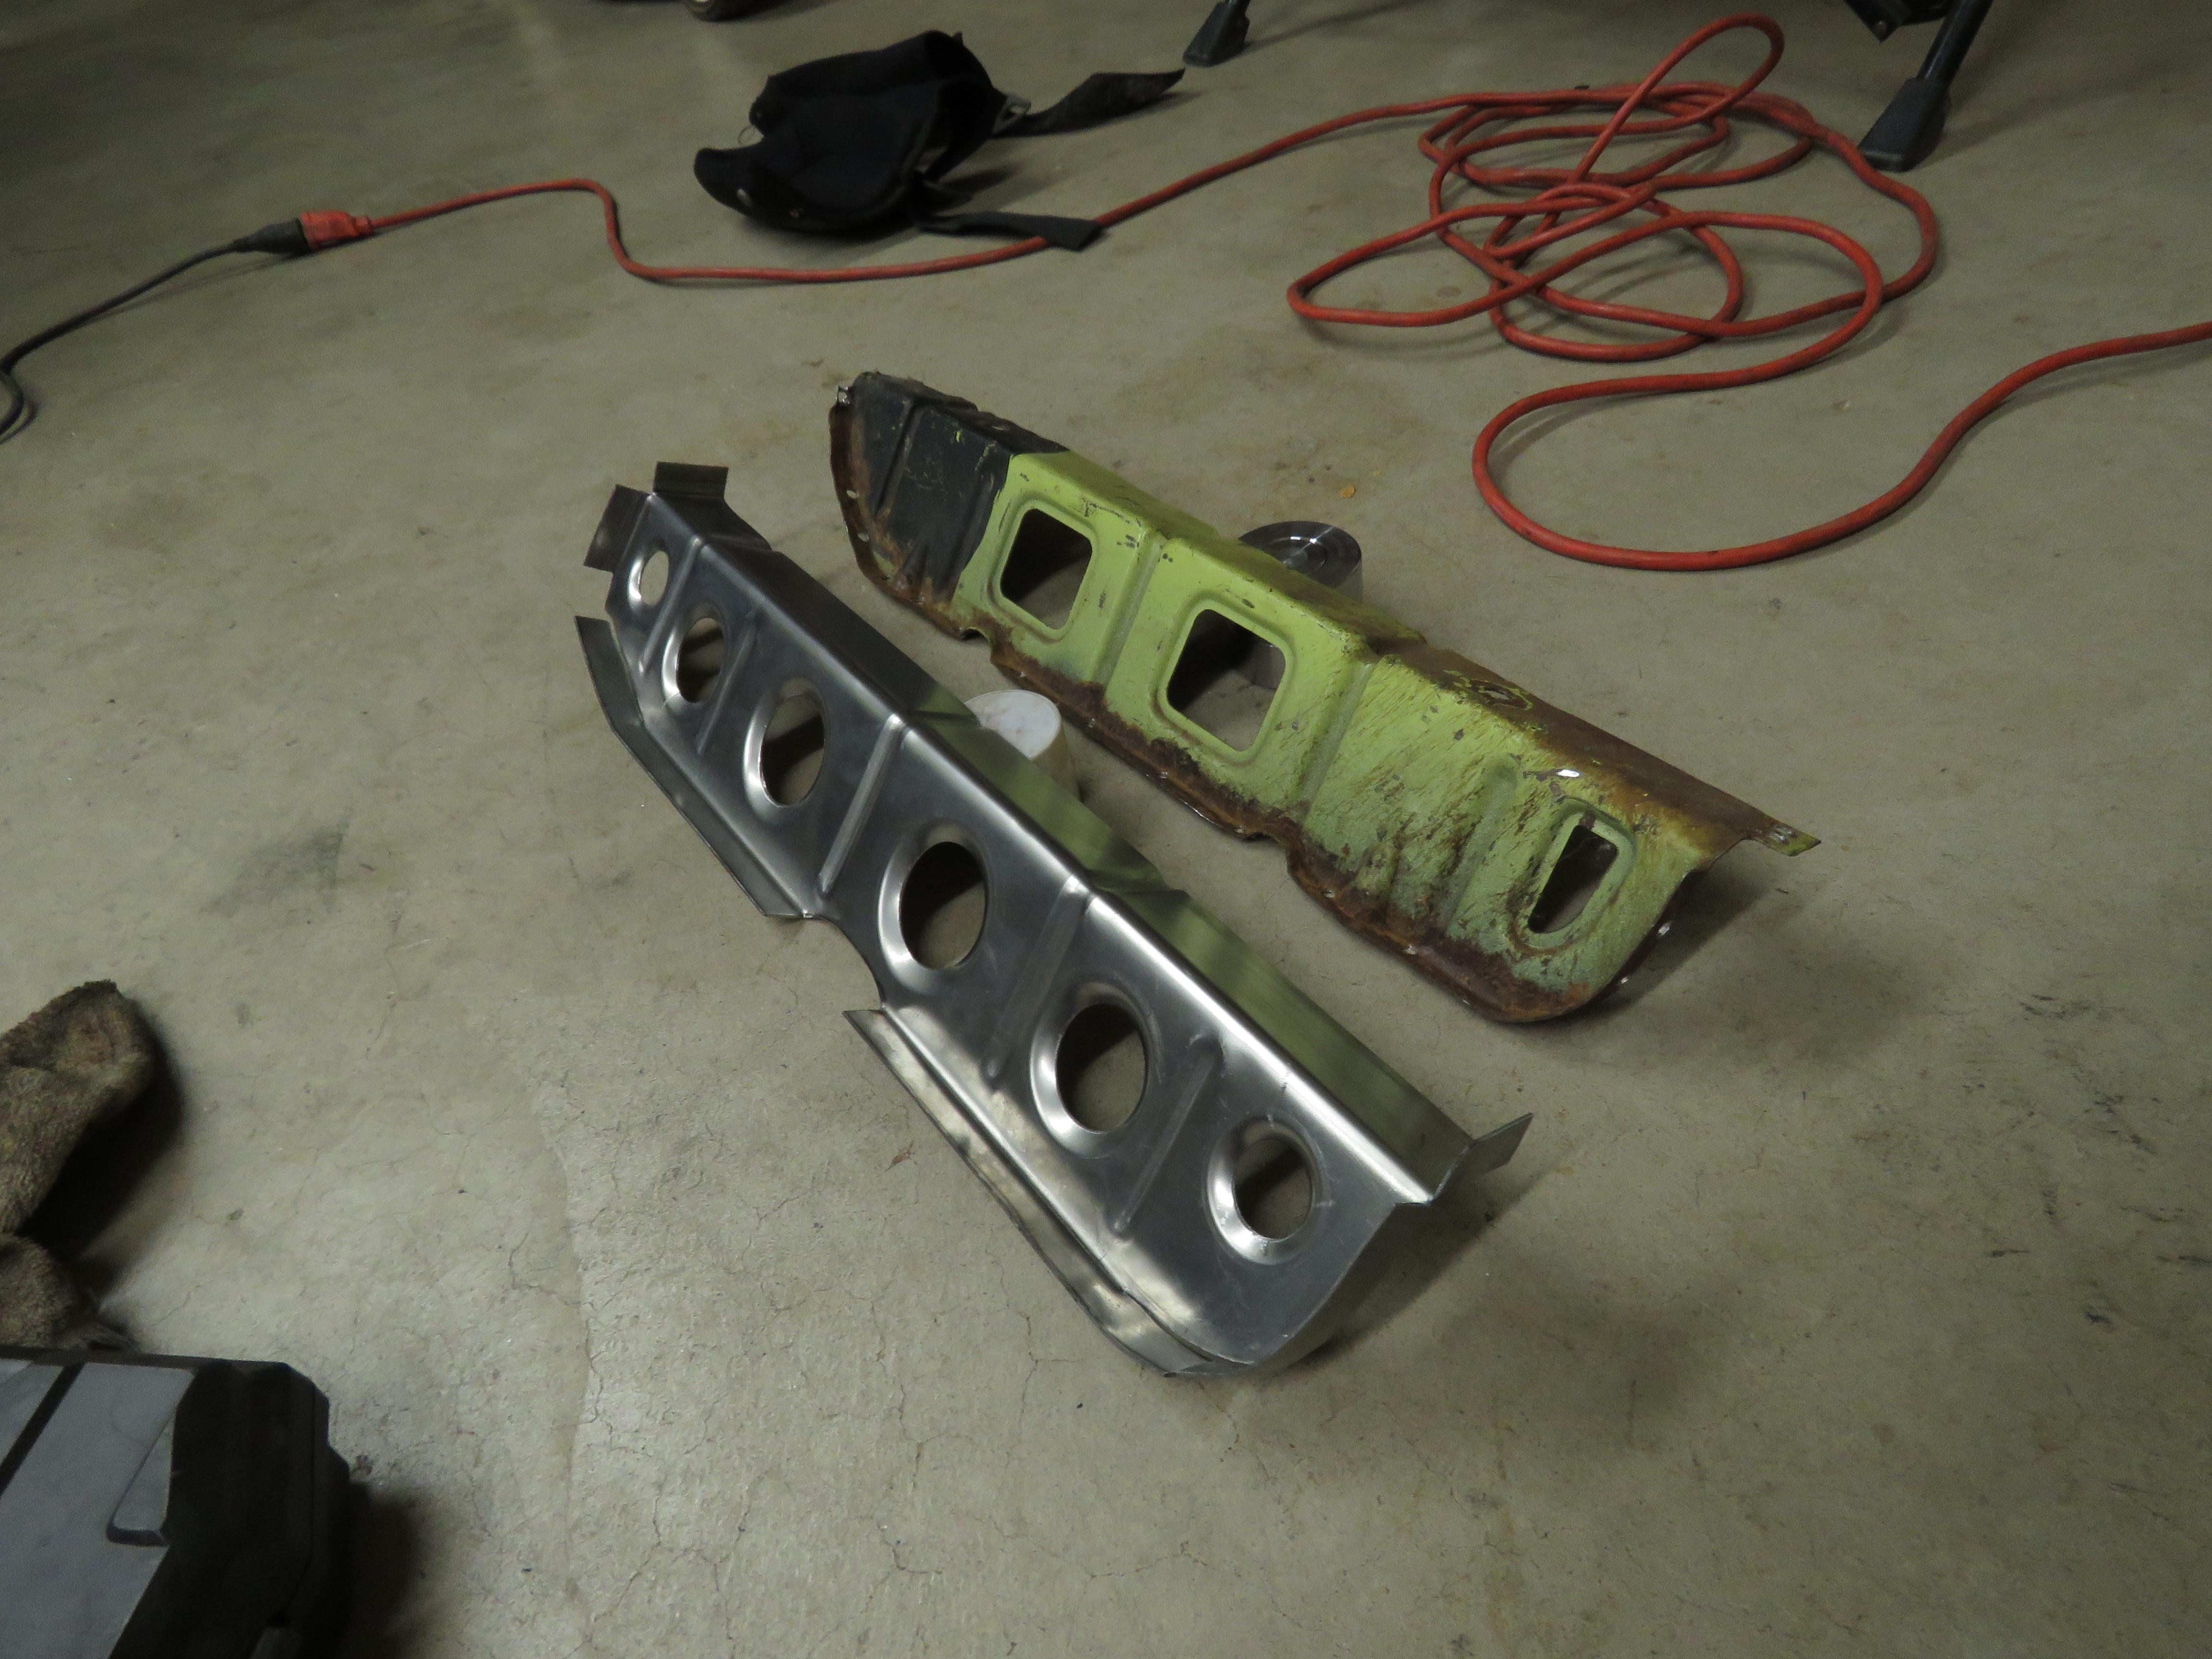
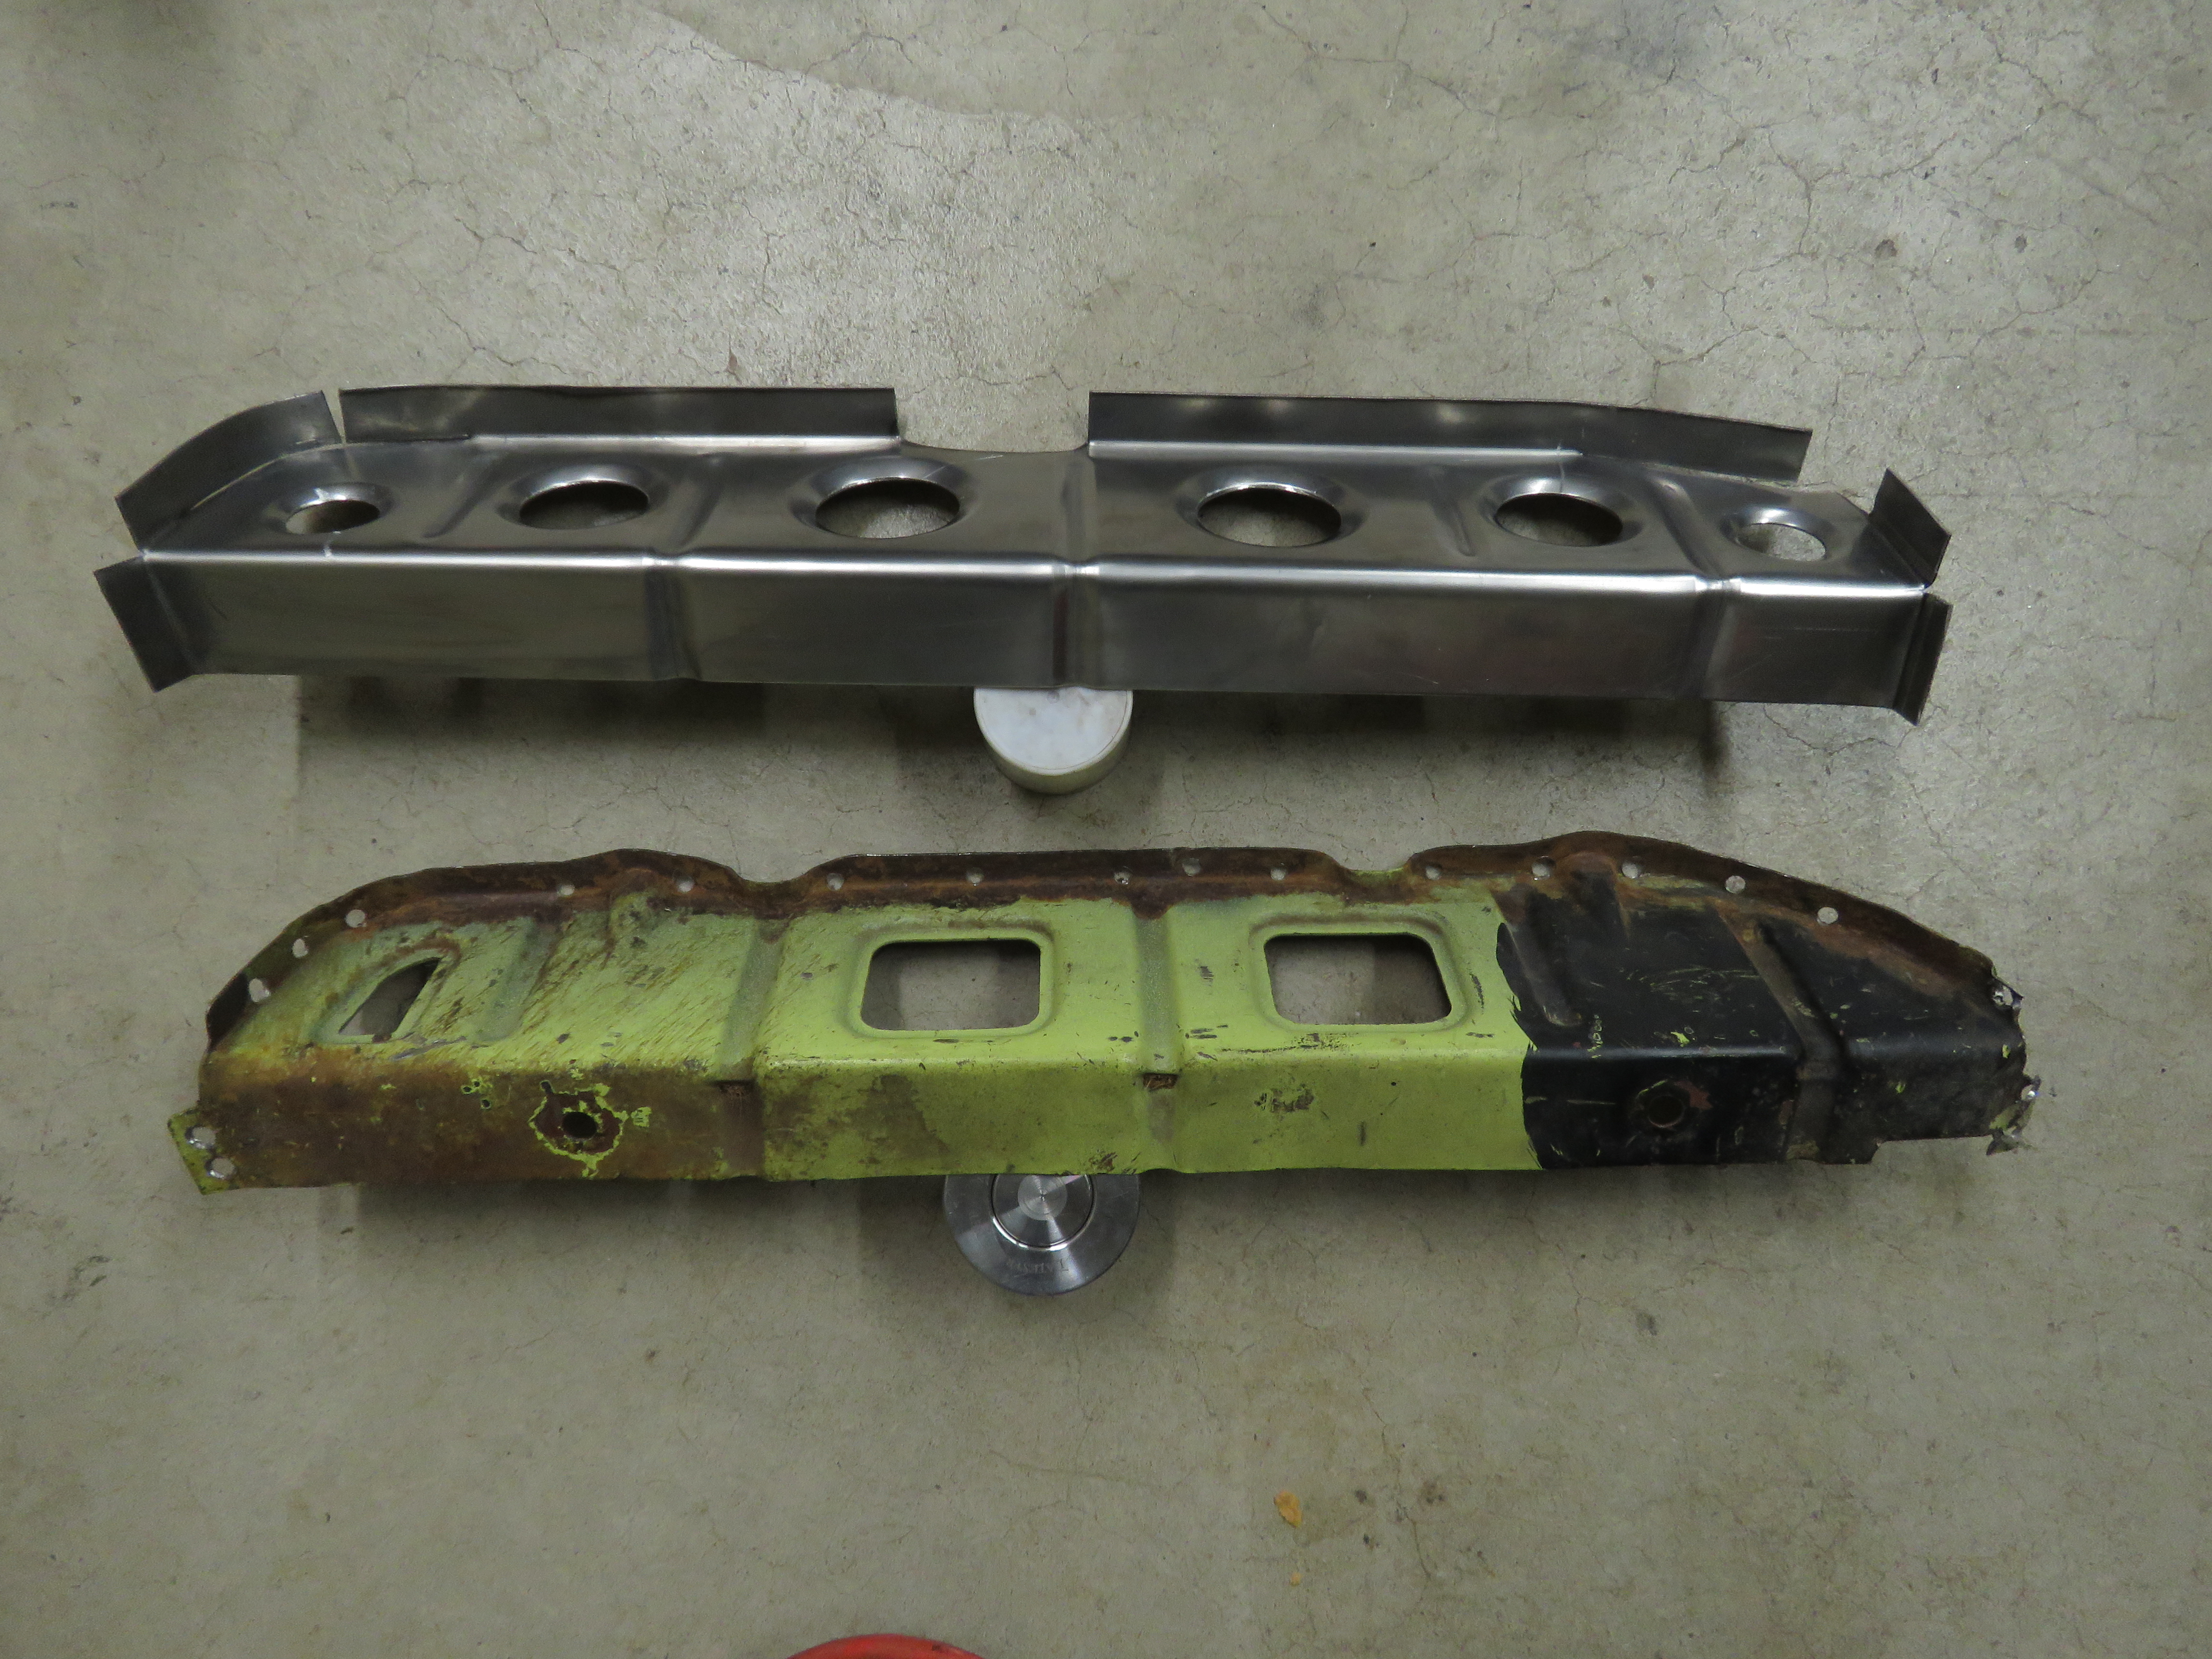
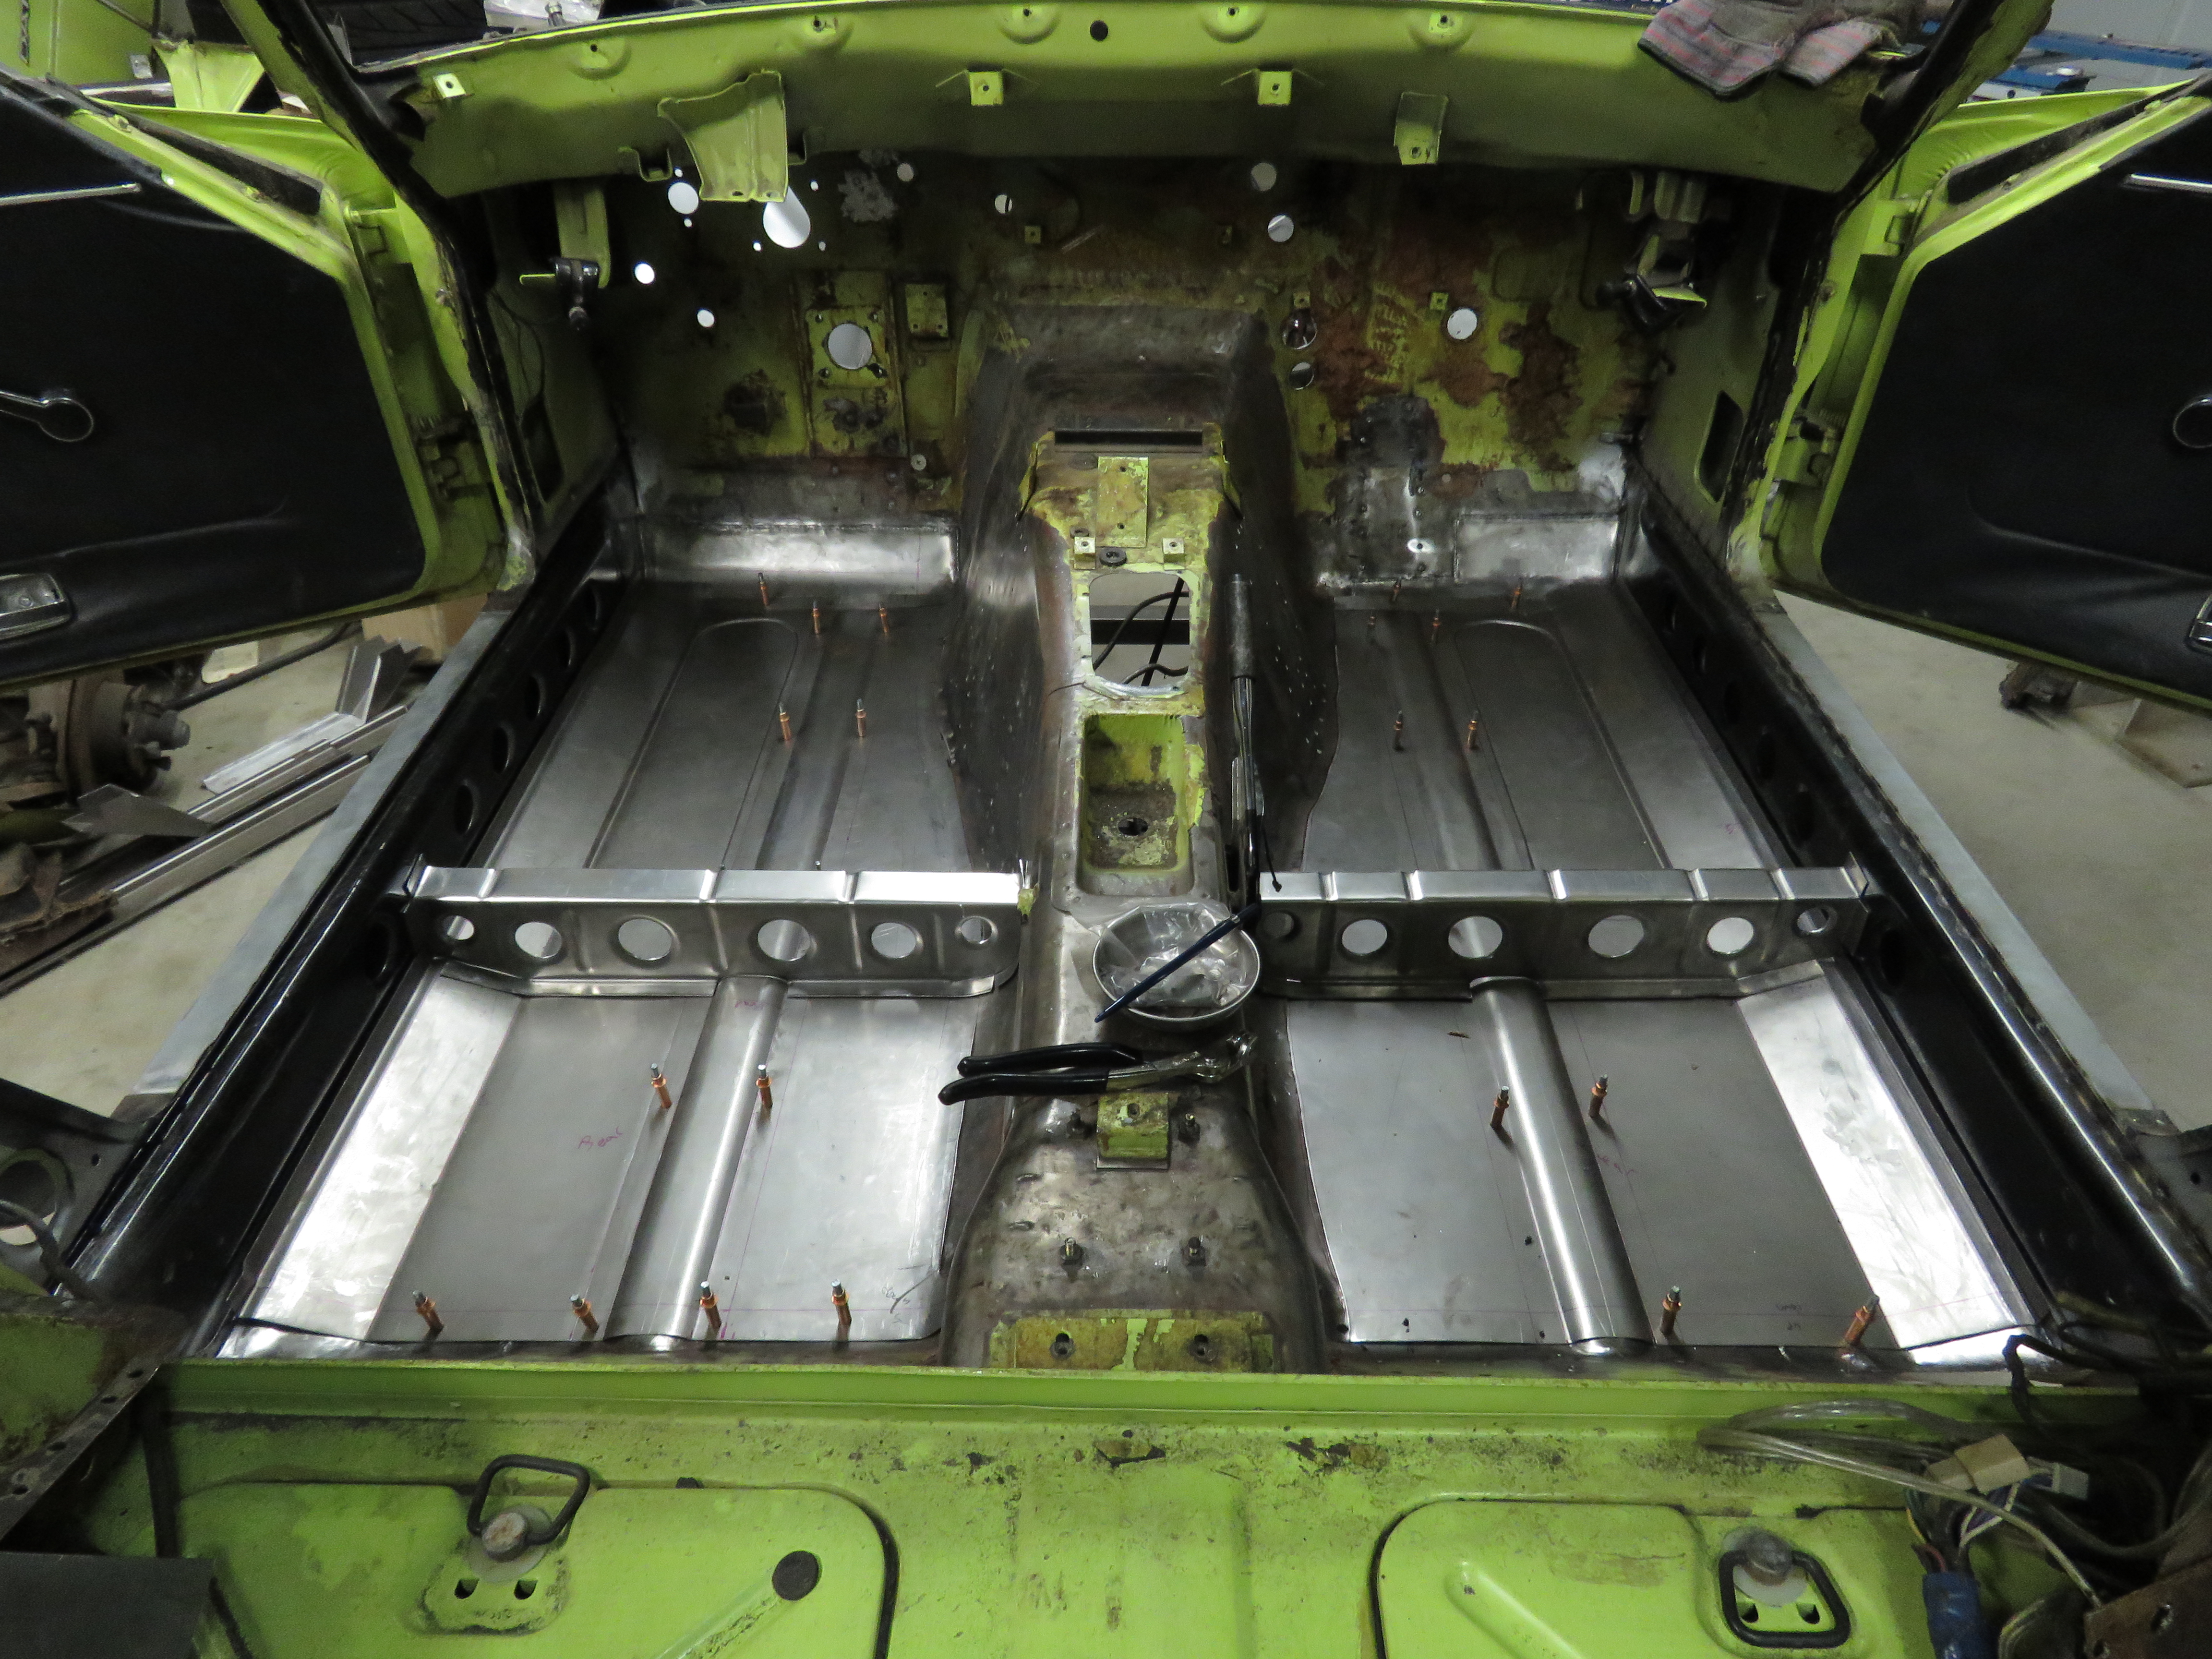
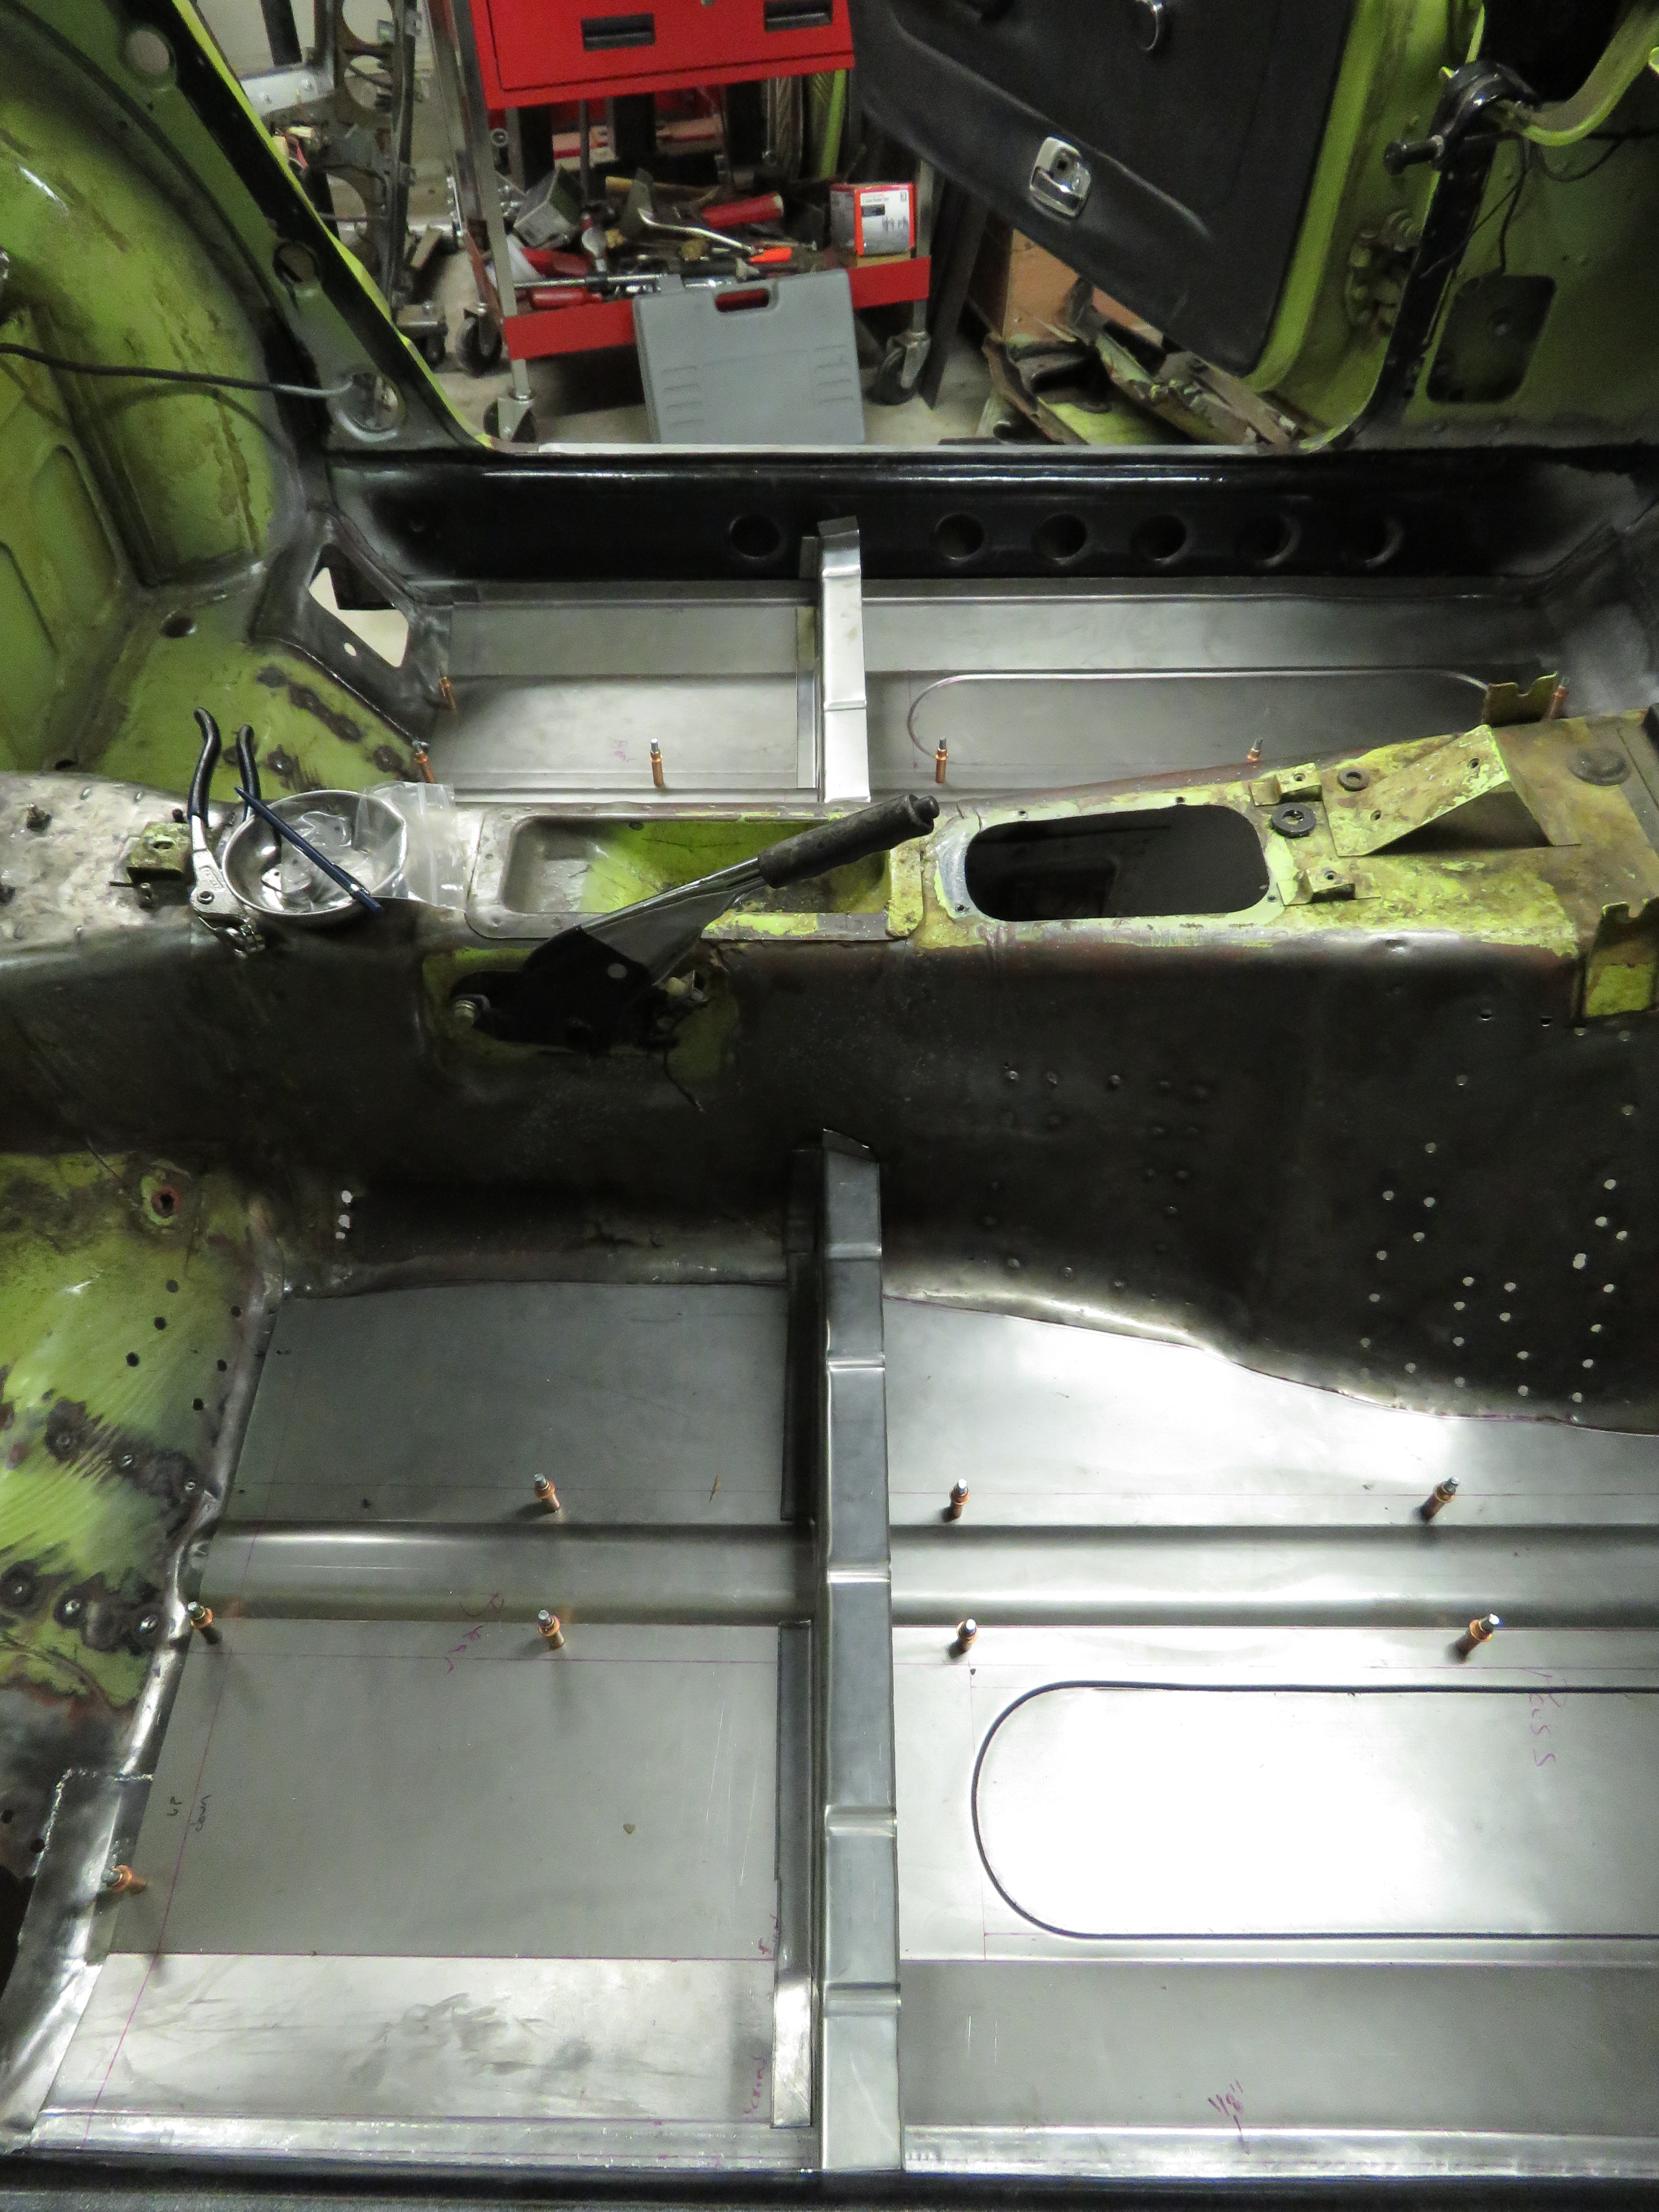
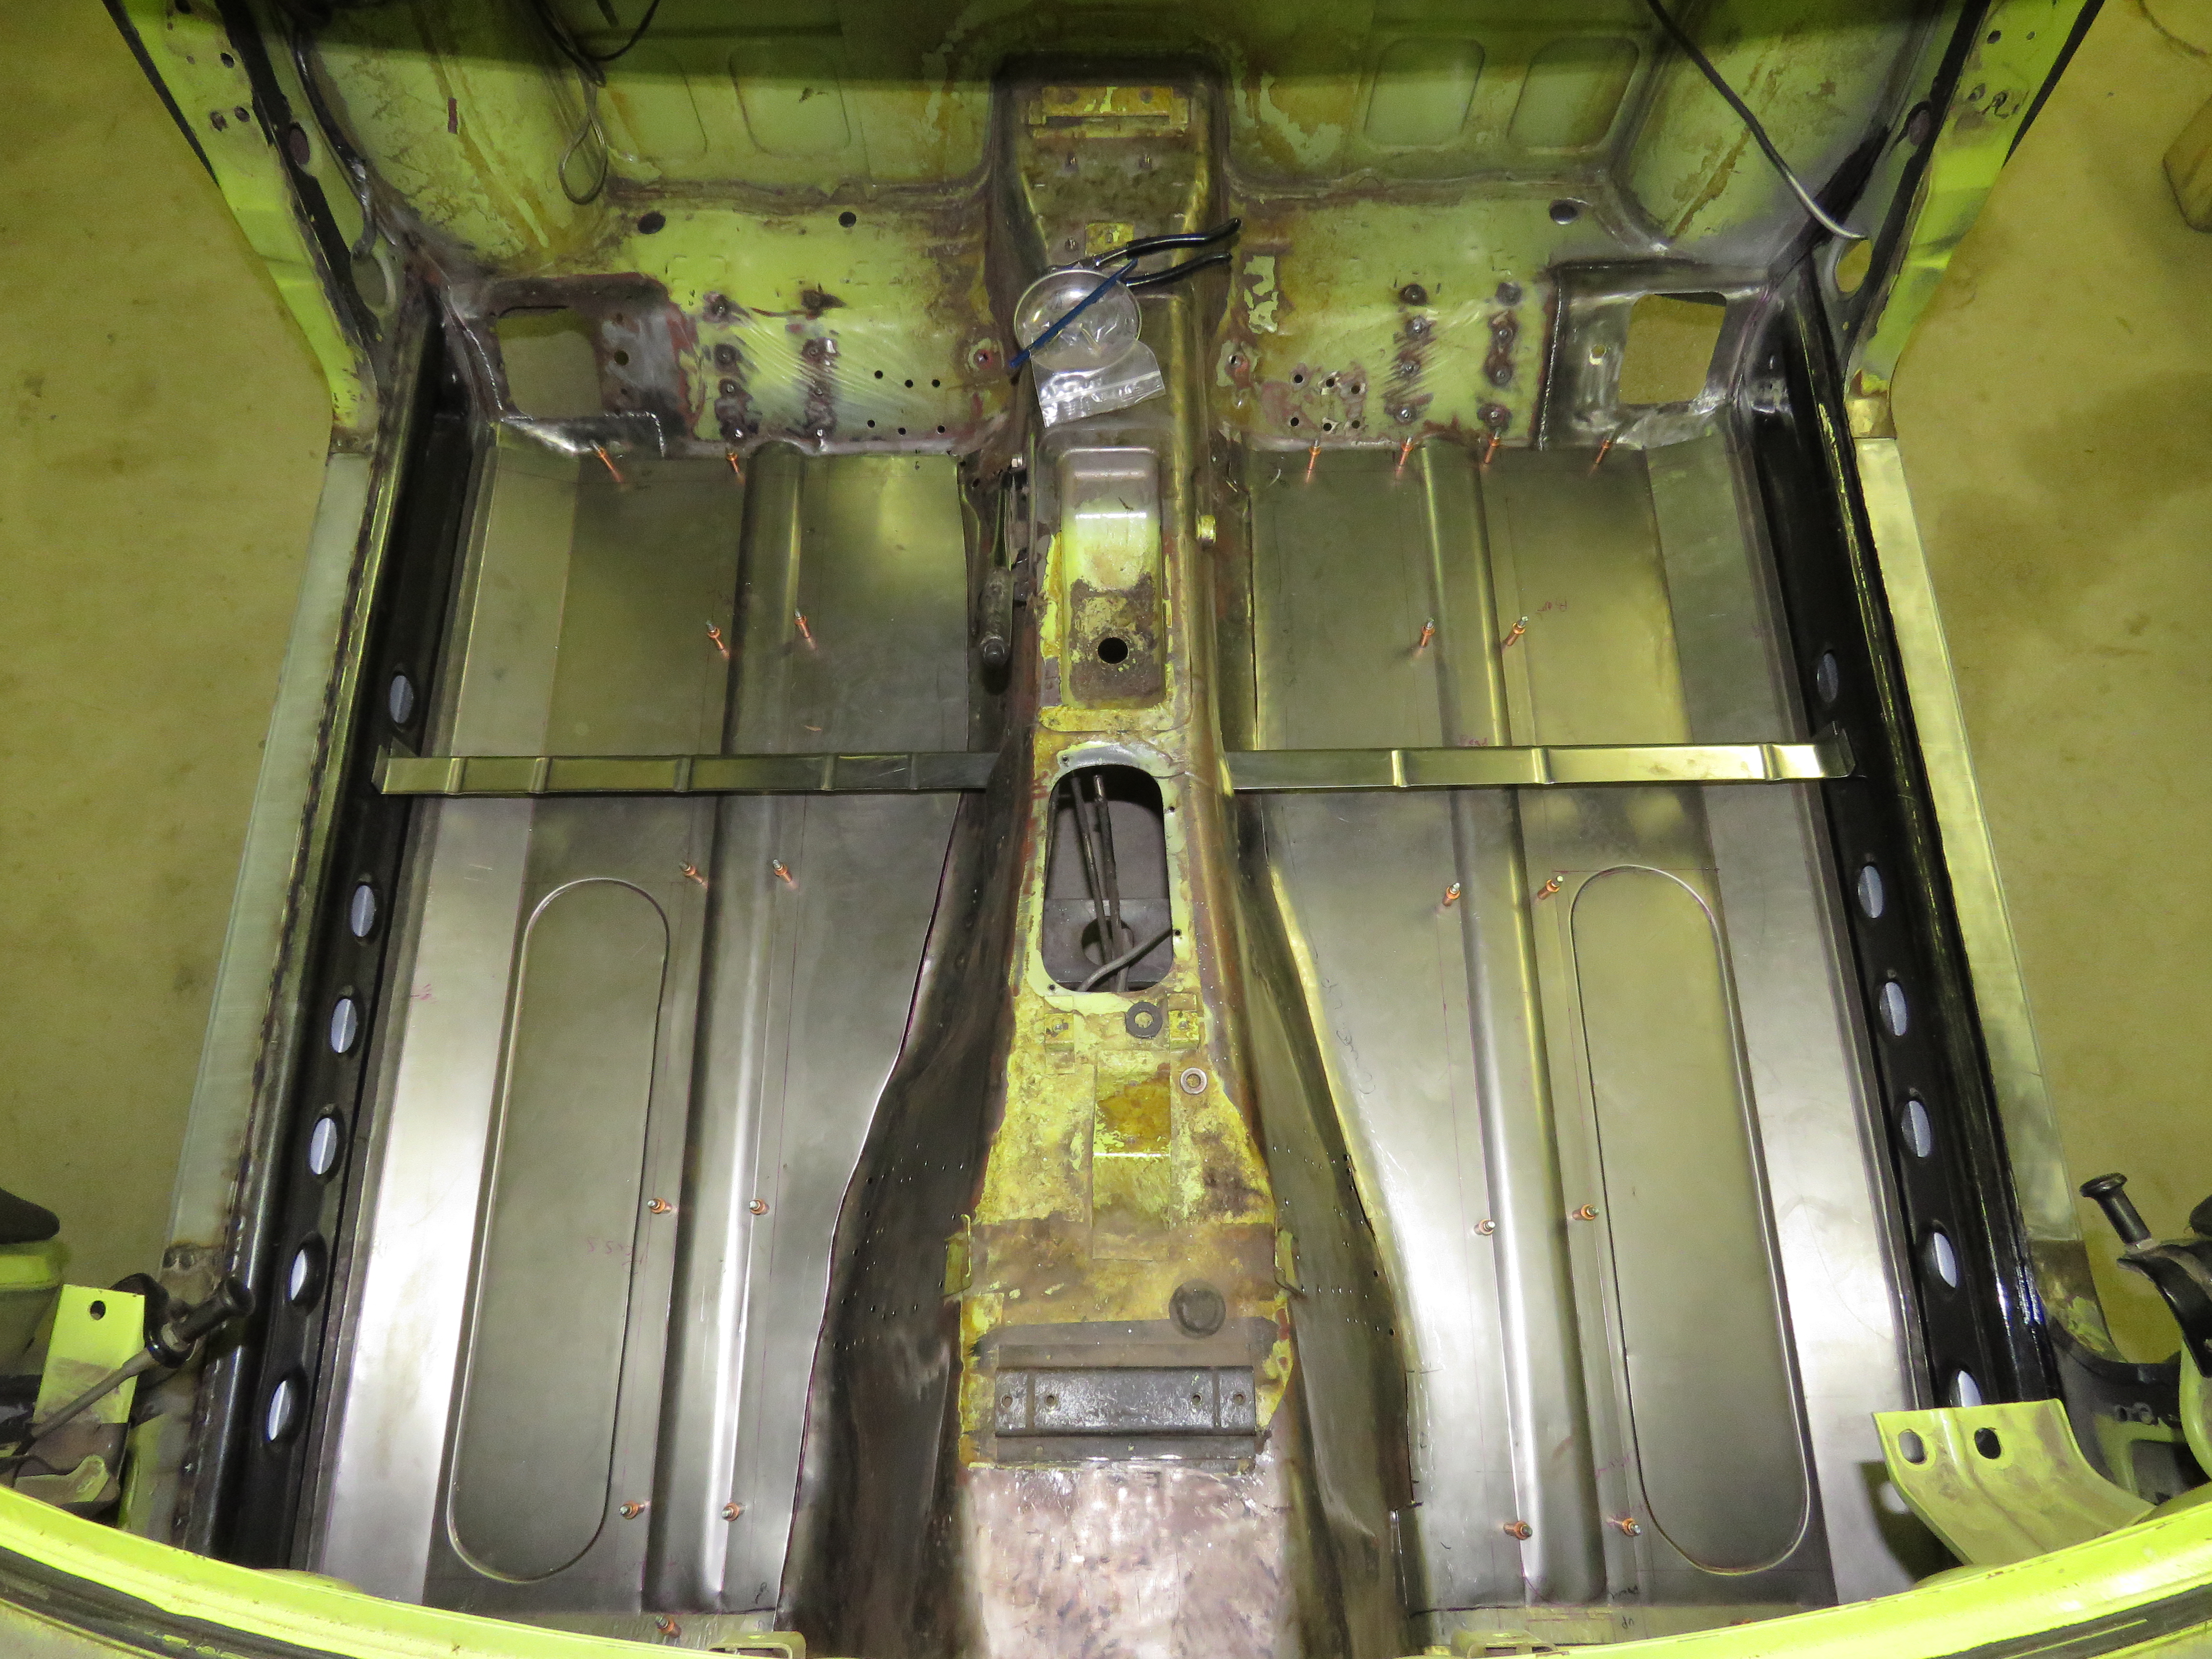
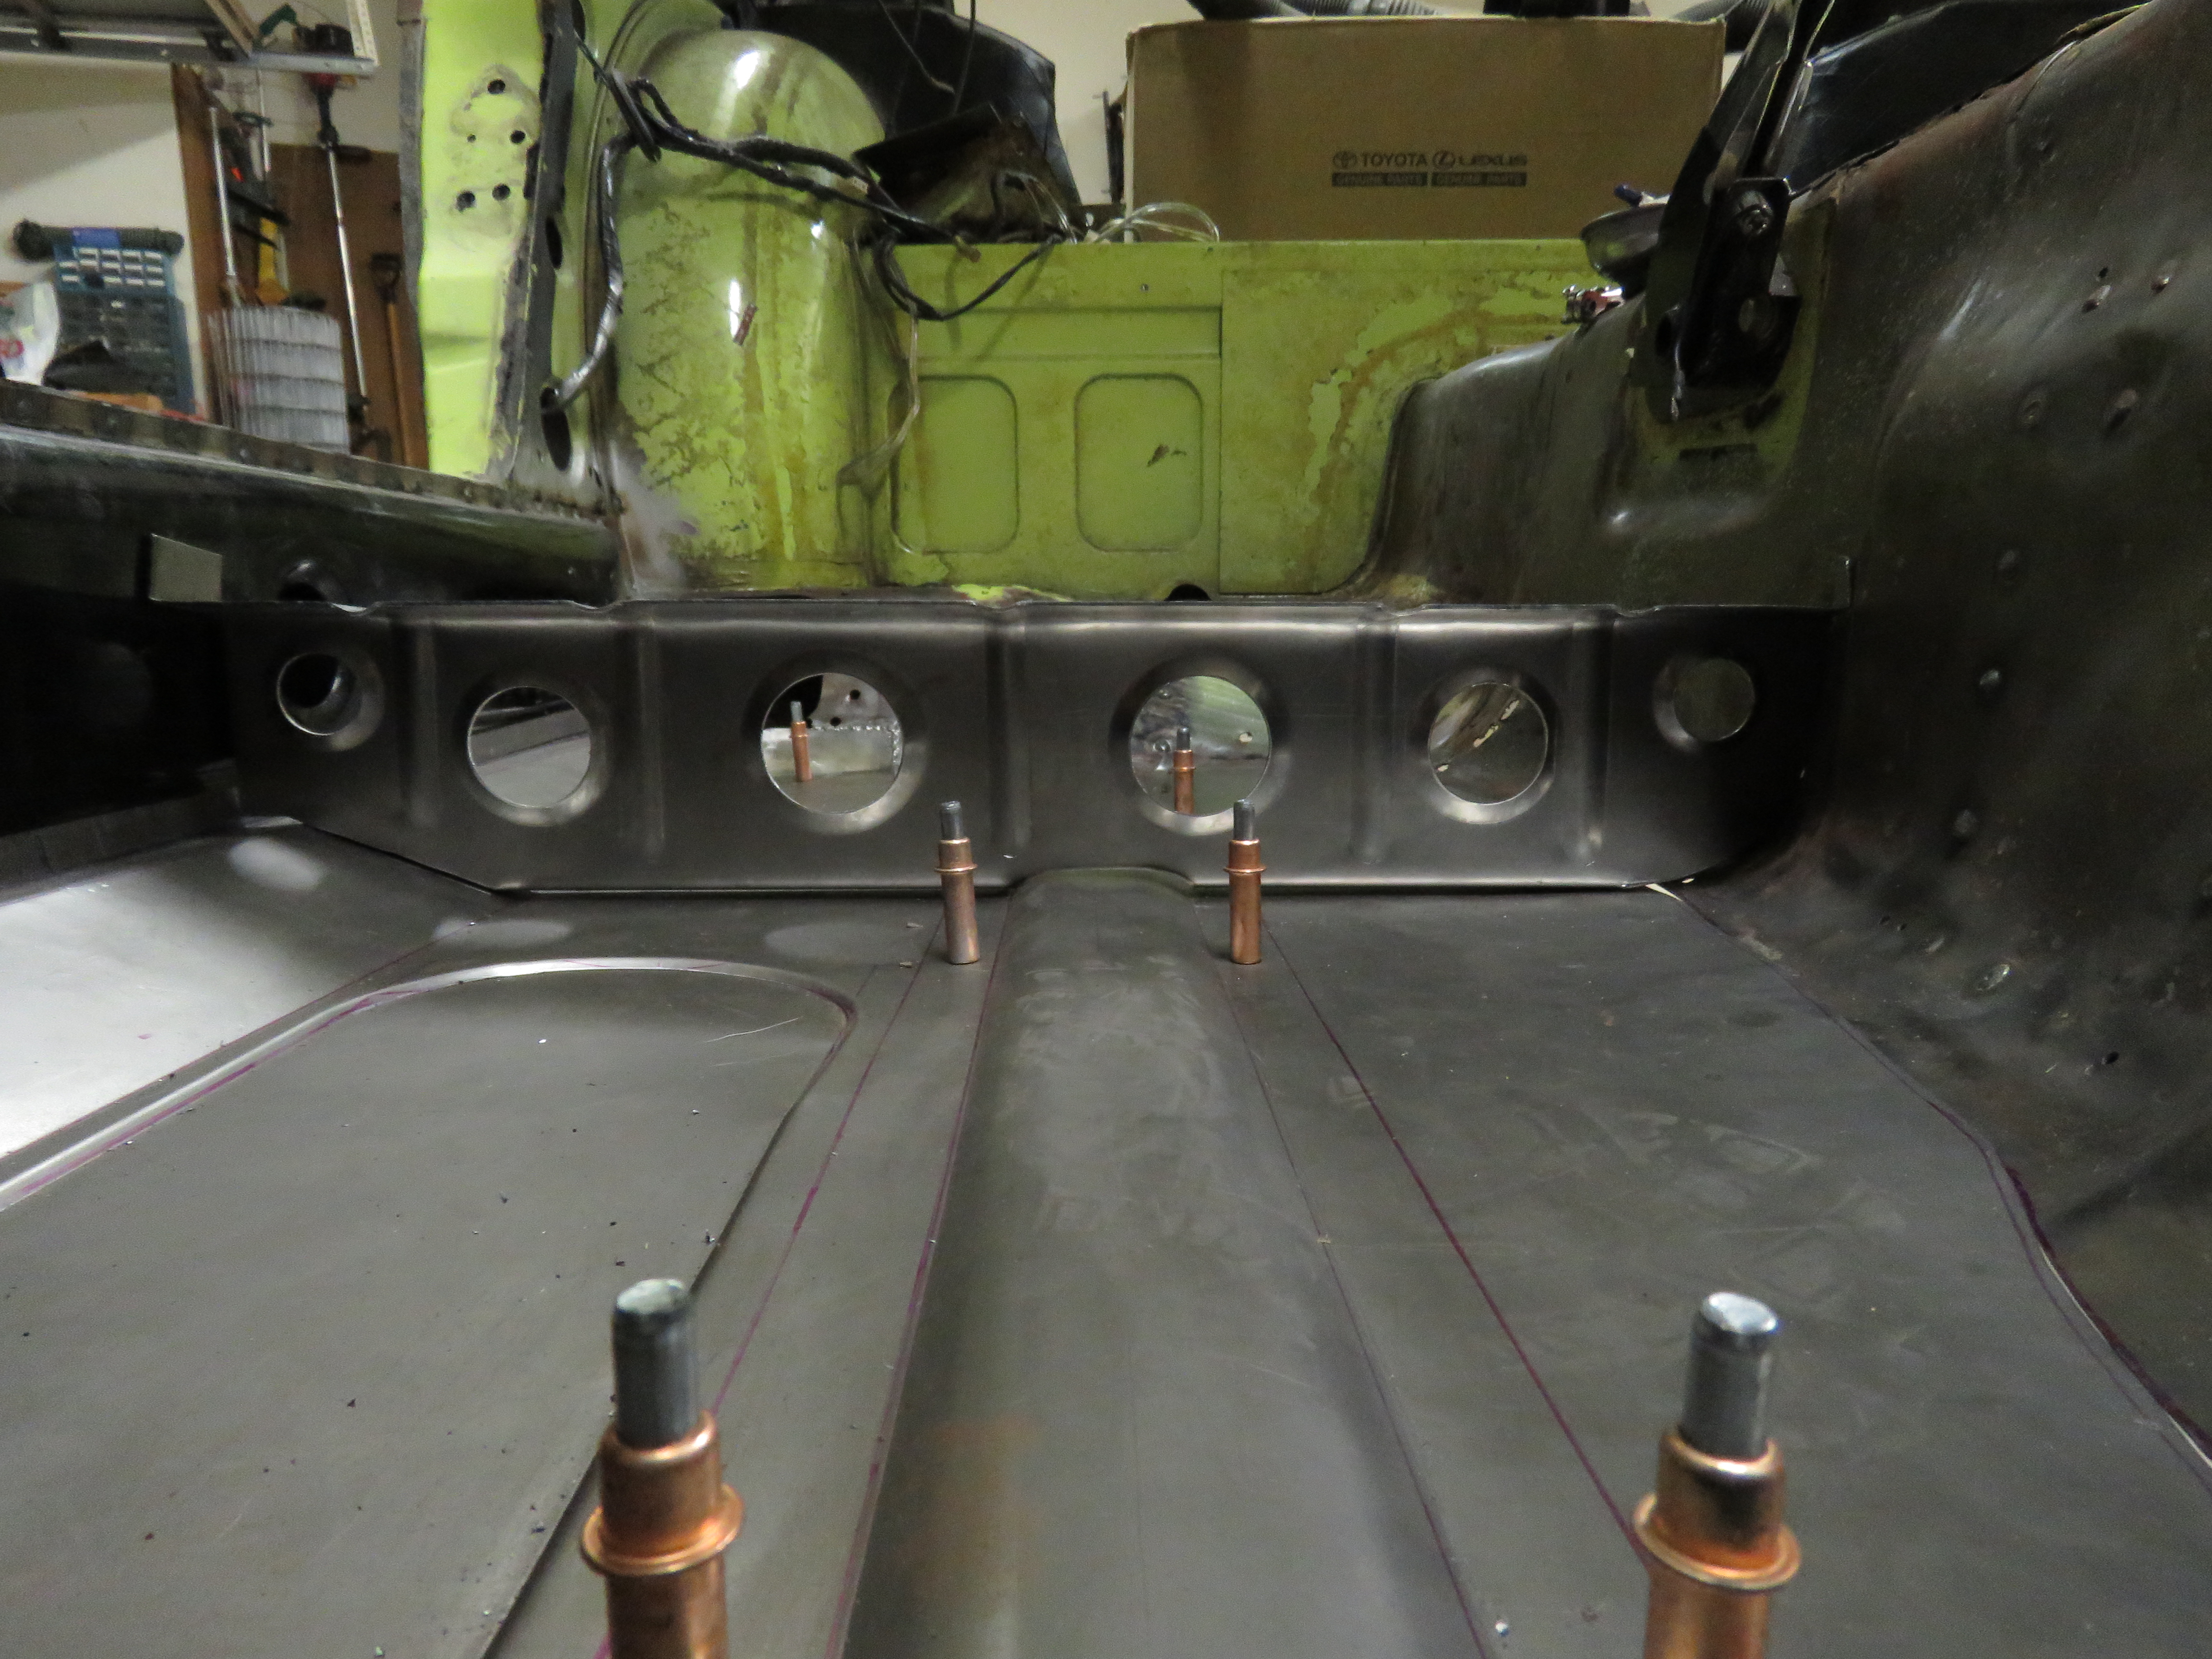
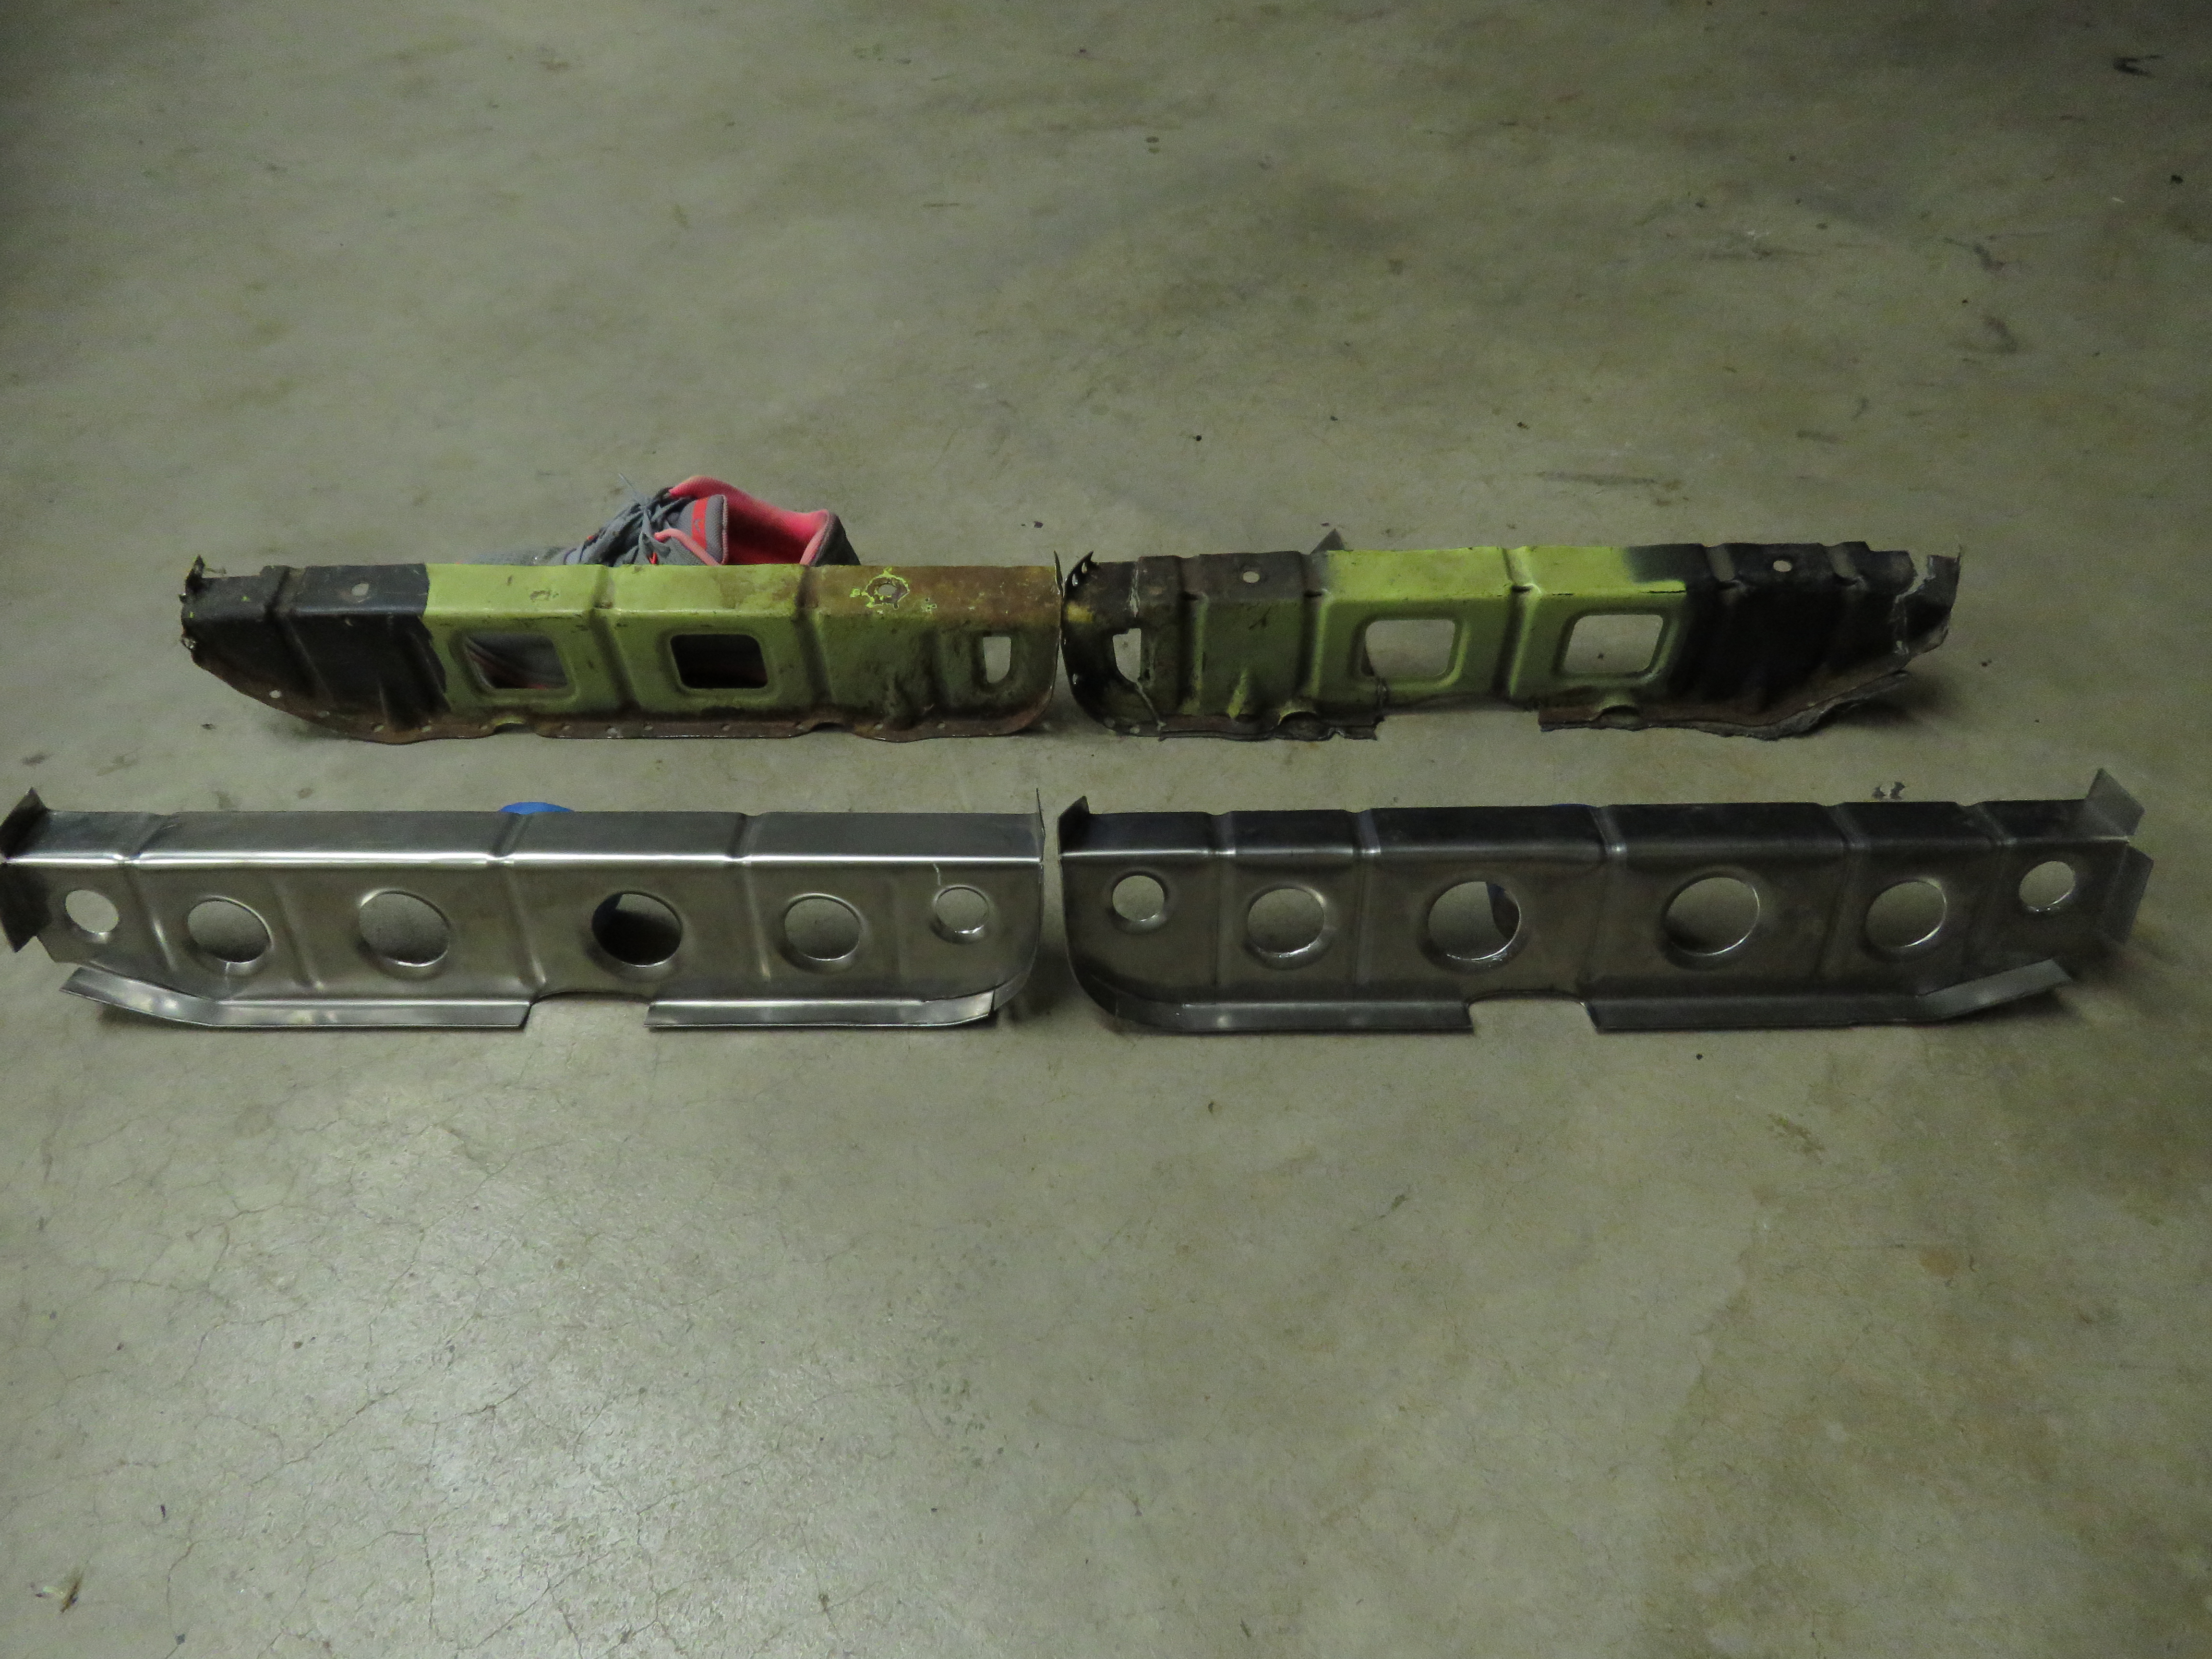
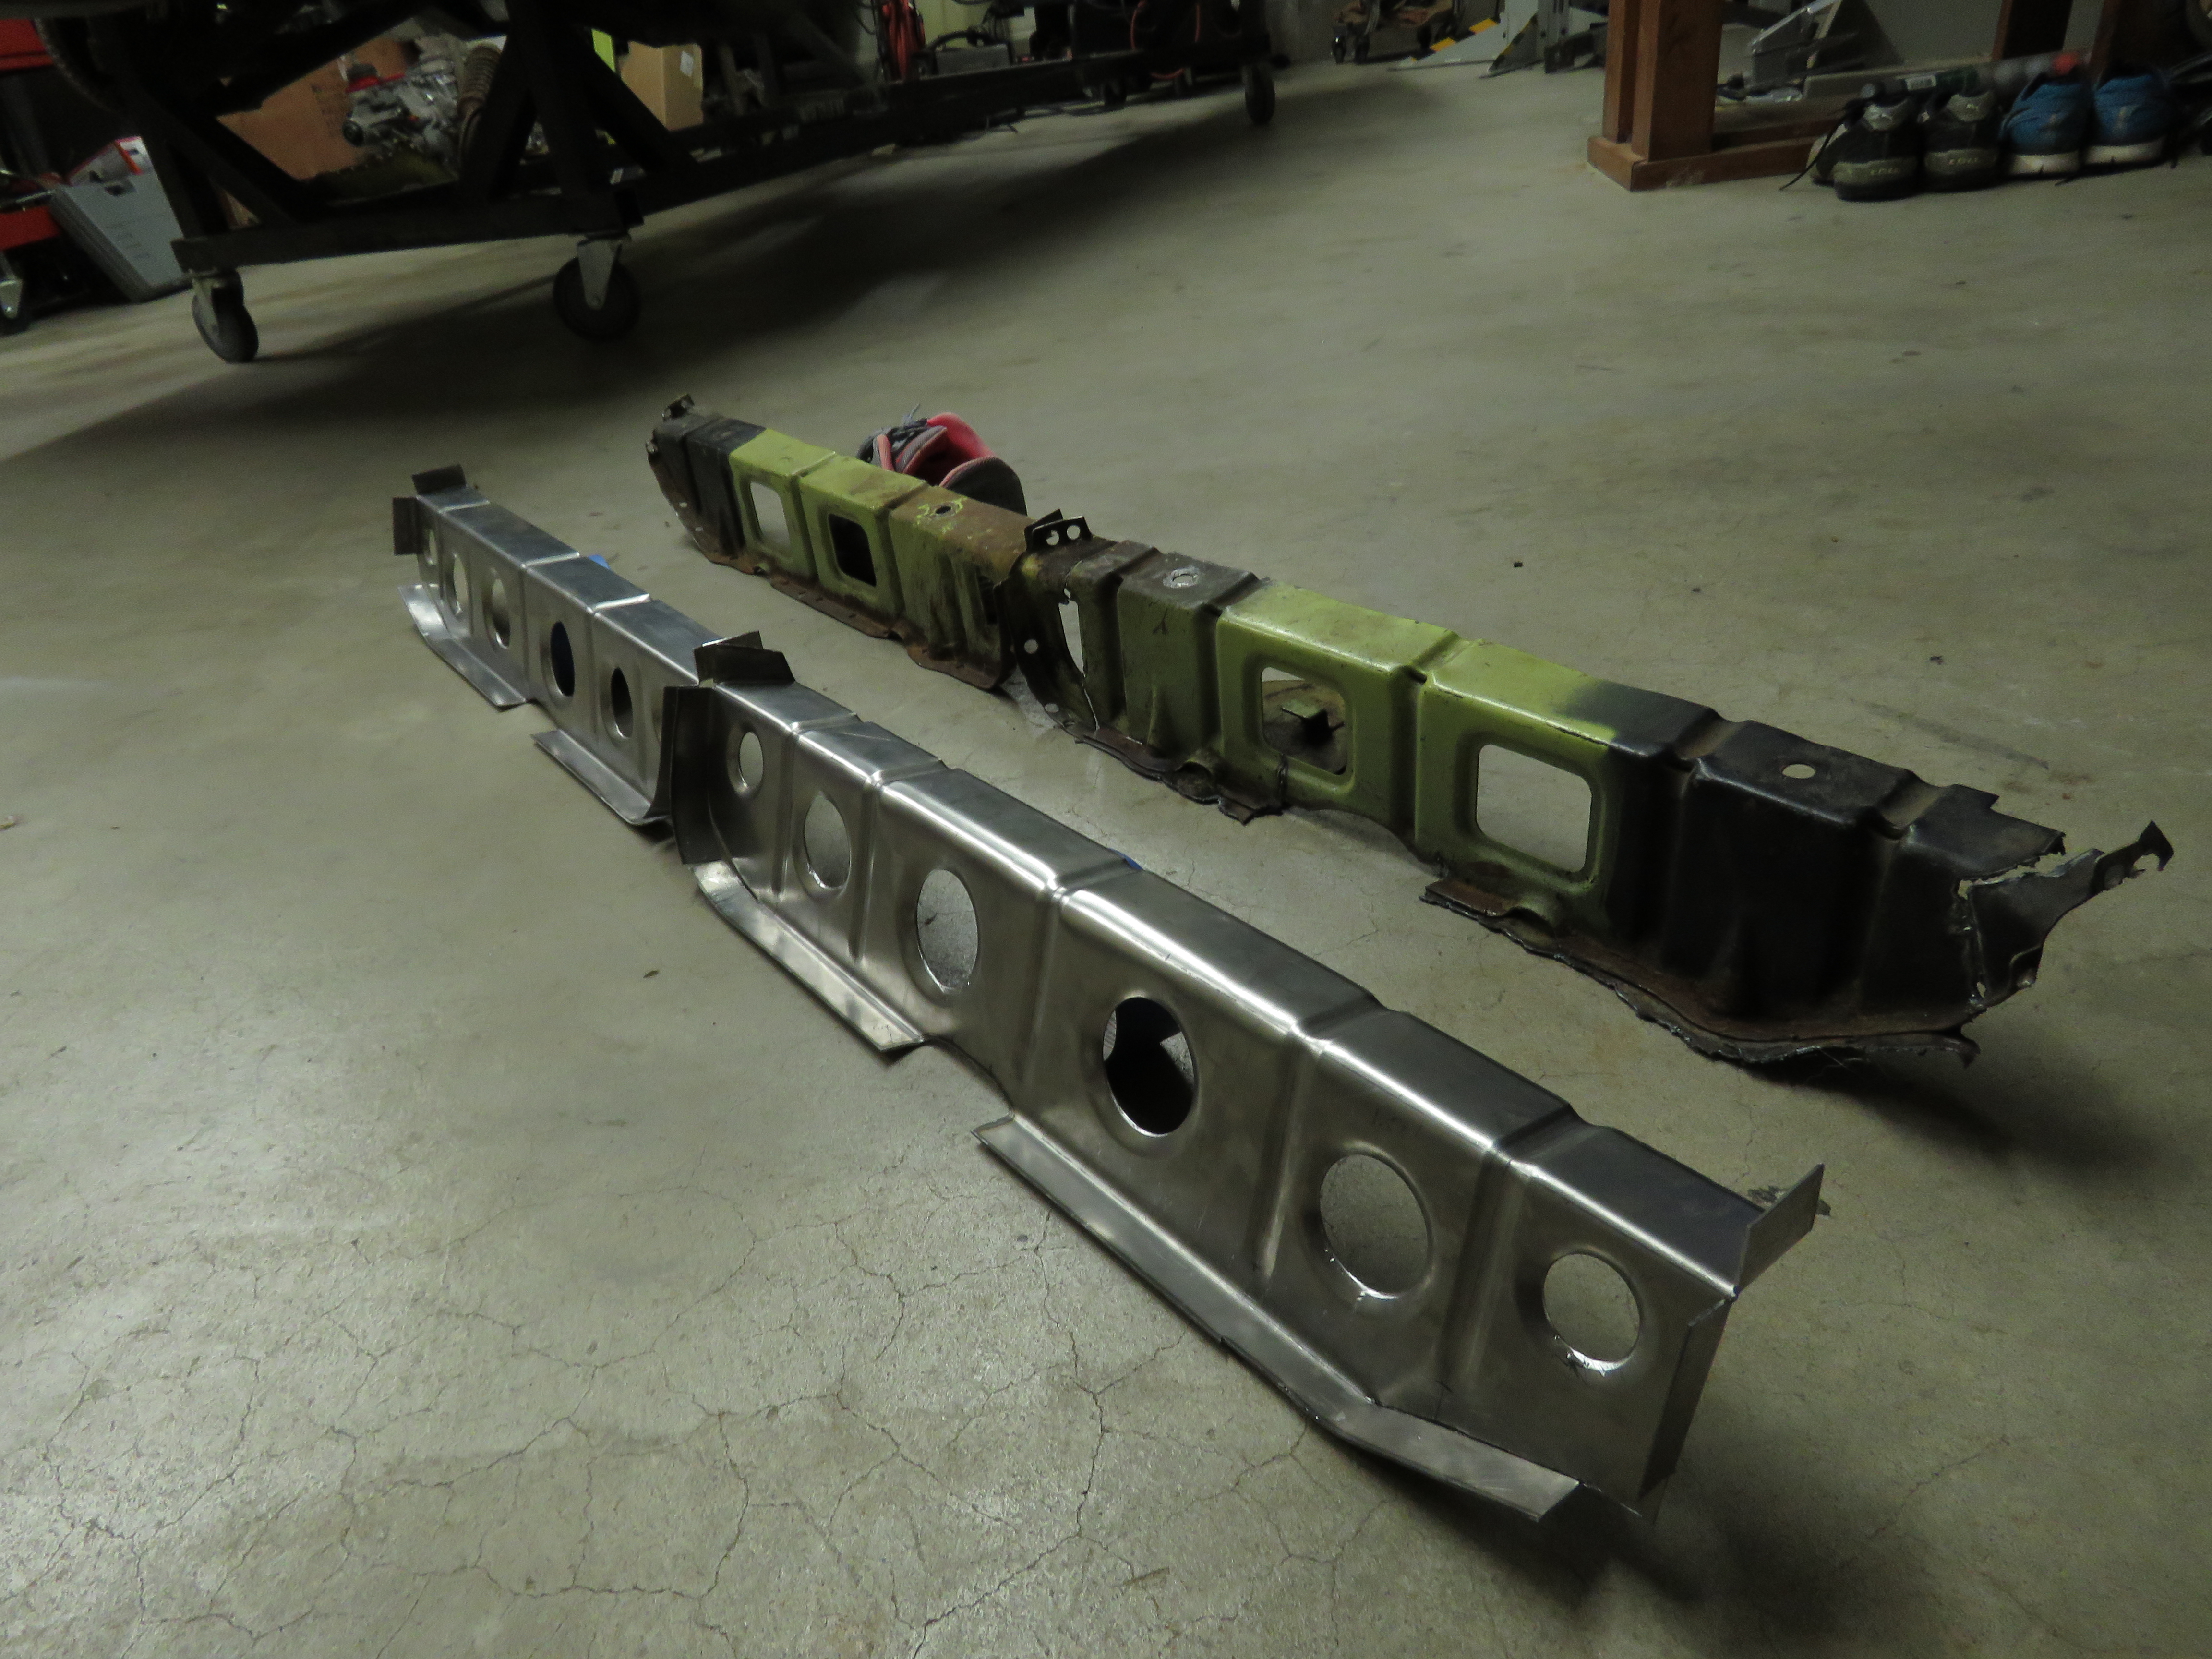
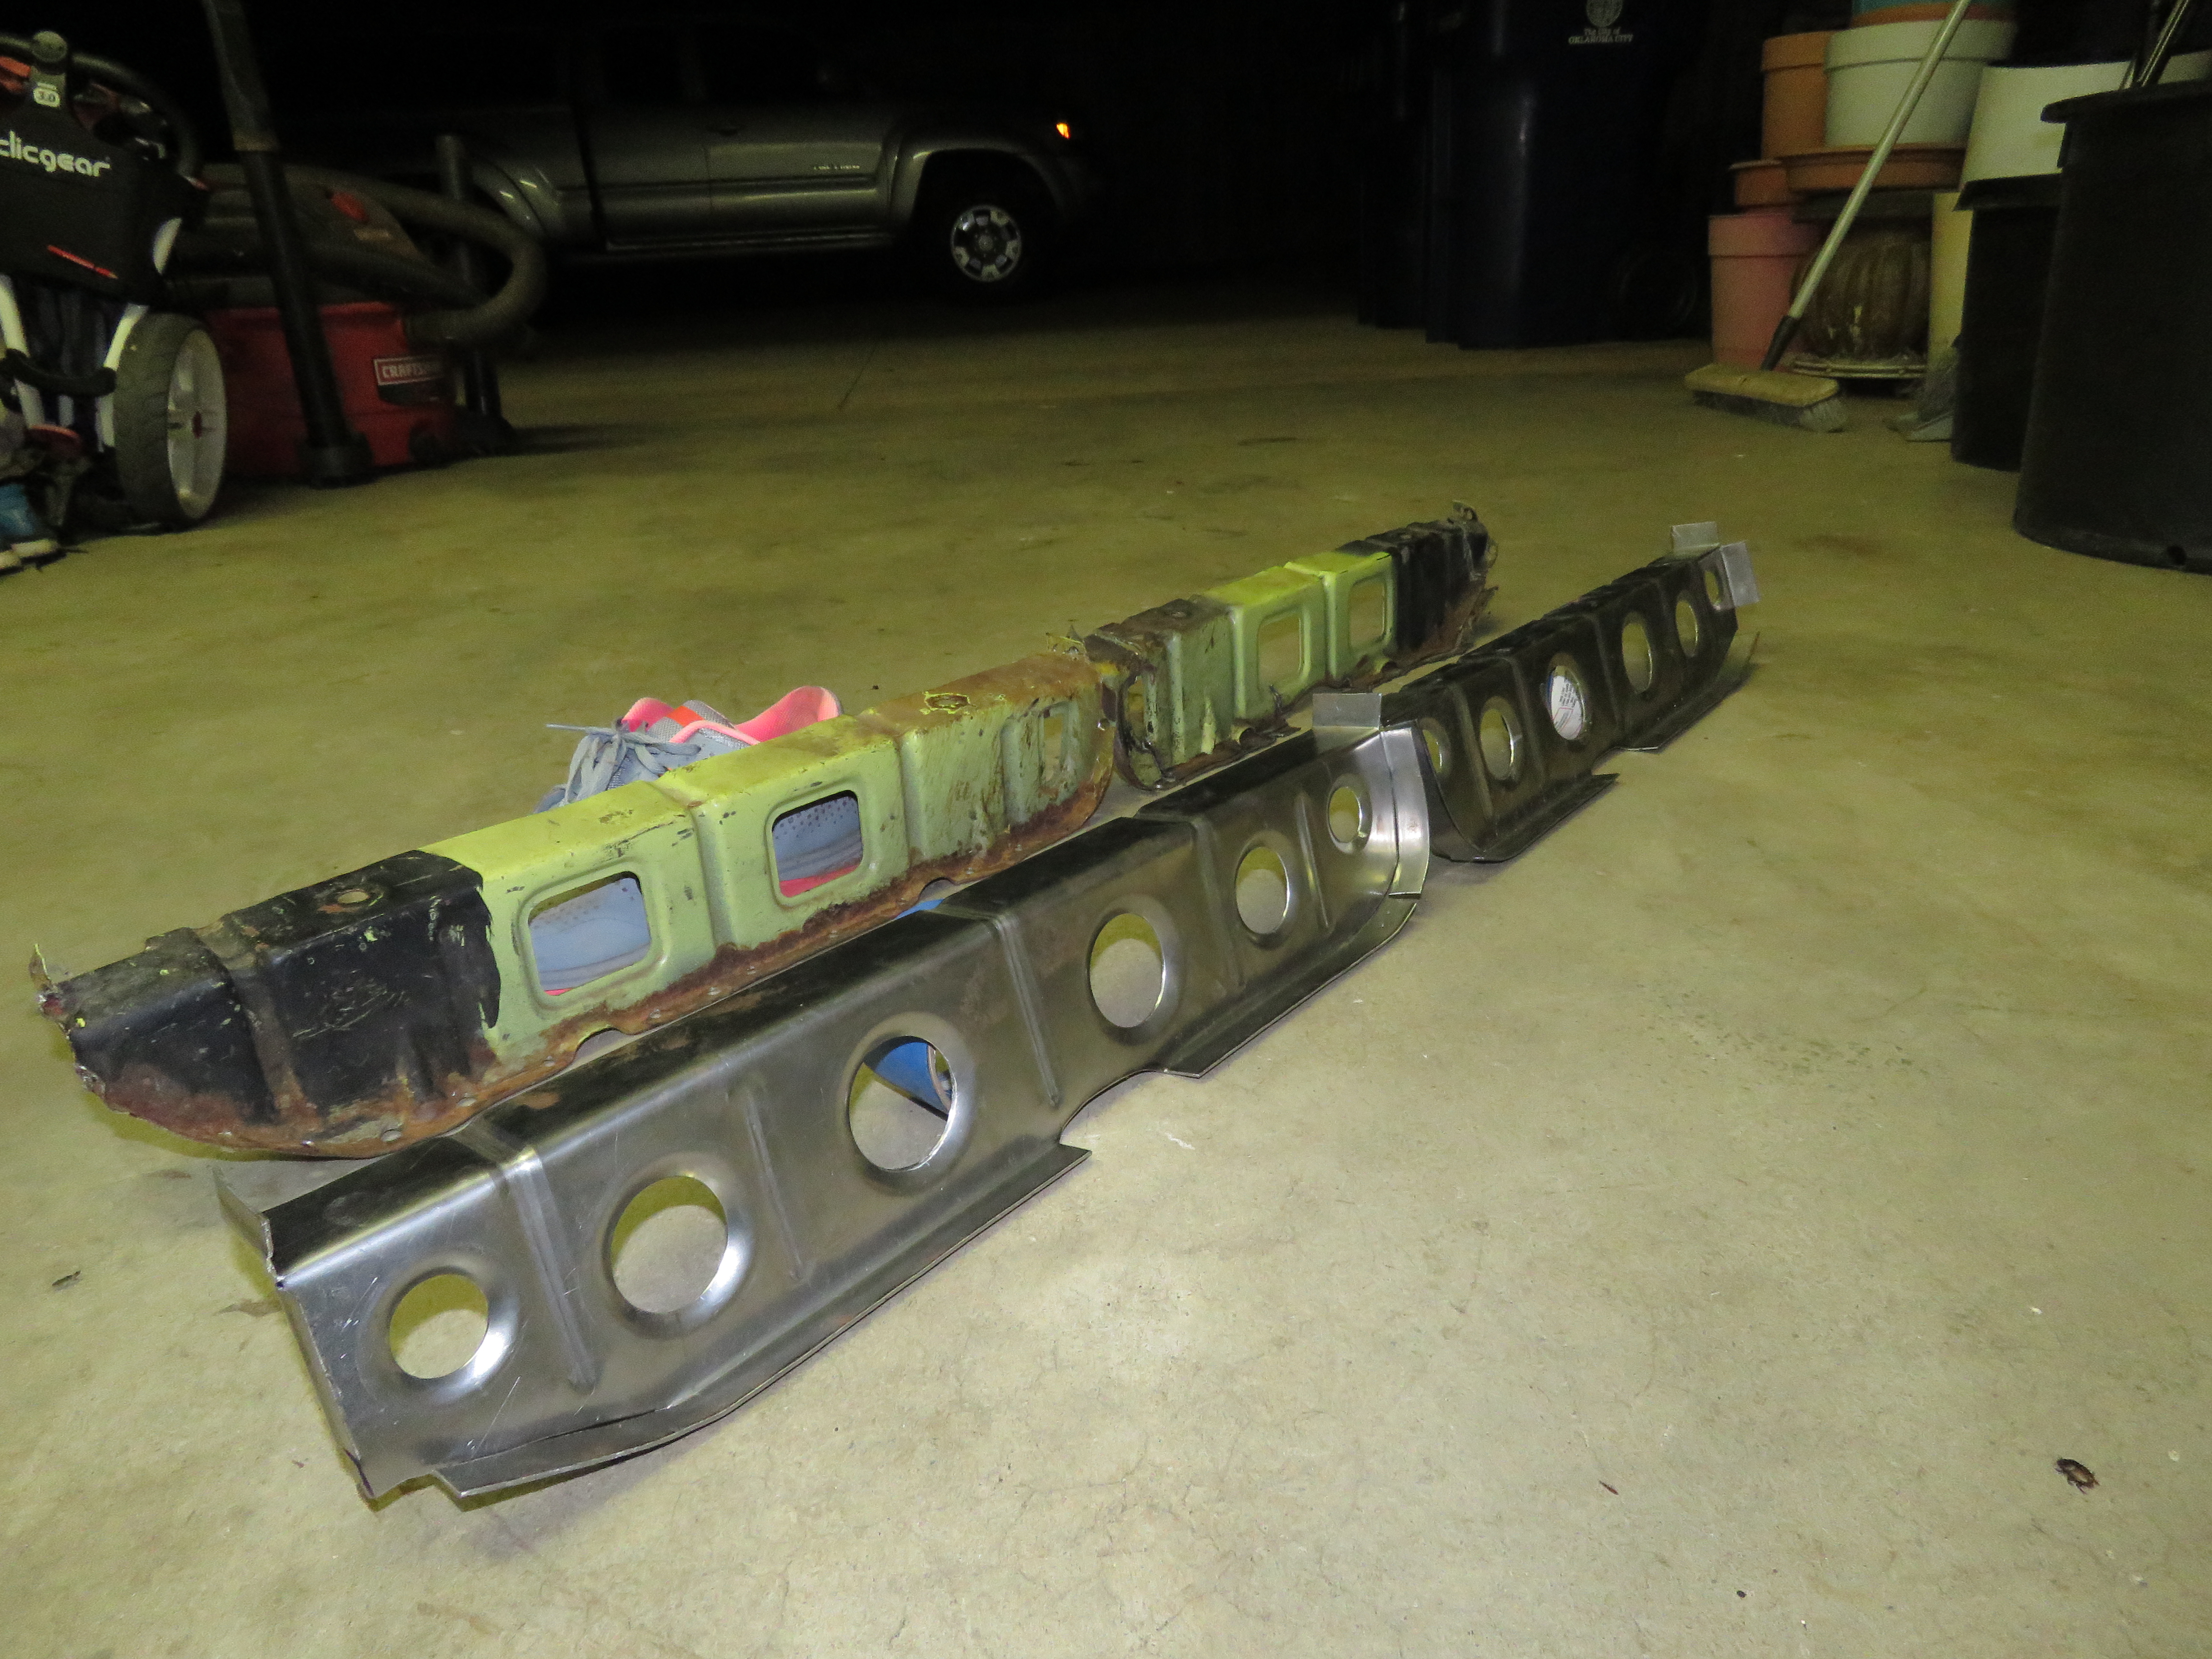
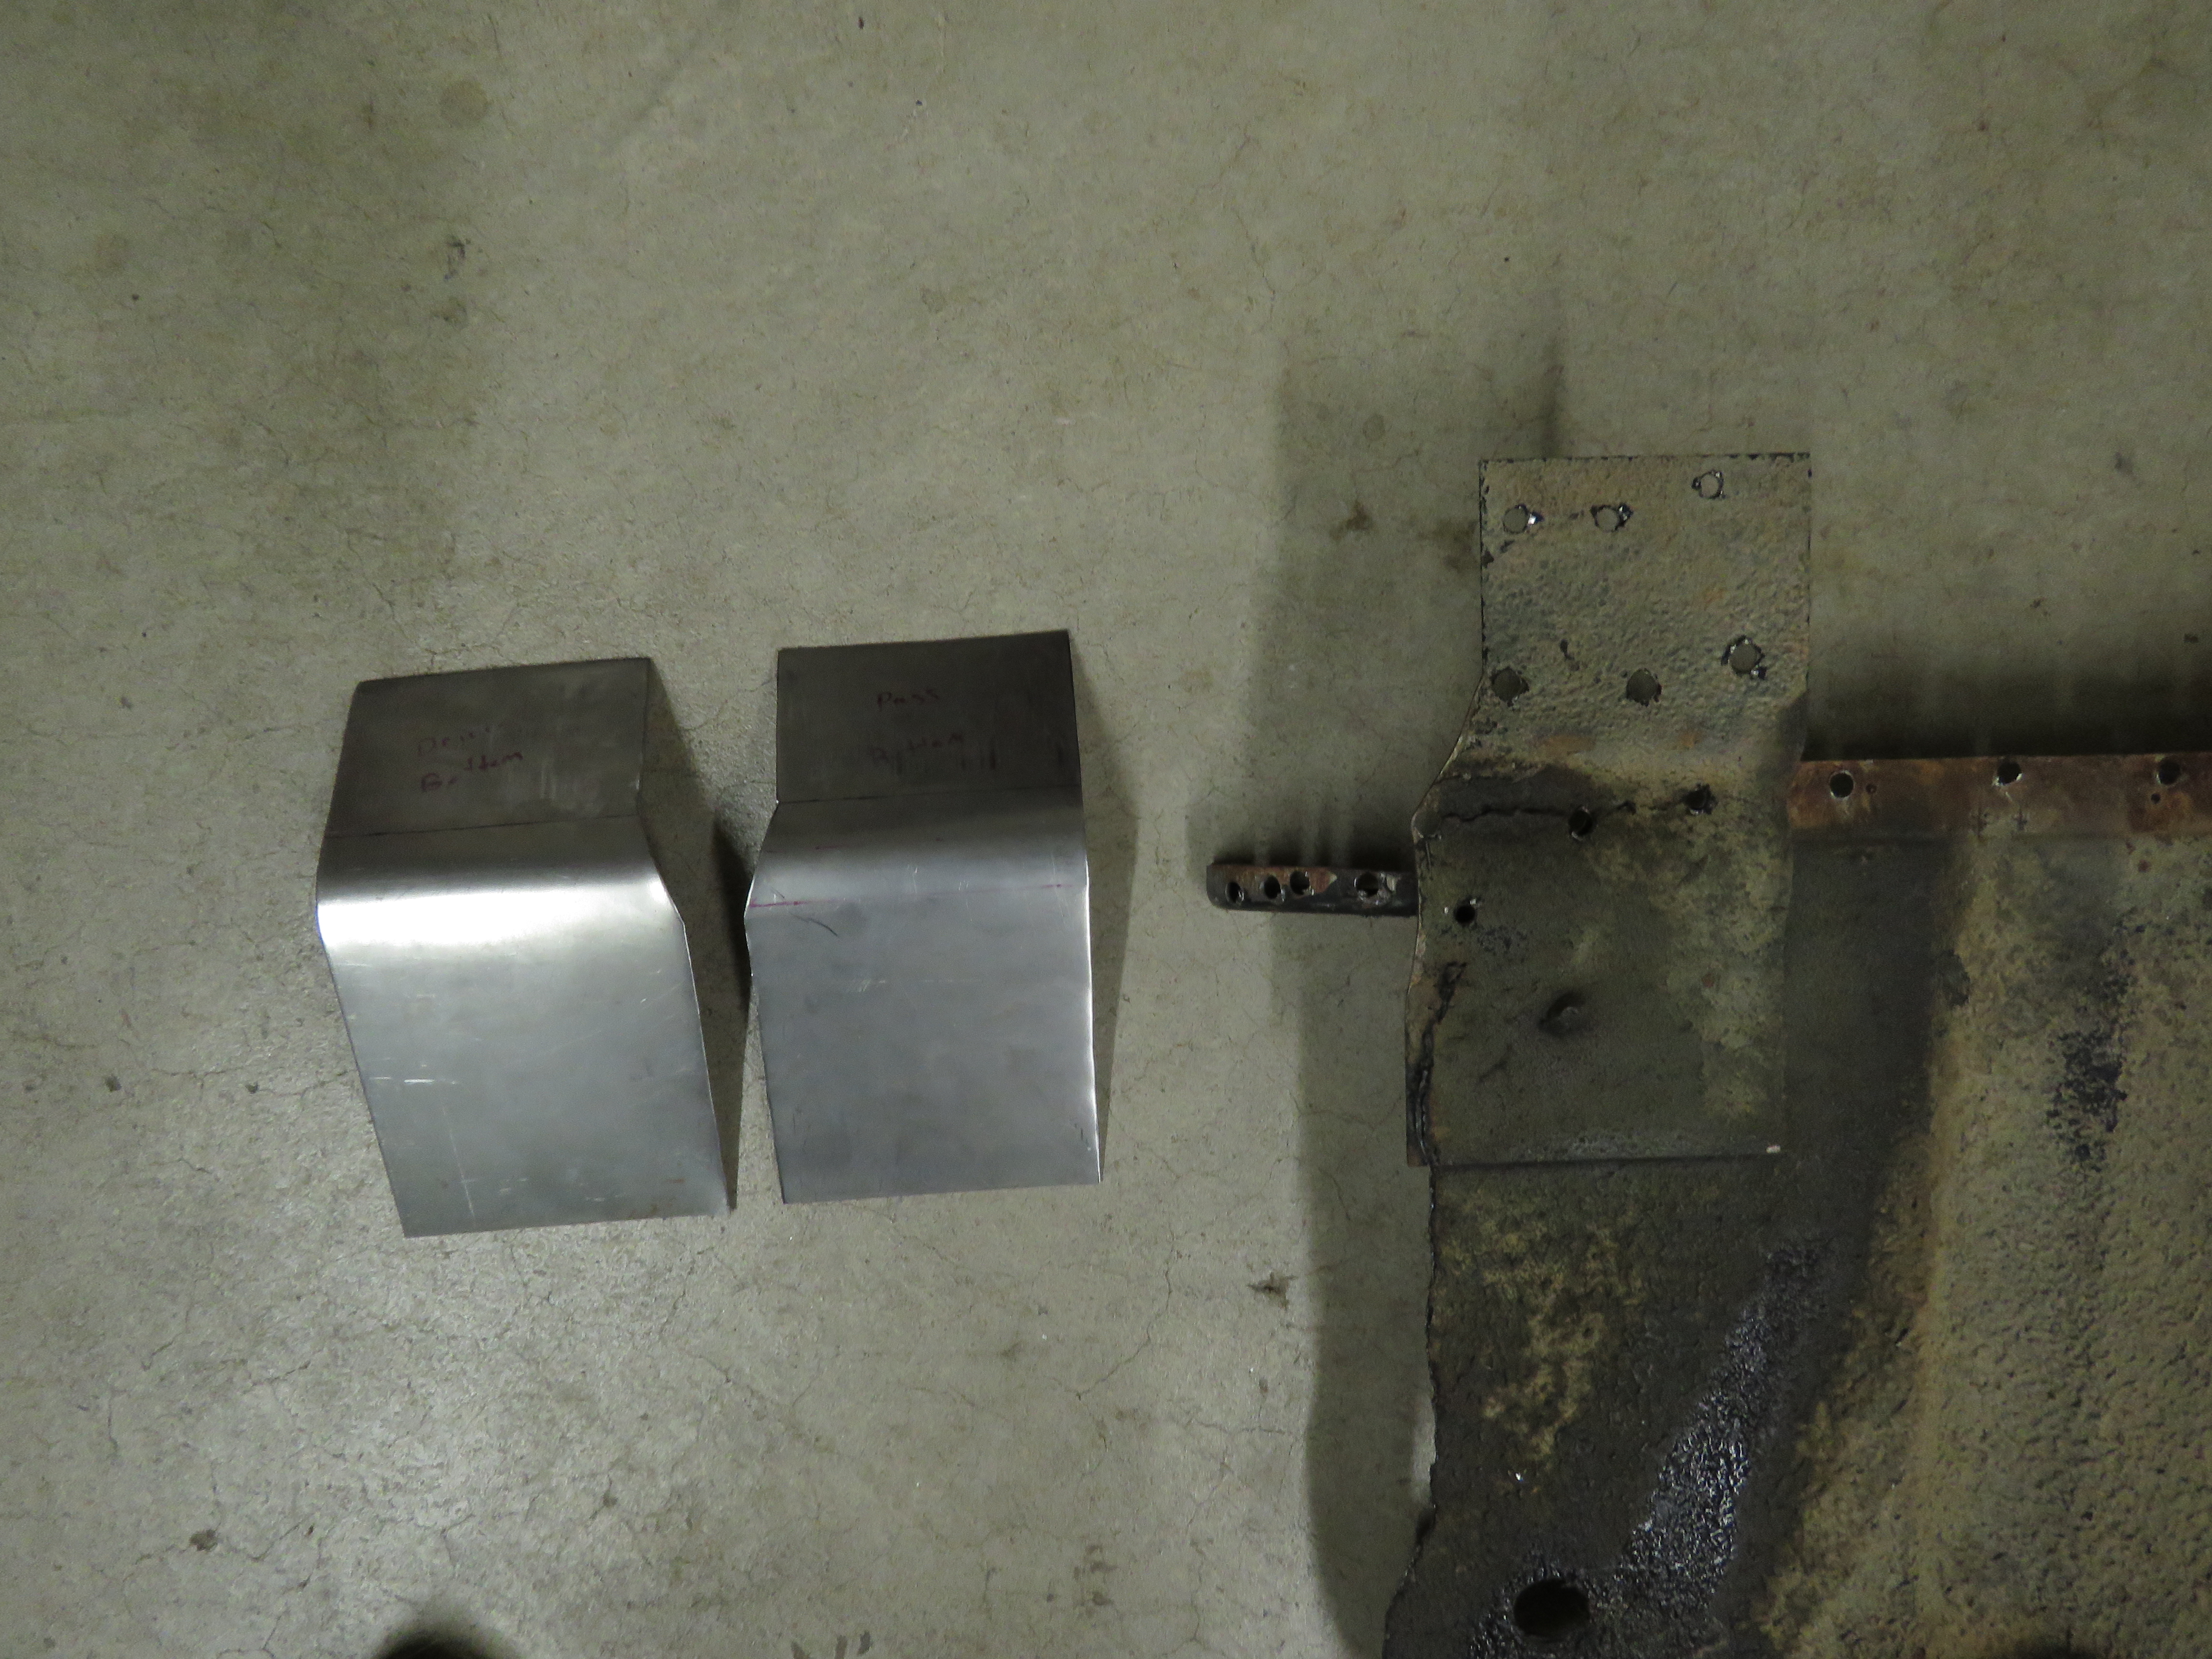
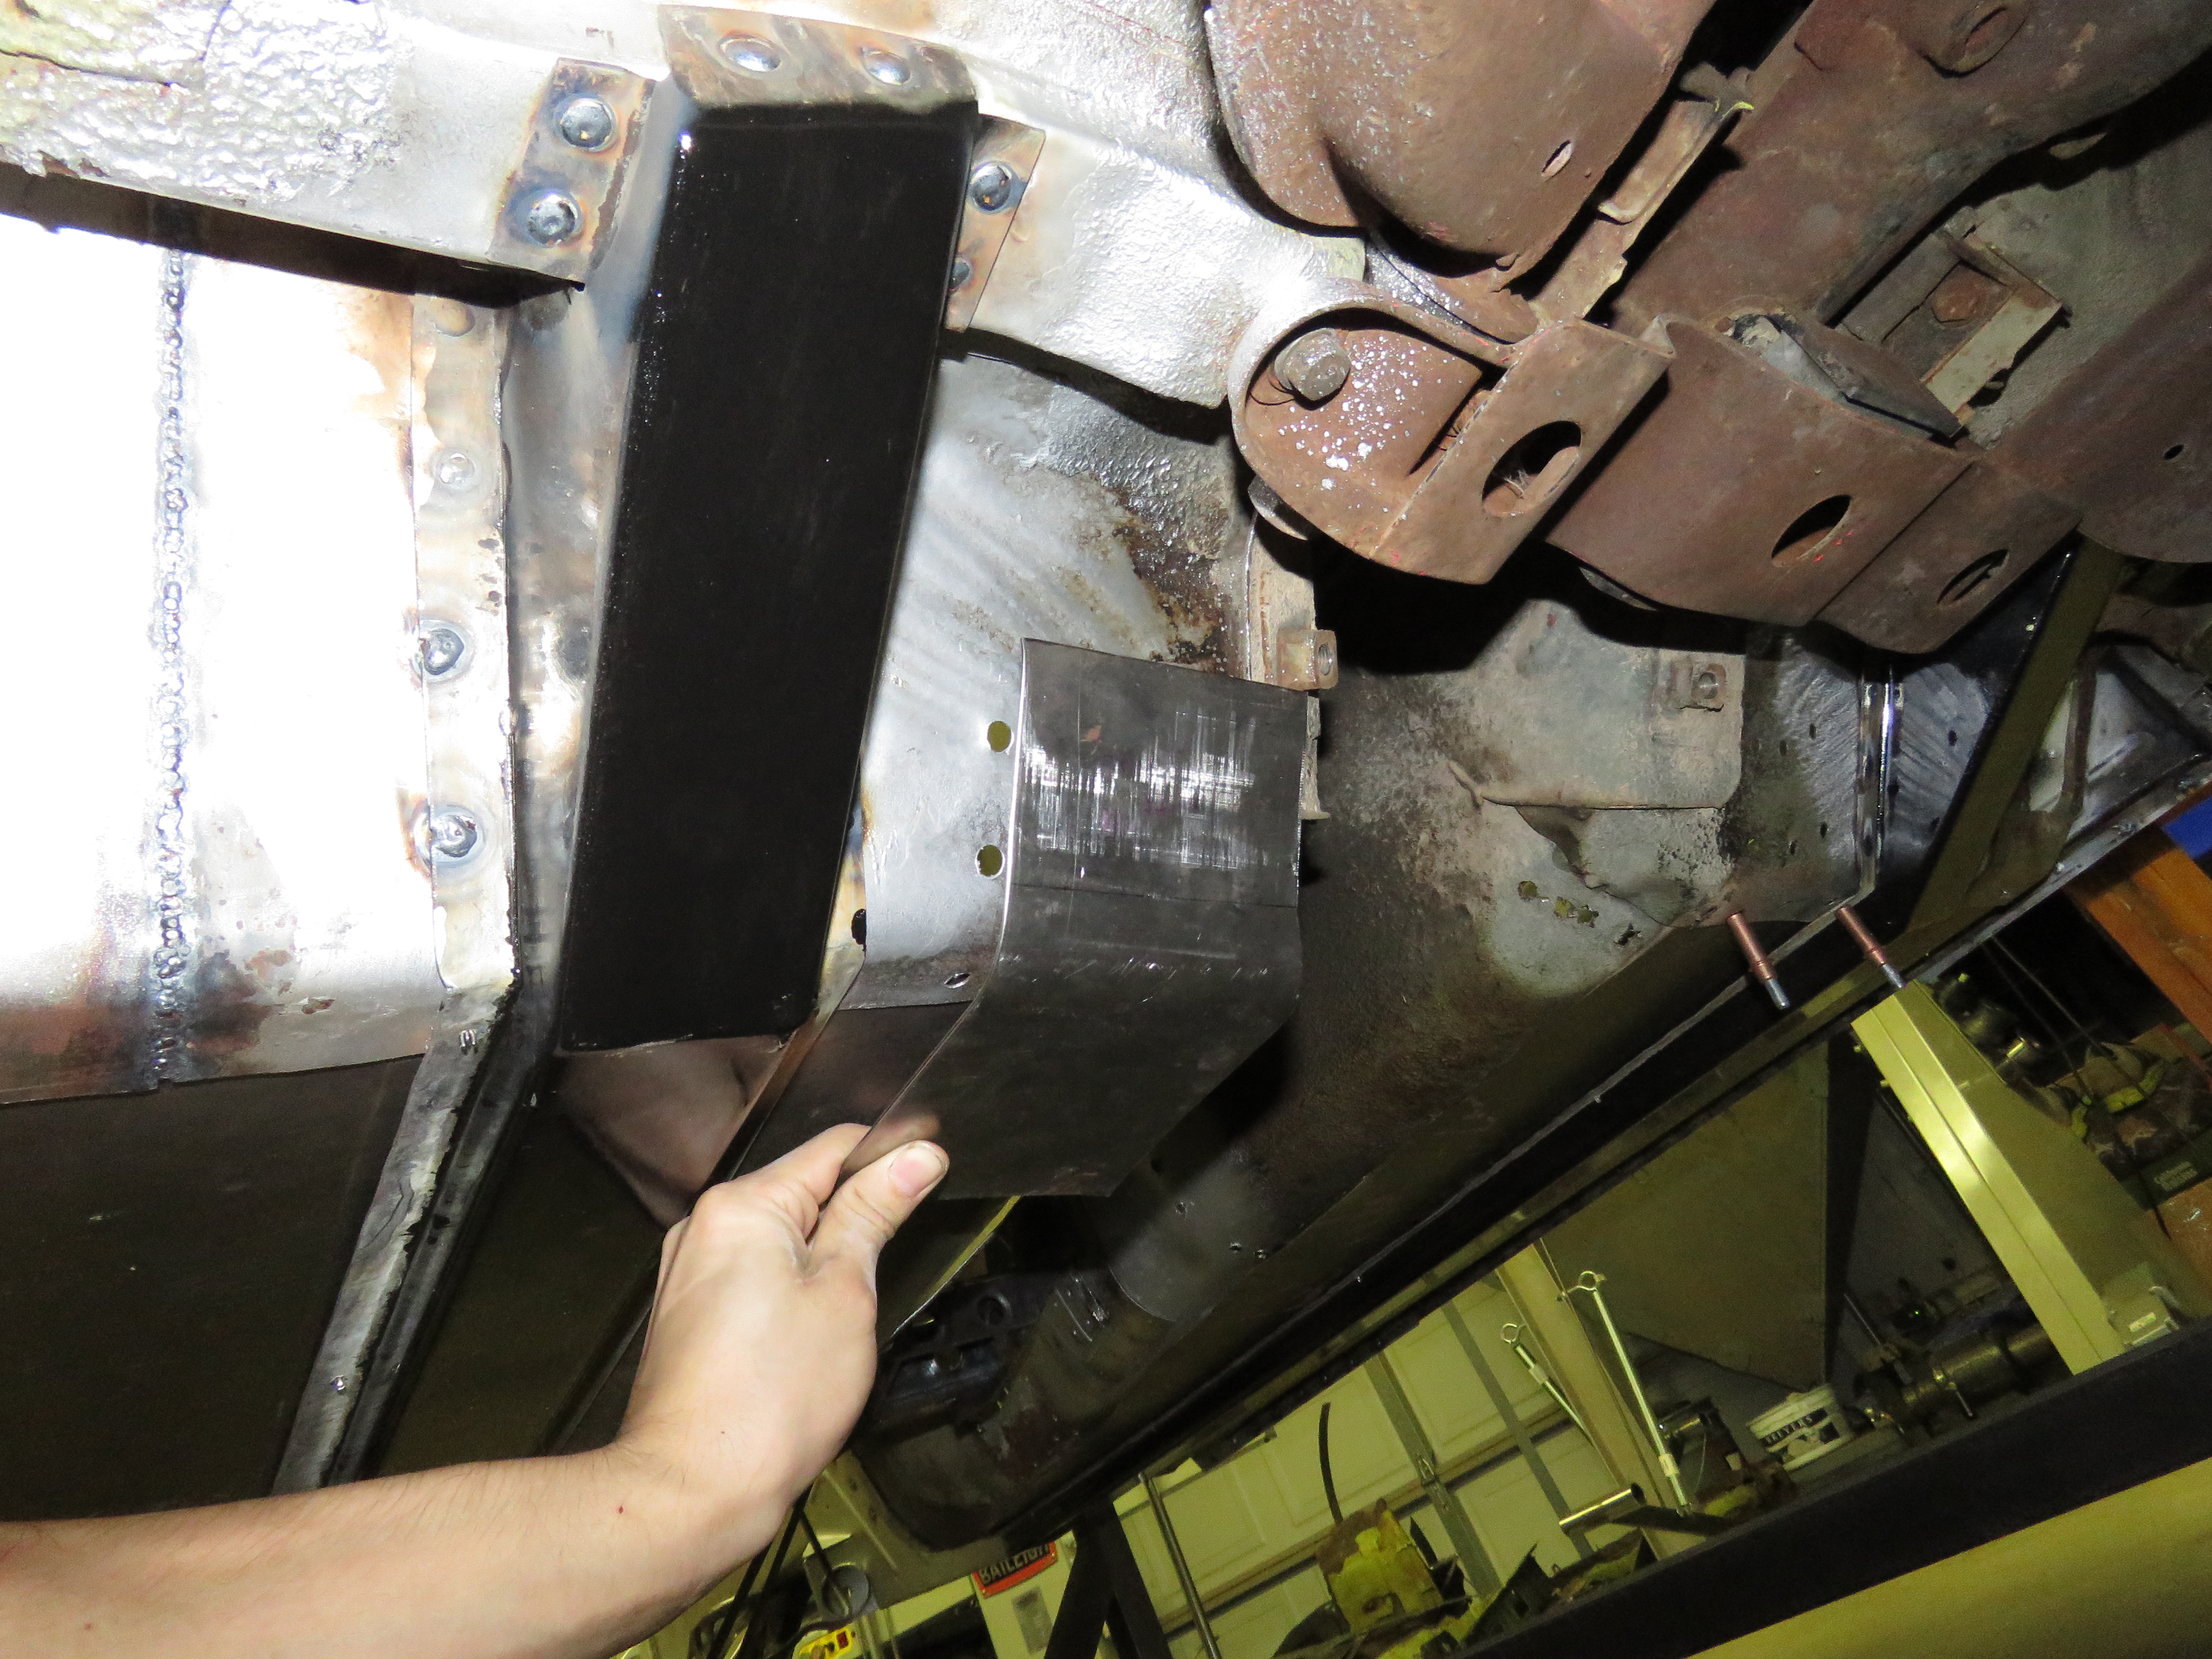
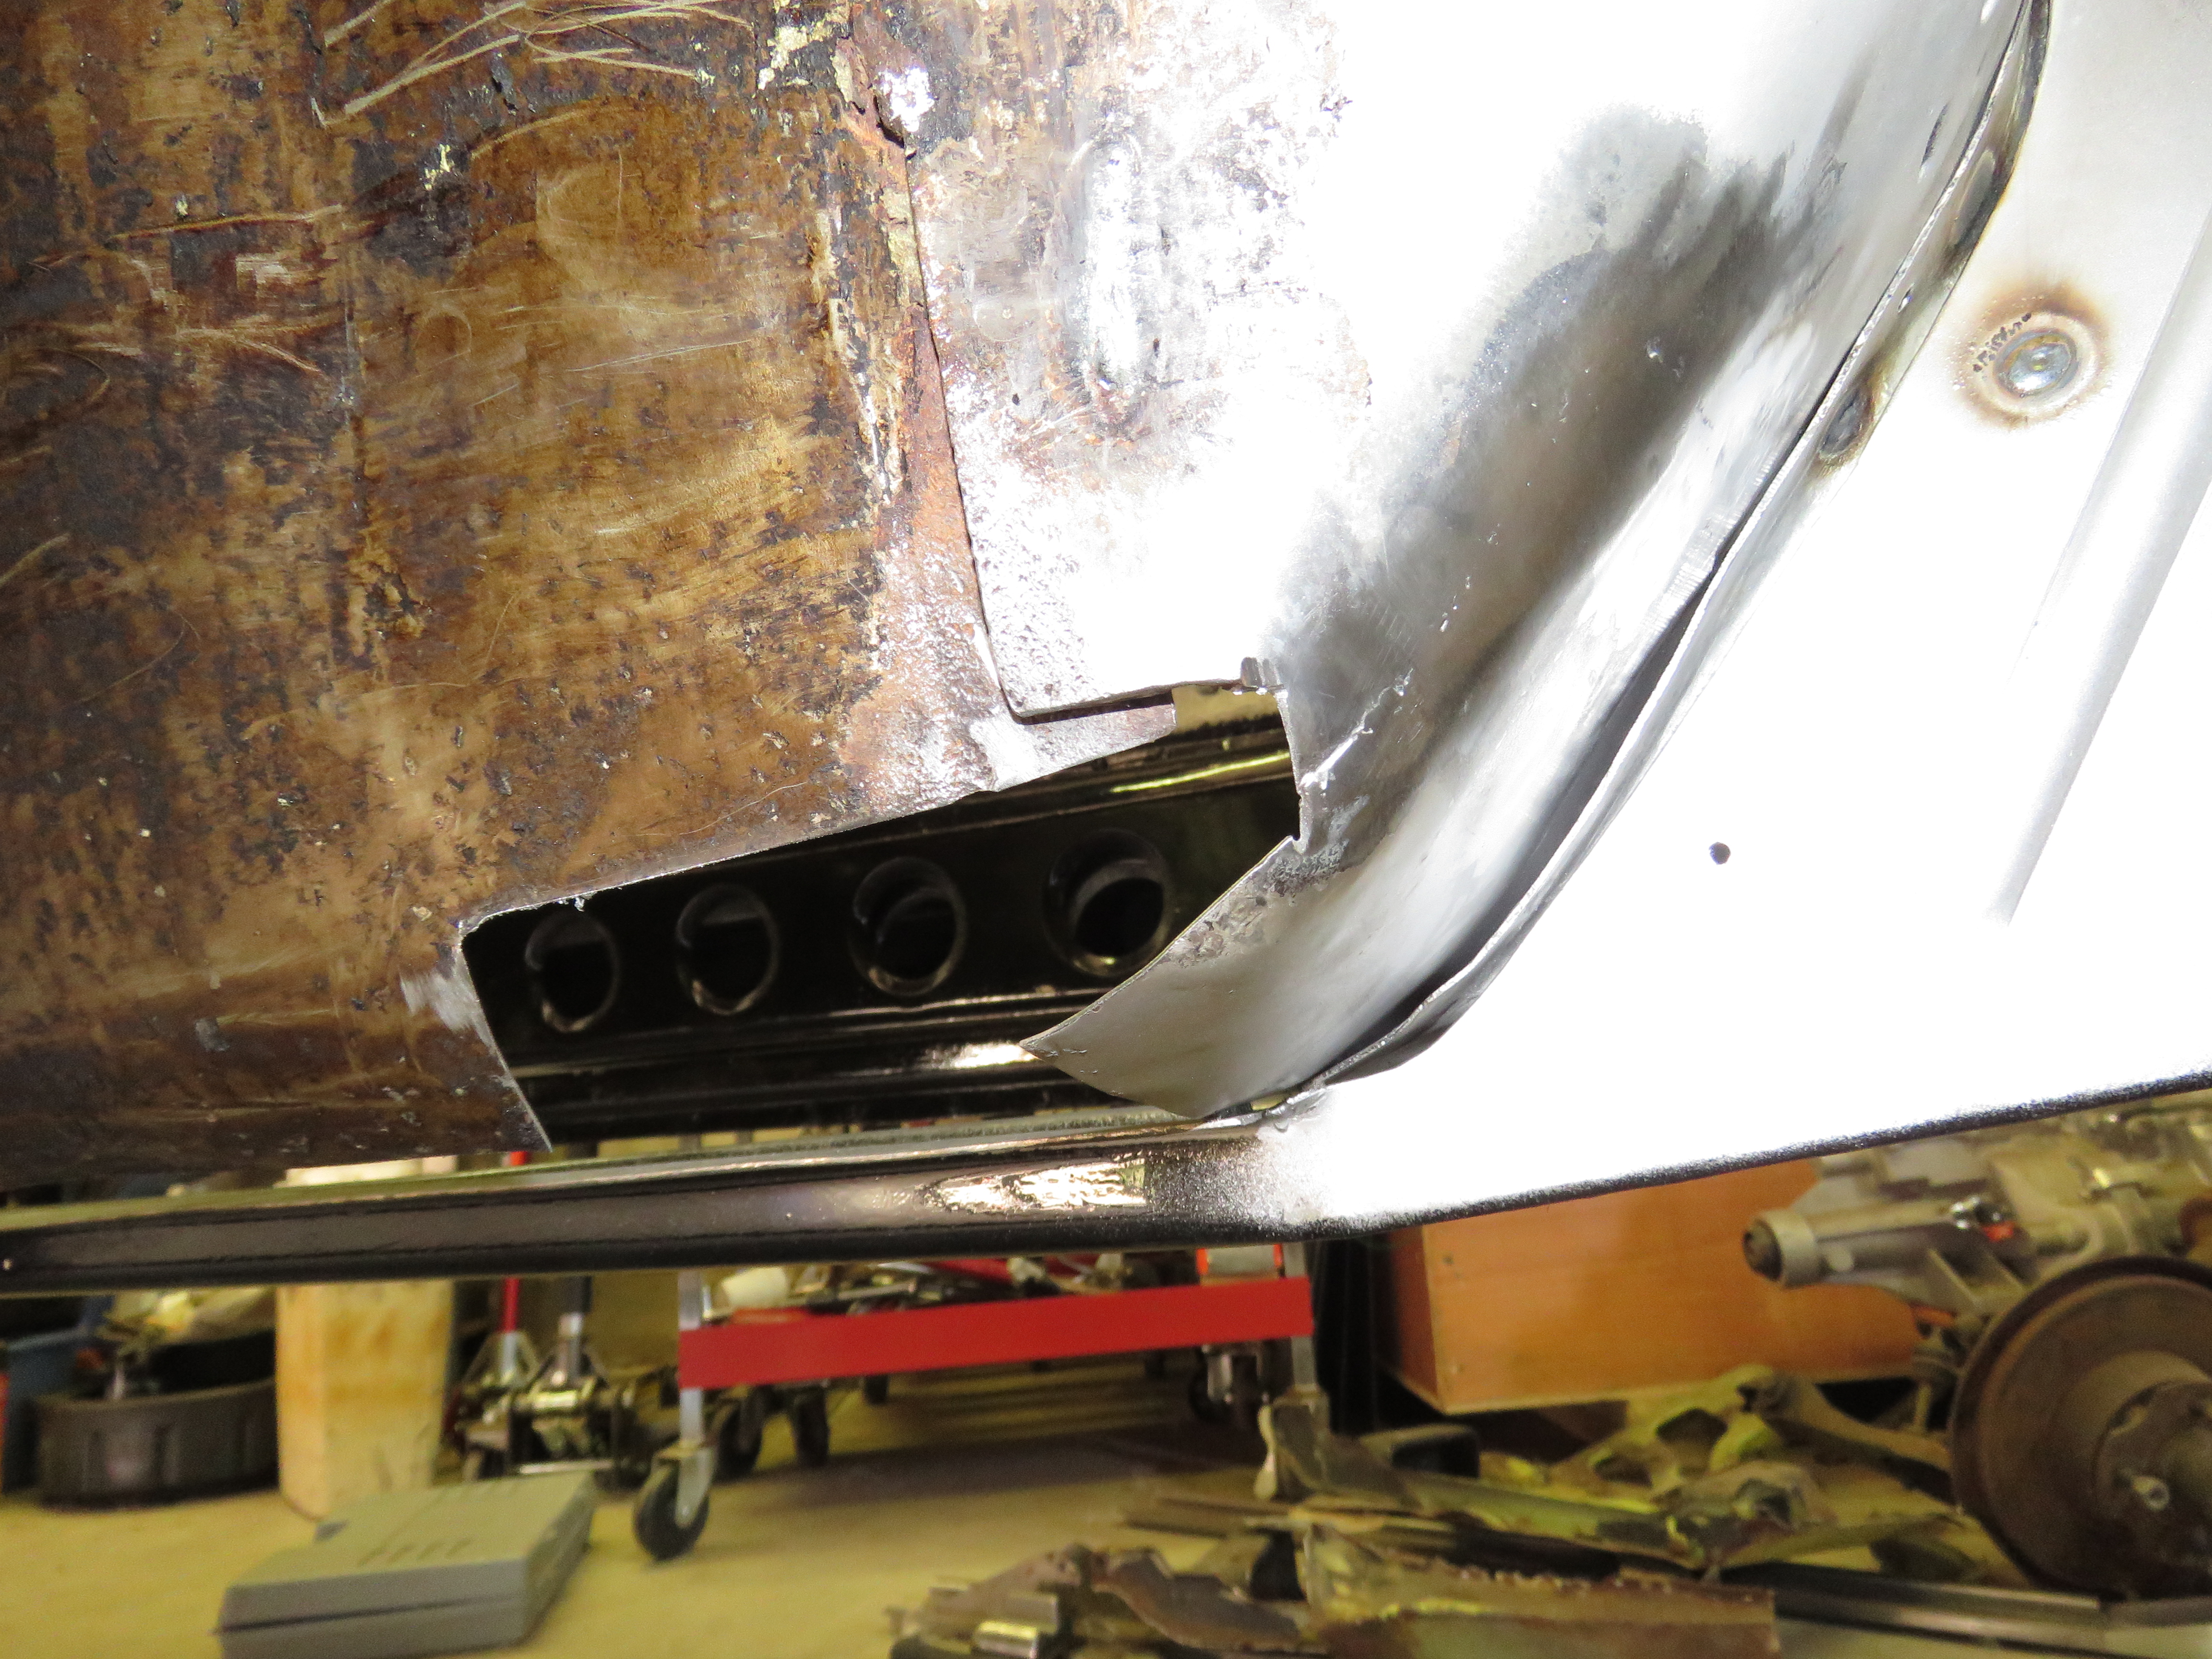
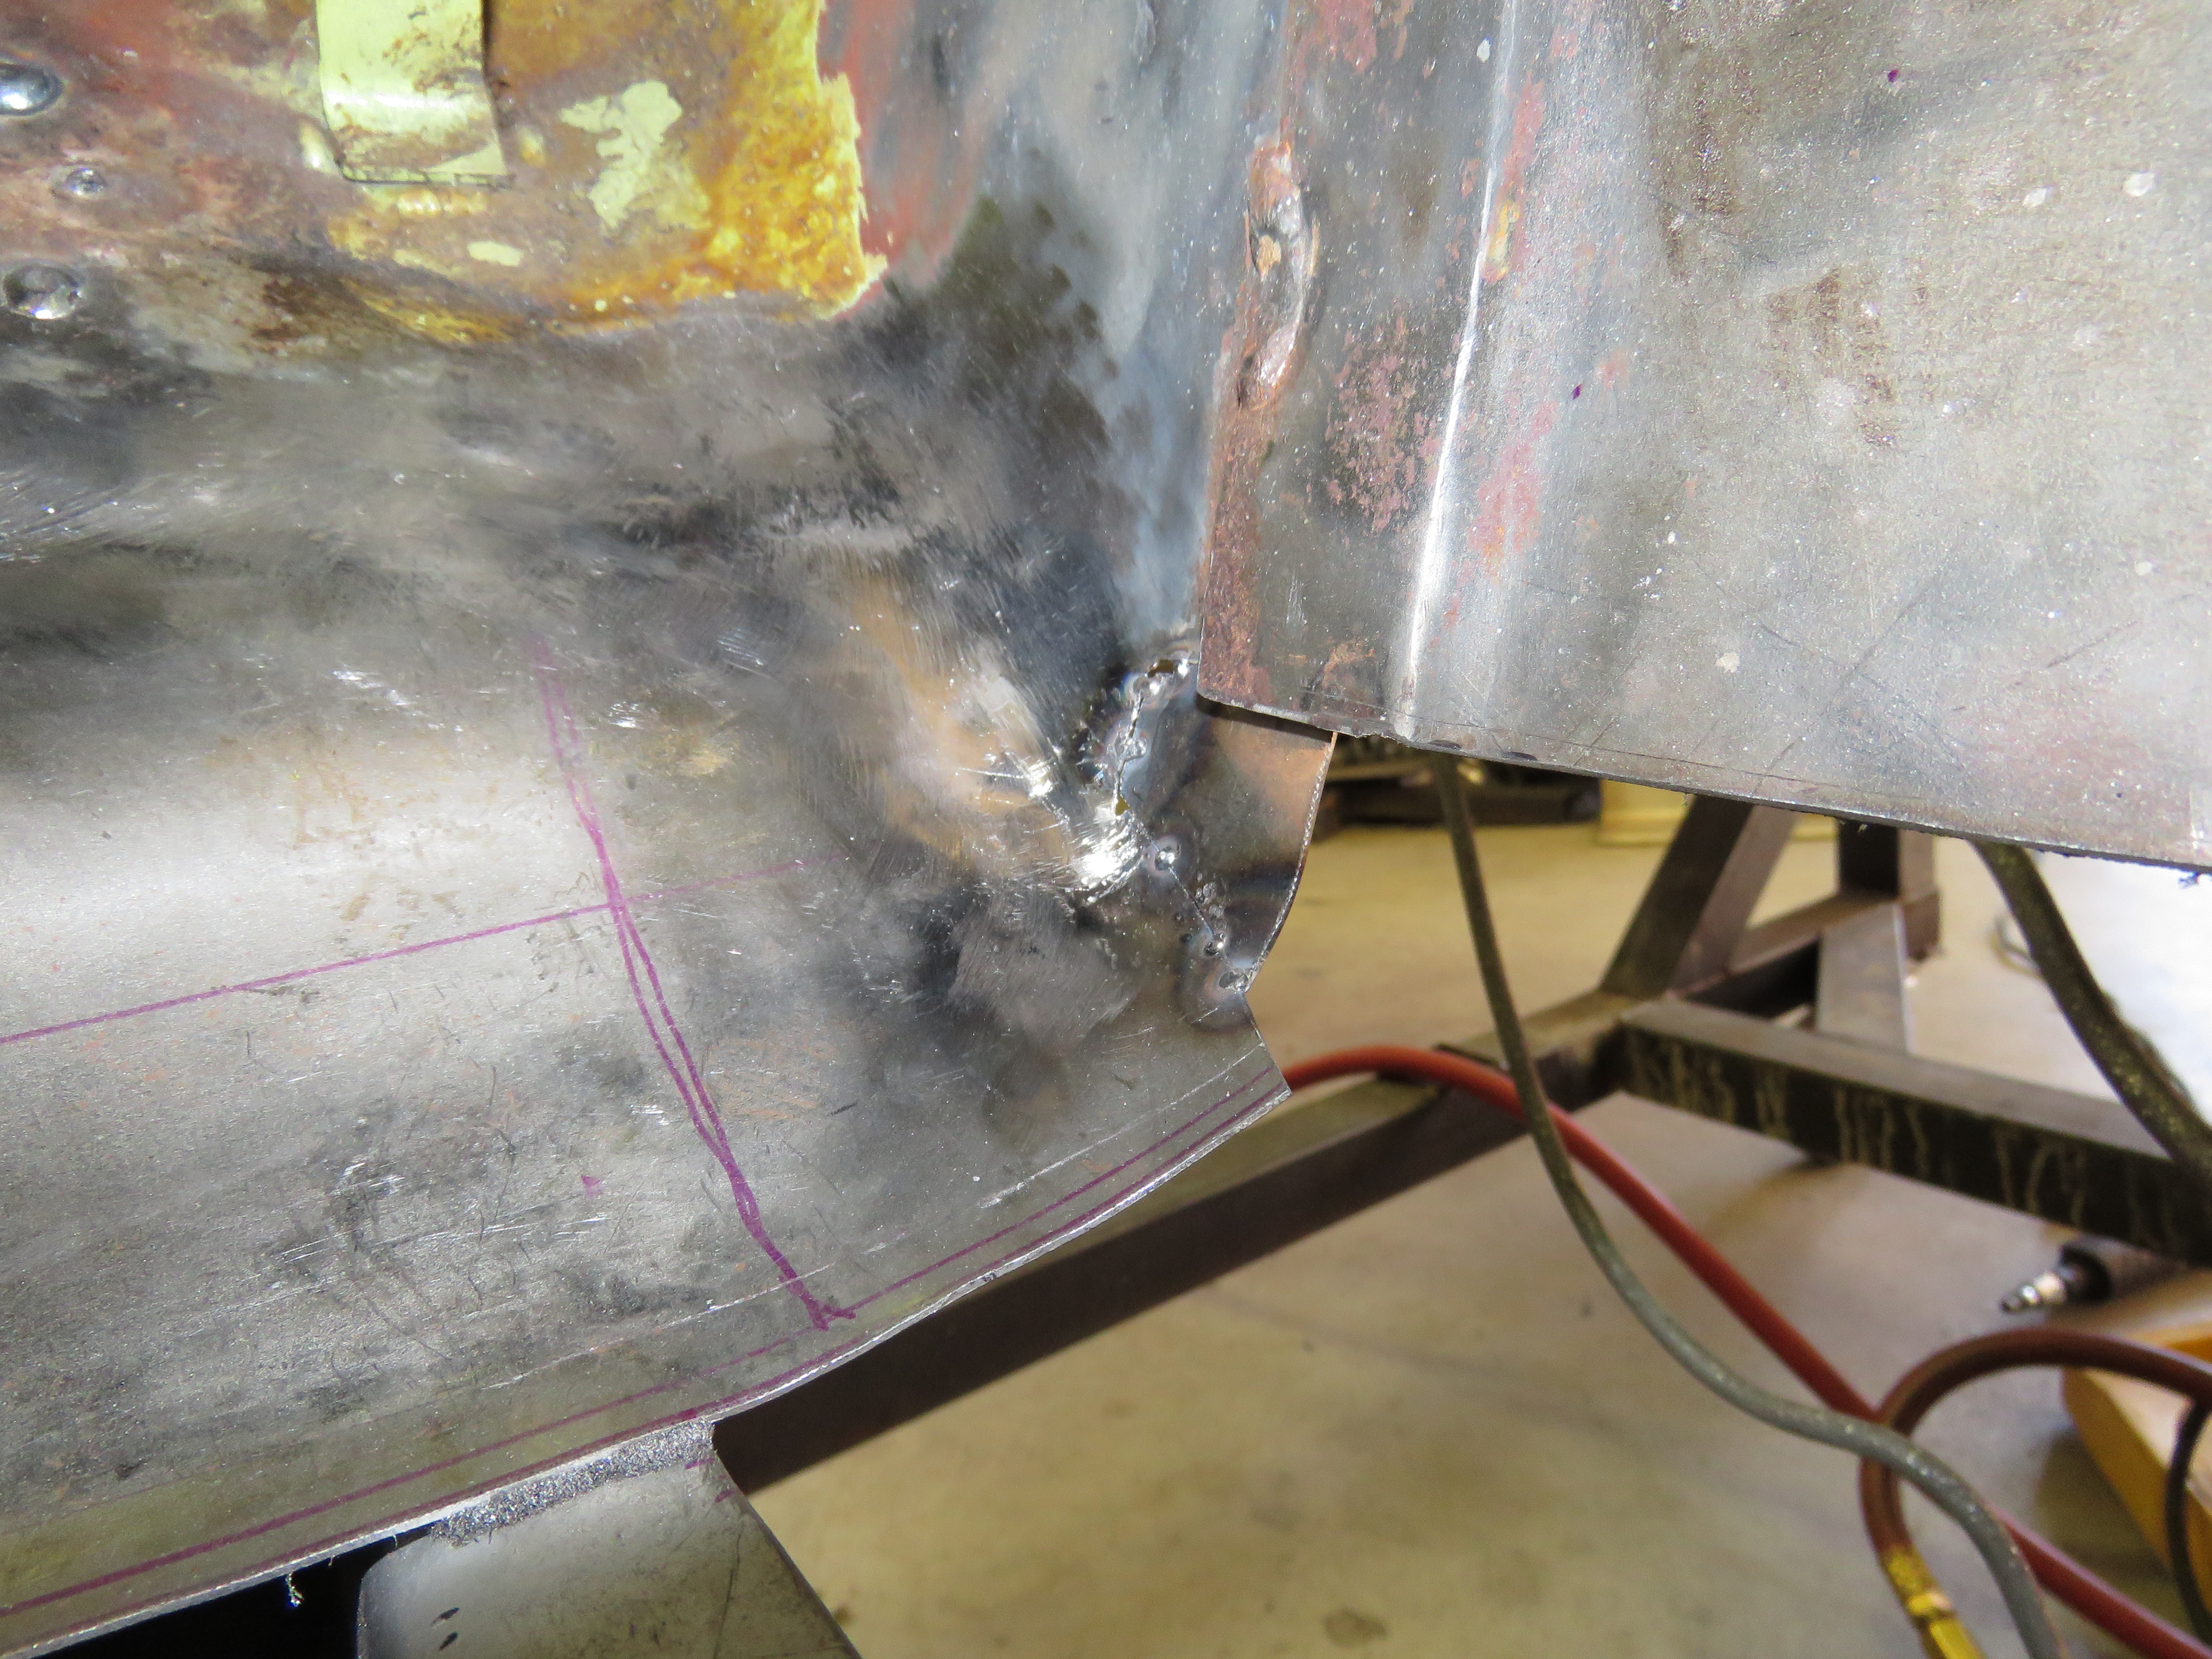
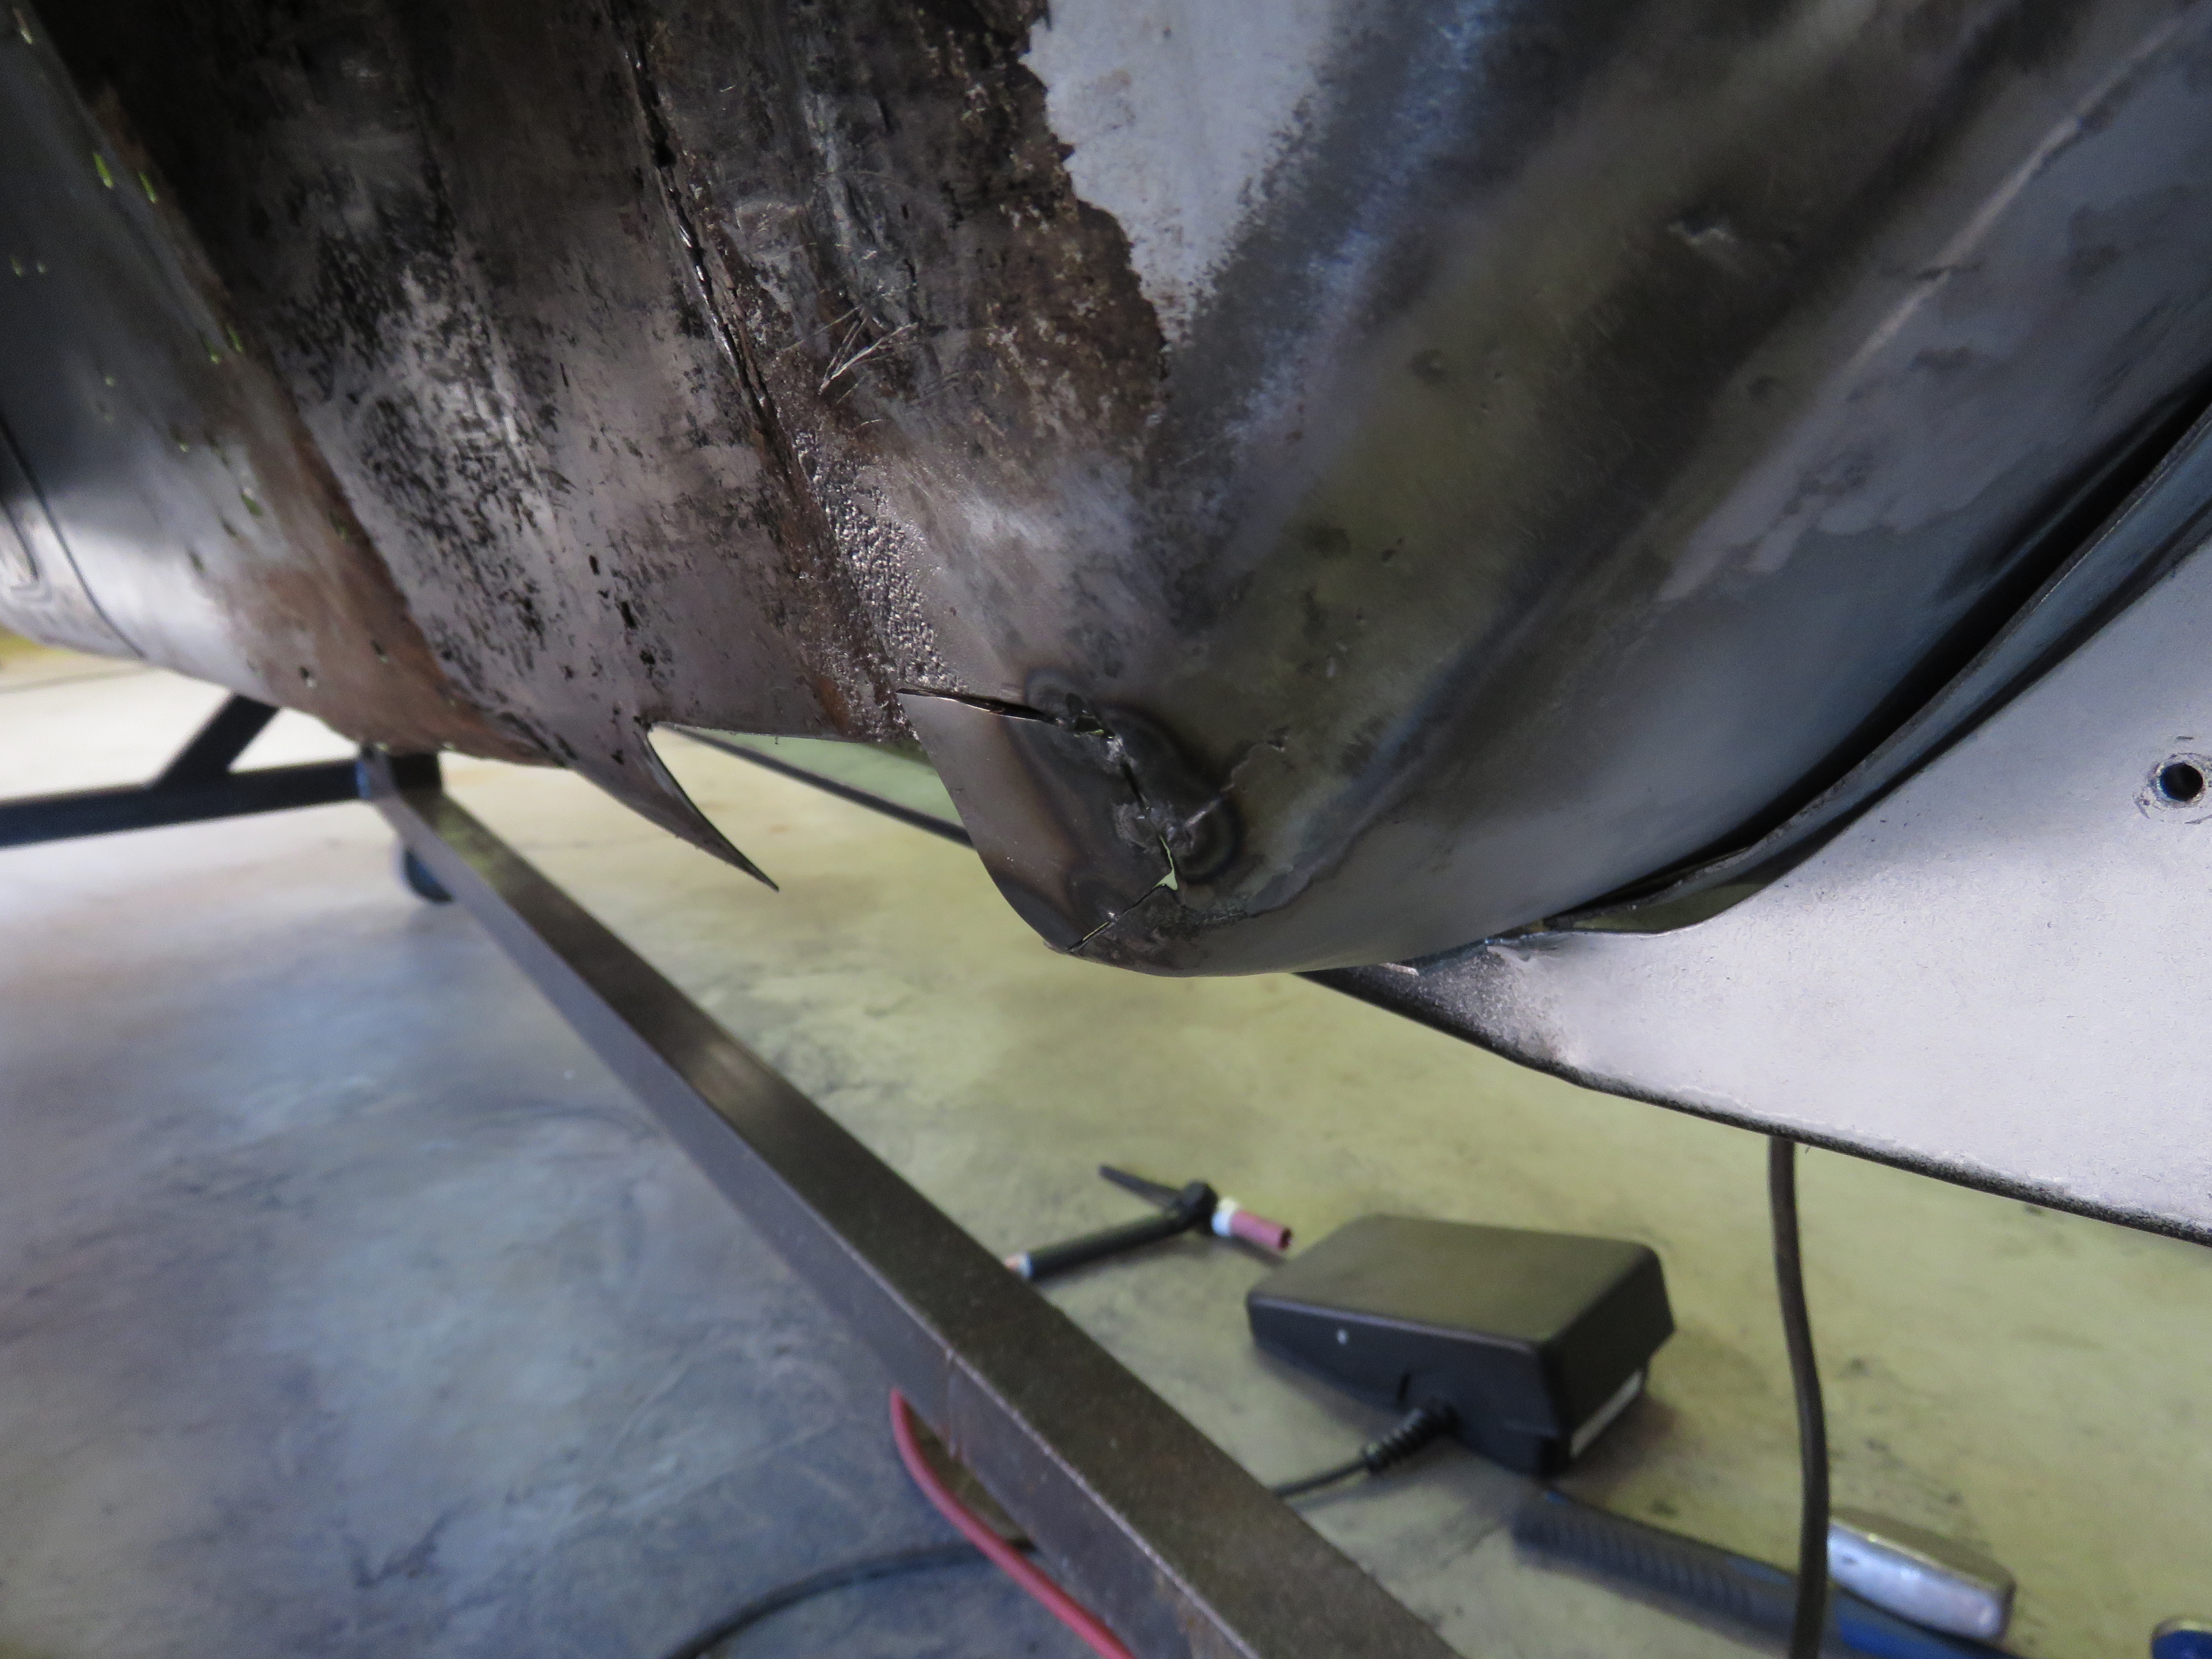
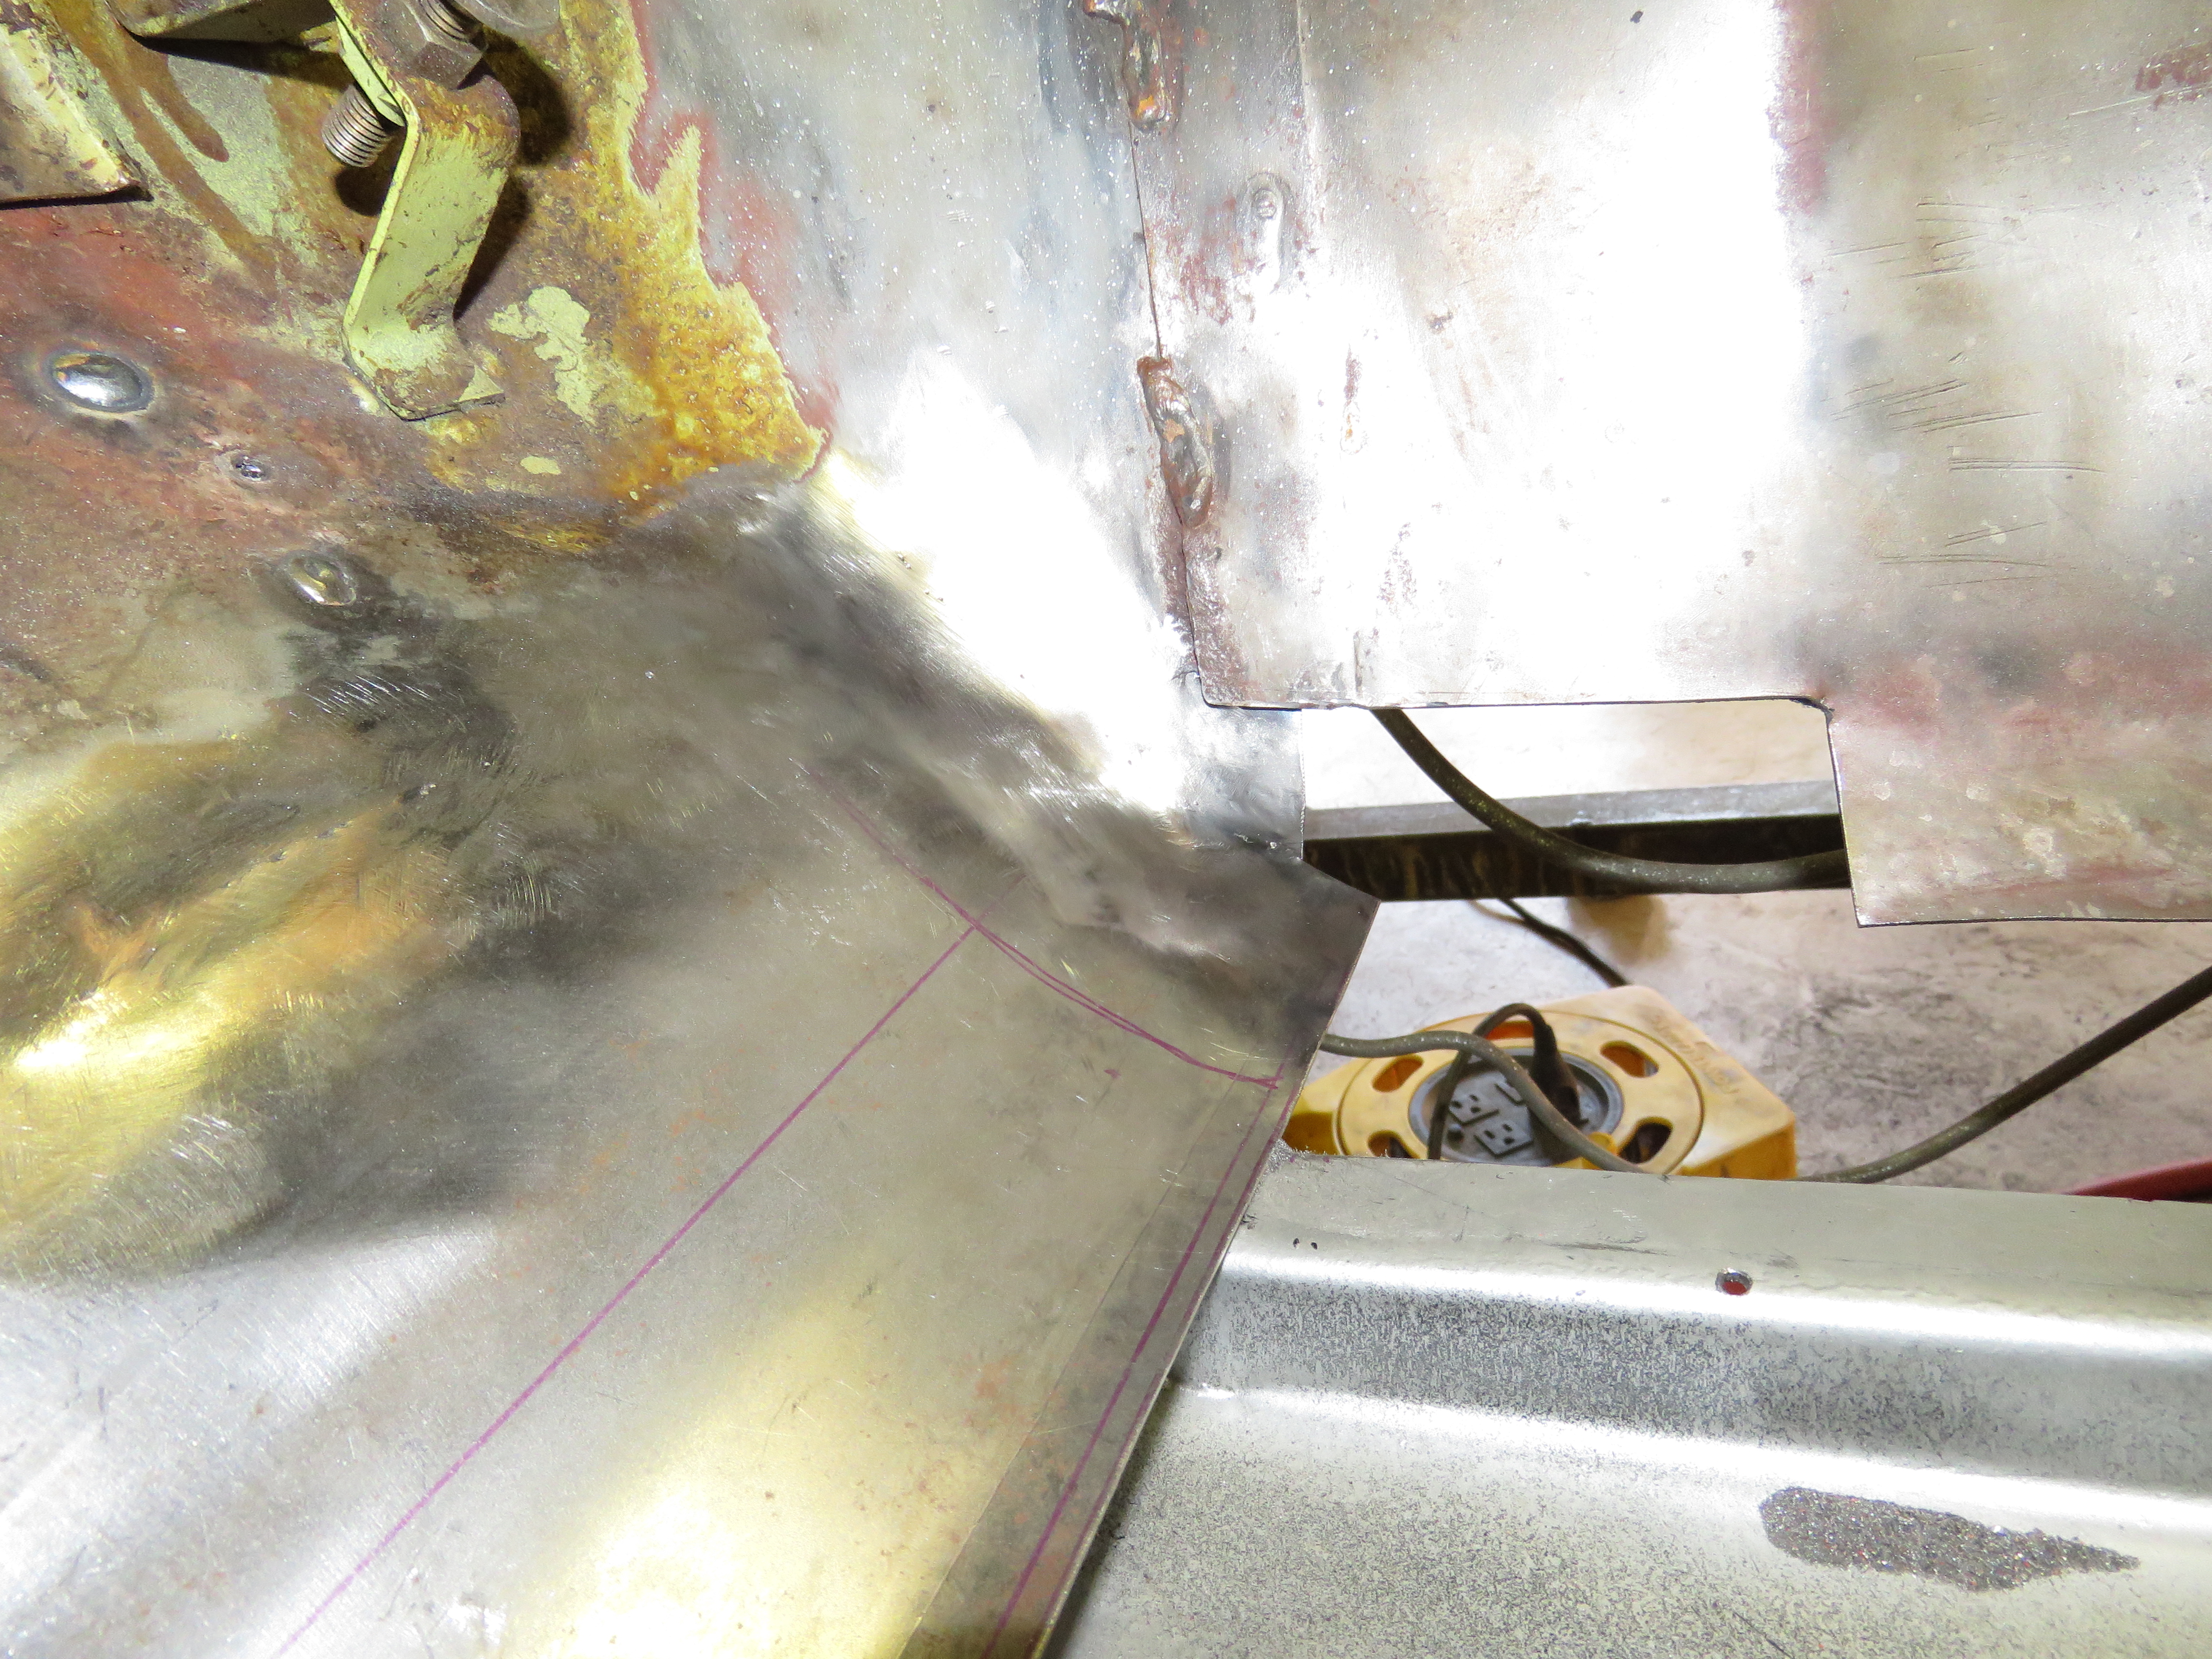
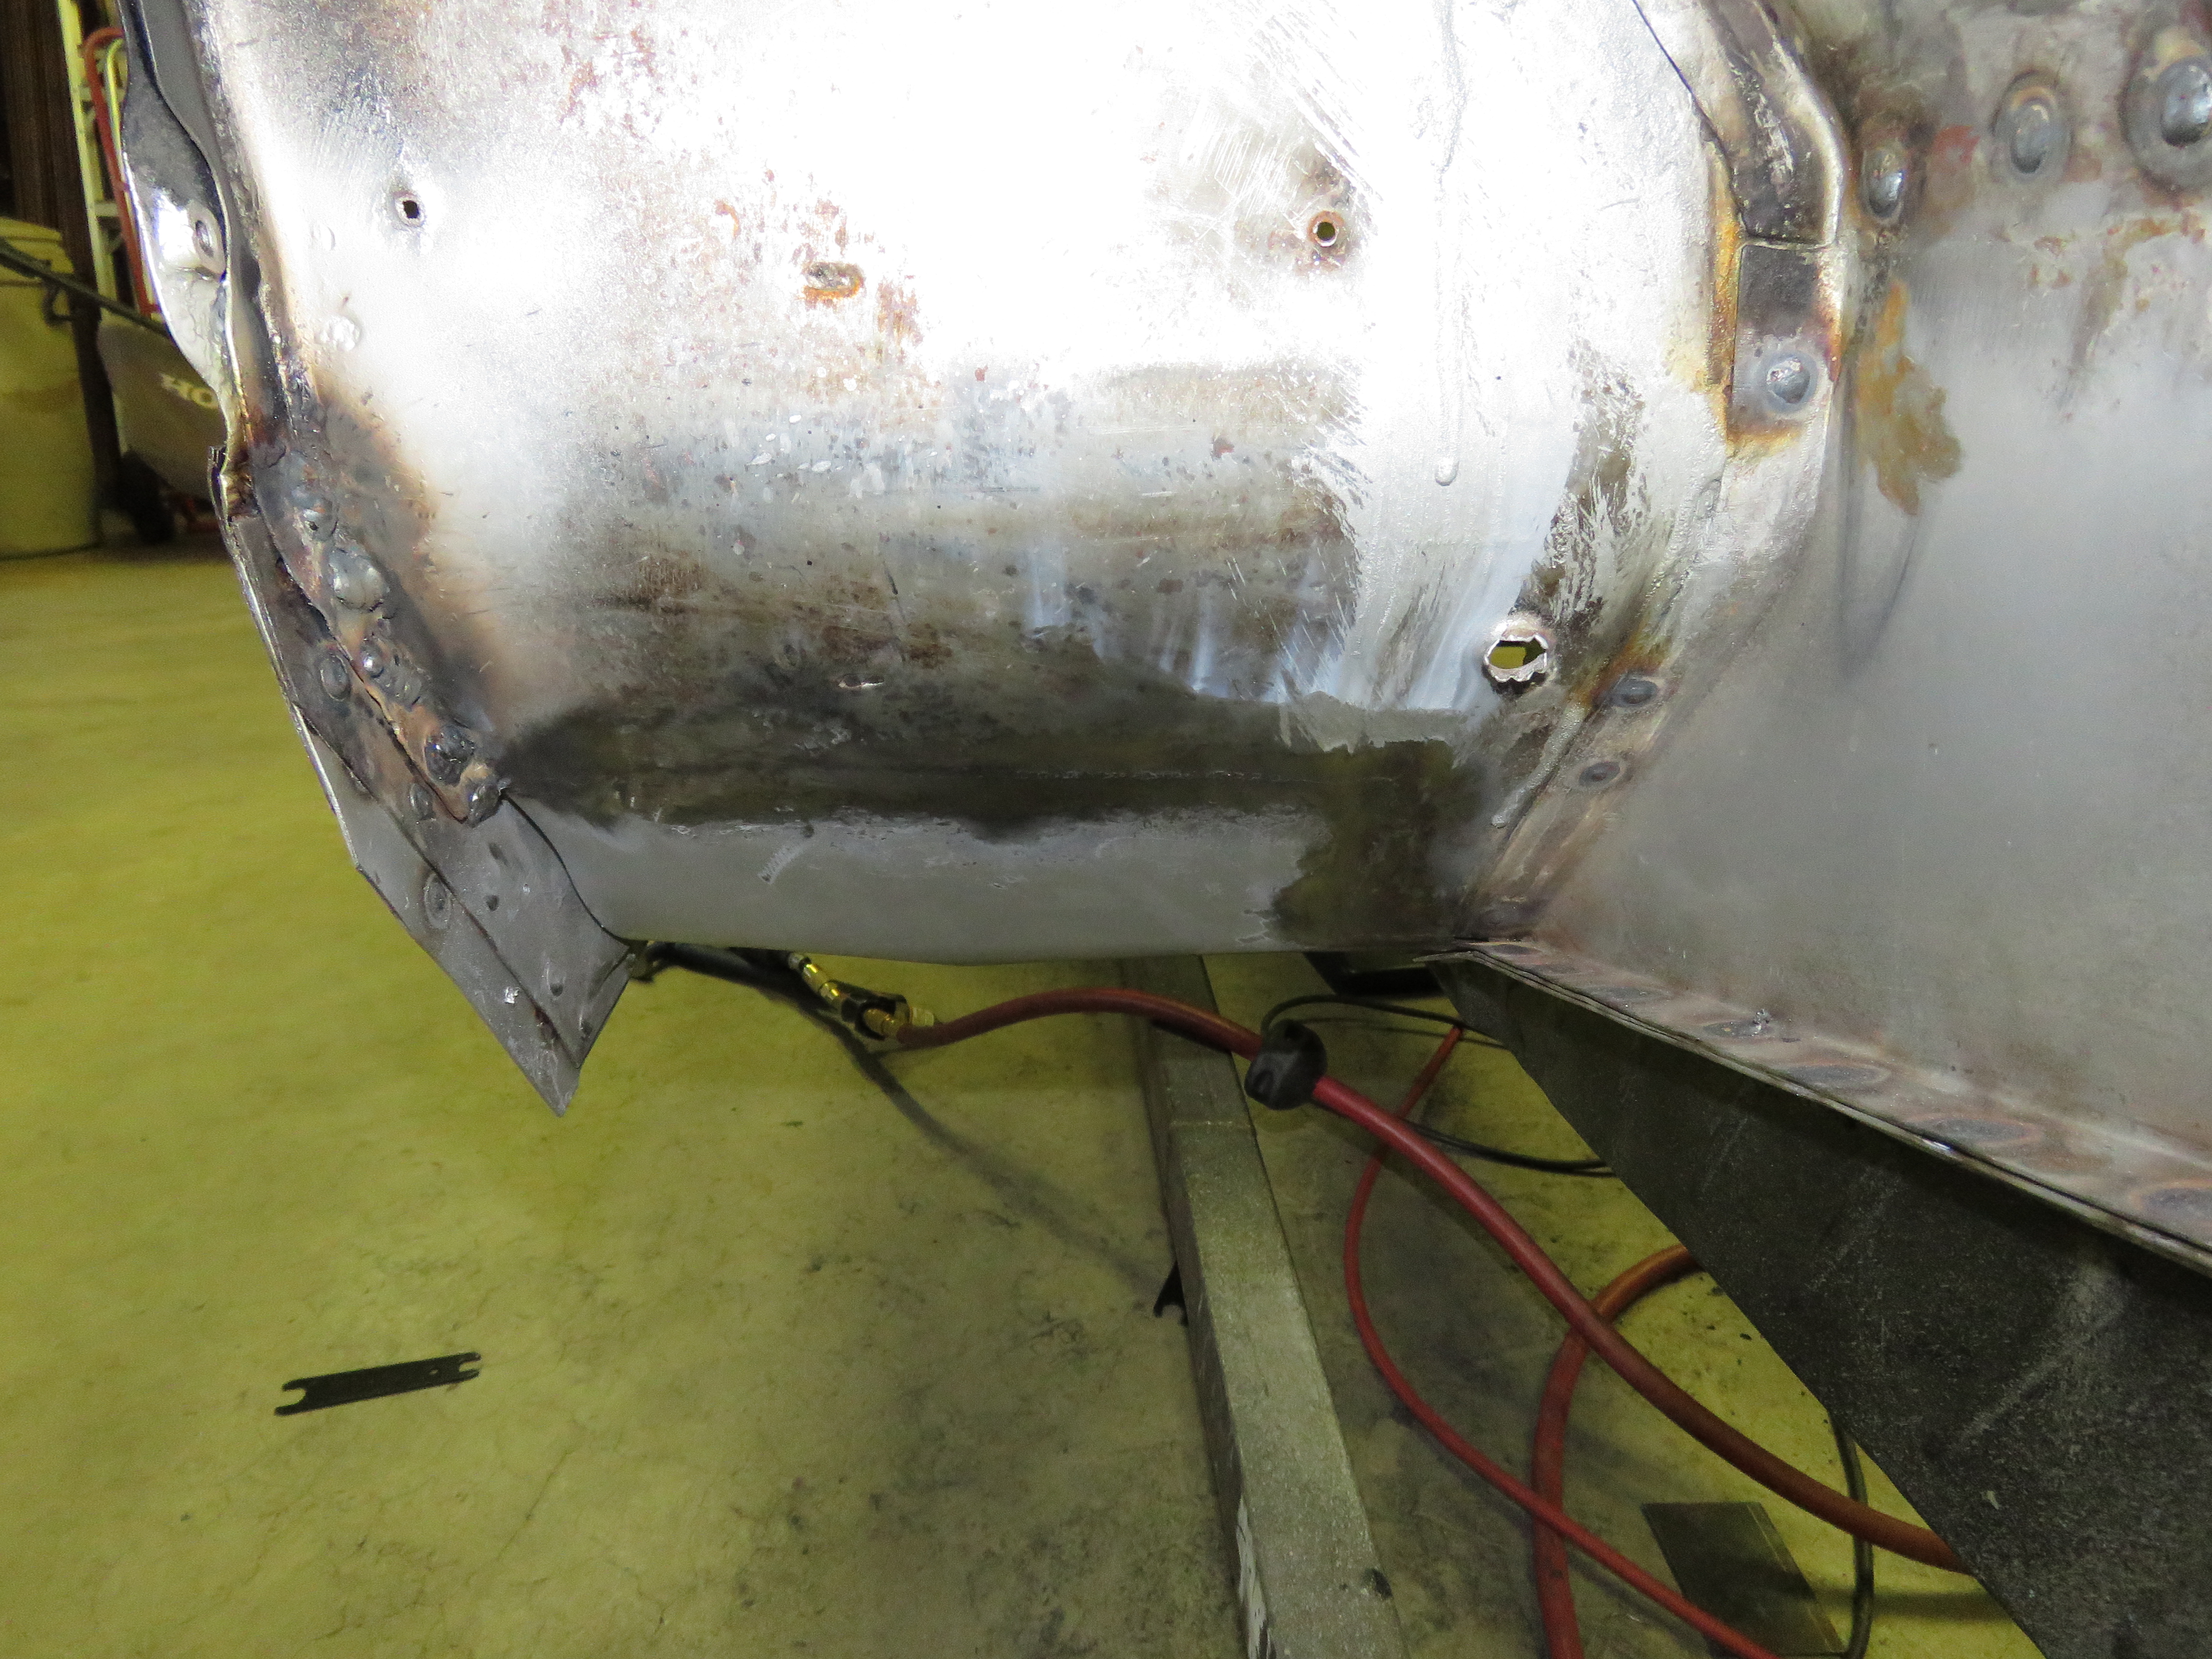
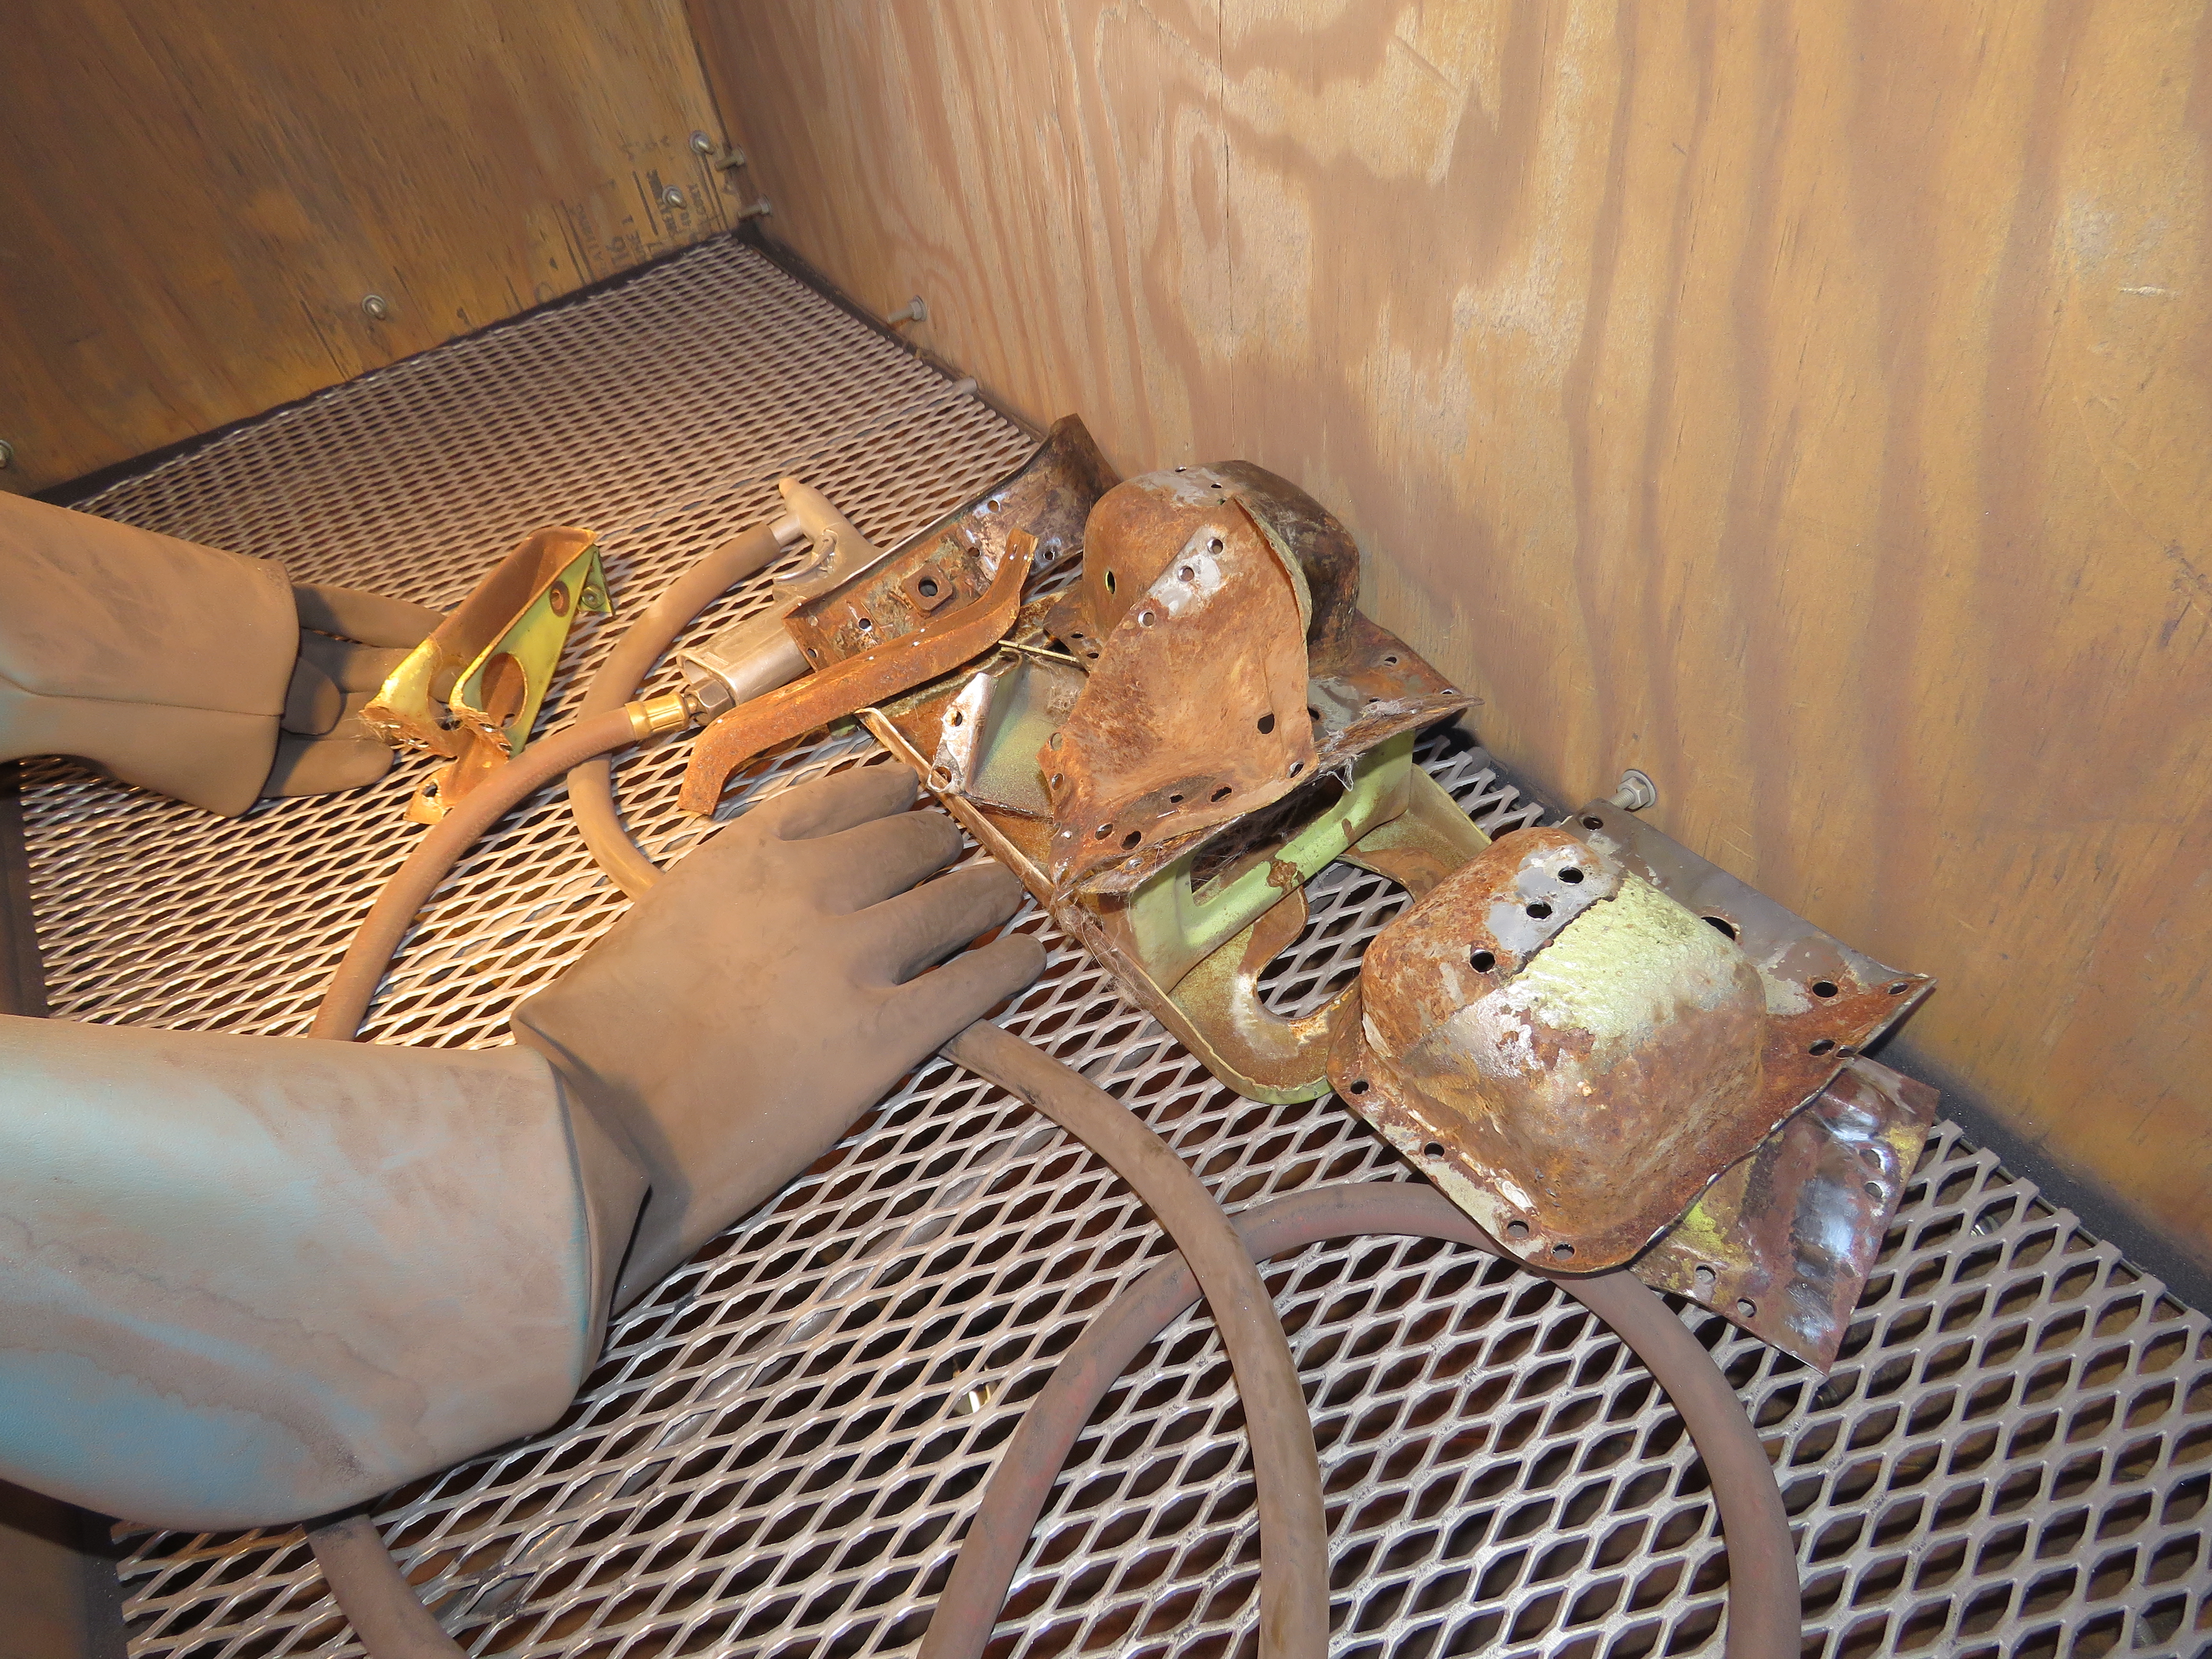
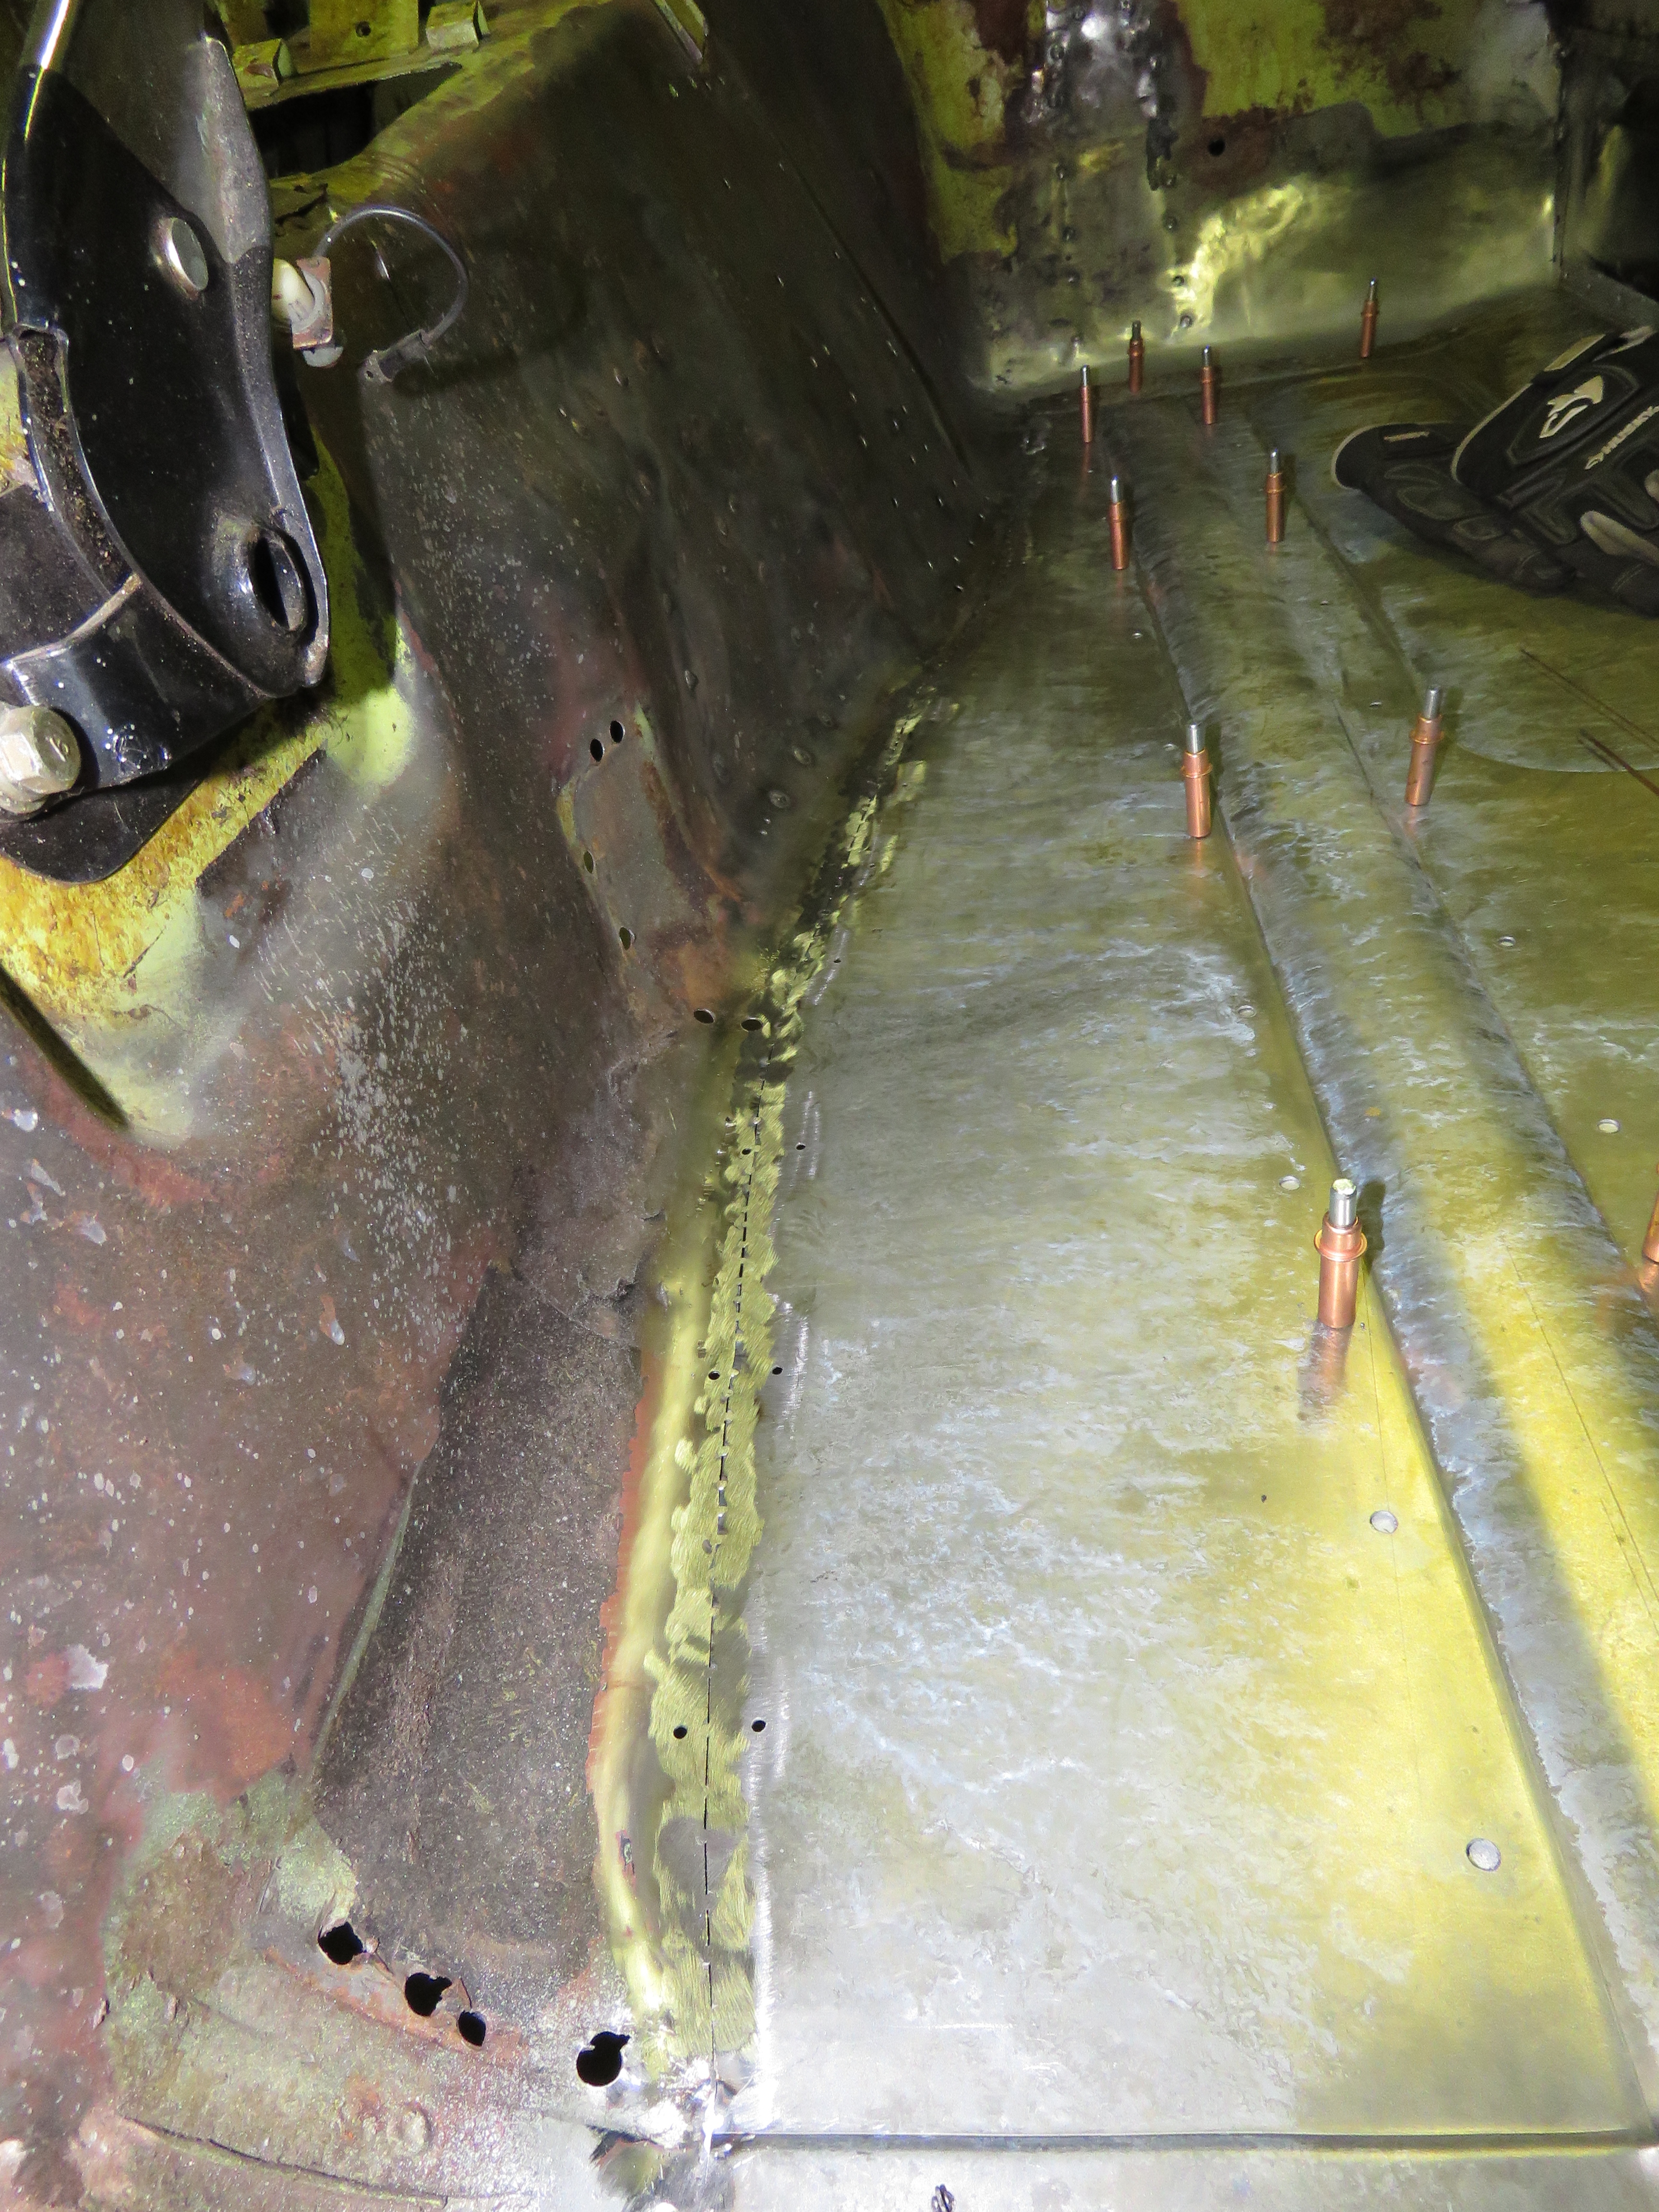
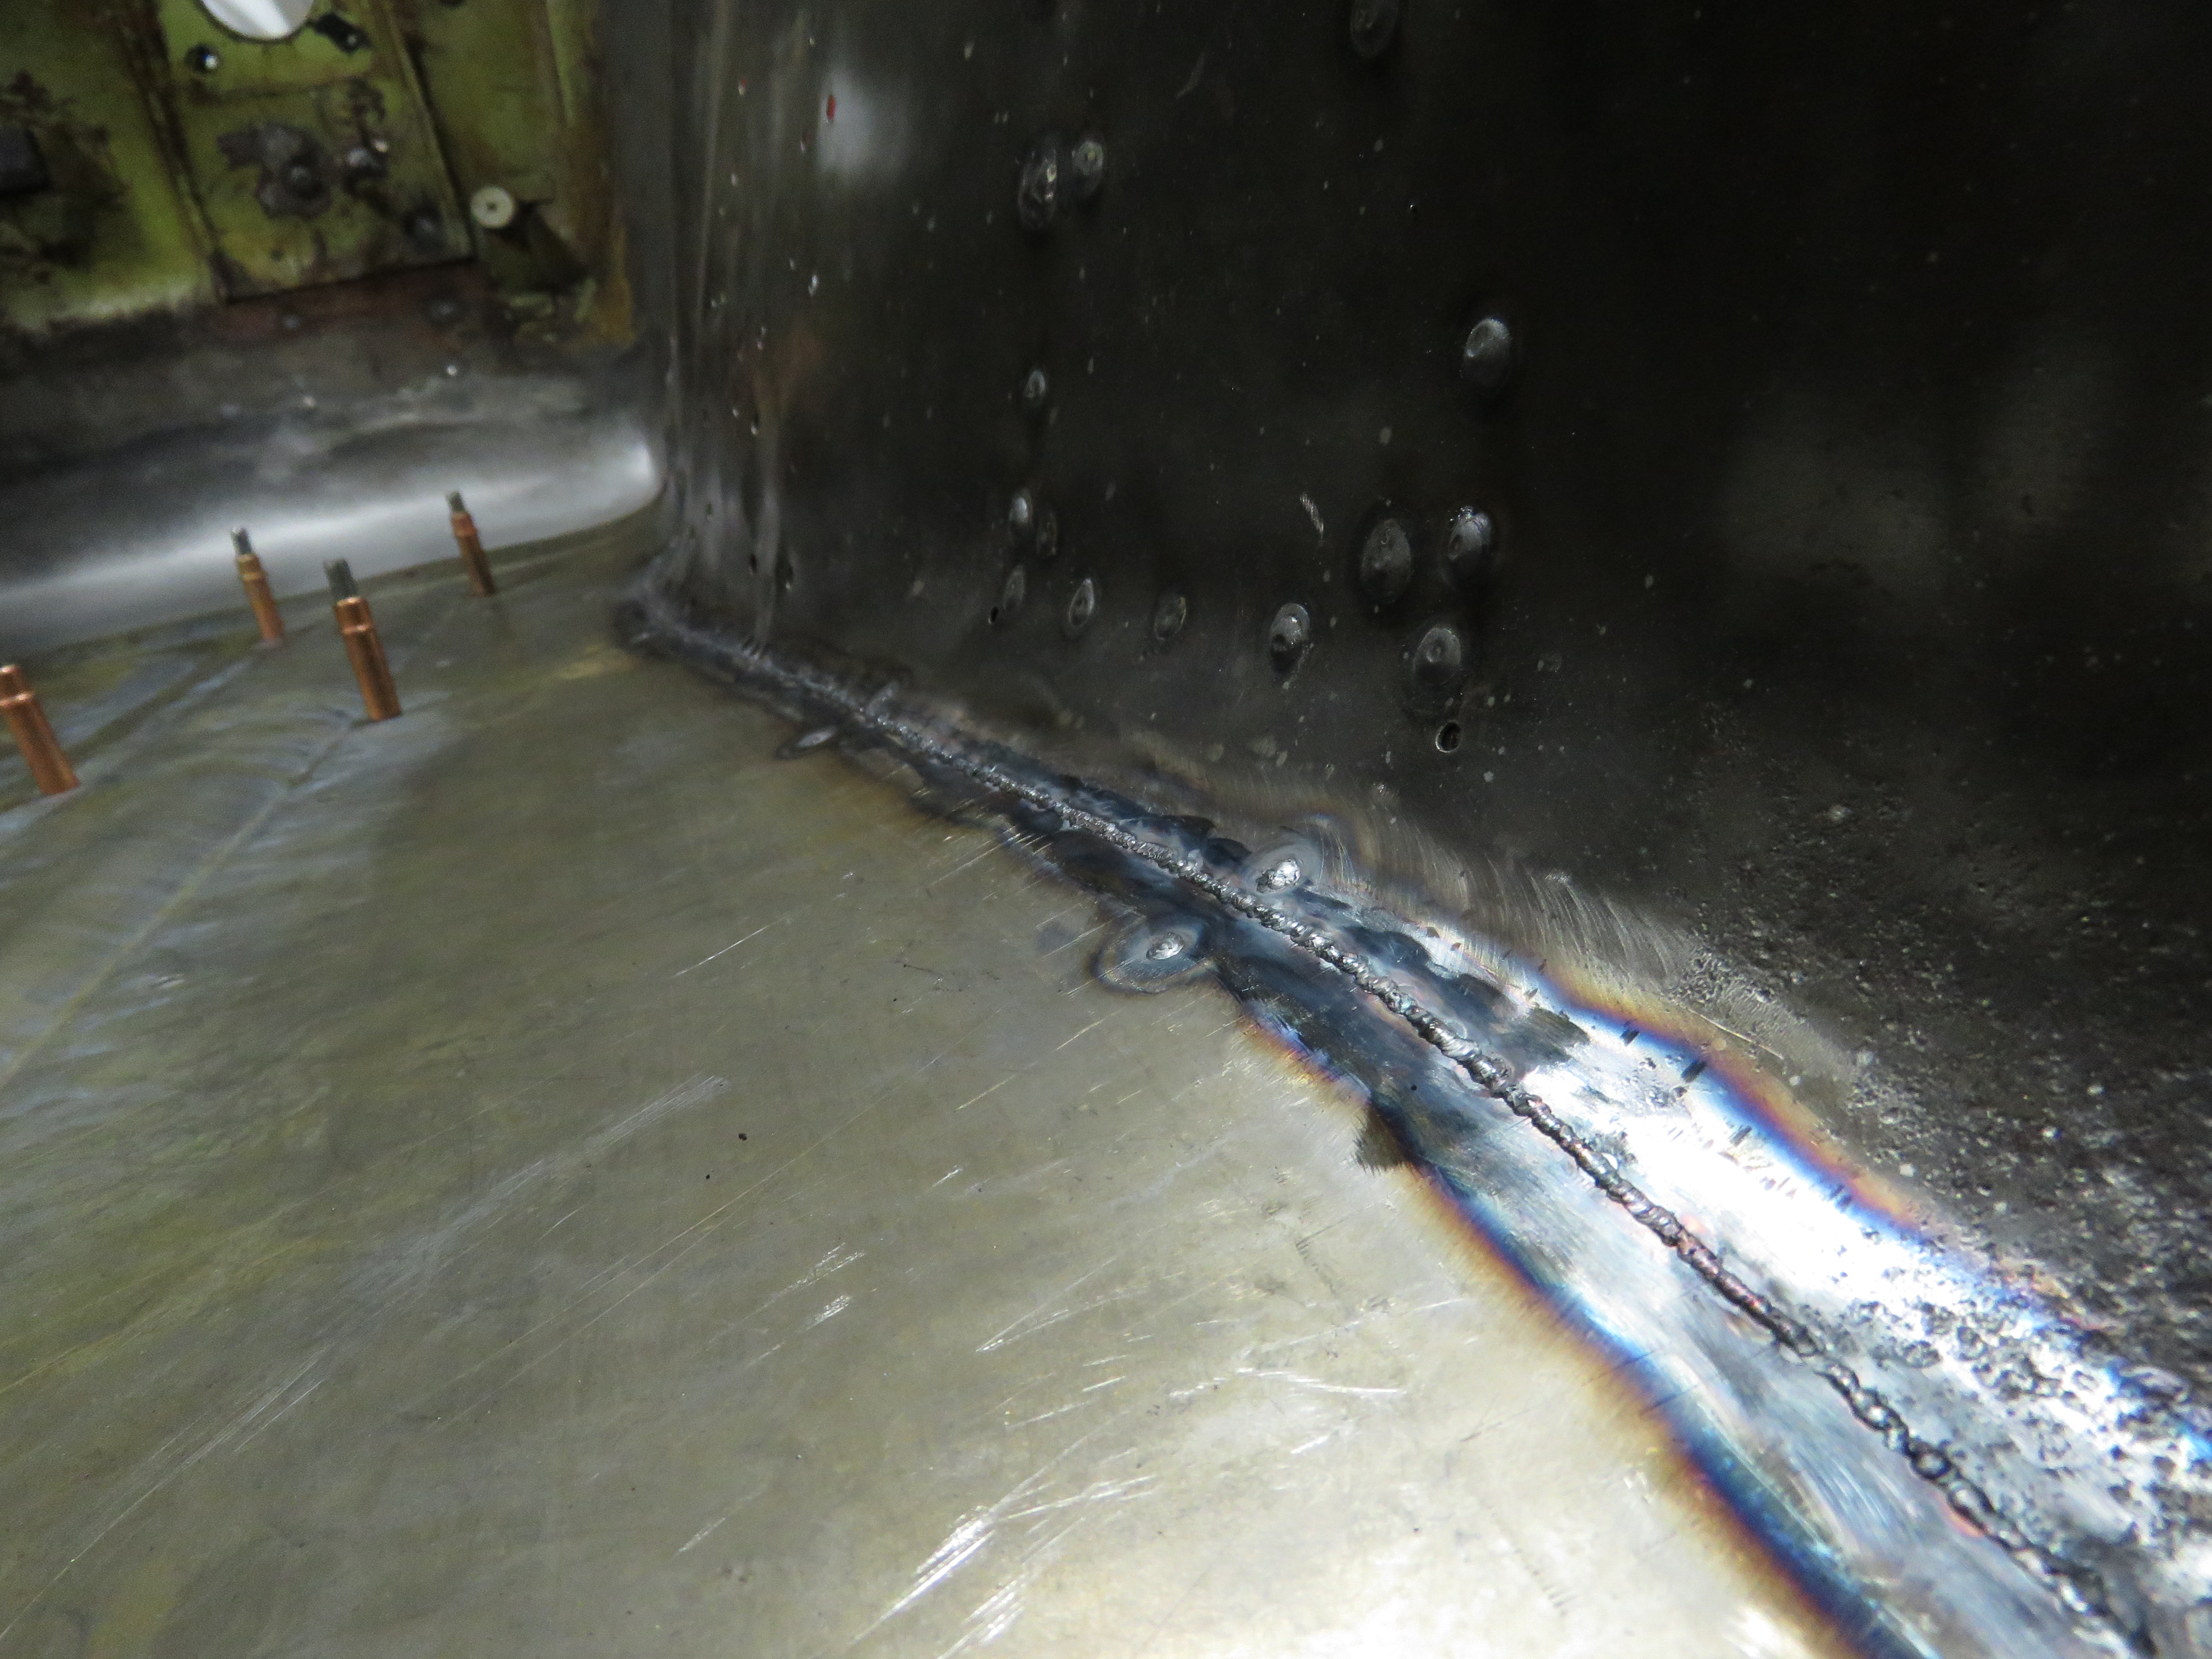
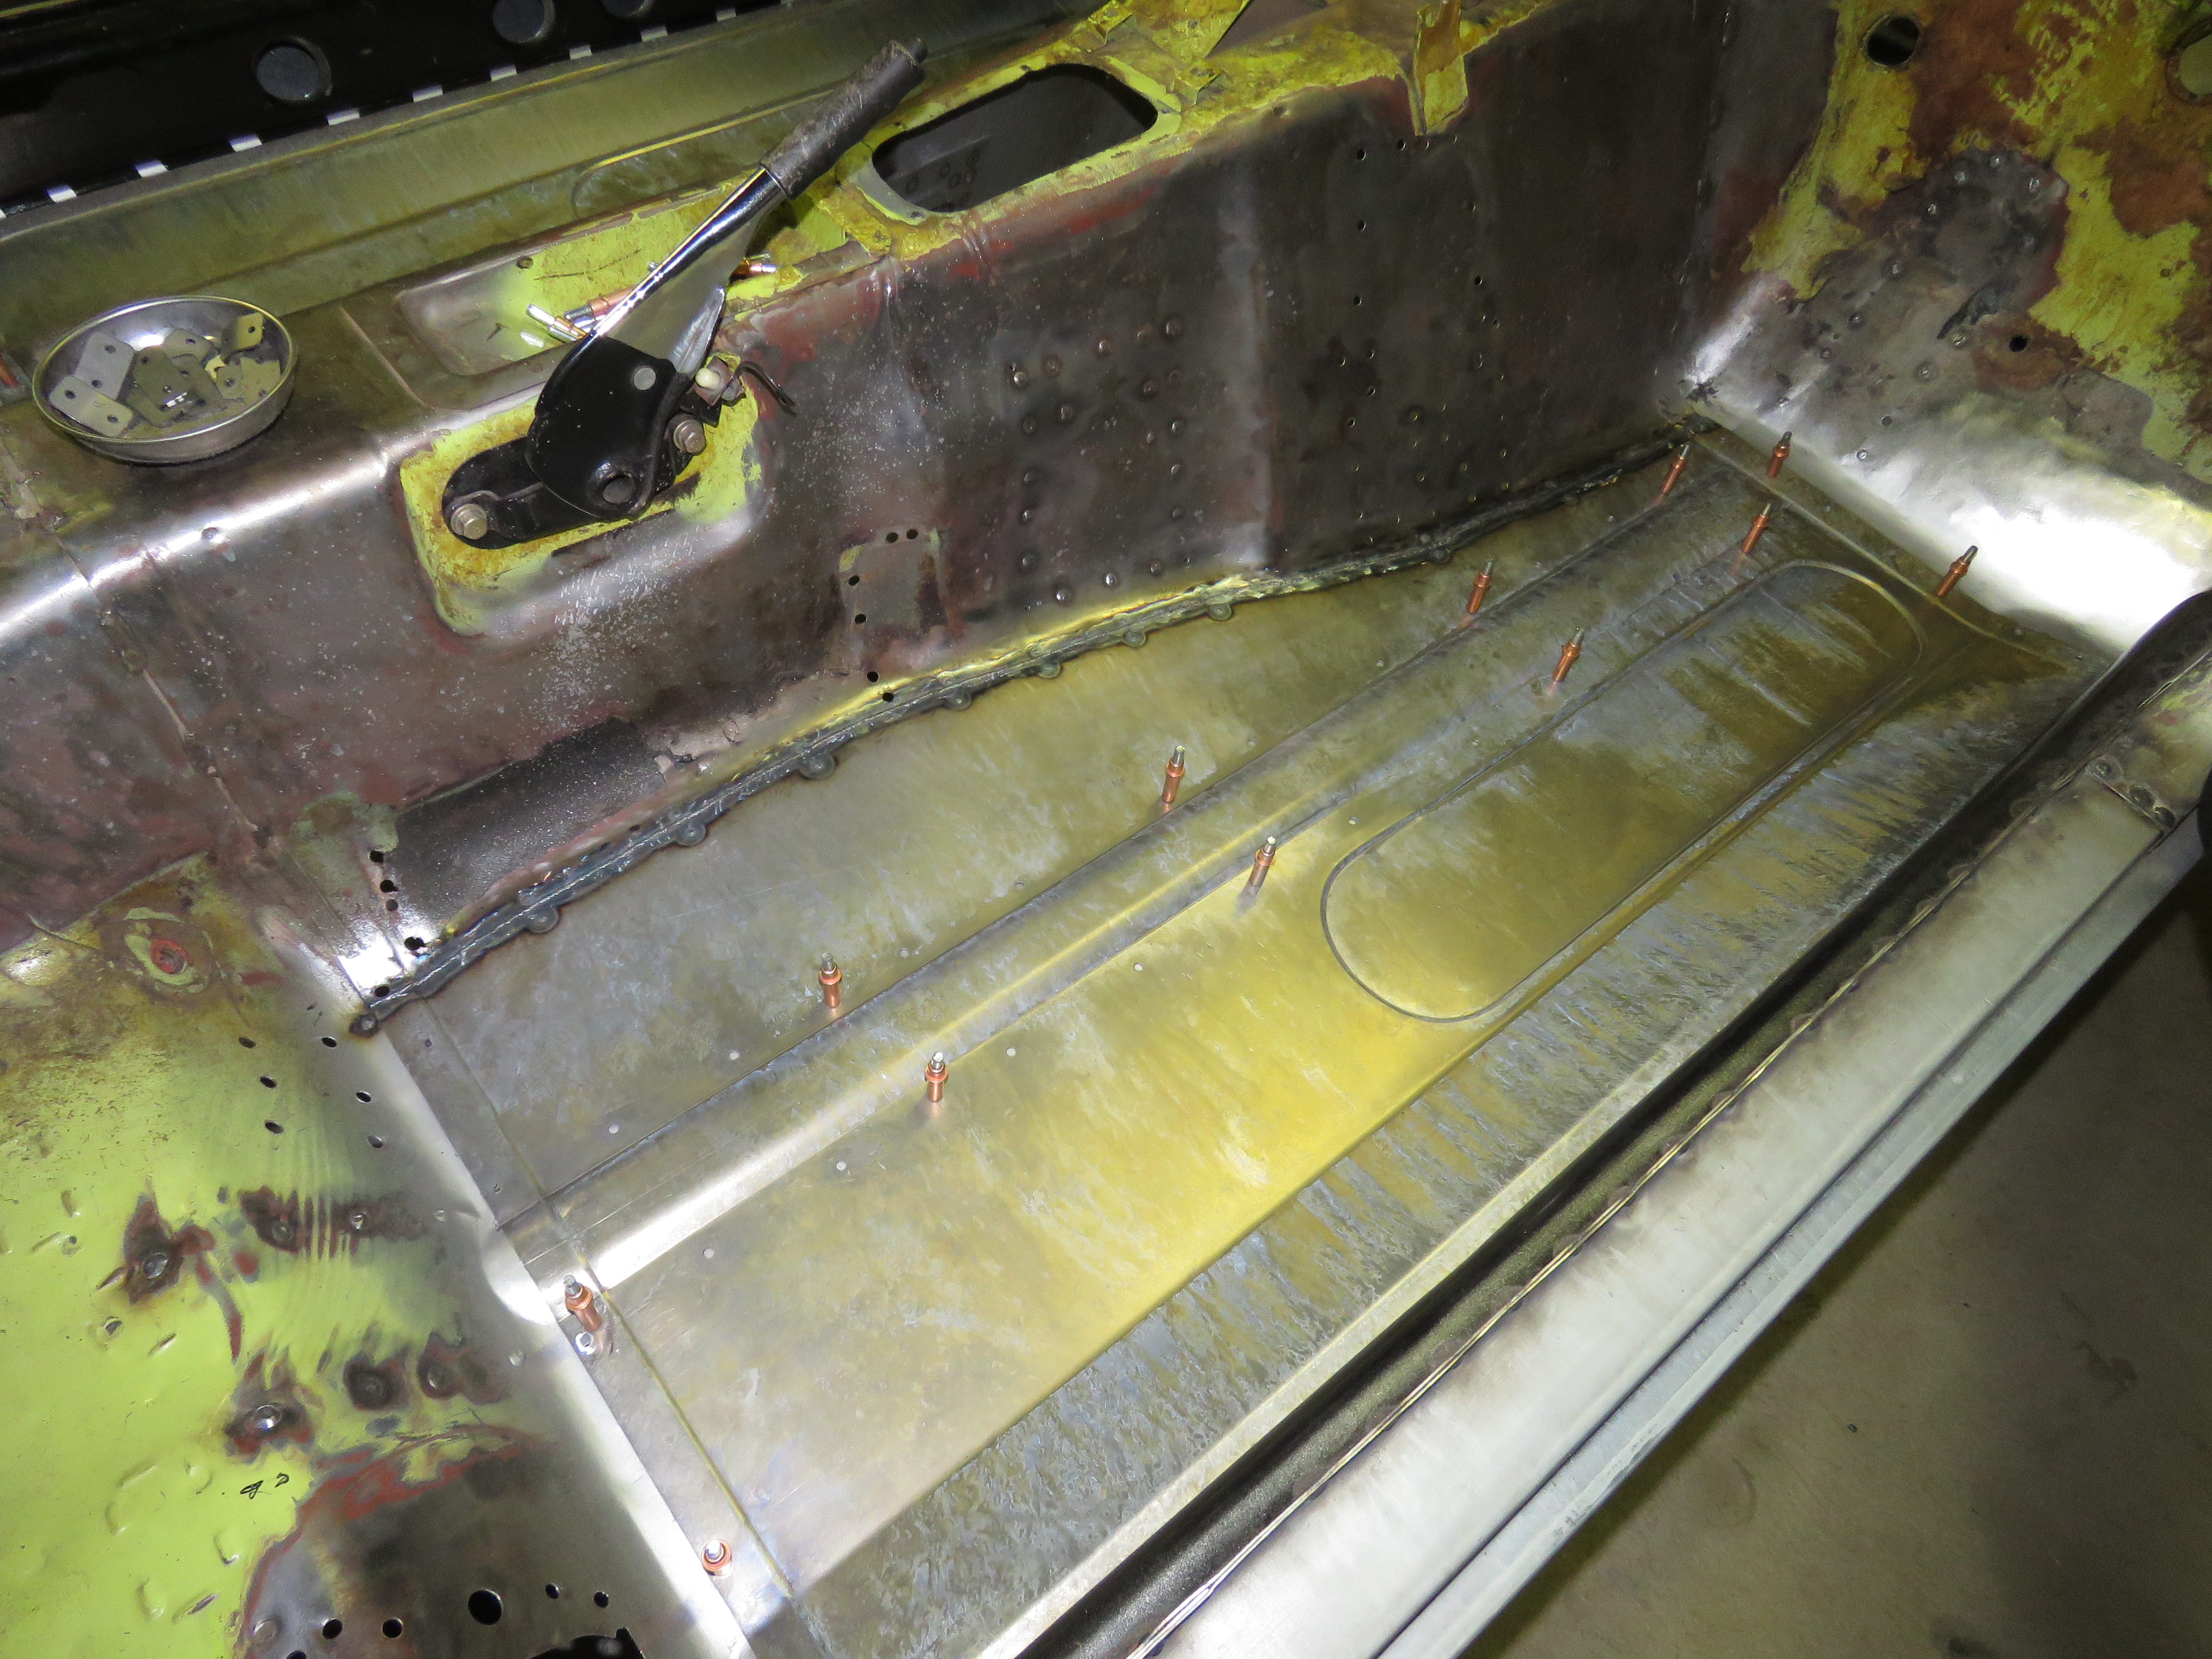
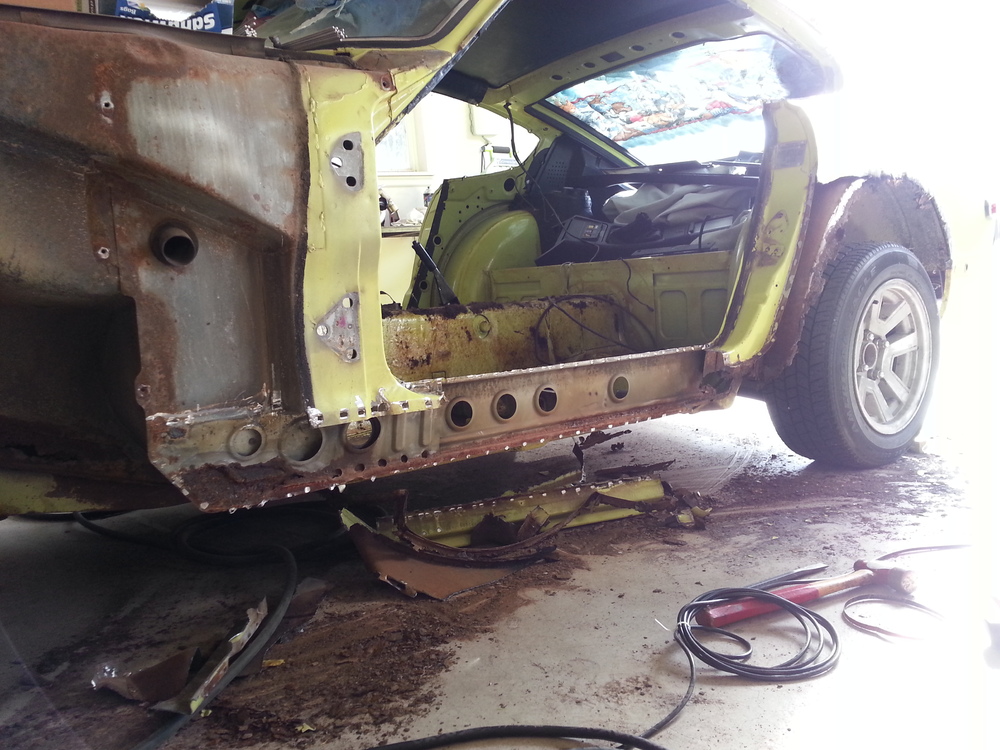
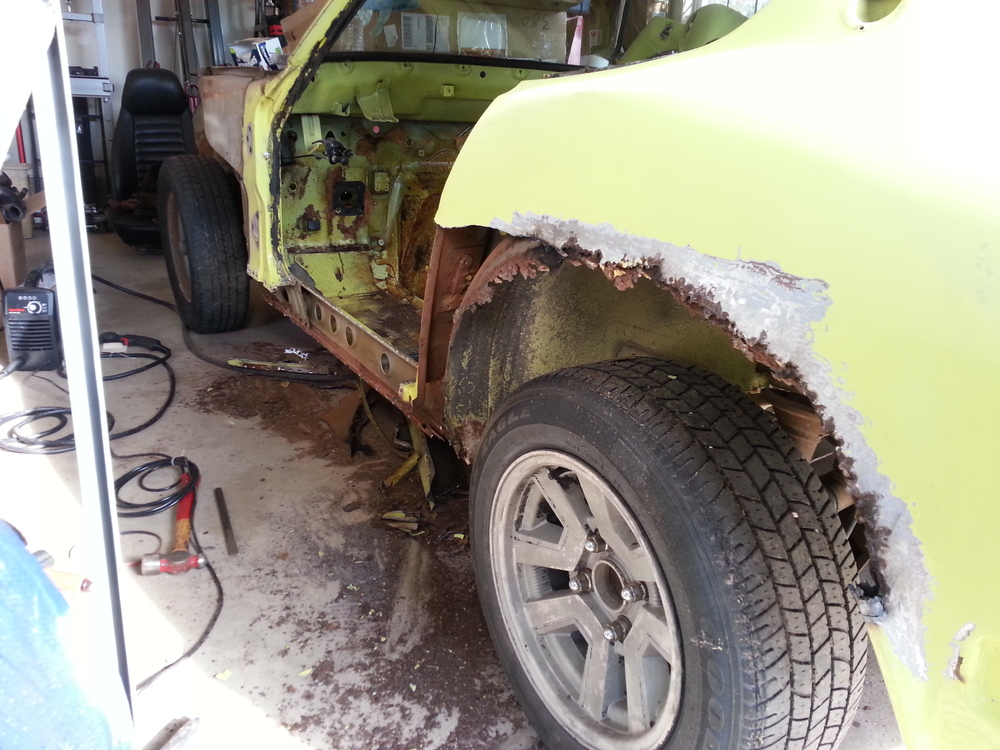
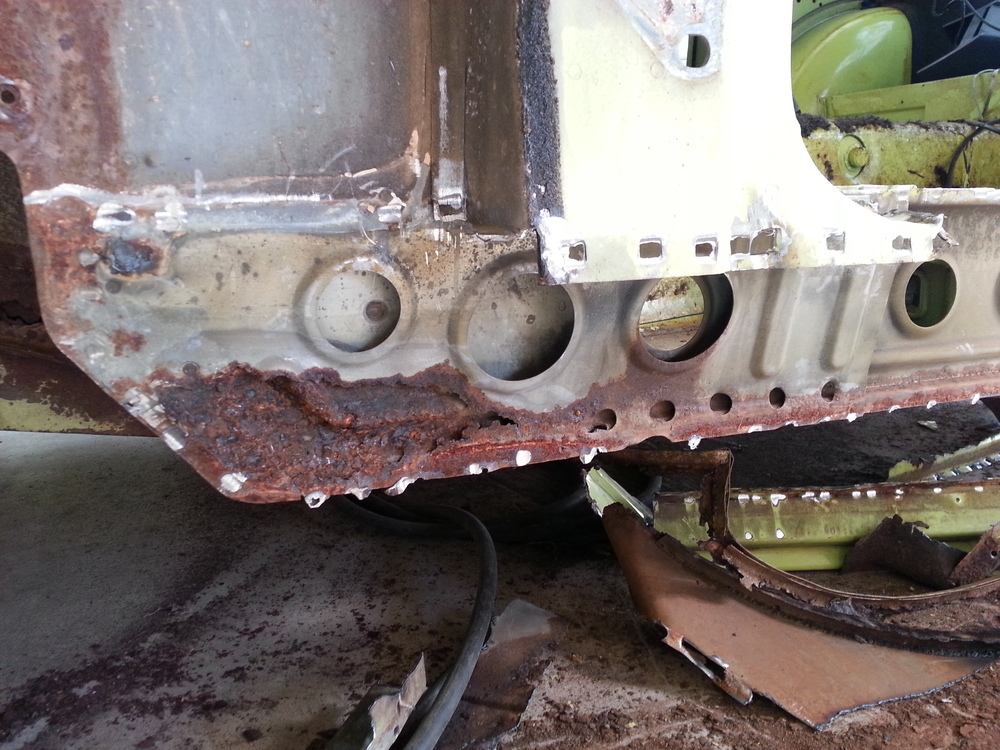
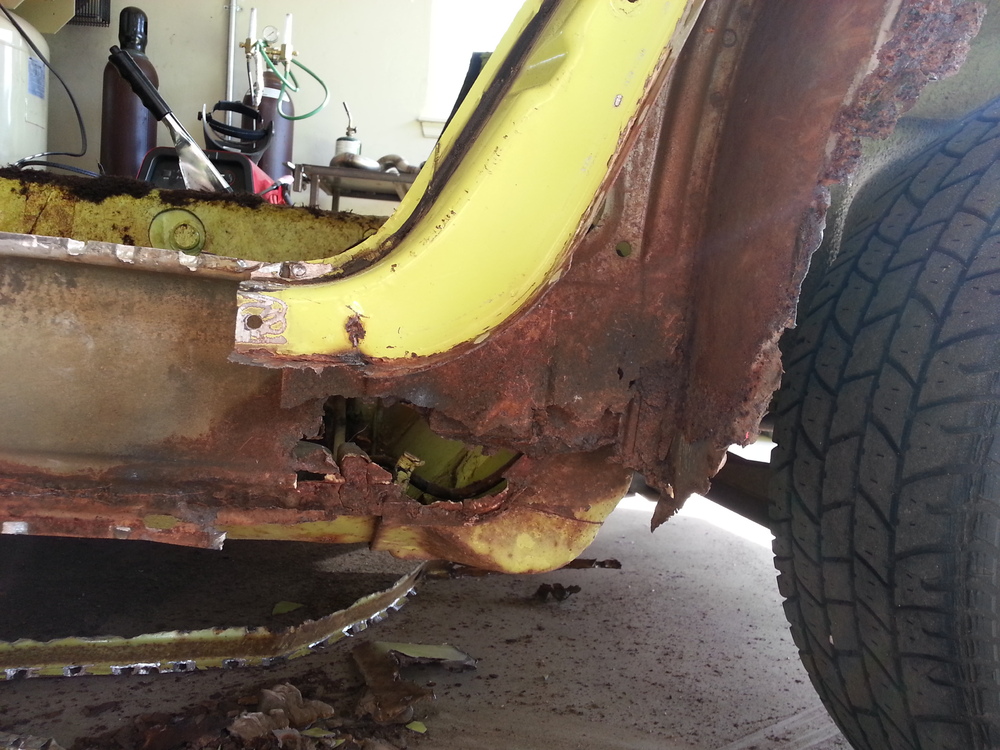
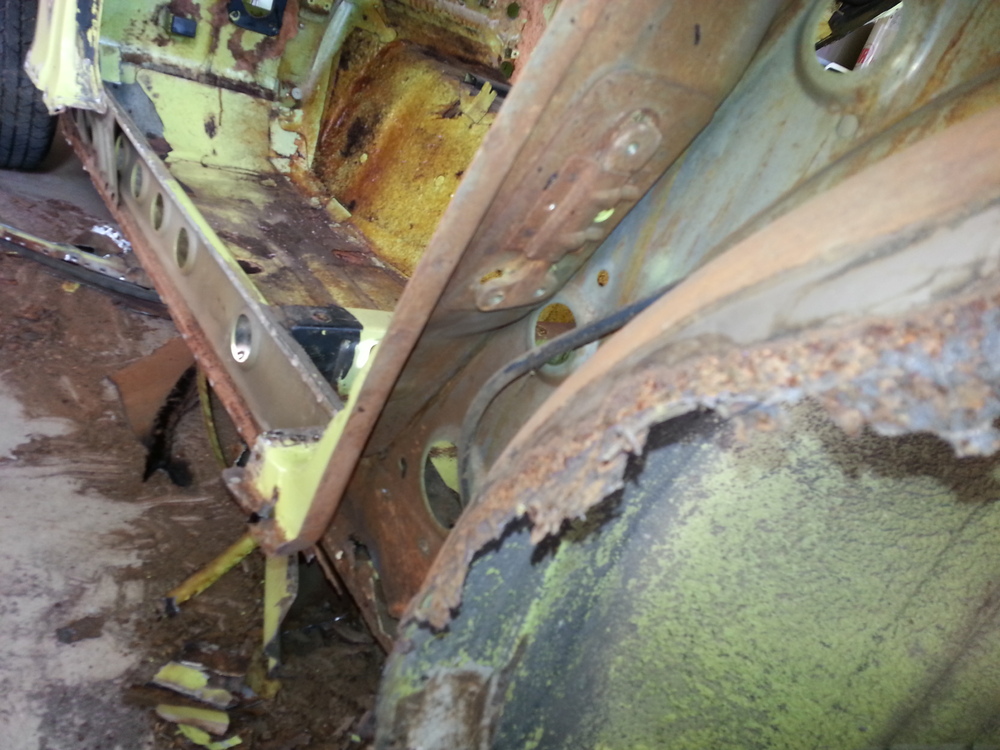
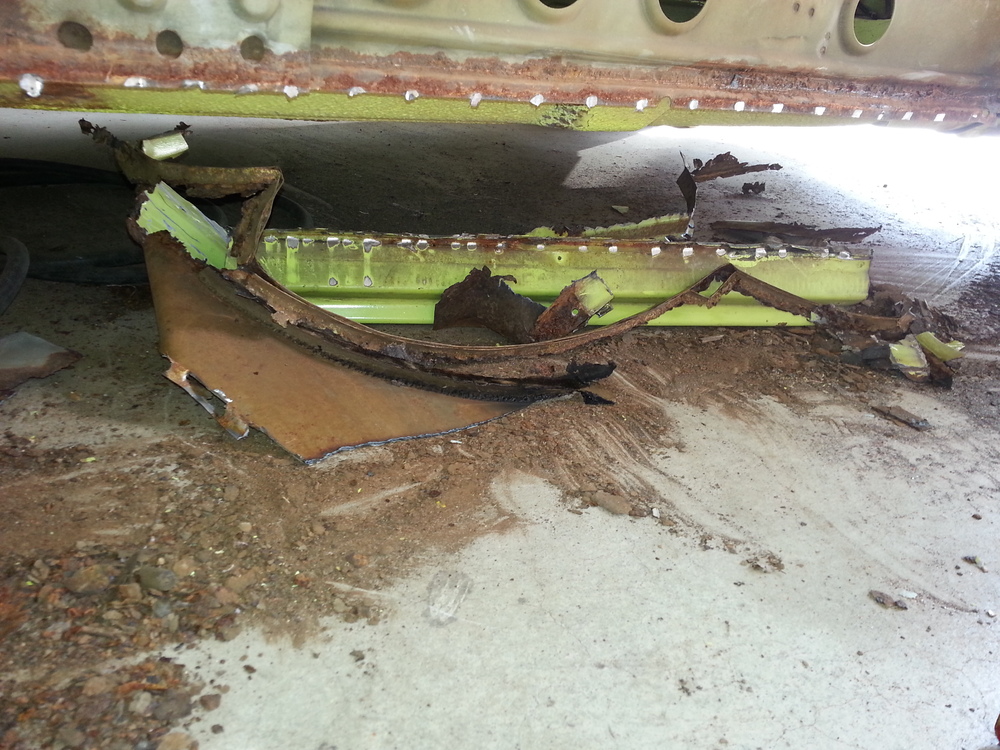
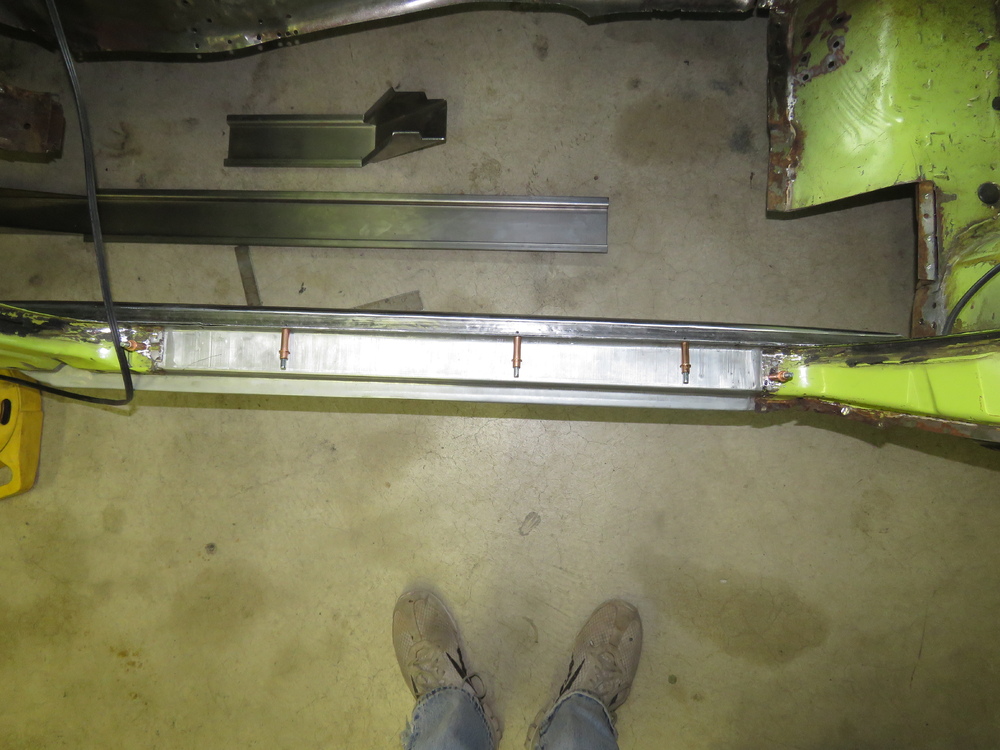
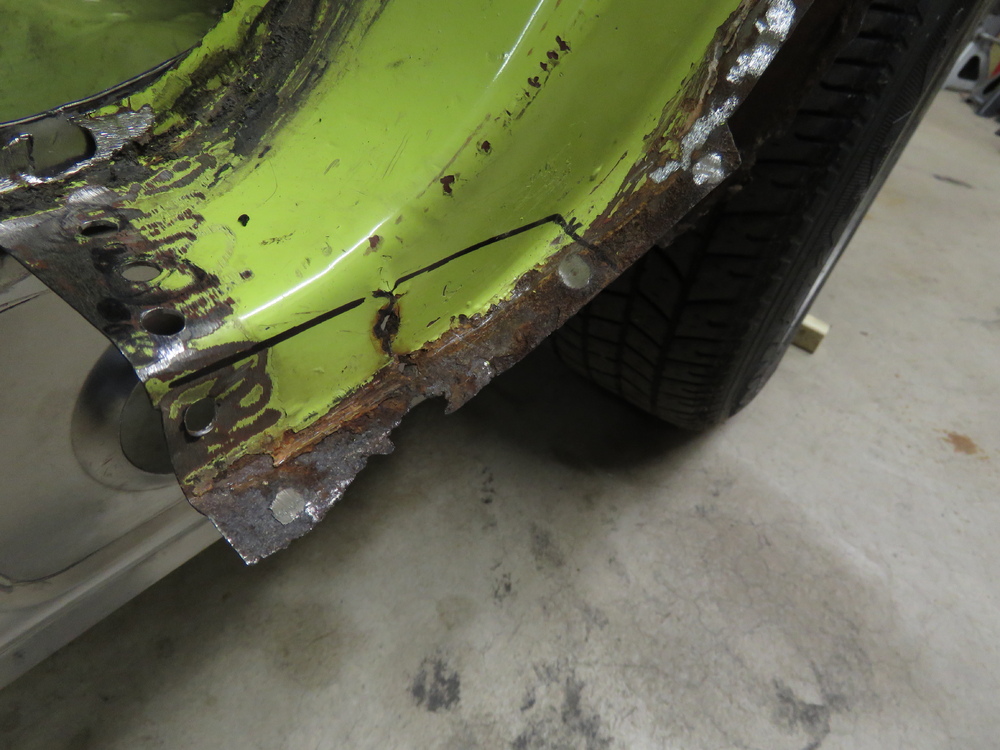
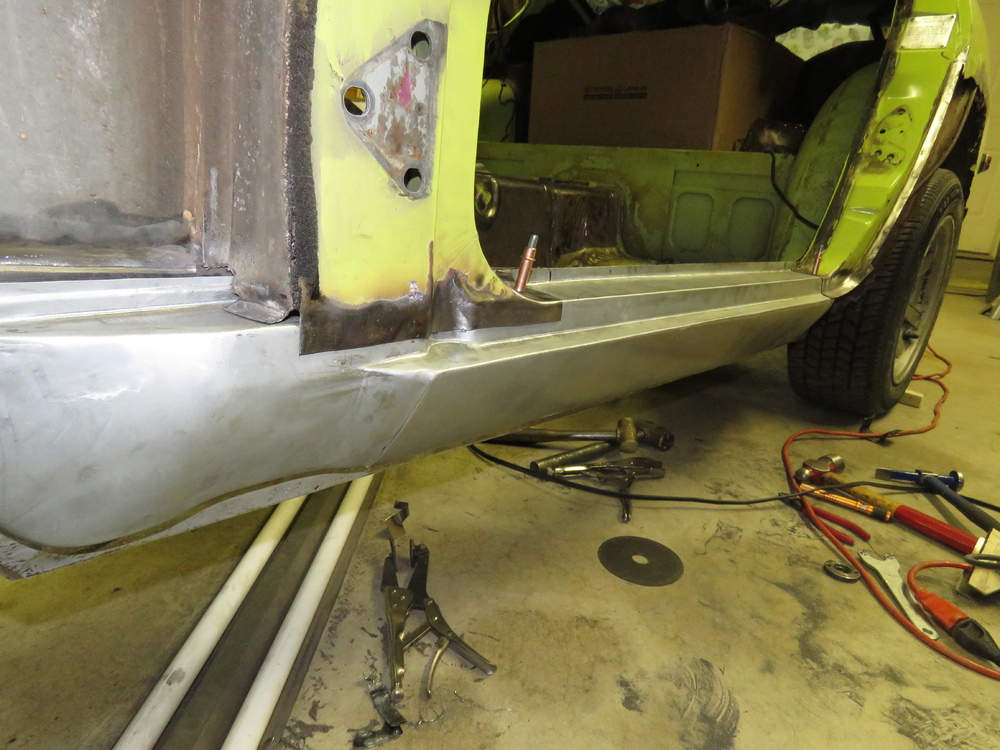
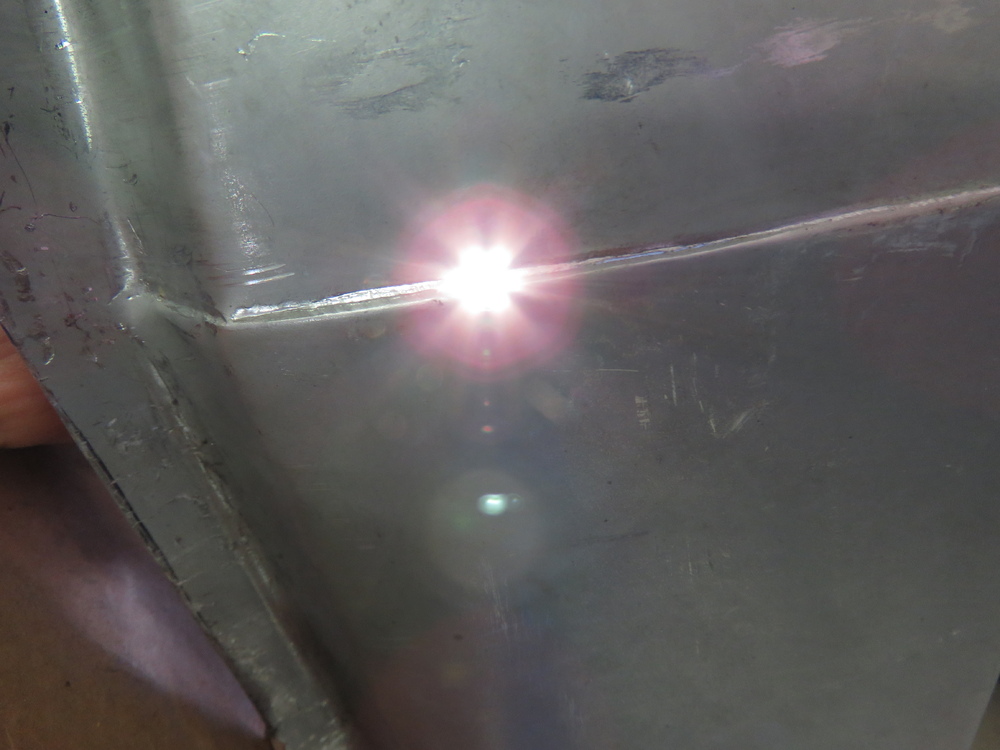
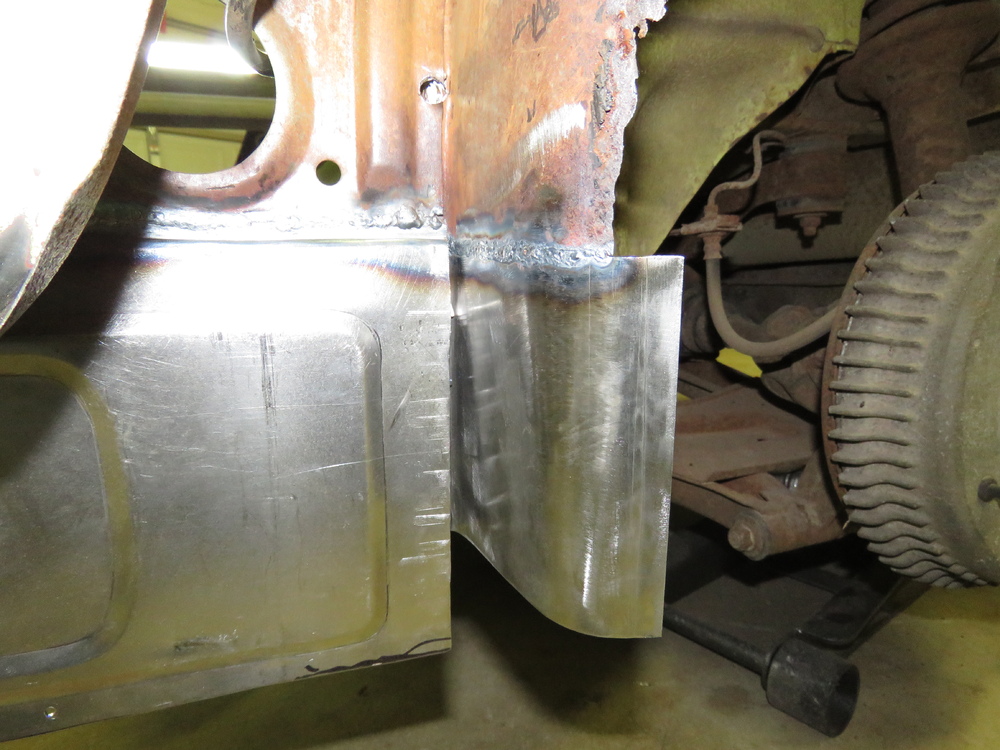
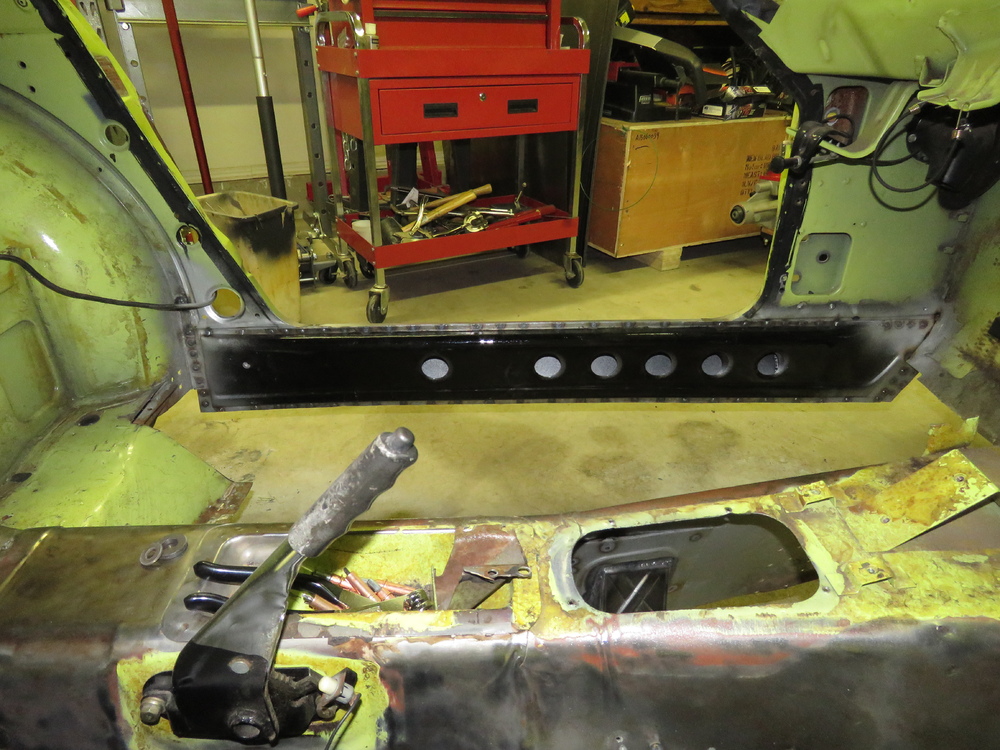
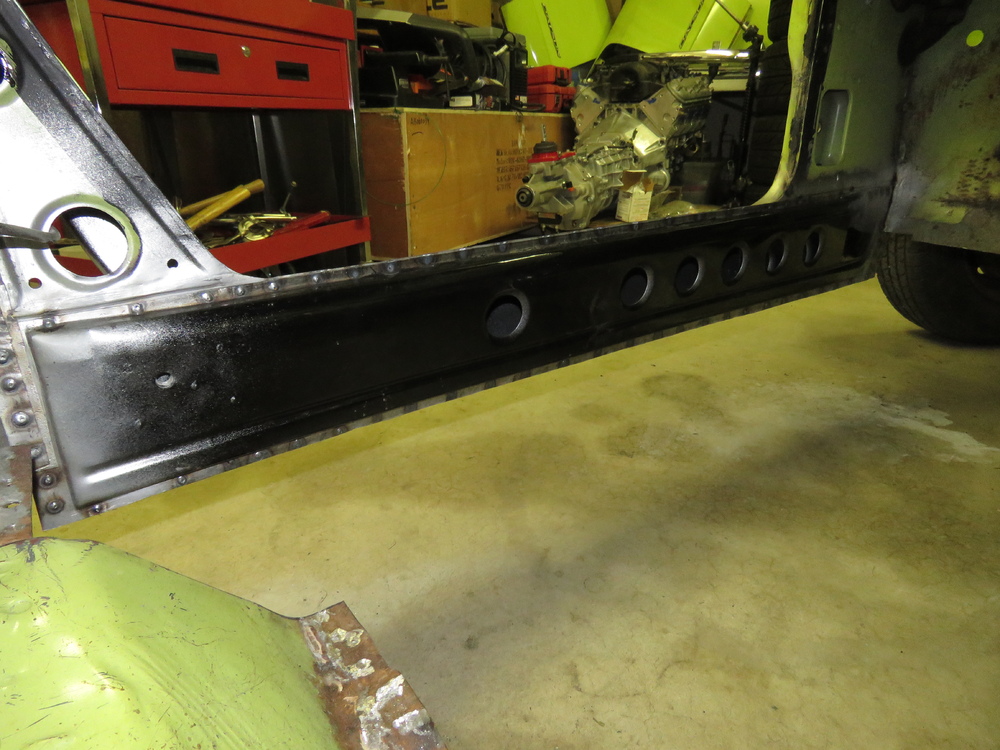
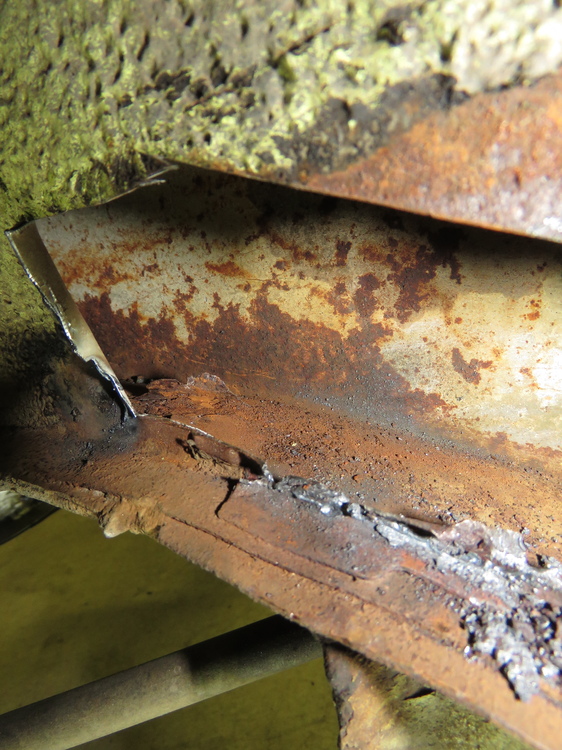
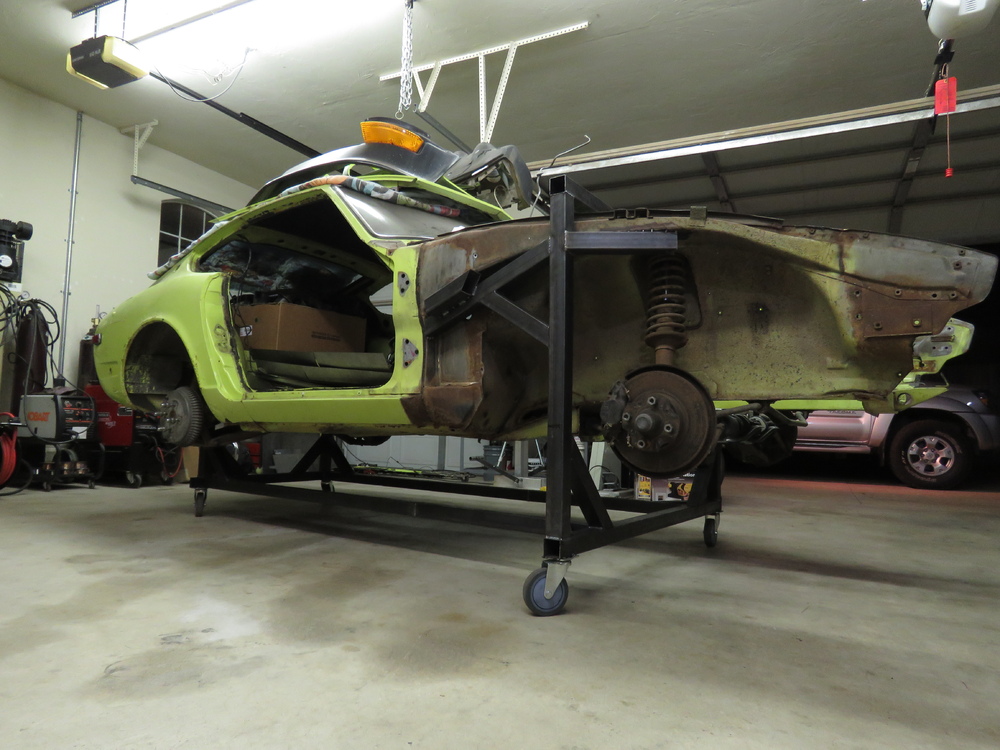
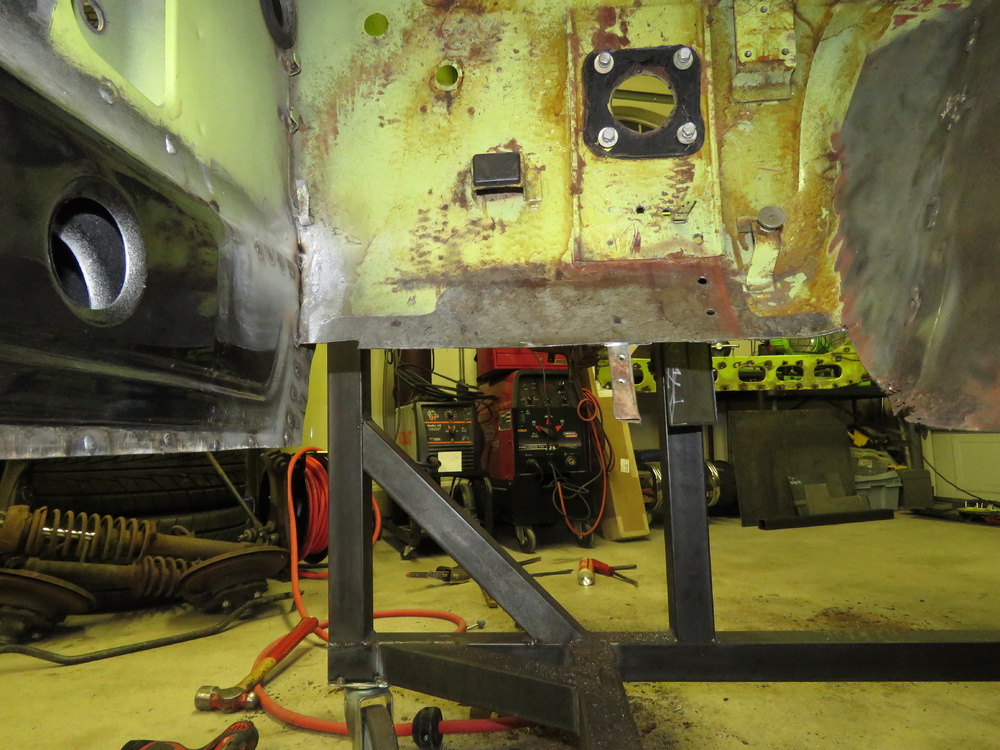
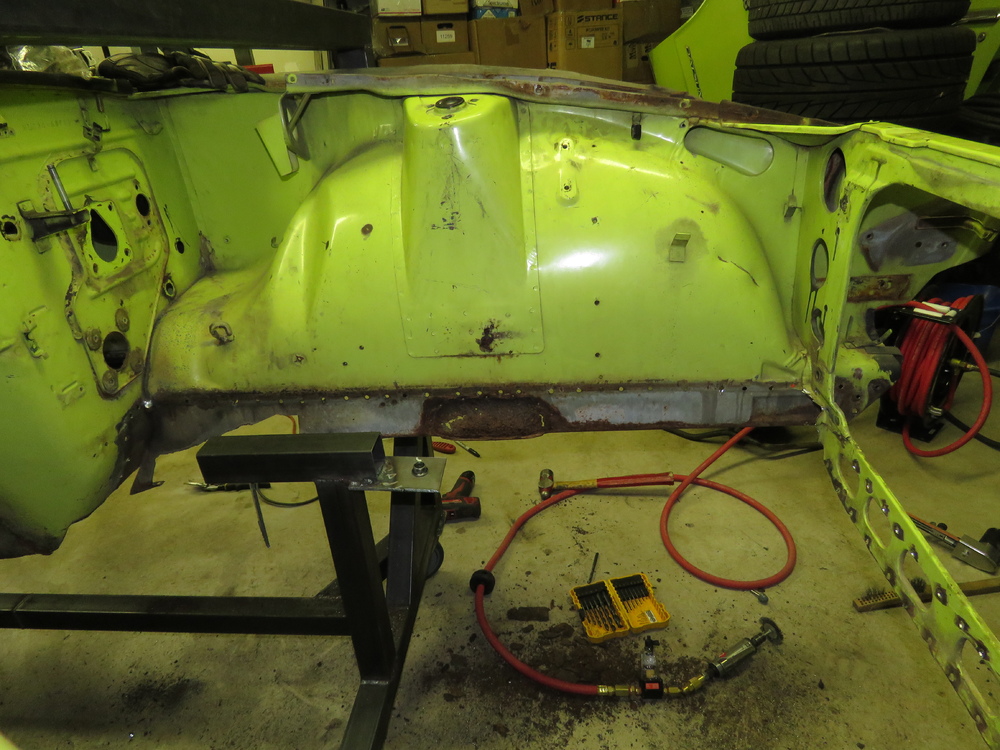
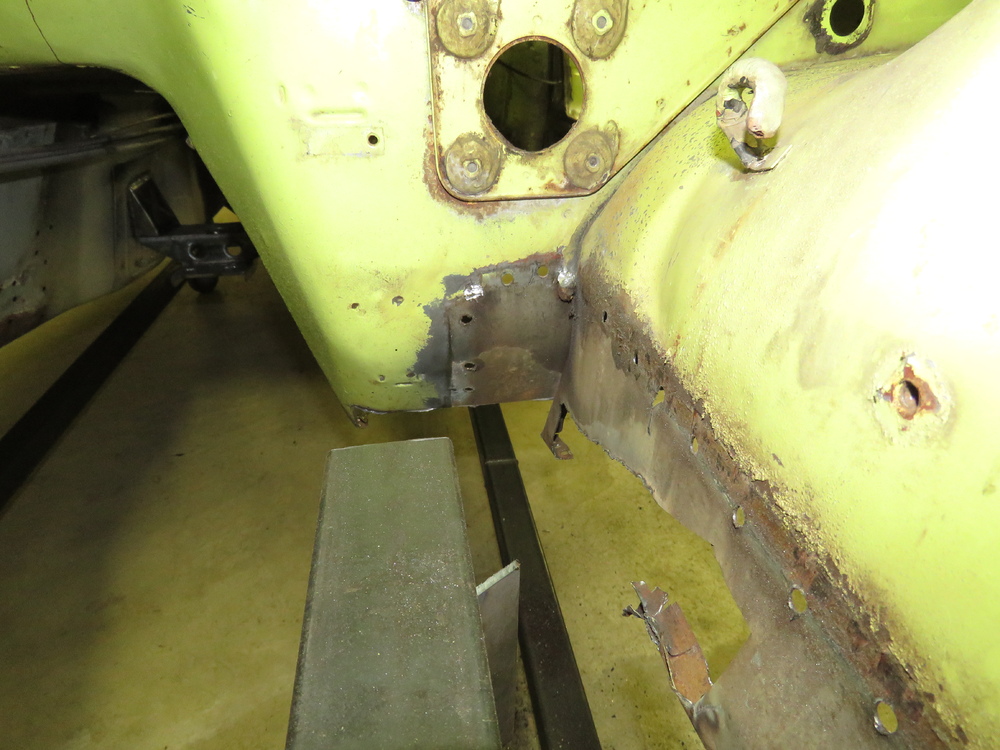
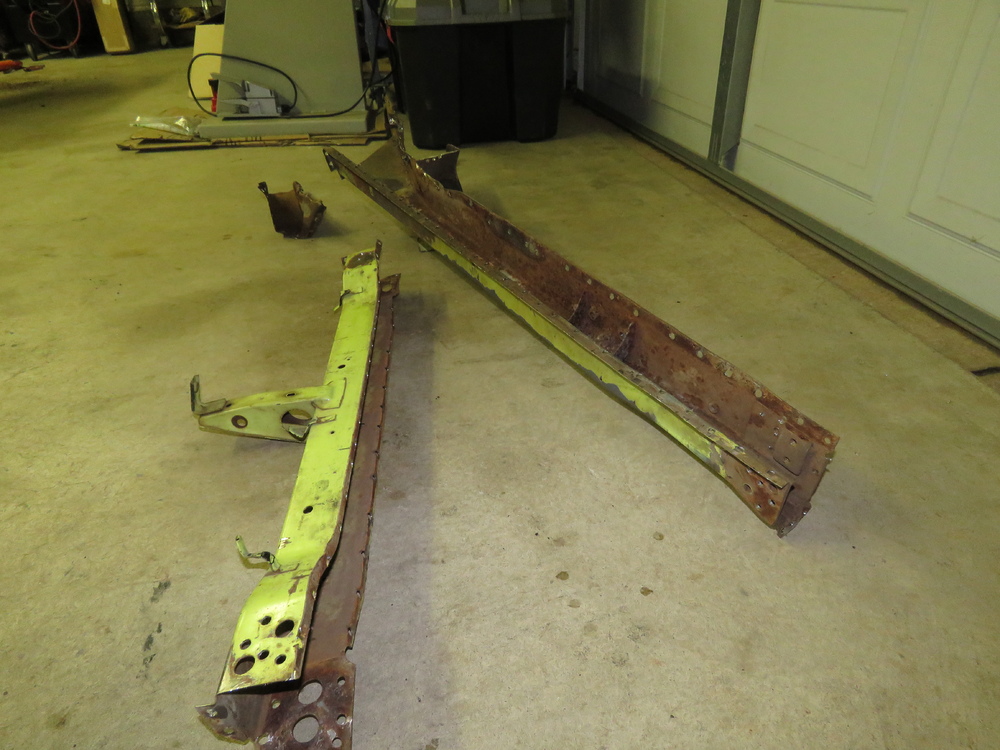
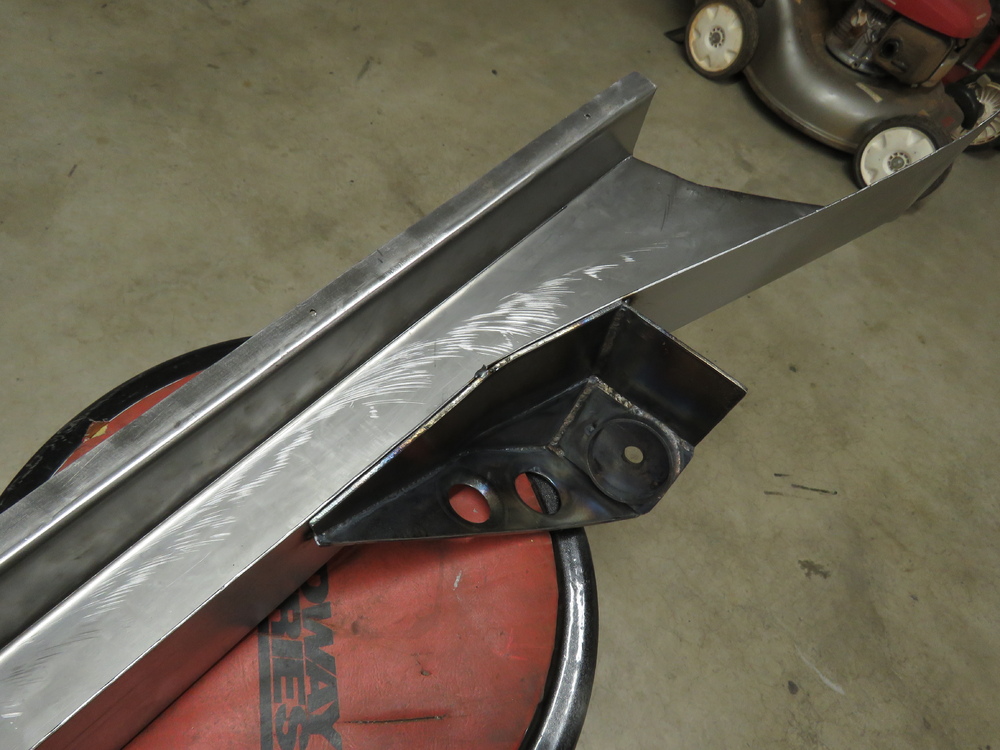
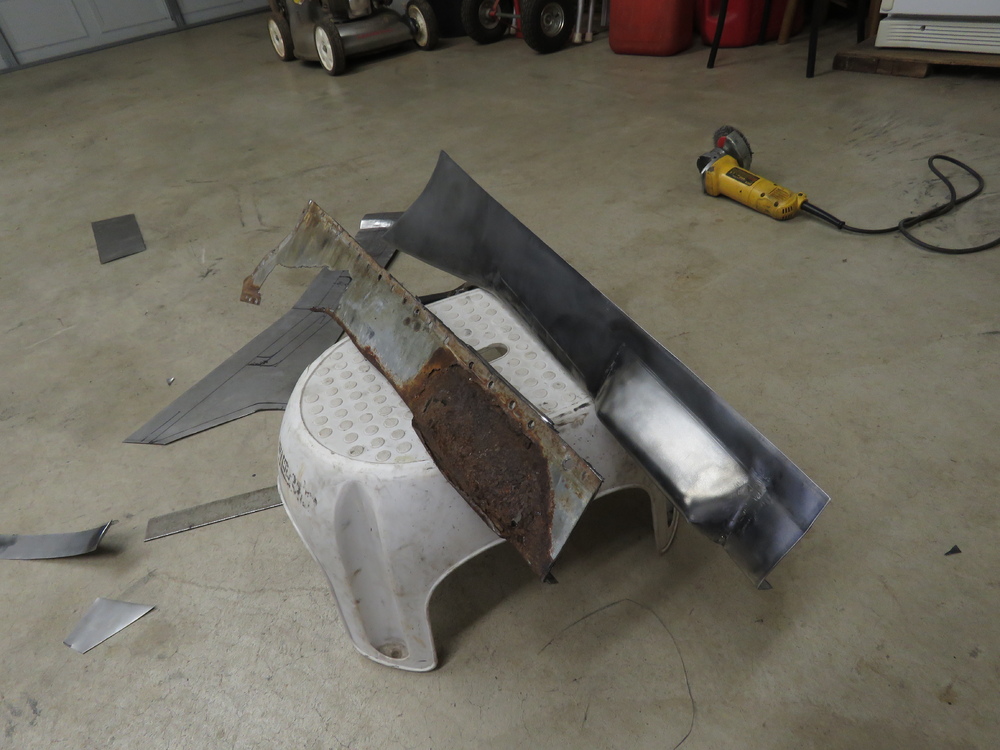
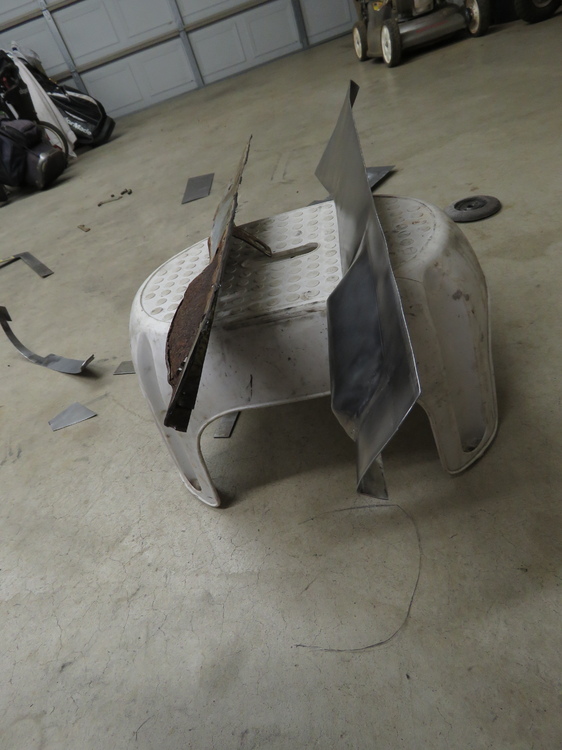
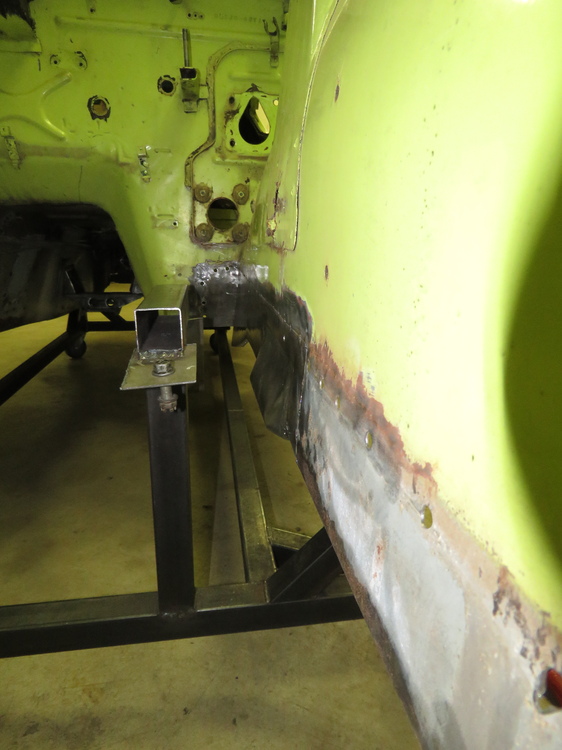
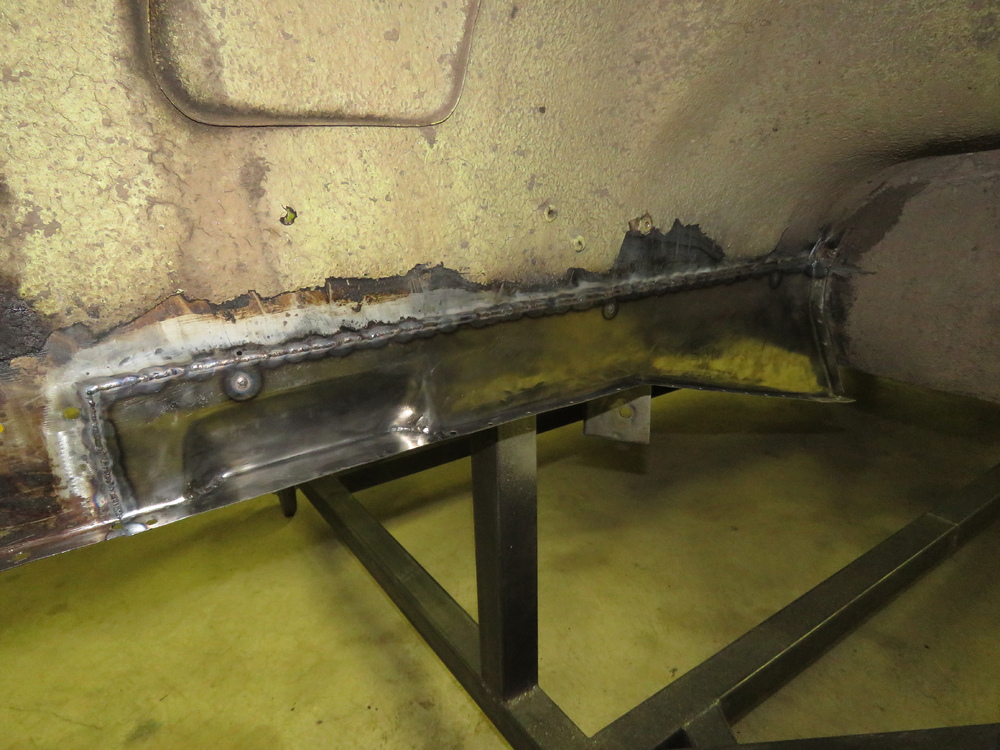
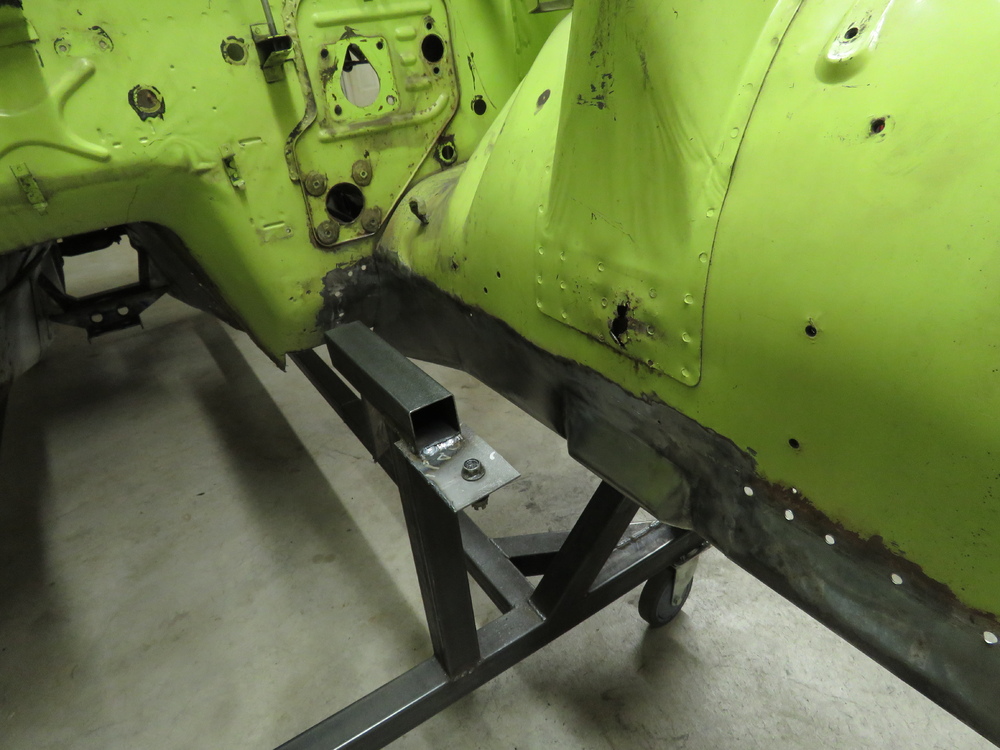
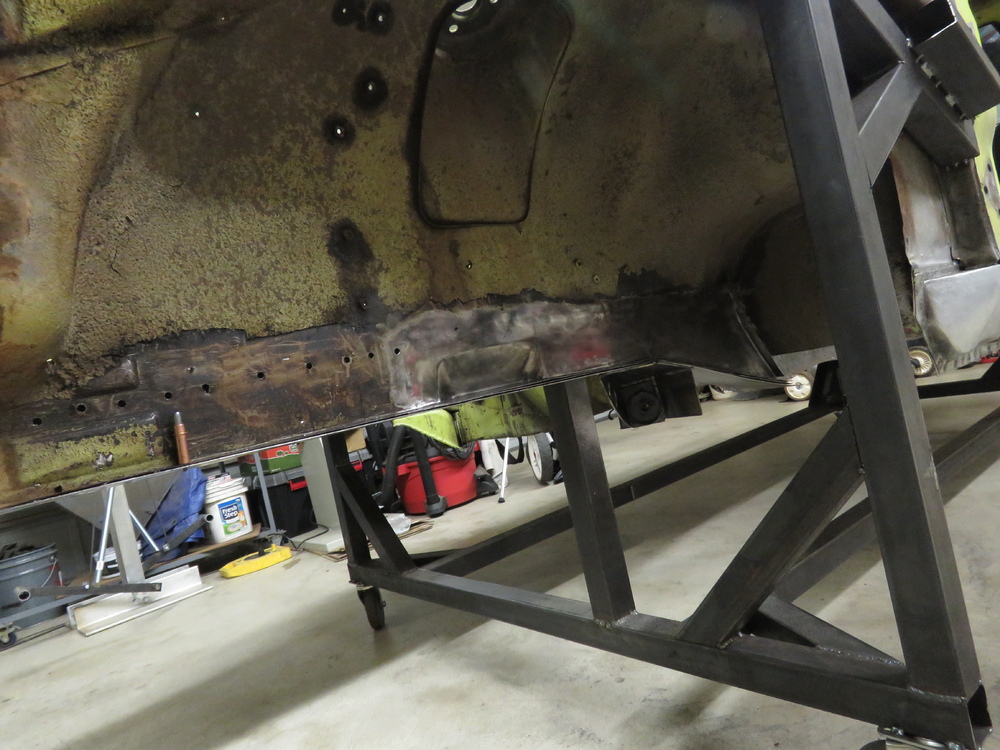
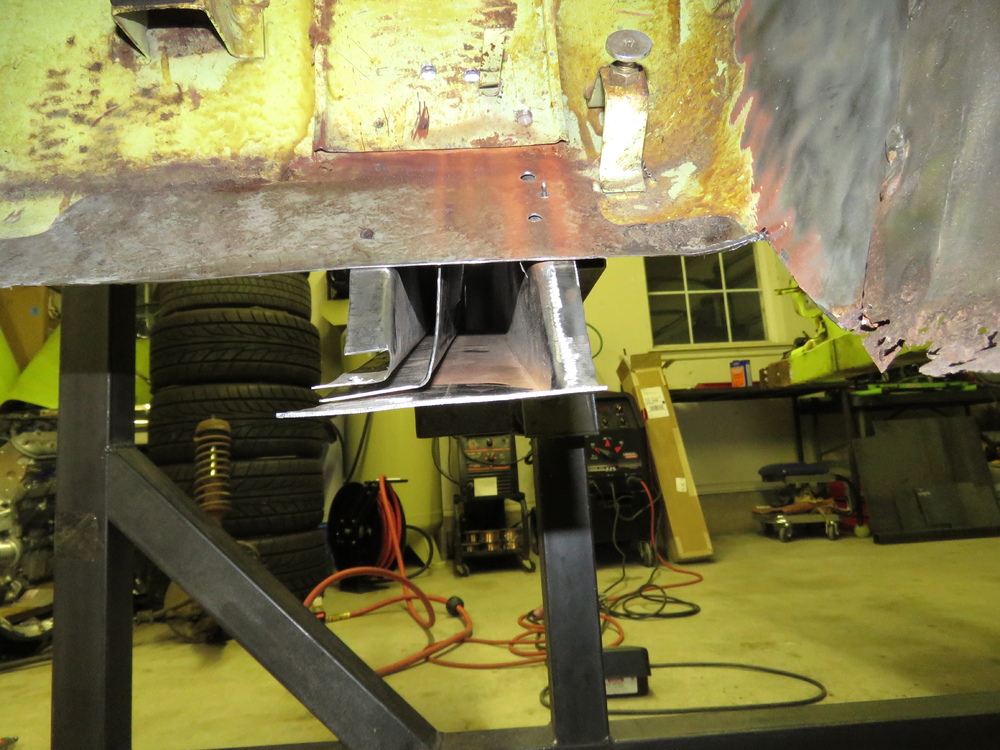
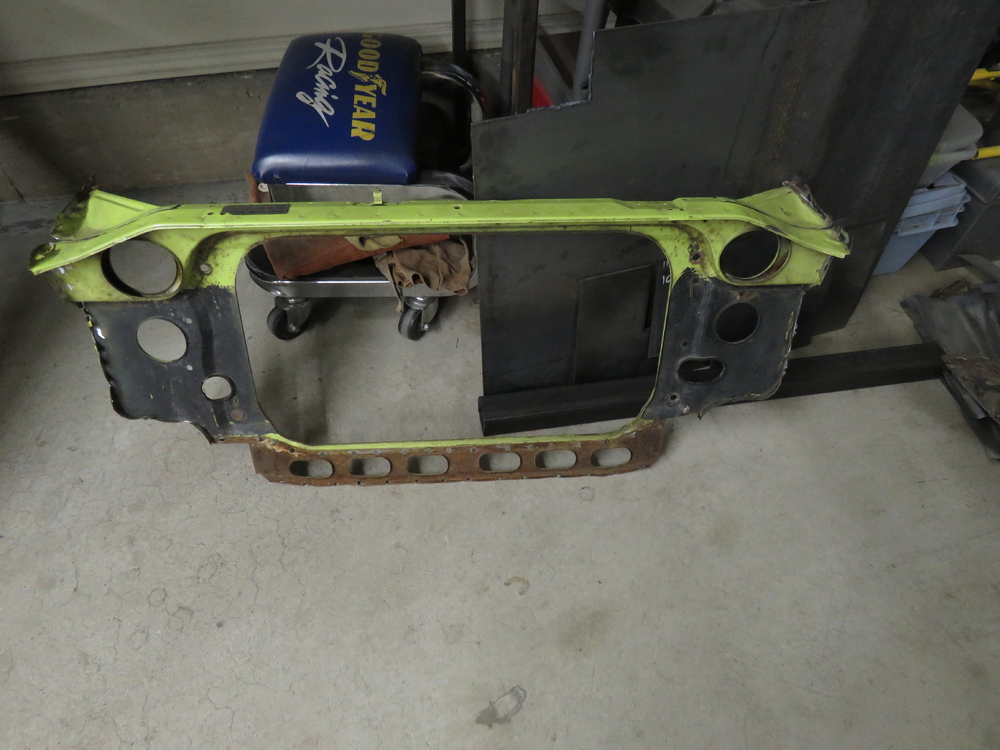
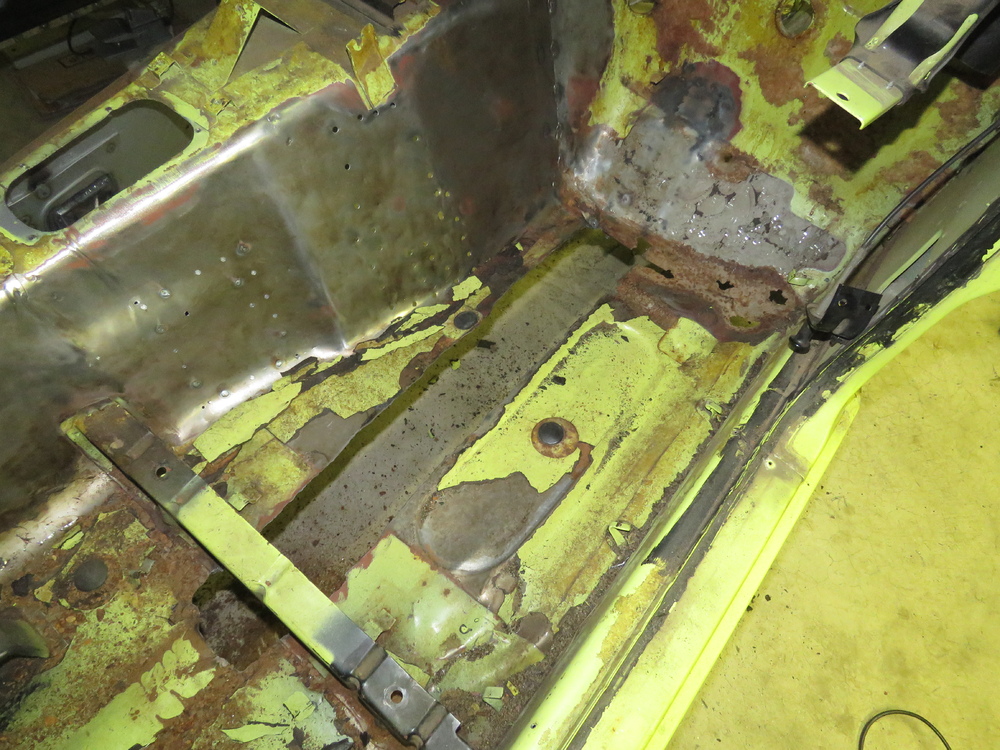
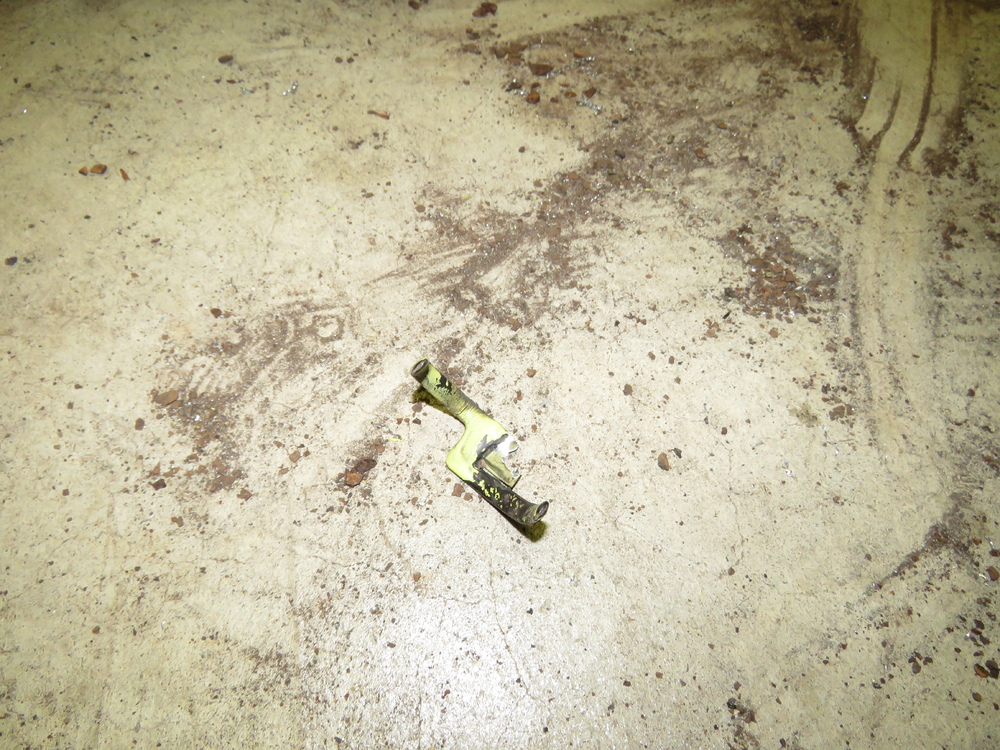
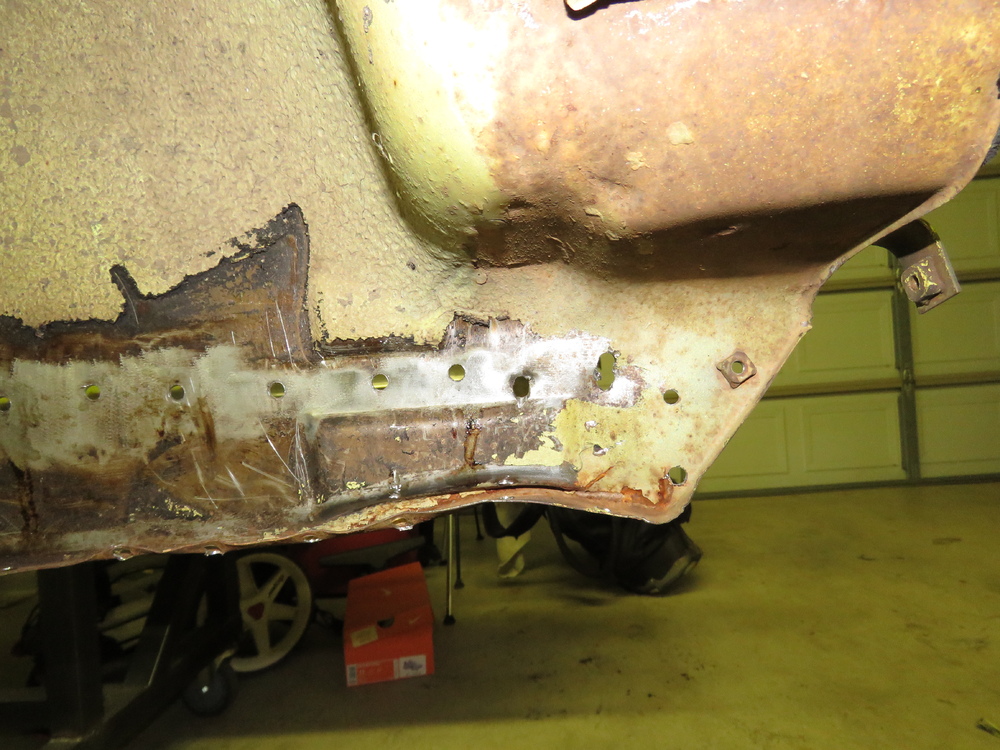
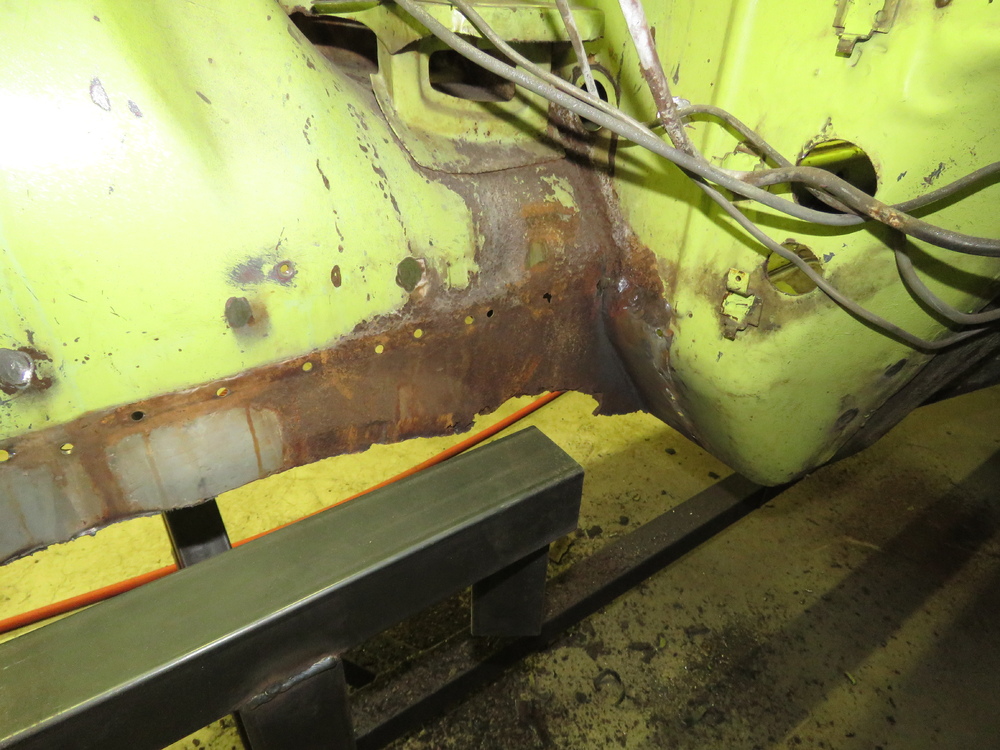
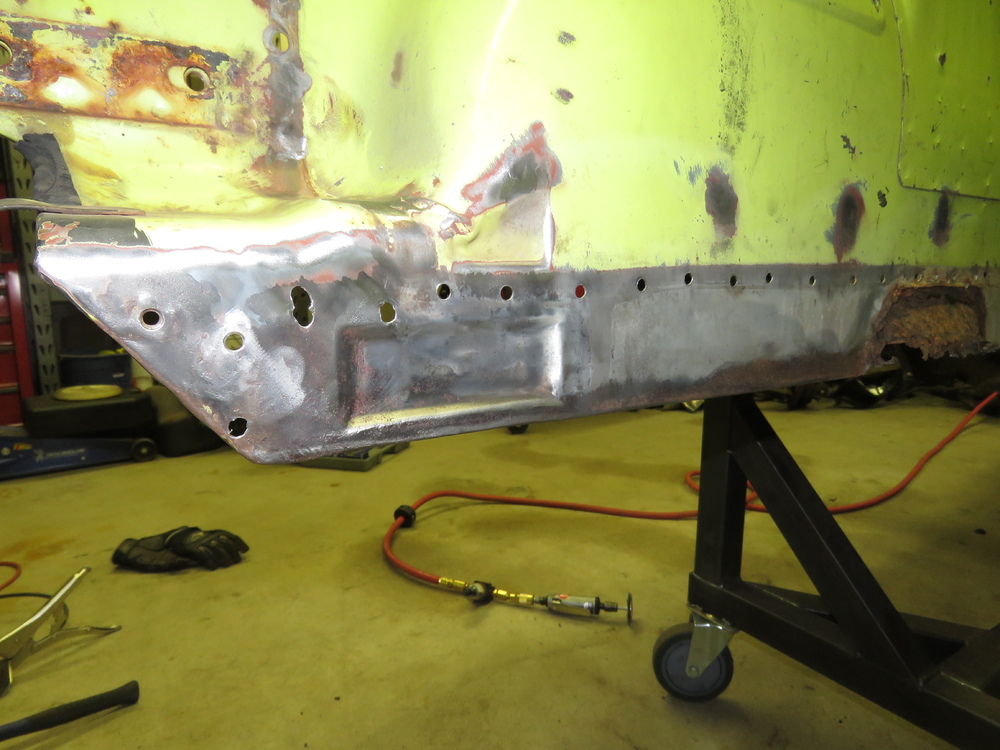
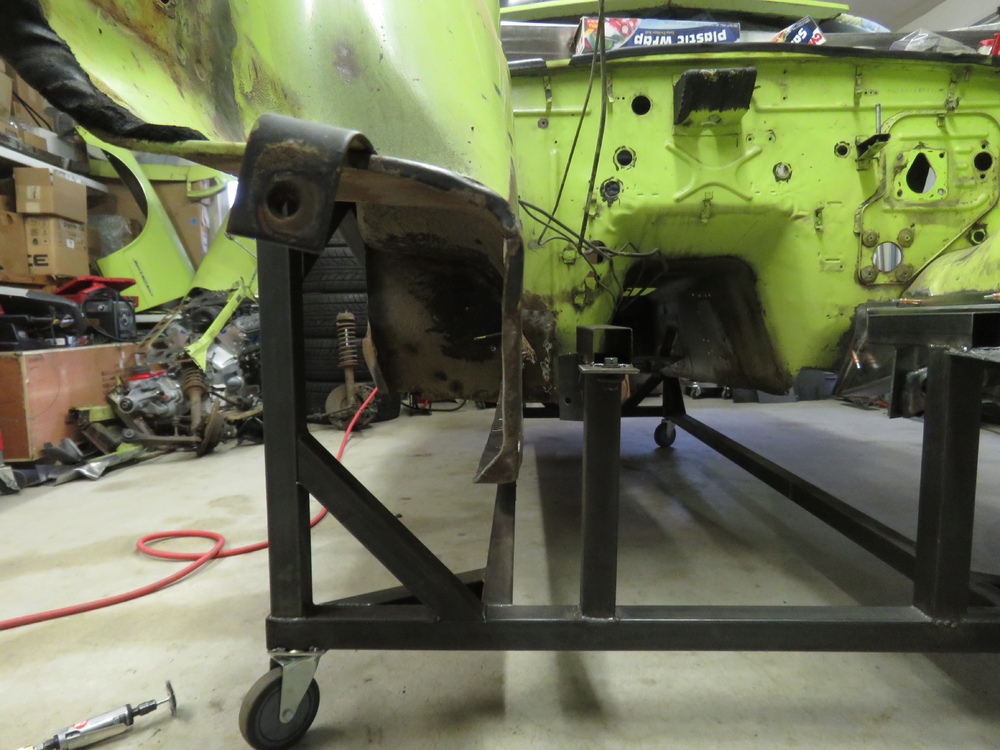
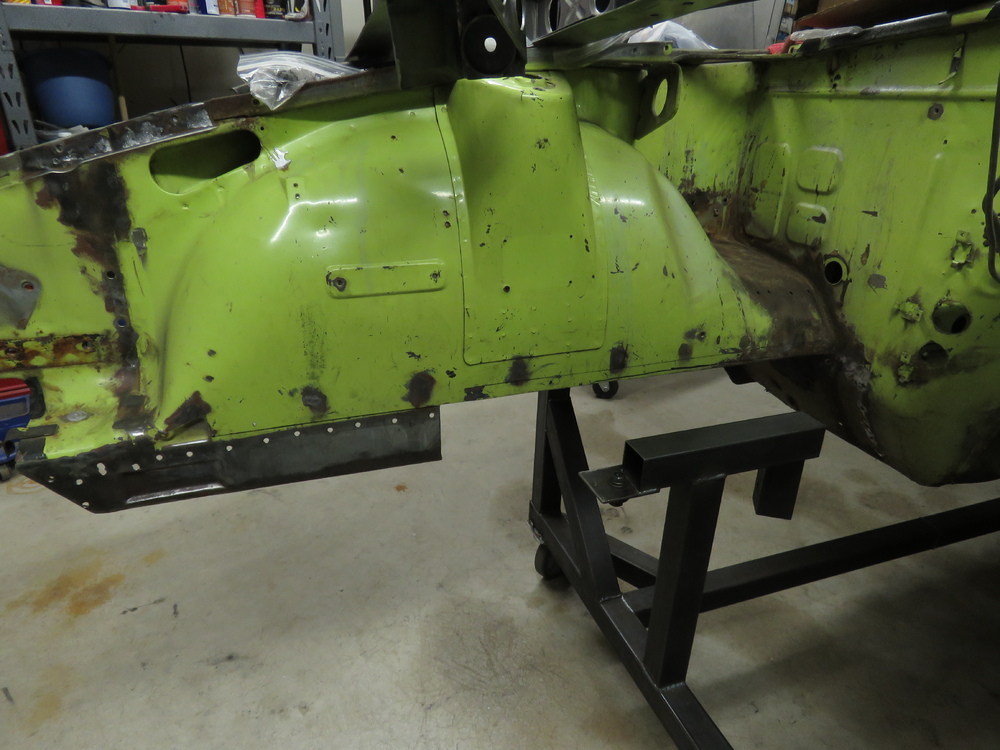
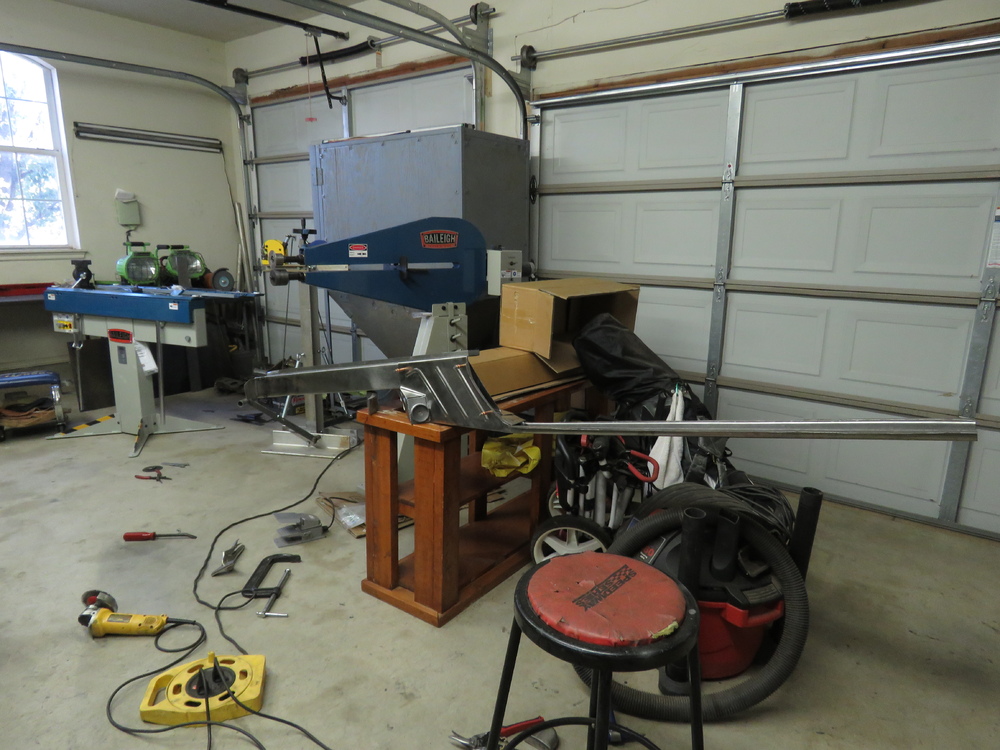
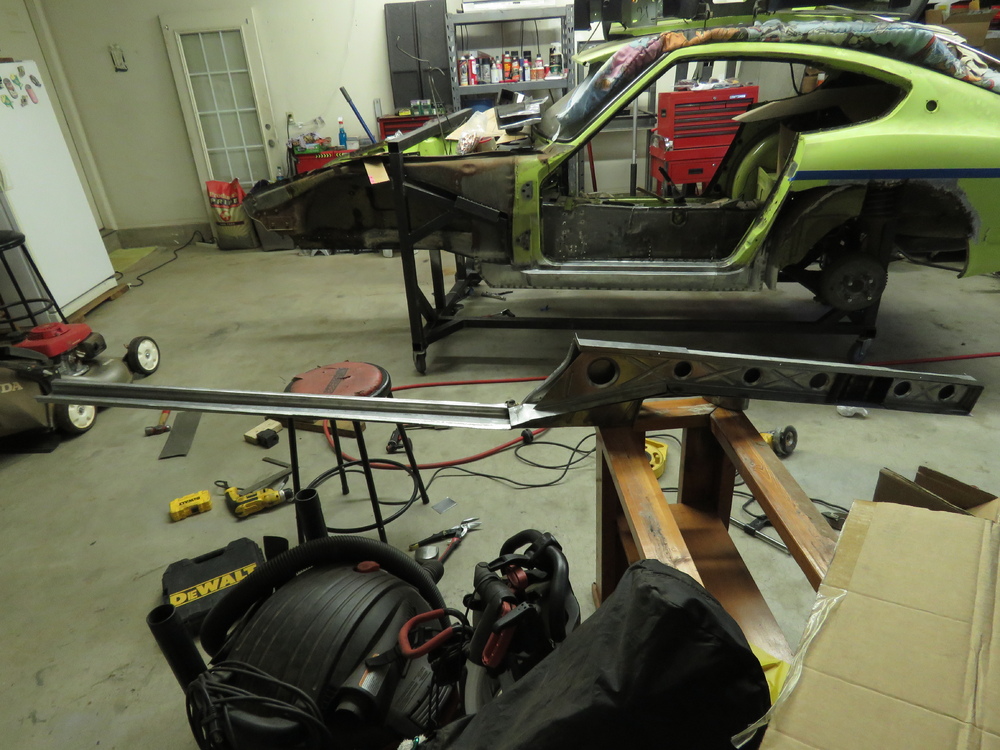
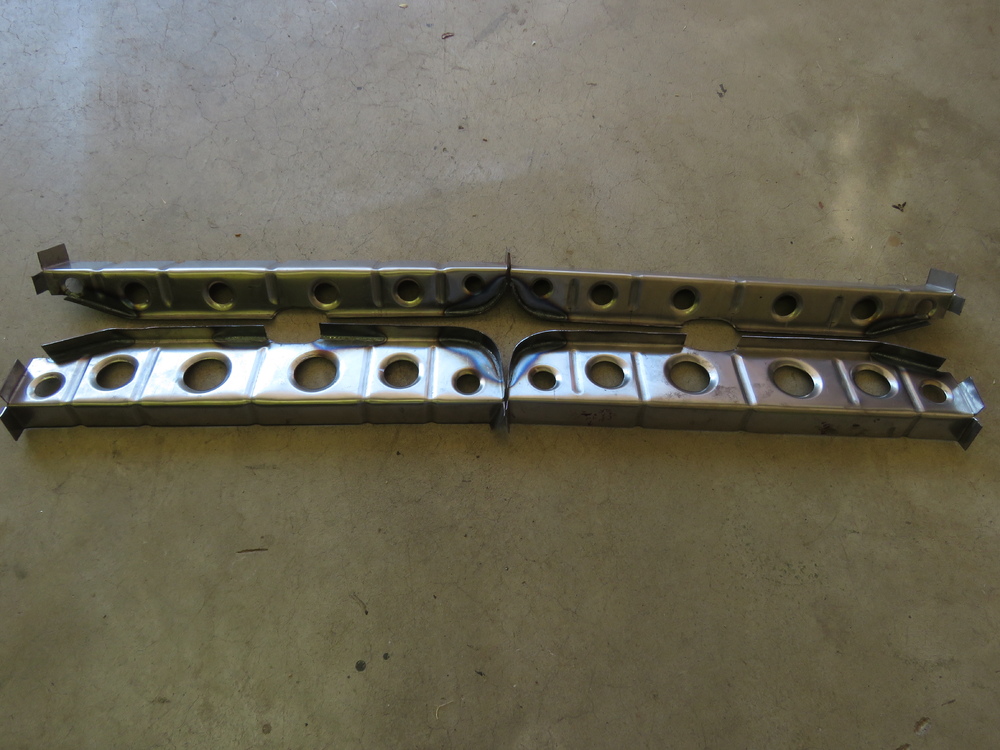
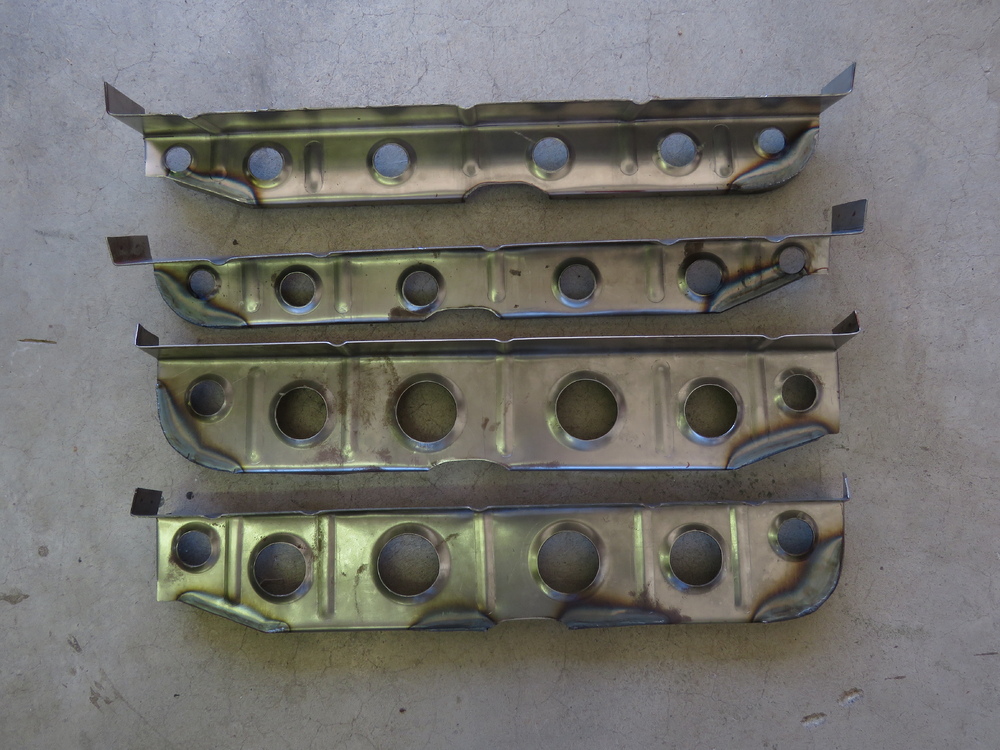
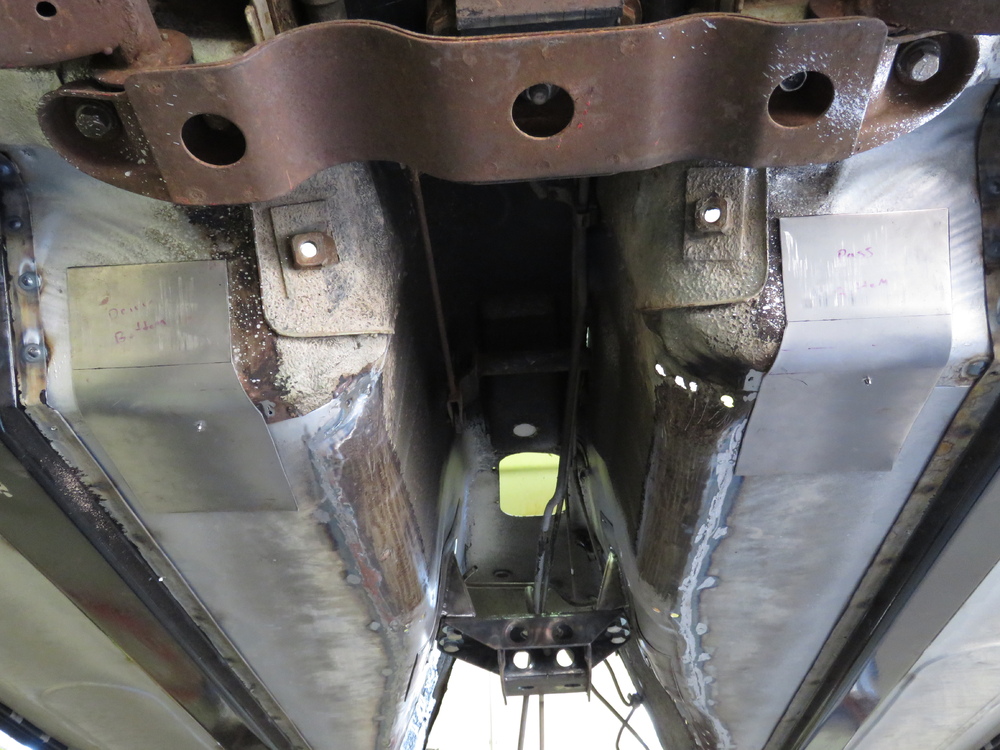
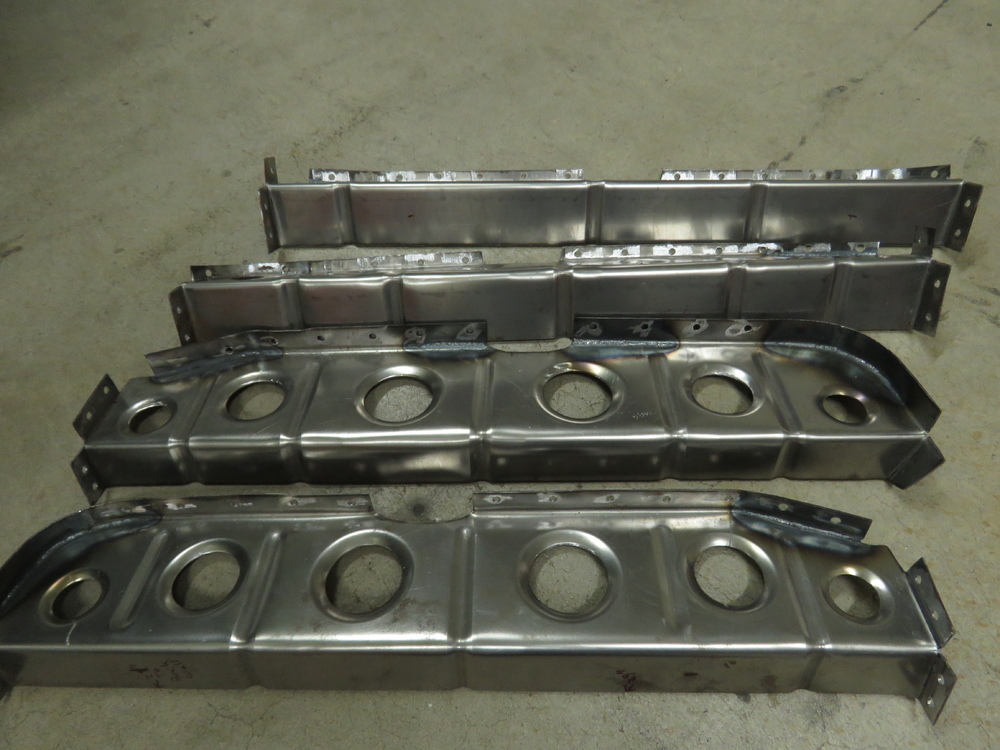
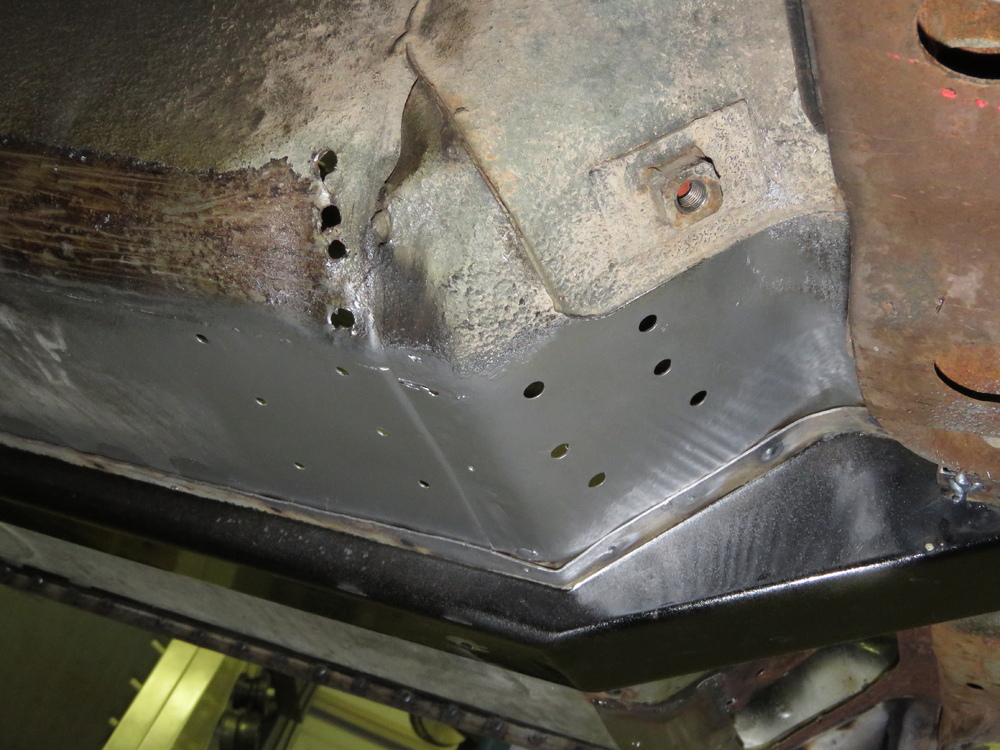
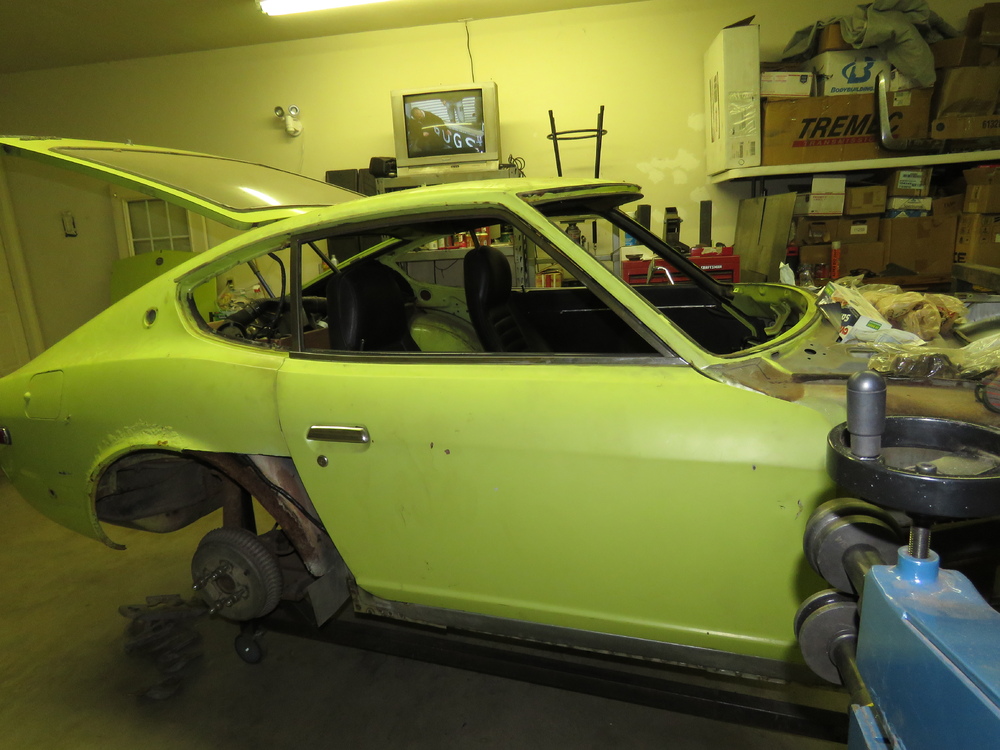
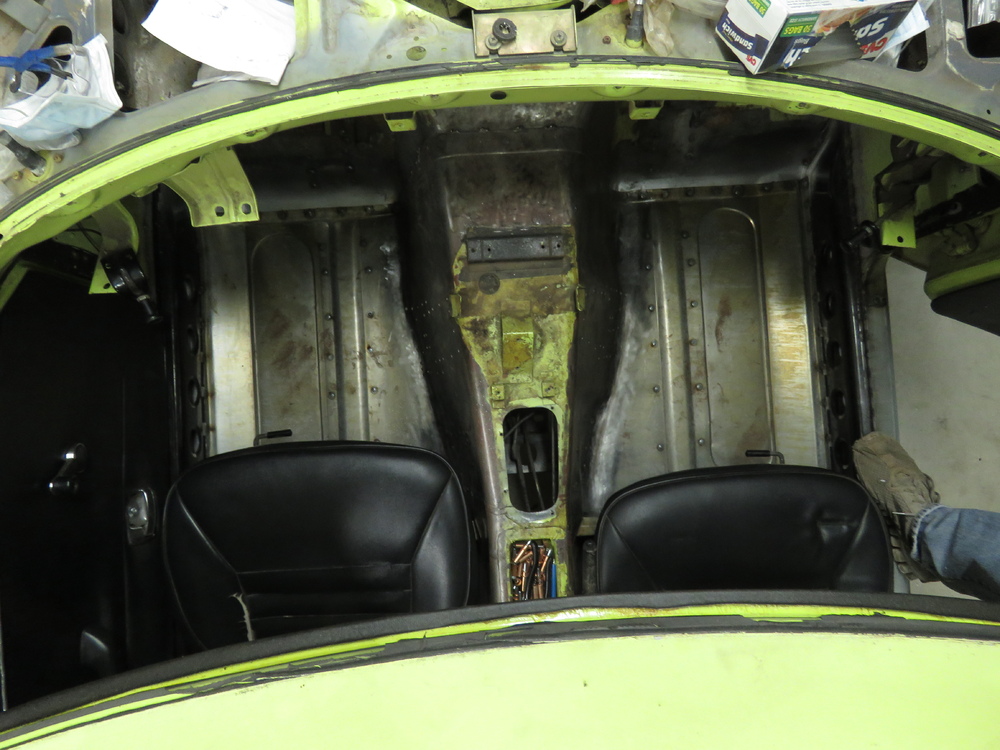
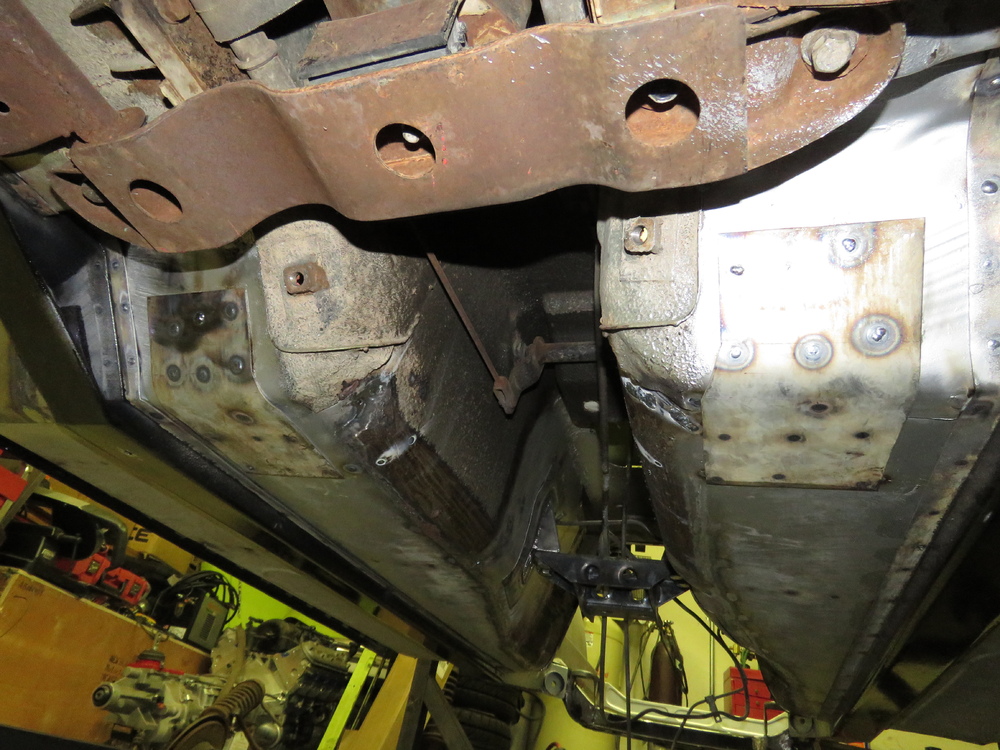
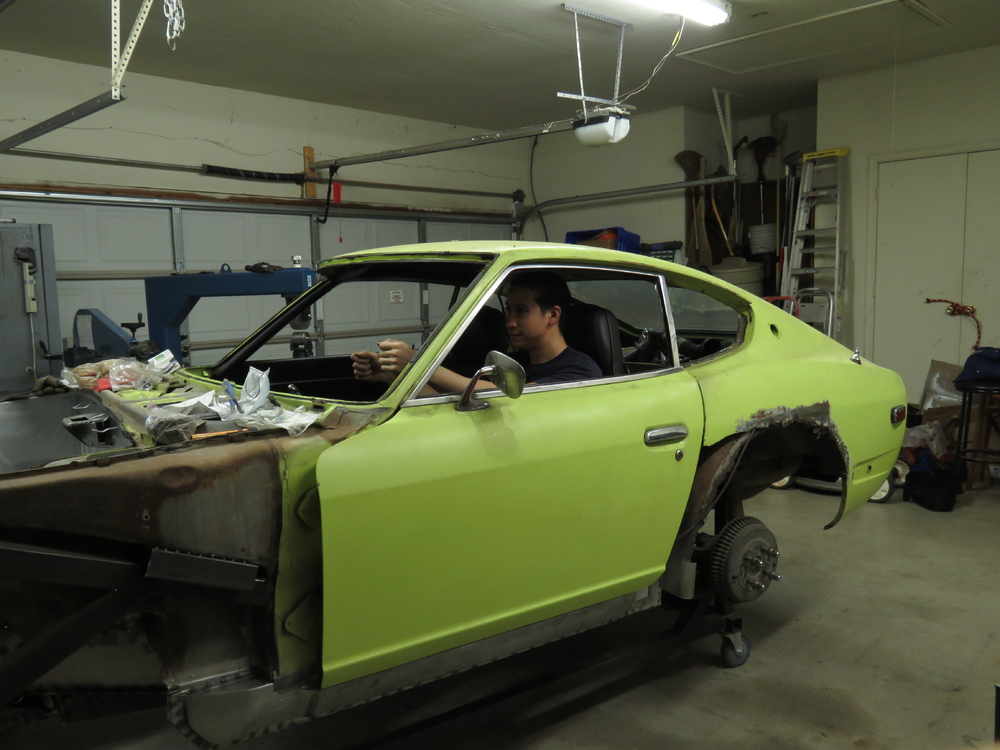
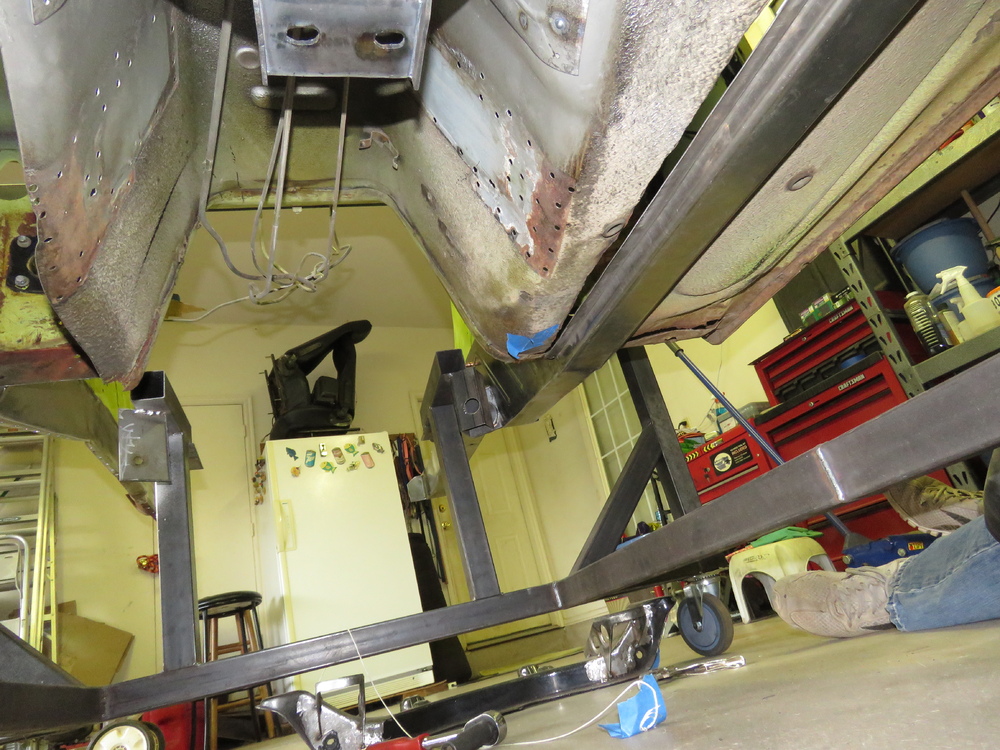
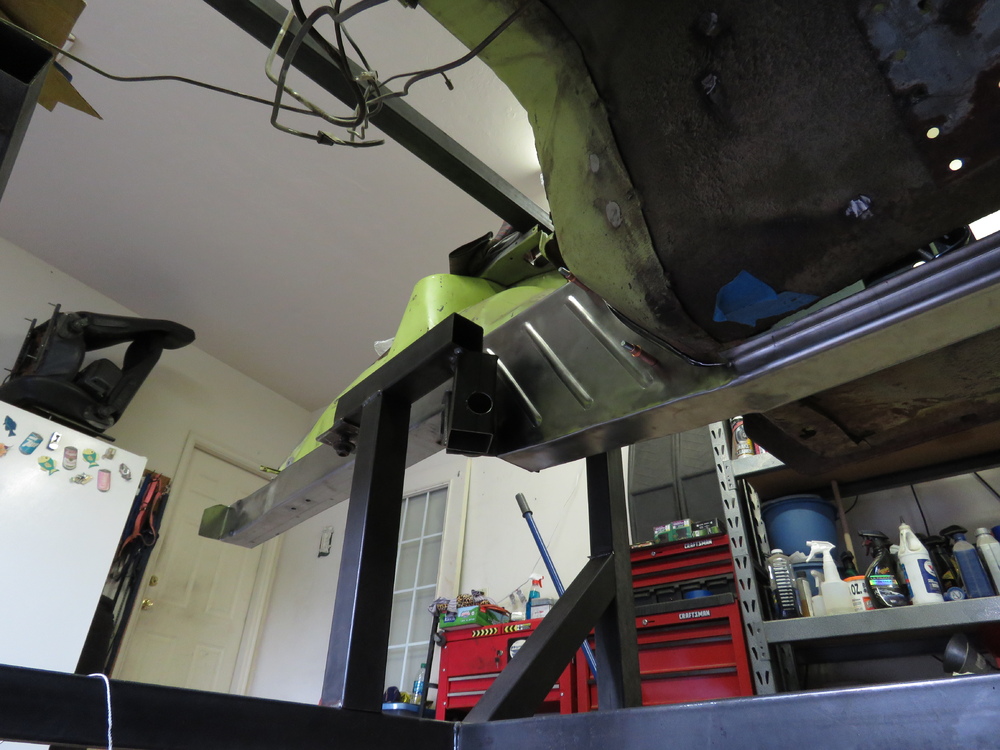
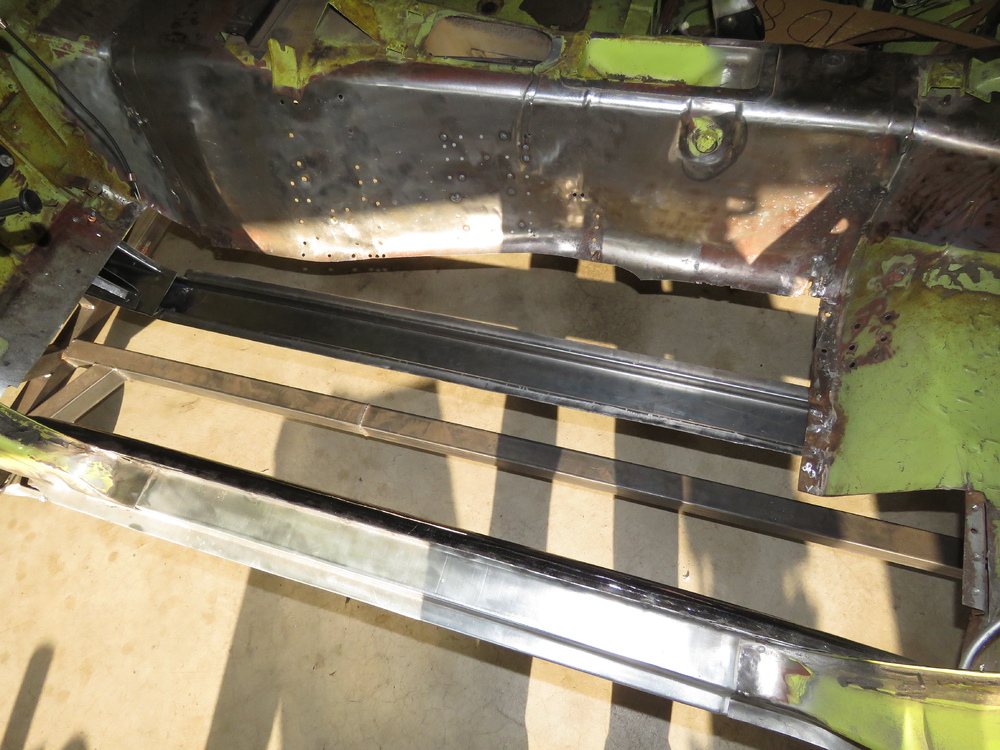
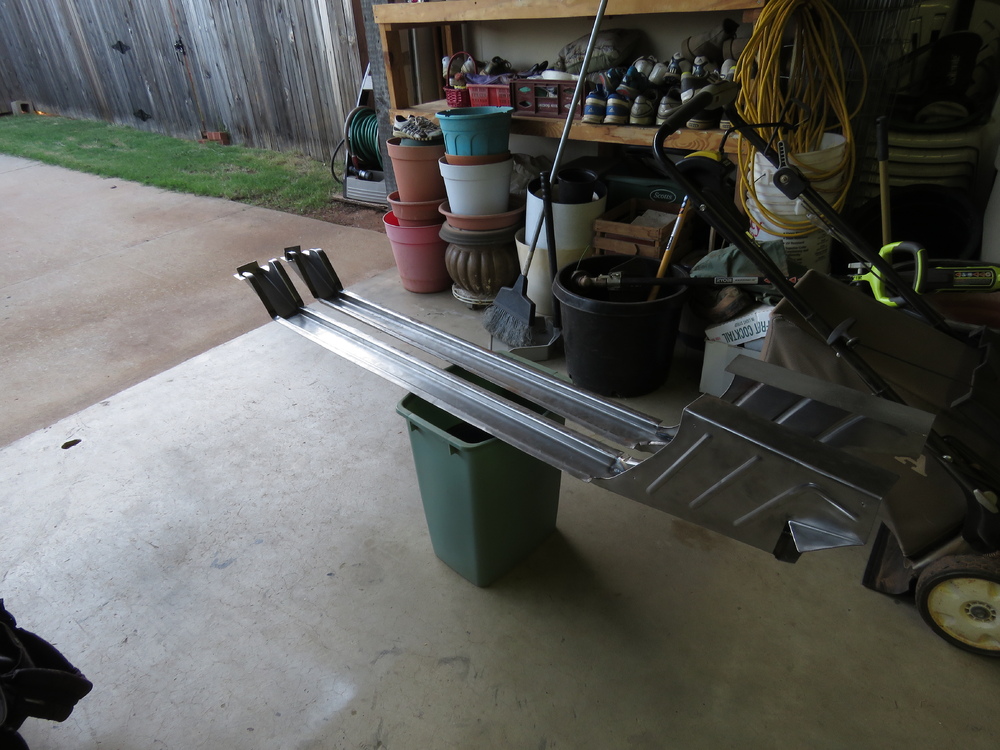
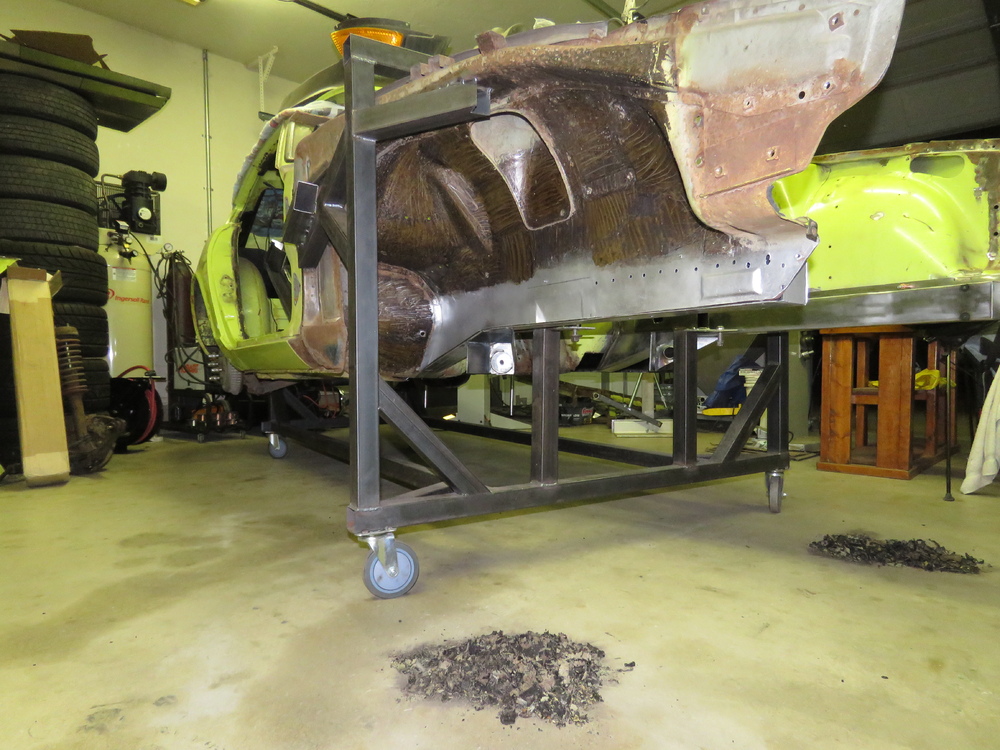
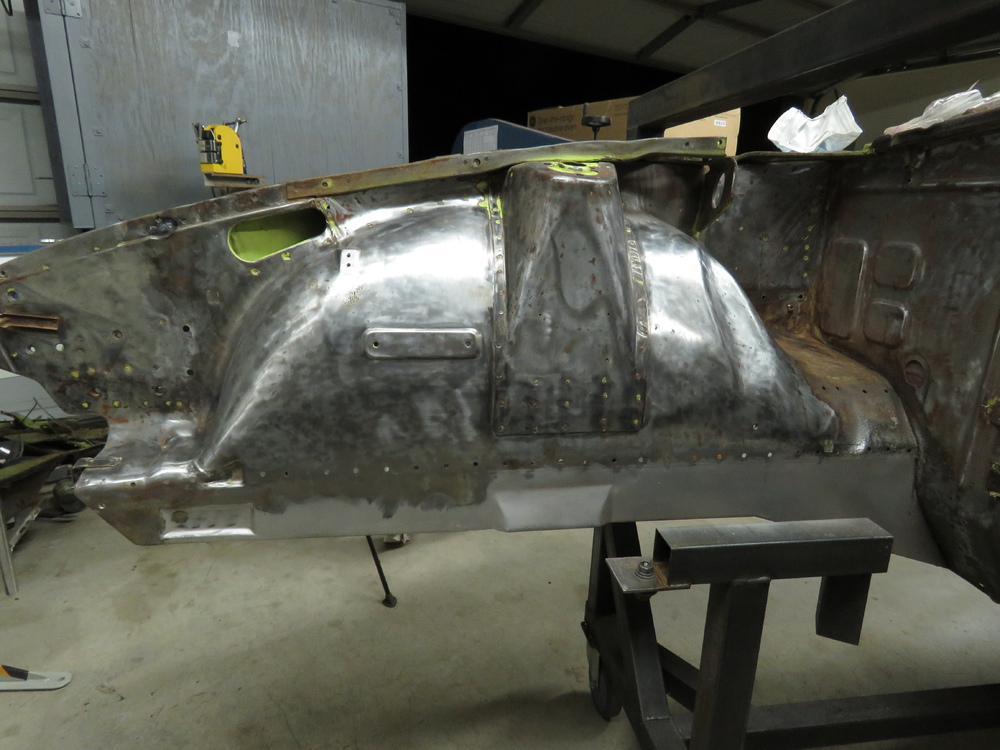
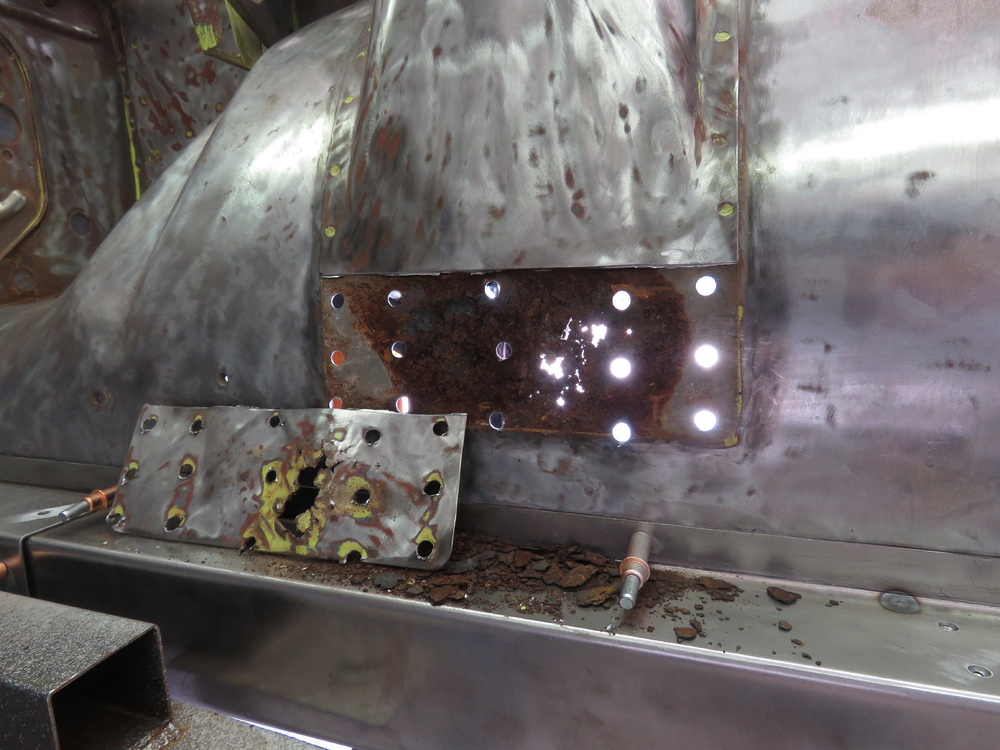
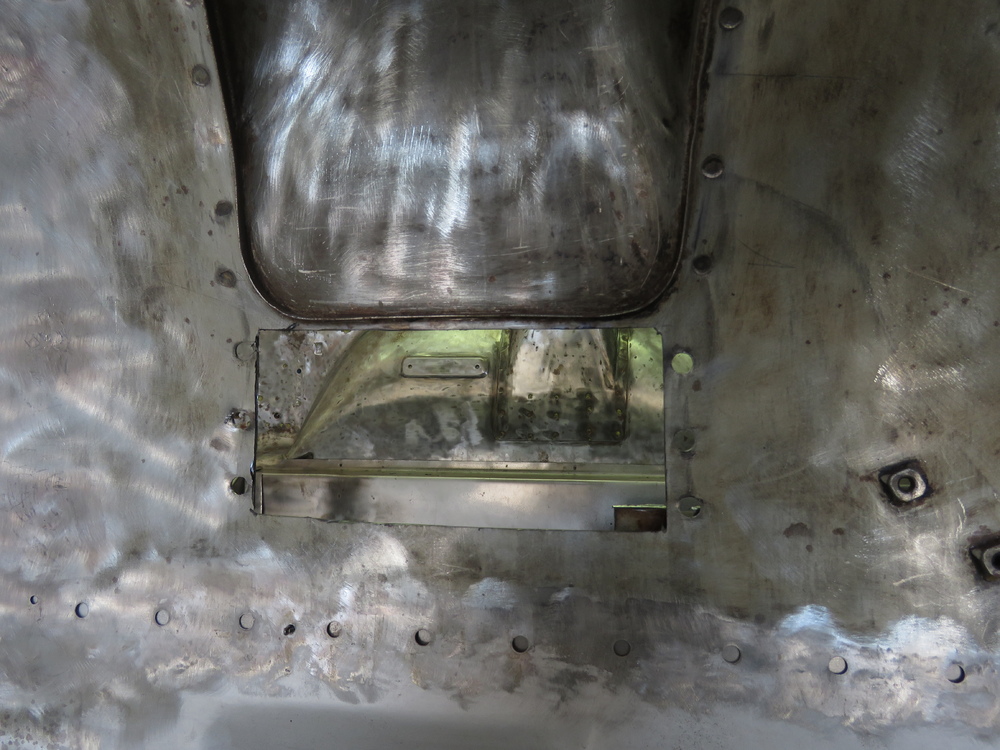
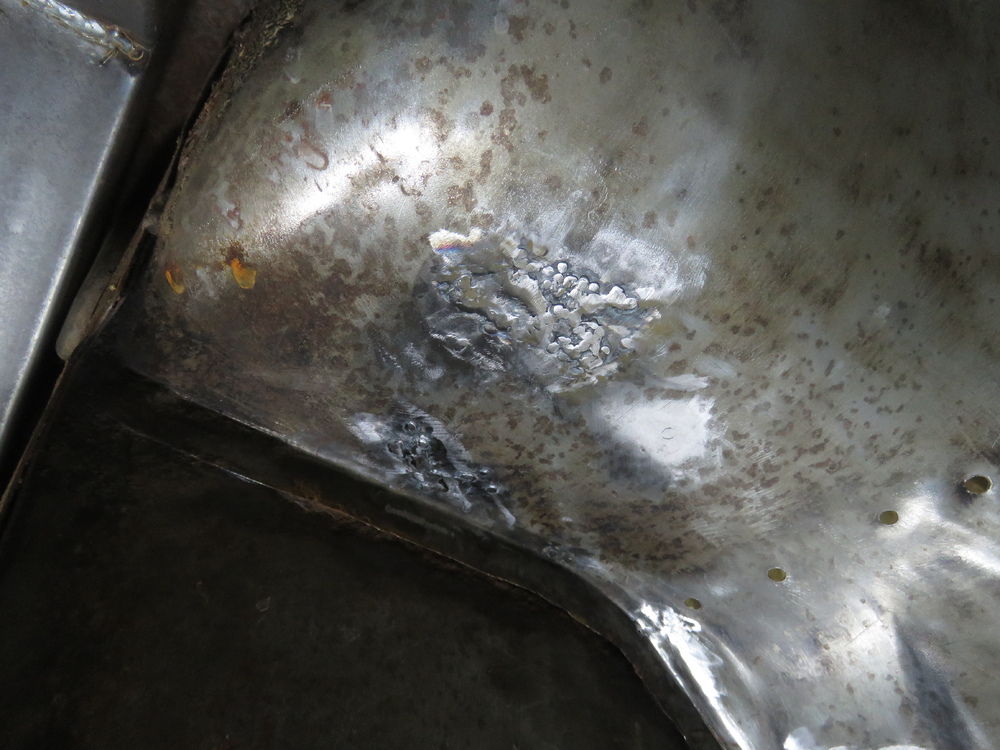
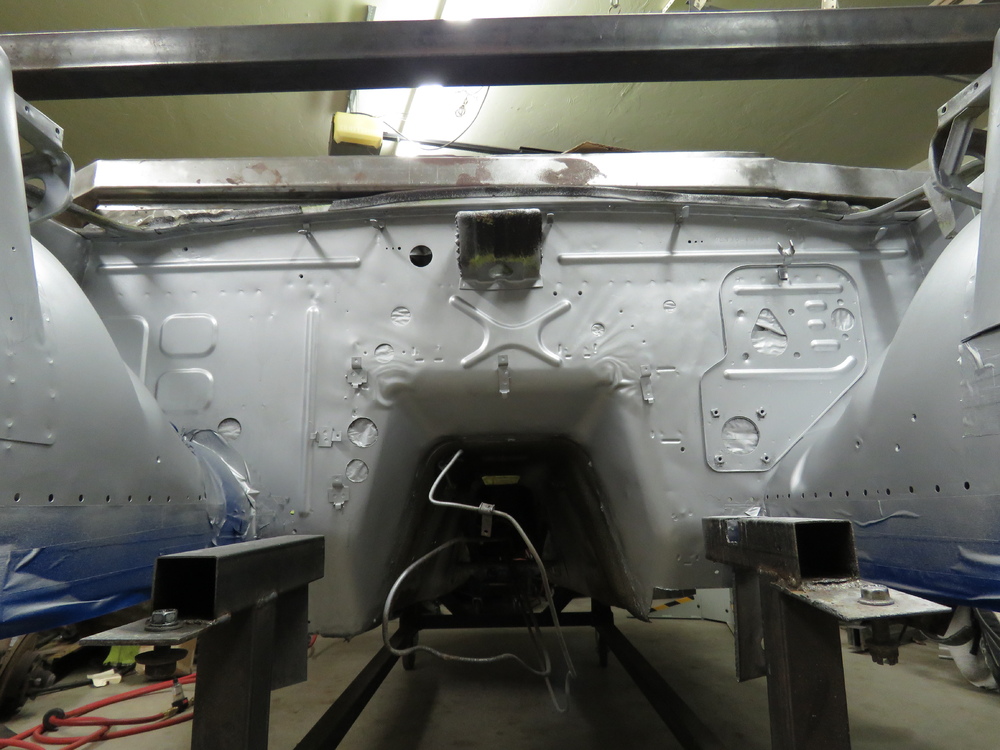
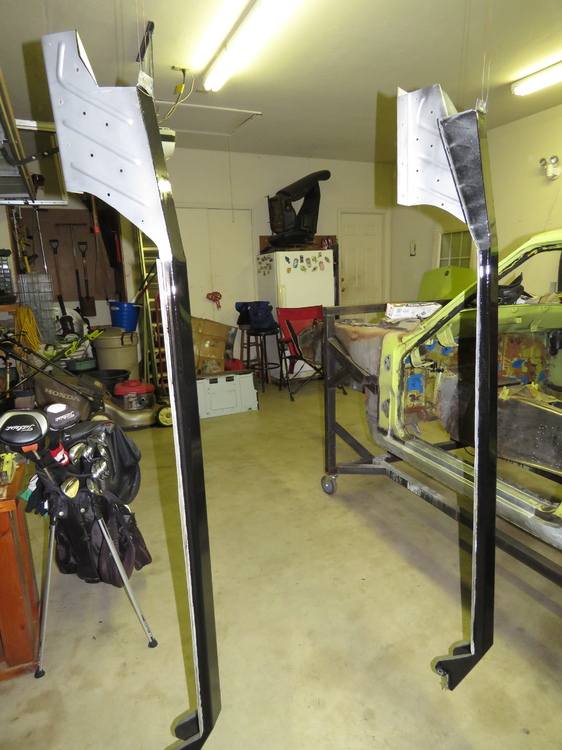
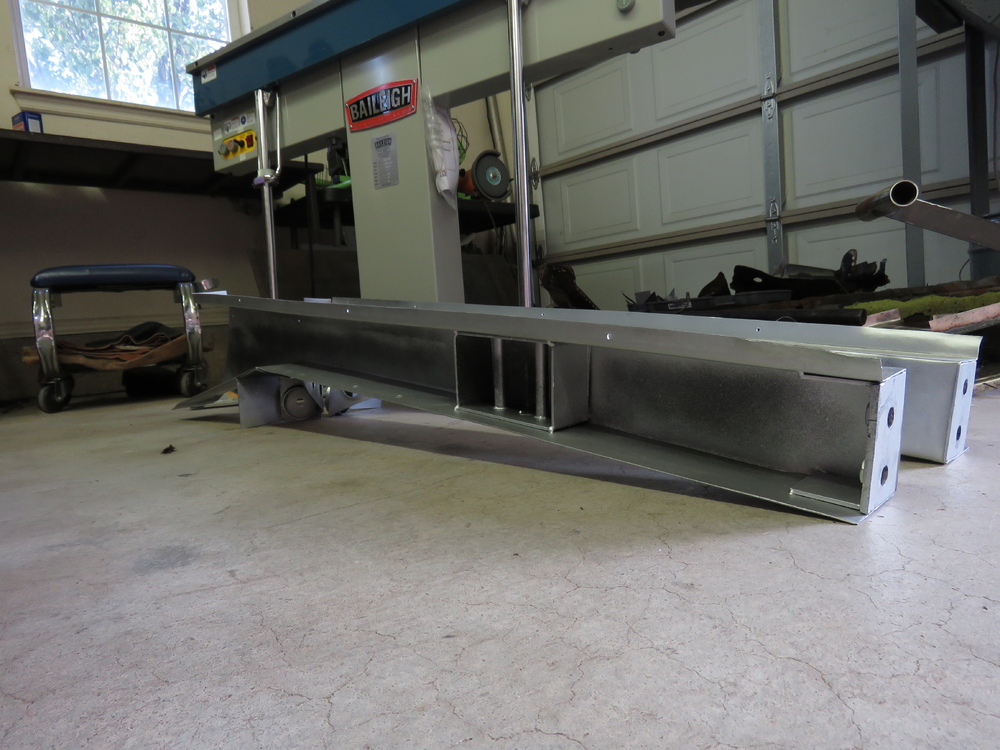
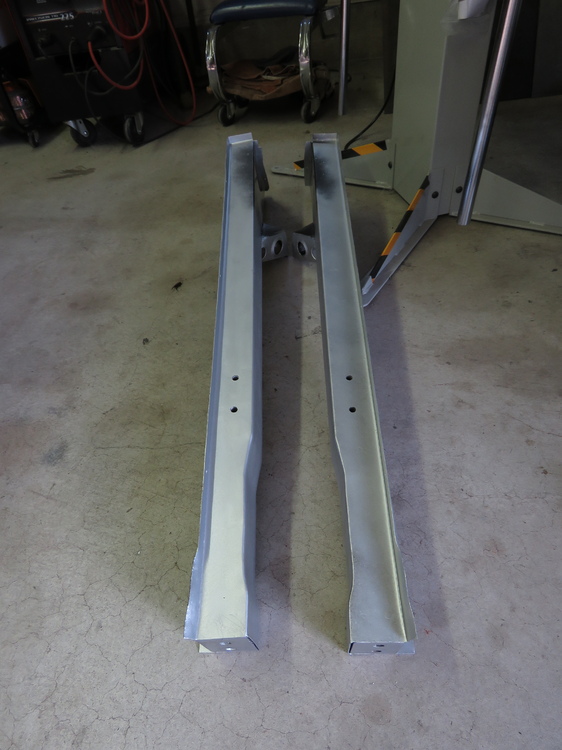
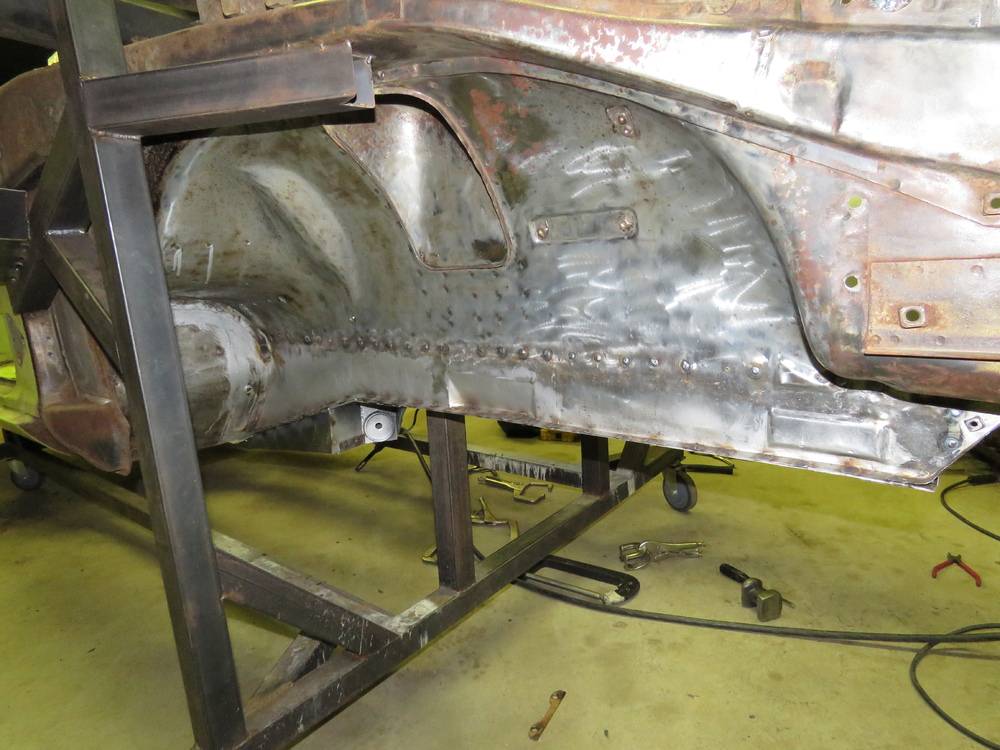
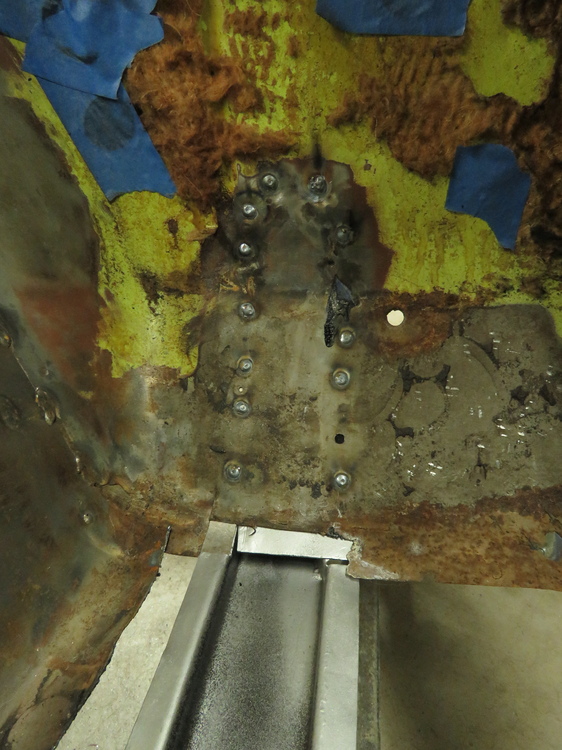
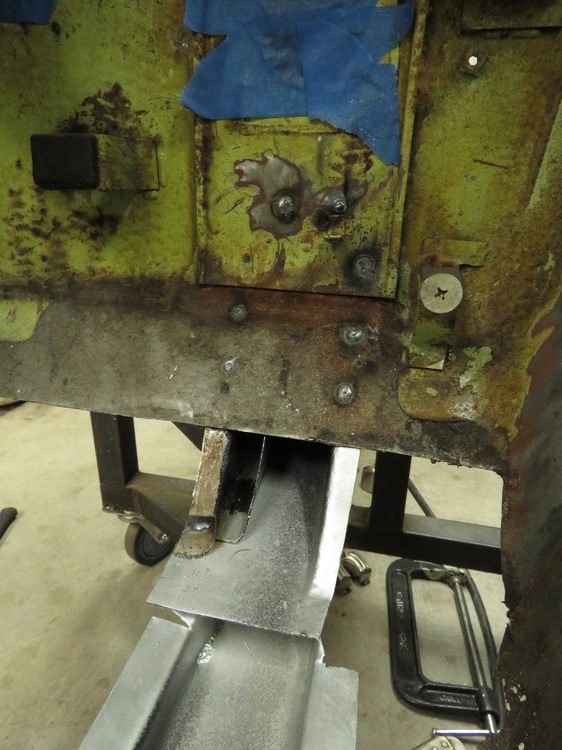
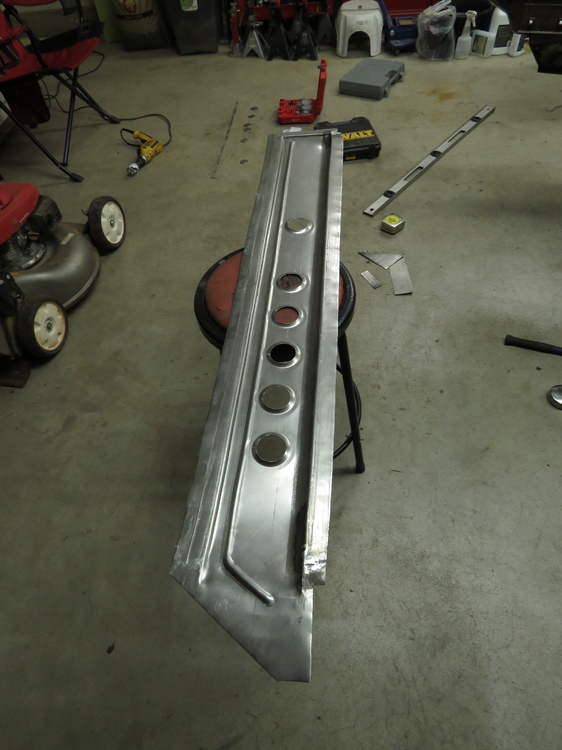
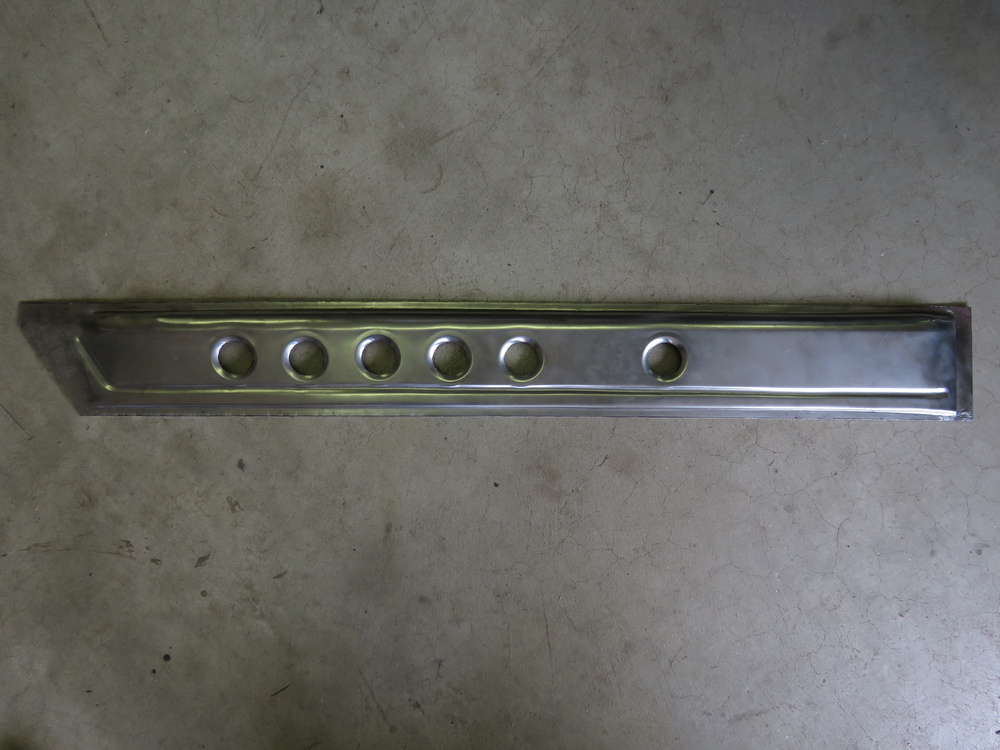
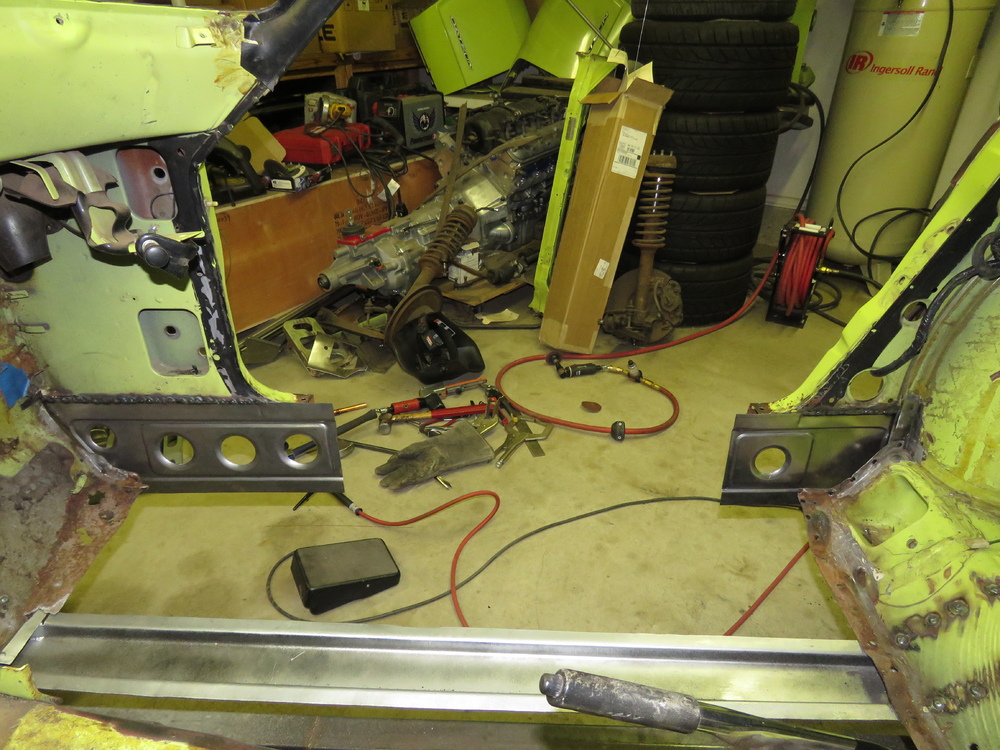
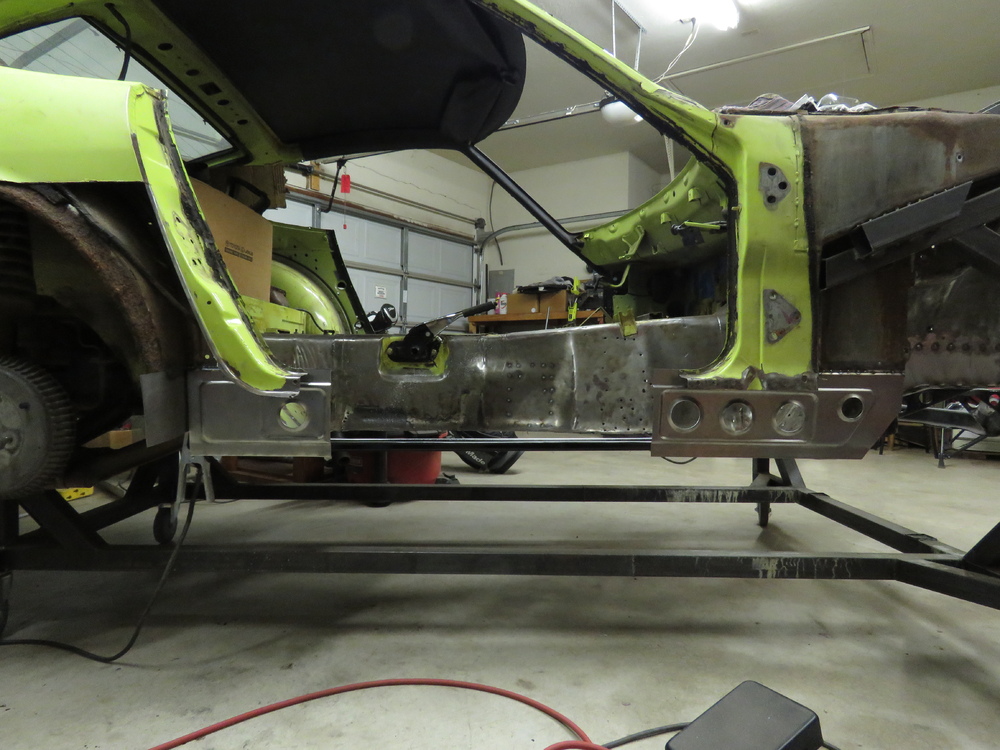
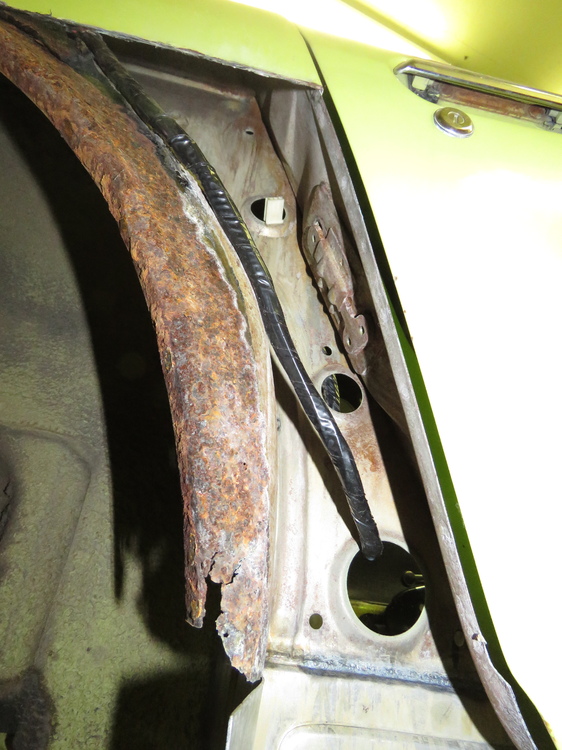
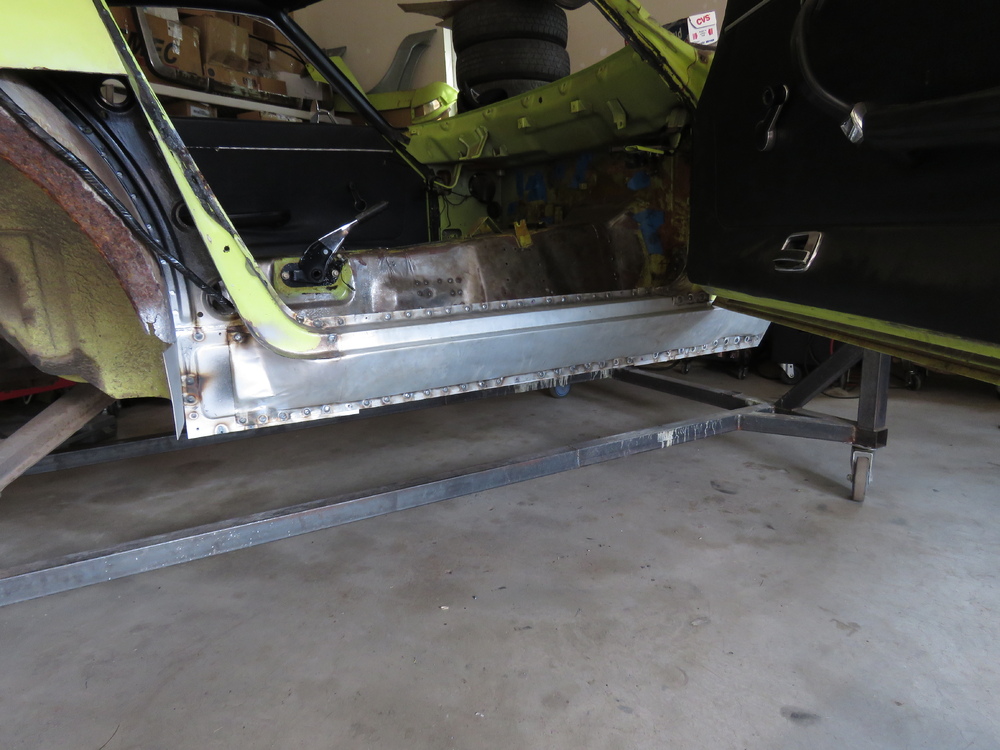
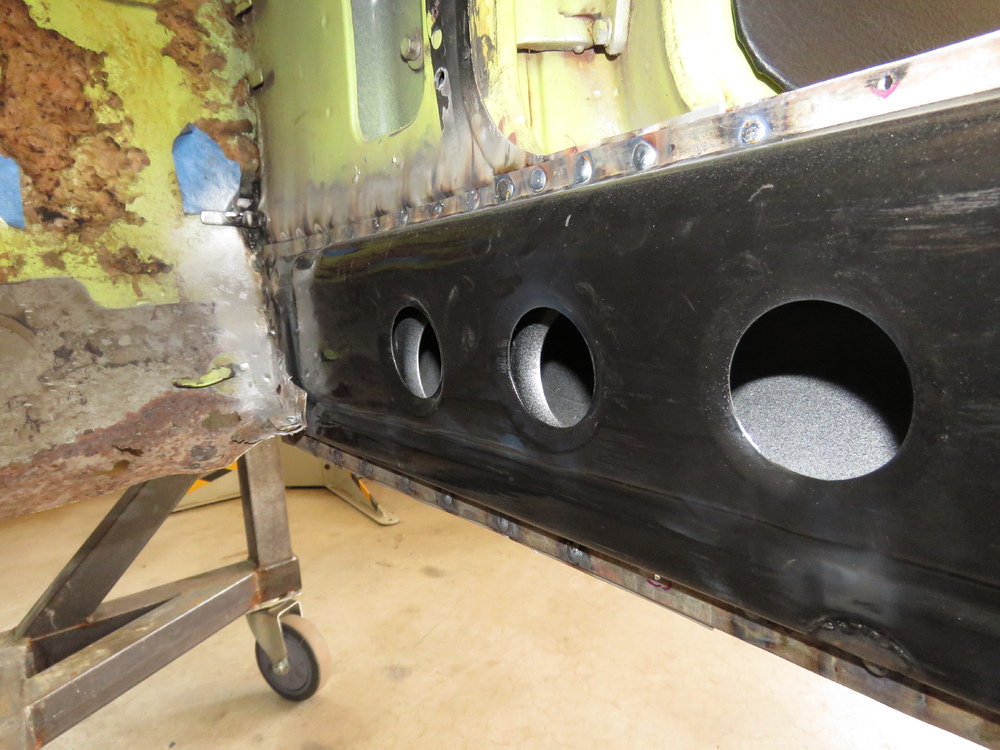
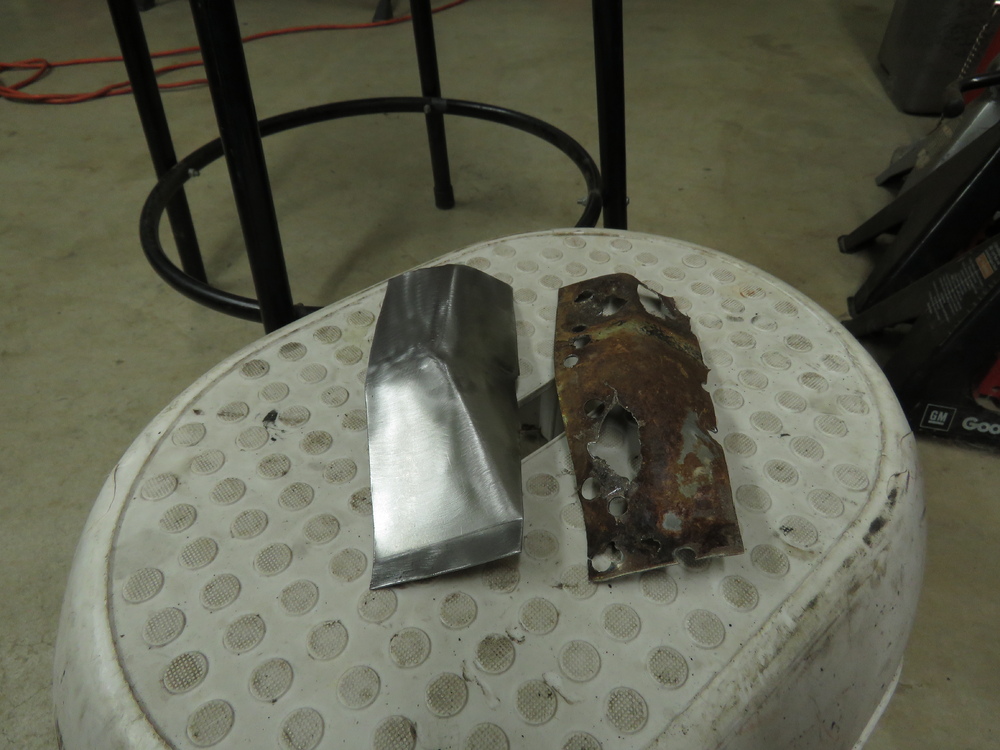
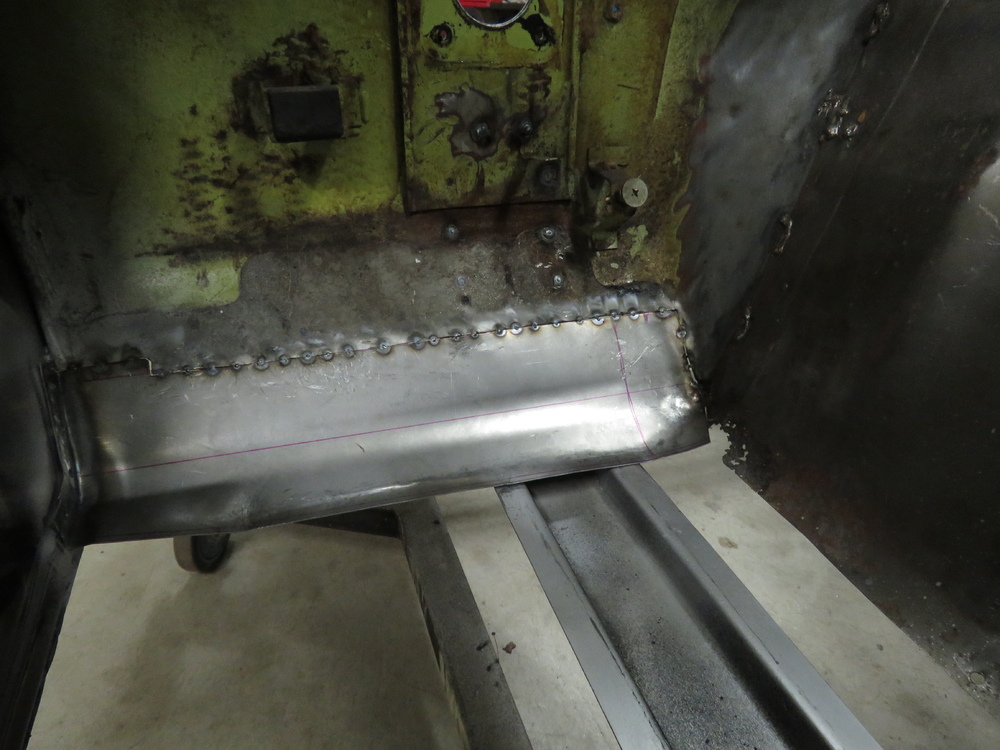
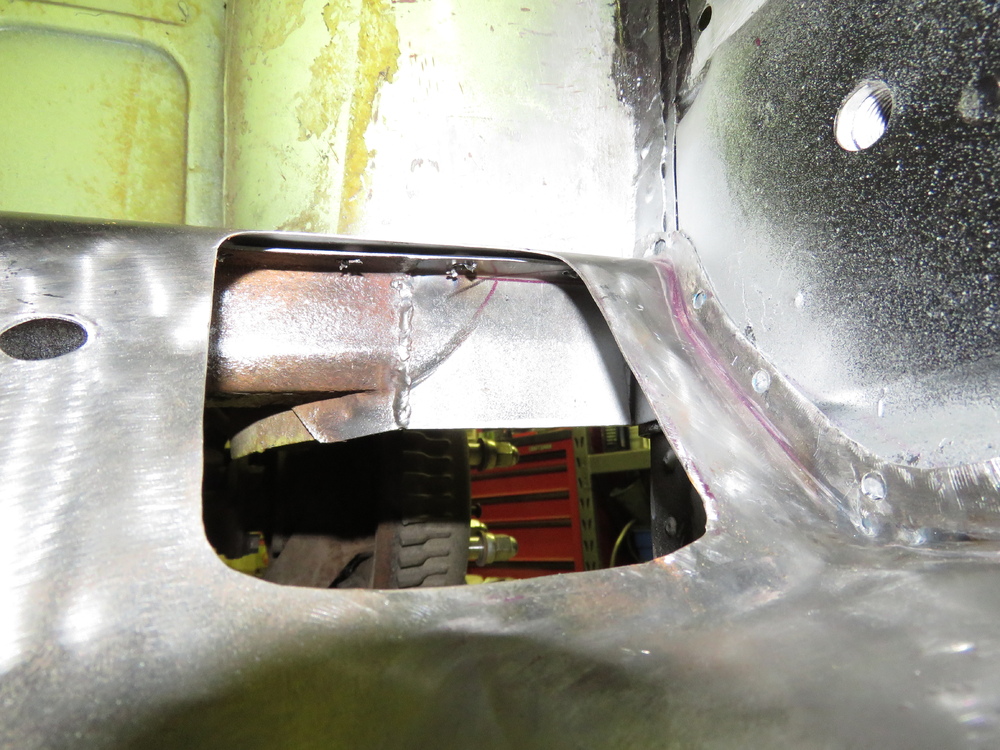
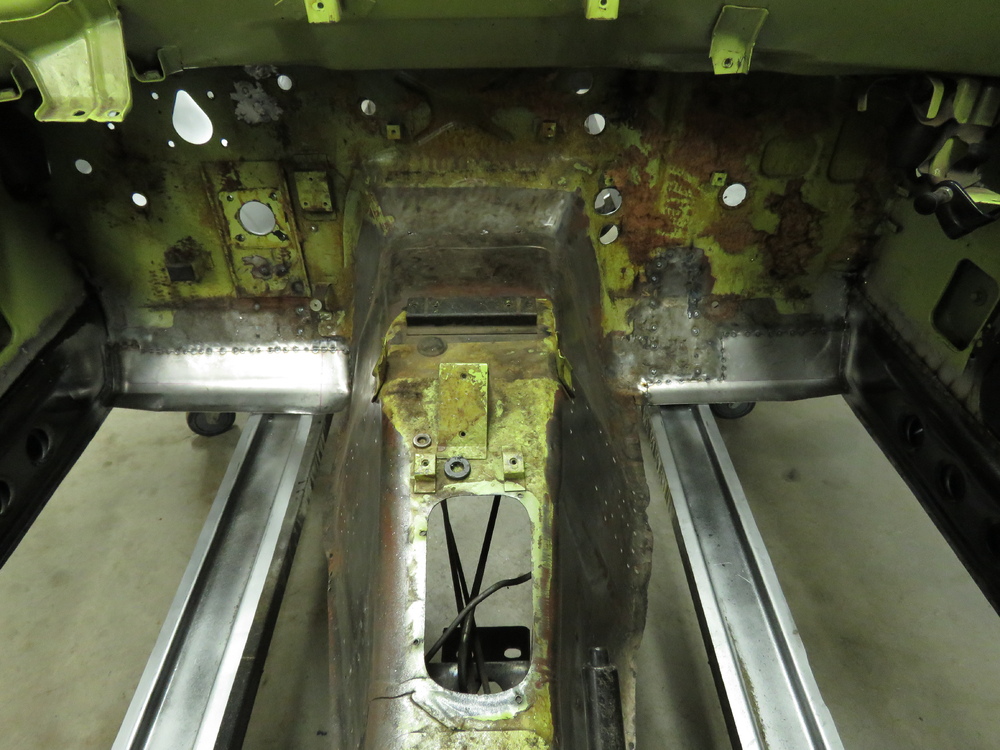
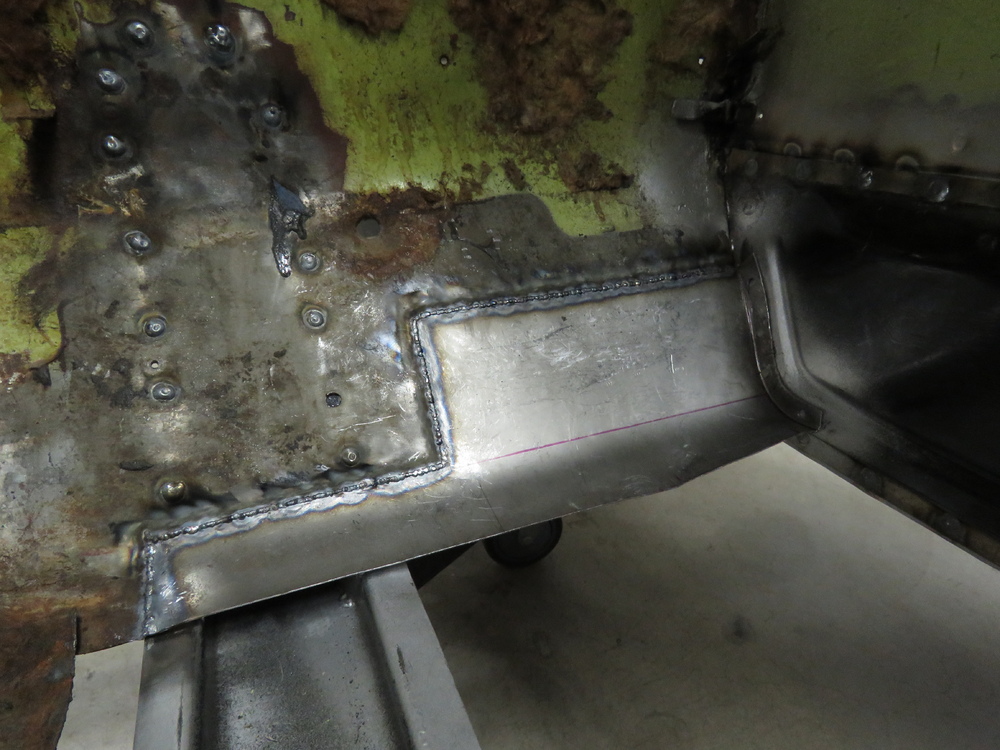
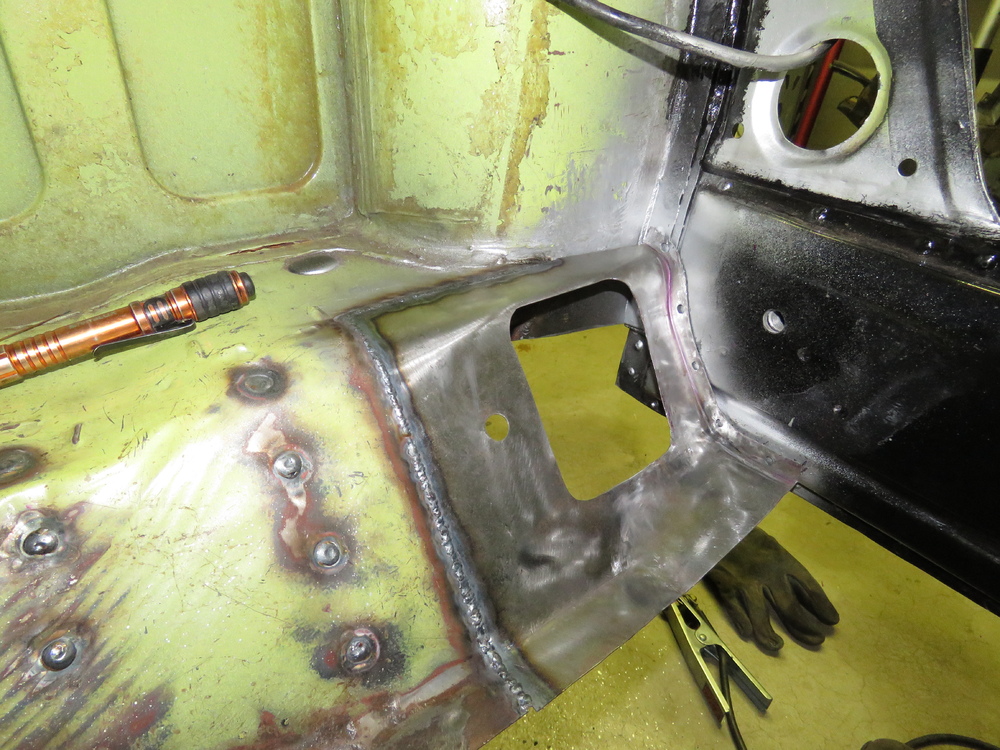
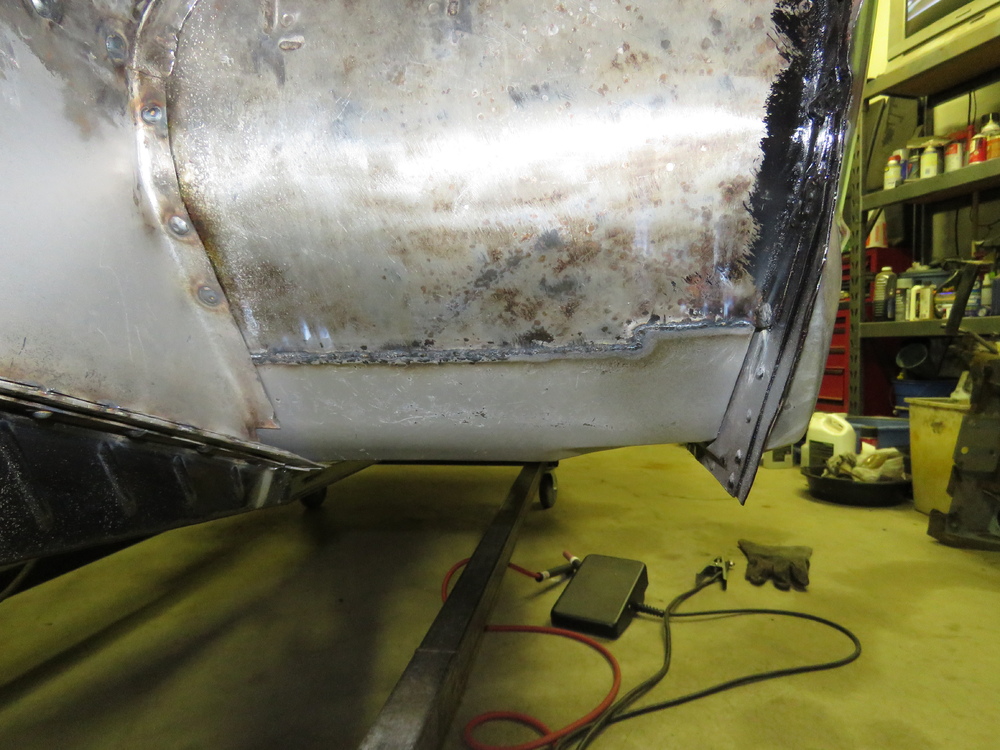
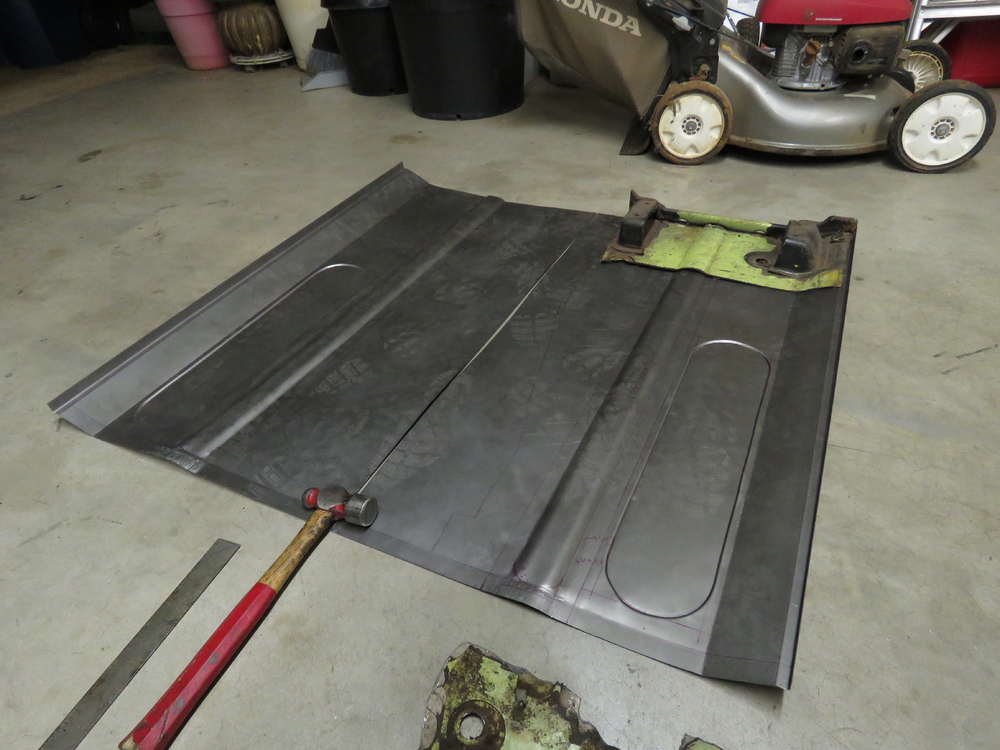
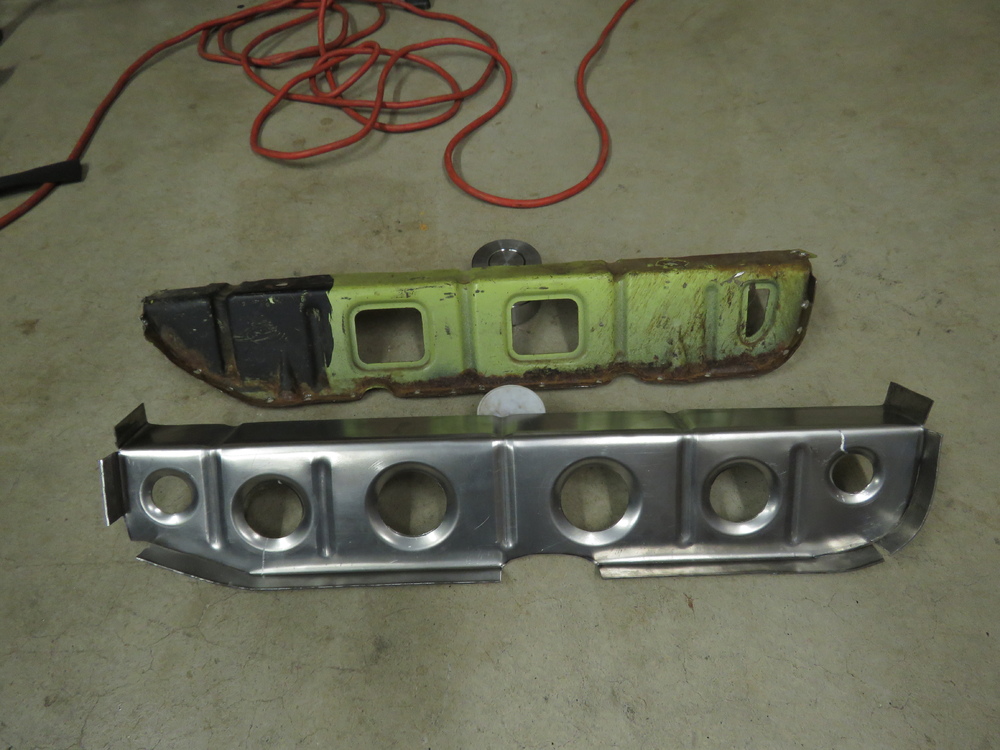
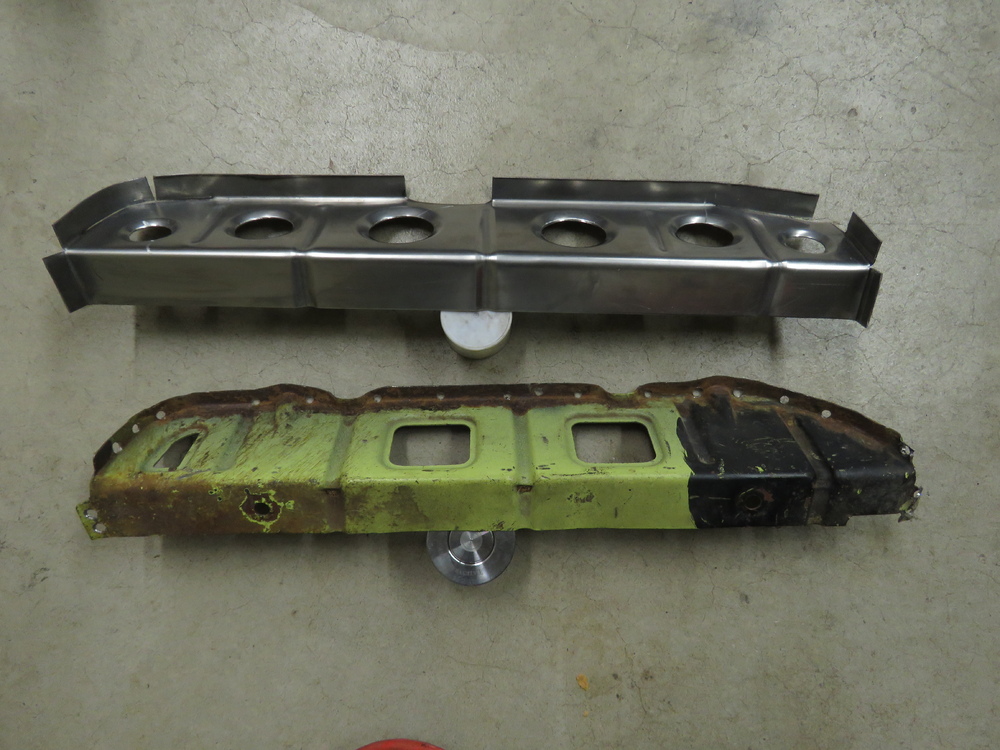
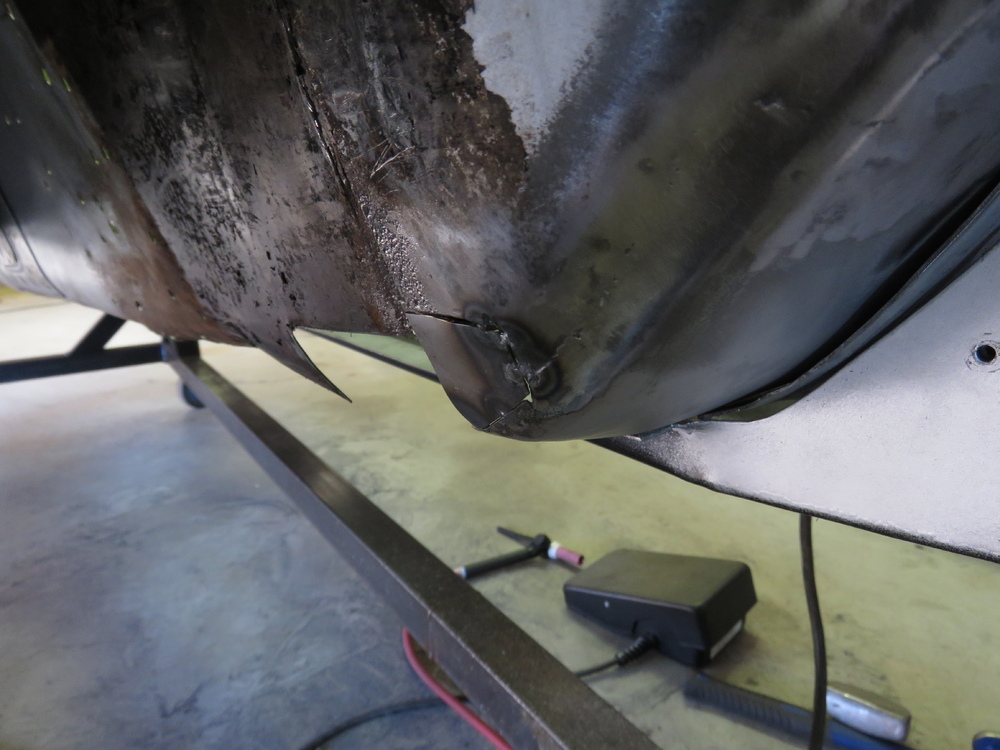
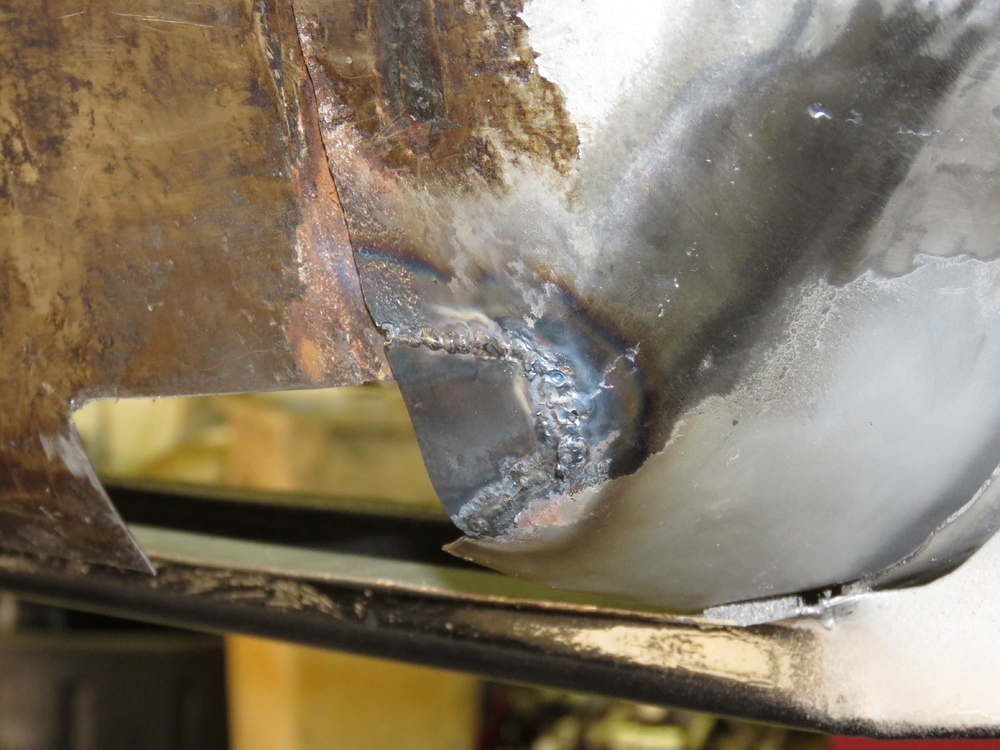
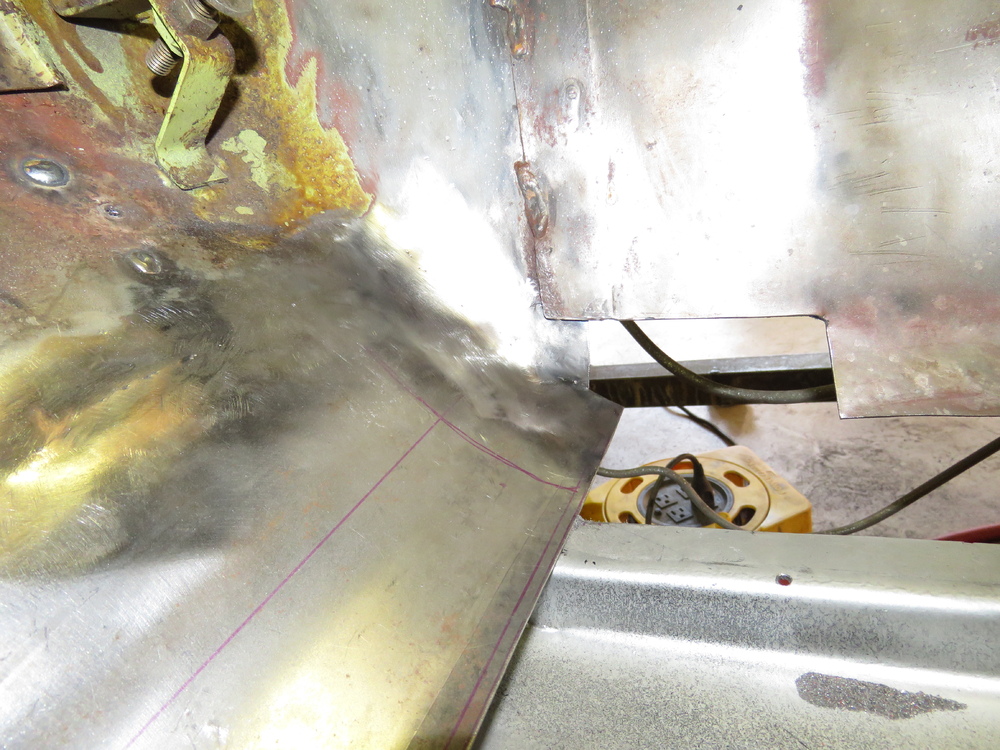
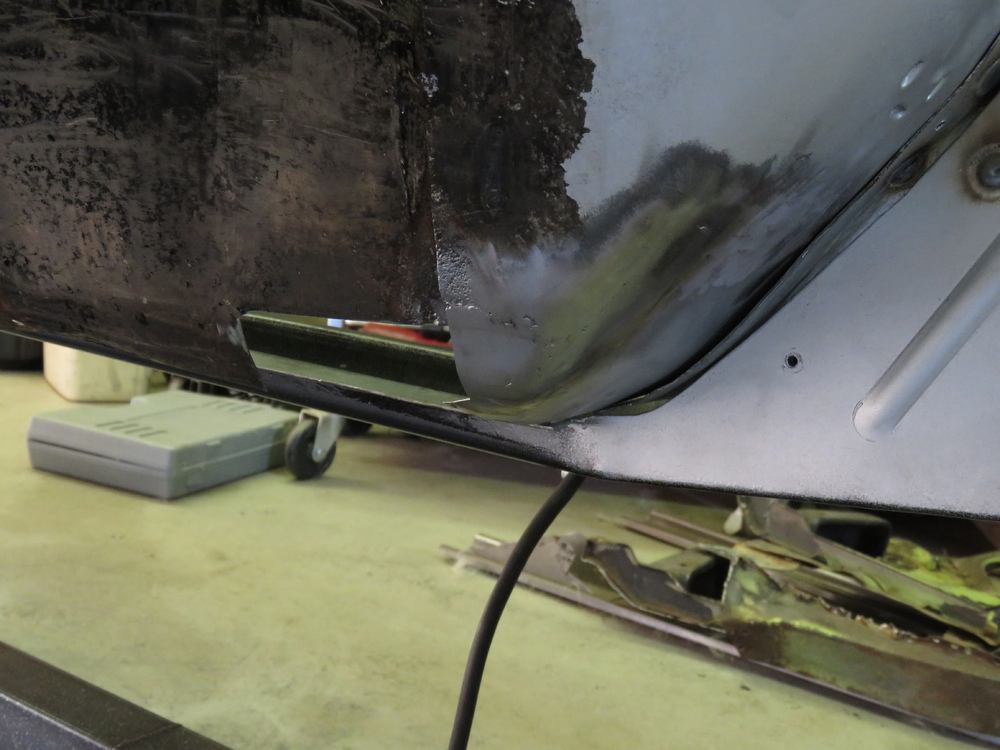
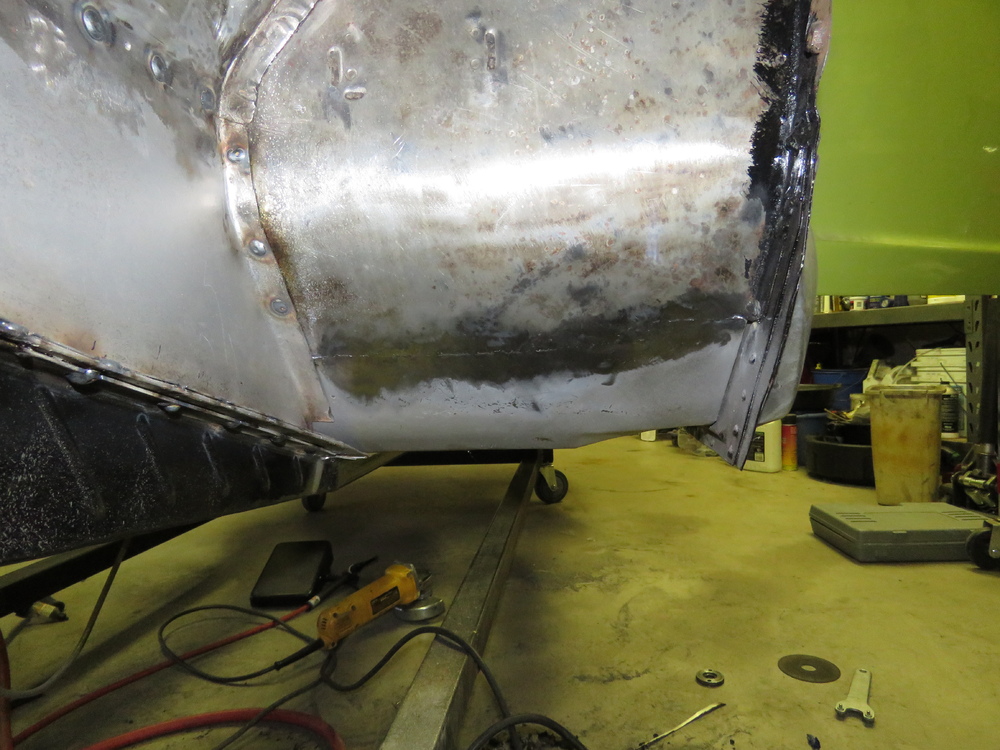
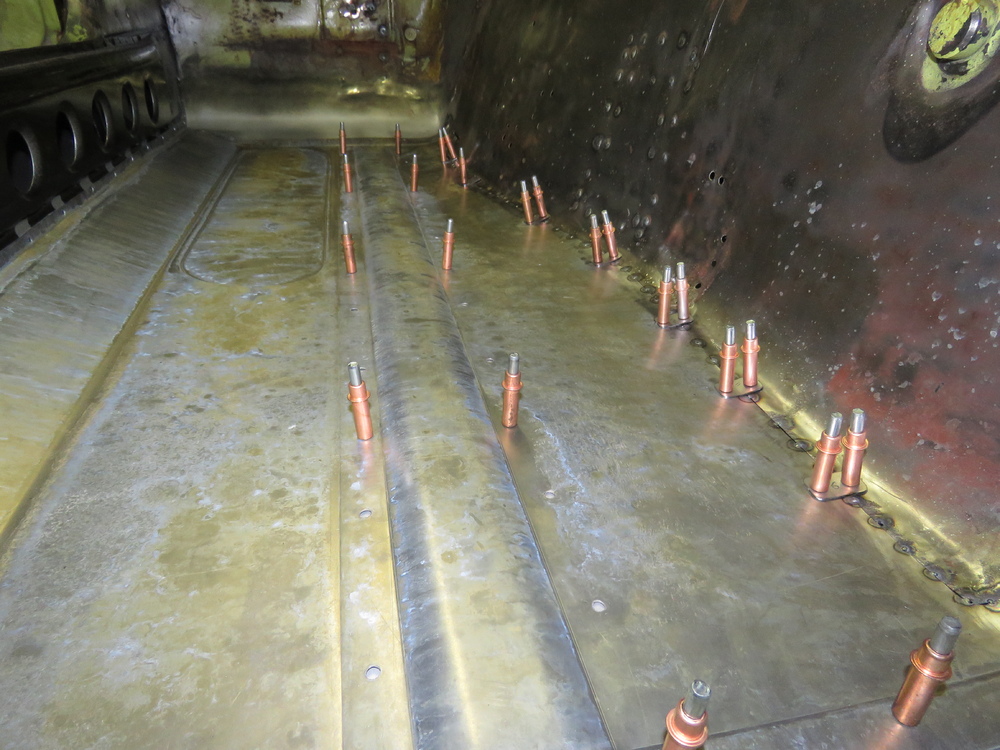
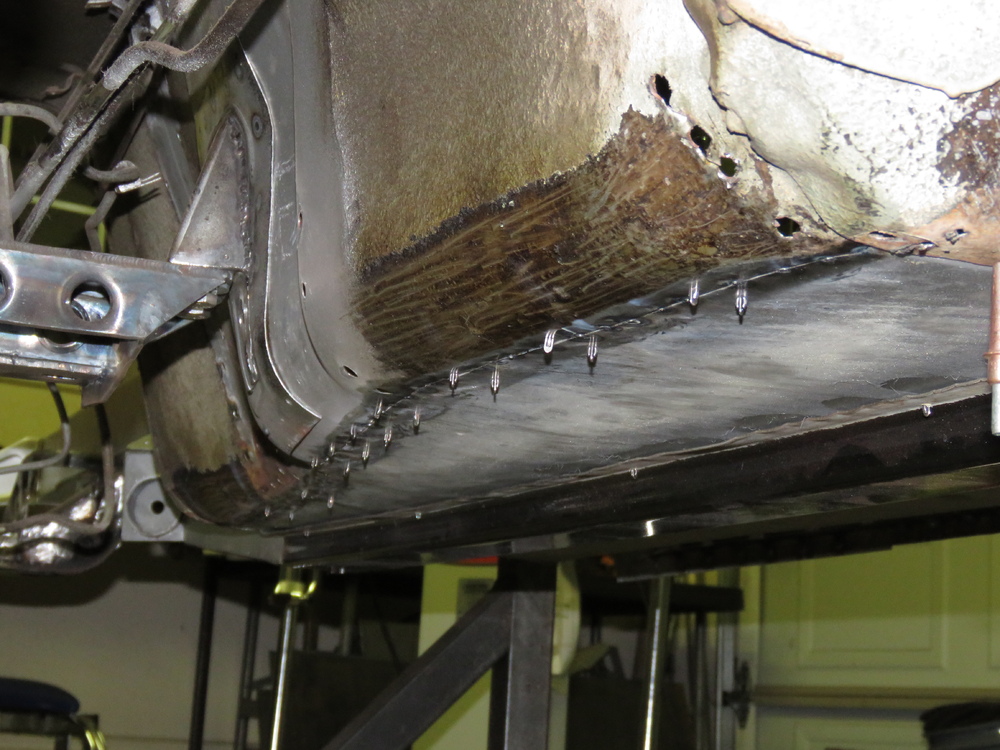
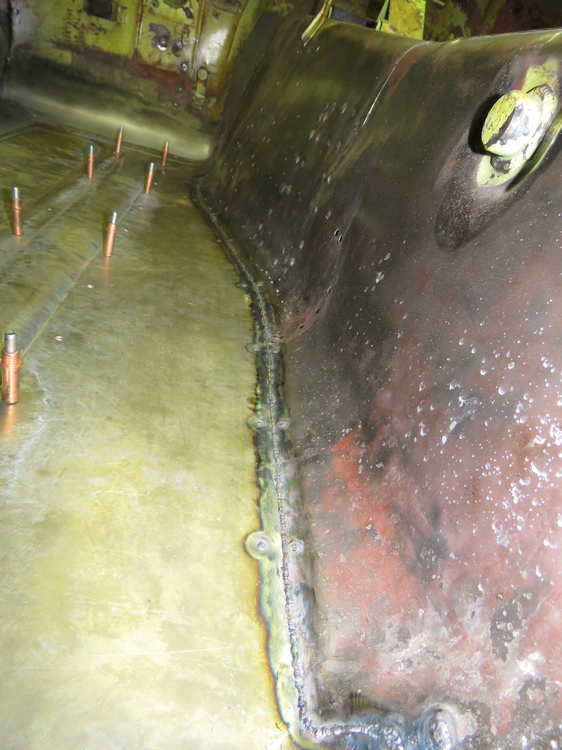
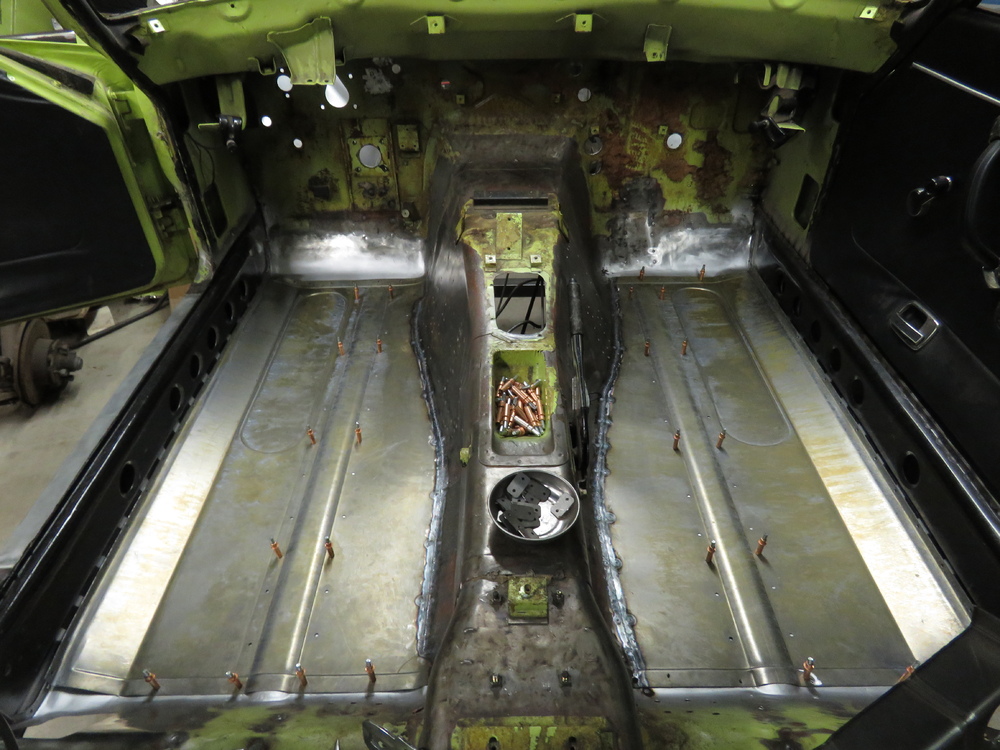
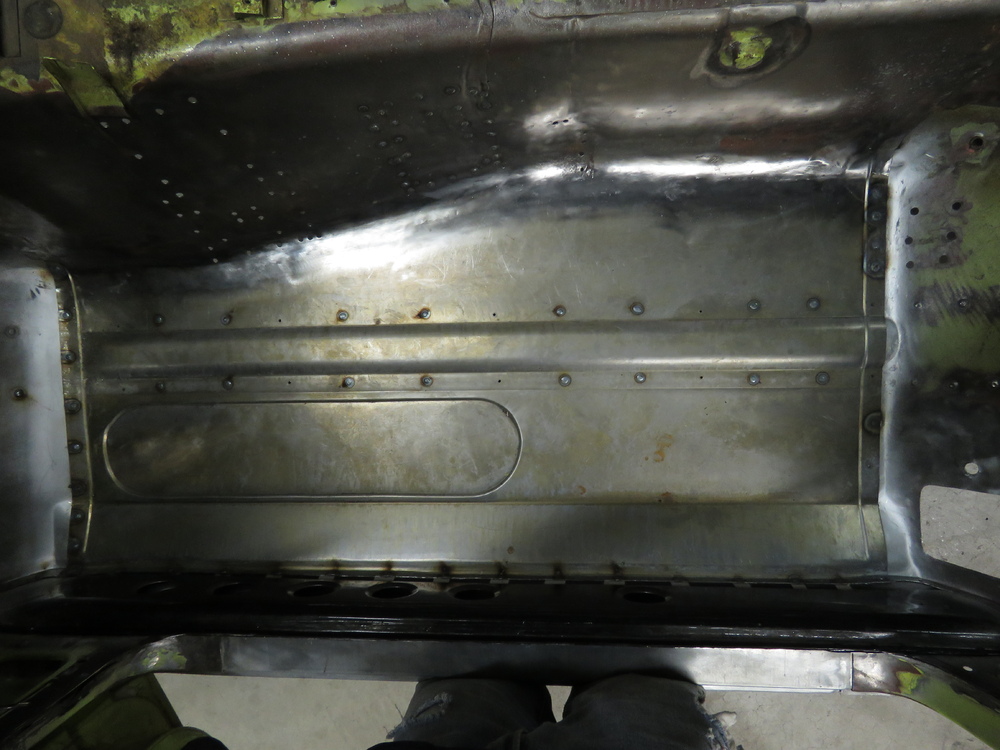
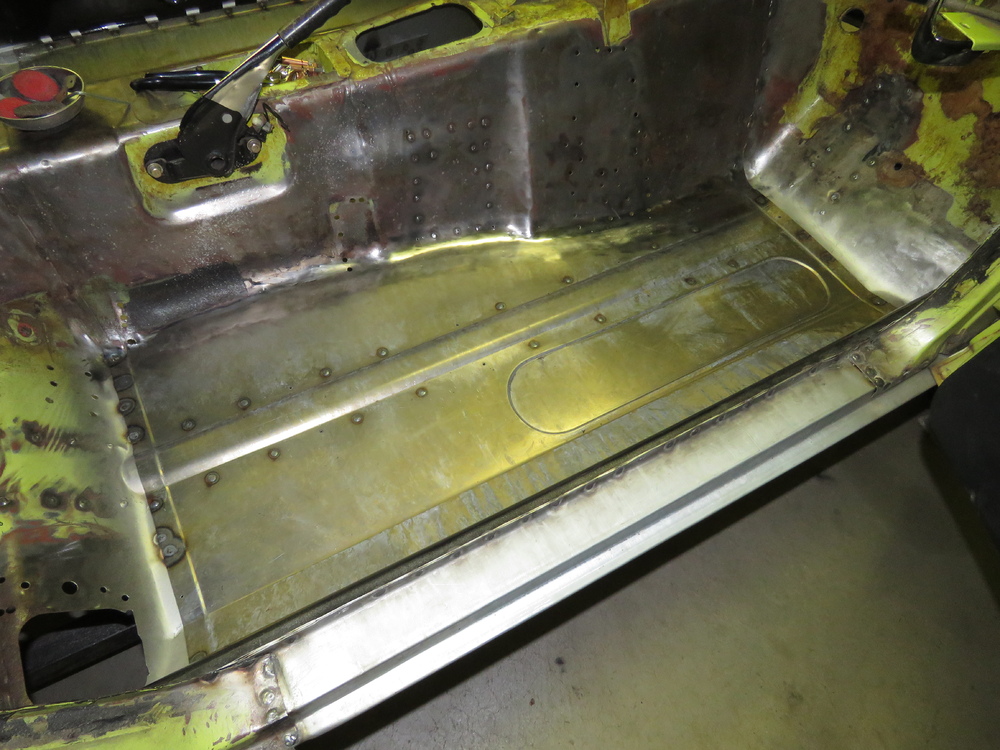
1 pointFigure I would contribute to this Forum with my experience on the I had no idea what I got my self into 240Z project. Maybe it will help others restoring their Z or thinking about it. Bought my 240Z back in 2010 or 2011, cant remember, from a student that went to the same college as me. I remembered seeing him drive the car around campus and was in ahhh every time. I usually saw him driving it same day of the week in one my classes seeing out the window during class session. Every time I wasnt able to focus on the class discussion. One day when I was browsing craigslist for Datsuns because I thought I was ready for one, I saw the same car. It was like a calling to me, SAVE ME!! Purchase price was $1,700, tried to talk him down, but his father was there during the transaction and wouldnt lower it. Well anyways, dont want to drag out this intro to long, I had no idea how bad condition the car really was. Well maybe not as bad as some of the projects I see around on the interweb, but still pretty bad in my opinion. I am doing an LS1 swap, because of that I will not show progress or pictures of that since this forum is a purest forum and dont want to start any conflicts with anyone, I think... I dont let me know if its alright and I will. What I will show for now is the rust repairs I've been working on the past year or so. Pictures: These are pictures of the craigslist ad. Pictures of when I got it, over the years. I fixed random stuff and the engine to keep it running. Interior was pretty good, few stuff thats bad here and there but over in good shape. The owners I bought it from clearly had no idea on how to work on cars, had to fix a lot, and I mean a lot of there work. Summer of 2015, Started tearing into it, repairing rust Started with the driver side rocker area. Got to start somewhere... I Will just post nothing but pictures from here, they kind of described what was going on. To much to talk about right now. Just ask me any questions, and I will try my best to answer. I will give a briefing though. I was going into this project thinking that only the common rusted areas will only need replacing and then I can move on to work on the engine, suspension, wiring, etc. to get the car going. I was dead wrong. All I had been doing mostly is making replacement panels for the rusted areas. I originally bought some of the replacement panels/rails you can buy online, but I was disgusted on the poor fitment (I will not name the companies, but will upon request). I cant believe everyone in the Z world has been putting up with crappy replacement panels offered by these companies... Because I did not like the fitment, and I didnt know anyone locally that does this kind of work, I went on my journey to learn how to shape metal, I already knew how to weld, but shaping metal is a whole different domain in the metal world. I am actually glad because I have learned so much, and it is actually fun to metal shape. The panels I made arent perfect, but I will say they fit better than the said panels you can buy online. Also I came to the mind set of this being a learning curve project for gaining experience metal shaping. Enjoy the pictures!! Next set of images will be on next post... Work in progress with getting images up.


 1 point
 -
1 pointAmen. Ditto... The really bad thing is I think I have sweat shirts older than Brent...1 point
-
1 pointI'm not sure plastigage would work considering it tends to stick to whatever crushes it but it's an interesting thought. I could try using something like lead solder which will keep its shape after deformation and hopefully not remain in the combustion chamber. My strategy would be to set a dial indicator to the block and zero it to a plate mounted to the head. Without messing with the indicator, pull the head off, remove the gasket, and reinstall the head flat to the block. The indicator will say what the compressed gasket thickness is. Knowing that deck height is 0.021", piston-to-head clearance can be accurately calculated. Of course, this involves pulling the head...1 point
-
1 pointI have to pick through my photo's carefully before I post them now so I don't look like a rank amateur compared to Brent but that is a small price to pay to be able to see such great work.1 point
-
Many ways of saying the same thing. Too much fuel in the bowl, getting the static level above the bridge height, causes raw fuel to be siphoned into the carb venturi. How the bowl gets too full can only be from pressure that forces the needle valve open. The argument that evap empties the bowl some, opening the needle valve, which allows fuel in to over fill is silly. The float would rise and stop it from exceeding normal height, unless, again, the inlet pressure was above the needle seat hold pressure. Simple test to put the old external fuel level indicator on the drain plug, get it hot, turn it off, and watch the level in the bowl. Also a pressure gauge on the line after/pump pre-carb would show you if it does get "high" enough to force the needle seat. If none of that is going on, then it's something BLOCKING flow into the bowls preventing the car from starting (ie too lean, way way too lean, like none!). This could only happen if evolved (boiled gaseous gasoline) in the line sits in a high spot blocking liquid fuel flow. Again, float level indicator would show an EMPTY bowl not refilling during cranking during attempted restart. Line pressure gauge would read very low or no pressure. Finding the cause of your problem is a matter of careful and methodical testing.1 point
-
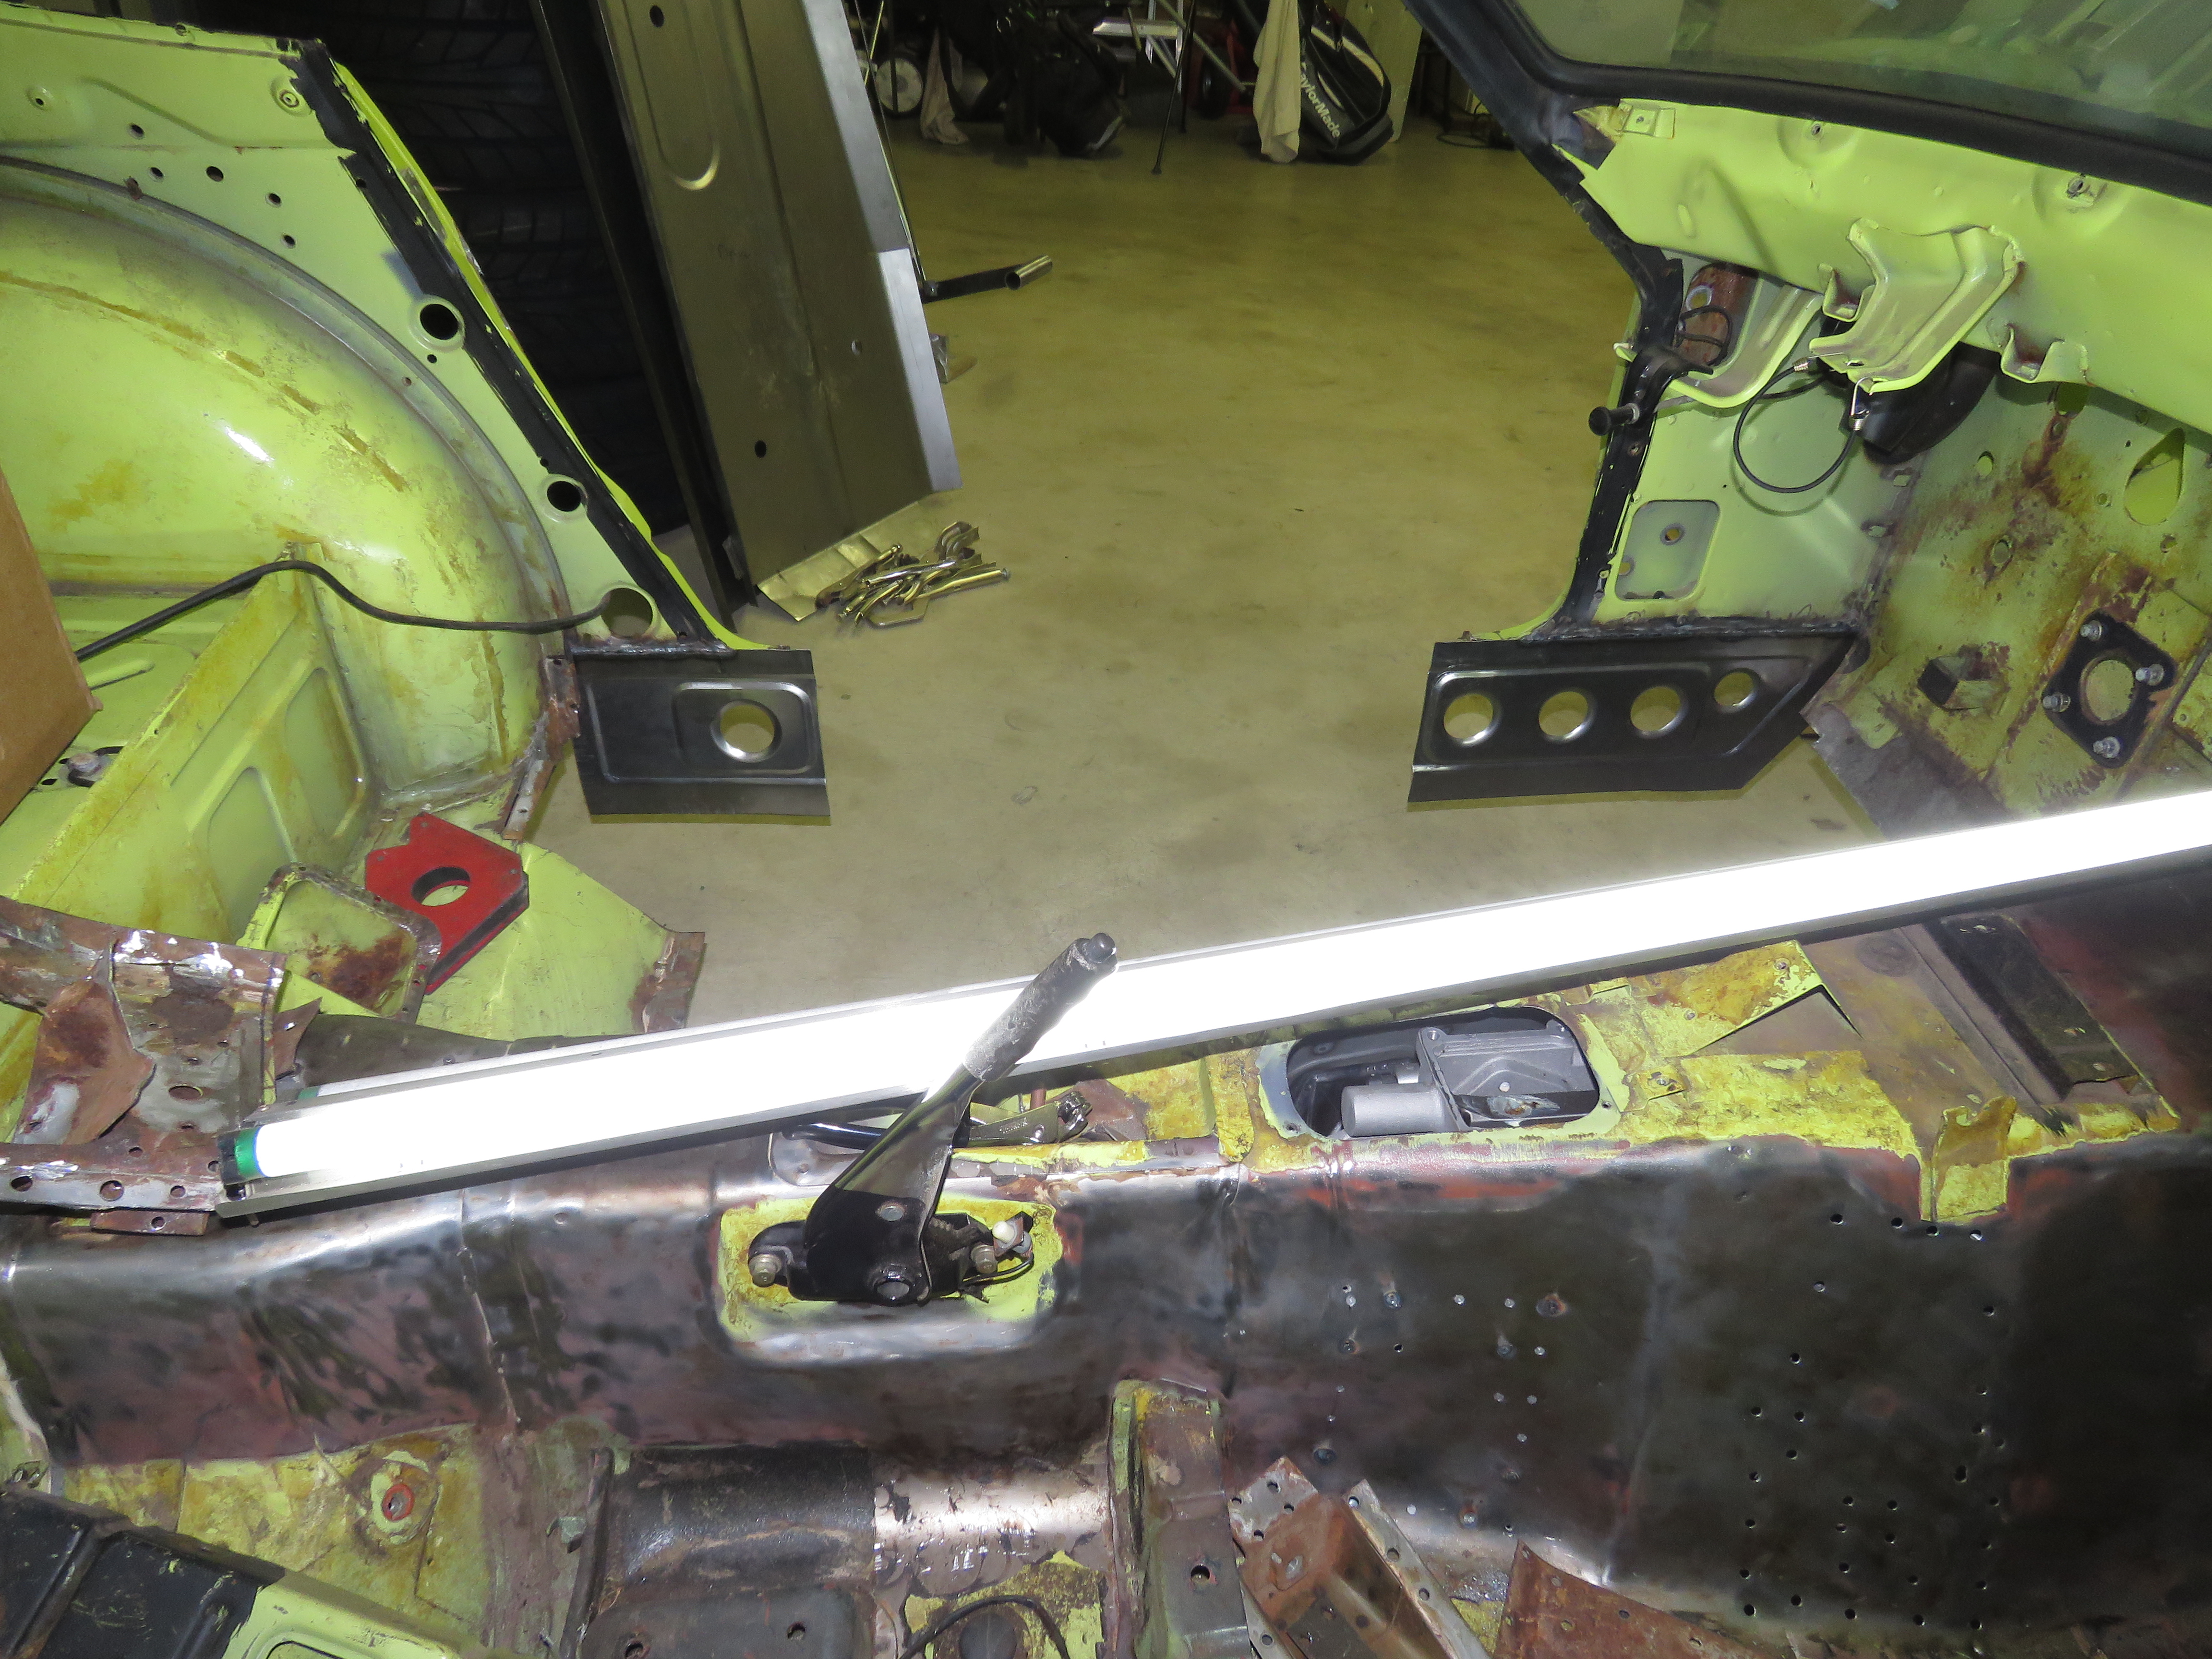
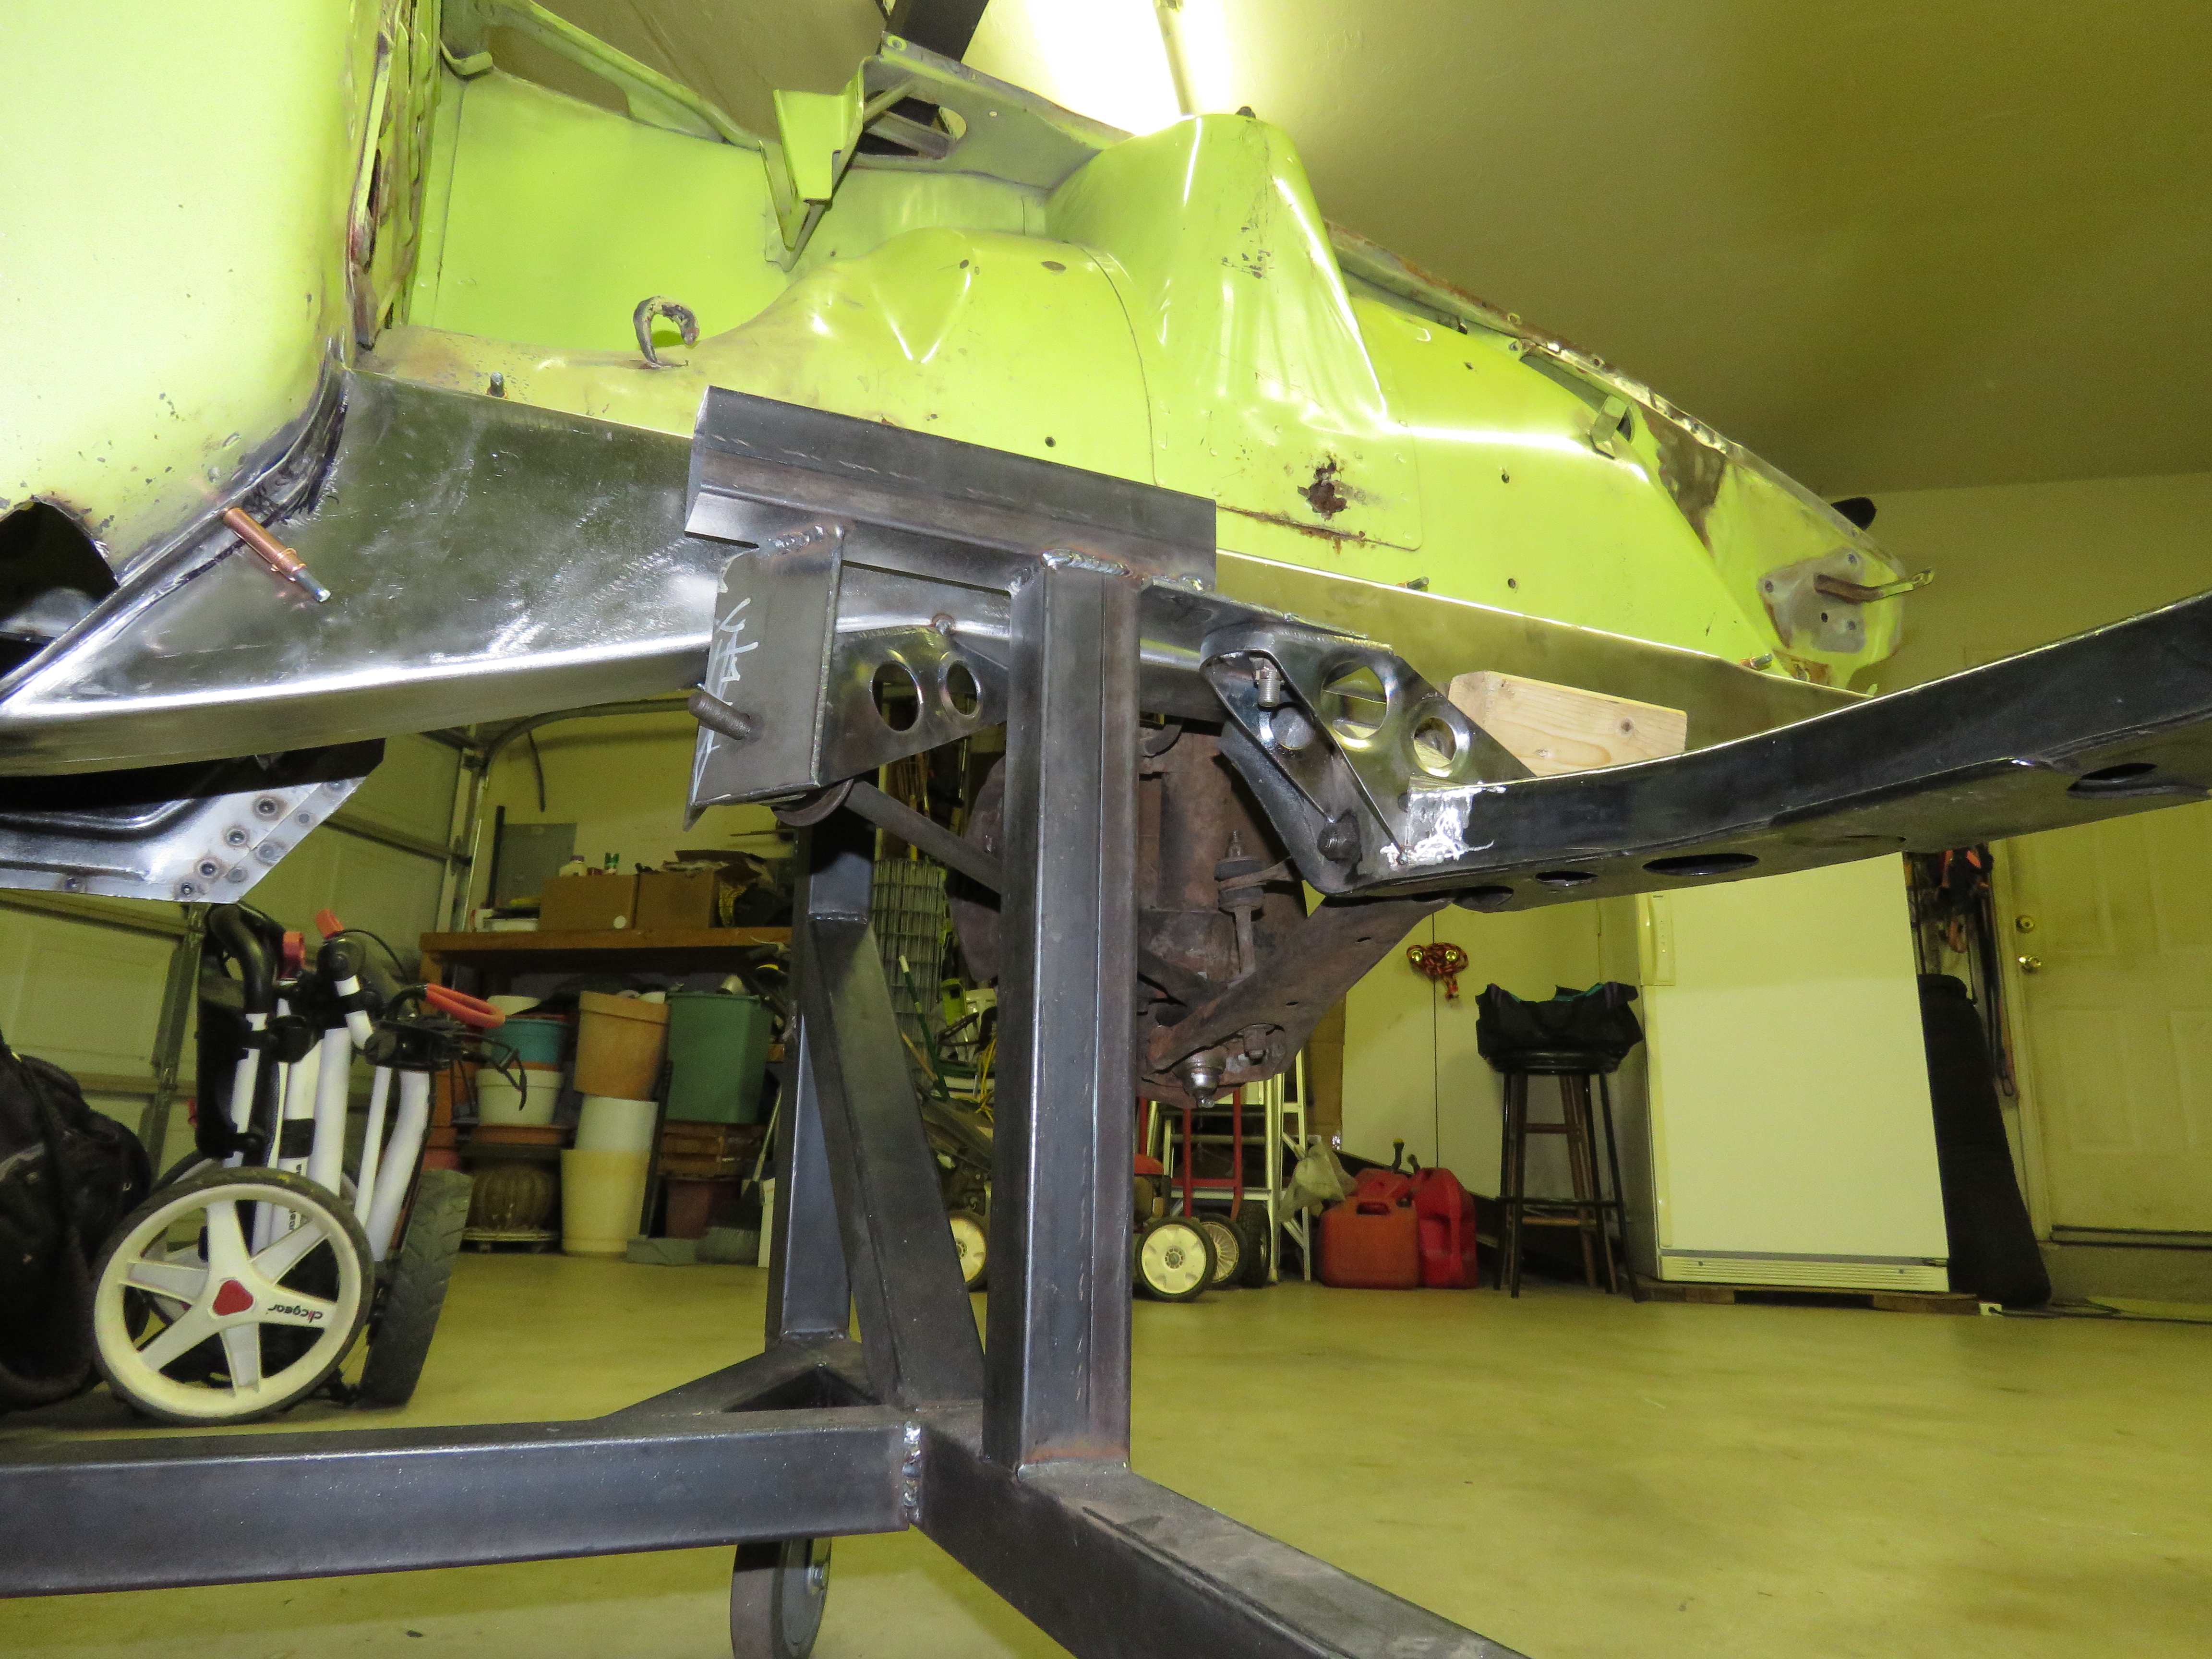
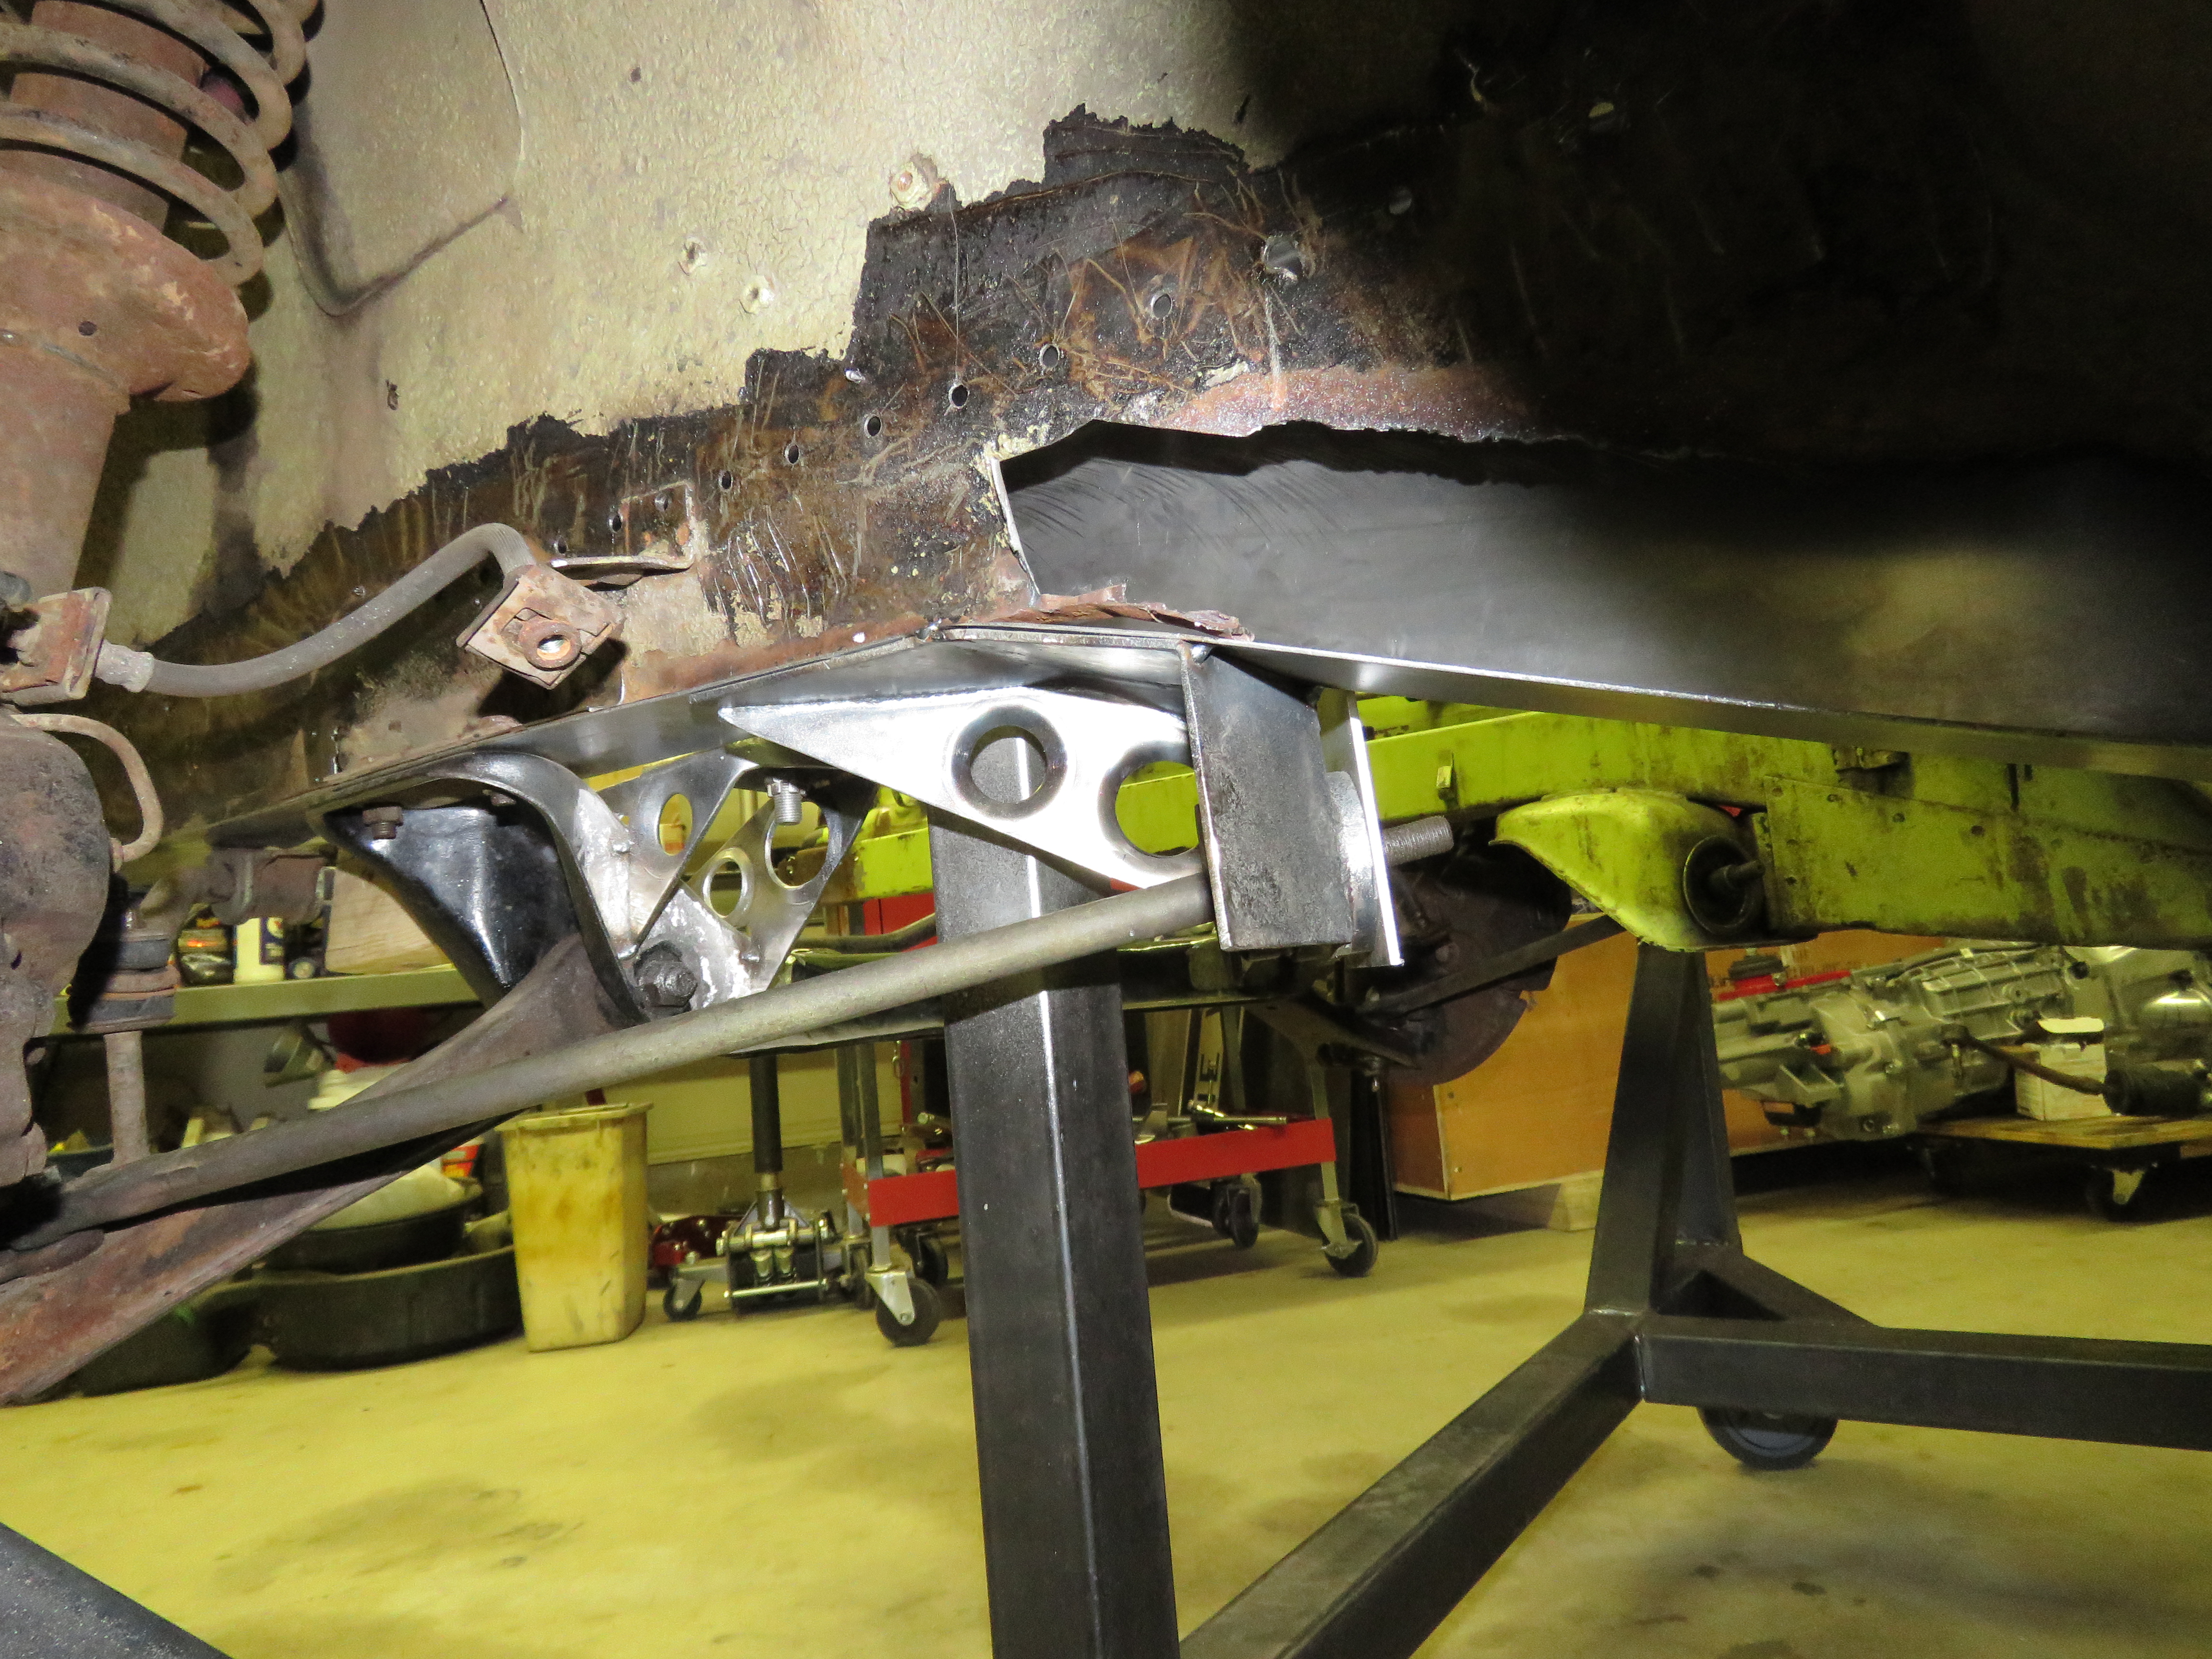
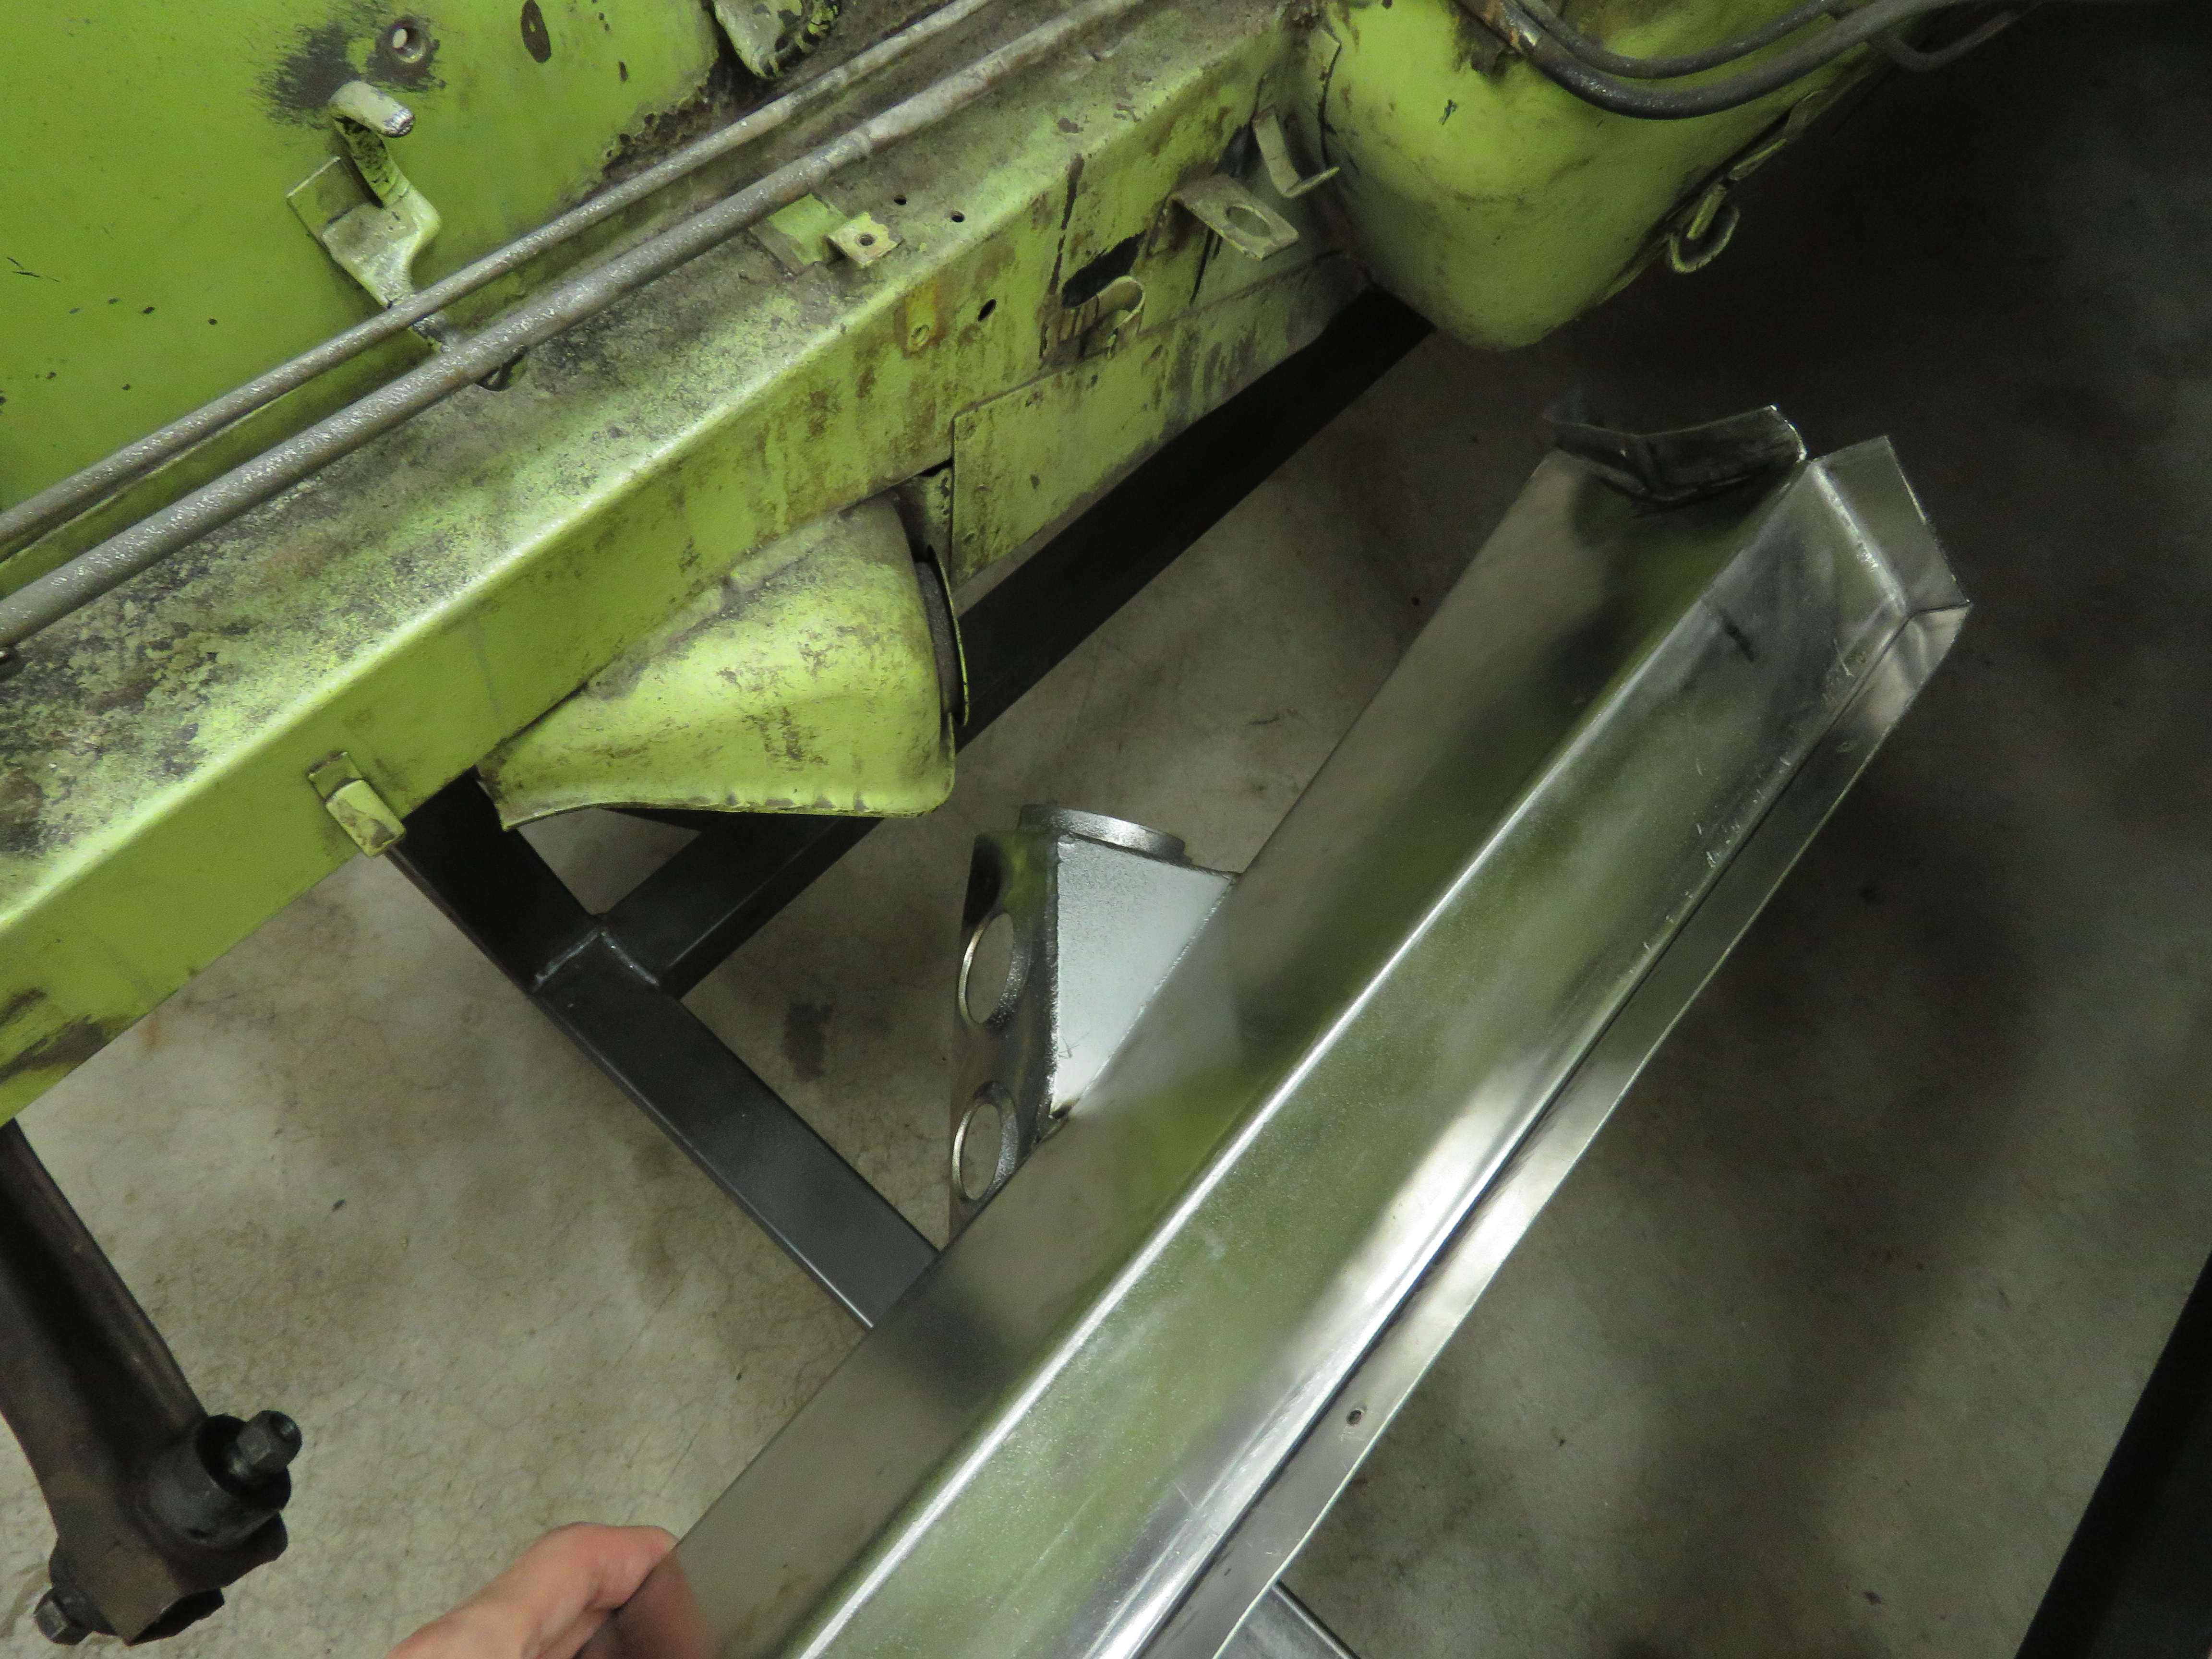
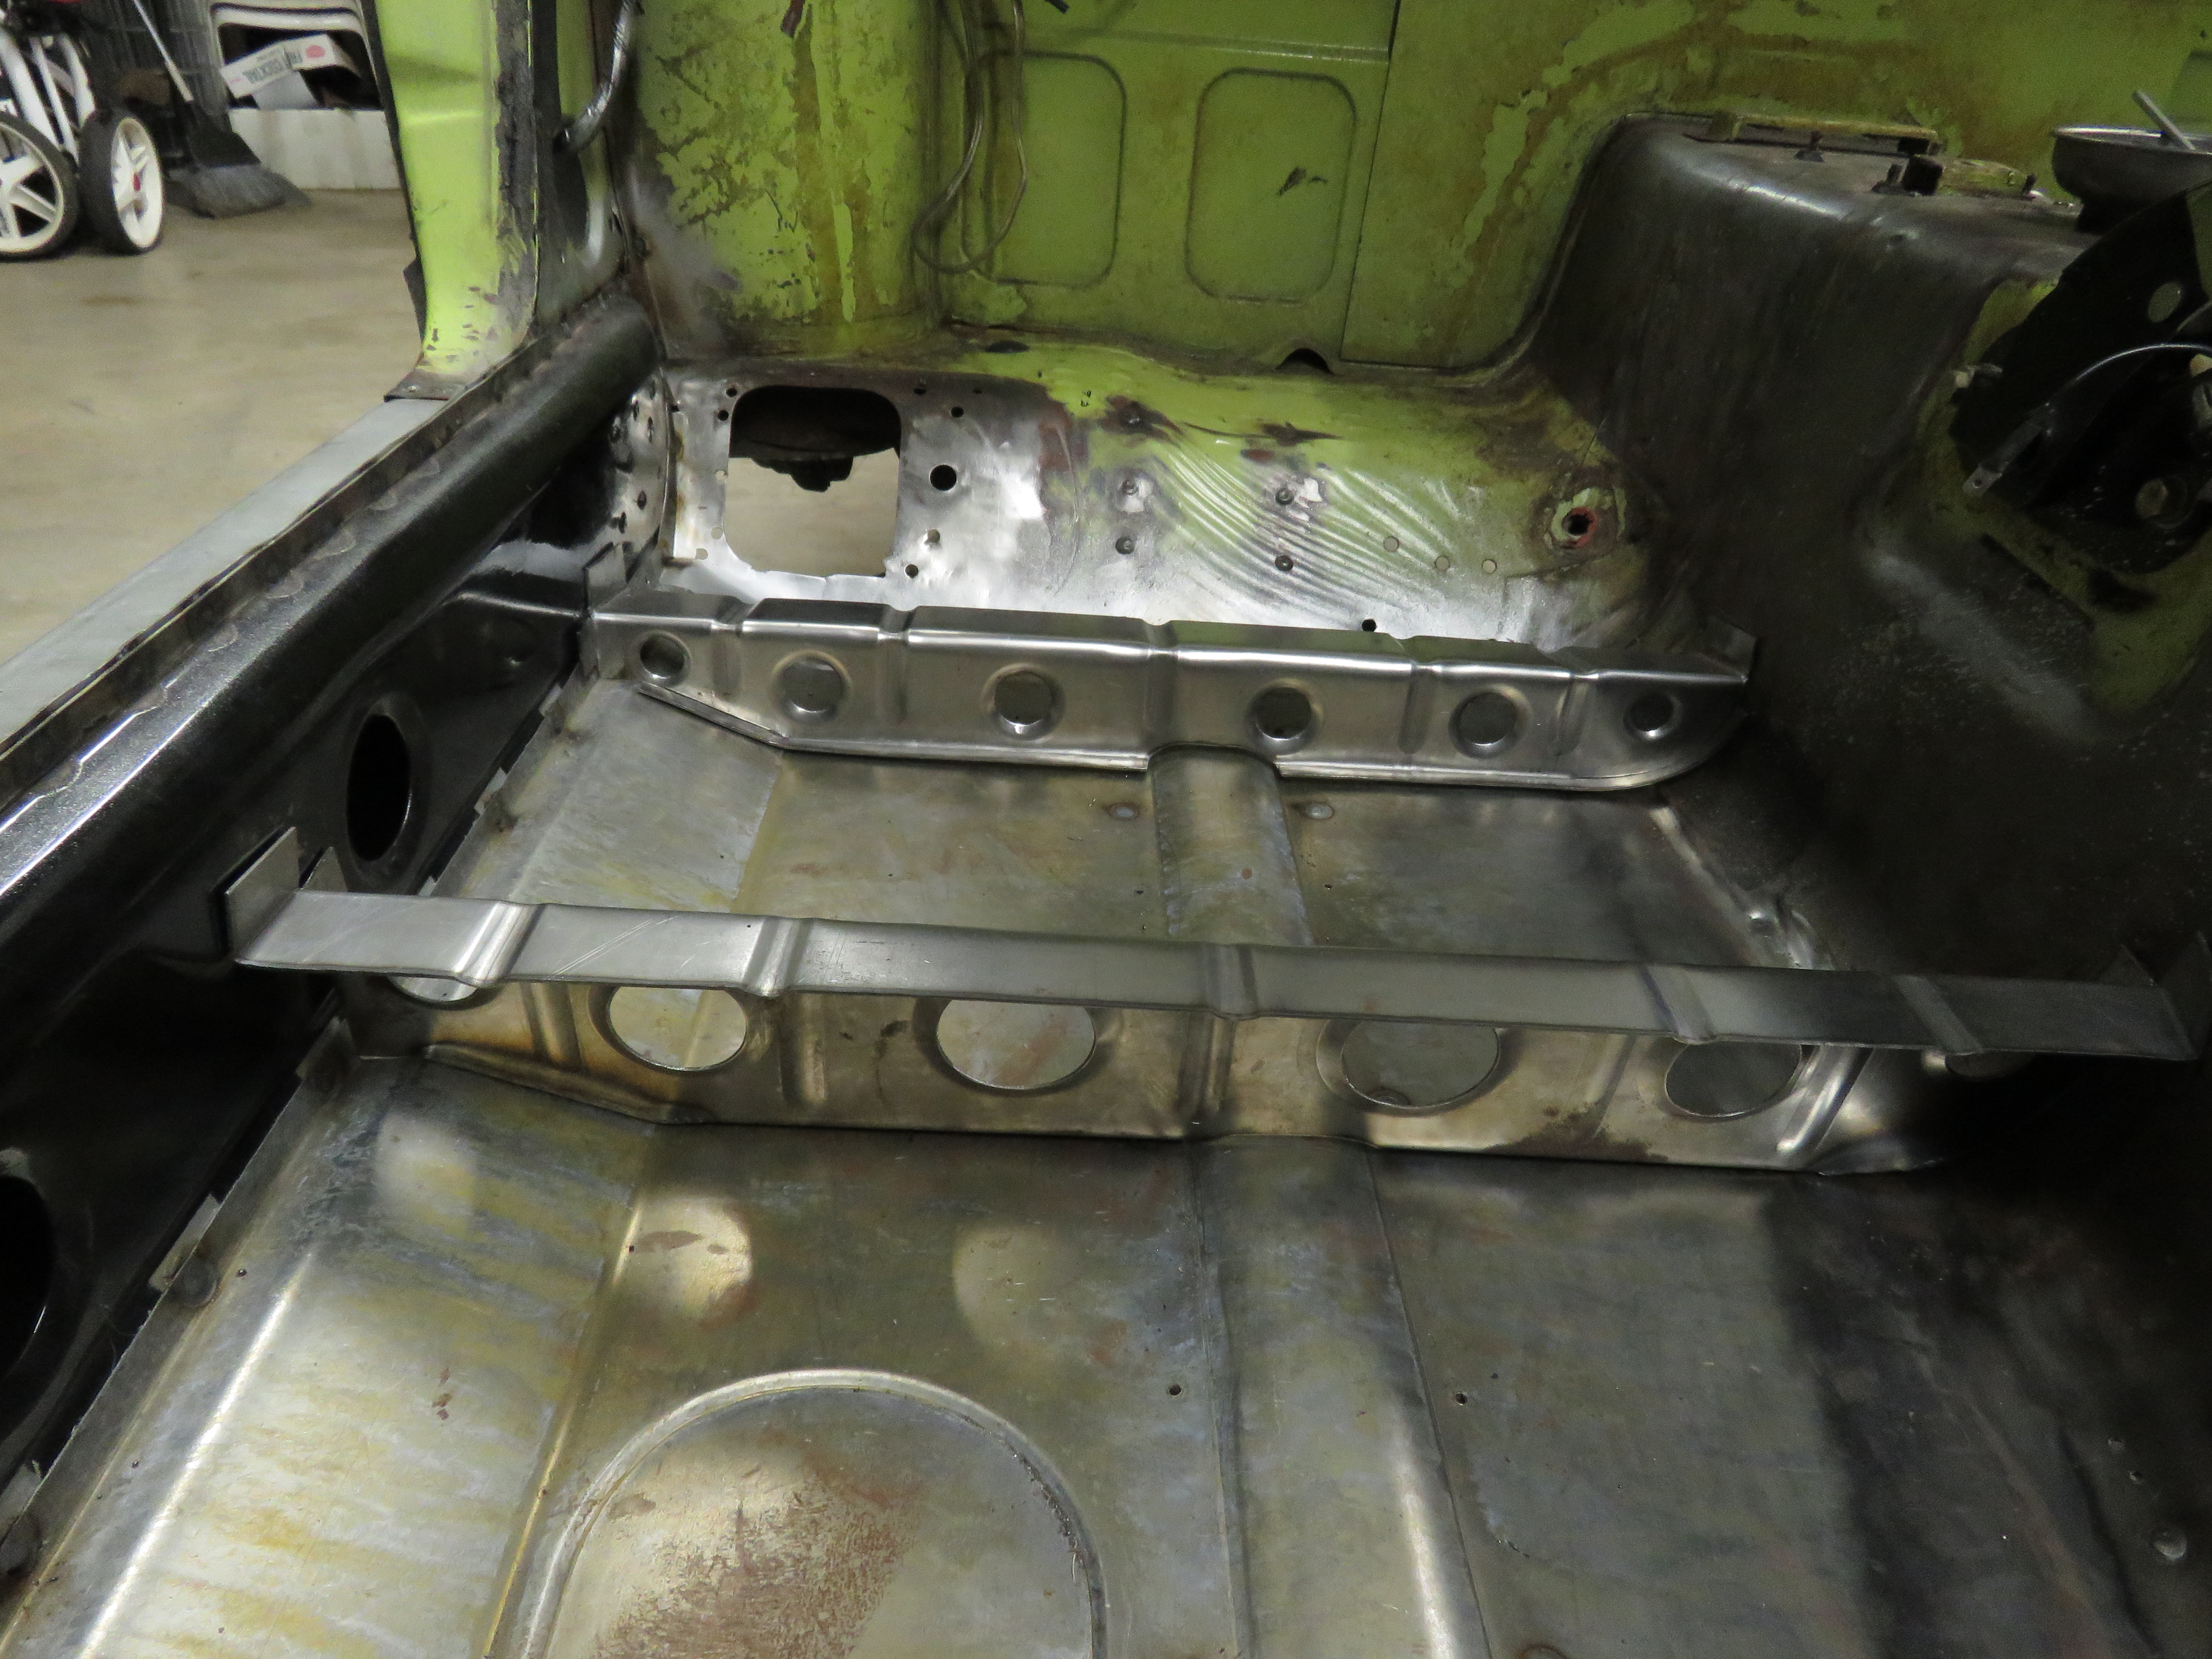
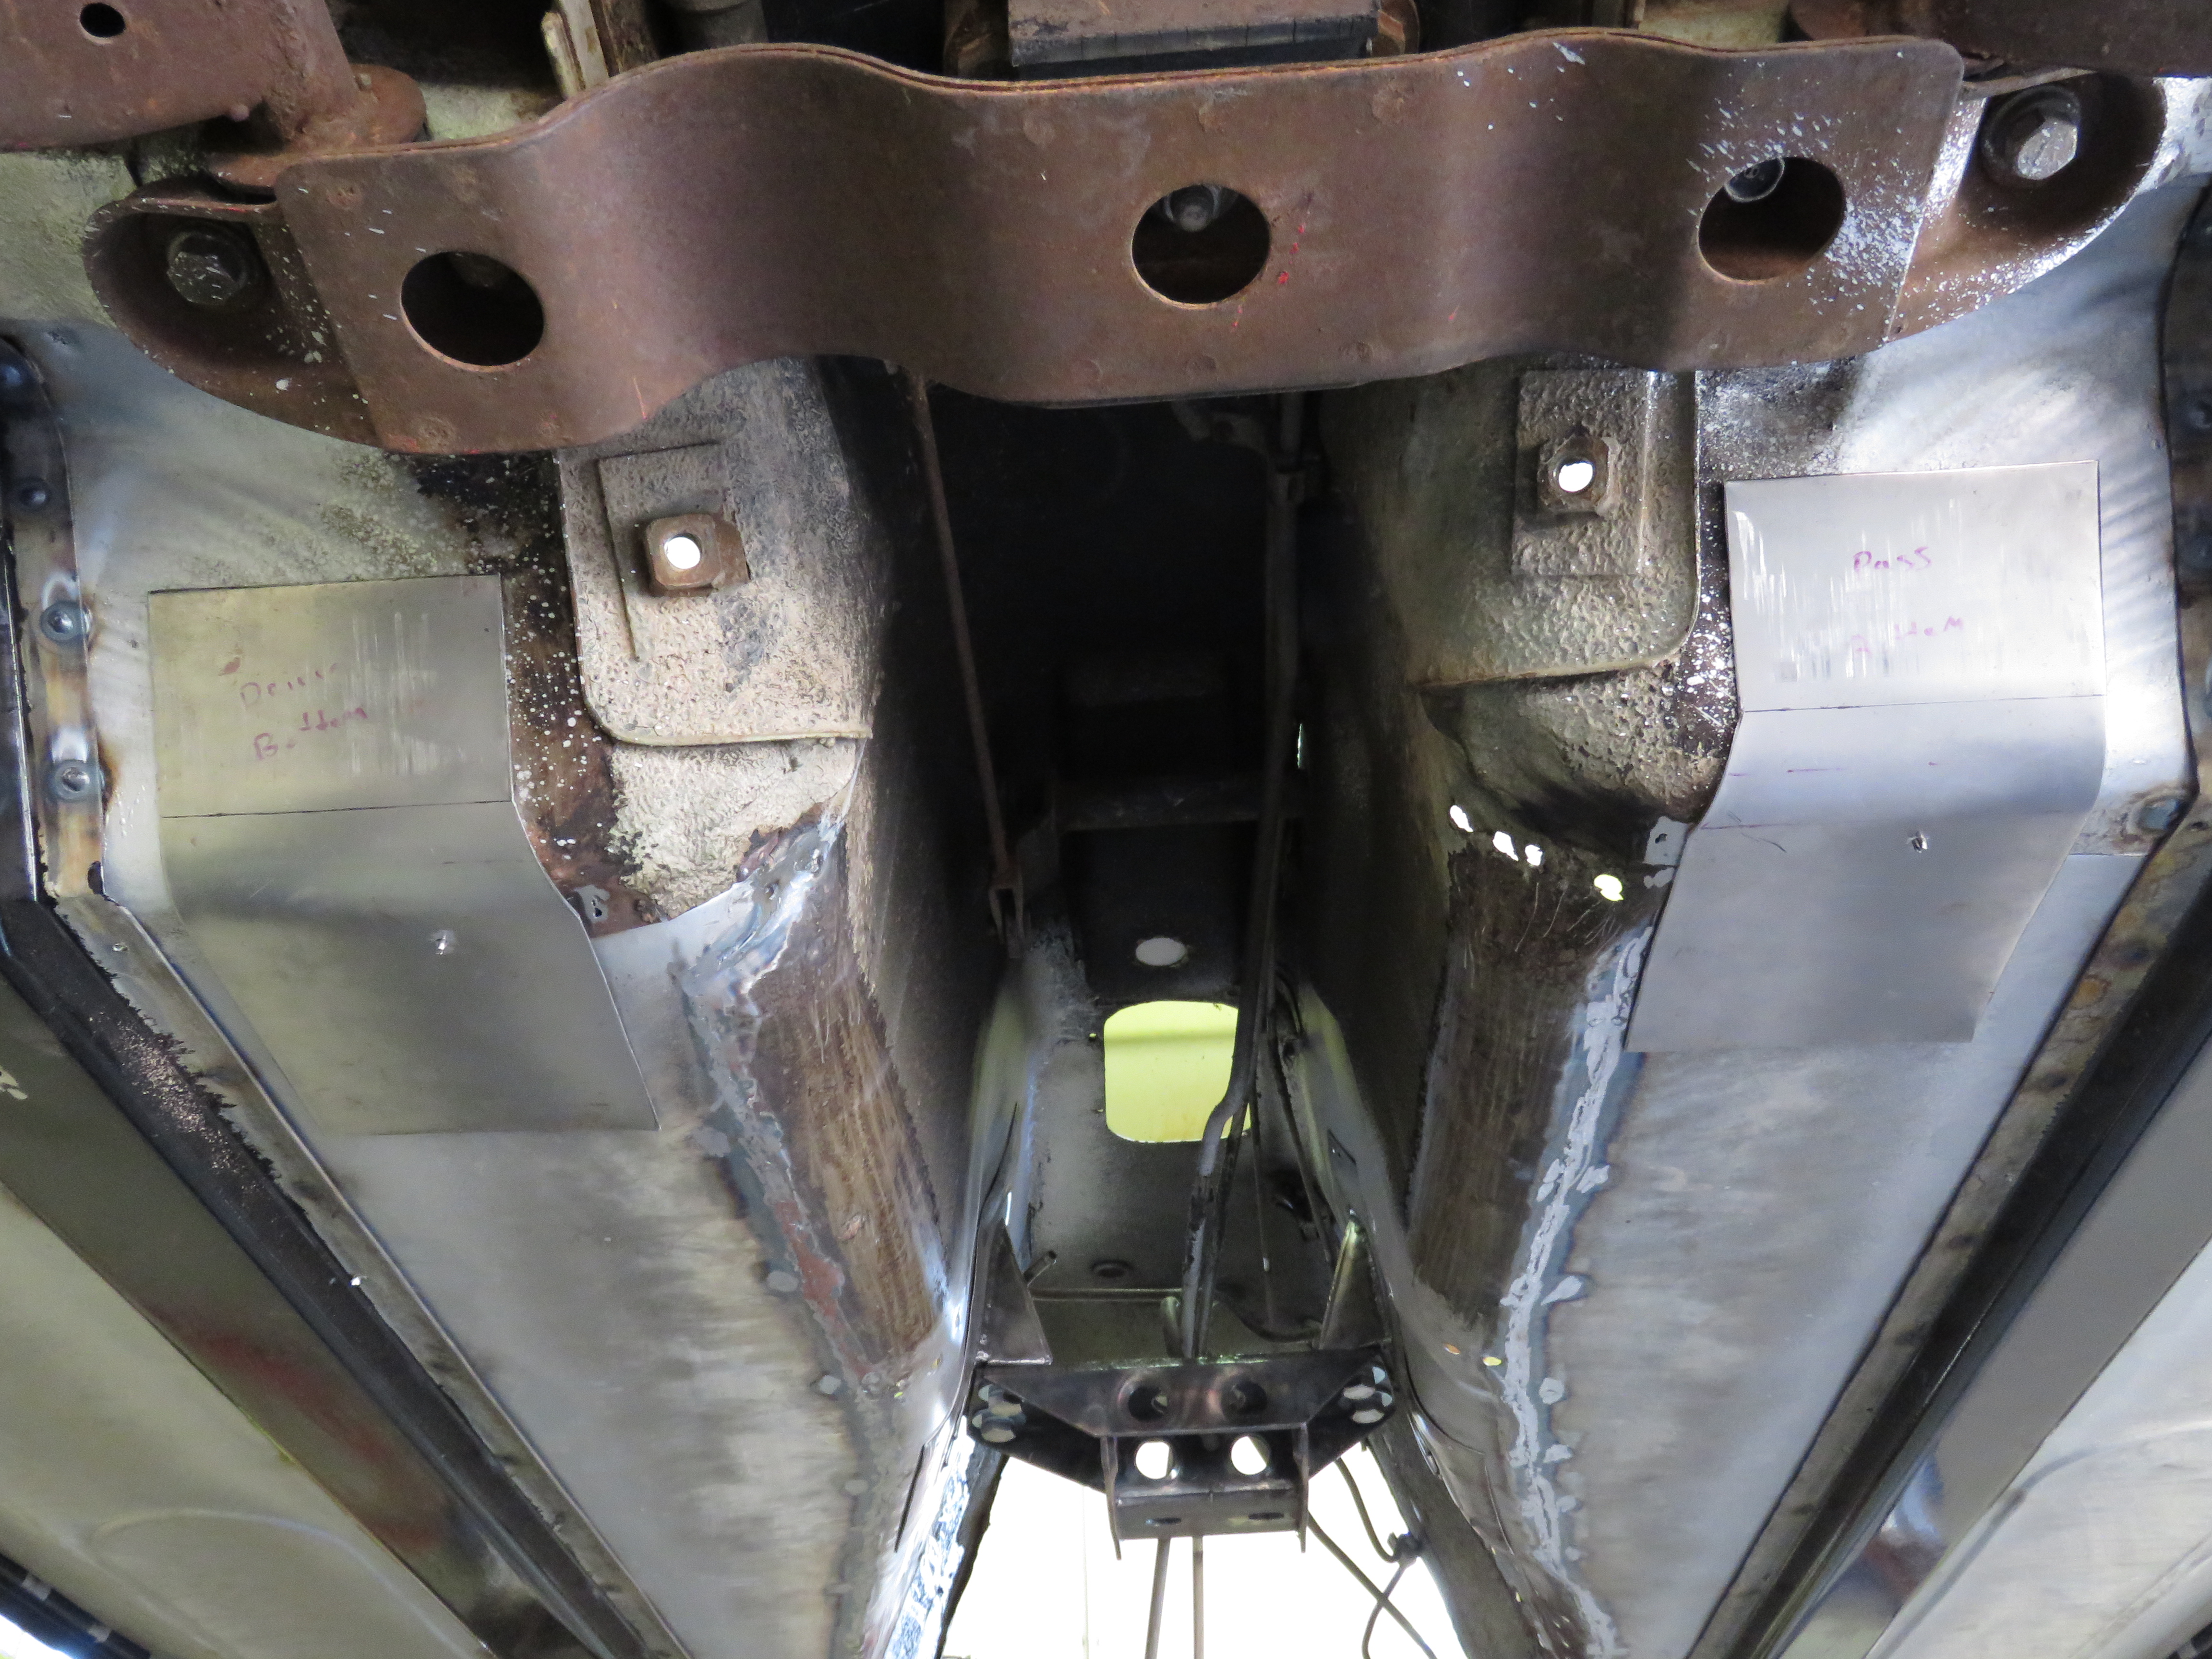
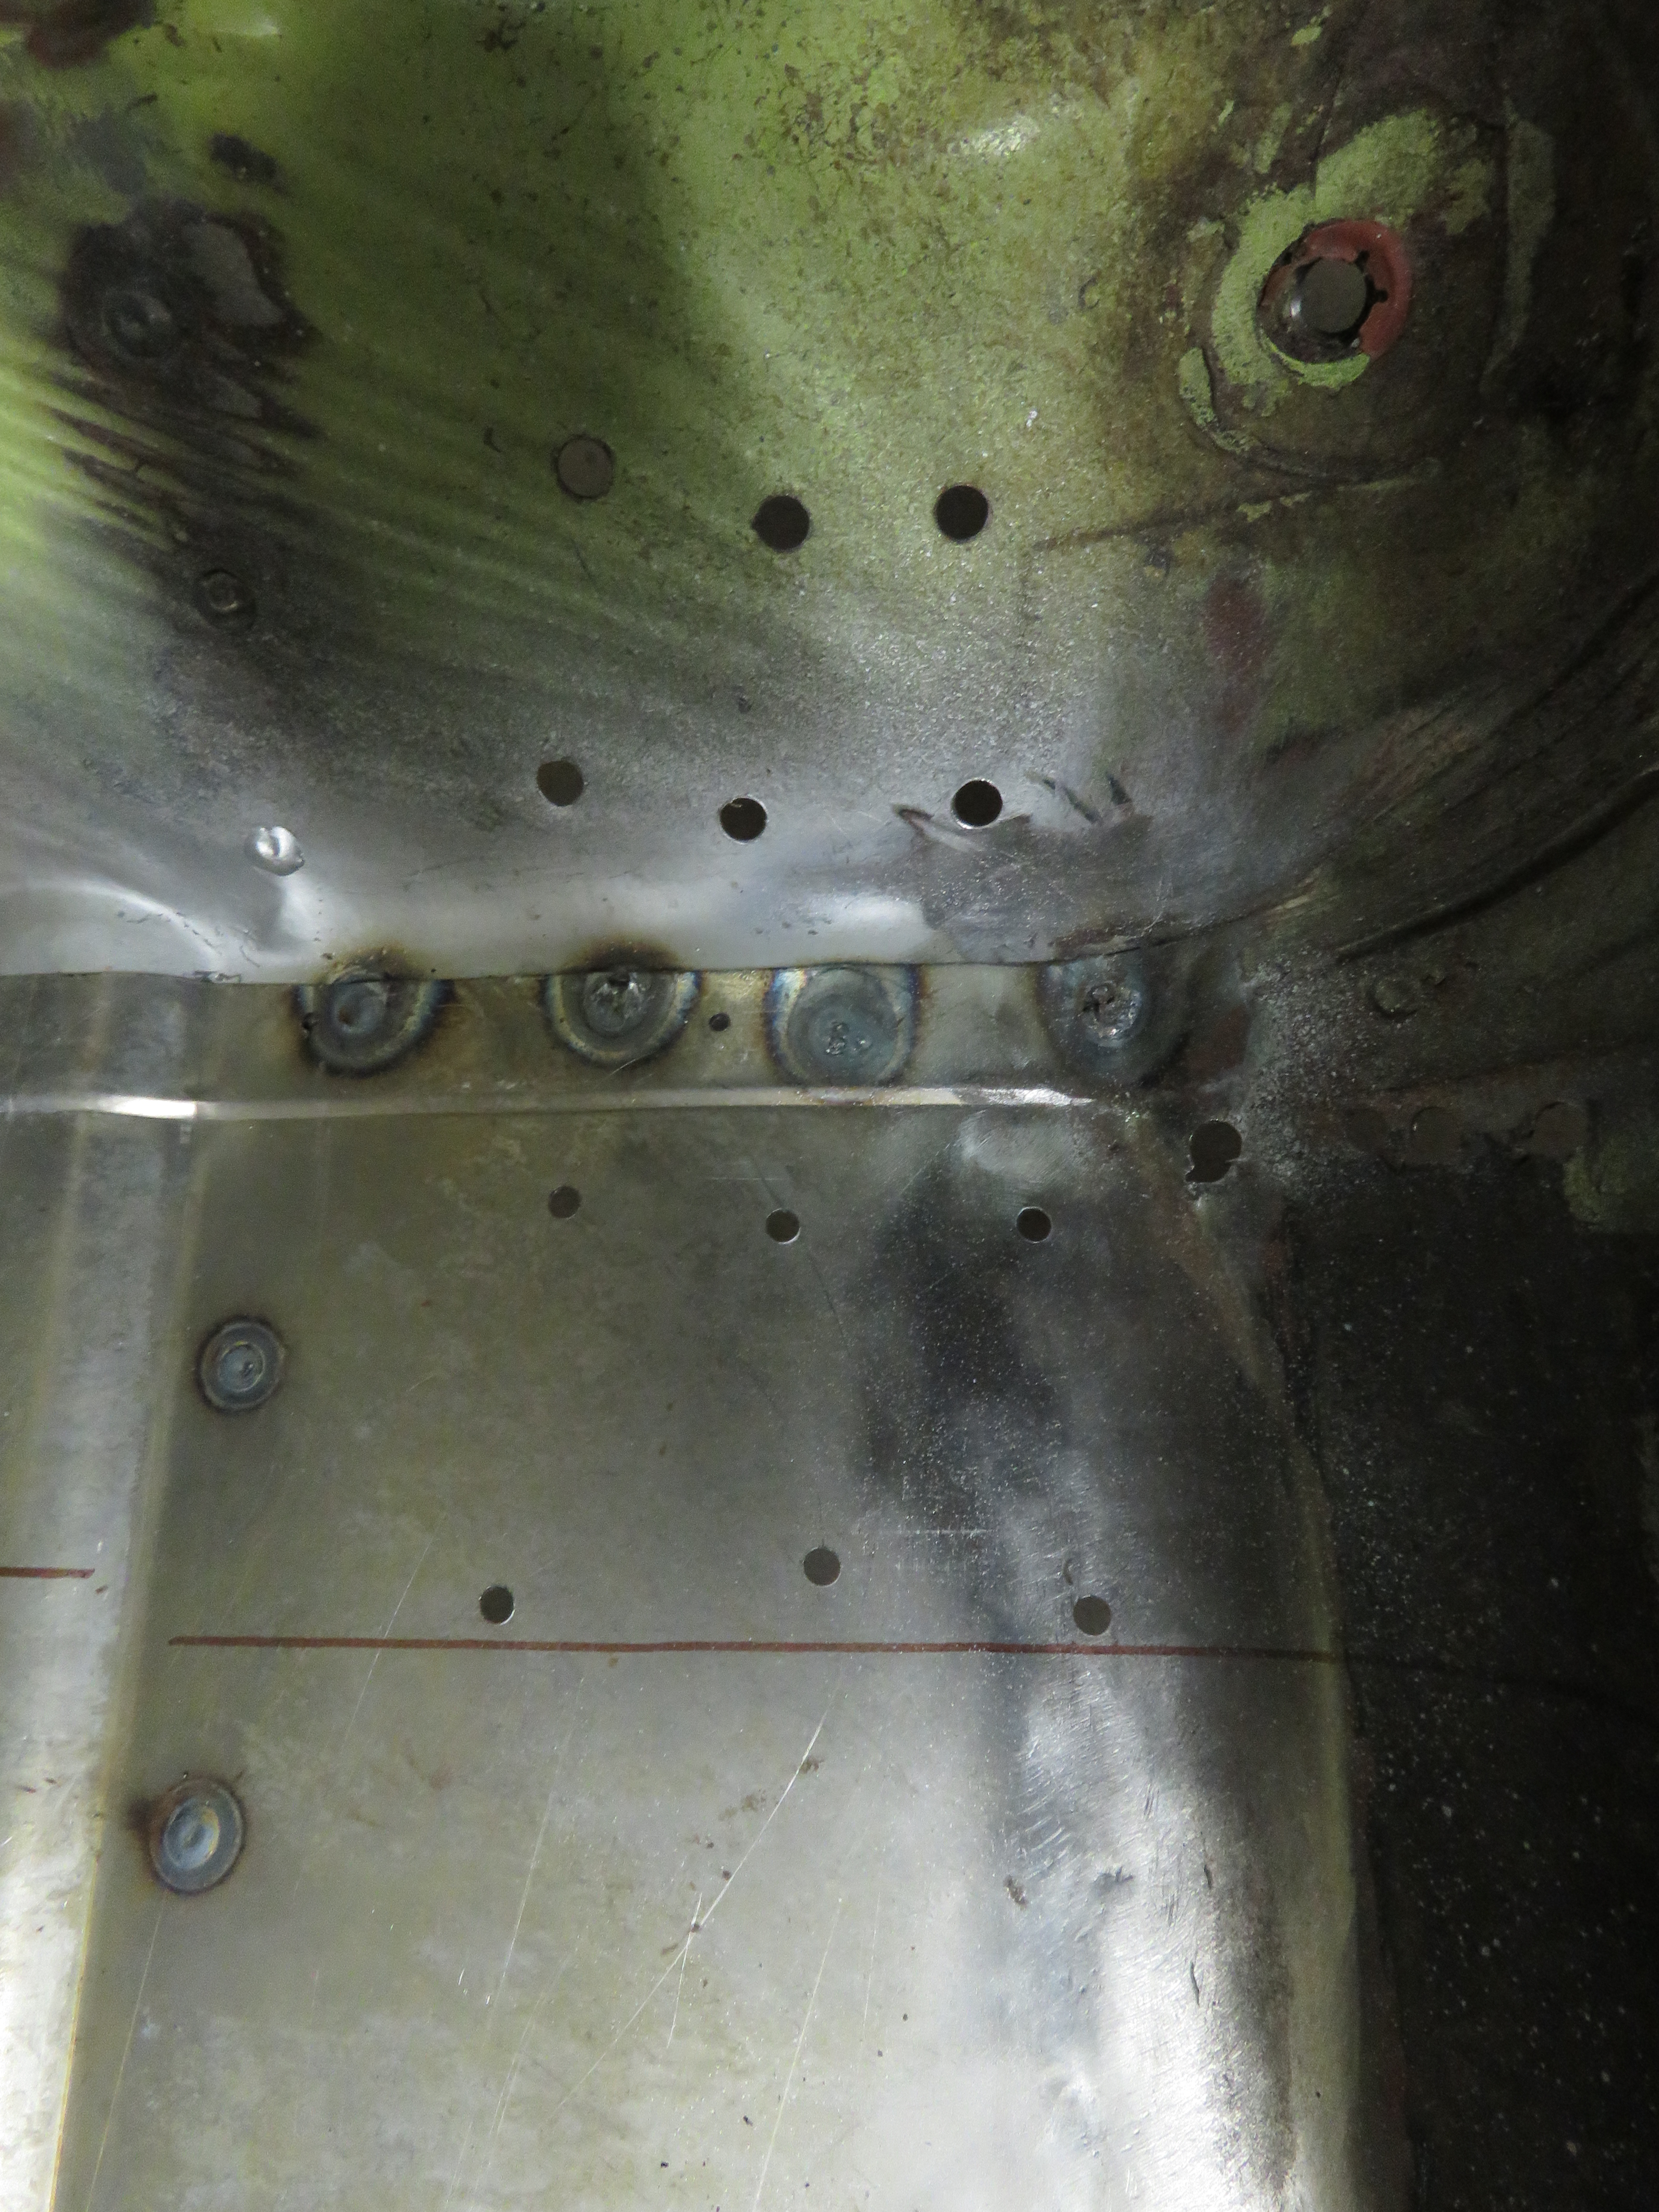
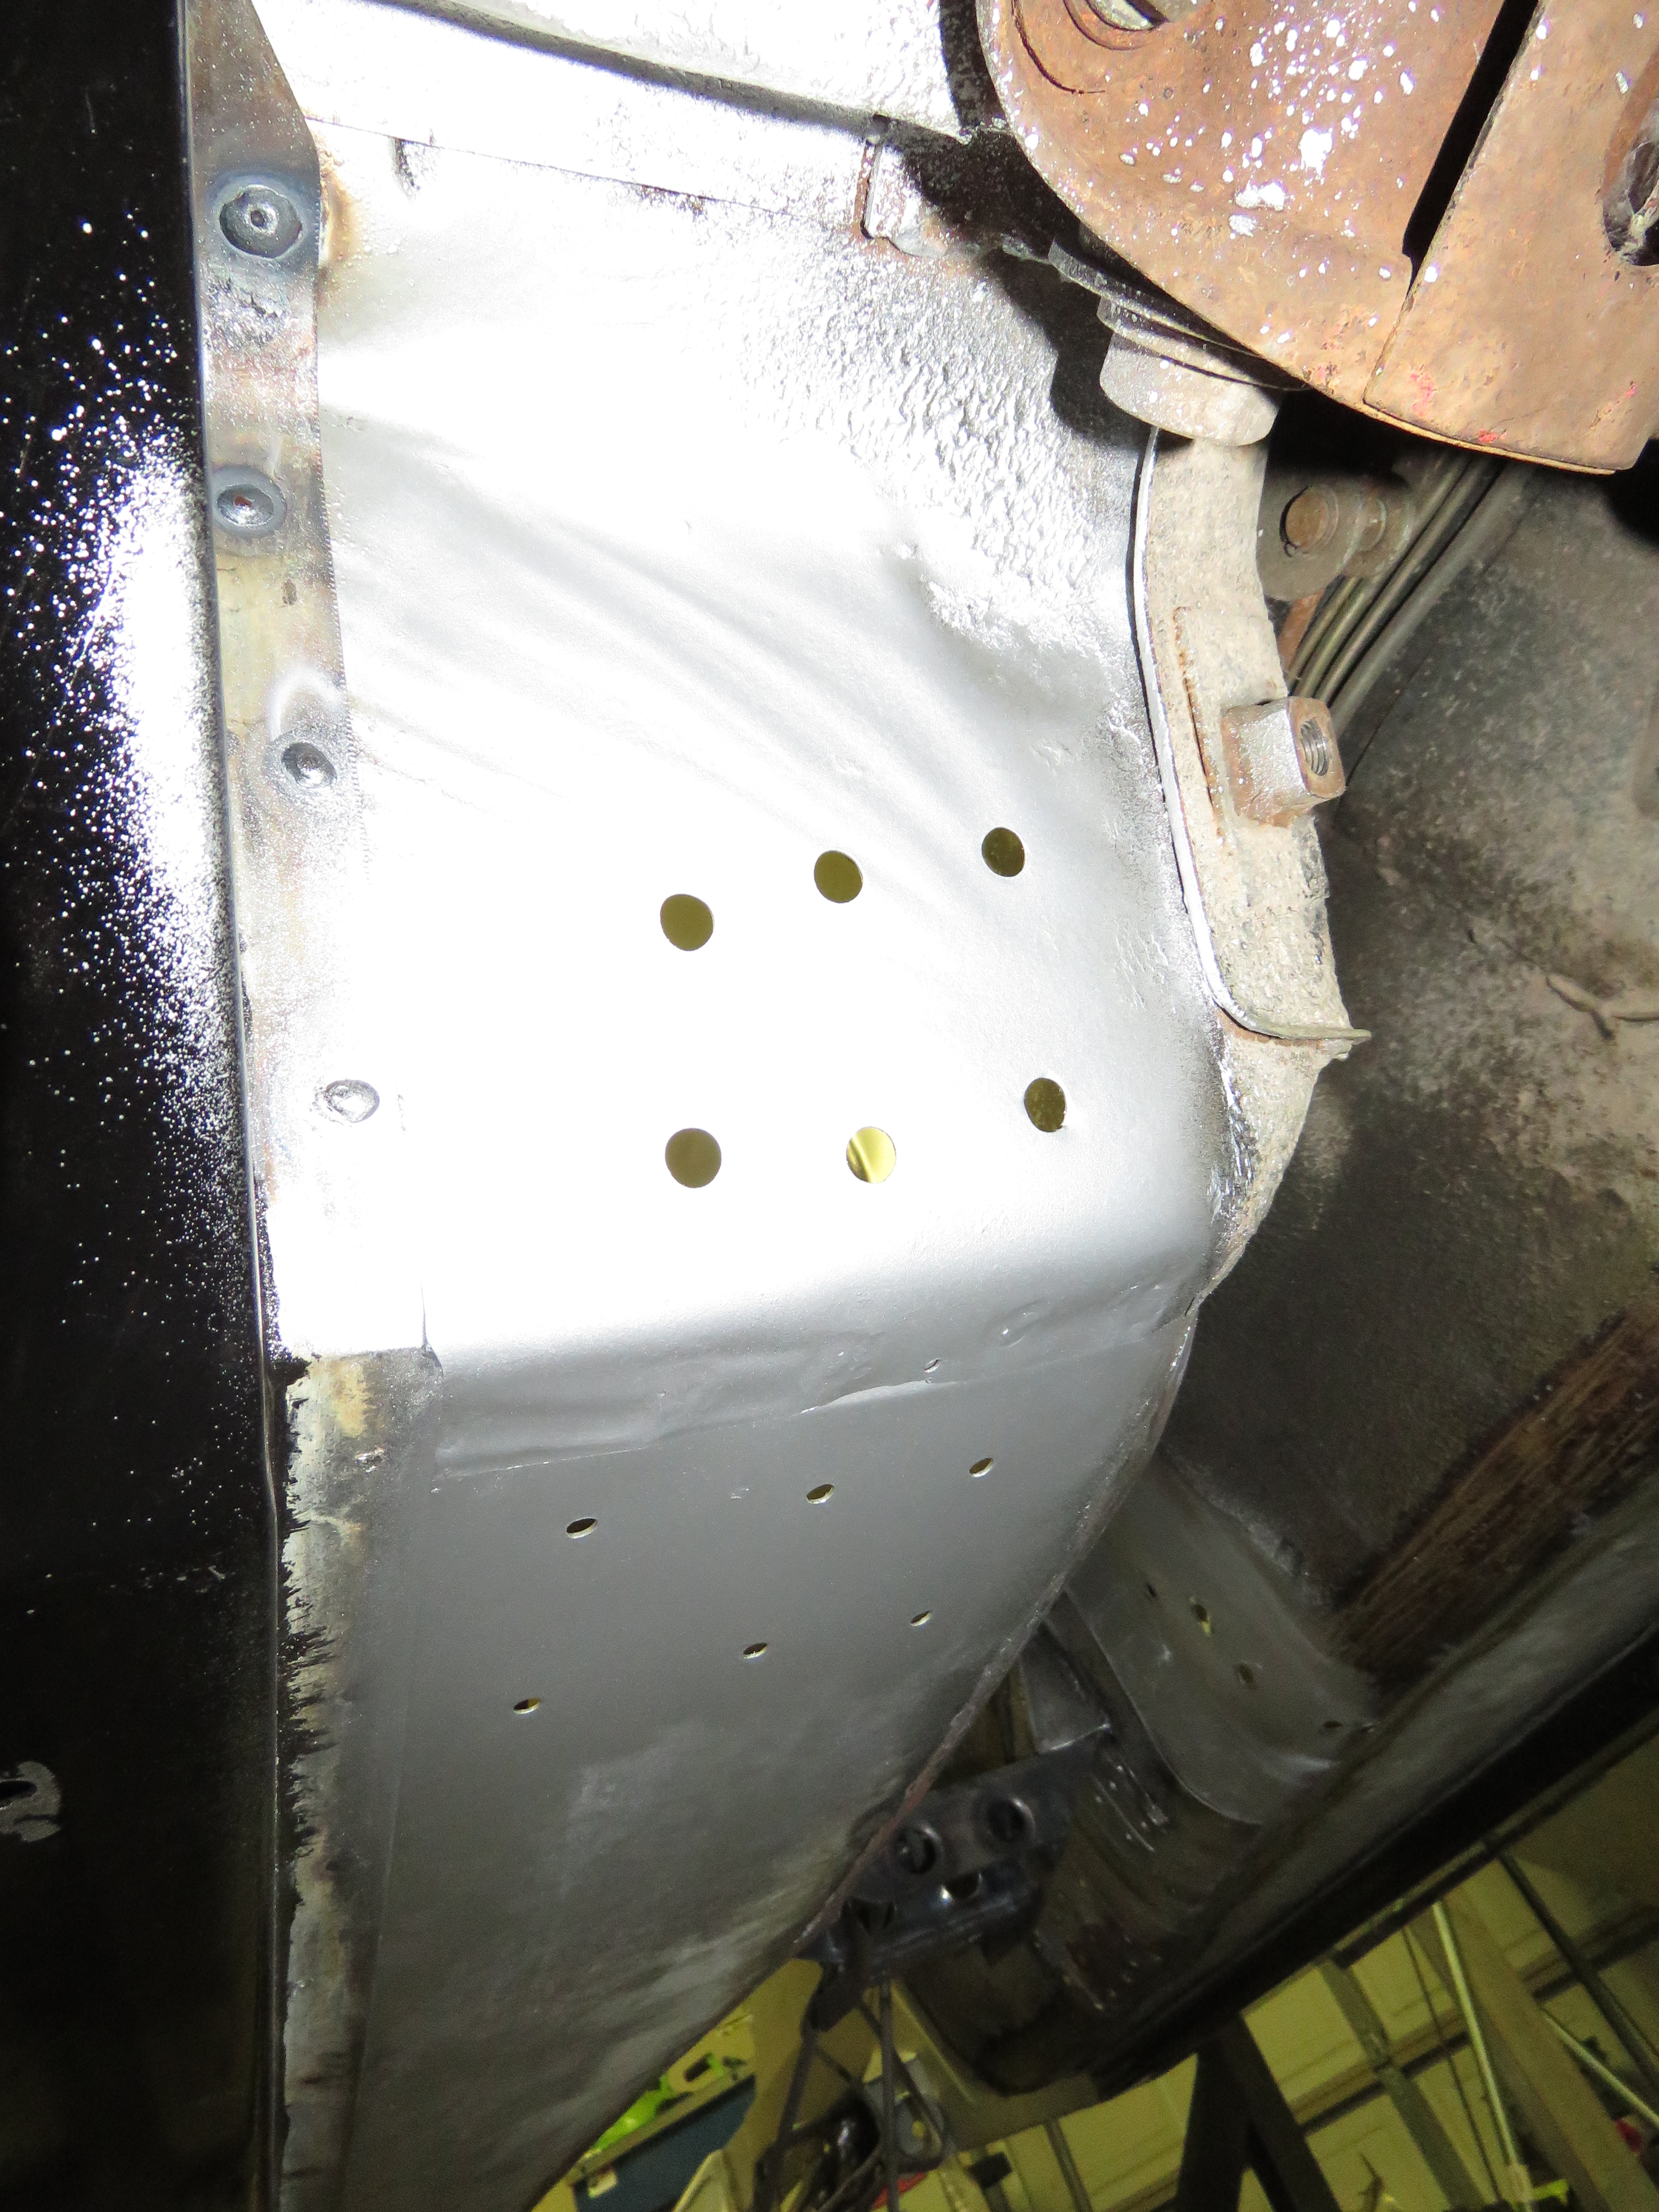
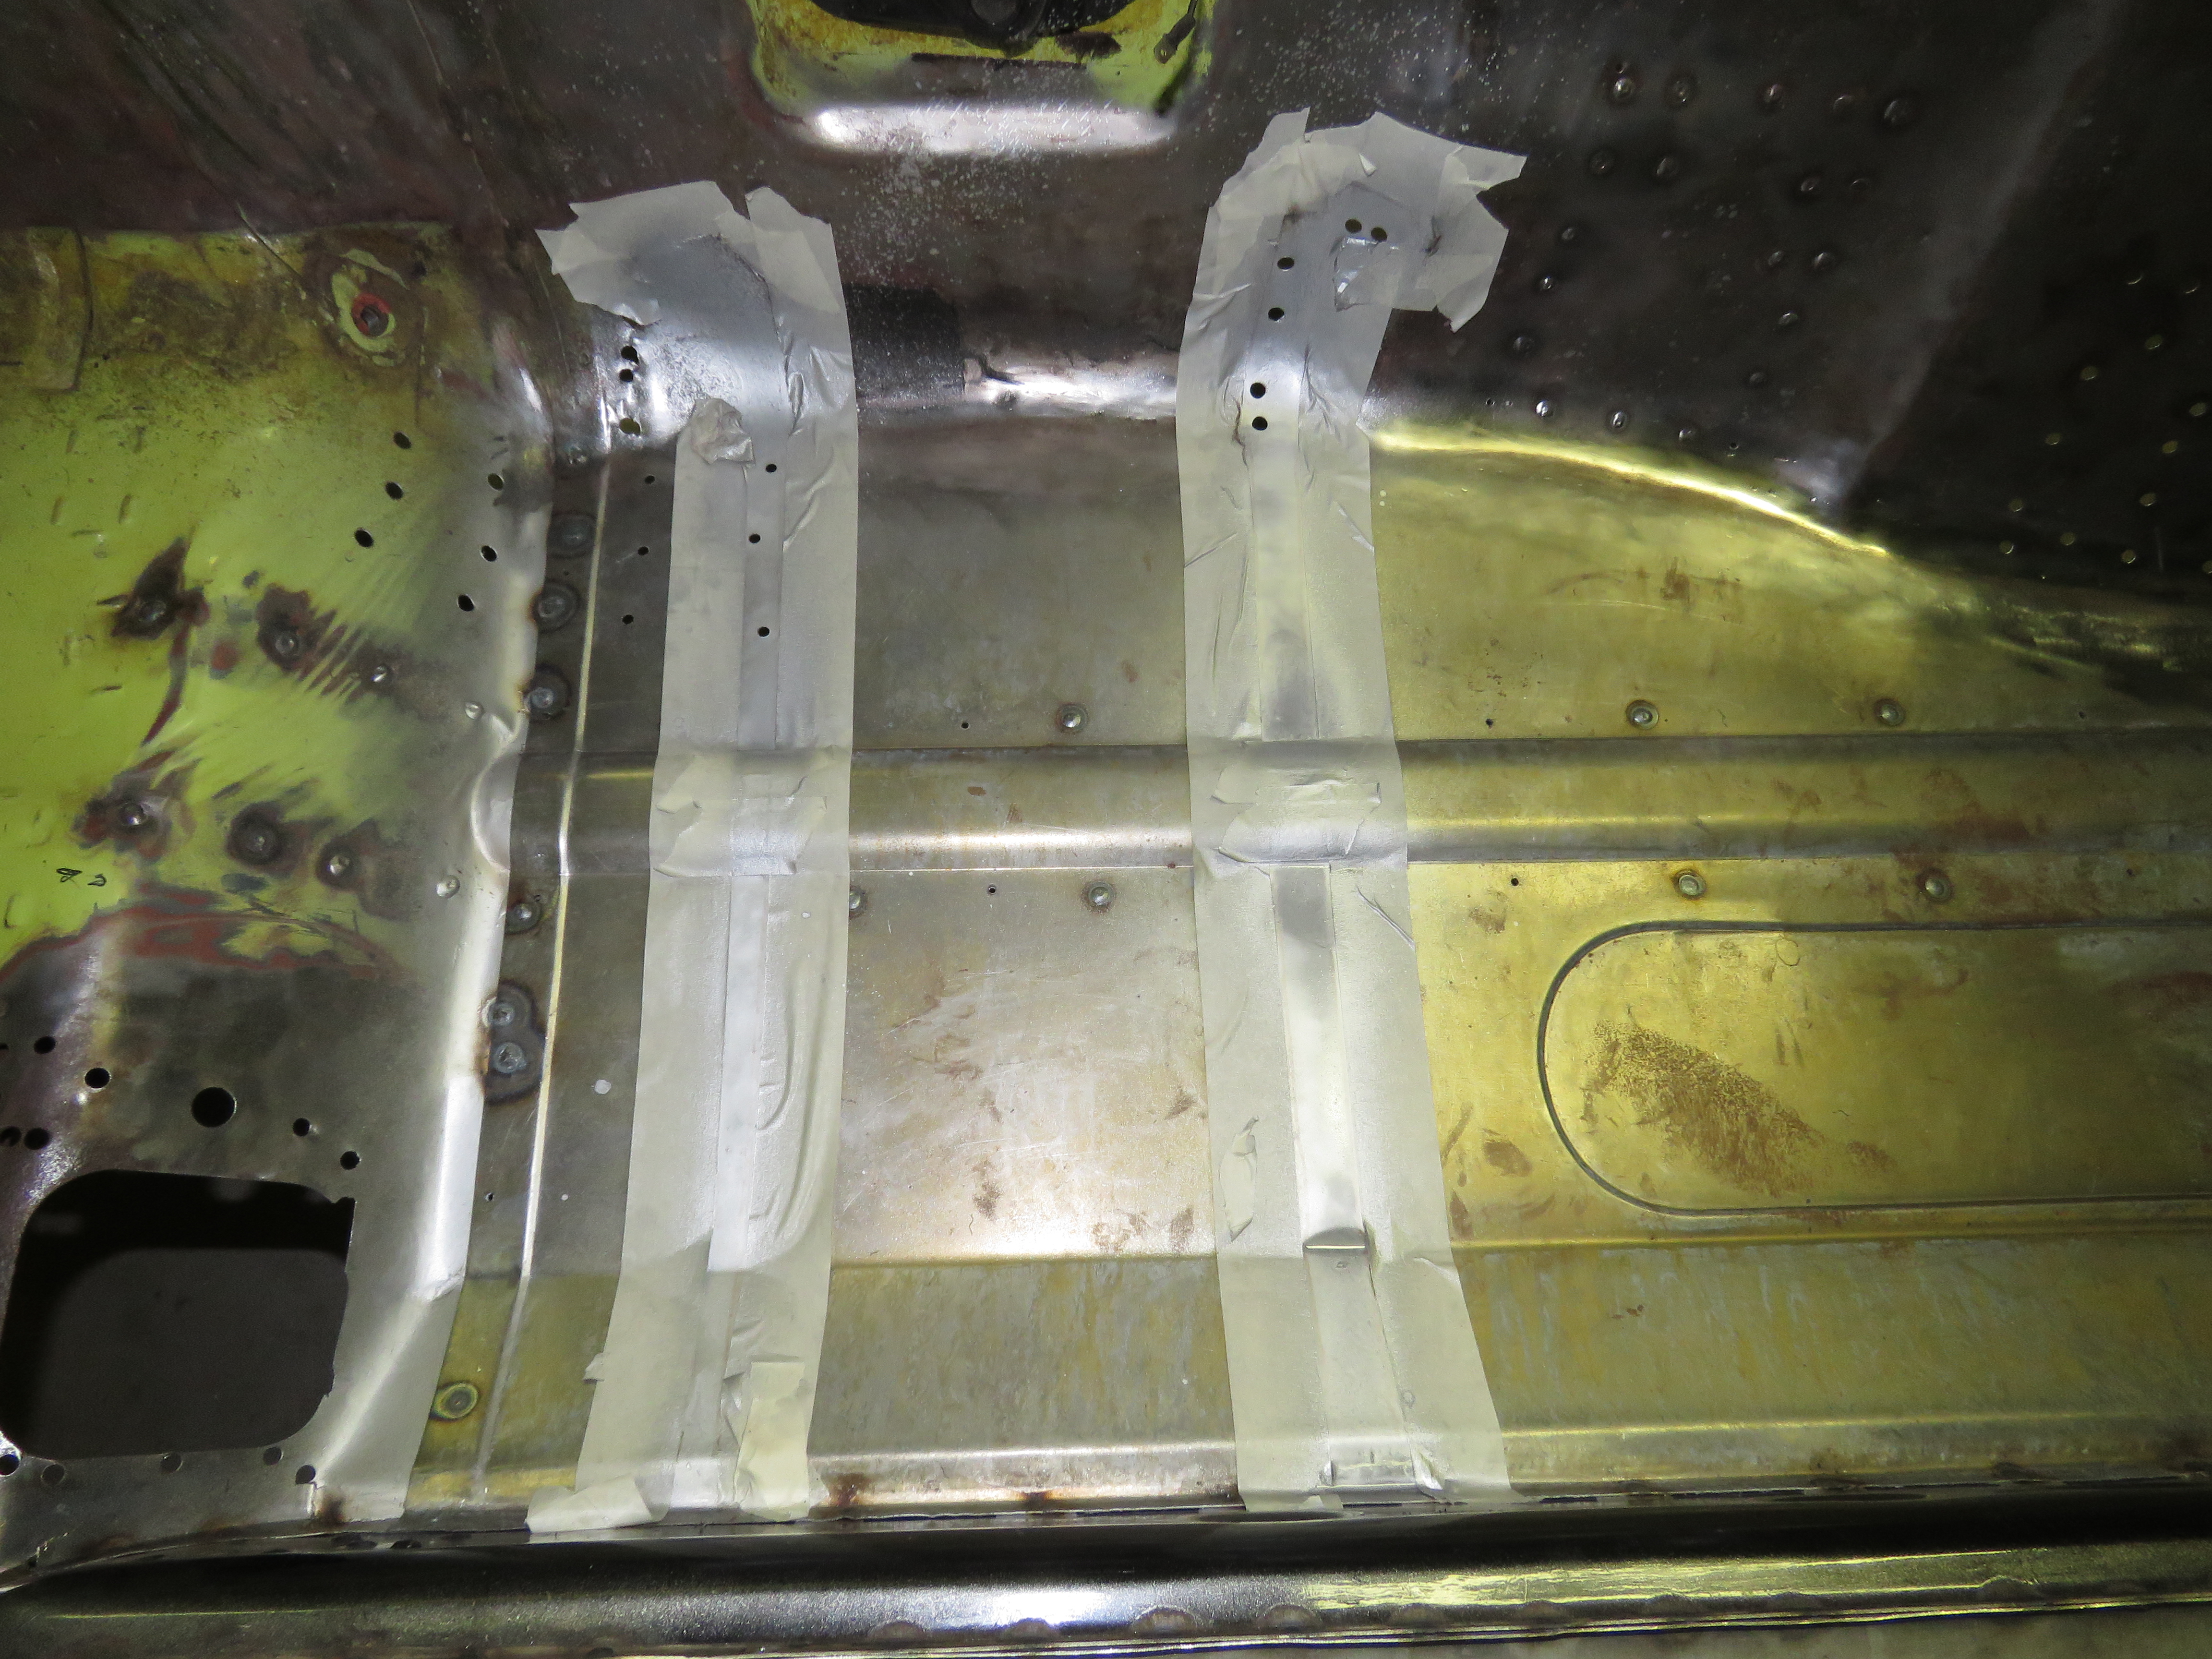
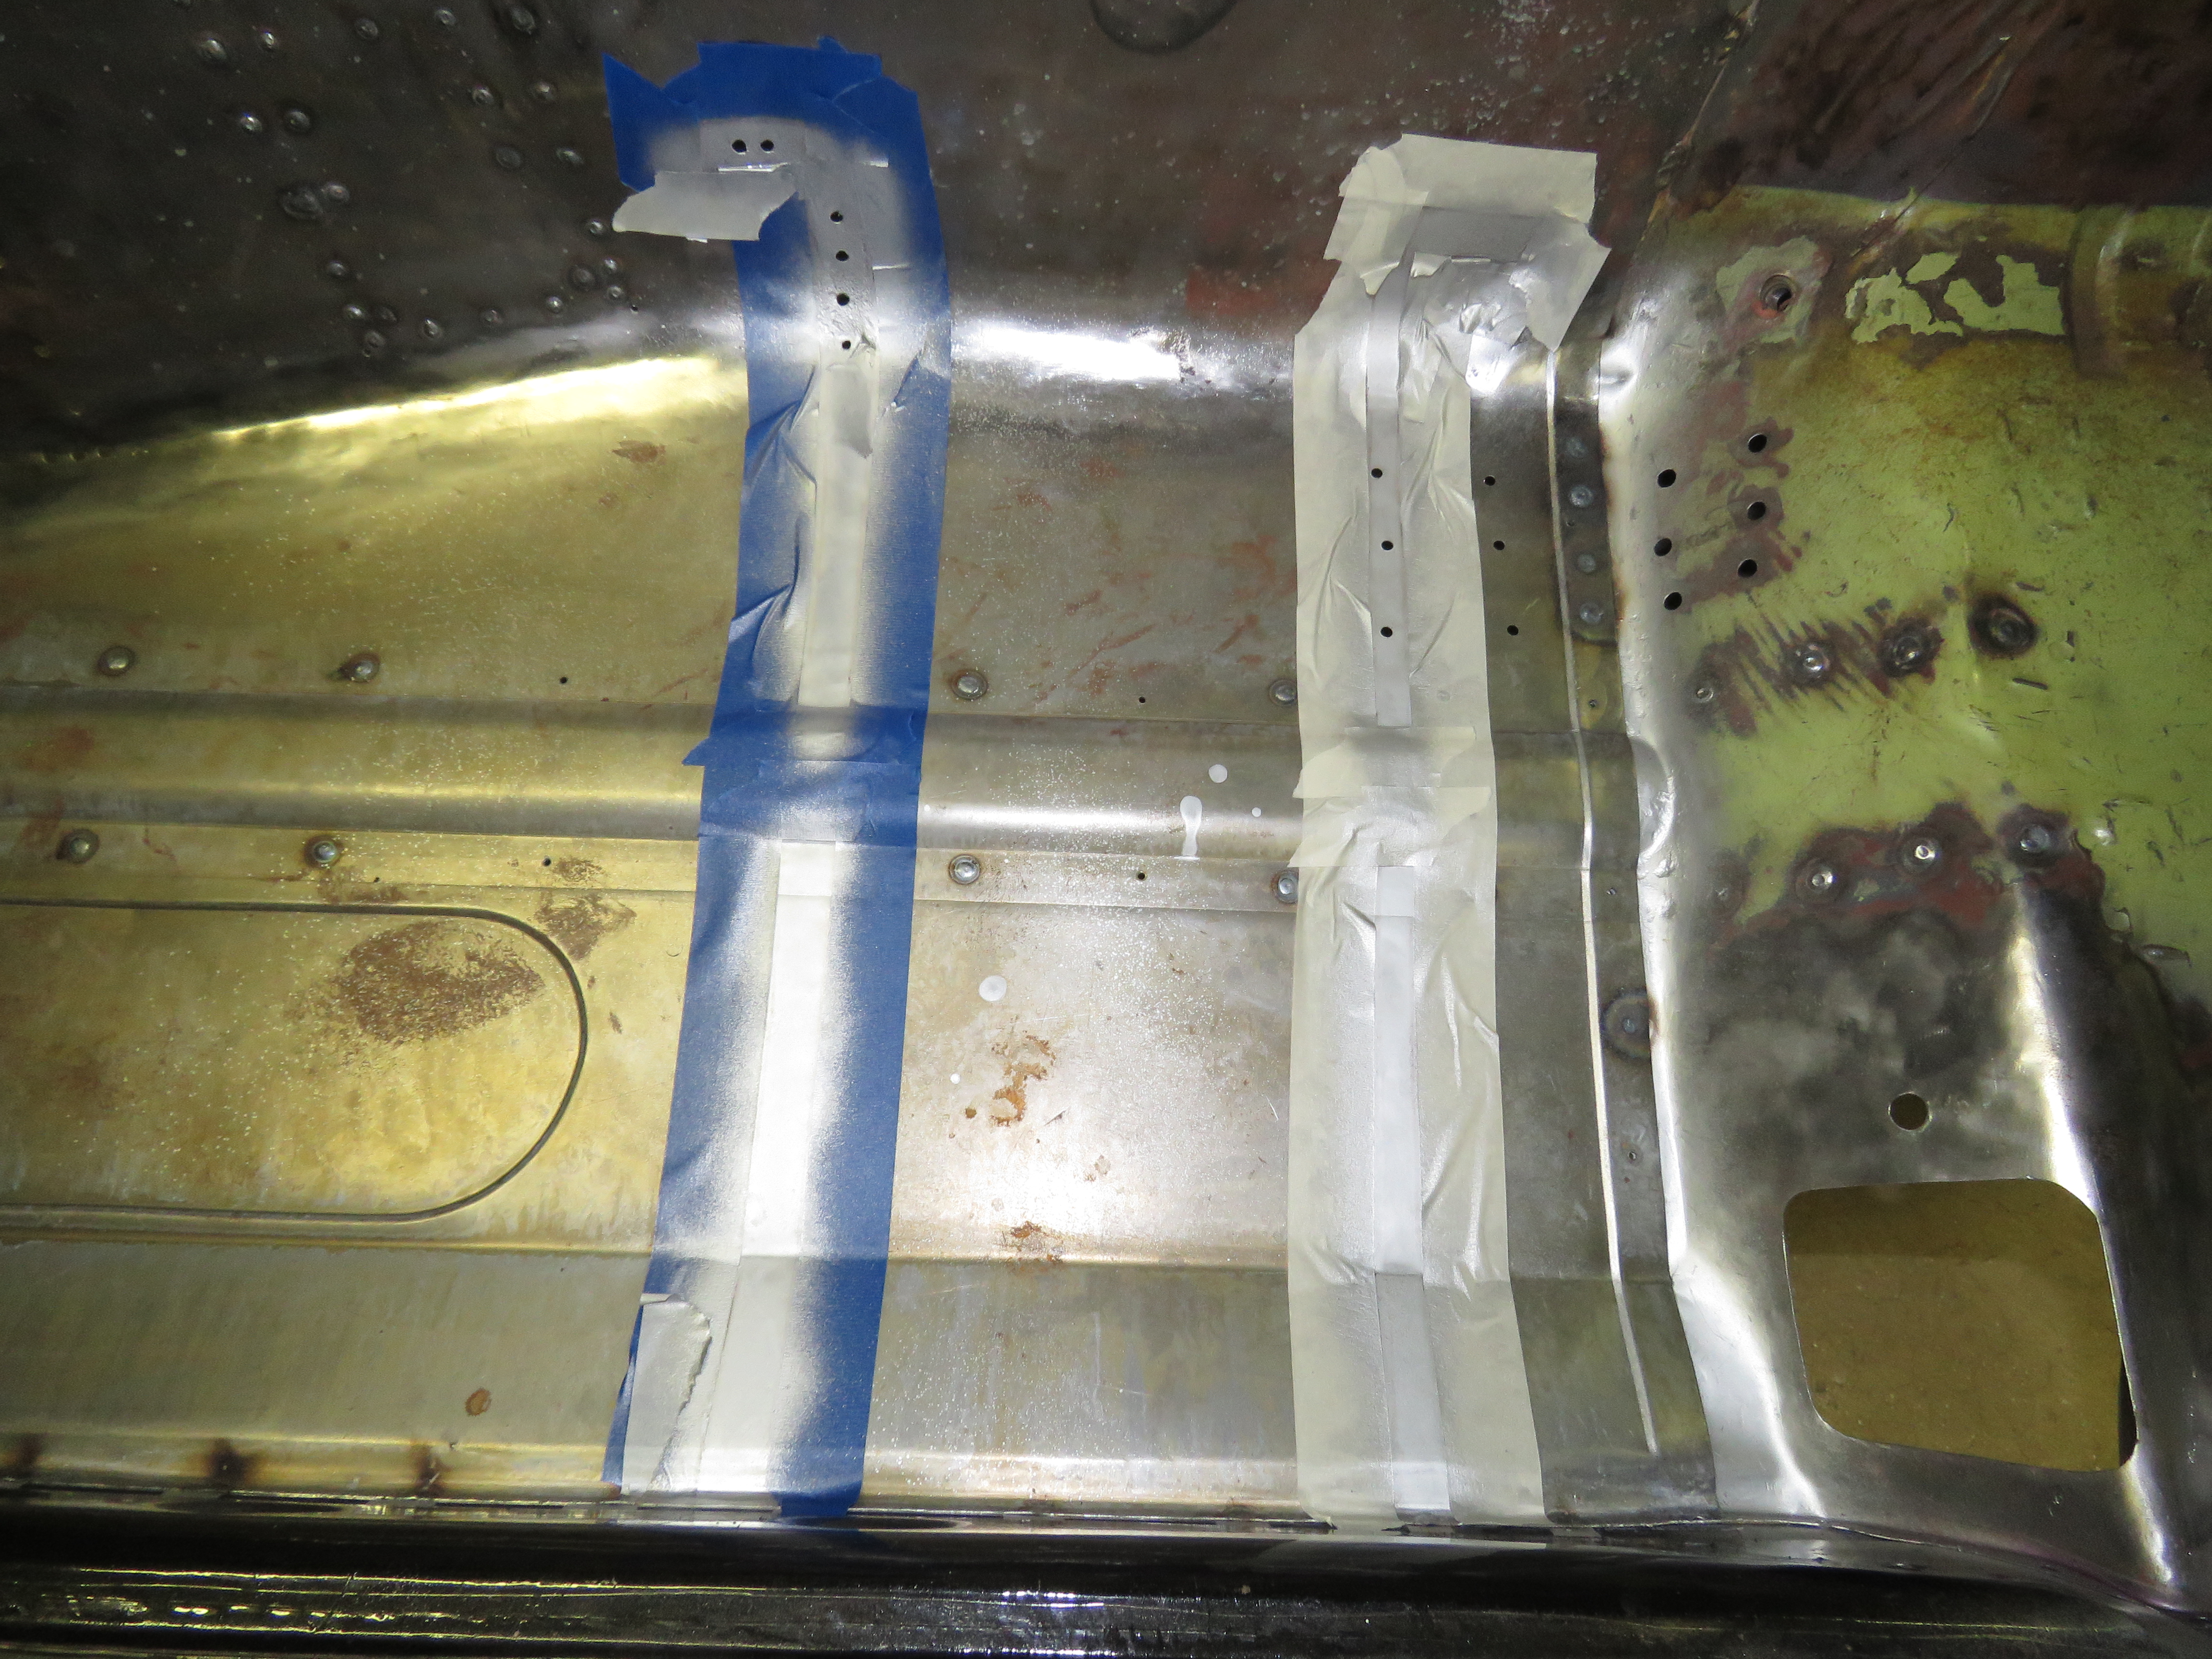
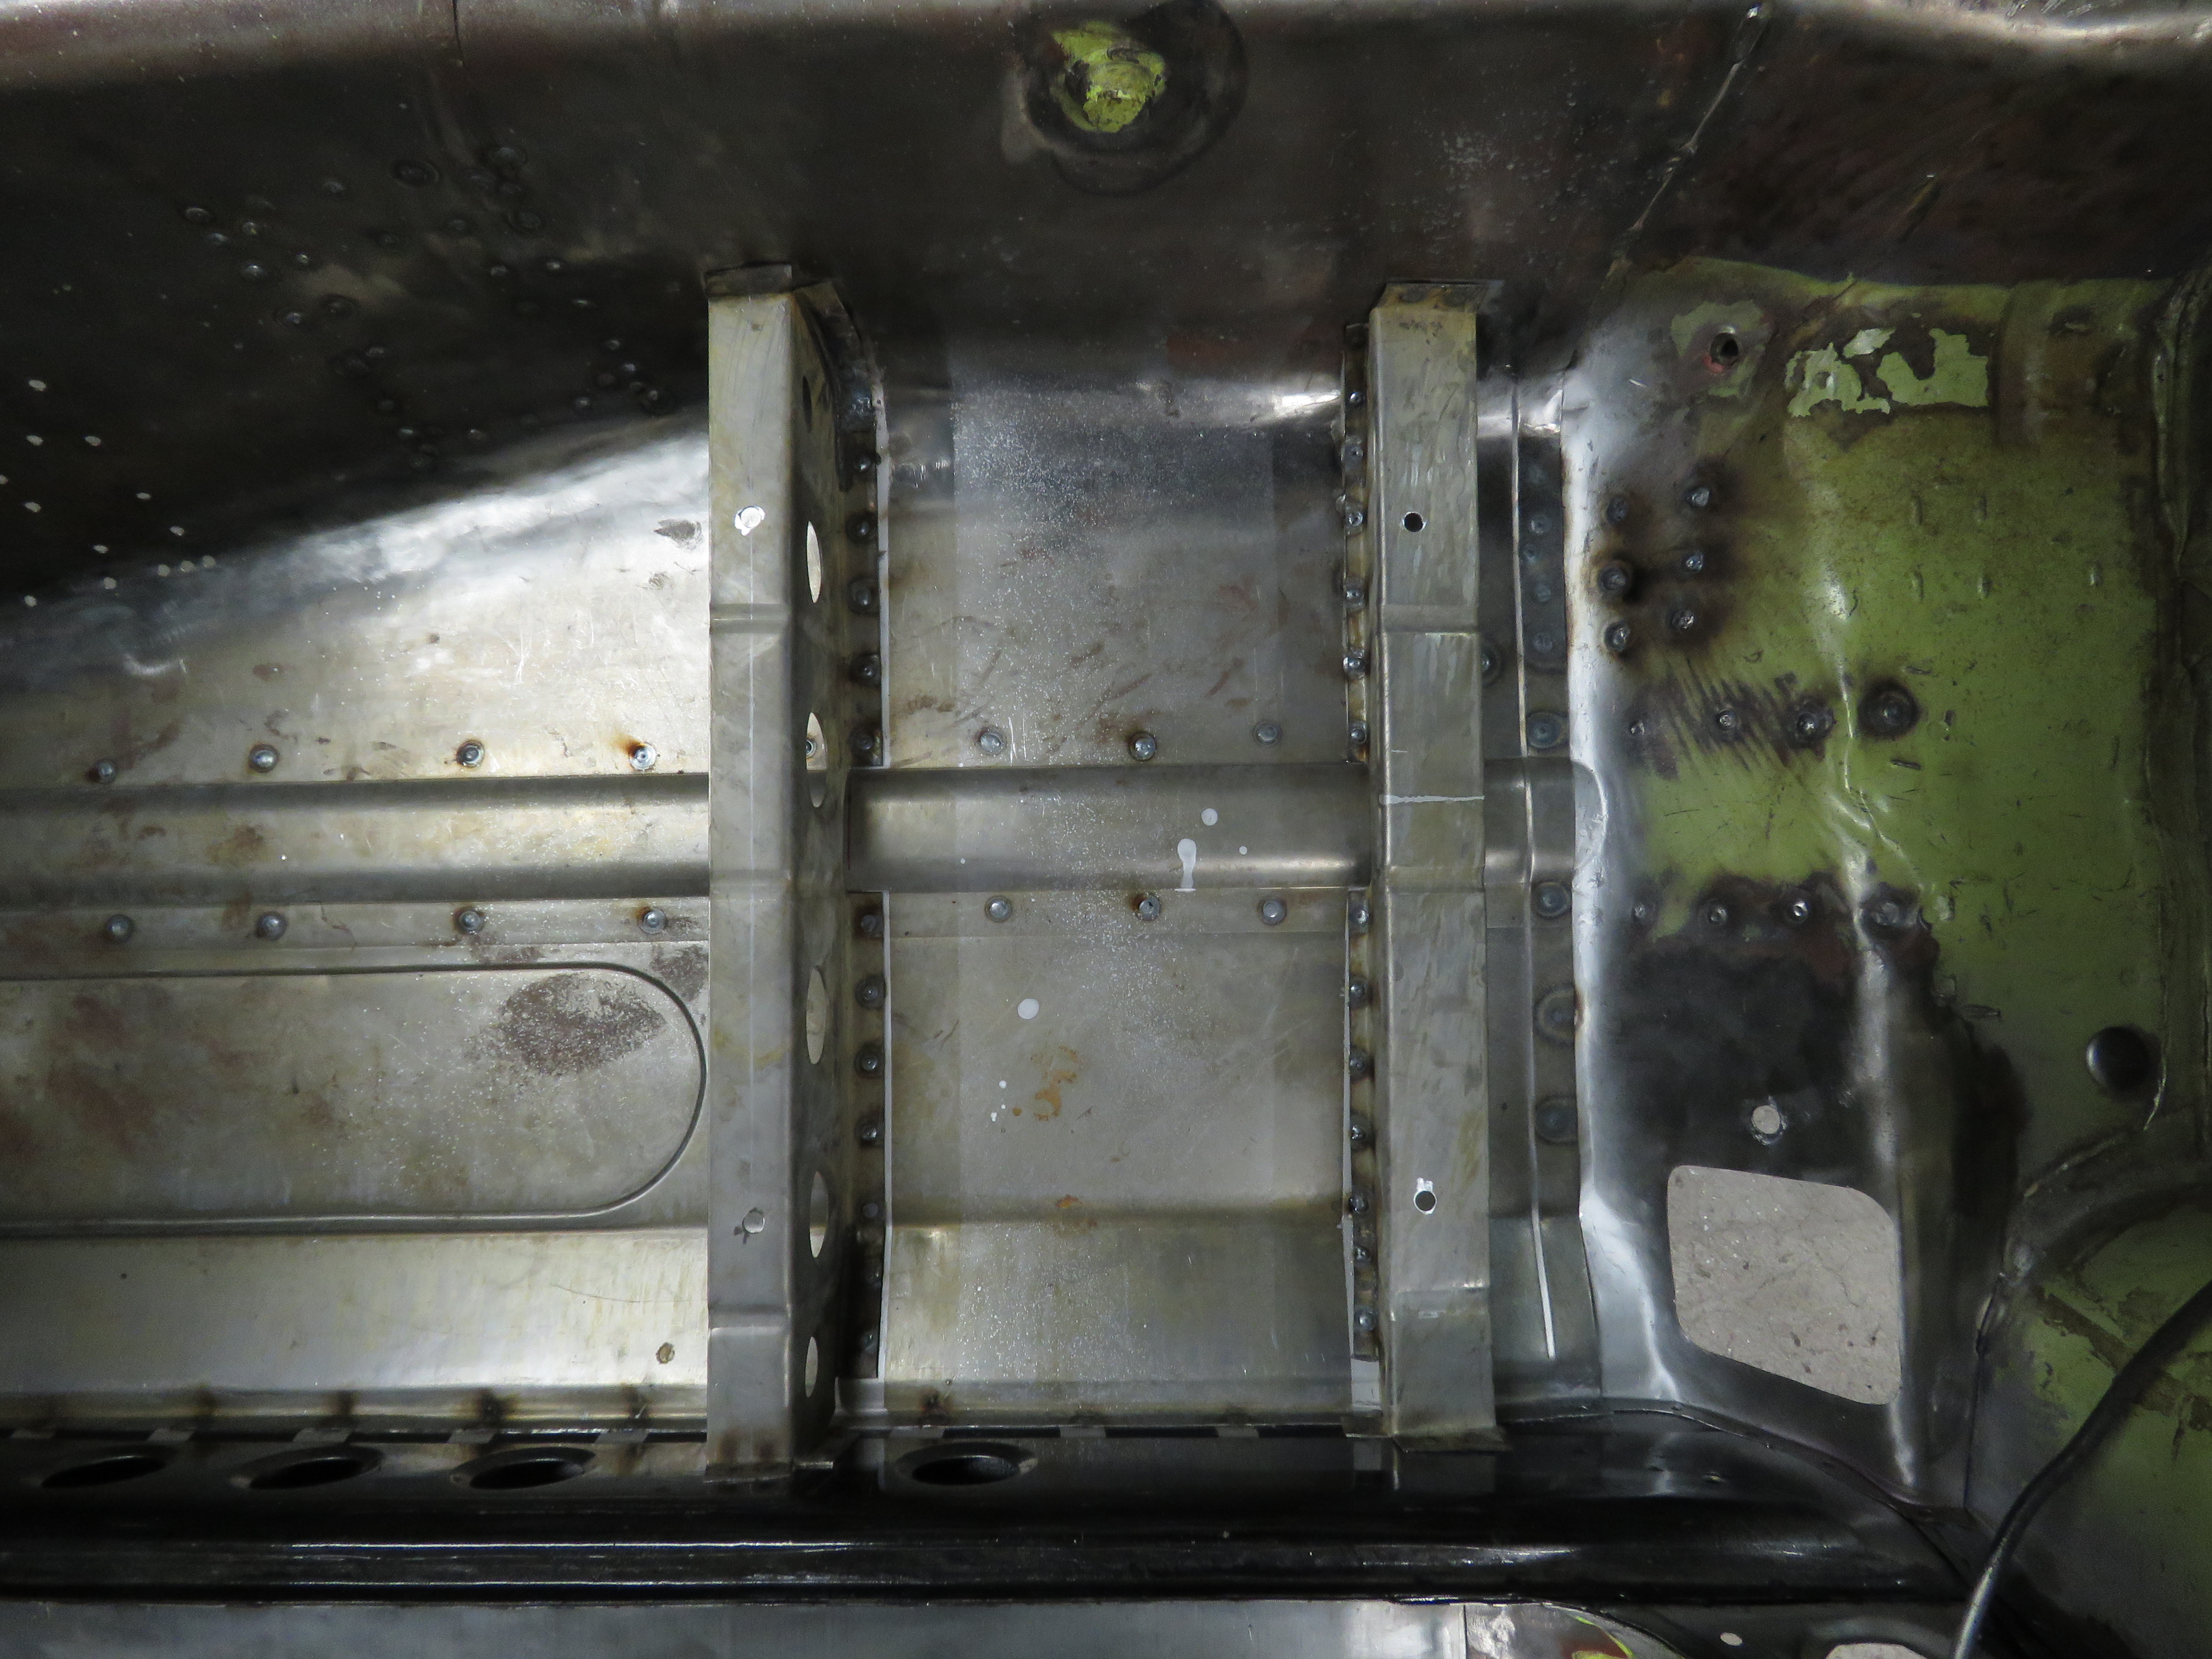
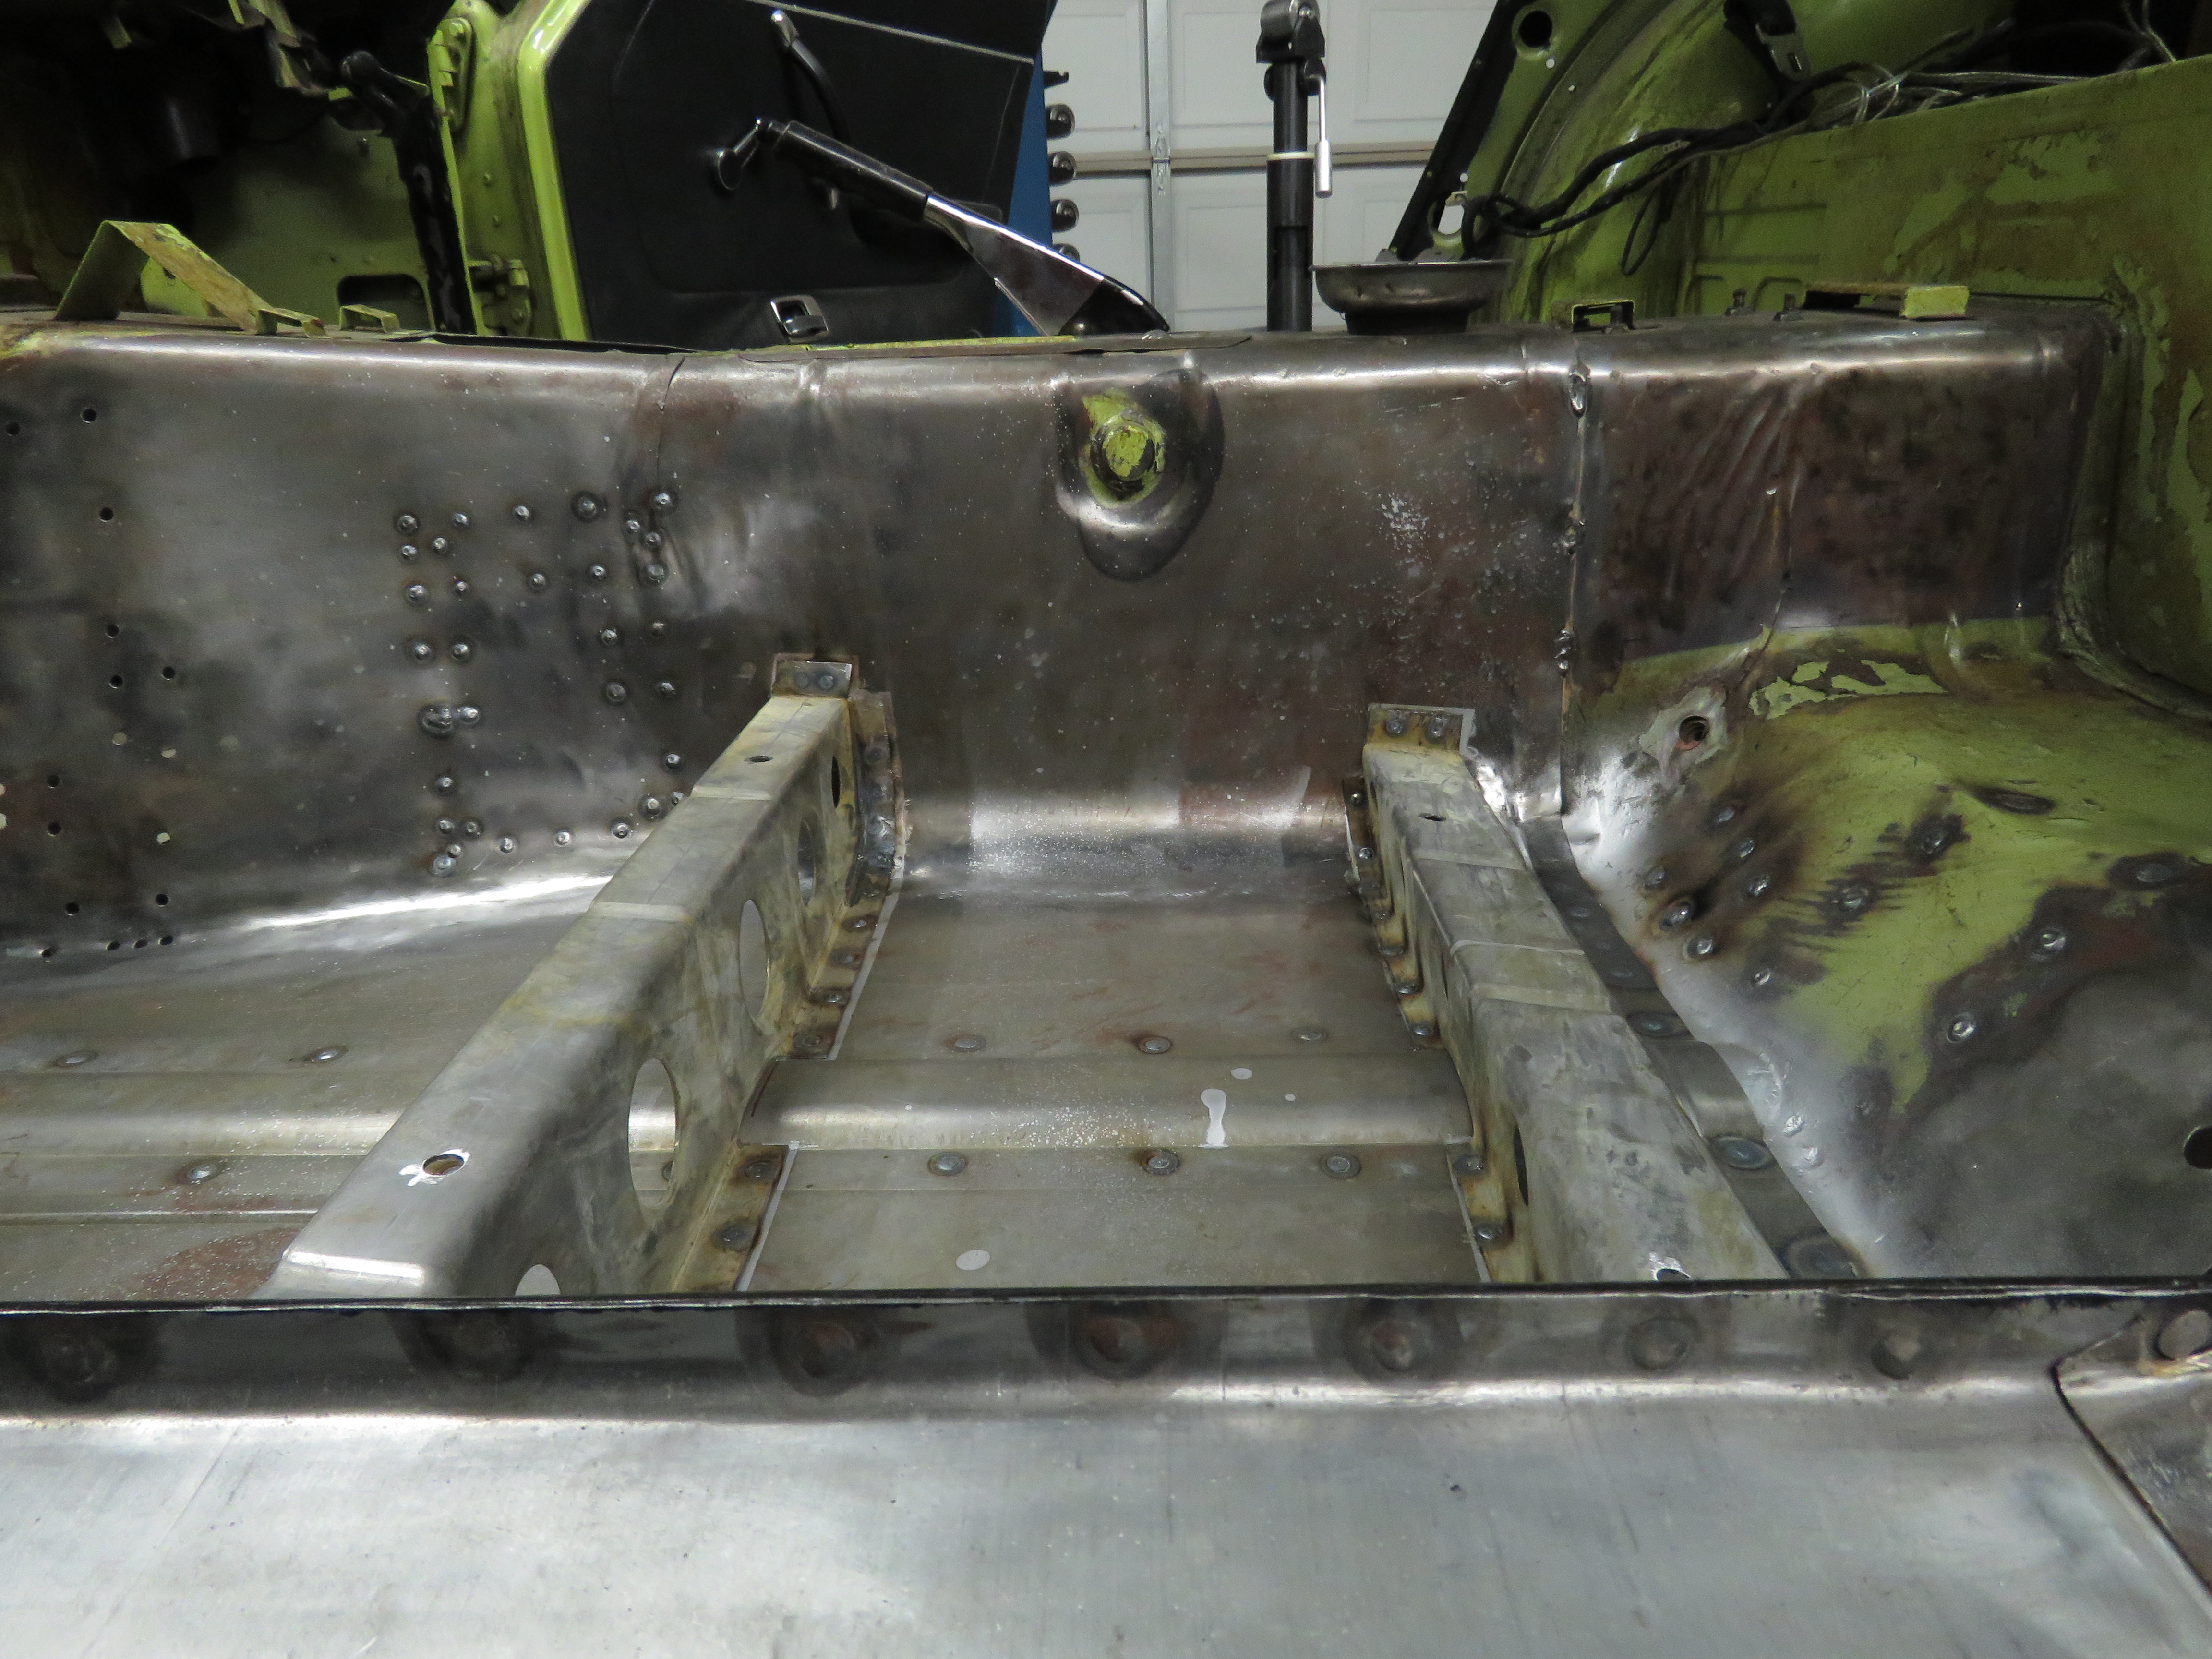
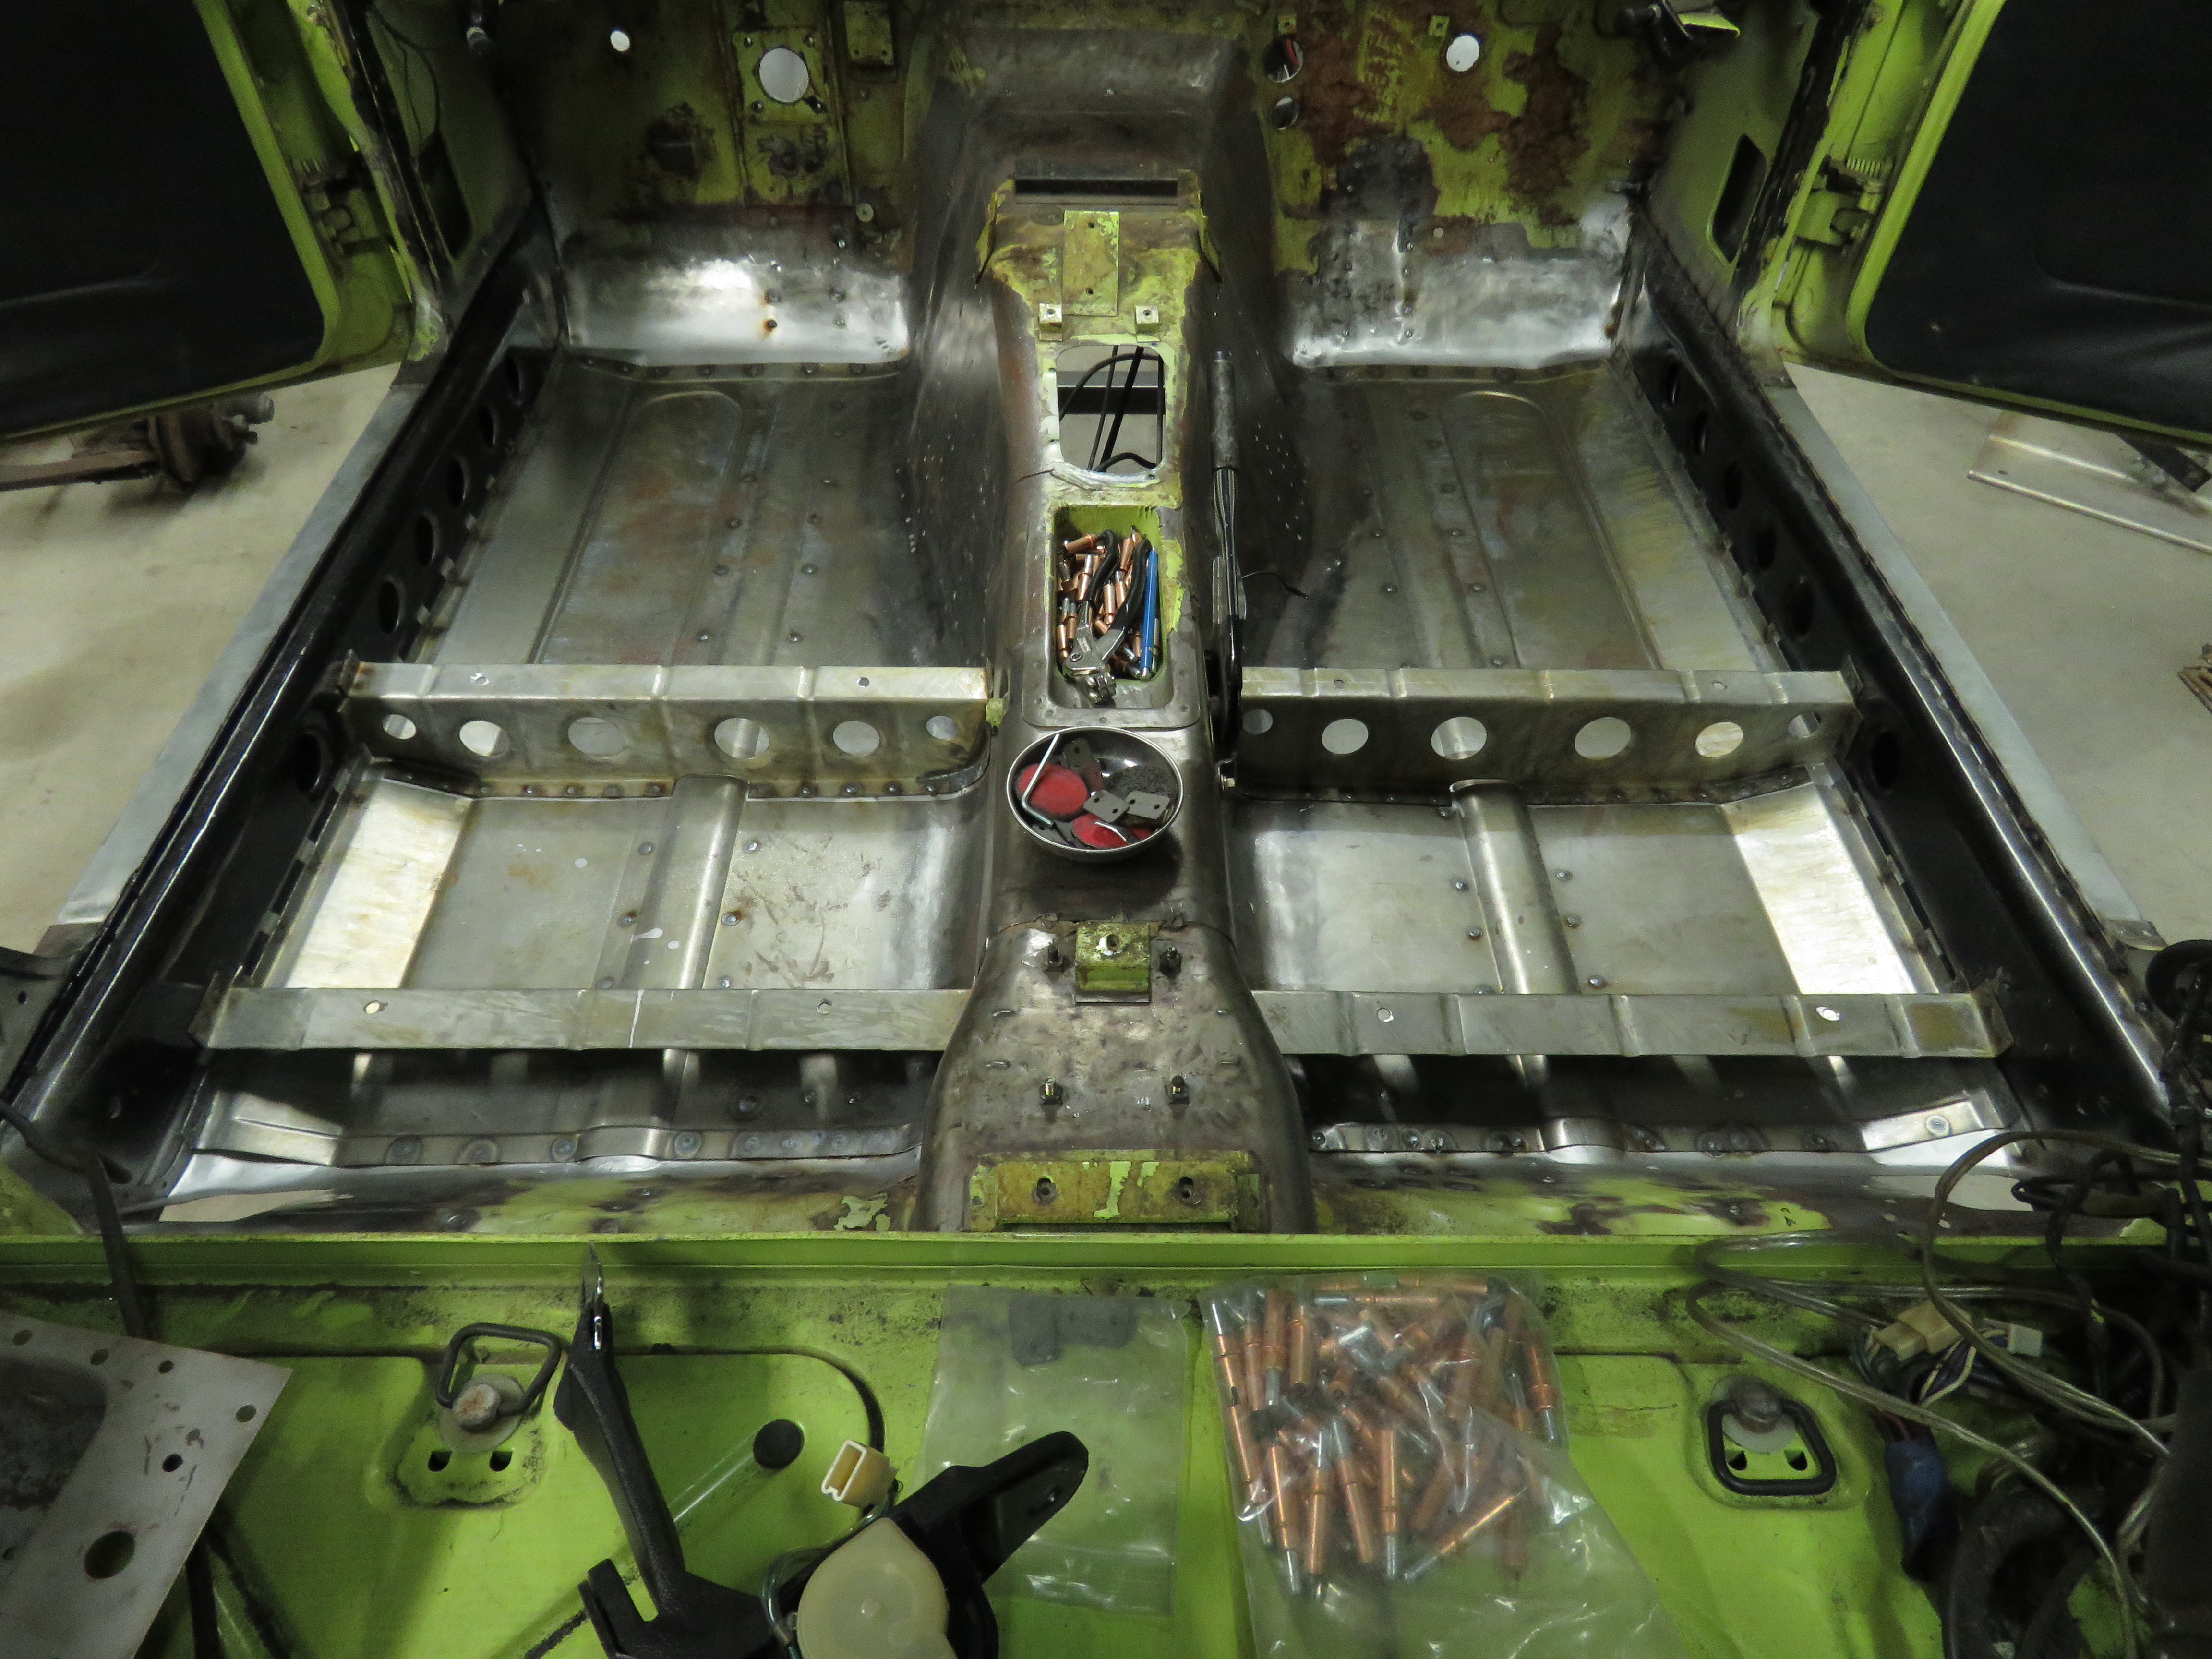
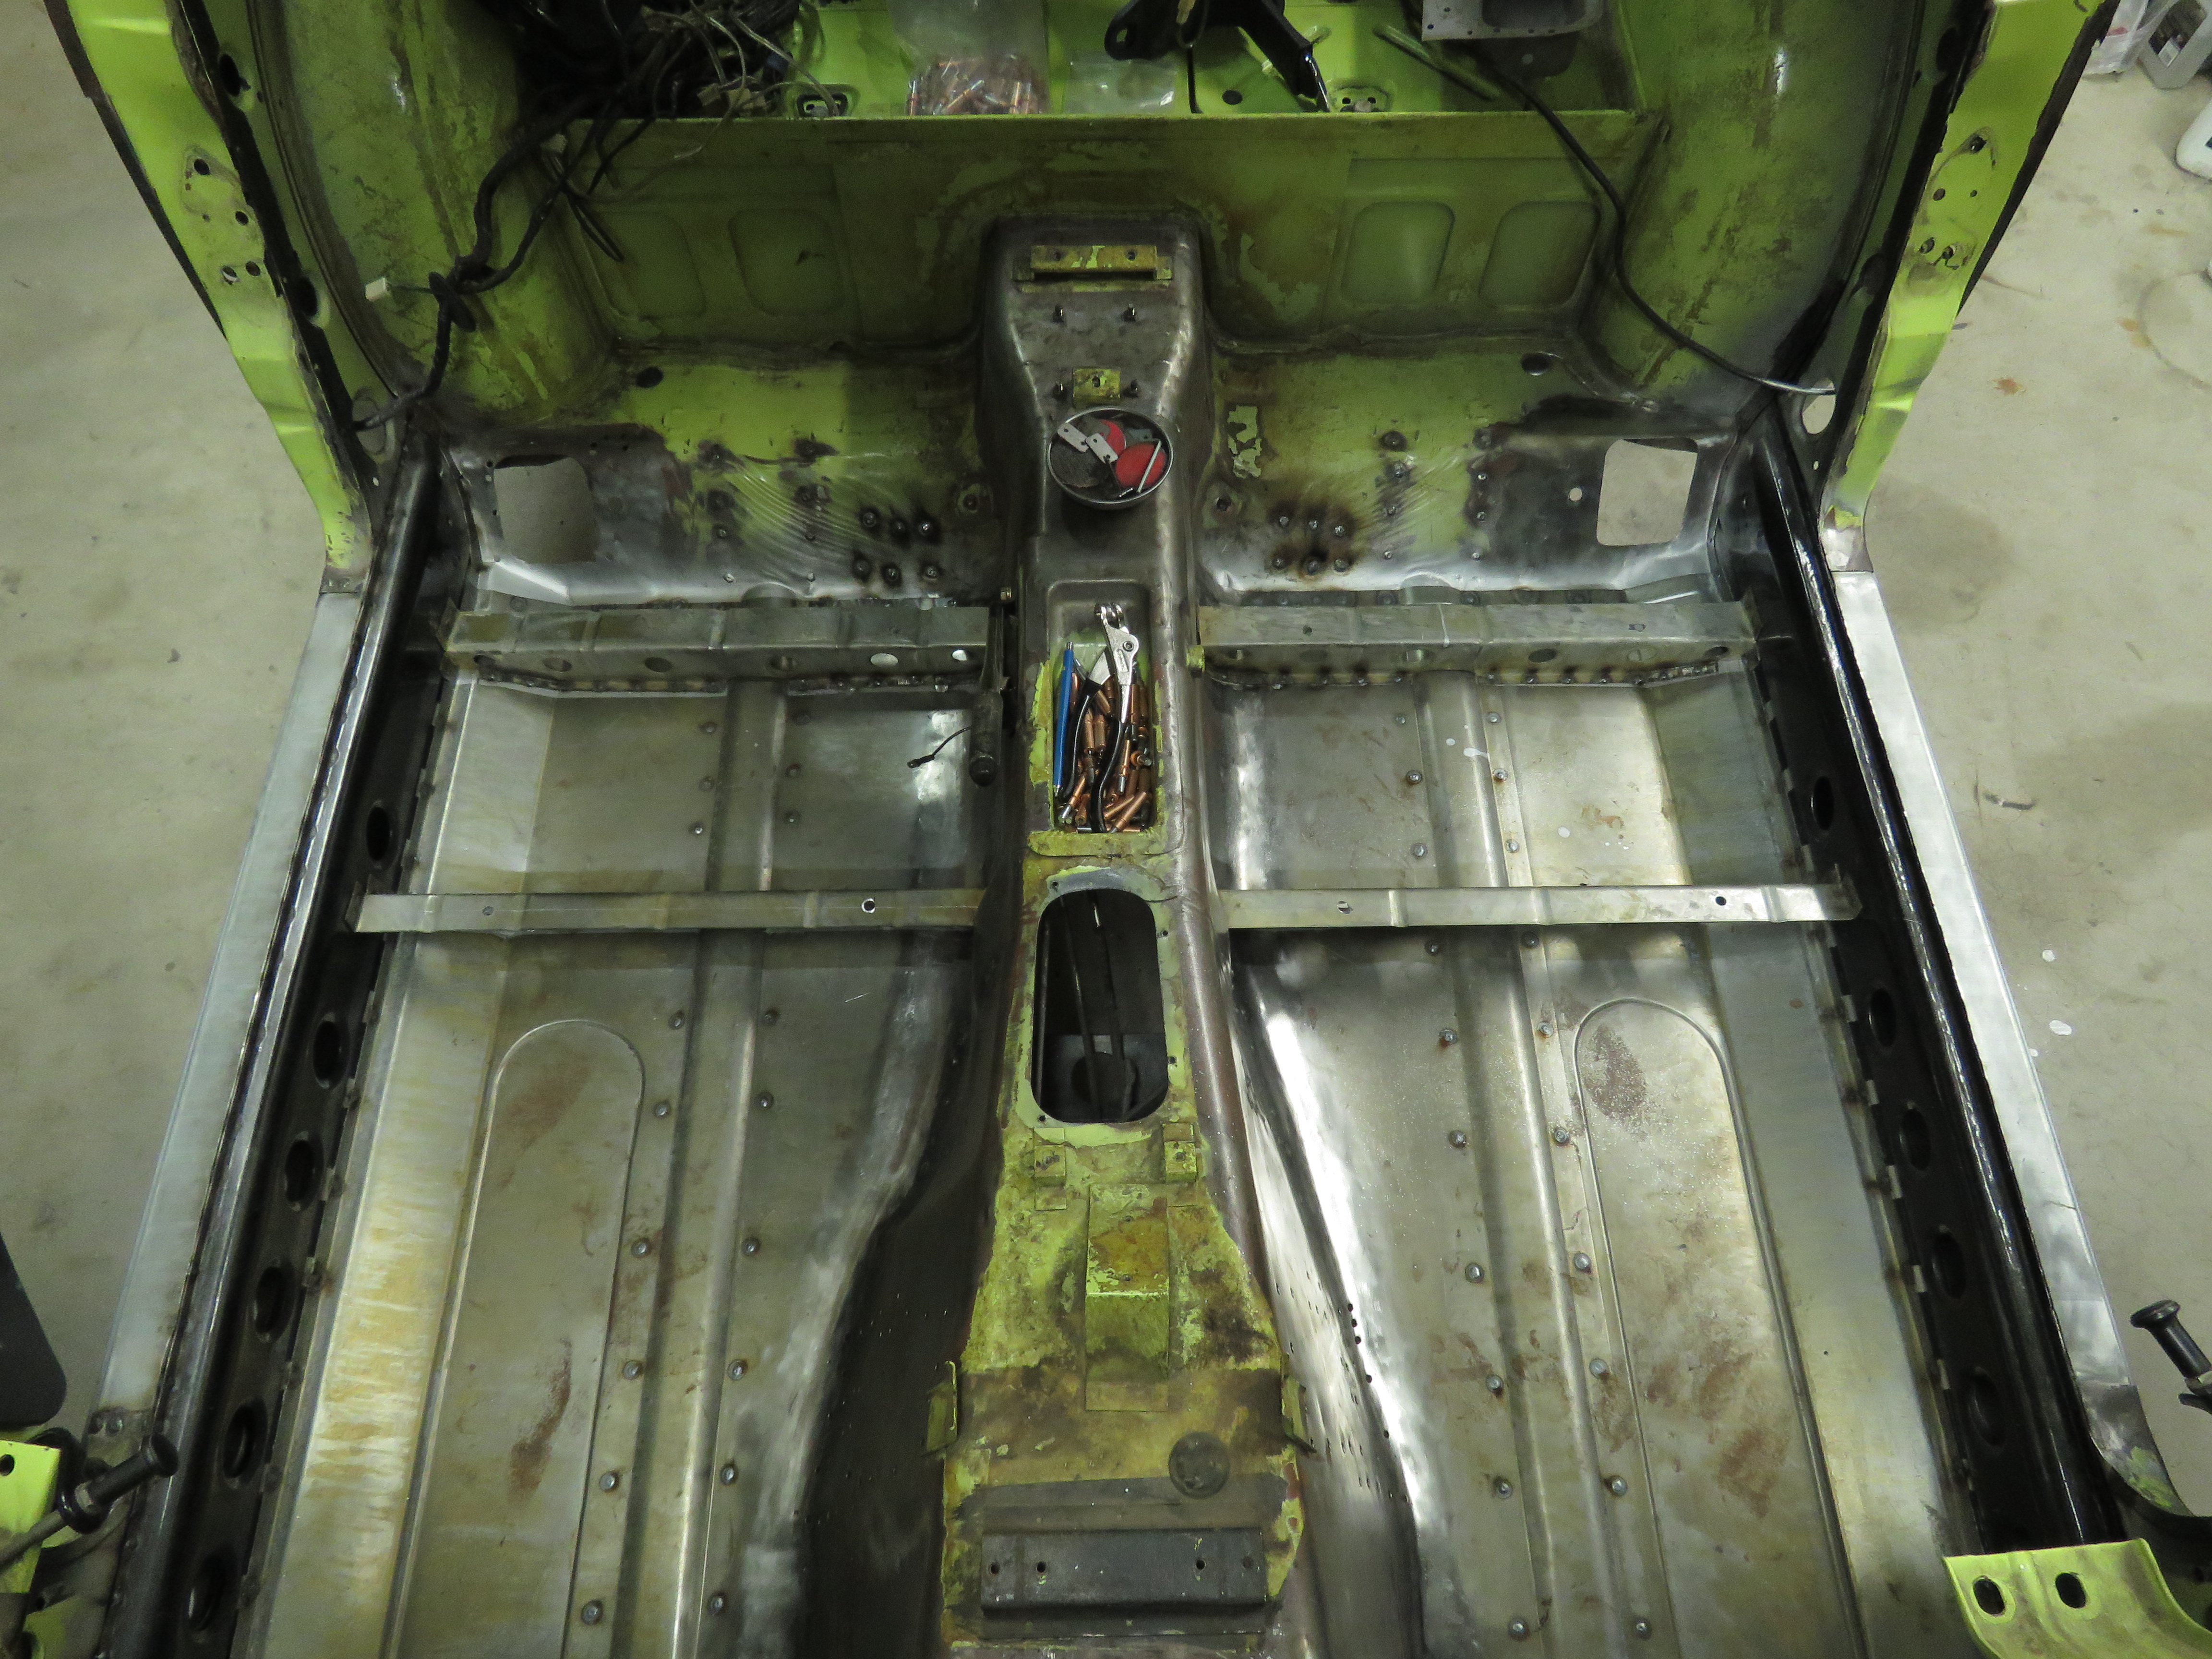
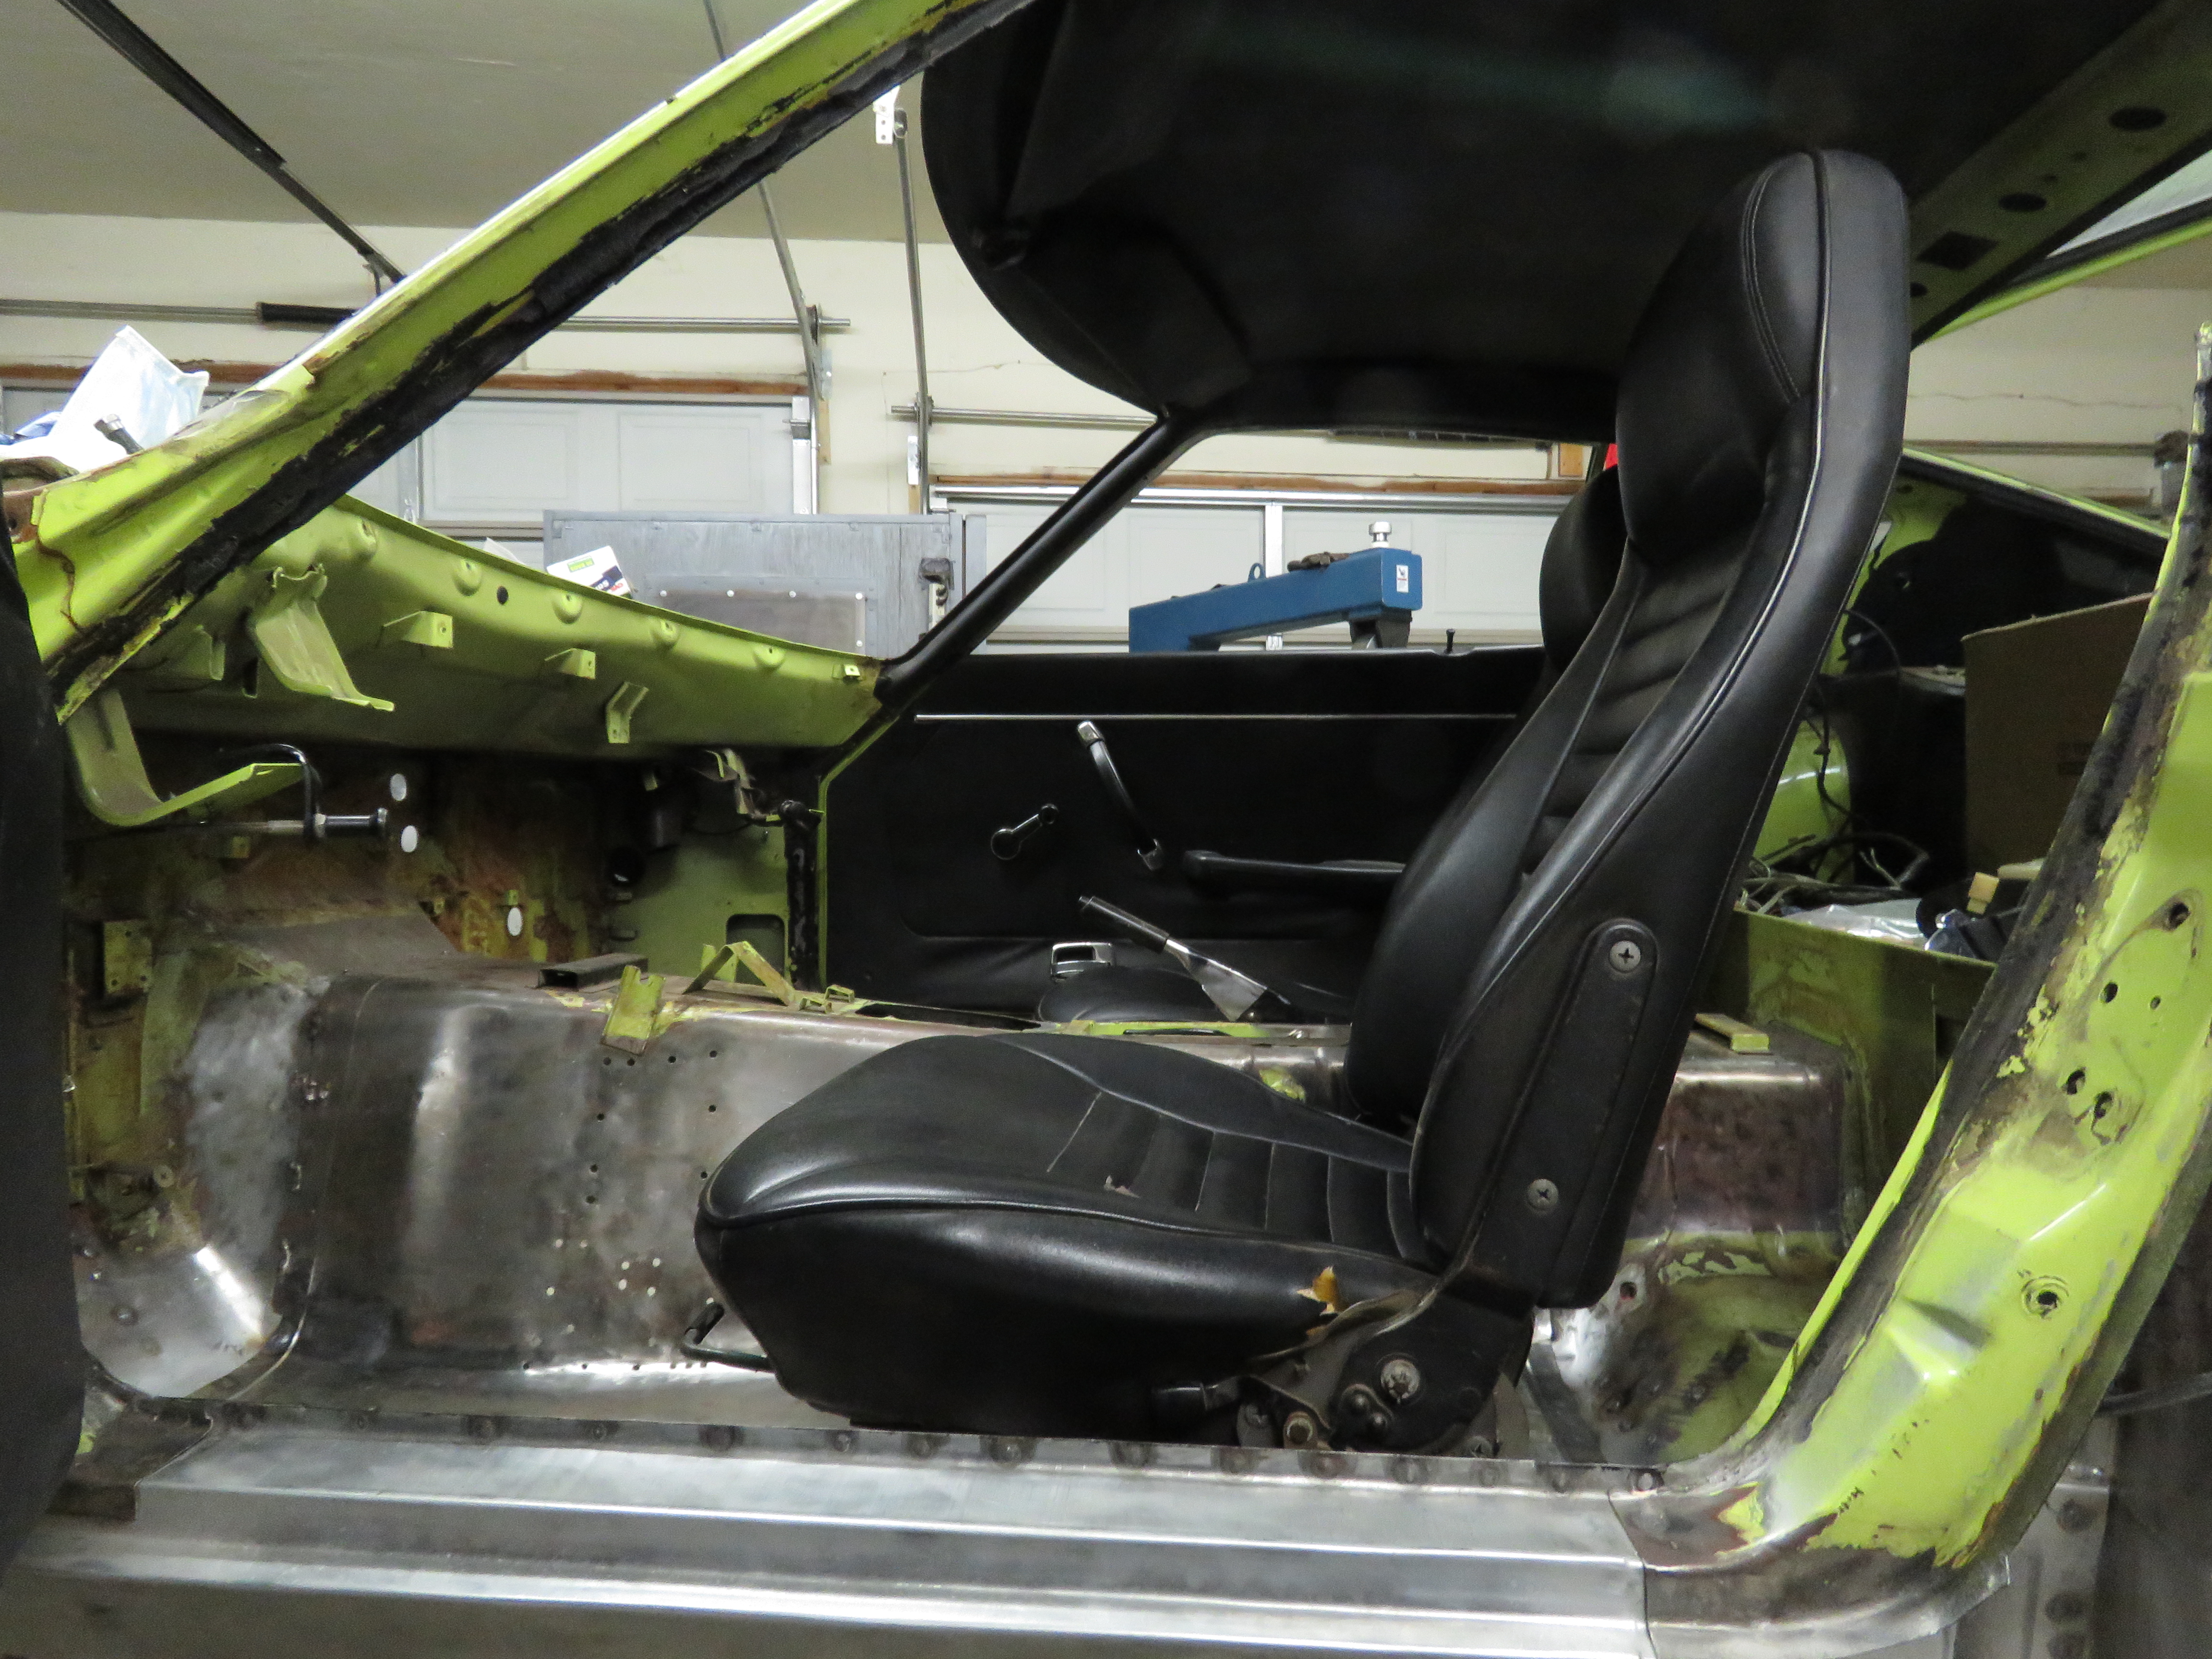
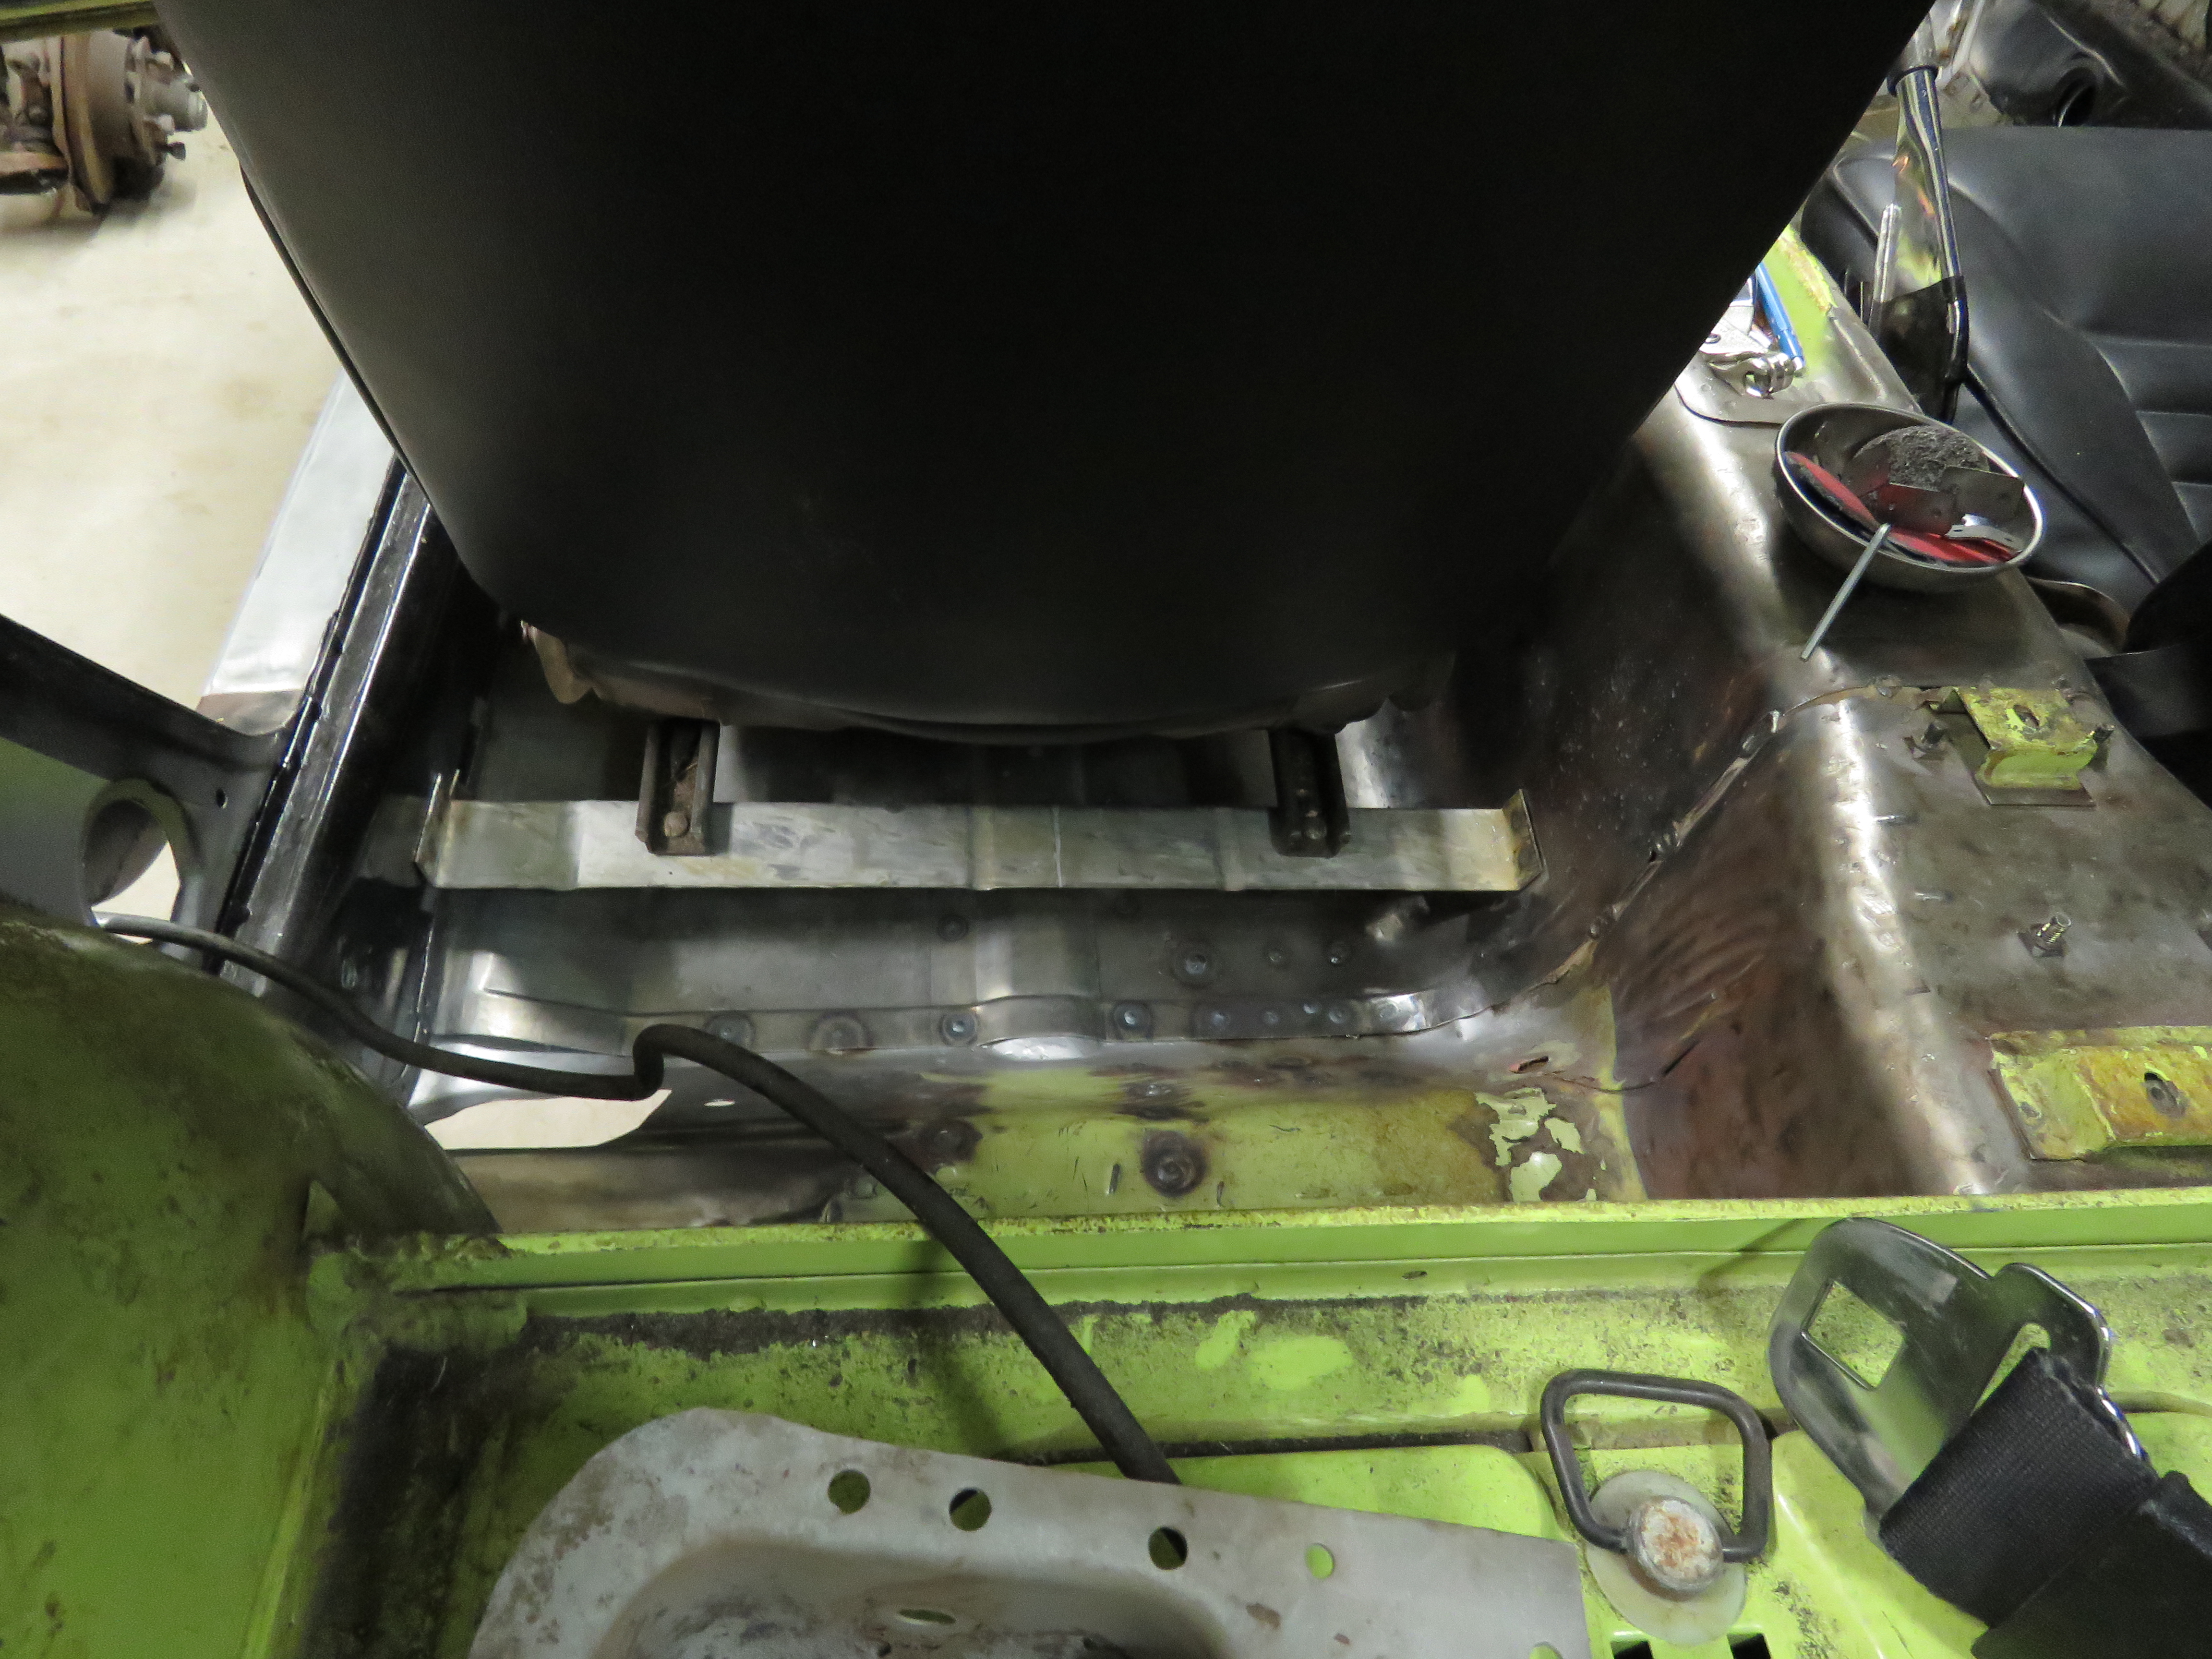
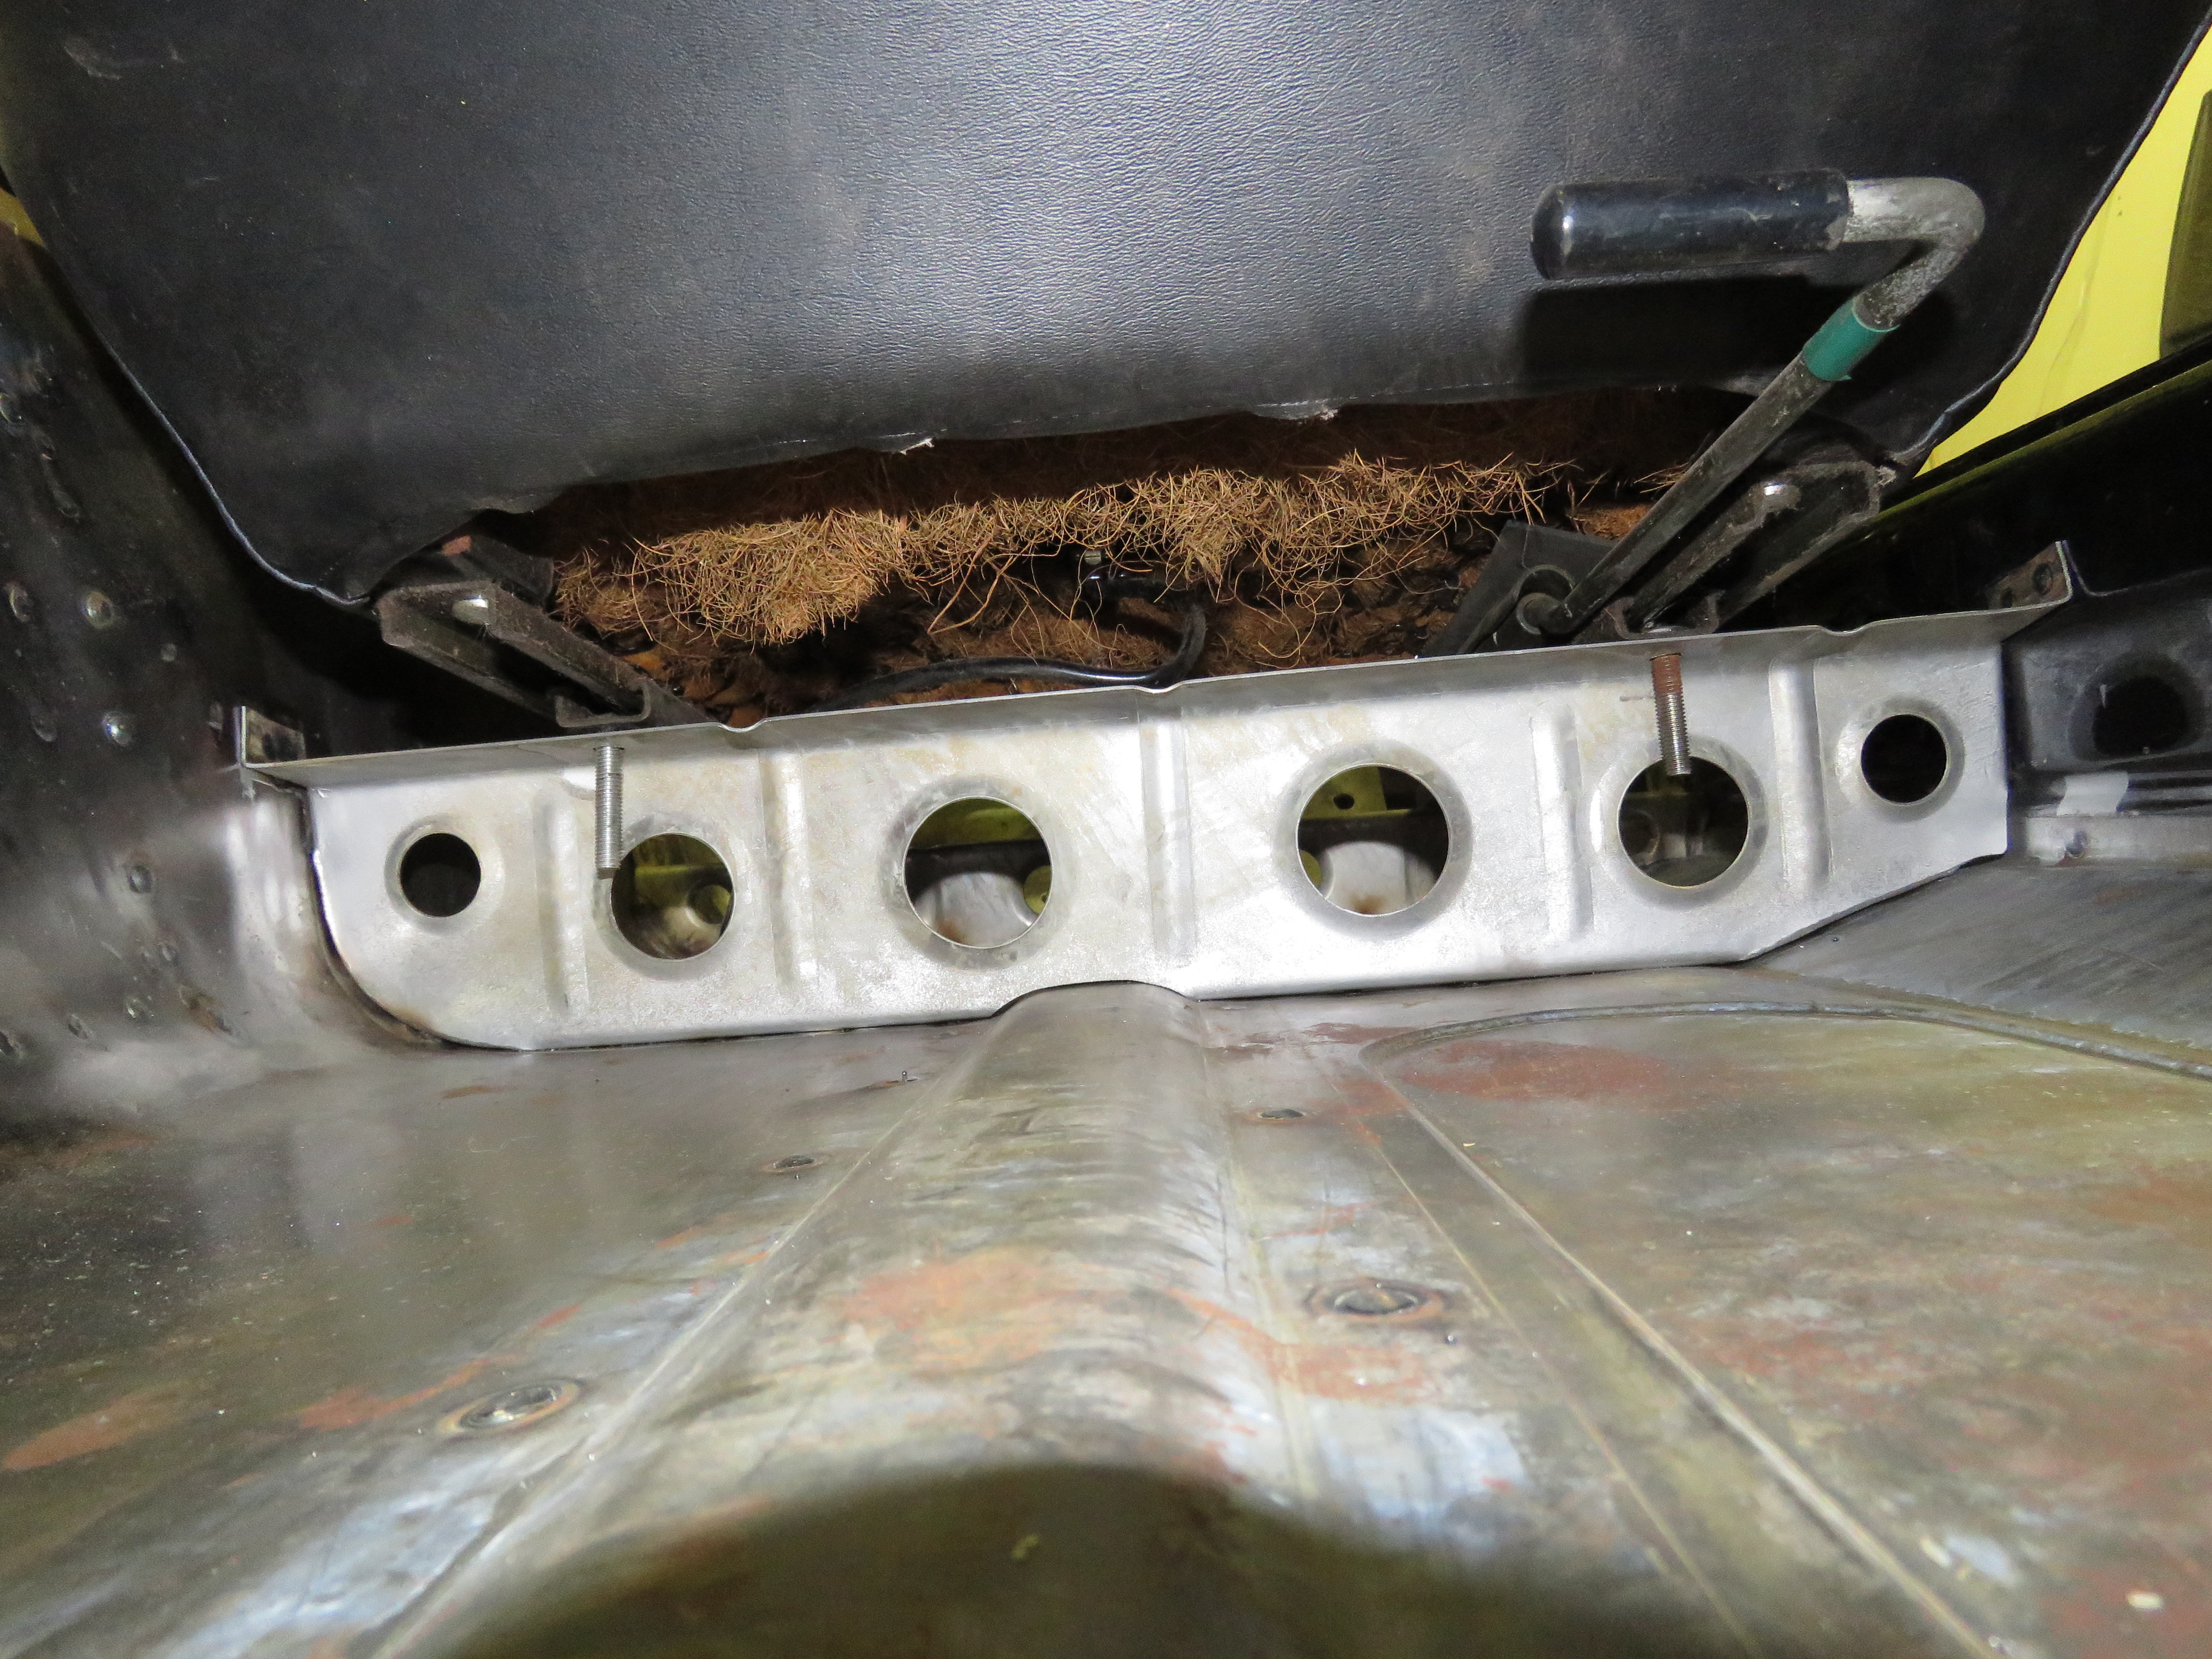
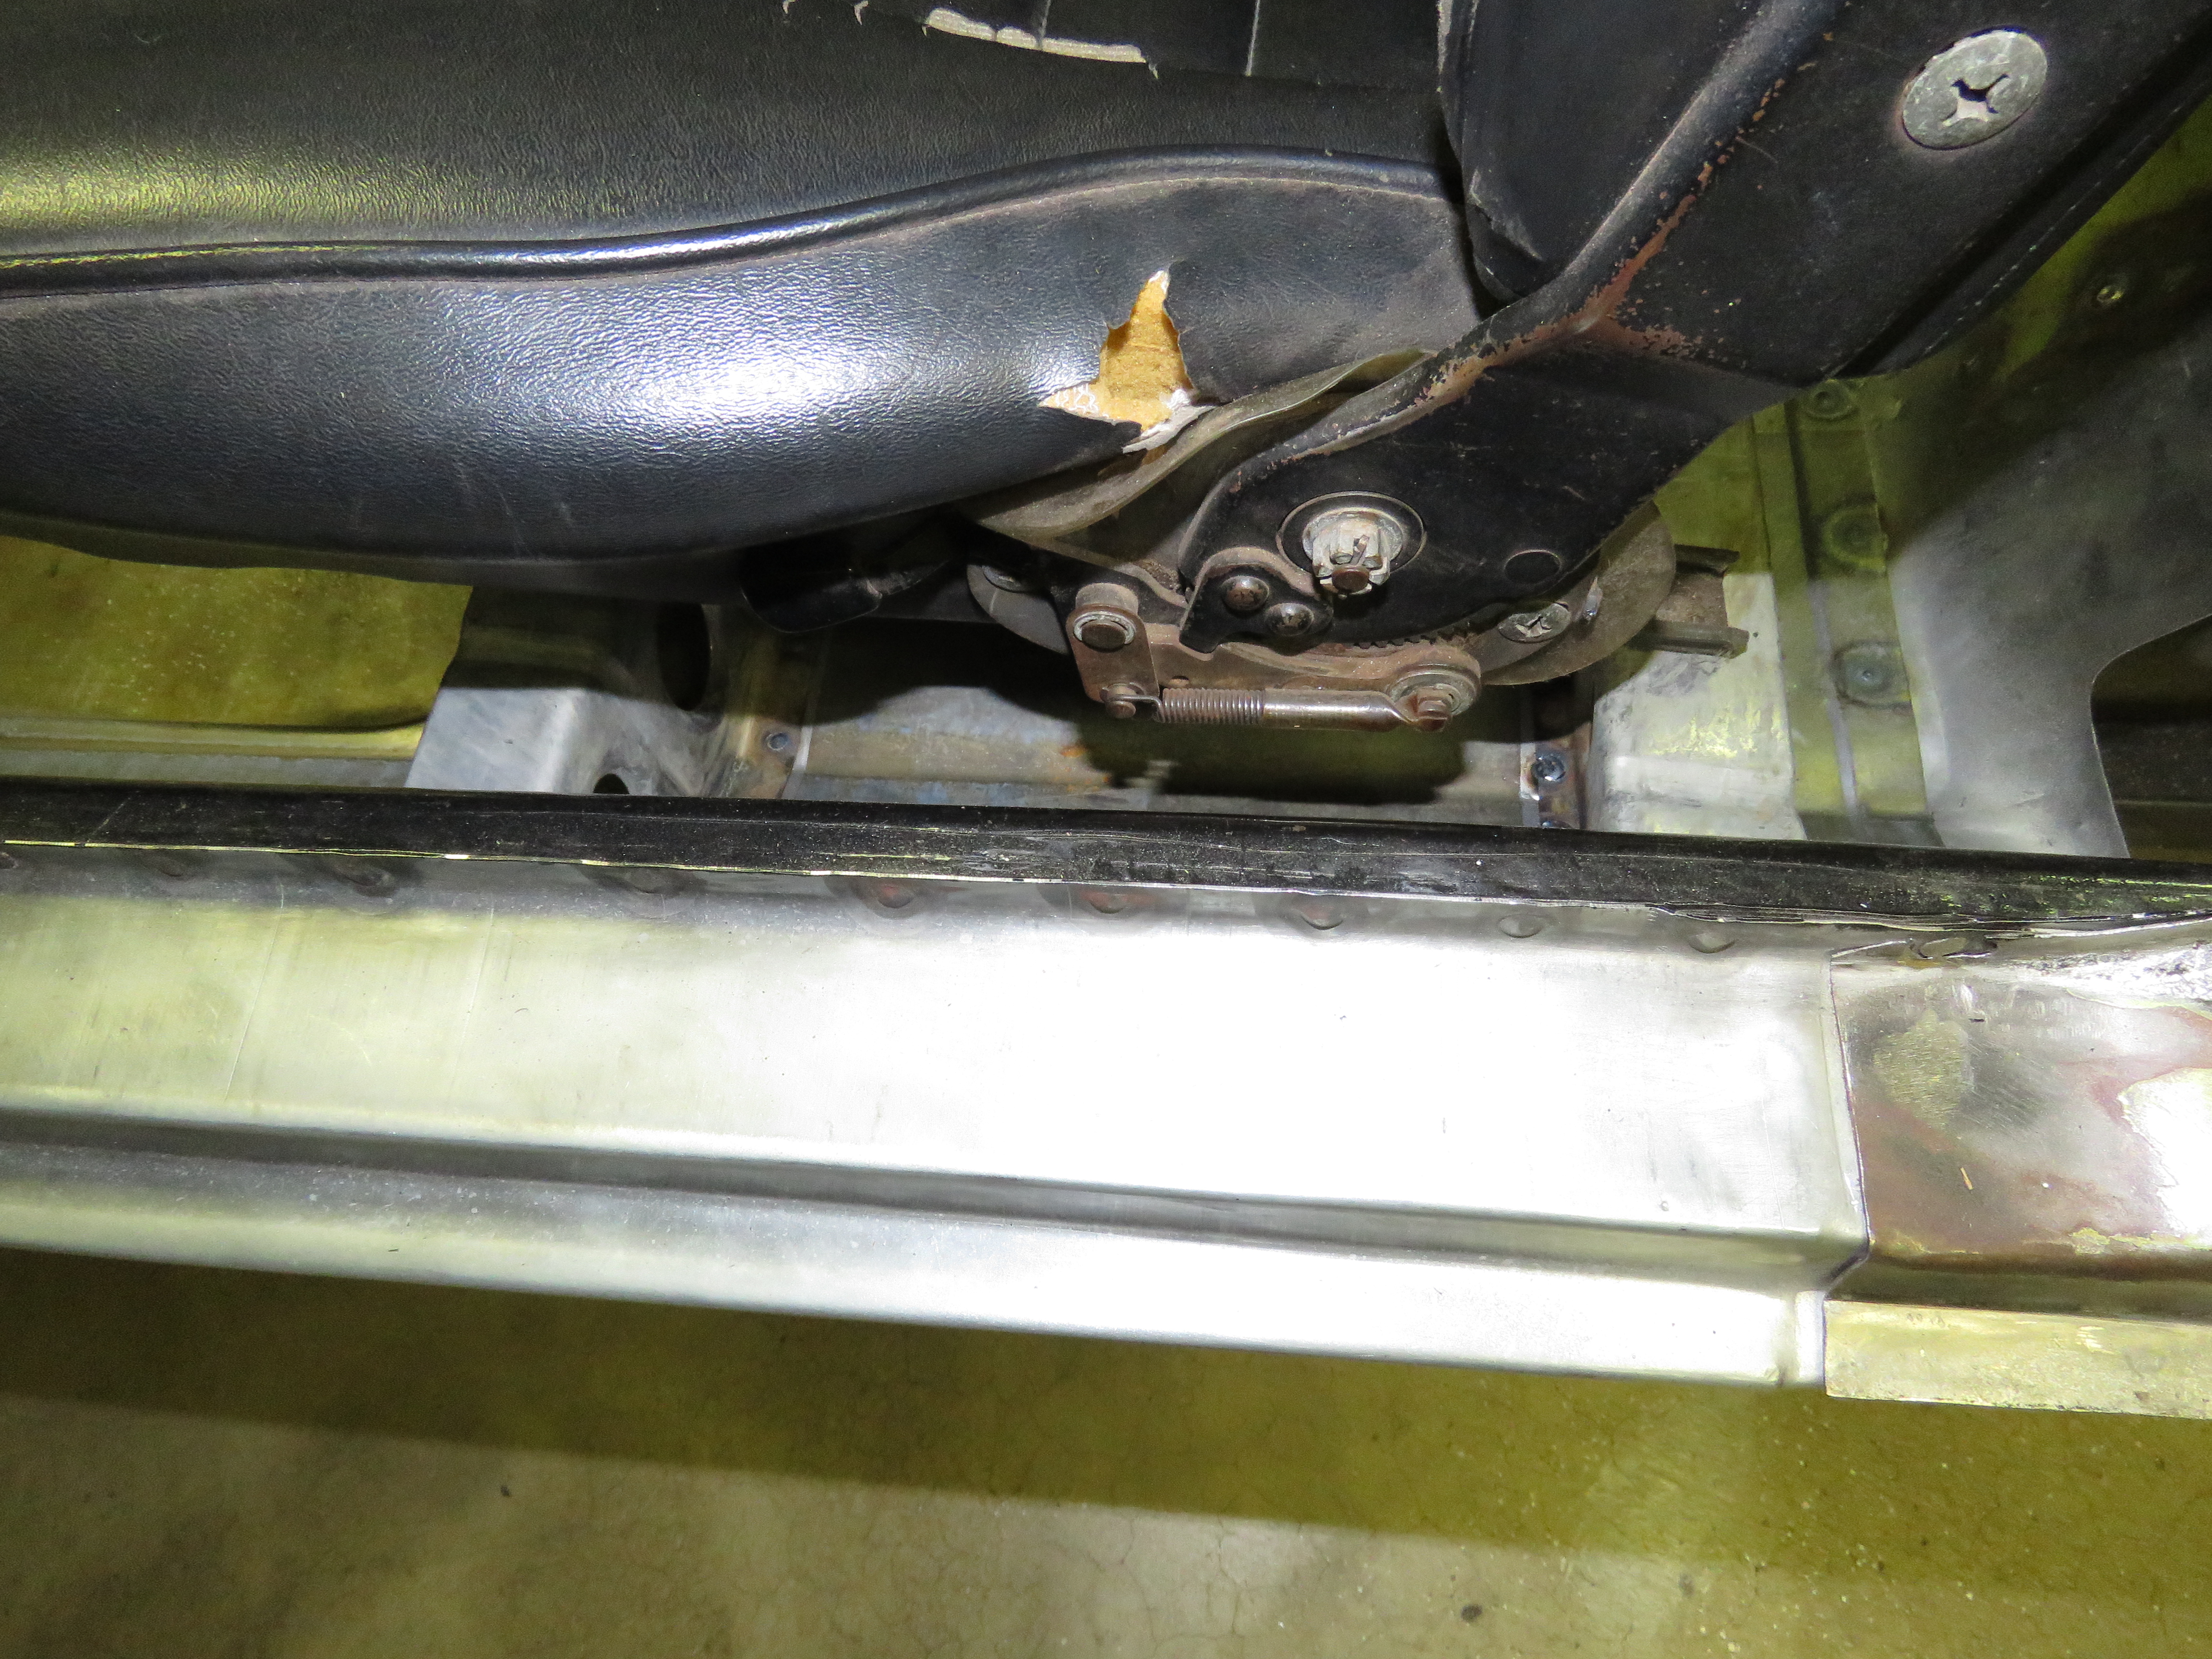
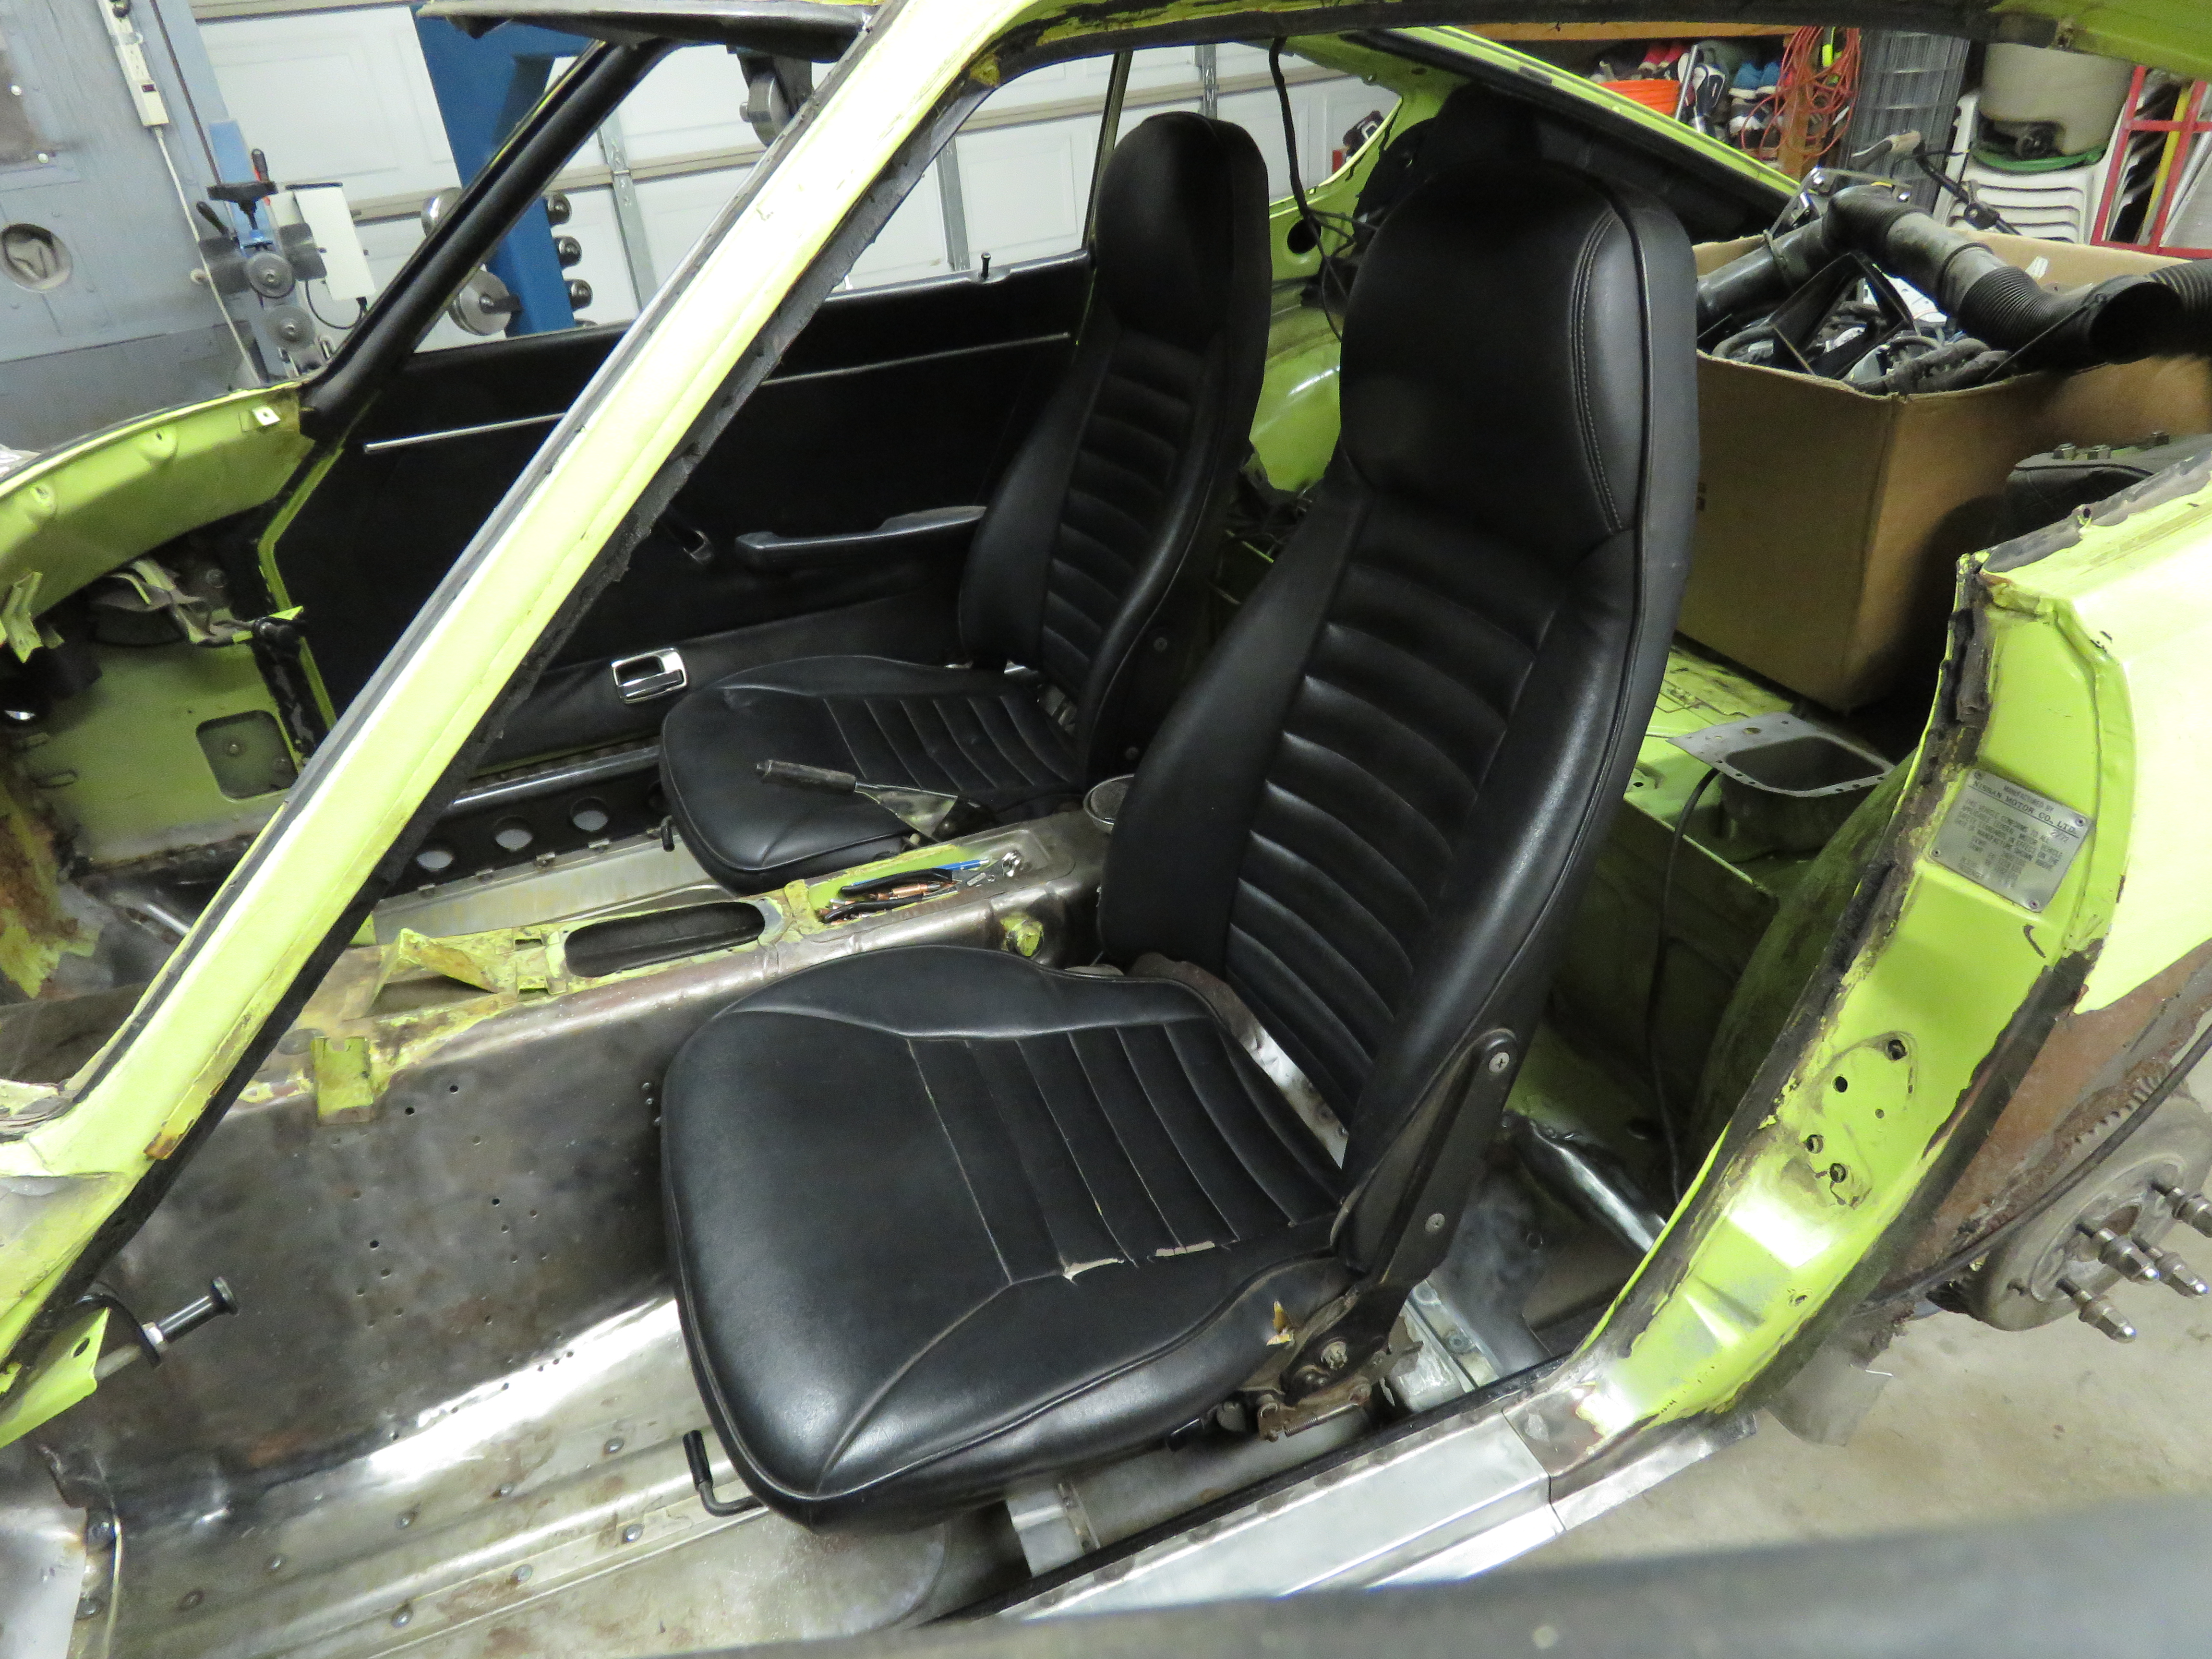
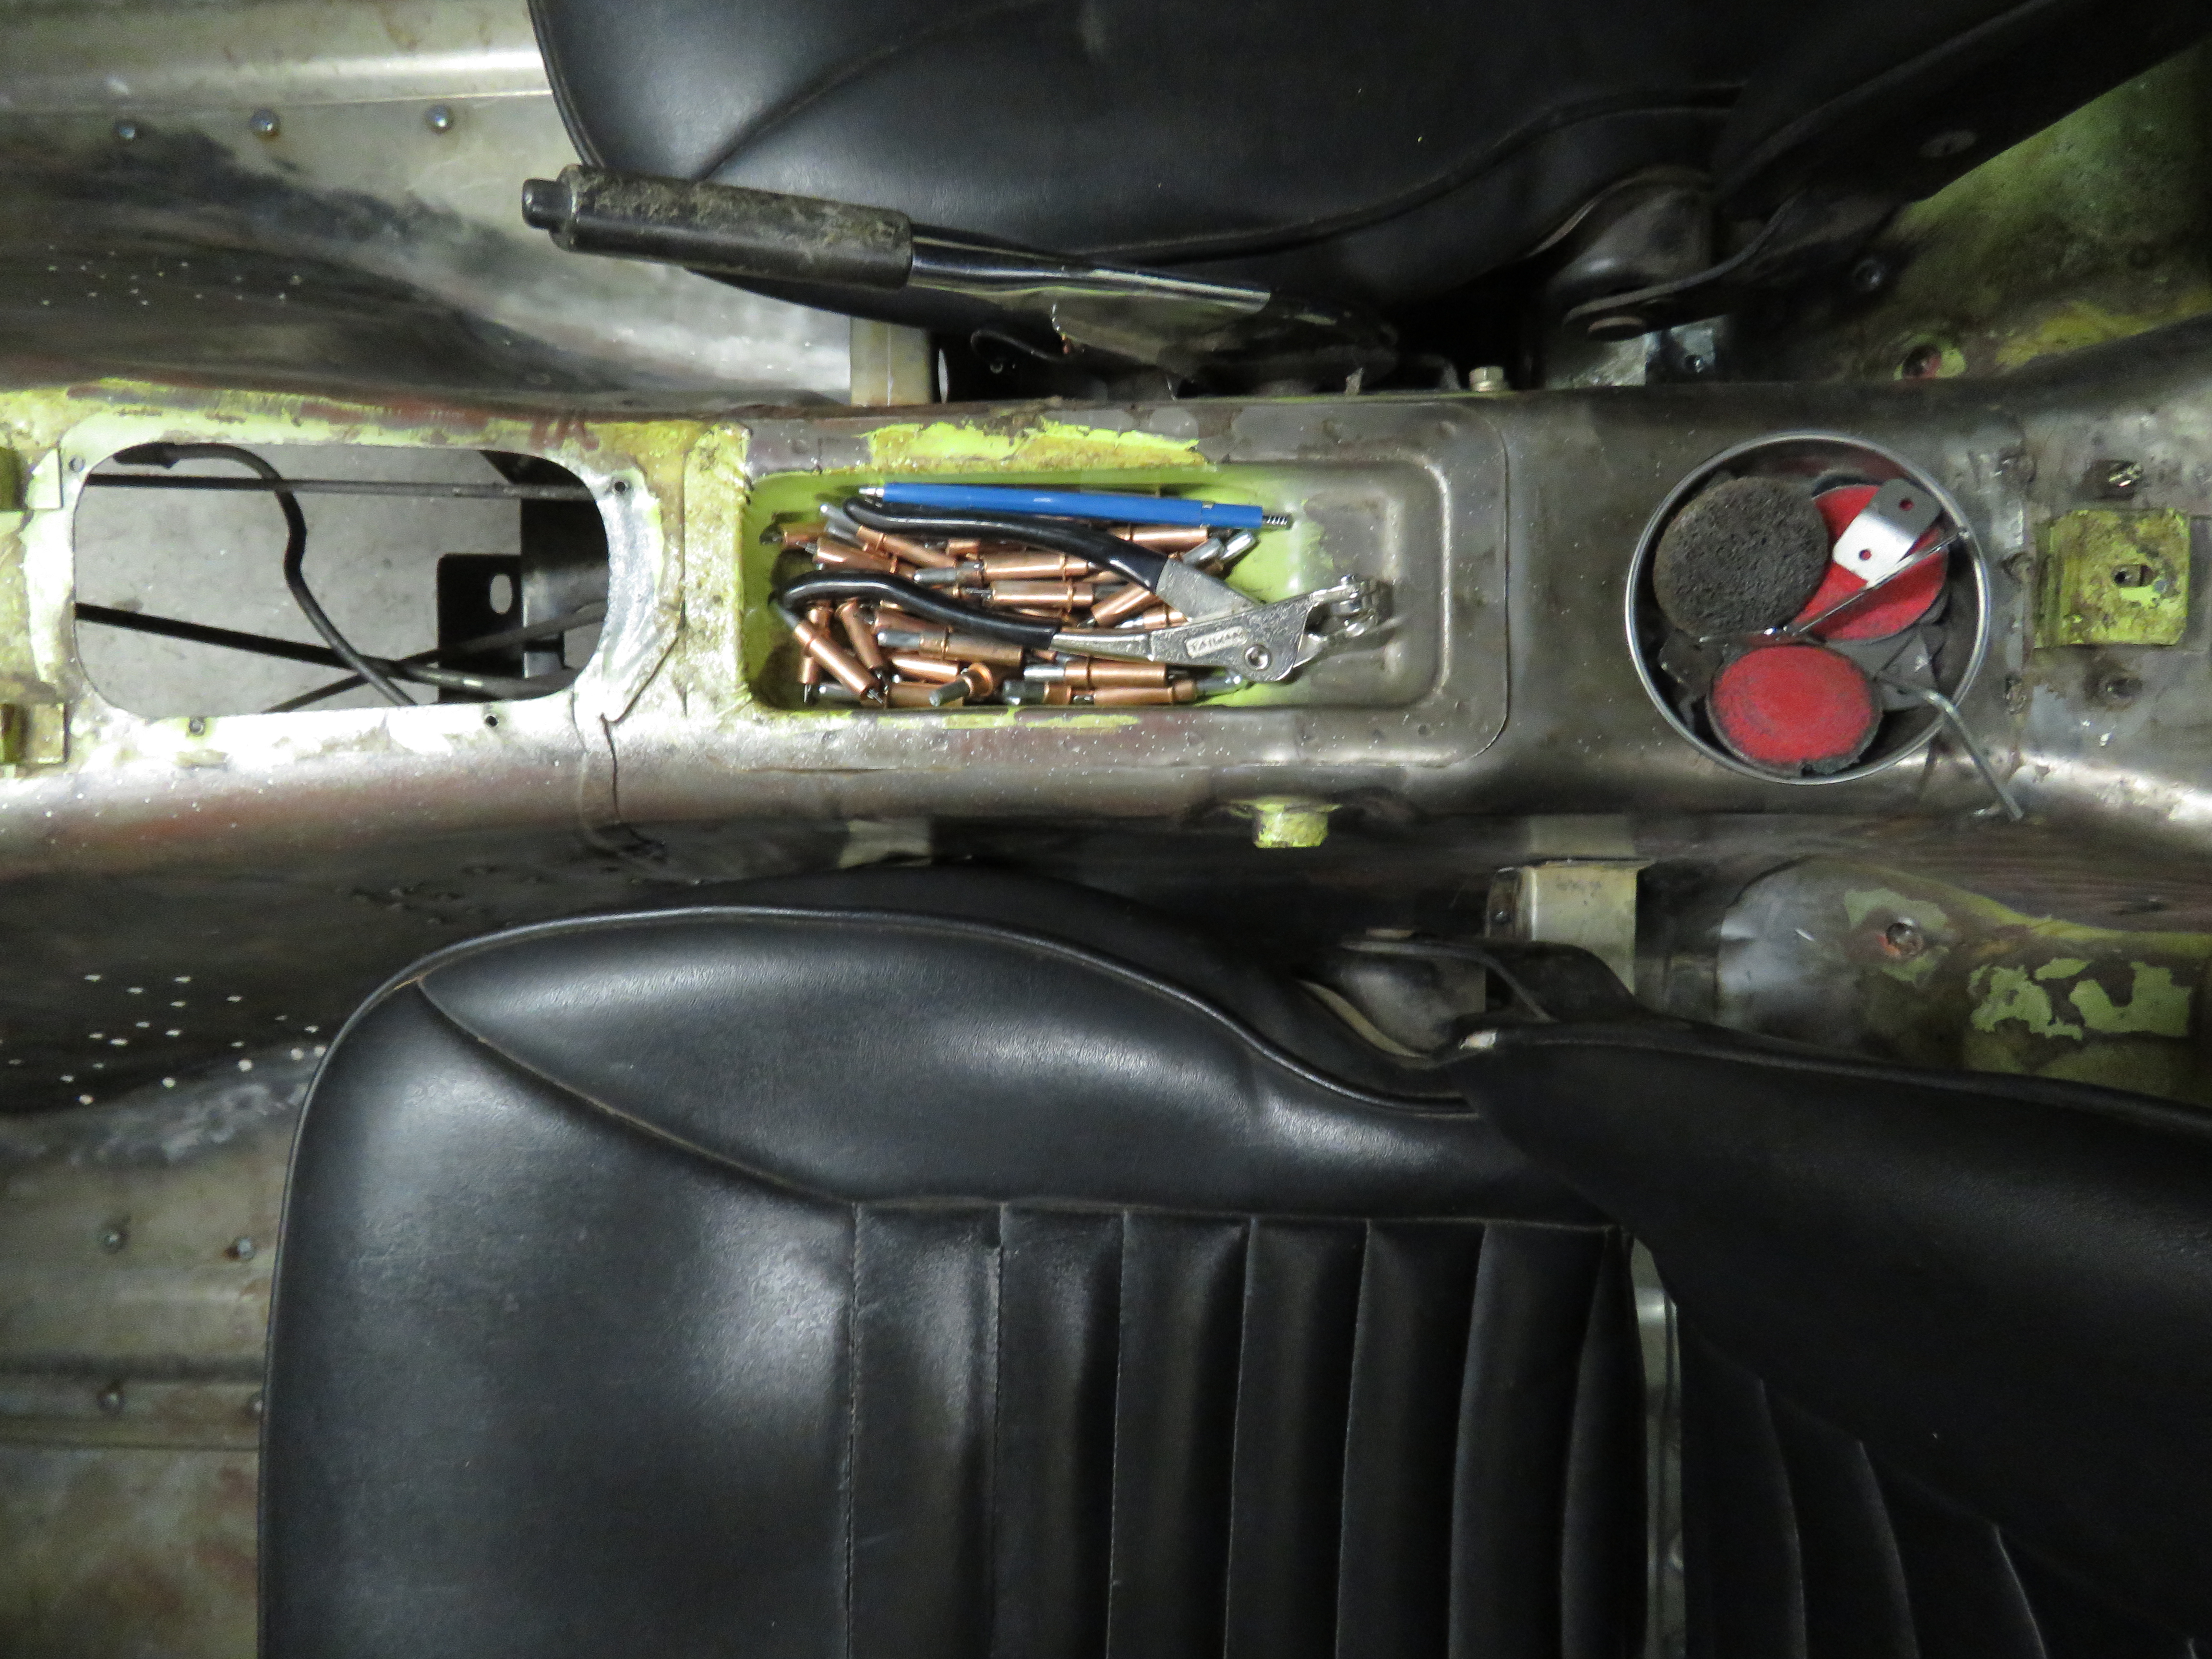
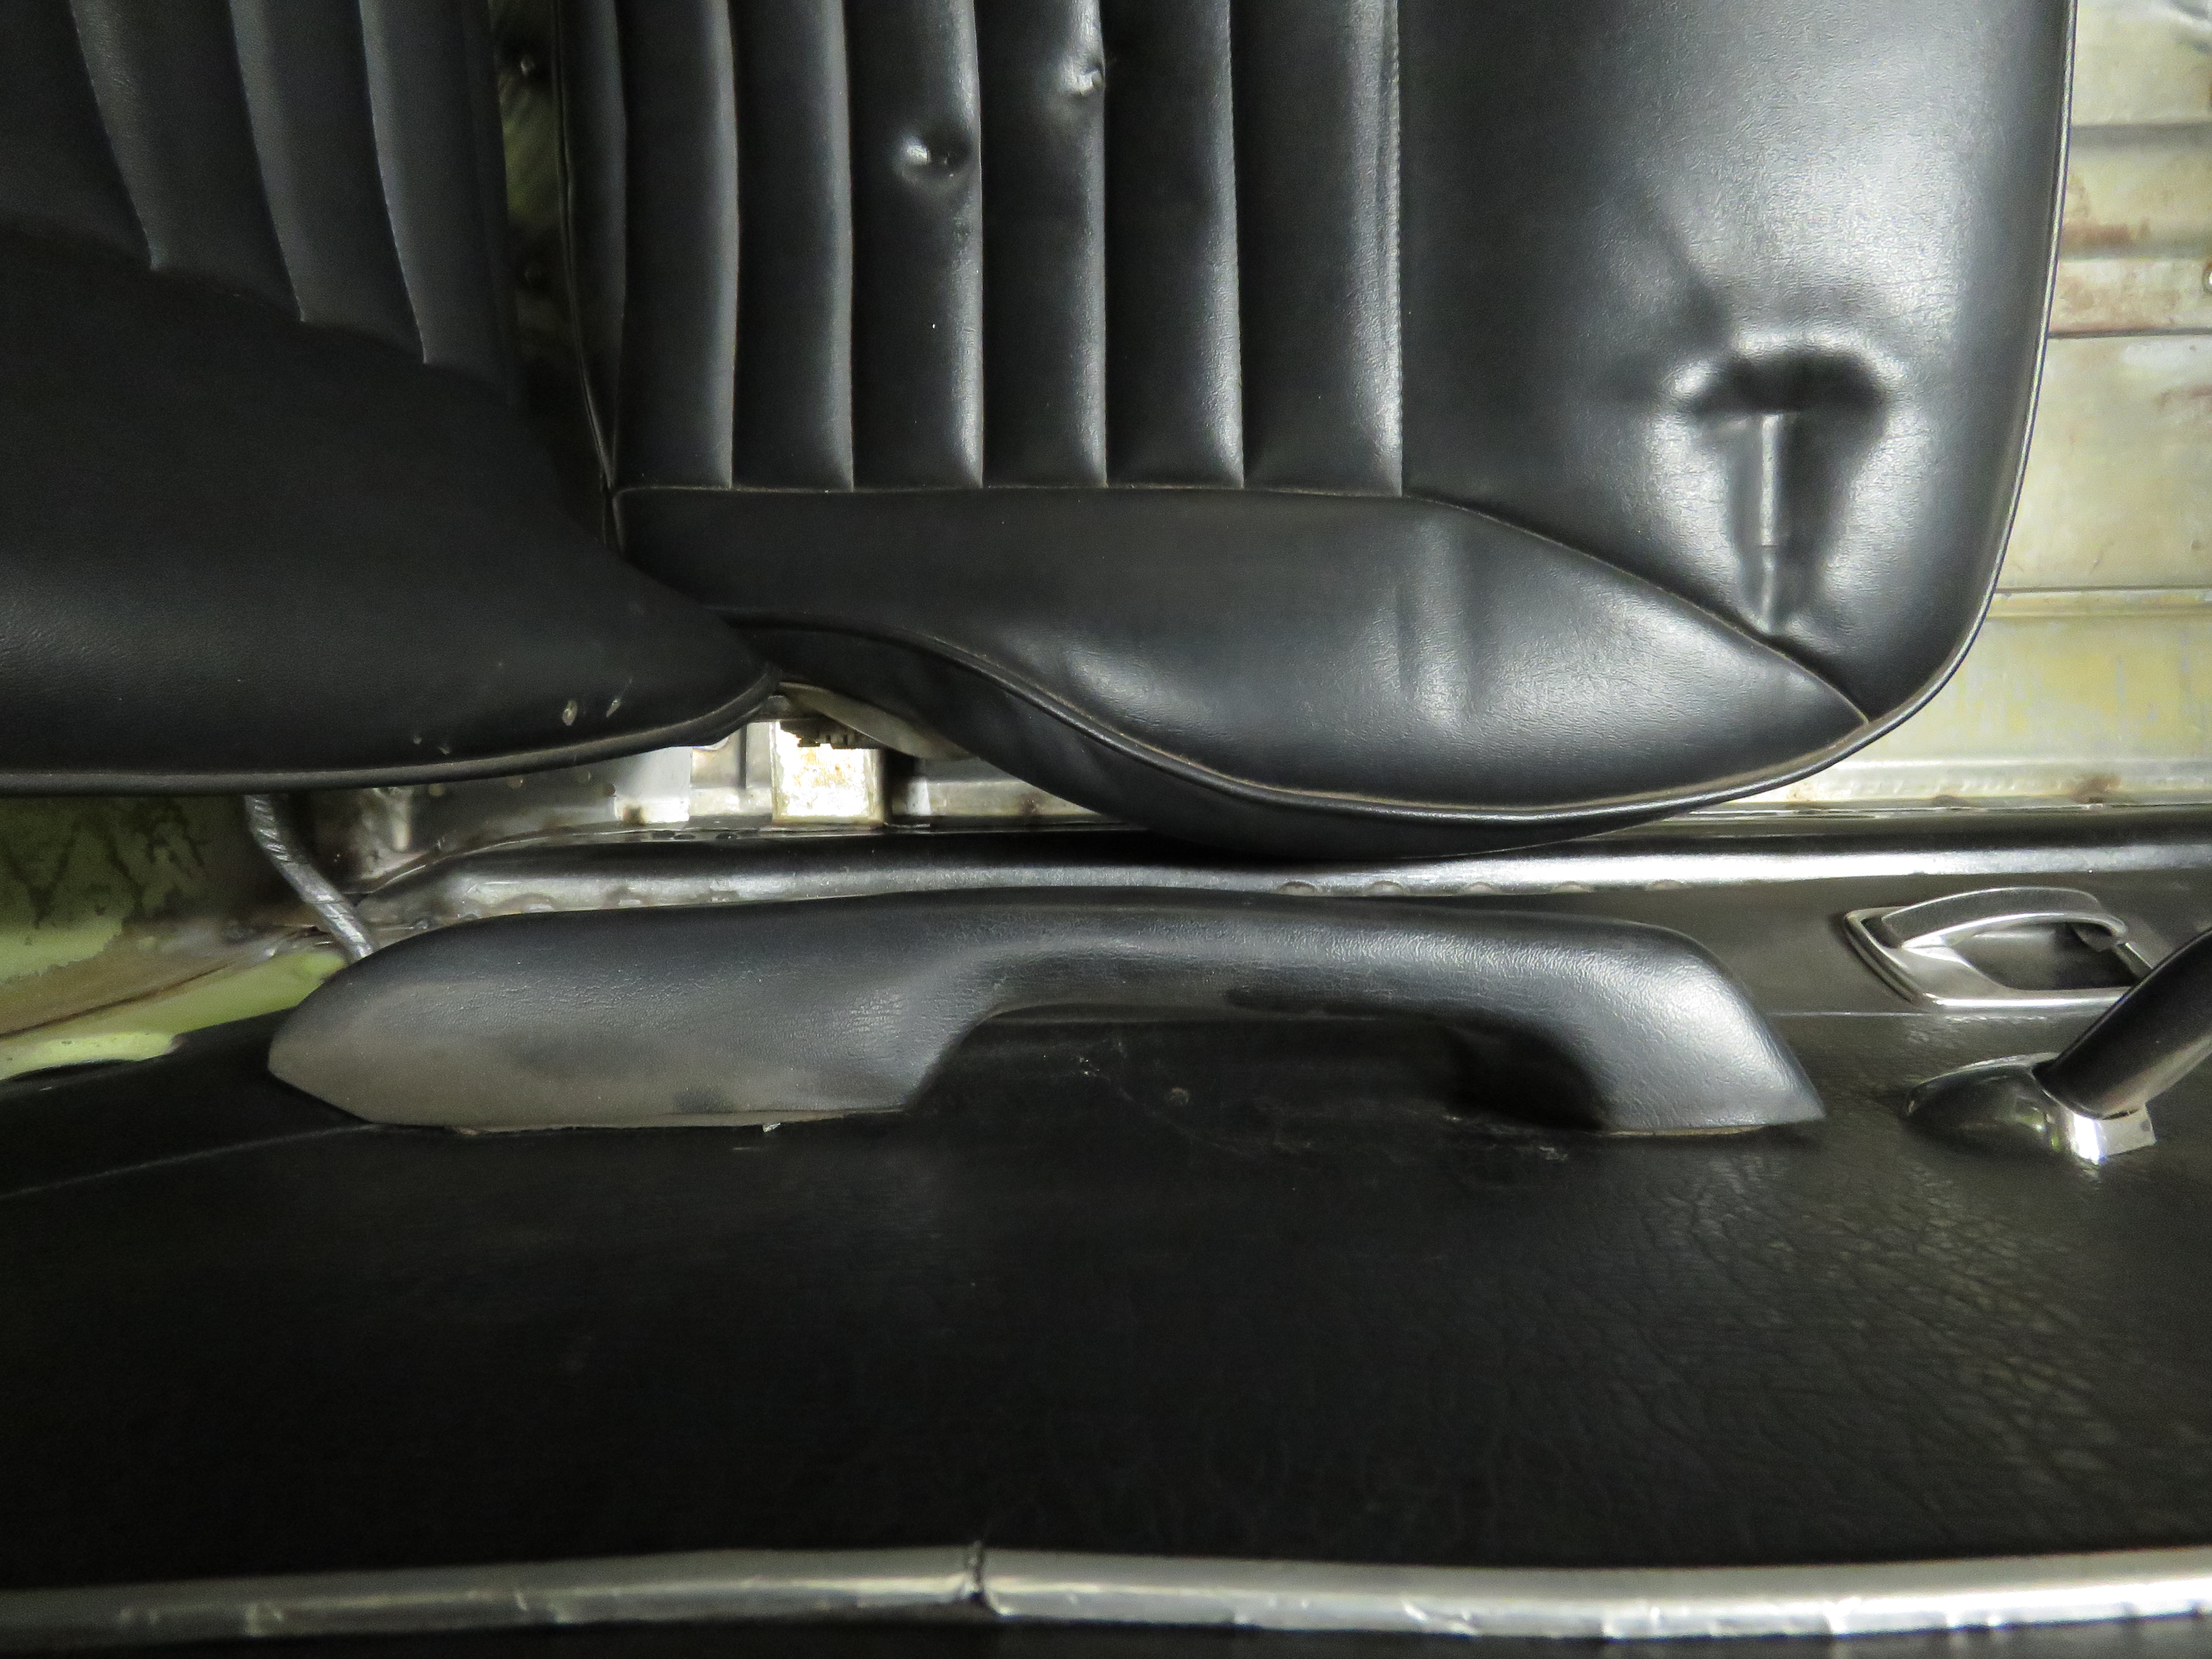
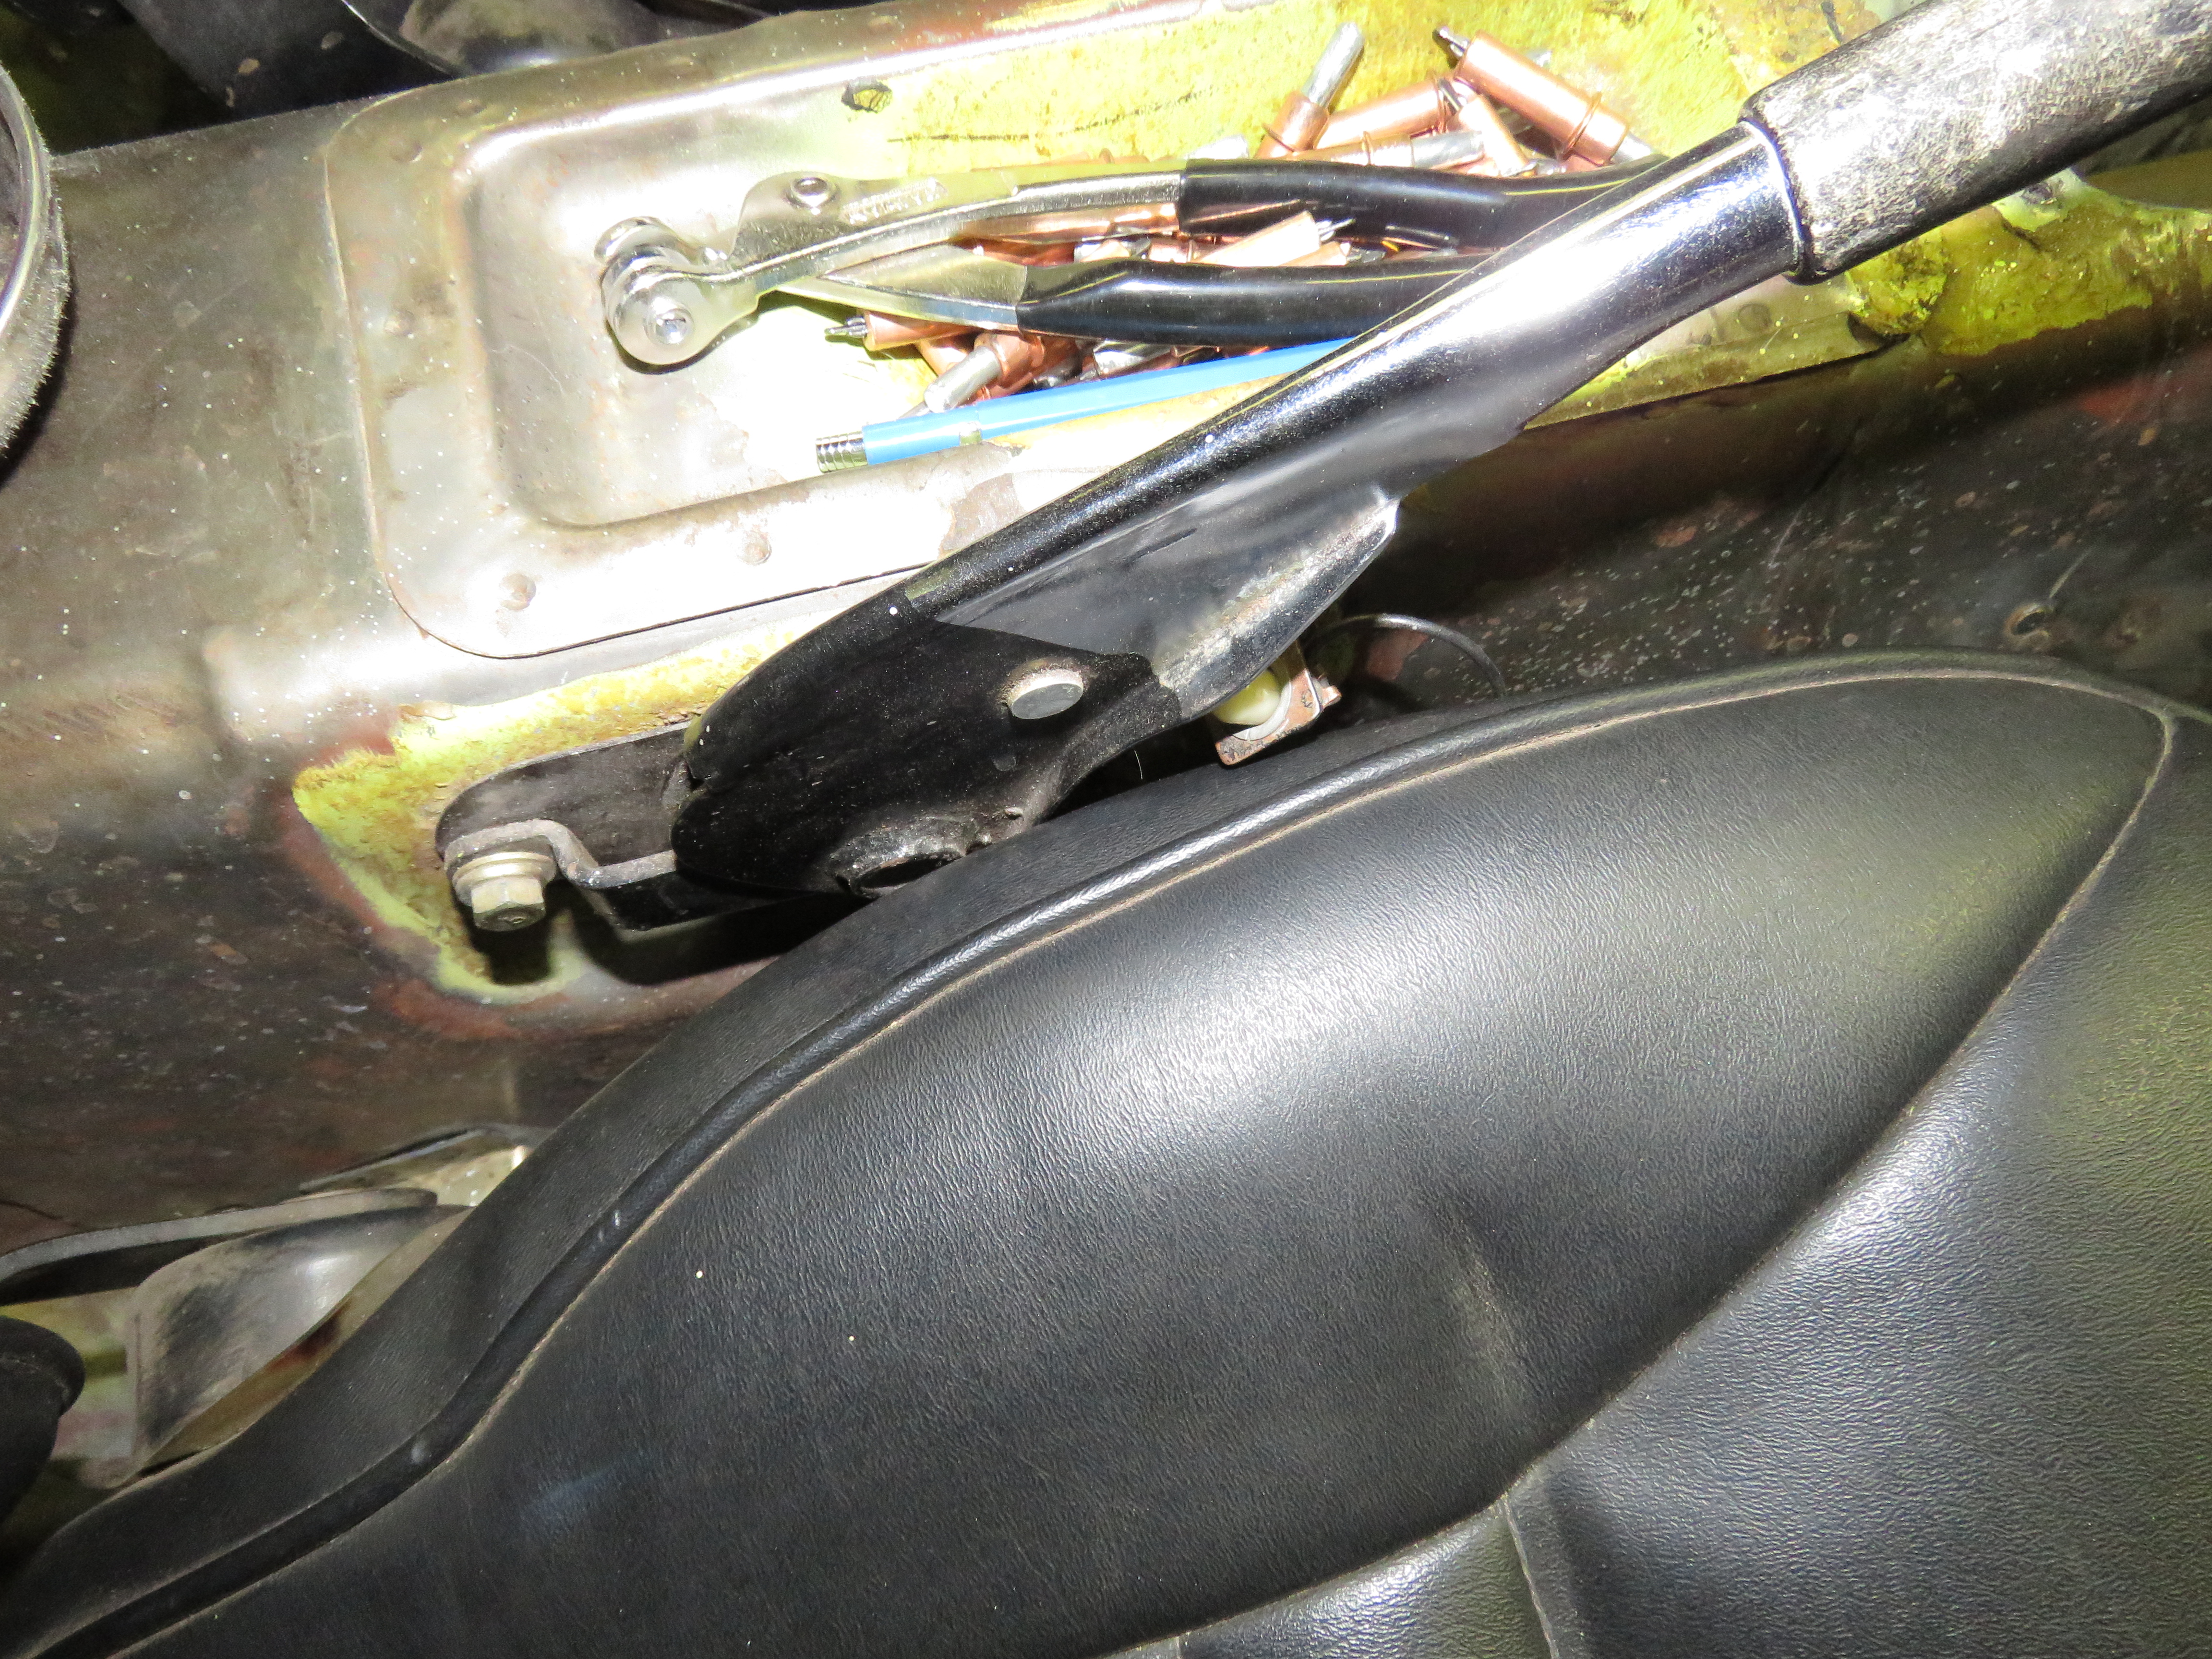
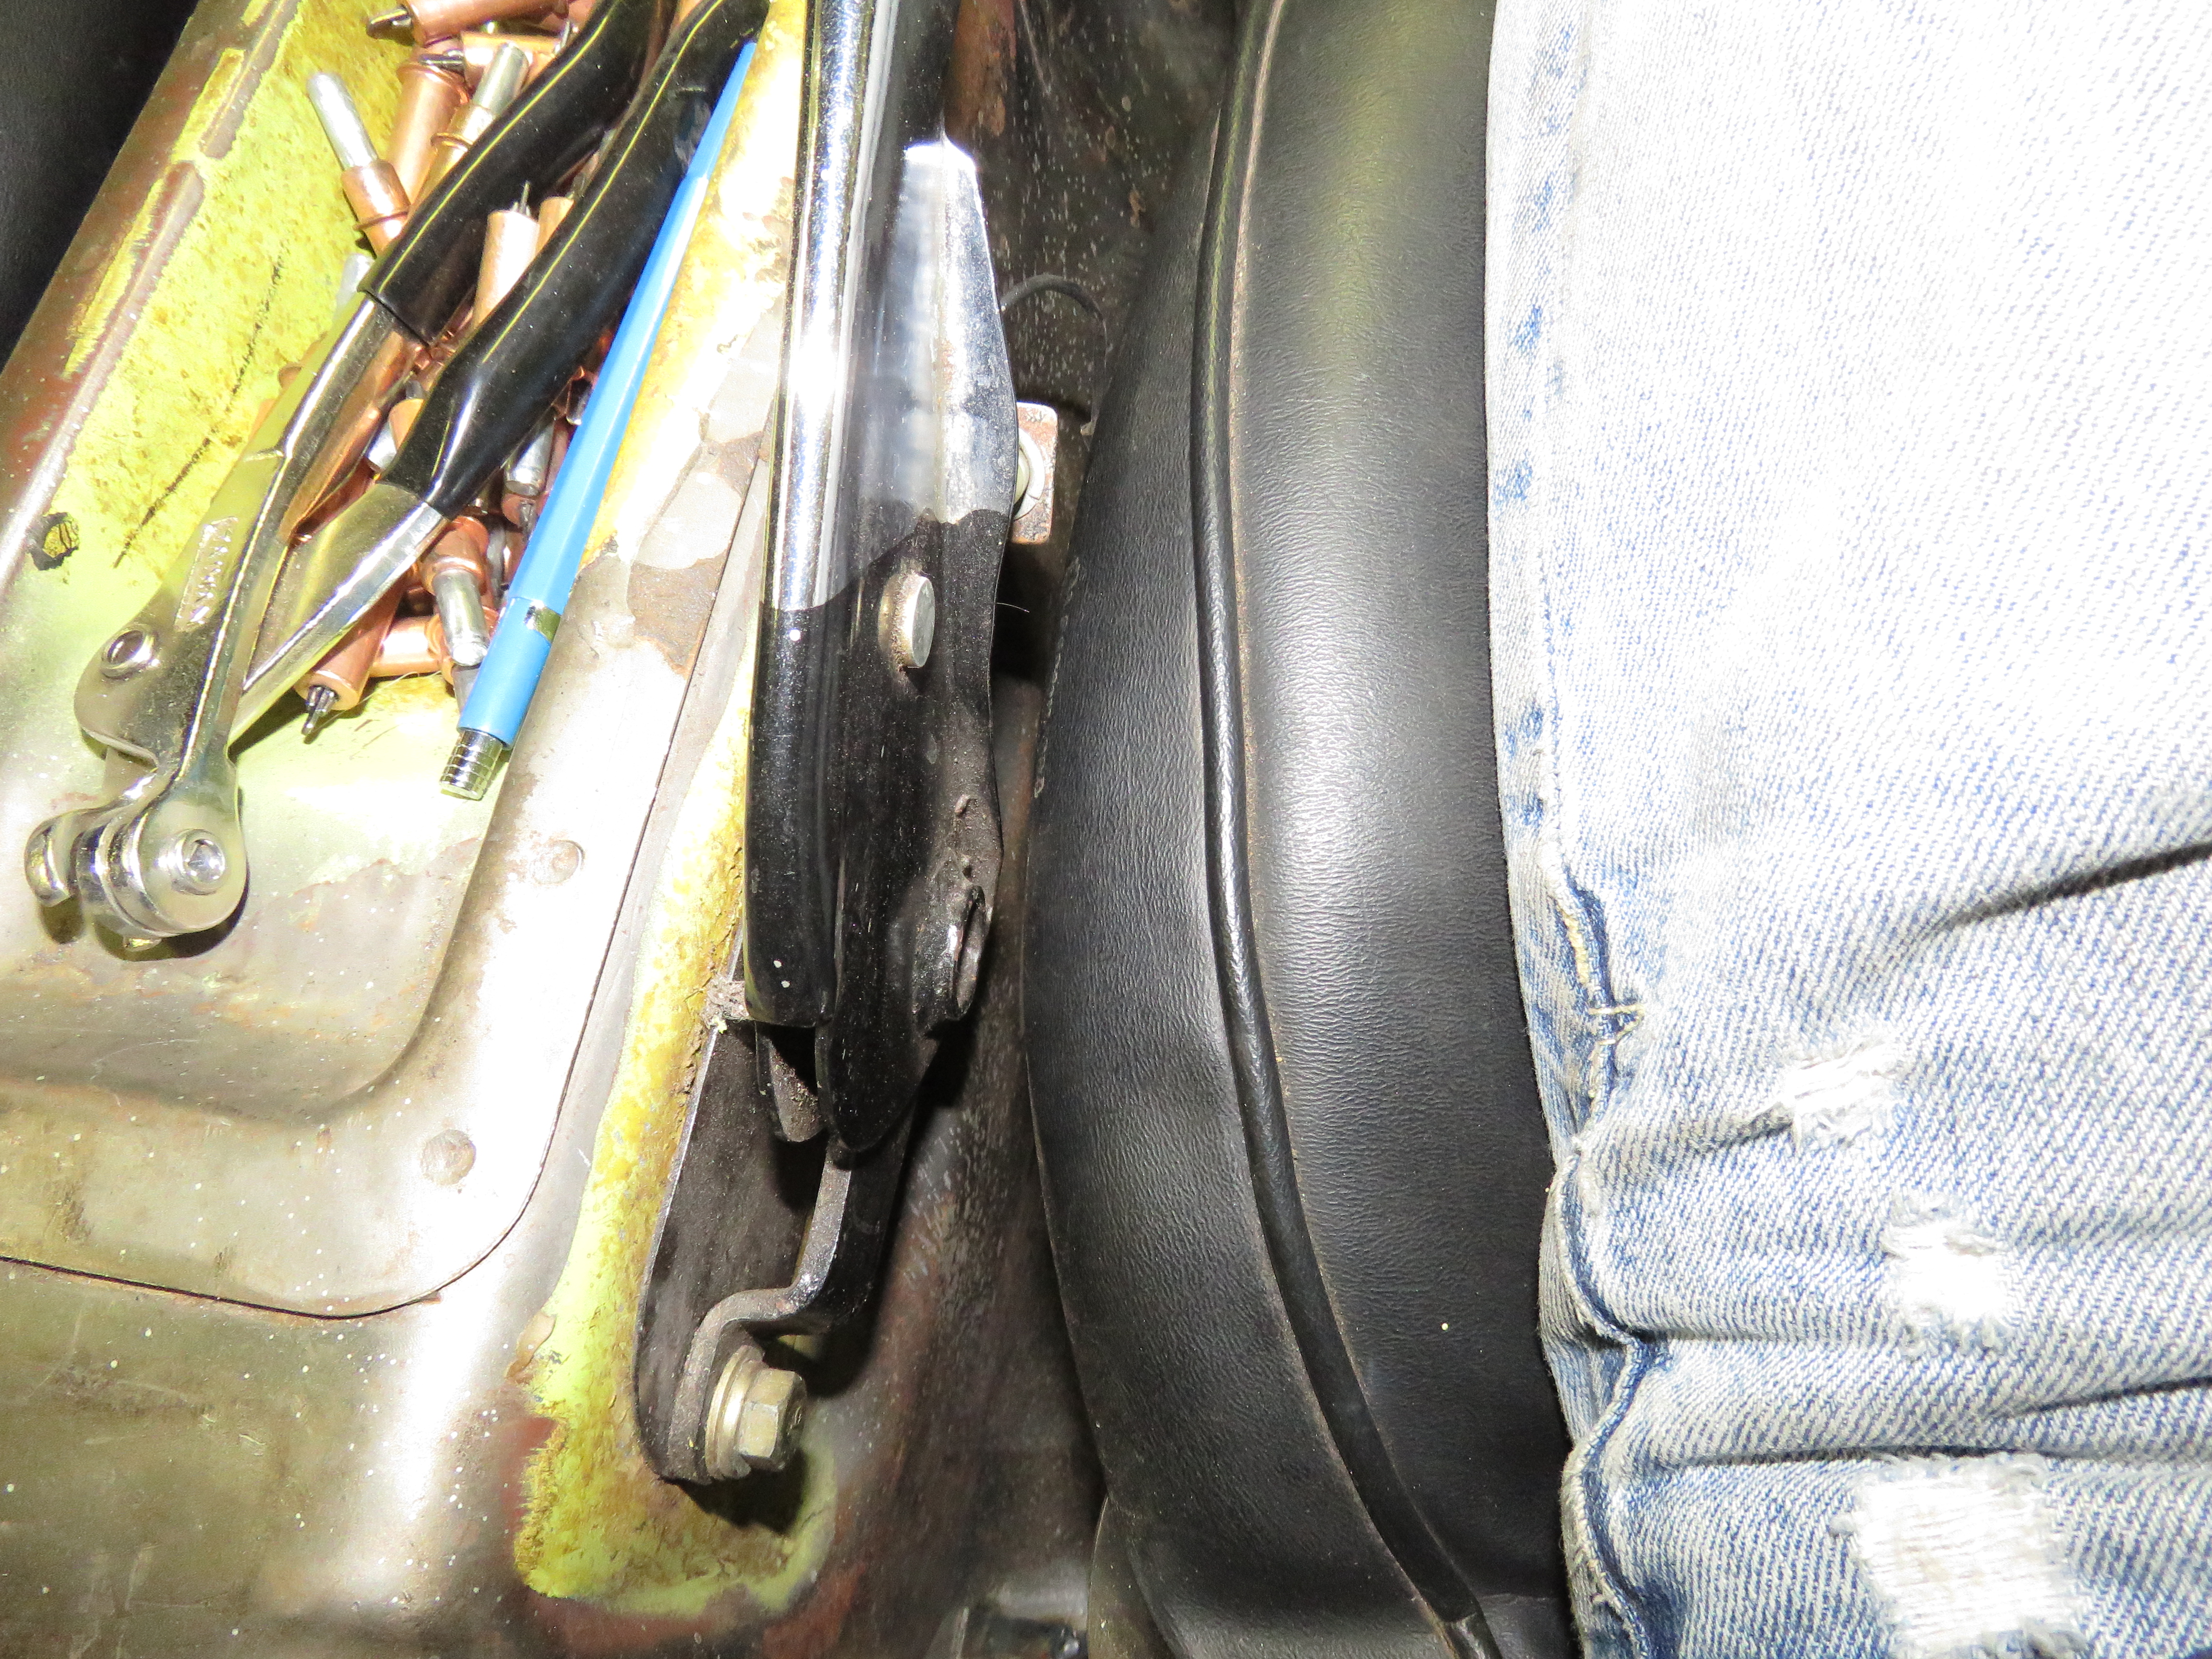
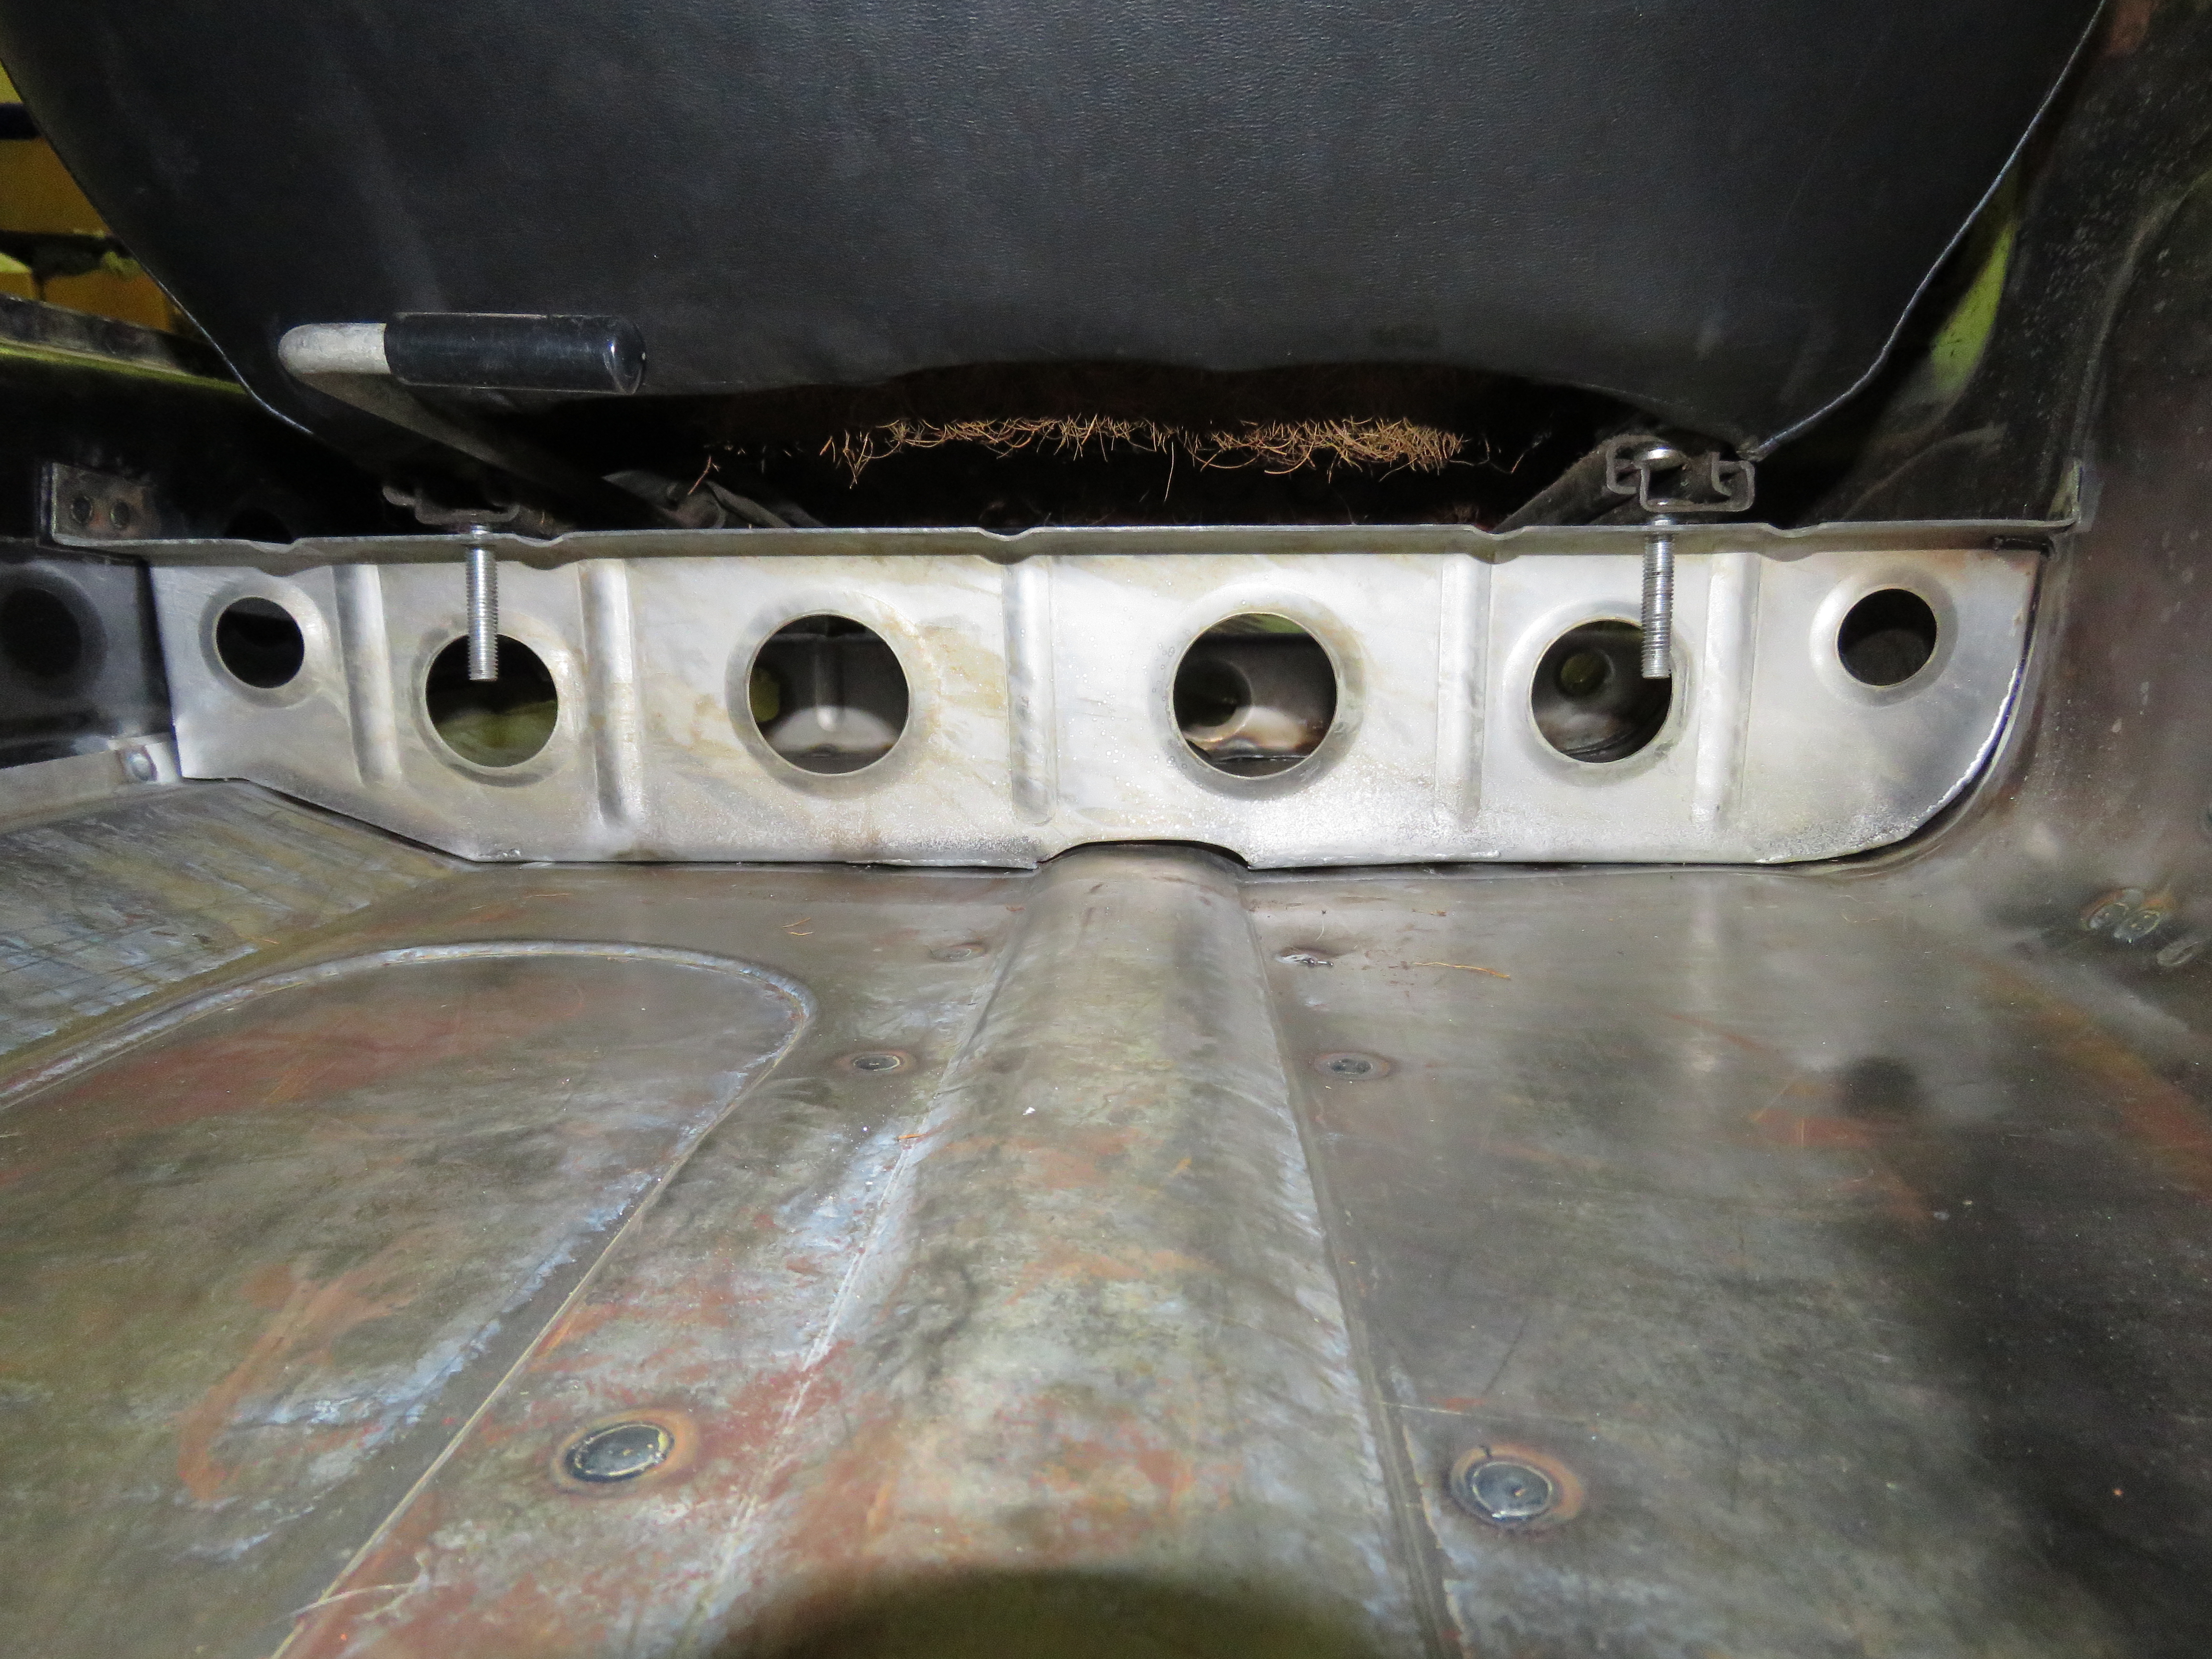
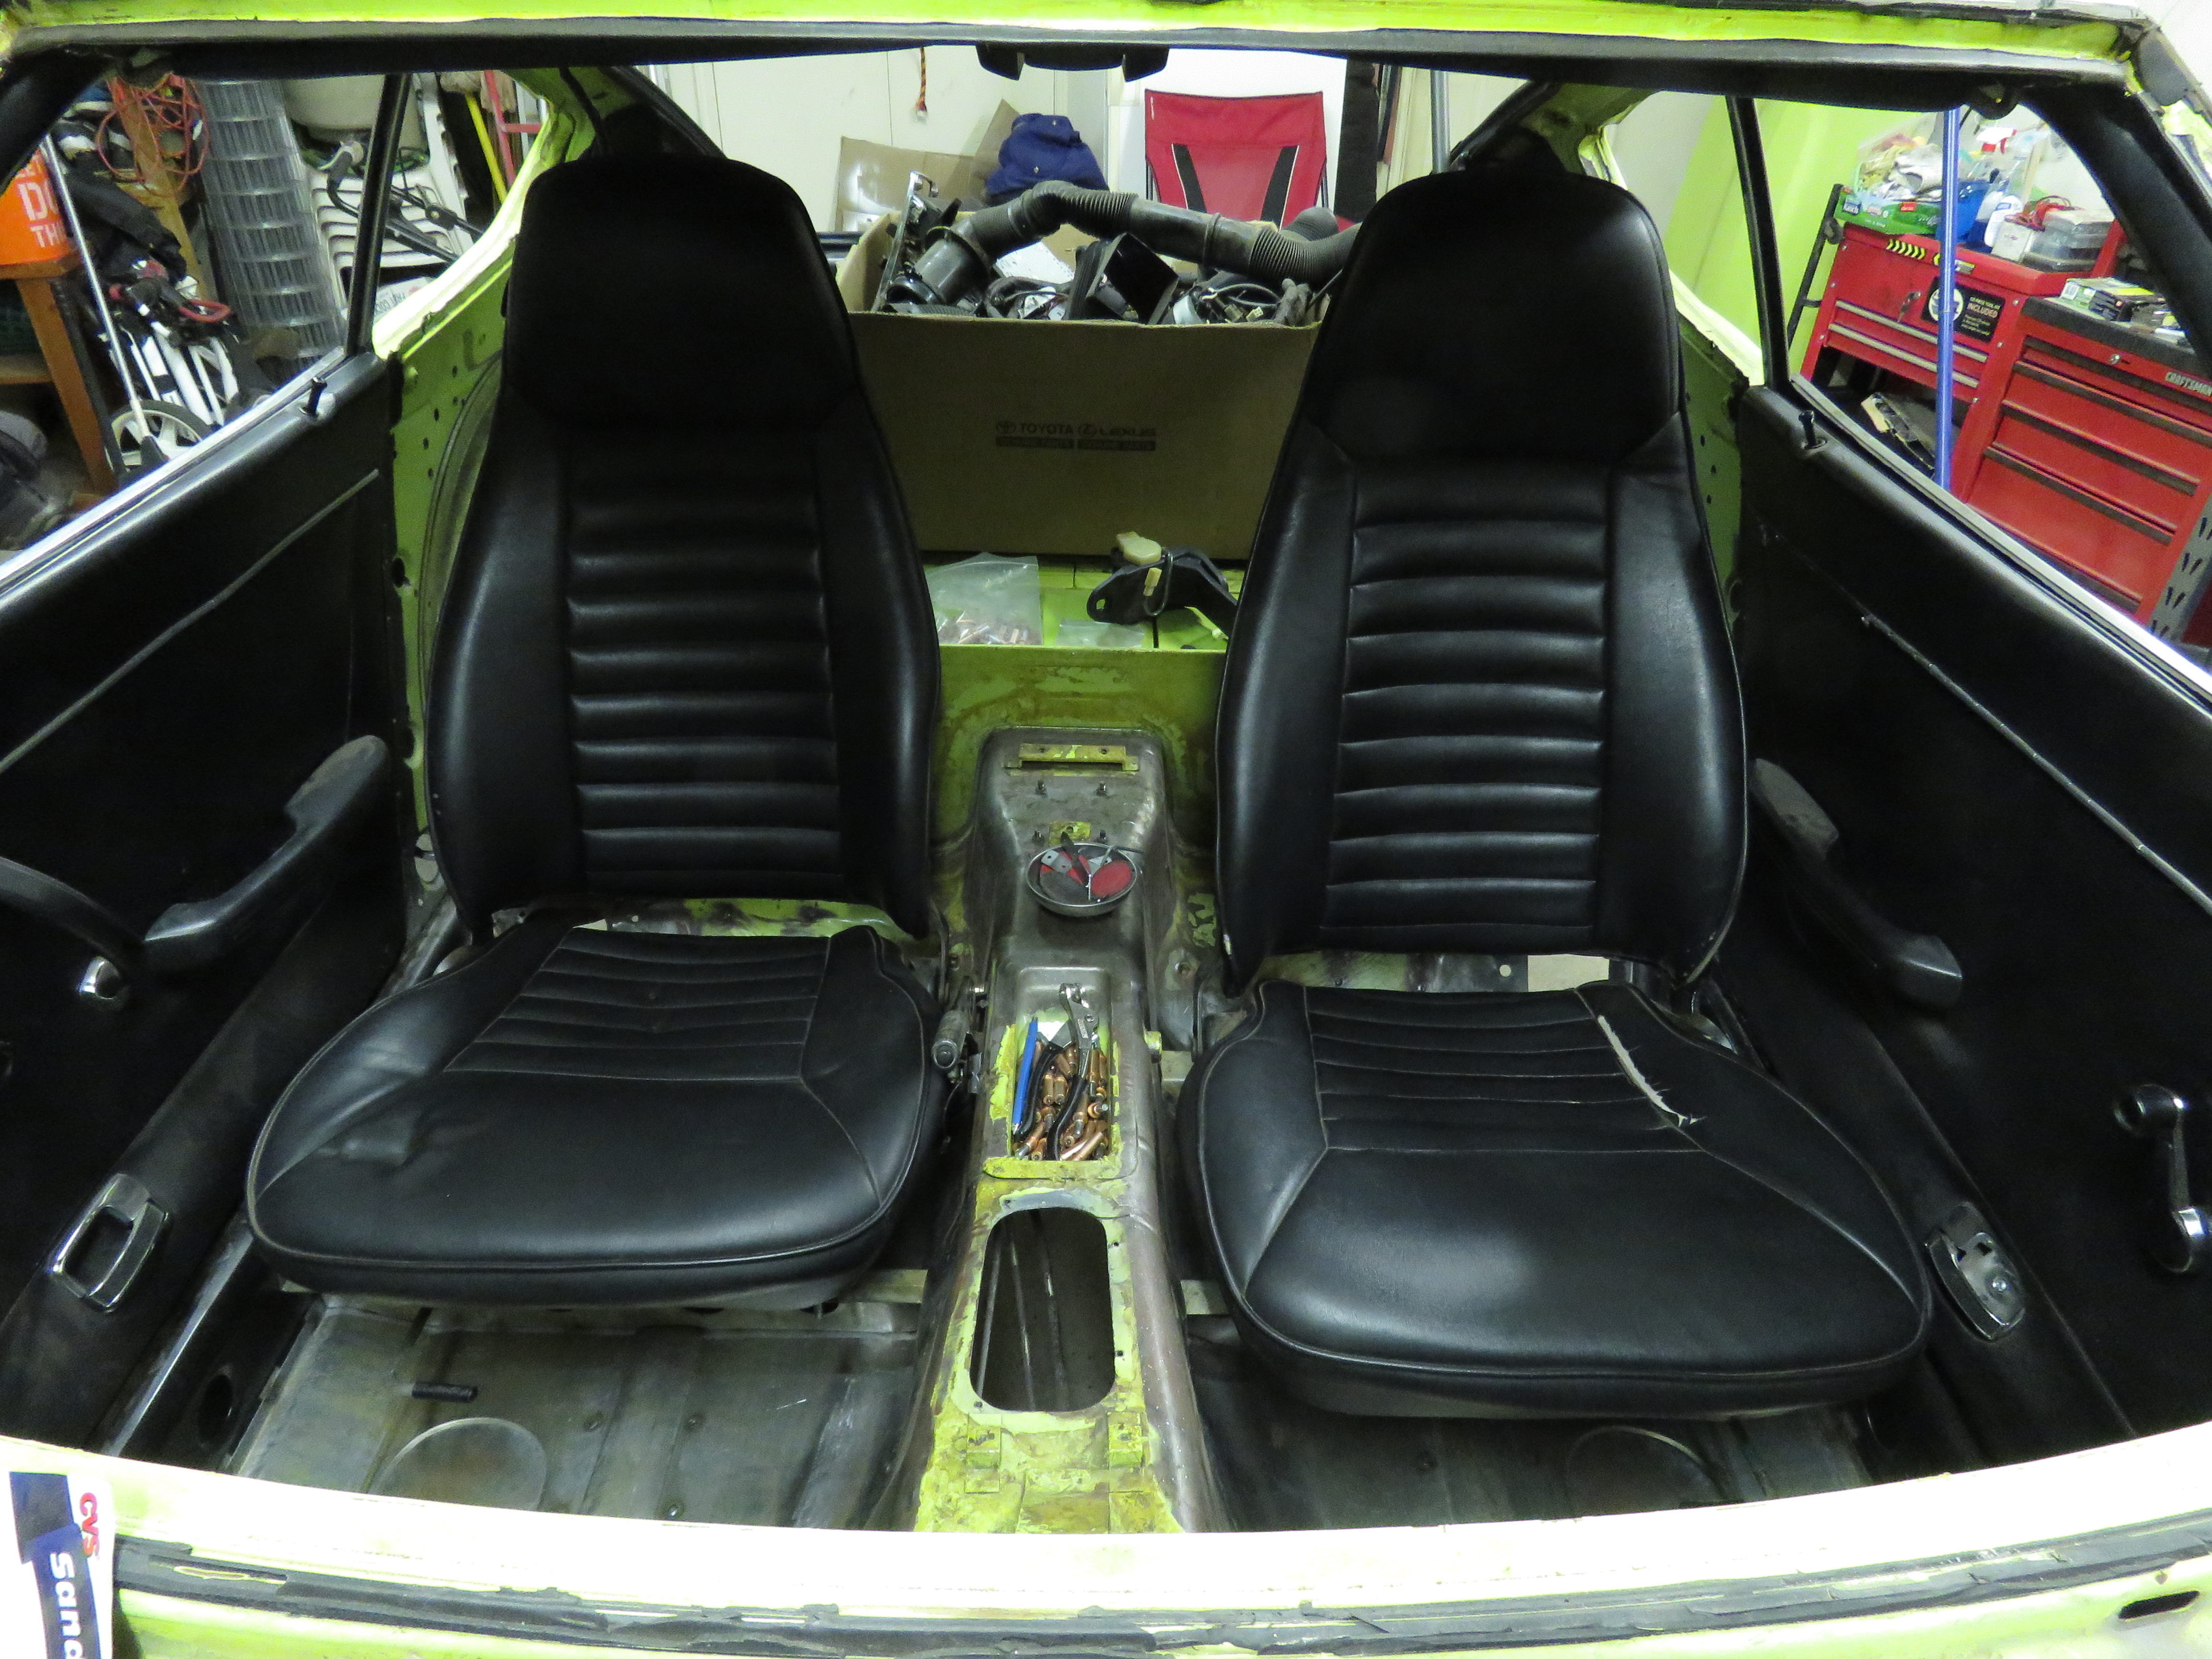
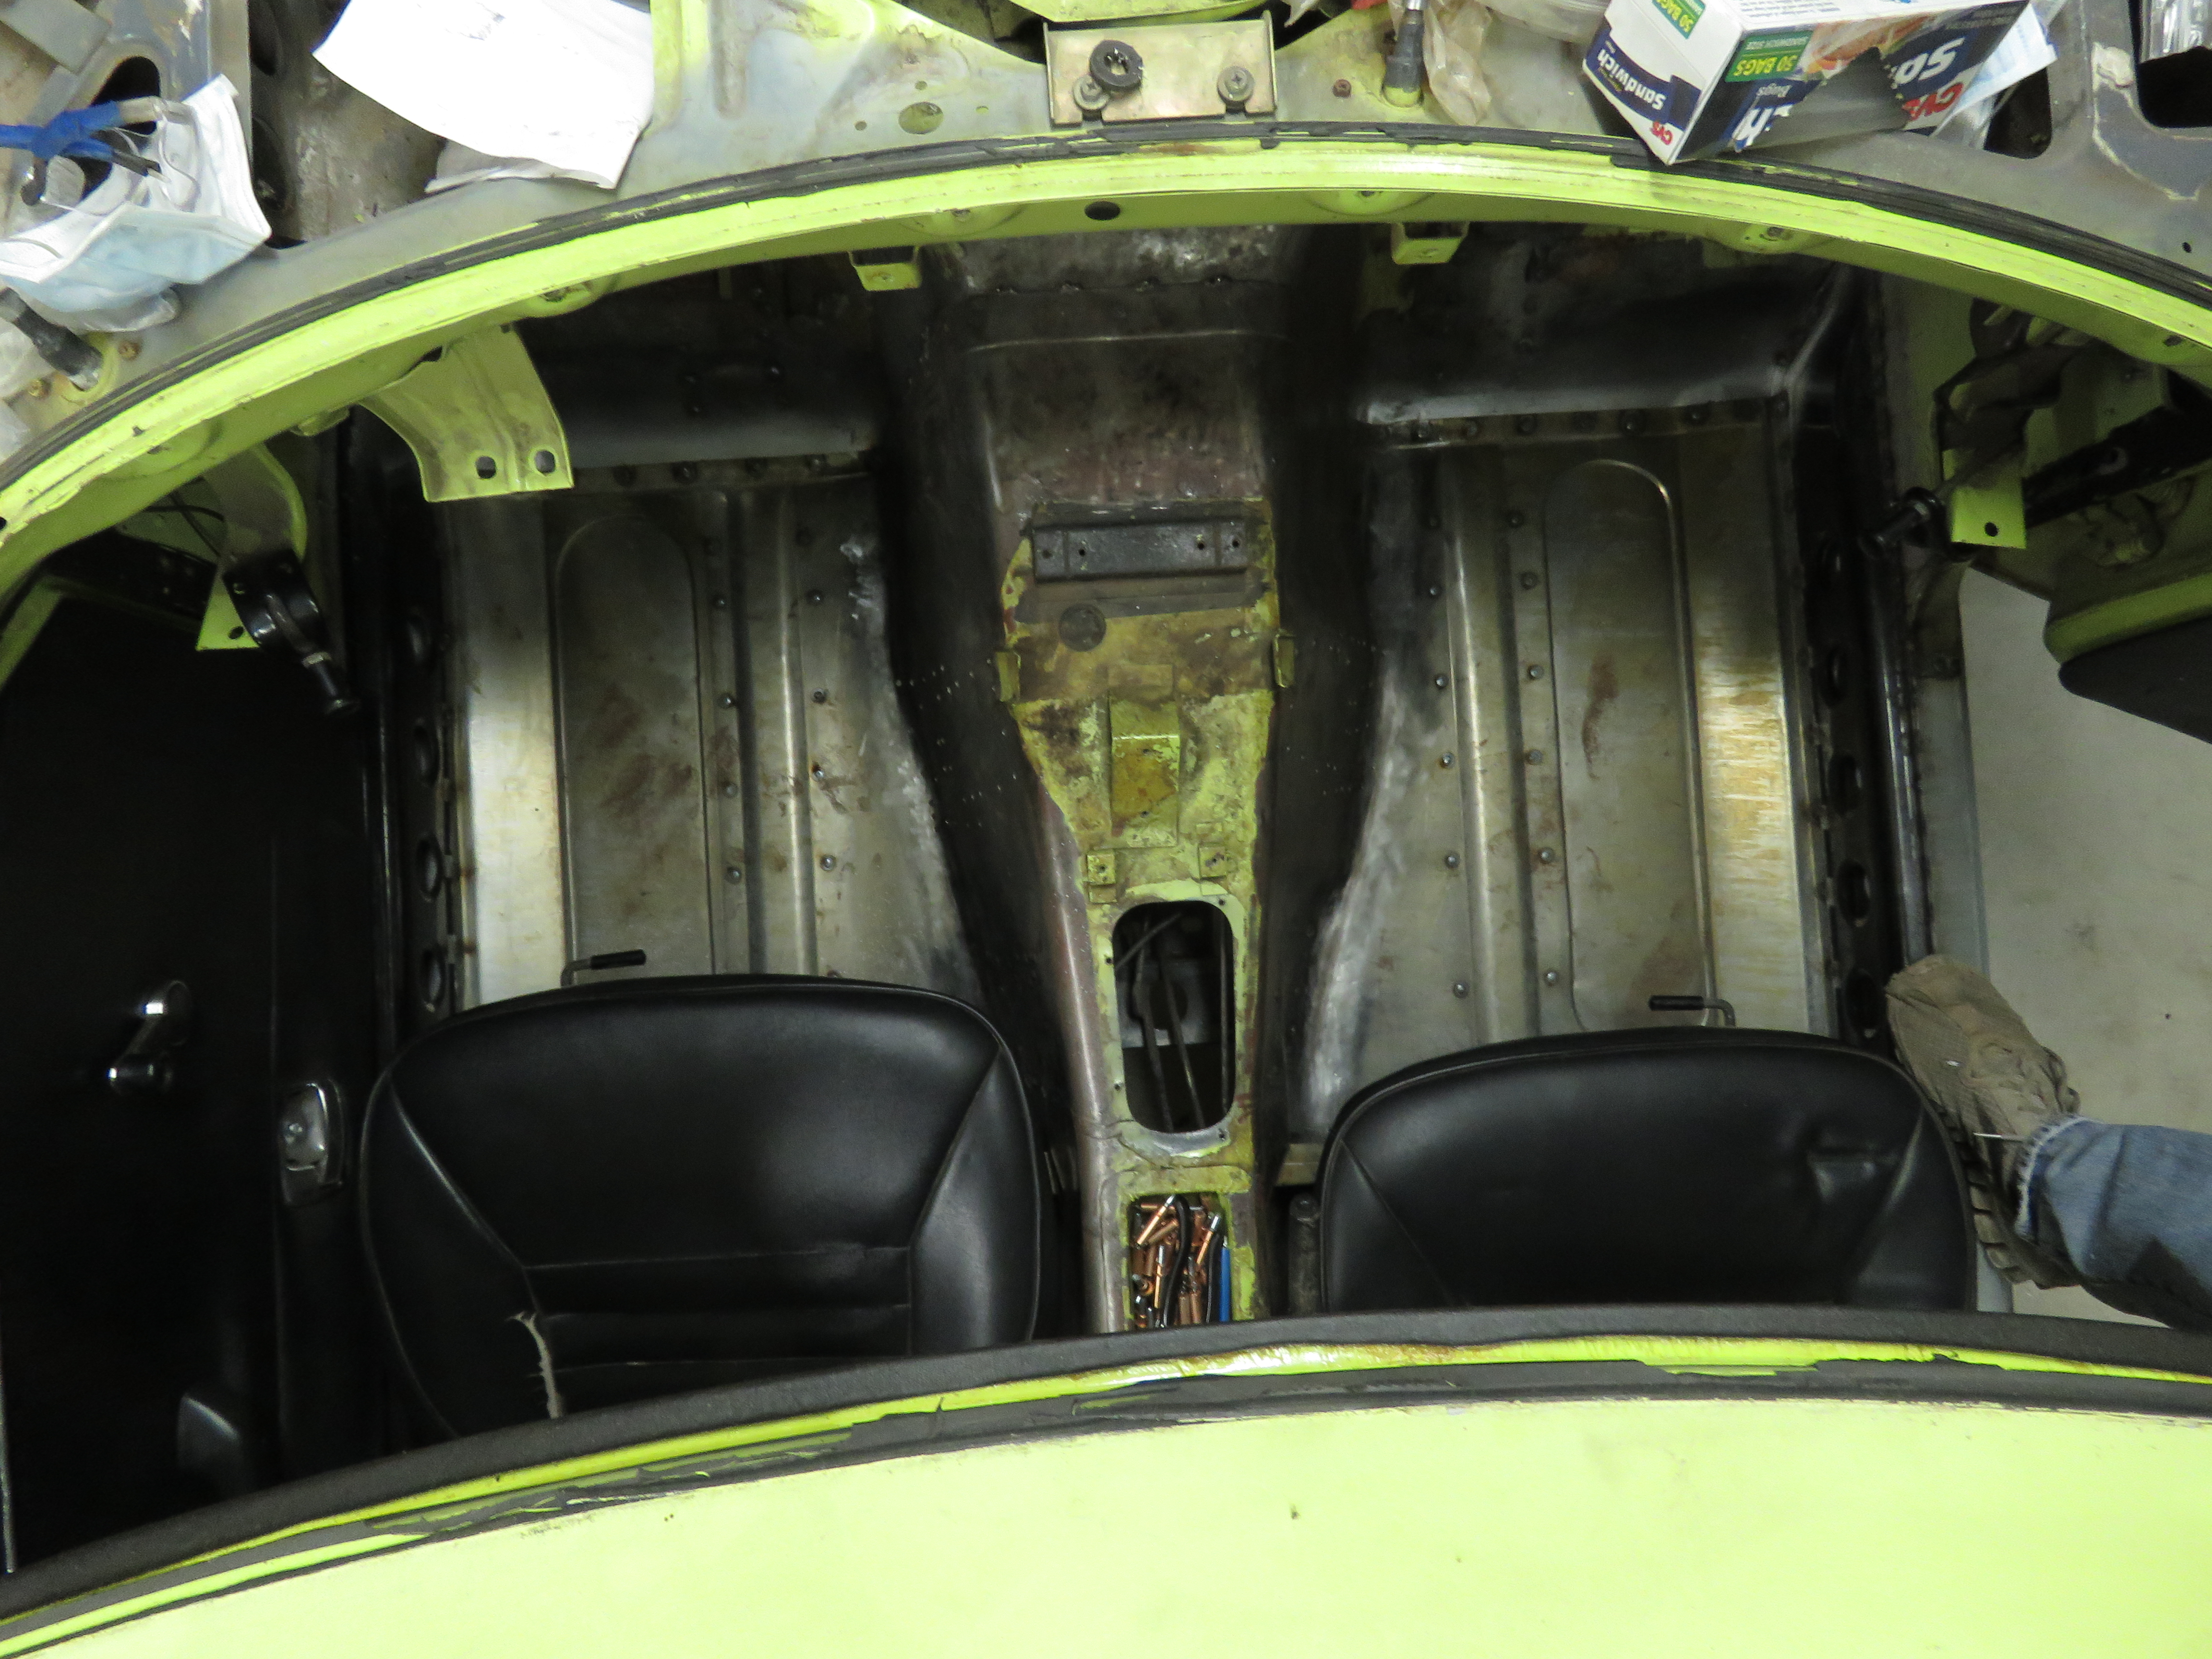
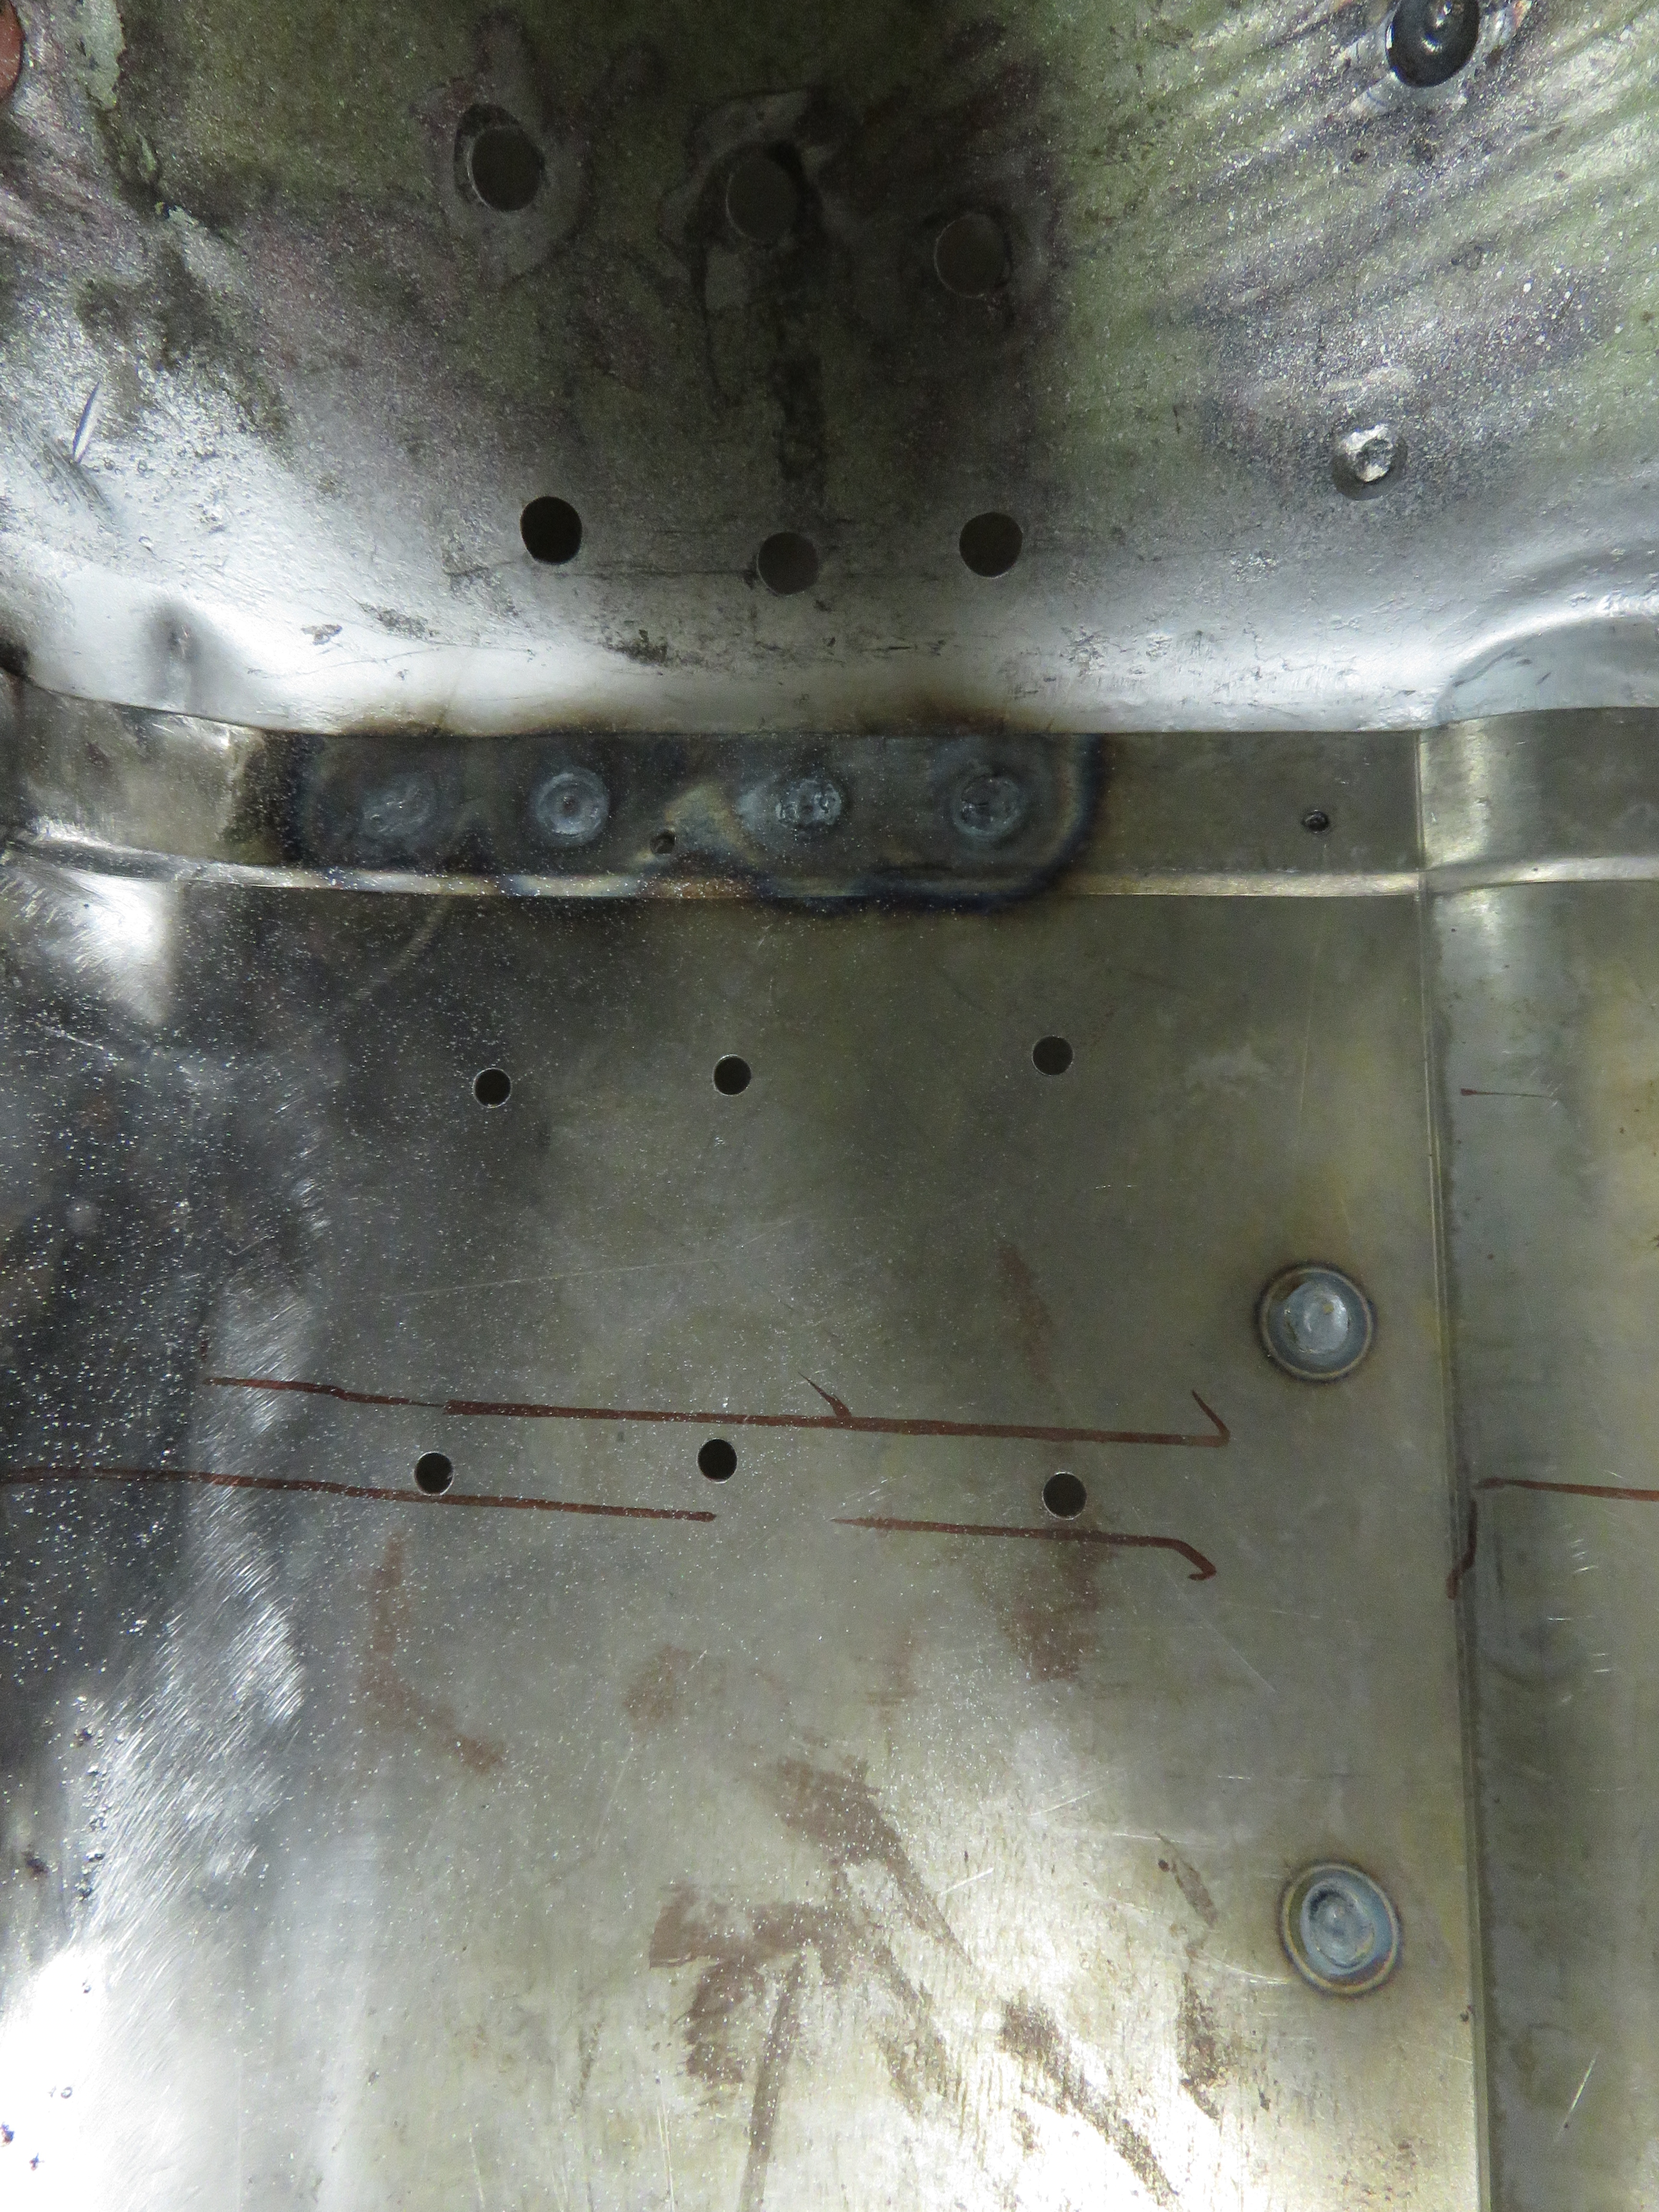
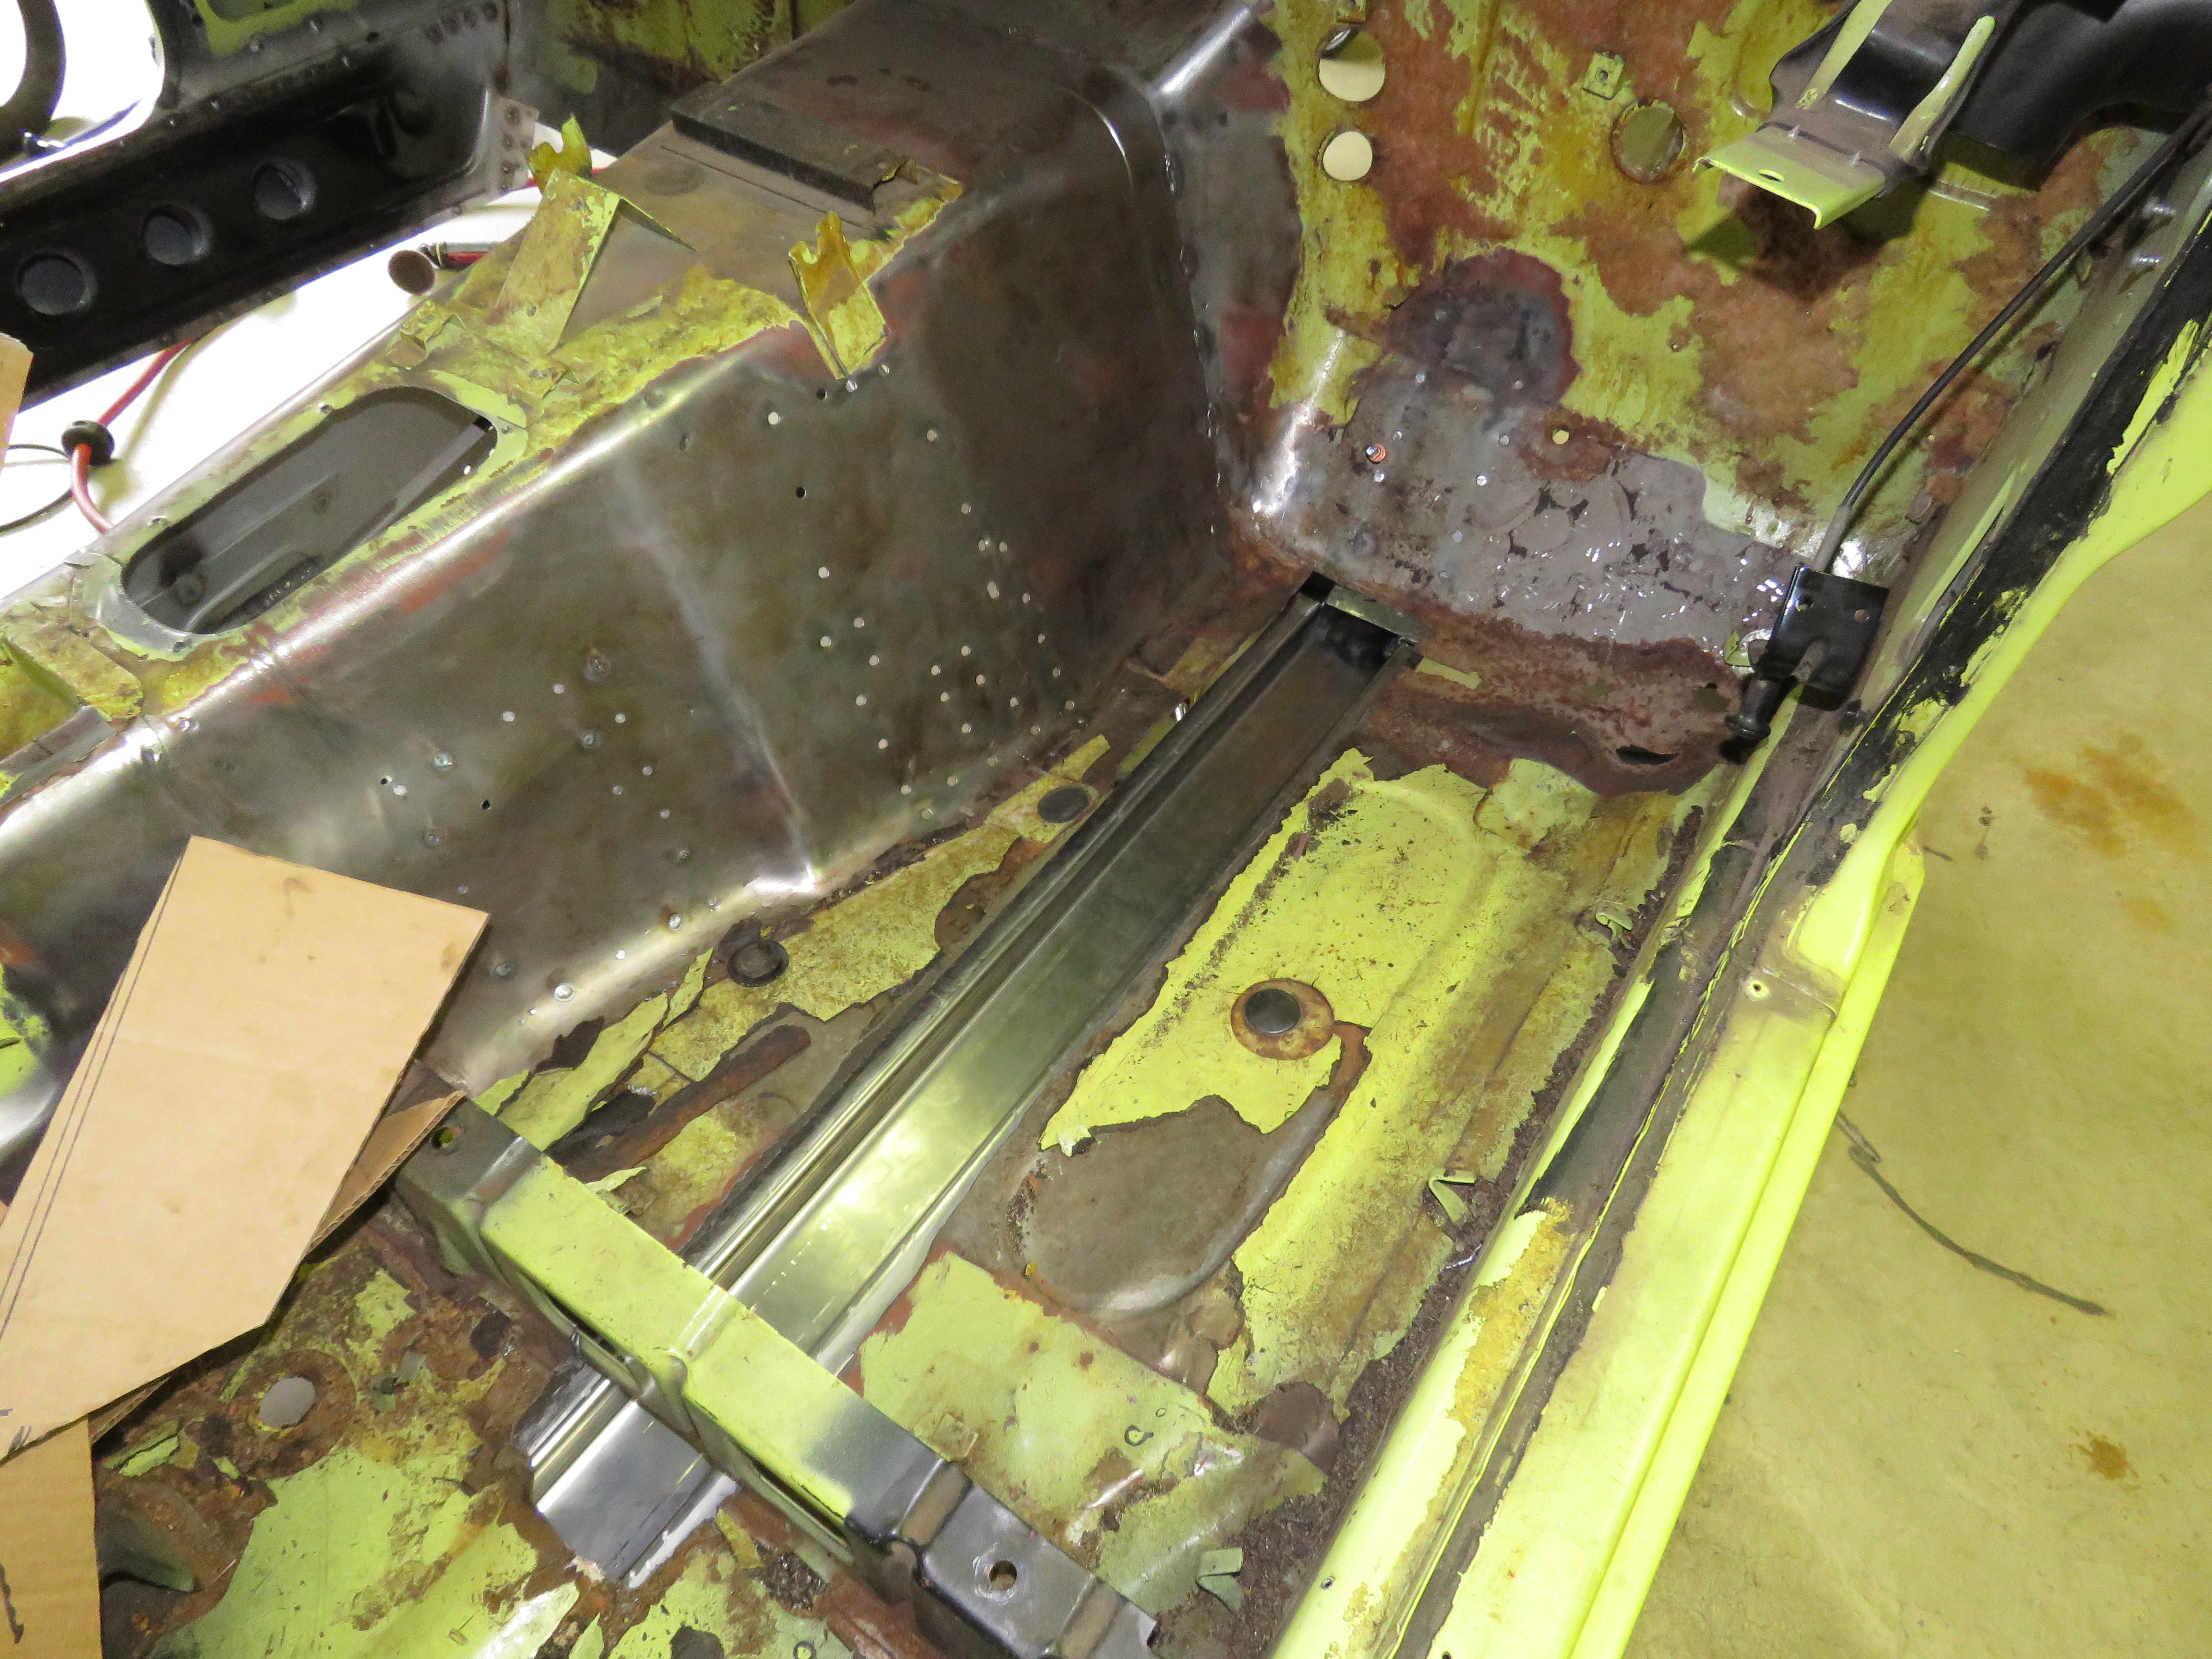
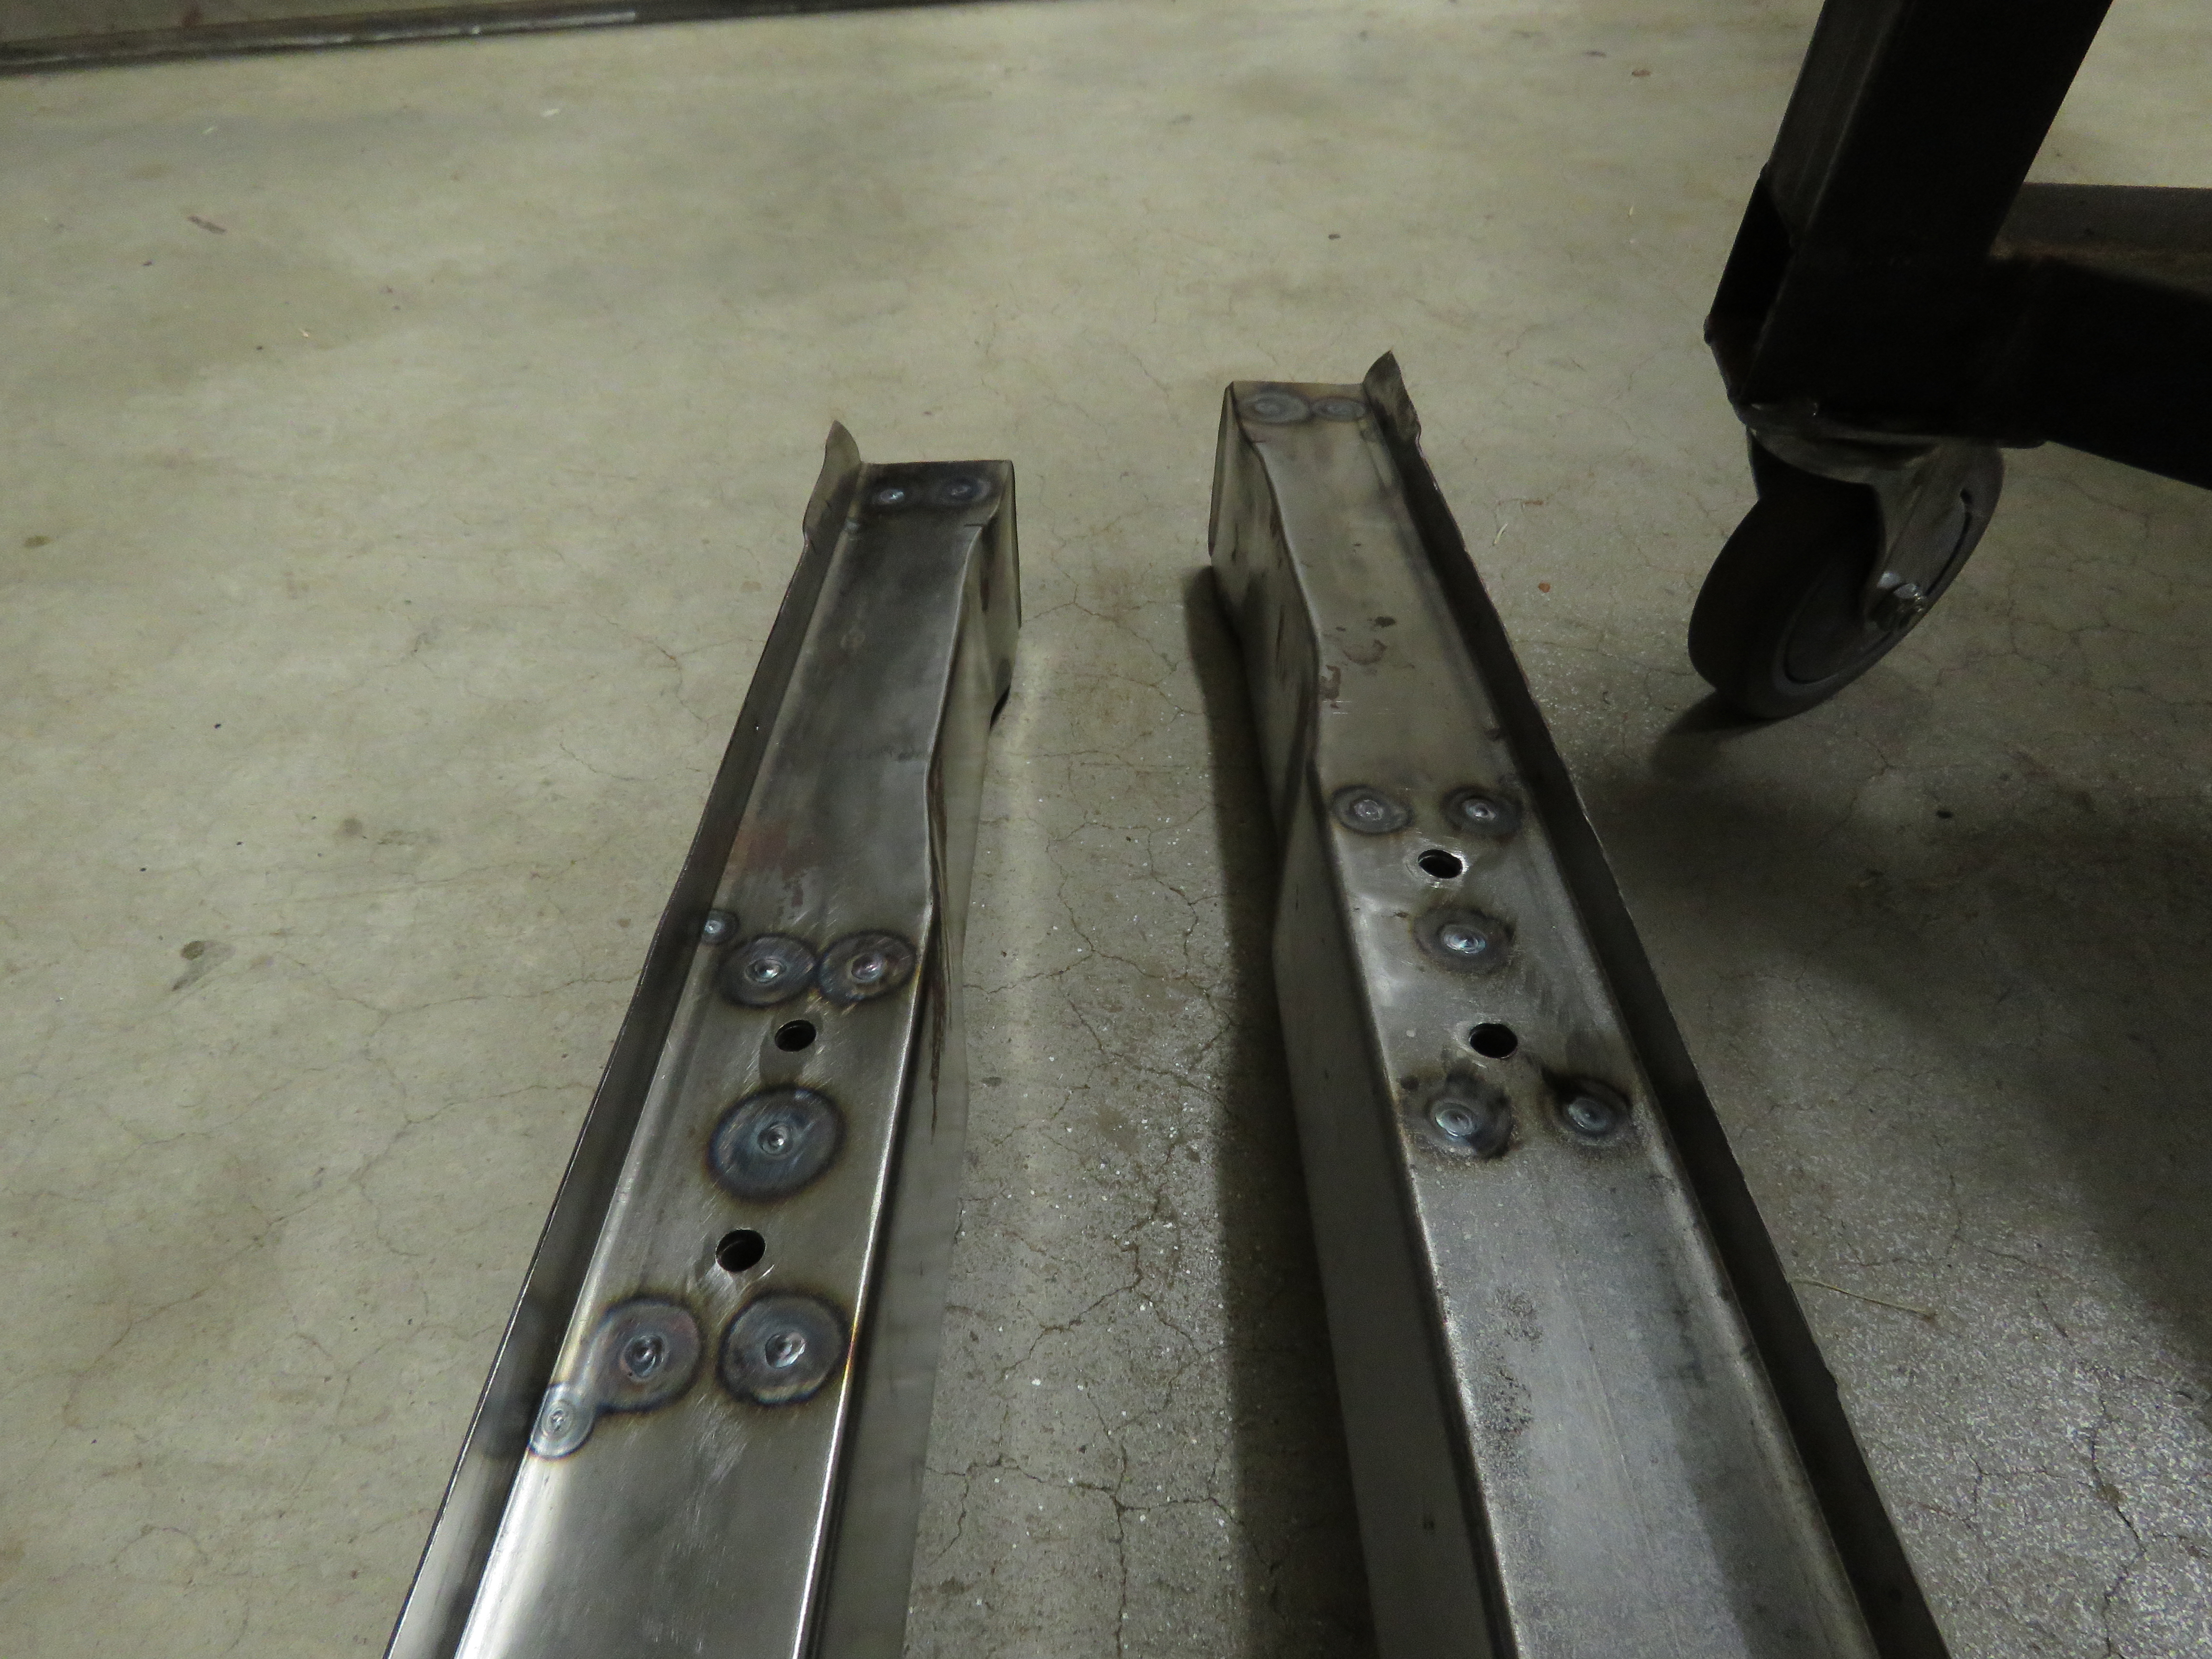
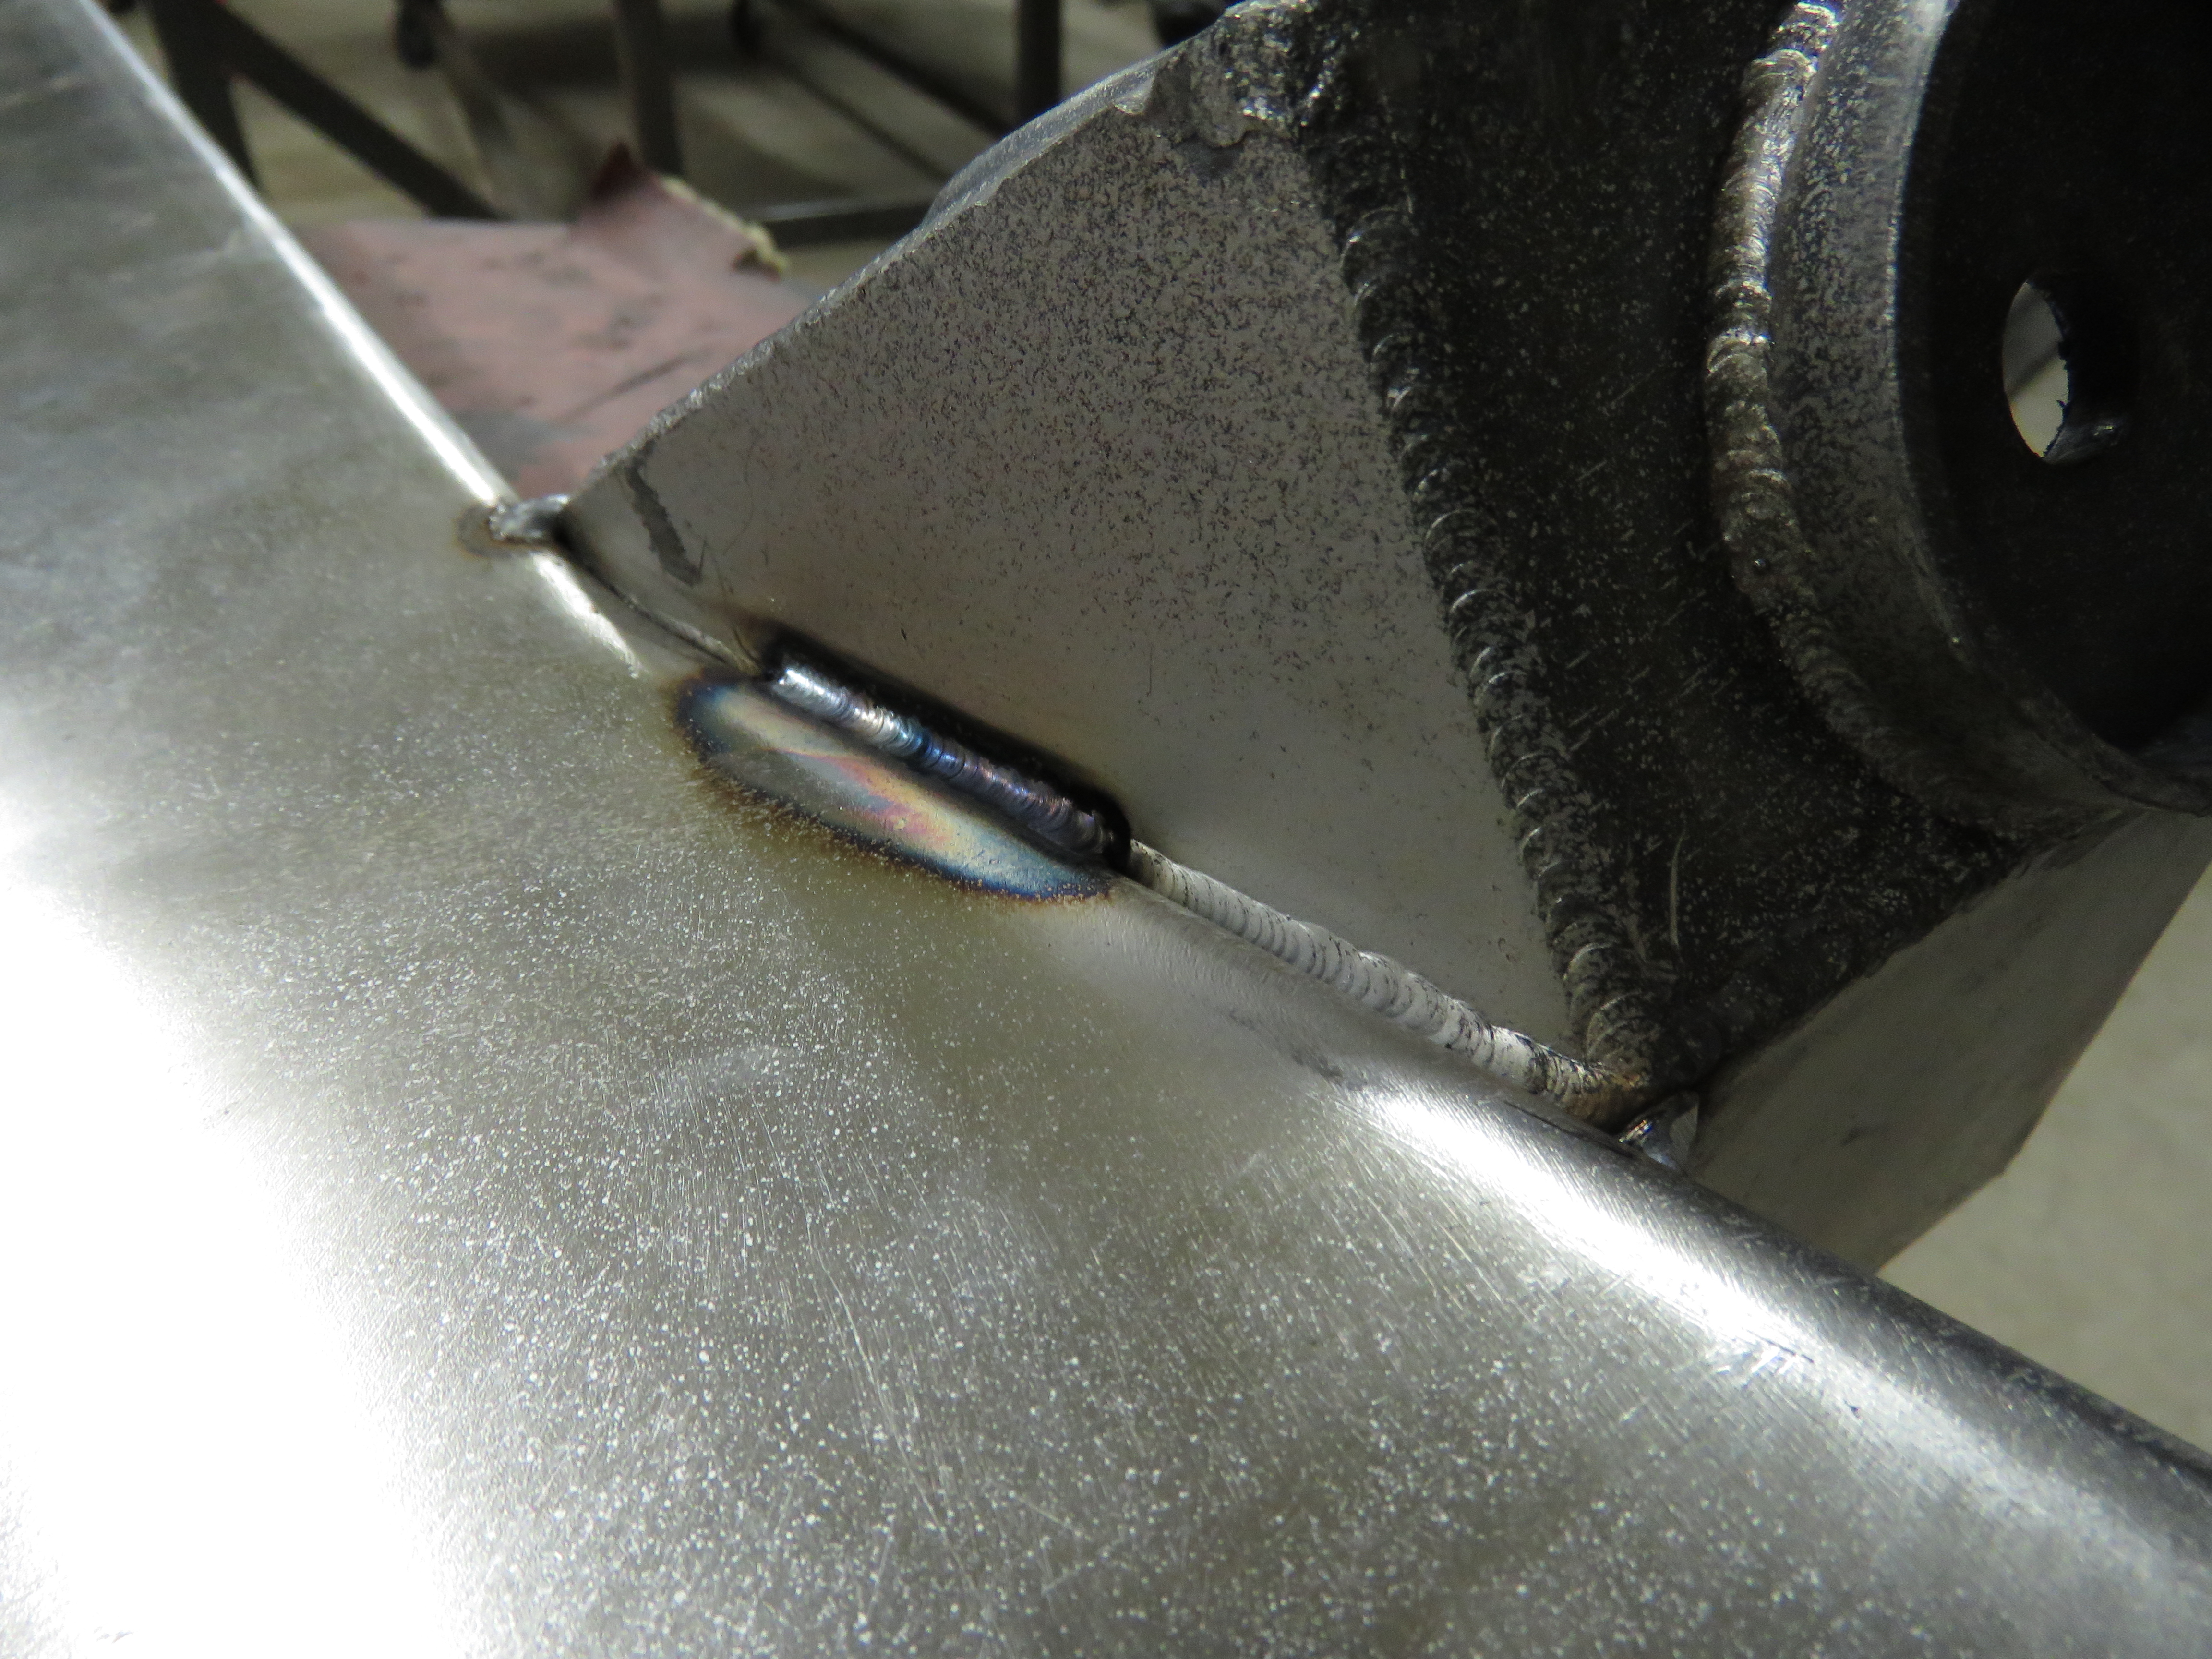
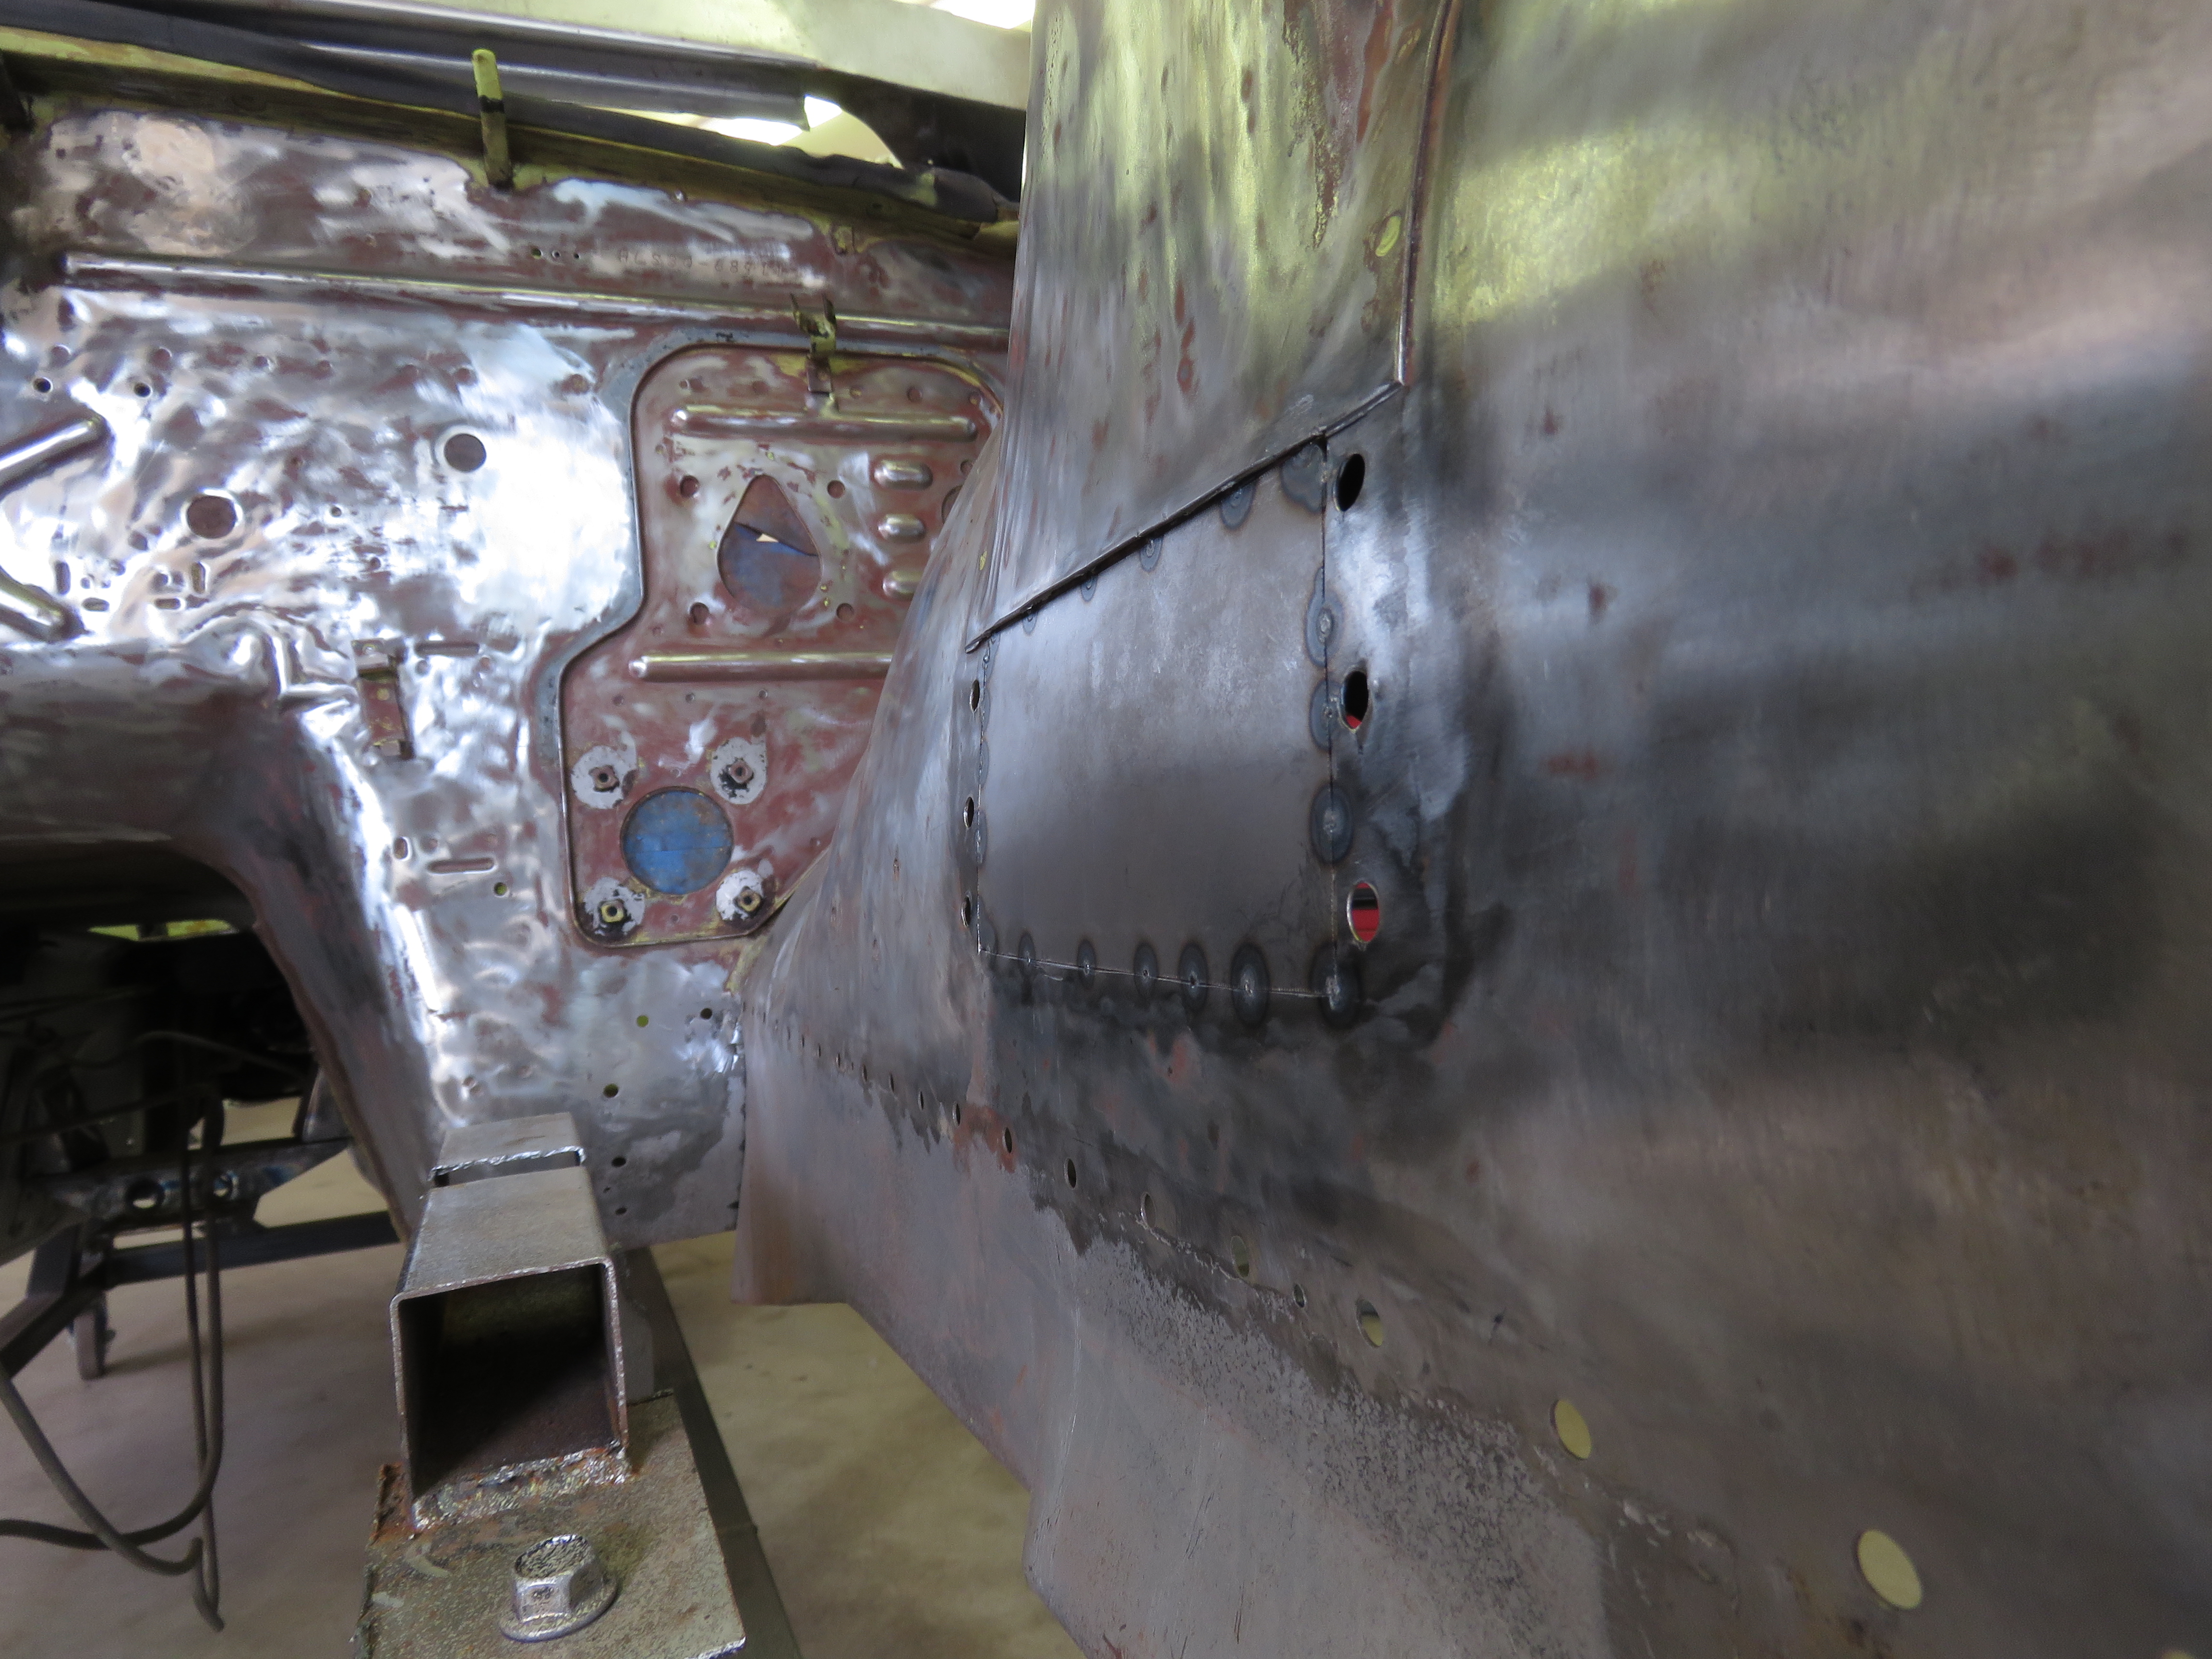
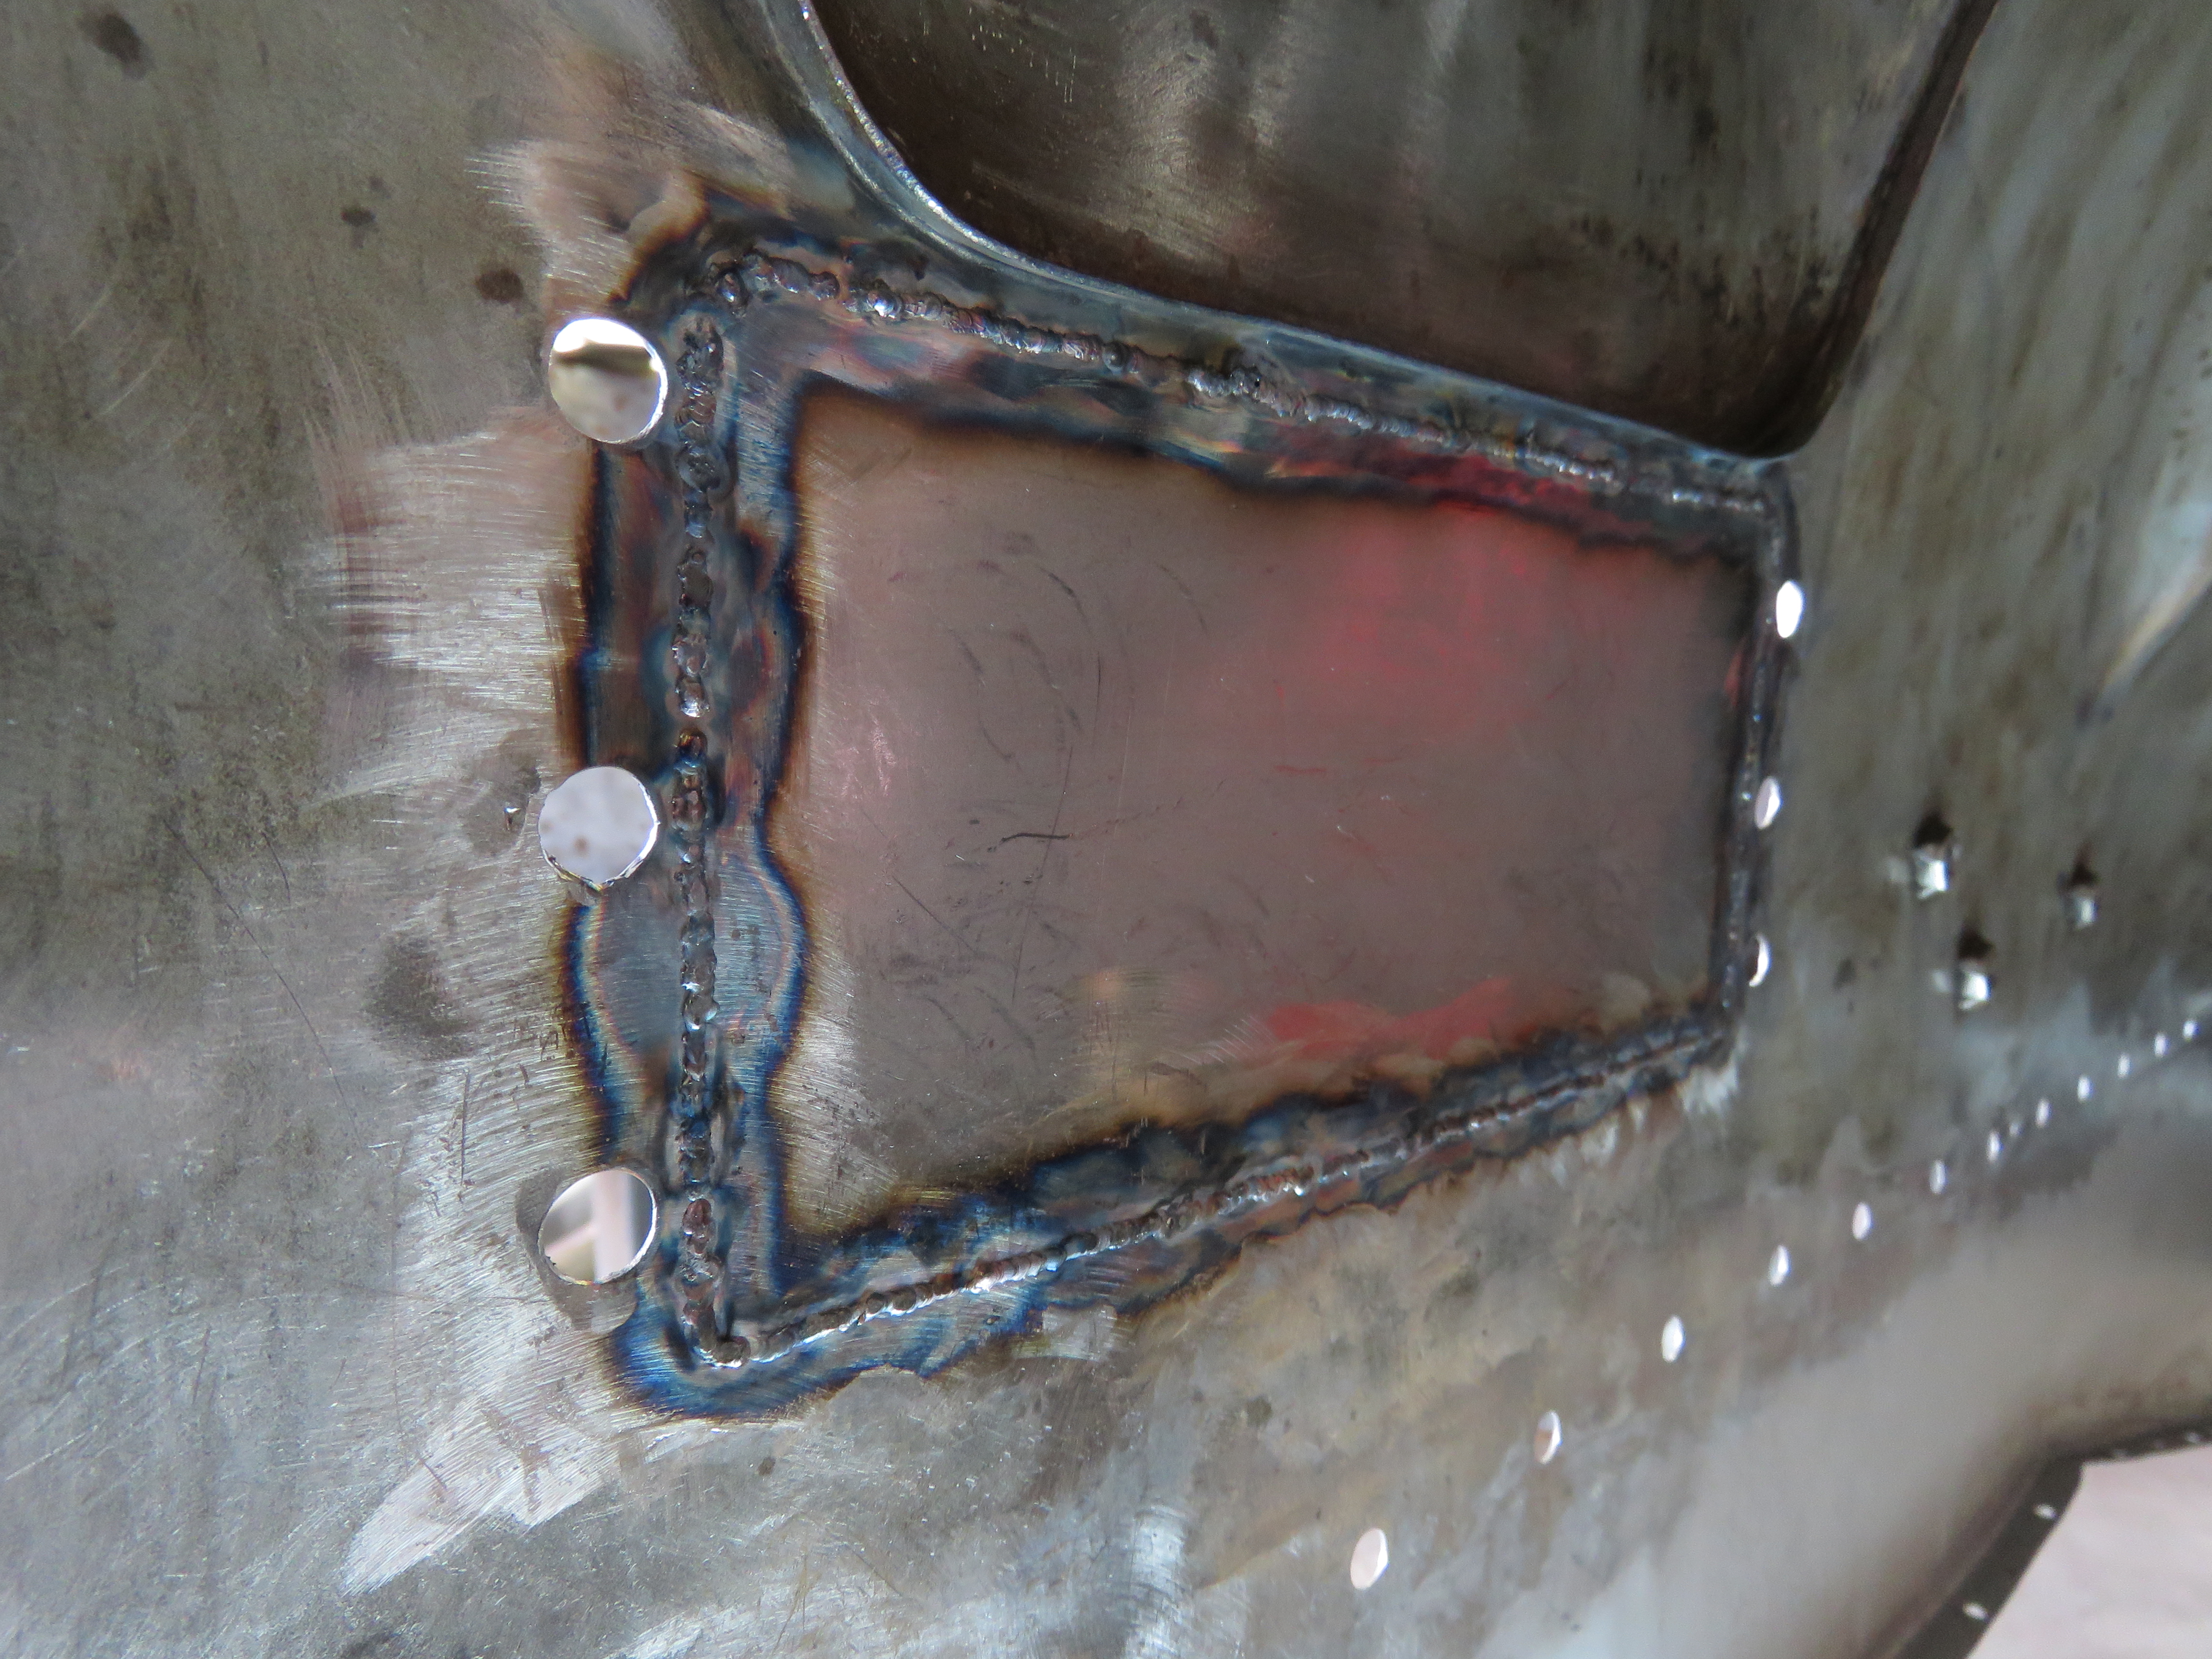
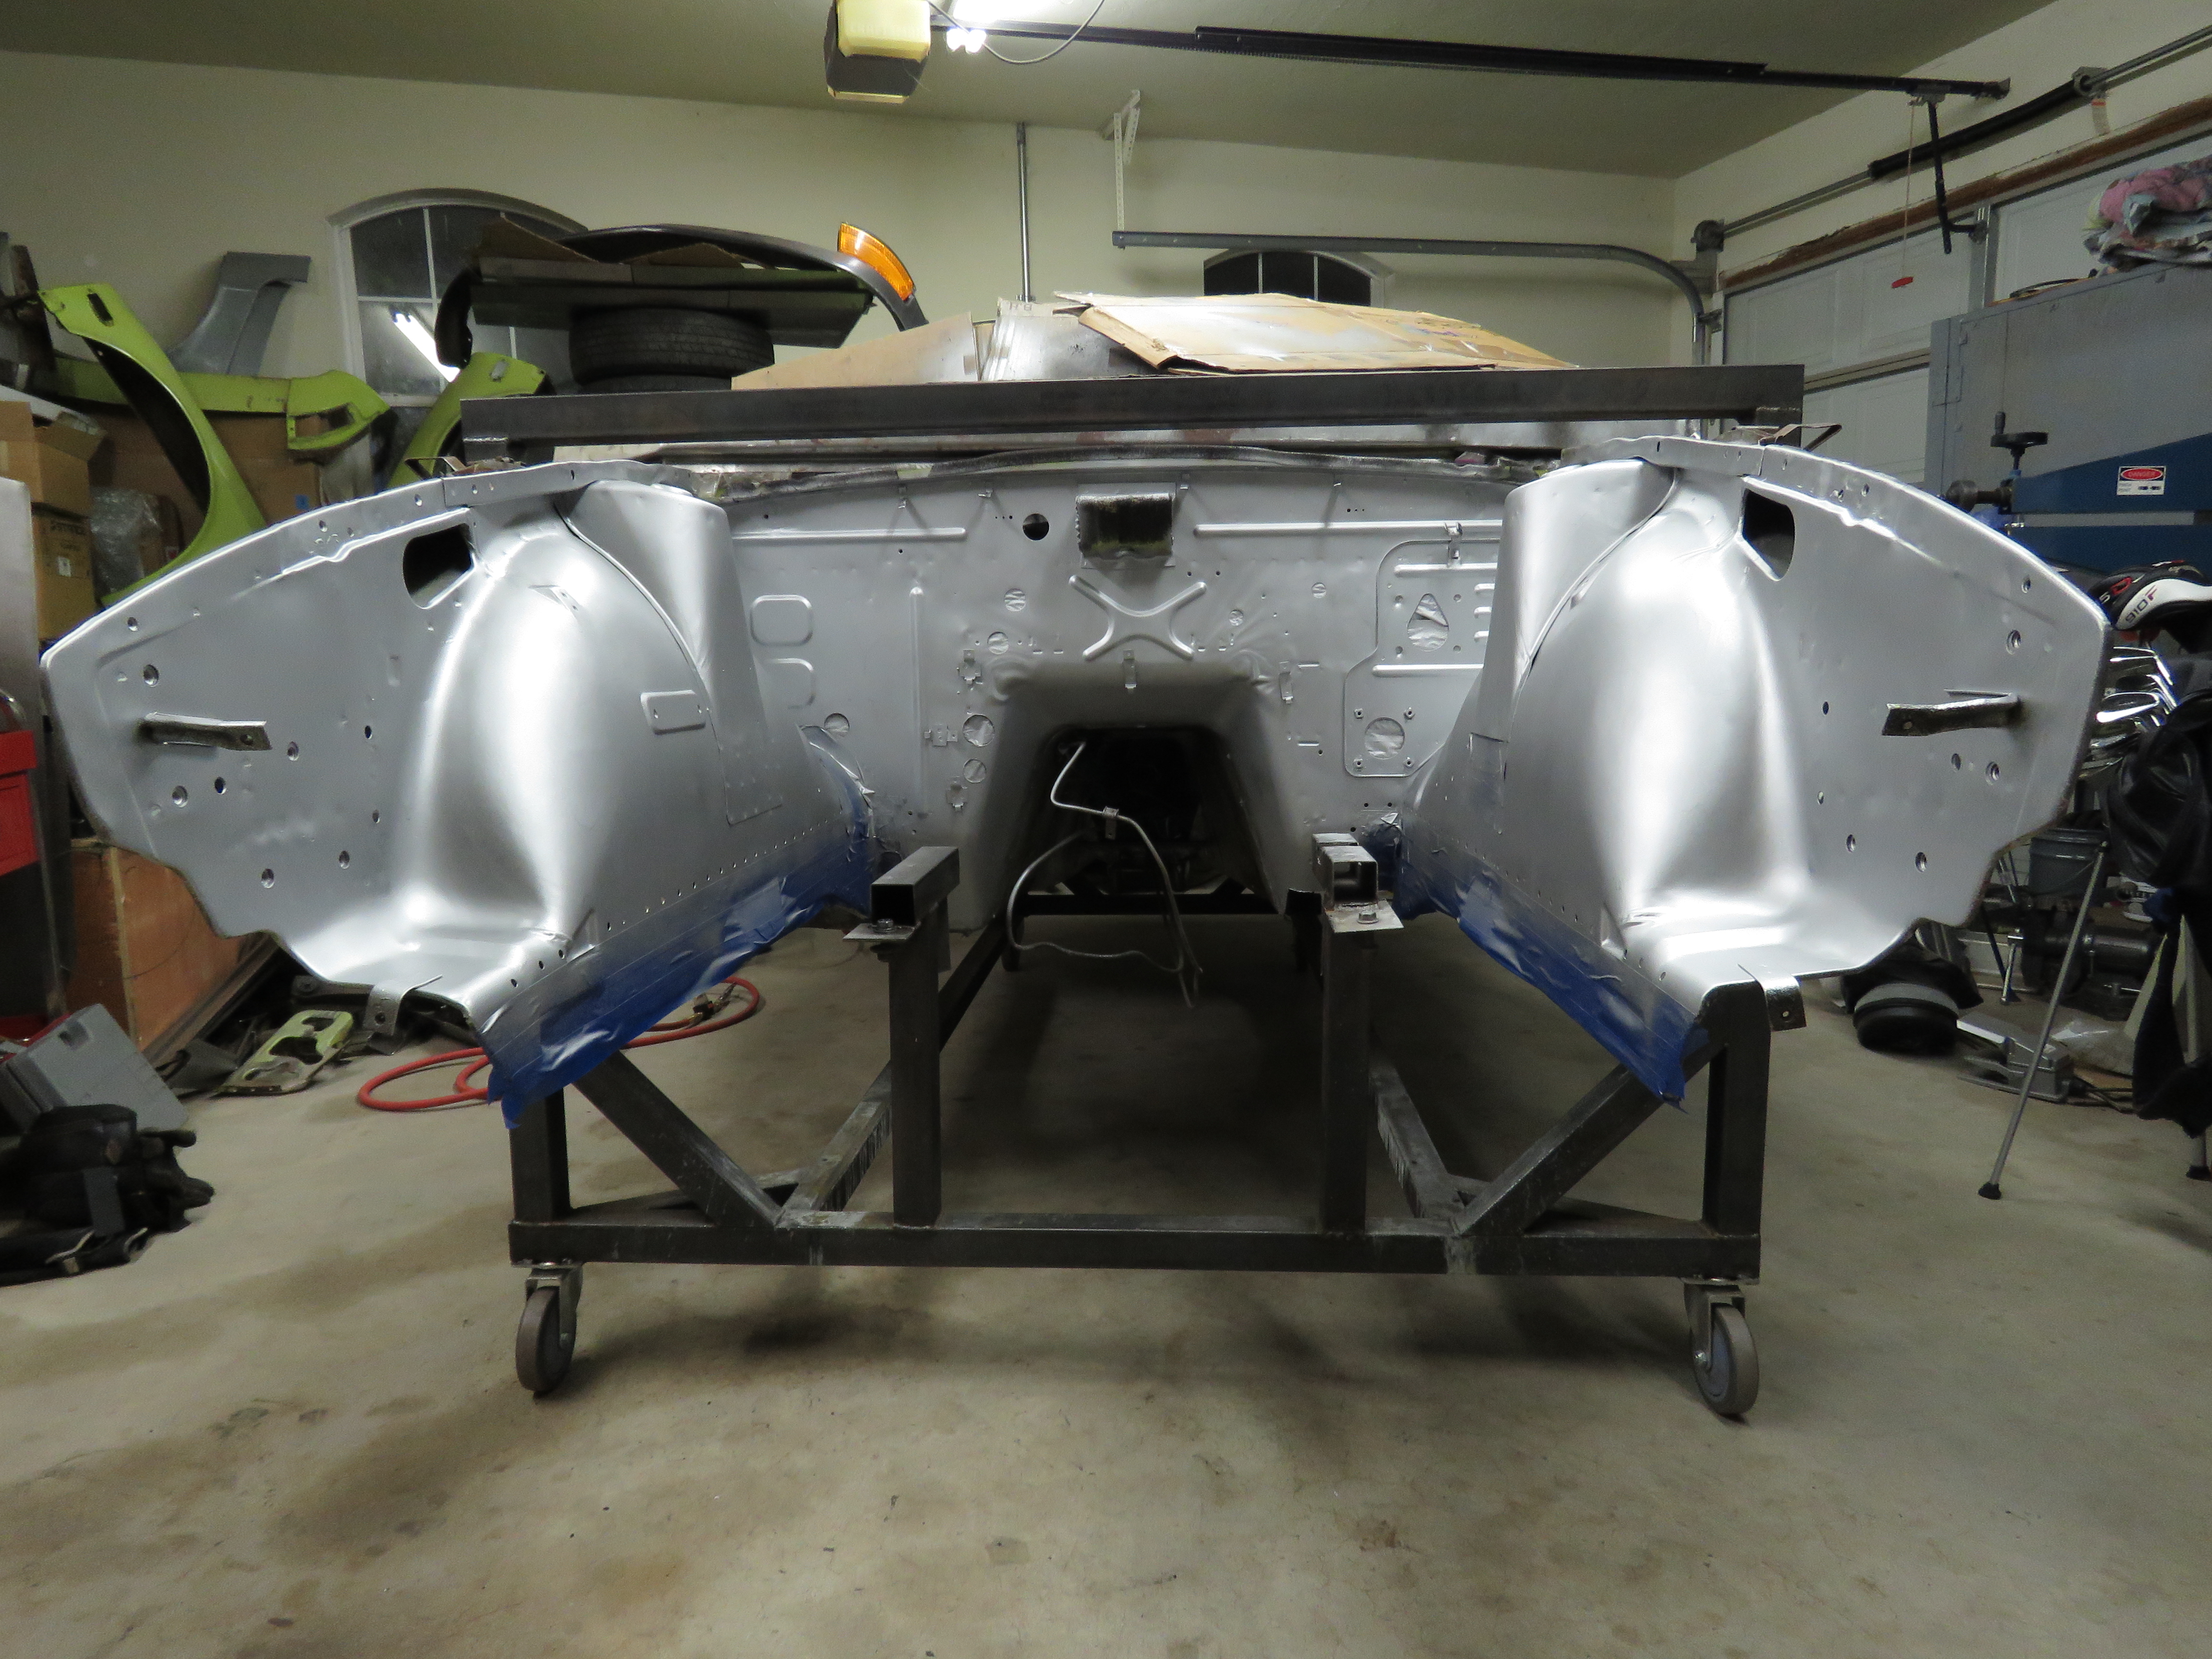
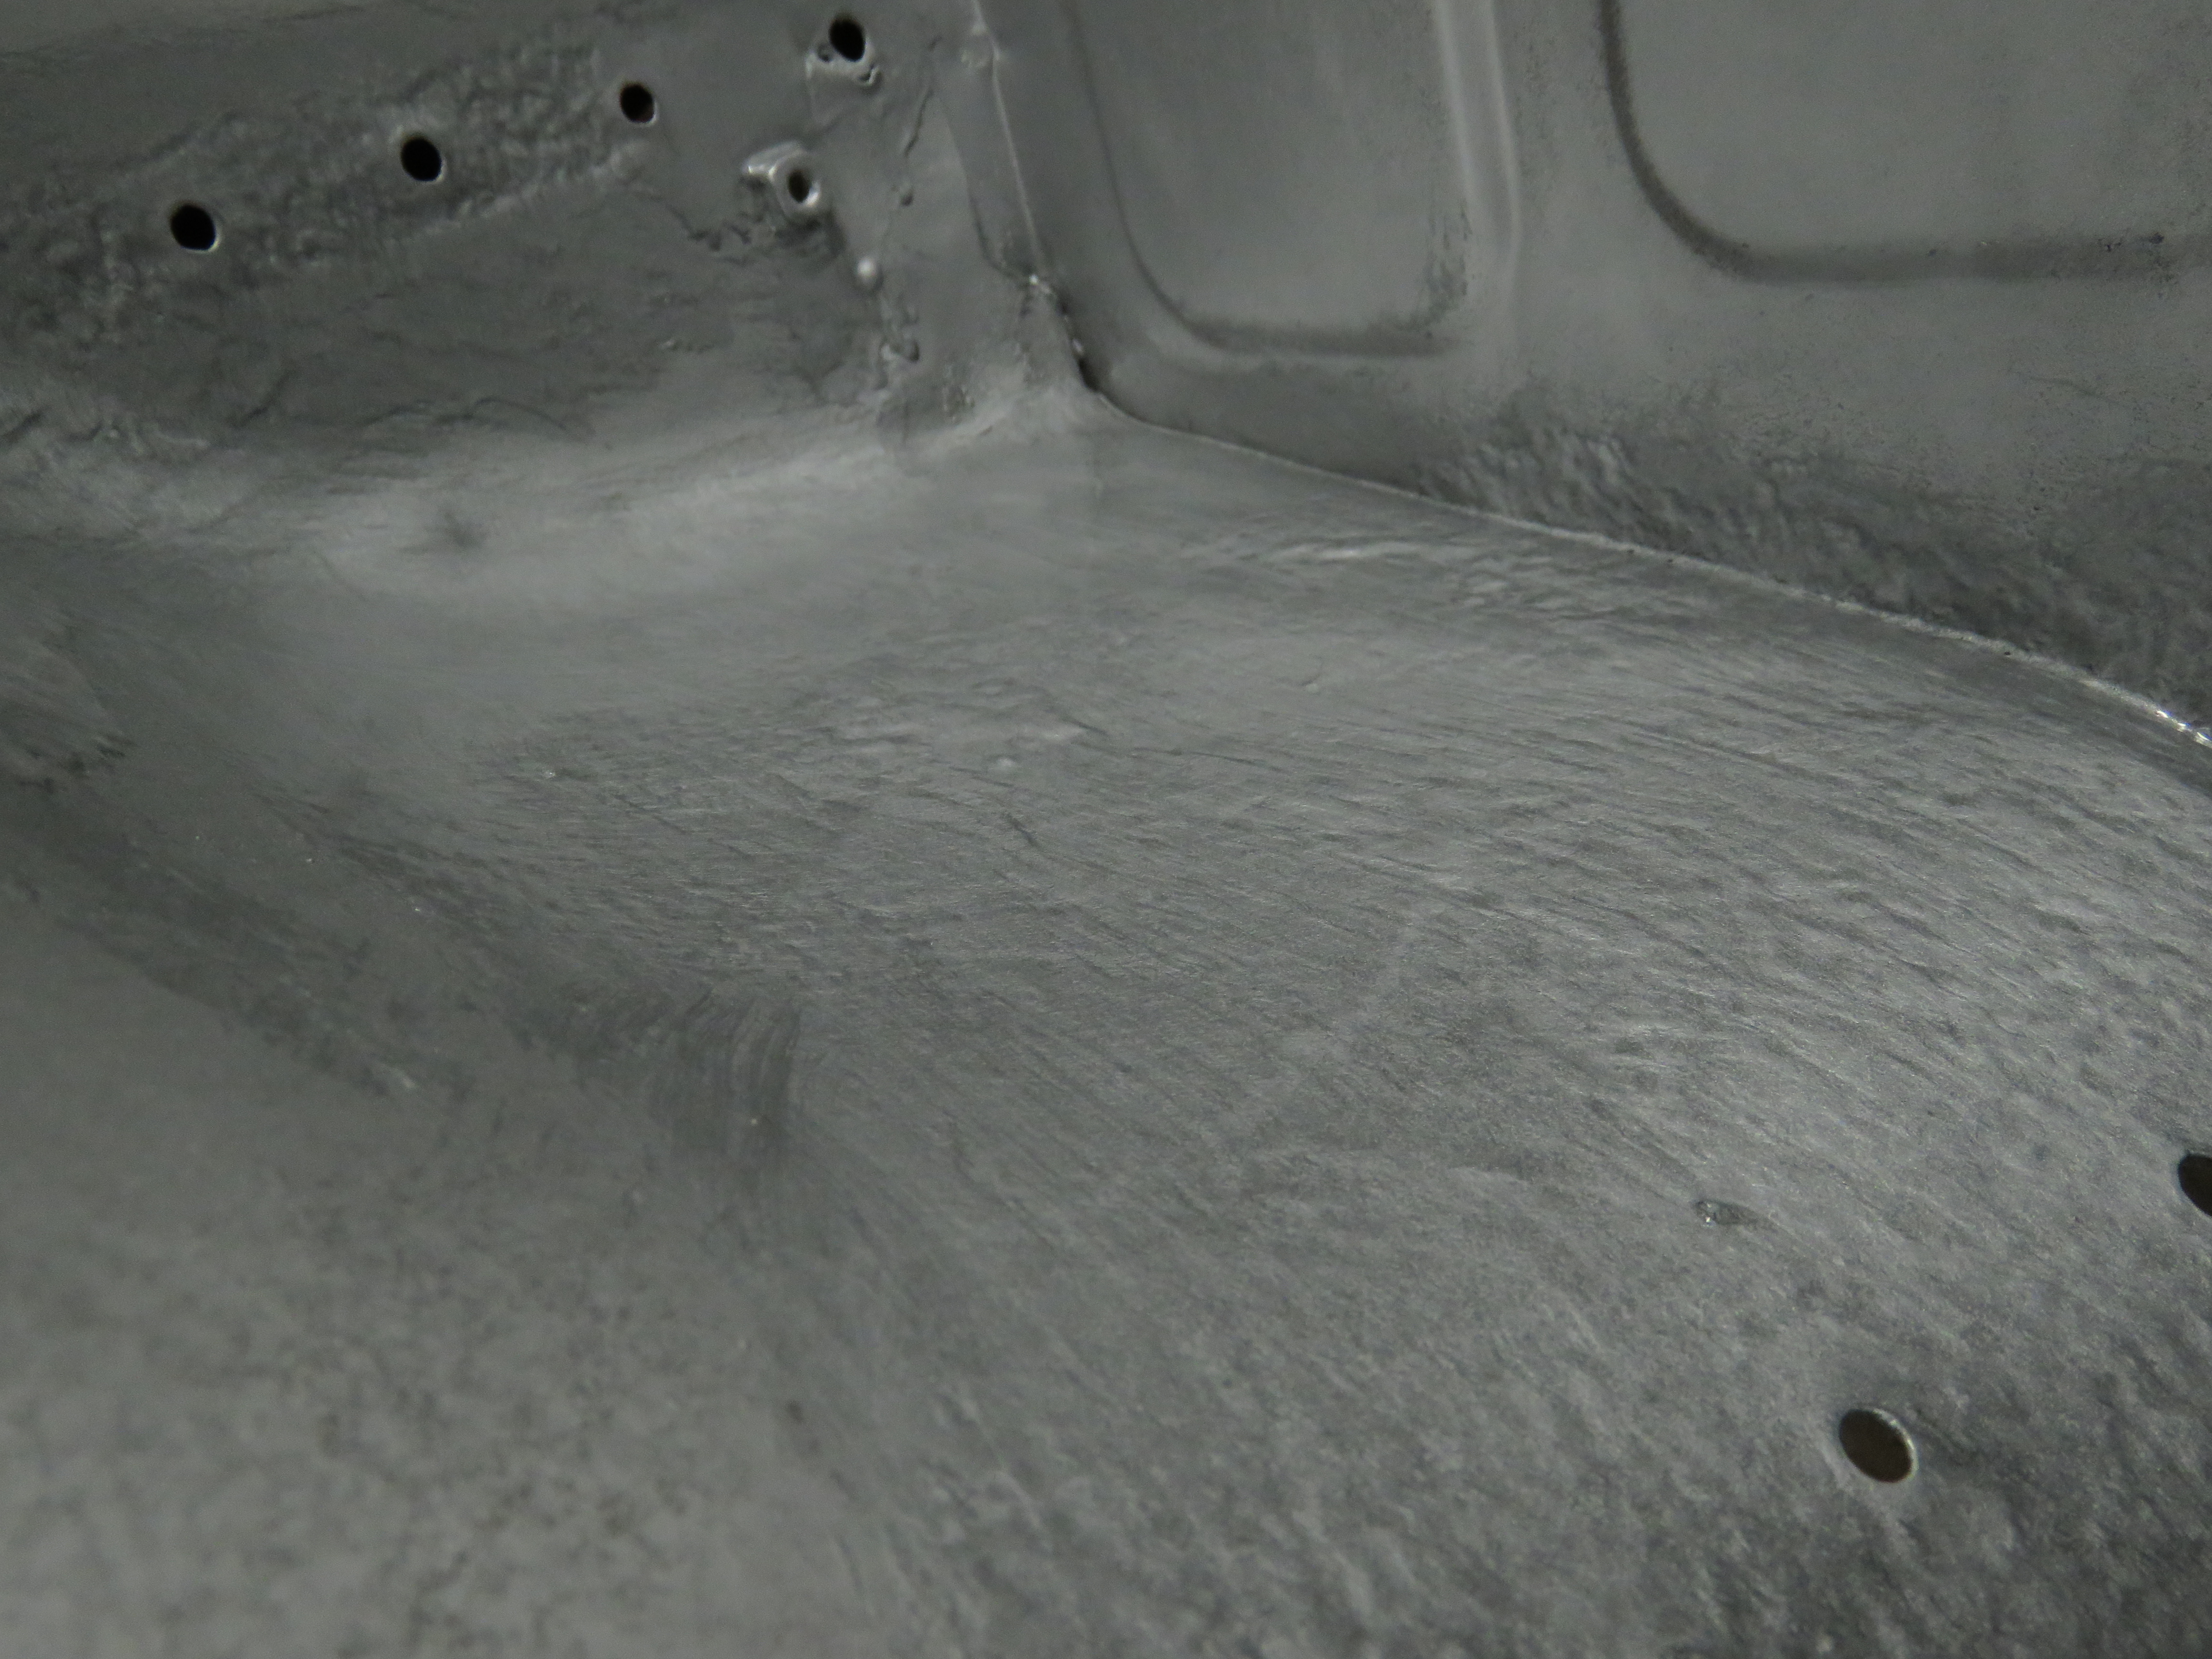
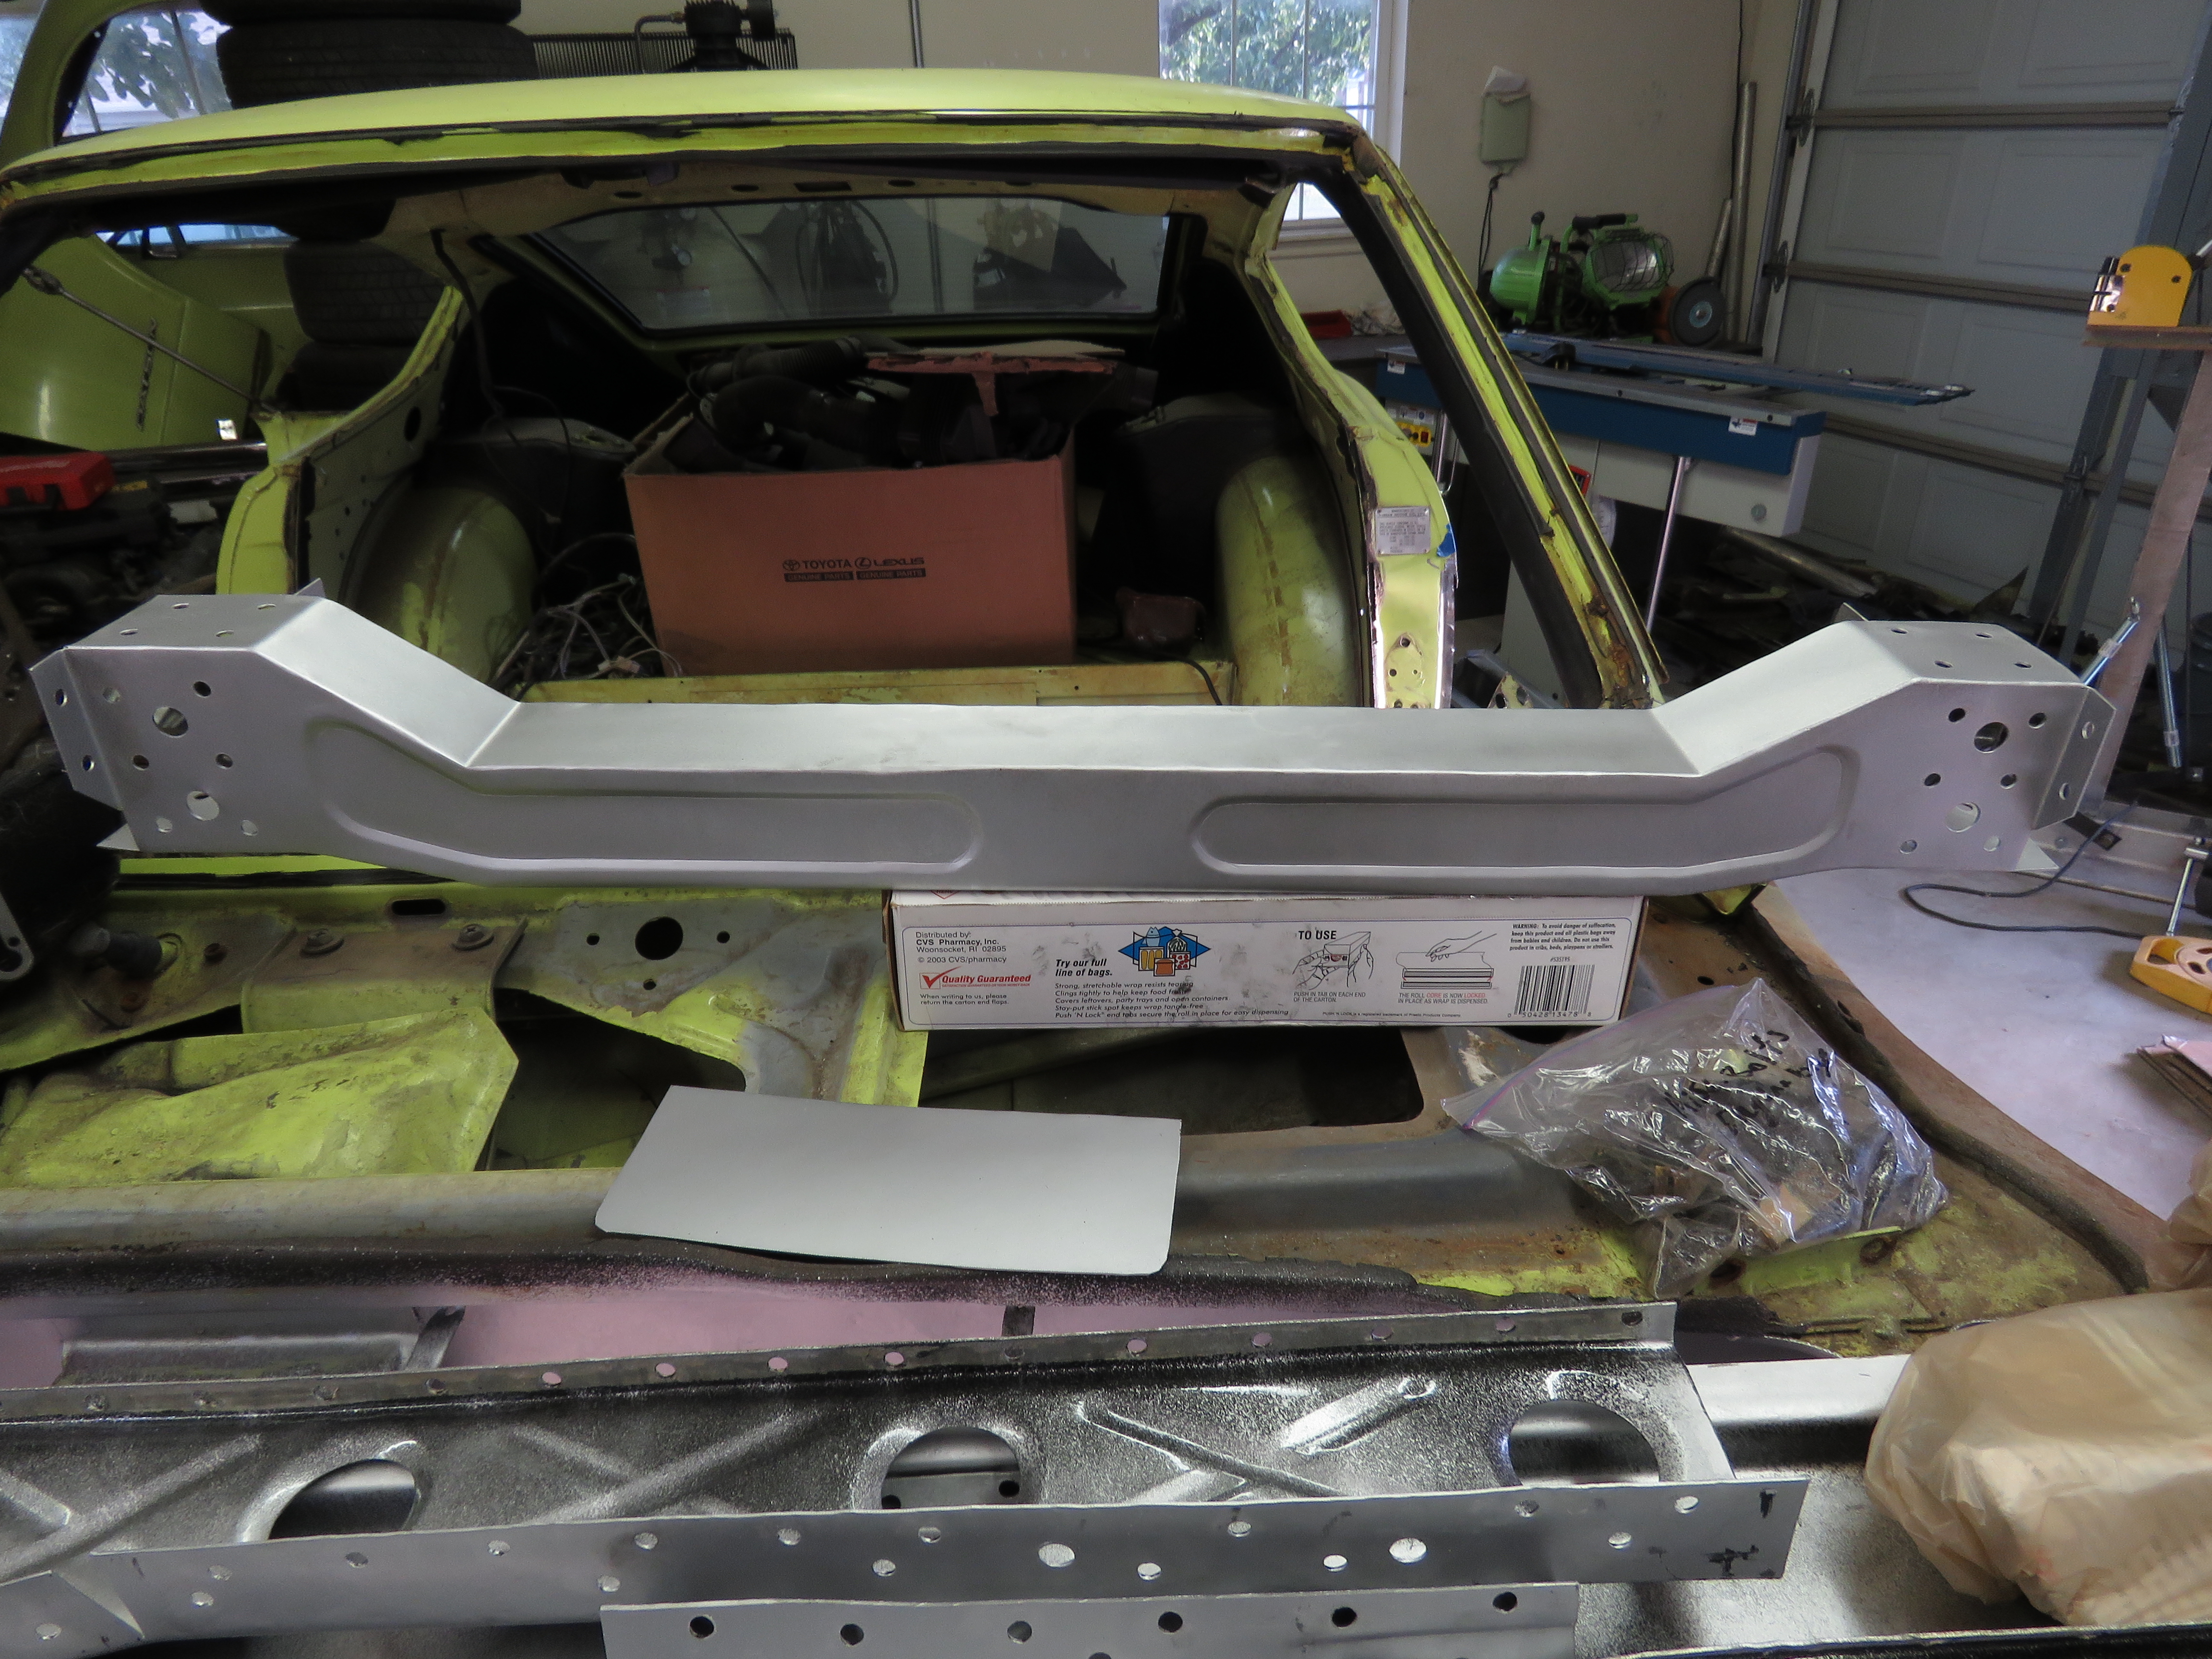
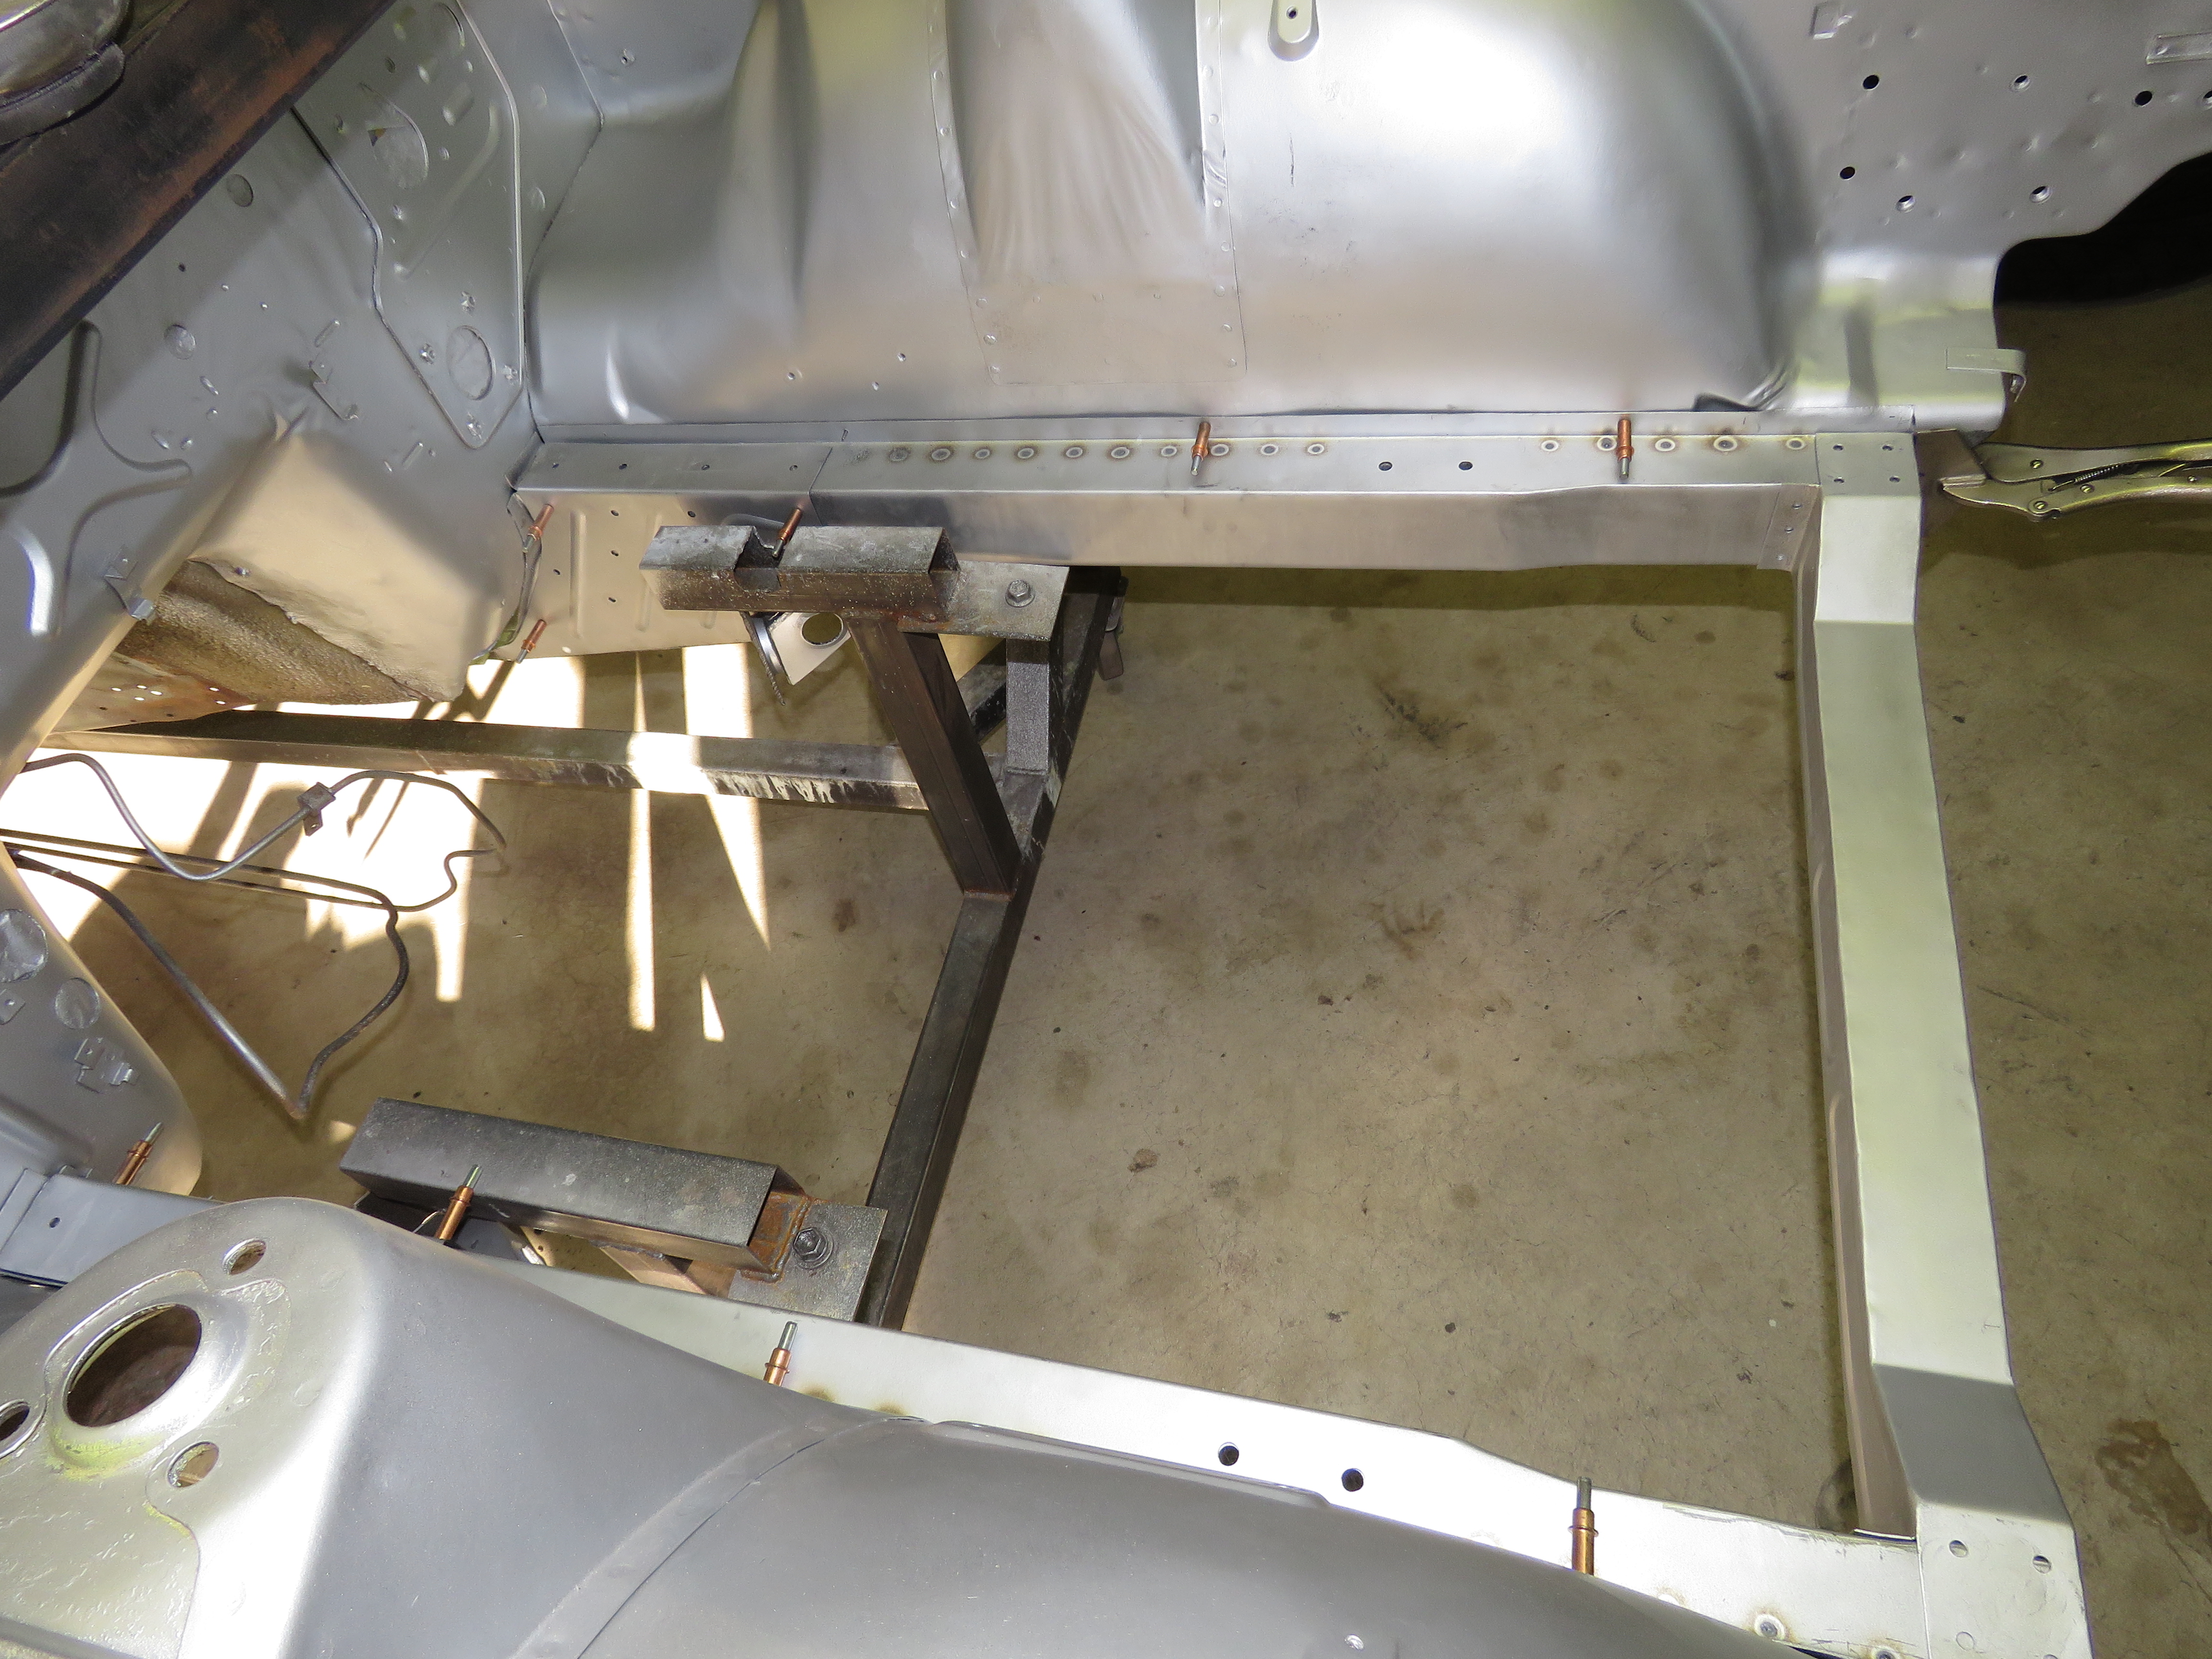
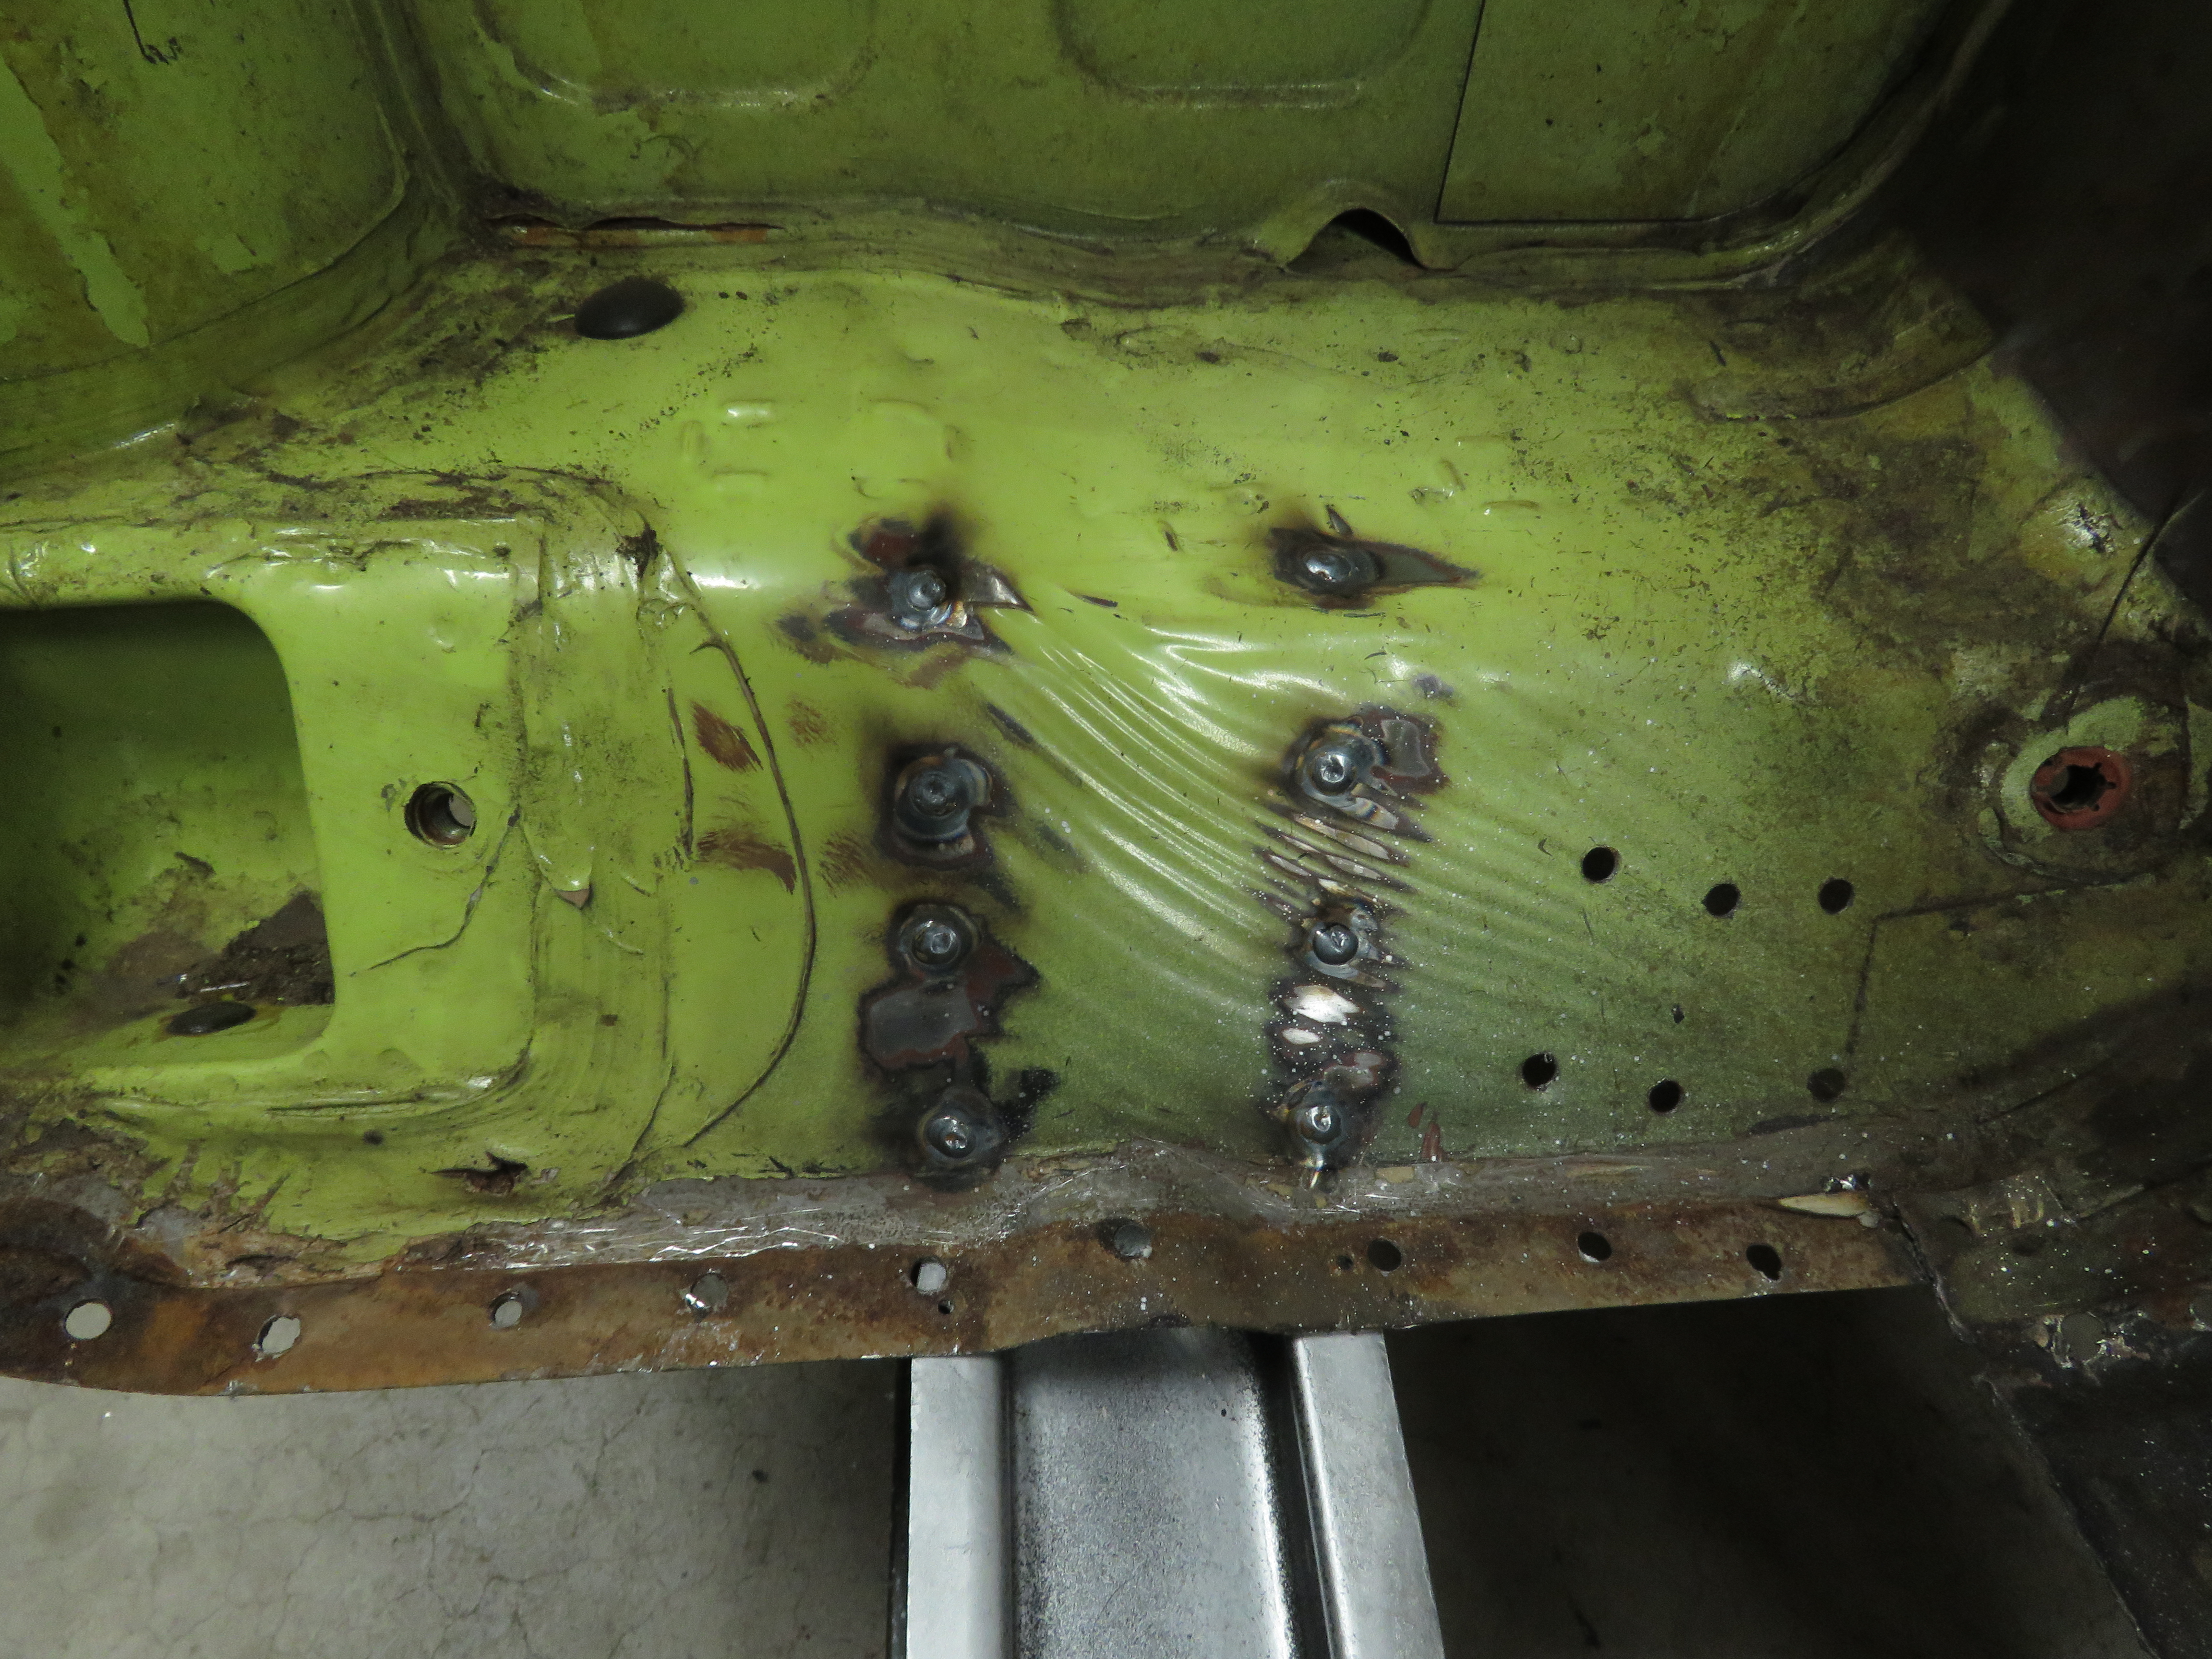
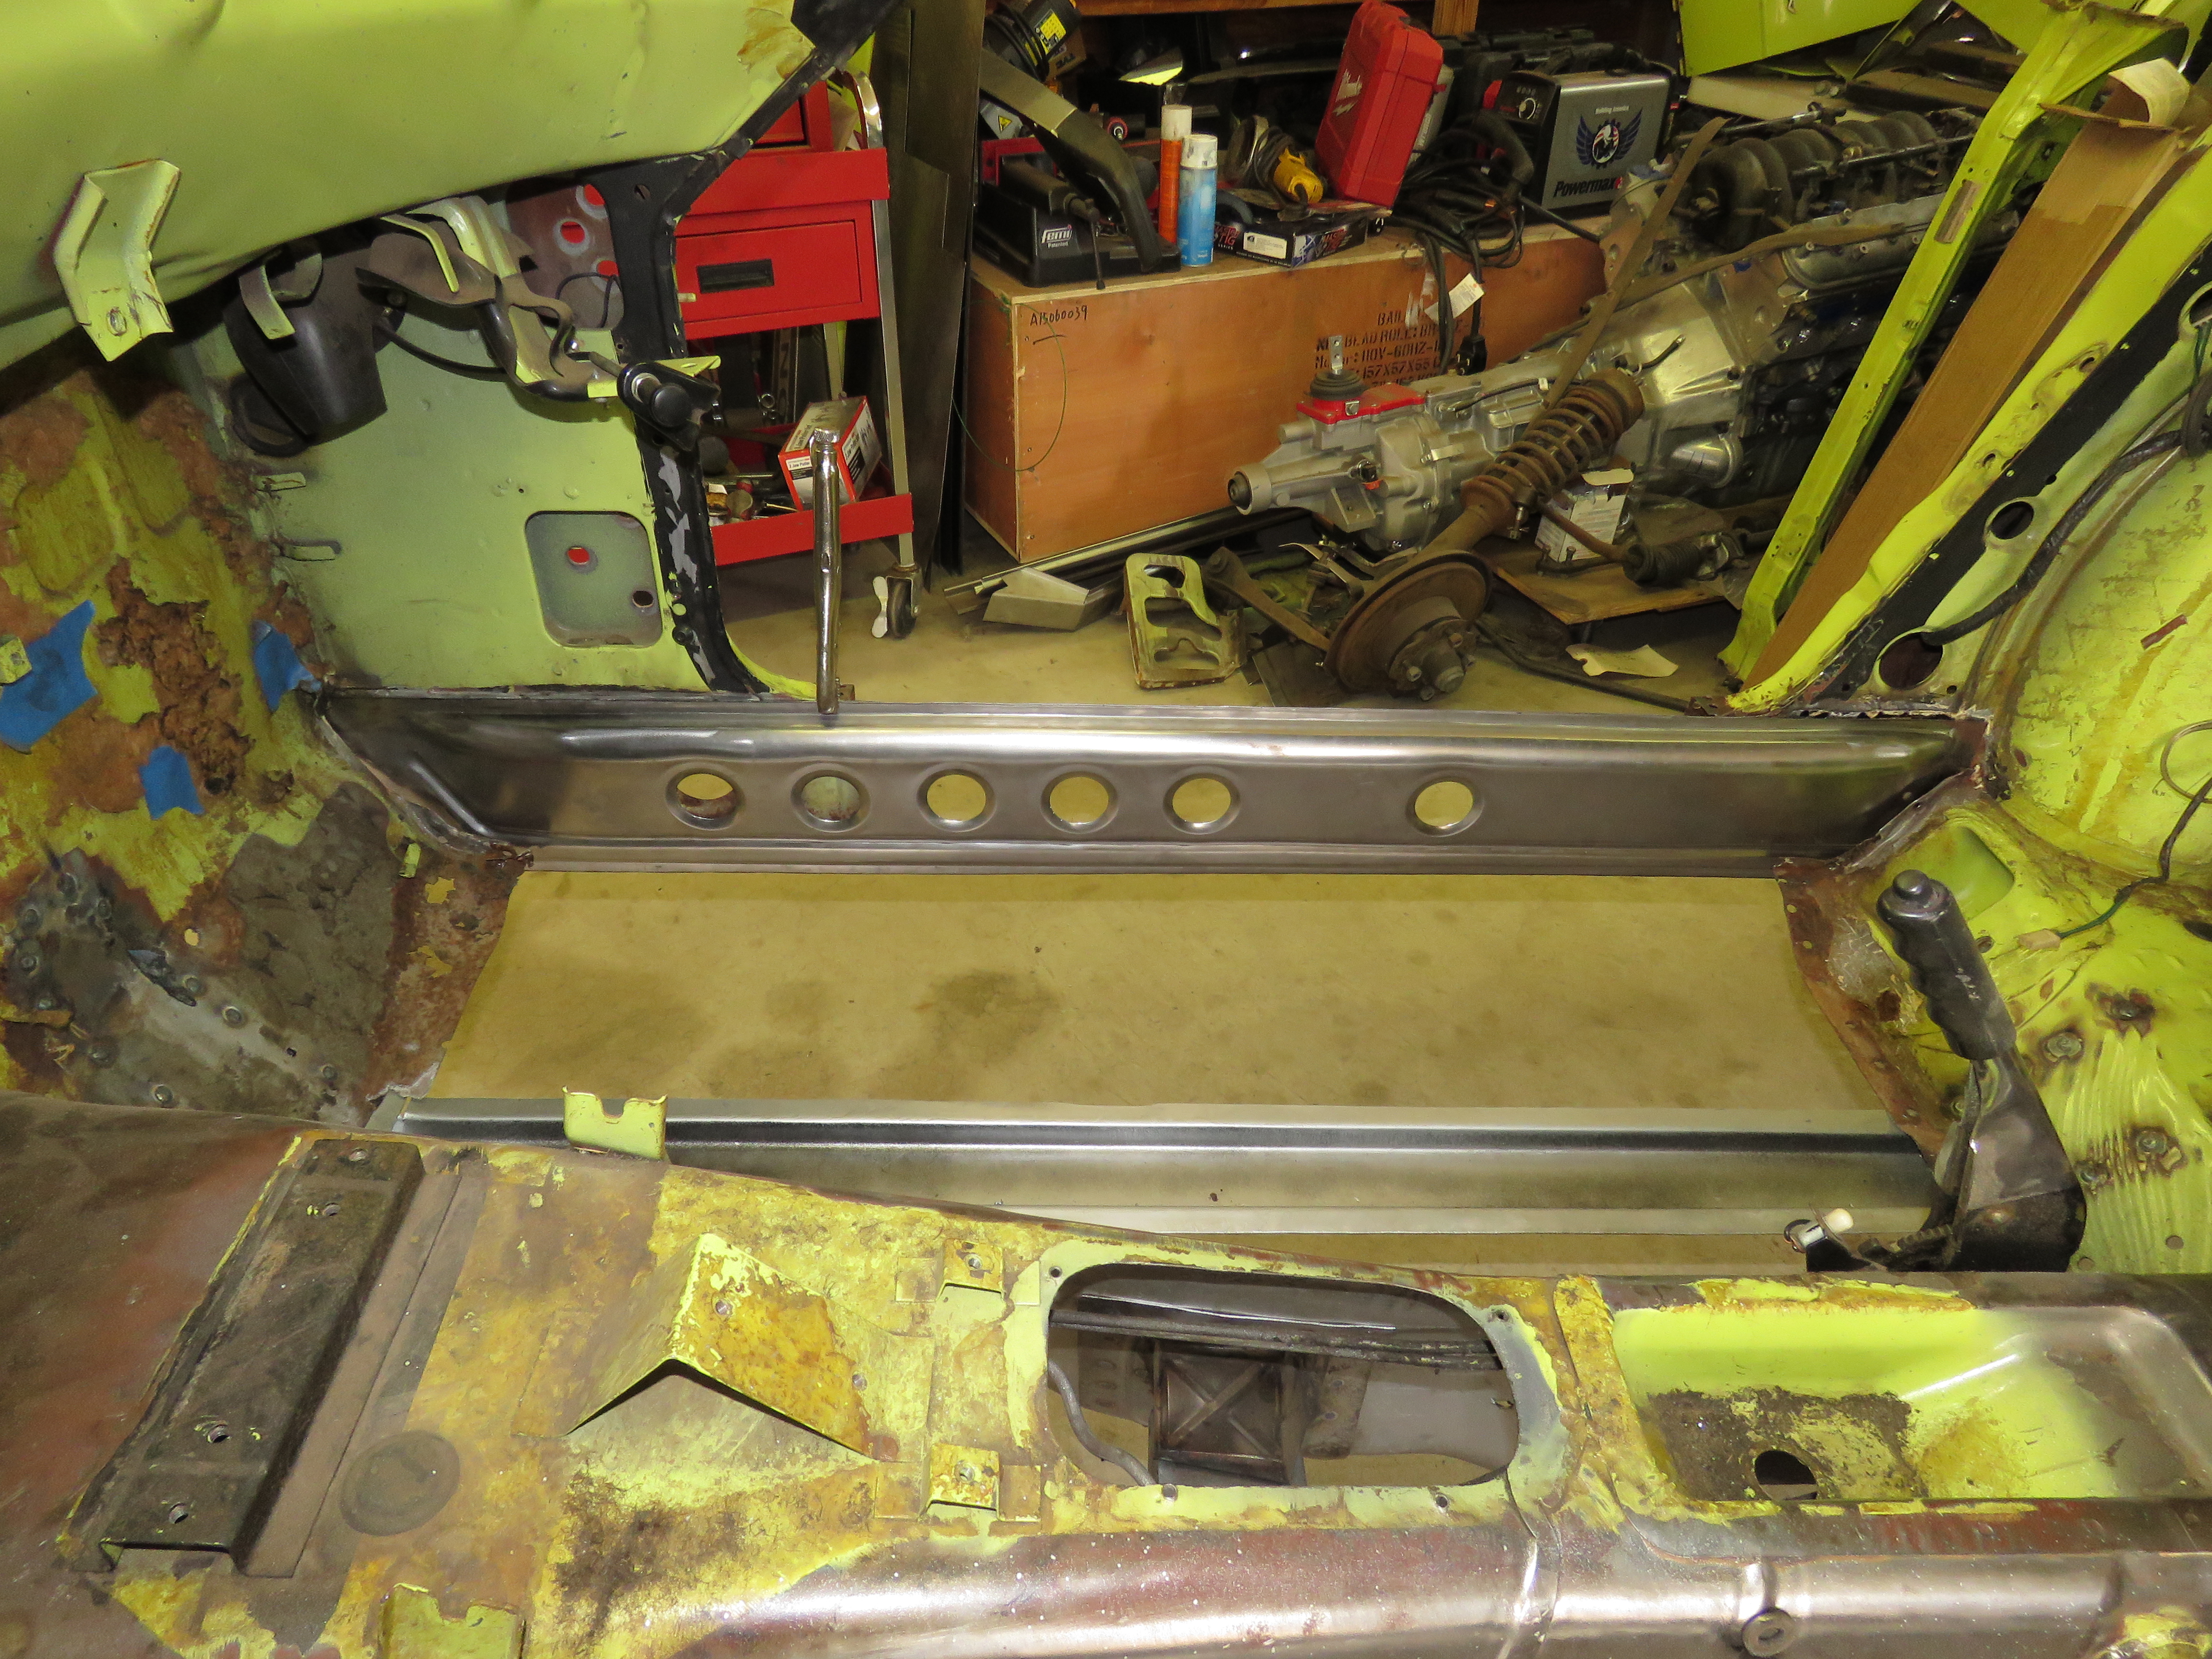
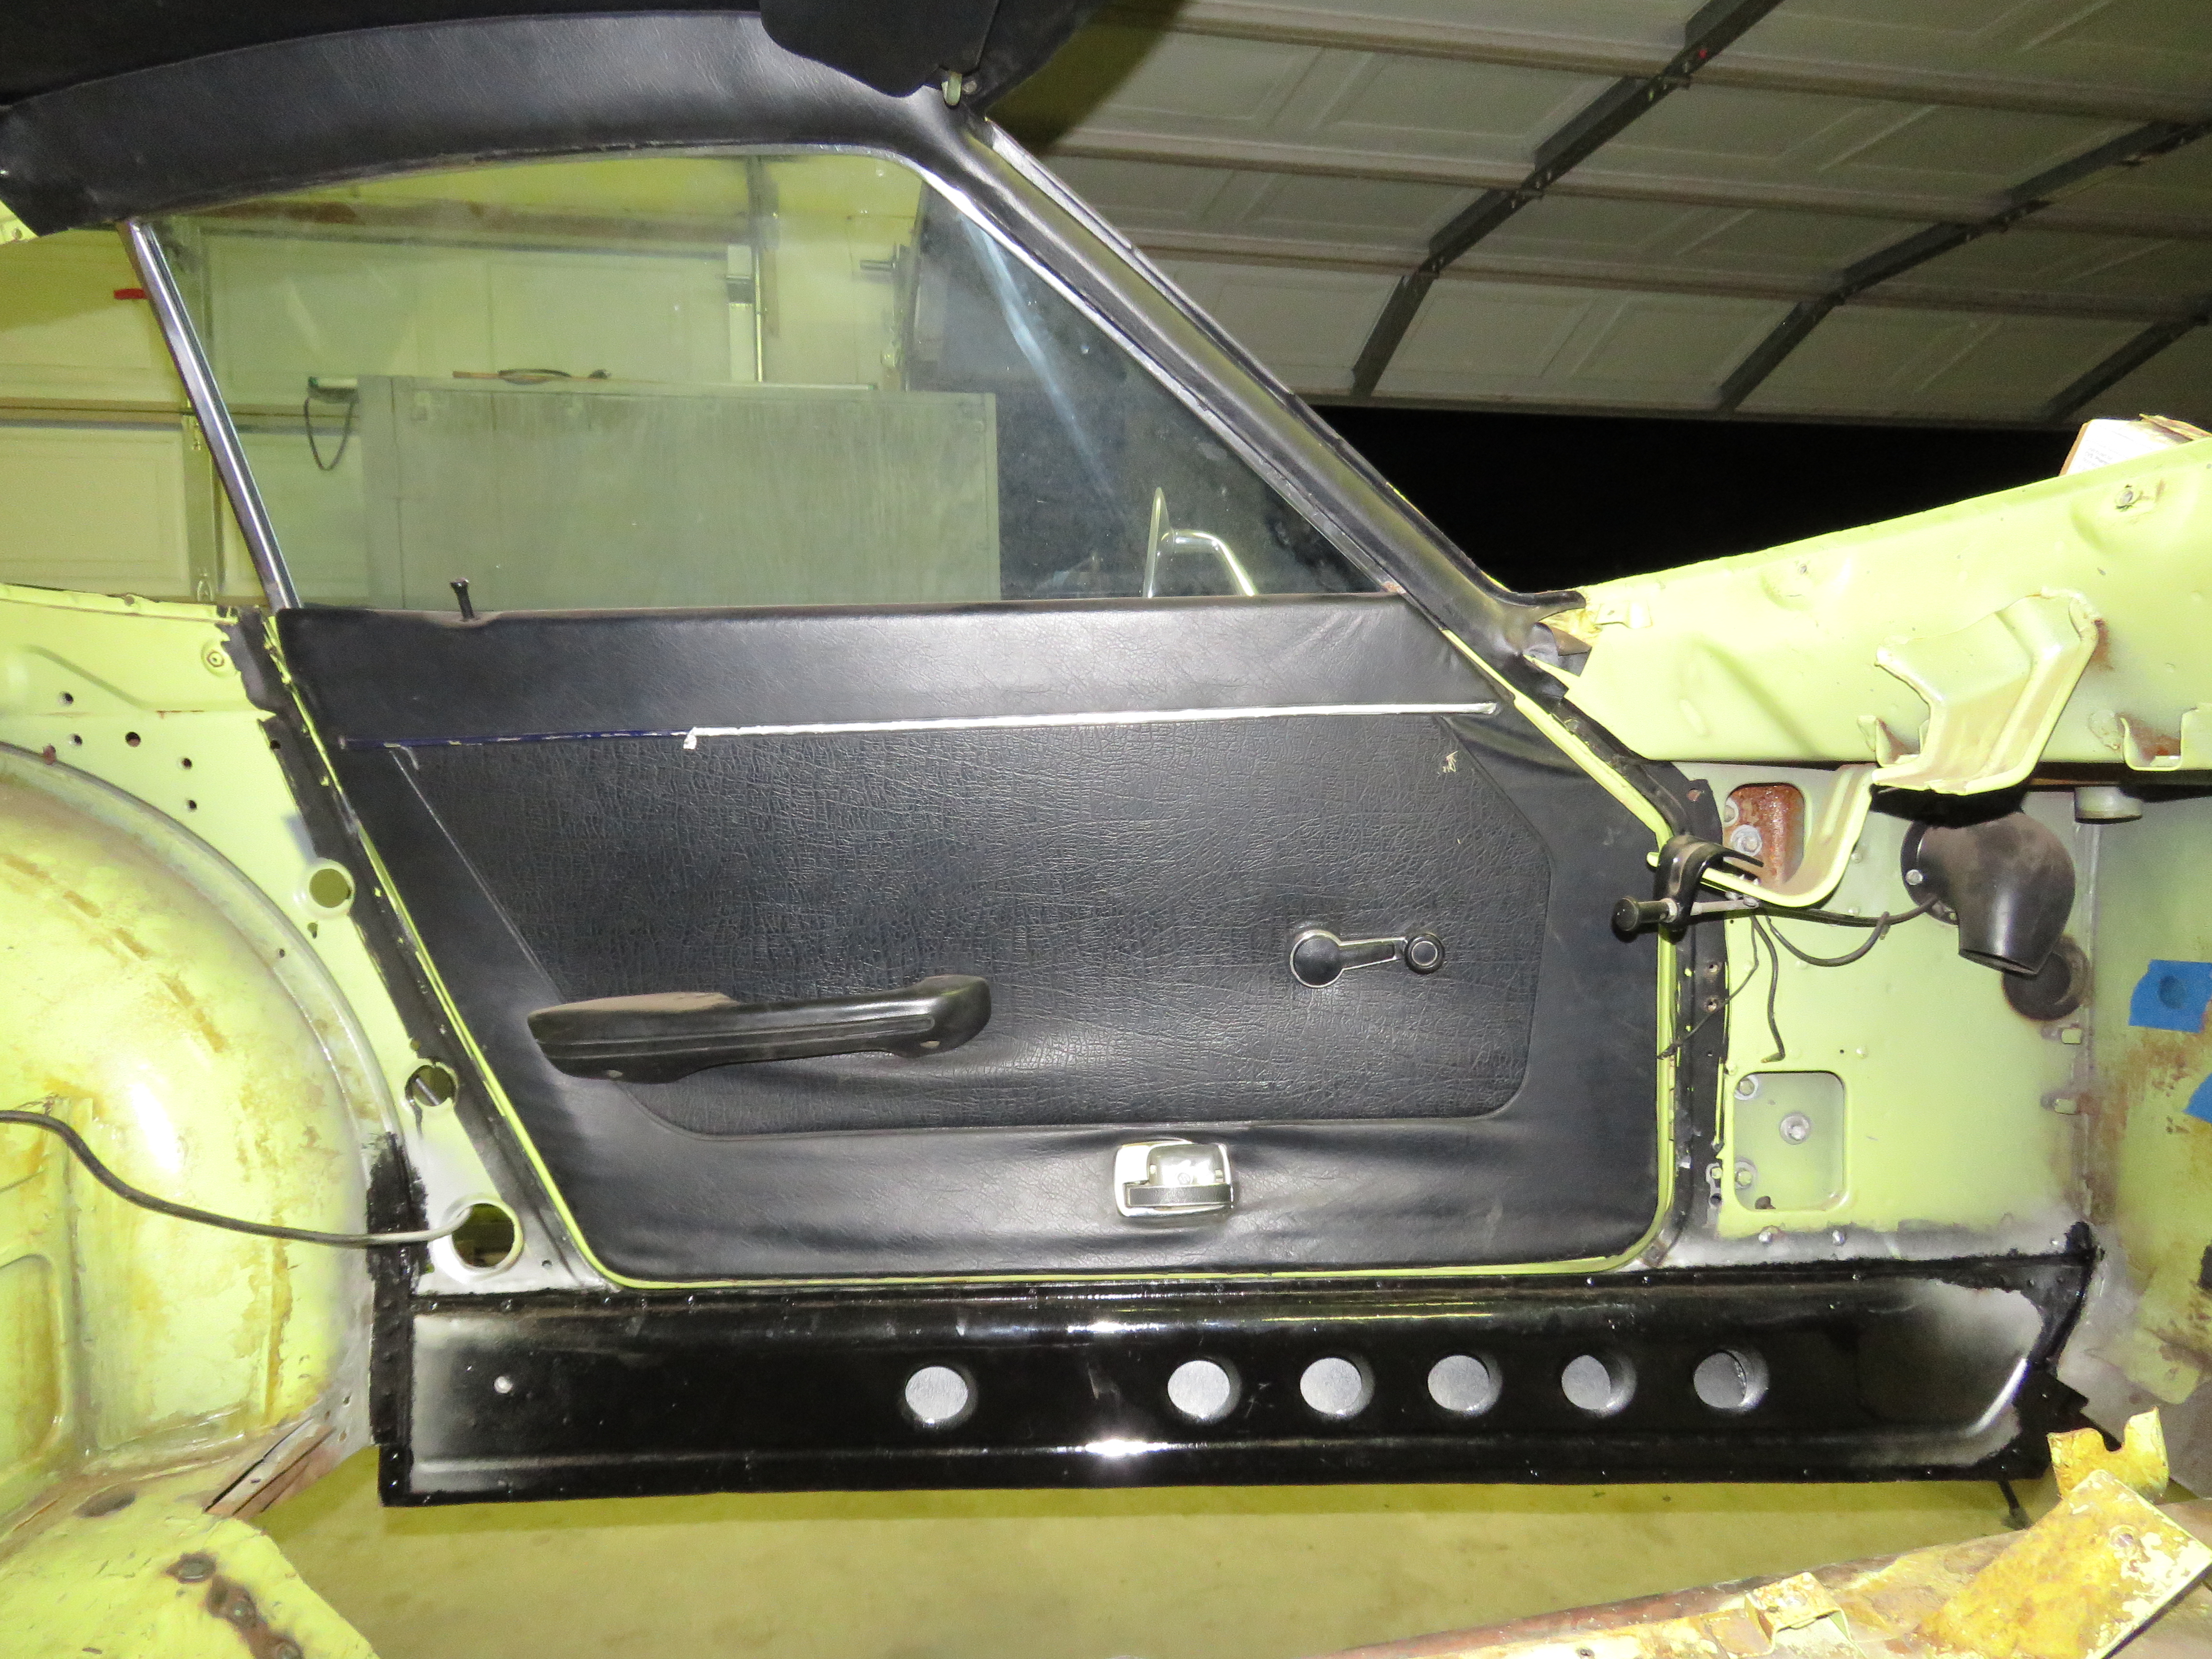
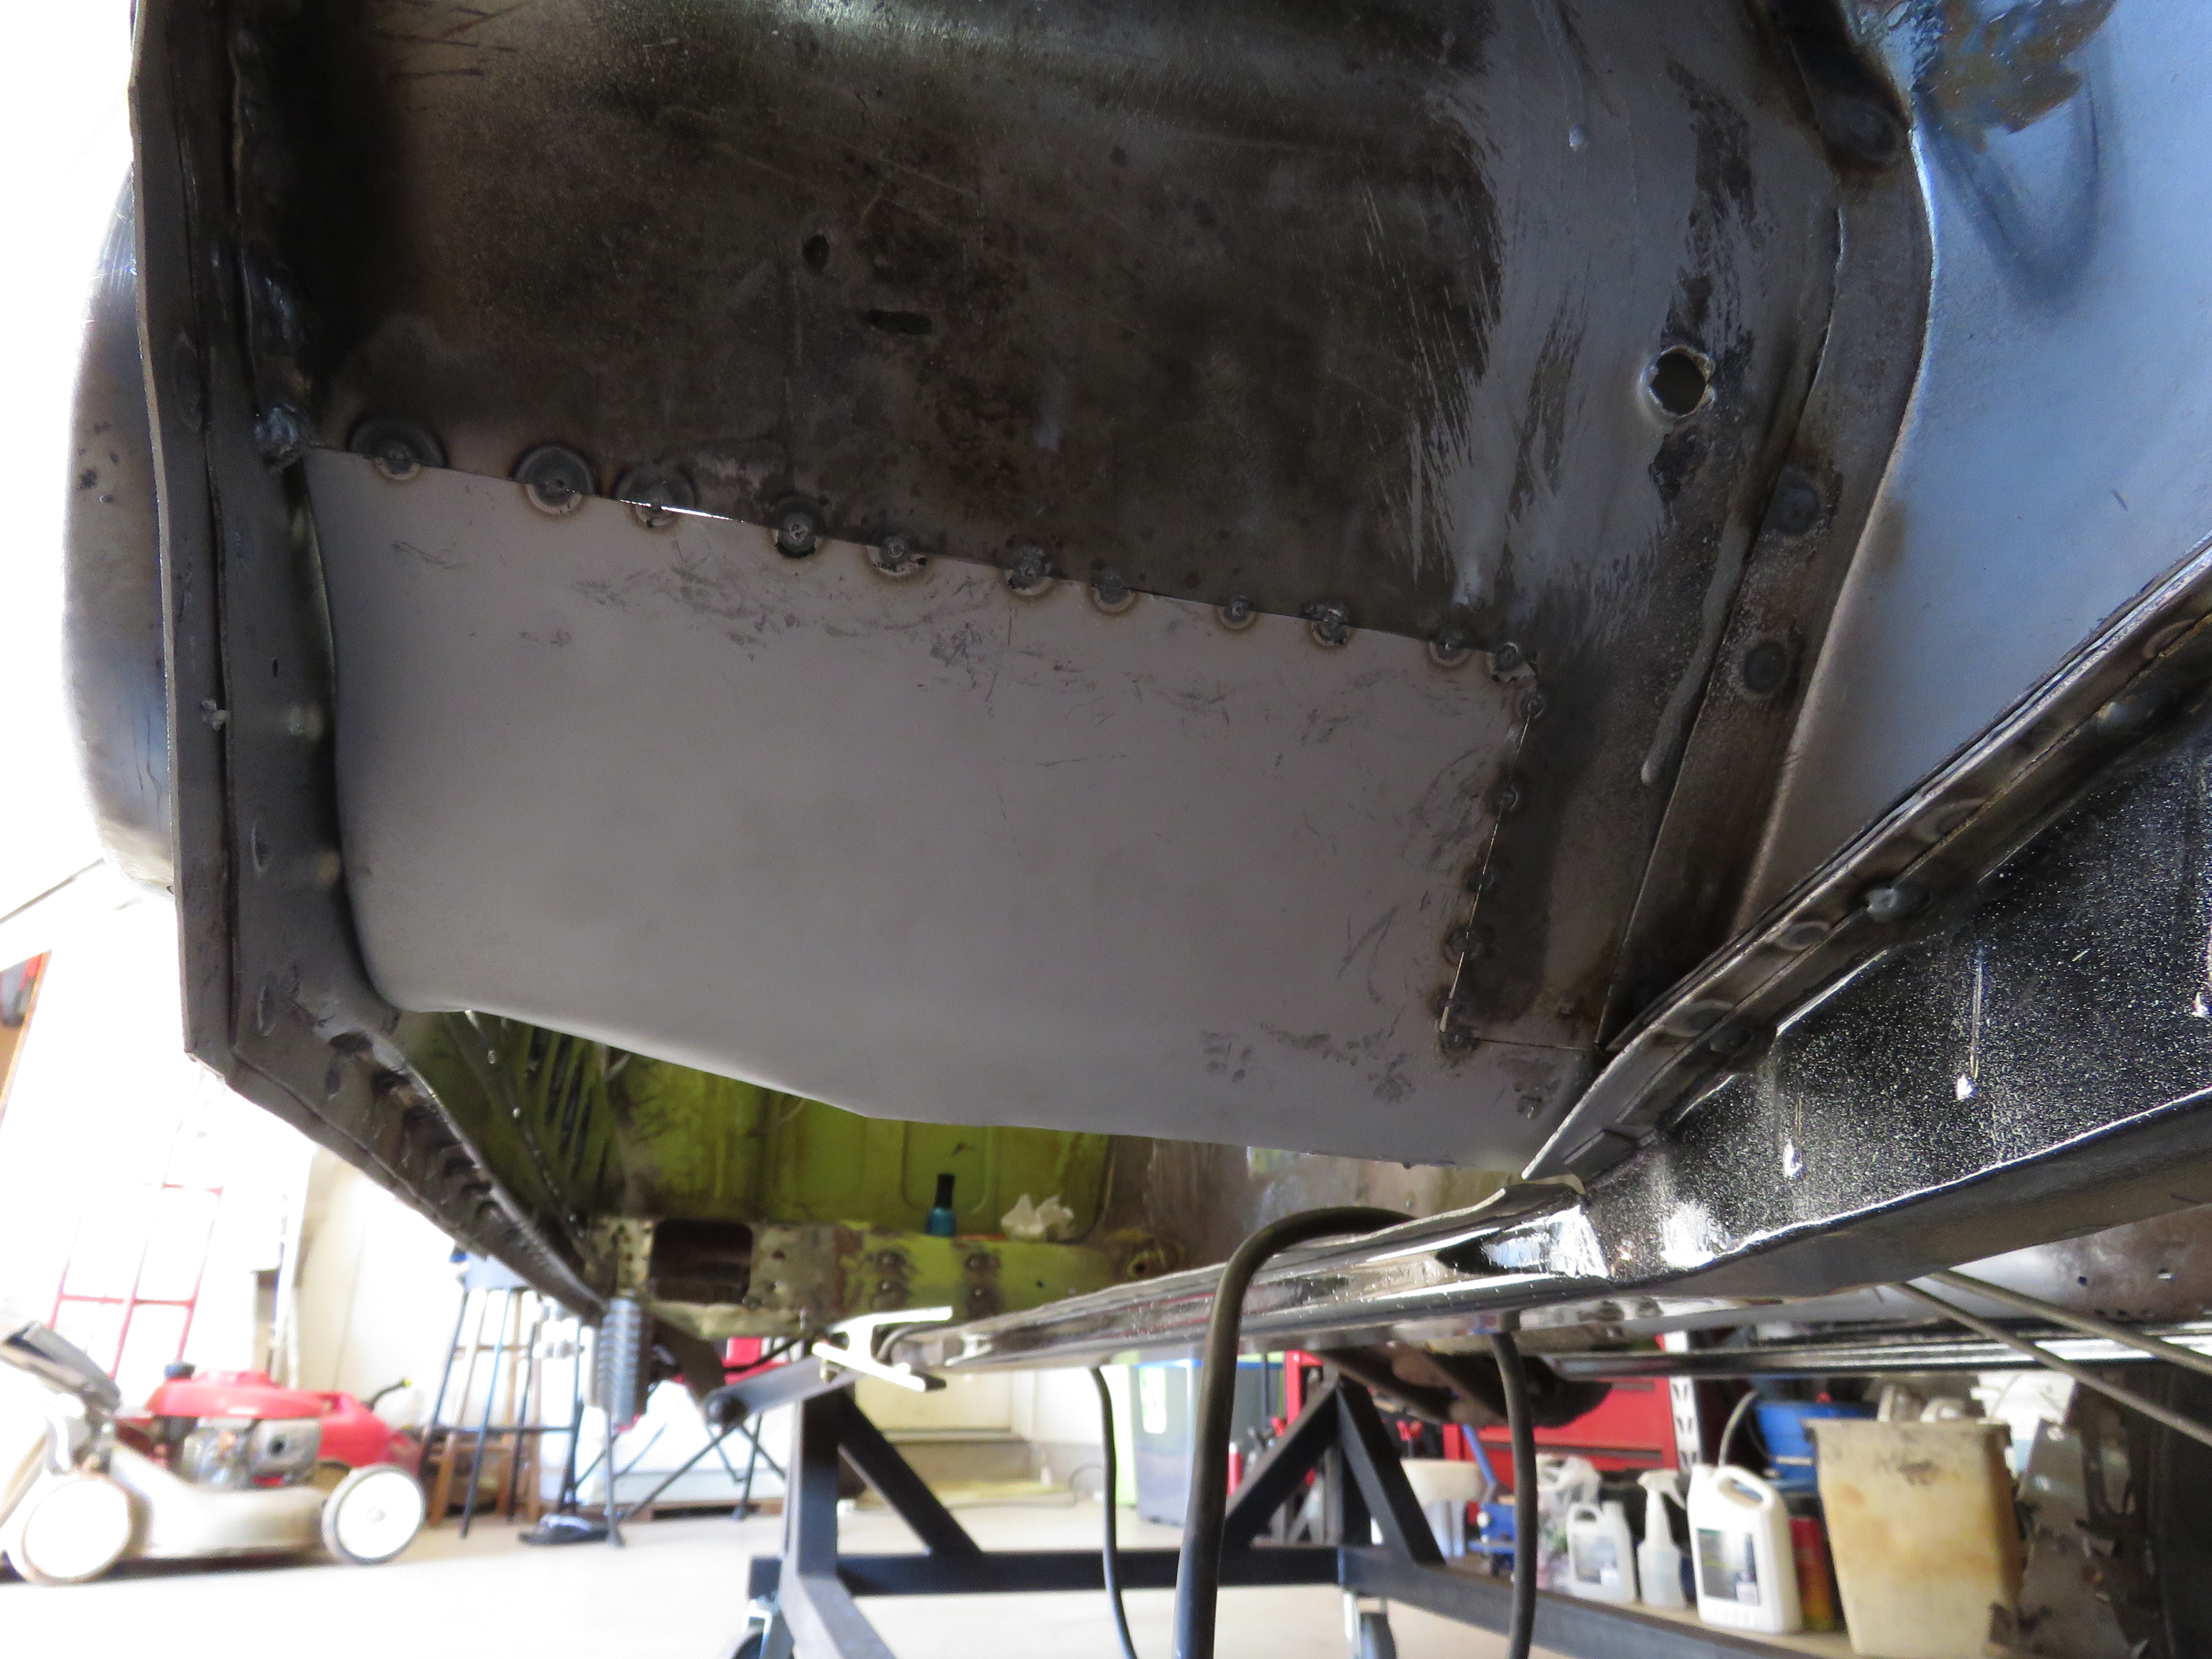
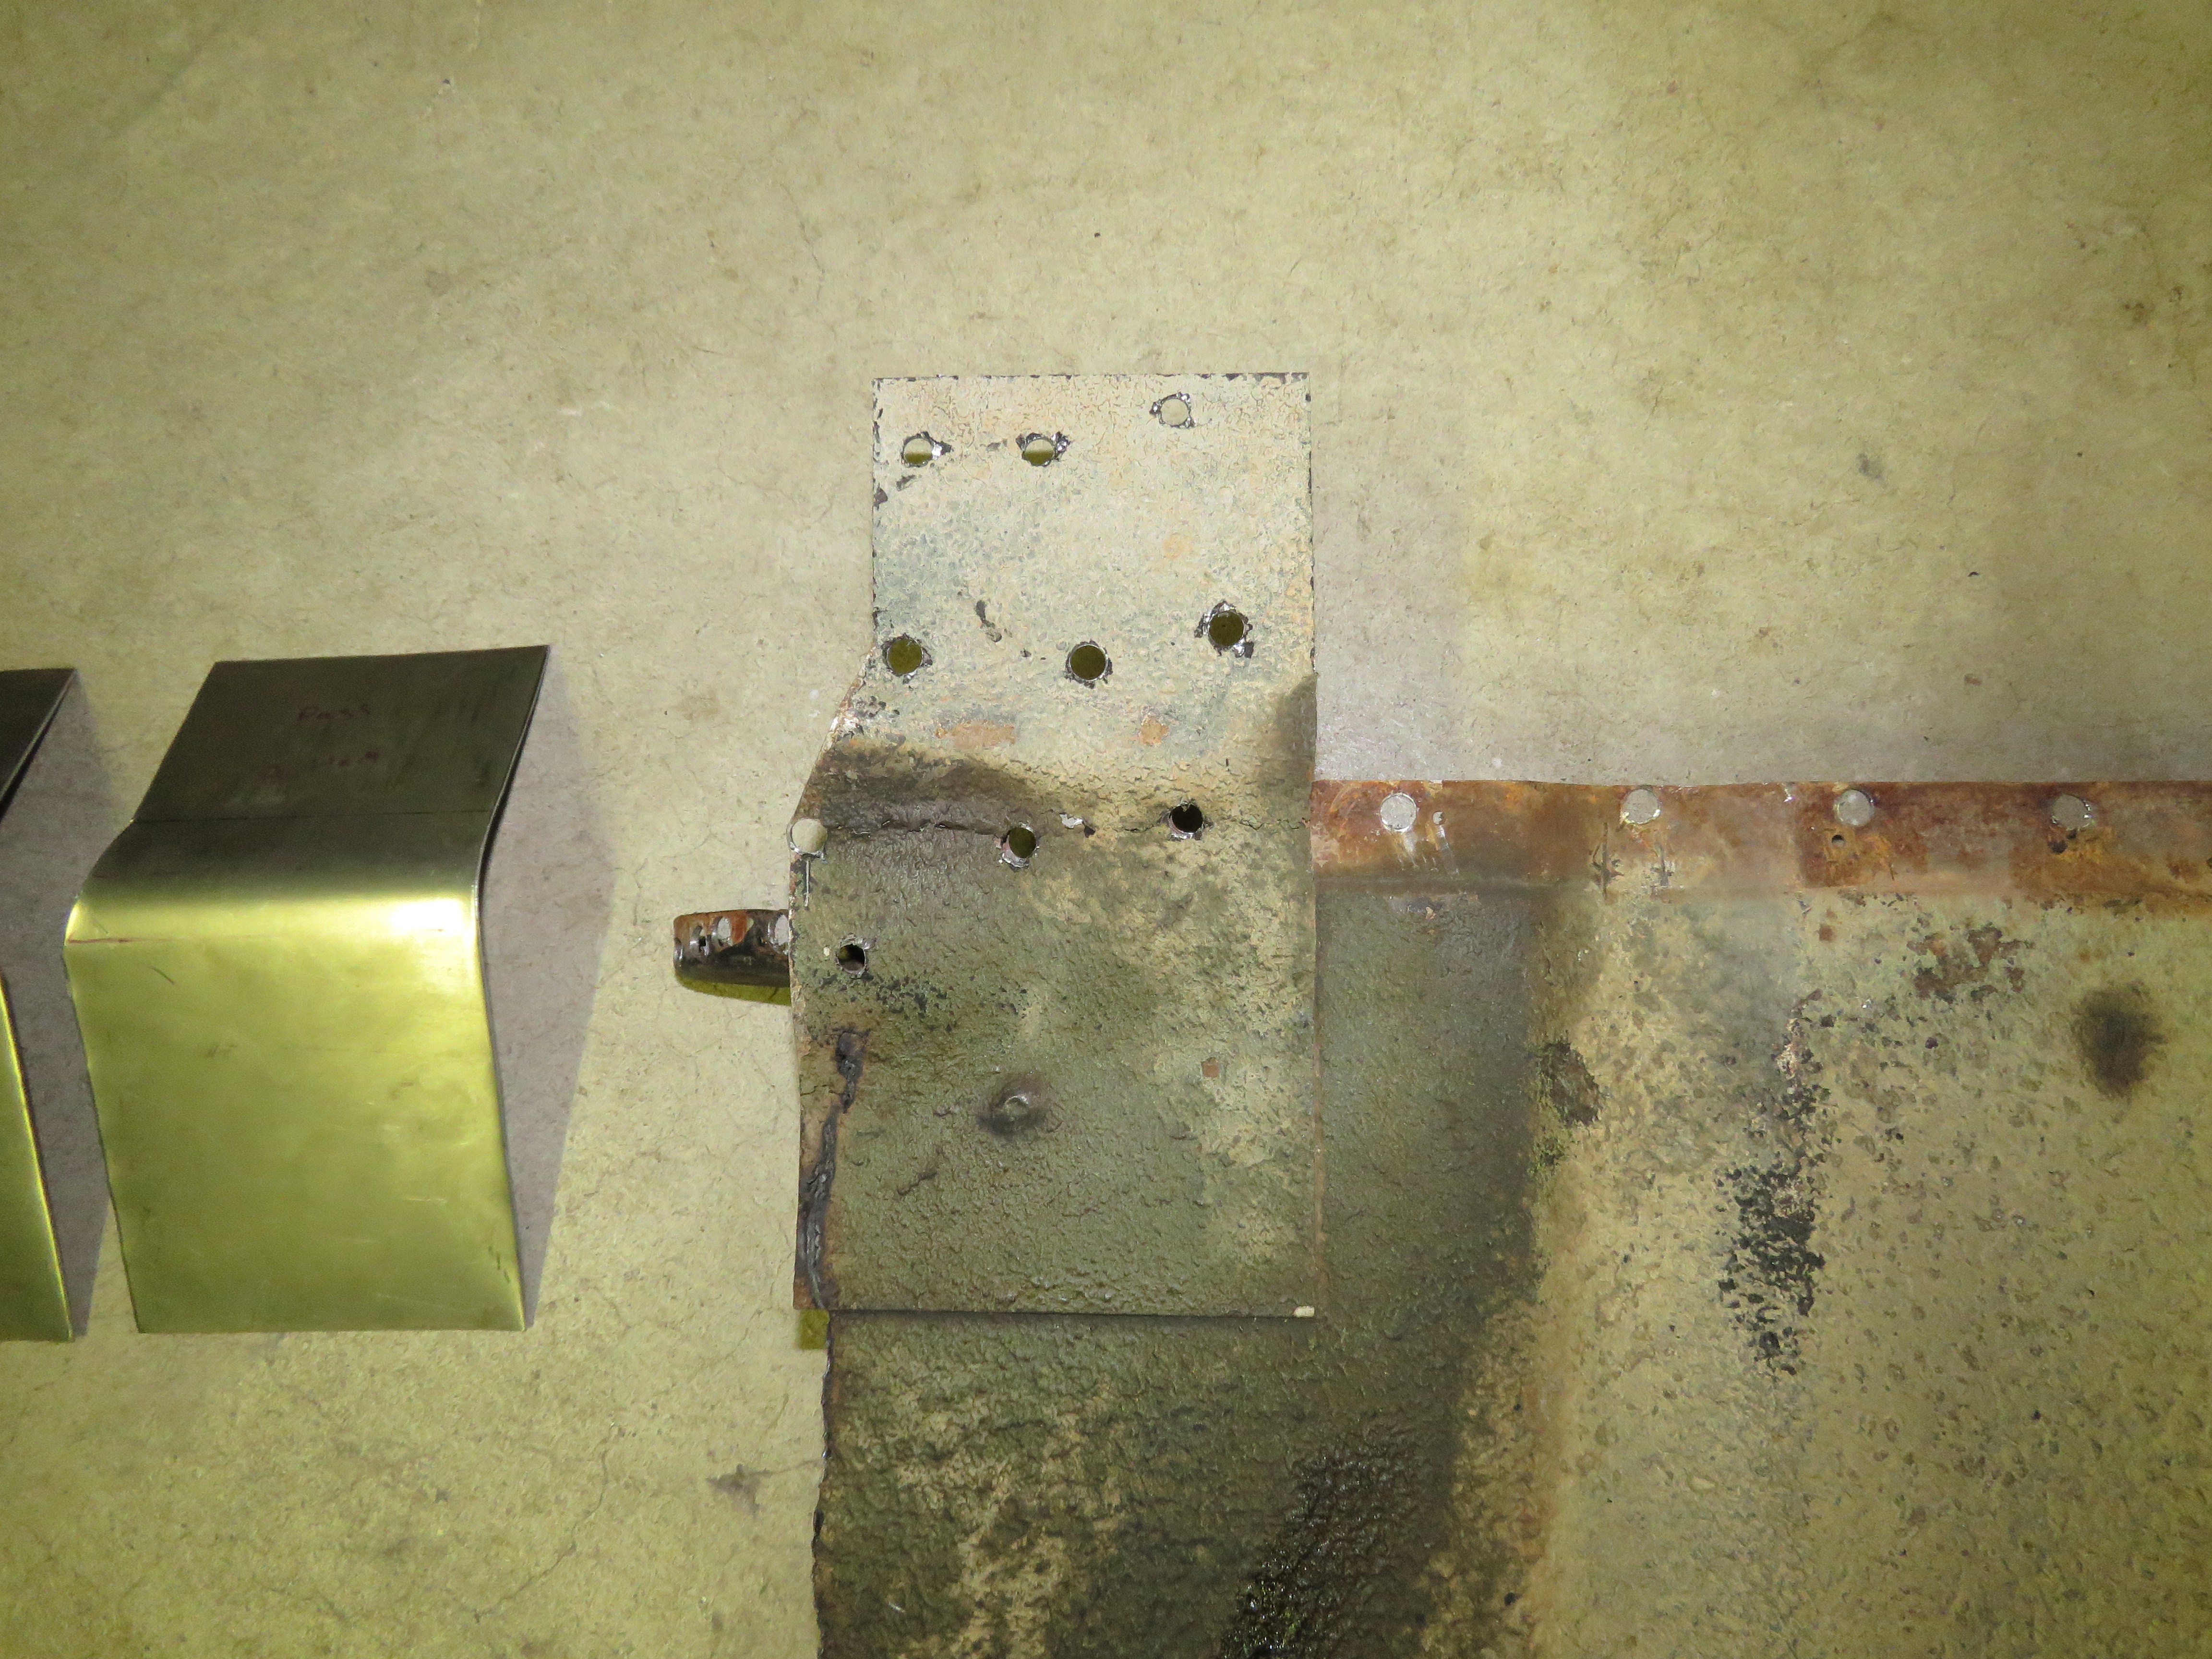
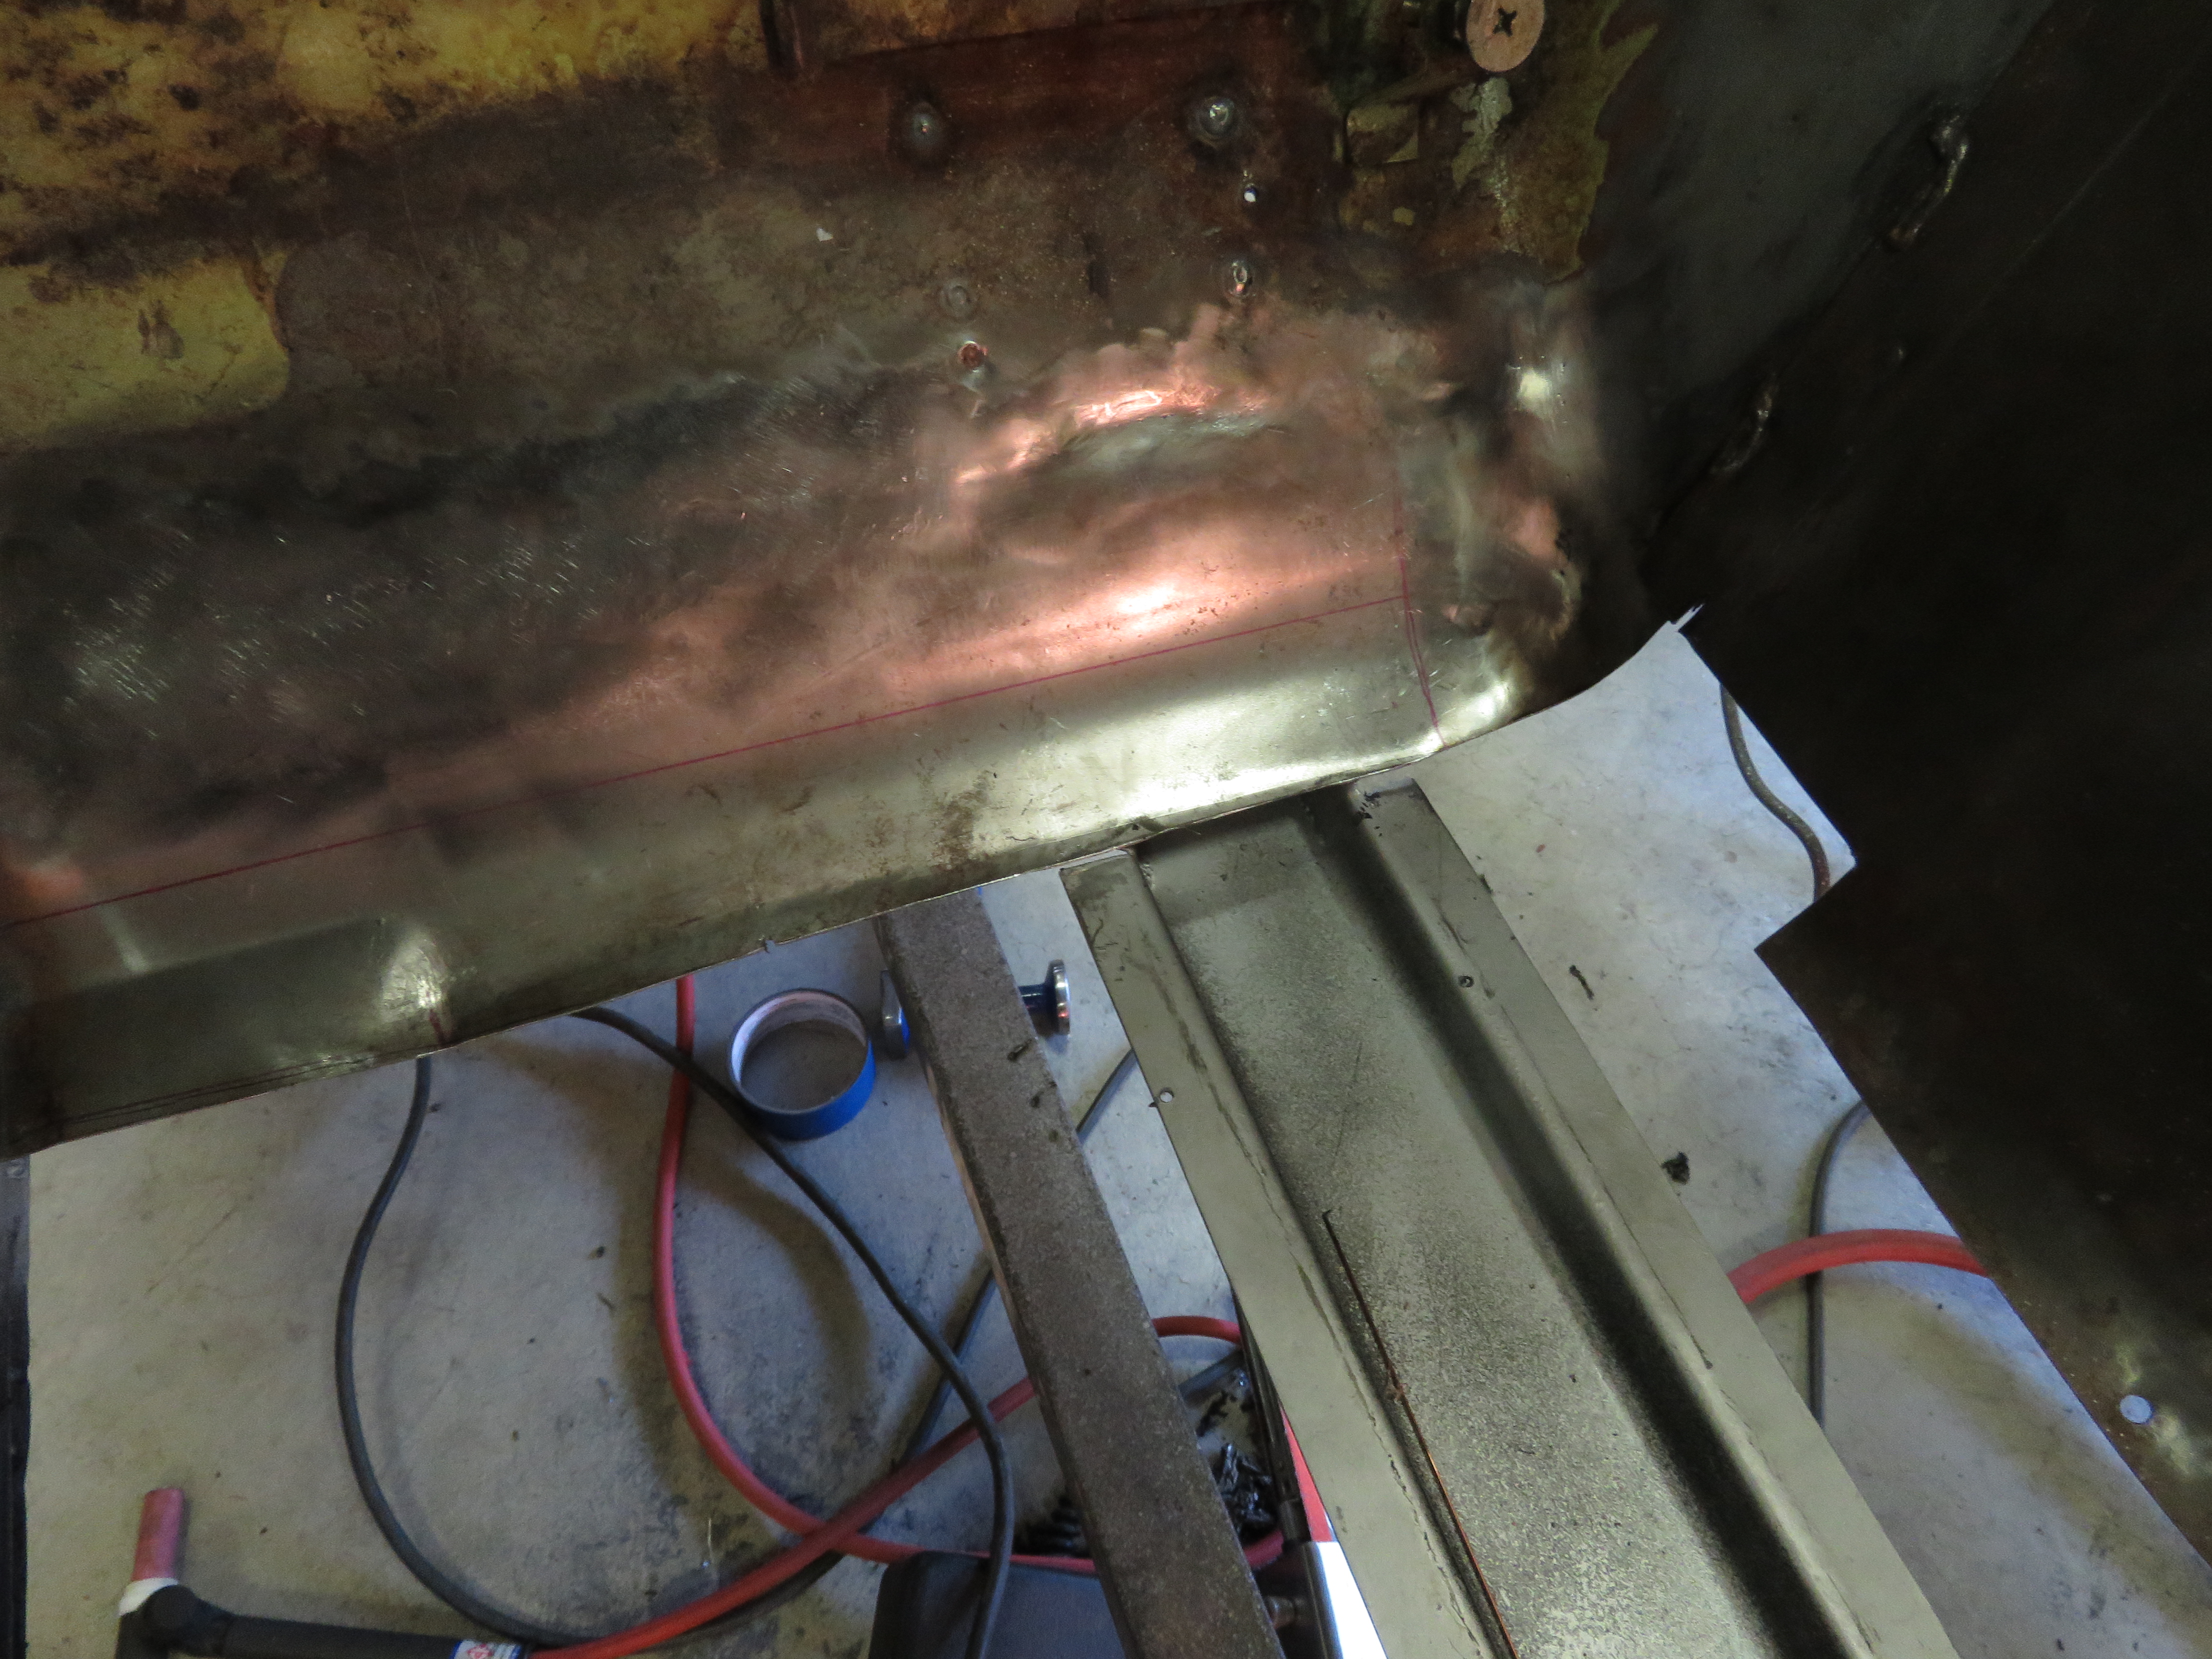
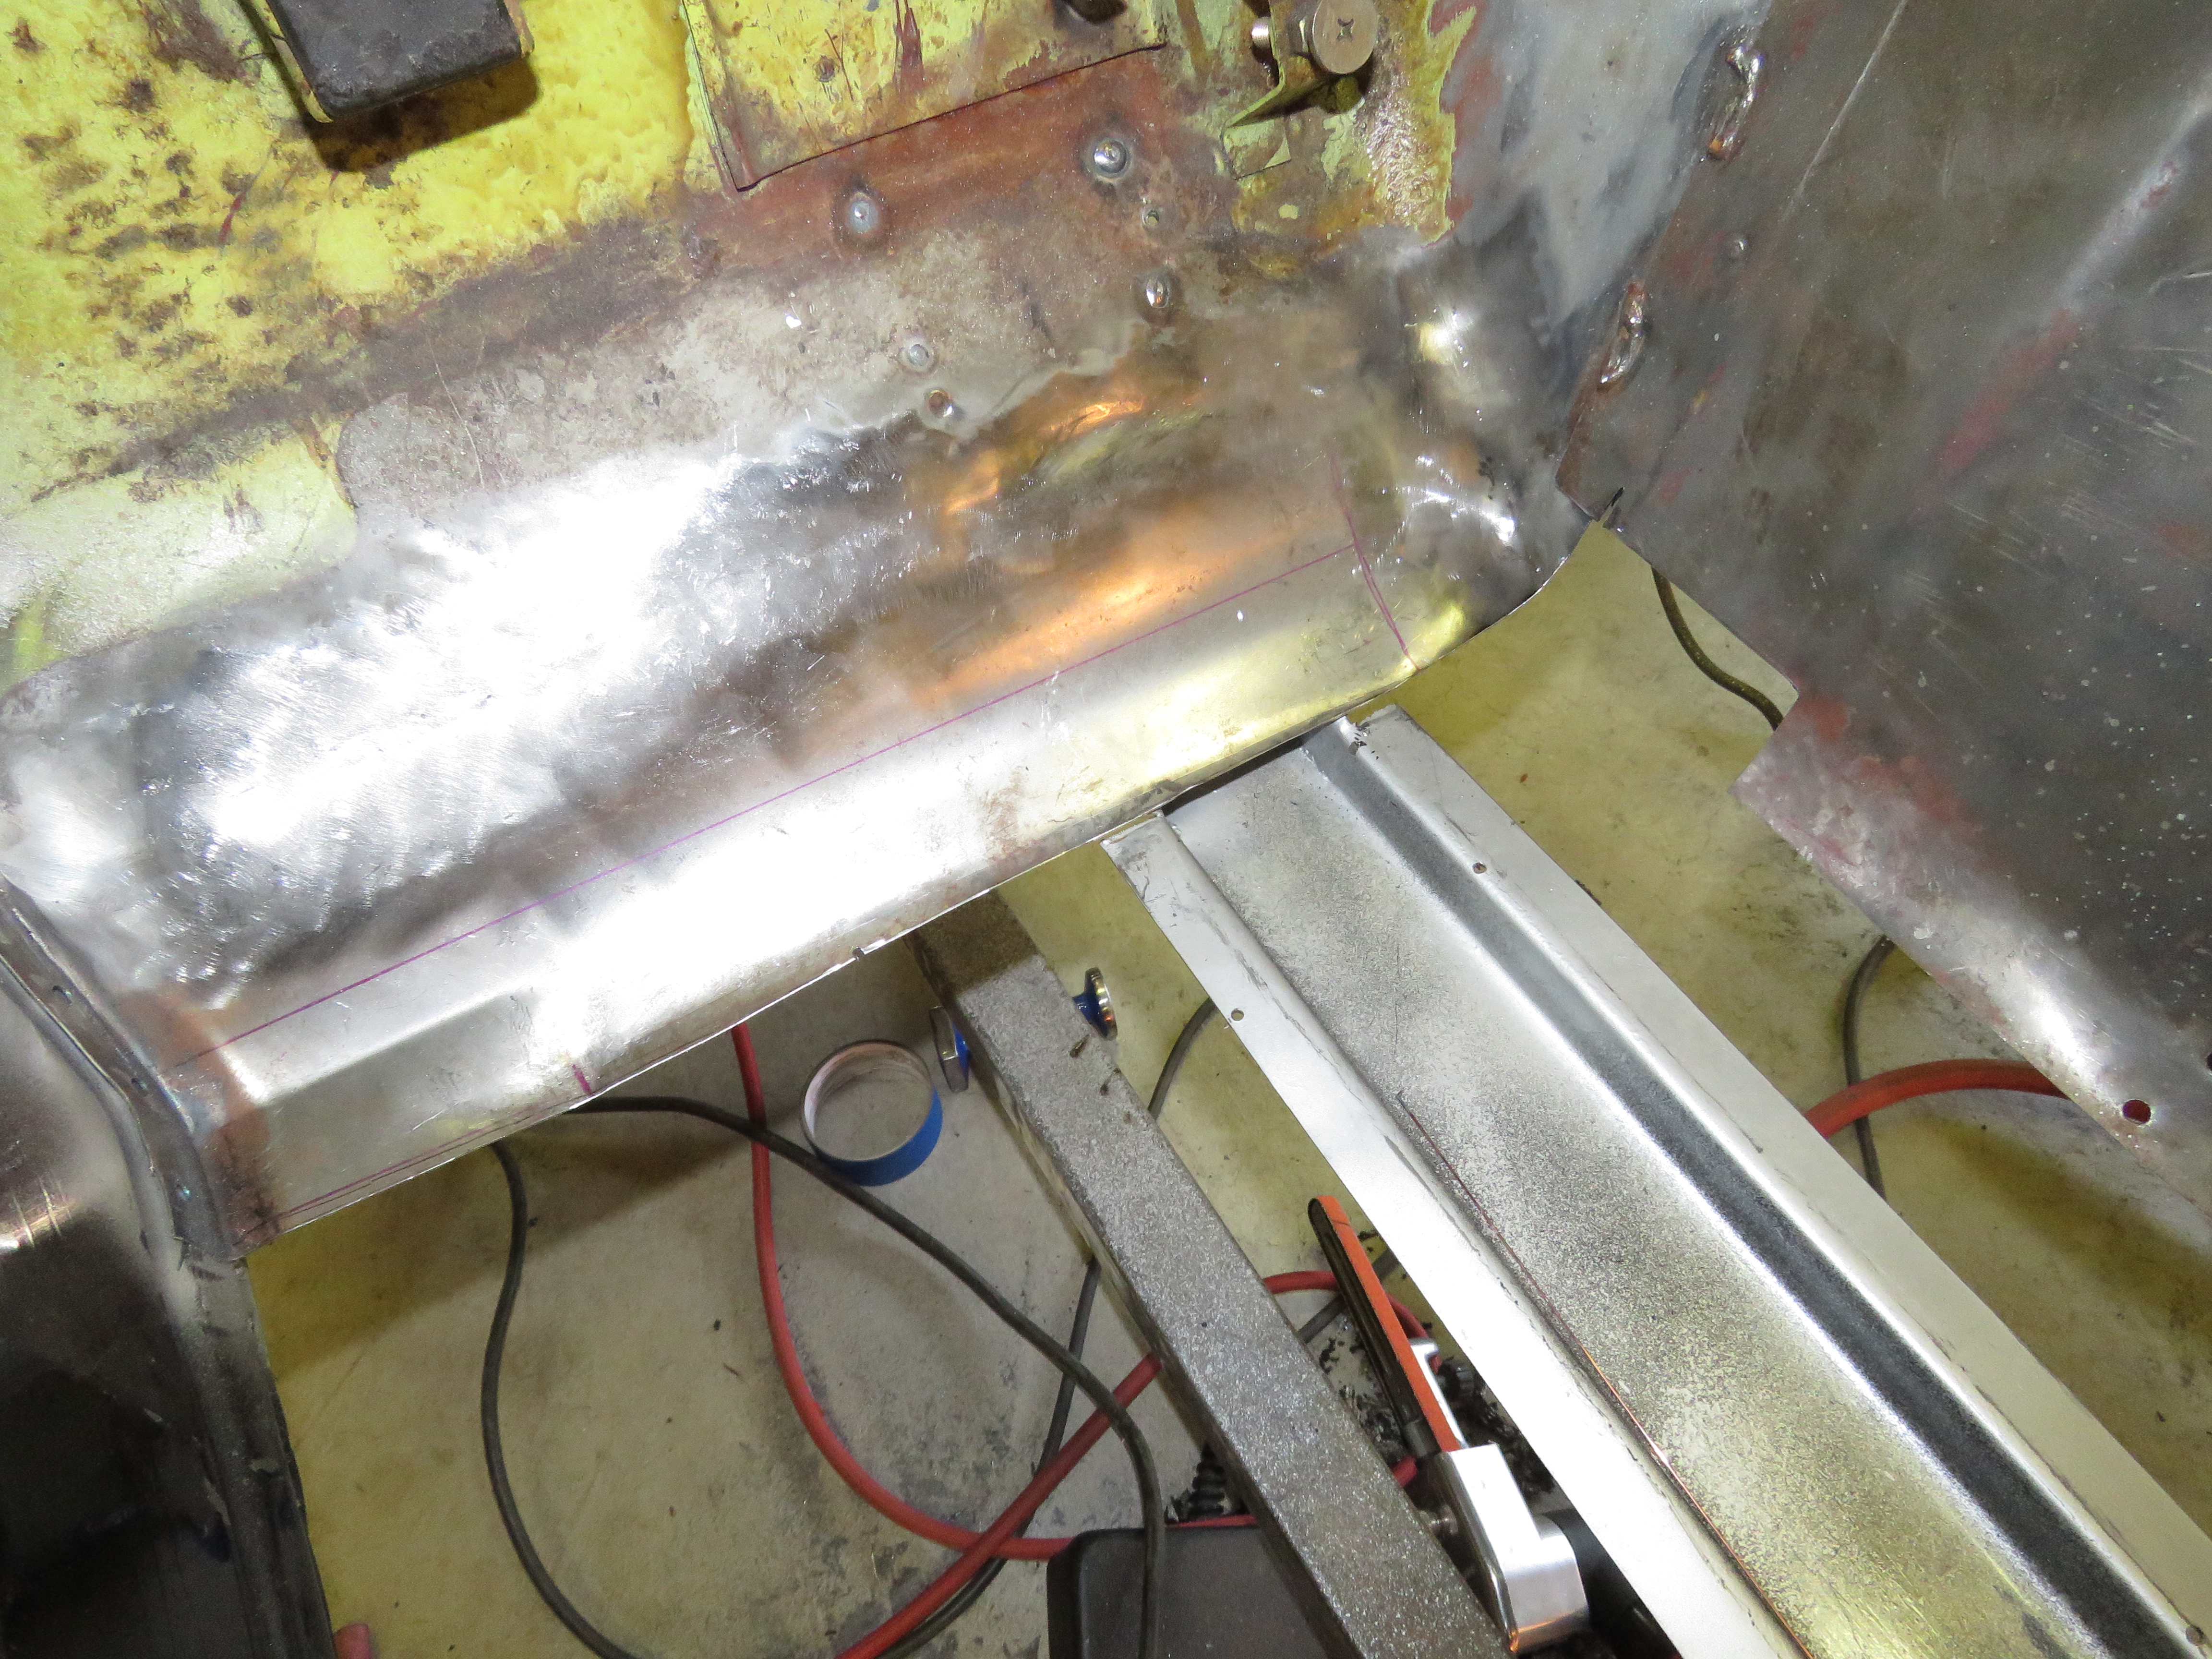
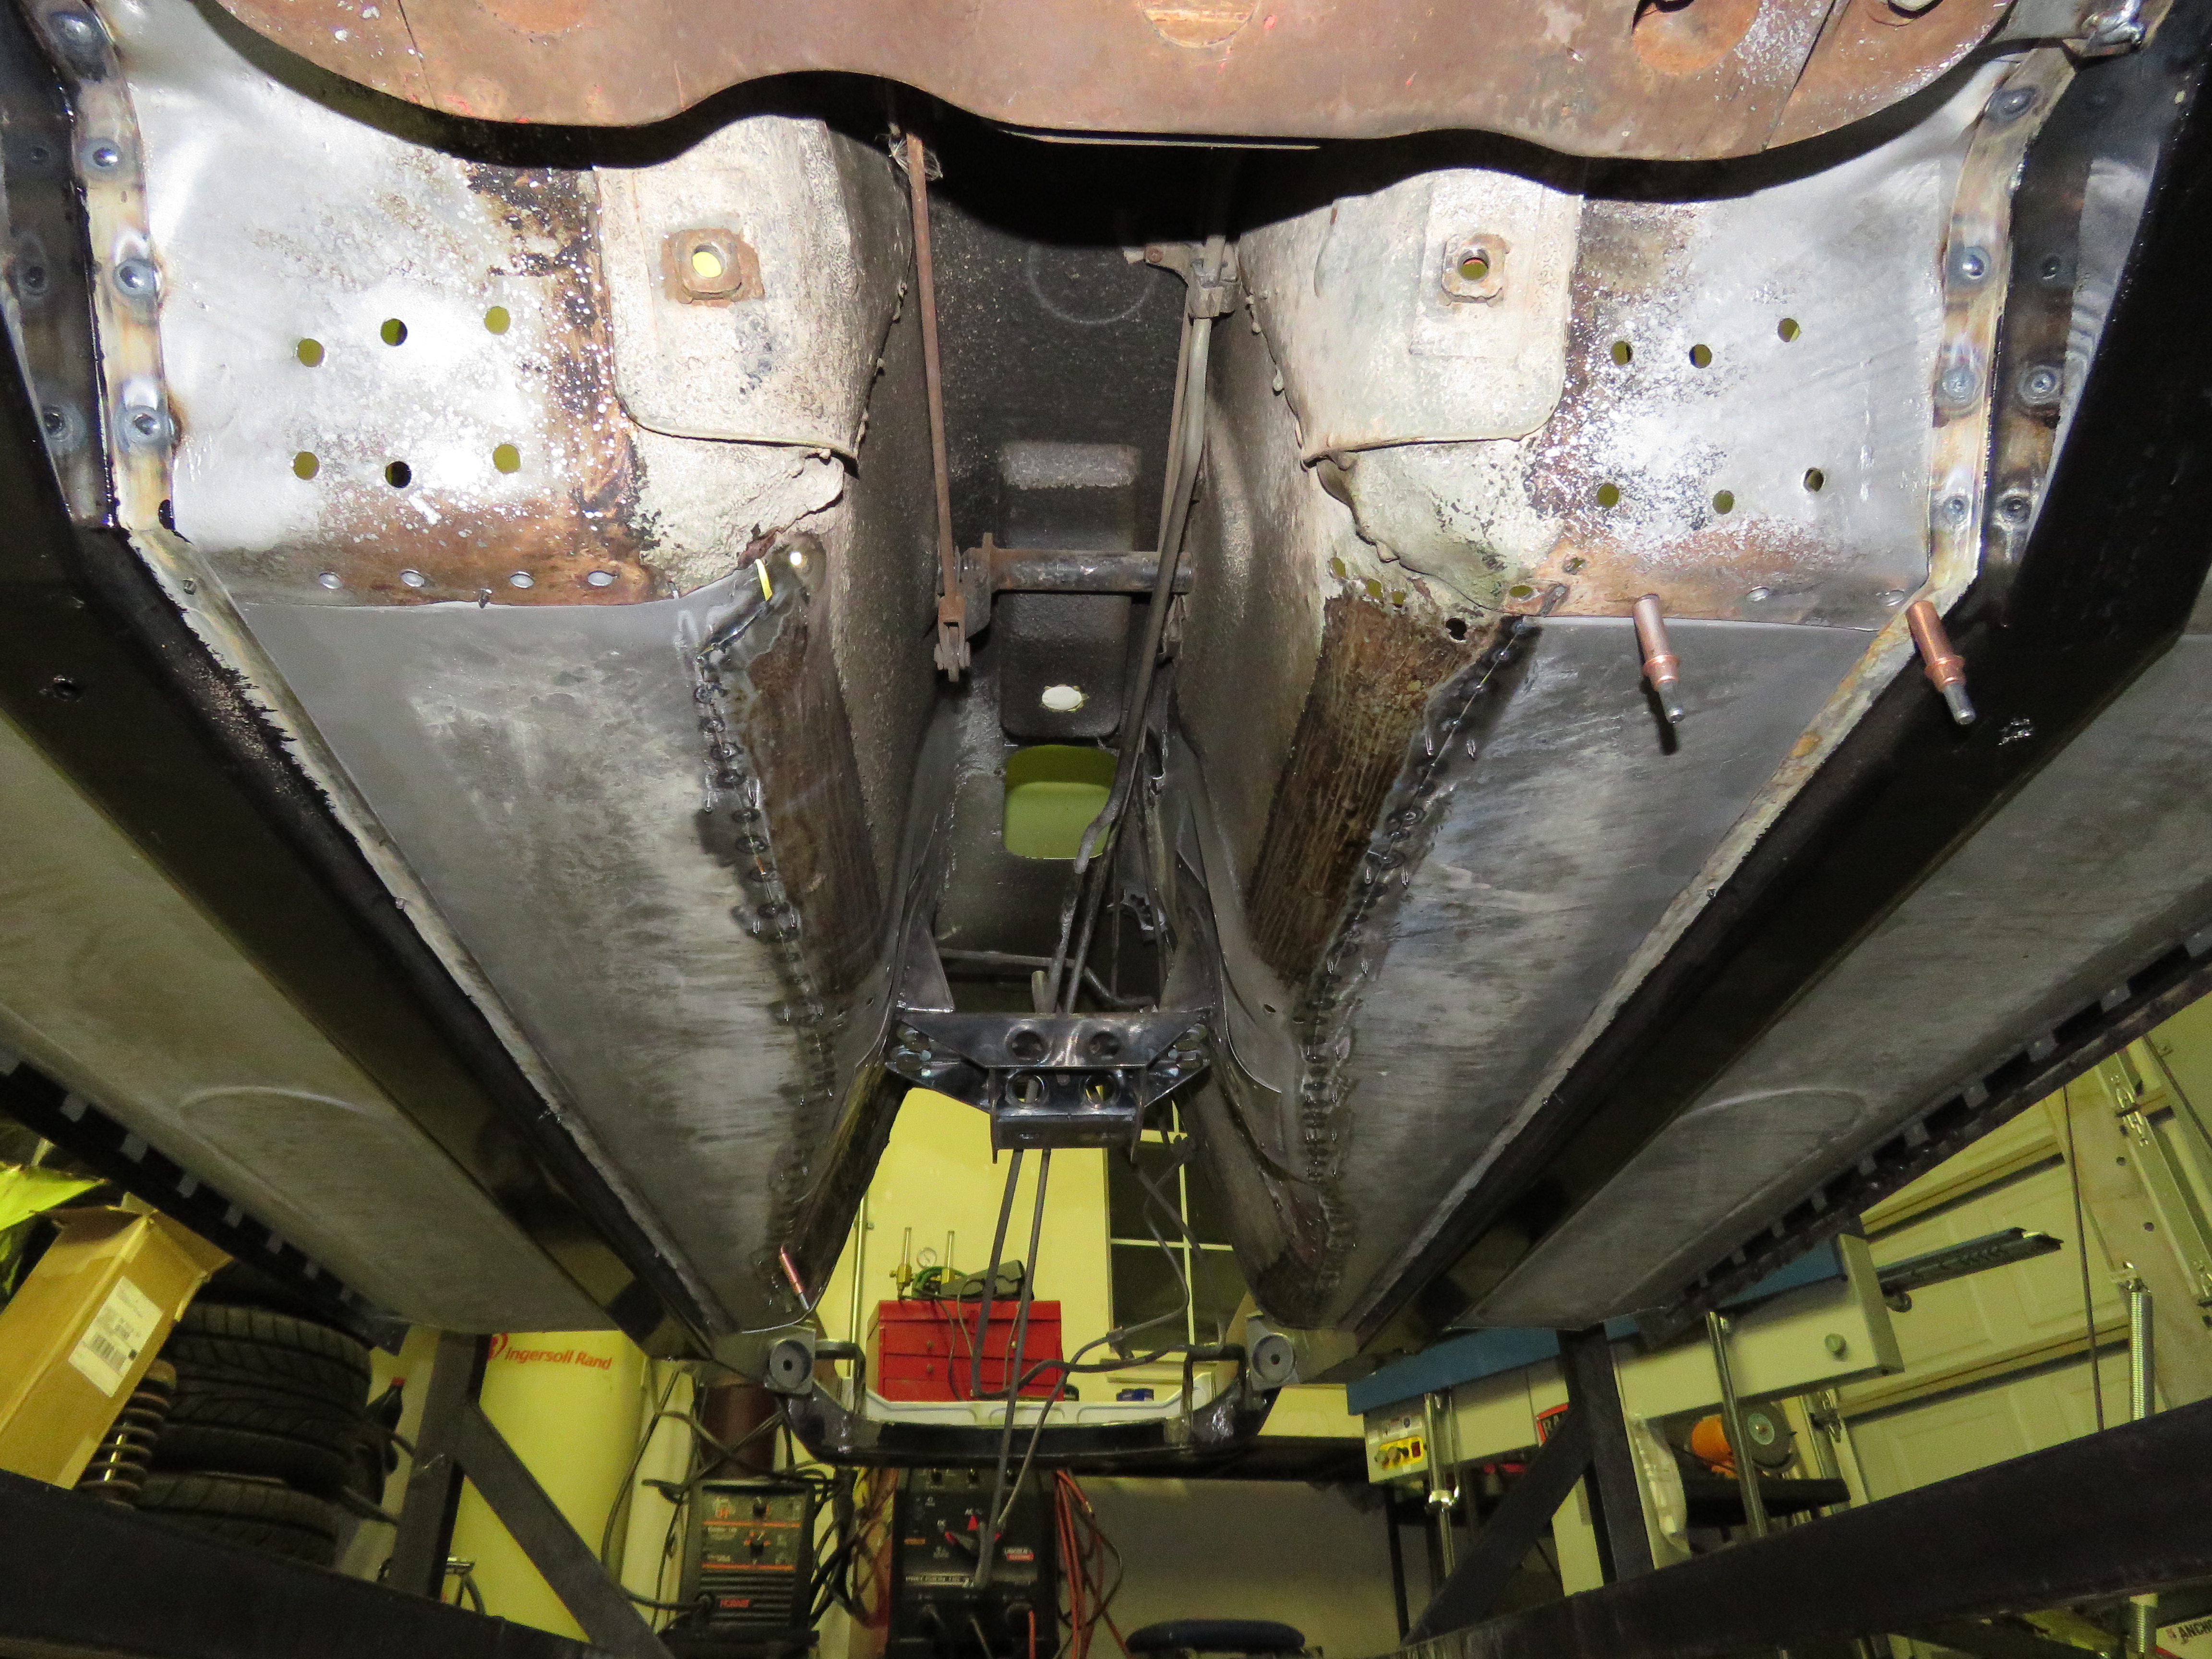
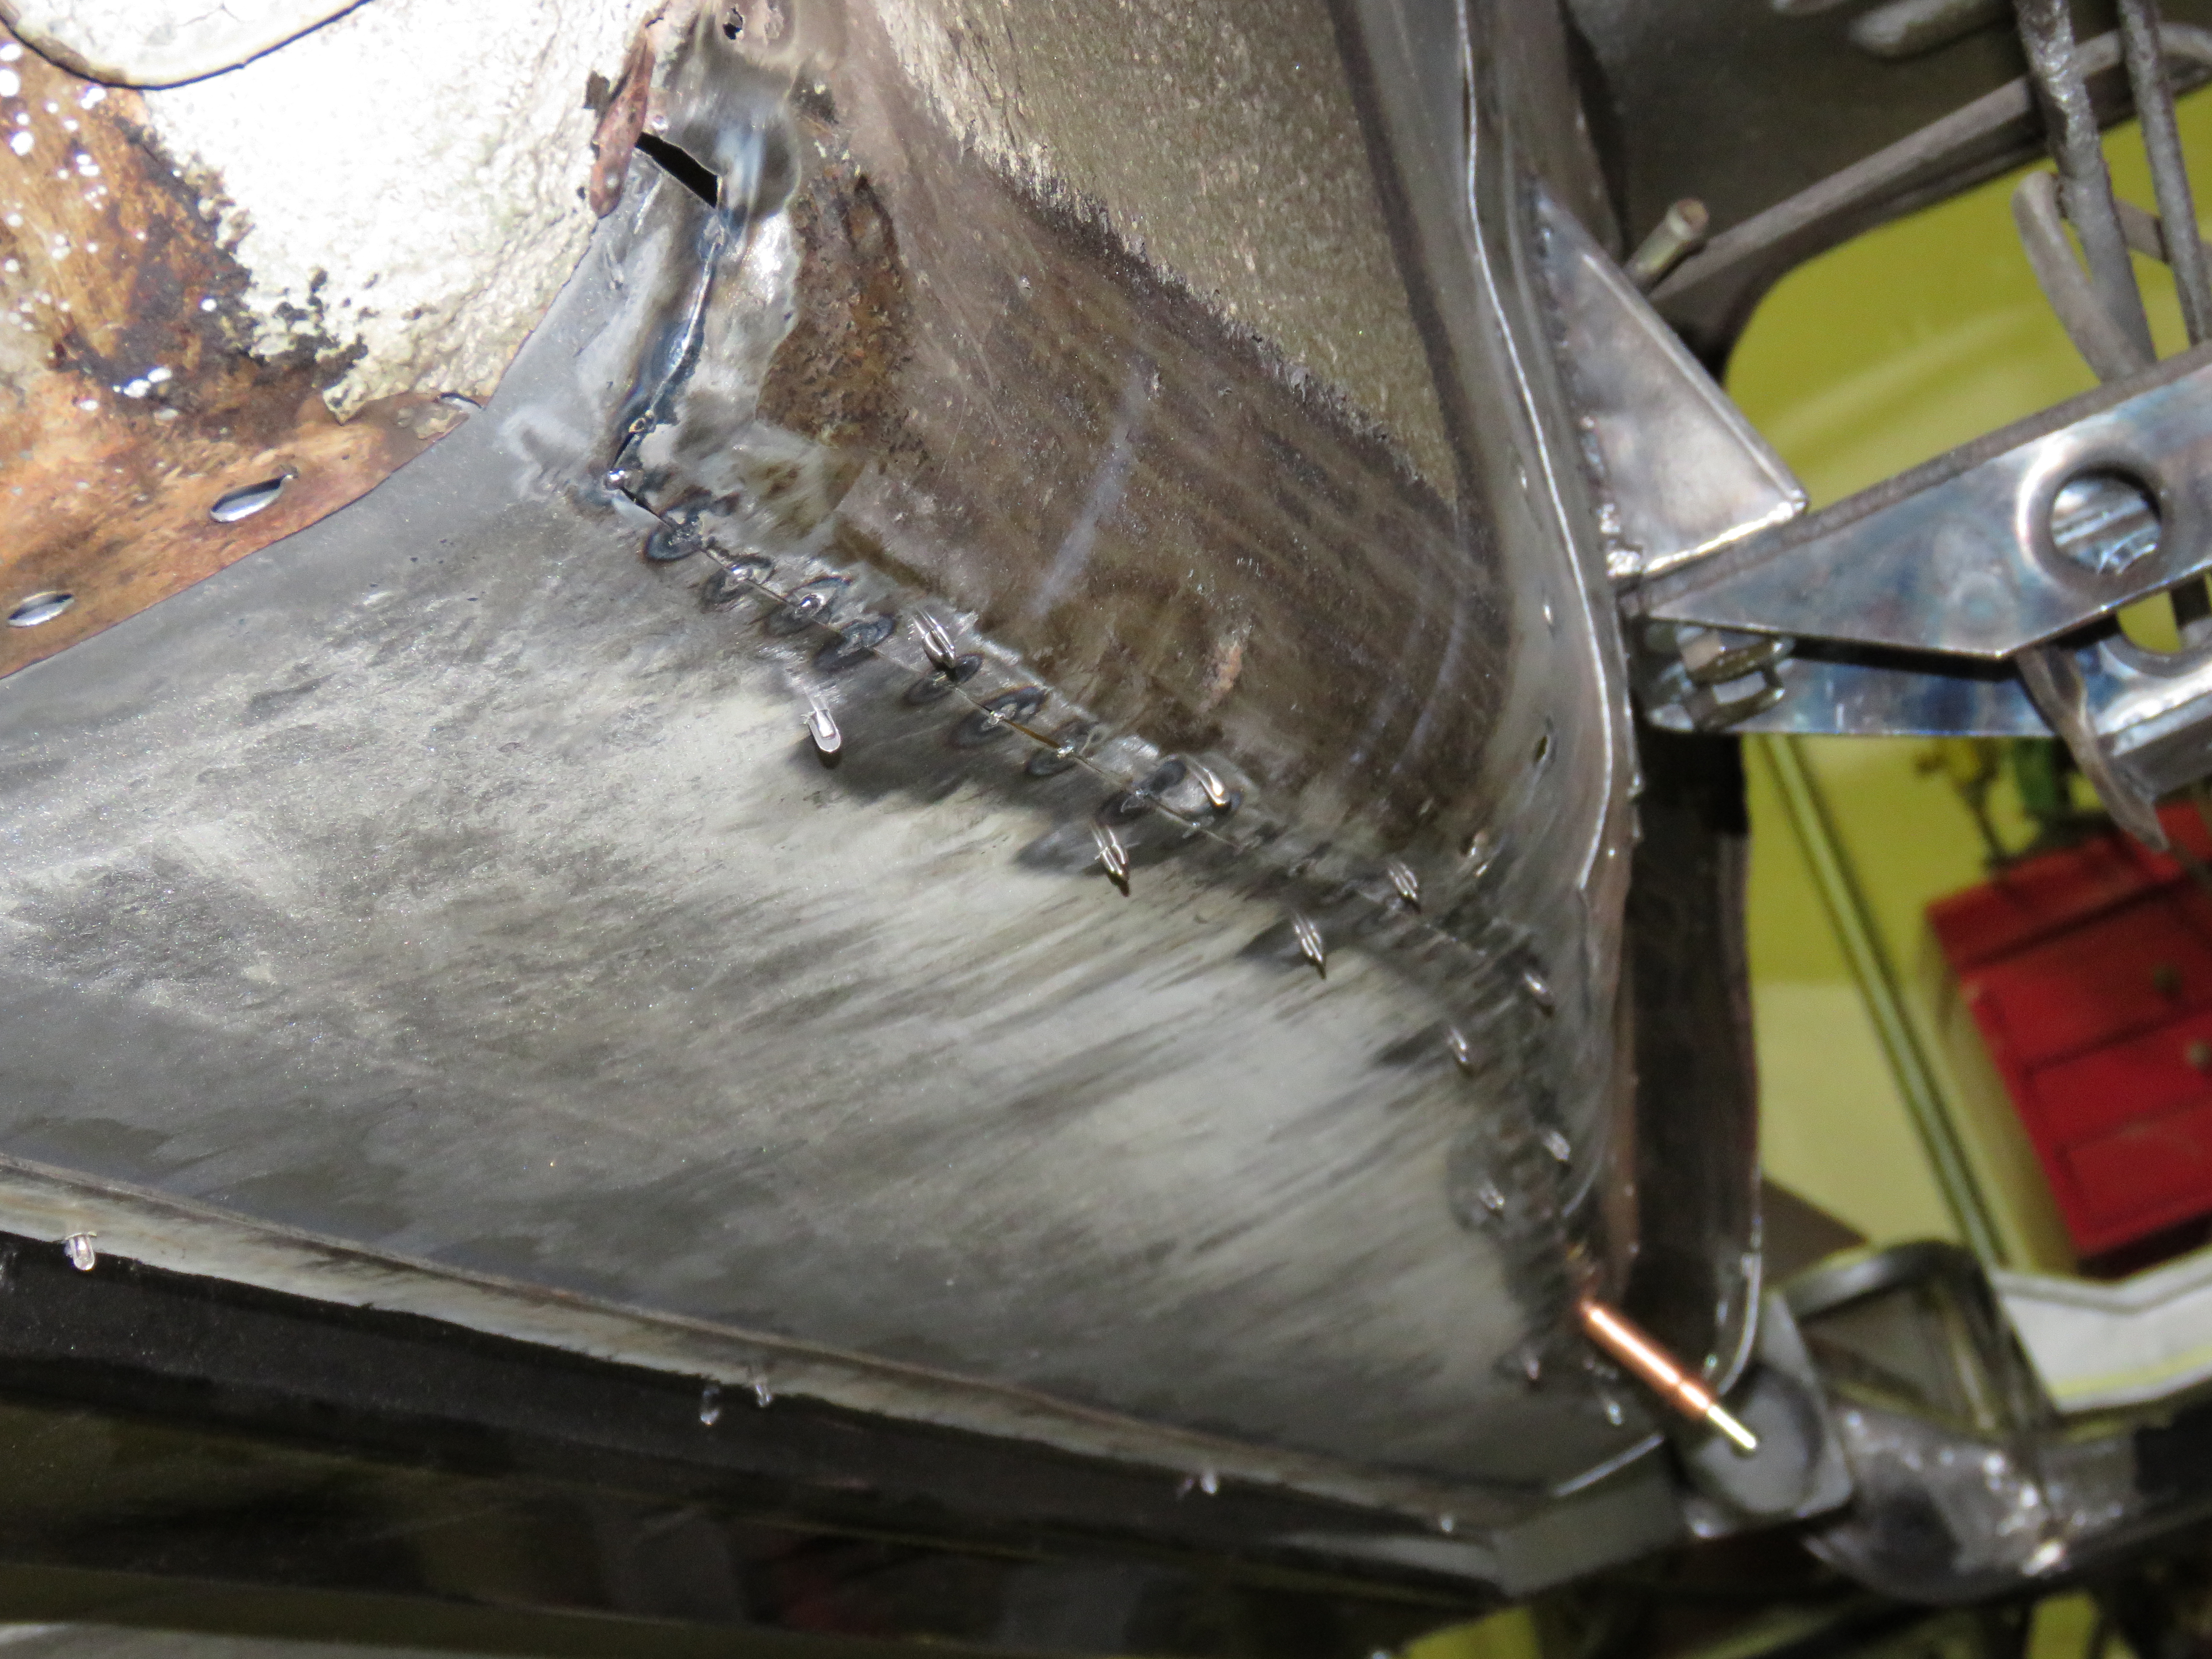
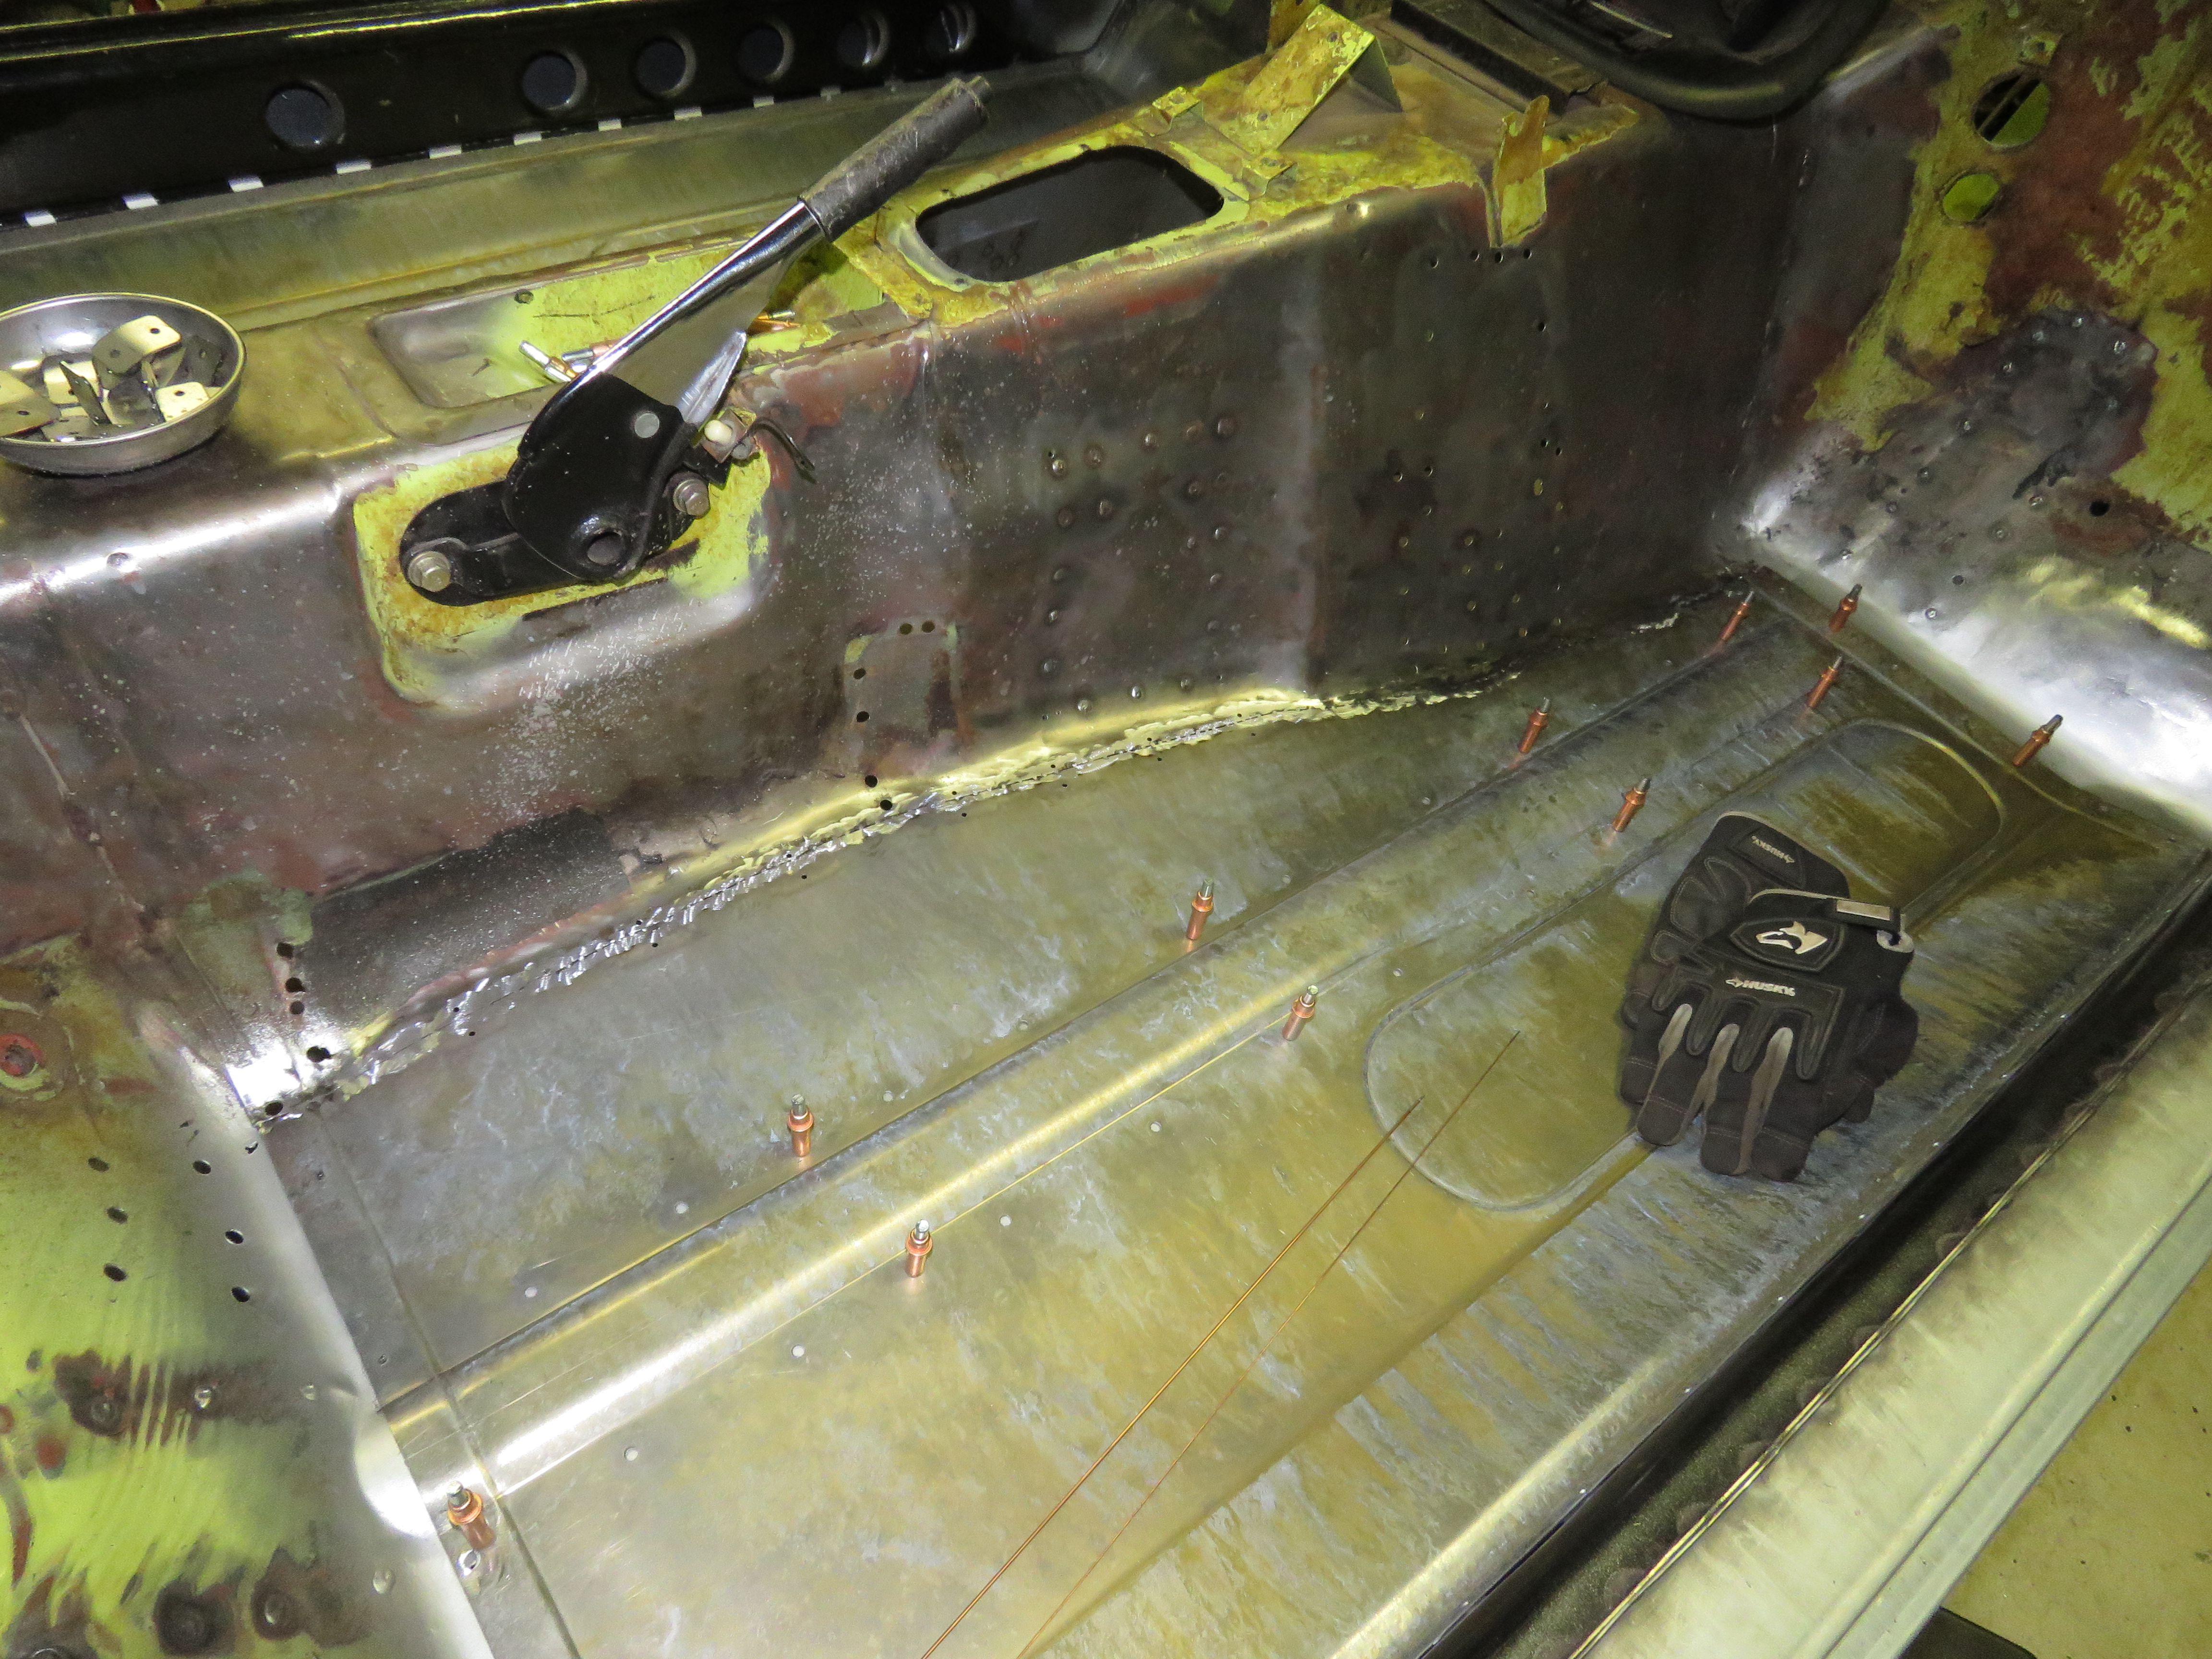
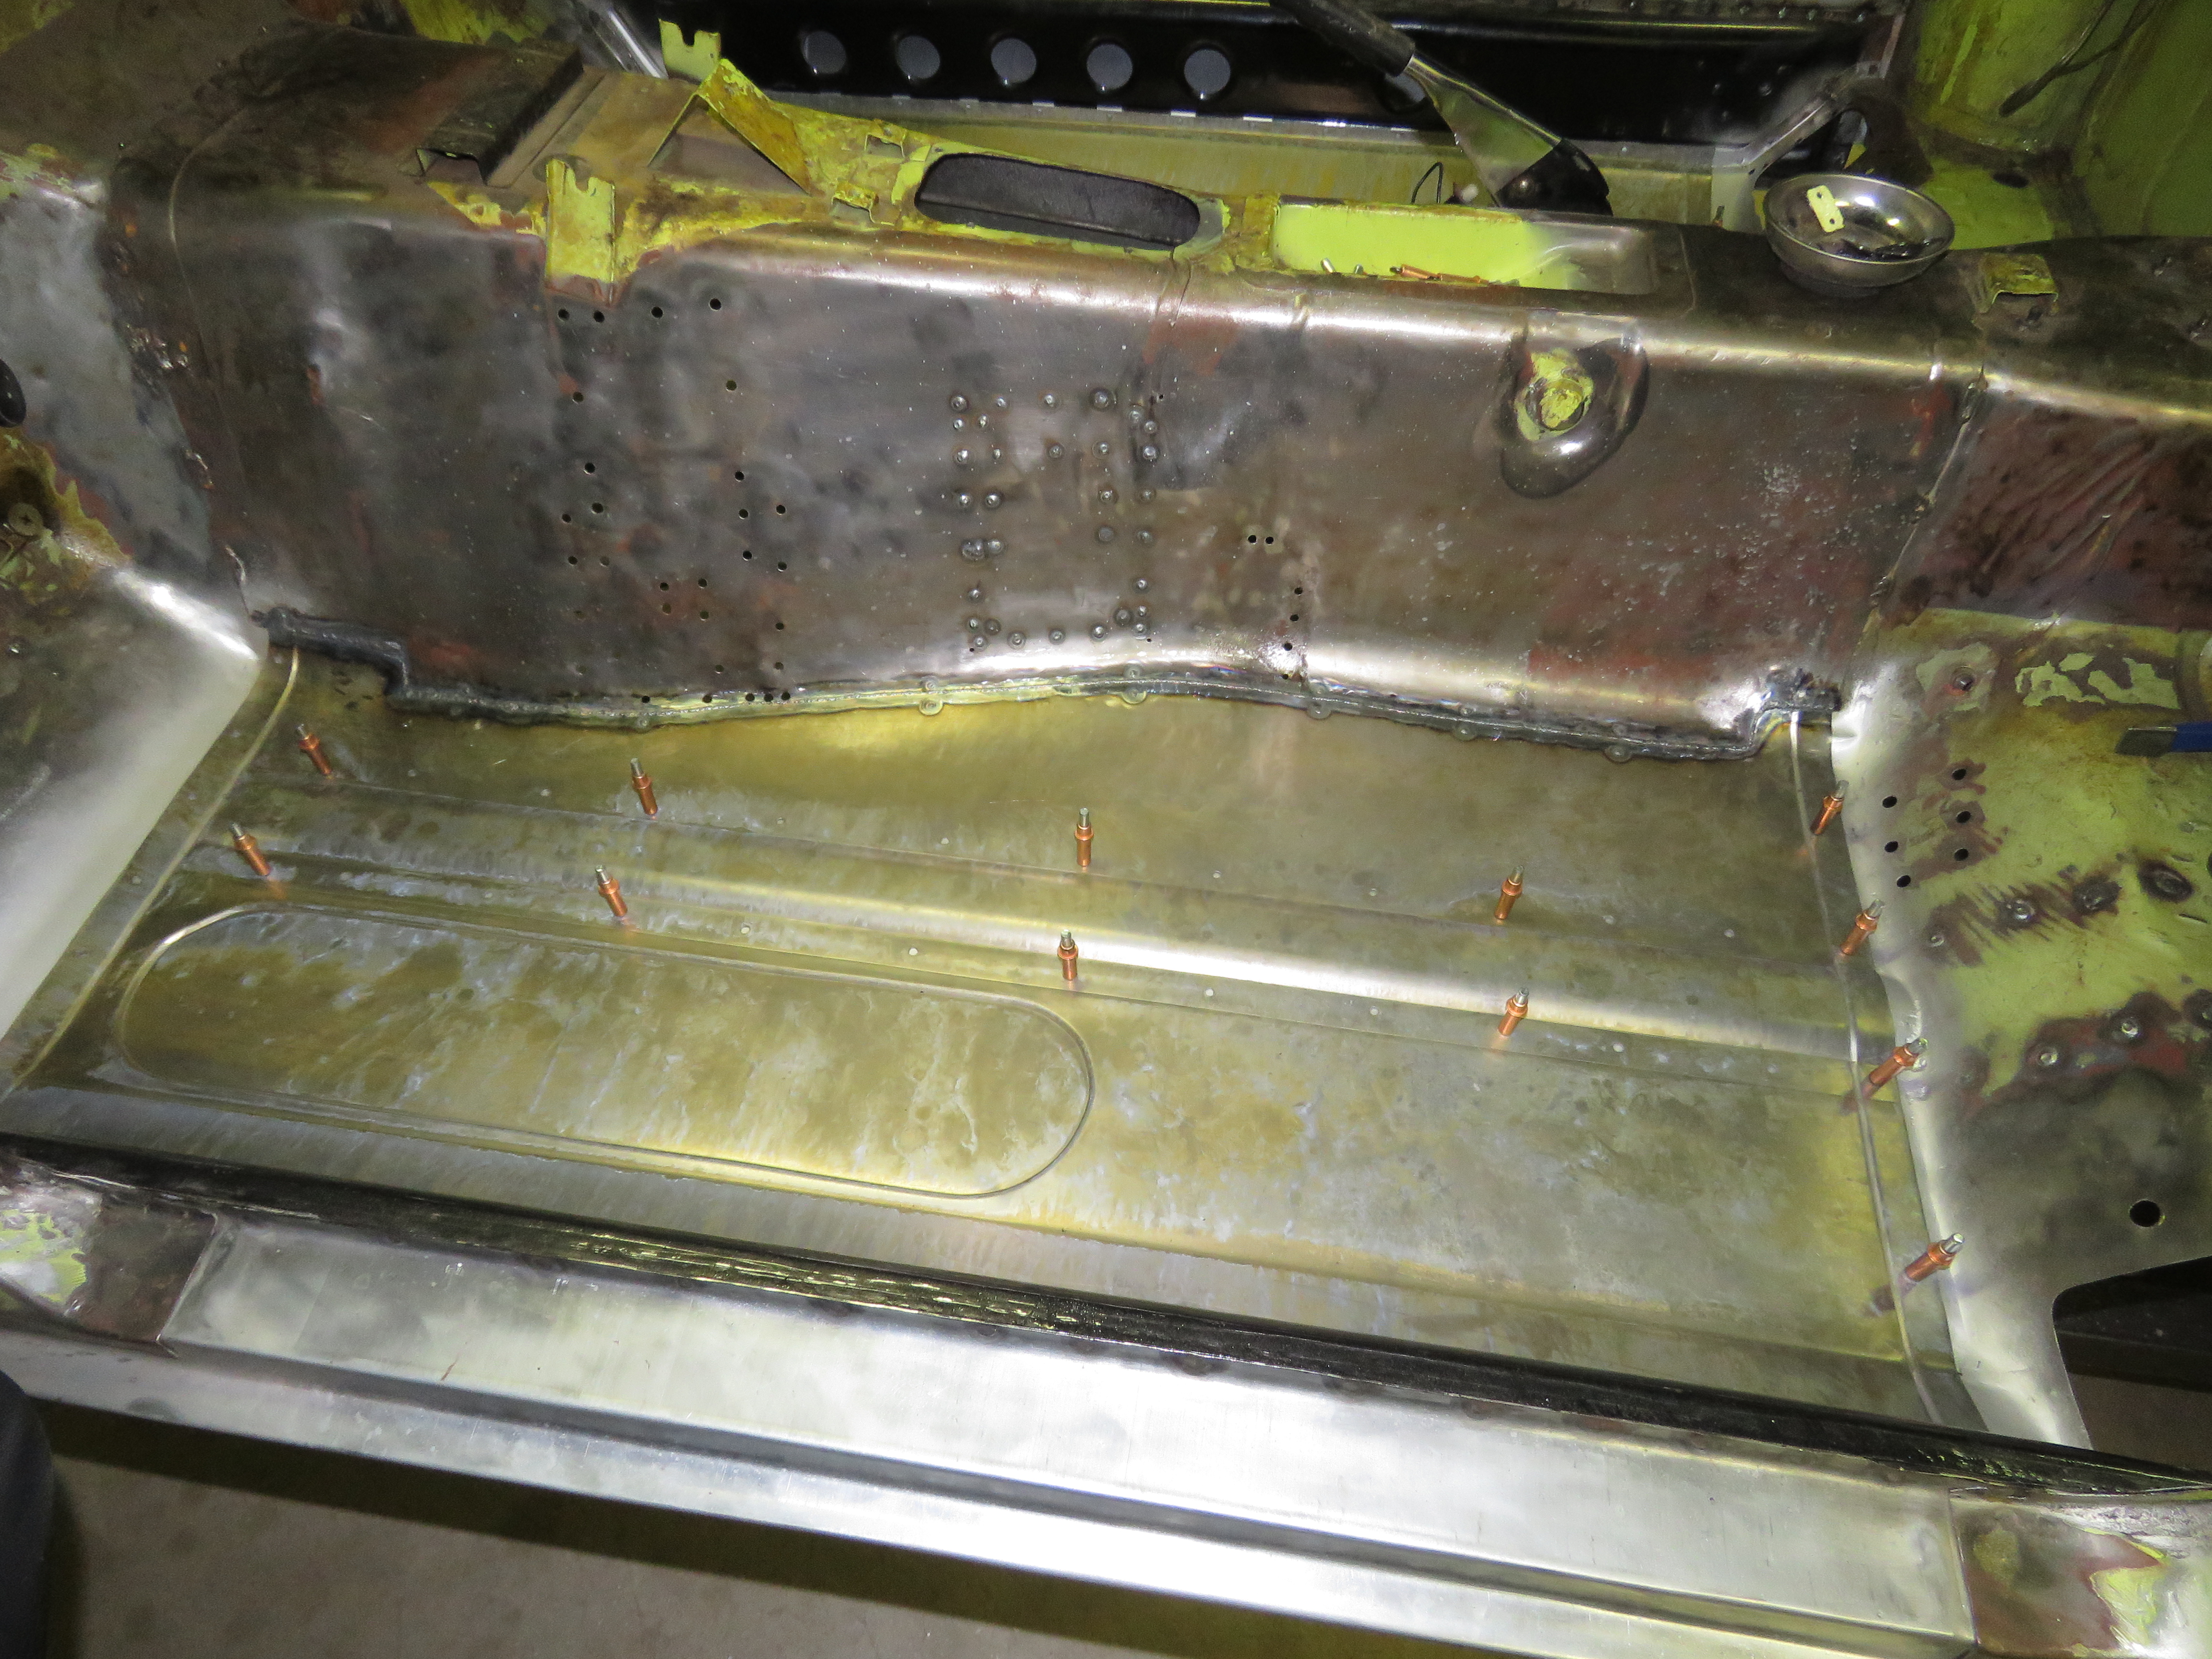
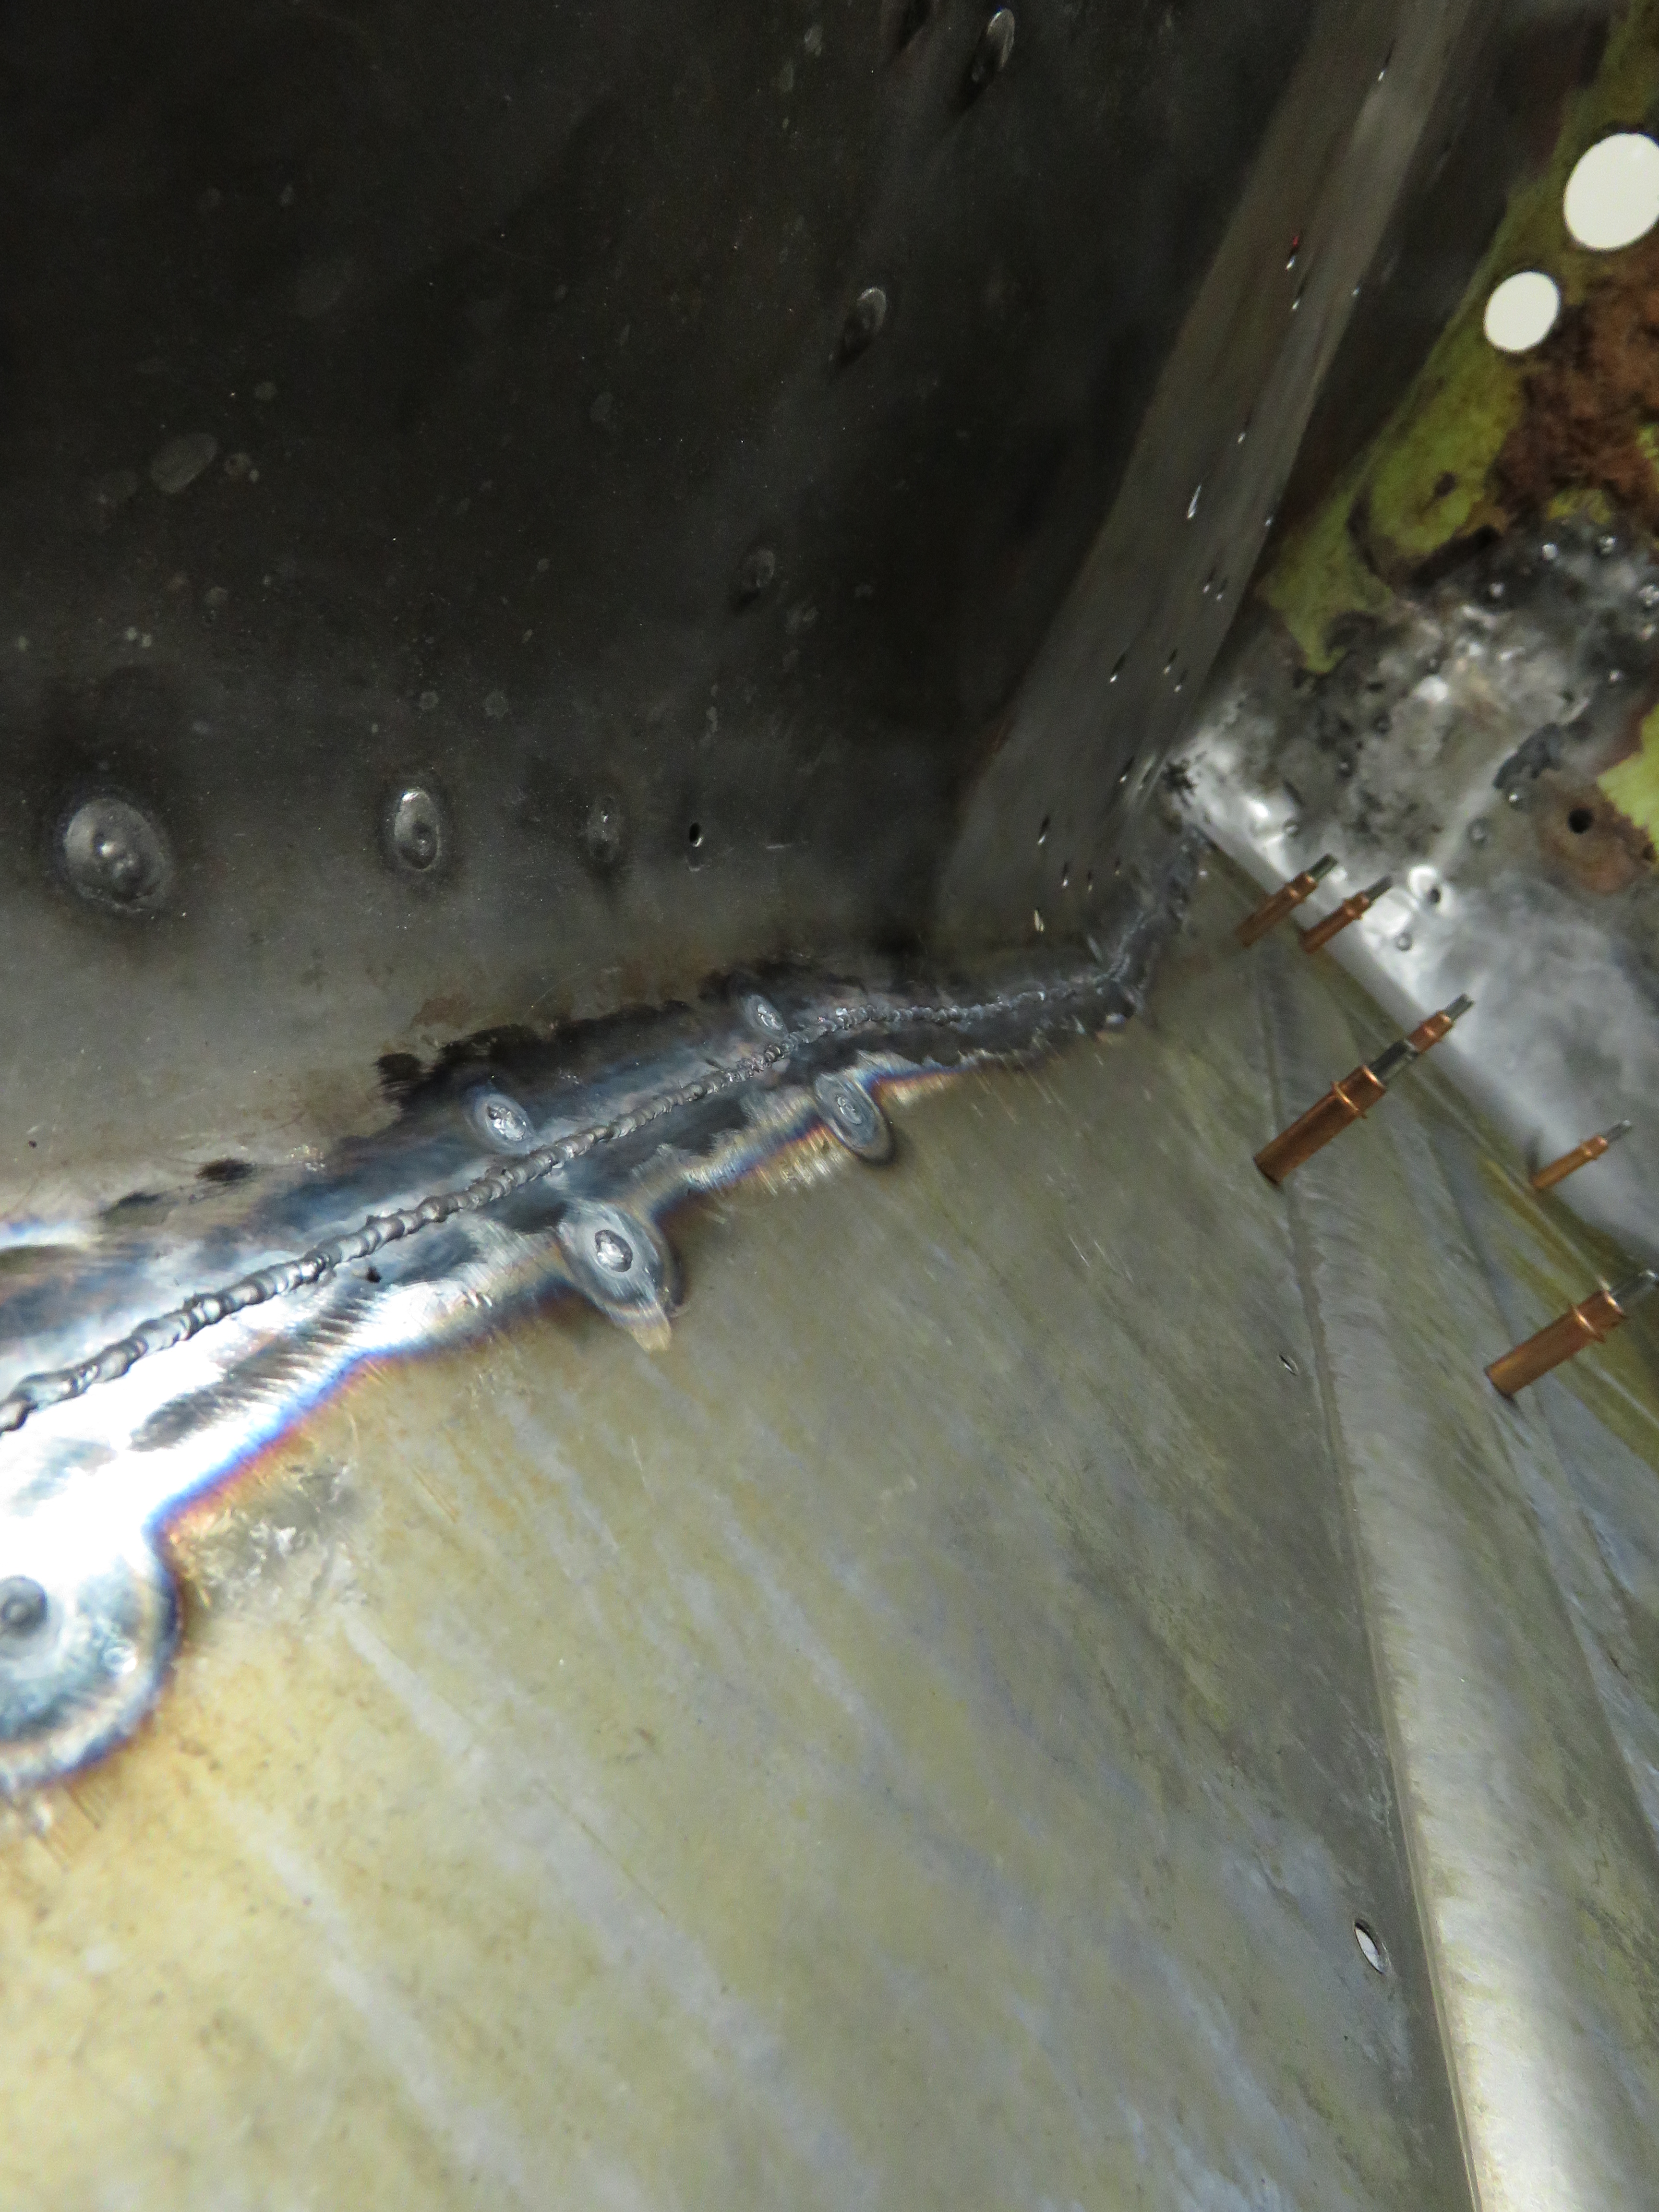
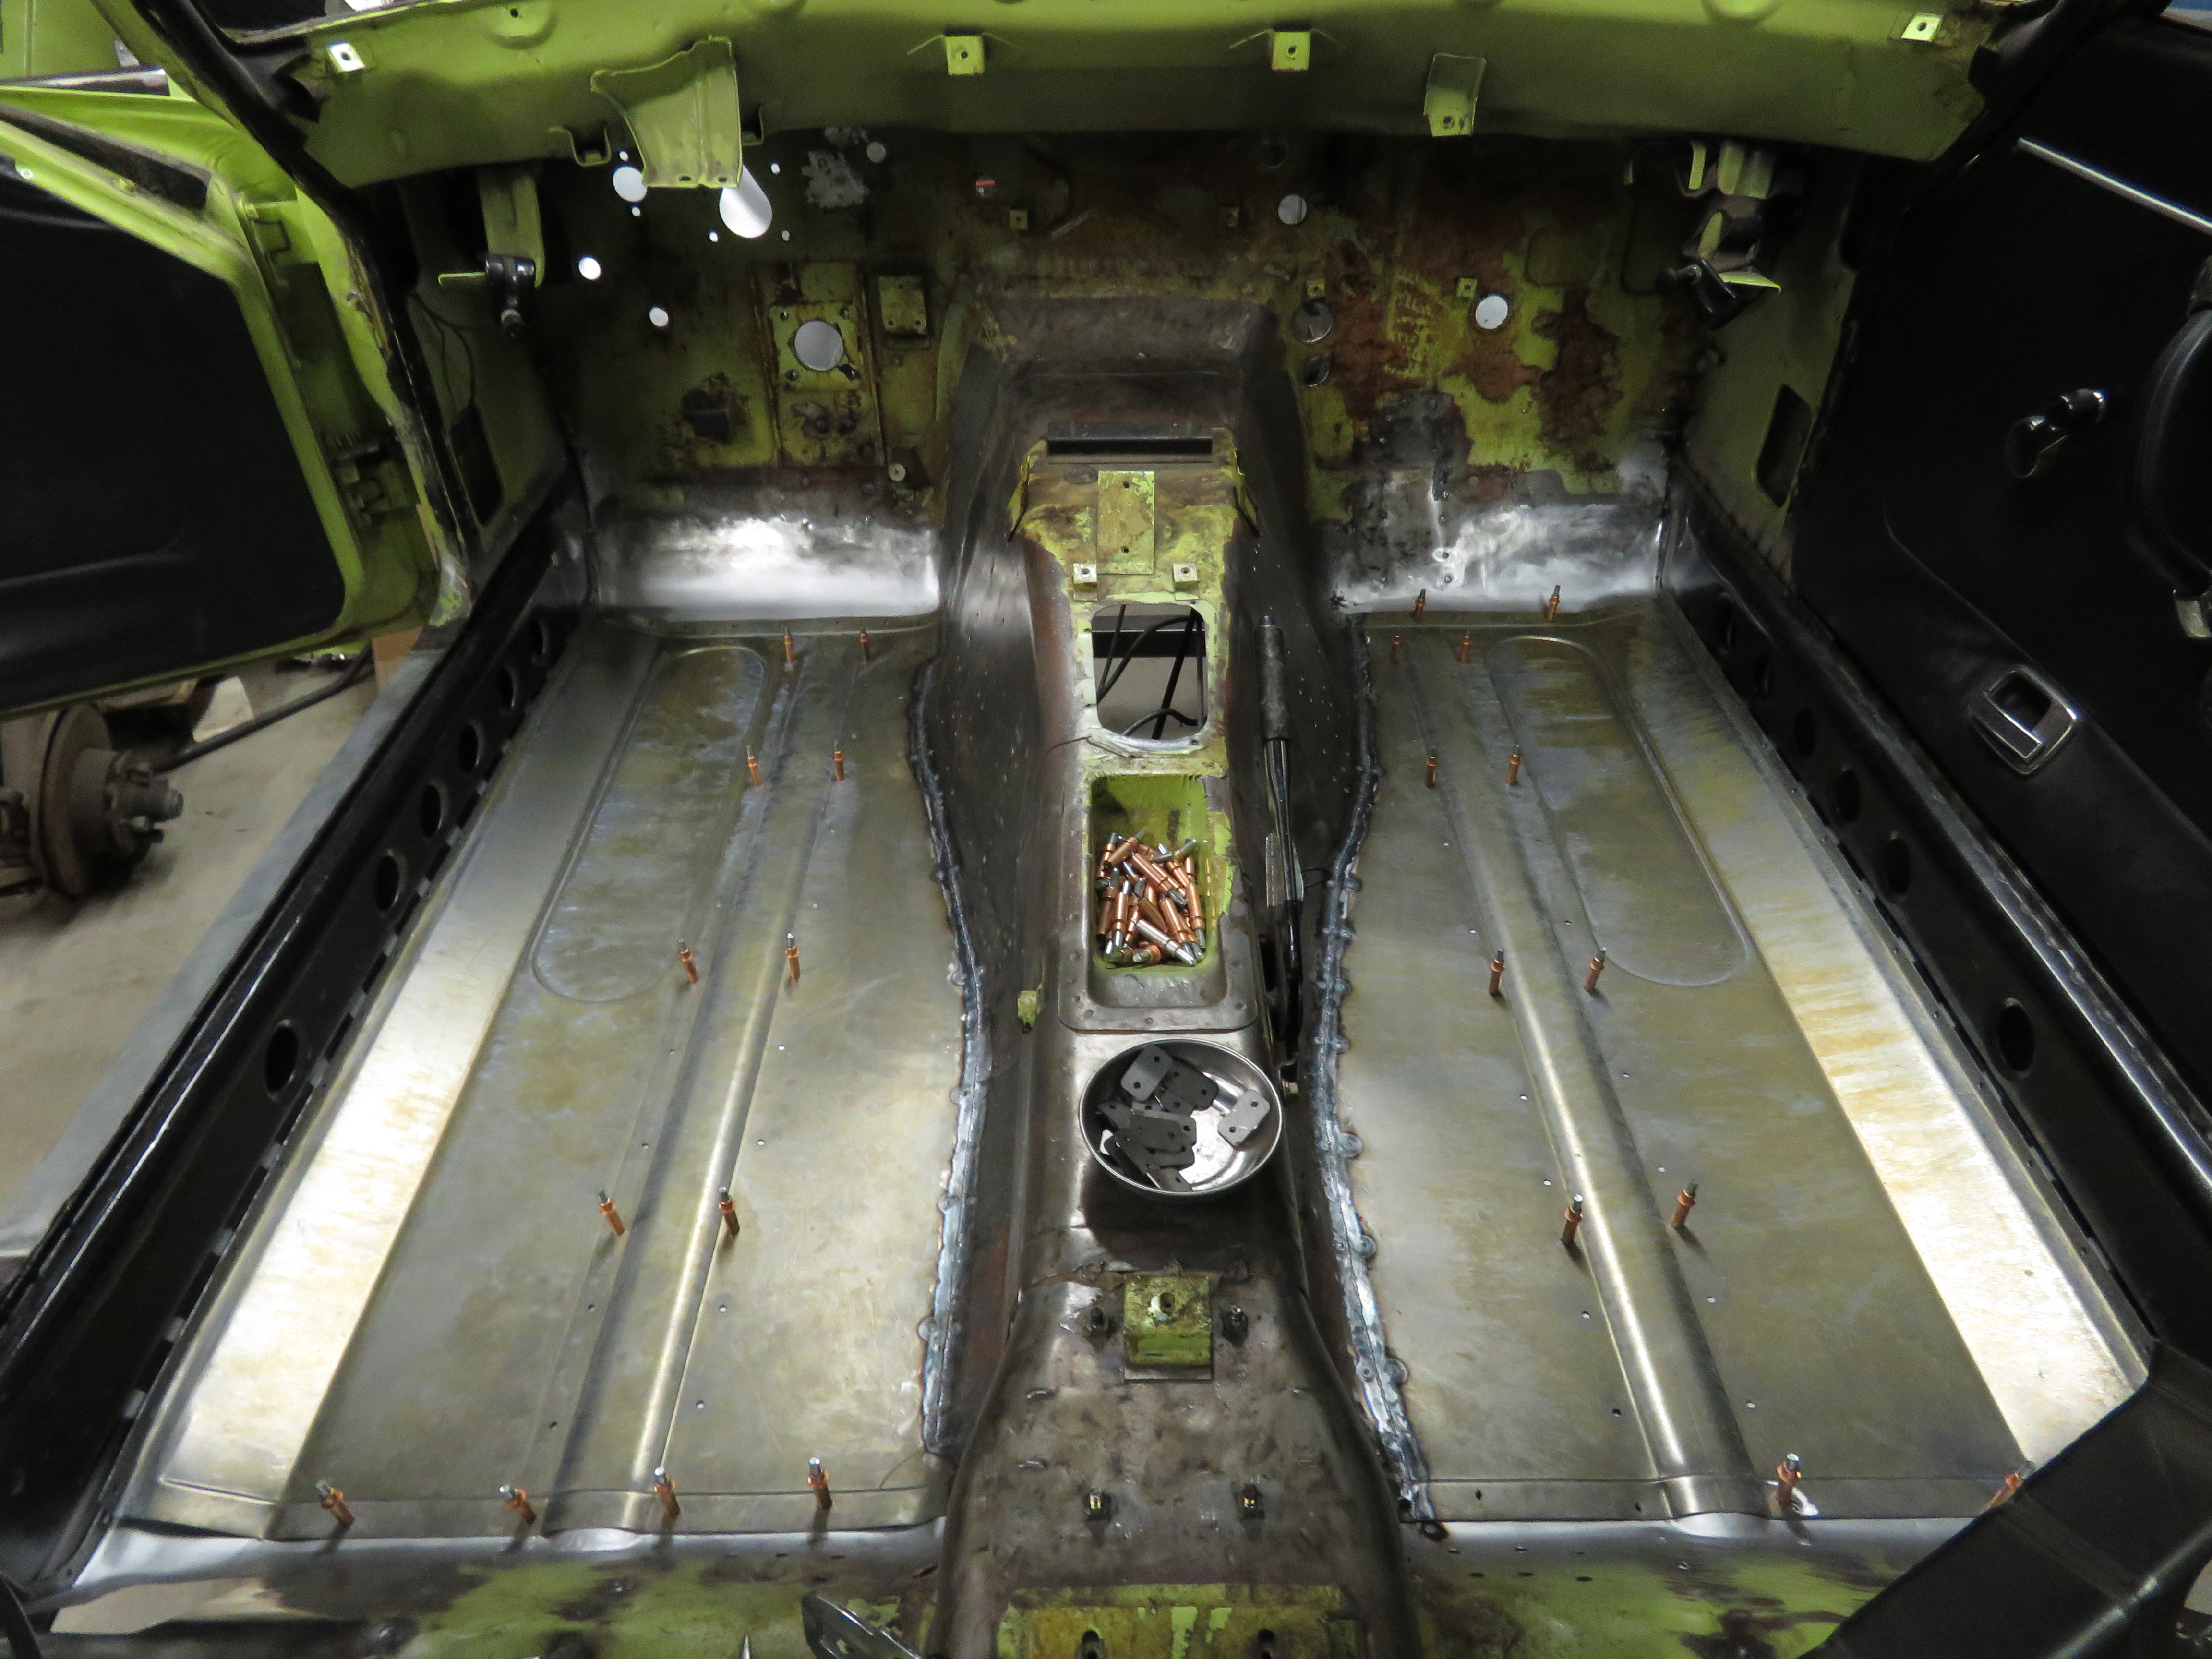
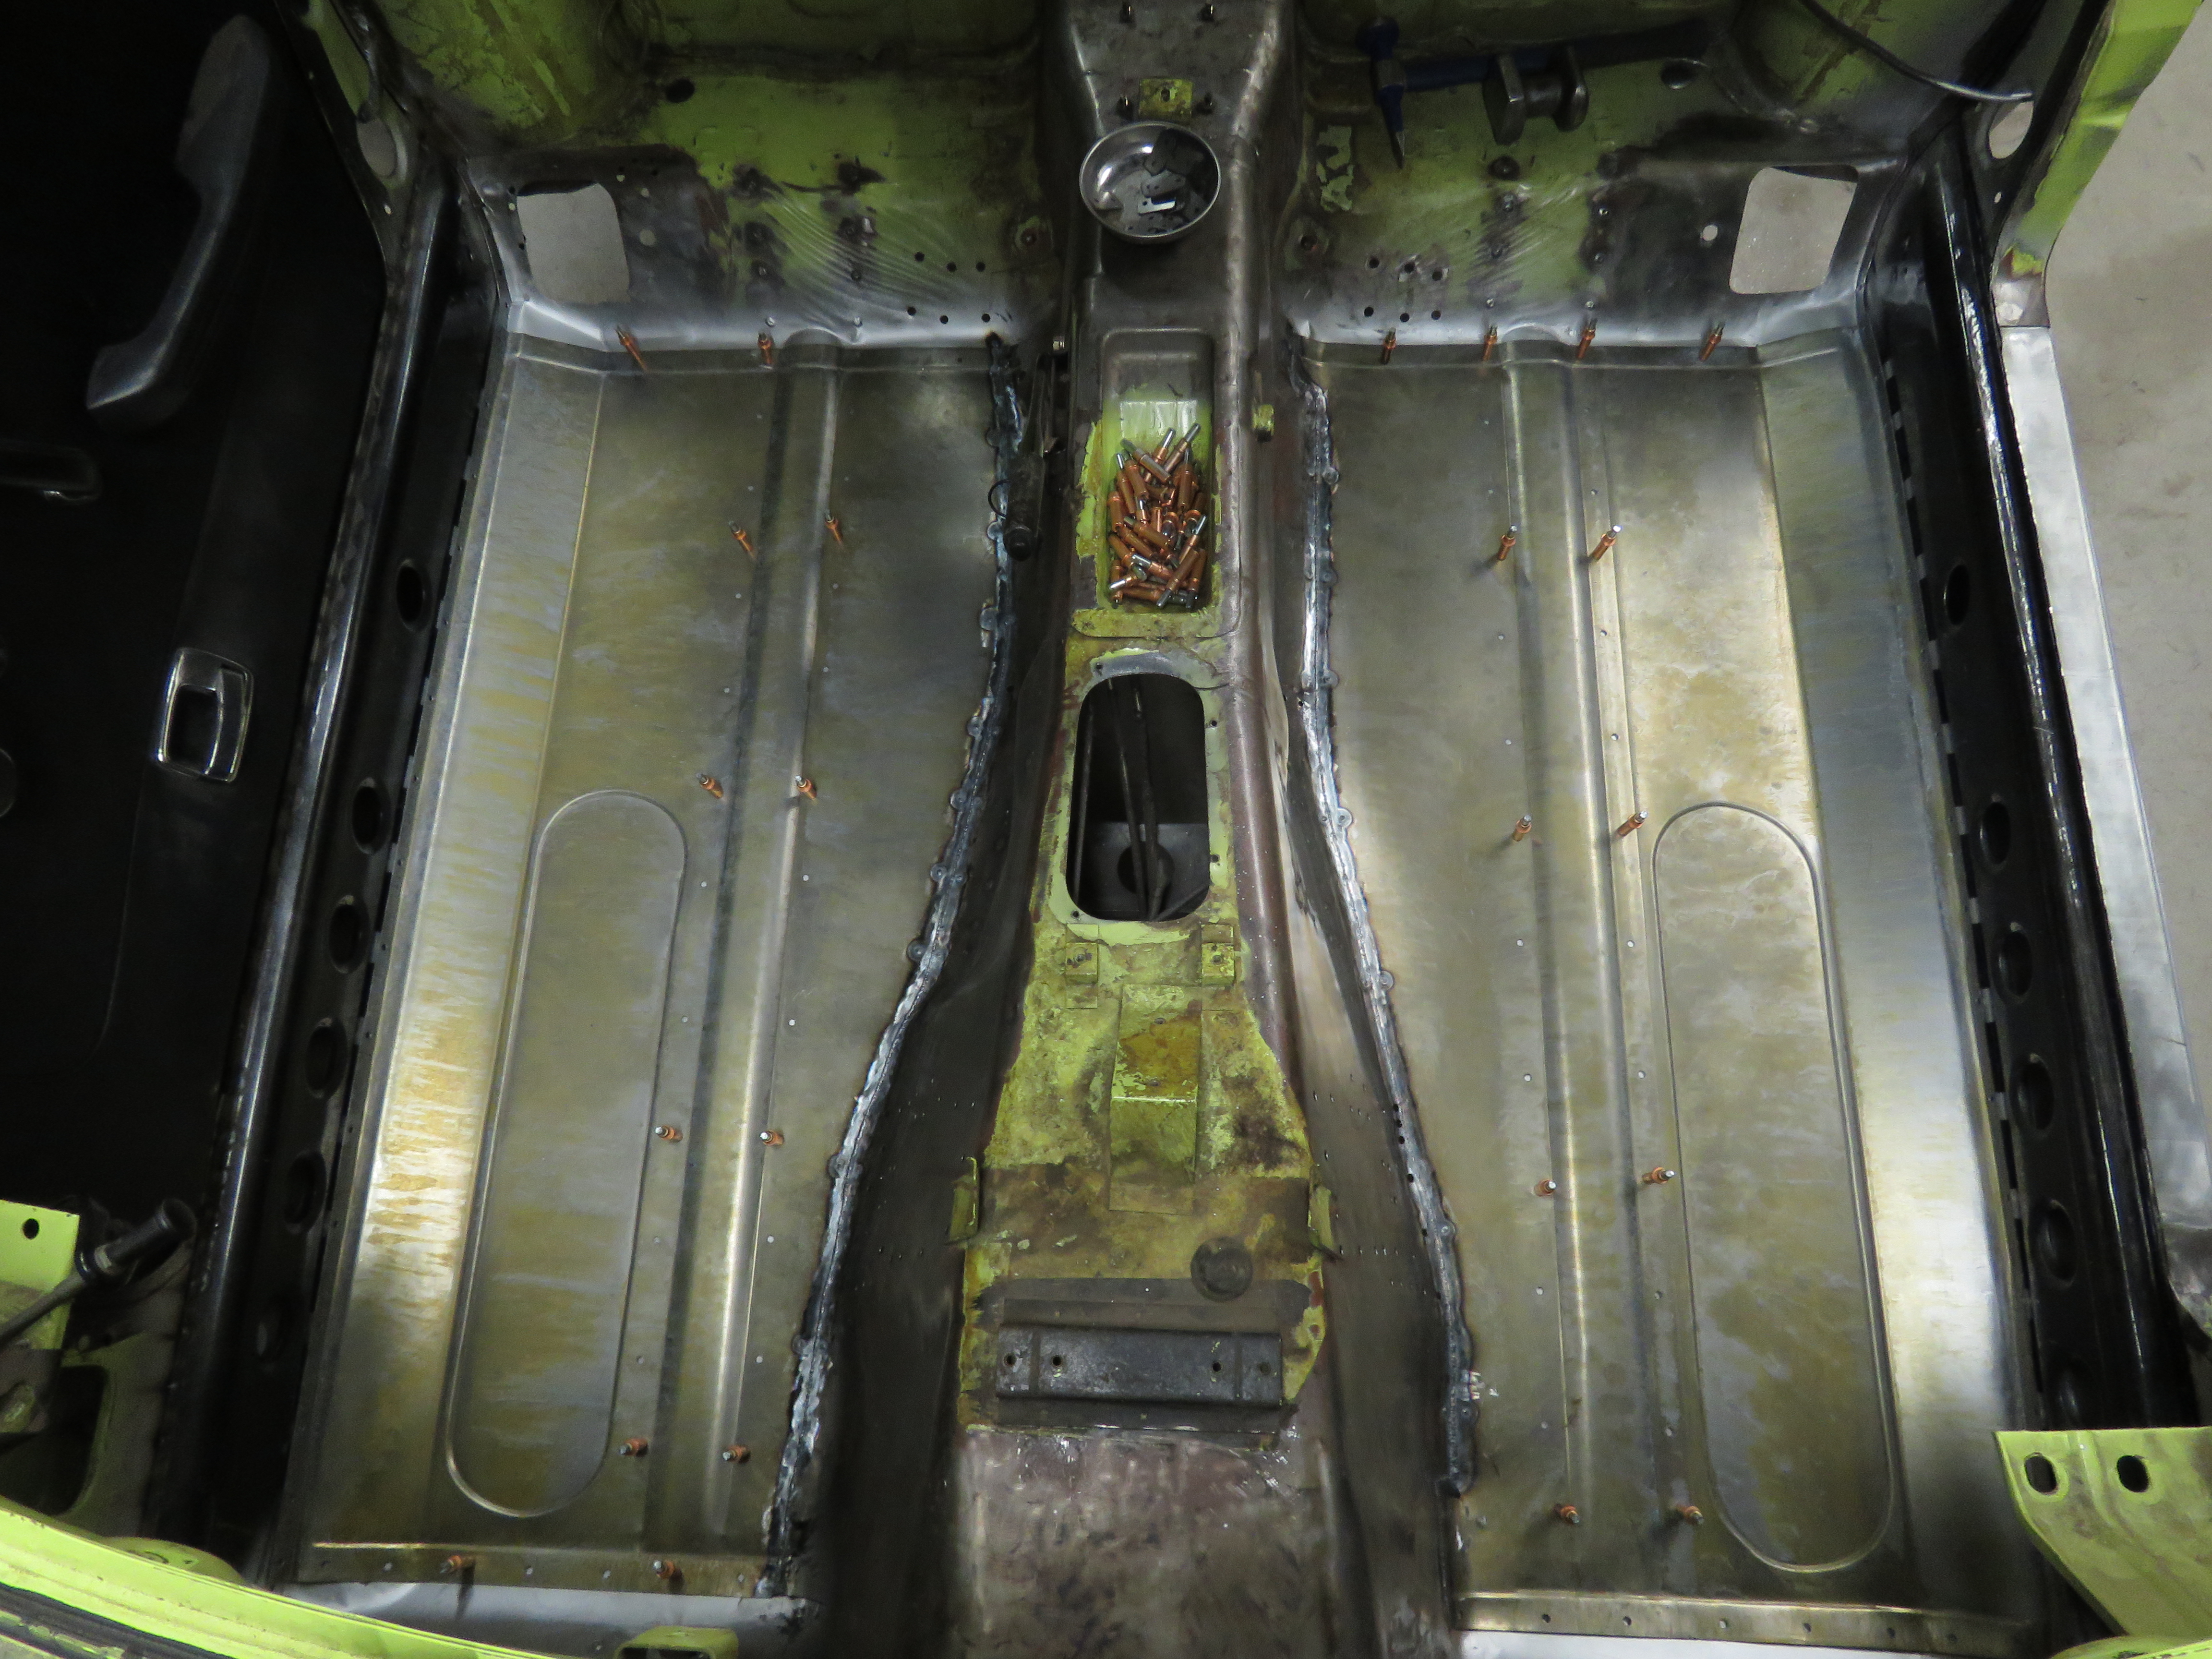
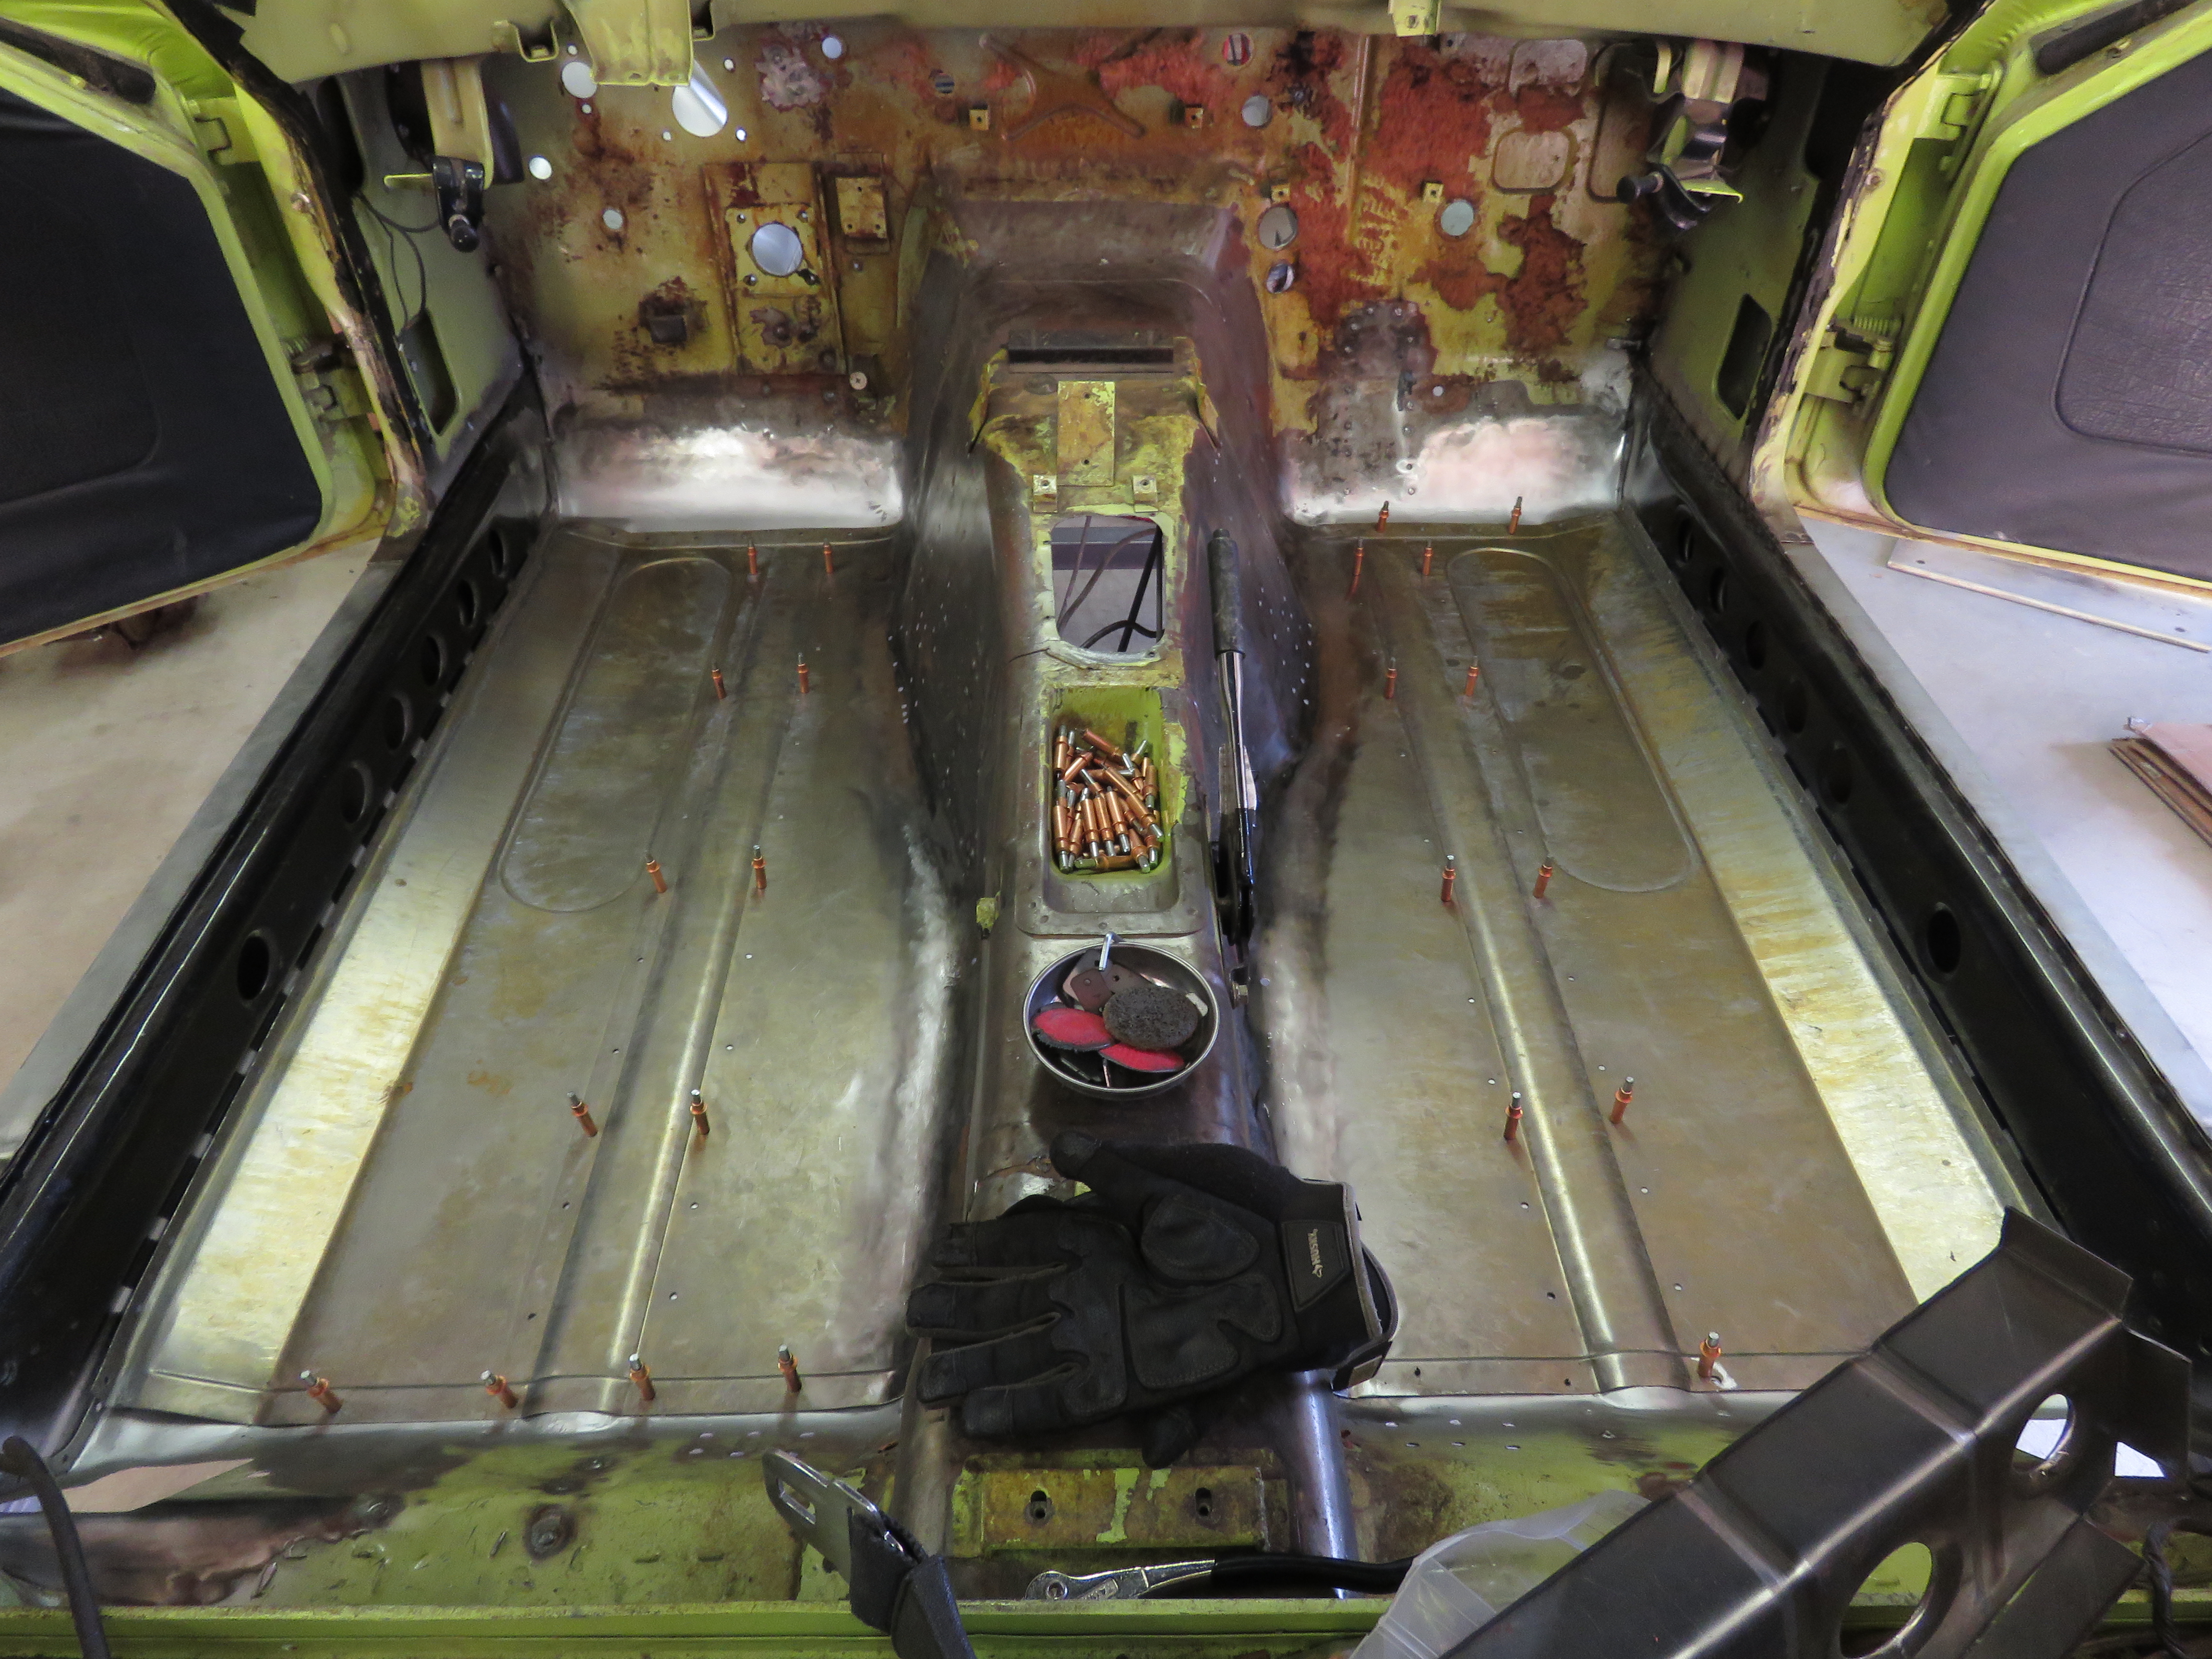
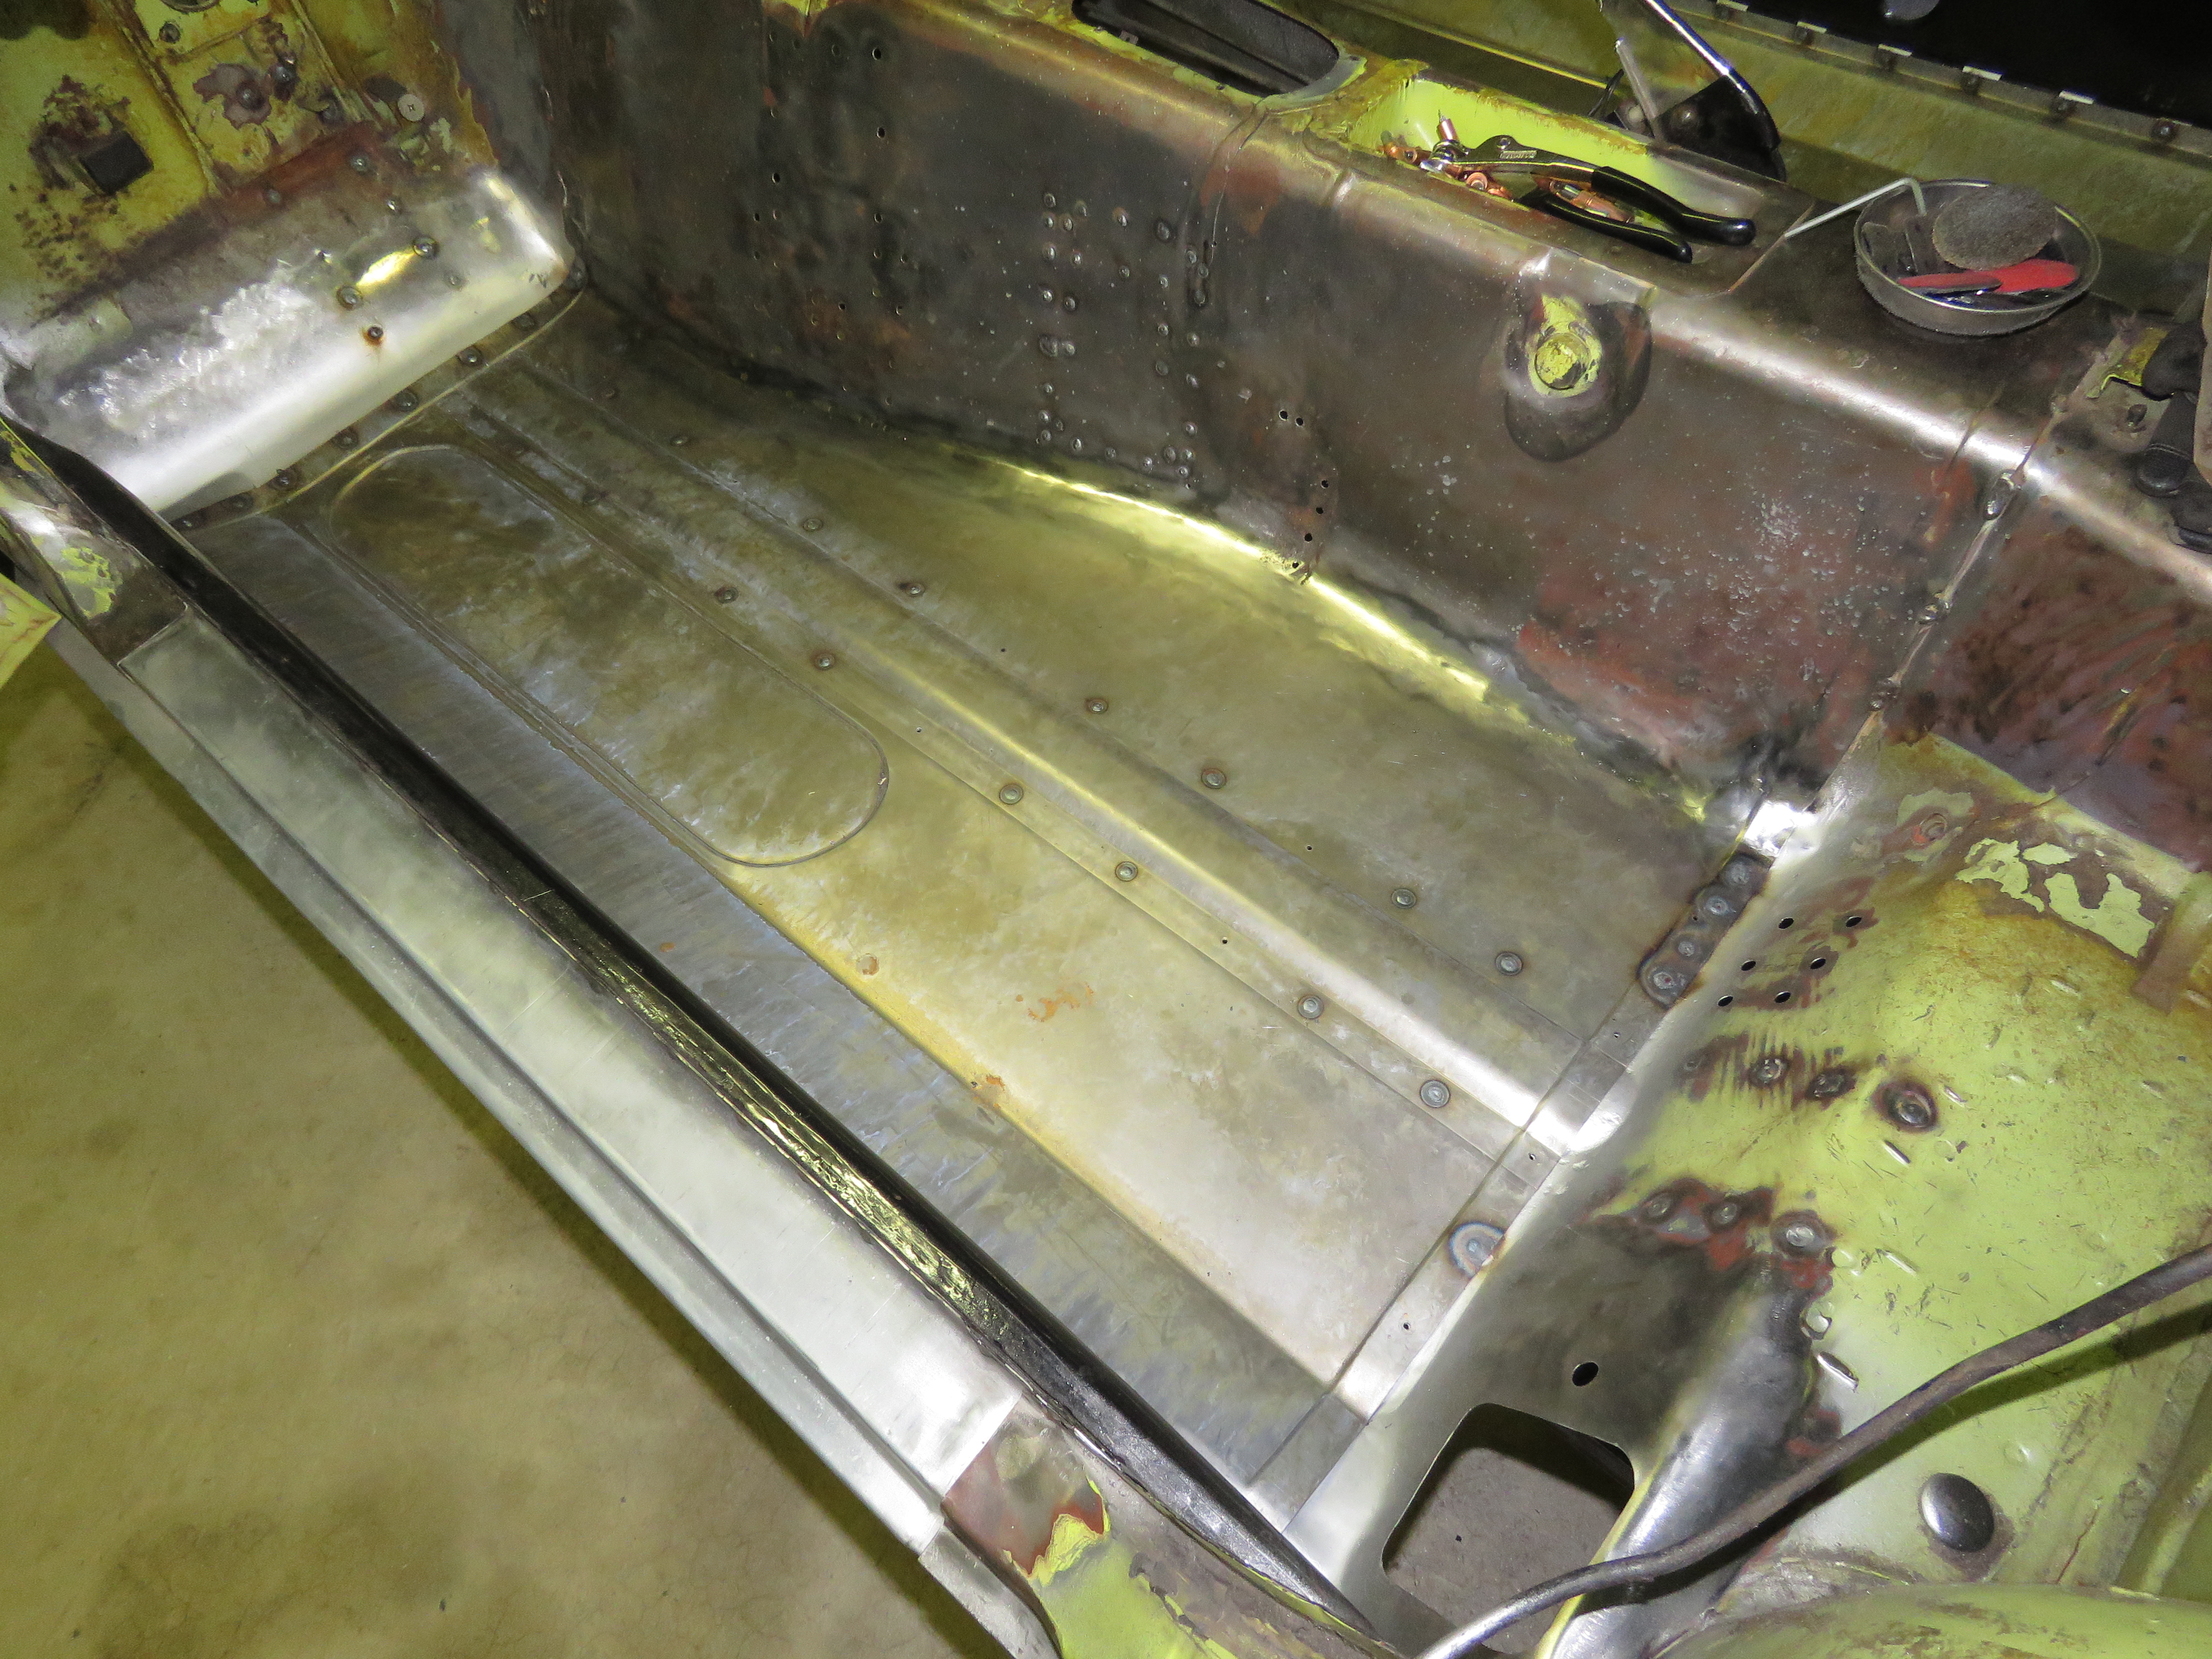
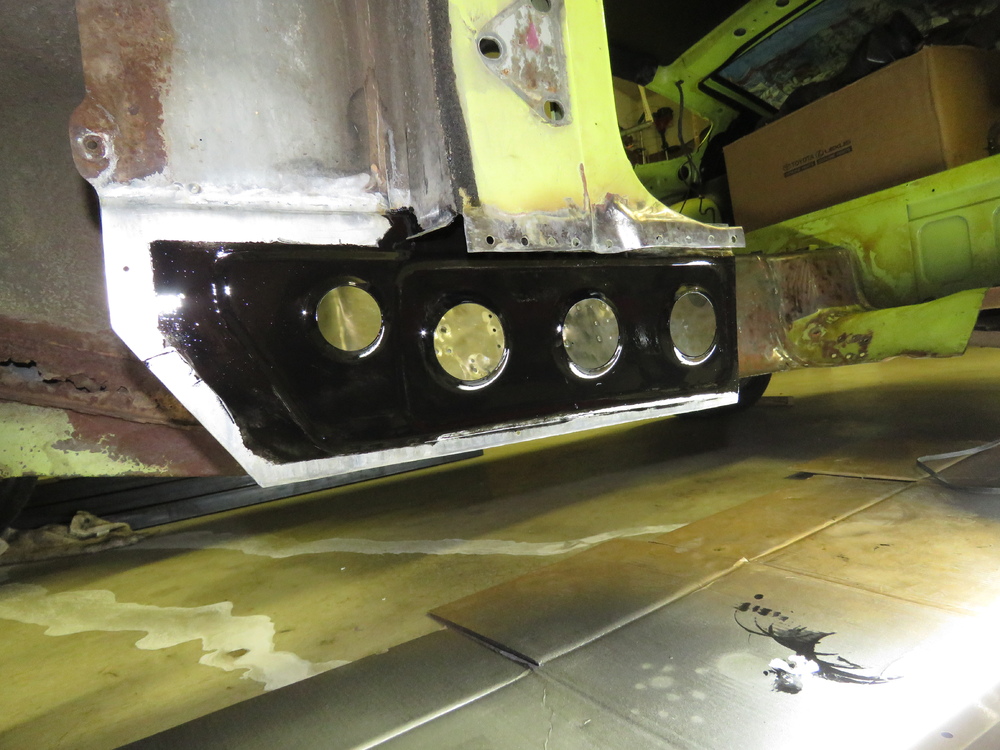
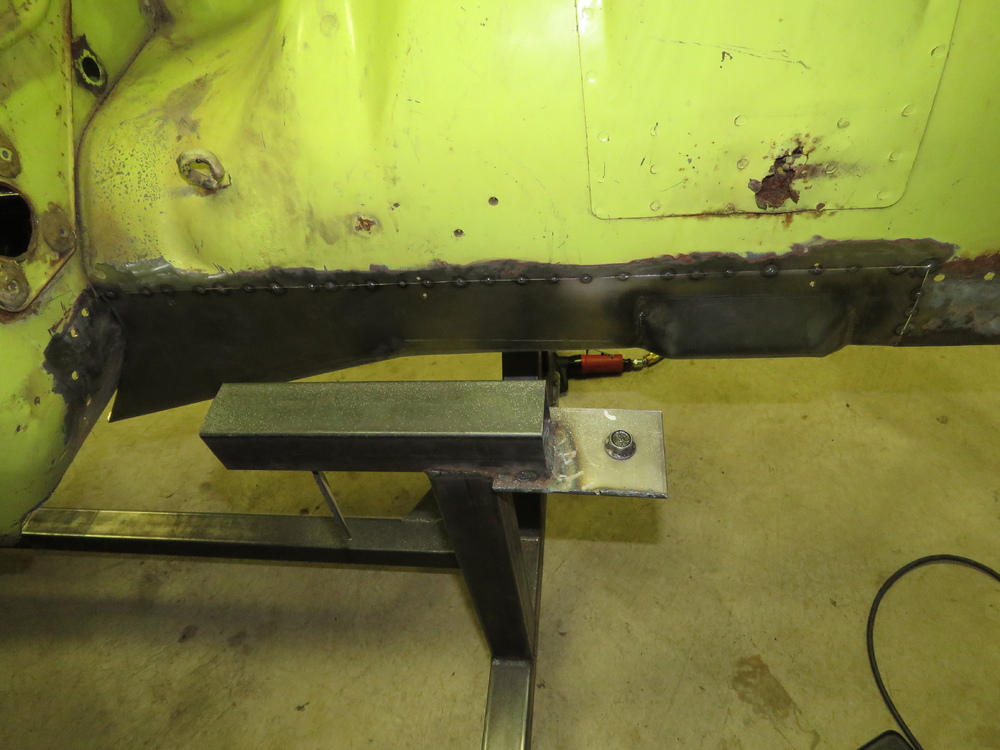
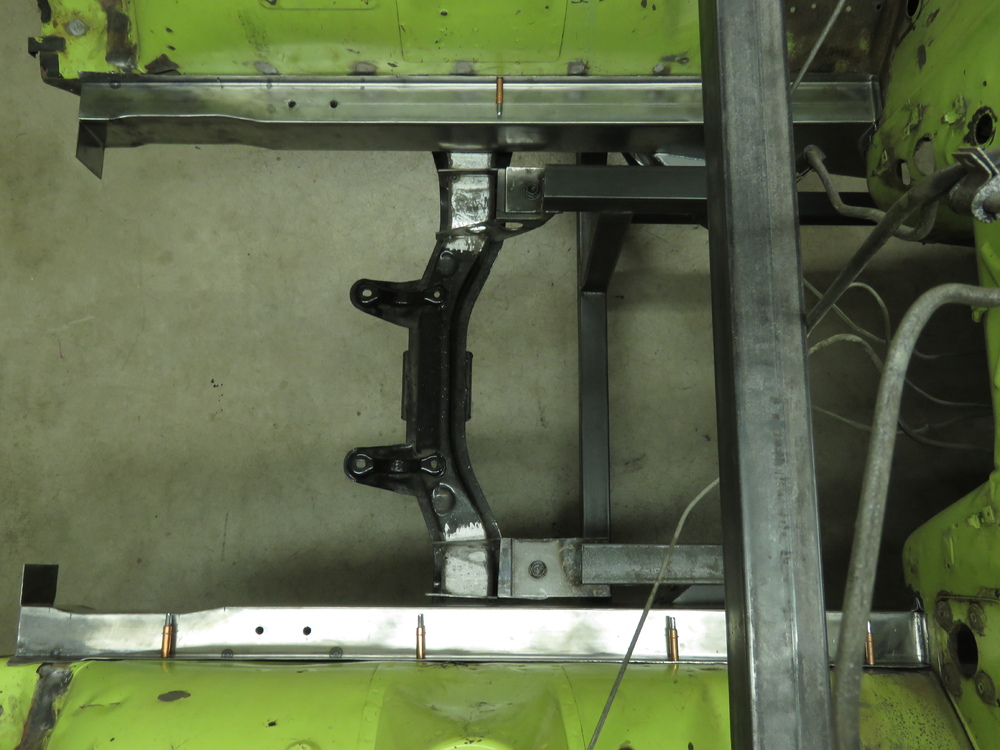
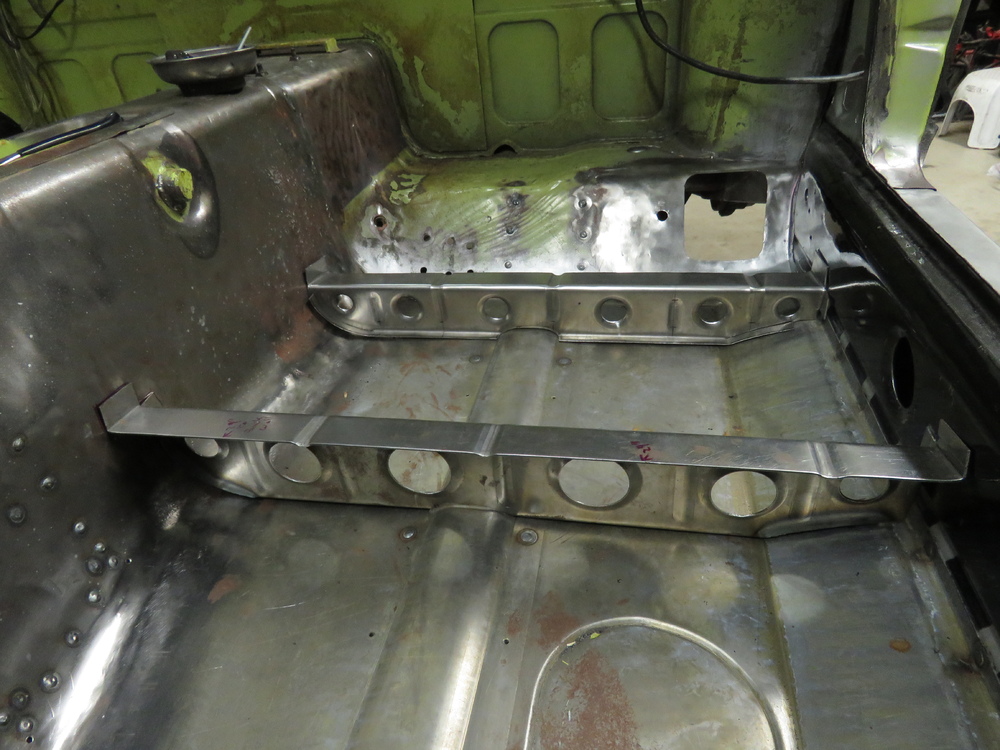
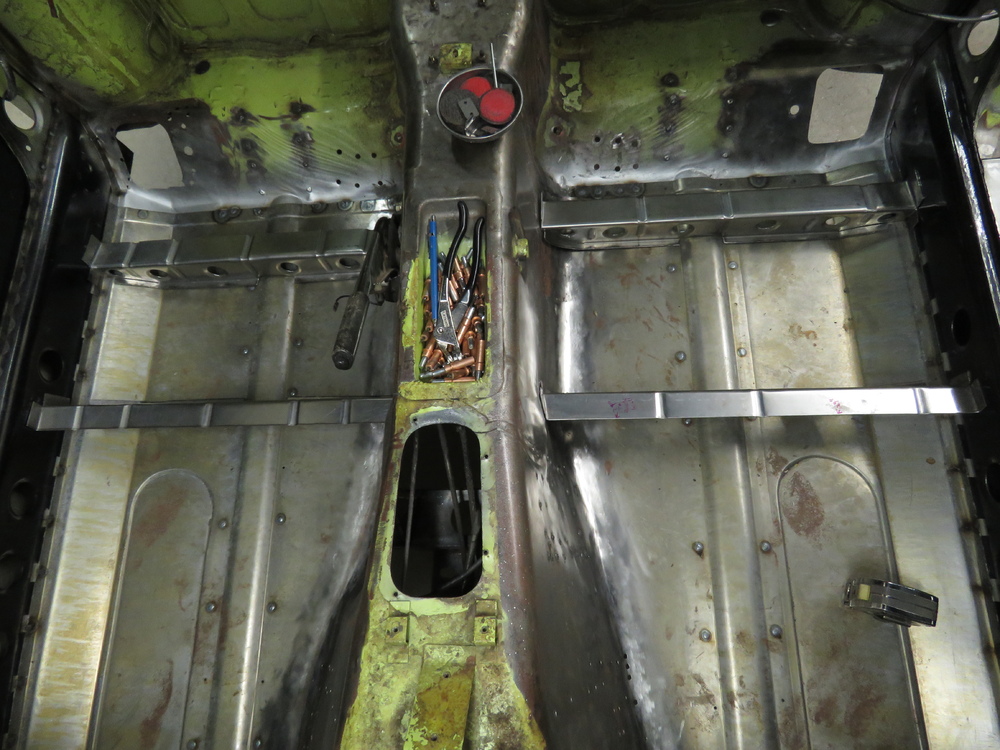
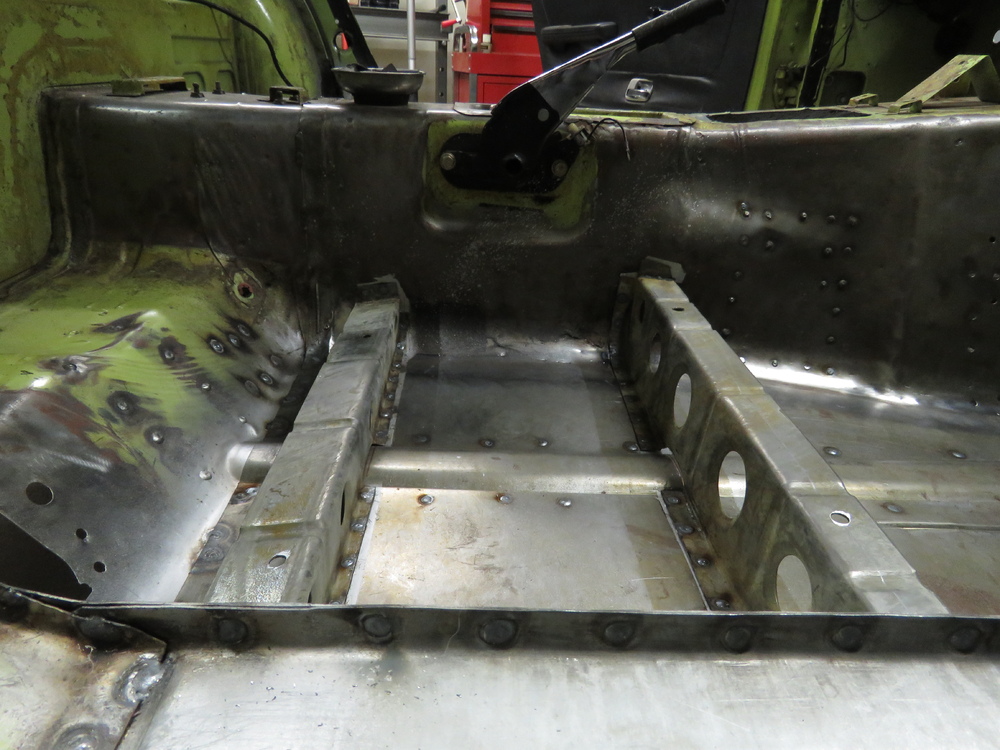
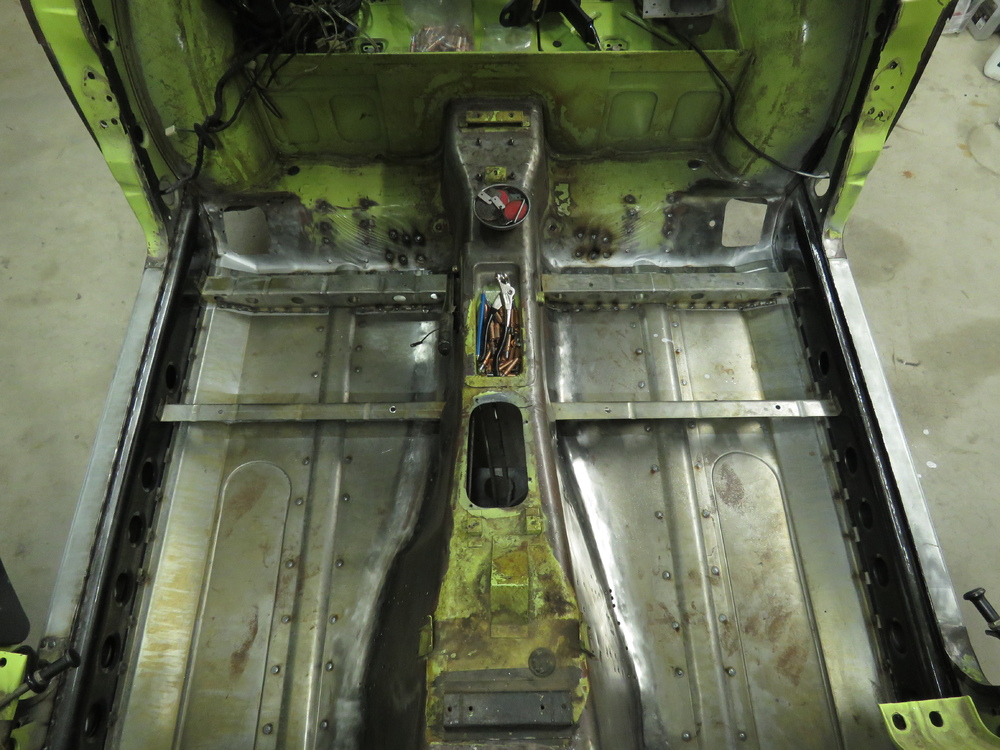
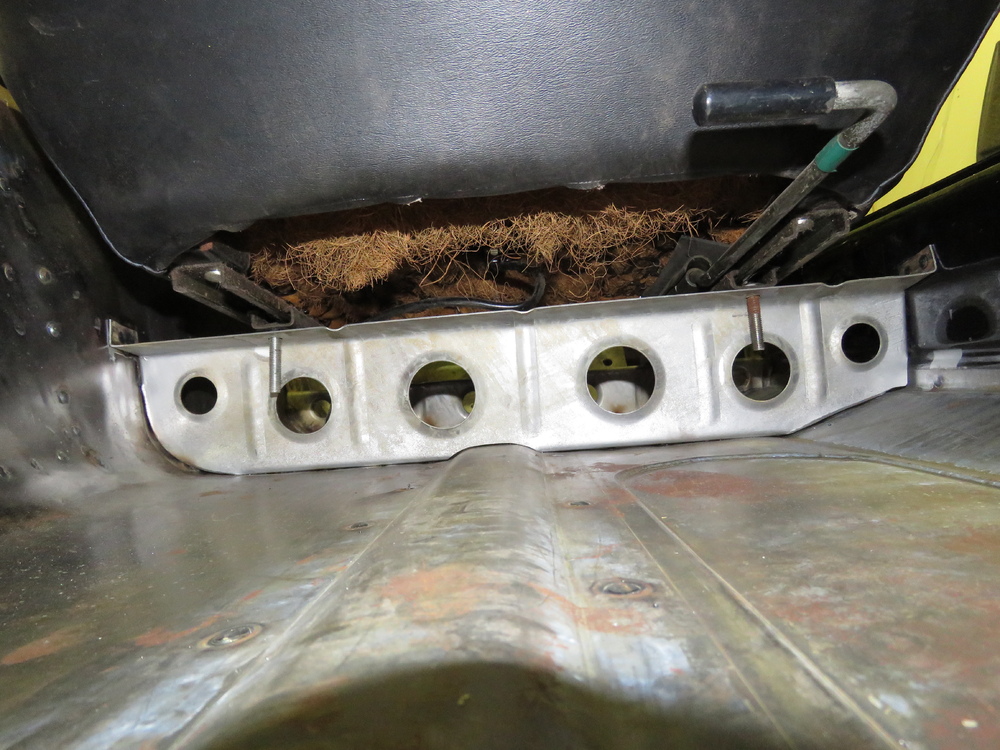
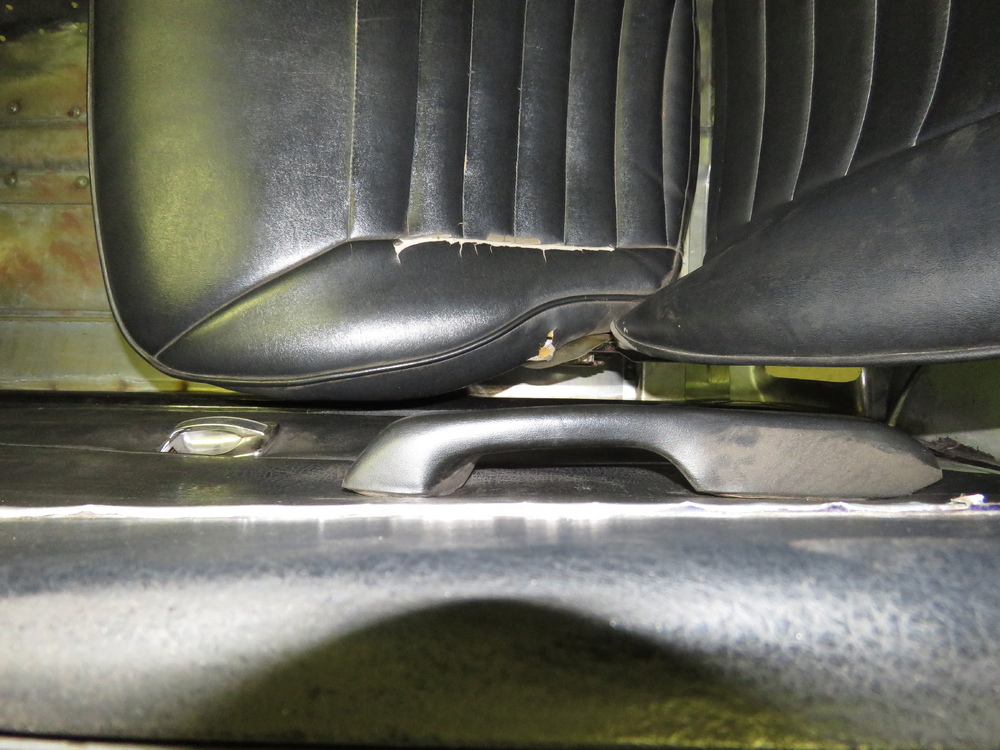
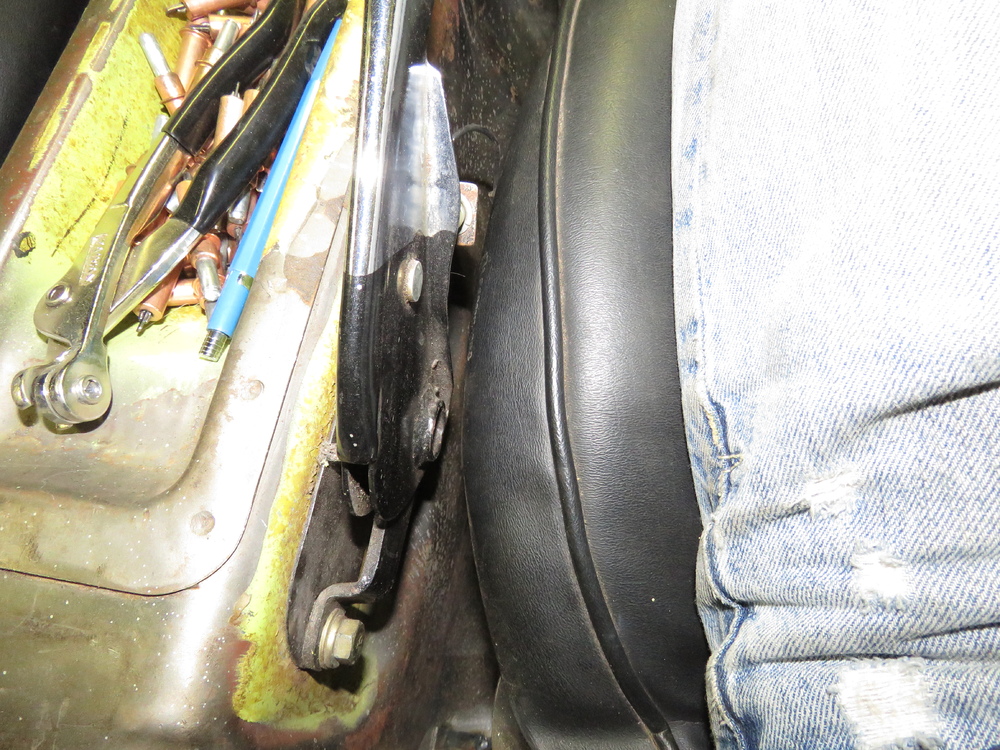
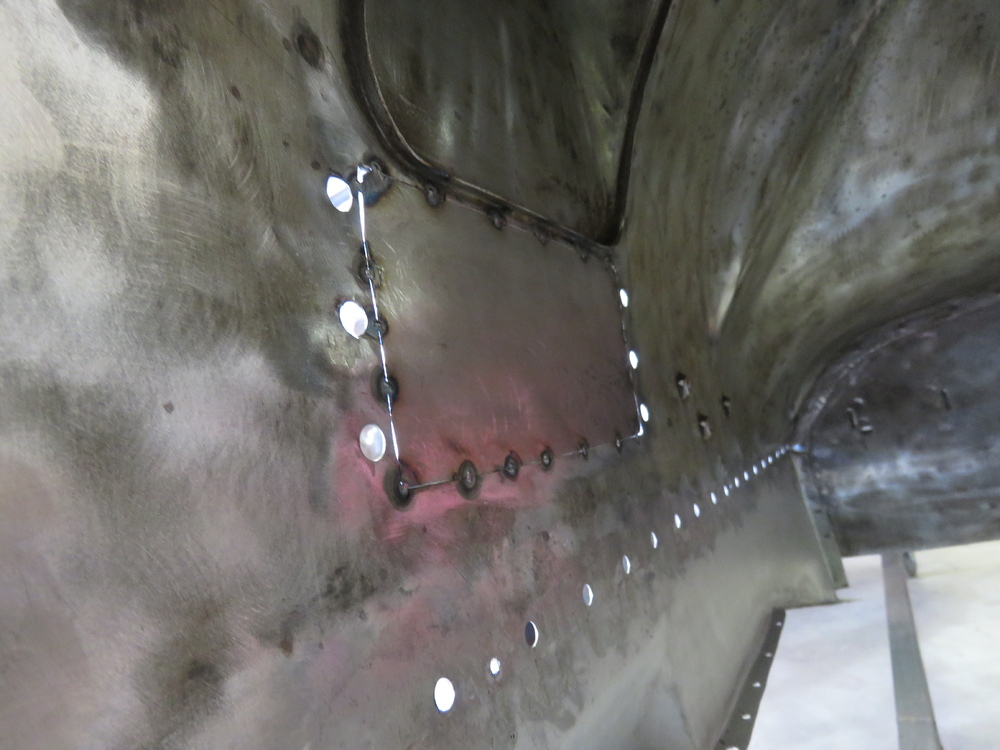
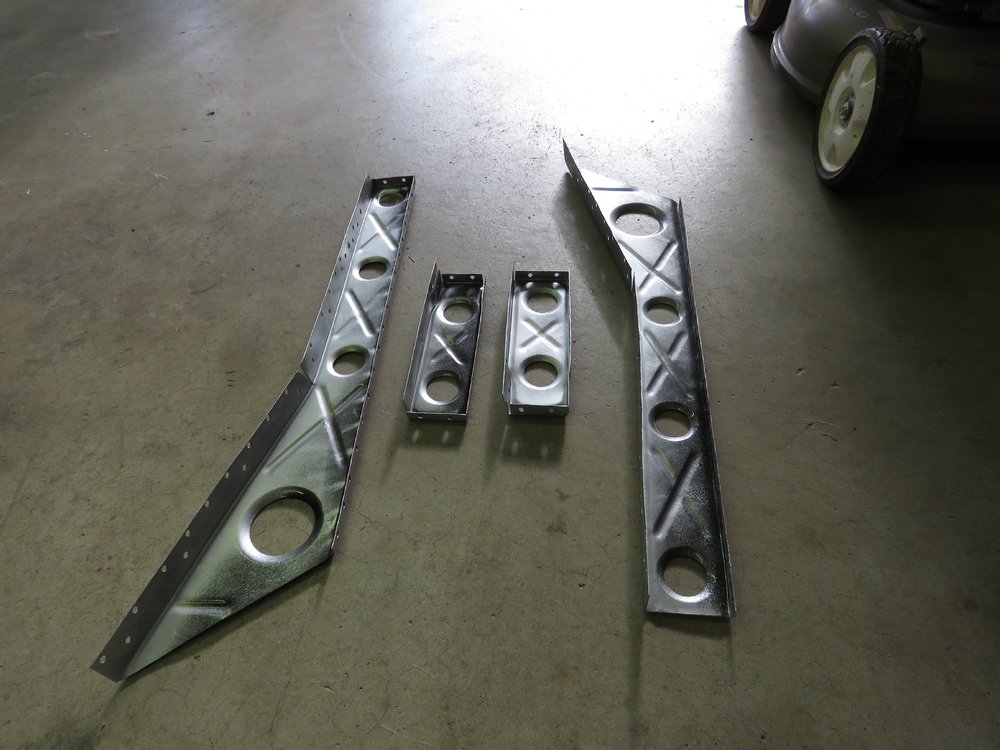
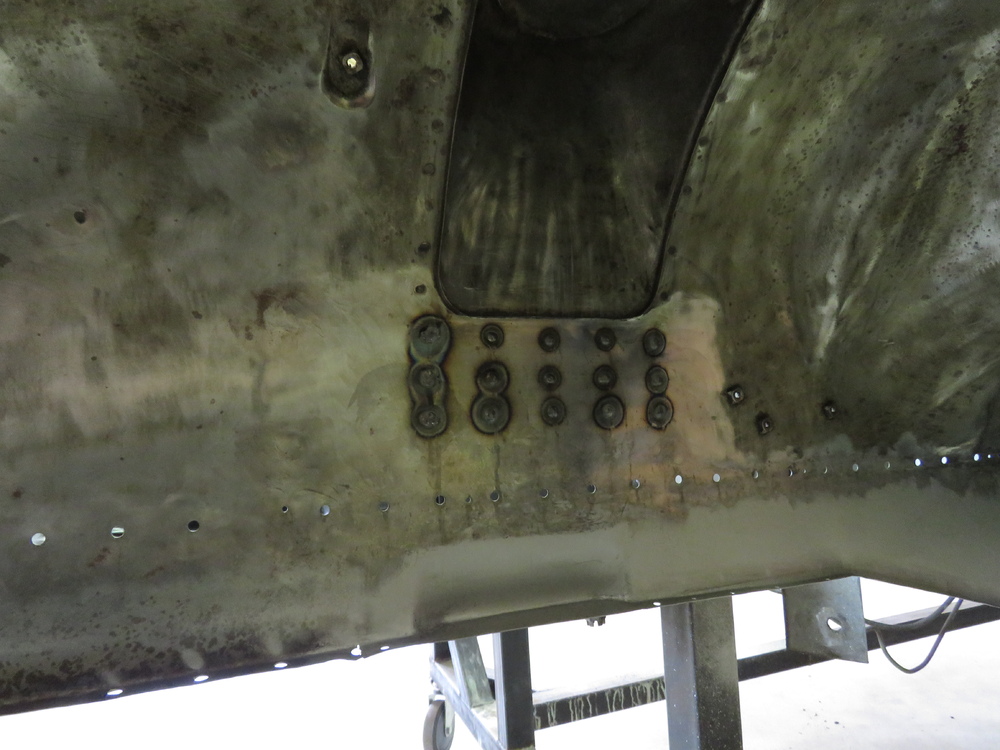
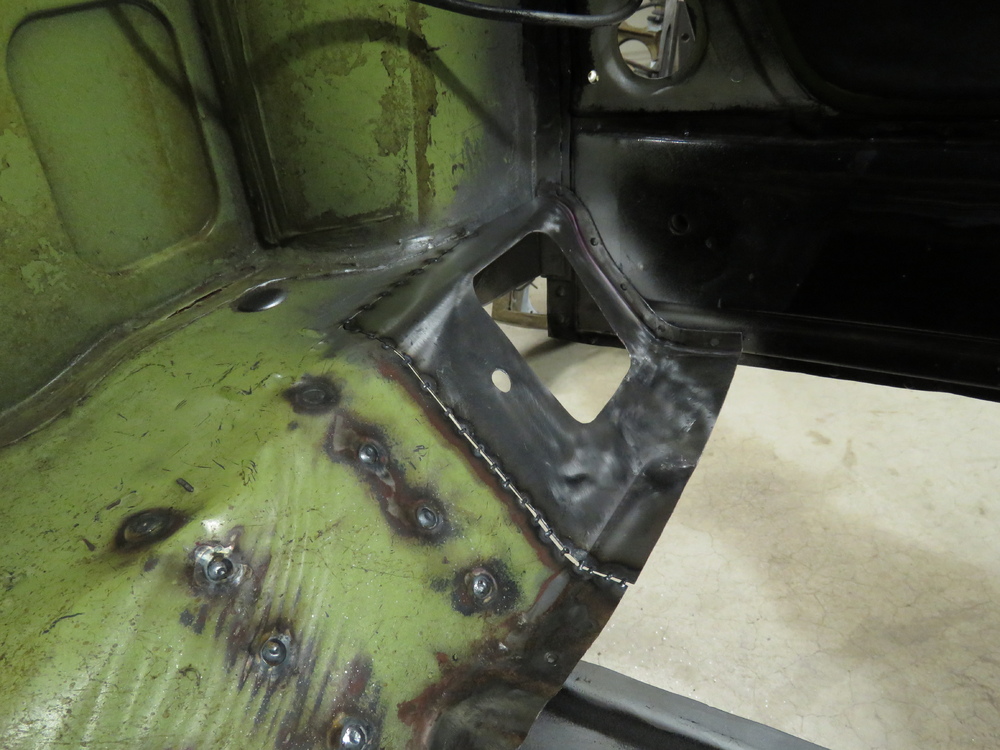
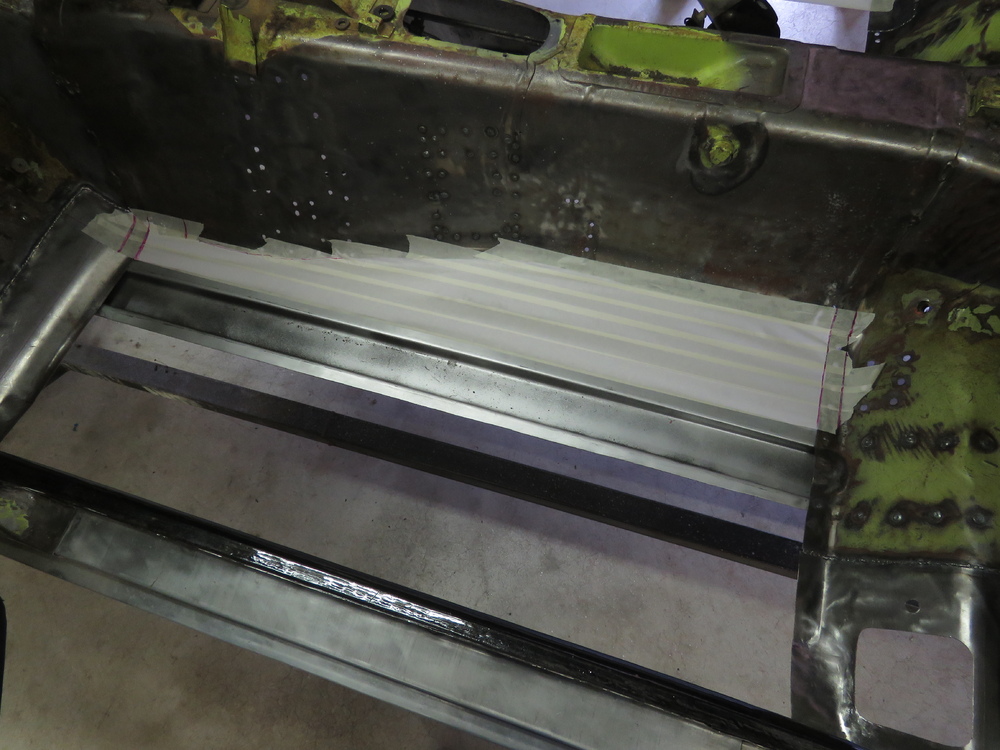
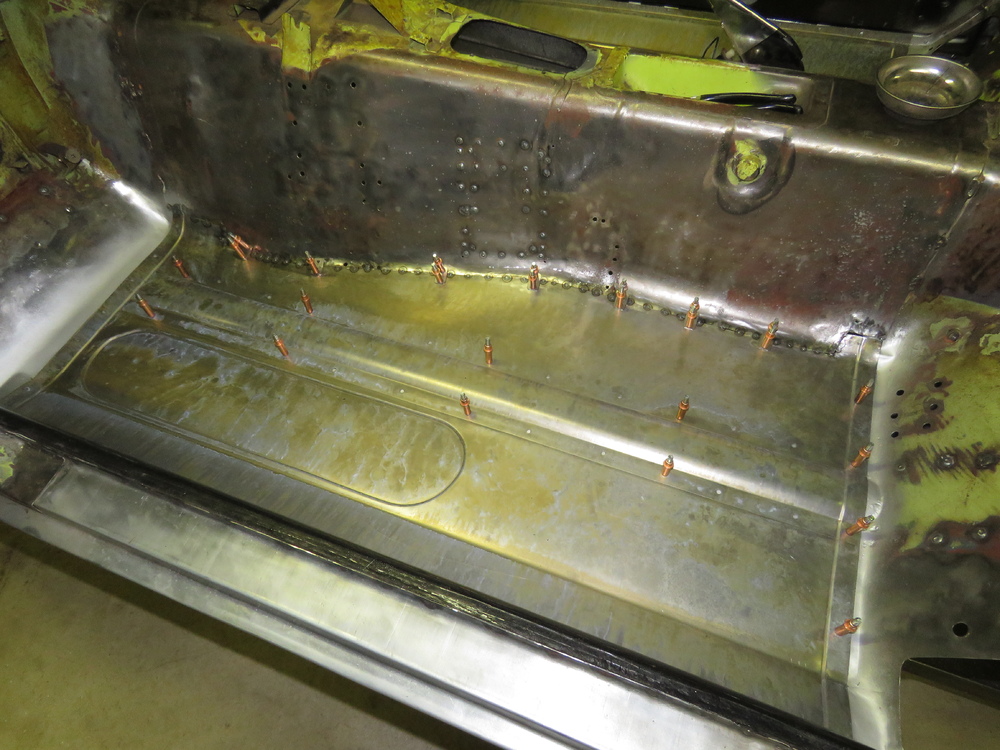
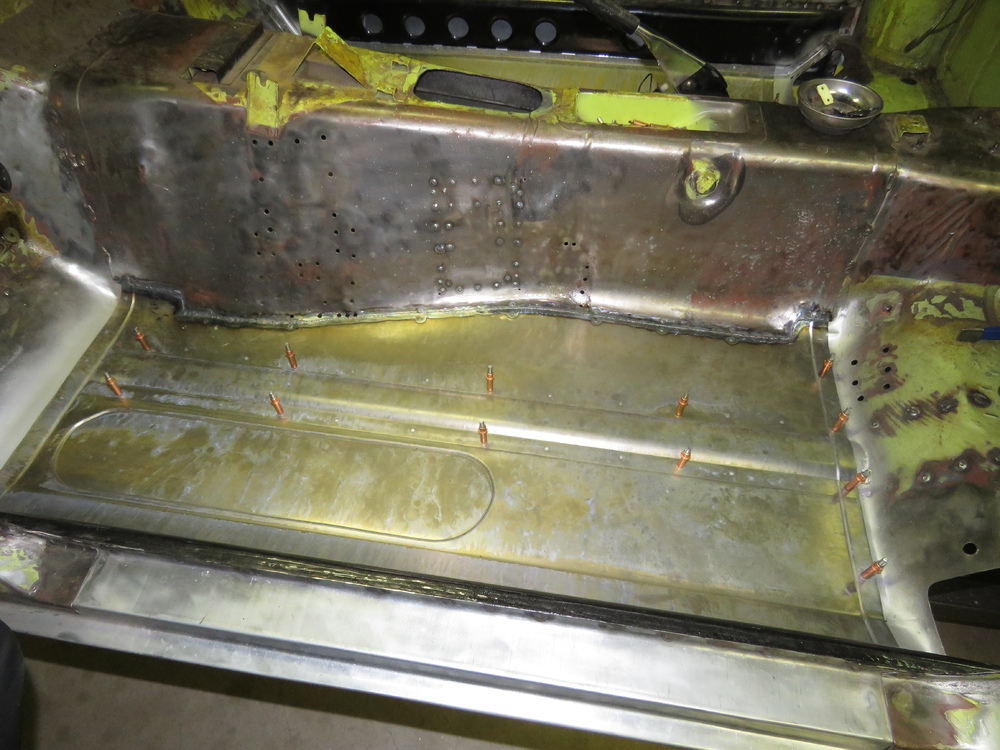
1 pointRear seat brackets made and both front and rear brackets welded in. Loosely fitted in place to give you an idea of how they will look. Front and rear brackets close up comparison. Holes drilled for welding. Decided this would be a good time to install the tie in plate underneath the floors close to the tunnel side. Holes drilled in the floors. Painted the flanges and area of the floors with weldable rust preventative primer. Also sprayed the seat brackets and tie in plates with POR15 degreaser and prep and ready to prepare it for paint. Seat brackets welded in. Seats test fitted. Passenger seat slightly touches the ebrake. however once somebody is seated, the cushion on the side collapses in a way to distance itself away from the ebrake. Tie in plates welded in. Me wishing my car was done and driving, hehe. Thats all for now. Bout time I actually start working on the parts I sandblasted.


 1 point
 -
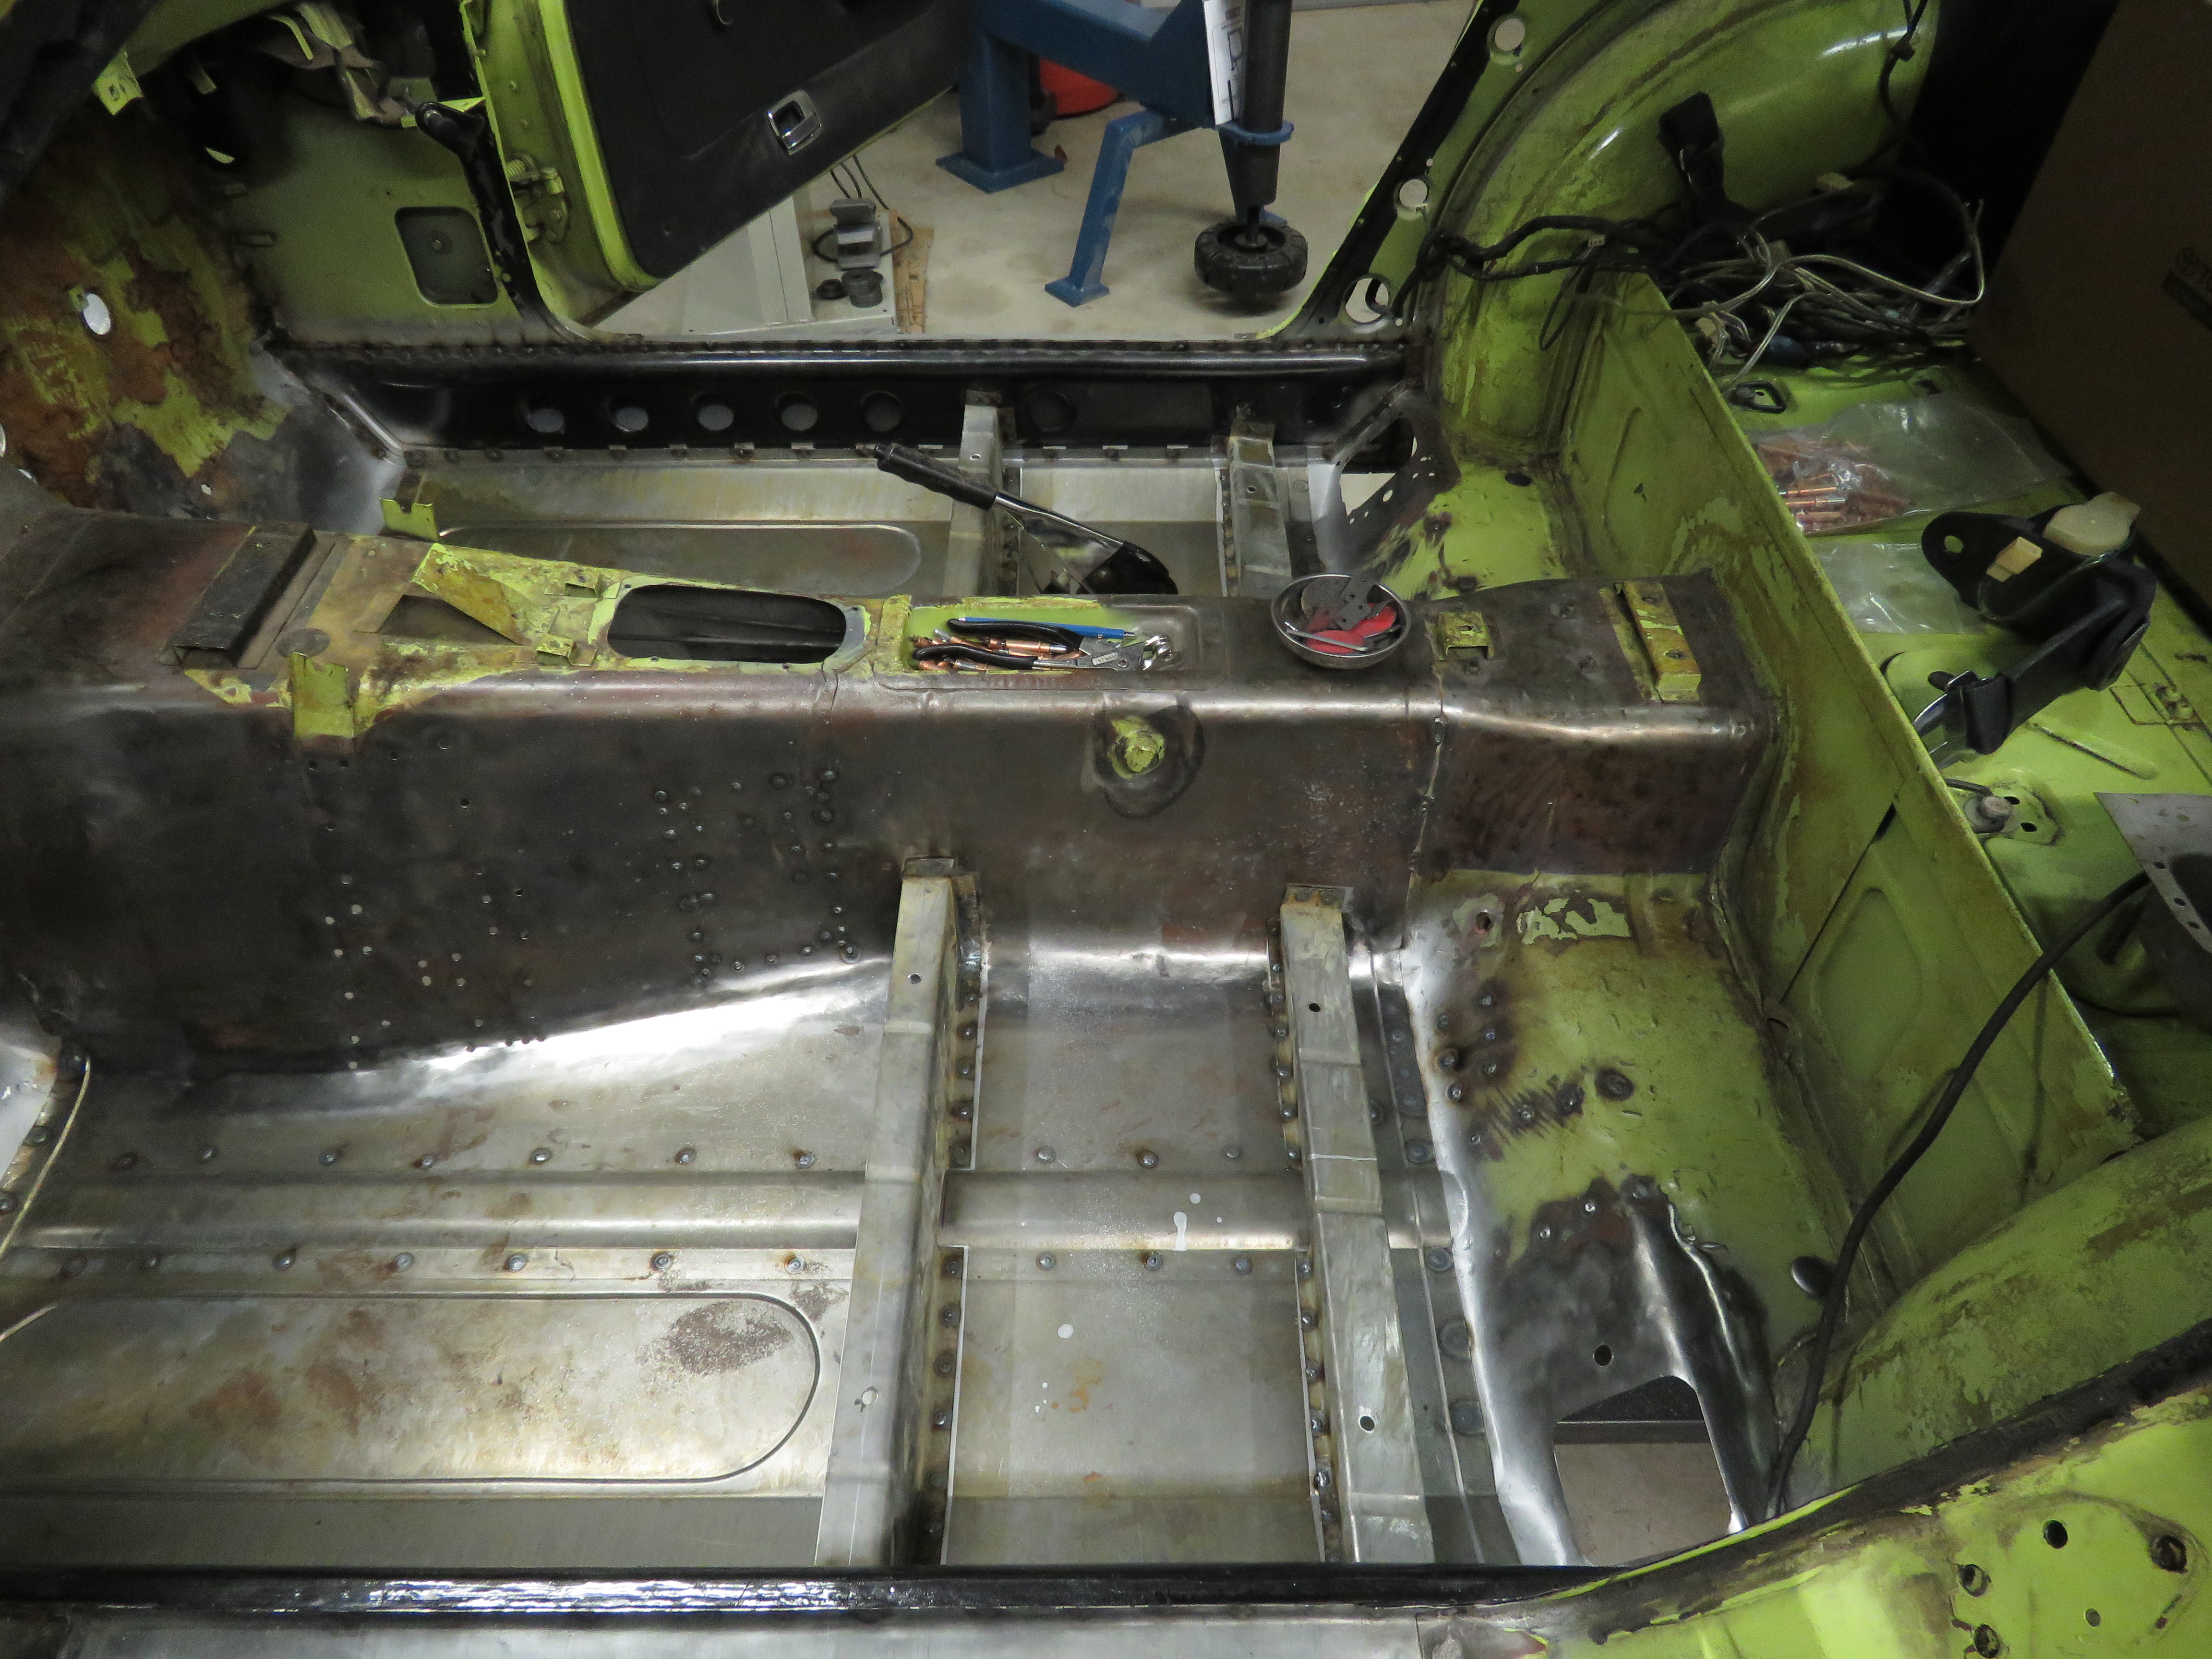
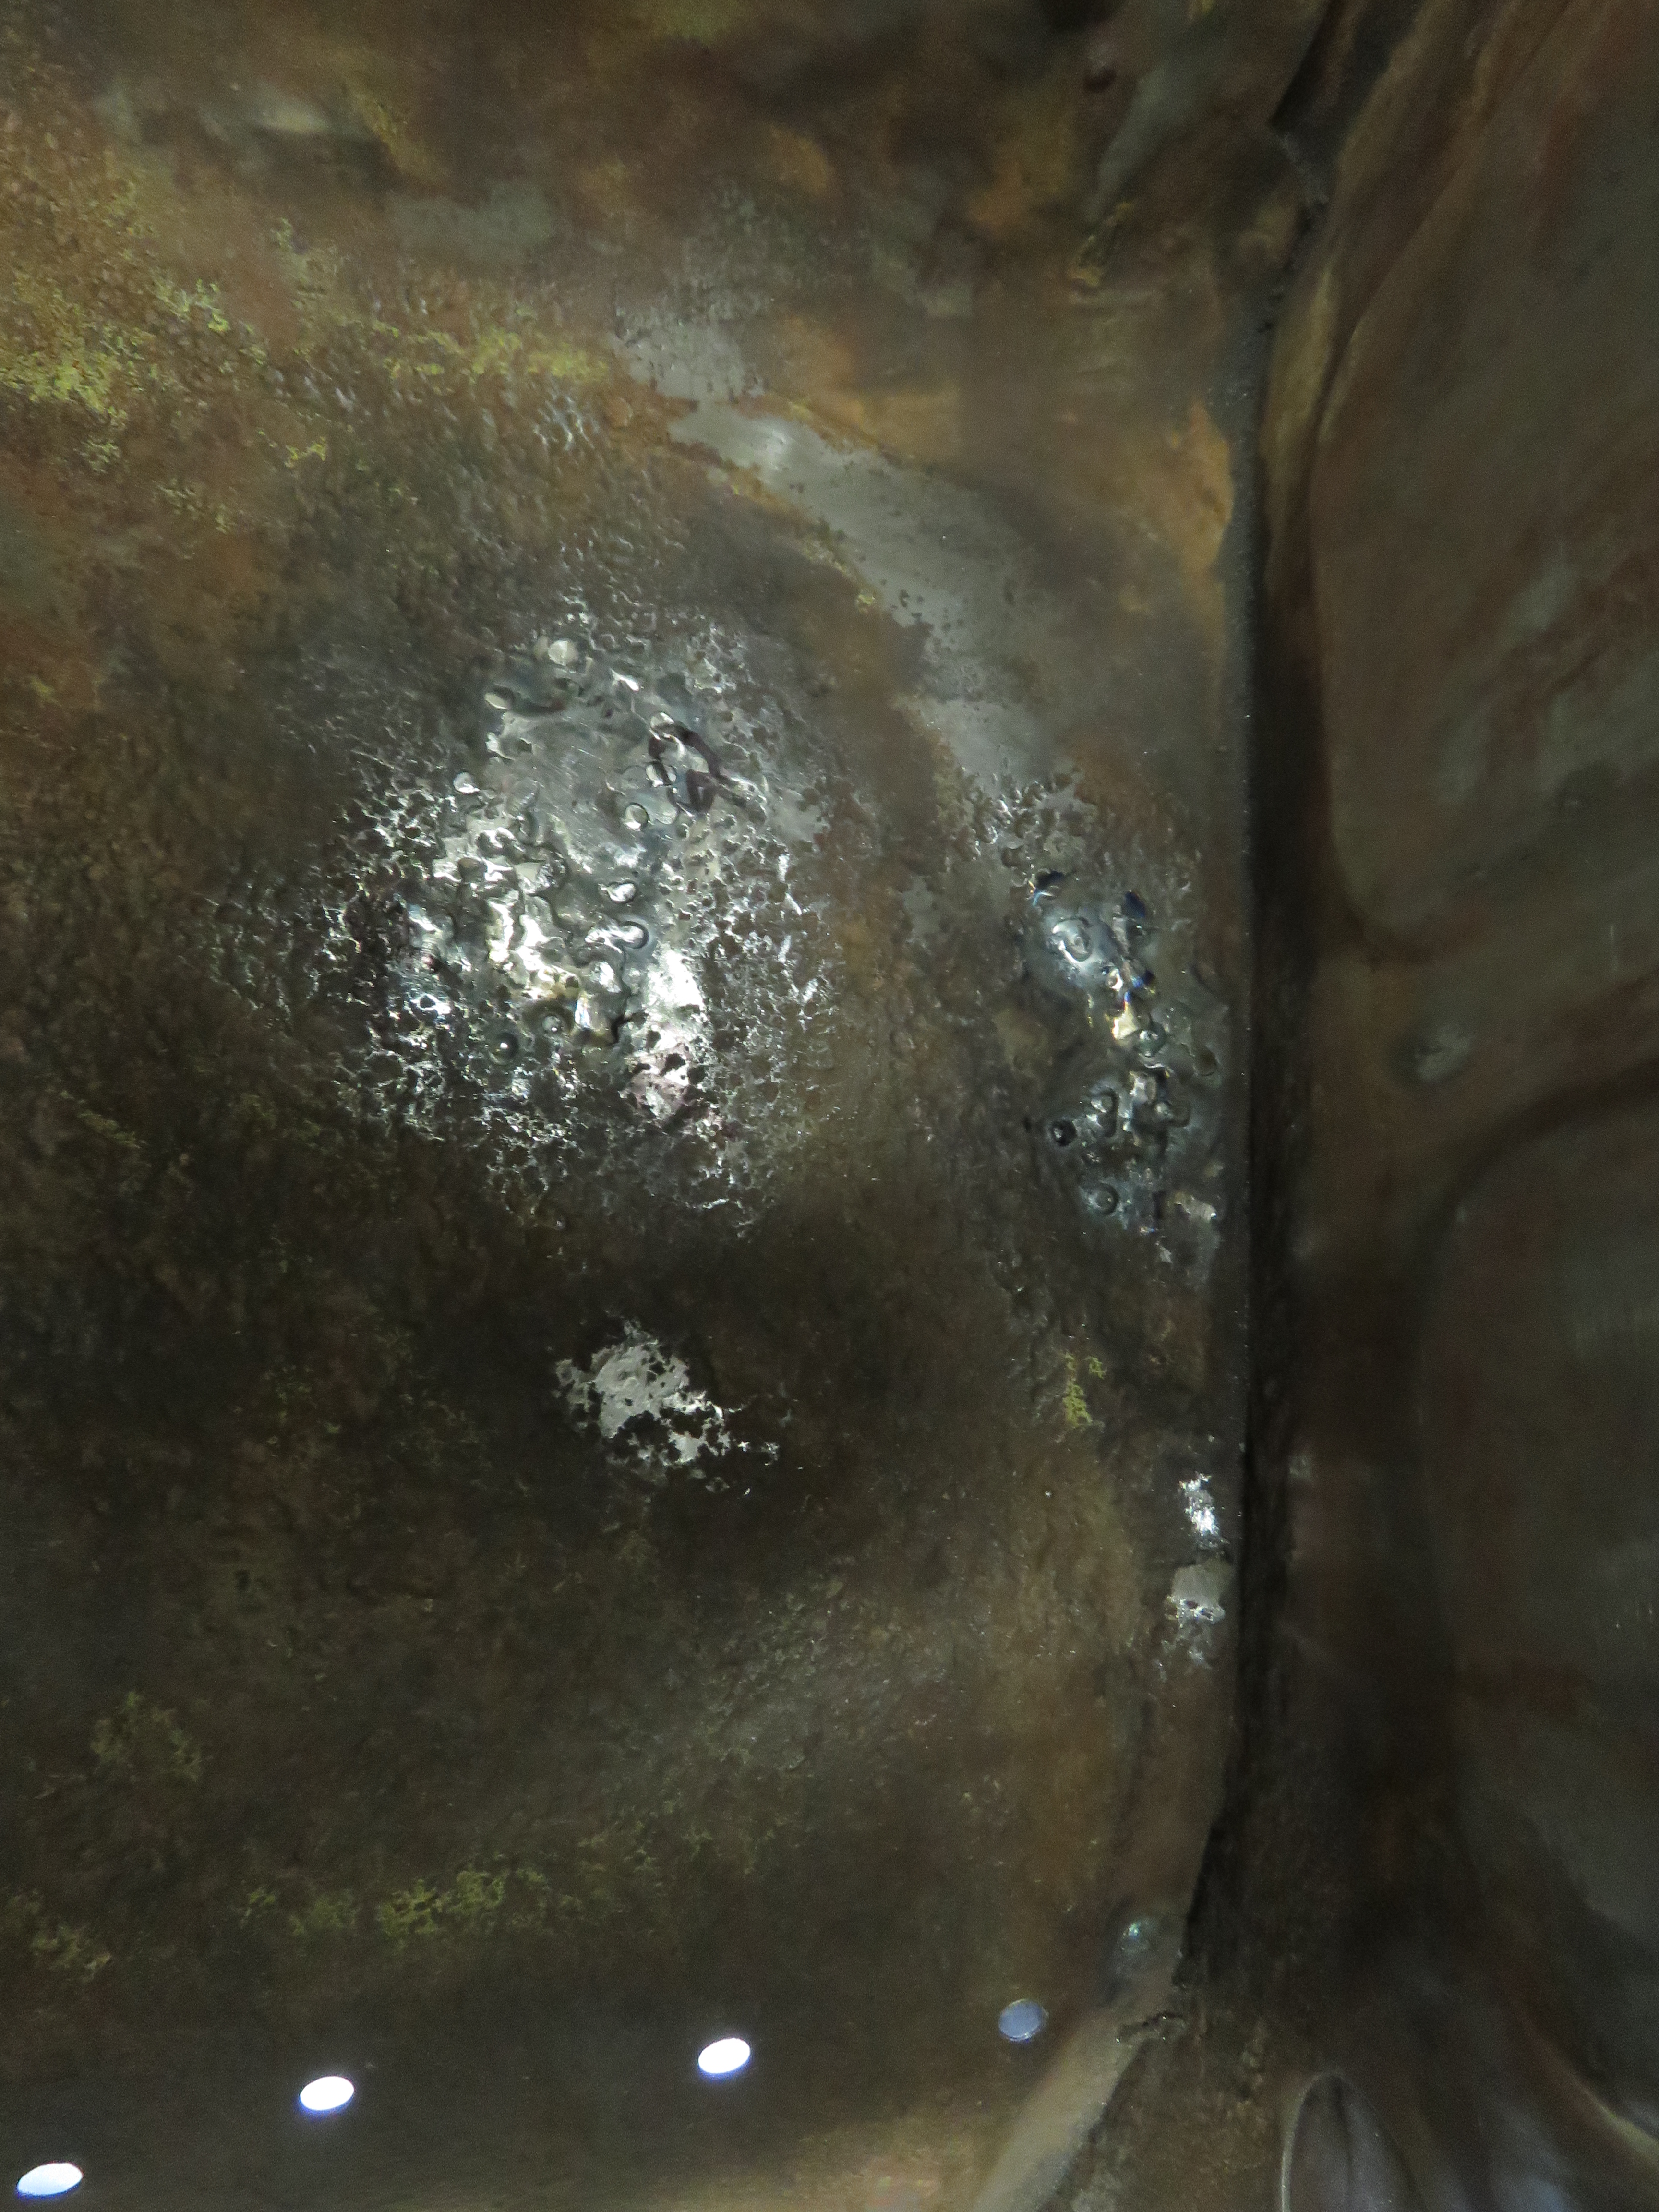
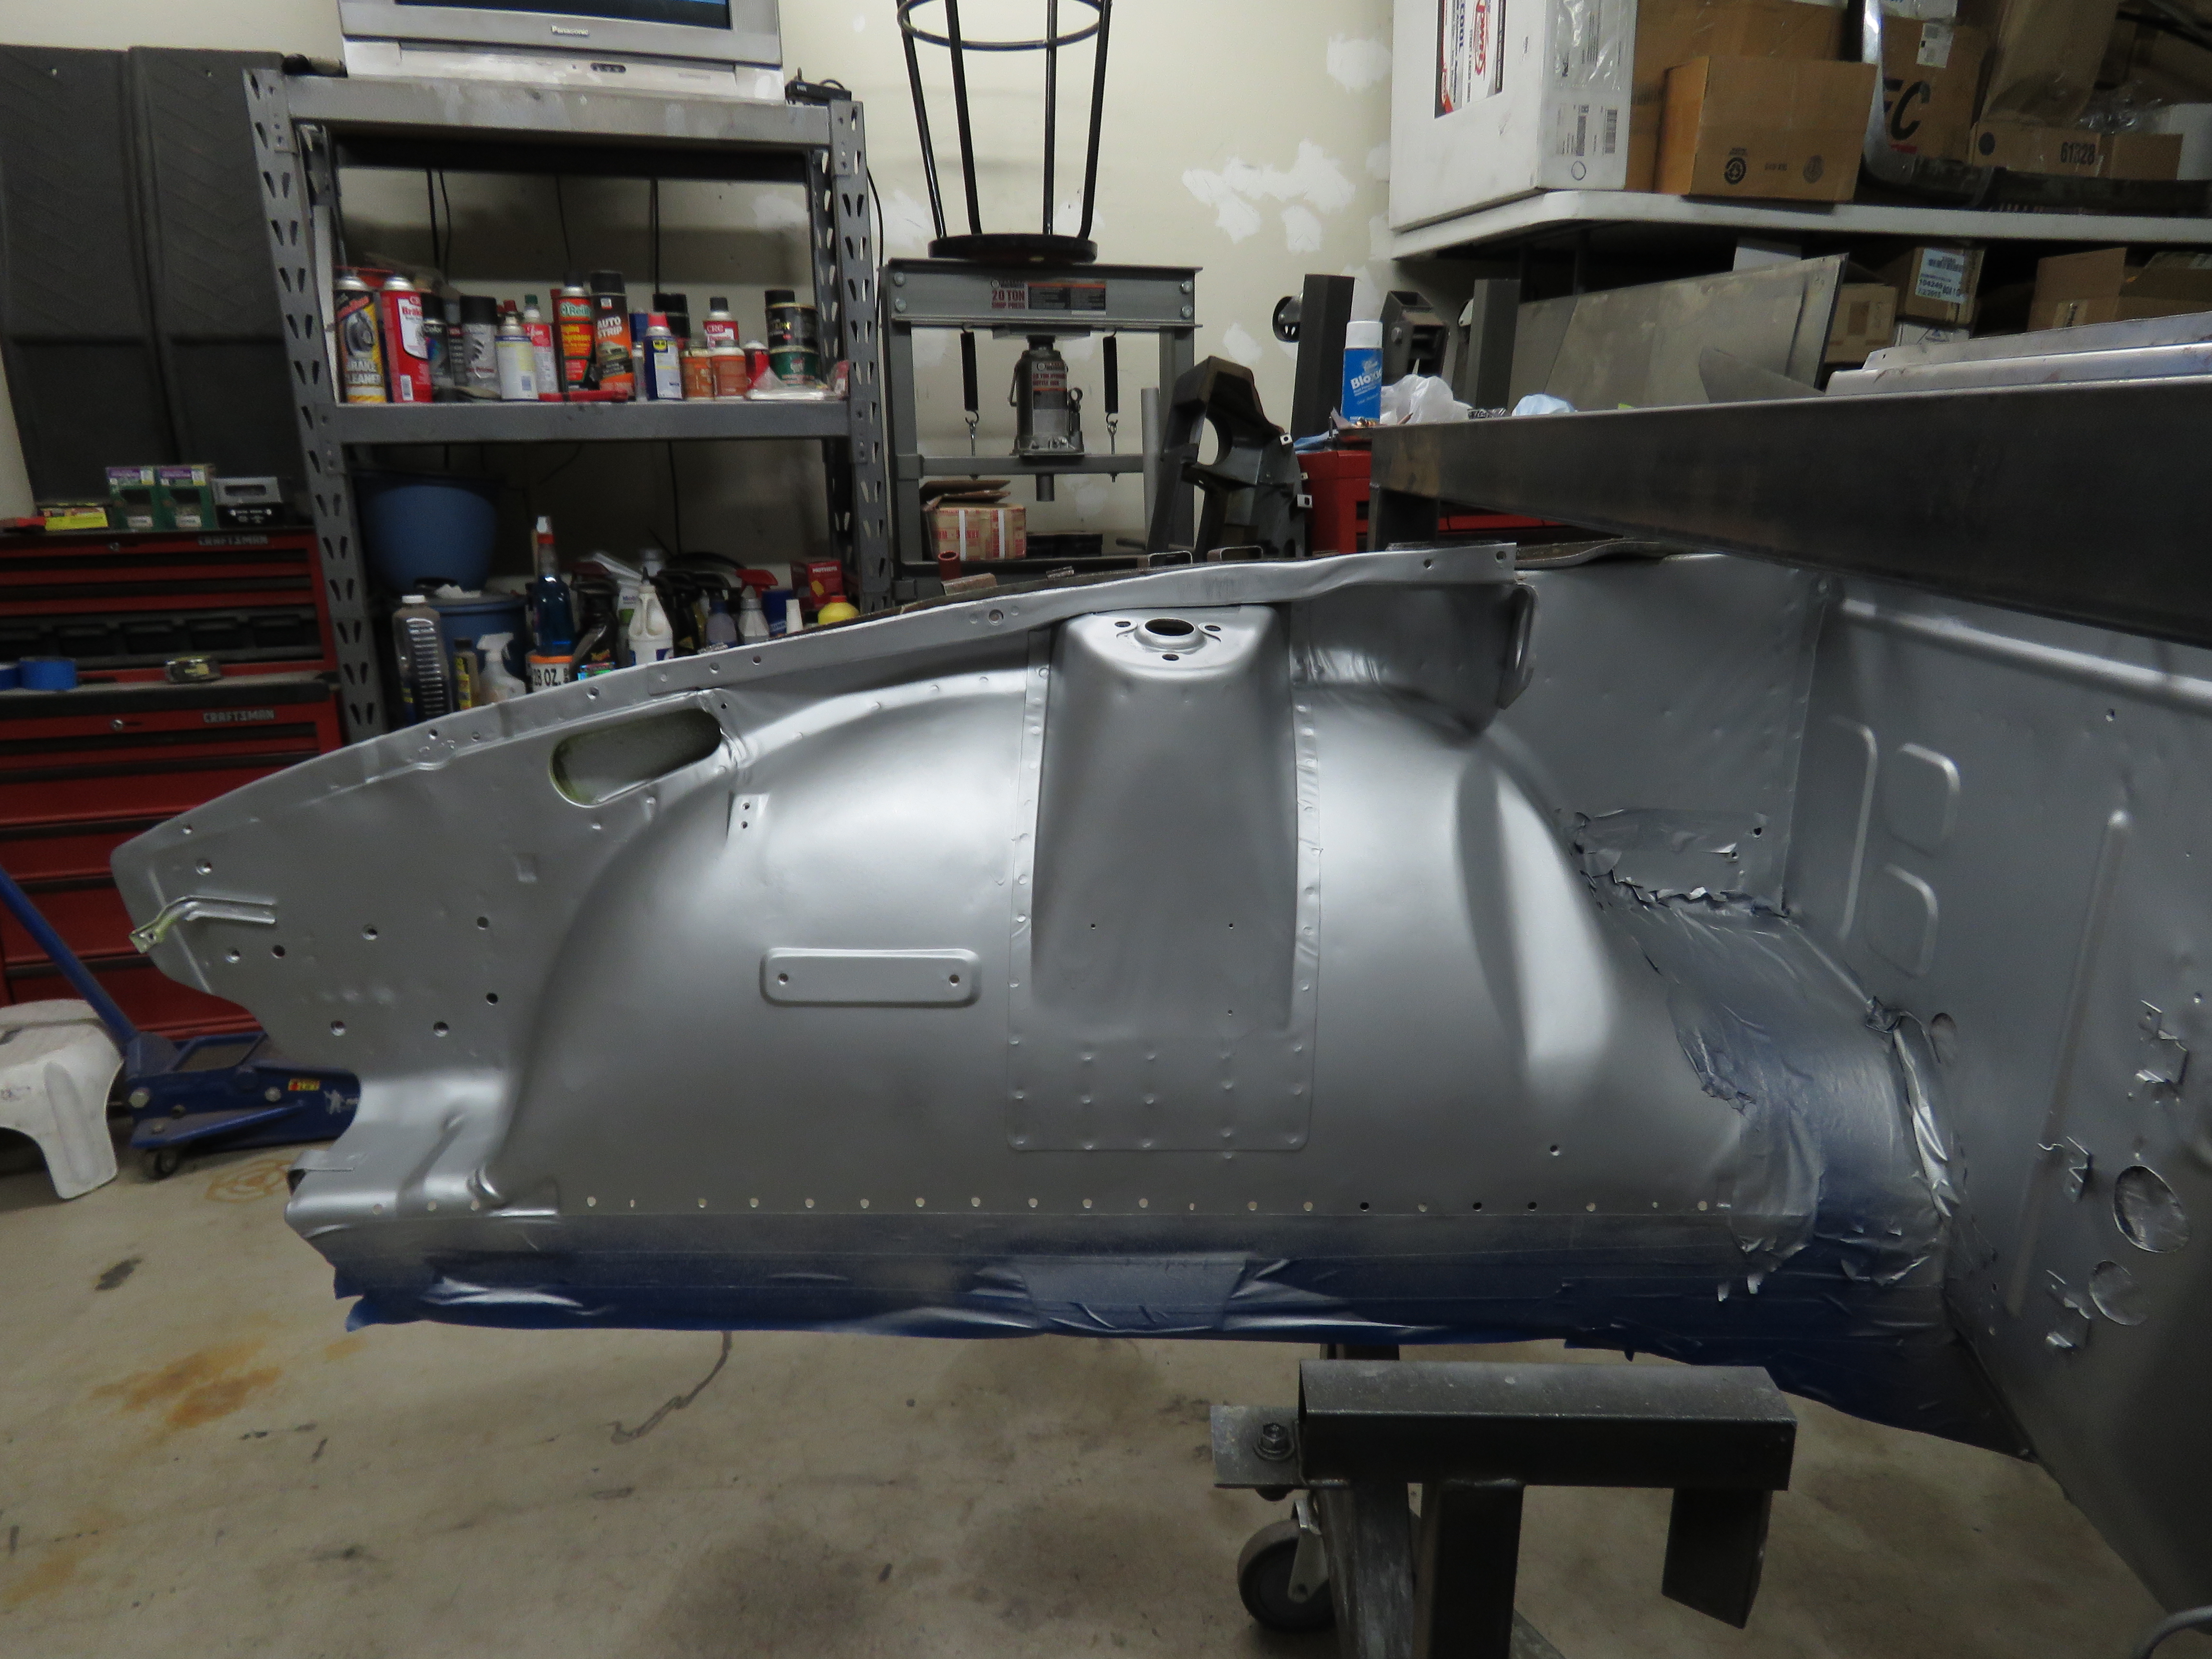
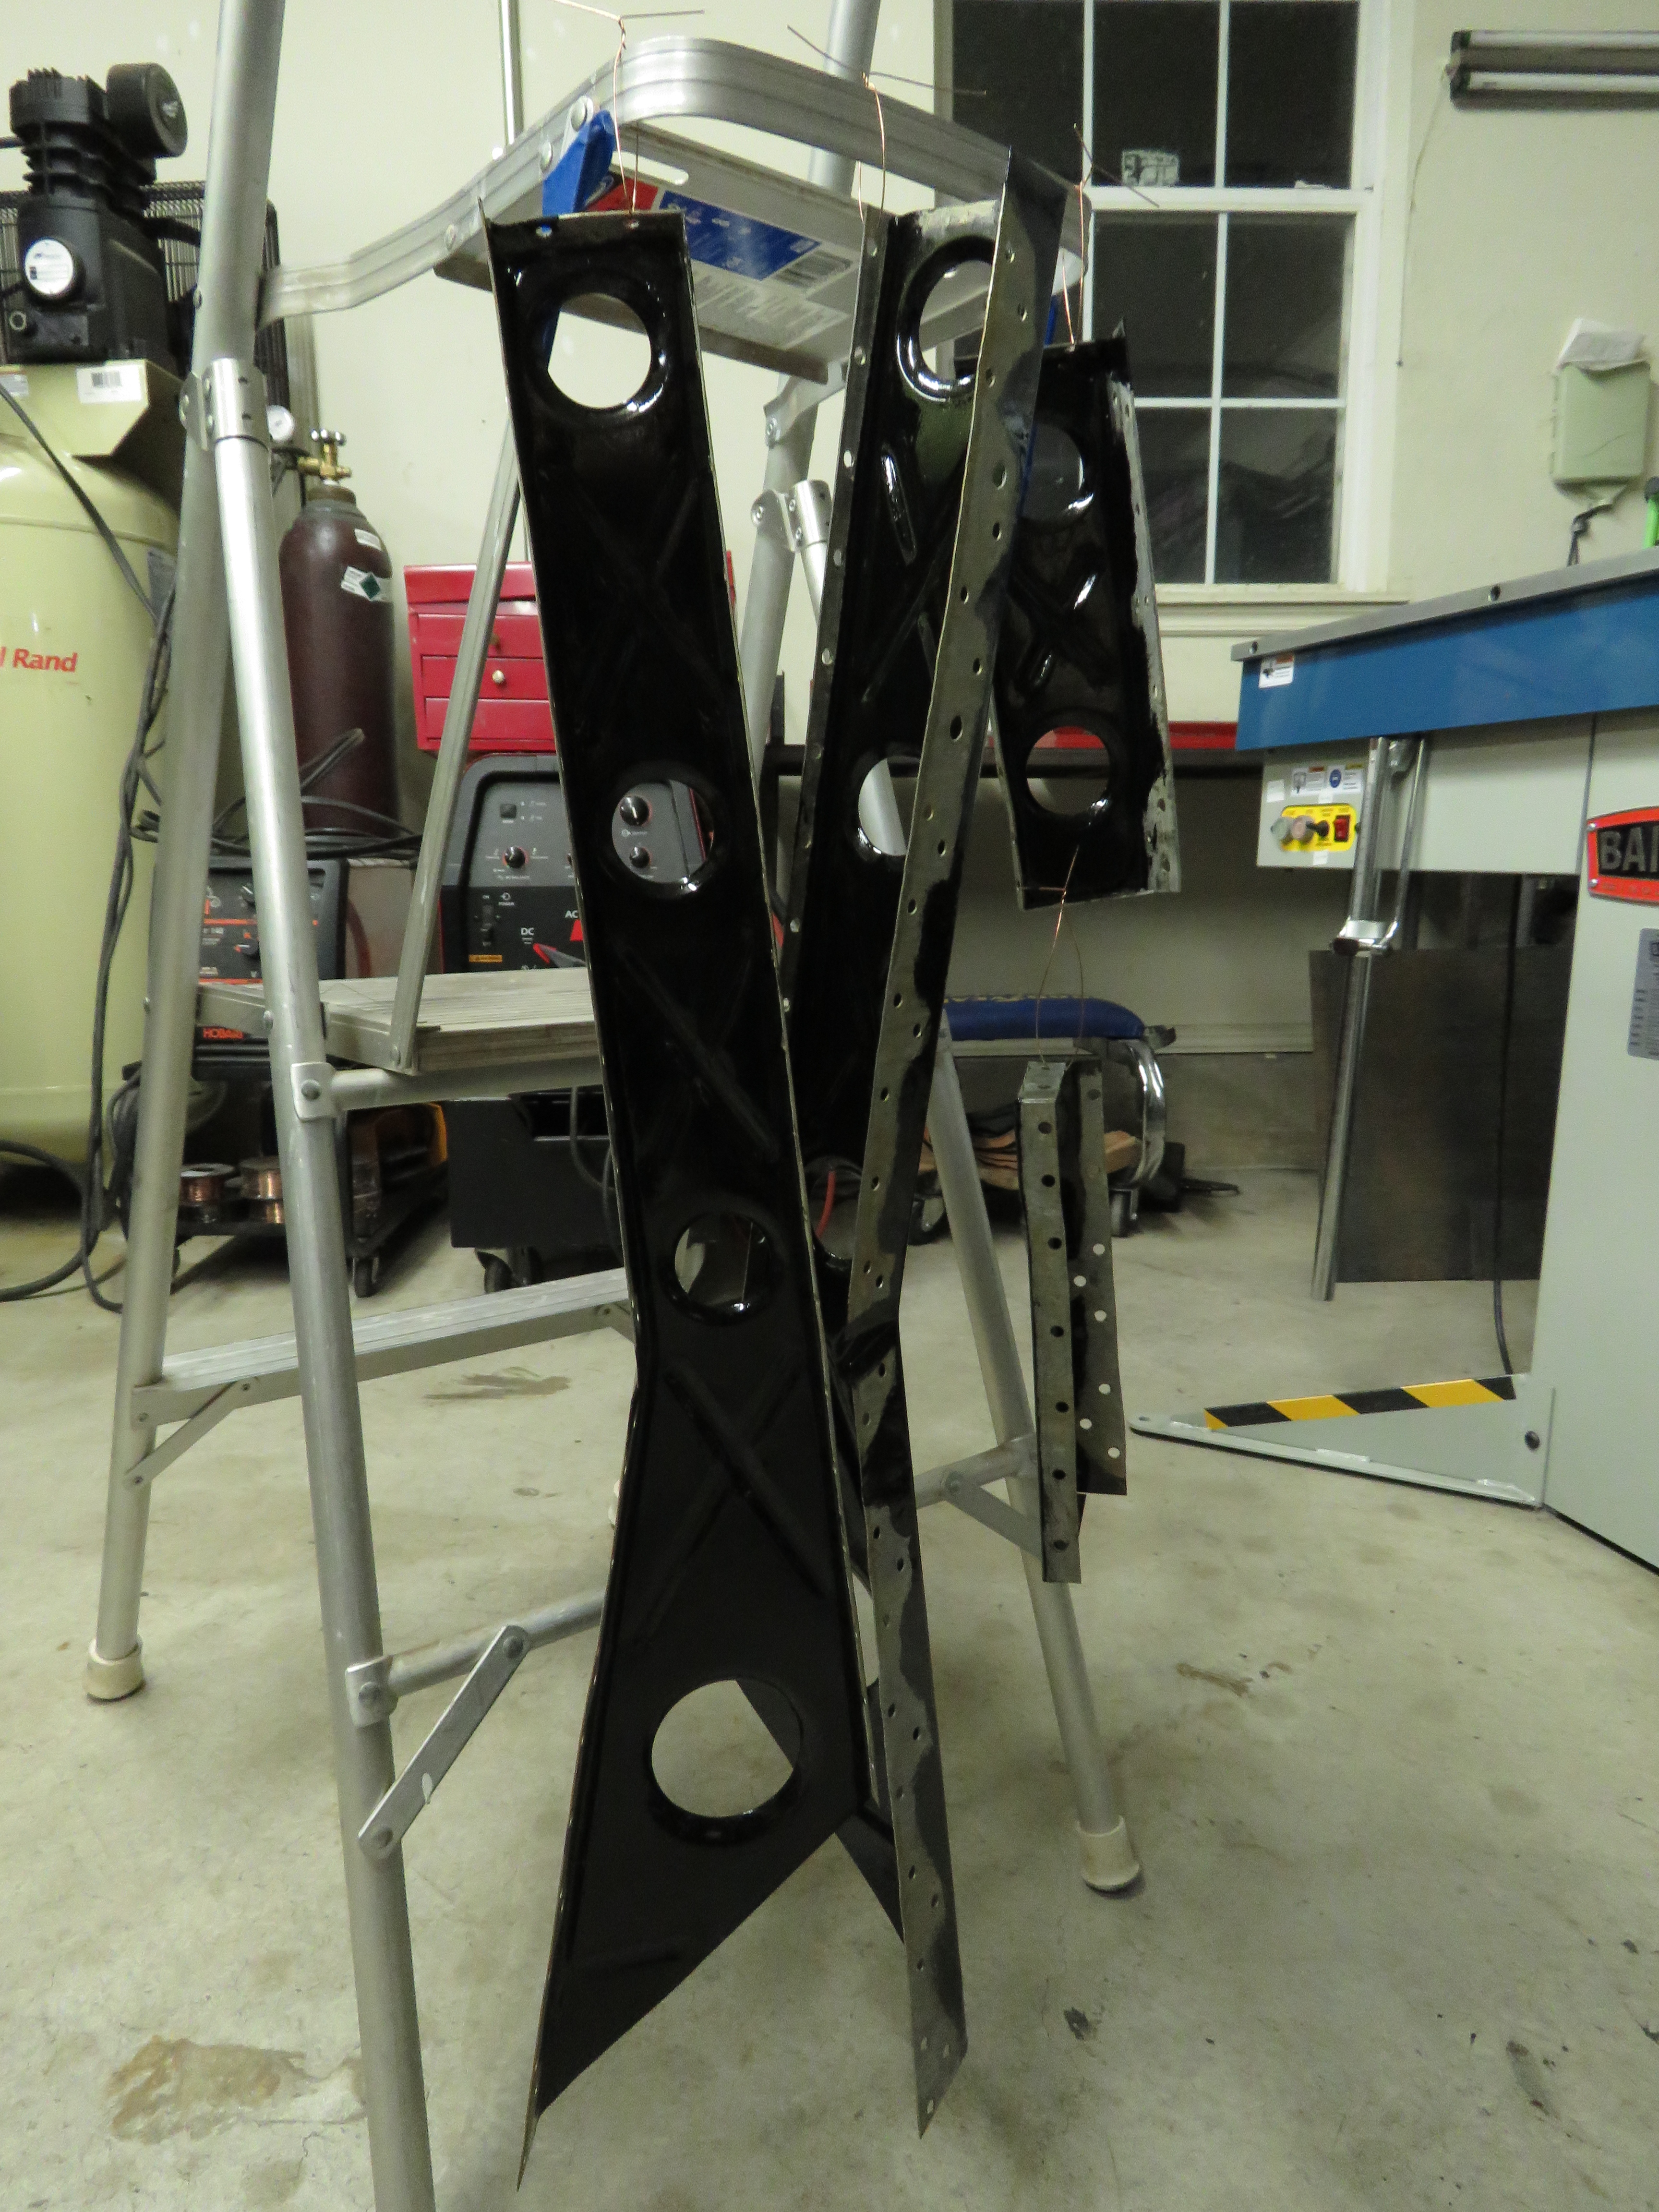
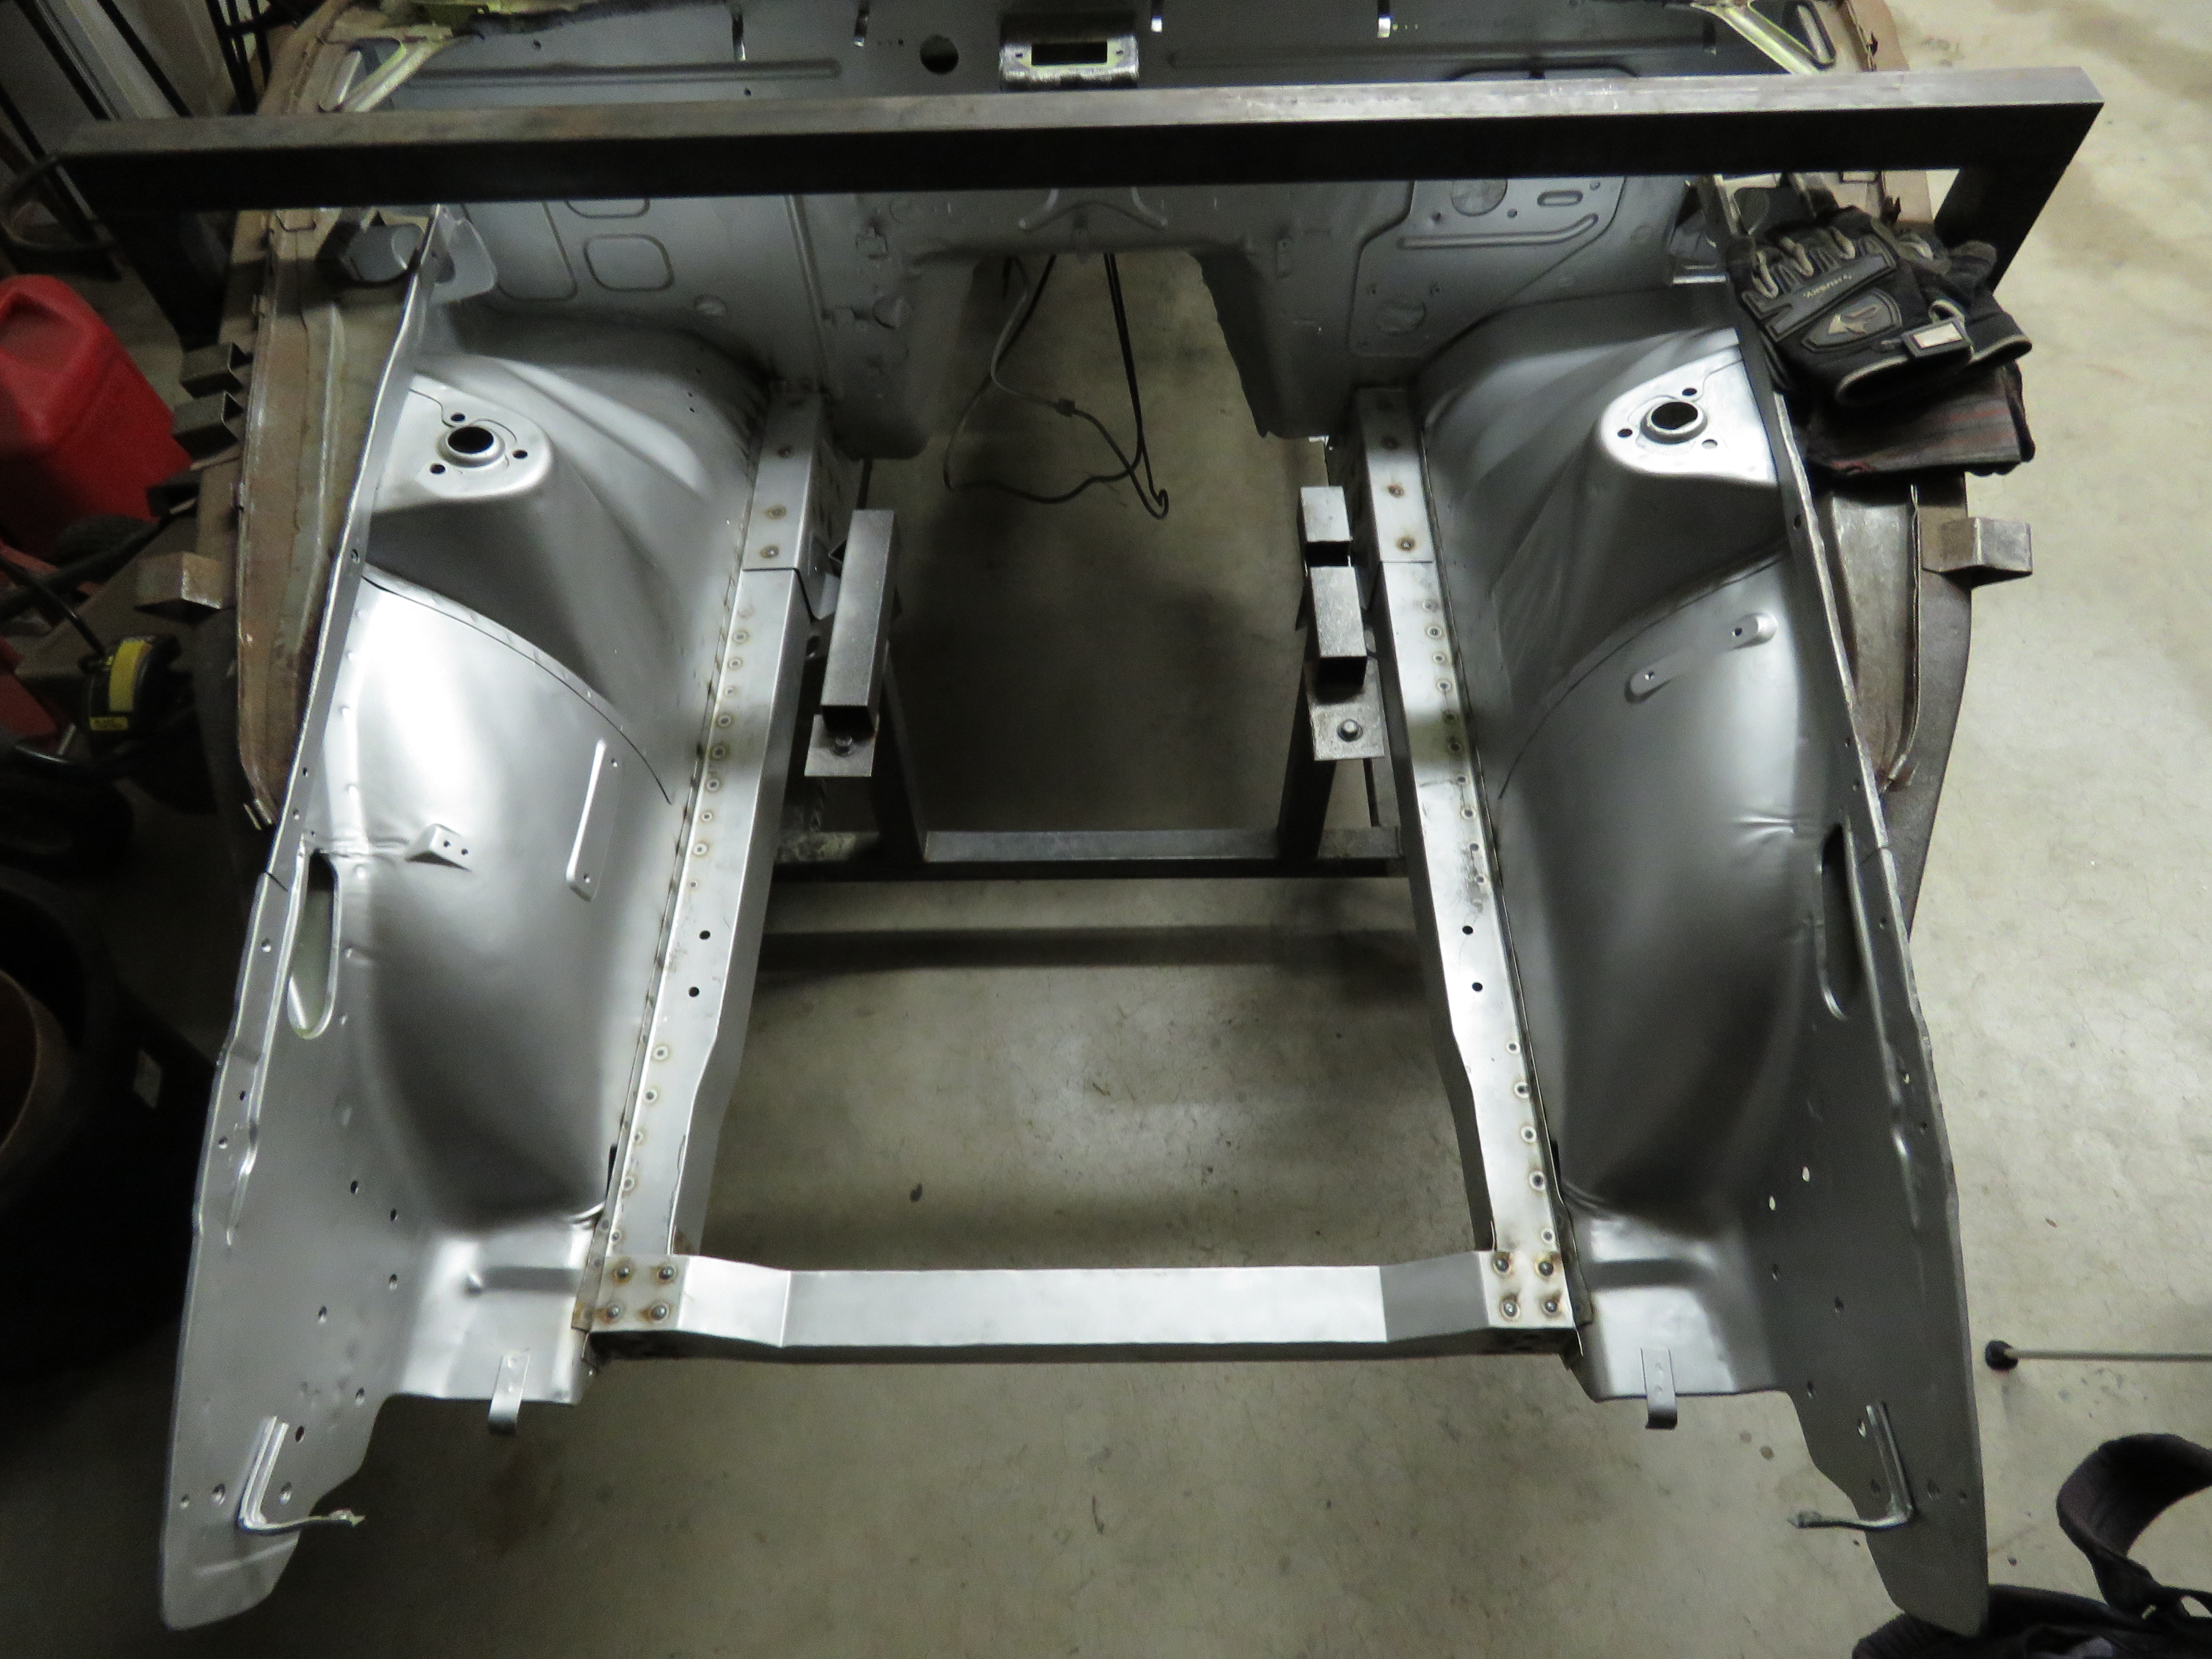
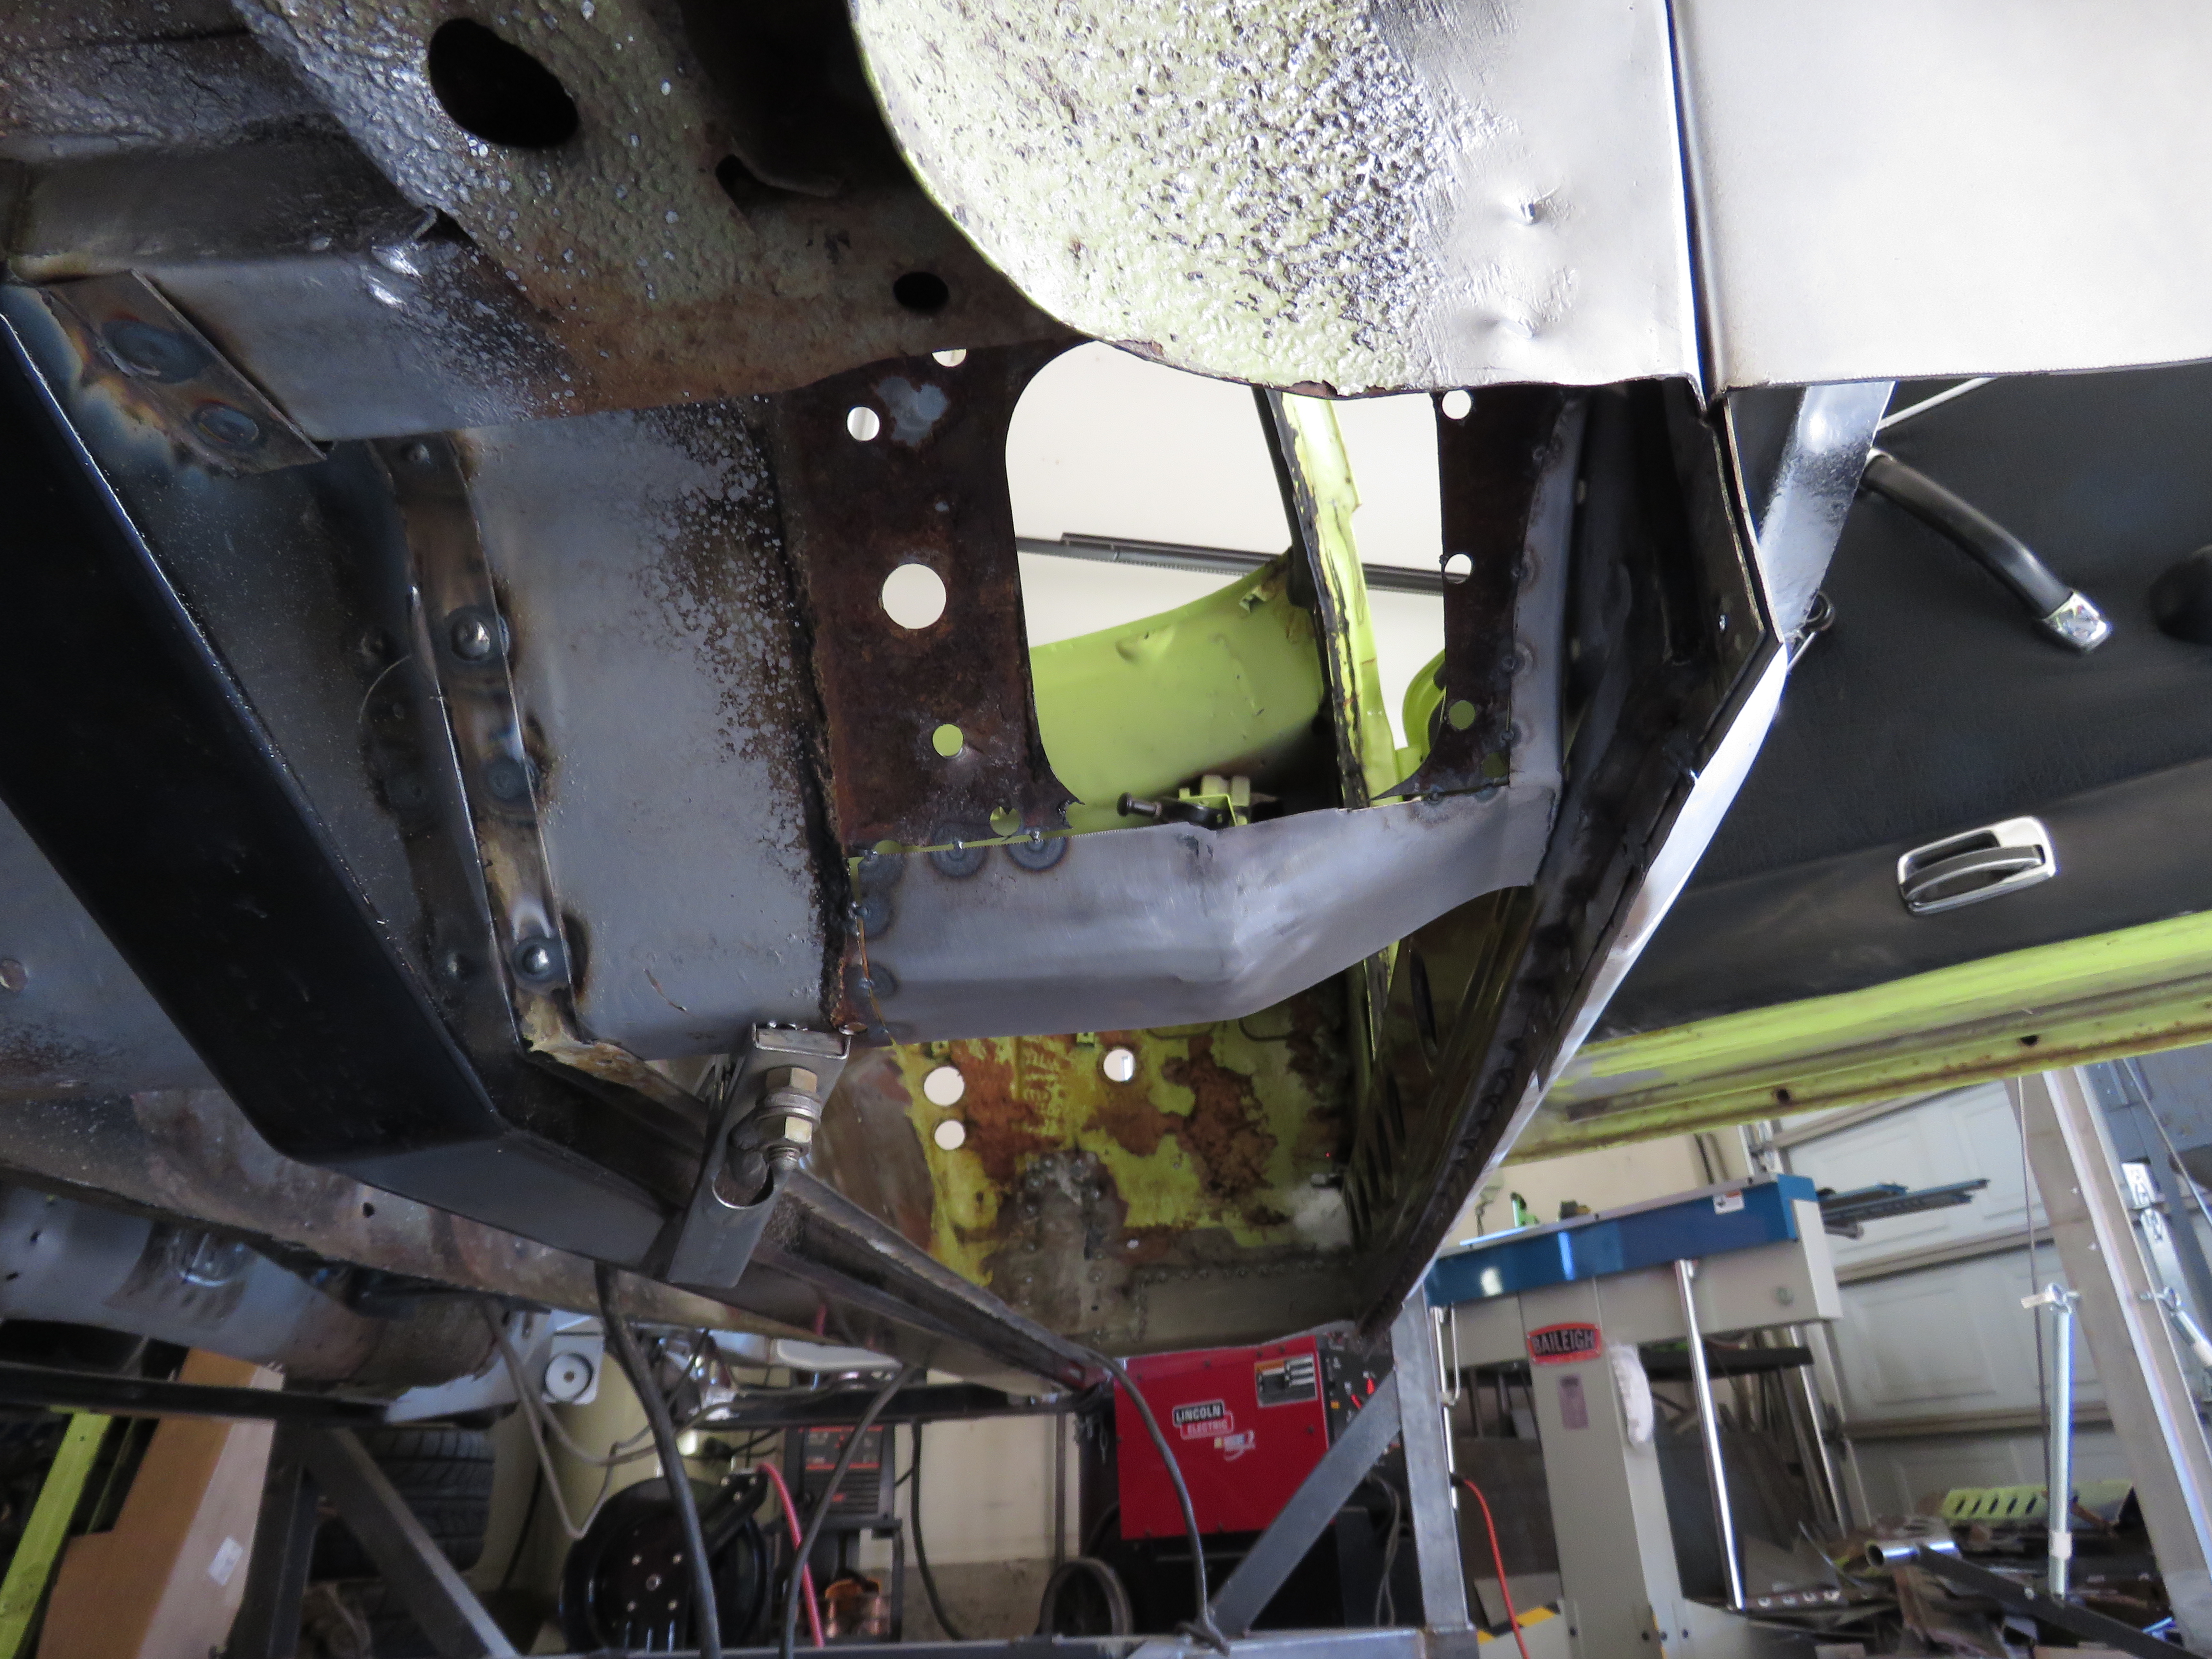
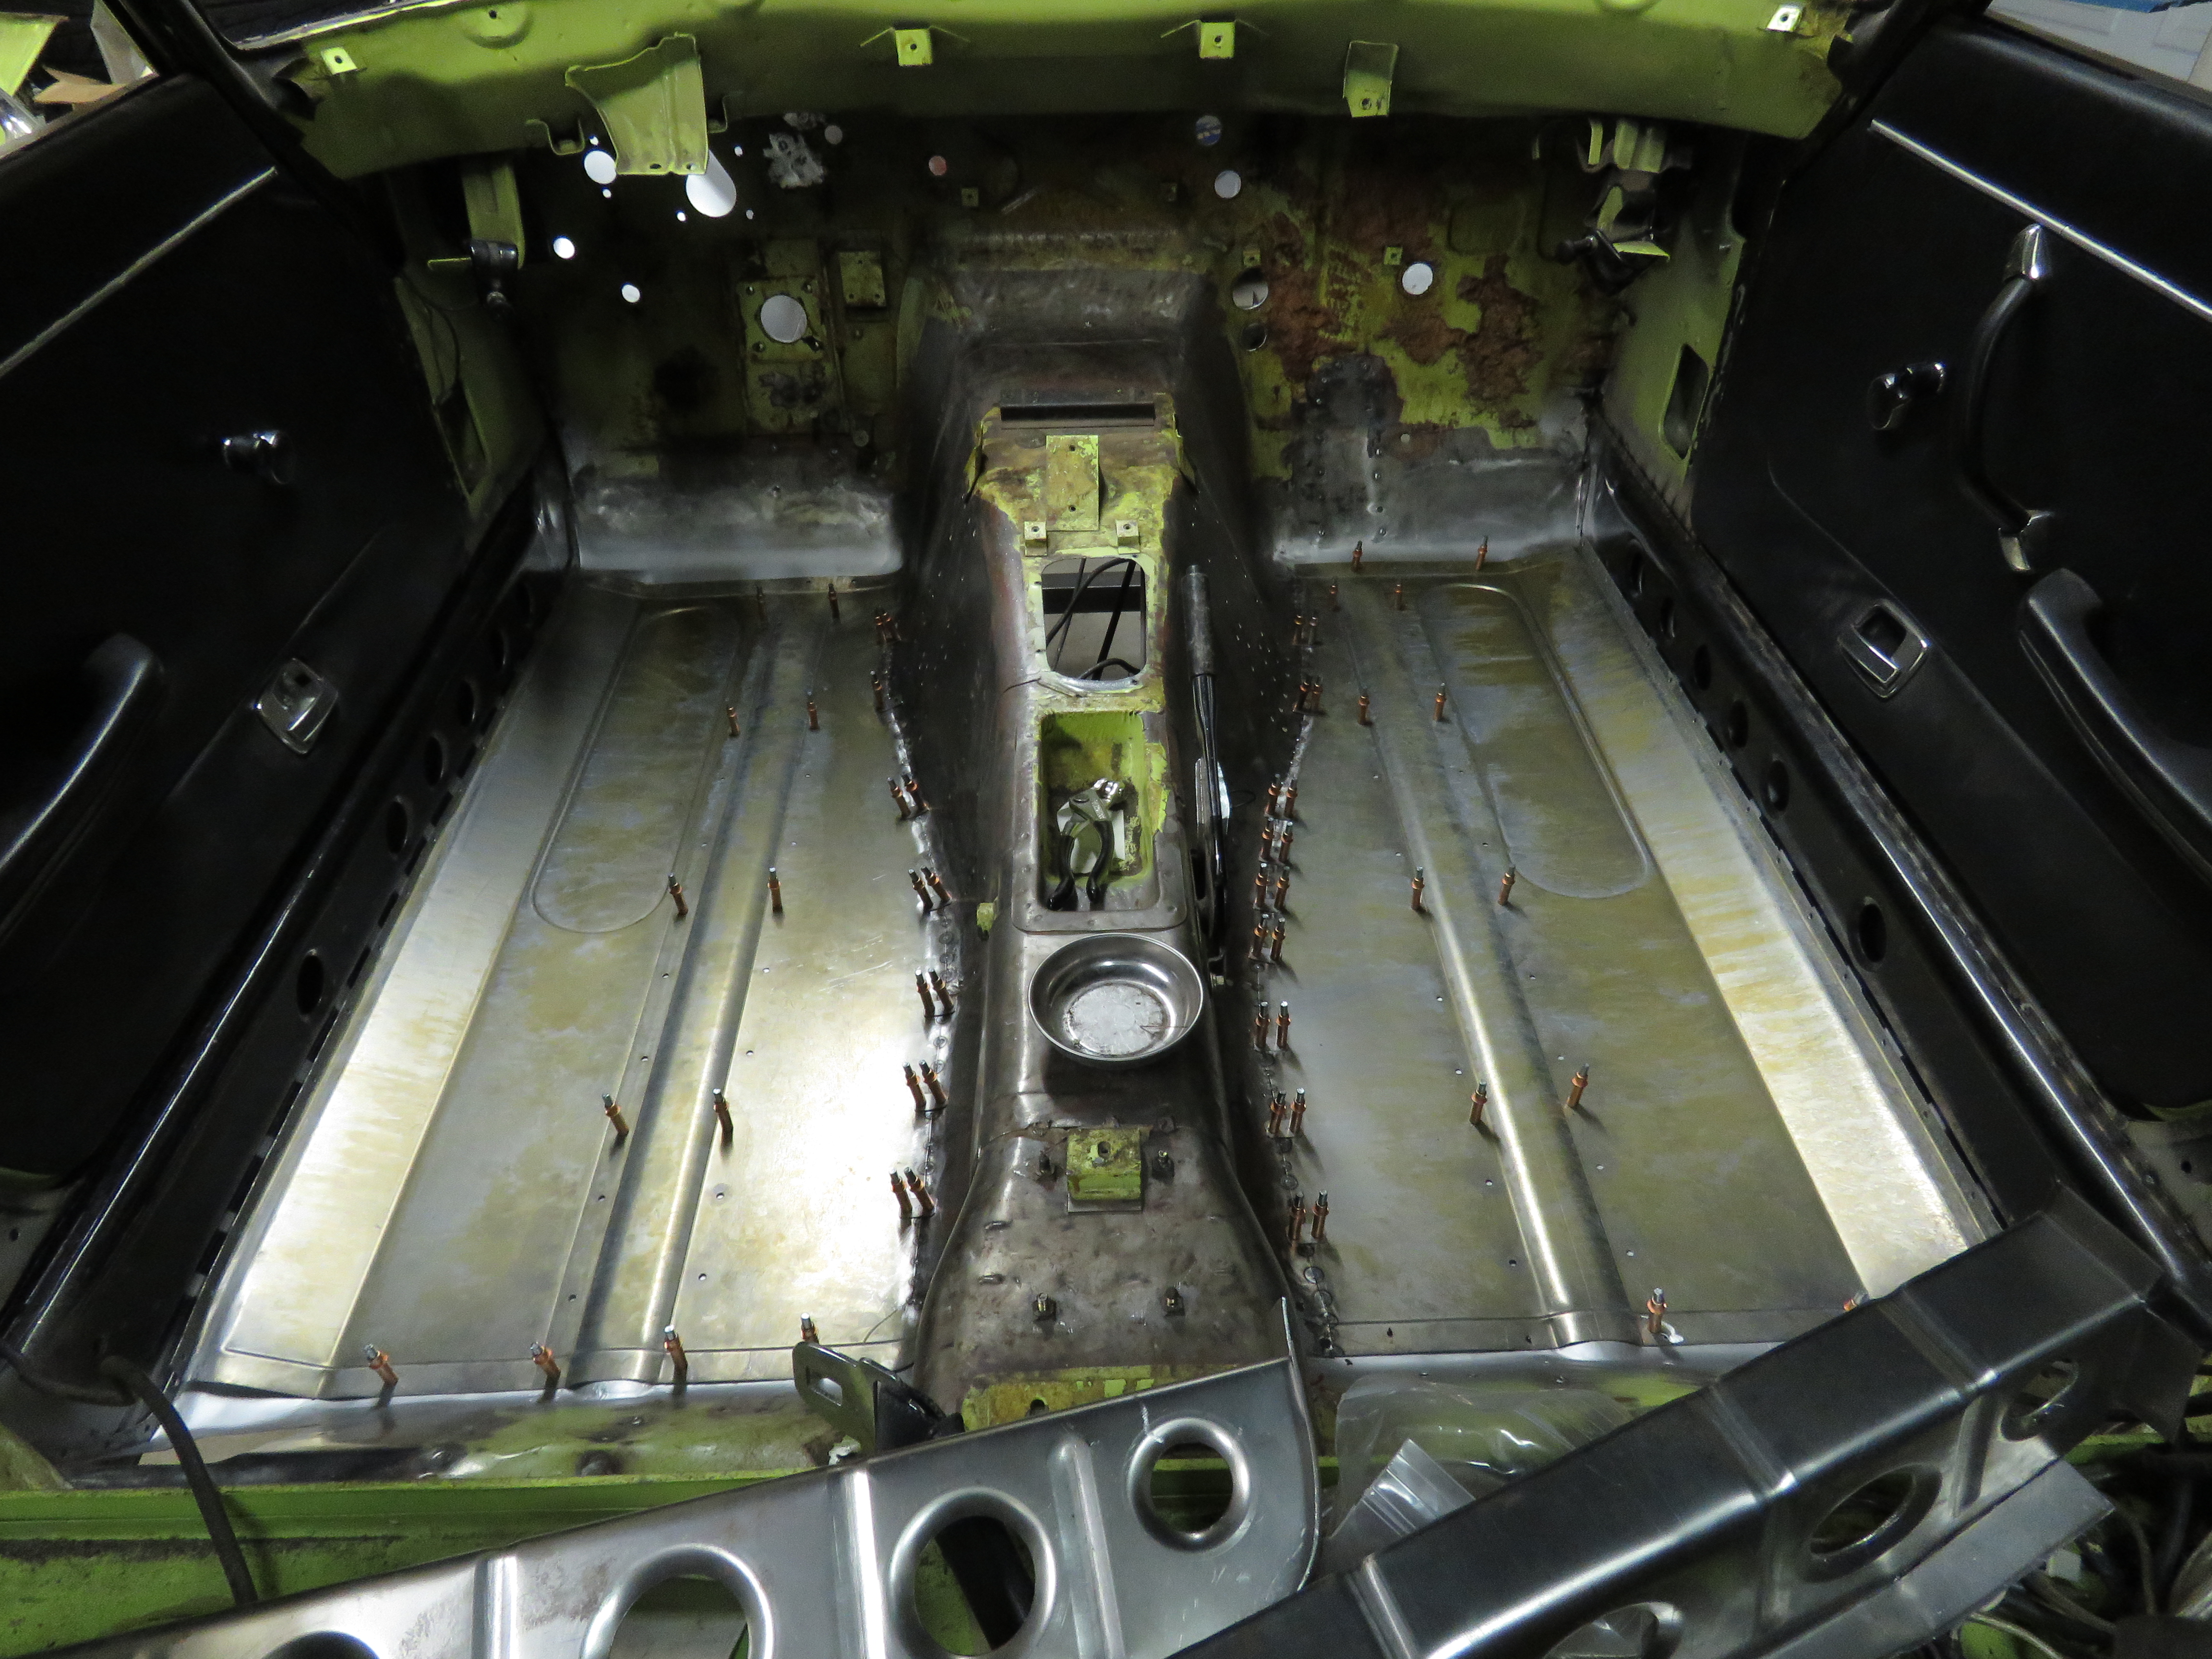
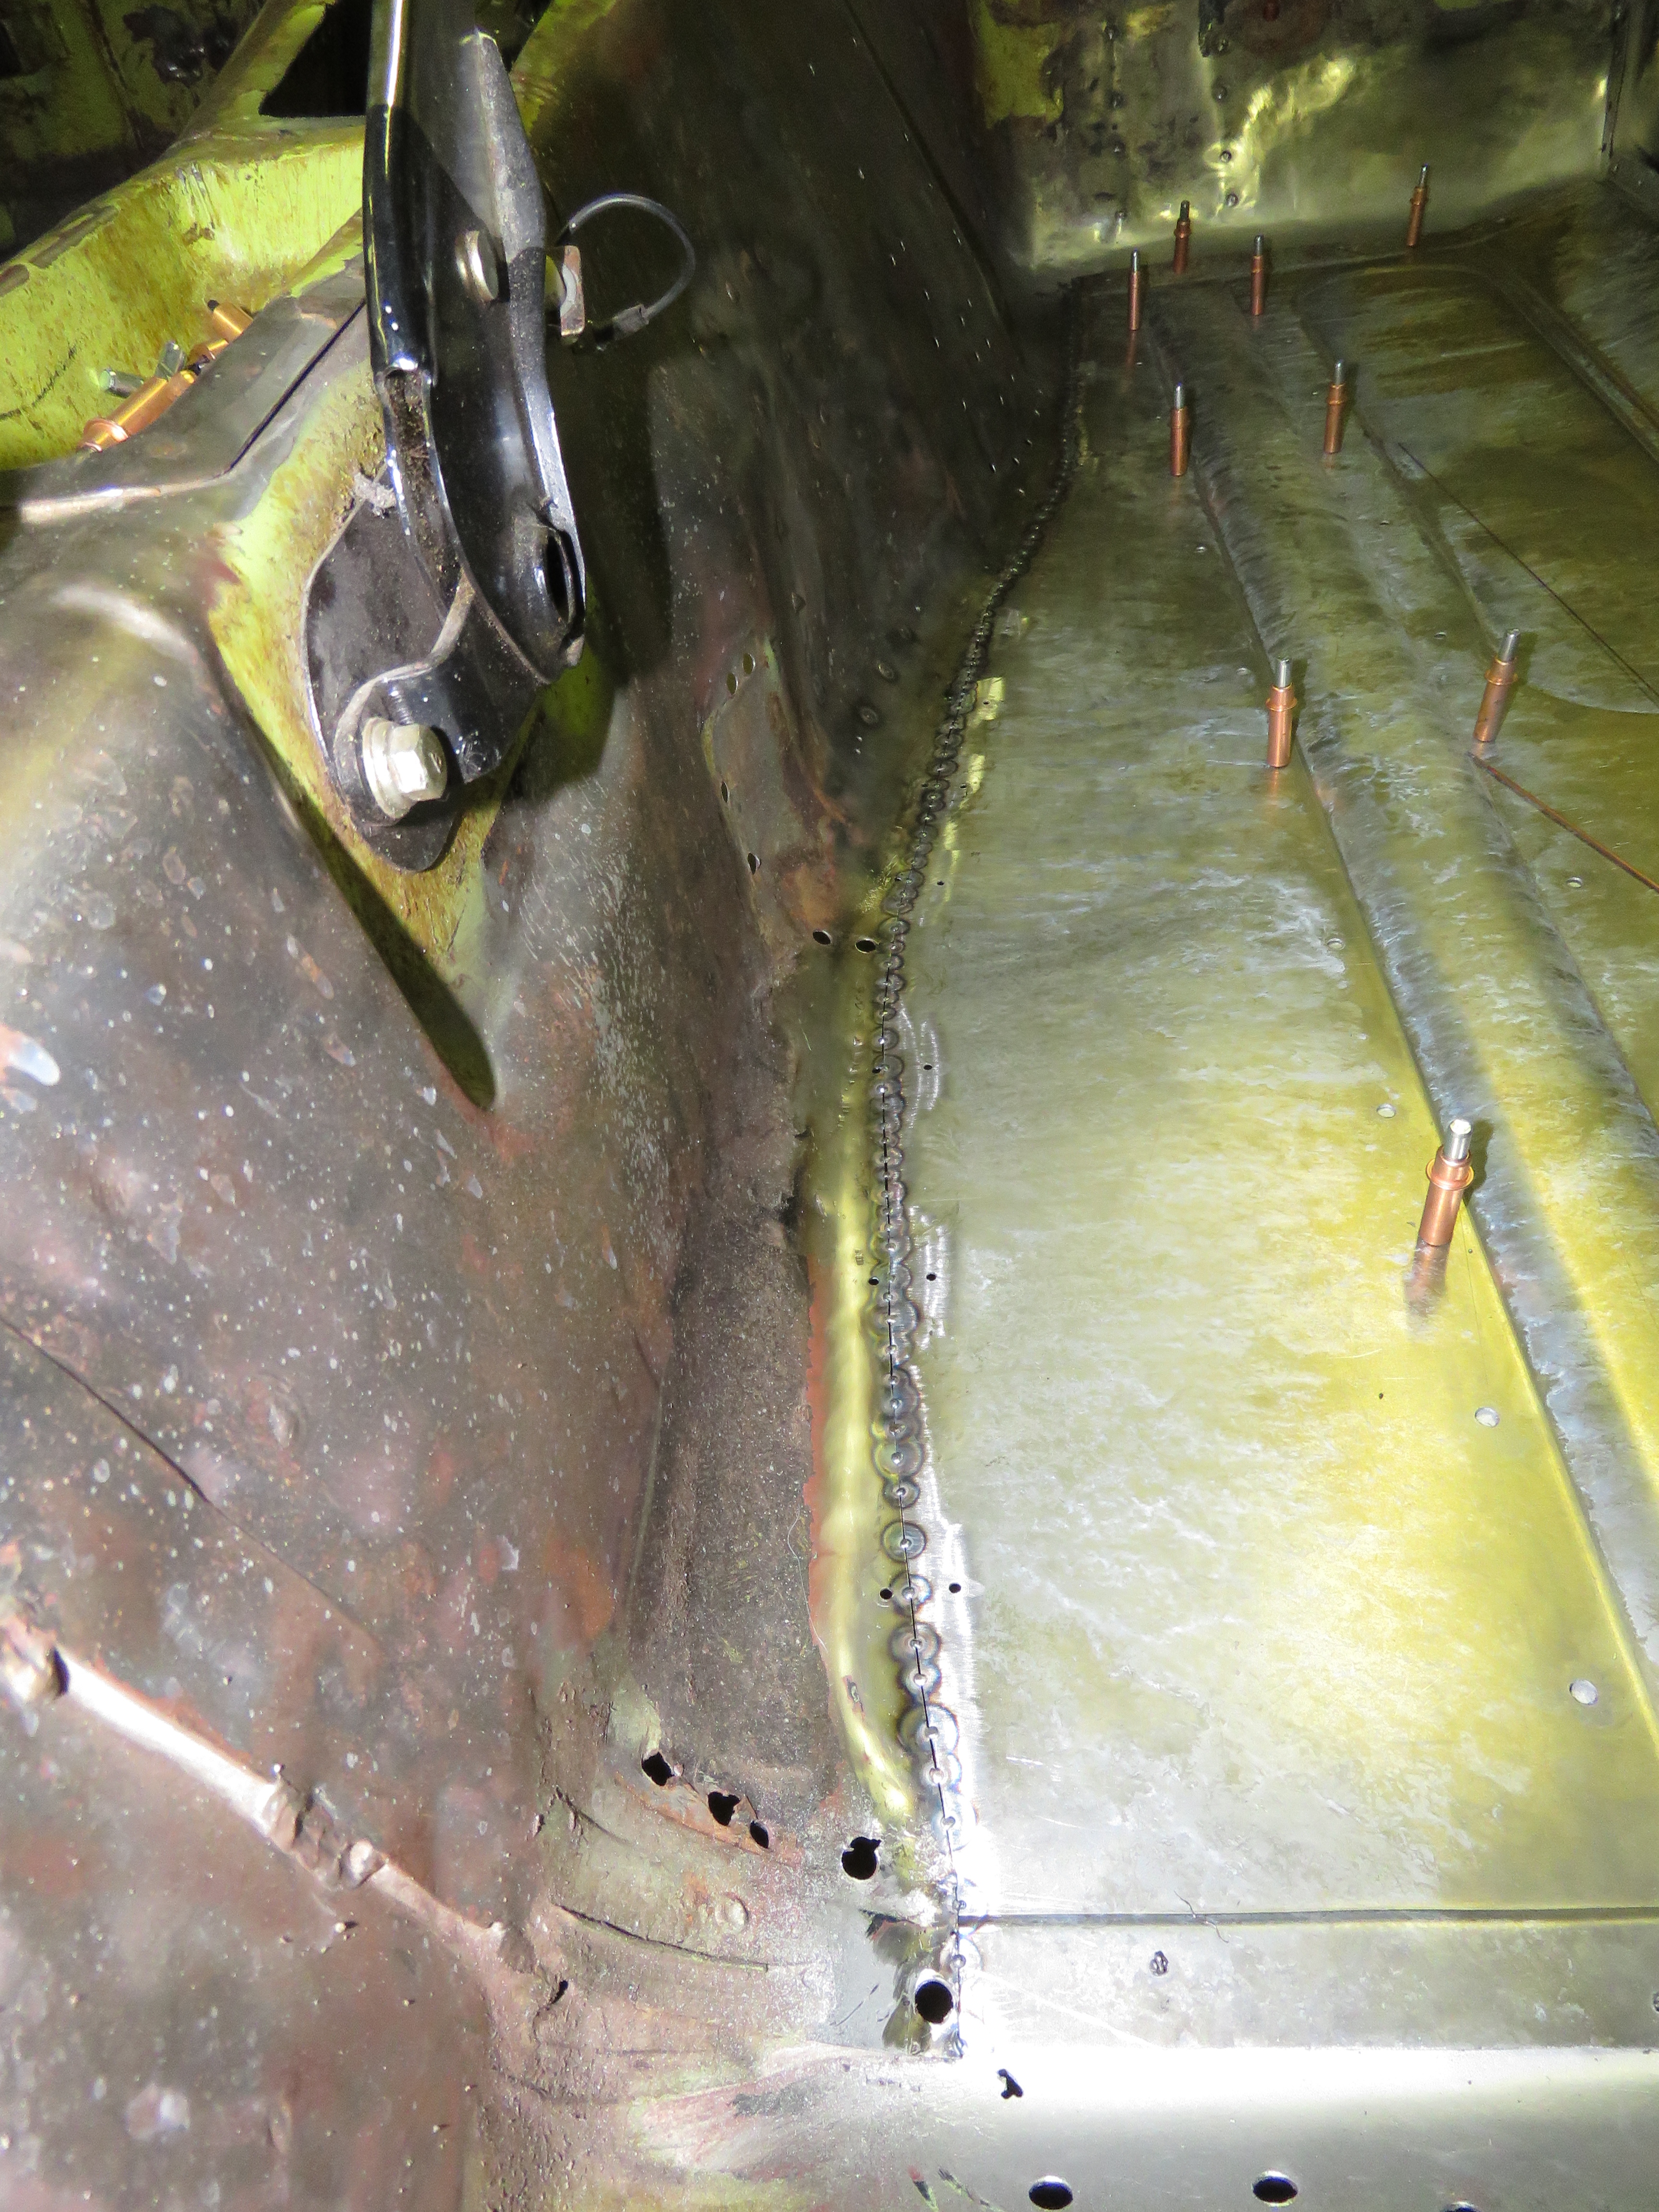
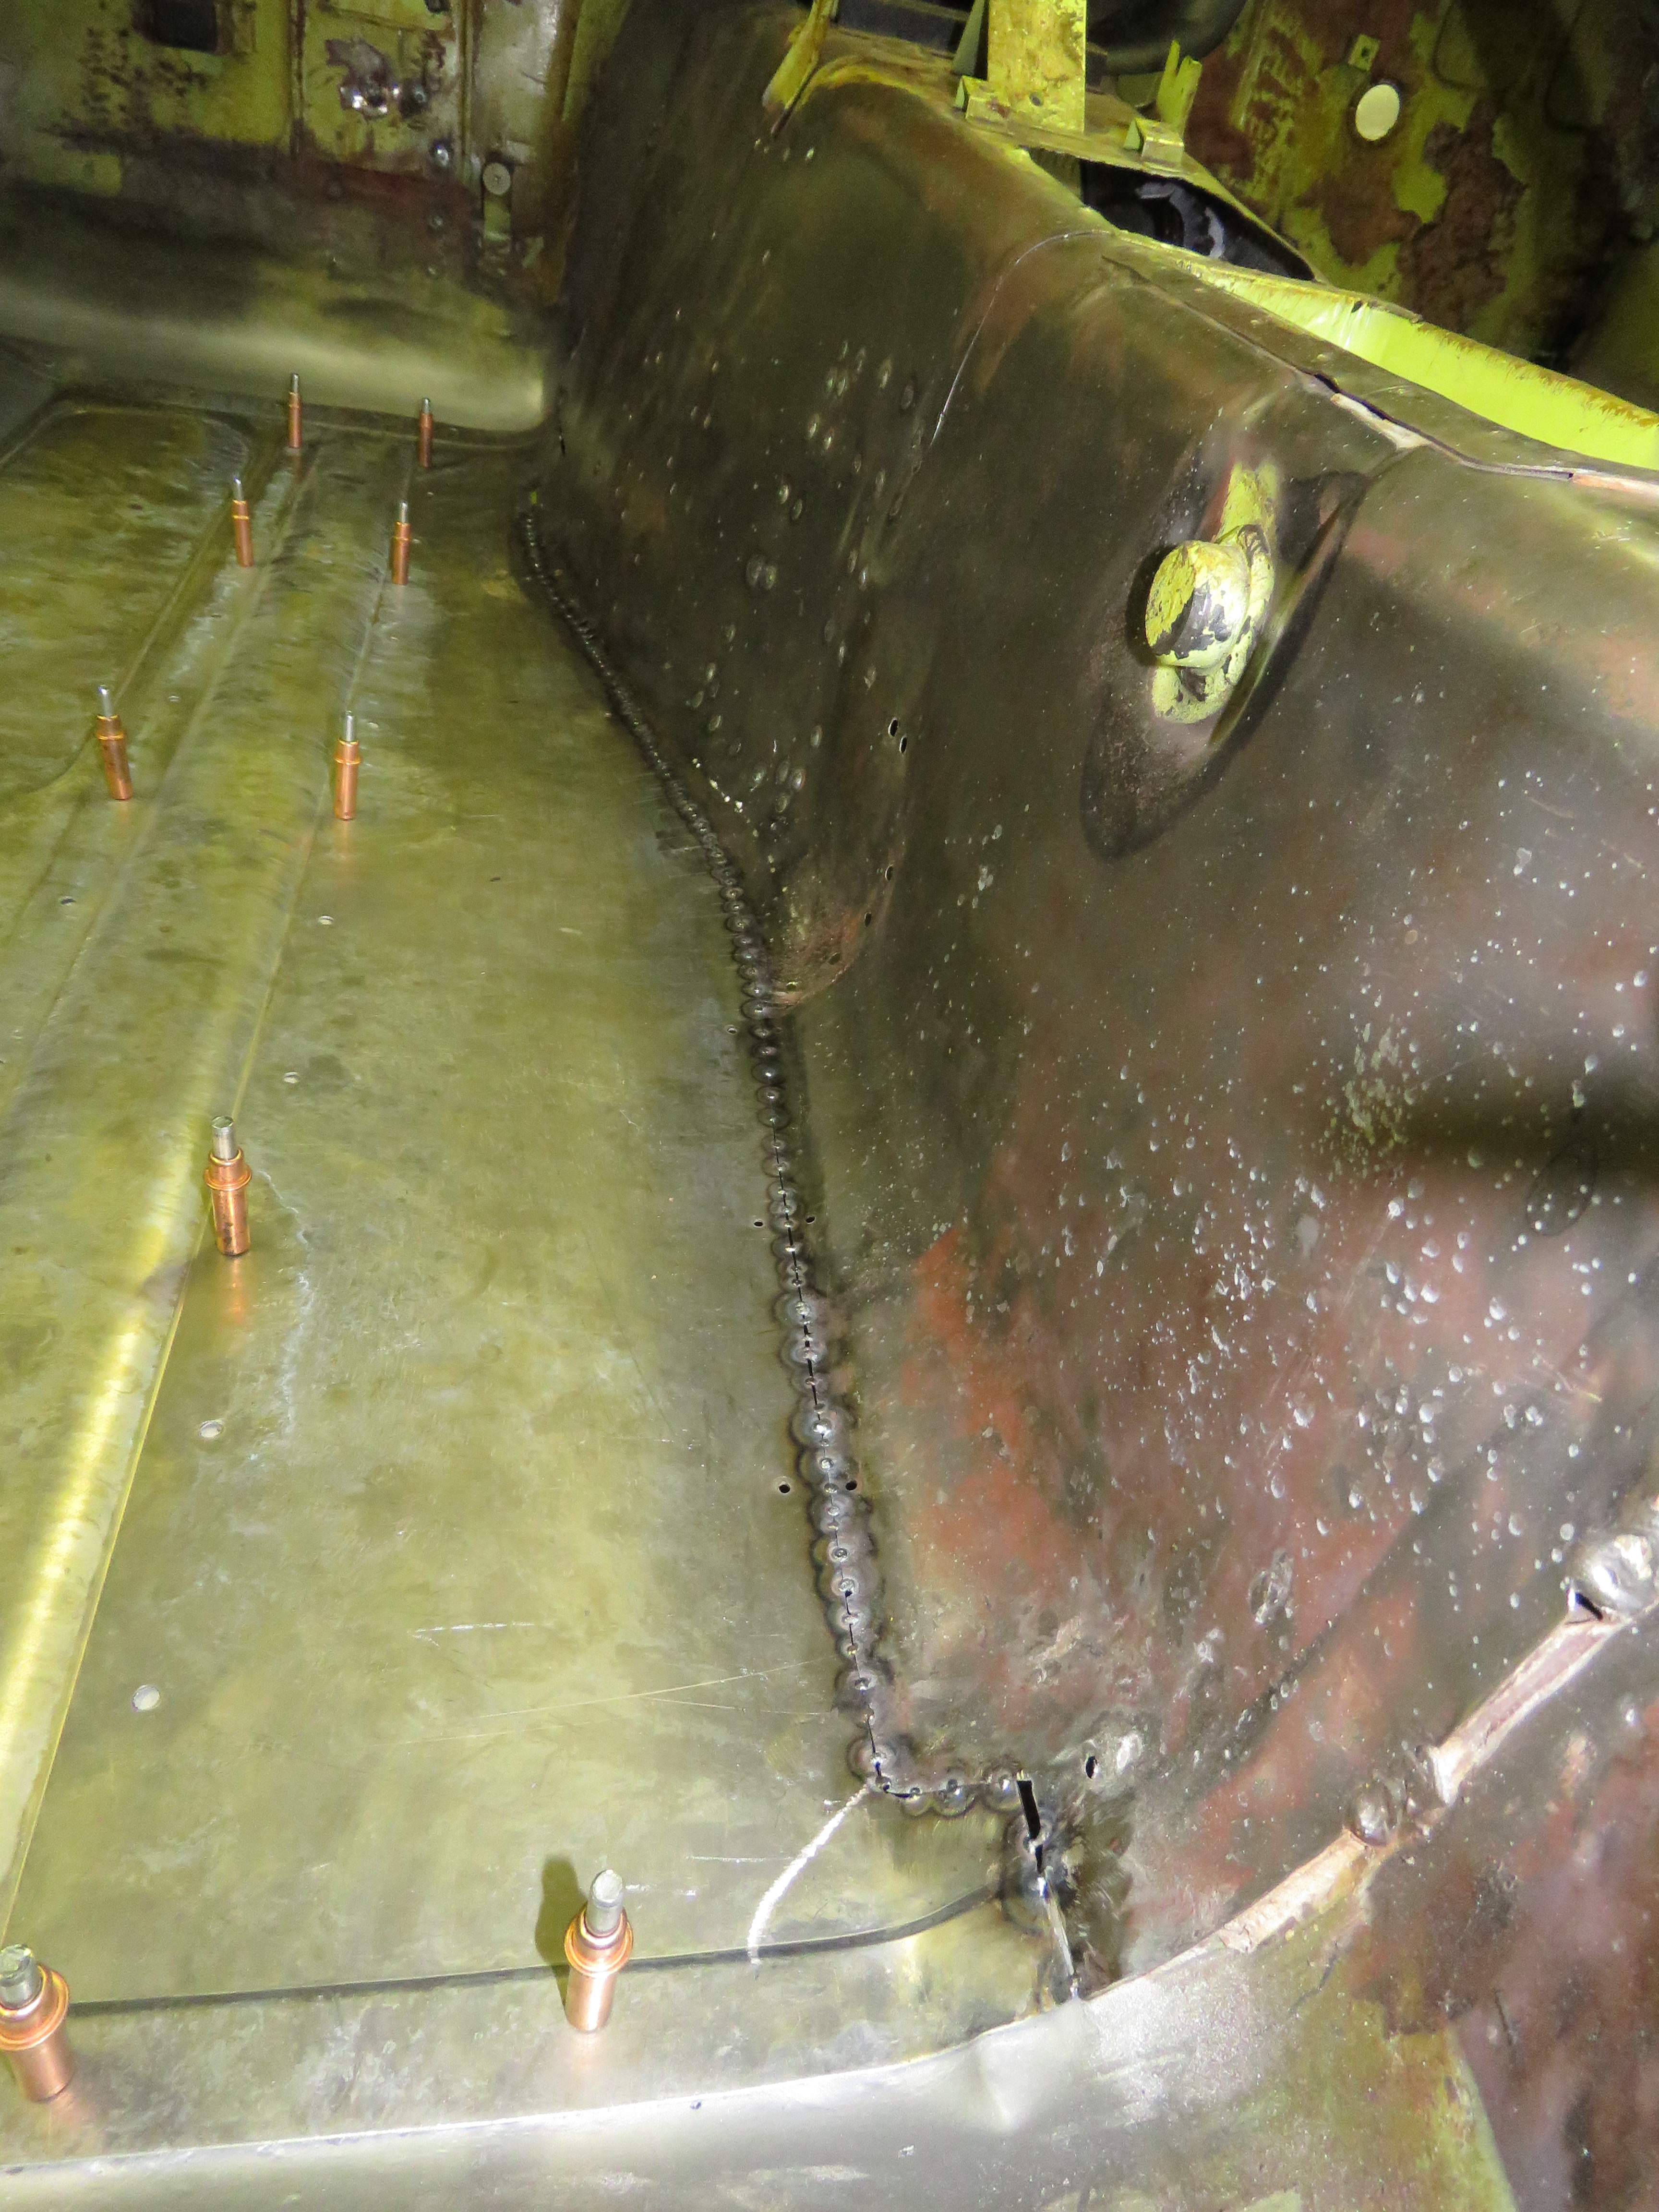
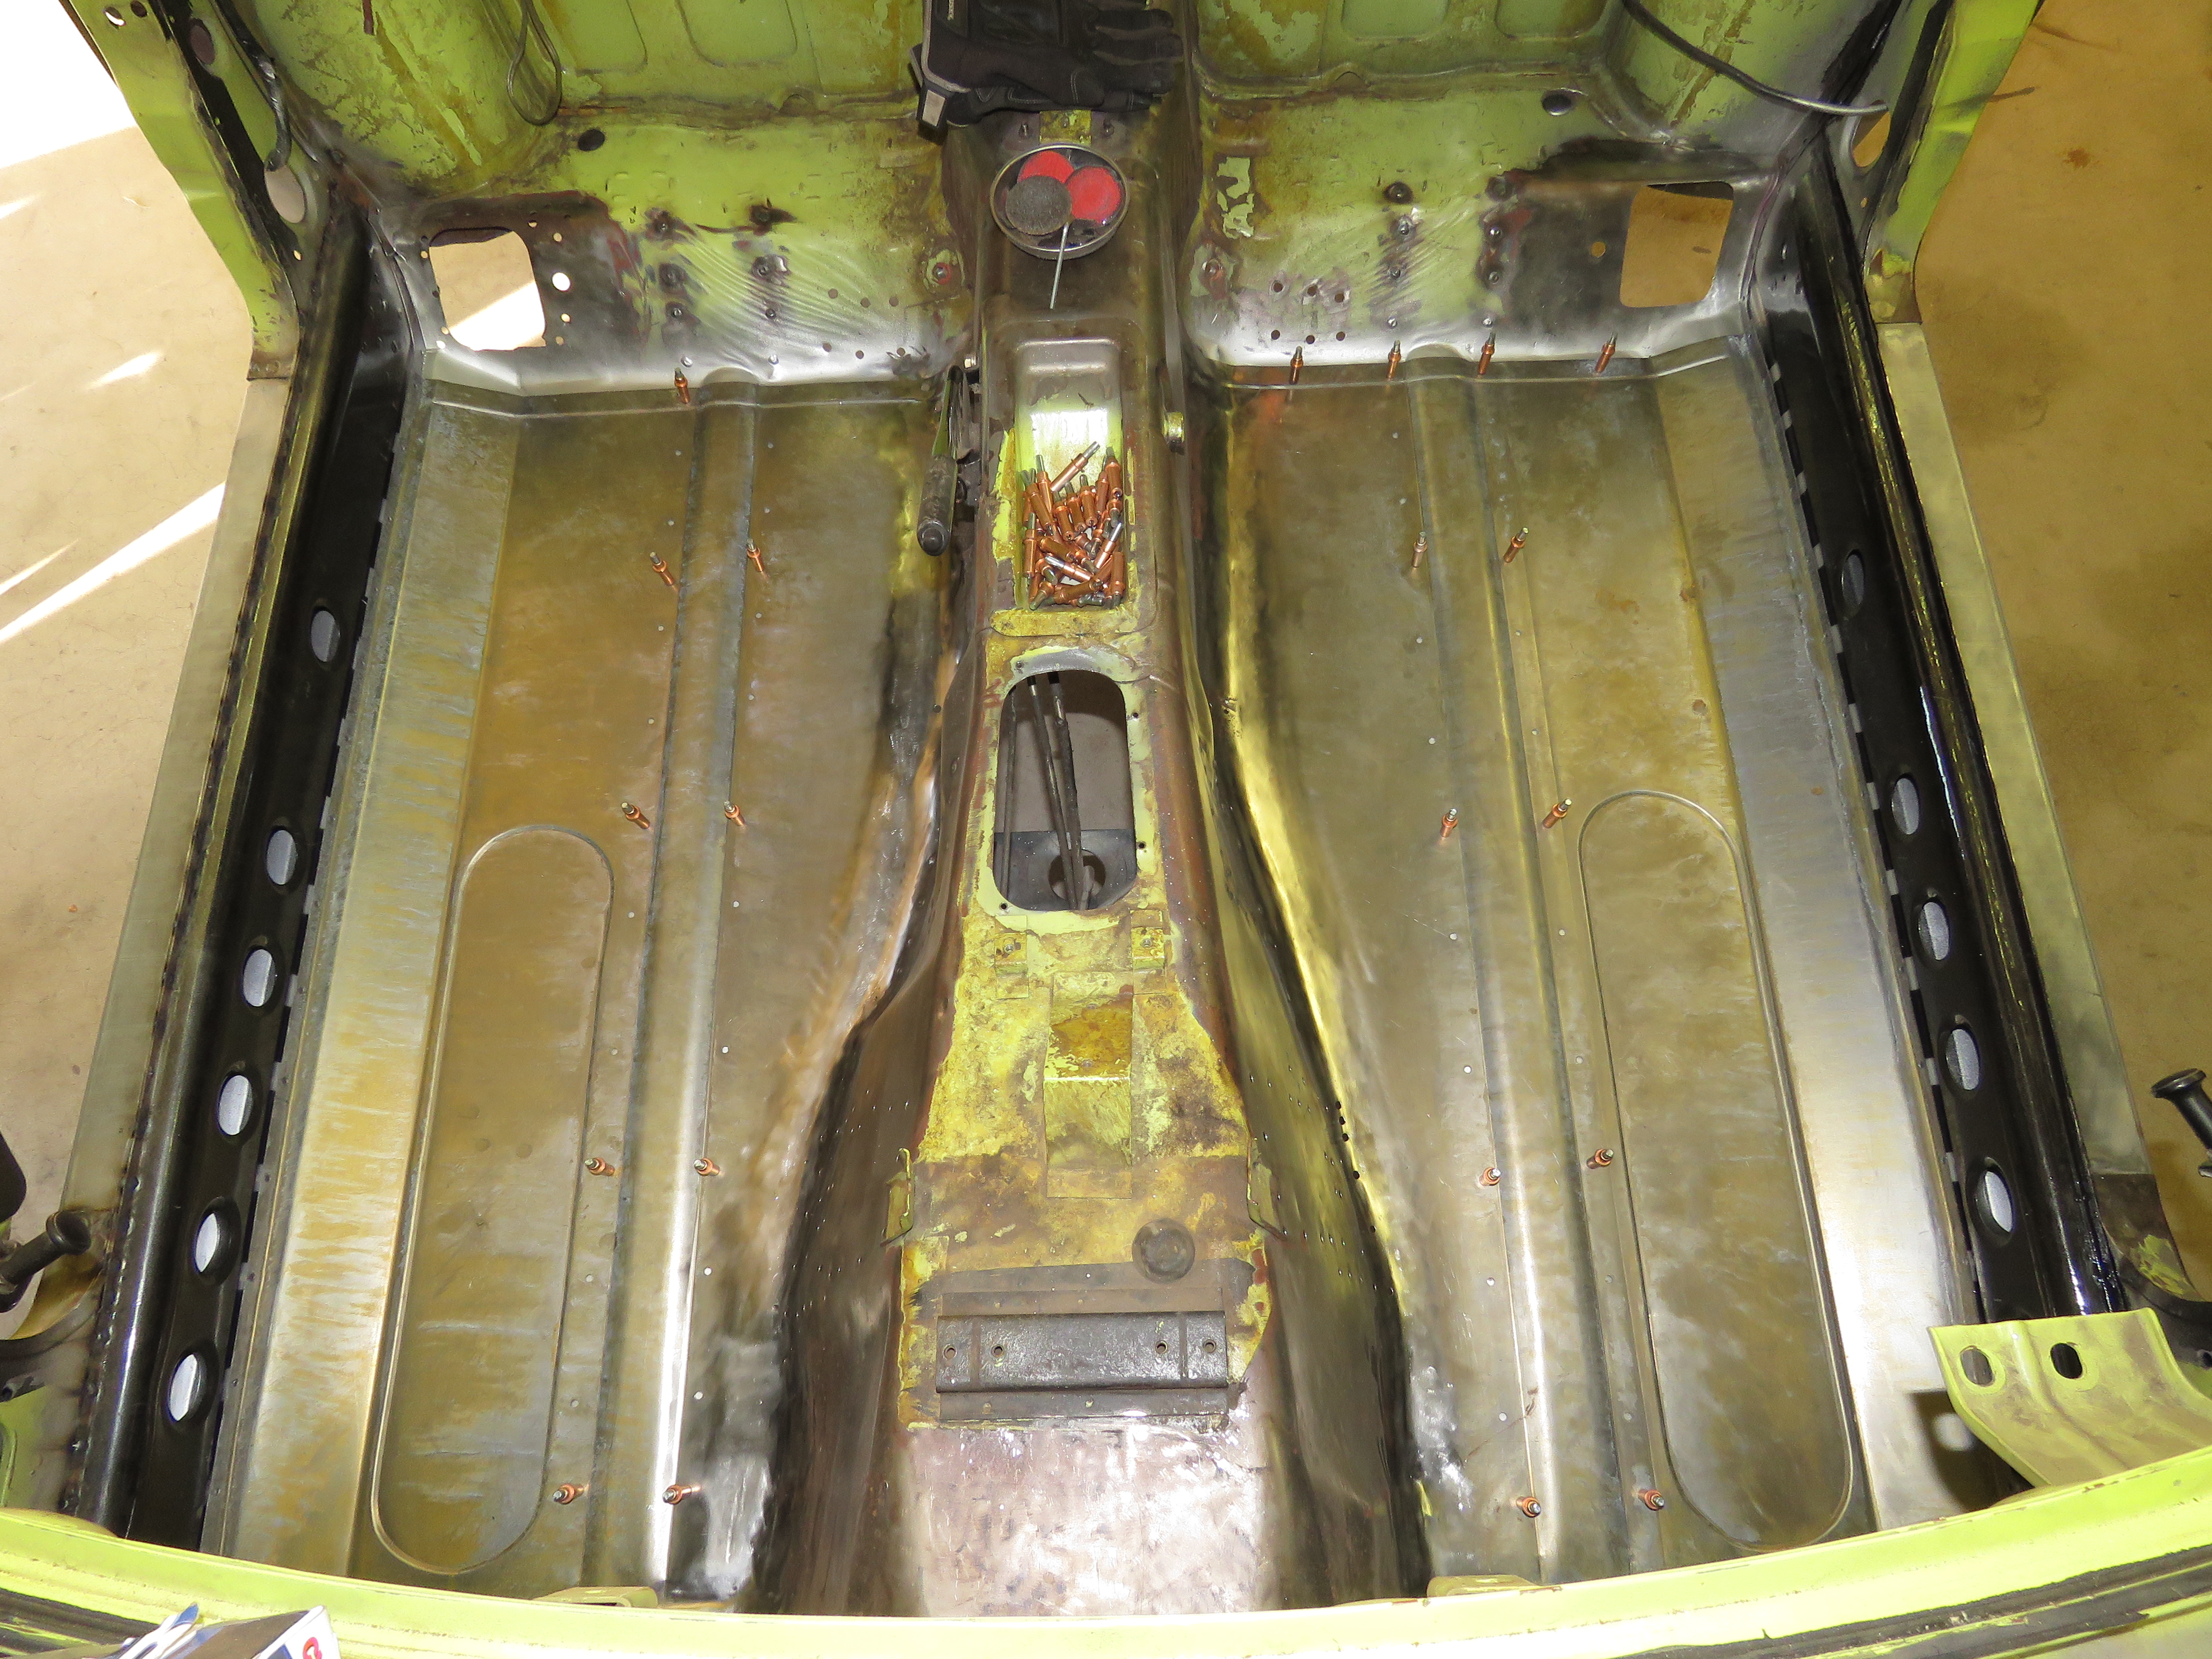
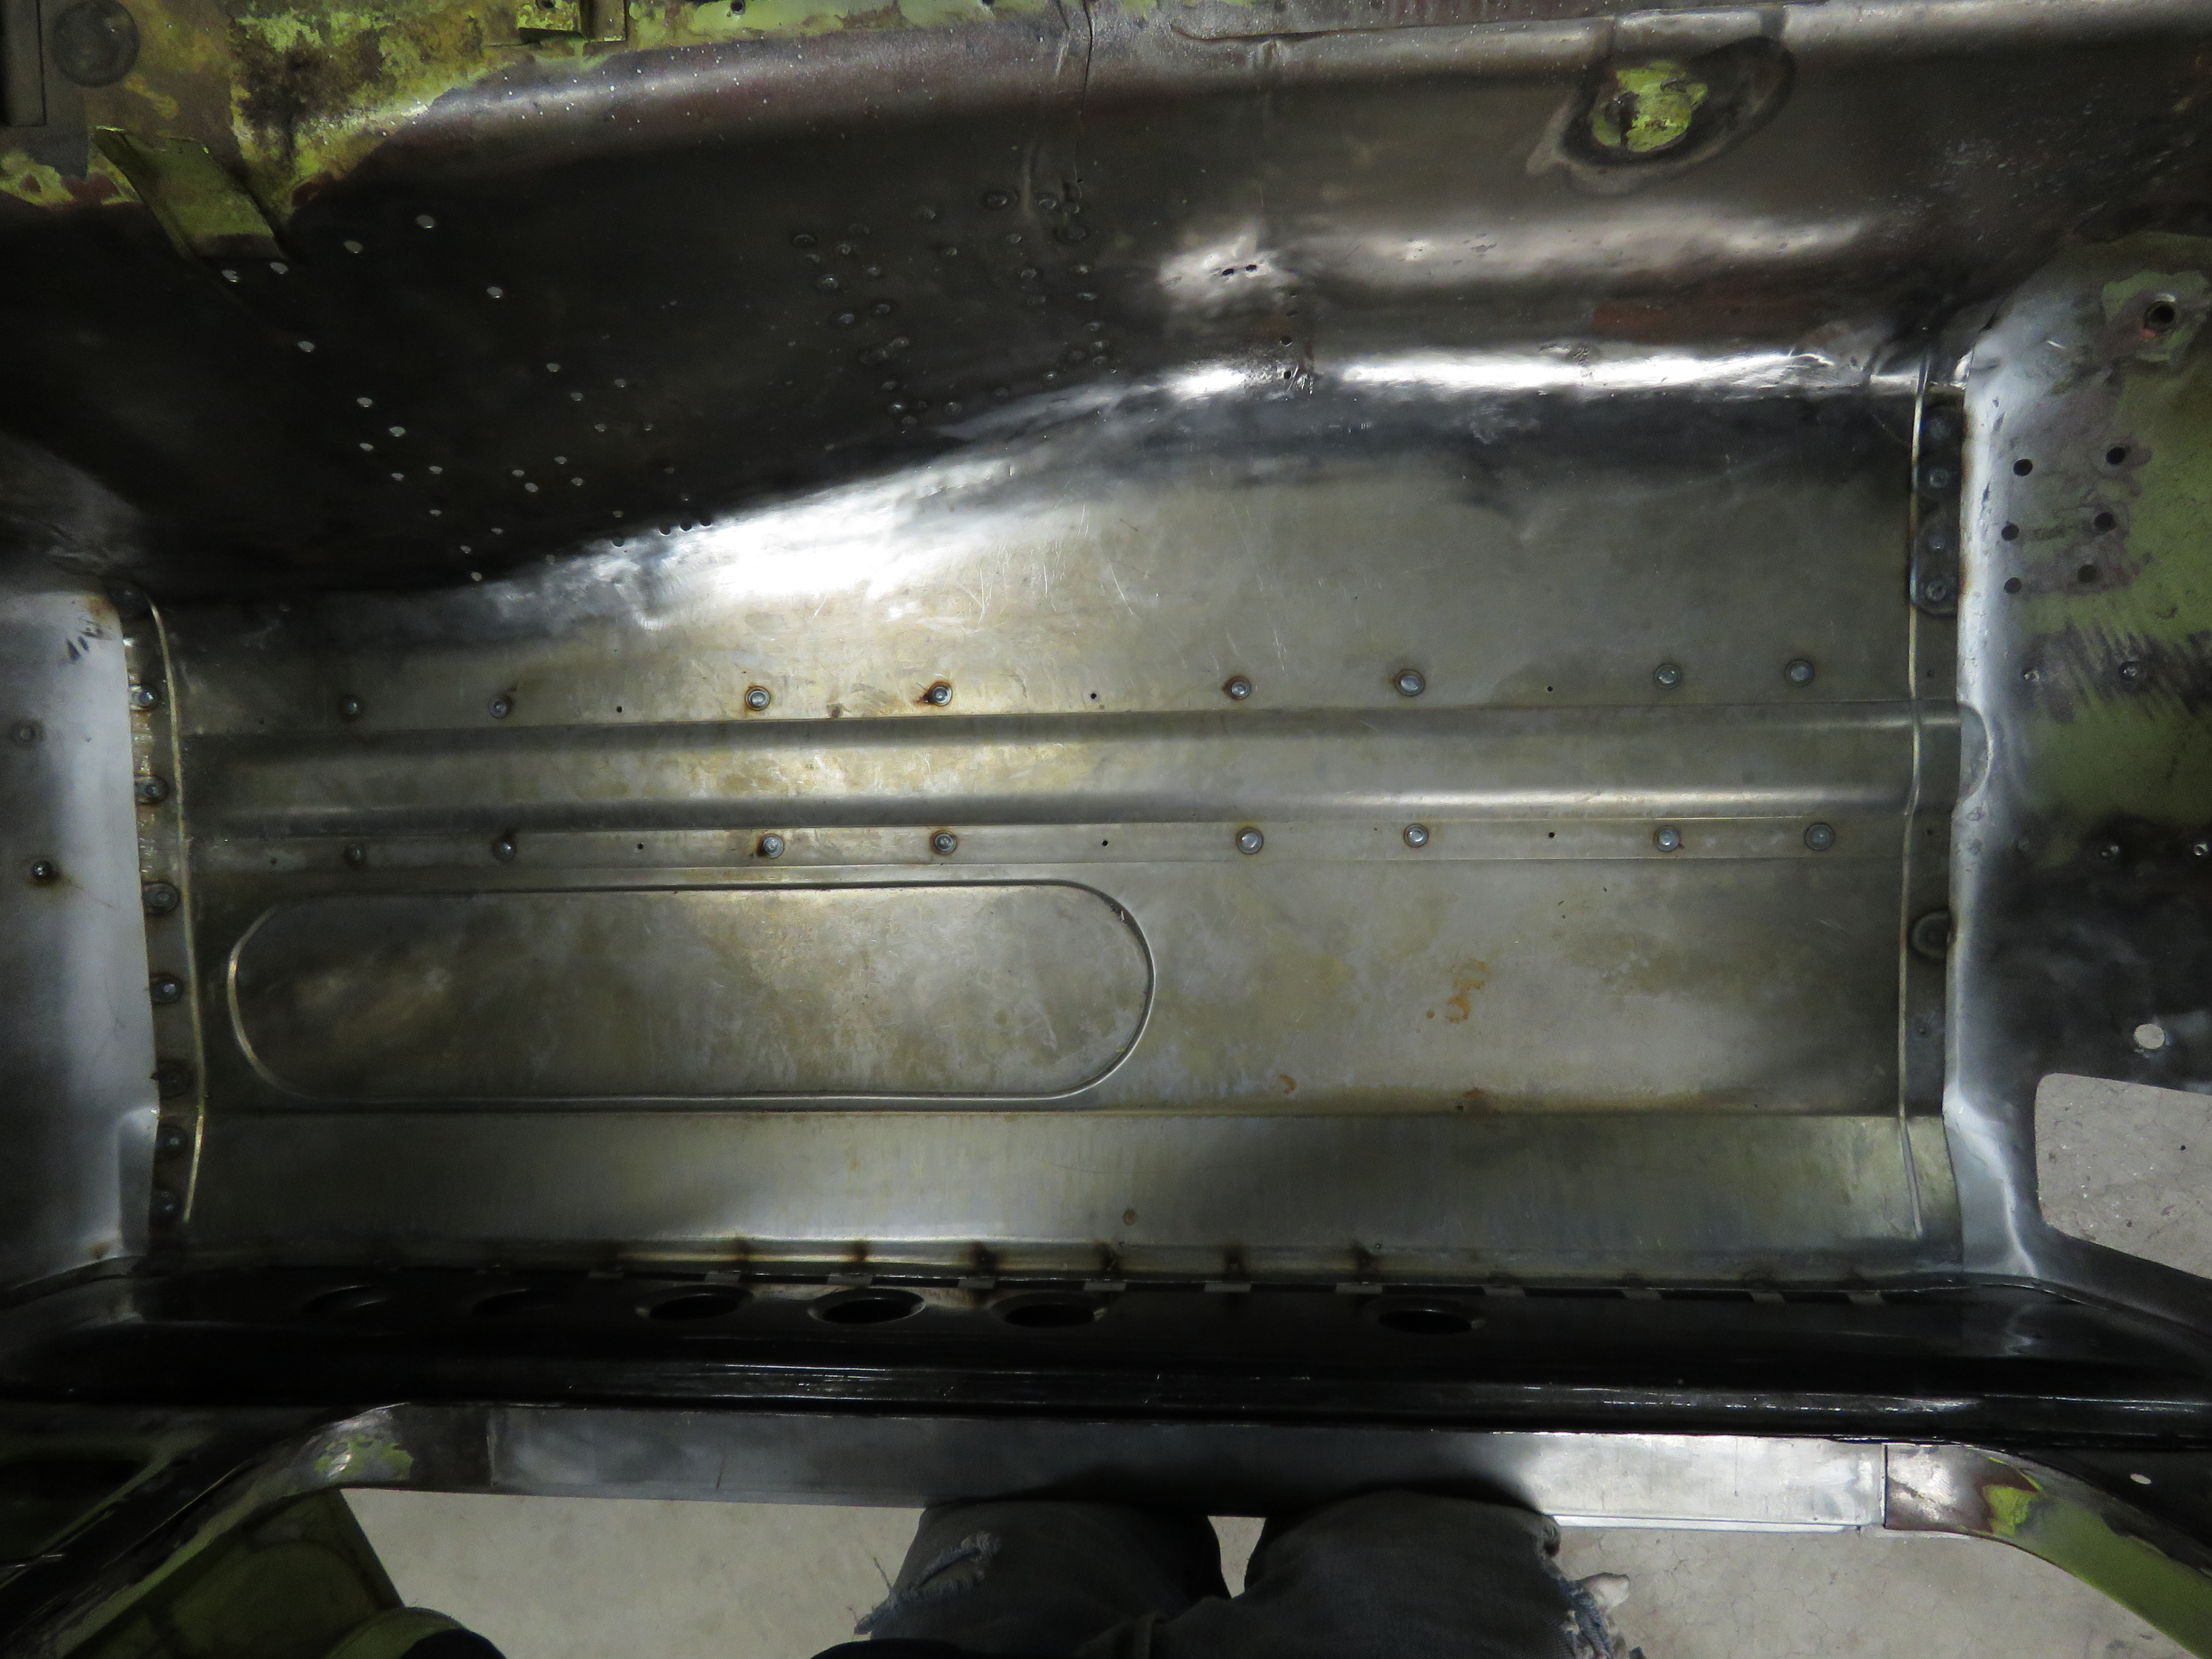
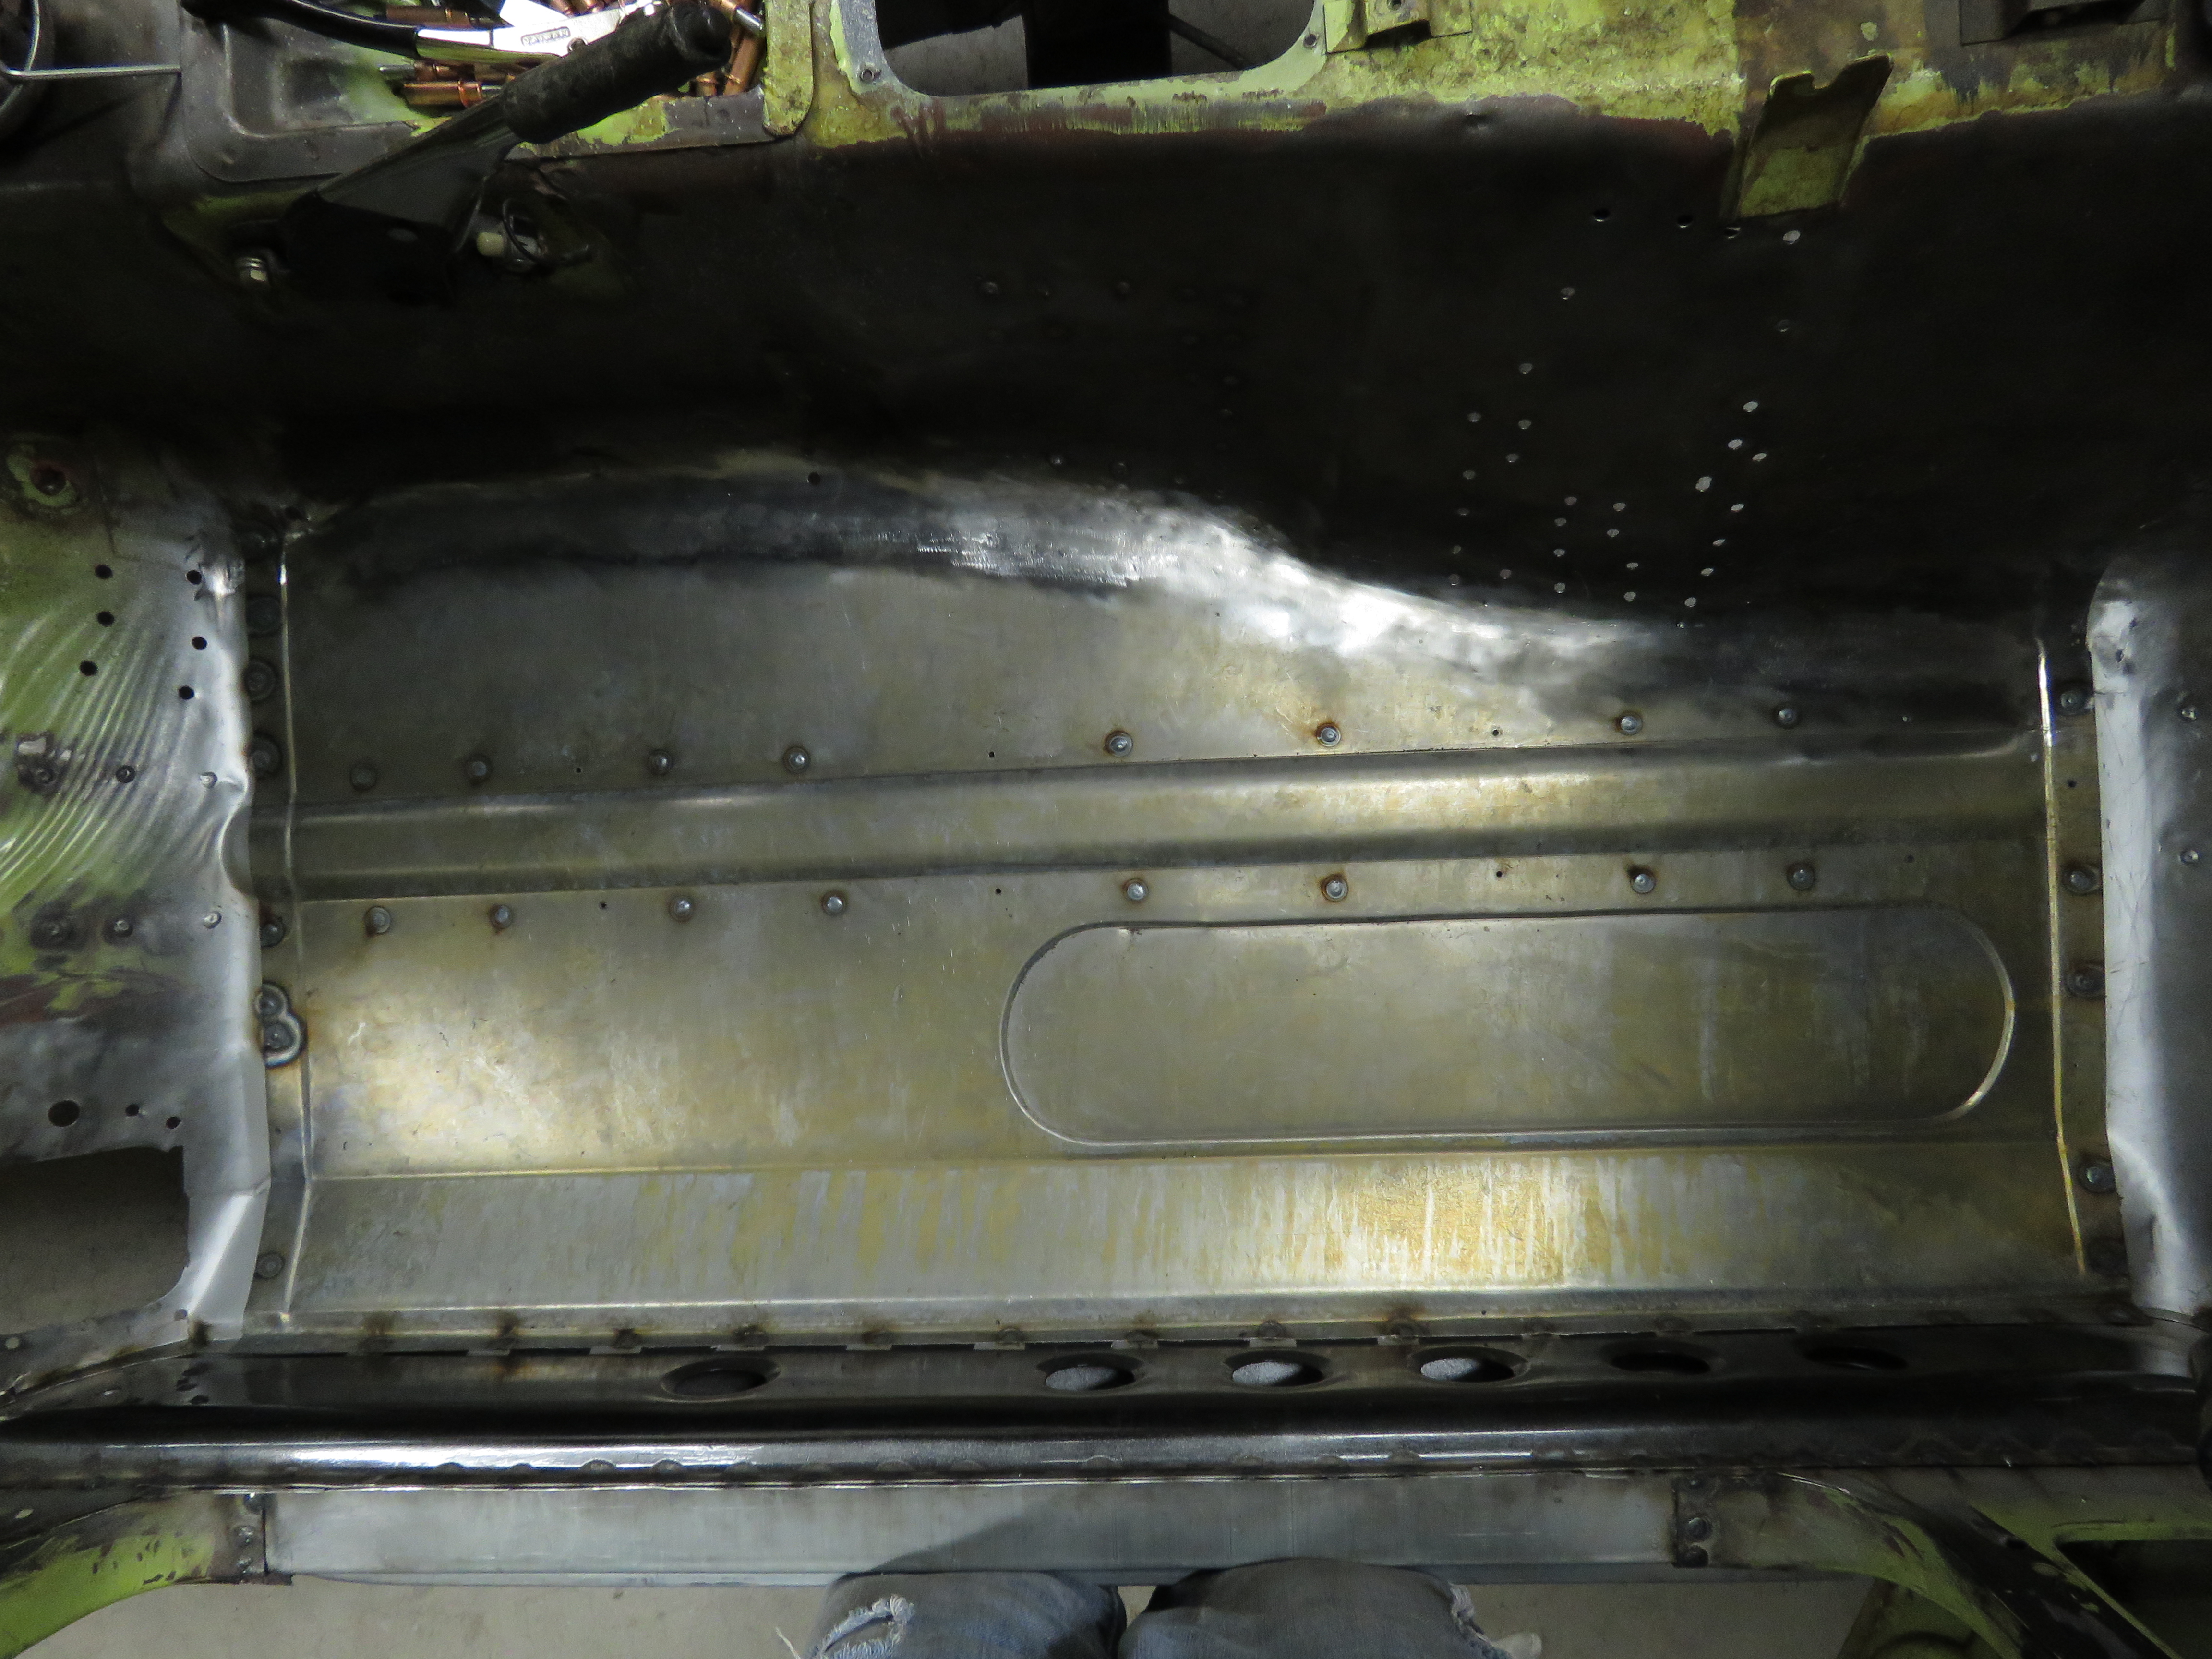
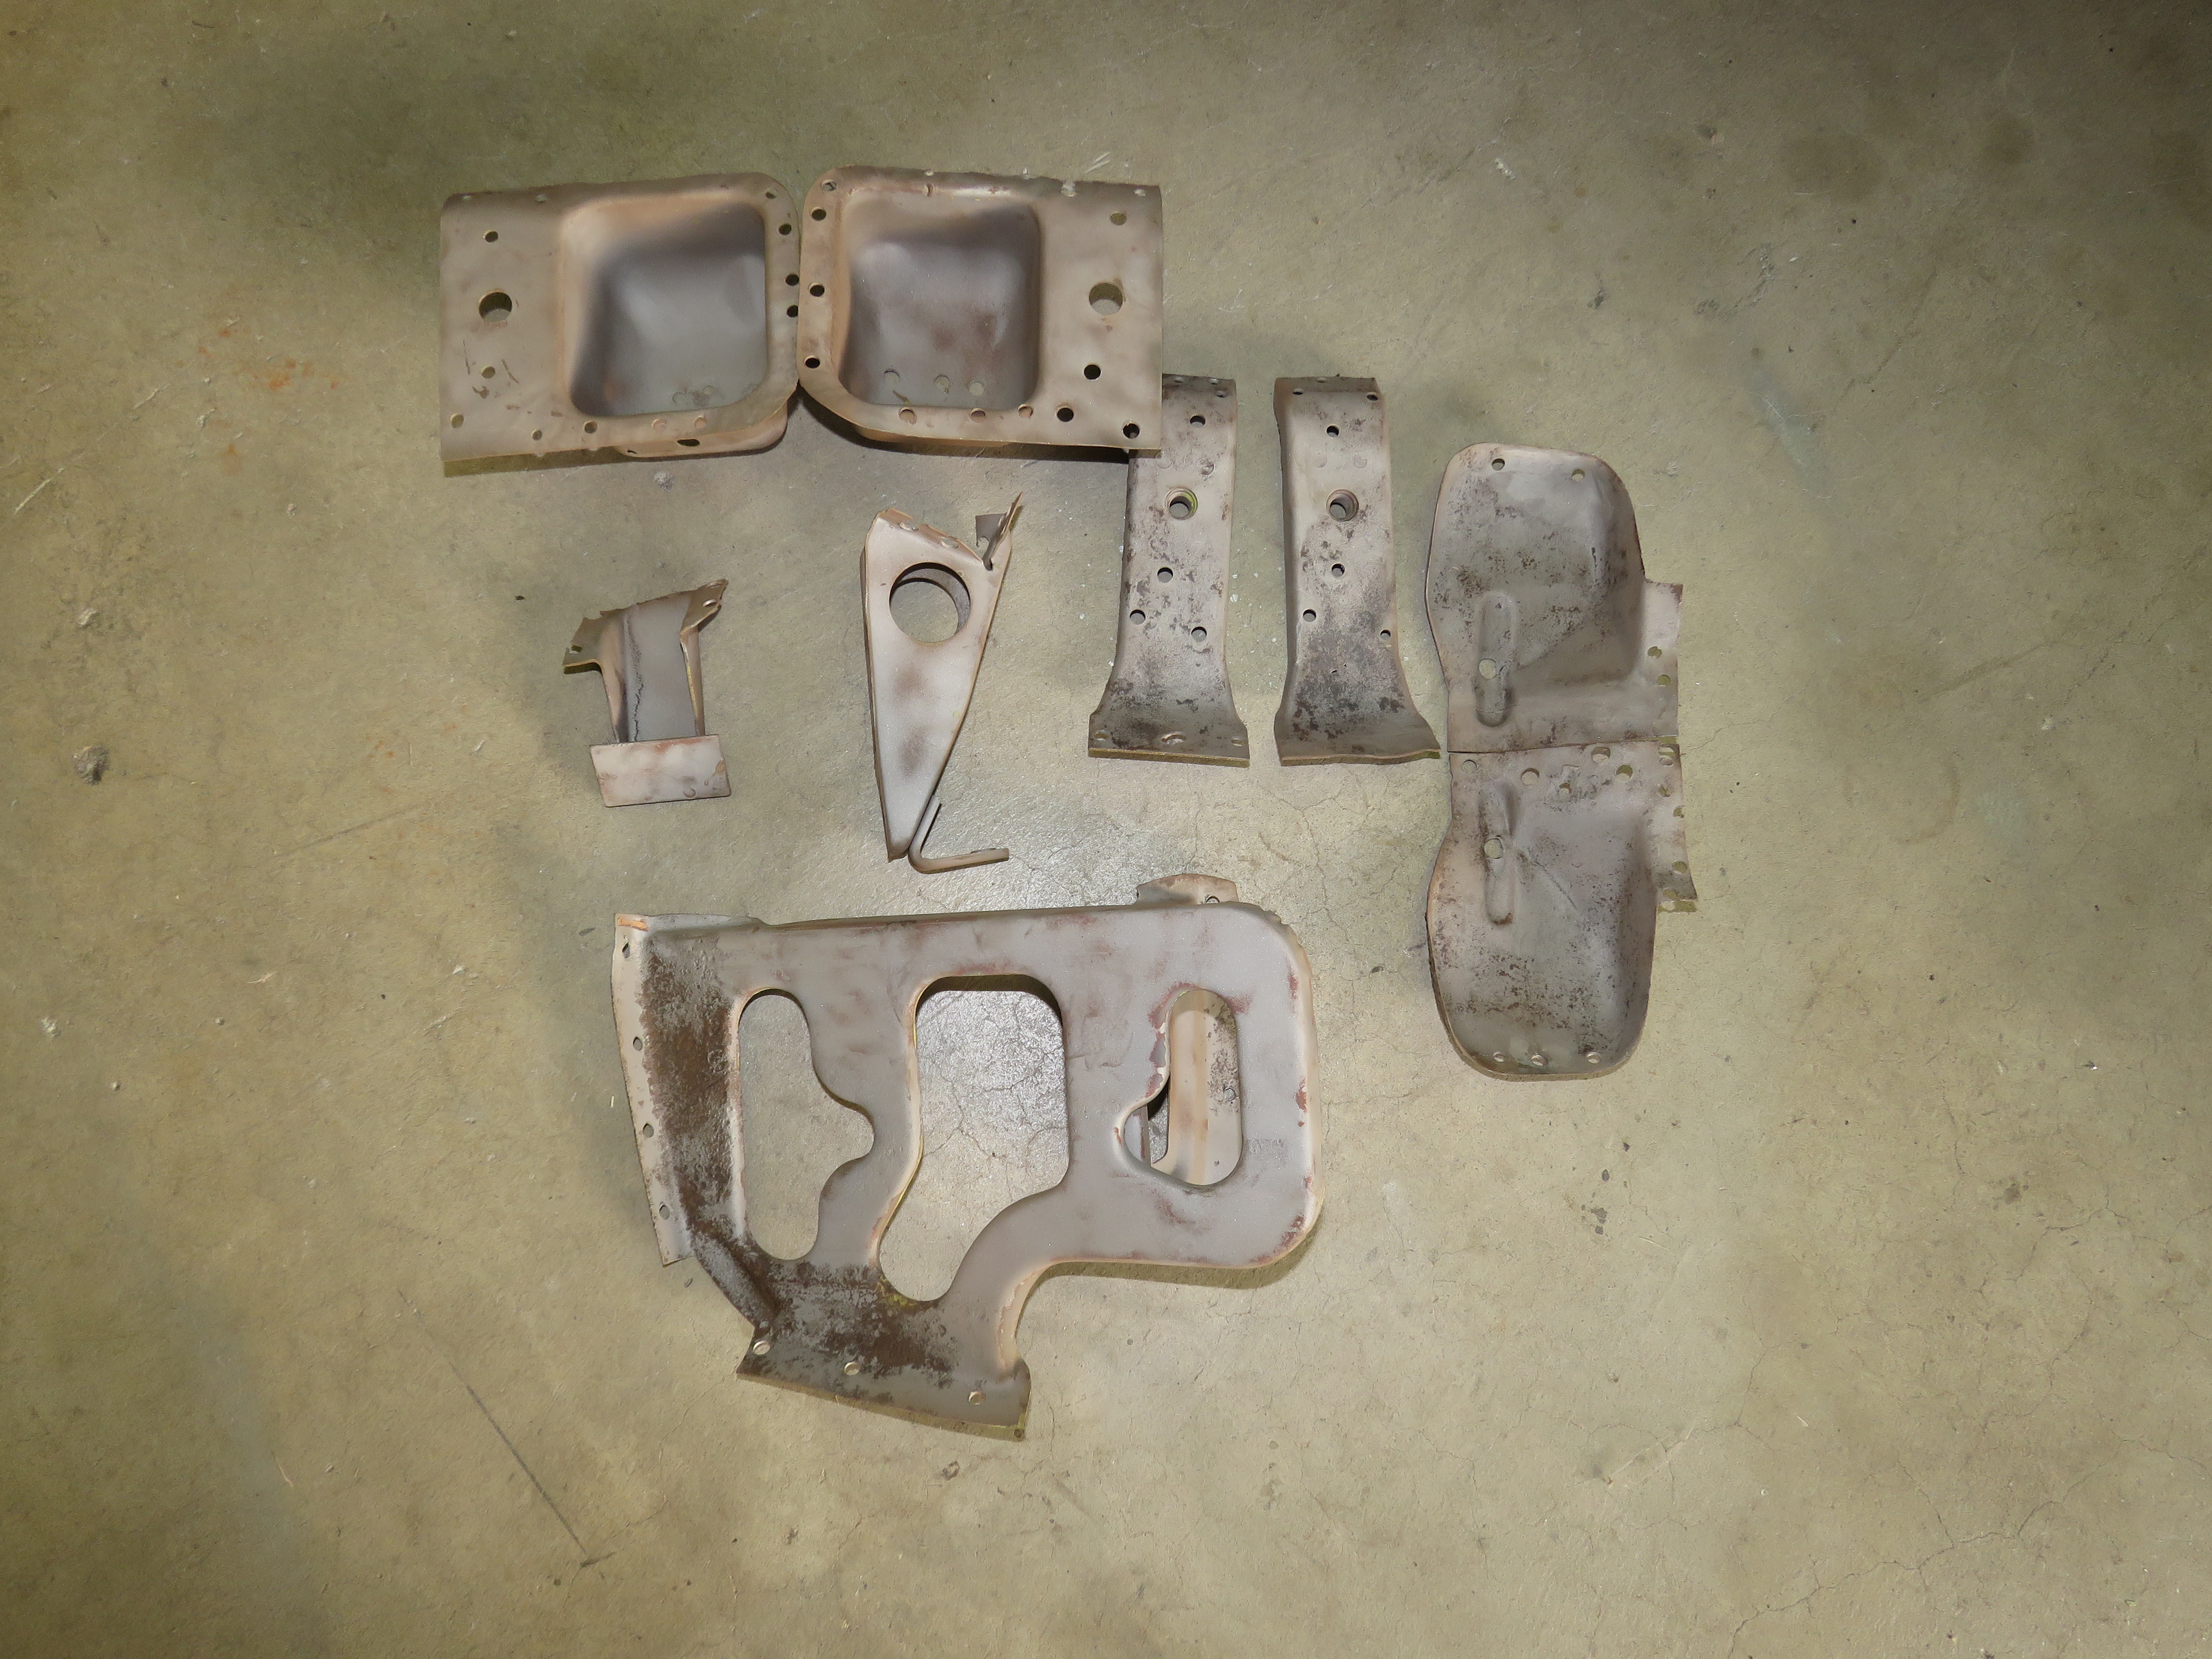
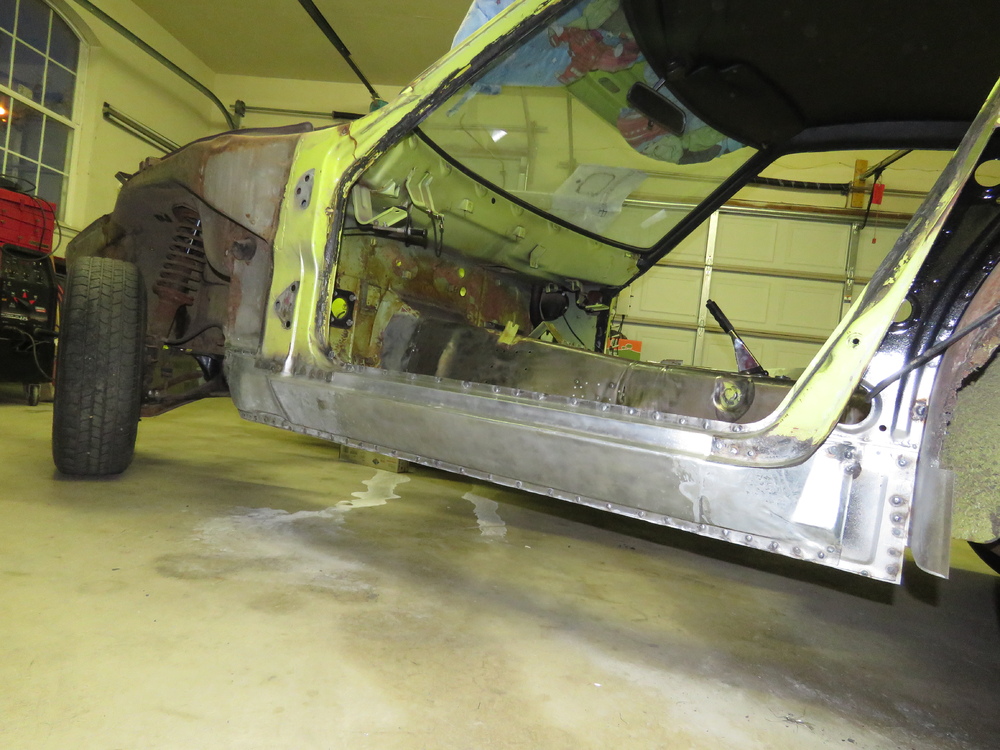
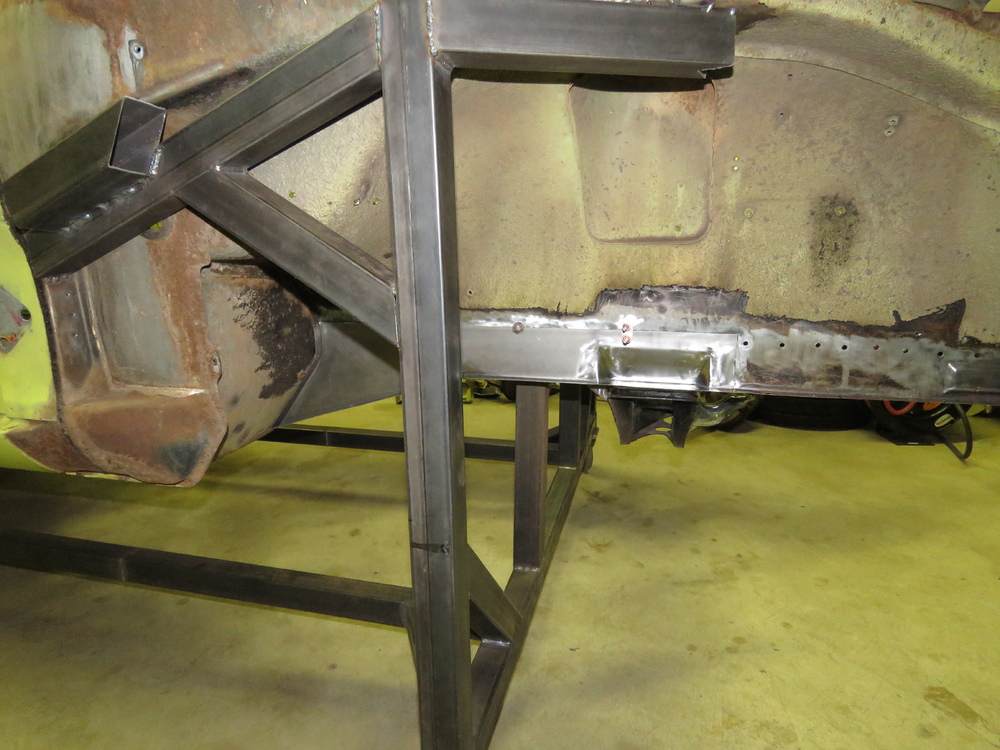
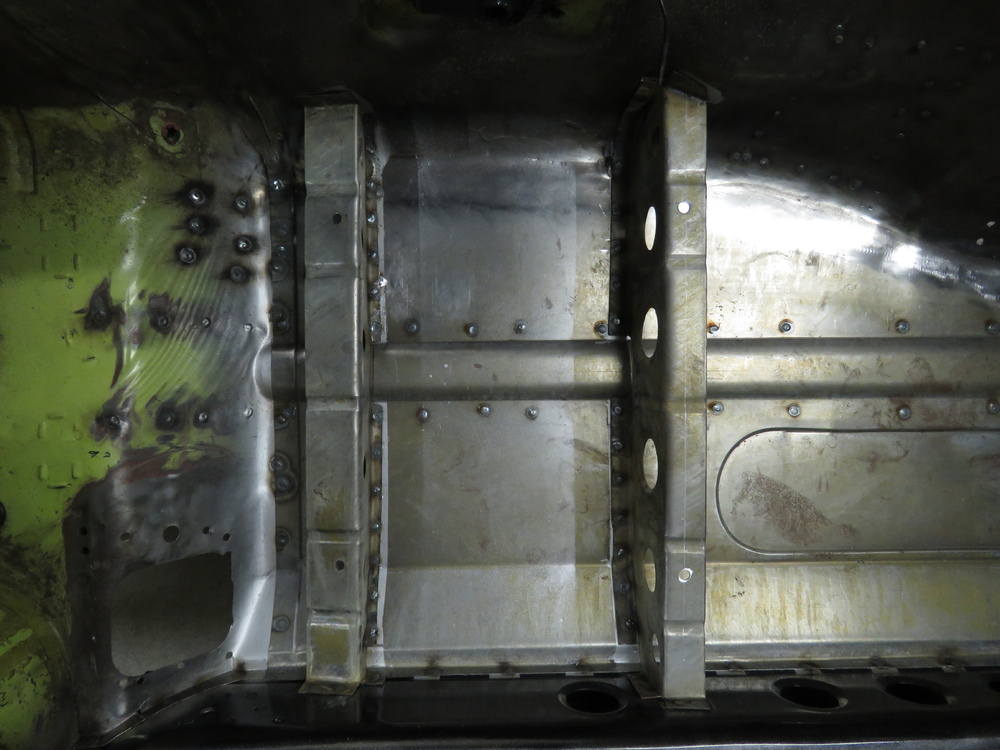
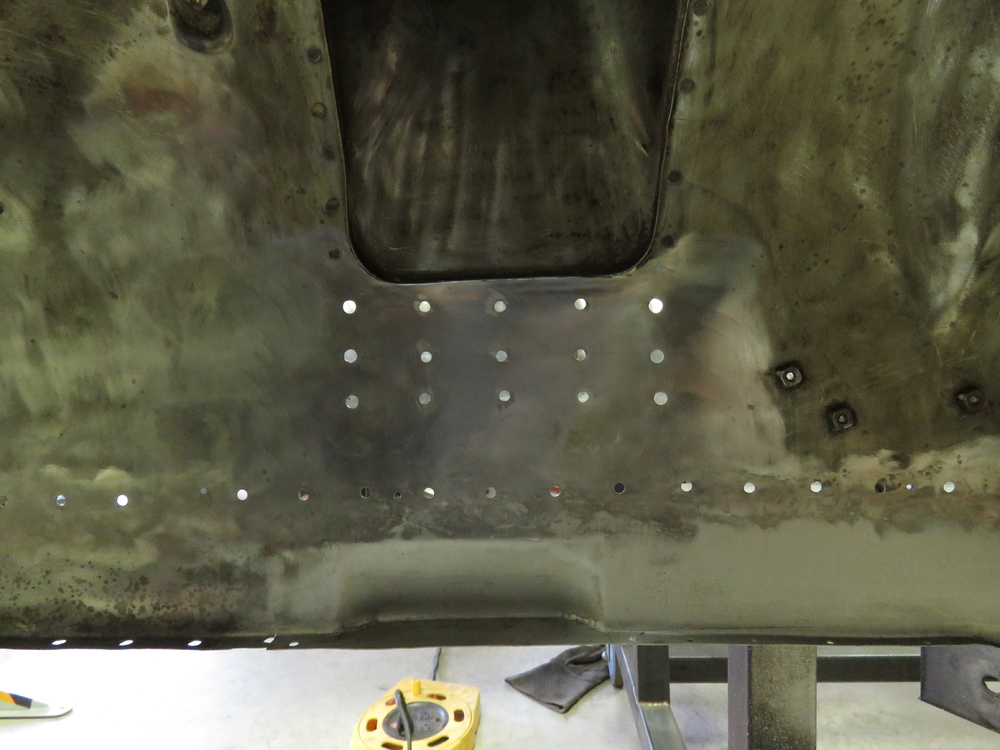
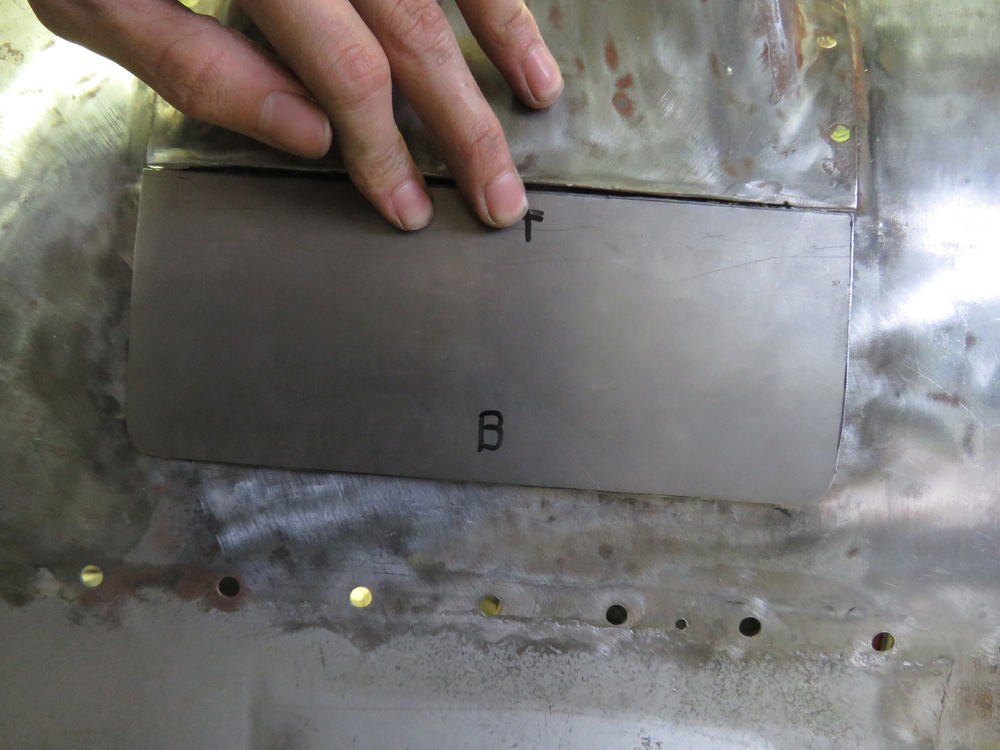
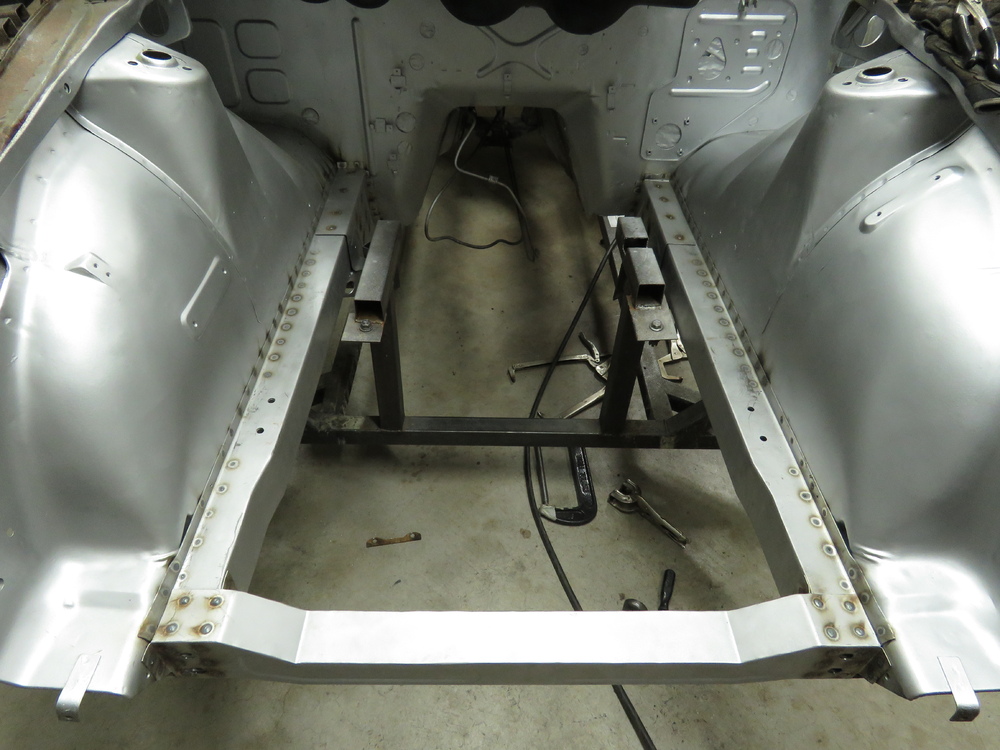
1 pointPart 2 of picture mania! Alright, pictures below are where I left off recently last weekend. Sandblasted some parts that go to the interior for the seat belt mechanism and other random parts. Finally got the floors permanently welded in. The reason the floors look so nasty is because I sprayed it with POR15 Degreaser and Prep and Ready. This also helps it from rusting prematurely before I actually paint it. Currently working on getting the seat brackets and the parts I sandblasted prepped for installation. STAY TUNED!


 1 point
 -
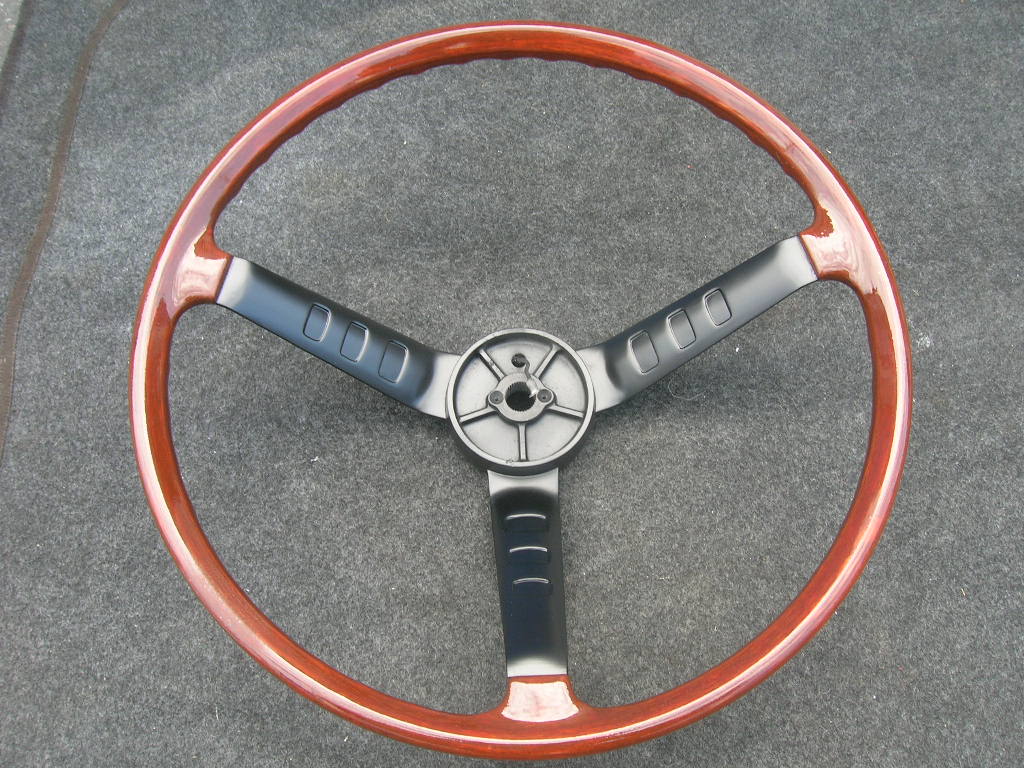
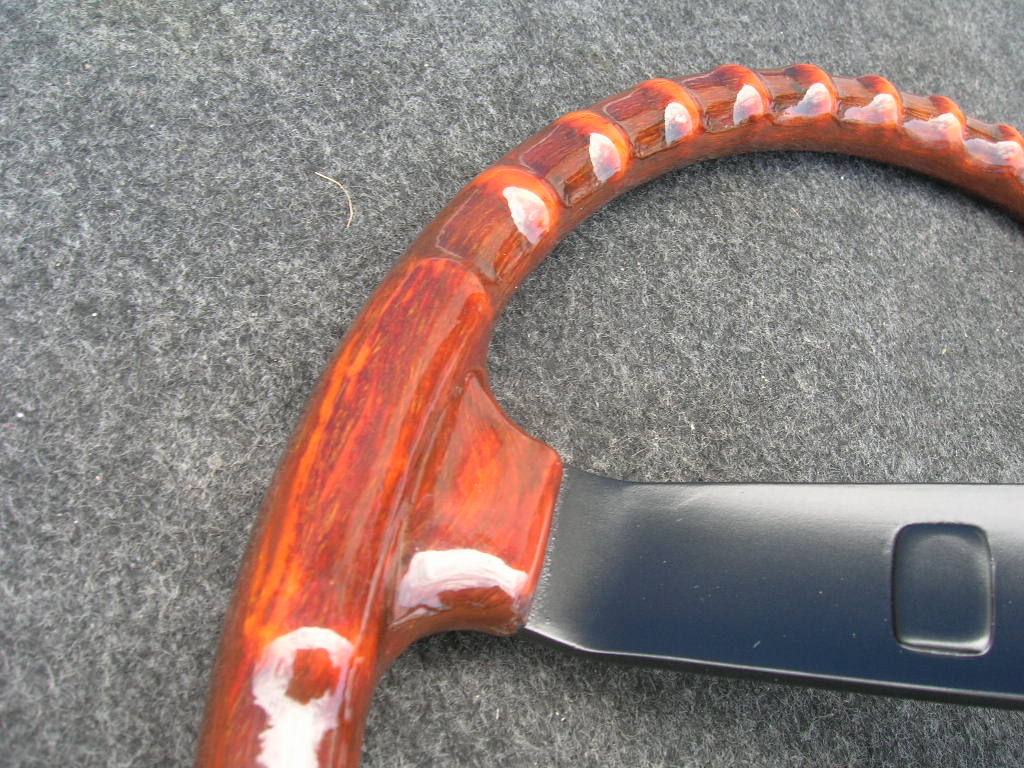
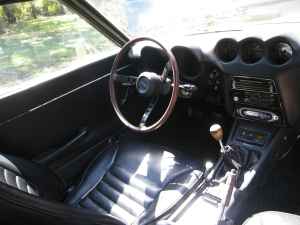
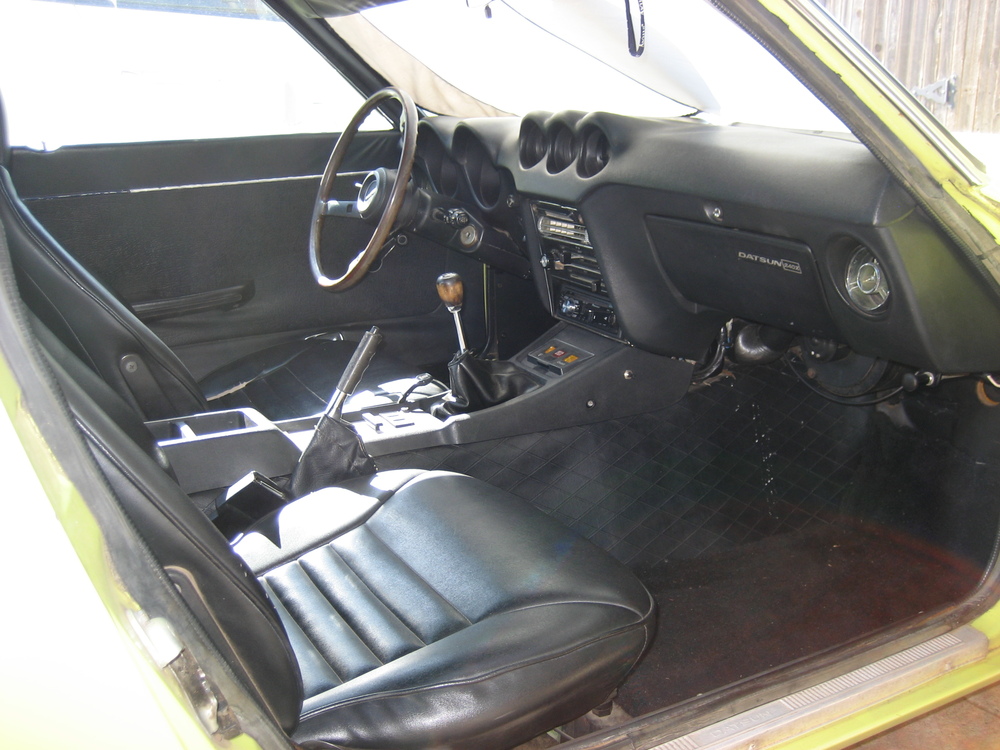
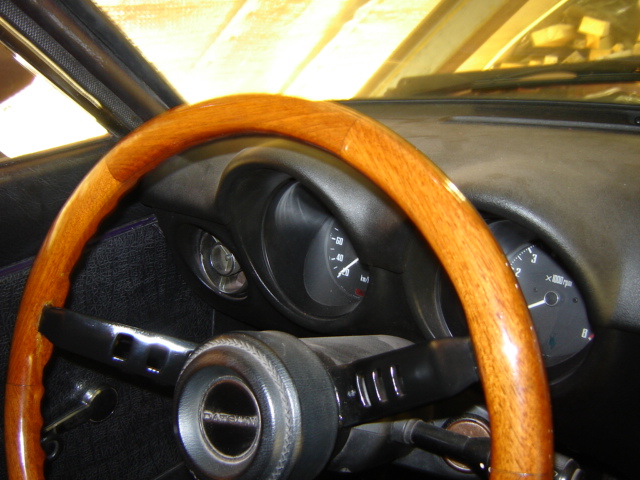
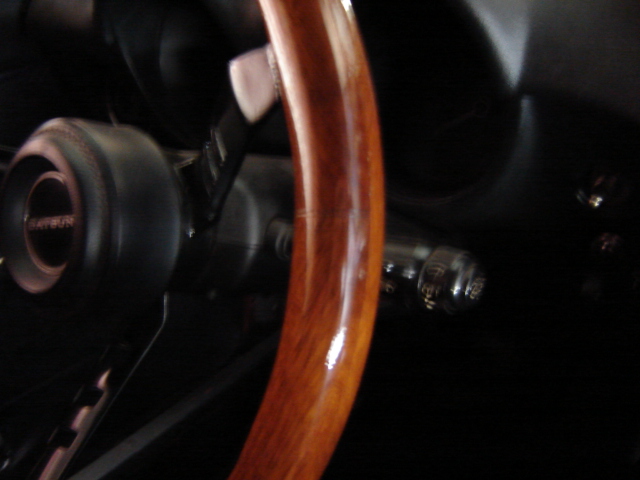
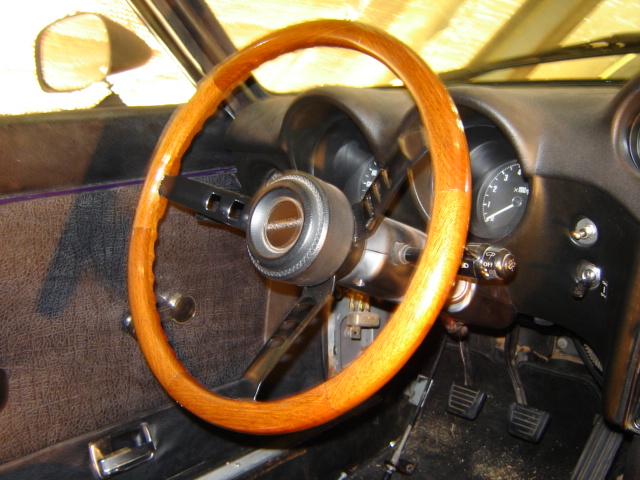
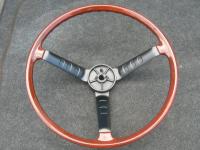
old topic.. nice steering wheel! My problem was it is to thin.. so i took of the "wood" and put on some mahogany with the use of a hand milling machine made me a new wheel... after lots of sanding and 8 coats of lacquer it was beautiful..
 1 point
 -
I have tried few differnt ways too. And this is the one I spryed 7-8 times to make it look "high gloss". It took several months to completely dry up. Now if you use too much thinner, it will mess up the original wood-color, also. I used the same spray can that was taked about on the thred. Esprist

 1 point