Leaderboard
-
rossiz
Free Member3Points1,109Posts -
Mark Maras
Free Member2Points3,719Posts -
Captain Obvious
Free Member1Points10,081Posts -
Stanley
Free Member1Points1,186Posts


Popular Content
Showing content with the highest reputation on 05/27/2015 in Posts
-
1 pointAlright so I've decided after taking someone elses Z for a spin this past weekend (and being thrilled with the ride quality) that I want to go coilovers. The kicker here is that I do not have the know-how or ability to section the struts or weld so I'm looking for something that I can bolt in directly if possible. The only place that I have found so far that does this is Techno Toy Tuning however (and please correct me if I'm wrong) I feel that $1950 for coilovers all around seems like a bit much even with included springs. Is there any other available bolt in ready product on the market that someone can suggest, or can someone let me know if spending the money here is worth it? I'm not looking at cutting into the car for camber plates or anything of the sort although I may be going with fender flares in the near future which is another reason why this must come first. Thanks for the help and I appreciate all responses you might have for me! -Chris1 point
-
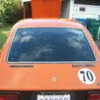
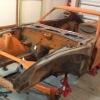
1 pointan hour a day?? i do that and more on my dd!! seriously, these things are an addiction and should be treated with the same care as any other addiction... the hardest part is trying to explain to the family when they ask if it's almost done, that it will never be 'done' - in fact that isn't the point. if i wanted a car that was 'done' i'd buy one off the lot - this is something that's sole purpose is to provide delight (while getting me back and forth to work so i can pay for it) and as such it's an eternal source of "projects" looking forward to seeing your build - i'm guessing you won't be happy with the strip-to-metal unless it's media blasted. reinforcing the rails is a good idea regardless of the power train. i believe Bad Dog rails are a pretty straightforward weld-in option. these cars are pretty twisty-bendy as is - mine is a 280 (more metal than a 240) and frame is completely rust-free and yet when i put the rear up on jack stands it flexes enough that the doors don't close correctly...1 point
-
1 point
-
You can have different turns on the jets due to mechanical differences, wear and user error. Getting all plugs to the same colour is a good goal. Also lifting the piston in the back carb with your finger and idling on the front 3 cylinders then doing the same and running on the rear 3 cylinders is a good balance check. We call it the equally shitty test.1 point
-
Hey Geoff I'm doing the "Snoopy happy feet dance" for you in Portland. Your description of a cold start is spot on. Sounds like you're very close to perfect. You're gonna love the carbs. Who knows, Maybe you can even convince Sarah that they aren't evil. Can't wait for the results from the butt-dyno run. So, is the new ignition sys. going to be installed, before or after the new build goes in? Great job. Mark1 point
-
Agree with Site. Start with a the basics. You mentioned previously the plugs were wet. The question is, too much fuel, weak or mis-timed ignition or a combination of both? Have you tried pushing the nozzles up on the carbs? These can become stuck & stay in the choke position. If the mixture is already set rich, adding choke (dropped nozzles) can make it blubber. I kinda doubt it's cam timing. It seems if that was off the engine would still be firing on six cyl. It sounded like it was firing on one maybe two at the most.1 point
-
1 pointI'll be there. Can't wait to see some nice cars and meet folks from this site1 point
-
1 pointI have 2 l28et's here in my shop, if I ever get around to trying this swap I will not be using the stock EFI. I will go Megasquirt and spend several years sorting it out, but that is standard operating procedure for me.1 point
-
1 point
-
thanks for all the kind words - i'm happy to have a simple mechanical system that i can understand and adjust, and it's a bonus that it appears to be working well so far. the actual transplant was fairly painless (with the exception of spending several hours fiddling with the floats and the sore neck i have from installing the choke setup) but the work this weekend follows several weeks of work and research. i watched the 'just su' video a couple times, read a ton of su tuning/setup posts/blogs/etc. and got to know the hardware by doing a complete clean, polish & re-build. even after having thought through it dozens of times, i still had to run to the hardware store twice for various bits and pieces. best tip i can give: glue the float bowl gaskets to the lids. they are a royal pita when they get wet and start to curl up. i used some permatex on mine and it held up long enough to do my adjustments (about 20 times) and towards the end they were starting to peel around the corners a bit. blue - thanks for the list, it really sums it up. i've completed 1-4, will do 5 tonight, 6-8 are the points i've yet to tackle and will get into that when i have the O2 sensors hooked up so i'm not groping in the dark. for the damper oil, i just bought a $1.99 bottle of the carb oil from msa (looks like vegetable oil to me...) and just filled up the reservoirs. not very scientific, but a starting point.1 point
-
first real road report: drove her to work this morning (16 miles) and i'm pleased to say i'm extremely happy with the carbies!! cold enrichment about 50 degrees this morning, not exactly frosty but definitely cold enough for the efi system to have needed the csv and temp sensor enrichment circuit. half choke, no pedal and she started instantly - actually startled me. revved up to 2000 so i tapped the choke forward a little till the idle was at about 1500 and pulled out of the driveway. interestingly, the choke enrichment does a better job of cold-running than the efi systems ever did. used to be, it would start right up on the csv but run like a dog until the temp gauge started moving. wouldn't rev over 2500, stumbled and stuttered, sounded awful, but i was used to this and just limped the first few blocks until she warmed up. with the chokes engaged, she ran just fine from dead cold - revved fine, ran pretty much completely normal and as she warmed up i just tapped the lever down. idle rock-solid steady at 800 rpm and silky smooth. the efi would hunt a bit, kind of a 100 rpm drift which i could never pin down to a specific condition or fix. performance pretty close to where i was with the efi - i didn't get too crazy on my morning commute, so i'll need to rip around my local test roads to do a better butt-dyno comparison. in normal driving, it's identical to the efi - smooth, no stumbles, burps or farts. when i get the dual-lambda setup in place i'll be able to really check on the needles (using the sm set sent with my zt rebuild kit) fuel economy it just so happens that i had a full tank prior to the swap, so i should be able to check by the end of the week and report back. have to say i'm impressed with these little buggers!1 point
-
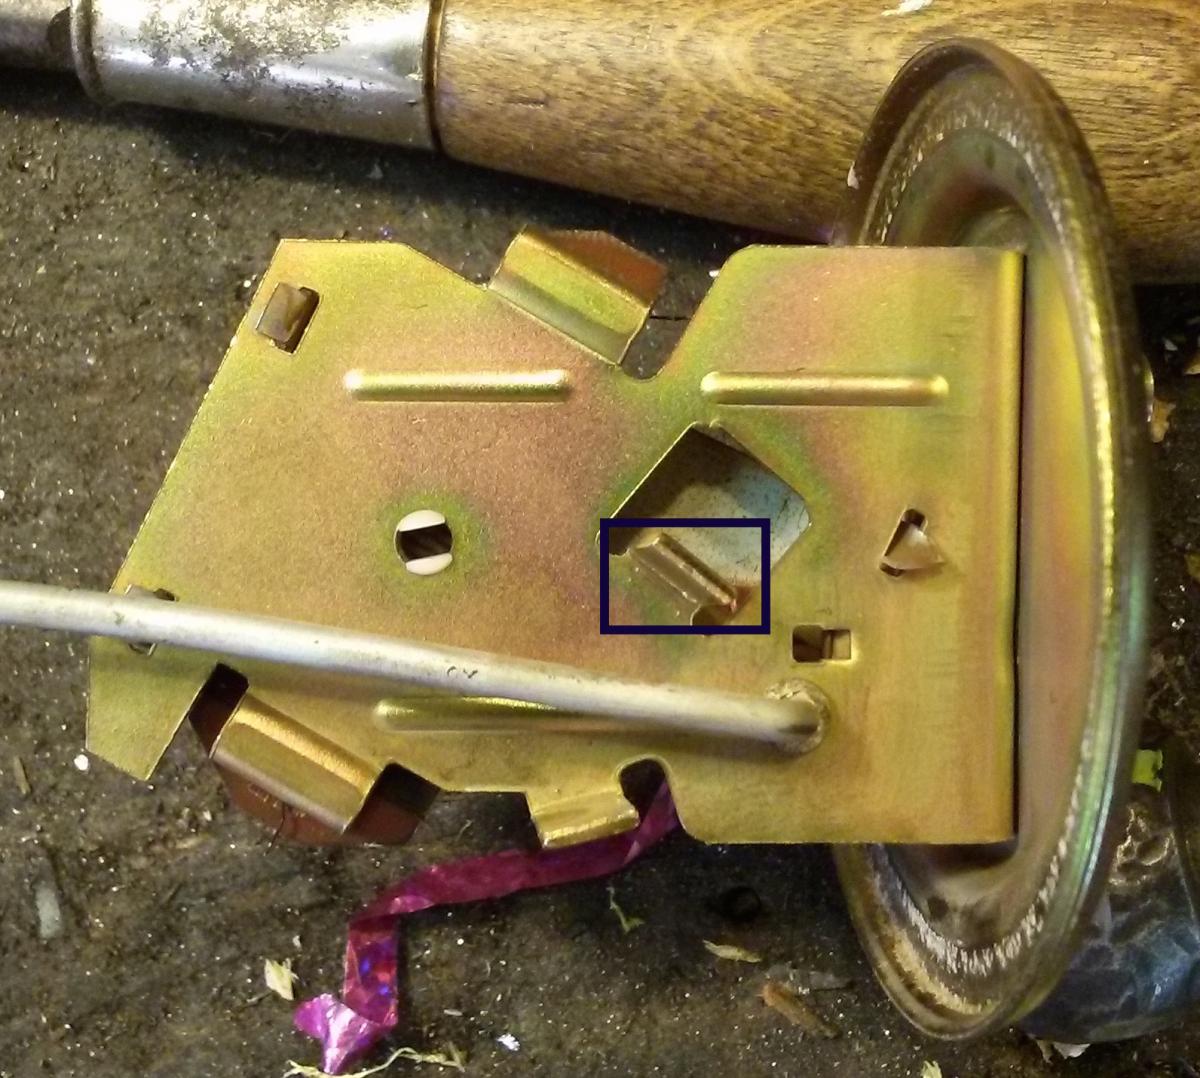
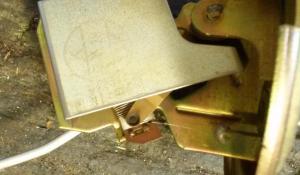
I know that this has been beat to death, but back when I put my car together I replaced the fuel tank sending unit with a new one, and like everyone else the gauge read 3/4 full with fuel all the way up the filler neck. I was replacing my electric fuel pump this weekend, and drained the tank so that I could replace all of the hoses. This gave me an opportunity to pull the sending unit back out and "tweak" it a little. I started by bending the arm slightly, to get the Empty reading a little higher. Then I noticed something strange about the position of the rheostat when the arm was in the Full position (See the picture Rheostat_1) With the arm on the travel limit, the wiper of the rheostat was not at the full travel of the wire wound resistor. Measuring it with an Ohmmeter the reading for Full was 14 Ohms, and empty was 85 Ohms. (Which was full electrical travel.) By bending the travel limit slightly as shown in the picture SendingUnitTravelLimit, I was able to get the wiper all the way to the end of the rheostat. In that position the resistance reading is around 4 Ohms. (Note that I have drawn a rectangle around the Full travel limit for clarity.) When I put everything back together, the gauge now reads E when there is no gas in the tank, and slightly above F when the fuel level is all the way up the filler neck. It isn't very linear in between, but given the shape of the tank, I wouldn't expect that.

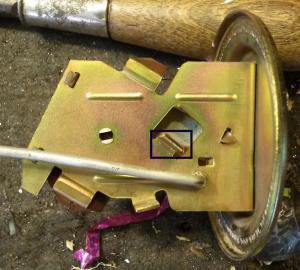
 1 point
 -
1 point2050-Z, Everything sounds like it is working exactly as intended except for the click and then completely dead. And as Zed Head suggested above, that is probably as simple as bad battery cable connections. The charge light is supposed to light up if the key is on and the engine is not running. The beeper is supposed to beep six times or so before stopping. Clean your battery terminals and cables and the "click-dead" thing should go away. As for the two small wires hanging down below the steering column, I believe those two used to connect to your ignition lock. They are used to beep the beeper when the key is in the ignition and the door is opened. A reminder that you have left the key in the ignition. If you removed the ignition lock portion, you had to disconnect those two wires to get the lock out of the car.1 point
-
1 pointWithout knowing what fooling around with things means, it has all of the symptoms of a bad battery connection. The connection will pass low current, to light the charge light (which is correct, with the engine not running and the key on), and beep the seat belt beeper. The high current draw of the starter when you try to Start causes the bad connection to heat up and open and everything goes dead. Check the connections at the battery posts, and the cable itself if you have the clamped-on "fixed" cables. They have to be cleaned with a battery terminal cleaner to be sure, and clamped tightly. No screwdriver-scraping and press-on-and-twist operations.1 point
-
My sensible is not your sensible. 325hp, triple adjustable shocks, and a sequential 5 speed trans are sensible to me. :-)1 point