


All Activity
- Past hour
-
 You could do an inertia switch in the jumper loop on that plug. Duralast Fuel Pump Inertia Switch SW1771
 -
 jimmyd joined the community
 -
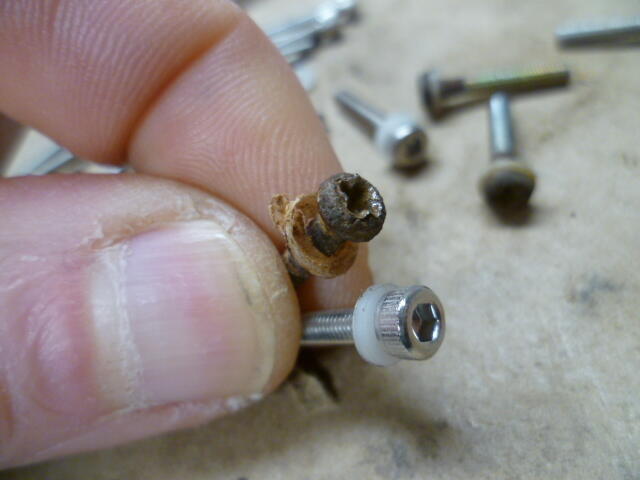
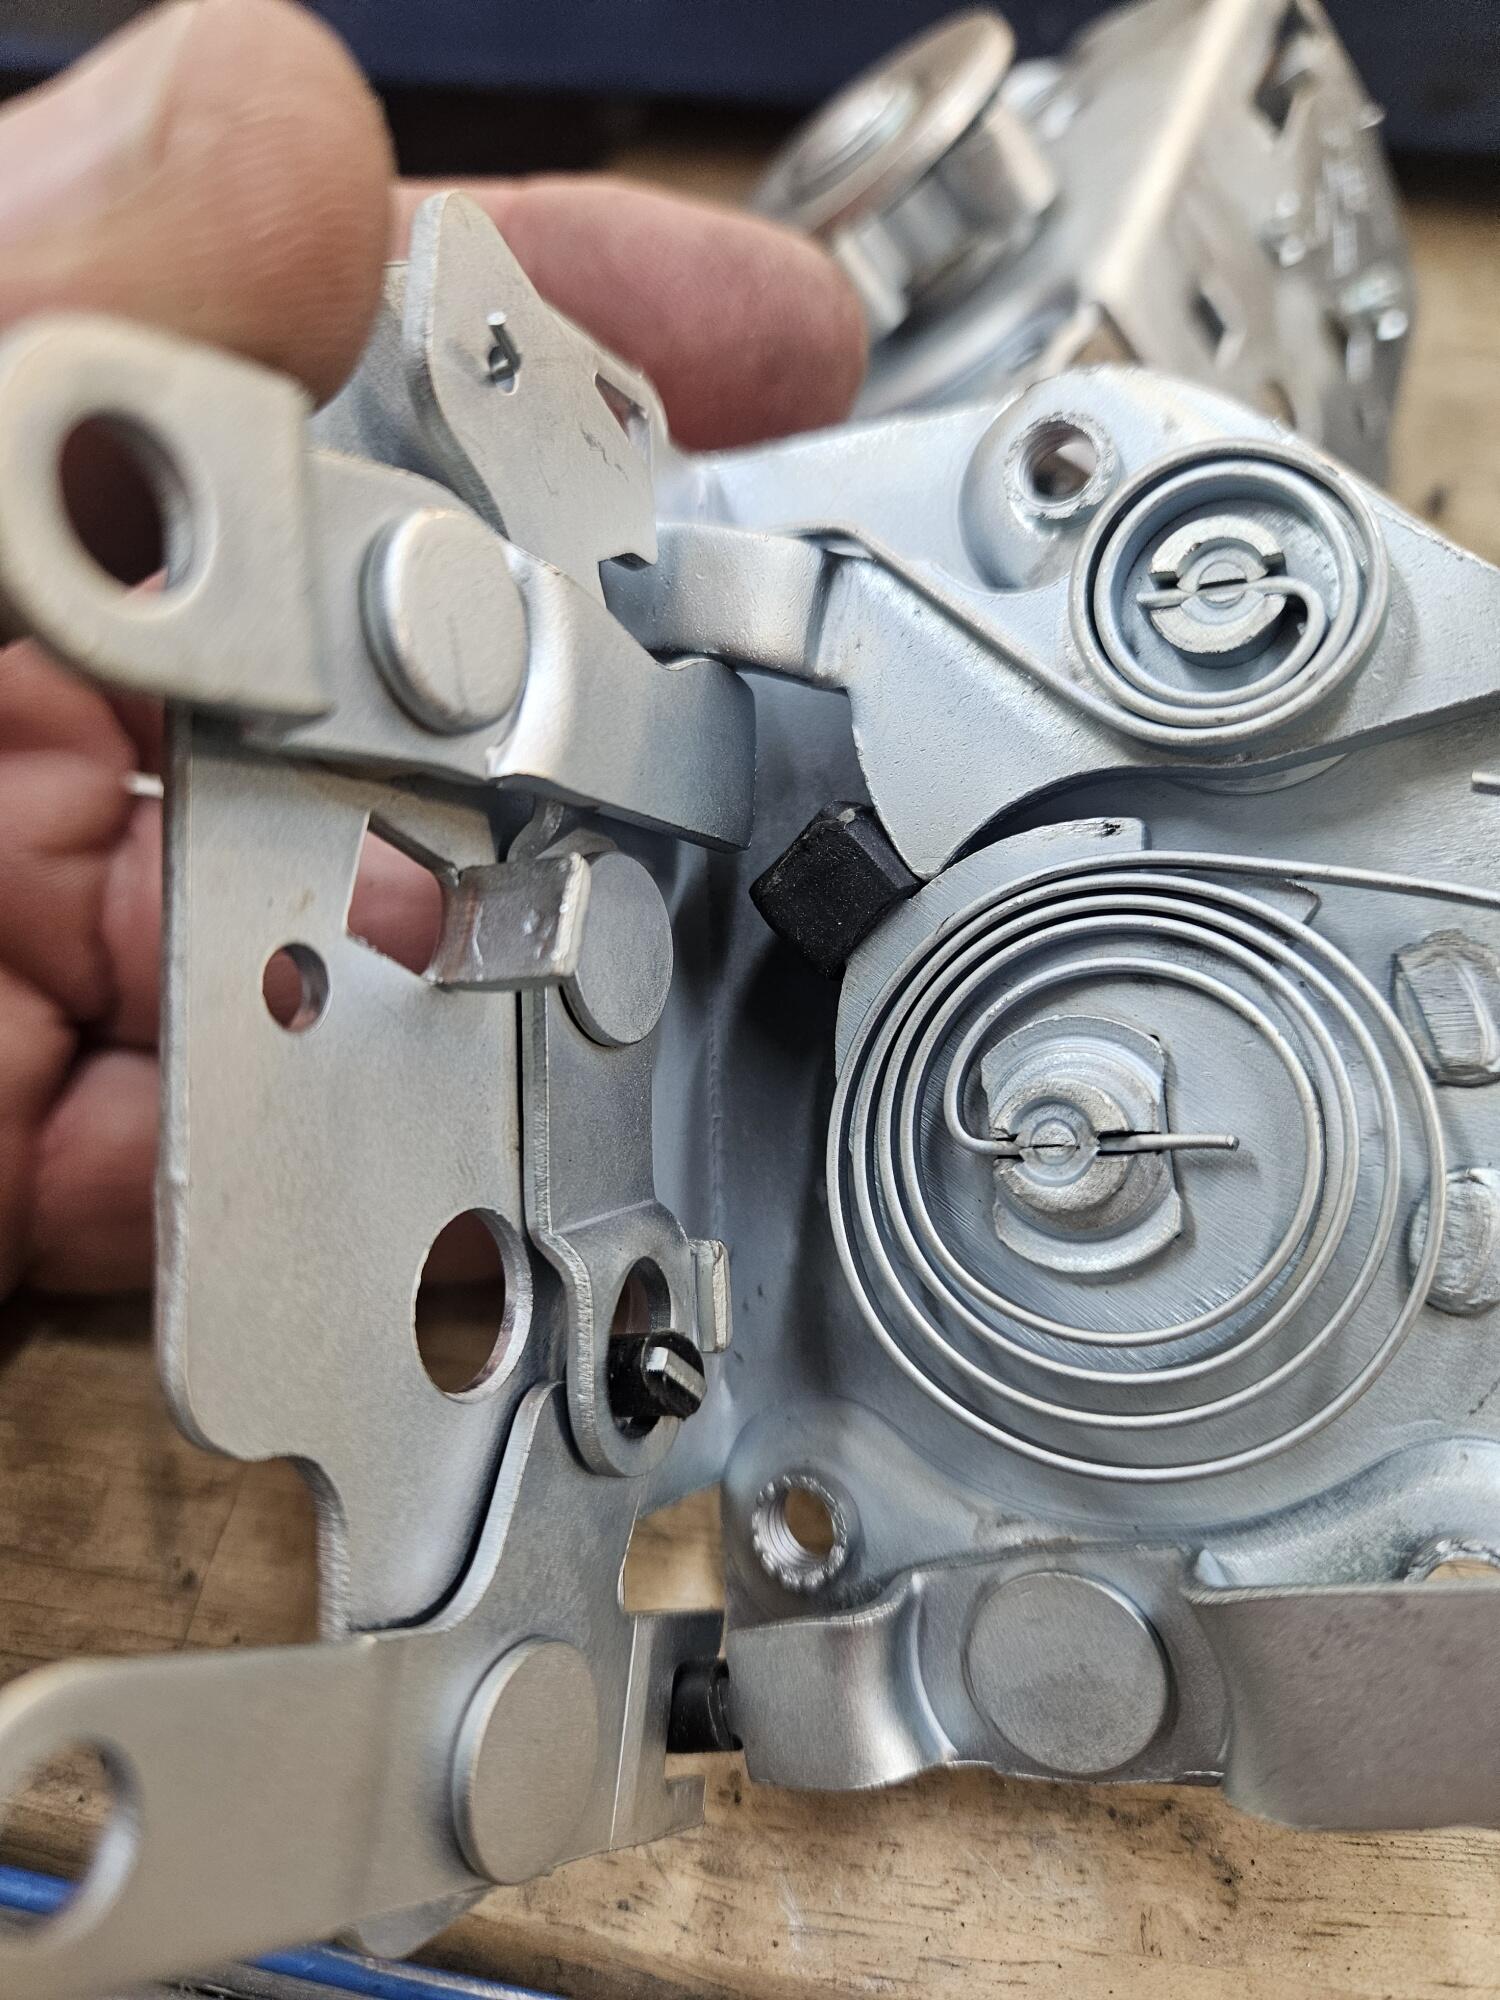
 When installing the door latches, make sure you use the correct length flathead. The lowest screw that attaches the latch is shorter than the others. If you put in the longer one in that position, the latch will hang up. Again, ask me how I know 🤣😝
 -
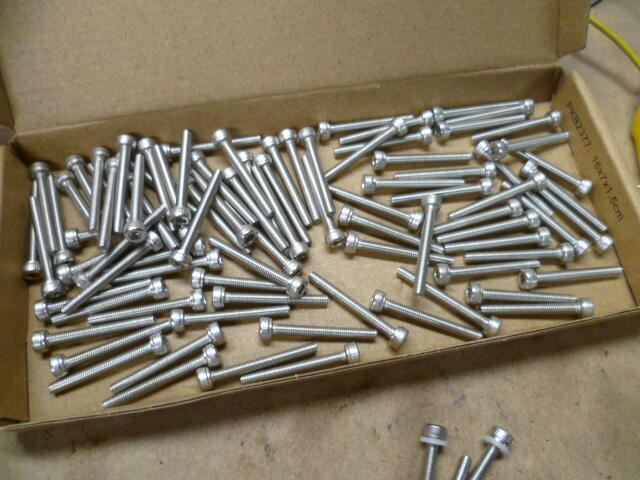
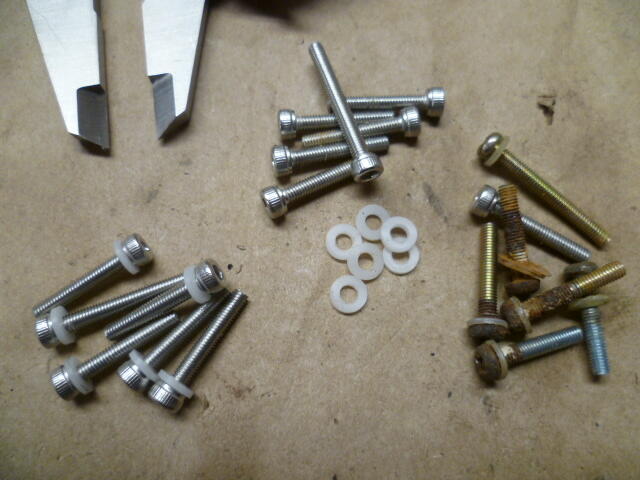
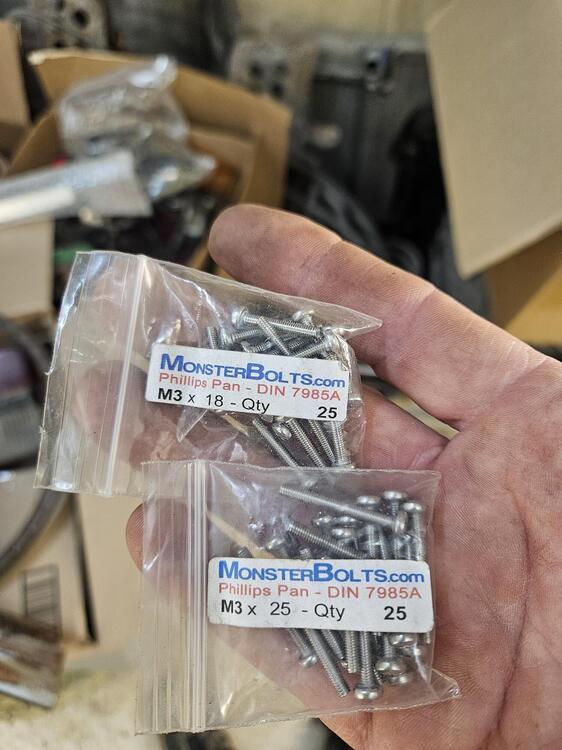
 Yeah, I went socket head because I was thinking that getting in there with a hex driver would be easier than a phillips screw driver. And now that I've done it, I think I made the right call. T-handle allen driver for the win. Oh, and they're stainless. Seemed like the right material for the application.
 - Today
-
 Yeah i know thát feeling.. it was only yesterday that i took a look at a combination of a drill/lathe and millingmachine.. but not really to buy one because it's all Chinese junk and i don't have really room for it/that! (And a bridgeport is a machine that needs a stable floor!)
 -
 They look like the radio power and lighting connections. Does you car have a radio installed?
 -
 Socket heads might be nice there. One day I might have room for a lathe... and a bridgeport...and... 😁
 -
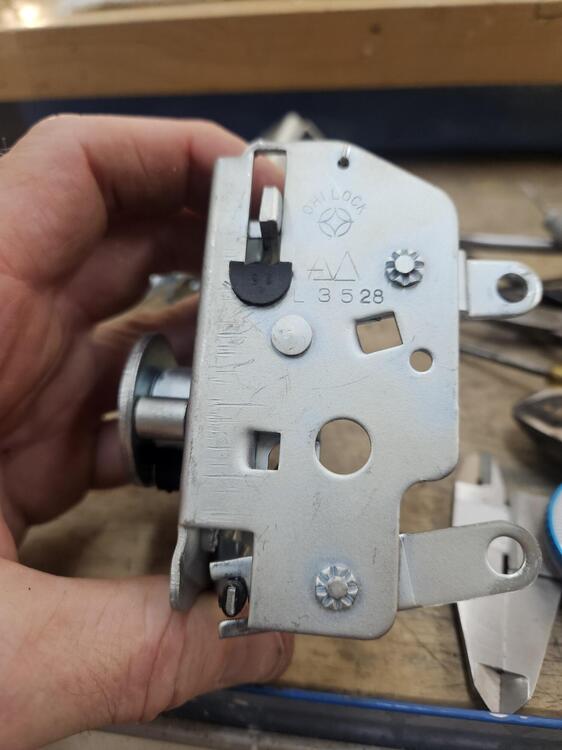
I don't know if it's the ONLY reason for it's existence (seems unlikely), but that is where they printed the identifying markings:
-
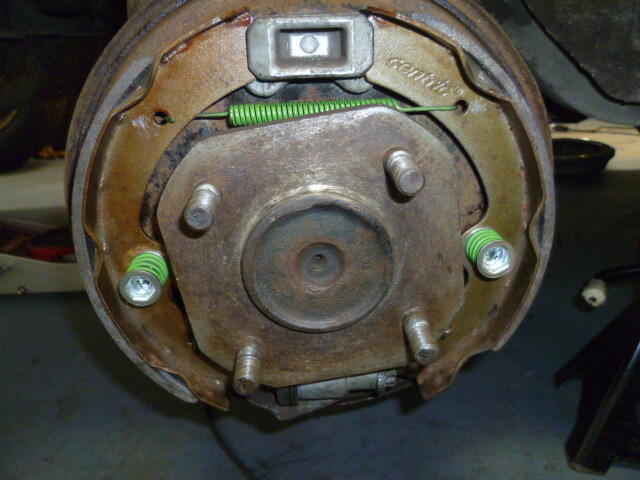
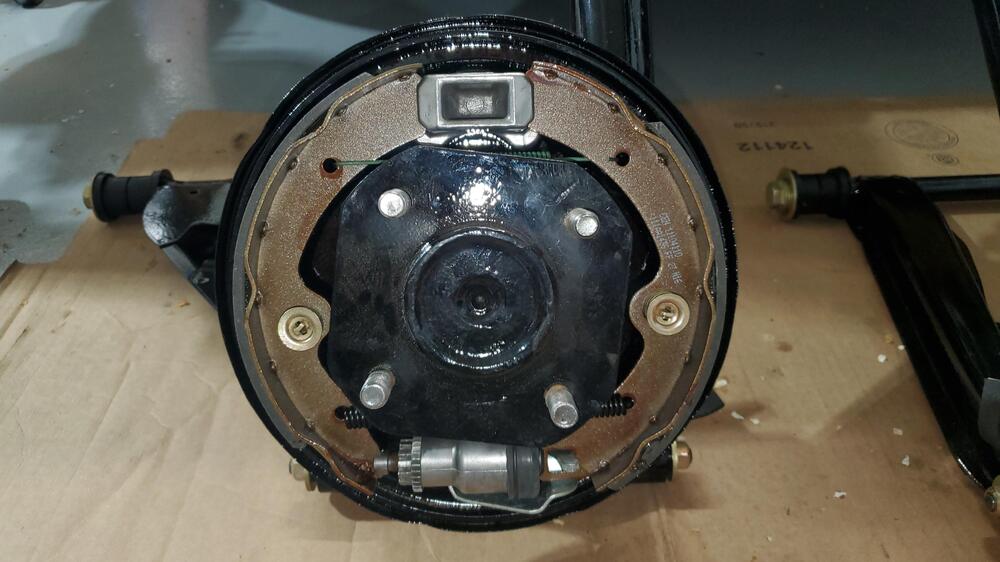
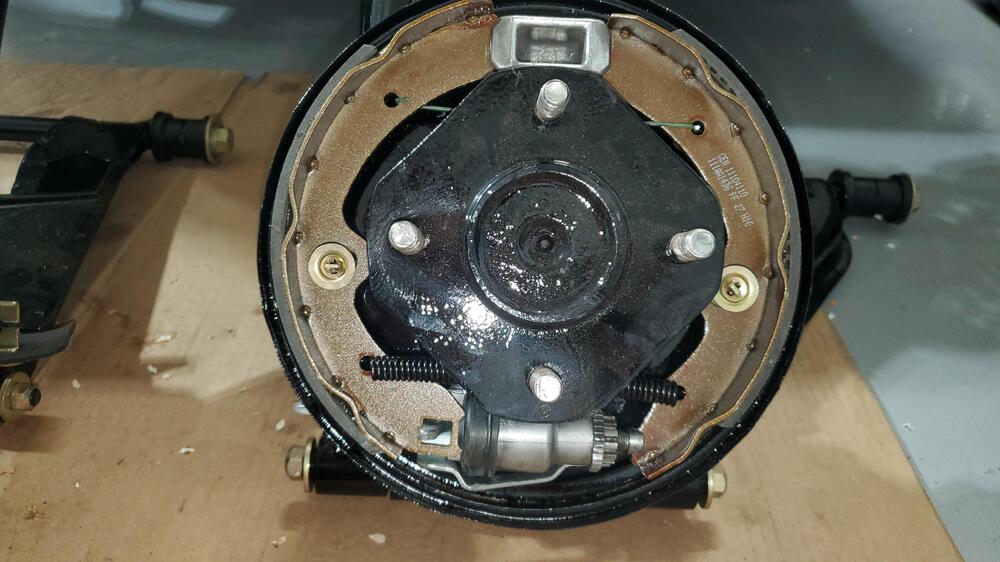
Here's mine. A little embarrassing to post after your clean and shiny stuff, but it's what I got. They'll work fine, but aren't as pretty. You can see the washers under the springs:
-
Much better. One follow up question though... Are there metal washers between the hold down springs and the shoes? I can't tell for sure from the pics, but I just want to make sure the springs are not riding directly on the shoes.
-
Sigh. Of course you did. Right after I did this: Yes... Before you ask. Yes, I made the little plastic washers.

-
-
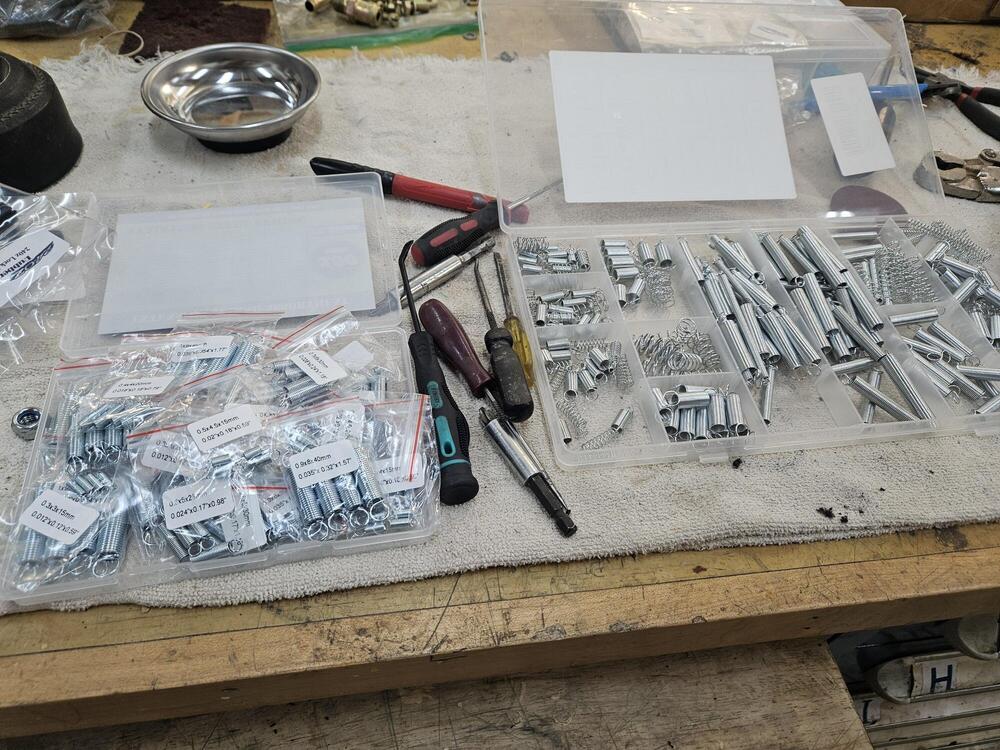
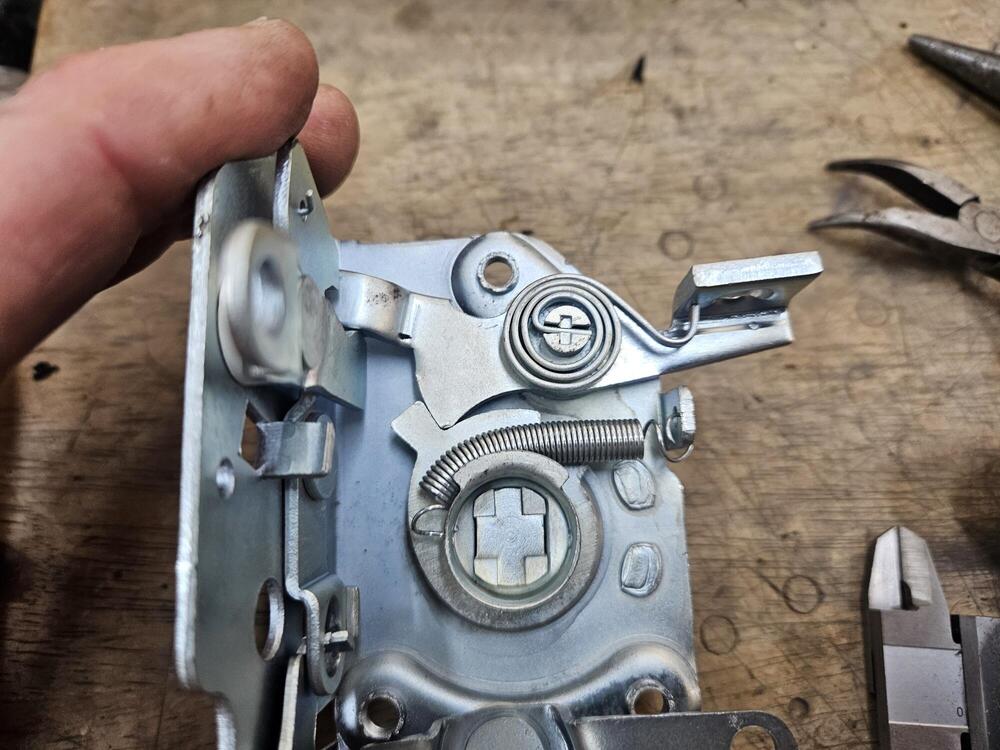
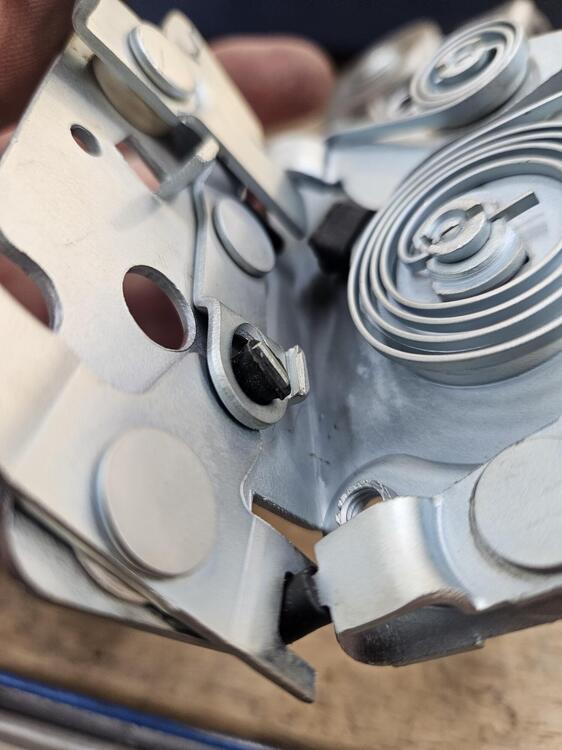
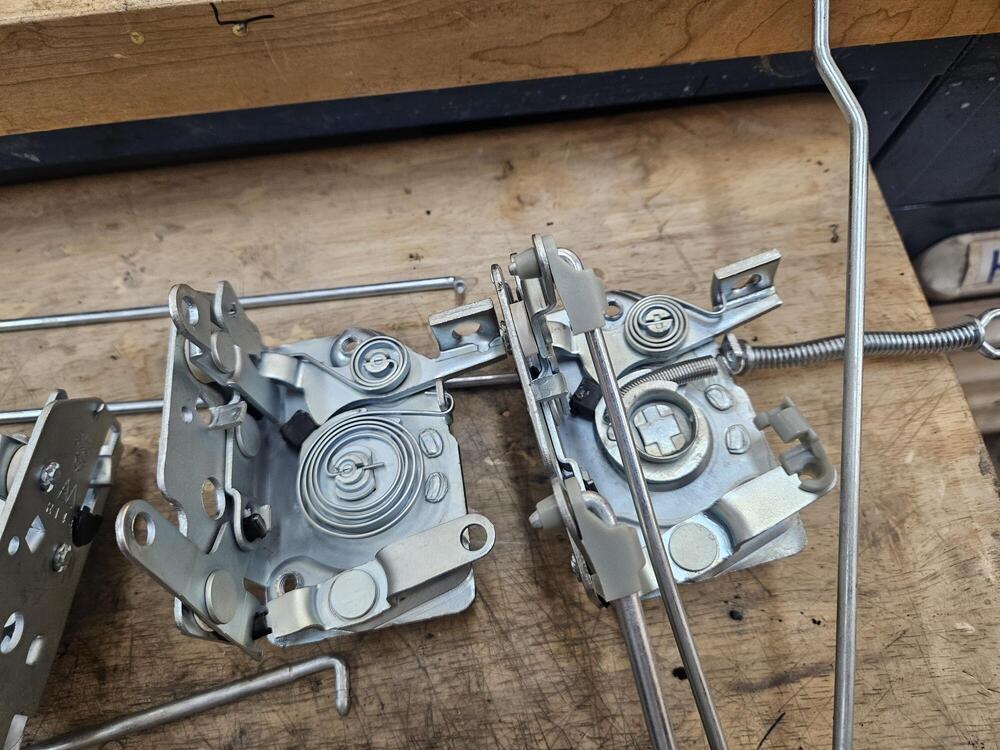
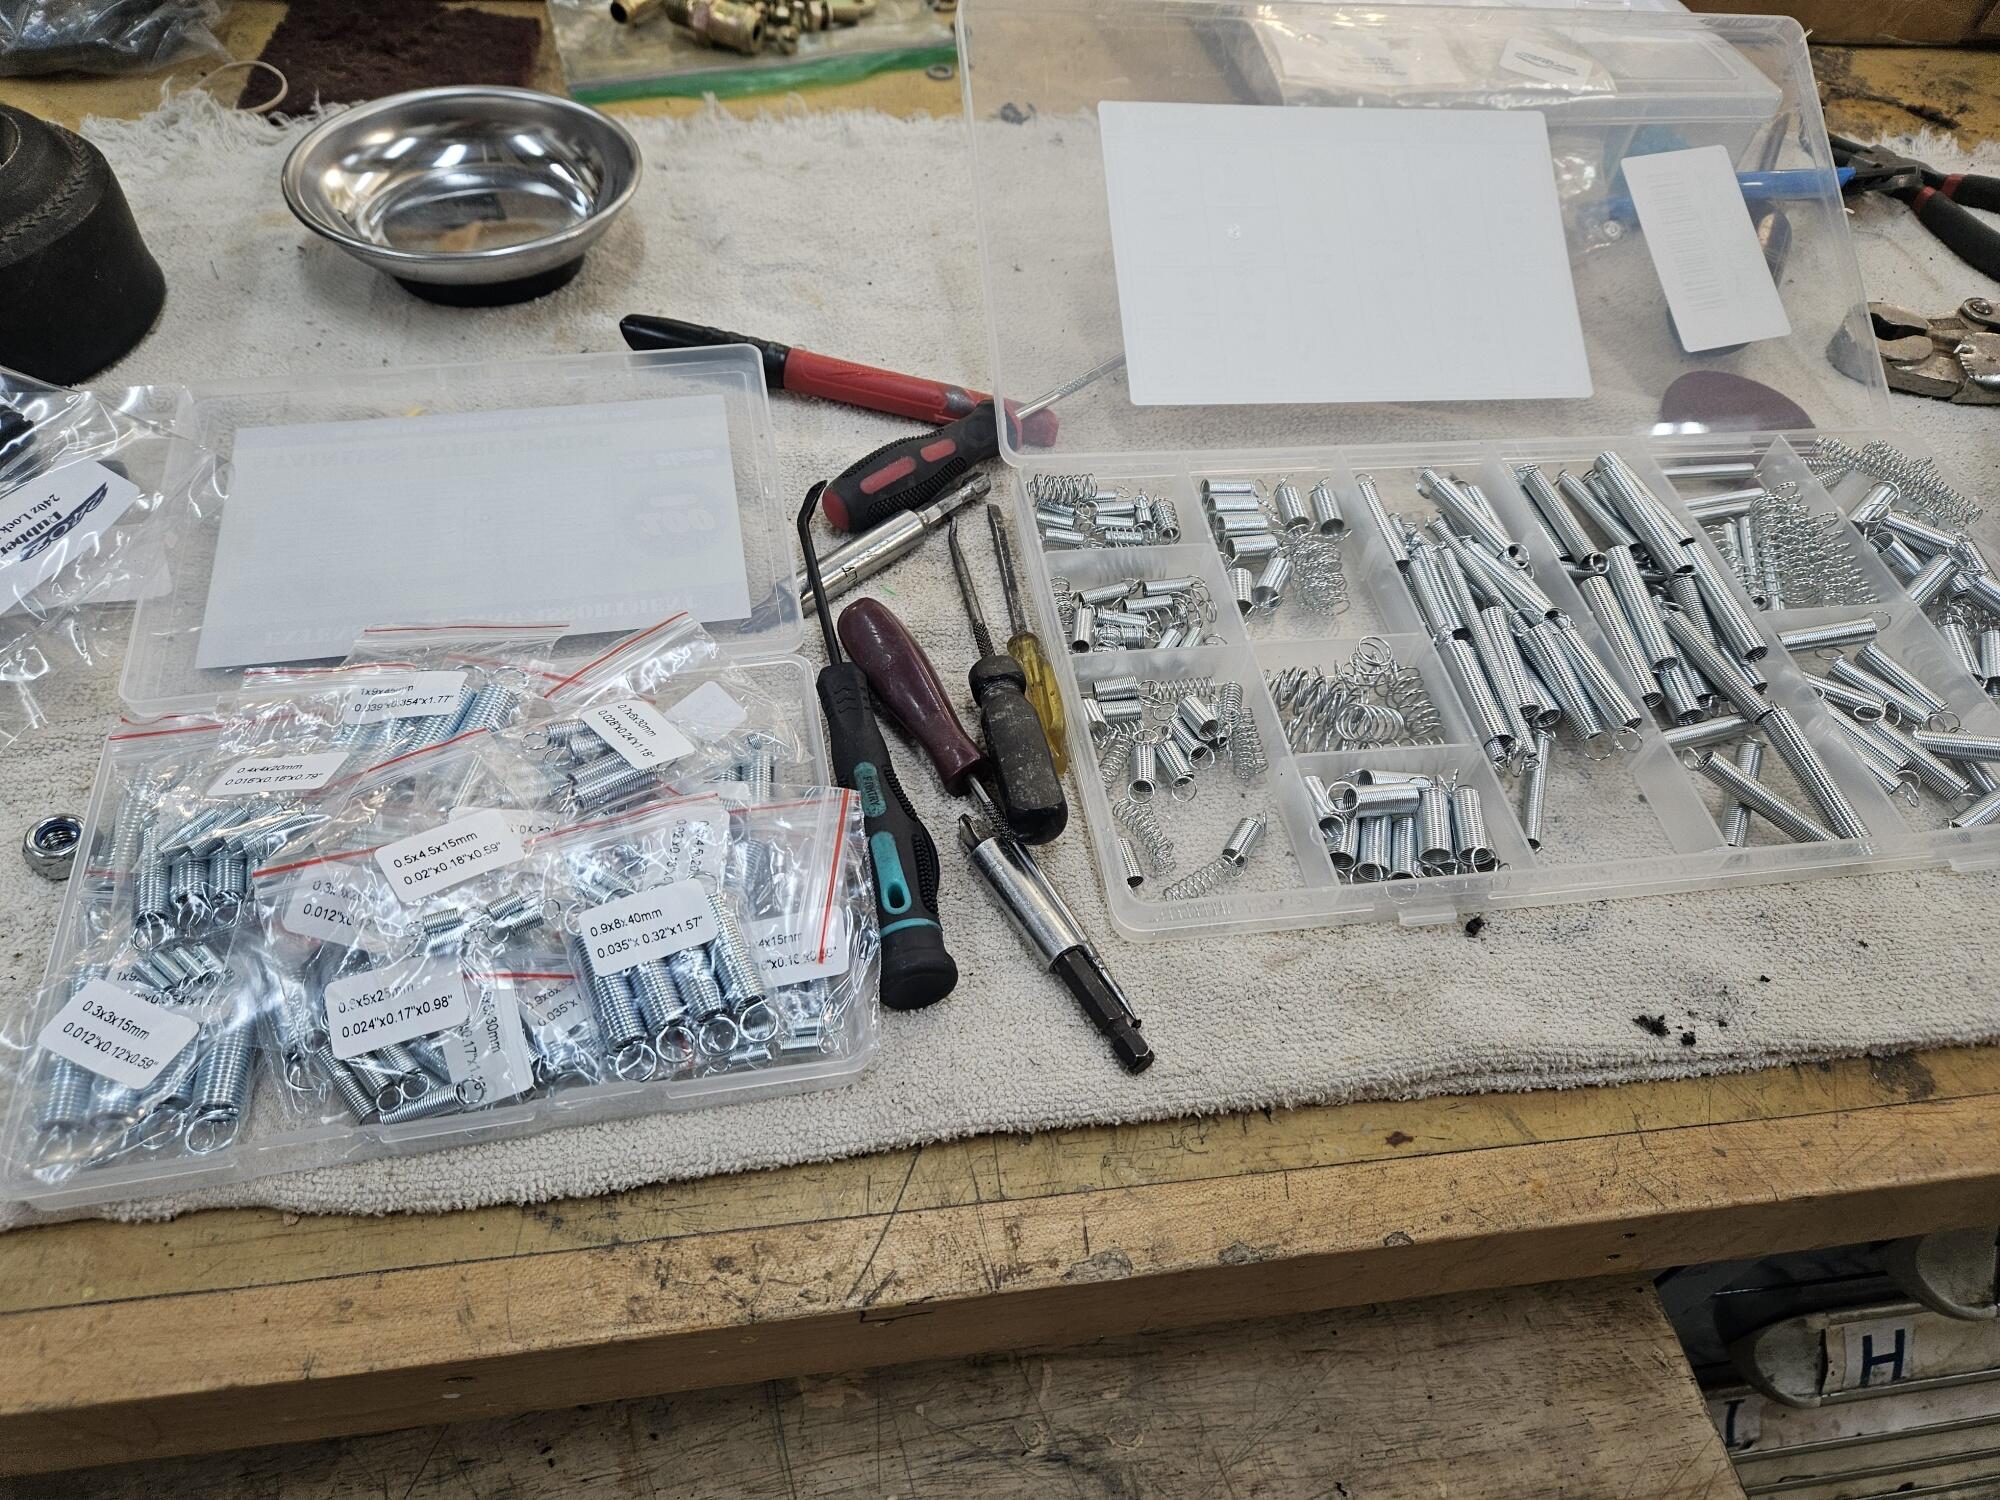
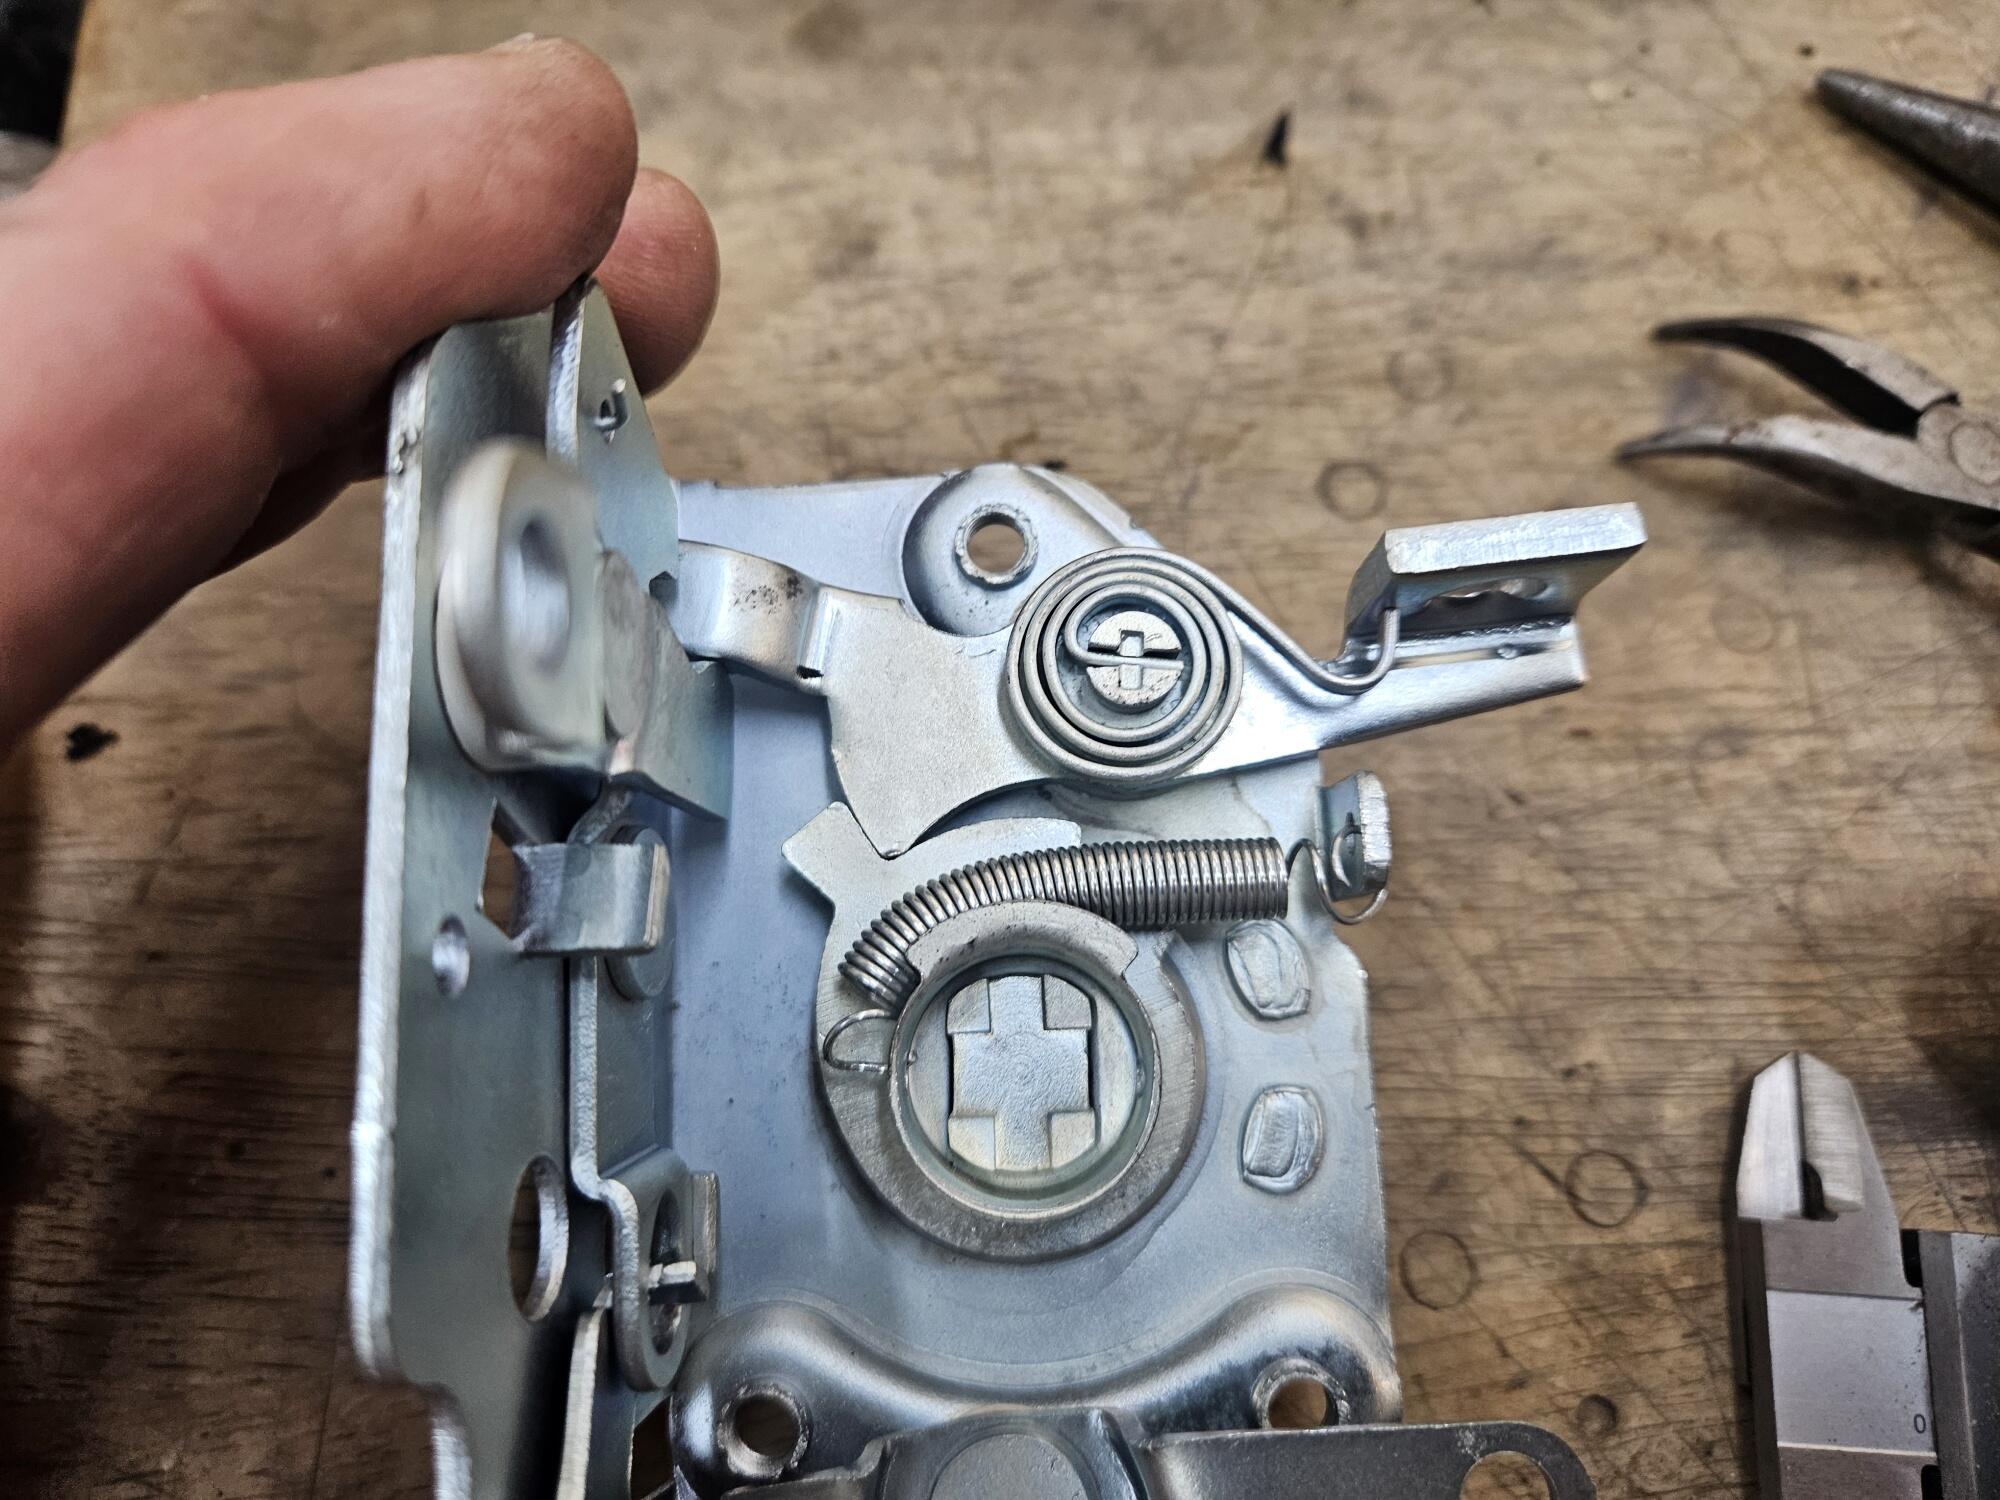
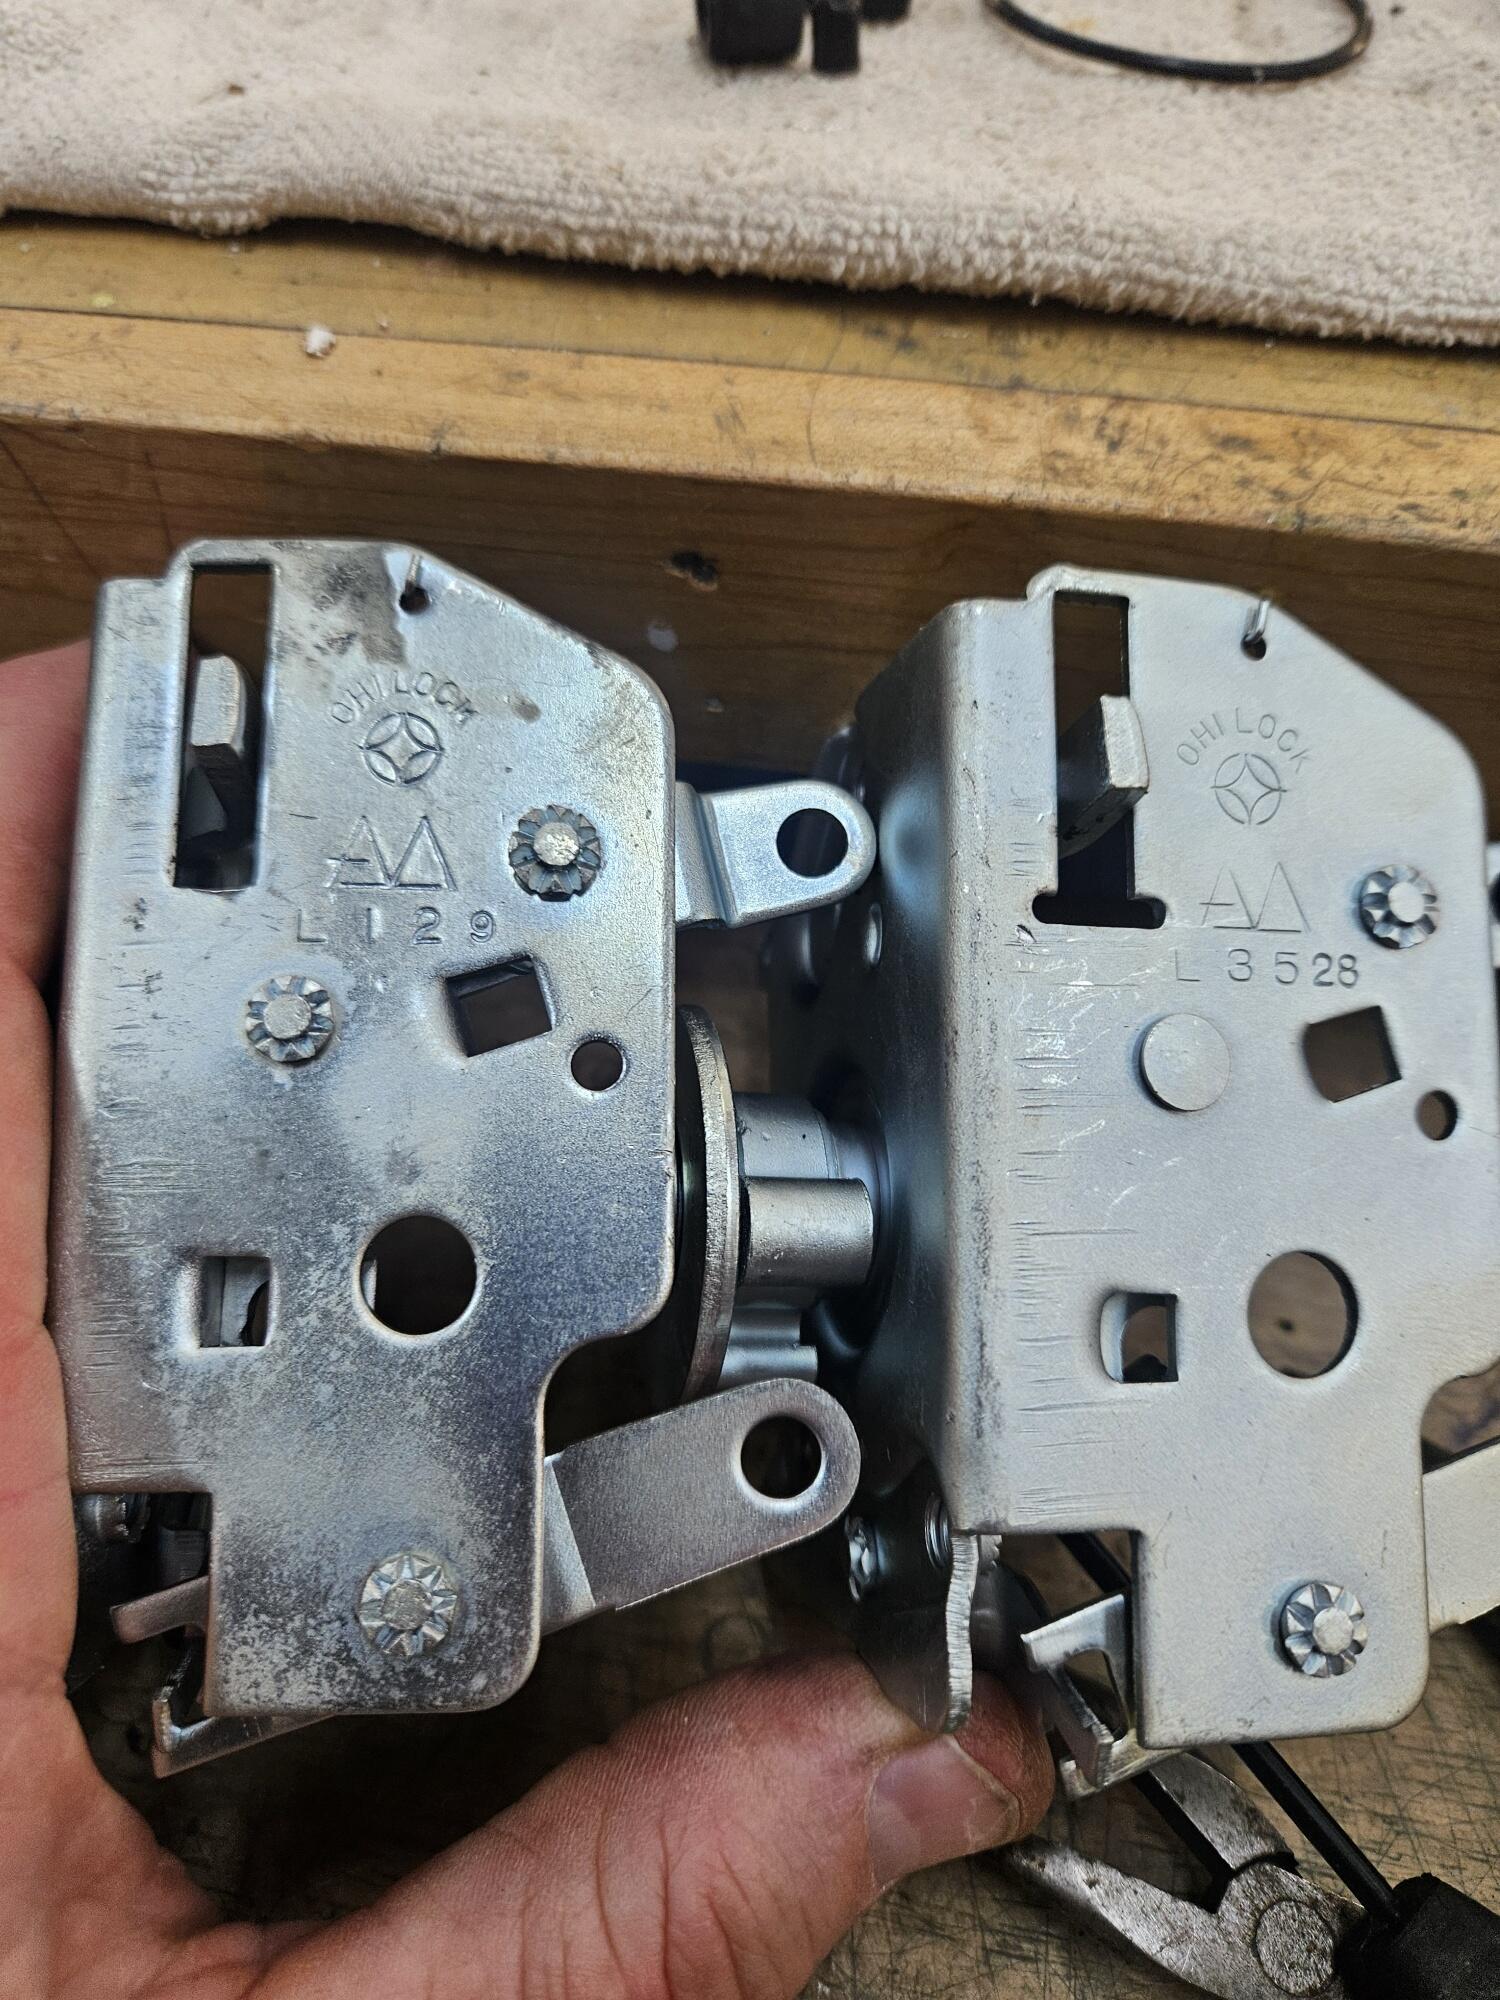
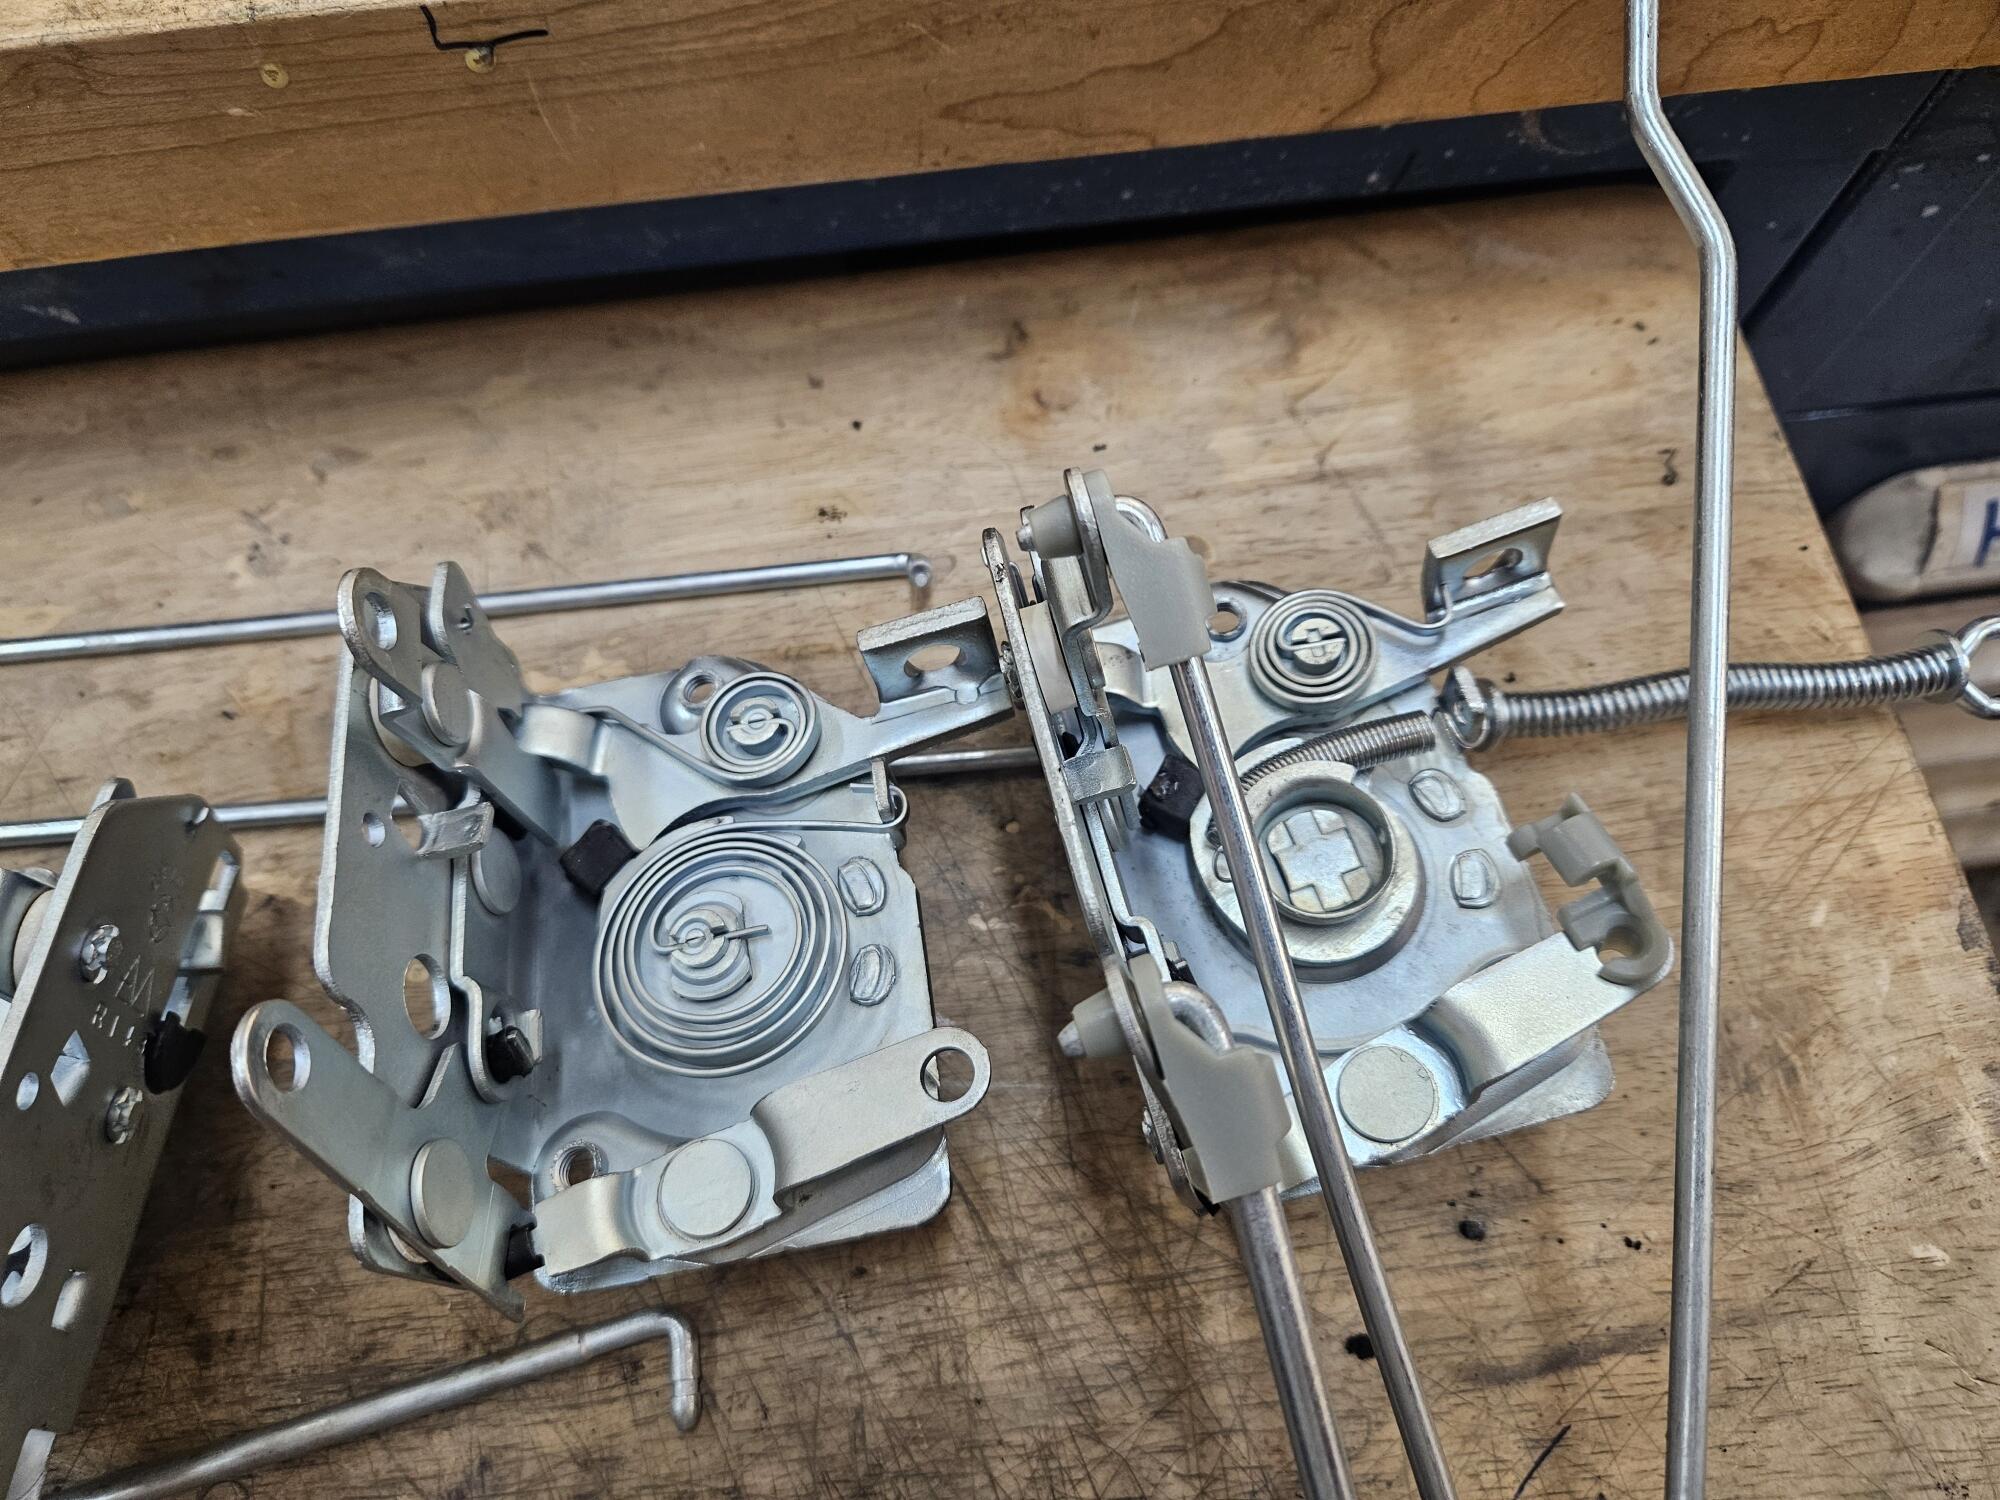
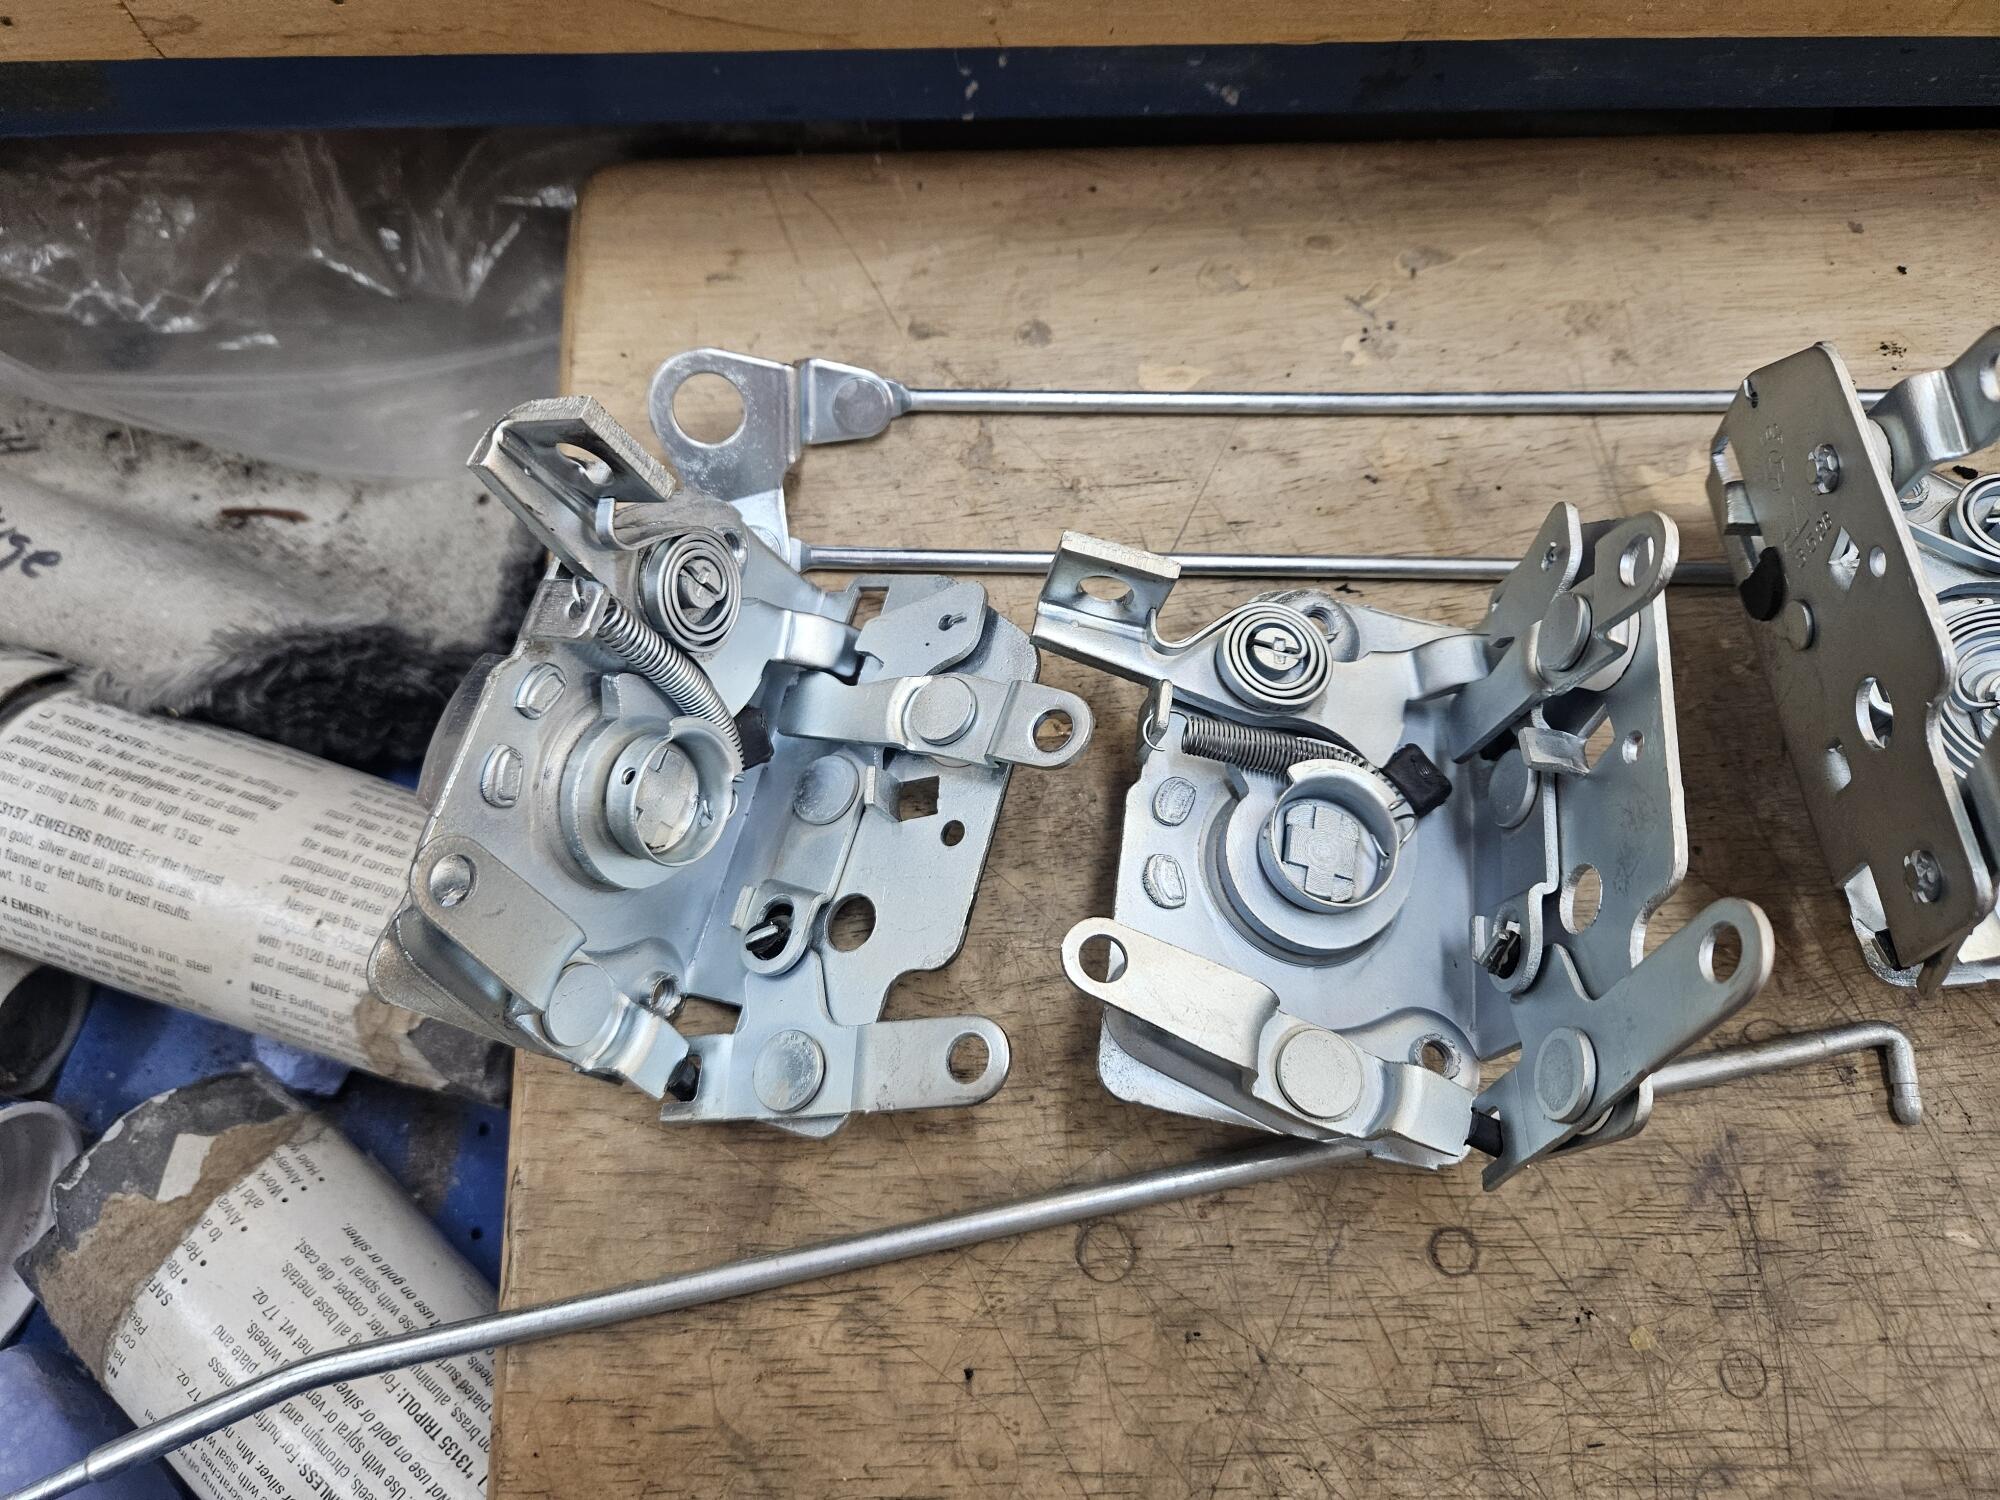
I made it back into the shop again, finally. I got a batch of clear zinc back from the platers and went through and reworked some door latches. I used the kits that Steve Nixon sells for the rubber bits inside the latch. I also bought a couple of spring assortments because one of the latches was missing the return spring Interestingly I have two different styles of latch. I have the style with the coiled return spring and then I have one latch that has the two flat springs in it. The one with two flat springs has a small notch on either side of the latch arm slot. Steve's rubber parts are designed for this style of lock. On the other locks I had to take a little rubber out of the semi circular pieces to make them fit properly and I glued them in place with some black super glue There are also three squarish rubber pieces that fit over the ends of the arms to cushion them The hardest ones to get on are the one that go on the door striker. There is very little little clearance to get the one side in Here are my two styles side by side. Maybe someone else can add some info on when these parts changed? Even the flat spring on the latch pawl is a different design between the two... I also put the dovetail on the edges of the doors and the spring loaded door poppers into the door jambs. Minimal progress but something. Now that I have the latches back, I can work on assembling the rest of the doors and glass


-
 Checking on my vin 740 shows the same apparently un-used black wire…… Looks clean as a whistle inside the protective sleeve…. Like the above mentioned previous picture Was folded for extended time …..
-
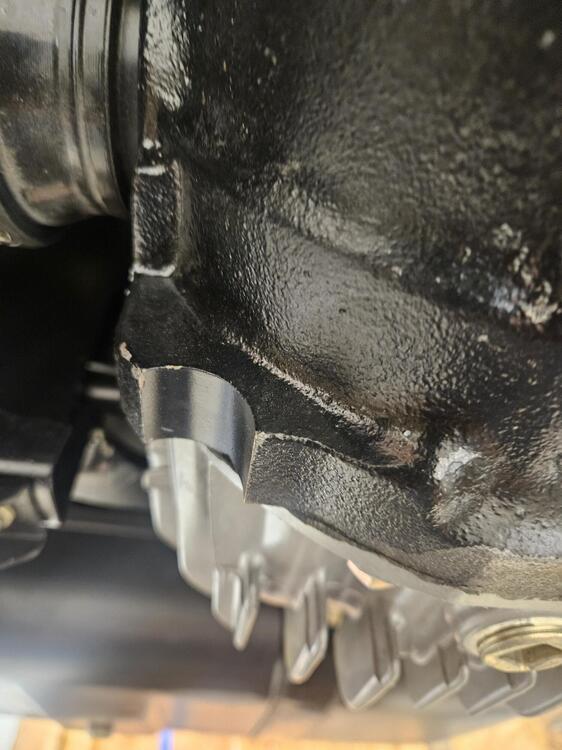
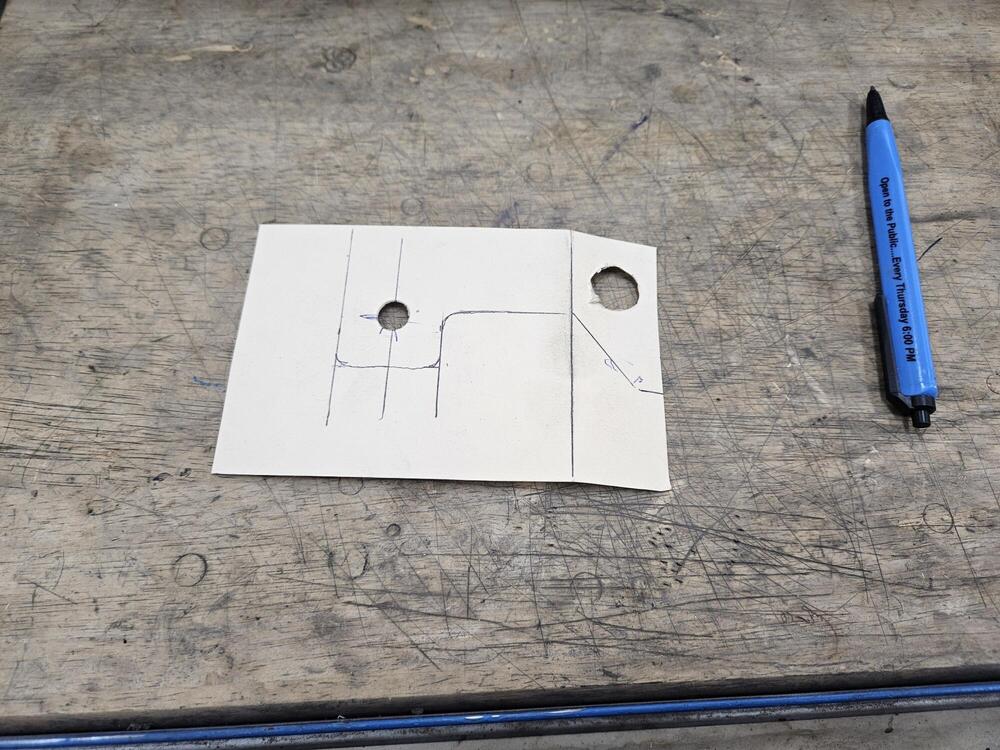
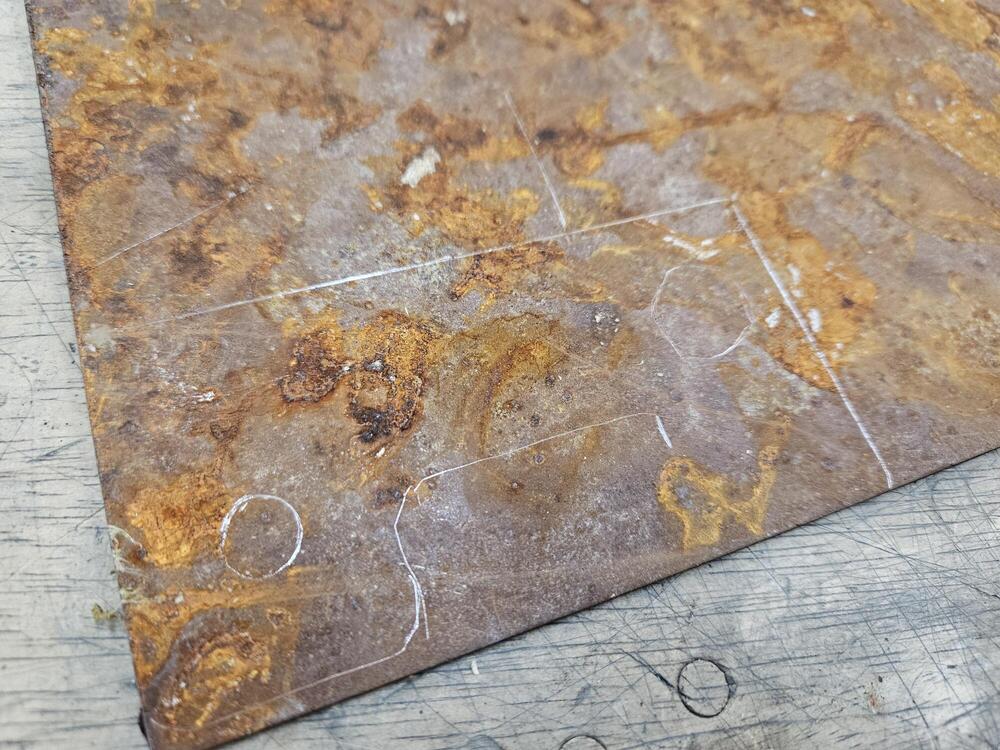
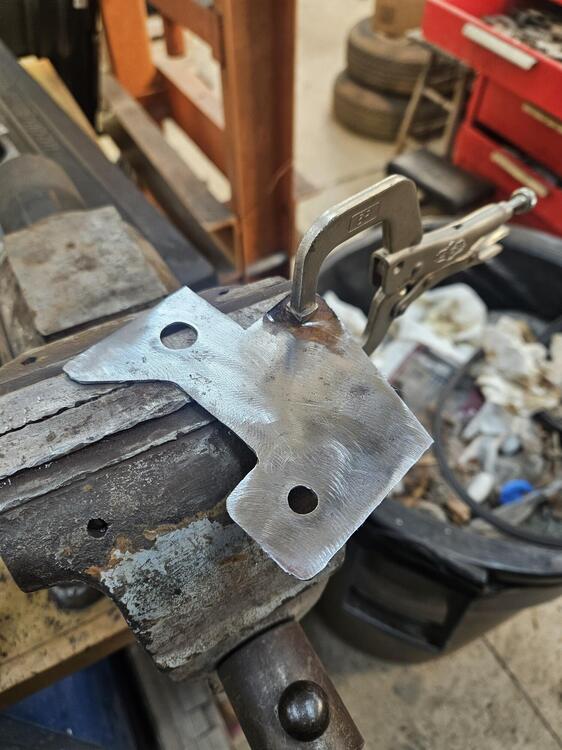
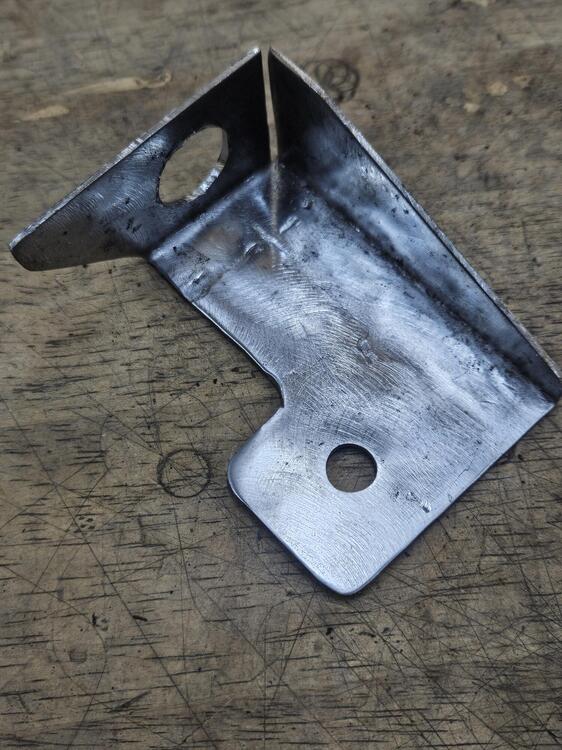
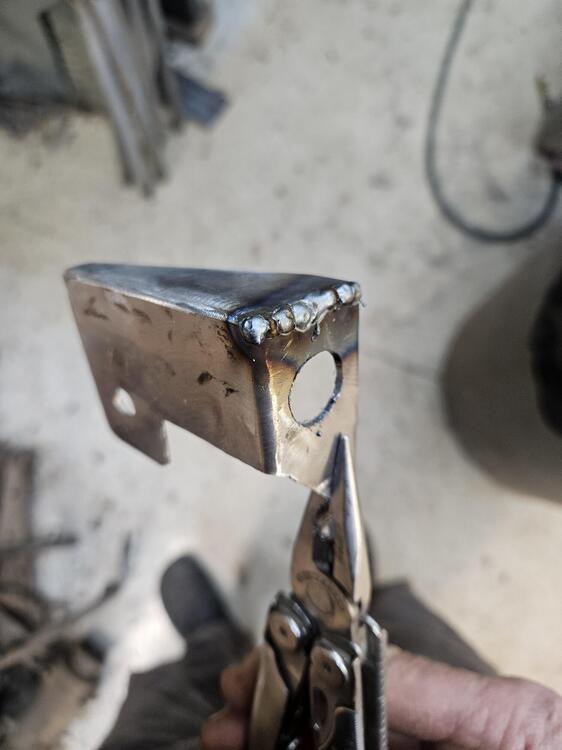
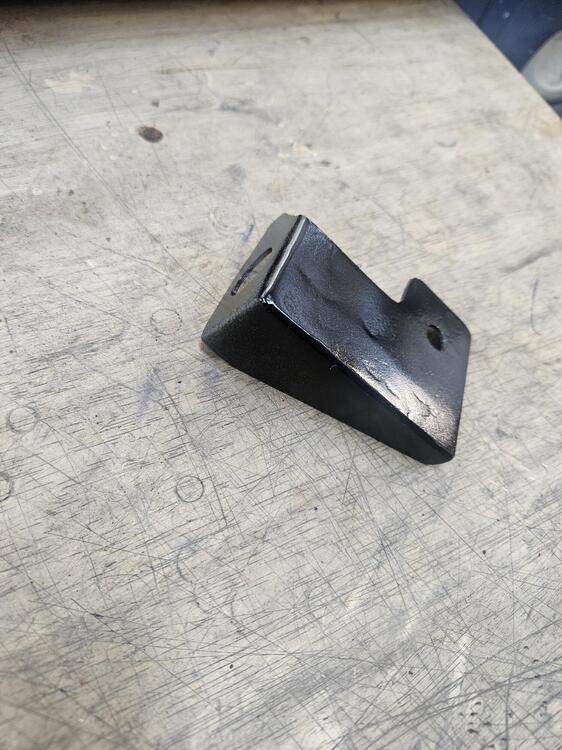
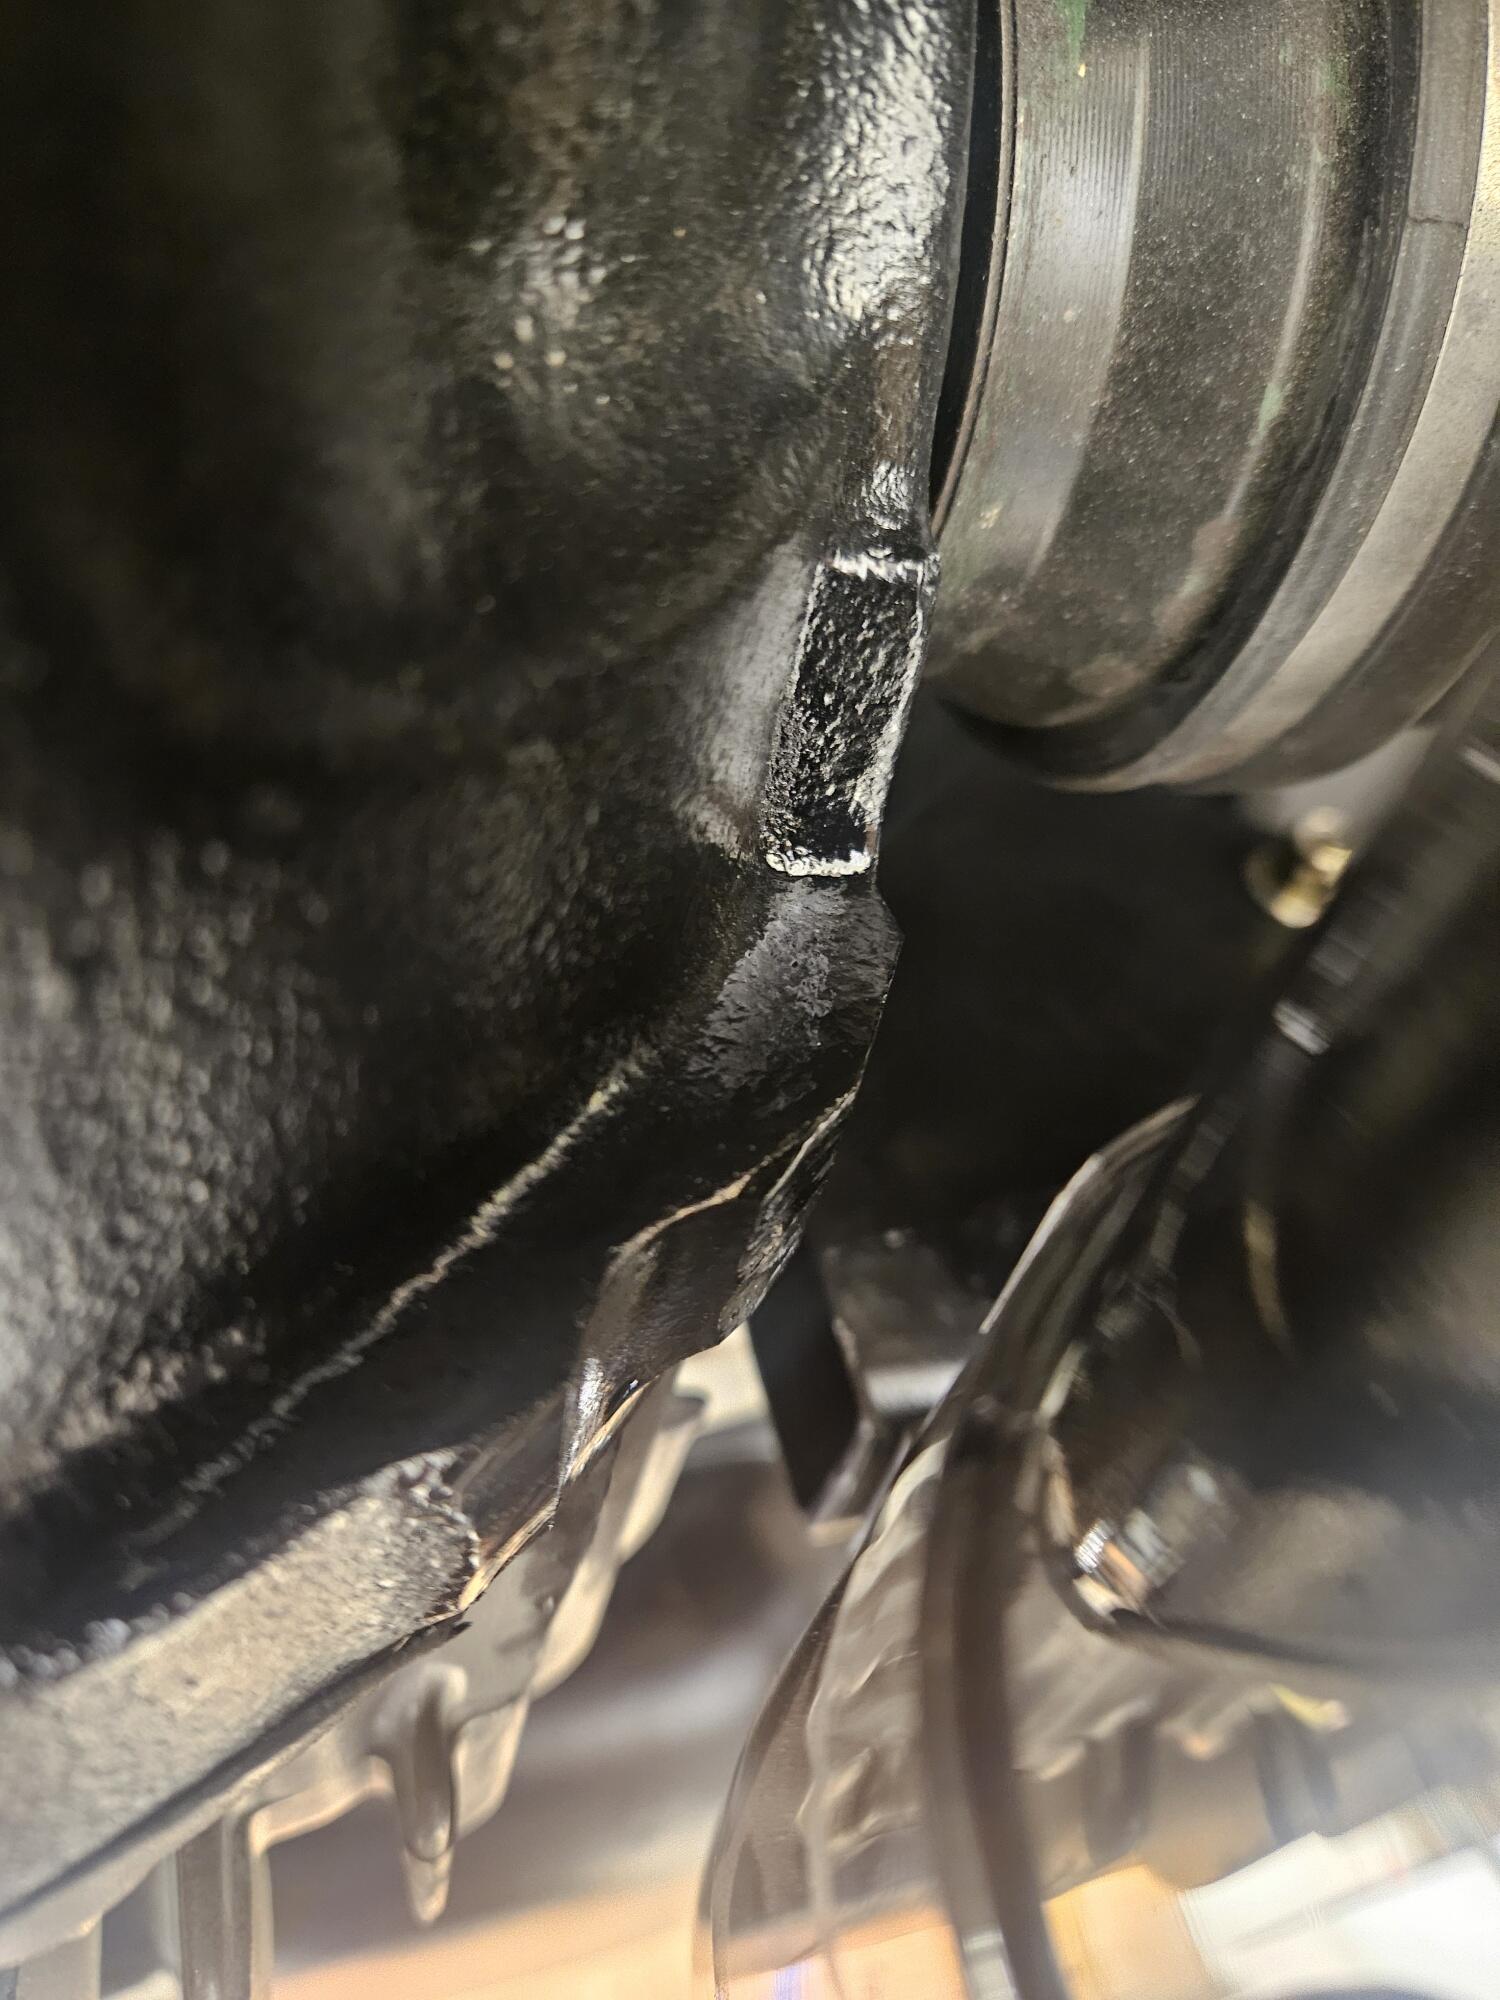
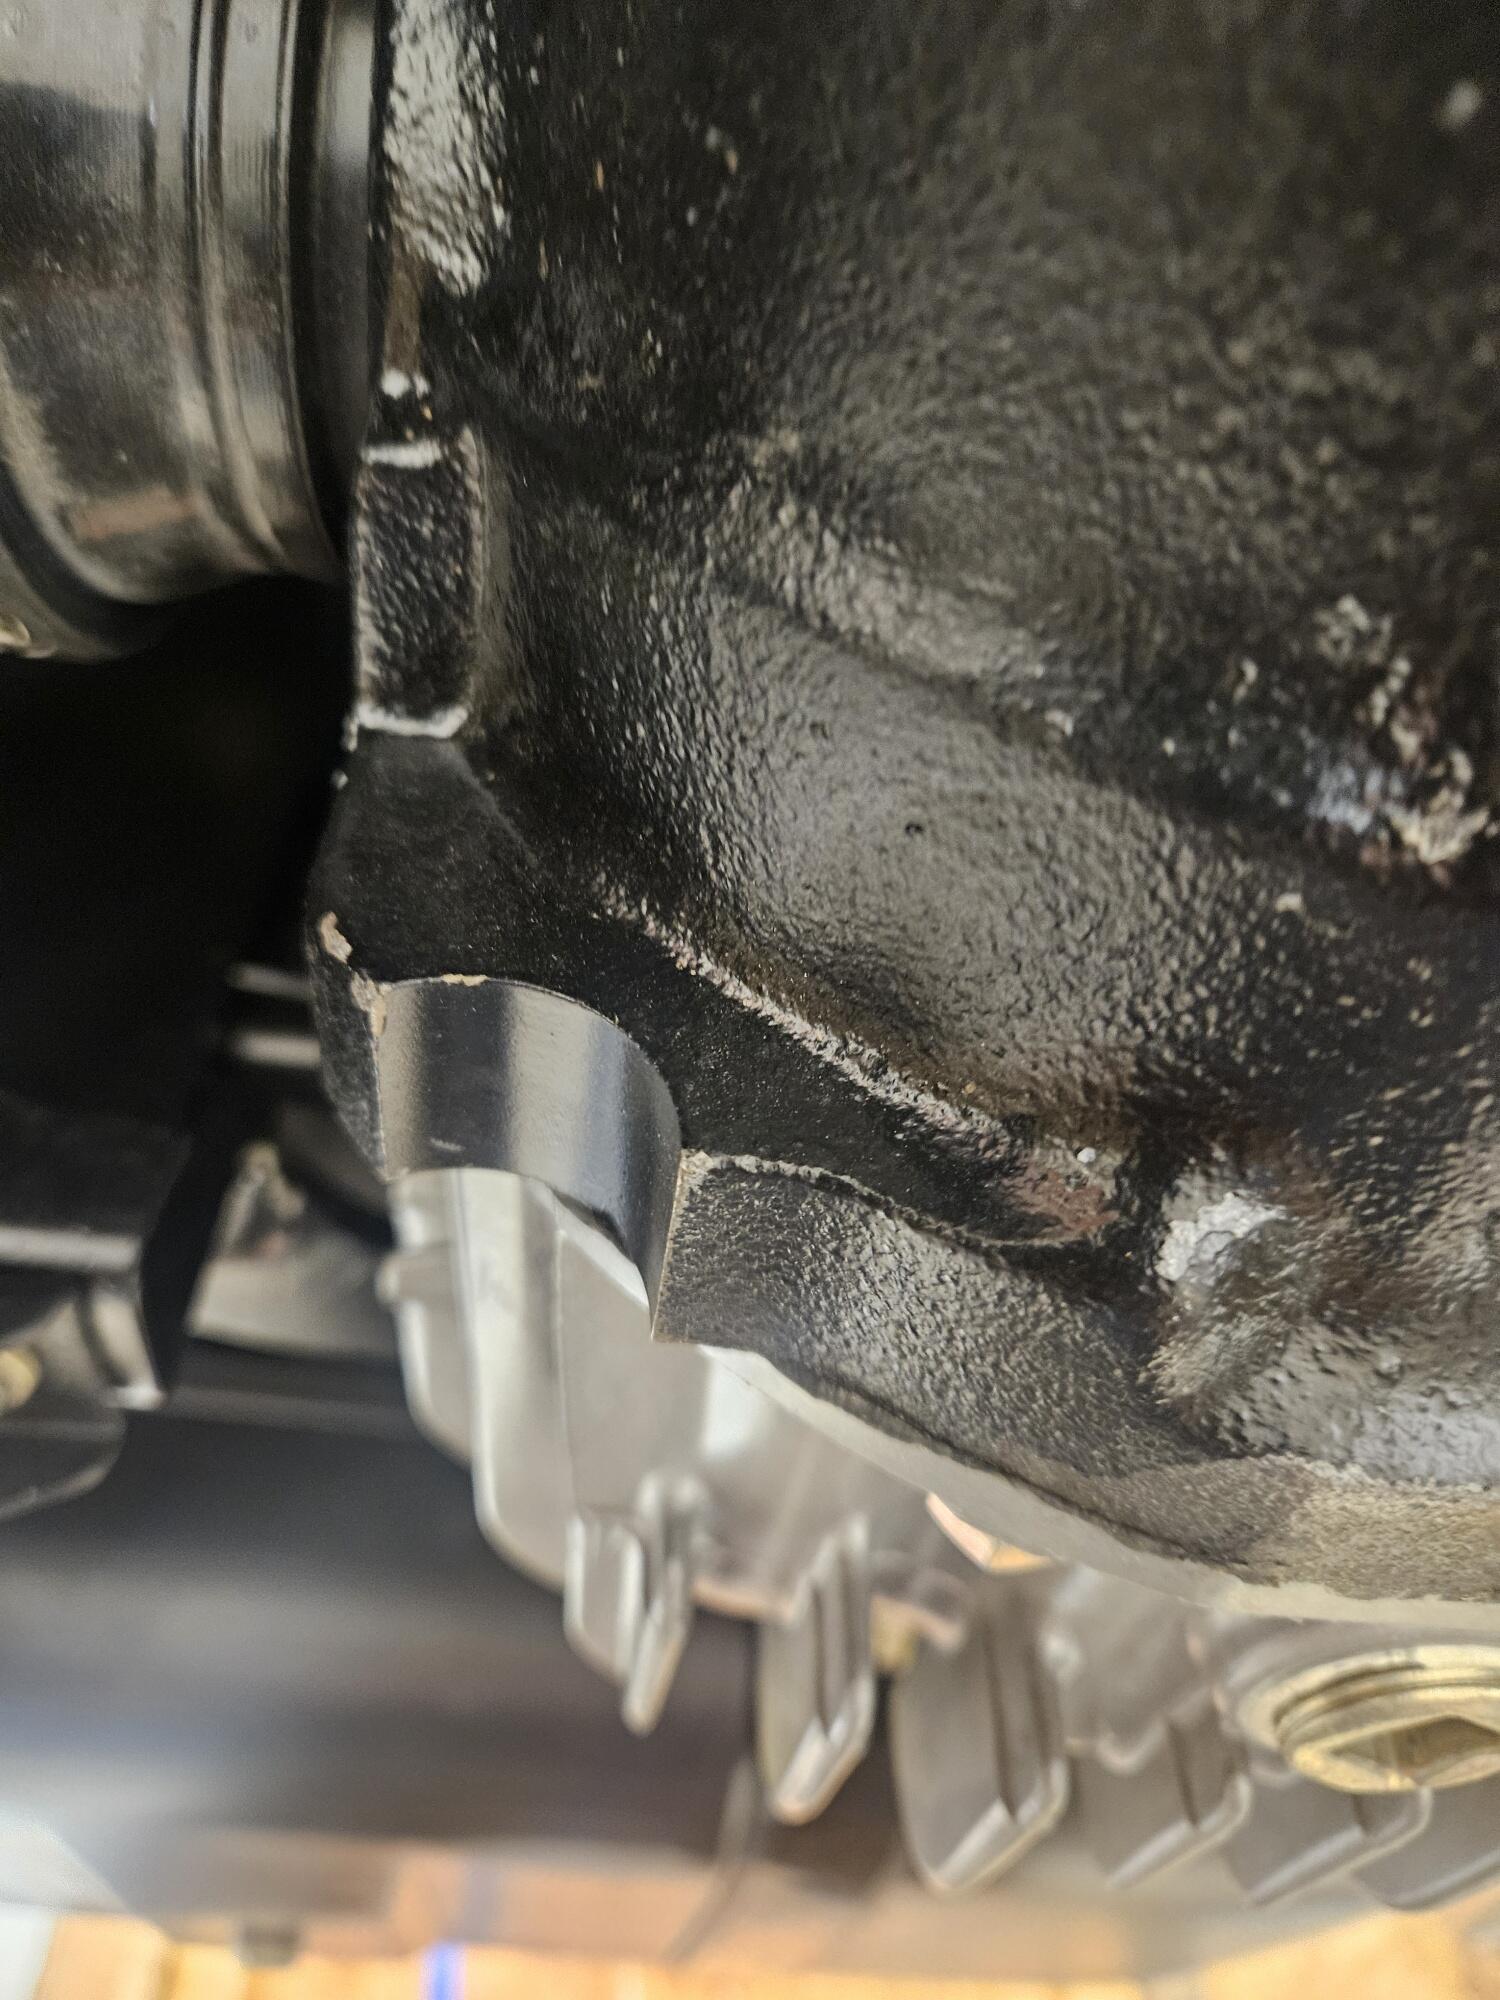
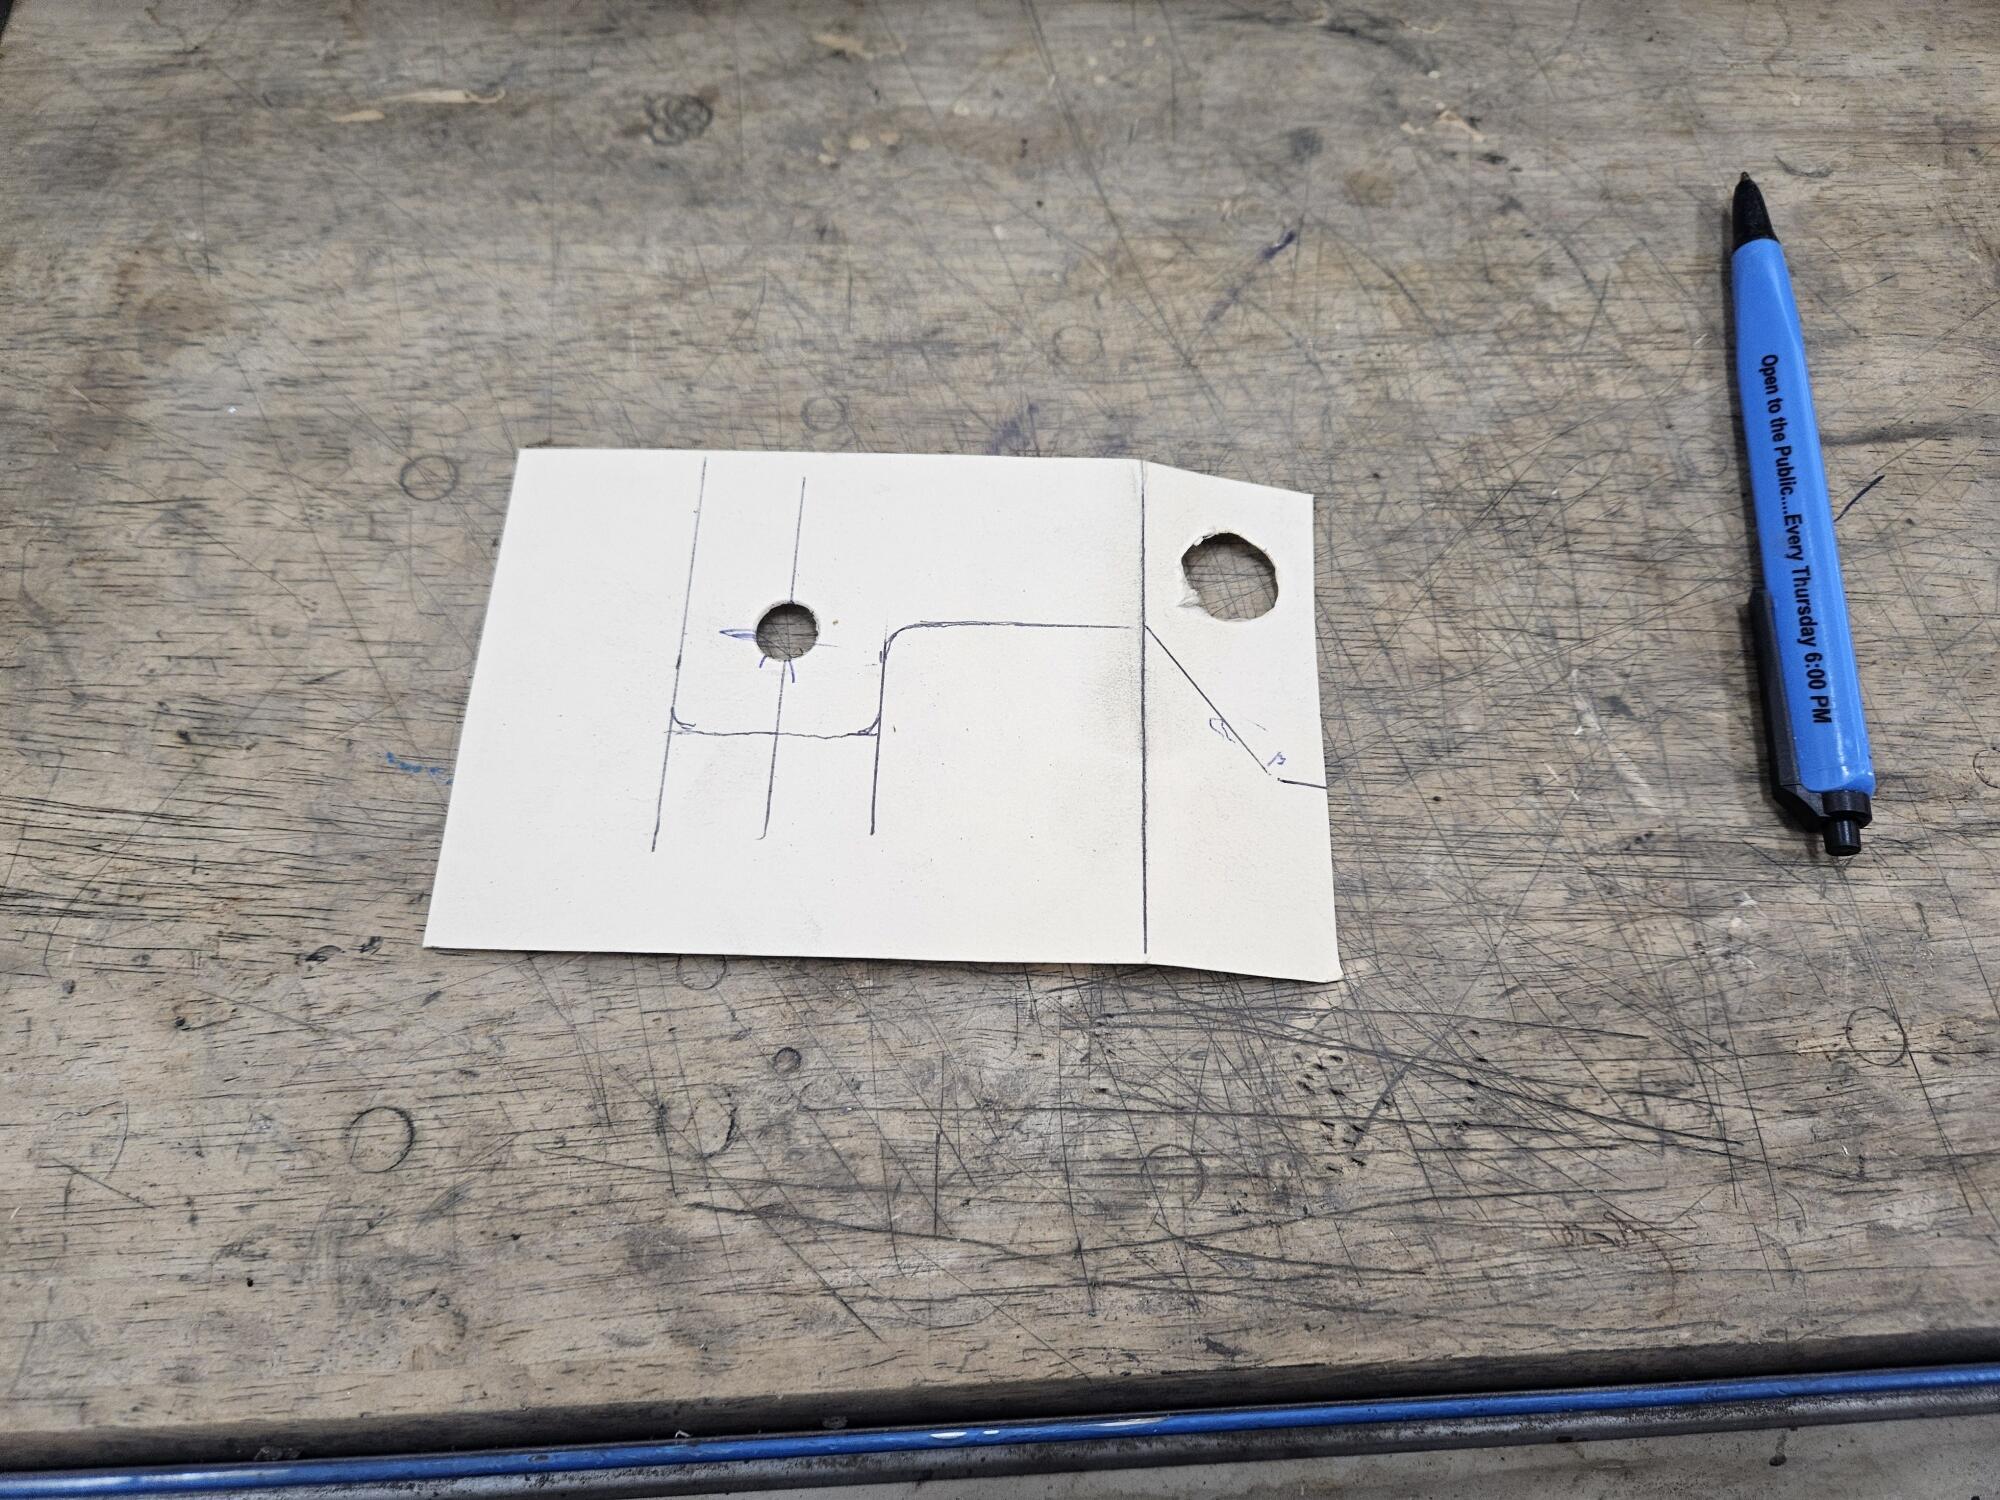
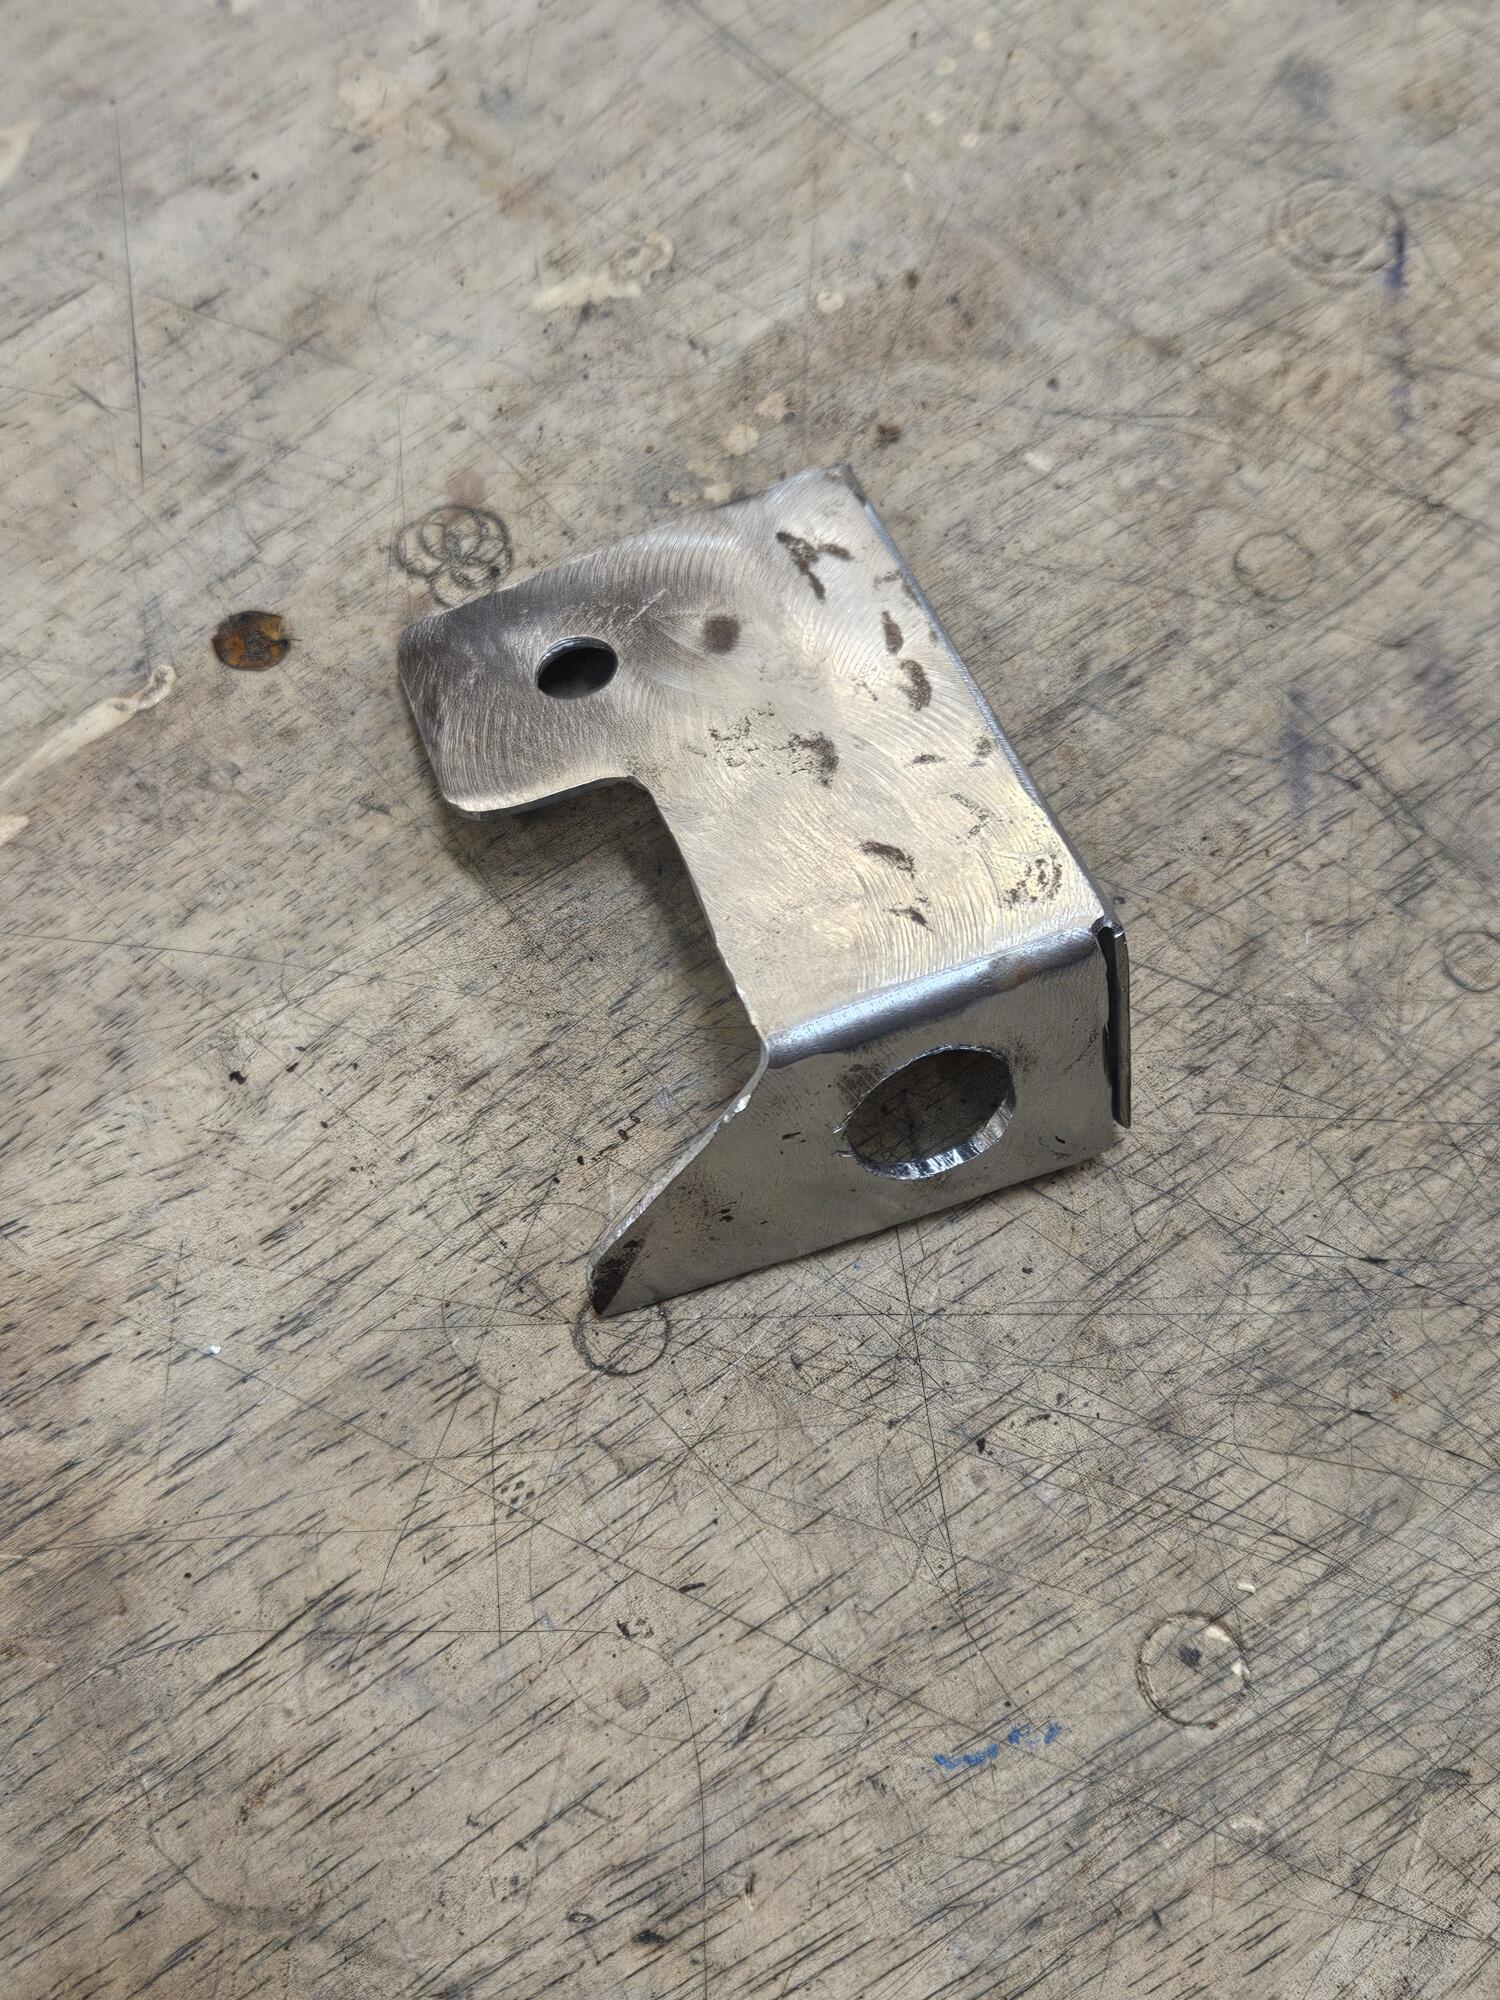
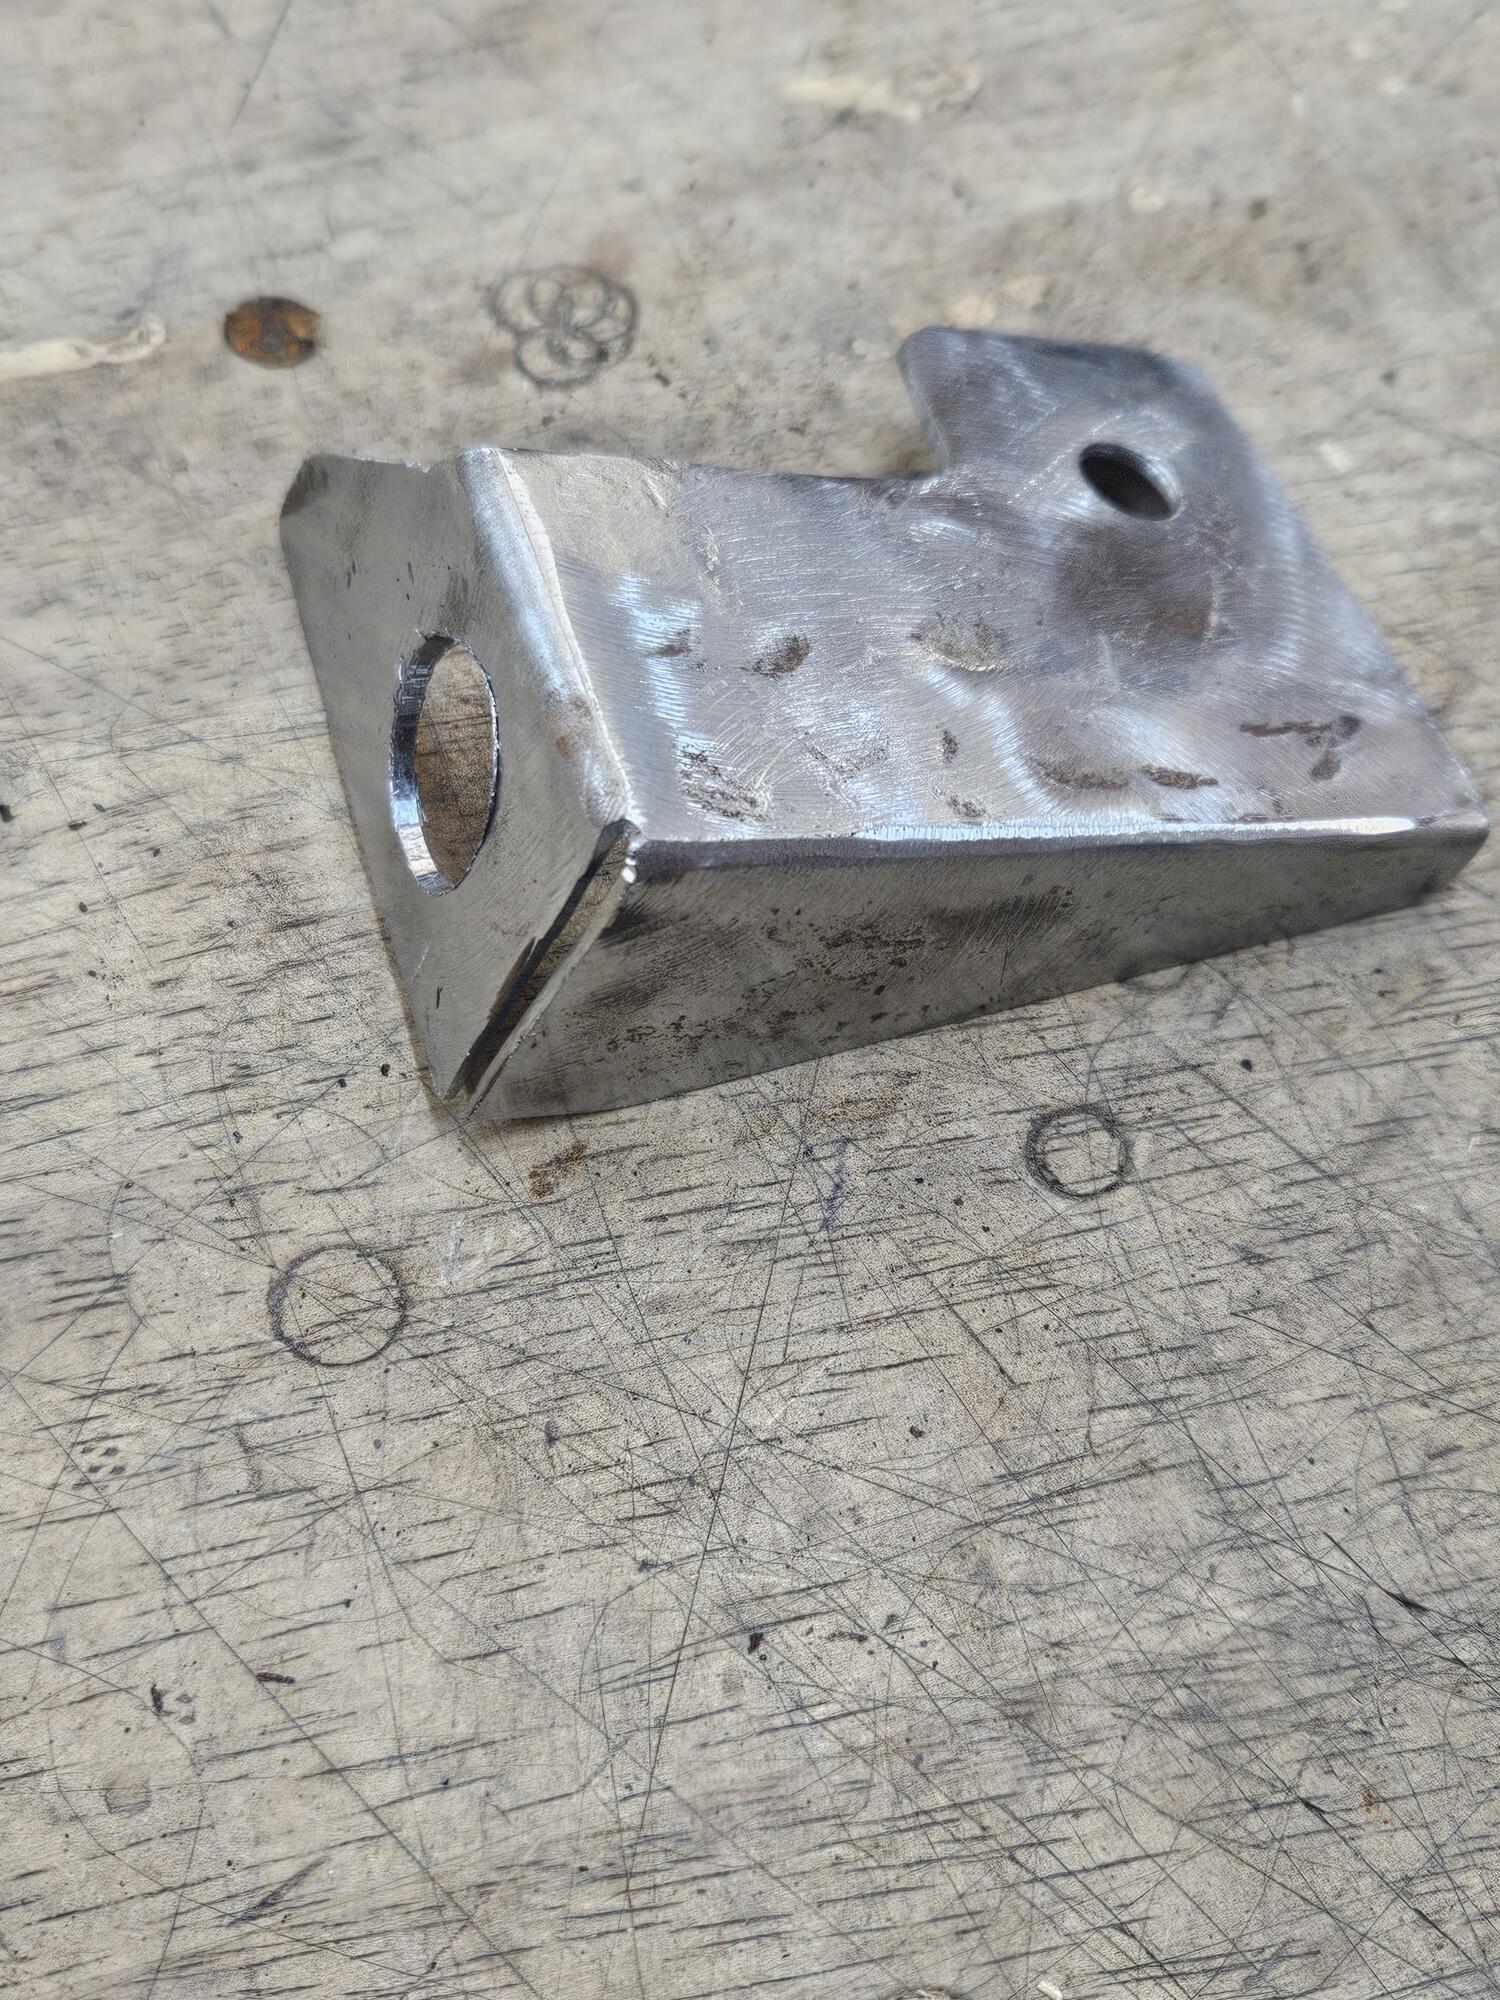
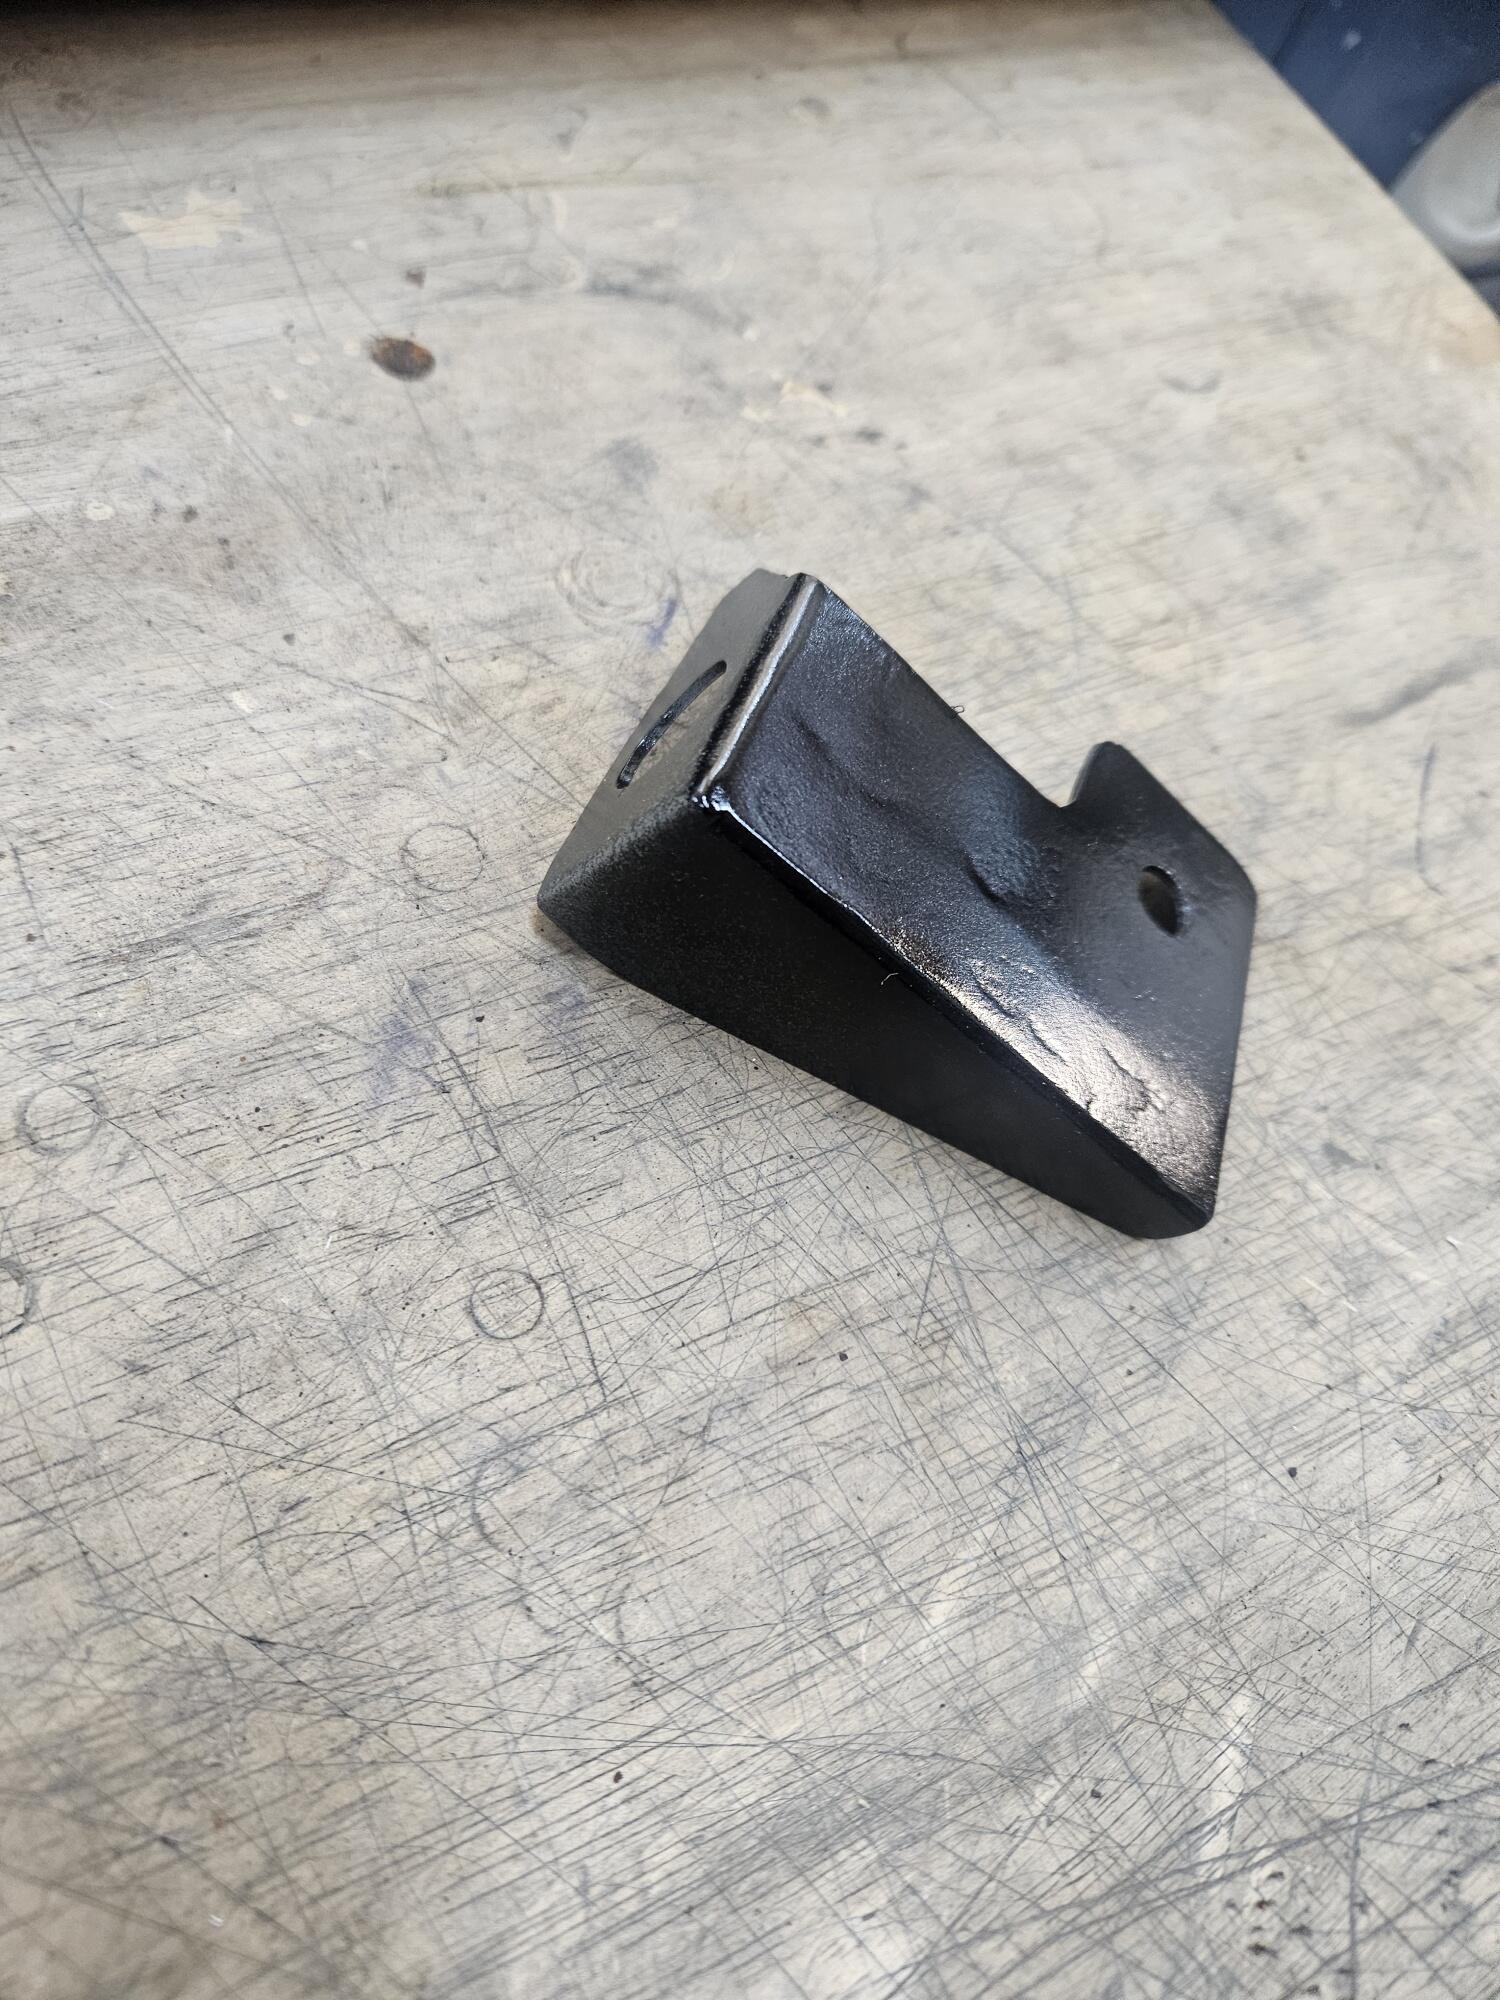
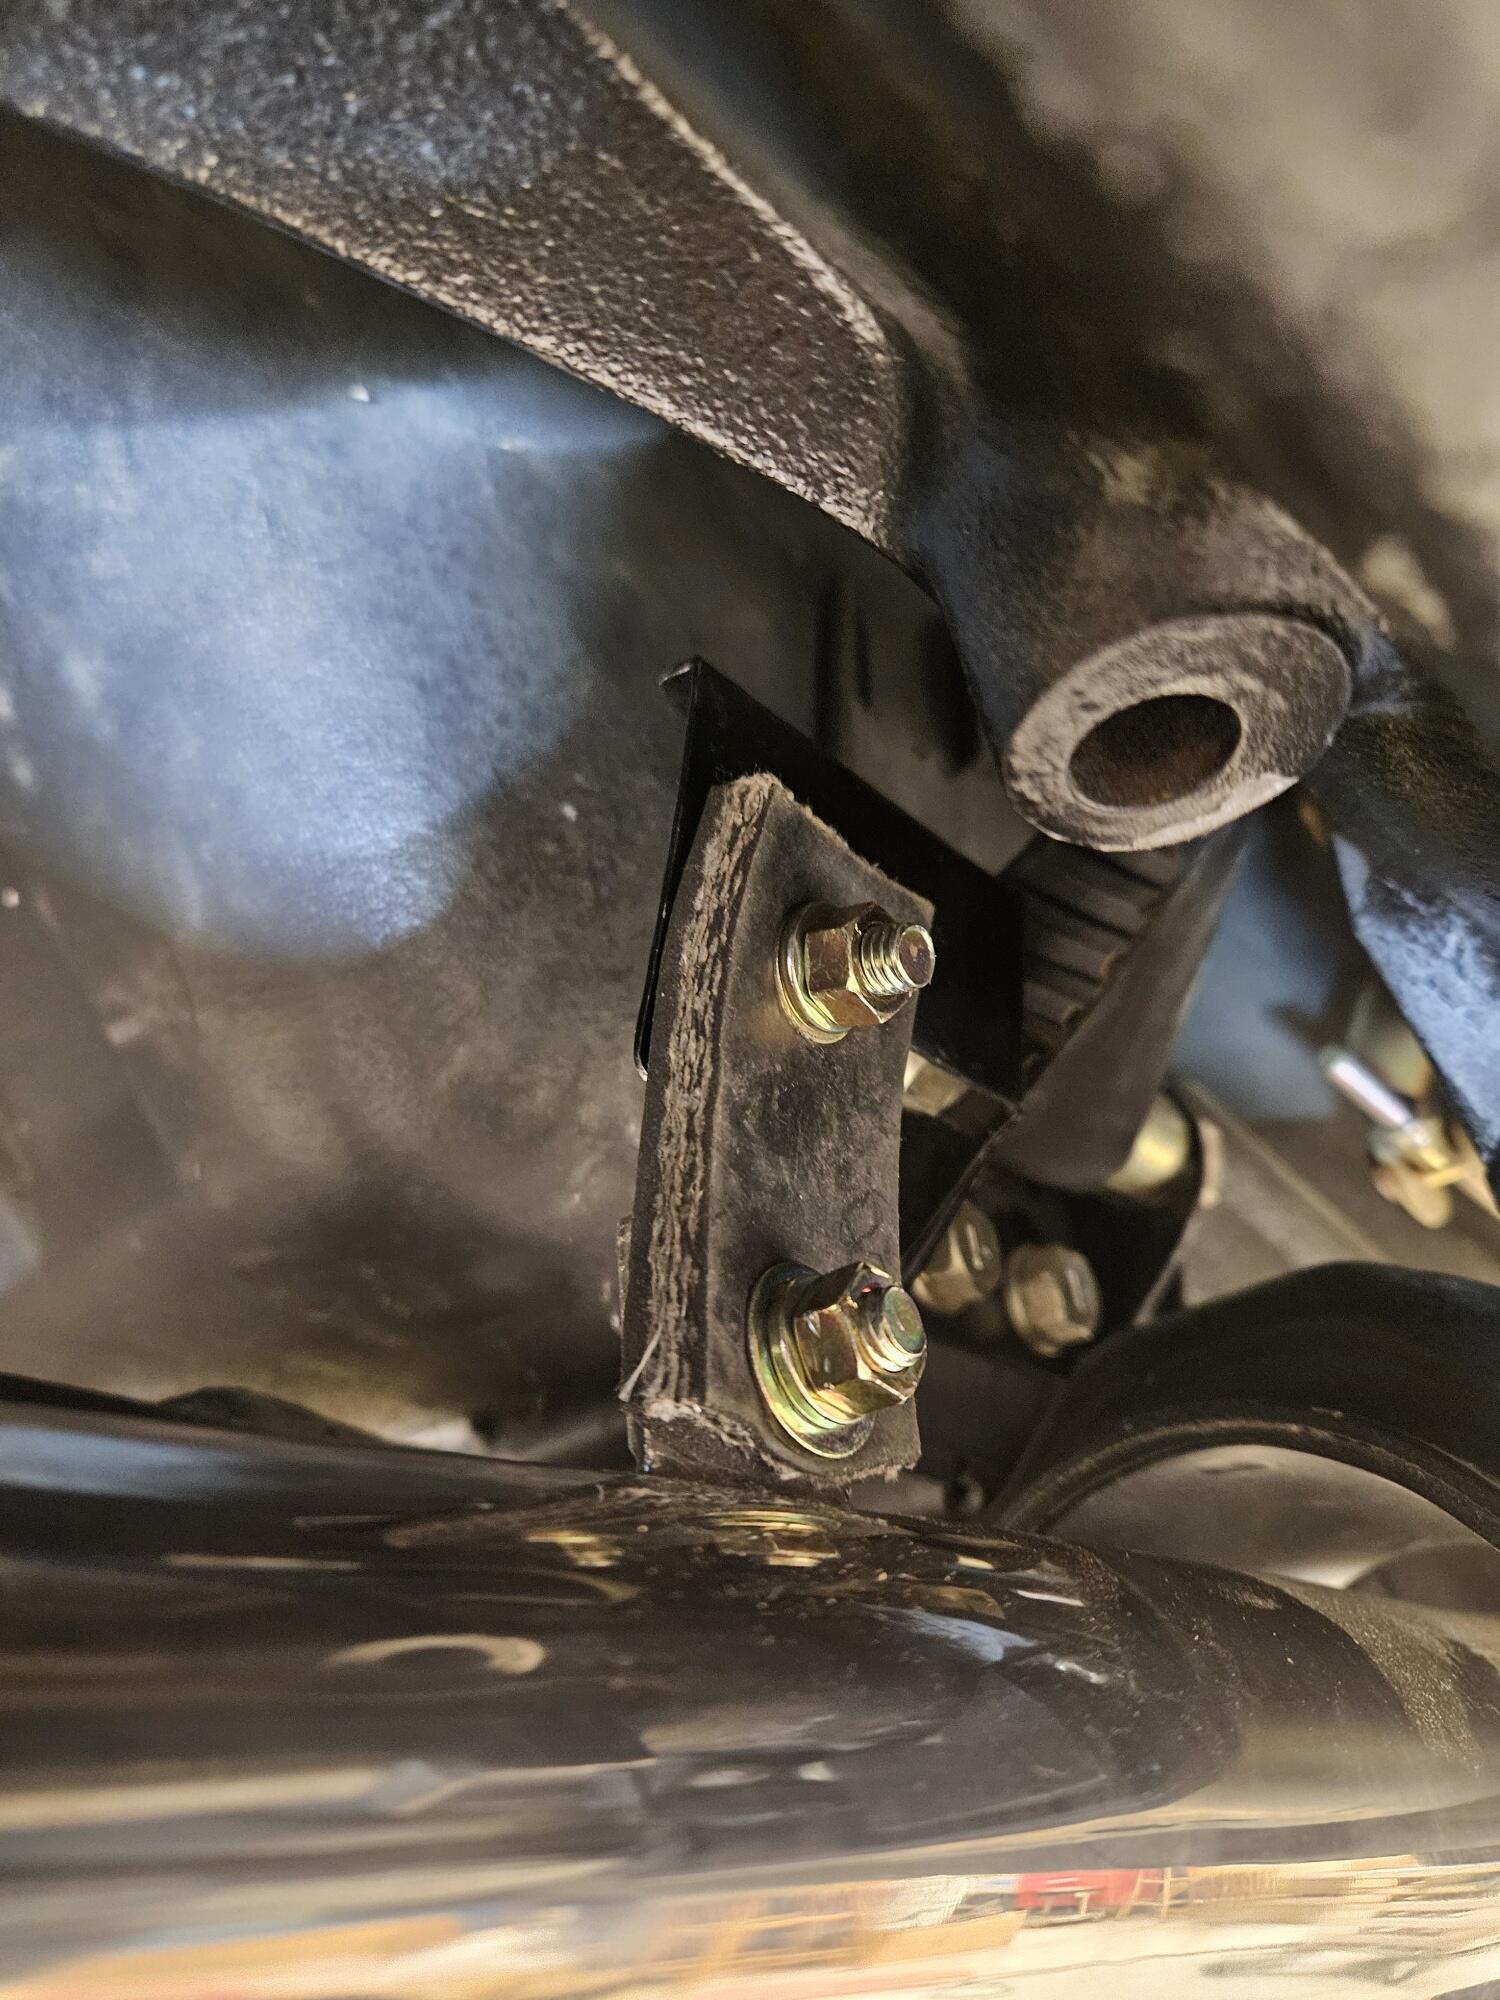
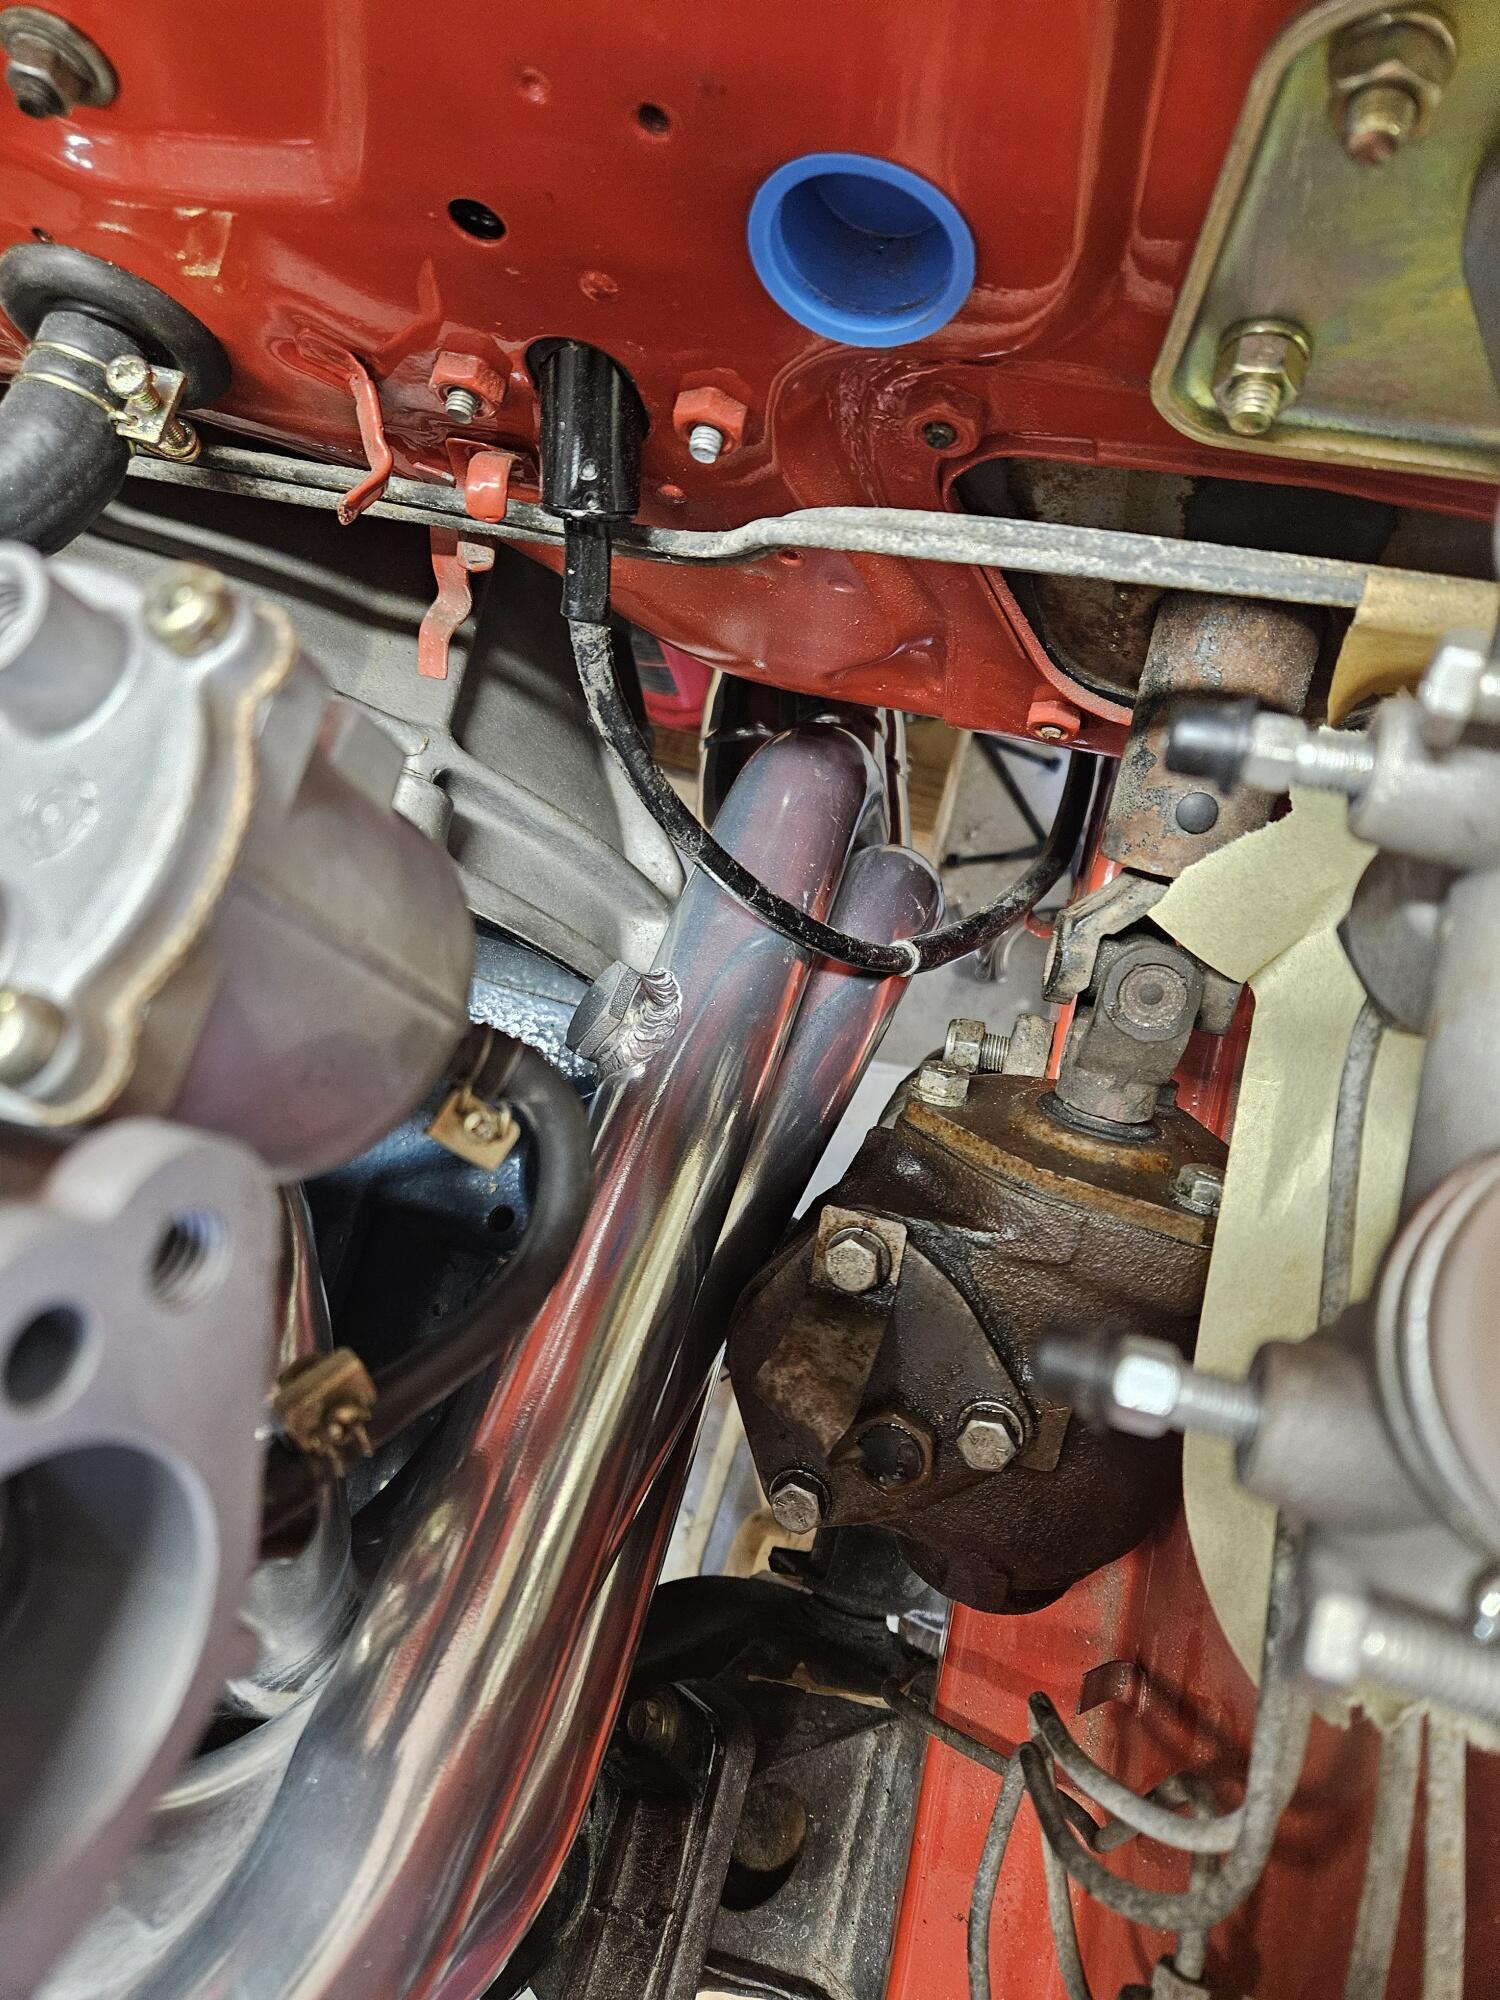
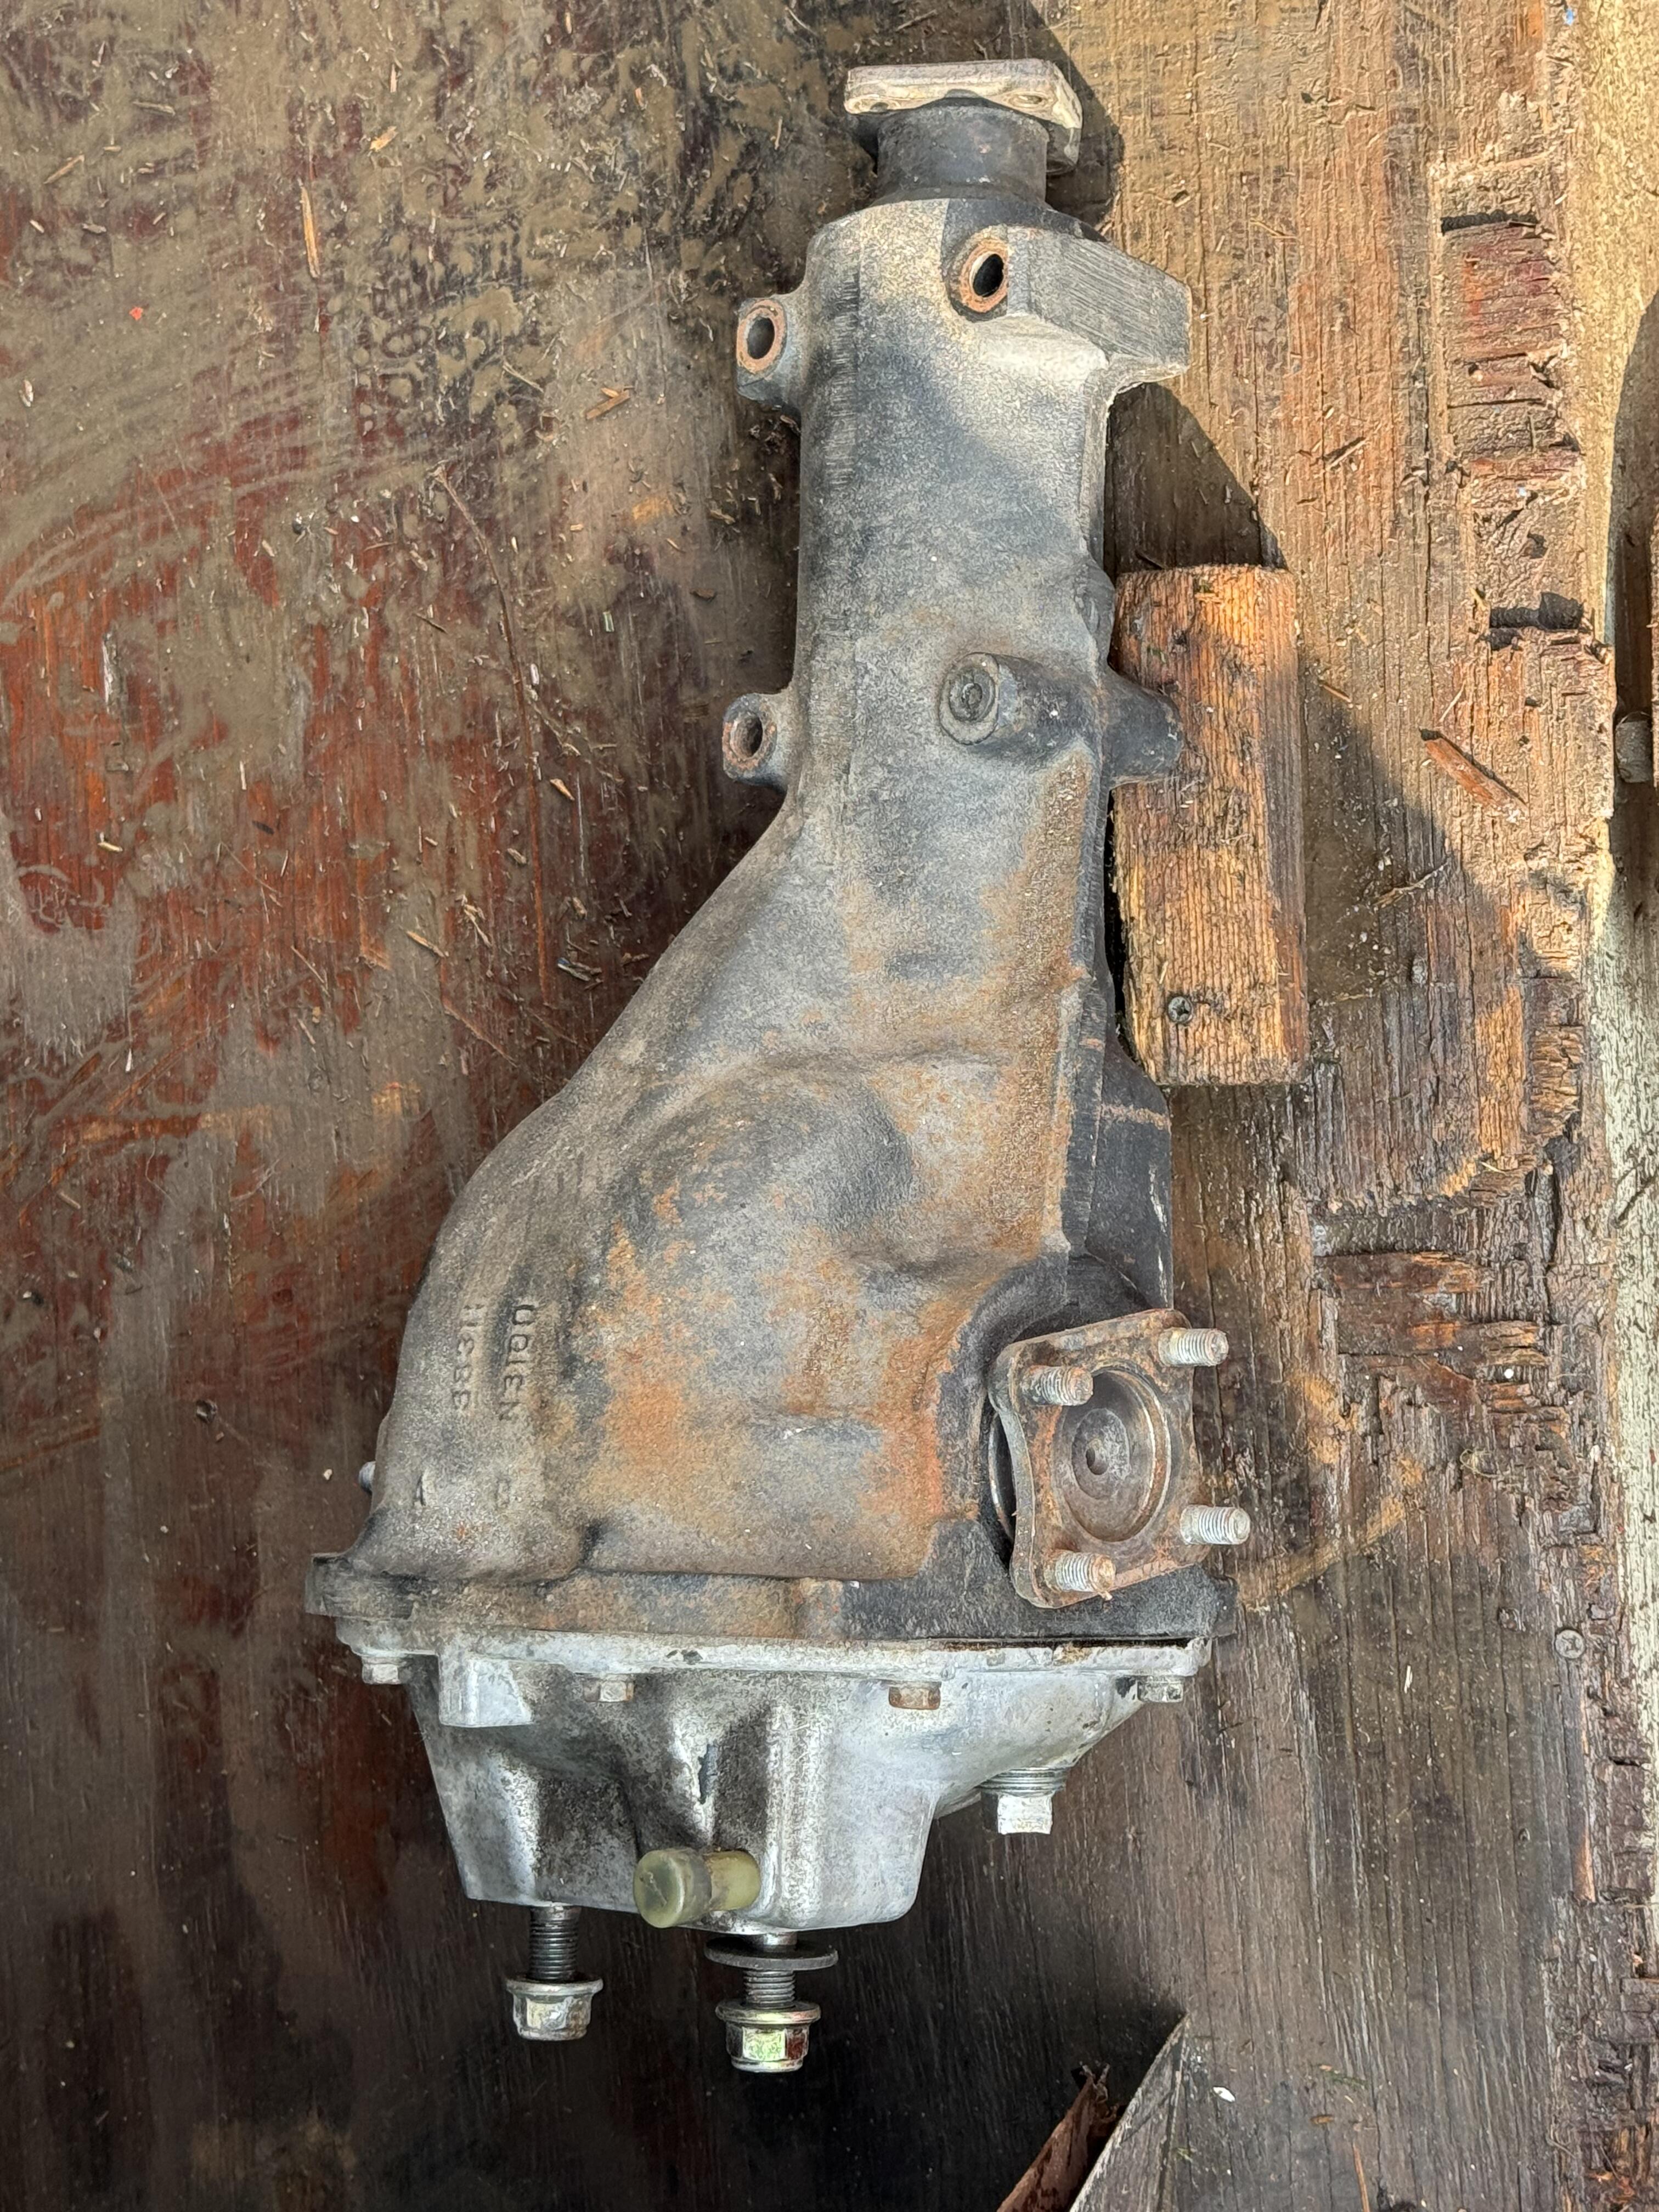
I thought I posted this up already but I didn't see them over the last few pages... I had to trim the ears on the R200 diff for a little more clearance on the new SS exhaust This is an untrimmed side Trimmed I made a bracket to connect to the mid span support on the top of the new exhaust. It will attached under the diff arrestor strap nut Template Under the car Finished


- Yesterday
-
@Captain Obvious I found the screws for the front turn signals today in the shop
-
-
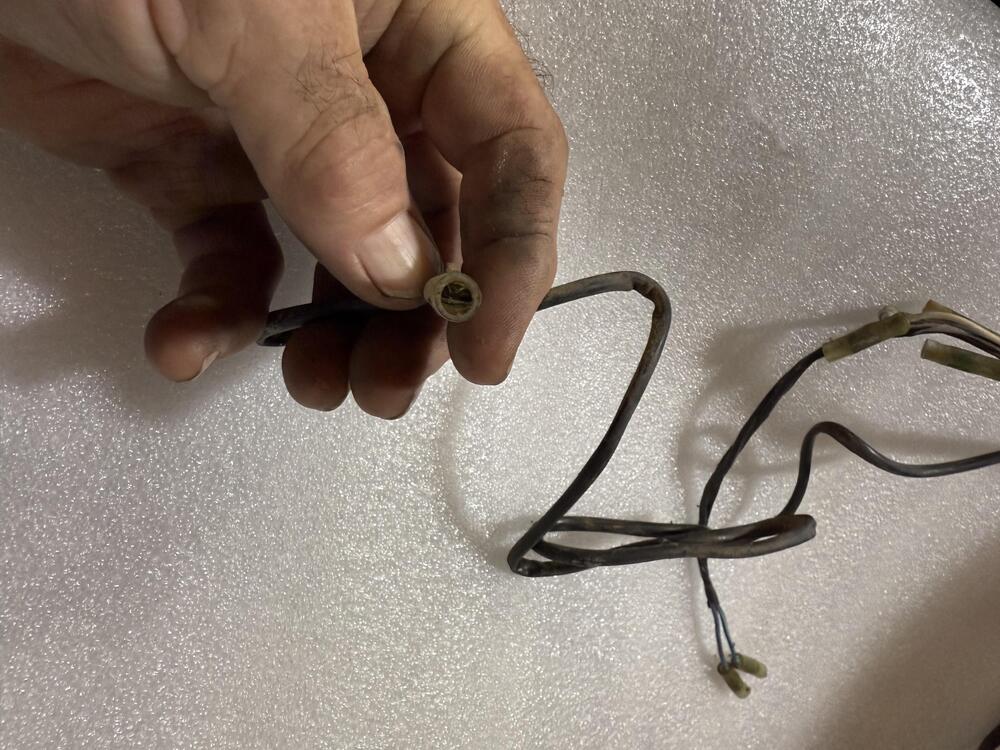
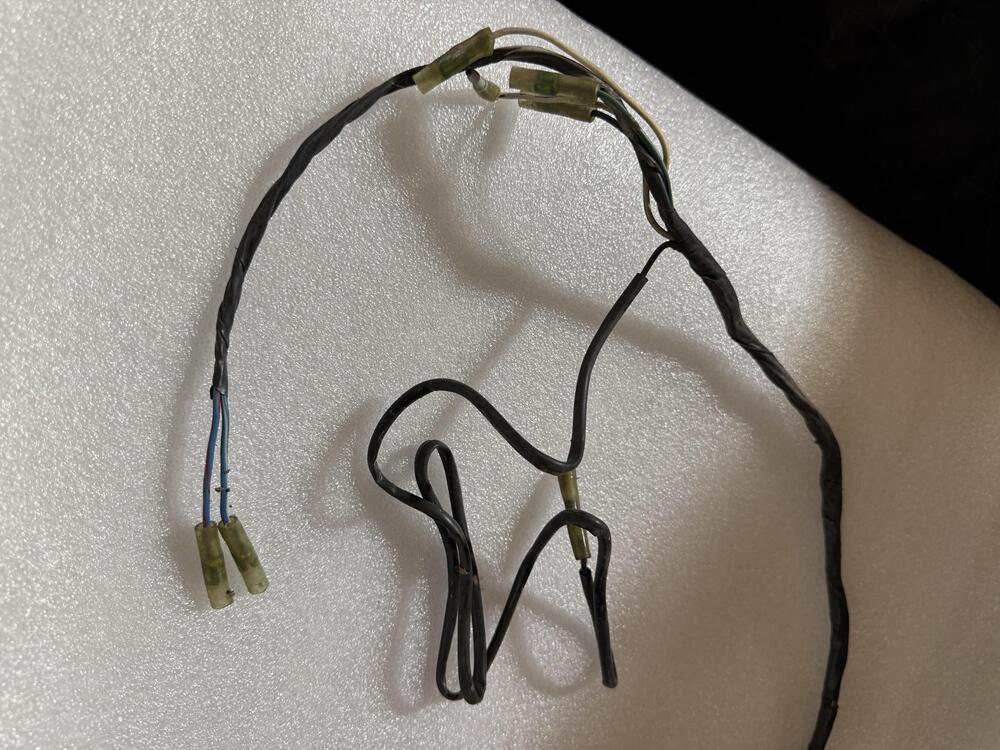
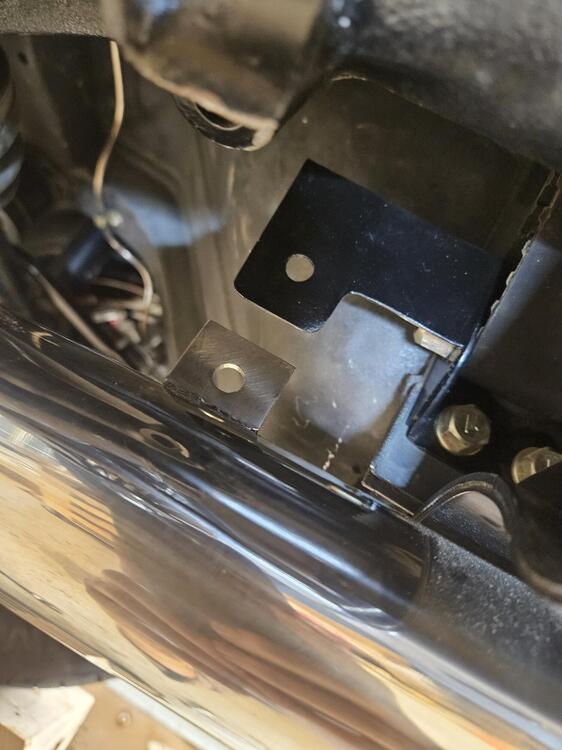
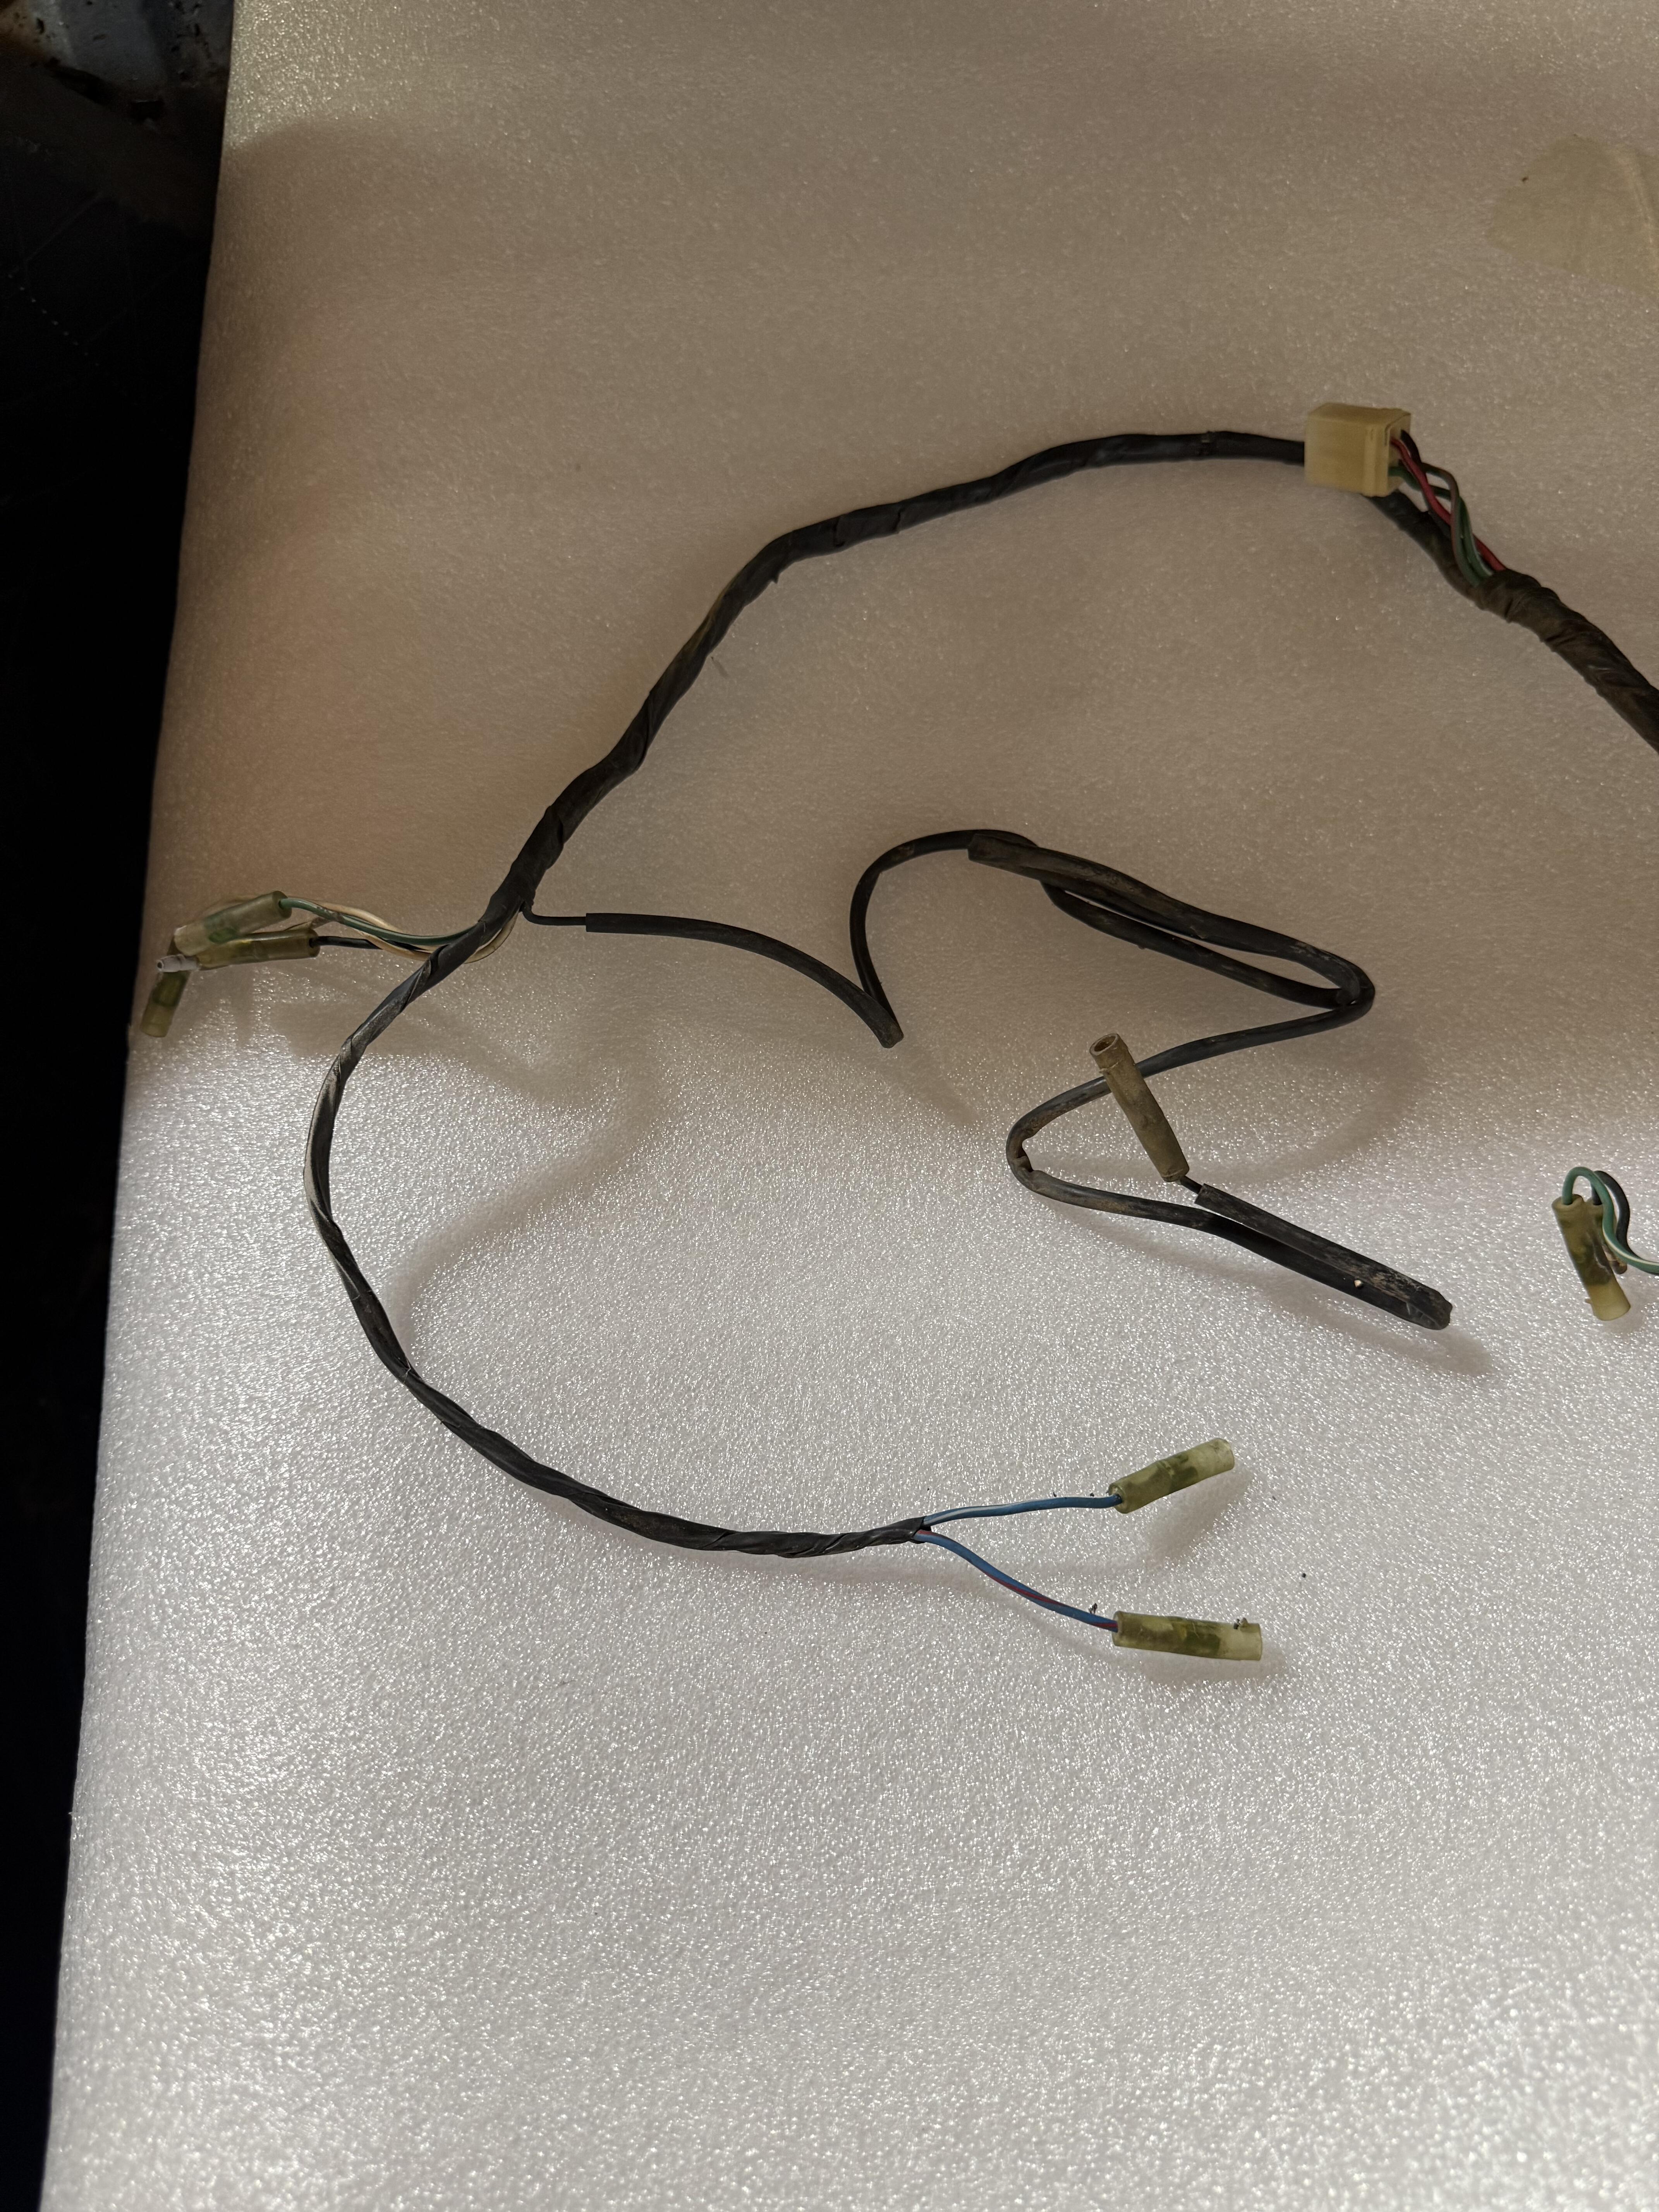
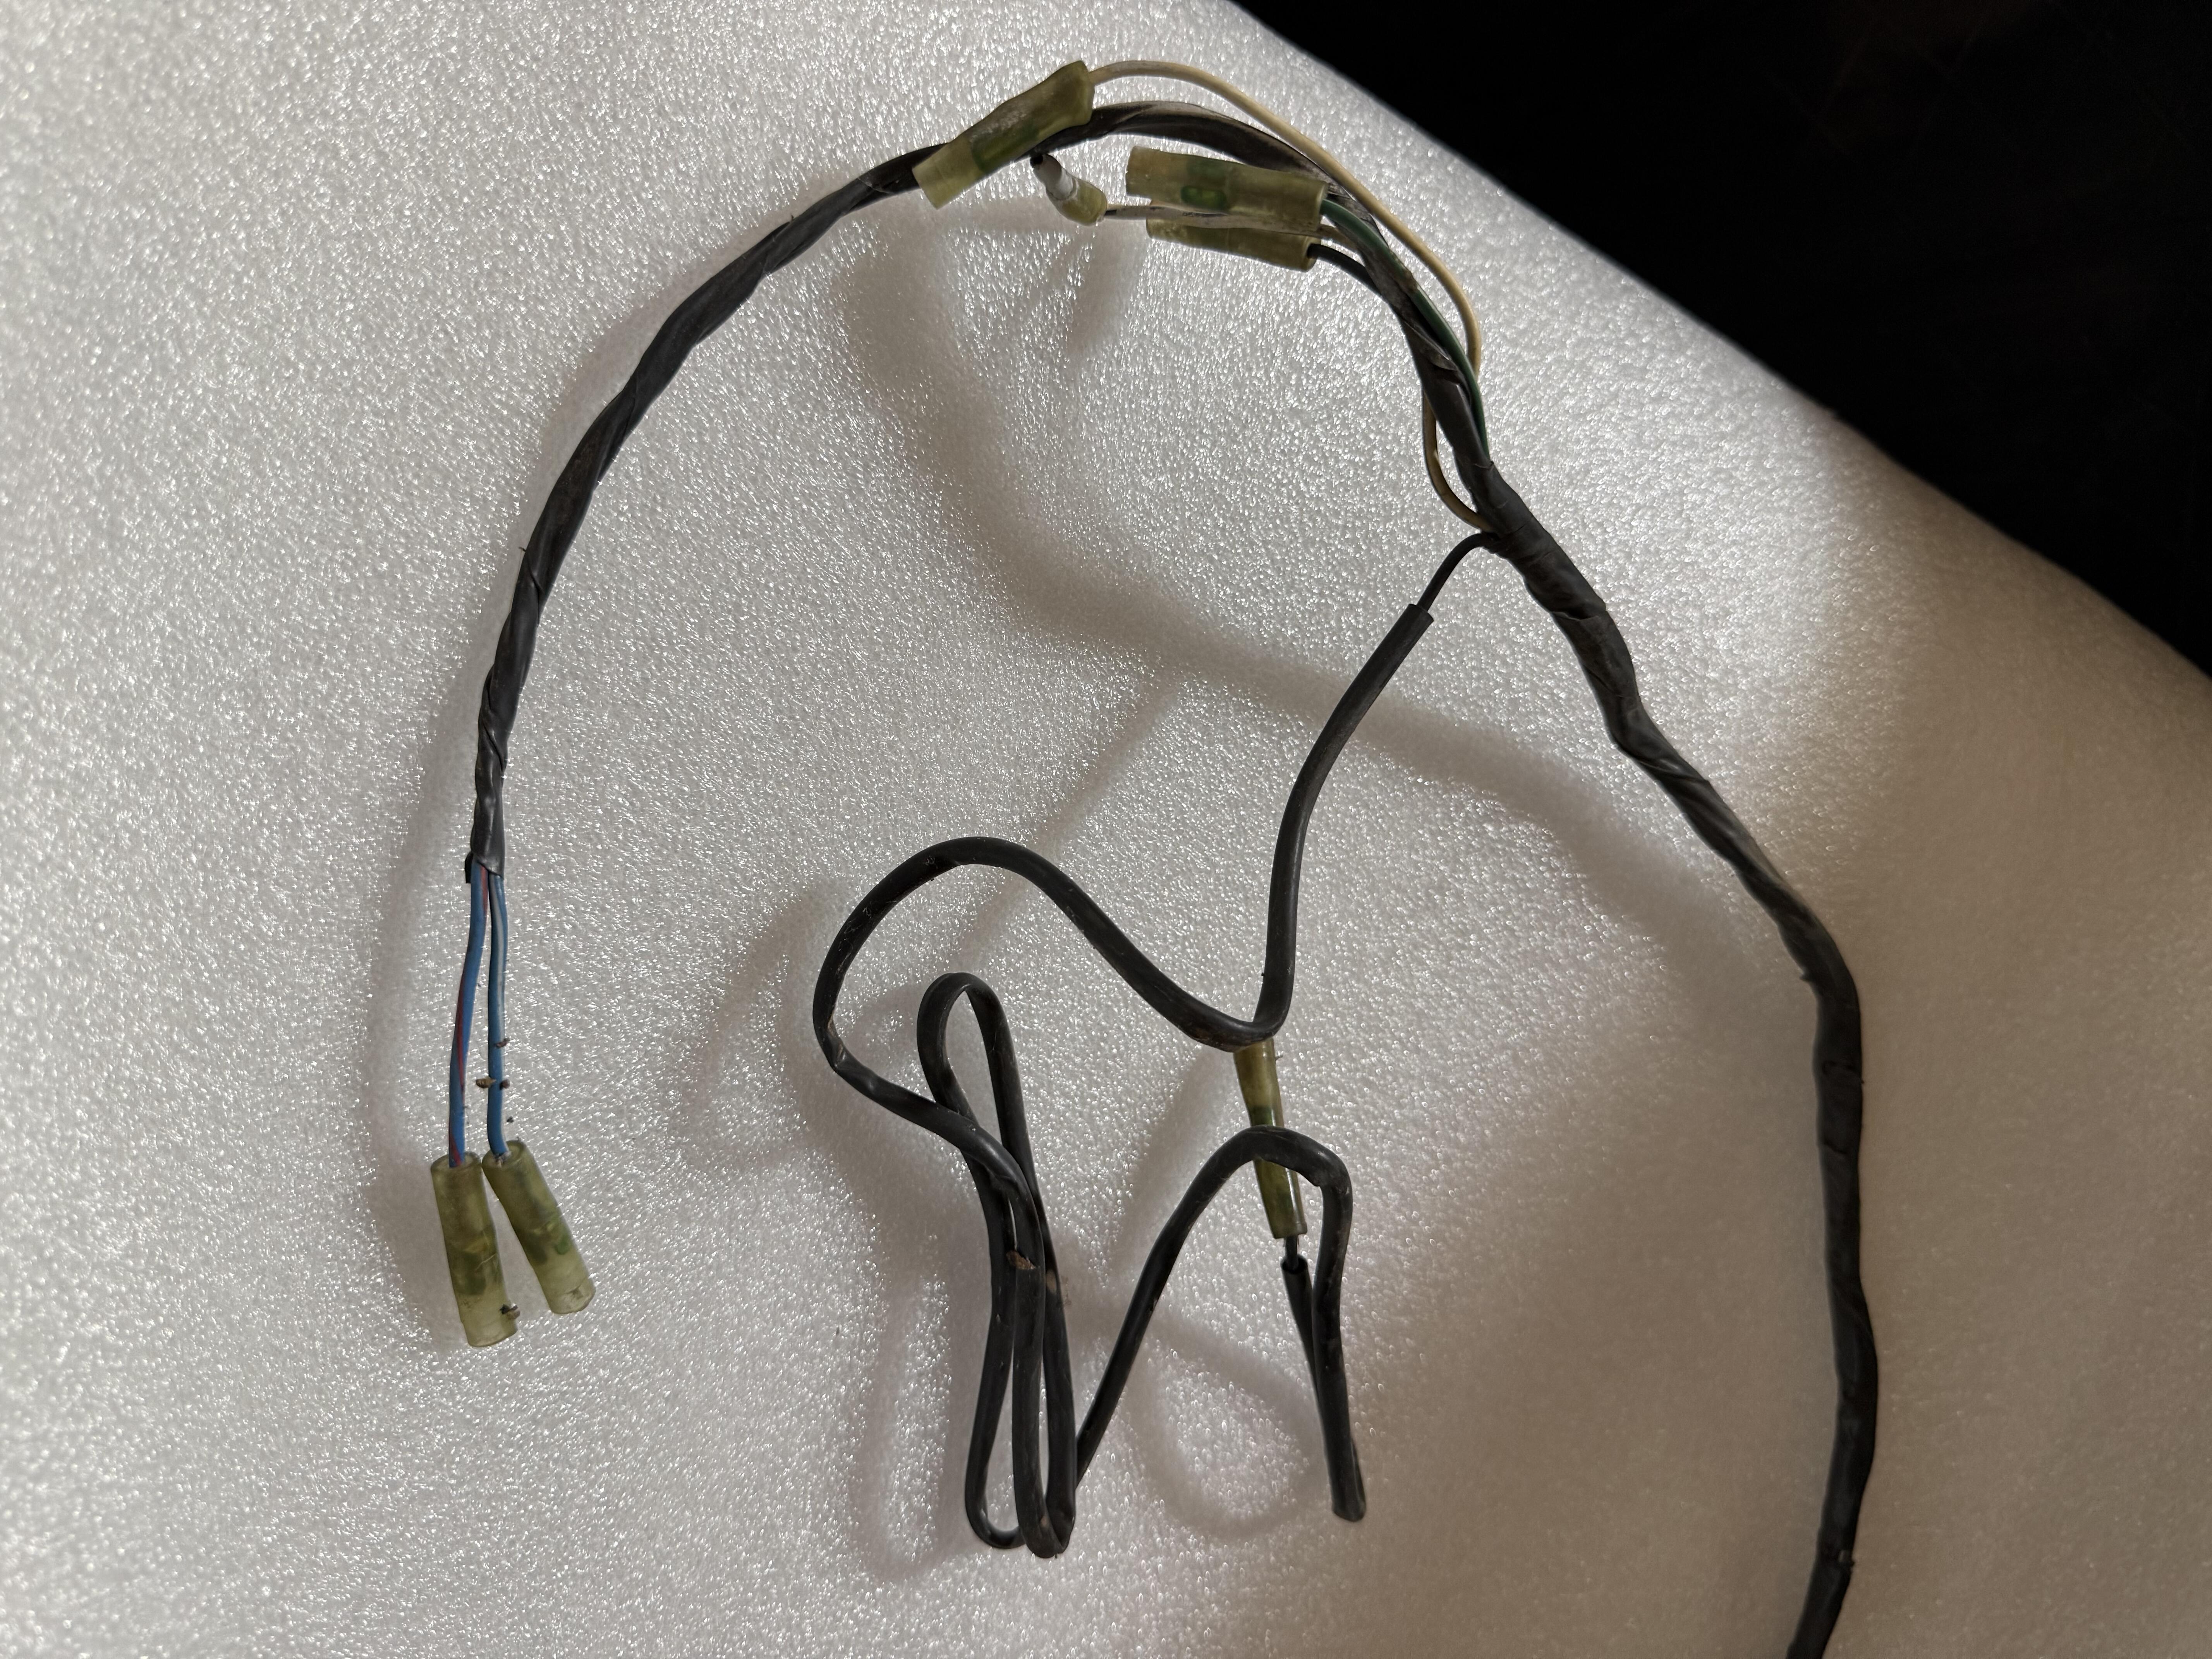
 I have a bunch of wires in the center, right above the tranny tunnel, that are connected to nothing. Can someone help with identifying what each of these should be connected to? Here are several pictures I just took. https://photos.app.goo.gl/AtbSgkaMo9Fm5uT8A
 -
Does anyone have the PROPER way to connect the under dash electronic fuel pump wiring in a 240Z? For testing purposes the connection in this picture (green and black/white wires) was jumpered and it worked. Being that there is a molex plug here there must be more to wiring it up properly. I've been told that the factory had it wired to the oil pressure gauge so that if the car lost oil pressure it would stop the fuel pump.

-
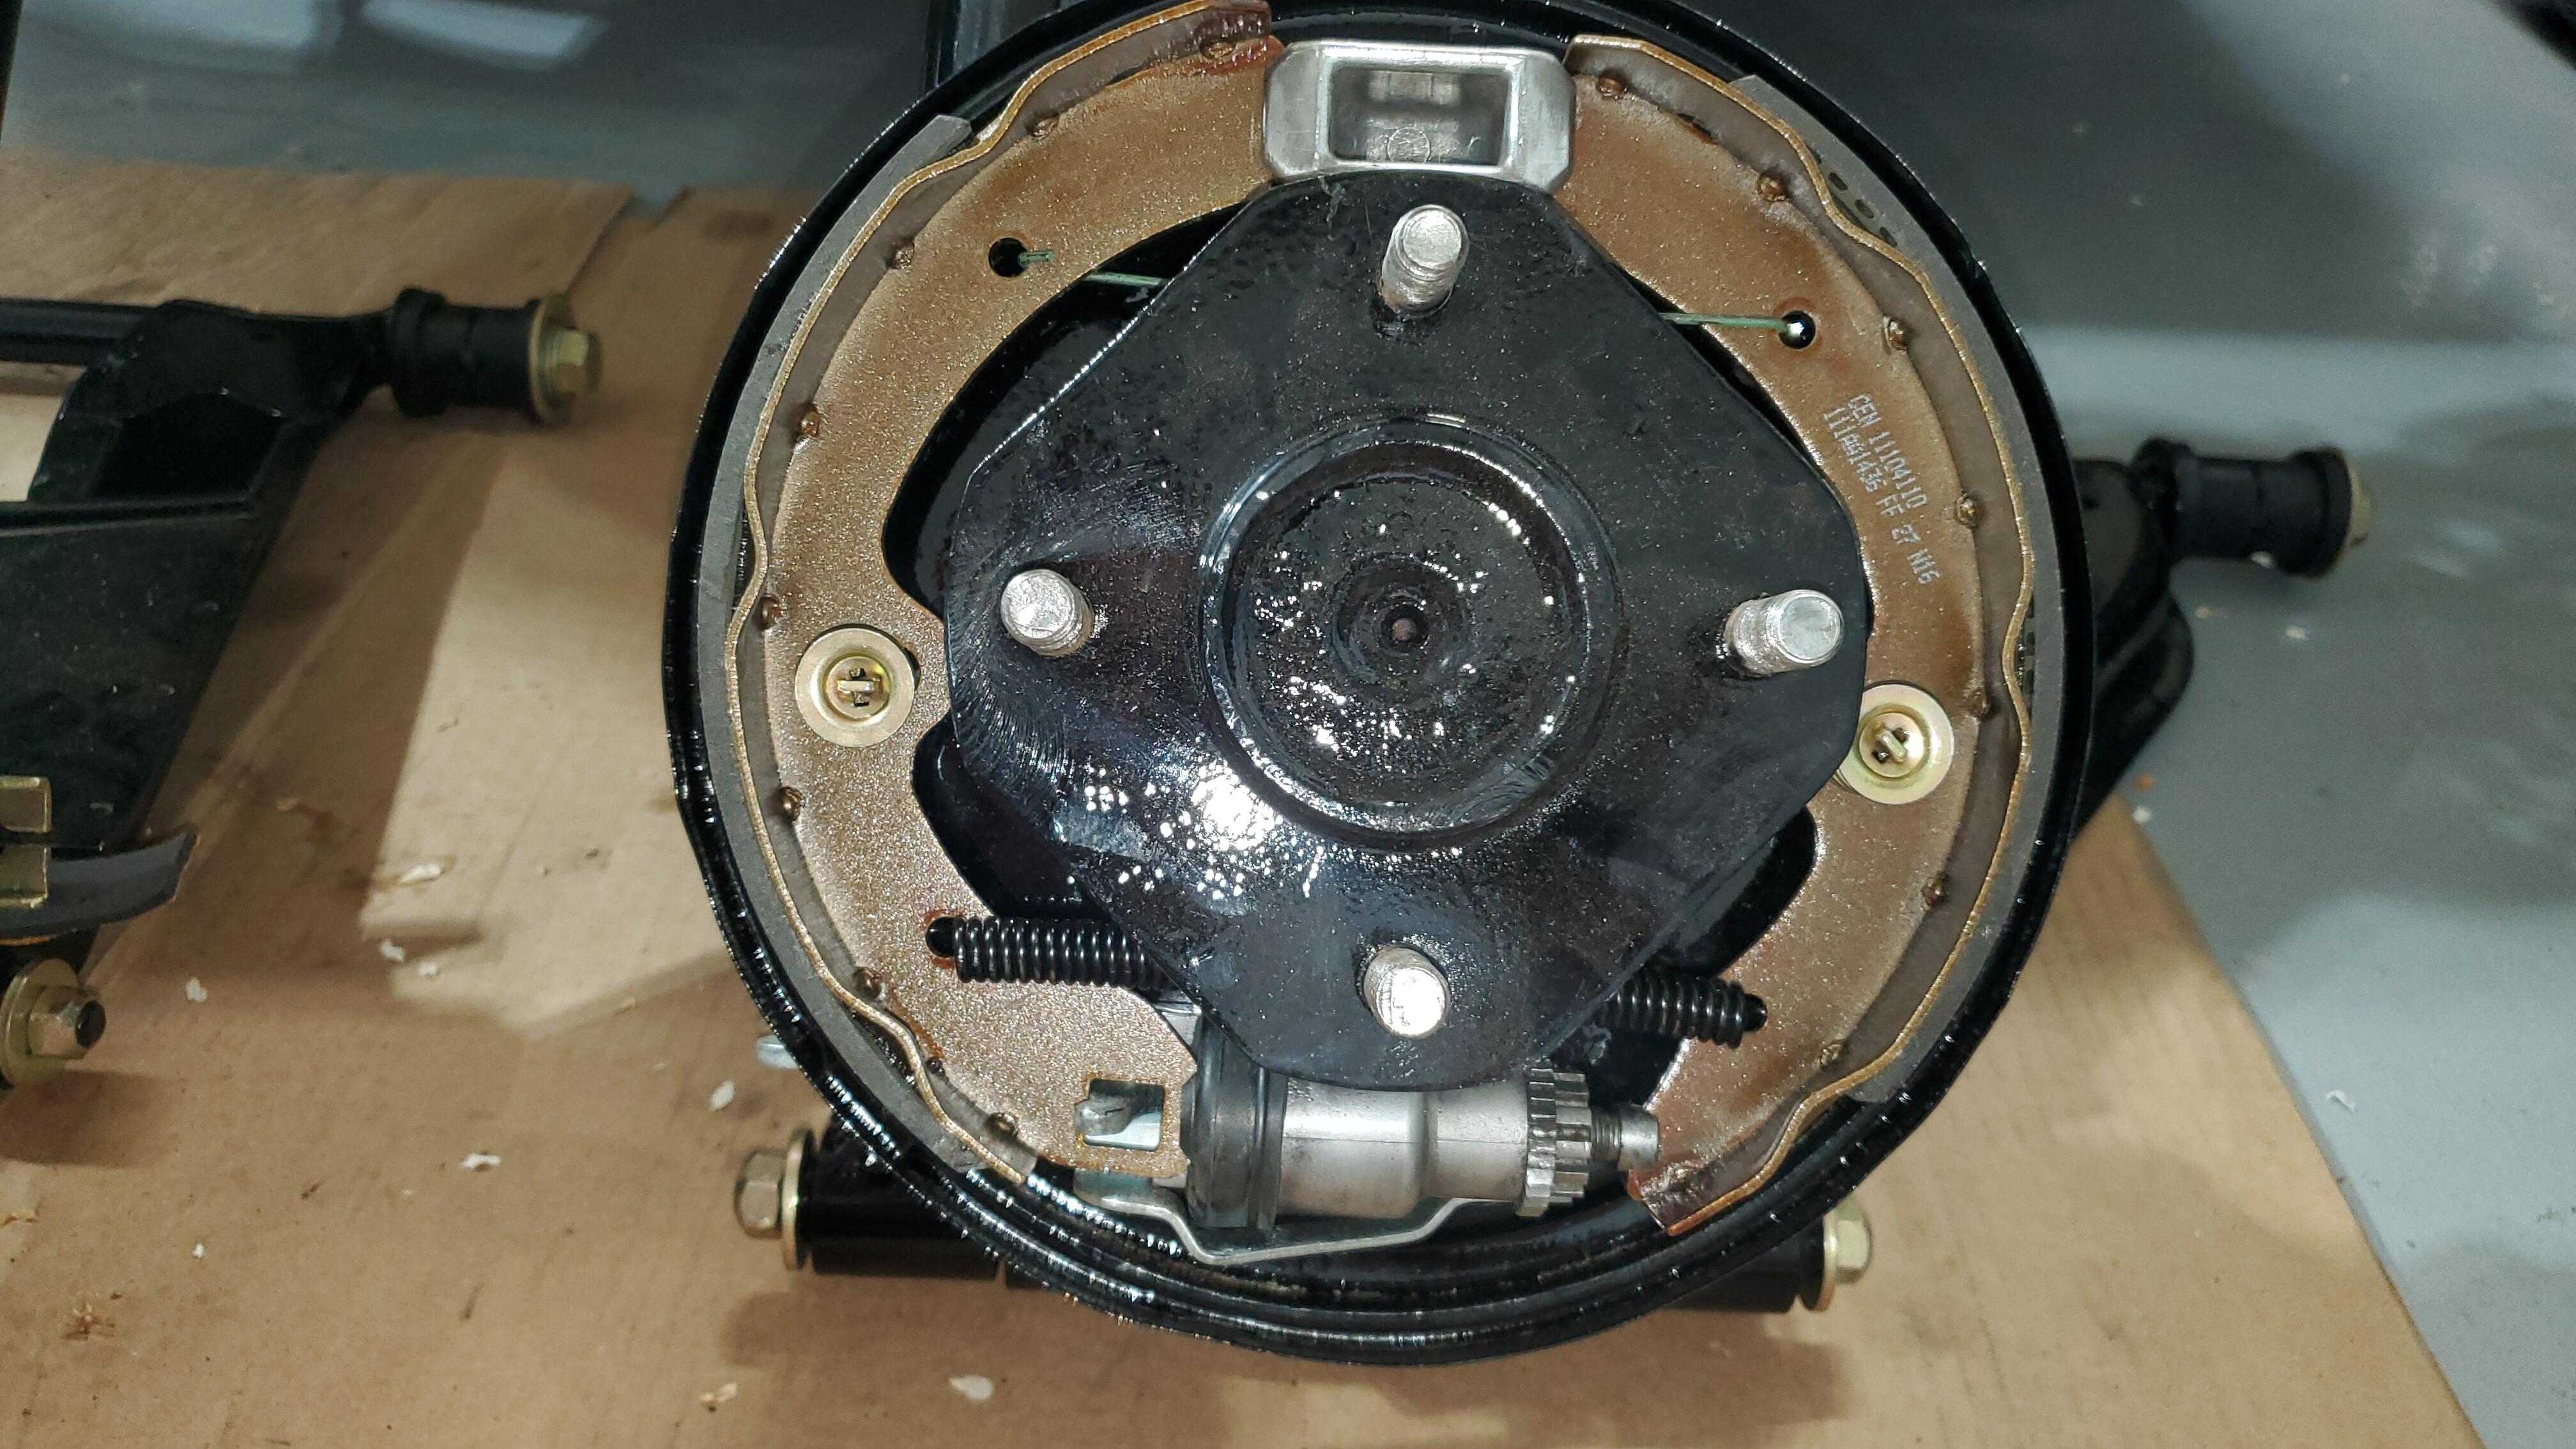
Brake spring installation Rev 2.0. Thanks for the input @Captain Obvious
-
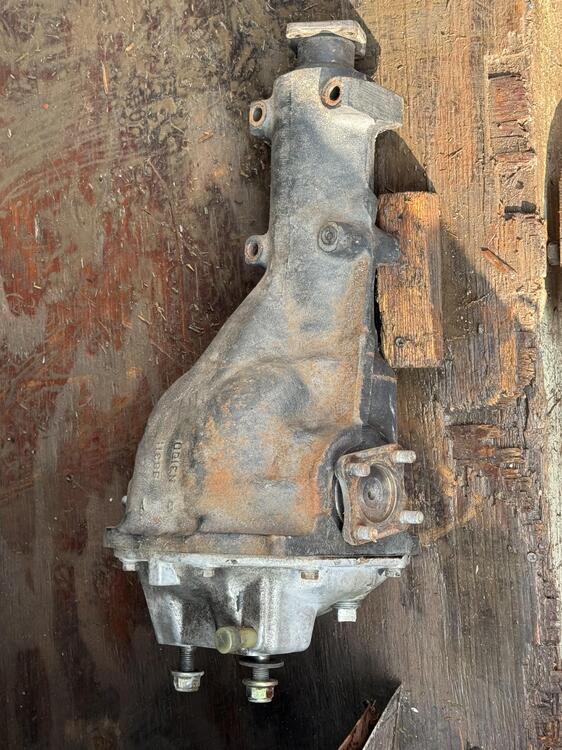
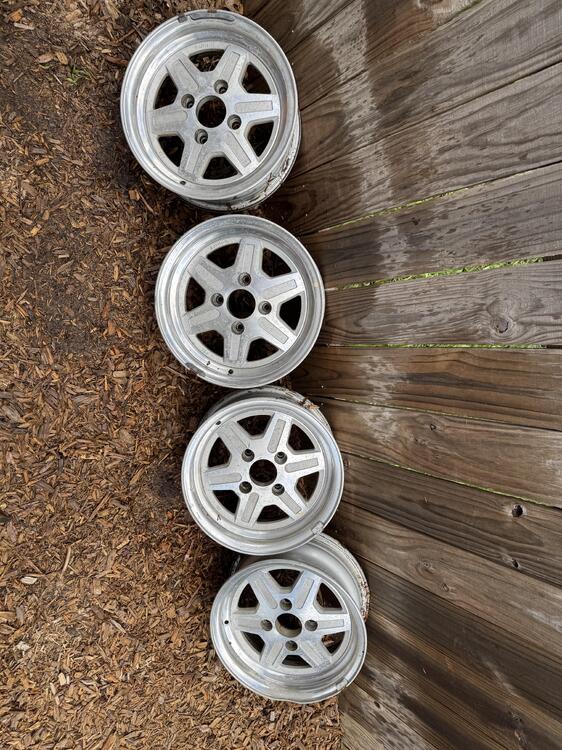
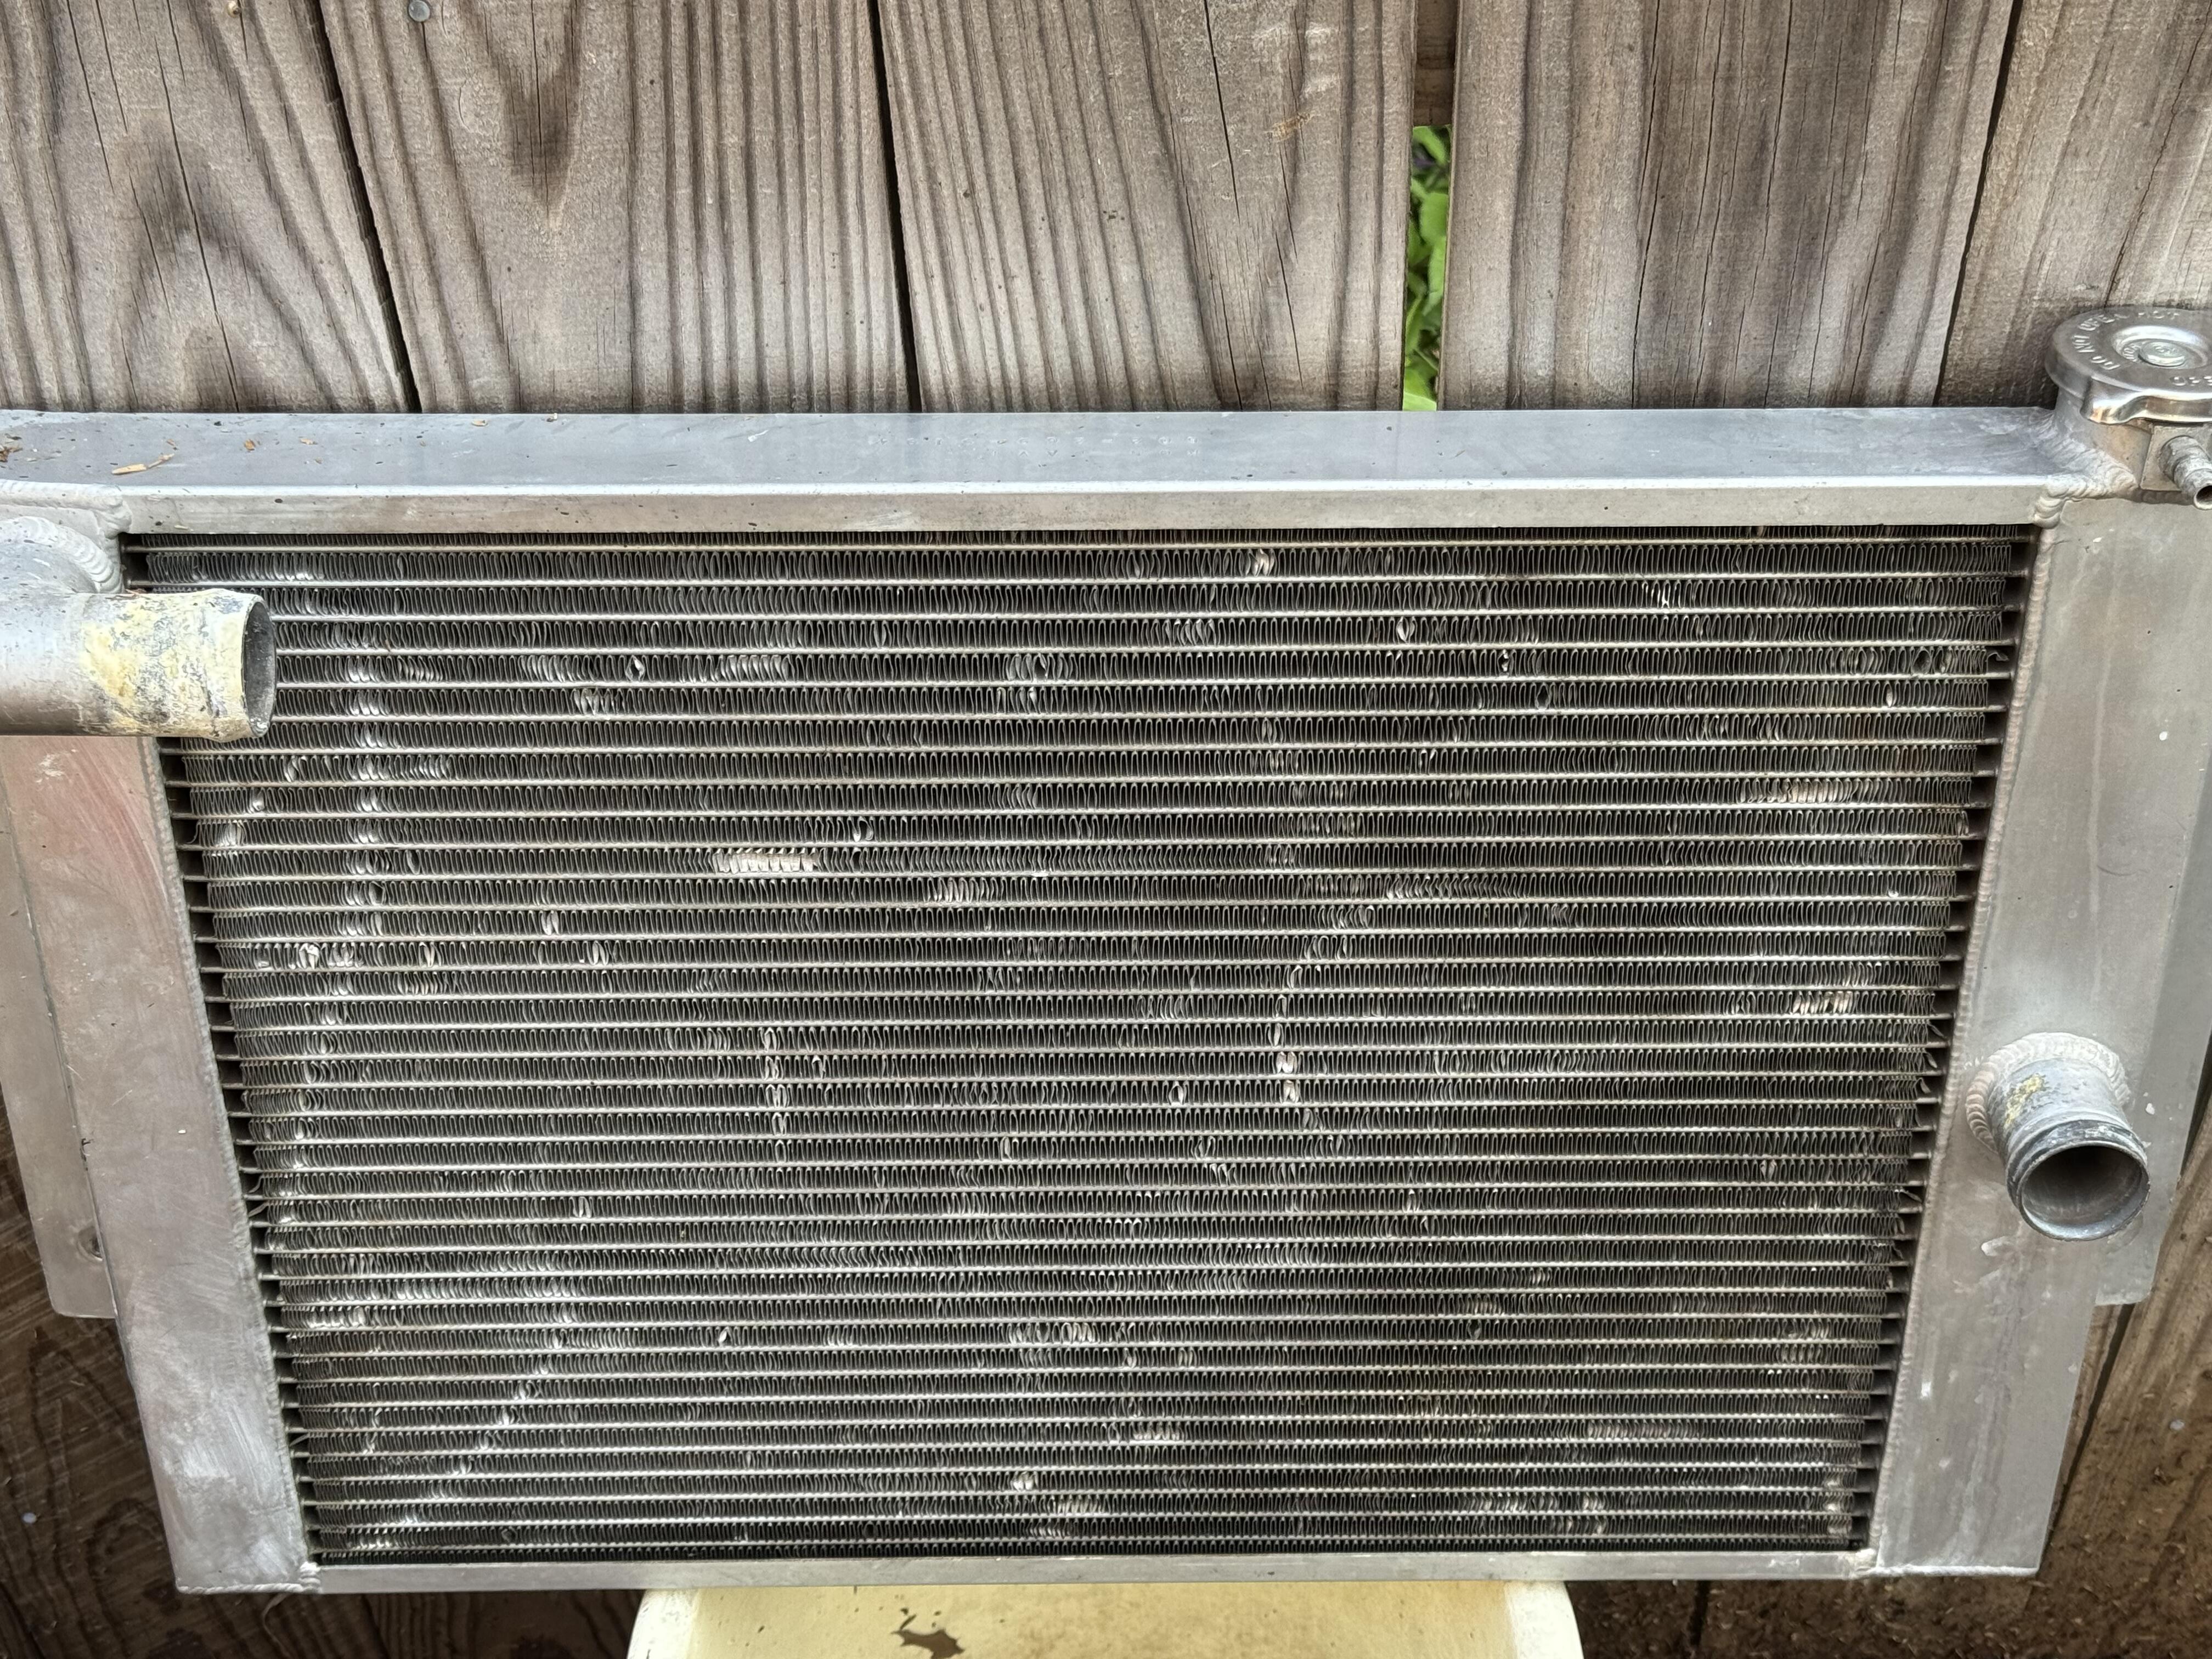
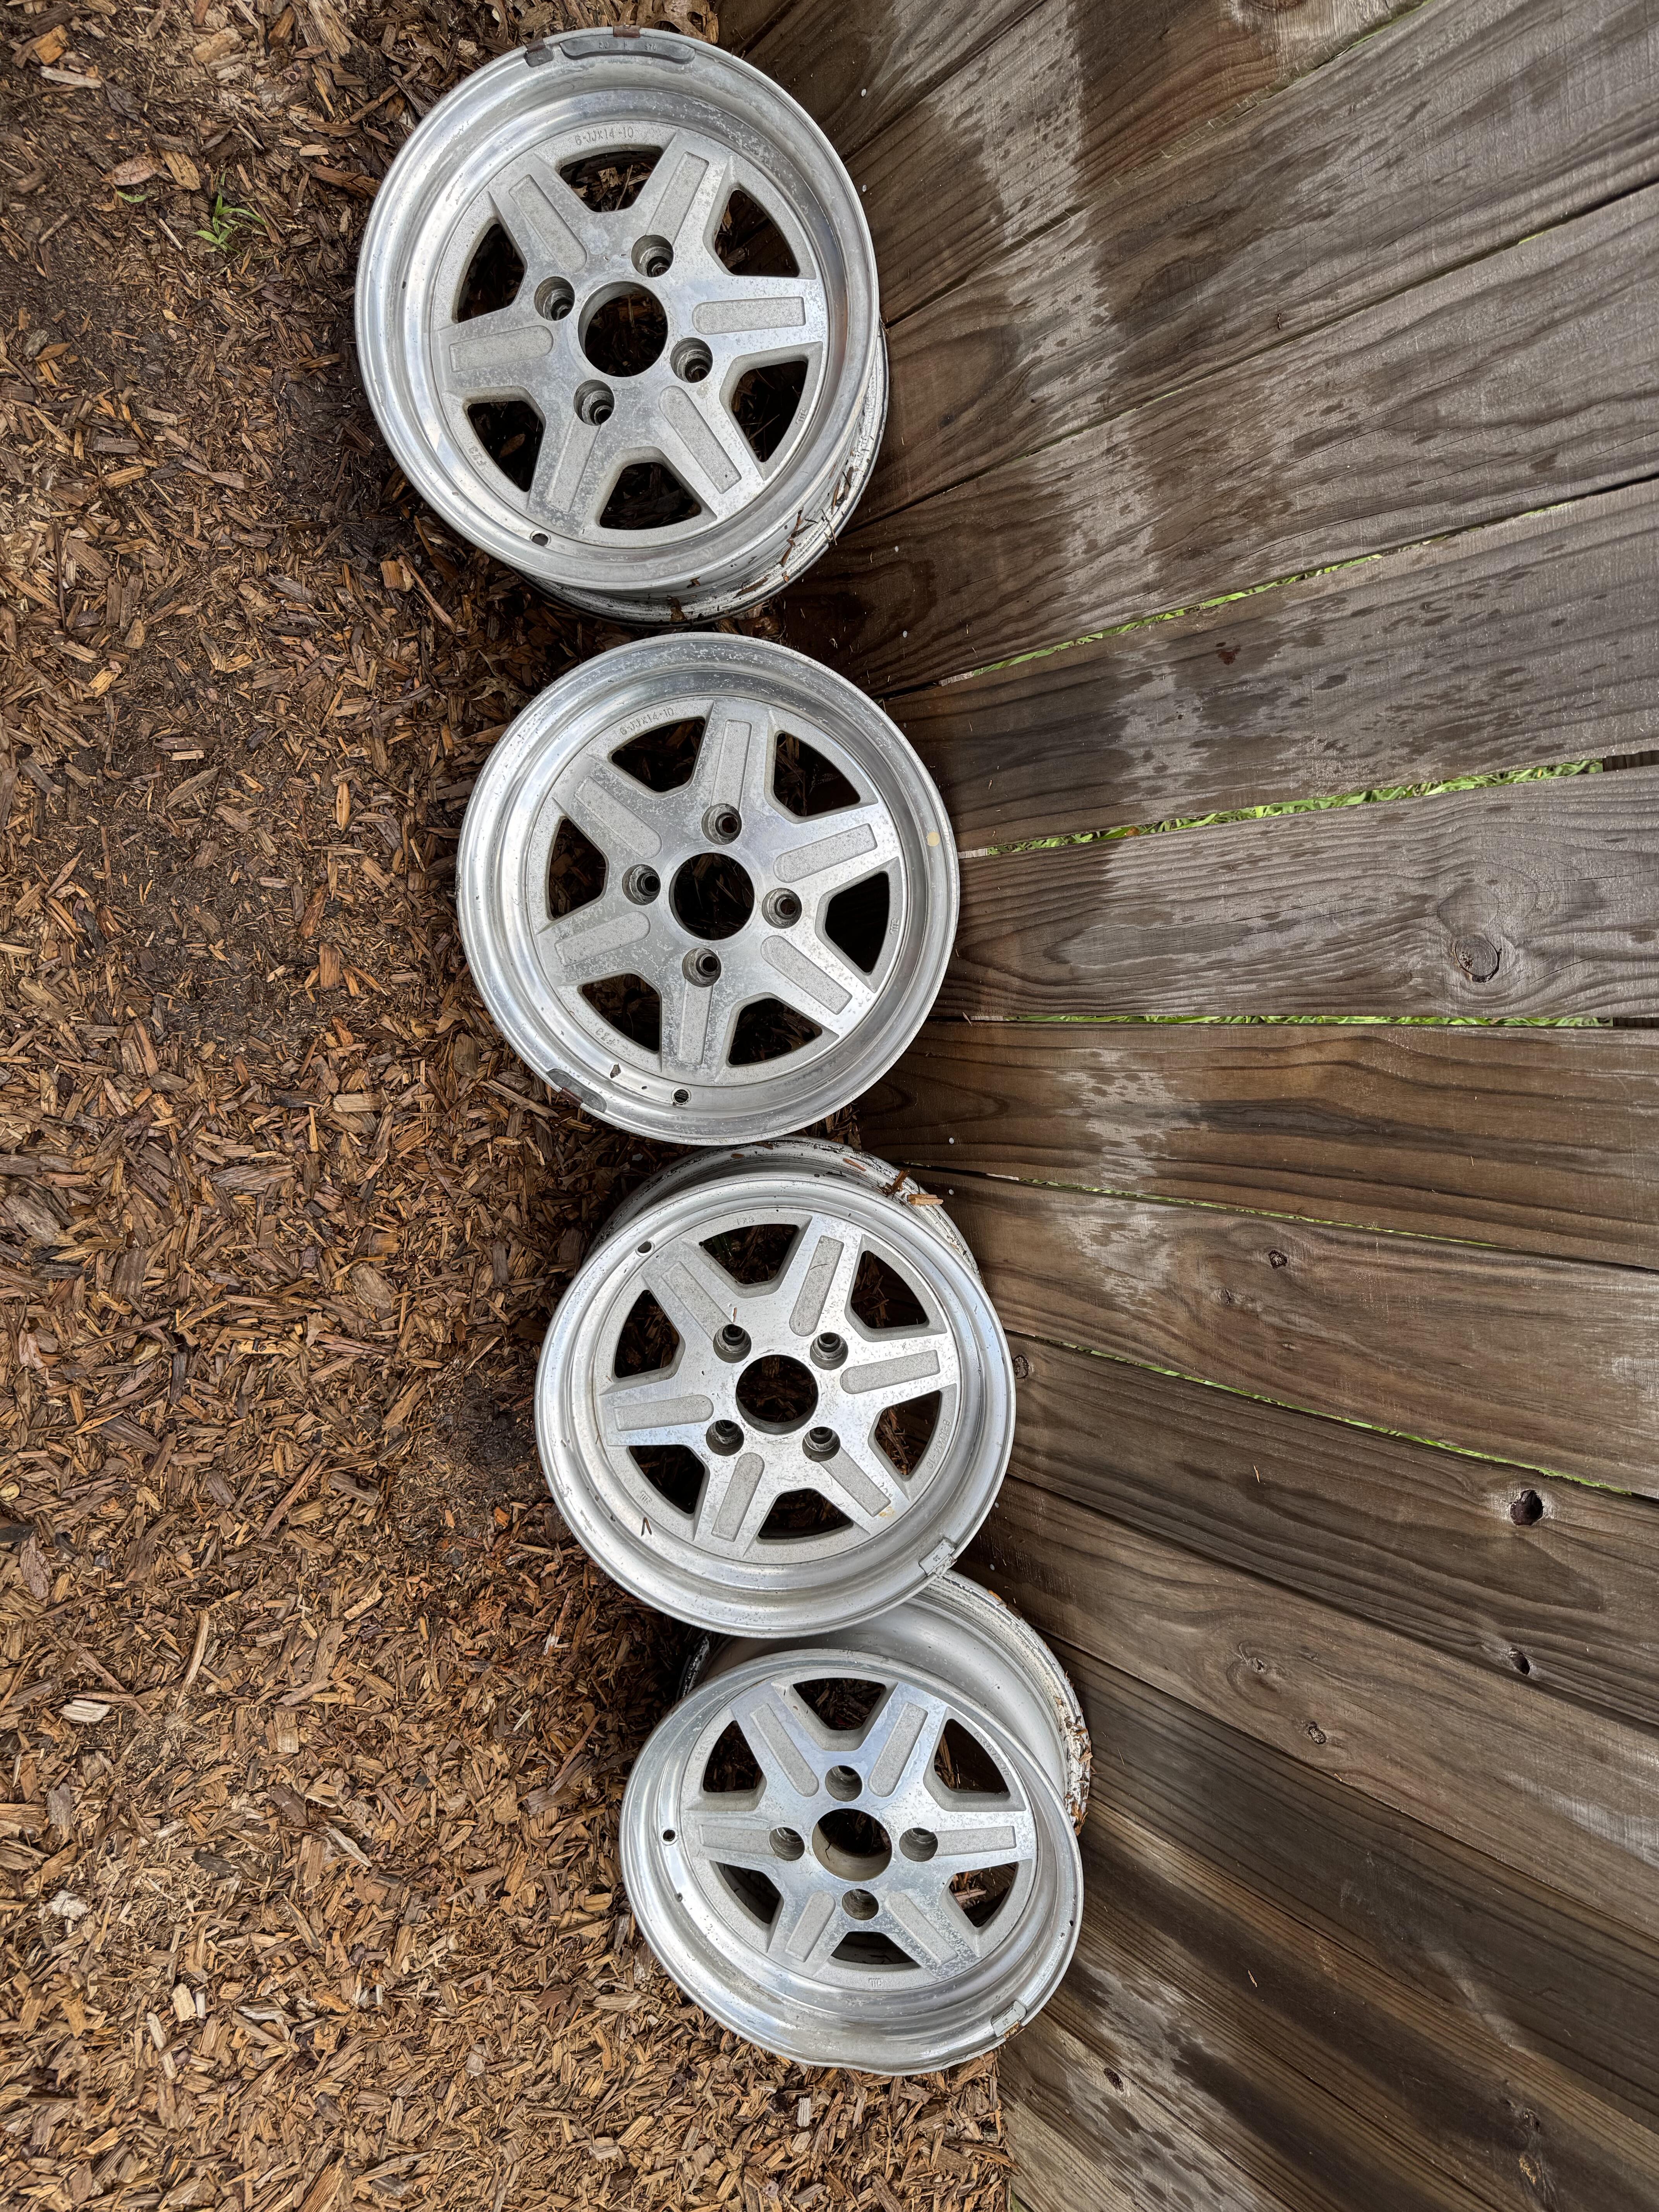
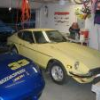 RESTORATION PROJECT DONE & CLEARING OUT THE SHED. NO REASONABLE CASH OFFER REFUSED. L26 Motor with E88 Head- 074185 4 Speed Transmission - Likely L4W71B Aluminum Radiator Door Window Frames (L & R) Fiberglass Headlight Scoops (L&R) R-200 Differential 4:11 R180 Differential 3:36 2-Hitachi 3 screw Carburetors (HJG46W?) Mounted to N36 Intakes NEW - 2 each 12" Electric Fans with Controller Set of 4 - 280ZX Wheels Front Bumper with Valence Panel - Good Condition Rear Bumper - Bumper Ends Good Center Poor Full Sets of Windshield and Rear Deck Glass Stainless Trim Grille Front Valence Pieces New Rubber Weatherstrip - Window Glass Run, Rear Deck Glass, 1/4 Window, Cowl to Hood Windshield Passenger Window Glass 1970 Deck Glass with Vertical Defroster Wires TOO MANY MORE VARIOUS PARTS TO LIST!!
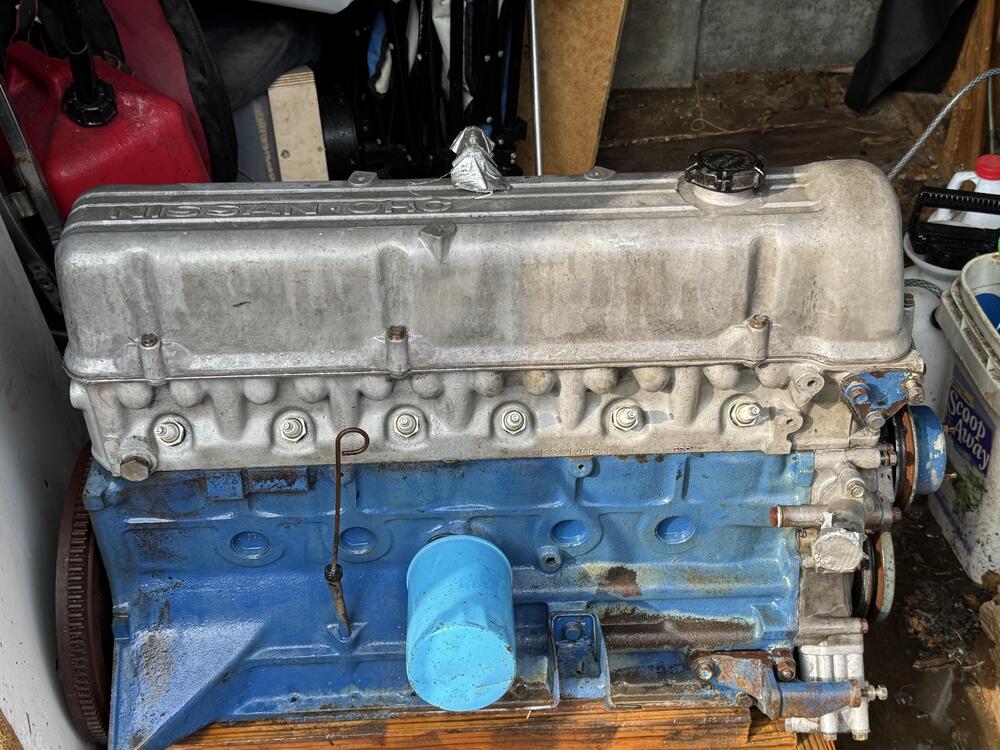


-
 That boss could be a surface for locating the part in a machining fixture.
 -
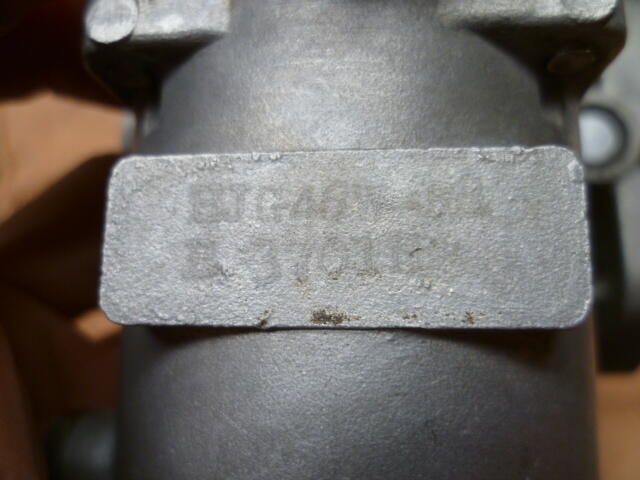
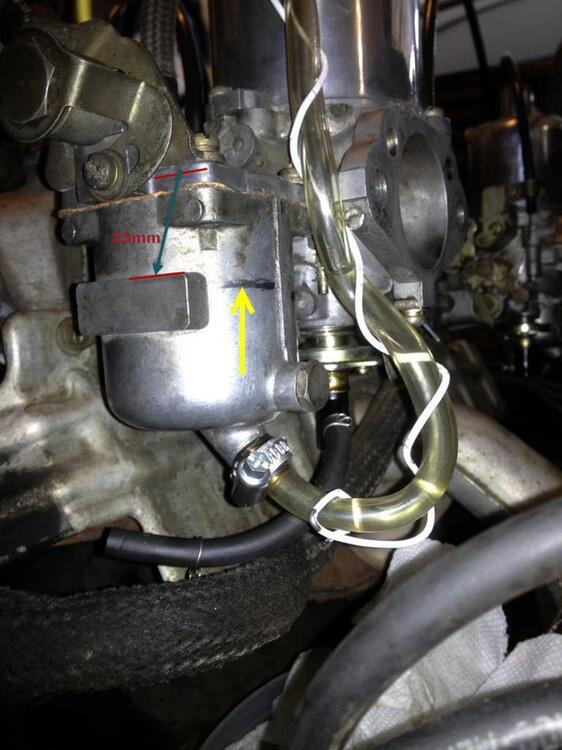
 I had knee surgery and am starting to fool around with my Zs. The carbed 240 was a little more trouble to start. I think the bowls had evaporated all the fuel out. For some reason I decided to hit my precious carburetors with a small tack hammer. The lord only knows how many have dents from being hit, trying to knock the floats loose. Well I saw the most obvious thing ever before I started whalopping the sides of my float bowls. Is there a chance in hell Skinner Union or Hitachi put this boss there for any other reason? I tapped them both a couple of times without leaving any marks and that little baby roared to life after getting a flow of fuel. Could Skinner Union/Hitachi have some foward thinking or did they just put a big chunk of aluminum to show the fuel level?
.thumb.jpg.c2d3f349d0292953b9463ccbb0613904.jpg)
-
Gotcha. Well that explains the "newness" of the connector, but I still don't know what the intent of that wire was. Still the only real idea I have is that it was intended to be a ground connection to the antenna. I'm thinking maybe they thought they might need to make that connection to the antenna, but then decided they didn't need it? I haven't yet dug into that corner of the car I have here, but I should be doing that soon. It's a mid-70 car, and I doubt I have that wire, but I will check when I get there.
-
Regarding the spade connector on the black wire, I replaced the original with a new terminal. There is an earlier picture of this section that shows the original, although the cover is so dark that the terminal type is not clearly visible. Typically, I replace all terminals and their respective covers and most connector bodies on all of the harnesses.
-
Thanks for the picture on the spring installation. I will make sure to correct that.


.jpg.b5ff324037c3150419a8de0545d56d74.jpg)
