


This came from the Mail List some time back and is due to be included at Z Home's articles. I've added a couple of notes and am posting it here due to it's relevance to recent discussions.
Going through some old e-mails and noticed this one. Saw one answer, but felt that there was a bit more information that should be included.

Jean-Pierre Lemonde wrote:
Question: The 240Z was pre-wired for fog lights. Anybody knows where the wires end up in the car and ultimately where would be the switch?
Answer: The 240’s had the fog lamp wires taped with blue vinyl tape to the main LIGHT wiring harness, in front of the radiator. You should find two sets of wires right by the wiring for the horns.
The colors for these wires are: RED and BLACK.
They are wired in parallel so if you only hook up one fog lamp you definitely should insulate the other pair from ground or each other.
Inside the cabin, by the fuse box, you’ll find a 2 wire connector that has spade connectors arranged in a T. That is, one spade will be horizontal while its pair will be perpendicular to it. In the cabin however, the wiring color CAN be slightly different than the Red and the Black at the lamps. The schematic shows it to be a RED wire and a RED/GREEN wire, but I have seen this be a GREEN/WHITE wire instead.
Since the Fog Lamp circuitry is actually receiving power from the Parking Lamp circuit (As well as the instrument lamps, although it's connected up ahead of the rheostat and inst. lamps.) all you need to power the Fog Lamps is a Switch, or simply join the two wires at the T connector by the fuse box. So a simple SPST switch is all you need. You CAN use a lighted switch, but you must provide a ground for the bulb in the switch.
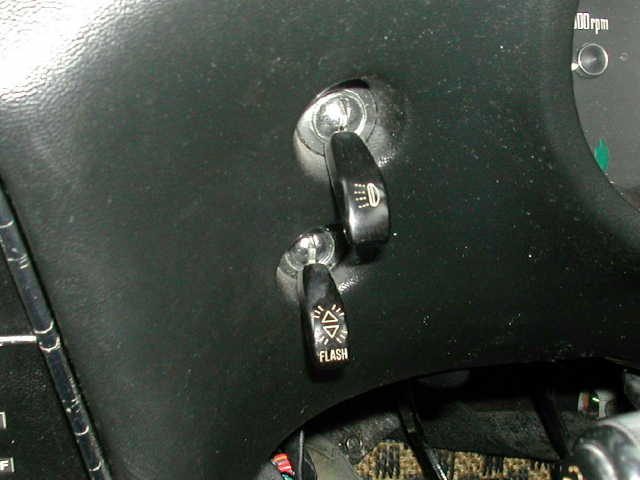
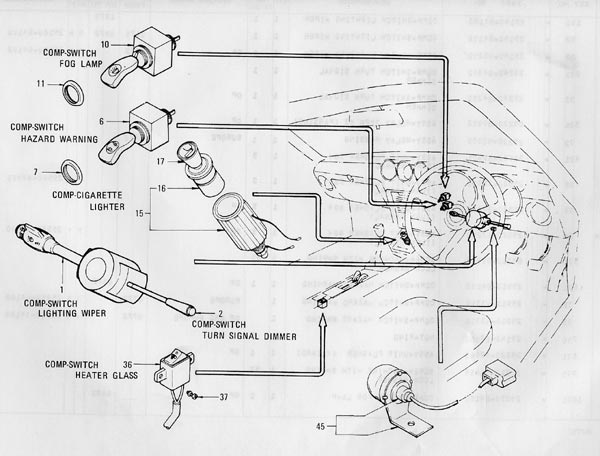
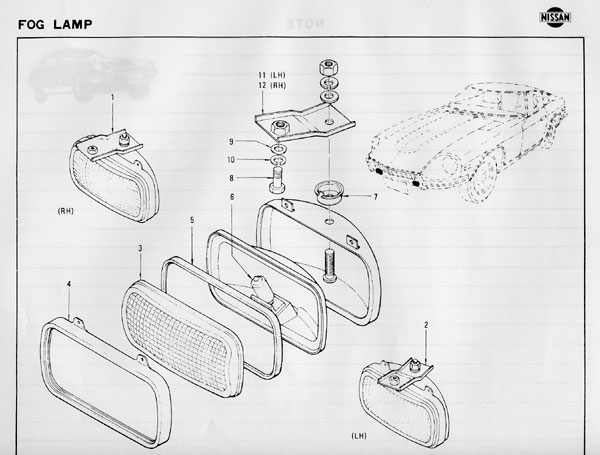
In the Series I cars, the true OEM Fog Lamp Switch was located above the Hazard Switch on the Dash. To my knowledge no U.S. or Canadian vehicles were shipped or received with the Switch in place. As a result, the OEM Fog Lamp Switch is but a mere vague memory to most Z fans in North America. The OEM Switch can be seen in one of the pictures below.
Kind of like the Independent Side Marker Lamp circuitry that was used in Japan. This was circuitry to light up the traffic side of the vehicle in areas where no street lighting was available. It allowed independent lighting of either the Left or Right sides of the vehicle, both front and rear, via a small 3W bulb. Note this wasn't using the Side Marker LAMP, but a separate bulb in the Front and Rear Light housings. IIRC Japan did NOT have the Side Marker Lamps required in the U.S. after 1968 or so.
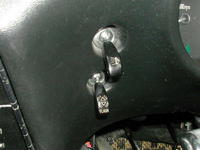
But, the location for that Ind. Side Marker Lamp Switch is on the Series I console. Just to the right of the Hatch Window Defrost Switch. If you've ever seen an EARLY Defrost Switch, you'll recall that it's NOT lighted. If you were to put two of those unlighted switches in the same housing side by side, you’d have the Ind. Marker Lamp Switch.
But I digress; the reason for mentioning the Ind. Side Marker Lamp Switch is that it's location on the console is PERFECT for an aftermarket Fog Lamp Switch. Especially since finding a Toggle Style switch that blends nicely with the Hazard Flasher Toggle AND fits in the hole is such an aggravation. (Some folks have just used a SECOND Hazard Switch in order to match the first.)
The only problem is that most Fog Lamp Switches that arrive with your freshly bought pair of Fog Lamps are lighted and are of the NARROW type leaving a lot of space on the sides of the switch. So now you need to fill that space, or find a different switch.
After a LONG and tedious search at my local Radio Shack, I found 3 switches that fill that hole very nicely. I'll give you the numbers so that you don't bug the hell out of your local Radio Shack help scrounging through their switch drawer.
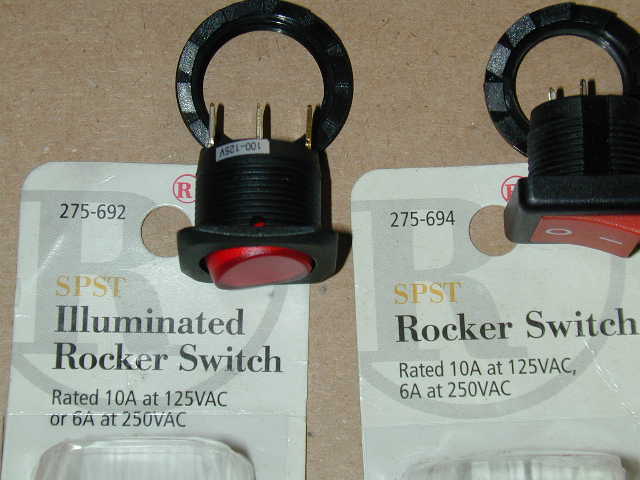
Radio Shack Part Number 274-731; this one is a direct fit and it has a Black Rounded Toggle with an LED in it. It is essentially a copy of 275-692 except that 692 is for 125VAC and has a translucent Red toggle (more on this later). Also, 692 is a threaded style while this one is a snap in mount.
However, for my vehicle, I didn't care for the lone LED dot switch next to the fully Lighted Defog Switch. But, the switch is a direct fit, 12V and Lighted. The frame around the toggle is squared with rounded corners. The toggle button is a round rocker style. It snaps into the surrounding plastic/metal that you mount it onto. You can connect to it with standard Spade connectors. For many this will be the ideal switch to use without further modification other than supplying a ground for the LED.
The next two switches are 125VAC, which simply means that they're rated for a much higher voltage than you'll be submitting them to.
If you use the Illuminated style in 125VAC, the light won't work with 12V. But if you cannibalize a 12V Lamp from a V Switch, you can make it work nicely. This involves opening both switches out and swapping out the 125VAC lamp with the 12VDC lamp, not terribly difficult but it does deal with small pieces. Take your time disassembling so you can see where everything goes.
Radio Shack Part Number 274-694: This one has a Square Frame and a Square Toggle. The Toggle is cast in Red plastic with White œ and œ painted on its face. It is a threaded mount style, which means that you'll be tightening a nut on its back side to mount it. Connections are Solder Style. This is yet another switch that can be used without modification. It is NOT lighted but it does have a Red toggle which will blend nicely with the Amber Rear Window Defog Switch.
However, for my tastes, I wanted something that lit up like the Rear Wind. Defog Switch, but also didn't clash with the rest of the console and switches. That's when I found the next one:
Radio Shack Part Number 274-692: This one is also very similar to the 12V switch (275-731) except that it has a rounded Red TRANSLUCENT Plastic Toggle Switch that is illuminated from inside the switch. It is a Threaded Mount, and uses the narrower Spade Lug Connectors. It is however a 125VAC switch. To convert it to 12V you will have to cannibalize a 12V Lighted Switch. But once you do so, the match to the LIGHTED Hatch Defrost Switch is much more appealing. This is the one I used on my car. Click the link below to see the final picture.
All of these switches FILL the space to the right of the Hatch Defrost Switch that's for the Ind. Side Marker Switch. Perfect if you don't have the filler plug. If you DO have the filler plug....DO NOT THROW IT AWAY. There are several people who are in need of just that plug. Trust me, either keep it or sell it.
To see a picture of the installed switch in my car, follow this link:
Hope this helps.
Enrique

Recommended Comments
Create an account or sign in to comment
You need to be a member in order to leave a comment
Create an account
Sign up for a new account in our community. It's easy!
Register a new accountSign in
Already have an account? Sign in here.
Sign In Now