


This is a real basic primer on how to bump out dents and shrink metal.
Ok, if you're handy enough with an oxy-acetylene torch, then you'll be ok with this next procedure.
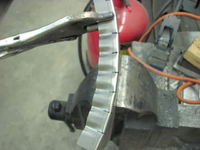
If you're concerned with the "panel beaters", and I take that to mean the specialty hammers, dollys and other body specific tools, you can still do quite a bit with your regular tools.
You can use your regular ball peen hammer or regular claw hammer as long as you're careful of the claw.
See if you can address the metal from behind. Typically this will involve removing the lights, wiring and other trim pieces that will be in the way. Once done with that, take a good look at the metal.
Remember, metal will stretch when dented, when you are pounding on the dent from the back side (inside of the car) you will also have to do a fair amount of pounding from the outside to restore the metal to the level required. If the metal has been stretched a bit, you have an acetylene torch, and you can do a fair amount of shrinking with the large heating tip, we called it a rose bloom but it's basically the one with many holes at the tip, used to heat large pieces of metal.
The trick is to heat the stretched area till it's somewhat glowing, not orange but kind of reddish, then with a rag thoroughly soaked in water, you quench the metal. This causes the metal to shrink rapidly and will strengthen it in the process by hardening the metal. You have to be careful of the amount of steam that will be generated, so wear gloves. Don't over do this, cause you can over harden the metal and then it can become brittle. Remember, you're just trying to reverse the stretching caused by the impact. Without a shrinking hammer, this is the next best method. By the way a shrinking hammer should only be 10-20 dollars, it has what looks like a meat tenderizer face to it, you use it like a regular hammer, but you have a metal dolly behind it. By the way, if you have spare pieces of solid metal lying around, look at them, you may have the basics for a metal dolly, i.e. a piece of metal to both anvil against and also to act as a counter hammer to your striking hammer.
The basic technique to pounding out the dents with a hammer is to use your dolly on the low side back side. That is, from the side that you are working on, find the deepest part of the dent, then from the other side (the side opposite you) put your dolly there and press outward or towards you. Then find the ripple in the metal out from that dent. This is the "rebound" dent. When metal gets hit, part of it sinks in, and the surrounding metal will bulge out. With your hammer now work around the dent, hitting the rebound part of the dent. If you work it properly, you'll slowly but surely see the rebound dent going down, and the deep dent coming out.
You CAN use the dolly to smack against with the sheet metal between, but this is usually reserved for smaller dents where you can work faster that way. Just be careful with your fingers and don't get too crazy, you can thin out the metal that you're working on, and you'll end up with a washboard wobble, then you'll HAVE to shrink that metal.
Once you've brought the majority of the dent out or all of it if you've been lucky enough all of it, then use your plastic body filler to finish the panel.
If you should have a dent that is too deep to try to hammer out, you can use a slide hammer, or if you don't have one, get some sheet metal screws, drill a smallhole in the deepest part of the dent, and using pliers or some form of gripping the screw use it to pull the metal out, while again taping down on the rebound dent.
I hope this helps, but I do caution you, I've summarized techniques that I'm sure others will say are too complex to be tried by the amateur as well as simplified some to basics that some may argue are too simplistic. Check your library, there should be some basic books on body working to help you.
and an addendum:
I'll add this to that, if you have access to an Eastwood catalog, they have an excellent tool that will help you do a quick job of shrinking metal. This is a hammer that has a rotating cam head with a spiral cut on it. As you hit, the cam rotates while grabbing the metal.
I personally prefer the plain old shrinking hammer. This is one that looks like a meat tenderizer. This hammer in combination with a dolly is usually all you need to shrink most stretched out sheet metal. The prior post explains the basics, and it is tricky to explain WHERE on the panel to select where to shrink.
The best I can do to explain that is as follows:
Metal shrinking is present when you have a washboard effect on a panel. Washboarding is when you press on the panel, and you can feel and hear it go bonk and press in, when you release the panel it bonks again and pops out. The other obvious is when you have a panel and you can see the obvious BULGE of the metal above where you need it to be.
To know where to shrink, try to find the one spot that is REALLY sensitive to push / pop. This is the sweet spot for THAT stretched out area. First use your shrinking hammer, and see what you can do to tighten up the metal with that. Put your dolly behind the metal, use your shrinking hammer, and smack the metal using the dolly to absorb the impact and accept the rebound. VERY IMPORTANT DO NOT LET THE DOLLY REBOUND ONTO THE METAL. This will tighten up that specific spot.
Next, find the next sweet / soft spot. Usually as you tighten one area, you'll have another area become the sweet spot. Keep addressing the individual spots with the hammer / dolly combination.
You will finally get to a point where no amount of beating will reduce the metal any more. At this point you switch to the acetylene torch.
Heat the metal, again not red hot, just starting to glow, and wearing some thick gloves, and with a rag that's pretty well soaked and dripping with cool water, put your dolly behind the metal to support your pushing, push the wet rag onto the surface. The metal will cool very rapidly and shrink. Move to another spot and repeat. You'll do this pretty much all over the panel, and usually it's between the spots you treated earlier.
Pretty soon the panel will feel tight and no washboarding will be felt or present. Check your panel for straightness and level to the surrounding metal. Use your dolly and regular hammer now to remove any last dents, etc, and you should be ready for your skin coat of bondo or lead. If you don't want to use lead or bondo, then you just need to continue to straighten and shrink the metal until the panel is to the shape desired.
Most body men will just avoid this, since it is incredibly time intensive and expensive. It is best to get it so that you end up with the THINNEST possible coat of filler.
But that's another posting.


Recommended Comments
There are no comments to display.
Create an account or sign in to comment
You need to be a member in order to leave a comment
Create an account
Sign up for a new account in our community. It's easy!
Register a new accountSign in
Already have an account? Sign in here.
Sign In Now