madkaw
Community Member
-
Joined
-
Last visited
Everything posted by madkaw
-
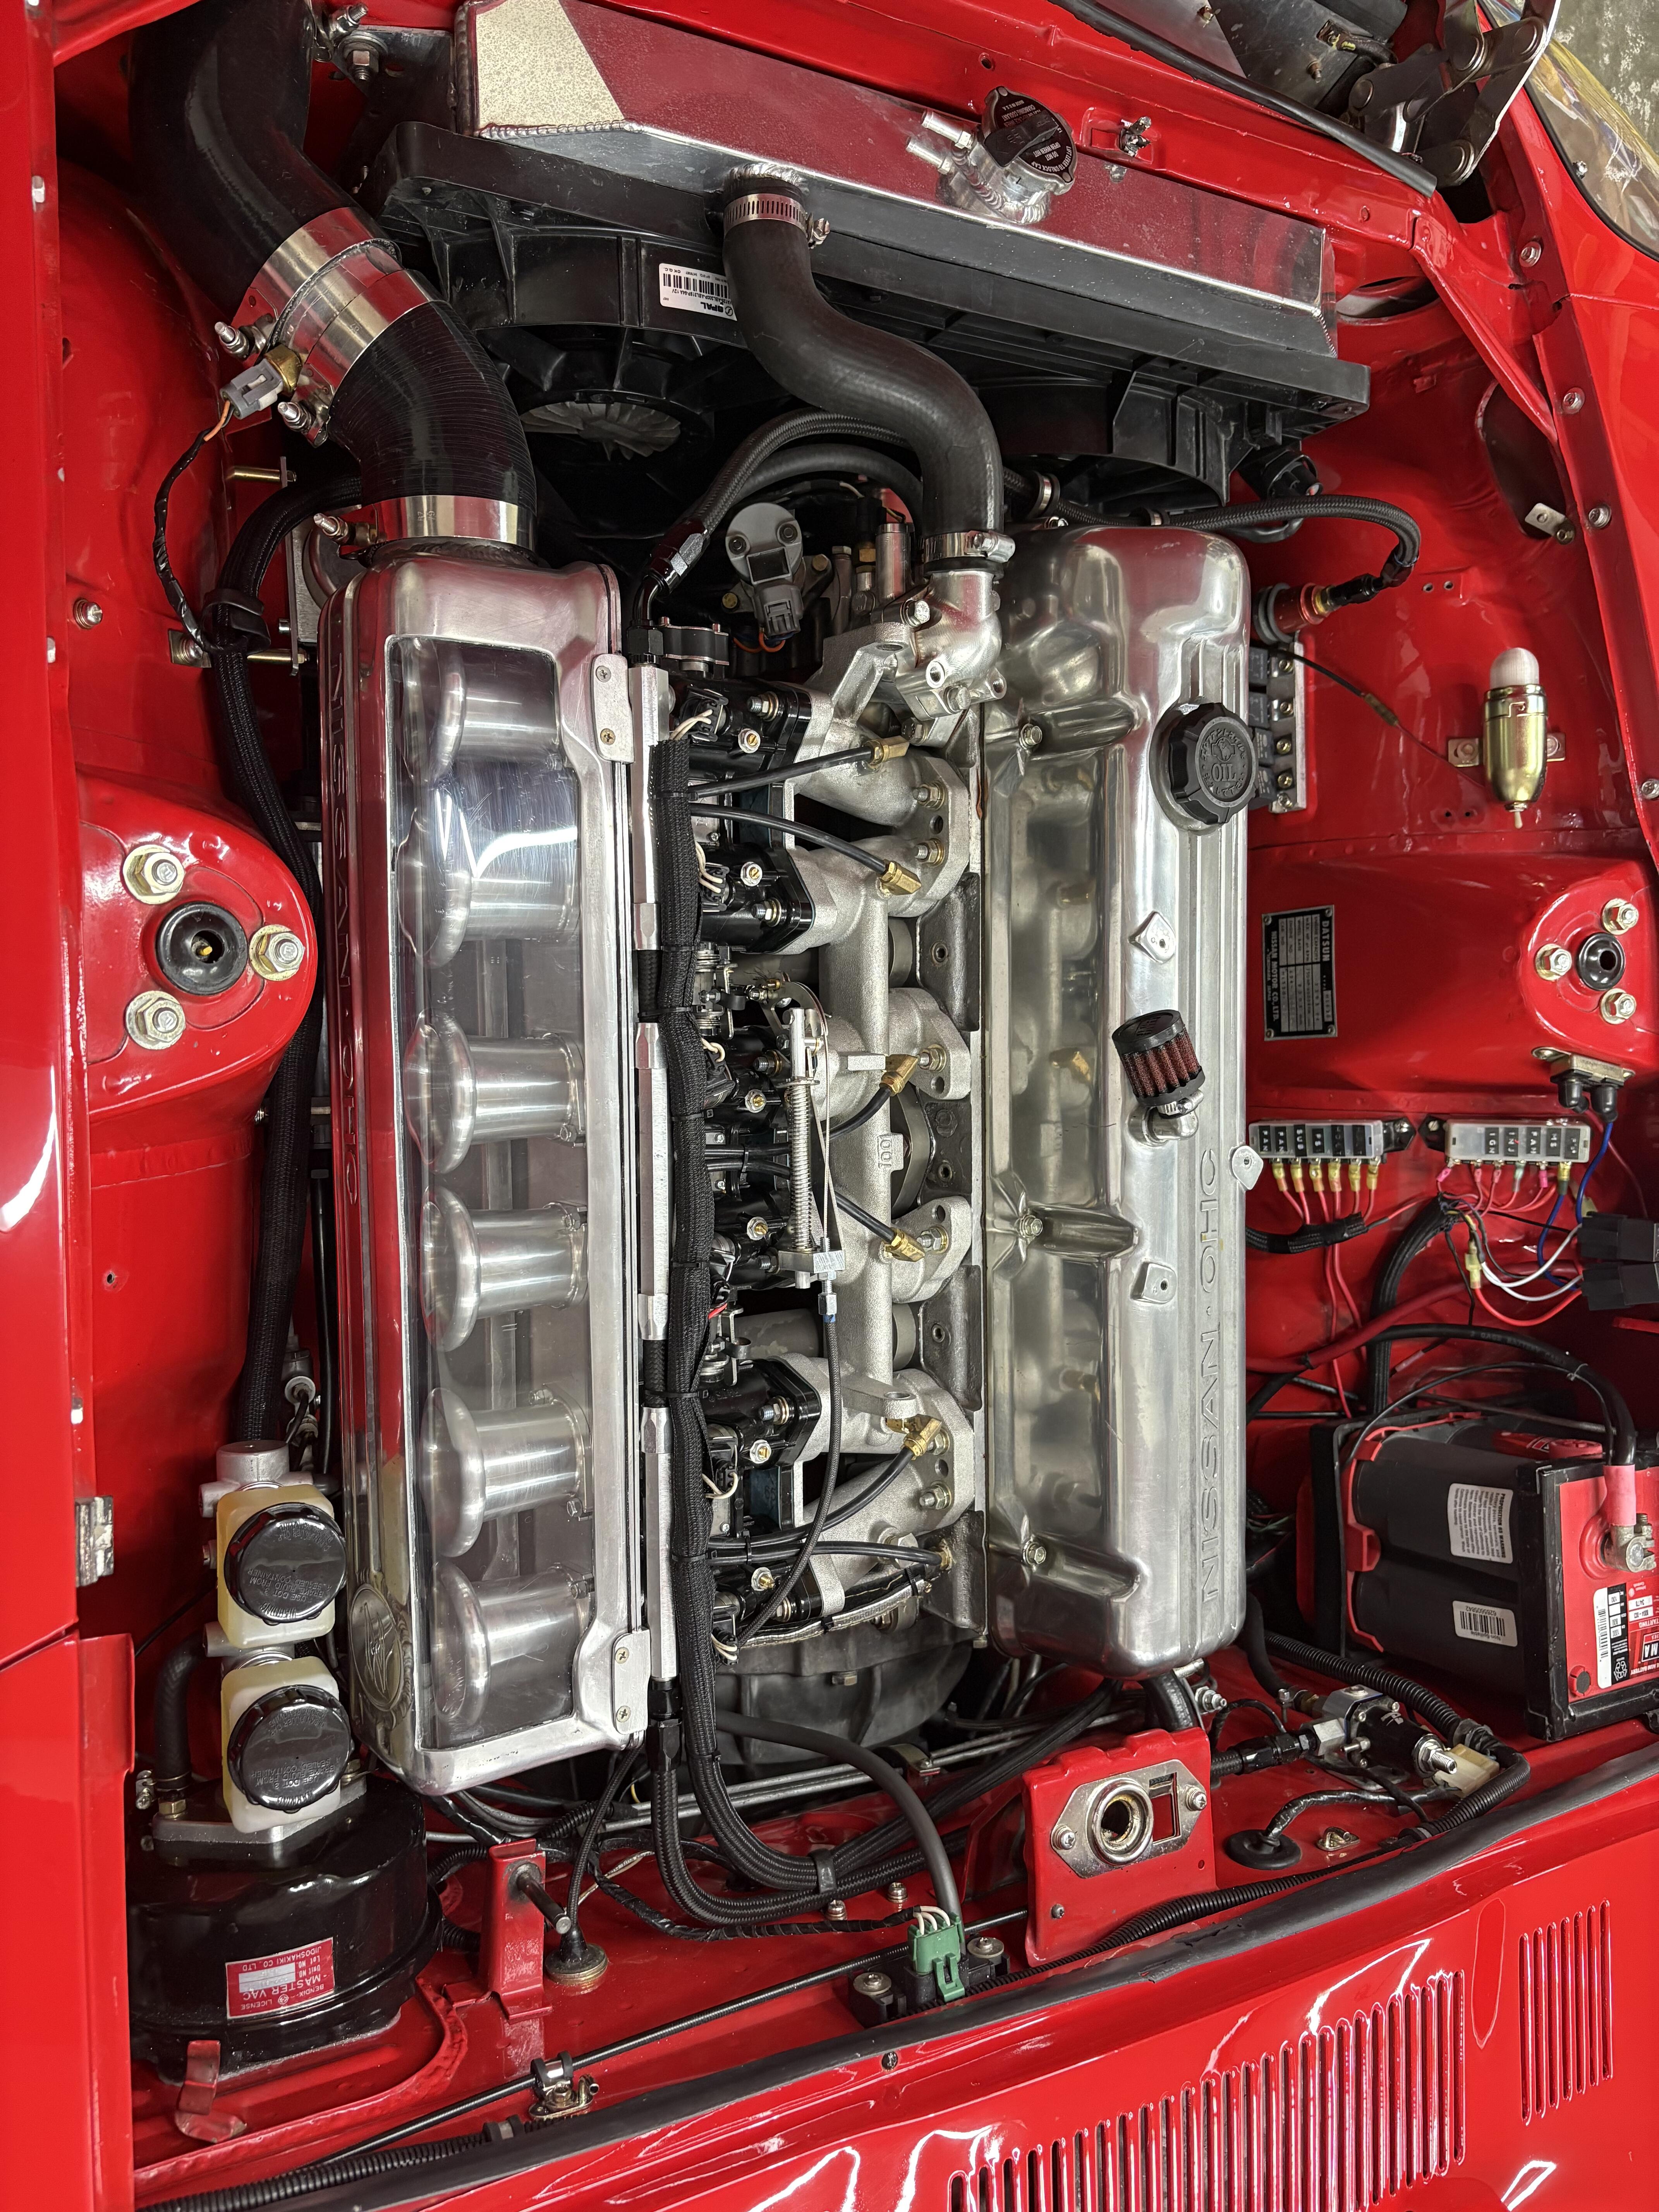
Damn- 5 year update ?!!! I’ve been thru several induction systems including Protunerz . Now running these FAJS . I’d say this package runs better than anything I’ve had on this engine . The Protunerz ran good but I think the runners were too short and fat . I did manage 35 mpg driving to the Woodward cruise last year with that manifold - that’s at 80 mph -windows down! I’ve been blown away that I’ve been able to get these ITBS tuned in so well . First start it idled at 750rpm . I run the cable linkage which like any linkage has to be dialed in correctly . I was always told that when the engine gets hot the idle rpm will climb , but I’ve got these to idle better than my single plenum . These are 45’s . The stacks are 75mm long . I have not dyno’d this package . Looking back at this thread I can say I was running too much ignition timing . Also blew up #6 piston . I run 28 degrees WOT . Finally got smart and made det cans to wear while tuning . I had some pinging at peak torque . I still run a lot of timing at light cruise - thus able to get lean cruise . I think I got high 20’s MPG going to ZCON . I was still tuning on the fly . Though I ran triple Mikunis before - I didn’t think I would do ITBS because I thought they would be to challenging . They are a challenge but glad I did it

-
I’ll have to recheck my setting for my stroker but I think my fan comes on at 185 and goes off at 180 ? I have an ECU so it turns on my fans at a lower setting at 185 and full speed at 195 .
-
Won’t find this info on FB- lol. I worked on a 72 thru Covid . The guy texts me yesterday that he has no rear brakes . I put all new SS lines in his car and had to clean/ rebuild his brake switch valve . I’ve had the weirdest stuff with his brakes . The O rings failed on the brake switch and fluid was forced from one side to the other back up into the MC . Now his rear brakes don’t work - so after reading this I assume it’s that proportioning valve . I haven’t laid hands on it yet . Looks like I have good reference material here . Wish me luck
-
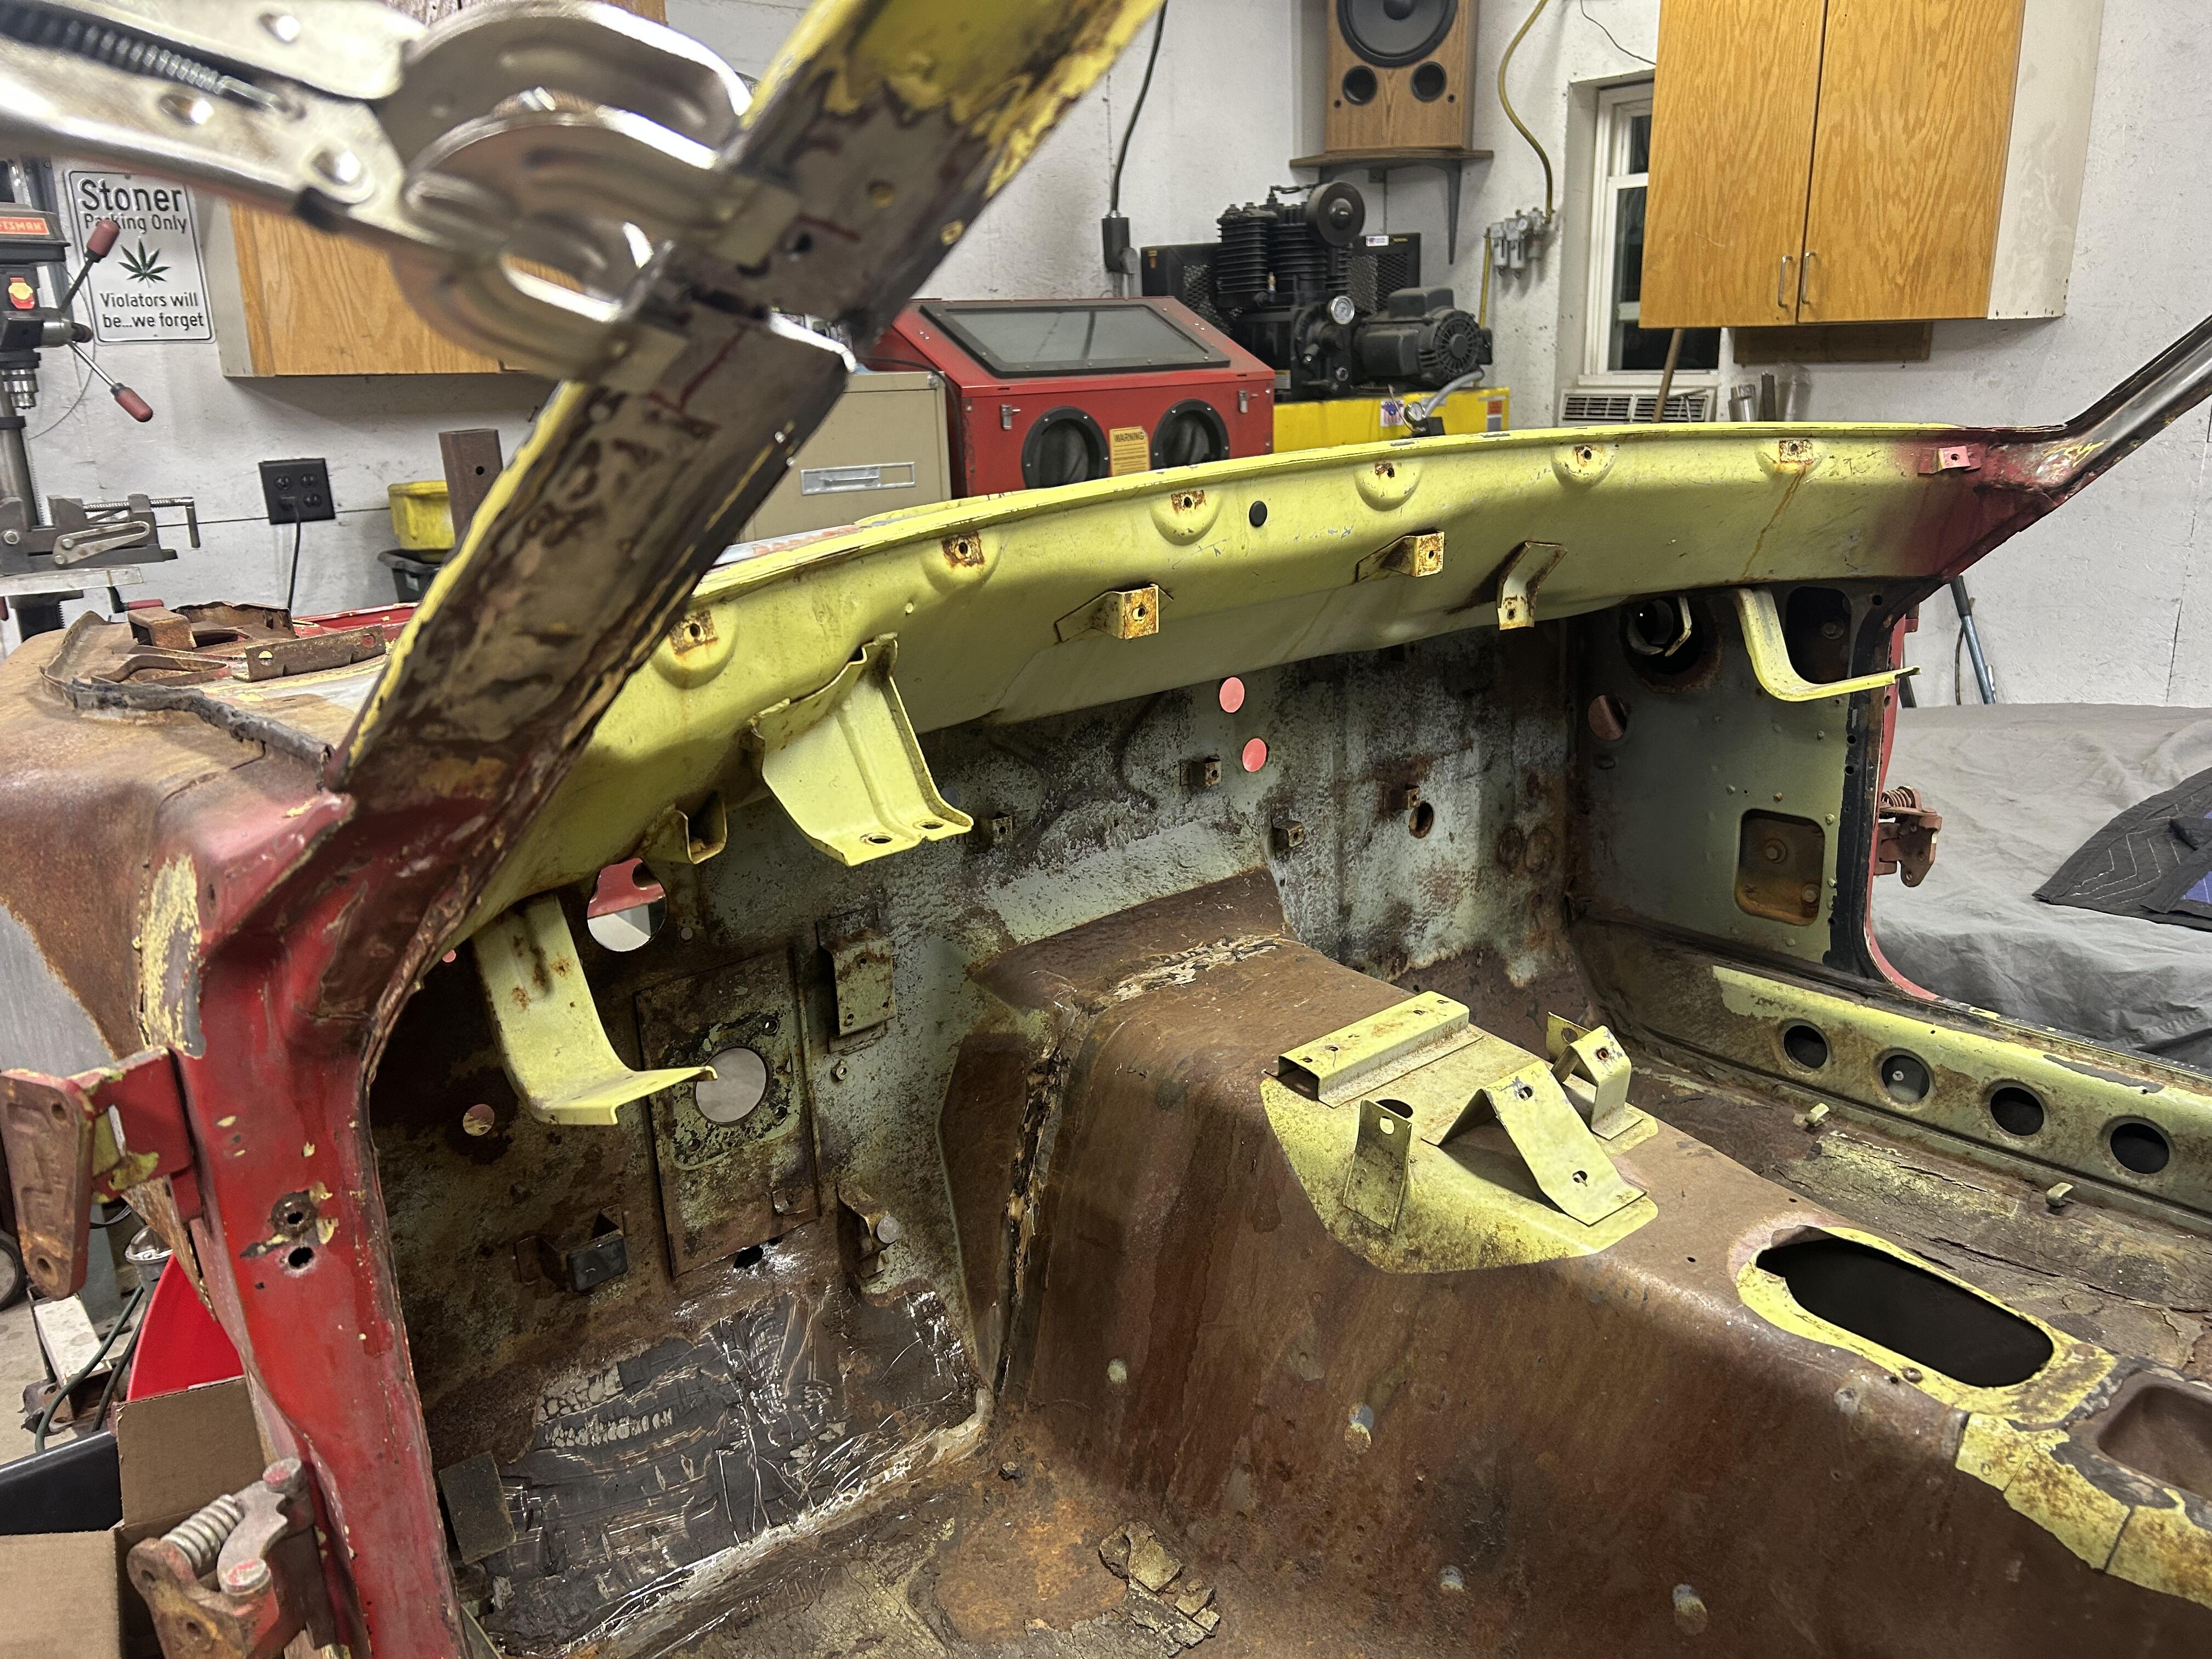
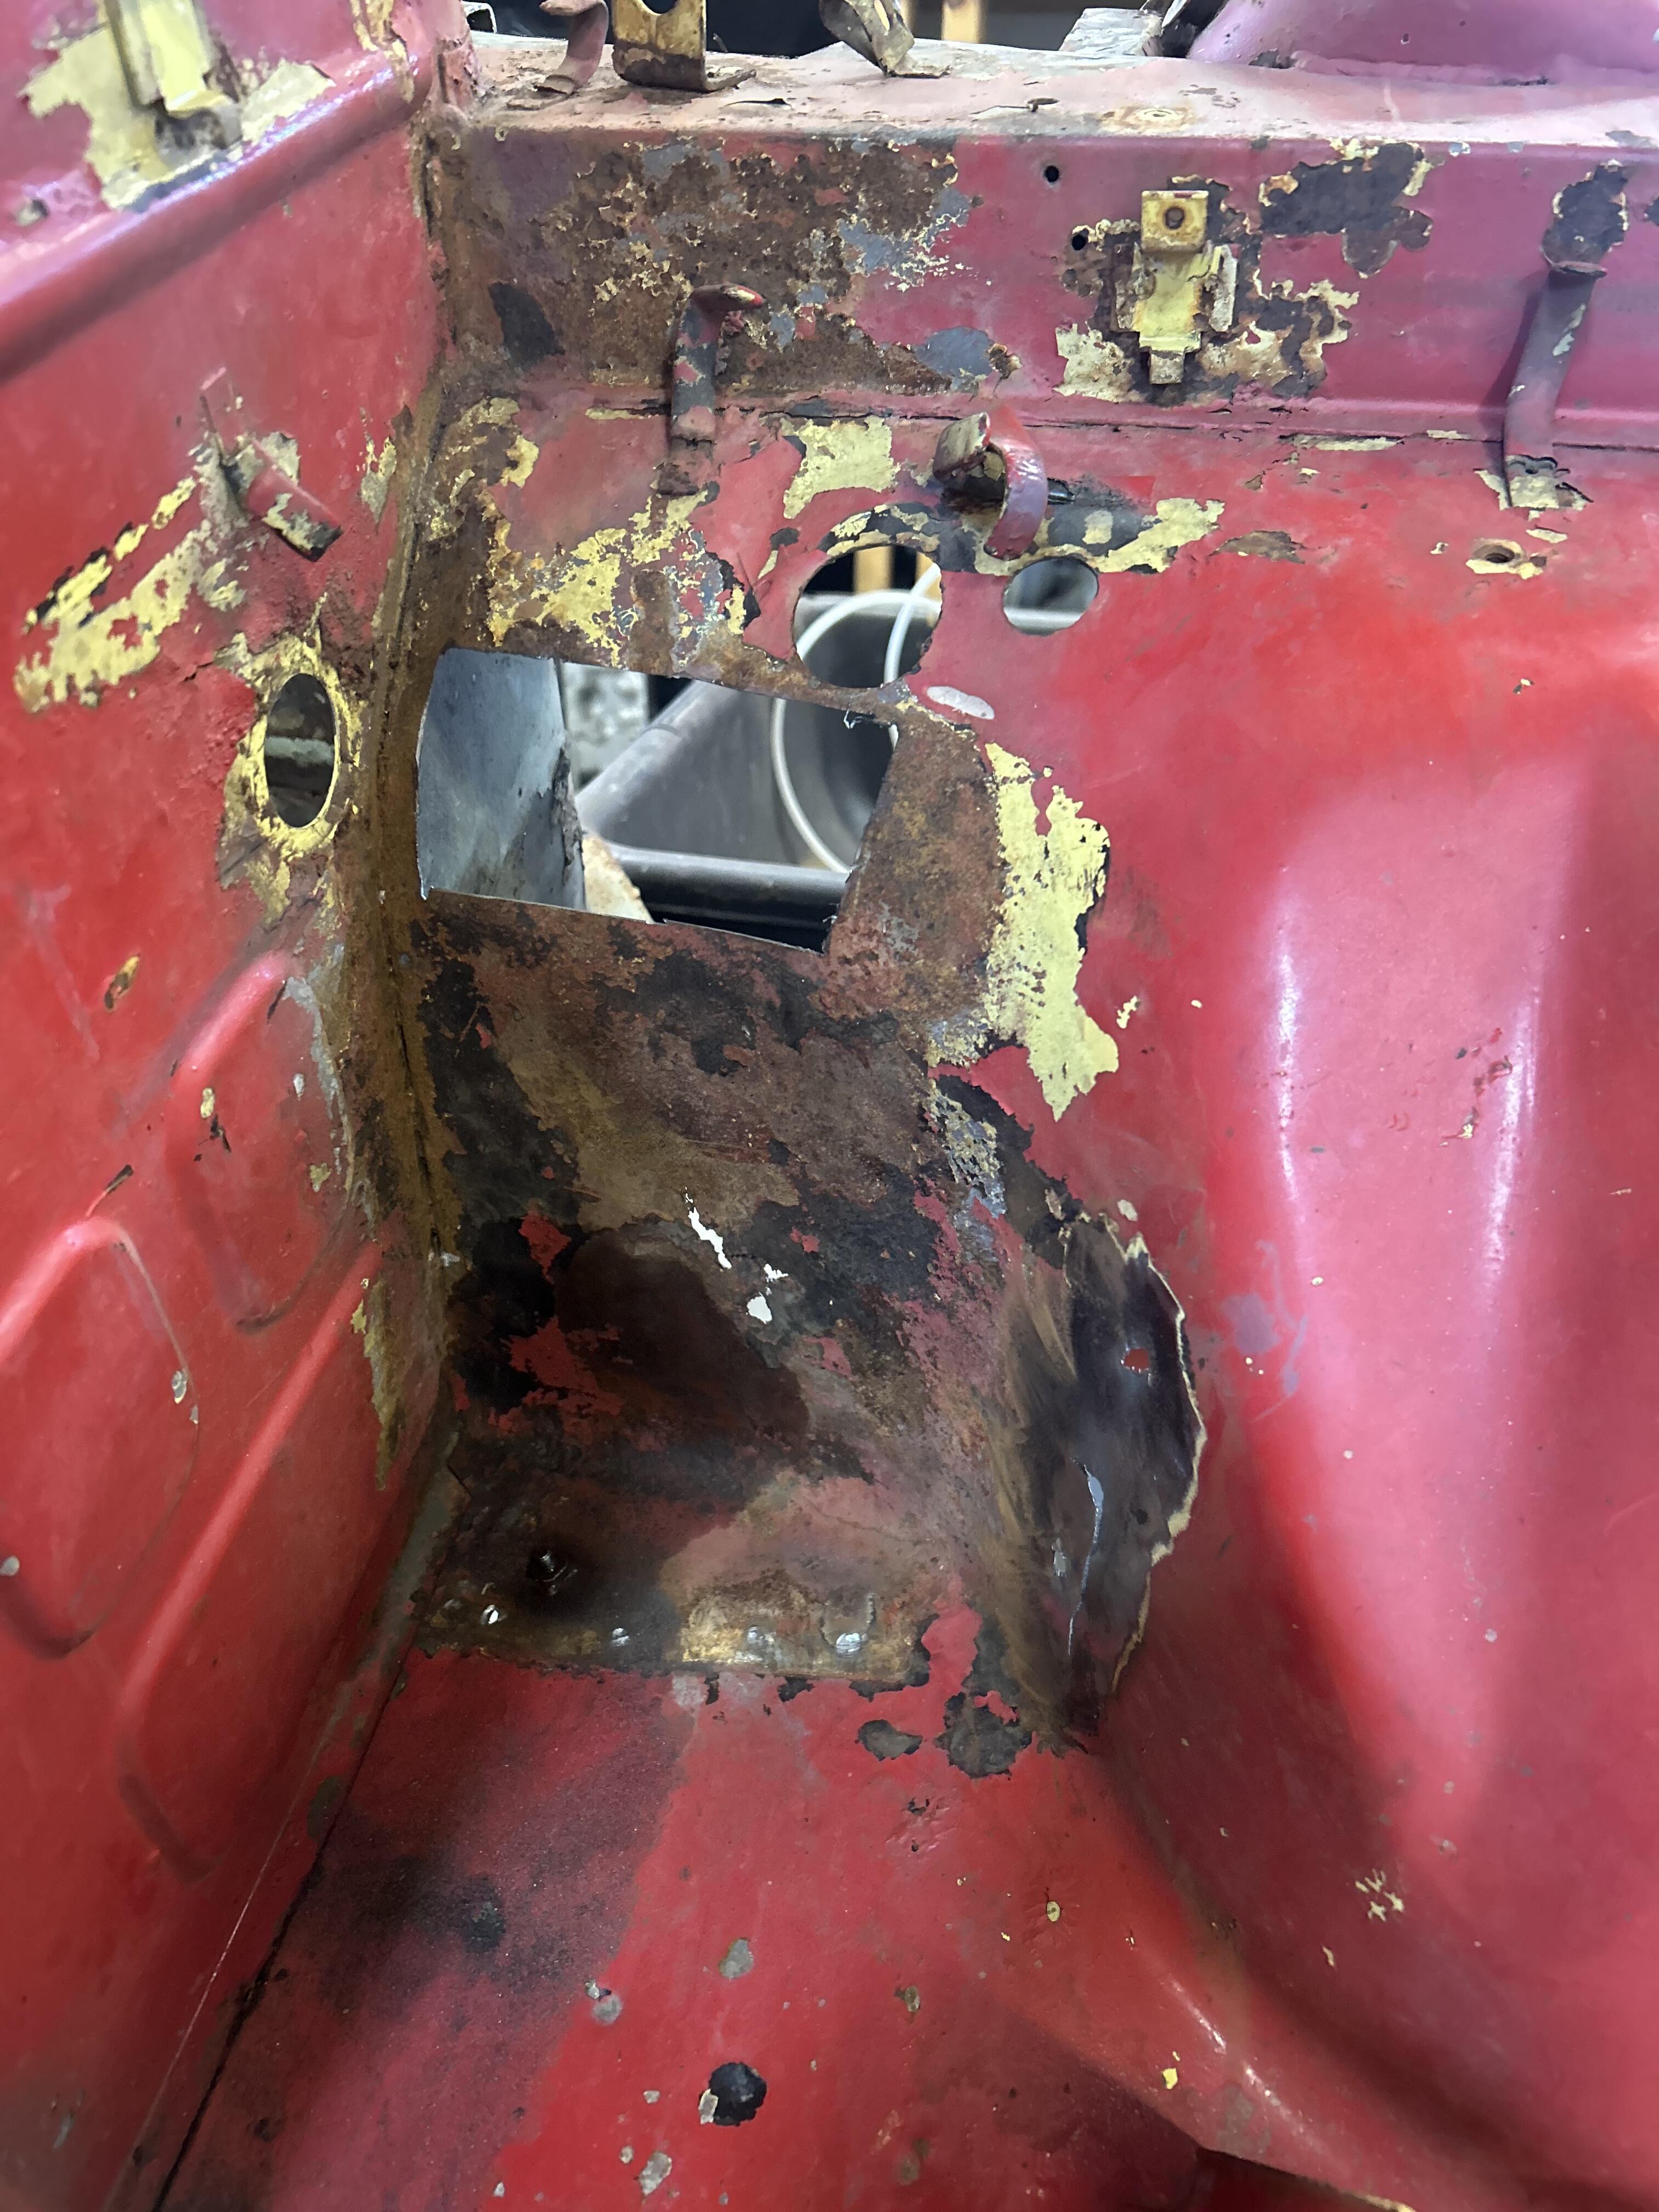
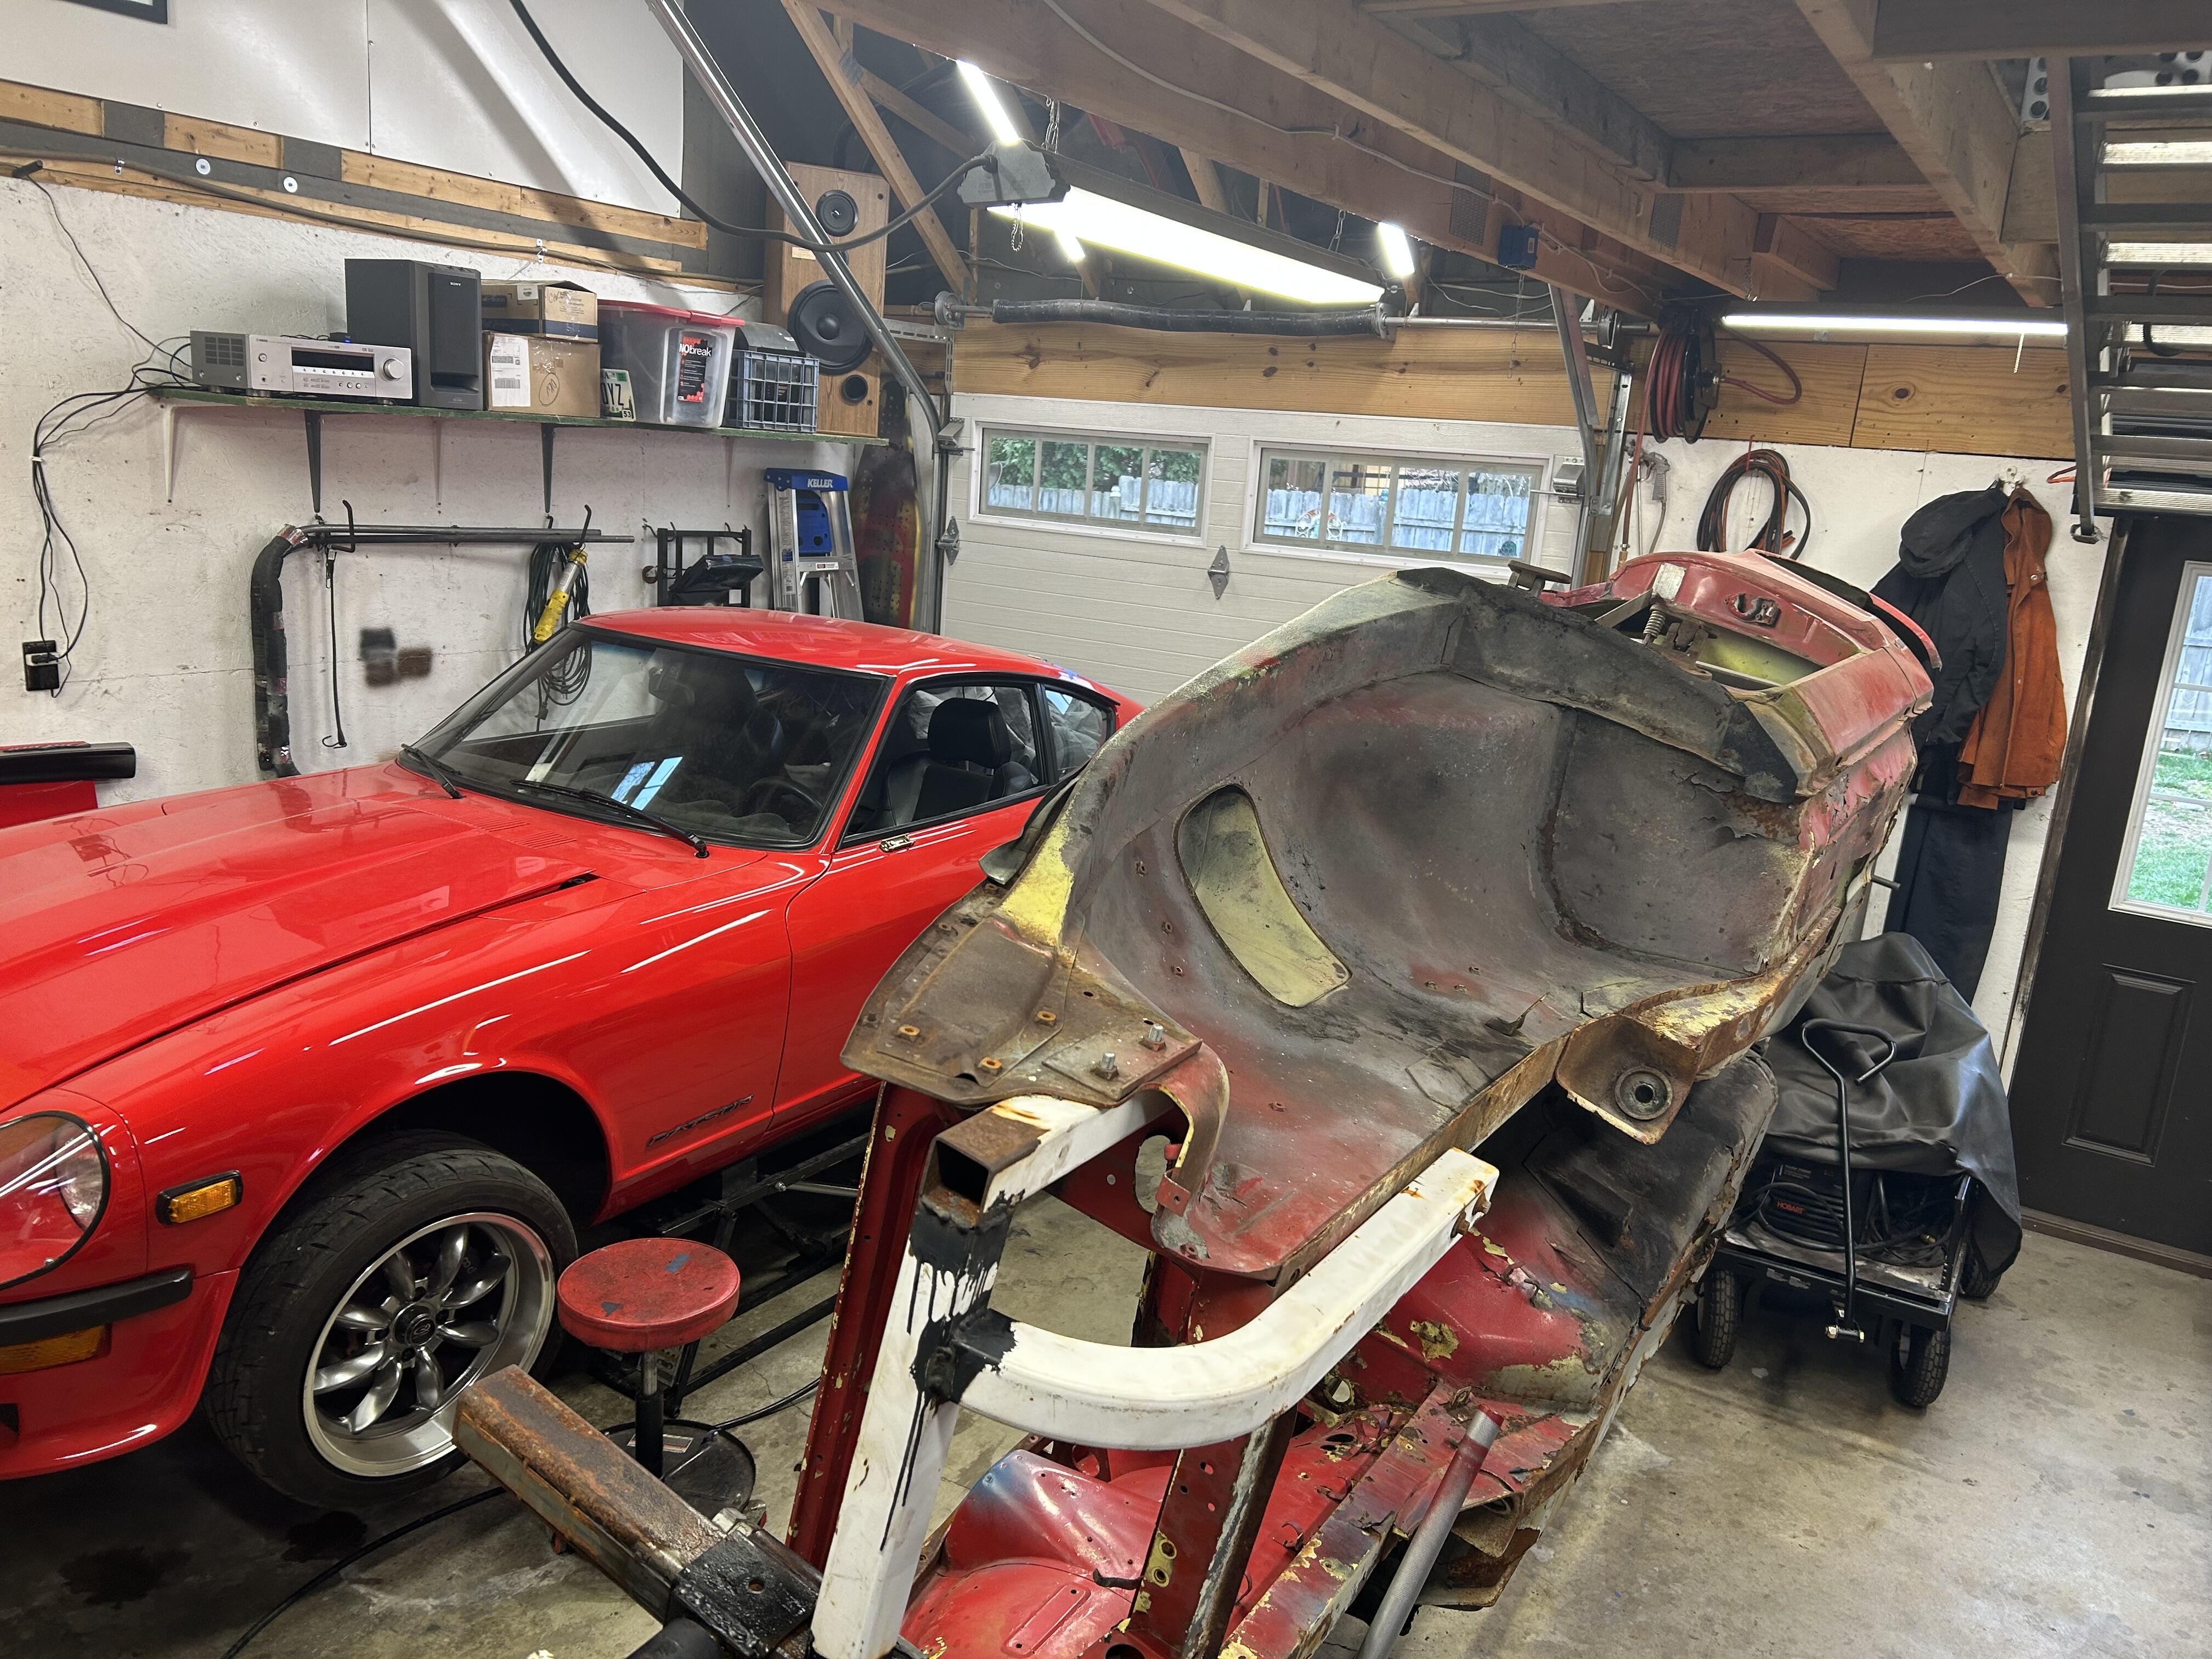
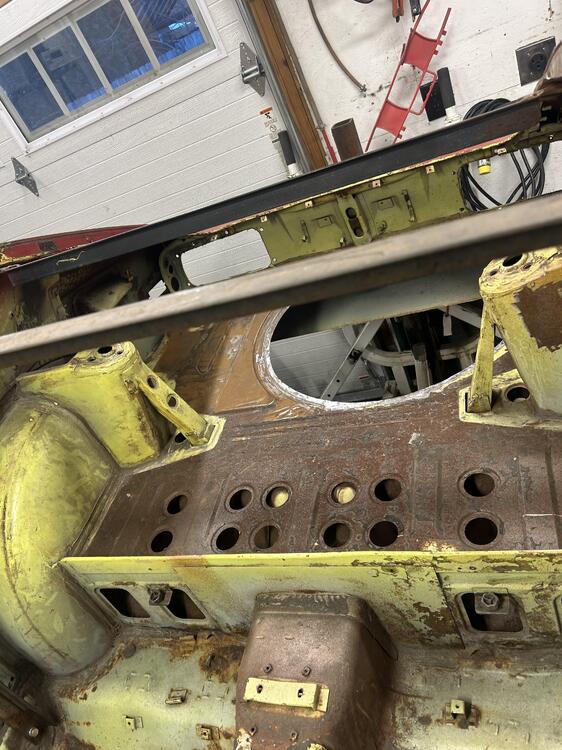
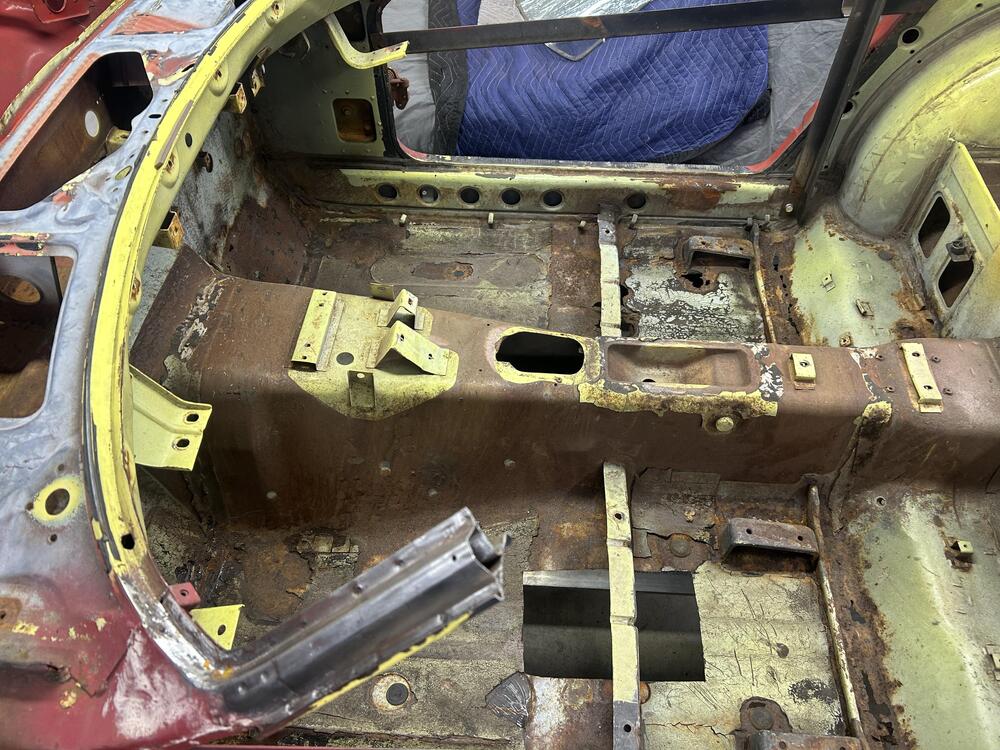
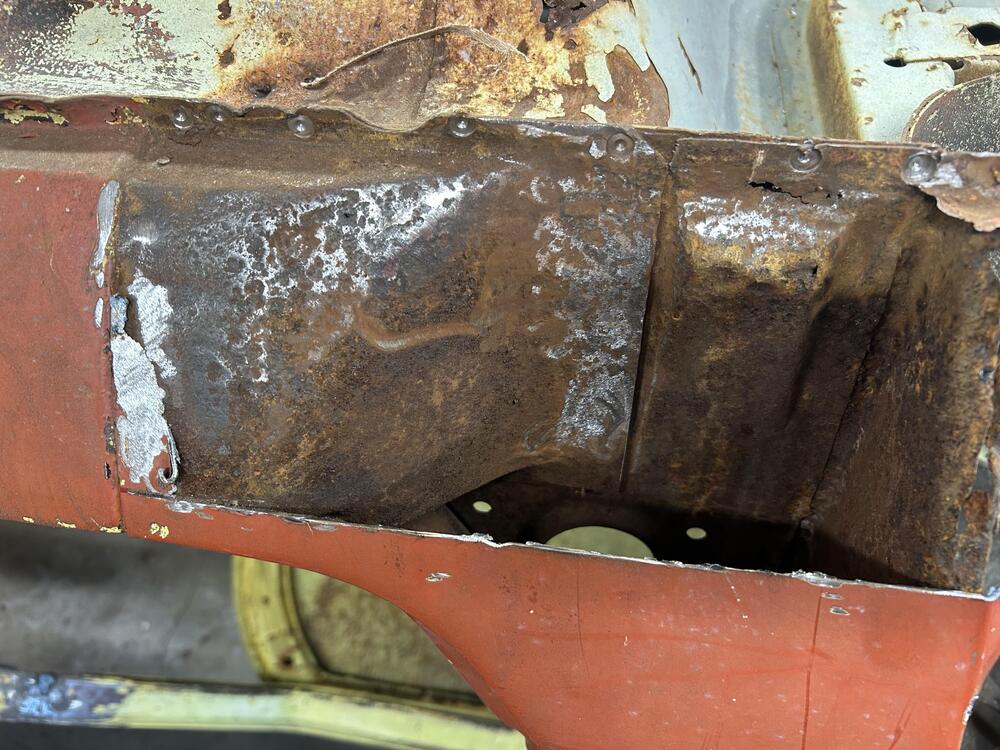
RUST!!! Random pics of rust before I started chopping and treating rust . I’ll put a link to a YouTube video I made regarding Rust911 . The rust seemed bad but my buddy said “ nah- it’s too bad” . He got me started on rust911 . Being a scientist he did controlled testing on various products on the market for treating or getting rid of rust . He’s currently doing a 72 Volvo 1800es. He had treated his car with amazing results . I followed his methods and I’m still using them to this day .


-
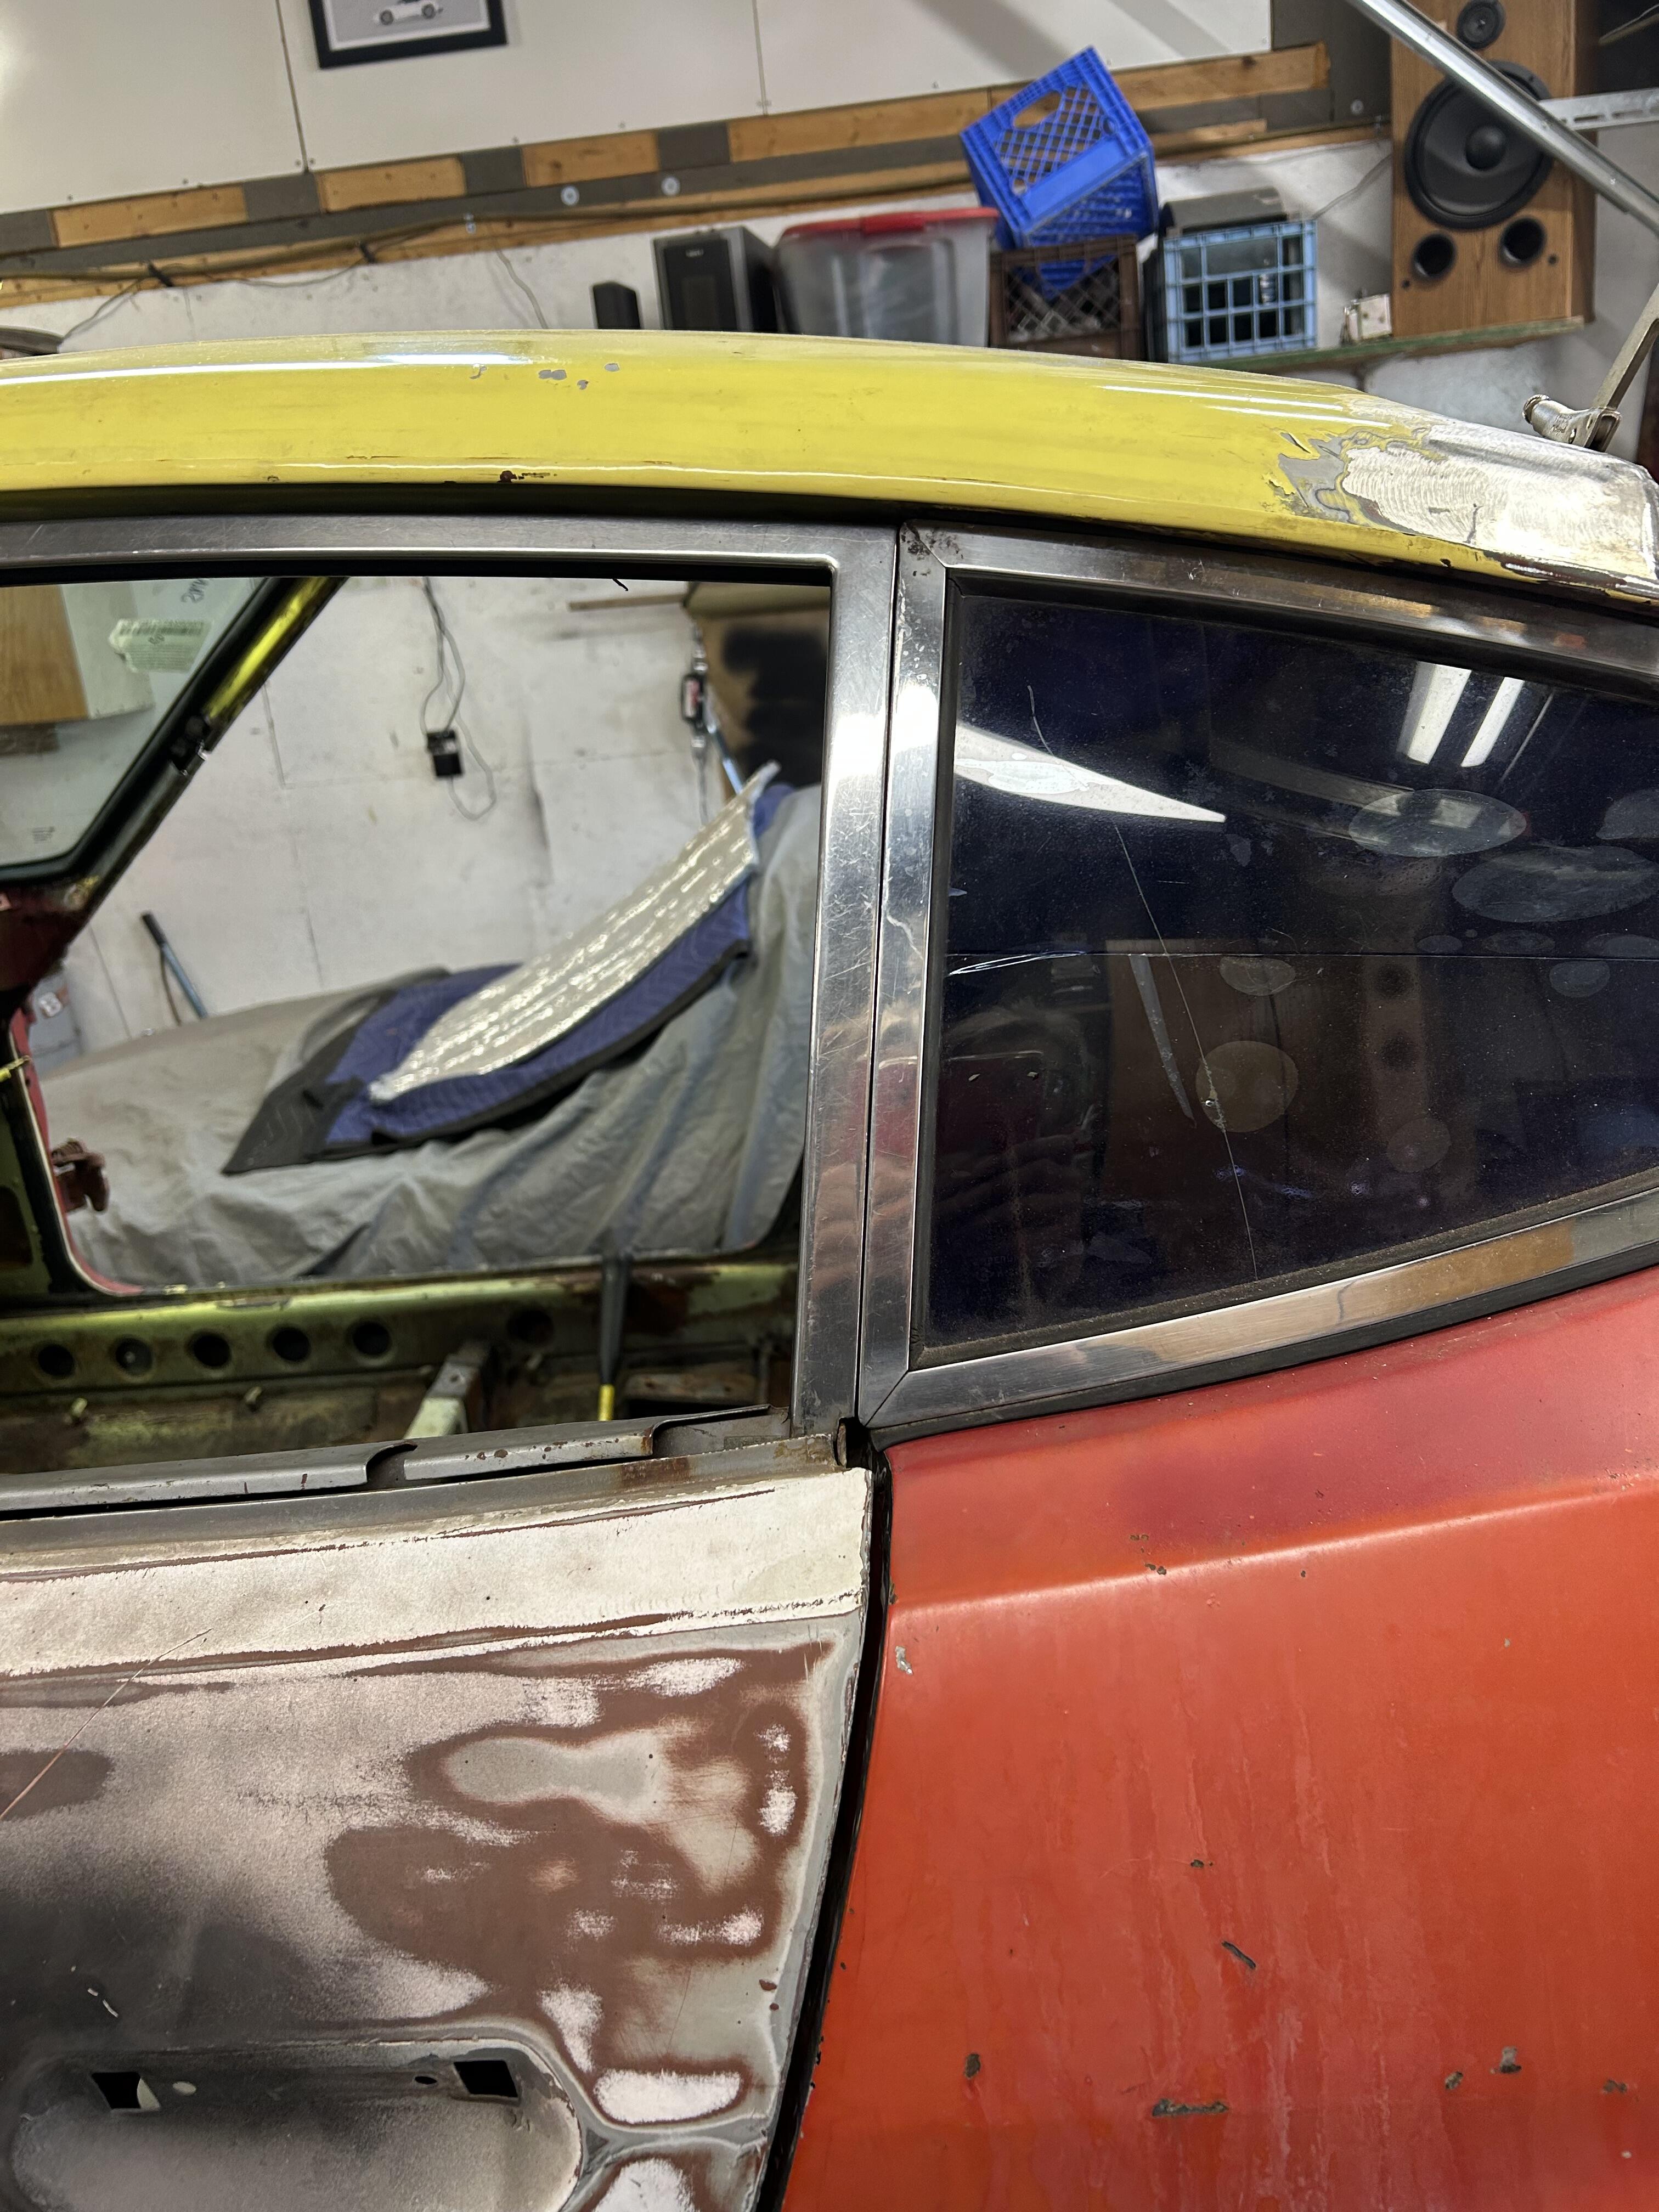
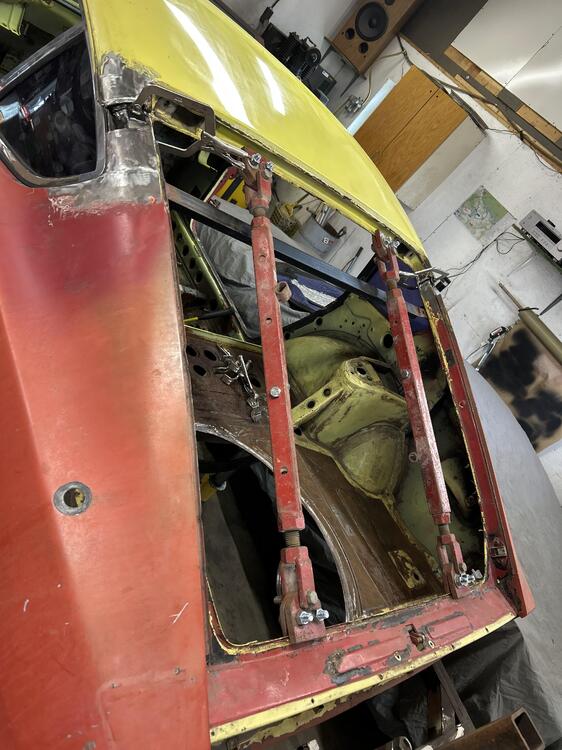
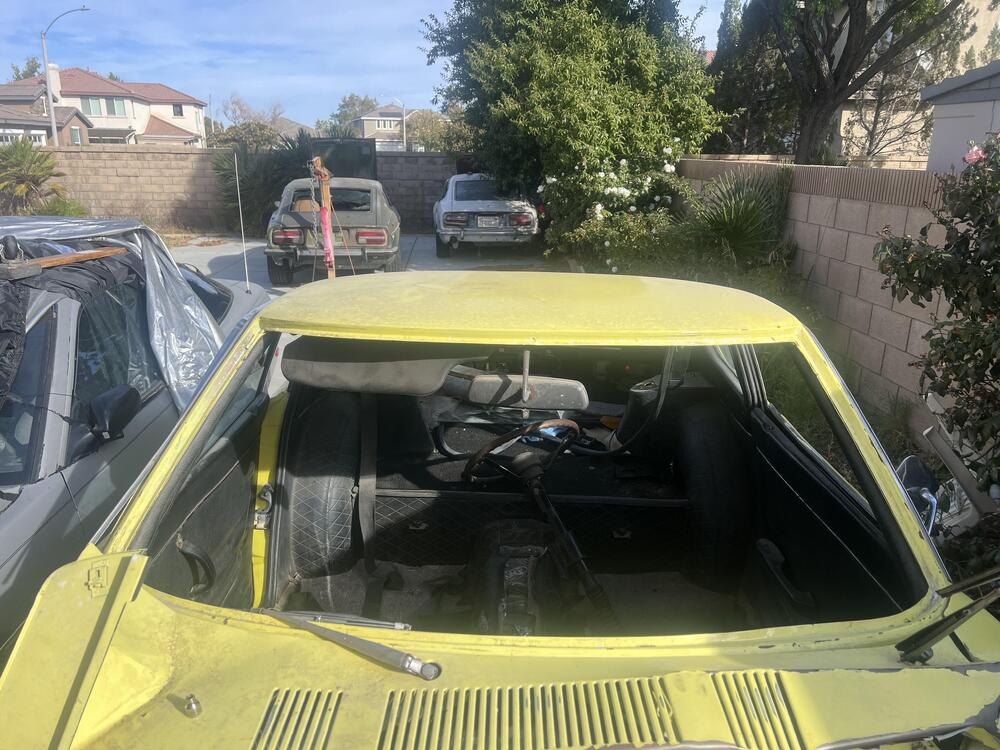
Looks like I forgot the pic of the turnbuckles . Once i tried a door and hatch to match sure my gaps were decent I finished welding things up . Getting the roof on was the big hurdle . It killed me to just walk past this car all these years and not do anything to it , but without a roof it would have been a waste of time . Now I could finally take to ordering panels . In case anyone cares this car is being built for me . I know there will be skeptics of someone welding a roof on but I feel confident enough to drive this until I can’t drive anymore :) Some videos I watched of chopped roofs made my install look better - ha .


-
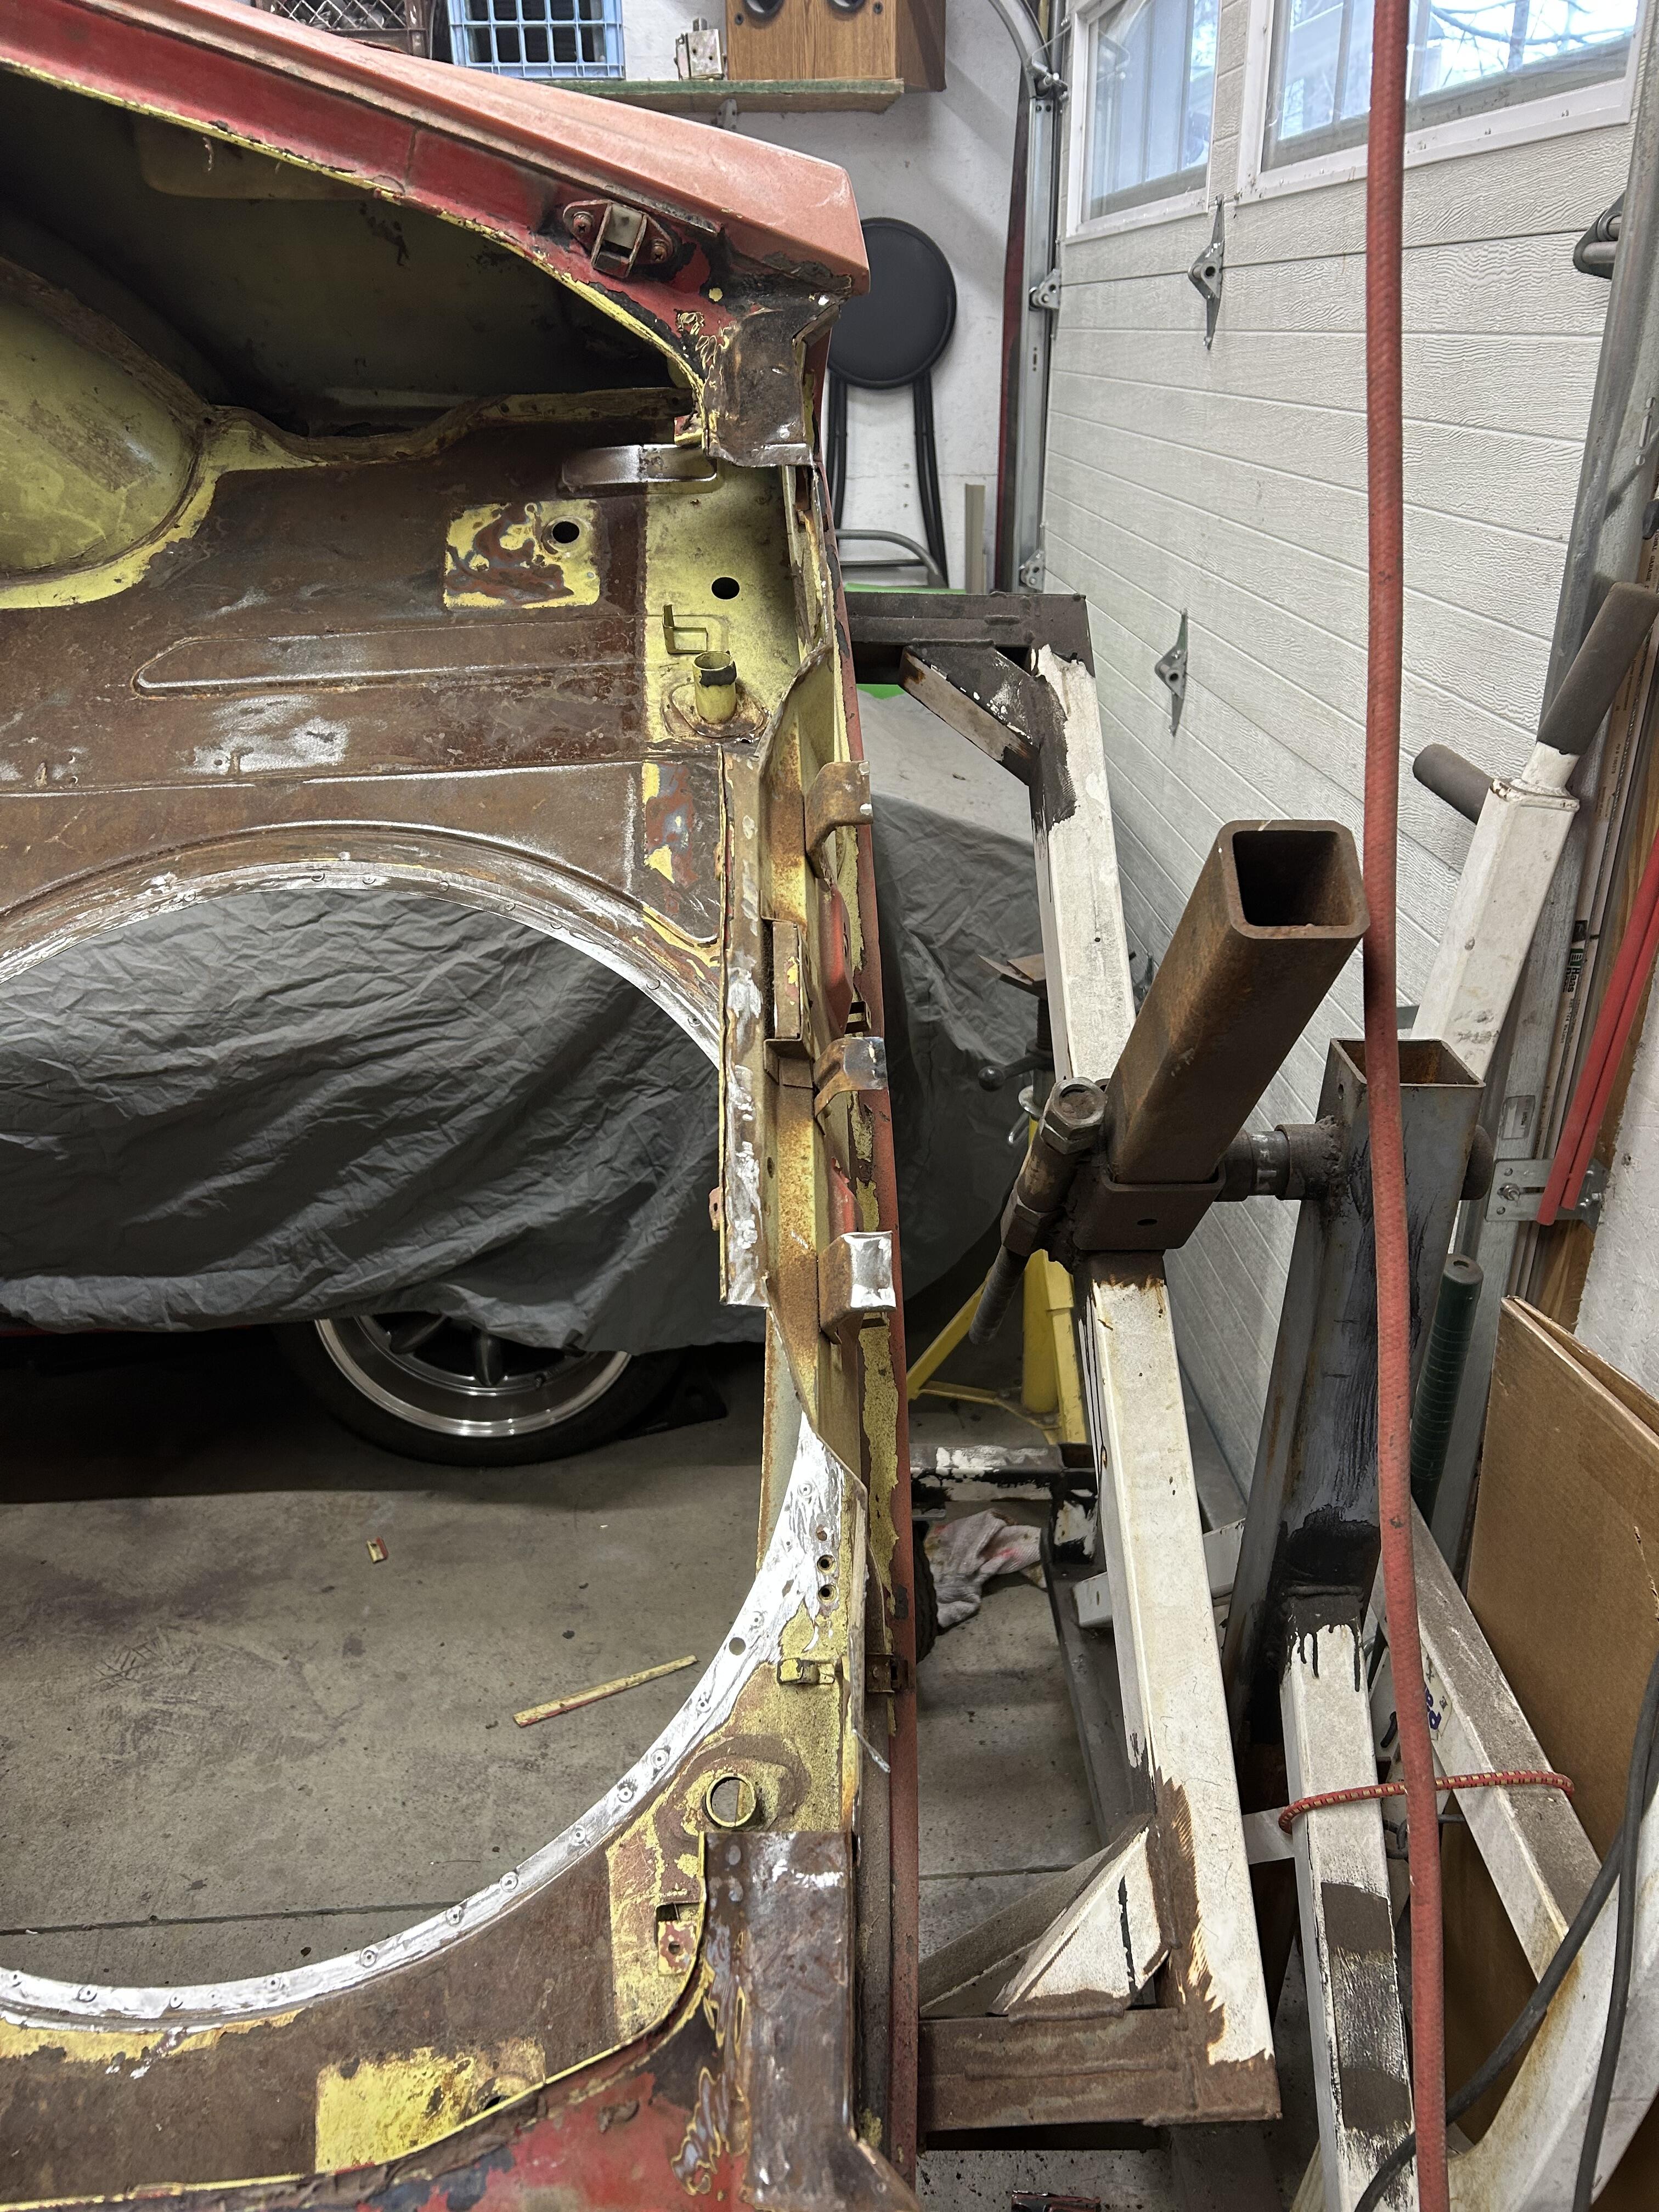
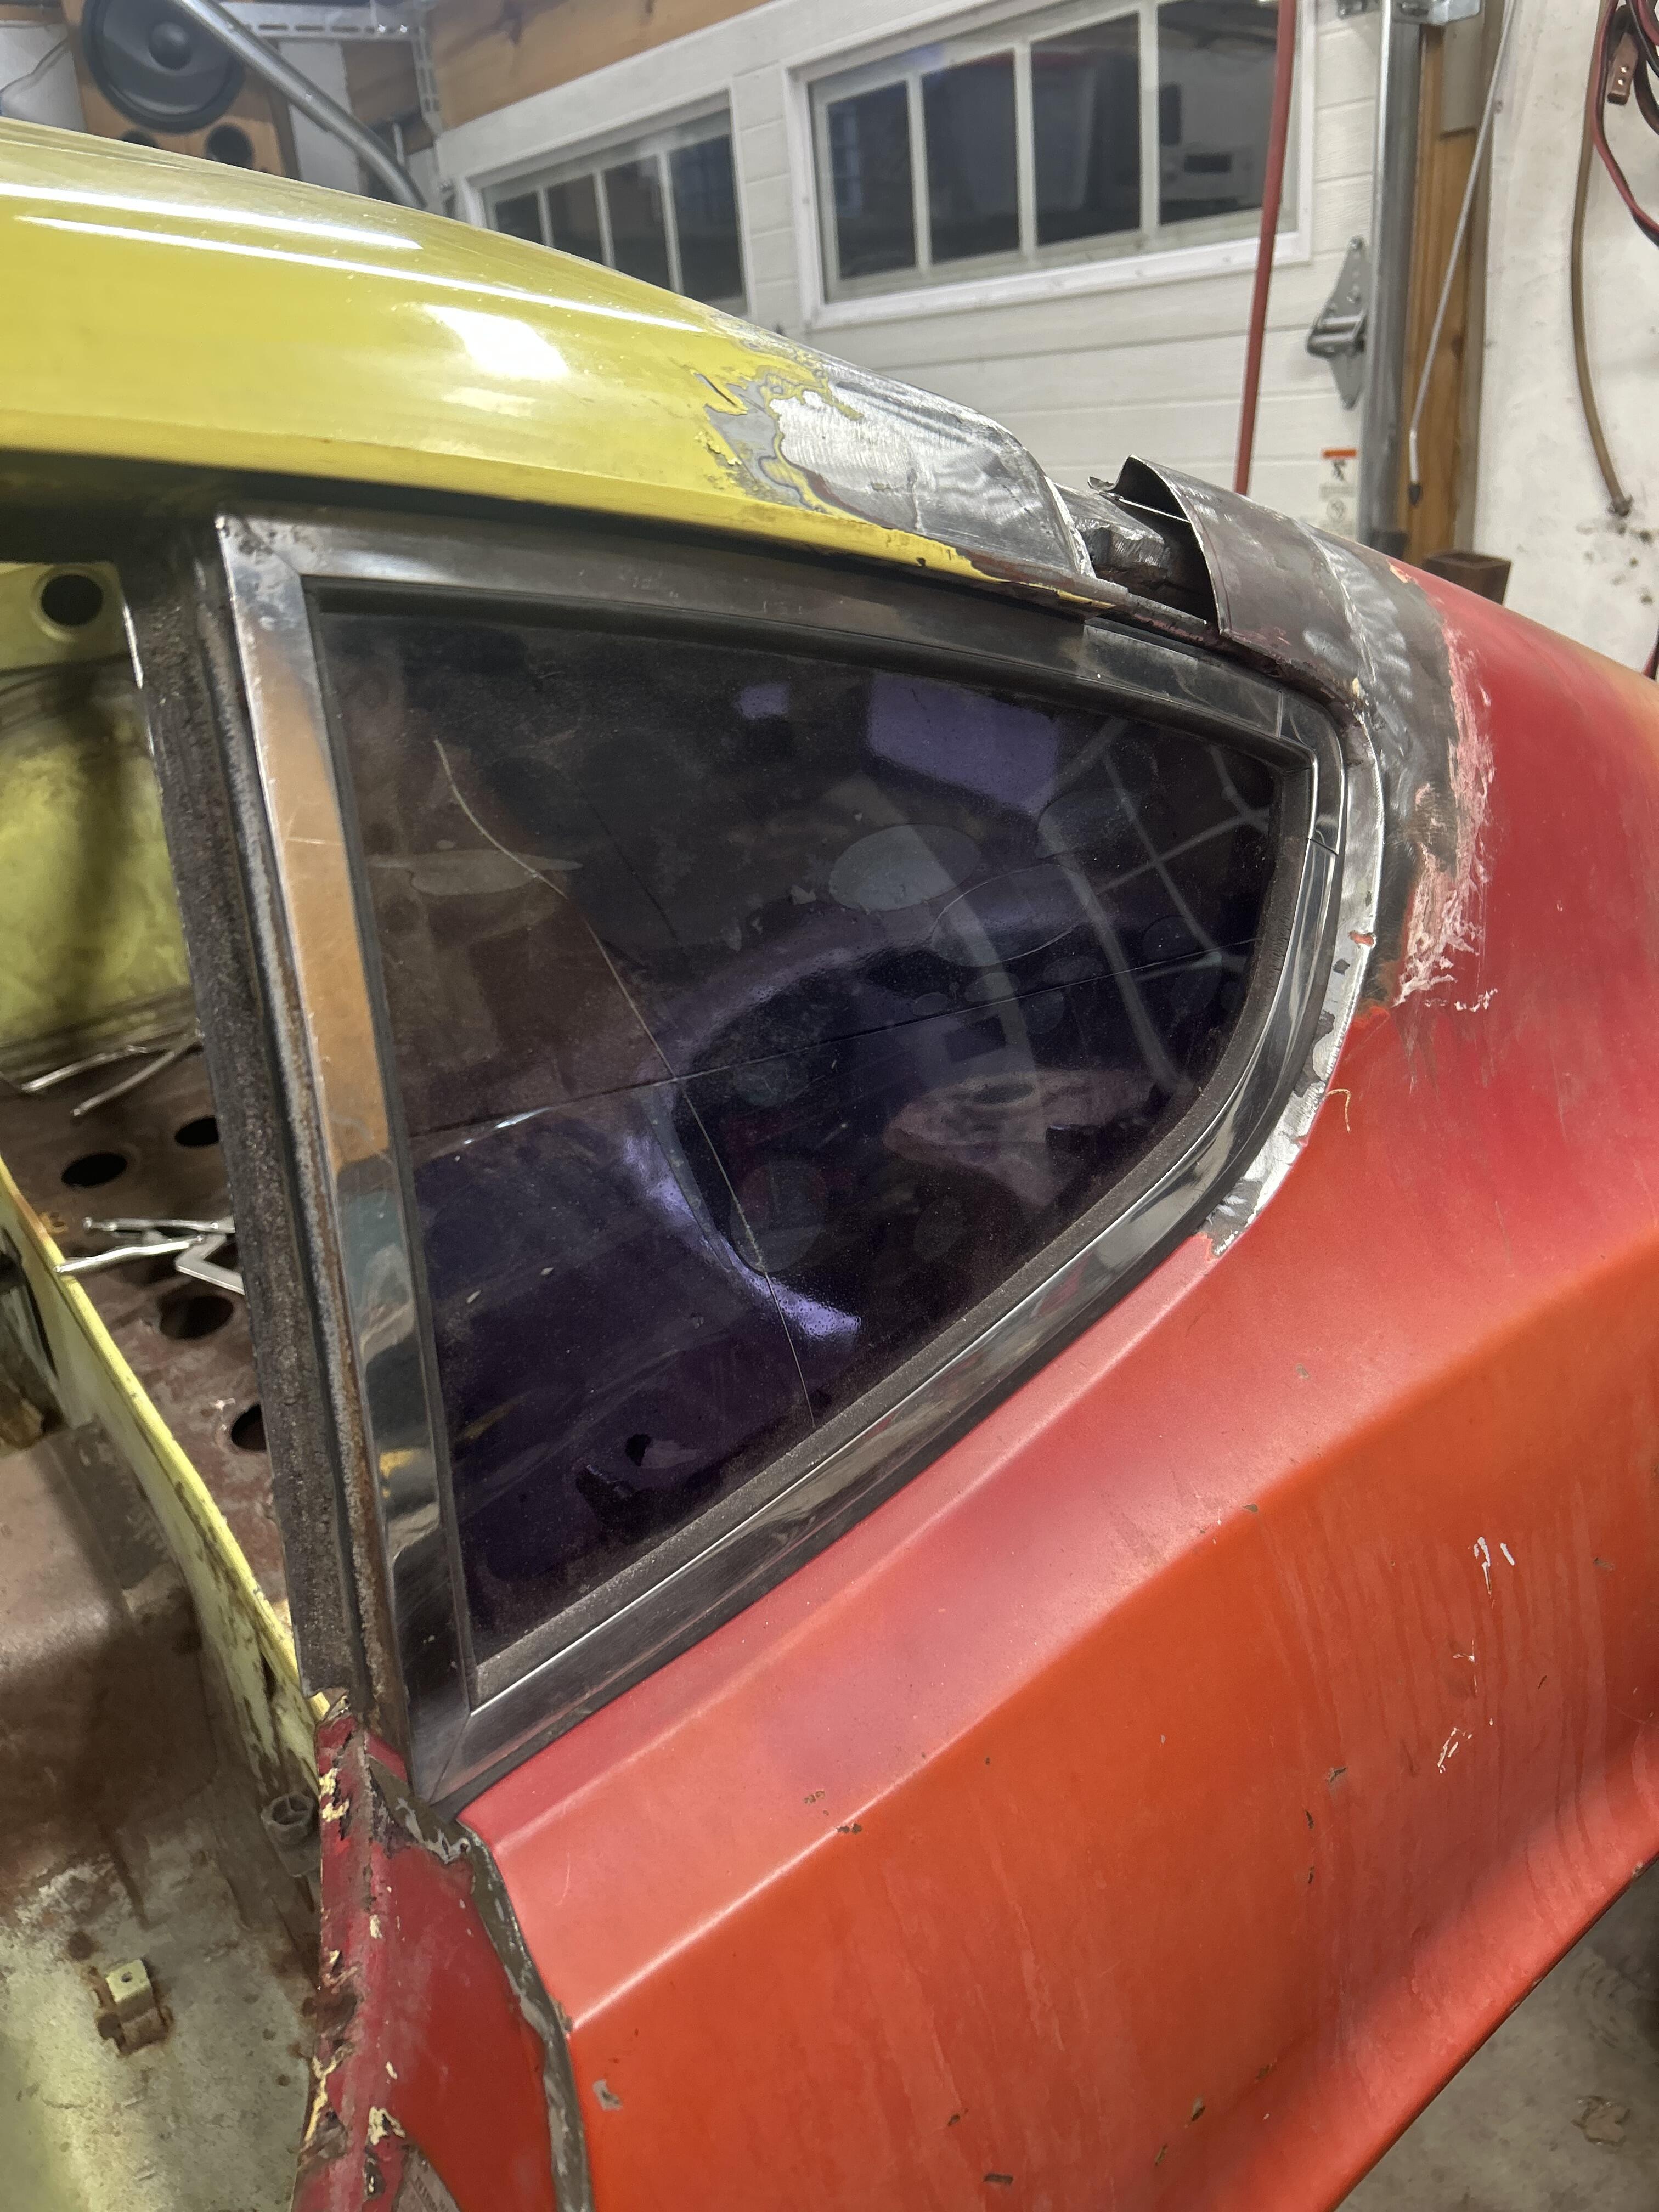
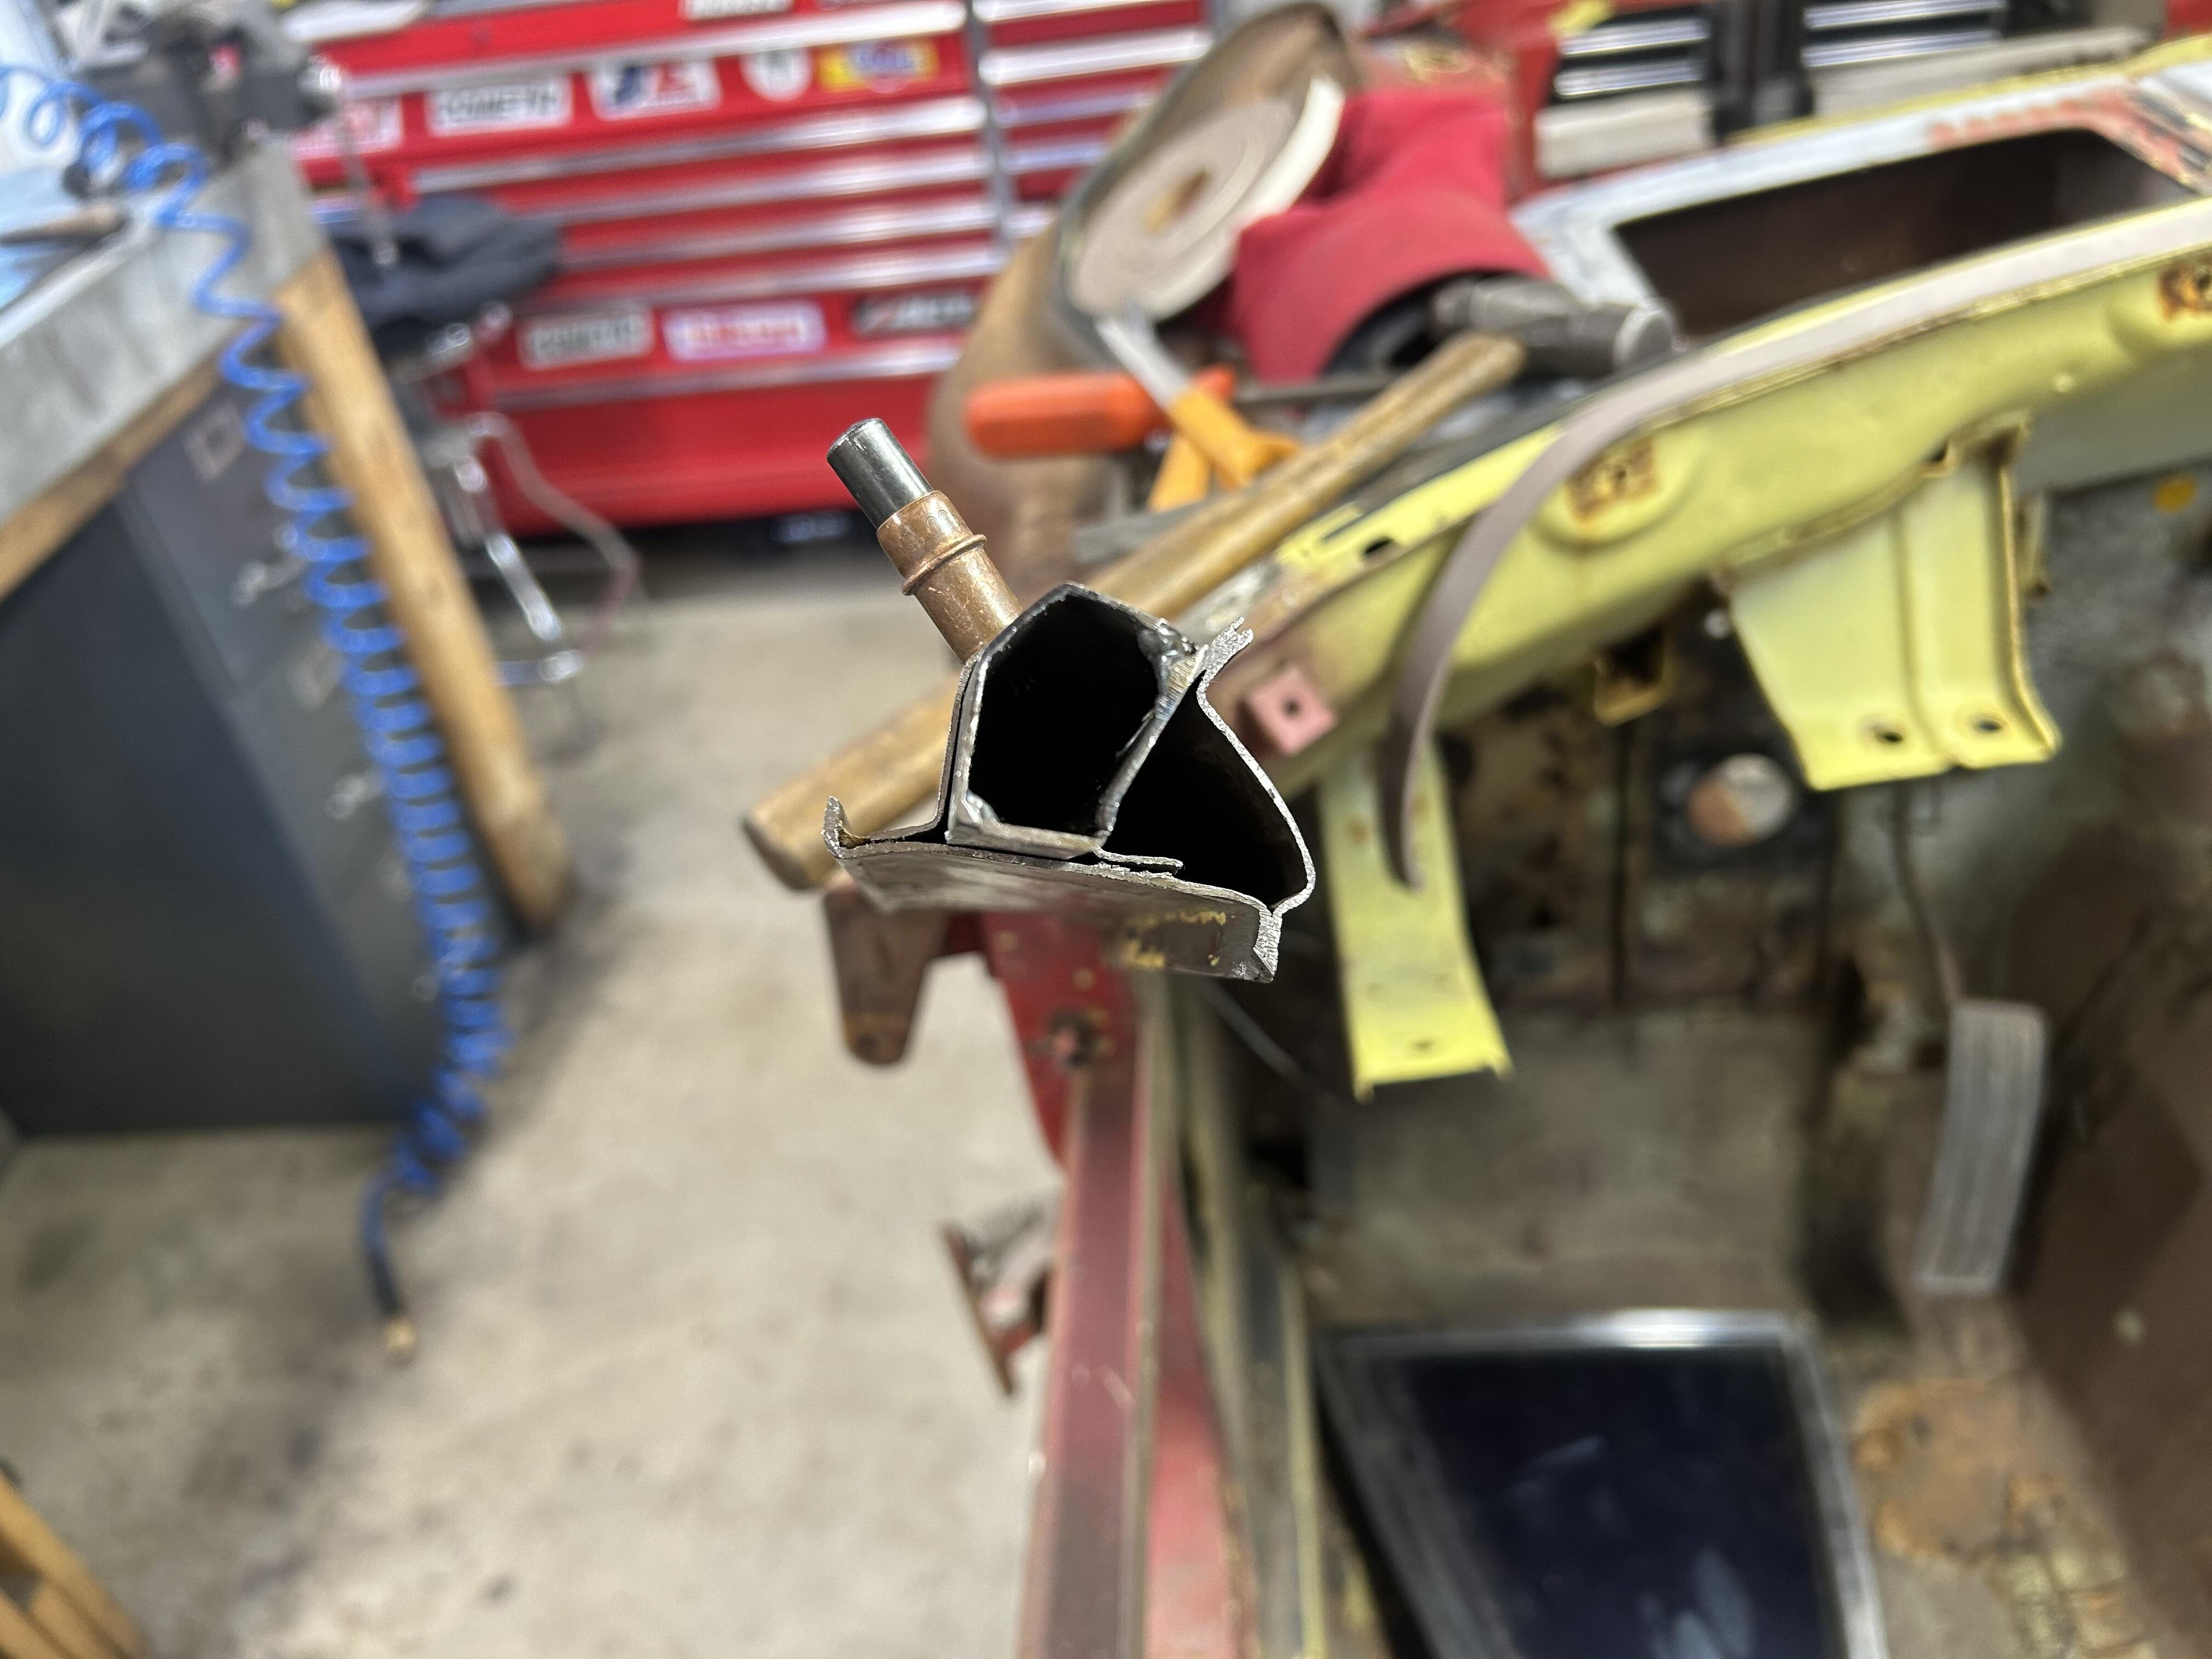
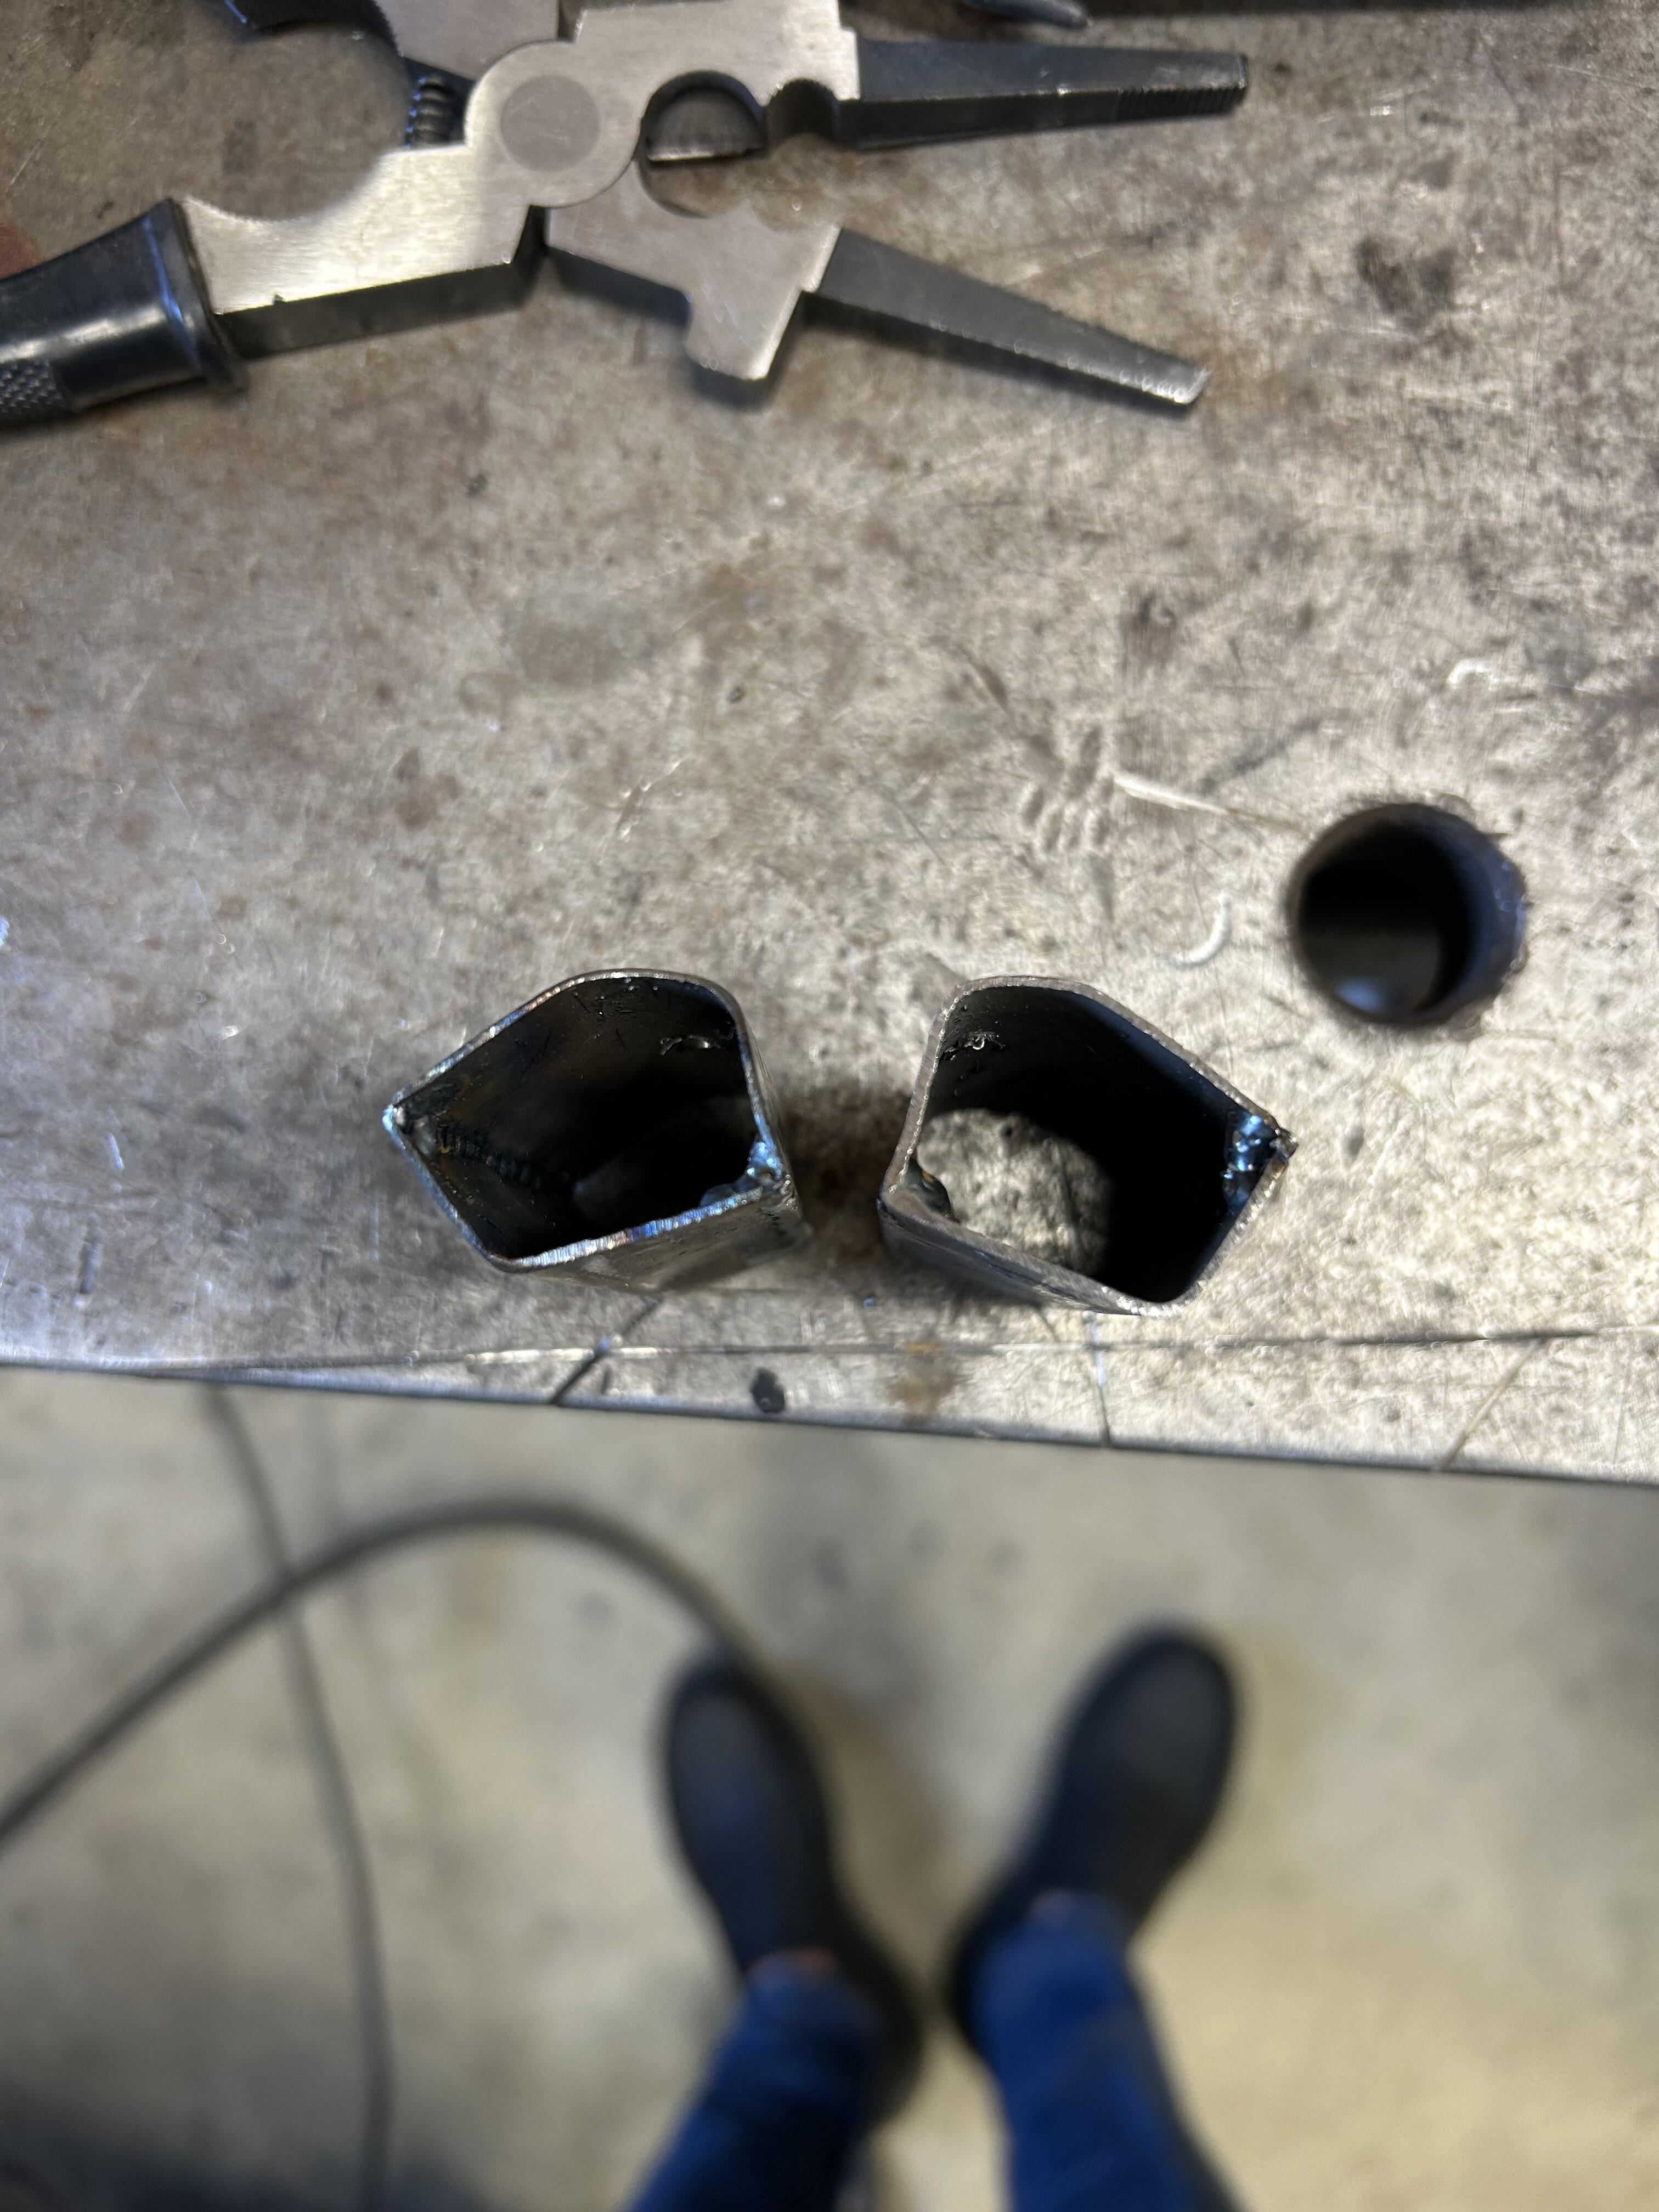
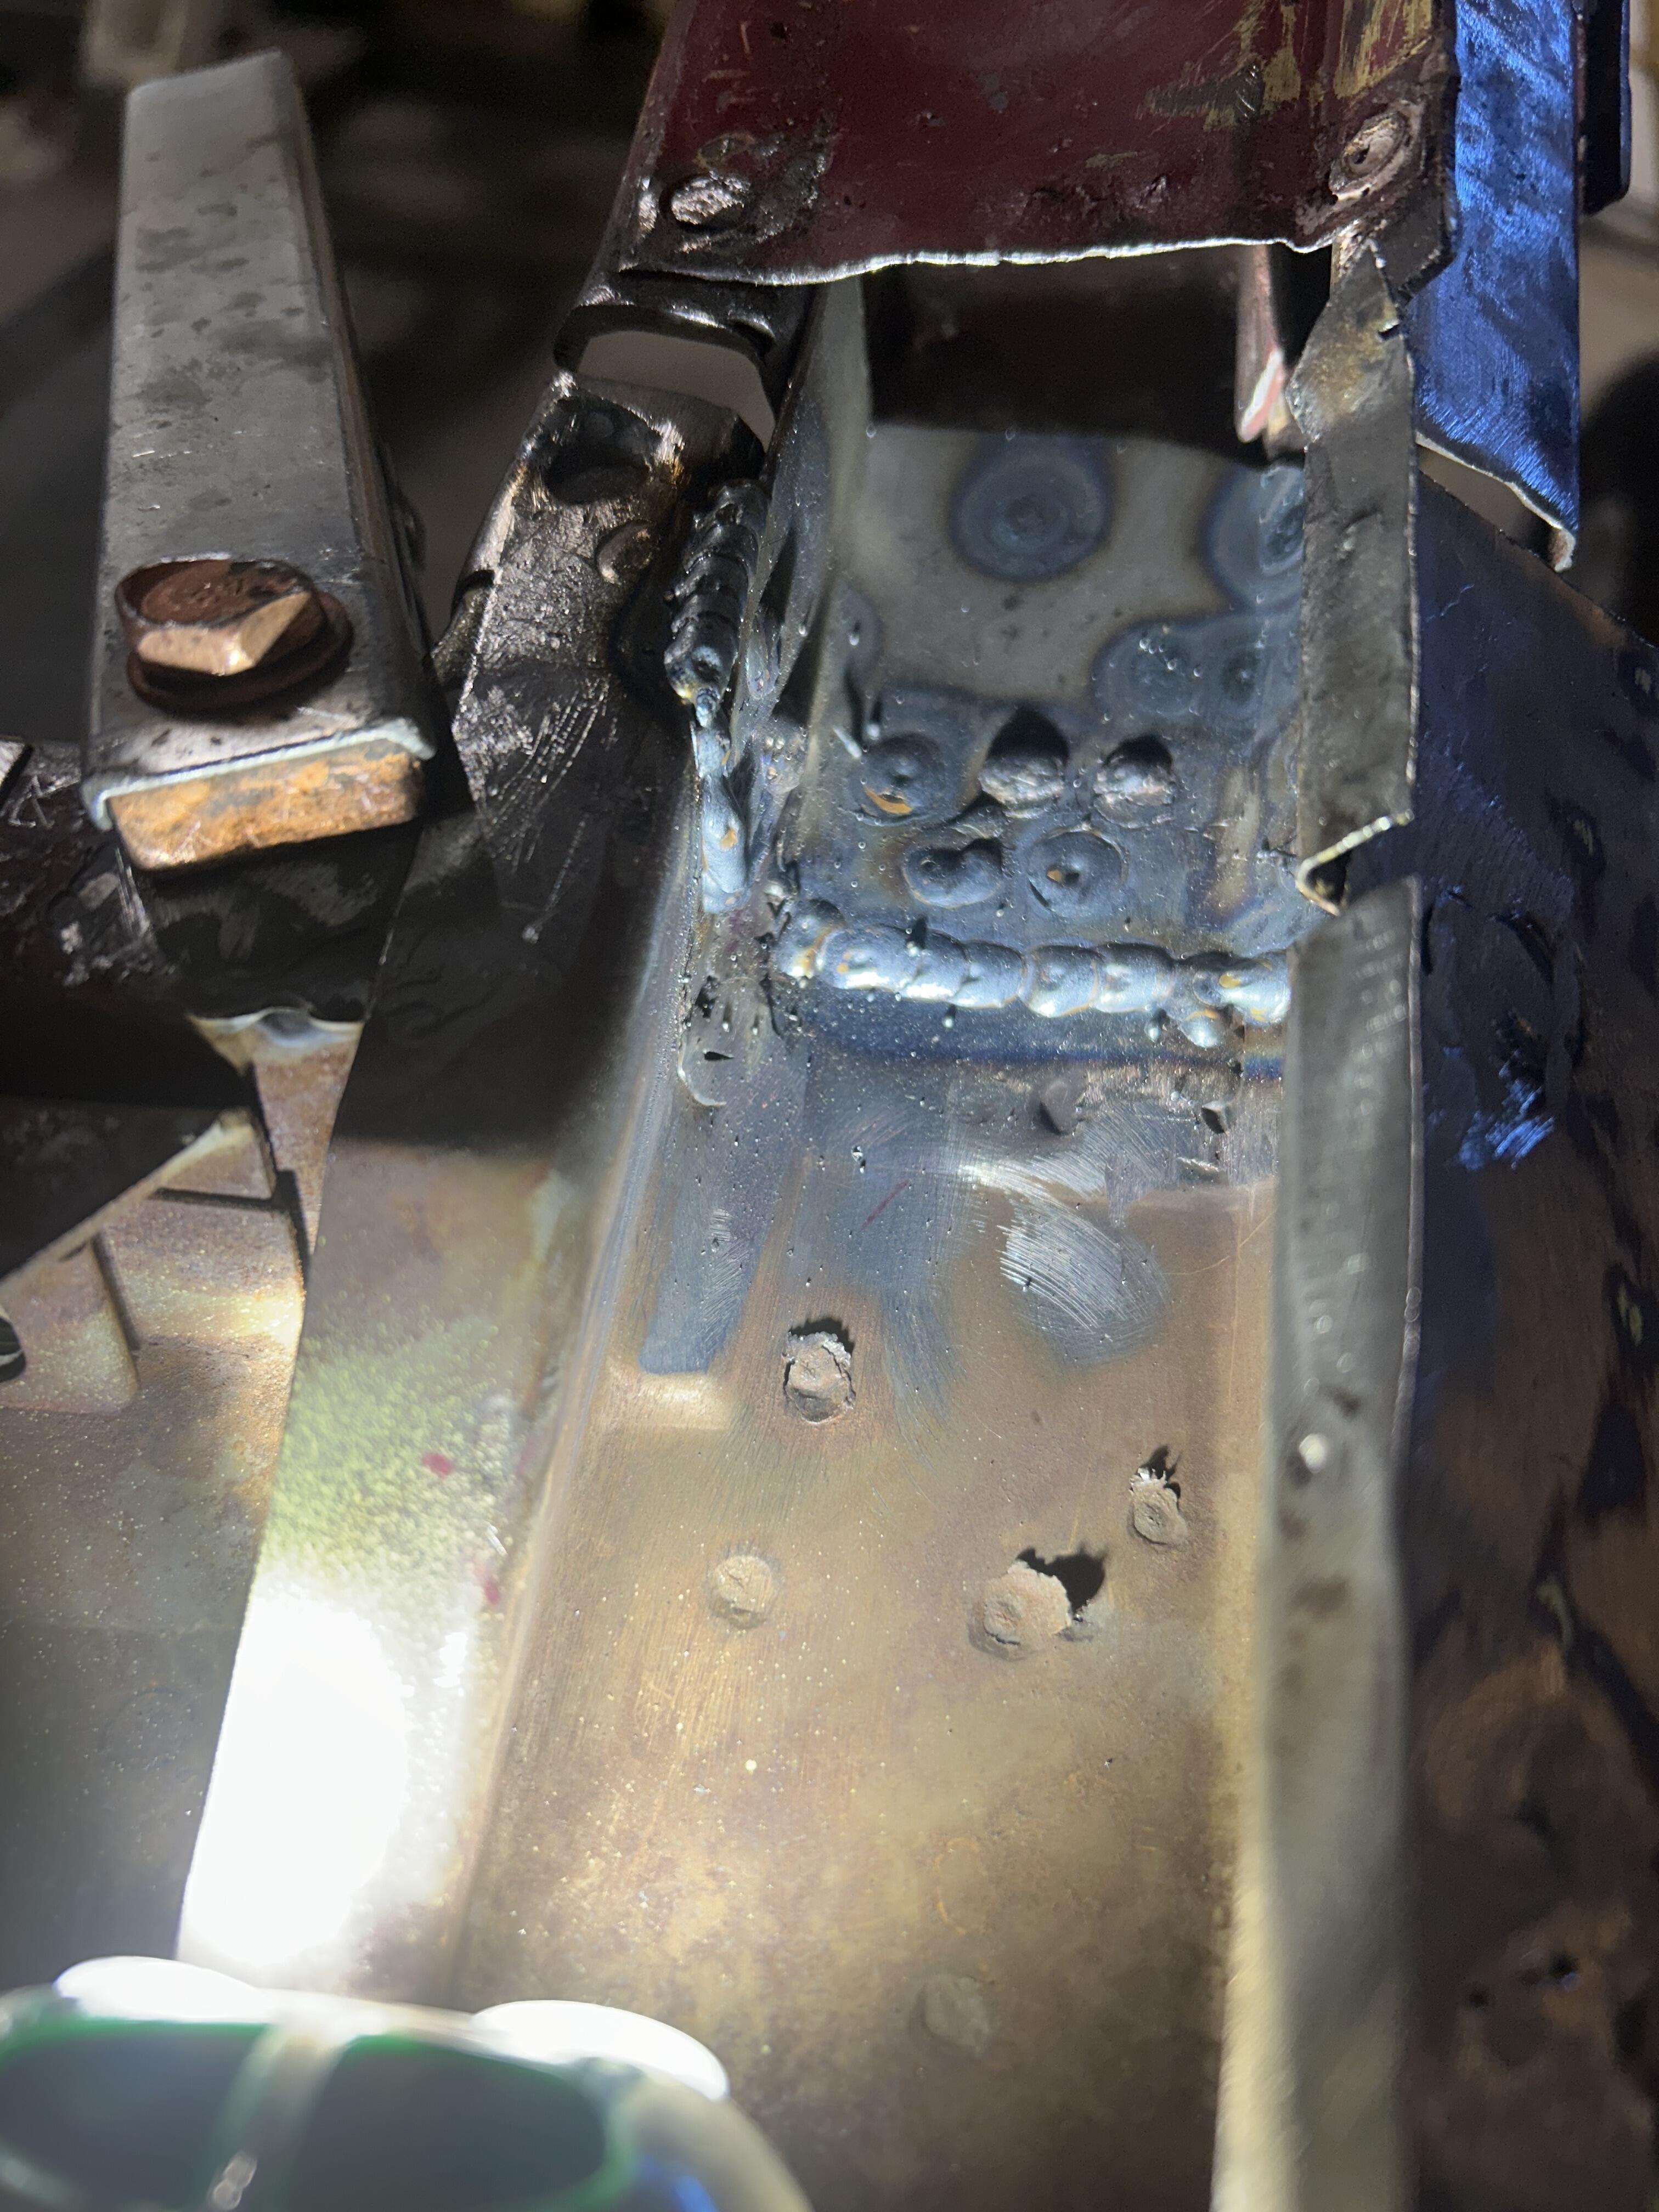
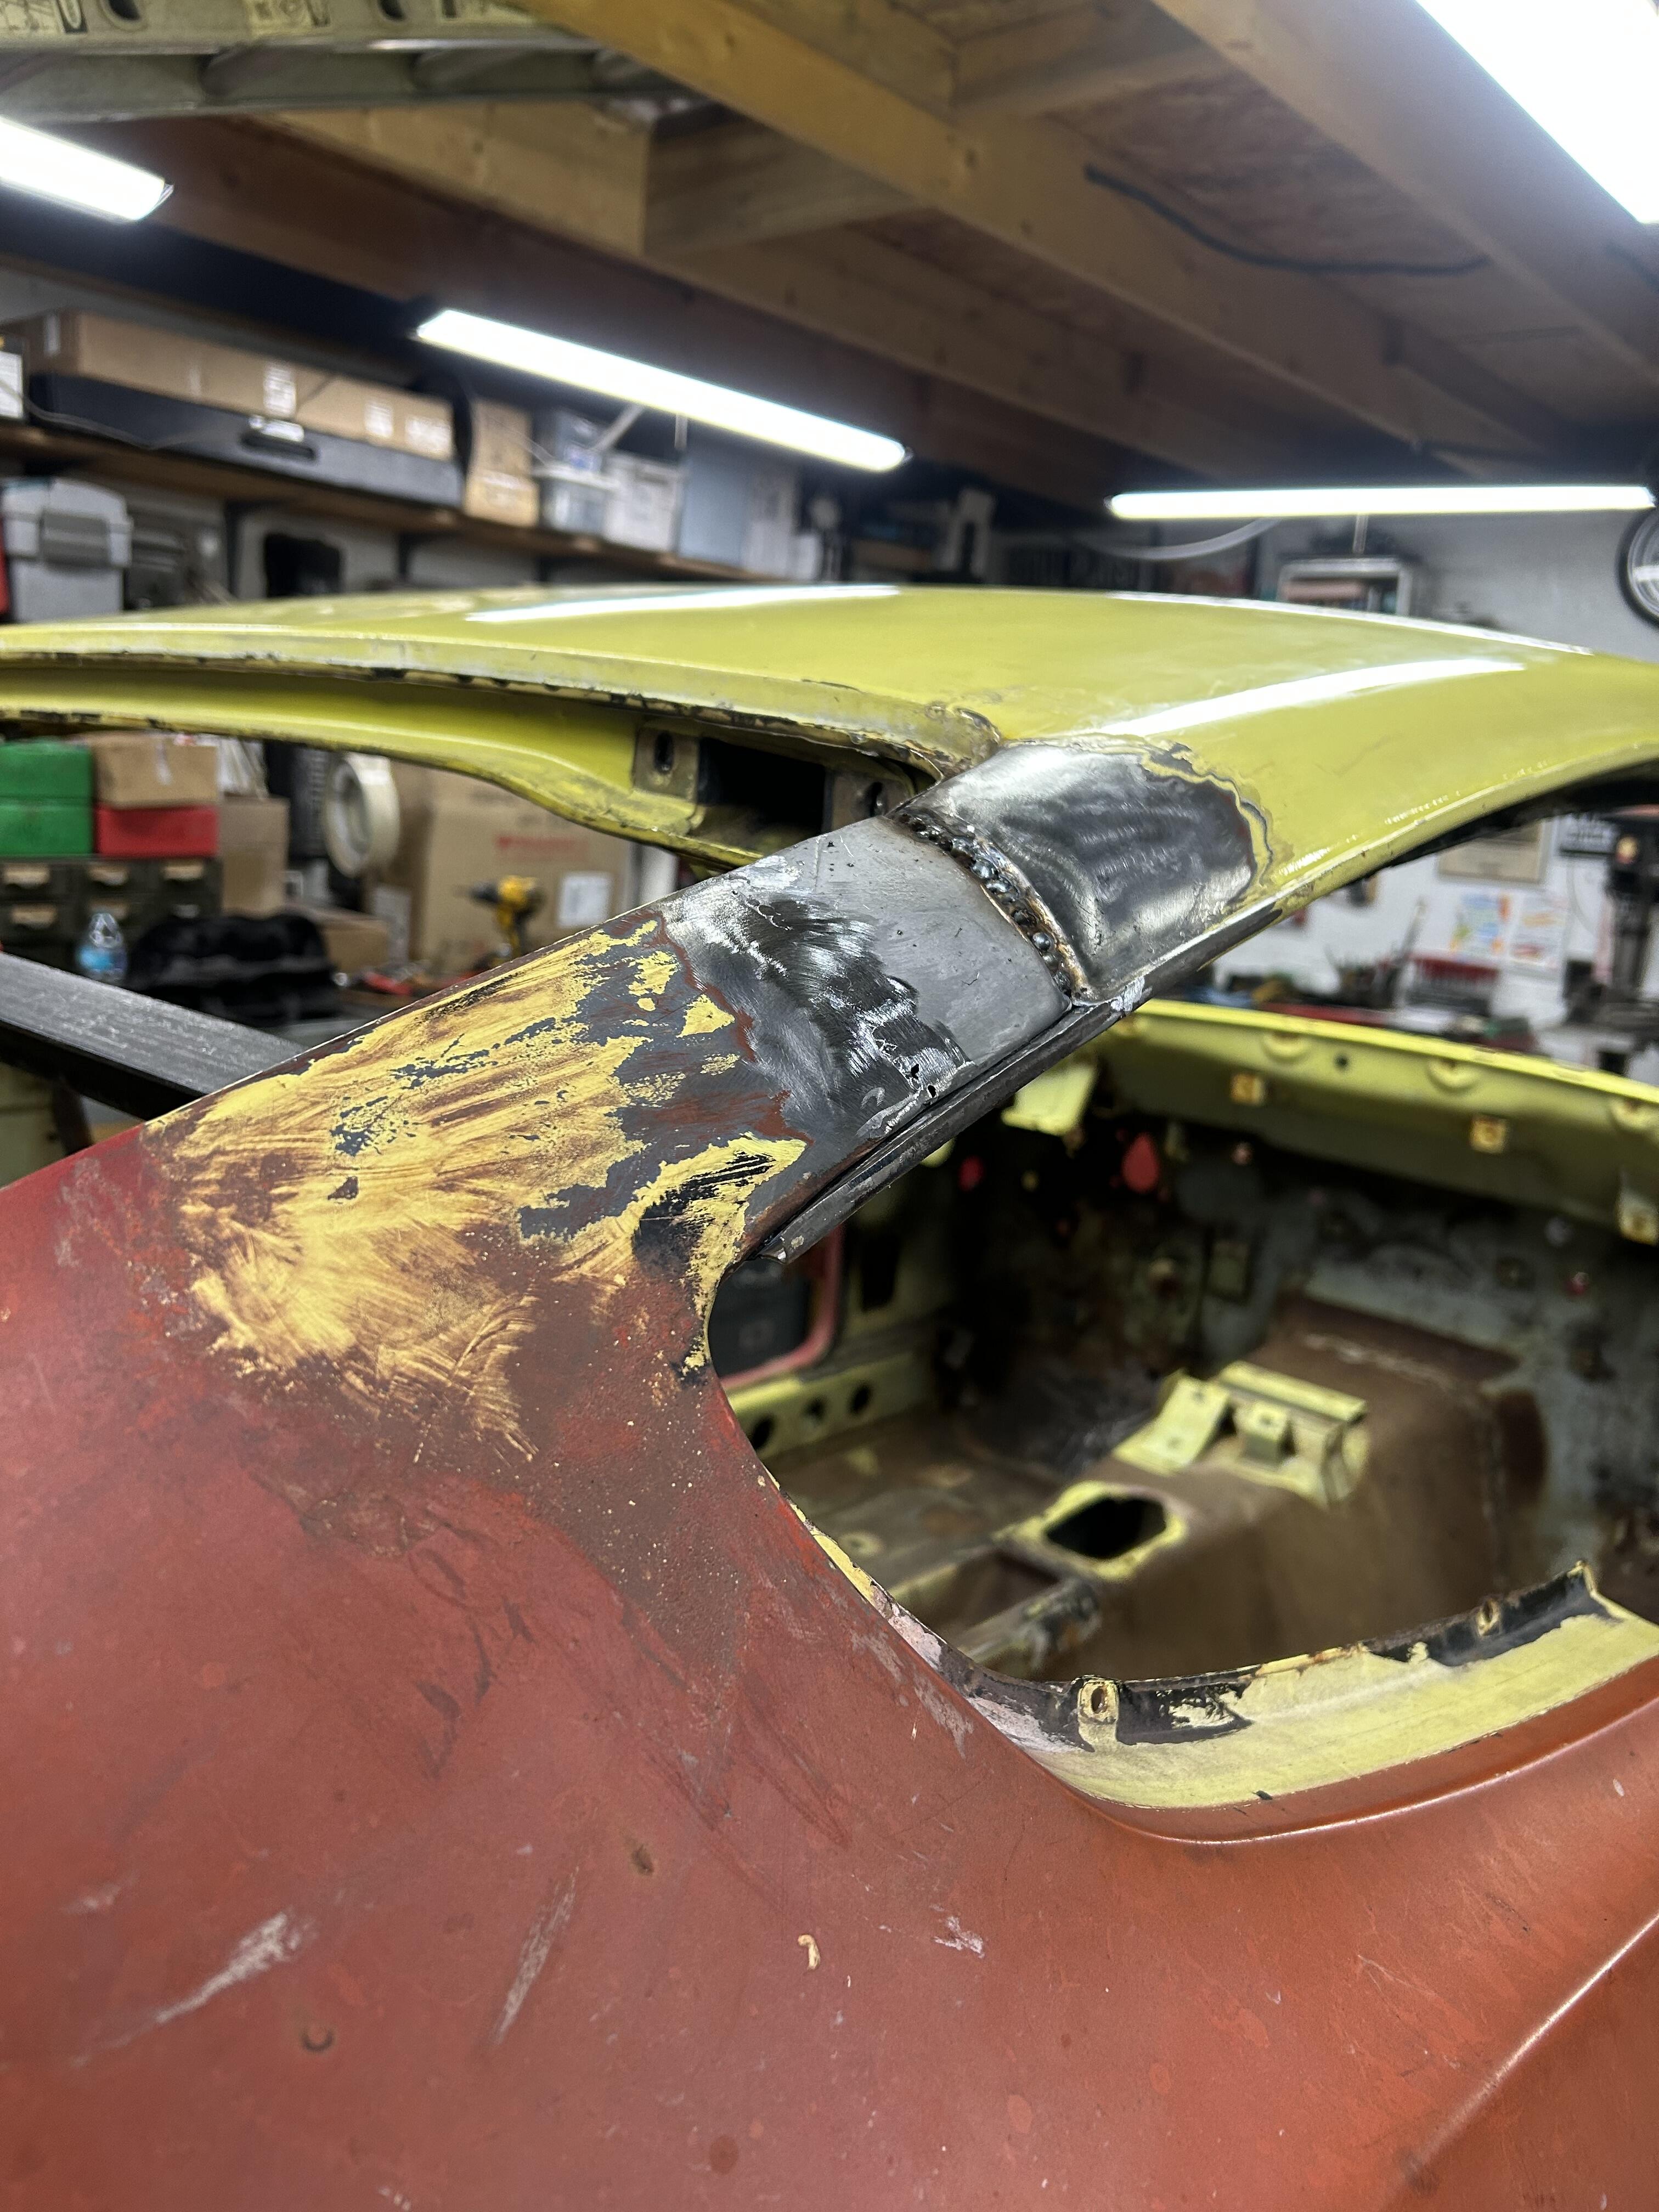
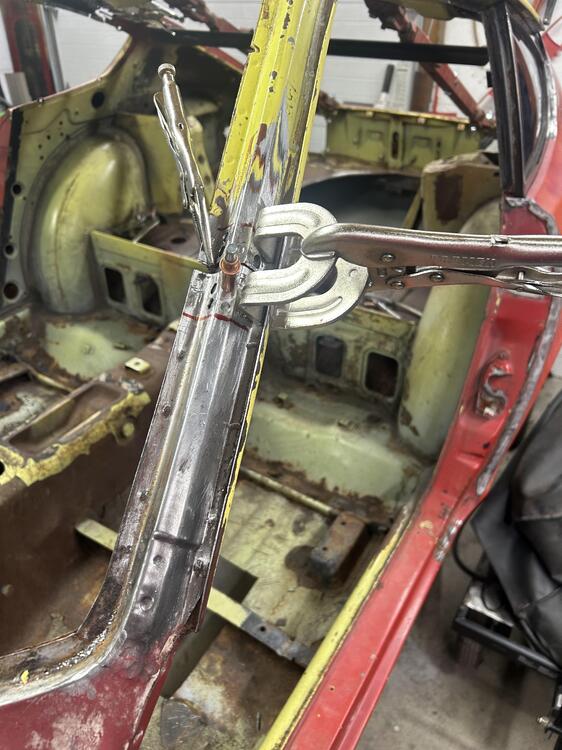
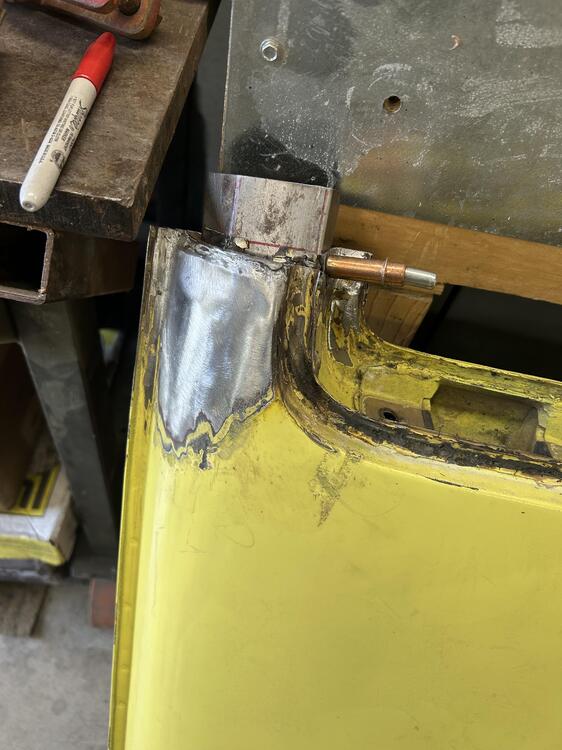
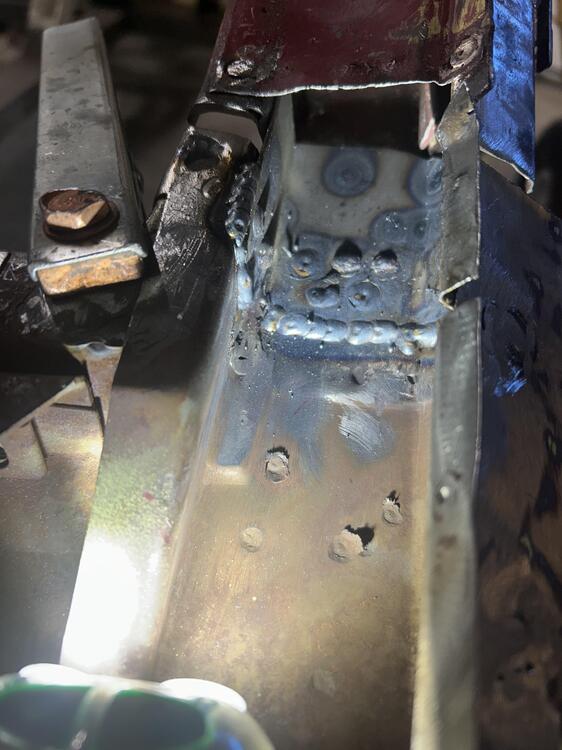
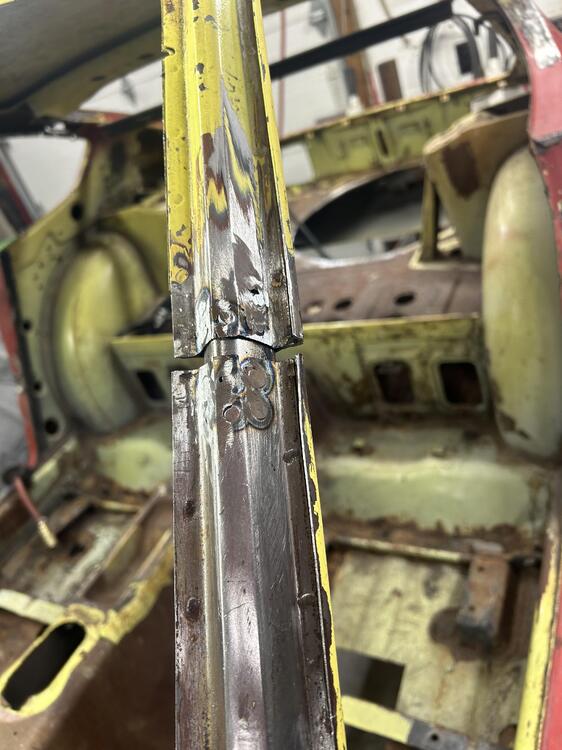
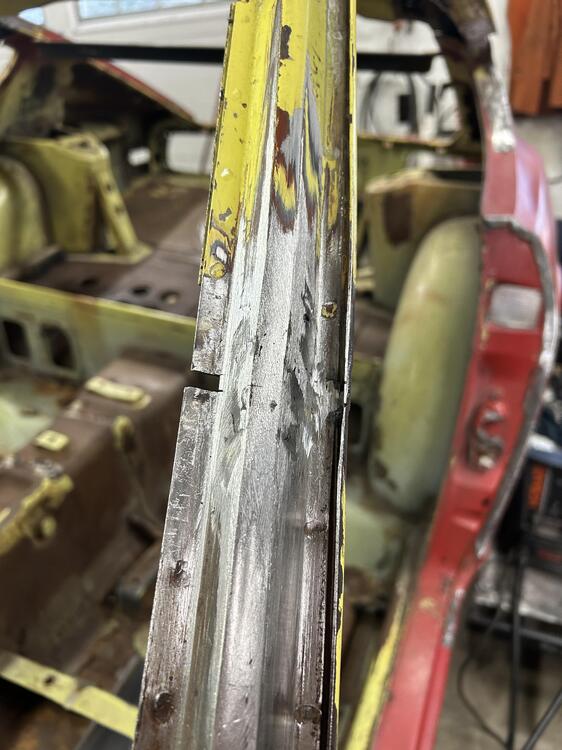
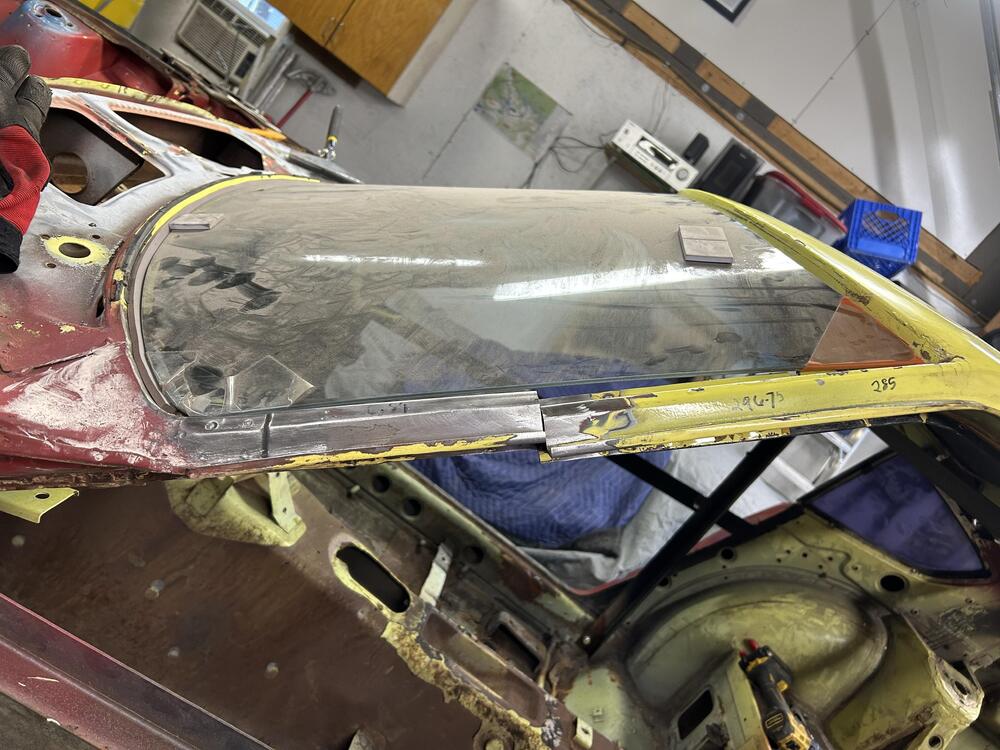
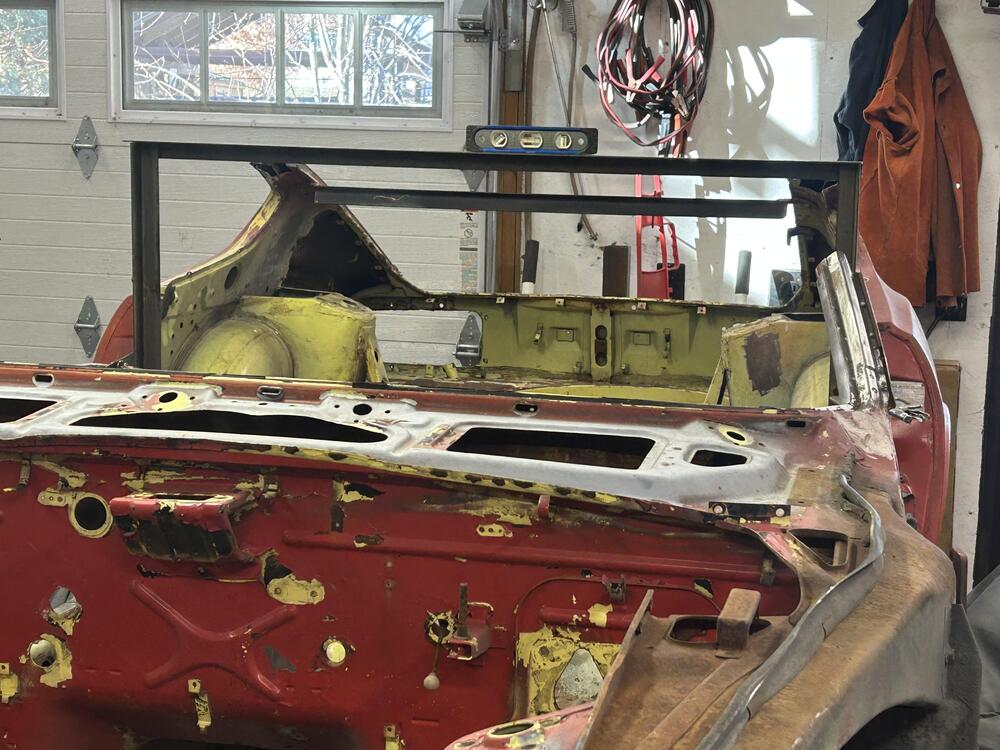
Well here is a look of the innards of a A pillar on a Z. The way it was designed made plugging it a challenge to say the least . I had plenty of A pillar material laying around so I made some plugs to slide down inside the A pillar . I think they were less than 3” . I wanted to be able to plug weld and butt weld from all sides . I peeled back the skin on the inside of the pillar . That allowed access to weld all the way around the plug . On the back side of the roof I made a plate to help join/bridge the new roof to the rear quarter . Of course the ideal scenario was to have as small of a gap as possible . I thought I nailed it the first time - but I made the error of relying on measurements . I welded it partially and got the fit too tight and couldn’t fit a windshield . I had to undo welds and clean things up . I should have attempted to install the windshield and then welded . In the end I ended with a .250” gap which was acceptable to me . It sucked having to grind out mistakes - but I was determined . At the rear I had the quarter windows to help me line things up . Since they have 4 screws and they share with the roof and quarter - I just had to make them line up . The problem was the roof was a bit sprung and I couldn’t pull it in place without some heavy equipment. My friend of the bodyshop told me he had these big turnbuckles I could try . They were the ticket .


-
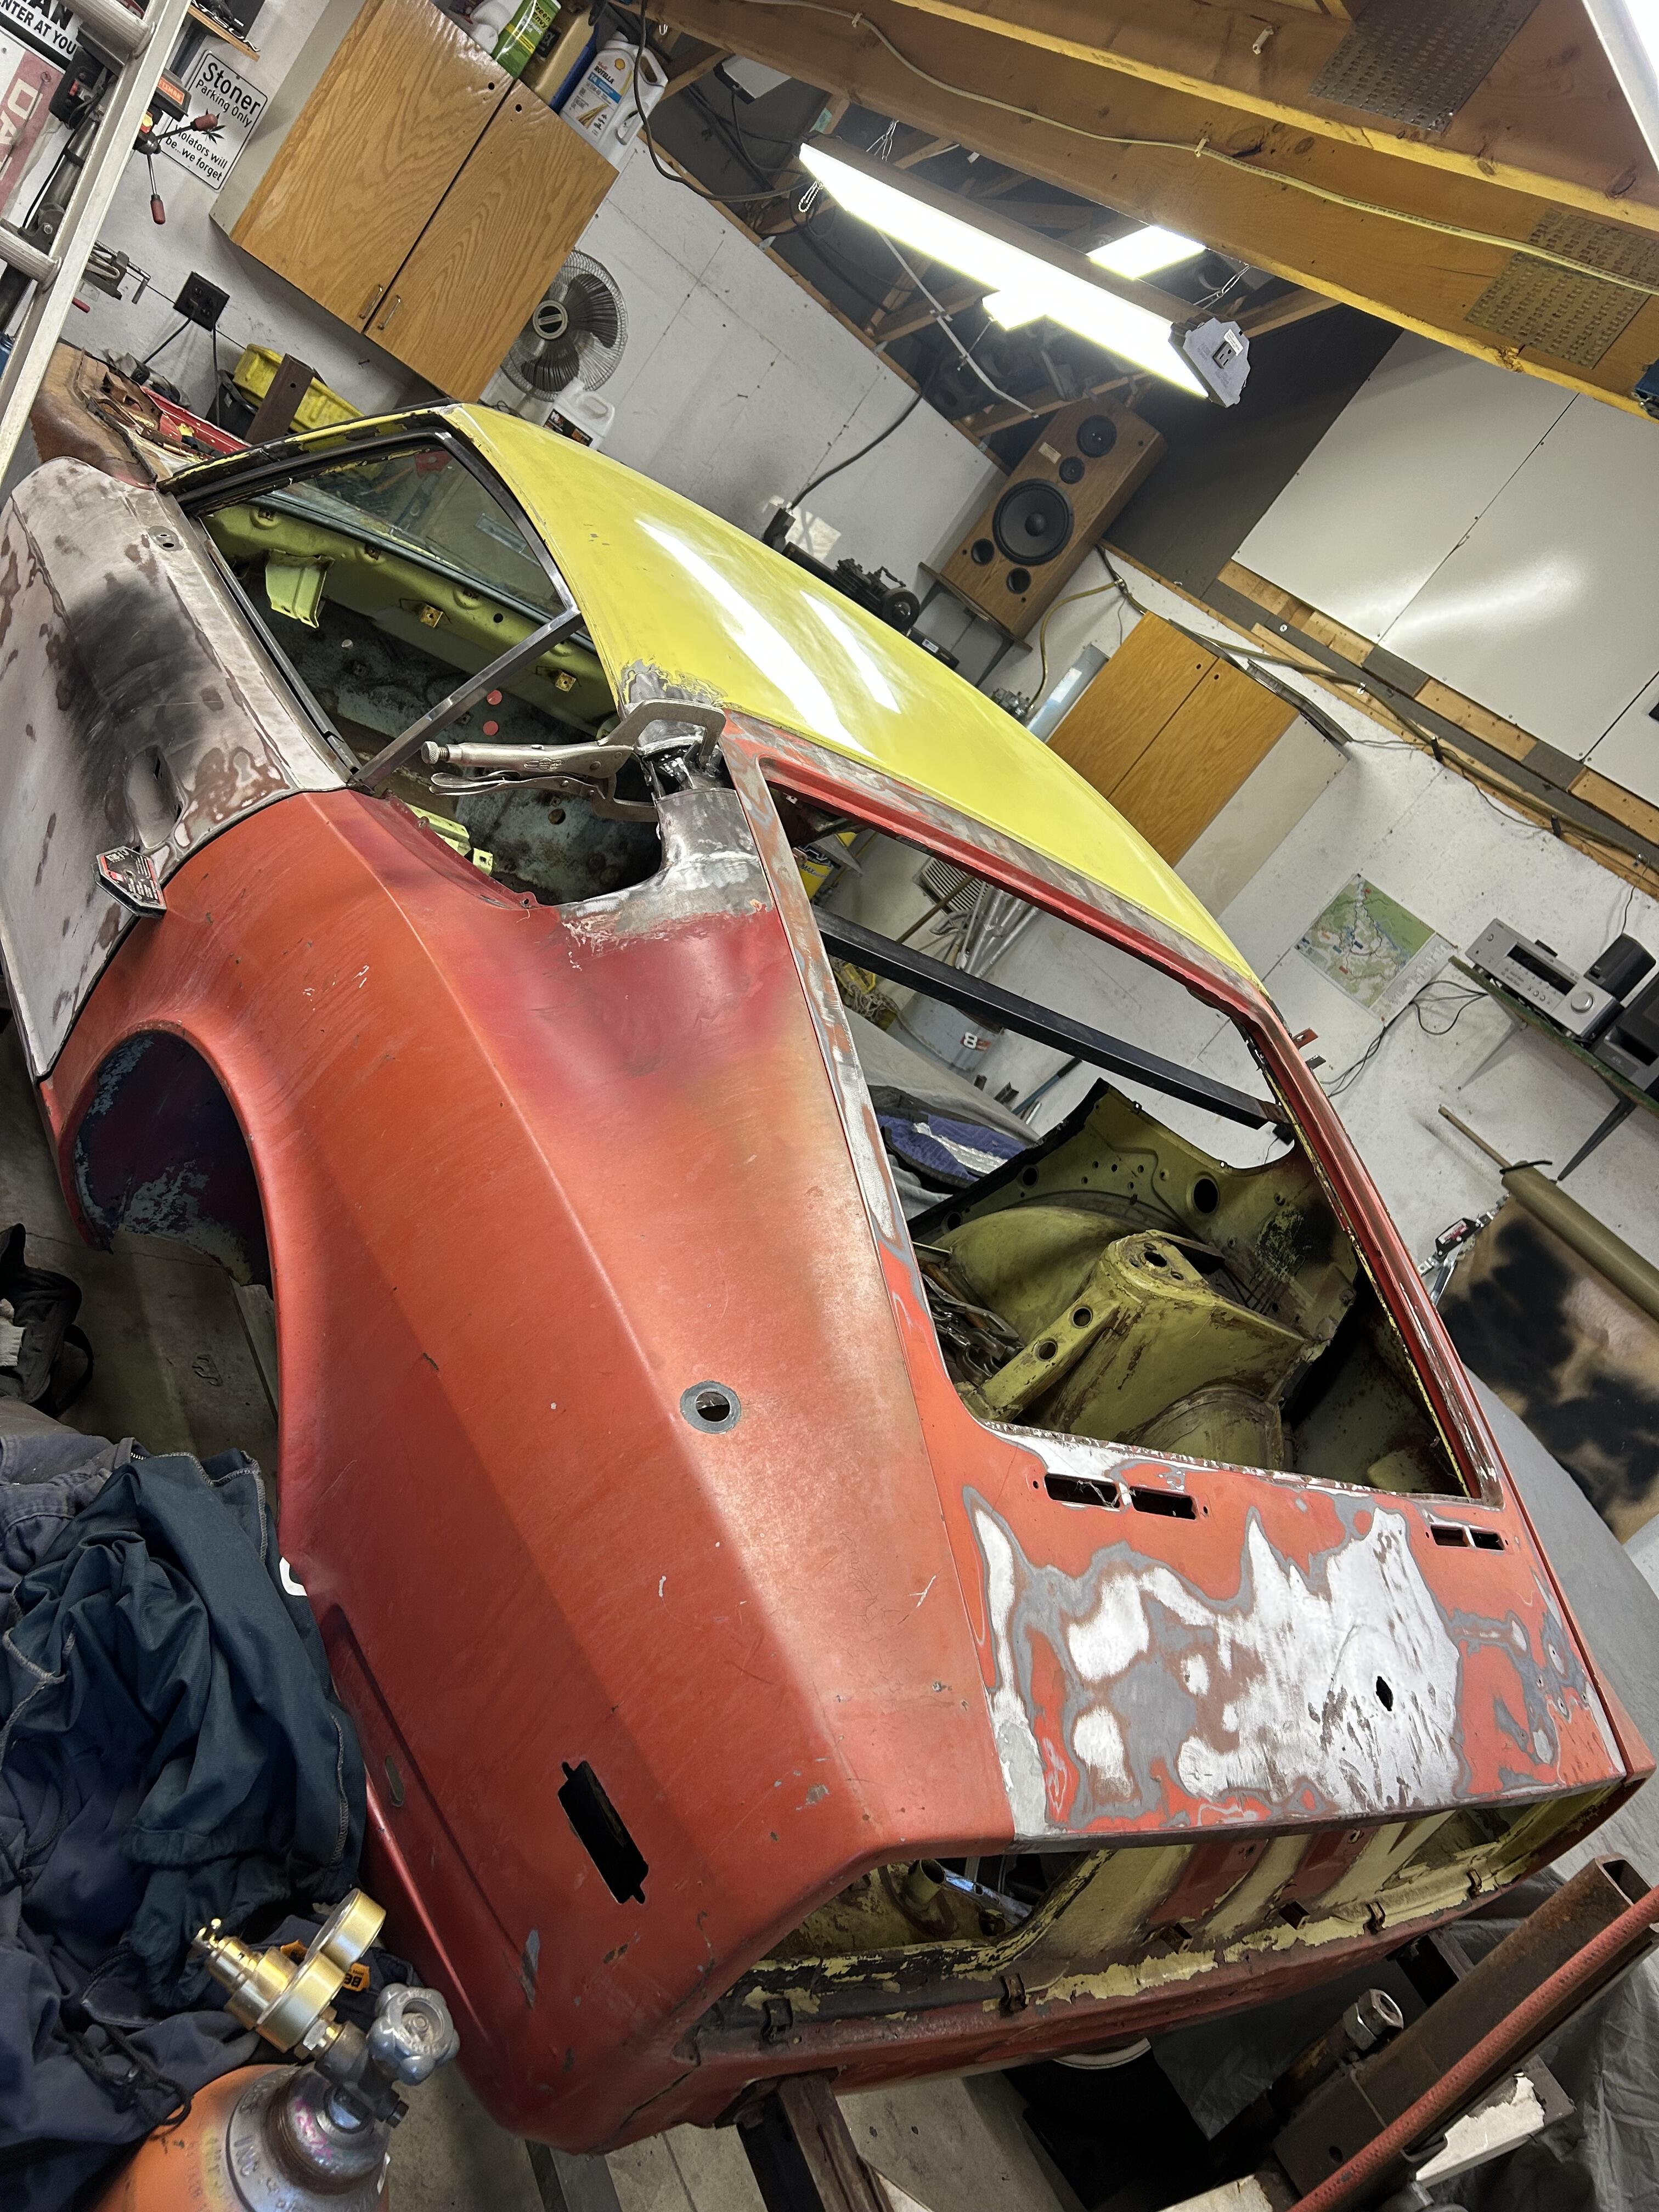
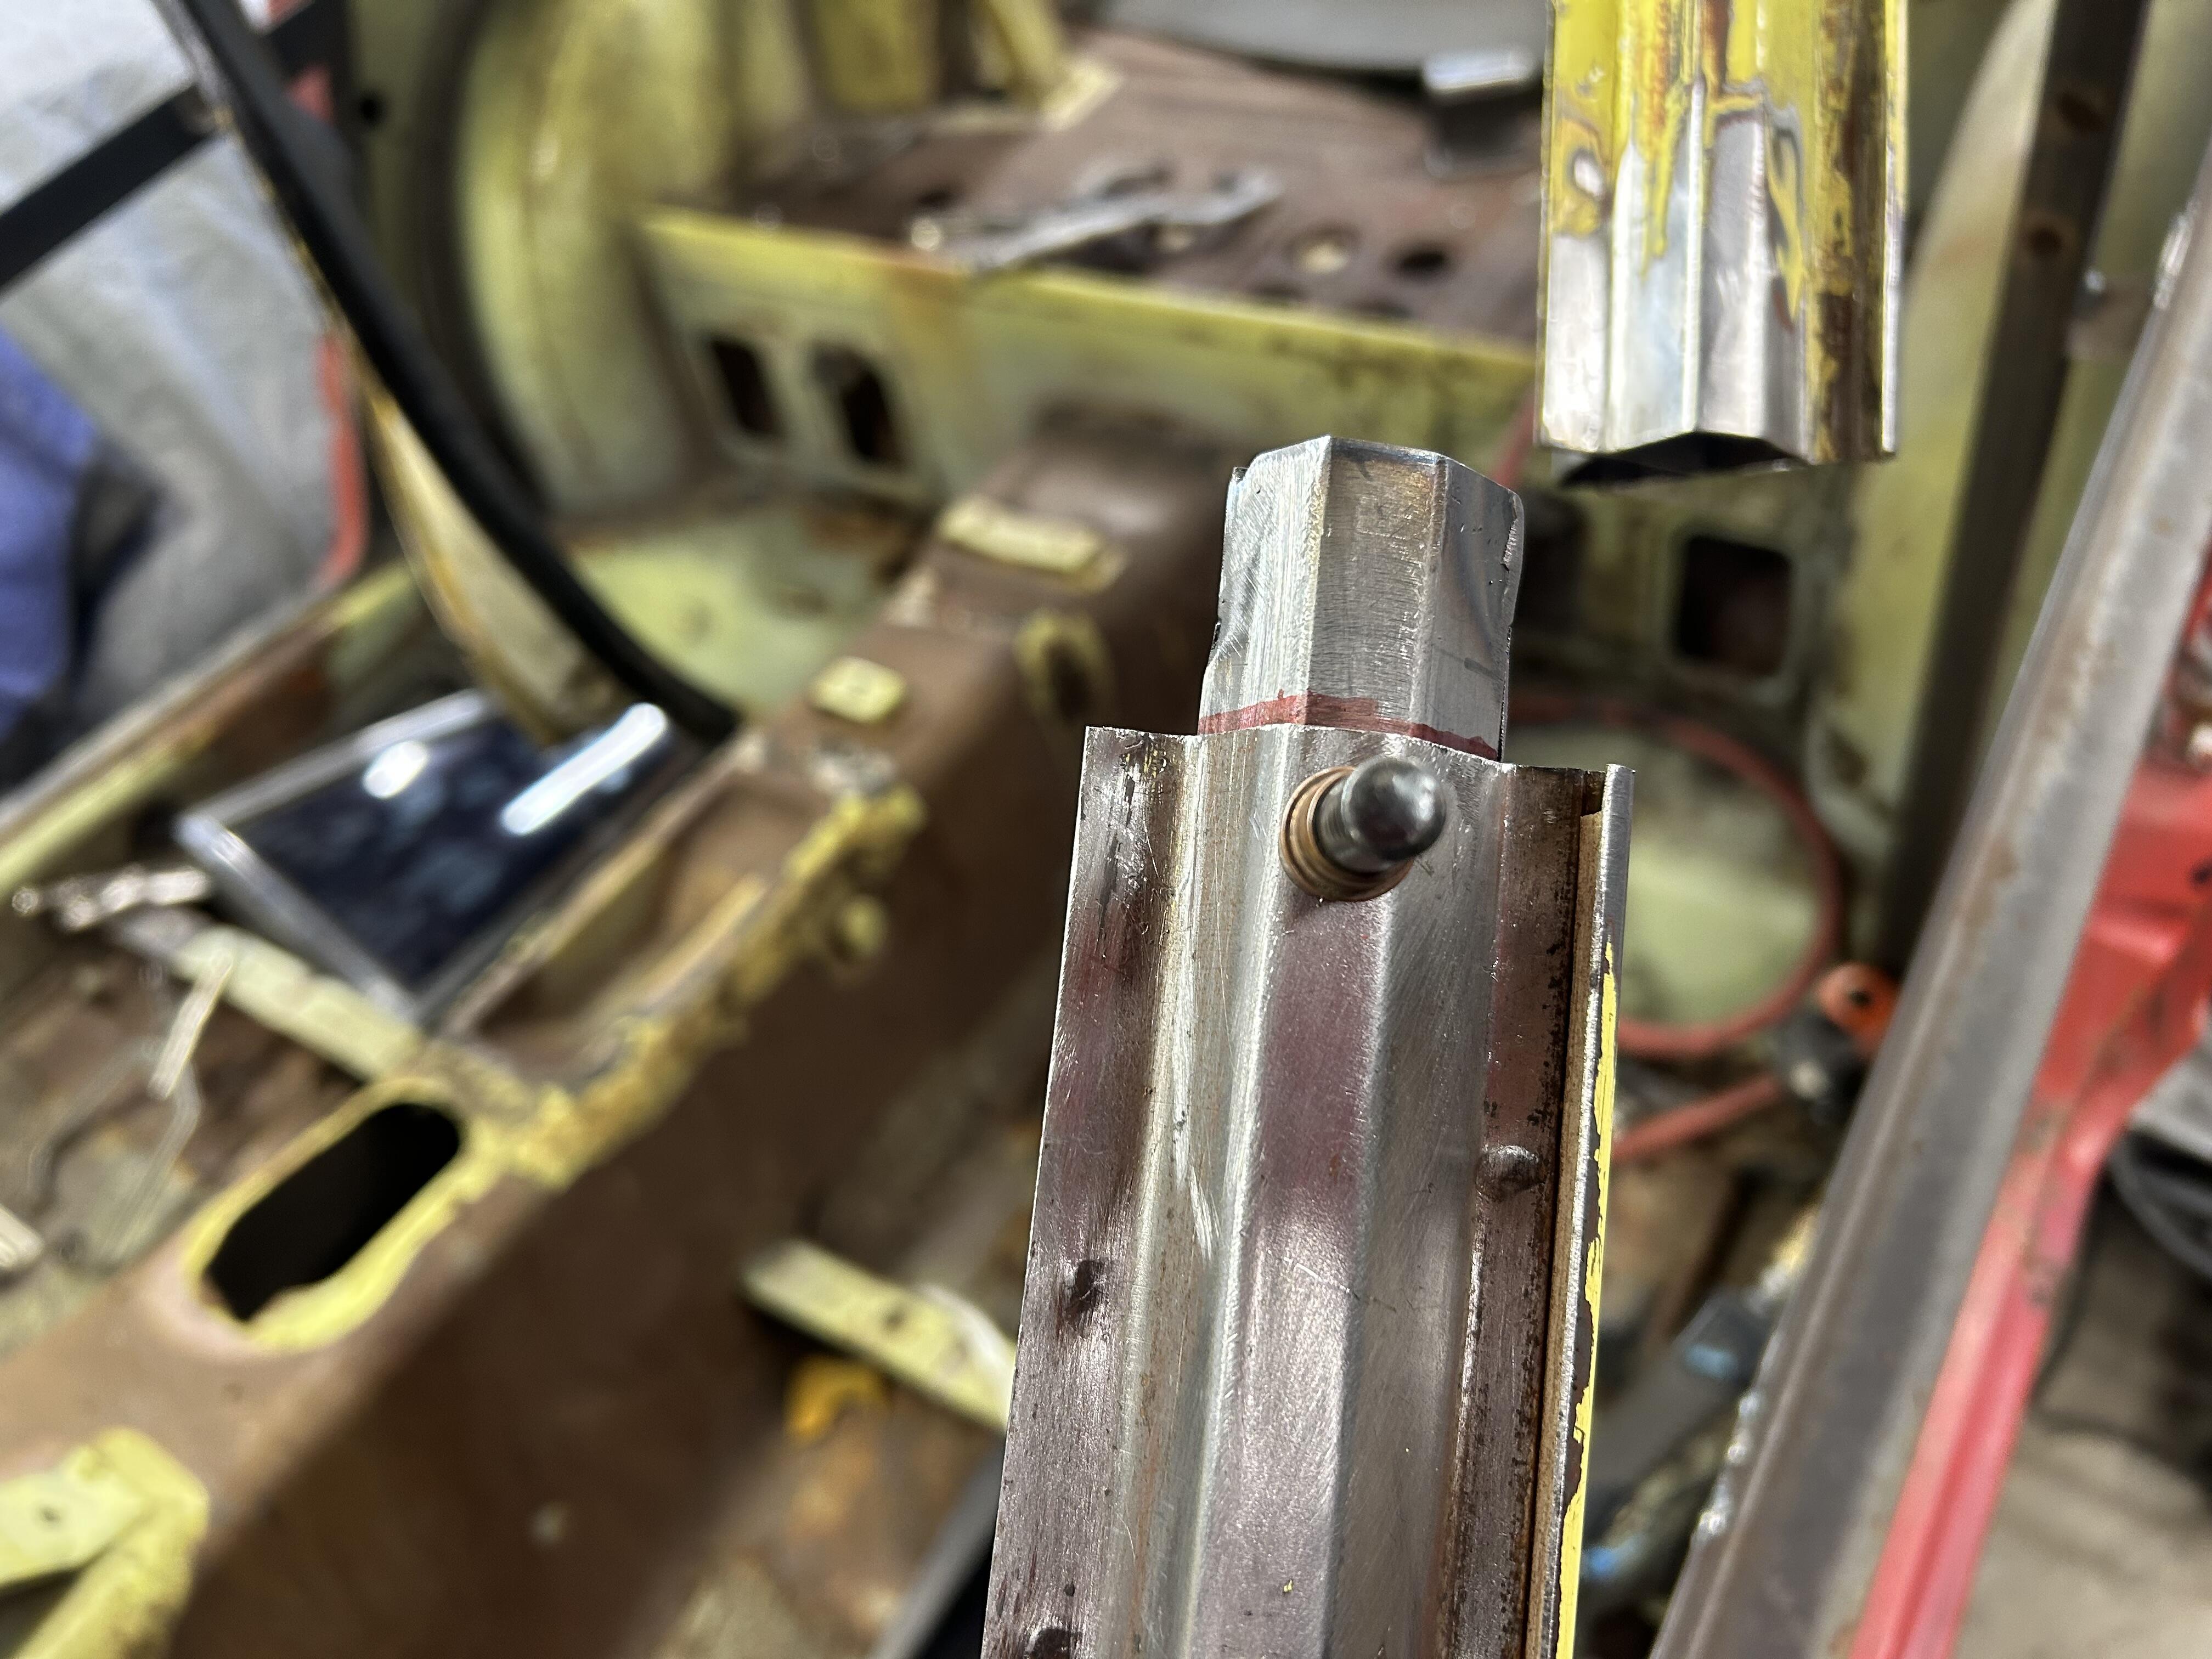
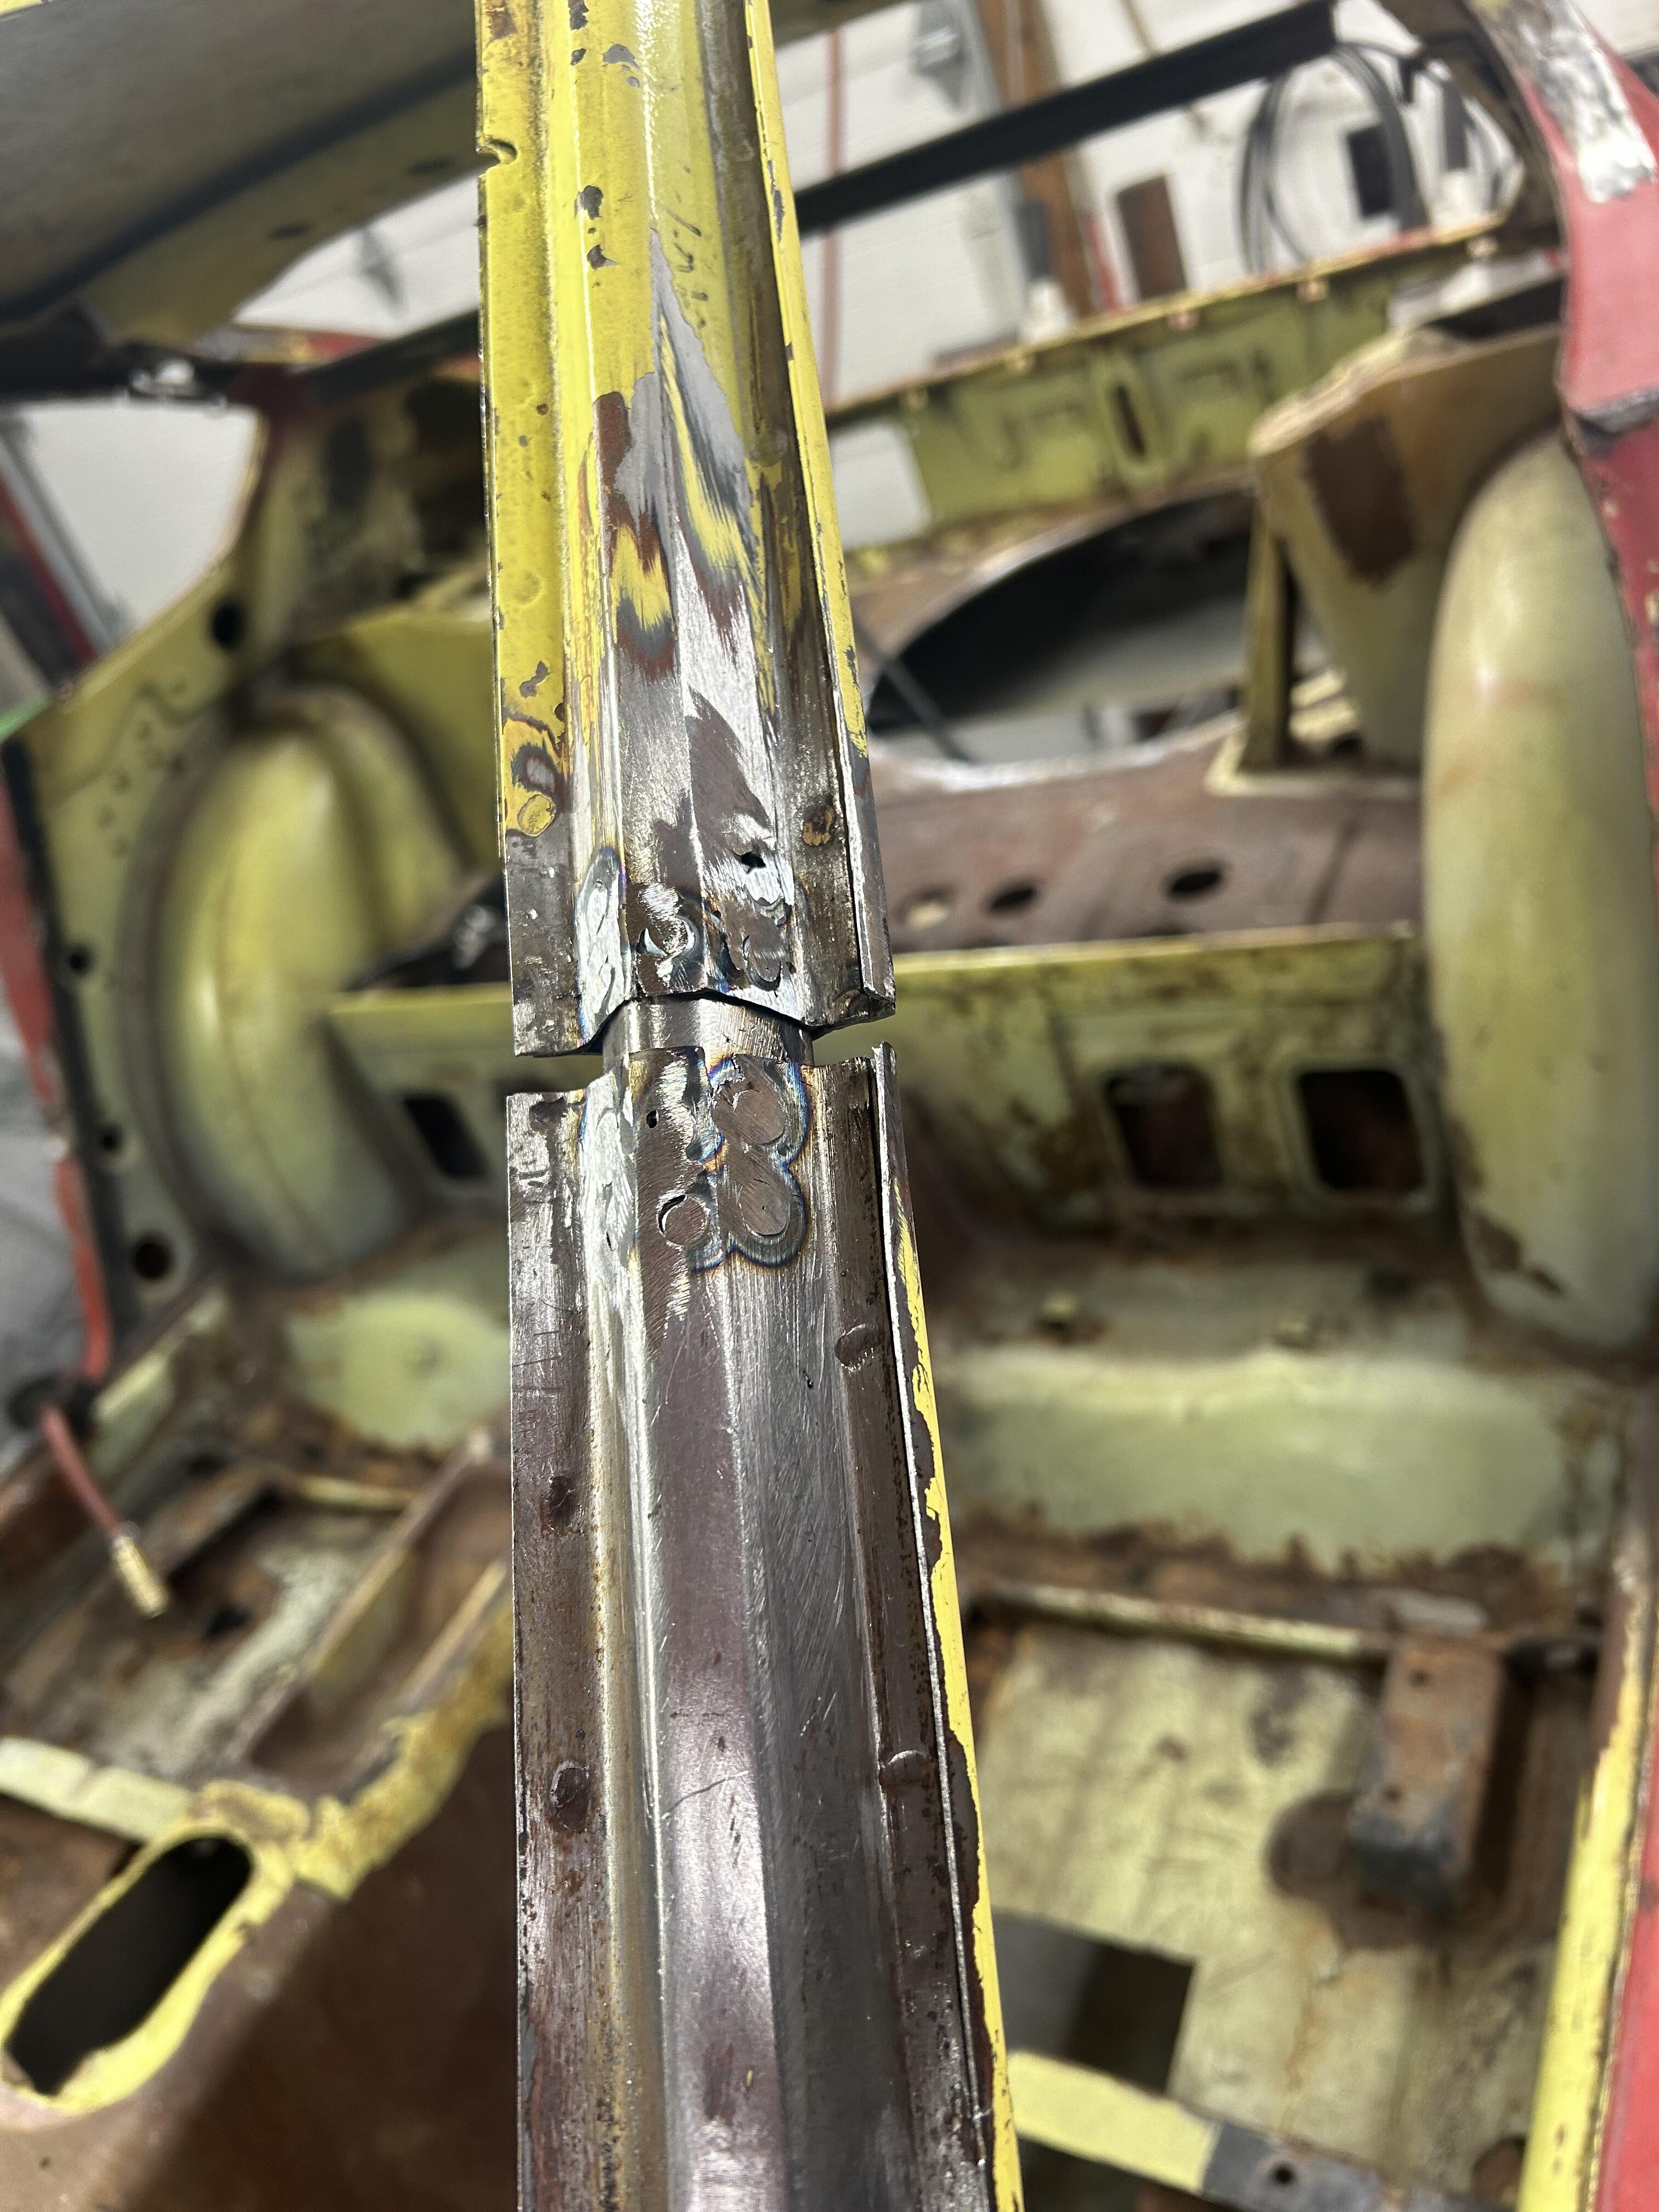
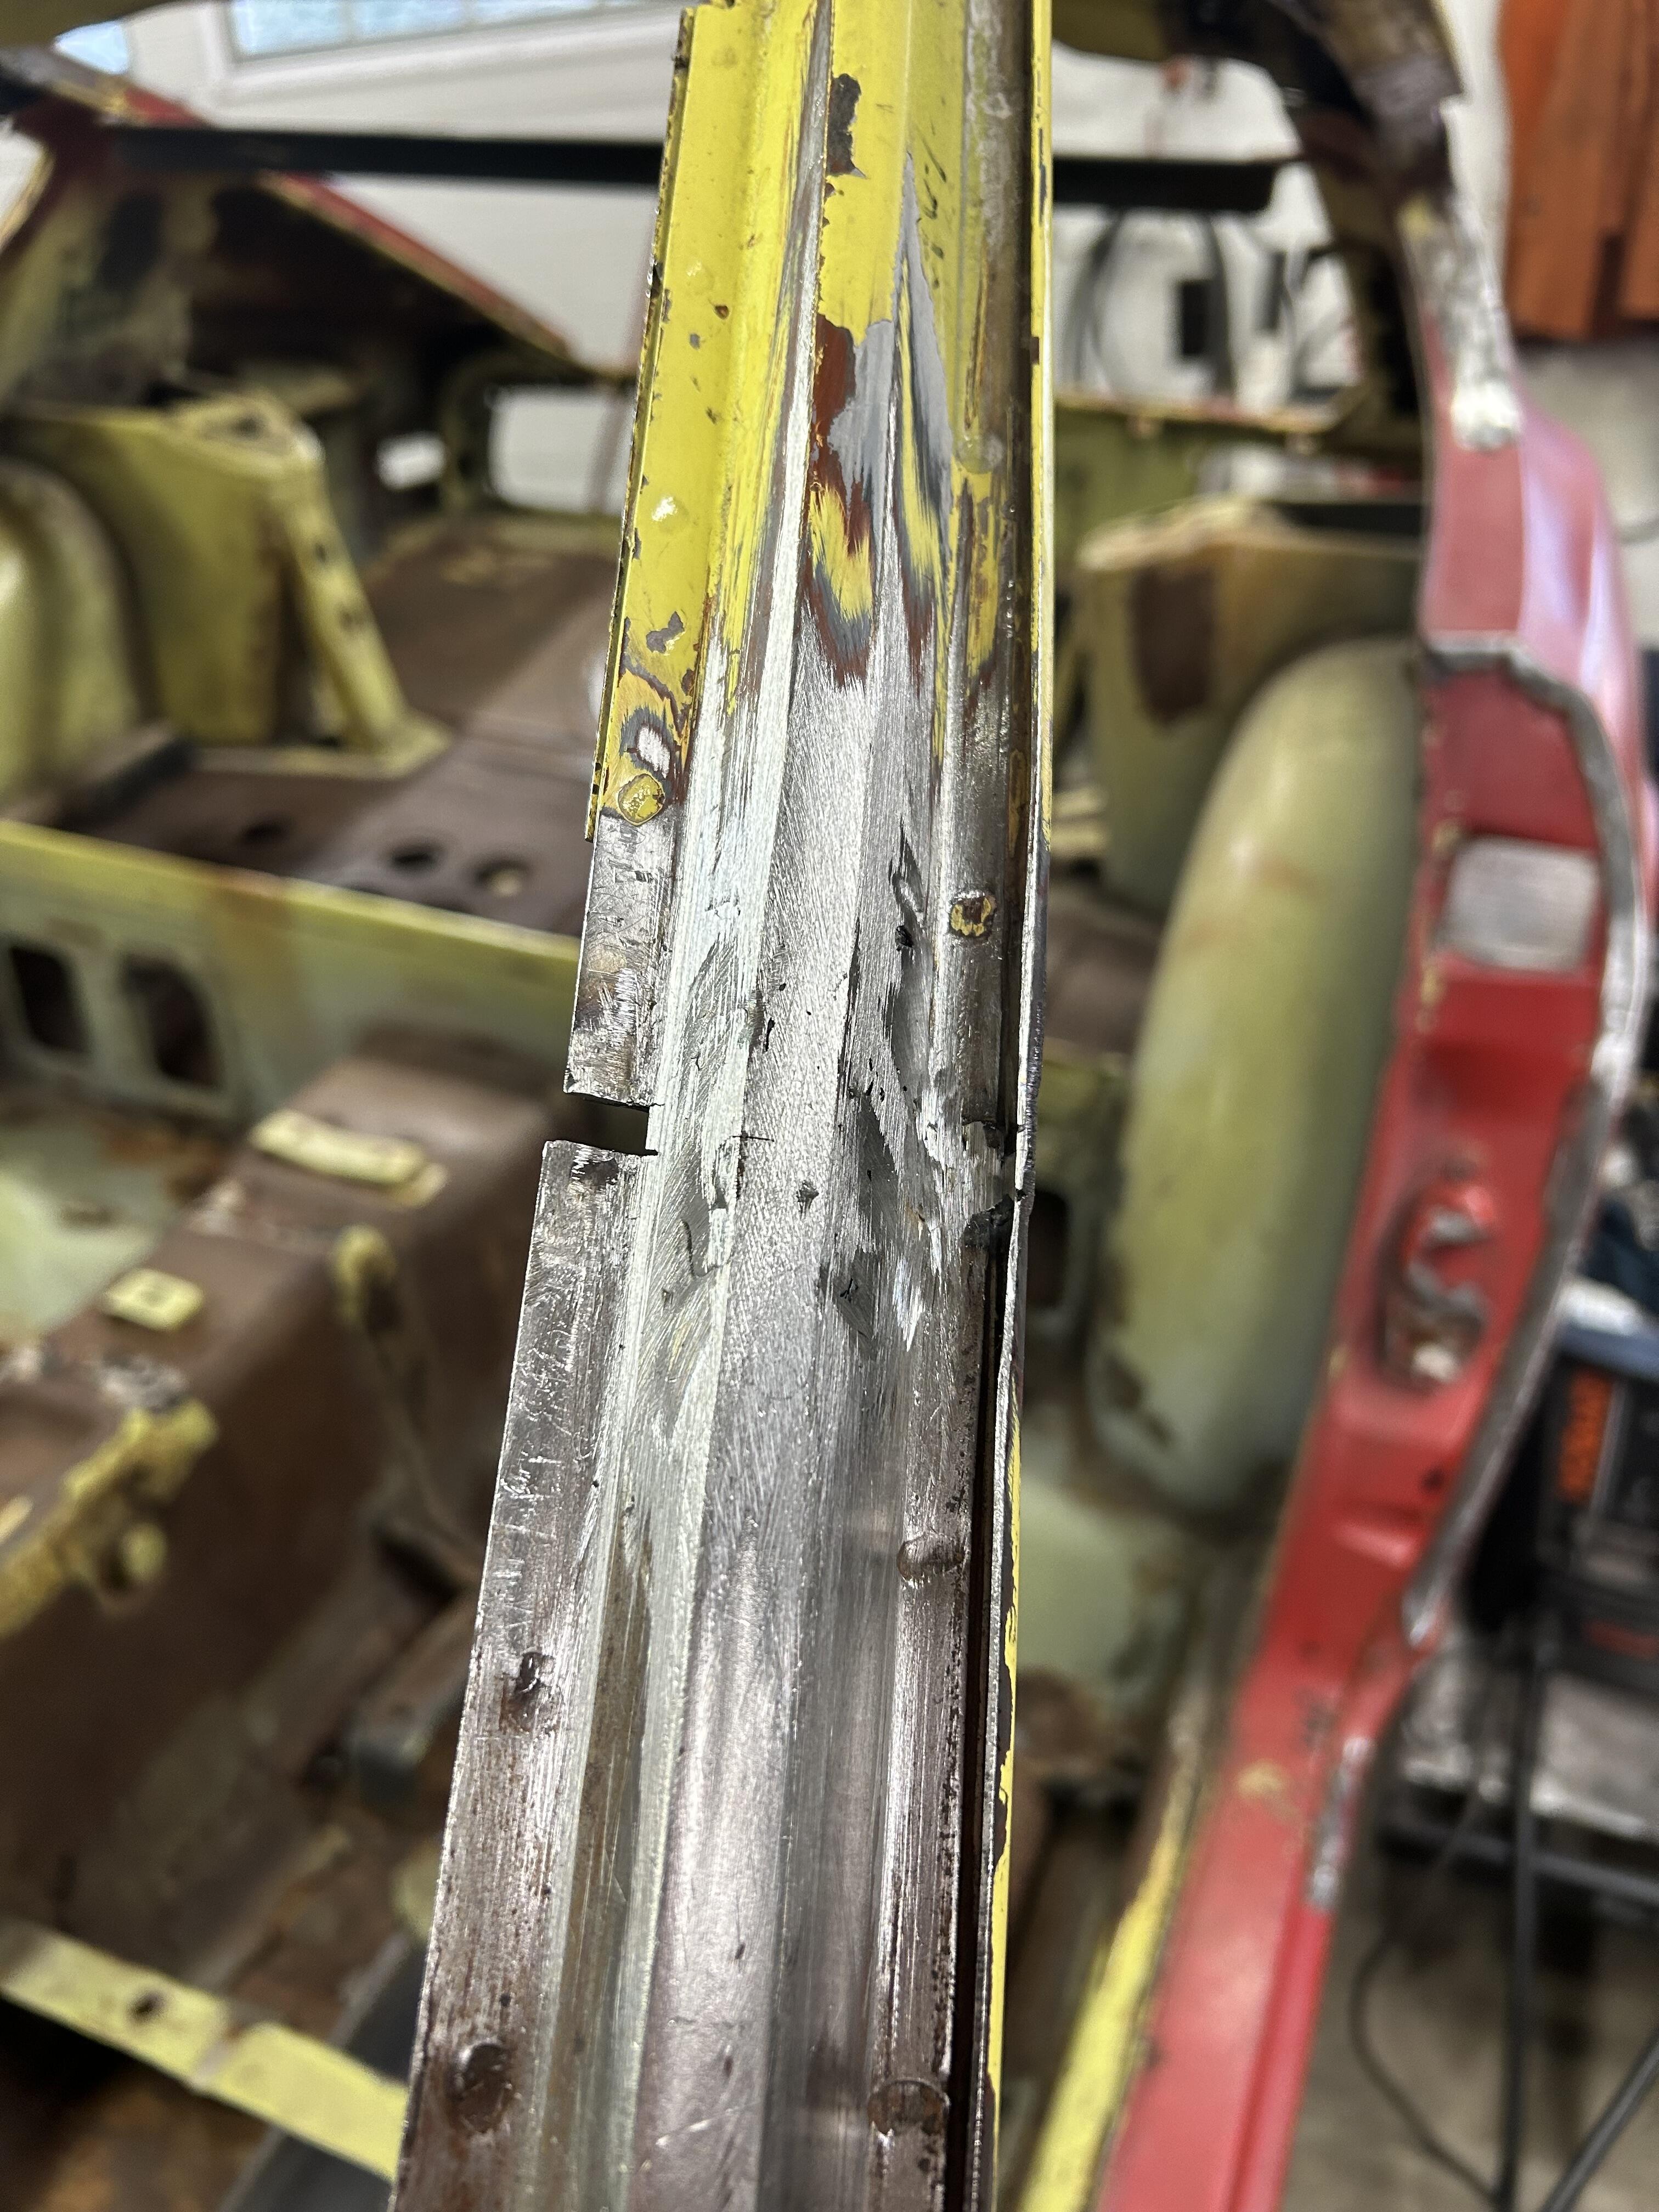
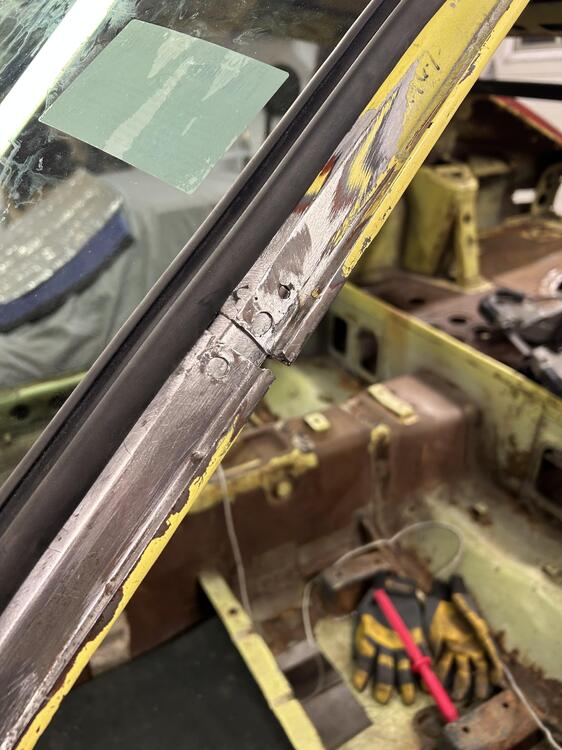
Whether it was the best approach or not , I decided to slug/sleeve the A pillars . I felt a sizable sleeve -3” would give plenty of weld points and help keep things aligned . I had kept lots of A pillars material from where I cut these roofs up . The complex part is that the pillars taper ever so slightly . Also tough is making square cuts to match one roof to the other roof pillars . Another obstacle was I realized the drivers A pillar on my replacement roof was bent back -likely from the accident the car was in . It was a hard hit- shoving the LS2 back into the firewall . Windshield was still in the car he said . Getting the height right on the A pillars was going to be the big challenge . In the first pic of this thread you’ll see I built a support out of angle iron for the roof to sit on . I used my Z to measure from the seat bolt hole to roof line . This support also helped to have something to set the roof on while I made adjustments. Thank god these roofs are light.
-
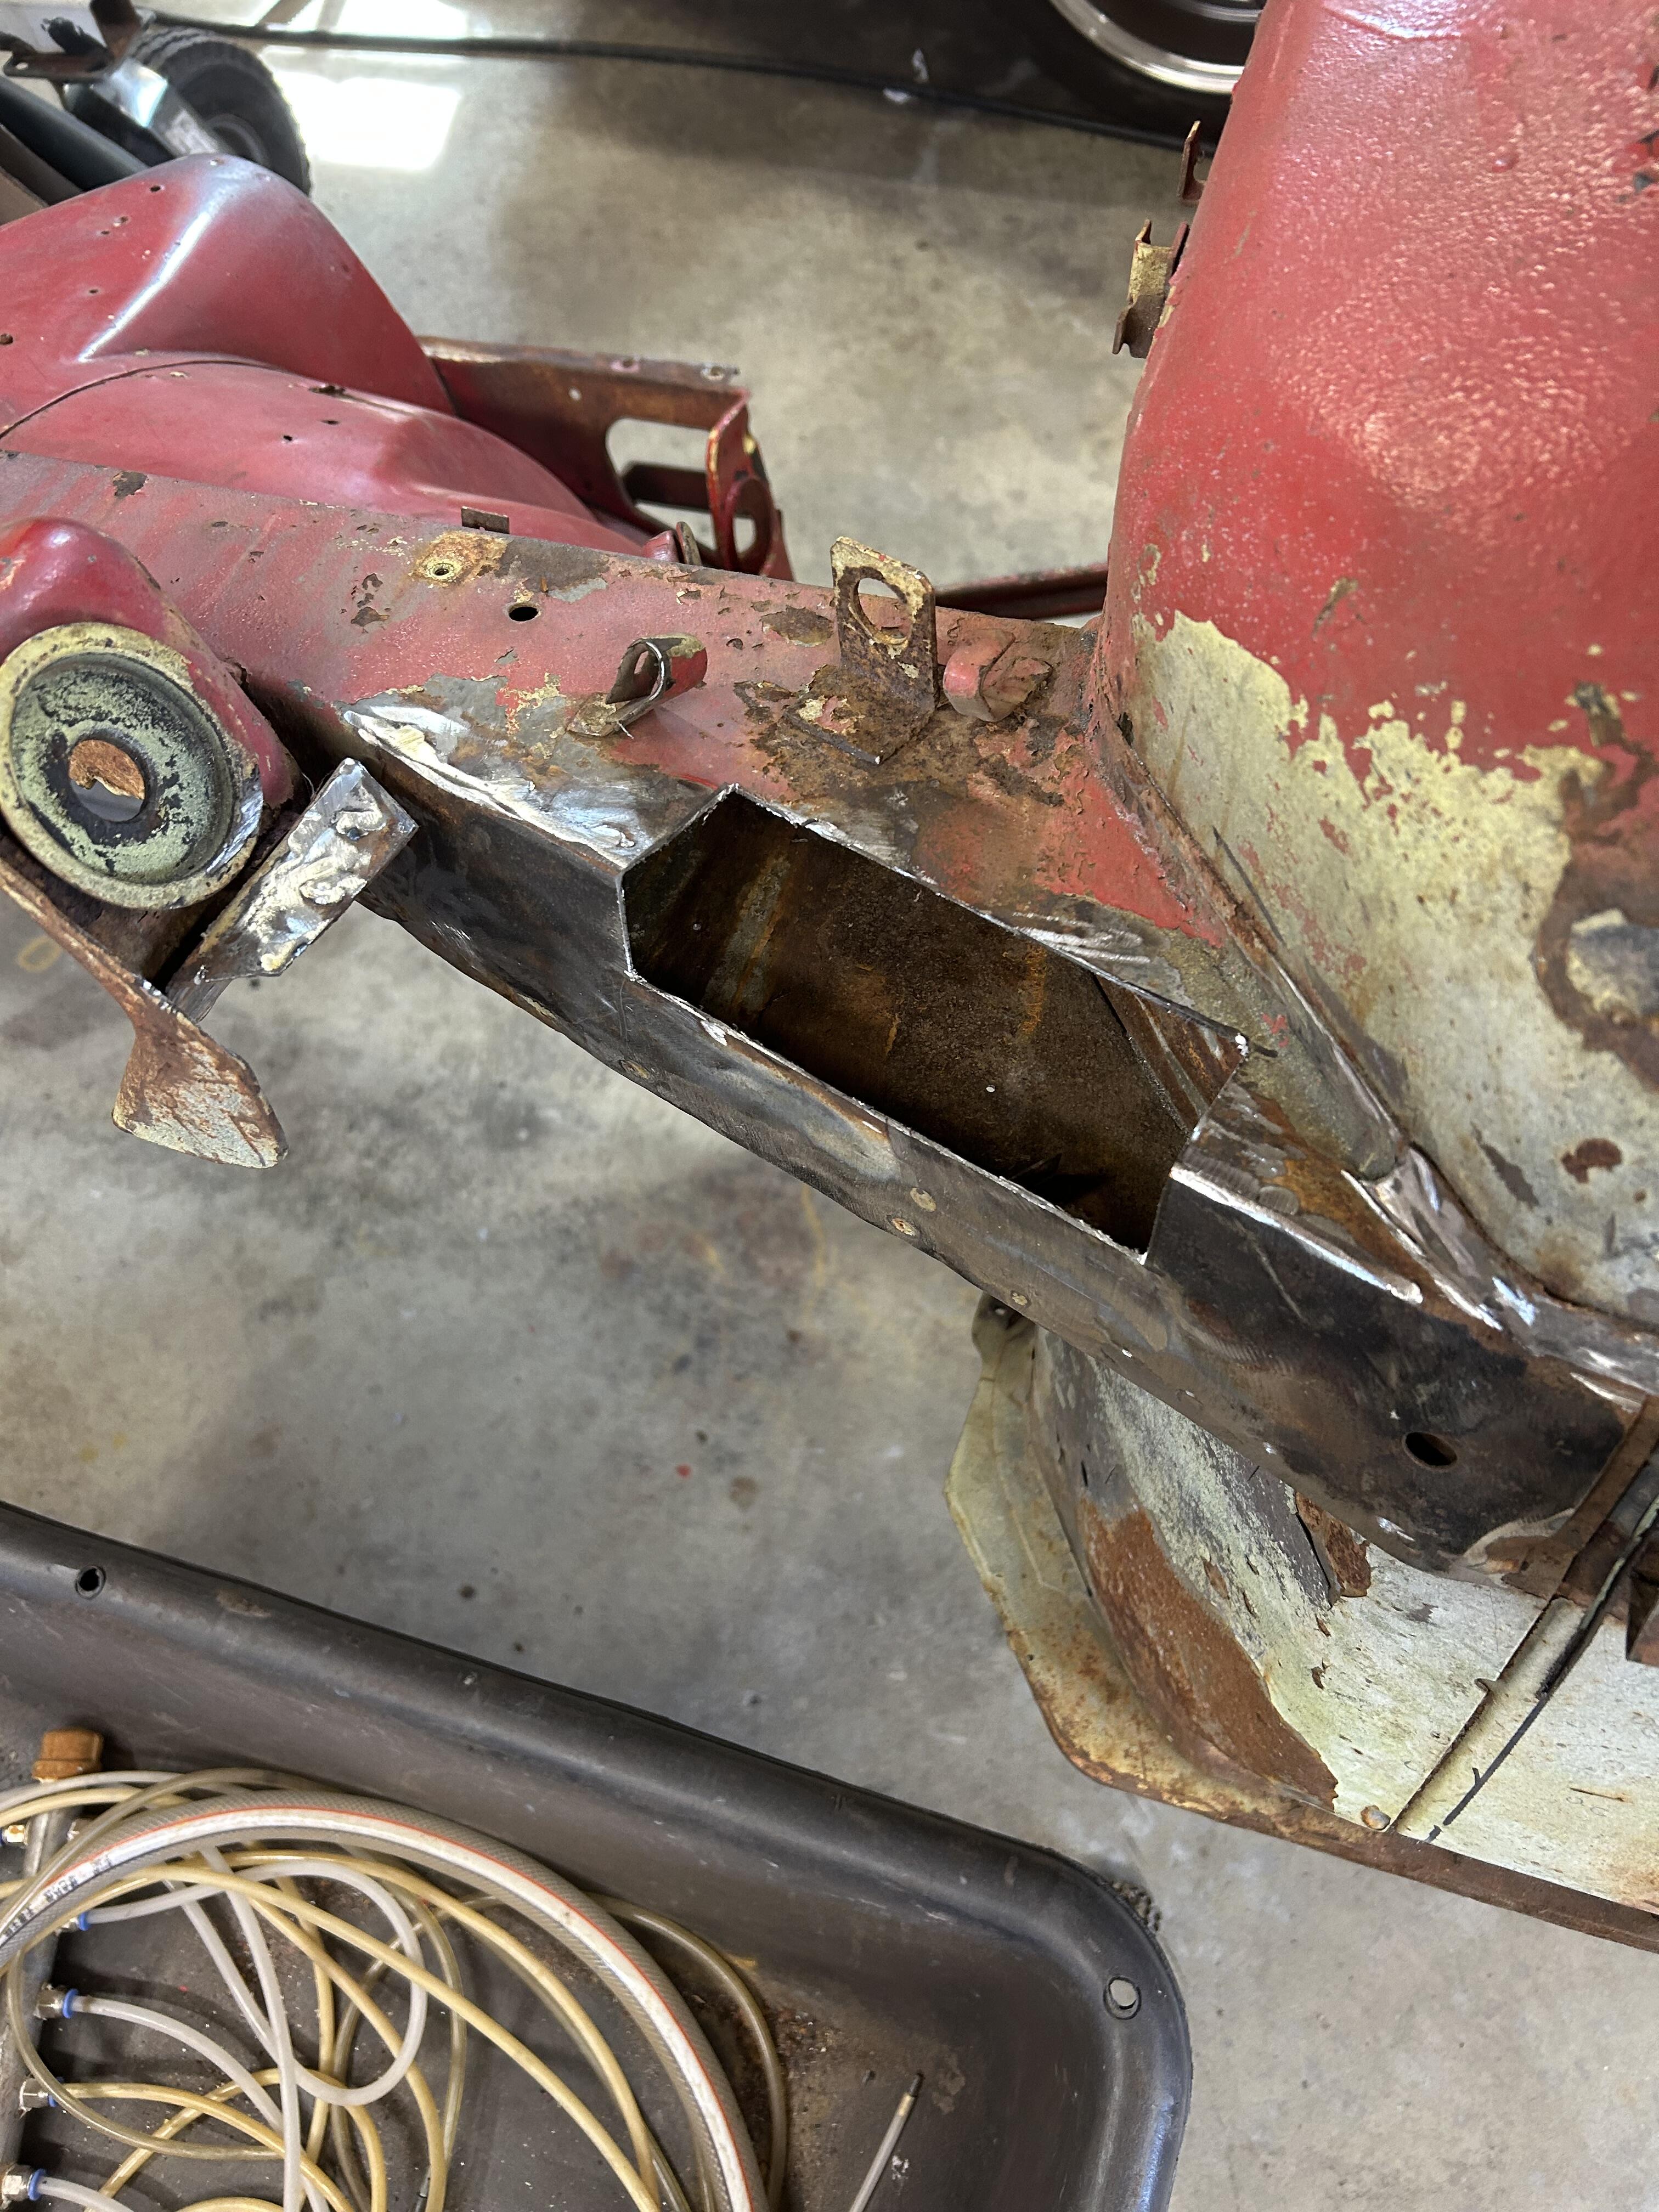
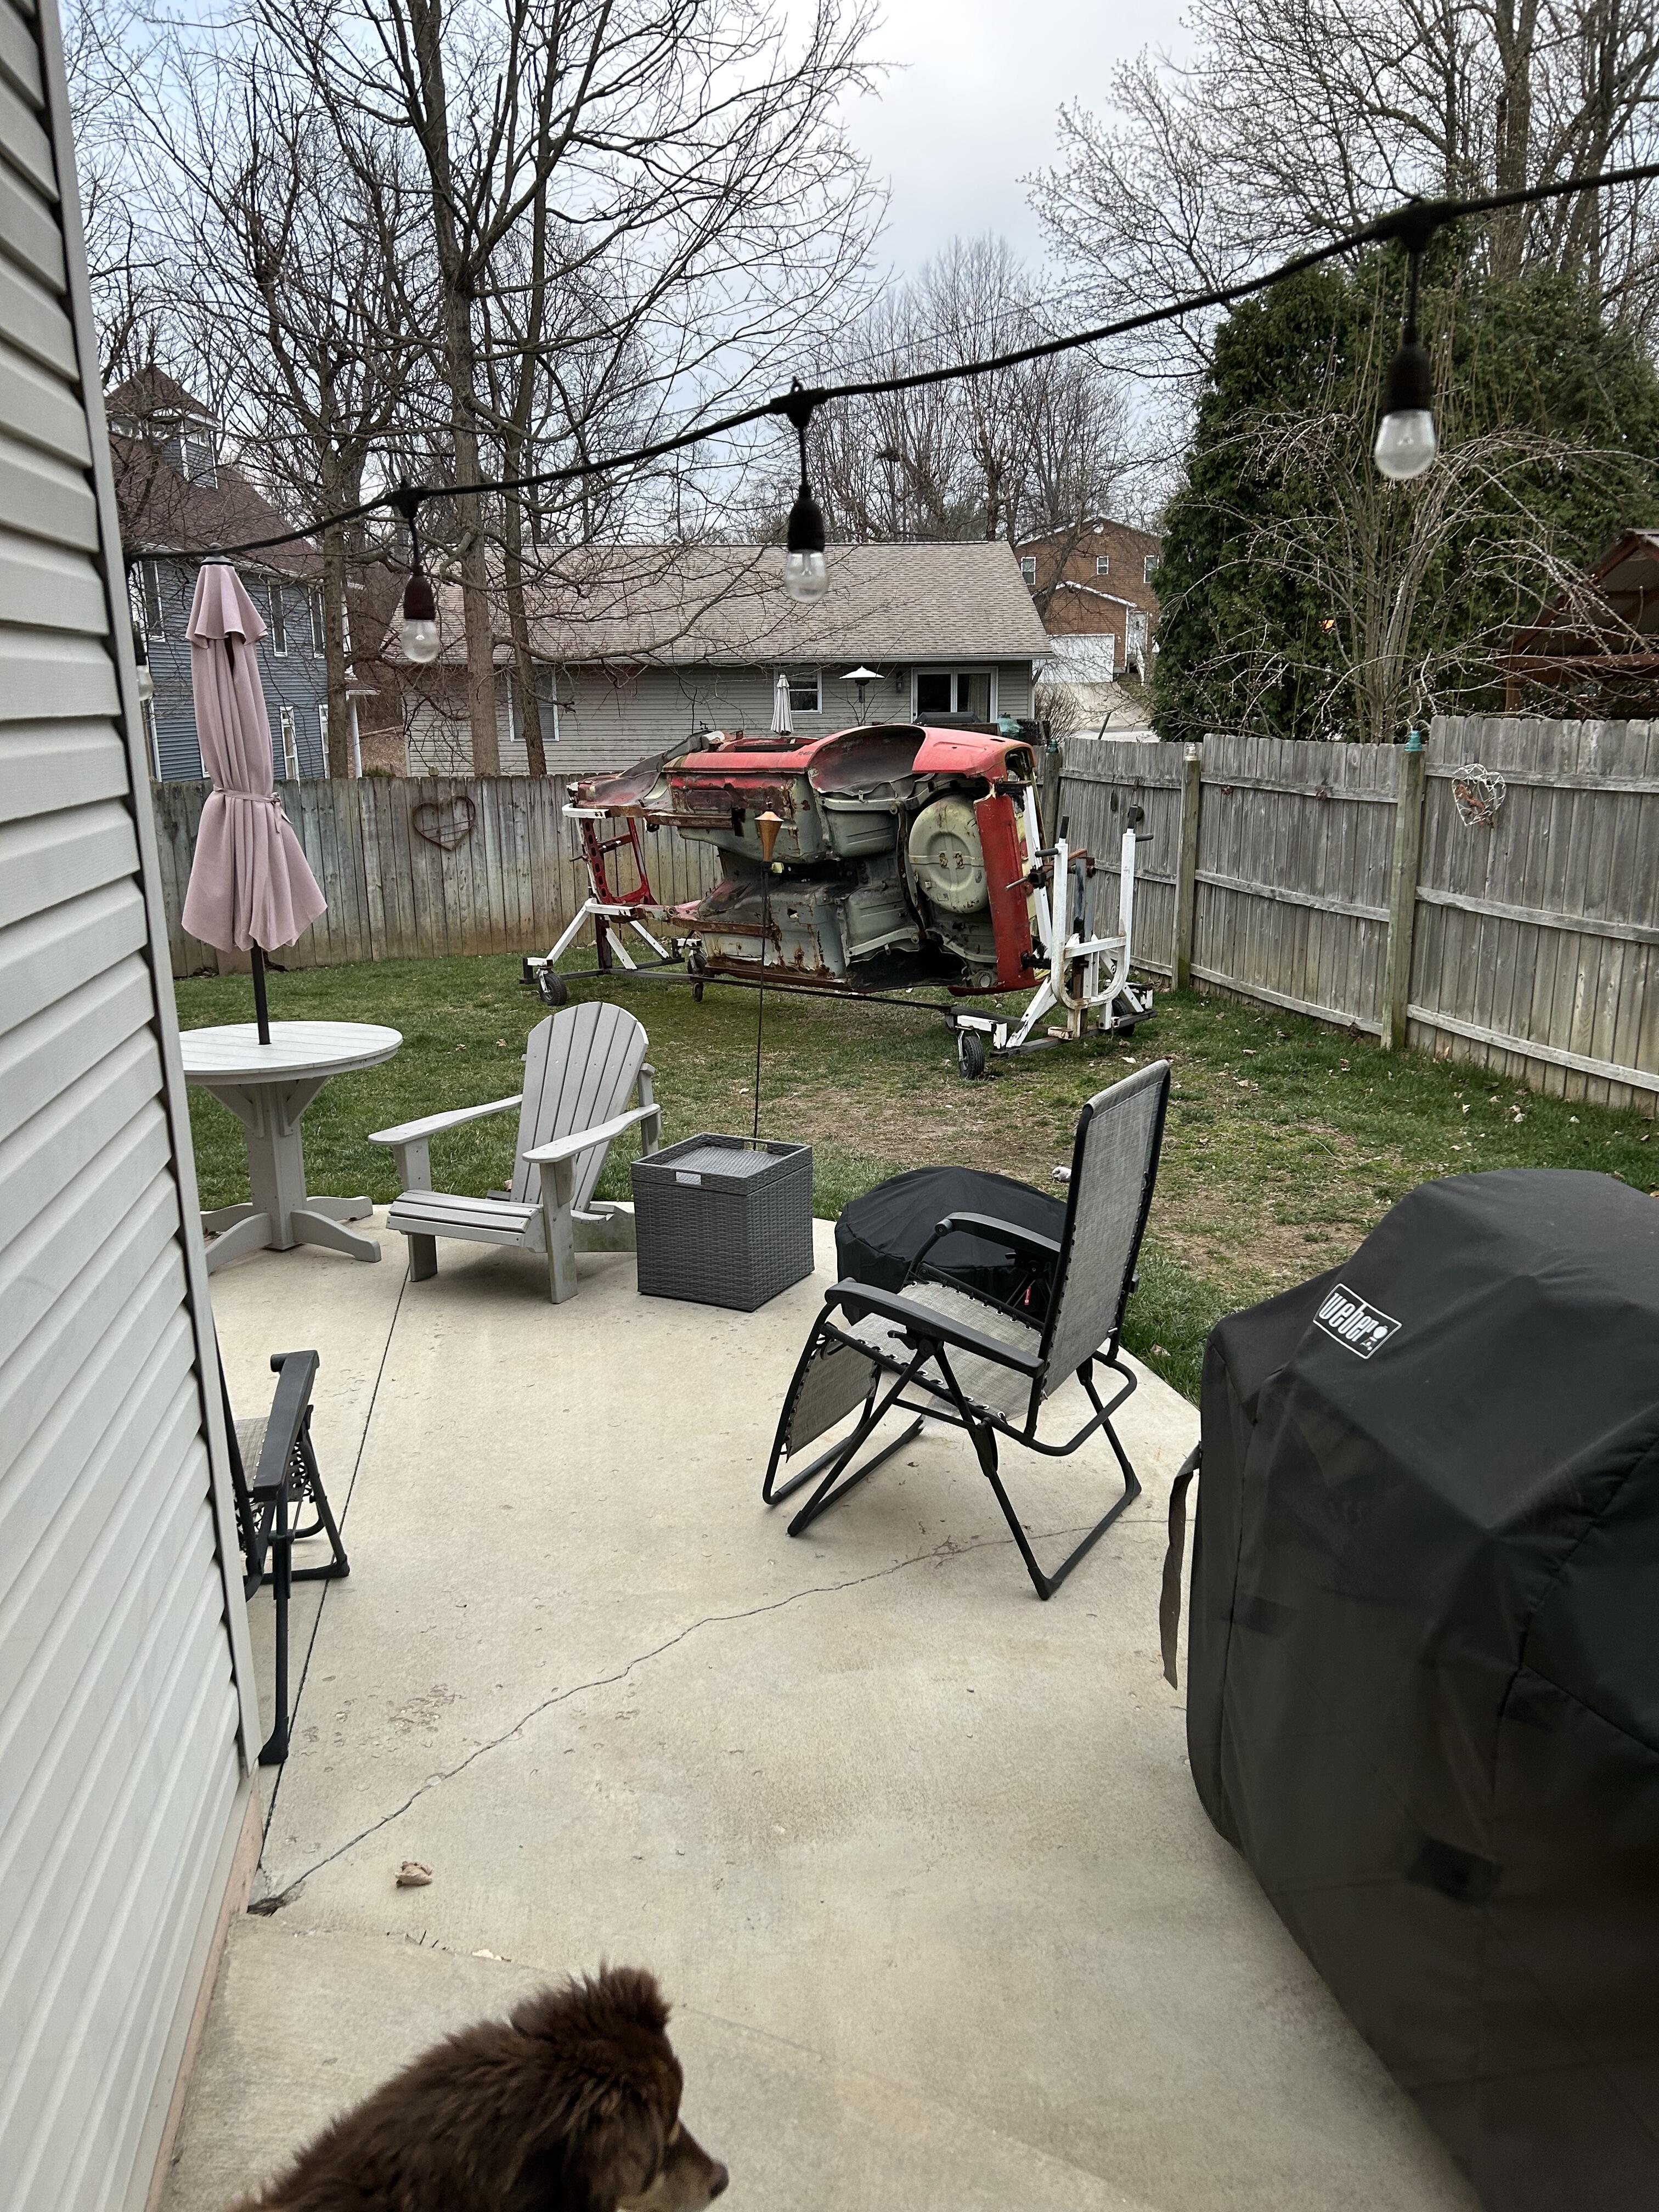
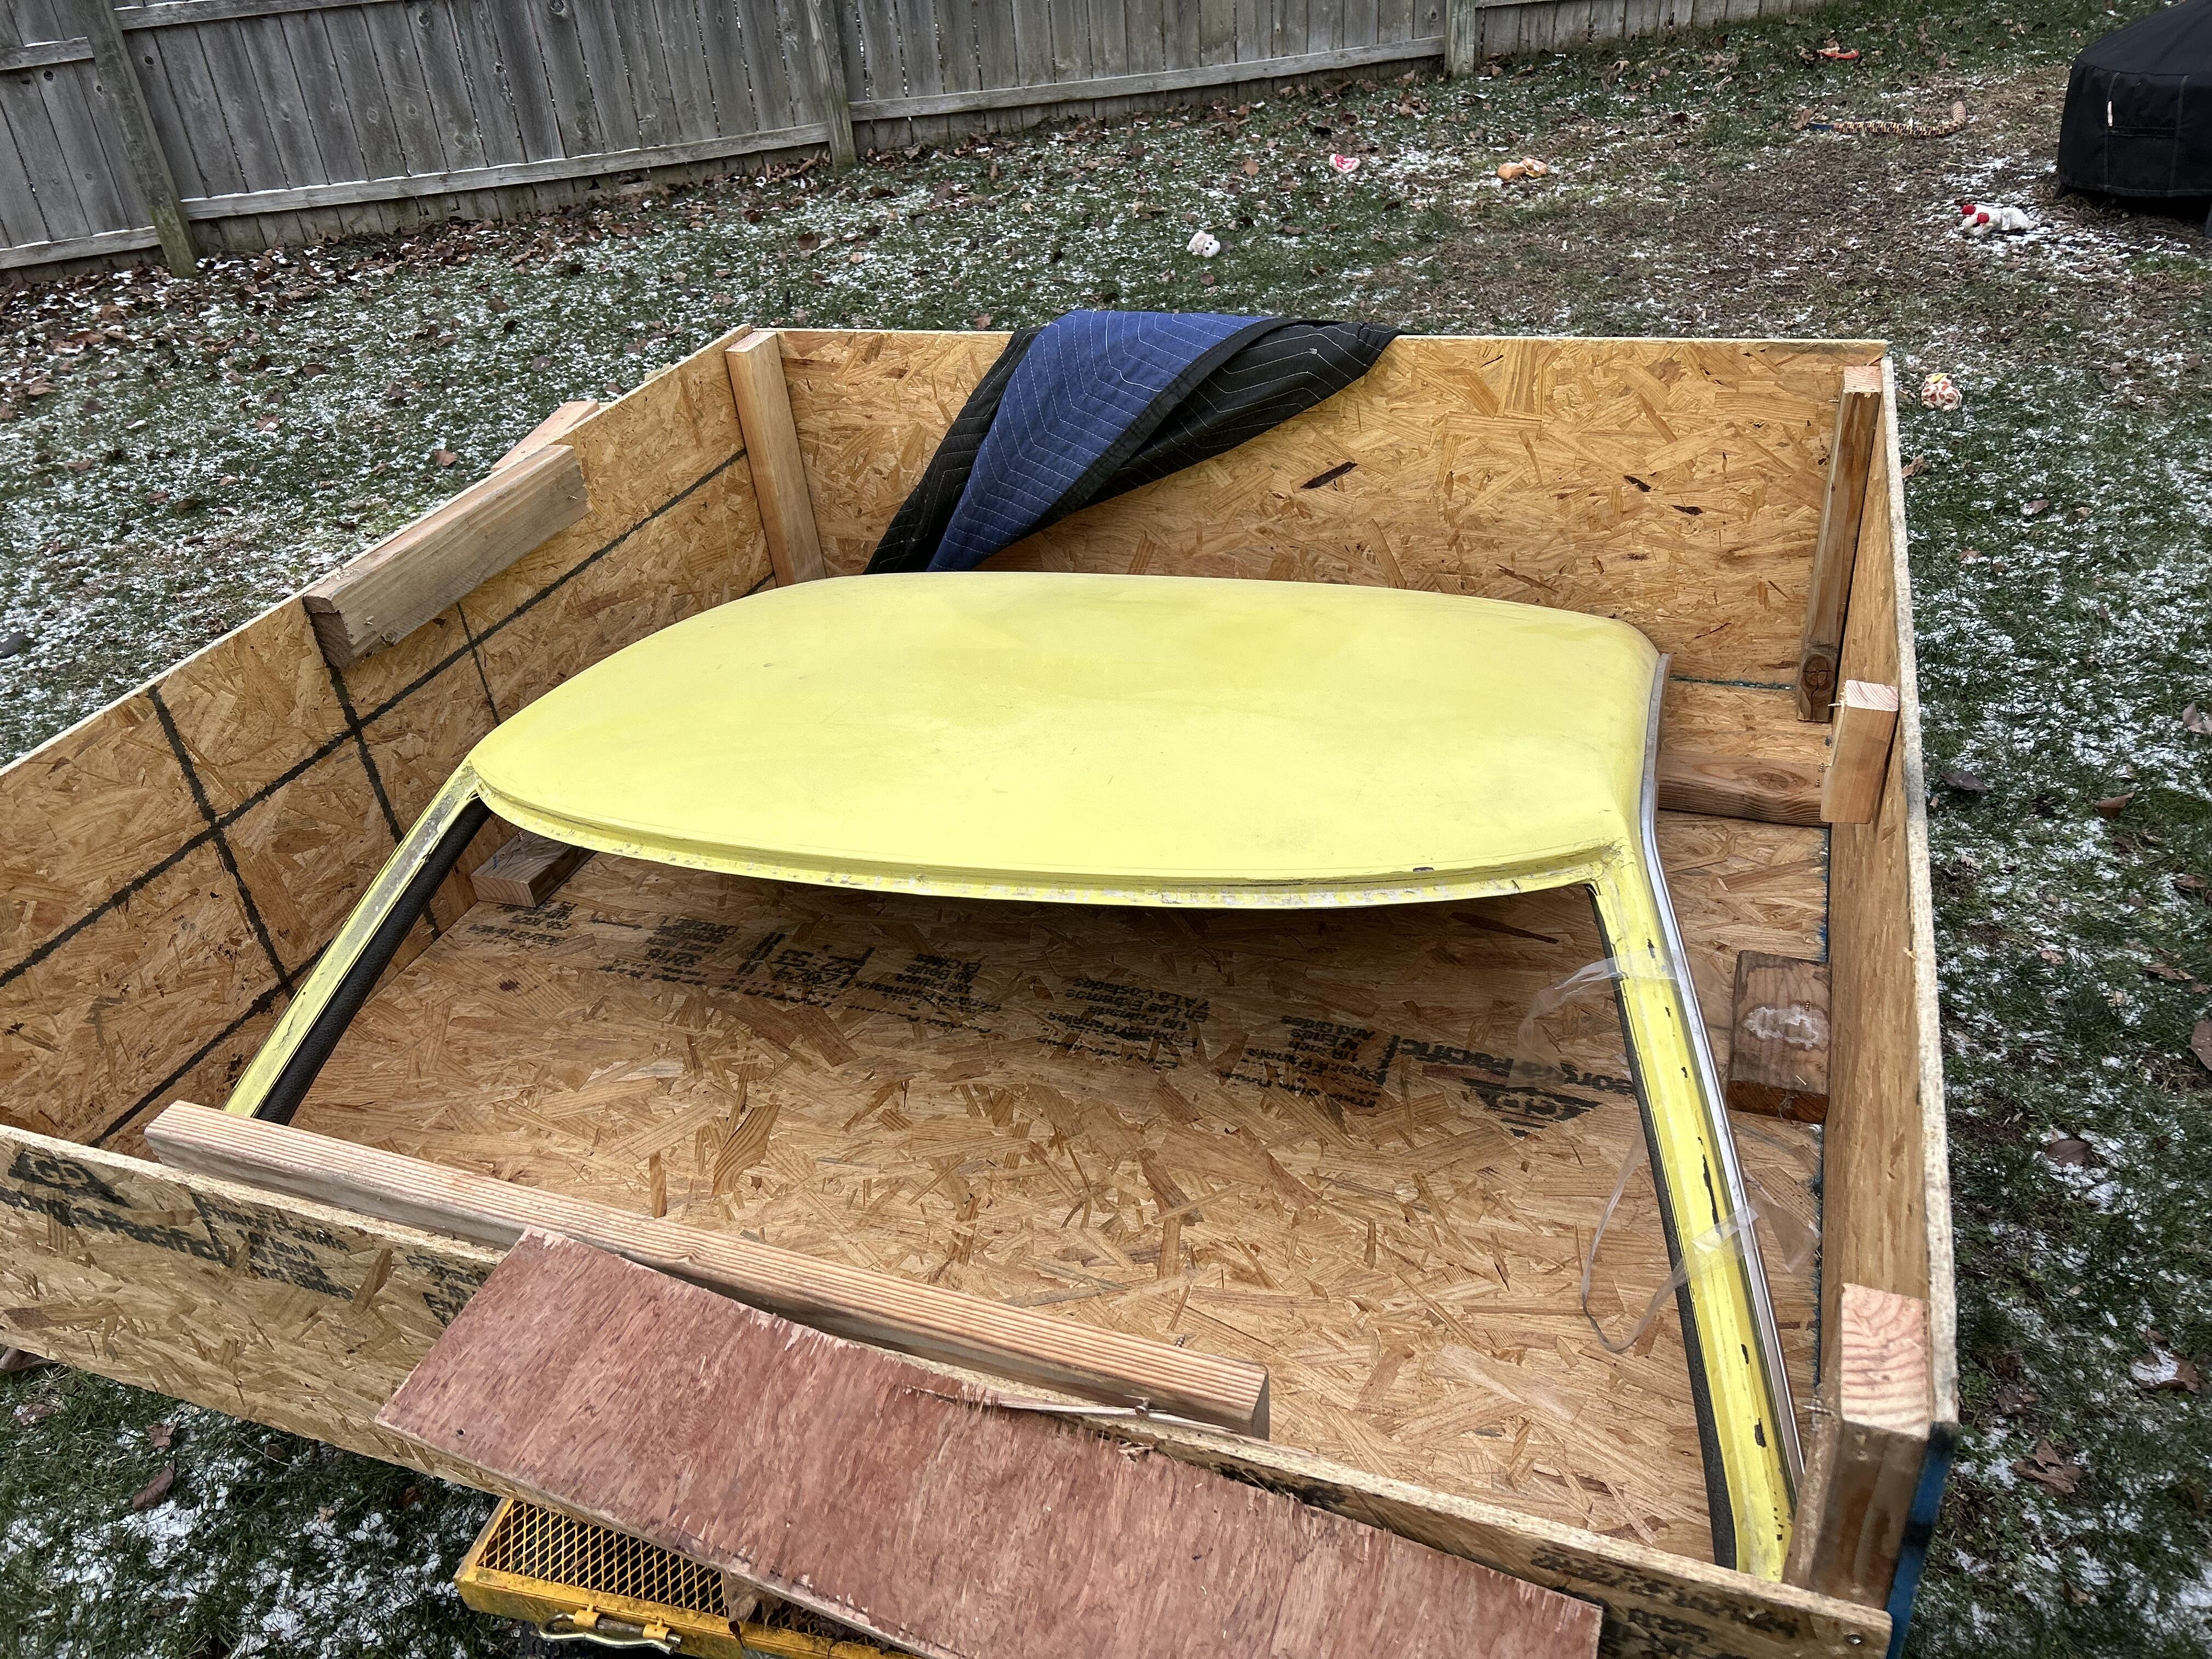
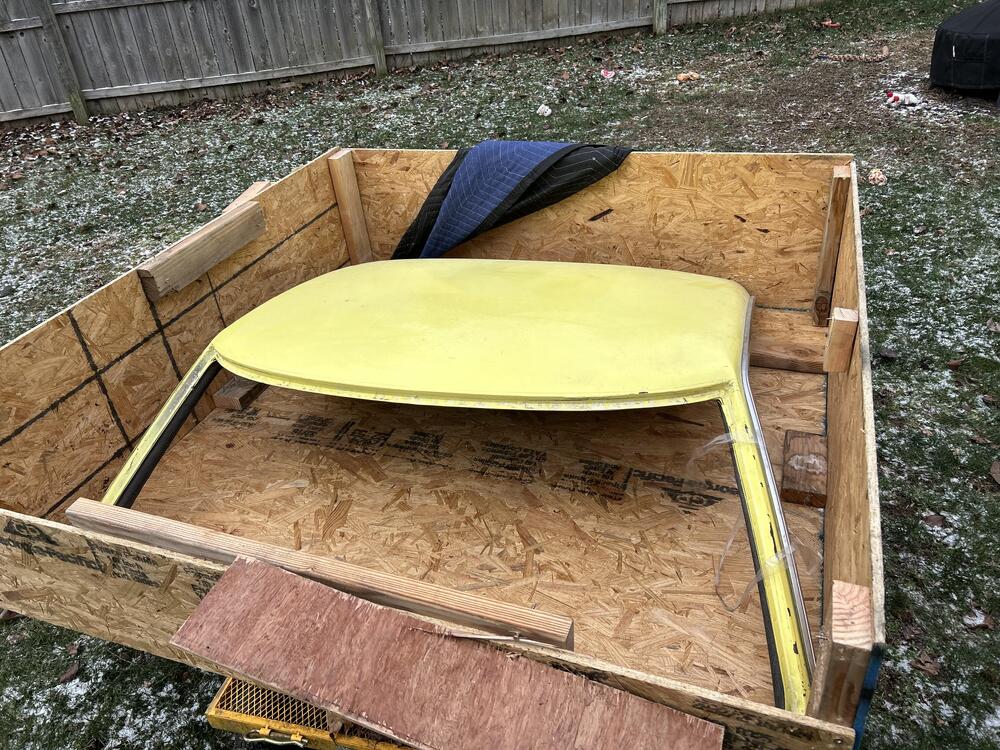
Fortunately the frame rails -front and back- and inner and outer rockers are completely solid . When I built the rotisserie I added extra support up front by attaching to the sway bar points . Cutting the roof has advantages as far as storage . Makes for a thin profile on its side . It was hard to find a roof that someone was willing to part with or wasn’t already rusted . Being in the Midwest didn’t help . Finally made a connection with a guy in CA and his 70 had gotten totaled in a front end wreck . It was a PITA but we managed the logistics and he was willing to help ship it out . And it was the right color - lol .


-
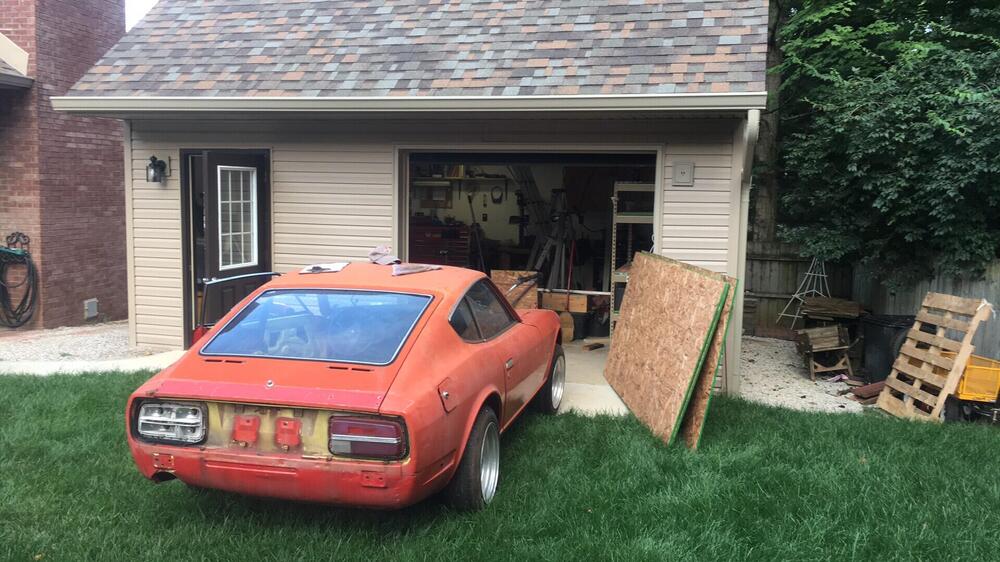
It seems I’m having trouble finding more pictures of the car before I dismantled it . All the exterior panels were in decent shape . Someone went crazy with the red primer and painted everything including inside the engine compartment. The roof had some rust holes that turned out to be worst case scenario . In fact the worst rust found on the car was the roof including its substructure. I thought I could do a skin job , but there wasn’t much to weld too. My only option was to put on a whole different roof . The job was daunting and I tried to get a friend who ran a body shop to help me . Meanwhile the car pushed to side while I looked for another roof and I took on other projects. I did brace the car and cut the roof off . I separated it from the factory location at the rear quarter but decided my approach for the from would be to go for the middle of the A pillars . I realized after searching for a long time that I was on my own to come up with a method . Couldn’t find any documentation for anyone else doing something this evasive . Lots of stuff regarding chopping roofs - which is basically what I’m doing .
-
Well I wanted to get back to posting here so this will keep me busy posting . Years ago I had a friend that had this car sitting at an apartment and it was about ready to get towed off . I offered him all my money in my PayPal account ( 800$) even though I didn’t have a place for it . It was sell it or lose it and he was just glad it didn’t get hauled off . My garage(workshop) wasn’t even done yet but there was a z waiting . This was 2017 . A year later I had surgery on my back so it sat around for a while . It was a complete car with a blown engine . It sat outside for years To be continued
-
I don’t know . Bruce and I left the banquet to work on his car before they announced it .
-
-
Glad to be alive . I’m a lucky guy for sure . It’s fancy but it’s all business too:)
-
Today I didn’t do anything but drive it !!

-
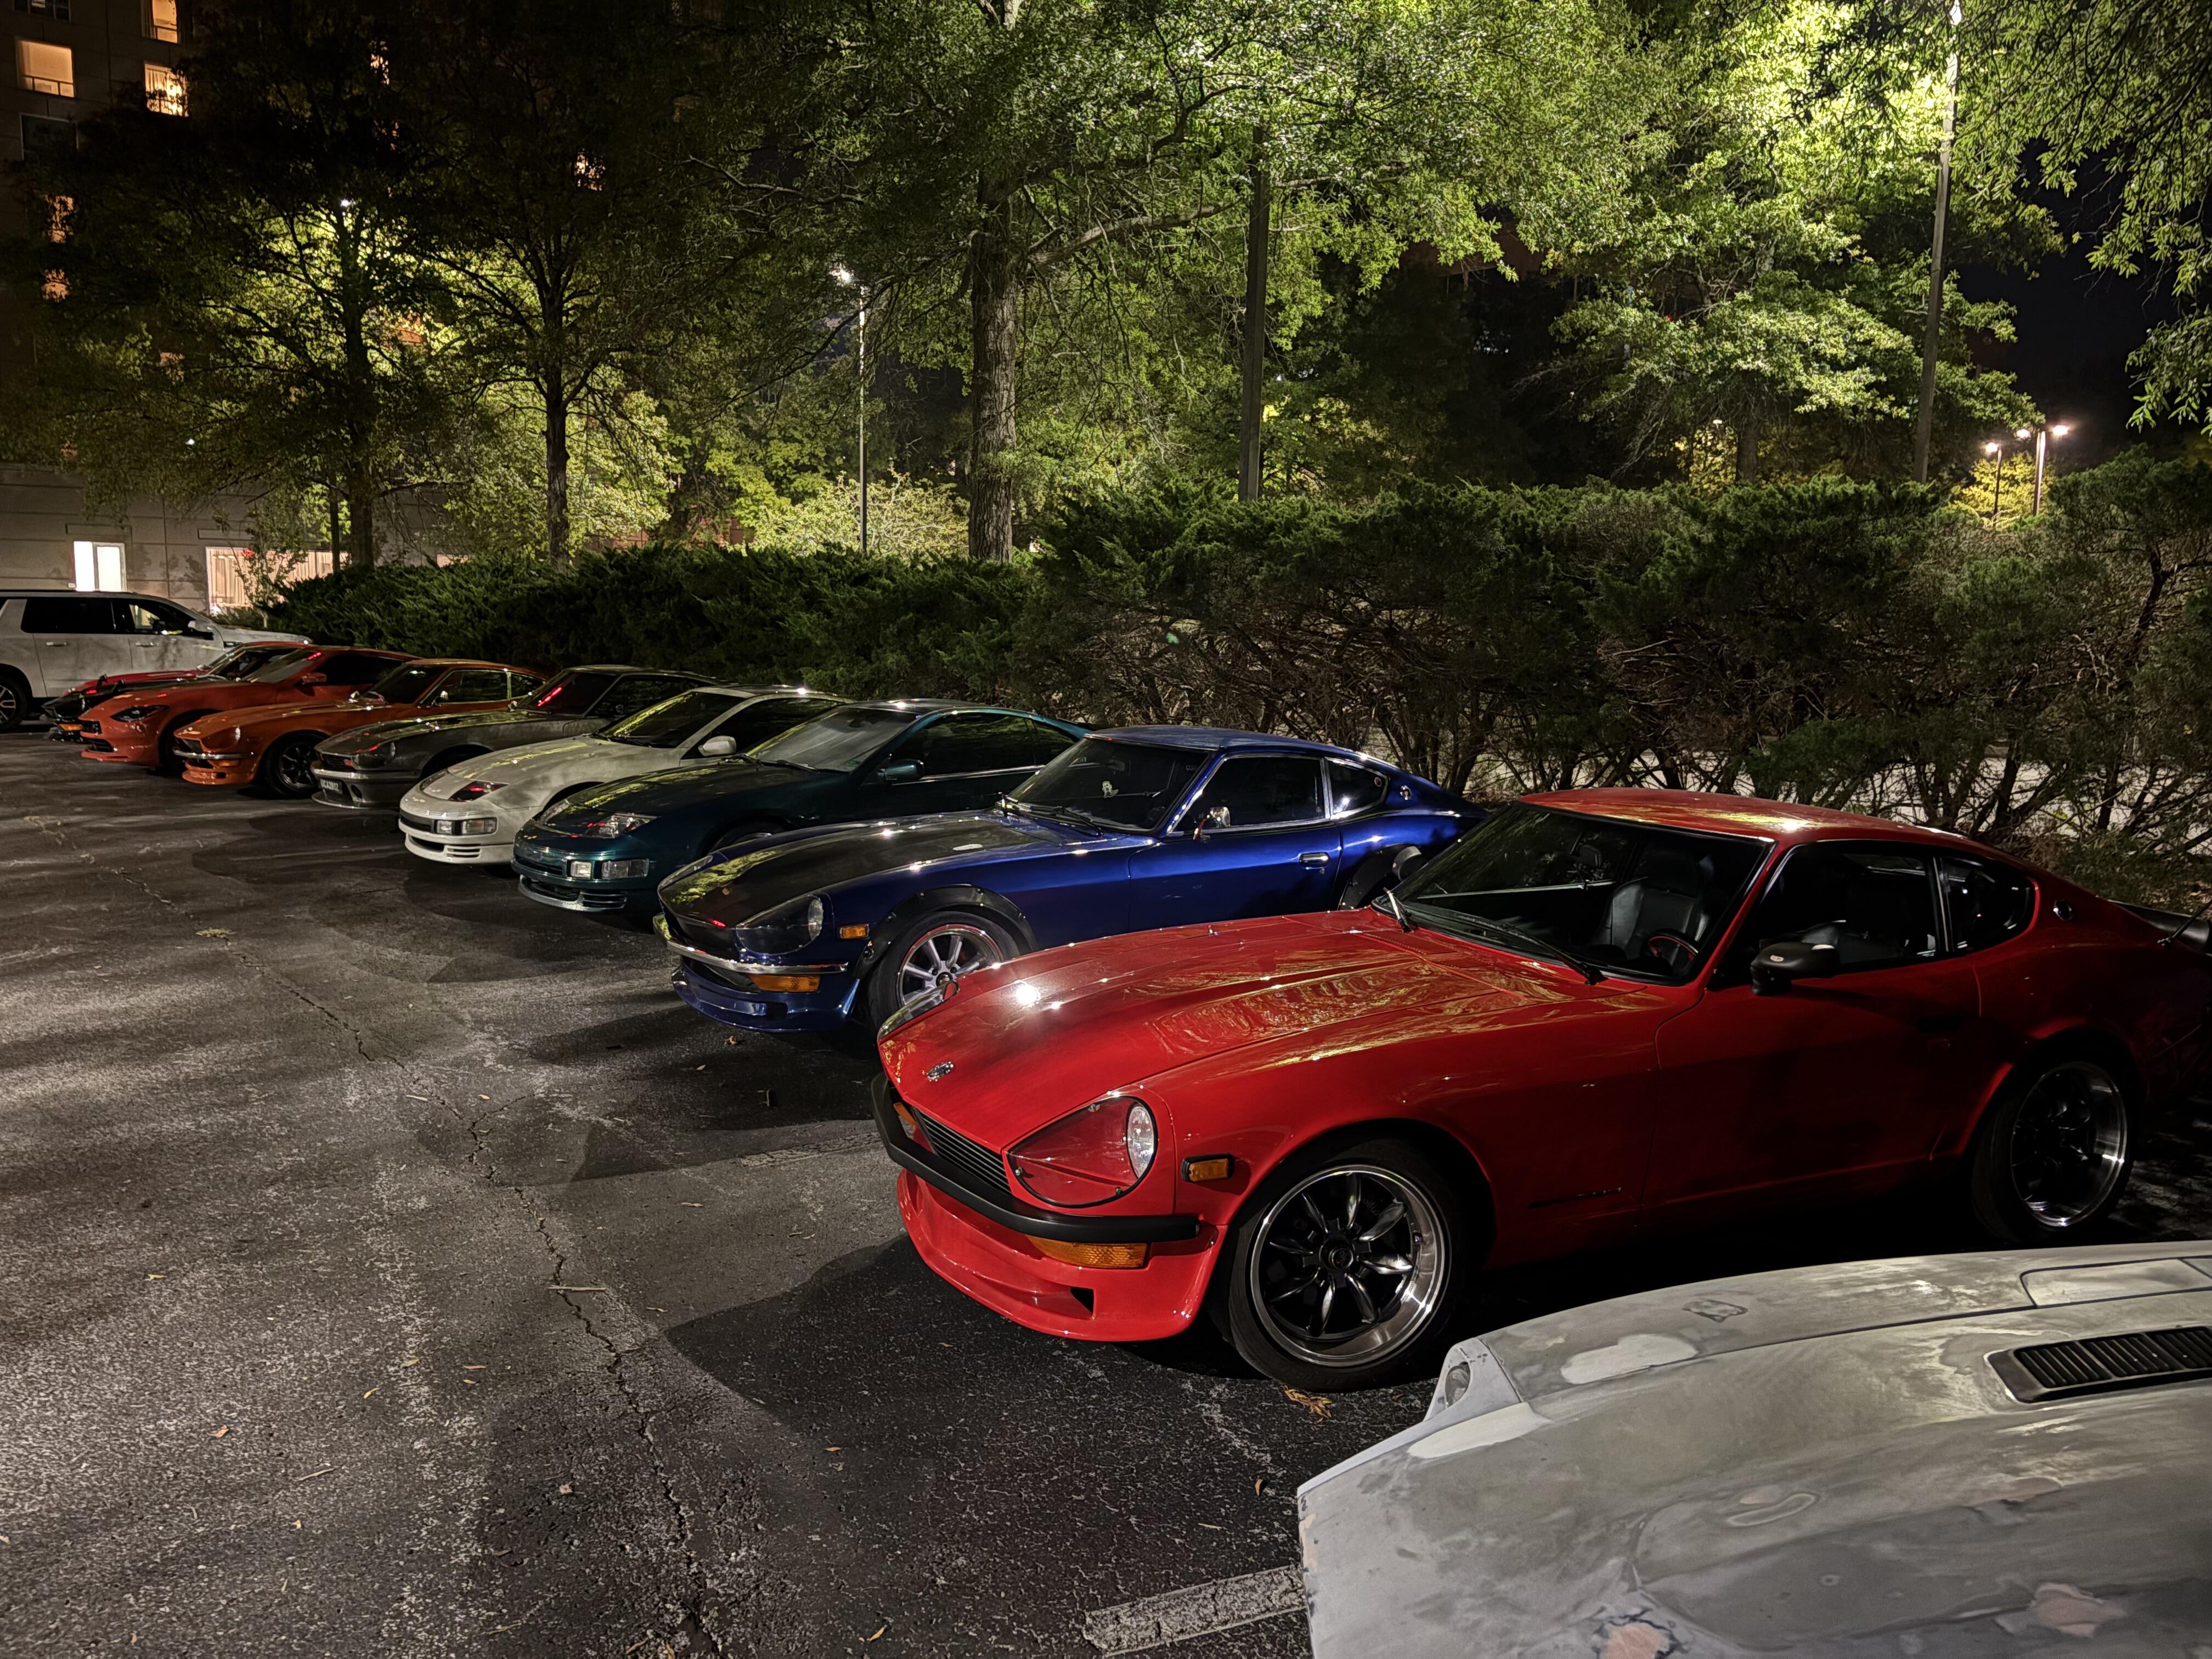
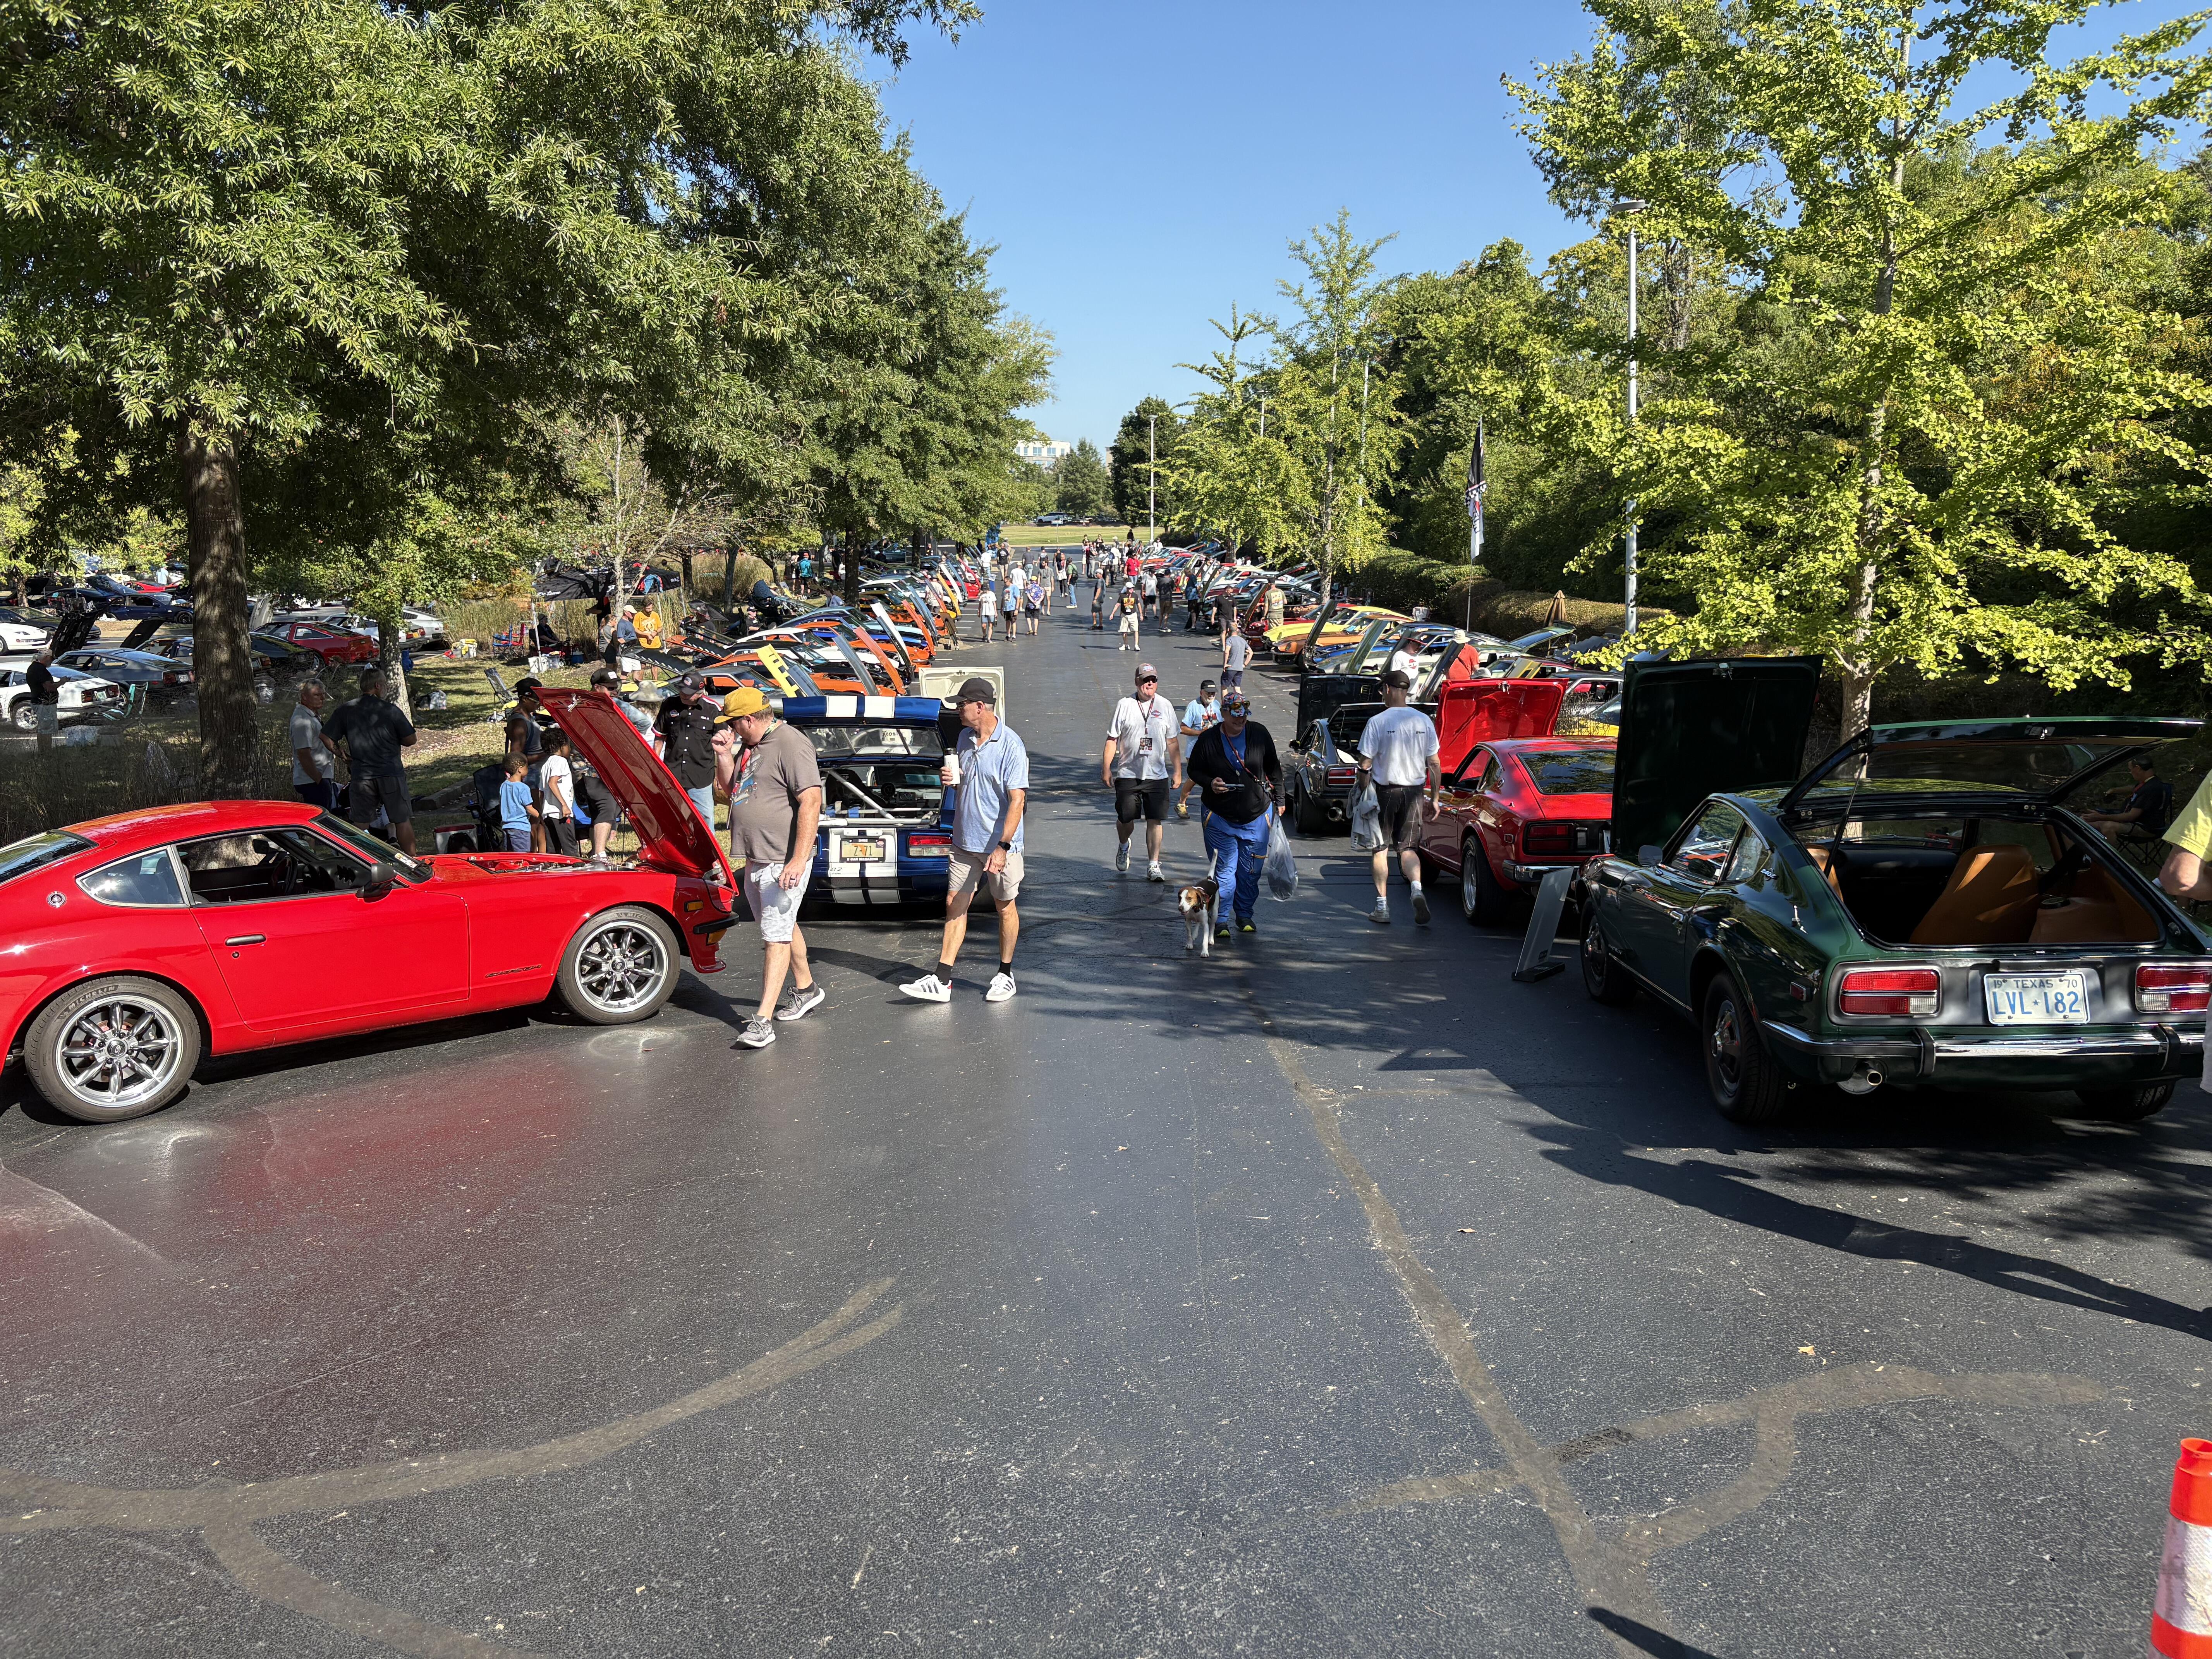
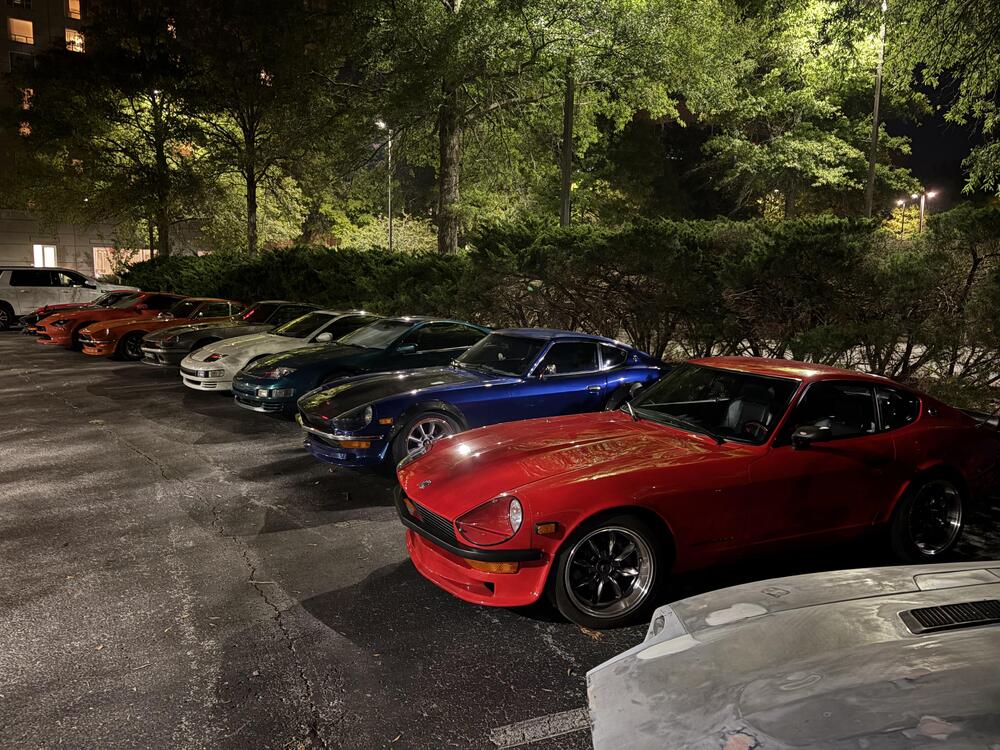
Finally figured out what was up with my log ins . Anywho- went to ZCON . Me and a buddy drove down the 4.5 hours from Indiana . The Z drove great with the freshly tuned ITBS. Had most fun in the parking lots talking nuts and bolts . Finally got to meet Captain Obvious . Wish I knew he was there earlier and could have spent more time hanging out .


-
Take good care of that head if it’s really a MN head . Like said - a compression test would show pretty stout numbers with any combo involving a Maxima head . CC’s are about 39 which should show 180-200 psi compression check . I’ll also say the Maxima head would be about better than anything you could pit on that engine . But it also would be a challenge for stock EFI to keep up with the compression - not even talking ignition timing issues also .
-
I thought it was rubber soul version which might be larger . I’d like to run 75mm horns but might be limited to 50mm . I’ll be running 45 ITBS . I still have my custom air box I might run . thanks
-
Trying to find info on this cold air box . How tall of velocity’s fit under there ! I’m doing ITBS and contemplating stack heights thanks
-
Trying to find info on this cold air box . How tall of velocity’s fit under there ! I’m doing ITBS and contemplating stack heights thanks
-
Trying to find info on this cold air box . How tall of velocity’s fit under there ! I’m doing ITBS and contemplating stack heights thanks
-
Trying to find info on this cold air box . How tall of velocity’s fit under there ! I’m doing ITBS and contemplating stack heights thanks
-
I got it figured out . I found my old email address and was able to sign in as Madkaw
-
I run BPR6 - es11
-
View Advert L28 thermostat housings I have 2 clean housings with no pitting and good threads . 100$ each includes shipping sfinnerty1018@gmail.com Advertiser madkaw Date 01/23/2024 Price $100 Category Parts for Sale
-
Triple sure look cool but I don’t miss them - especially what you are going thru plus all the tuning .