mlc240z
Free Member
-
Joined
-
Last visited
Everything posted by mlc240z
-
 absolutely!! doesn't matter if anybody else knows, I know it looks good, even great for a 30+ yr old car. although i can't wait to watch the faces of any mechanics who see it up on a lift. that will be a bonus!
 -
-
-
-
-
thanks guys, perfect pics. kinda what i thought but it's great to have confirmation from someone who's done it before. thanks again
-
installing the delrin/aluminum/rubber bushing kit for the tension rods. everything fits well, but does anyone have a hint on installing the black boots that are supplied? do they just fit flush 'into' the cups attached to the frame? i would think they are supposed to fit over the cups to help seal the assembly and prevent dirt/water from entering and prematurely wearing the delrin. if this is true, any tips to getting the edge of the boot over the cup since it's pretty tight in there (heat until more pliable, maybe). thanks
-
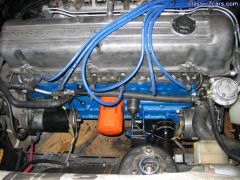
wire wheel and wire brush for the heavy gunk. then i used electrolysis for the rust. it just sounded pretty cool and i was curious to see how well it worked as a cheap alternative. takes a little time but converted the rust to a paintable surface. also by soaking in the washing soda solution, most of the other crud just fell off. scrubbed parts down with detergent and a nylon brush, rinsed and dryed with a blow dryer. coated parts with Rustoleum Rust Reformer paint as a primer/rust converter/protector. then coated with Rustoleum rattle can semigloss. looks great but time will tell on how long it will hold up. wish i could have afforded more but this was very easy and cheap. check out before/after pics in my gallery. good luck!
-
$200 gift certificate for MSA, and an original Factory Service Manual.
-
i think arne's right, that's why the gap size is limited. no heat, just continuity to bridge the oem lines. picked up my kit in NAPA, but most local parts stores should have them. even kmart/walmart. use a shoplight on the backside of the glass, and then look in from the outside at the grid lines. inspect each grid line closely and gaps will be evident, or will show as a different color (light brown as opposed to dark) depending on the color of the grid.
-
i've used a permatex repair kit before successfully, but the breaks must be fairly small. it is not supposed to be used on large gaps. sorry, don't know the exact max gap size.
-
amen to that!! i laughed when my son bought one, said i'm not running a tire shop here. until i used it, of course. haven't broken a bolt since. the hammering action seems to really break loose the rustiest bolts without the problem of constant torque slowly snapping the bolt. assuming you're talking about the strut gland nut. soak for a while with PBblaster/kroil/Liquid Wrench then just use a big pipe or monkey wrench. she'll come off.
-
probably a good compromise. i installed a passenger side speaker for stereo but it's only apparent if you are lying down in the back with your head between them. one thing i would recommend would be to find a way to secure your standalone speaker boxes. in case of an accident, they could become dangerous projectiles. an accident is bad enough without getting smashed in the head by your sound system.
-
on other cars i've owned with a similar emissions test, i would always remove my air filter before testing. i figured without the restriction of the filter, a little more air couldn't hurt. i can't say if it made any difference, and it might have passed anyway, but i never failed emissions.
-
enigma, that's basically how i did mine (check before/after pics in gallery). however, i used the jack with a block of wood under the oil pan to lift enough to allow the removal of the rack first. it seemed easier to unbolt and separate while still mounted than trying to on the bench. then just unbolted and dropped the crossmember. having the jack under the pan allowed adjusting the height as you are working to help with clearance. if you want to bring them down as a unit though, kenz's procedure sounds like the way to go since the jack will help carry the combined weight.
-
listen to Marty. when i tore mine down, i had a leaky core and went to a local rad shop. for $35 they boiled it out, soldered the leak, tested to 20 lbs of pressure, and even repainted it!! very reasonable, good work and with the pressure check i gained piece of mind.
-
www.rockauto.com (good site) has them for $44 each (wagner) beck arnley is $58, but rt side only. noone seems to have driver's side anymore so i had to get from MSA.
-
GREAT JOB, Dave!! looks bulletproof! Thanks for adding a totally complete how-to for all of us.
-
yup, that's where they go. $16 poly at MSA.
-
yea steve, i know. i'm too chicken to un-solder and clean up the bottom of the radiator. . and i still haven't attempted to find the right sized caps for them (metric?). i think they look incomplete just sitting there. just figure'd i'd let the guys know what they were buying (as of 5/05 that is).
-
bought a 3-row from MSA for about $220 delivered. good quality, no probs. looks a little different from OEM (no top fan guard), but fits and performs well. it did take a while to get since they were in the middle of changing suppliers, but that was in May '05. should be resolved by now, i would think. be warned the MSA radiator is a generic, comes with auto trans cooler fittings on the bottom of the rad. shouldn't be a problem for Tomo (you've got an auto, IIRC, right?). just plug for a manual.
-
that extra strain on the water pump shaft can also cause the shaft to let go and launch the fan into your new radiator. drain plug is on driver's side just below rear of the exhaust manifold. look for a big 22mm bolt. kinda high up for a drain plug. be sure to soak the thermostat bolts with PBlaster or penetrating oil. they are prone to snapping.
-
WAIT!!! scroll down about 1/3 to 'fan clutch too loud' http://geocities.com/zgarage2001/ more detailed http://zhome.com/ZCMnL/tech/FanClutch/FanClutch.htm this is one of the few EASY things to do on your Z. you NEED to use that cash for other things on your ZZZZROFL.
-
agreed, sounds like an overcharge situation. i'd zero in on the voltage regulator since it sounds like you're redirecting too much voltage to the battery/electrical system. if you're popping the cell covers off be very careful with any kind of spark or ignition source under the hood. hydrogen gas is produced when charging, and we have all seen footage of what happened to the Hindenberg. I have seen batteries explode just starting the car so PLEASE exercise EXTRA caution when the hood is up. I always turn away from the engine when someone starts any car (hood up) after witnessing that. you can't drive the Z if you're blinded from battery acid.
-
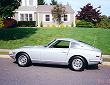
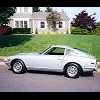
welcome to the Z disease support group. damn fine specimen you've got there. you'll find a sh*tload of info here by searching for specifics. the guys on this site are first-rate about all aspects of the Z and are great at helping with anything that comes up.