kenz240z
Free Member
-
Joined
-
Last visited
Everything posted by kenz240z
-
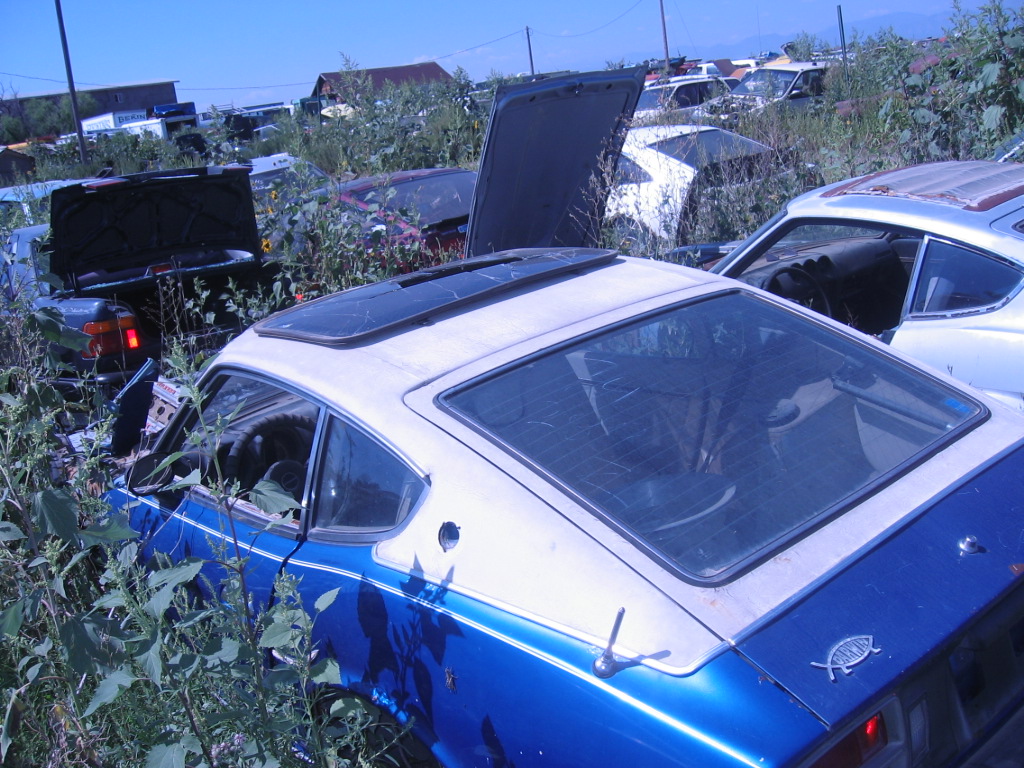
 Here's a pic I took of a 280Z with a vinyl top. I came across this car while searching for Z parts in a local salvage yard. While there were several Z's there, they were pretty well picked over.... Kenny P.
-
Hi Andrew, I have a Panasonic CQ-1120U head unit. The previous owner had a cheap tape deck wired directly to a hot lead on the back of the fuse panel. When I removed it and installed the Panasonic CD player I re-used the same hot lead. Consequently, I have to manually power the unit down since it isn't switched off by the ignition. The unit is powered down by pressing and holding the SRC button for a few seconds. The unit goes dark except for the SRC button, which has a red glow. I've noticed that if I bump the DISP button while the unit is off, the unit powers up, the display is backlit and the buttons light up. If I then try to power down the unit by by pressing the SRC button, the CD/radio will stop playing and the display will show the clock time, but remains backlit with the buttons lit. If I bump the DISP button a few times the unit will power down. I don't know if this is because power to the unit is never switched off by the ignition. How is yours powered, directly to battery, or through the ignition? I haven't had any problems with mine, but may eventually power the unit through an ignition switched lead to prevent me from accidently leaving it on for an extended period of time. Hope this helps...my explanation should be clear as mud! :classic: Kenny P.
-
My '73 240Z has the same full fan shroud. From what I understand this was an optional item for A/C equipped Z's, which was a dealer option. My knowledge is on the subject is far from complete, can anyone set the record straight? Kenny P.
-
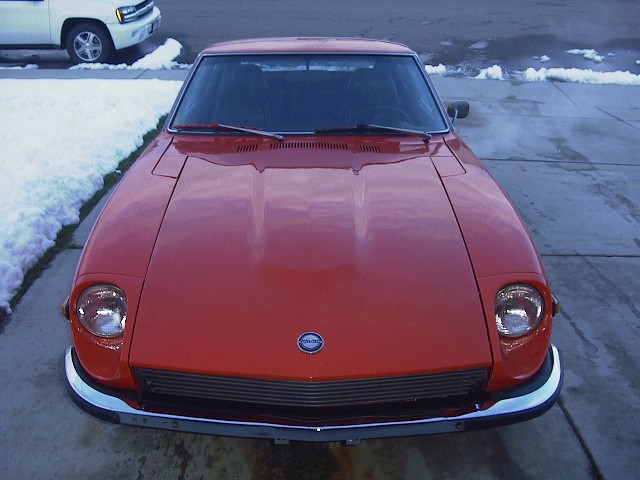
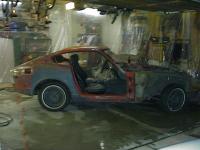
I must confess that I'm a convertible kind of guy. So far, a '91 Cadillac Allante and a '75 Caprice Classic convertible have provided the high I seek, to me it's the best way to roll down the road, only the windshield between me and the world...but, to be honest, the Z car would have to be my first, and true love. When I was 5 my mom sold her old '62 4-door Chevy II with Fred Flinstone floors and bought a Datsun B-210 that we affectionately called Goldie. But what I remember from the trip to the Datsun dealer was the sporty 2 seater that, to my 5 year old eyes, looked kind of like a Corvette. At 5, I had a keen appreciation for automobiles that was fostered by my growing collection of Hot Wheels... So, 30 years later, when my buddy told me a co-worker's husband had a 240Z for sale I had to go look. Fair interior, rusty rear wheel arches, dents on both doors and the roof (from someone's posterior), faded lipstick red paint over the original orange with overspray on many of the non-painted parts (poor masking!) and it hadn't been driven for 7 years. So, why did I buy it? I guess I was looking through those 5 year old eyes again, and it wasn't the flaws that I saw. Rather, it was how I knew the car would look with a little love and attention. Since then I've spent a few dollars on freshening up my 240Z, to me it's part of the relationship we have developed. I buy the parts, do the work, and the Z gives me the pleasure of slipping behind the wheel, turning the key...the sound of the engine turning over and starting up with a smooth idle...backing out of the garage and rolling down the road, it doesn't matter where I'm headed, I'm driving my Z! Kenny P.


-
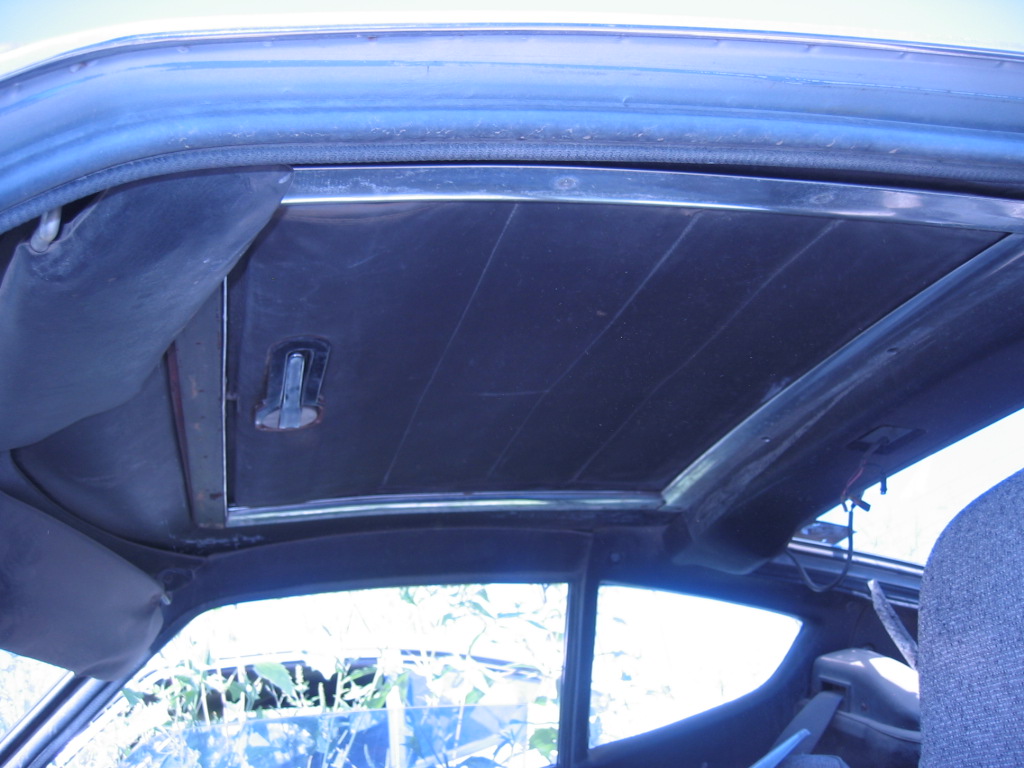
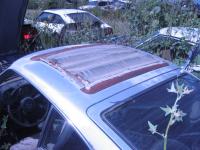
I stopped at one of the salvage yards nearby today to scrounge up Z parts (and a few for my Chevy convertible....). While my search for parts didn't yield any new treasures, I saw an interesting sunroof on a 280Z. It doesn't appear to be functional any longer, looks like someone tried to seal up the edges on the outside, and I'm guessing that it probably had some kind of trim around the perimeter. A view from the interior shows what appears to be a soft vinyl "panel" that could be unlatched and slid back to open up the sunroof. Who knows, maybe it originally had a piece of glass on the exterior...anyone ever see anything like this? Kenny P.

-
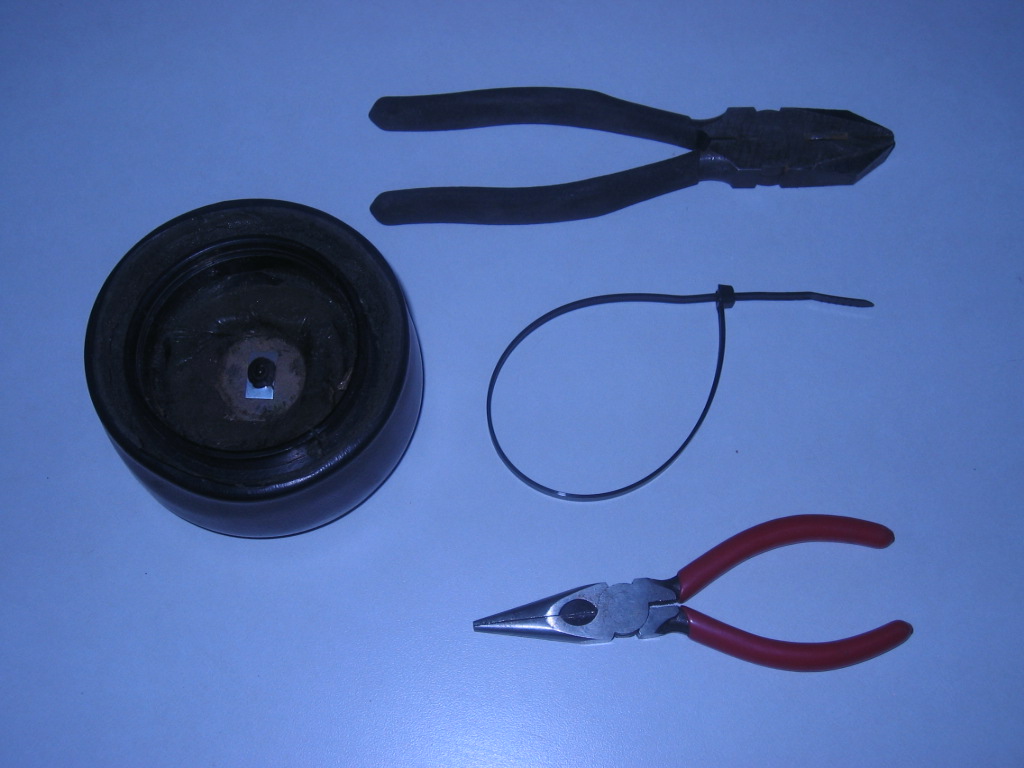
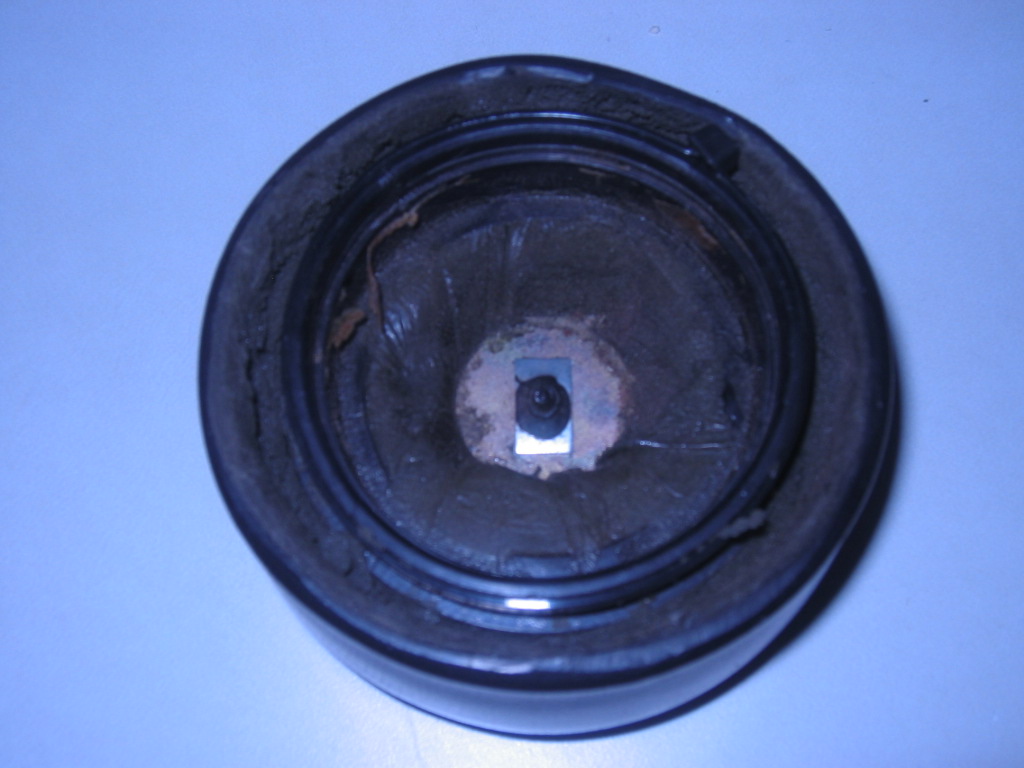
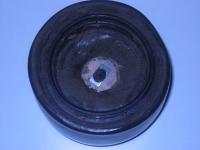
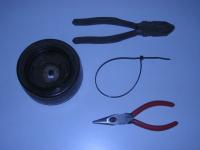
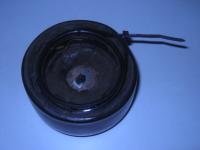
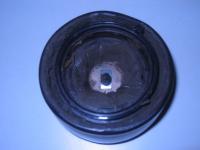
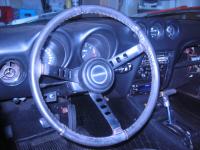
When I bought my '73 240Z, most of the interior parts had been removed and were piled in the rear. After I painted the car I put the interior back together, and I noticed that the horn button would fall off at the slightest touch, even though it seemed to snap into place. Closer inspection revealed a crack in the inner plastic "ring", the one with a groove that is supposed to snap onto the steering wheel, as shown in the first photo. After scratching the old noodle for awhile, and being a DIY type of guy, I came up with a simple fix: it seemed that a tie-wrap cinched around the outer perimeter of the plastic ring would make the horn button stay in place. The second photo shows the horn button, tie-wrap, and a couple of pliers I used to do the job...the 3rd photo shows the tie-wrap in place, before it was cinched tight, that's where the pliers came in handy. The 4th photo shows the tie-wrap in place and trimmed up. Finally, the last photo shows the horn button SECURELY installed on the steering wheel...it hasn't come off since! I hope some of you find this usefull!!! Kenny P.
-
Hi Chris, I just now noticed you are in Lincoln. I lived there for 30 years before moving to Colorado. I lived in Havelock, if you're familiar with the area. One of the challenges of relocating is finding good repair shops, salvage yards, etc...but I did take my radiator to a shop here in Longmont. The guy there found evidence of several previous repairs done before I bought the car and suggested getting a new radiator. So, for $200 I now have a new radiator. Now I just need the time to put everything back together! Ken
-
I went to the local Hobby Lobby craft store. For less than $3.00 I purchased enough clear, heavy vinyl to make a pair of vapor barriers. I bought 2 square yards, if I remember it right... I used 3M strip caulk (PN 051135-09578) to attach the vinyl to the doors. Kenny P.
-
Two Ken P's, both with '73 240Z's...I wonder how many more of us there are??? Might be time for a poll or survey! Let me know if you have any other questions about painting your Z. When I bought my 240Z it was a bit on the rough side. The PO hadn't driven it for 7 years, just kept it in the yard planning to fix it up, but never did. It was dirty, rusty and had a few dents & dings. My sweetheart thought I was a nut when I brought it home and showed it to her, even if it was only $300. Now, a few bucks later, she still thinks I'm nuts, but she loves the Z! Kenny P.
-
Check this link: http://www.auto-interior.com/datsun1.html#240Z Looks like they have 2 kits for a 280Z: One with wheel well and shock covers for $232.95, and the other withouth the wheel well and shock covers for $160.95. I bought a carpet kit from them for my '73 240Z, and it looks great. The only things lacking are the slots towards the rear edge of the front carpet pieces that help hold the carpet in place; however, this area isn't visible, as it is under the front of the seat. Also, I transplanted the firewall snaps and they hold the carpet in place. Hope this helps! Kenny P.
-
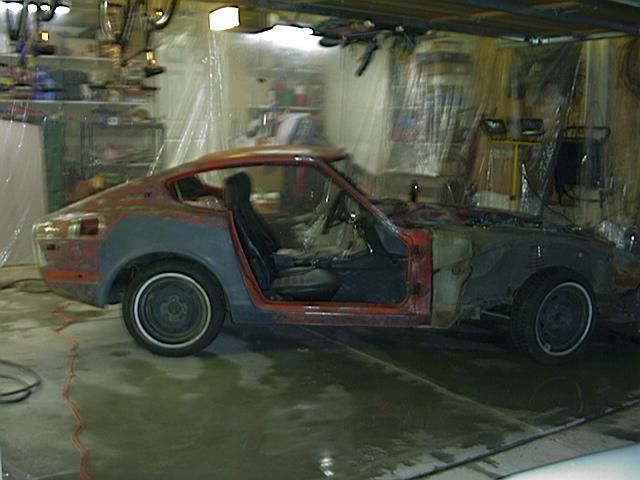
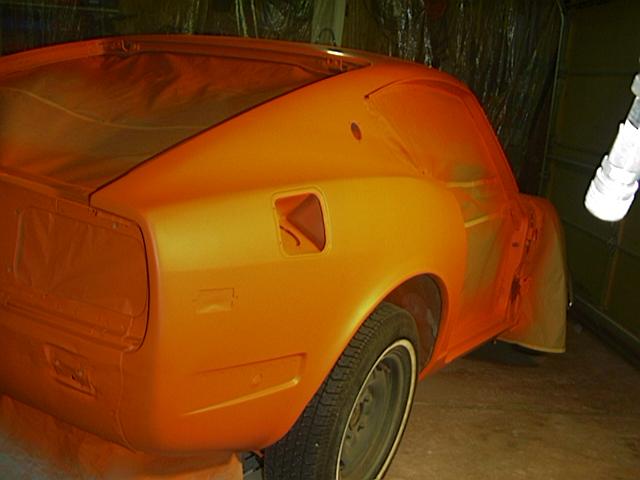
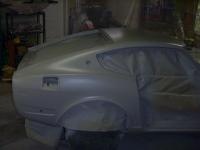
Hi Ken, Before I repainted my '73 240Z I removed the hood, inspection lids, cowl, fenders, doors, rear hatch, front valance panel, head lamp extensions and front turn signal panels. All hardware was also removed - door handles, locks, latches, strikers, turn signals etc... Once all the major body work was done I then primed the body shell and each piece with a primer/sealer. This was followed by a high-build primer, dry sanding with a long board, then wet sanding. After repeating that process a couple of times as needed I sprayed each part with the base coat, followed with a bit of wet sanding. Finally I sprayed each part with a clear coat, again followed with a bit of wet sanding and then 3M polishing compound. The primers, base coat and clear coat were all from PPG's Omni AU line. My 240Z is now very orange! It was a bit more work, but the door jambs, hatch jamb, under side of the hood, etc... look great! There are no edges, hard or soft, due to masking. I did all the paint work in my garage. I hung plastic sheeting all the way around, used a couple of fans with air filters, one to blow air into my make-shift paint both, one to exhaust out. I have a Craftsman 5 hp compressor with a 40 gallon tank, and a $50 HVLP paint gun from Harbor Freight (actually, I have 2 - one for primers, one for BC/CC). Even with re-assemblying the car before painting, you may be able to spray the base coat and clear coat without masking the jambs, etc...you could start with the hood, doors and hatch open and spray the jamb areas first. Once the paint has flashed then "close" them and spray the outside. Overspray should be minimal, especially if you use an HVLP gun. A little wet sanding, which you would probably be doing anyway, should also help. The same process could then be followed with the clear coat. However, my thoughts are that it would be harder to spray the hard to reach areas, like the bottoms of the doors, the front door jamb/door hinge area, and around the rear hatch hinges, to name a few. A long winded reply, but I hope you find it helpful! Kenny P.
-
Last night I was driving my 240Z from my sweetheart's place to my uncle's house. I had about a mile to go when the radiator decided to spring a leak ...looks like the seam along the top tank above the fan shroud. Anyone have any good leads on where I might find a suitable replacement? Anyone had good luck with having a radiator repaired? The 240Z isn't my daily driver, but I plan to get it back on the road as soon as I can. Kenny P.
-
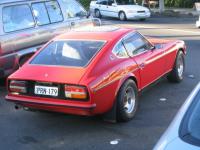
My family and I spent a week in Kirra Beach in April. My kids were out of school for spring break. We took a drive to Byron Bay, where I came across a neat 240Z, see the attached photo. Anybody recognize it? Does it belong to anyone on the site? With all the surf shops near our hotel I thought I'd find a new tie-dye t-shirt for myself. However, none of the shops had any. I spoke with the proprieter of one shop who recommended that I go to Nimbin, he seemed sure I'd find one there, but he wouldn't offer anymore information on Nimbin, just said I would either thank him or hit him... While in Byron Bay I noticed a sign advertizing a bus trip to Nimbin, but didn't have time to make the journey, so no new tie-dye for me. A few inquiries revealed that Nimbin is a hippie kind of town, a relic of the '60's. One person said it's a good place to get wacky backy. Never touch the stuff myself, but everyone I asked was sure they have tie-dye t-shirts there. I guess I'll just have to visit again and take the bus to Nimbin...
-
If you have the storage space, I say go for it! Strip the car down to the last nut & bolt, then get rid of the shell (be sure to put all the small parts in plastic bags or containers and label them appropriately). With rusted frame rails, floors, etc... it would end up costing you a small fortune to repair. As others have mentioned, it would be better to spend a bit more for a more solid car. Then again, maybe you could sell it on e-bay, especially if the rear quarter panels are solid (or you may want to keep it, then). I've come across Z's in the salvage yards that have been cut in half, cut in quarters, etc...apparently for someone who needed to section a car to repair it. Whenever I go to the salvage yards I tend to buy any usable part I can find, even if I don't need it for my Z, never know when I might get another one! Consider the value of the parts you could salvage from the vehicle, especially those that you can't get new replacements for or that have high price tags. Even at $300 there may be enough good parts that would be worth much more.
-
Did you visually inspect the bulbs, or did you use a DVM to insure that the filaments in the bulb aren't open (broken)? If the bulb is indeed good, then you could use a continuity tester or the DVM to insure that the wiring is ok. Basically, you want to make sure that there is a measurable voltage on the lead when the brake pedal is depressed. Just guessing, it should be around 13-14 Volts with the car running, probably 11 or 12 volts with the car off, but I'm not sure if the voltage is reduced elsewhere in the circuit. A wiring diagram for the brake lights would be a big help to make sure you have the correct wire. Kenny P.
-
I had some rust holes in the narrow strip of metal in the hatch jamb area above the tail lights. This piece appears to be spot welded to the panel that the tail lights mount in, and there should be a bead of seam sealer on the bottom side, where the two are joined. Over time, moisture seems to collect in the area. I used an awl and small screwdriver to dig out most of the rust from the top side, then used the awl to remove the old seam sealer. Most of it came right off, as the metal behind it had rusted. Fortunately, none of the holes was very big, maybe the size of a dime at most. After using Rust Mort to neutralize the rust, I patched the holes with an epoxy type of metal repair material, similar to that used for repairing fuel tank leaks, and applied a new bead of seam sealer. The area was then primed & painted, along with the rest of the car. That area won't be rusting again any time soon! Kenny P.
-
It depends on the condition of the surface of the body. Are there any dents, door dings, or rust spots? All of these need to be addressed before you paint. If the body is straight & smooth, you could prep the old surface, spray it with a good primer sealer, then repaint it. You shouldn't need a self etching primer unless you strip the body to bare metal. I repainted my '73 in my garage. After taking care of the body work I sanded everything down with 220 grit on a jitterbug sander. The car was then shot with a primer/sealer, since there were still areas that had the old paint. This was followed by a primer/surfacer, a high build primer that helps fill in small imperfections in the surface, like sanding scratches. Next the car was wet sanded with 400 grit wet/dry paper, then the color coat was applied. The color coat was also wet sanded with 400 grit wet/dry paper and then the clear coat was applied. The clear coat was sanded with 1200 grit wet/dry paper and then hand polished with 3M's polishing compound. Since it was my first paint job, I used PPG's OMNI AU line of paint, a step down, and cheaper, than their main line of paint. See the pics in my gallery for some before & after shots. Hope this helps, Kenny P.
-
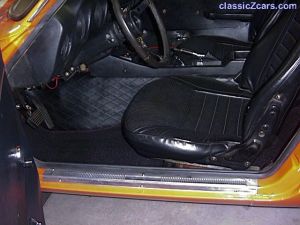
The throttle linkage, fuel & brake lines, hood bumpers, inspection lid cushions, door jamb light switches, etc...have all been painted the same yellow as the car. More of a custom look, I guess... When I repainted my '73, which by no means has been restored, I made sure not to paint anything orange that wasn't orange to begin with.
-
Another area to check is the cowl area in front of the windshield. There are some drain passages there that can sometimes clog up, leading to rust. I had some rust on the A-pillars (the sides of the windshield) in the area where they meet the cowl. The rust had eaten small holes through on the underside, towards the front of the door jam area. Be as thorough as you can with your visual inspection, those tiny rust bubbles on the exterior can often mean lots of rust on the other side, just waiting to get out... The biggest expense I encountered while fixing up my '73 was getting the rear wheel arches repaired (there are before & after pics in my gallery). I paid about $720 to get them fixed: just under $120 for the replacement panels from Tabco (tabcobodyparts.com) and $600 for the bodyshop to install and primer them. Here's a link with some great photos of typical Z car rust spots: http://www.geocities.com/gramage2000/the_rust_file.htm Hope this helps, Kenny P.
-
I bought a 5 piece carpet kit (80/20 loop) for my '73 240Z from Auto Interior and Uphosltery for $134, they offer the ACC carpets: http://www.auto-interior.com/datsun1.html#240Z I put it in myself (not much to it on a 240Z) about a month ago and it looks great. The five pieces have serge bound edges and jute backing glued on. Hopefully it will hold up well, I keep the car garaged and have louvers on the tailgate, er, rear hatch (?)... While the carpet looks great, it doesn't have cutouts for the cargo straps or for the hold down tabs in front of the seats. When I set about "refreshing" my 240Z I knew it would never be show car material, and that I planned to drive it a lot. So, I figured I'd do whatever I could to make the car look nice without spending too much money (too late!!!). Oh well, I can't help it, these cars are addictive! Kenny P.
-
I got an aftermarket windshield from Triumph Auto Glass (www.diamondtriumph.com). I live in Colorado, not sure if they are in other areas or not... Anyway, they came to my house and did the installation. It took the guy a couple of tries, but he got it. It looks good on the car and doesn't leak under the hose. I paid $190 for the windshield and aftermarket gasket, I think they said the gasket was from Precision. Not sure who supplied the actual glass. Here's what I found on the lower corner on the passengers side: FY ASI - M868 DOT - 459 FW 241 They offered me one with shading at the top or without. I got it with shading. Kenny P.
-
I haven't looked at that area of a Z car, but here are my thoughts: Look for the factory spot welds and use a spot weld cutter, either the drill bit type or the hole cutter type. Then use a nibbler, air saw, shears, etc... to make any cuts across the sheet metal. If you are removing a complete section you should only have to remove the spot welds to get the part off the car. Of course, finding the spot welds can be tricky, especially in areas under the car that may have an undercoating...this would have to be removed so you can feel the metal for small depressions. A bit of sandpaper can often help. Sand over the suspected seam area and look for low spots that the sand paper hasn't touched. Then drill 'em out. Kenny P.
-
I think the hood ends up with mild dents, or rather depressions, especially in the area around the latch, from years of being pushed shut. The hood is a pretty big piece of rather flat, metal real estate and being on the thin side tends to dent rather easily. You may be able to remove some of the imperfections with a hammer and dolly, depending on your skill with these and whether you can get to the back side of the dent. The area around the latch has a brace on the back side of the hood, so a hammer and dolly won't work there. I would use a good body filler on the hood and go over it with sandpaper on a long board. Also, use a good primer/surfacer, again followed by more long boarding, to help smooth things out. A guide coat of a contrasting color can be used, just mist it on before you sand...it will reveal the high spots and low spots. The low spots will show up as areas where the guide coat hasn't been touched, high spots you might sand through to the surface. So, it is a repetitive process of either pounding out or filling the low spots and pounding out the high spots. Under the front fenders there are braces, as mentioned in the other post. I used closed cell foam, the generic weatherstripping kind. If I remember right, I used a couple of 1/2" wide strips, side by side and I think it was 3/8" thick. The old foam was gone on my car... Hope this helps, Kenny P.
-
Here's a method for cleaning up nuts, bolts & small parts: http://www.geocities.com/gramage2000/links.htm Basically, it involves using a rock tumbler. Toss in the parts to be cleaned with a bit of abrasive and a mixture of water & anti-freeze. After reading this I went to the nearest Harbor Freight & bought a rock tumbler for about $20. I tell ya, it does the trick! Kenny P.
-