webdawg1
Free Member
-
Joined
-
Last visited
Everything posted by webdawg1
-
I cleaned up that other picture I made reference to in my previous post. Might help somebody out down the road when they get ready to do this job on their Z. webdawg1

-
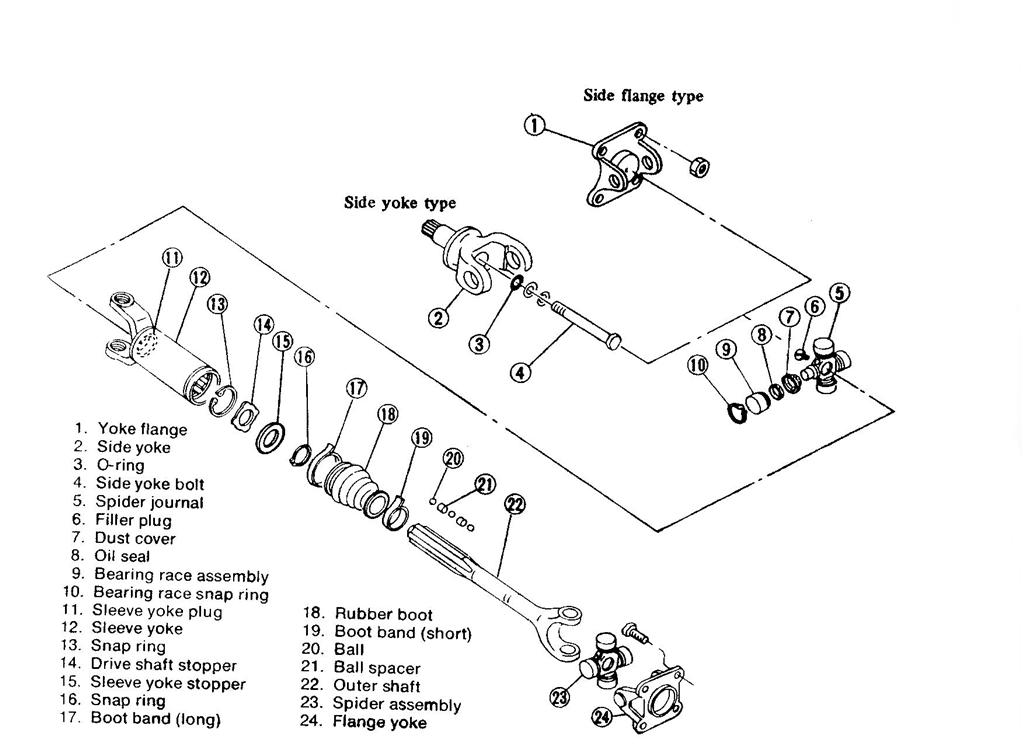
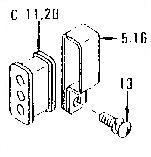
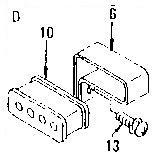
Disassembly procedure from FSM 1. Remove universal joint spider from the differential side. 2. Remove snap ring from sleeve yoke plug with snap ring pliers. Depress drive shaft and remove snap ring from stopper. Remove stopper. Disconnect boot and separate drive shaft carefully so as not to lose balls and spacers. Only problem is that you say you don't have a "sleeve yoke plug" ? webdawg1
-
You say you have new boots on hand....right. I'm looking in my 75 FSM and another image I have of the half-shaft and it appears there is a "Big" clip and a "Little" clip. I'd say cut the boot(s) off and see what's holding it up. I'd venture to say it's probably hanging up on the big clip... webdawg1
-
Well...you could call them up on Tuesday and double check just to make sure they did not give you an incorrect filter. Better to be safe than to trash a motor over a $5.00 dollar filter...Just a thought.... webdawg1
-
That appears to be a valid P/N. Just for laughs and giggles I checked the Z microfiche. The part number I came up with is P/N: 15208-65014, which subs to P/N: 15208-43G00. (Listed at $4.97) Did not have anything listed in the From/To column in regards to model years that it fits on. webdawg1
-
You might want to do a search on "Gas Tank Renu" before you proceed with replacing the fuel pump or anything else fuel related. You will be amazed at what's inside these gas tanks after 10-12 years of sitting idle. That is....unless you want to change your fuel filter about every 4-5 miles from all the "Stuff"....Just a thought...... webdawg1
-
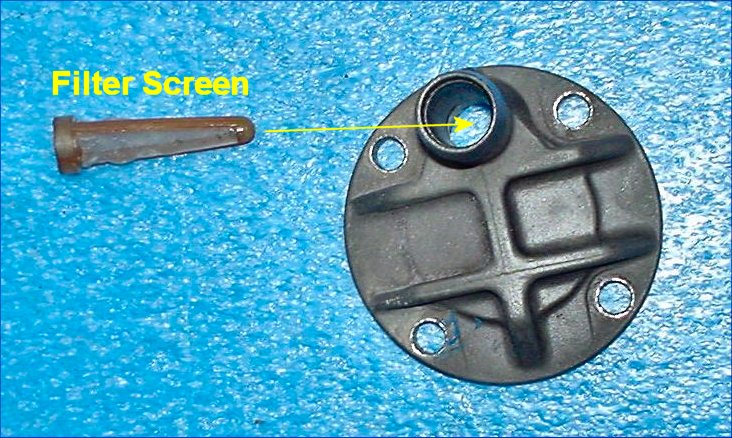
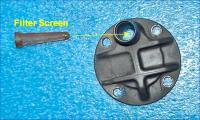
While you're at it (troubleshooting your fuel problem) you may/might want to look at the little screen filter on the fuel pump inlet itself. I'm not saying that's your problem as it sounds like it will be electrical in nature, but the last couple of fuel pump inlet filters I've looked at where about 75-80% filled up with tank trash. Just a thought... webdawg1
-
You might want to check out the following website: http://www.baddogparts.com They also have repo seat mounts you can weld in after cutting out the old floorpans. Also have various other items of interest...Zed Findings would probably be your best bet for the floor pans.... webdawg1
-
EricB, I bought it for a 75, which would explain the difference. All the strut nuts I've seen to date have had the flats on them. Oh well, you learn something new just about every time you log onto this site anyway..he he...Later..... webdawg1
-
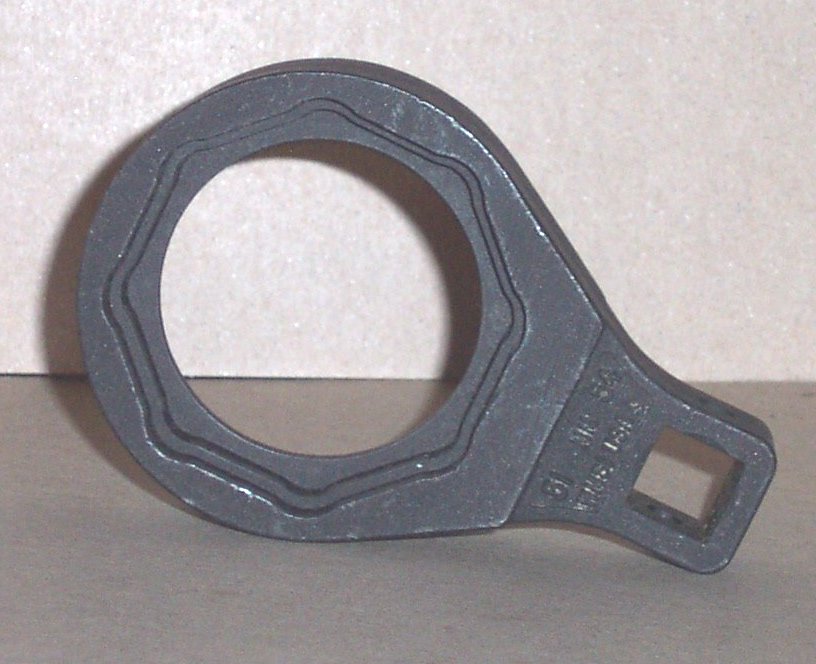
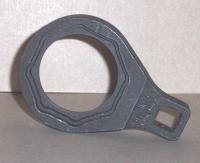
Snap-On has this tool (WMS1) which is a functional eqivalent for special tool (KV40100800) Appears to be special order only...if you want to get one from Snap-On. Not a very cheap tool tho...$75.00-$80.00. Well worth it tho, if you don't want to chew up the strut packing nut taking it off or putting it back on. Fits 51mm-54mm on one side and 55mm-58mm on the other side. webdawg1
-
I sent you a email several months ago regarding a set of (4) steel rims off of a 75. Did you not get the email I sent you?? I'm in Georgia so shipping should not be to bad...Let me know... webdawg1
-
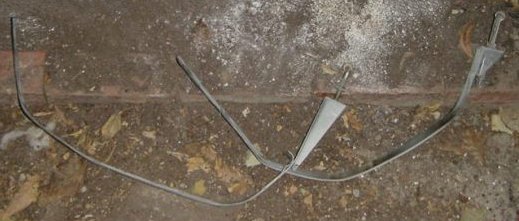
Just a info request for tank straps length. Would like to compile a list of strap lengths for all model years. (240, 260, 280) Measurement should be taken from front edge of strap bracket (Where the "J bolt" passes thru bracket) Please label "Left" & "Right" side. See enclosed picture for reference. From what I can gleam from various posts these usually break when trying to get the J bolt nuts off or are usually in somewhat poor shape after many years of use. Checking into fabricating some.... Thanks... webdawg1
-
Made up a generic "How To" on doing a fuel tank removal. Should be generic enough to fit just about all model years with minor differences. webdawg1 Fuel Tank Removal.doc
-
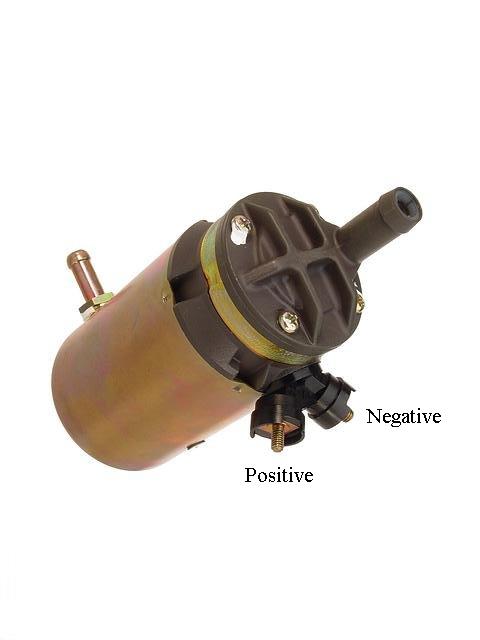
Anyone out there in Z land have any idea what the stuff was/is that they used to seal up the electrical connections (Positive/Negative terminals) on the electric fuel pump. (75-78 FI models) Looks sort of off-white or a light pink when you start breaking off pieces of it. Is their a modern day equivalent that will perform the same as OEM?? webdawg1

-
A "Metric" thread gage would be a real handy tool right about now...once you have the pitch and diameter of the shifter handle you'll be good to go...Found a "Printable Metric Thread Gage" that might help you out some. Just follow the following directions when you print it, so it will print correctly. Directions: After downloading the file and printing it, do a quick scale check to make sure your printer printed it to the true size. Use a ruler to verify the printed scale is right on. Note: if using Acrobat Reader to print the .PDF file, make sure the "Fit to Page" check box is unchecked. That will allow the thread gage to print in the true size. (If the size is still not right you can use a Xerox machine to reduce or enlarge it slightly). Also uploaded a "Word" version... webdawg1 webdawg1 Gear-Shift Thread Gage.pdf Gear Shift Thread Gage.doc
-
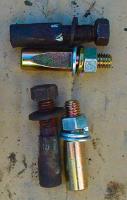
I found a really good picture that shows the "Locking bolt" in a "Rusted" vs. "New" condition. I guess you can see why it's such a PITA to get out because of all the rust. Might help somebody out down the road as you have to line up the flat space on the locking bolt with the spindle pin cutout during reassembly. webdawg1
-
You might check out the following web site as it has several very good "How To's" regarding the front/rear drive train. (http://www.atlanticz.ca) It's in the "Tech" section under wheels. Has quite a few pictures...etc...etc. It's pretty big so you may want to save it to your hard drive for future reference. webdawg1
-
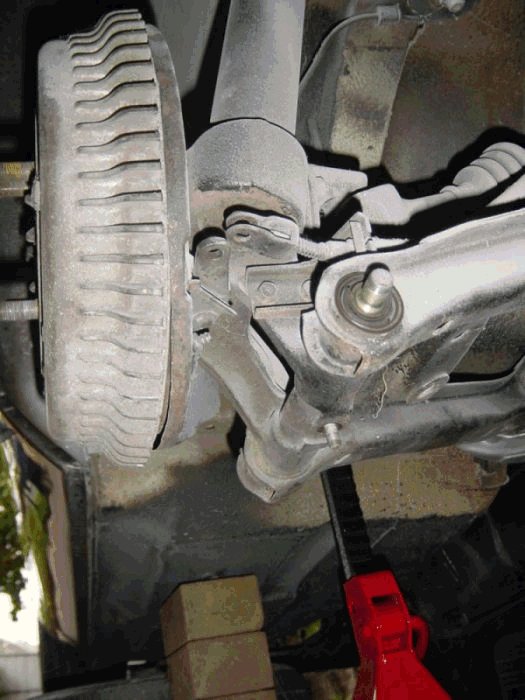
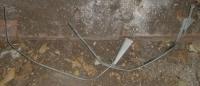
I'd get a drift pin (Long skinny one) and drive it out the rest of the way from the bottom after you soak it really good with some penetrating fluid (I.E. - PB Blaster, WD 40, Seafoam - Deep Creep or your own personal choice. Hope you have a new pin/washer/nut to go back in there and maybe the spindle pins also? (I see them on eBay from time to time as well as the locking pin) Have attached a picture that shows the locking pin sticking out for reference. In regards to the rear bearing R/R see the following website: http://www.atlanticz.ca for a "How To". It's in the "Tech Section". It's pretty large so I hope you have a cable modem in case you want to get it for future reference. webdawg1

-
The following word file will probably help you out some. Have also compiled several web links if you want to have some of your old and nasty looking fuel injectors "Refurbished/Rebuilt" at one of the places listed. If interested PM me and I'll send them to you. webdawg1 Fuel Injector Info.doc
-
The engine should have two brackets already bolted to the engine. Front right corner, and back left corner. You should be able to hook your chain to these two lift points and pull it right on out of there. (After you unhook everything that you need to unhook of course...) webdawg1
-
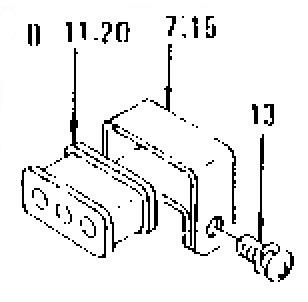
Anyone have a current source for the fuel line (Rubber Tube clamps) as listed in the fiche 40-1 (From Dec 74) This is the rubber part that goes inside the metal clamps that hold the fuel lines. Have included a couple of scans of the various clamps in case anyone wants to use them to document where each fuel line is going thru the rubber (Tube Clamps) in relation to the other lines. If you open the image in "MS Paint" it prints out about 1" x 1". Any other program will print it out really big. (As in LARGE.......) webdawg1


-
Almost forgot...They also have a "Tin-Zinc Electroplating System" that might be of some interest to you. With the "Tin-Zinc" system you could do the various brackets "In House" and not have to send them out to be done... webdawg1
-
You might consider the "High Temp" POR-15 line of paints. Eastwood has several paint products you might be interested in checking out....bottom line tho, is what ever makes you happy and will look real good and last a long time..... webdawg1
-
I'm thinking about doing the same thing with my trim. Was considering powder coating them sort of a matte black or either gloss black. I think the matte black would look the best tho, because I'm thinking about doing a matte black racing stripe on the bump for the hood. (Sort of like the early Z28 Camaro's....Yeah....Yeah...I know it's a Chevy...Get over it...) I found a wallpaper out on the web that shows how the blacked out trim would look. Looks pretty damn good to me.... webdawg1
-
It might just be several pinhole leaks in the same general area. You'll never really know for sure until you get it out of the car. If you send it to one of the above mentioned shops and it's going to be mega-bucks and you don't want to lay out that kind of money then just tell them "No Thanks" and have them send it back to you. At the most you'd maybe be out $20-40 bucks in shipping and that would be about it.... webdawg1