Warty
Community Member
-
Joined
-
Last visited
Everything posted by Warty
-
This is the one I have. Same tool but only one die set came with it. https://a.co/d/06Q5t9Kj the short wings that wrap the bare metal can’t get around all the wire.
-
ah. defroster switch. that would make sense. this particular car doesn't have switch or wires [in the hatch window]. The thing that's confusing me really is that SOMETHING was connected to the illumination blade connector: it has a numbered paper label I put on there 5-6 years ago. I only put those on ones were I was disconnecting it from something. unfortunately, the other side fell off at some point. On an aside, I got new 7.8mm blade connectors from vintage connections for the 10 AWG(ish?) ammeter lines, as the originals showed heat damage and oxidization. The wings that crimp are a bit short, and the pieces themselves are thinner metal than the originals. They aren't biting very well because the wings are short for wire thickness. Anybody else with them notice that? I think I'm going to try Anderson Power Pole connectors instead for those wires. Not original looking, but it's' writing I don't want anything coming apart.
-
mine has Floor label which seems to reflect the very last version of 240z panel if I trust googles AI. I’ll add that to the list of “what is THIS doing in this car?” Items.
-
hmm well using a later panel wouldn’t be the first unoriginal thing about this car. The dash harness does seem to conform to the early 240z setup shown in FSM but I admit I haven’t actually tried to compare against the later 240z wiring diagrams.
-
Power is ready to go. Just don’t have it connected at the moment so I’m only testing continuity with multimeter ATM.
-
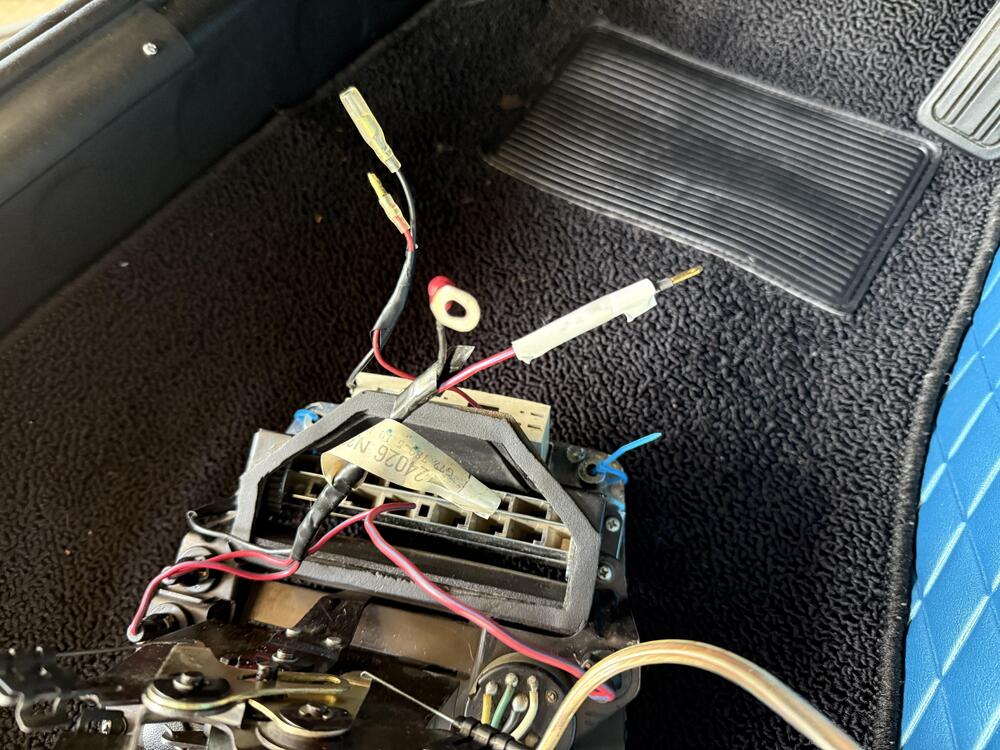
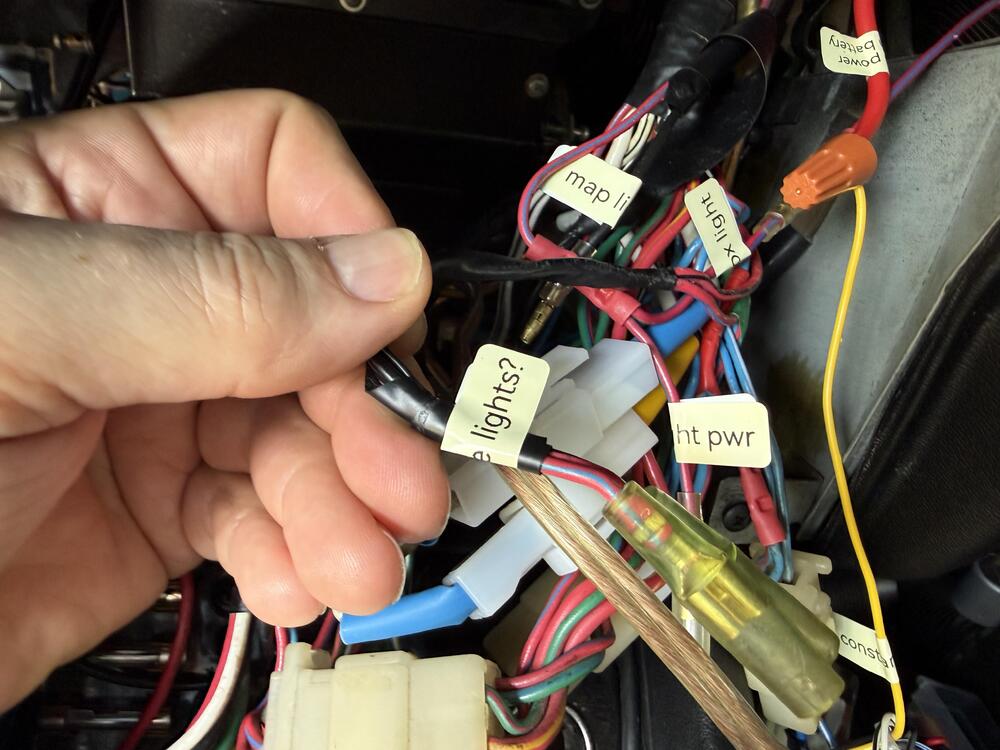
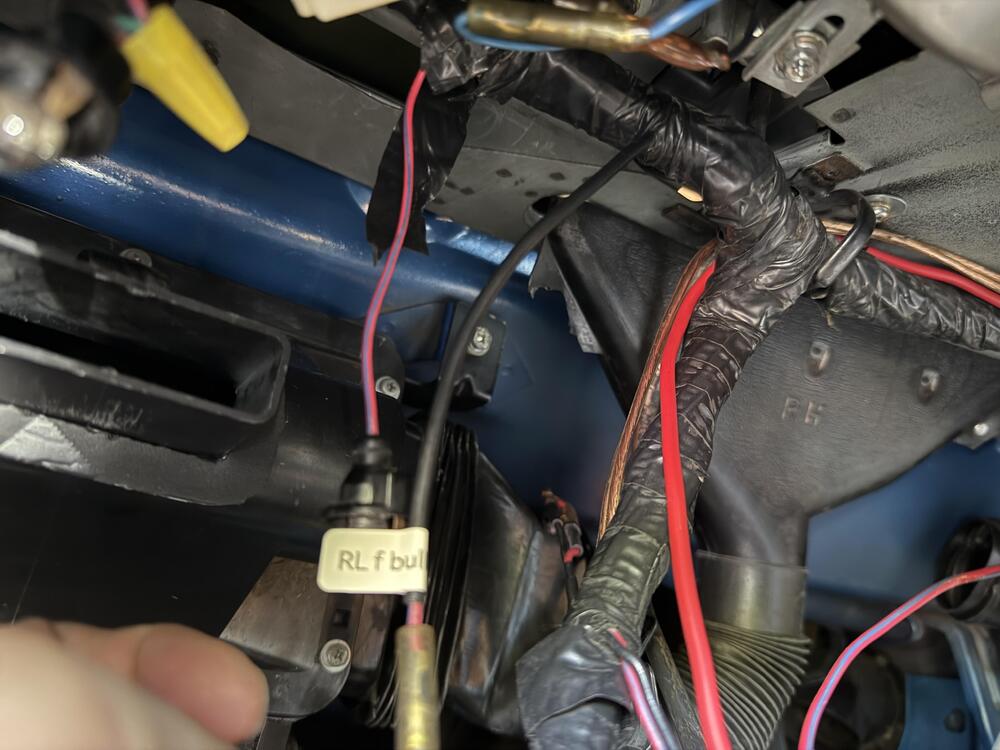
trying to reassemble wiring harness after several years. The paper tags I used mostly worked except for where they fell off and got lost. I’ve been working through the FSM supplement and I have it mostly figured out but a few mysteries. I don’t have battery connected right now as I had some ugly heating issues with the ammeter lines and had to replace the connectors. 1: power for the illumination on the heater control unit- RL male spade. To where? 2: two female spade connectors from dash harness, RL and RB. Are these 39 and 40 on figure V1-1? Reverse lights. If so what are they supposed to connect to? They dump out right in the middle but don’t seem to go to fuse box. Can I safely use the RL one for heater control unit? Seems weird but if it s just ACC power… 3: RL female bullet hanging down from right near the clock. But from dash bundle. Don’t see anything that would have connected to that.
-
Resurrected classics. The rubber seal replacement set was quite good. Not sure what I’ll do now.
-
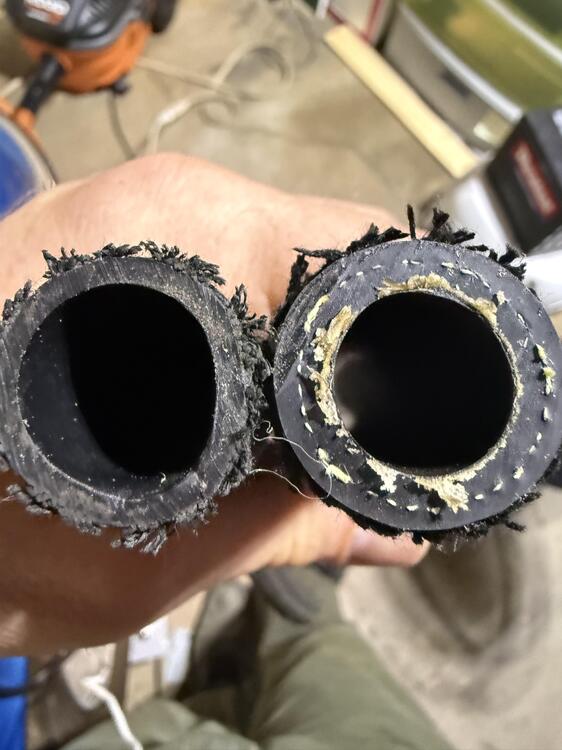
I got a set of repro hoses for my 1970 car, for fuel lines and engine bay. I also got a set of double ring style clamps. The clamps don’t match the old ones I have in my car (but only about half were still in it). Anyway the main thing I noticed is that the hoses fit to what they are supposed to fit to, but the rubber in them has a thicker wall width than the original hoses. IOW ID matches but OD is too large. Some of the originals still have original Nissan wraps on them so while I don’t think these are from 1970 I do think they were OEM of some vintage. the problem is that my existing clamps and the new repro ones don’t fit on the hoses in most cases. Even with using Saran Wrap or think tape to get them on with pushing the braid down they are just too big in most cases. The huge radiator ones are ok. I wanted the braided ones because I am trying to get the car closer to original but I dunno… this is a huge pain and not being able to use the right clamps makes it worse not better. Is it just a case of “can’t be helped that’s the kind of rubber available now”?
-
Sadly, those are not hard plastic. You'll be putting in 4 pieces: passenger A pillar + overdoor piece driver A pillar + overdoor piece part that spans front window the actual headliner Kits are available at MSA, etc. https://www.thezstore.com/product/3905/headliner-pillar-trim-roof-rail-trim-kit-70-78-240z-260z-280z-coupe Just did this 2-3 weeks ago. The front window has to come out. so that's fun.
-
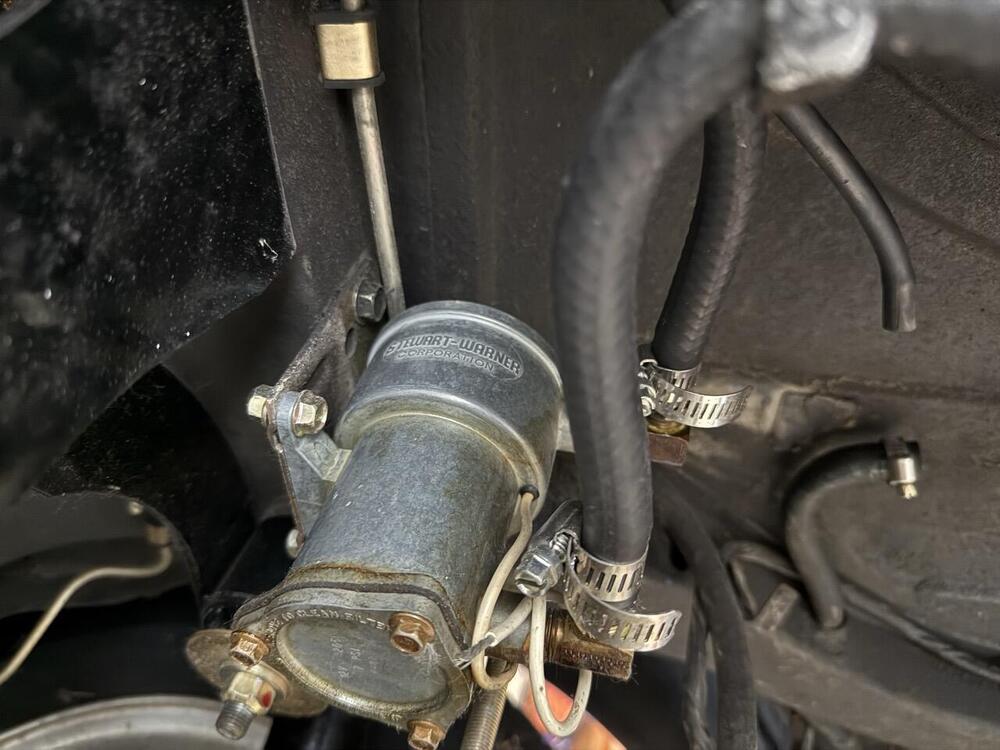
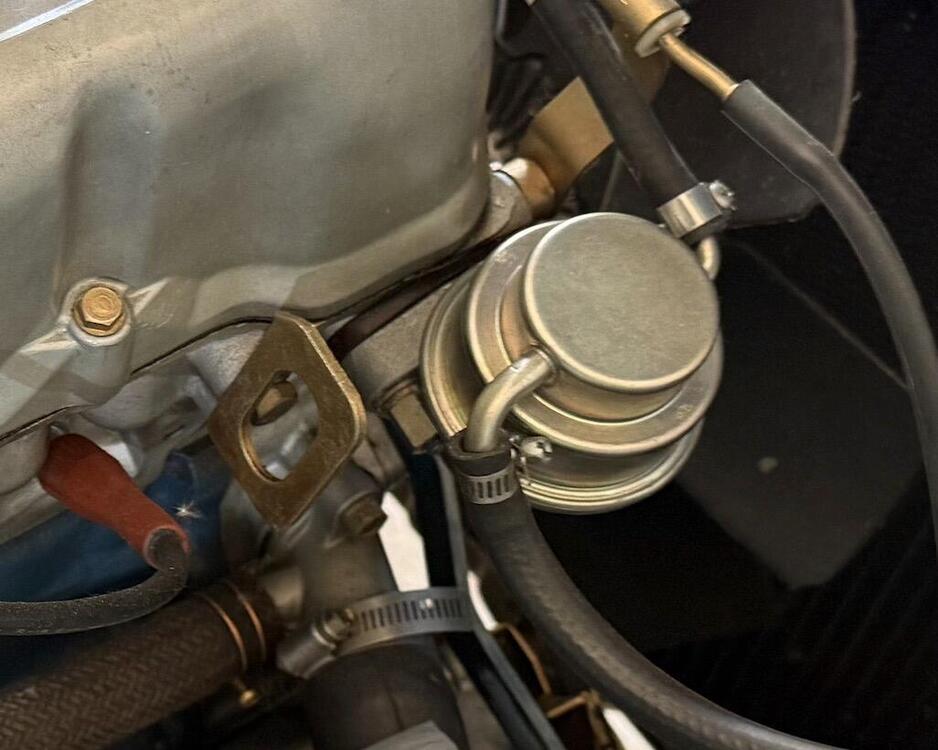
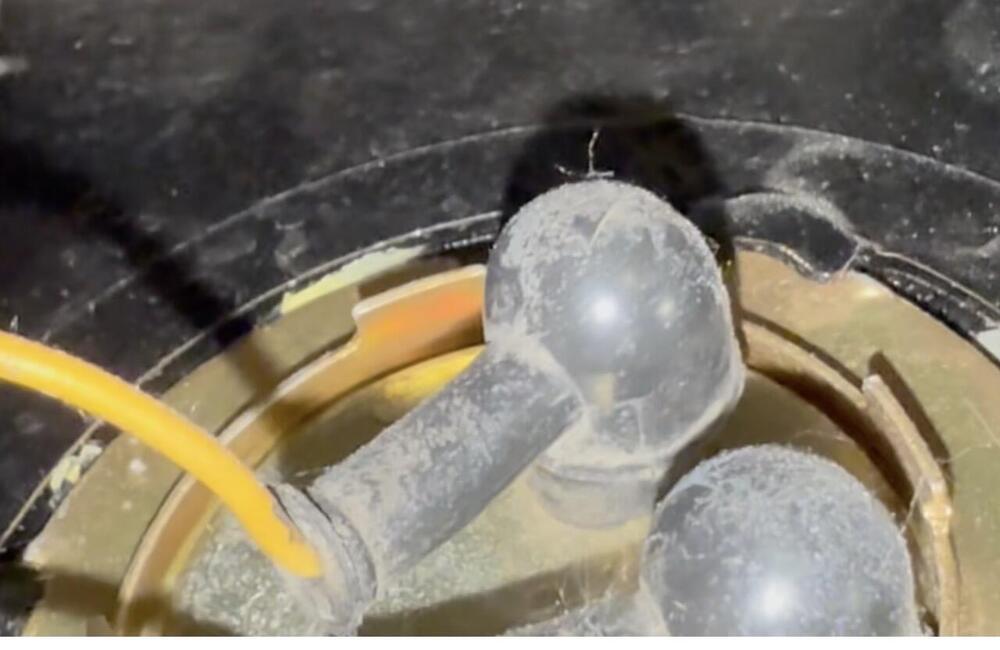
Awesome! That's great news. The fuel pump installed is an after market one (https://www.ebay.com/p/1233674301 - Stewart Warner 82050). I don't know when it was installed.Perhaps with the 1980s overhaul. 1) should I proactively replace this with a new one while I have the tank out? 2) there is a white wire coming out of it, but not going anywhere (see pic). Not sure if it was NEVER used, or was just disabled at some point. It is definitely still in the loop as far as fuel lines go. The car WAS running fine before I started taking it apart bit by bit, and the mechanical pump up front (see 2nd pic) looks newer too. Should I remove this entirely? There was also a black write that ran down from the aft deck, down to the tank area. But it wasn't hooked up on EITHER end. obviously doesn't affect running of car, but any idea what that might have been in the past? Finally, what do you call these rubber boots on the fuel gauge lines. They are torn, and I want to get some new ones.
-
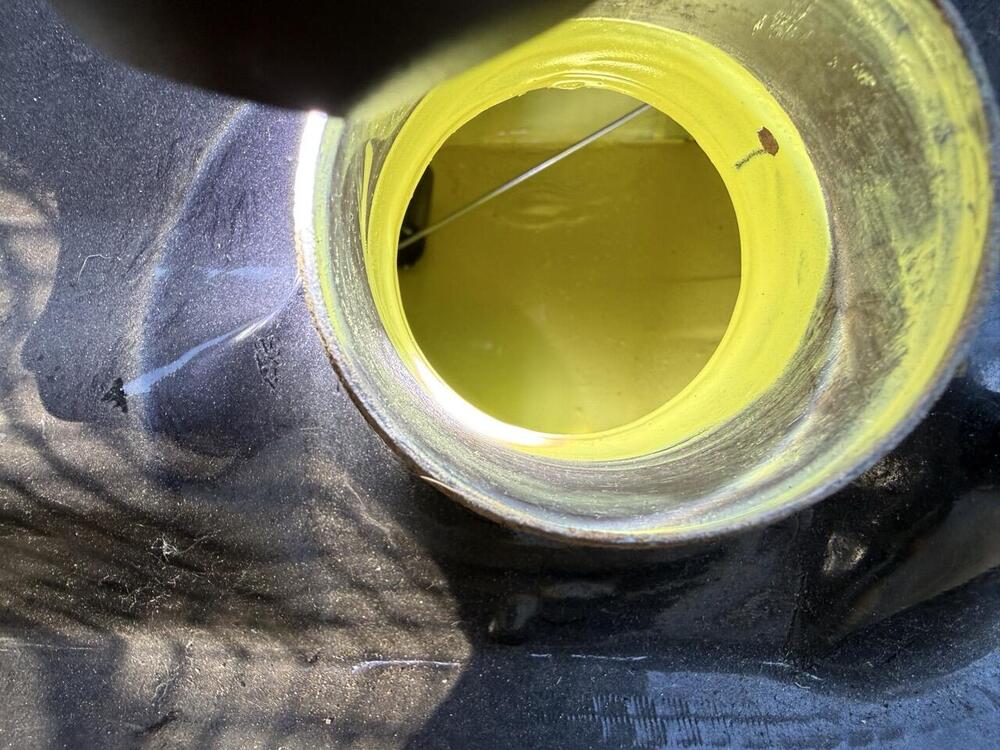
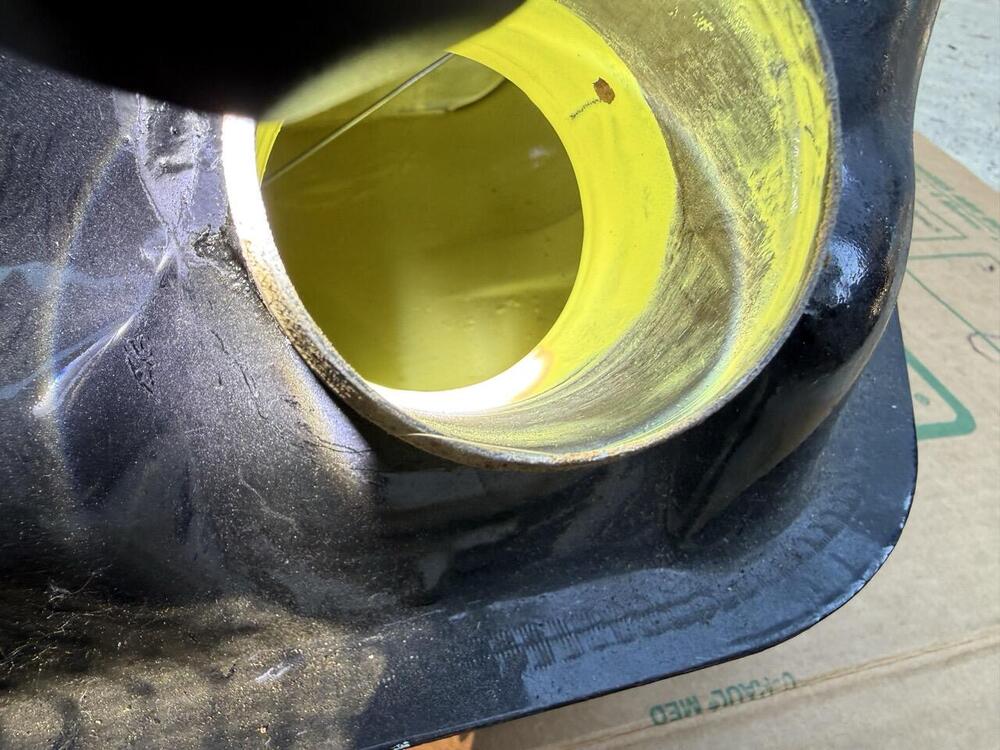
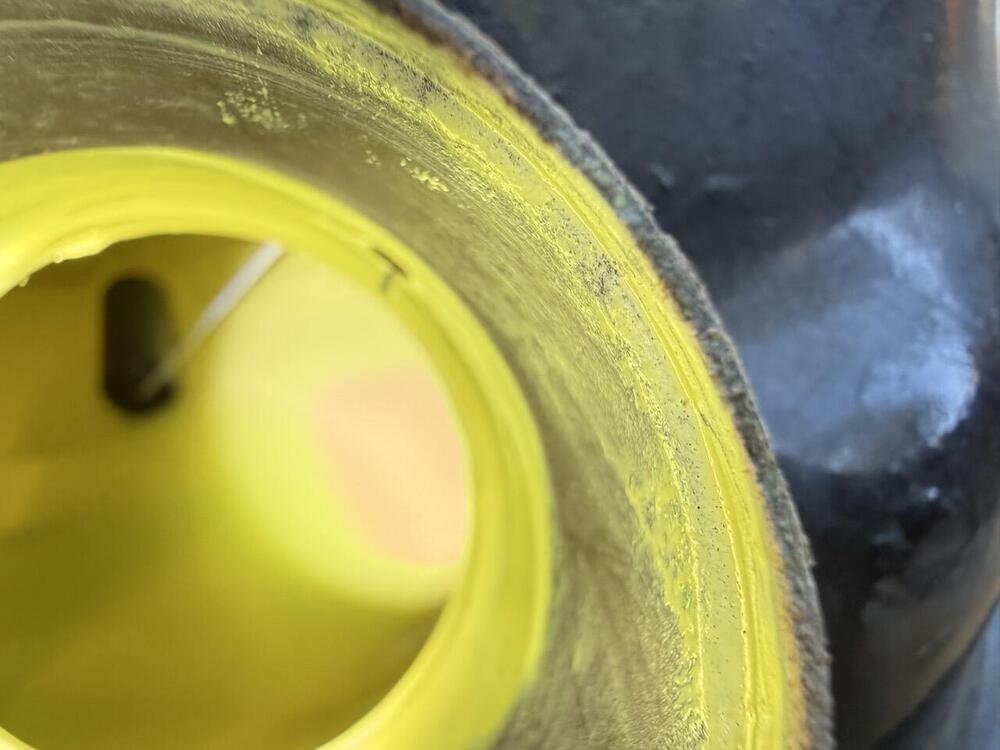
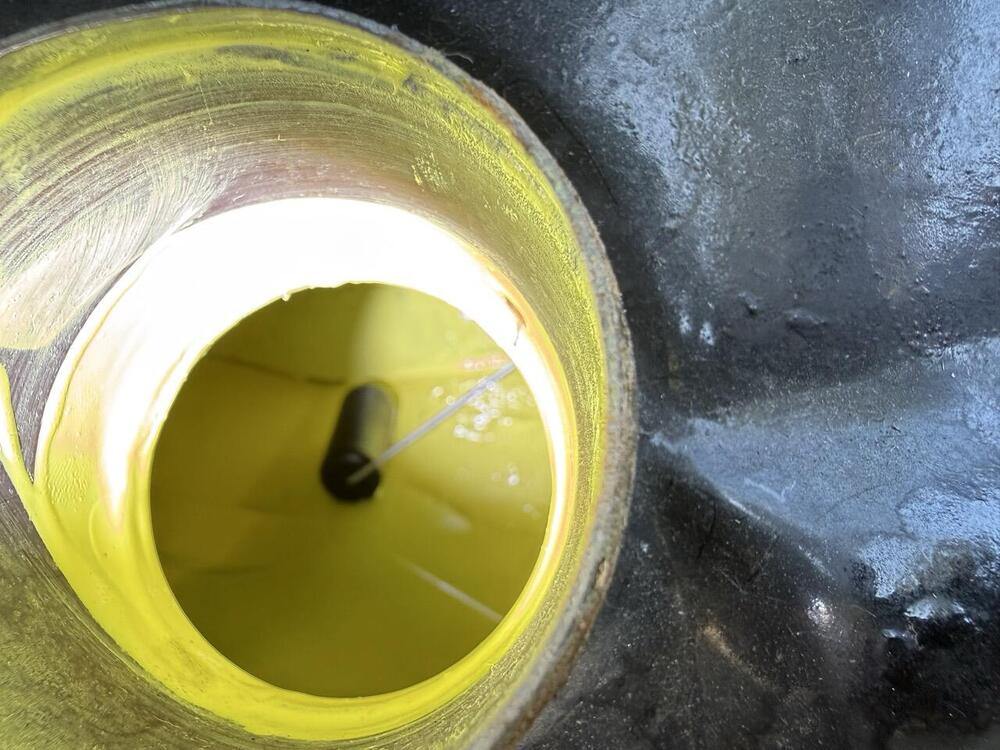
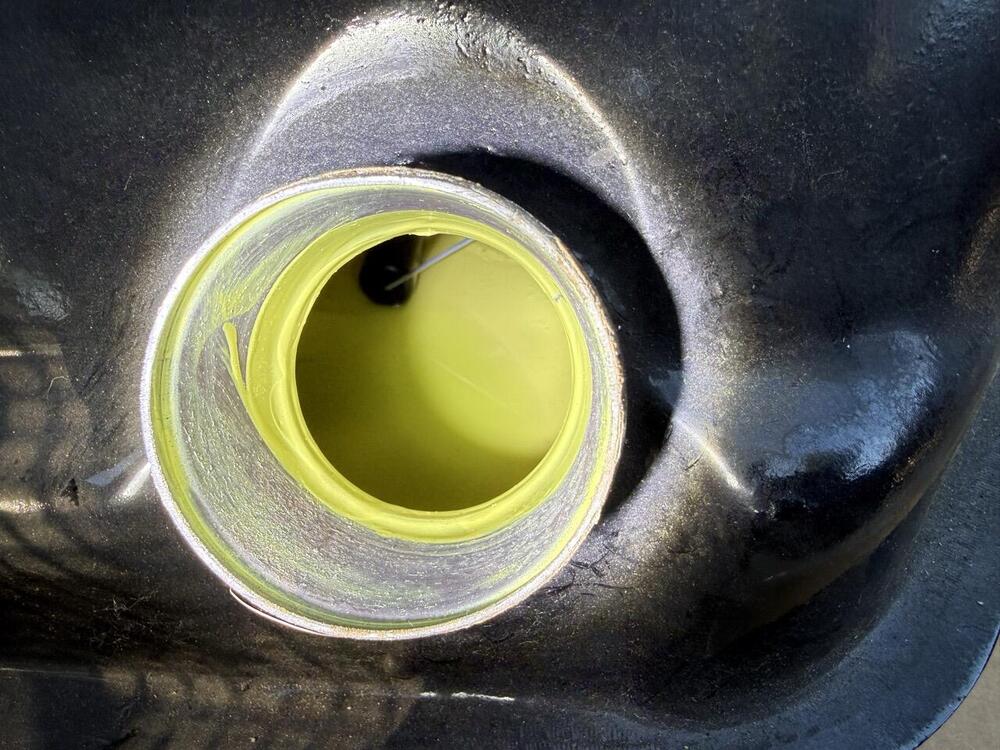
I was able to drop the tank today. Of the 2 grommets you mentioned, I only had 1 on the car, and it was crumbling. I think I'll replace all the lines. I'm not 100% sure when these were last done, but they've also been sitting 7-8 years without the car running. Can I get an assessment of the condition of the inside of the tank? There was about 5 gallons in it. It has had some kind of yellow/green treatment applied inside I think. I didn't see any sludge or rust that I recognized. But I have never looked in a tank before so I don't really know what "bad" looks like.
-
I just did that. It's slightly concave: the middle sags a bit. but it's evenly distributed as far as I can tell. As for the wheel well, I don't see or feel anything obvious. Other than whatever made that 5-point indentation on the LEFT side, but even that is just barely sticking up. It's feeling like this tire/wheel combo SHOULD fit, but maybe doesn't fit perfectly because of age of tire, not because it's wrong type of tire. If that's so, I'm not going to worry about it. When I get this running again, I'm not going to drag that tire around anyway. Wouldn't mind having a foam filler that supported the fiberboard and didn't weigh anything.
-
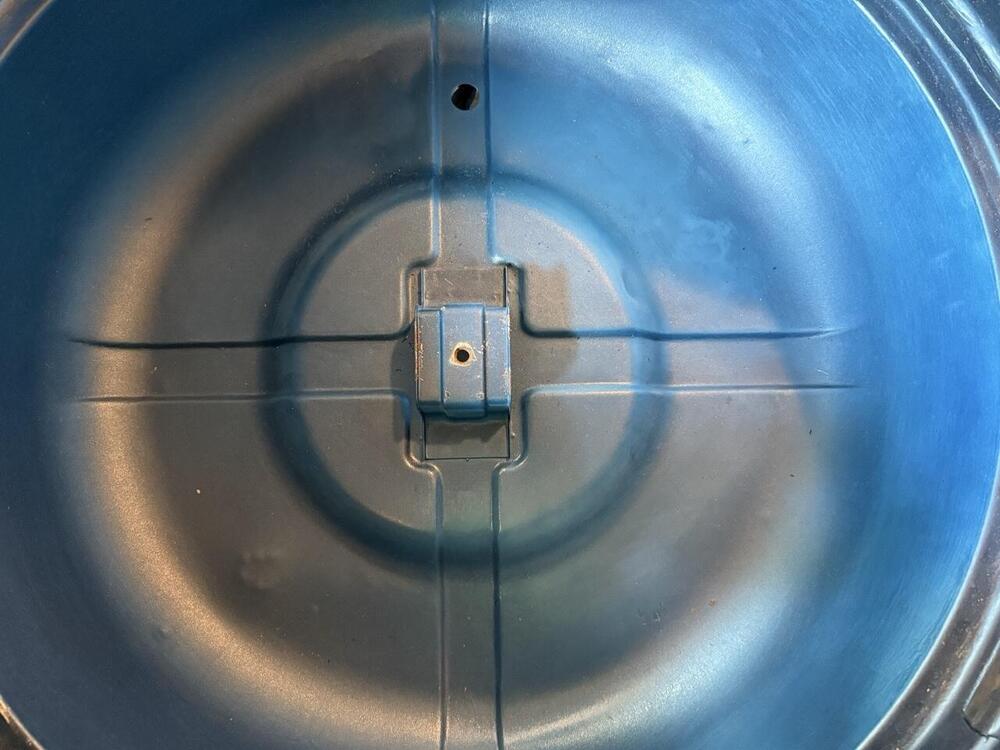
I wouldn't be caught dead driving on that tire. Or rather, I probably would be if I tried. I eyeballed the measurement with a tape measure, and it looks like width of tire is variable depending on where I measure it. a bit less than 6.5 inches to a right around 6.75-6.9. Didn't get to 7 at any angle. But again, no calipers to make exact measurement. So yeah, probably just bulging in places. I tried different rotations when putting it into the well, and I can definitely shift which part of the tire cover sticks up. It's not bad when it's the part most towards the taillights. No velcro there either.
-
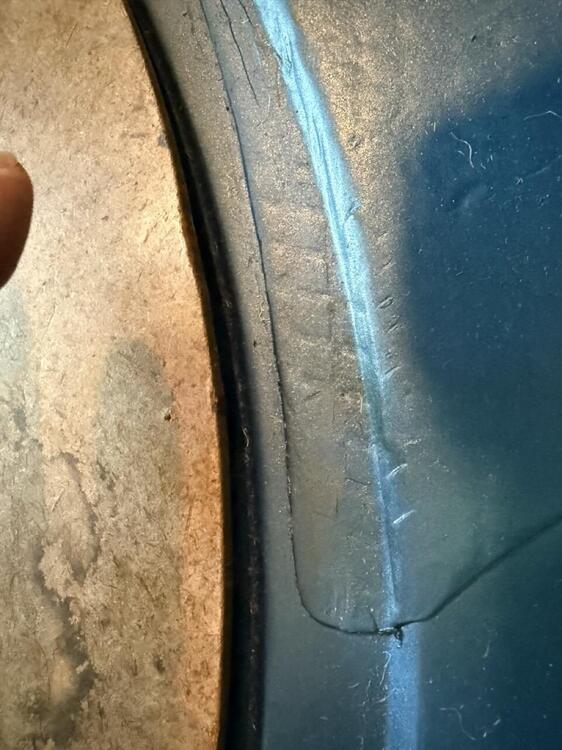
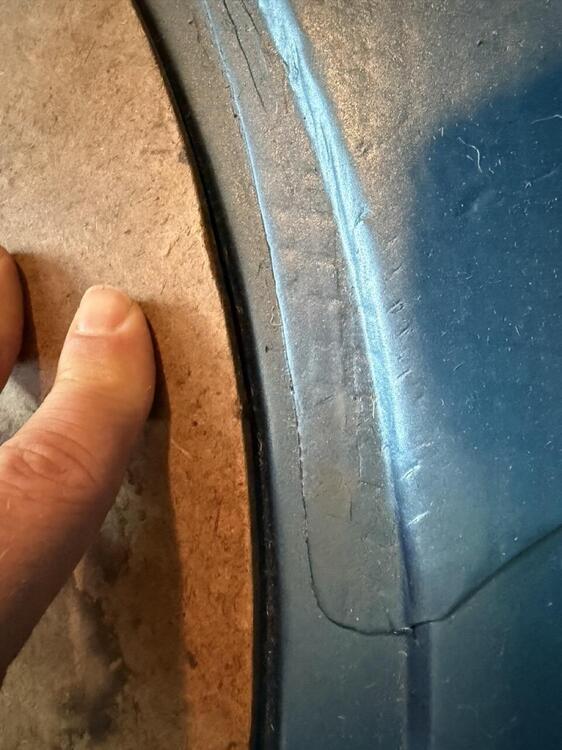
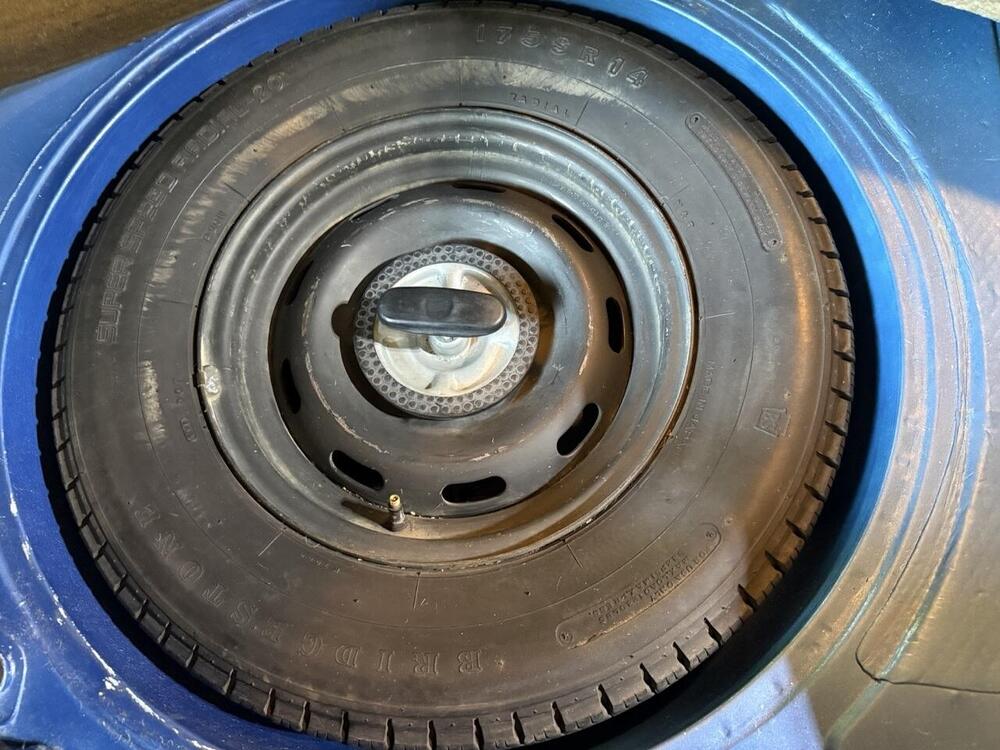
I haven't put the new velcro in yet, but on the right side, it's not going to connect I think. The top and left side are firm against the deck floor. The right side, no matter which way I lay the tire, is not quite flush with the deck. If I put my finger on it I can push it down to be flush (and it's only maybe 1/8" having just done it right now). I tried to photograph that, but... I can't trust ANYTHING in this car to be OEM, in the sense that it came from THIS car. The wheel has 11/70 stamped on it, and the tire is 03/70. So some PO acquired it presumably.
-
Should this tire/wheel combo allow the fiberboard spare tire well cover to lie perfectly flat in a 1970 car? What it does is make it sit maybe 1/4 inch or 1/2 inch higher than the surrounding deck floor. it's not totally inflated, but also not super deflated. What's "normal" in this situation? Is this even the right tire for the spare in a Jan 1970 car?
-
My 240z came with what I believe are factory 280zx wheels (you can see them on car in original BAT listing from 2017: https://bringatrailer.com/listing/1970-datsun-240z-9/) I have slowly been restoring the car MORE towards factory 1970 conditions (blue interior, more original parts, etc.) This car is never going to be totally original (non-matching engine, 1980s resto, etc.). So I think spending money on steelies and 'D' hubcaps is not in the cards. I would like to get it back to something it could have walked out of the dealer with, or had been upgraded to in the first year or two of ownership. I am thinking about slotted mag wheels. I think they would have been very common in early 70s. Anybody have some they want to get rid of? Or know of a place I can get new (old-style) ones? Something like this, but in-stock: https://wheelwiz.ca/products/vna695748?srsltid=AfmBOophSBA80judsZLxQ0OX8IUzmeIxCEvPAnCKcCrGn2PUc-1noTNI Also, if anyone wants these 280zx wheels I'll be selling them once I get replacements. Tires are ancient.
-
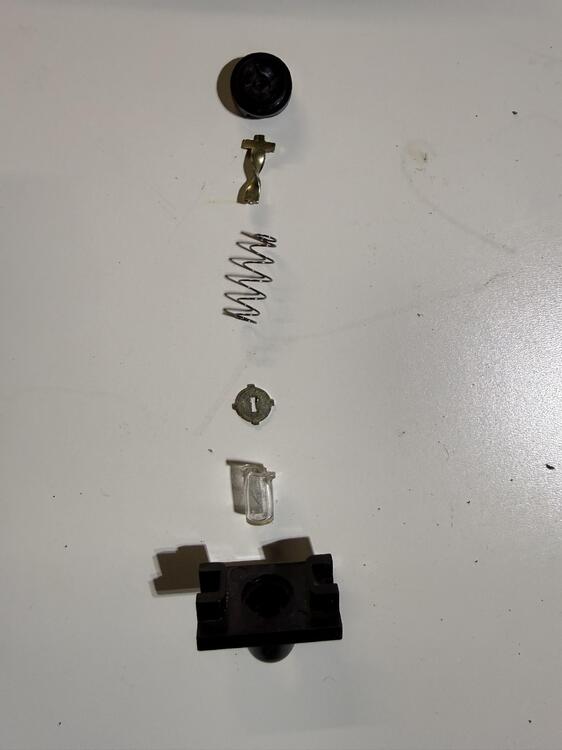
Just to wrap it up for anyone who stumbles across "some light" (hehe) in the future: the order above is the correct order. Hints maybe for easier reassembly: on mine, the lip of the clear plastic plunger was slightly melted, changing the angle a bit. Until I realized I had to rotate it a bit until the twisted plunger would fit through it, it was never going to install correctly. You can preassemble the metal disc + spring + twisty plunger and it will stick together. installing it from within the car (looking up at the roof) was hard. I found it much easier working from outside the car, looking down (I have the hatch off). You can hold the light switch in one hand, facing up, place on the black disk, then the plunger-spring-roundplate assembly, then the plastic button and black casing. That was tricky, but worked a lot better than trying to fit the assembled part, under pressure, upwards with the light casing above you. Obviously, this would be even easier if you have the switch assembly completely removed from the car.
-
sorry I just realized I fat fingered the title. This is about the DOME light switch. Iki is the manufacturer name I believe.
-
I feel like this shouldn’t be as hard as I’m making it out to be. I took mine out a few years ago and now I can’t figure out how it goes back together. Can anyone tell me the correct order and orientation of each part? And if I’m missing anything. I still have the housing wired up in the car so that’s not showing. The order I have them in photo is my best guess but I haven’t had any luck with it yet.
-
No man, thanks for sharing that info. Seriously. I will try another route before I go down that path. The sad thing about it is I don't think it would have been much work to include that tightener screw. The rest of the setup is pretty good.
-
Hmm. That gives one pause. Thanks for sharing info. When you were trying to seal it, which glues did you use, if you remember? So I can skip those... I was thinking maybe WeldWood, maybe plastic model cement (it kind of melts plastic), maybe superglue? Don't feel confident about any of those. Maybe the top could be glued, and then sewn together with a stronger blue colored thread. Didn't have learning to sew on my bingo card.
-
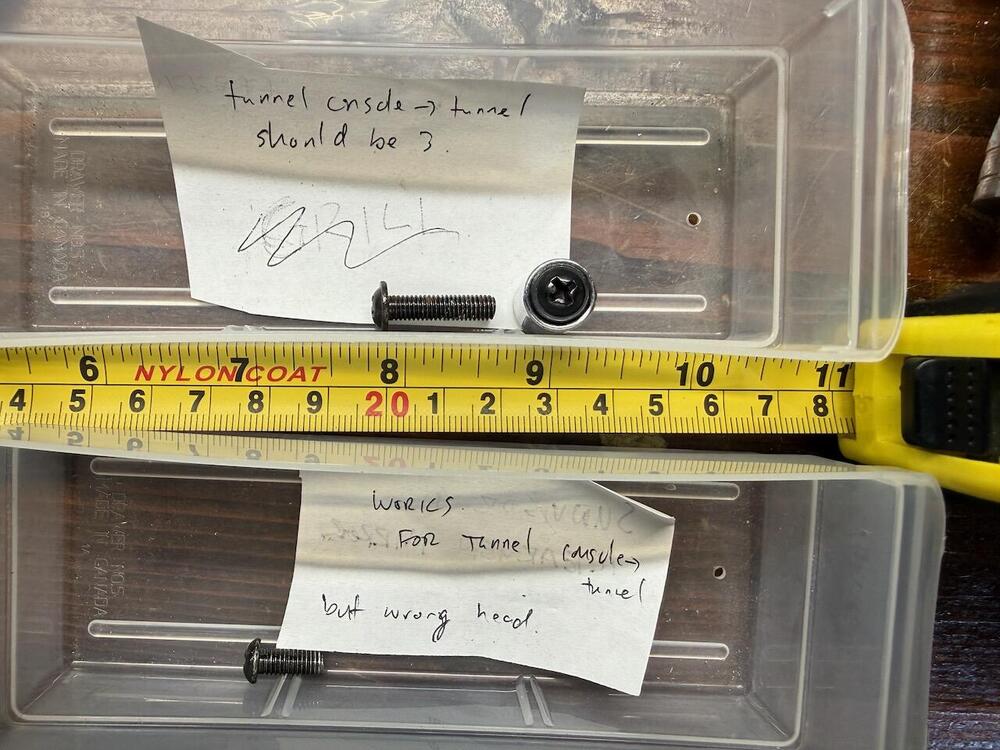
Thanks. I might have mixed up the bolts for this and the ones for the heater/radio console. Or not, haven't checked what those are supposed to be yet. For any future lookers: coin case: 08320-51242 The two in back: 08320-51242 https://www.carpartsmanual.com/datsun/Z-1969-1978/body-240z/floor-console-finisher-ash-tray so both locations are, according to this anyway, the same size. So I think that's M5 12mm length. And washer-plain: 08915-43510 That washer at least appears to be available online. The info in carpartsmanual.com for 240z... that's not like downloadable in any format is it? Would like to have it in the garage in book form.
-
Thanks Captain, that's the spot I was thinking of. Awesome.
-
What I enjoy about it is that in my head, I took enough pictures. So I'm always like "Oh, I know I got shots of that, let me check how that looked before" and then... nope. I suspect I will continue to pay this tuition for a long time.
-
I am trying to get this car back to closer to original. For the 3 bolts that secure the tunnel console to the tunnel (the ones you see I mean), what are they supposed to be? I have a hard time seeing the shape in BAT photos. I only found 2 when reassembling my car. They have kind of a lip around them, but are flat (no shoulder). Seems an odd choice to use for the fiberglass tunnel, where the holes are kind of rounded (at least on mine, FWIW). I have unrelated bolts I could use, but would like to use original hardware where possible.