Matthew Abate
Free Member
-
Joined
-
Last visited
-
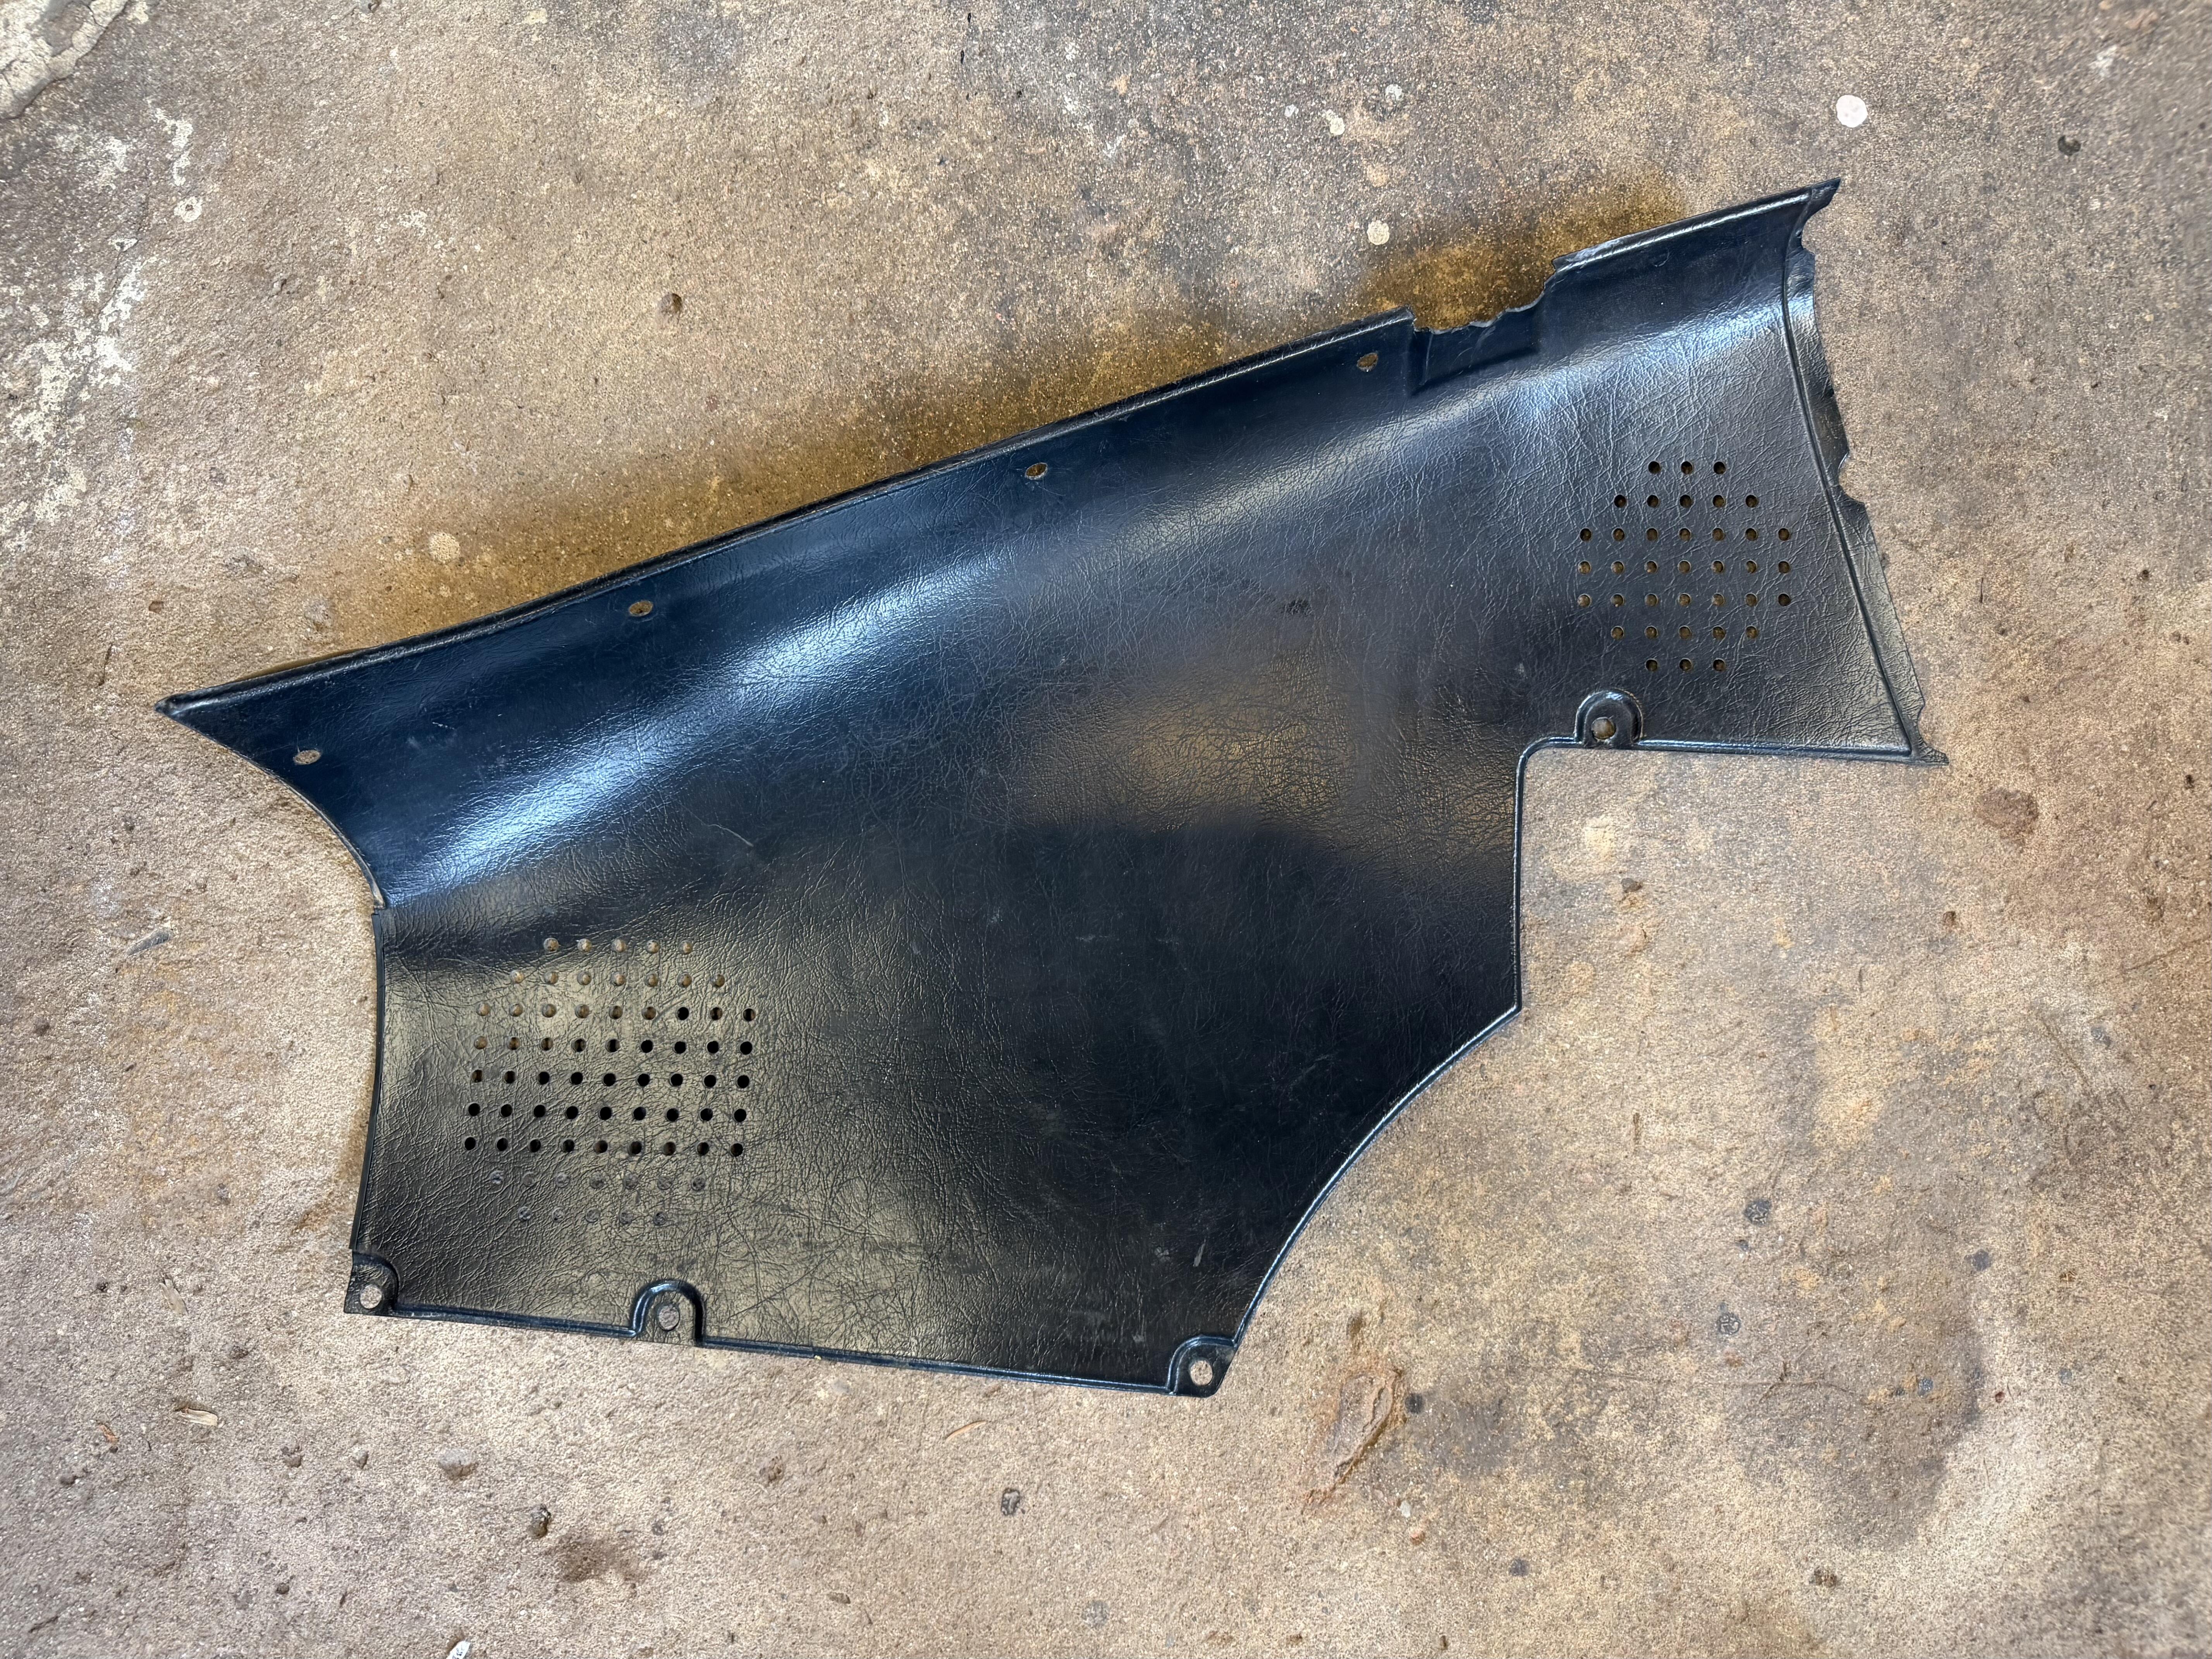
 Can anyone shine some light on the small speaker grills on my interior panels? I’ve read all over that these cars only came with one speaker on the driver’s side. I know the 280s had pleasers in front of the rear wheel humps, but I’ve never seen any discussion of small speakers pan over the strut towers. The holes are there in the sheet metal, and both interior panels are perforated for them. They are Nissan panels and have the paper sticker with the blue Japanese character on the back side. I have no idea what size they would be (probably 3”). So what’s the story?
-
I have no idea if I did or not, but feel free to copy it over there, or maybe @Mike can duplicate the post there.
-
I’m guessing no one has problems with that then. Maybe the clue is in the name (dust cover) and it’s more about keeping things out than keeping things in.
-
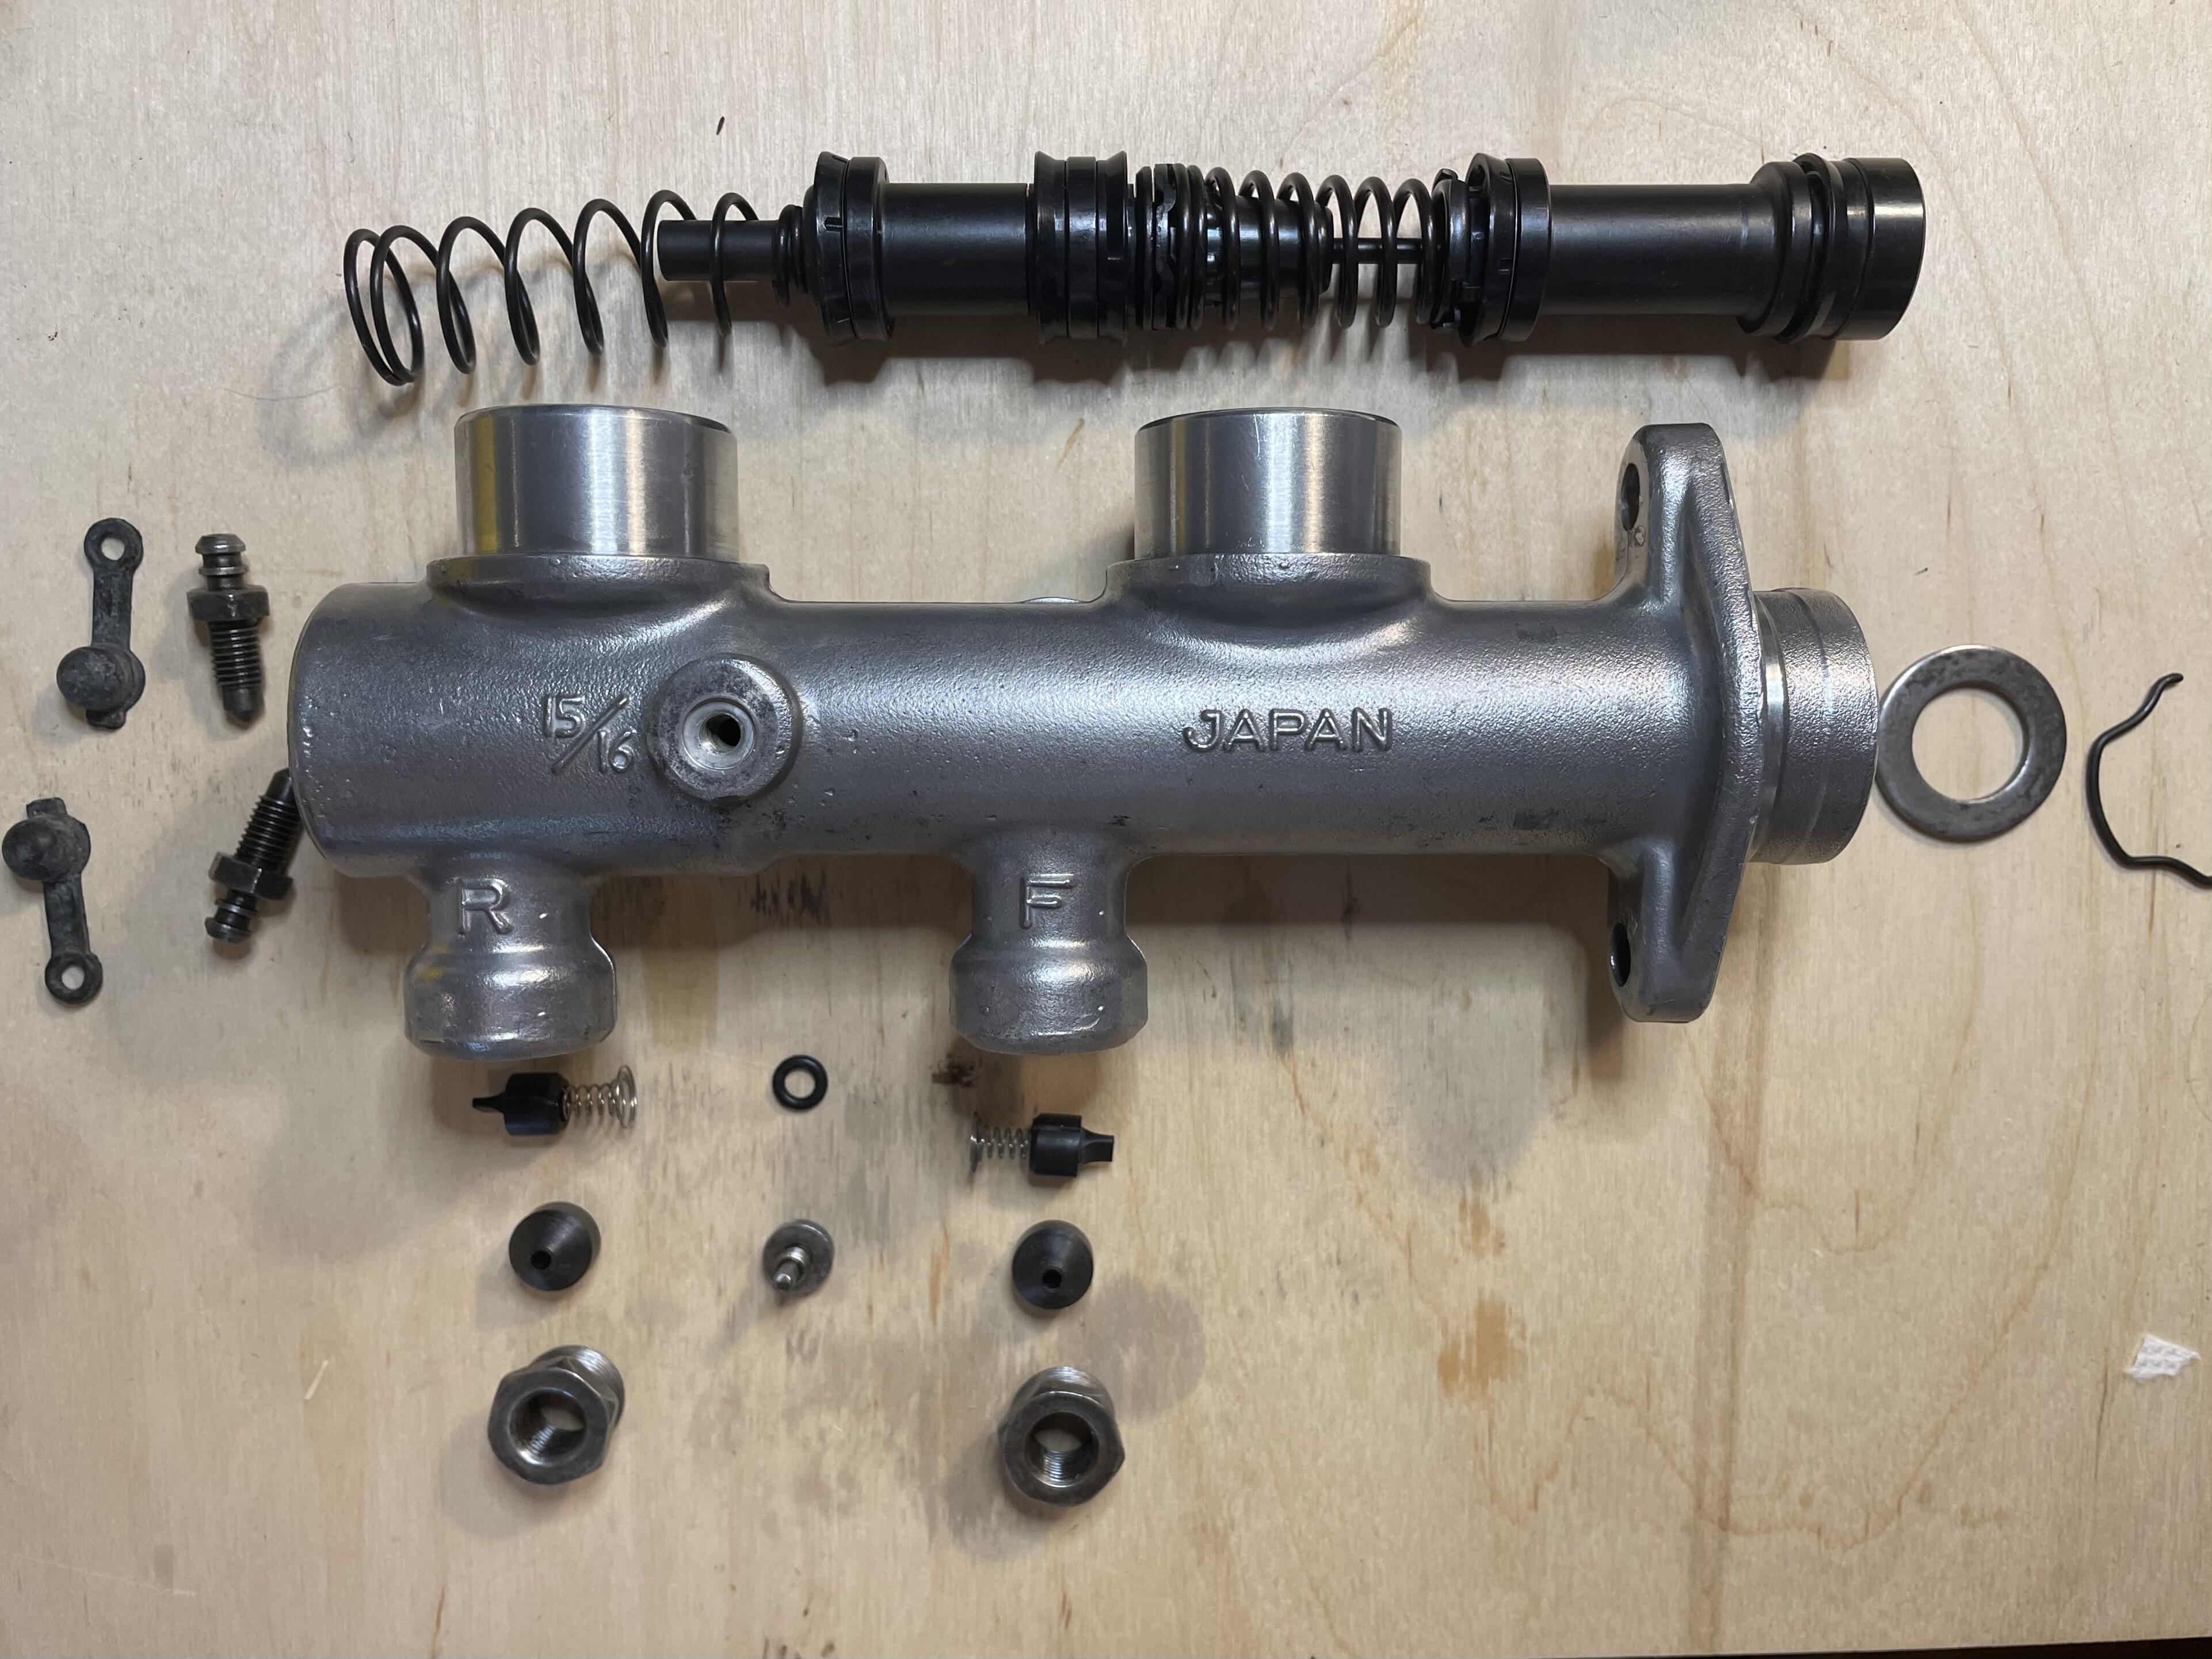
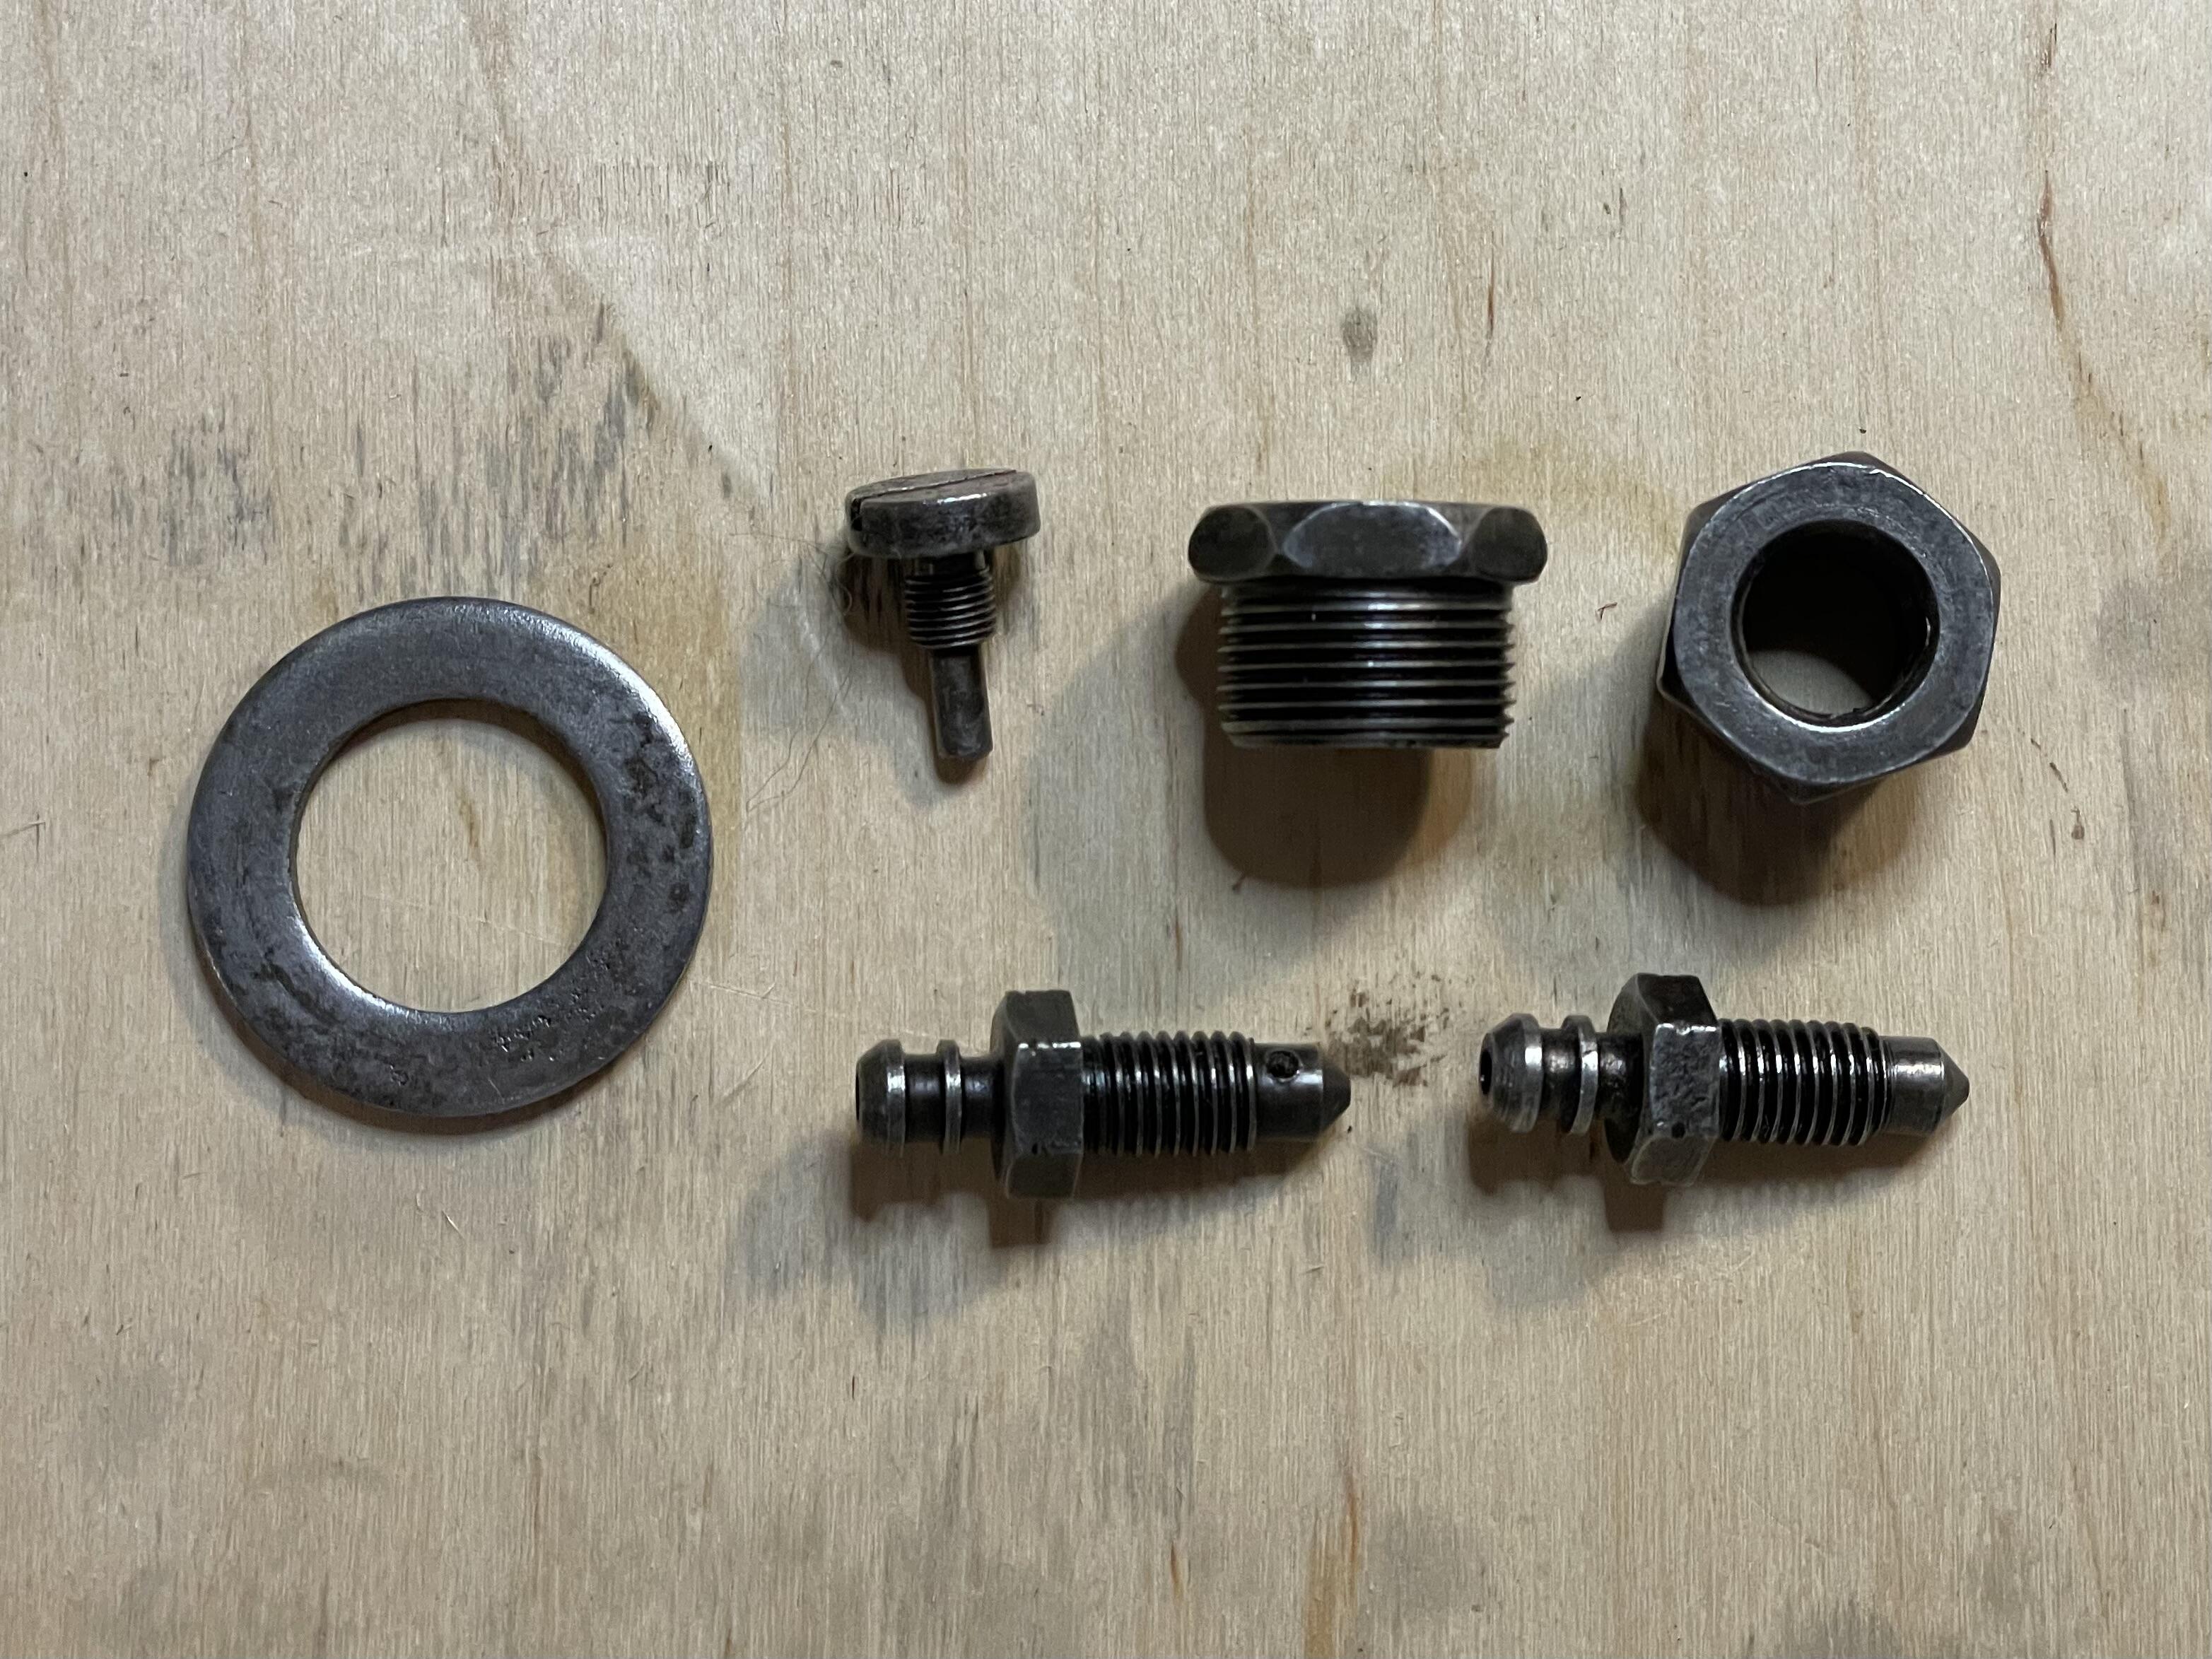
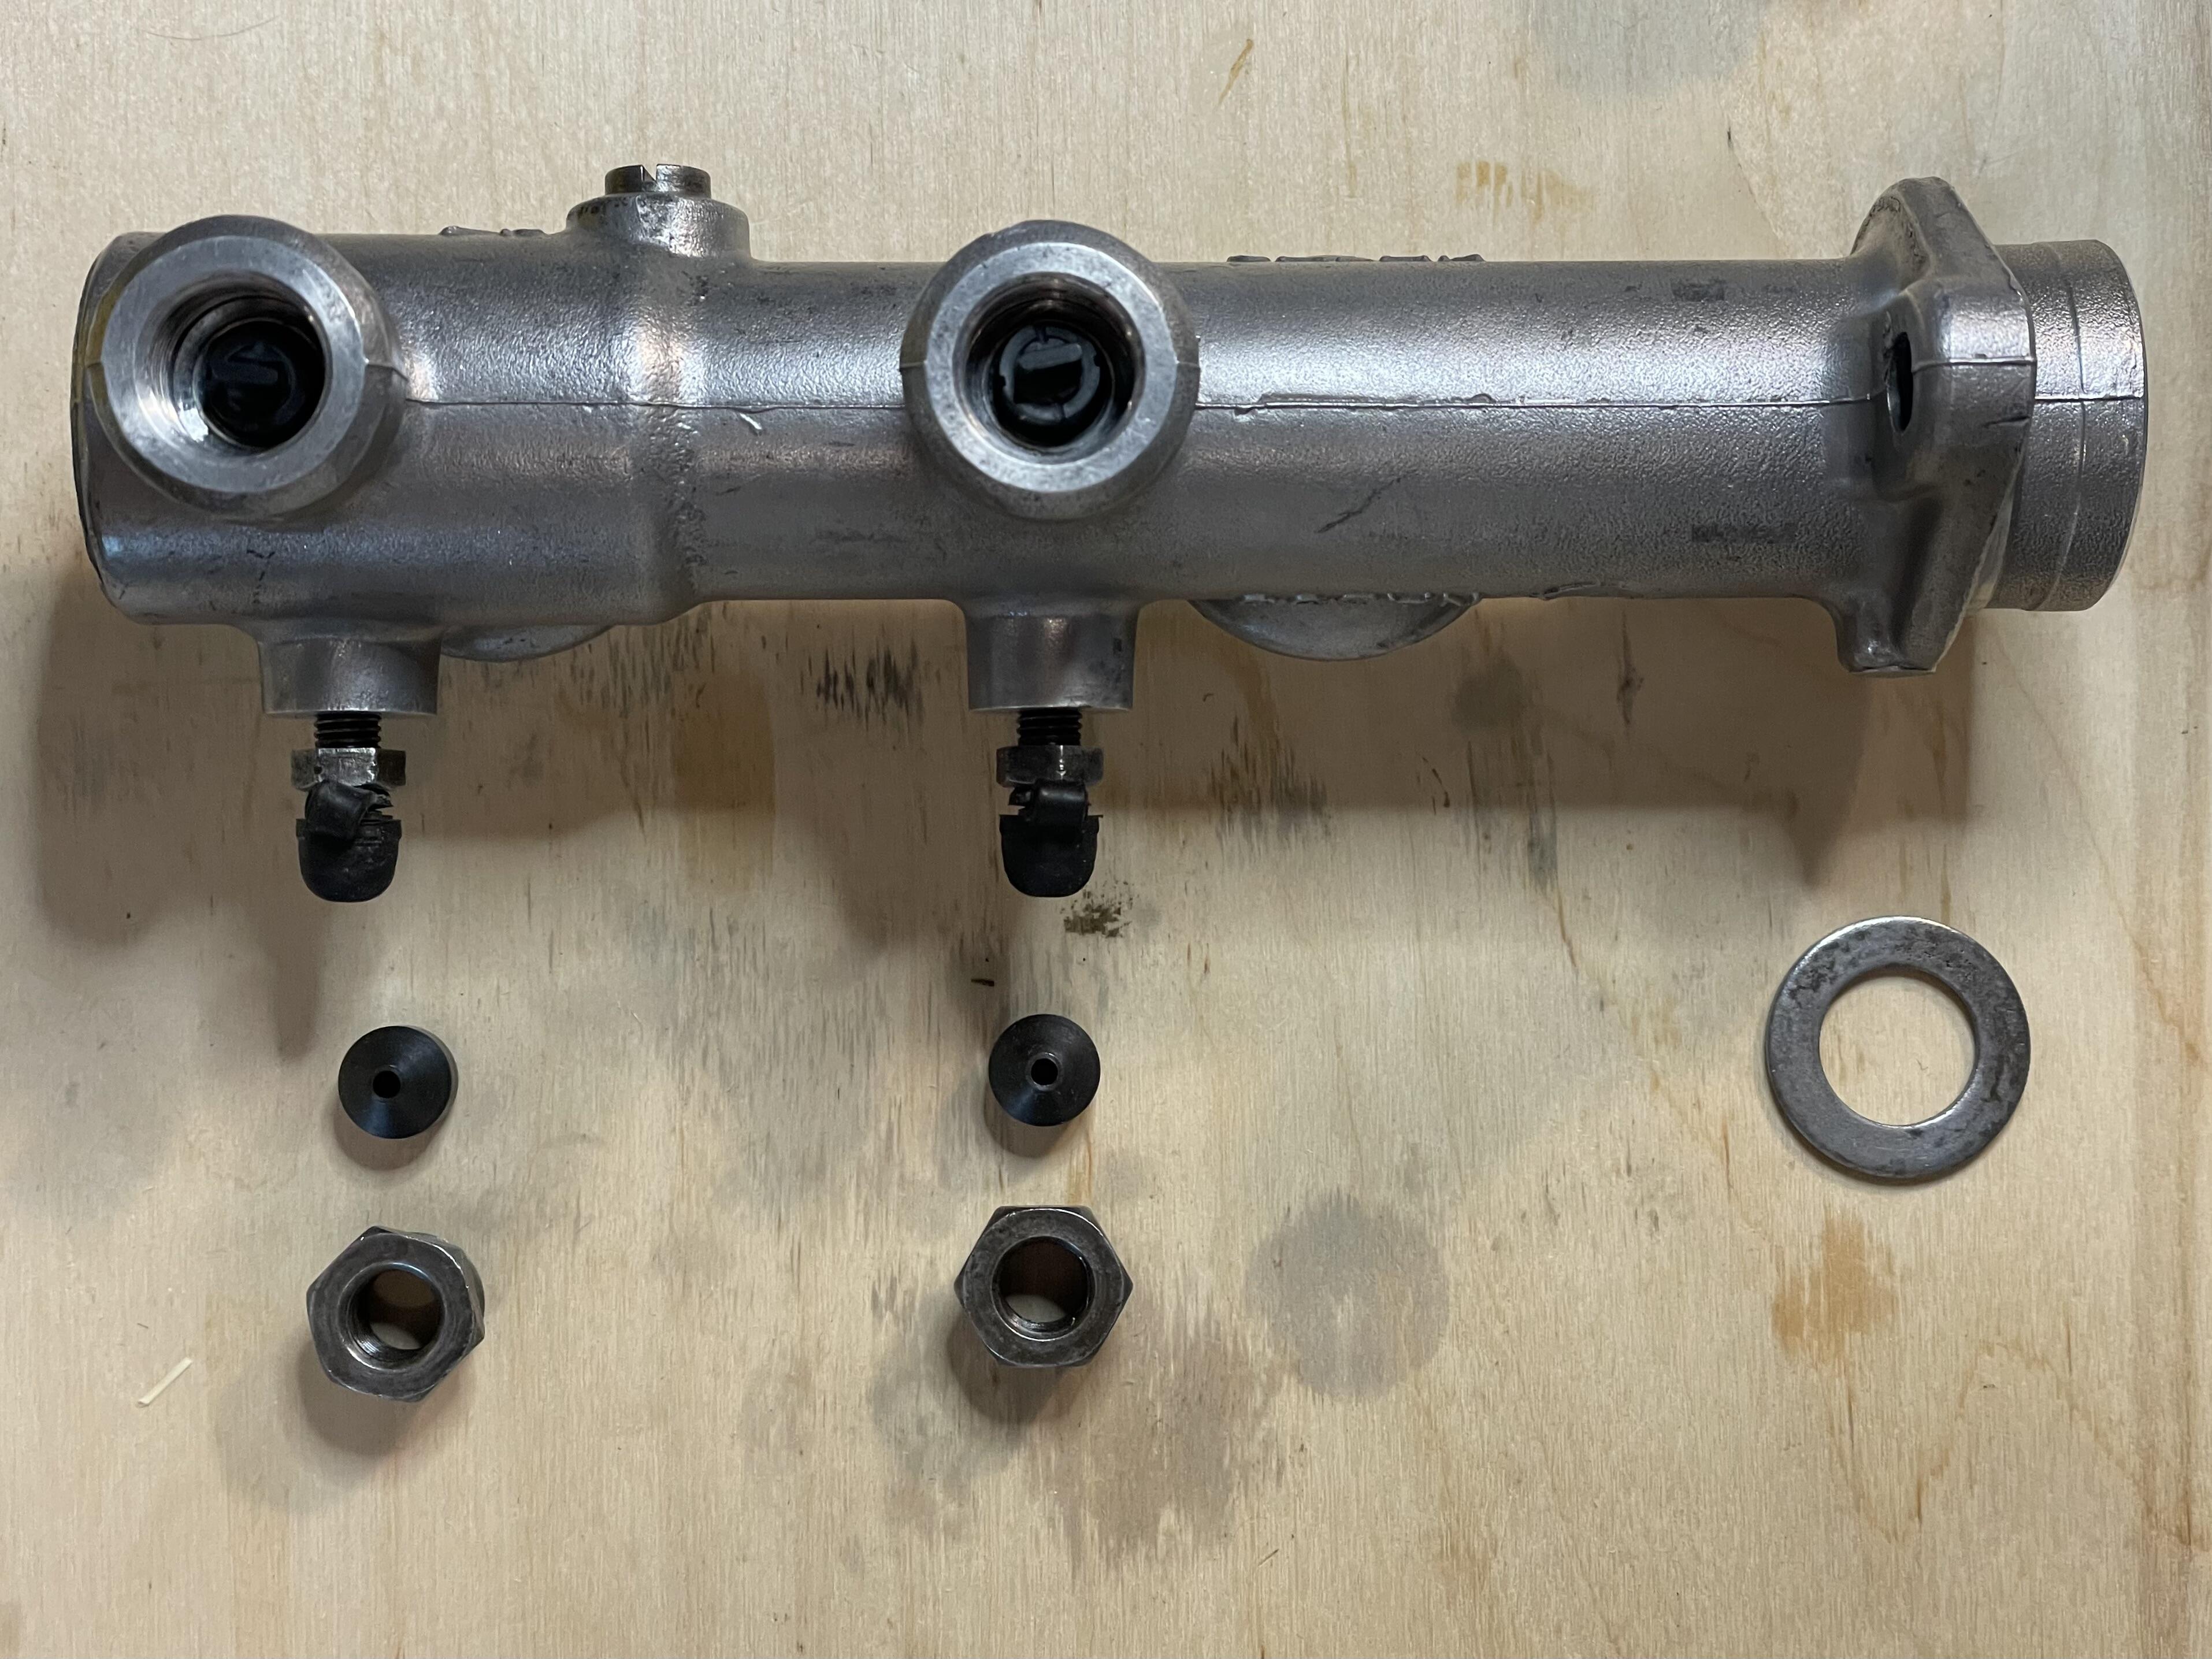
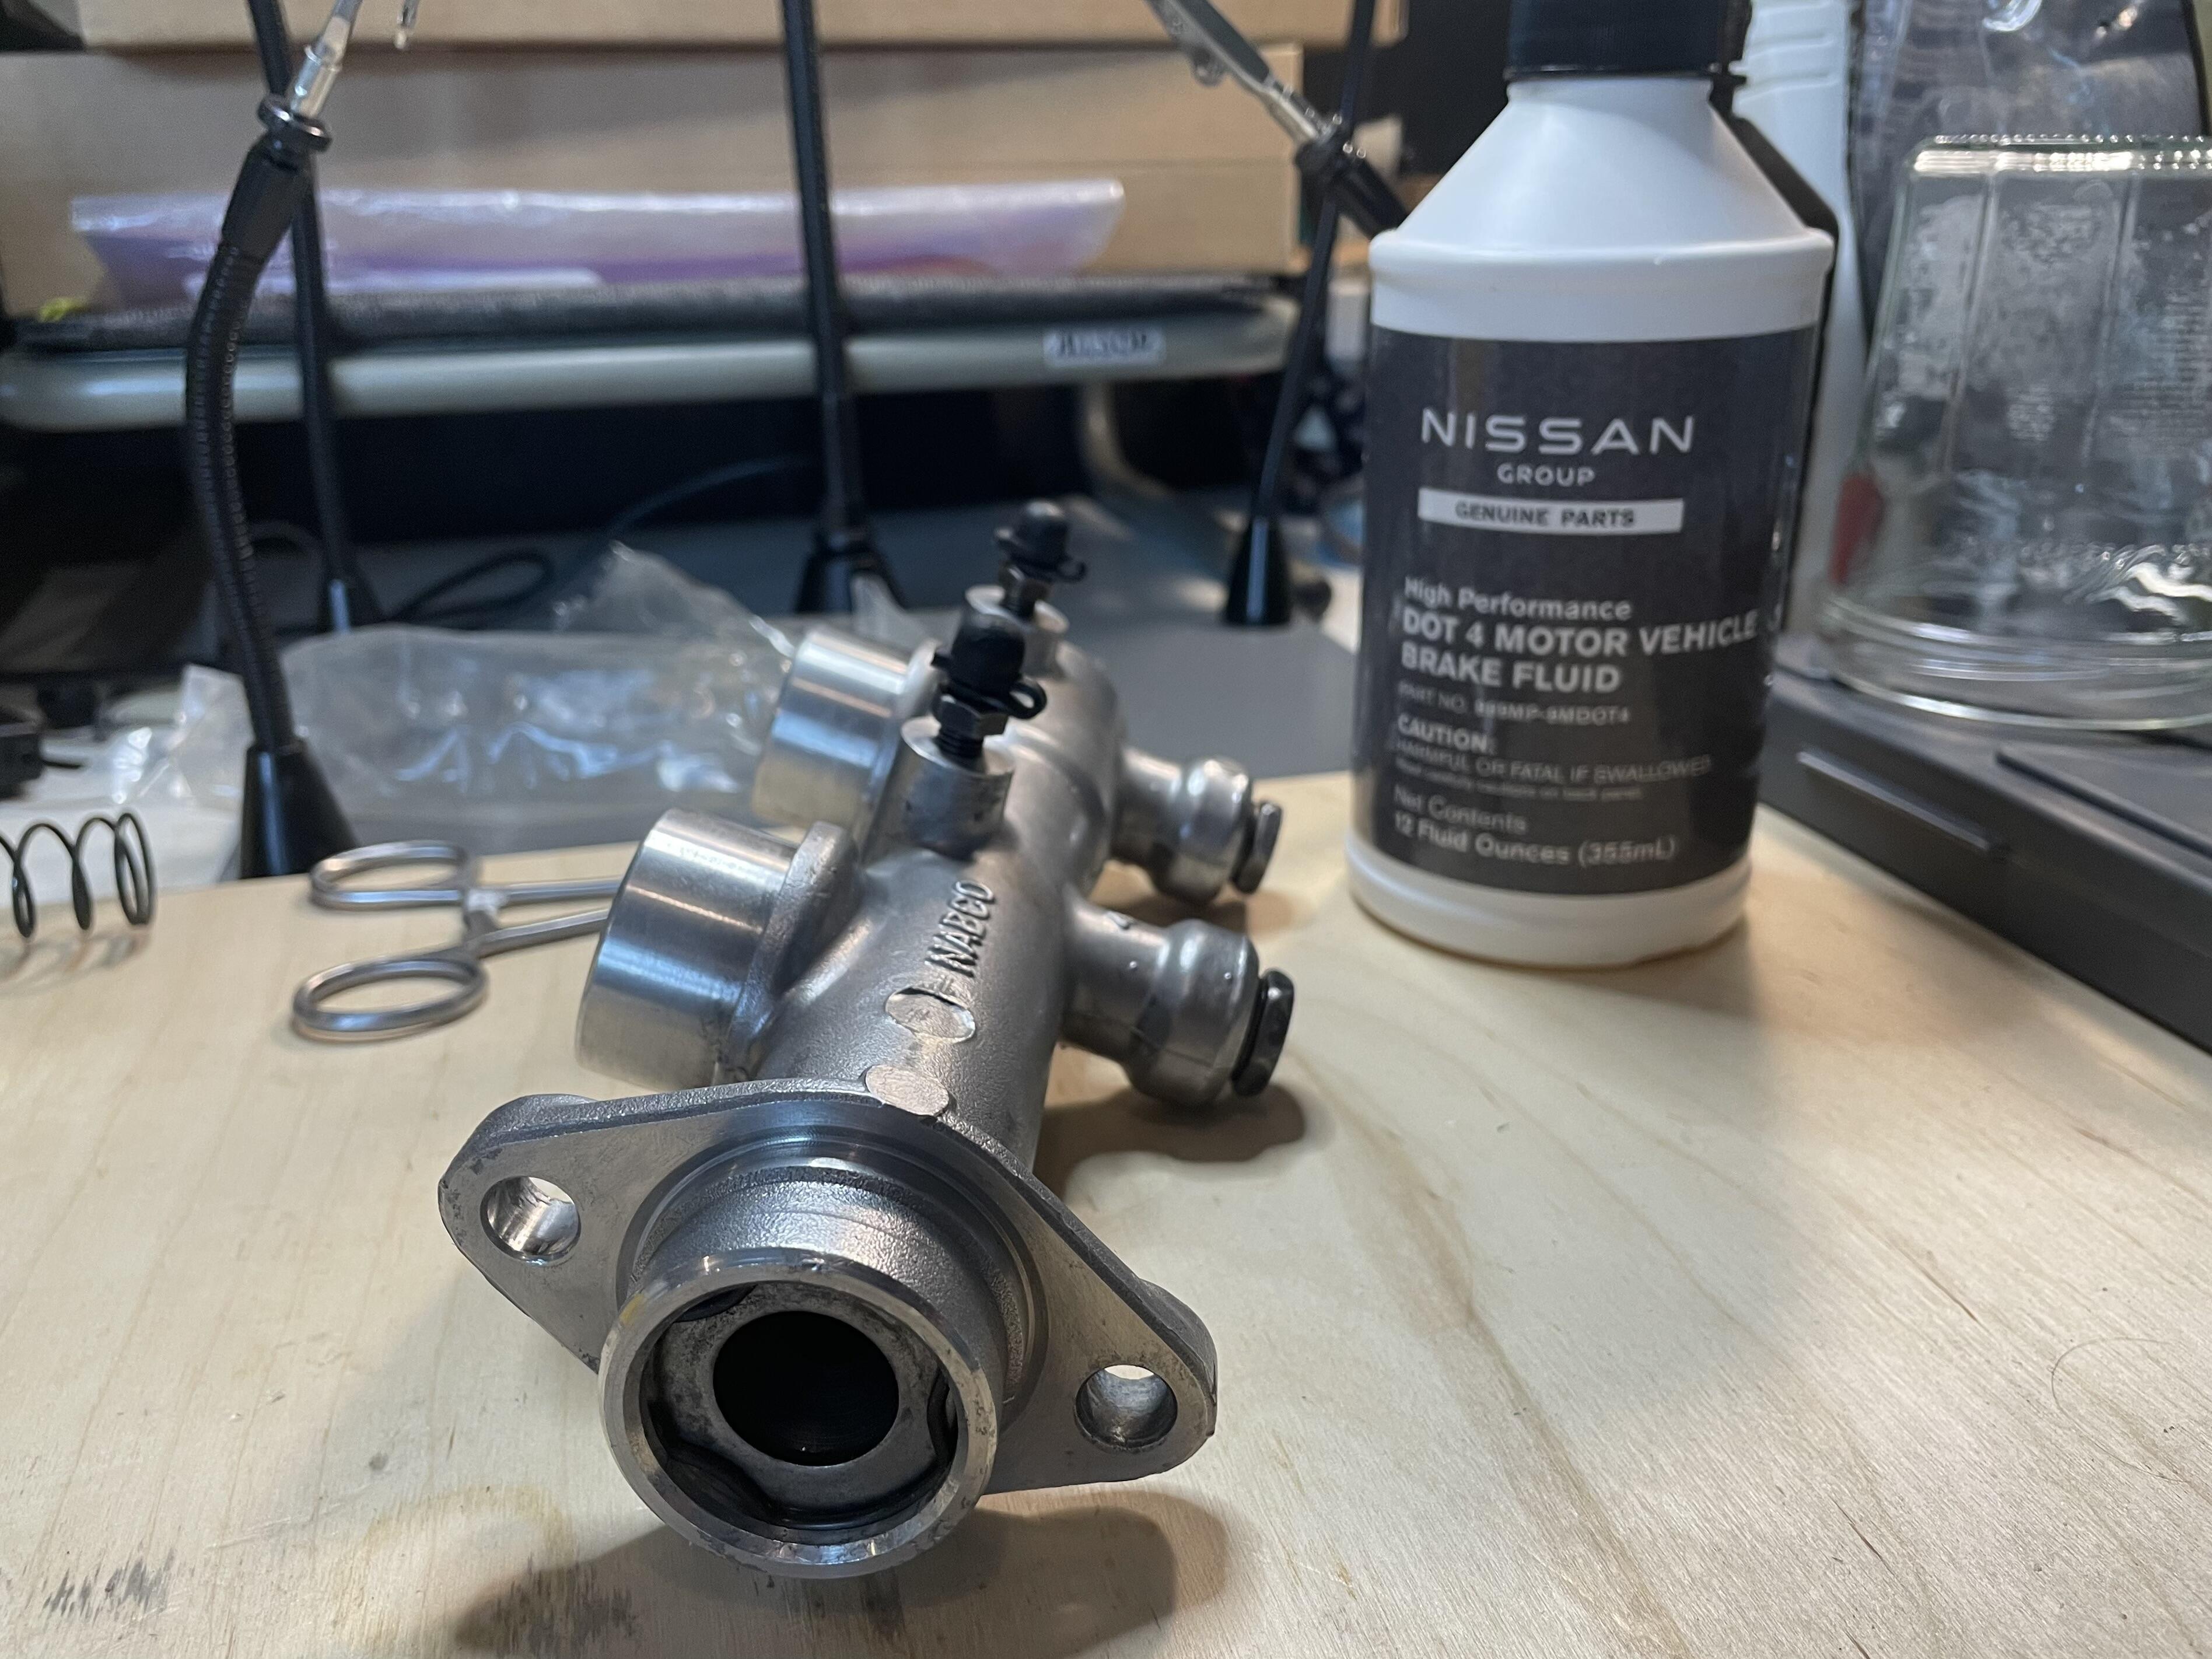
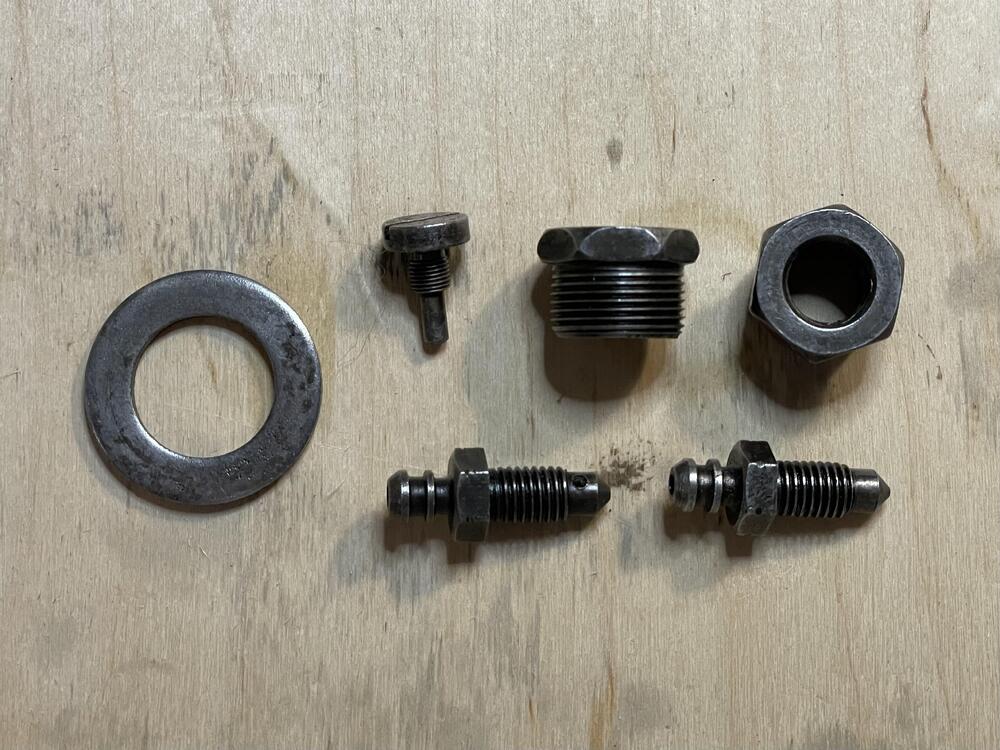
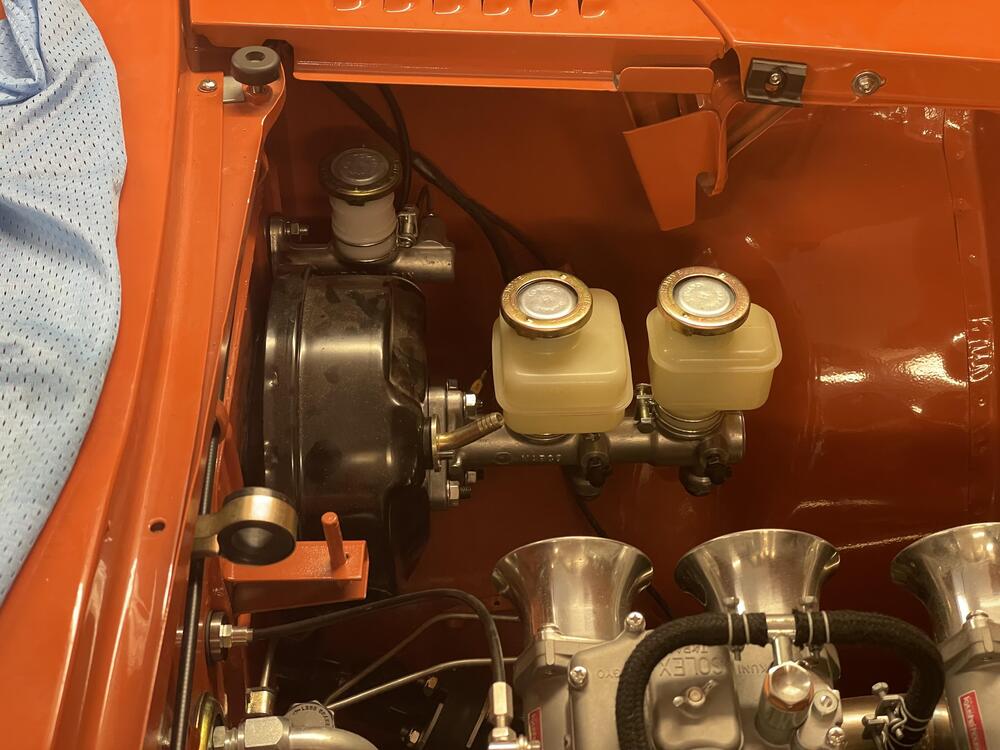
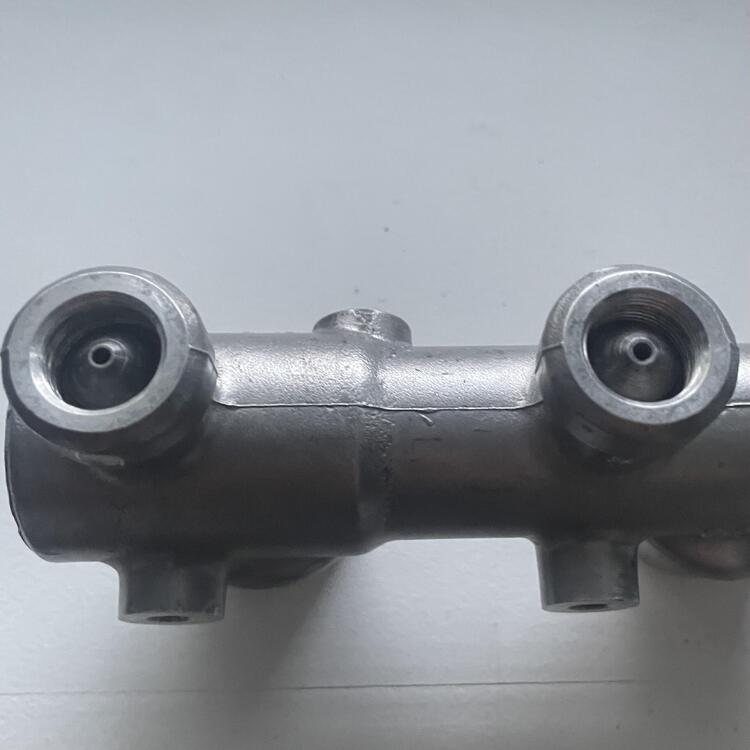
Does anyone know if the 15/16” 280ZX brake master cylinder is supposed to have a dust boot here: That collar is 38mm. The only ones I can find that look right are 26mm. It looks like there’s a groove to hold one on, and there’s clearly a channel for an o-ring, but I can’t find one in the exploded diagram. I have seen a bunch of aftermarket ones that have a dust boot, including the Wilwood 1” MC, but nothing for the factory ones.


-
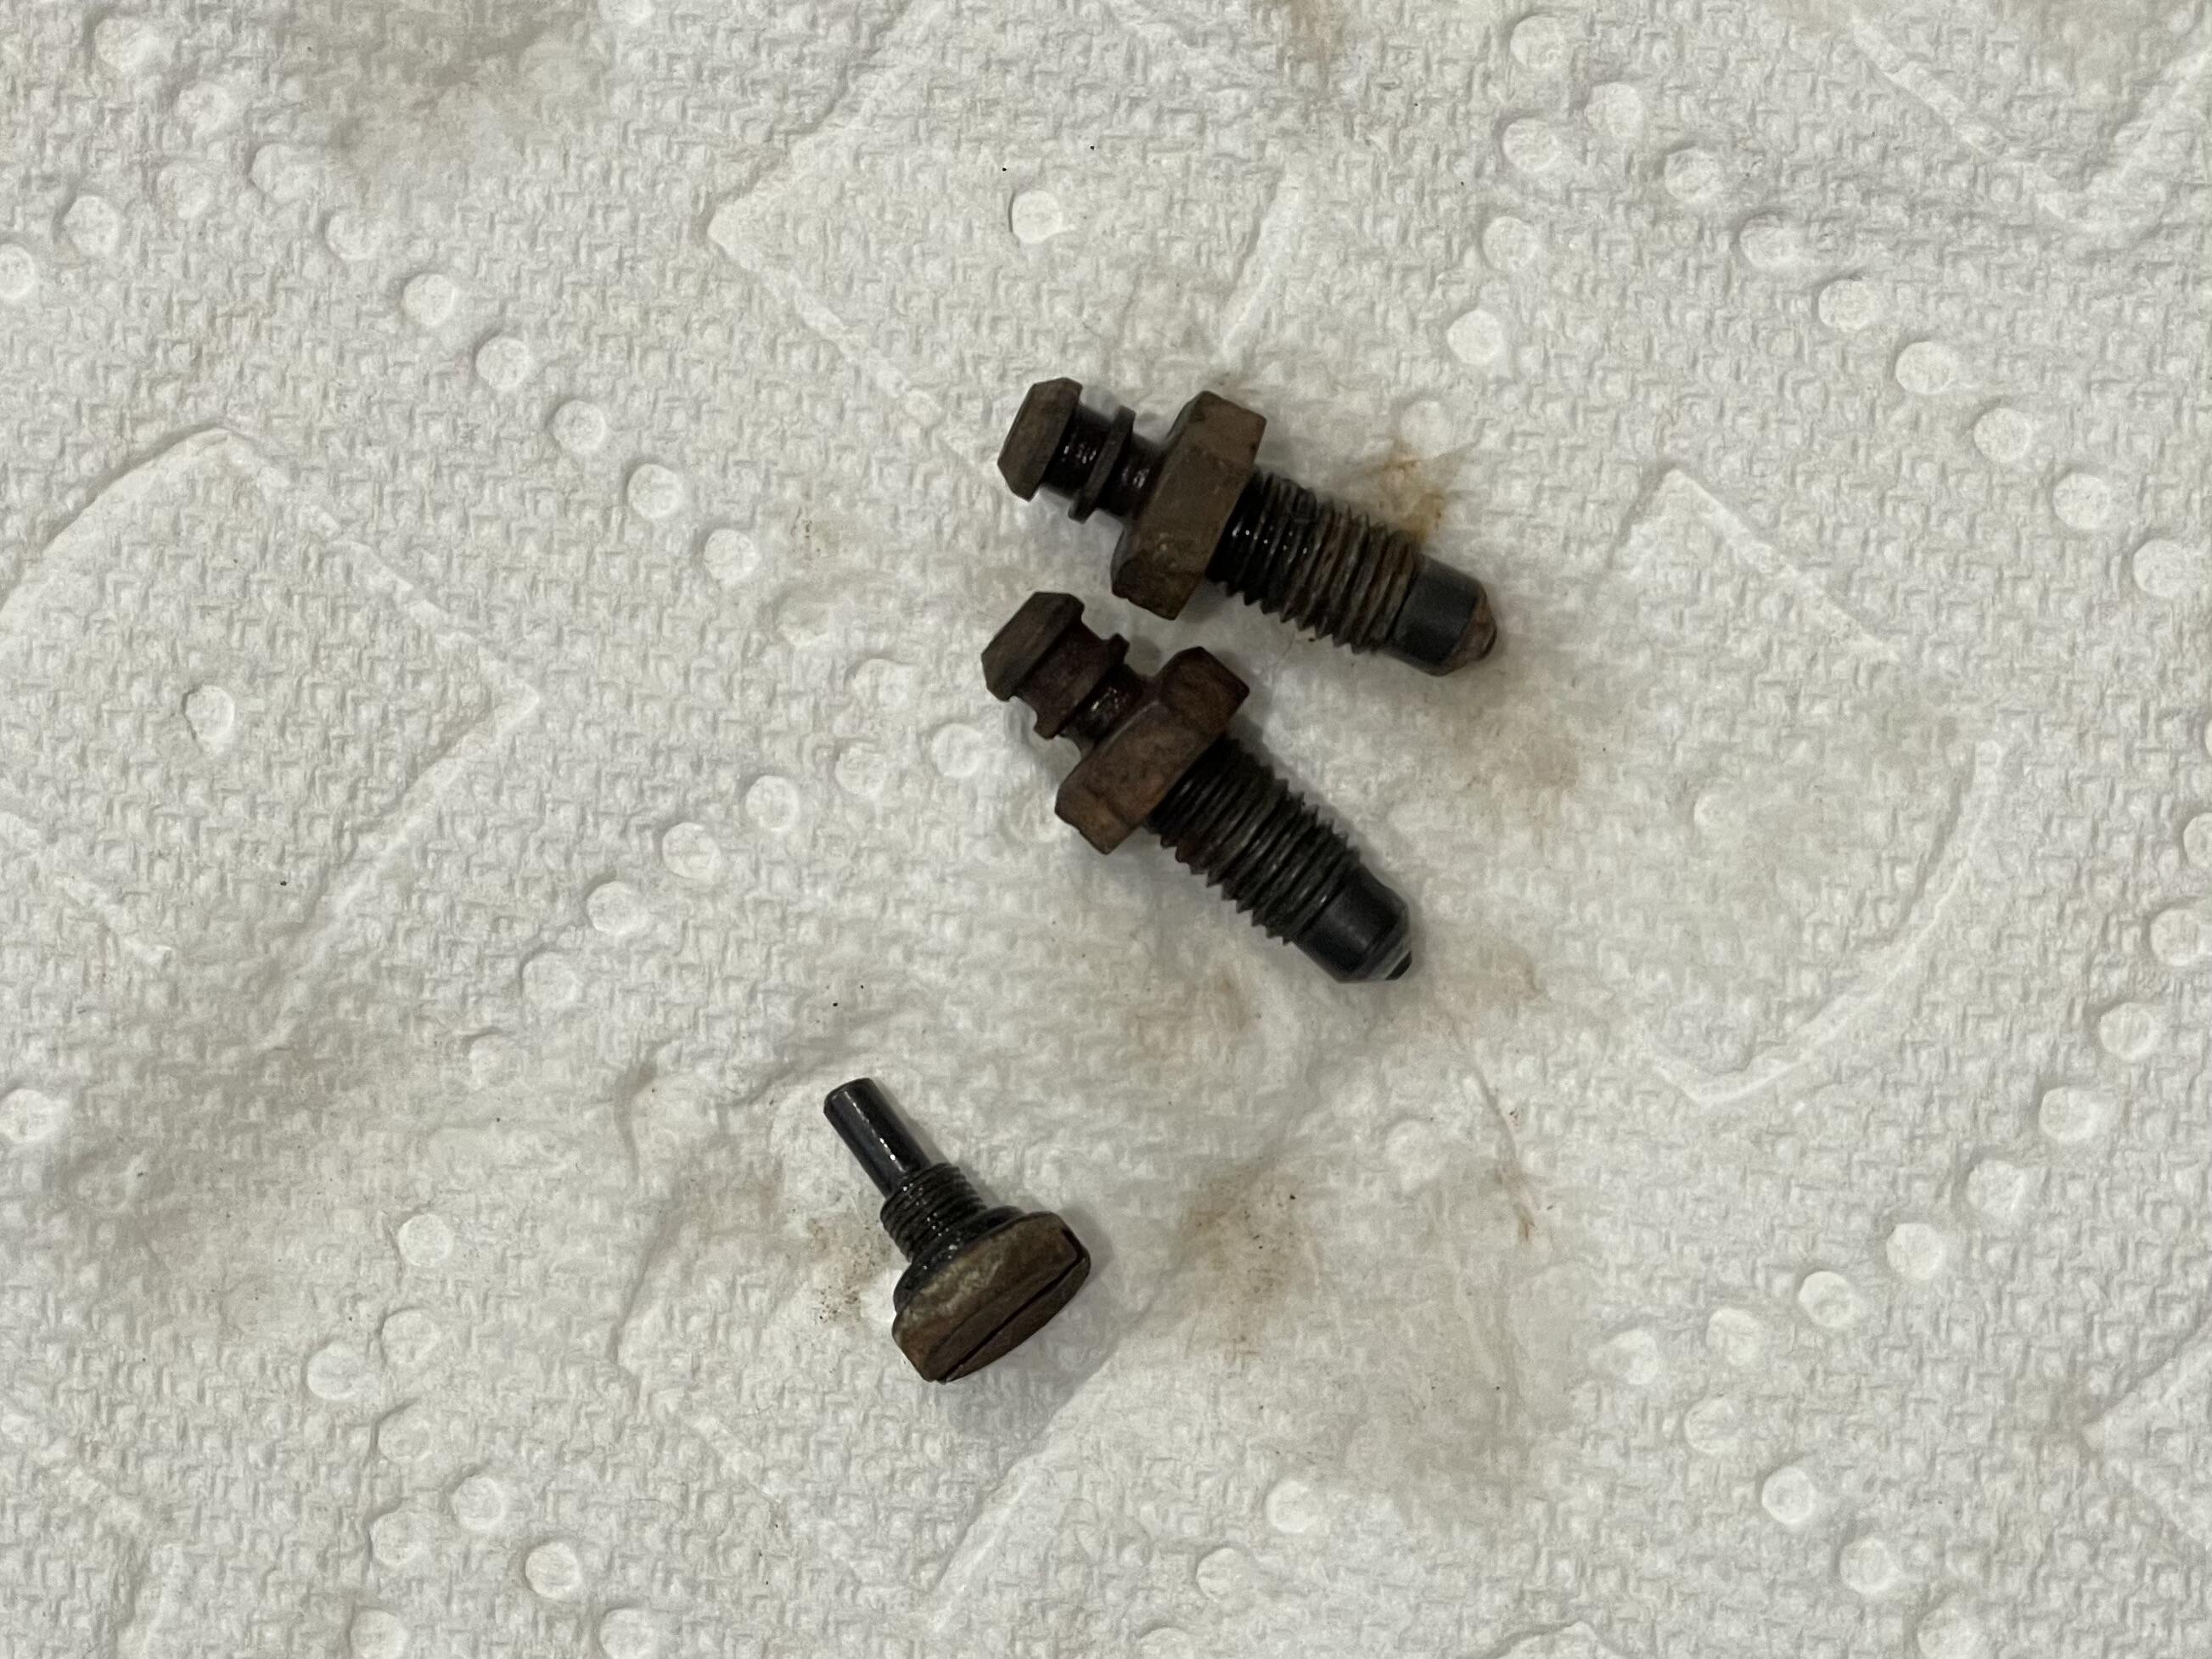
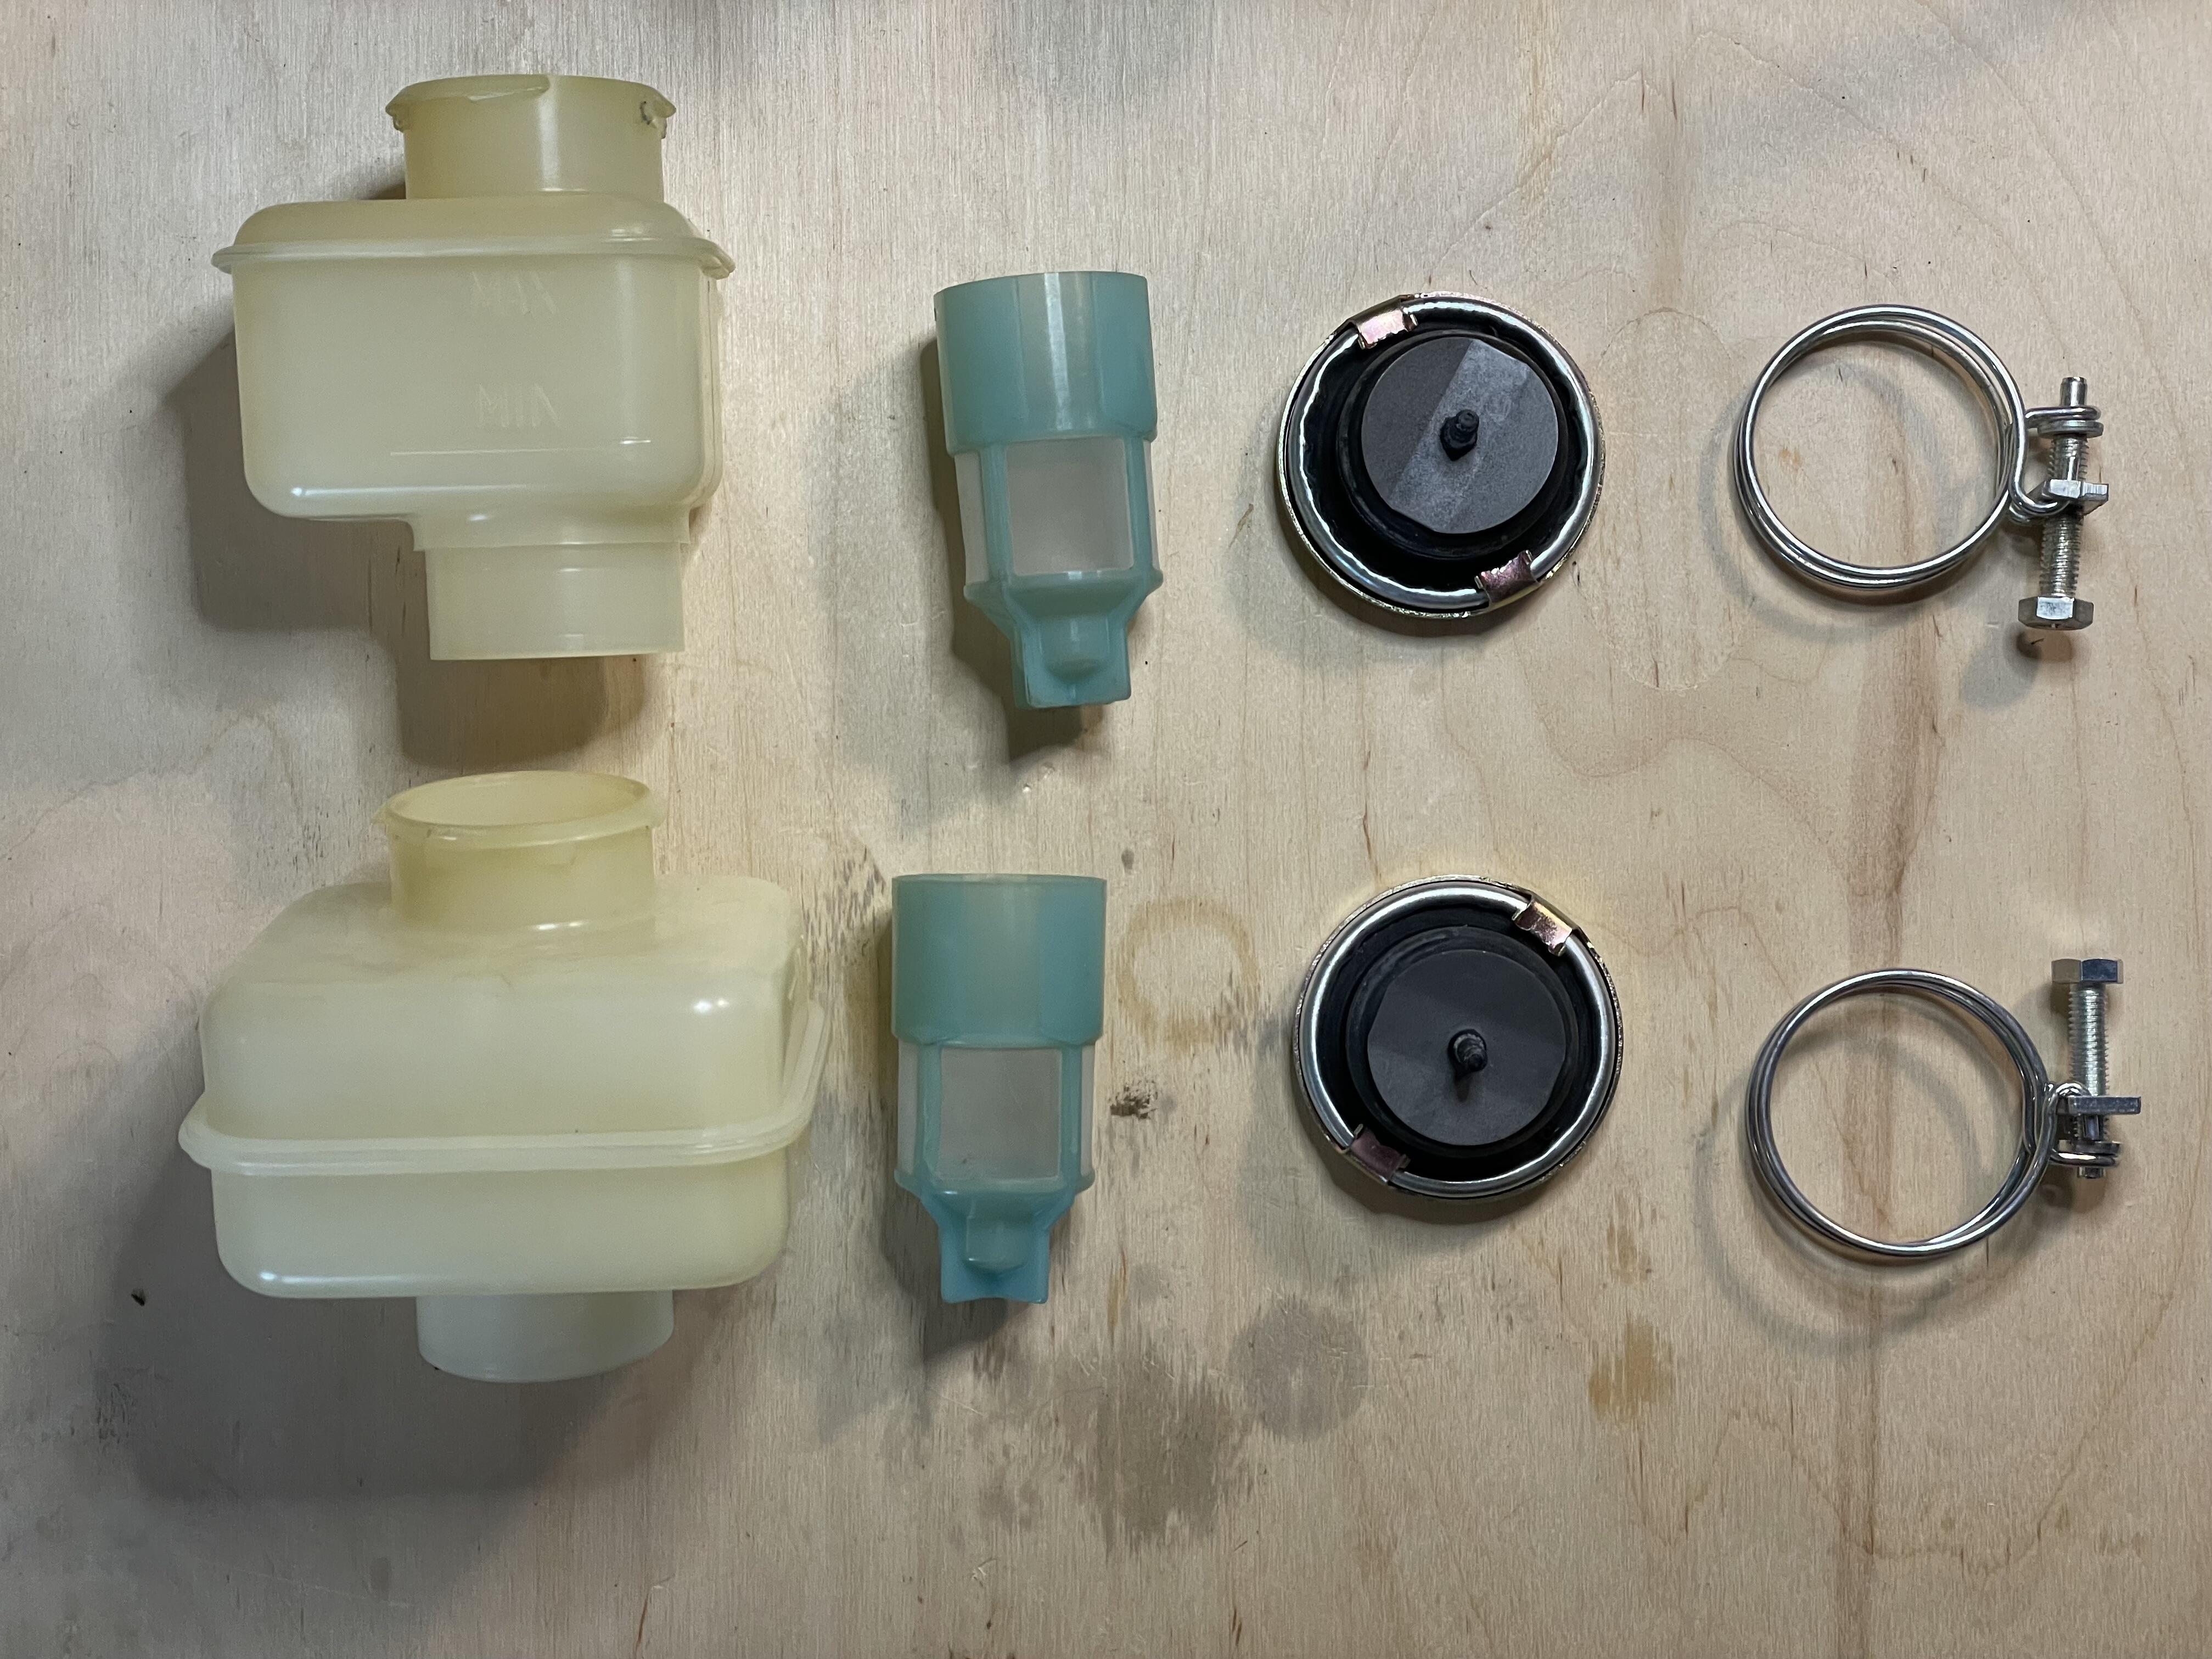
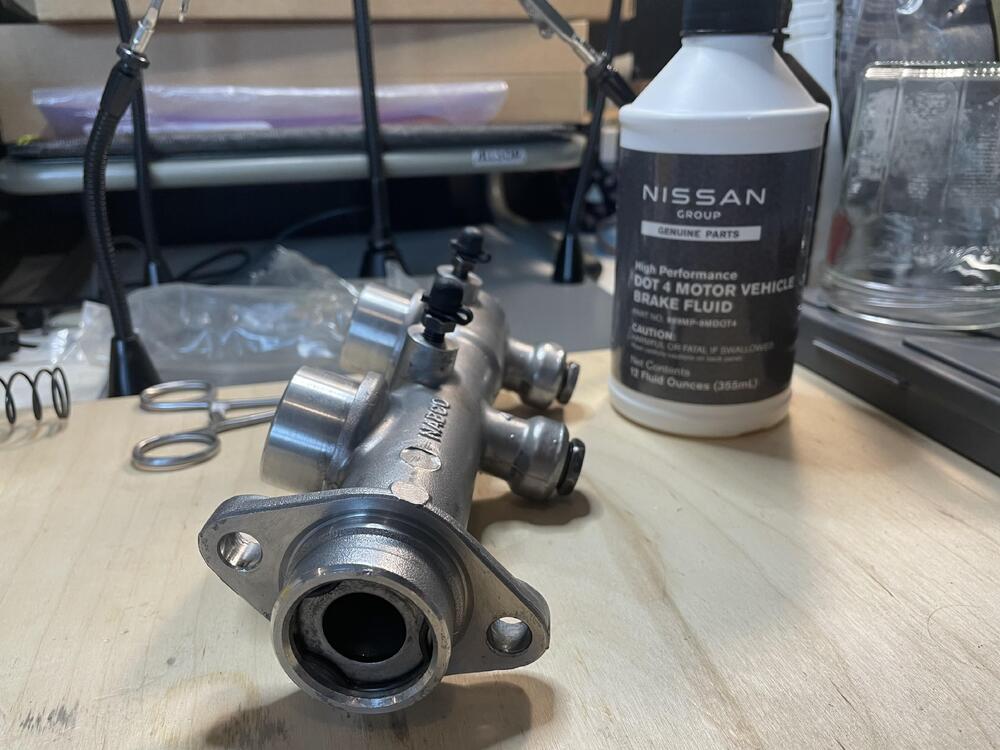
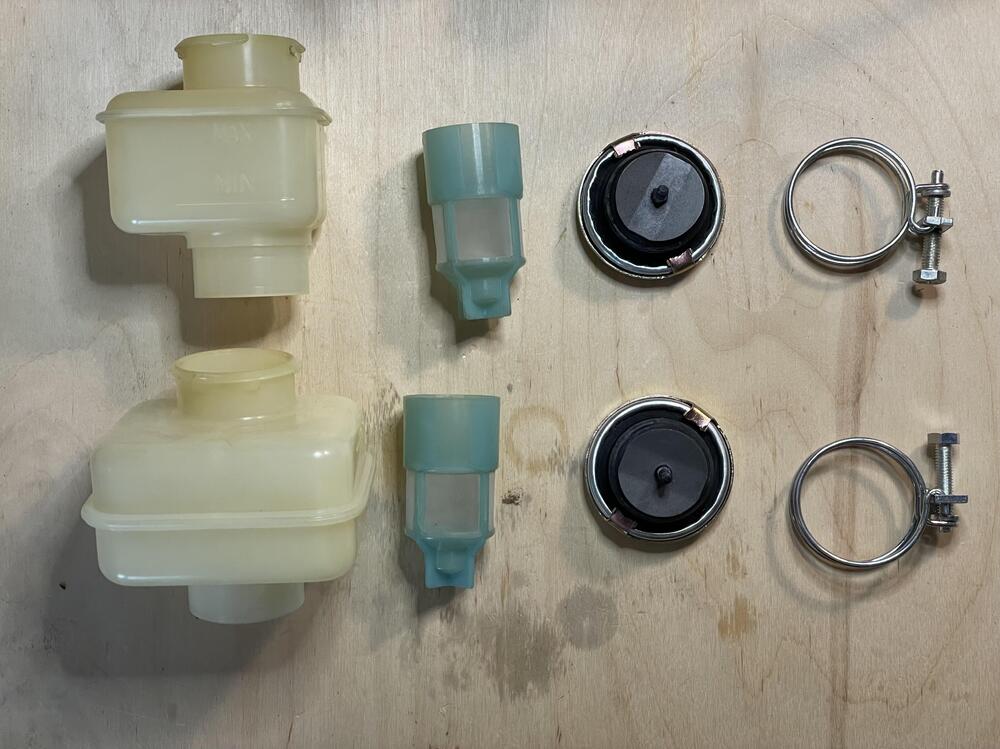
280ZX Brake MC is ready to go! I tore this apart several years ago thinking it would be a short project, but the rebuild kit I had turned out to be for the one made by Tokico (large perforated disc residual valves) and this one is made by Nabco (small rubber duckbill residual valves, see below). I had messed around with trying to rejuvenate the reservoirs. I had read you could cover it in a solution of oxy clean and hydrogen peroxide gel under UV light for 24 hours and it would take the yellow out. It lightened it up, but they’re still clearly yellow. Super clean, though. I also did some chemistry on some of the hardware. The bleeders and reducers for this thing are not common sizes (the reducers are m16x1.0 to m10x1.0) and after two weeks of searching for replacements I gave up and decided to try chemically coating them. I didn’t want to do the hardcore hot bluing or zinc methods because of the chemicals, so I used the rust bluing method. Basically, you soak them in white vinegar to strip off the rust, zinc, and anything else on them. Then you paint them with a paracetic acid / salt solution (8 parts hydrogen peroxide:1 part white vinegar + as much salt as it will dissolve). Dry it with a heat gun and throw it into a double boiler. You’ll see the rust turn black, which is when it turns into iron oxide. Buff it with steel wool and repeat until satisfied, then soak for 24 hours in motor oil. They came out okay. I was hoping they would look more like the pistons, but this is what they look like after four rounds of the process, so it’s going to have to be good enough. Fingers crossed that they don’t just immediately corrode. You could also do the phosphoric acid version (cold bluing), but this makes a harder coating of iron oxide. Then I just had to hone the cylinder, flush it with 91% alcohol, wipe it out, and reassemble. I kept the Tokico 240Z reservoir caps since I didn’t wire the car for ZX caps (PN: 46020-U6701) with the fluid level sensors and don’t have the metal (PN: 46020-K2401) or plastic (PN: 46020-N6000) Nabco caps. Maybe later if I can find a set for less than €53.40. It looks pretty good after test fitting it. I’m waiting for a dust cover and O-ring in the mail, then I can install it and bleed the brakes.


-
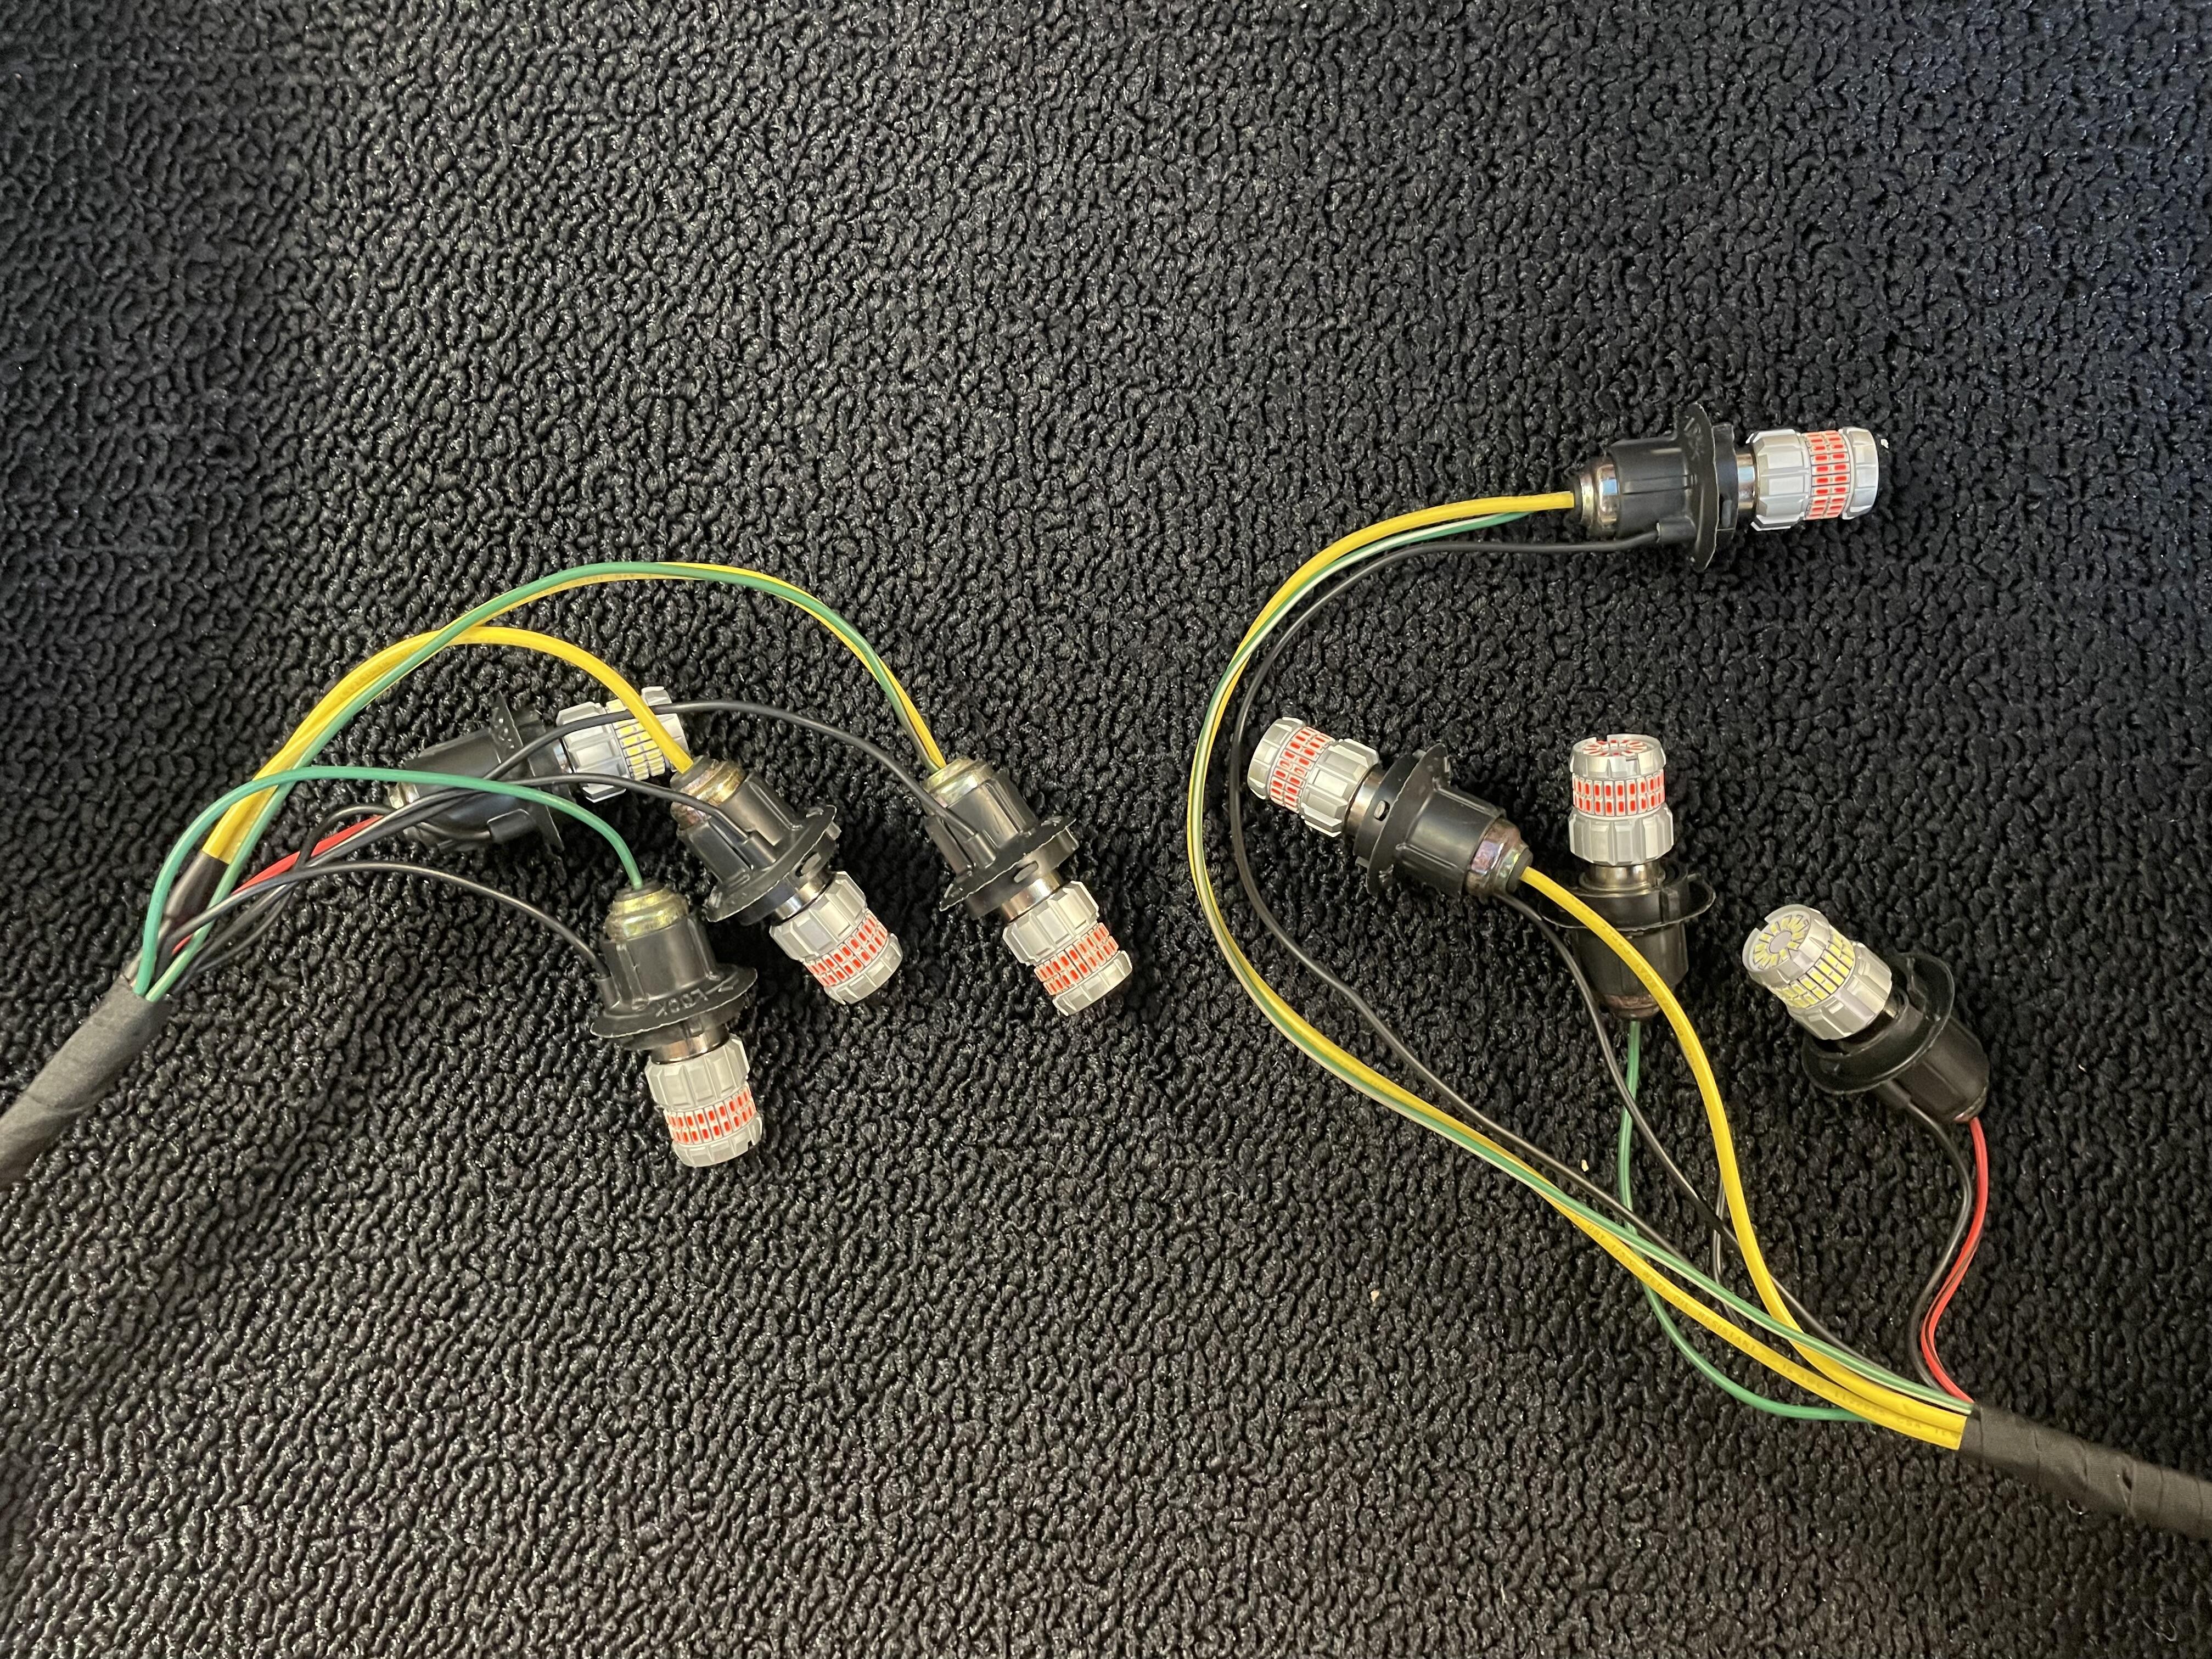
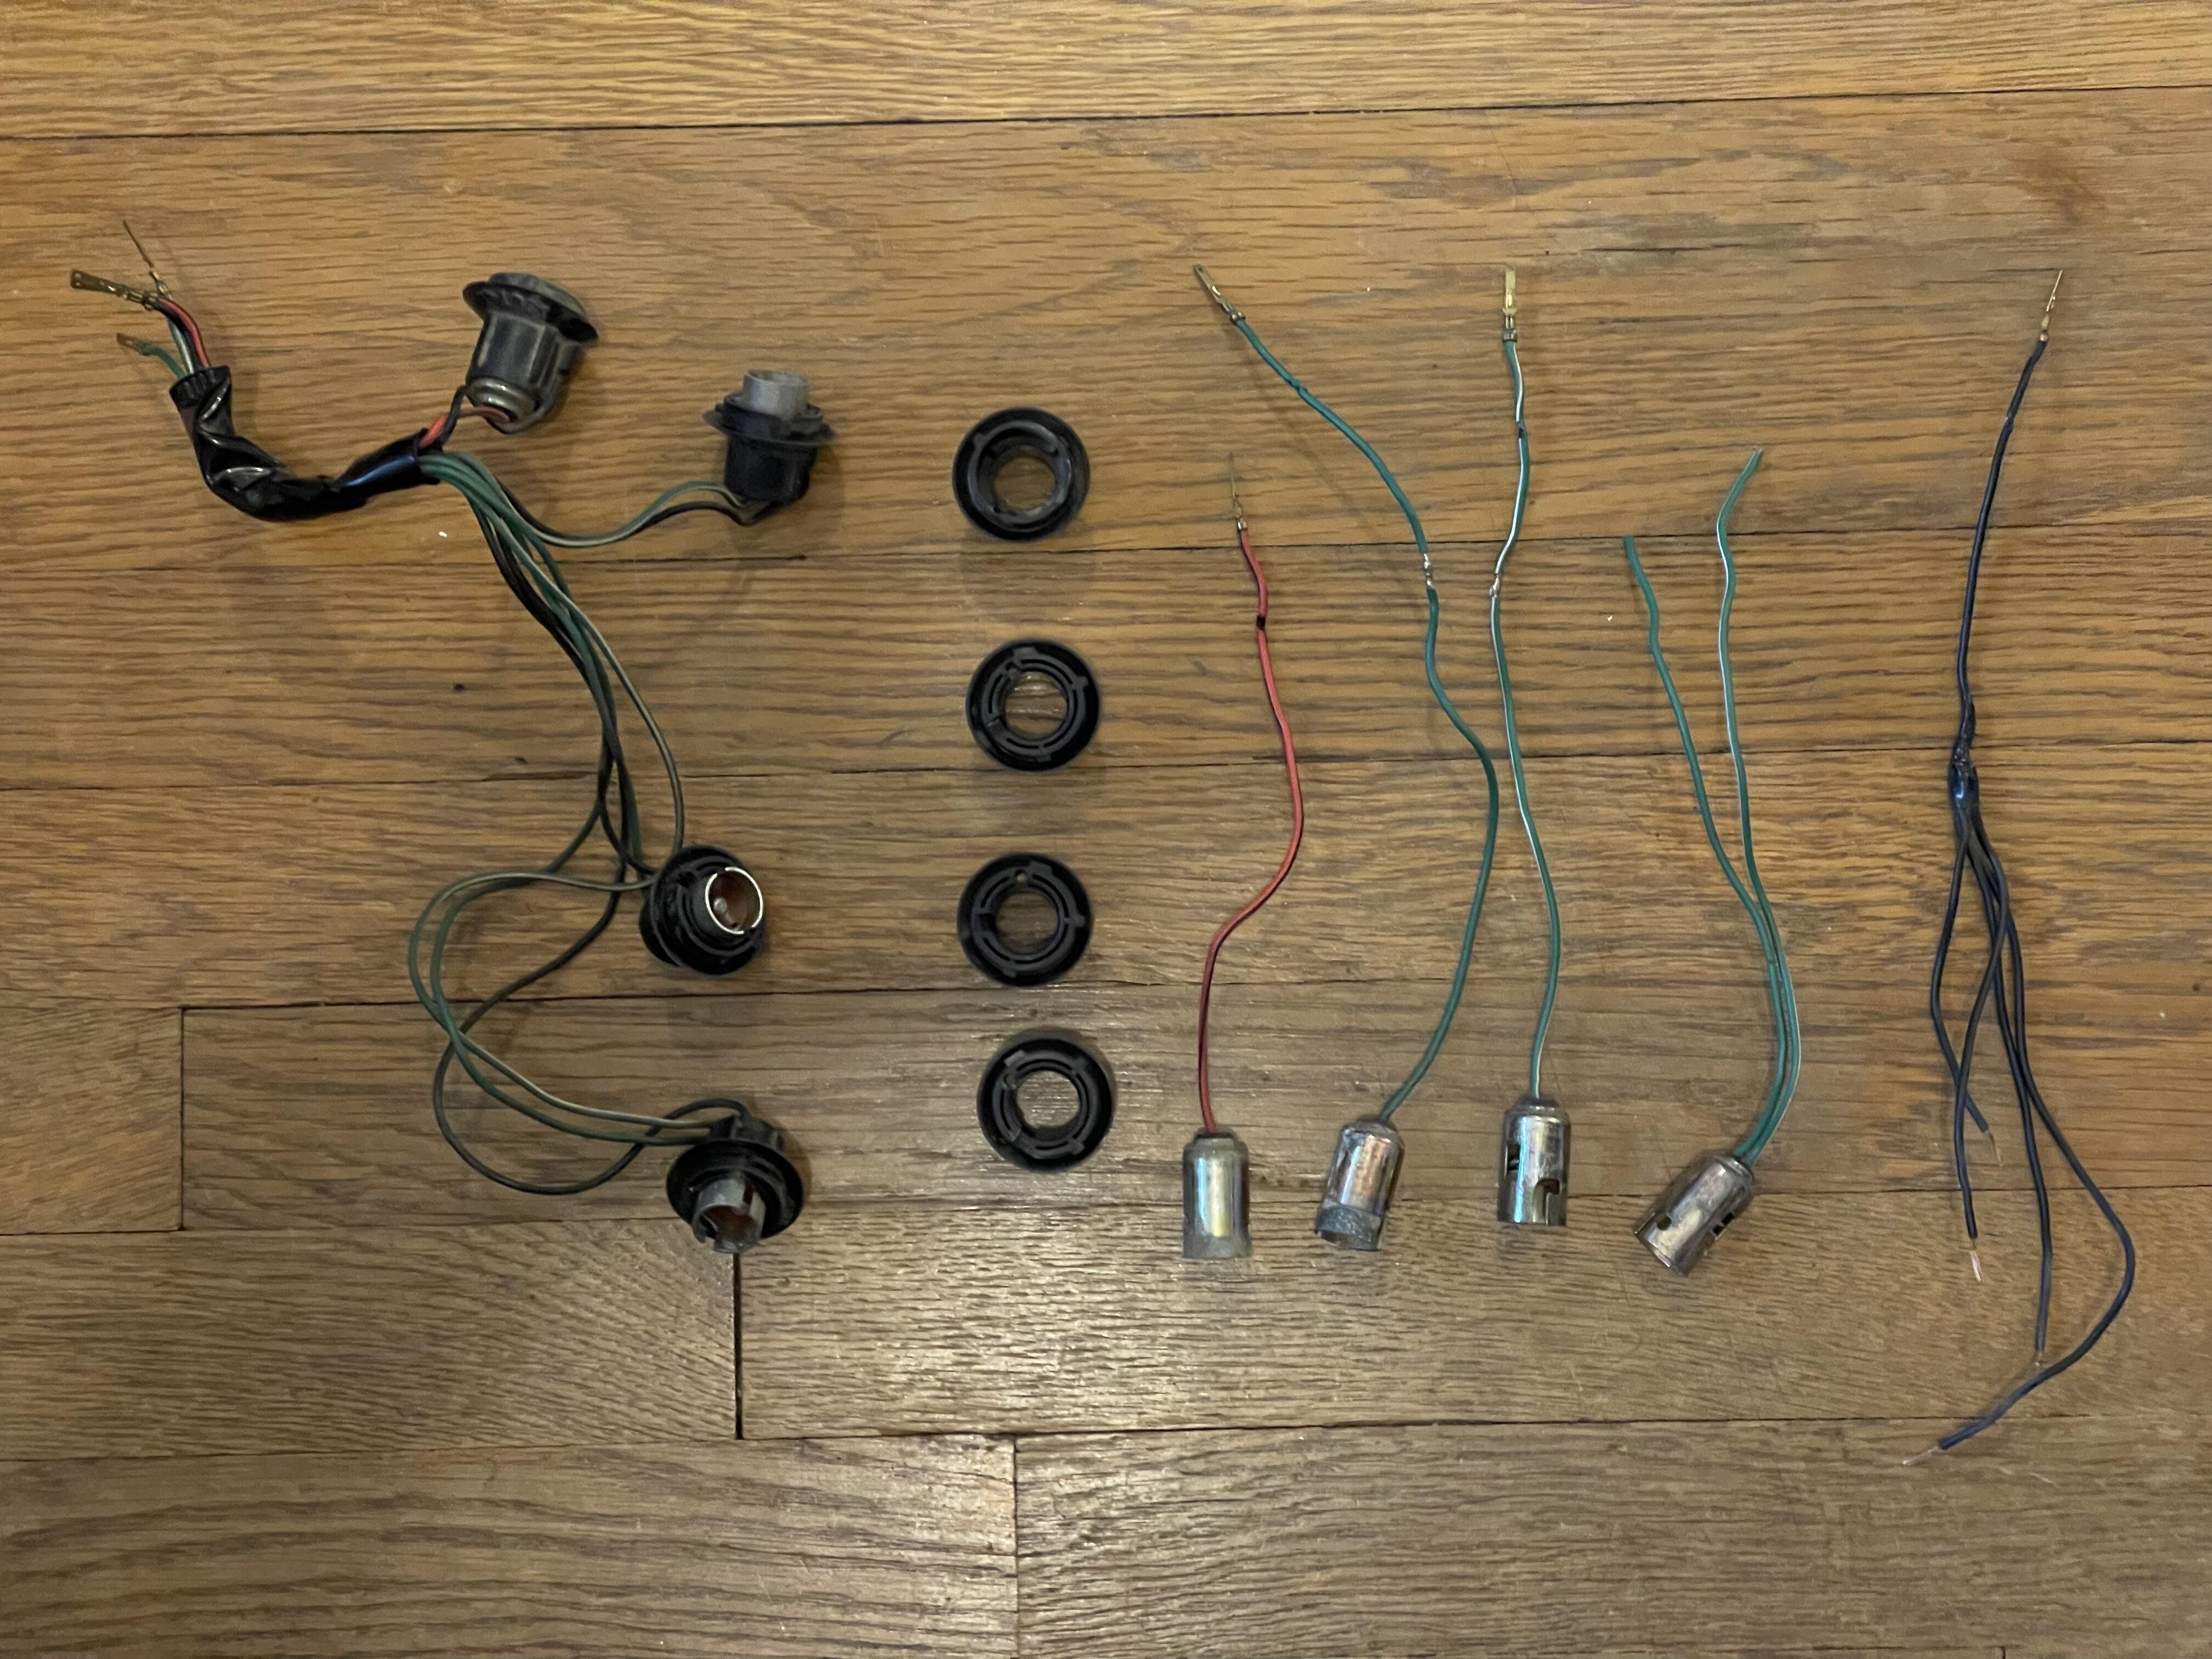
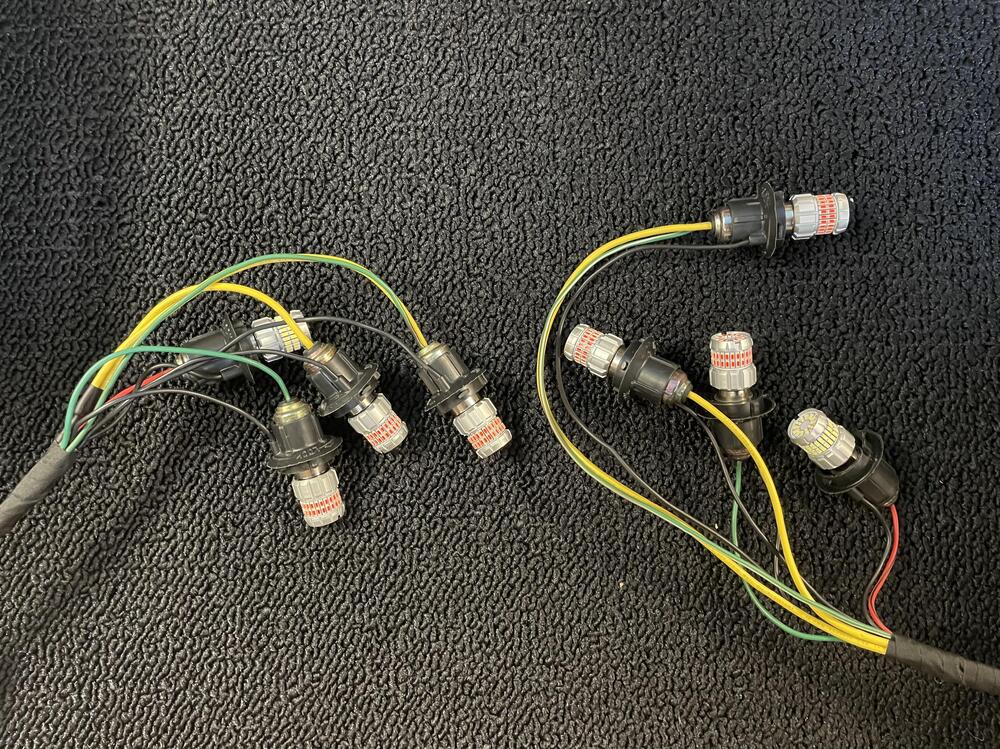
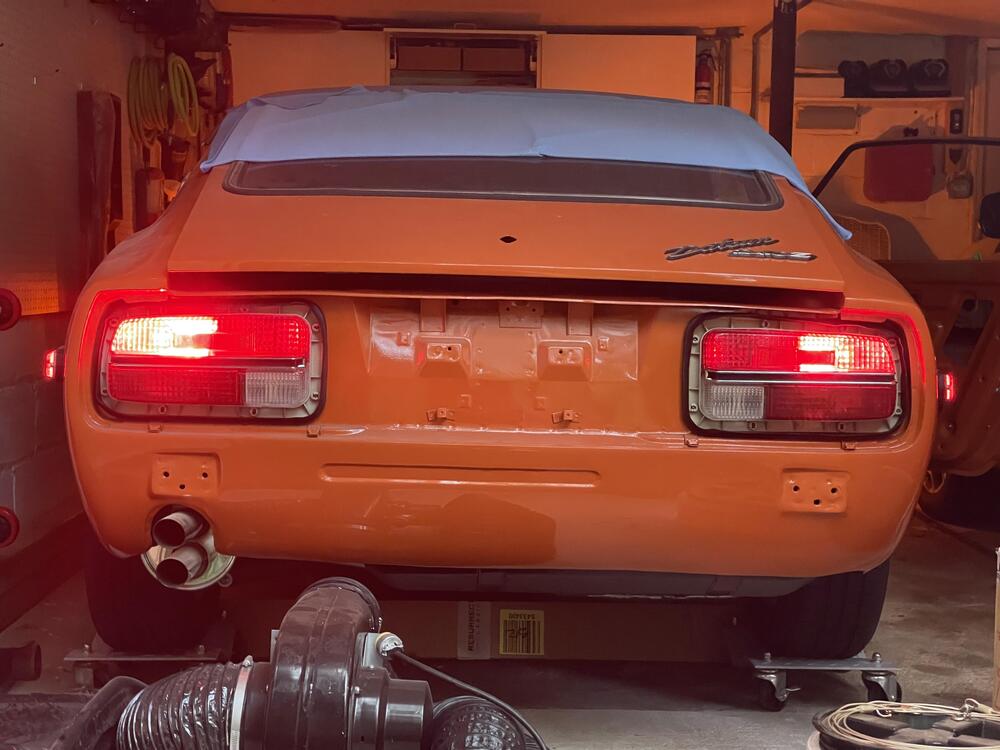
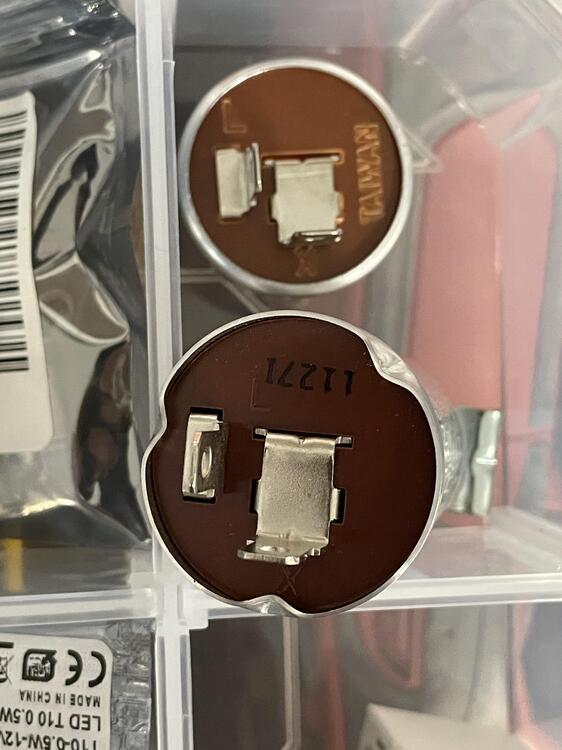
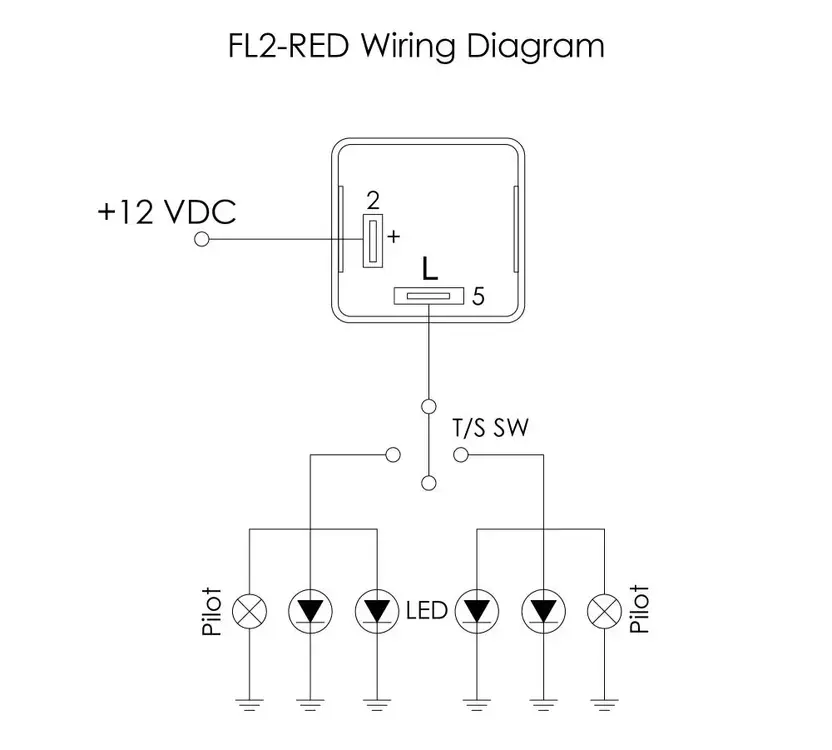
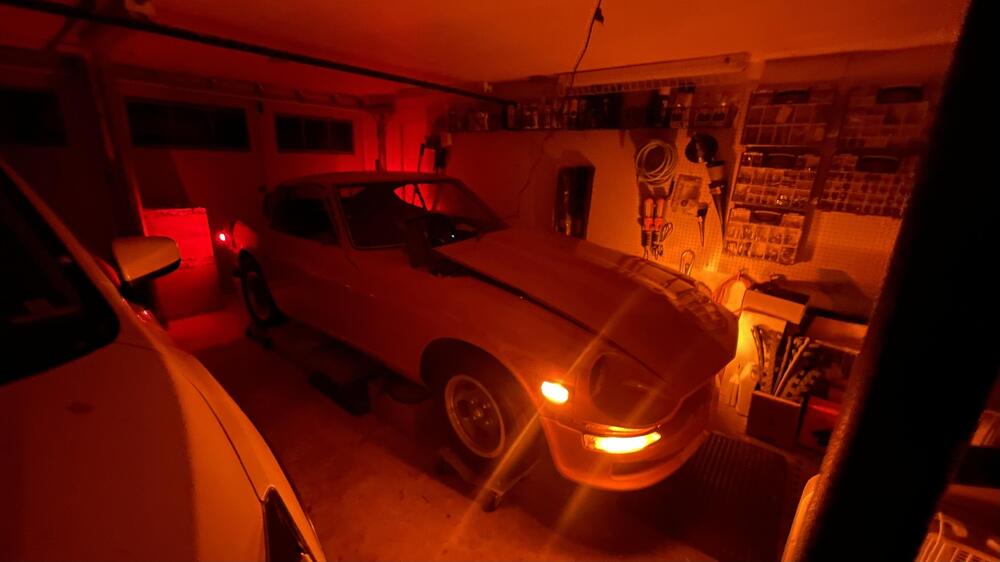
Quick one today. After working out some kinks in the wiring (thanks @SteveJ) I’m nearly done with it. I refurbished the wiring for the tail lights this week. I’ve always planned to rework the arrangement to be more like (but not exactly like) the euro tail lights. I’ve read a ton of stuff about these cars getting rear ended, so I wanted to make it as clear as possible that I’m braking. I still plan to add a third brake light, but I think this is substantially better than the original US tail light configuration. Driving lights are the outside top lights only. IMG_4744.mov IMG_4745.movTurn signals are the outside bottom lights only (thanks to @w3wilkes for the flasher recommendation). Brakes all of the top lights. Now I have to figure out what I’m going to do with the front turn signals. These LEDs are so bright that when the driving lights are on you can’t tell they flashing from more than a couple feet away. I’m wondering if there’s a way to make it cut power to the driving light wire only when the turn signal is working.


-
I just switched to OEM flasher relays and tried it with the LEDs still installed. No change. The lights come on but don’t flash. Then I pulled the LEDs and put incandescent bulbs in, which totally fixed it. So it’s the flashers and/or the LEDs and not the wiring. I am going to try swapping the wires over the weekend and putting the LEDs back in (no time right now. Work deadlines). If that fixes it I’ll just leave it like that until I get around to buying new relays.
-
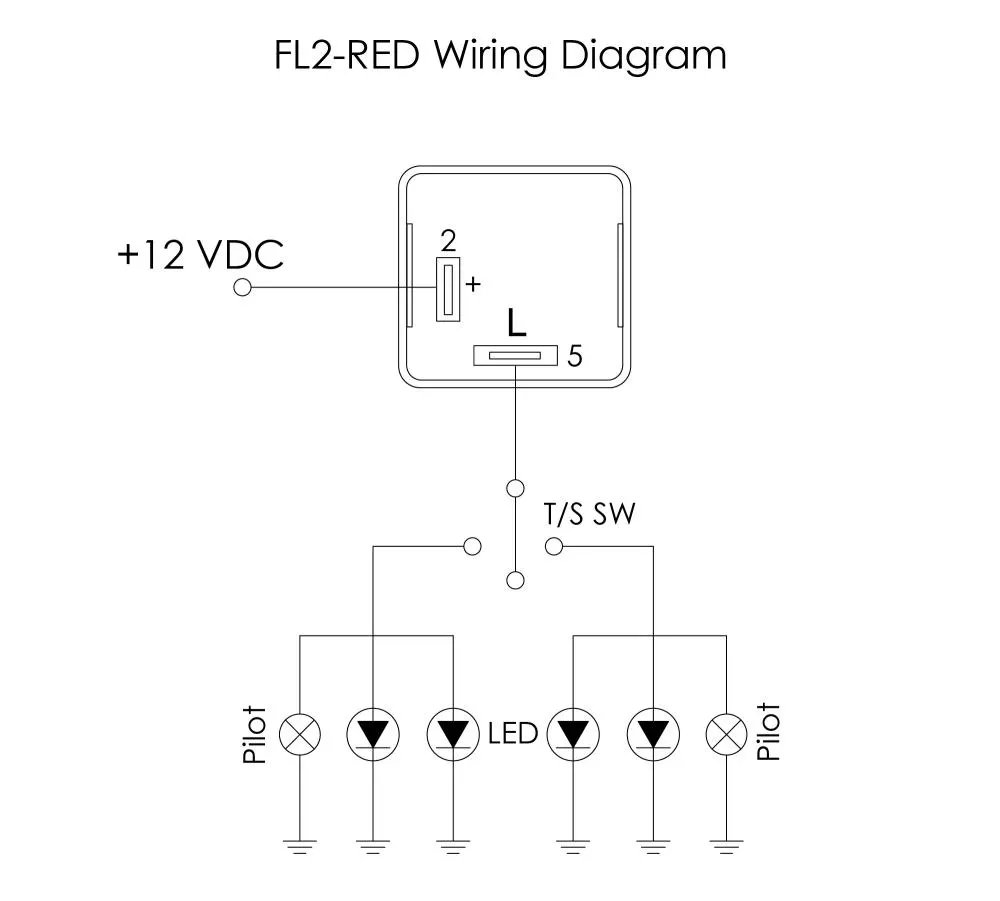
Okay, found my first error. The flashers aren’t flashing. I had replaced both the TS flasher and the hazard flasher with one of these LED-specific flasher relays. When the switch is thrown the lights come on, but they are just on, no flashing. Unplug the flasher and there are no lights, which makes sense because the circuit is broken in that scenario. I swapped an aftermarket replacement for the stock one into the spot for the turn signals, but there was no change. I haven’t had a chance to get to the one for the hazards yet. Any thoughts? Edit: After looking at the spec diagram on the red relays and comparing the marking on the original relays, I’ve found that the polarity is backwards. This flasher relay has the pins flipped from the one I am using and is the one I should have bought. Maybe if I swap the wires in the connector it will fix it. I just blanked on checking this.
-
I have lights. No one is going to not see this thing. These LEDs are significantly brighter than the lights on my Subaru. Unfortunately, somewhere between testing it on the bench and installing the dash, the speedo and tach illumination stopped working. I think the main branch of wiring coming out of the dimmer is messed up. I also don’t have any blinkers for some reason. That one is going to be harder to figure out. Worst case scenario is that I made a mistake in the engine harness.
-
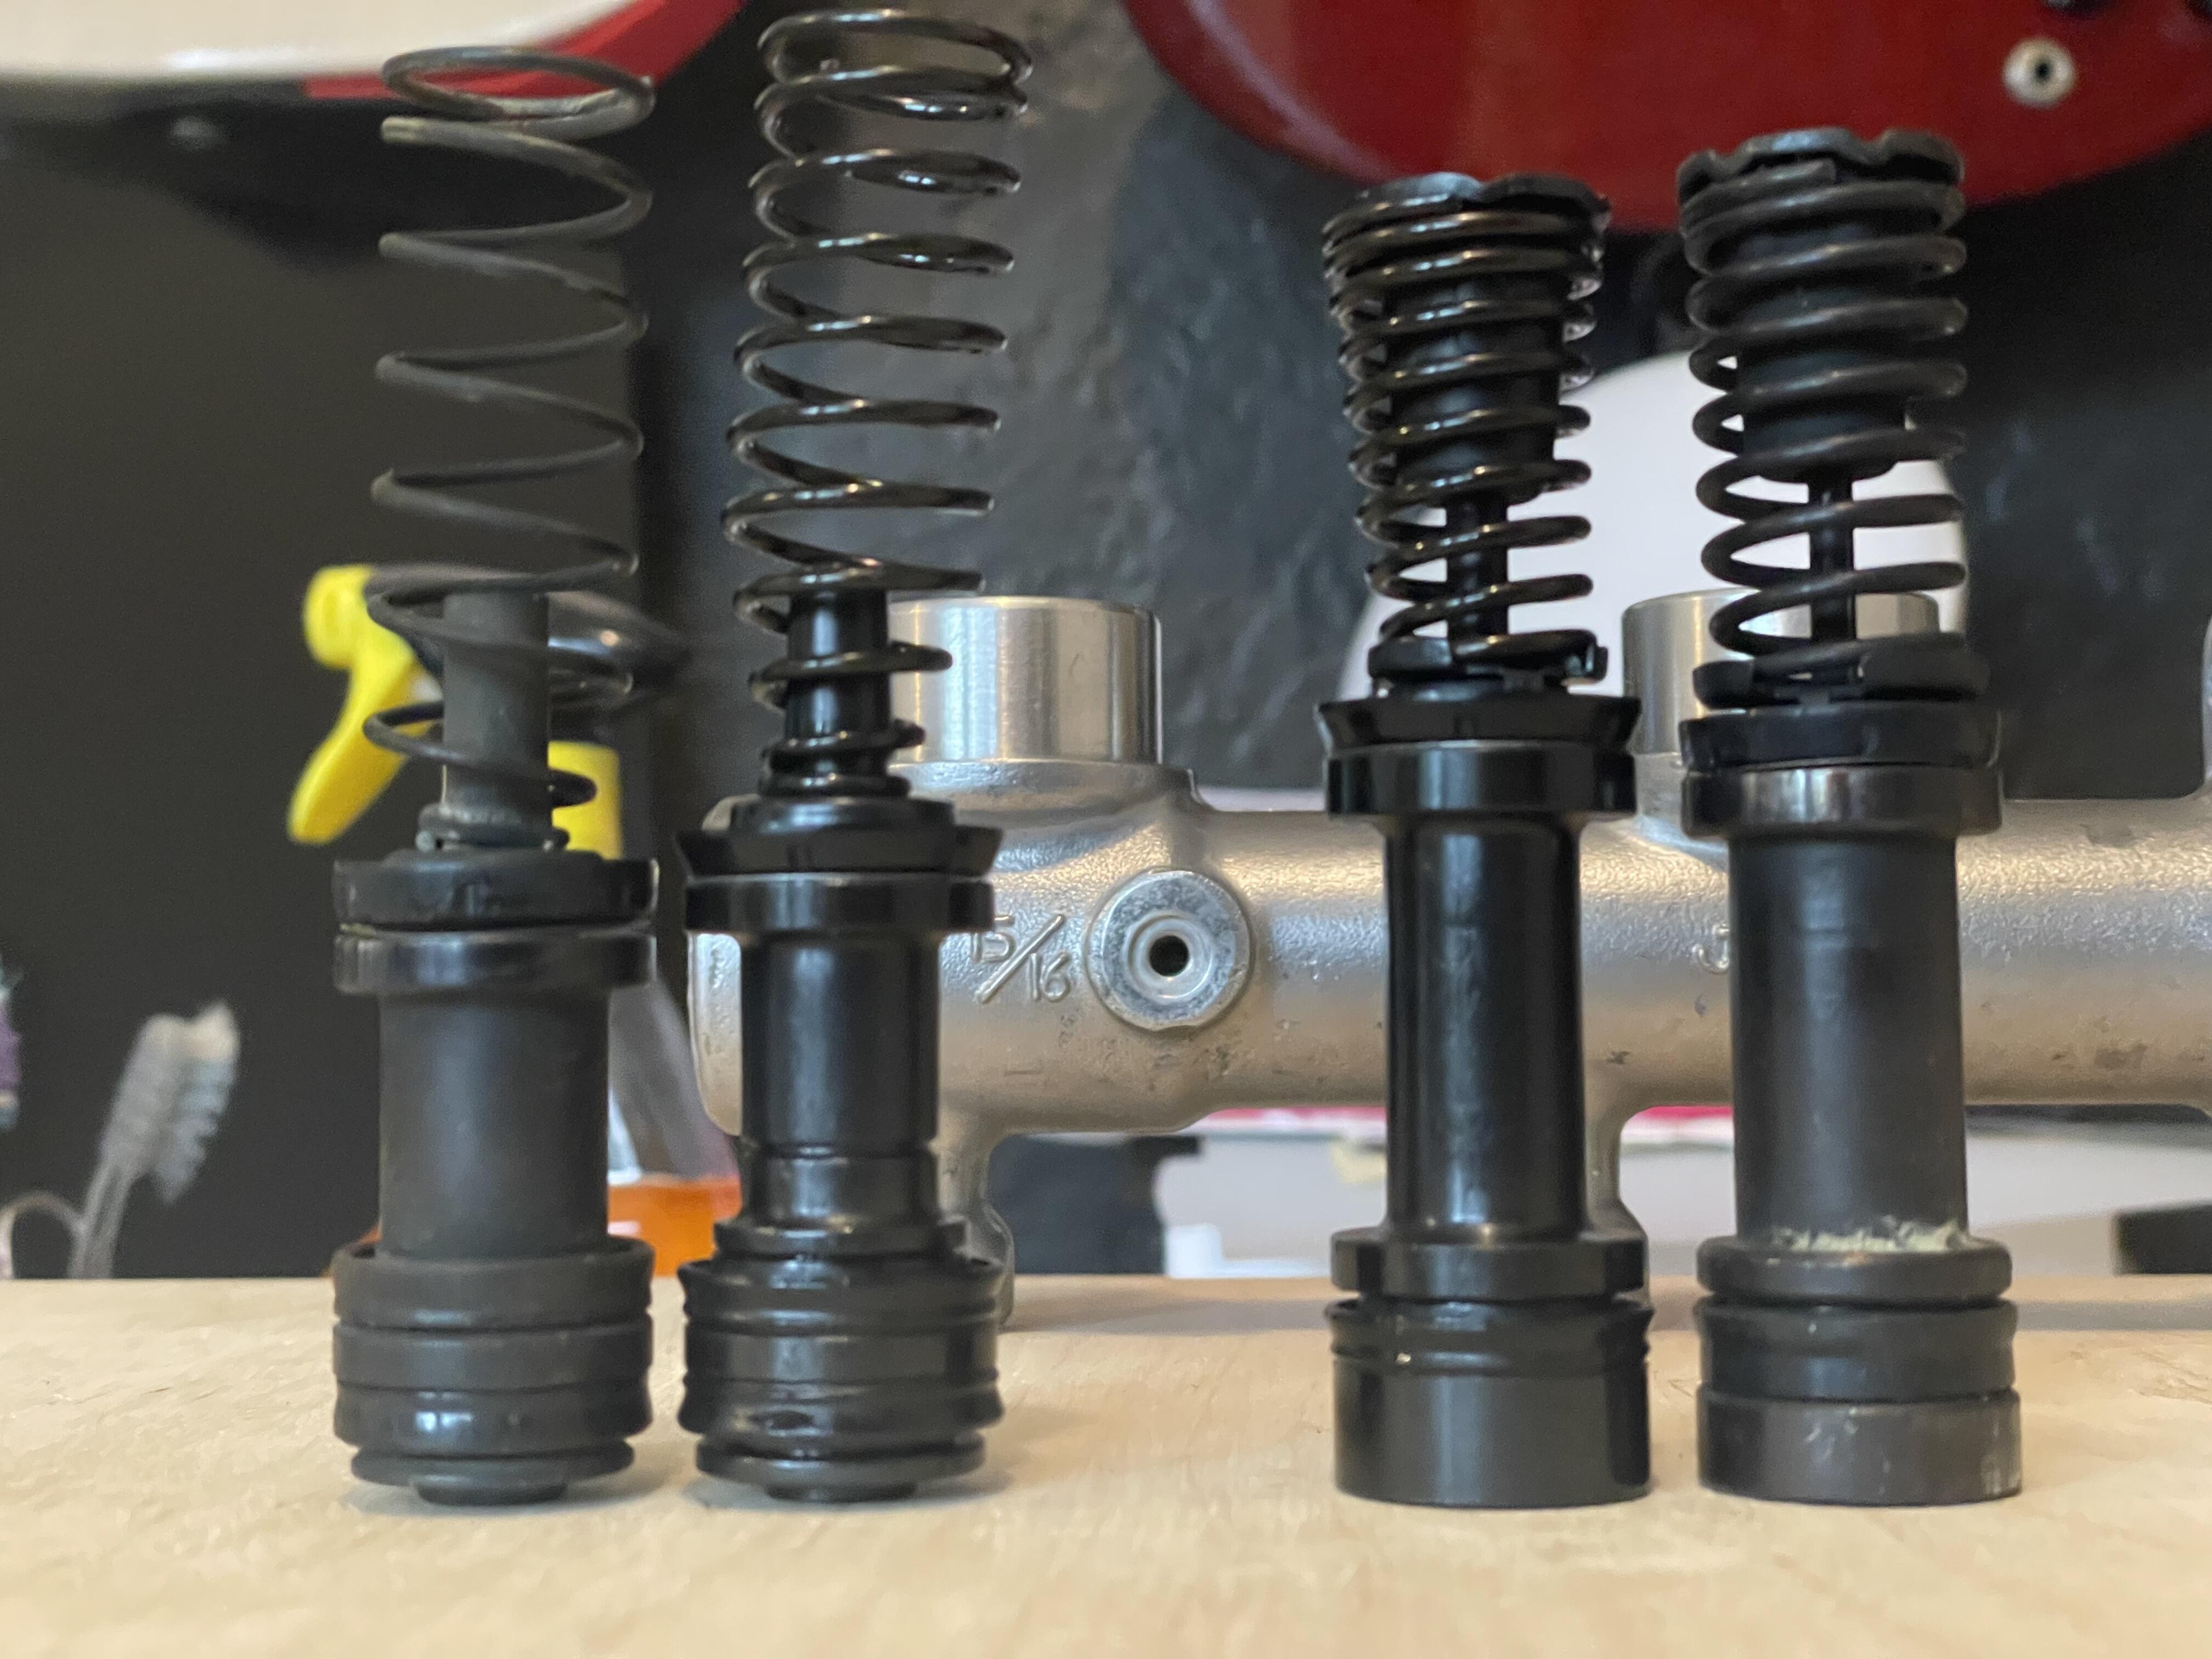
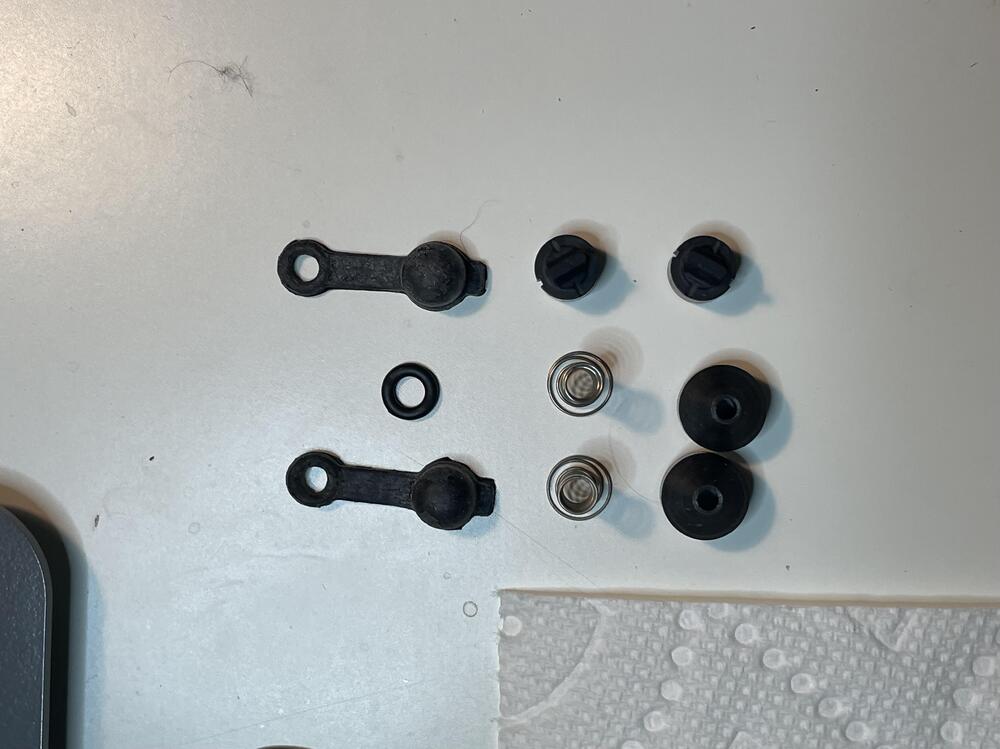
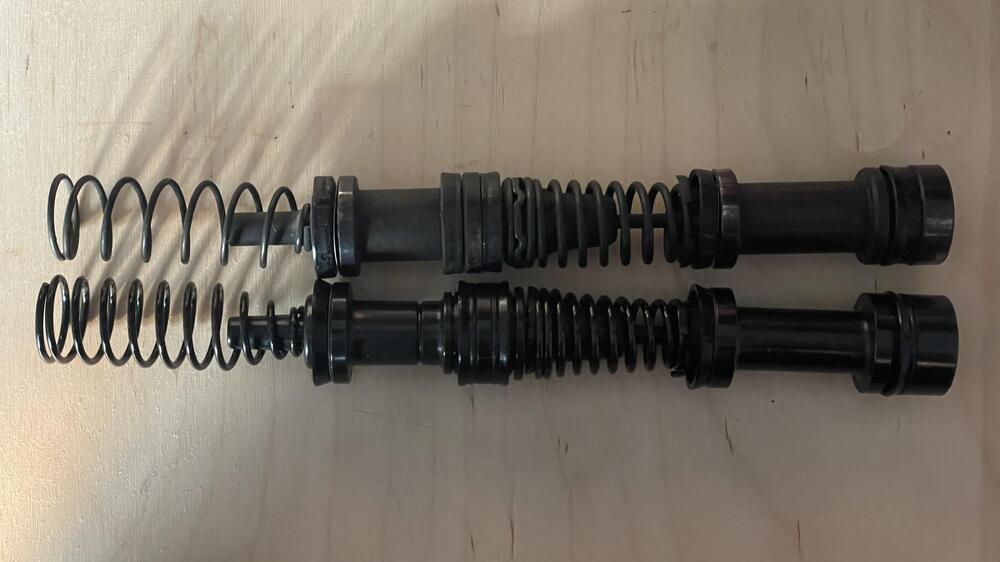
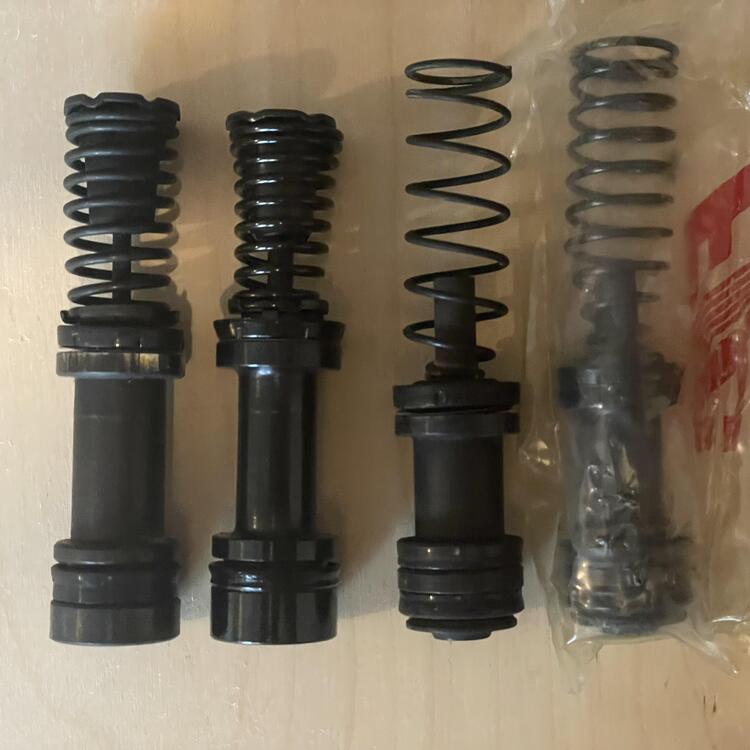
The stop screw catches the rear (left in photo below) piston in the narrower part between the seals, right? I noticed that space on the Tokico kit (bottom) is longer than the Nabco version (top). There’s also more fluid in that area because the piston is narrower there. The front (right in photo) piston is also narrower on the Tokico, but otherwise those are really similar in length. Virtually the same. I wonder if the Tokico works in the Nabco but not the other way around.
-
I considered putting this in the ZX section but I thought the brake specific section would be better due to all the upgrade threads. I was wondering if anyone has tried or knows what happens if you try to use the pistons from a Tokico master cylinder rebuild kit in a Nabco MC. looking at them side by side they are clearly different, but only just. It make be hard to see in the photo but there are small differences in the measurements between them (dirty is Nabco, shiny/bagged is Tokico). The overall length looks the same. I haven’t measured them yet so can’t give you precise numbers.

-
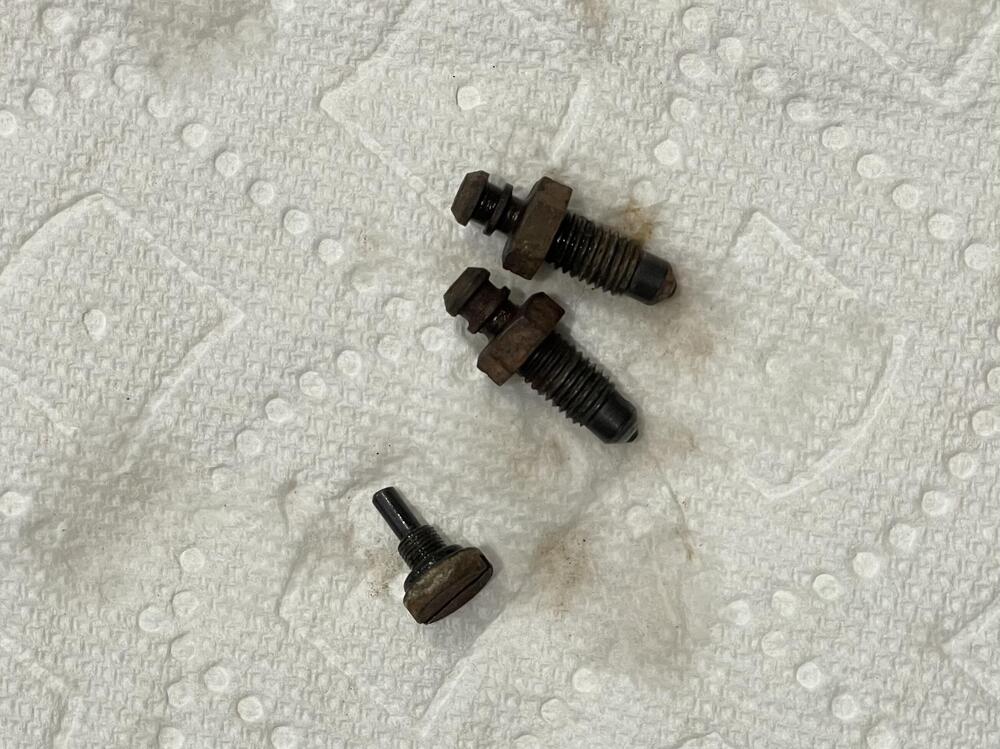
I was able to get these out with a small hook. I think the corrosion was holding them in. Once I got it open I found out I have the wrong rebuild kit. I have 46020-C6126, which is for the Tokico . This is a Nabco, which uses totally different residual valves. I think the kit part number is 46011-P6525.
-
The 7-piece kit, black 80/20 loop. When I spoke to them they said that was better feel than “OEM” and better wearing that cut pile. It does have good feel.
-
They only showed two kit options when I looked for 240zs. There are several fabric and color options though. https://newarkauto.com/pages/search?Make/Datsun/Model/240Z/Year/1973 ••• By the way, does anyone know how to pull the residual valves (the black cones) out of a 15/16 Nabco master cylinder? The ones in the rebuild kit are not threaded. I’m assuming it’s some kind of press fit situation.
-
They have this kit and one with several more pieces, which I assumed was for 280zs.