dmorales-bello
Free Member
-
Joined
-
Last visited
Everything posted by dmorales-bello
-
 Man, that's a beautiful sight!!!!
 -
Hi Jim, I did do a write up when I finished that project and I've copied that topic below with step by step instructions. Please pardon the video with the crappy music. BTW, the kit for the 240Z does not work on the 280Z (unfortunately). Regarding a write up on the "entire project", do you mean the whole build? If so, I've posted that on the HybridZ Forum site because I thought you guys would frown at a restomod. Now I know better (I think?). Here's that link: http://forums.hybridz.org/topic/123252-280z-restomod-progress/ BTW, is there a way to copy that topic onto this site?
-
About $250. Definitely not cheap.
-
I had tried to use my front turn signals as white DRLs when placing the light switch in the first position AND amber turn signals when needed. JDMAstar sells LED bulbs with the stock 1157 base that fit right in the housings and are advertised to do exactly what I wanted (they're called "switchback" bulbs because of the 2 functions). They worked erratically, with the turn signal activating spontaneously now and then so I pulled those out and went back to simple amber LEDs with the OEM amber lens with the stock functions. Then I found Zleds. Samuel makes LED boards which go from very simple to very complex programmable units that do all kinds of funky stuff. I just wanted the simple switchback functions WITH sequential turn signals. He took a couple of weeks to manufacture and I finally got around to installing them yesterday. Easy mod with safety benefits and cool factor. Here's a video of them working as DRLs and as sequential turn signals. Note that I had already wired in the front fender position lights to act as turn signals as well (posted elsewhere in this forum).
-
Nice job Charlie. Long road to get to there but you got it working.
-
Looks amazing and sounds like all major hurdles have been cleared. Beautiful work. Enjoy!!!
-
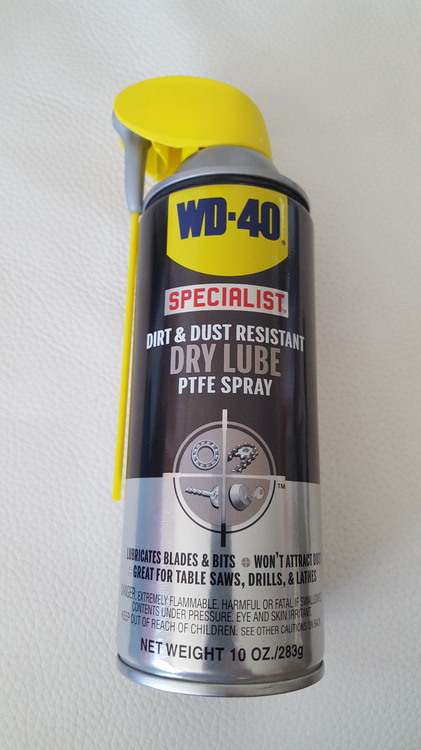
I had the exact same problem after reassembling my interior. I was ready to take the panels apart and add some felt strips until someone suggested spraying lubricant in the squeaking panel joints. It worked amazingly well. It's been over 18 months since and the car is still very quiet. I used a member of the WD40 line "Specialist Dry Lube PTFE Spray" which I found at Home Depot. Simply spray into the edges where the panels meet and wipe off the excess. You'll appreciate the silence.
-
Great to see progress!
-
Did you notice an appreciable difference with the Wilwoods as compared with your OEM setup?
-
WOW!! That looks absolutely perfect and probably even much better than new with updated covering. Should last even longer than the original. Would love to do it but just thinking of all the disassembly/assembly work plus the down time really weighs heavy on my mind, especially considering I only have 2 hairline cracks.....but perfection is so tempting!
-
Deepest sorrows for you, Mike and especially to his family. God bless.
-
That Lissa is a sweet looking girl, Jai. I'm sure she will be a great (and healthy) companion for you for a long time! Great deed!
-
Yes, I also went with vinyl myself for the sake of durability and in keeping with the spirit of originality but I've always second guessed myself about the aroma of leather.
-
Where did you find these?
-
Those look really nice. No missed stitches, very clean. Might seem like a crazy question but, do they actually smell like leather?
-
Found a link for the rubber door loom Charliekwin: https://www.electric-life.com/product/5050-10-099-rubber-door-loom/
-
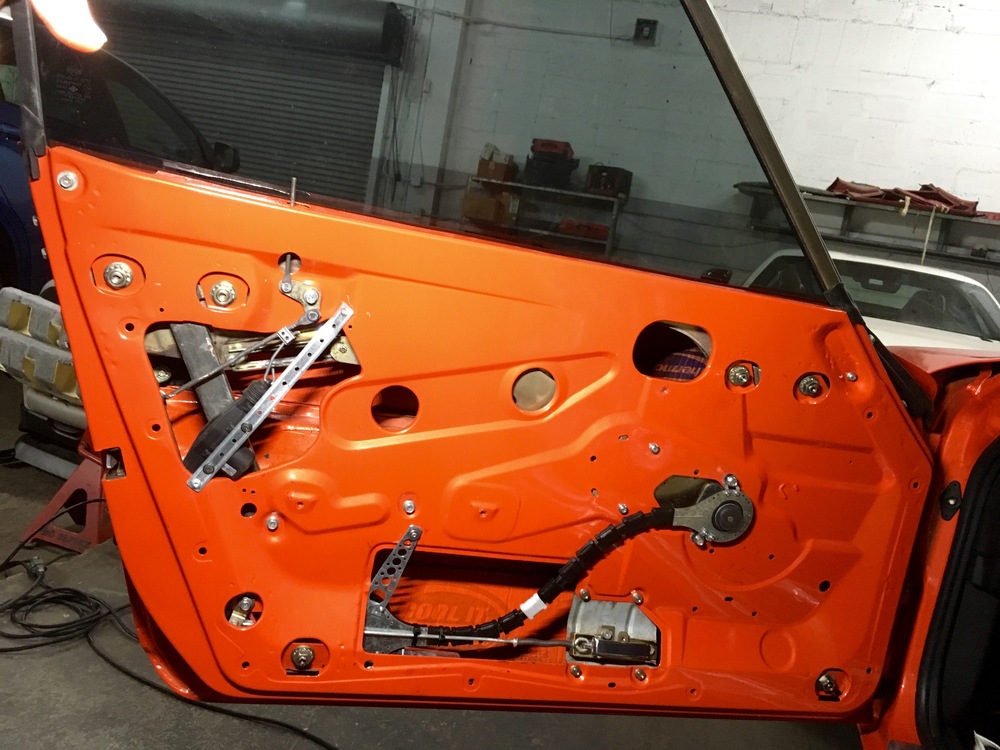
I drilled the corresponding holes in the door (and the car) when they were off for painting. I ran the wiring downward along the rear edge inside the door, along the bottom where it joined the power windows wires and then out the 1/2" pre-drilled hole through a corrugated rubber wire loom from Jegs Performance like the one pictured below protecting the cables between door edge and frame. I'm sorry I don't have a picture of that finished detail of the install but I'll take one for you when I get back in town in about 10 days
-
God bless him and I hope his transition is tranquil.
-
Sorry I couldn't respond earlier (I have to work now and then). We did expand the cut out initially toward the front of the door thinking it was necessary but once the actuators were fitted it looked like we could have avoided trimming the metal. We rolled the edges of the cut before paint went on so it would look factory. Once installed the actuators bow out the brace a bit (less then 1/4") which concerned me but it didn't prevent the door card from snapping in place and it can't be noticed at all. I tried finding the receipt for my actuators but couldn't place it right now (I will keep looking) but I do remember them being labeled as "slim" . I just did a quick search on Ebay and found these: http://www.ebay.com/itm/2-X-Universal-slim-design-Power-Door-Lock-Actuator-Motor-Auto-Car-Truck-12Volt-/311731565864?hash=item4894a63528:g:iyEAAOSwo4pYFrq8&vxp=mtr
-
Charliekwin, I mounted mine right against the rear window track and about 1 inch back toward the door handle mechanism. Unless your actuators are larger than mine they should fit in a similar fashion. Look at my pic again.
-
87mj, thanks for the report and the instructions. Good to hear you're happy with the results.
-
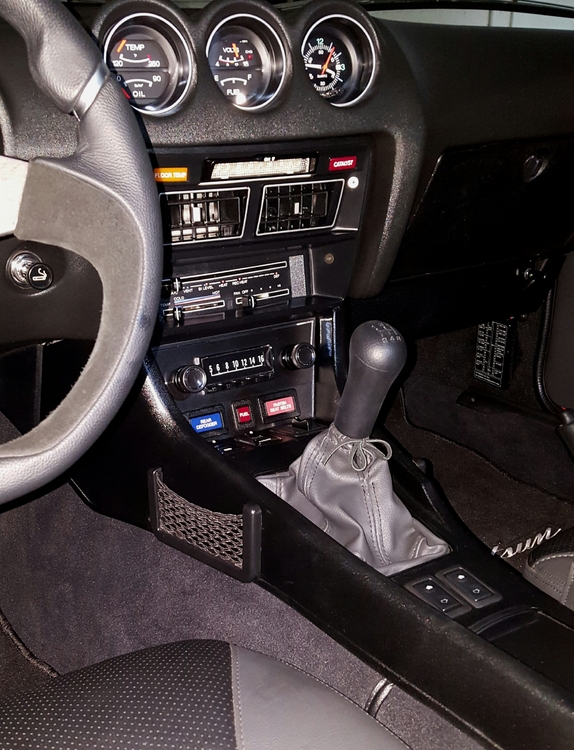
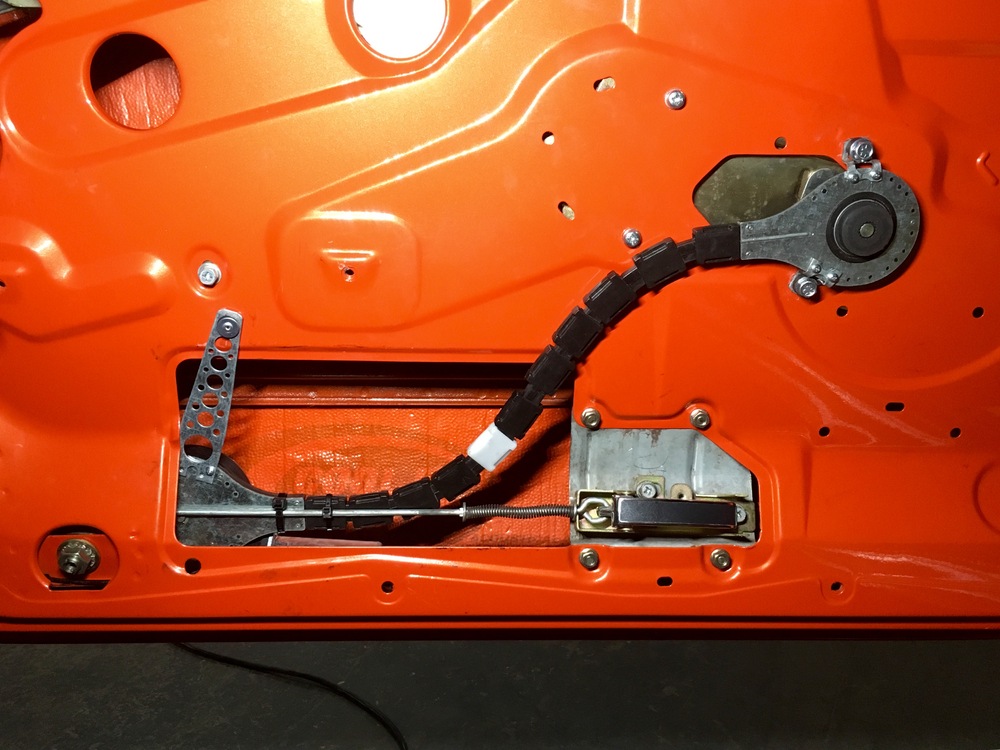
The power lock install was actually very simple once you decide the placement for the actuators. By using the metal brace (see pic in the post) the actuator can be placed in such a way that the hook that connects to the door mechanism rod can be bent in the angle needed for smooth operation. They work great and gives me the peace of mind that a sharp edged key will not damage the paint job. Definitely go for it.
-
Would you consider making it a '78 ?
-
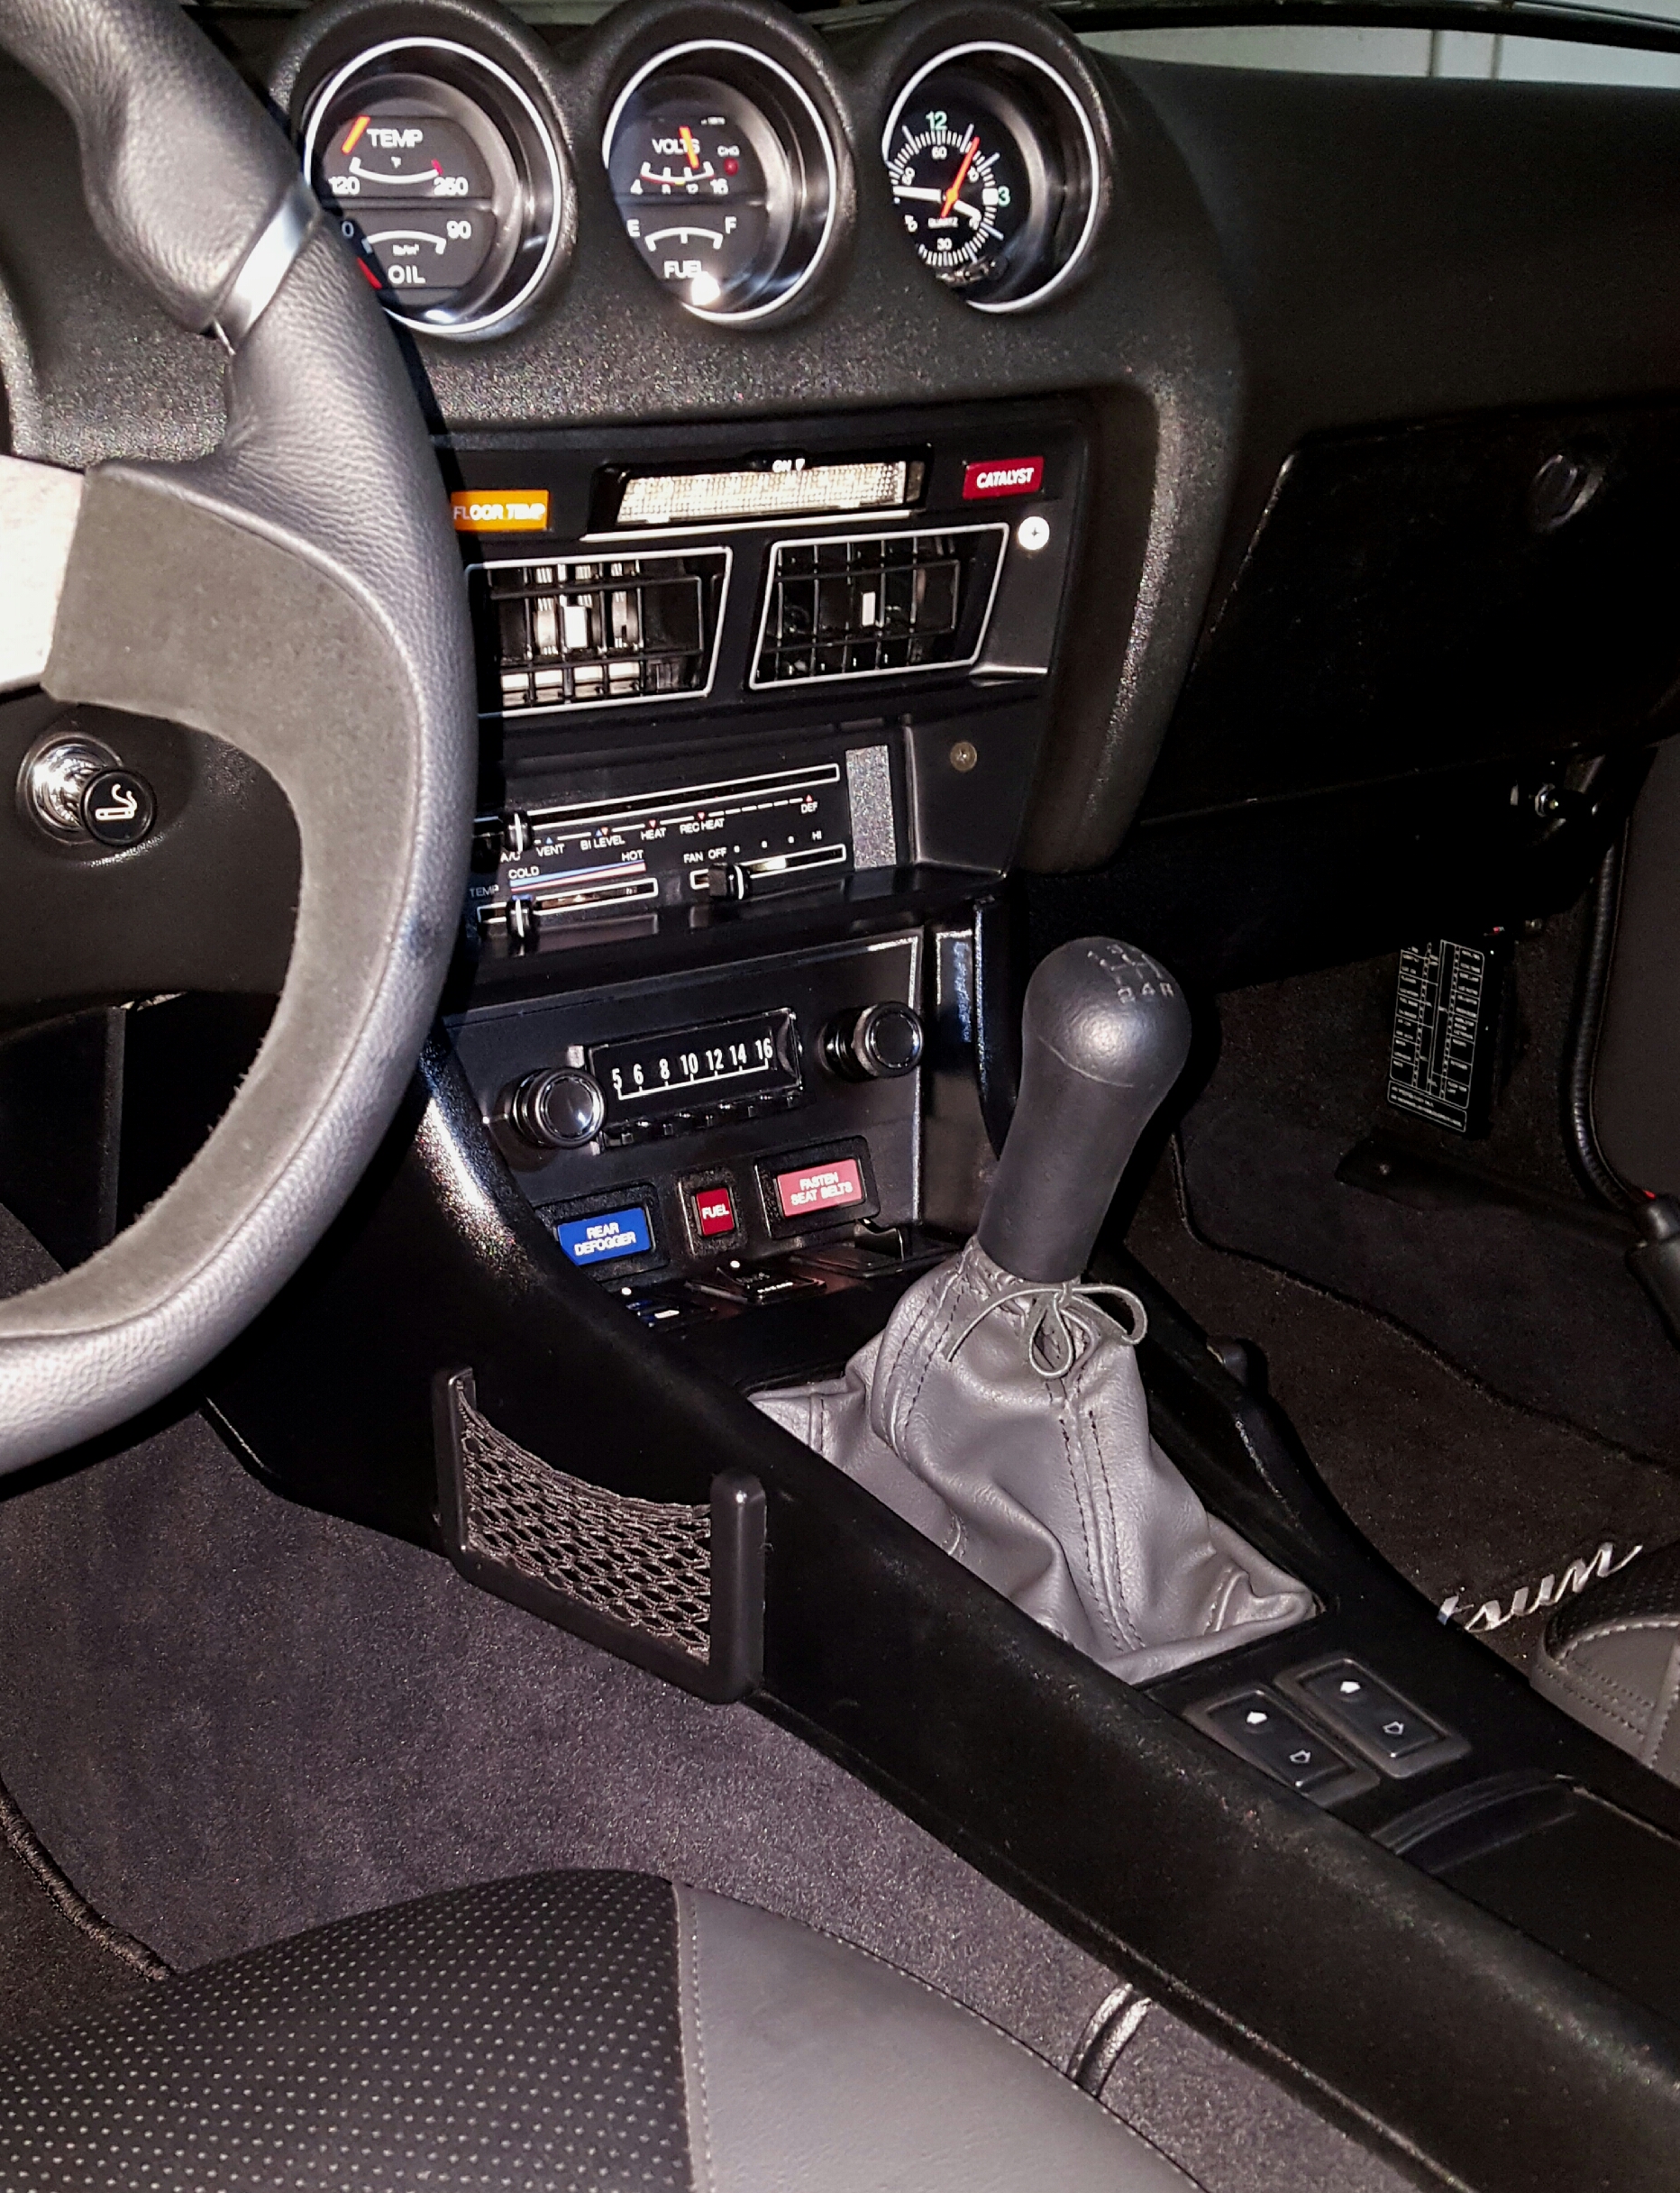
My power windows install is quite similar to yours. I considered the Spal unit (definitely one of the best) but decided to go with a kit from Italian maker Colibri because of the sturdy design of the belt drive and a shallow profile. It came with illuminated switches (red, I would have preferred white) which I mounted between the shifter and the ash tray. The speed is very much like yours, and very quiet. You can see the power door locks in the pics as well.
-
I got the same cancellation from Amazon as well!