inline6
 Subscriber
-
Joined
-
Last visited
Everything posted by inline6
-
 My tank did not have any kind of screen or sock at the pipe (inside the tank). When I bought my original 240z in 1992, the previous owner told me to "change the filter often". I was 22 - didn't know much. So, what I described above was happening. Car would drive fine, especially if the tank was full. Then, when the gas level would go down, the debris would find its way to the supply pipe opening. The car would empty the SU fuel bowls and come to a stop. The first few times, I found that, after a few hours, it would start up again and run fine. One of the subsequent times it did it, I had my tools. I disconnect the hose at the fuel filter inlet, stuck my head in the engine carpartment and blew back through the pipe as best I could. Got gas in my mouth in the process. 😖 But, it started when the hose was reconnected. I dropped the tank, and used an Eastwood kit to acid wash and seal it after that. All kinds of rust flakes in that tank when I took it out. If you have an obstruction, when it does it again, you could check to see if the fuel bowls are empty. With a rebuilt pump, running empty in the bowls intermittently would point me in the direction of an obstruction in the tank. It may just be a few chunks - not necessarily the tank needing to be replaced.
 -
Sediment in the tank, if present, can plug the fuel supply pipe in the tank. Check your filter (you may want to run clear ones) to see if bits of dark matter are collecting there. If it stalls, and has you stranded... and you can undo the supply line just below the fuel filter, and blow back through the line into the tank... and then assemble and fire it up and drive away, then you know. Many years ago, I had that issue. Had to drain the tank and get it coated inside to stop rust flakes from clogging the line.
-
Hi Katz, Is the jute you have a roll of still available from the manufacturer? I'd like to source some. I am able to source this jute from a British car specialty shop (the CUF1/J - Underfelt), named the Roadster Factory, but it is a bit different. It is not as thick and would also have to be dyed brown.
-
What looks to be the original carpet is in good condition under that animal print thing.
-
Looks to me like you are progressing nicely, and you're enjoying it. Have the carbs ever been rebuilt? While running, I think you can spray a bit of carb cleaner on the areas that can allow vacuum leaks (idle will drop if there is a leak is what I've heard). Regarding one carb dropping out, you may want to check your fuel float levels if you haven't done so. SU's are sensitive to that.
-
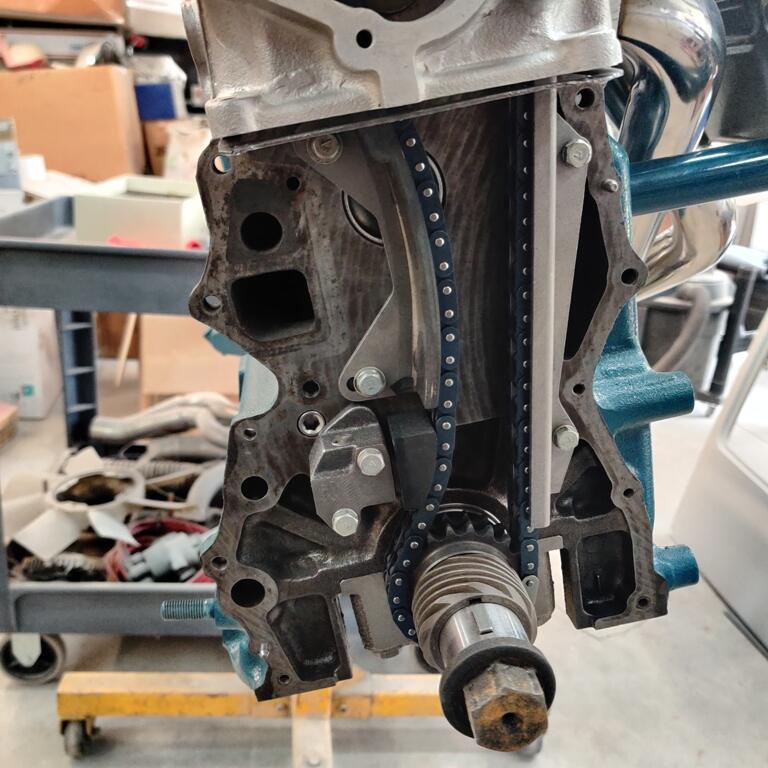
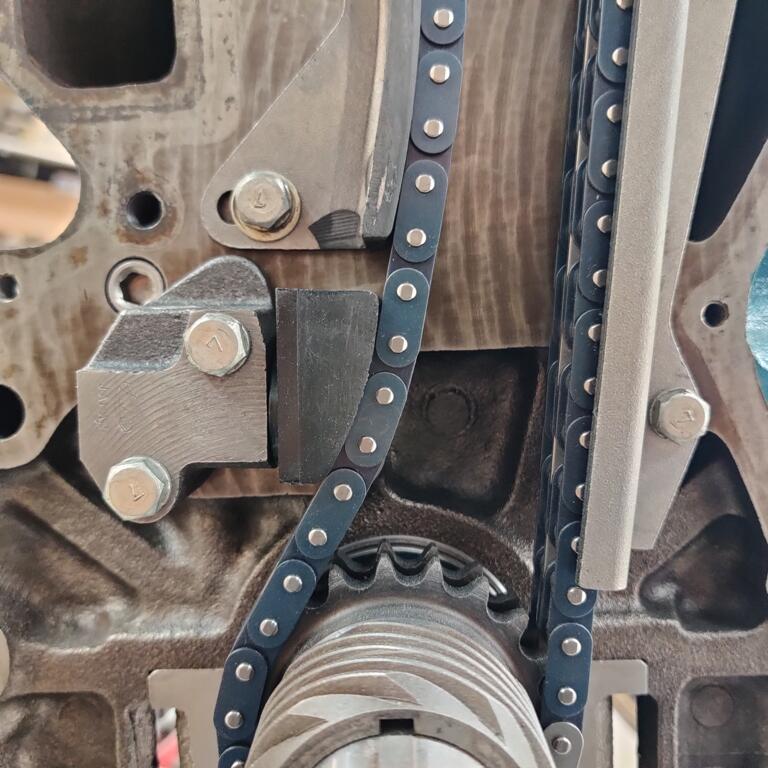
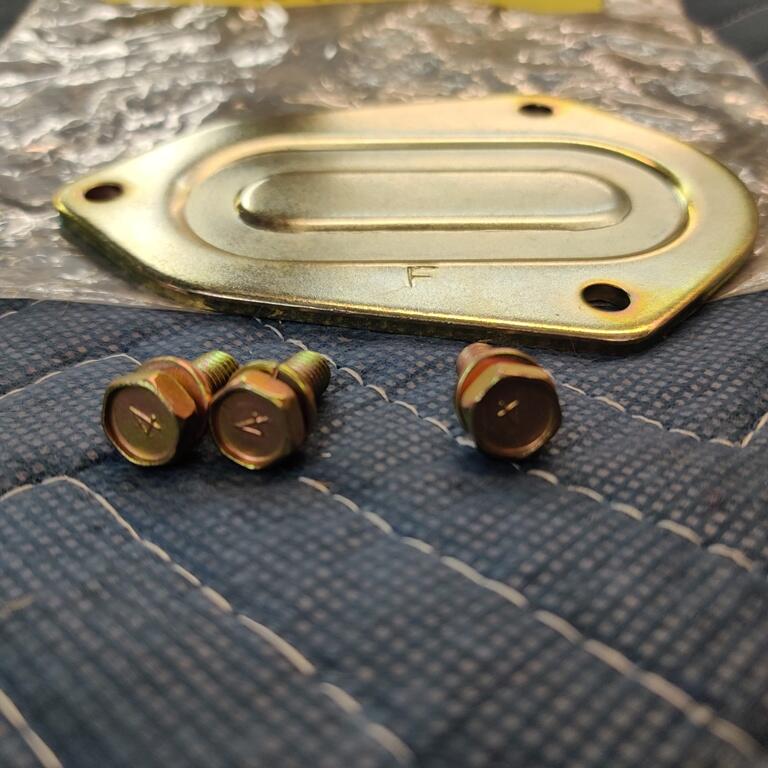
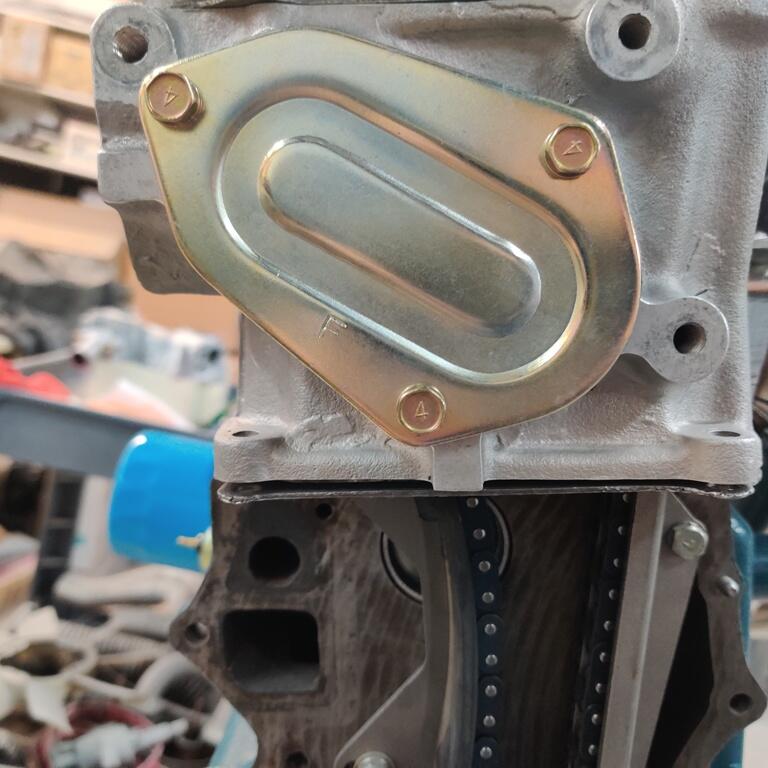
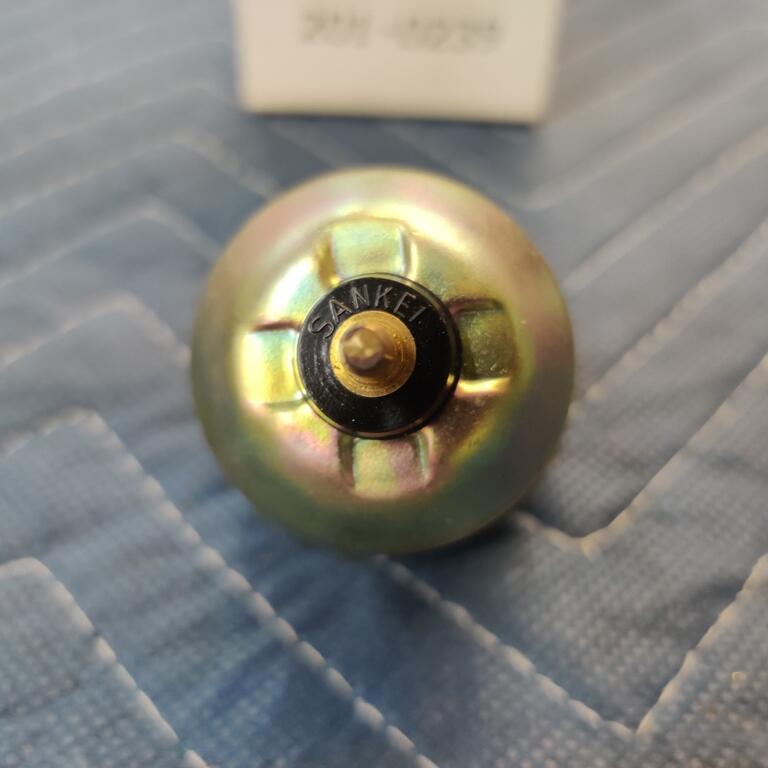
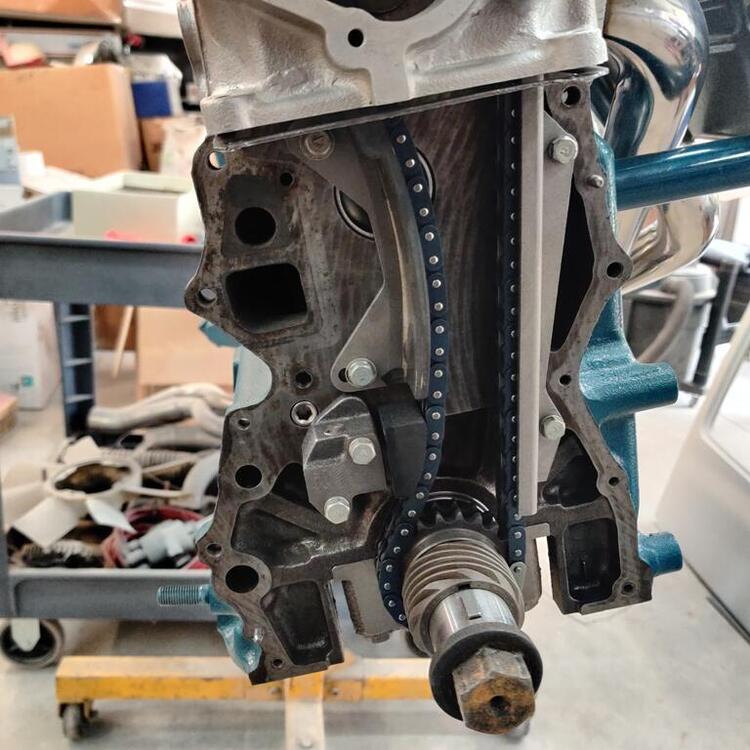
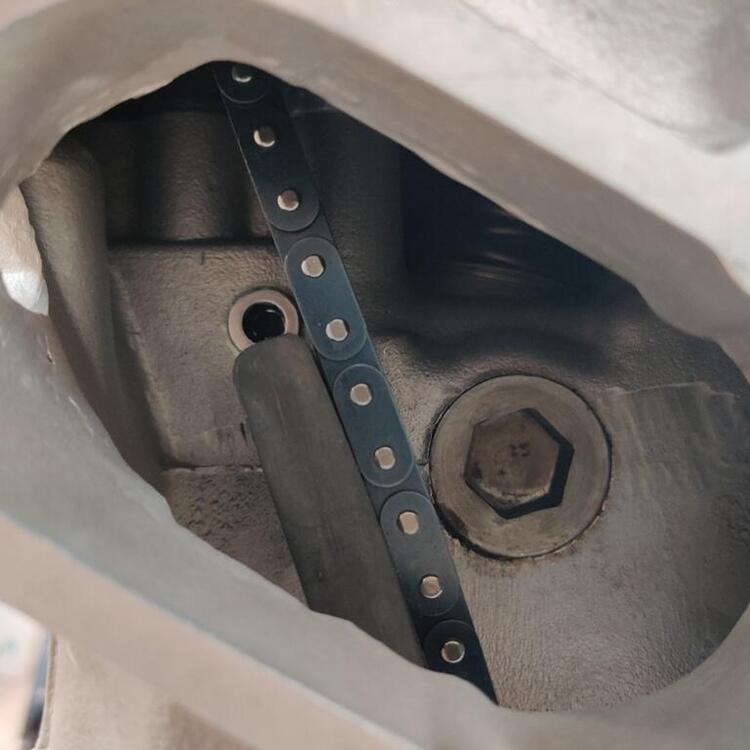
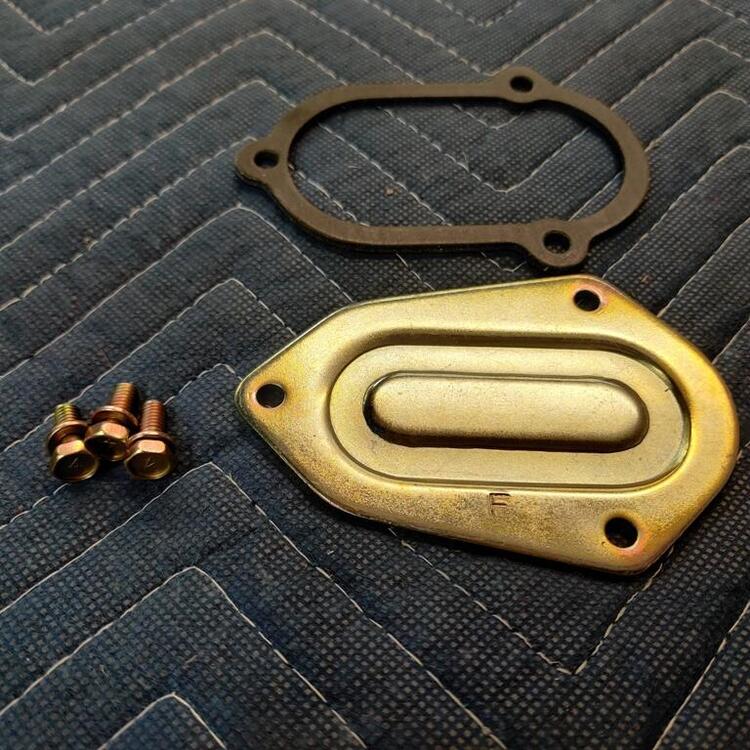
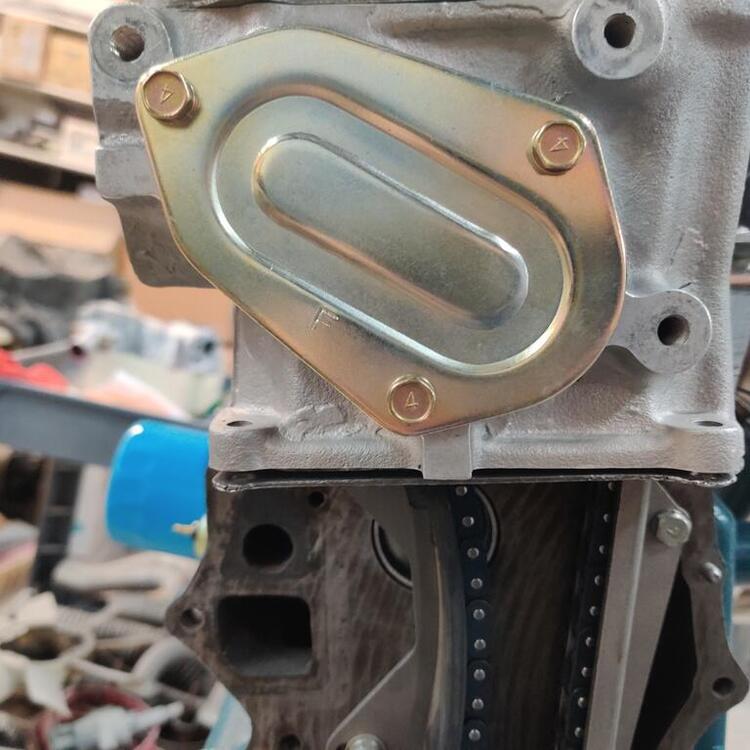
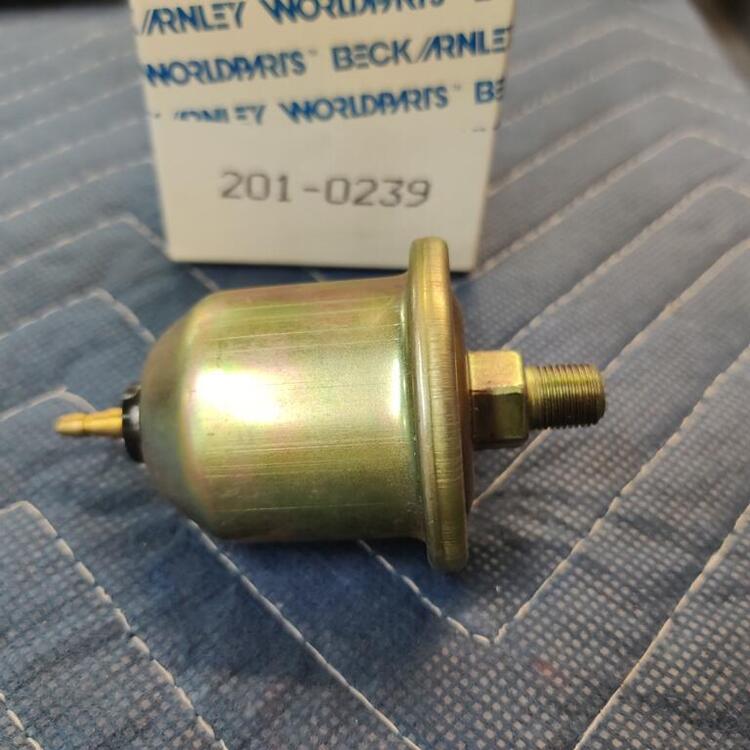
Before I put the front cover on the engine, wondering if I can get confirmation that this chain guide and tensioner alignment is good. What do you think? More pics: Oil pressure senders aren't available new from Nissan anymore, however, this "Sankei" from Beck Arnley looks like it could be an original one? More progress on both door panels and fenders this weekend as well. Getting panels flat is hard!


-
Looks very original, unmolested. For example, orig. master cylinder and emissions hardware is there. Date stamped jack, chocks and spare say a lot in that way as well. Front most areas of the floors have received impacts of some sort (both sides). Otherwise, the floors look pretty straight. Obvious repair to left front fender means damage occurred there. Could be slight hidden damage behind, but probably not major. Lots of indicators to me that on the rust "scale" this one is toward the "very little" side. Key questions - does original engine come with it - as that impacts value a lot. I am restoring a 6/71 with a vin in the 35XXX which is a bit higher than this one.
-
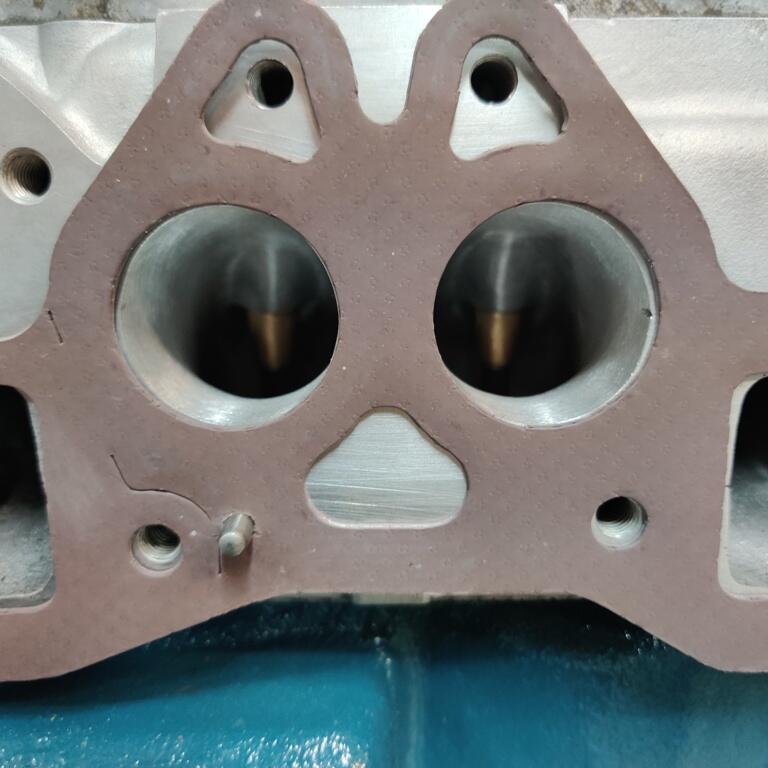
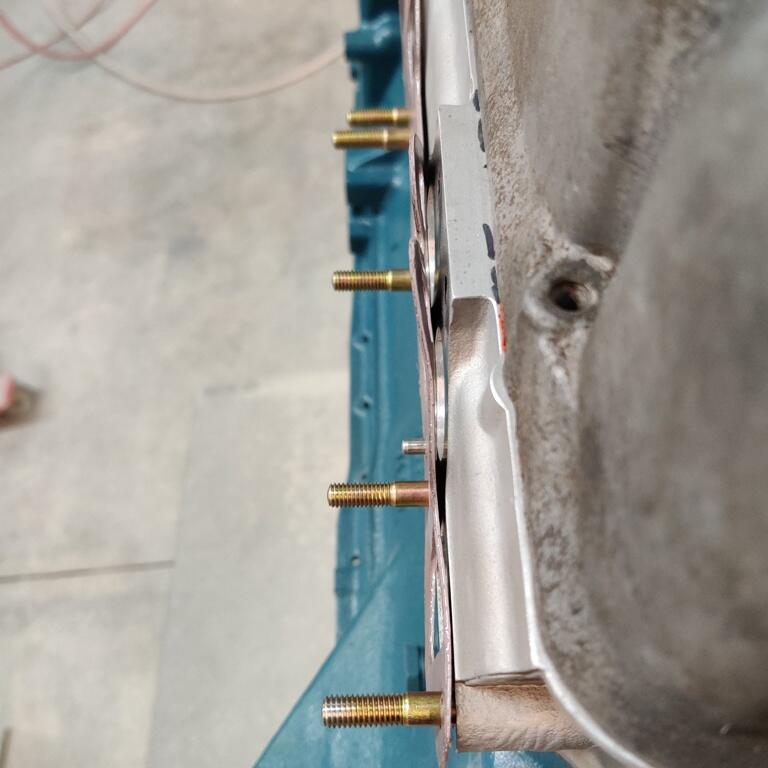
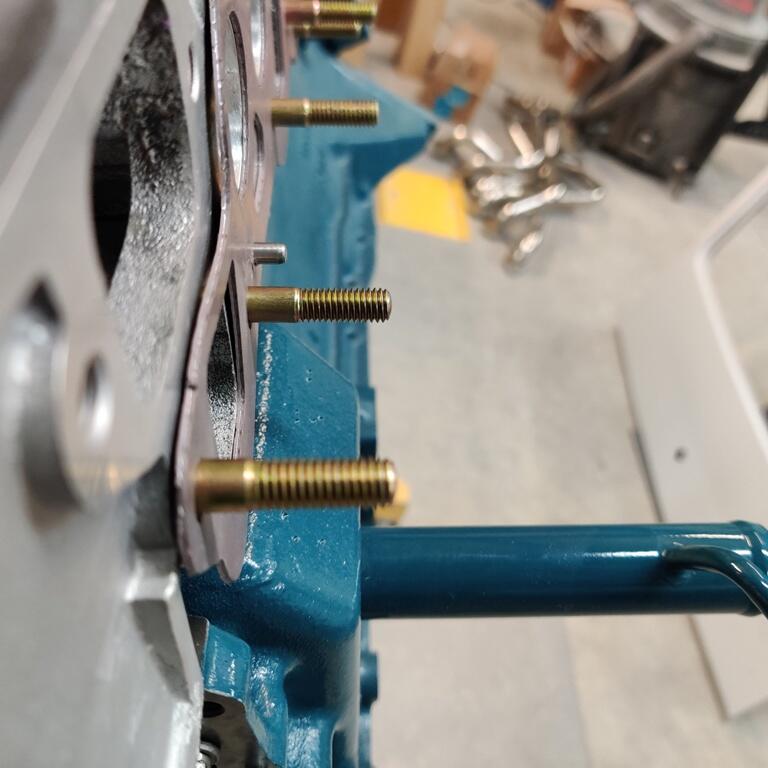
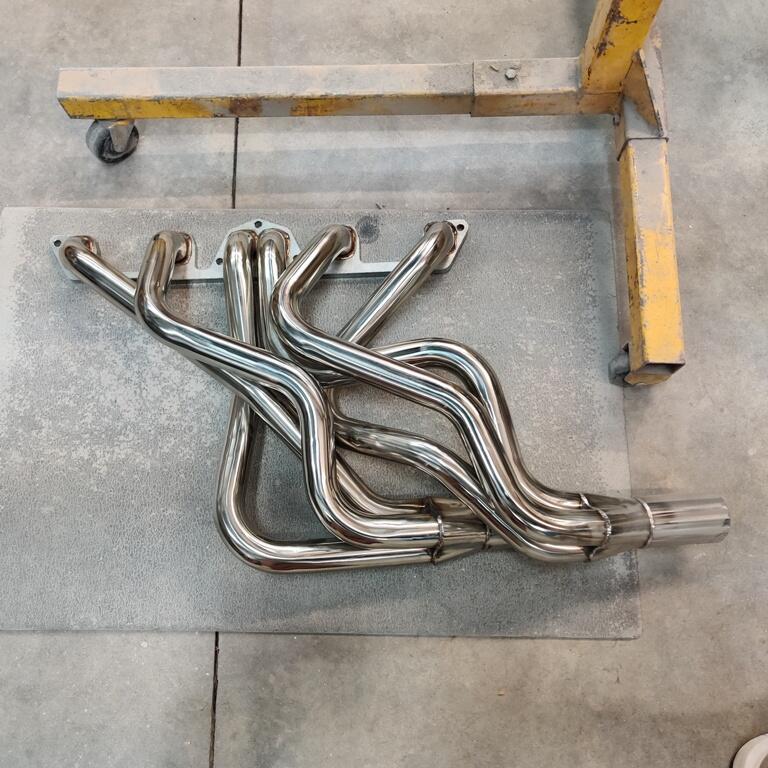
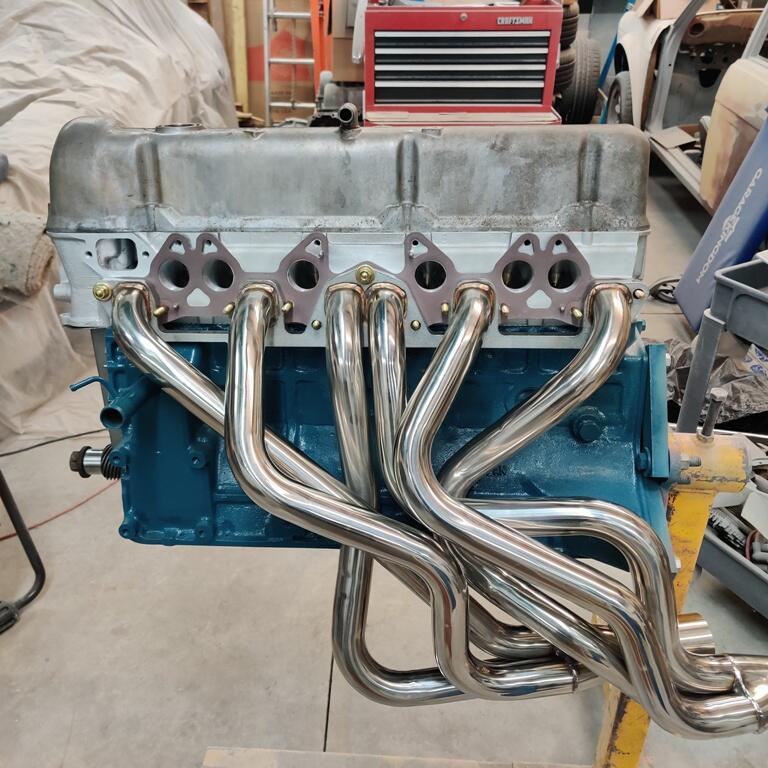
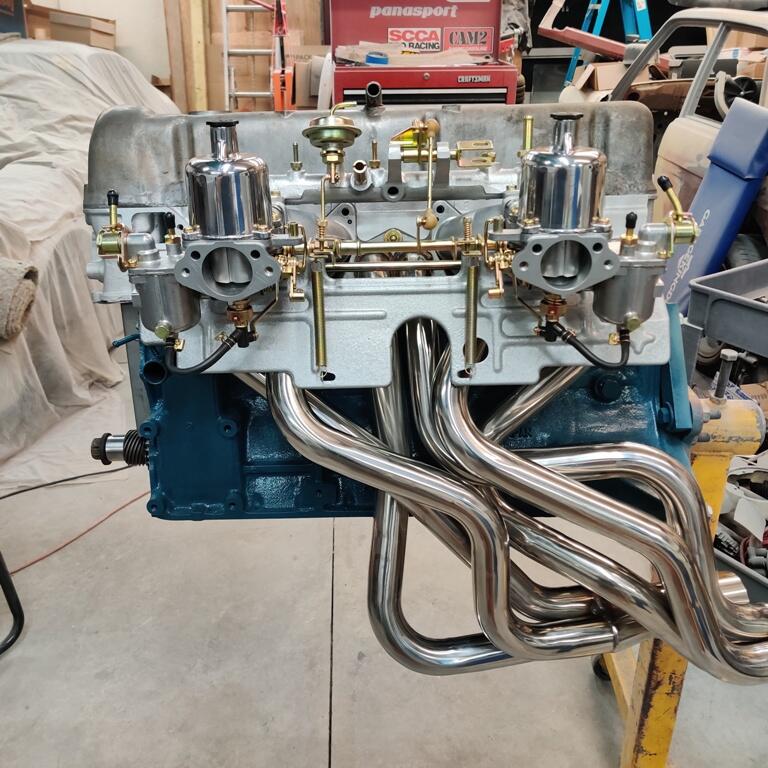
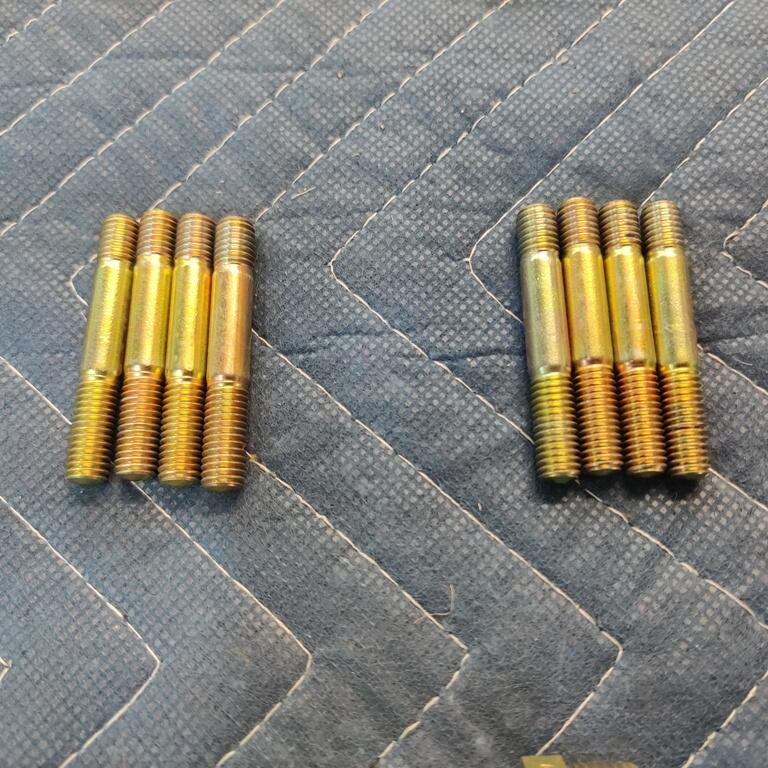
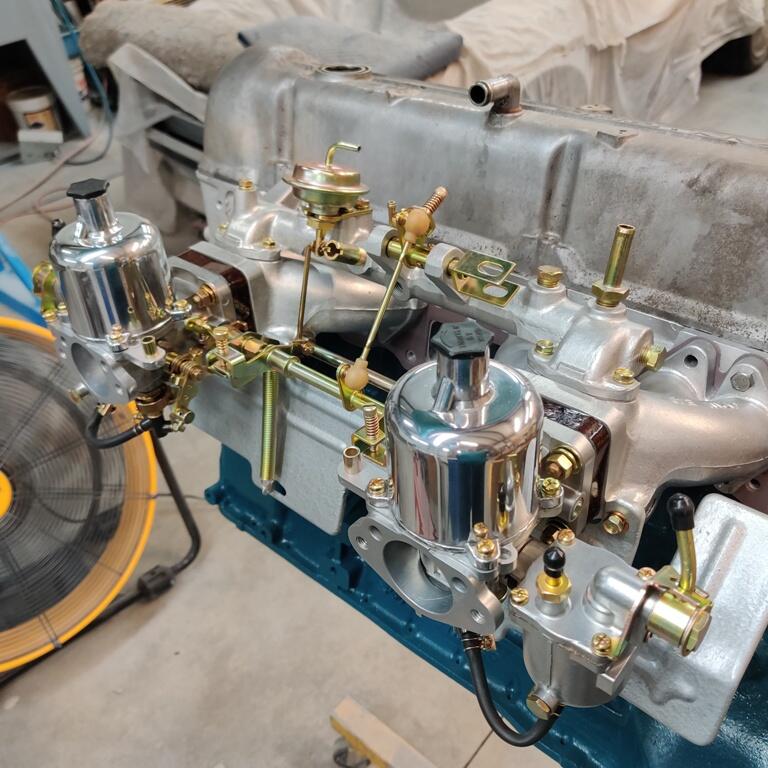
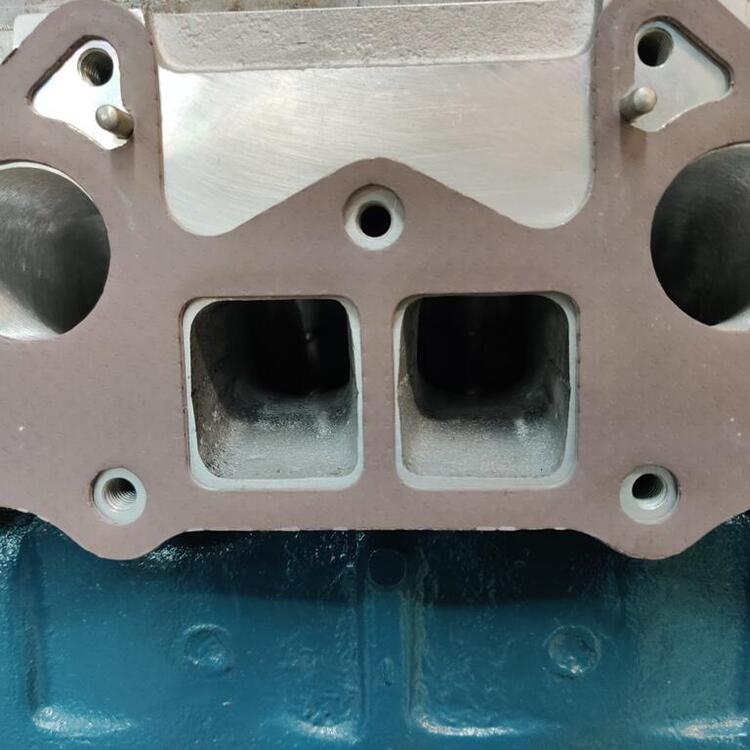
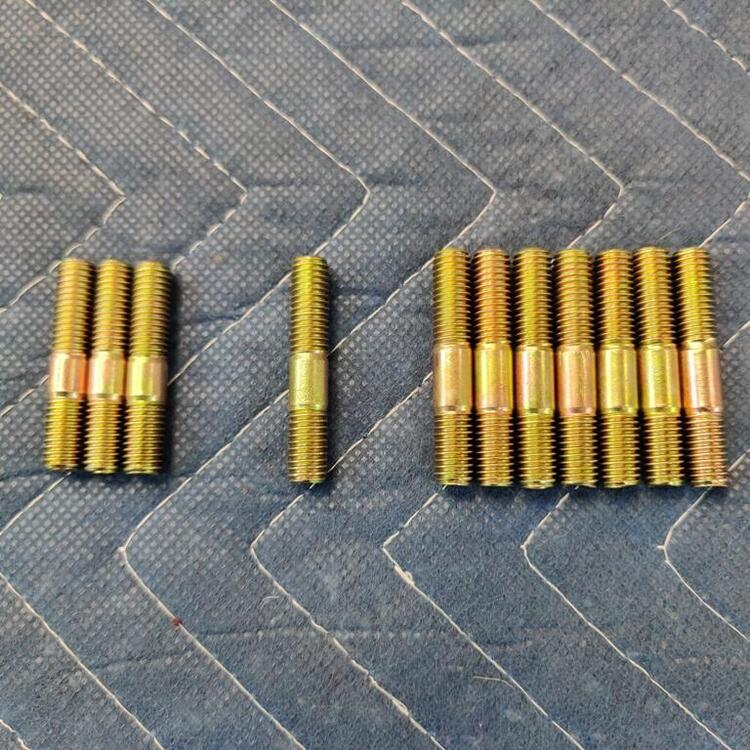
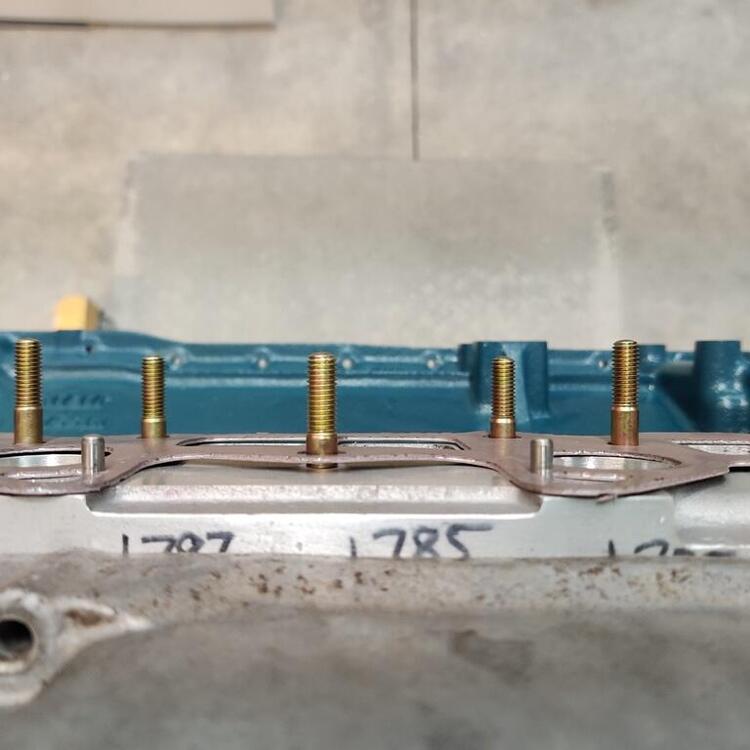
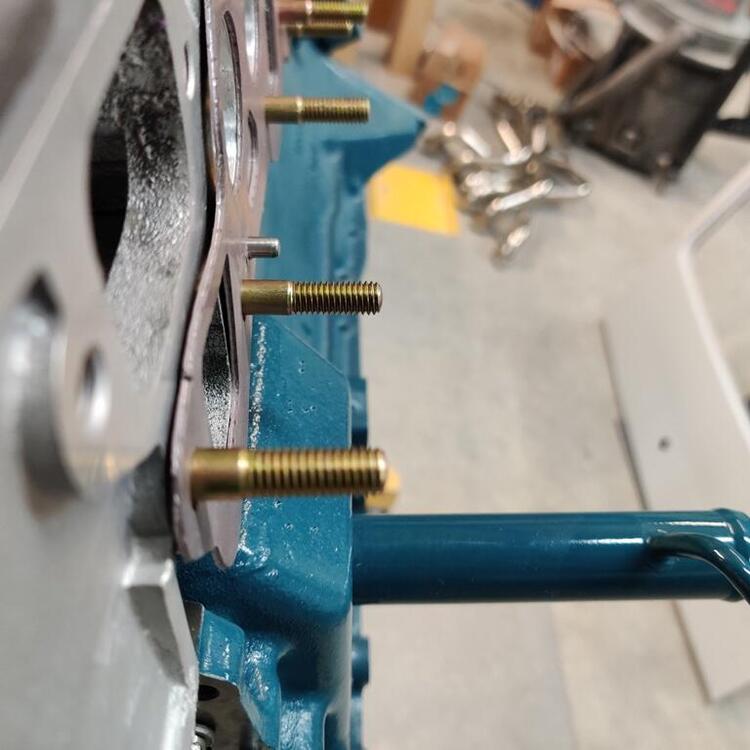
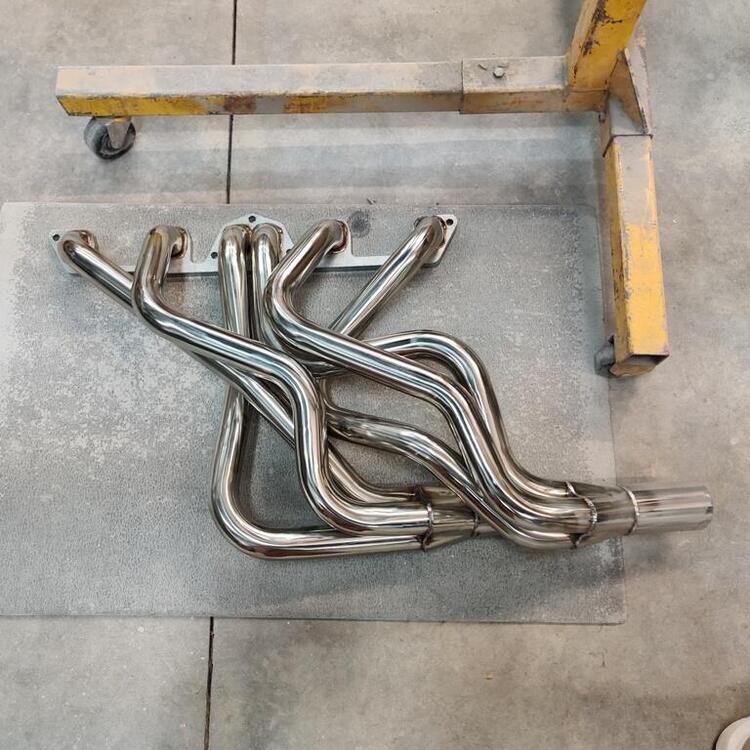
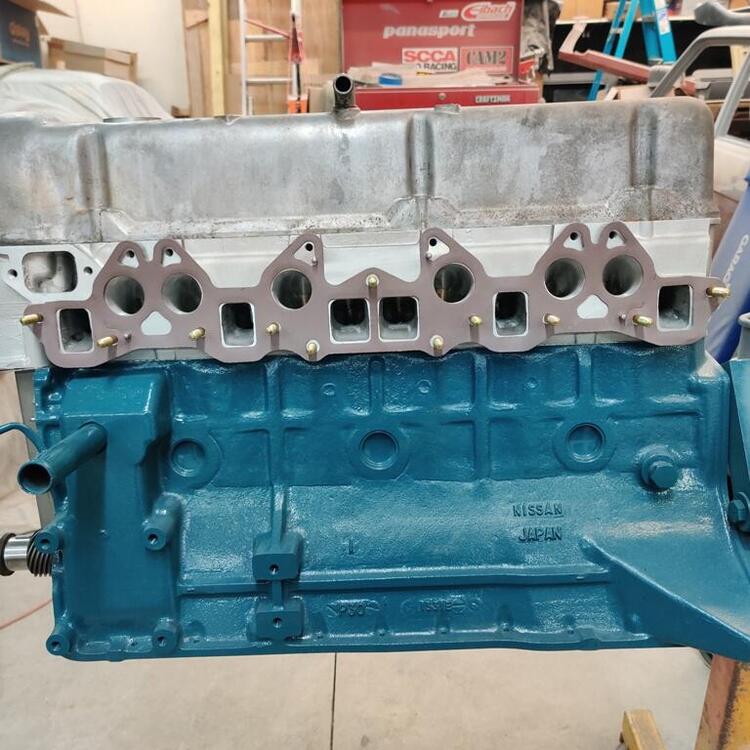
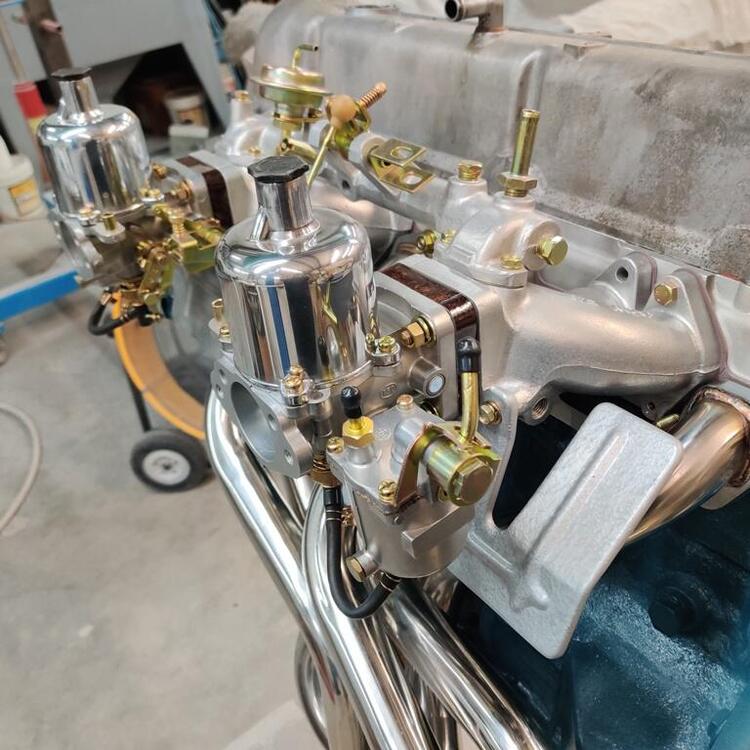
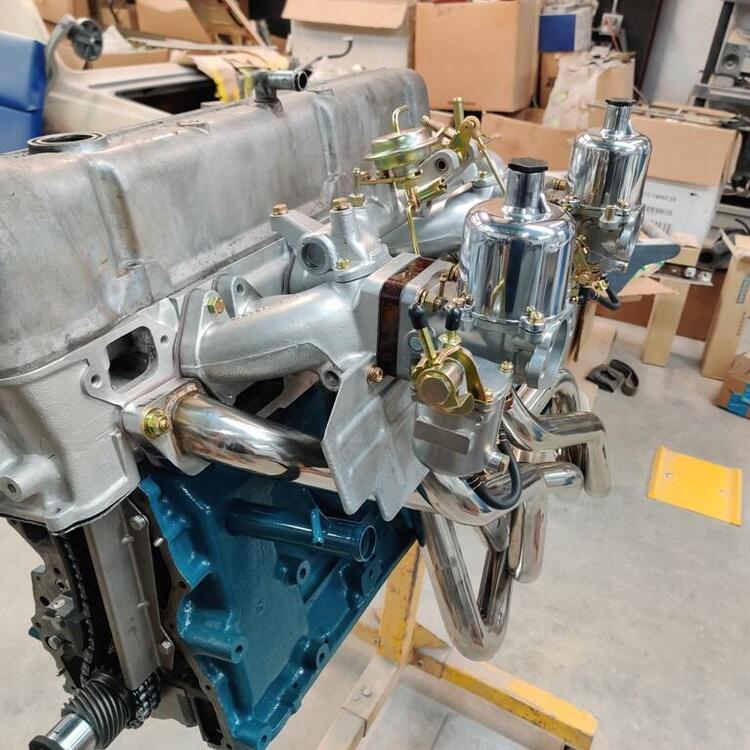
A bunch of pics today. As always, click for a larger version if you like. I like the original style intake/exhaust manifold gaskets like this one. Notice that I have alignment dowels for the intake manifolds. These positively locate its position relative to the ports and facilitate installation. I believe I mentioned before that mild porting would be done to work with the mild cam (not stock, but stock duration). Studs for manifolds shown: there are 7 of one type, 3 of another, and one odd one. I believe they go in locations as follows: 3 for the three holes closest to the 3 and 4 exhaust ports - these secure only the exhaust manifold; 6 (of the 7) for the studs that will hold the thick washers which bridge front intake to exhaust manifold; and then I put the 7th one on the back most hold which is where the rear engine hook (for hoist) goes, and the odd one, I put in the very front where the exhaust manifold secures under the thermostat housing. Instead of the stock exhaust manifold, I am using a Zstory stainless steel header: Bolting new and reconditioned parts on is ridiculously easy compared to bodywork. It is going to be very satisfying work putting this car together after I get the body back from painting.


-
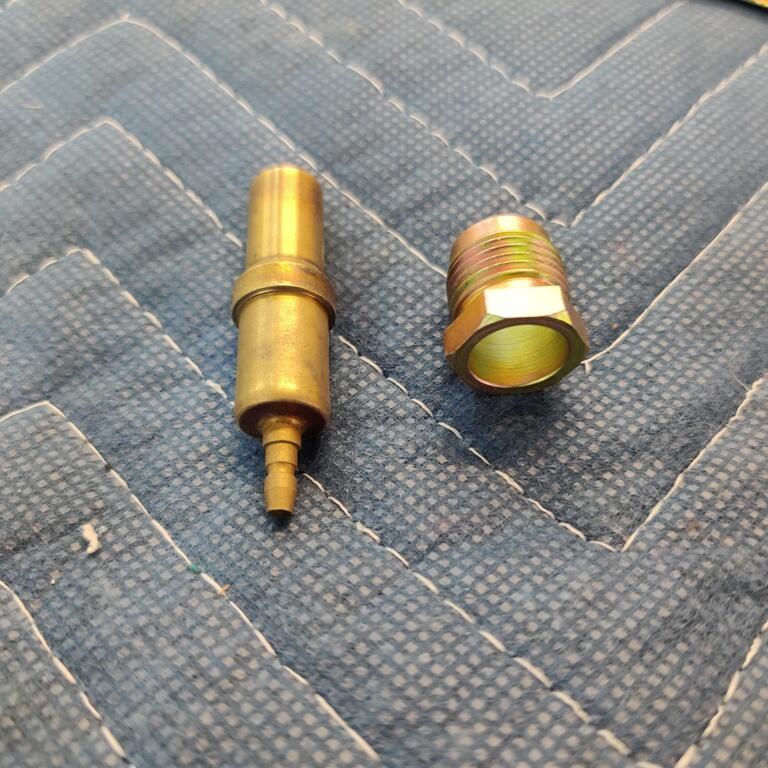
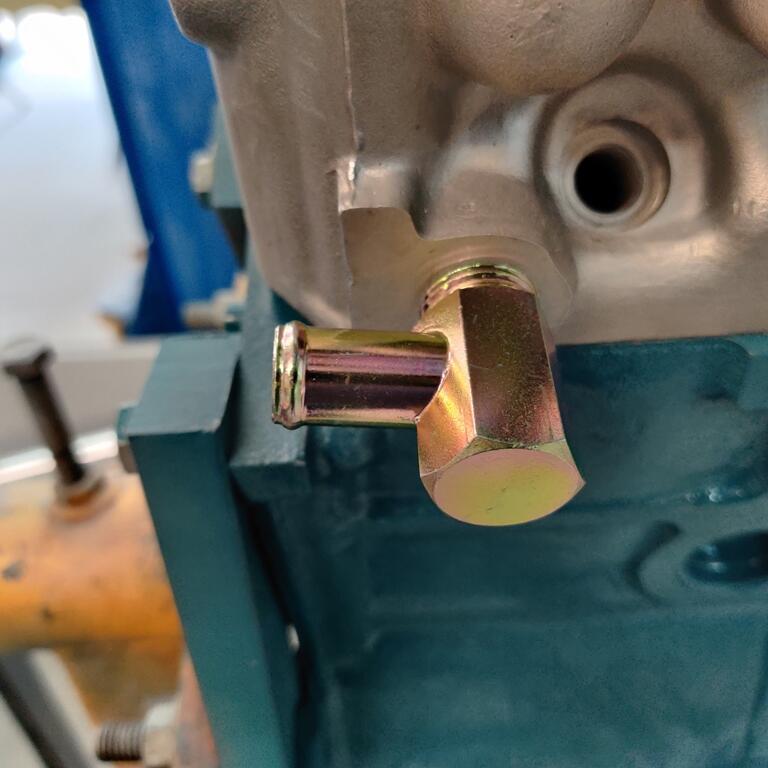
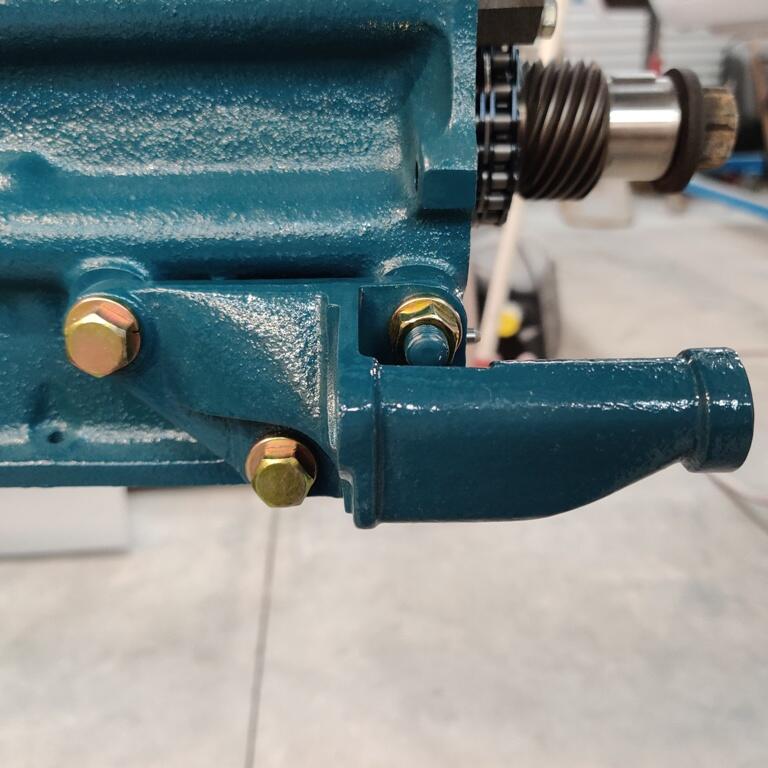
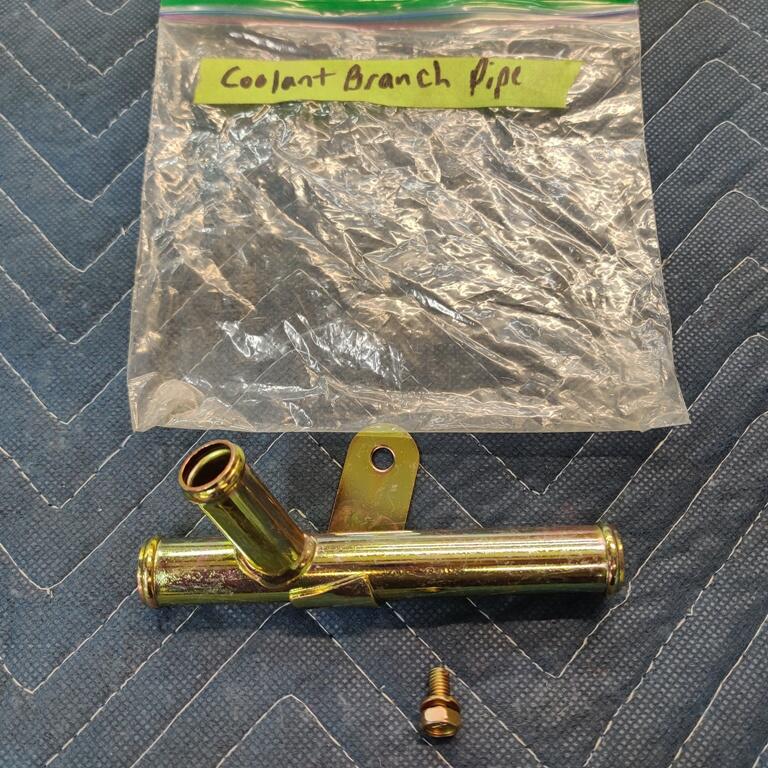
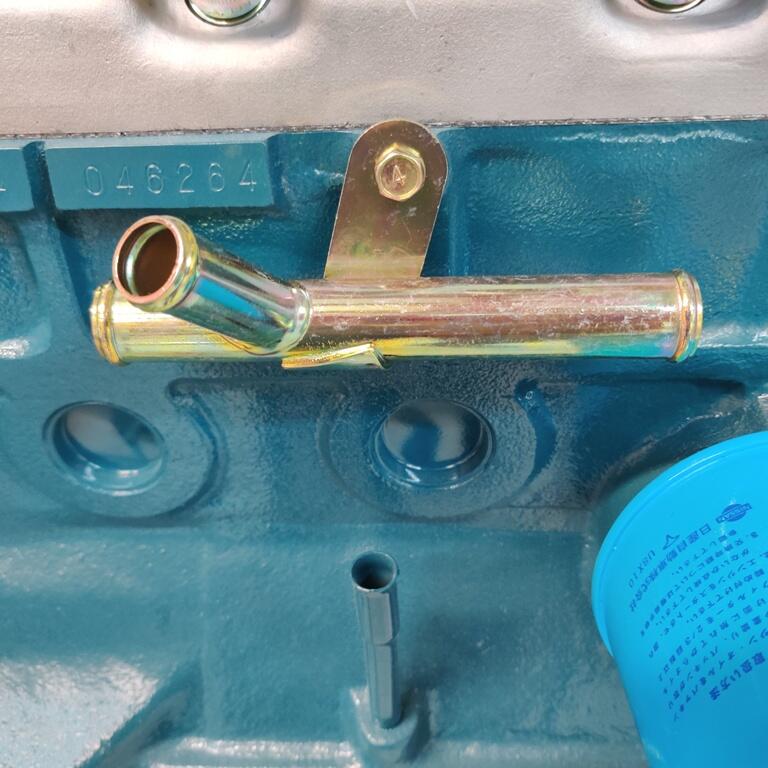
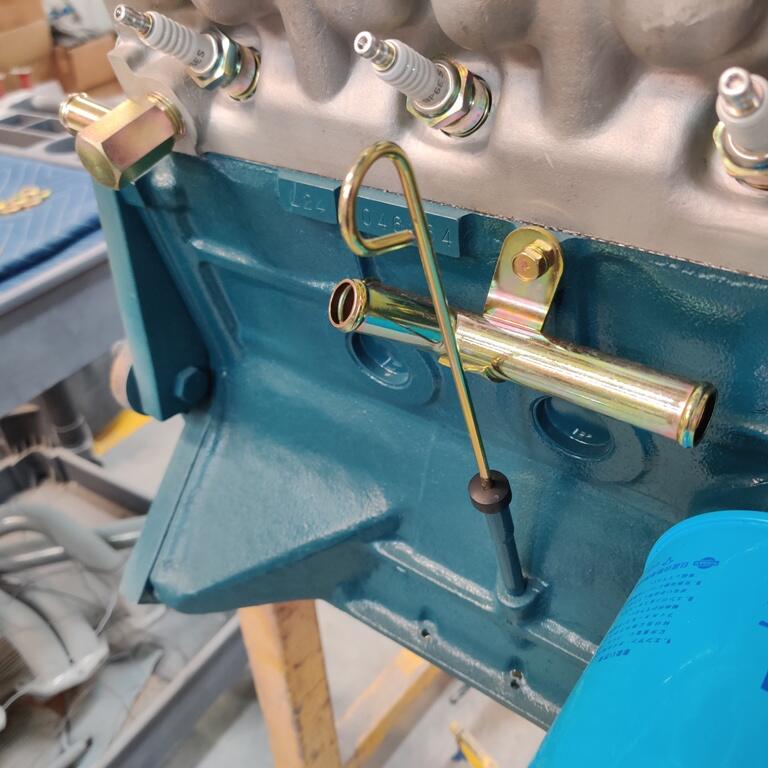
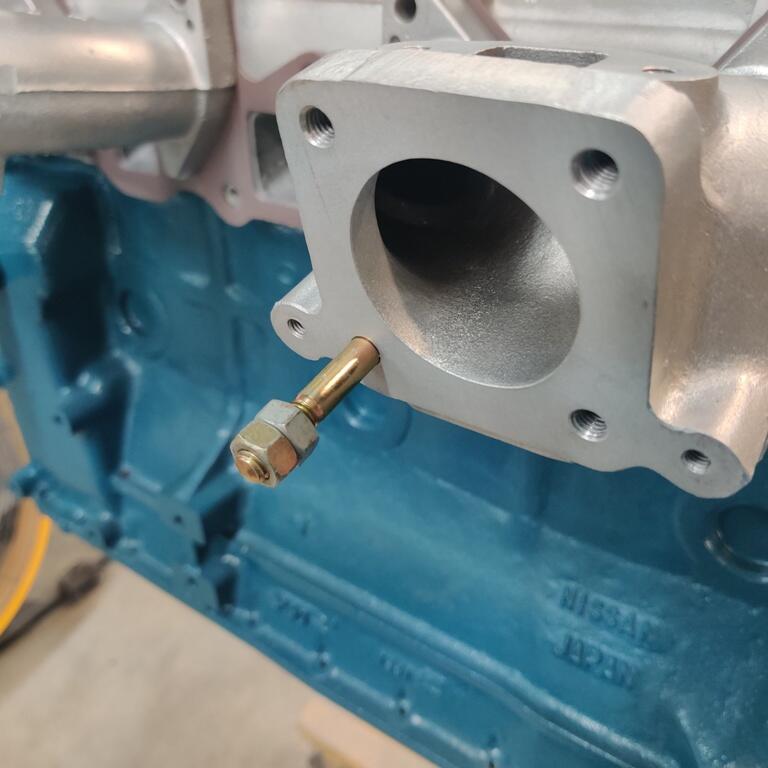
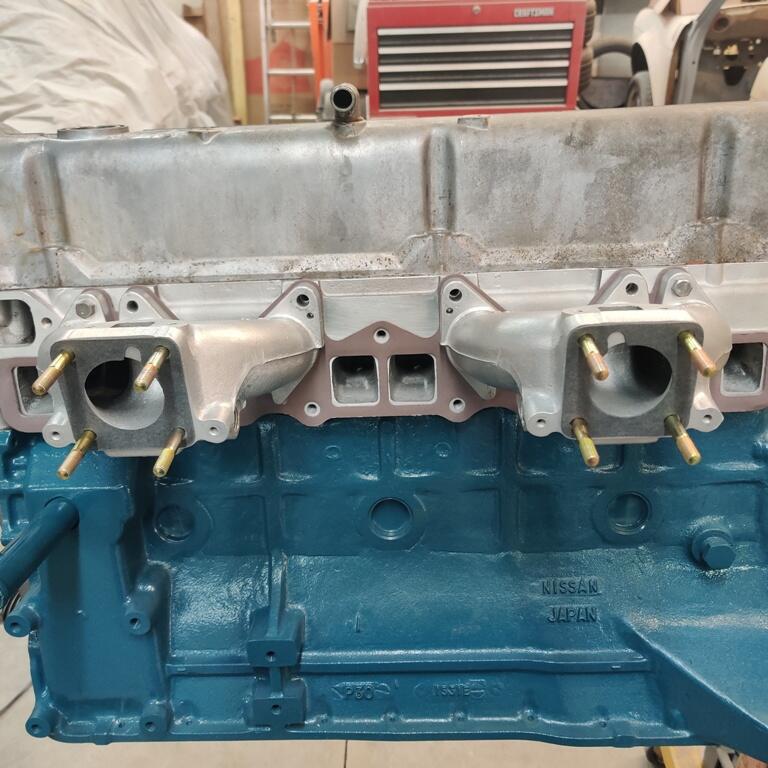
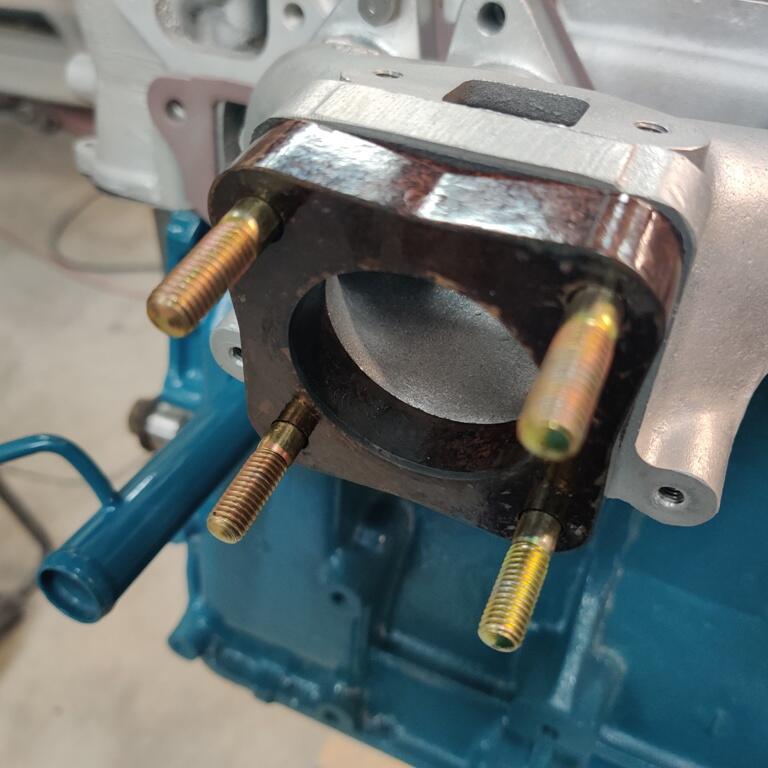
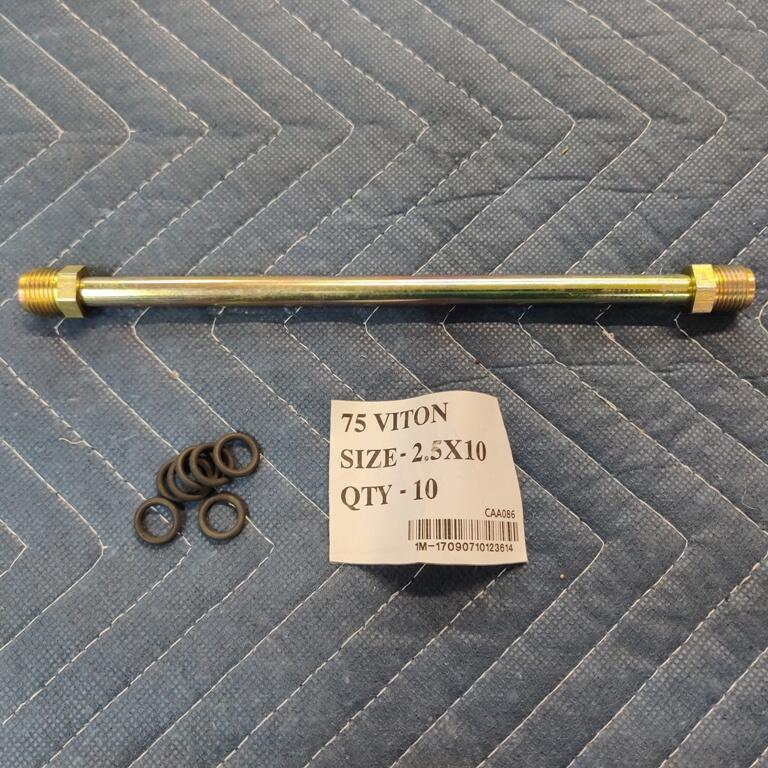
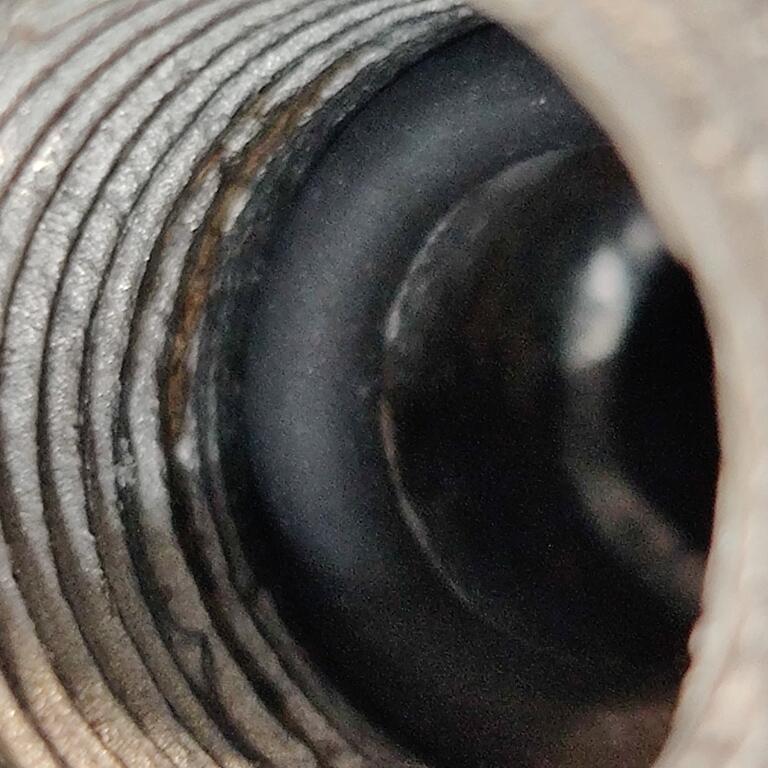
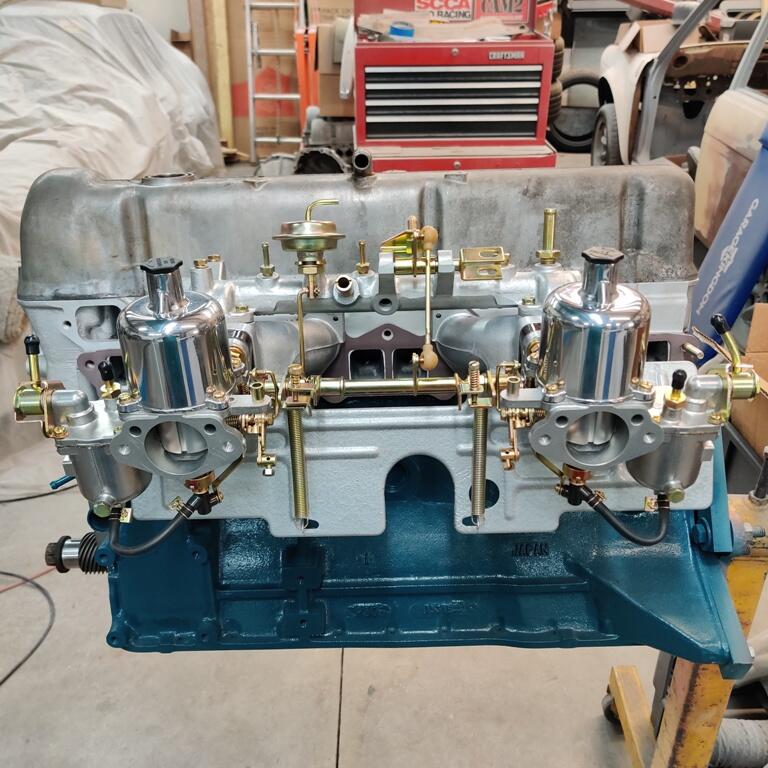
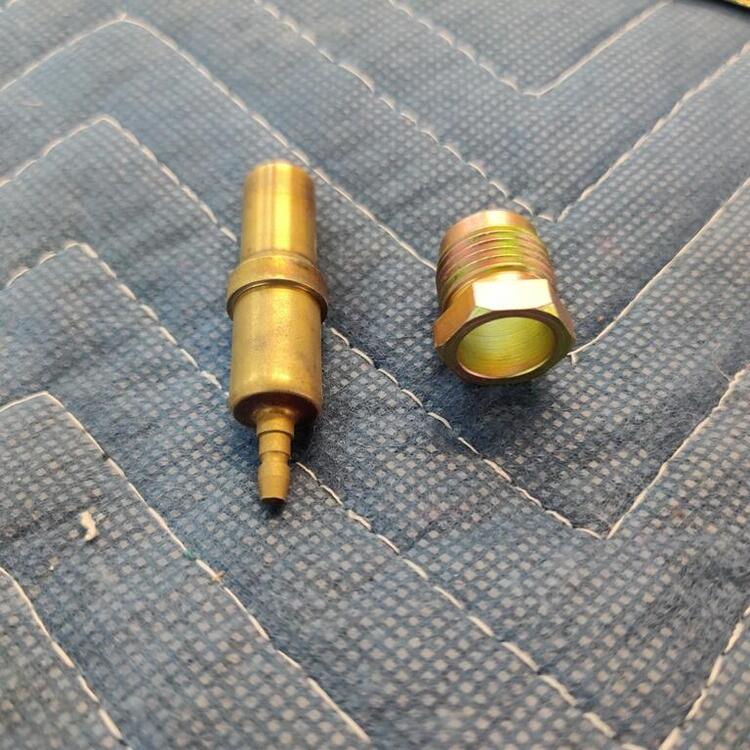
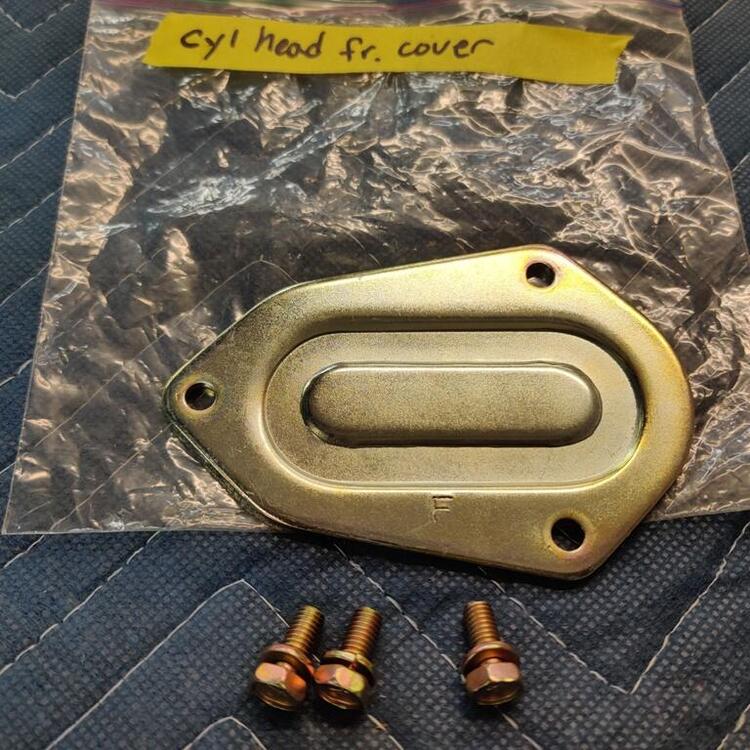
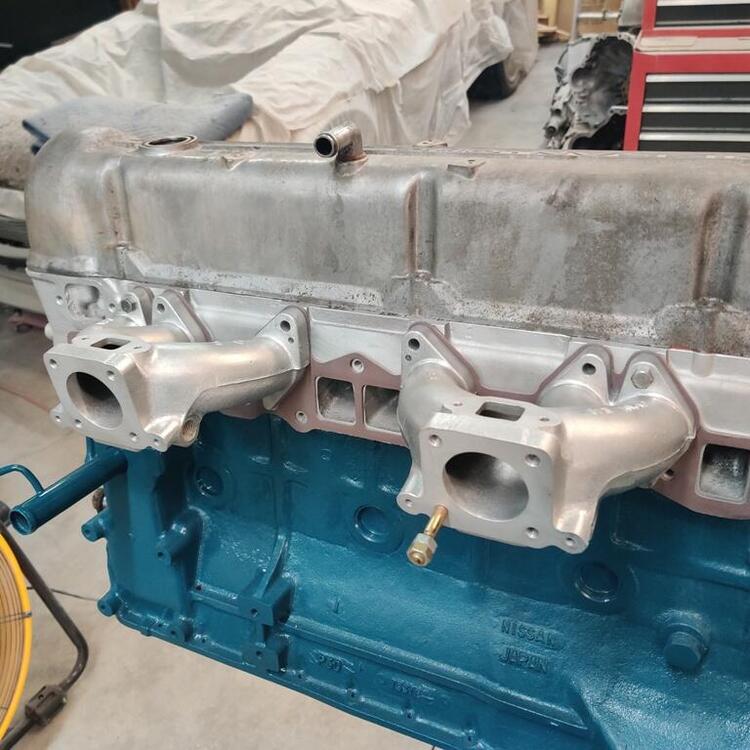
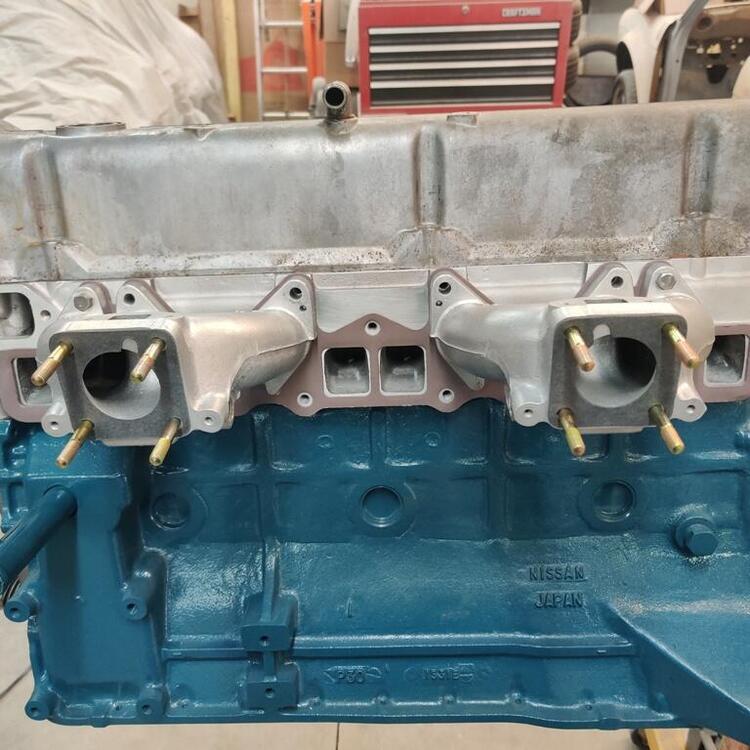
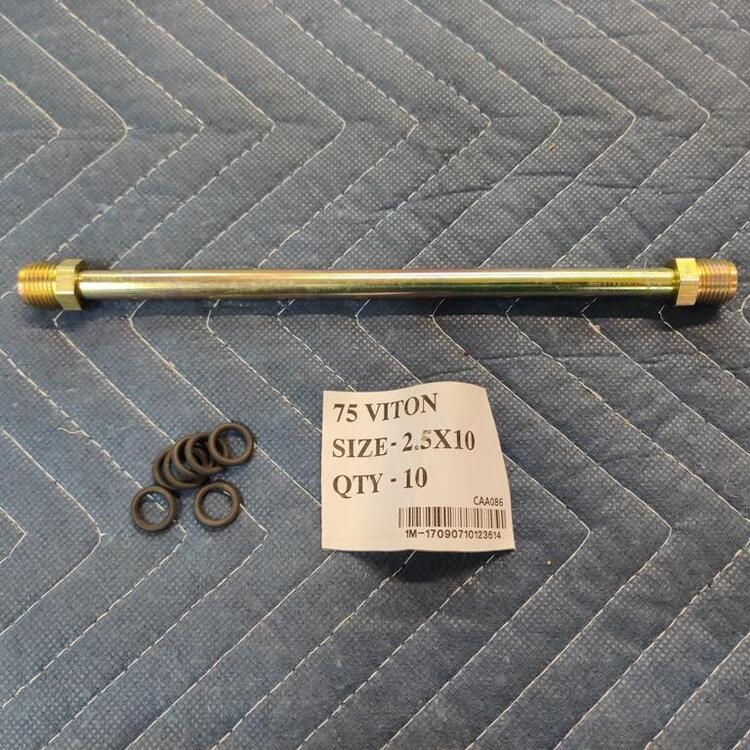
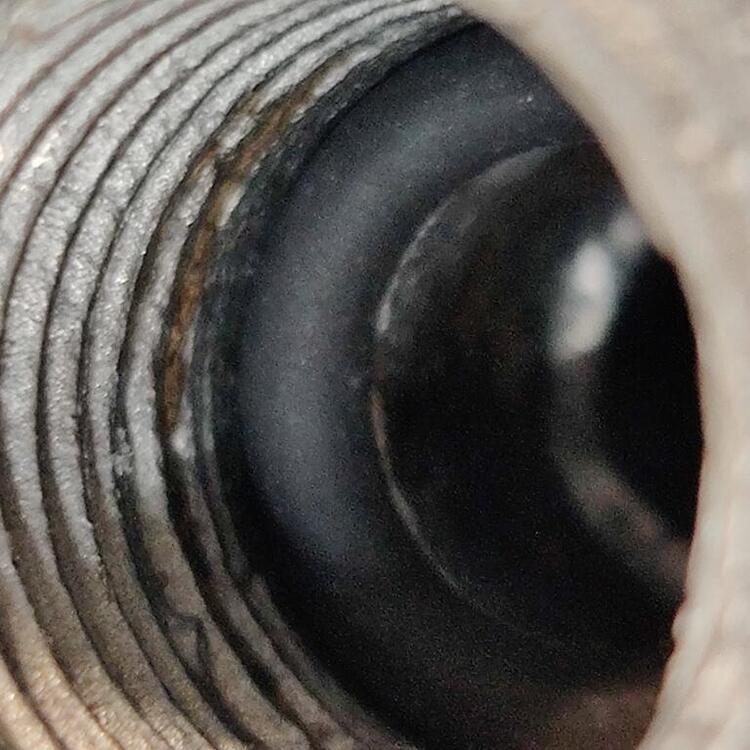
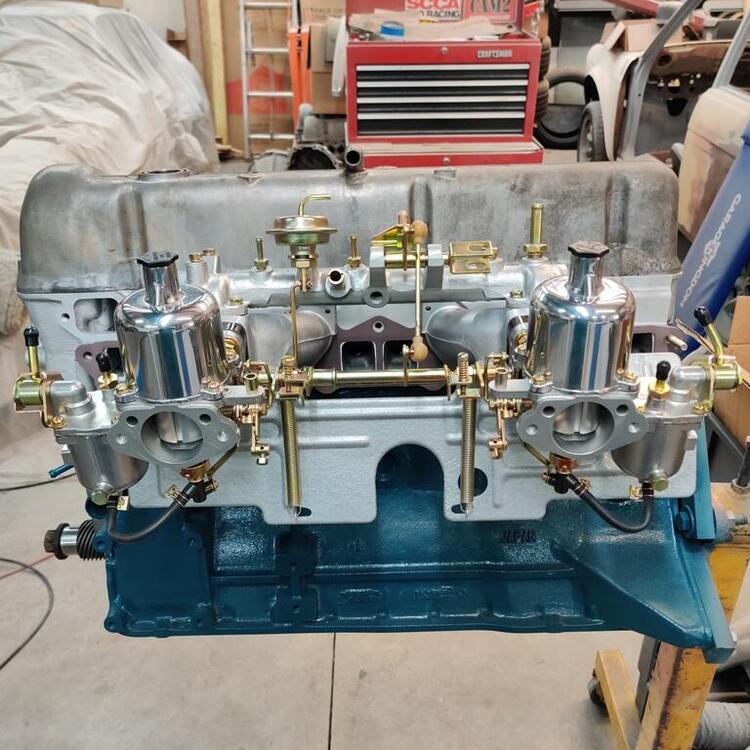
In addition to working on the doors and front fenders, making progress towards addressing the minor imperfections again today, I had some downtime waiting for 3M platinum finishing glaze (fine filler) to dry. So, I decided to pull the cover off of the engine - Ah ha! That (center pic, first row of pics, holding the manifold to the engine) is where my two intake bolts that were missing went! Unfortunately, they didn't make the trip to the plater. I am thinking there will have to be one more shipment to them for a few parts that I accidently left out. Assembly of the intake manifold. For those that do not know, studs can be installed using two nuts on the end of the stud tightened up against each other. Locked together, they won't spin and the outer one can be acted on with a wrench to wind the stud into position: Four studs in each intake manifold, gaskets and the heat insulator blocks installed. I rarely see people remove the coolant tube from the manifolds during restorations. It was a pain. I destroyed the old tube, and mangled the original fittings. But, the tube is basic, and a replacement is easily sourced. The outer diameter is 10 mm. The fittings at each end are very odd. I remember spending a lot of time searching the internet, trying to get info on them. Eventually, I figured it out. They are "Male Inverted Flair - Tube Nut - M16 Threads x 10mm Tube" The factory ones have a 19 mm size on the hex, but I couldn't find ones like that. The replacements are 16 mm hex. Additionally, what makes a water tight seal at each end of the pipe is an o-ring. Originals were hard as rocks, and crumbled. I was able to source some Viton O-rings that I am confident will work (see third pic in the row of pics below). There is an angled (chamfered) shelf that the o-ring seats against. The nut compresses against the o-ring. The chamfer forces the o-ring to push against the outer diameter of the shaft to create the water tight seal. First pic is 5.9X magnification of the o-ring in place. Second and third pics show the intake assembly. Unfortunately, the rubber fuel tubes got kinked a bit during storage. Will have to see if that resolves itself now that they are installed. I sanded the 3M glaze and applied 3 more coats of high build primer which I will sand tomorrow. Fingers crossed that I can finish the doors and fenders tomorrow.


-
View Advert Fair price paid for 1971 240z parts I need Here is my wish list of parts I'd like to track down - along with what I value them at, all prices do not include shipping: tool box liners - the foam backed that go inside storage compartments - thinking $60 for both in very good condition 4 pieces rubber trim which are glued to corners of tool door compartments (compartments are in the front of the rear hatch deck/floor area) - thinking $20 for nice ones removed with care not to tear them. speaker bracket, cover and mounting hardware - thinking $45 each original "old" style fuel hose clamps - thinking $20 each seat recline knobs (not cracked) -- item #6 in the picture here: http://www.carpartsmanual.com/datsun/Z-1969-1978/body-240z/seat-slide/type-1-adjuster-seat/6 - thinking $40 each factory original 14" 175HR14 RADIAL spare tire. Prefer DOT code "221", "231", "241" or "251", but let me know what yours is (check DOT code on tire sidewall) - thinking $200 original carpet padding "jute" (brown horse hair like stuff). This "jute" was originally installed under the front floor carpet mats, under the seats, under the center tunnel diamond textured vinyl trim, and under the carpet in the rear hatch deck/floor. This stuff is fragile, and it would be nice, if you have any that is in good condition, to take some care with removal (it was glued to the tunnel). Depending on the piece out of the set and condition - thinking $30 to $80 per piece battery cover (plastic) related parts for 1971 240z - not sure how much - there are reproductions available yellow wheel chocks with correct date stamps - 1E or 1F - thinking $30-$40 for the pair original scissor jack. There are letters stamped into the base of the jack. I need one that has letters starting with Q (1971), and then be followed by F (June) as the second letter, then followed by any letter S through Z as the third letter ---- or, if there are four letters... then AA through CC as the third and fourth letters. As best I can tell, I need a jack with any of the following letter sequences: QFS, QFT, QFU, QFV, QFW, QFX, QFY, QFZ, QFAA, QFBB, QFCC. - thinking $100 4 original hubcaps for a 6/1971 240z - Any condition considered but the most I can see spending is $2000 for a set original key blank - the type with black paint - still not sure which type I need Garrett 434-227-2333 Marietta, GA 30062 Advertiser inline6 Date 07/09/2022 Price Category Parts Wanted Year 1971 Model 240z
-
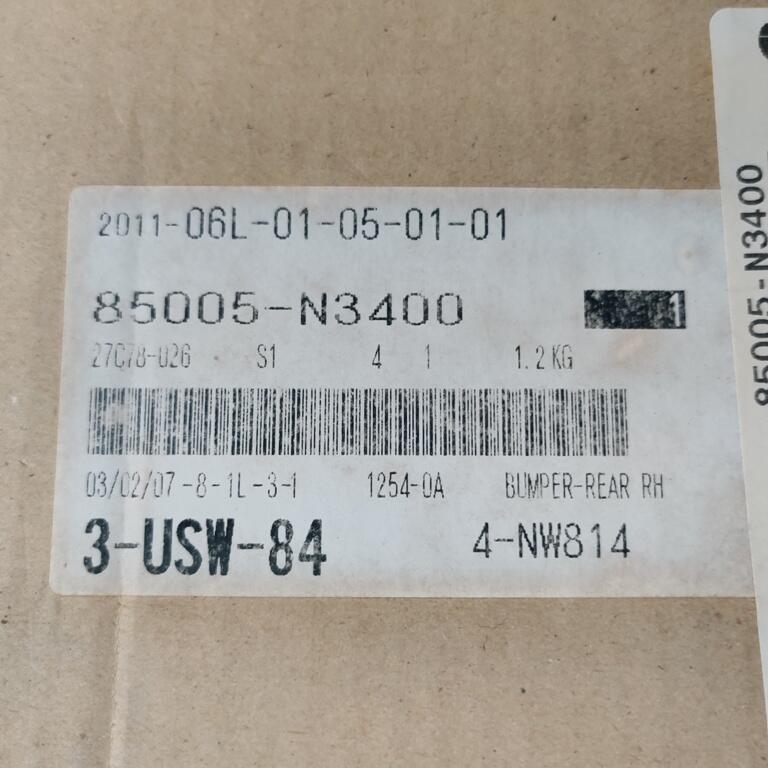
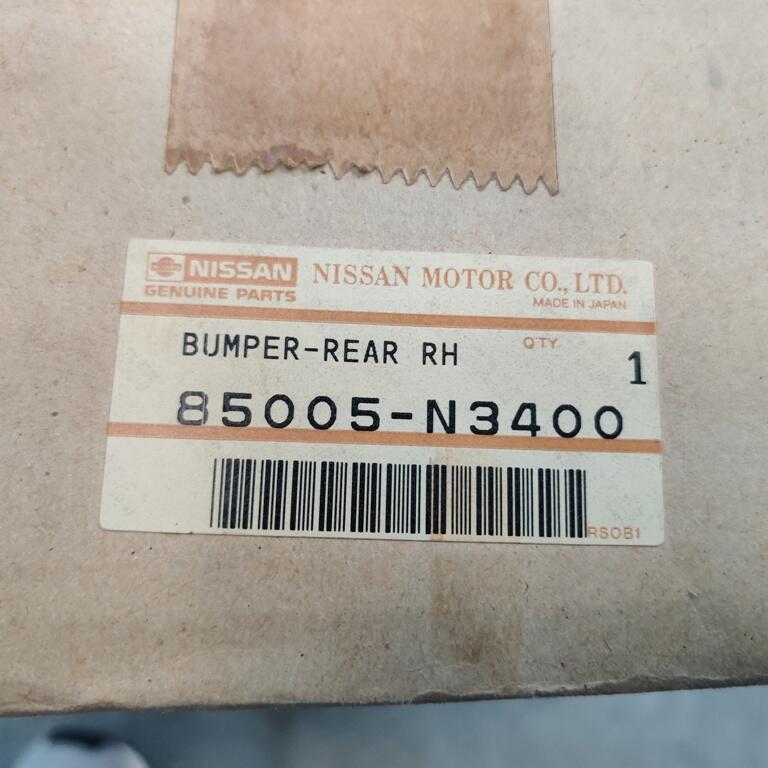
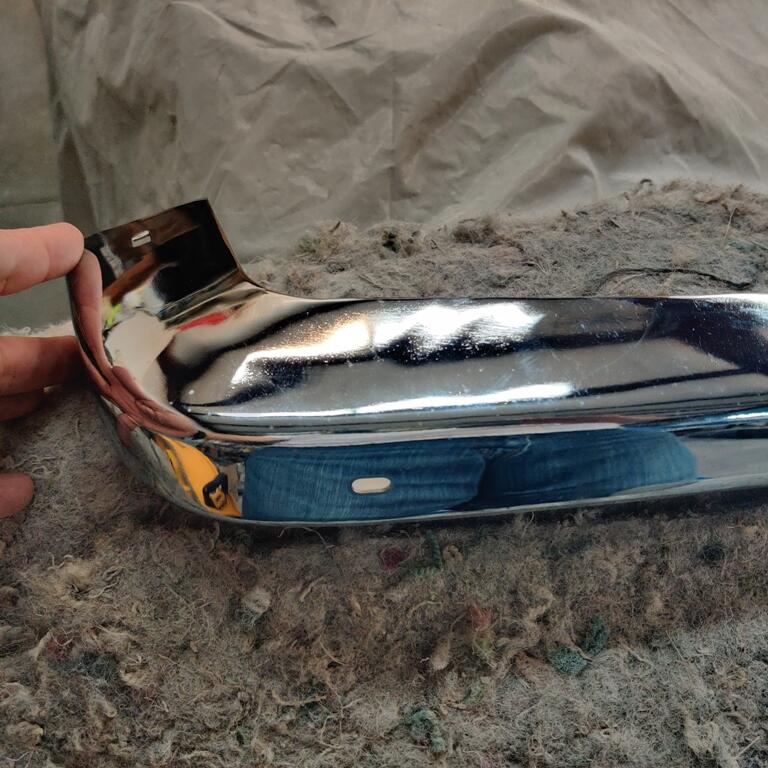
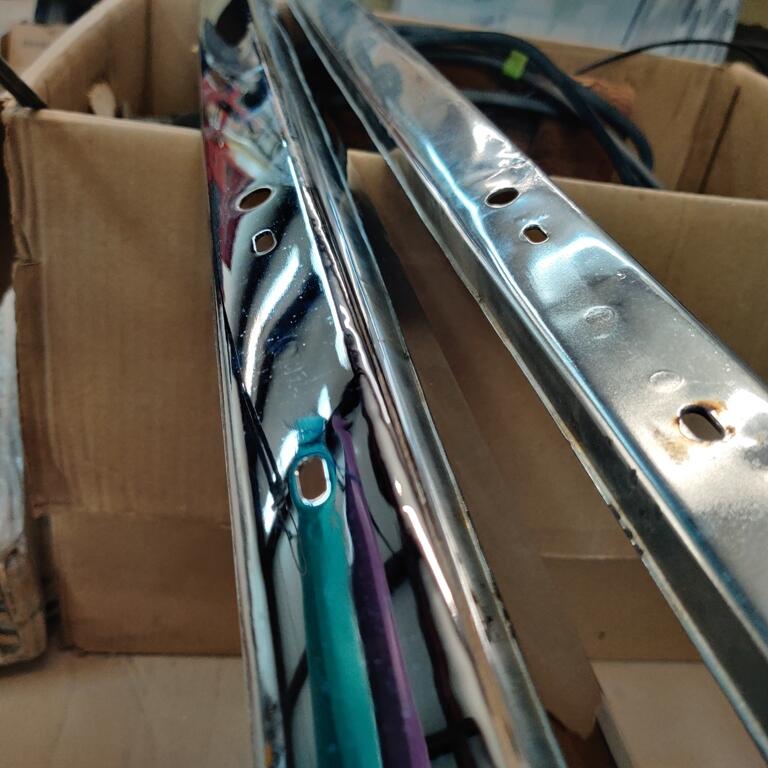
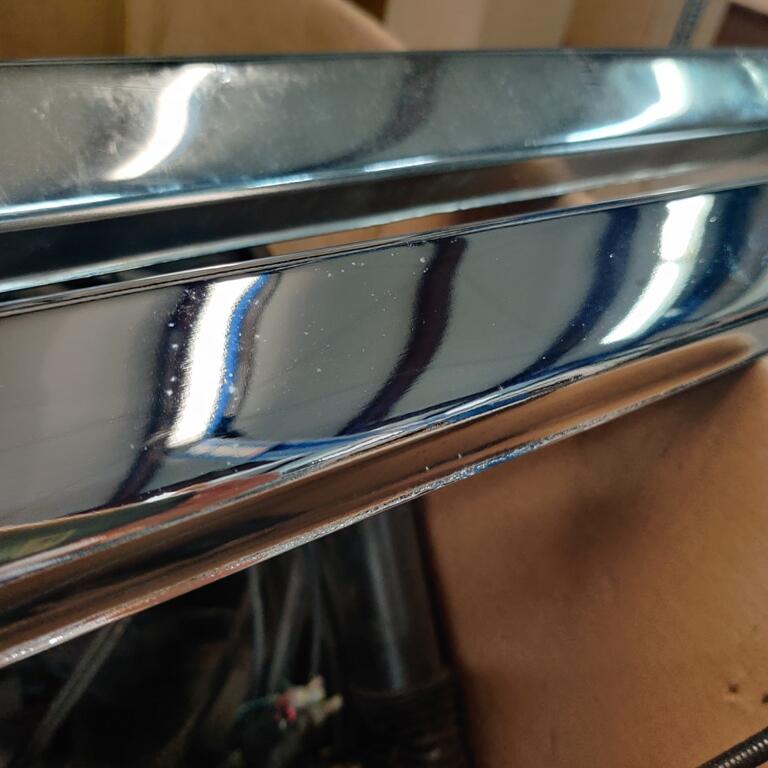
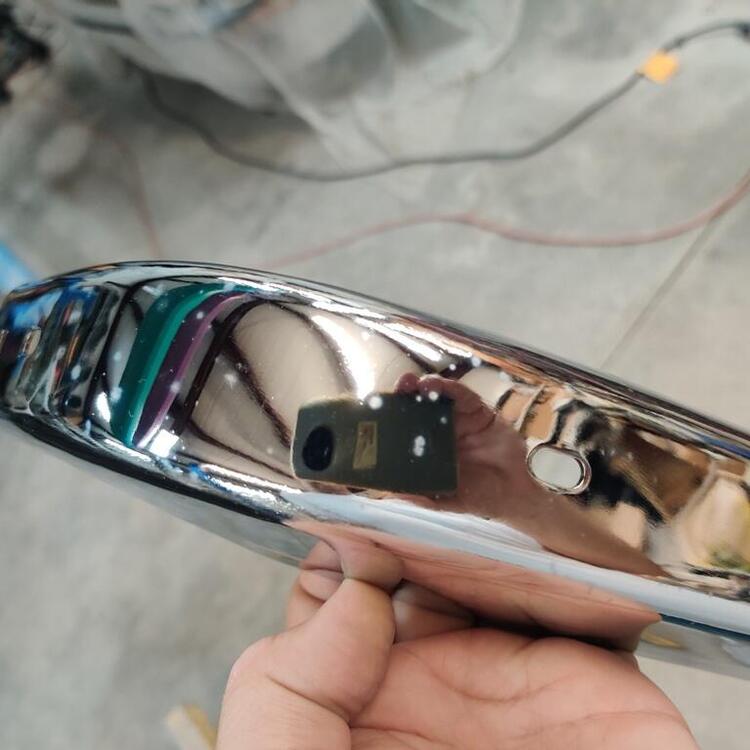
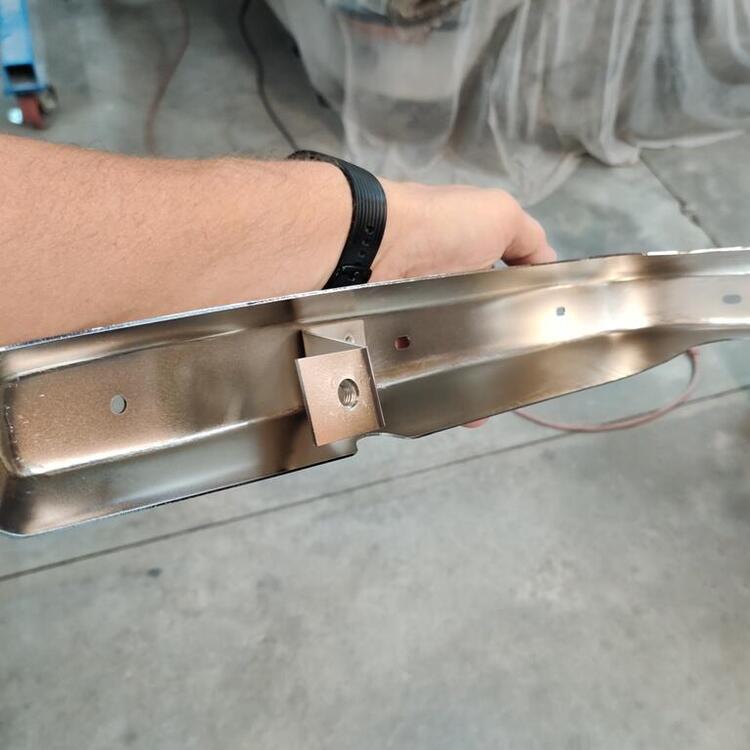
I talked with a painter about a week ago. His shop is only a few minutes drive from me, surprisingly. Went by the body shop he owns, and I talked with him for about 10 min. I told him that I was doing a "rotisserie restoration" and I had stripped the car to bare metal and was getting close to completing the bodywork. Before I could get another word out, he mentioned bare metal body restorations start at $48k. I said, right, but I will have done all the body work and I am just looking for someone to spray it. I mentioned I was using Glasurit products and that I wanted the paint and clear to be Glasurit also. He said I was looking at $4-6k if I provided the paint/materials. Well, I said I had budget $3-4k, but that I honestly thought that with me providing materials, that was too high. Then we talked a bit about "my bodywork". I let him know that I get it... someone comes in and claims they have done the body work and just want him to spray it - that person may not be capable in the slightest of doing bodywork. It could be all wrong. Wrong in hundreds of ways. And these could show up after it is painted. And then he is worried that I will blame him. I mentioned that I have experience with bodywork, but understood the position I was putting him in. After the 10 minutes, I mentioned I wanted to be respectful of his time. He offered me his cell phone number and said he would need to see the car. So, that was a positive outcome, if we had a shaky start. We arranged a time a couple of days later. He showed up on time and I took him to my shop at the back of my property. While looking the car over, he provided a few comments. He pointed out a couple of areas where the body line down the side of the car was not as sharp as in other places. He said that I had done a really good job, and saw the Glasurit containers and mentioned his approval. I figured now that he had seen the car... oh, and I further explained to him that the only part that was to be sprayed separate from the car was the hatch panel - fenders weren't to come off, doors weren't to come off, etc. And, no color sanding... and no buffing... just spray it with base coat, spray it with clear coat, and I can take it from there... I figured, surely, the price would come down? Eh - no. It seems that $4-6k was the minimum. But... he did say he knew someone that he could refer me to who would be cheaper. So there is that. In the end, I may be able to get that referral and I may not, but I appreciated his time - thanked him many times for stopping by and having a look. So, I continue to work on a few panels to flatten them out to perfection. I've lost count of the number of primer coats I have applied. It seems I still have a lot to learn about sanding a panel. I think (no really this time) I am close to finishing up the bodywork - a couple of months of weekends more is my guess. And as that milestone approaches, I find myself thinking of a few other areas of the car that need attention, like chrome parts. I took a look at my nos rear bumper pieces today. It is a real bummer to see very slight signs of corrosion on them. Looking at the stickers on the boxes, it appears at least one of these pieces dates back to 07. Note the white spots which I think are tiny holes in the chrome leading to the base metal: Also, the bumpers have imperfections like these two high "waves" in the white part of the light shining in the reflection (first pic); center pic shows similar corrosion on the center bar; new bumper bar vs. old bumper bar (third pic): The original bumper was damaged in a light rear end collision. I have straightened it a bit, but I think it needs a bit more work. At this point, given the corrosion showing up on the new one, I think it best to send all the parts of both rear bumpers to be re-plated (along with the front bumper). I think I will have them address minor issues with the new old stock one as well as work on further salvage efforts for the original one.


-
Looks good! I'll check them out.
-
It seems like from looking online, I see a lot of hit and miss with chrome plating. Does anyone have a recommendation for a place that does high quality work? I'm looking to get the following re-plated: 1971 Datsun 240: front and rear bumpers and bolts that secure the bumper ends to the center section gas door latch/"lock" ash tray bits (like the grill thing you put cigarettes out on) exterior door handles The bumpers have light taps (high and low spots) and will need copper filling or whatever to get them straight, but they have very little rust since they are from an Arizona car that then sat in a garage for 28 years.
-
Hi Katz, I see you purchased 2146 off of eBay - did I help you become aware of it?
-
-
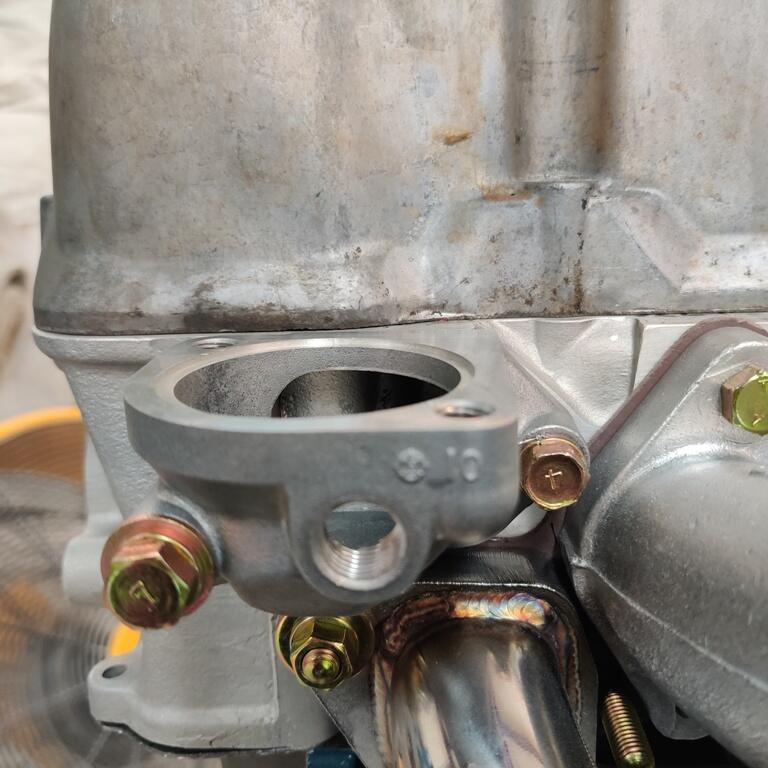
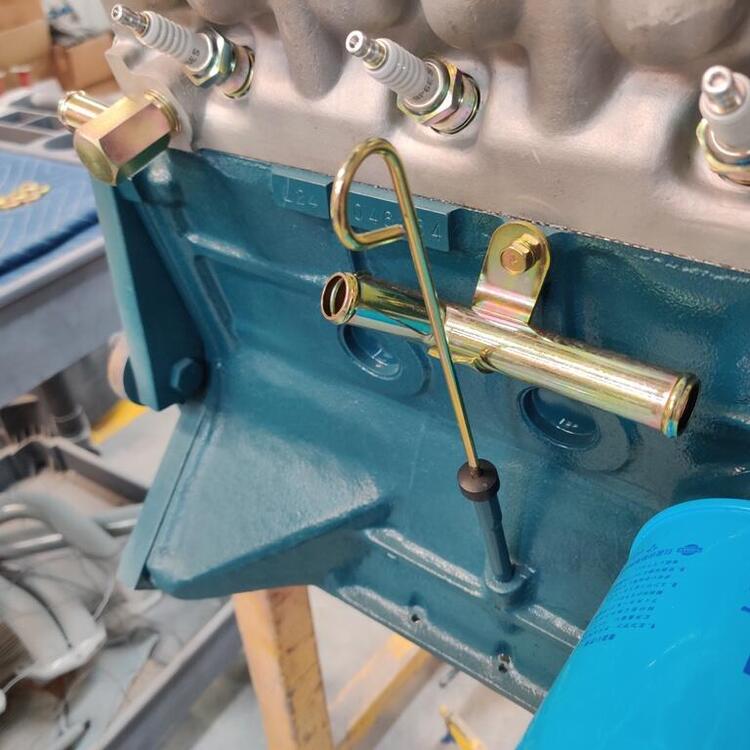
For what it is worth, the nut you have on the rear engine lift hook looks to me like an original exhaust manifold to down pipe nut. I think they are made of some type of alloy - they are not plated. You could polish it a bit and see if it shines like a new penny. It is possible some of your hardware got moved around a bit from the factory locations. Most of it looks right, and I can't conclusively say, but the other pieces that look suspect to me are the stacked "B" washers at the engine lift hook location under that nut, and the thick "D" washer at the center top stud for the exhaust manifold to the head (6 required and you have 7). On your engine, "B" washers are in all the other locations that secure only the exhaust manifold to the head. So, it seems to me that the center top stud should have a "B" instead of a "D". I think the "D" washers are used only on the six locations that bridge from exhaust manifold to intake manifold.
-
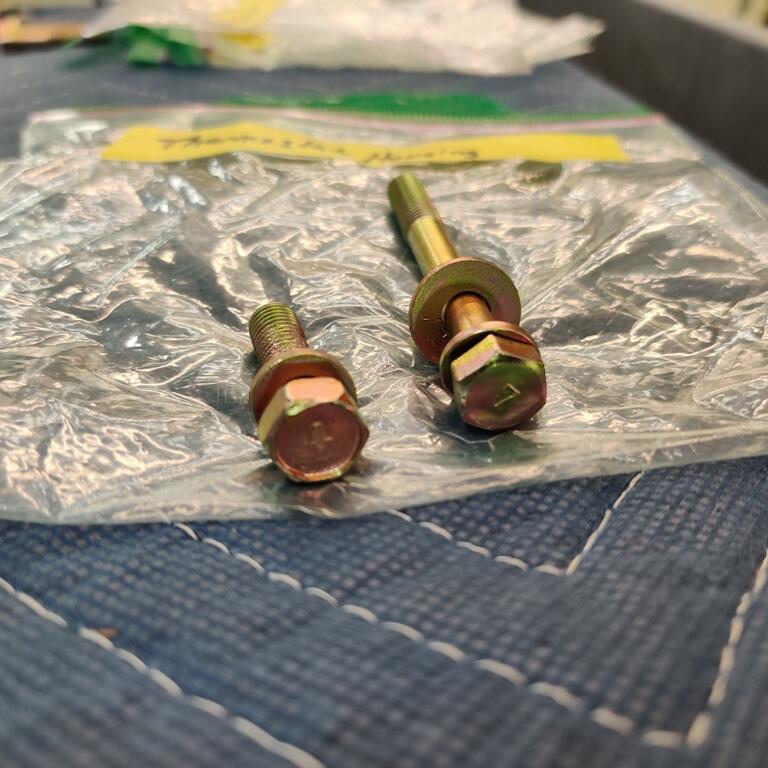
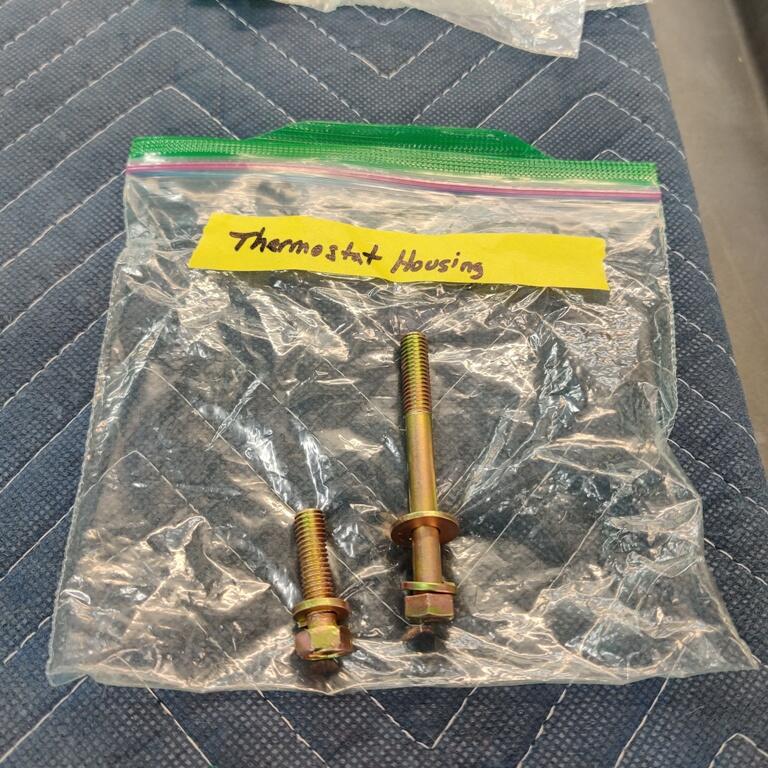
Ok - thanks for that info! I seem to be missing that bolt for my car. I will have to attempt to find one in my spares. If you get a chance, I'd love to have the specs (e.g. yellow chromate hex head bolt - M8 X 1.25 - ?? (length in mm) under head, and ?? length in mm threaded.
-
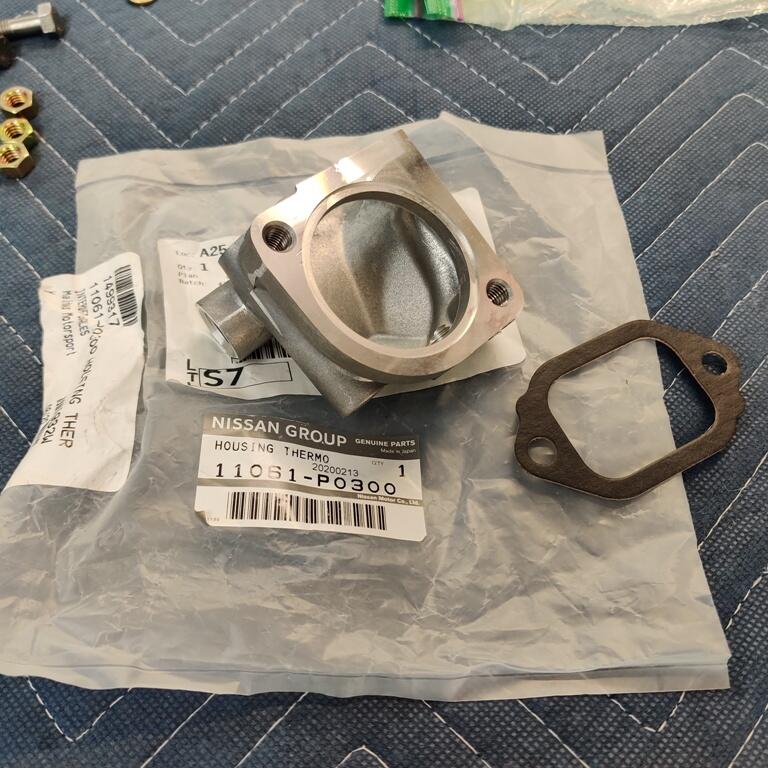
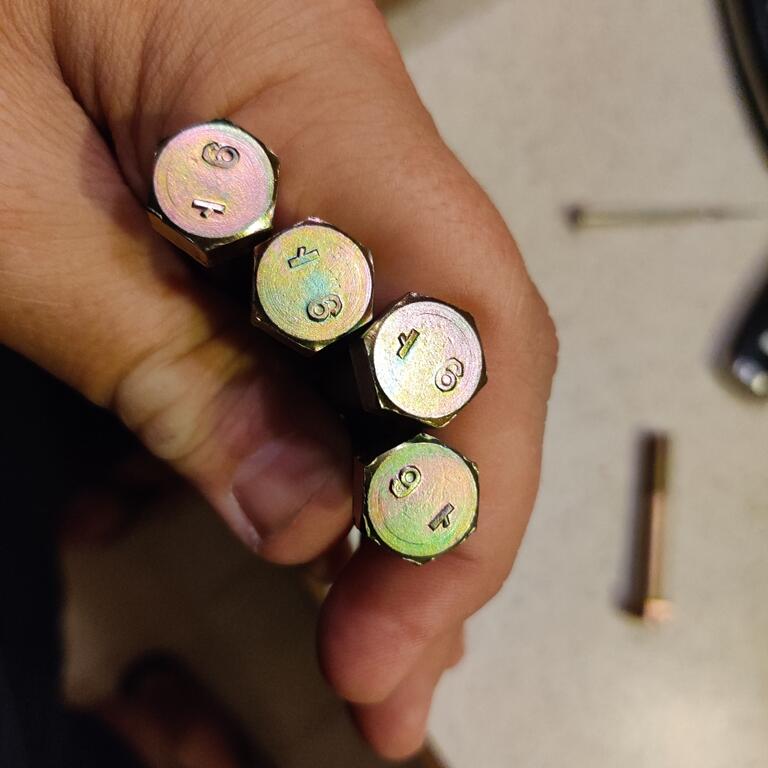
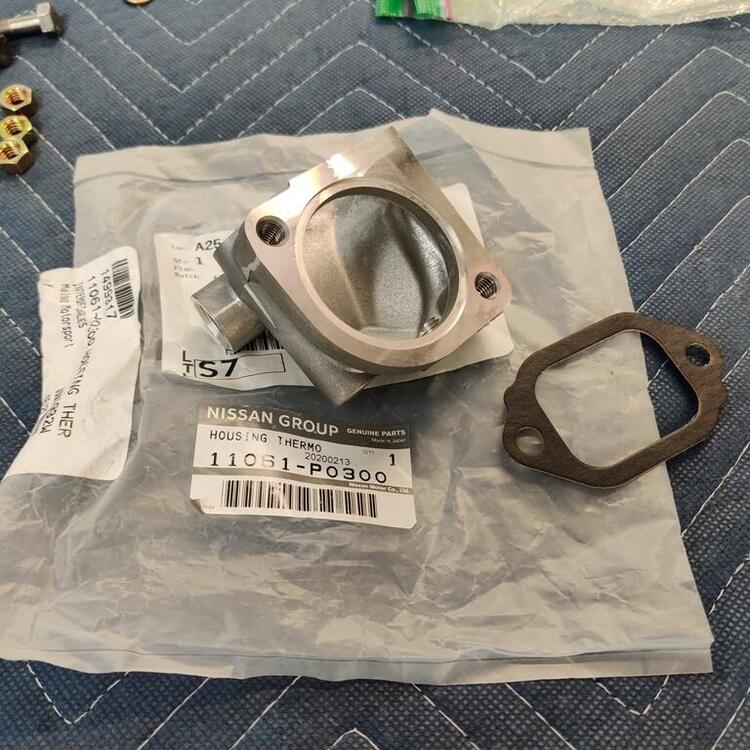
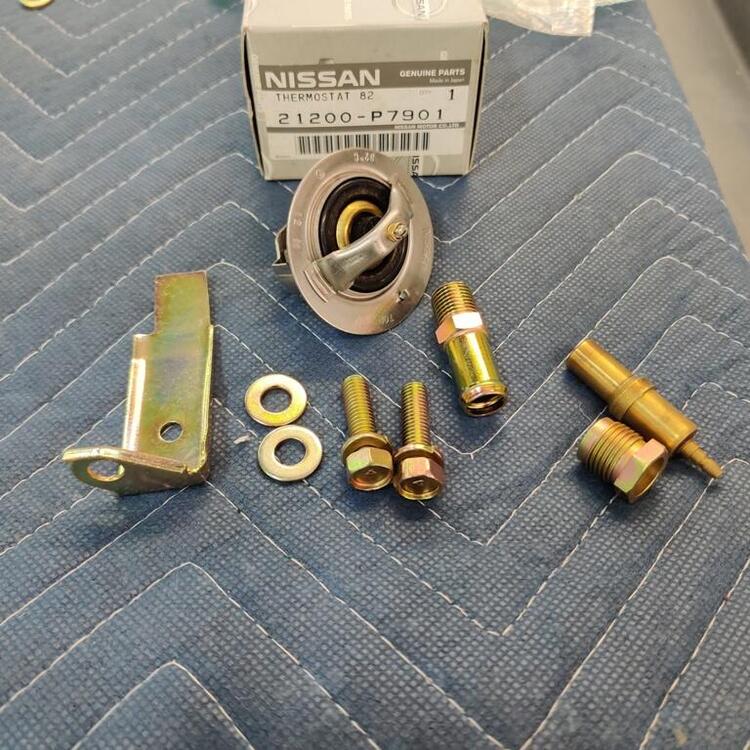
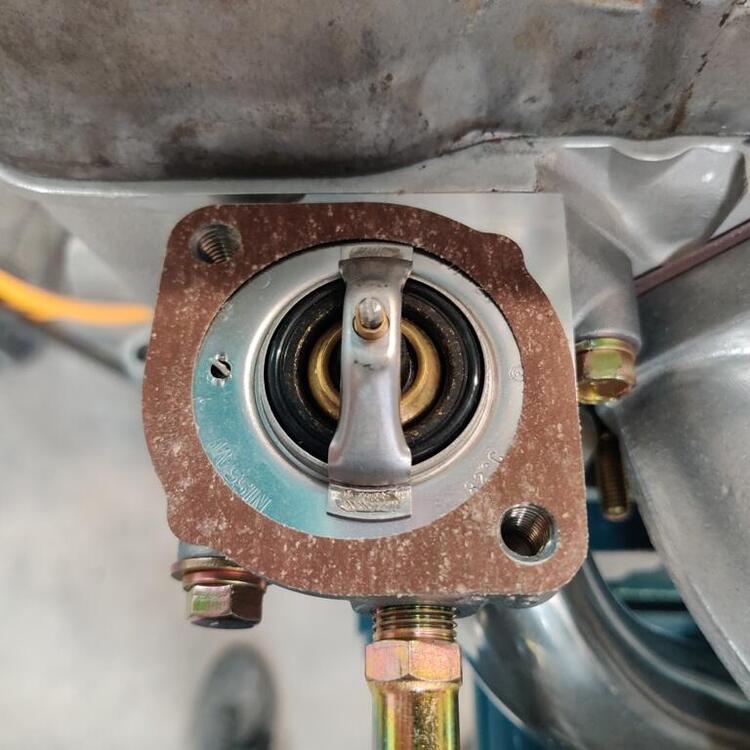
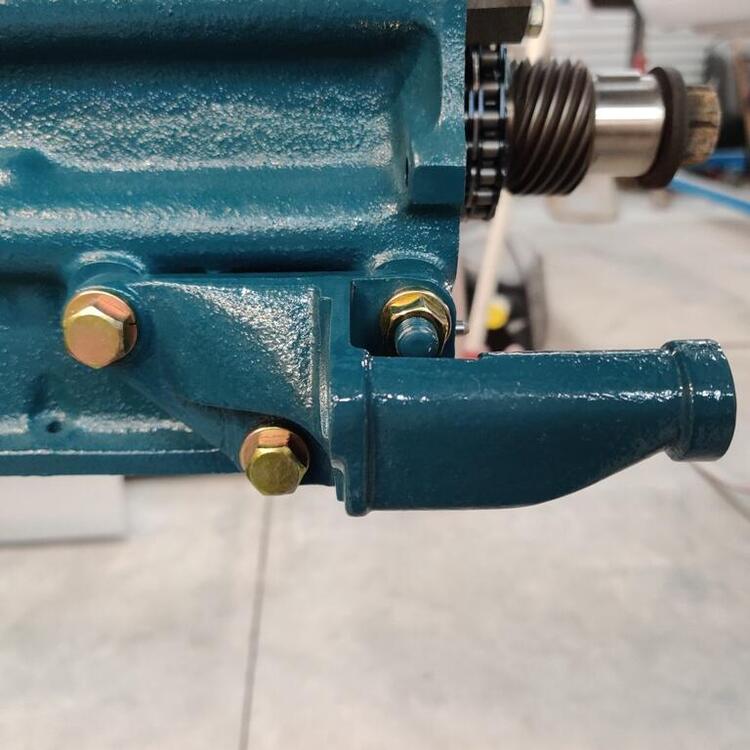
Any numbers on the head of the longer of the two thermostat housing to cyl head bolts? *Edit: I tried zooming in on the pics you supplied above. I think I see something, but can't make it out. Does that long bolt that secures the thermostat housing to the head have these markings on the head? I have 5 of these. I thought they were all for holding the transmission bellhousing to the back of the engine, but maybe one of these is for the thermostat housing.

-
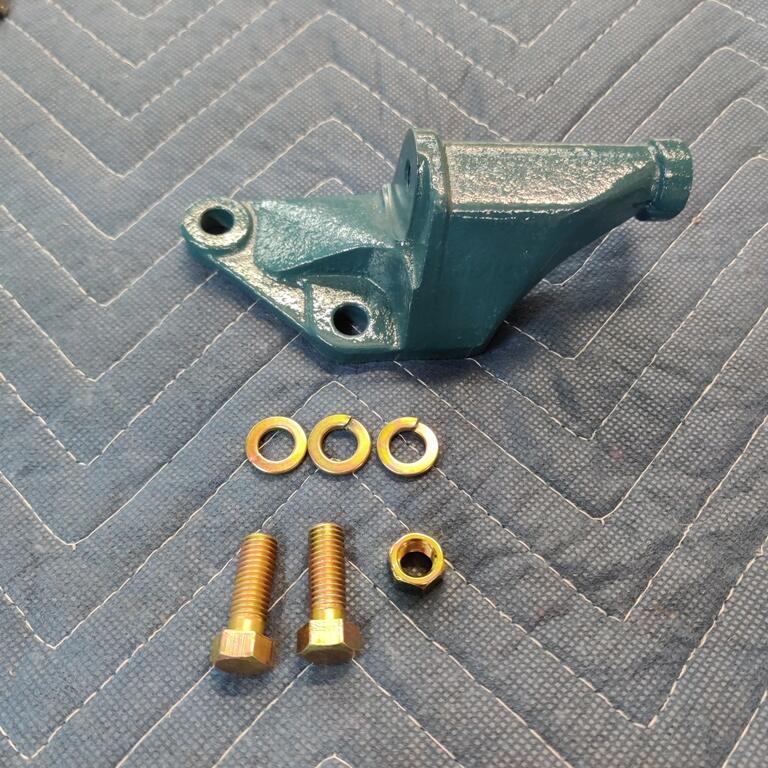
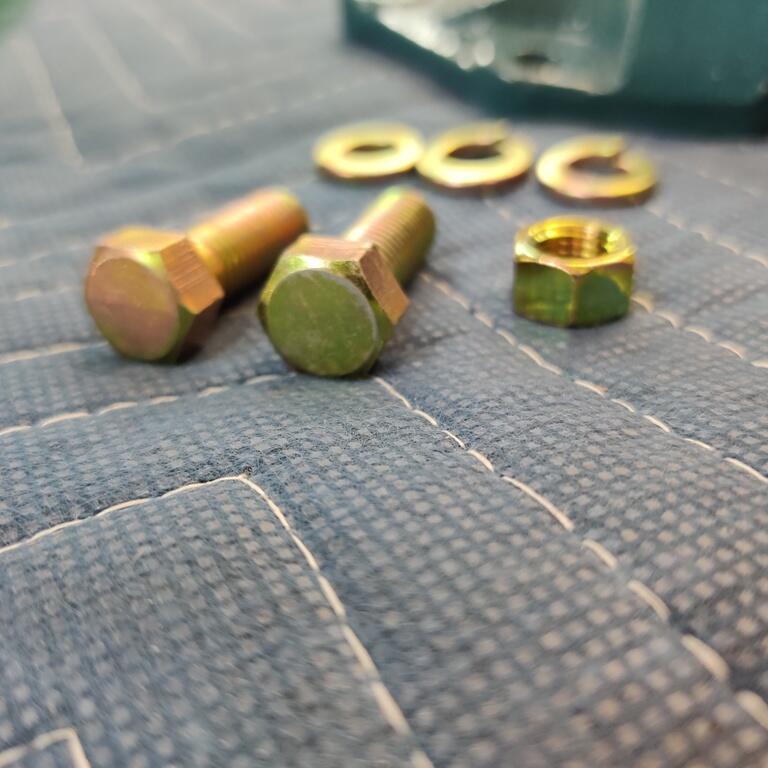
I was thinking about the fuel rail, and how it came into play, but didn't recall exactly where the brackets were. Thanks for the pic. If you have a chance to get the dims on the flat washers that go under those T R 7 bolts, please share those as well. I am updating my documentation of all my 240z's hardware which I shared once before in another thread. https://docs.google.com/spreadsheets/d/1Cmnw0F8N7B3VknCzNwGkfN2SGmIHdFJhDjARv3jkxNI/edit#gid=0 I have updated my Excel copy quite a bit as I have been going through all of the hardware that I got back from plating. I have been putting it back in the zip lock bags with my labels of where they go. Though slow, it is going very well. It's amazing how much of the hardware is unique to its location on the car. I will be updating the Google sheet for everyone after I have completed sorting and cataloging all of the hardware.
-
From you picture, I see that of the 6 T R 7 bolts, only numbers 1, 3, and 6 have flat washers. The other three didn't have a washer... of any kind? Do you know if your intake manifold has been taken off at any point? Out of all the hardware on the car, that used by the factory on the intake manifold is most unusual in my opinion.
-
Yes, that is helpful. What is the diameter and thickness of the flat washers used on the exhaust manifold only? Looks like 5 total - 1 front and 1 rear and 3 in the middle.
-
I'd like some further information about the factory hardware used to secure the exhaust manifold and intake manifolds to the head. Can anyone tell me what markings are on the heads of the 6 bolts which secure the top of the intake manifolds to the head? And, should there be flat as well as split lock washers used in conjunction with these bolts? To secure the exhaust manifold to the head (3 points), besides the hex nut and split lock washer, there is a flat washer used. What size OD and how thick?
-
Kinda looks like a fan blade on the radiator fan - odd pic.
-
Well, it came out very nice on your car. For the car I am restoring, I share your observations regarding the factory coating having a really heavy orange peel texture. Raptor liner (it is a truck bed liner), mixed per spec, and as sprayed from their application gun doesn't lay down quite as smoothly as the factory texture, but it is closer than other spray on liner protection coatings. I researched quite extensively before I decided to buy Raptor liner. Additionally, however, I have two videos to provide which I found very interesting and which provide information which may help to achieve a finish like the factory coating. Jump to 20:50 to see the resulting finish for the tintable stuff this guy achieved with the standard gun that comes with the kit and I think 60 psi at the regulator: It is still more textured that the factory stuff, but closer than any other bed liner I researched. That said, here is another video that I found where a guy using Raptor liner over dash parts and achieving a surface that literally allowed the original texture of the dash to show through. I question the use of this product on dash parts, but I plan to experiment with the same, cheap gun, drilled out nozzle, more reducer and less hardener, as well as different air pressures to attempt to get a lot closer to the original factory look. Jump to 11:48: He uses a cheap Harbor Freight HVLP gun with the nozzle drilled out to 2 mm. And he uses 20% reducer instead of 10% and half to three quarter of the amount of the hardener called for, so that the sprayed material doesn't set up as quickly. Finished dash is shown closer to the end of the video. Most of the coating on my car is still in good shape. There are many areas that were impacted at some point, however. My plan is to try to replicate the original texture in those spots as best I can, probably using the raptor gun and Raptor thinned to 20%. Hopefully, I can get a good result there, and then, I want to spray a very thin coating over the existing factory coating using the method in the second video. I hope the new coat won't add any texture, but that it will allow the factory texture to show in the new coat.
-
Can you share any pics of the underside? I've got Raptor waiting in a box. I hope to be able to apply it to the underside of the car I am restoring in a few weeks or so.