Dr. 240Z
Free Member
-
Joined
-
Last visited
Everything posted by Dr. 240Z
-
 16'' Robello rims (gunmetal) would be nice....Hint, Hint, Santa are you listening??????? Season's Best to ALL, George
 -
Hi, Welcome to the site. As for the orange air filter cover, go to ebay and search: Datsun 240Z and air filter cover There's one postedon the first page for $69 Regards, George
-
Sorry - Wish I could accommodate you but it's -12F outside here this AM and my Z is hibernating inside in its warm den until April.
-
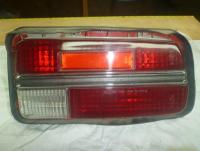
Hi Mike, I used Turtle Wax 'ICE" - works great on many types of surfaces and does not leave a white residue. Google it and you might be tempted to give it a try. In any case, this was the very first time I applied anything to the lenses and as you can see they ain't look'n too bad for 42 year old plastic. Cheers, George
-
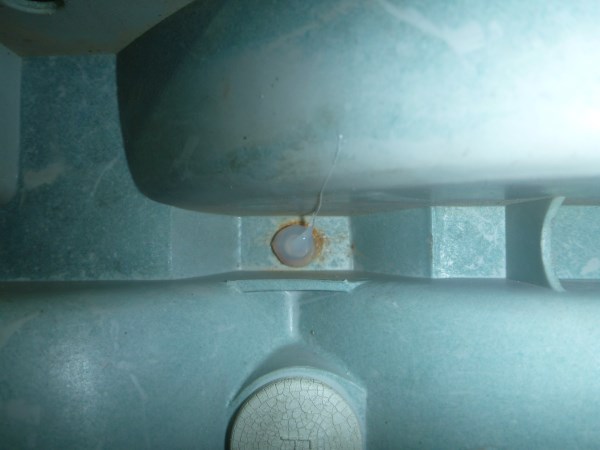
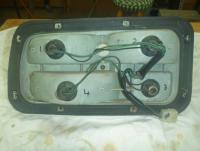
I wish! However, going from the 4th to the 5th picture you can see the center post with the retainer (4th) and then a fractured off post without a retainer (5th). I did attempt to remove it without creating any damage but after awhile I gave up when it dawned on me that I was replacing the old bar with a shiny new one anyway. Dennis, I think that the only way to remove the old retainer without damaging the post would be to carefully grind it off with a small power tool. Actually, if you have a friendly dentist, I'm sure he/she could do it for you. Cheers, George
-
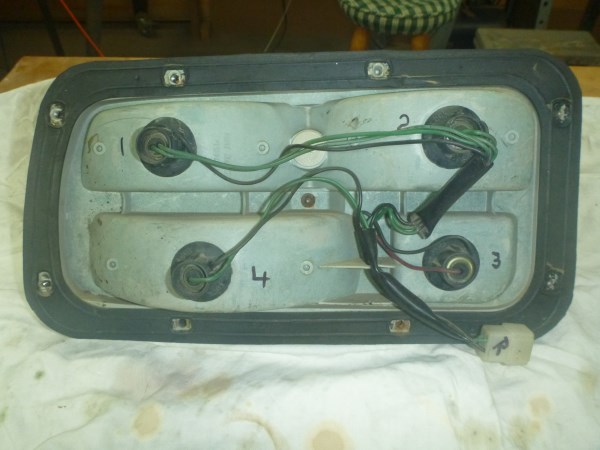
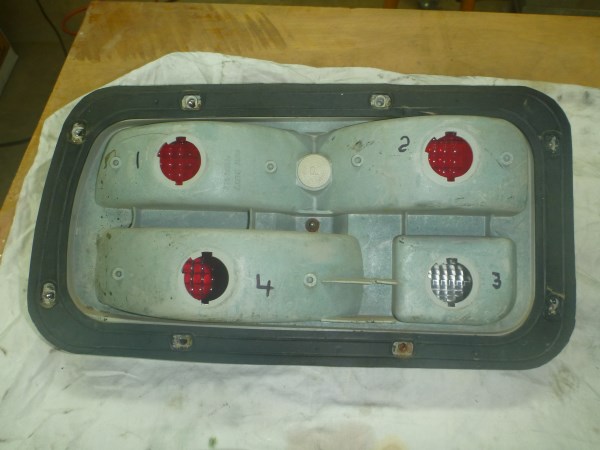
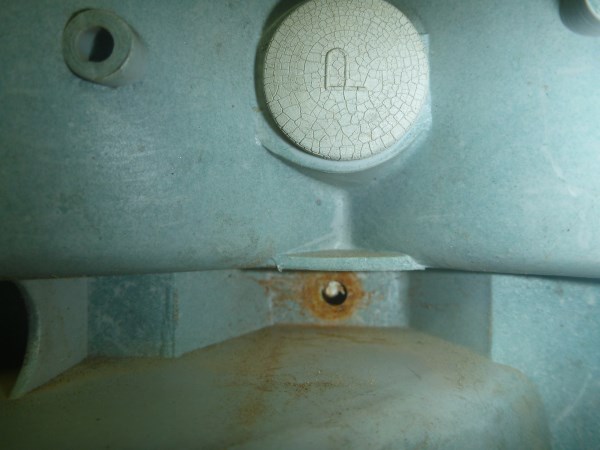
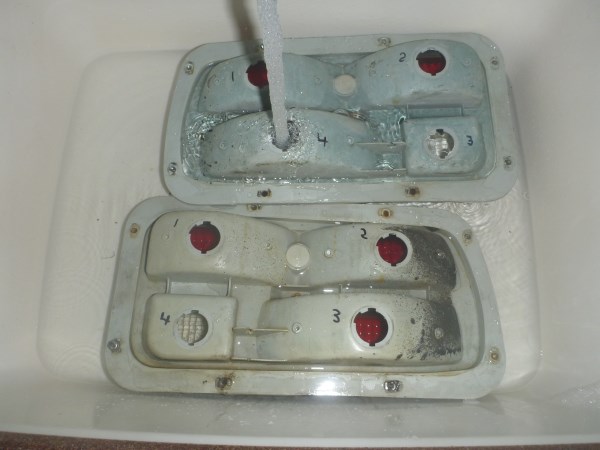
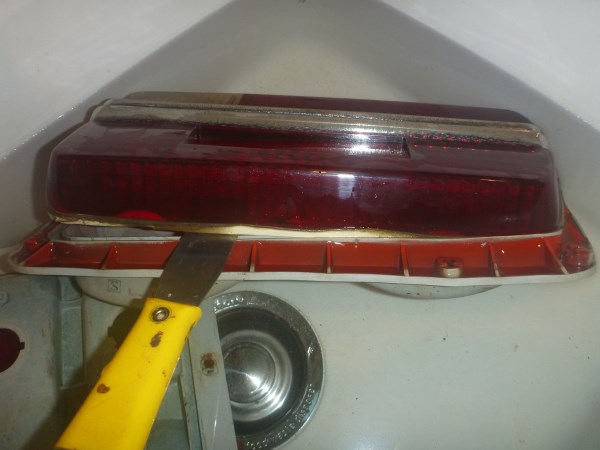
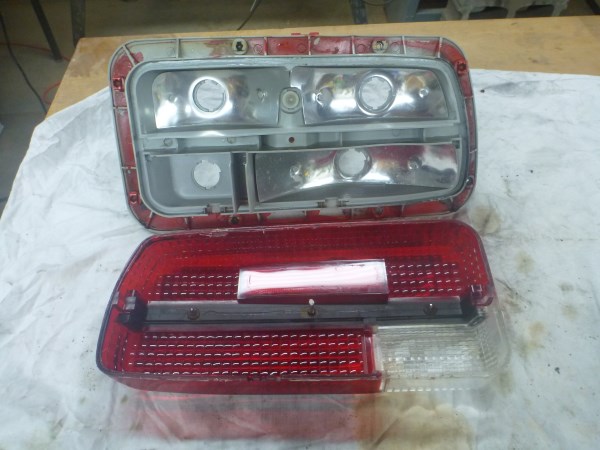
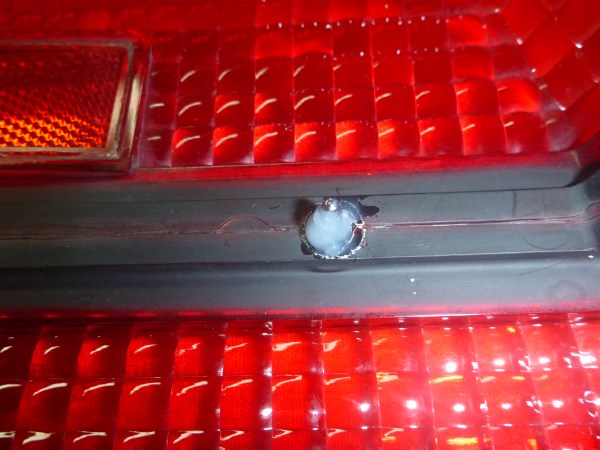
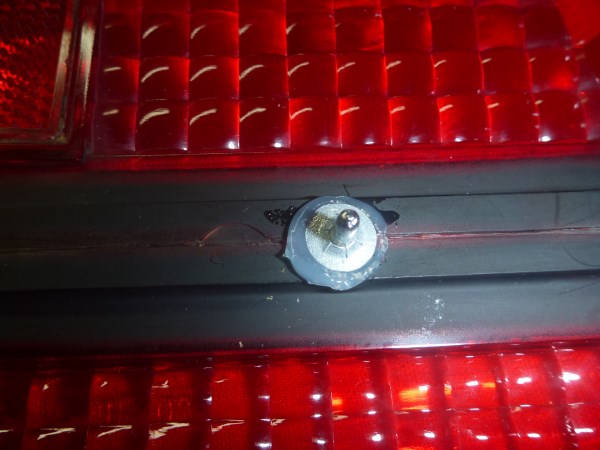
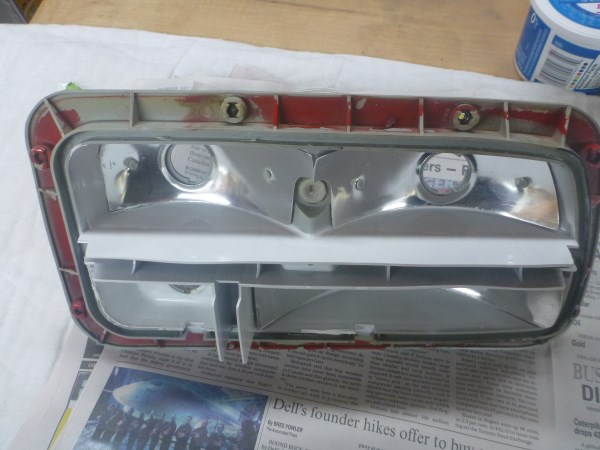
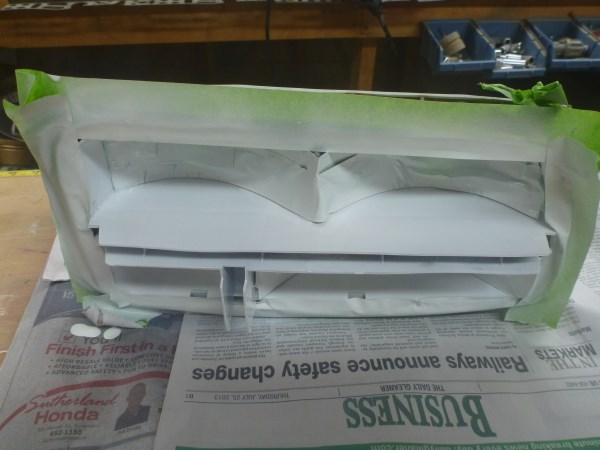
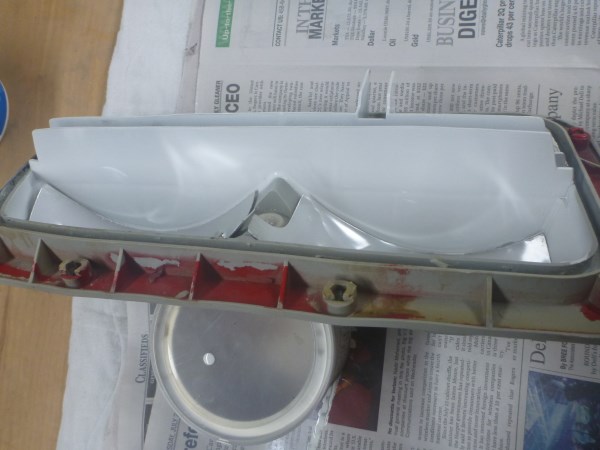
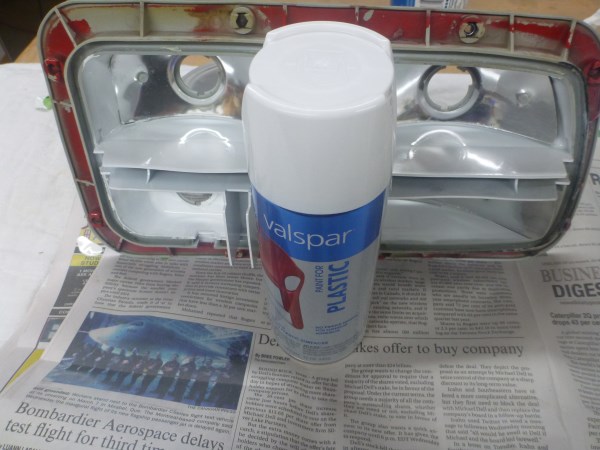
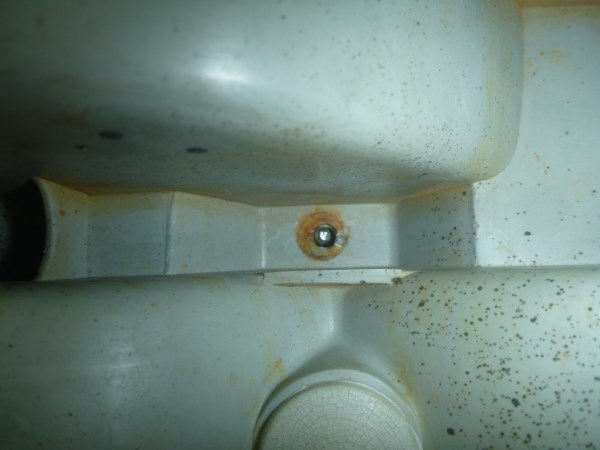
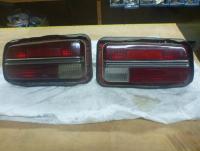
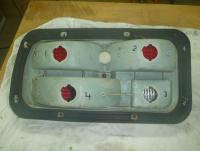
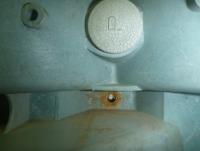
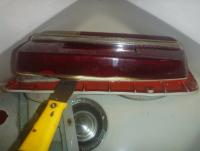
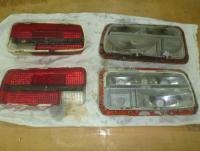
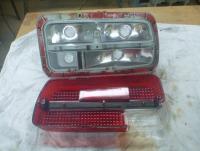
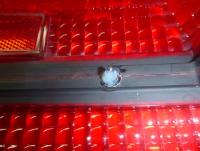
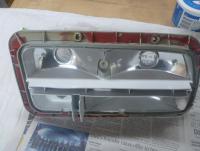
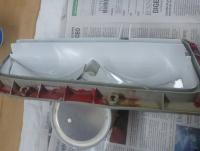
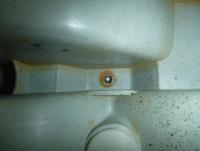
If interested in refurbishing your 40+ year old tail light lens here are the steps I took with mine after removing the exterior rubber gasket: 1) Before disassembly of the light unit (lens from body), mark the wiring harness left and right. Then number the individual plugs. 2) Remove the bulbs. 3) Remove the metal retainer from the light bar center post as it protrudes from the backside of the body. Please not that if you are planning on reusing the bar, removal of the retainer might require ruining it for reuse. On the other hand, if you are going to replace the bar with a new one, just do what you have to do to get it off. 4) In a sink filled with hot water fully submerge the light unit for 10 minutes. 5) Remove the felt plugs (2) on the bottom side of each unit and set them aside carefully. 6) Slowly pry the lens away from the body using a small flat bladed screw driver. Once enough of the edge of the lens is exposed from the recess, slide a small putty knife along the cement line. 7) Clean up any of the remaining putty by scraping the blade of a small screwdriver over the warm putty. This can take some time. Warm putty is easier to remove than either cold or hot. 8) Wash the lens and body in hot soapy water. Dish soap works well. 9) Now out of the sink and dry, go over the internal plastic with a commercial cleaner. I used ‘Tuff Stuff’ made by STP and it worked well. 10) Polish the reflectors with a metal polish such as ‘Autosol’. 11) Mask the reflectors with painters tape. 12) Paint the internal grey plastic with shiny white paint suitable for this application. 13) Replace the tail light lens bar. Before pressing on the retainers to the outside posts, place a dab of silicone over the protruded end to ensure a good seal. Ensure that you have a good fit of the bar to the lens. 14) Insert the two small pieces of felt in the lens edge just as they were before disassembly. 15) Lay a bead of clear silicone in the recess of the body that accommodates the edge of the lens. 16) Place the lens over the body and press it slowly but firmly into the recess until you feel it bottom out, fully positioned. 17) Place a dab of silicone over the protruded part of the center post of the lens bar as it exits through the body. Now press the retainer into position. I found that a safe and easy way to place these retainers was by use of a socket sized slightly less than the circumference of the retainer. 18) Reposition the wiring harness and secure the bulbs in their sockets 19) Shine up the lens with a paste car wax.


-
Great 'Love Story' ....Well done....Thanks, Jim
-
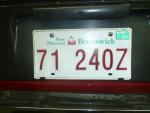
Hi, I'd like to make this triplets!! As is, I'm the original owner of a 1/71 with production # HIS30-18859 Cheers, George
-
Interesting....Thanks for sharing
-
Hi, I placed a Cherry Bomb mid way back last year and the result was as hoped. The drone disappeared and the exhaust sound deepened. Now the Z has a beautiful balance of engine growl and exhaust purr. If I recall correctly, the Cherry Bomb cost ~$25.00 on ebay, so not a big investment considering the value of the pleasure derived. FYI: There's lots to read on this topic - worth the investigation - enjoy
-
Hi, Here's an interesting post regarding this product as shared with us by EScanlon over a decade ago (10-02-2002): http://www.classiczcars.com/forums/help-me/4040-cleaning-tail-light-lens.html Poast#11: Rustproofing Side markers
-
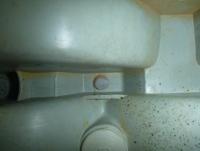
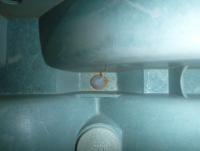
Hi, Mike's post#17 - lower picture - estimates the distance at 4mm. Cheers, George
-
Hi, I've got that print mounted and hanging proudly on my garage wall. In the fall of 1970 I had my name added to a first come, first serve list of eager 240Z buyers in Dartmouth (Halifax) Nova Scotia. Fast forward to the following April/May and I was still somewhere on that list. In May of '71 I went west to Kitimat, British Columbia for a summer job. As luck would have it, I no sooner landed there but what I spotted two shinny red Z's at a small dealership. Immediately I went in to find they had just been unloaded and one was already sold. So, without any '****ering', on the same day I could have been in Halifax to receive my first degree, I bought my first car. Forty two years later I still have it.
-
As is, if I've got it correctly, the engine is cold and the "choke kills it immediately". To my limited knowledge therein may be the problem. The function of the choke is to help bring a cold engine to life.
-
Choke working?
-
I'll step up and make the first guess/suggestion: Revisit the fuel system with a thorough cleaning from the carbs to the tank. After that, compliment the cleansing with a new fuel filter.
-
Mine has been in for a week but gets 'sealed in' in a couple of hours. A few years back I made an insulated barrier out of plywood that sits on the exterior of my insulated garage door. Its got a R20 value and fits very tight. Looking forward to multiple projects: refurbishing the steering wheel, rear-view mirror, replacing the chrome on the rear lenses, and exchanging the alternator to name a few. As for the gas tank, I fill it to the very top for the off season. I was told to do this with my HD bike and it seems to prevent problems.
-
At the time this item was posted his eBay 'Seller Rating' was 98.9%. Obviously, something is out of whack!!
-
Brian, Thanks for the pictures...Your Z's colour looks just great!! Cheers, George
-
Some random thoughts: Could the car have been repainted between 1970 and 1983? Have you compared your Z's 905 with that of another Z with 905? Take a look in my 'garage' and click on the four pictures. You will see the same 905 paint on my Z looks very different in red/orange content when viewed in different lights. Google: Metamerism for a better understanding as to why. The "more orange in value" really is in 'chroma'. Chroma is the intensity of a specific colour. Value equates to a colour's brightness. Please give us some pictures of your Z taken with different light sources.
-
Thanks....Our Z's were made on the same day or within a day or two of one another!! I hope that you will enjoy this site. George
-
Hi, Welcome and thanks for showing off your Z. It looks like its had loving owner(s)....nice shape. Just curious: What's the VIN number? My Z is a 1/71 and, as such, I'm always looking to see where Z's of that production date are located. George
-
Thanks, Dale, for your insightful response. I'm going to send you a PM George
-
Having AC is appealing even if it is very limited seasonal use here. Just curious: Did you install it yourself? If so, how difficult was it to do? George
-
Sharp eyes!! Be having to accommodate the tailpipe it doesn't appear from the pictures that Fred had an alternative.