siteunseen
Free Member
-
Joined
-
Last visited
Everything posted by siteunseen
-
 Here's Hardway's adventure http://www.classiczcars.com/forums/thread46588.html
 -
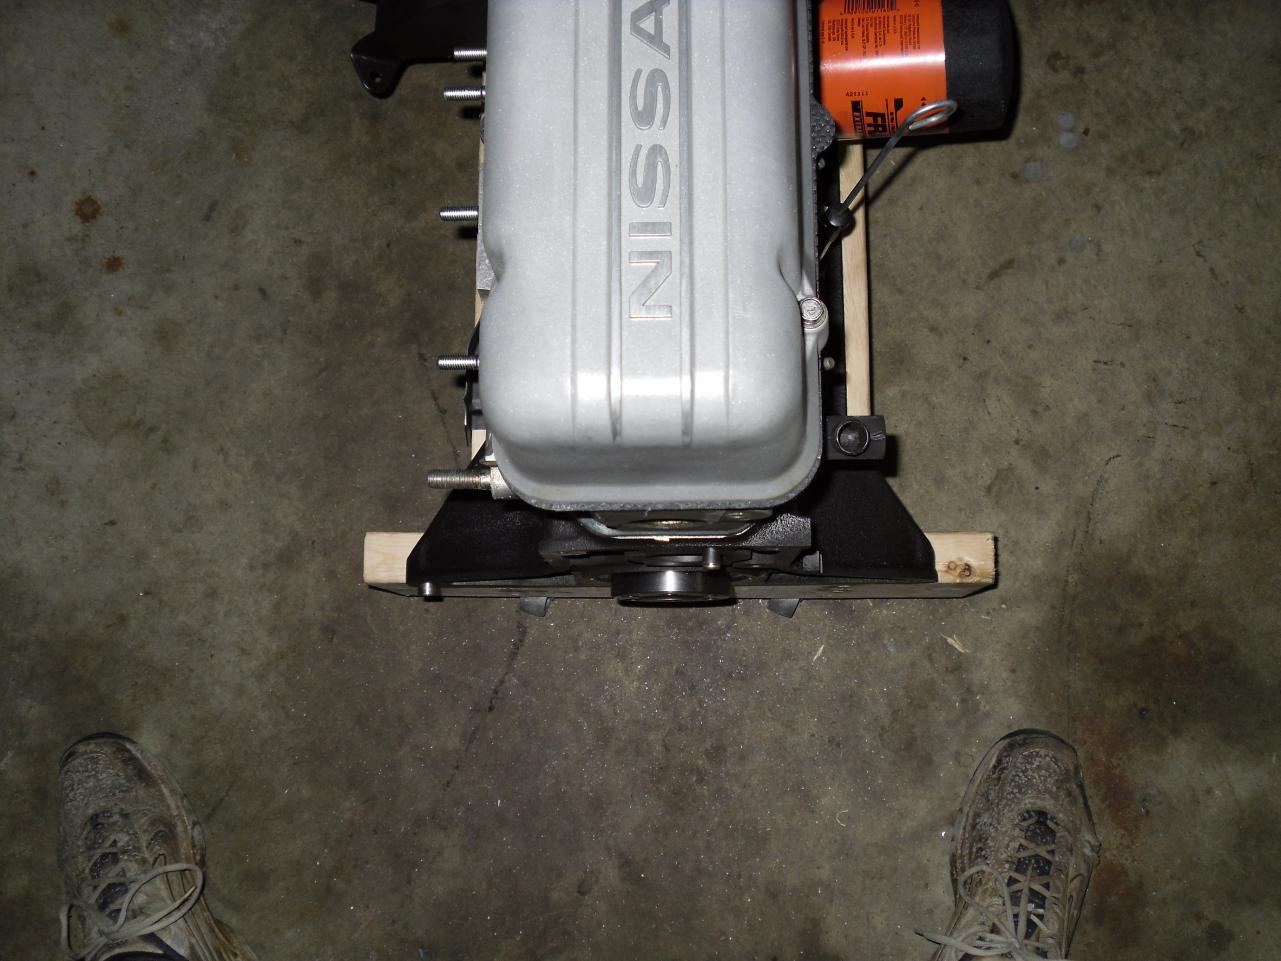
I've built the engine crate you put up measurments for. Works great but if someone (like me) is going to work on the rear of the motor, plate and flywheel, they should use 1x6 for the back side or do what I had to do with a wood chisel. The 2x is too thick to let the rear clear the board so I had to chisel out 3/4" of the thickness and went down about 2" so it will clear the rear board. You could still use the 2x but cut that out before nailing together. It sat about 1/2" short before I cut that out. But for storage it would be fine. And you'll have to go 1/2" farther back for the oil pump cut out.

-
That's some damn good eyes olzed. It does look thin or non existent. Where would it be? In the oil pan like hardway's was.
-
Part number for the M8 deformed nuts. I bought a great header from MSA but the stud kit was wrong.
-
Finally! Somebody else makes bad moves other than me. Trial and error is the only way for me to learn, sometimes hard learning. Nows your chance for those oversized pistons that make more power. A blessing in disguise, maybe!
-
Ok I have some more info on exhaust studs from my local Nissan Dealer. I carried one of the studs and nut from MSA, M8x1.25, and asked about a M10x1.25 stud and nut. He had some from their 8 cylinder pick-up, #14064-JG30B STUD $1.98, #01223-N0021 NUT $1.06. that matched length wise and the nuts are truly out of round. You can't tighten them past the last 2 threads in the nut without a socket where as the MSA nut would spin all the way down to the shank on their stud. Parts guy said that those nuts were NOT deformed or out of round because they thread down so easy. He said I should mash them with a vice a little to make them out of round or buy the ones he sales. He has been selling Nissan parts since '85 and said that he's never seen a nut you could tighten all the way with your fingers on a manifold stud. Exactly what 5thHorsemann said. I don't think MSA got the right nuts for me, maybe I'm the only one?
-
I'm sorry. It's been so long since I've seen my motor actualy in the car I forgot what it looked like. Mine's tilted the same way looking at my pre- destruction pictures.
-
Are 240 motor mounts slightly tilted to the passenger side or is that a camera trick? My 280 valve cover is level sitting in the hole. Maybe a carburetor thing?
-
Here's something to look at http://www.classiczcars.com/forums/thread46186.html Good pictures always help me. And all the bolts on the front cover and water pump are diffrent so pay close attention on their locations. Don't forget the oil slinger, that's a dumb mistake I made because I got in a hurry. You'll need a rubber hammer too.
-
I'll say you drive it to work in the morning. You've got the fever man. More cow bell!
-
My right side is tight against the guide but it's new stuff so that's expected. I know there is a slack side on timing chains, maybe you could find out but I imagine it's not the right side because the tensioner is on the left. I watch all the NCIS and CSI shows so I'll say your chain IS rubbing that valve cover on the right side too, where your guide is gone. IMHO I would fix that before I drove it. But I'm like that.
-
I'm going with 10x1.25 studs on the ends so's I can wrench down on them. 15lbs isn't much but I've read to retorque them a few times fairly soon after install. Did you put your new manifold gasket on with the metal core closet to the manifolds? The thicker side of gasket material to the head right? Oh and I thought your cylinder head was new looking at those pictures. Great job!
-
Rainman I've been reading up on "slightly deformed nuts", sounds like the middle of a joke, they say that they work good without lockwashers but only once. Mine are new but someone might find this useful.
-
Could some of you that have the thermal coated header from MSA tell me whether or not you use the heat shields. I'm trying to make a decision on this and would appreciate your advice/opinions. Thanks, Cliff.
-
I'm going to put 2- M10x1.25 Toyota studs in my cylinder head. 1st bolt under thermostat housing and the last bolt before the firewall. Those were wallerd out big enough that I might not have to drill before the thread tap, exageration but they are threadless about 1/4" going in. I don't think Loctite will be enough on the M8x1.25.
-
I've bought the thick "Williams Washer" for the other 5 studs, the ones that do not attach intake and exhaust together- they were with the bolt kit from MSA, are lock washers not required on the exhaust manifold or header?
-
Here's a picture of mine. The wires are off though but it is to the right of the drain plug. It's a '77 5spd. My leveler is a Torian. I forgot it came from amazon.com.

-
Any tips on using that leveler from HF? I'm about to turn that handle myself. What's your ceiling height? Thanks for the pictures.
-
Captain Obvious are you thinking of upgrading to the early ZX distributor? Advance has the Cardone 31-619 for $133.99. Reatailmenot.com has a coupon code $30 off $100+ so that be around $115 for a rebuilt one. I've found some Zs & ZXs at a local junk yard and may look at there's as I'll have to get that diffrent mount bracket. I'll do mine after I get this motor back in.
-
L-jetronic system trouble and maintainence article. http://www.hiperformancestore.com/Ljetronic.htm
-
Use a sharp putty knife, not too sharp though. 1" would be good I guess.
-
Ok if I can find one will it be as easy as pulling the pulley and front seal? Will it fit through that hole? It doesn't look as though the lip is turned up more than 1/4". The pulley nose is that big isn't it?
-
Yea I rolled the front wheel of my engine stand onto 1" of floor tile so hopefully the oil all drained back to the pan and I'll only loose what's in the pump.
-
When I bought mine the exhaust was leaking at the last bolt, #6 cylinder, when I took the manifolds off I found my EGR was badly cracked and had rotted out the tunnel under the plentum? on the intake. I almost have the motor ready to put back in 6 months later. The more I took off the more I saw that needed to be replaced. It's a slippery slope that I slid down fast. Put up some pictures of the leaks.
-
Is the Moto Guzzi running right? Sounds like you'll be putting some miles on it.