darom
Supporting Member
-
Joined
-
Last visited
Everything posted by darom
-
Thanks, Jim, for posting the video! Would you happen to have any photos of how you/muffler shop installed the resonator/rest of the exhaust? I have a welder, but will probably use the pipe spreader to make it easily removable with clamps. I found some posts from other members posting various reviews of their MSA headers/premium setups and commenting on some fitting well (around the rear diff) and some not so much.
-
Richie G, I have been also looking at some exhaust 'drop-in' kits and probably would get an MSA premium one (coated version). What bugs me is that they found a new welder shop, which has 3-4 month wait period and I can't find any reviews of the new shop's quality of welding. Good luck with your search and look forward to seeing the final results on your car. @jfa.series1 which 12" resonator did you end up installing (model/make)? I don't like loud/droning noises and will probably do what you did. Do you have any video with the audio of the exhaust sound? Thanks!
-
Pomorza, i'd also recommend to apply some fuel tank JB Weld epoxy to the inside/outside of that one connector with the rubber washer. I had to replace the brand new sending unit with another one from zcardepot, because someone overcrimmed the rubber washer inside of it. My car had a big fuel leak at the car show when I filled up the tank full. The replacement unit looks better, but i don't want to take any chances.
-
Unfortunately, the only spare one I got, has busted threads too.
-
There is one from Protunerz, on the expensive side though ($280): https://protunerz.com/products/datsun-l-series-billet-thermostat-housing-set-water-neck
-
Awesome news, Chris! Glad they worked out for you.
-
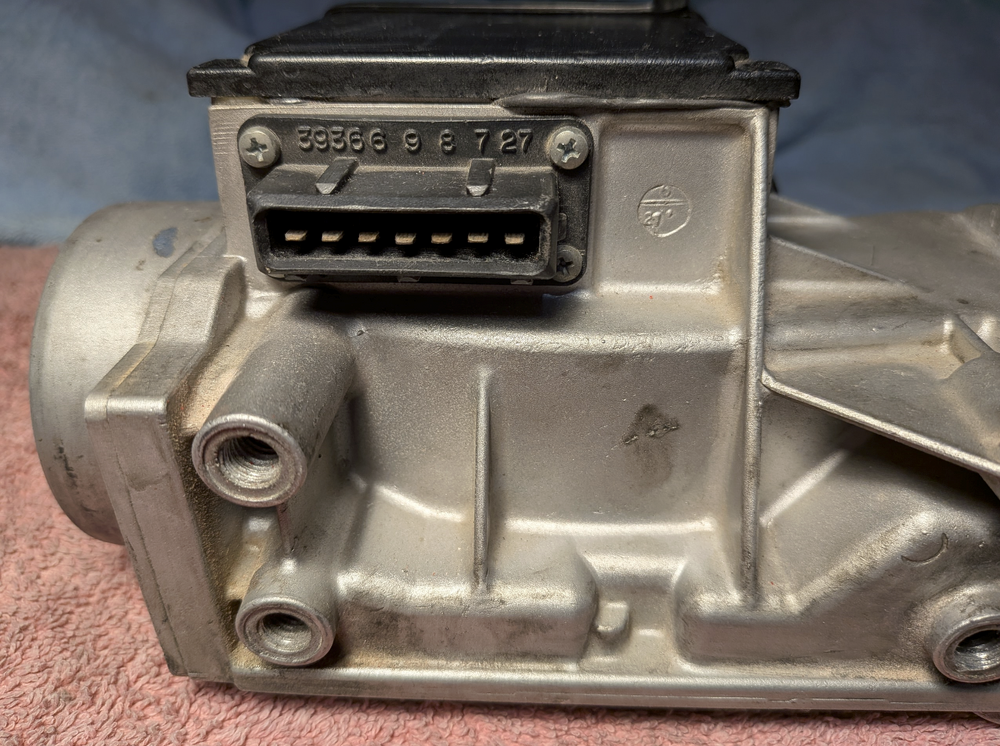
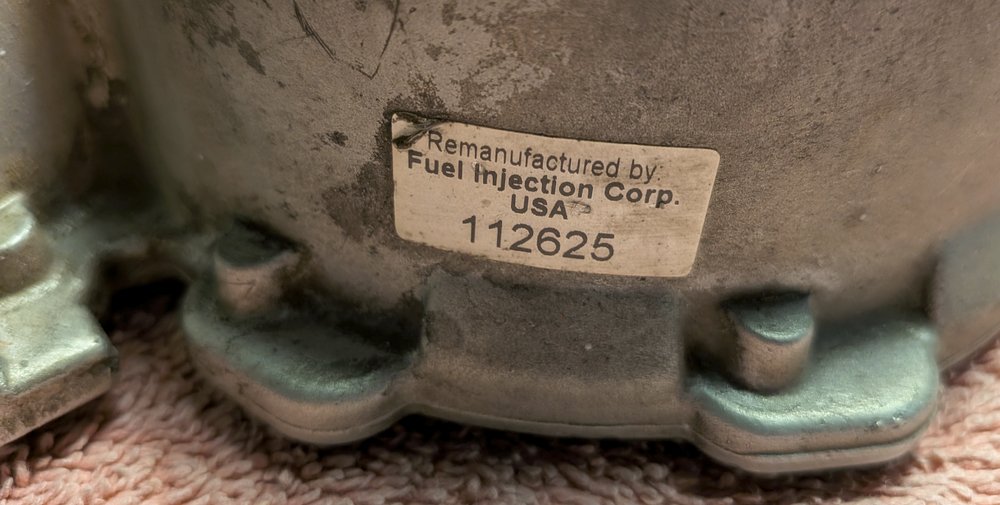
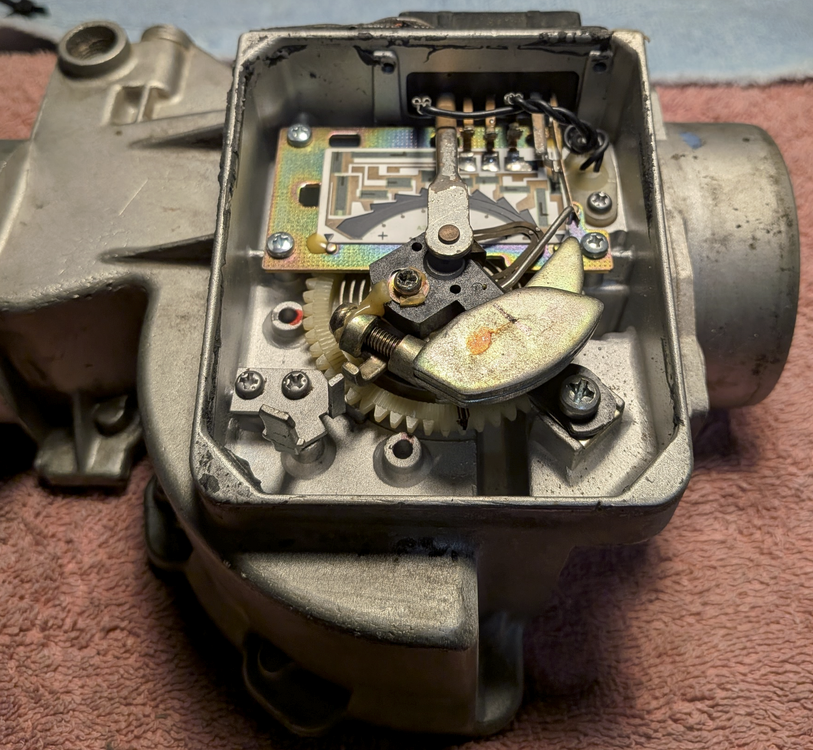
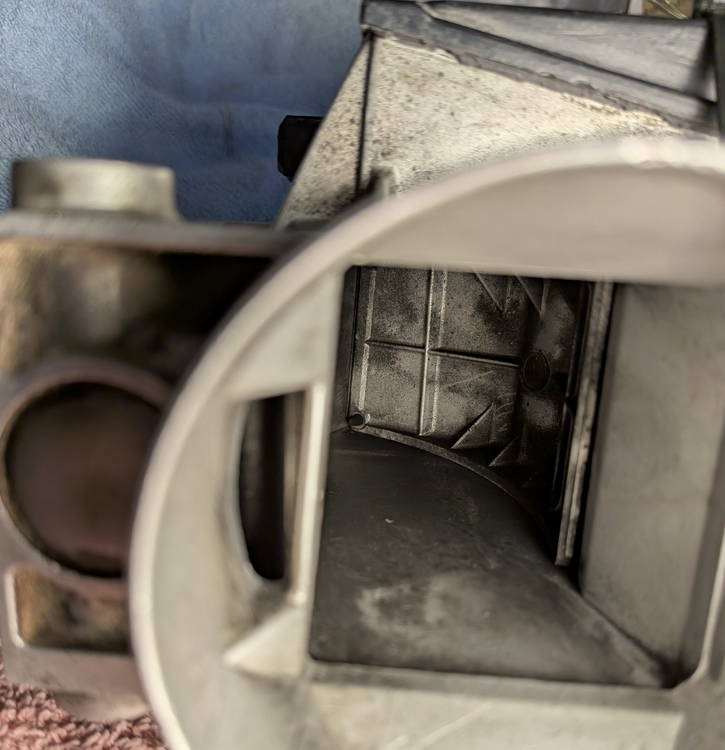
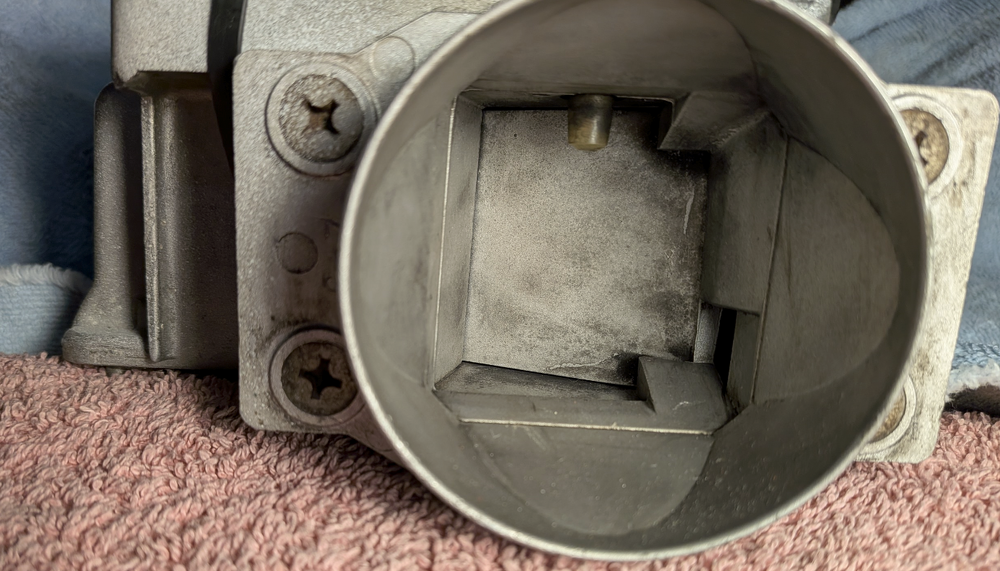
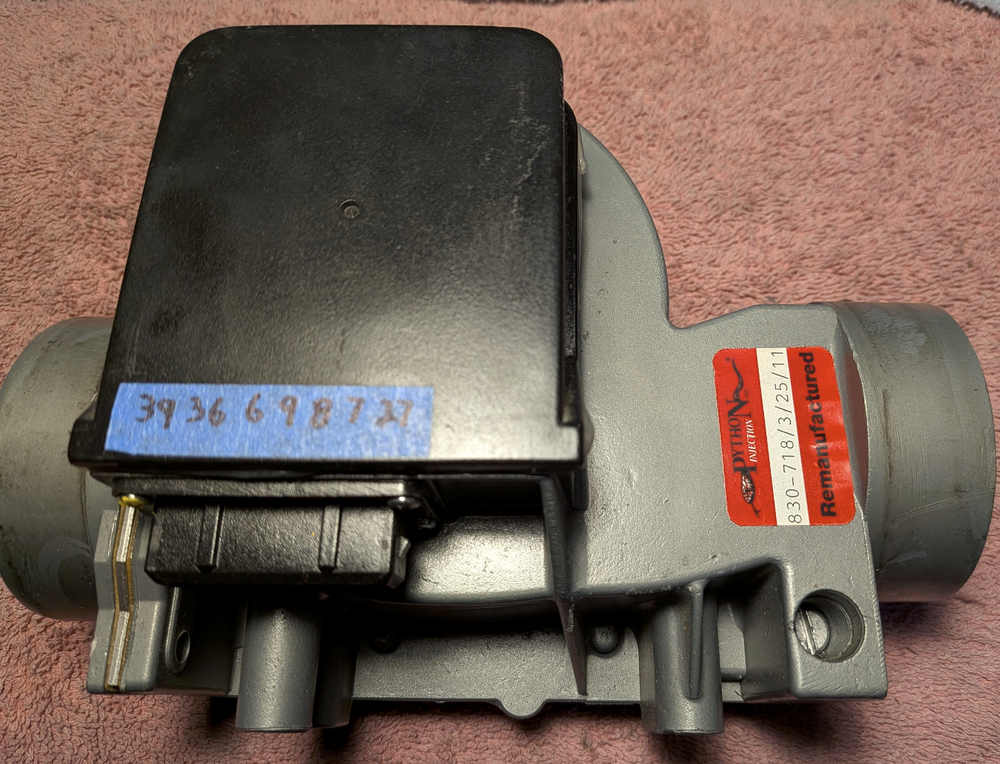
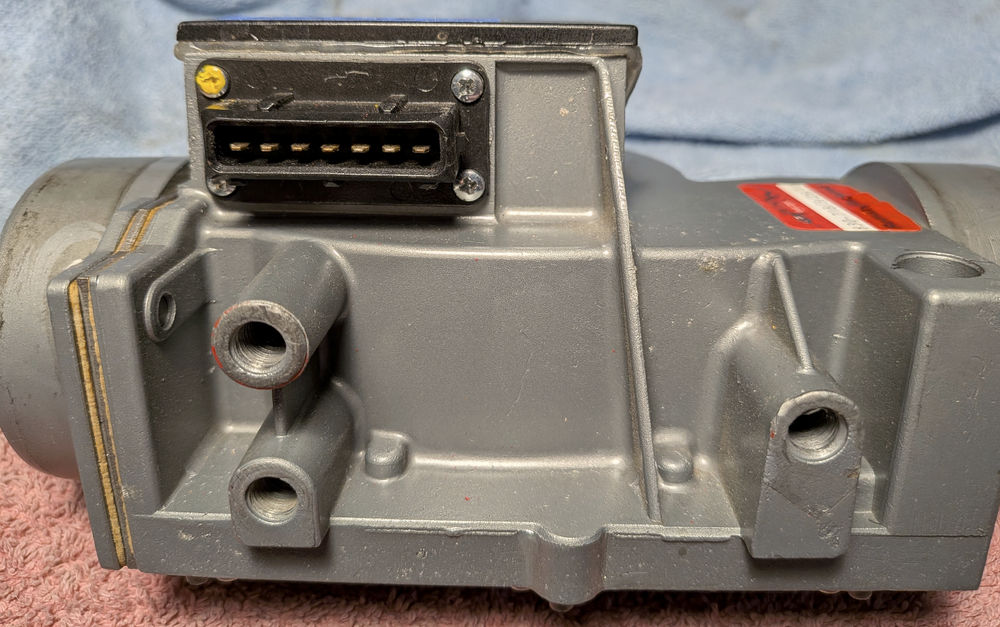
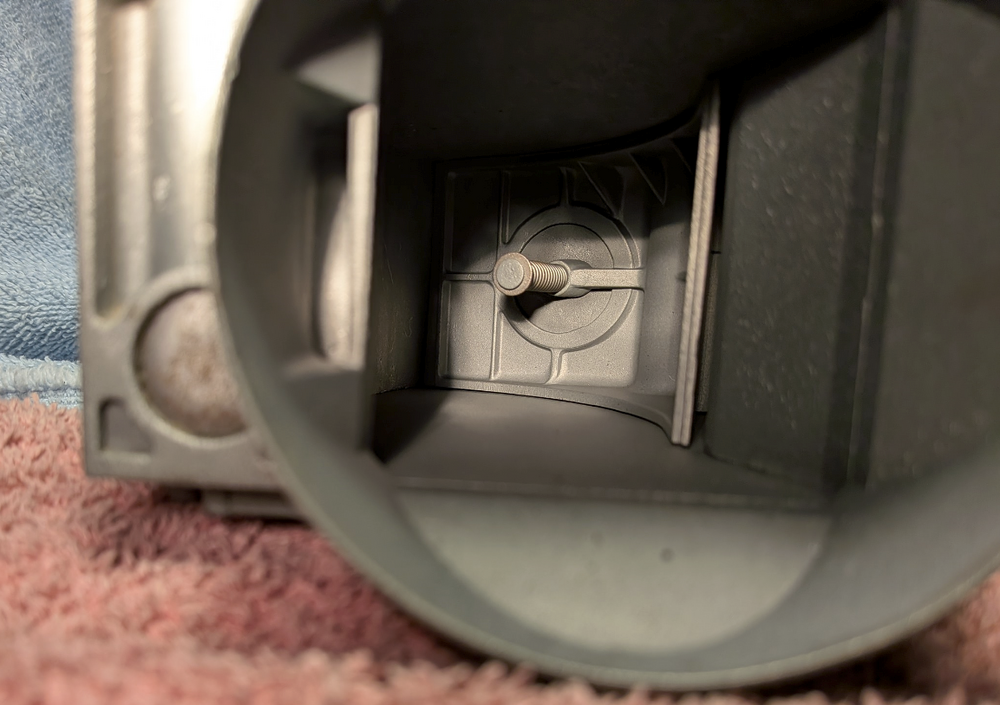
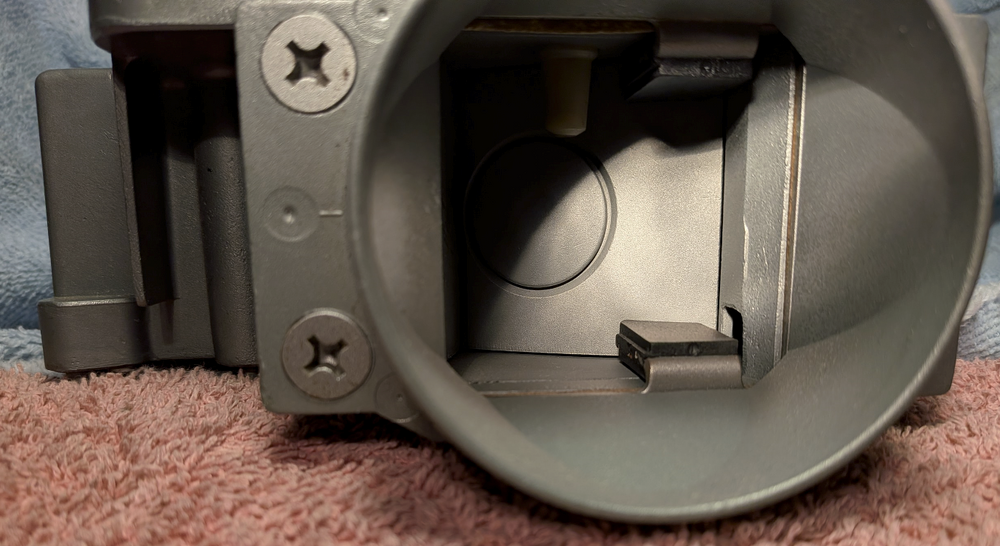
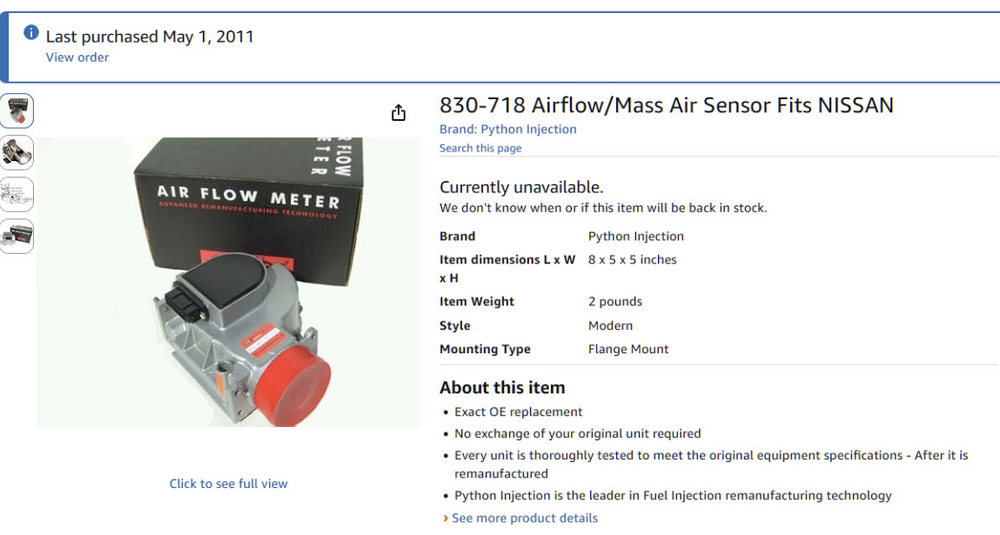
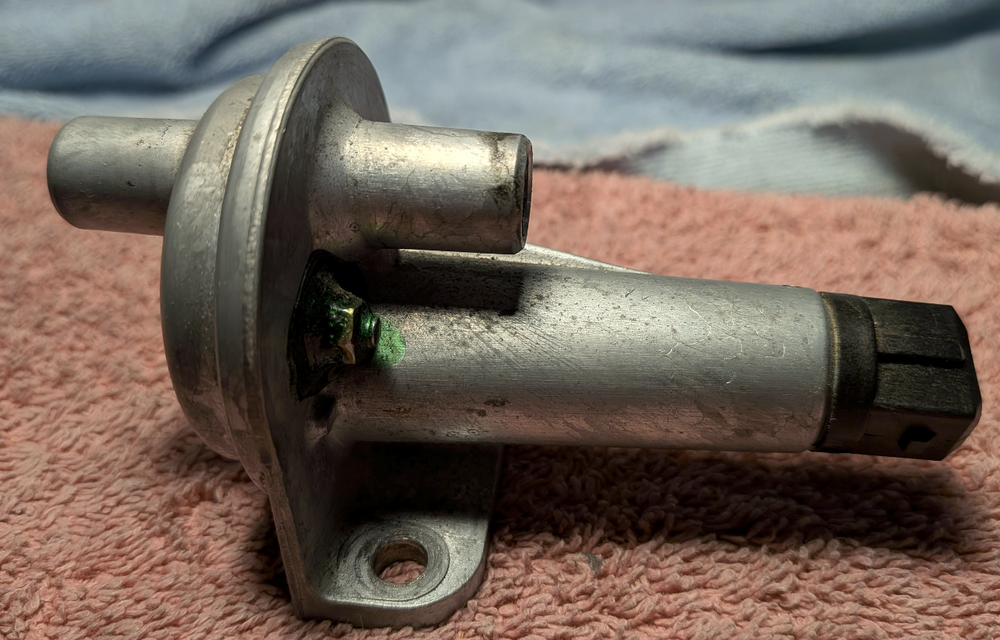
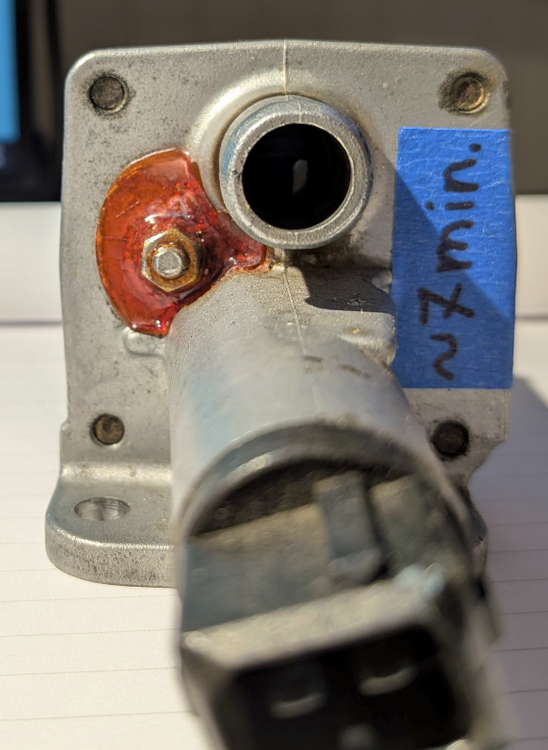
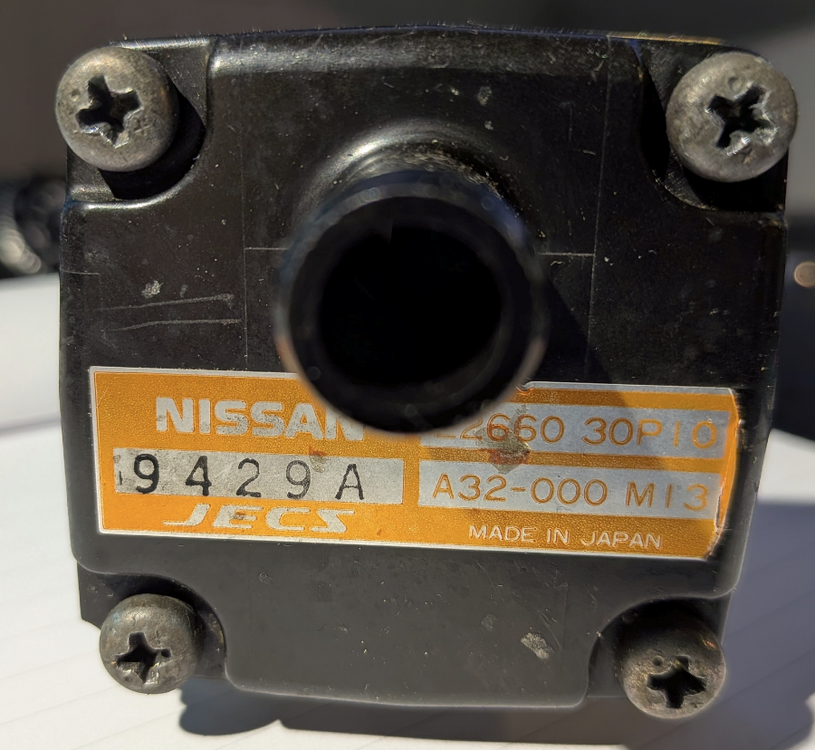
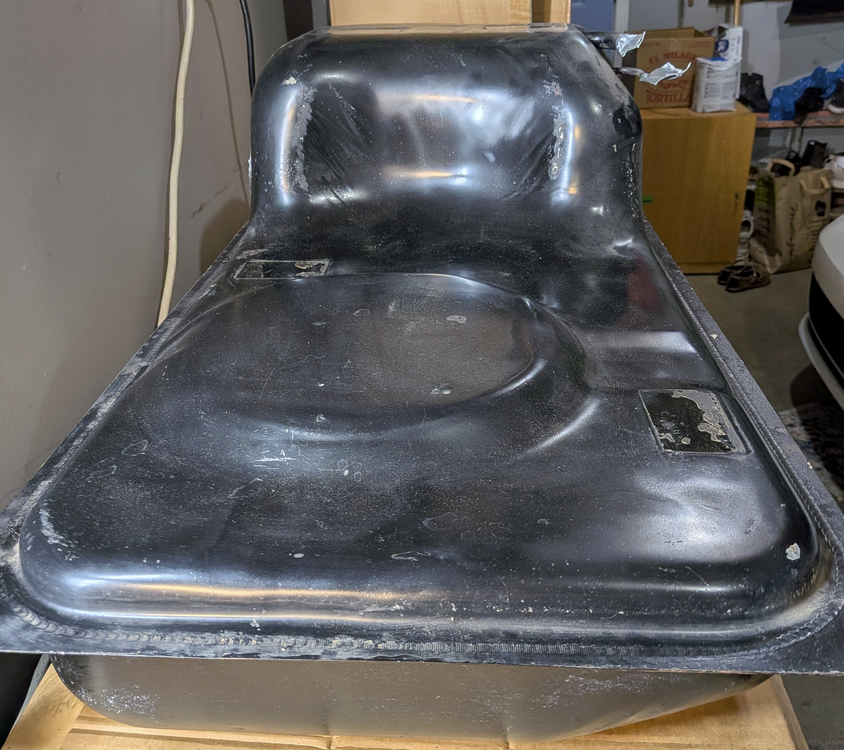
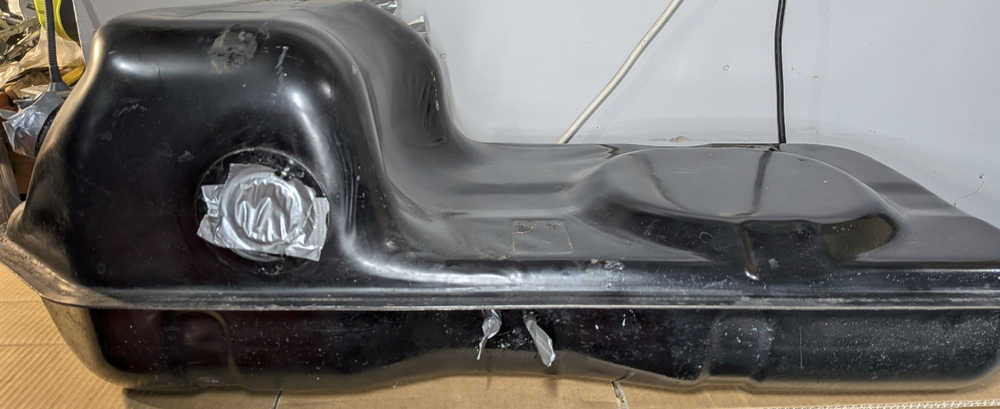
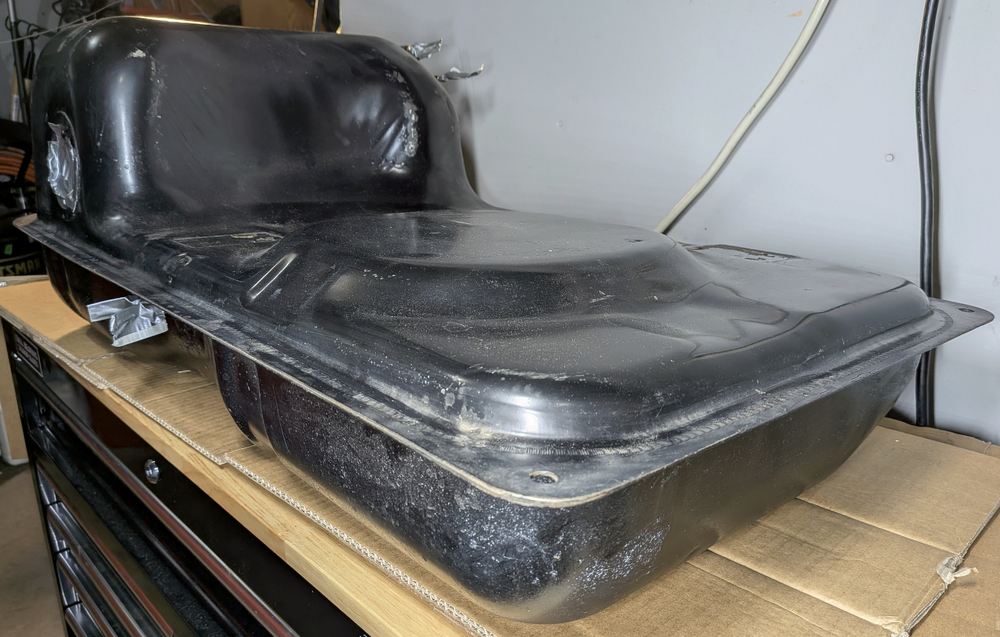
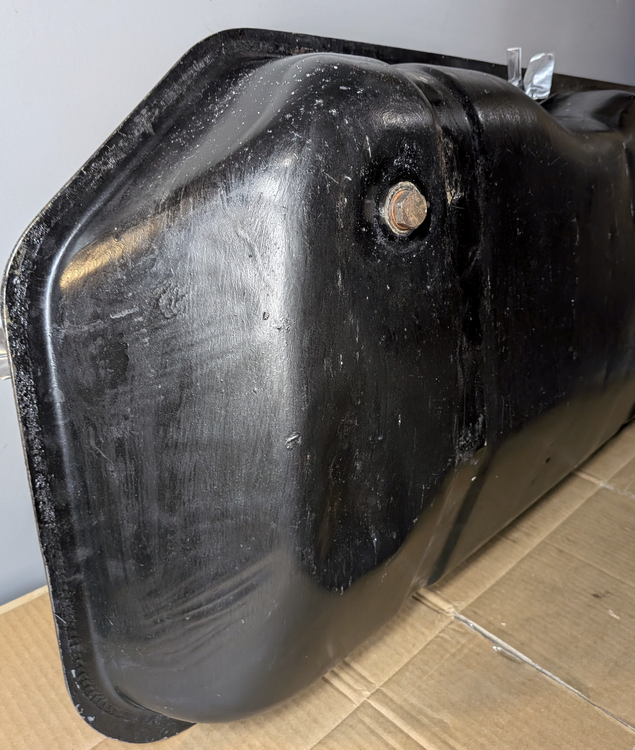
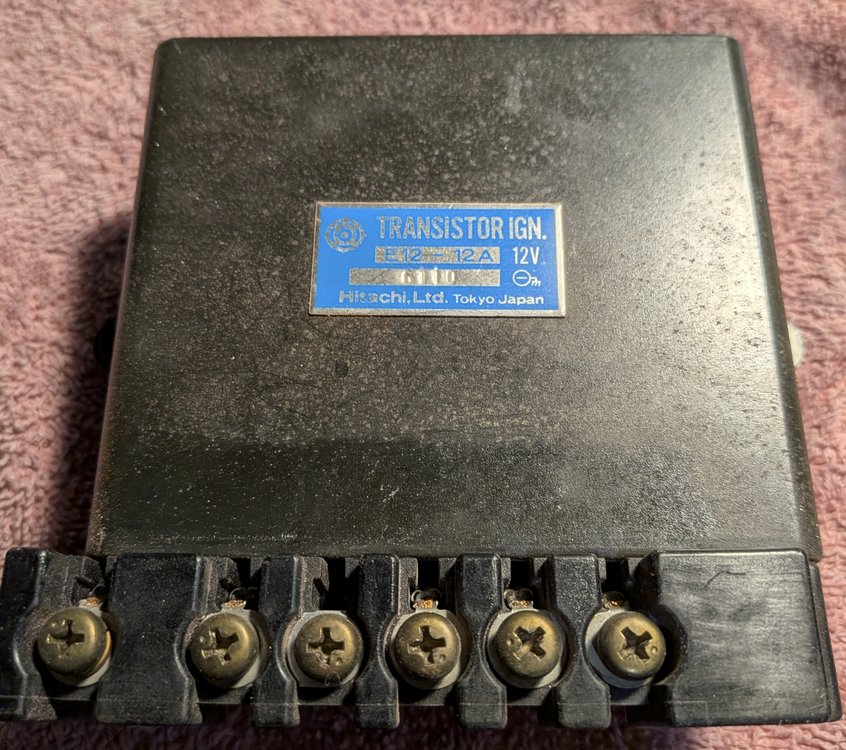
AFM #1, $100, at some point of its life it was rebuilt (there is a sticker). When I purchased my 1976 280z in 2009, the car had a running engine with this AFM. The PO opened it up at some point (the cover wasn't properly glued). The AFM passed all the test per FSM, page EF-51 - EF52. Pins 8 & 6 = 182 Ohm, 9 & 8 = 103 Ohm, 36 & 39 with flap closed - no continuity, 36 & 39 flap at 8 or more degrees - continuity, air temp 75-80F, 27 & 6 = 2 kOhm, 27 to ground - no continuity, applying 12V to 9 & 6 -> voltmeter leads on 8 & 7 - while opening the flap, voltage decreases. AFM #2, $200. I bought a re-manufactured unit sold by the Python Injection company in 2011 (sold on Amazon, have a receipt, the car has had 985 miles since then). The unit was never opened, and is an excellent condition. Very clean inside. I passed my CA smog multiple times with this unit, I have a smog certificate from 2017 if the buyer would like to check out my CO, HC, and NO numbers. Per FSM tests: 8 & 6 = 181 Ohm, 9 & 8 = 104 Ohm, 36 & 39 flap closed, no continuity, at 8 degrees or more -> continuity, air temp 75-80F, 27 & 6 = 2.14 kOhm, 27 to ground - no continuity, applying 12V to 9 & 6 -> voltmeter leads on 8 & 7 - while opening the flap, voltage decreases: Aux Air Regulator #1. $60. Part A32-600000 UNISIA JECS, made in Japan, tt was installed on my stock 76, applying 12V, it takes about 5 min to close: Aux Air Regulator #2, $60, Part 22660 45POO, A32-618 M14, Jecs. Tested, takes about 7 min to close. Attention: the connector's top plastic notch is to the right side. It can be filed off to make it work with the stock 280z connector: Aux Air Regulator #3, $60, part 22660 20P10, A32-000 M13, Jecs, takes about 6 min to close. Attention: the connector's top plastic notch is to the right side. It can be filed off to make it work with the stock 280z connector: 1/1976 Fuel Tank, will need to be boiled off/potentially re-lined due to the some corrosion. The tank never sat with used bad gas, i always filled it up with the off-road no corn additives gas during the winter storage. The overall condition is good, with one dent at the bottom (see the picture with an arrow), $200 (prefer a local pickup in Madison, WI, the shipping will be around $160 in a nice s30.world box): Ignition Transistor unit, $40, part E12-12A, removed from my running car. I prefer paypal for payment or Zelle. Thanks, Den




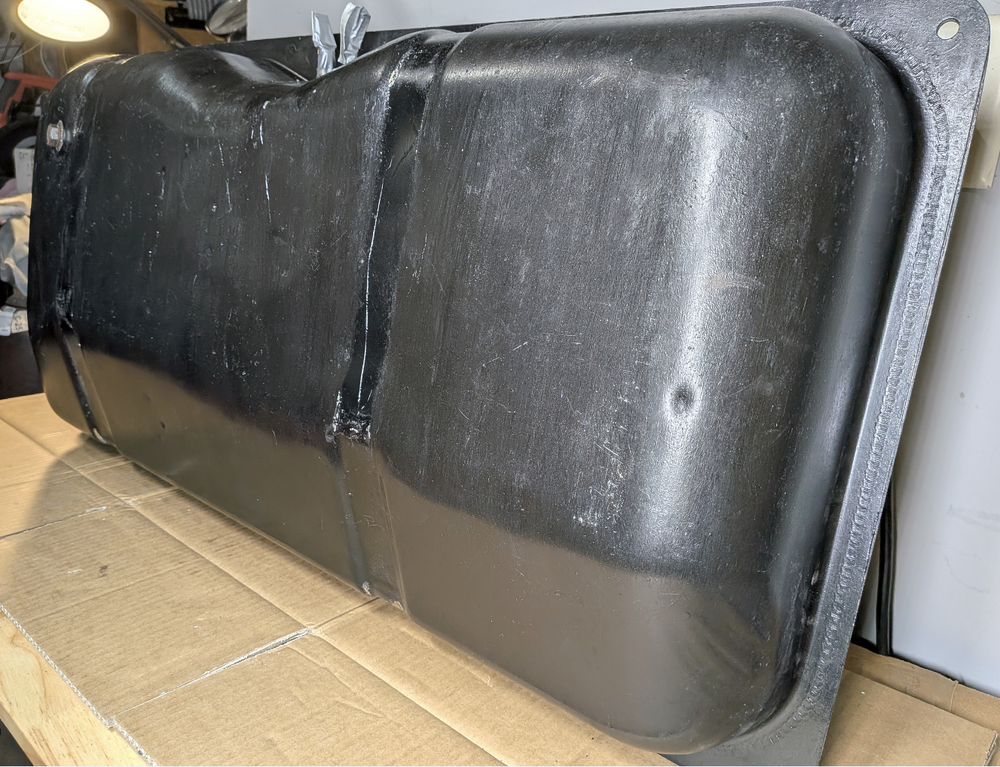
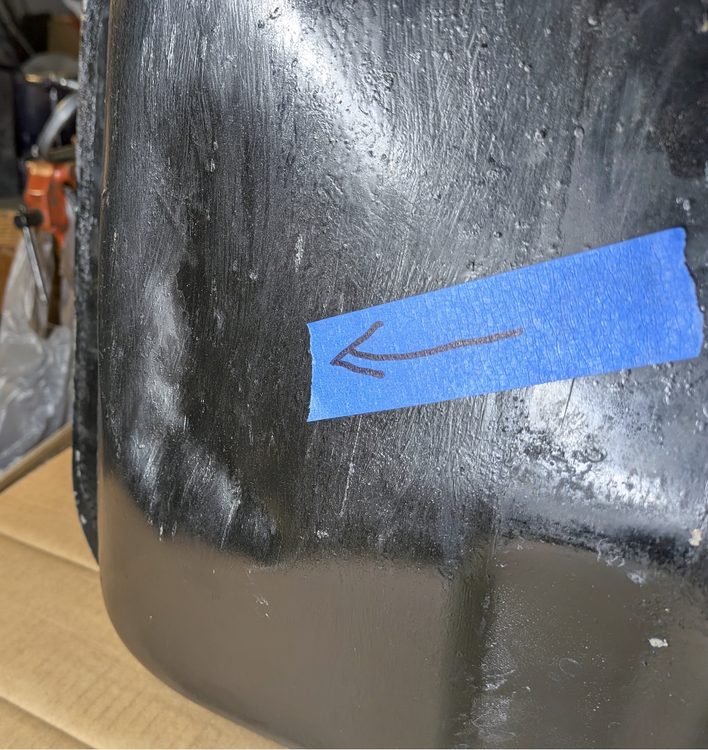
-
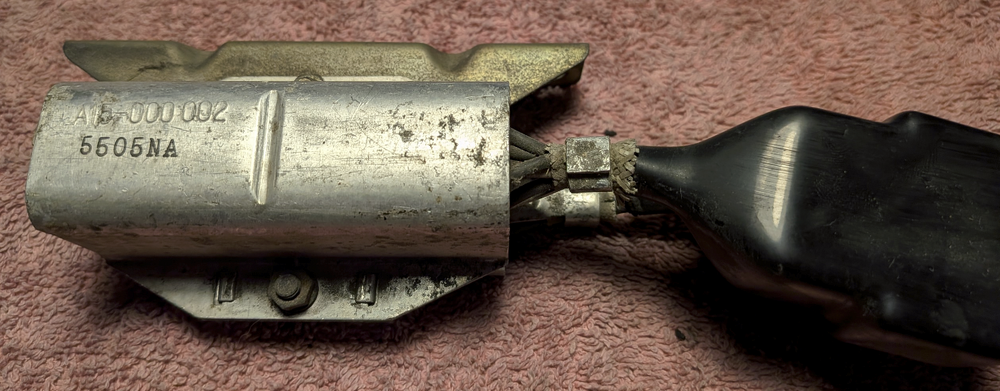
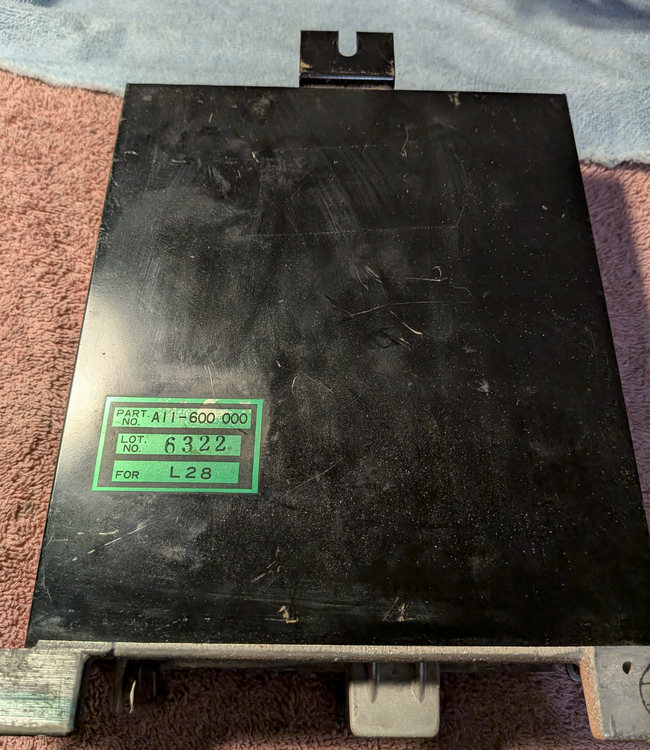
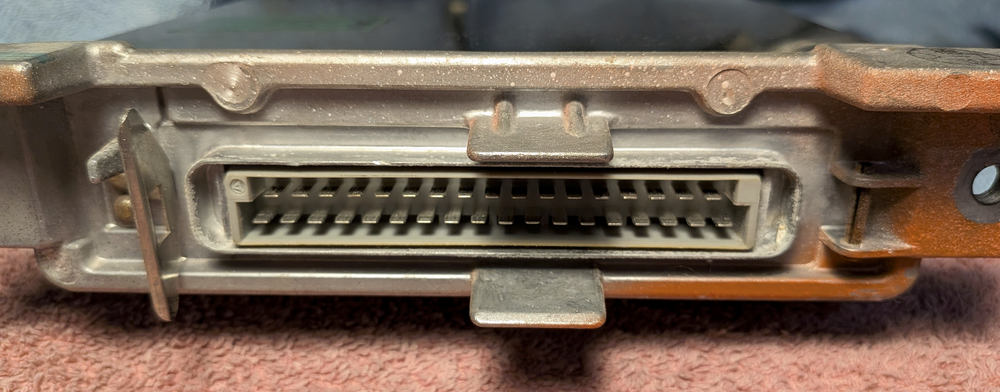
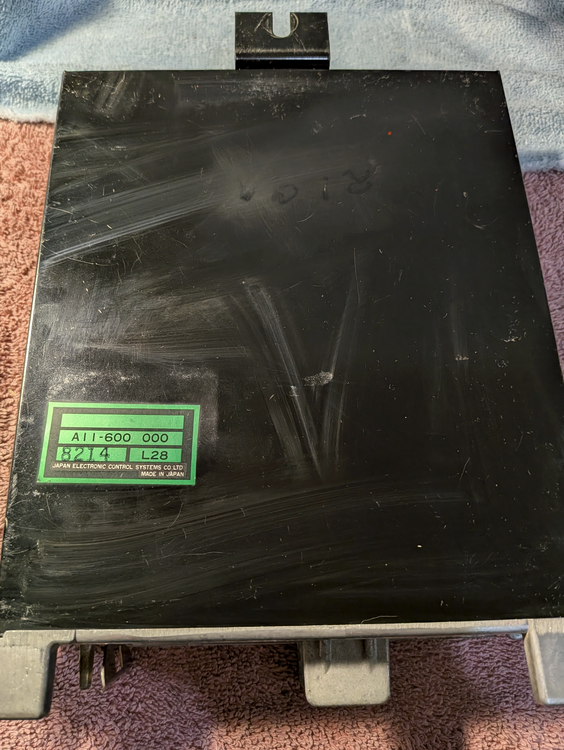
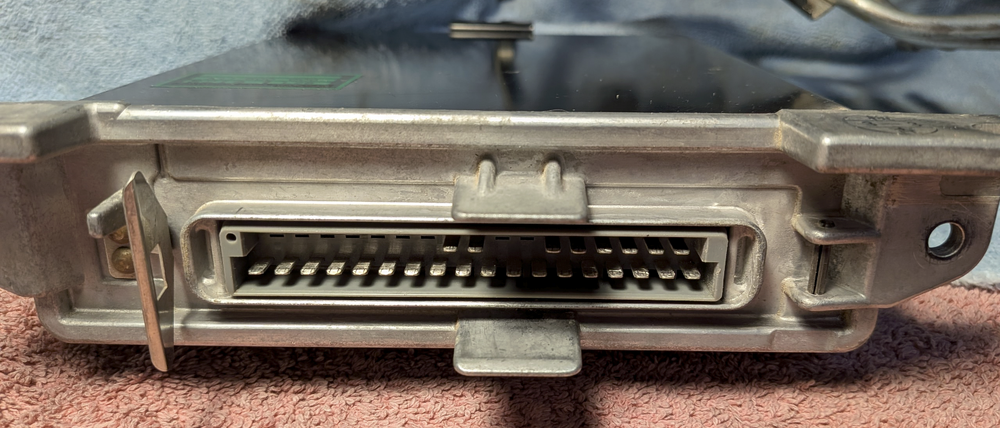
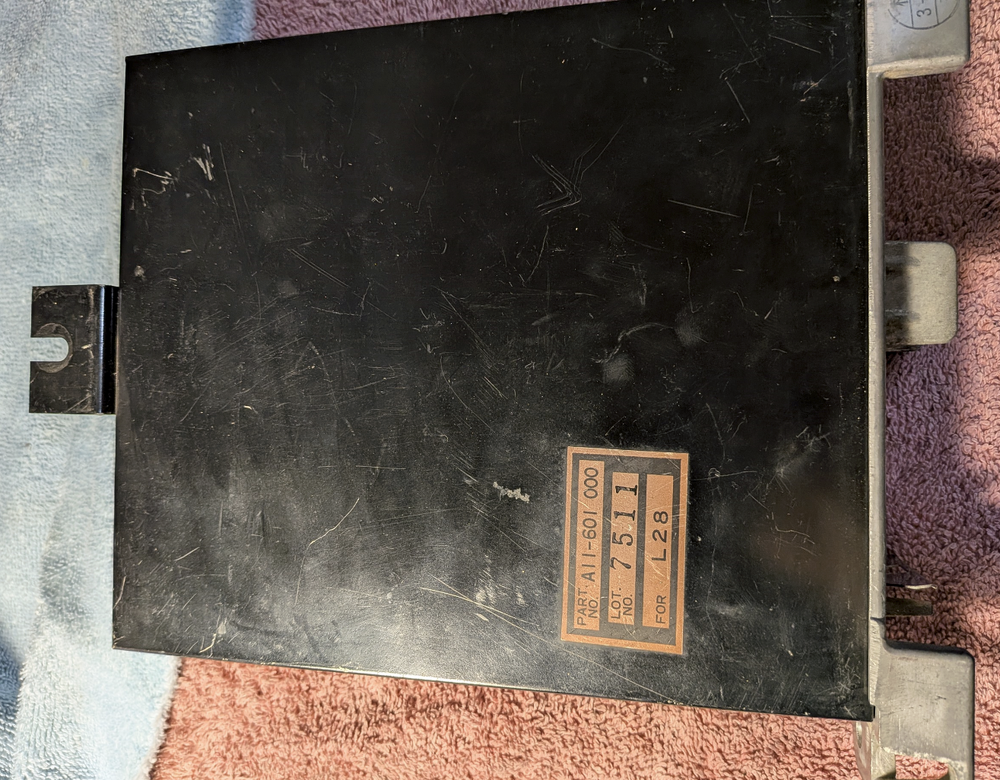
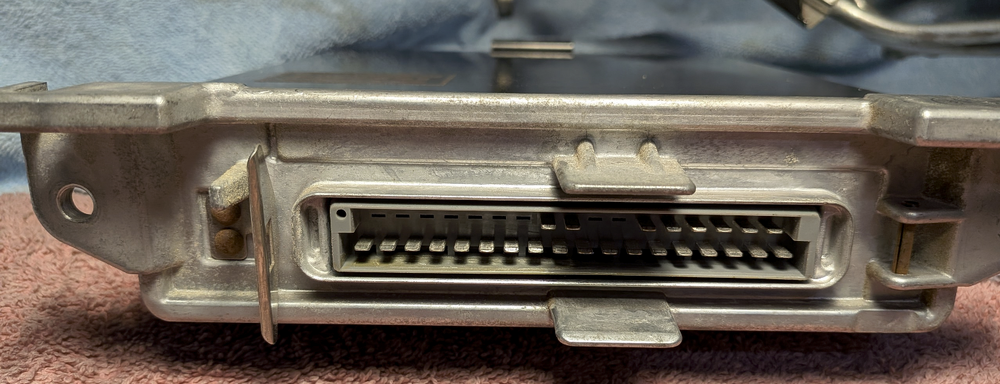
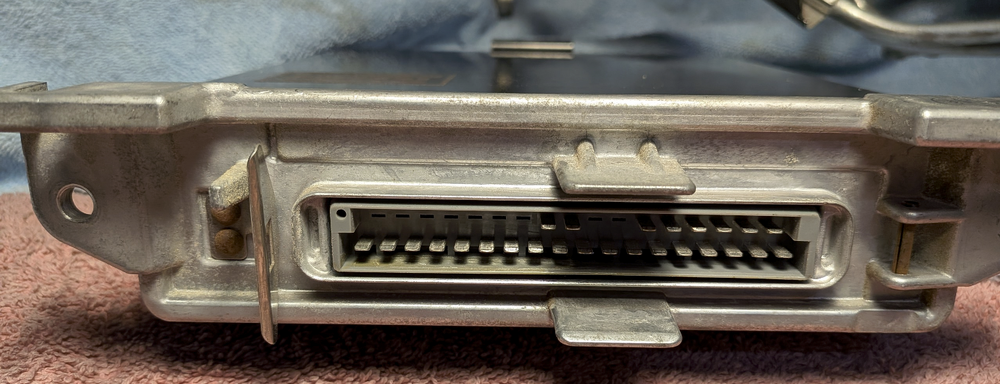
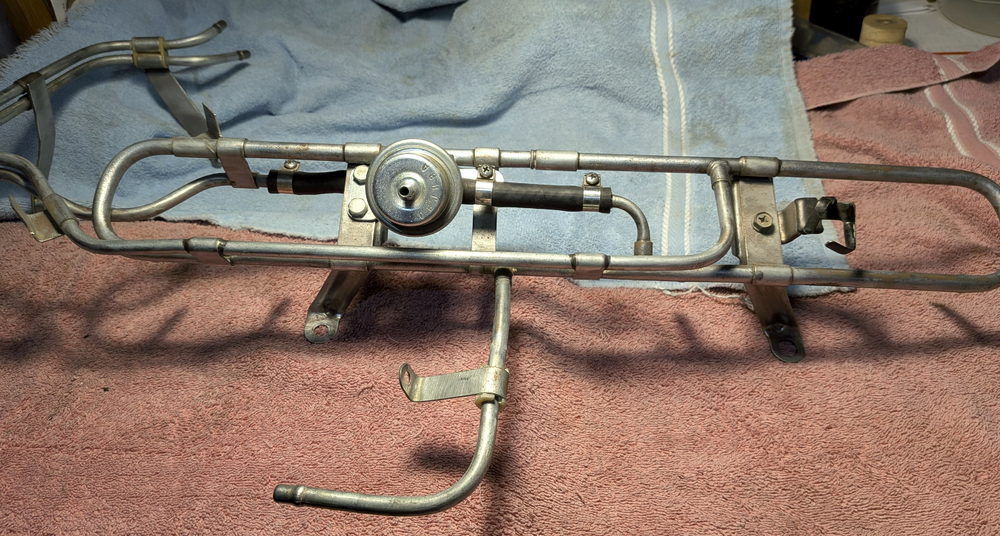
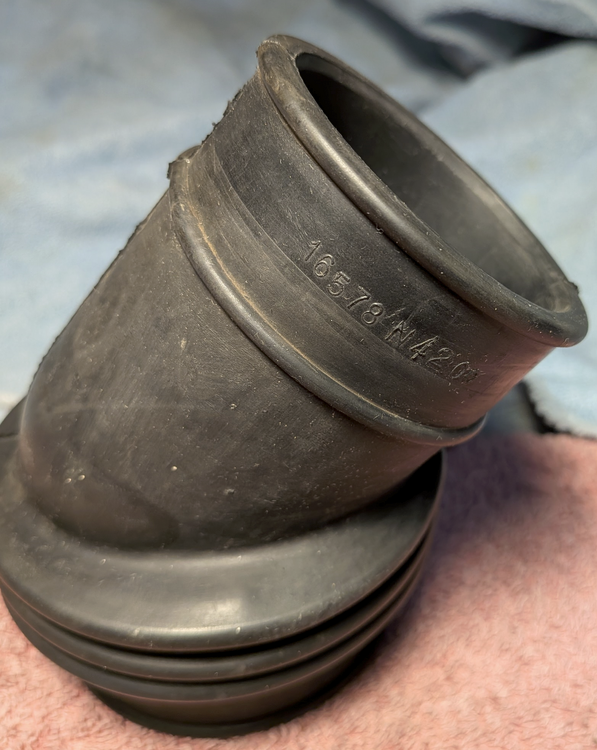
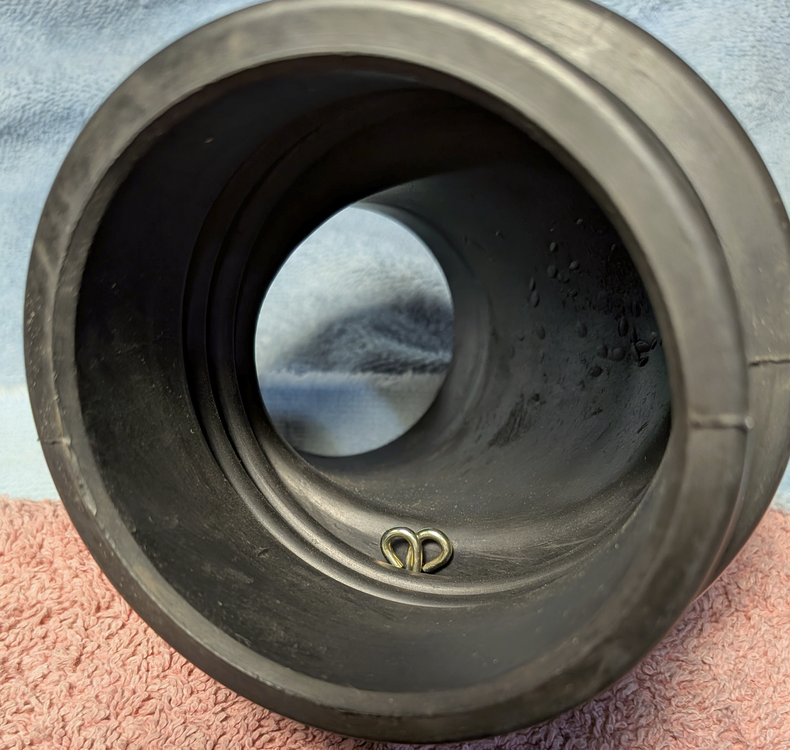
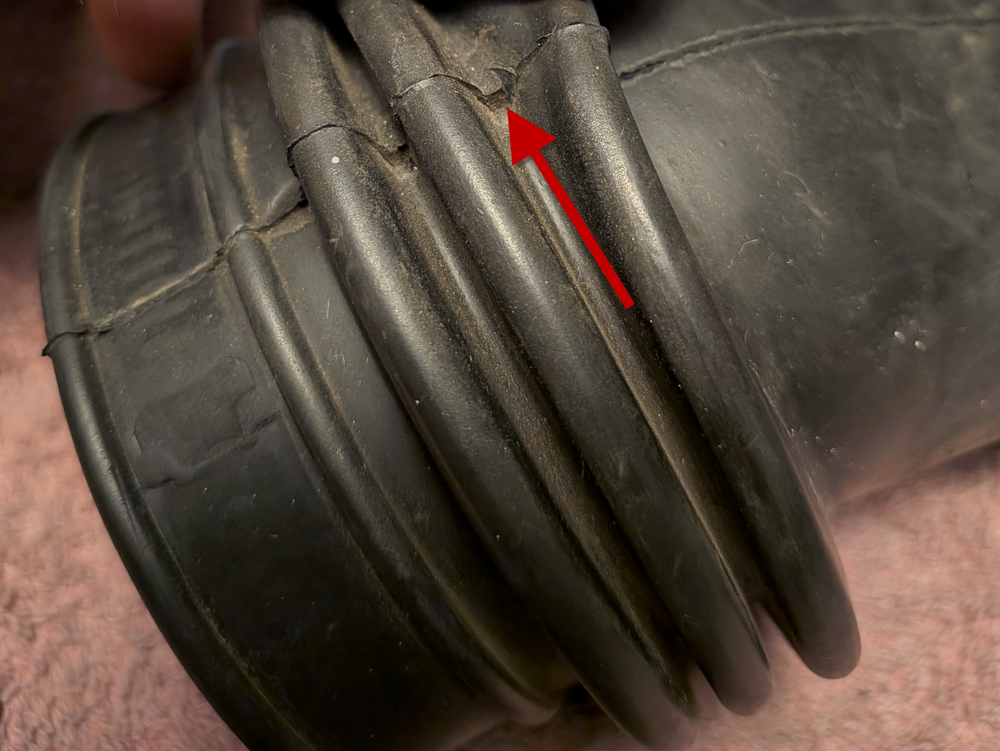
Hello, I am getting rid of some parts I have accumulated throughout my 1/76 280z ownership (since 2009, total number of miles driven since then => 985), shipping extra: dropping resistor $45. Part A15-000-002 Tests per Ef-56 page: 43/1-41 6.5 Ohm, 43/1-40 6.5 Ohm, 43/1-38 6.5 Ohm, 43/1-37 6.5 Ohm 43/2-56 6.6 Ohm, 43/2-55 6.6 Ohm dropping resistor $45. Part A15-000-004 43/1-41 6.5 Ohm, 43/1-40 6.5 Ohm, 43/1-38 6.5 Ohm, 43/1-37 6.5 Ohm 43/2-56 6.5 Ohm, 43/2-55 6.5 Ohm Electronic fuel injection relay $50 each. Hard to find item. Quantity 2. Part A13-000 001. Both passed all the tests per EF-54 - EF-55 pages of FSM. ECU, Part A11-600 000. Lot No. 6322. $60. Removed from my running car before the Microsquirt upgrade: ECU, Part A11-600 000. Lot 8214. $60. Tested it in my 280z. FYI: The number of contact pins is less: ECU, A11-601 000, Lot 7511, untested. $40: Fuel rail from a 280zx which I installed on my 76. Datsun removed a few rubber connecting joints improving the design. It comes with a functioning fuel pressure regulator. $75: Rubber boot AFM to the air filter. $45. Part 16578-N4200. I bought it new in 2009 (have a receipt). Pliable, rubber is in an excellent condition. I found one small rip (see picture with an arrow), it doesn't go through, no air leaks: I prefer Paypal or Zelle for payment. Thanks, Den

-
Are your new injectors low or high impedance? Have you checked your injectors' resistance? If only half of injectors are firing, is it possible your dropping resistance pack is not working?
-
Yes, my original bumper pads were in a good shape as well, reused them. I applied the double sided 3M sticky tape to hold them in place.
-
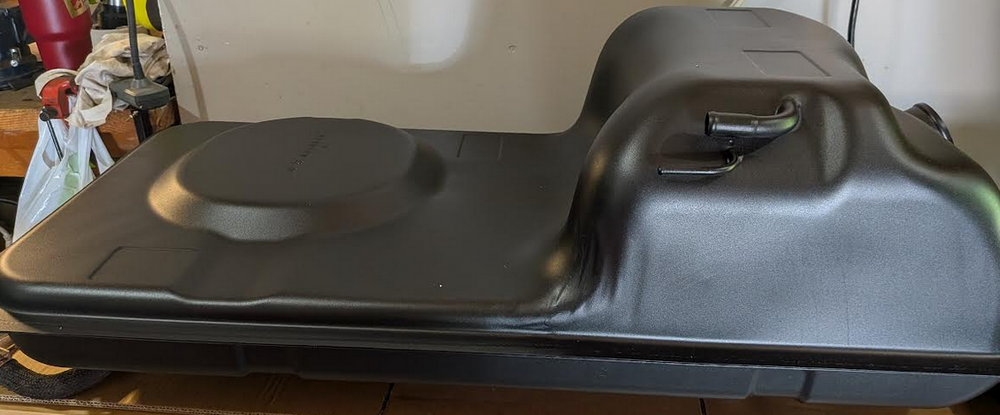
I hope this saga post is over. I tested the fuel pump running off the fuel jug and it worked without any hesitation, the FPR maintained the 43 psi of fuel pressure. I dropped the fuel tank and found very fine sediment of rusty 'sand' at the bottom. I couldn't fit my endoscope into the fuel bowl to check the condition of its sock, but I think it is covered with crap creating major flow restriction for my pump. I took apart my 100 micron pre-pump fuel filter and didn't see any sediment inside (good news). The sock did a decent job preventing rust particles from getting into my fuel filter and pump. I bought the s30.world early 76 fuel tank and it is a piece of beauty/construction. It is an exact replica: I also replaced my evap fuel lines (they looked old and stiff, but with no cuts). It took 12 days to get the tank, s30.world has a warehouse in the States, no import tariff BS fees. I just wish the web site would send a tracking email. I contacted them directly and haven't heard back. The tank was also very nicely packaged in a sturdy box. I did initial fine tuning of idle in my TunerStudio since now I have a good fuel pressure. Thanks to all of you who contributed to the ideas.
-
Hi nowak1981 I have a set of used/previously running injectors from my '76, resistor packs in case you need those too. You can DM if you are interested. I converted mine to the microsquirt setup with EV6 style Bosch ones. Regards, Den
-
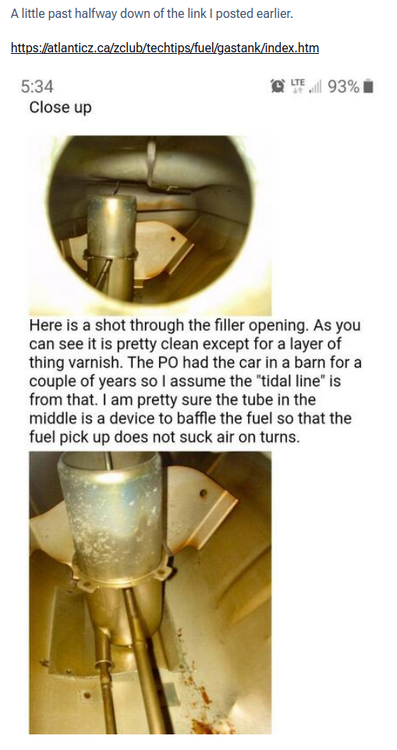
I did the return line restriction test - the fuel pressure went over 60 psi (max on my FP gauge). I have a spare Chinese FPR knock-off I used to have, I can replace the Aeromotive with that one. I need to rig up a temp fuel canister and try running the car off it. If I have an occasional fuel restriction in the tank's fuel pickup area, that might explain all these issues. I also considered pulling the drain snake down the main feed fuel hose/line inside the tank to see if it clears anything. Although the thought of a piece of debris in the future causing a break-down on a side of the road is not 100 percent comforting.
-
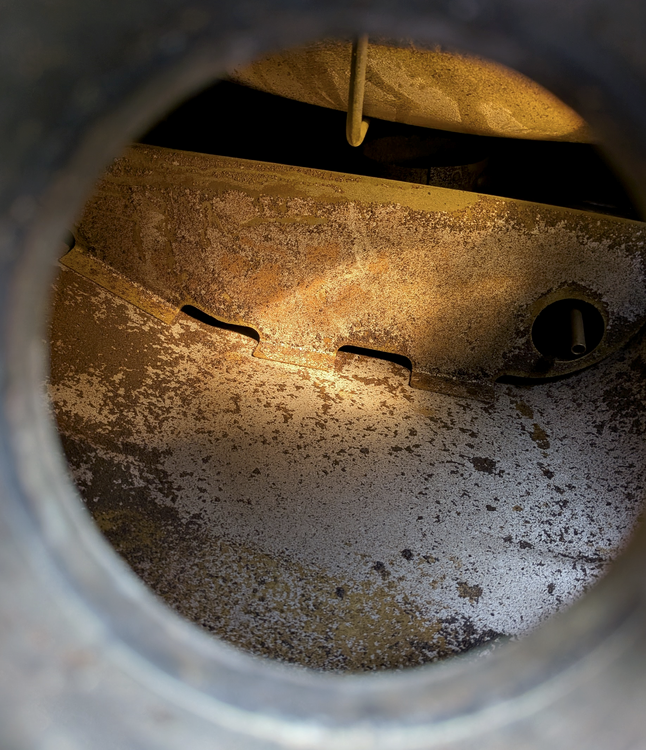
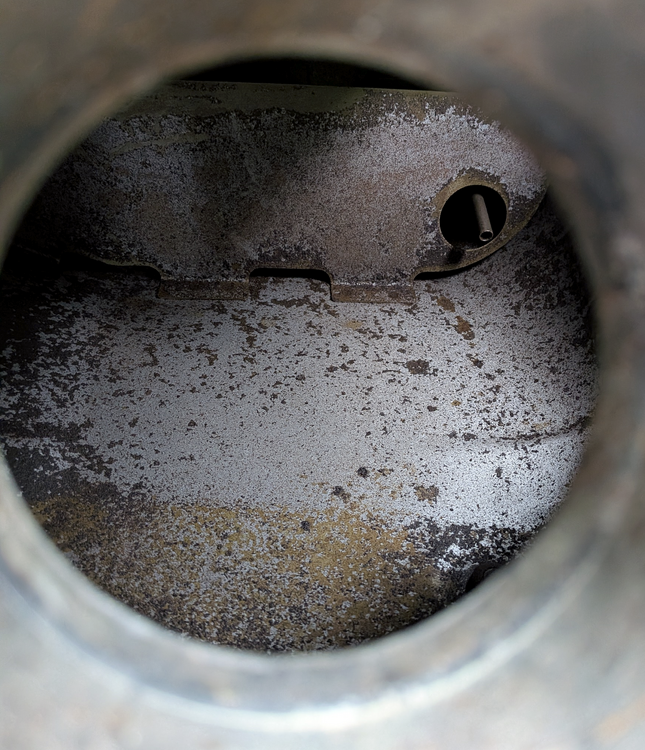
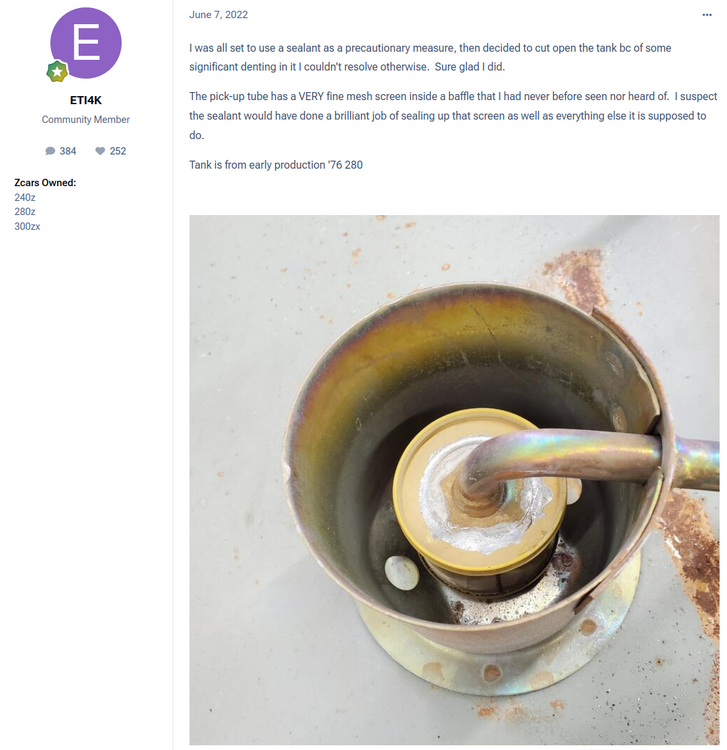
I did some searching for the fuel tank pick-up tube, and boy, it might be difficult to look inside of it or clean it using the filler or sender's openings (if this is my case) without removing the tank and/or opening it up. I might try to blow compressed air through the main feed, and then inserting a hose with my vacuum oil extractor tube to pick up any dislodged pieces? If this turns out to be the clogged mesh sock, I might just get a new fuel tank. The local radiator shop quoted me $400 to fix my original copper 280z radiator. Back in CA, I had shops doing it under a 100. I can't imagine how much they would ask to open/clean/re-weld the tank... I am getting ahead of myself, I need to keep positive thoughts. Here are some pictures from: https://www.classiczcars.com/forums/topic/67550-most-dreaded-of-jobs-finally-on-the-horizon-the-fuel-tank/page/2/
-
Charles, this is a good point. I will insert my remote mechanic's camera through the filler neck or through the fuel sender's access to check the condition of that mesh filter/sock on the bottom. I hope I won't have to drop that tank. When I bought the car 15 years ago, I was lucky that the fuel tank inside was in a great condition without any rust. If this is indeed the mesh, would you suggest completely getting rid of it since we use pre-filters anyway? Zed, the noise is definitely coming from the pump. Its noise varies depending on the output I am seeing on my fuel pressure gauge. I will do the test with restricting the return line and share the results. Before my test drive, I did adjust the FPR and couldn't get a stable 43 psi reading (no vacuum), it was moving between 40 and 43 psi. I left it alone without giving much thought to it. A year ago the FPR adjustment for 43 psi was steady, no pressure variations. Thanks for your suggestions!
-
Hi Charles, Thanks. I tested it without the gas lid on. The pump was turned on in TunerStudio in test mode (engine is off, battery is 12.7V, pump - 12V). The in-cab fuel pressure gauge showed 30-37psi fluctuations accompanied with an annoying squealing noise. My FPR was set at 43psi (no vacuum attached). Last week I drained gas 3 times getting my fuel sender's float adjusted (my fuel gauge is properly showing the value now, small victory :-)). The gas was clean. I used Fram (F3?) clear pre-filters (30 micron) for the past 12 years before I decided to move up to a 100 micron one chasing previous fuel pumps' failures. I am just debating if I should start looking into a gas surge tank/dual pump setup? When the pump worked yesterday, the car felt like a rocket ship.
-
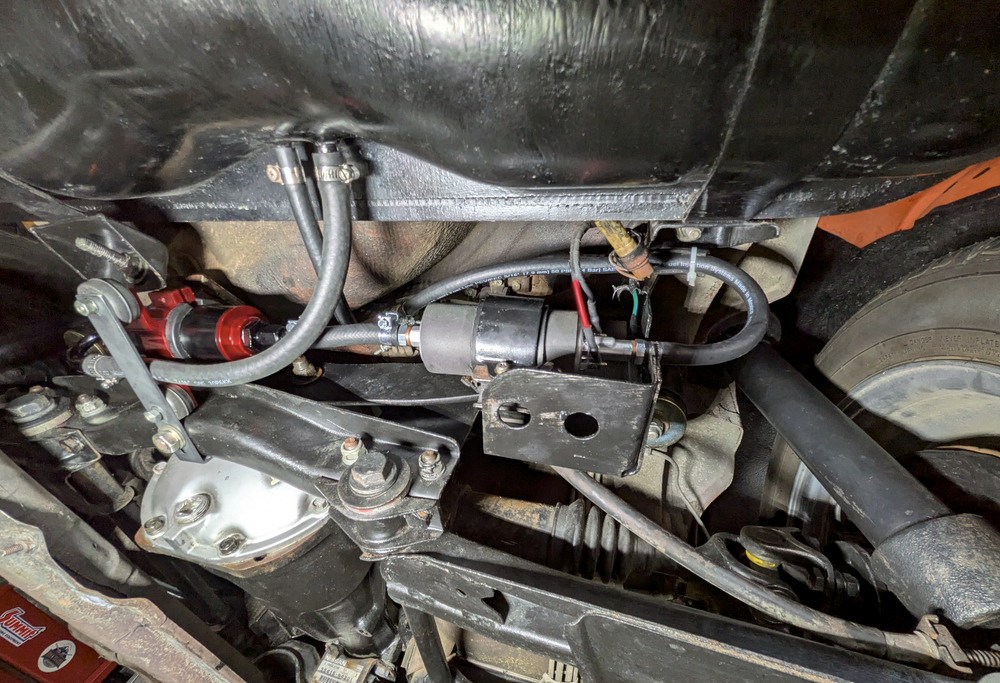
Good evening, My fuel pump saga never ends. I replaced the failed MSD (lasted 2 years) one with a Walbro GSL392 255LPH (authentic, made in USA, sold by Summit) in August 2025. I am running Microsquirt, set the base pressure at 43 psi with Aeromotive FPR. All is good until today. I took the car for a test drive fine tuning my VE table, the car was bucking, popping noises through the exhaust. I noticed my fuel pressure was bouncing around 20 - 38 psi, then dipping into 10s. The pump started making squealing noises. In the Tuner Studio, one can operate a test mode with the fuel pump. With the vacuum disconnected, my fuel pressure won't stay stable, would move between 30-40psi on my fuel pressure gauge. There is a 75amp relay with a 20amp fuse which supplies power to the pump. I ran a positive direct wire via the relay from the battery to the pump, separate good ground. There is almost no voltage drop at the pump's electrical contacts. The pump is in the lowest horizontal position, as close to the tank as possible, with no sharp kinks in its fuel line, 100micron fuel pre-filter. Half of tank of clean fuel. No debris in the fuel filter. I am back to using my original fuel tank's lid which has a built-in pressure relieve valve. When unscrewed, I can hear some little air pressure being released. I am not sure what else to do to make my fuel pump reliable. I found some posts about a 280z guy with weak fuel pressure issues using the same Walbro pump. He ended up installing a pusher pump then a puller pump. How did the Datsun's stock fuel pump manage to handle this all these years? Do I need to look into putting a sump tank with a puller pump (submerged inside) and then using my external Walbro as a pusher pump? Maybe installing the whole sump in the engine bay (RH side)? Any suggestions? The original Datsun design pumps go for over 1200 bucks (at Z Car Depot)! If I can find a cheaper reliable replacement/alternative, that will be a winner. Any advice is appreciated, Den
-
Have you checked the ebay? I found a 1970-74 fuel sending unit with the stock resistance (10 - 73) for $15ish. The description said it was part number 25060-E4100. The part is not OEM. Here is the label off the box:

-
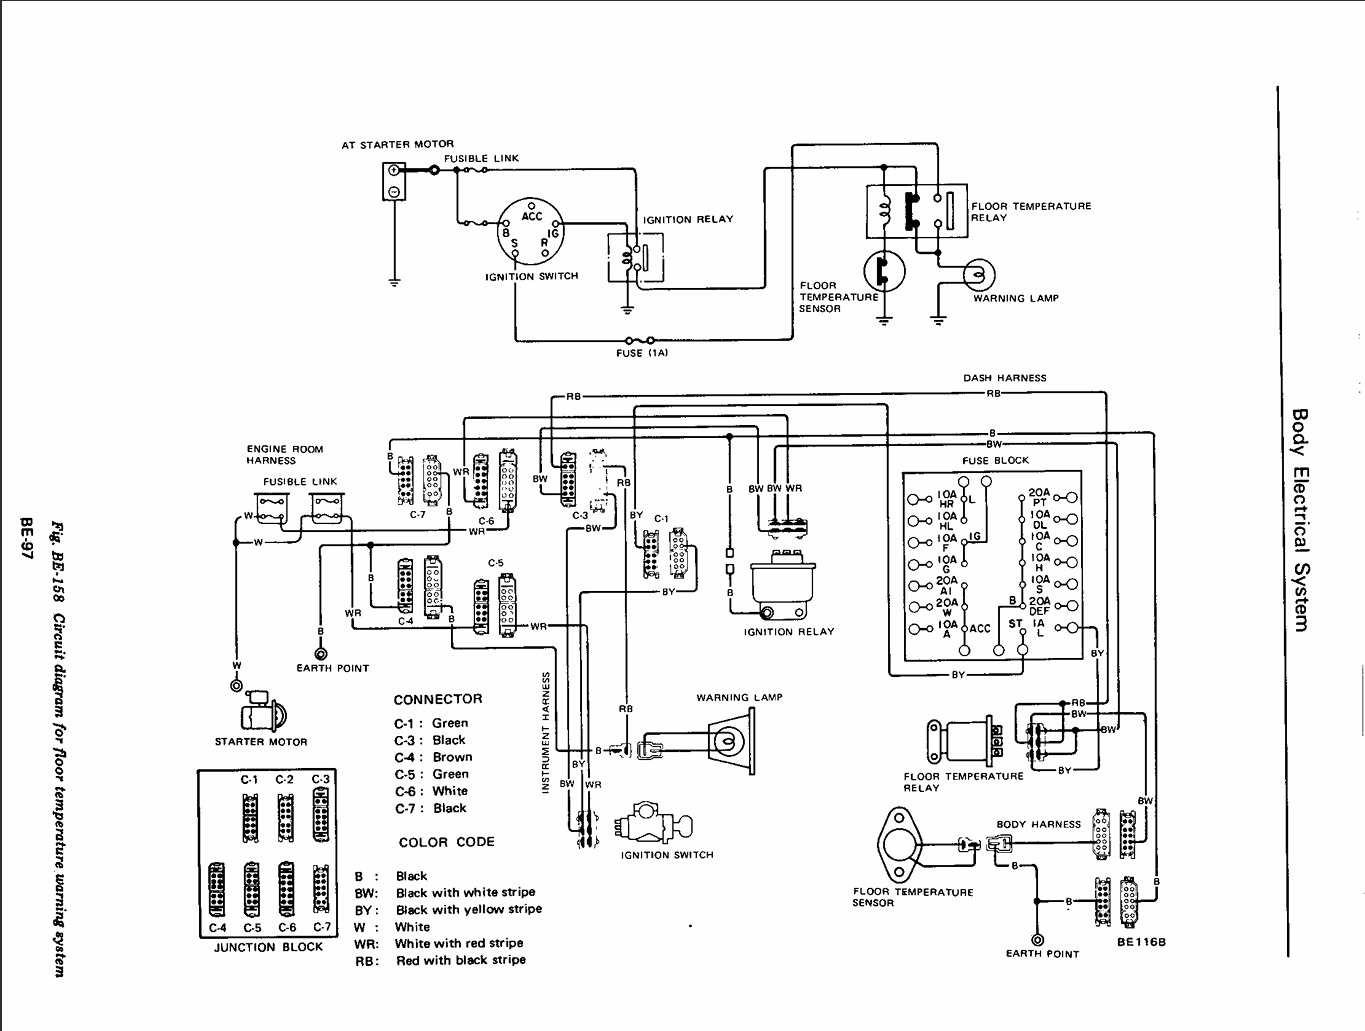
I did the yellow/blue wire grounding test. I had both the Floor Temp and Fuel warning lights on. I guess I have an independent to the fuel sender's thermistor issue with the Floor Temp sensor. I will check the relay under the pass seat.
-
Will do. Thanks. Still not sure how the yellow/blue wire for the fuel sender's thermistor affected my floor temp light. I checked one of the floor temp sensor's wires for the ground connectivity and there is one.
-
I am a big fan of Deutsch connectors. I put a 3-wire one to replace the Datsun's one. The yellow wire goes to the positive on the sender's unit, the black - to the sender's ground. The yellow with blue stripe is not being used.
-
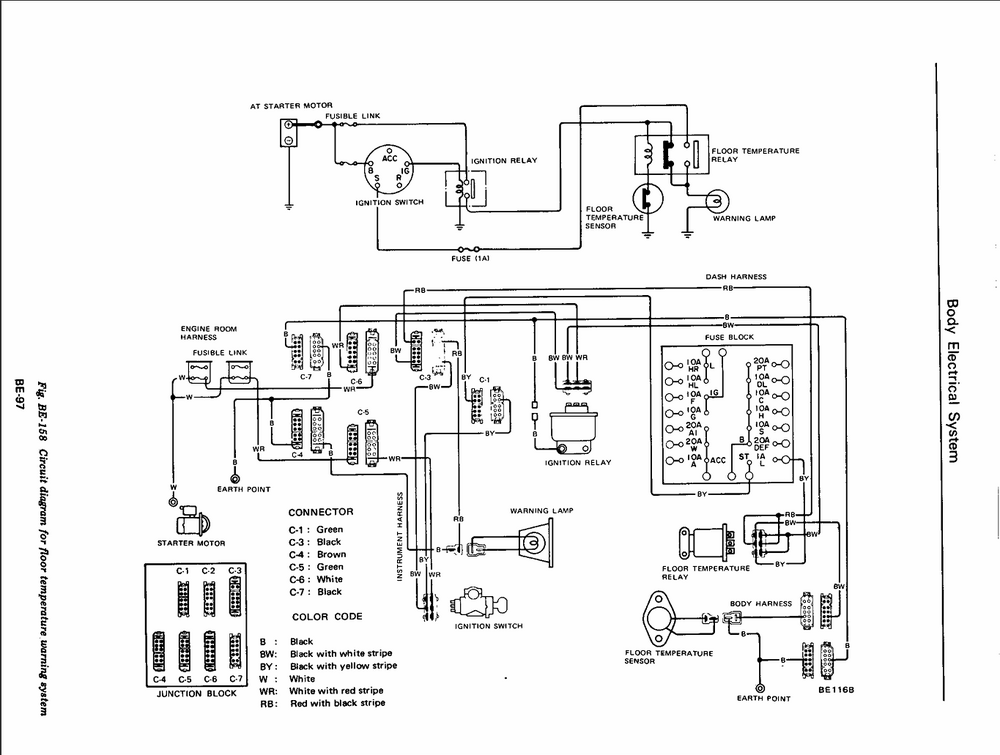
Hi guys, My original fuel sender was leaking around the positive contact. I replaced it with a 2 pole sender from ZCD. Since I lost the 3rd contact for the thermistor (low fuel), I only used 2 wires (pos and ground). The fuel gauge is working (I do need to bend the float's arm - I have 12 gallons there, it is showing barely half full). Now my floor temp light is always on (cranking/driving). My model is CA, I still have the sensor/catalytic converter installed. The sensor used to work. I checked the electrical diagrams - the dash lights for Floor/Fuel Warning are sharing the same wire. I am not sure why the fuel sender's wire would affect the Floor temp sensor's bulb? The only thing I haven't checked is the floor sensor's relay under the passenger seat. I probably can ground the sensor's connector in the back to see if the light goes out - this should verify the relay's operation. Any other ideas? Thanks! Den
-
What an amazing build thread! I just spent a few days reading it. What a journey! How is your car running? Did you figure out the rich carb running condition?
-
Thanks, Parman. I will be heading out to Menards to get the automotive Goop tube. I don't know what 3M was thinking designing a glue which is black. Clear one makes perfect sense.
-
Hi @Parman , I totally understand your pain with the 3M adhesive and its black tar it leaves behind. My hatch top weatherstripping piece got detached. I used the 3M and Permatex - same results, it won't stay in place. I looked up the Amazing Goop one, and do like that it is clear when dries up. Did you use the Automotive version or the Trim one? Thanks! Den