darom
Free Member
-
Joined
-
Last visited
Everything posted by darom
-
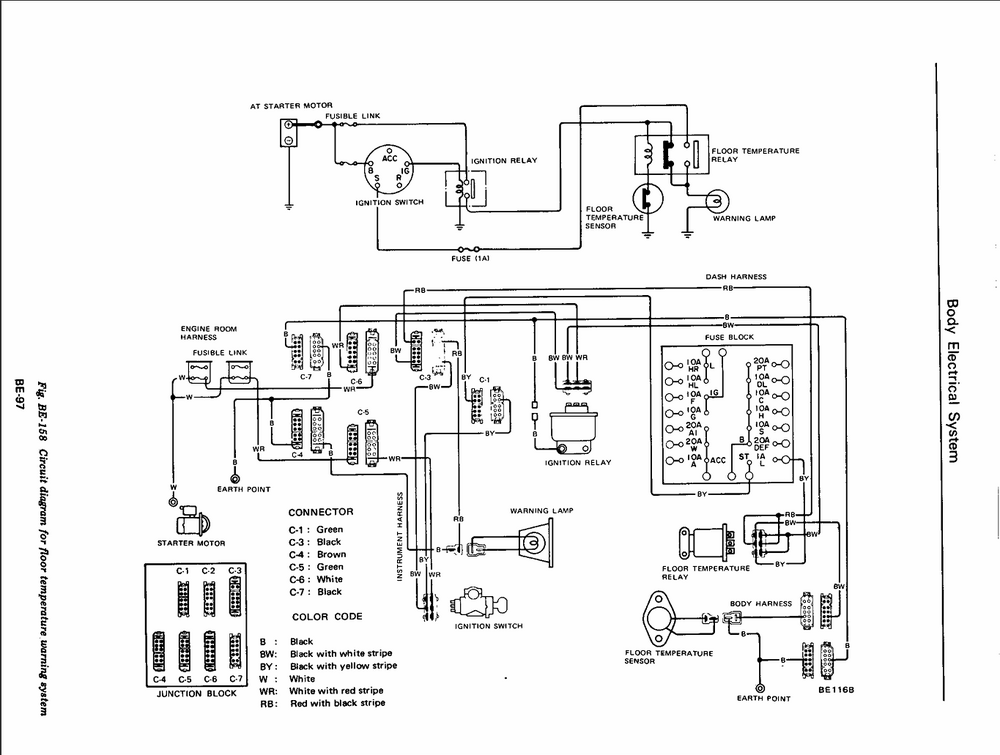
 I did the yellow/blue wire grounding test. I had both the Floor Temp and Fuel warning lights on. I guess I have an independent to the fuel sender's thermistor issue with the Floor Temp sensor. I will check the relay under the pass seat.
 -
Will do. Thanks. Still not sure how the yellow/blue wire for the fuel sender's thermistor affected my floor temp light. I checked one of the floor temp sensor's wires for the ground connectivity and there is one.
-
I am a big fan of Deutsch connectors. I put a 3-wire one to replace the Datsun's one. The yellow wire goes to the positive on the sender's unit, the black - to the sender's ground. The yellow with blue stripe is not being used.
-
Hi guys, My original fuel sender was leaking around the positive contact. I replaced it with a 2 pole sender from ZCD. Since I lost the 3rd contact for the thermistor (low fuel), I only used 2 wires (pos and ground). The fuel gauge is working (I do need to bend the float's arm - I have 12 gallons there, it is showing barely half full). Now my floor temp light is always on (cranking/driving). My model is CA, I still have the sensor/catalytic converter installed. The sensor used to work. I checked the electrical diagrams - the dash lights for Floor/Fuel Warning are sharing the same wire. I am not sure why the fuel sender's wire would affect the Floor temp sensor's bulb? The only thing I haven't checked is the floor sensor's relay under the passenger seat. I probably can ground the sensor's connector in the back to see if the light goes out - this should verify the relay's operation. Any other ideas? Thanks! Den
-
What an amazing build thread! I just spent a few days reading it. What a journey! How is your car running? Did you figure out the rich carb running condition?
-
Thanks, Parman. I will be heading out to Menards to get the automotive Goop tube. I don't know what 3M was thinking designing a glue which is black. Clear one makes perfect sense.
-
Hi @Parman , I totally understand your pain with the 3M adhesive and its black tar it leaves behind. My hatch top weatherstripping piece got detached. I used the 3M and Permatex - same results, it won't stay in place. I looked up the Amazing Goop one, and do like that it is clear when dries up. Did you use the Automotive version or the Trim one? Thanks! Den
-
Hi Bruce! I am glad you made it home ok. Relax, maybe get some back massage?
-
Congrats Bruce! The hatch strut is holding!
-
No marks to be found - there is a strong smell of Chlorine though.
-
Bruce, good luck on your trip! Looking forward to some pictures from the event.
-
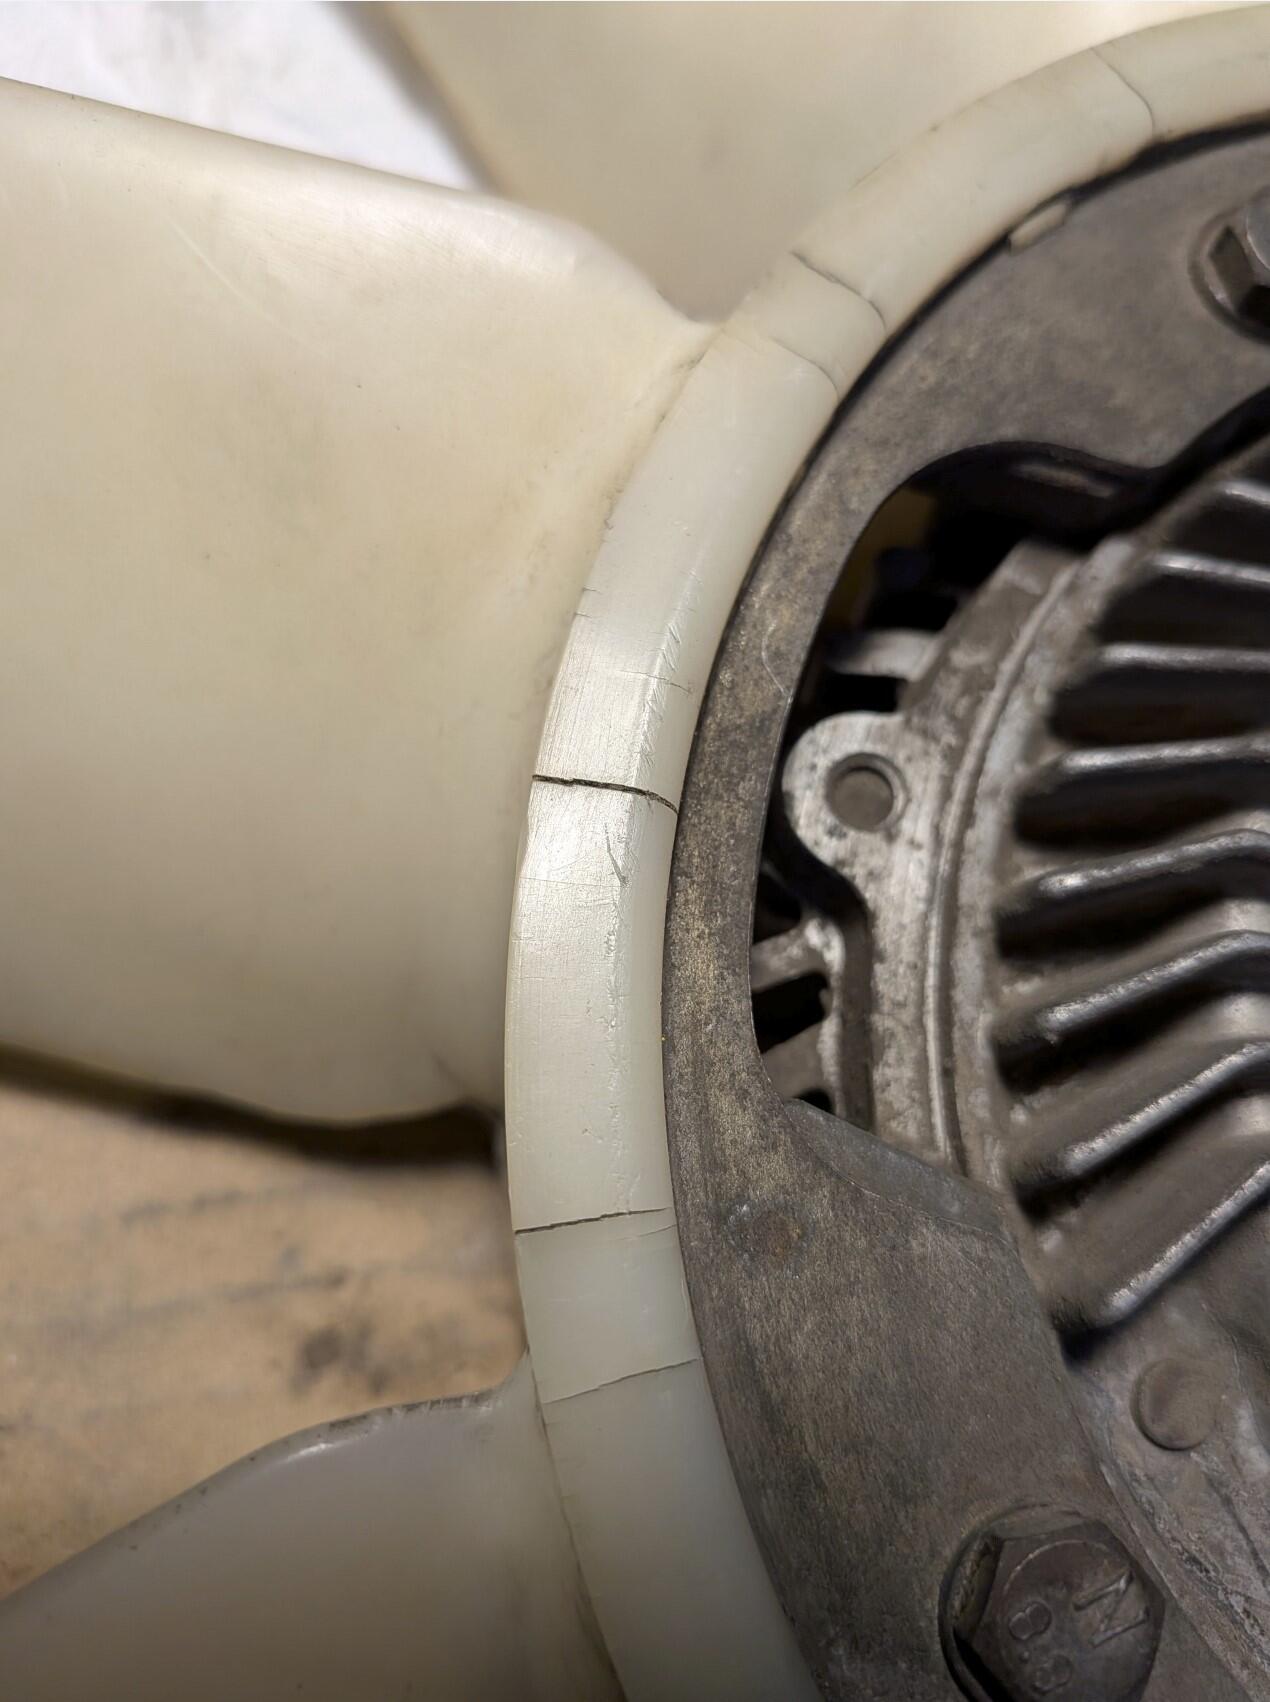
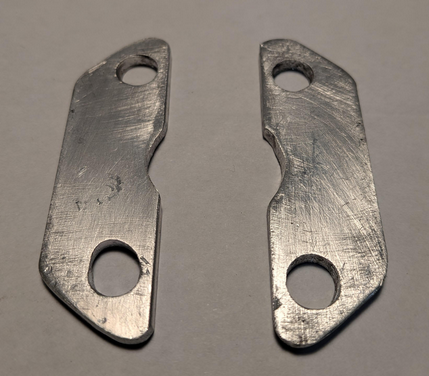
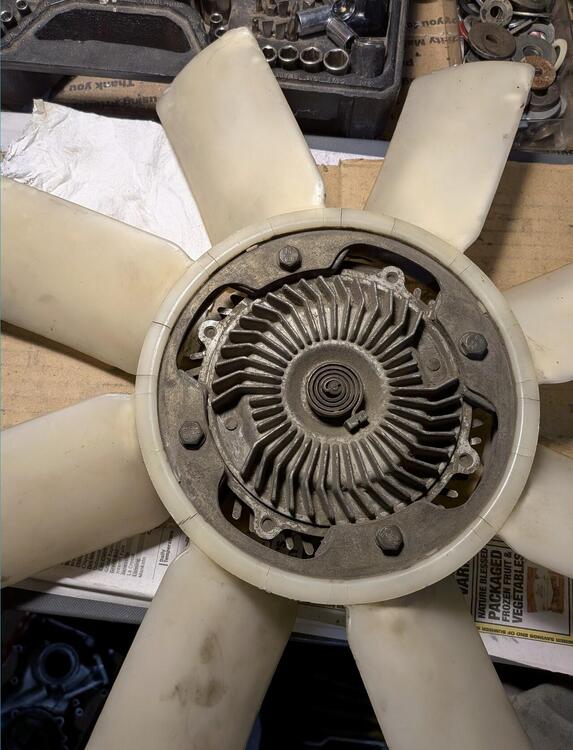
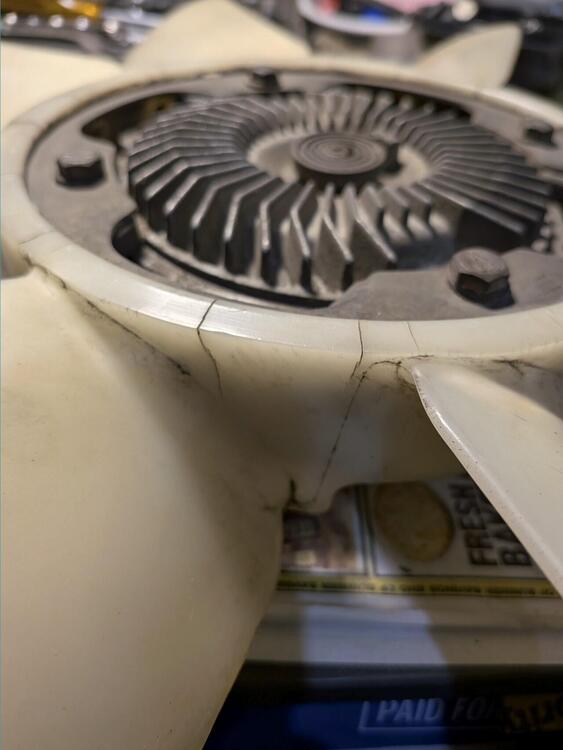
Thanks guys, I will measure the old/cracked fan vs the new replacement one. I am actually facing a different issue on top of the cracked fan blades. After I removed/reinstalled the tranny and installed a new TC, I started hearing some hitting noises coming from the front of the car. I think my fan got too close to my HALL sensor mount and would occasionally hit it (especially when warmed up). I fab'ed 2 shims to move the clutch/fan assembly forward by 3 mm: And here is how close the fan is to my HALL sensor mount:

-
Thanks, ordered one.
-
That's what I thought. Thanks!
-
Hi guys, Can you please review the pictures of my radiator fan ('76 280z) and let me know if I should replace it with a new one from zcardepot? I am seeing some cracks and am afraid the fan can explode taking out my radiator and my hall sensor which is sitting within a few millimeters from it. The fan clutch is showing some resistance while free moving it. I'd like to stick with the mechanical one since it has been cooling my car pretty well. I have a stock fan shroud. Thanks!

-
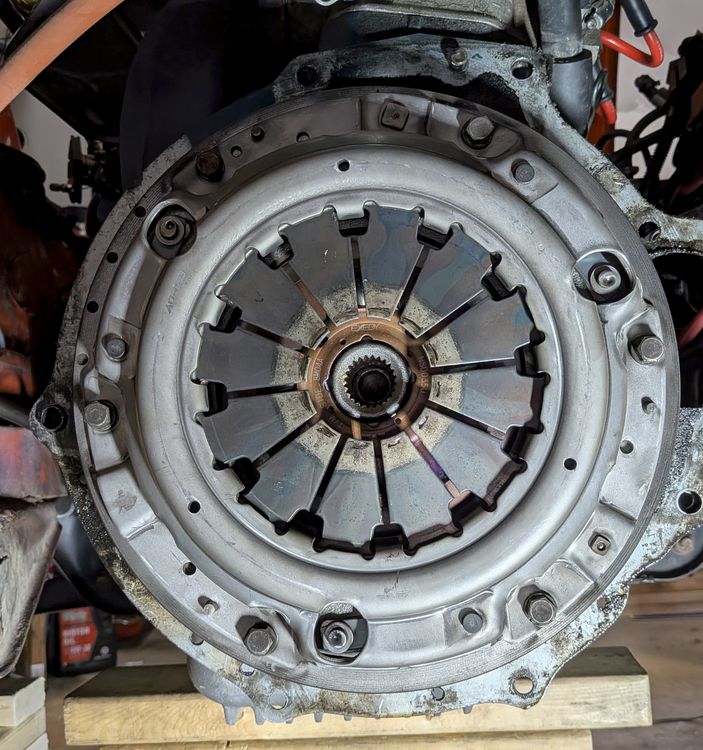
Hi cgsheen1! Thanks for the recommendations. I am running the latest version of Microsquirt, 440cc Bosch injectors, Spartan 3 v2, crank 36-1 wheel with HALL sensor, LM7 truck coils with batch firing, AZC oil pan. I will try making Microsquirt work with the turbo (no sequential ignition). I have only one output left (relay) which I can use for an electric fan, for ex. I was aiming for 8-10 lbs of boost to play it safe and keeping my stock rear diff/half-shafts alive. I looked up some parts from rockauto and here is a list if it works? EXEDY 06030 clutch kit, 1975 2+2 Flywheel: AMS AUTOMOTIVE / RHINOPAC 167304, for 2+2 model Throwout bearing, WJB / INMOTION PARTS WRDNE01576C (any manufacturer preference?) Hopefully, if the car parts are for 2+2 model, I am not going to run into any issues with the fitment/clutch fork throw. I just installed a brand new master and slave clutch cylinders (for my 280z 1976 model). Will this create a problem? (I checked the part numbers, they are the same for 76 and 75, I think I should be good here). I started a thread here on hybridz dealing with my project: https://forums.hybridz.org/topic/136053-76-280z-microsquirt-project/ Thanks! Den
-
Yarb, it is the gasket I found at Rockauto. I think it is a cork type. Steve from AZC recommended to use the RightStuff gasket maker. I used it in the past, it seals well, and is a major pain in the neck to deal with if you want to remove stuff. Steve mentions it in his note with his oil pan that the best way to install the oil pan is with the engine out of the car :-) I wish it was my case. With an oil pan installation, the clearance on the 280z is tight already. The oil pickup on the AZC pan creates an issue trying to install the pan without jacking up the engine to give more room. If I use an RTV like RightStuff, I would swear that stuff all over while trying to install it. It would be a mess. What I did is to put a thin layer of black permatex onto the AZC pan and glue the cork gasket to it. Give it a few hours before the final installation. Now I can move the oil pan around the oil pickup with all my bolt holes nicely lined up etc. The gasket wouldn't move it I bump it against something. Apply some black permatex in 4 areas the FSM talks about, and you are all set. I don't think it would matter if it was a cork type gasket or a rubber one. I just need some material to seal the oil pan against the engine. I am sure some other guys have a different way to deal with it. If my engine was out of the car, flipped over, I would be happy to lay a nice bead of the RightStuff and carefully place the AZC oil pan on top of it. I am sure there would be no leaks since this stuff truly seals.
-
I installed the AZC pan, very nice piece. No leaks yet - I used a cork gasket with a few small blobs of black RTV in the areas suggested by the FSM. It might be in my head, but the engine noise had quietened down since the pan installation.
-
Thanks, Yarb. I am on hybridz too, I joined it when I started exploring the Megasquirt/turbo upgrade (I was getting fed up with the AFM/running lean etc lol). There is less traffic now as it used to be.
-
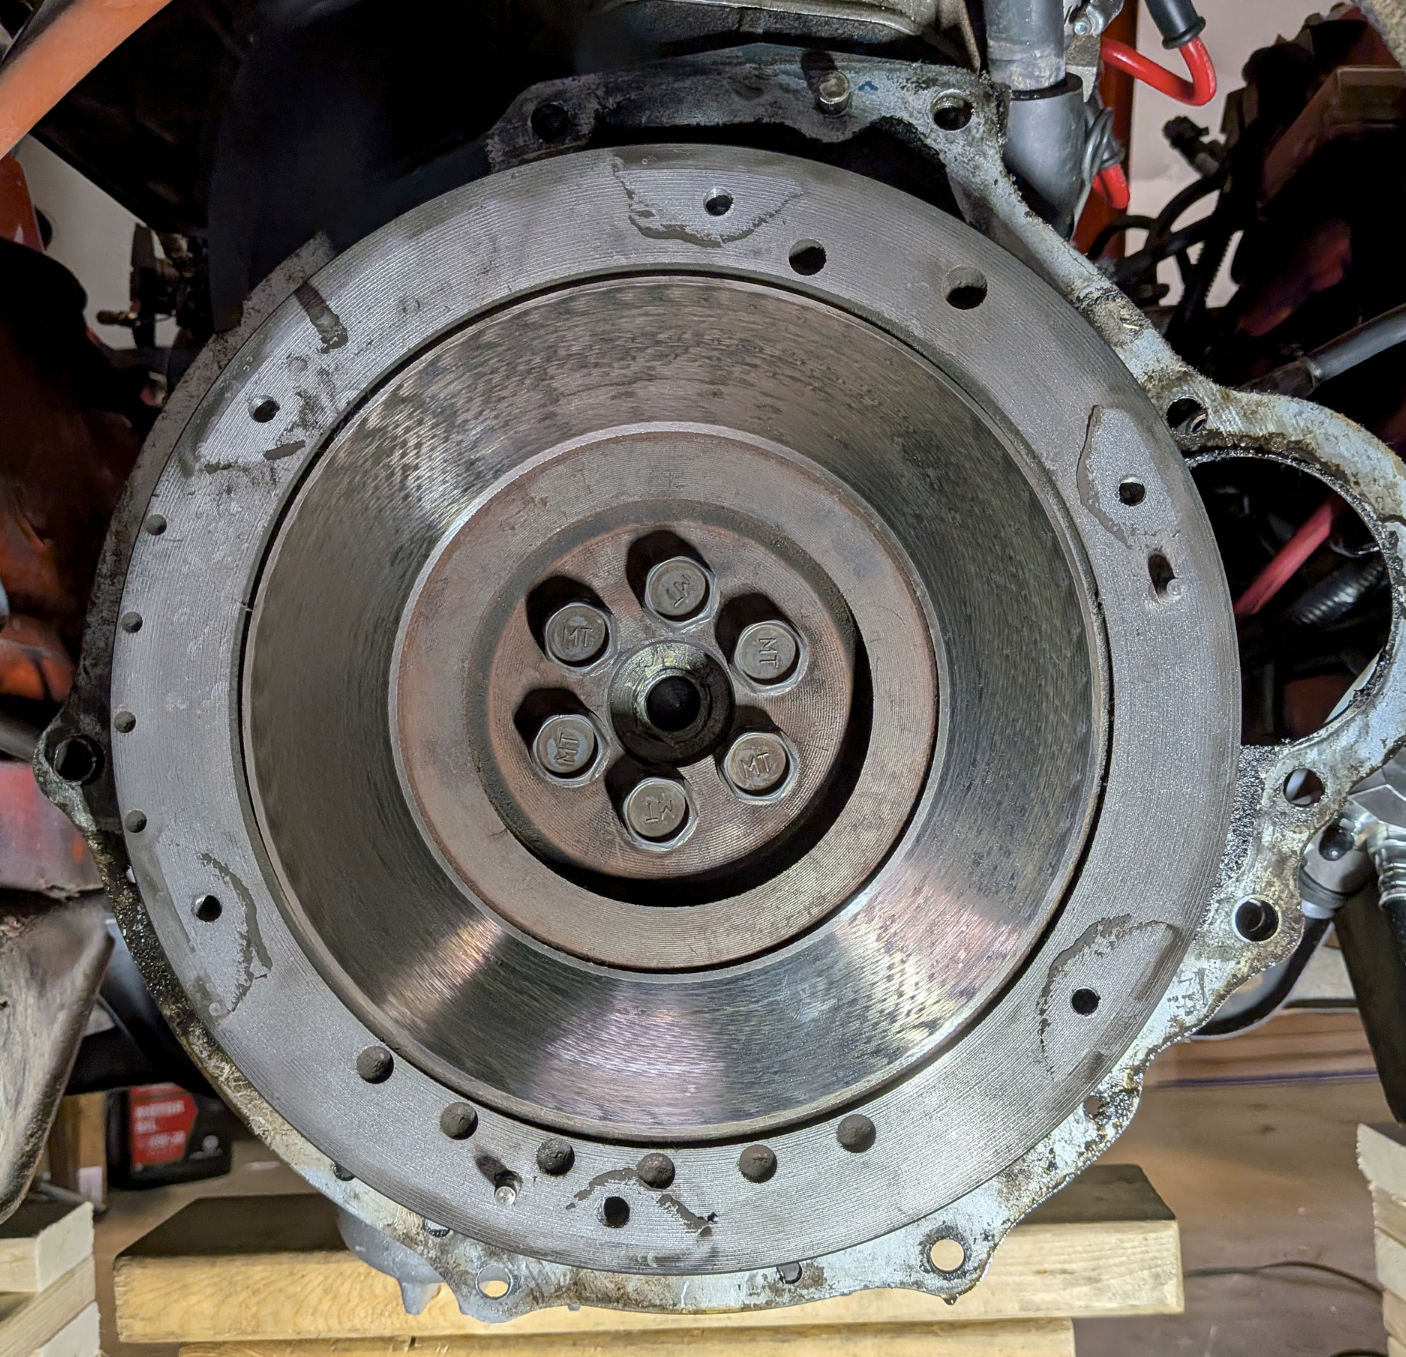
Hi Zed, unfortunately I didn't take a picture of the back side of the PP. I did inspect it, it looked like a brand new brake rotor, no scratches, smooth surface. No discoloration. Appreciate you checking it out for me. I took the car for a test drive - the shifts were fine, no slipping. Re: the turbo - I am looking at the Protunerz turbo kit. A larger flywheel (240mm) is probably what I am going to end up with. I am sure I will have questions for you guys here on this forum later on :-)
-
Here is one of the PP:
-
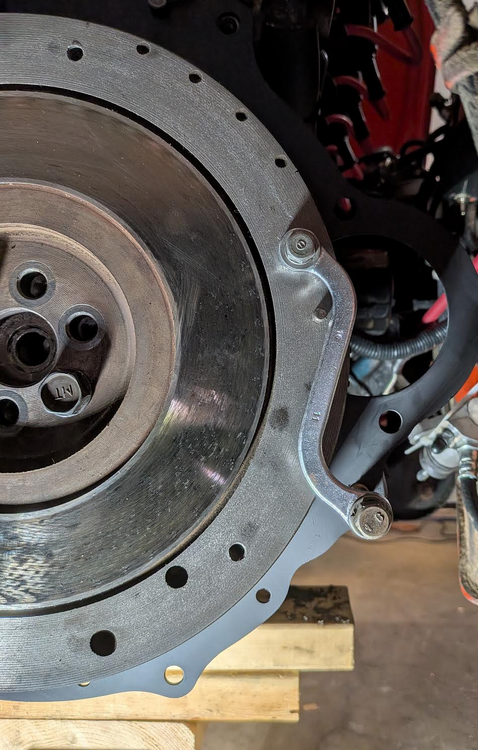
Shoot, I wish I would have posted my flywheel's picture for you guys to review too. Here is what it looked like when I removed the clutch disc: Previously I didn't have any clutch slipping/disc chattering issues. My plan is to install the turbo next year and replace the clutch with a beefier version if it is needed. Either I will re-surface the stock flywheel then or go a with new lighter version, I will have to do a research about it/ask the forum for an opinion. Appreciate your input.

-
Yes, it is quite heavy (over 20 lbs?).
-
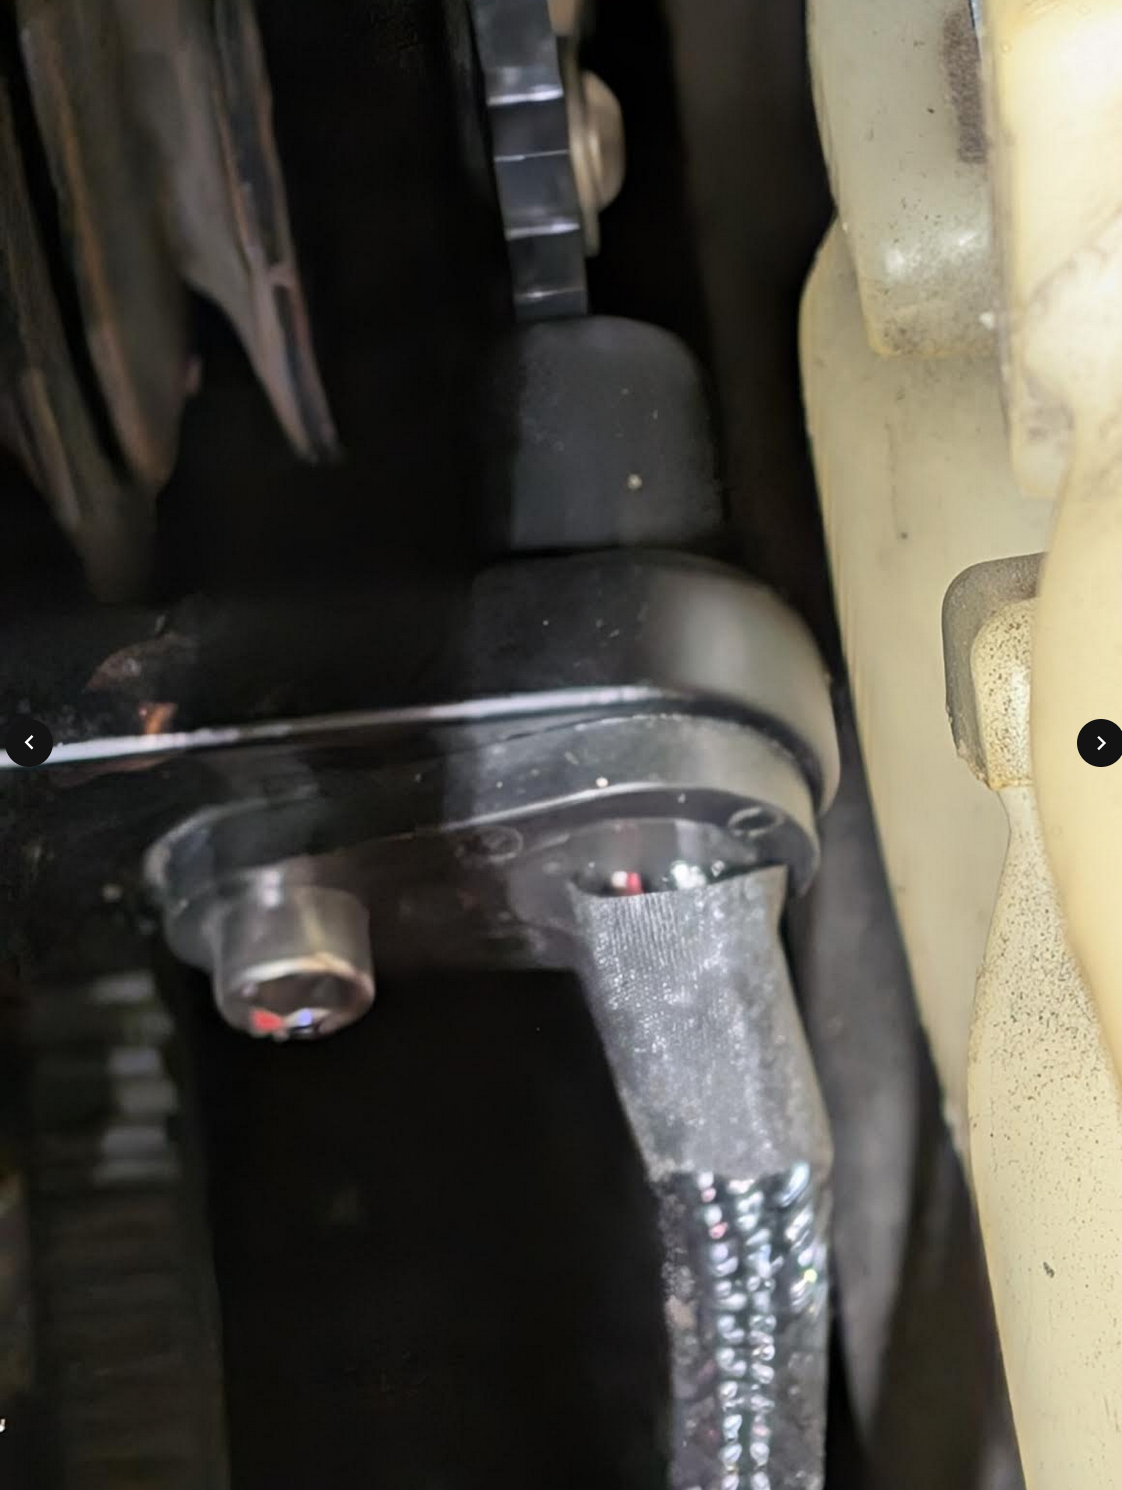
Update: put the transmission back with the Dorman $6 clutch alignment tool for 24 splines. Installed 2 guide bolts (don't forget to put slots into them, otherwise you won't be able to remove them). The transmission was in 1st gear, I moved the rear shaft a little to help it ease into the clutch splines. It took 10 minutes. Here is my improvised flywheel hold tool (saw some guys on youtube doing this): Next is the driveshaft, refill the tranny and exhaust mounting.
-
Hi @kw906! Thanks for the interest. I haven't taken my car on a long ride yet to see if the poly mustache bar bushings are transmitting too much road noise. If the noise is there, I would use these serrated washer insulators instead of flat washers that came with my poly kit.