


AZ-240z
Free Member
-
Joined
-
Last visited
Everything posted by AZ-240z
-
 [quote name= So does anyone have some old URL's or Item Numbers from e-bay that would apply here? Series I cars in #3 or #2 Condition? that sold for something above $14K even? I know many have' date=' but I didn't keep the old listings... remember a #3 car "looks like new" to the average person looking at it... and a #2 car is a real show winner... FWIW, Carl B. Carl, I saved an ebay auction for item # 320112203242. This was for a white Z owned and being sold by a car dealership owner. The car had a $26,000 bid which did not reach the reserve. This may help in aguing value with the insurance. Hope so. Dan
 -
Chris, I had pretty well decided to install these cups for the dogleg panels. My reasoning is that these cups may allow the clips to slide out more easily and, thereby, reduce damage to these panels when removing them. They are fairly fragile, and I have seen many with cracked backer boards,. ie. masonite, where the clips fasten to the backer board. Functionality takes priority over originality for me in this case, and, as you say, who will ever know. How Cool, (Sweet for contemporary slang) would it be to peak under new loop pile, surge bound carpet, and find that original natural fiber jute padding; messy, but original. I just can't get that vision out of my mind. If anyone has any NOS or real nice jute pieces, ------------yeah, right. There has to be a supplier out there in the restoration world, somewhere. Dan
-
Bruce, Jim Thanks for confirming why my car didn't have the plastic retainer caps, too. I did notice that the clips for the dog leg panels were slightly narrower and shaped a little differently than the door panel clips. Now, if I could only find out where Kats gets his undercarpet jute----------hmmmmmmmmm??????? Dan
-
I removed those interior dog leg trim panels with the chrome accent strip that are found just forward of the rear wheel housings to do some work. They are installed with the same clips which are used for the door trim panels. On the door panels, the receiver holes for these clips use a cap shaped like a thimble with a lip which are pushed into the hole in the metal door frame. My car is a '70 Z, and my question to the forum is, to install these dog leg trim panels, were these thimble shaped caps used, originally, to receive the clip fasteners on the trim panels when installing these dog leg trims? Mine were installed without the use of these caps but it would seem reasonable to me that they would have been originally installed with the same caps as with the door panels. Any thoughts appreciated. Dan
-
Heck, if you have a two row stock radiator now, I would just shop for a four row radiator and get that OEM thermostat. I believe that would solve your problem. Dan
-
Randy, Go to www.jrdemers.com and open up," Z-car: Tips and Tricks", then, "Over Heating". I used his method for calibrating my temp gage with a Radio Shack resistor plugged into the lead to the temp sensor, and I use a 180 Nissan thermostat. My gage runs about one needle width right of center on my 1970 Z on 100 degree day in Phoenix. I also have a three row radiator core. I have confirmed my gage readings with the thermometer in the radiator trick and using an infrared thermometer around the engine,and am now happy that my gage readings are pretty accurate. Hope this helps. Dan
-
Just my opinion, but, yes, I would say thats a little too hot for a 76 degree day. Is the 180 thermostat you put in a Nissan OEM product, or did you get an aftermarket thermostat? The reason I ask is, the opening in a Nissan thermostat is probably 20% bigger than an aftermarket unit and will make a difference. Dan
-
Just thought that I would bump this to the top one more time. This was mainly a community project which seemed to have a lot of interest, so, for those who expressed an interest and may have missed previous updates, this decal is now complete and available and the results have far surpassed my expectations. If interested drop me a PM. To those who have already purchased one or more, thanks for the support. Dan
-
I guess I'll chime in with my take on wax. After I had my car restored and painted, I let the new paint cure as, recommended, for about six month. I then decided to use just good old fashioned carnauba wax instead of anything synthetic which may contain a variety of silicones which I definitely wanted to stay away from. I use One Grand wax and only for the use of sealing out airborne impurities. My considerations may differ from yours as my car is not a daily driver, and spends most of its current incarnation in a garage under a car cover. Hope that helps with your decision. Dan
-
I think that those little rubber tabs that stick out of the side go toward the outer side of the window frame and under the ends of the stainless and rubber window wiper strip that mounts on the top, outer edge of the window ledge. At least, that how mine are mounted which may or may not be correct. It makes me VERY NERVOUS when I appear to be correcting Escanlon. Dan
Randy, Are these the seals that that mount between the lower, aft edge of the door window frame and door body metal, or are these the small L shaped seals that mount to the upper, forward edge of the quarter window frame? Dan
Why not go to a good auto paint supplier and get some of that clear adhesive backed laminate used by many new car manufacturers made for the purpose of a rock guard. It is probably made in different mil weights depending on application. I wish I could be more specific as to suppliers or part numbers, but that would be my first choice over the mud guards.
Arne, the info given above from your experience with the Mulhollands is just what I was looking for. My car presently has stock springs which were cut, and not sure what struts were installed during the restoration. The ride is pretty stiff and I would like to have a bit softer, more stock ride. My car is not a daily driver, more of a show car, so the return to stock characteristics is my prime consideration. I do drive it occasionally just to keep things lubed and free, but a less than very firm ride would put less wear and tear on everything. I know that my objectives go against the grain of what most people on this site are trying to accomplish as far as shear driving enjoyment, but I did enjoy driving this car for 35 years, and now putting it back to showroom stock is what turns me on. Roads and highways here in Phoenix are generally pretty good so not really an issue. I just want a ride for the limited driving I do which is close to stock for less stress on all the components. The car had Konis which were hydraulic, not gas, for many, many years and the ride was great, just a little firmer than stock. Wish I could find a set of those today. The KYB-GR2 struts would increase the ride height over stock too much or I would put those on. Not too many other options for what I am seeking to do, unless you have some suggestions for another strut option. Thanks, Arne, for the good info. I will more than likely put the Mulhollands on unless I happen to find a set of NOS stock struts squirreled away in some dusty dealer store room. Any suggestions, given what I am looking for, are always welcome and appreciated from all who are following this discussion. Dan
Hi Arne, I did pick up a set of those Mulholland struts for my car that I planned to match up with the repro stock U.S. springs. I wanted to ask you how you found the ride and car stance (height) as compared to stock. I am hoping for a ride and stance close to stock, but a ride a little firmer would be OK. Thanks, Arne. Dan Original Owner, hls30-20419
Just wanted to bump this up to the top and let everyone know who had been interested that these decals are available for $12 each. after more than a year and about six revisions, I can honestly say that these are as close to a perfect reproduction as is possible. For all who have received your decals and posted comments in previous posts, thanks and I really appreciate the kind words. For those who would like to put a nice finishing touch to that renewed master vac, just PM me with your request. Dan
I've got a 1970 240z and that looks like the connector to the windshield wiper motor harness which passes through the firewall directly above the upper heater hose.
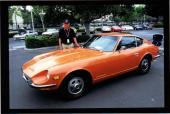
If you look closely at the picture of the air pump in his auction, you will see one of the A/C lines and the bolts of a York compressor housing below the air pump. The York was one of the dealer add-on units. For me, too many other things on this car are from later models to qualify for somewhat of a survivor car. Just my opinion. Dan
Hmmmmm....,,,,,Lots of Series 2 items on the interior. Steering wheel, choke plate, fuse box cover, dash, seats with flip recline lever, rear deck carpet has split for tool box locations in deck rather than behind seats, hub caps. It appears that the interior has been gone through extensively for whatever reason. The seller mentioned floor repairs also, so I would want to get up and personal with a closer inspection of this car. He may have tried to make one good car from the parts of two, but that is just my paranoia showing through.
Bryan, I'm guessing that in the pictures of the grommets, the grommet on the left is the original, and the grommet on the right is the replacement you found. Yes? Dan
Sorry to disagree, but there is a copper crush washer that should be changed with your oil change. These are still available at Nissan Parts.
Ron, Victor, Thanks for the feedback on my master vac decals. I thought that they turned out quite well, and really appreciate your appraisal as to its quality and accuracy. I am currently having more made up for anyone else who had expressed an interest in buying one or more. Please PM me to place an order. I have set the price at $12 each. Having worked on these for about a year, the costs involved were more than anticipated. As I had mentioned earlier, this was not meant to be a money making project for me, but a means to make a decal for my own car and try to recover the costs of production. These are not photocopy replicas, but entailed hours of artwork to replicate all details as accurately as possible. If, after purchasing one of these decal, you are not totally satisfied, I would certainly offer to take it back. I think our cars are far too important to each of us not to be satisfied with what we put on them. If you have looked at pictures of my car in my gallery, you will realize that I am very particular. Dan
John, I'm trying to follow your logic. Is that left unsaid above the fact that the Z will never attain the value of the Austin Healey MK IV 3000 because the number of 1+ 240Zs will always be much greater than that of the Healey? Or, does the Datsun loose appeal due to being modified, crushed, crashed, or rusted out in far greater numbers than the Healey? Or, is the value and collectability based on it European origins? I am not disagreeing with your conclusion on relative values, (my brother had a Healey 100 which was incredibly fun), but I guess that I missed the premise on which you have based your value comparison. I am really enjoying this discussion. Dan
Spanky's Auto Body (480) 644-0060 Gary has been working on Zs forever and knows his stuff.
Bob, I've had to do this a couple of times, and have found the easiest way was to remove the whole blower assembly. This assembly bolts to the firewall in three or four places, and once these machine screws are removed the whole blower fan and housing just drops out. Be carefull not to bend the cables that control the freshair vent located on the right side of the housing, or simply disconnect it from the vent actuator. You then can remove the glove box out the back side and have ample room to do the heater core. Really not difficult but takes a little time, time well spent. This explanation is kind of quick and dirty, but once you get into it, it is fairly easy to see what needs to be done. Dan

Important Information
By using this site, you agree to our Privacy Policy and Guidelines. We have placed cookies on your device to help make this website better. You can adjust your cookie settings, otherwise we'll assume you're okay to continue.