


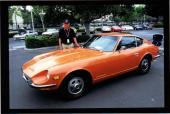
AZ-240z
Free Member
-
Joined
-
Last visited
Everything posted by AZ-240z
-
 I noticed one of the rubber floor plugs in the rear deck floor has been painted over with the red. Pop that plug out and you may seen the original color around the edge of that drain hole. Dan
 -
The right red, white, and blue Monroney sticker that 26th-Z shows here in his post #14 is the one that came with my 1/71 series 1 car if that helps anyone identify the correct format for there car. Dan
-
Unkle, I feel your pain and am going to outline my recommendations in finding probable sources of exhaust leaks. I am assuming we are talking about hls30-00538. This will take some time and effort but should pay dividends. You need to expose all the manufactured holes in the rear of your car. To do this, roll the carpet and any padding forward of the strut towers. Next , remove the plastic interior quarter panels, the plastic tail light panel, and the louvered interior rear deck hatch trim panel. Around the edge of the metal rear deck floor from the back of one wheel well, across the rear edge, and up to the other wheel well, you will see a verticle lip spot welded to the associated quarters and rear tail light housings. Check these mated surfaces for any gaps, either from looking inside or crawling under the car with a flashlight. Use a calk of your choice ( rope calk, or various tube calks) to fill any gaps. Next, starting inside the left quarter panel area, the antenna drain mast needs to have a good grommet in the floor. The spare tire well needs good plugs in any drain holes. The rear deck has two drain holes in the aft corners which need good plugs. Along the aft edge of the rear deck, there are three grommets, two for fuel hoses and one for a harness wire that need good grommets. The tail lights are sealed to the tail light panel with rubber weatherstripping which rots after time and needs to be replaced. You will, also, notice a small wire for the license plate light passing through the tail light panel and needing a good little grommet. Moving to the right interior quarter panel area, under the fuel vapor tank there are two fuel lines that exit through the floor that need good grommets, as well as the fuel filler tube passing through the floor to the fuel tank. The biggest, and most obvious hole, is the rear deck hatch. This weatherstrip material needs to be undamaged and with a good, tight seal. With the help of a friend, since you already have the spare tire out, climb into the back end, have your friend close the hatch, and using piece of thin material such as cardboard, slip it into the seal and run it around the hatch checking for gaps. The rear hatch louvered trim panel that you removed from the inside of the hatch lid has two rubber flaps that allows air to leave the cabin. These rubber flaps should be checked for condition and integrity so air cannot re-enter through rotted or damaged flaps. The rubber flaps on this panel were only found on the series 1 cars with the hatch vents. The fuel hose grommets mentioned in this explanation are often cracked and rotted or missing entirely. A source for reproduction fuel line grommets ( and I have no business interest in this source) is Banzai Motorworks , www.zzxdatsun.com. I have used these grommets and they are of the highest quality as is everything that Banzai sells. If you check all of these possible potential sights for exhaust leaks, I think you may be surprised at how vulnerable your car is. To remove the rear interior plastic finisher panels you will need a small diameter finishing nail, or similar tool,to punch out the center pins from the plastic rivets that secure these panels, but you probably already know how that works. This has been kind of quick and dirty, so let me know if there is anything that I can clear up in this explanation, and best of luck. Dan
-
adamr, To be correct, I am sure that your 12/70 car had the hot manifold air snorkel with the diverter flap. My 1/71 car, very close to your production date, is one of the very last of the series 1 cars and has the snorkel. I can't quote dates, but the terrific pictures 26th-z profiled are for early '69 & '70 series 1 cars which did not have the heat riser, possibly up to the start of '71 cars in 7/70. According the www.ztherapy.com, the late '70 smog laws required the addition of the heat riser for carb pre-heat. If you have the original exhaust manifold, you will notice two holes on top of the junction area where the hot air collector cover is attached to the manifold. These threaded holes were not on the early cars that did not have the heat riser. The ztherapy site may be quite helpful in answering some of your questions. Hope this helps. Dan
-
John, The oil pan, to be totally correct I believe, should be a semi gloss to gloss black. The alternator fan is gold cad, as you mentioned, but the alternator pulley should be semi-gloss black and the securing nut and washer in the center should be gold cad. This can be seen in the early maintenance manuals that I have. Opinion about the pulley color has been mixed in difference discussions here, but this is my conclusion, FWIW. Dan
-
Randy, if your grommet is flat with two molded holes for the choke cables, it is most probably the correct original. The pig nose grommet is for later 240z cars, and is the only available replacement at this time, as Arne mentioned. If someone has a good original, maybe someone on this site can do a reproduction someday. Dan
-
On my car, that big elbow in the center of the air cleaner that angles down is connected to the intake port of my air pump. As you do not have the air pump or pollution control stuff, you just need to block off this elbow, I would think.
-
Randy, Those covers are original to the Datsun 240z. They fit neatly under the metal battery hold-down frame which is secured to the firewall and the battery stand. Back before maintenance free batteries, the cover did a nice job of hiding those six screw-on cell caps. Did you pick it up on ebay, or from Nissan? The only differences I have seen on these is the yellow decal which seem to have a couple of variations. Dan
-
Check the most obvious, which you probably already have. Inside the gas cap, there should be a rubber sealing ring which may be torn. The gas cap, itself, mates to a flange ring (not sure what you would call it). This flange ring is mounted to the body with a rubber protector flap between it and the body with three screws. It, too, may be rotted and not providing a proper seal to the filler hose. If both of these are sealing properly, there is not way for gas to get outside of the cap and on the paint. Let us know what you find, and good luck. Dan
-
I purchased this grommet from Banzai and it is quite nice and accurate, but anything you get from Mike is going to be extremely accurate and of high quality from my experience. To install, I removed the five or so wires and conncector pins from the windshield wiper harness plug which lays against the fire wall, (you need to number the pins and the slots on the plug to reinstall correctly) pass the harness wires through the grommet, and reinstall the pins in there respective plug holes. I hope this makes sense. If you have never removed the wire pins from a multiple wire connector plug, it is important to know how this works. Each copper or brass pin on the ends of each wire has a little tab that hooks onto the interior of the plastic connector and this tab must be depressed with a very small tool to allow the wire and pin to be removed. When reinstalling the wires, just pry up this tab again so it is secure when pushed back into the plastic multi-wire connector. If you can do this, there is no need to split the grommet or remove the cowl to install this grommet over the harness wire. Let me know if more explanation is needed, and best of luck. Dan
-
I agree with 26th-z. From what I have seen on many early cars, the only blue engine paint intended was on the engine block, and a few pulleys up front. Any blue paint on oil pans, heater piping and hoses, engine mounts, etc., was factory overspray which varied considerably in degree. To attempt to duplicate the correct (?) overspray patterns convincingly would be incredibly difficult and could create much more debate over what is correct enough. To attempt to get it right, I think that one would have to figure out and follow the order of factory assembly of parts and painting as the car progress though the assembly process. Then, your car may appear to be incomplete unless you had all the little yellow splashes of paint on nuts and bolts, and , yes, evan blue or red dots and splashes of paint on bell housings, and control values. etc bolted to the engine. I would think that this would only truly be necessary for a concours restoration, and I don't know if the judging criteria is to that point now or will ever be. The judging may think that an admirable degree of resto quality, but for judging(?), Chime in any time, 26th-z. Just my thoughts Dan
-
I would be surprised if there isn't some form of compatible reducer for this paint which would work and allow the use of a touchup sprayer.
-
Randy, My suggestion would be to look up your local auto paint supplier, have them match the original in single stage paint and buy paint and hardener. Mix these in correct proportions and put it into one of these inexpensive little paint sprayers that has a screw on propellant cartridge (Propell, or something close in name) and touch it up. The advantage of this is the paint is much more durable than a rattle can which does not have the hardener. If the car is painted in single stage paint, I don't think you will be satisfied with trying to do a touchup in two stage system paint. Just my thoughts, and good luck. Dan
-
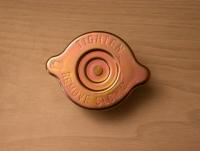
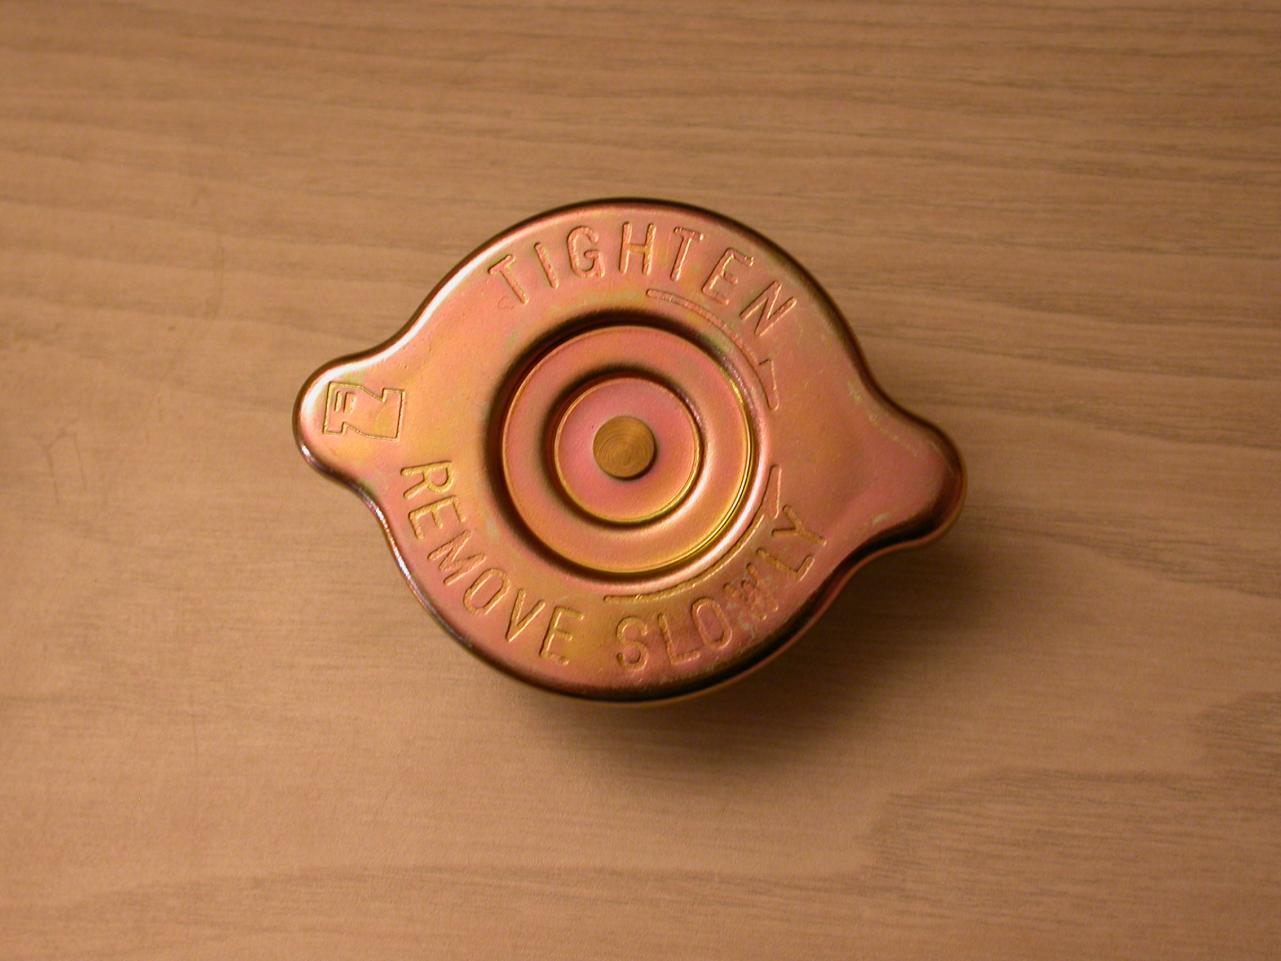
Both of Chris caps appear to be yellow zinc with different degrees of fading. It appears there is more than one supplier of these stock caps for early cars, one JDM and another possibly North American, or at least that is a reasonable assumption. I am satisfied that my cap matches up with the original part number, though, and I have a high degree of confidence in my source from past purchases. Dan
-
Chris, I just got confirmation from the source of my radiator cap purchase that it is the North American part: 21430-10600. It has since been removed from his web site as it is NLA. I have always been very happy with this person, and his ability to come up with hard to find NOS parts. His web site is www.New-Datsun-Parts.com I have no interest in, or association with this site other than as a resource for my parts. Dan
-
Chris, I bought a radiator cap for my car which is supposed to be for the series 1 cars. Practicng my picture attachment upload skills, (real novice here). It is gold cad and all early caps I have seen were the same gold finish. Do you think these were available in both silver or gold finishes from difference suppliers? Let me know what you think as there seem to be some subtle differences in the scripts engraved in these caps. Kats 432z also has the gold cap. Dan
-
Chris, that has been a quandry for me, also. I have always thought that the pulley was painted a semigloss black with the fan done in yellow cad or zinc. I bought a factory remanuf. grapefruit alternator on ebay, factory stickers and all, that had that finish. I also have a second reconditioned grapefruit alternator I purchased locally from an auto electric shop. It, too, had a black painted pulley and am assuming the shop just redid the original finishes. I, also, have a picture of a white '72 z with 16M original miles on it showing a yellow plated fan and pulley. I am leaning toward the black pulley finish right now. Dan
-
The cars' looking real good, Clive. Thanks for asking. It is basically done except for making a set of carpets to original quality and appearance, mounting the NOS exhaust system I have collected, and putting all the braided hoses on under the hood. My goal is extreme originality which is a very slow process when it comes to finding all the correct parts. Its all about the process for me, though, so it may be a bit of a let-down when completed. Dan
-
Thanks, Mike. I won't be home for a few days, but when I return I will try to upload a couple of pics of my alternators with the inscriptions for comparison. The engraved parts numbers may be on a part of the housing closer to the mounting pin. Dan
-
Clive, I think someone on this site has reproduced those early plastic inspection lid clips. Not sure who, but someone should chime in with that info. Dan
-
Thanks, Mike. That is my point of confusion. I have two alternators with the following engraved in the housing. # 1. LT140-53 104 (Not LT145-35 as Kats references) 23100 A4800 # 2. LT145-35B105 23100-E5200 But my FSM engine book on page EE-20 says the Hitachi LT145-35 is for an L24 engine with an output of 12V-45A, and the Hitchi LT 140-53 is for an L20A engine with an output of 12V-40A. Both of these grapefruit alternators appear to be identical in appearance, otherwise. Our parts CD shows the original alternator is 23100 A4800 with an output of 12V-40A. When the weather warms and you get into cleaning under the hood, you may hold the definitive answer as to what is correct. Thanks, Mike. Dan
-
Congratulations, Clive. I can only imagine how excited you have been getting this time capsule home. I second Mike's request for more pictures to include under-hood shots of any blackout paint forward of the radiator support such as the grill mounting brackets. Pictures of any surviving decals, of all sorts of original fasteners from hood hinges, fender ledges, door hinges, etc., would all be a terrific resource for future restorations. Detail pictures of all parts of a very unmolested early 240z are invaluable. Dan
-
Hey Mike, Does the alternator you pictured have a part number engraved into the housing? There were actually two grapefruit alternators, one for the L20 and one for the L24 with different part numbers. I think that #210 could be a gold mine of originality info. Standby for being pestered by me. In your picture, you show that little oil press. sending unit wiring minder which is bolted to front engine mount. Would you, or anyone, happen to have an extra one of these little minder hooks available for sale? Sorry for the hi-jack, but I couldn't resist with such a good picture and opportunity. I'm going to go Stand In The Corner for a while, now! Dan
-
Mike, I agree that there are a log of incorrect things going on here, but the later series 1 cars do have the summer/winter flap. I'm guessing this was added around the model year change between 1970 and 1971 series 1 cars. Sorry, don't mean to be picky. Dan
Important Information
By using this site, you agree to our Privacy Policy and Guidelines. We have placed cookies on your device to help make this website better. You can adjust your cookie settings, otherwise we'll assume you're okay to continue.