Leaderboard
-
conedodger
Free Member6Points12,513Posts -
inline6
 Subscriber
 3Points1,281Posts
 -
Richard McDonel
Subscriber2Points381Posts -
Carl Beck
Free Member1Points5,043Posts


Popular Content
Showing content with the highest reputation on 09/27/2025 in Posts
-
2 pointsI see Hagerty Insurance is featuring the 240z - along with another old Japanese sports car we won't mention - on its latest on-line ad. Also, it only ran for a couple of days (mind you I don't watch that much TV so I might have missed some) but Nissan had an ad featuring a full fleet of Z cars on a car-carrier semi, driving through the mountains. Front and centre, high above the tractor unit, was a yellow 240. At the back, the loading ramps were lowered while the rig was still in motion, just to let the latest model join the ride. Neat. I don't remember any car maker featuring a 50+ year old model in their ads. Cheers All Richard McDonel2 points
-
1 pointIf the hole is just next to the rear wheel well in front of where the "wall" goes up to the rear deck floor I think it's just a rubber plug. I believe the indent just below right of your finger is where a seat belt retractor would go.1 point
-
1 pointMight help to identify where it is on the body. Probably recognizable to the guys that have torn their cars down but most have only seen carpet and interior fabrics.1 point
-
Just a quick update: After returning from holidays, i spent some hours to finally sand down the remaining areas with old layers of paint, filler and primer: And finally: Done. Still needs a bit of love here and there, especially around the edges, but I'll leave that to the body shop. I Also made a little stress-test with my crack-repair and it seems pretty solid. So finally I got it installed back on the trunk at all original 6 mounting studs, like intended from the factory. It took me quite some hours to get that wing back into shape, but I think it was well worth it, and I'm more than happy i was able to save another OEM part which belongs to this car. Then I got some stuff in my mailbox: First. A spacer for the trunk / hatch damper, as mine are all toast. And more importantly at the moment: A bunch of fastener / retaining clips for the front fender side markers: Which allowed me to finally also test-fit the other side. Note protective foil on the lamp is just there to not damage it during trial fitments: And then I got a nice book from Autoliv in Sweden. They were the manufacturer of many of the aftermarket seat belts installed by European Import companies (along Britax). I asked them for a bit of Background information about the company and the specific seatbelts. They were not really able to help me with the 240Z seatbelts, since they're now a global company, but instead they sent me this very cool Company history book, which they released last year for internal use only, with some very cool information. I will prepare a post about those specific seat belts in the coming months. As for now, I wait for a few parts and information here and there, to proceed with the next steps on the car, but that should be possible in the next few days. I'll keep you updated.1 point
-
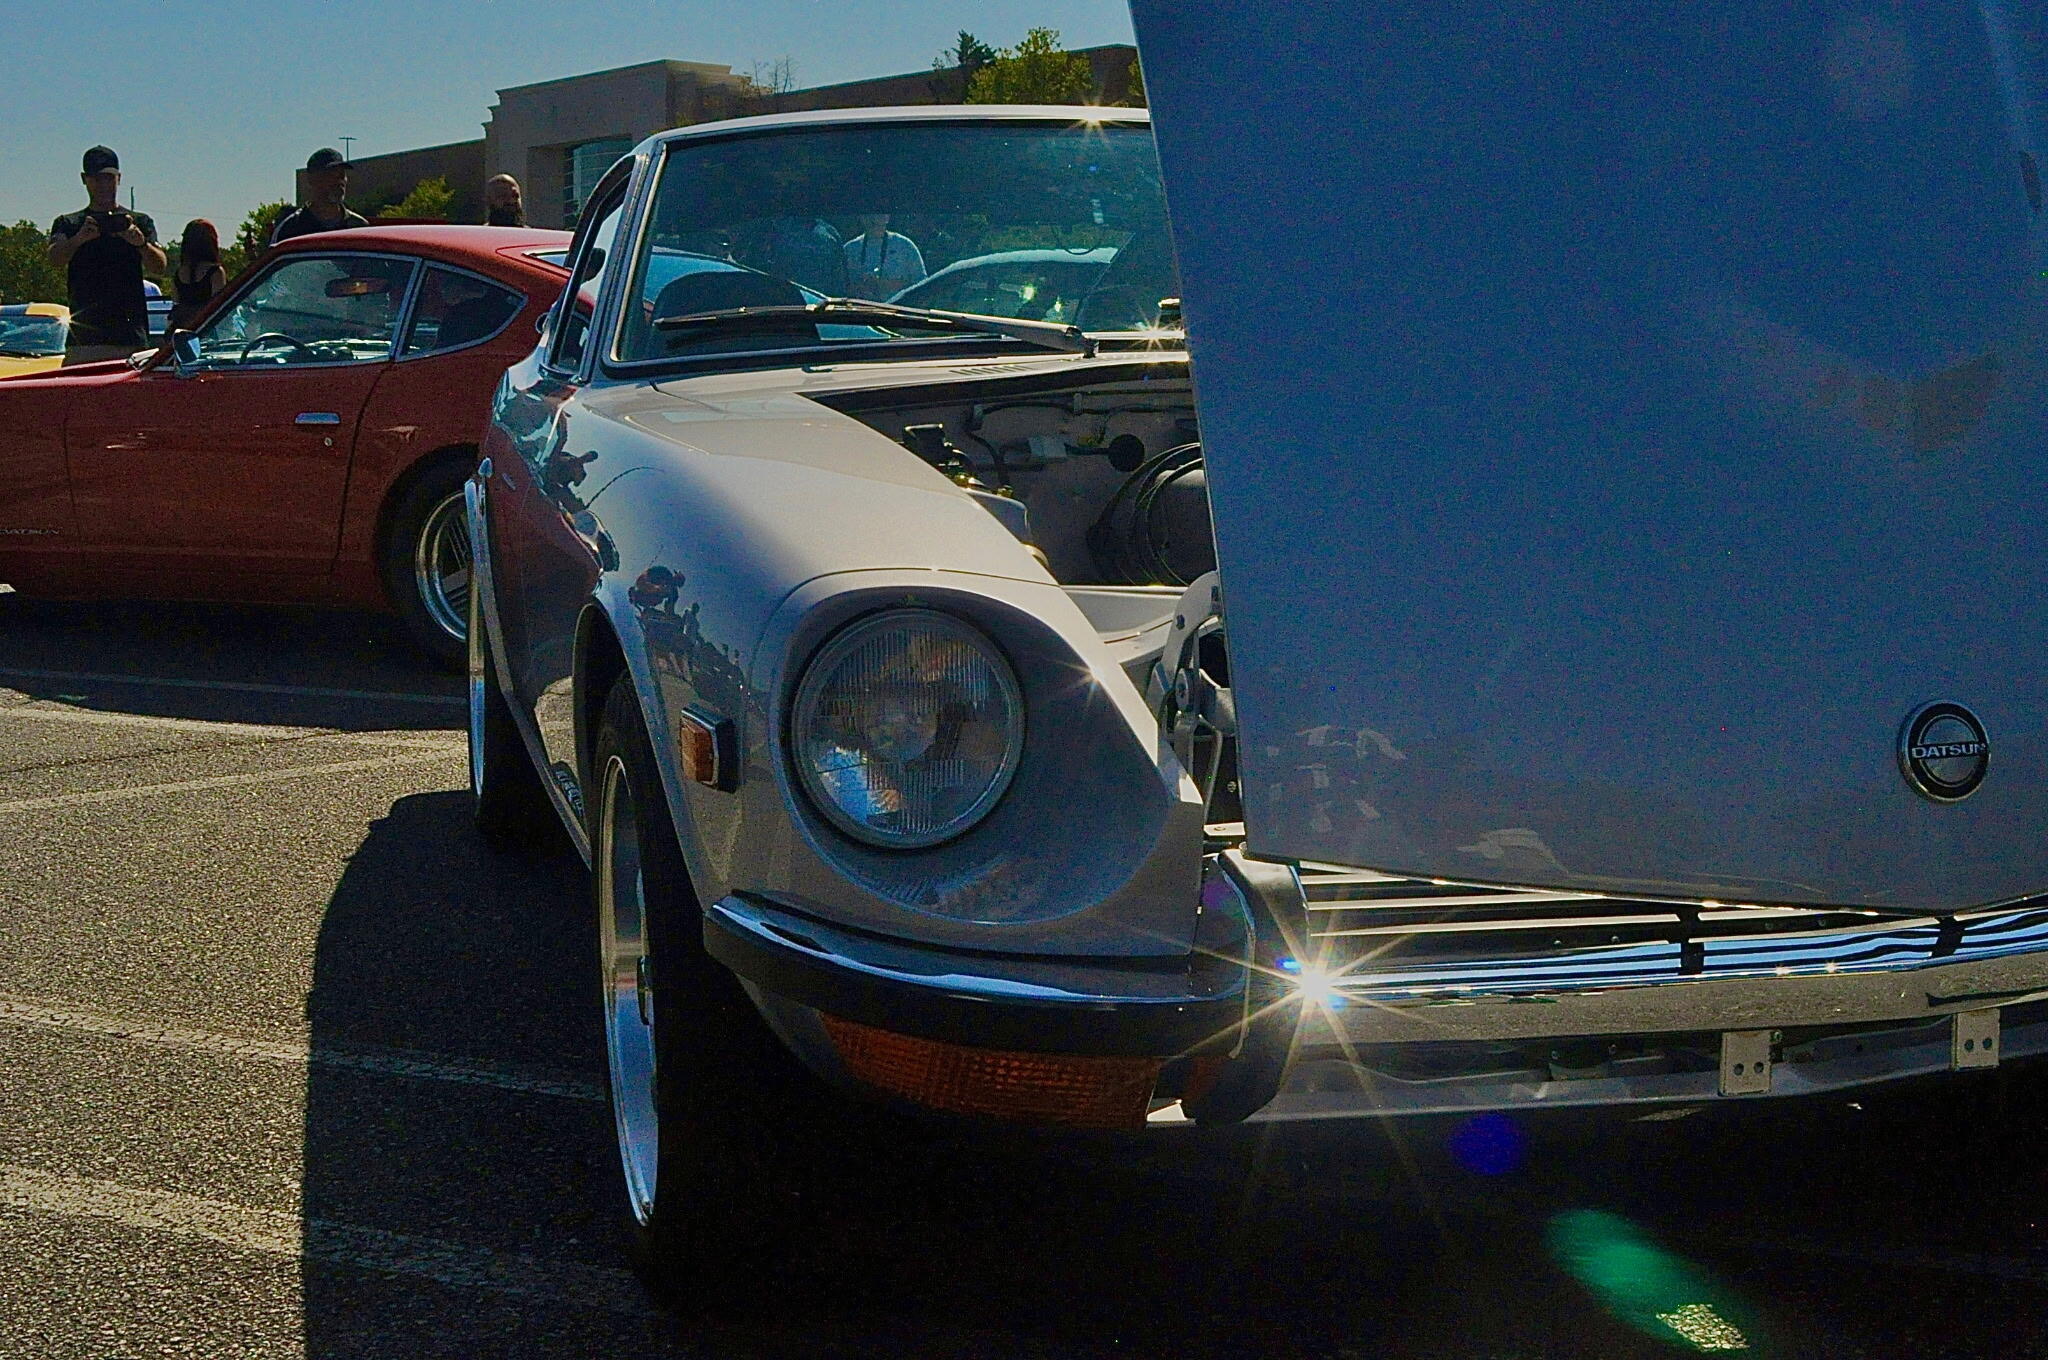
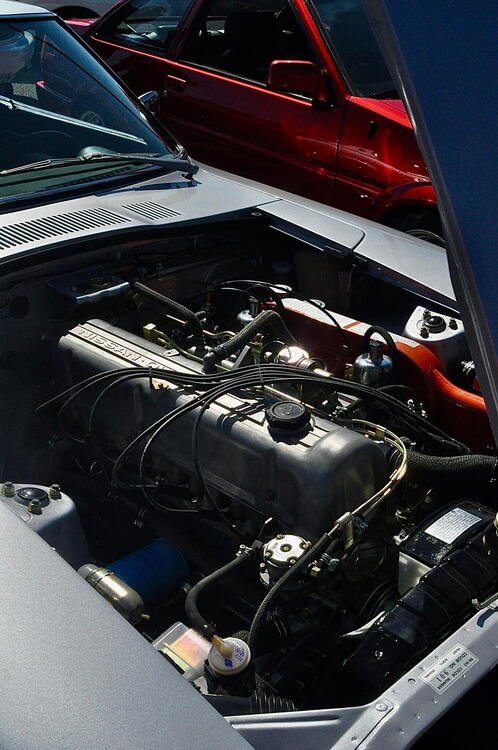
I took the car to Caffeine and Octane on 9/7. While there, one of the attendees offered to take some pics of my recently restored 1971 Datsun 240Z. Looks to me like she used some kind of lens filter. Nice of her to send them along to me.
.thumb.jpg.5773de9e8b4fb1e6e8ae94ad9ca5638e.jpg)
.thumb.jpg.0e15ff6d68903030860de7e52c077255.jpg)
.thumb.jpg.d2bd9602f29cc4bd2e07e82ca8b5005c.jpg)
.thumb.jpg.c9c2b6eeca68b6a00fd82c717d6ddc83.jpg)
.thumb.jpg.2266c5e8920524521450406020fb6aa6.jpg)
.thumb.jpg.b054fec78b2be911938a6cf18f7c7c10.jpg)
 1 point
 -
I think there are a lot of signals that the economy is weakening. To me, this is another of a great many.1 point
-
The Black underside didn’t hide the poor metal work done when the new floorboards and frame rails replaced the originals. You could clearly see the lines where everything was cut out and the replacements welded in. The OEM reinforcement patches at the rear of the floorboards were cut and left off the floorboards as well. Perfectly OK for a daily driver refresh, but not the professional metal work you expect to see on higher dollar restoration. Picture #127 and #228 of 3251 point
-
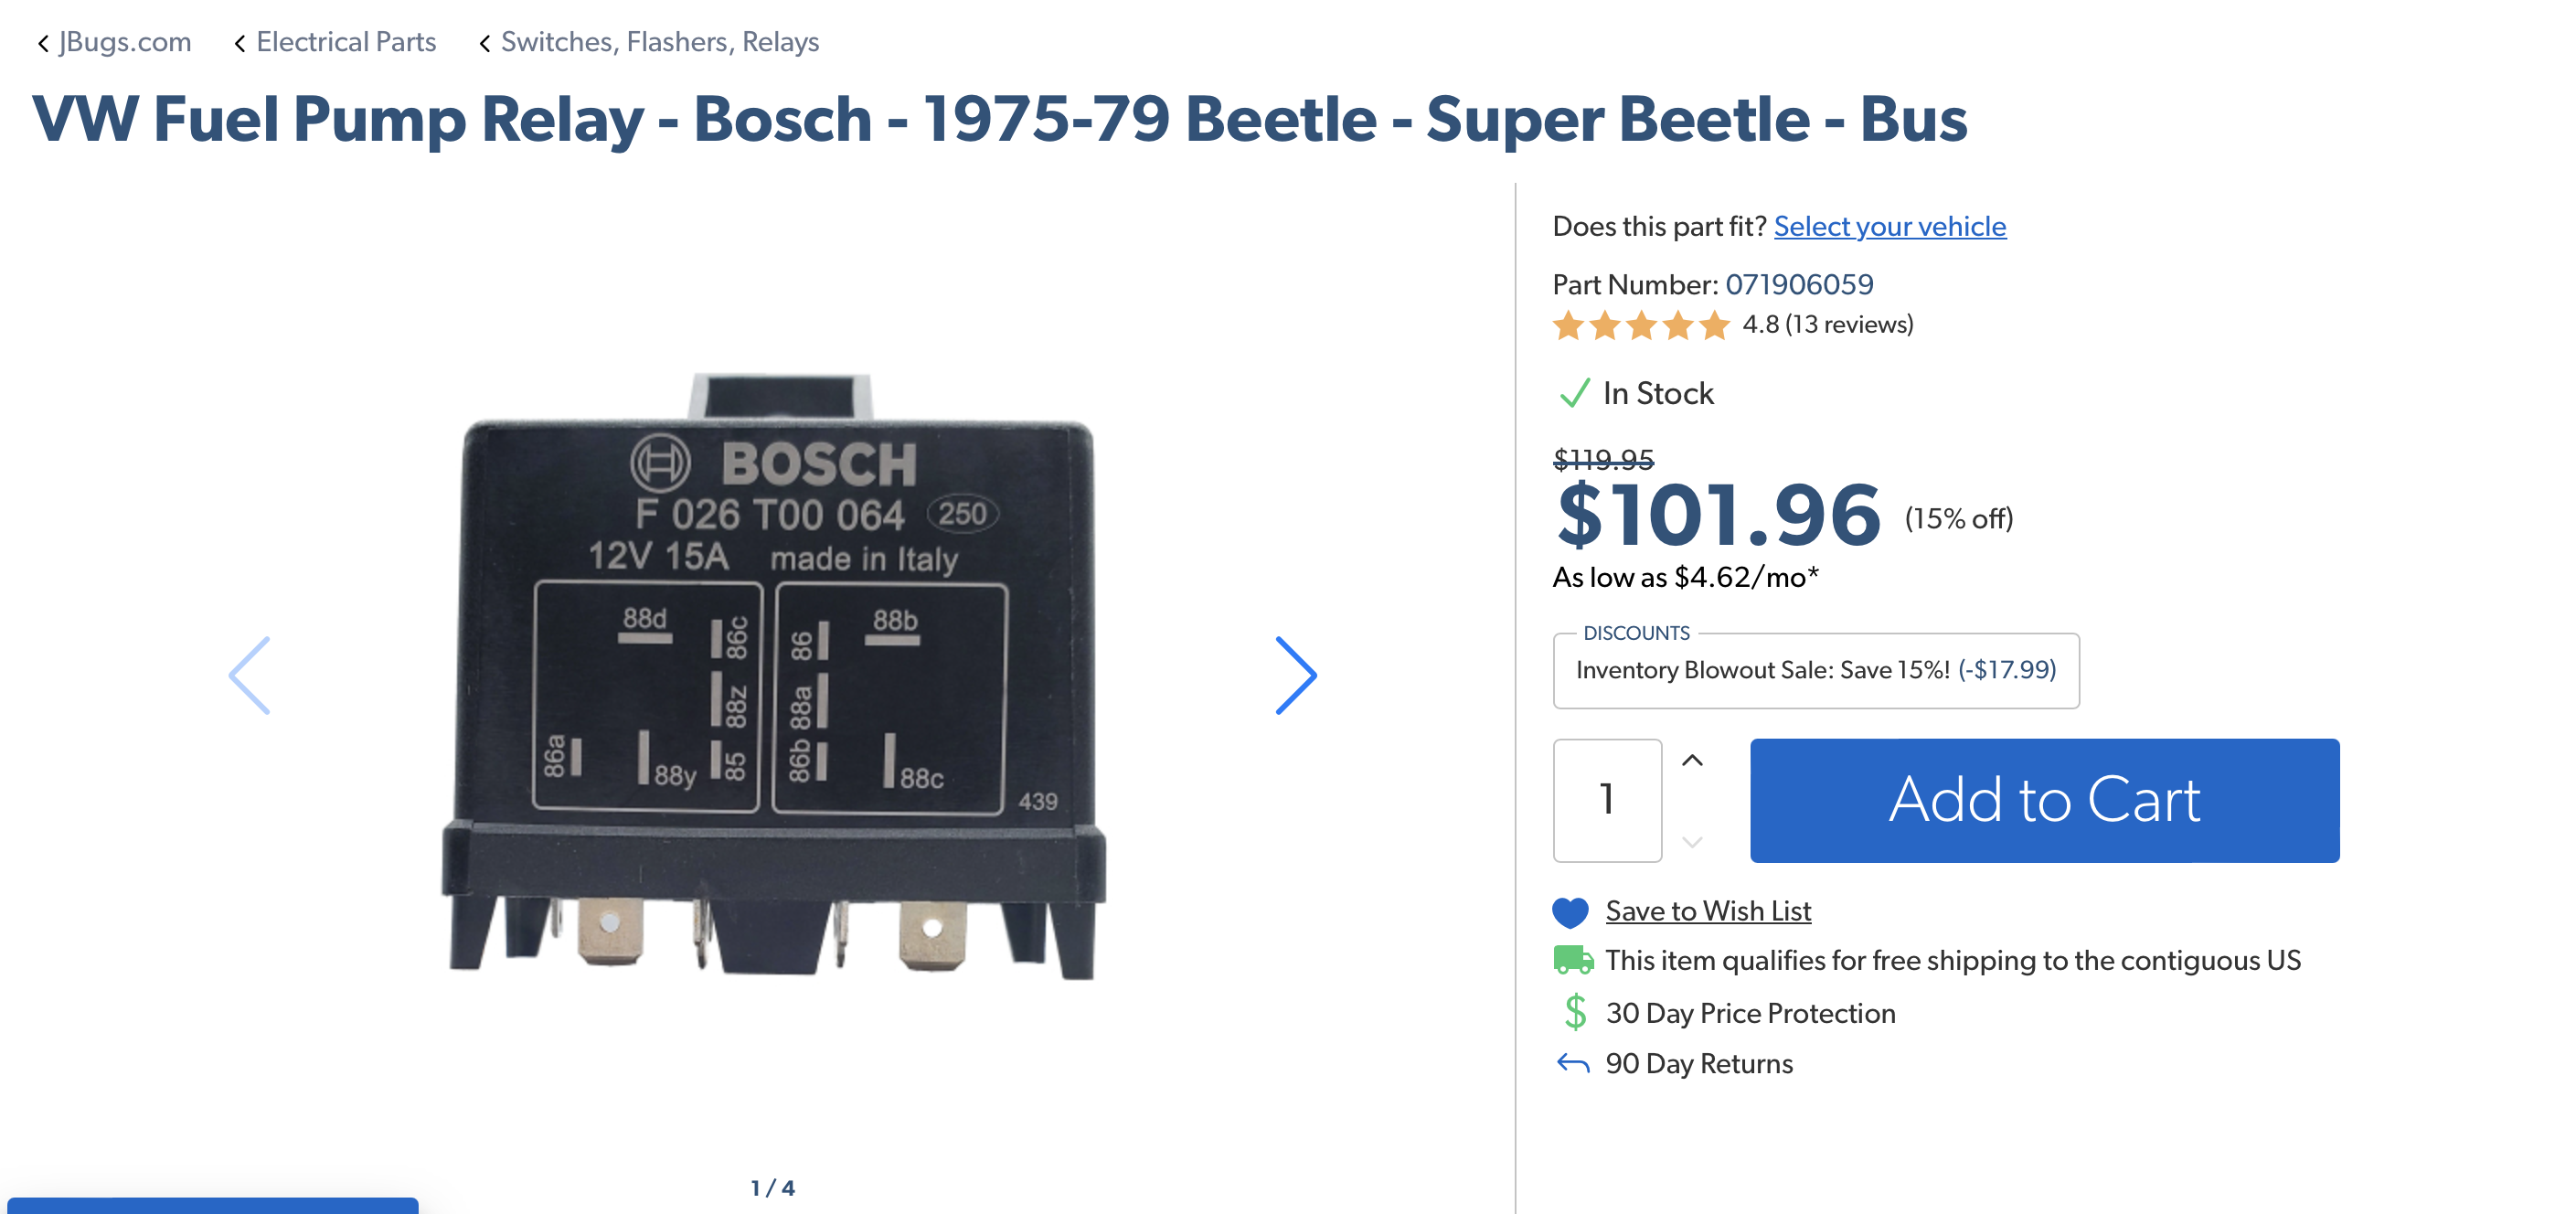
1 pointNice! Adding a pic of the linked relay for posterity - never know when it will go dead
 1 point
 -
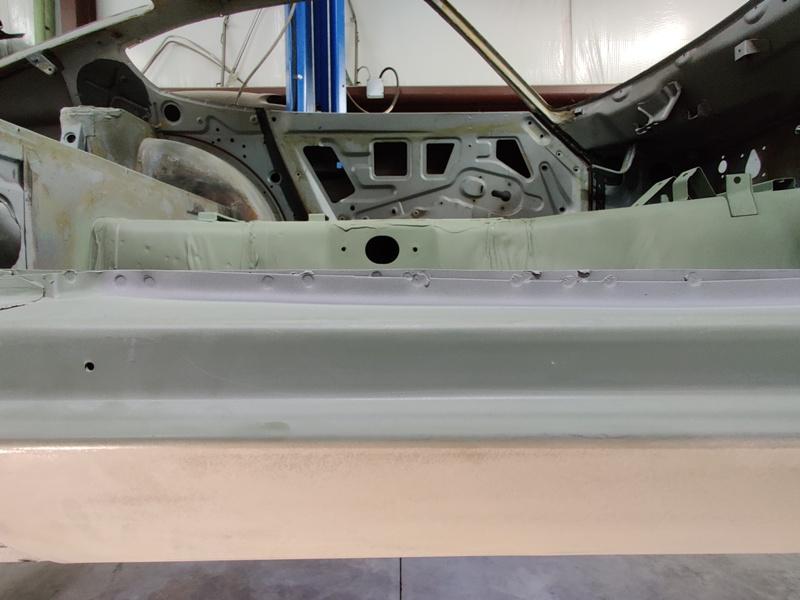
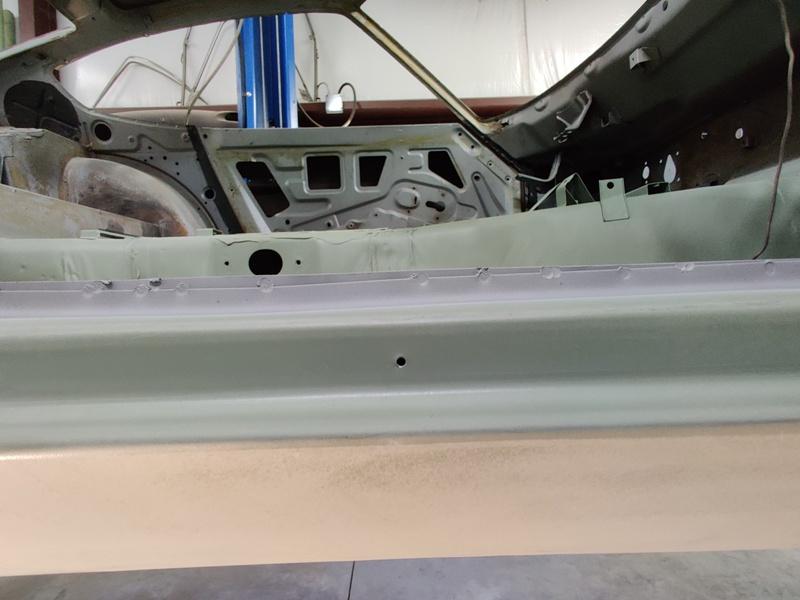
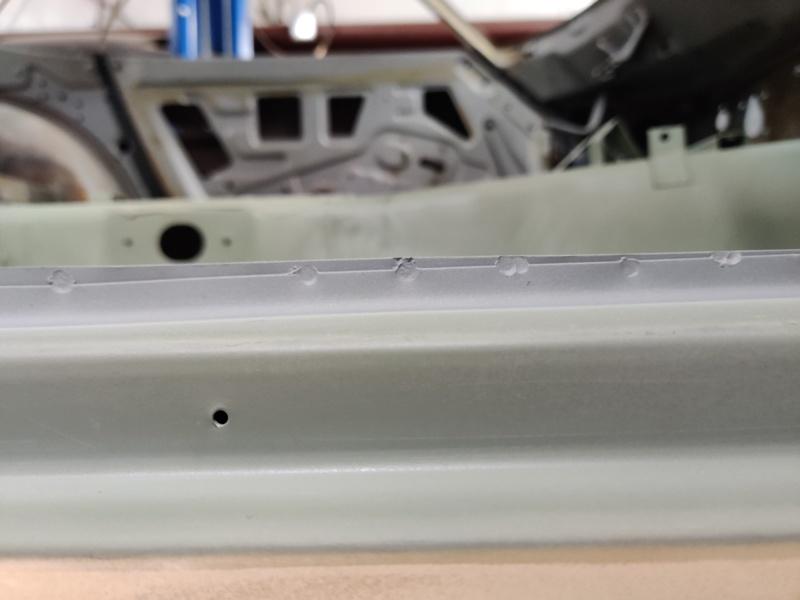
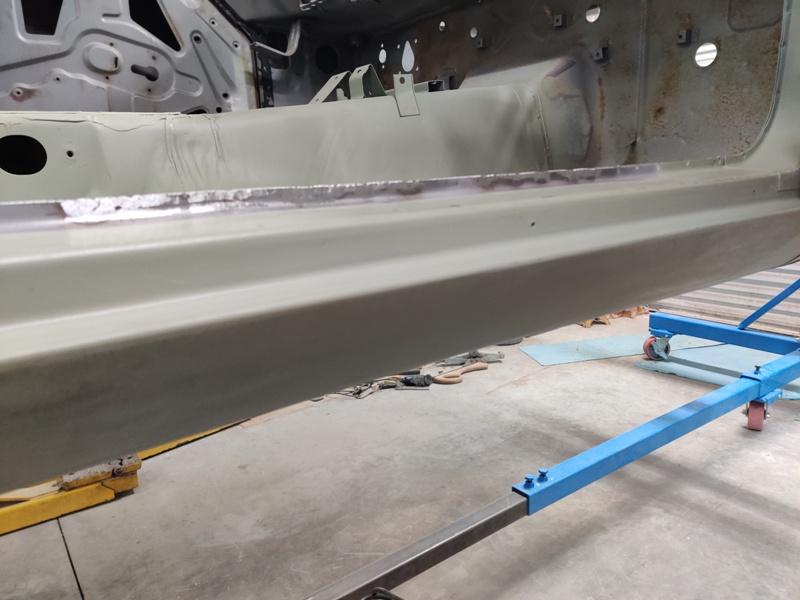
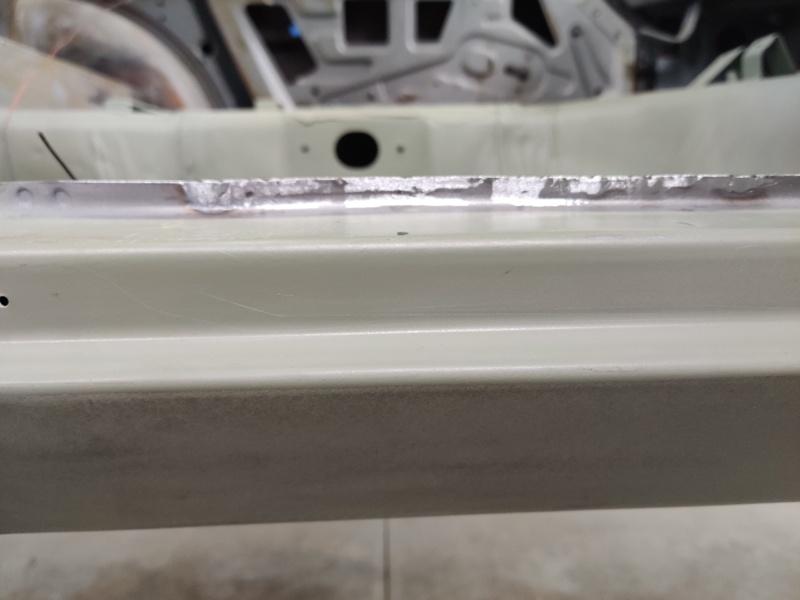
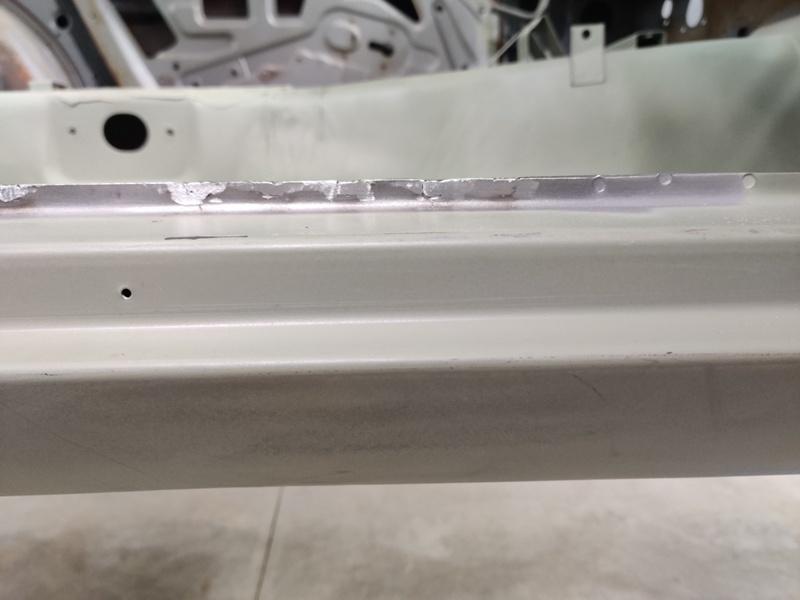
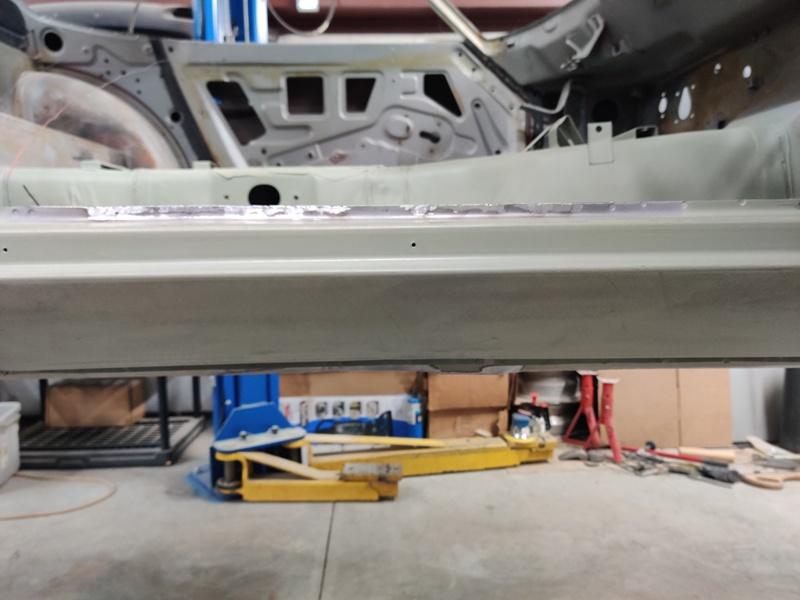
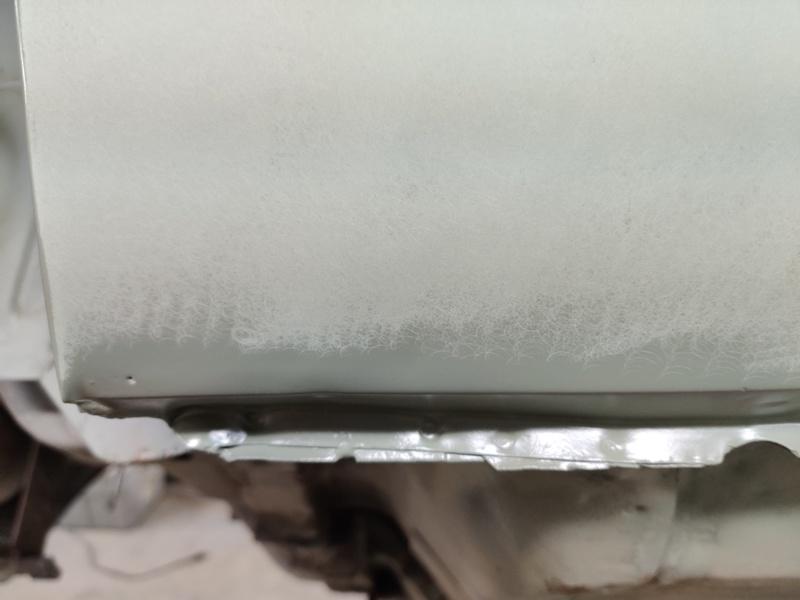
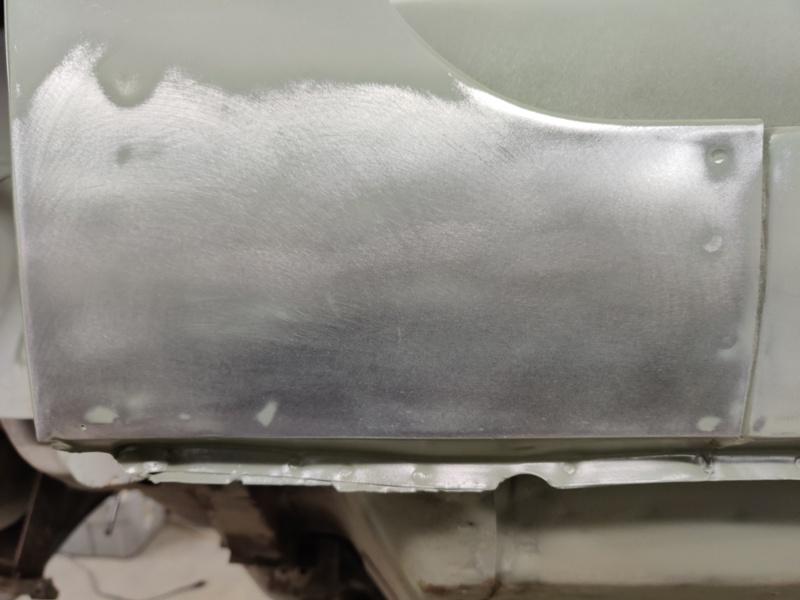
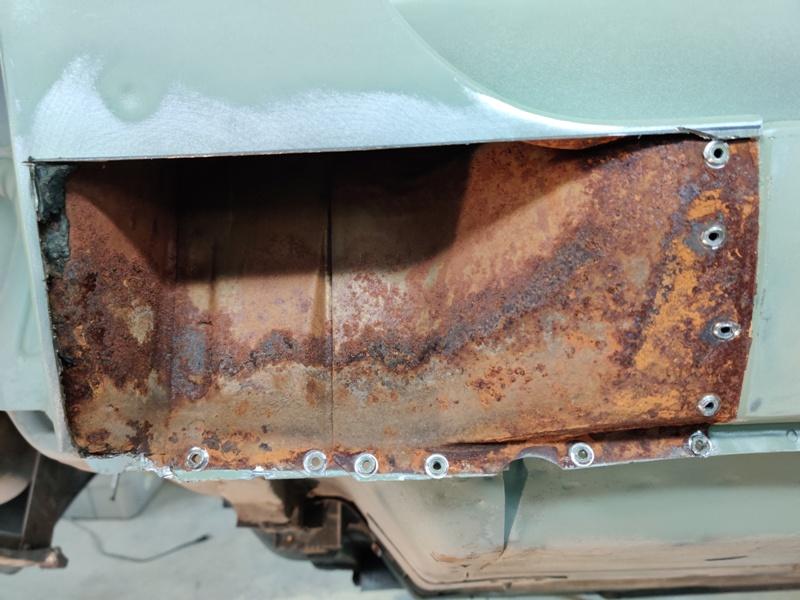
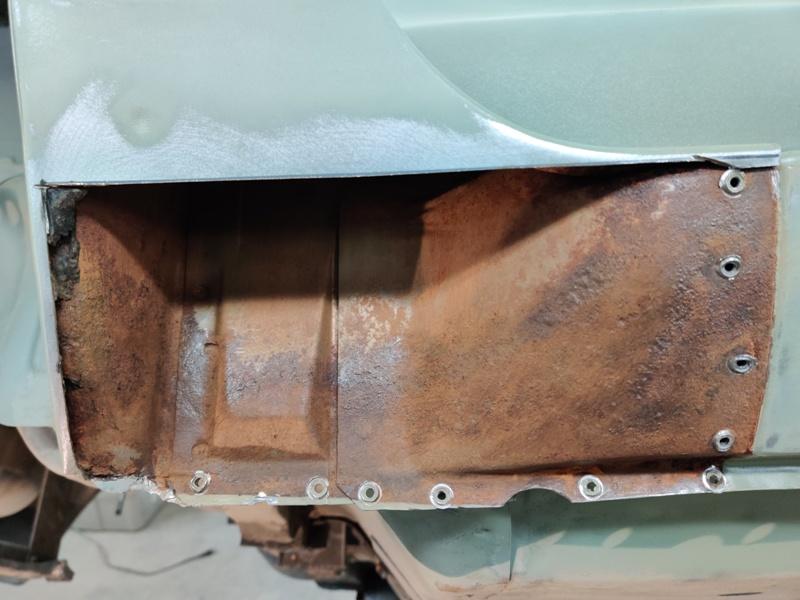
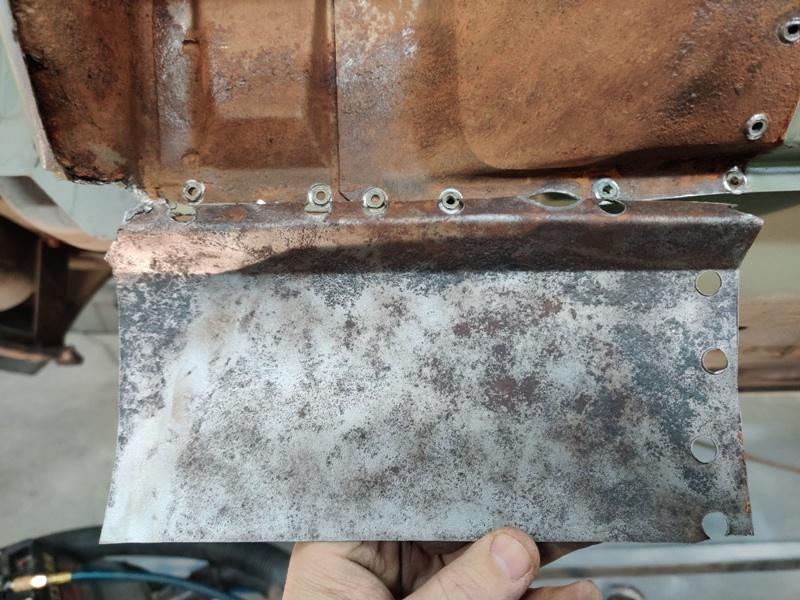
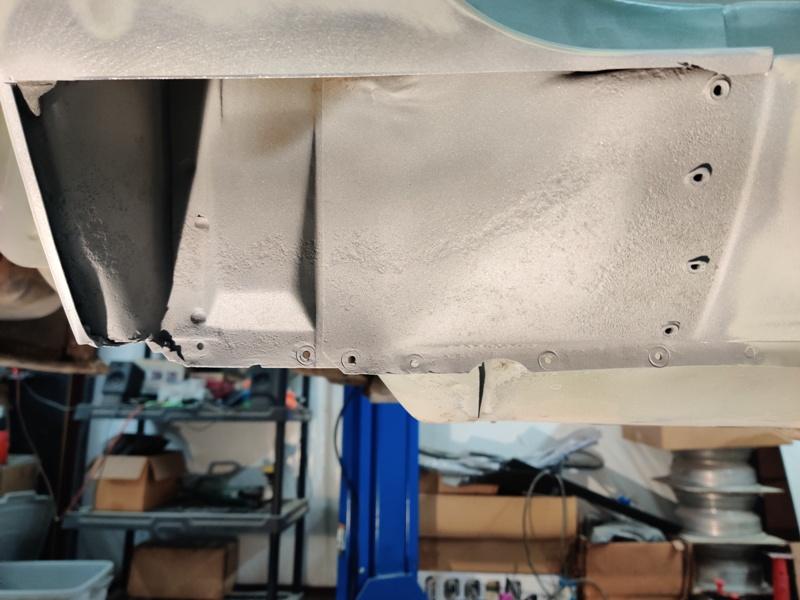
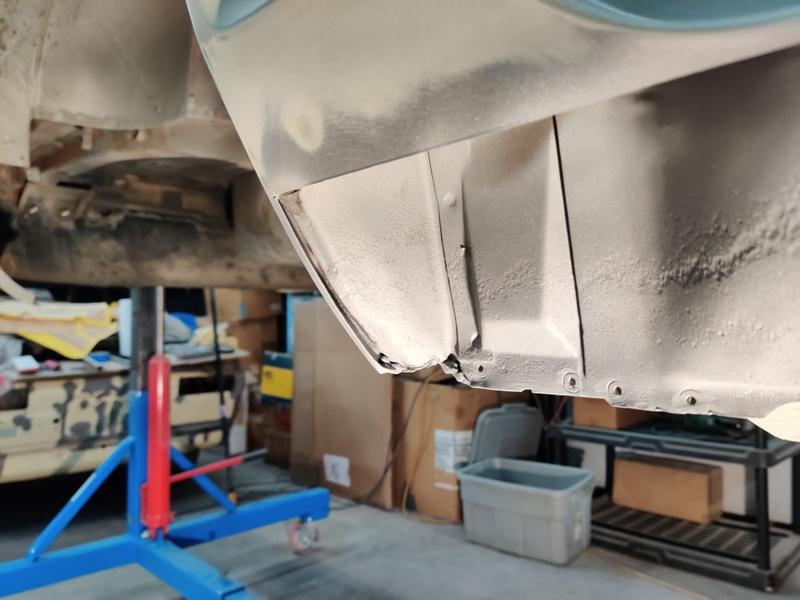
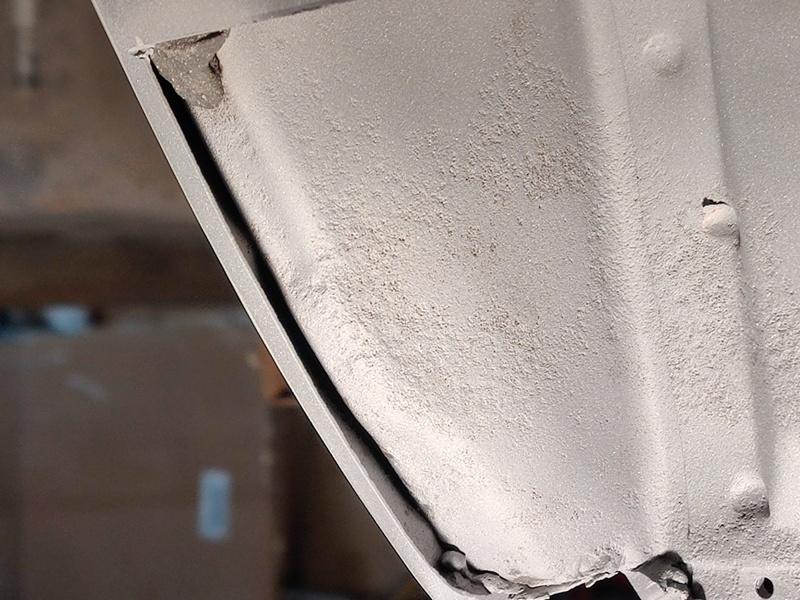
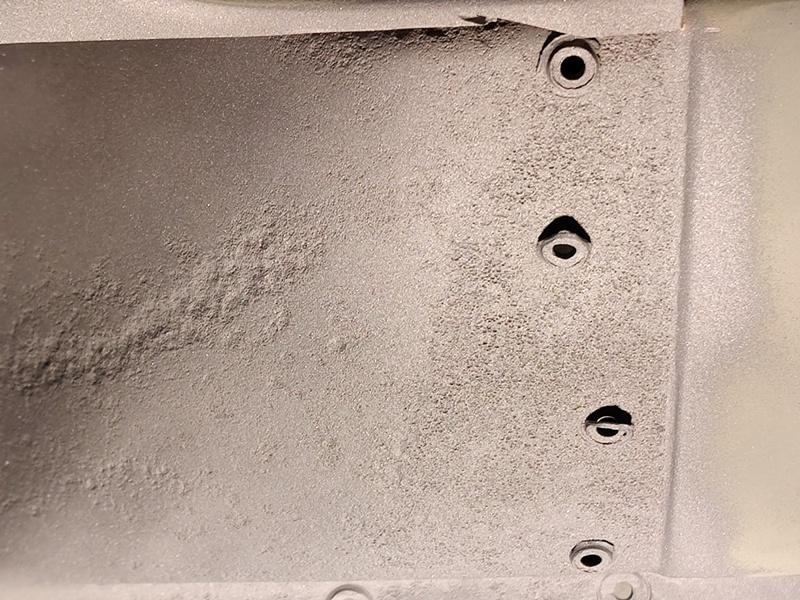
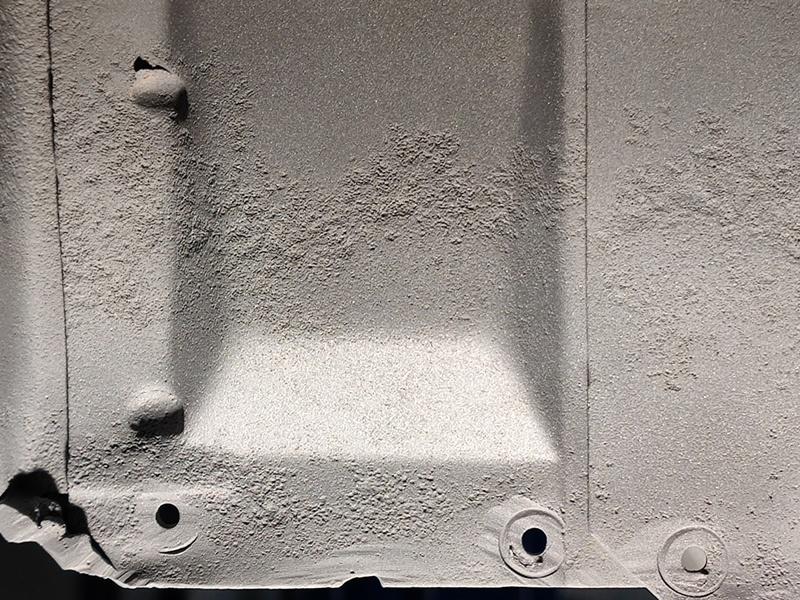
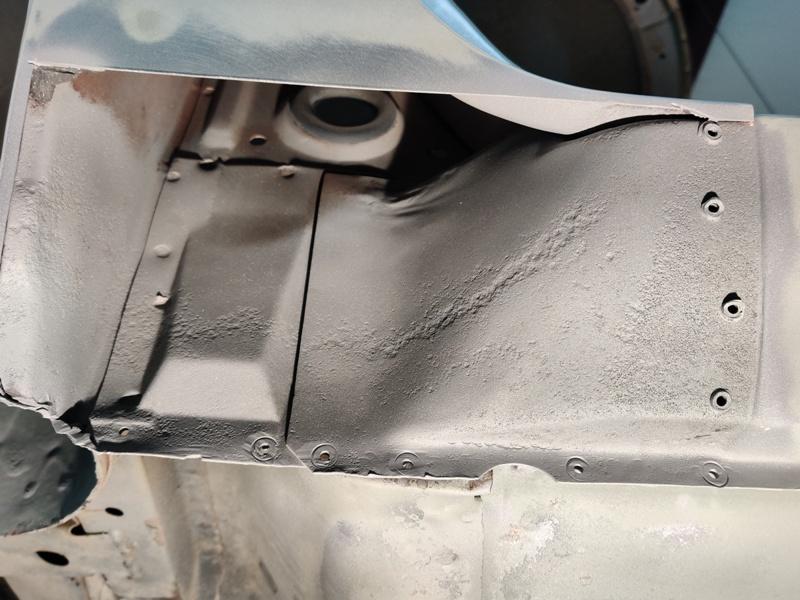
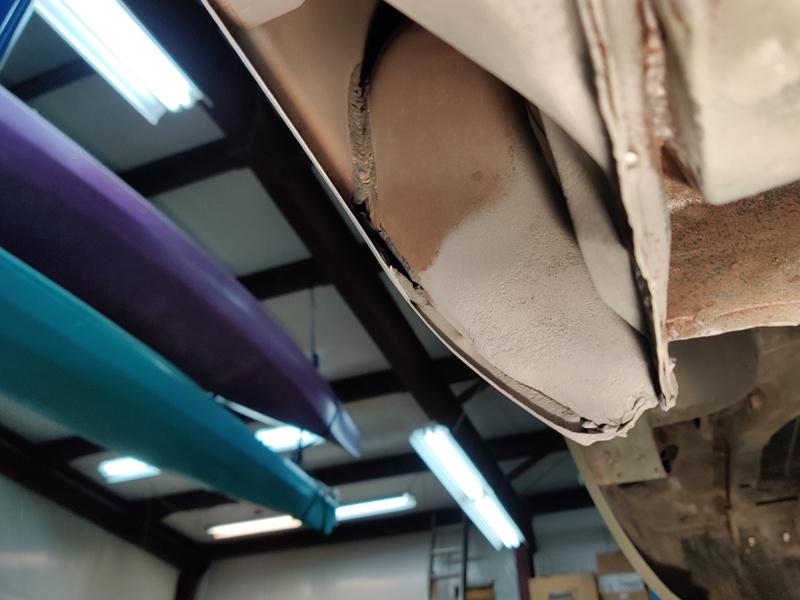
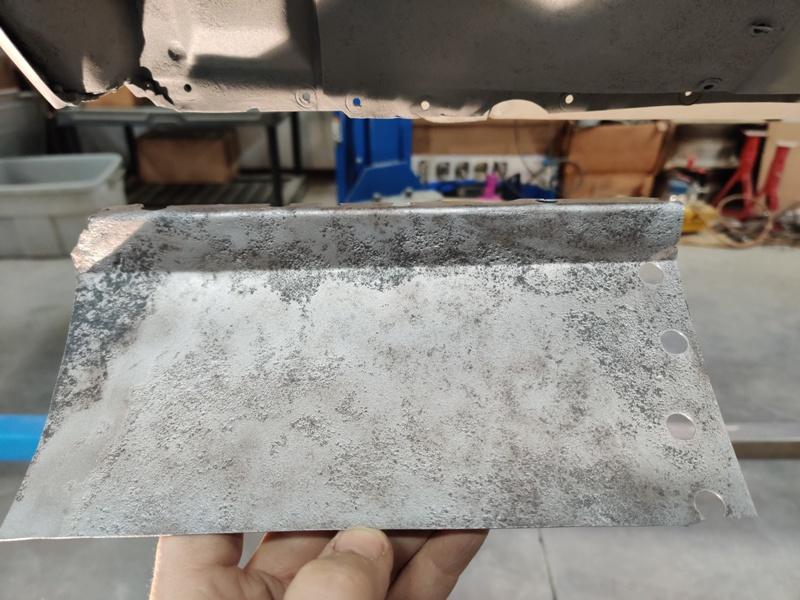
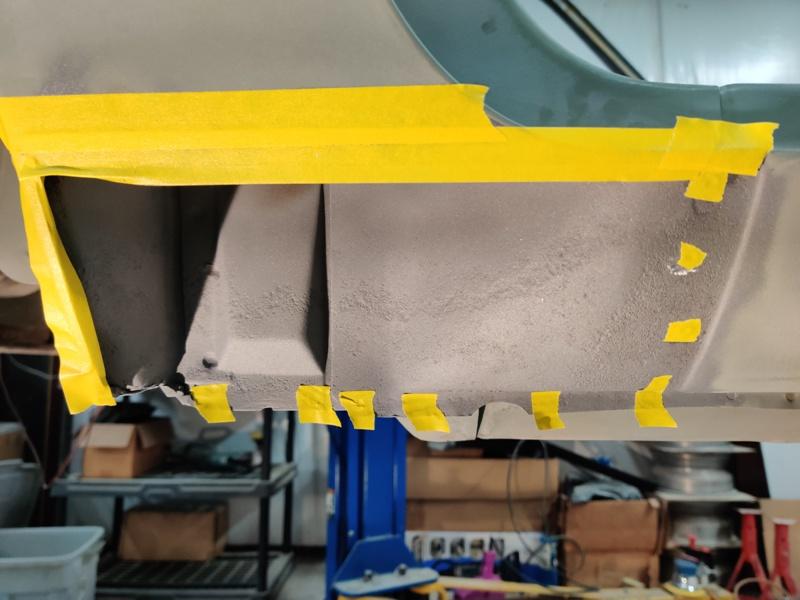
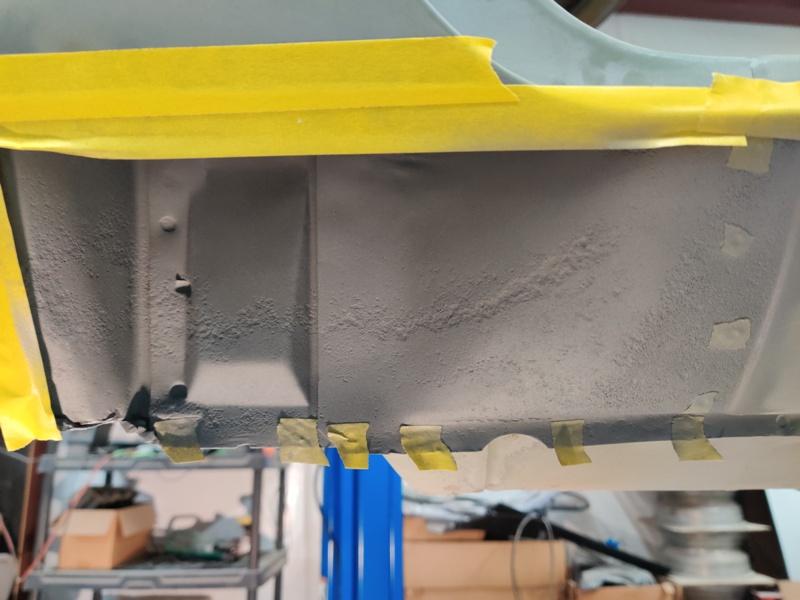
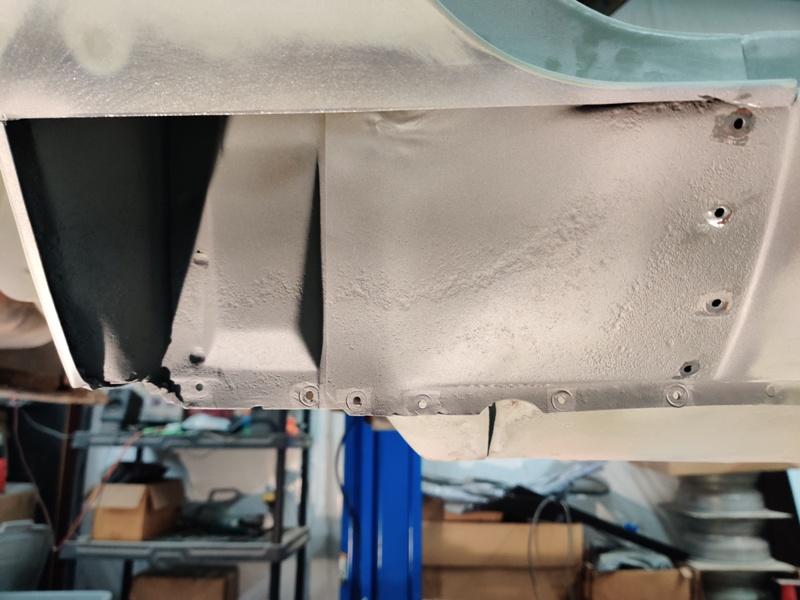
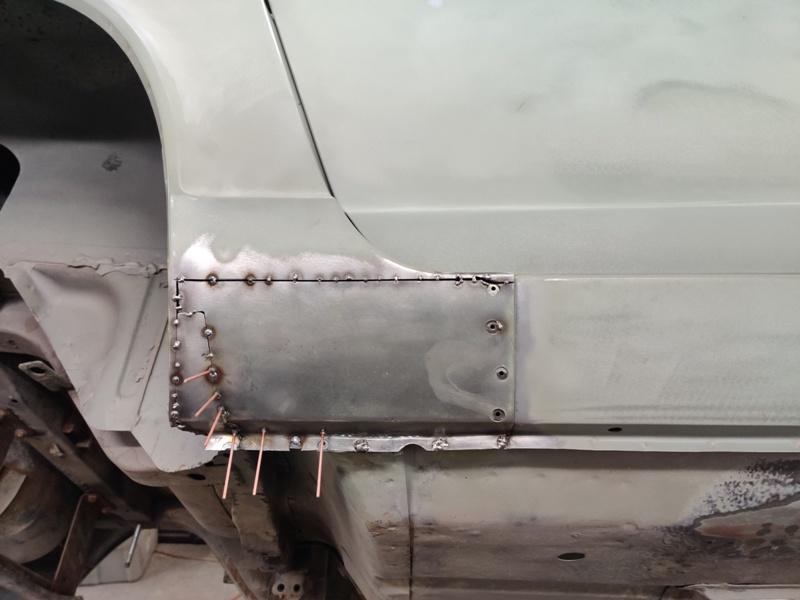
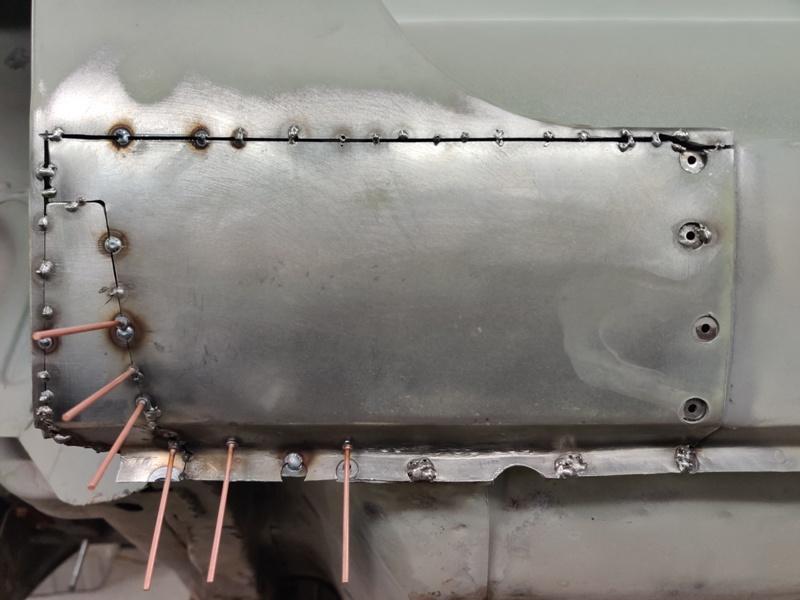
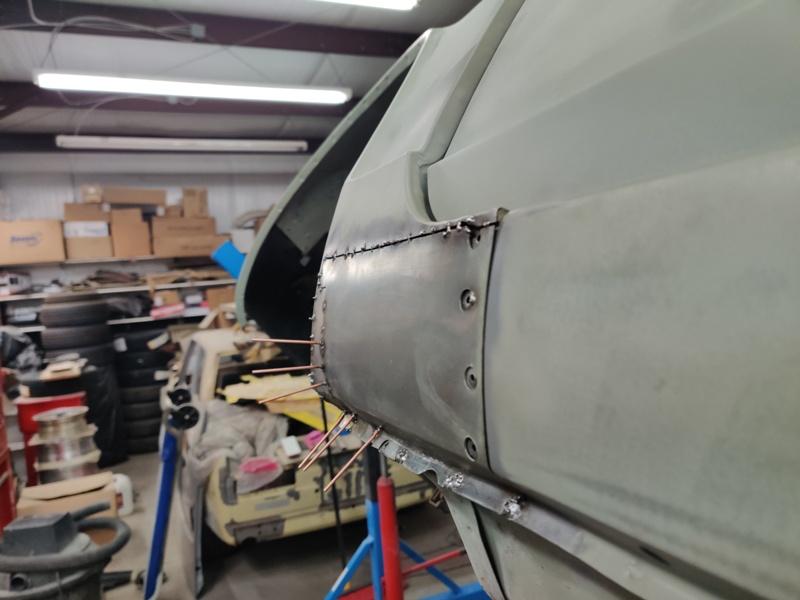
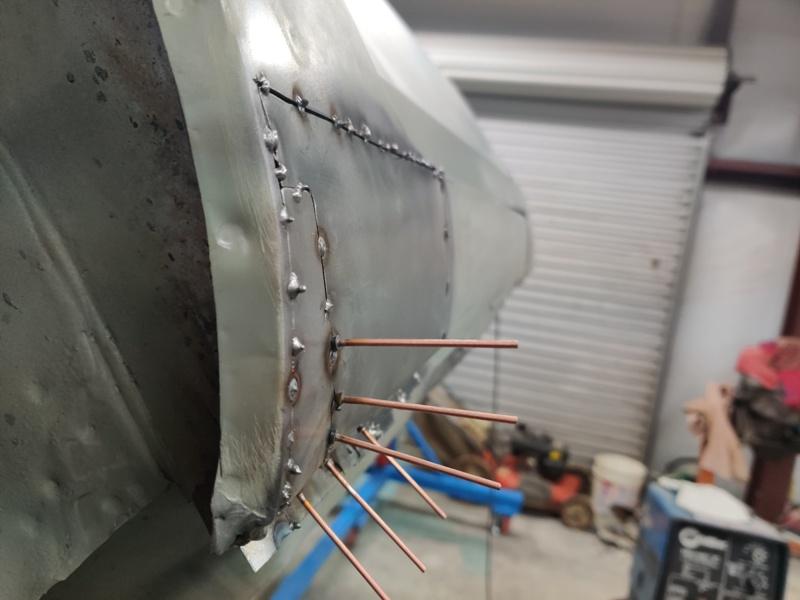
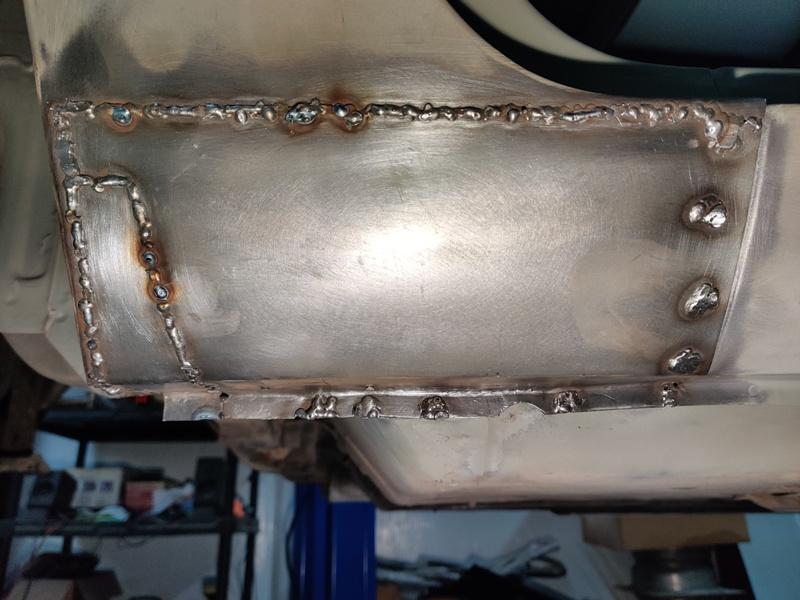
Work to straighten out the misaligned rocker panel (at the factory) has begun. In addition to the problem I already showed pictures of, the top of the rocker panel had some misalignment as well. The outer panel was noticeably low along the top edge, but only for the center portion of the rocker panel. This caused a dip in the top surface that the aluminum threshold goes over top of: You can even see where the spot welder completely missed in attempting to join the inner and outer panels. Seems the workers at the factory had to adjust the welder downward to hit the outer panel, and even then, they could only pick up the top edge. I didn't show how I corrected it, but I just drilled out the spot welds, then used the stud welder to put some pins on the weld flange, and then used a crow bar and piece of plate to protect the top surface of the rocker, while prying up on the pins. This allowed me to put enough lifting force on the weld flange to raise the low area of the rocker. I then welded, with my Mig, the holes left from cutting out the factory spot welds, and ground everything flat again with the surface of the outer panel's weld flange: It's not perfect, but it is much better. Metal work like this is a big time suck. Lots of tedious grinding of welds. I finished them off with my hand held belt sander. I hope to experiment with the spot welder I bought on this flange, but the electrodes may be too large in diameter to align well on this flange. We'll see. Next up was the part where the quarter panel folds over the rocker at the back. Interesting to see what is inside. After a light dressing with wire brush... and the outer panel piece receiving some attention in the glass bead cabinet: The sandblaster was again employed to remove corrosion and get to nice metal. Got several pictures while this area was seeing the light of day: Close ups showing pitting (light pitting, in my opinion): My first 240z was missing the entire dog leg corner (inner and outer). So nice to see this area in such nice condition. Pic showing up inside (bare metal from the factory and the seam sealer they used in the wheel arch). A few more minutes in the glass bead cabinet with the panel. The dark corner (upper left in pic) was pitted too much, so I made a section to replace that. Taping for application of weld thru primer. I've never used it before. It is kind of transparent (has been applied in second pic): Tape removed and outer panel tacking in progress with new fabricated piece also (bottom left) As the welding occurs, the panel wants to move around. I used the stud welder to yank on low areas, trying to keep alignment as best as I can as welding continues: Alignment is not bad. Lots of time involved with keeping alignment, tacking, and eventually grinding. I easily have more than 30 hours of time with fixing the rocker and removing and reapplying this panel. The end result of the main effort, to straighten the bottom of the rocker panel/quarter panel along the bottom of the car is "better". Sometimes I can't get things good enough to my liking. I've ground the welds in the last picture down and filled small voids etc. More pics will follow, but it's time to get out there and work on the car again. ?


 1 point


.jpg.3c3e8812cc5d8514867770e5bd57e0a3.jpg)
.jpg.ba4f6165bf10c2b48166c3f9ffb89958.jpg)
.jpg.29a011ccd9829e69d4e75b014bd48f5b.jpg)
.jpg.4724424978e368fd06734166d72d6d1d.jpg)
.jpg.f13785688b8c7329dacbe4e01518de5b.jpg)
.jpg.7505c934fa5dfd5da3fd123a1f147cc5.jpg)