Leaderboard
-

CanTechZ
Free Member6Points1,311Posts -
Captain Obvious
Free Member5Points10,081Posts -
grannyknot
Free Member5Points5,158Posts -
HusseinHolland
Free Member4Points1,031Posts


Popular Content
Showing content with the highest reputation on 11/05/2023 in Posts
-
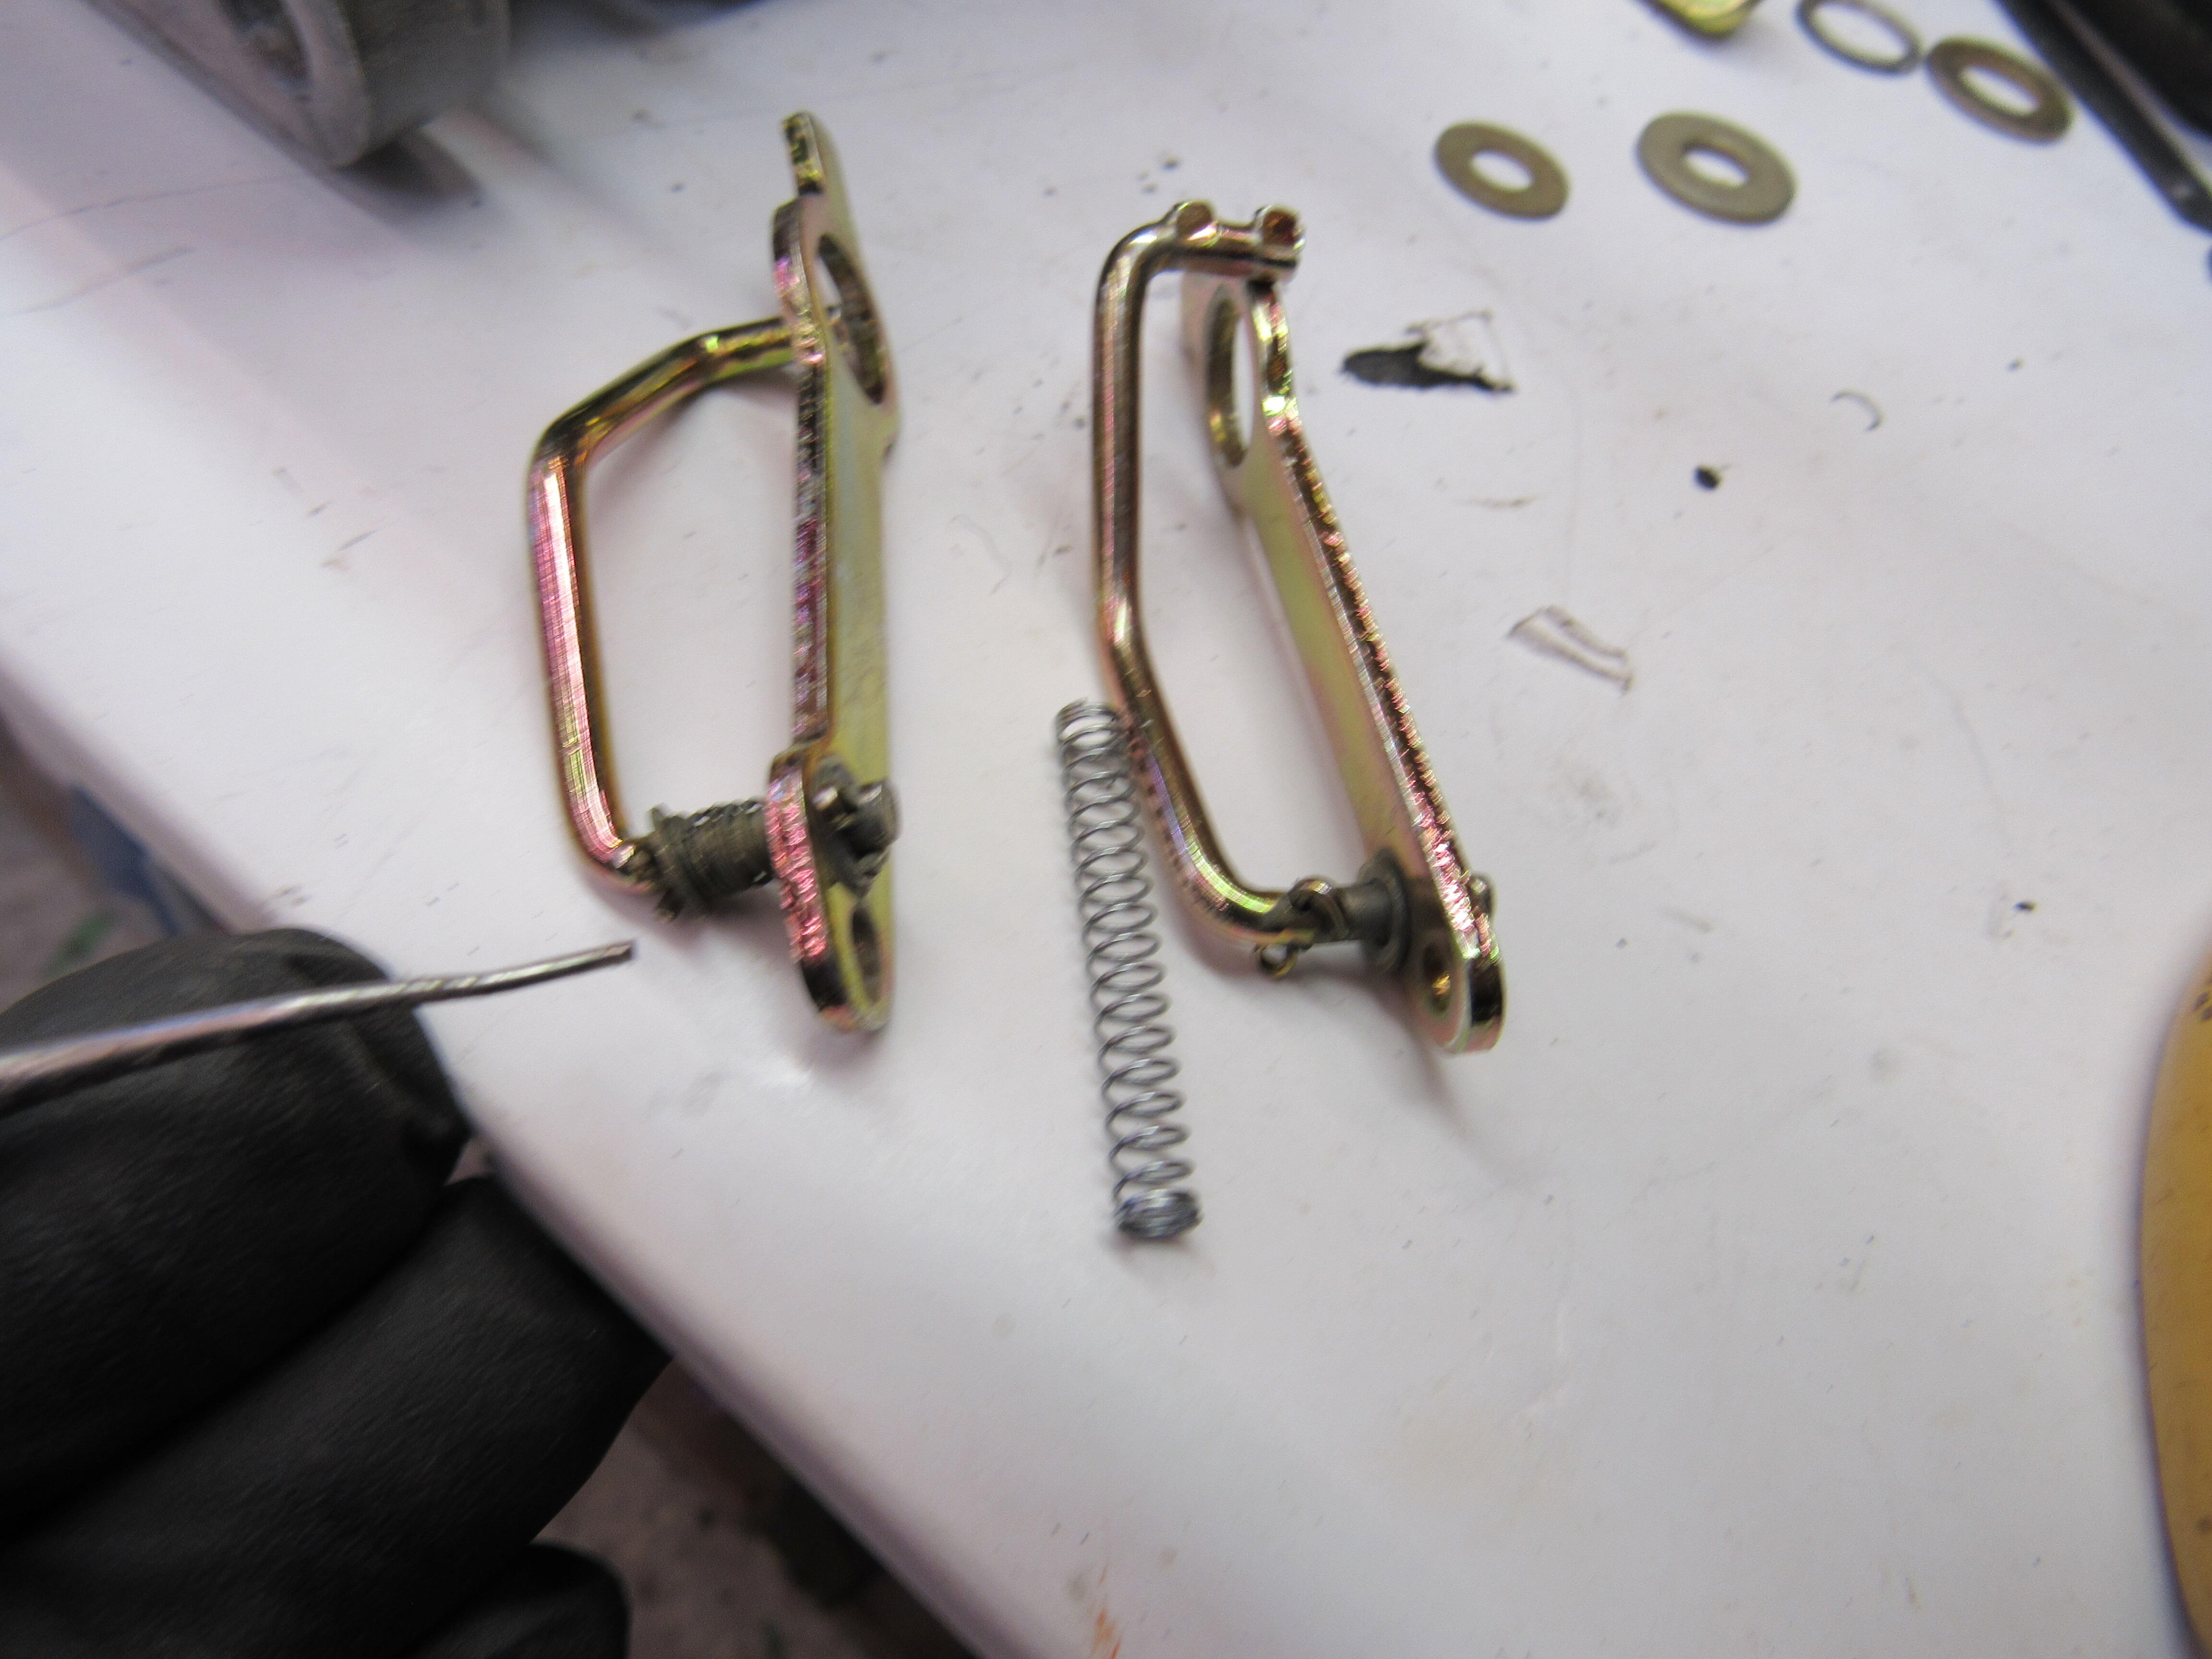
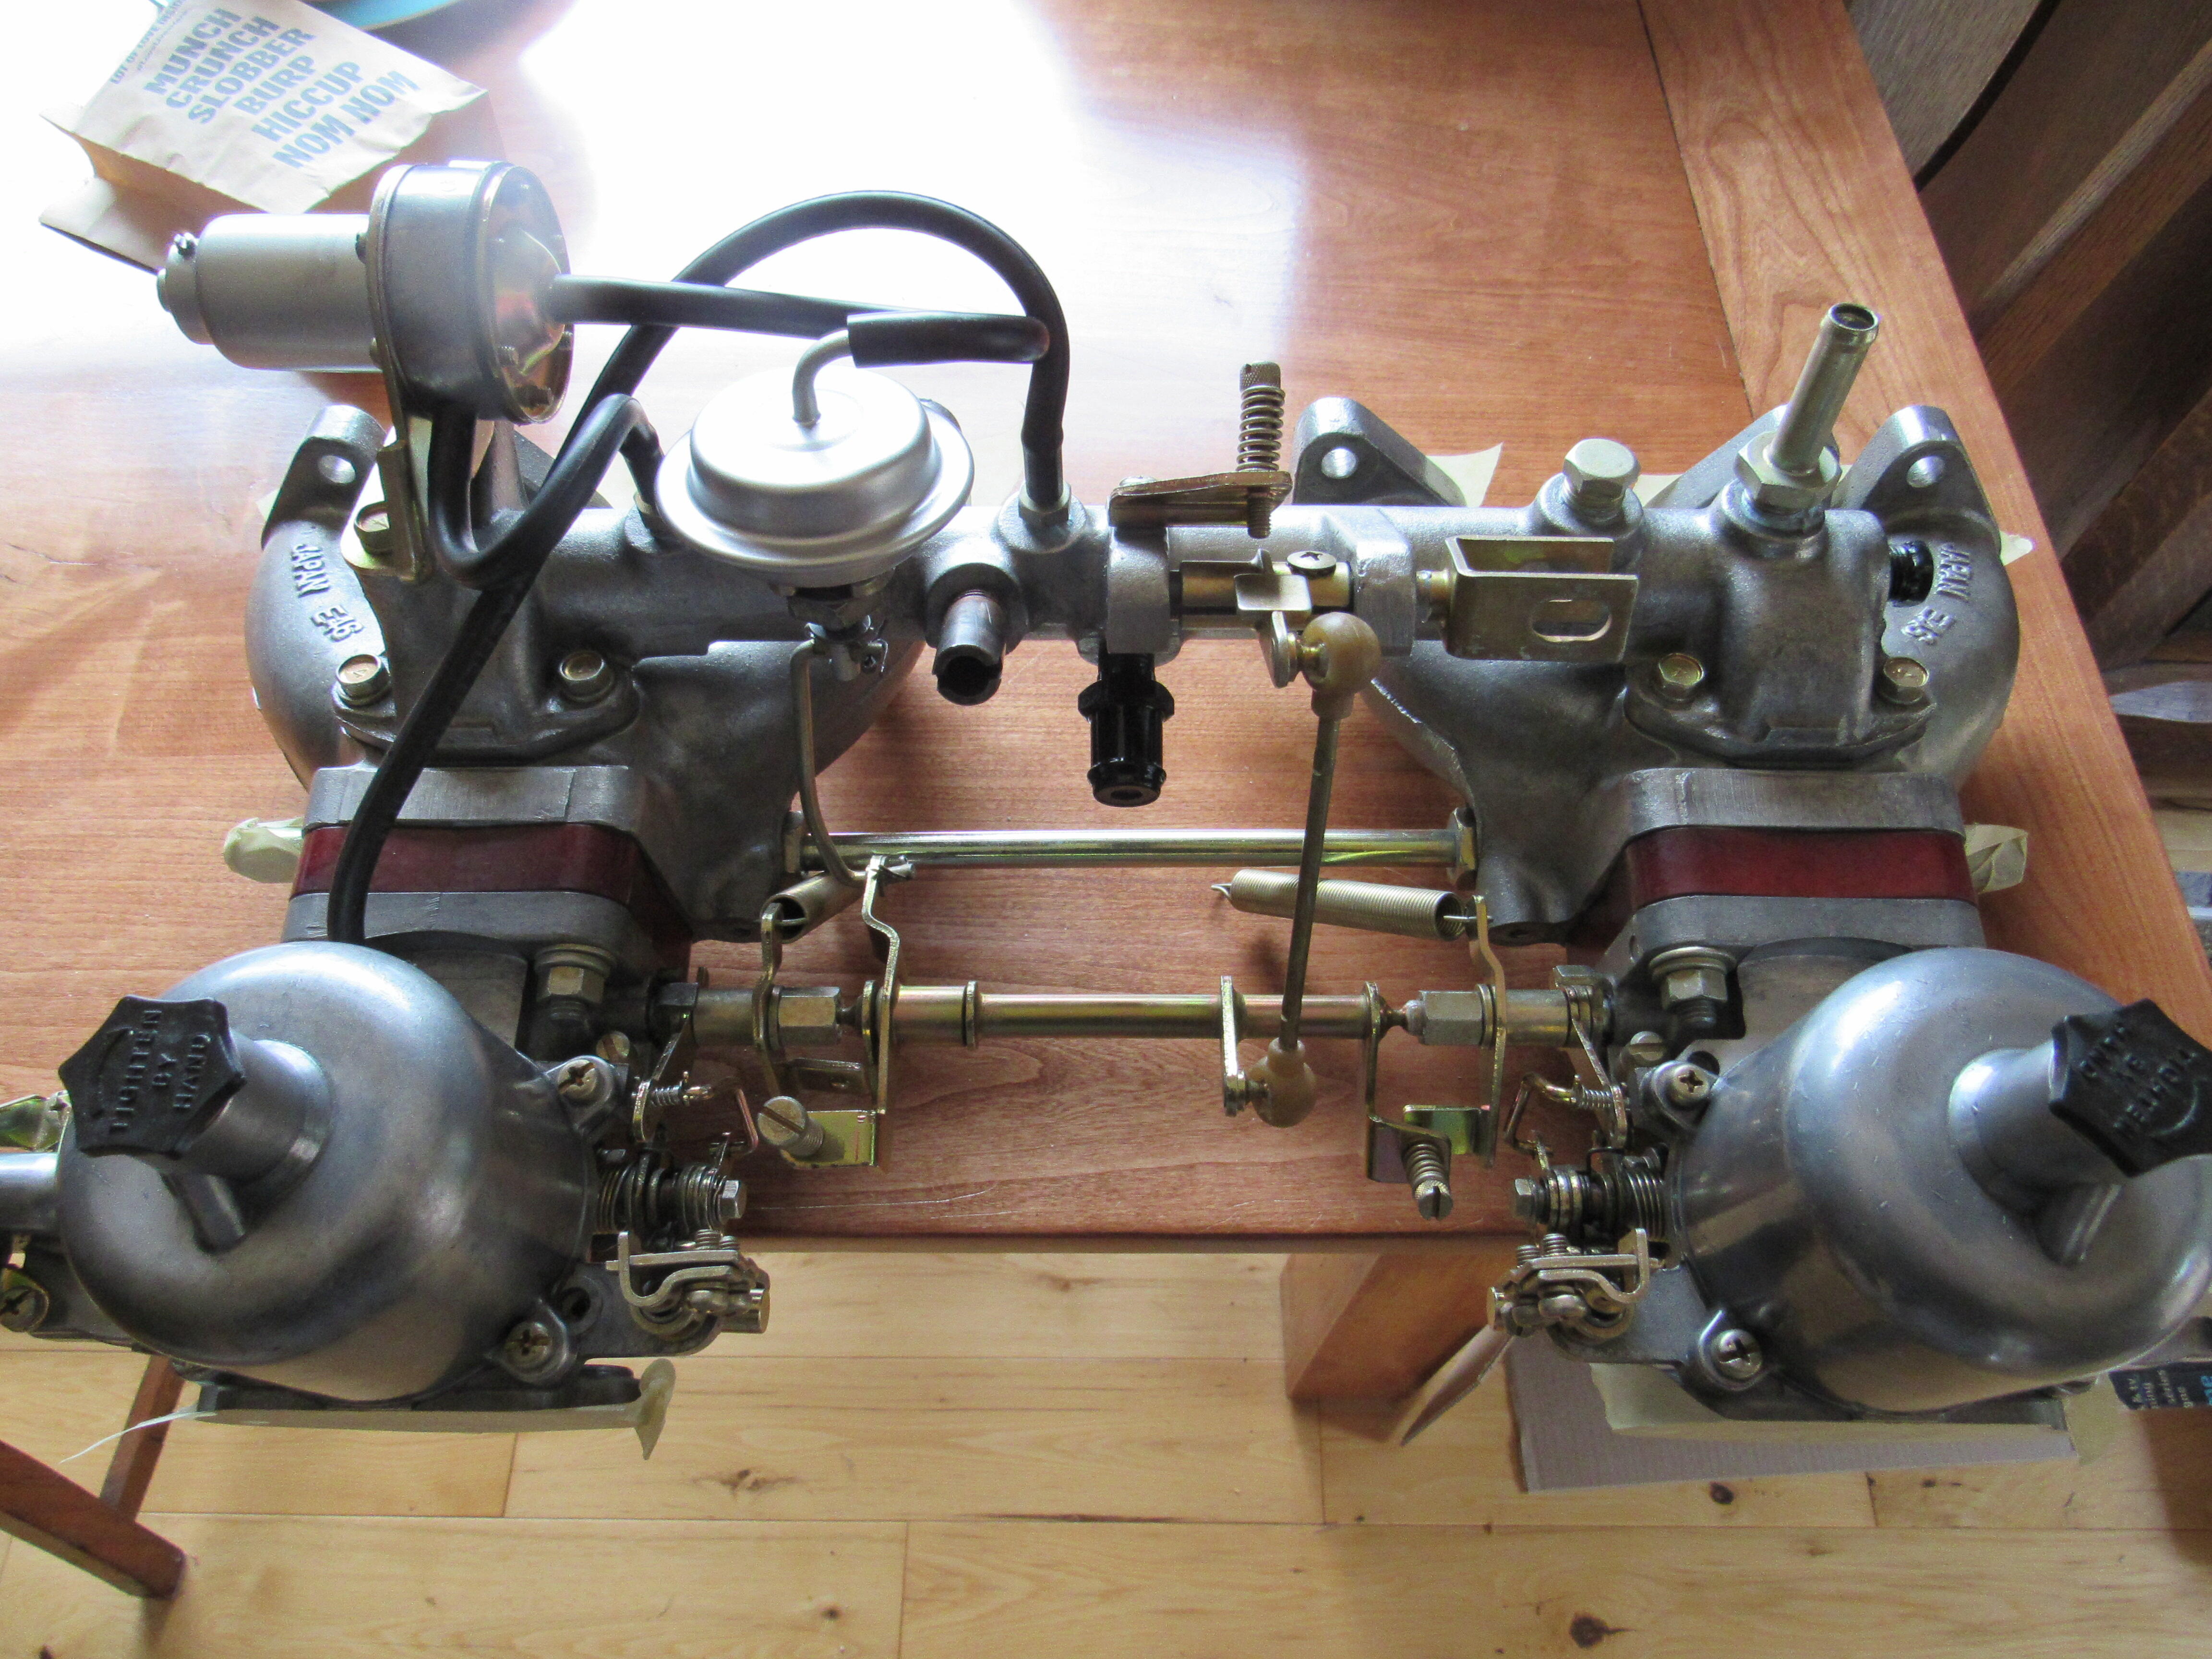
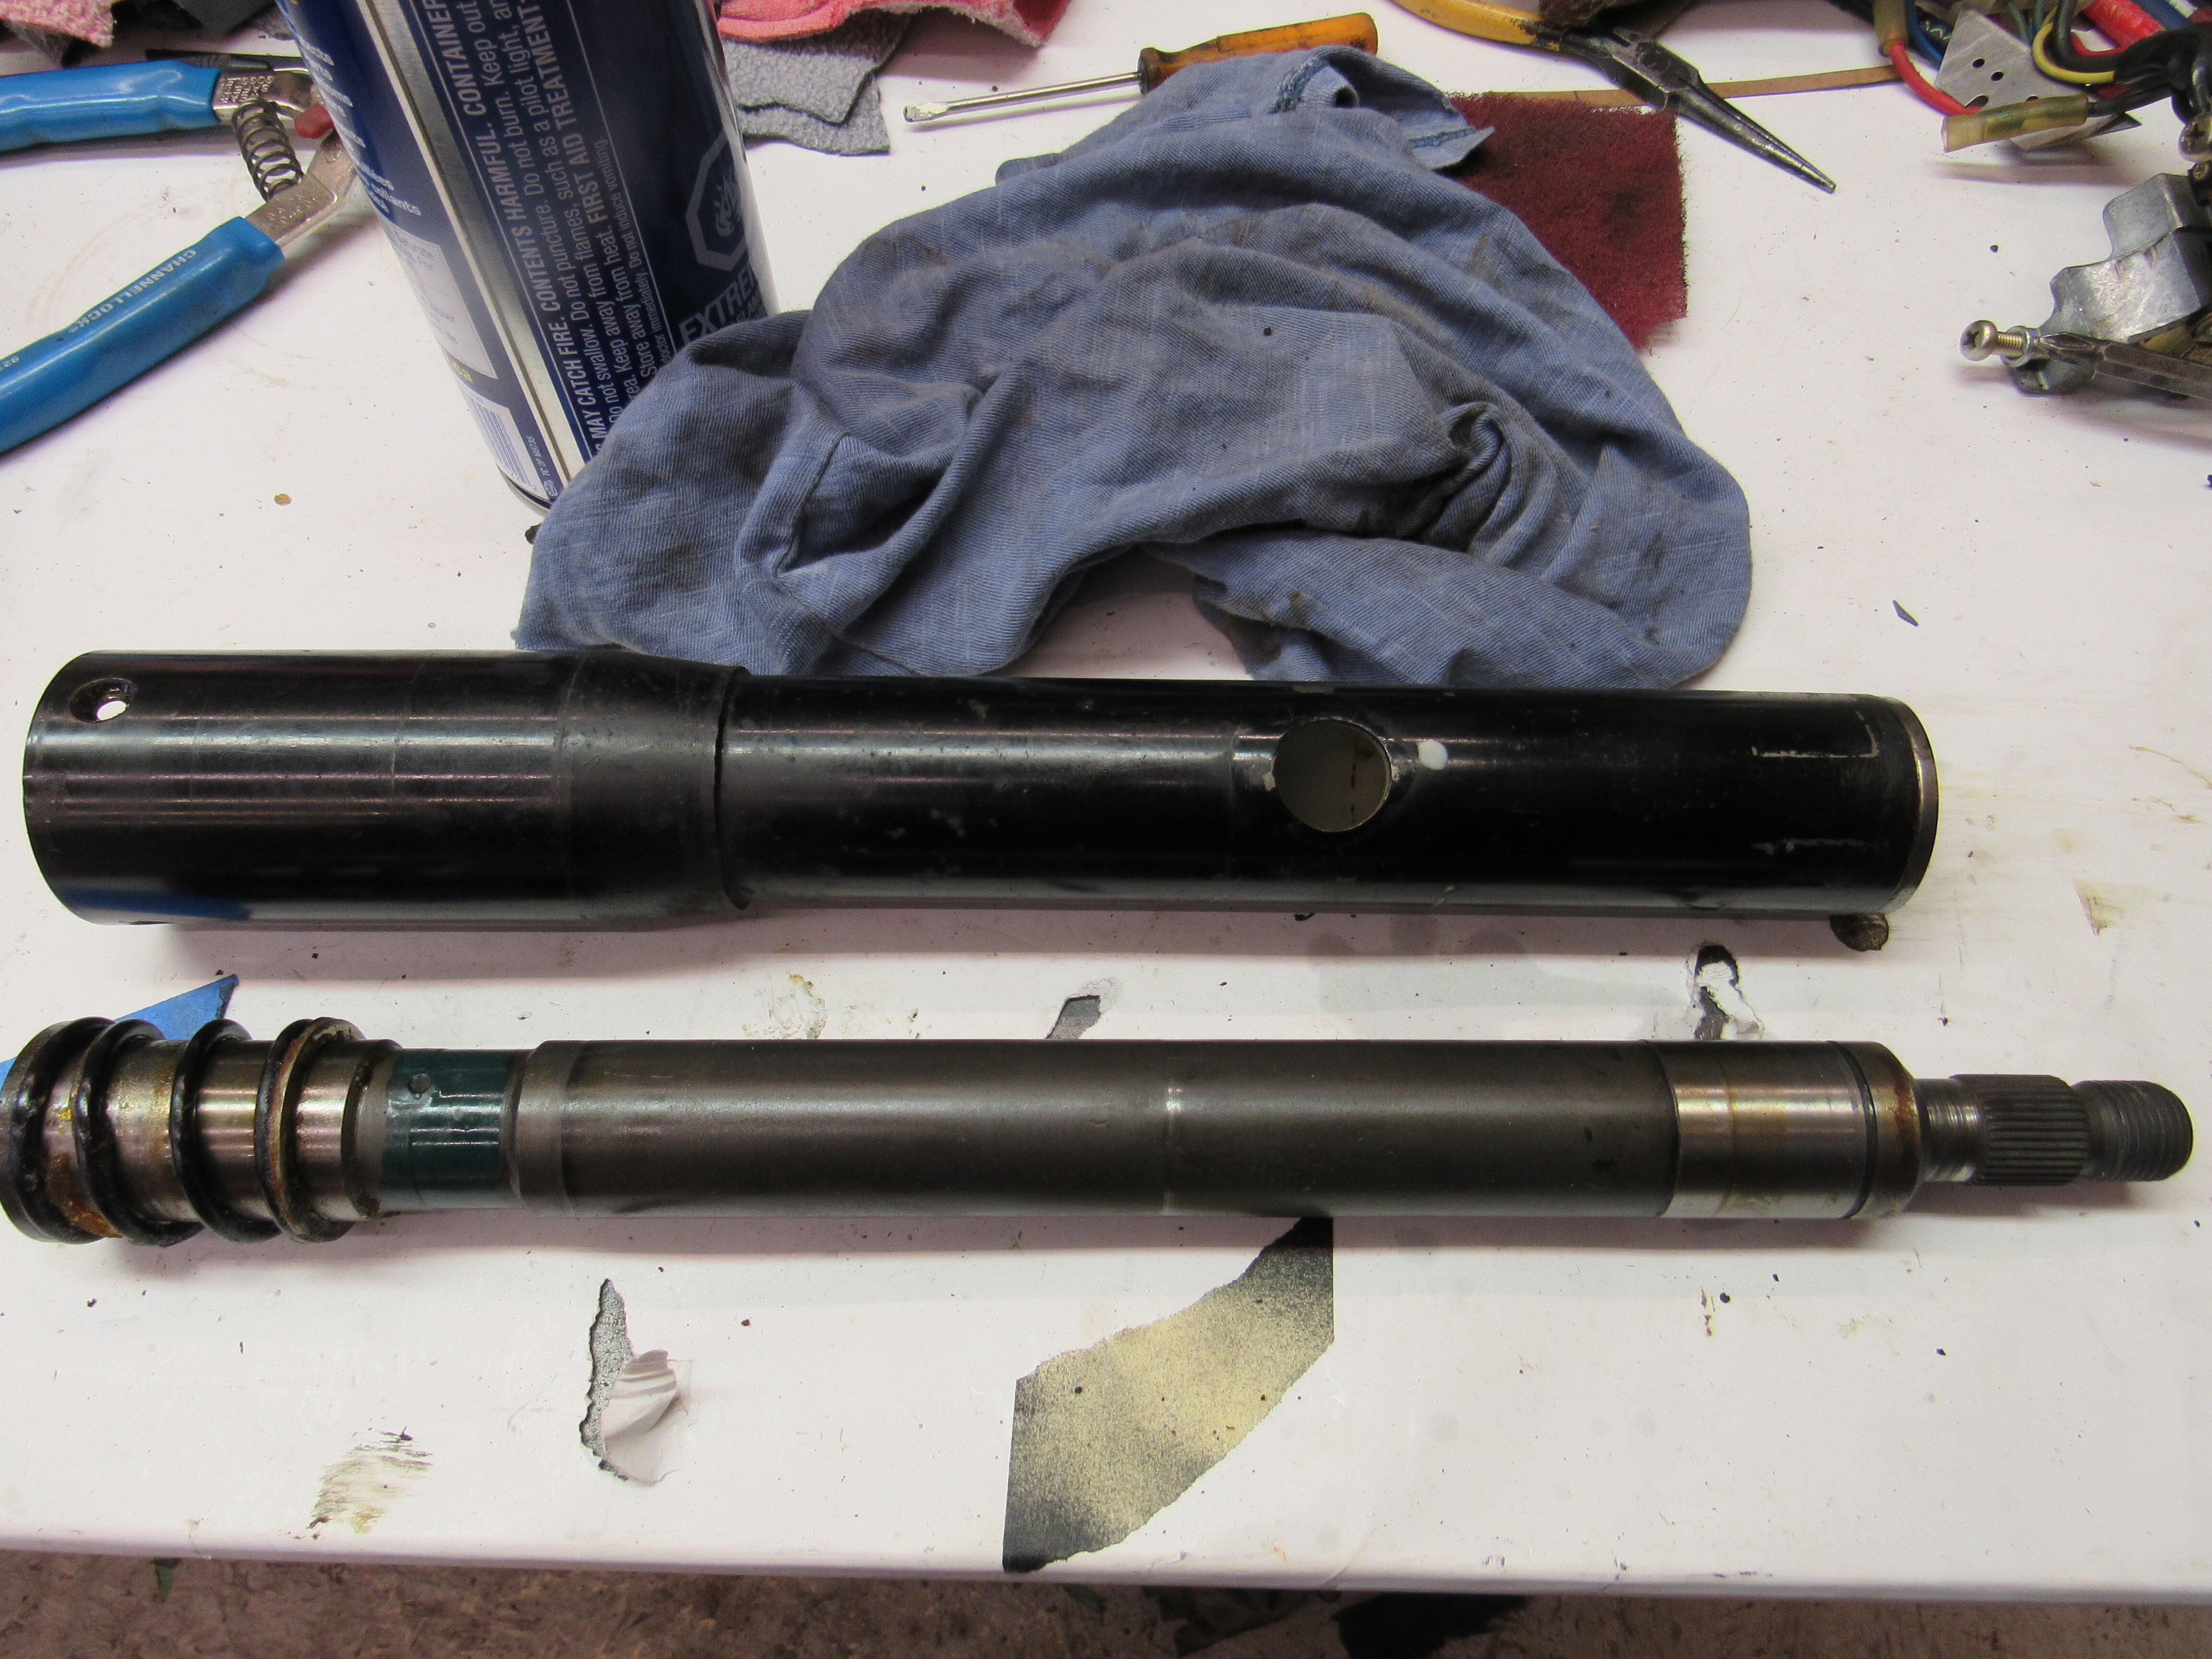
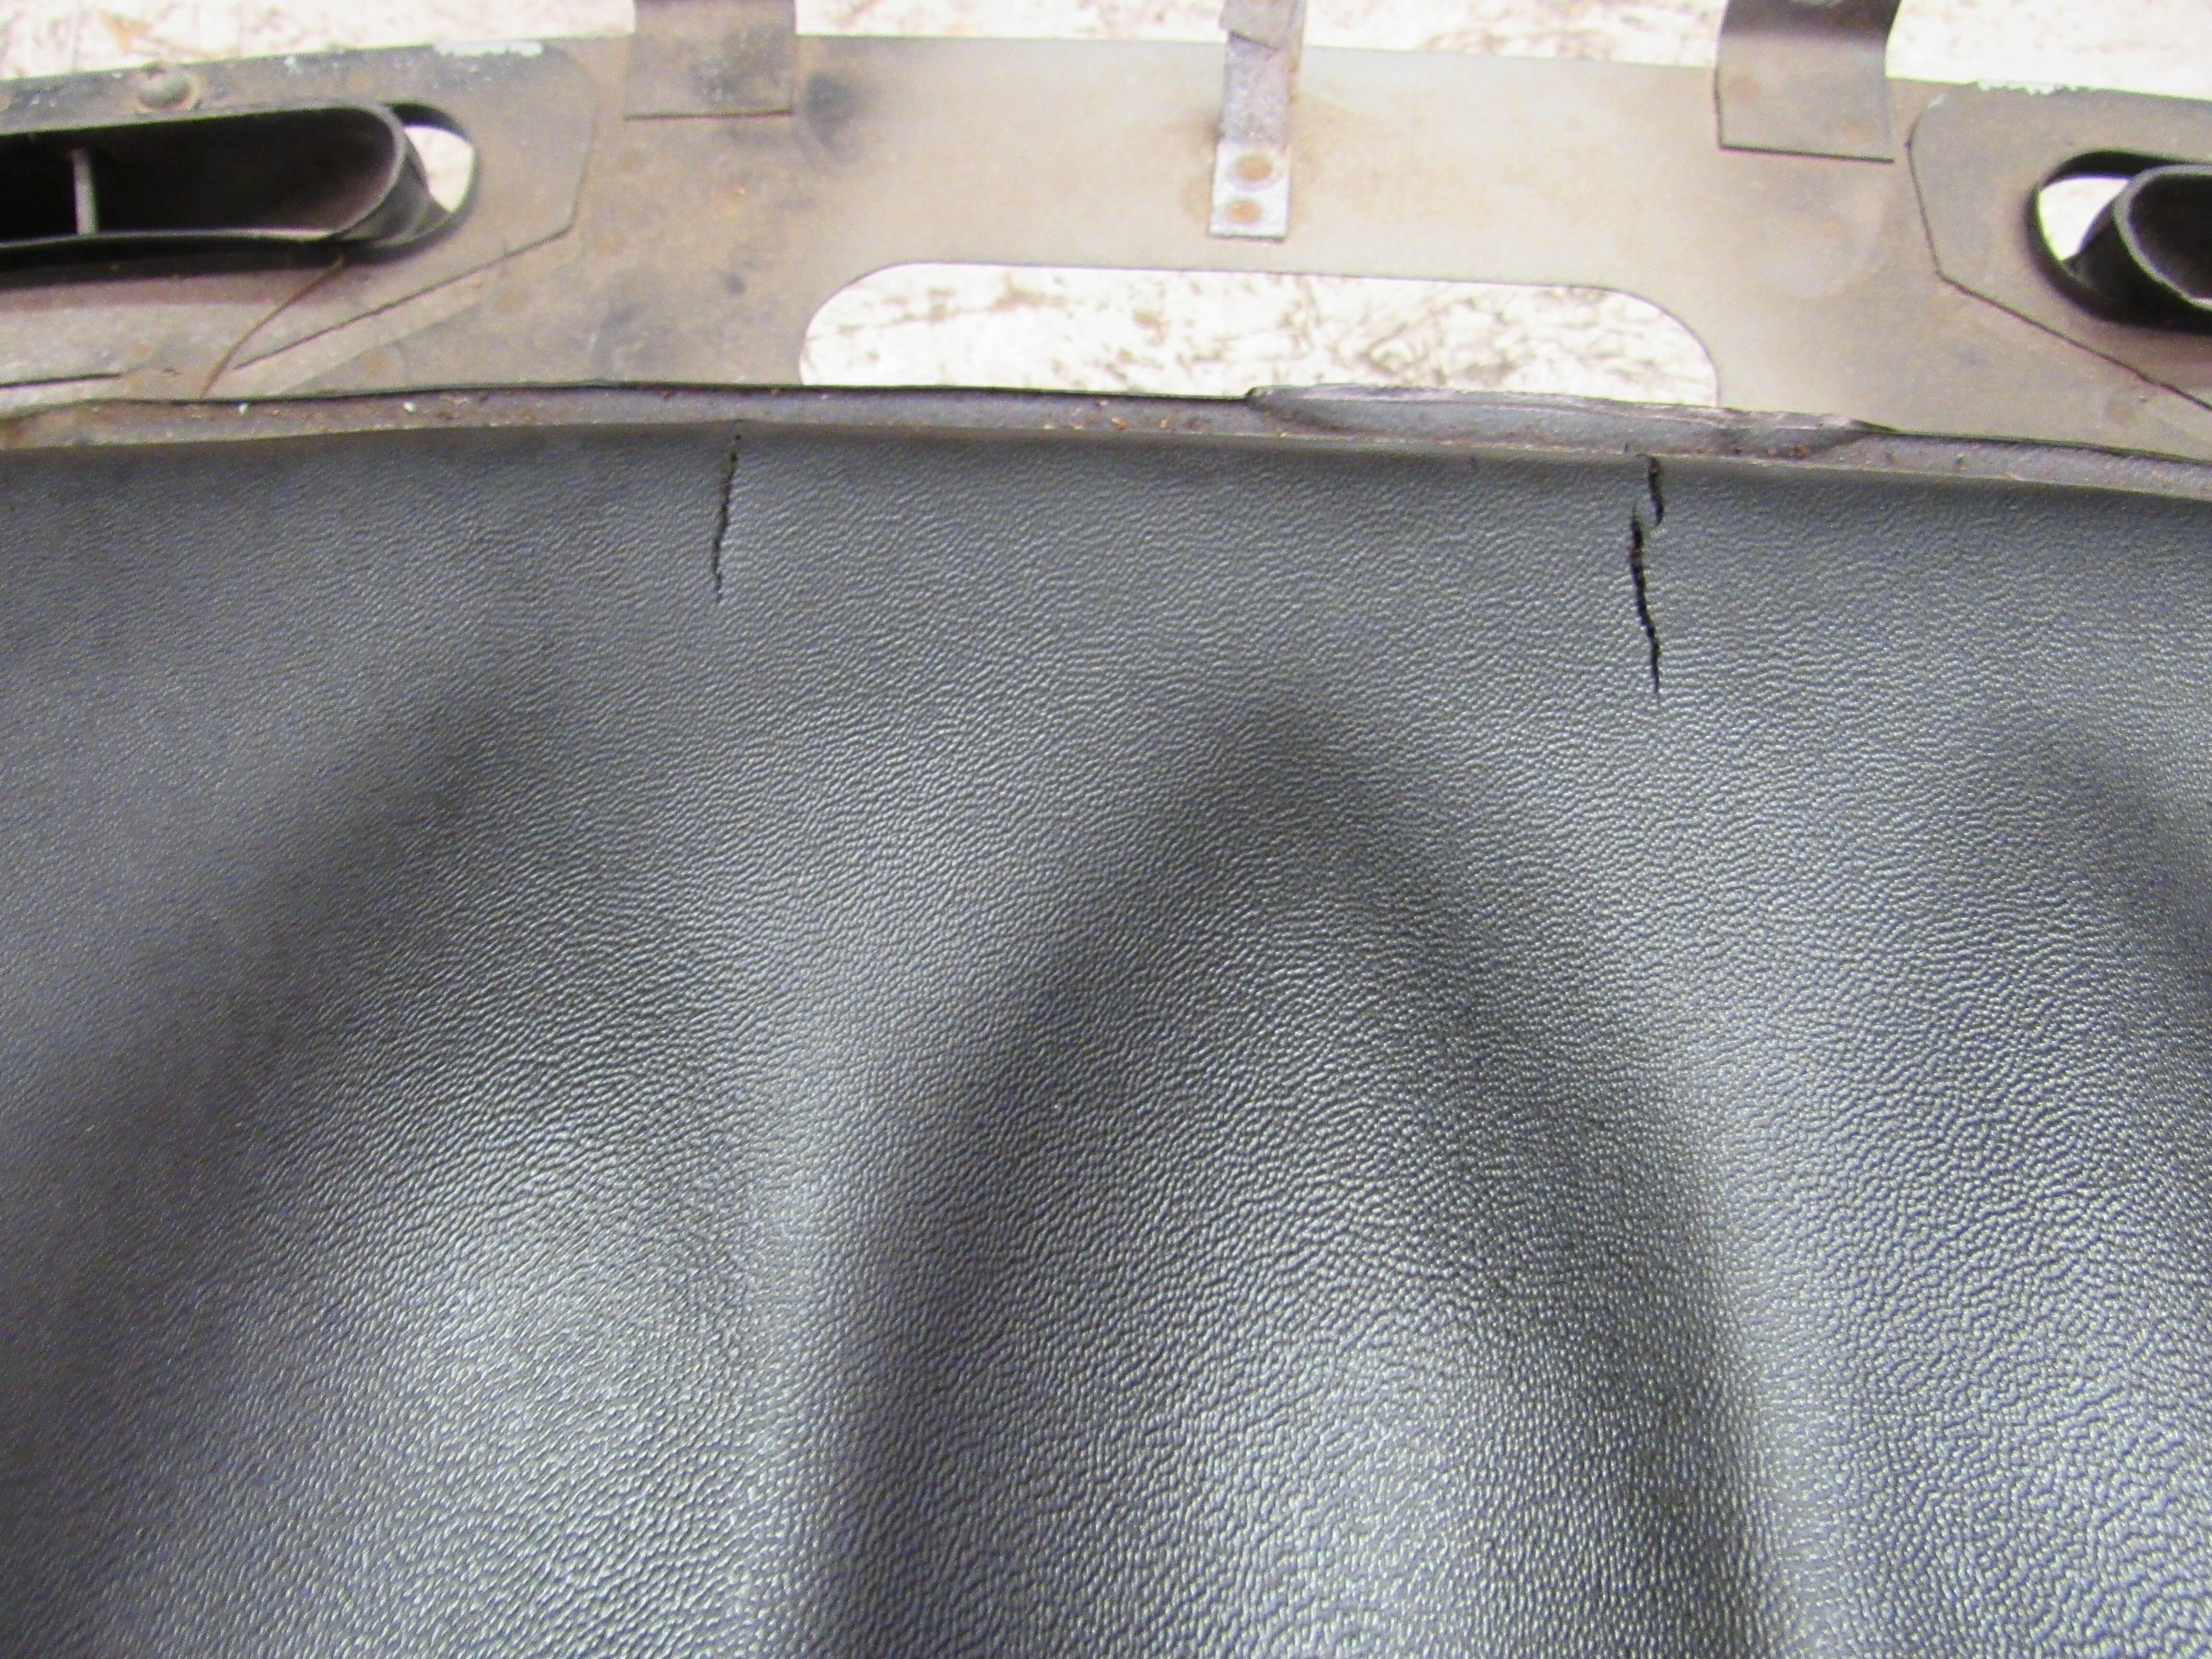
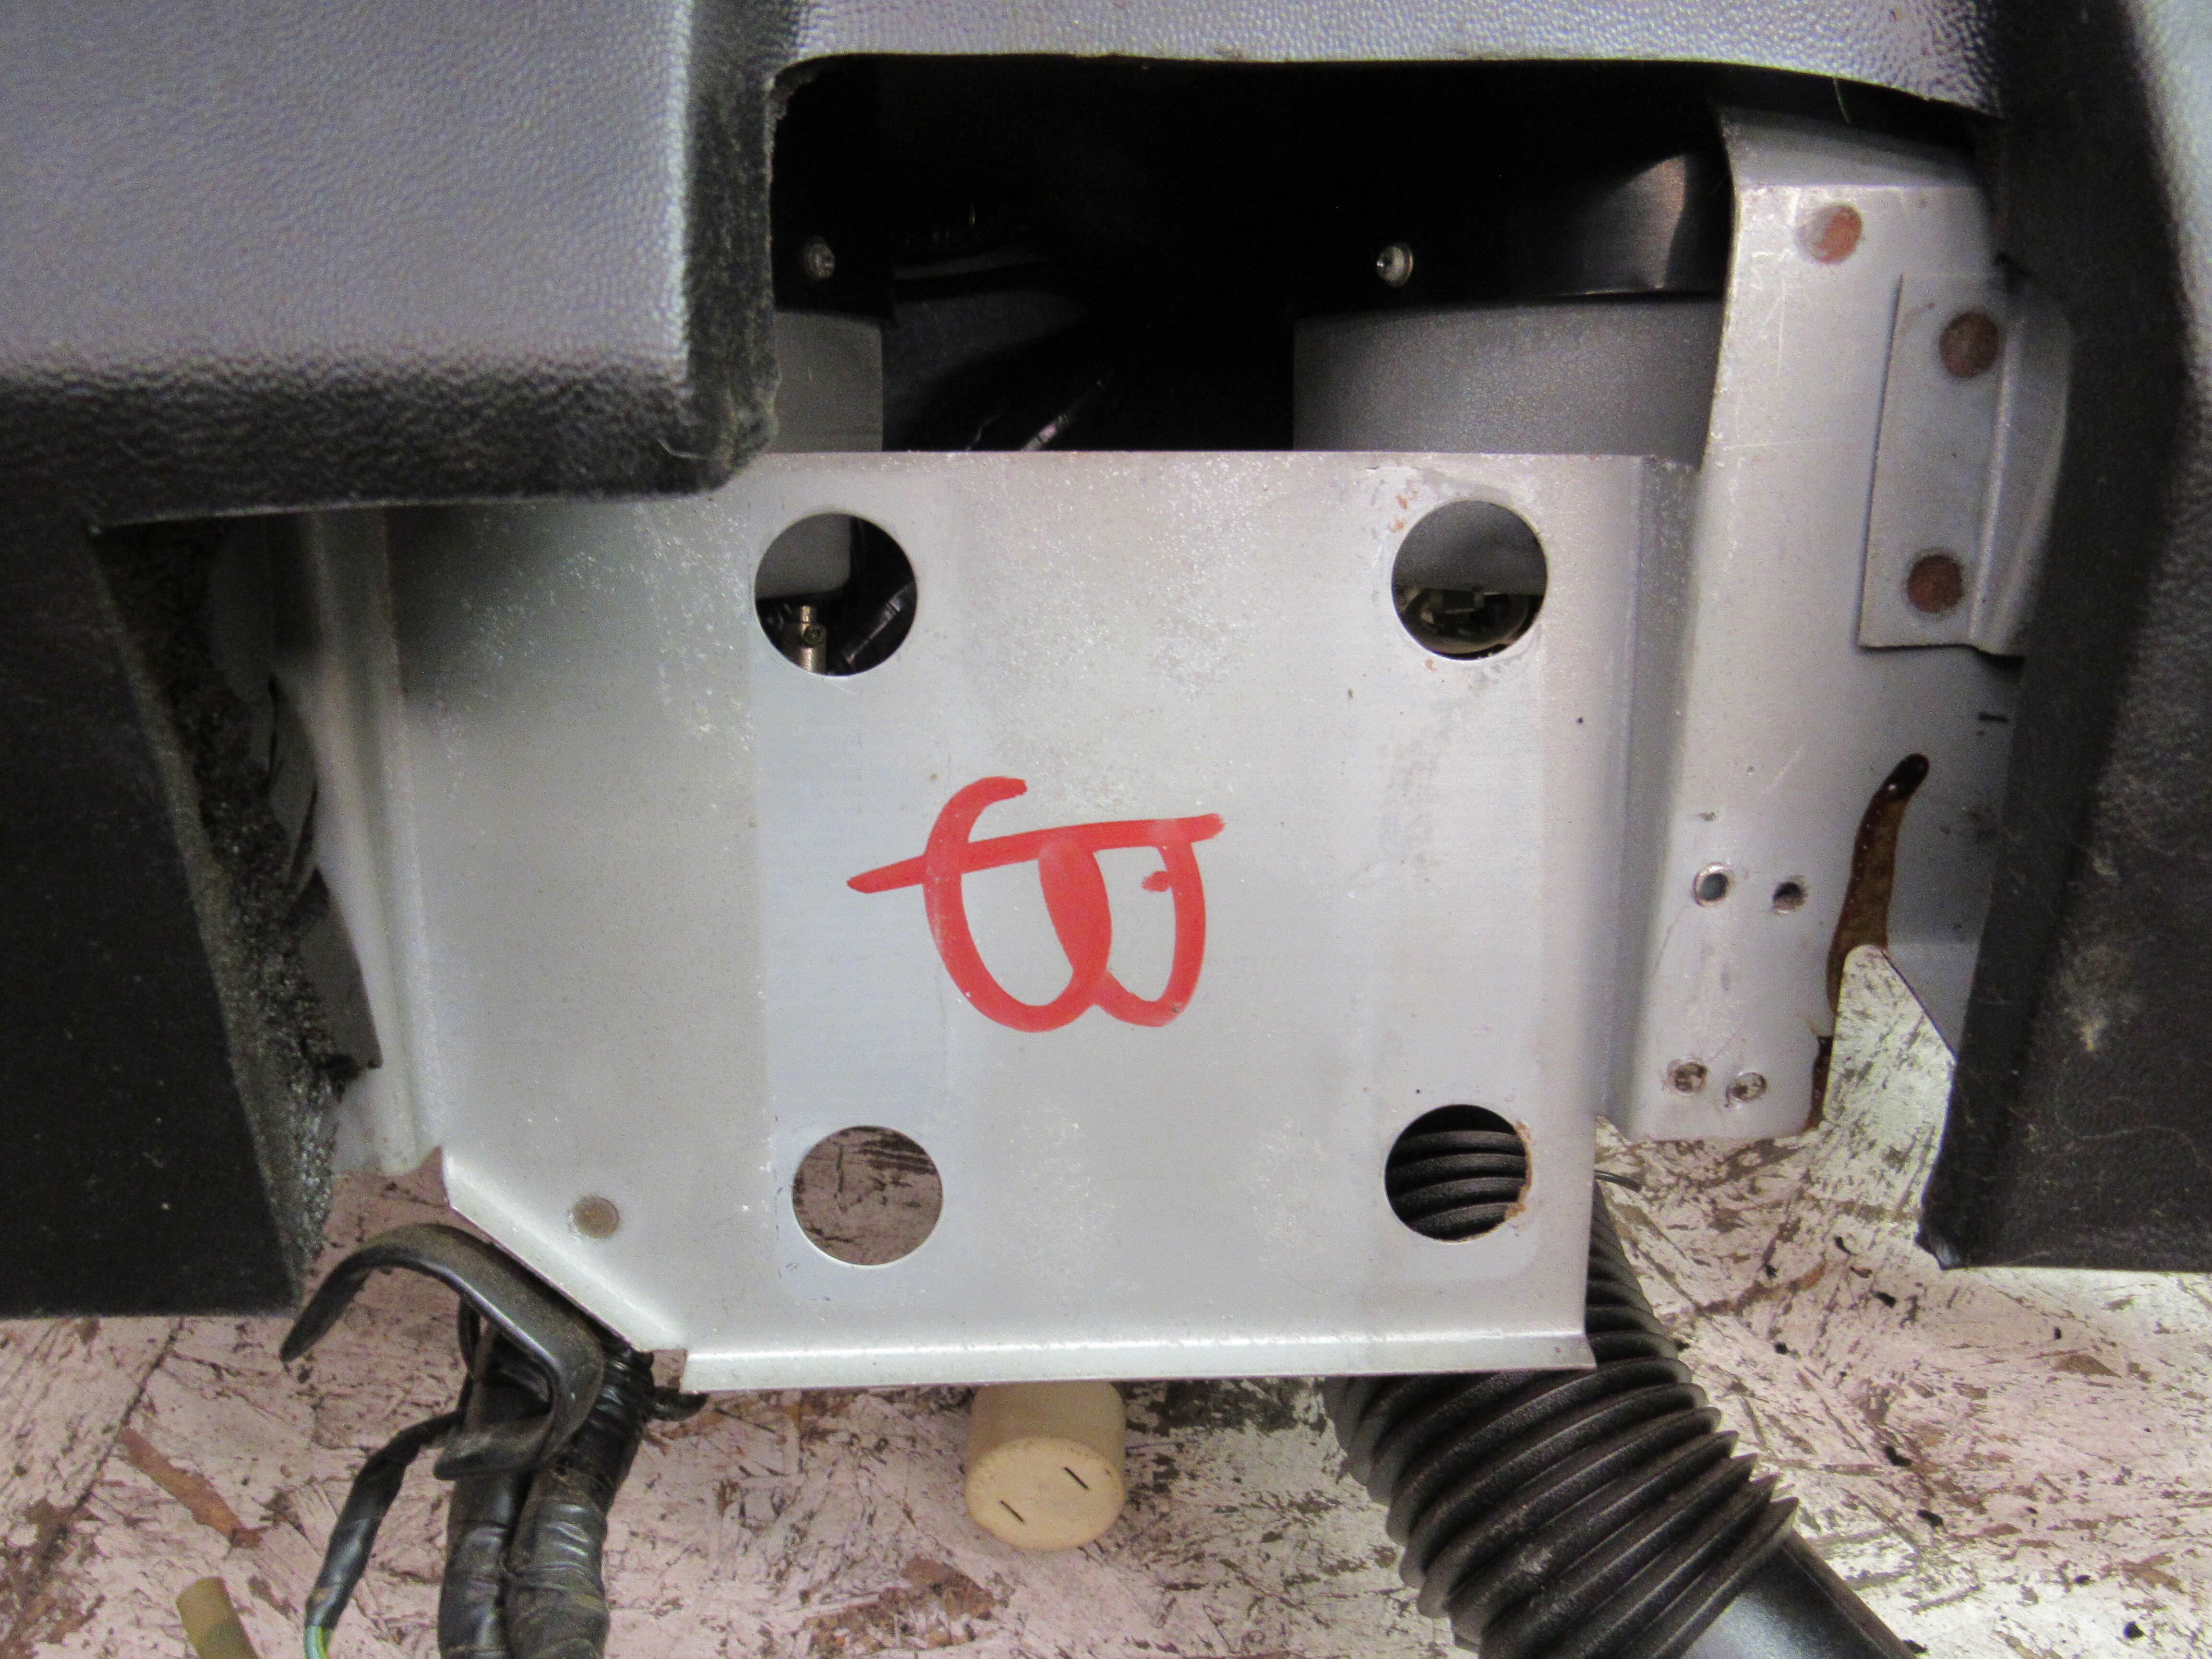
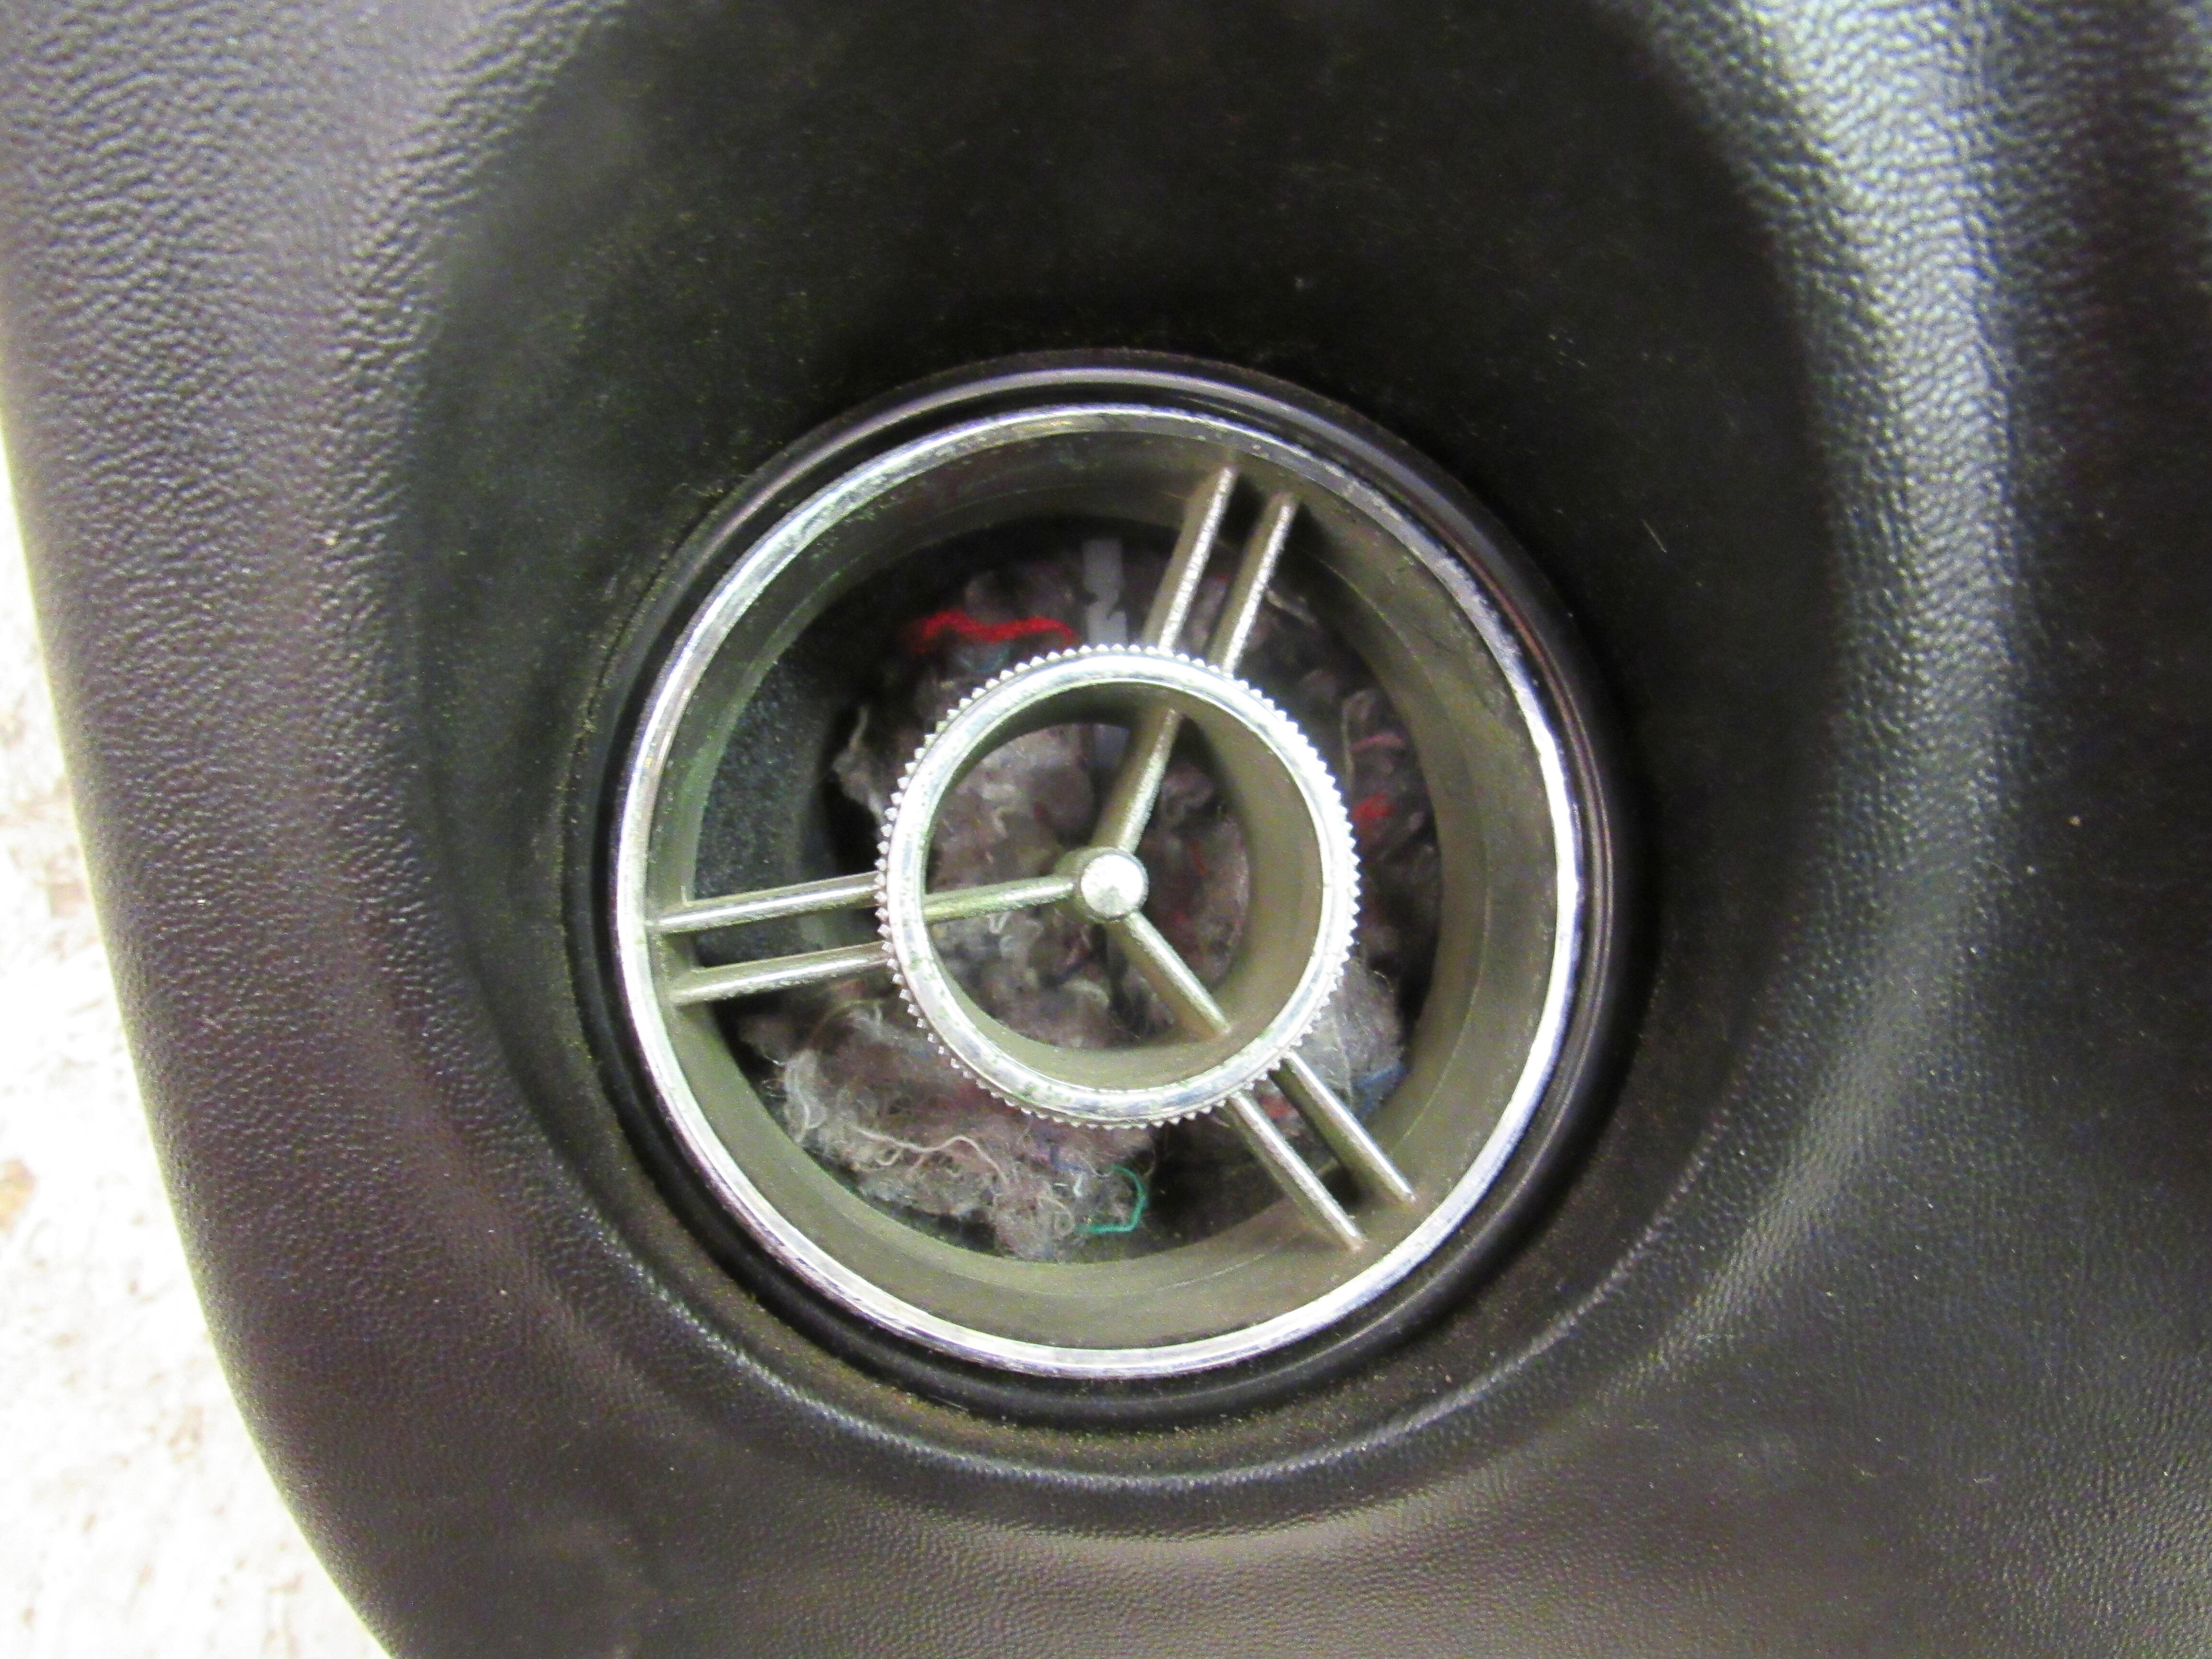
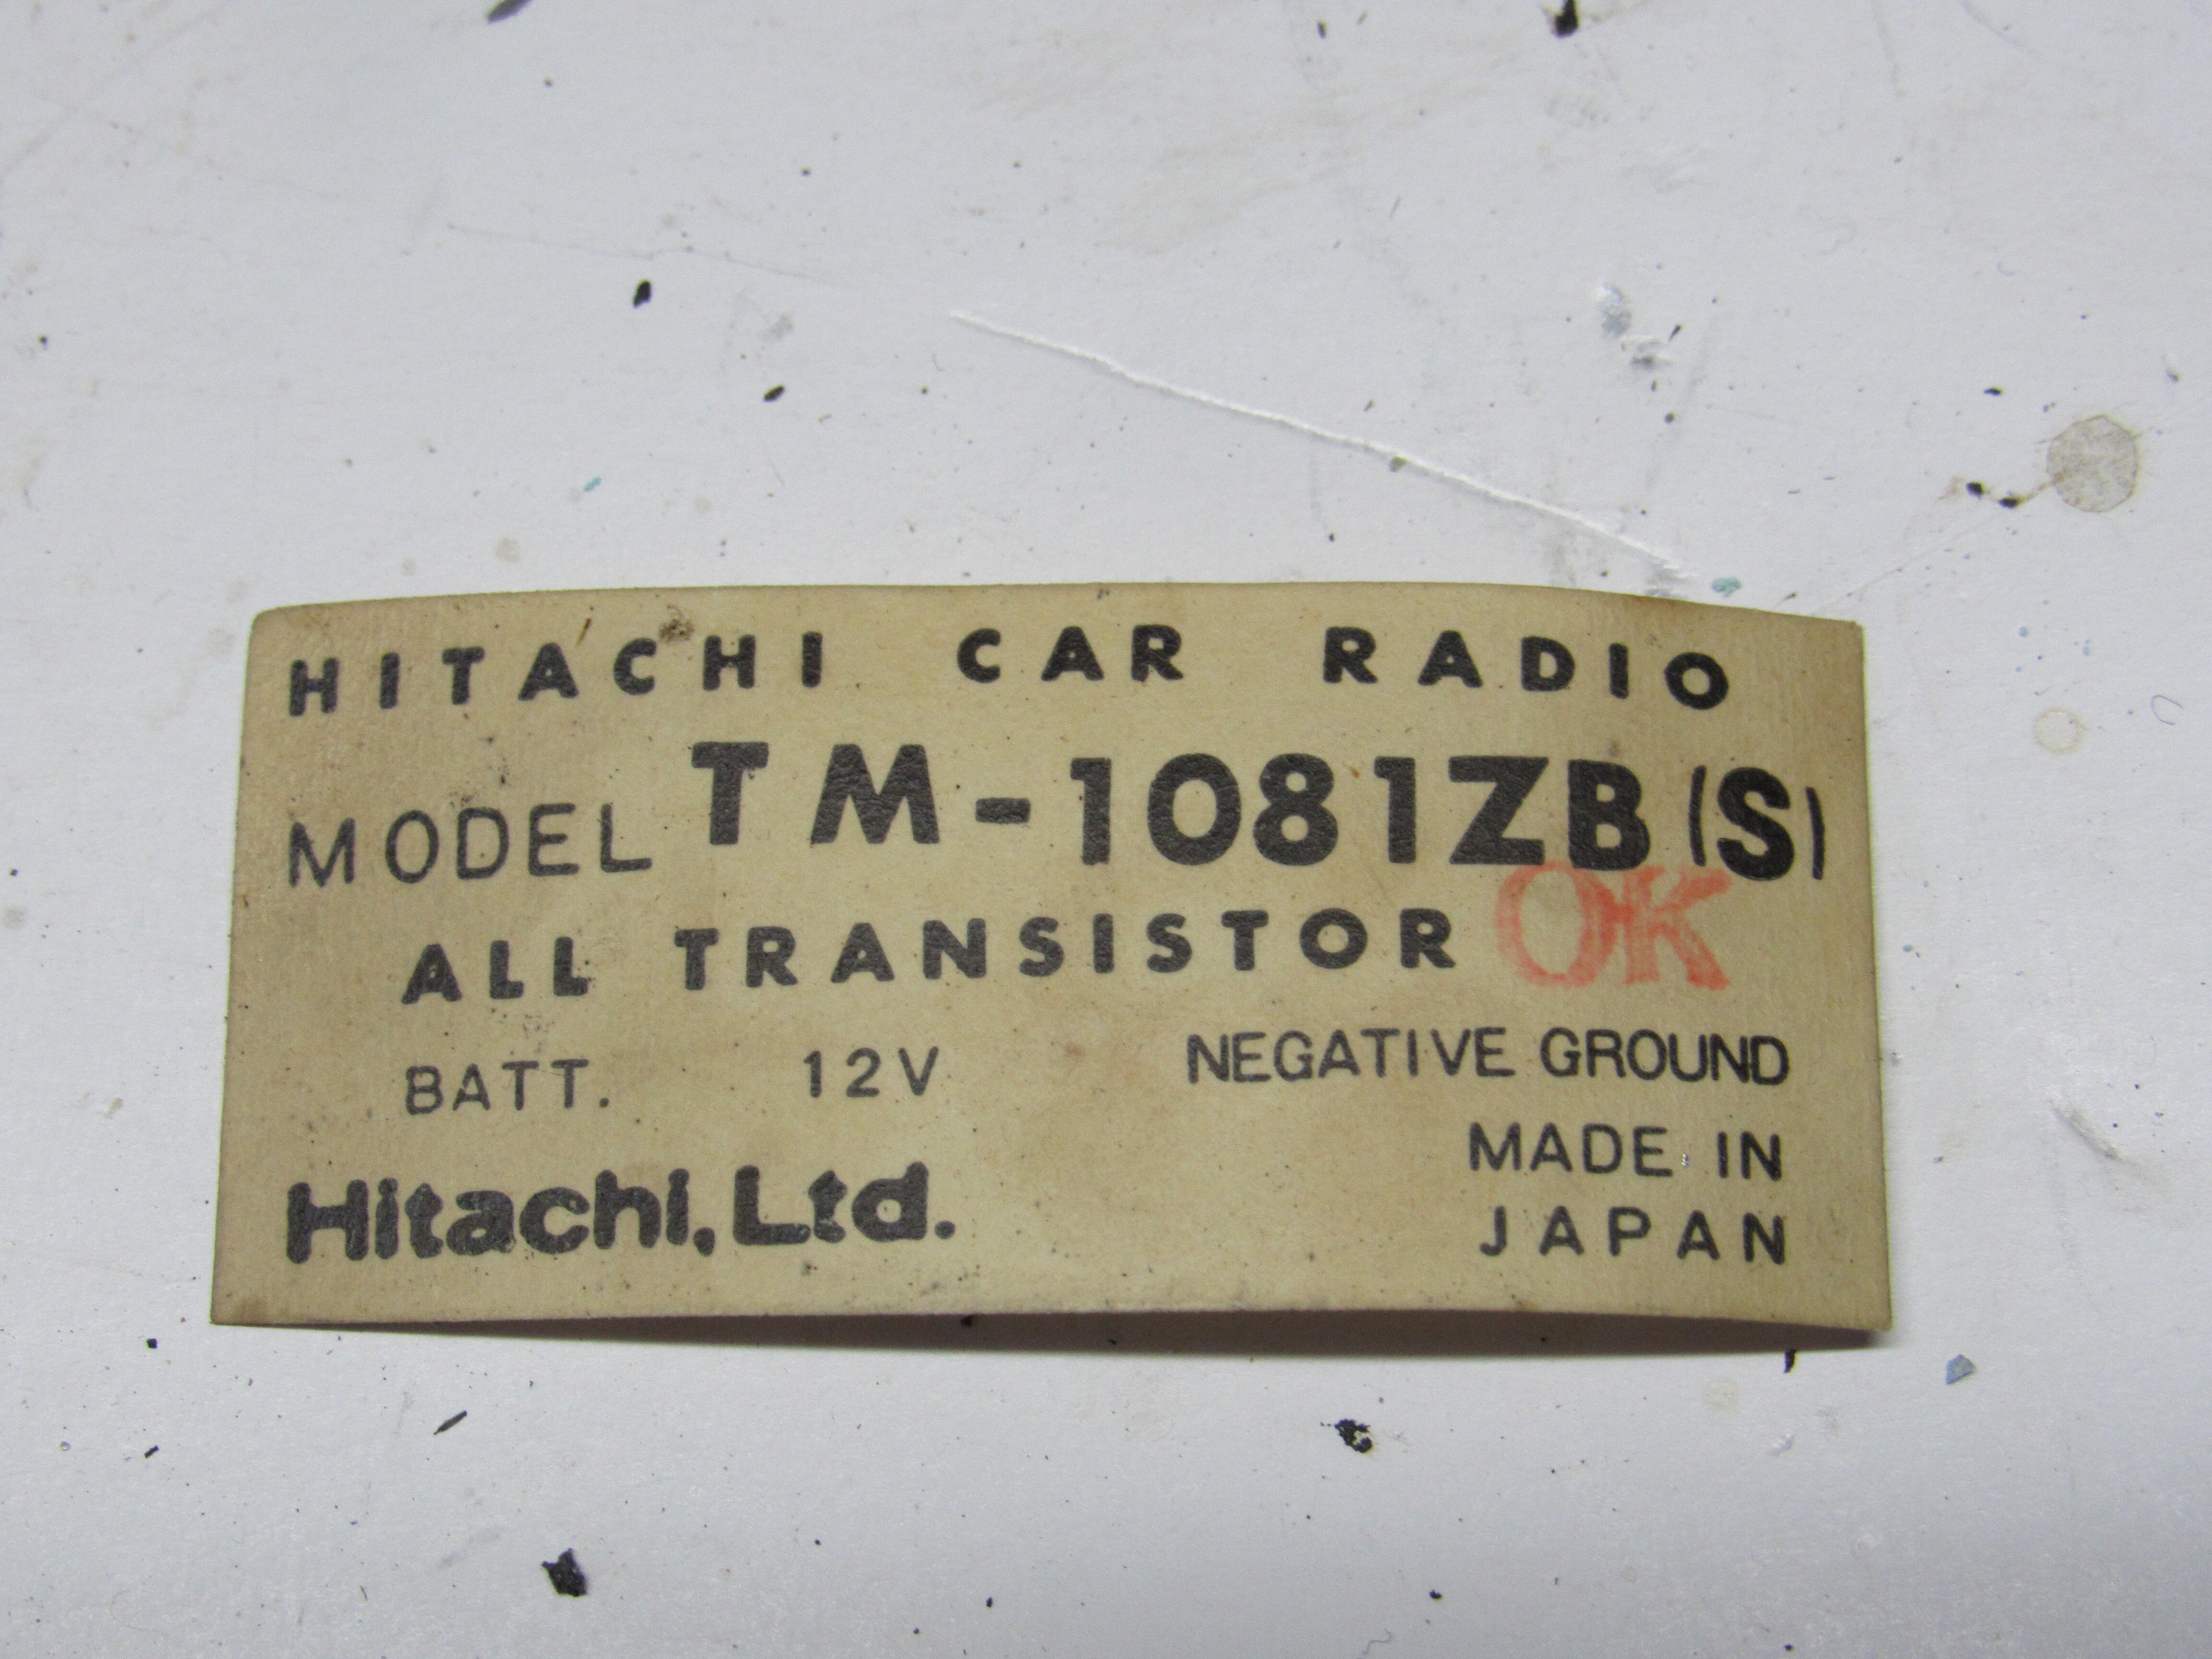
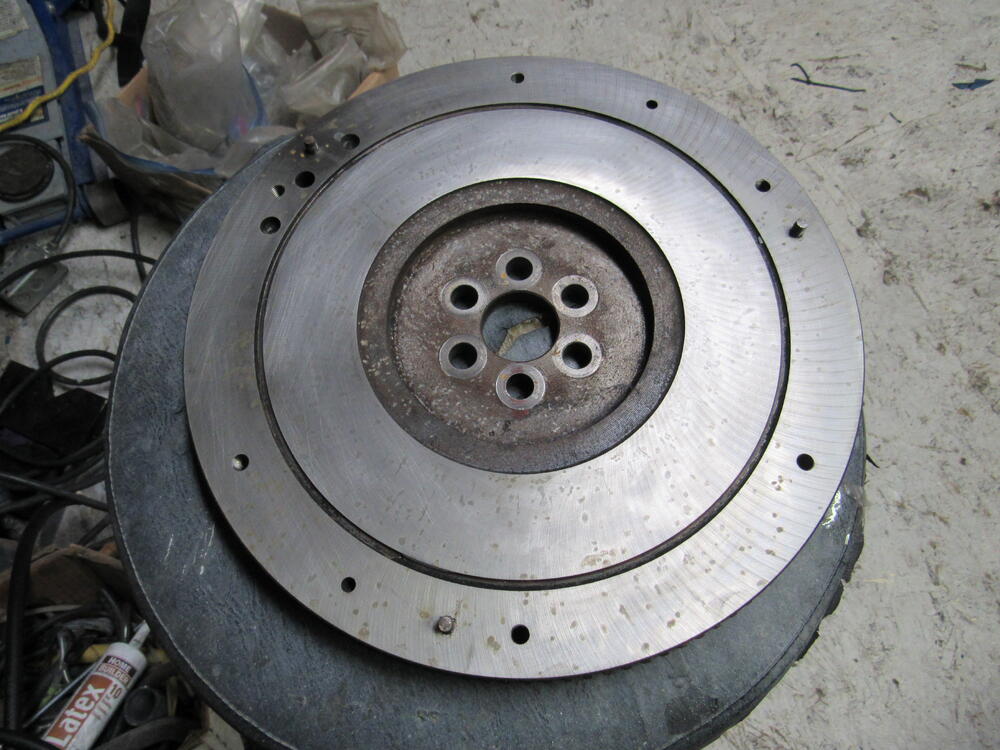
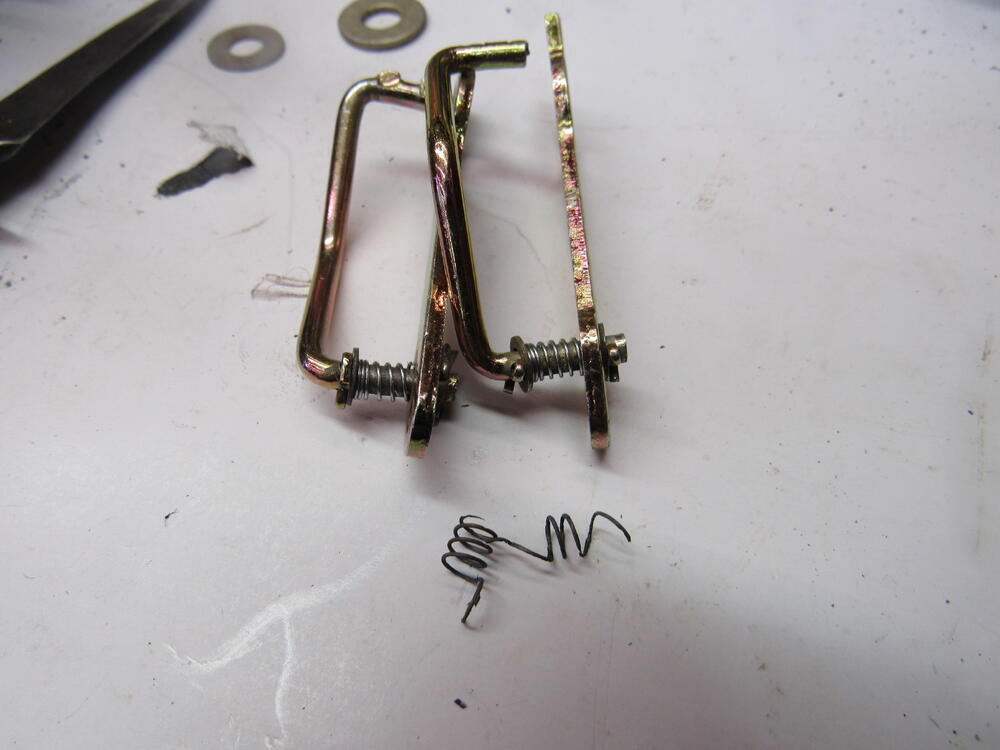
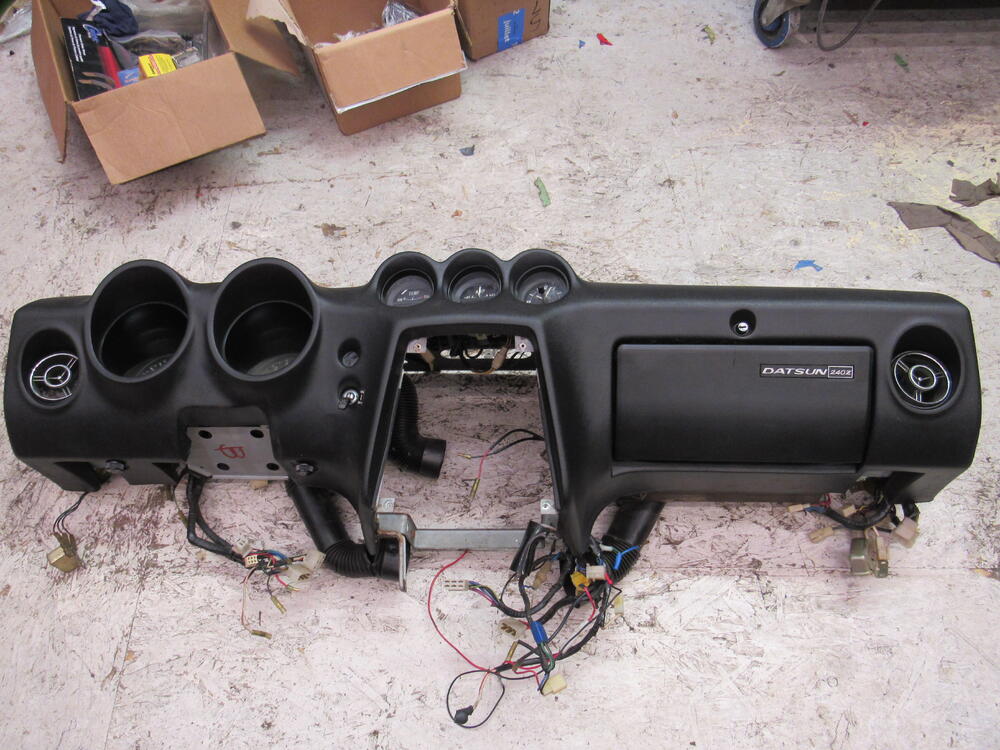
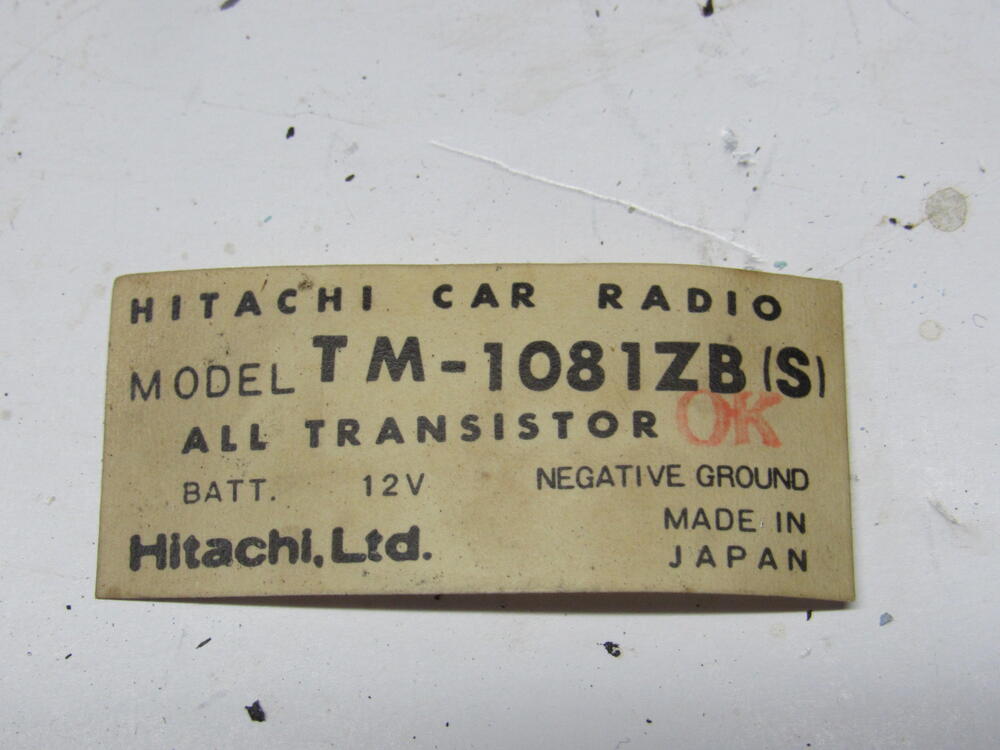
3 pointsDave and I looked for a couple of months to find a new stock flywheel, couldn't be found so I took the old one in to the machinist, there is still a few heat cracks that he couldn't get out but I don't think it will make a difference the way it will be driven from now on. The plating acid disintegrated a couple of small springs on the carb linkage so I sacrificed a cheap ball point pen for a replacement. Carbs are finished now and up on the shelf. Disassembled the steering column, flushed out all the old grease with brake cleaner and compressed air and repacked the grease. The dash is in nice shape except for a couple of cracks, here is the Kanji. I found a squatter living in the air duct and this label was in the glove box, I'm guessing from the original radio.


 3 points
 -
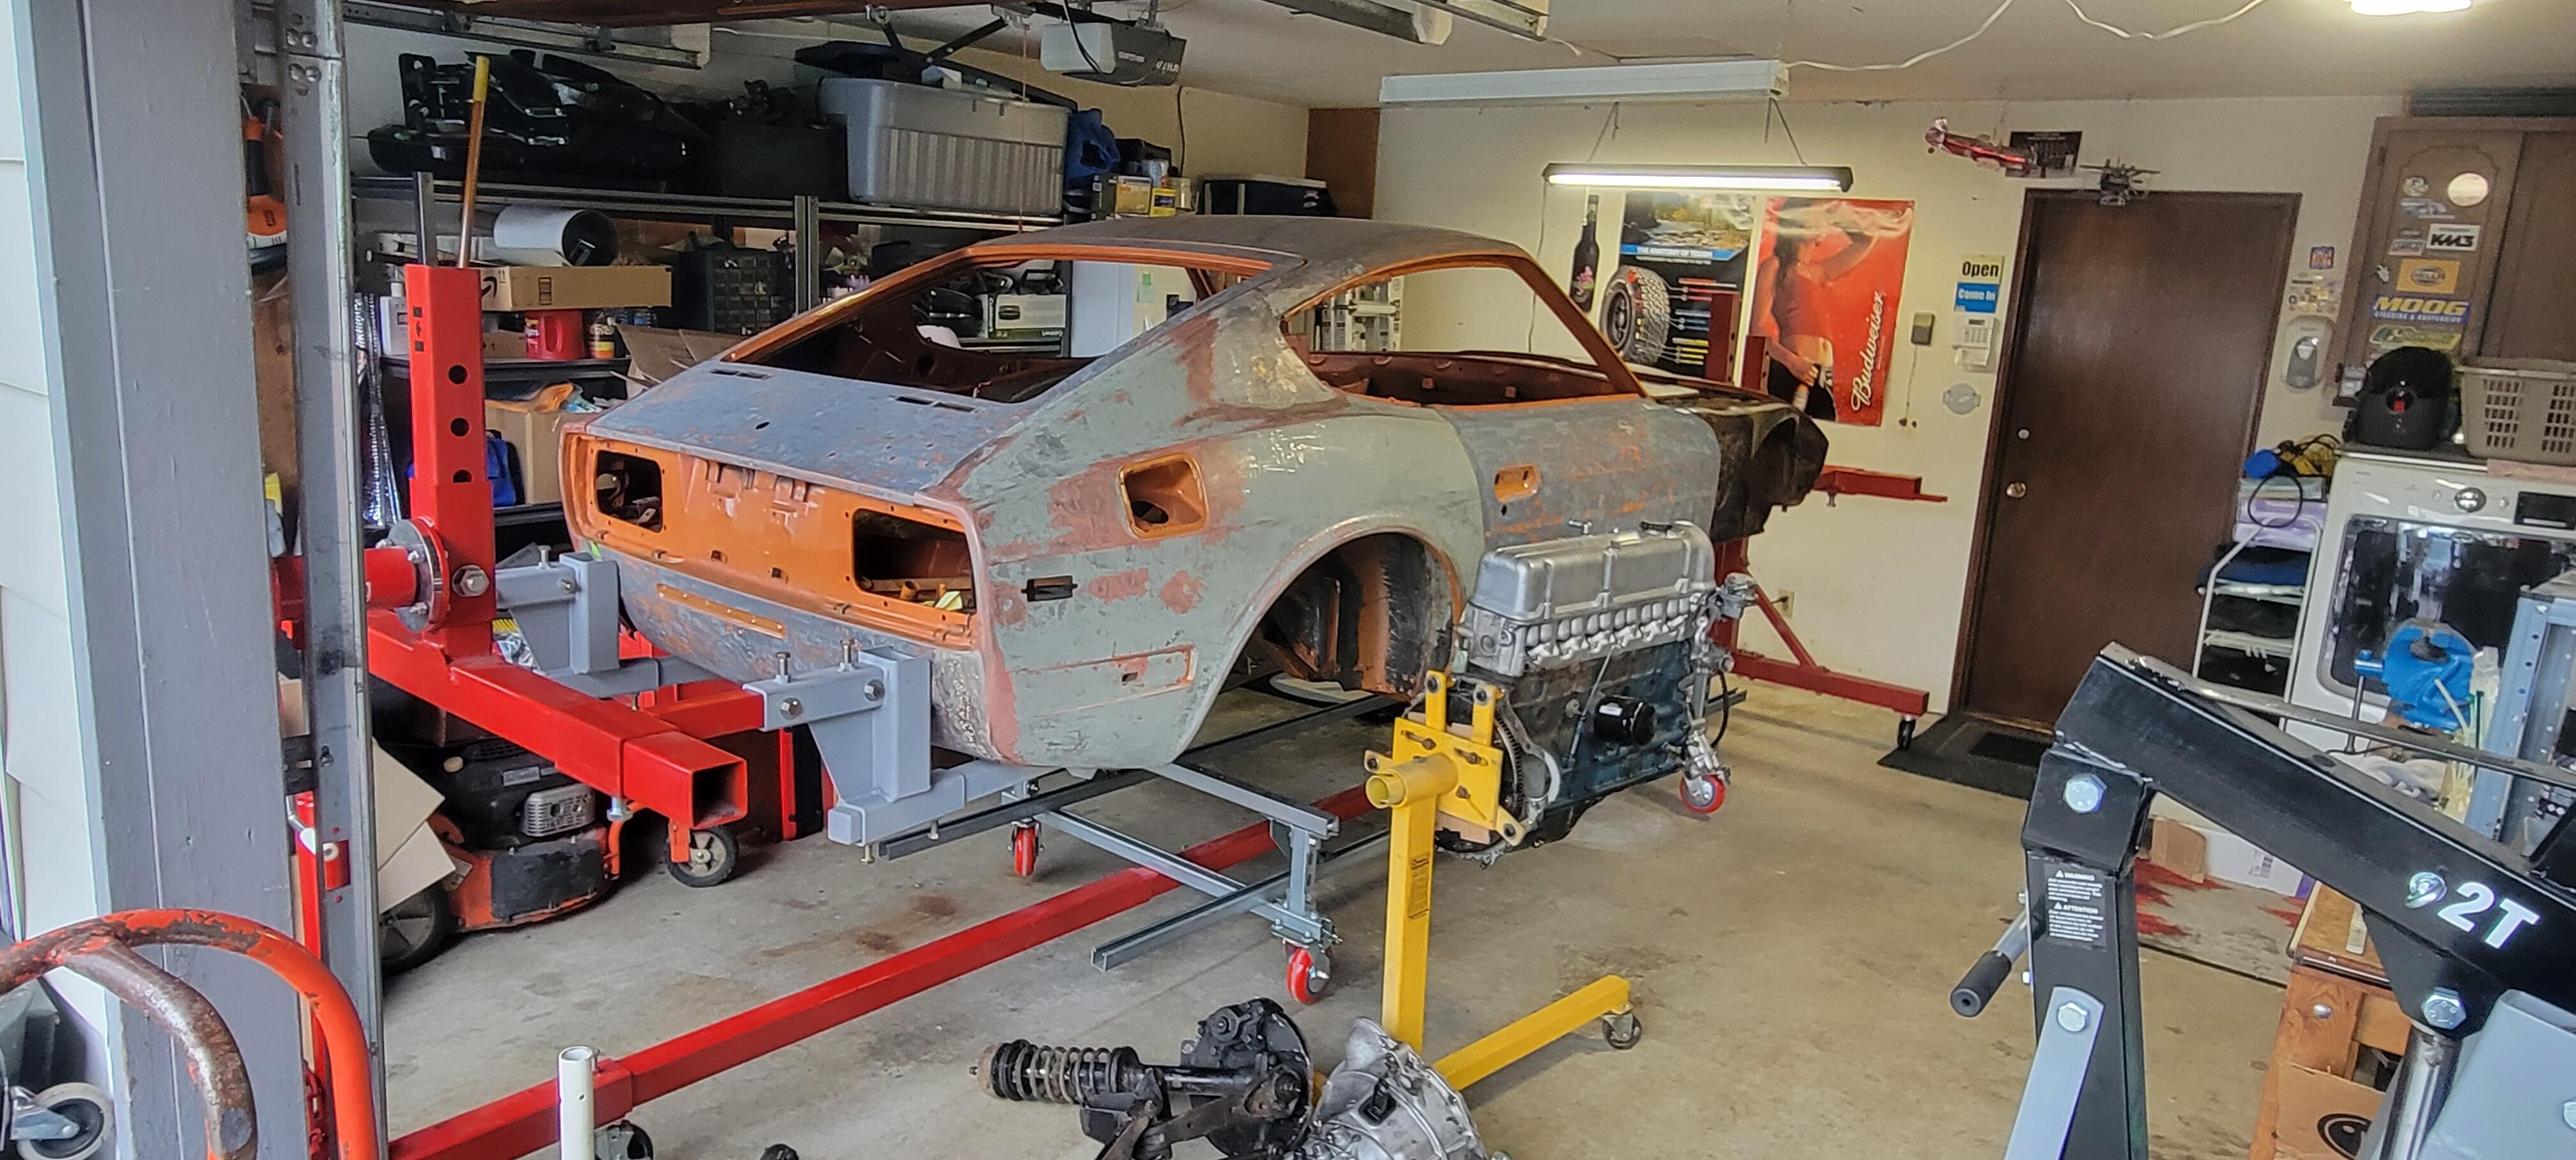
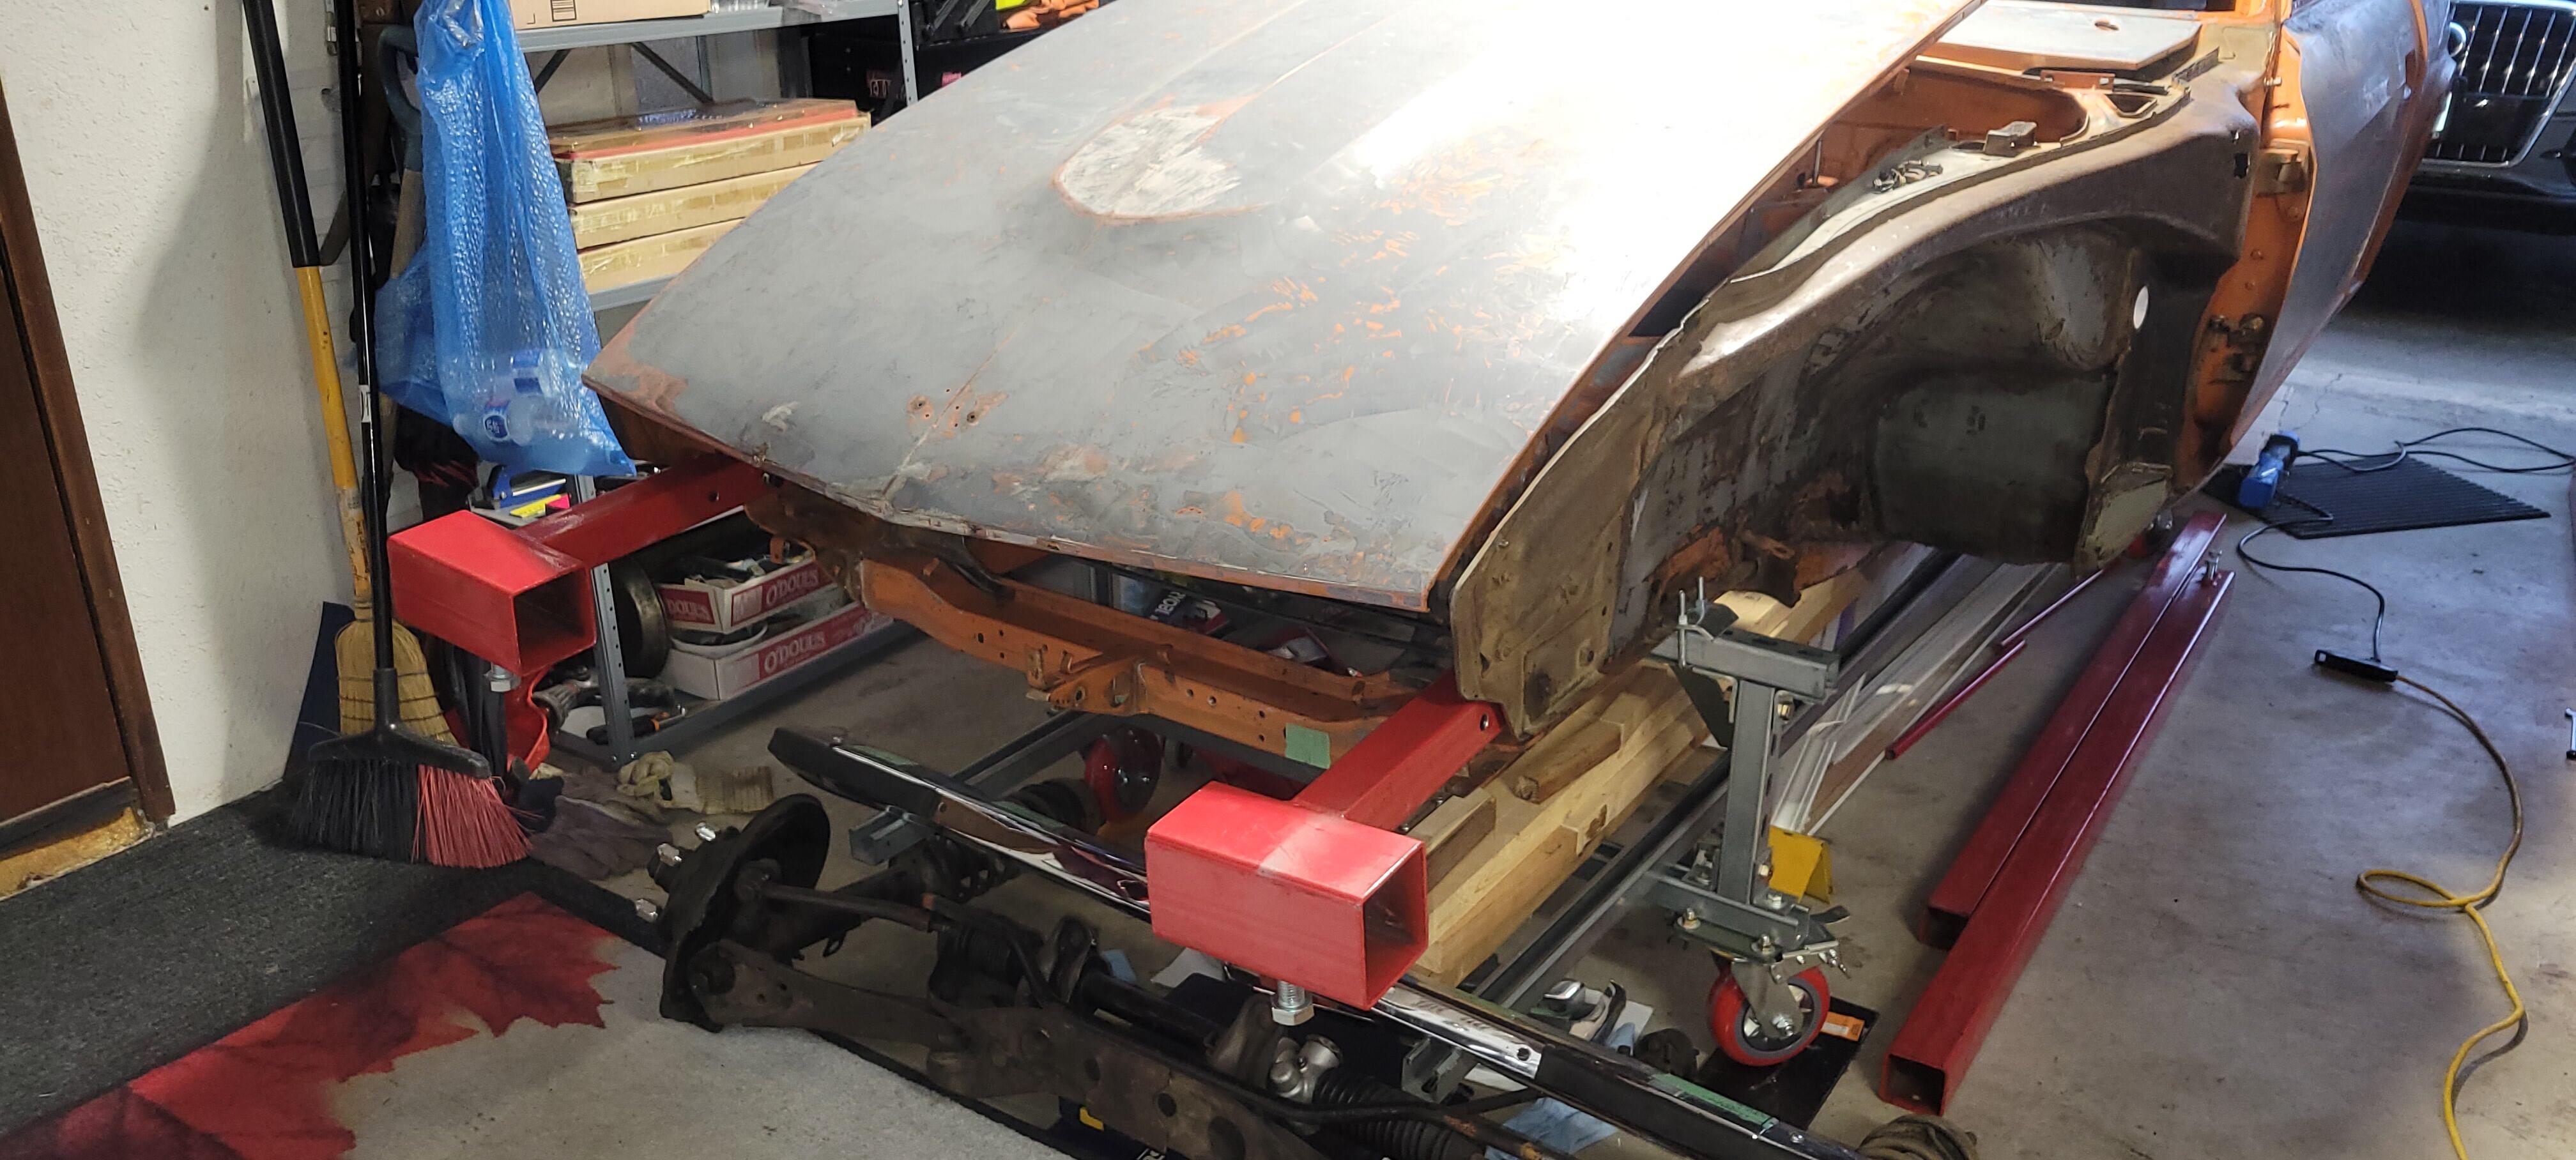
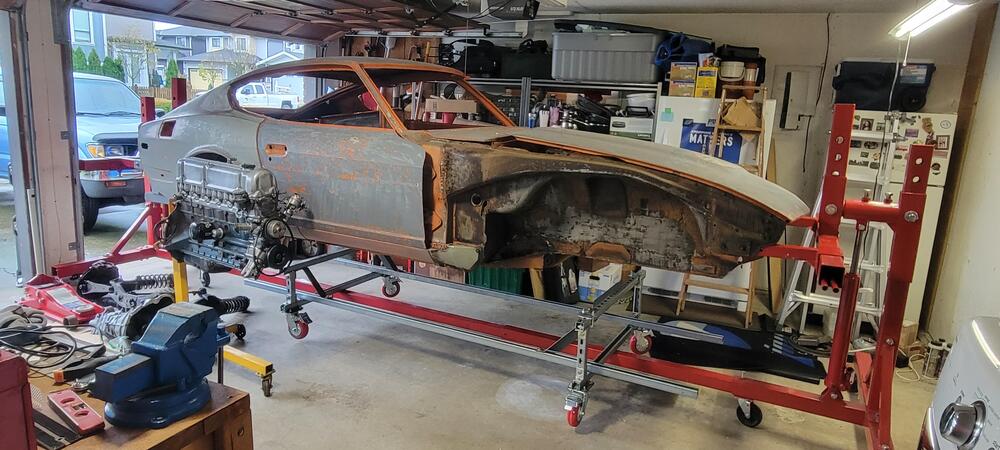
3 pointsLuckily I have already removed most of the undercoating, so hopefully there won't be much mess. As far as rotating it, I've only turned it about 30 degrees with my son holding the door closed. Still need to empty some parts out, like fenders and misc light items. It's been a bit of a storage bin. Also I will need to tie the doors, hood and hatch closed. It will likely be a fee days before I can do the full spin. I will most definitely report back when I get to it.3 points
-
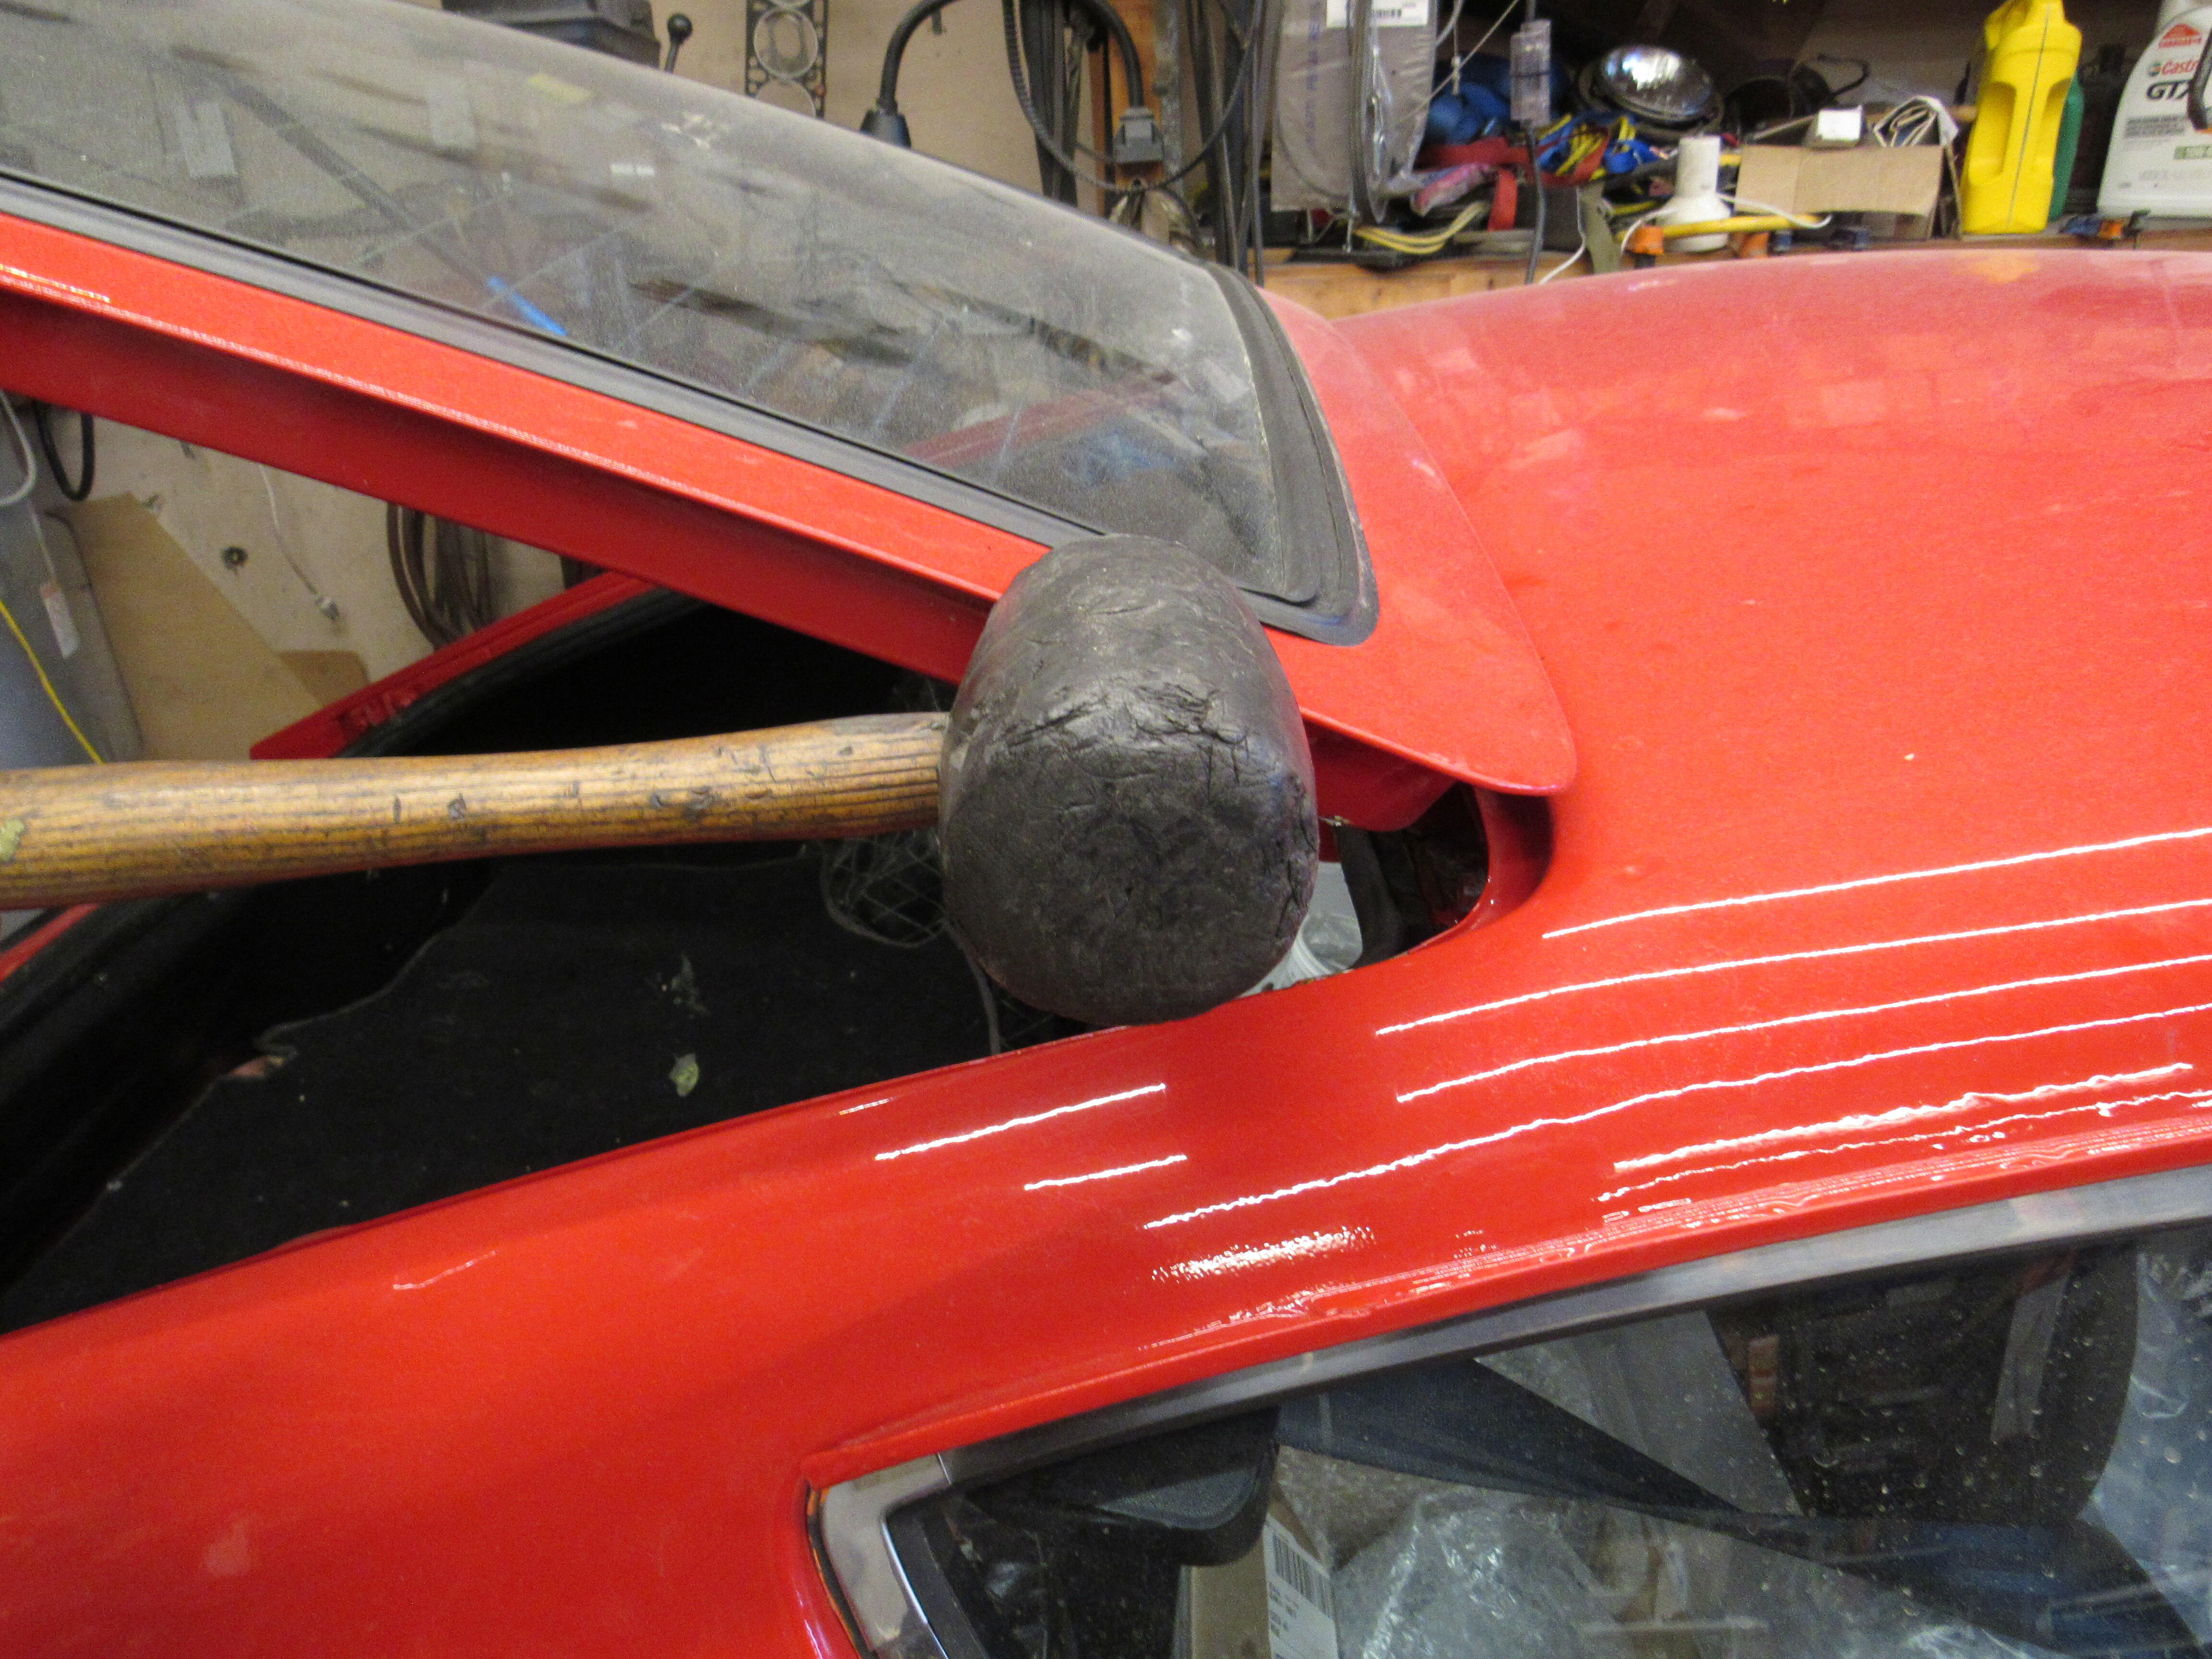
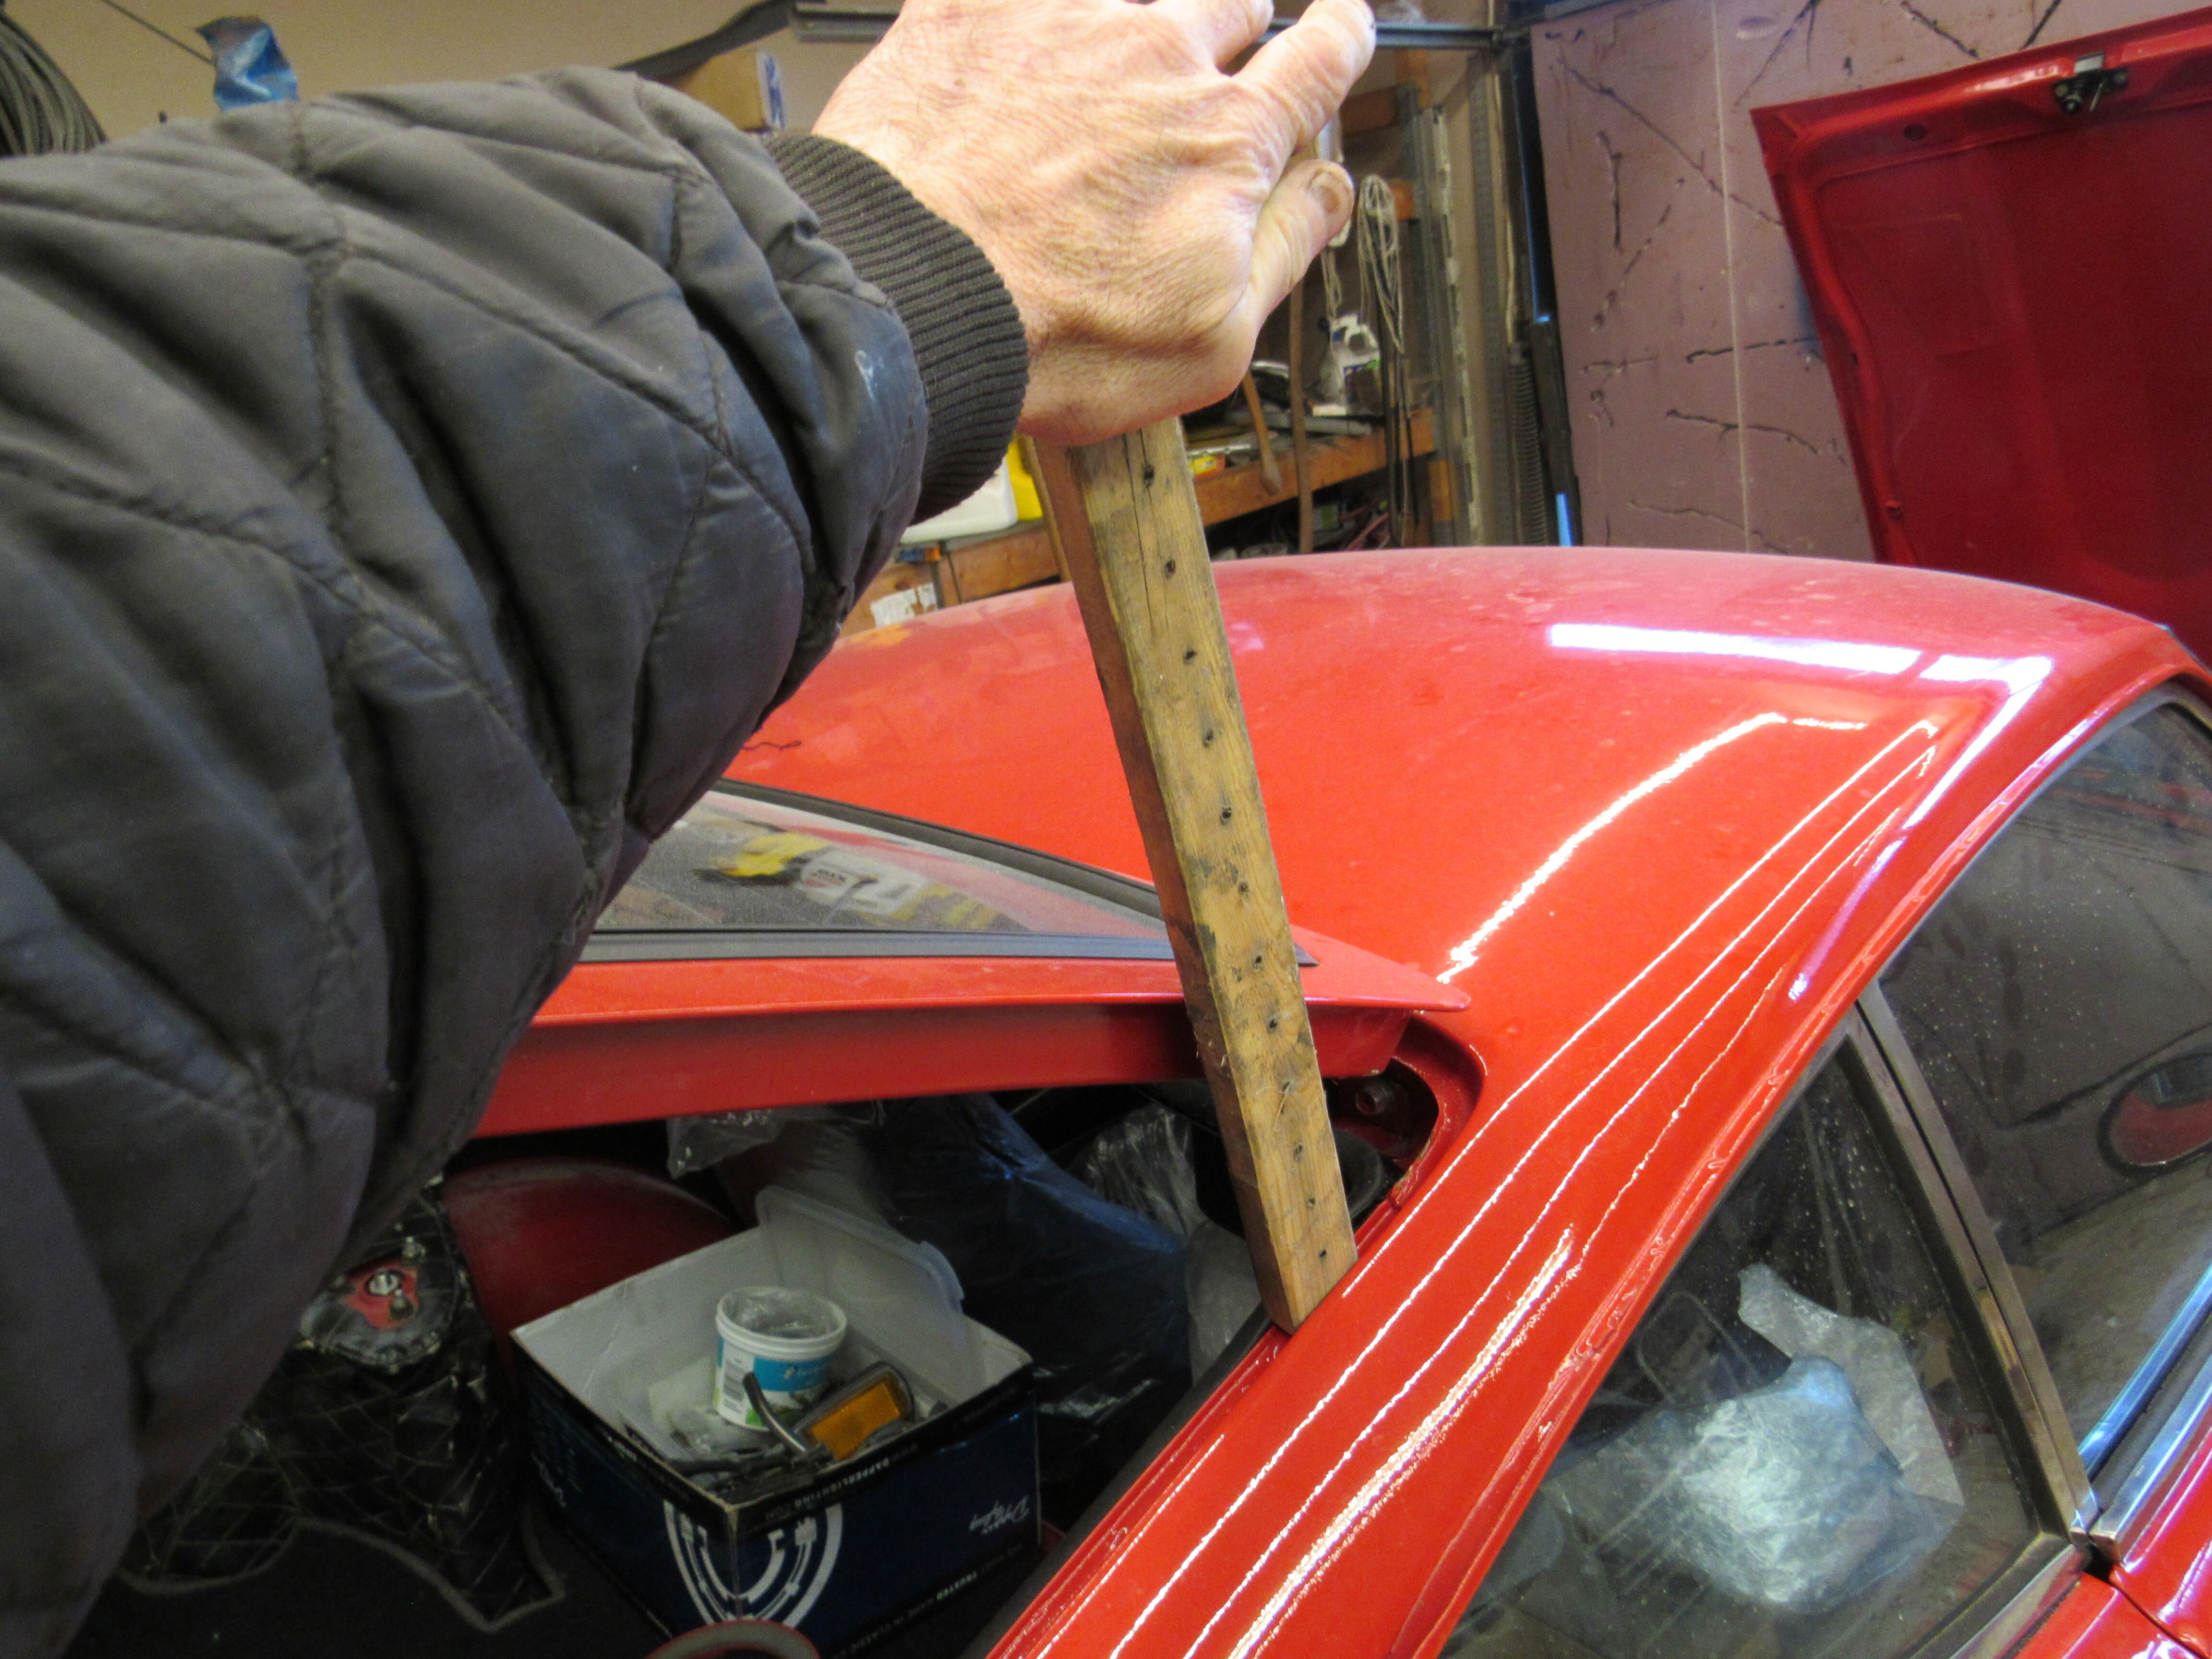
2 pointsAlthough the gaps are different, they are parallel which is good. You'll need to open the hatch, loosen off but don't remove the 4 bolts holding the hinges to the roof, then from the P/S up near the hinge you want to give the hatch a shove or sharp rap with a rubber mallet. If the hatch hasn't been removed before you may have to work hard to get any sideways movement, most of them are painted in place, keep lowering the hatch to see if you have shifted it enough, when you get it to where you want tighten each bolt a little bit at a time until all 4 are snug. Don't be surprised if the hatch has tightened down into the same spot it was before, repeat the process a use a wooden lever to hold the hatch in place as you tighten. If all of that seems like too much, you can rub down the side bumper with the end of a paraffin wax candle.

 2 points
 -
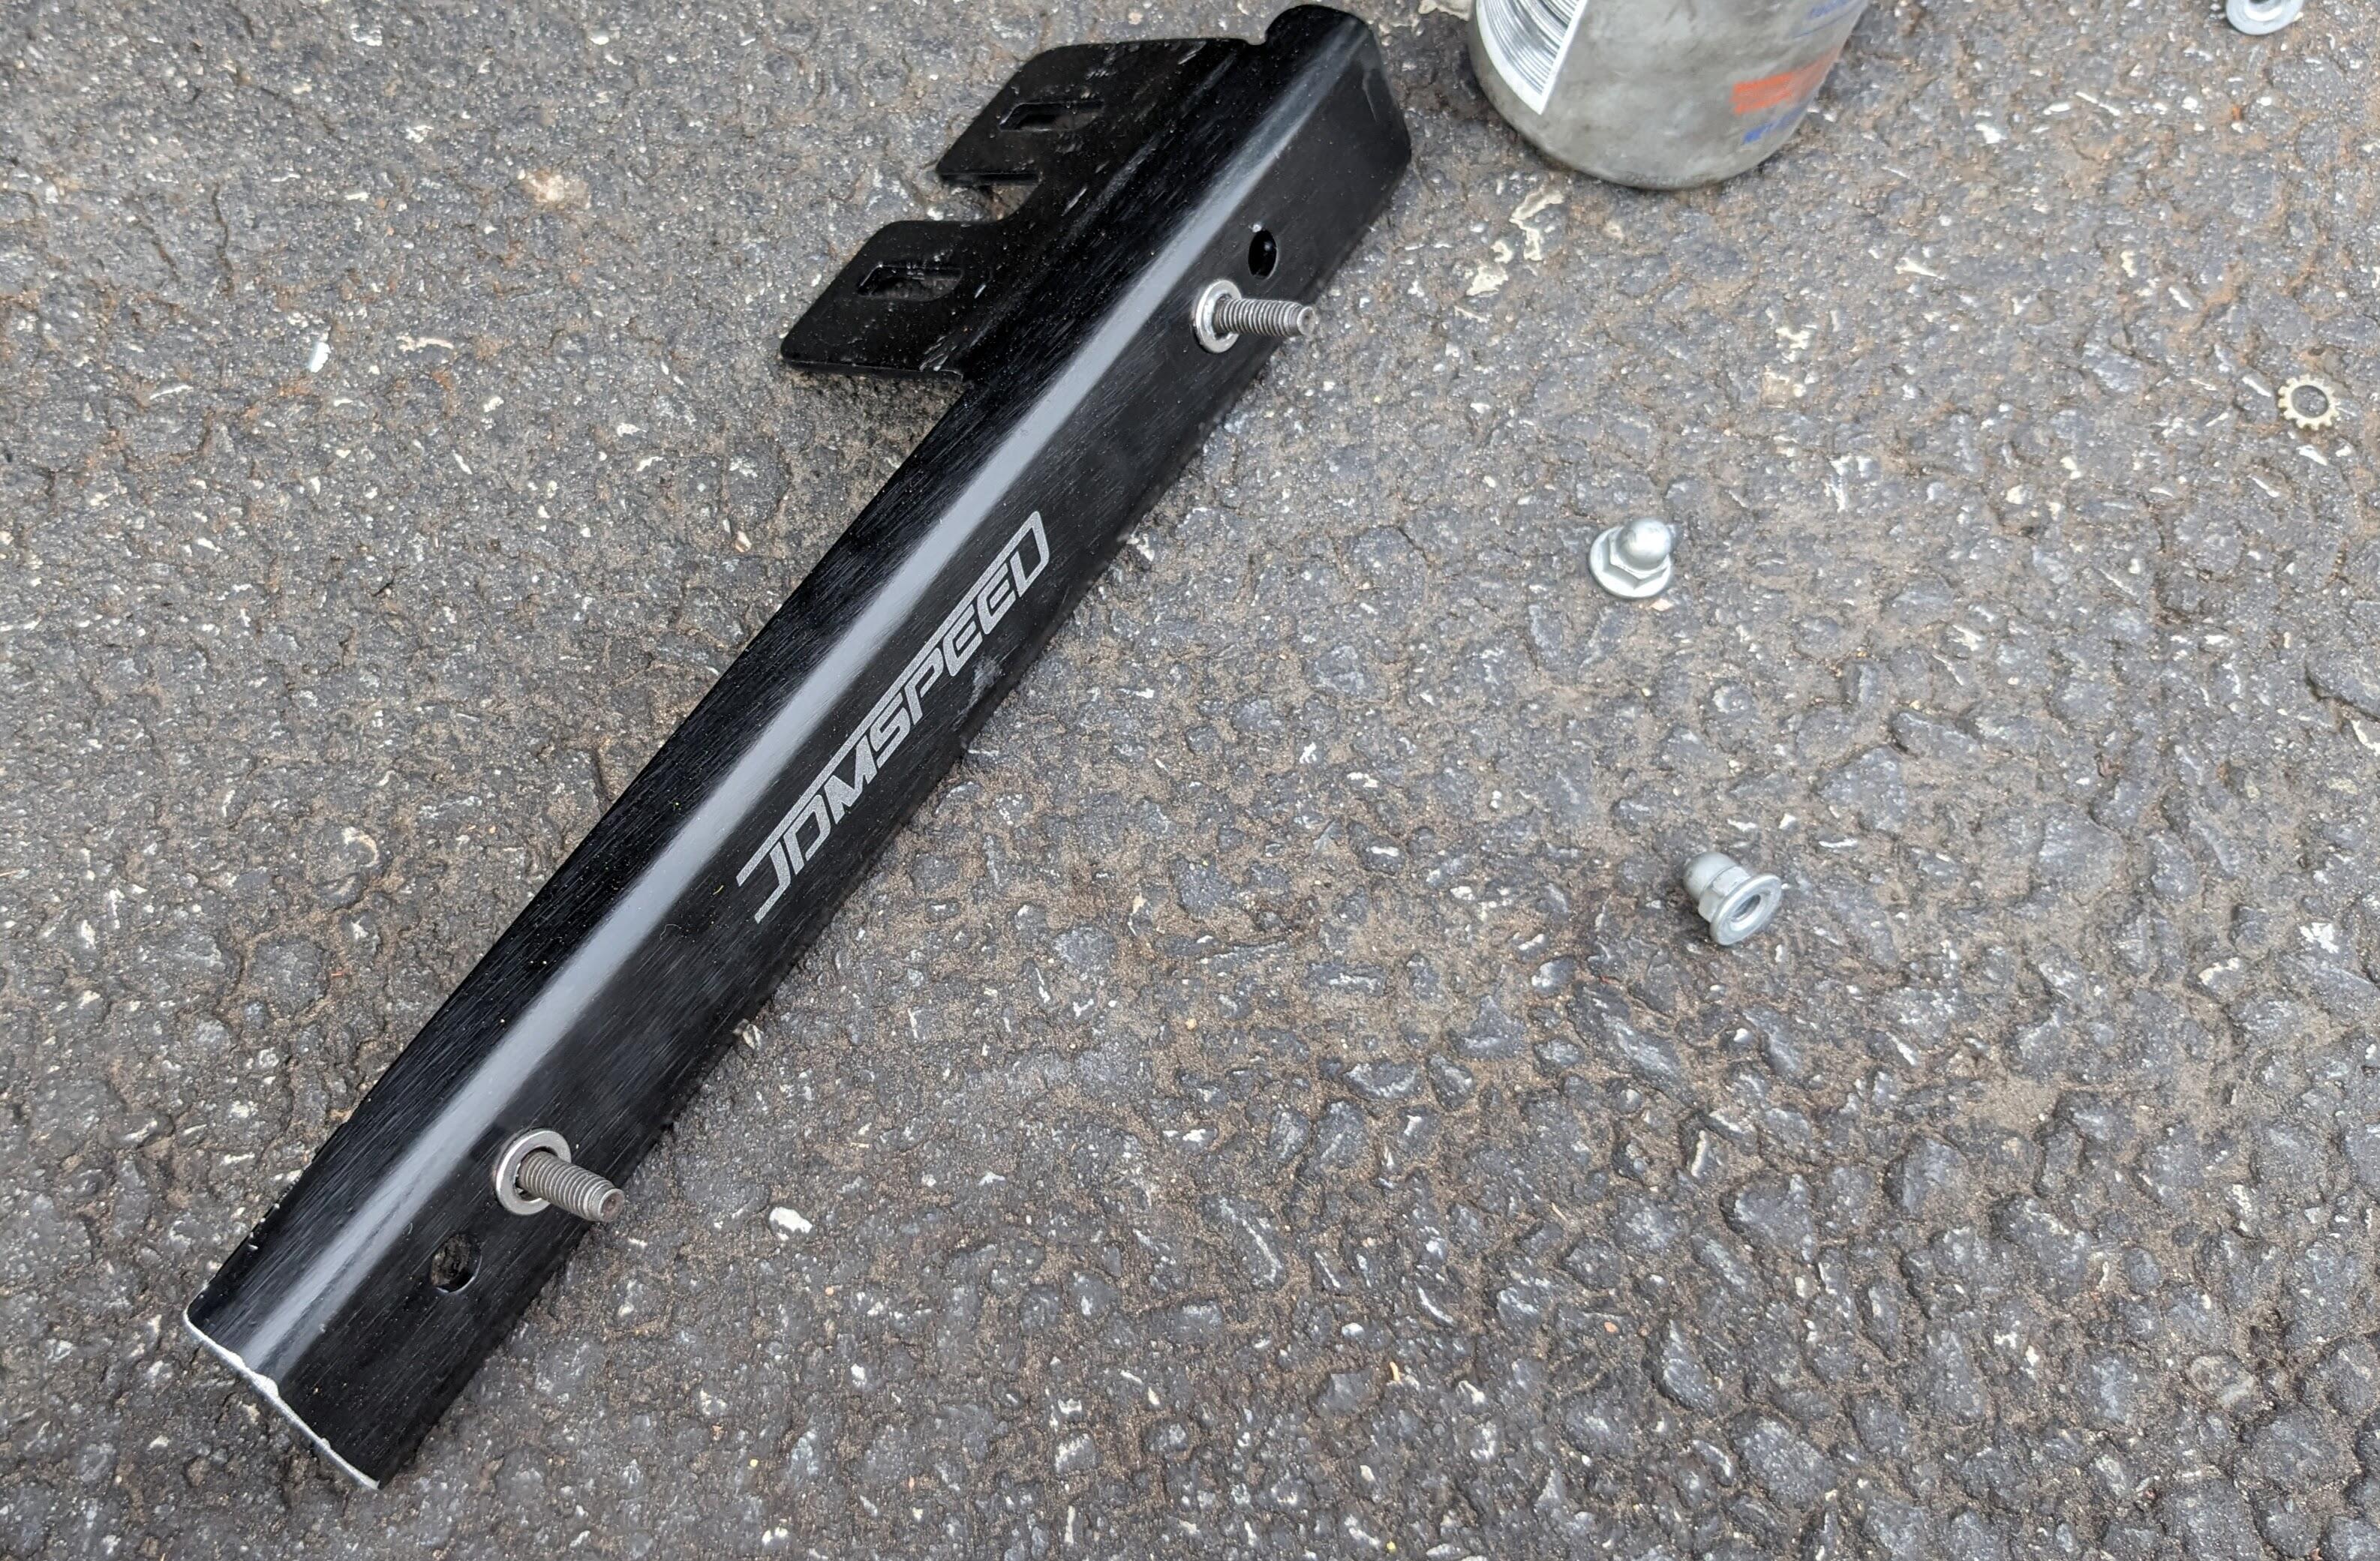
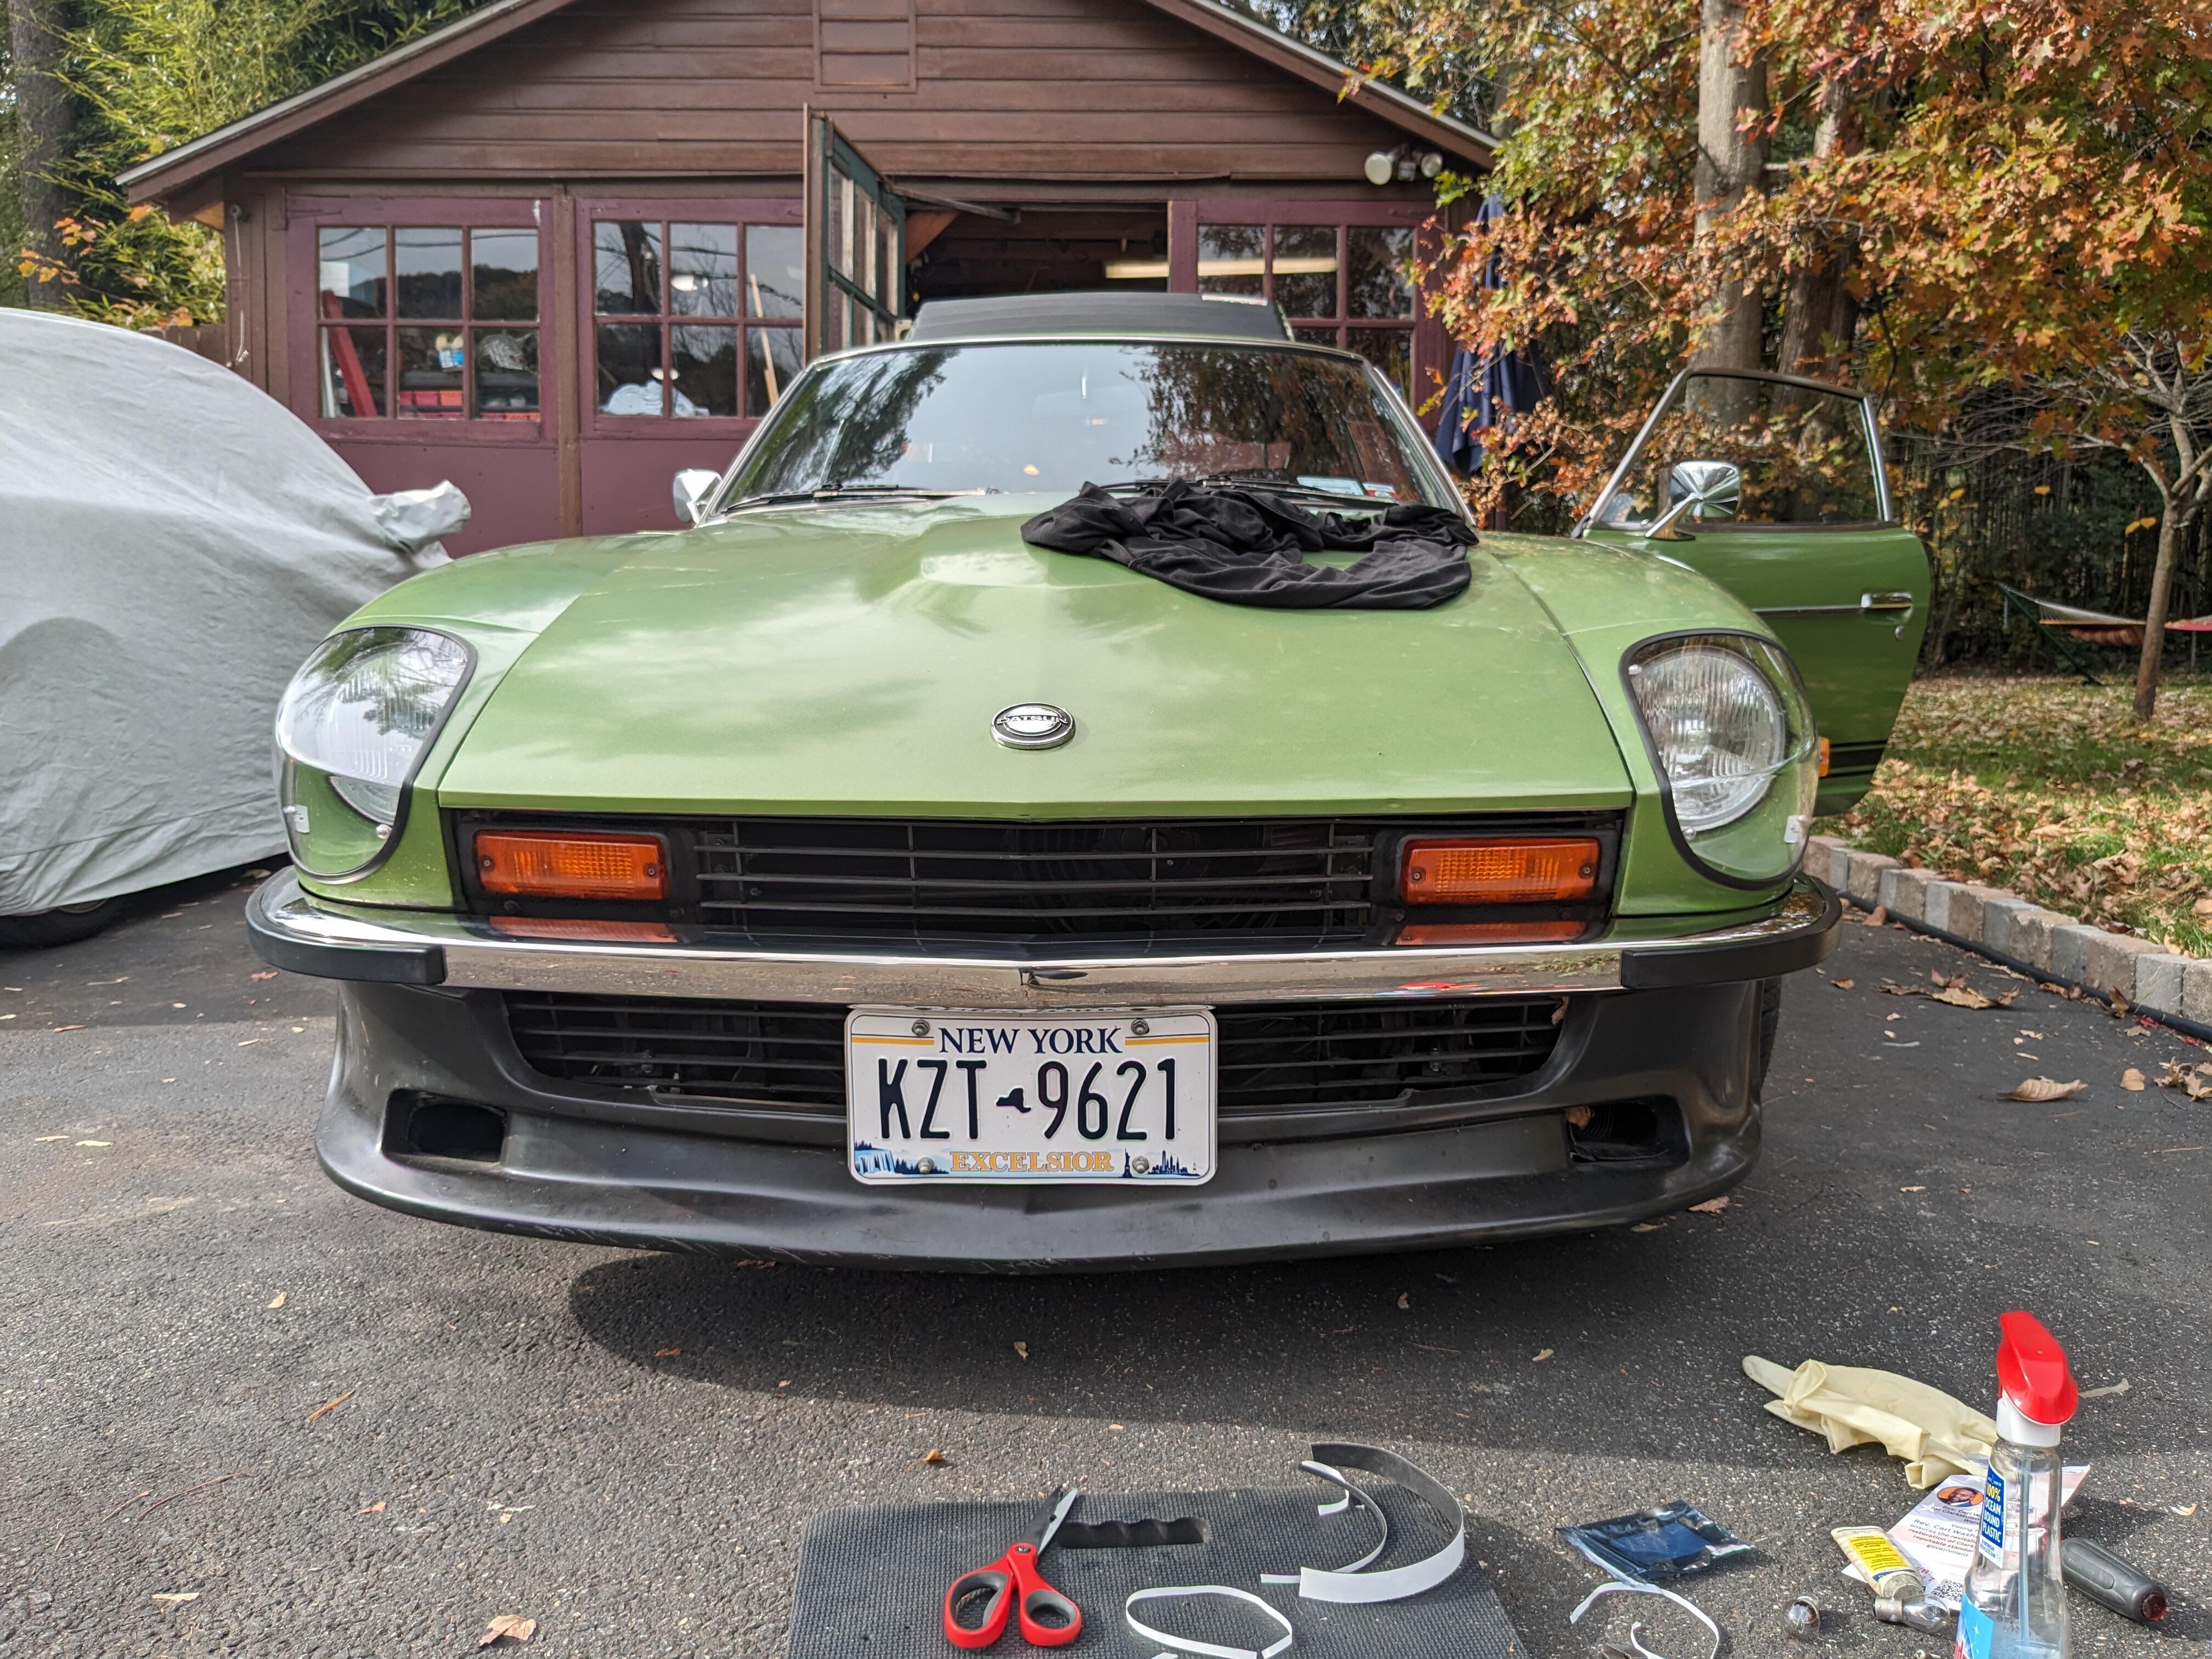
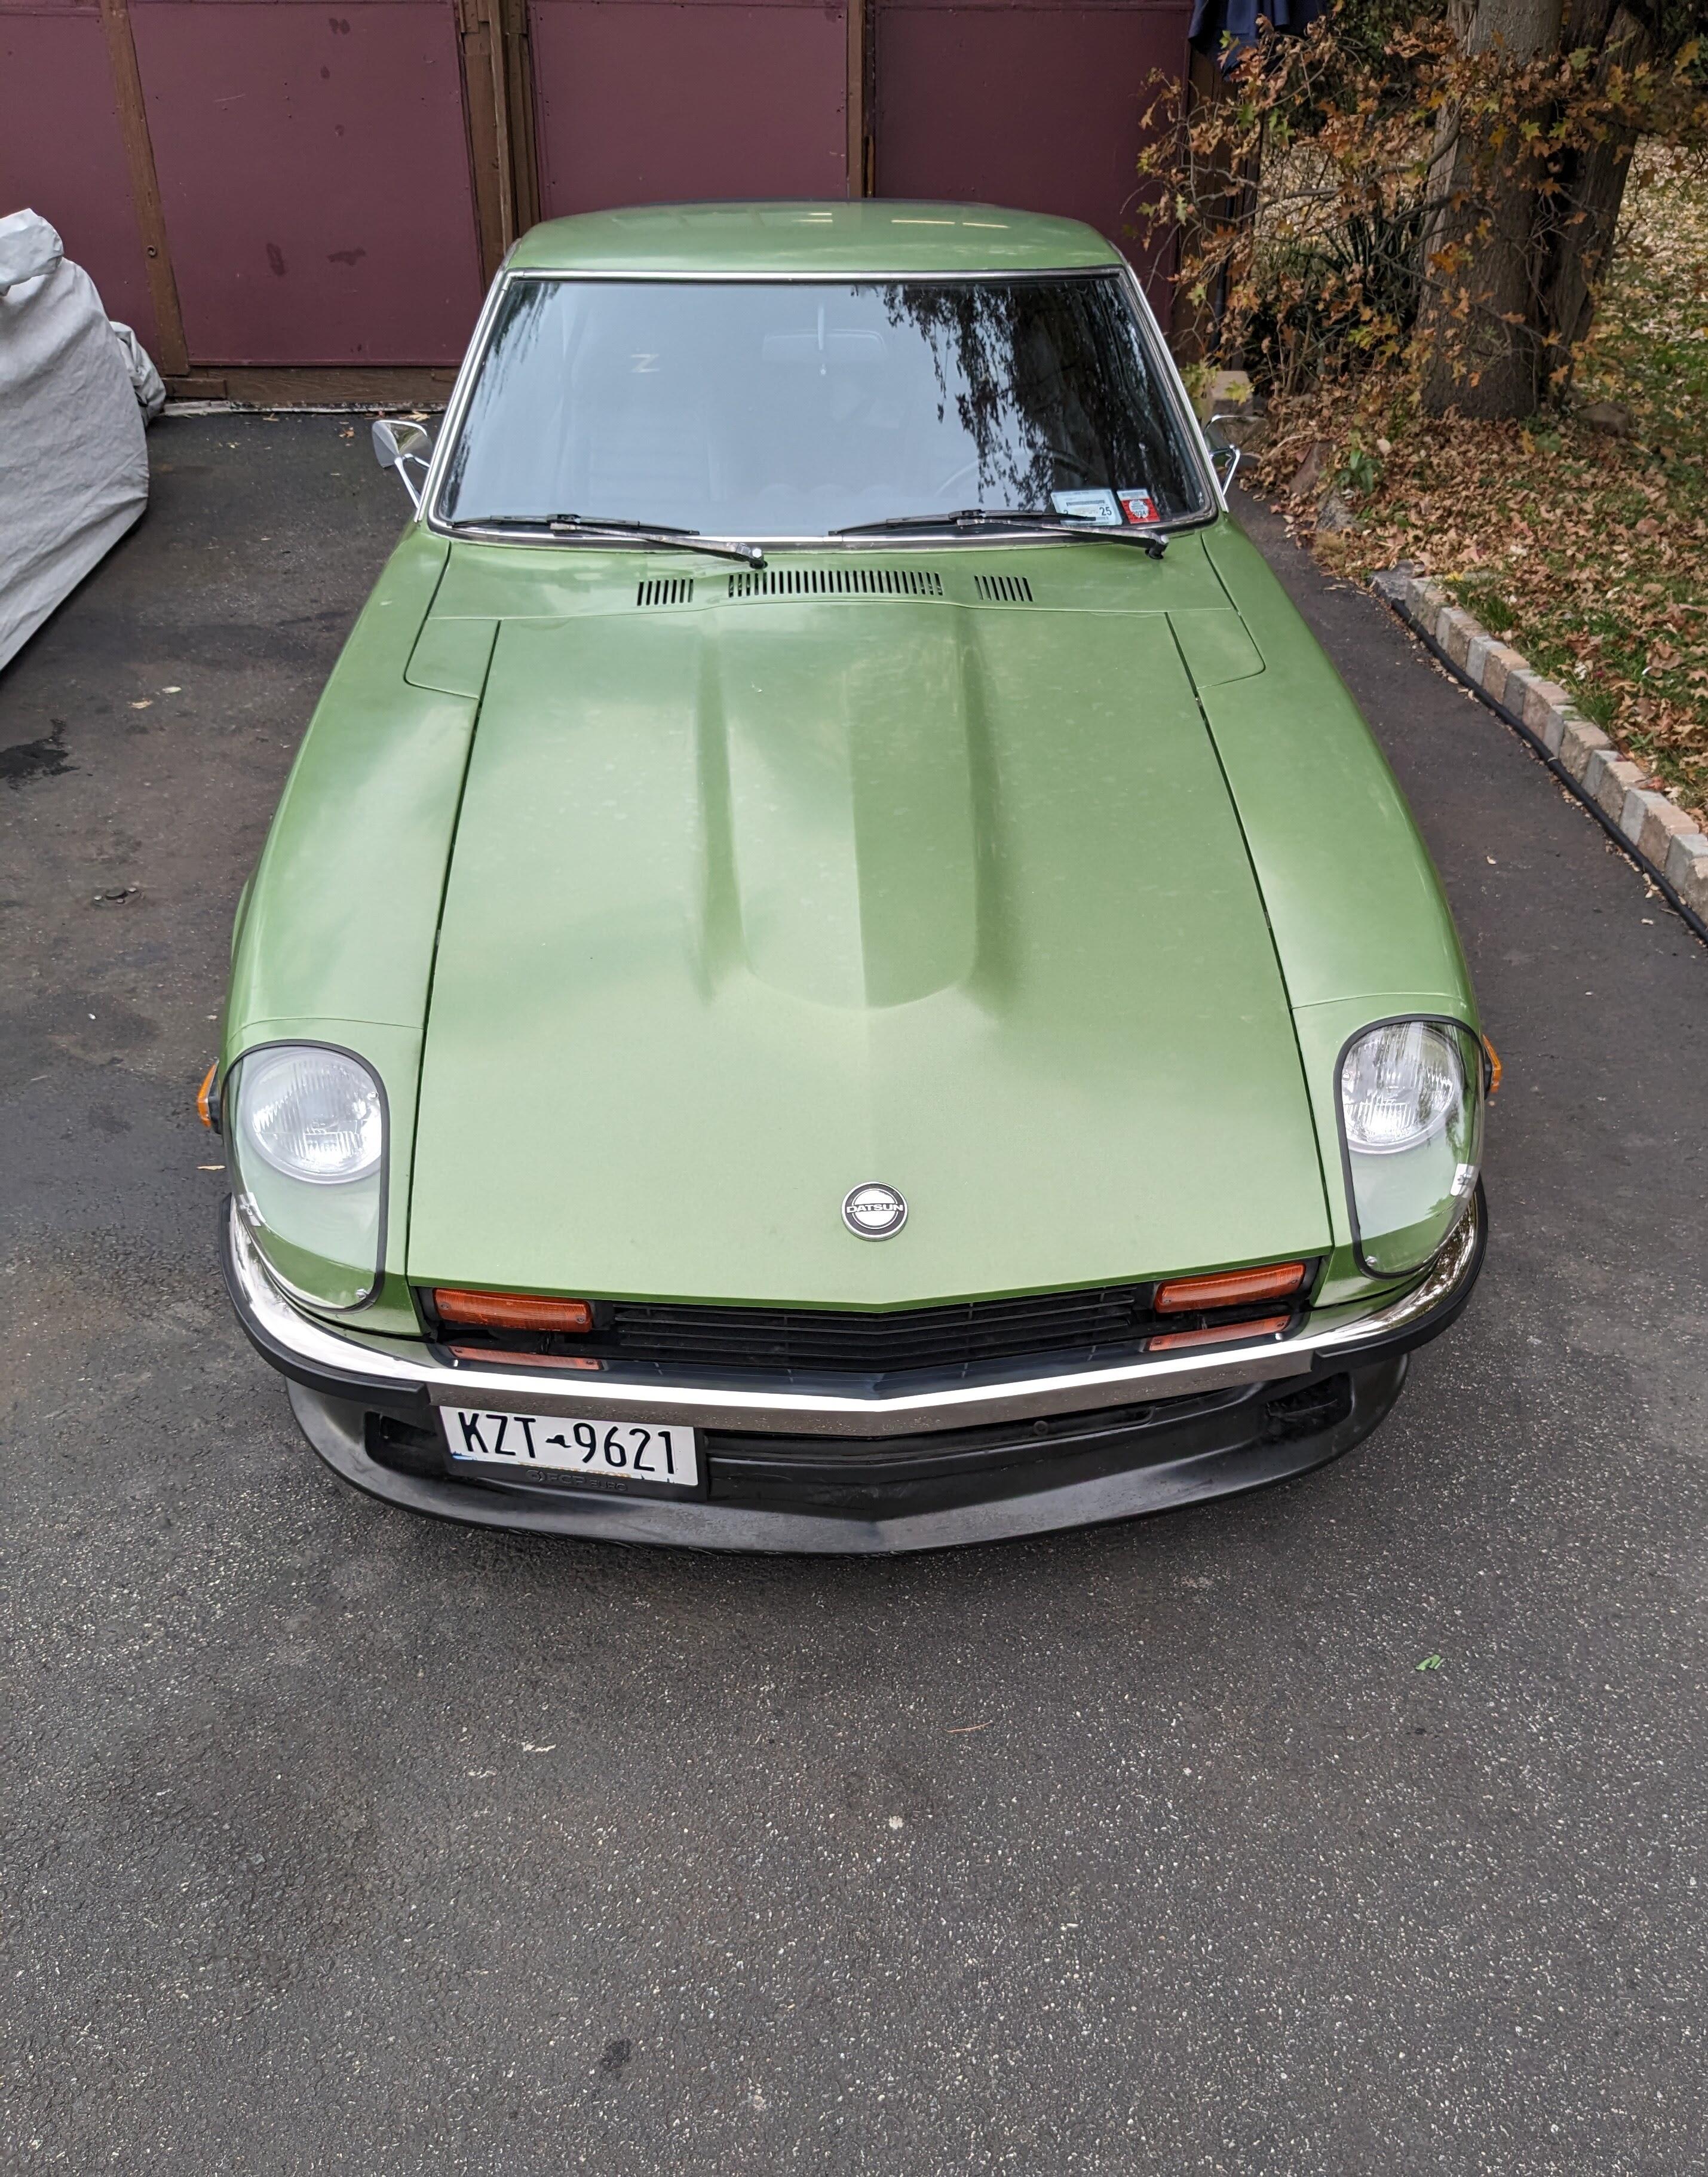
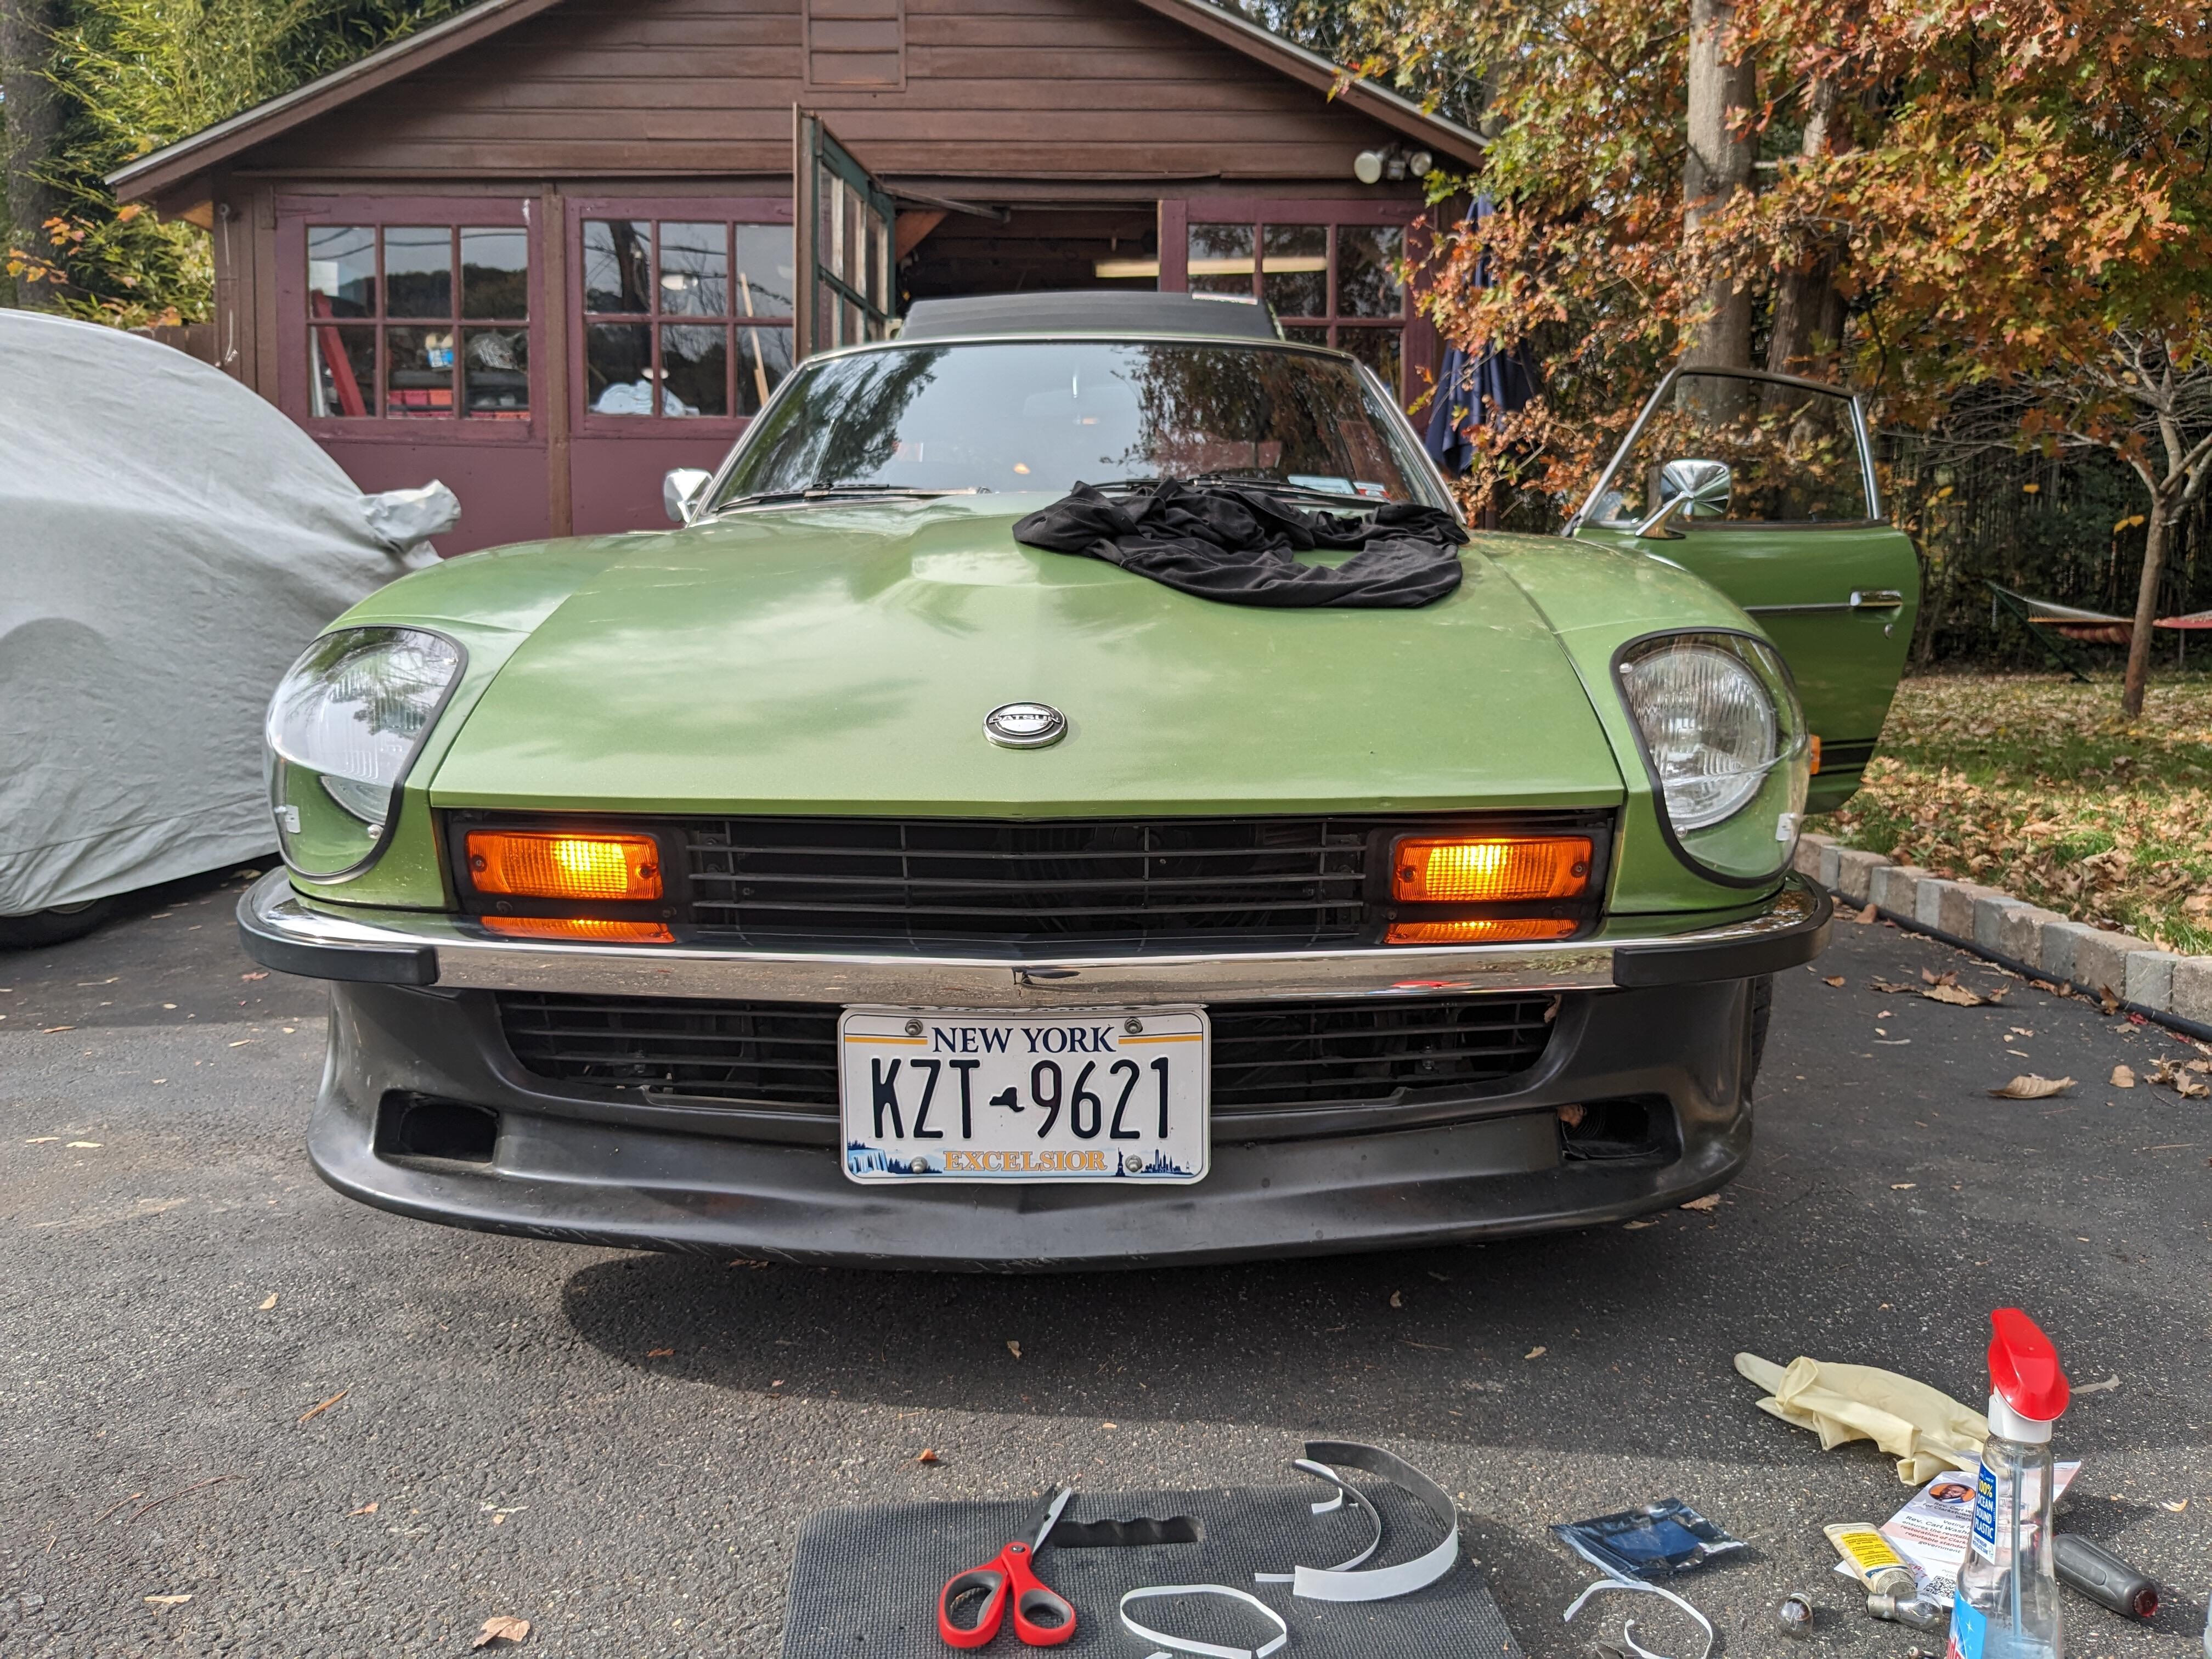
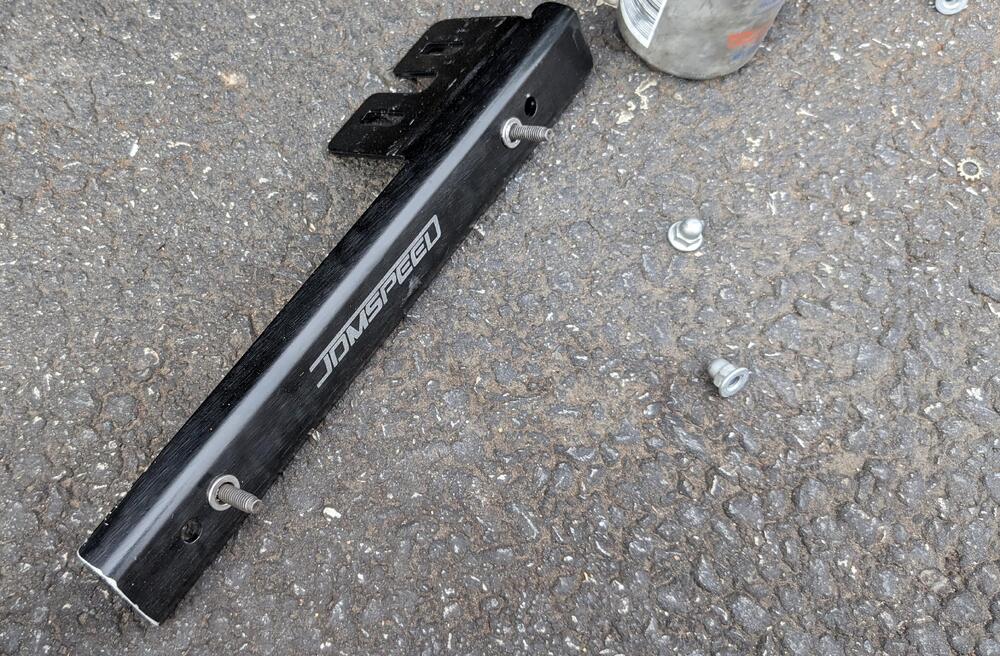
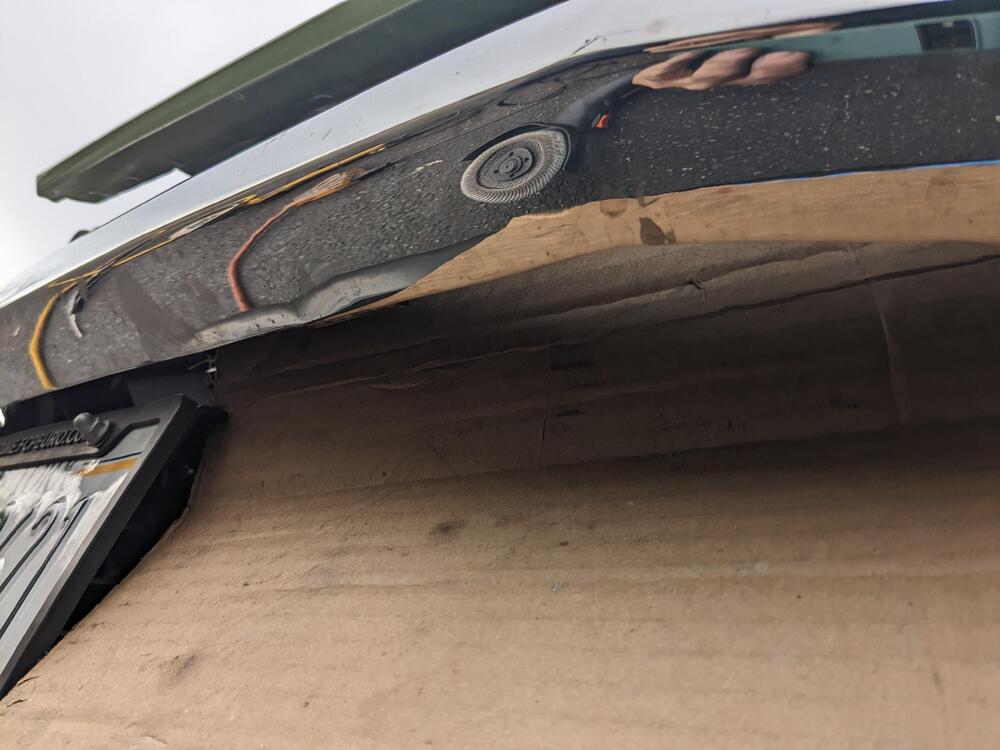
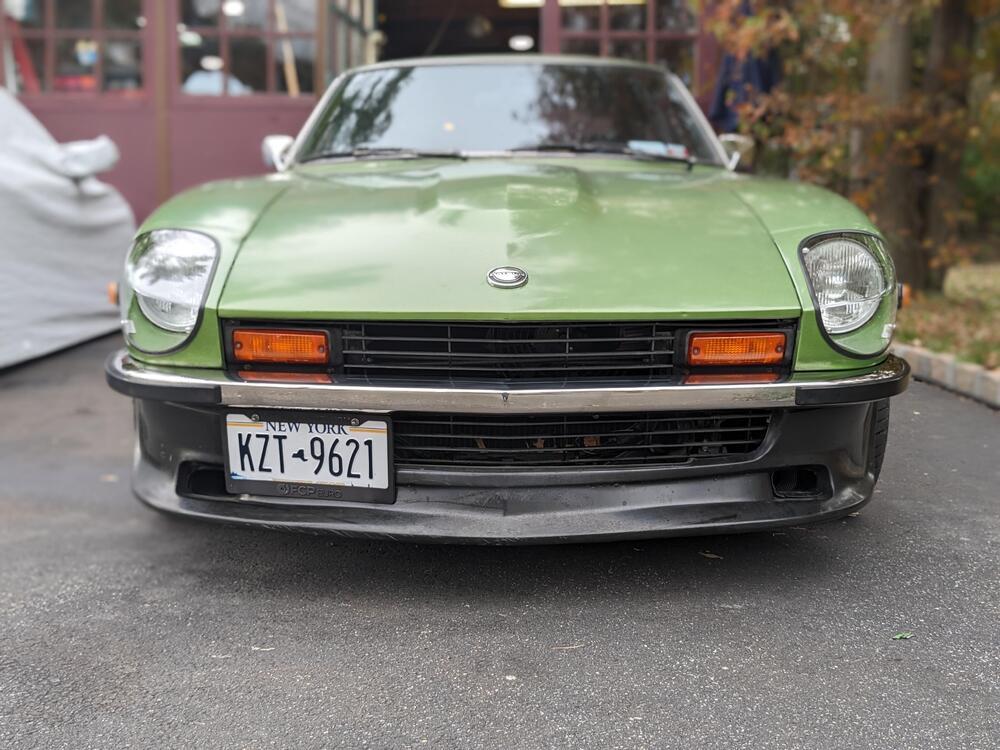
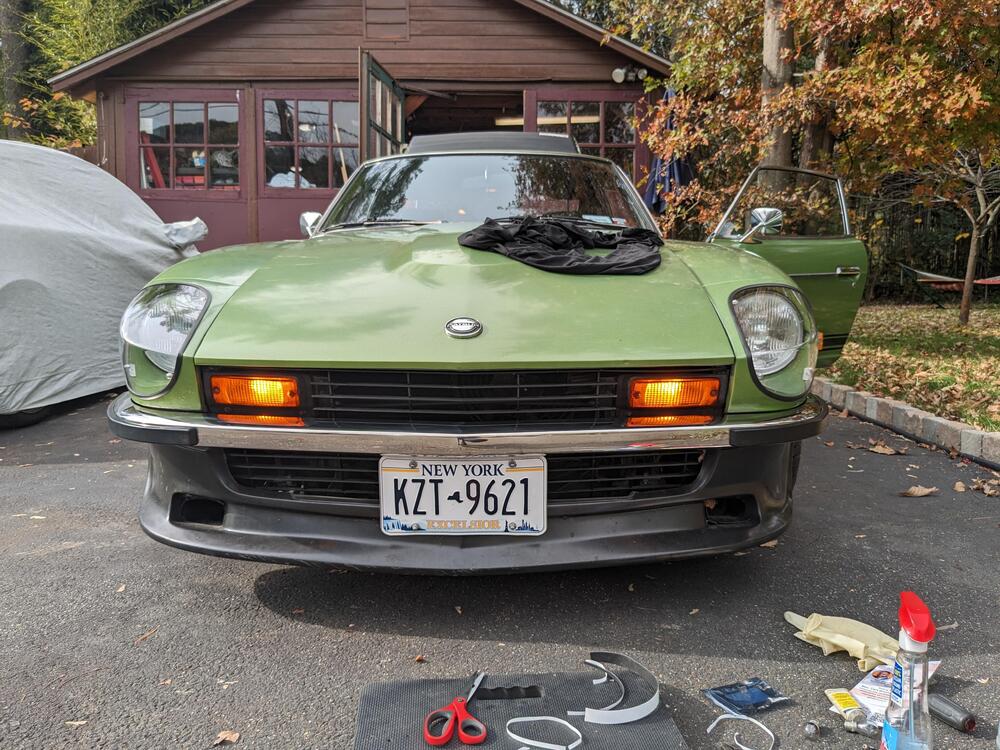
While I was working on the front directional cleanup & LED conversion, I decided to take care of relocating the front plate. I bought a cheap aluminum bracket of Amazon. After playing with placement, I decided the only practical location was to attach the bracket to the Skilled grille. I wanted the plate offset as far right as possible without blocking the spoiler duct, and/or extending to far out where the bumper & fender line starts to run rearward. Added rivnuts and studs to allow me to use acorn head retaining nuts for the plate. Cut some material off the length where it hit the Skilled grille opening, changed the angle of the mount tab to get the plate vertical. drilled mount holes in the grille cut off the stainless tangs welded to the bumper Before & After. Much happier with this. Still blocks some air passage into the radiator, but at least it's not a giant deflector

 2 points
 -
2 points
-
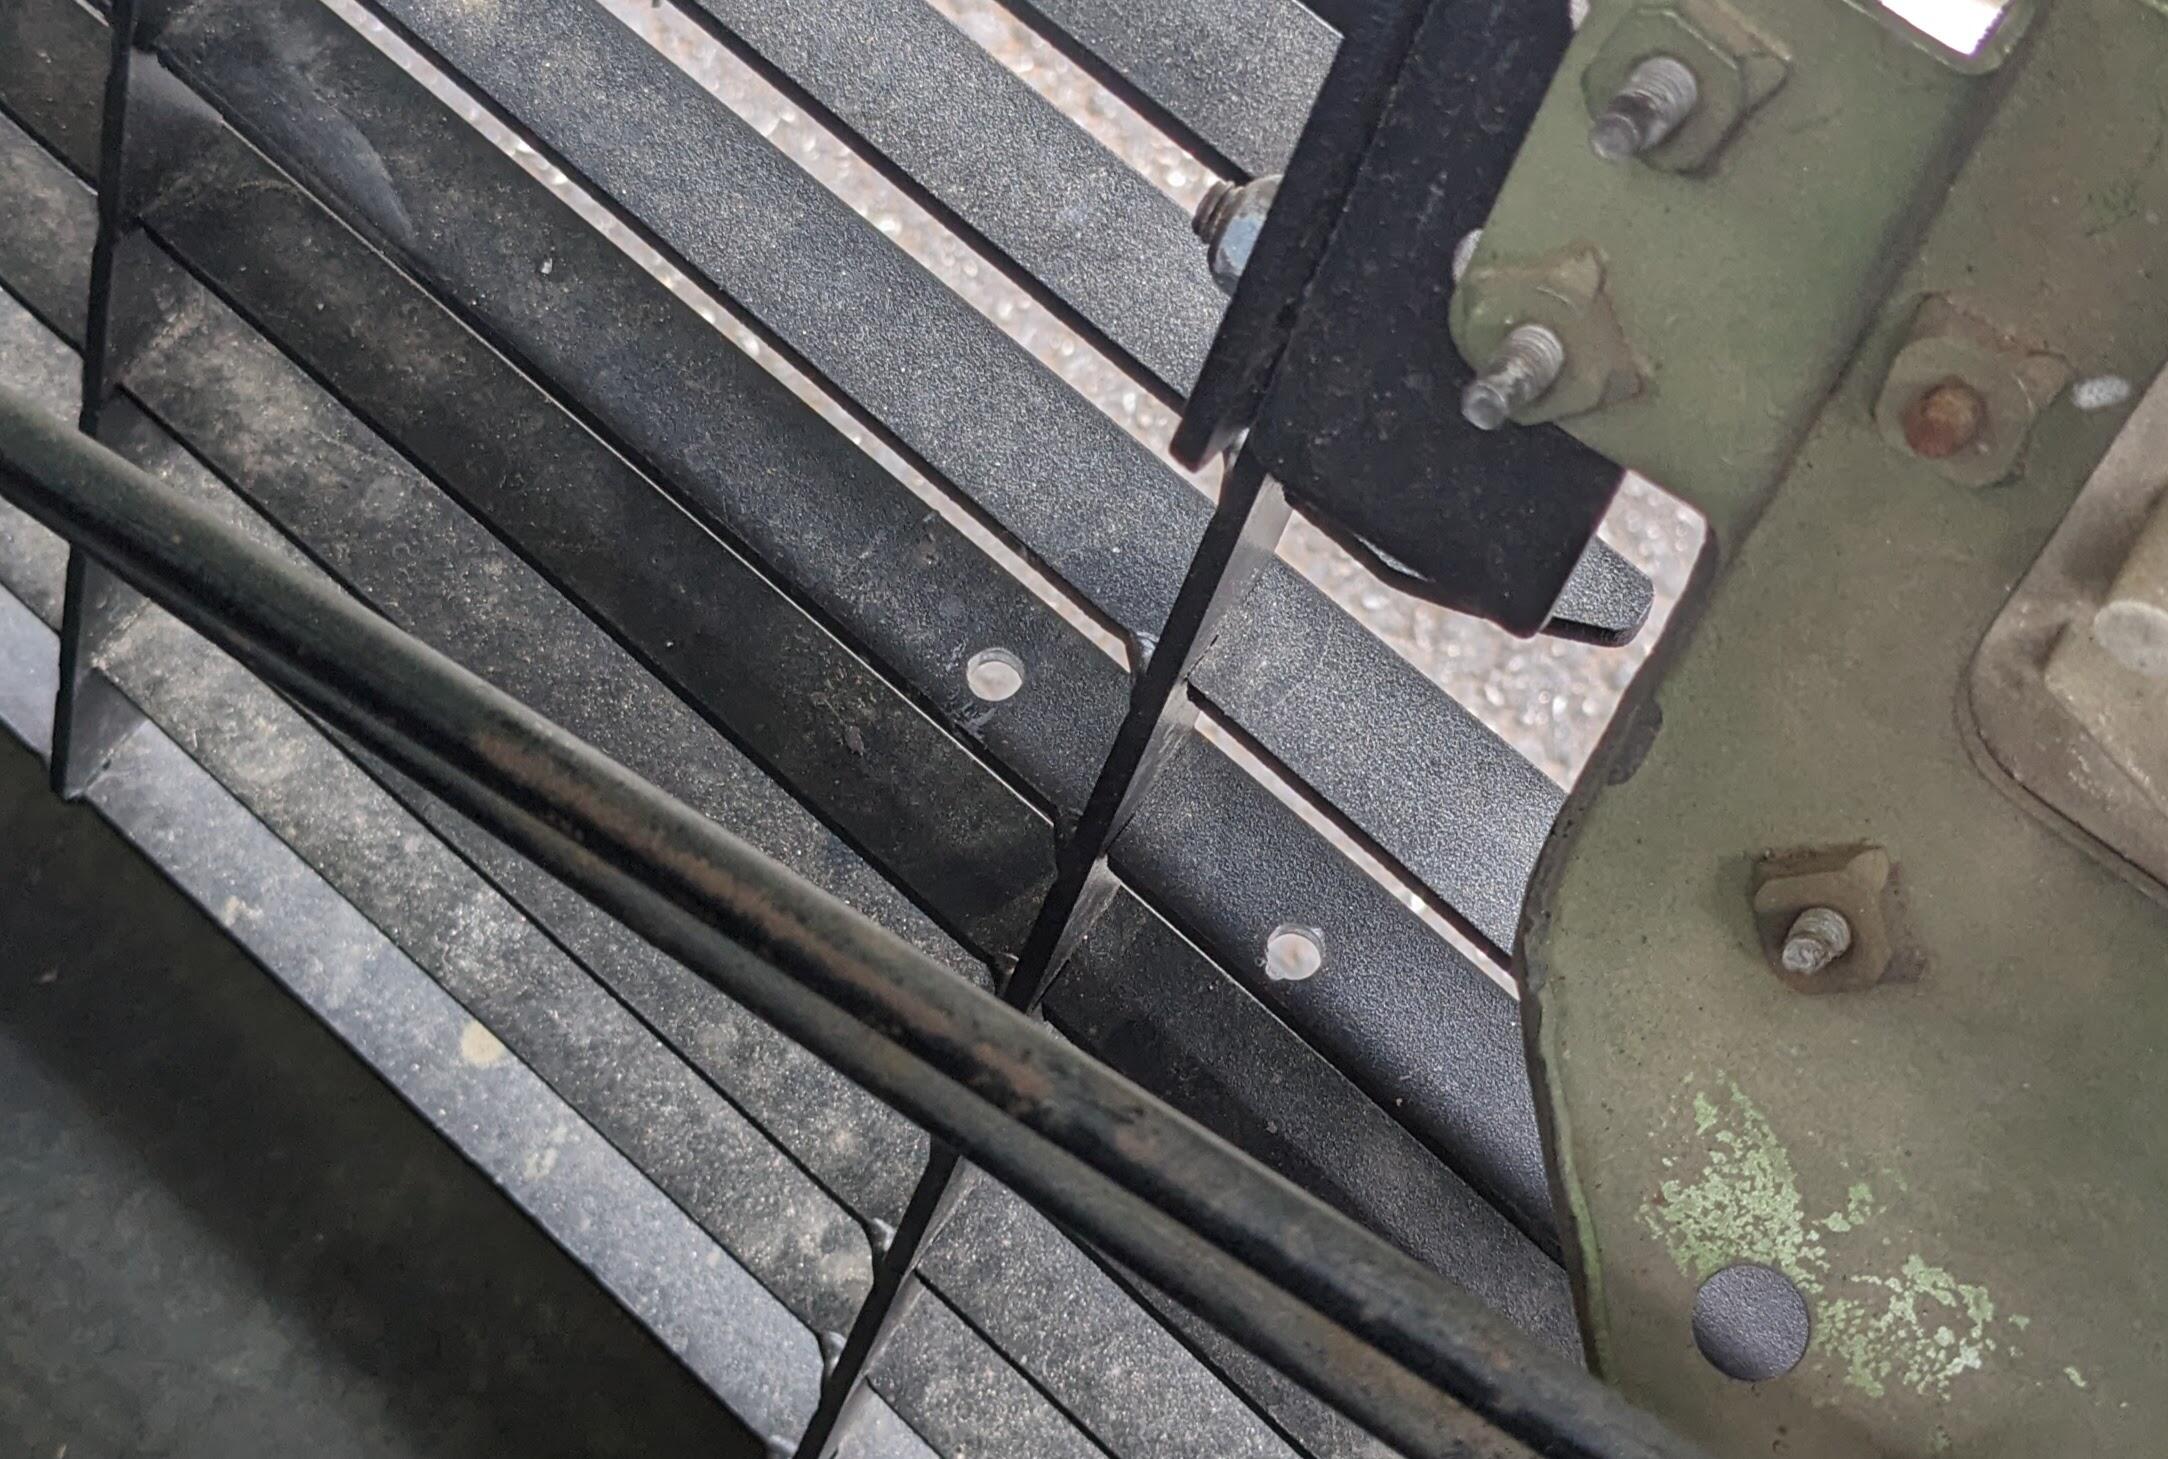
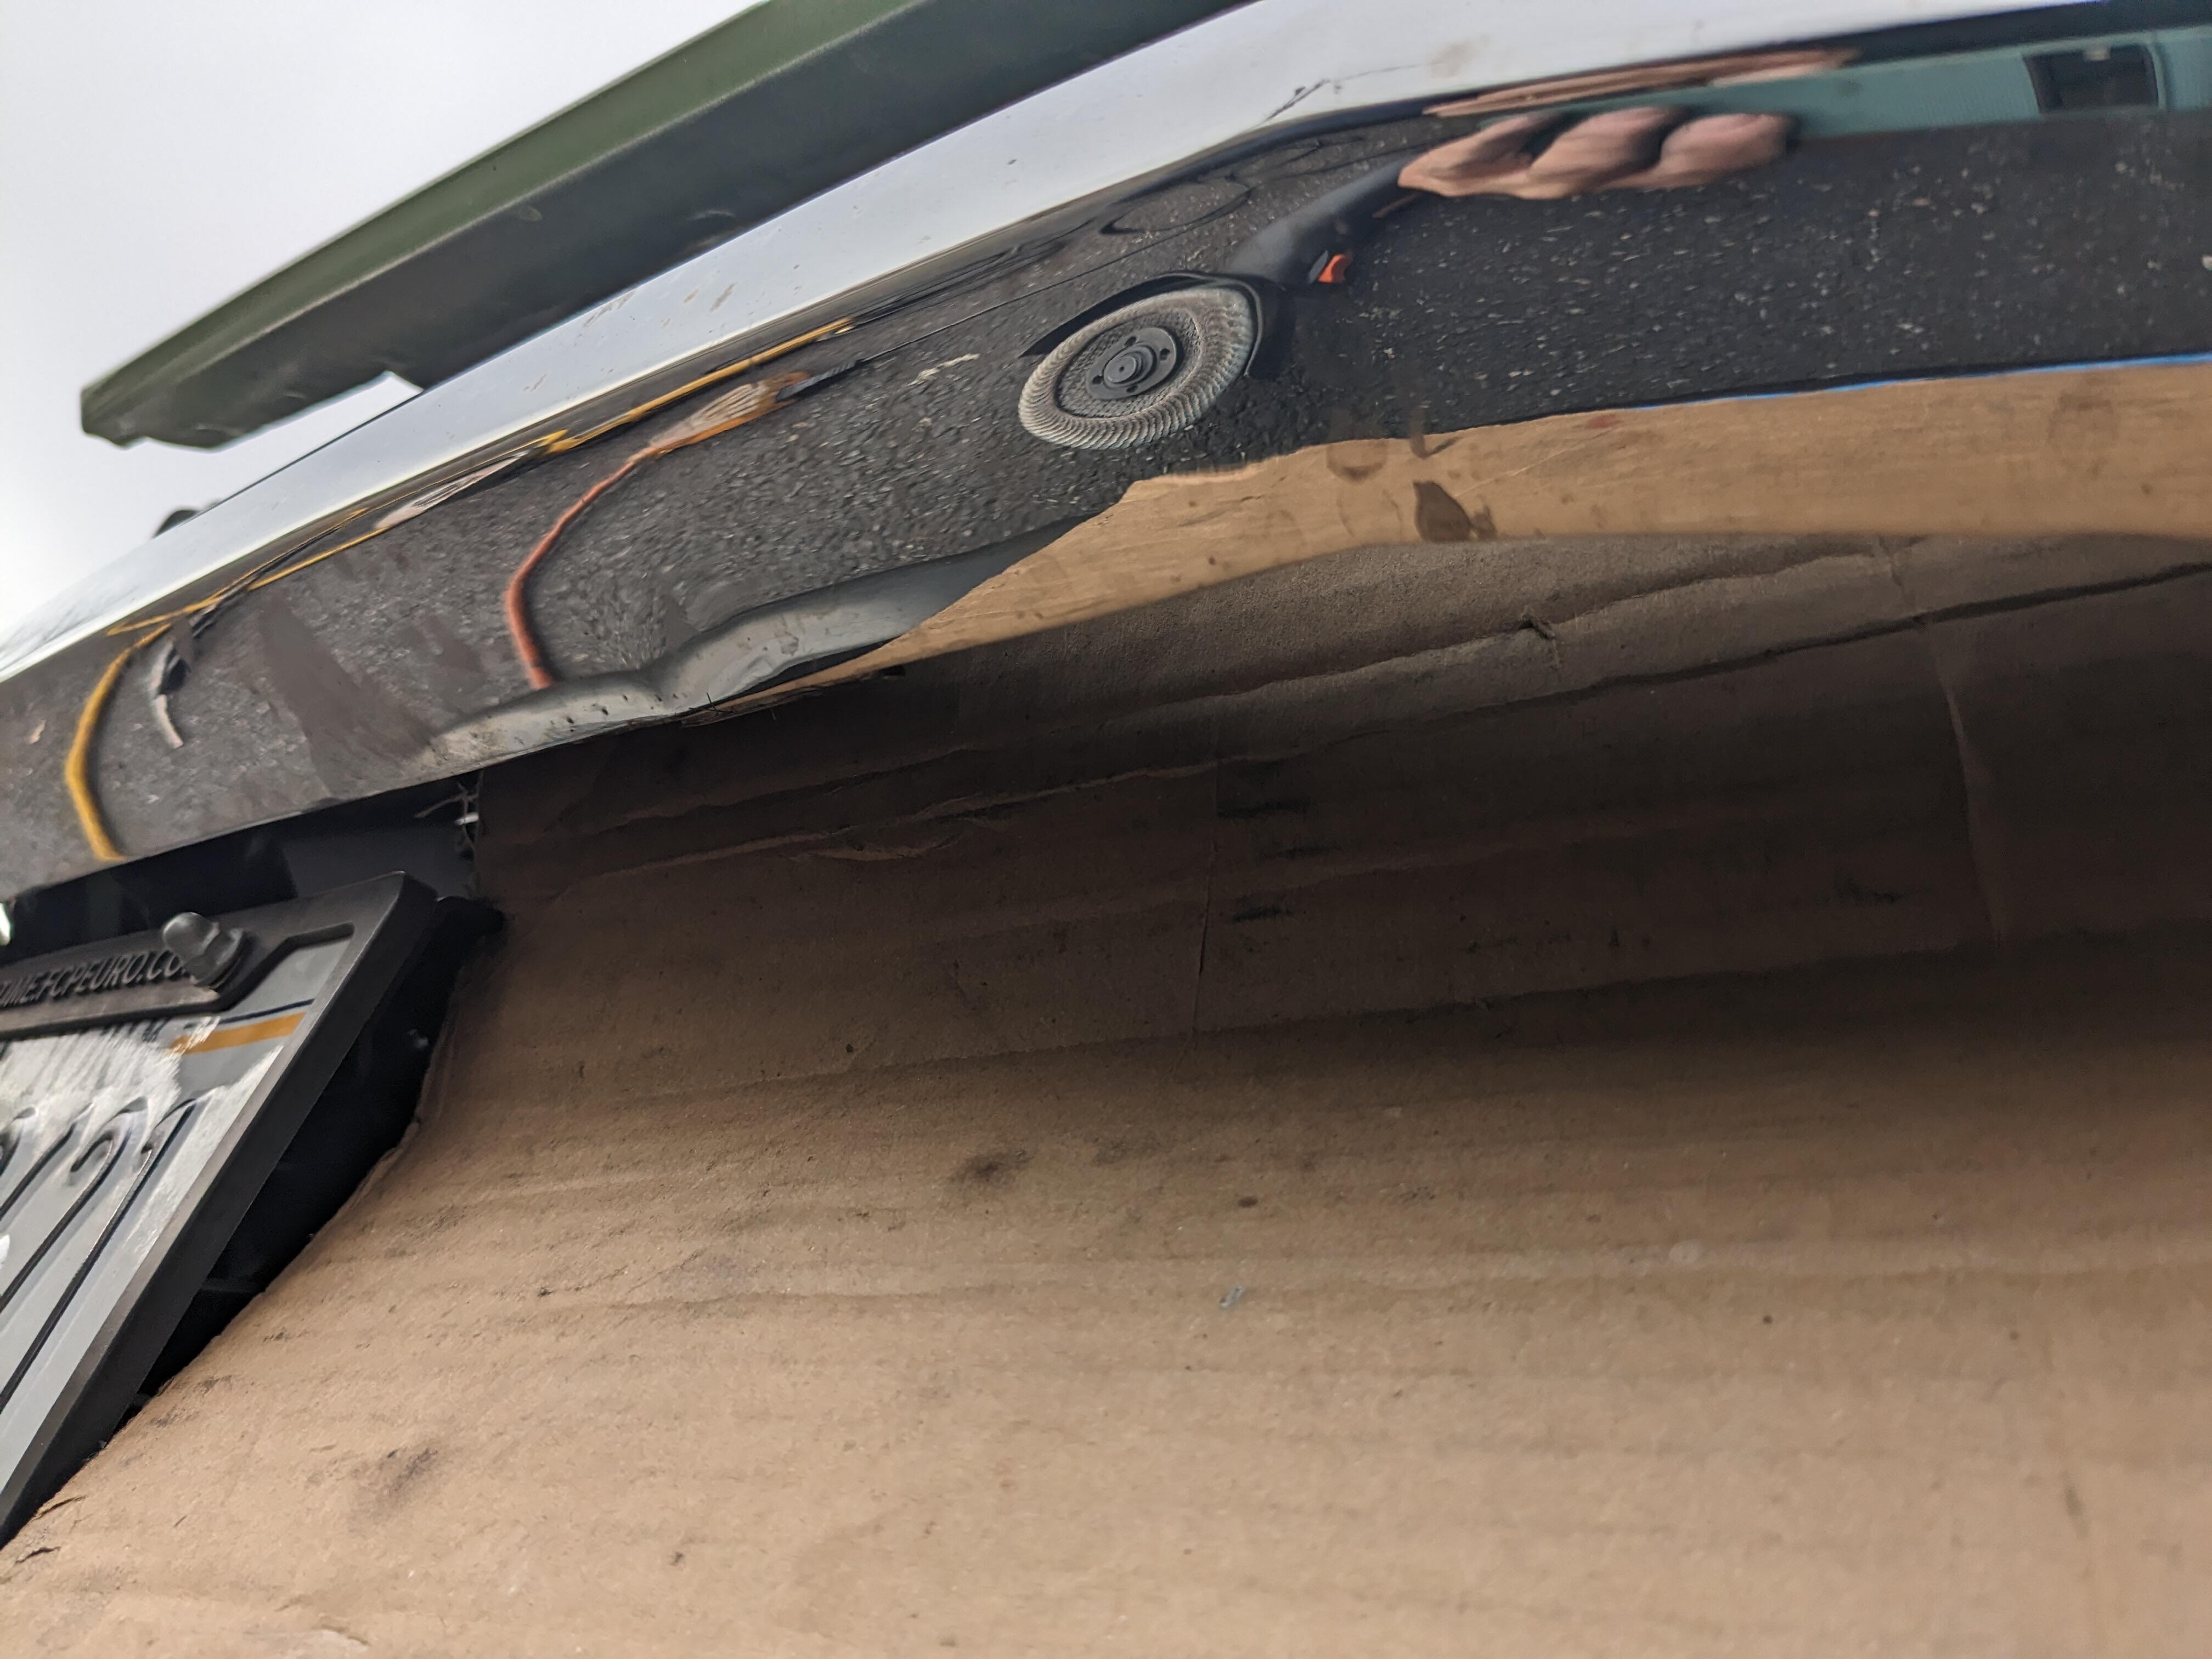
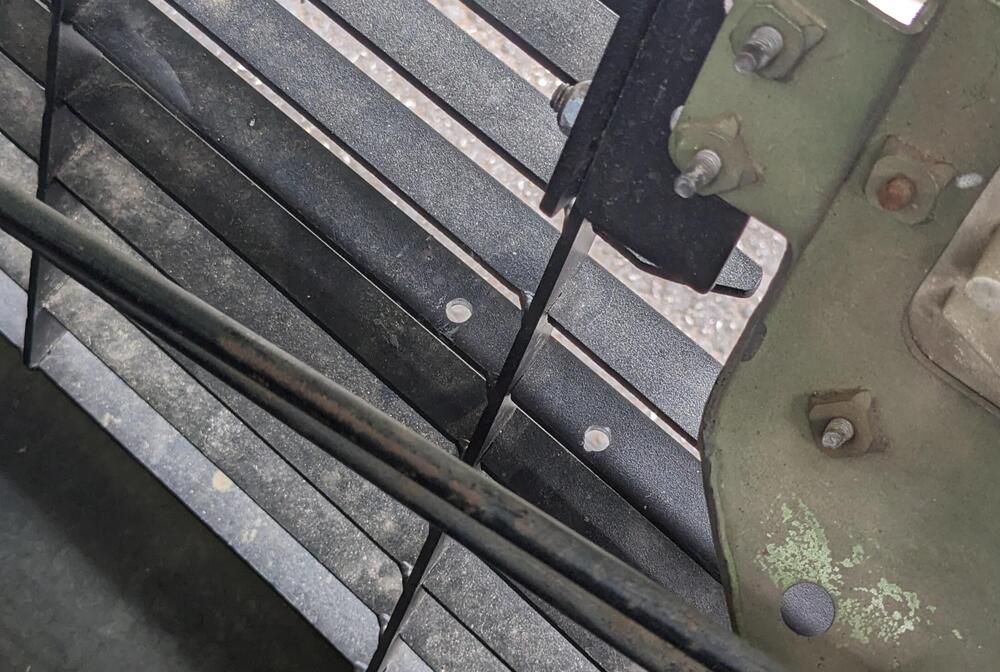
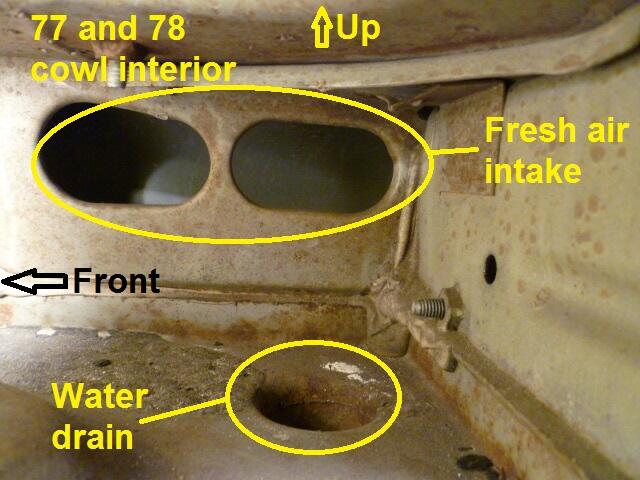
2 pointsThe fresh air openings for the 77 and 78 bodies is under the cowl area. Previous years they piped air through the frame rails behind the headlights, but with the extensive metal redesign in 77 they moved the intake holes to under the cowl panel. Couple years ago I had my cowl panel off to work on my windshield wiper assemblies, and while it was off, I stuck my camera down there and took a couple pics. This should explain things:
 2 points
 -
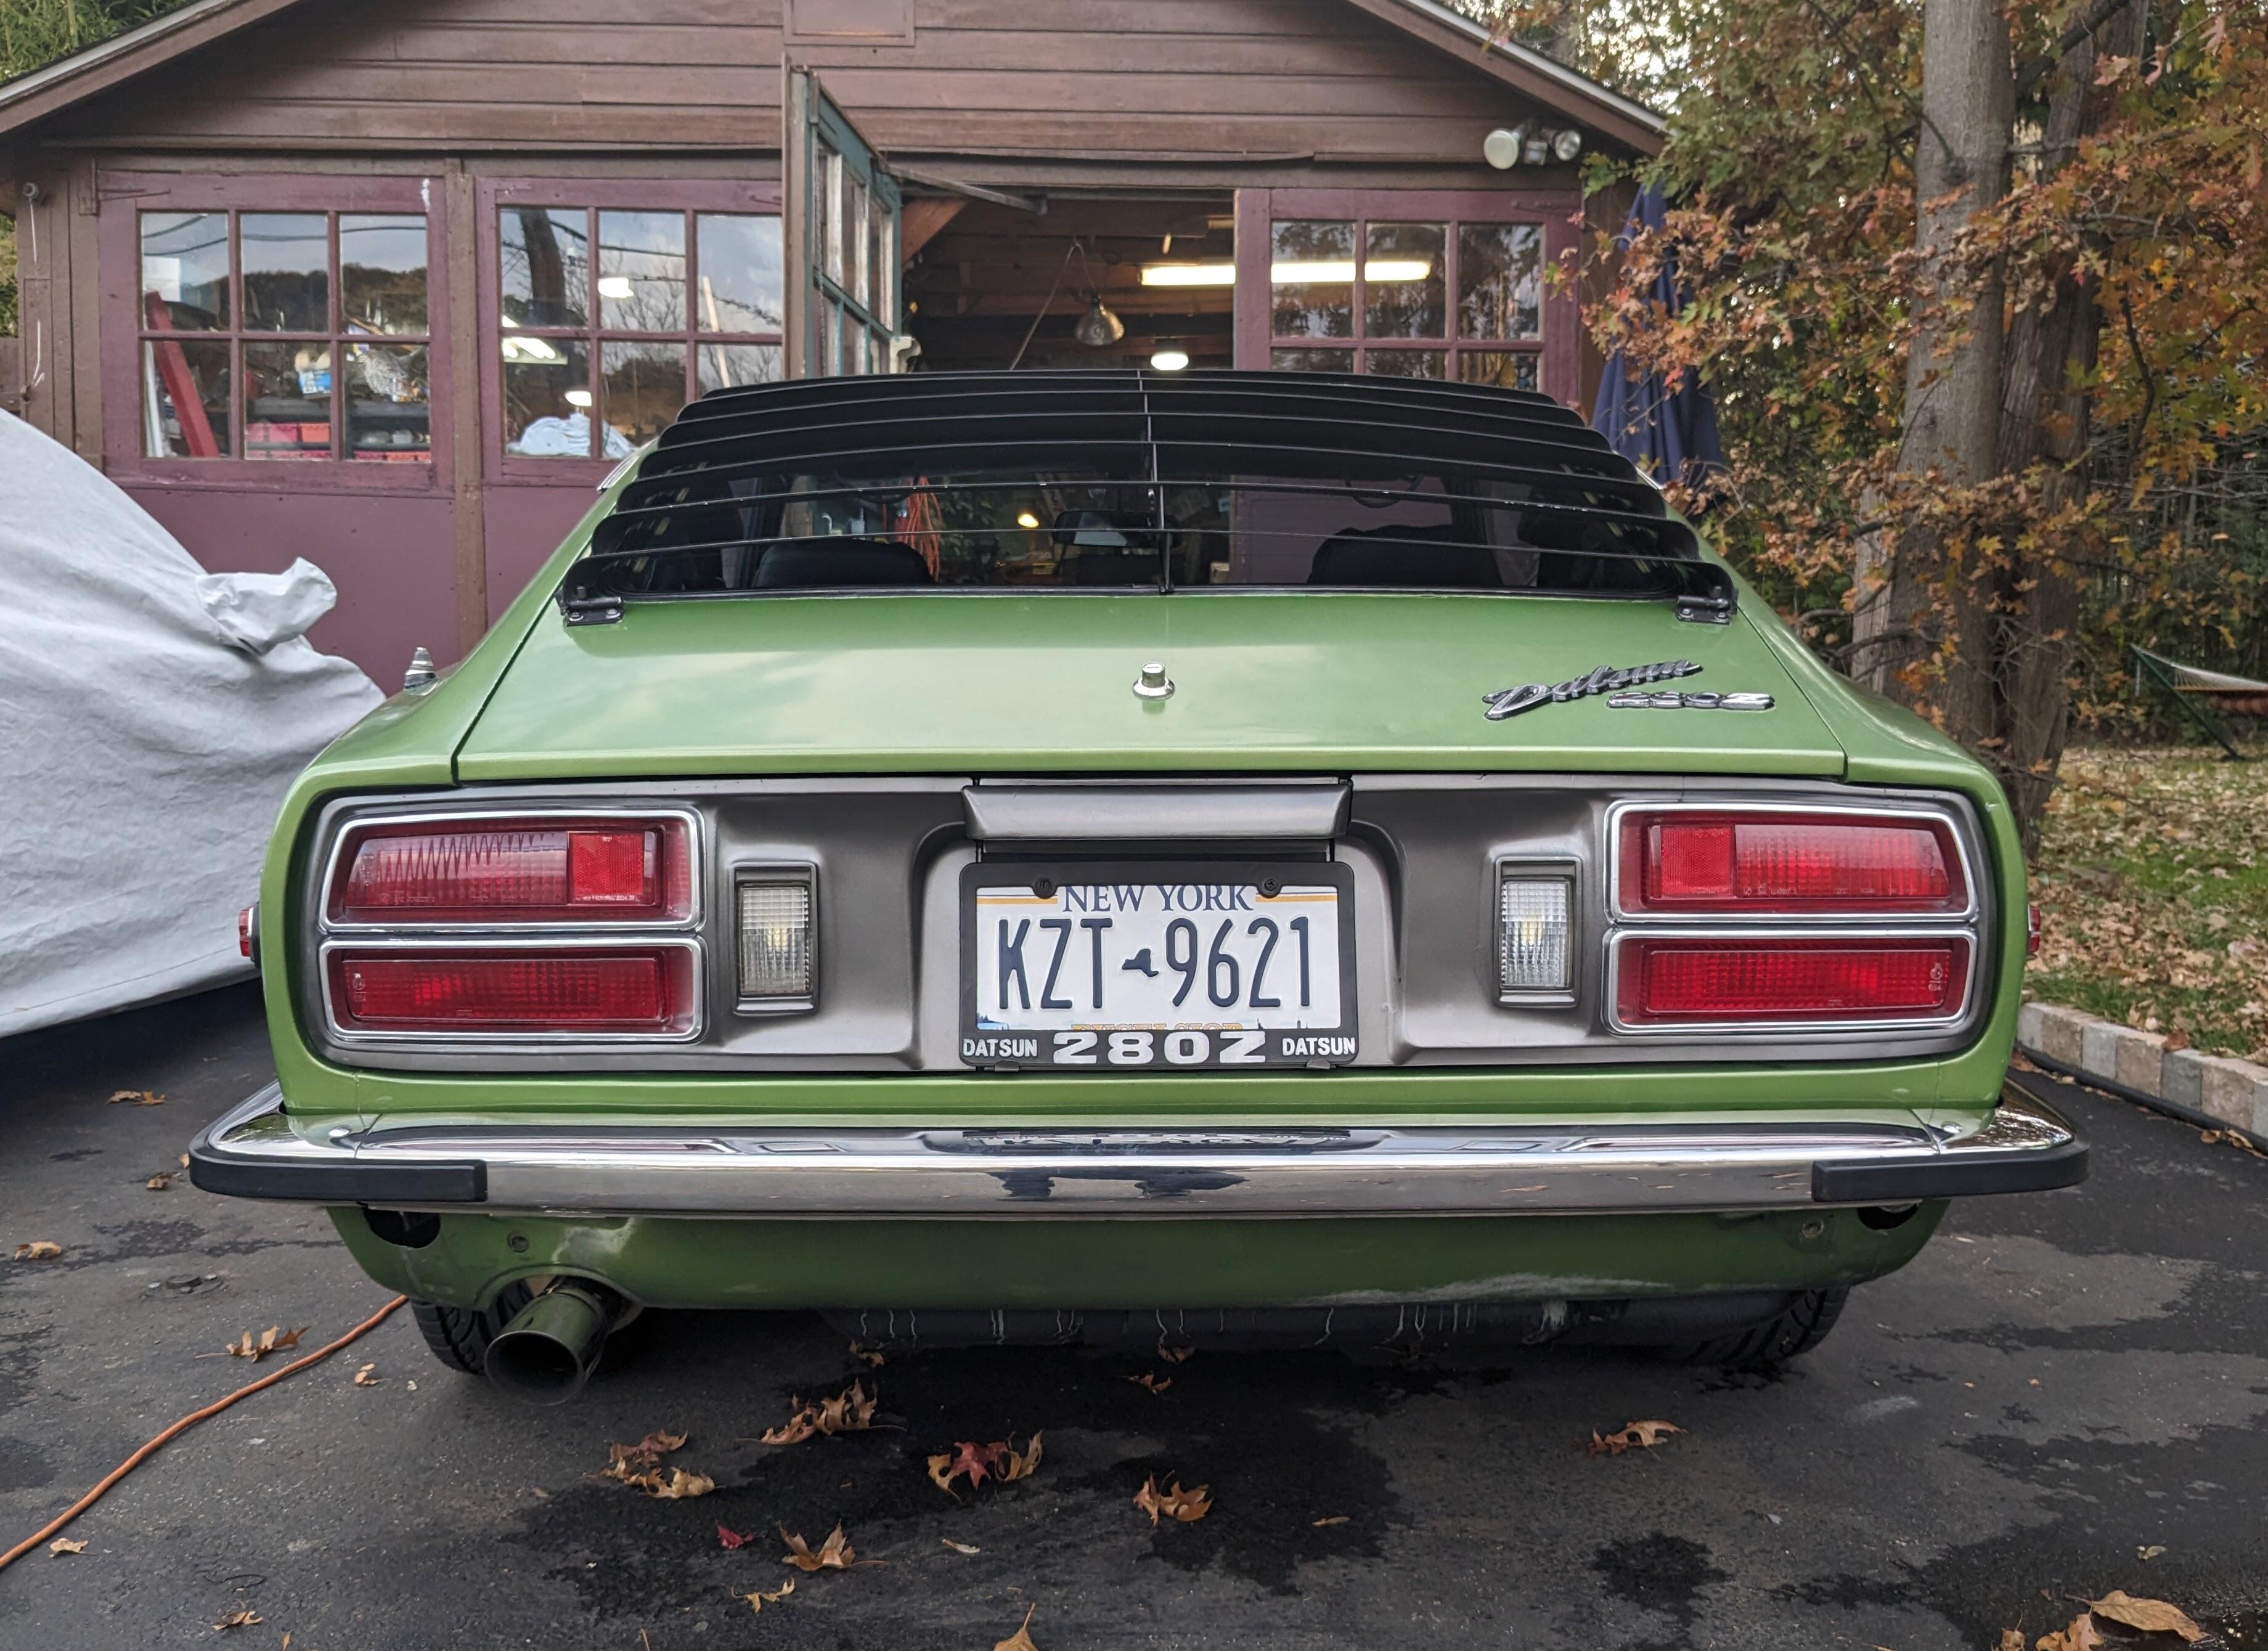
I have already posted all over the forum, so I will add links to work I've already done as much as possible to avoid double-posting. This will be to consolidate the work. Should have done this from the start back in the Spring, for whatever reason I didn't notice the Build Thread section back then. My "toy" car has been a Bertone / Fiat X1/9 (mid engine) since around 2007. That car evolved over the years. The last major revisions were a Dallara replica wide body conversion (2016-2018), and then a Honda K24/AST5M drivetrain conversion (2018-2020). I do all my own work. Now that is essentially 'done' (not in need of major changes or constant fiddling) & really only needs to be driven, I needed a new long term project to keep me busy. In one thread on the X1/9 forum, a member brought up the Datsun 240Z, can't remember what the topic was, but anyway, I have loved the styling of the Z since I was a kid in Malaysia during the mid 70's, where I bought one of the Tamiya FairLady Z model kits. I decided to focus on looking for a 280Z after seeing just how much the 240Z's were going for, and knowing that this would not be a stock build. I'm not one who cares about keeping or using original parts just because. Settled on this 75 280Z from inland CA based on price & overall condition of the sheet metal & one owner. Bought back in early Spring. At this point, I've installed or modded, not in order (I'll convert the list below to hyperlinks): Note- many, many thanks to all the ppl on here whose existing threads/work I have tapped for ideas and ongoing assistance 😊 Front & rear skinny bumpers. Installed a Skillard grille, Xenon front spoiler, fixed the louvre mounting system. New seat foam & Upholstery, w/heated seat grids. Honda seat belt shoulder guides Honda wiper motor conversion, Cowl refresh (actual paint), Replaced all opening/glass seals. Repaired the driver's door panel, glass winder mechanism & inner release mechanism. Replaced exterior rear view mirrors. Rebuilt the entire front & rear suspension, Rear Strut Brace updated the Front & Rear brakes, Modified Steering wheel, Front & Rear wheel well liners & stone guard & undercoat refresh, converted the rear axles, replaced trans & diff fluid replaced the dash, console & carpeting, rebuilt the AC system, Ford Heater Core Install, SS heater pipe, AN bulkhead fitting Kia Blower Motor Install Water Pump, Front crank seal 3" SS Exhaust, custom DP Replaced Fuel pump & bay fuel Ines, ProTunerZ fuel rail + High imp. Bosch Inj. added a Bosch Idle Control System, replaced the EFI harness on the engine, Added 2.2K Pot for ECT circuit enrichment Replaced the fusible links with 2 fused power supplies in the engine bay, replaced the fusebox with a ATC fuse & relay panel, added auxiliary relay panel & power/ground expansion panels. Added a starter relay. Converted to HEI ignition module. Added the Headlight Relays. H4/LED headlamps. Converted to LED exterior lighting. Repaired rear tail panels, replacing light gaskets. Headlamp covers. Volvo horns. Reverse light relay. Lights On Buzzer. Voltage Regulator Adj. Clock Repair Bunch of odds & ends I can't recall right now that only got posted in my Fiat forum thread, because I didn't make on here 🤪 - I'll try to add some of that as time goes by. First long term project on this will be the drivetrain conversion. With this chassis, I wanted to keep it Nissan. I already did one major conversion with the X1/9, and am doing a Chevy V8 conversion with my '91 Volvo pickup, so I don't need that kind of extra flavor on this project. I settled on the VQ35DE/CD009 after doing some research on the various older drivetrains commonly used - RB series, etc., most of which if available are $$$$, and not so easy to find parts for moving forward, given that I want this to be reliable for DD fair weather use. The 350Z drivetrain uses readily available service parts & can be modded if I choose to go that route. Stock, it has around 300BHP, so using the stock 350Z EMS the car should be more than enough performance wise. I may change my mind about that DTR, however I've done an excessive horsepower build in the past, so I really don't need to do that again. I'm going to be driving it 'stock' for the next year or so, until that V8 conversion is done. 350Z Drivetrain Conversion Thread Work I still need to address to make it complete (not necessarily in this order): Deal with heat soak / fuel vaporization issue (installed billet fuel rail & composite injectors) 3-5 sec fuel pump primer circuit Replace L& R door panels, fix pass outer handle release rod, get door adjustment so they don't need to be slammed so hard Drop the gas tank address the vapor system (leaks if filled) Install Xenon rear spoiler (maybe painted first, haven't decided whether I prefer body-color for F&R spoilers or keep the contrast) Additional floor / rear tub sound damping Replace L & R door 'sashes' w/ later channeled versions Install 350Z leather seats (reference HybridZ thread) Add/incorproate switch for fan speed 1 (using Volvo 5 speed resistor, Datsun 3 speed fan switch ) New console lid has really annoying squeak if you use it as armrest - need to address Go over whole body to address surface rust areas (no pitting or perforated concerns at it stands) Then & Now pics more recent


 1 point
 -
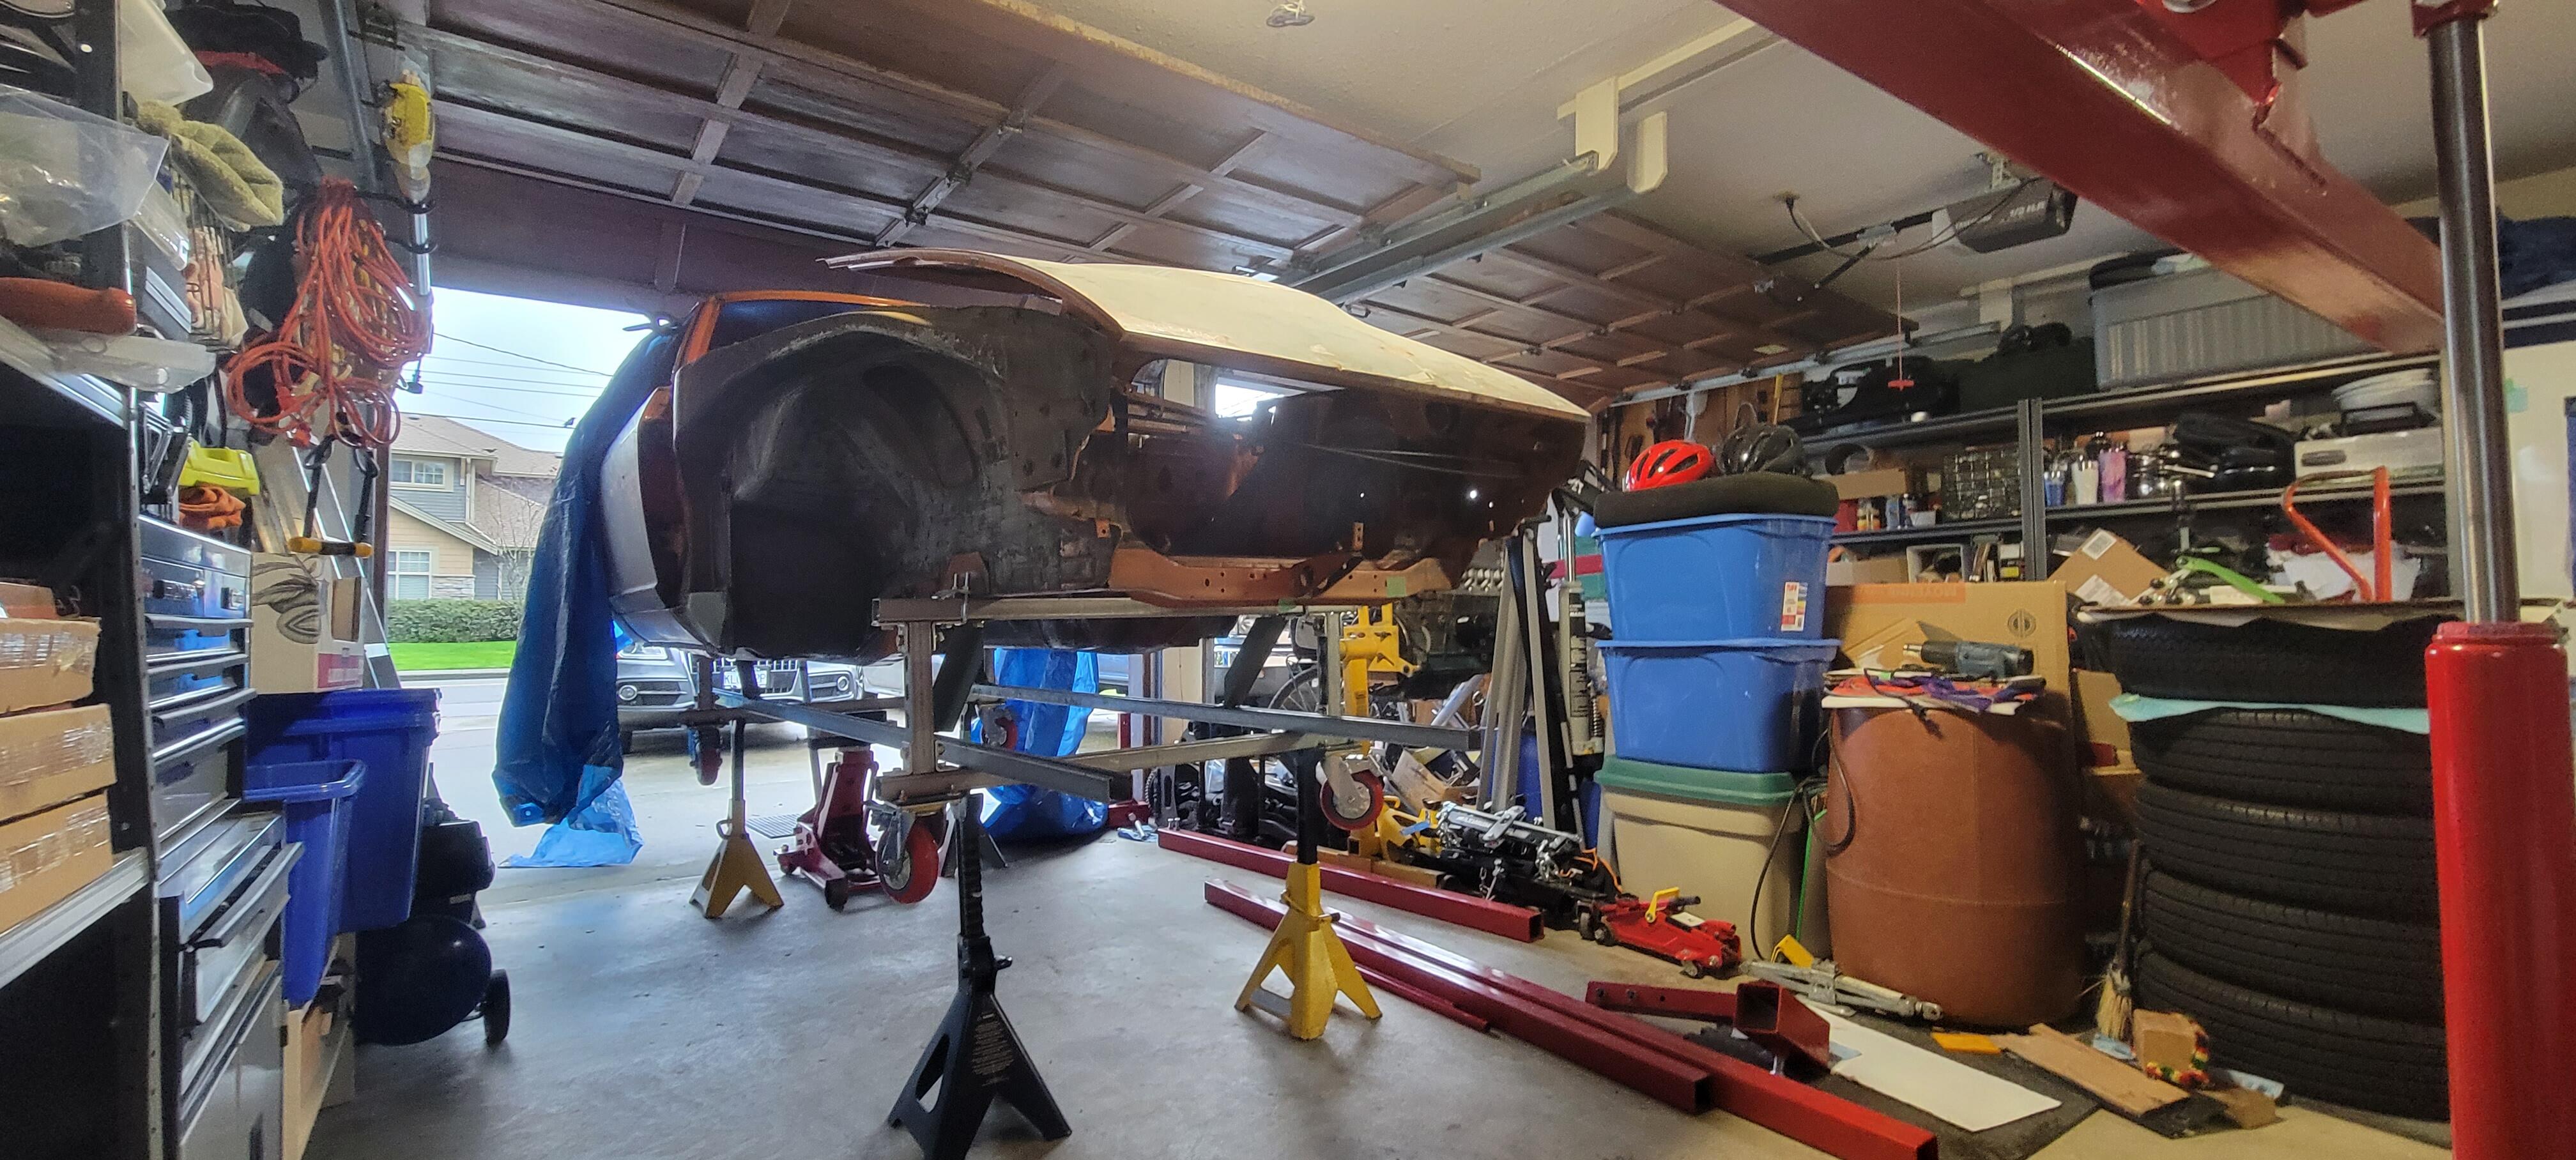
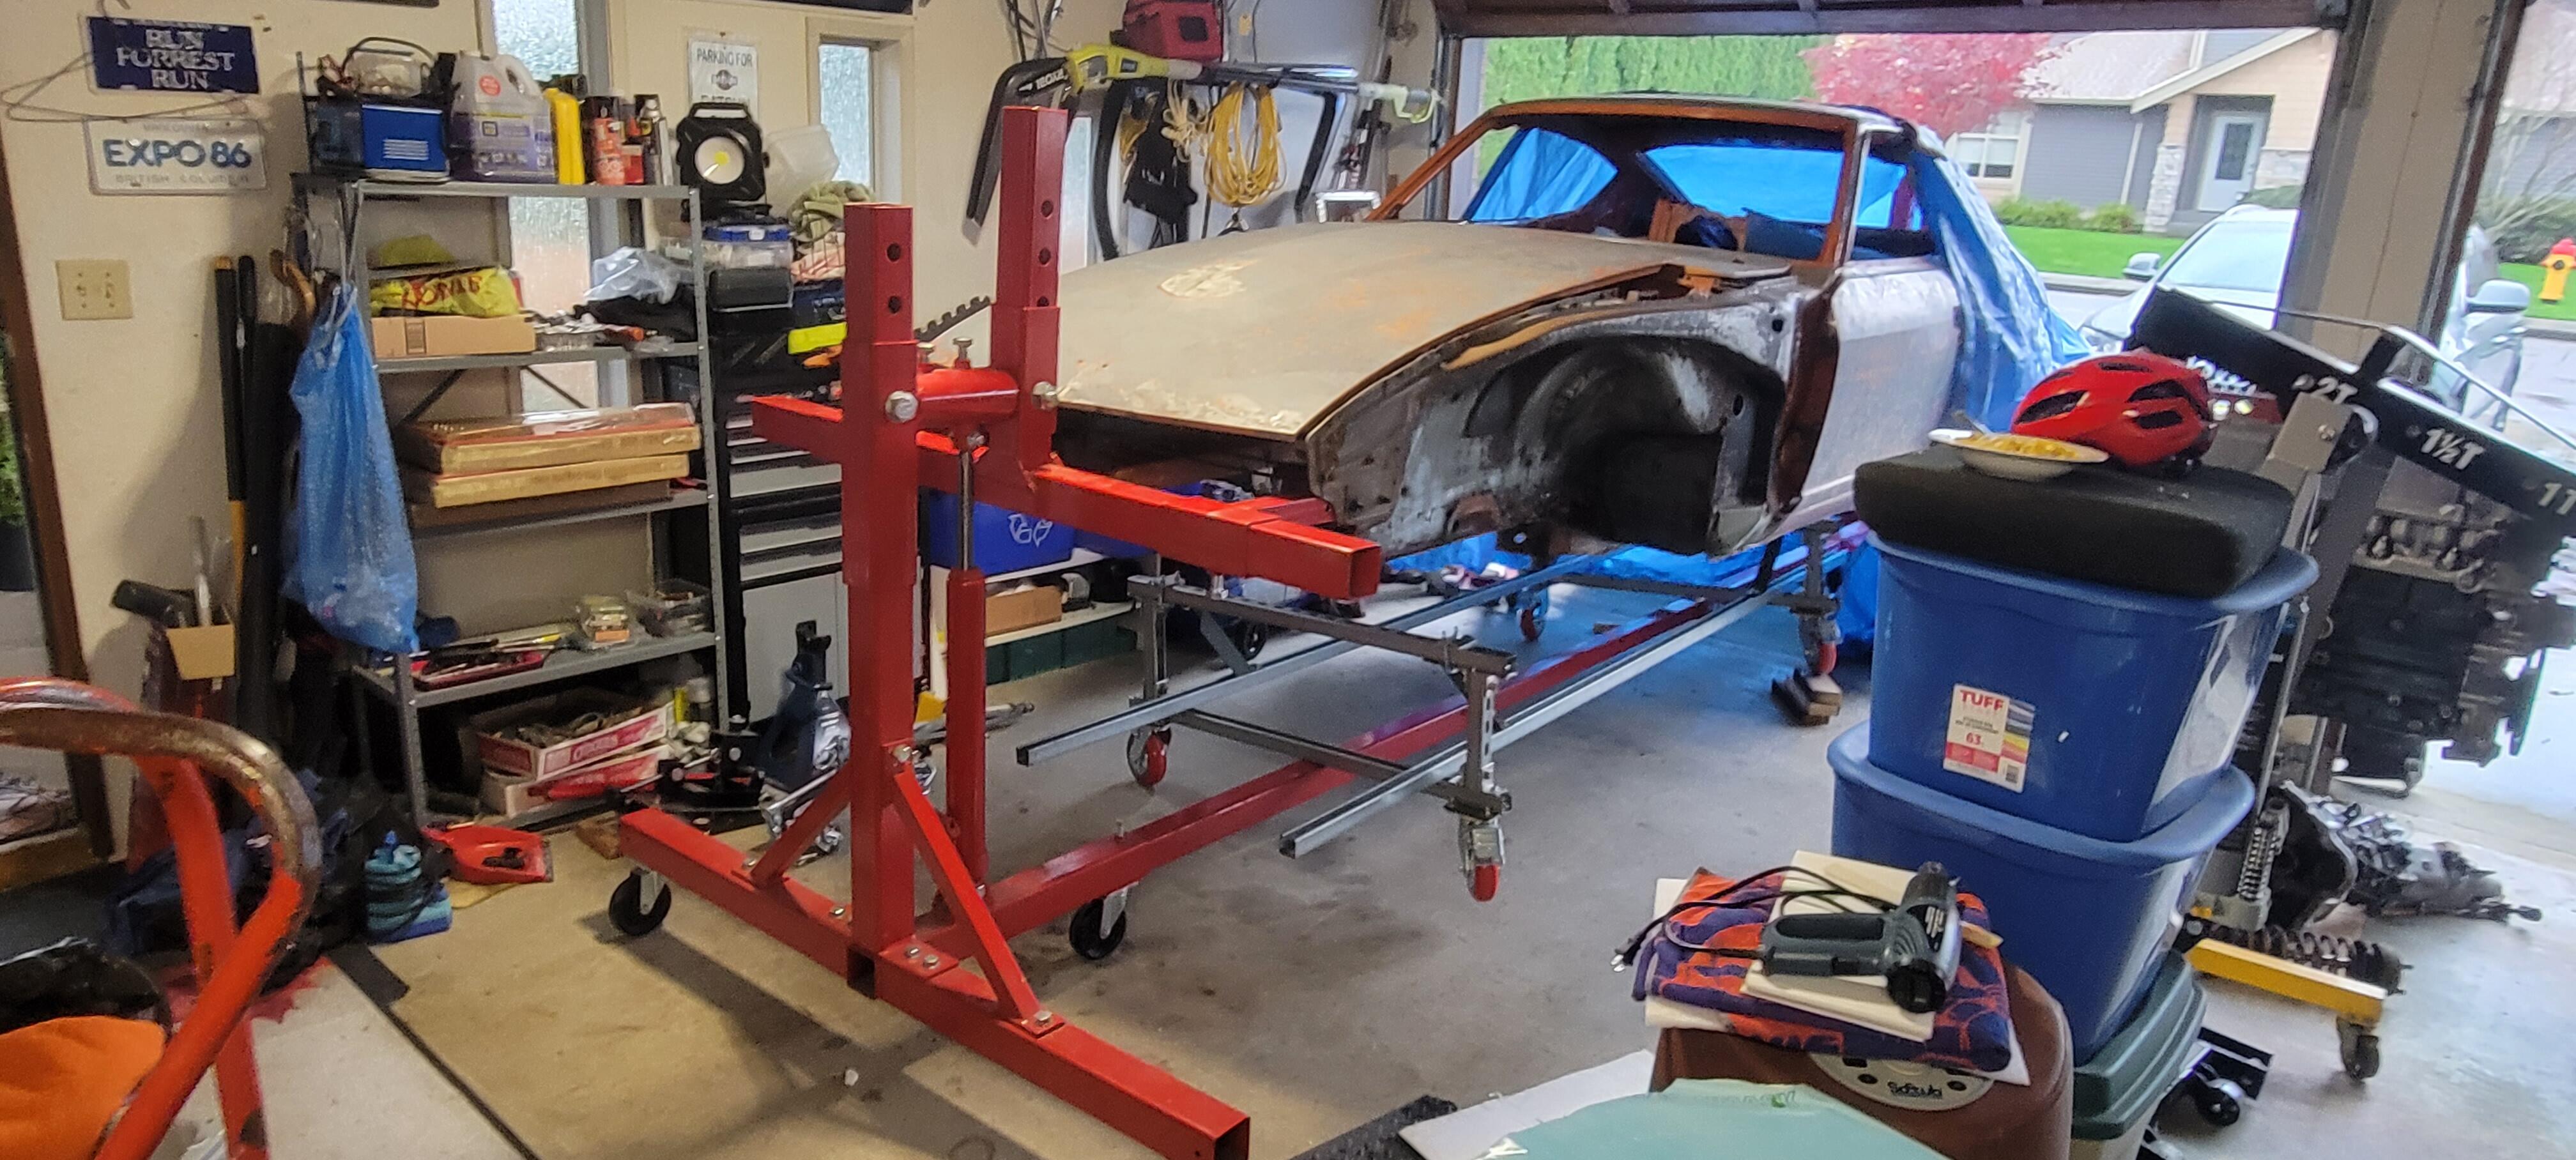
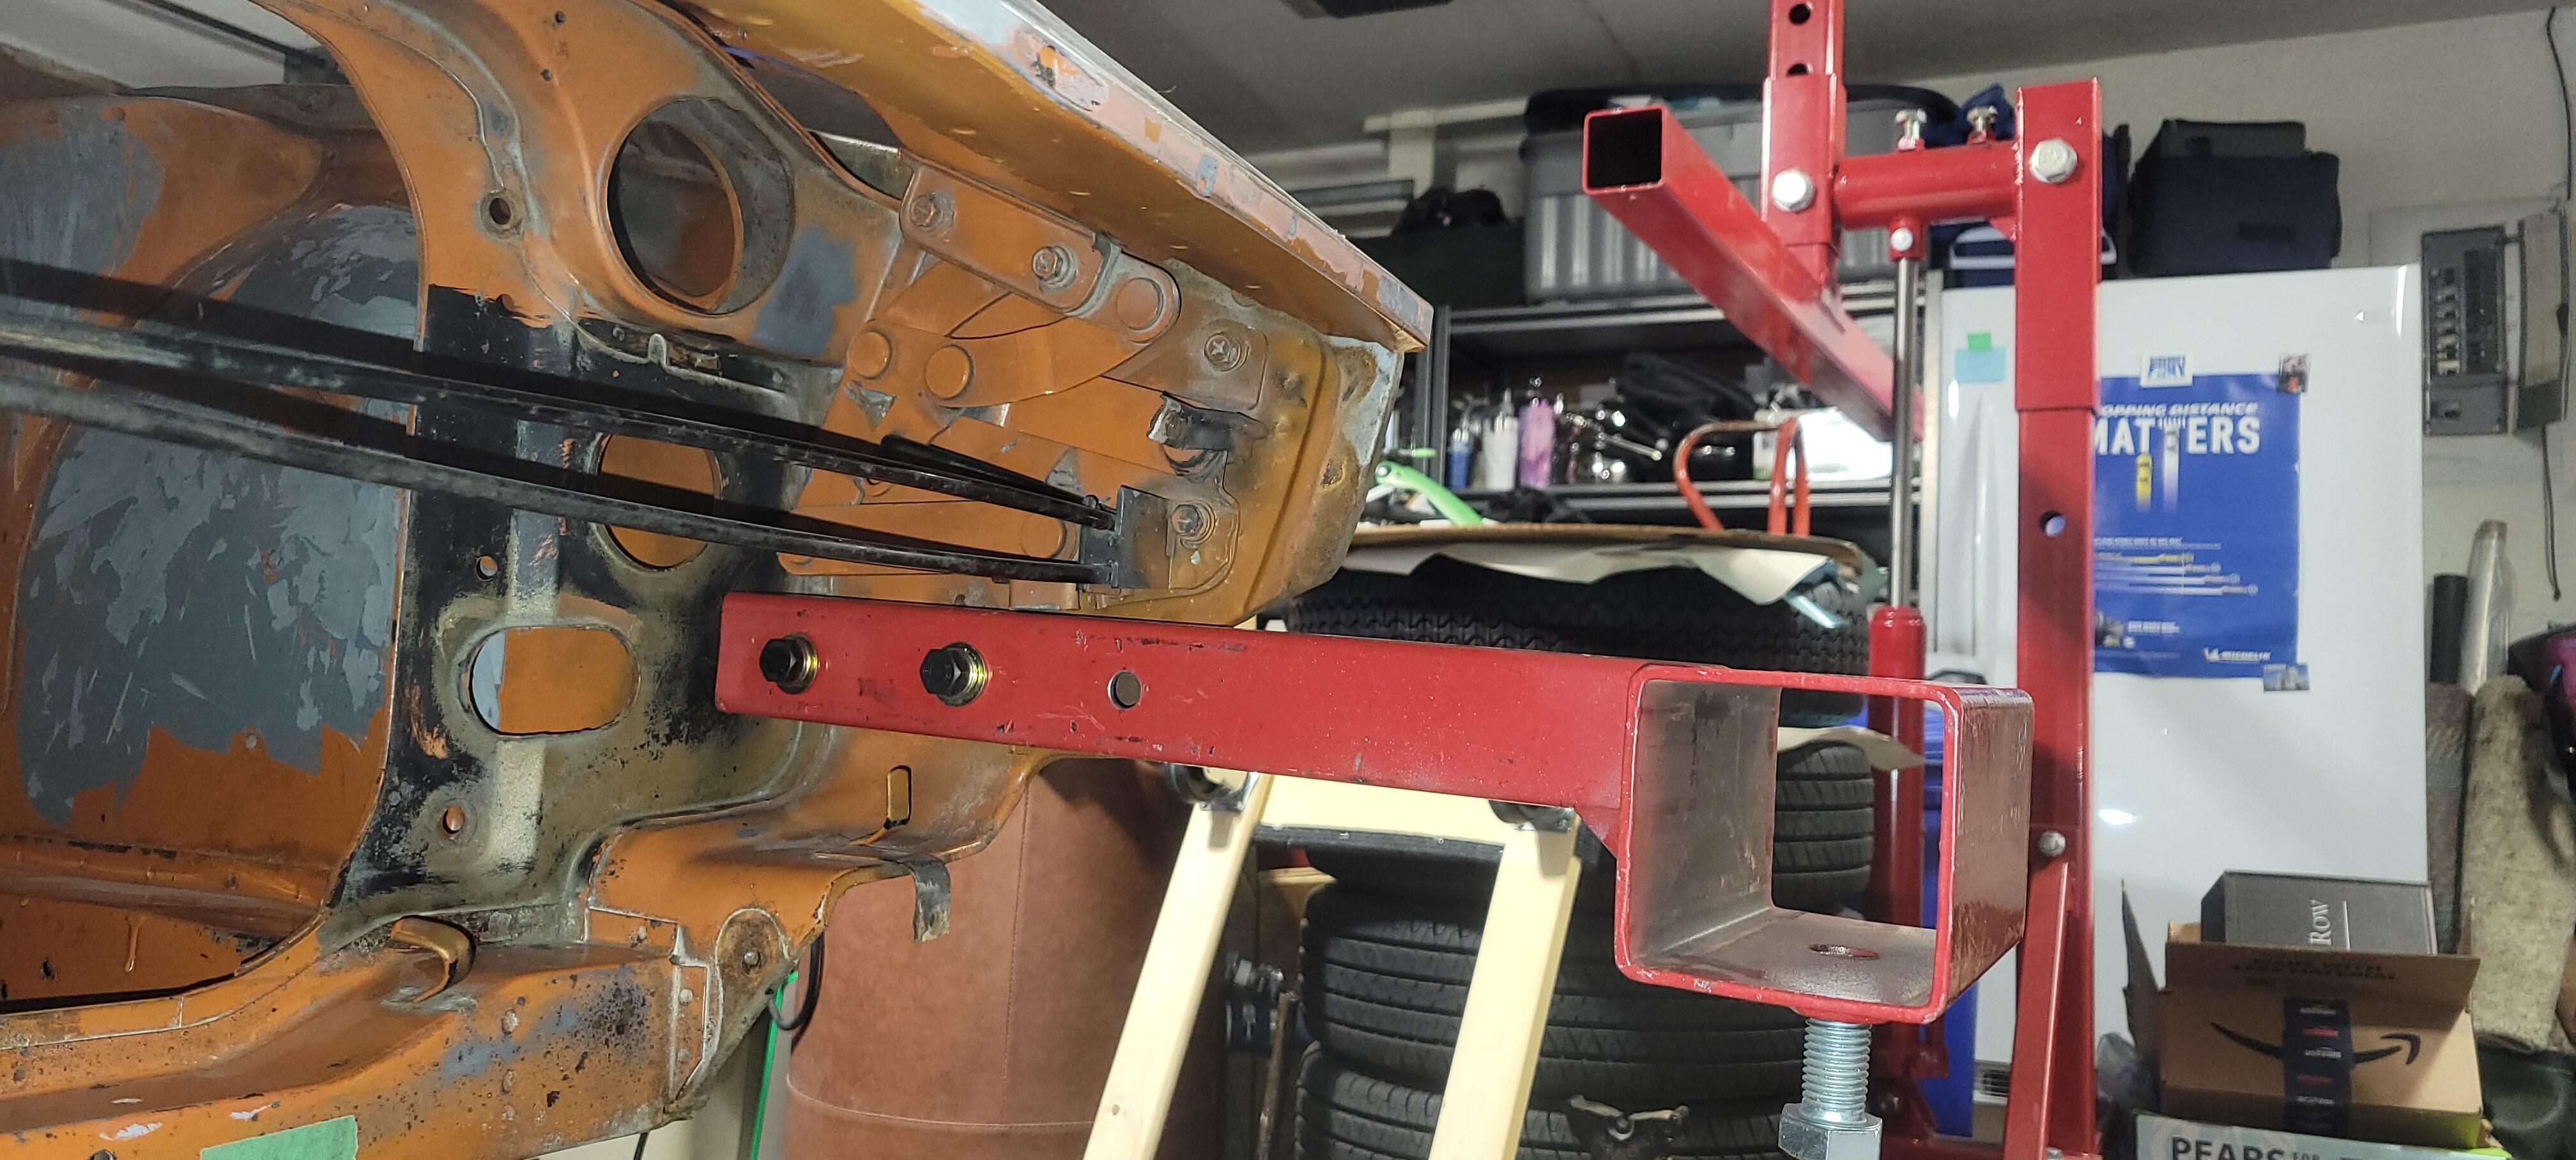
1 pointYesterday, with the help of my son we completed getting the car on the rotisserie. It went very well. Now on to the bigger task of re-organizing my garage. Here's a few pics.


 1 point
 -
1 pointThe factory had shims that installed at the hinge mount points to correct the alignment when needed, sounds like it is time for one on your ride. I'll look to see if I have one in my collection of bits and pieces.1 point
-
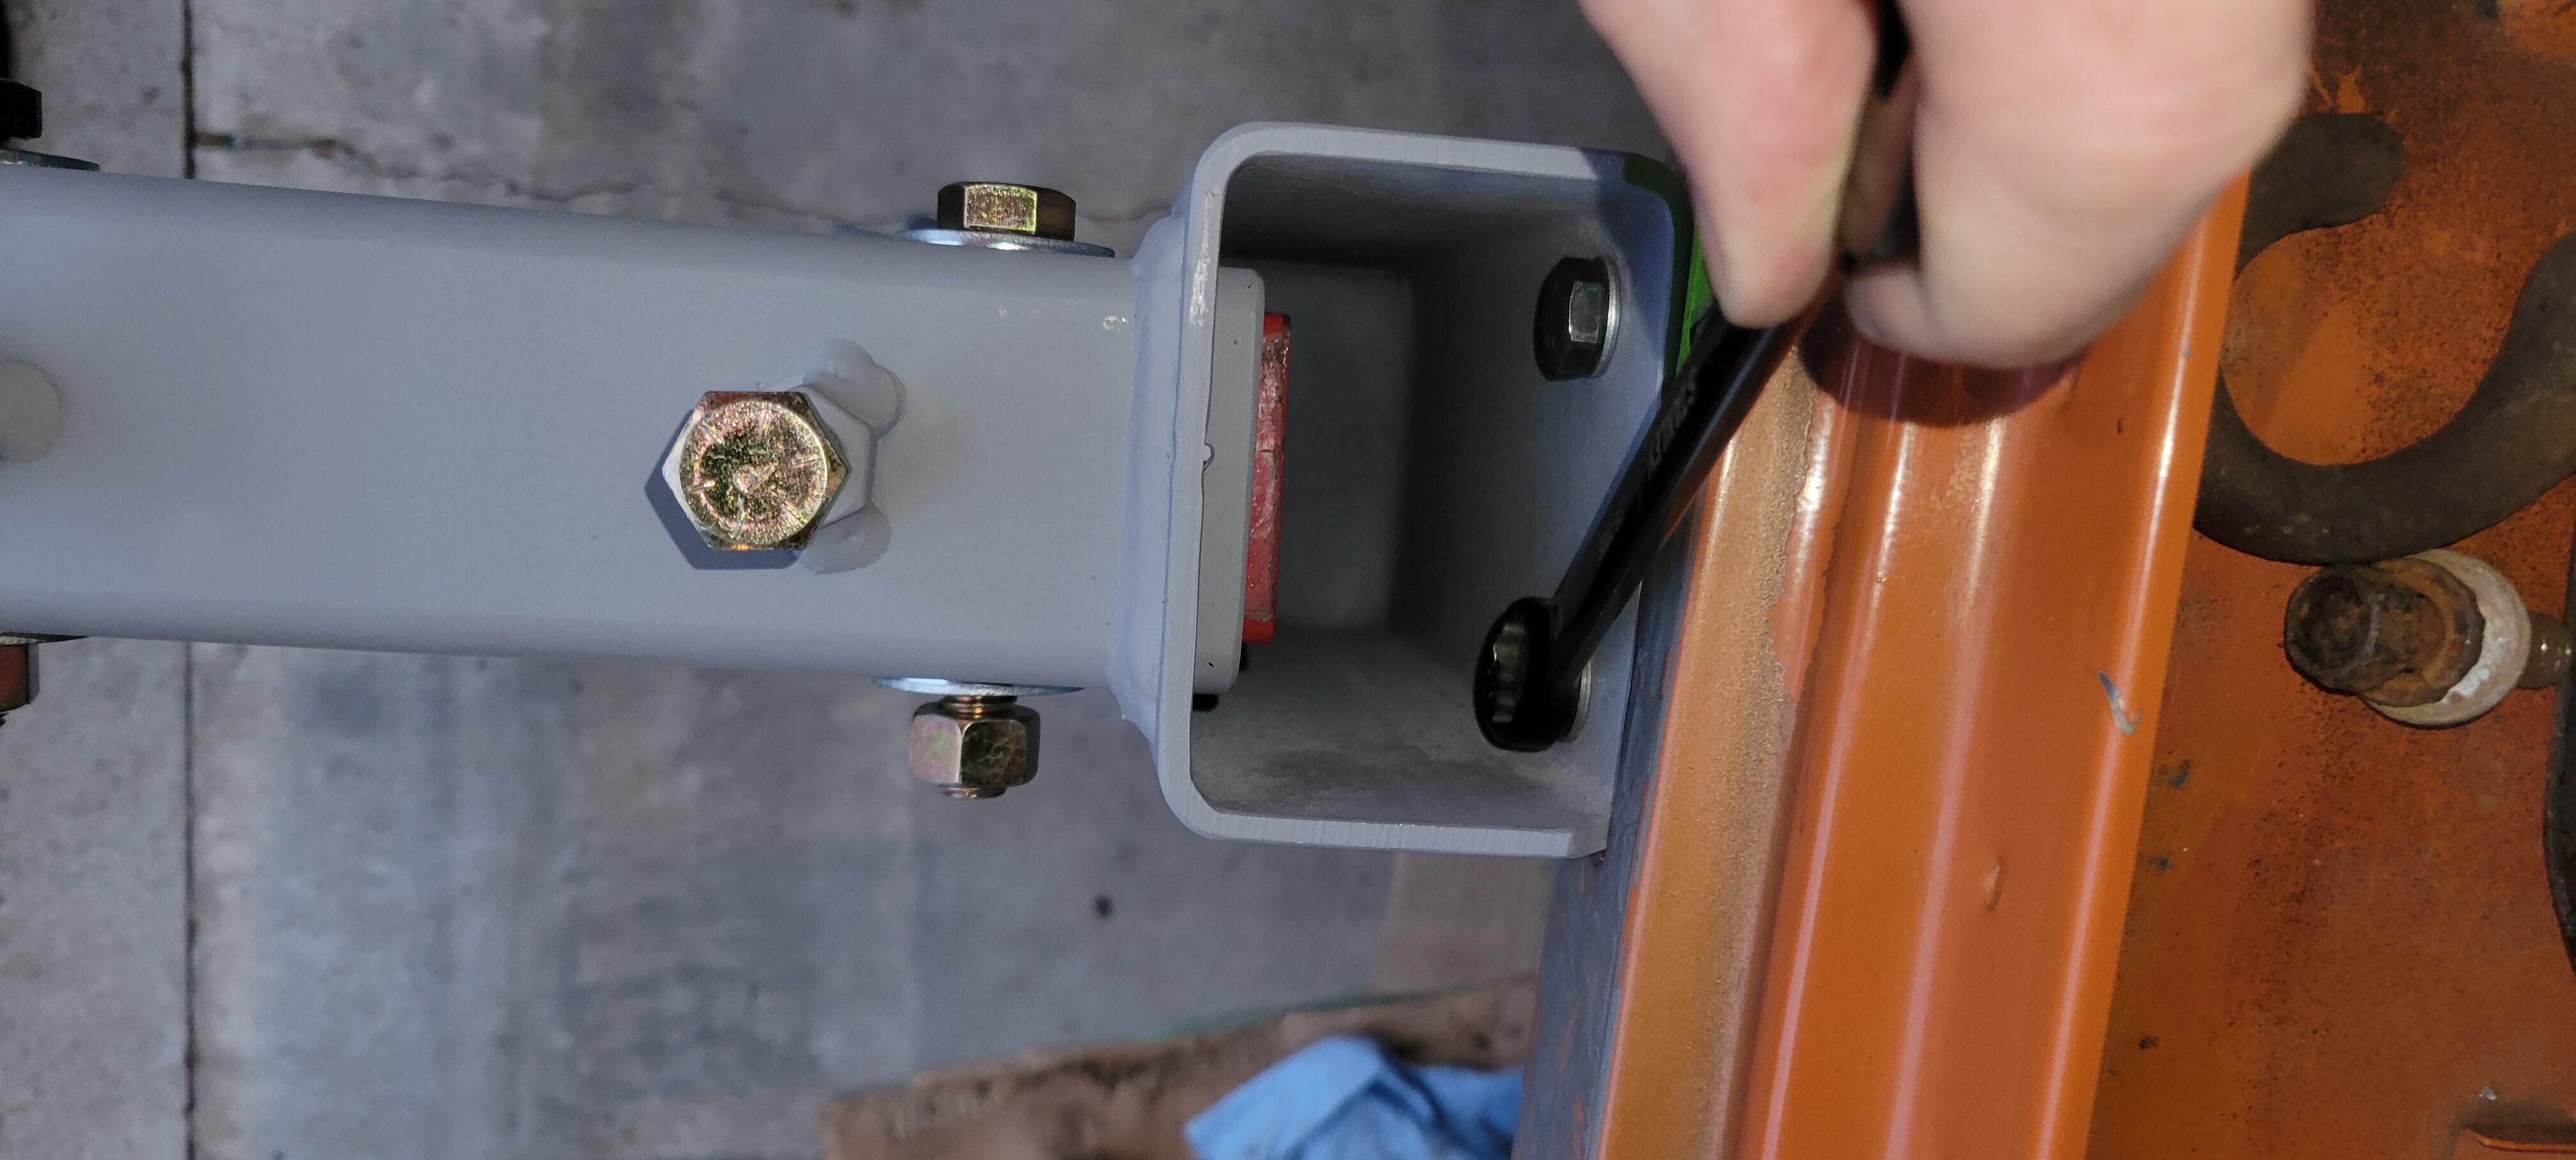
1 point@grannyknot I added a step in the alignment procedure above. You should test to make sure the nozzle didn't squirm around as you tightened the lock nut.1 point
-
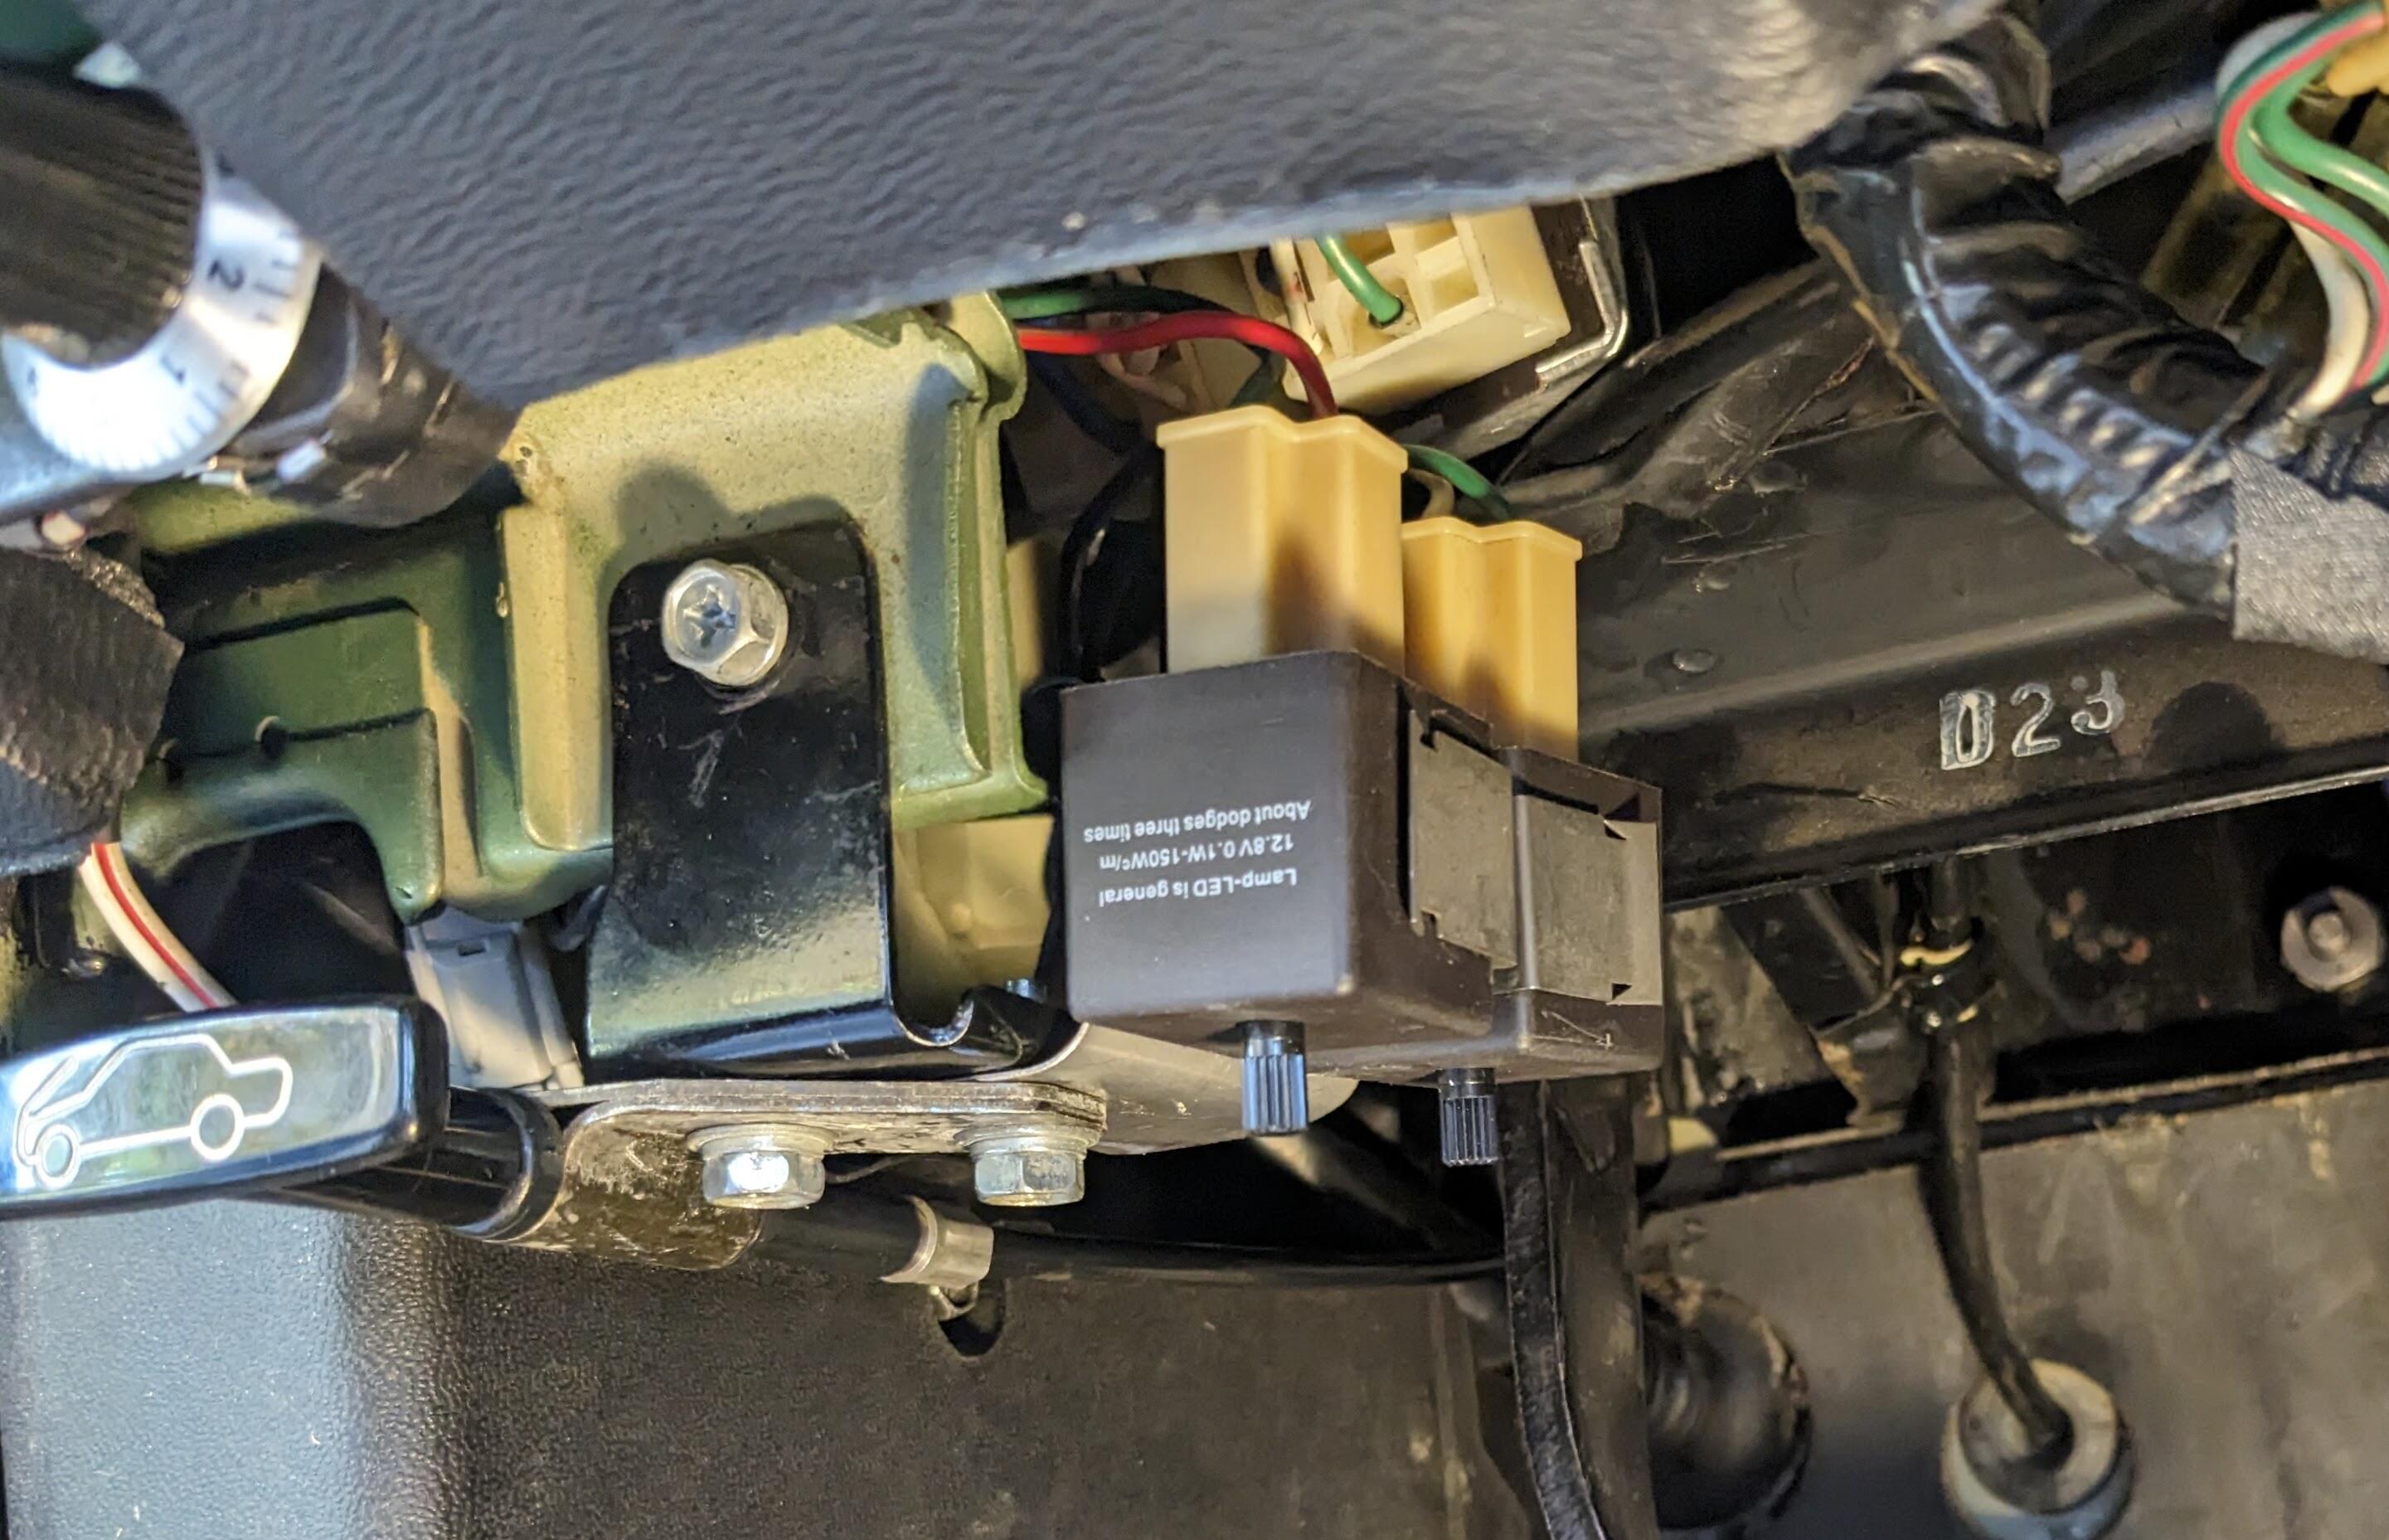
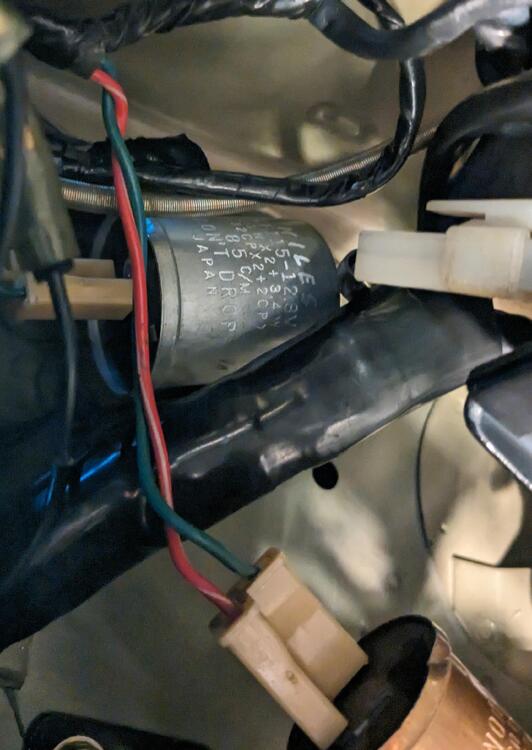
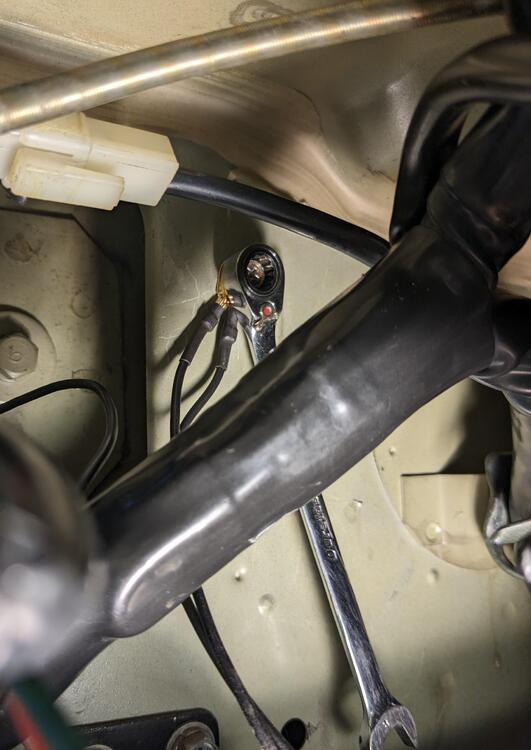
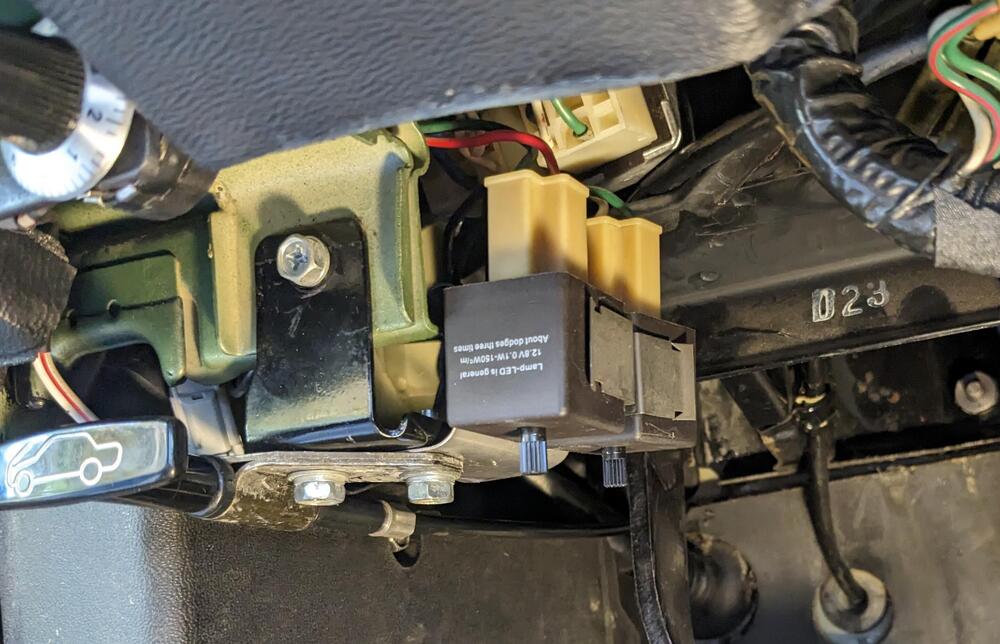
1 pointThe infamous Tony D clued me in on the existence of adjustable rate flashers. Once I tried them, I knew they were keepers.1 point
-
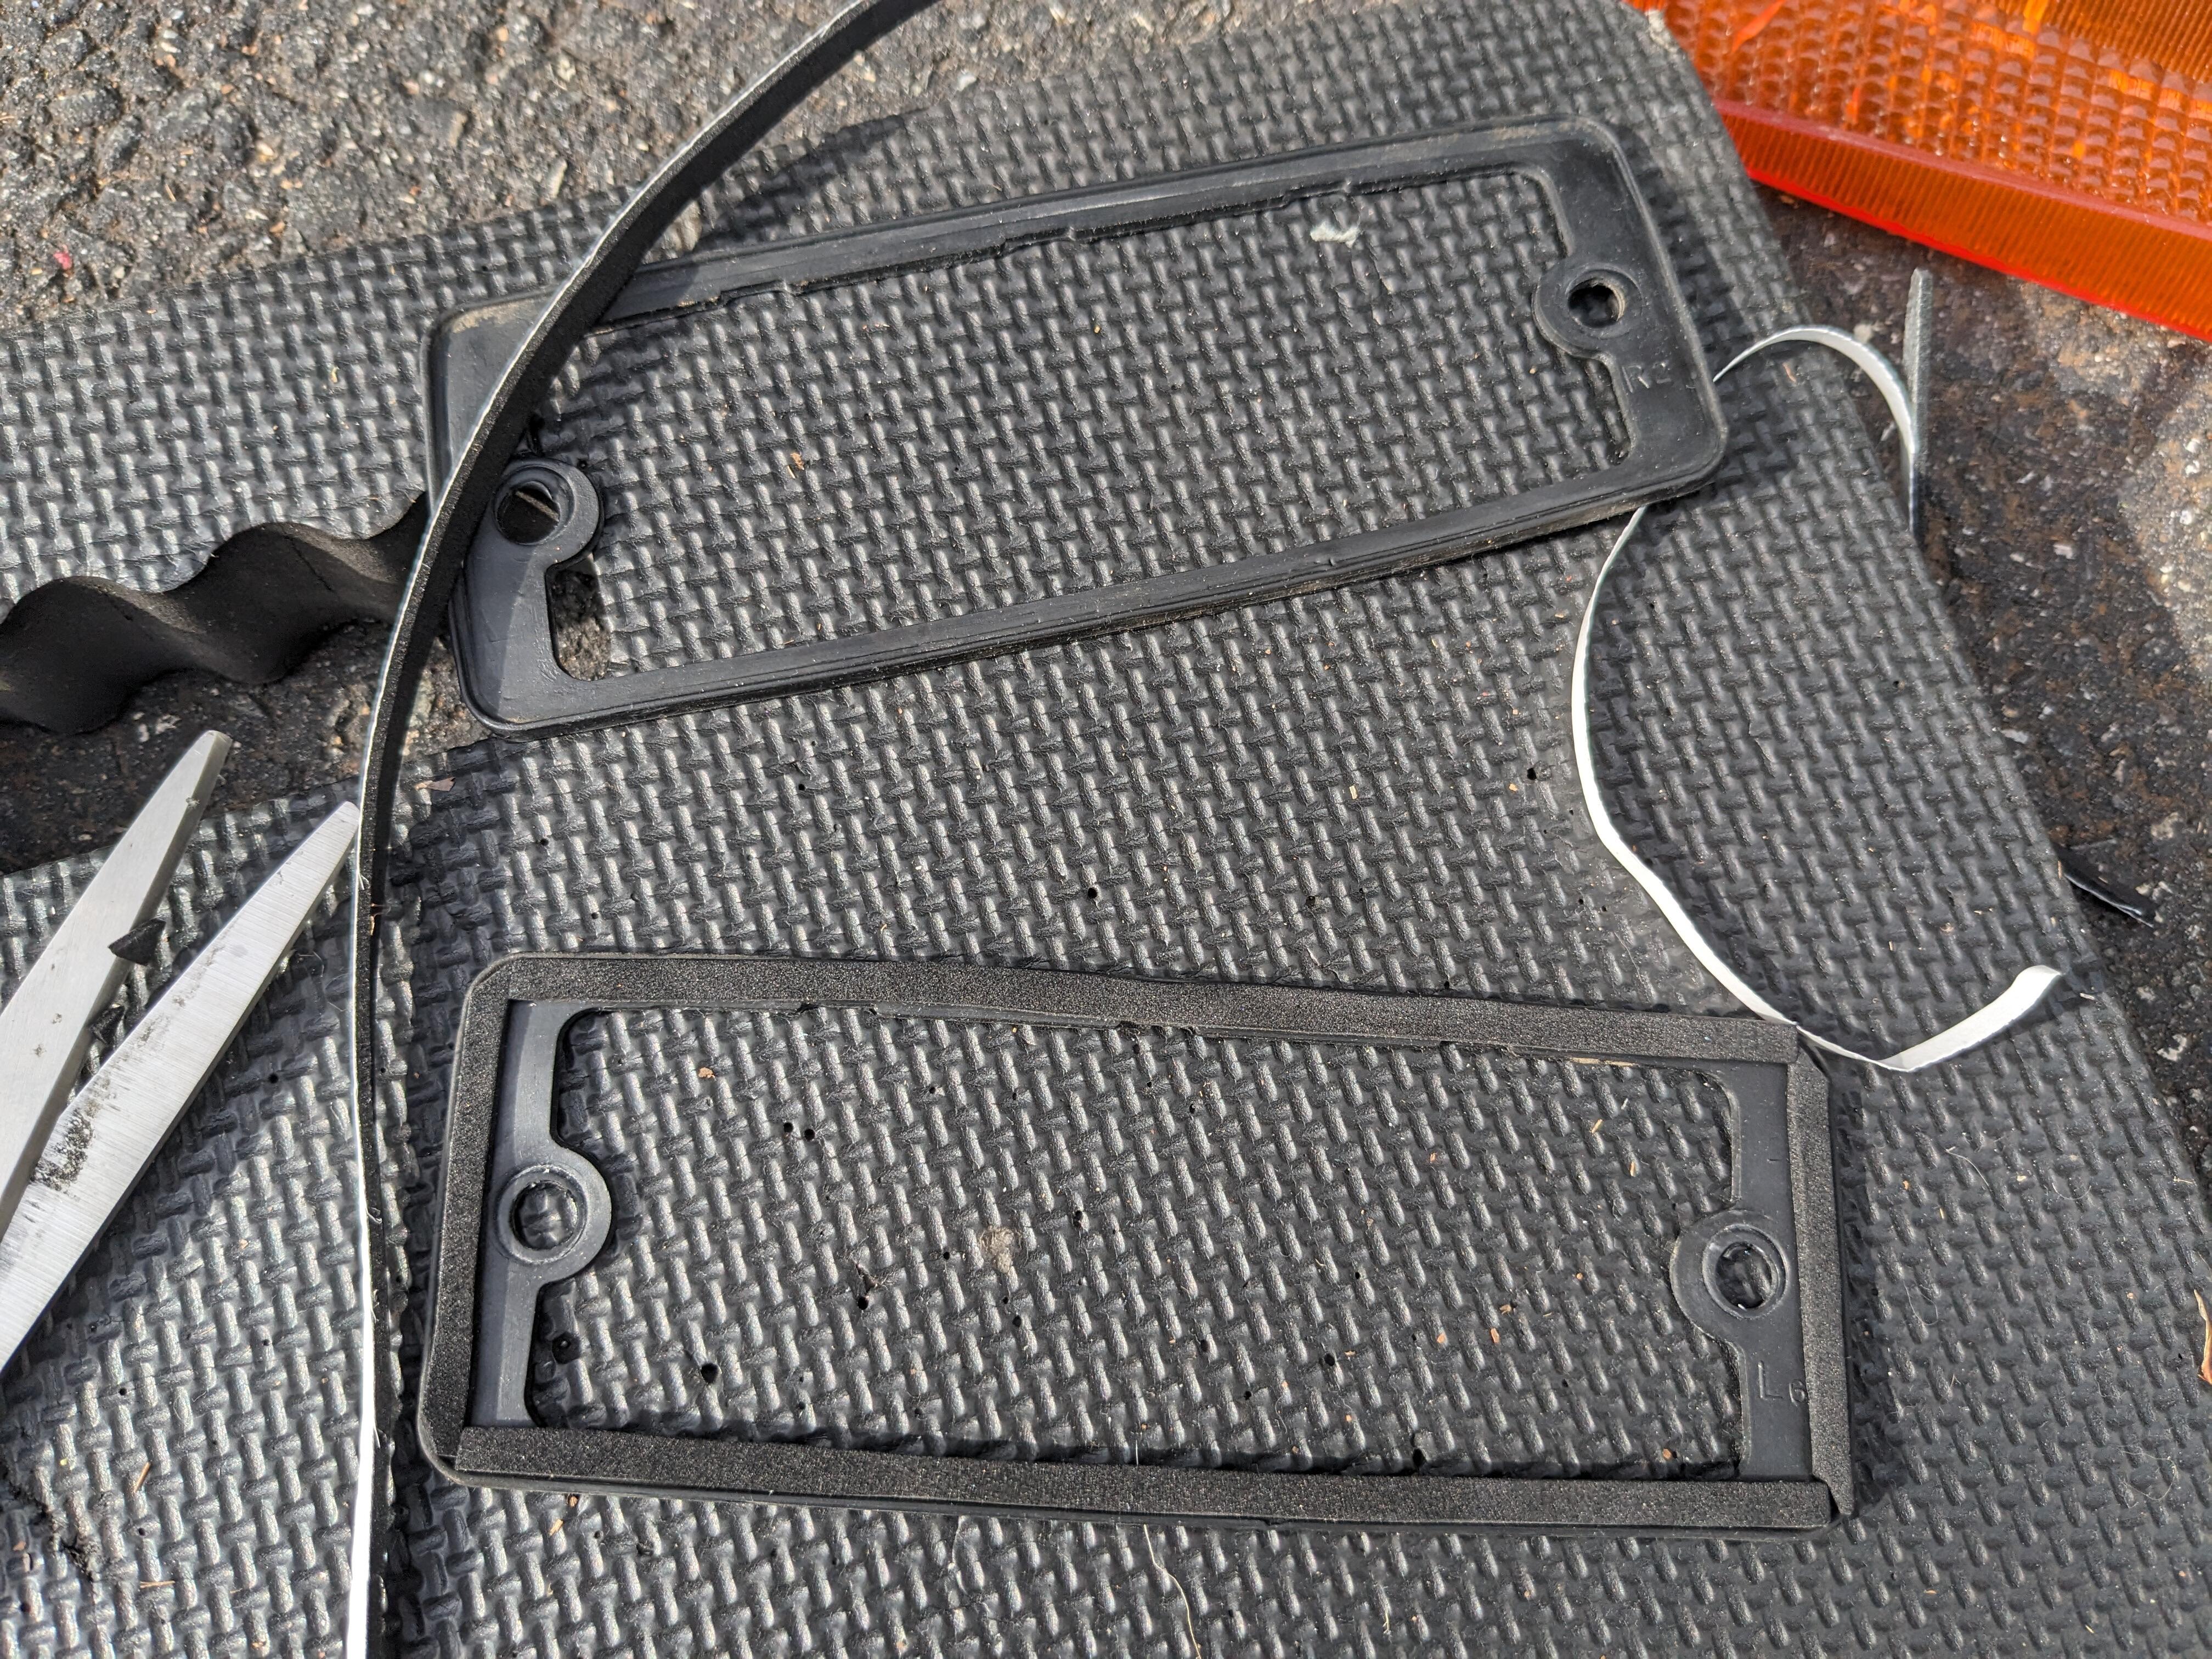
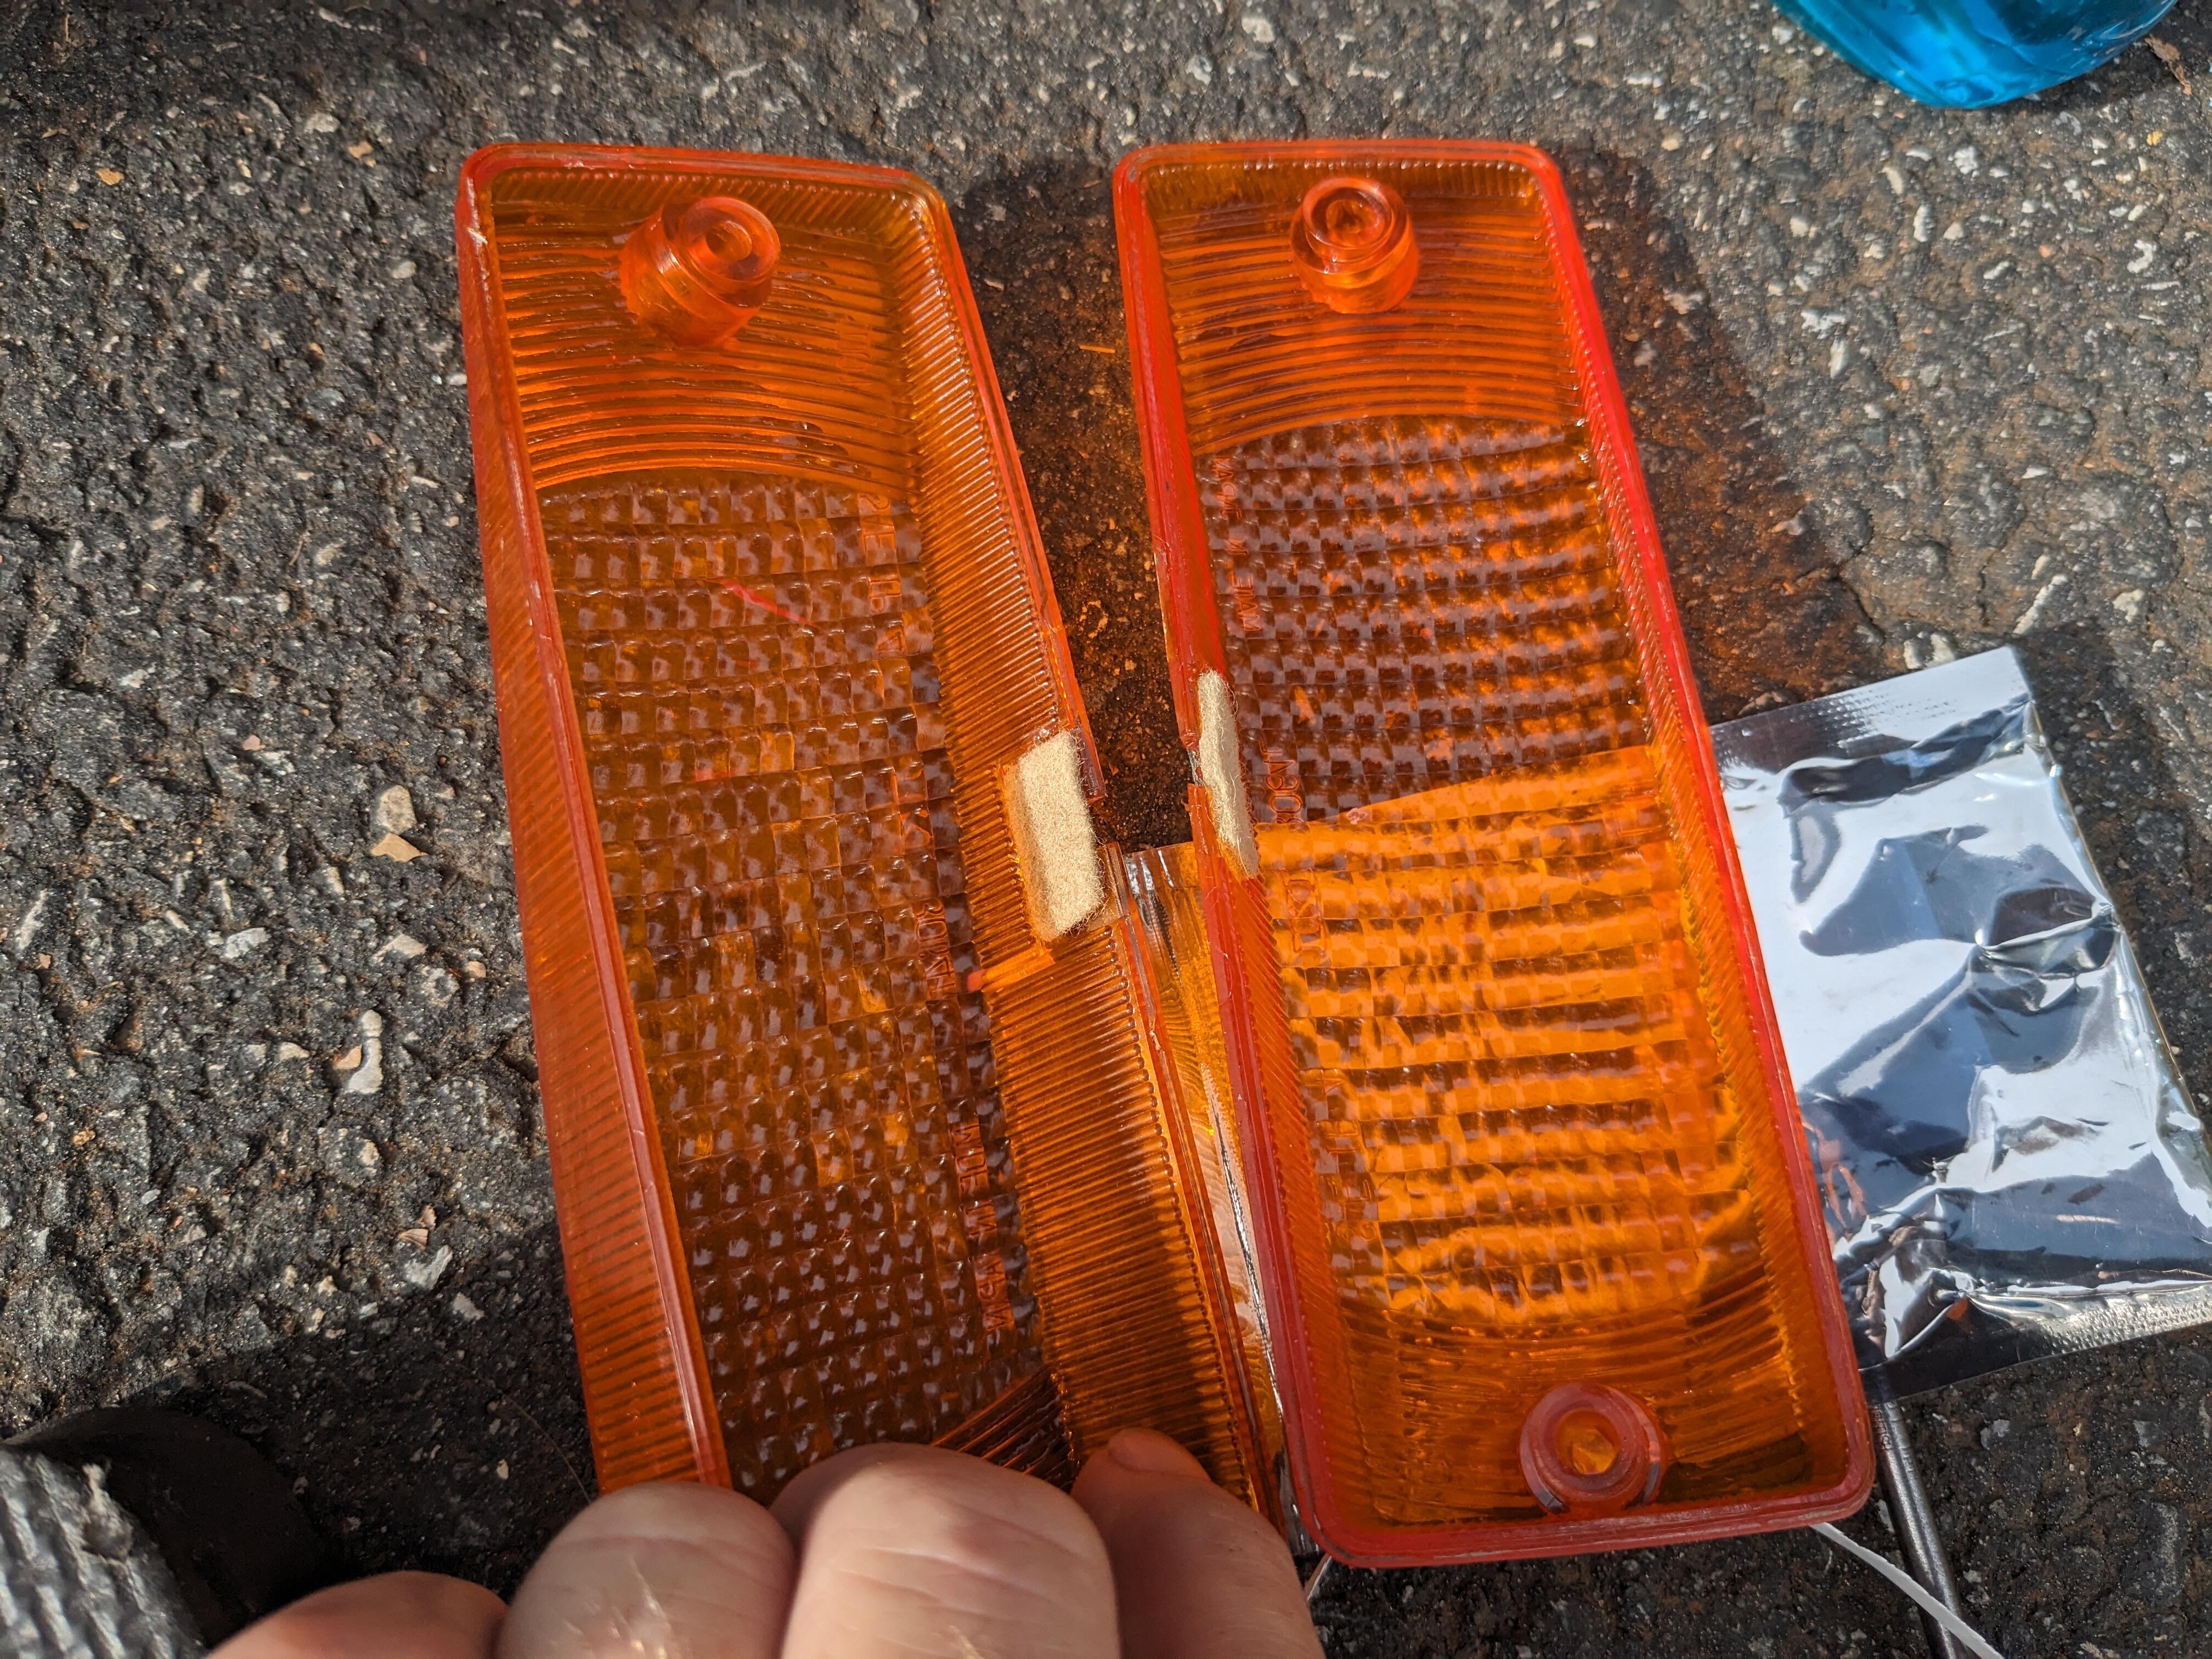
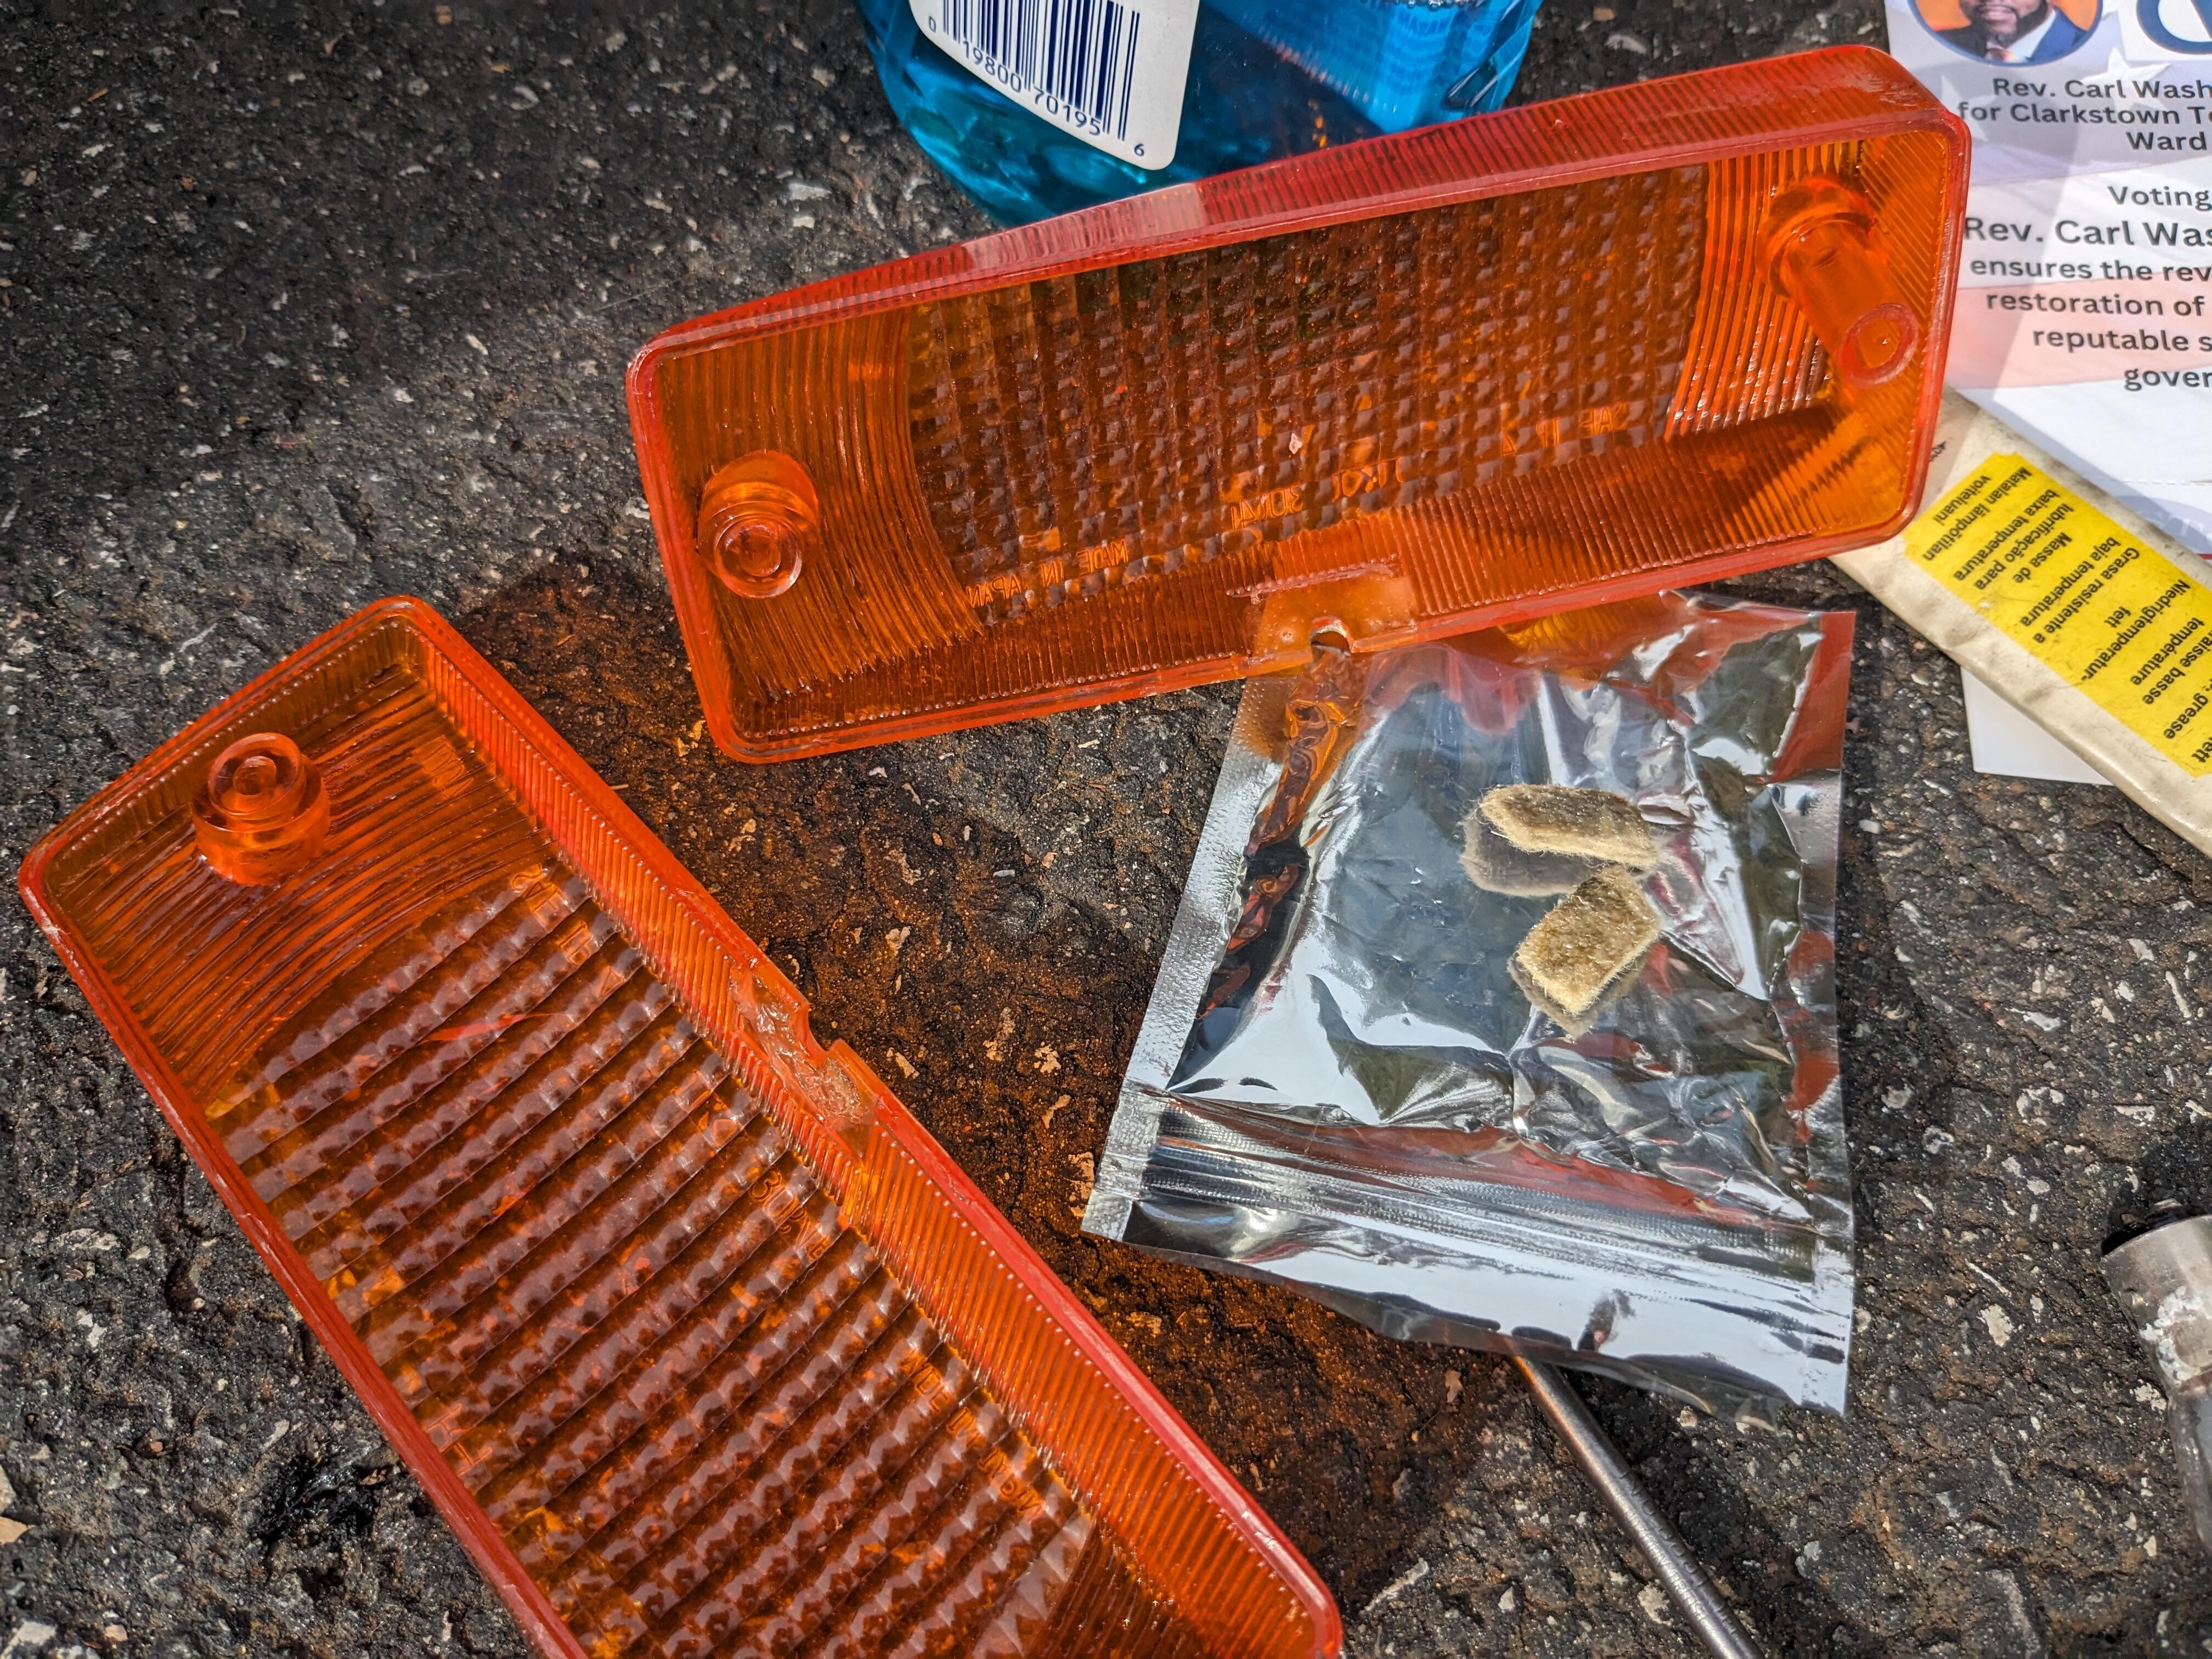
1 pointInstalled the LED-compatible flasher relays today & switched out the front & rear directional bulbs removed the two factory relays used the flasher relay mount point for the grounds made a stainless bracket to retain the relays. @SteveJ - It is nice to be able to adjust the flasher speed 🙂 Cleaned up the housings, and added a thin strip of closed cell foam to improve the seal. Also Volvo used nylon washers to help seal the screw holes, so I added those. cleaned up the foam moisture pads & re-glued them


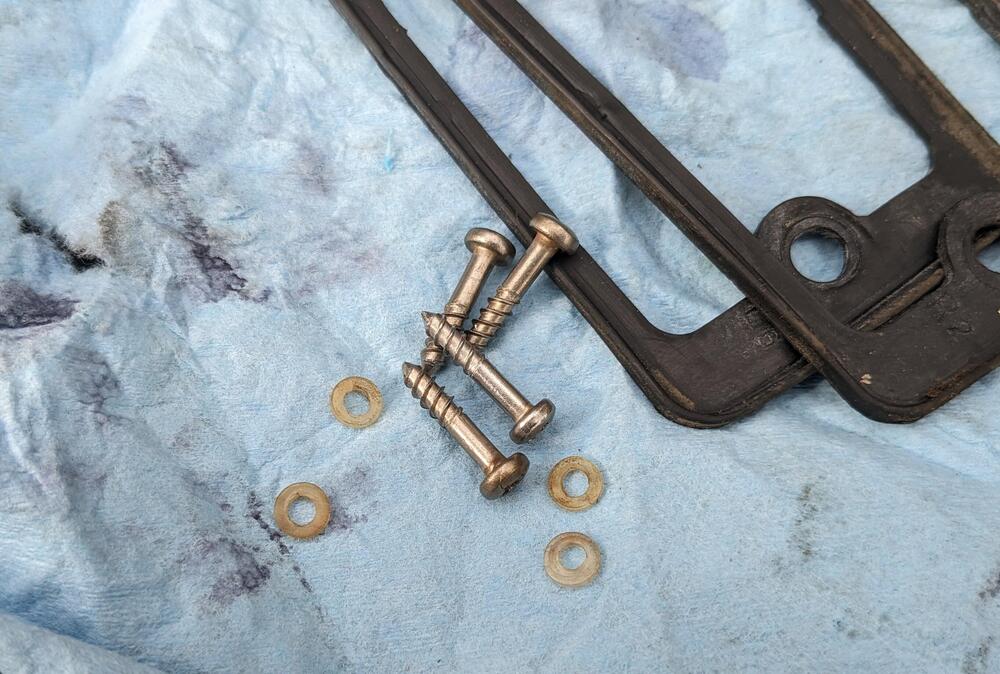 1 point
 -
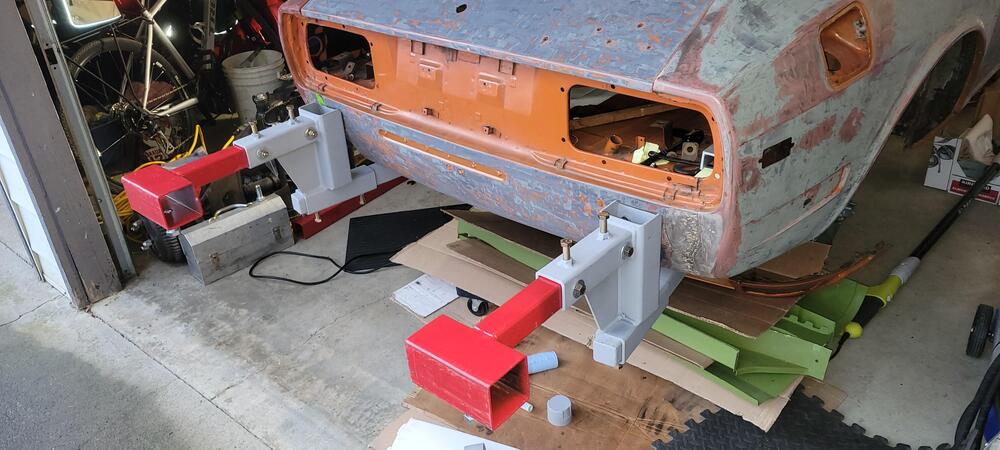
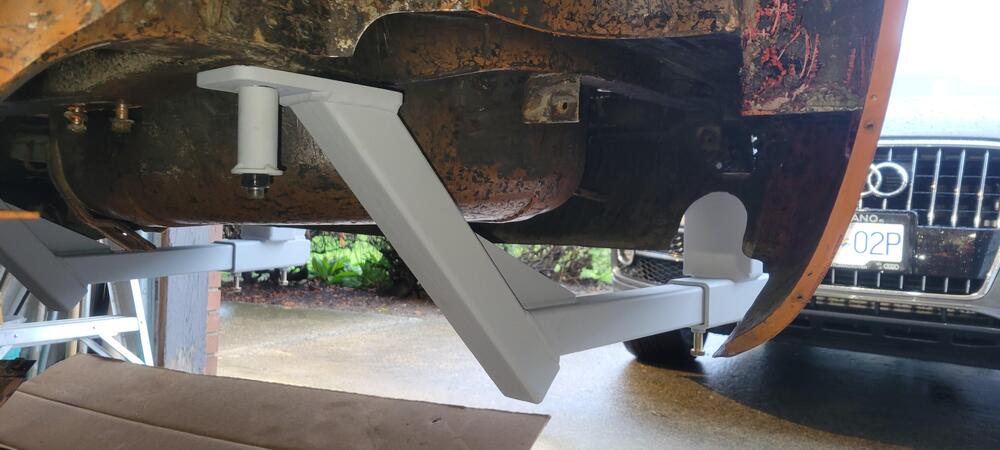
1 pointInstalling the front and rear brackets went well, time for breakfast.🙂


 1 point
 -
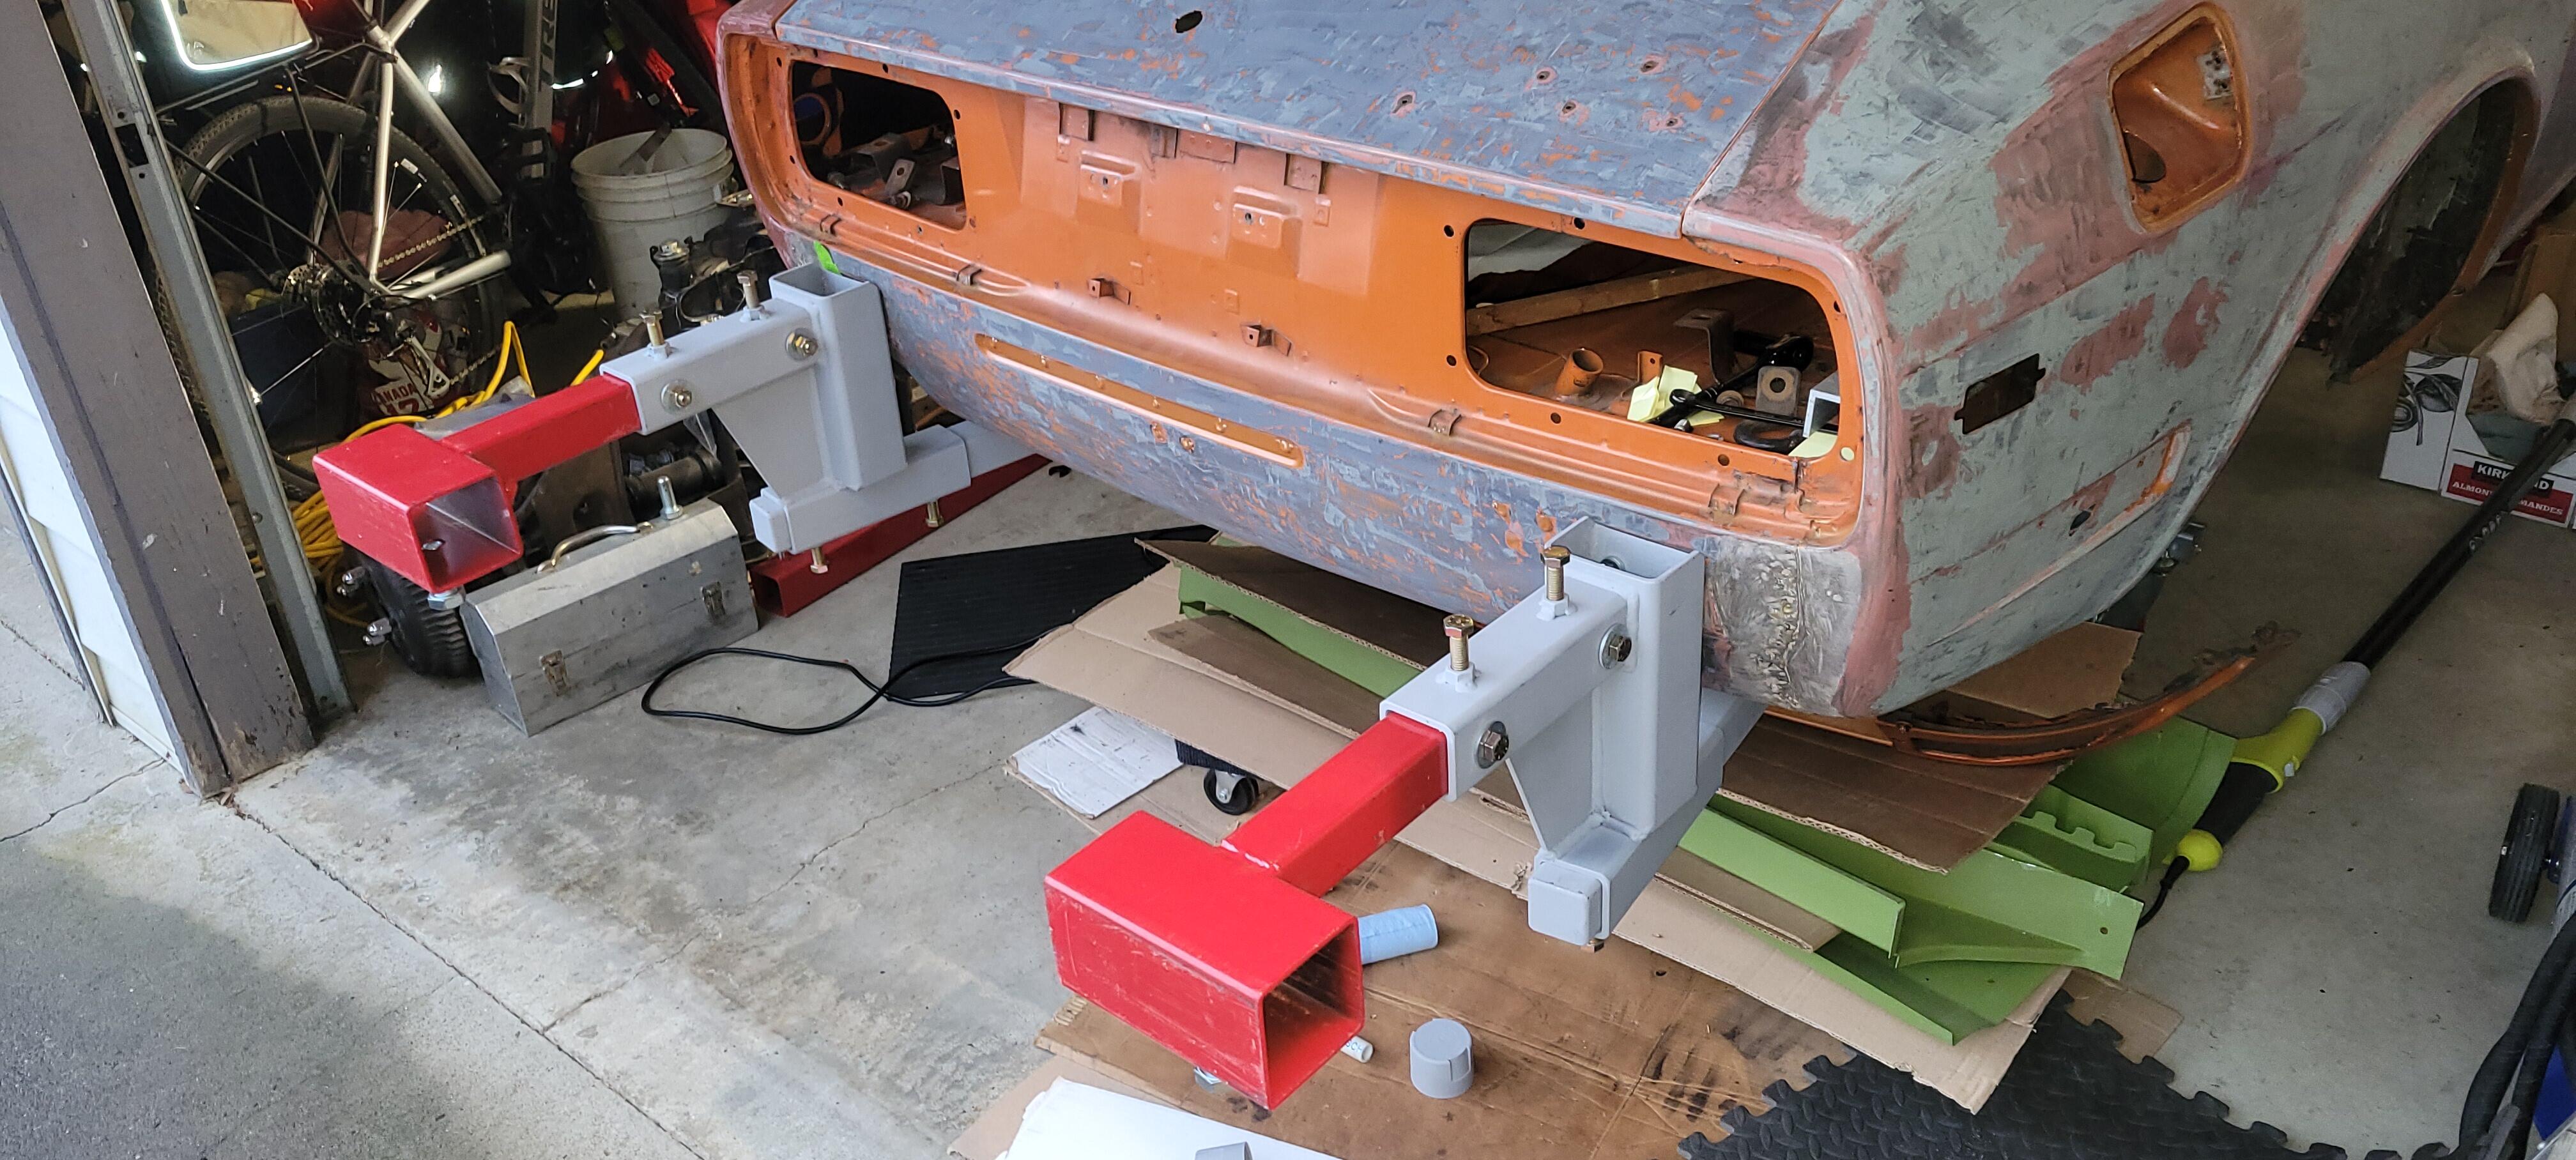
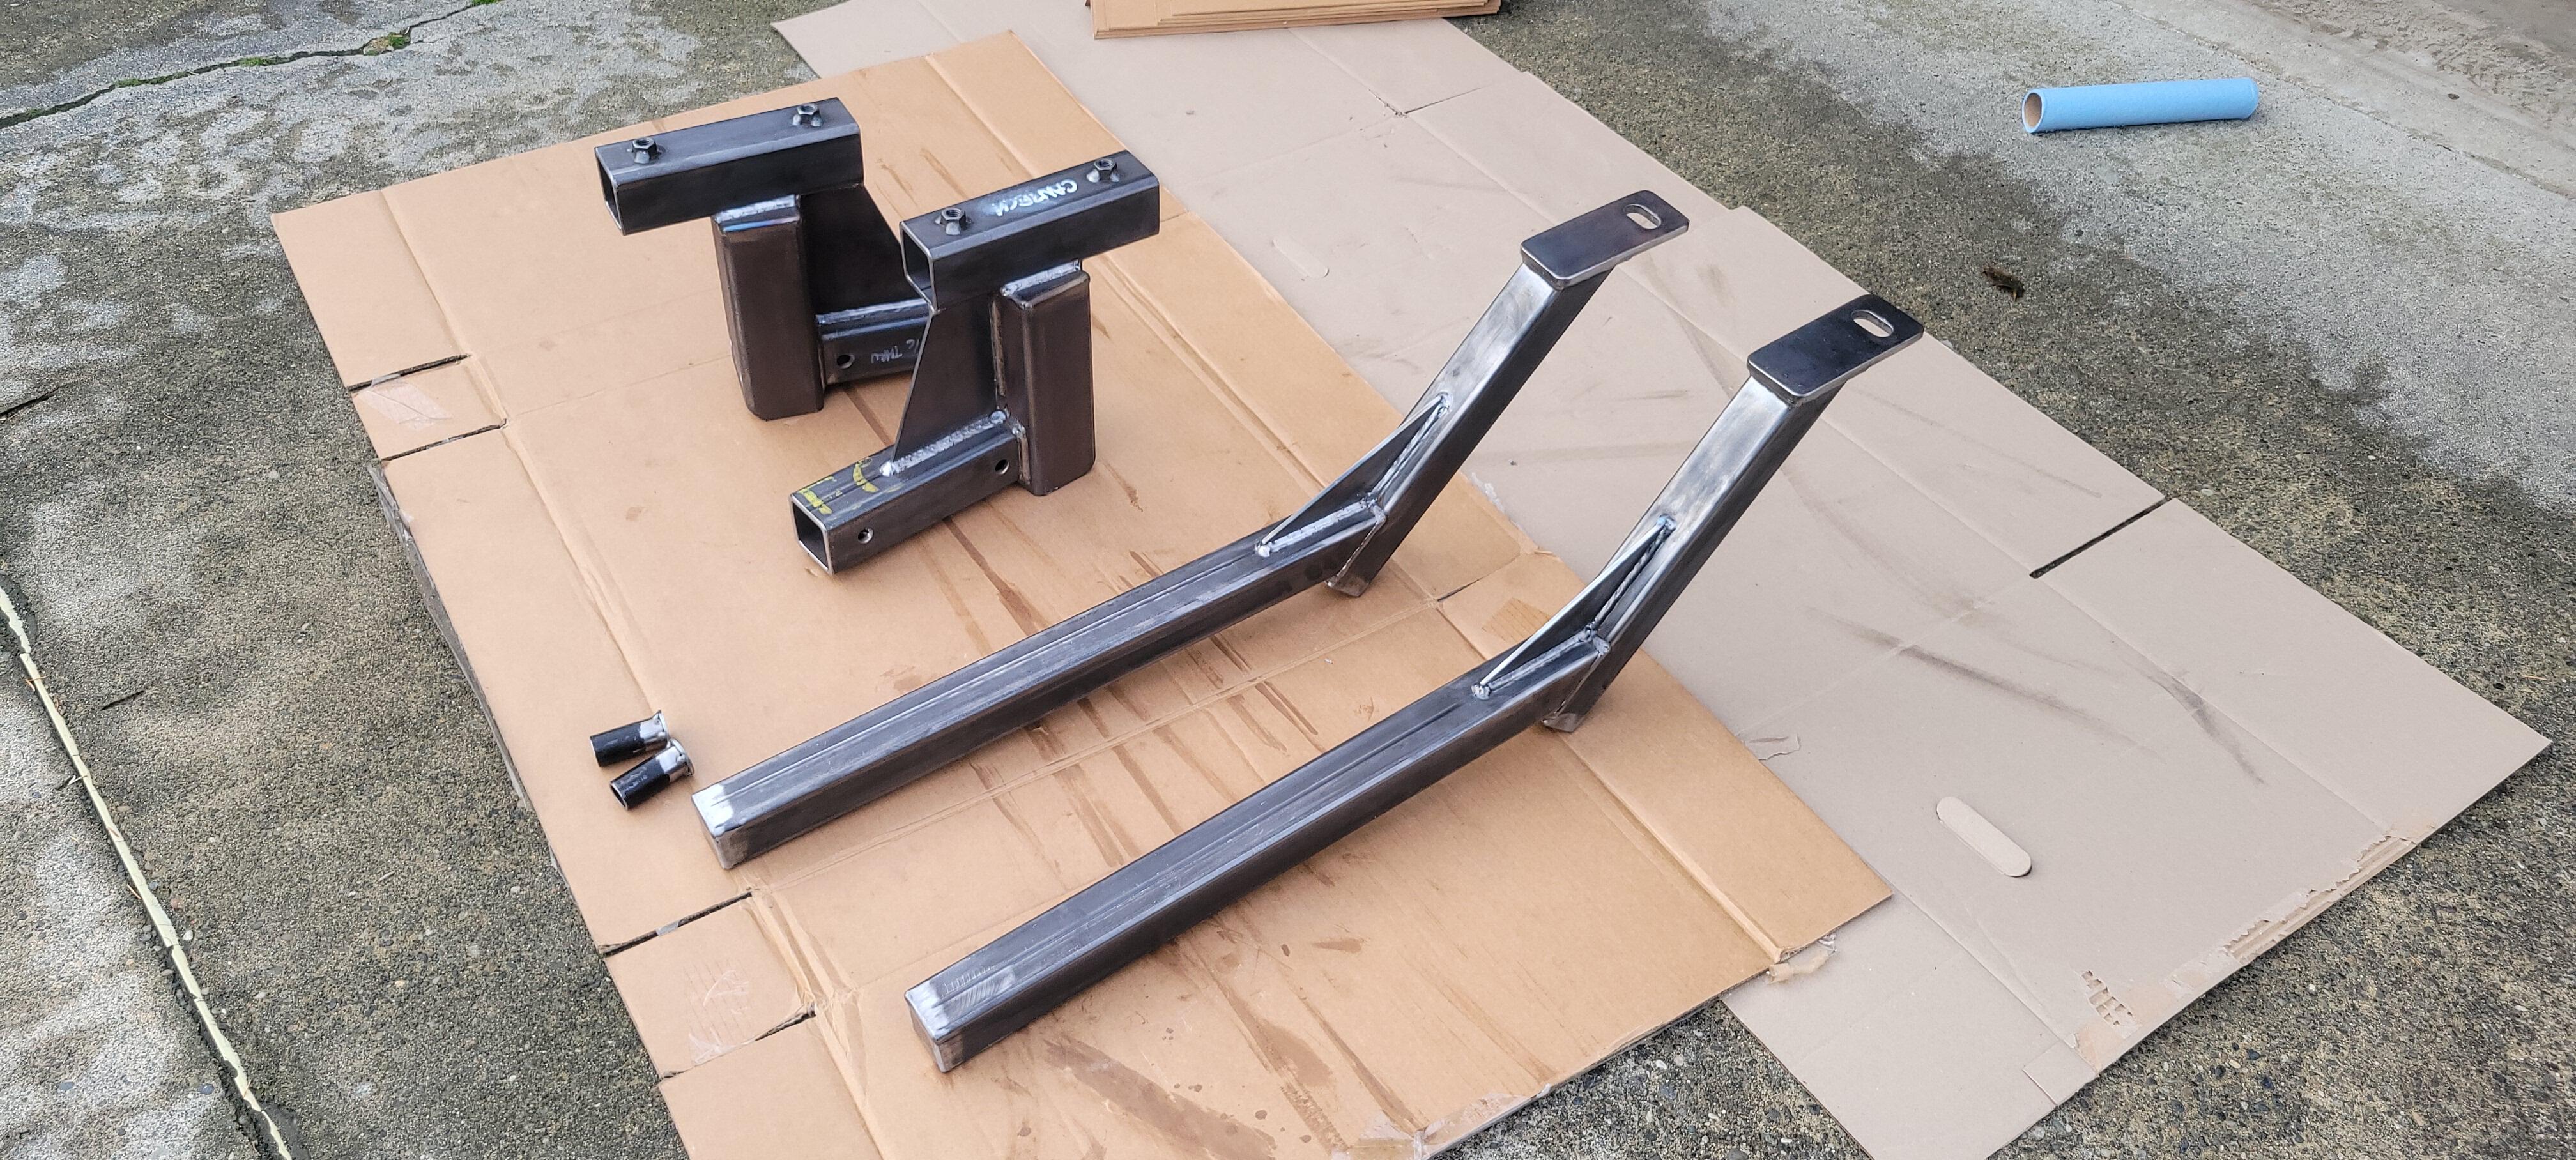
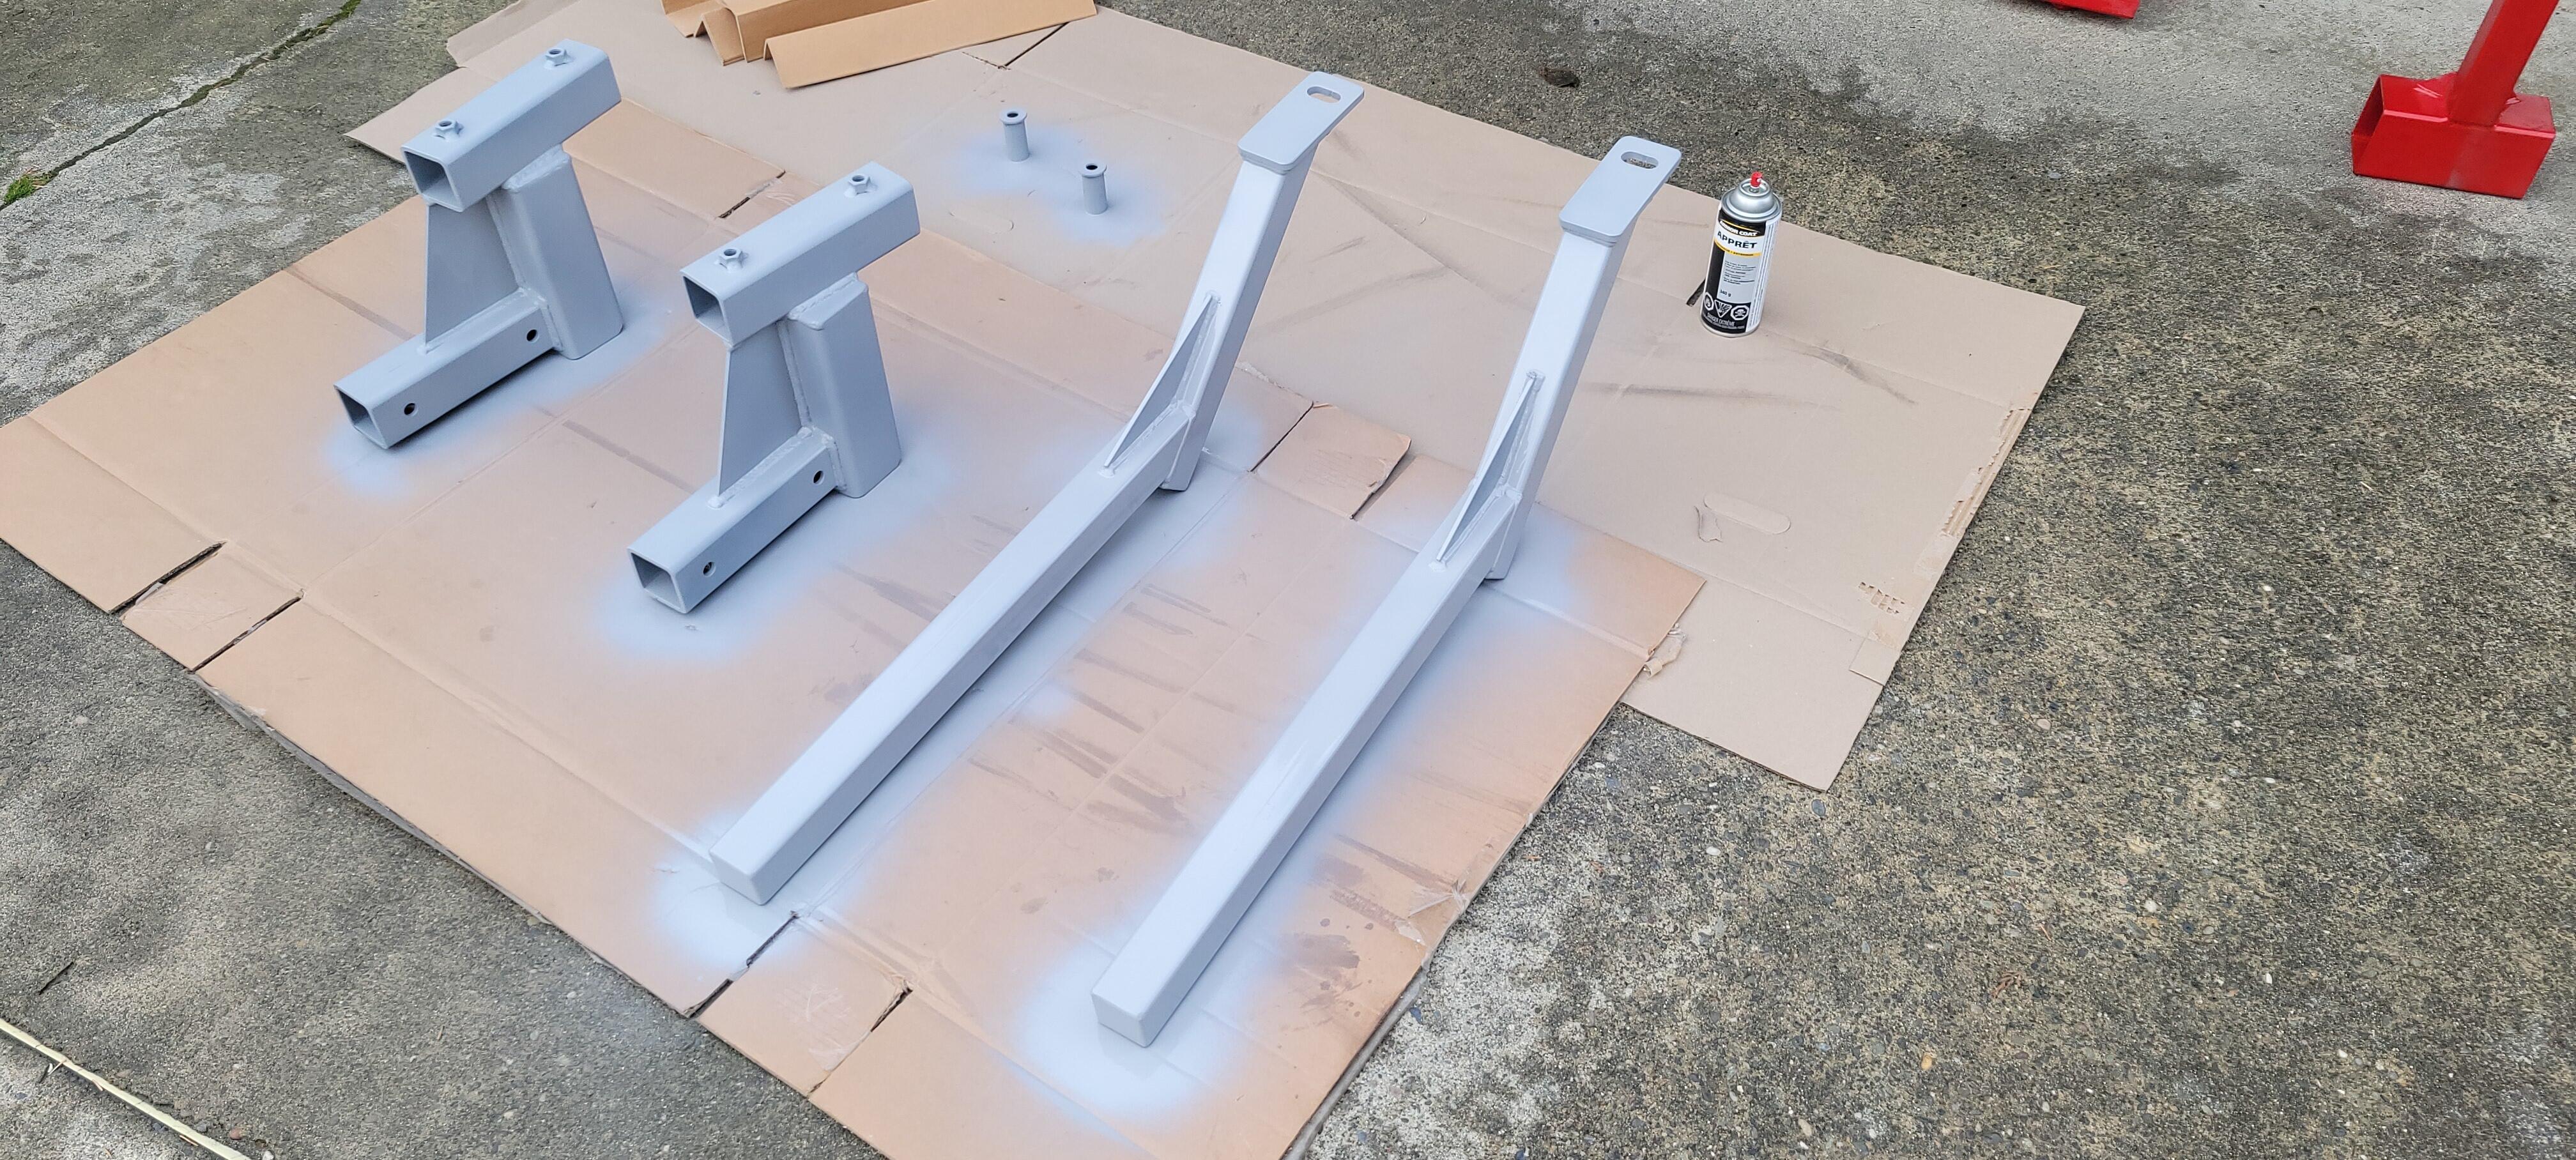
1 pointYesterday I picked up the finished rear brackets I had made for mounting the shell on the rotisserie and gave them a quick shot of primer. I'm very happy with the result, my fabricator does great work. Over the weekend I will be working on getting it all put together. I was hoping to do this in my driveway but the weather is not cooperating. The predicted rain for all weekend has already started. My garage is only 21' wide x 20' long so it will be a bit crowed during assembly. When it is all done there is not much front to back walking room but I laid it out in cad and after moving my beer fridge and work bench it looks like it will work. It was handy that I had created a basic 3d model of our house to plan our recent kitchen re-model. Here's a couple of images,


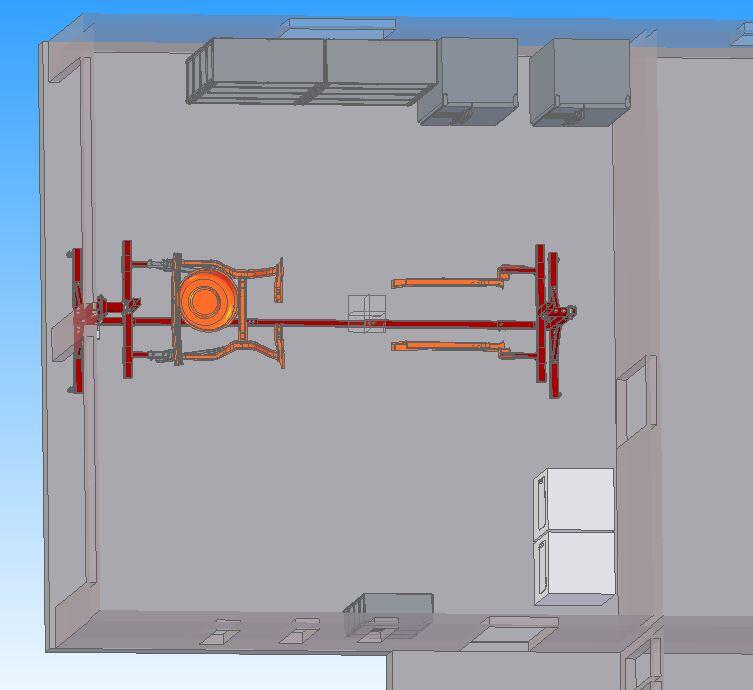 1 point