Leaderboard
-
jfa.series1
 Subscriber
 2Points2,733Posts
 -
KDMatt
Free Member1Points697Posts -
Jasonsdad
Free Member1Points4Posts -
TheCrazySwede
Free Member1Points135Posts


Popular Content
Showing content with the highest reputation on 05/02/2016 in Posts
-
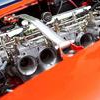
1 pointAttention all Mikuni Users: We were all at a loss when Todd (Wold Creek Racing) passed away, and the knowledge that left with him for our Mikuni Carbs….not to mention all the parts that he had. I know there are other authorized dealers of Mikuni parts on the internet, but without the knowledge to share there are just another parts shop with no first-hand knowledge for the sale. I have found a great new resource on Mikuni PHH carbs and he is willing to share his knowledge and is also an authorized distributor for Mikuni – David Premo A few weeks ago I called up Dave Rebello and asked him if he was interested in me purchasing a few parts and pieces for my Mikuni from him – he said “not really” due to he is really an engine shop – I asked him who he would recommend to push that business to - he said “David Premo” and gave me David’s number. After a few conversations with David and advise for my jetting – David came up with a small jet order for me, and some advice on my current jet settings. Over the weekend, I make a couple adjustments to my pump nozzle rod, upsized my pump nozzle and changed the duration of the fuel being injected at launch, edited an air jet and it was like my Mikuni’s woke up for the first time (even more so than the original jetting that Todd send me when I bought my Mikuni’s). I’m stoked on getting some new jets in from David mid week (USPS Priority) to see how the total jetting package that David recommends will affect my overall performance and the air fuel ratio mix. I called David yesterday and told him I had reduced my Air Jet per his guidance (I have good collection of jets through trial and error) and it was a HUGE difference – he said “wait until the new jets come to you mid week – you will really feel the Mikuni’s kick in then – you will think you have turbo’s”……………yep – I’m pretty stoked to say the least! For any of you Mikuni guys/gals our there give David a call – he is a world of knowledge – easy to talk to , has a complete inventory of Mikuni parts, and will steer you in the right direction for performance of your Mikuni set up. dave@tuning4performance.com 925-890-80741 point
-
I keep hoping I'll stumble across a really great, annotated writeup with tons of pictures to help me feel more confident about this... but it's not happening, lol. I guess you're right though, in that there's no harm in cracking it open just to see how bad it is.1 point
-
1 pointHockey pucks with a 1/4"W X 1/2"D slot are the perfect interface for using jack stands at the jacking points. A slotted puck can also used with a floor jack at the jacking point. Cheap, too!!!1 point
-
I know, I know Charles... Toronto is only a four and a half hour drive from my house.1 point
-
1 pointNo doubt while you were watching football with your favorite adult beverage close at hand.1 point
-
1 pointI think that Blue's input would be valuable to both you and Buyer #2. One of the members here ('George' from NB?) has Blue's telno in NS, I believe. If not, go the the Atlantic Z-Car club's website and ask there. Just remember that, other than the sea shipment part, there's really no difference (from your perspective) between selling to a buyer in the USA vs. selling to a buyer in Europe. Your obligations to a buyer (foreign or domestic) re shipment end at your driveway. The shipment, whether by truck or by truck/ship is the buyer's problem. Same goes for the paperwork, shipping insurance, brokerage fees, inspections, duties, and taxes that are imposed at the dock and at the border. I agree with the others that you need your terms met by Buyer #1 and you are perfectly entitled to move on to Buyer #2 if they aren't met within a reasonable period of time. 'Reasonable period of time' is subjective, but I think that 2 business days would be appropriate here, given that you risk losing Buyer #2 if you give Buyer #1 too much time to stall. I'm not an eBay expert, but don't see how they can interfere with your rights as the owner of a piece of property that you've offered for sale with stated conditions. My two cents.1 point
-
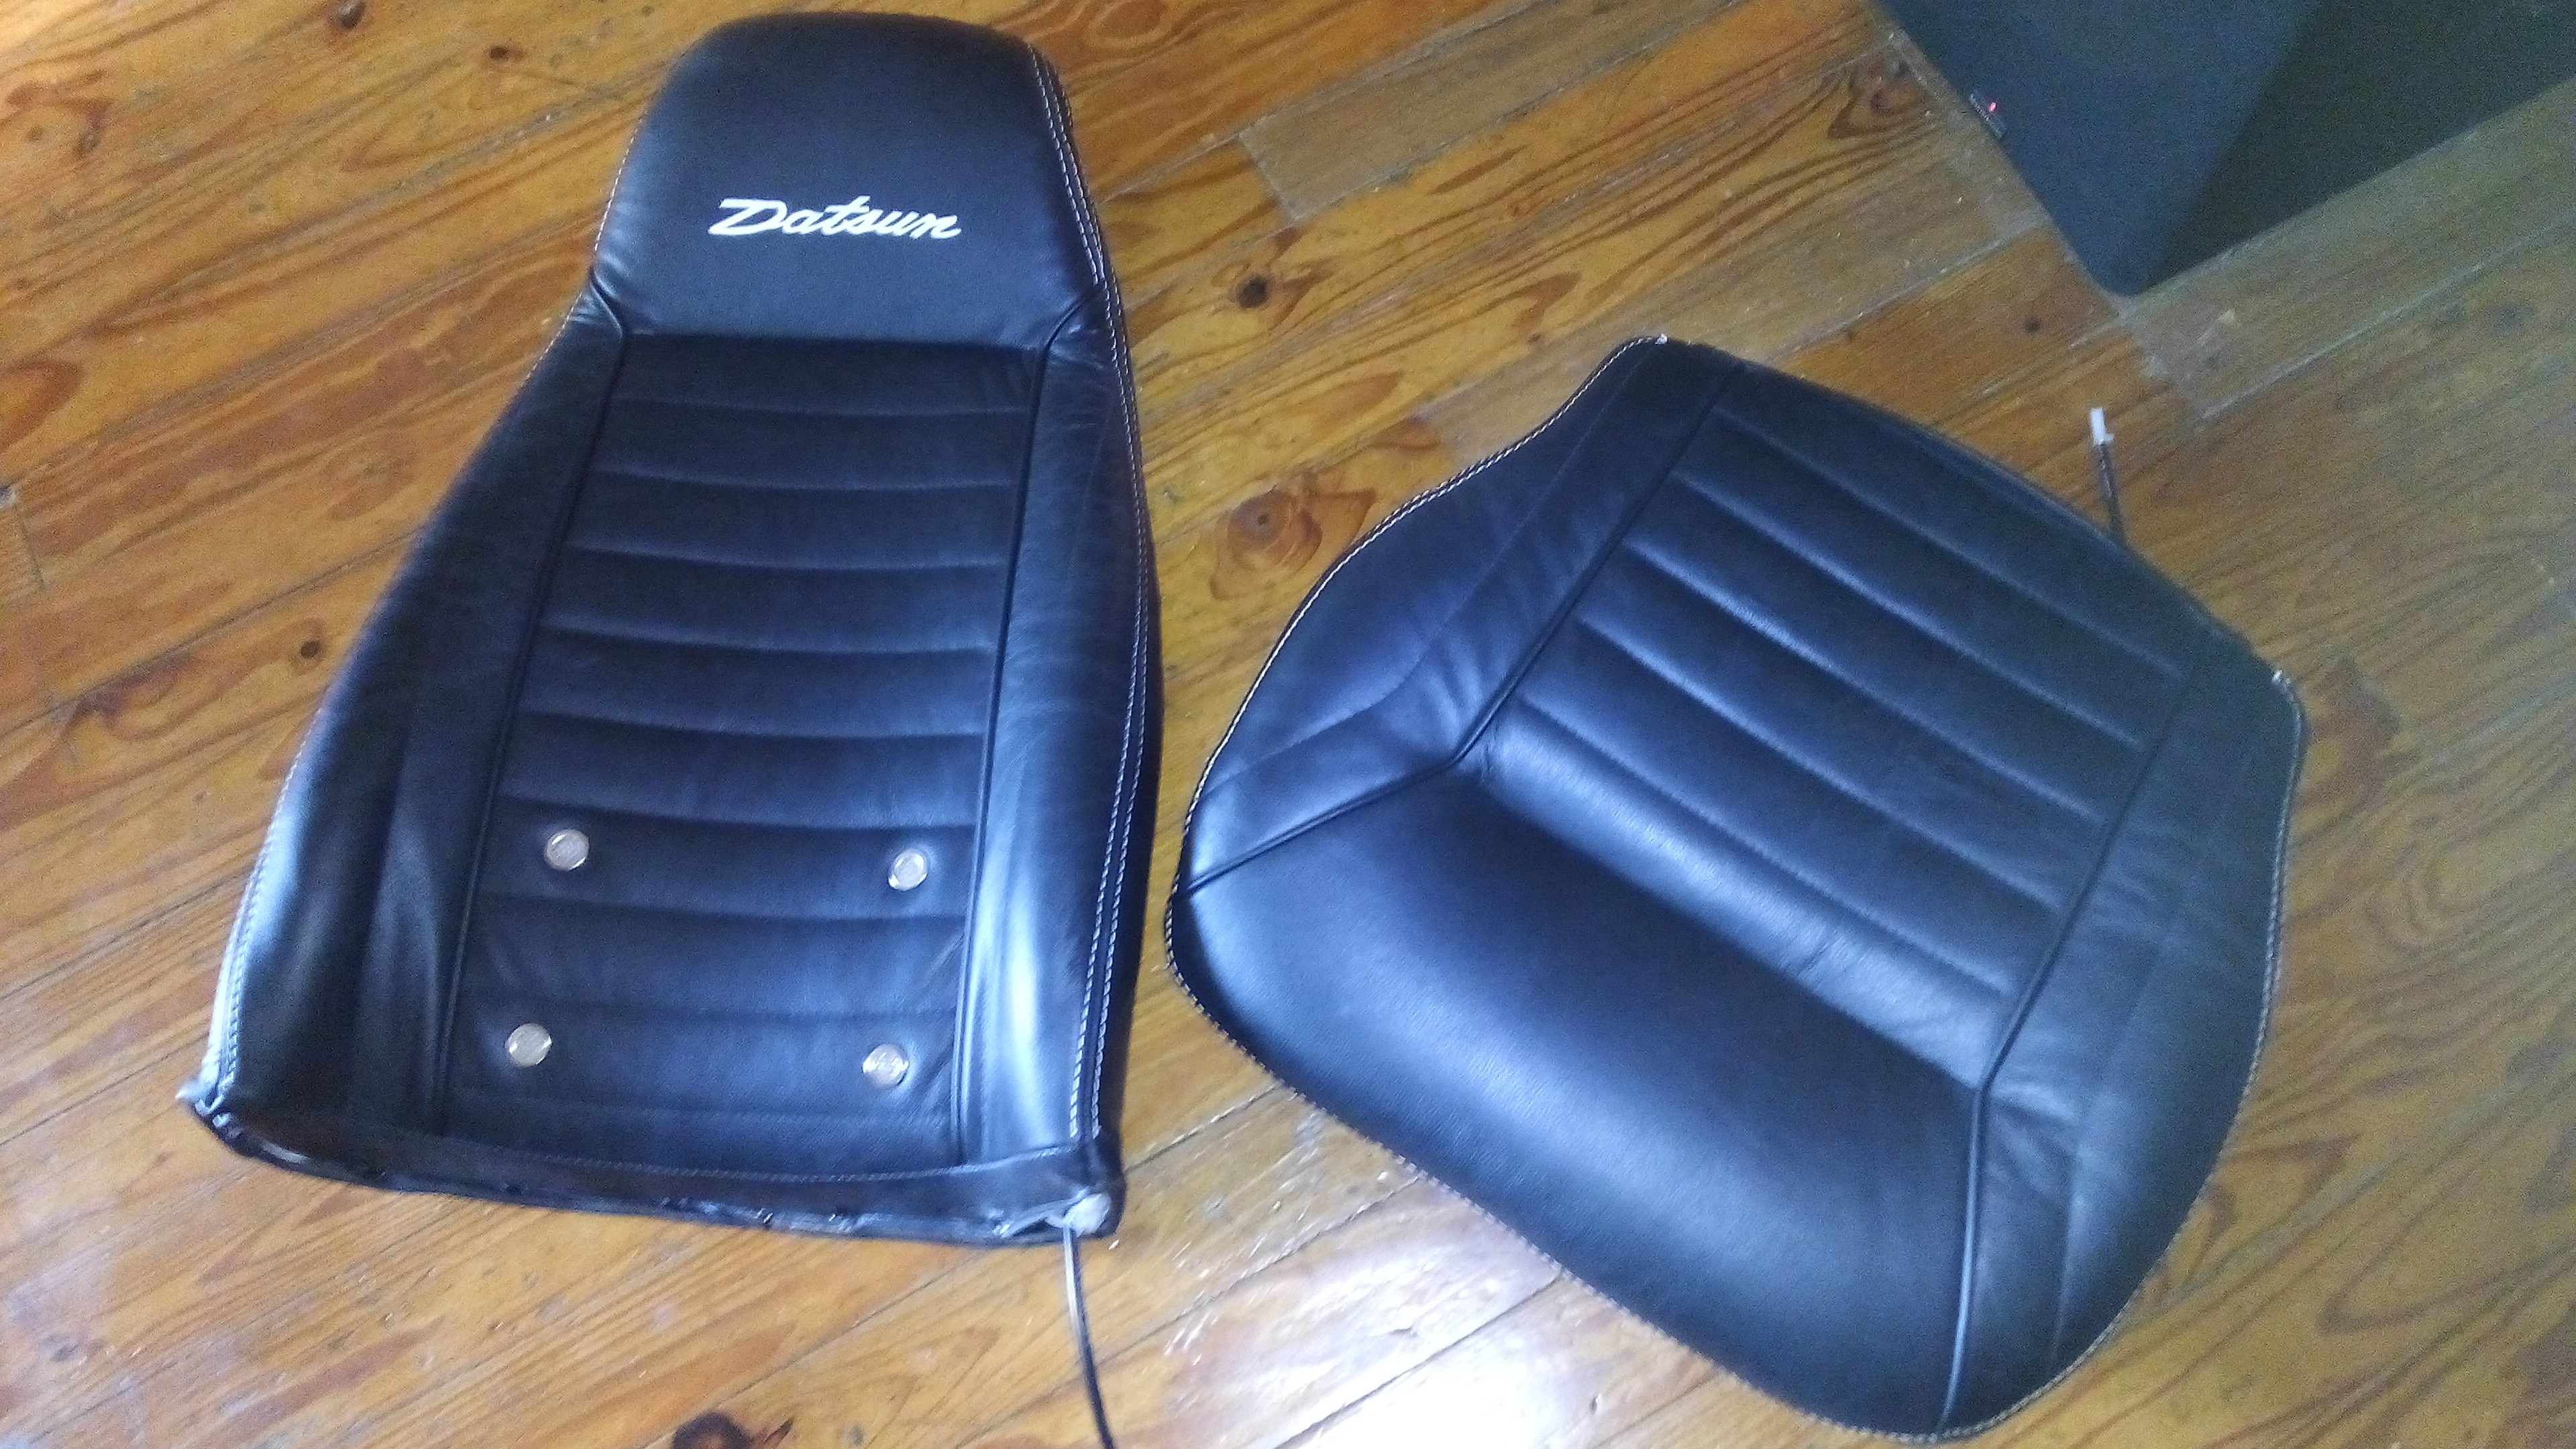
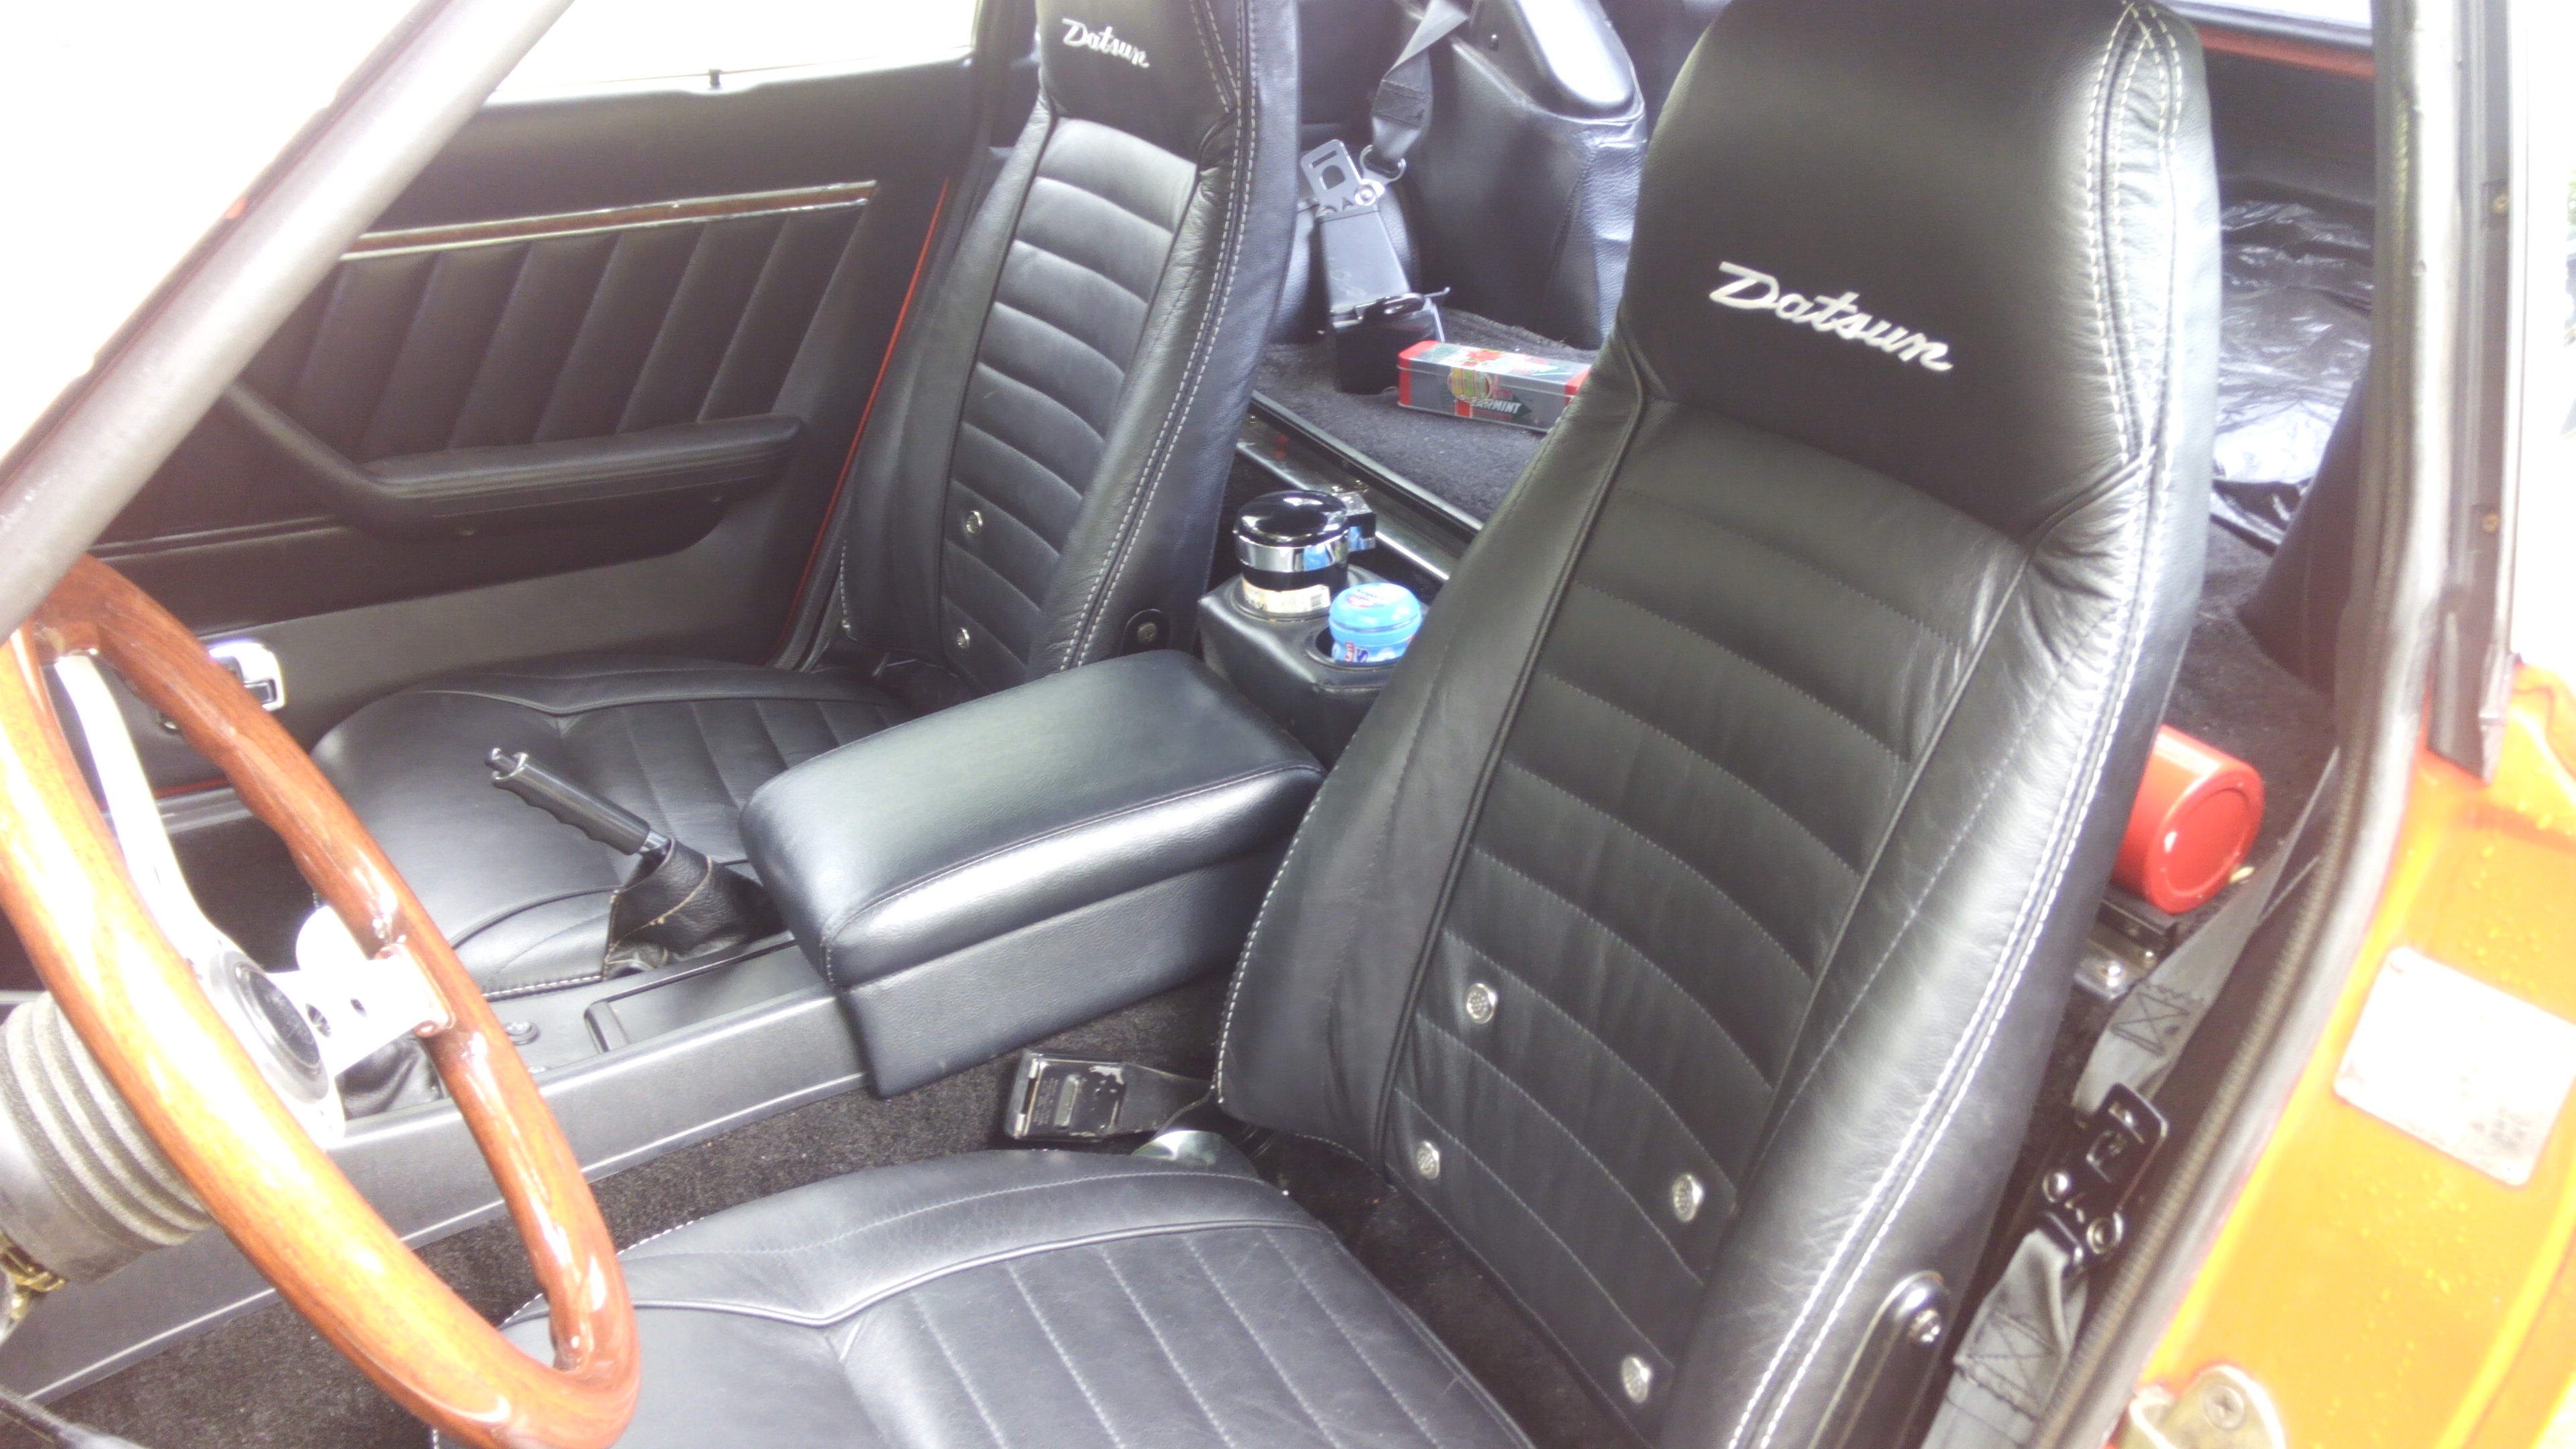
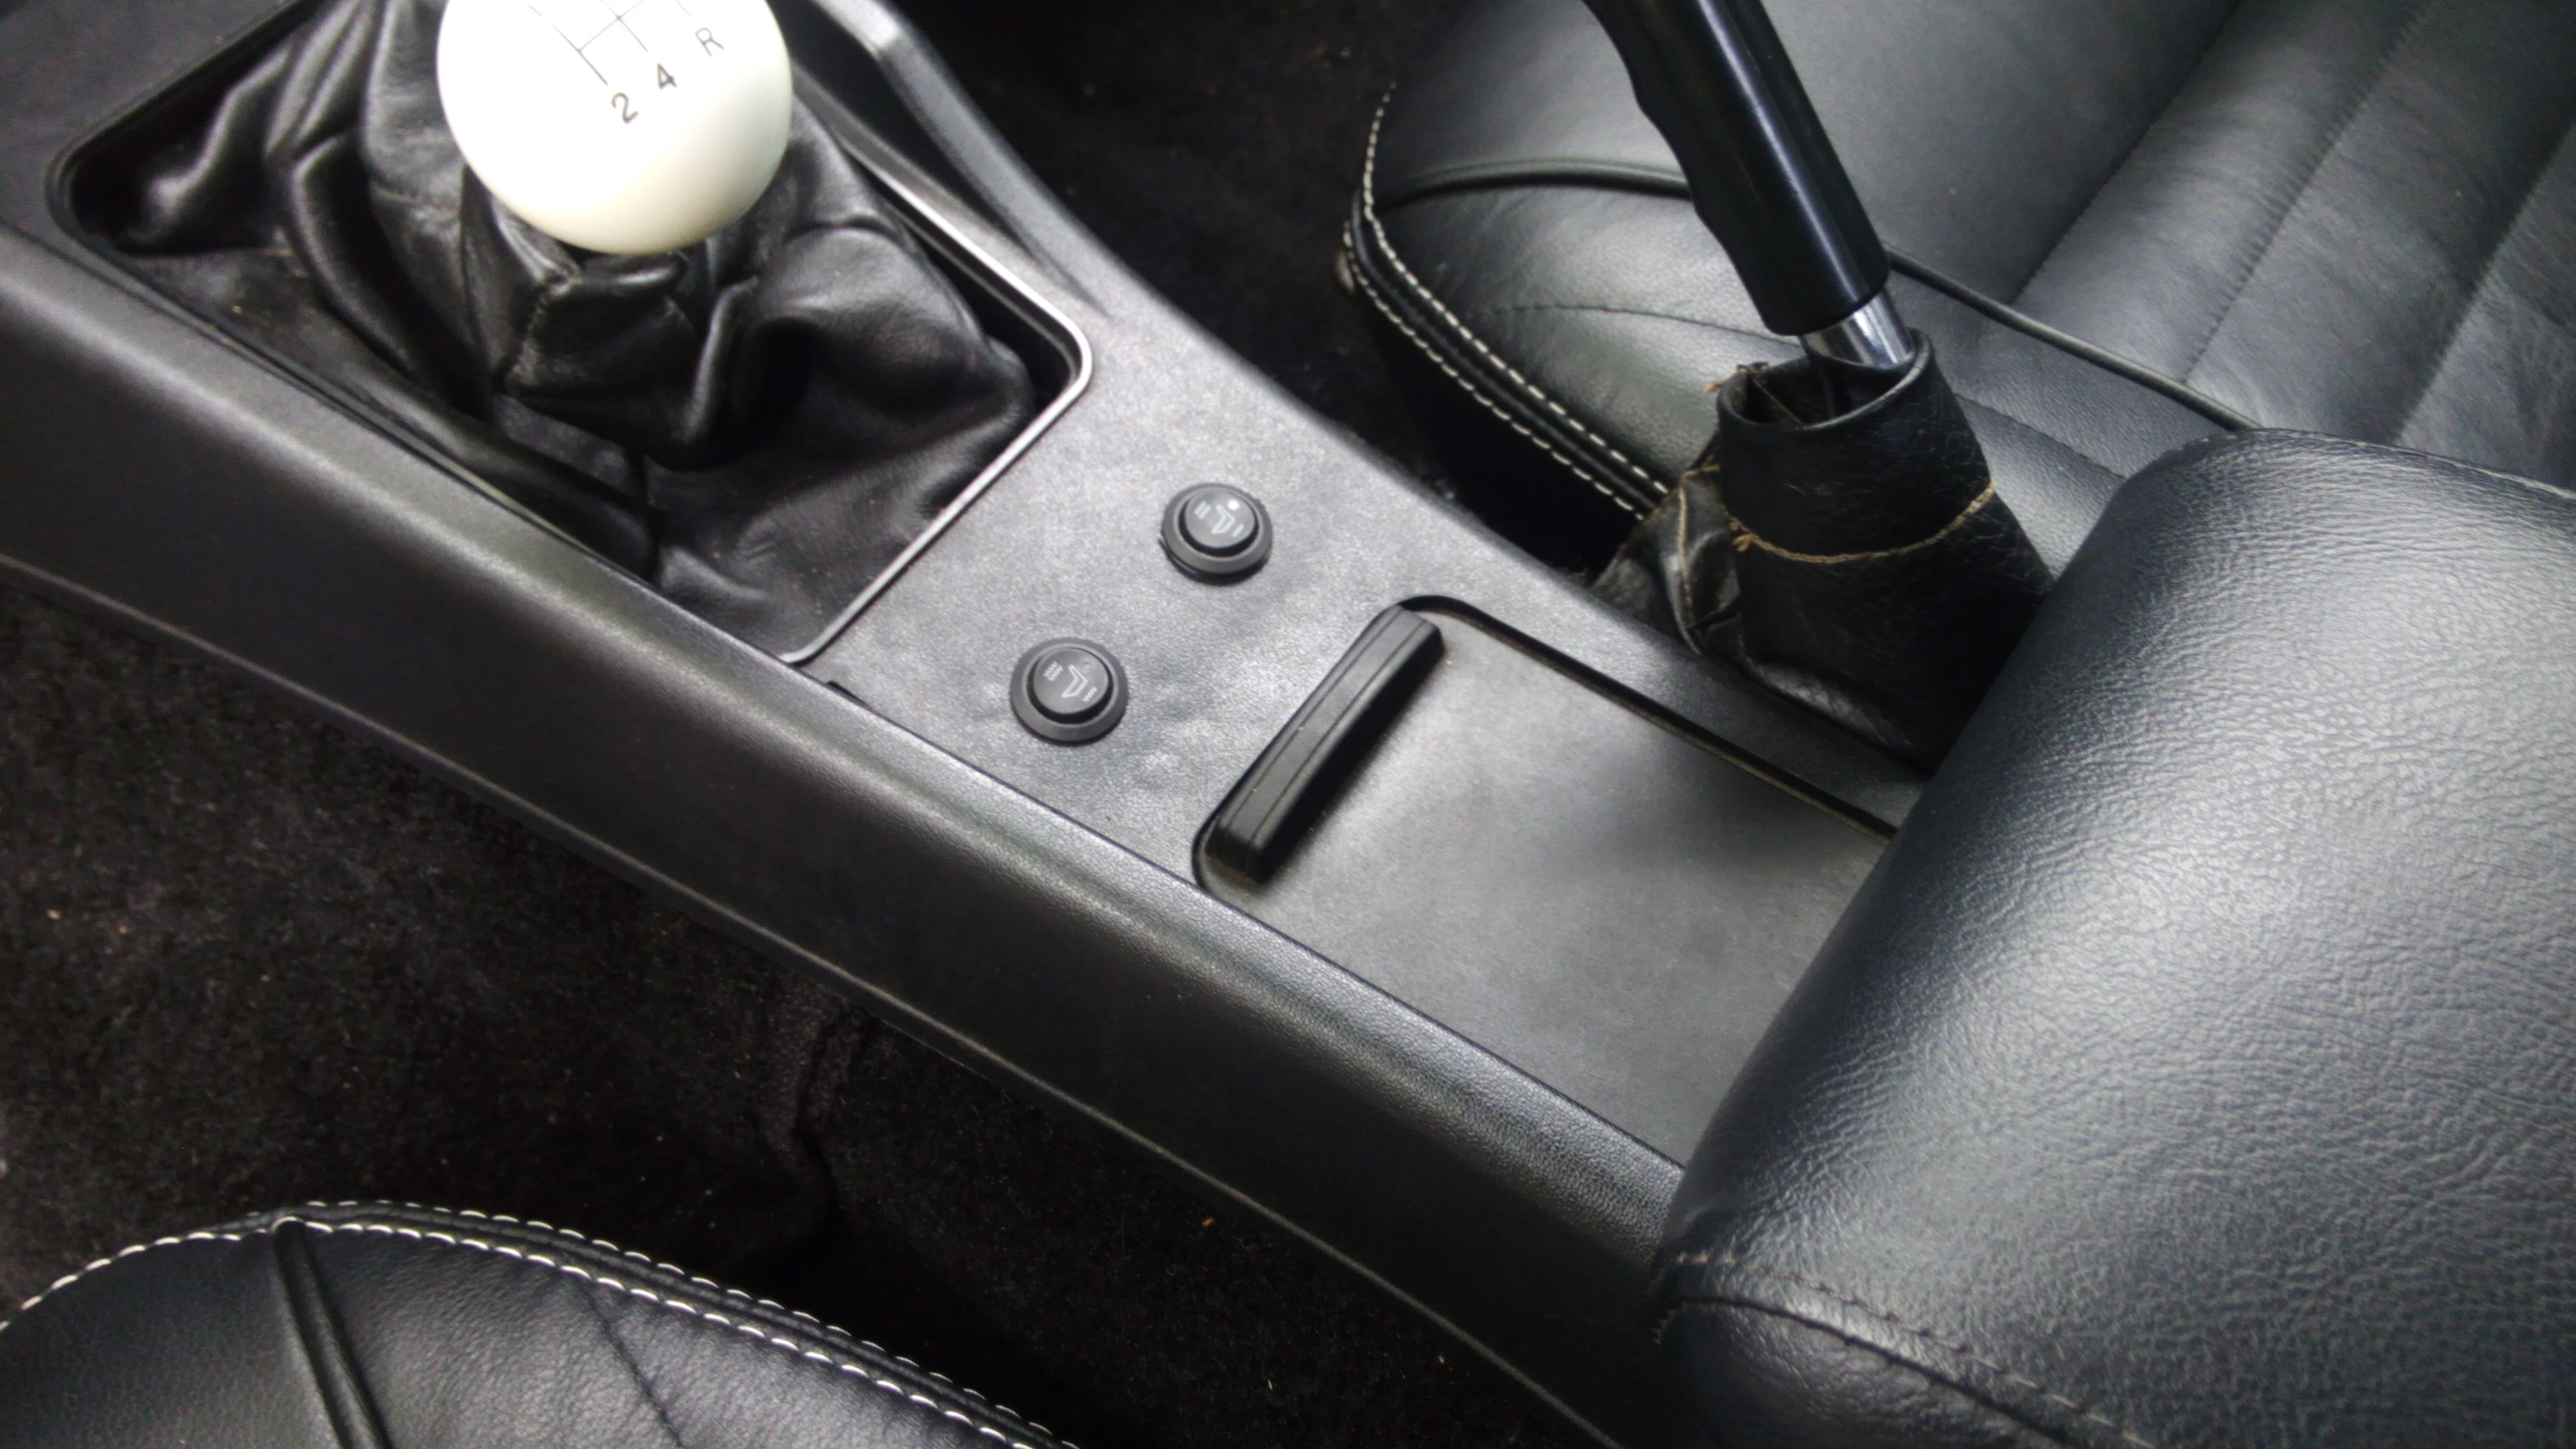
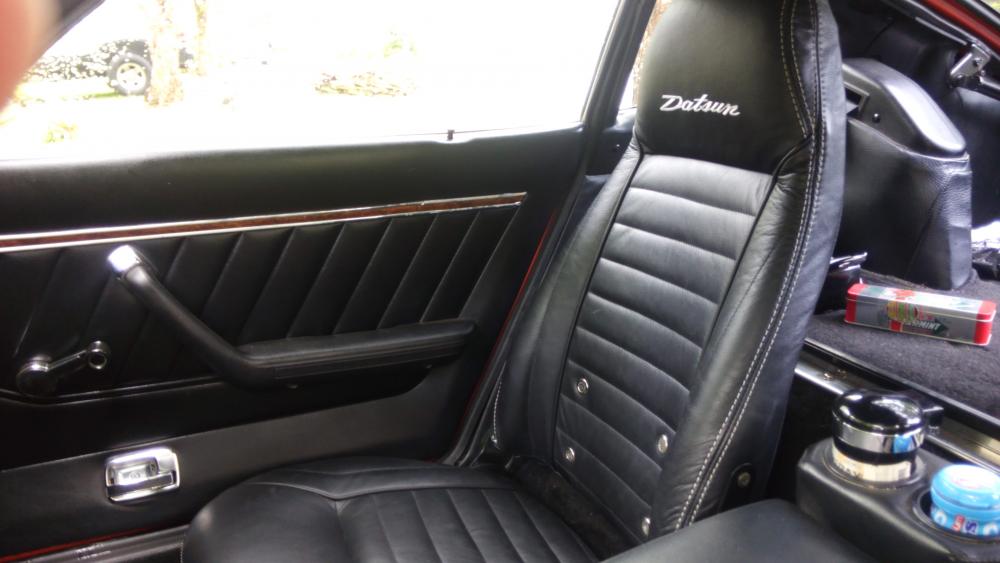
1 pointS30driver has added upholstery to his magnificent resume of skills! I've seen Jim's efforts up close and sat in the finished product and can vouch that the material, workmanship and quality of his install would satisfy the even the most discriminating of us. His switch install for the seat heaters is perfect---very professionally done! To answer @sweatybetty -- although the switches came with the heater set, if you didn't know better you would think it was factory fitted! If you guys are looking for real leather covers for your seats, I don't think you can do better than the Interior Innovations set. I can see some additional sales resulting from this thread. Following Hardway's lead, these are great photos and documentation Jim, thanks!1 point
-
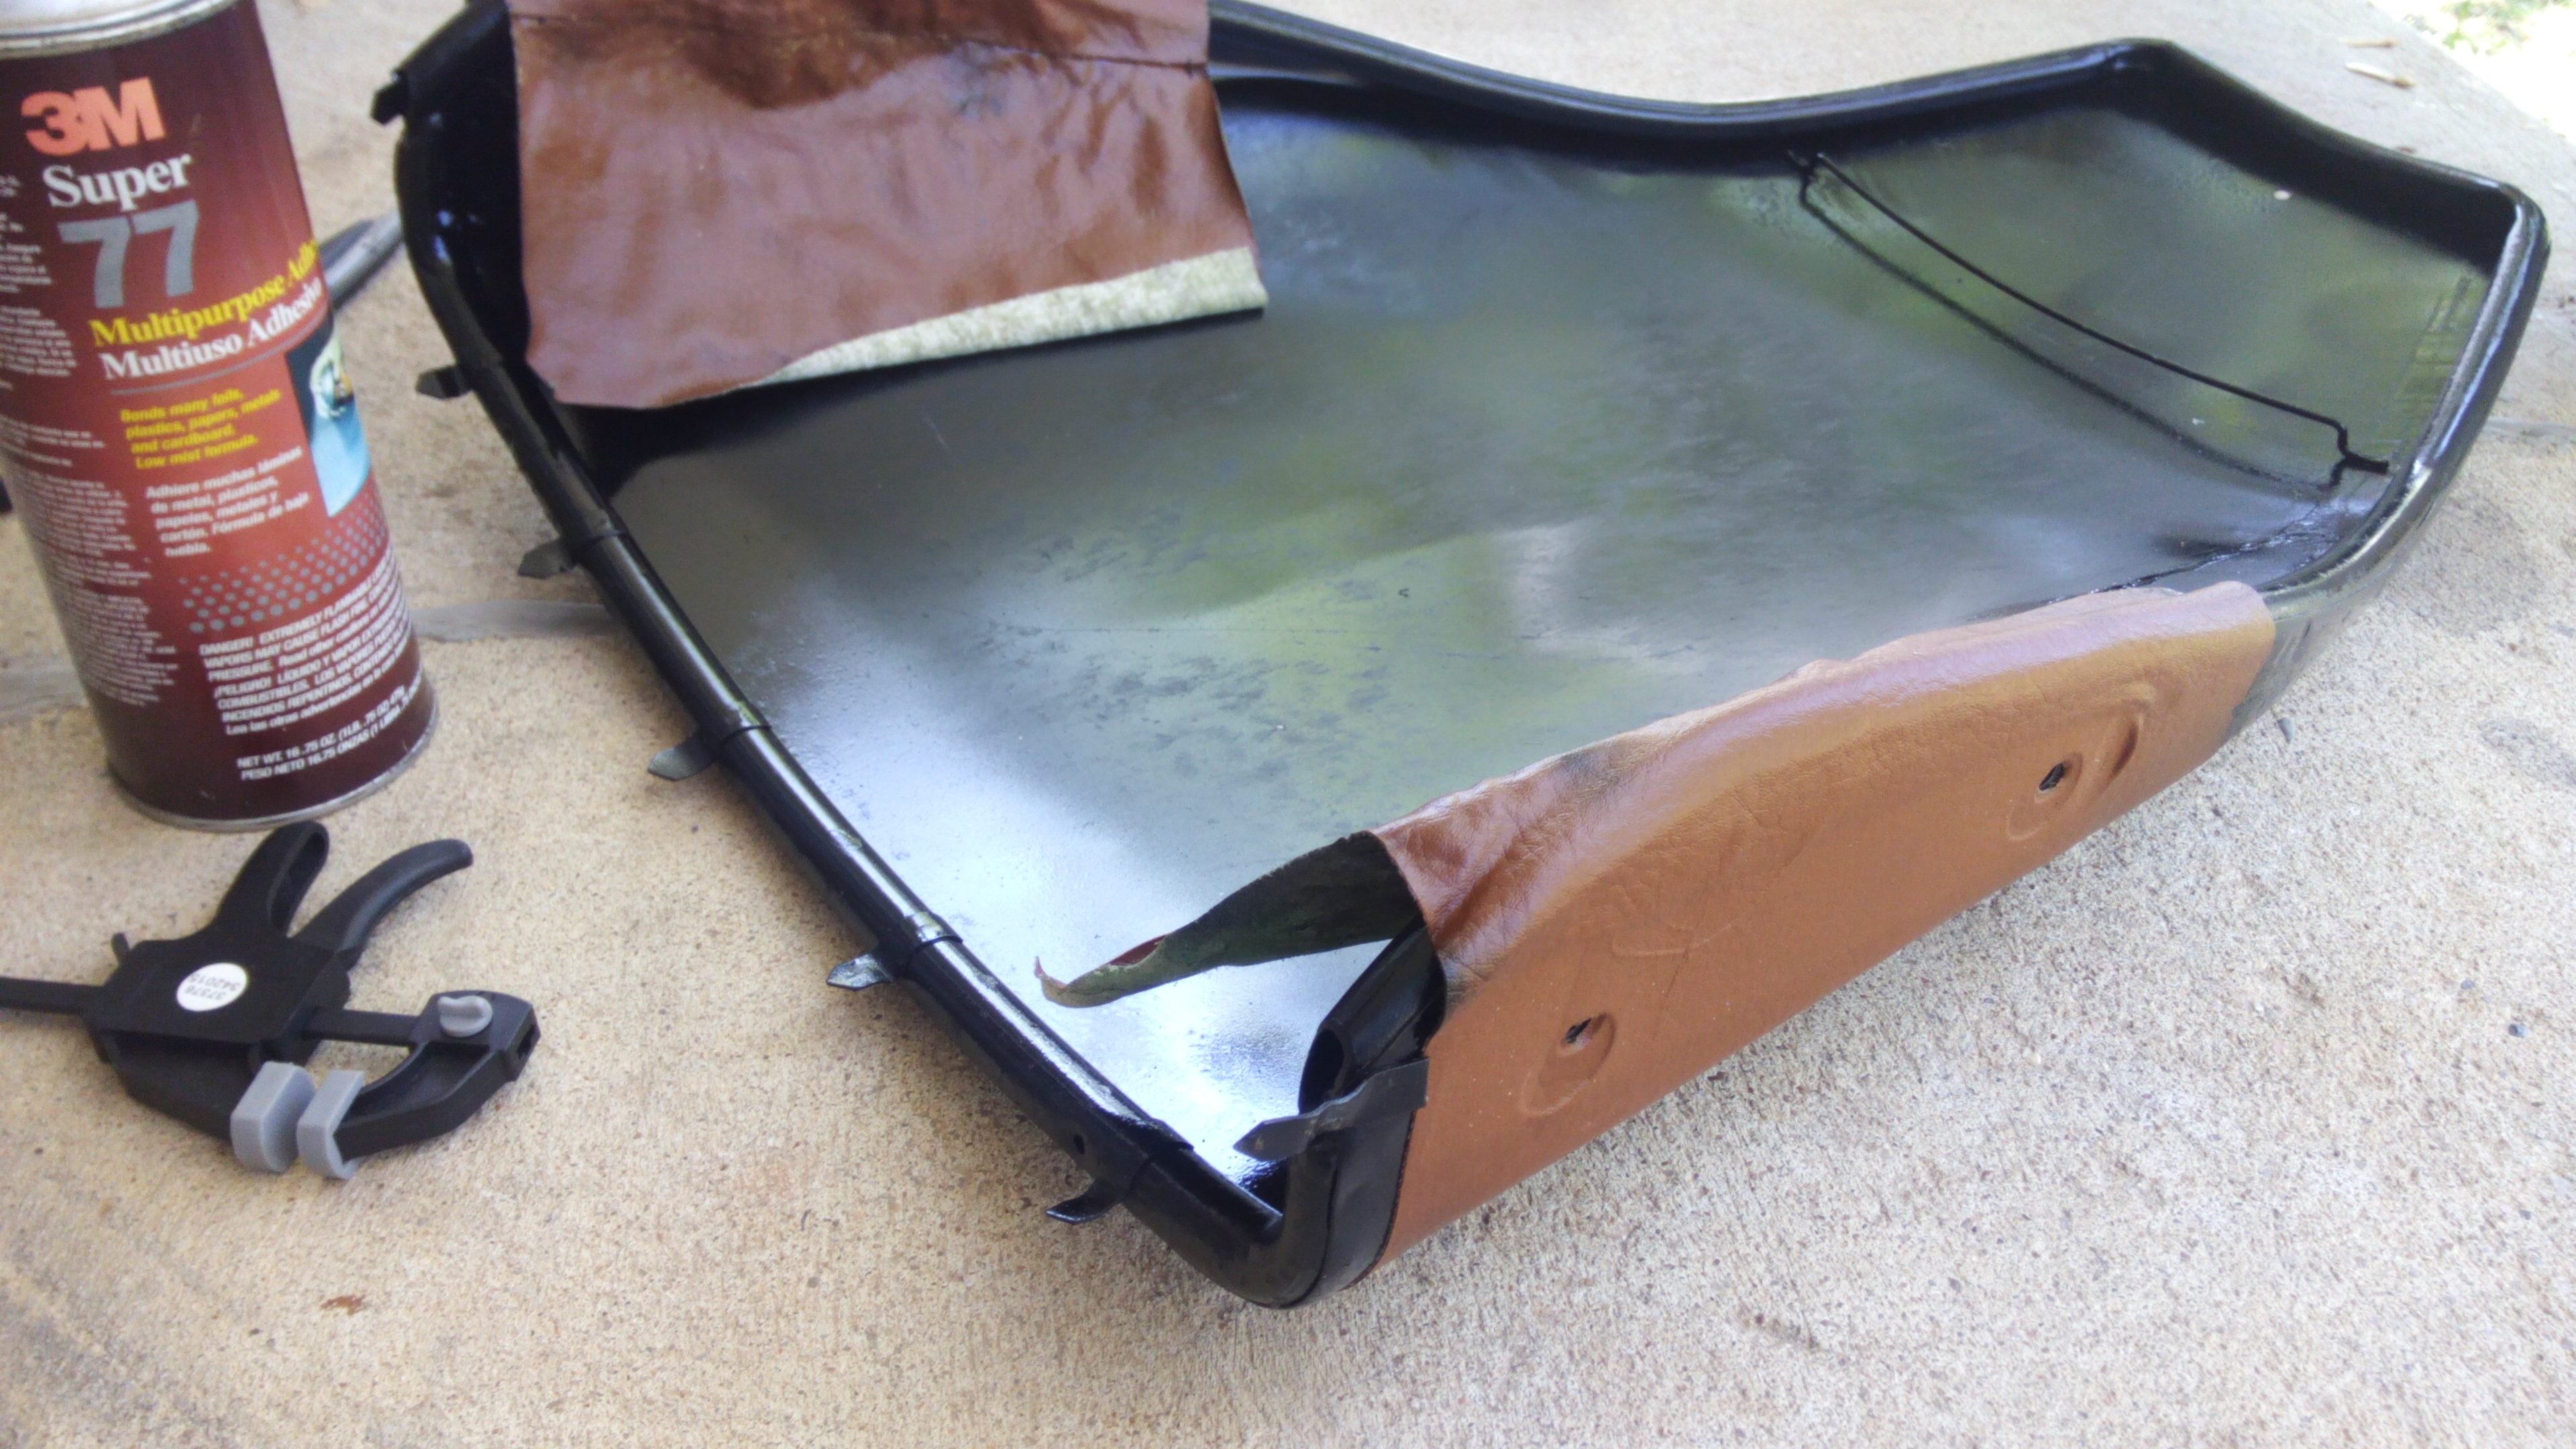
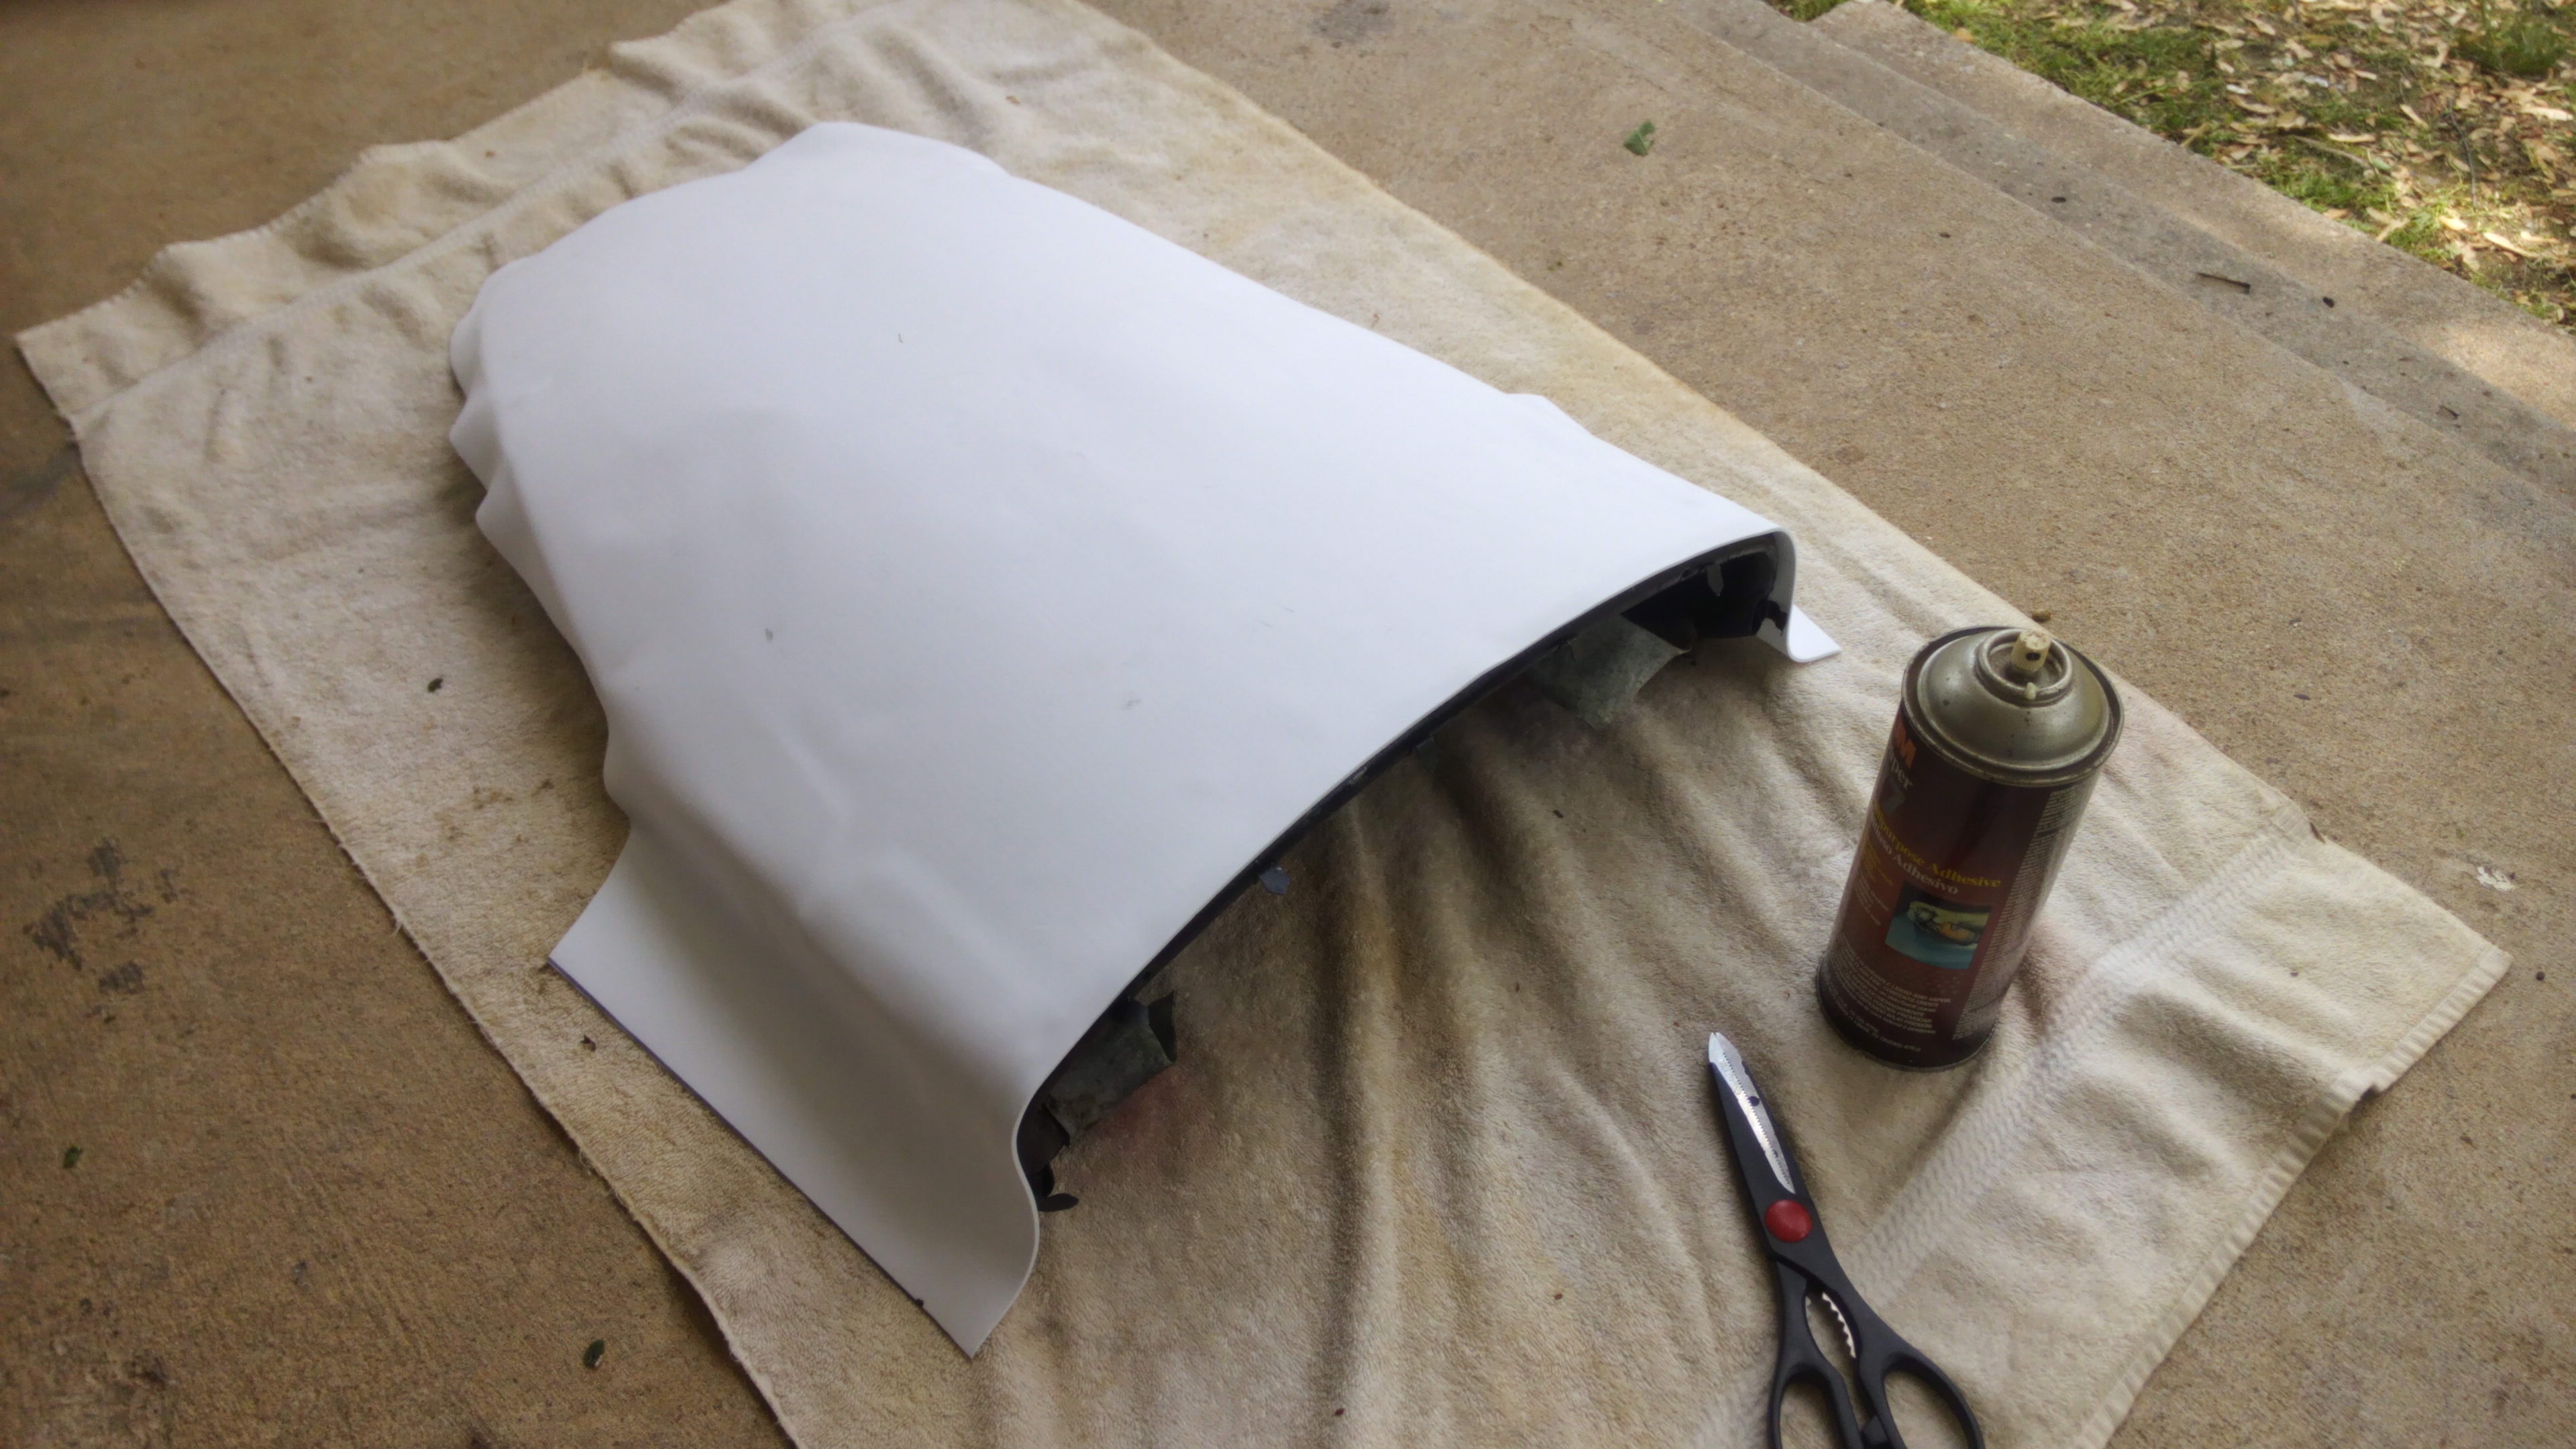
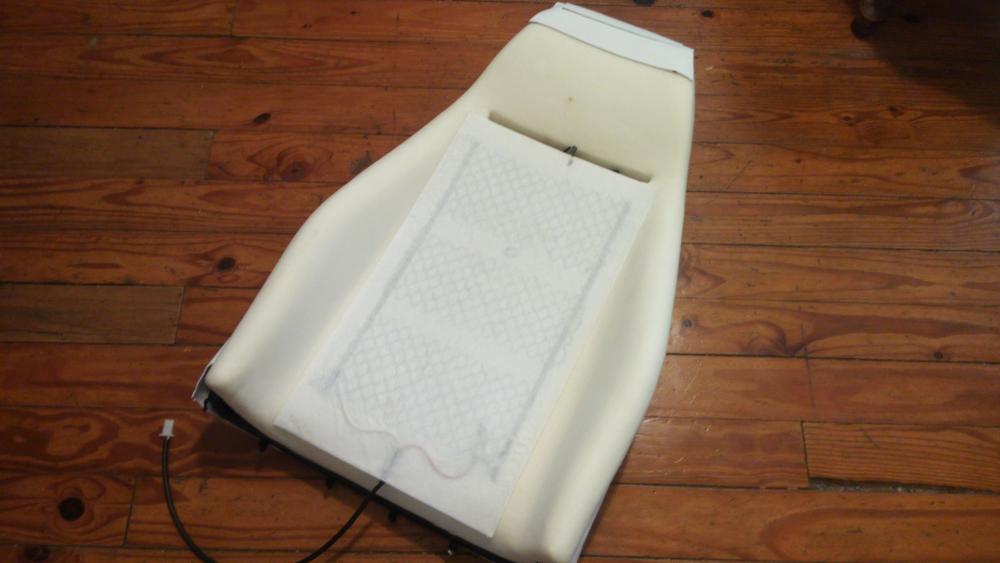
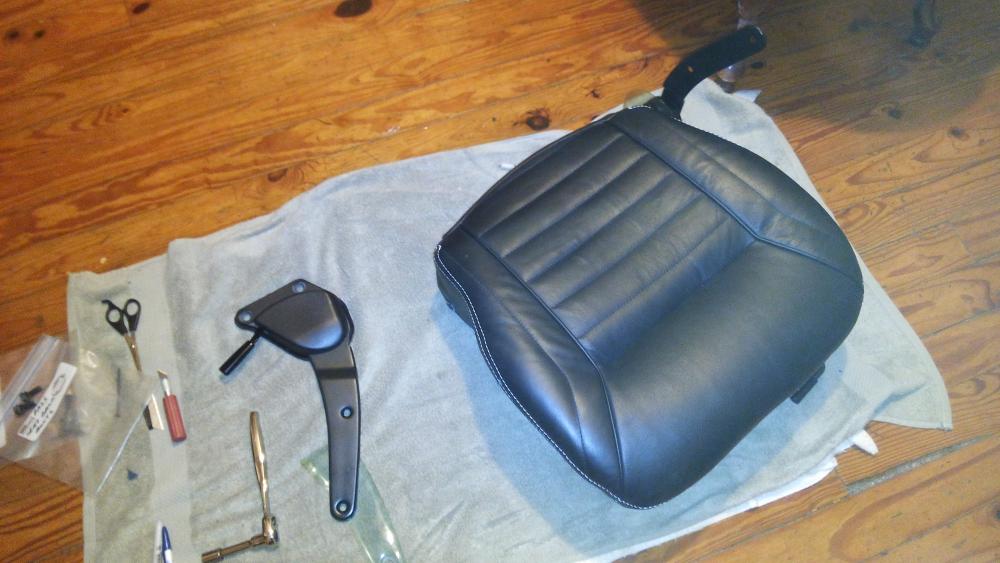
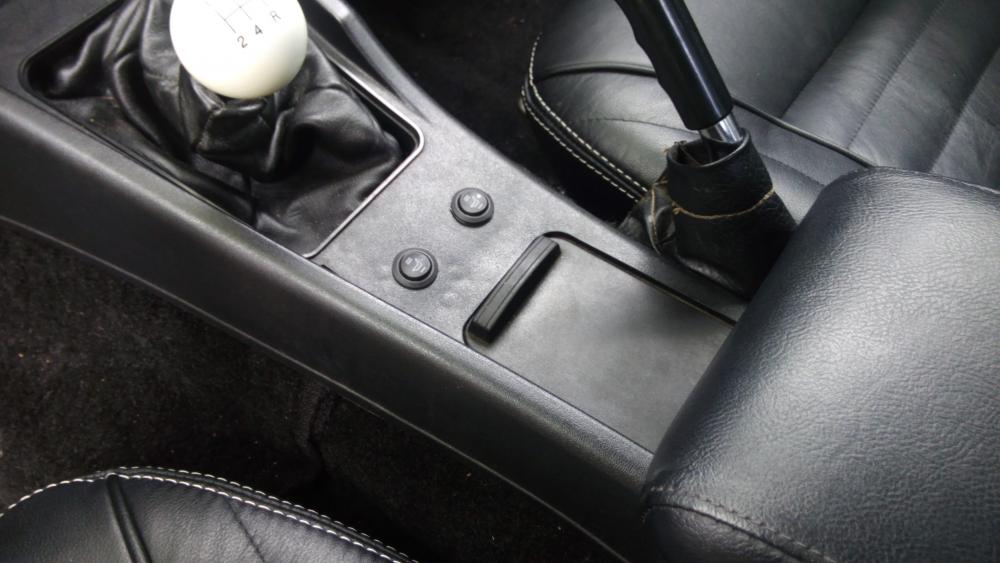
1 pointAfter a big delay this winter, and with the help of warmer weather, I finally have almost completed the interior refresh. Just some minor things left such as the door panel wood accent strips. The seats were the big project, worked on them on and off over the last couple of months. Tried working with the seat leather over the winter but it was difficult when cold and I did not want to use a heat gun on it. The warmth of the sun on my porch made it more pliable and less chance of damage. I used Hardway's excellent DIY seat restoration as a guide. It's very comprehensive and gave me the confidence to attempt the seats myself. His suggestion to use tie wraps to pull the flap up thru the foam where you can hog ring it to the springs works great. Many thanks Sir. For the seat covers I used Interior Innovations leather seat kit. The quality is superb, all leather including the non-seating surfaces, they let me customize the embroidery on the headrest, (I sent them some high res pictures of my Datsun deck emblem) and the buying experience was one of the best I have ever experienced. They are made overseas and I was notified of their status every step of the way, including a call from DHL asking if I would be home the next day for their scheduled delivery. The seat foams were purchased from Banzai Motorworks, also very nice quality, and a super smooth transaction. Thanks Mike. From Amazon, I purchased the foam for the back of the seats. it is 2 or 3mm thickness & a roll is 36" x 60" which was perfect for both seats. It is a nice density closed cell foam, about $8 . Also used a small amount of it to fill out the top of the head rests. Also from Amazon, I sourced a seat heater kit, very nice and about $60 . For the integration of the switches into the console, I took a page from Rossiz's interior book & mounted them in the flat area ahead of the ashtray. They look like they belong there. Thanks Geoff. One thing for sure, this is not a trivial job. At least not for me. I probably took 5 times longer than the average person - I am so paranoid about the fit & symmetry, stitching straight, etc. It would bug me forever if they did not look right. Hardway was right... check your work as you go. This was one of his best tips in his guide. It's a real workout to stretch and hold the covers on the frame while you hog ring it or fit the covers over the tabs. i found the seat back to be a degree of difficulty more than the seat bottom. I probably deviated from Hardway's write up in two places. I inserted stiff coat hanger wire in the edge pockets where the seats get hog ringed as I did not totally trust the cotton cord sewn in for reinforcement. The factory covers have wire in those pockets, some of which I re-used. Probably a little over kill. Also, I purchased a single hole punch to make clean round holes in the two flaps behind the reinforcing wire to allow big tie wraps to pass thru and pull the headrest cover tight to the frame. This allowed me to fasten the headrest flap from the top of the foam as opposed to under it which risks bending the seat back foam and breaking it. i used three heavy tie wraps and added some hog rings as well. I used three big tie wraps on the seat bottom flap to the springs as well, and added more hog rings. All in all, I think the seats look good. I have about 80 miles on them - they feel great! Let me know what you think. Before I forget, now that the new sound deadening, carpet, and seats are in, Patcon asked about improvement in cabin noise. I would say it has made around a 50 to 60% reduction in cabin road noise and still have some of the deck area to complete. With windows up, it's a dramatic drop. the


 1 point
 -
Hi all, I just added a new feature to the classifieds area. This feature will allow you to mark an item as sold so other people know it's no longer on the market. To mark an item as sold, simply open your post (ad) and you'll see the new option in the upper right (next to the reply button). Hope you enjoy! Mike1 point
-
I'm far from an experienced Weber tuner, but that's the main purpose of this post - I share everything as I'm learning. That way I can forward the information to others in a way that is easy to understand, rather than being so "pro" at it that you get too 'technical.' If I don't understand it - then I won't post it until I do. Most of the information I'm sharing comes from a ton of reading and from friends who know way more than I do and have been gracious enough to share their knowledge. I'm just sharing the love! Eventually, I want to extract all the important parts from the manuals/guides and re-write them in an easy-2-follow way for beginners to comprehend and avoid making things too complicated. It'll take time, which is why this post is a WIP. Thanks again for your kind words, Cliff! I'll be sure to update this post as I gather more information1 point