240260280z
Free Member
-
Joined
-
Last visited
Everything posted by 240260280z
-
 Cool! You made me look:
-
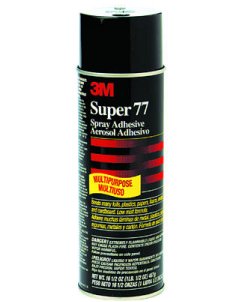
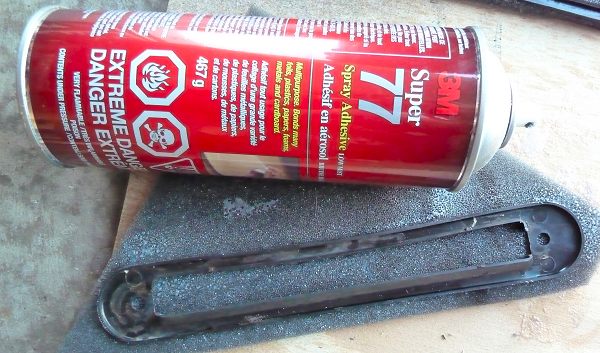
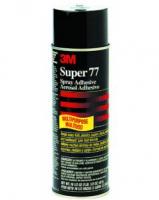
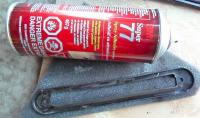
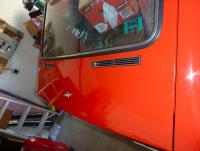
The technique I used to install was: Pre-fit / trial fit each vinyl piece using masking tape to hold in place. Make mental notes of sequence of installation and any cuts required. Make the basic required cuts and folds dry so that vinyl sits in approximate place. Take your time. (I found it best to complete the detailed cuts when wet with glue as the material does not always fall into the same location). Decide whether to remove the vinyl and spray it with adhesive "off line" or to spray it in place. Also plan the spray direction and the pressing direction and the press-in-place sequence and direction. Pre-planning will never hurt you. Check fittings/overlap where two pieces will overlap/finish. Mask all areas using masking tape and use drop cloths to prevent over spray. When spraying always consider over spray before pulling the trigger. For adhesive, I used 3M Super 77. I used 2 cans in total as well as a seemingly generic can that came with the vinyl kit (it sprayed in an interesting web pattern). The 3M 77 can included 2 interchangeable nozzles: a red (stored in the cap) for a very directed pattern and white for a wide pattern. I used red for all except the roof liner where the wider white pattern helped with even distribution. The red was great for touch-ups and also when spraying when the vinyl and metal were nearly together. Wear lung and eye protection as the aerosol adhesive will slowly glue your lungs and eyes. The order of installation I followed was: Header Foam Header Vinyl Passenger A Pillar Foam Passenger A Pillar Vinyl Driver A Pillar Foam Driver A Pillar Vinyl Roof Liner Passenger Half Roof Liner Driver Side Back Wheel Well Vinyl Passenger side Front Wheel Well Vinyl Passenger side Back Wheel Well Vinyl Driver side Front Wheel Well Vinyl Driver side Transmission Tunnel Vinyl Luggage Riser Vinyl Passenger Door Sill Vinyl Driver Door Sill Vinyl It is best that all wiring harnesses and speaker wires are run; all holes are sealed; all insulation and sound deadening is in place. Heads-Up List Header Foam: Trim after in place. Header Vinyl: Must be centered and it folds back on itself. Mark the centers including the rubber stripping that holds it into the pinch weld. Don't forget to trim the excess material that will be tucked inside so that it does not bulge the material. Passenger A Pillar Foam: Trim after in place Passenger A Pillar Vinyl: Start at coat hook and work forward. Take your time at the corner fold at the top of the A pillar. Try to make both folds the same on left and right side. Measure 10 times, cut once. You can do the horizontal section, then the pillar section.No need to rush and do both at same time. It is important to start far enough back so that quarter panel plastic will cover the vinyl AND it is important to finish far enough into the dash area so that the windshield seal and dash cover up to the vinyl. Driver A Pillar Foam Driver A Pillar Vinyl Roof Liner Passenger Half: Mark center; pre-fit and test stuff into gap. Make sure there is not "too much to stuff". It is better to cut excess dry rather than when wet. Don't spray glue within 6" to 8" of edge so that stuffing will go easy. Bubbles in foam/liner seem to disappear when glued Roof Liner Driver Side: Back Wheel Well Vinyl Passenger side. Test fit, re-fabricate new cardboard inserts if it is baggy. Cut out bolt holes dry. Front Wheel Well Vinyl Passenger side: Mask back piece when spraying at over-lap area. Cut holes for seat belt bolts. Make sure dog-leg will finish nicely against the vinyl. Back Wheel Well Vinyl Driver side Front Wheel Well Vinyl Driver side Transmission Tunnel Vinyl: Tape in place at top of tunnel (do both sides at same time and centre it). Make all pre-cuts. Do not cover ebrake electrical line. ensure vinyl goes into luggage riser so no gap is left AND ensure that no gap is up front near heater where floor mats go. Glue the vinyl in place when taped. Work from top to bottom. Cut holes for seat belt bolts. Luggage Riser Vinyl: Align top of vinyl ~ 3mm below top edge. Ensure it is centered on tunnel and no gap is shown at back of tunnel Passenger Door Sill Vinyl: Align with top of door sill pinch weld. Do not glue pinch weld. Work from seat belt bolt towards front of car Driver Door Sill Vinyl: Is the coaxial antenna routed? When gluing, it is best to wipe the metal with a solvent then let it dry. Spray adhesive on the metal and also on the back of the fabric. Wait a few minutes then install. If you install instantly after gluing then you can work the material into place easier but there is no "tack"to hold things in place. You must balance wet sliding verses holding... you will know what I mean.
-
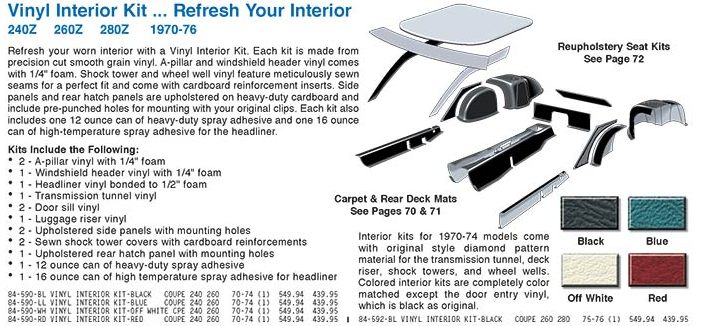
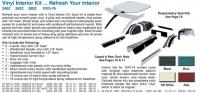
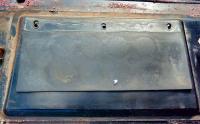
Kit Supplier: Black Dragon Auto I picked out this kit because, compared to others when shopping, it was a complete kit. It even includes the e-brake handle cover with 4 snaps (not in the description below) so I had ordered one in parallel. The material quality of finish is fine. The vinyl is not as thick as stock. The cloth backing is adequate. The only problem is the fit of the vinyl. Here are the problems I encountered The back section of wheel well covers were very baggy and the plastic inserts not sufficiently big. The front section of the wheel well covers was different. The right side fit much better than the left. A lack of "extra material" at the rear of the transmission tunnel made it is difficult to have the luggage riser cover the gap. The transmission tunnel gap in the centre of the luggage riser was too wide exasperating "minding the gap". Fortunately the roof, the header and the two A pillar vinyls are fine. It is also worth noting that the rear hatch finisher is plain (no vents) and the side dogleg panels do not have silver beading trim. Some extra cutting is required but it is not complicated. There is one pre-cut in the transmission tunnel that should be on the reverse side. It makes tucking the flap into the seat brace less efficient.
-
It's a deal and seems like it will be wine Just ordered from Summit. Thanks again.
-
BINGO!!! Thanks a million. Spot on mate. I owe you a Bourbon, Scotch or a Beer:)
-
I am hoping but not sure. The msa web site says to measure to the "32nd" of an inch.
-
Yes sir. You are 100% correct! They look like tin cups.... if I only had 4 begging monkeys. Dang you made me think!!!! Hmmmm maybe I can get 4 stainless steel cups from a camping supply or dollar store? I better bring my dial gauge with me next time I go shopping.
-
Mike, that is exactly what I was thinking... but to use el-cheapo air tool manifold and brass barbed fittings. The ZCCNE club racer has a similar design but the fuel header is on the firewall right of the brake booster. Here is another kick at the can by our UK buddies:
-
I always wondered why Nissan routed the fuel lines to the front of the engine bay after the mechanical pump was dropped. I am guessing that they wanted to keep the fuel away from the exhaust and header as well as to get some cooling in front of the hot motor. It sure would be convenient and tidy for the fuel line to come up on the left side of the transmission tunnel and then stop between both carbs and feed fuel from below.
-
Yes I did but unfortunately 75mm is not supported. I did a quick search and it seems to be a Mercedes / VW size.
-
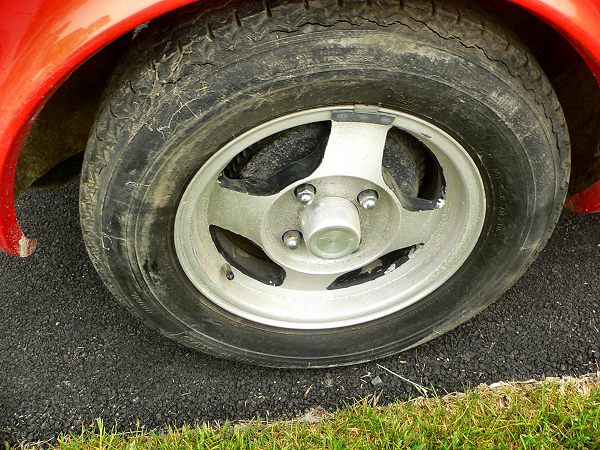
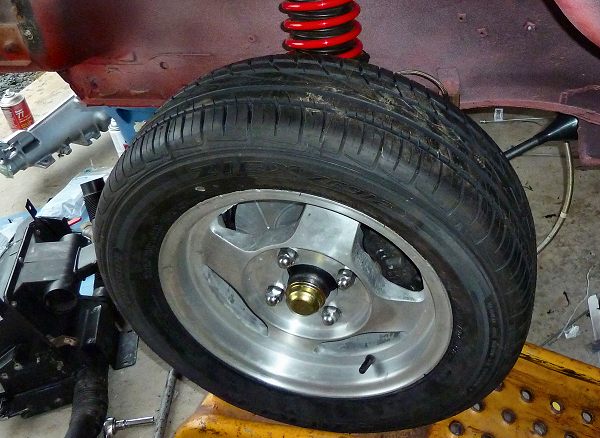
The original 75mm spun aluminum "cup" center caps are long in the tooth.... like that cracked tire. Any suggestions for a nice centre cap to make the wheel look nicer? The hole dia is 2.97" / 75mm.


-
I have seen some triple carbs fed from a manifold that looks a little like this sort of compressed airtool manifold
-
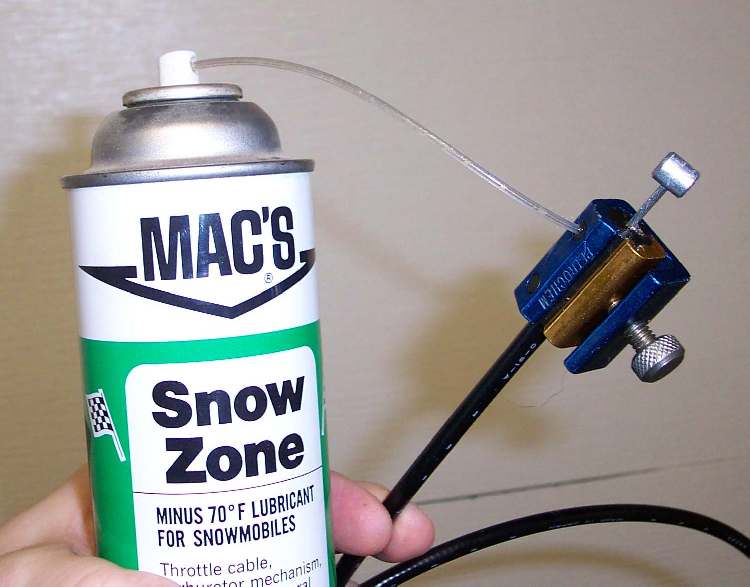
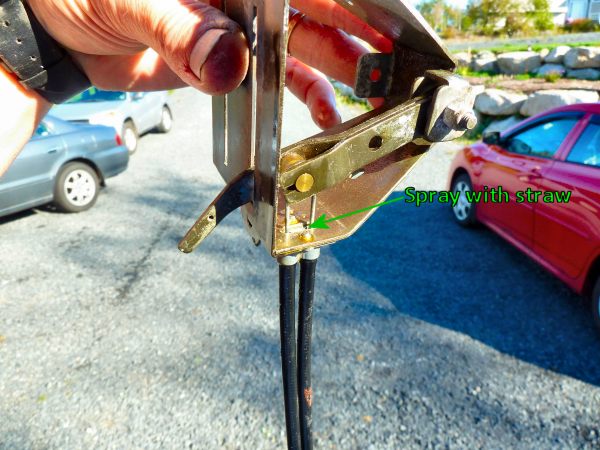
I found the best way to deal with the push-pull cables cables on our Z's is to remove: 1. the inner steel cable from the sheath/casing 2. wash the inner steel cable 3. wipe the inner steel cable with a scotch brite pad 4. lubricate the inner steel cable 5. use penetrating oil in can and flush the sheath using a straw attachment (there are better methods in the posts below). The results are very nice. Heater Control and Side Vent cables: Depending on the type, you can often remove the plastic sheath/casing. In my experience, some of the metal cable gets crusty and/ or very sticky over the years. A wipe with a solvent and a scotch brite pad will bring them back to a smooth new finish. Flushing the sheath with a solvent then following up with lithium grease and reassembling does a nice job. Lube the heater and vent control lever mechanisms to complete the job. I never looked closely but if you need to replace a cable, I think that lawn mower cables or push cables in RC planes may be a source. Speedo Cable This is slinky. Again pull out the snakey inner cable and wash and lubricate then dry. It does not need a lot of lube. Flush out the casing with a spray solvent/penetrating oil and you are good to go. Choke Cable, Hood Release Cable, E-Brake Cable Again, it is best to disassemble, clean and lube like the heater cables, however, if you can not disassemble (like the Ebrake and Hood Release), simply hold the cable vertically and flush spray solvent through it from top to bottom. (sprat into the narrow opening between the sheath and the metal cable). Let it hang and keep hitting the top entry with more fluid every few minutes over an hour or so. Eventually you will see drips at the bottom where fluid carrying debris is washing through. Operating the cable sometimes helps. My new fav solvent:


-
found this: http://www.lotuselan.net/forums/elan-f14/leaking-weber-carb-t14103.html
-
Here is a modern Marcos that is similar:
-
I would think something like the GR1 would be the way to go: errr something identical but with 240z cues rather than cobra GT cues is all that is needed.
-
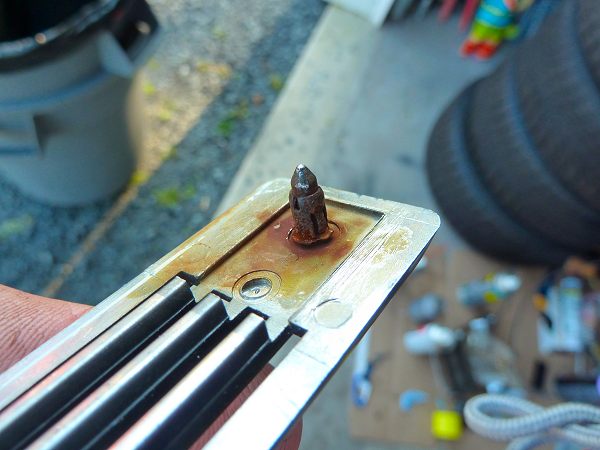
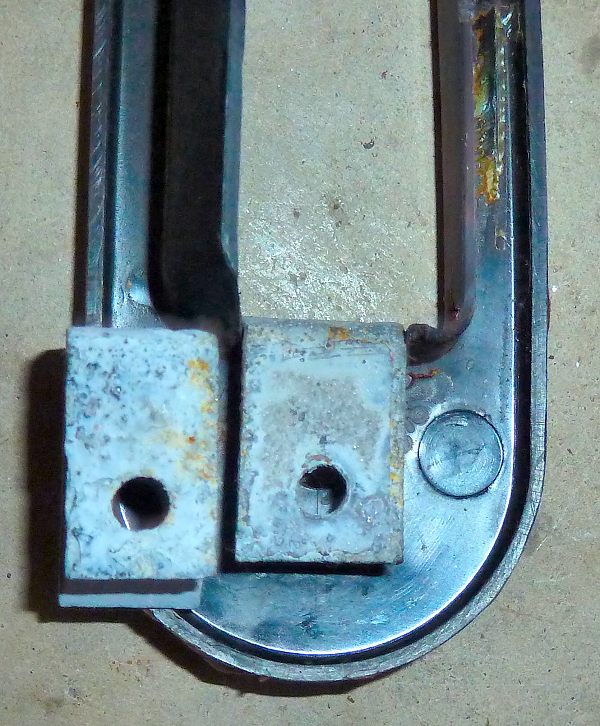
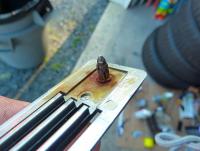
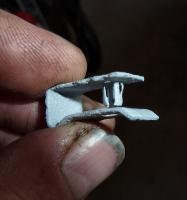
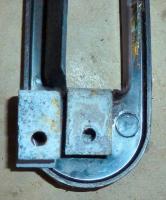
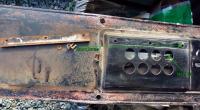
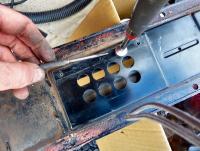
The plastic trim has a barrel-shaped retaining clip that rusts. This fastens into a speed-nut like clip on the body Here is the body clip with the retaining clip installed. Both were acid dipped and primed. On this 240z, there were two different width body clips. One hatch vent used wide and one used narrower. I seem to have misplaced the photos of the door interior parts of the vent system. Here is one that I have. It shows the plastic part that attaches to the inside of the vent hole. It originally had a foam seal that has long since decayed so I replaced it by gluing on new foam then cutting out the shape. To install the body clips and not damage the paint, I used a waxy paper to help the clip slide into place. Note there is also the plastic part underneath that the clip fastens. Once the clips are in place, the barrel retainers can be inserted. The clips are in place and top finishing chrome vent is ready to go on Note the new 2-way tape installed in the centre as well as the epoxied plastic pin that had broken off. Job done


-
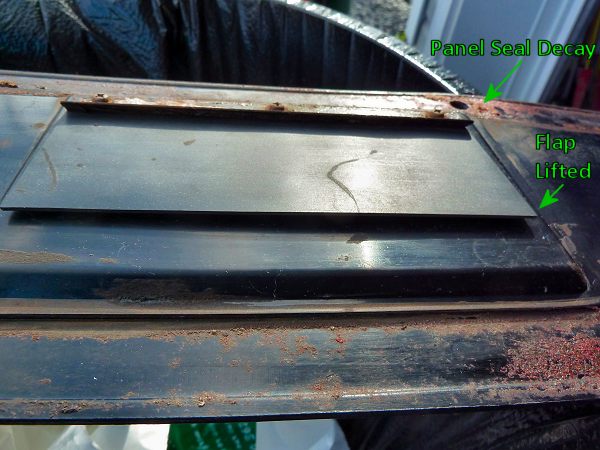
Jan 1971 240z. I decided to refresh the stock vent system and at the same time, bag the interior so that all possible leaks were sealed. I used a thick vapor barrier from the home insulation industry as well as a special sealing tape to close all holes (grommets,rust holes, panel holes, empty bolt holes) and panels from front to back. Here is what I did to refresh the vent in the hatch: The original hatch had long lost the perimeter seal. It was just globs of an seemingly old acrylic caulking or a decayed foam seal that was similar to globs of chewing gum. [*=1]The two rubber flaps that blow outward when air flows through the cabin were settled into a permanently open "lifted"position. The chance they would ever close under negative cabin pressure seemed unlikely in this state. [*=1]To refresh the rubber, I cleaned it and flexed it then wiped with lacquer thinner. To make the rubber seal better, I flipped around so that the default shape now pressed against the panel. [*=1]Taking the screws out makes reassembly a bit challenging. My solution was to use a magnet to lift the steel bar (tapped with 3 holes) up to the inside (relative to car) side of the vent. I then used a scribe to adjust the steel bar so that the holes aligned. This then allowed the screws to attach. Note that there is one short screw and it goes closest to the centre of the panel. Actually the procedure is a little more complex: the first step is to get a screw into the middle of the bar then to get a screw, rubber seal, and top metal plate into an end hole. [*=1]Here is are the two refreshed flaps in place. [*=1]To seal the panel, I ran a closed cell foam around the perimeter and I also ran a bead of sealant around the perimeter to completely seal the panel against the hatch.


-
Congrats! Sounds like a great time was had.
-
Very happy to help! It was great talking... your enthusiasm and energy to beat the problem is inspiring. If you need anything else I'll be glad to help.
-
Looks great..... and s/n 333 wow! That is an early bird.
-
Thanks! Always learning on this site.
-
Nope,,,, 12 to 16 hour days resto for 9 day week.... no time for that unfortunately.
-
You have to bite the bullet and learn how these carbs function if you are going to tune them, haphazardly turning a screw to a jet will not help if your problem is elsewhere.
-
I forgot to say "Never use your dishwasher as a parts washer".... maybe a used one out in the garage with a recycled solvent such as varsol or better, some orange based solvent or simple green but it may exploded or the plastic melt with a volatile solvent. Could be an interesting "Mythbusters" experiment.... I just head of a used washing machine and a couple of boards with nails being used as an apple cider shredder/press.