kenz240z
Free Member
-
Joined
-
Last visited
Everything posted by kenz240z
-
 If you have a factory service manual for your ZX, it should have information on removal/installation of the trim, emblems, bumpers, etc... Items like the bumpers will be bolted on. In general, embems & trim can be tricky because you need to determine how they are attached. Could be adhesive, retainer pins, screws or nuts. A good set of plastic pry tools is handy for popping off emblems & trim that are attached with adhesive or retainer pins. Be sure to double check for hidden screws or nuts so you don't accidently break something...
 -
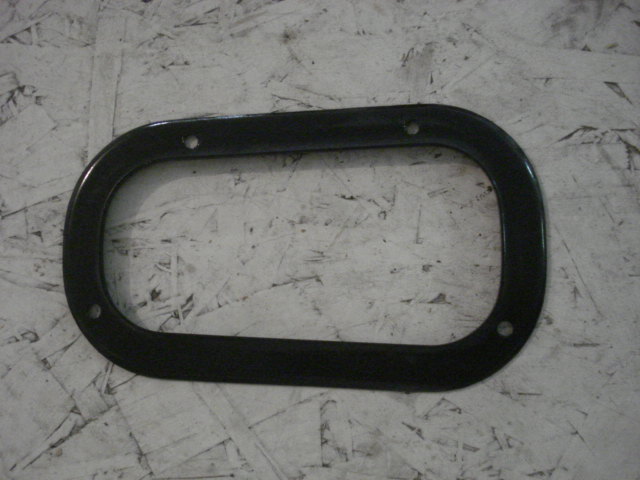
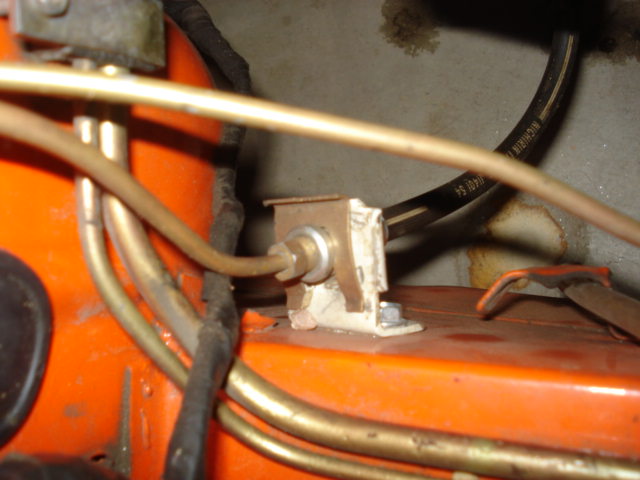
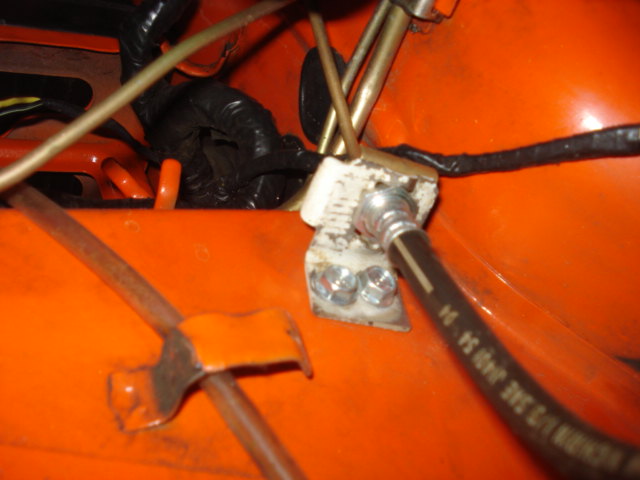
Guy, I think you will need an inner shift boot retainer like the one in the 1st photo attached. I put a 5-speed from an '82 ZX in my '73. No cutting required. But, you will probably need to install the tab to clip the clutch line into. It mounts on the passenger side inner frame rail close to the firewall. My '73 was an automatic car and did not have the tab. There were a couple of dimples there, presumably for locating the tab when they were welded in at the factory. I simply drilled a couple of holes and mounted the tab with sheet metal screws. Attached are a couple of photos of it. Hopefully you can get both of these items from the donor car. To remove the clutch line tab, simply drill out the spot welds.


-
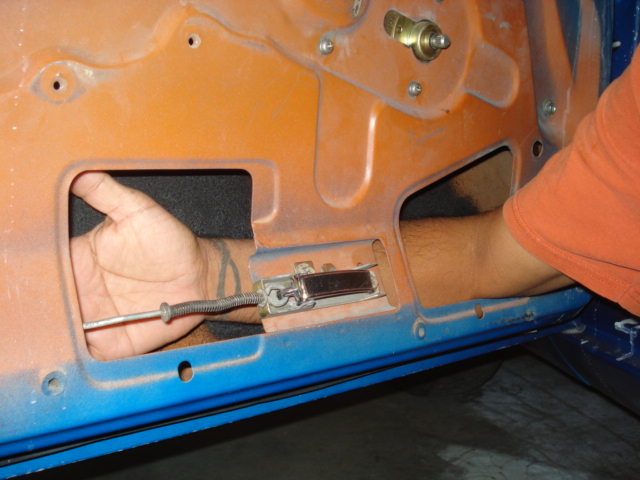
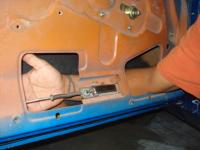
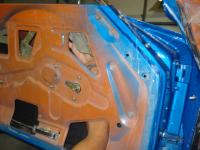
I've found it real easy to get to the mirror mounting nut by reaching up through the bottom opening. Start by raising the window all the way up. The trick is to put your hand and arm in parallel to the bottom of the door, then rotate your arm up to where the mirror mounts. A small ratchet or a rachet-type box wrench will fit up there to remove/install the nut. I took a couple of photos to illustrate...
-
Cool, glad you are making good progress!
-
I need to check into the cad plating kit. I've been using Eastwood's cad paint, which looks pretty good, but obviously not as good as true plating!
-
Ditto on the carb cleaner, it does seem to "gum up the carbs" on wasps! Yeah, getting the tank back in by yourself can be a challenge. I've had good luck using a large floor jack with a block of wood under the tank to lift it up into position. The hardest part is getting the filler hose on to the filler neck of the tank. I little heat with a heat gun helps-easy does it with the heat-you don't want to melt it! If you don't have a heat gun, borrow your wife's hair dryer...
-
Looks like you are off to a good start. I painted my '73 in the garage. Used a HF gun for the basecoat & clearcoat, too. Surface prep is the real key, get the body straight & sanded down real smooth and the paint should turn out pretty good! The HF lamps should be ok, but I'd recommend a couple of 4' flourecent lamps. Put them down on the floor when you are painting the lower half of the car. Without plenty of good light, you'd be surprised at how it will look like you got a good amount of paint on the car. Until you see it in the sun, that is! Ventilation is another key. I used 2 fans, one with a filter to blow clean air in, another with a filter to suck out the over spray. I used a filter on the 2nd fan to minimize the spray "dust" going into the fan. Remember your physics: finely atomized particles when presented with a spark (fan motor) tend to go "BOOM!" Be safe and have fun!
-
Will you be replacing the various panels, or patching the original pieces? If you make your own patch panels, do you have the tools you need? I've found I can make most everything I need with a cheep bending brake and throatless shear I bought from Harbor Freight. I also have their shrinker/stretcher and english wheel. Plus an assortment of Martin hammers & dollys. Tabco has most of the standard patch panels, doglegs, rear wheel arches, wheel houses, etc... Do you have a spotweld cutter? There are a few different type out there, I like the Blair tool, which is like a tiny hole saw. It cuts a "circle" around the spot weld, separating the two pieces without cutting through the bottom layer. Then use a punch to punch holes in the replacement piece and weld it back together in the holes. Kind of duplicates the original spotwelds. Good luck and post your progress!
-
I've cleaned a couple by removing the tank and cleaning with a pressure washer. Then a rinse with a bit of muriatic acid. Neither of the tanks I cleaned had any major rust or holes, so I simply re-installed back into the car. No problems with either one so far. As for the fitting, take a look at the auto parts store, they will likely have an epoxy for gas tank repair. While soldering would be an "authentic" fix, a cold weld with a fuel tank epoxy should do fine.
-
Sounds like pretty extensive work. Does the rust damage on your car truly warrant removal of all the panels you mention? Unless you have good welding & body work skills, lots of time & money, you may consider repairing the rust with patch panels. When the old metal is cut out, you should be able to determine the extent of any rust in the inside spaces and deal with it with POR-15 or something similar. As for where the spot weld seams are, the seams along the dog leg, wheel well and back panel are pretty easy to see. Hit the seams with a rough grit sand paper (36 or 80) and the spot welds should stick out as "dimples" or small depressions. On the rear 1/4 panel, there is a seam above the rear 1/4 window, near the top of the hatch opening. There are also spot welds in the channel for the rear hatch weatherstrip.
-
Hi Tony, I've had to repair a few wiring harnesses. What I did was remove the plastic wrap back far enough to cut the wire in the harness. Then solder the replacement wire and re-wrap the harness. If there is a particular section of the harness that is damaged, then you could cut out the damaged wires and solder in new wire, then re-wrap it. I tend to re-use the original, non-sticky "tape" to re-wrap the harnesses, with a small piece of electrical tape to tack it back together where I cut into it.
-
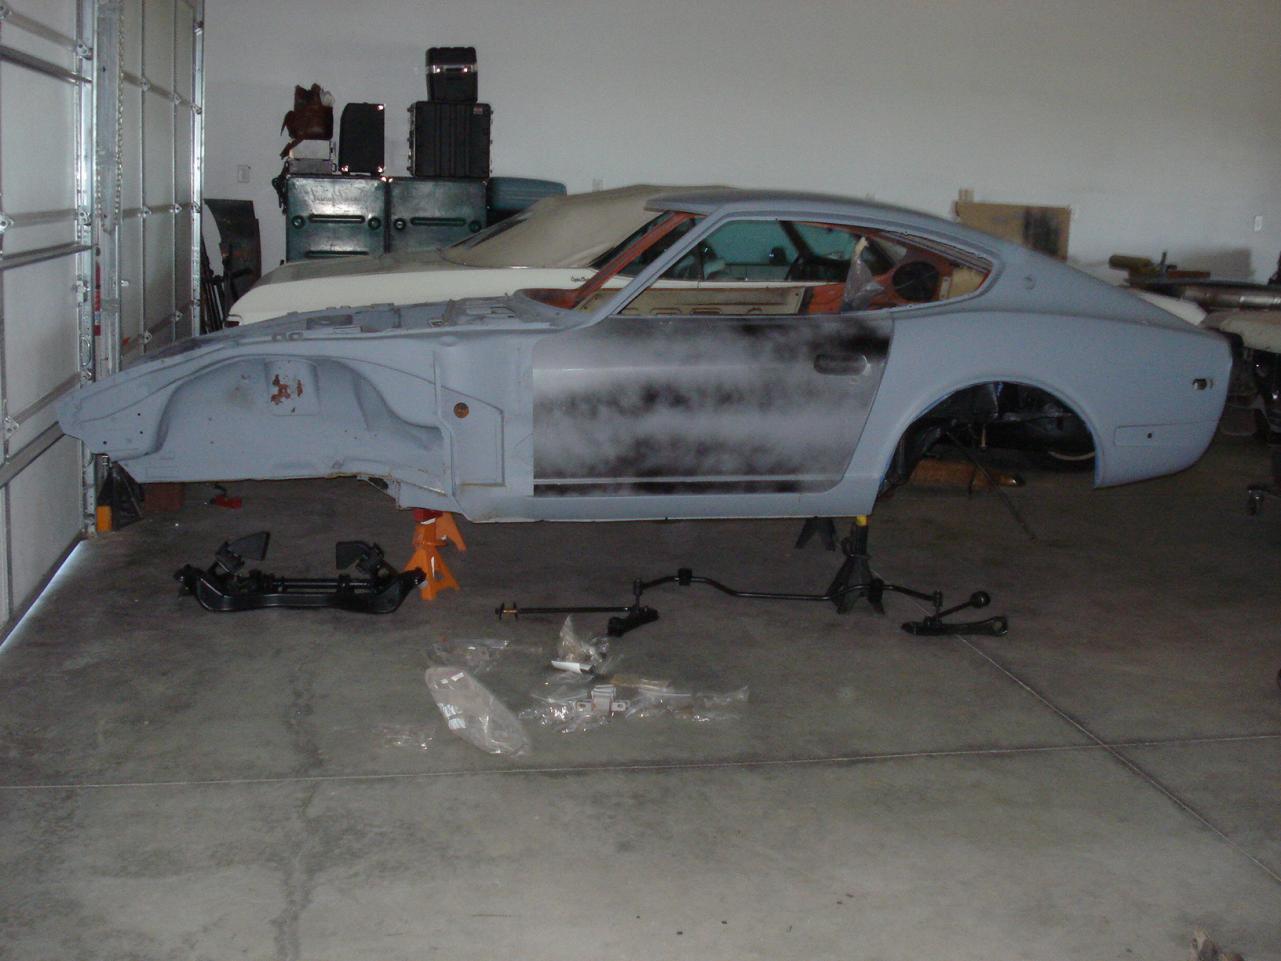
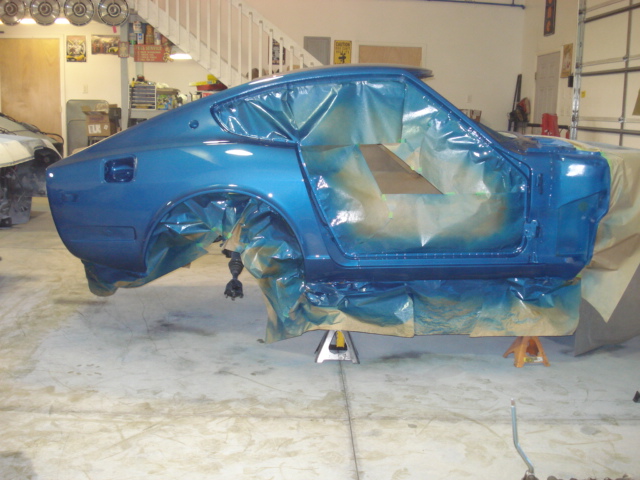
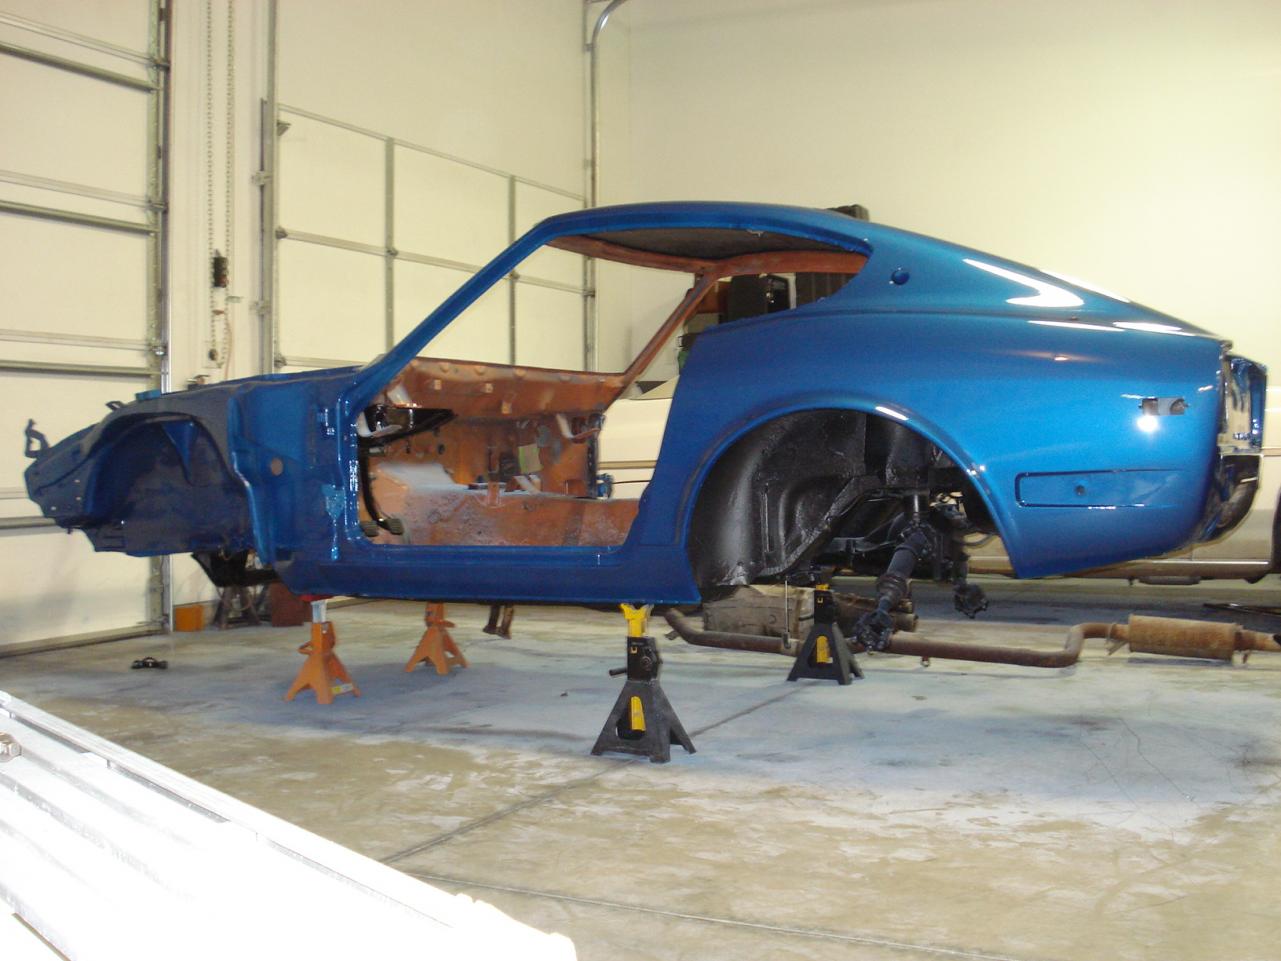
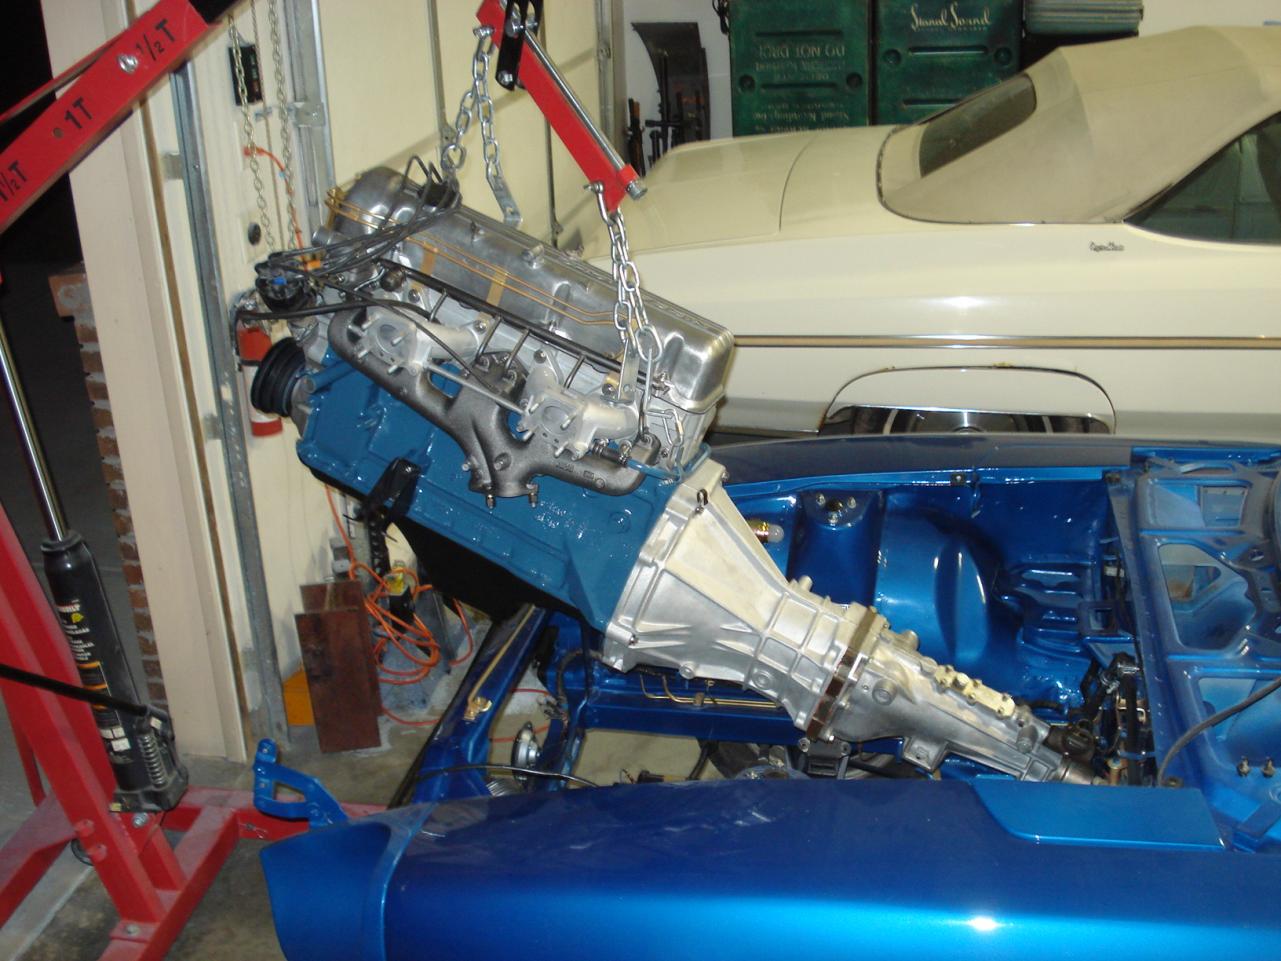
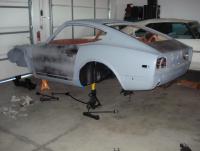
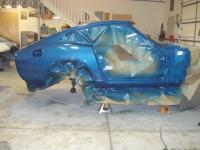
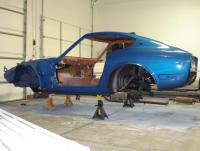
The leveler sling helps to get the tranny & engine at a good angle. I also jacked up the rear of the car and put it on jack stands to help with clearance, too. Here are a couple of shots of the car right after I first got it and a couple after I painted it. I simply wet the floor in the shop before I sprayed the car. I had a couple of exhaust fans with filters below the garage door to pull out the overspray. Wet sanding is underway and it is looking real good.

-
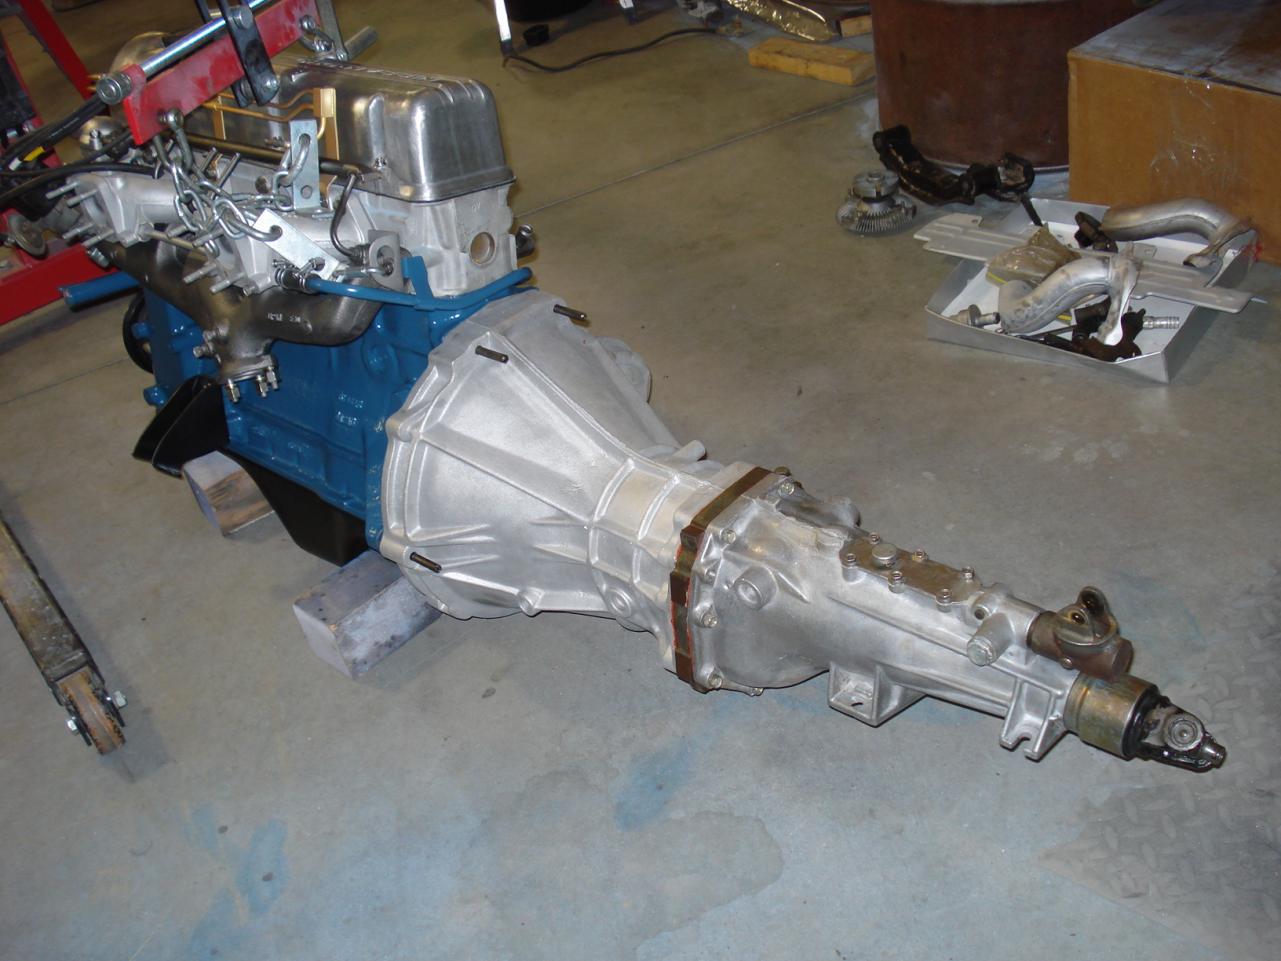
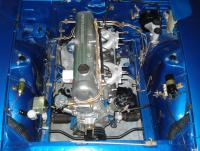
The engine paint is actually Chevrolet blue (Duplicolor DE1609). According to the previous owner, the engine was rebuilt. It is the original L24 that came in the car. Before installing the engine, I adjusted the valves and there is no wear on the cam. Everything I could see through the spark plug holes and intake/exhaust ports looks super clean, so I'm guessing the seller was honest about it. It sure doesn't look like the engine has been started yet. The PO spent close to 8K on the car, sandblasting & refinishing the suspension, engine rebuild and various parts, but never got it back together.
-
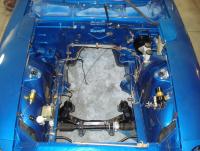
Tonight I managed to drop the engine into my '71 240Z. I bought the car earlier this year as a stripped & primered shell with all the parts in boxes. It has been a challenge, as several parts were missing. Fortunately, most items I've been able to find in the rafters of my garage, other parts have come from salvage yard forays and then there is MSA and Black Dragon!


-
I sprayed my '73 with PPG Omni basecoat followed by the Omni MC260 Quick Clear. I painted the car in my garage. That was, oh, almost 7 years ago and the finish still looks great. No flaking, peeling, delaminating or anything. And that was the first time I ever painted a car. Used a Harbor Freight gun, no less. I just recently sprayed a '71 with PPG Omni bc/cc and it turned out fantastic. The color is their formula for 903 blue and you should see it in the sun.
-
I'm guessing you have several problems to deal with. First, it sounds like you may have a bad starter. As Julio said, remove the starter and take it to an auto parts store to be tested. If your car has an electric fuel pump, check the fuel filter inside. A clogged filter can cause fuel starvation problems, similar to what you have described.
-
sado masochist
-
How about the rubber "blocks" that are used to mount the fuel & brake lines along the firewall and also through the tranny tunnel? And also the rubber "blocks" that are on the clutch hard line and a few of the brake hard lines that have a metal clamp that mounts the line to the frame rail?
-
I'm currently working on a LT1/T56 swap into a 240Z. I bought a complete '95 Firebird donor car so that I would have the engine, tranny, driveshaft, PCM and wiring that I needed for the swap. And I also have the factory GM service manuals, which are a must for this kind of swap. I have the LT1 and T56 in the car, need to get the brakes going and then I can take it for a shakedown drive. I have more details on HybridZ.org, as this site is dedicated more towards stock Z cars. Shoot me a PM if you have any questions, as I have the LT1 up and running in my 240Z. Cheers
-
Hi Abe, I've tackled rust similar to what you've shown on a couple of 240Z's, plus a few non-Z cars. I have no formal welding training, but have managed to weld in patches where needed and grind the weld bead down enough to make a suitable repair. A little Duraglass then a little bondo type filler and Bob's your Uncle. Will your car ever be a concourse show winner? Sure, but only after lots of bux and hard work. Will it be a decent cruiser? You bet. The advice you have received to part it out is valid, but don't let the challenges get in your way. If you take the parts car route, what harm is there in "practicing" your welding skills on it? Either you will botch it up royally, which would be no major problem because it is a parts car. Or, you will do a passable job and it will turn out ok. In this case you could end up with a nice driver. I am a hands on, do it myself kind of guy. I took auto shop in high school, 20 some years ago, but have no other formal training in auto related work. Even so, I do all my own mechanical and body work, including welding and painting. If you have the desire, then get the tools you need and get busy! You can whip that car into shape and then when someone gives you a compliment on it you will have the satisfaction that comes from doing the work yourself.
-
The engine is idling on the rear carby only. As E pointed out, the carbies are unbalanced. You need to adjust them so that they are flowing evenly at idle. A Uni-syn or other flowmeter will make the job easier, although you should be able to get close by ear.
-
I drive a company vehicle, so I tend to follow the speedlimit to the number when I'm working. In my own vehicles, I sometimes tend to put my foot into it a bit more... I was driving my '95 Camaro Z28 in the mountains a few weeks ago with my wife. Traffic wasn't too bad, but when I caught up with the cars ahead of me, I'd back off and let them get out of sight. Then I'd tear through the gears and put the car through the turns a bit over the posted speed limit. I saw one State Trooper go by, but the next State Trooper hit the brakes. I new I was done, so I pulled over and had my paperwork in hand when the Trooper pulled up. She asked me if I knew how fast I was going and I responded that I didn't know for sure. She then asked me if I knew what the speed limit was, and I said I didn't notice. She told me she clocked me at 62 in a 50 mph zone. She went back to run me through the system, came back and said I could keep my clean record for awhile longer. I got off lucky with a warning. If she had caught me one turn earlier, I probably wouldn't have been so lucky...I had the car up to 90.
-
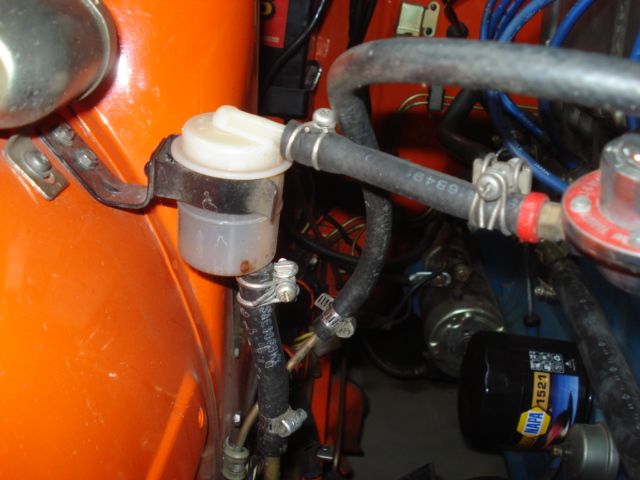
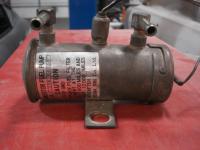
Yes, it is separate from the fuel filter in the engine bay. Here's a photo... When I got my '73 running it would idle just fine. I could drive it a short distance, but then it would start to lose power and ultimately the engine would die. I went through everything, points, rotor, plugs, plug wires, fuel filter (by the engine), replaced all the fuel hoses, etc.. and nothing helped. I finally discovered the fuel filter in the electric pump and it was clogged with sediment. I replaced it and the car ran better, but still not 100%. Turns out enough of the crud had gotten through that the new fuel filter in the engine bay was already clogged up, too.:mad: So, I replaced that one again and the car ran fine after that.

-
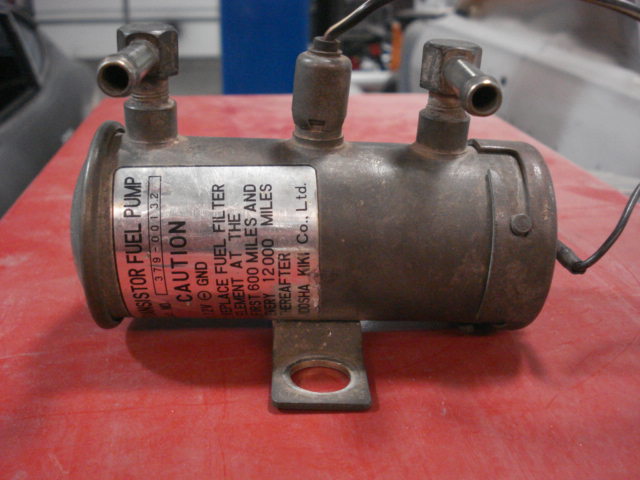
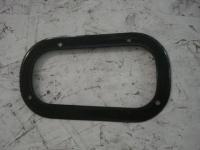
I haven't seen anyone mention this yet, although I only skimmed through this post and might have missed it.:stupid: Check to see if your Z has an electric fuel pump back by the tank on the passenger side (most '73's do, I think). If so, there is a fuel filter inside the pump. If the filter is clogged it can cause the problems you are experiencing when you drive your car. Ask me how I know... Remove the bottom of the pump to access the filter. Here are a few photos:
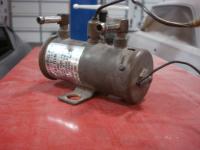
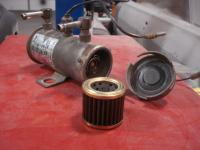
-
Just a guess, but it appears the car was rear ended at some point in its life. That's what the gap between the rear finisher and the rear valance, plus the signs of body filler, seem to indicate. Get a flashlight and look up into the space between the rear valance and the gas tank. Take a look at the brace up there and see if it shows signs of a rear impact. Also check if the gas tank itself shows signs of damage. Not necessarily a show stopper, as these things can be fixed or replaced. I didn't look at all the pictures, but the shot of the roof looks like it may have a little bit of hail damage.