kcpope
Community Member
-
Joined
-
Last visited
Everything posted by kcpope
-
I had the same issue. I think the rear hatch retainer clip is unique to the hatch lock and is a bit bigger. i ended up ordering this clip and taking a dremel tool and widening the gap to make it fit the lock. Its a bit on the small side, but it did work. Crown Automotive-2583377 Lock... https://www.amazon.com/dp/B077Z8NKQ6?ref=ppx_pop_mob_ap_share
-
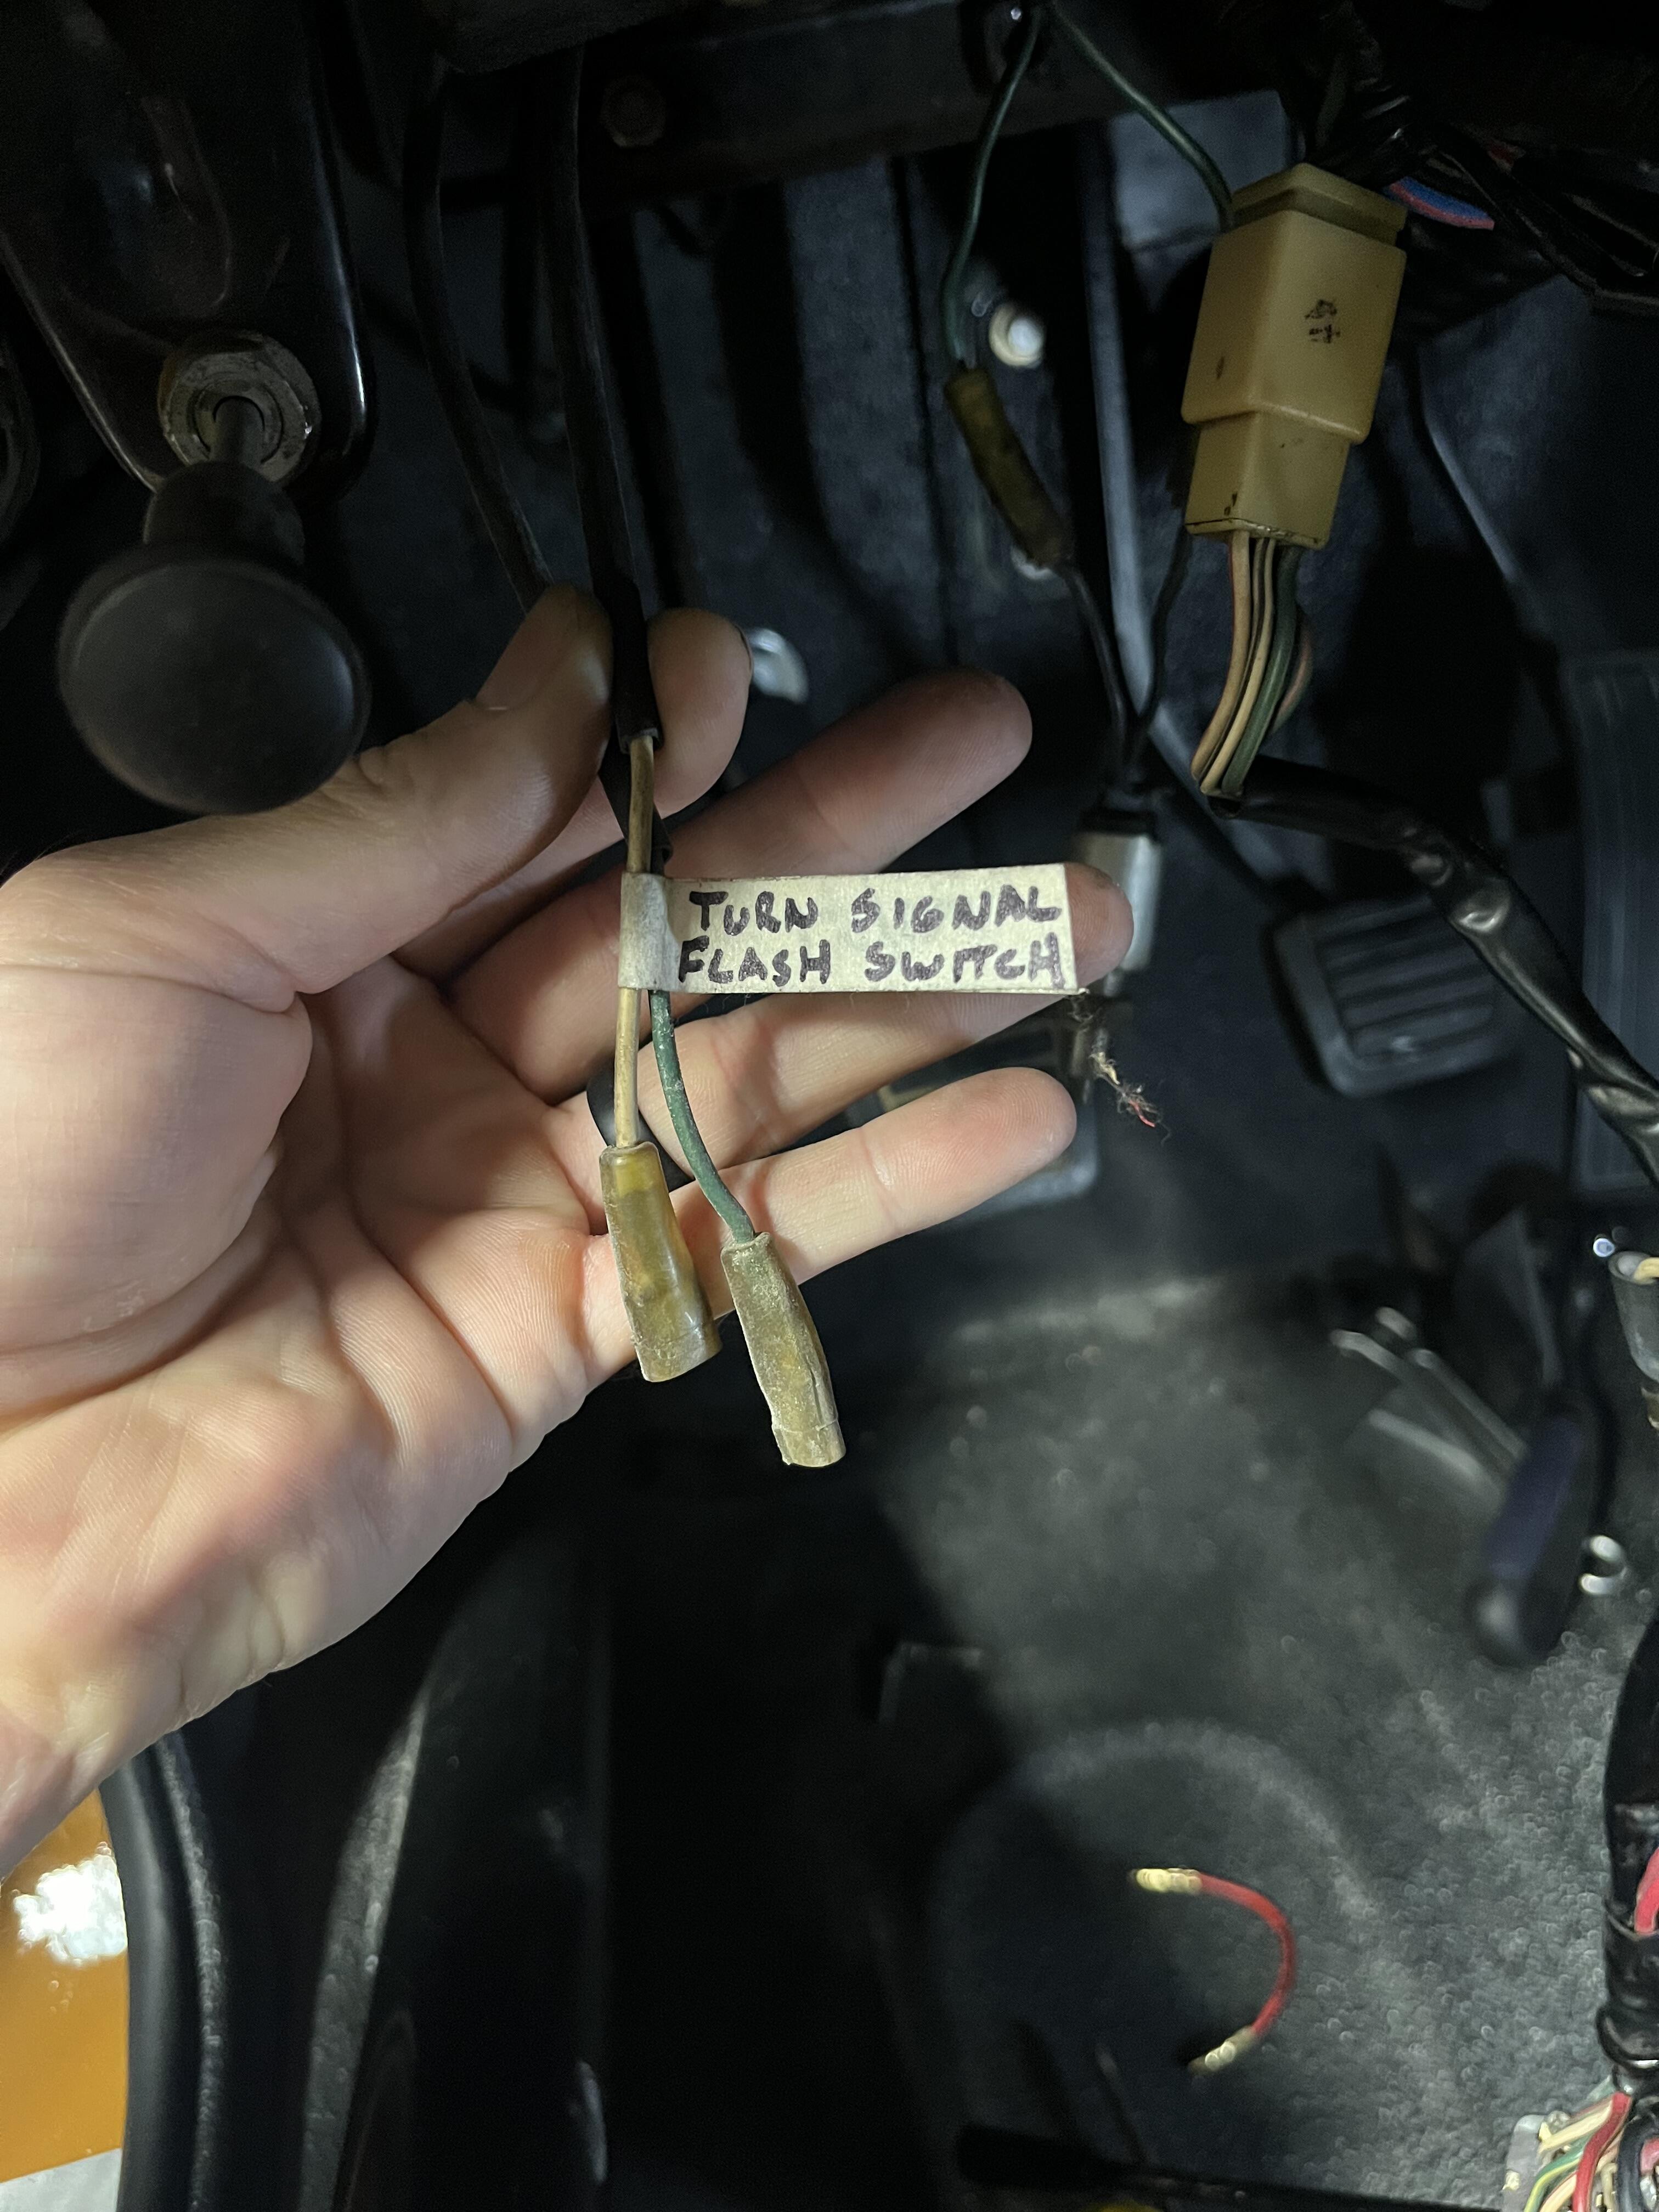
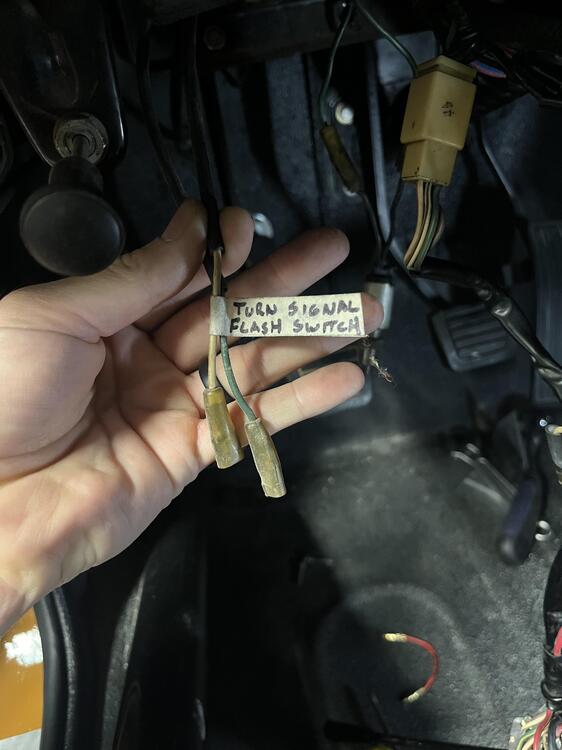
Well I’ll be dipped! Reach my hand up under the dash, feeling around for the turn signal flasher, and down dropped these wires, labeled and all! What a deal. I’ll buy a flasher unit and I think we’ll be in business. Thanks all, and hopefully my saga helps someone down the road.
-
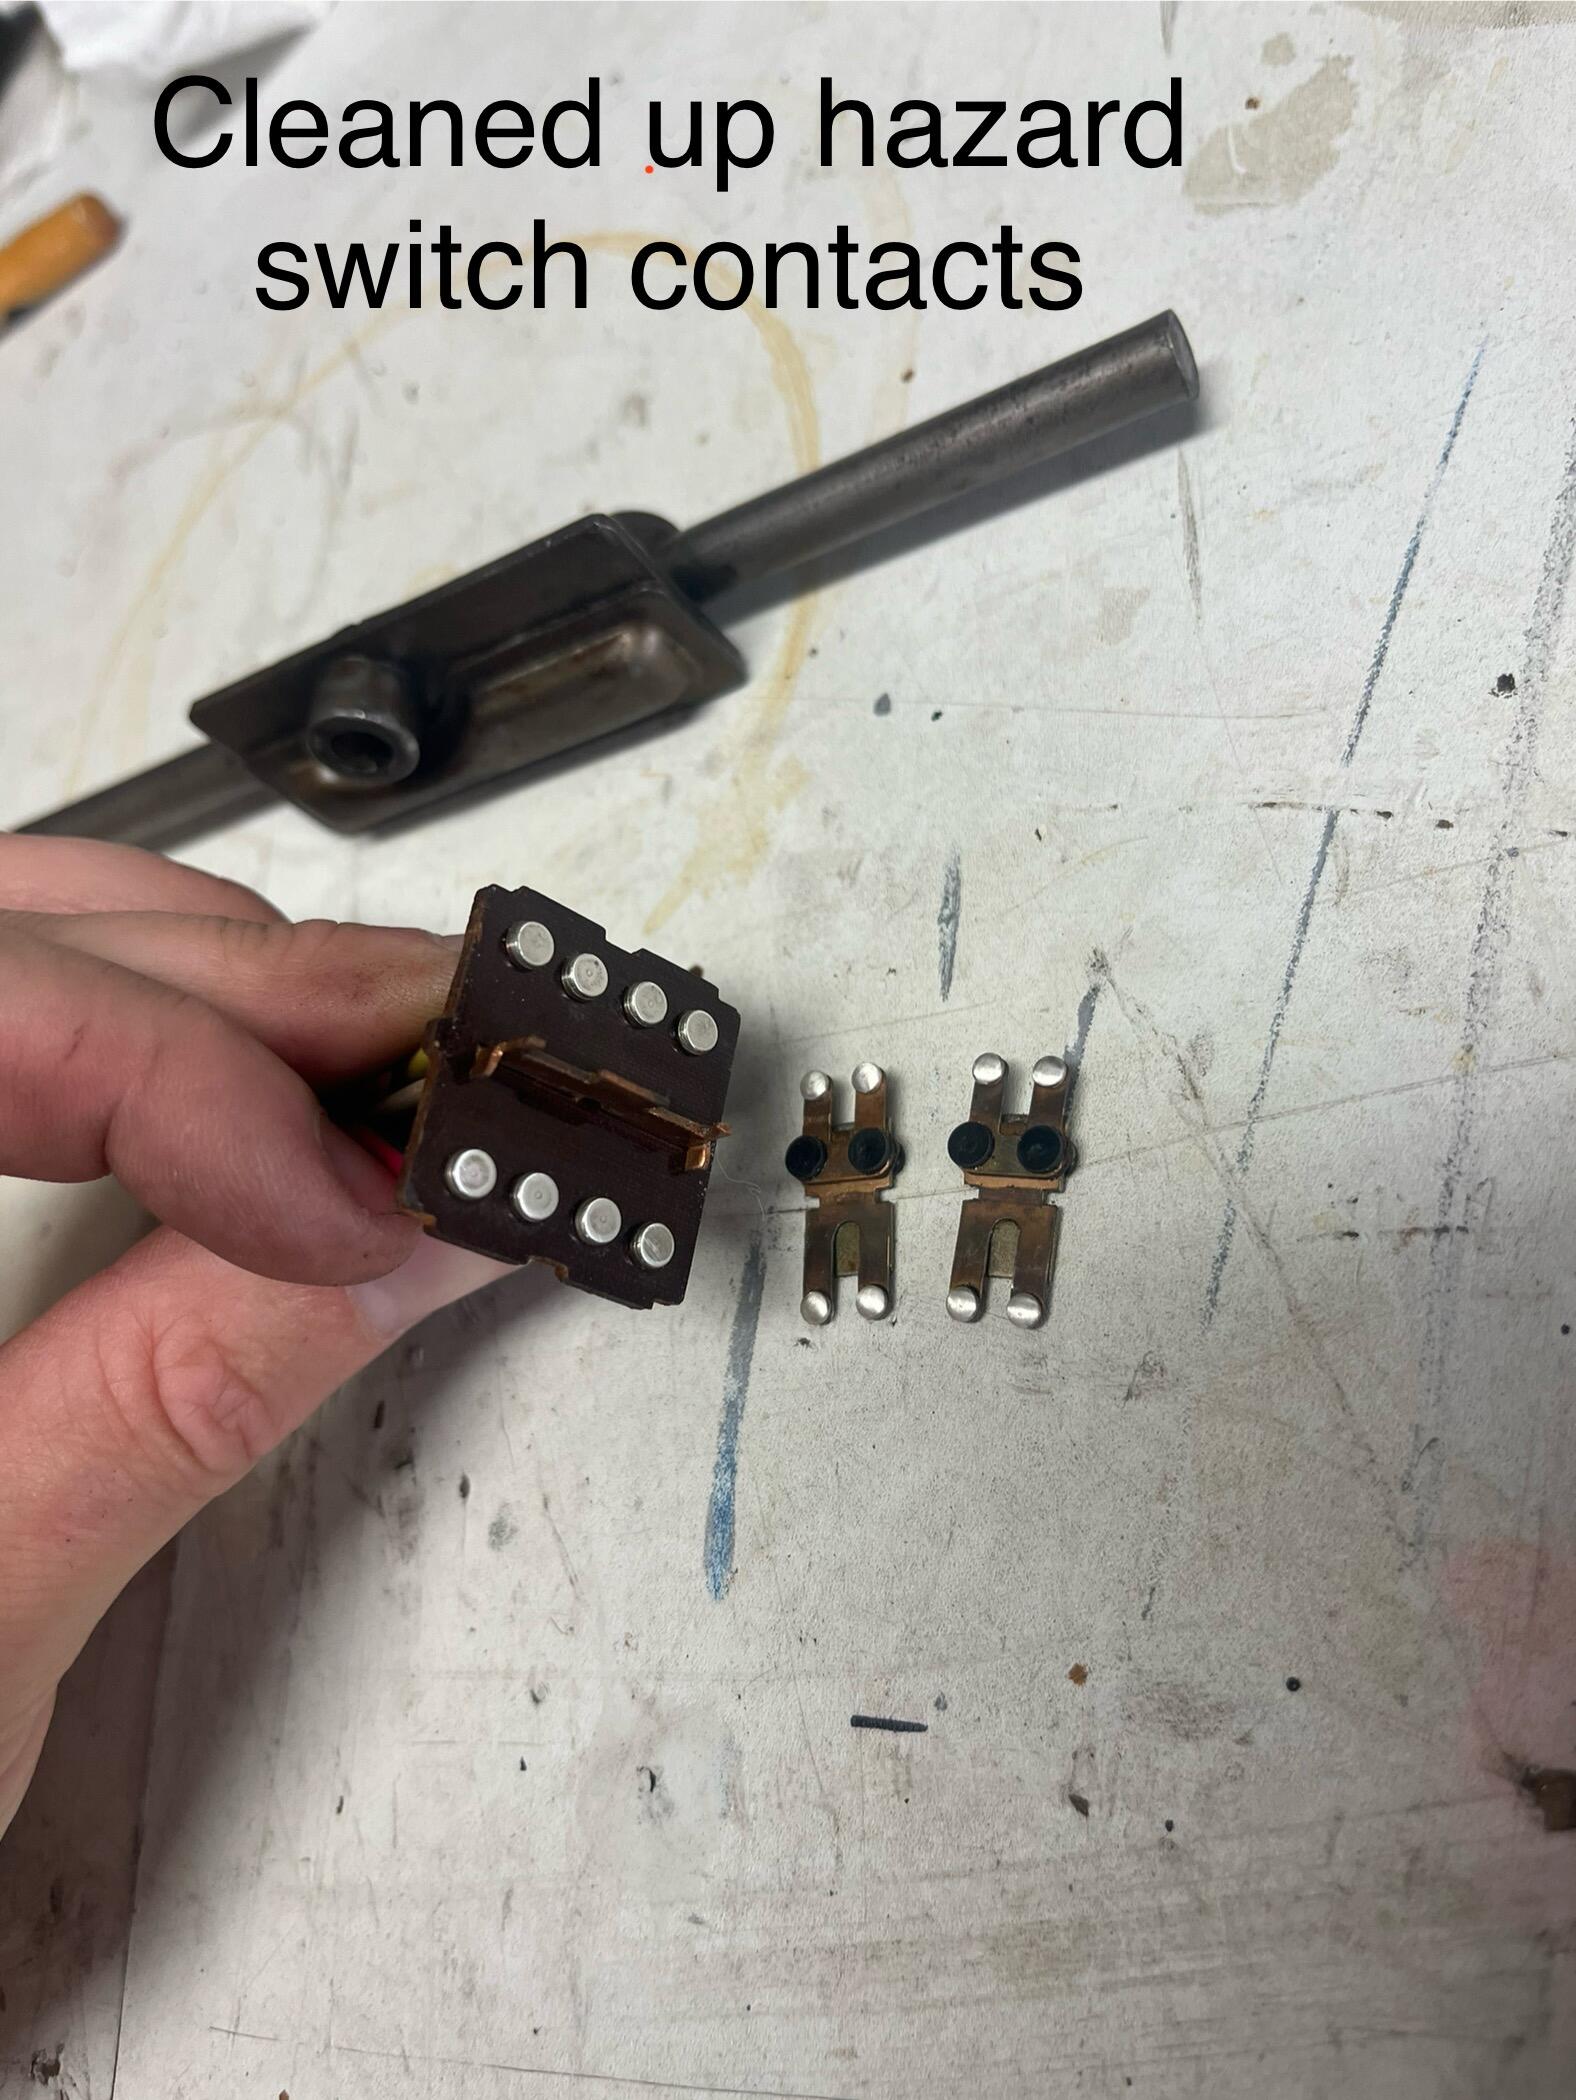
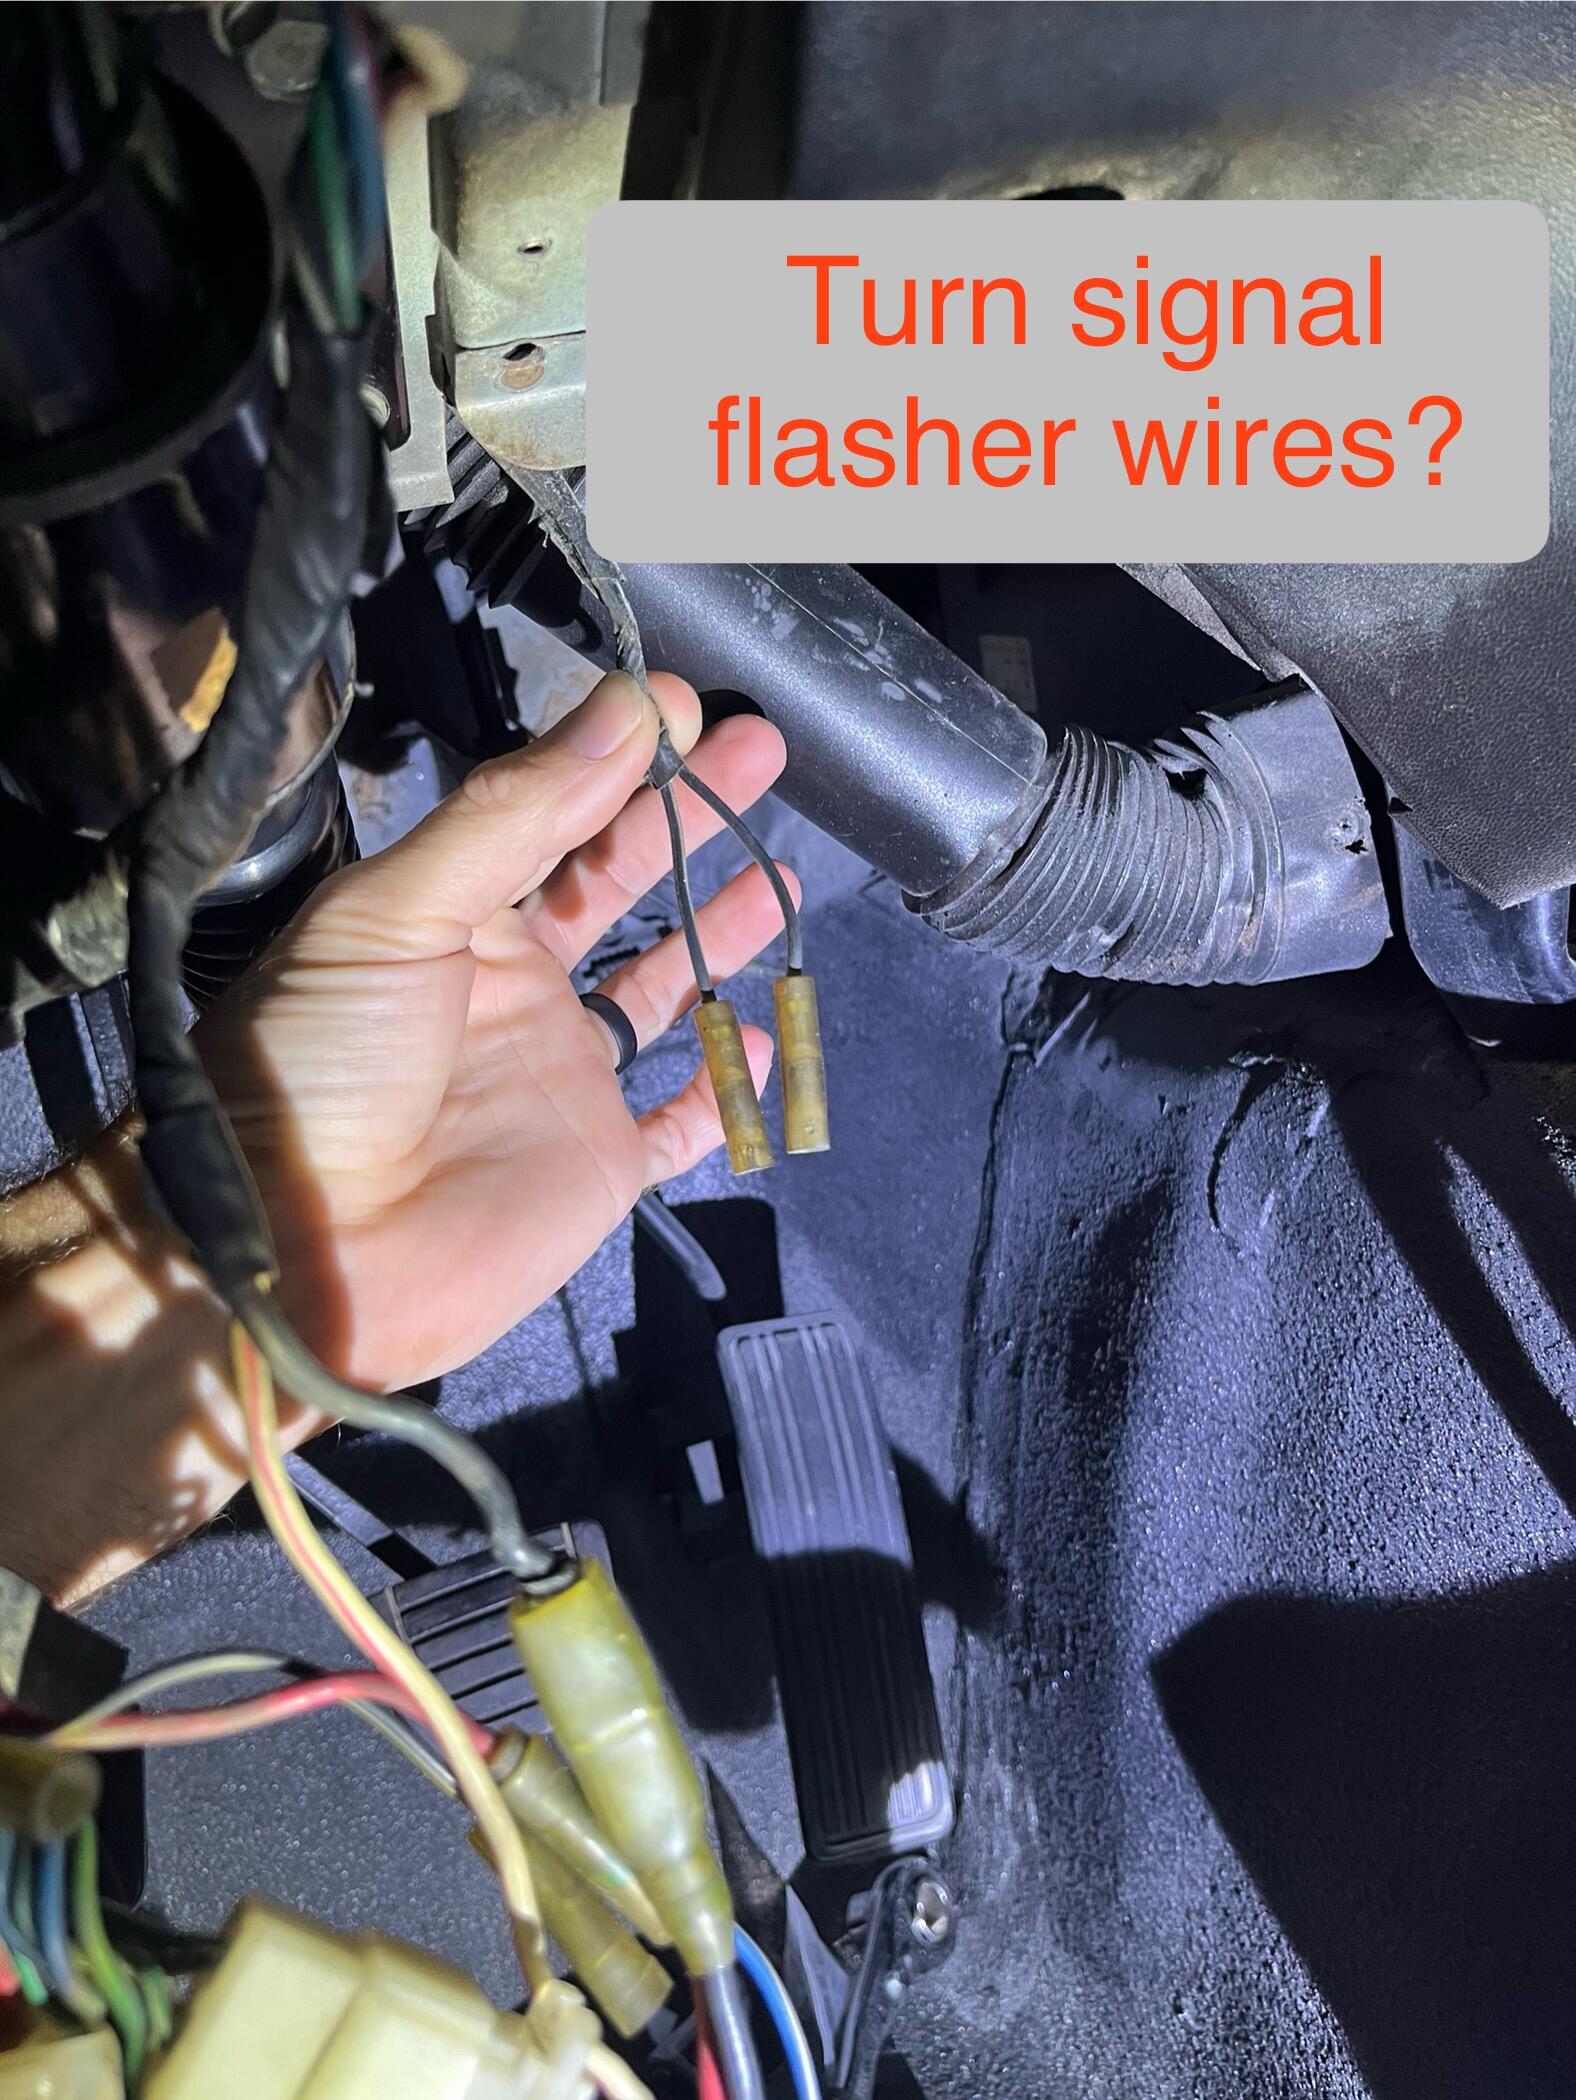
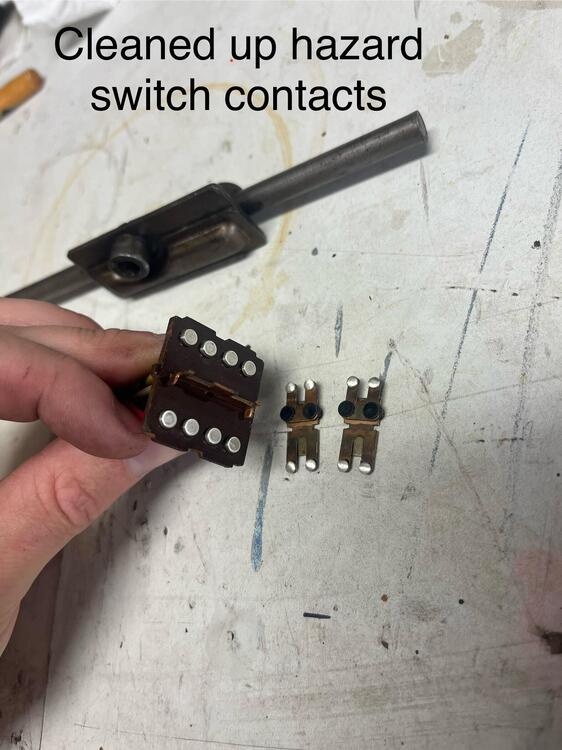
SteveJ and zKars, thanks for the input! Progress, good news! I went through the inspection points Steve mentioned. When I got to the hazard switch, I figured what the heck, I might as well open it up and clean it up. It honestly looked fine on the inside, but I cleaned it up anyways and lightly sanded the contacts inside. And good news, that brake lights are now working, woohoo! But still no turn signals, front or rear. While I was poking around, I came across two female bullet connectors that weren’t connected to anything. One black wire, the other is black with a white (I think) stripe. Any chance these are supposed to go to a turn signal flasher? Do I even have a turn signal flasher in the dash? Where is it typically located on a 72 Z?

-
Understood, thanks for the explanation. Oh man, a demo video or even just a list of what to test next work be great! Sent from my iPhone using Tapatalk
-
When I connect a jumper wire connecting only the two green/yellow wires together, I get 12 volts at the proper terminals on the turn signal stalk (but still no brake lights). See explaination video here… Sent from my iPhone using Tapatalk
-
Connections are all solid. No wires being pushed out. It’s like when I plug in the connector the GY wire just stops supplying 12V. Sent from my iPhone using Tapatalk
-
Alright, check out the video I made here explaining the results of my test, amongst other things. Easier to explain with video… Sent from my iPhone using Tapatalk
-
Steve, thank you. Tomorrow I will test like you said and report back. Sent from my iPhone using Tapatalk
-
Well, sorry to dominate all the recent forum activity, but I’m really trying to get this thing done! I’ve got an electrical problem somewhere. I’ve read what feels like 100 posts regarding the turn signals. I’ve studied the following links heavily and still can’t seem to figure it out: https://www.classiczcars.com/forums/topic/16435-72-240z-brake-light-wiring/ https://fiddlingwithzcars.wordpress.com/2013/01/20/hazard-switch-brake-light-turn-signal-circuit-analysis/ THE PROBLEM: I have no brake lights or front/rear turn signals HERE’S WHAT DOES WORK: Hazards (front and rear), Headlights & Tail lights, Reverse Lights, Brake light switch, all fuses are good, all light bulbs are good, Turn signal switch was just rebuilt, as well as combo switch. I meticulously cleaned everything, lightly sanded all the contacts, dielectric grease, the whole 9 yards. I sanded down my grounds both at the firewall and at the rear under the gas tank. I followed the directions from the first link I posted above and verified that I have 12 volts at the Green/yellow wire that goes from the hazard switch to the connector for the turn signal switch. Picture below. I also verified that the voltage goes to zero when the brake pedal switch is pressed, telling me that the brake switch is working. Again, according to that first link above by 72SLOZ, that should indicate that my problem is something downstream of the hazard switch. When I plug in the turn signal switch, I don’t get any voltage from the green/yellow wire to the white/black or white/red wire. This might seem to indicate a problem with the turn signal switch? BUUUUT, I thought to myself, I’ll bypass the turn signal switch and just insert a jumper wire into the connector shown below and see if I get any lights, still nothing! I have my multimeter in hand. Any idea where to look next? Sent from my iPhone using Tapatalk
-
Thanks for the link. I do have my oem pump, which I will try and refurbish and use. If I need to buy the Nikki pump and scavenge parts off of it, I wlll[emoji1360] I’ll update the thread as I go. Sent from my iPhone using Tapatalk
-
@emccallum any chance that offer still stands?? Sorry to revive an old thread. I’ve finally got the car on the ground and I’m getting ready to tinker with the engine. This means I’ll need to find an eccentric. I want to try the mechanical pump route first before having to mess with an electrical pump. Hopefully @emccallim is still around somewhere, or anyone else who might have one to sell? Thx Sent from my iPhone using Tapatalk
-
If you’re OK with non-OEM fasteners, I’ve found every type of metric fastener I’ve ever needed for my Z at Ace hardware. Guarantee they’ll have the M5 and M6 hardware you pictured. Sent from my iPhone using Tapatalk
-
And in case anyone is converting from and auto to a manual, and needs a clutch pedal stopper, here was my $4 solution. Everything was purchased at Ace hardware… 3 inch 3/8 elevator bolt Your choice of fender washers 2 nyloc nuts Rubber or felt pad glued to elevator bolt head Drill a 3/8 hole in the footwell, fender washers on either side of the sheet metal, tighten the nylocs on each side and your done. Adjust the height appropriately. In my case, it’s set at 1.8 inches as measured by grannyknot above. It feels very solid and should work fine… Sent from my iPhone using Tapatalk
-
Thank you! And that’s 1.8” from the metal firewall to the top of the rubber pad on the stopper? Sent from my iPhone using Tapatalk
-
My car was originally an auto. I’m in the process of restoring it, and I’m getting close. I put a 4 speed in it, but there is no standoff on the firewall to prevent the clutch pedal going to far. Could someone do me a big favor and measure the height of this clutch pedal stopper (including the rubber pad)?? Please measure starting from the metal firewall, not the insulation. Greatly appreciated. Here’s the part I’m referencing… Sent from my iPhone using Tapatalk
-
Bought this car as a non running project, so no experience with it before, but everything appeared OK. Yes, they were originally on the car. Yeah, I’m liking that lower torque spec. Yep, I have the oil seal, just didn’t have it installed for the pic. Appreciate the feedback. Sent from my iPhone using Tapatalk
-
1972 240z Alright, I’ve read all the posts regarding this copper washer that was installed as part of a TSB to reduce noise of some kind, and then was done away with in later models. Mine are in fine shape. Leave them in? Or toss them? Or indifference? I can’t seem to arrive at a consensus with what I read. The one advantage to leaving them in is that the TSB says to torque the axle nut to ~120ft/lbs, which is actually attainable with my torque wrench, as opposed to the ~200+ ft/lbs required if you leave the washer out. Sent from my iPhone using Tapatalk
-
Yes, the collar is about 47mm from the TO bearing face to the fork contact shoulders on the collar. Yep, swapped out the pilot bushing using the bread trick. Couldn’t believe it worked but it worked like magic. Sent from my iPhone using Tapatalk
-
Well, figured I would offer a conclusion to benefit anyone reading through this thread in the future. Yes, the exedy 06009 clutch kit appears to be correct for the longer collar. Stacked everything up as described in other threads and appears to be exactly 92mm. Sent from my iPhone using Tapatalk
-
Dude. Am I going blind? Or my garage lighting is severely lacking. The shaved threads were there the whole time. I dunno how I missed that. Anyways, carryon. Sent from my iPhone using Tapatalk
-
Valid, I’ll see if I can get in touch with KYB first. Ugh. Sent from my iPhone using Tapatalk
-
Good point. I’ll have to grind the shock threads then. I bought the KYB 361001 for the rears, as is recommended. I’ll check those out when I get home and see if they suffer the same problem. Sent from my iPhone using Tapatalk
-
Got them directly from rock auto, so I doubt they’re fakes. Maybe it’s the cost cutting you mentioned. I wonder if it’s better to round out the isolator, or attempt to grind down the shock threads to fit the D shape. Rounding the isolator would obviously be easier, but I’m open to suggestions? Sent from my iPhone using Tapatalk
-
Putting the front suspension back together. I bought brand new KYB 361002 struts for the front strut tubes. Is it normal to have to drill out the spring isolator to remove the “D” shaped opening for the shock threads to pass through? Pics below showing the issue. Sent from my iPhone using Tapatalk
-
A chart would be nice. And I know Motorsport would get me the right setup. I’ve used them plenty of times for other parts. I’m just trying to save a buck and cobble together the kit on my own. Ordered the exedy 06009 kit last night. We’ll see how it goes. Sent from my iPhone using Tapatalk