kcpope
Community Member
-
Joined
-
Last visited
Everything posted by kcpope
-
thank ya👍🏼 Yeah, still planning on smogging just to see the numbers so I can know if it’s running right and if all my various fixes worked. But after that, yep, I’ll be getting hagerty insurance and she’ll be smog exempt. Can’t believe that actually passed🤯 I’ll take it. Yes, starting jan 1, 1981 and older is exempt as long as one of the conditions you mentioned are met.
-
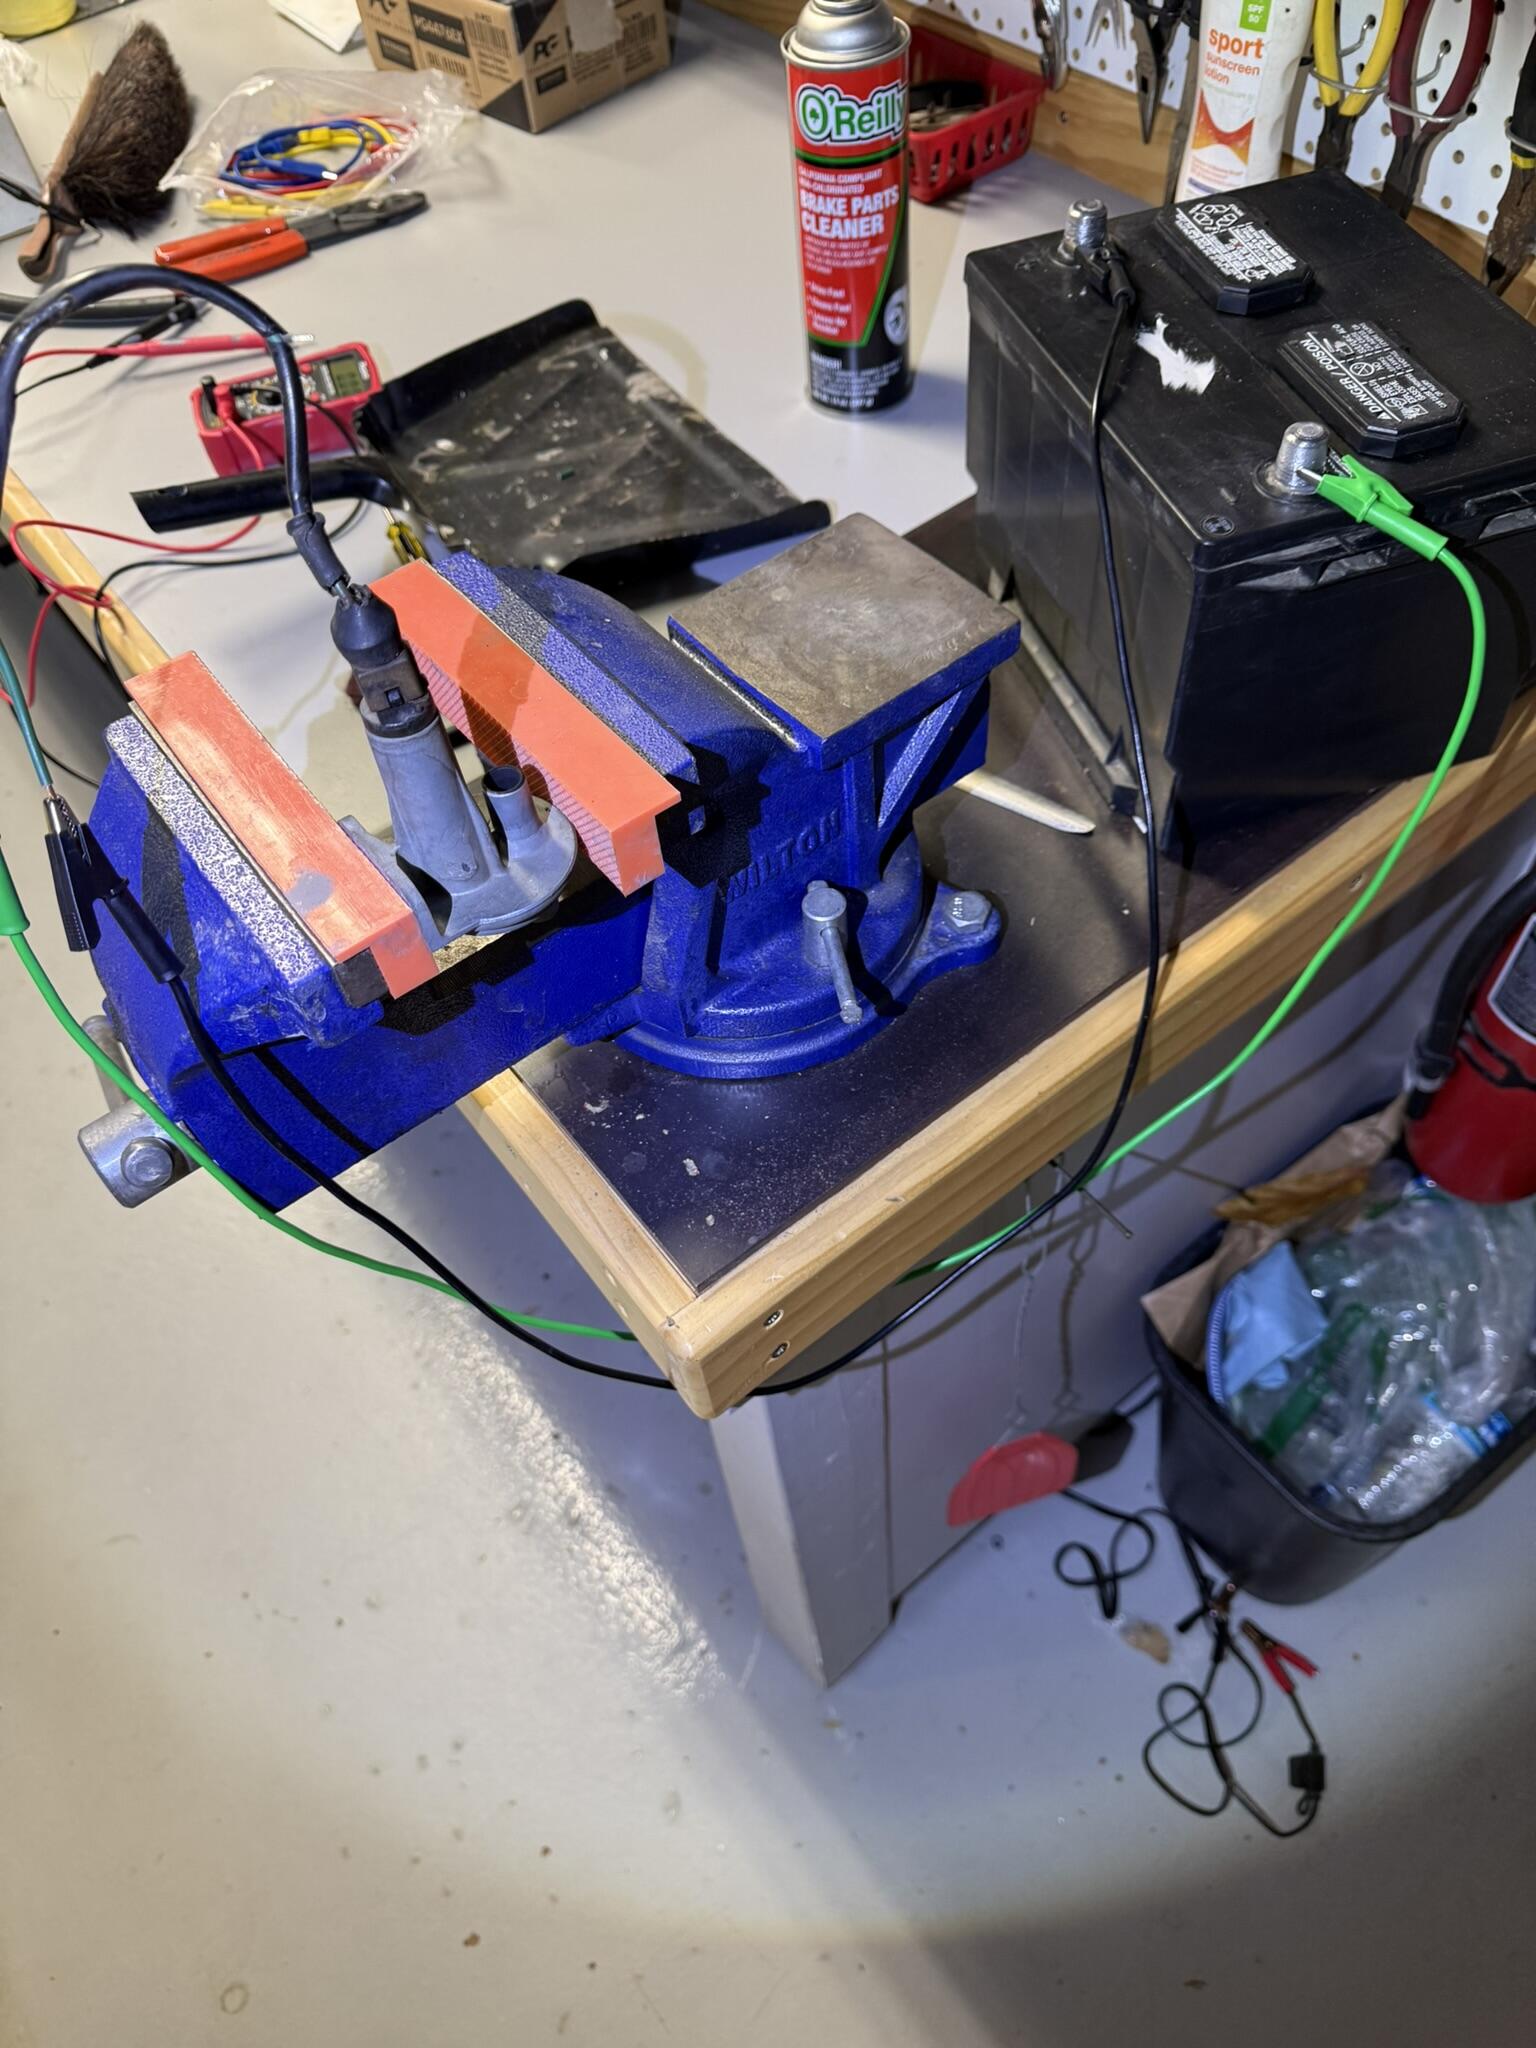
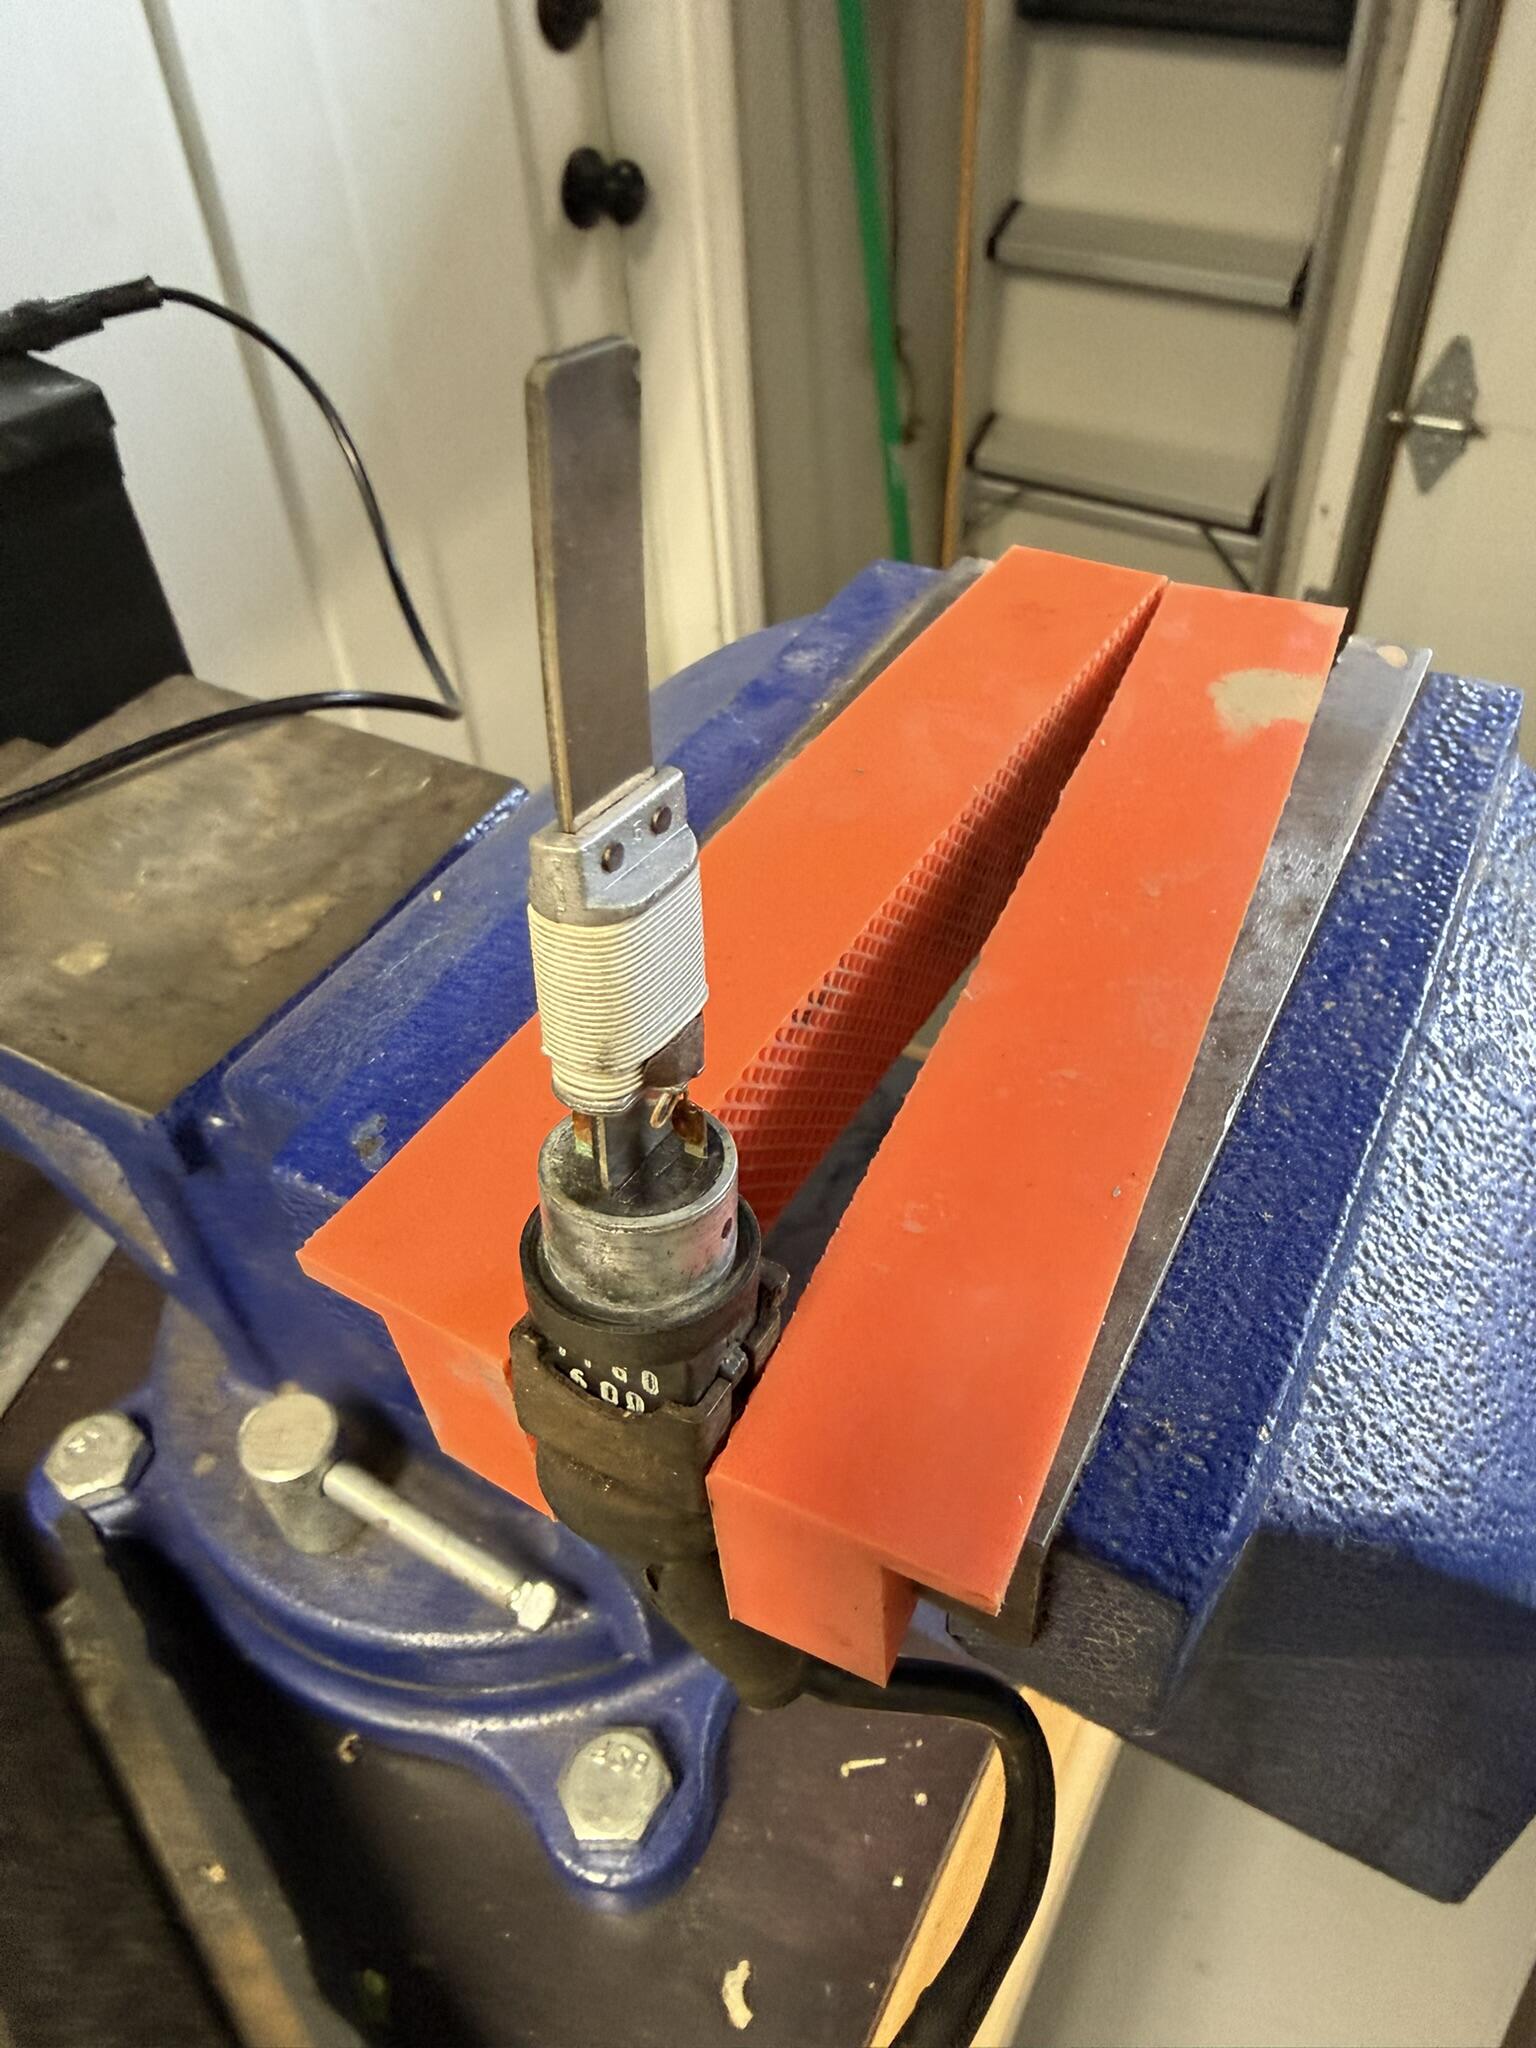
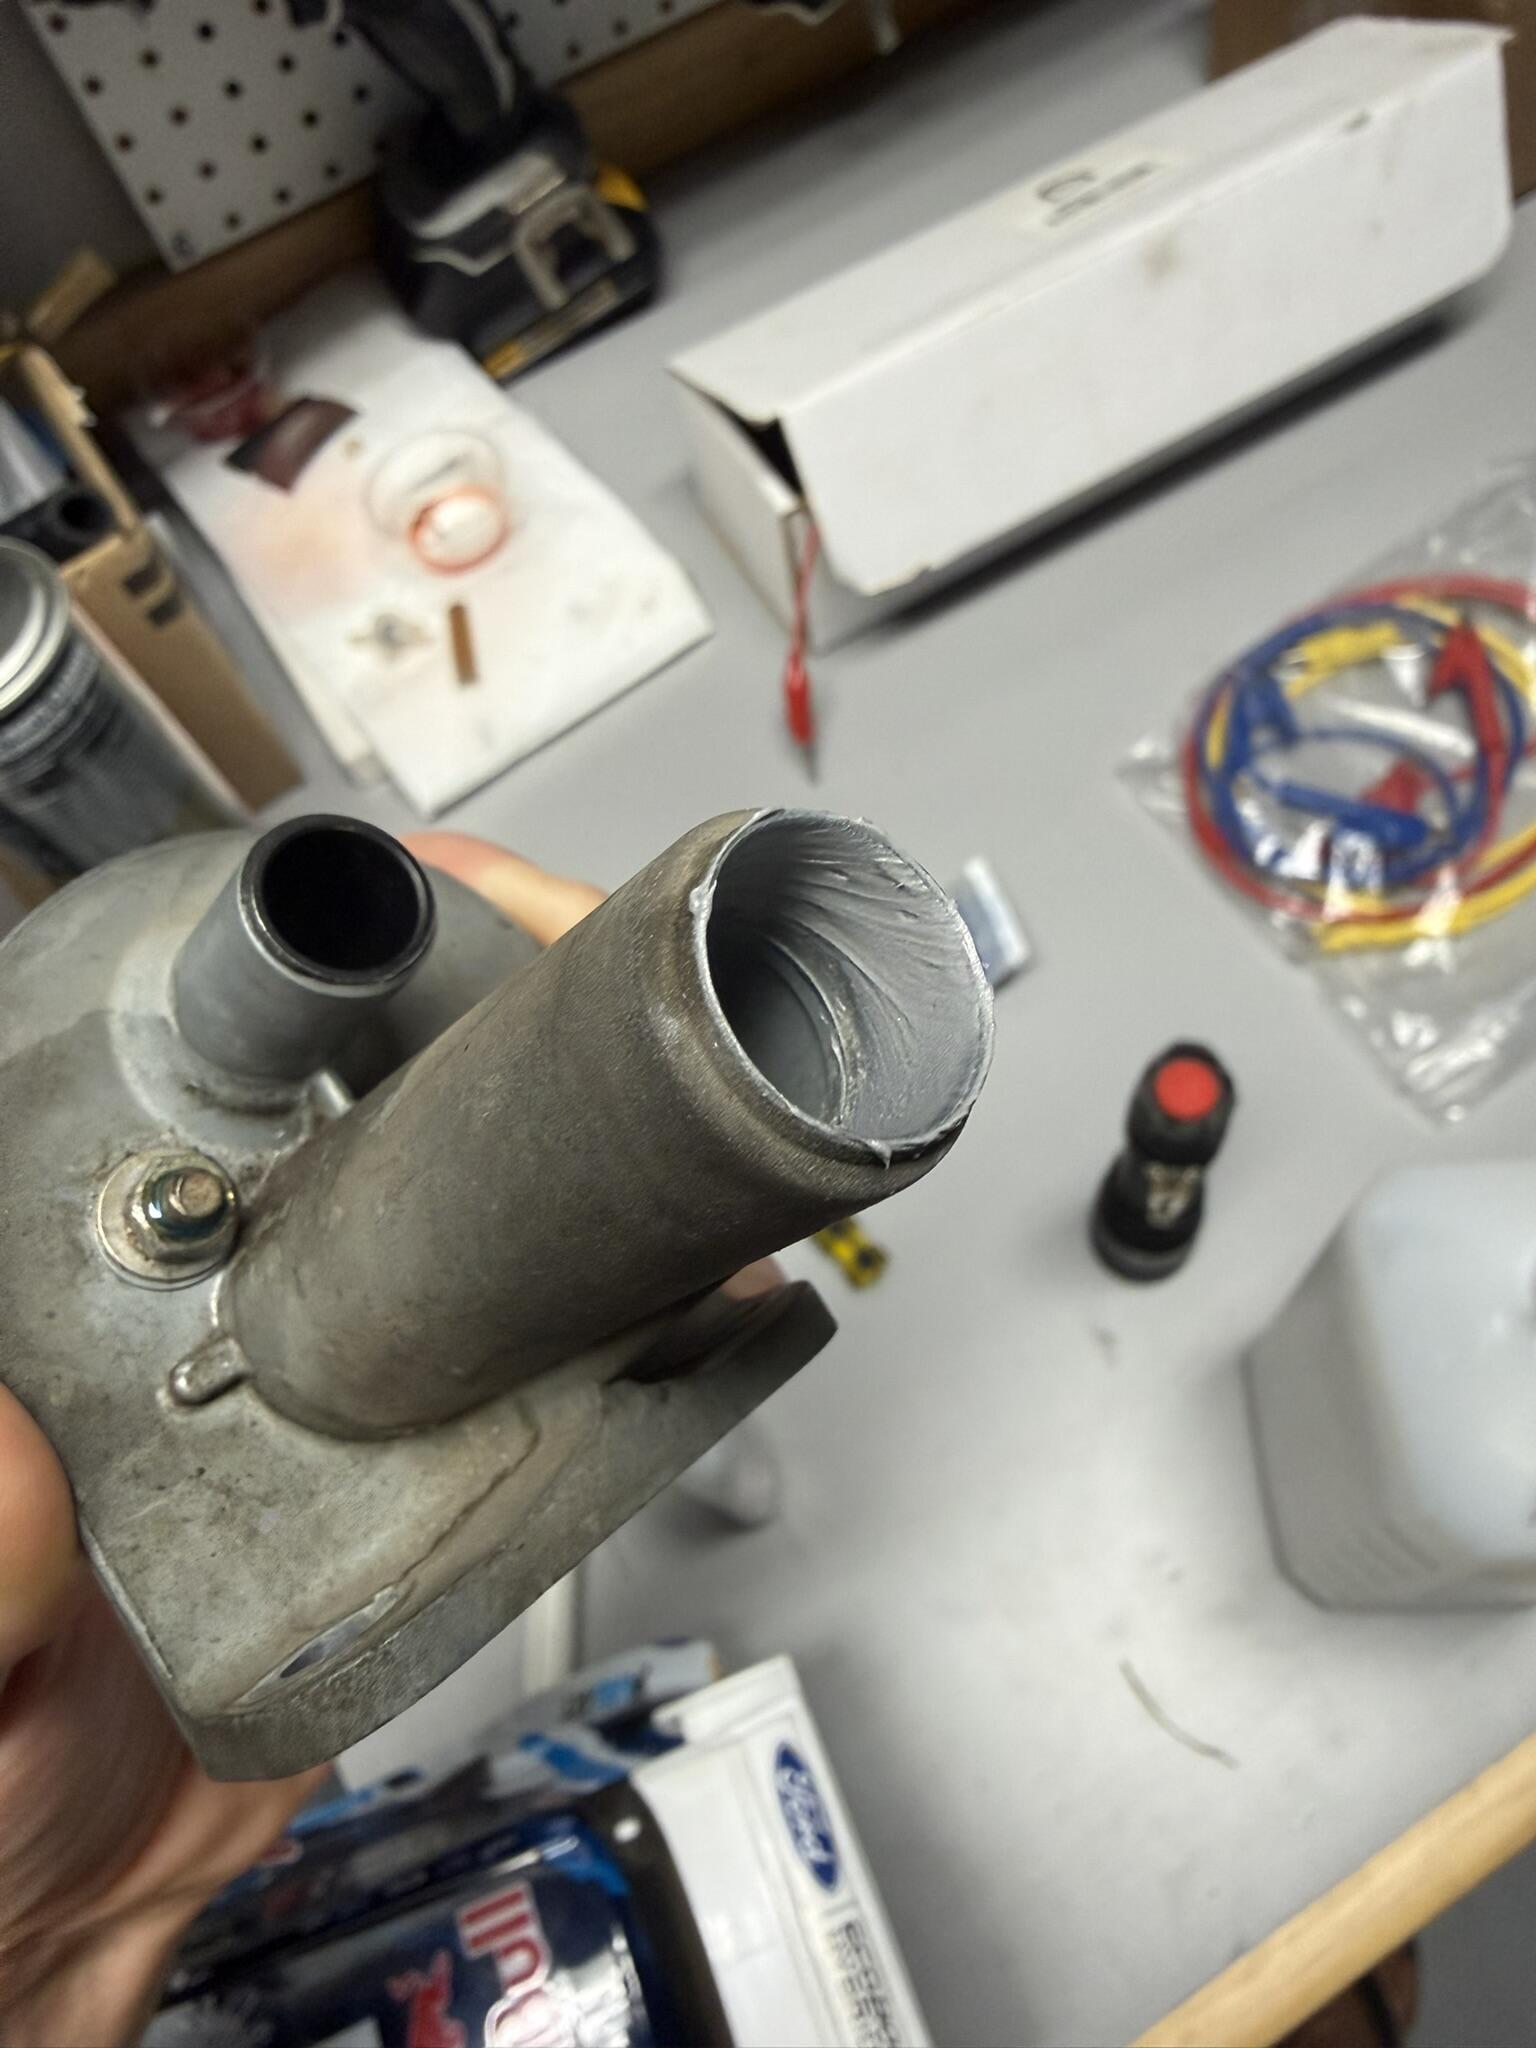
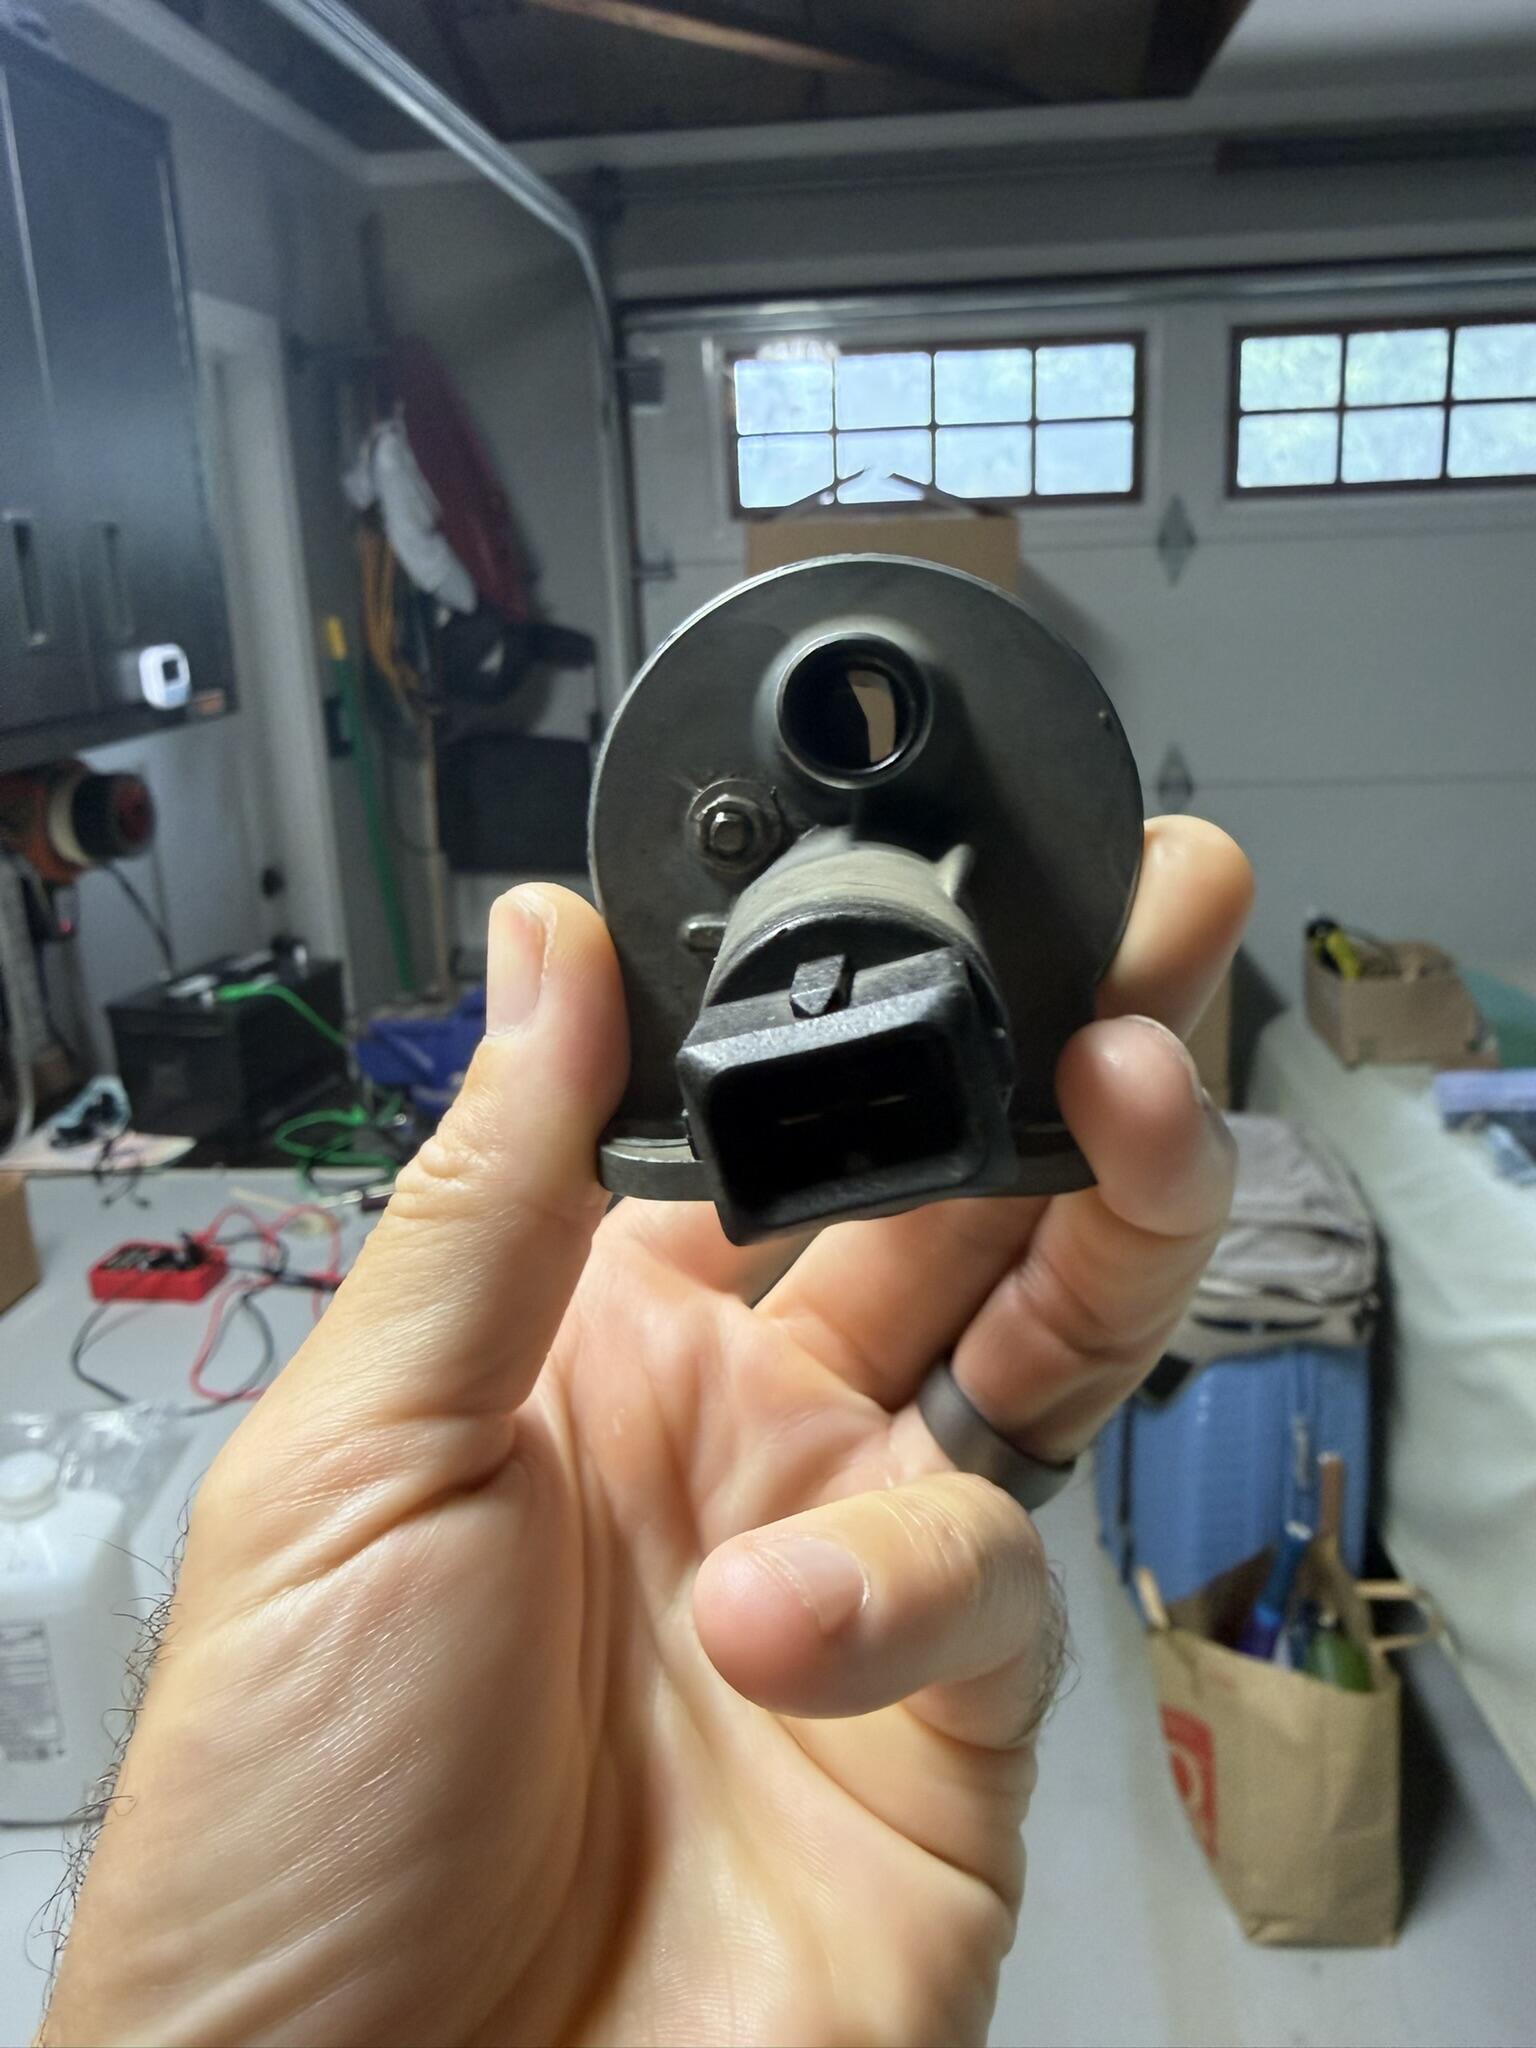
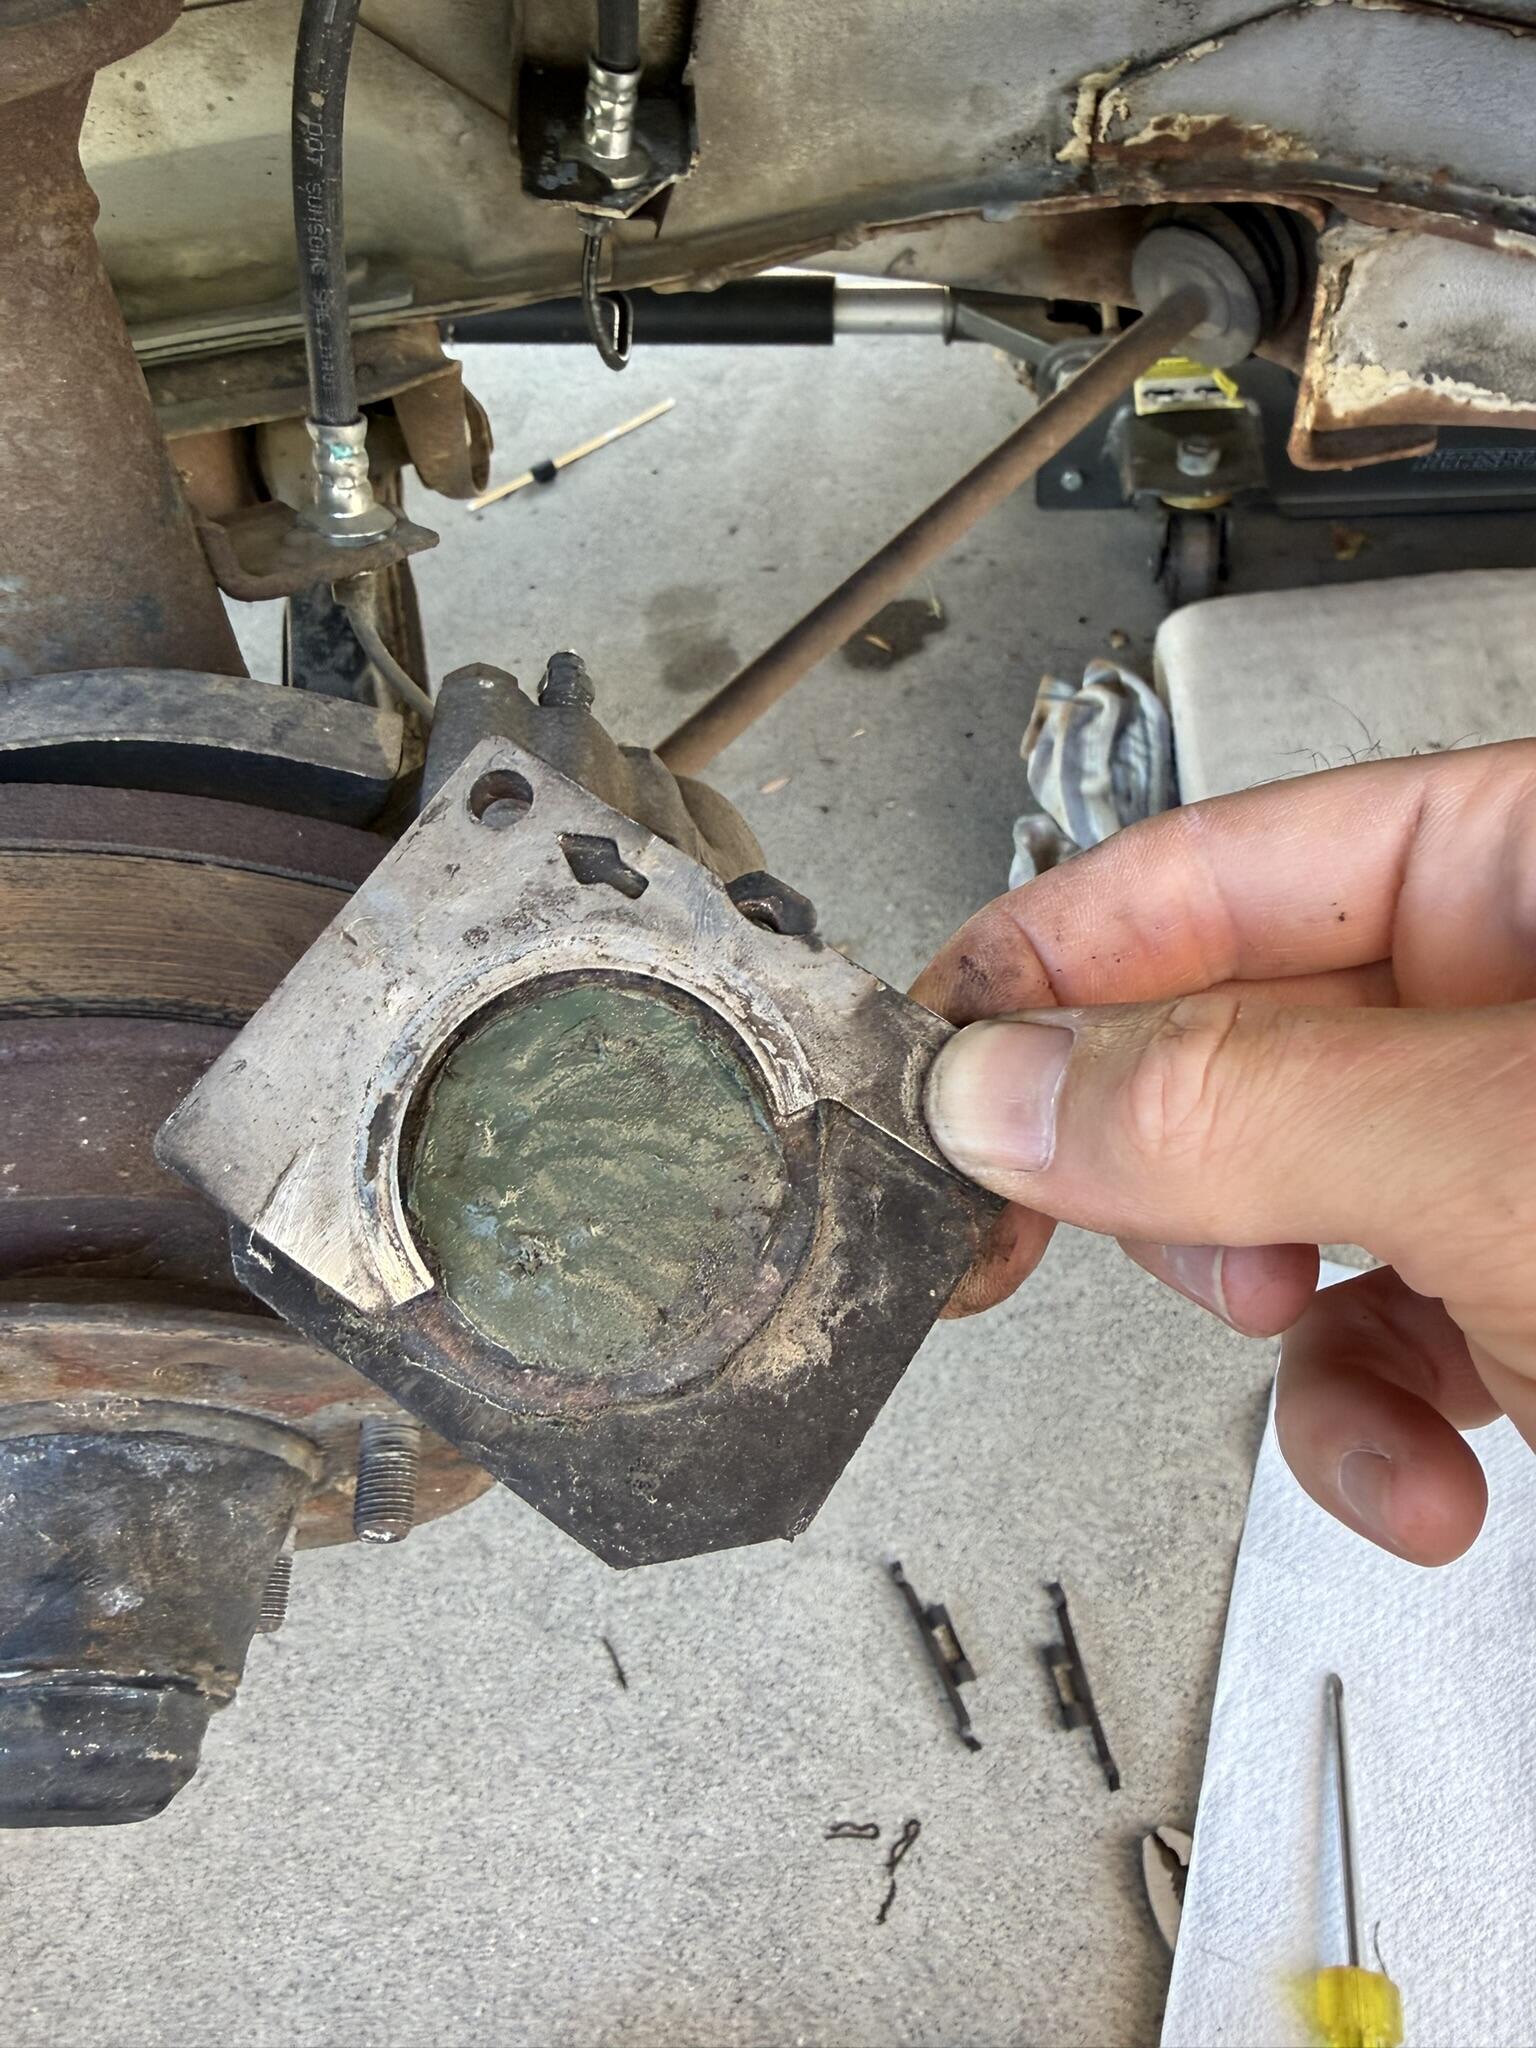
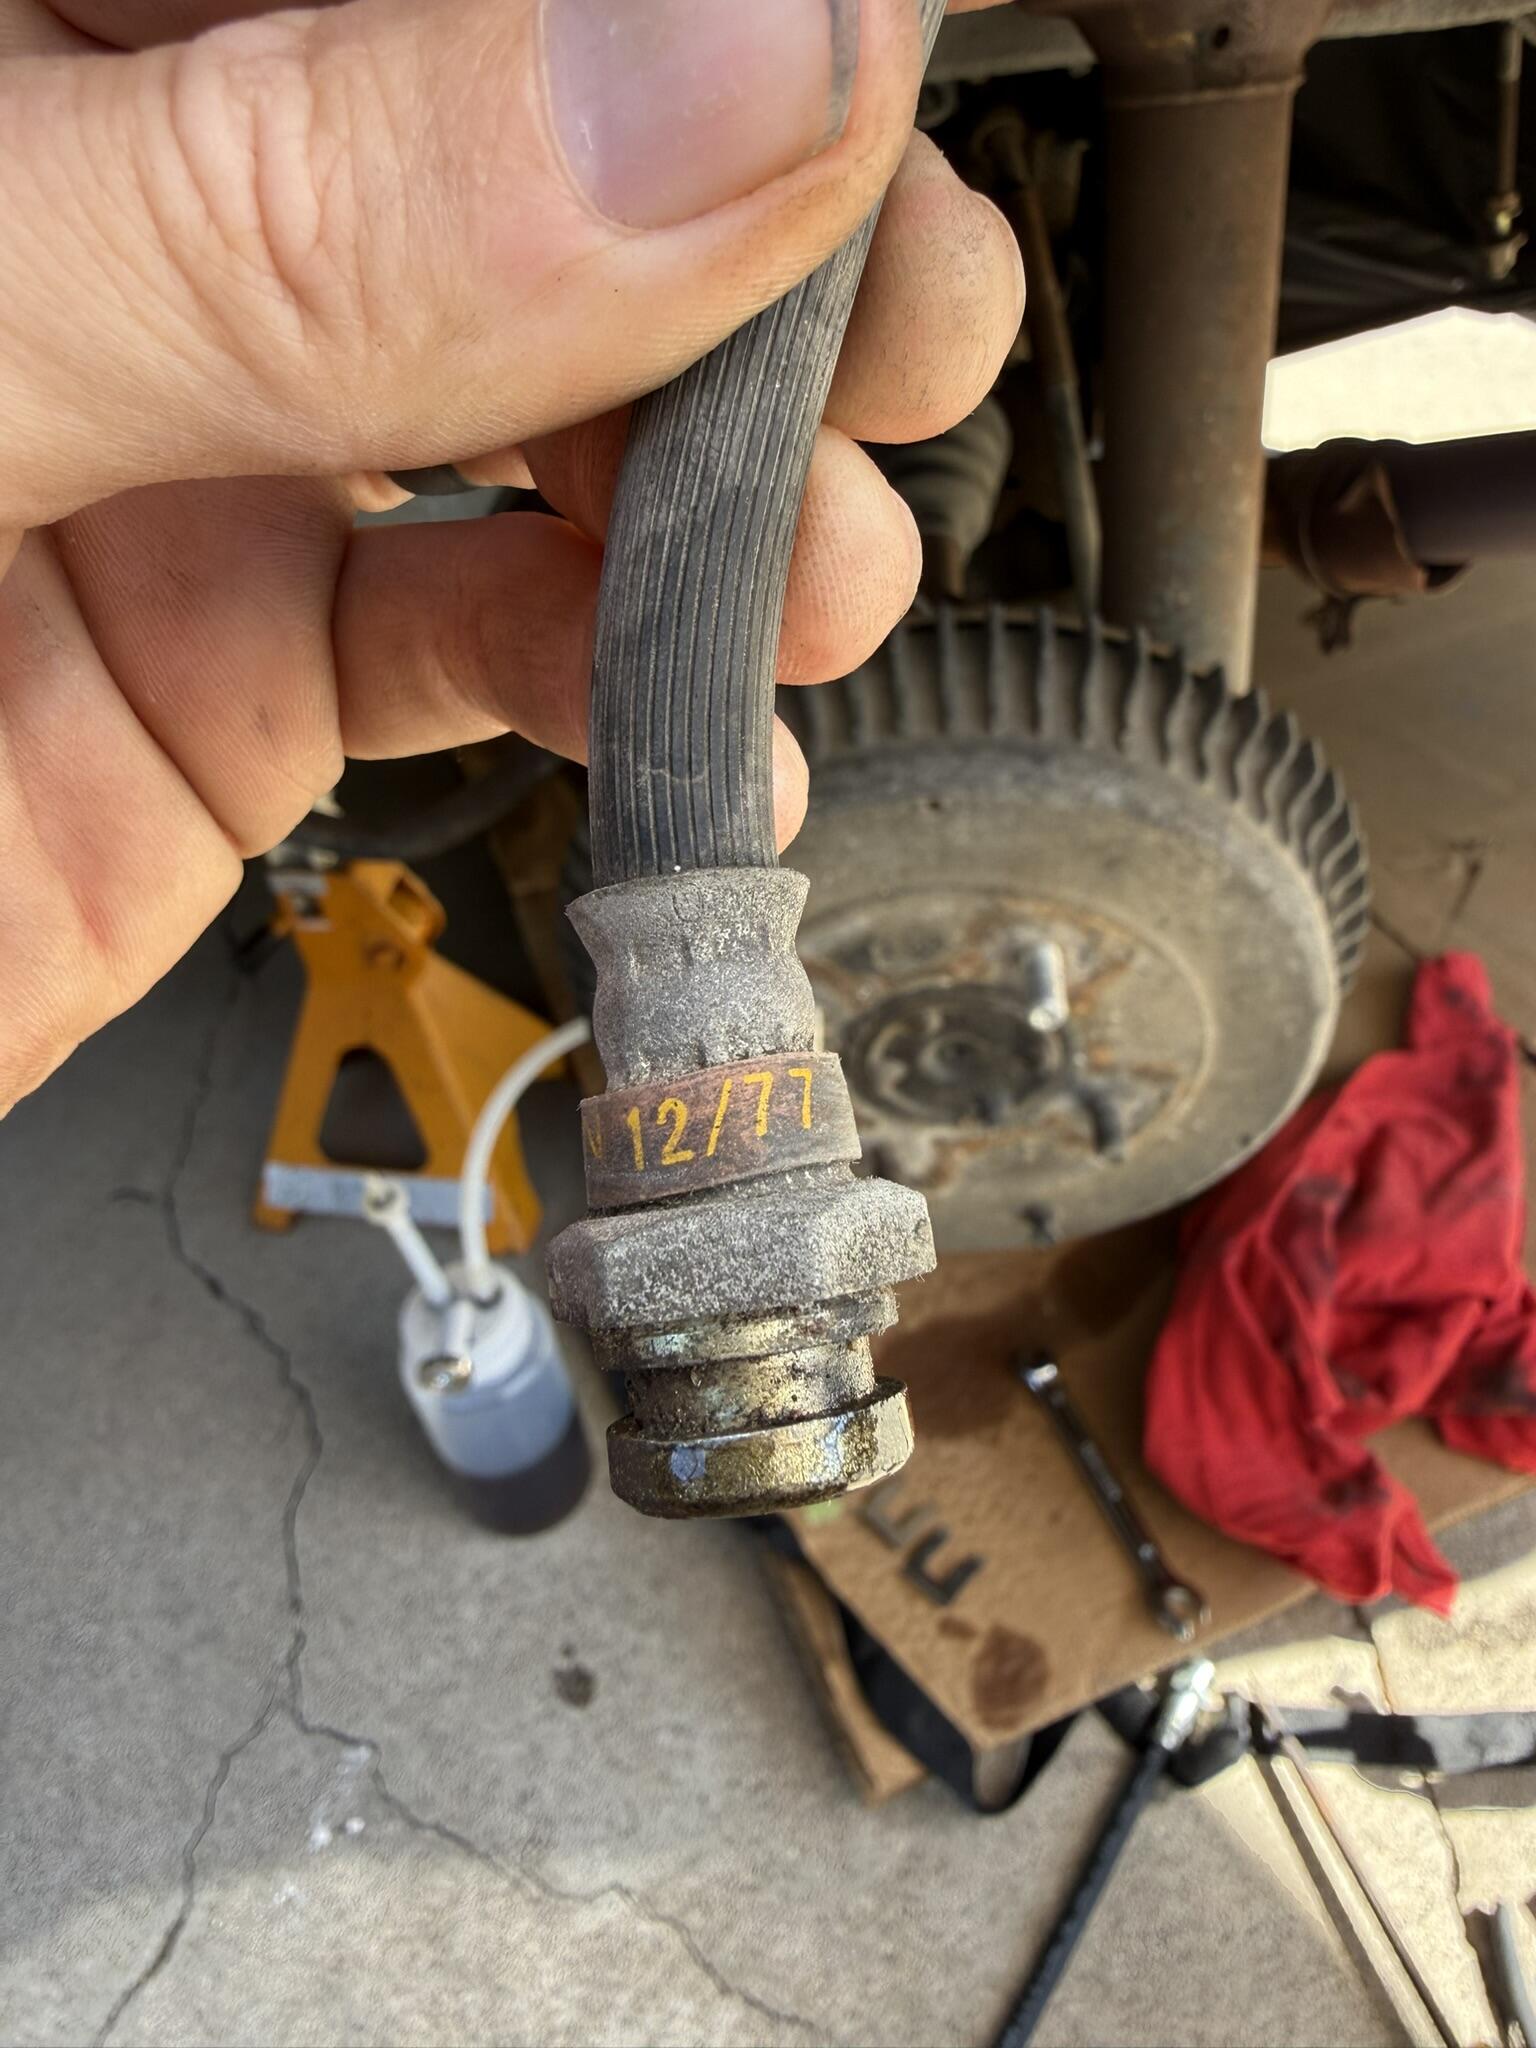
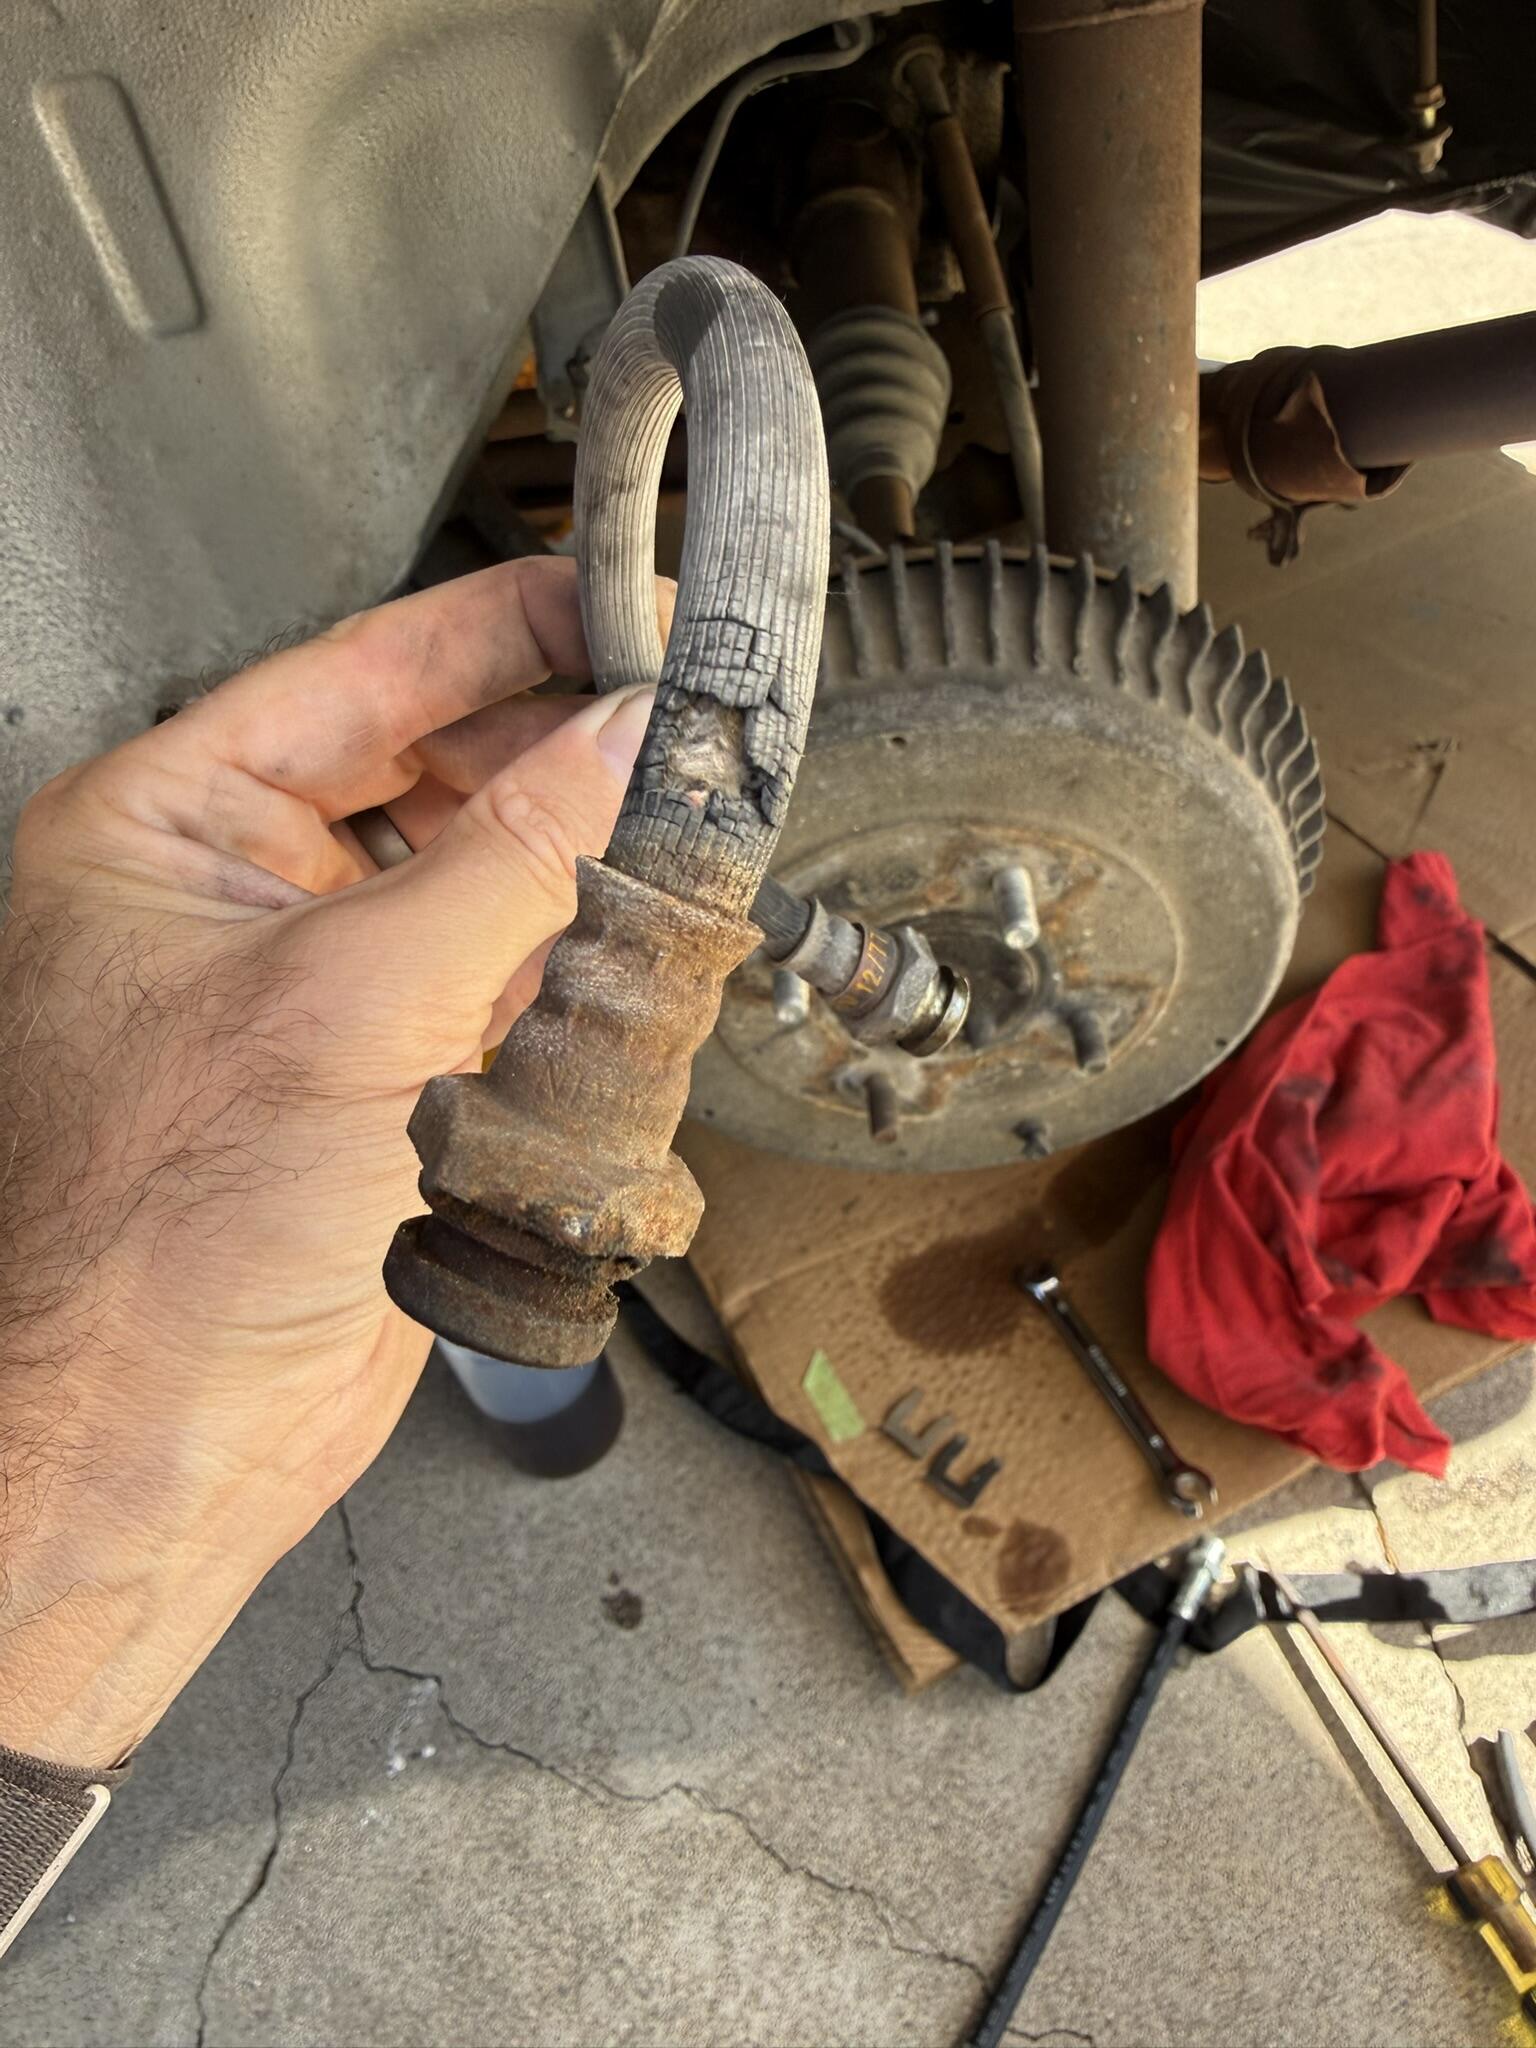
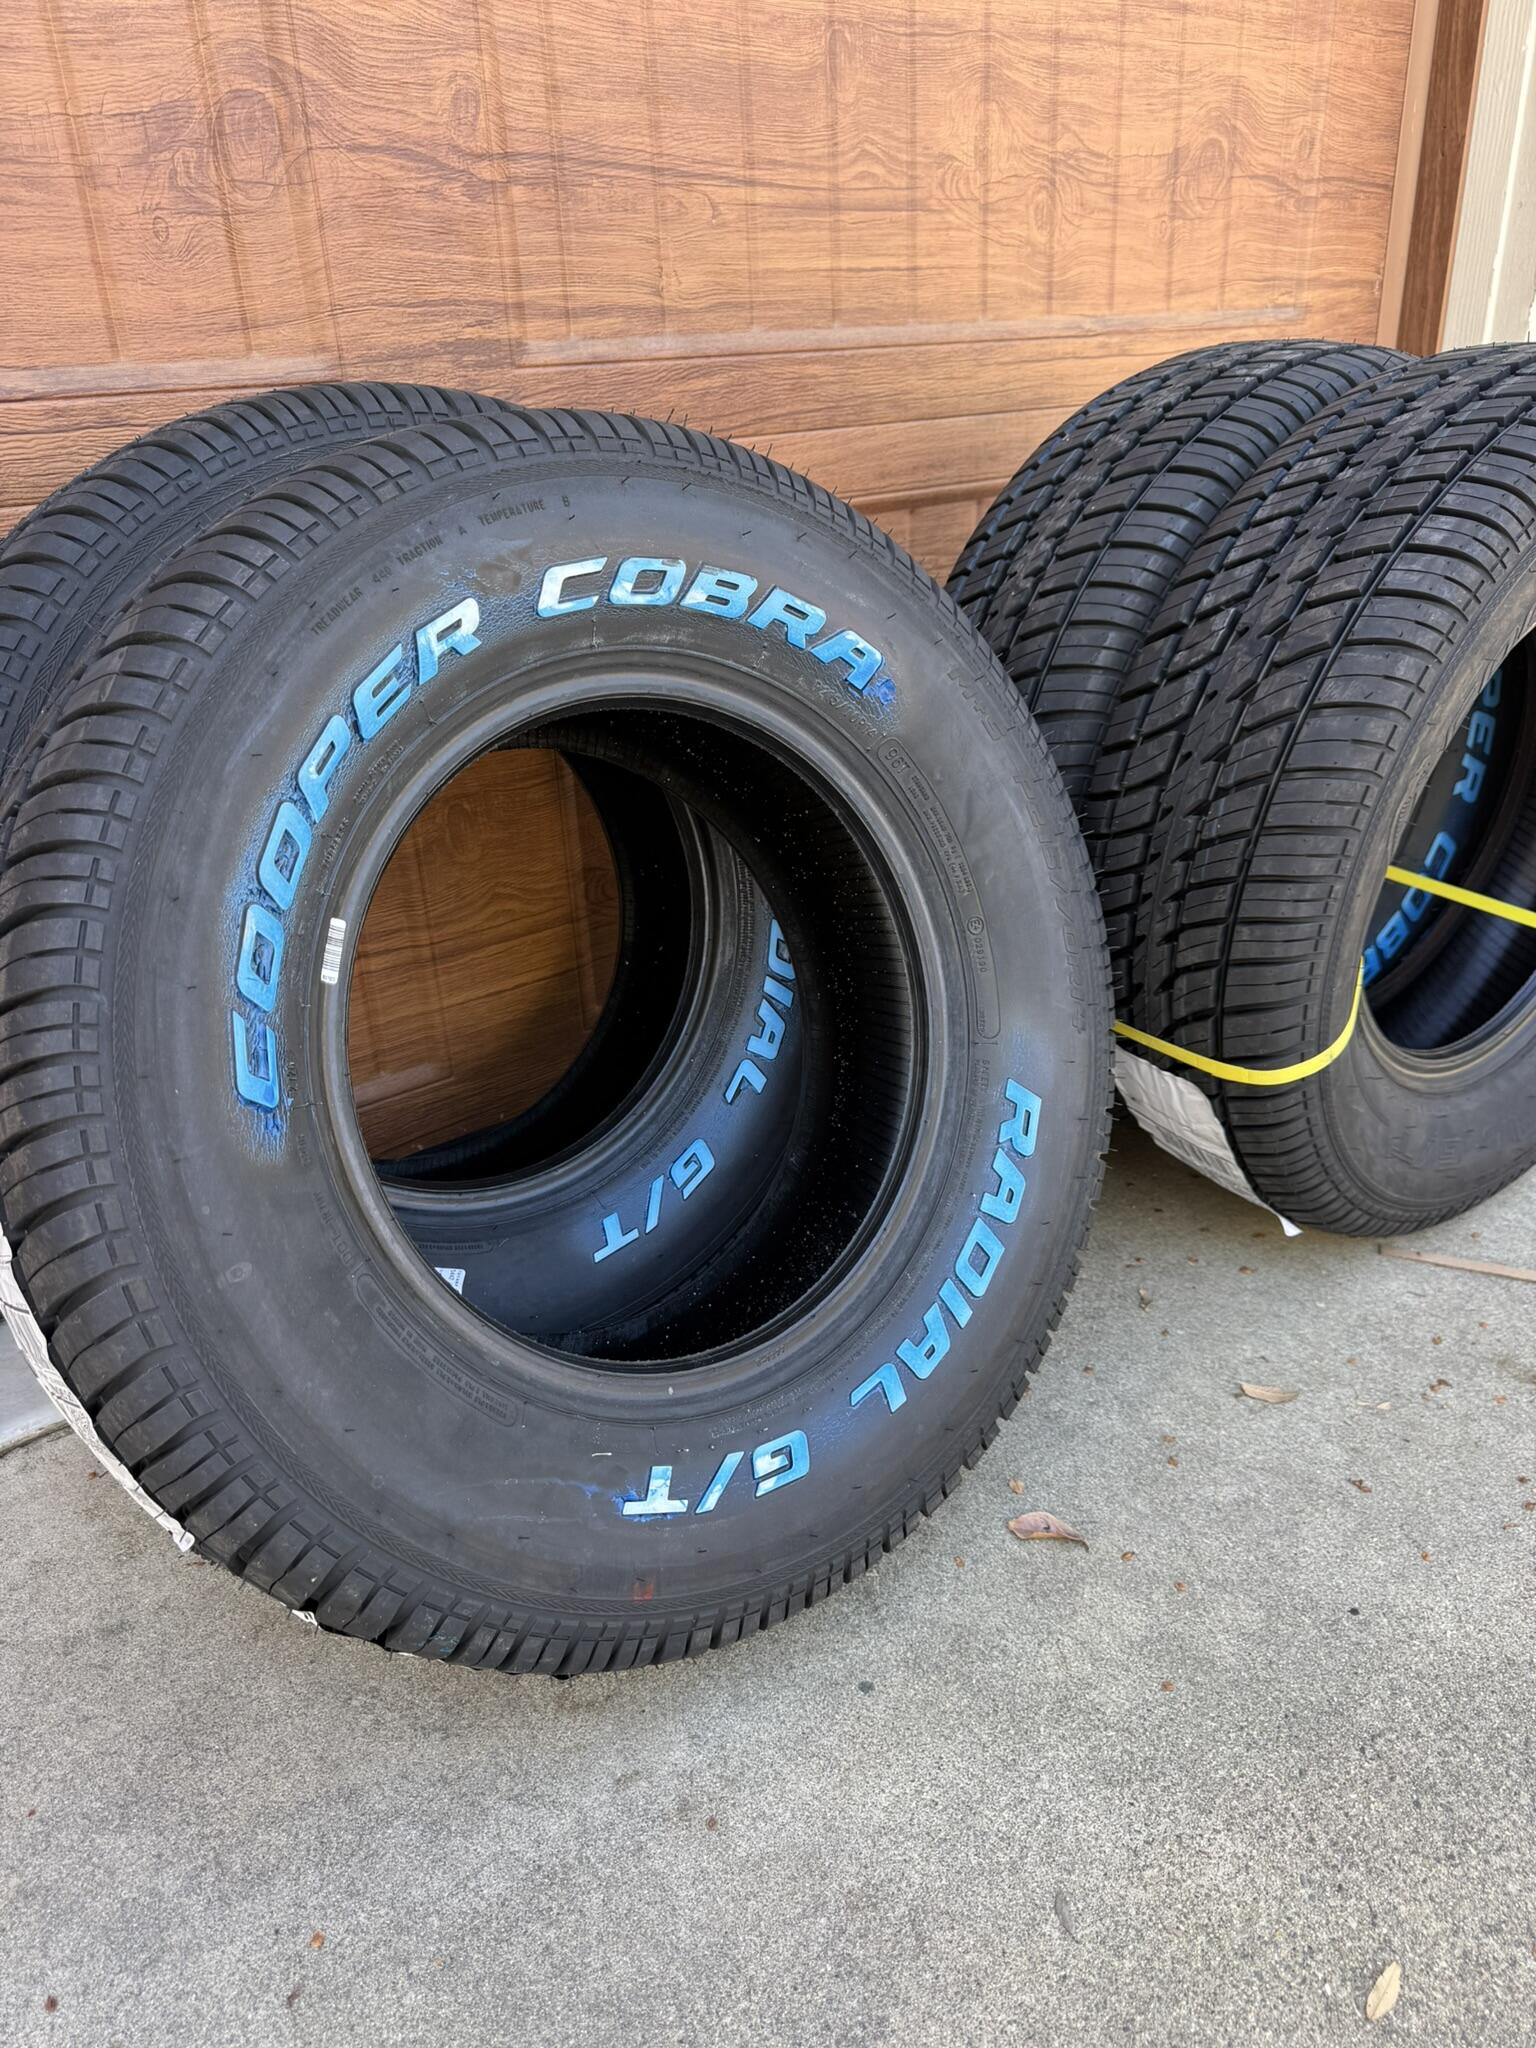
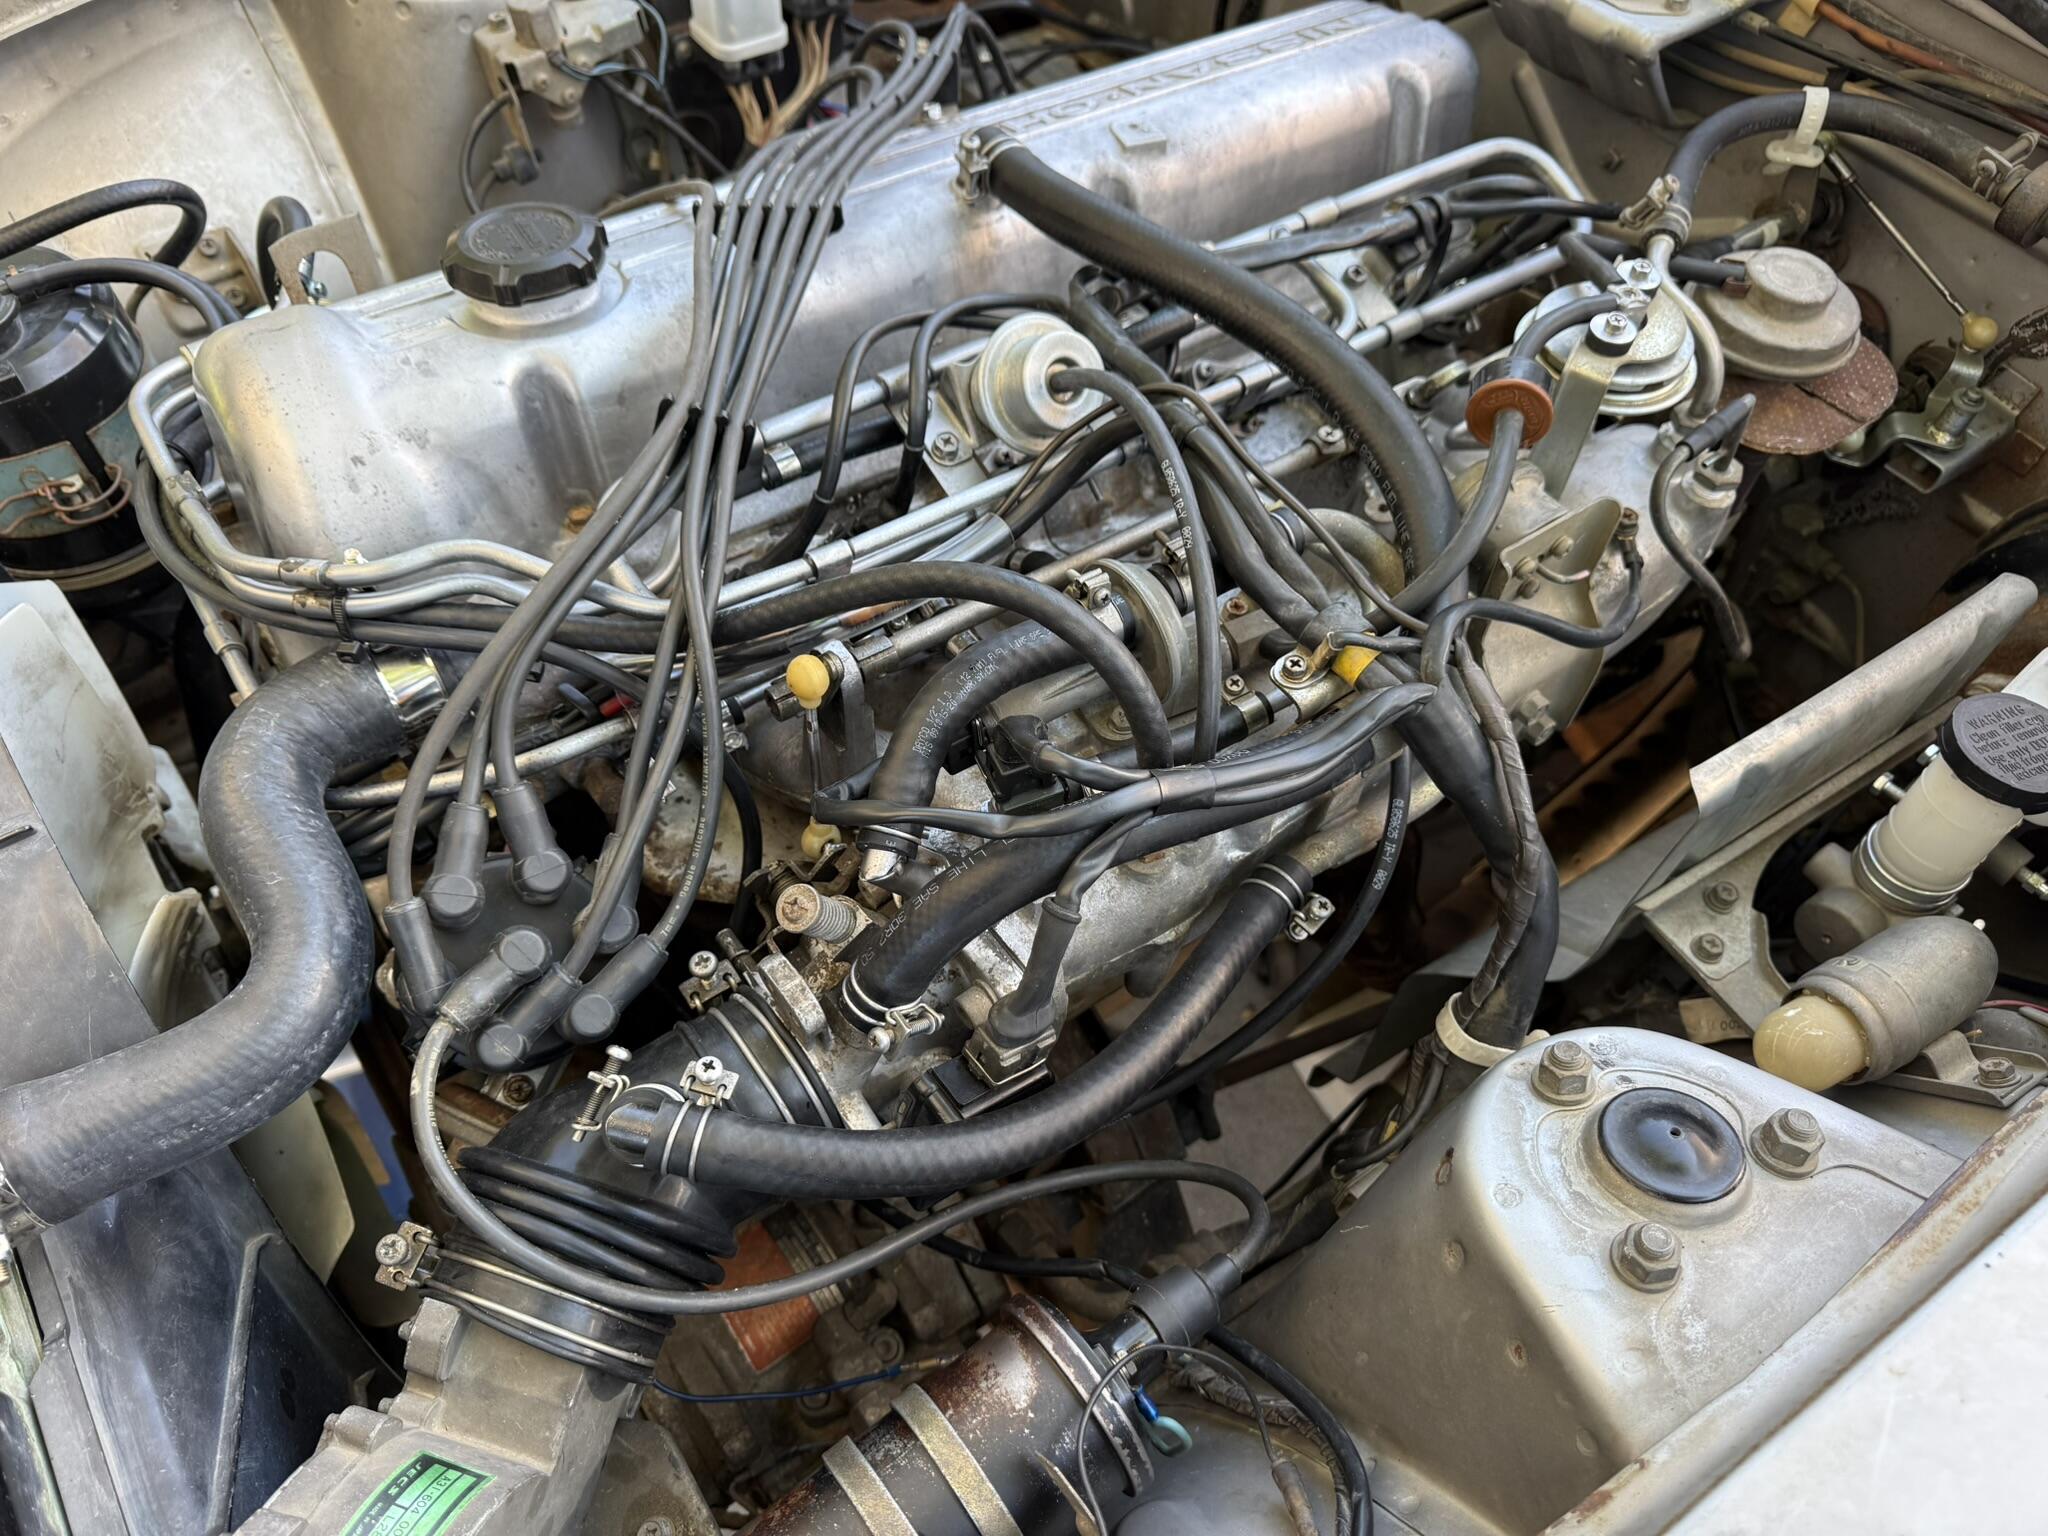
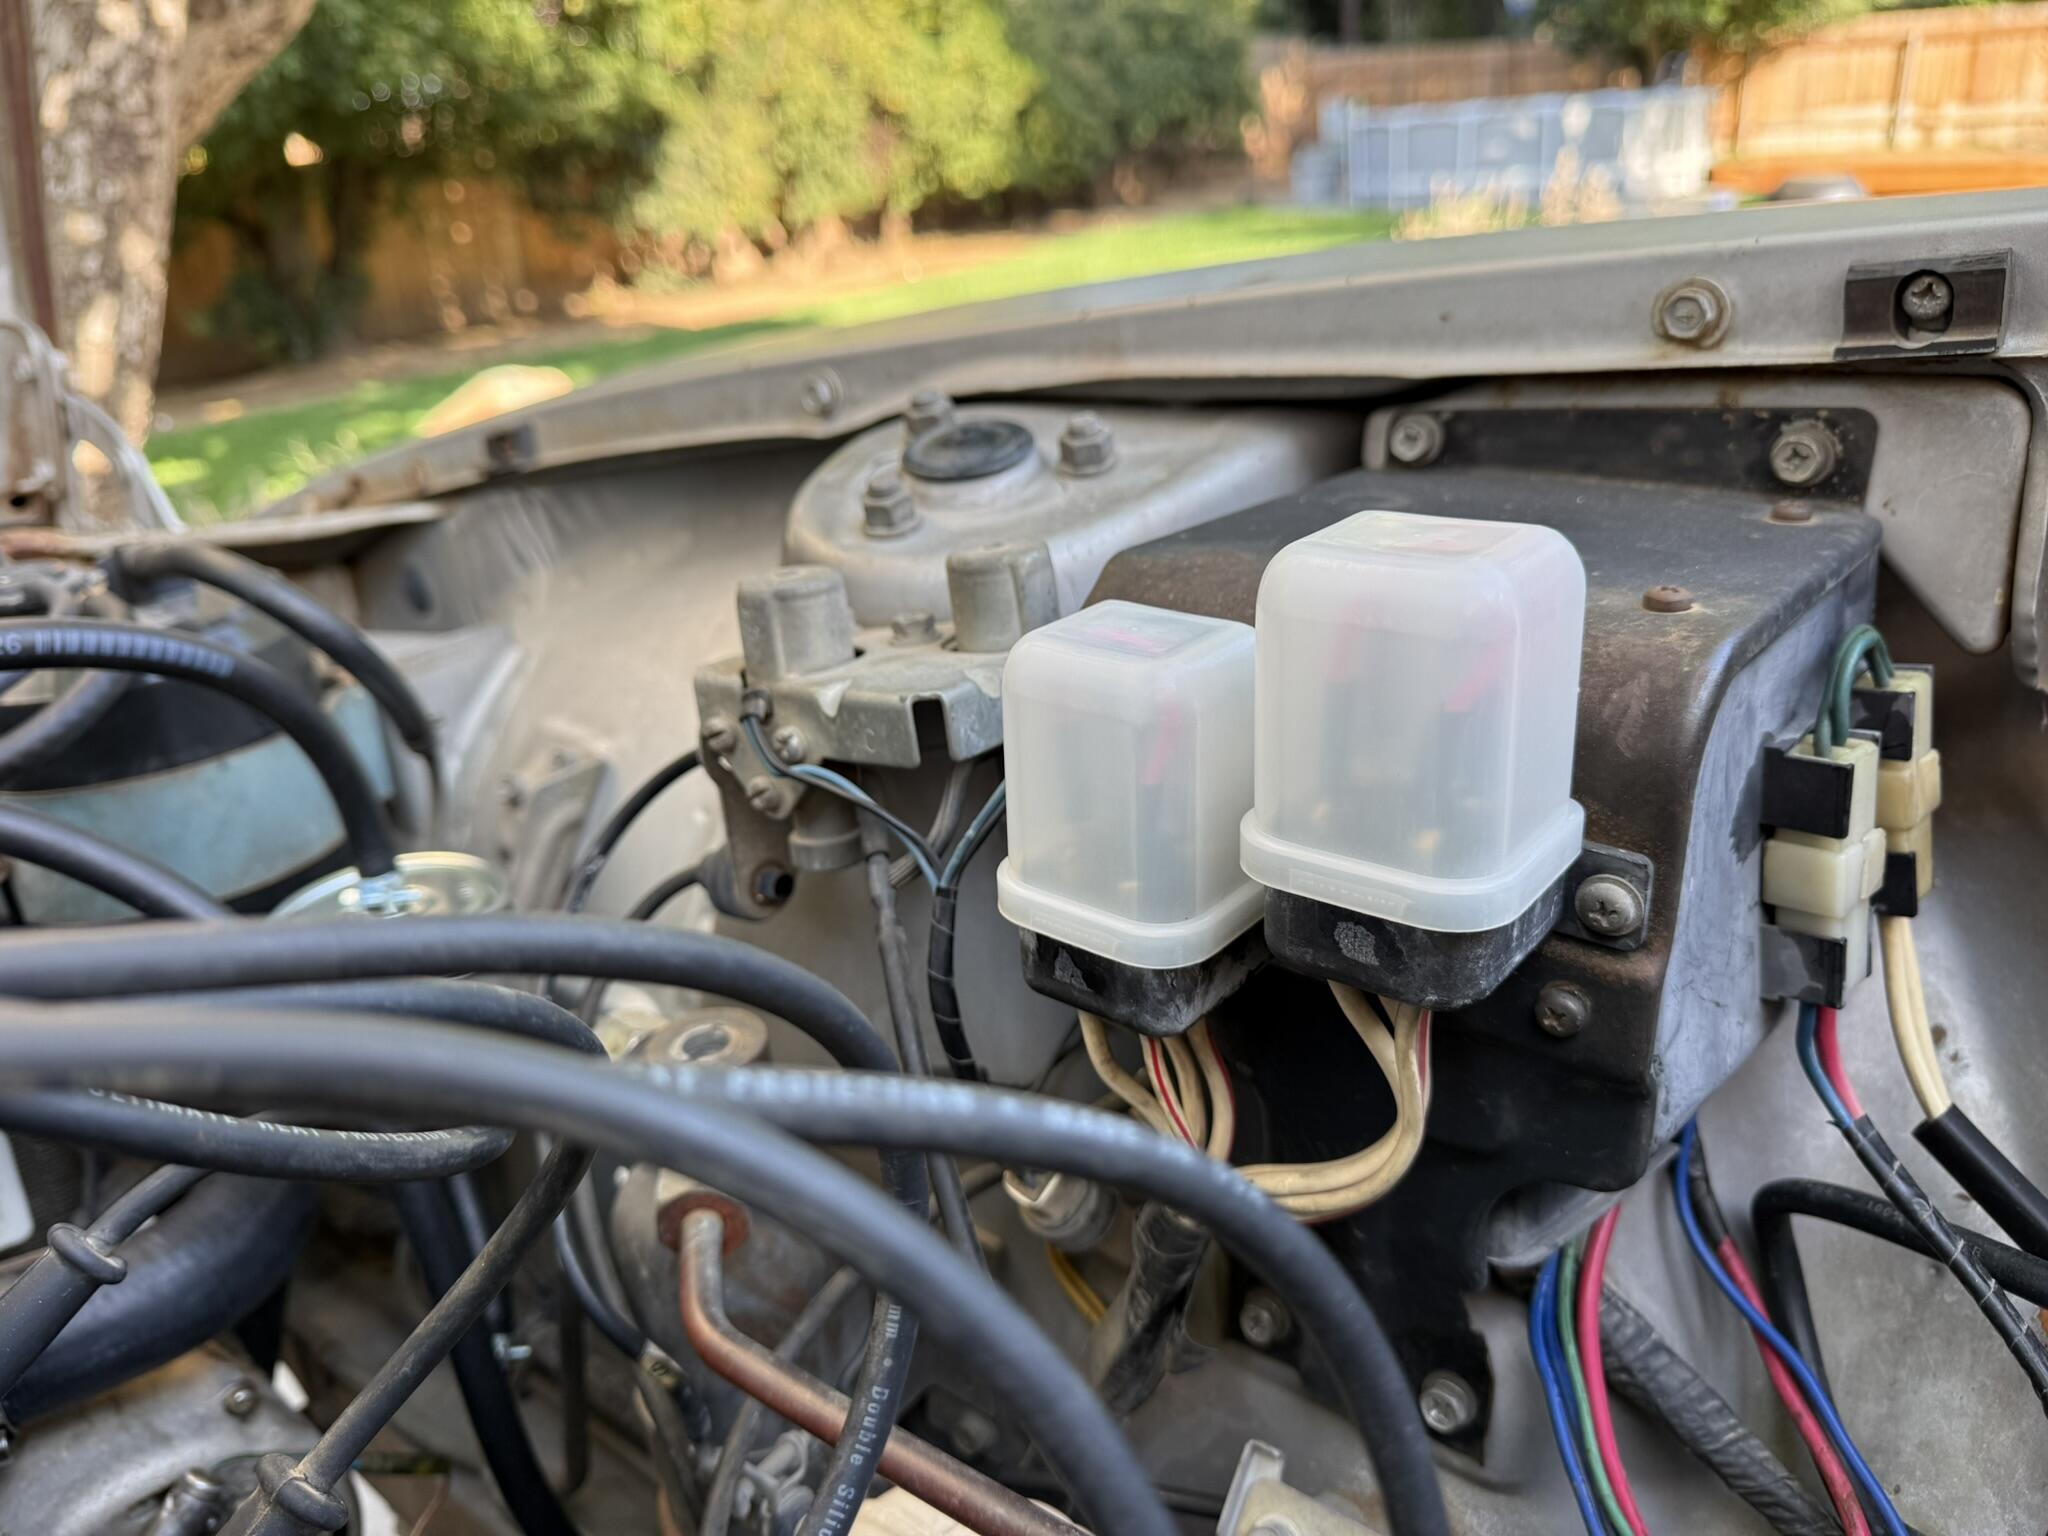
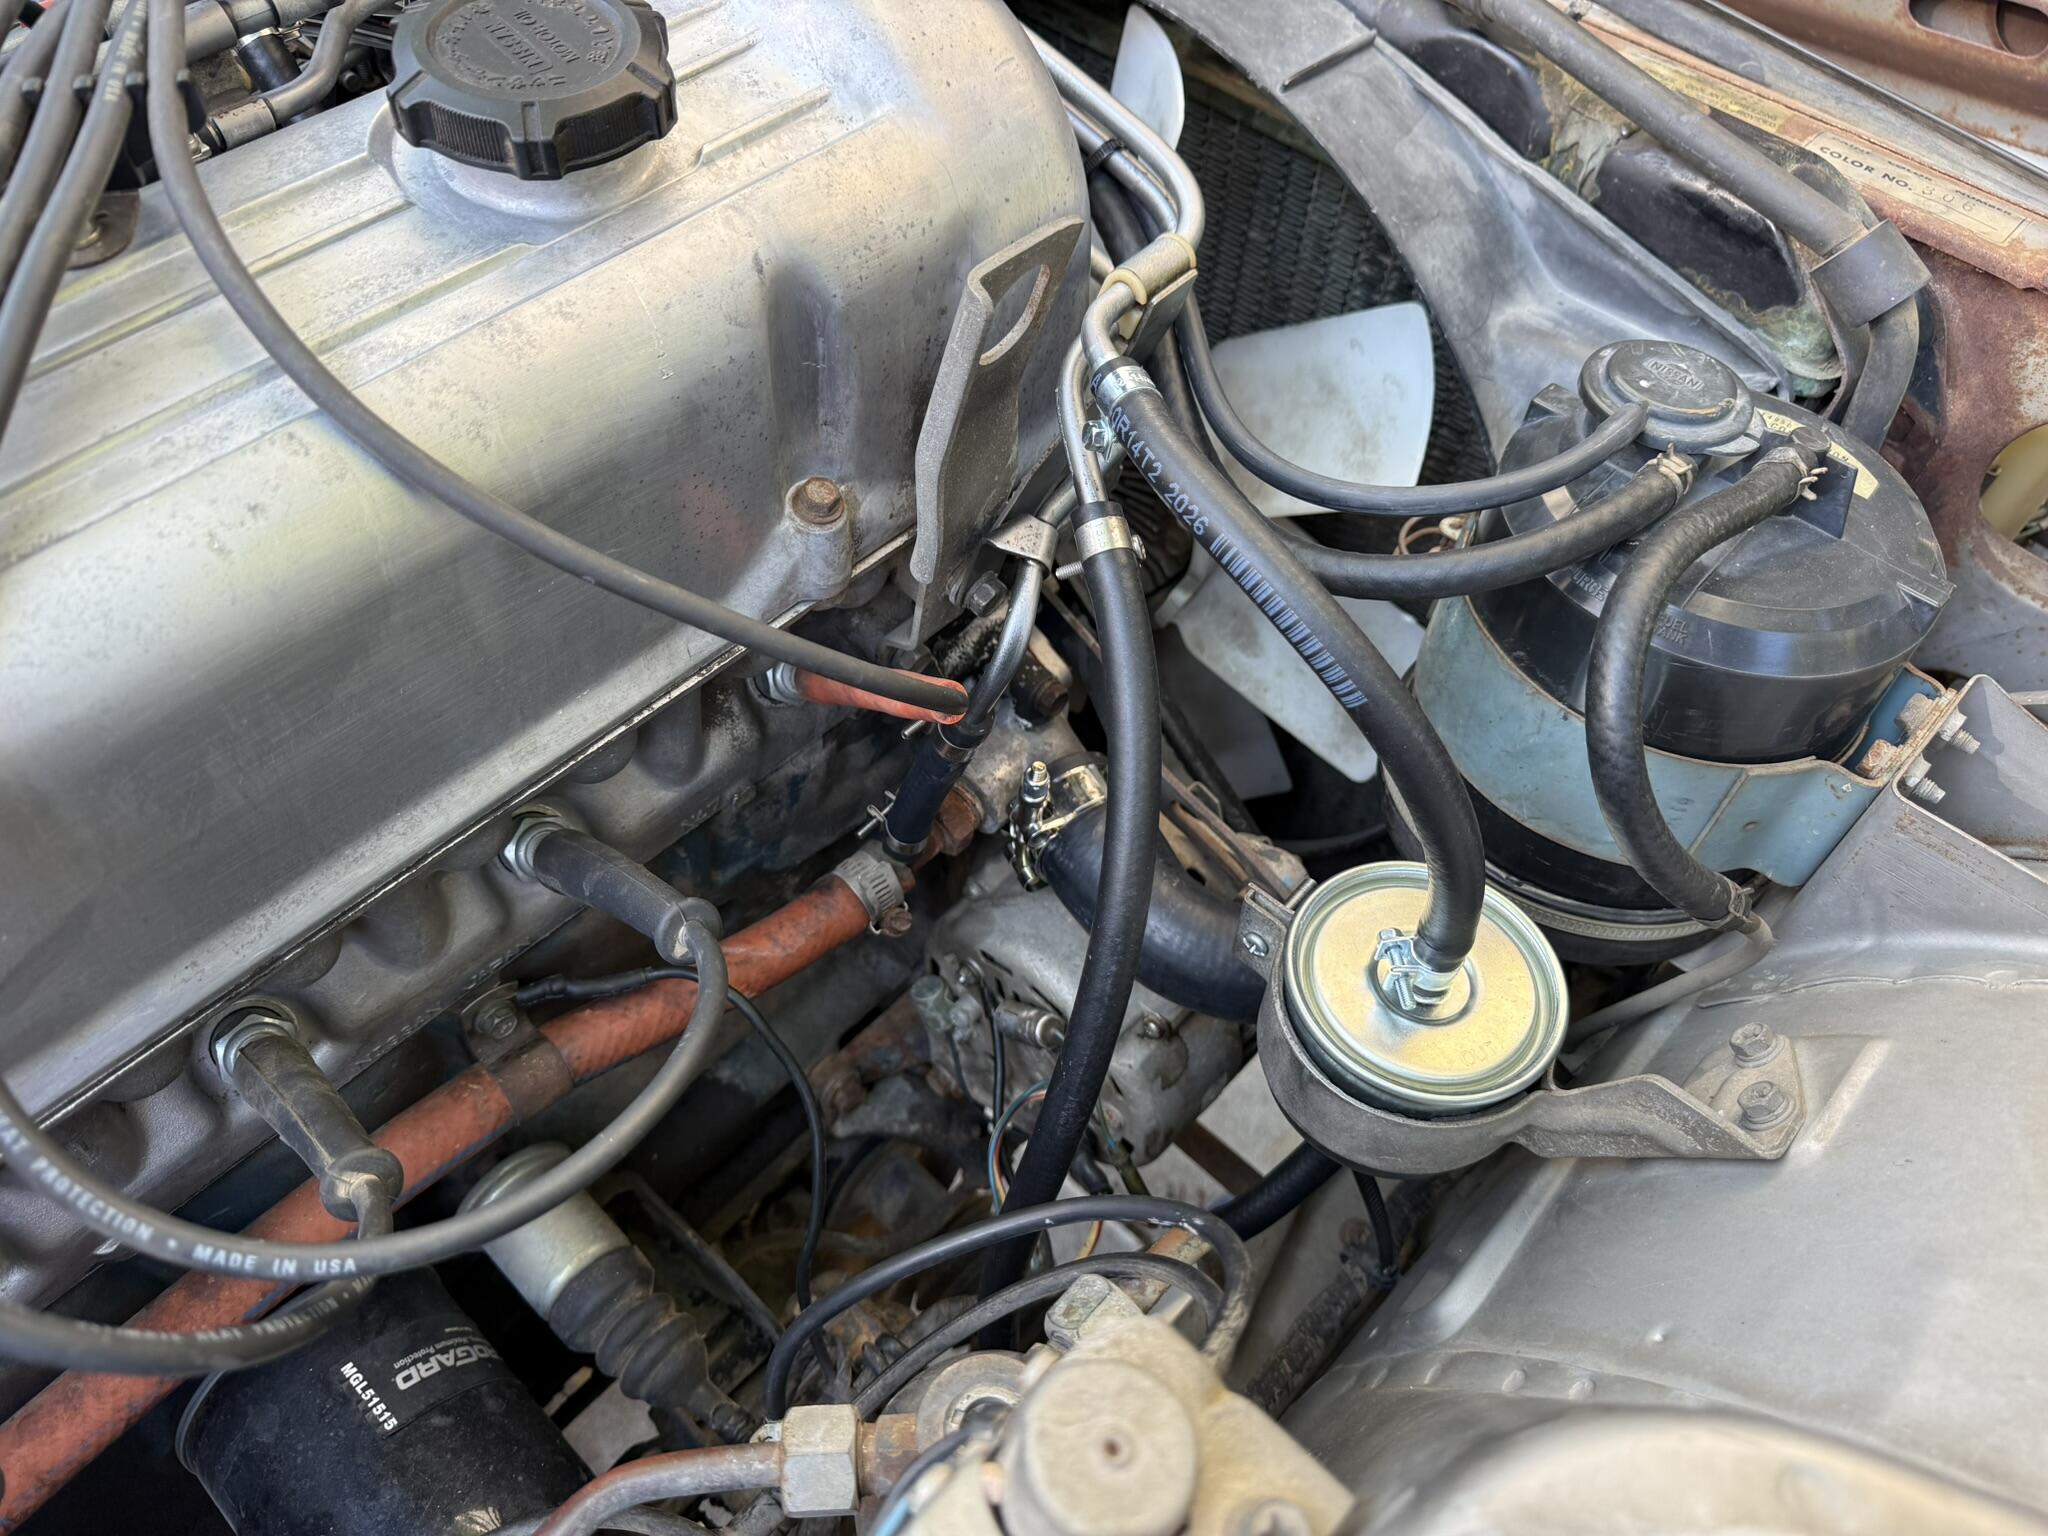
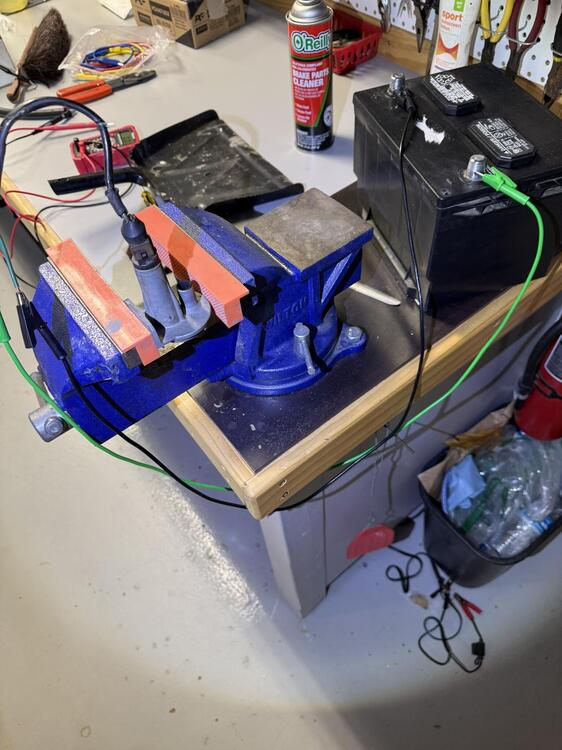
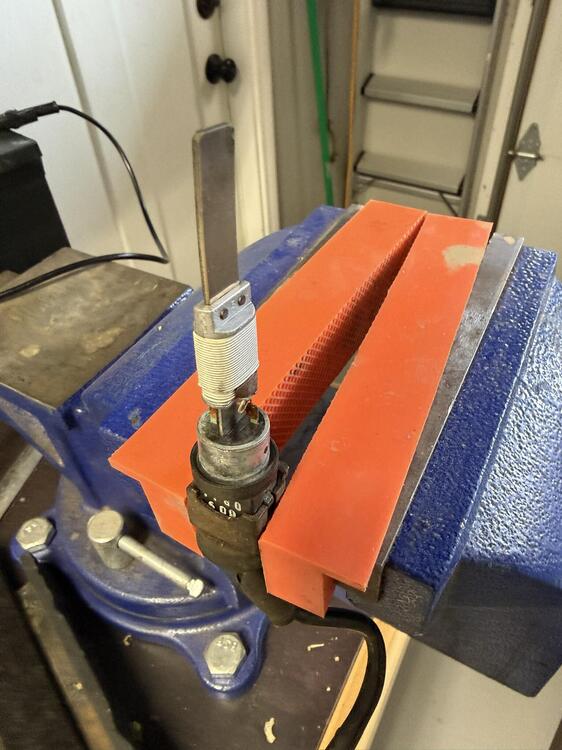
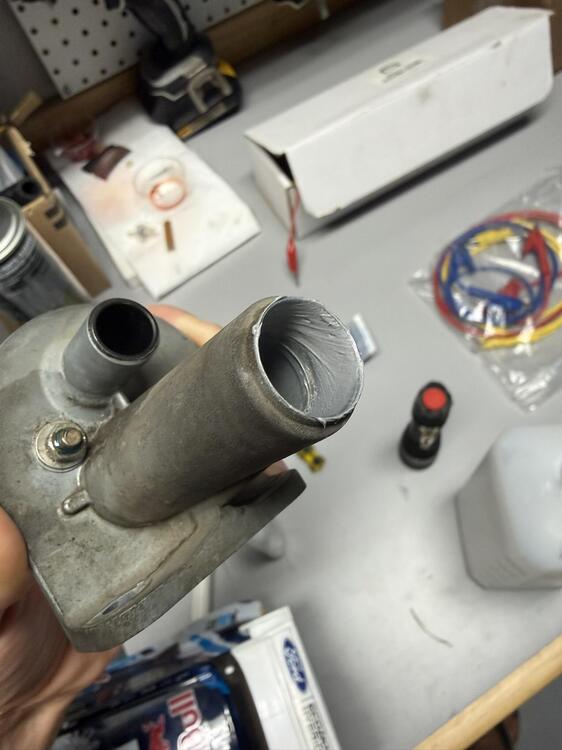
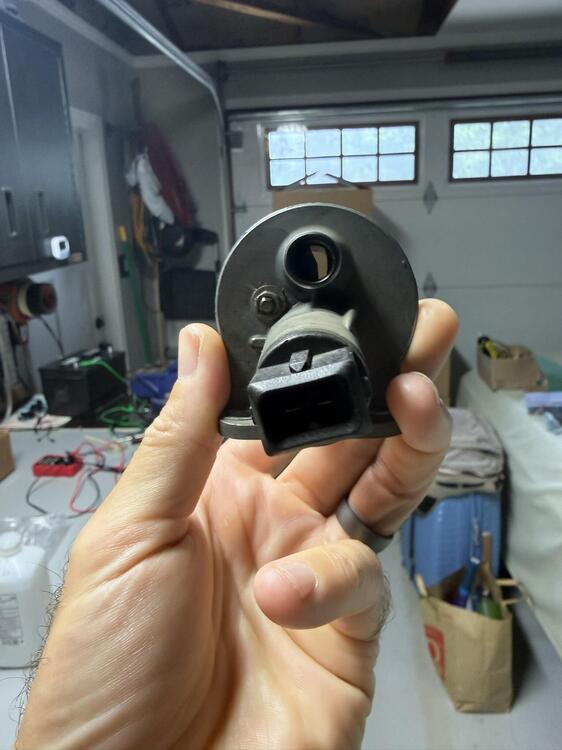
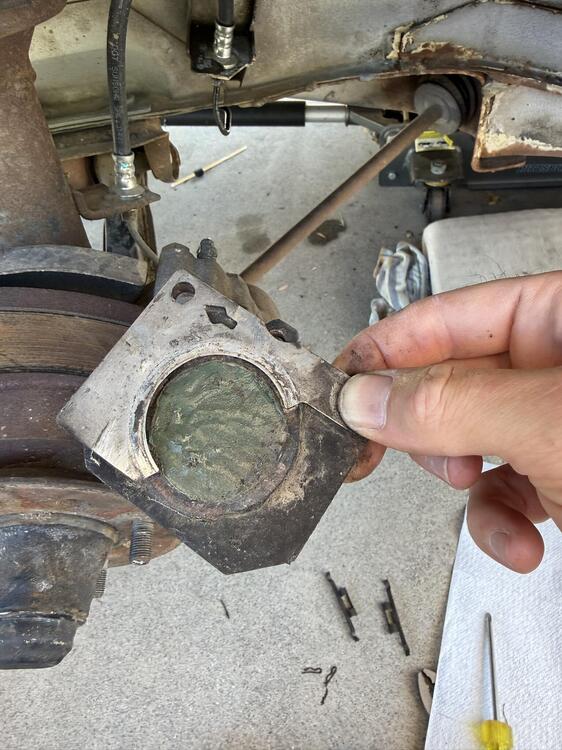
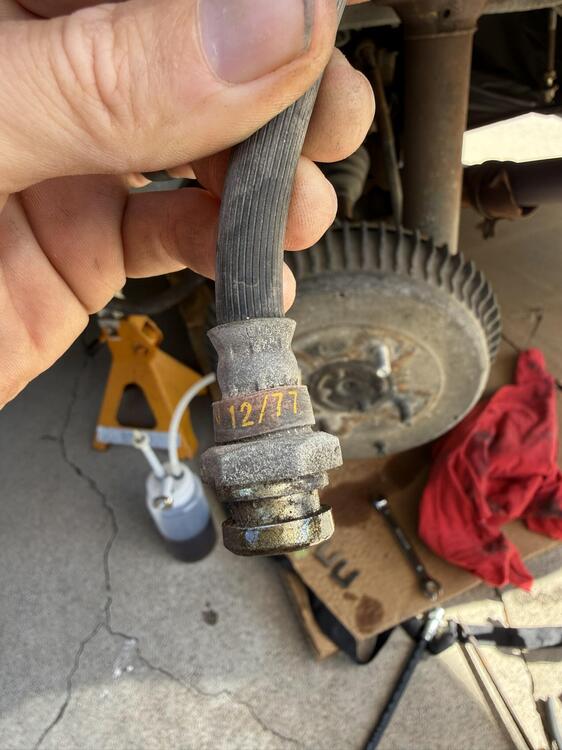
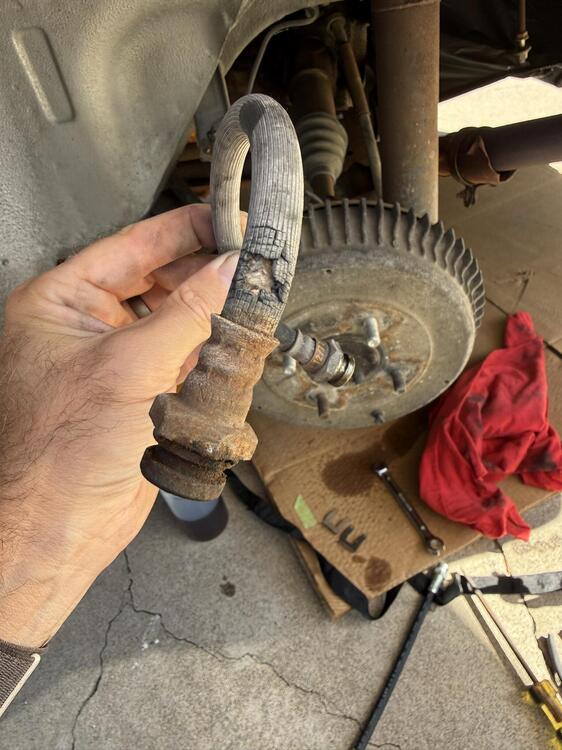
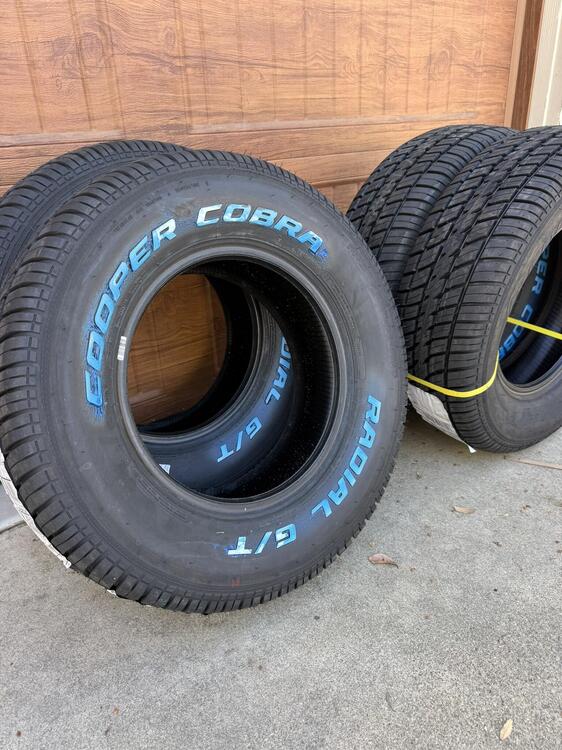
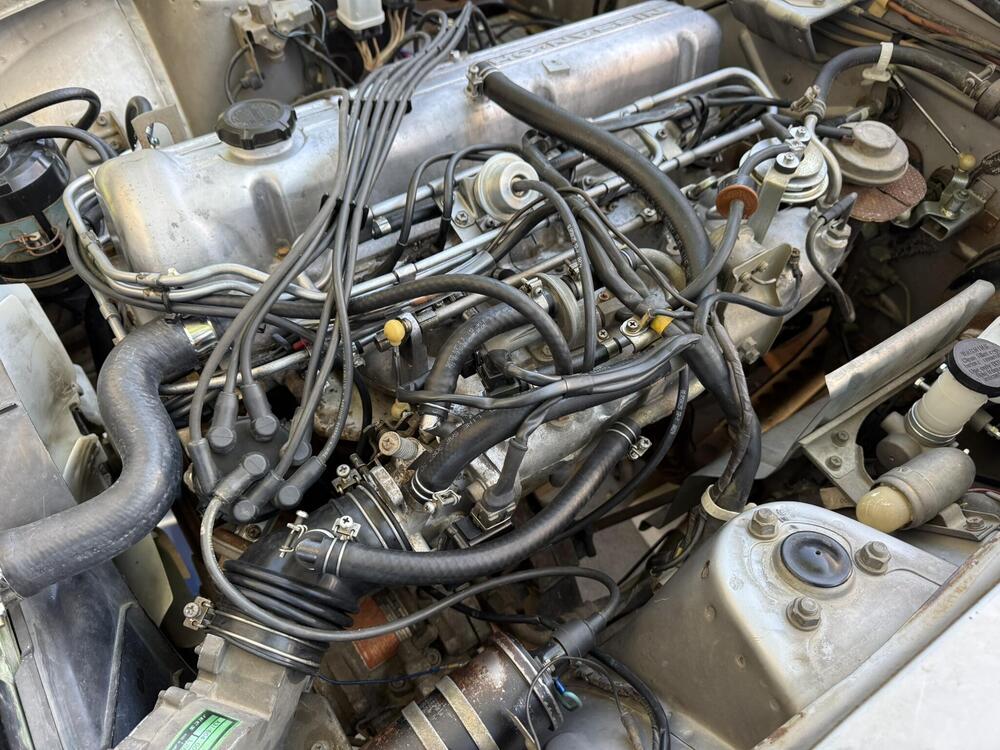
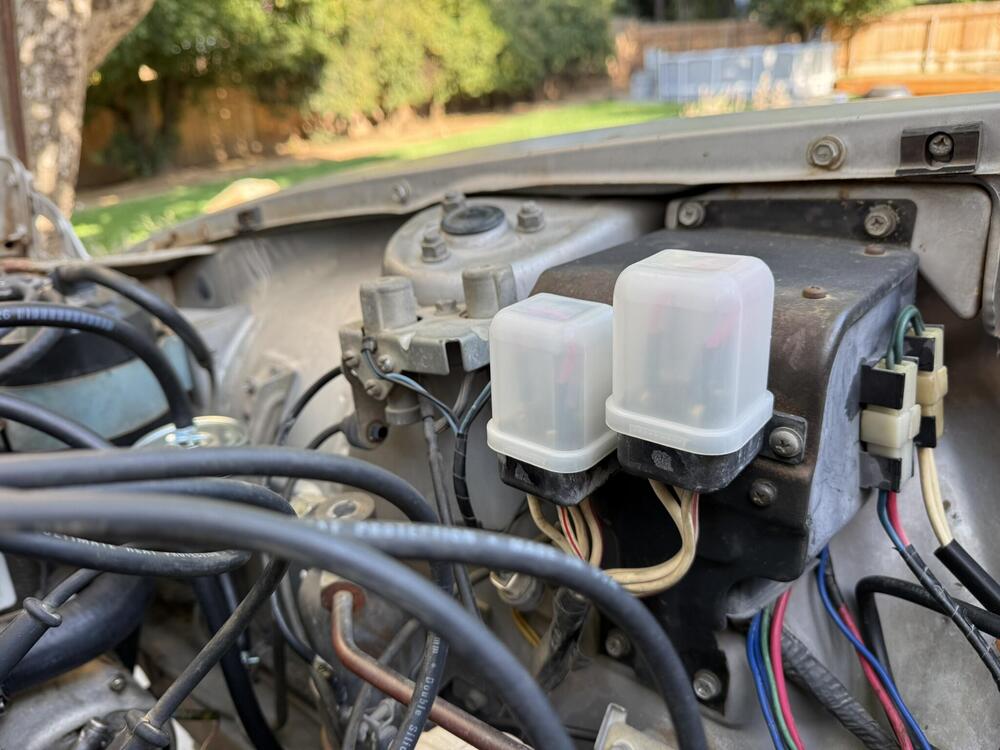
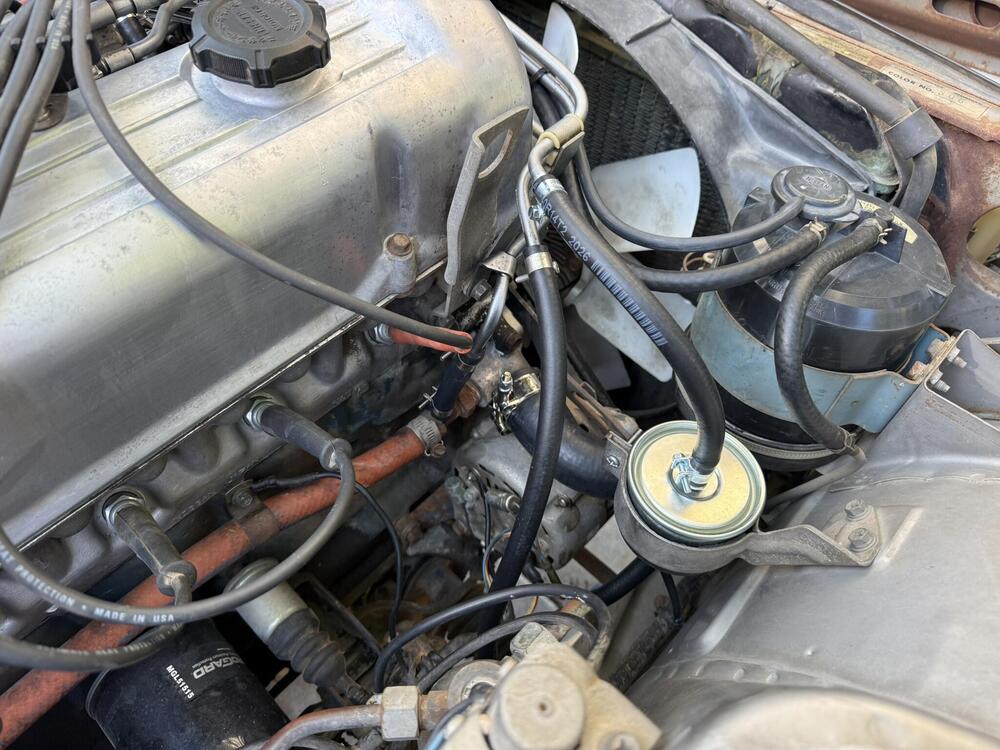
We're making progress... I've begun putting everything back together in the engine compartment. It's looking good. As I was putting the AAR valve back on, I figured I should test it to verify operation. Glad I did, because it wasn't working right. Even after putting it in the freezer for an hour, the shutter stayed closed. Hit it with brake cleaner, still nothing. Everything I ready online indicated that's there really isn't a good way to disassemble and repair these things, so I was getting ready to purchase another used on on ebay. But then, I wiggled the heater plug and it slid right out. I think the problem was that the heater was not "clocked" correctly. The bimetal switch was moving down and to the right, instead of up and to right as it should be. Anyway, it's working properly now. Bench testing... Bench testing the internal heater. Kinda interesting how these things work. It moves about half an inch either direction depending on temperature. This acts as the "lever" that opens and closes the AAR valve. Primative, but it works. I added a couple targeted drops of marvel mystery oil and the shutter action was moving very smoothly. A little bit of RTV to glue the heater back into place... Note the slight "up and to the right" angle of the heater. That matters. It also matters which side is up versus down because of the movement of the bimetal strip. As you can see here, it was about 80 degrees in my garage, so the valve should be open as you can see. As the temp increases, the valve becomes fully closed. Cold = open, Hot = closed, Mild = somewhere in the middle. Anyways, it works now, back on the engine it goes! Engine is pretty much back together, looking much more tidy and cleaned up. New rubber AFM elbow, all new vacuum and emissions hoses, new radiator hoses, correct spec coil installed, all electrical connections cleaned up. She should be ready to go. Correct fusible links installed... New fuel lines (yes, fuel injection rated) and a bosch filter... But alas, apparently the STOP is as important as the GO. Brakes. The front rubber lines had been replaced at some point. They looked OK, but the rears, yikes. I decided to just replace them all. Front brake pads have very little meat left on them. I kinda wonder if they're original. They have this green paint circle. Anyone know? Rear rubber brake lines were original. 12/77. Almost 50 years. Not bad. Prolly could've got a few more miles out of these...😜 Next thing on the list is to bleed the brakes, and get these bad boys mounted on the wheels, white letters facing out of course, for the added horsepower!
-
Zed, if you used 5/16” and didn’t have any leaks, that’s good enough for me! 😆
-
Thanks Zed, I'll carry on sans additional clamps. The connection feels very secure anyway👍
-
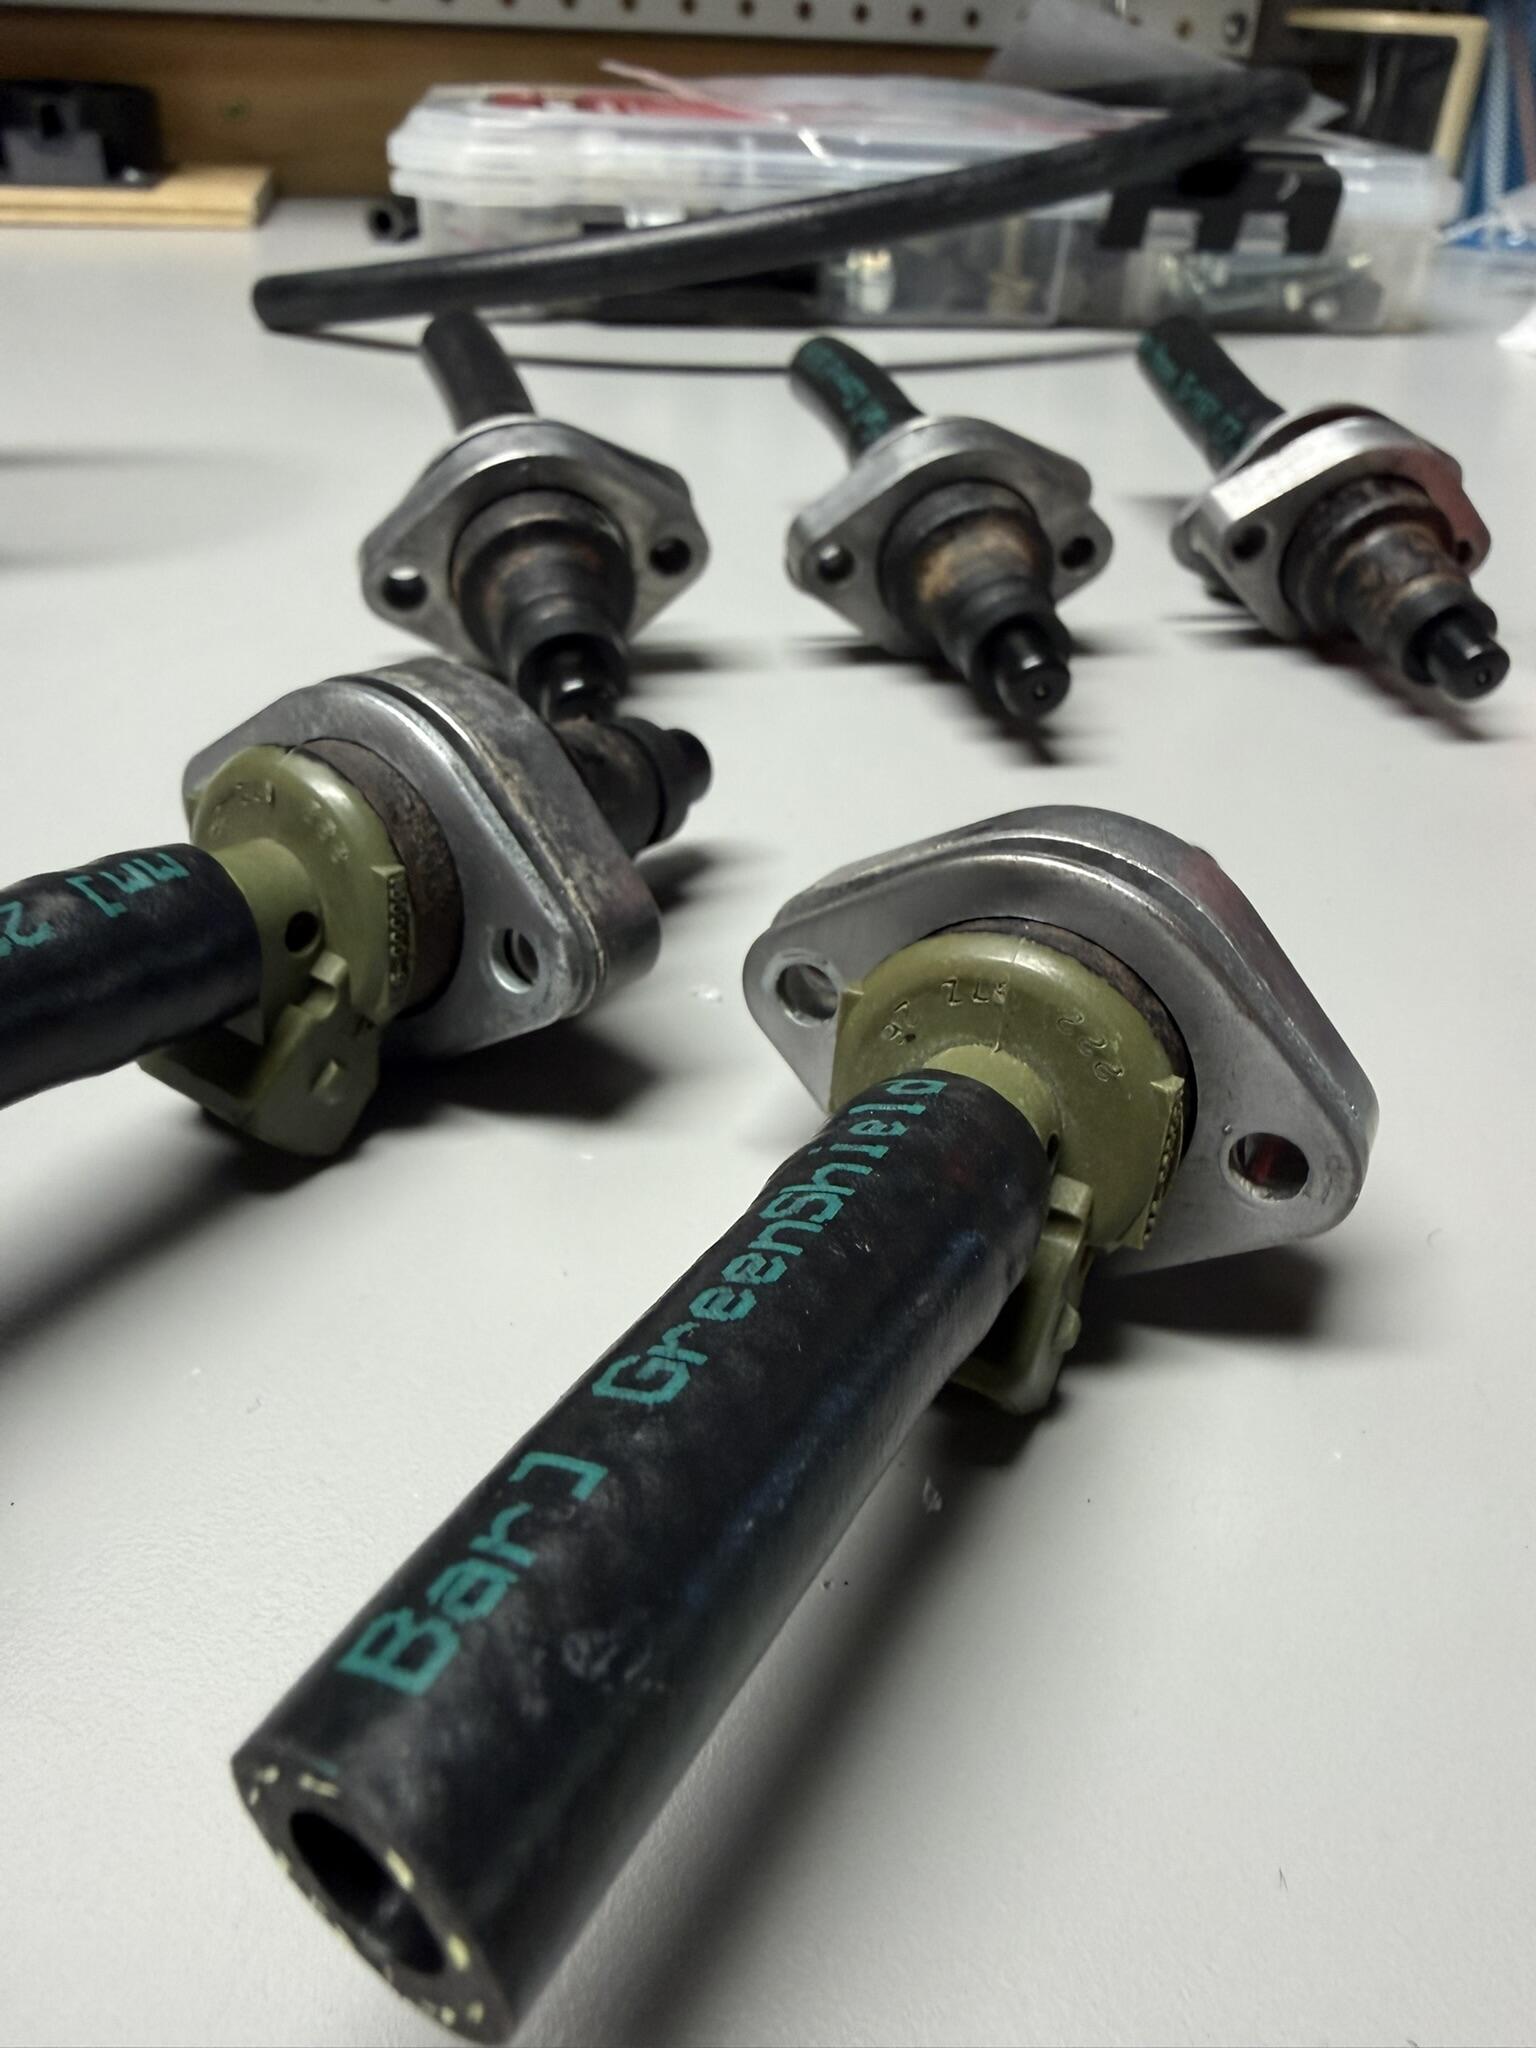
Question on my injectors… I’m not sure what OEM hose size they used (some say 7.5mm), but the only hose I could find is 5/16” fuel injection rated hose. This seems to be what everyone uses. I saw one forum post saying you should ADD another FI clamp to the barb fitting side of the injector. This would mean you end up with 2 clamps per injector, one at the injector barb/hose connection and one at the hose/fuel rail connection. OEM setup only had a clamp at the hose/fuel rail connection. For those who have replaced their injector hoses, what did you do?
-
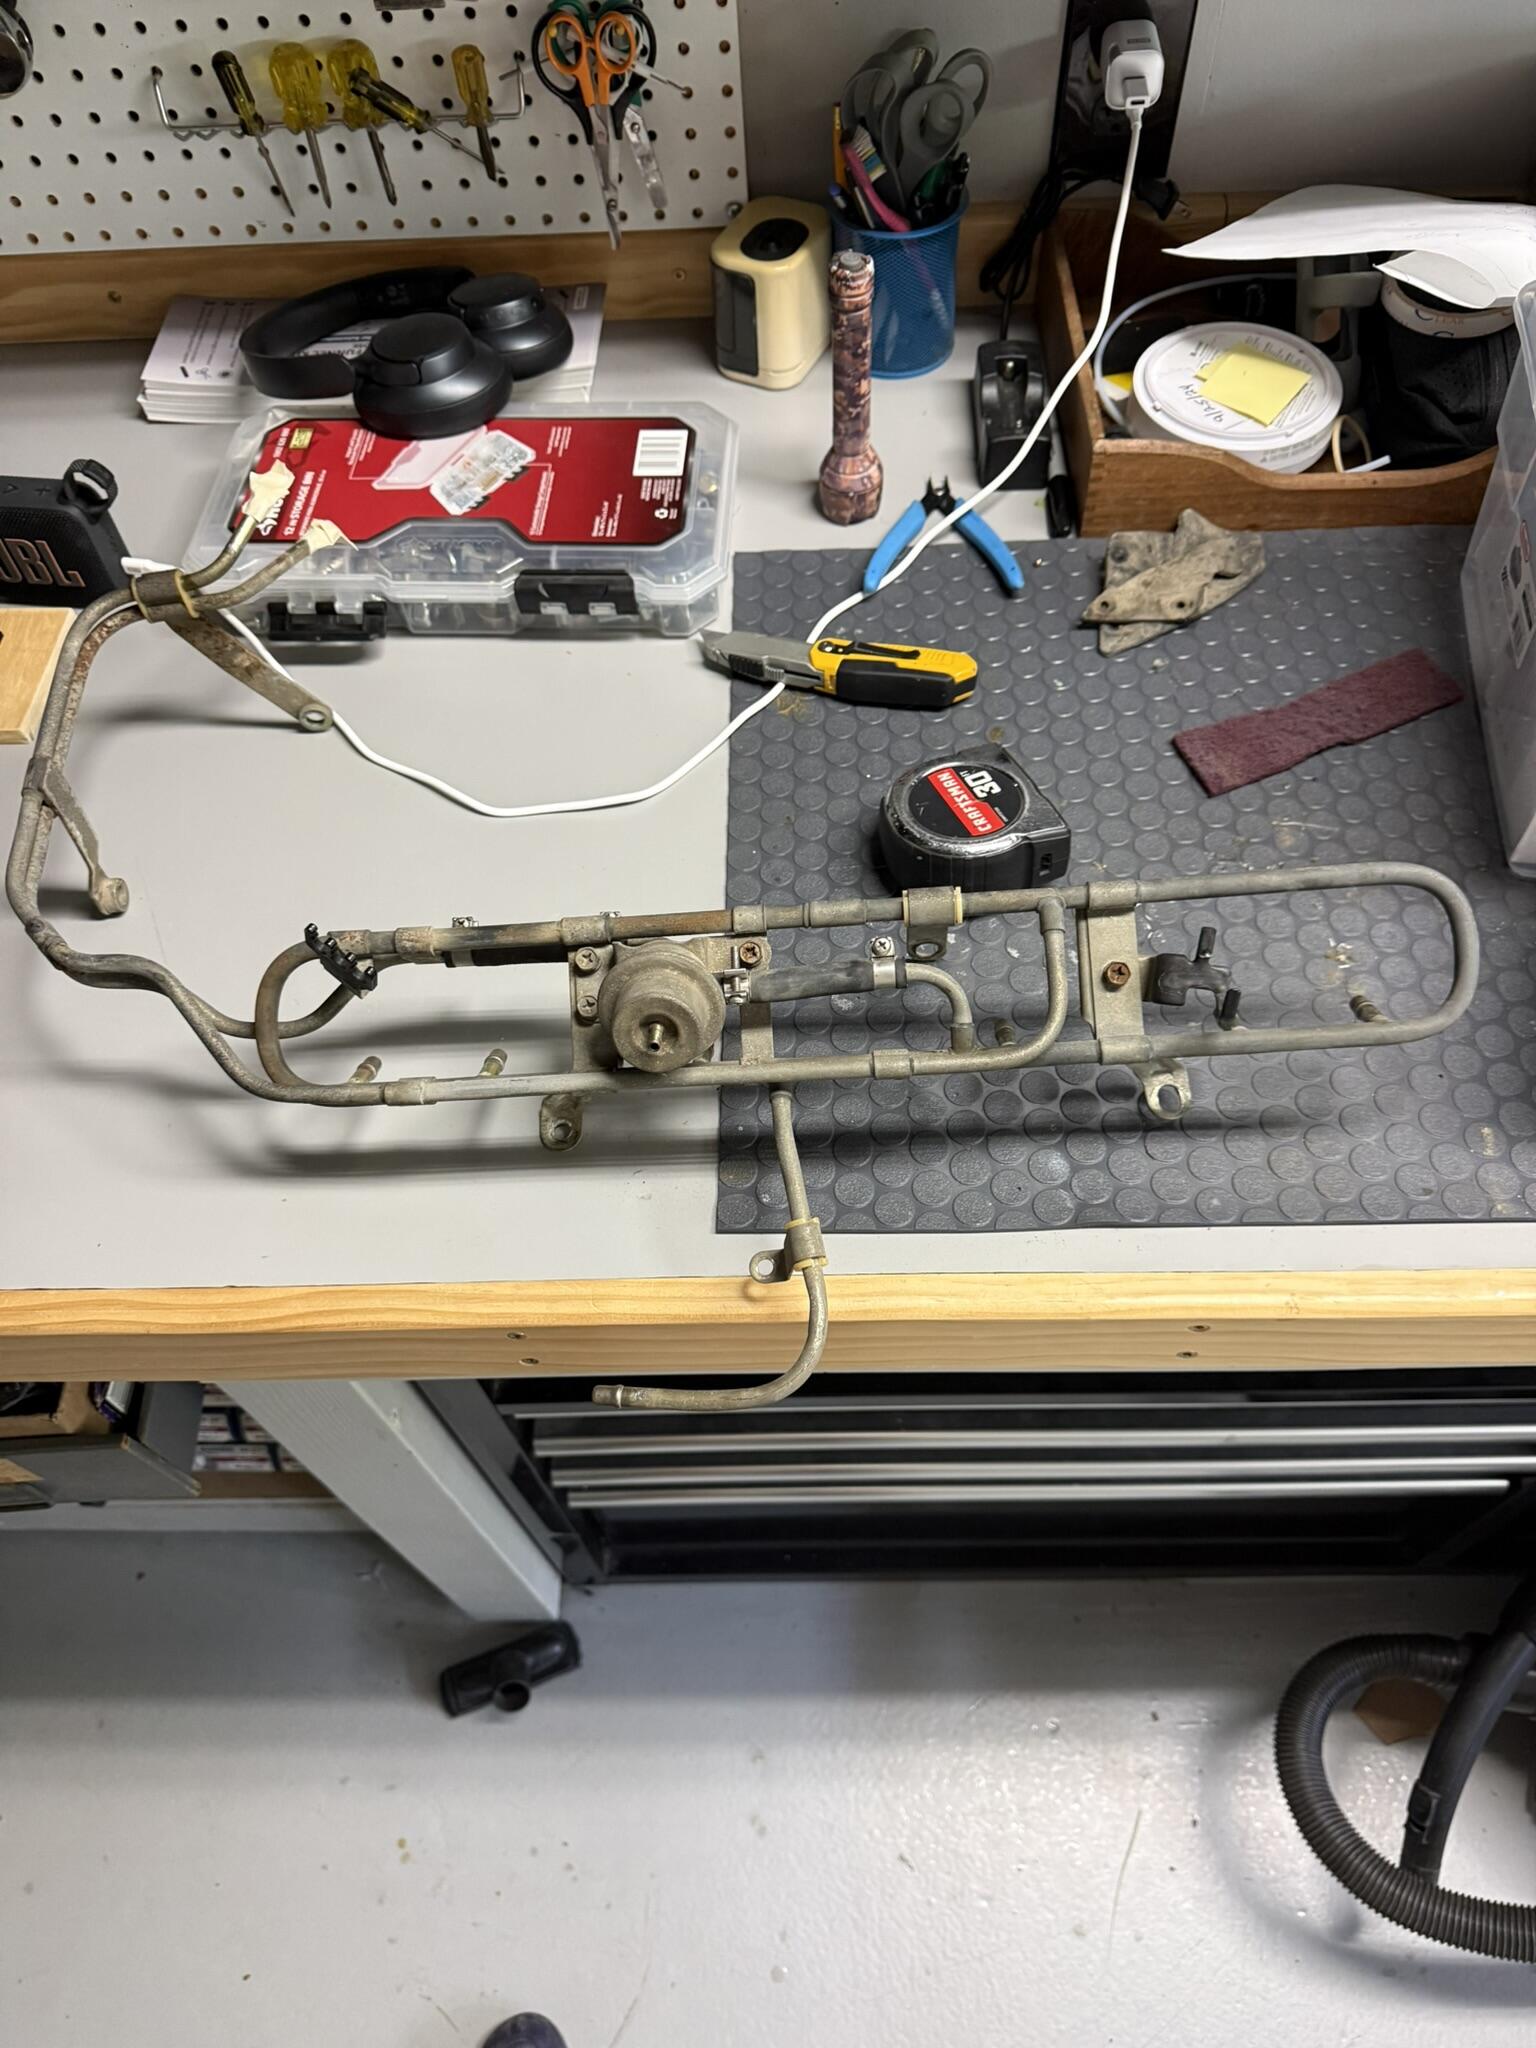
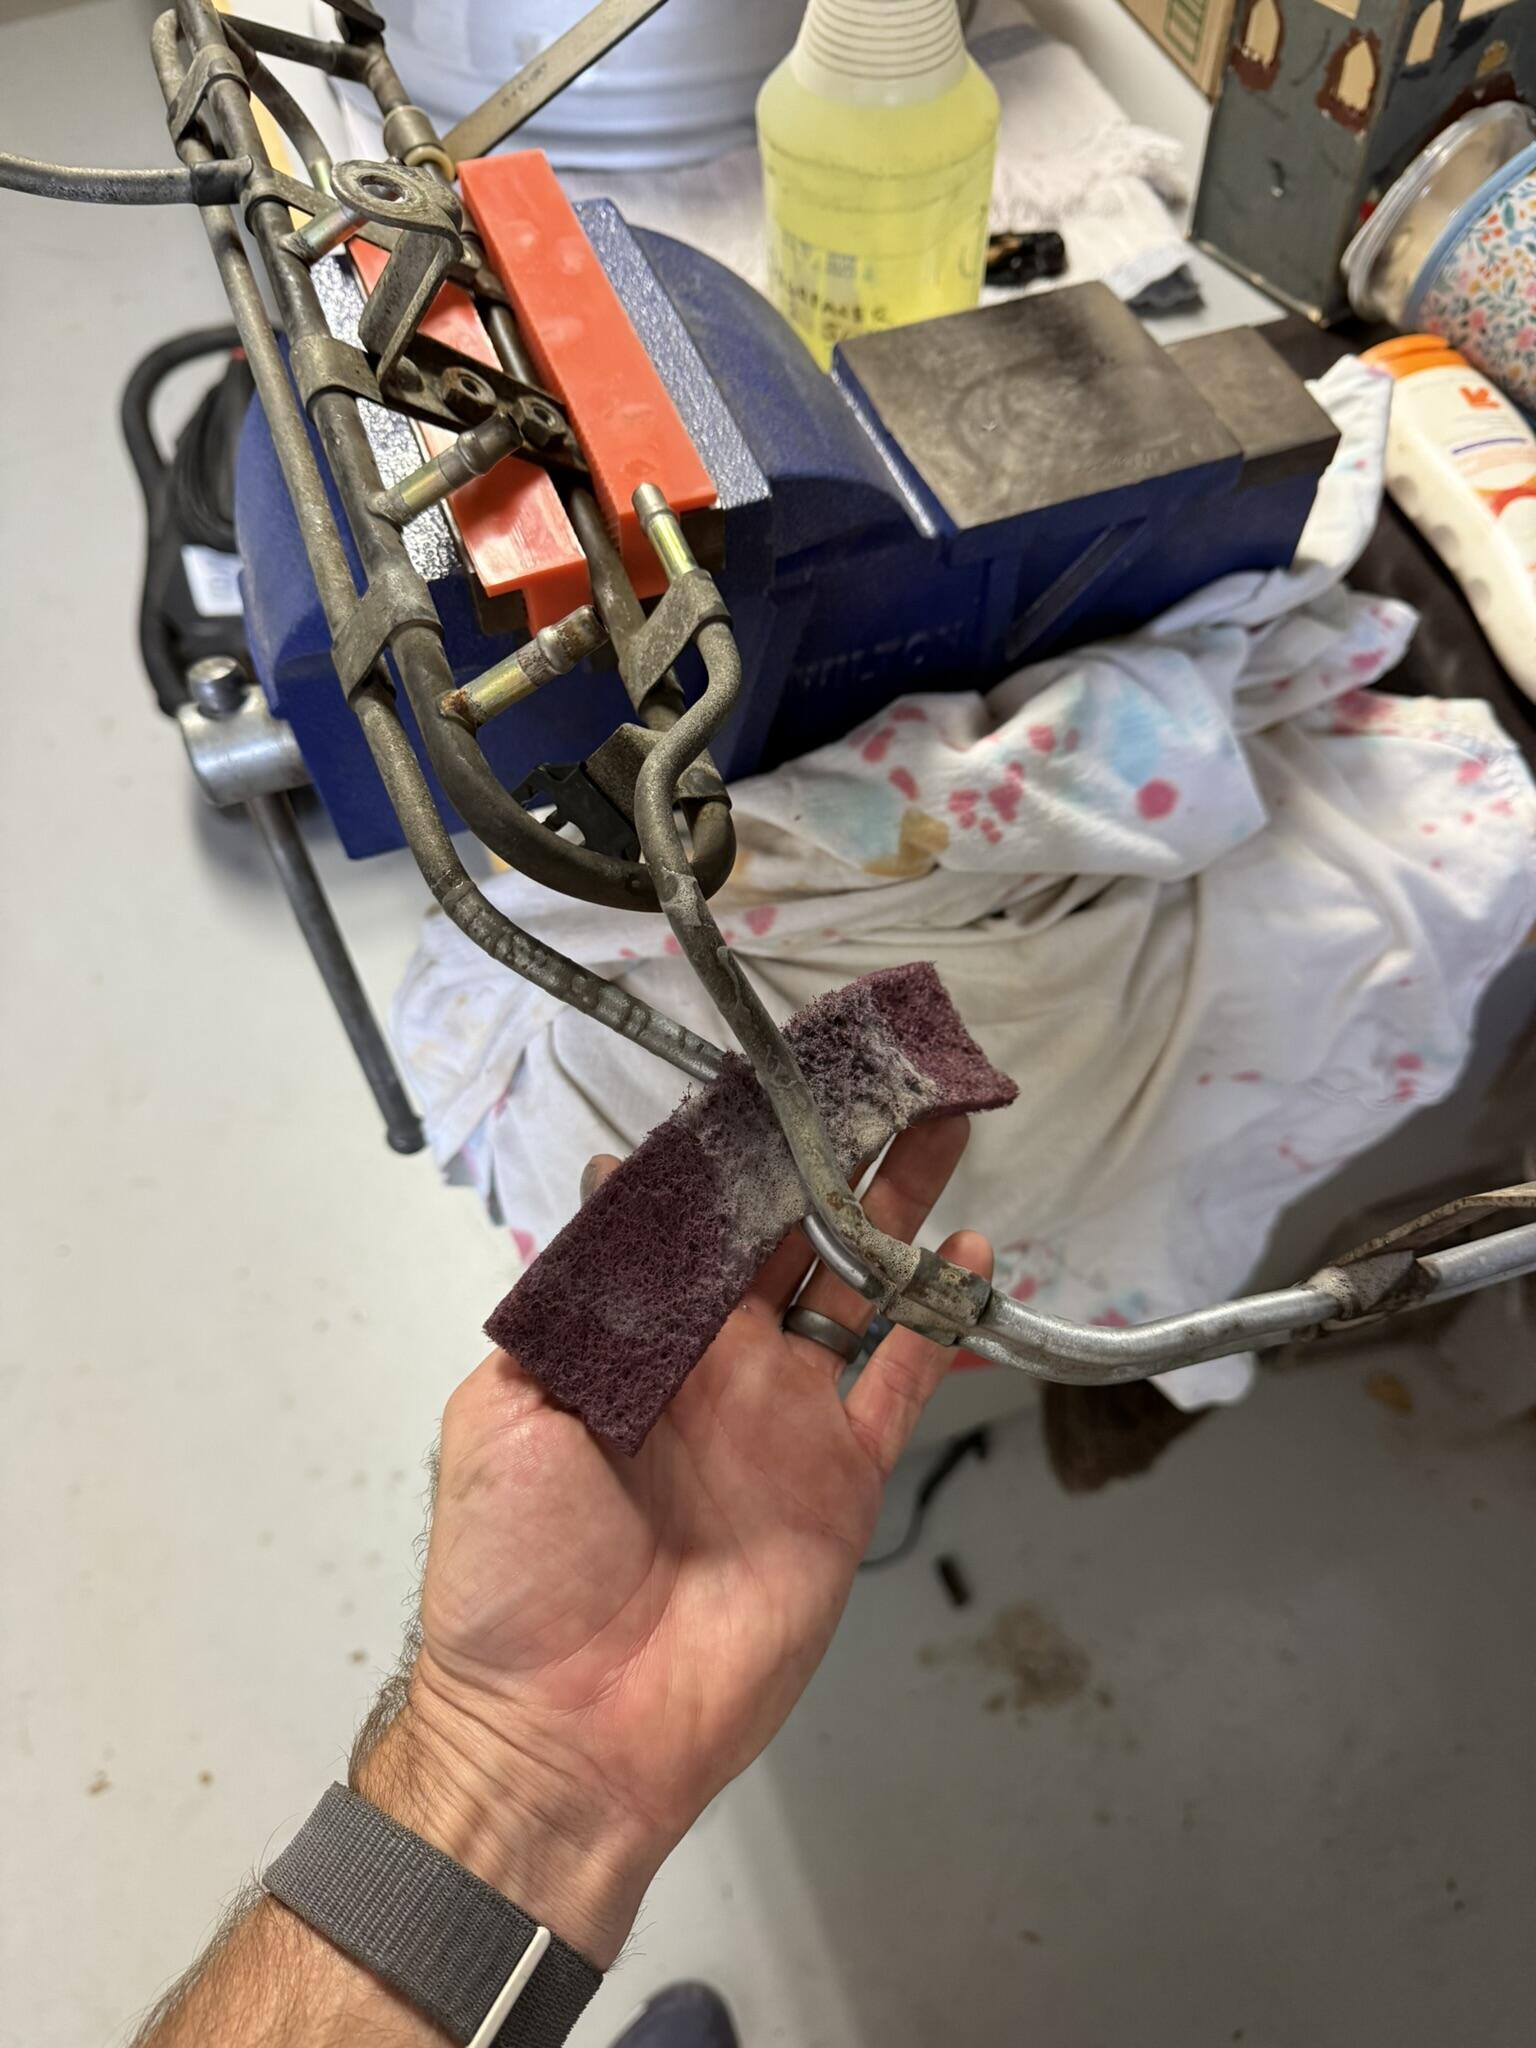
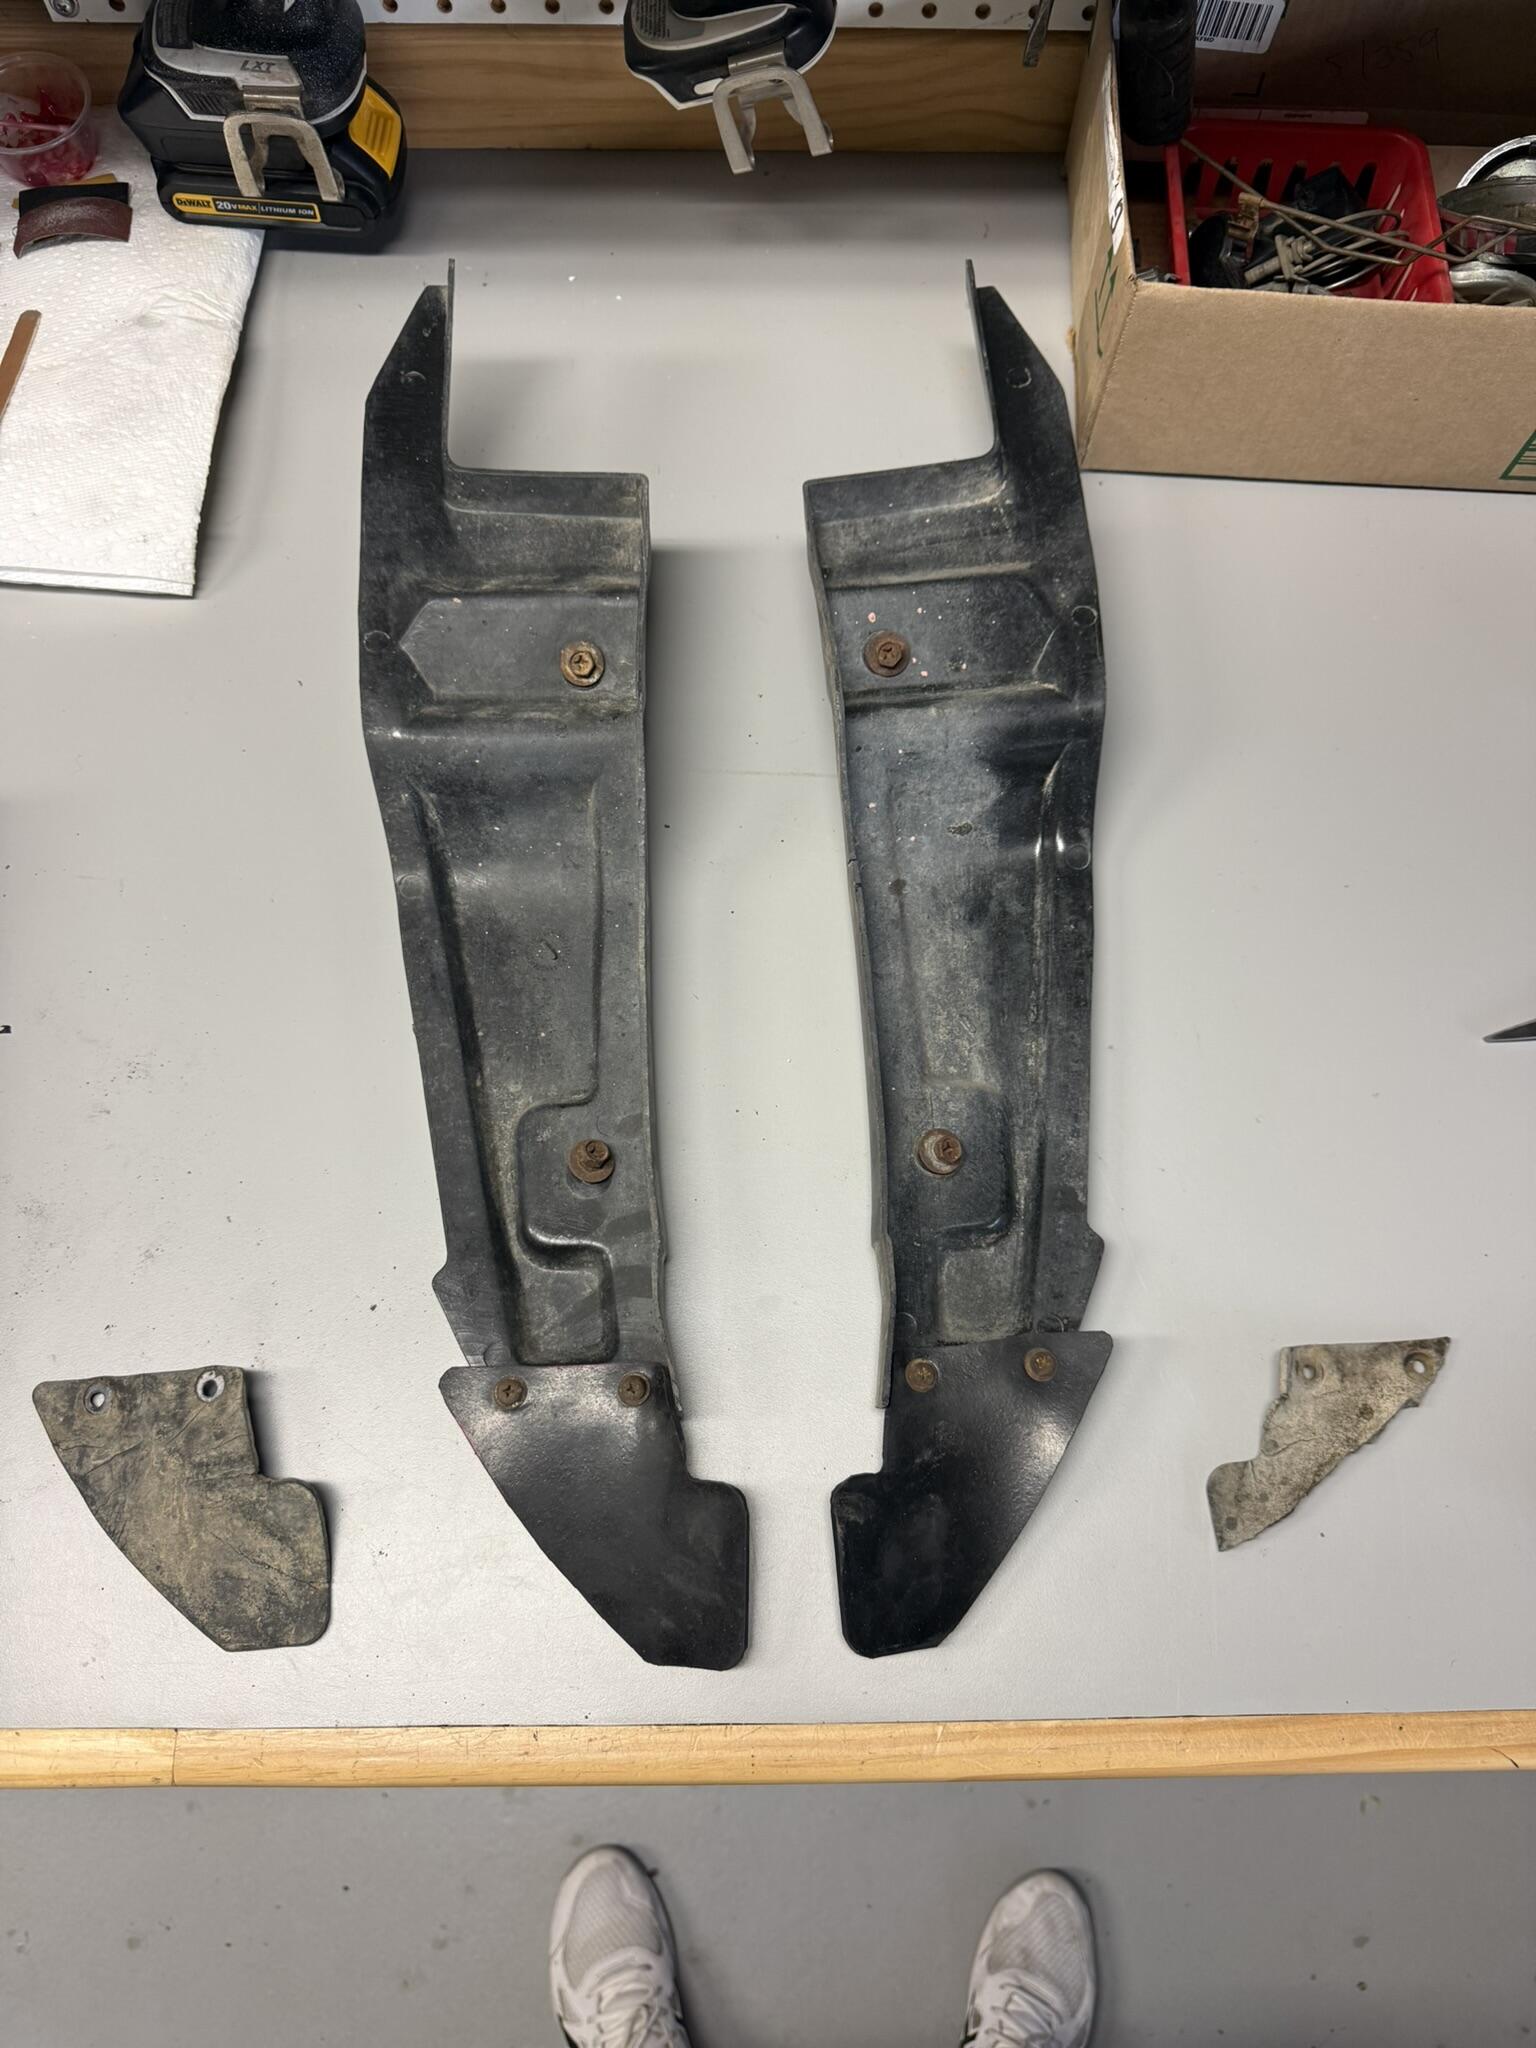
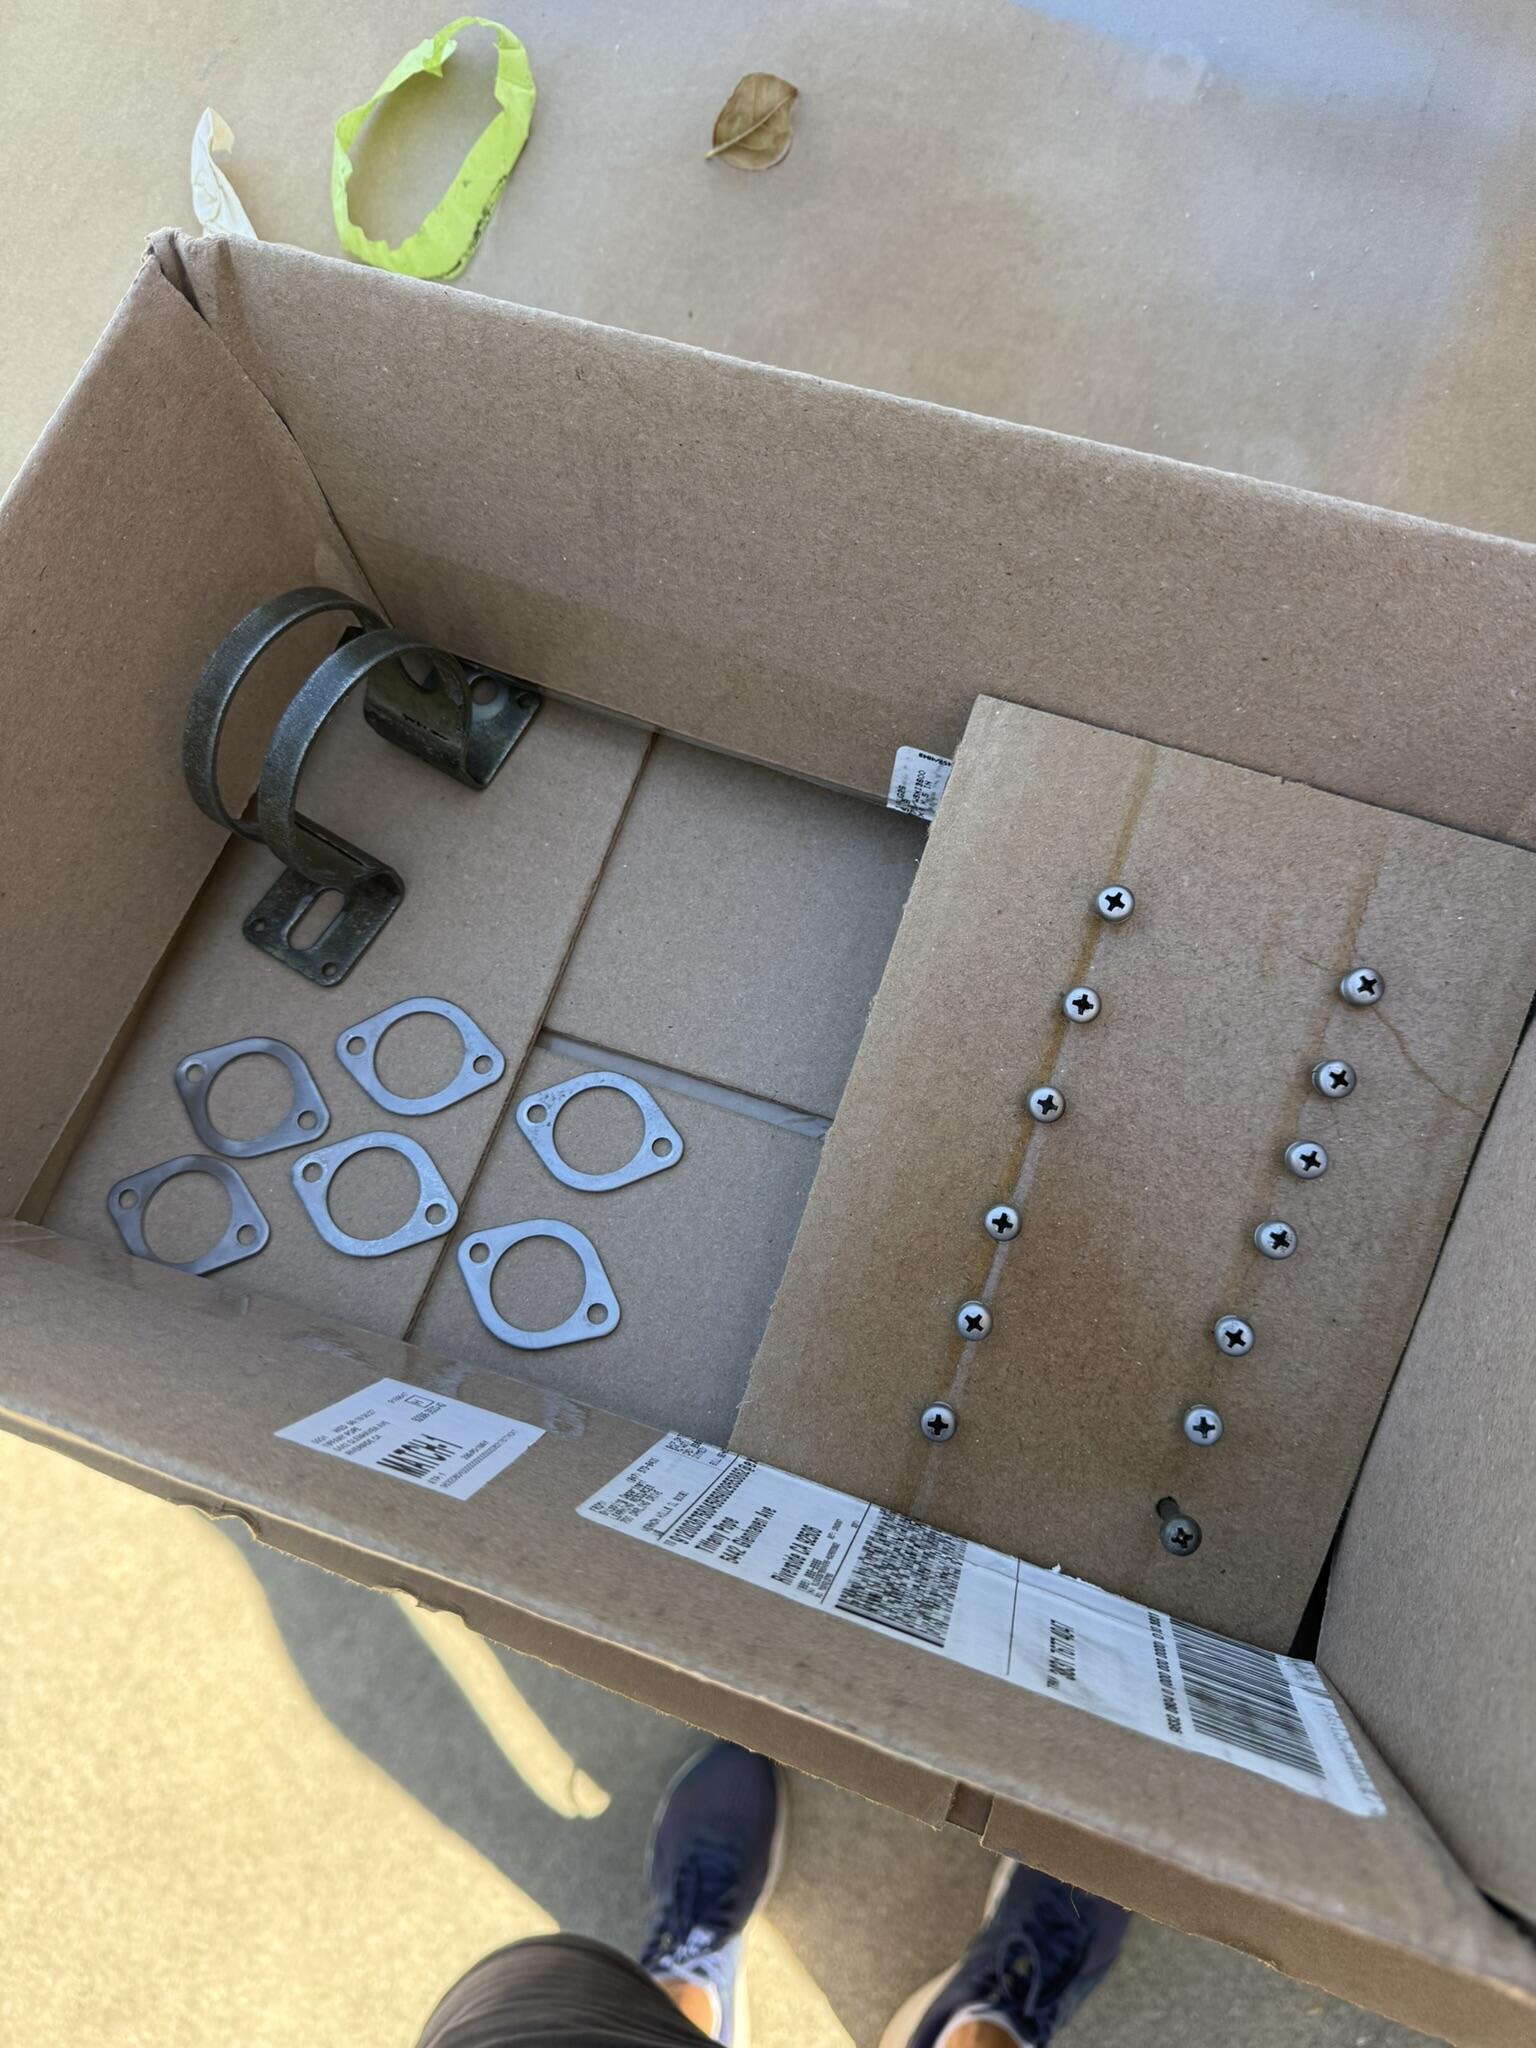
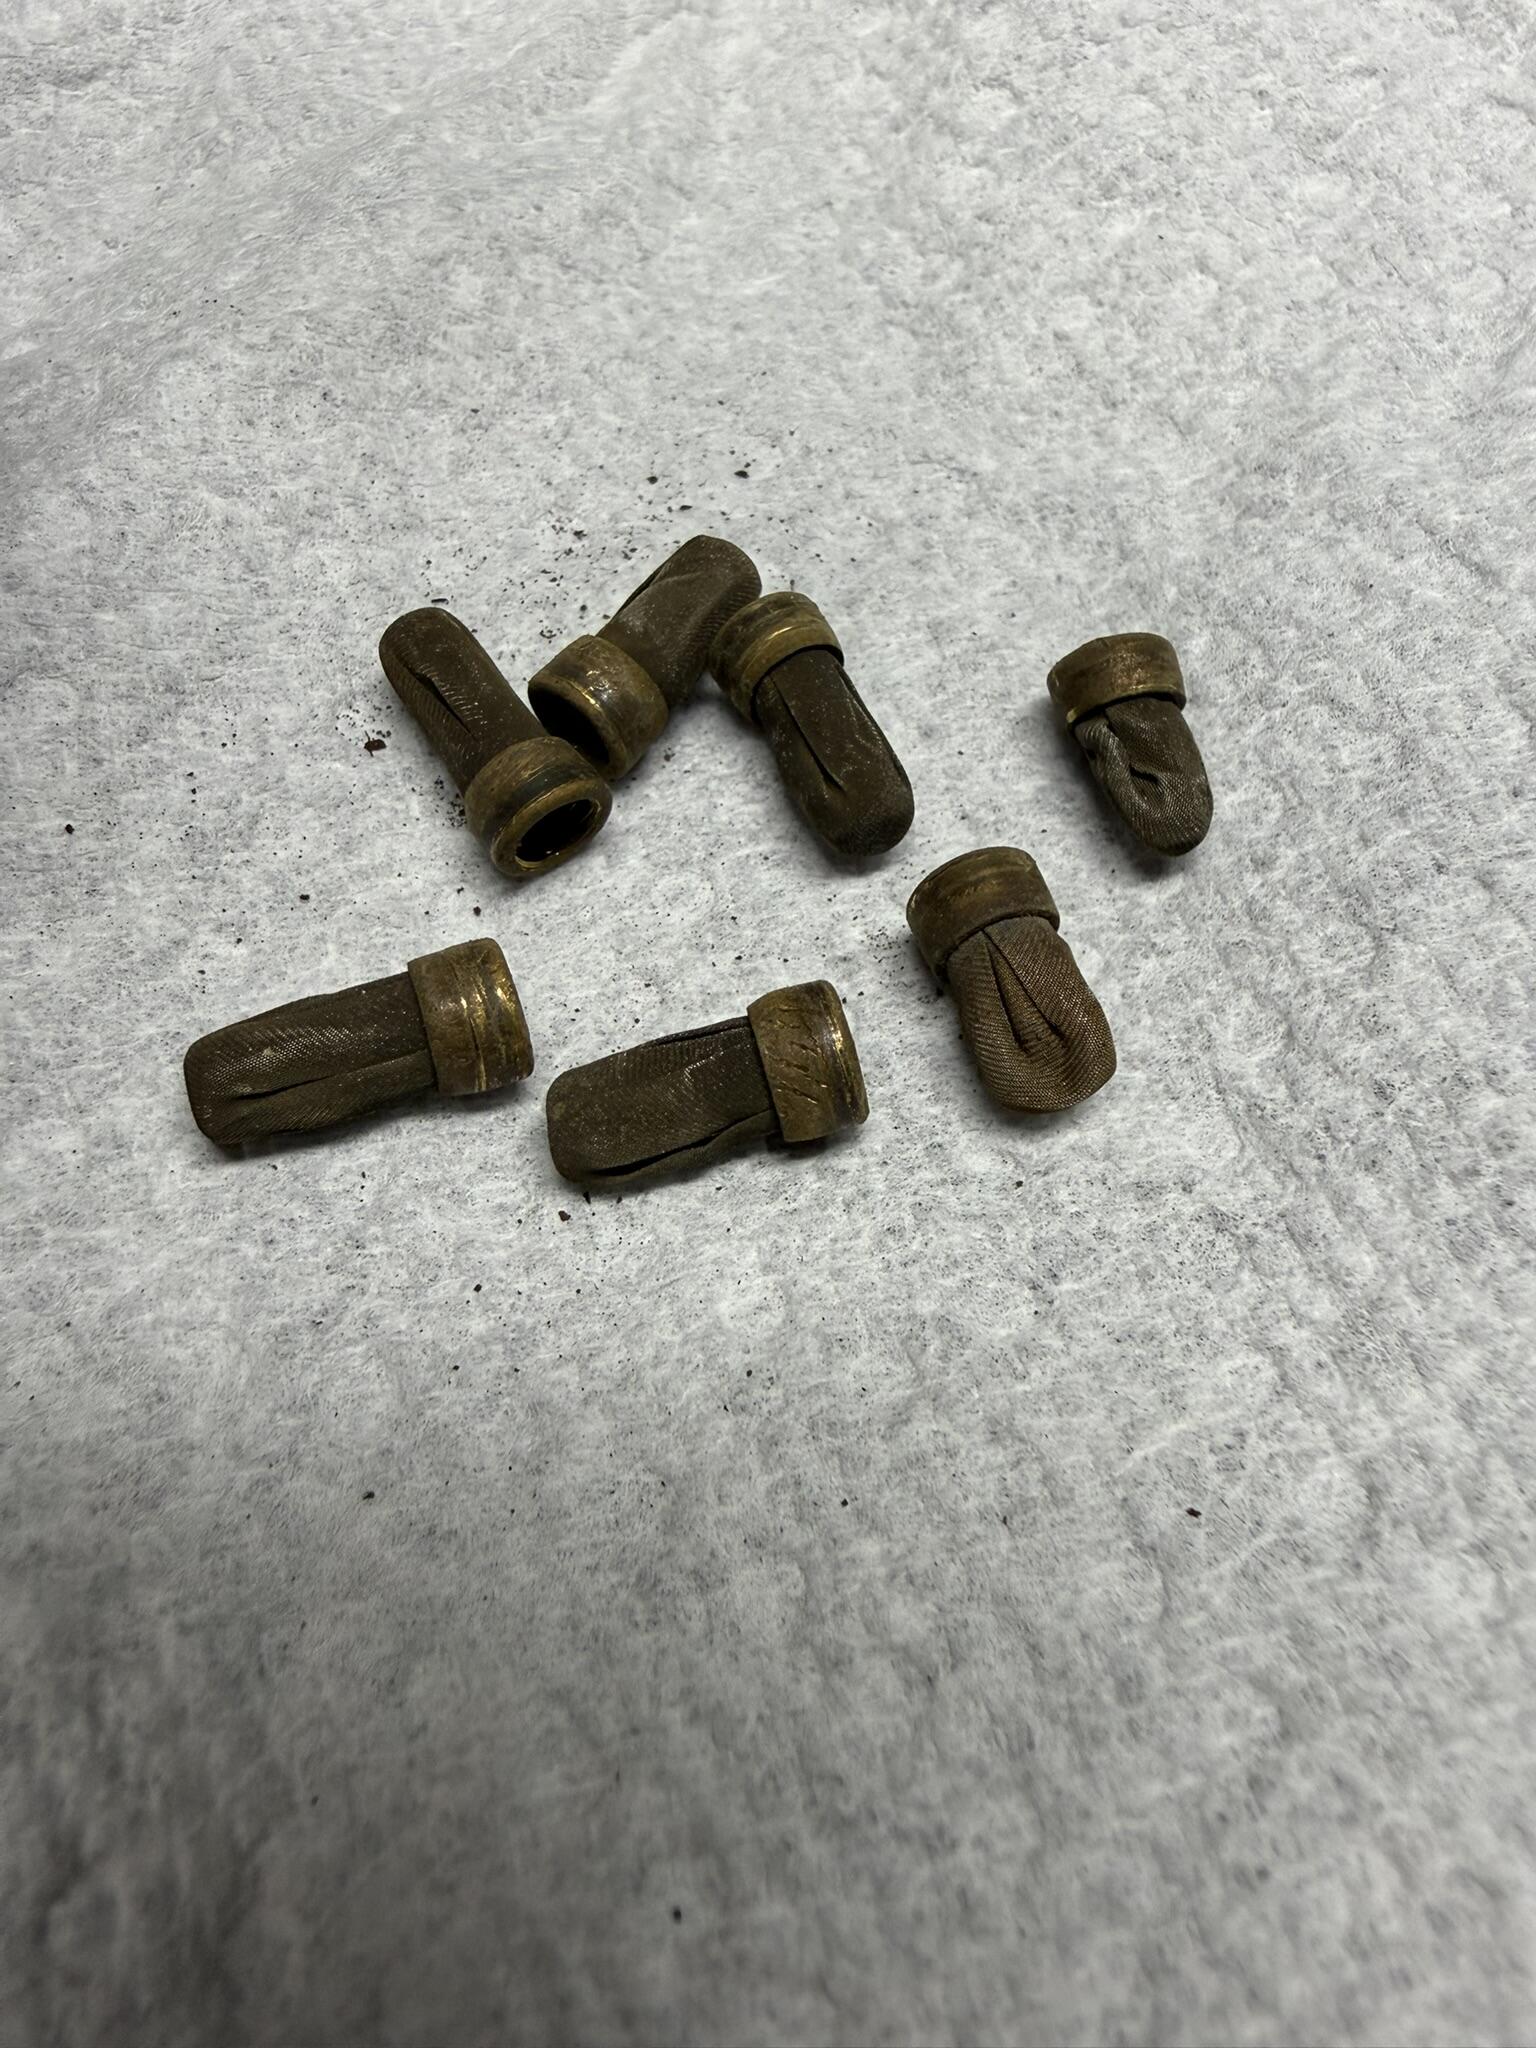
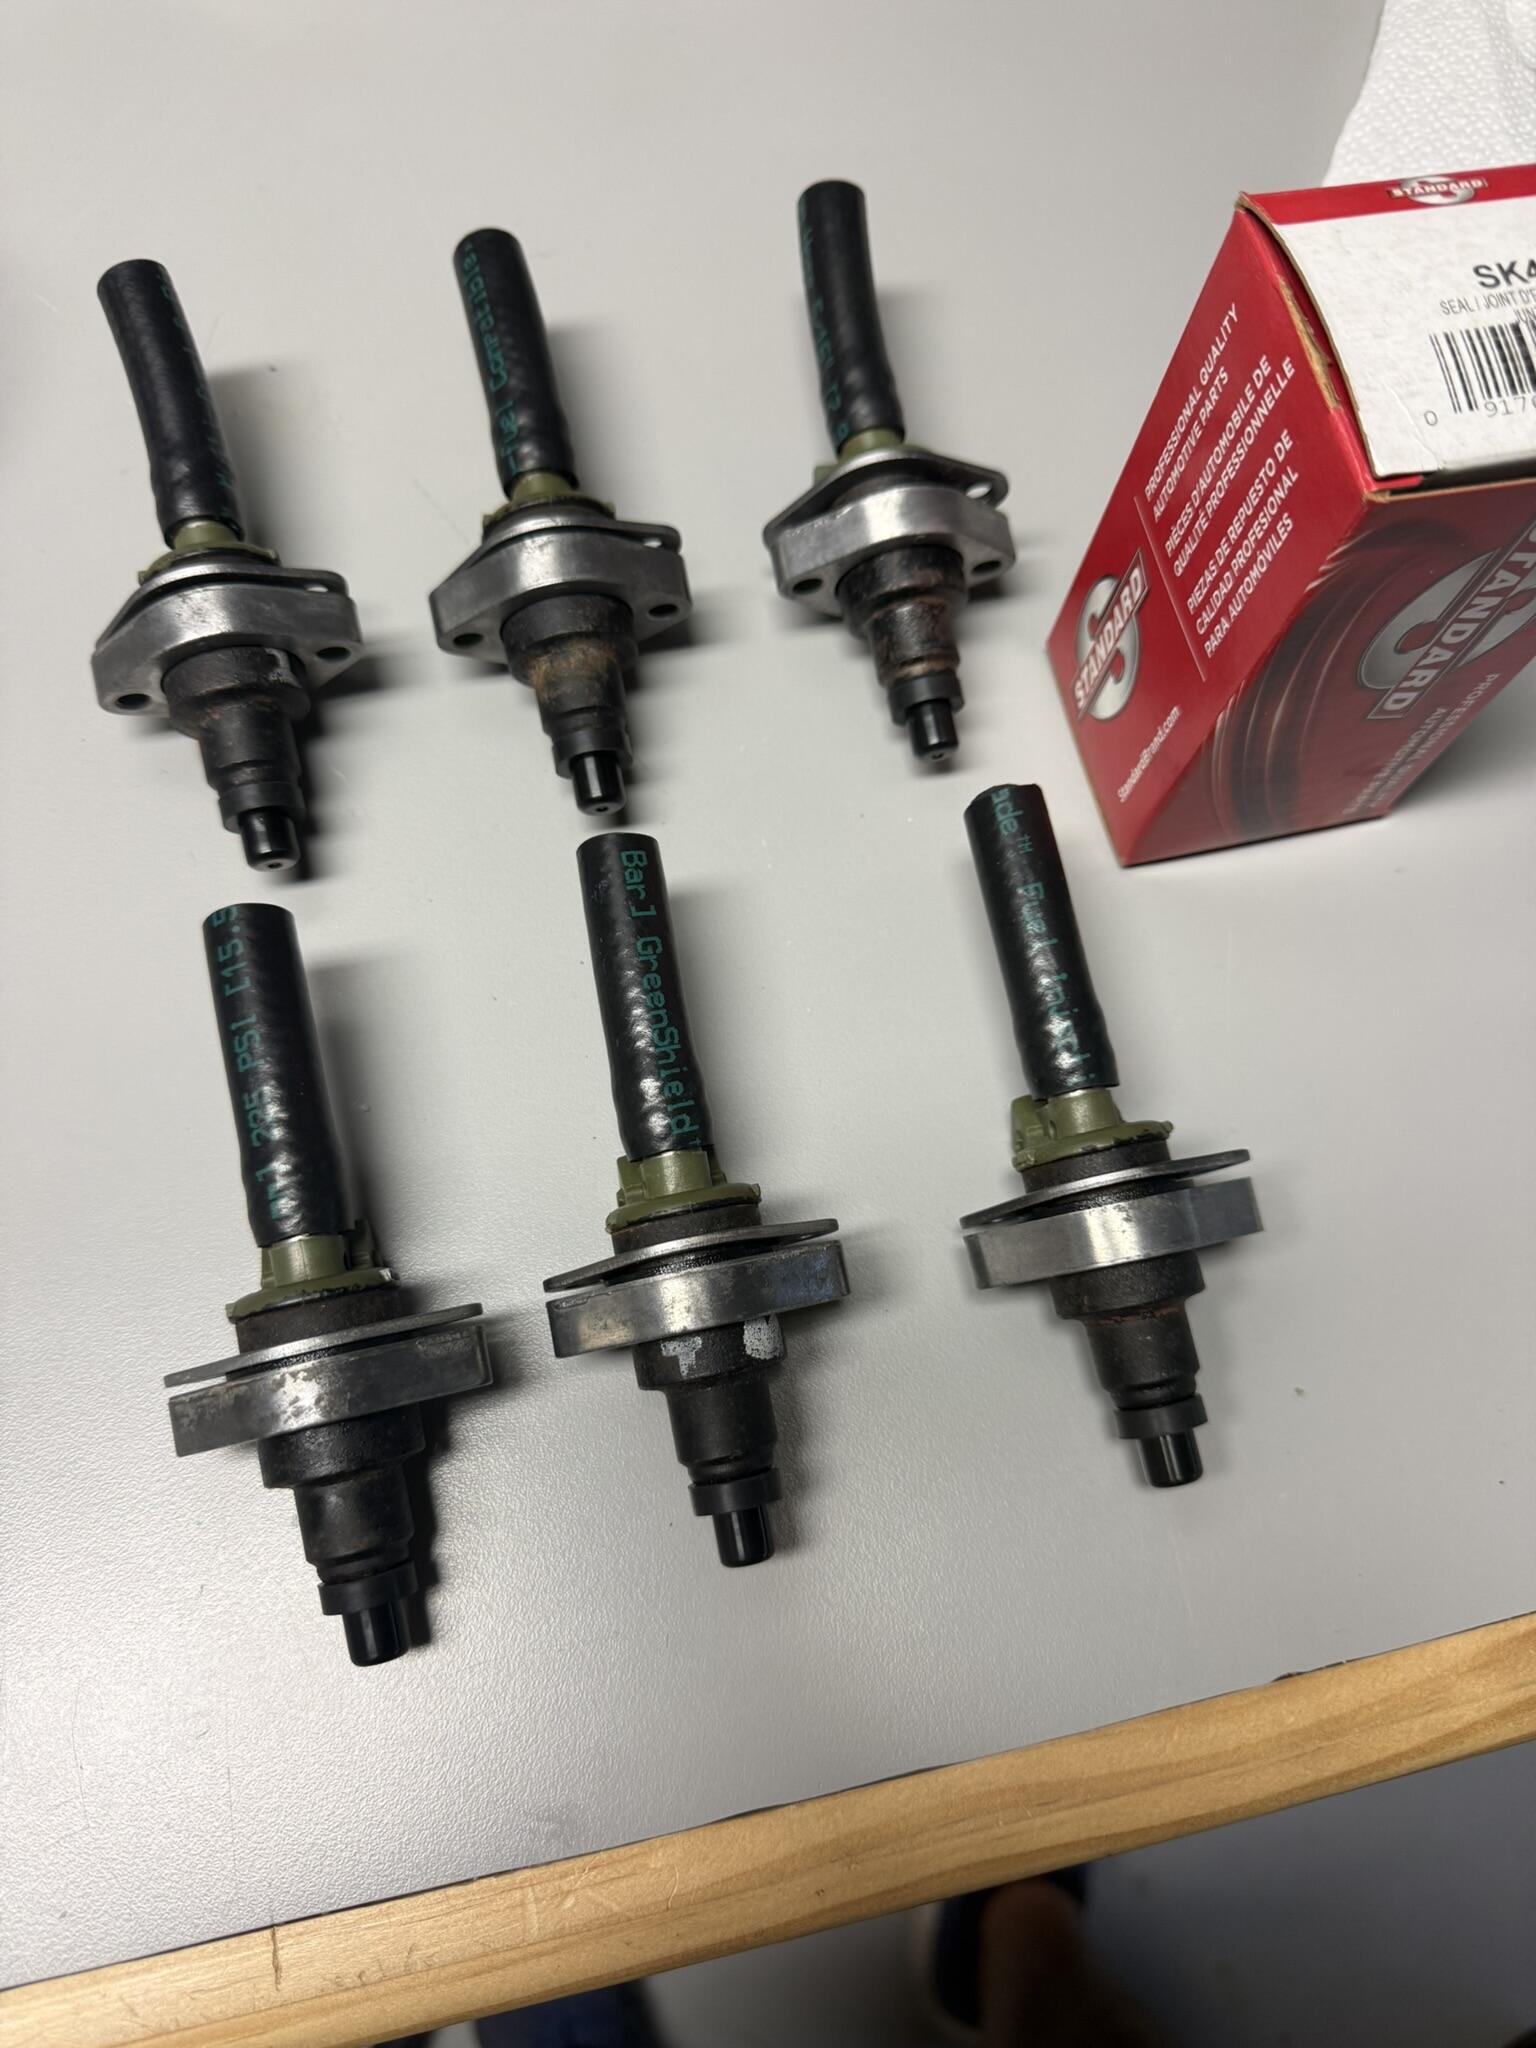
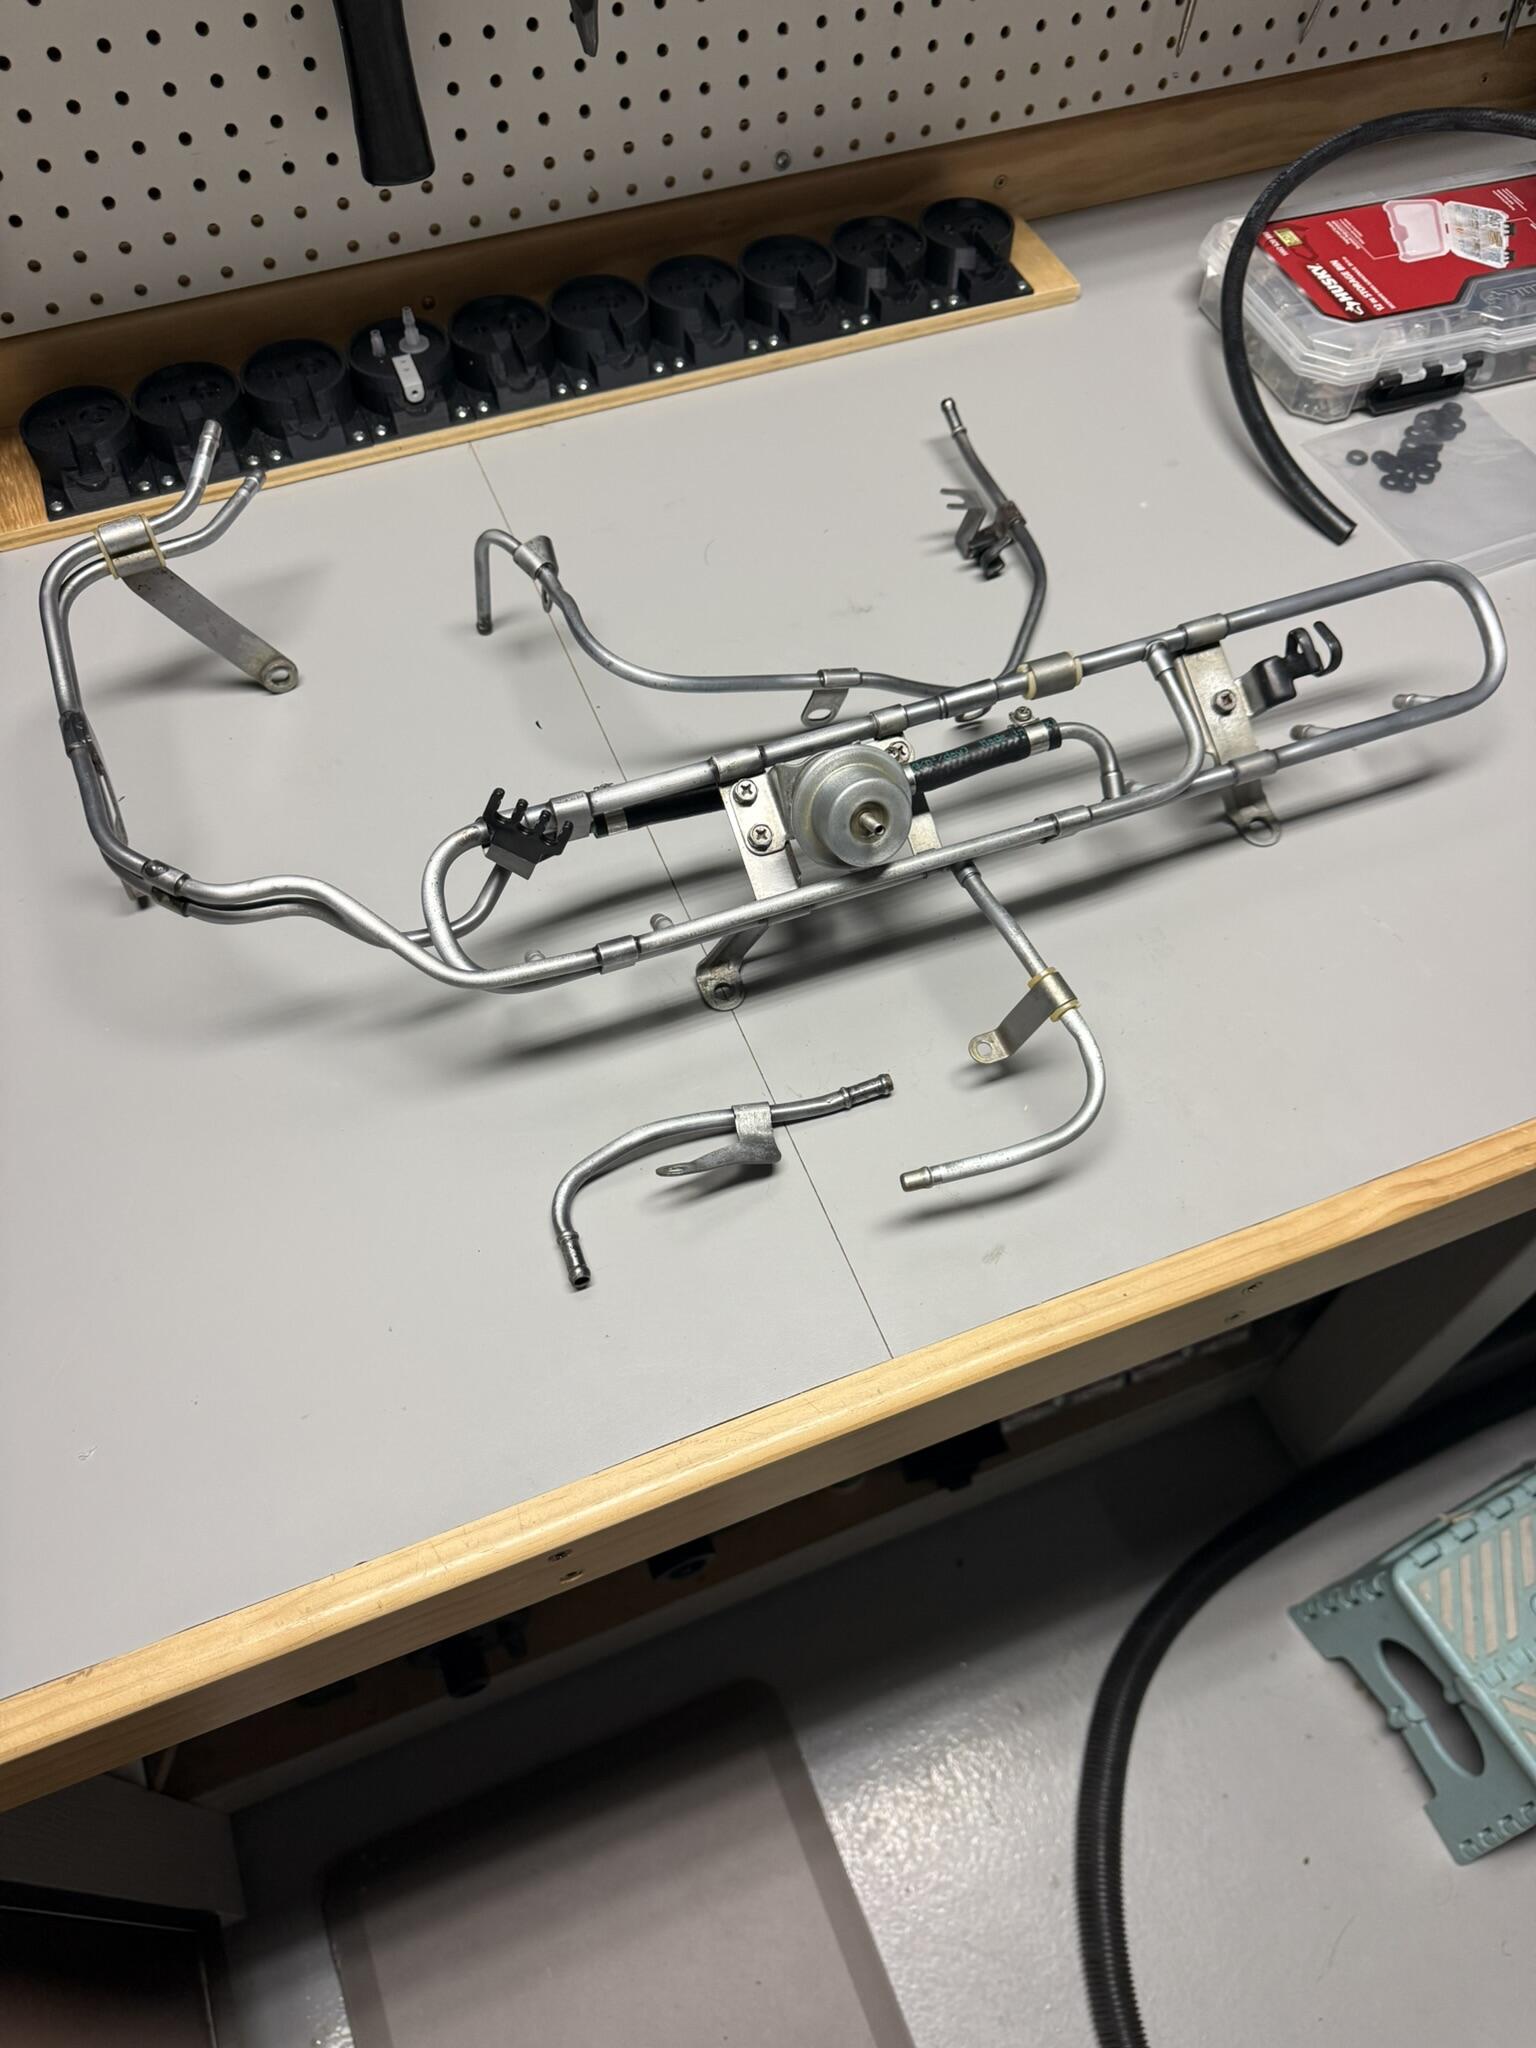
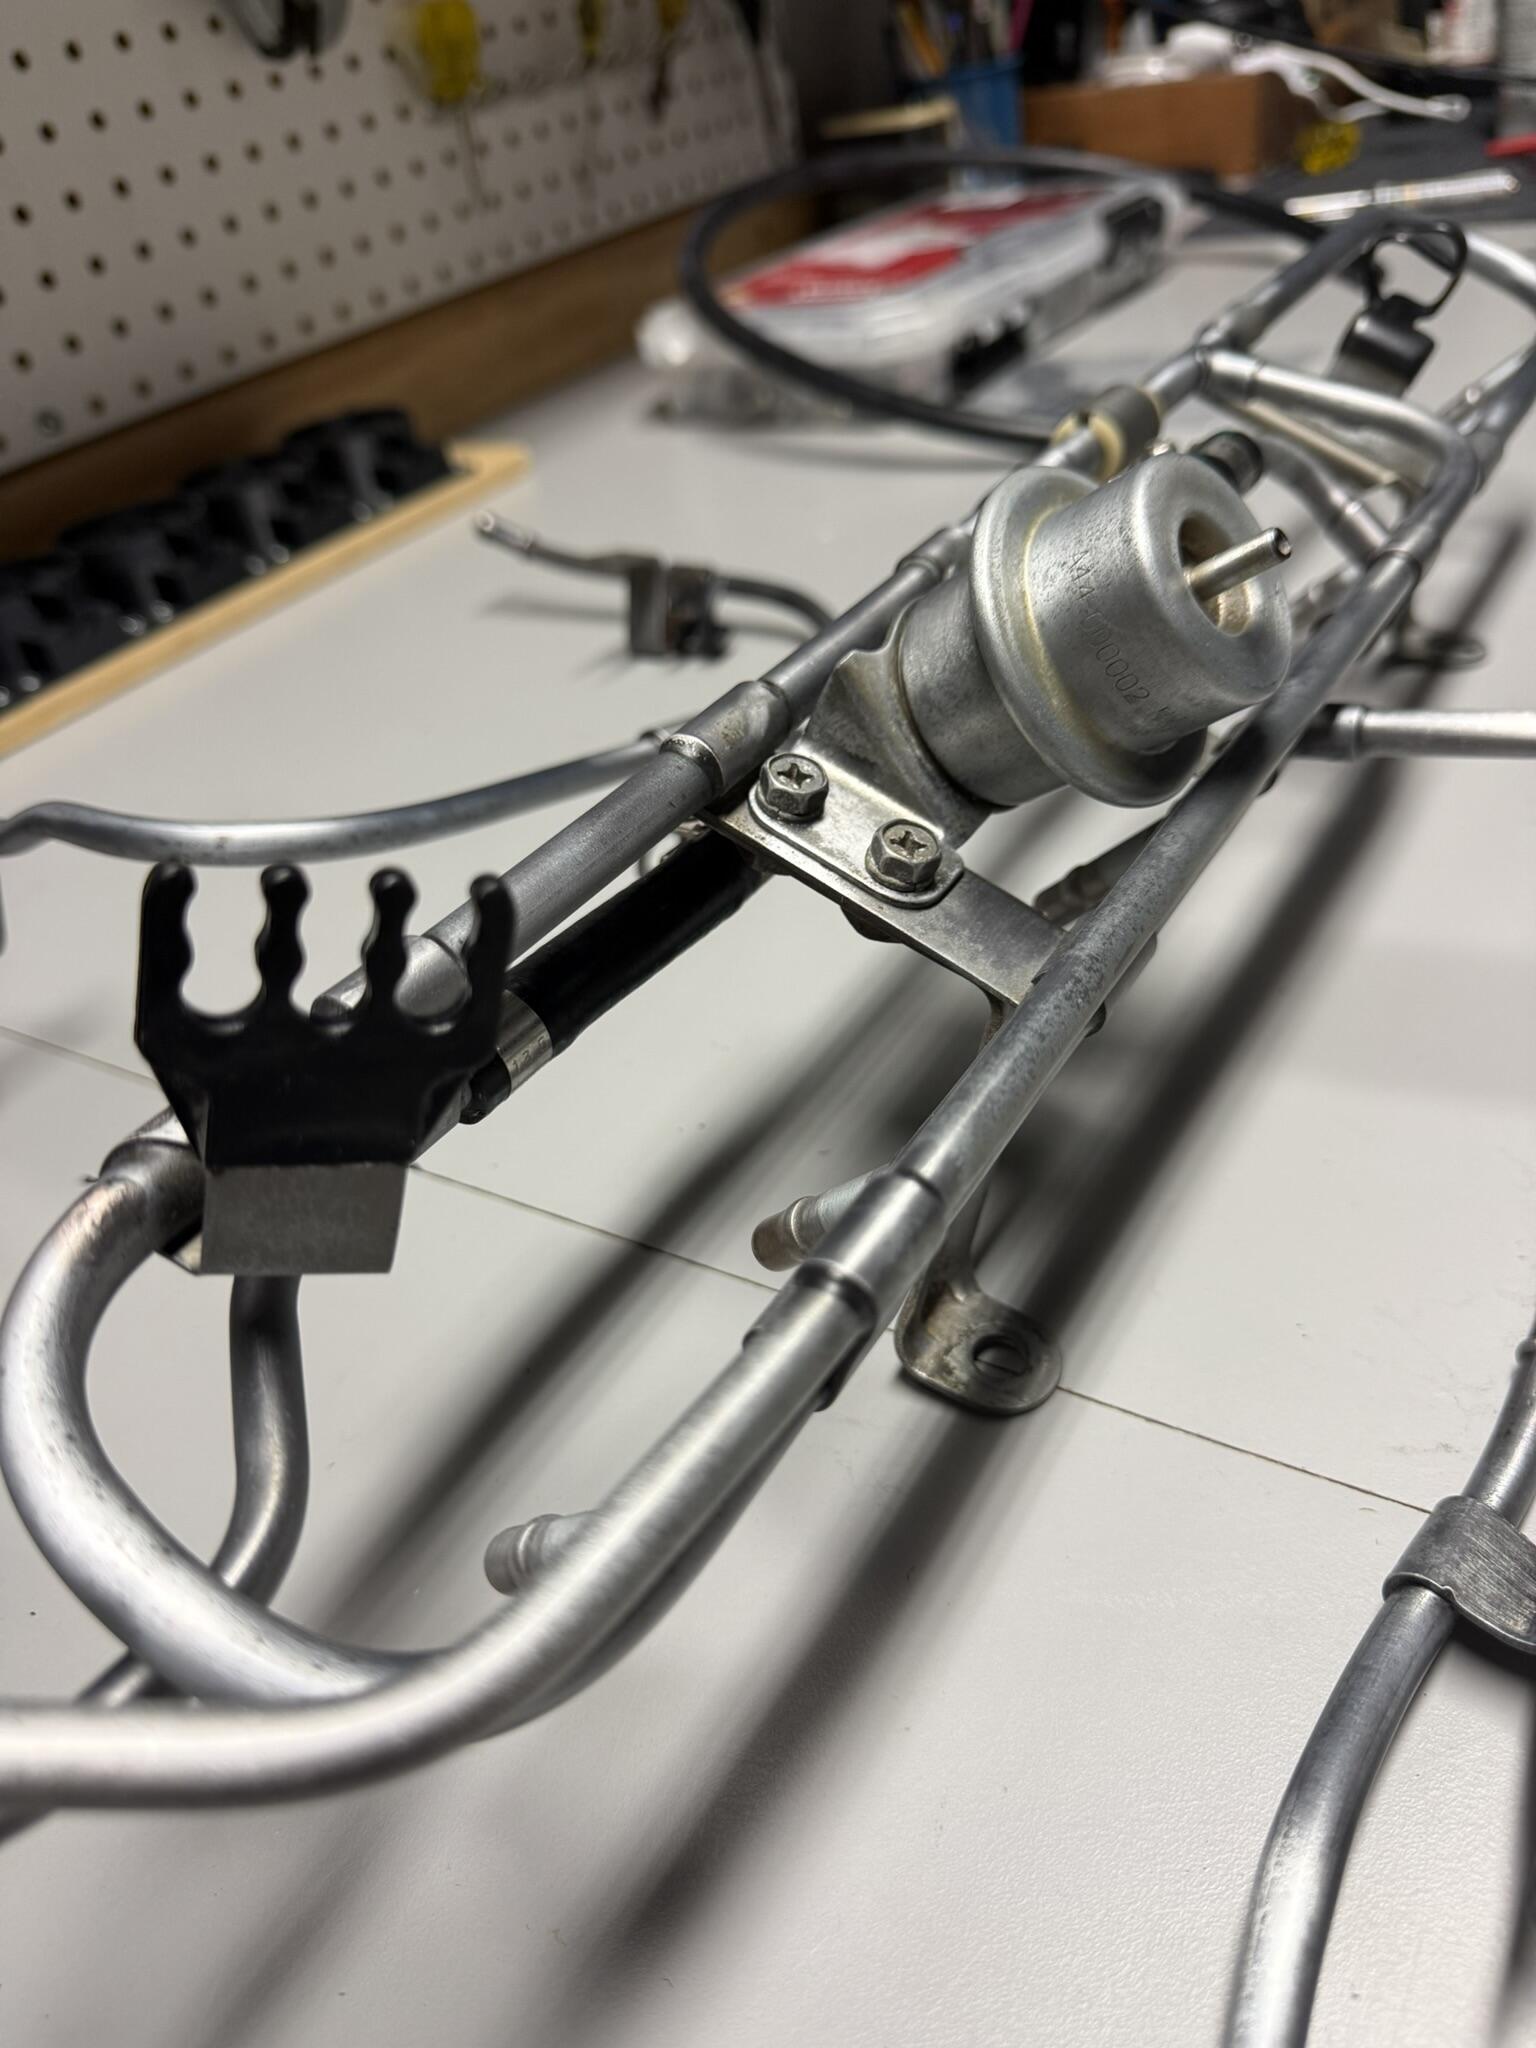
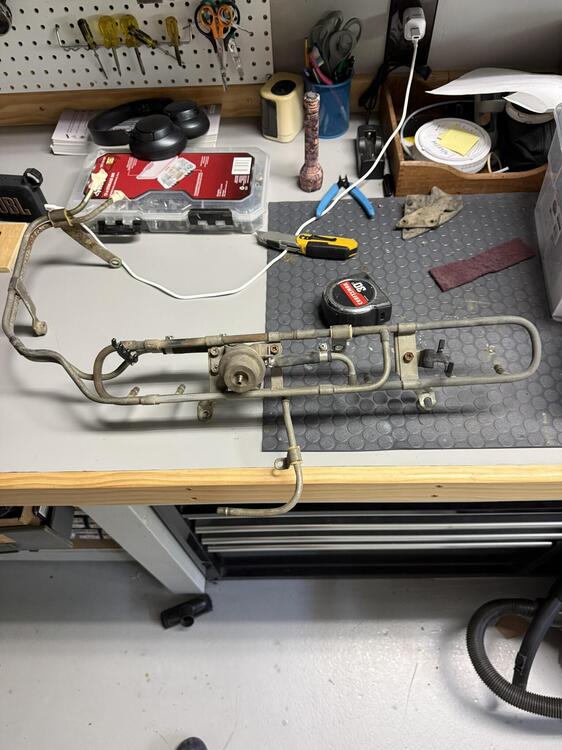
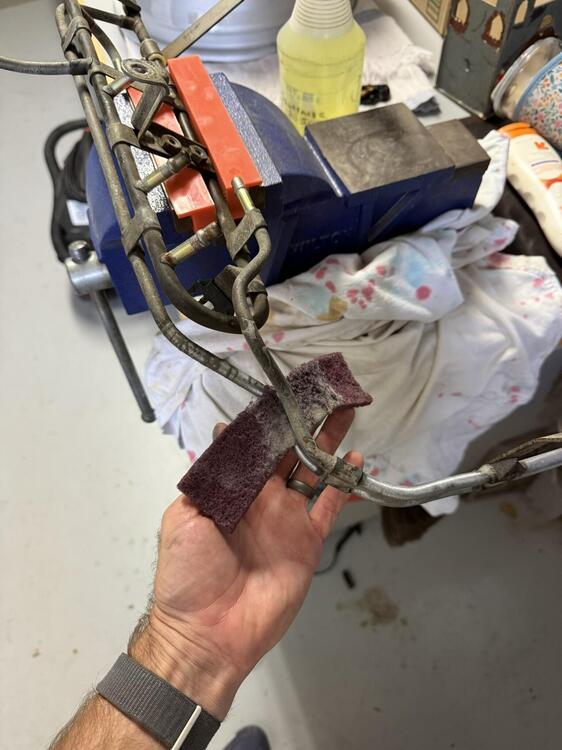
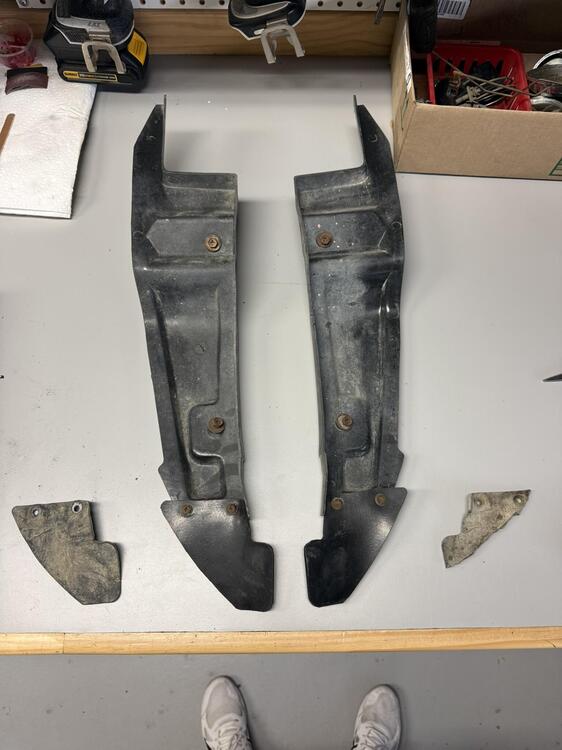
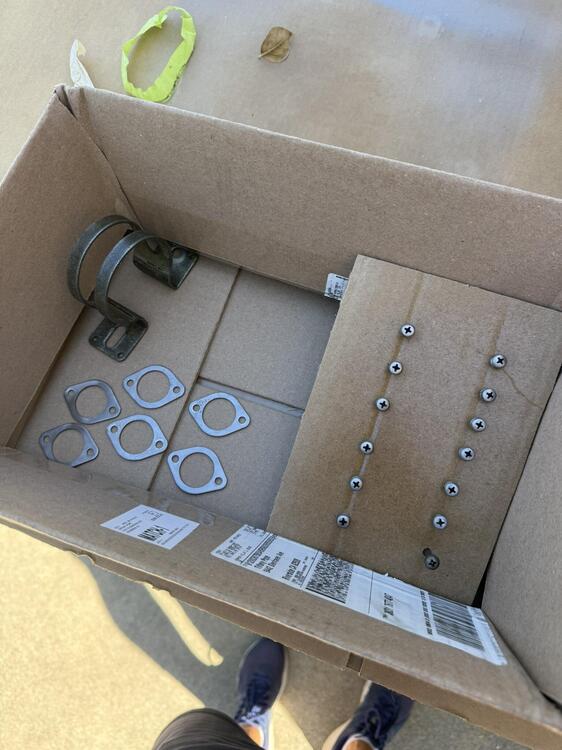
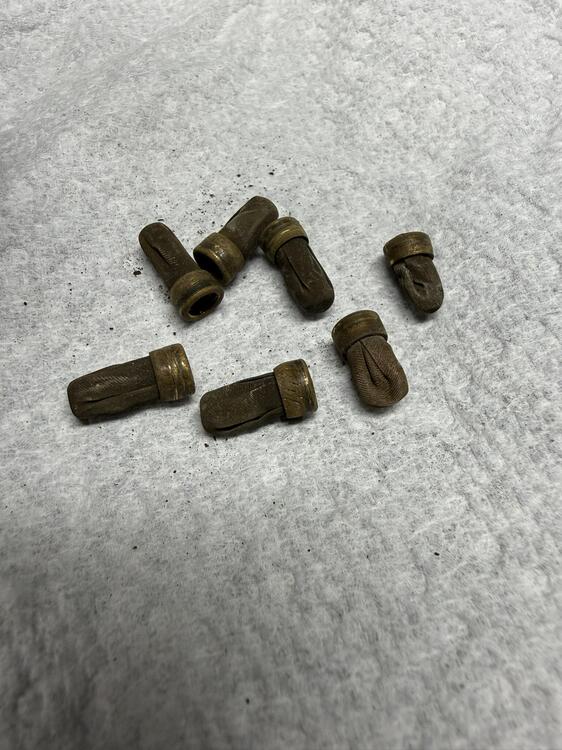
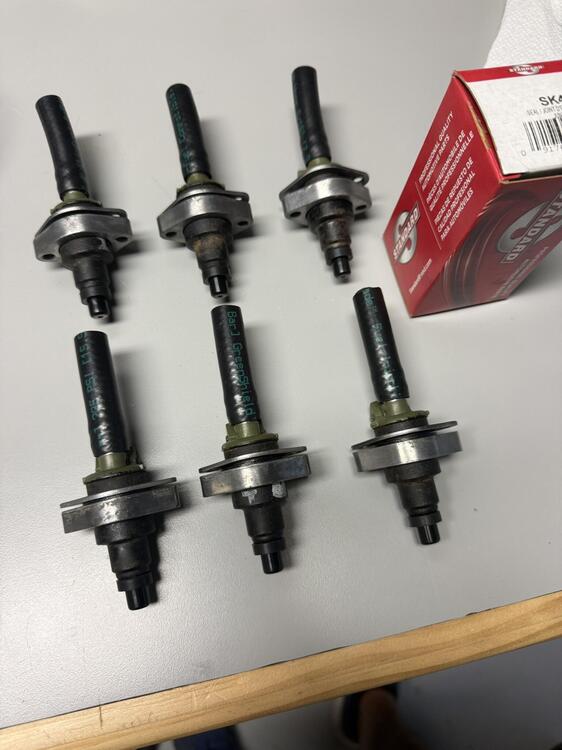
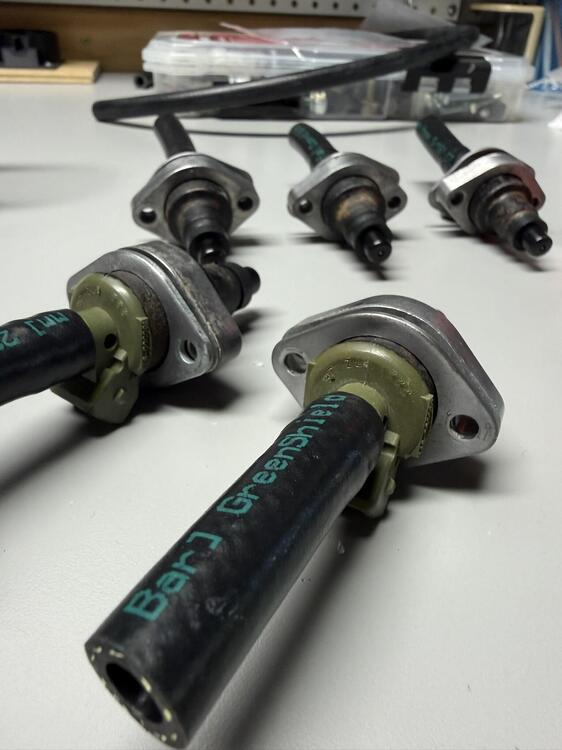
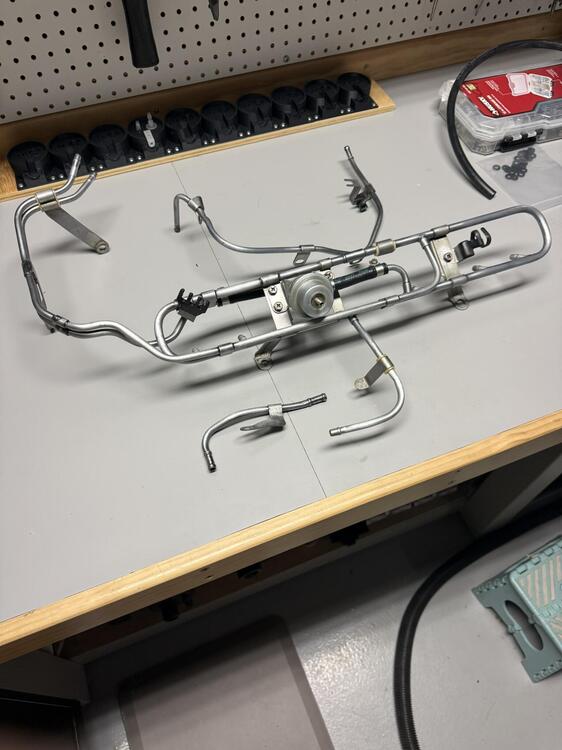
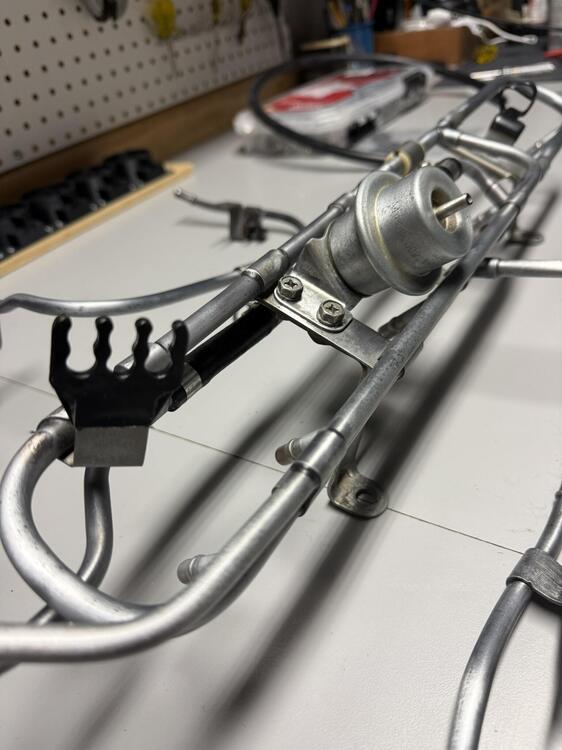
Another little update by way of pictures. I believe I have everything in place to begin re-assembly. Everything removed has been degreased at a minimum, and in some cases more than that. One of those "while I have it off the car it sure makes sense to refurbish it" situations. Anyways, I'm happy I did it. Again, balancing time with results. She'll never be a show car, but with minimal time and effort, I can make it look 80% better at basically zero cost🙂 Here we go... Here's the fuel rail before, exactly as I removed it from the car. Crusty and oxidized... Mounted it in a vice, cranked up some tunes, and scrubbed away with some degreaser and a scotch brite pad. A perfect afternoon task... I had 1 can of 2K matte clear left over from refinishing the wheels and opted to use it on the fuel rail and coolant lines. They came out great, and the 2K should keep them that way. Again, while I have em off the car, why not spruce them up a bit. I know it's a slippery slope, but trust me, there's a limit to how far I'll go...😉 Shiny😎 I did the same thing to the injector hardware because I had more paint than i knew what to do with😅... Speaking of injectors, here they are. Assembled and ready to be installed. New seals, hoses, and pintle caps. All serviced and confirmed good by Jim at injectorrepair.com. I also polished up the aluminum injector holders because why not... Here are the injector filter screens that were replaced, plenty of debris and varnish it looks like... I also replaced the bottom rubber pieces on the inner fender splash shields. Ready for install... More to come. Stay tuned. Also an interesting fun fact, I've been following Leno's law 2.0 here in CA. It's looking promising (which is shocking), and if it does pass, this 78 would be smog exempt. I won't hold my breath, but who knows. I'll prolly end up getting it smogged anyways before the law takes effect next year, which will at least allow me to know it's running right. Thanks for following along this far👍
-
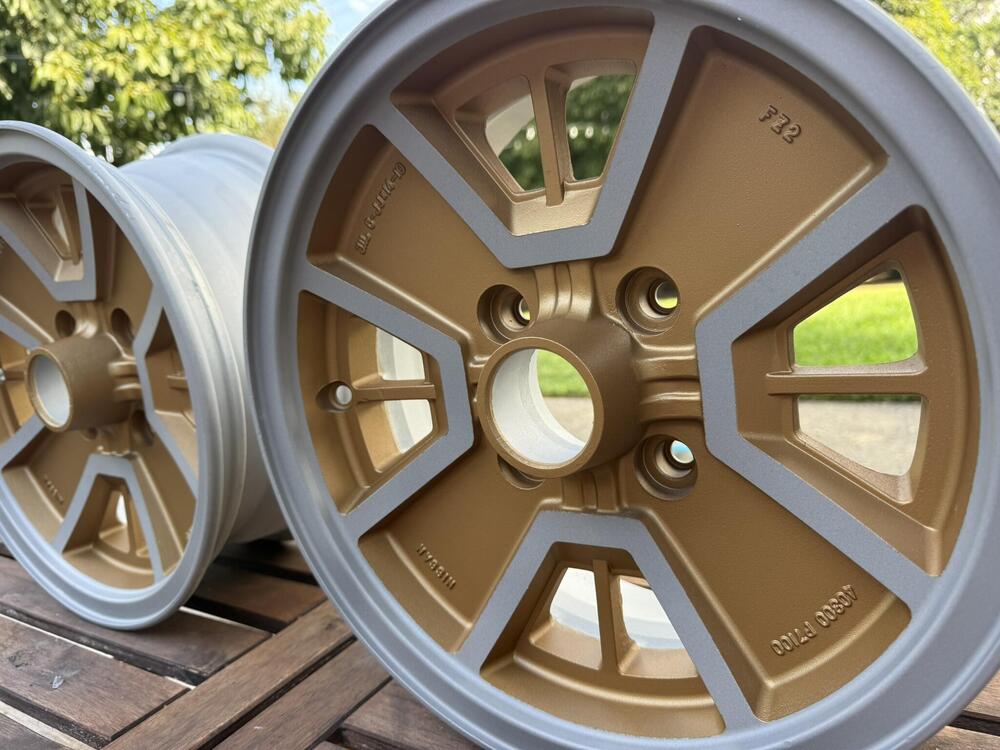
@dutchzcarguy You are correct, but aesthetically I felt that the OEM paint scheme makes the 4 gold spokes too prominent, and I've never been a fan of the "4 spoke" look, so I added some extra gold in there to add more interest and lessen the 4 spoke look. It was a stab in the dark, but I'm happy with the look.
-
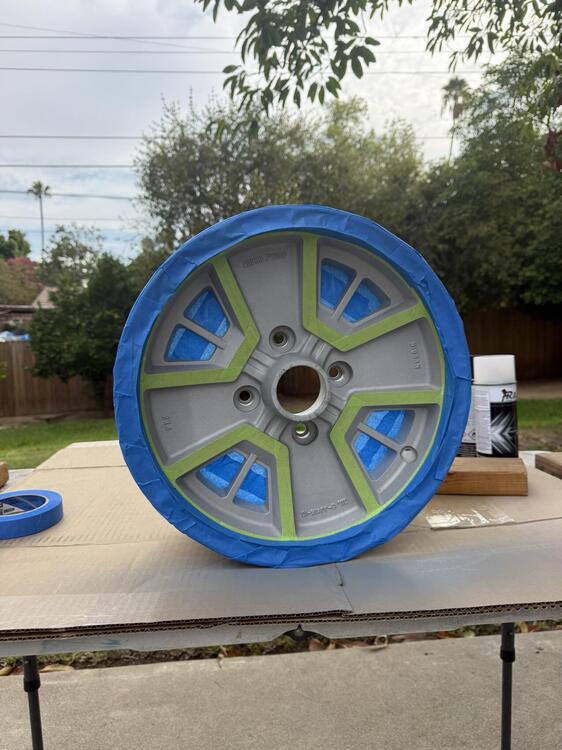
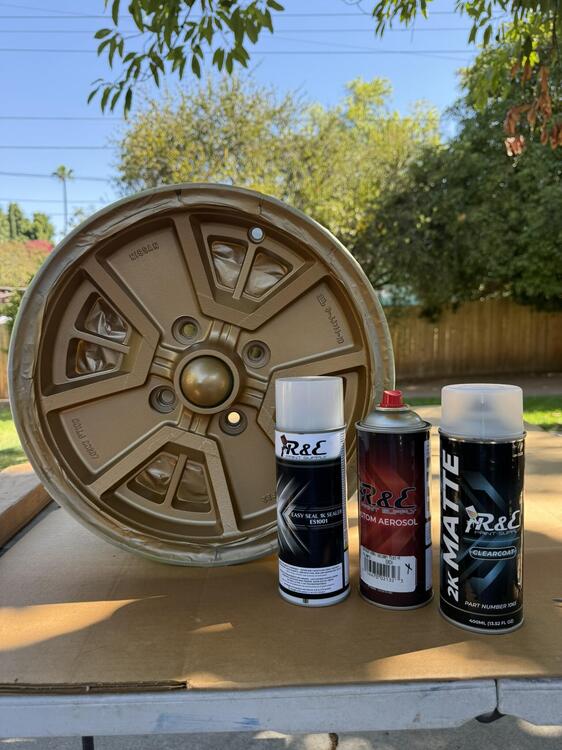
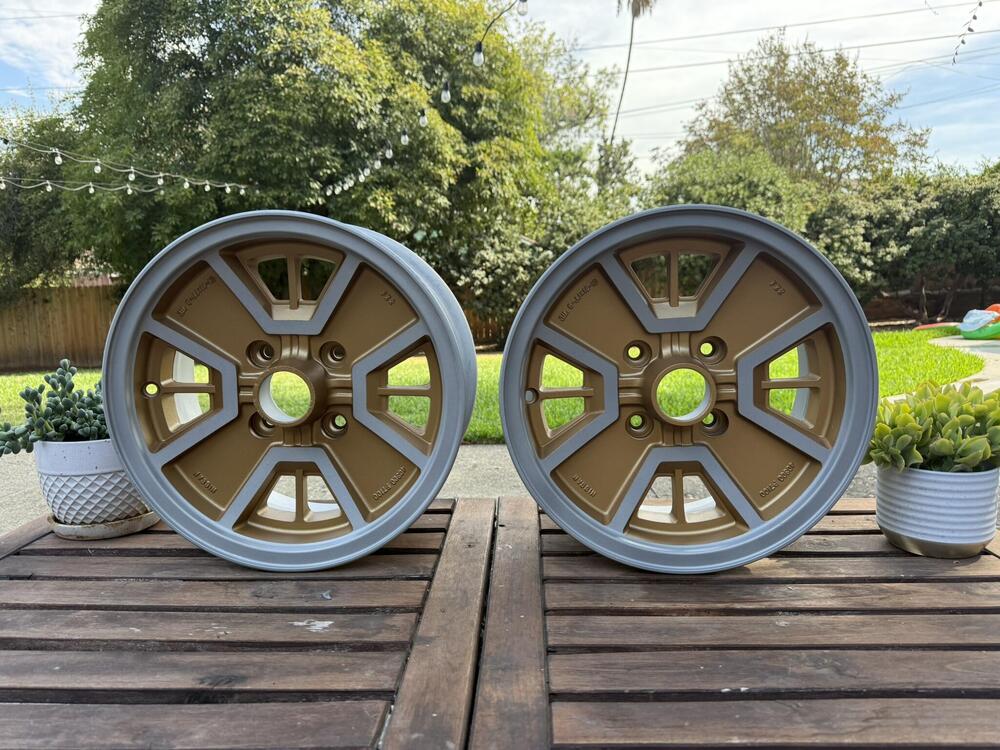
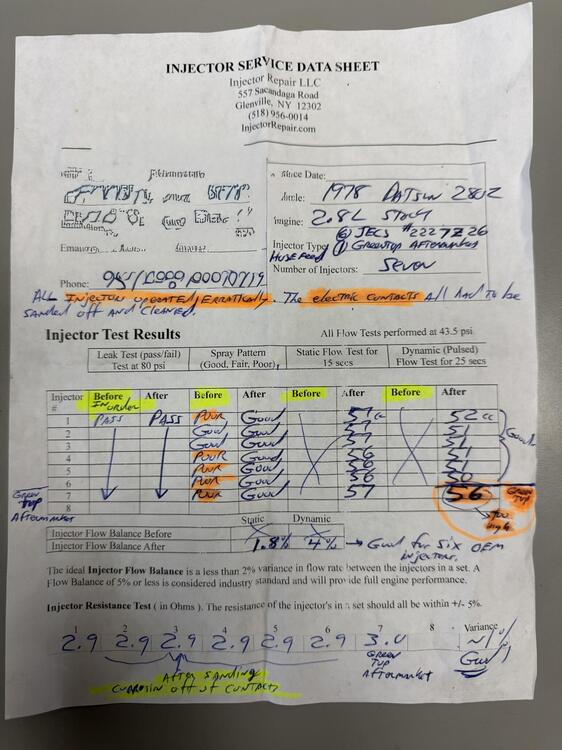
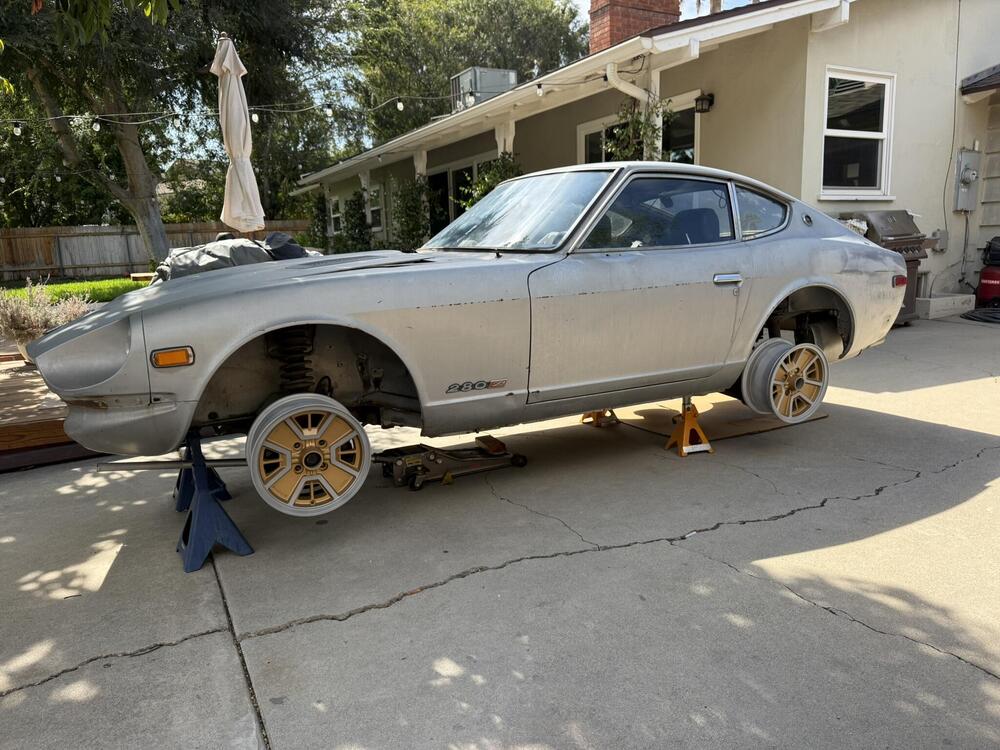
Welp, another little progress update. It's been wicked hot here for the past couple weeks so progress has been slow. 🥵 But I got a few things knocked out! I think very soon I'll be turning the corner and putting everything back together. While I've got everything apart, I can't help but freshen things up. Currently I'm cleaning up the fuel rail and steel coolant lines of surface rust and giving them a coat of 2K matte clearcoat. The same clearcoat I'm using on the wheels, so I'm spraying it all together. Anyways, I'll post some before and after pics of that down the road. For now, wheels and injectors! Wheels: Wheels came out great, I'm super happy with them!😃 I called R&E paint supply, told them I'm looking for Datsun 690 golden mist metallic. They said they could get within 95% of the original, and I'd say they nailed it. I also got primer and 2K matte clear coat from them. The 2K clearcoat is the boss move here because it'll protect these wheels from typical automotive solvents that will eat up a 1K finish. I didn't bother trying to polish up the bare aluminum parts of the wheels because I would've been at it for weeks, and the dull aluminum finish fits with the rest of the patina finish anyways. This is one of those low cost, high visual impact projects that I quite enjoy. Injectors: Got em back this week, woohoo! Maybe another clue as to why it wasn't passing smog. I sent in 6 OEMs (thanks to @siteunseen for providing me with some spares) and 1 aftermarket. Looks like the single aftermarket injector I sent in was flowing more volume than the other OEM injectors. I obviously won't be using it. Looks like the spray pattern wasn't great for several of them as well. Money well spent in my opinion to know that they're cleaned up and ready to go. These were not fun to tape up. Had to use a razor blade to get everything crisp. The green 3M automotive tape was the right choice for the critical areas... Here's what I used, all from R&E paint. Can on the left says sealer but it's actually primer. Guess it was mislabeled they said... The end result. Really like that 70s gold look. Very Trans-AM like... A bit closer up... Oh yeaaaaaaah, the vibe is right🔥These with some white letter tires should be just right... Injector report, I'll be using the OEMs... Anyways, that's all for now. Slowly but surely...
-
@Zed Head Woah, that's interesting! Crazy that it's even possible given a cast aluminum intake that I would think to be immune to that kind of corrosion. I'll take a look in there for the heck of it...
-
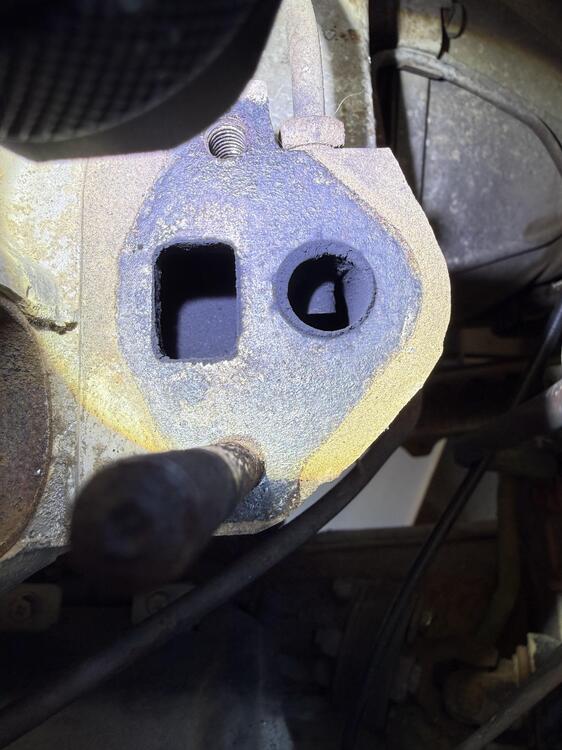
Removed the EGR valve just to do a cursory check. Regular carbon build up, but was probably still functional. Applied vacuum and the valve opened properly. There’s really no good method to clean the internal EGR passageways without major disassembly so I opted to just focus on the EGR valve itself, specifically the valve area that does the actual opening and closing. Shown in the second pic. Hit it with some brake cleaner and a toothbrush and reinstalled… Intake manifold, typical carbon buildup, hopefully inconsequential. EGR valve, bottom part is the actual valve After…
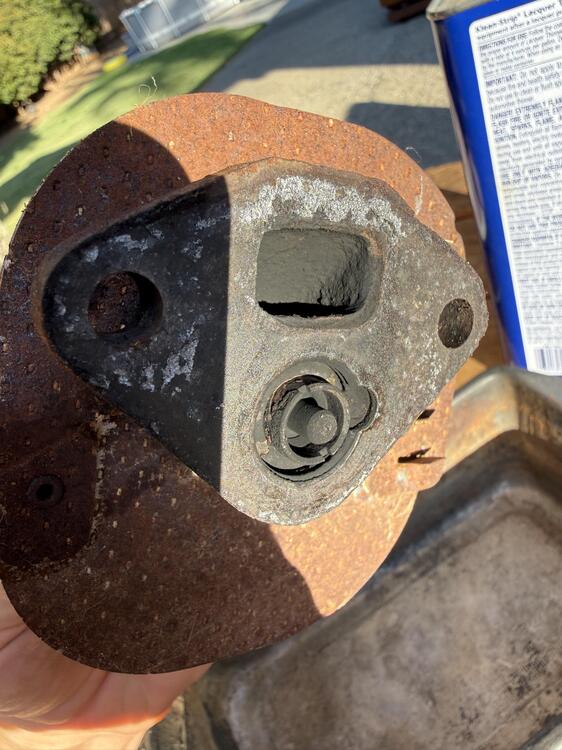
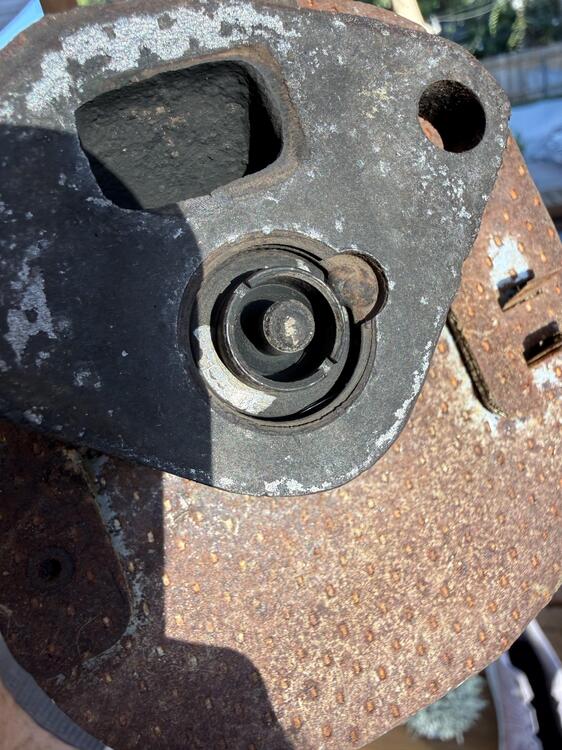
-
hah, right!? I'm still waiting on my injectors to come back from the service shop. They've been very backed-up, but supposedly they're shipping out this week. He said they were a mess (leaking, spray pattern all over the place), and he was surprised the car even ran. Once those arrive, I should be pretty much ready to reinstall everything. That said, I would've wanted to do all these little tasks before smog anyways (clean electrical connections, new injector pigtails, fix fusible links, repair chaffed wires, fix vacuum leaks, clean AFM, refurb gas tank) And then there's the side quests that sometimes I just cant help myself from getting distracted with: removing bumpers, cleaning out the engine bay and undercarriage. I can justify these because they cost me nothing other than a little elbow grease.😅 Oh yah, and the car doesn't have wheels or tires yet, so I might need to address that🤪 But we're getting closer, and I'm taking my time and enjoying the process, spending minimal amounts of money because I realize this all hinges on appeasing the smog overlords...
-
Yessir, that was next on the list. And it didn’t disappoint. It’s amazing how much debris gets in there over 50 years. My lower back is screaming after leaning over that cowl for a couple hours😅 before… After…
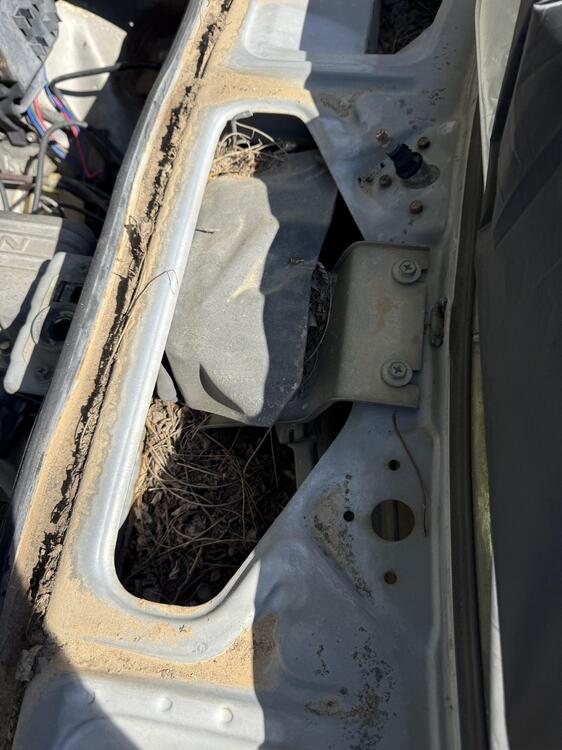
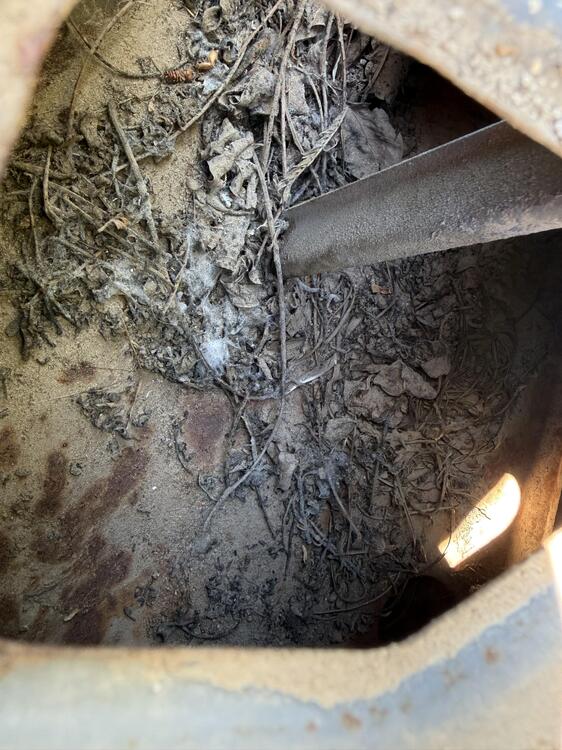
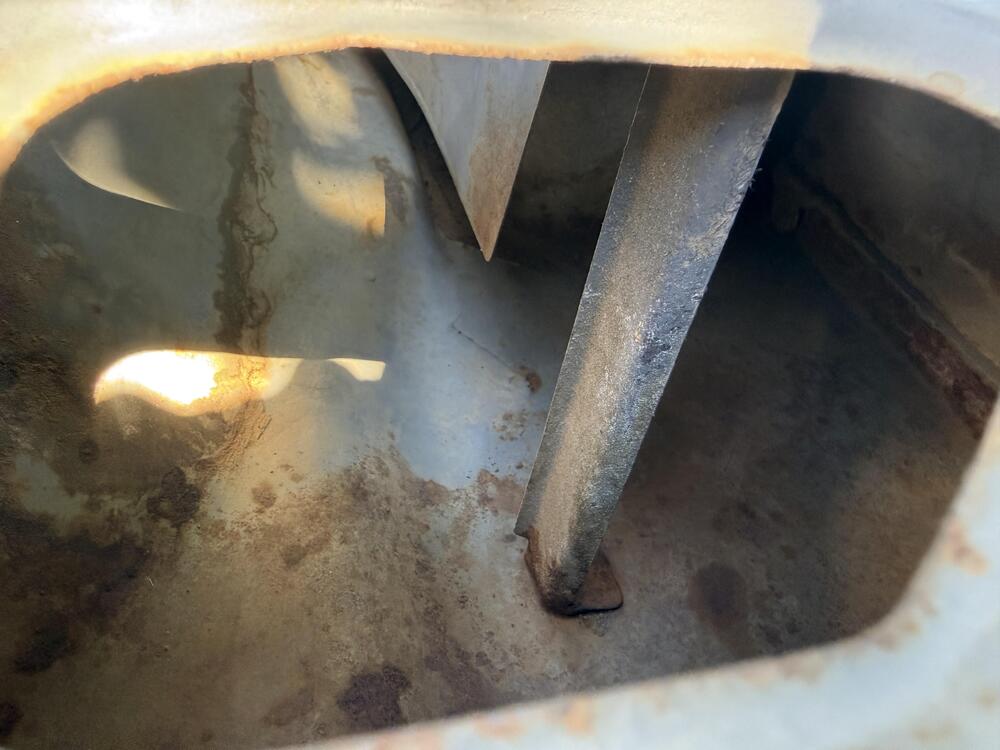
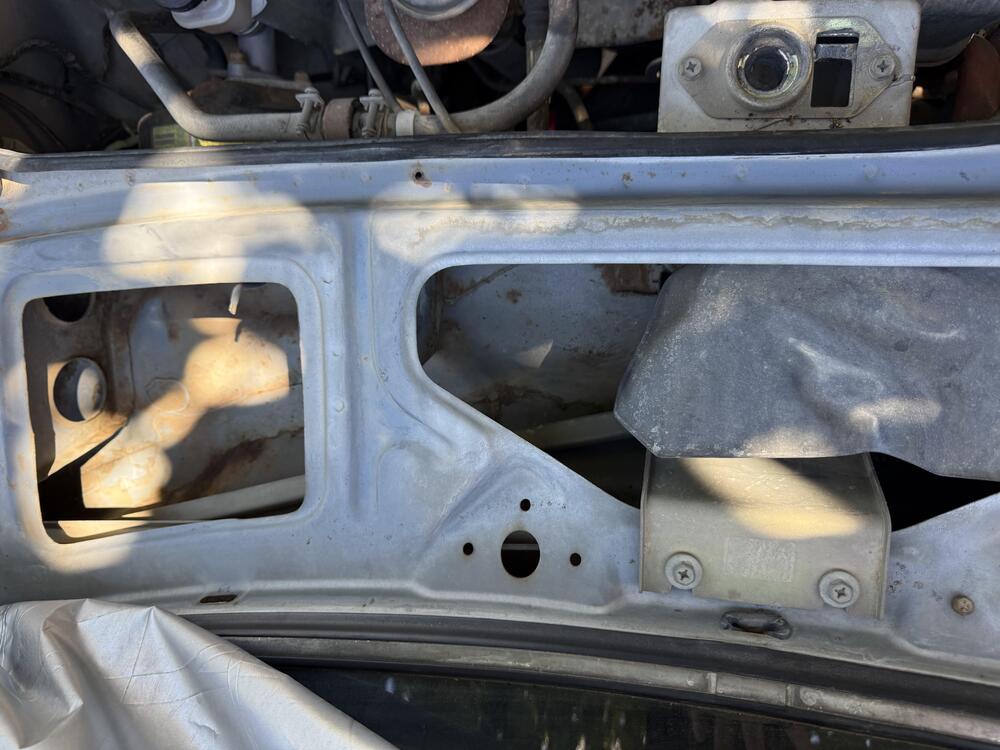
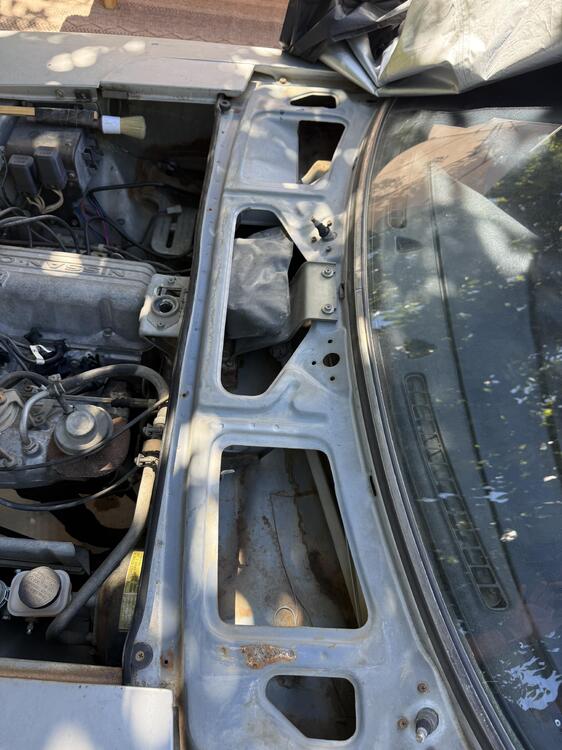
-
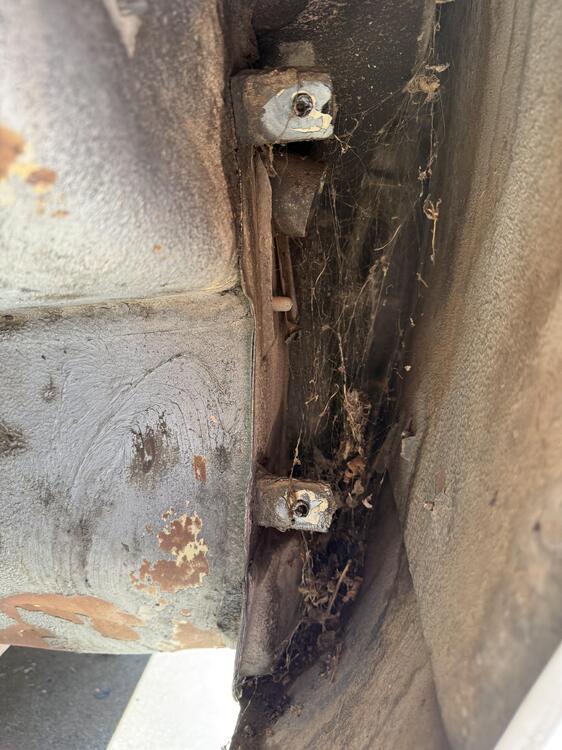
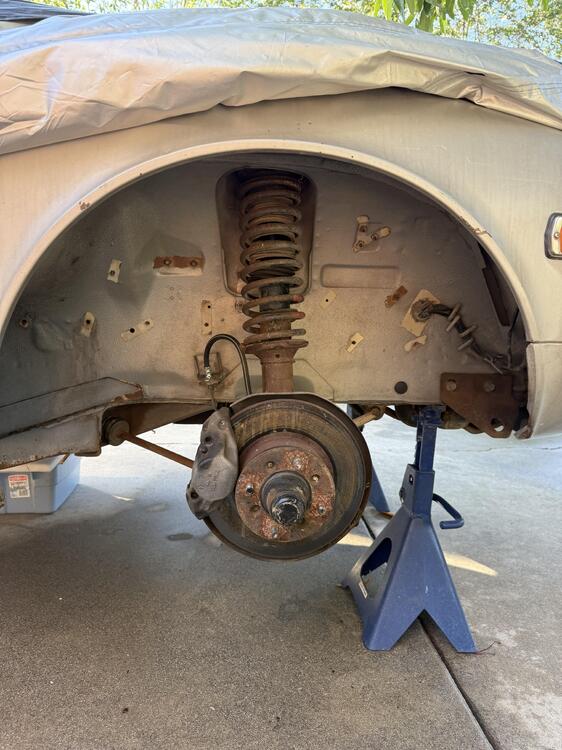
Another little side quest complete… I wanted to do a quick scrub down of the undercarriage and wheel wells to remove decades of accumulated desert dirt and sand. Simple green ftw. I oddly enjoy these tasks 😆 All cleaned up. Peep the OEM springs with the red dot. Rubber shock bellows have seen better days… Also on my list was to clean out the lower front fenders. We all know this is where they like to rot away. Again, I was super pleased with what I found. First of all, all lower fender bolts came out relatively easy, whew! Plenty of dirt and accumulation in there. I think I’m the first person to open them up. Spider webs and eggs as far as the eye can see… Here’s everything that came out of there. Prolly 2lbs of dirt. Makes sense why these things rust out in the fenders… Great news, as close to “no rust” as you can ask for in a Z! The inner fender reinforcement is fully intact and in great shape. Cleaned it out real good with compressed air. Having had a 240z with plenty of rust in the past, I’m thrilled with how dry this 280 is, both sides look great. Next side quest will be getting those wheels painted up…
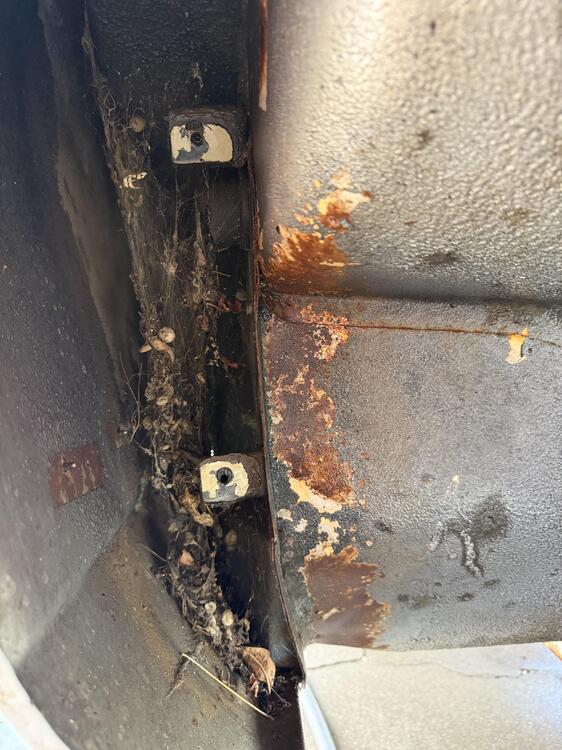
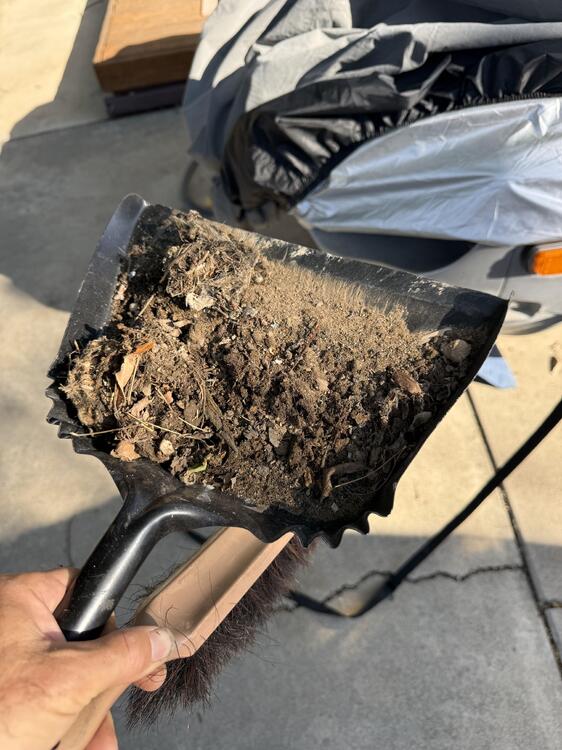
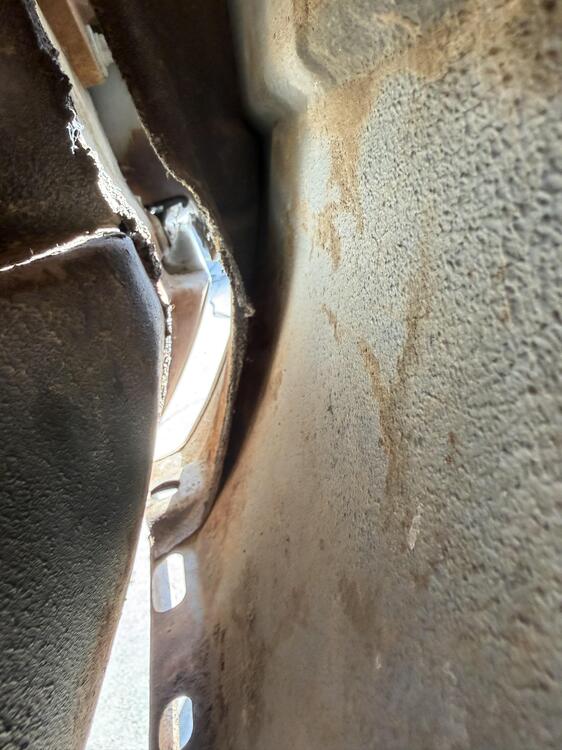
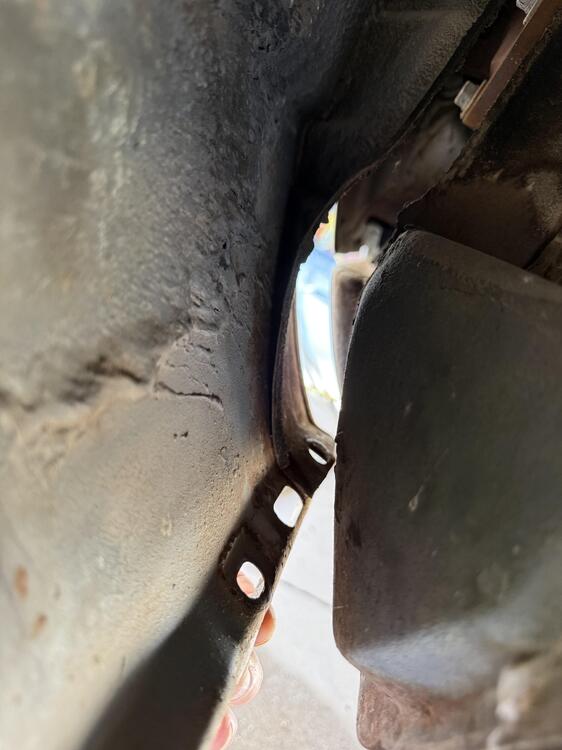
-
@Zed Head Yep, the 2 green wires (fusible links) are present in my setup. I'll clean up the connections and call it done.
-
Yes, the 78 is a bit different setup than the 355 mile BAT car. Everything I find just shows the two white wires "disappearing" inside the sheath that's wrapped around the positive battery cable. I can only assume they tap into the positive cable somehow. There's really nowhere else they could go. I suppose I'll just tie them back in with a proper connection and be done. Here's a couple reference pictures of 1978 cars from BAT... to show what I mean...
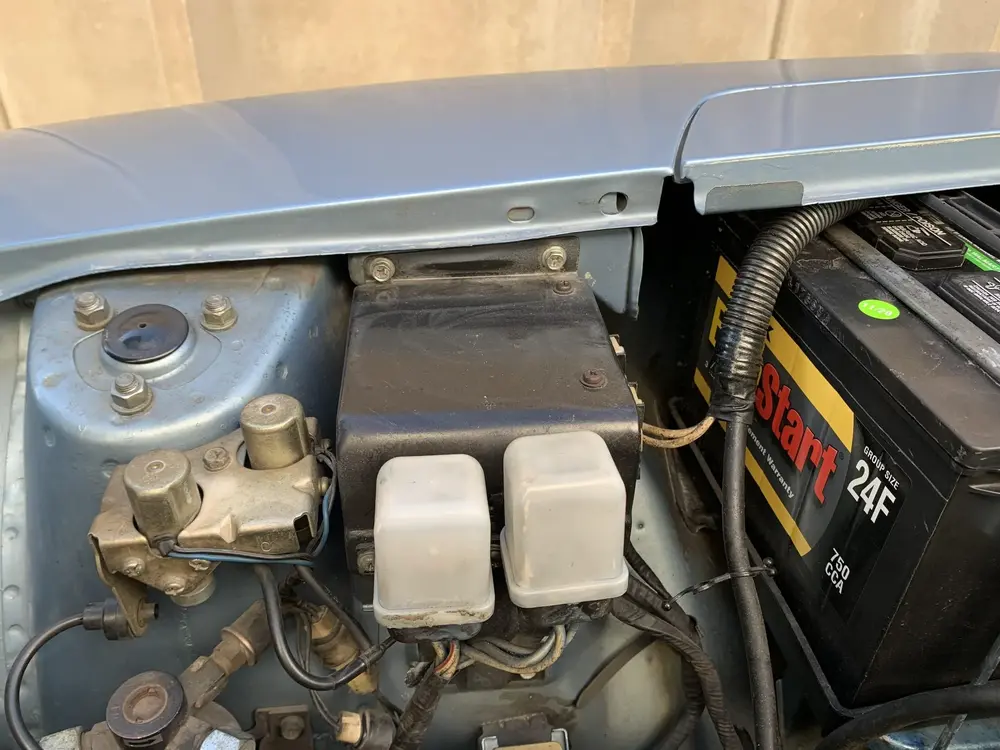
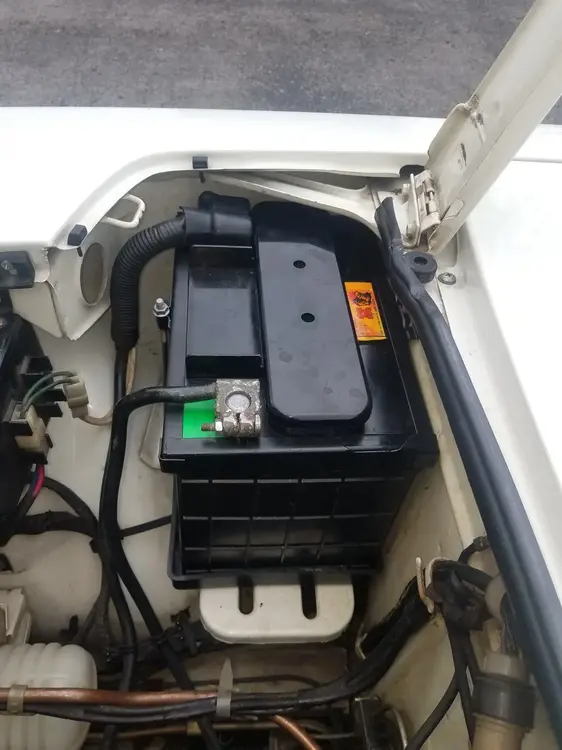
-
Picture request! For those with 280Zs, can you show me what this connection should look like? Positive battery cable pigtail to fusible link. Mine was just twisted together and wrapped in electrical tape. I’d like to see what it should look like before I attempt a repair 👀 Thanks!
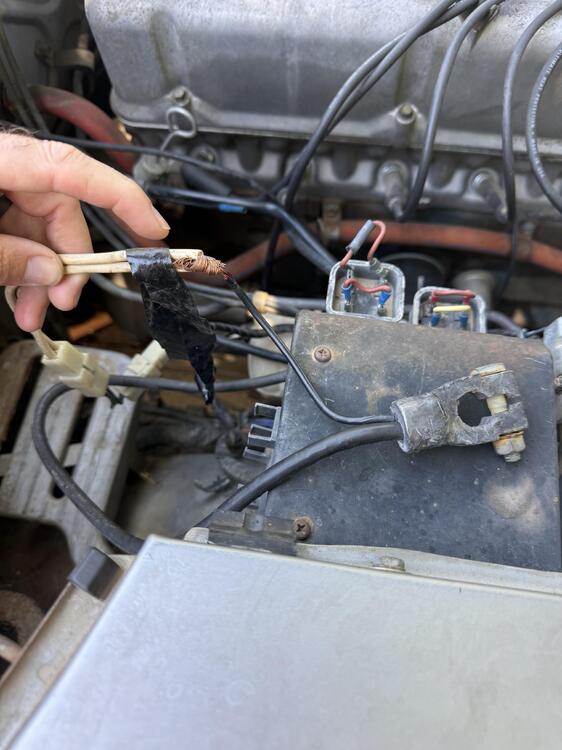
-
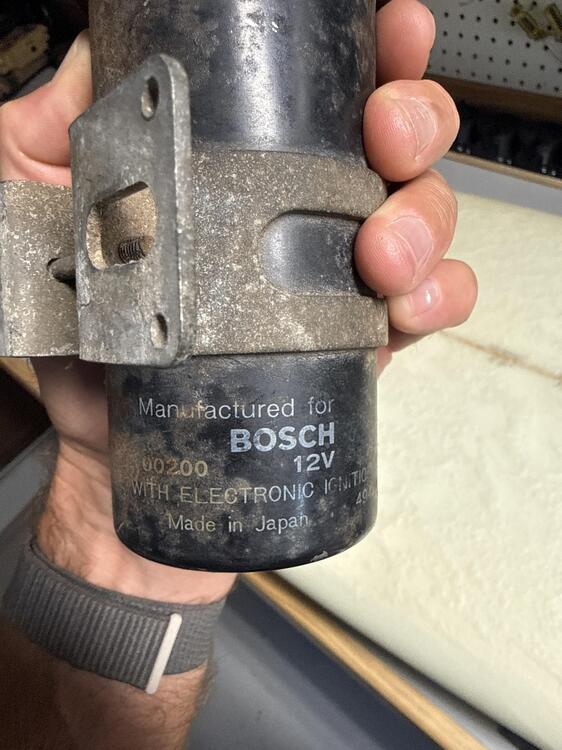
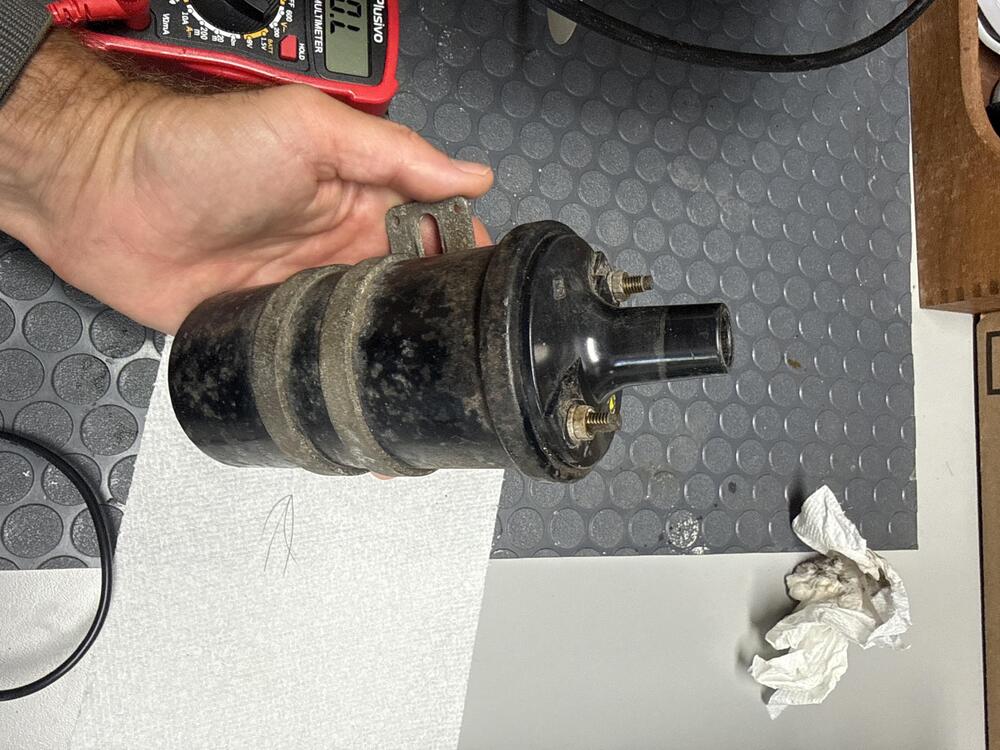
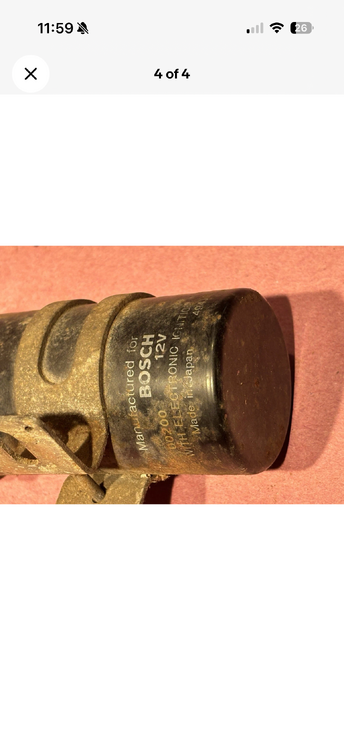
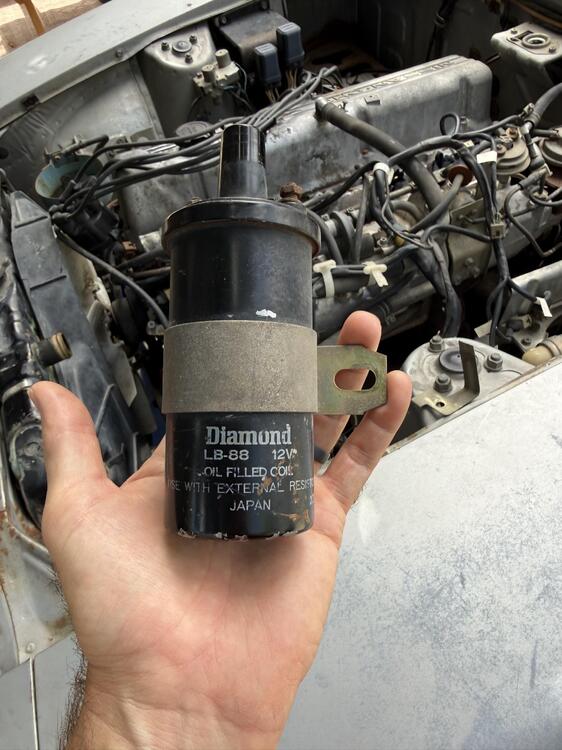
Cool, used 280zx coil arrived today. Primary measures 1.0, secondary 10700, both nicely within the FSM spec. And cheaper than anything new at $25. Appears OEM, made in Japan, Bosch 00200, “use with electronic ignition” markings. Not the prettiest on the outside, but correct on the inside👍🏼 One more thing off the list.
-
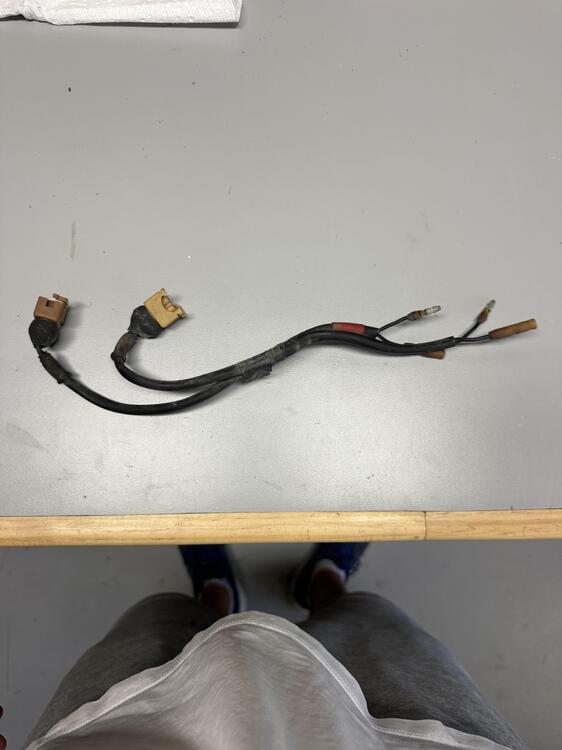
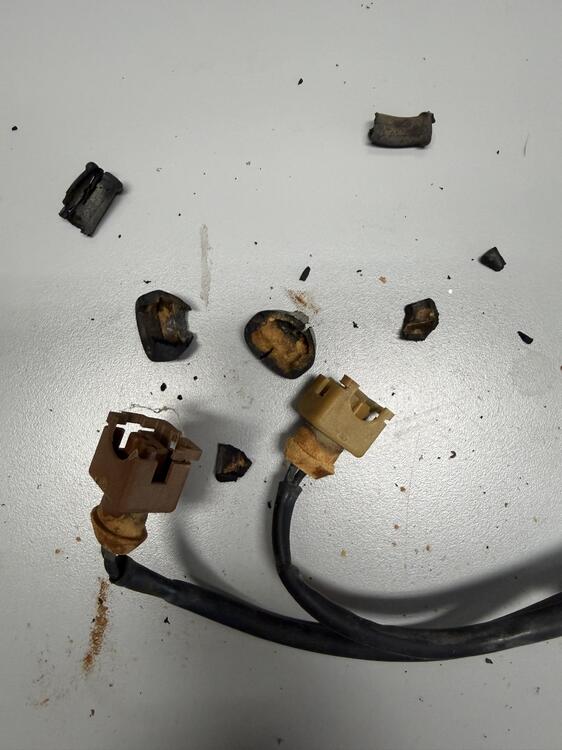
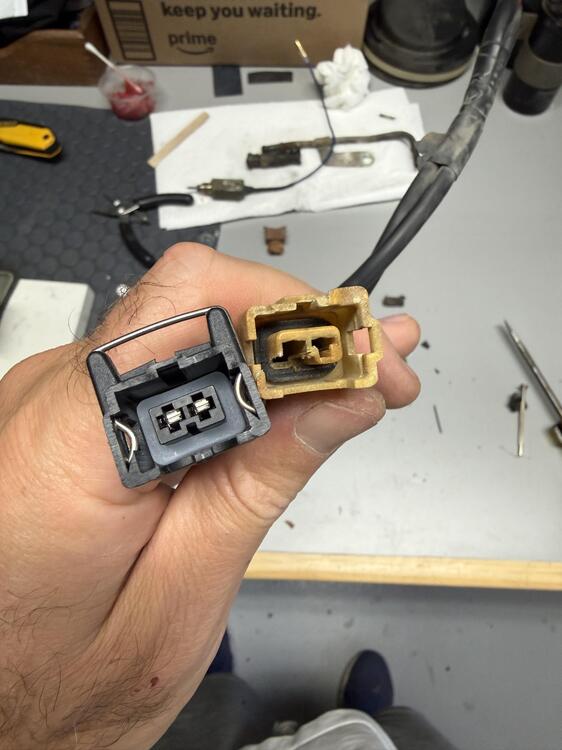
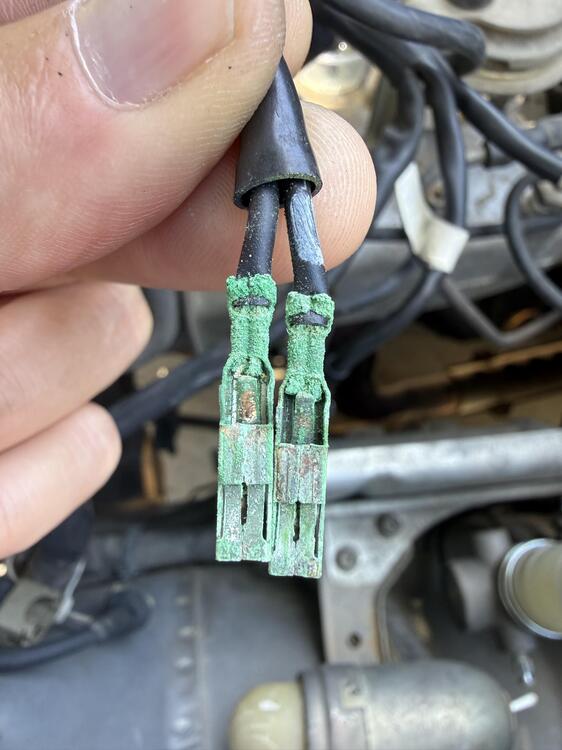
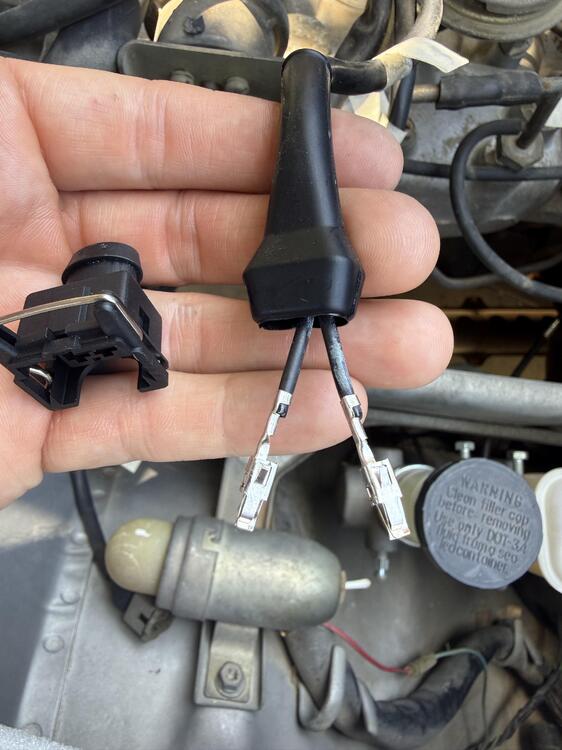
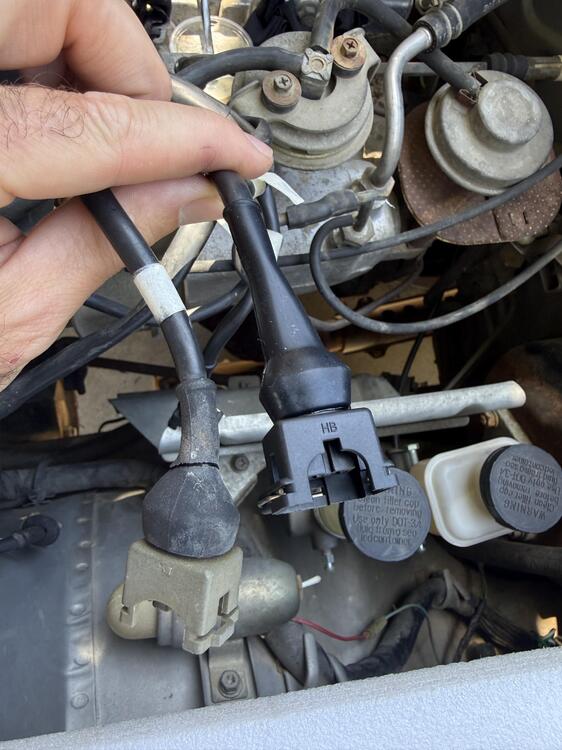
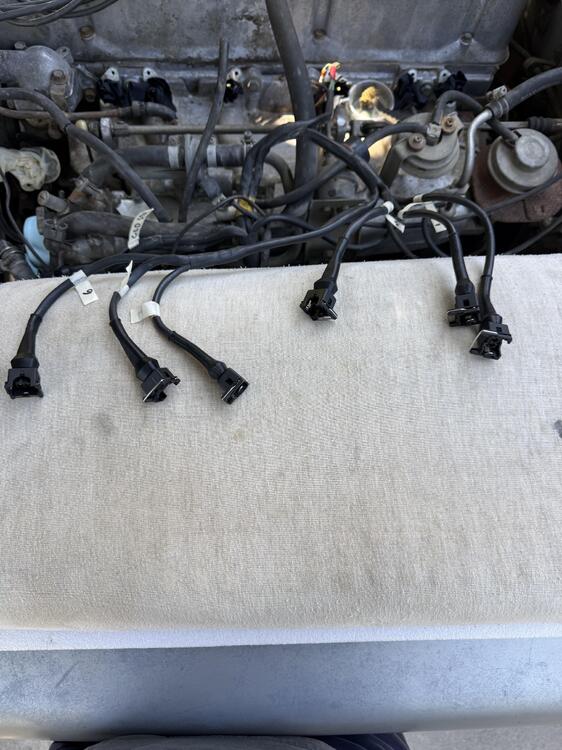
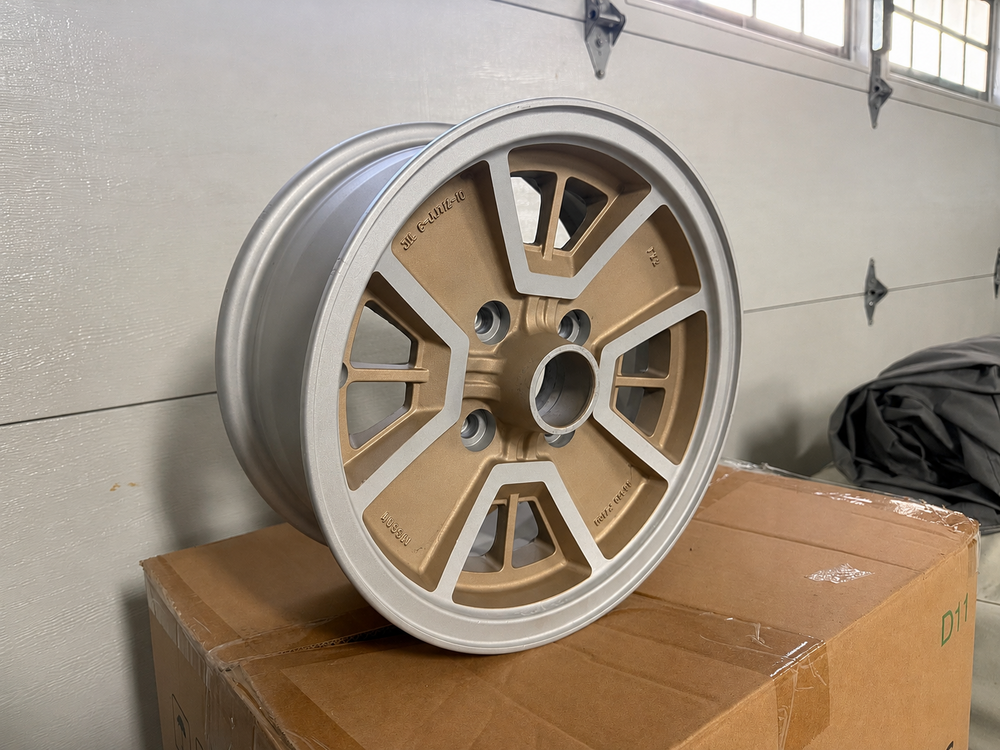
One more thing checked off the list, new EV1 connectors for the injectors, cold start, AAC valve, and thermostat housing sensors... Thermostat housing connector harness... Extra crispy! Old vs new... Green means good, right?;) New connectors going together... I'm just as excited about the new rubber boots being pliable again... All 6 injector connections done... Still waiting on the injectors to come back from the refurb shop. Also bought a used and hopefully original Bosch 280zx coil off eBay. Seller couldn't be bothered to put a multimeter on it, so we'll see when it gets here.🤞 Also still working on my wheels side quest. My research leads me to believe the original gold color on the 280zx 10th anniversary wheels is golden mist metallic (690). Ordered up some custom 1K spray cans from R&E Paint and will topcoat everything with their matte 2K clear. I'd like to maintain the dull "not shiny" look that the freshly blasted aluminum already has. Really not looking forward to masking them off, but oh well. Here's the end goal, thanks ChatGpt...
-
@Zed Head Yup, I have plenty of first hand experience buying "new" only to find out the the oem "used" stuff is far better. I'll see what I can scrounge up for a coil...
-
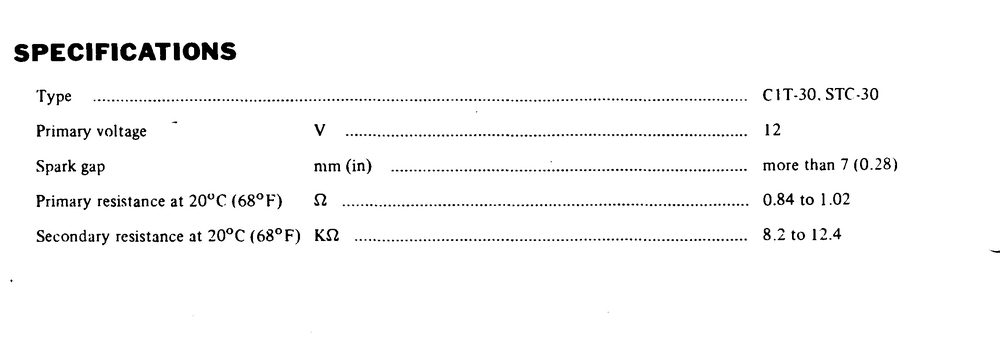
Interesting discussion. I'd like to find a coil that actually makes a claim as to what it's primary and secondary resistance is. I can find 1.5 ohm coils all over the place, but anything less than that is almost non-existent. I messaged a few people on ebay and asked if they could report back their readings. We'll see. I'm sure 1.5 ohms would be fine, but if I'm gunna pull the trigger and buy something, I'd rather get something that matches the FSM:
-
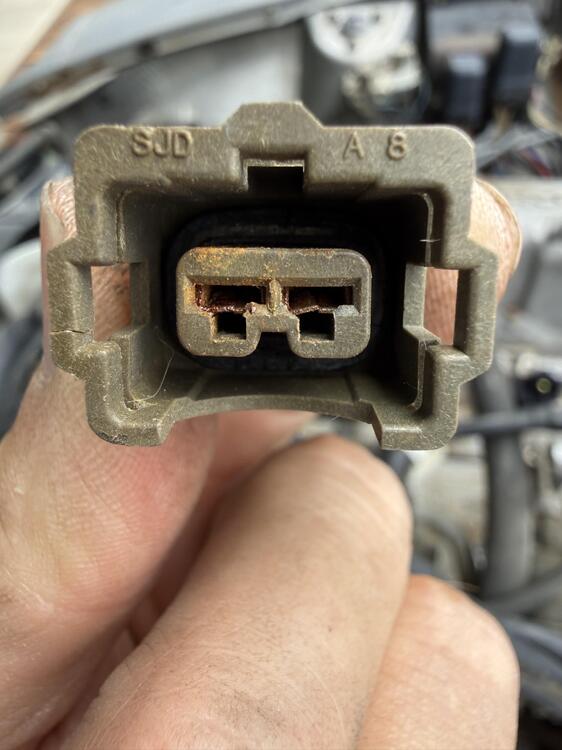
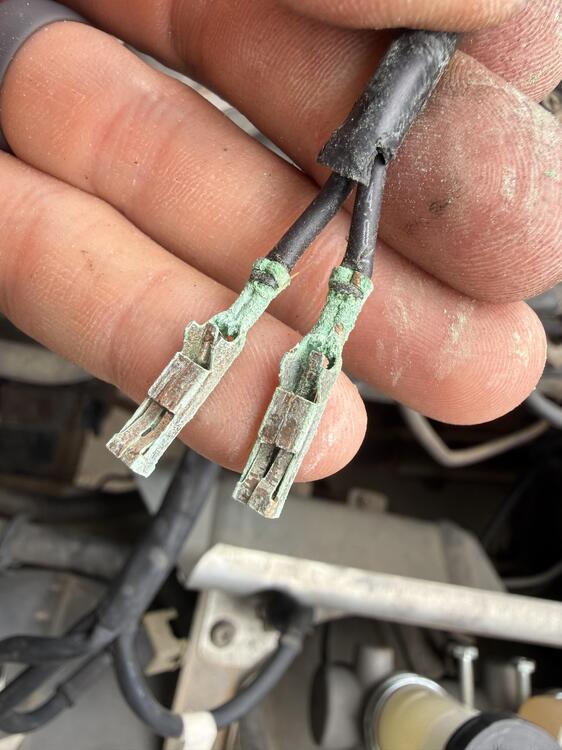
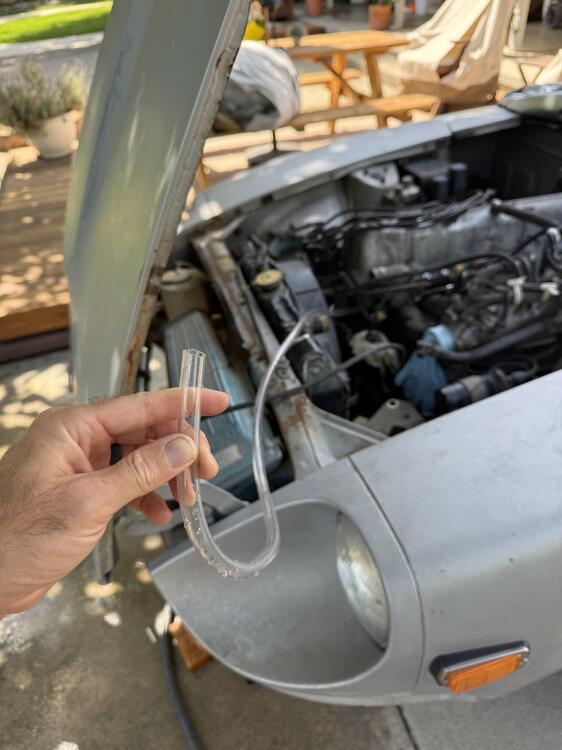
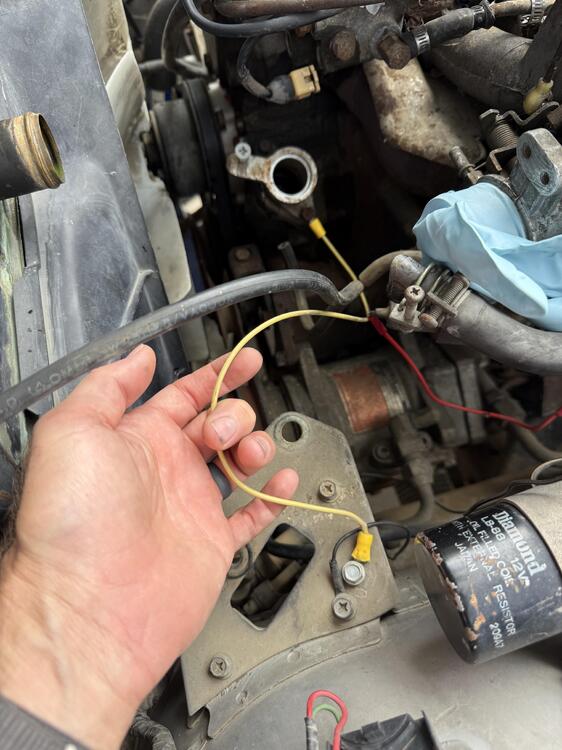
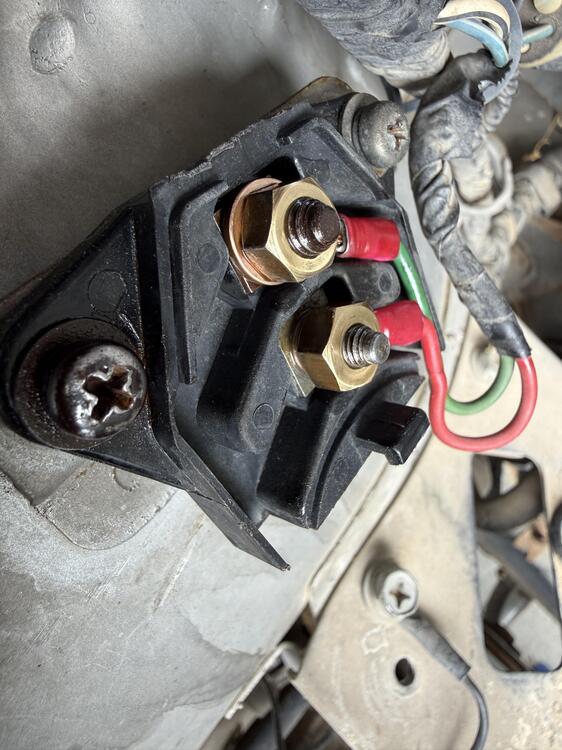
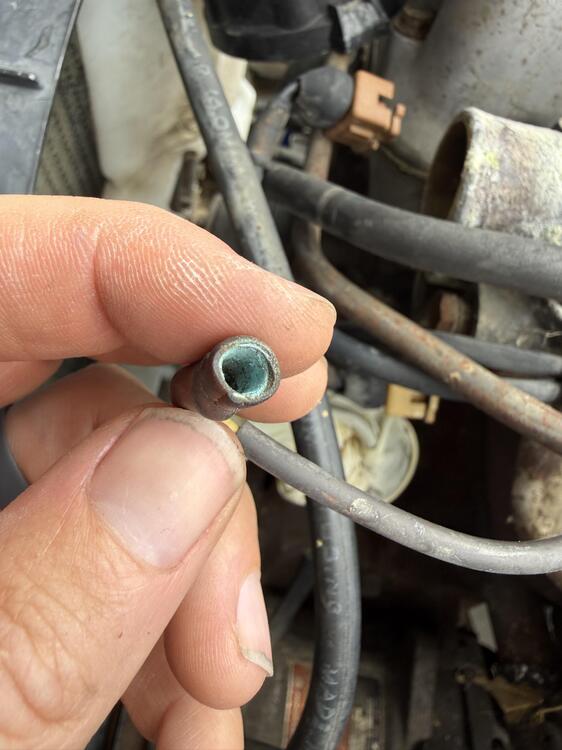
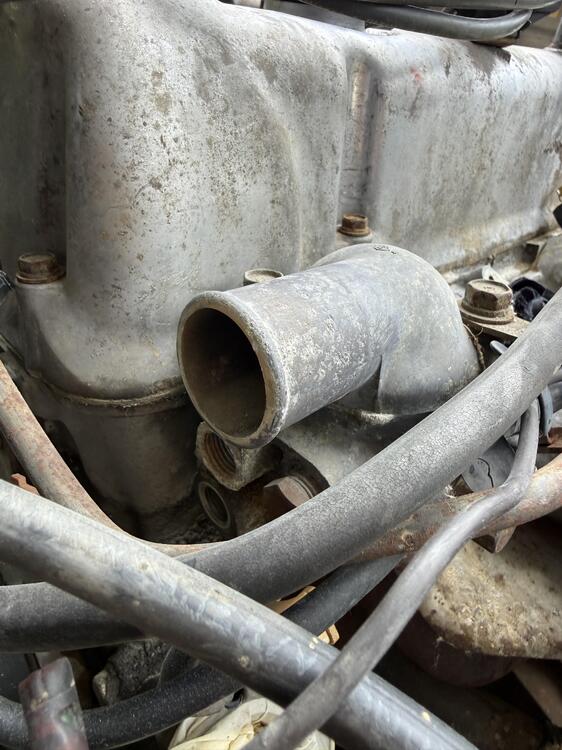
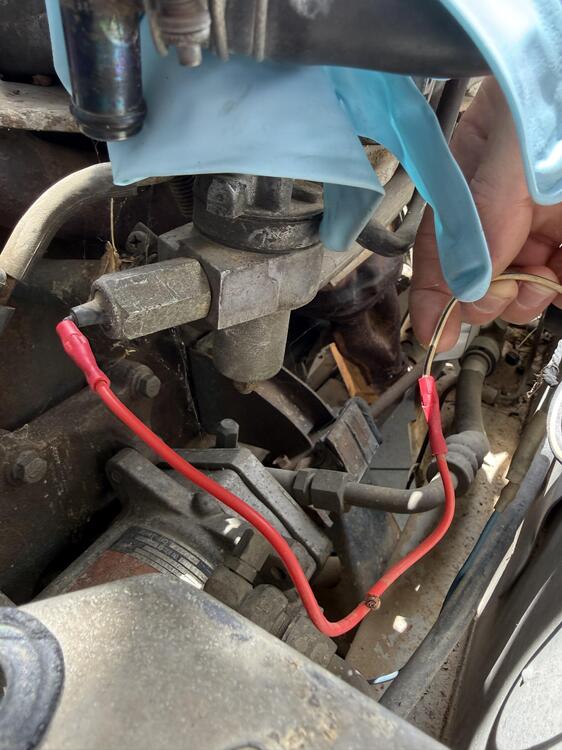
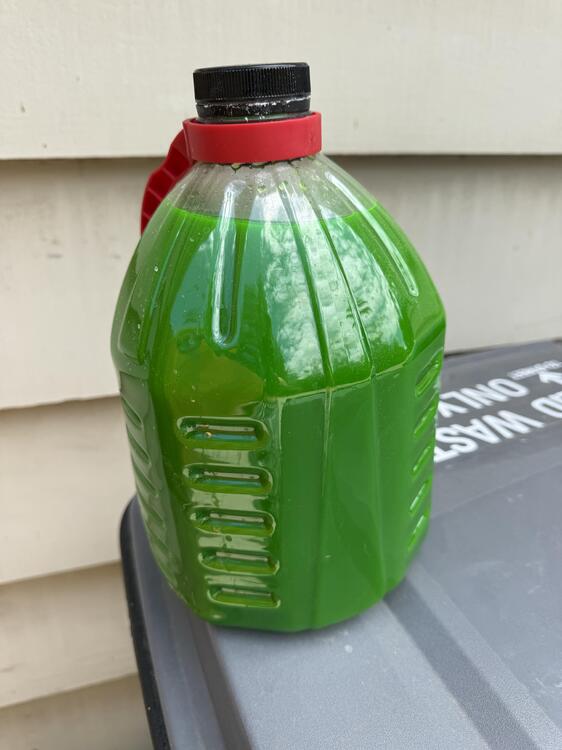
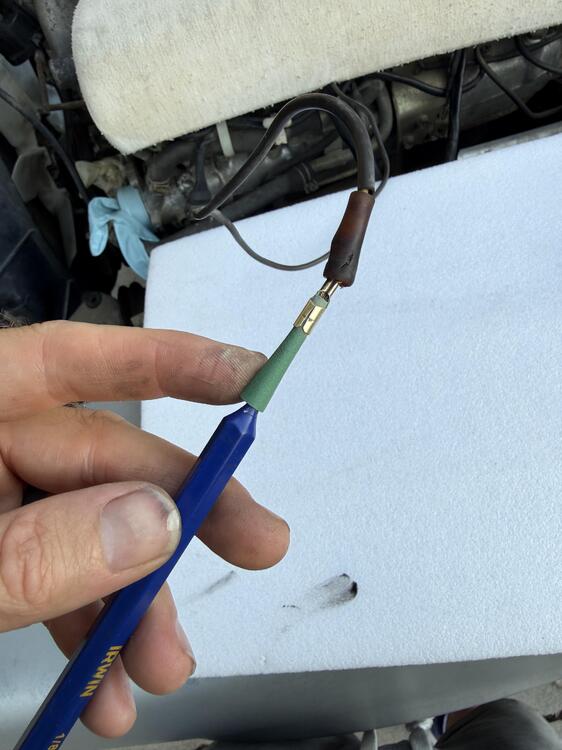
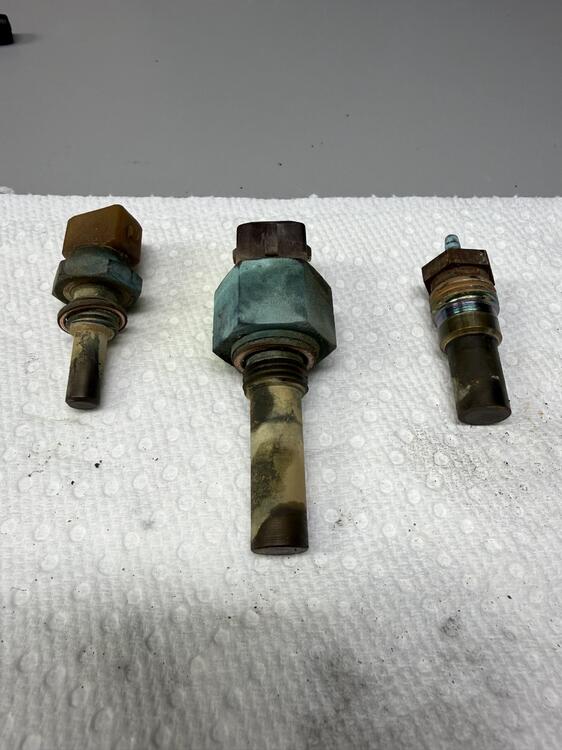
Ok, a few more updates. I continue to work my way through the electrical connections in the engine bay. I think I'll just describe my findings and questions via pictures... Injector connectors are in bad shape. This one being the worst examples. I've got new EV1 connectors on the way. I plan on using all of the existing wiring and simply crimping on the new metal ends. Should end up with a cleaner finished product. Drained the coolant. It was very green, like 100% coolant green without any dilution. Glad I drained it. Ran pure water as a flush as well. This grounding wire is clearly non-original. Can anyone confirm if a 78 280z is supposed to have a grounding wire from the distributor base? Pulled the ignition coil for testing. 2.0 ohms primary and 13.5K secondary. Based on the service manual, it should be about ~1.0 ohms primary and 8-12K secondary. This probably isn't the factory coil. I looked online for anything around ~1.0 ohm primary, but can't find anything. Most sites don't even list the resistance. Best I can seem to find is the flame thrower at 1.5 ohms. Any recommendations? TBH, polishing up the connections is quite satisfying. Instant results. A bit of sandpaper wrapped around a punch makes for a good setup to clean up the inside of female bullet connectors. Thermostat housing sensors before and after. They weren't too bad to begin with, but I understand these are critical for the ignition system to work rightly, so I cleaned 'em up real nice. Maaaaaaaybe more evidence of a true 70K mile engine? Thermostat housing has very little pitting and corrosion. My prior Z car was paper thin here. Can anyone tell me what this little electrical device with red wire does that's screwed into the throttle body? I can't seem to make out the electrical diagram I have. Maybe it says "flood cut solenoid"? You can see in the pic mine has the ol' twist-em-together-and-call-it-good wiring method. Anyways, more to come...
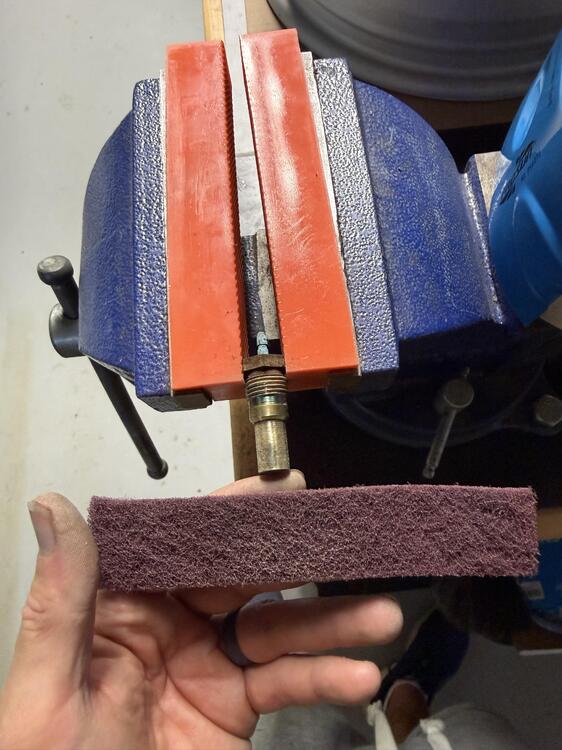
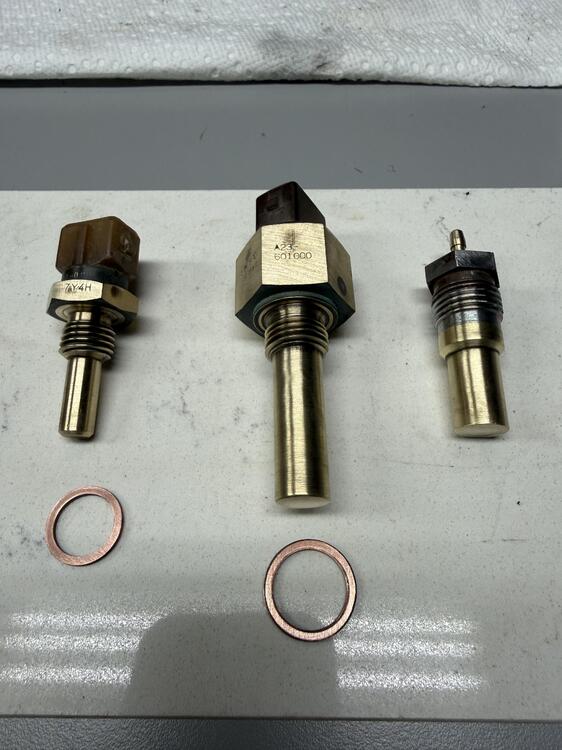
-
Yep, I read your entire thread on the subject a couple days ago. Found it helpful👍
-
Appreciate you sharing. That was a great read, and I'll keep it in mind should I need to crack the AFM open again. 👍
-
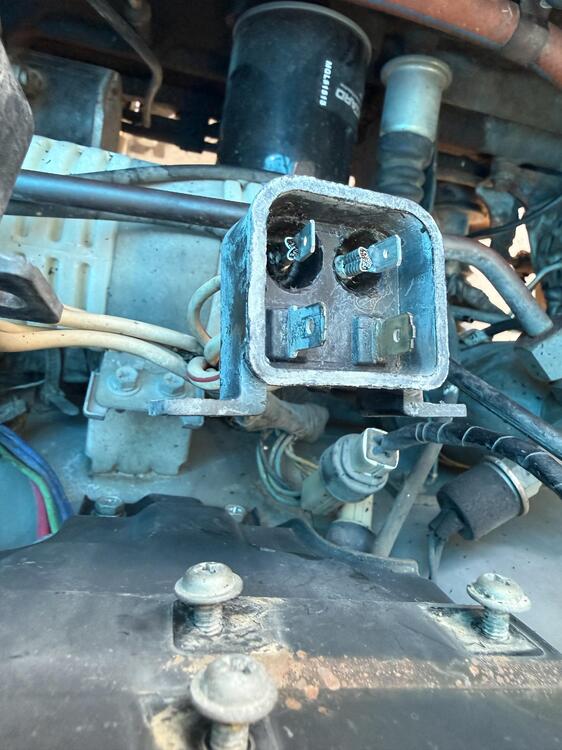
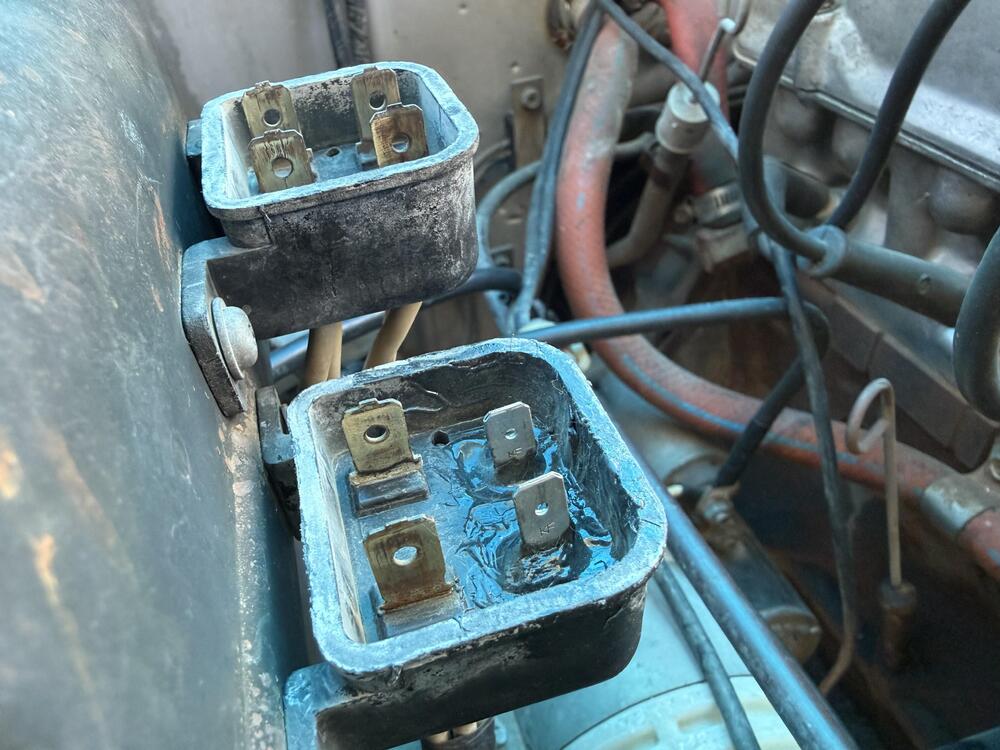
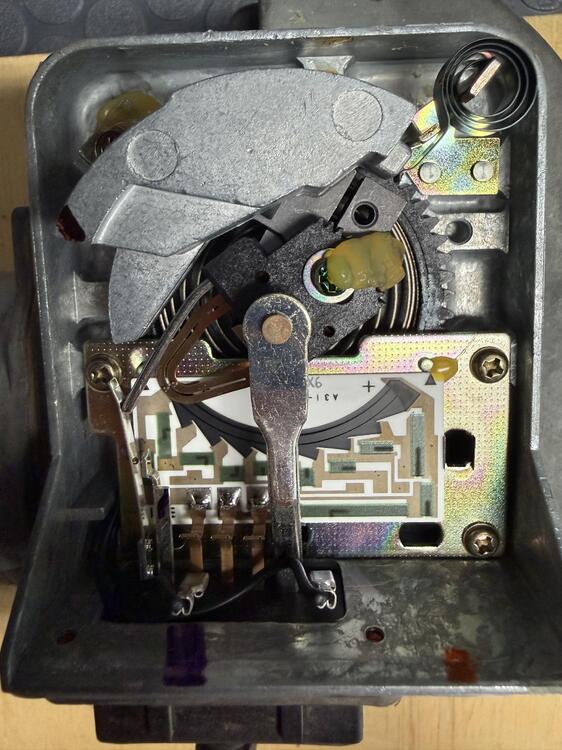
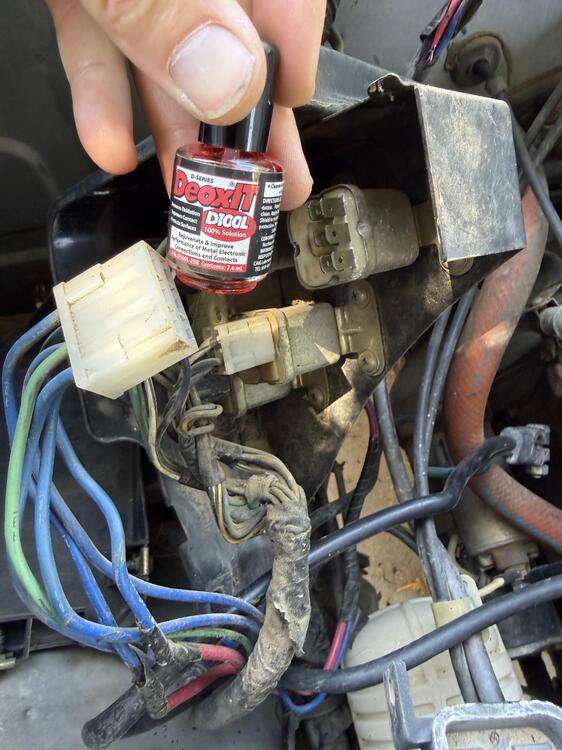
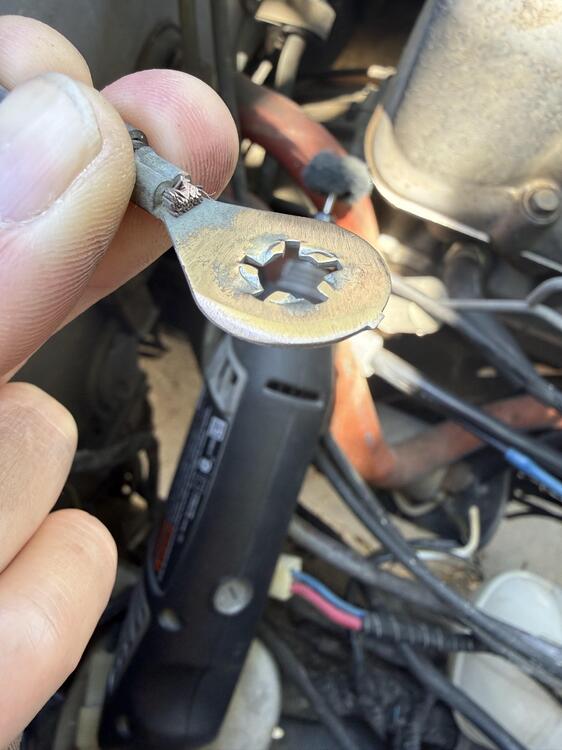
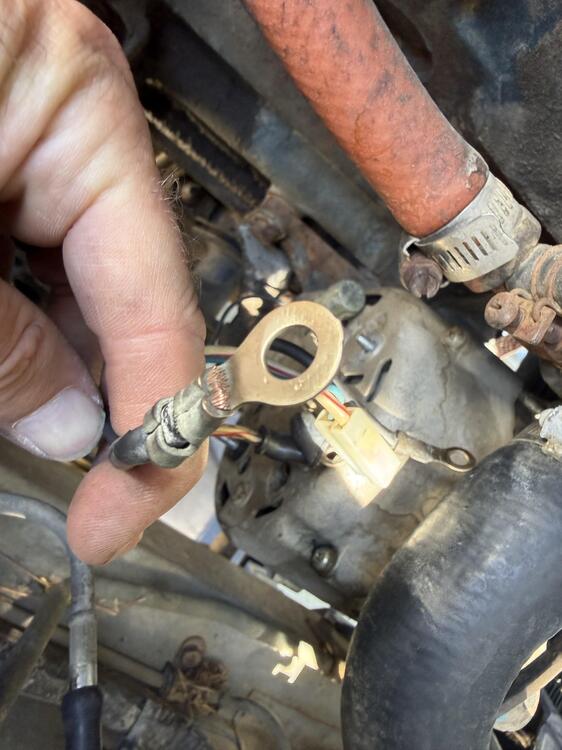
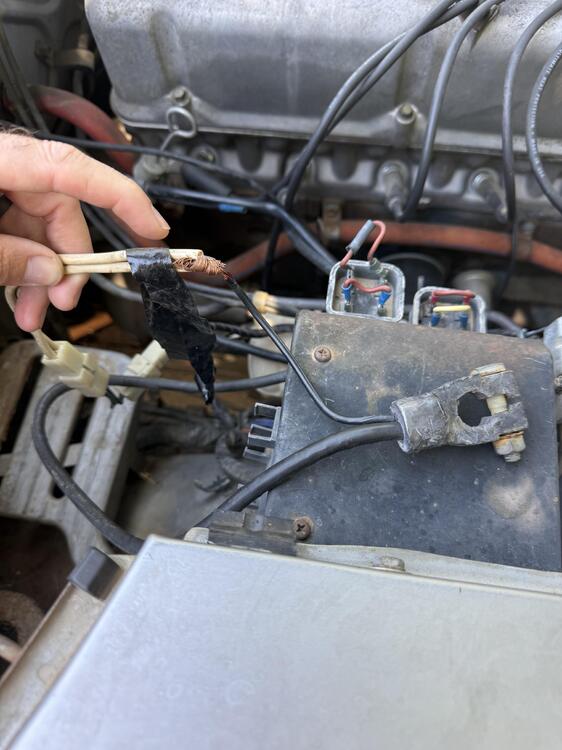
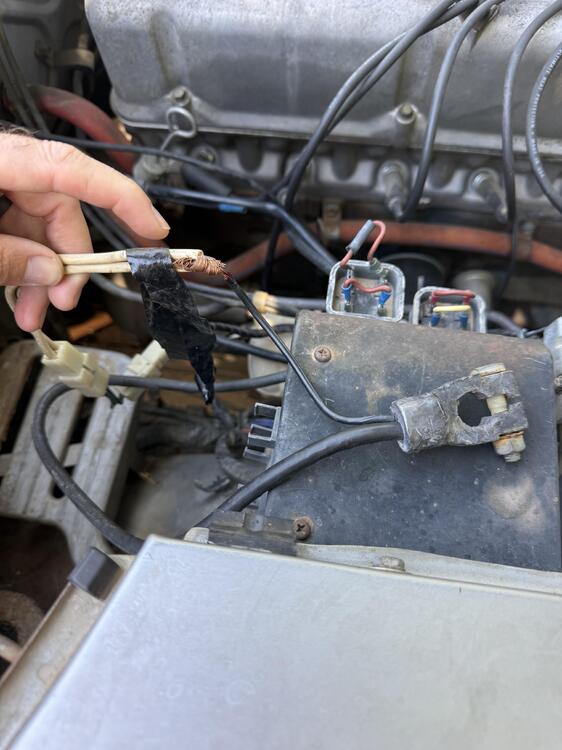
A couple updates... Got the fusible link holder spades repair done... A 1/8 tungsten dremel bit was the tool for the job. As soon as you get about a 1/2 inch down into the plastic, you can start pushing the wire up through the bottom of the base. Crimped on new spades. Yep, they're not quite as big as the originals, but i connected the fusible links to them, and the connection seems pretty solid. Filled the void created by the dremel with JB plastic epoxy. Not the prettiest finished product, but it's functional. I can always come back in the future and splice in a completely new unit if I really want all the spades to match. At least the caps will cover it... I also went around and cleaned up all the electrical connections and grounds I could find in the engine compartment. I got these small scotch brite wheels for my dremel tool and they cleaned everything up nice and bright! Better than using a nail file… I put some of the D100L on each connection. It claims to remove oxidation and protect/improve all electrical connections. Cheap insurance... Another previous owner suprise I found. No biggie, but as I’ve read elseware, all these little sub-par electrical connections can add up to a poor running condition. This one is for the fusible link coming off the positive battery terminal. Just twist em together and tape it up! Oof… Lastly, I gently persuaded the spring “backstop” back into place and it’s working properly now. Took very little effort. Other than that, I put some rubbing alcohol on a q-tip and cleaned up the contact trace and sealed it back up. I'm leaving the idle air bypass screw at 7 turns out from the bottom. Zed, in a previous thread of yours, you mentioned a decent rule of thumb being...if you remove your oil cap at idle and the engine doesn't stumble, you're too rich. I'll use that as a guide to "tune" this screw before taking it in to smog... I'm going to see if I can find a 3D print file for those fusible link covers...
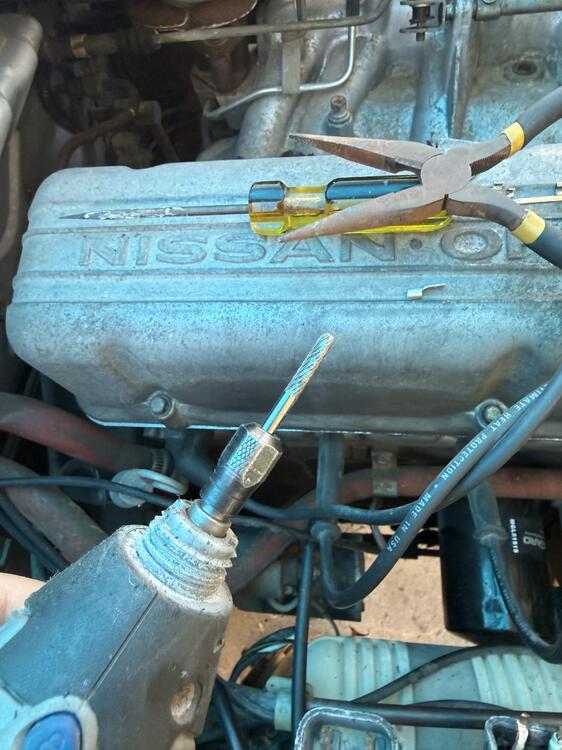
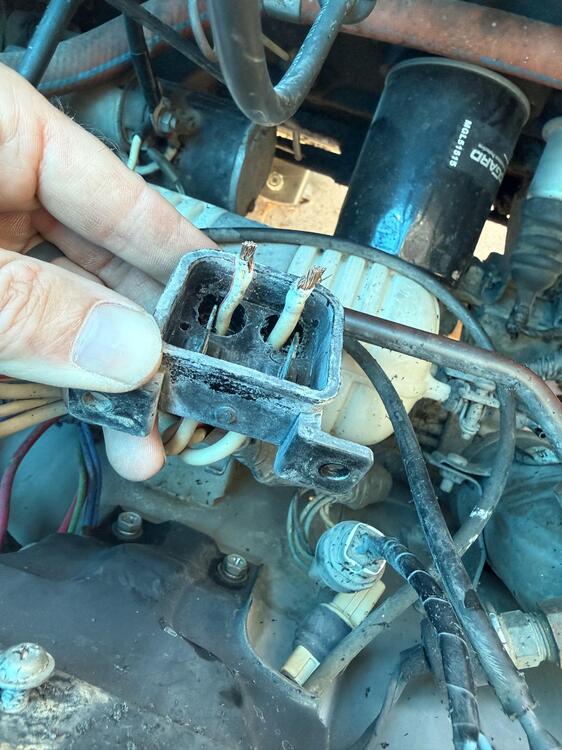
-
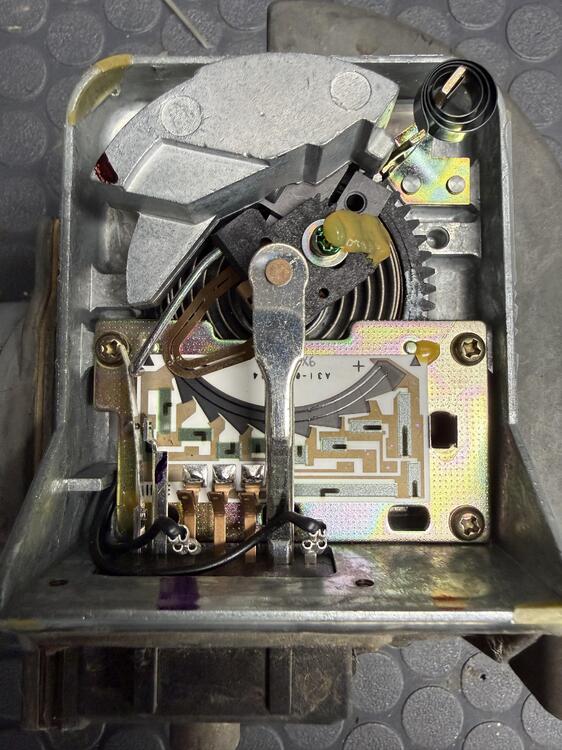
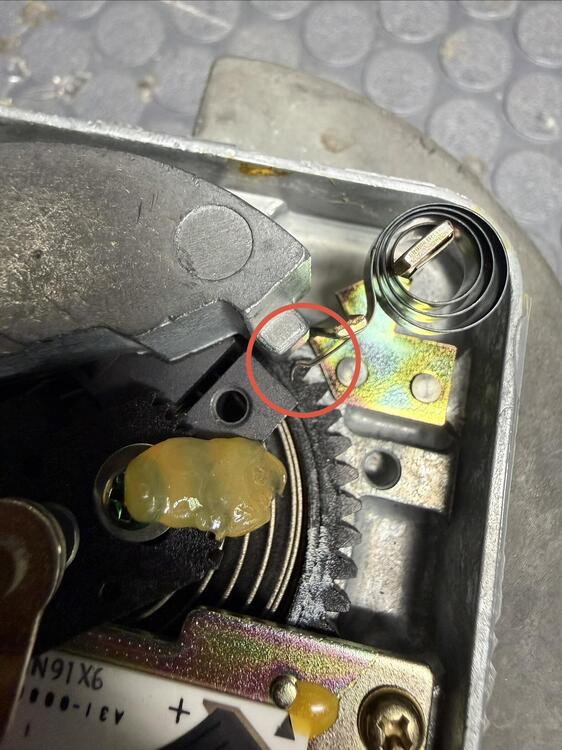
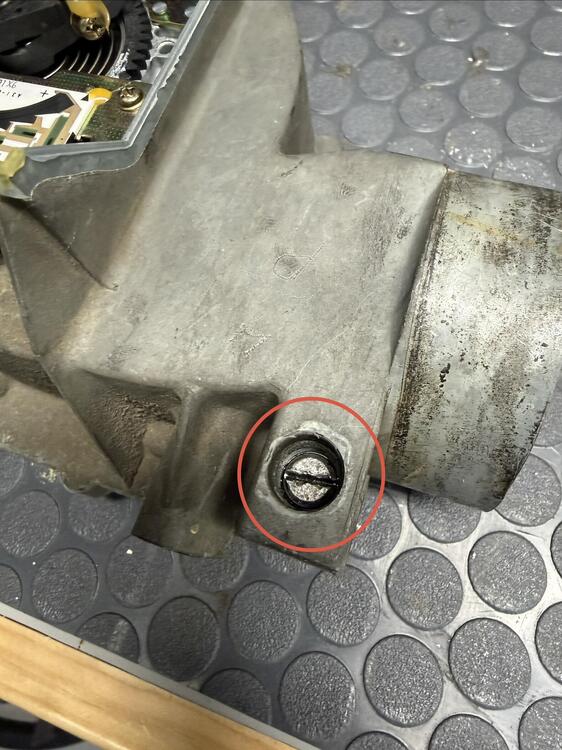
I know I'm jumping around all over the place, but trust me, I'm staying organized! The AFM. Man, been doing a lot of reading, and I want to get thoughts. Here's mine, freshly opened up. As far as I could tell, I didn't see any signs of anyone having been in here before. All glue blobs in place. I followed the atlantic Z writeup and measured resistance across the pins he mentioned. Everything checked out OK. It all looks pretty good in here, except for one thing, the coil spring "back stop" for the weight. Mine is not making any connect with the weight when in the fully closed position. Here's a pic of what I mean... I wanted to get input before just bending the spring back to make contact. Is that the right move here? Also, unless you guys see something obvious, my plan is to just seal it up and make no changes because it appears to be untouched and I know this could have an effect on my smog readings. Secondly, the AFM bypass adjustment screw appears to have been played with. Mine is 7 turns out from the bottom. I wonder if there's a factory spec for this, and if it being a CA car makes a difference...