the_tool_man
Free Member
-
Joined
-
Last visited
-
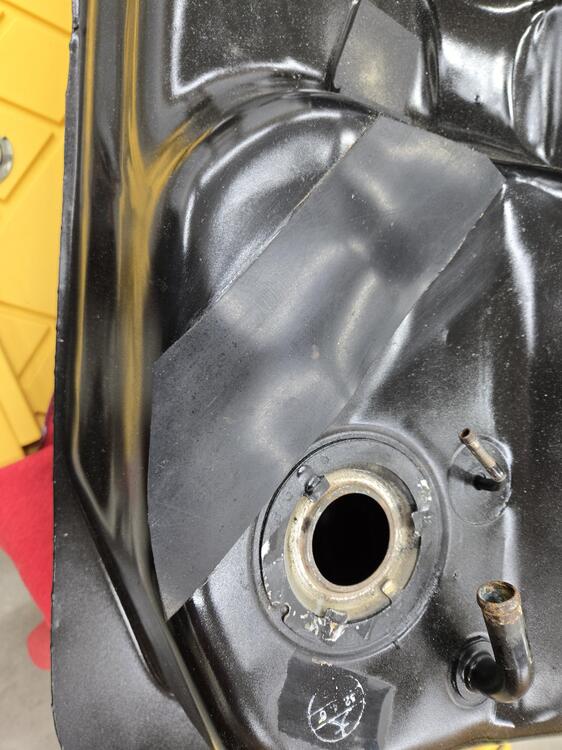
 I installed a new factory fuel pump a few years ago and have maybe an hour run time on it total since then. I just did a full restoration of the tank and removed the strainer, which was clogged with rust when I took it out. This is why I want to install a pre-filter before the pump. Without that, there is nothing to protect the pump from ingesting debris that might end up in the fuel tank. The filter I linked is pretty large and has a replaceable filter element. It strains to 100 microns, which is commonly accepted as a good compromise between protecting the pump from damage while not being so fine as to clog and restrict flow enough to cause cavitation in the pump itself. If you want more detail, read back through this thread. That's why I resurrected it.
 -
That's allegedly too fine (20 microns) for a pre-pump filter. My pump was much louder with the Fram version installed than without.
-
Yes. I used one for a while. But now I see where it can restrict flow enough to cavitate in the pump. Indeed the pump was noticeably louder with the G3 installed.
-
Older thread, I know. But I'm on the hunt for a proper pre-filter, having just learned that the G3 is too restrictive. I just got finished restoring my fuel tank and coating it with Red-Kote. My preference would be all of these in decreasing order of priority: 100 micron filtering. 3/8" barb fittings, or threaded so I can provide my own. Clear body, so I can see if Red-Kote failed, rust, etc. Not glass, for obvious reasons. Inexpensive compared to those racing filters that cost hundreds of dollars. I haven't found anything that matches all of these. Being clear and not glass seems to be the unobtainable feature. But there are options that aren't clear, and meet all the others. I'm currently running no filter,, and really need to install something ASAP. Looking at going with one of these inexpensive aluminum-bodied filters: https://www.amazon.com/EVIL-ENERGY-Universal-Aluminum-Gasoline/dp/B0DN6SH631/ref=sr_1_3?crid=1KOAAR2TYSE5R&dib=eyJ2IjoiMSJ9.p_O7PvRTWOlBskuqunz5j1hb3qgTtqxuxTRwI_k3iJGFft3lAuJQ9dBkfGtH6RUnk8BnmLd6jbNIeSbCMHq6yOLpudvAuIvg28_HnsEirBDW5yuzLC0UXo-IywBRhaLhc7VhdL3reL-MrorDb1I7DBNGdvzQ8GLF33hzosp18jWgf6W3FXldklMcZ7D6IhpkSnMS_k53IFnXQ98ROHfPRKCSNrxPCddjjdLxr1OzYBs.alzow_qg4vB6MChEDLoyk3aaTUBwCPw2cXBaKVCu2rQ&dib_tag=se&keywords=100%2Bmicron%2Bfuel%2Bfilter%2B3%2F8%2Bclear&qid=1751743955&sprefix=100%2Bmicron%2Bfuel%2Bfilter%2B3%2F8%2Bclear%2Caps%2C188&sr=8-3&th=1 Has anyone tried one of these, or something better? Again, not being clear means I'll have to open it and check the element periodically. But I don't see a better option.
-
I'm a member of about 20 different forums. This one has more ads, BY FAR, than all of the others.
-
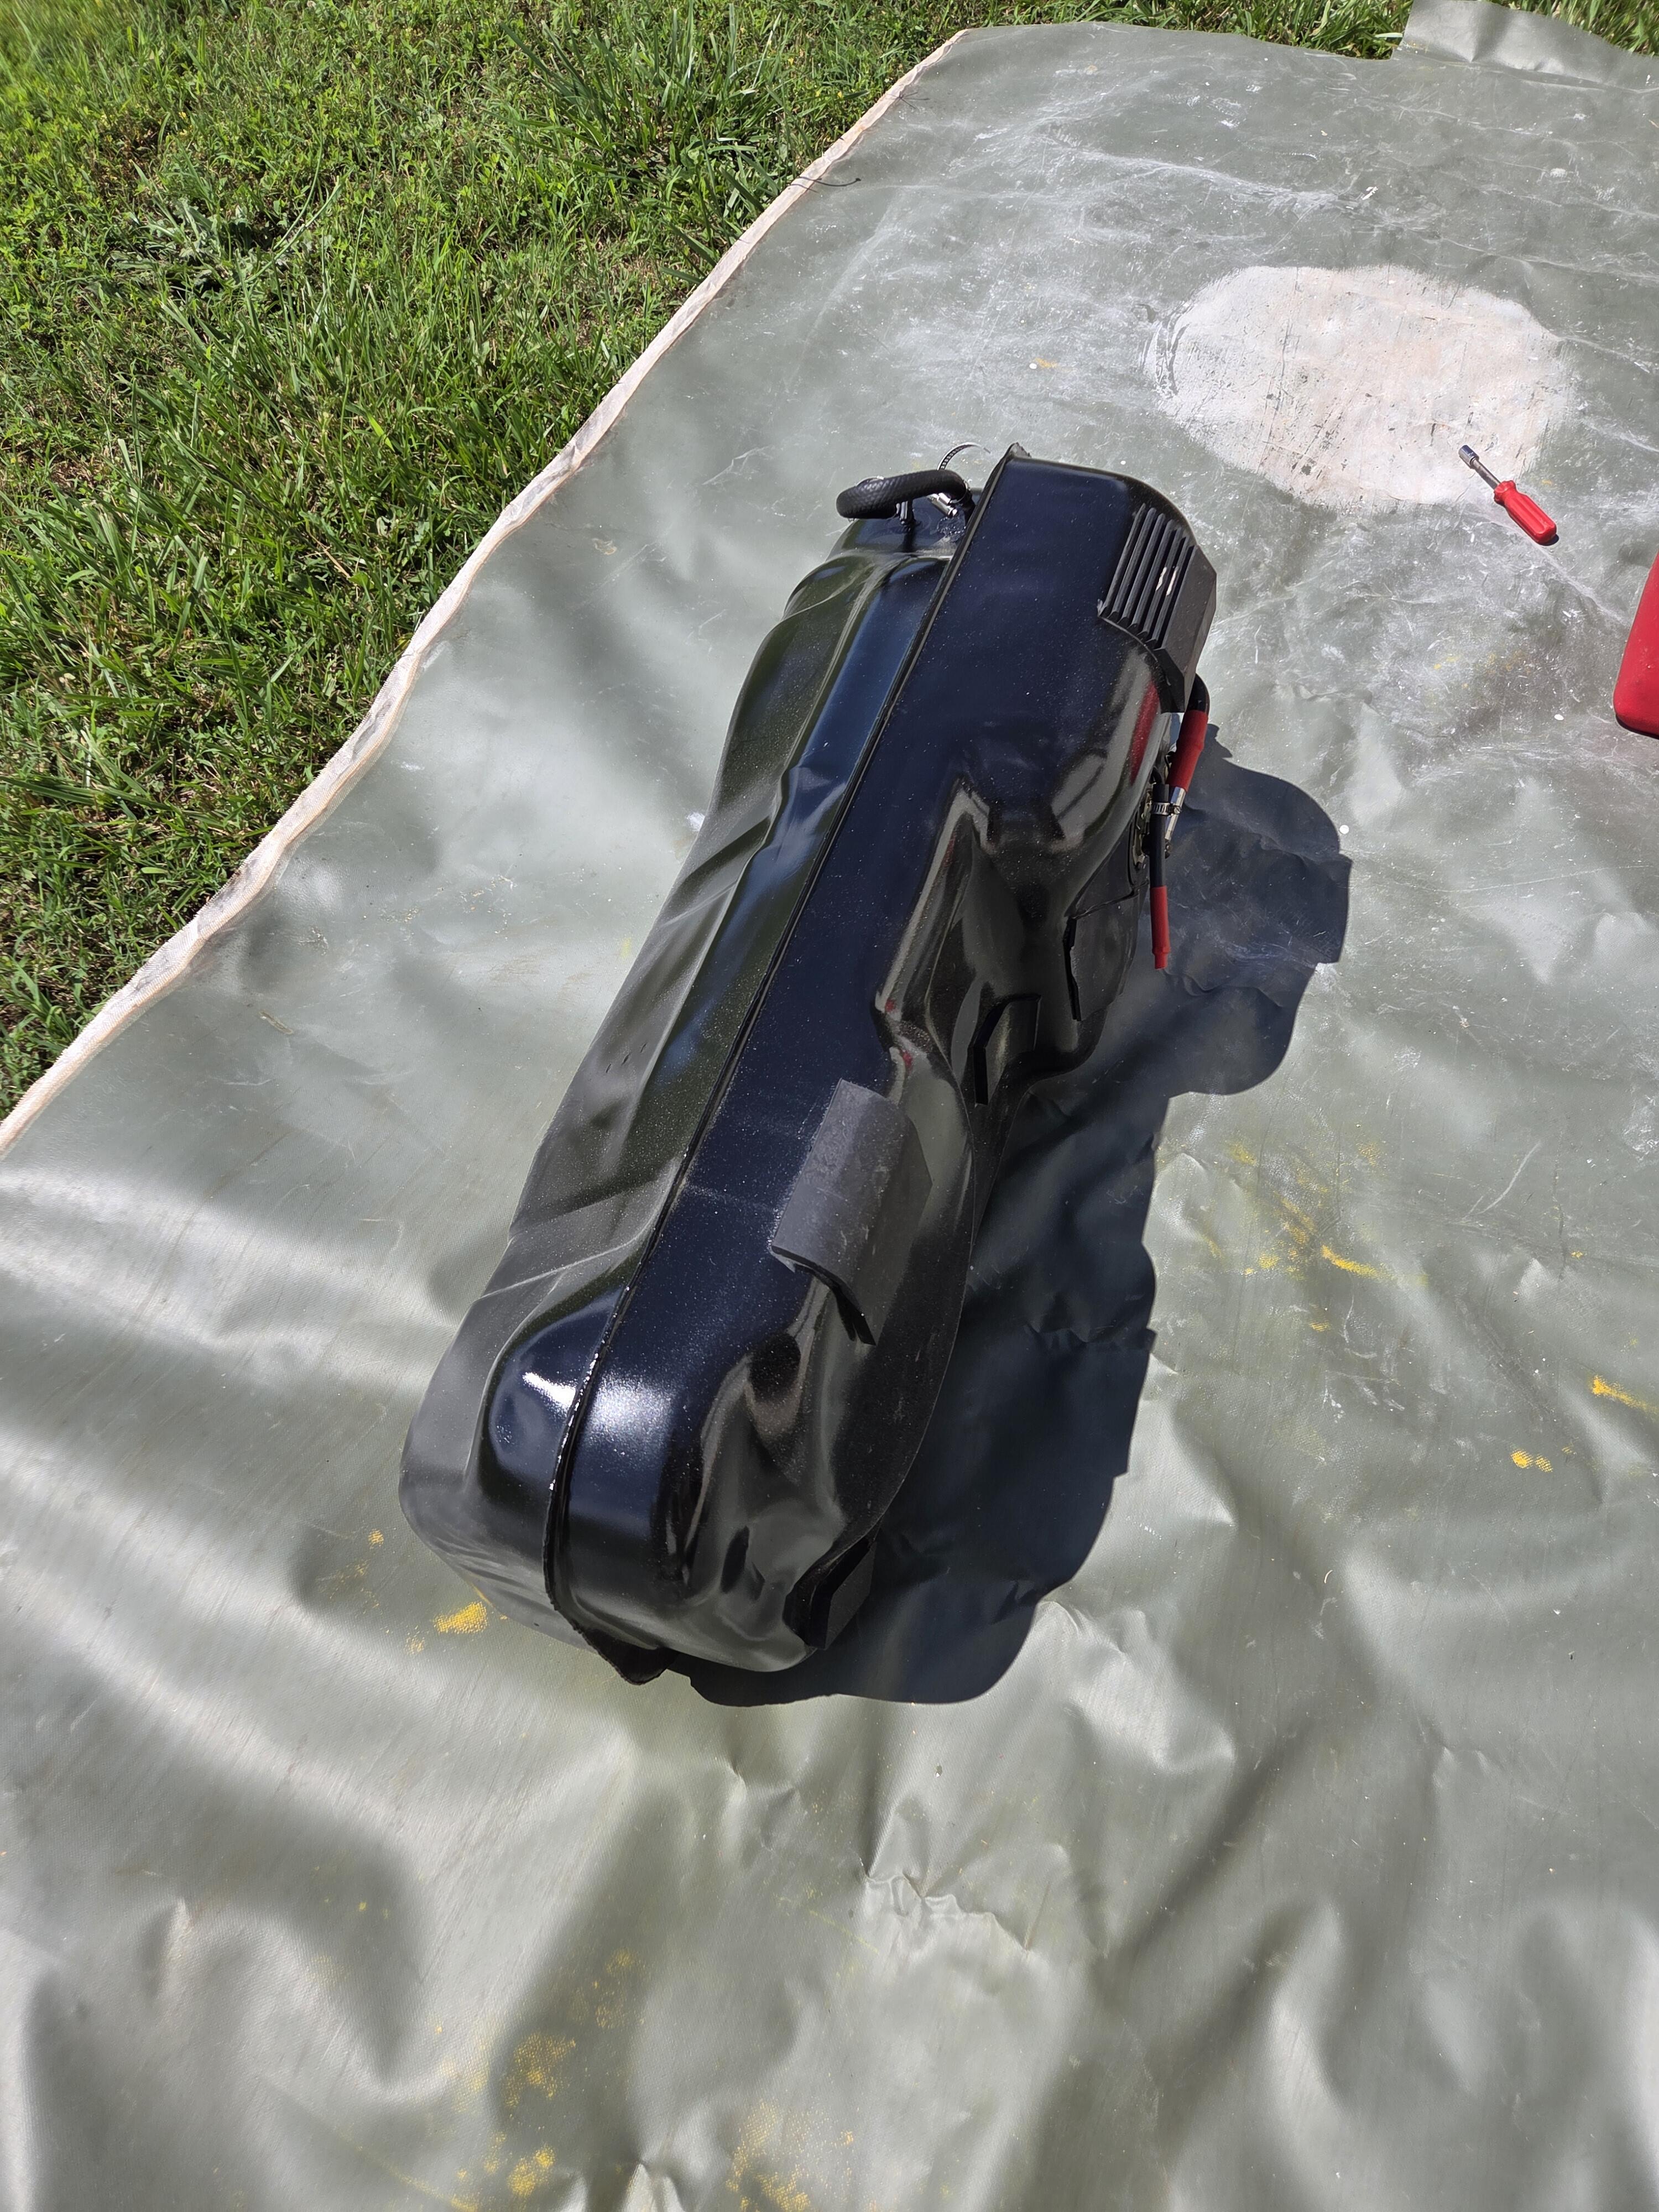
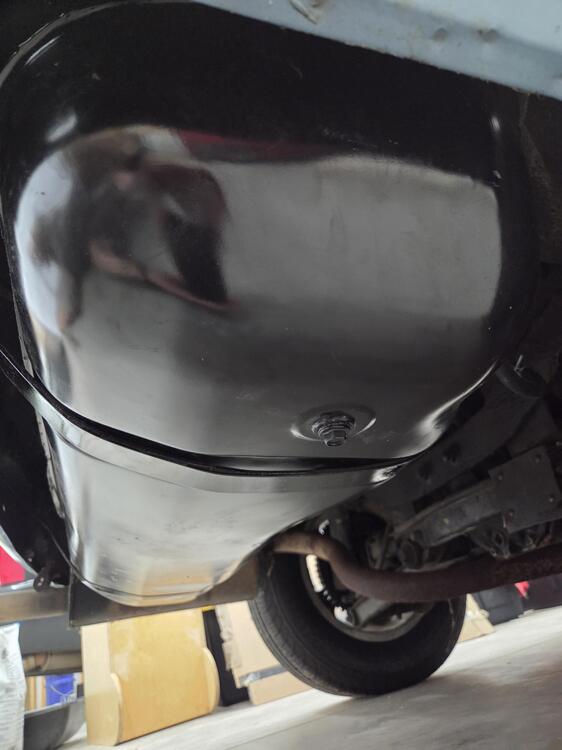
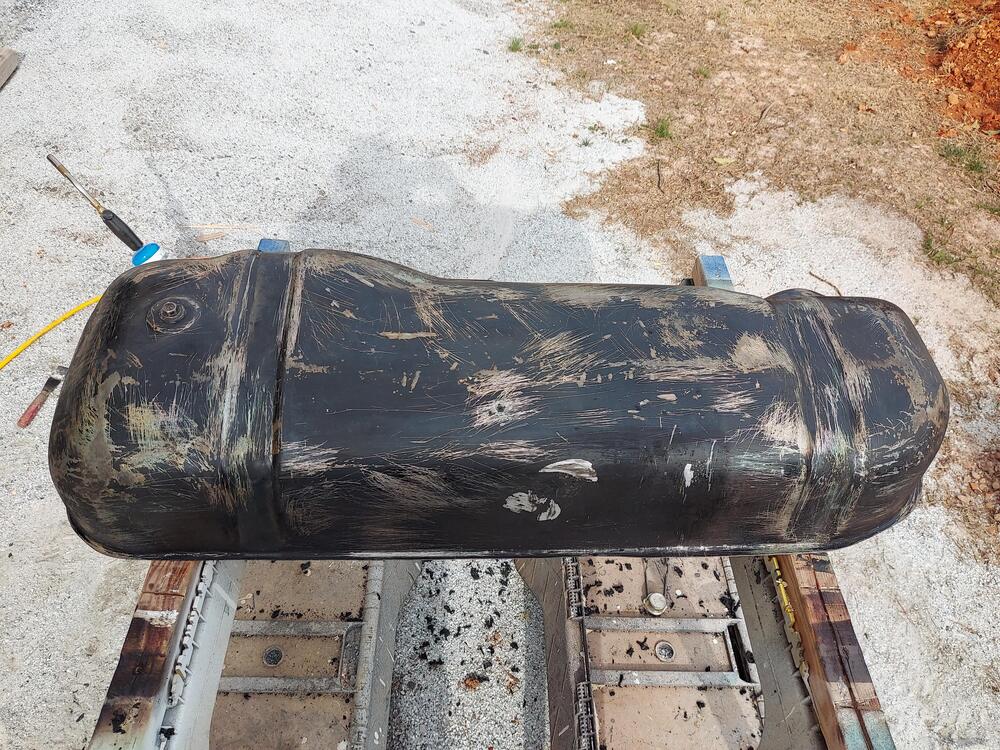
One last pic after washing and driving around for a bit. Thanks everyone for the help.

-
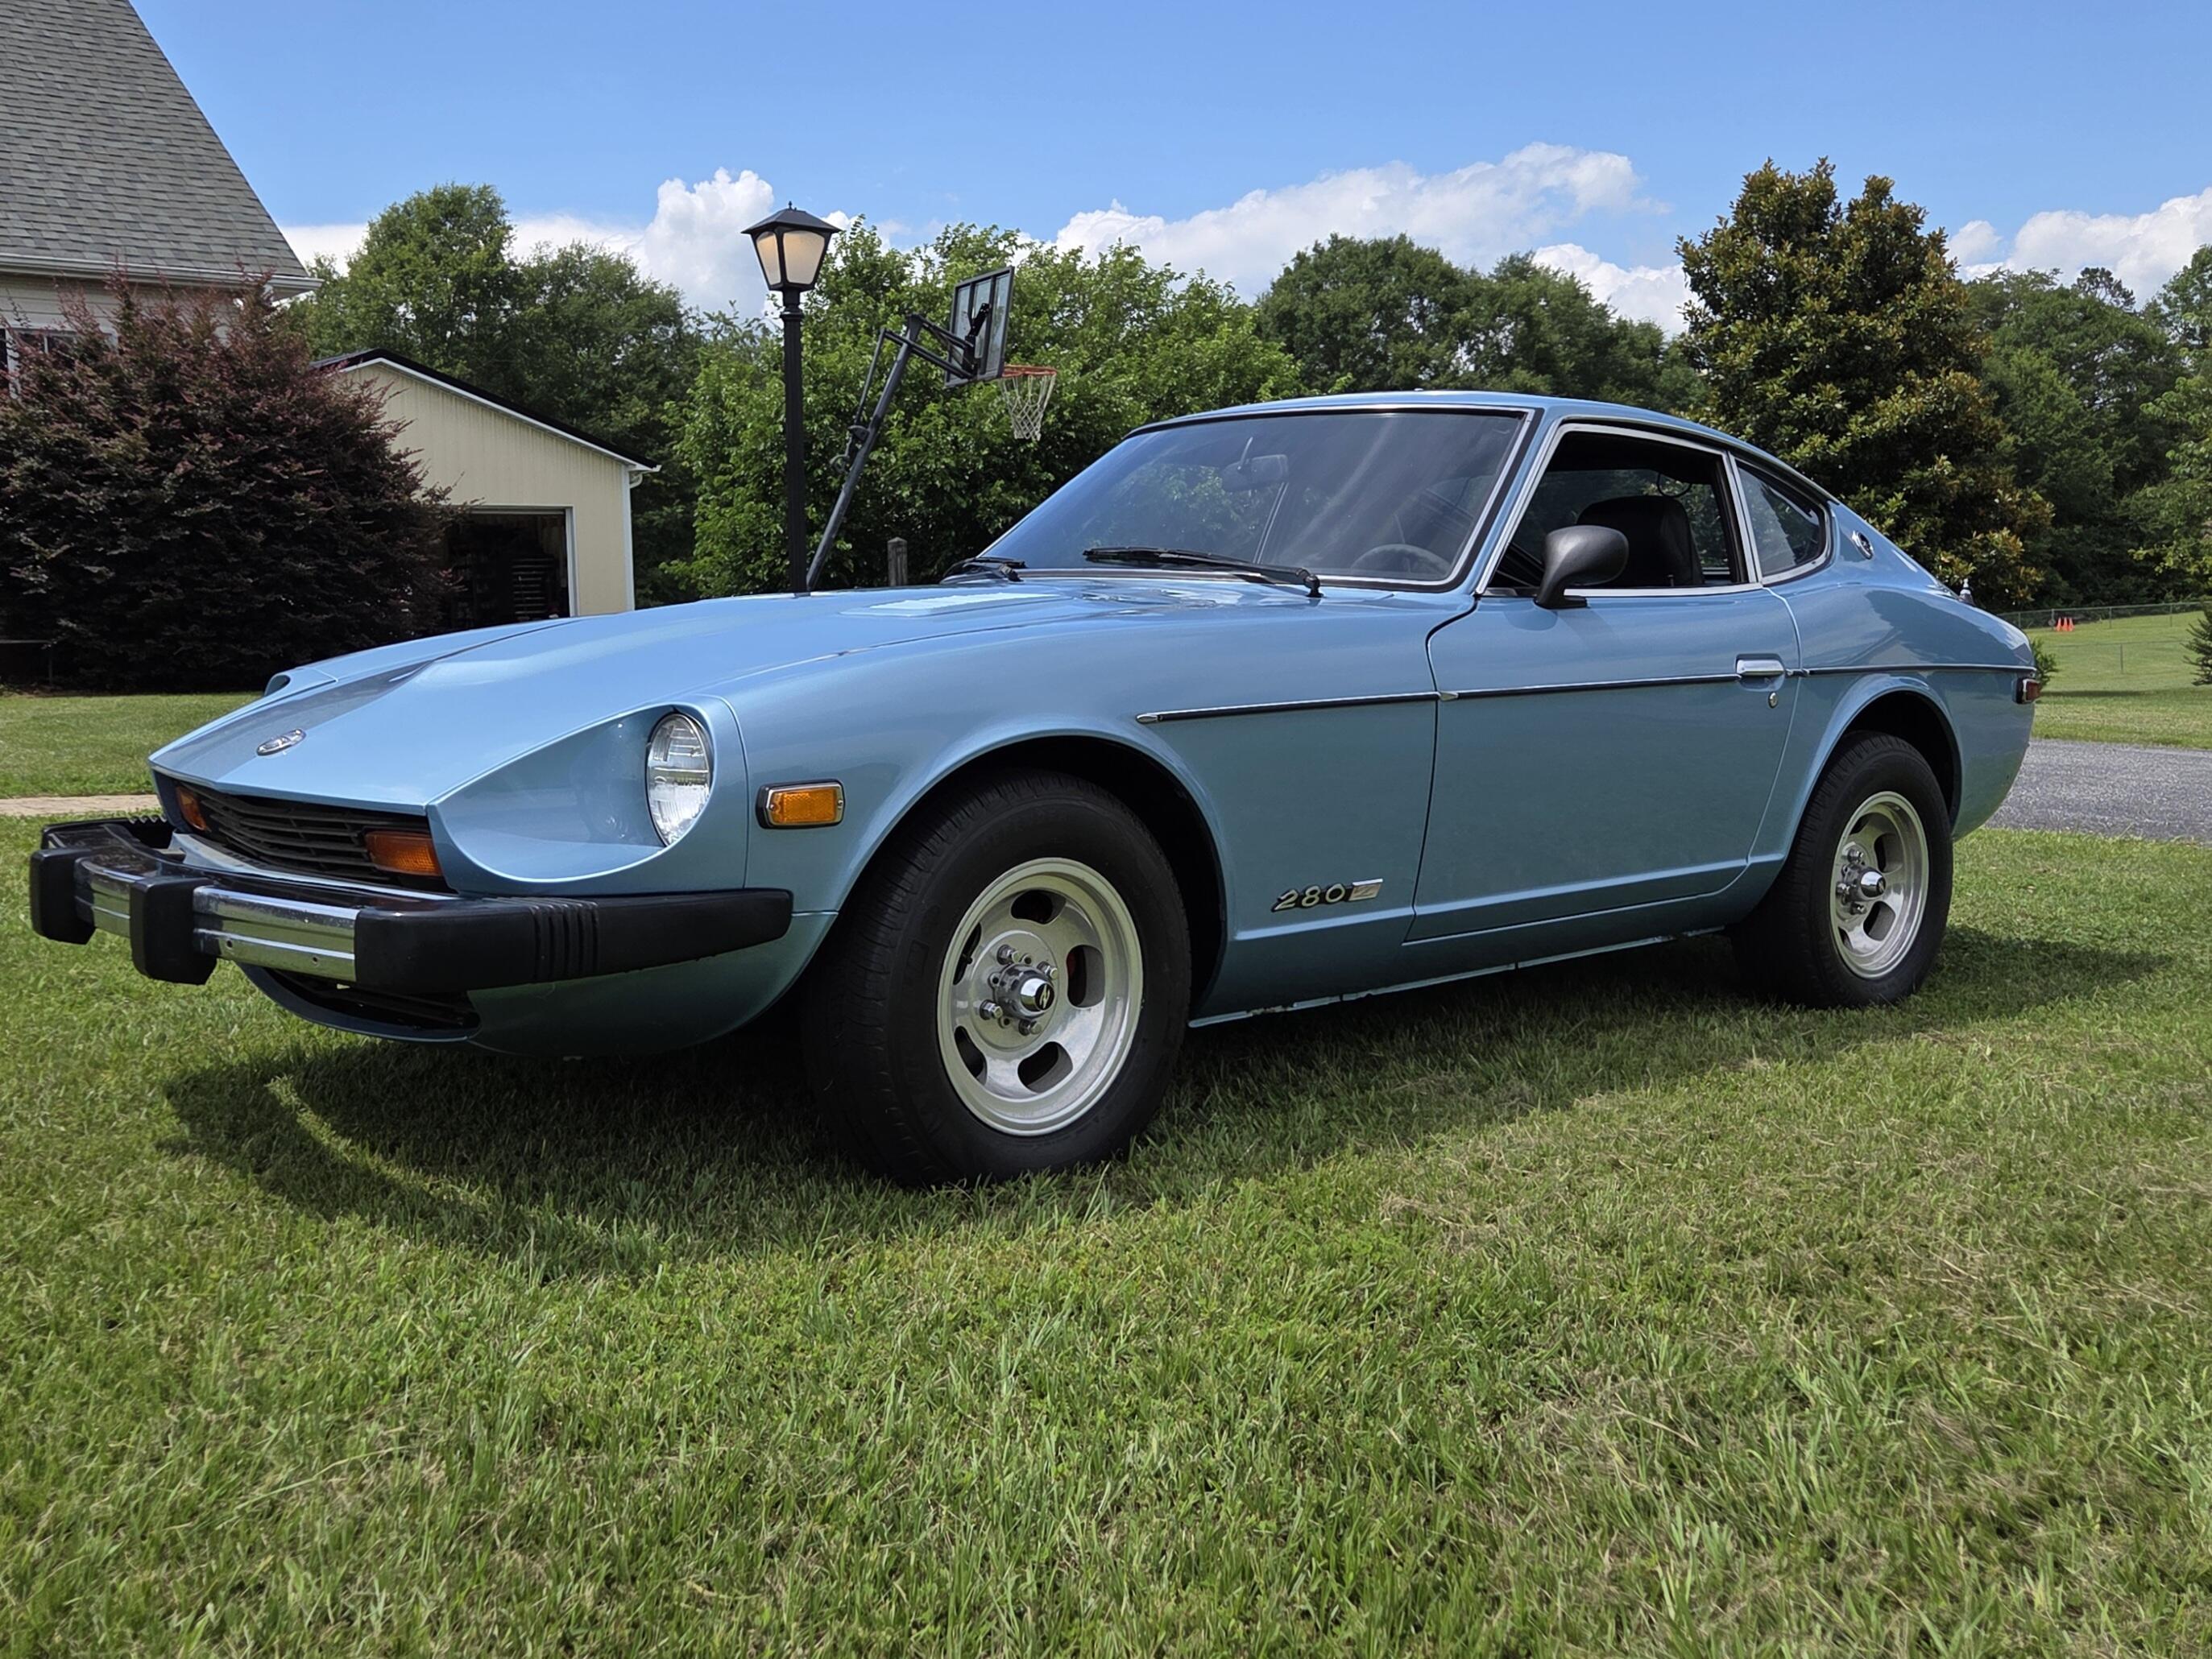
Her name was Elizabeth.
-
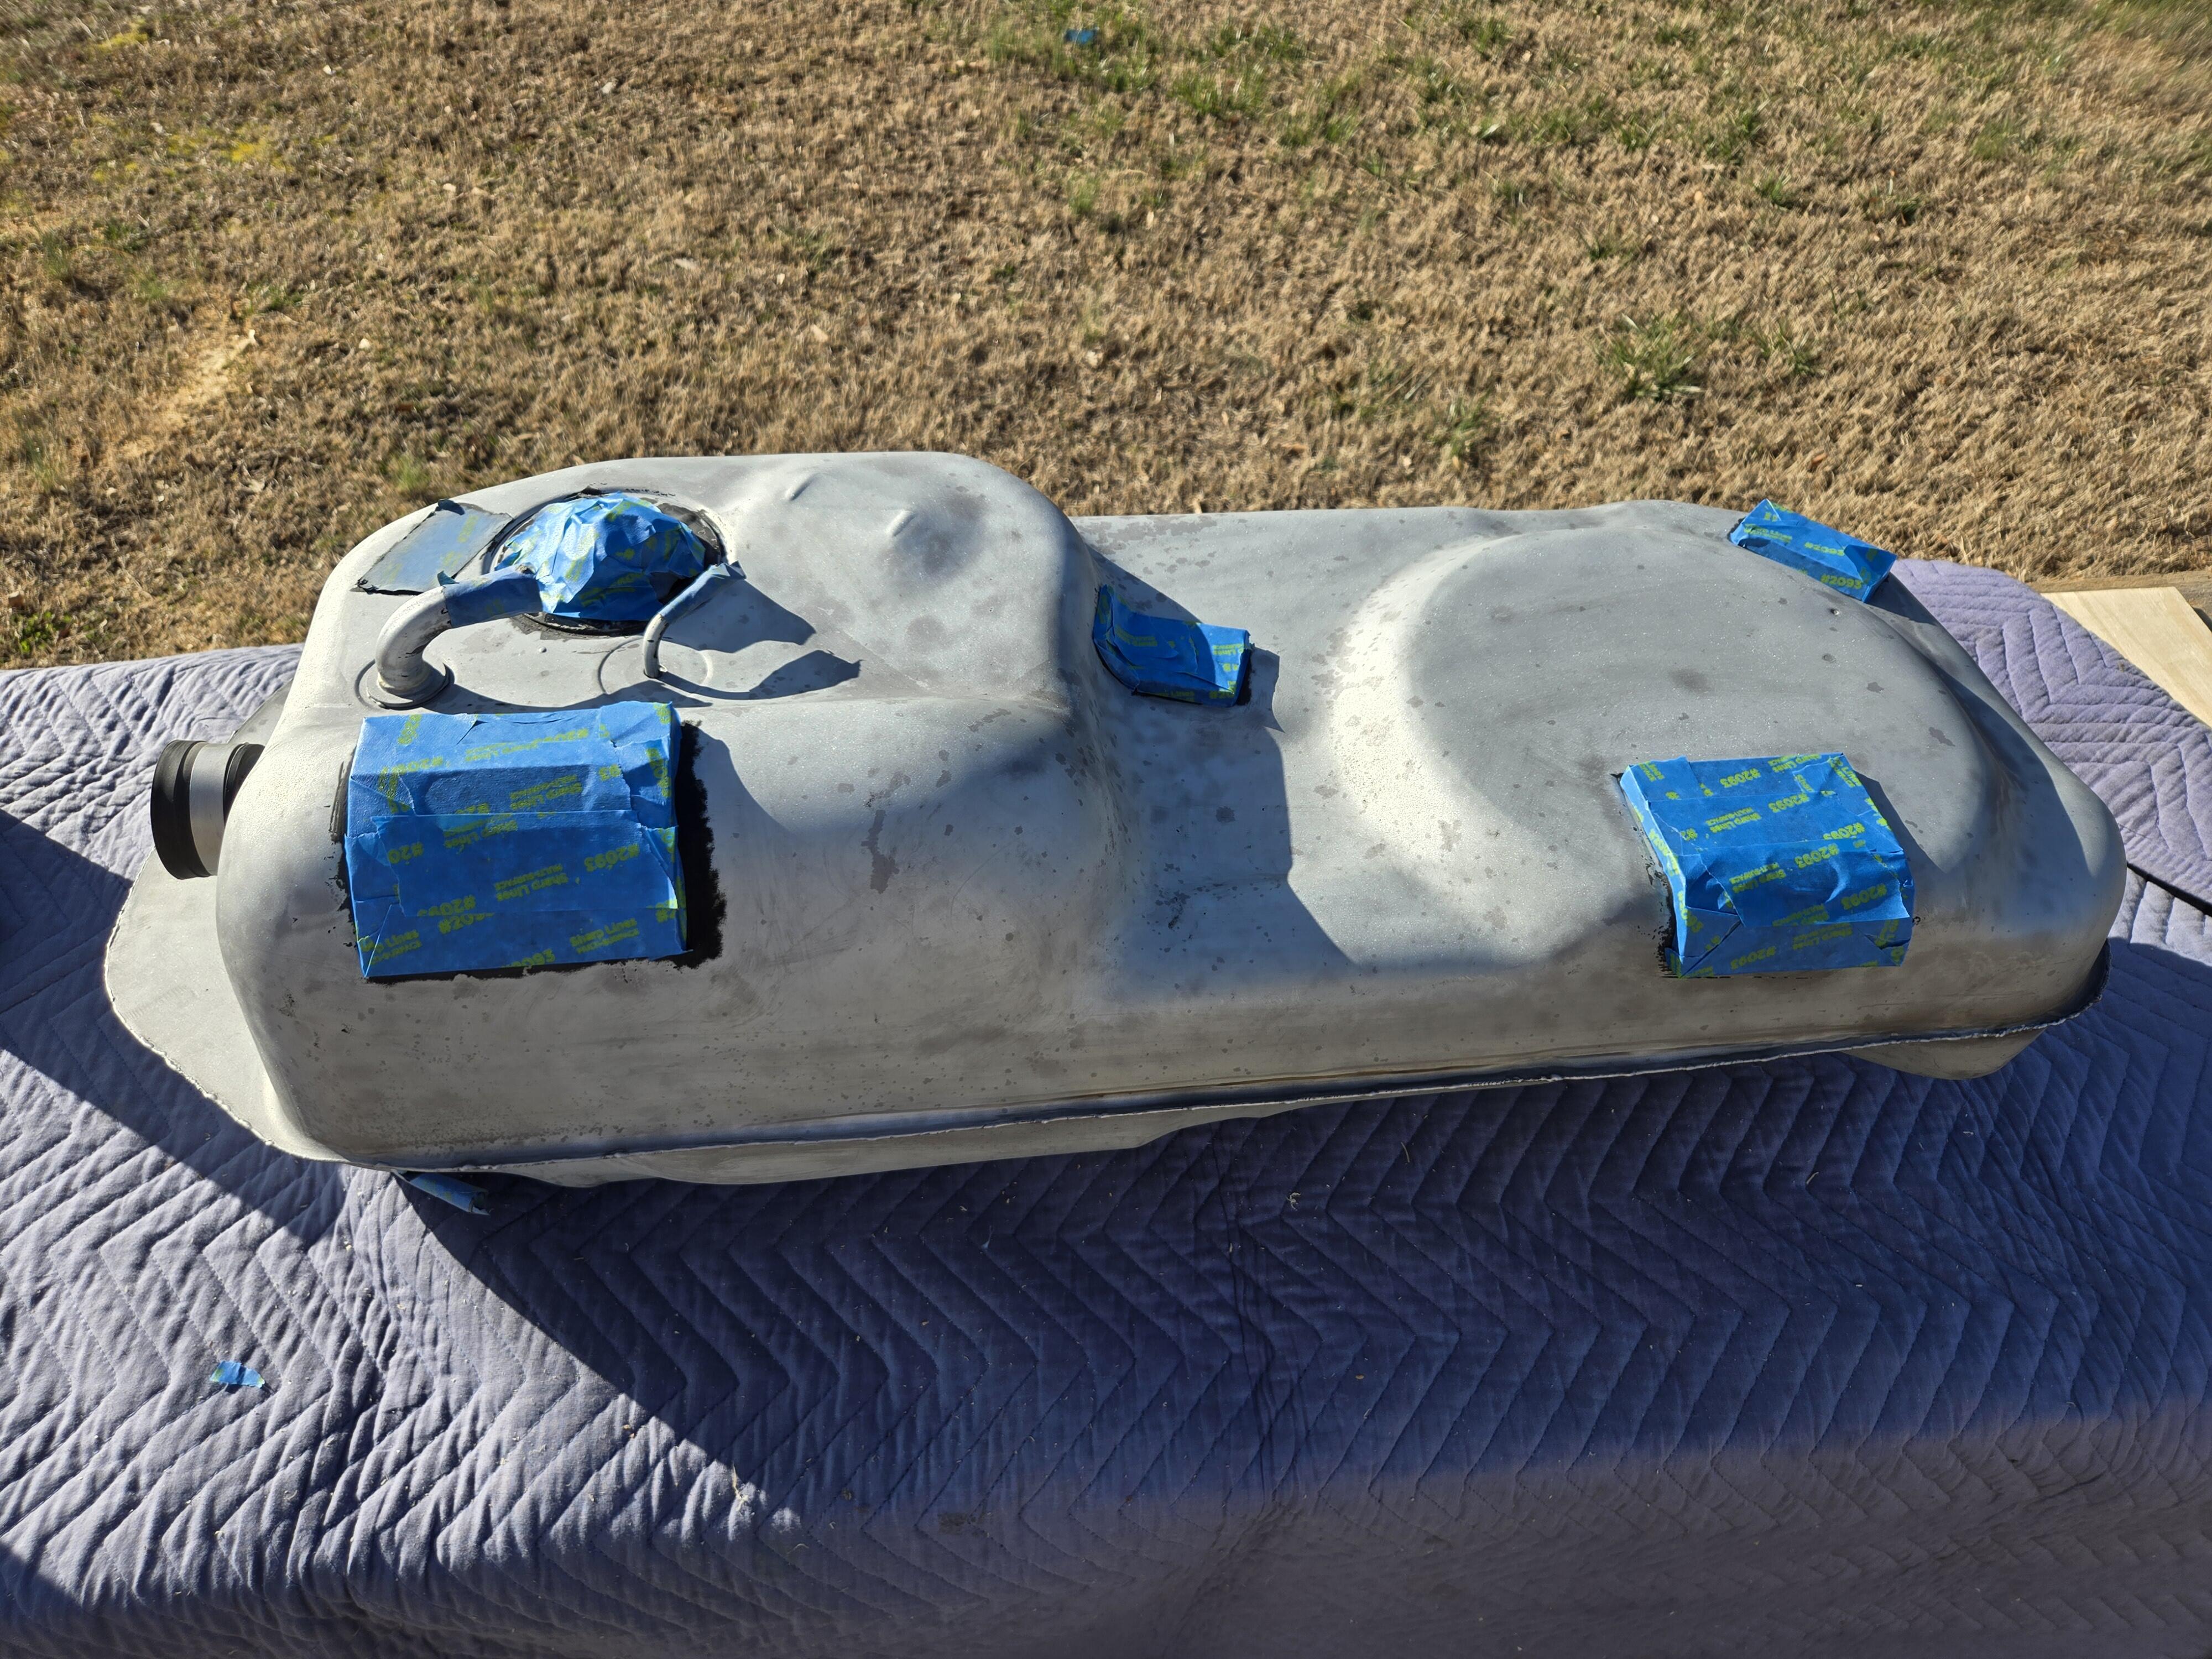
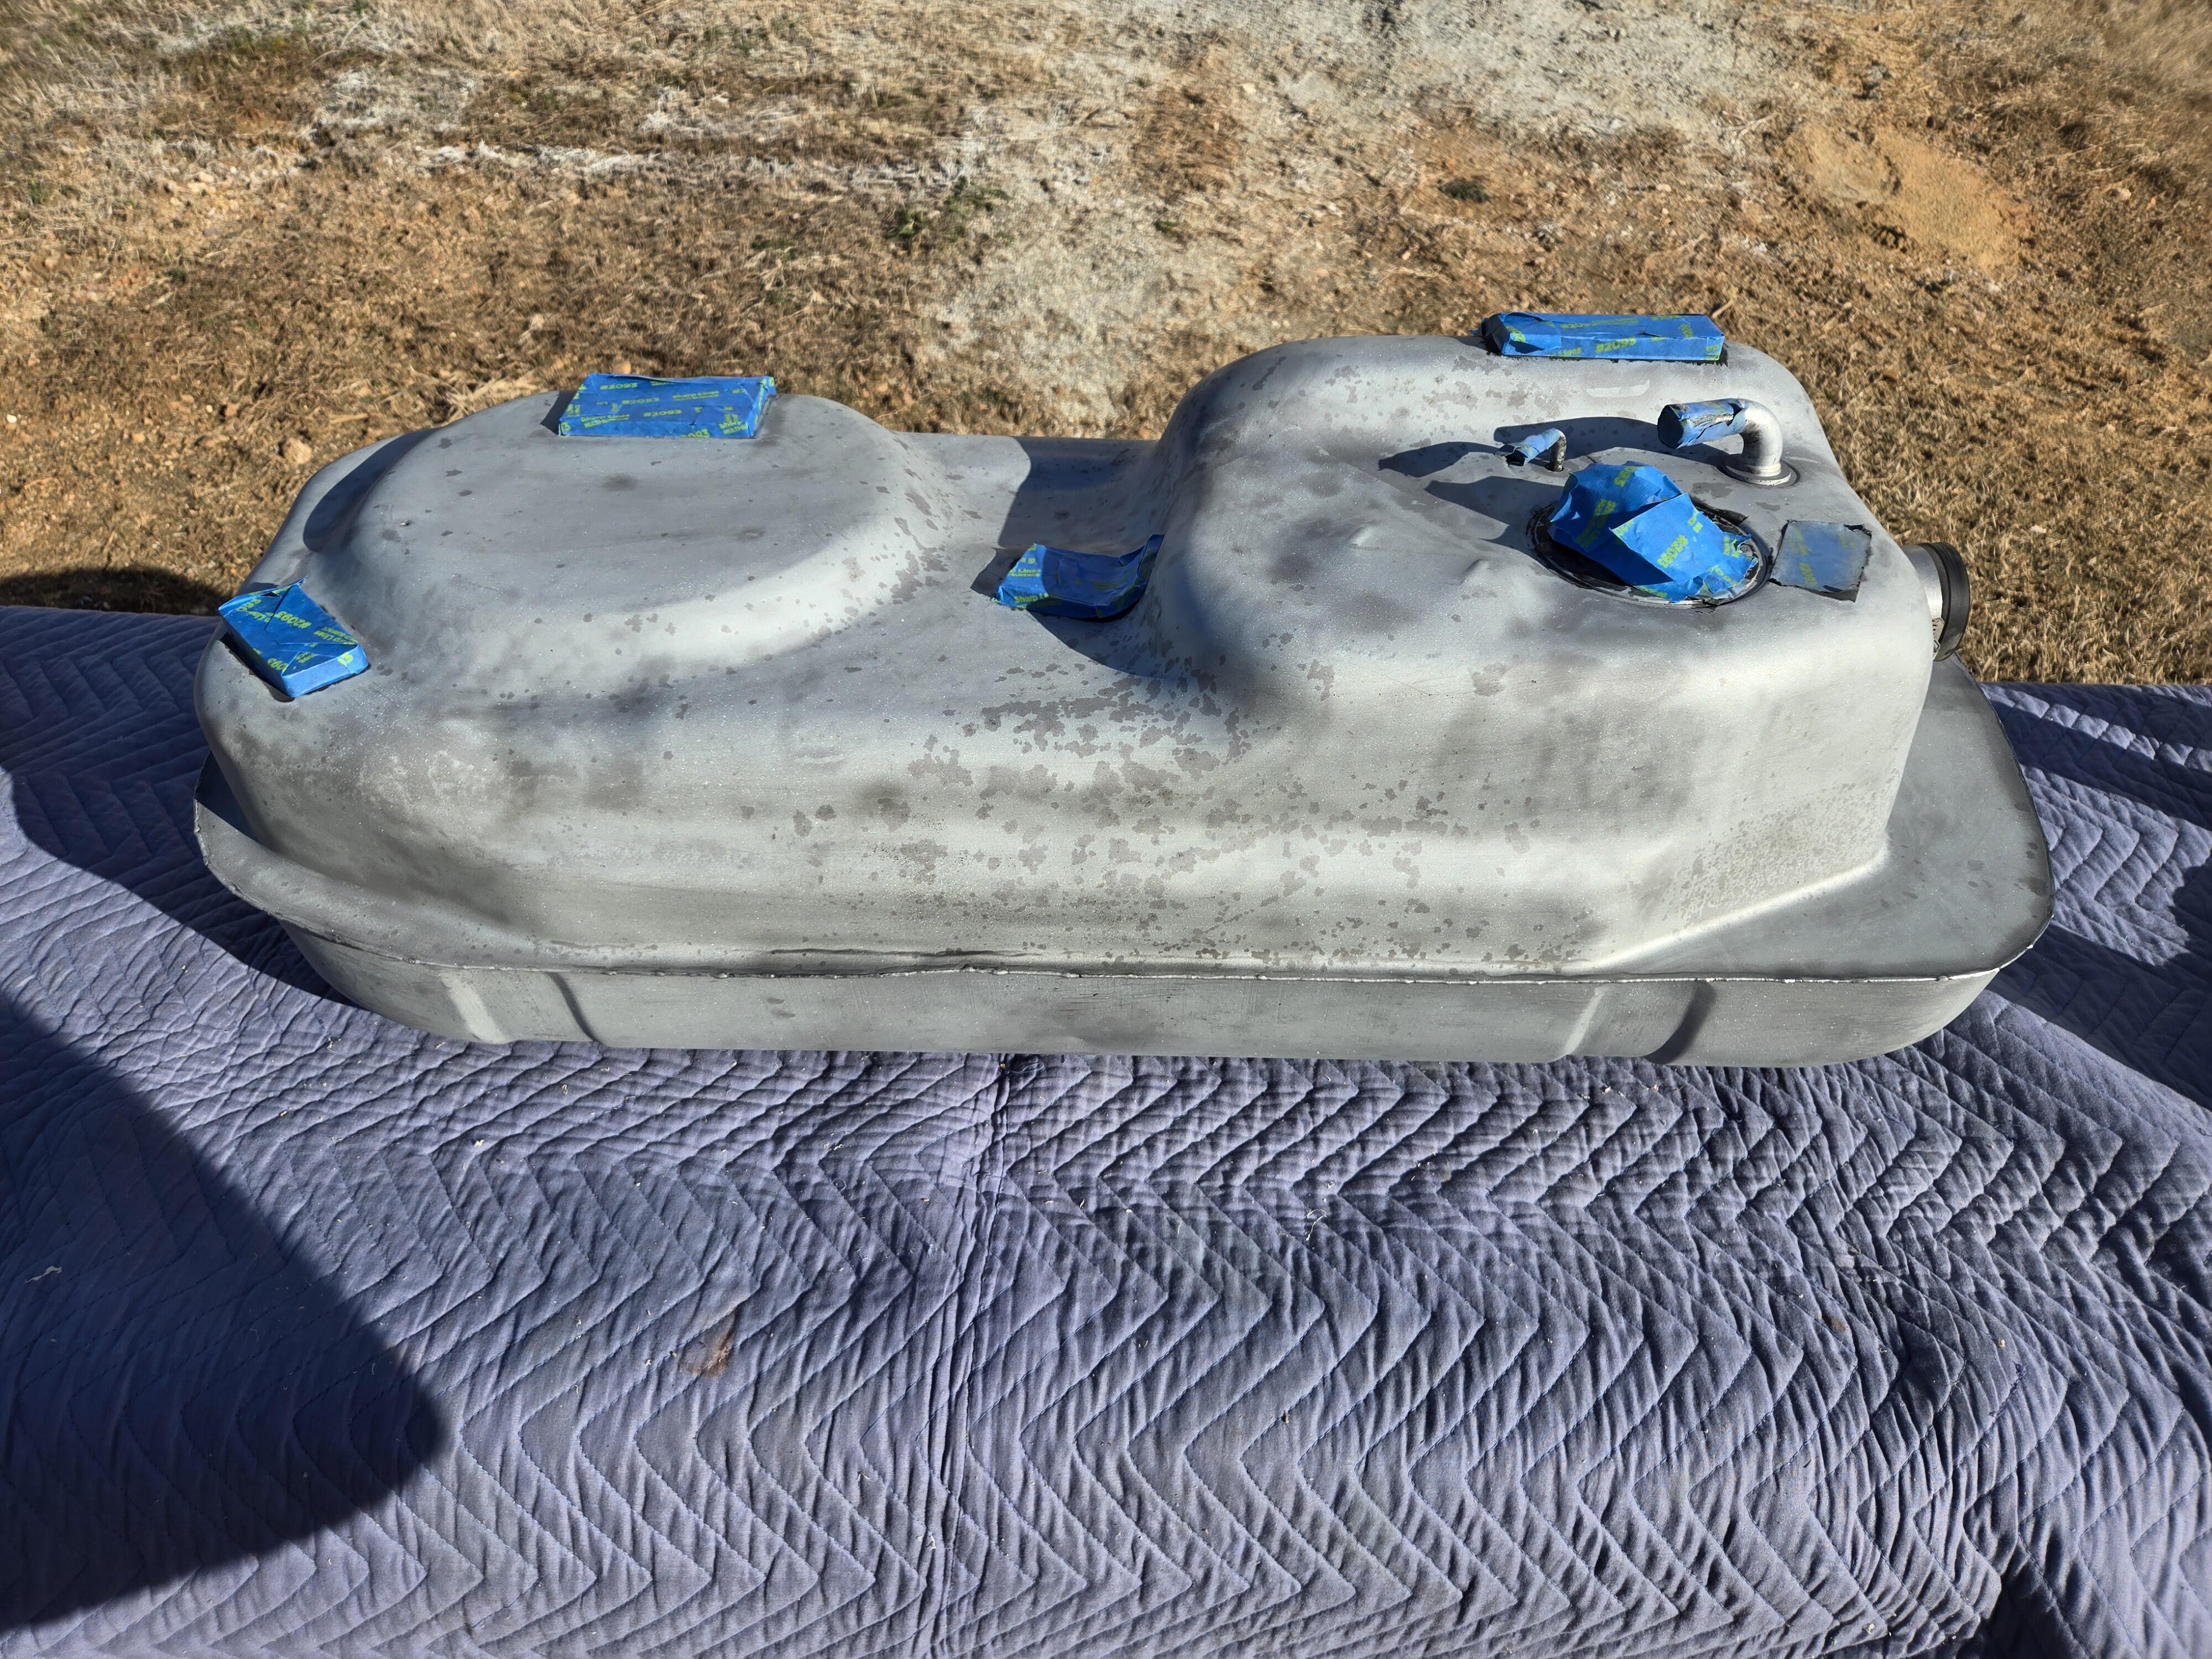
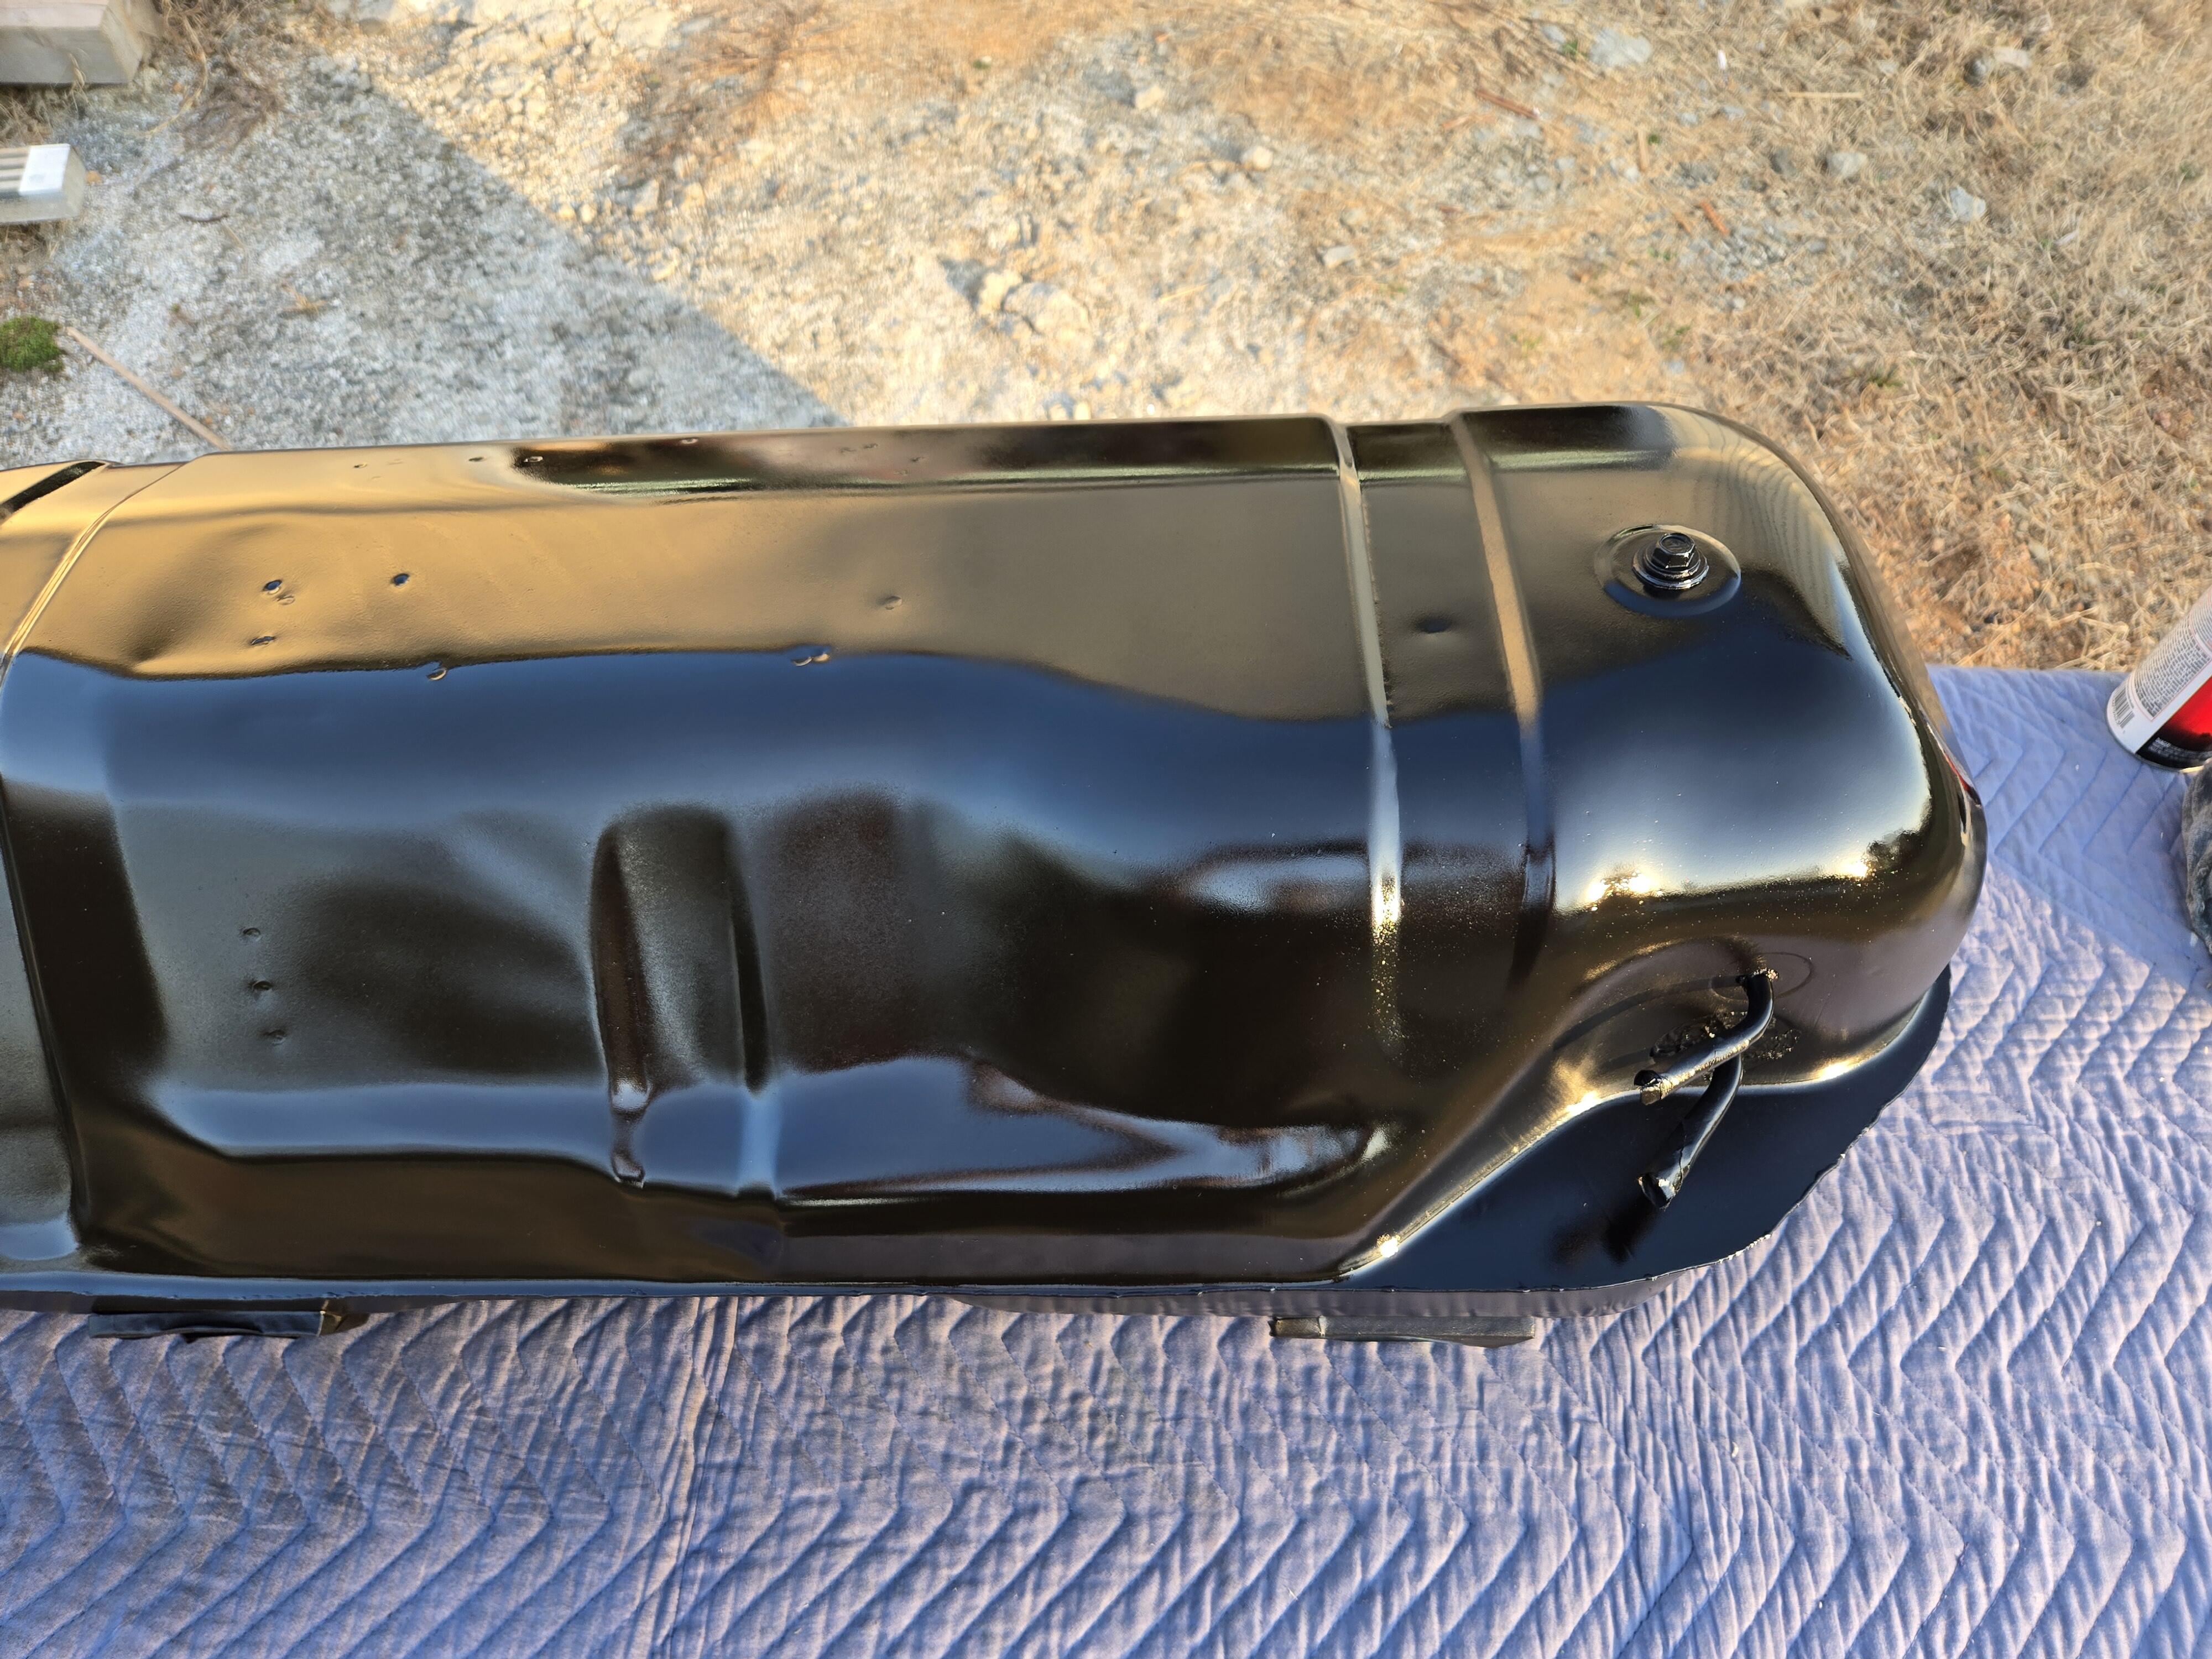
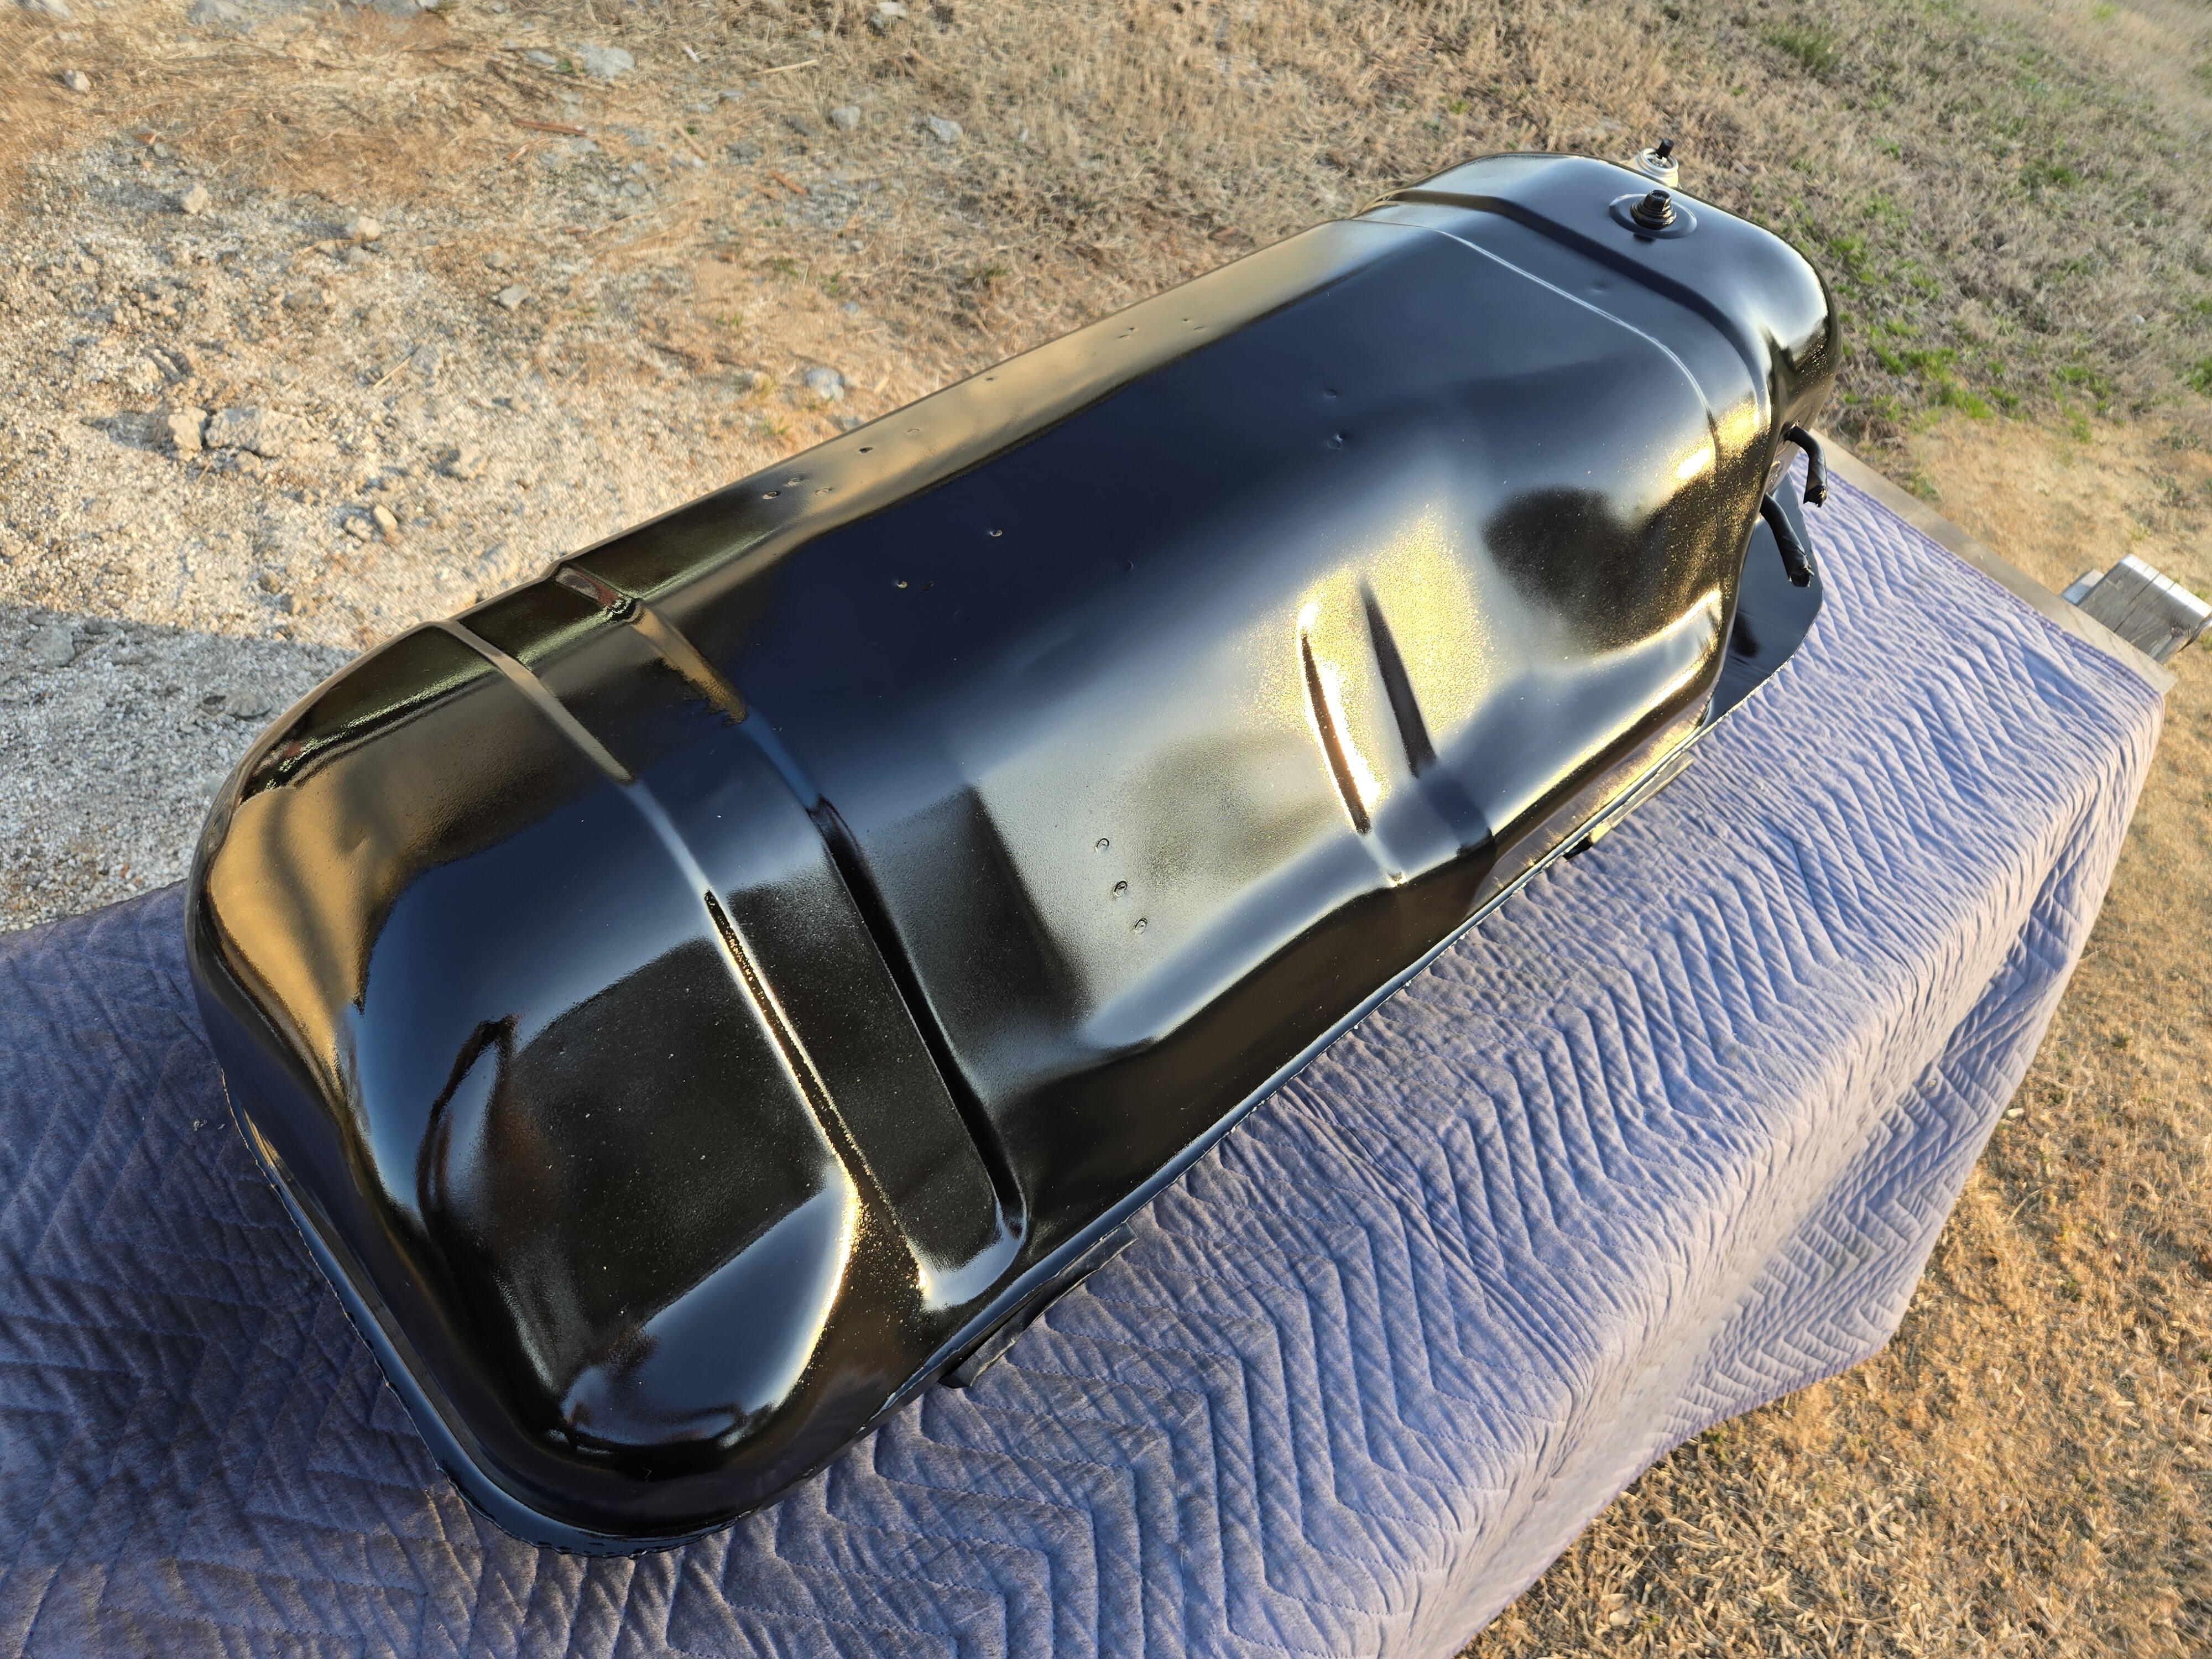
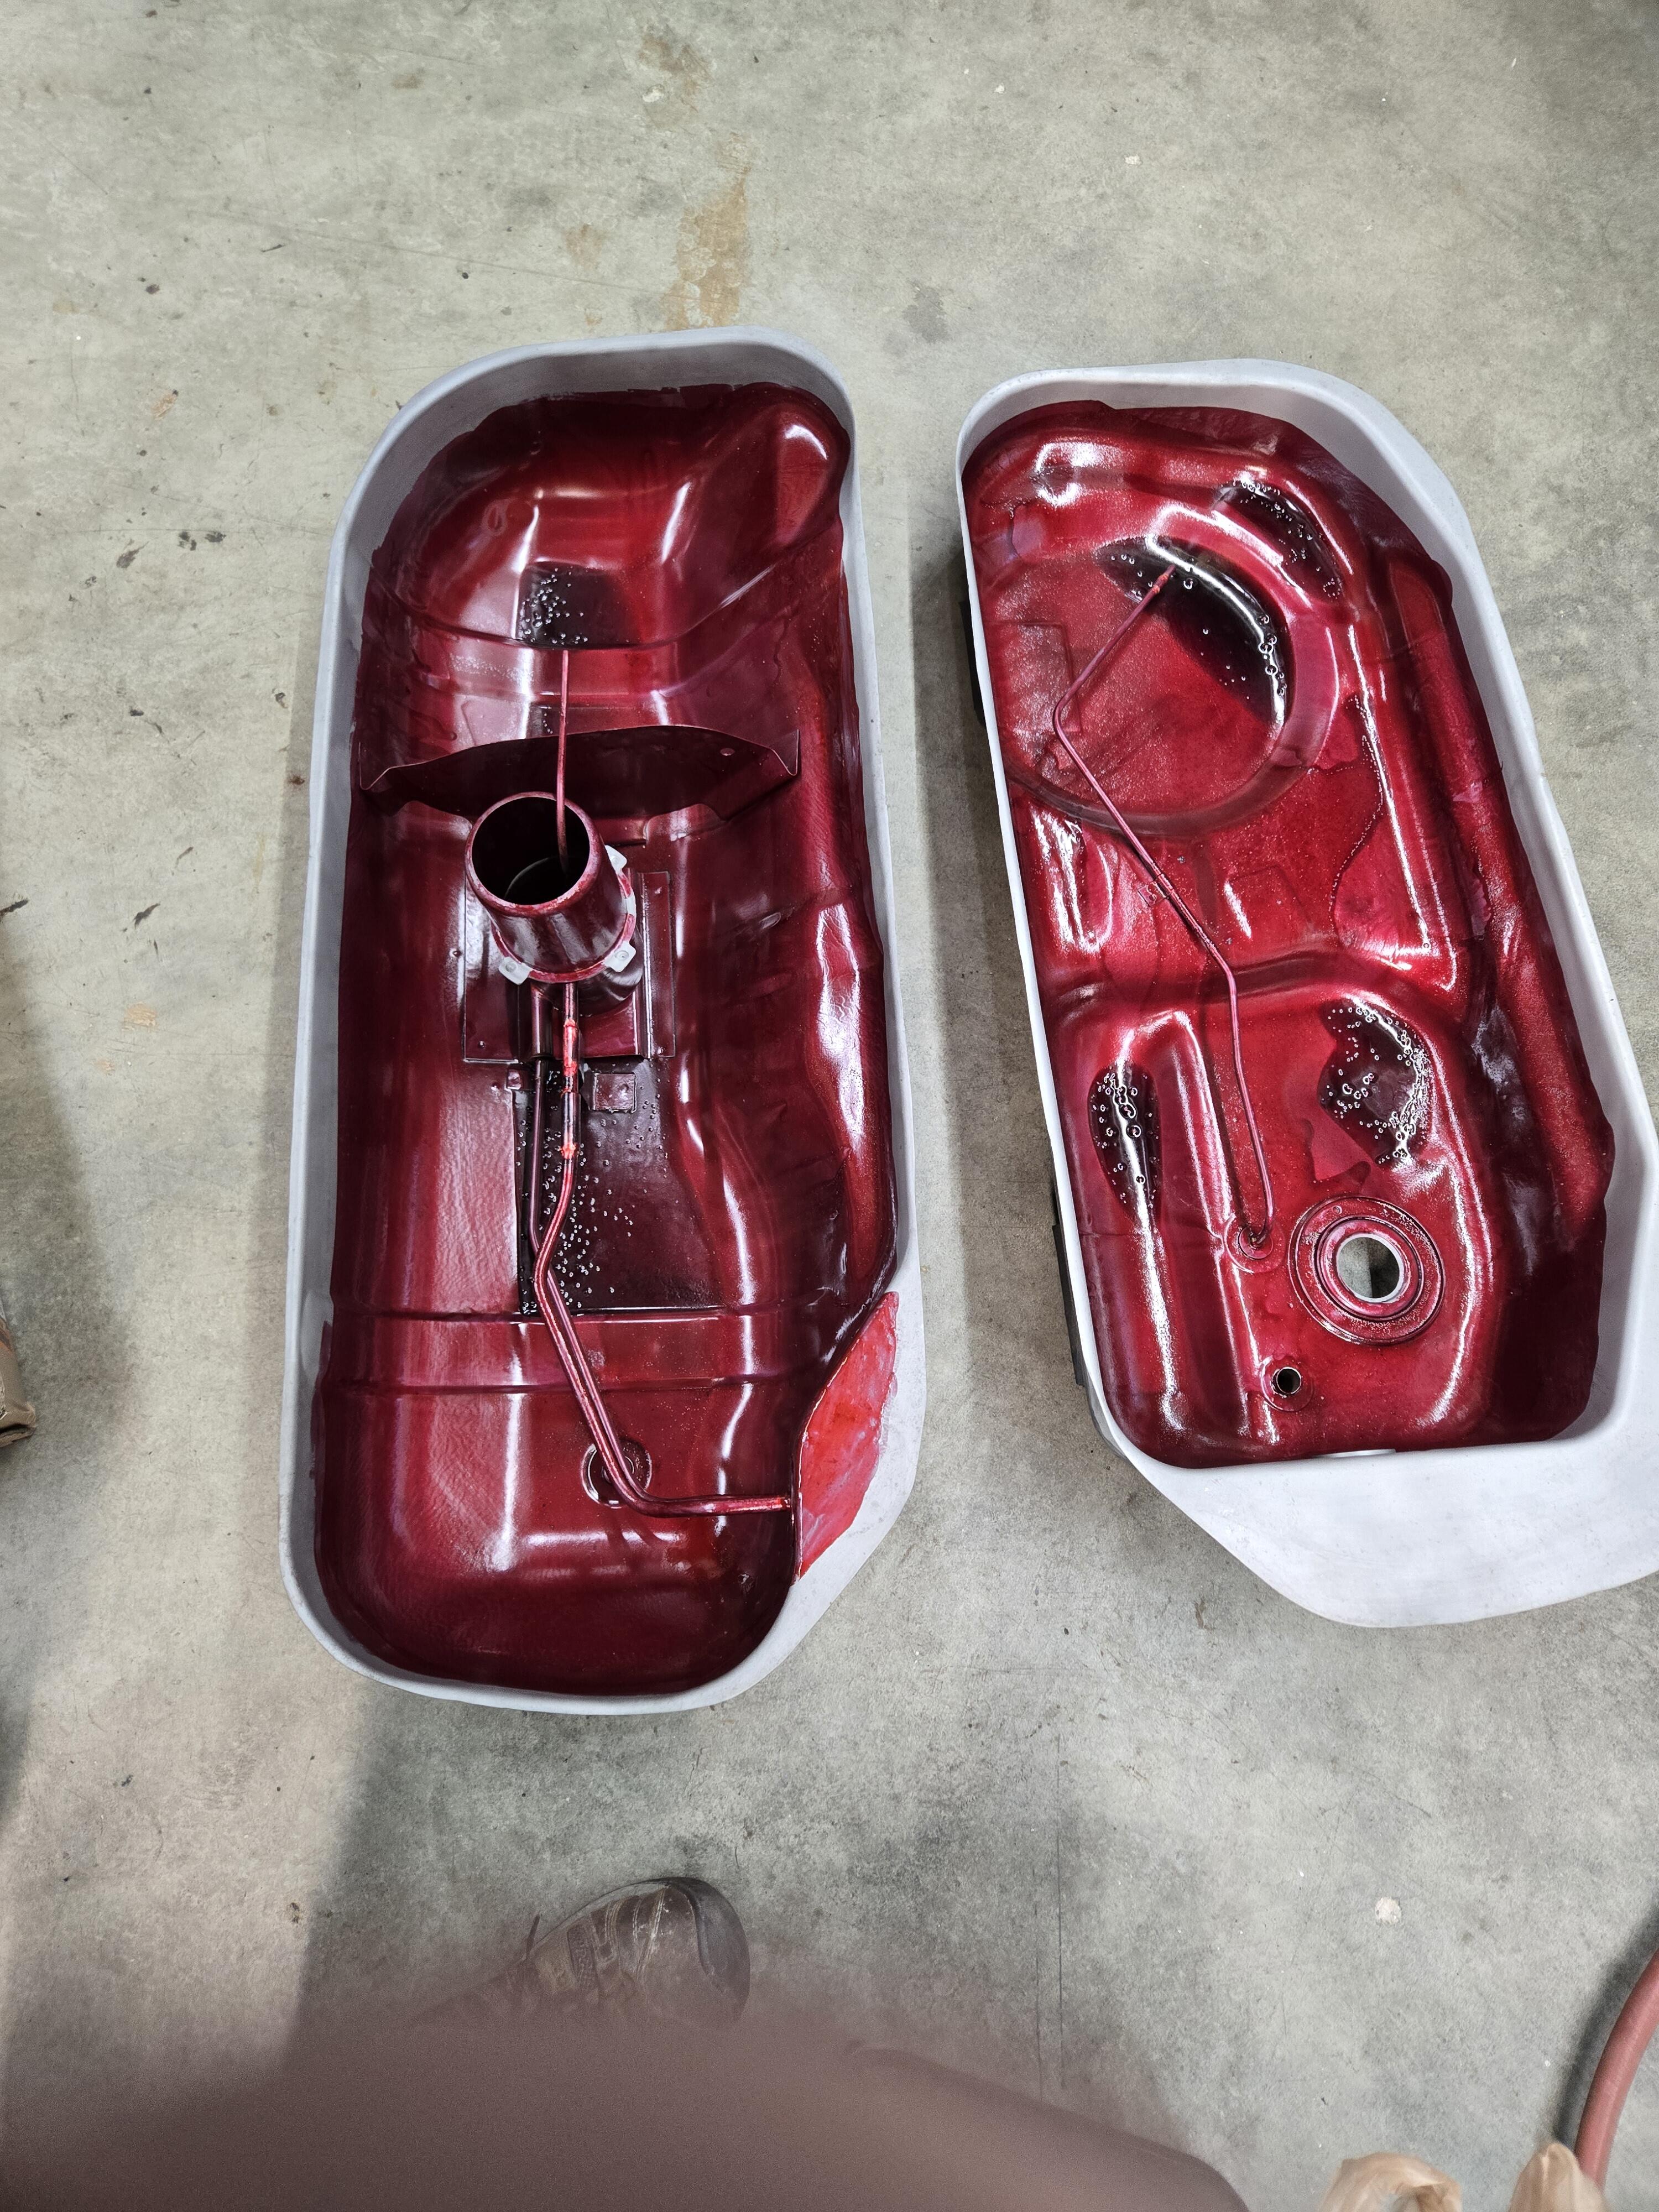
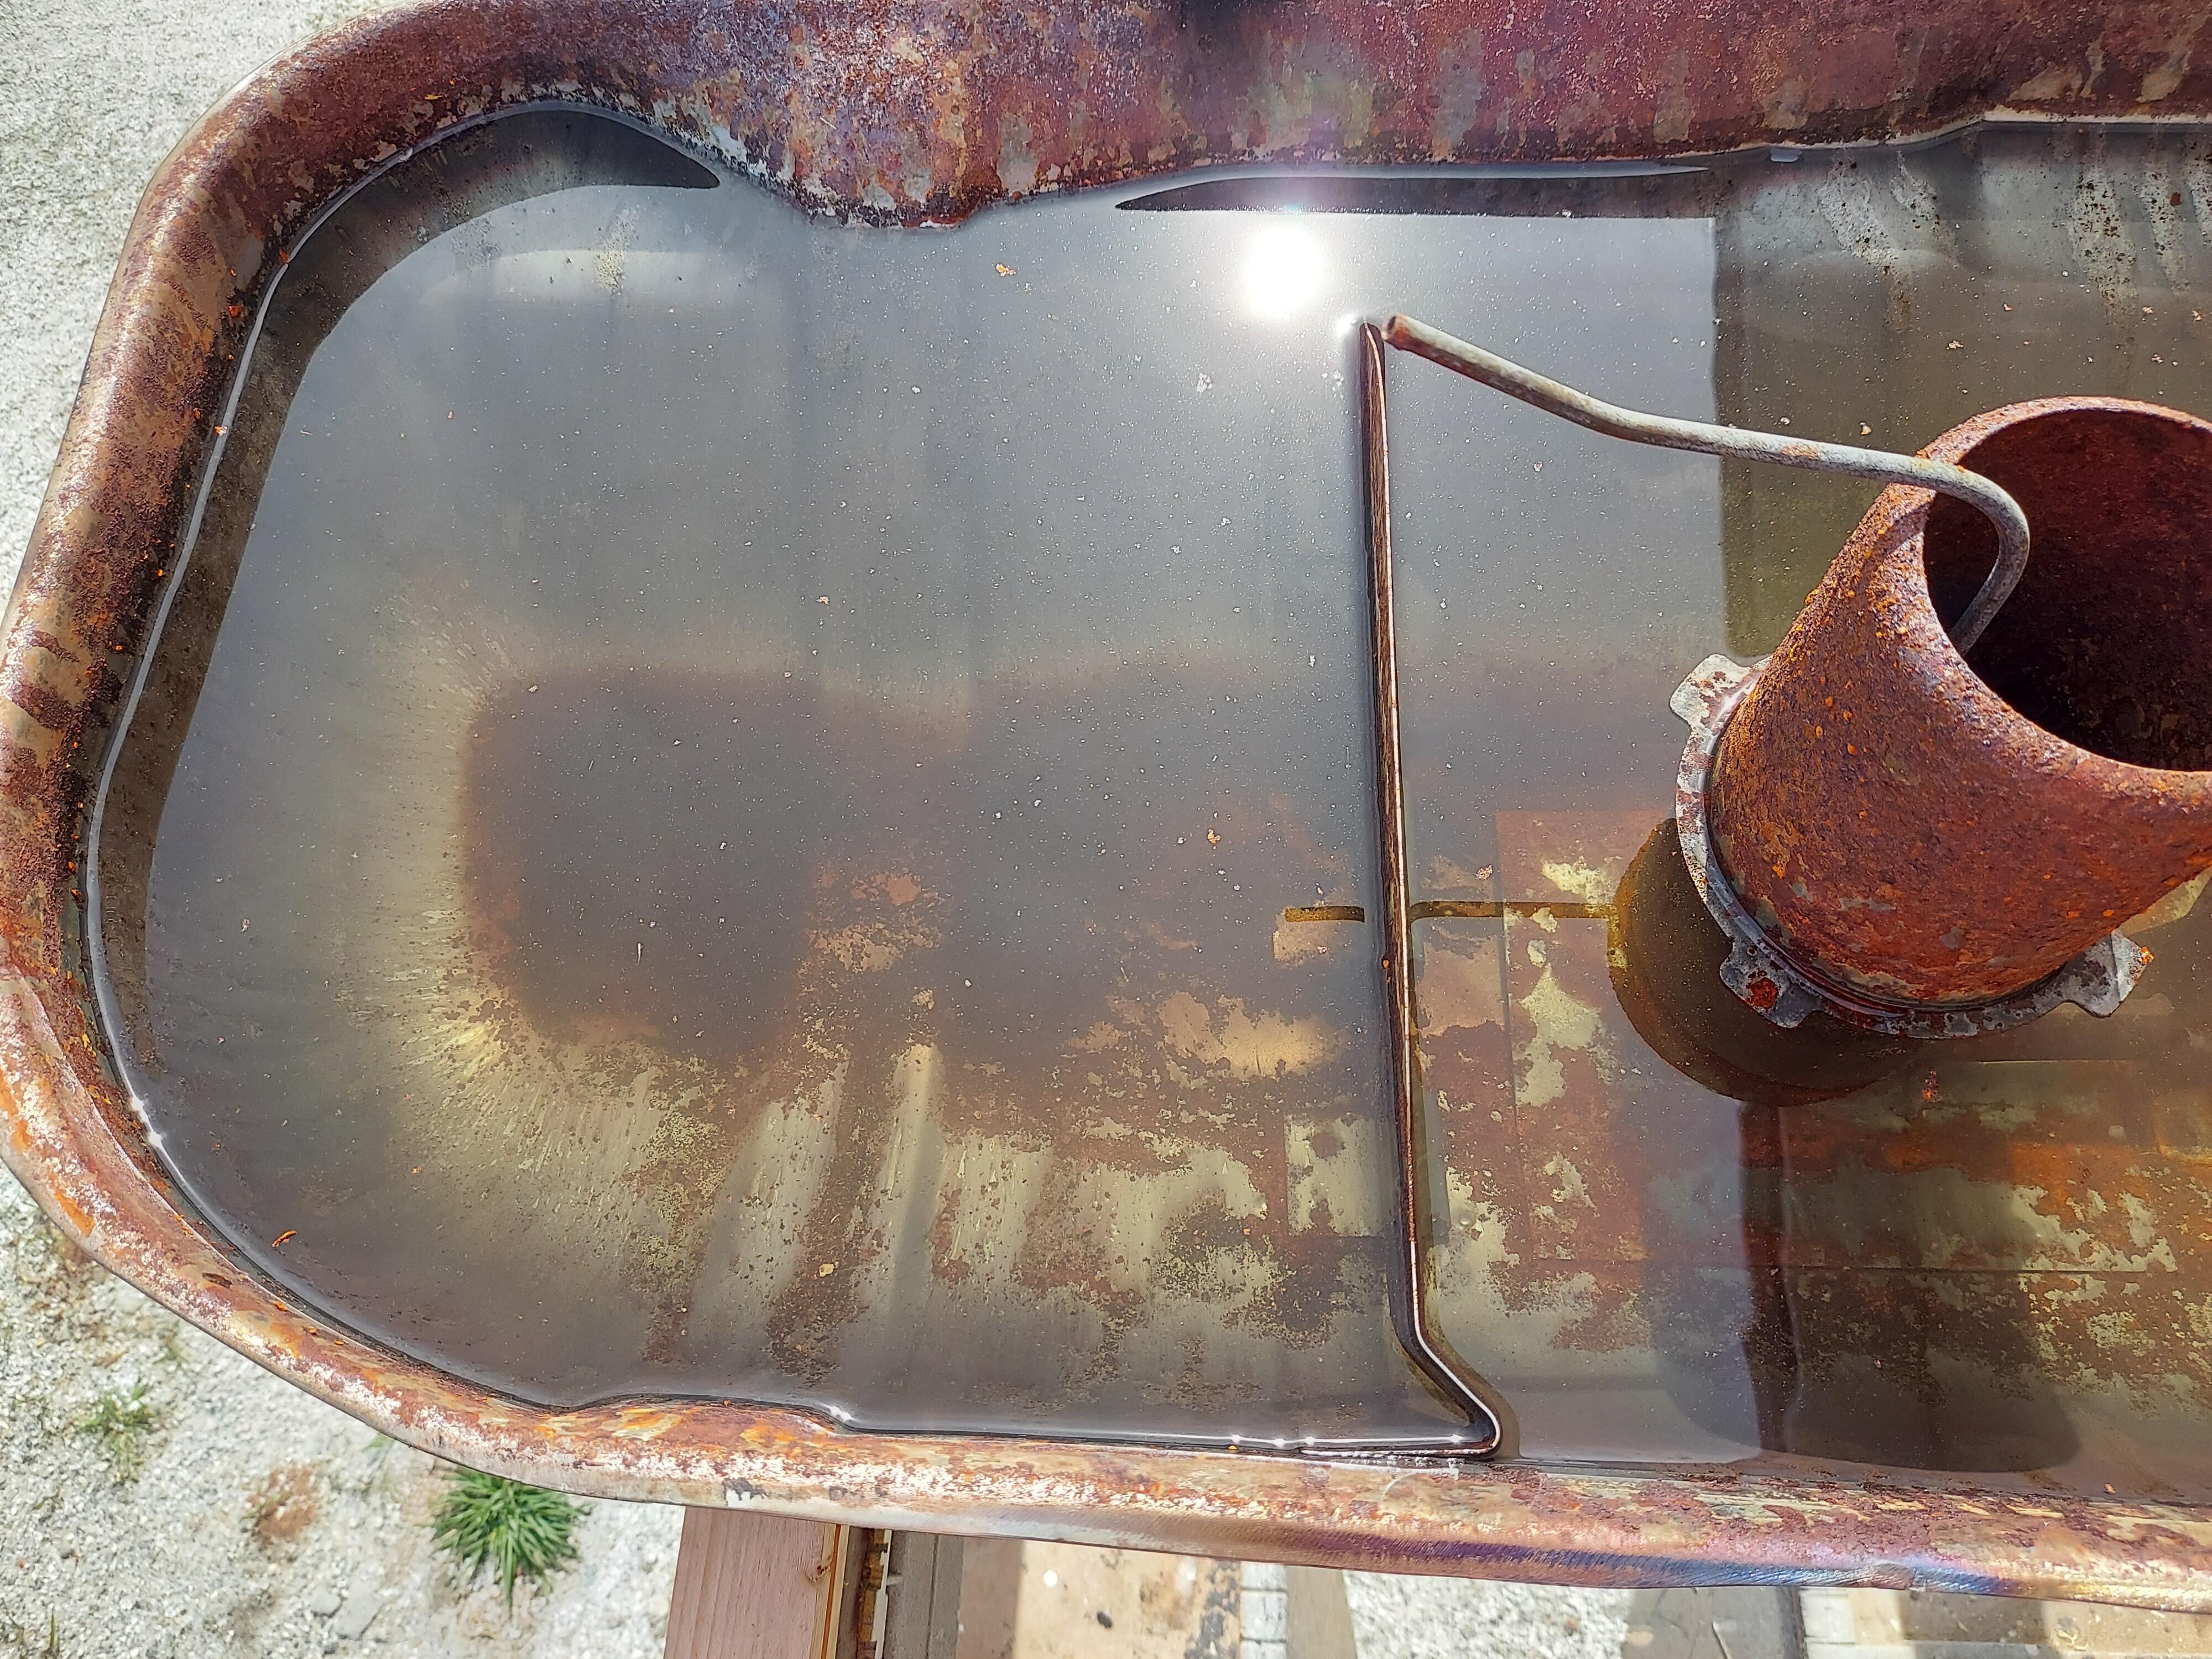
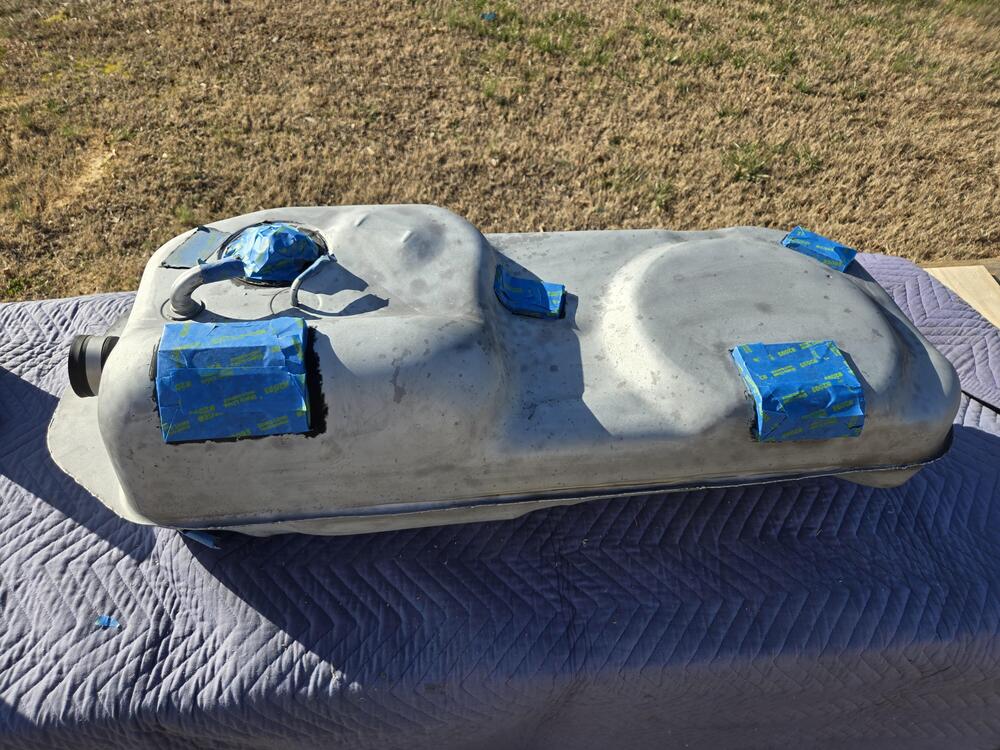
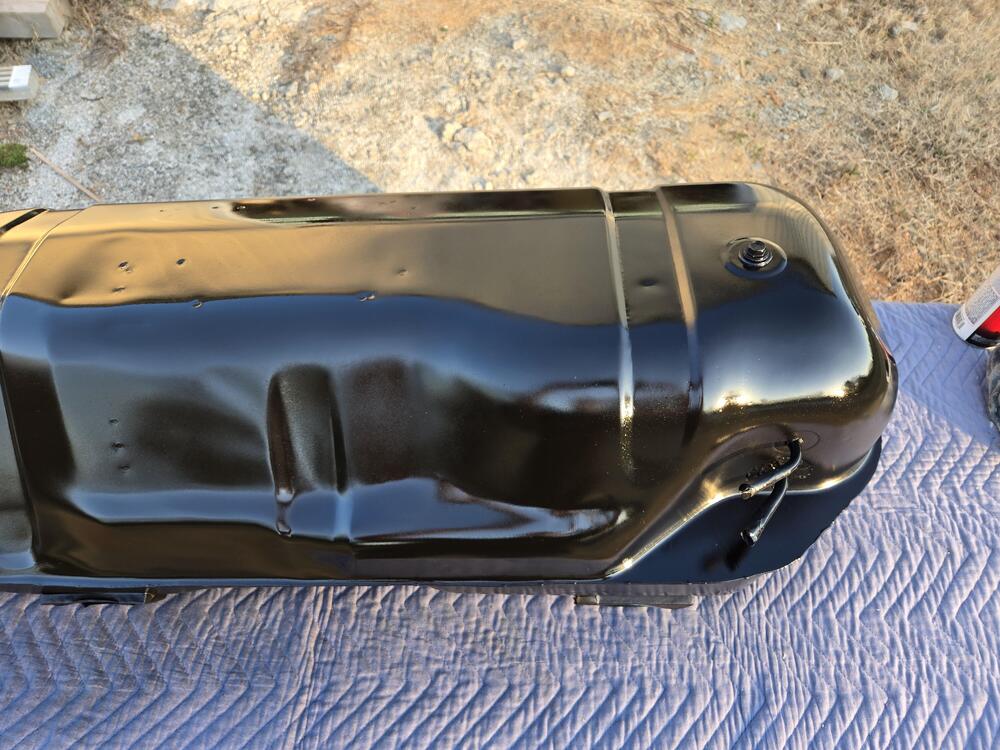
I didn't trust my ability to hermetically weld the tank. So I assisted a friend while he tacked it together. He then took it to a mutual friend with a TIG welder and finished it up. At this point, I poured more Red Kote into the tank and allowed it to flow over all of the seam. I let this sit for about a month to cure. Then, I sealed off all of the openings and blasted off the remainder of the external paint. Interestingly, there were dozens of small hidden rust spots beneath the paint. You couldn't see them through the paint. But when the media hit it, the paint would flake off, revealing a brown rusted spot. After blasting, ready for paint. I primed and painted it with Rust-oleum automotive paint in rattle cans. It turned out decent. No one will be looking at it. Note I didn't remove the original rubber blocks. They were stuck on really well, and not damaged. I did remove the original foam rubber piece near the sender hole because it was falling apart. I replaced it with a similarly-sized piece of 1/8" (3mm) thick EPDM rubber, just to make sure nothing would rattle. You can also see where I masked off the factory marking, just in case anyone might ever care if the tank was original. Lastly, I leak tested it by putting a few gallons of gasoline in it and allowing it to sit on each edge for 30 minutes. The sun was out, so the tank heated up and pressurized, which was a good sign. I'm happy to report that I've reinstalled the tank in the car, and it works fine. No leaks. And no more plastic gas can bugeed to the rear shelf.


-
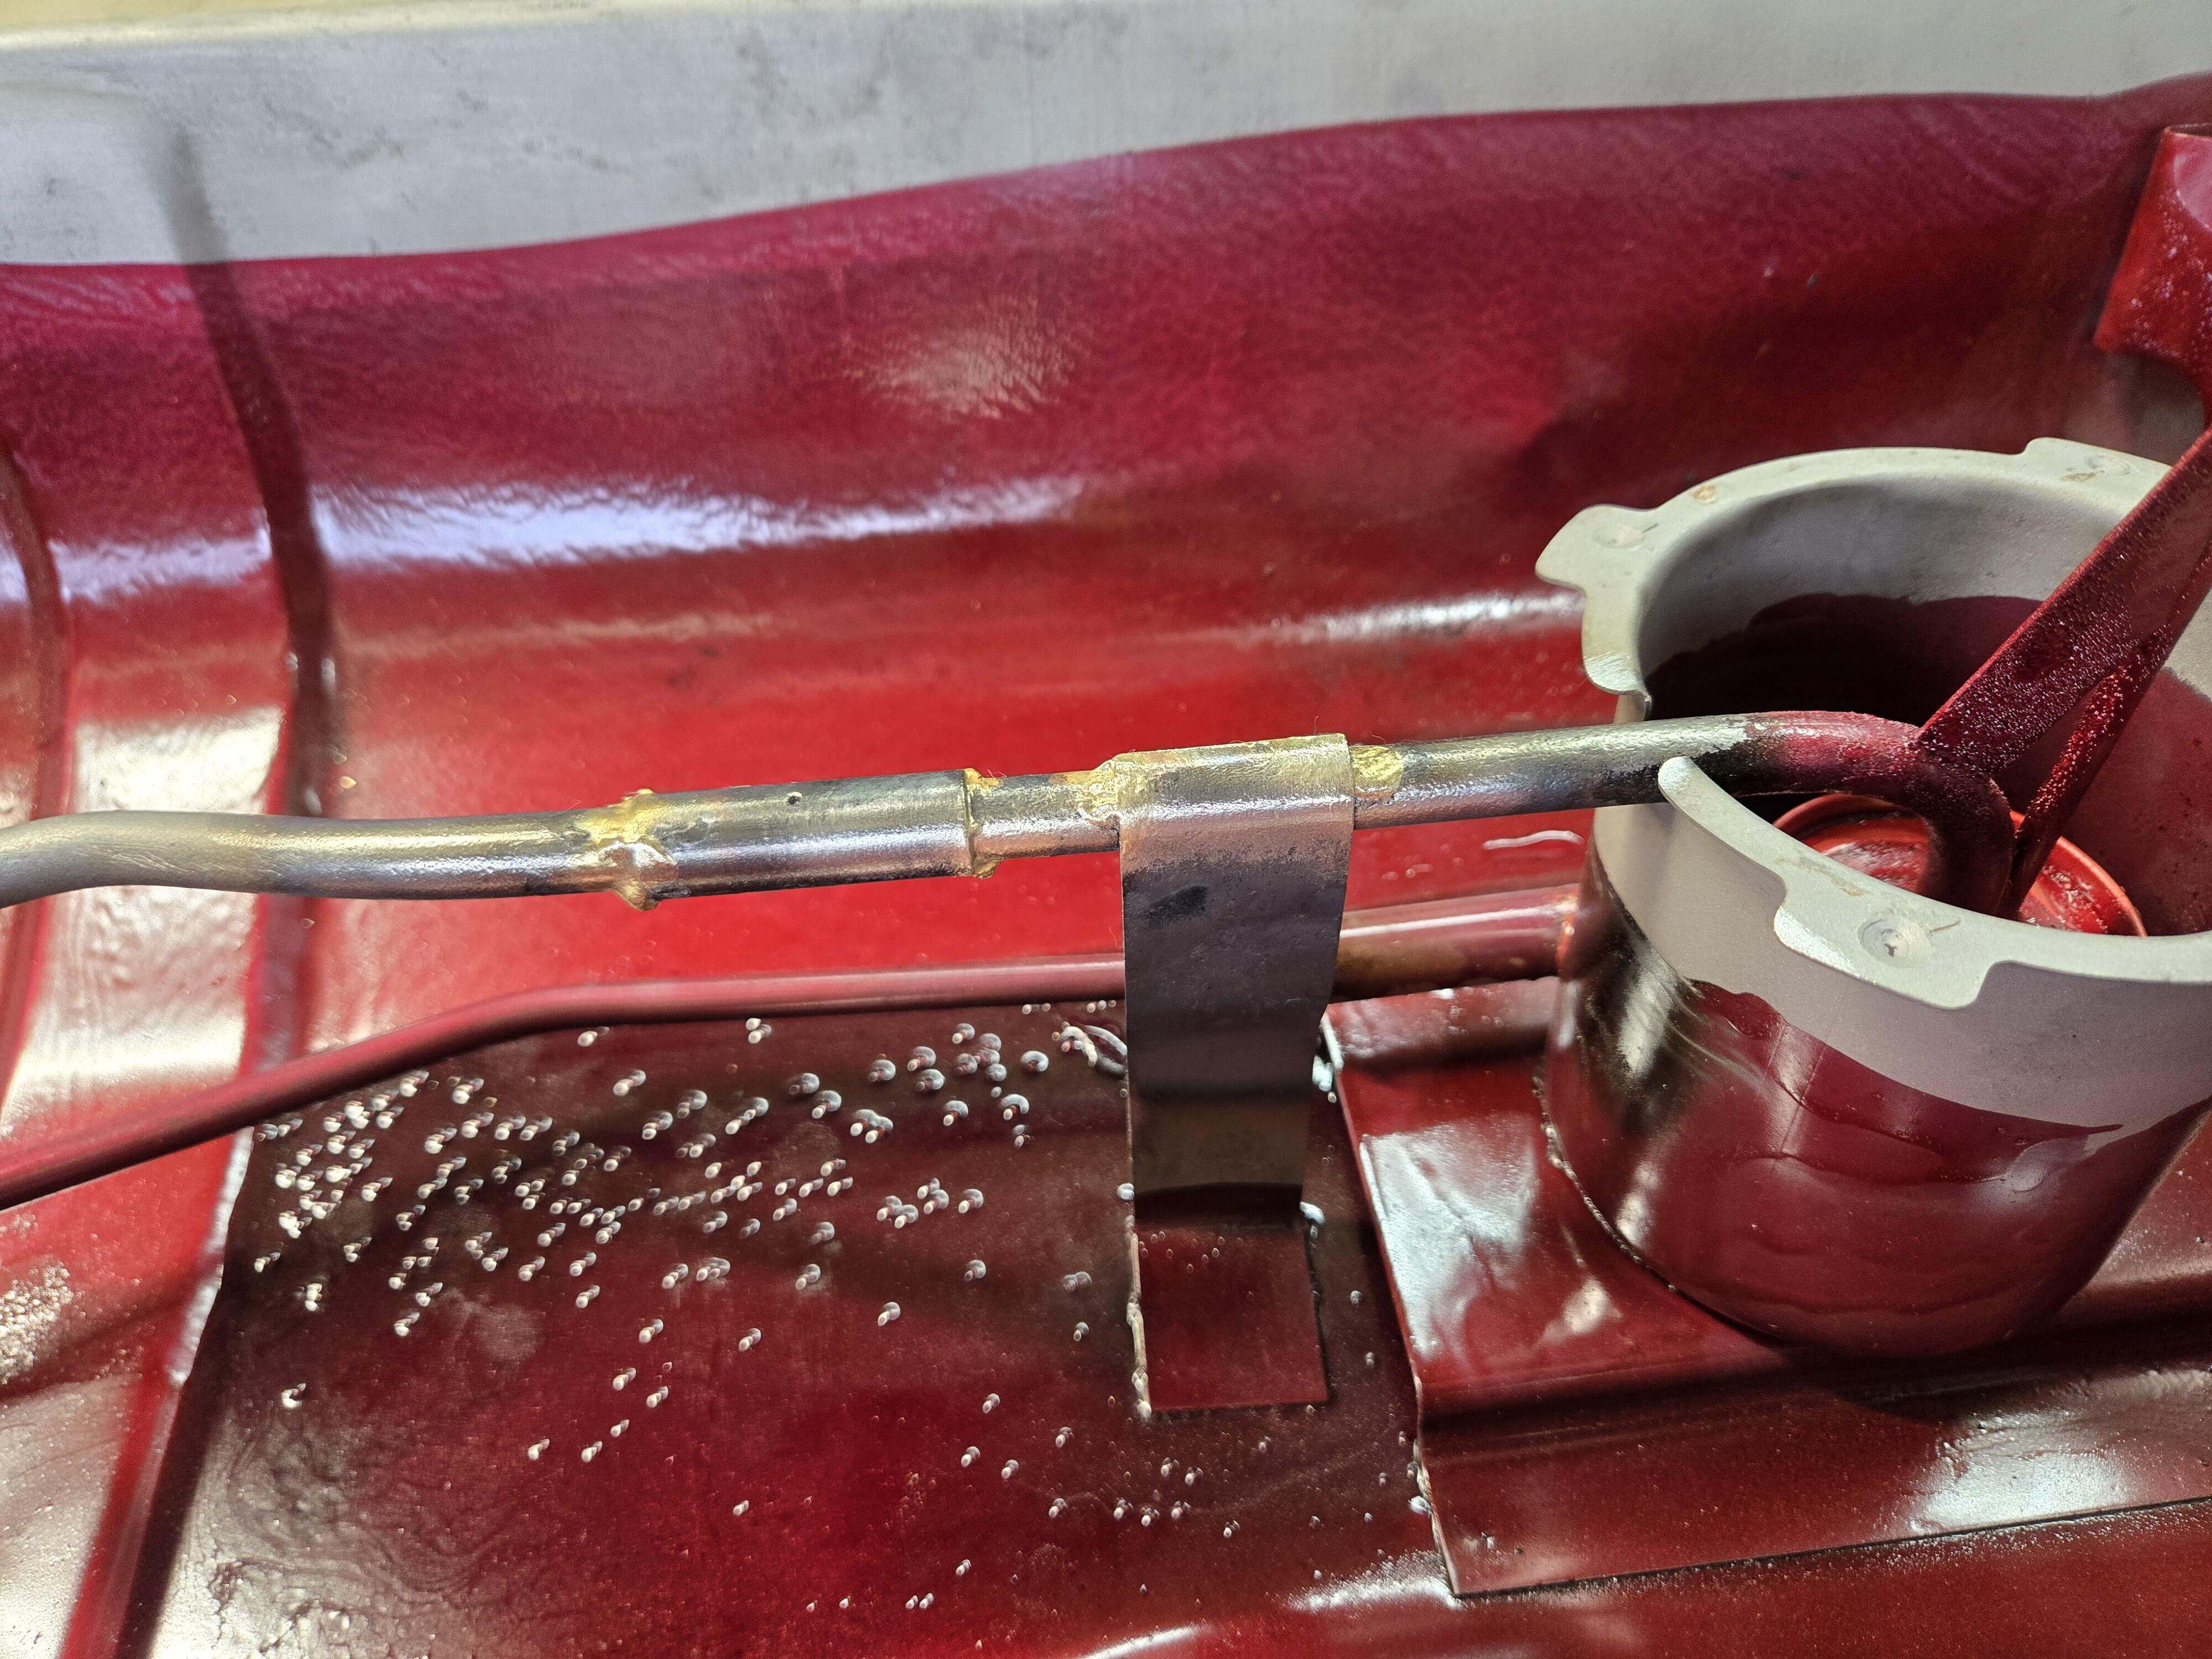
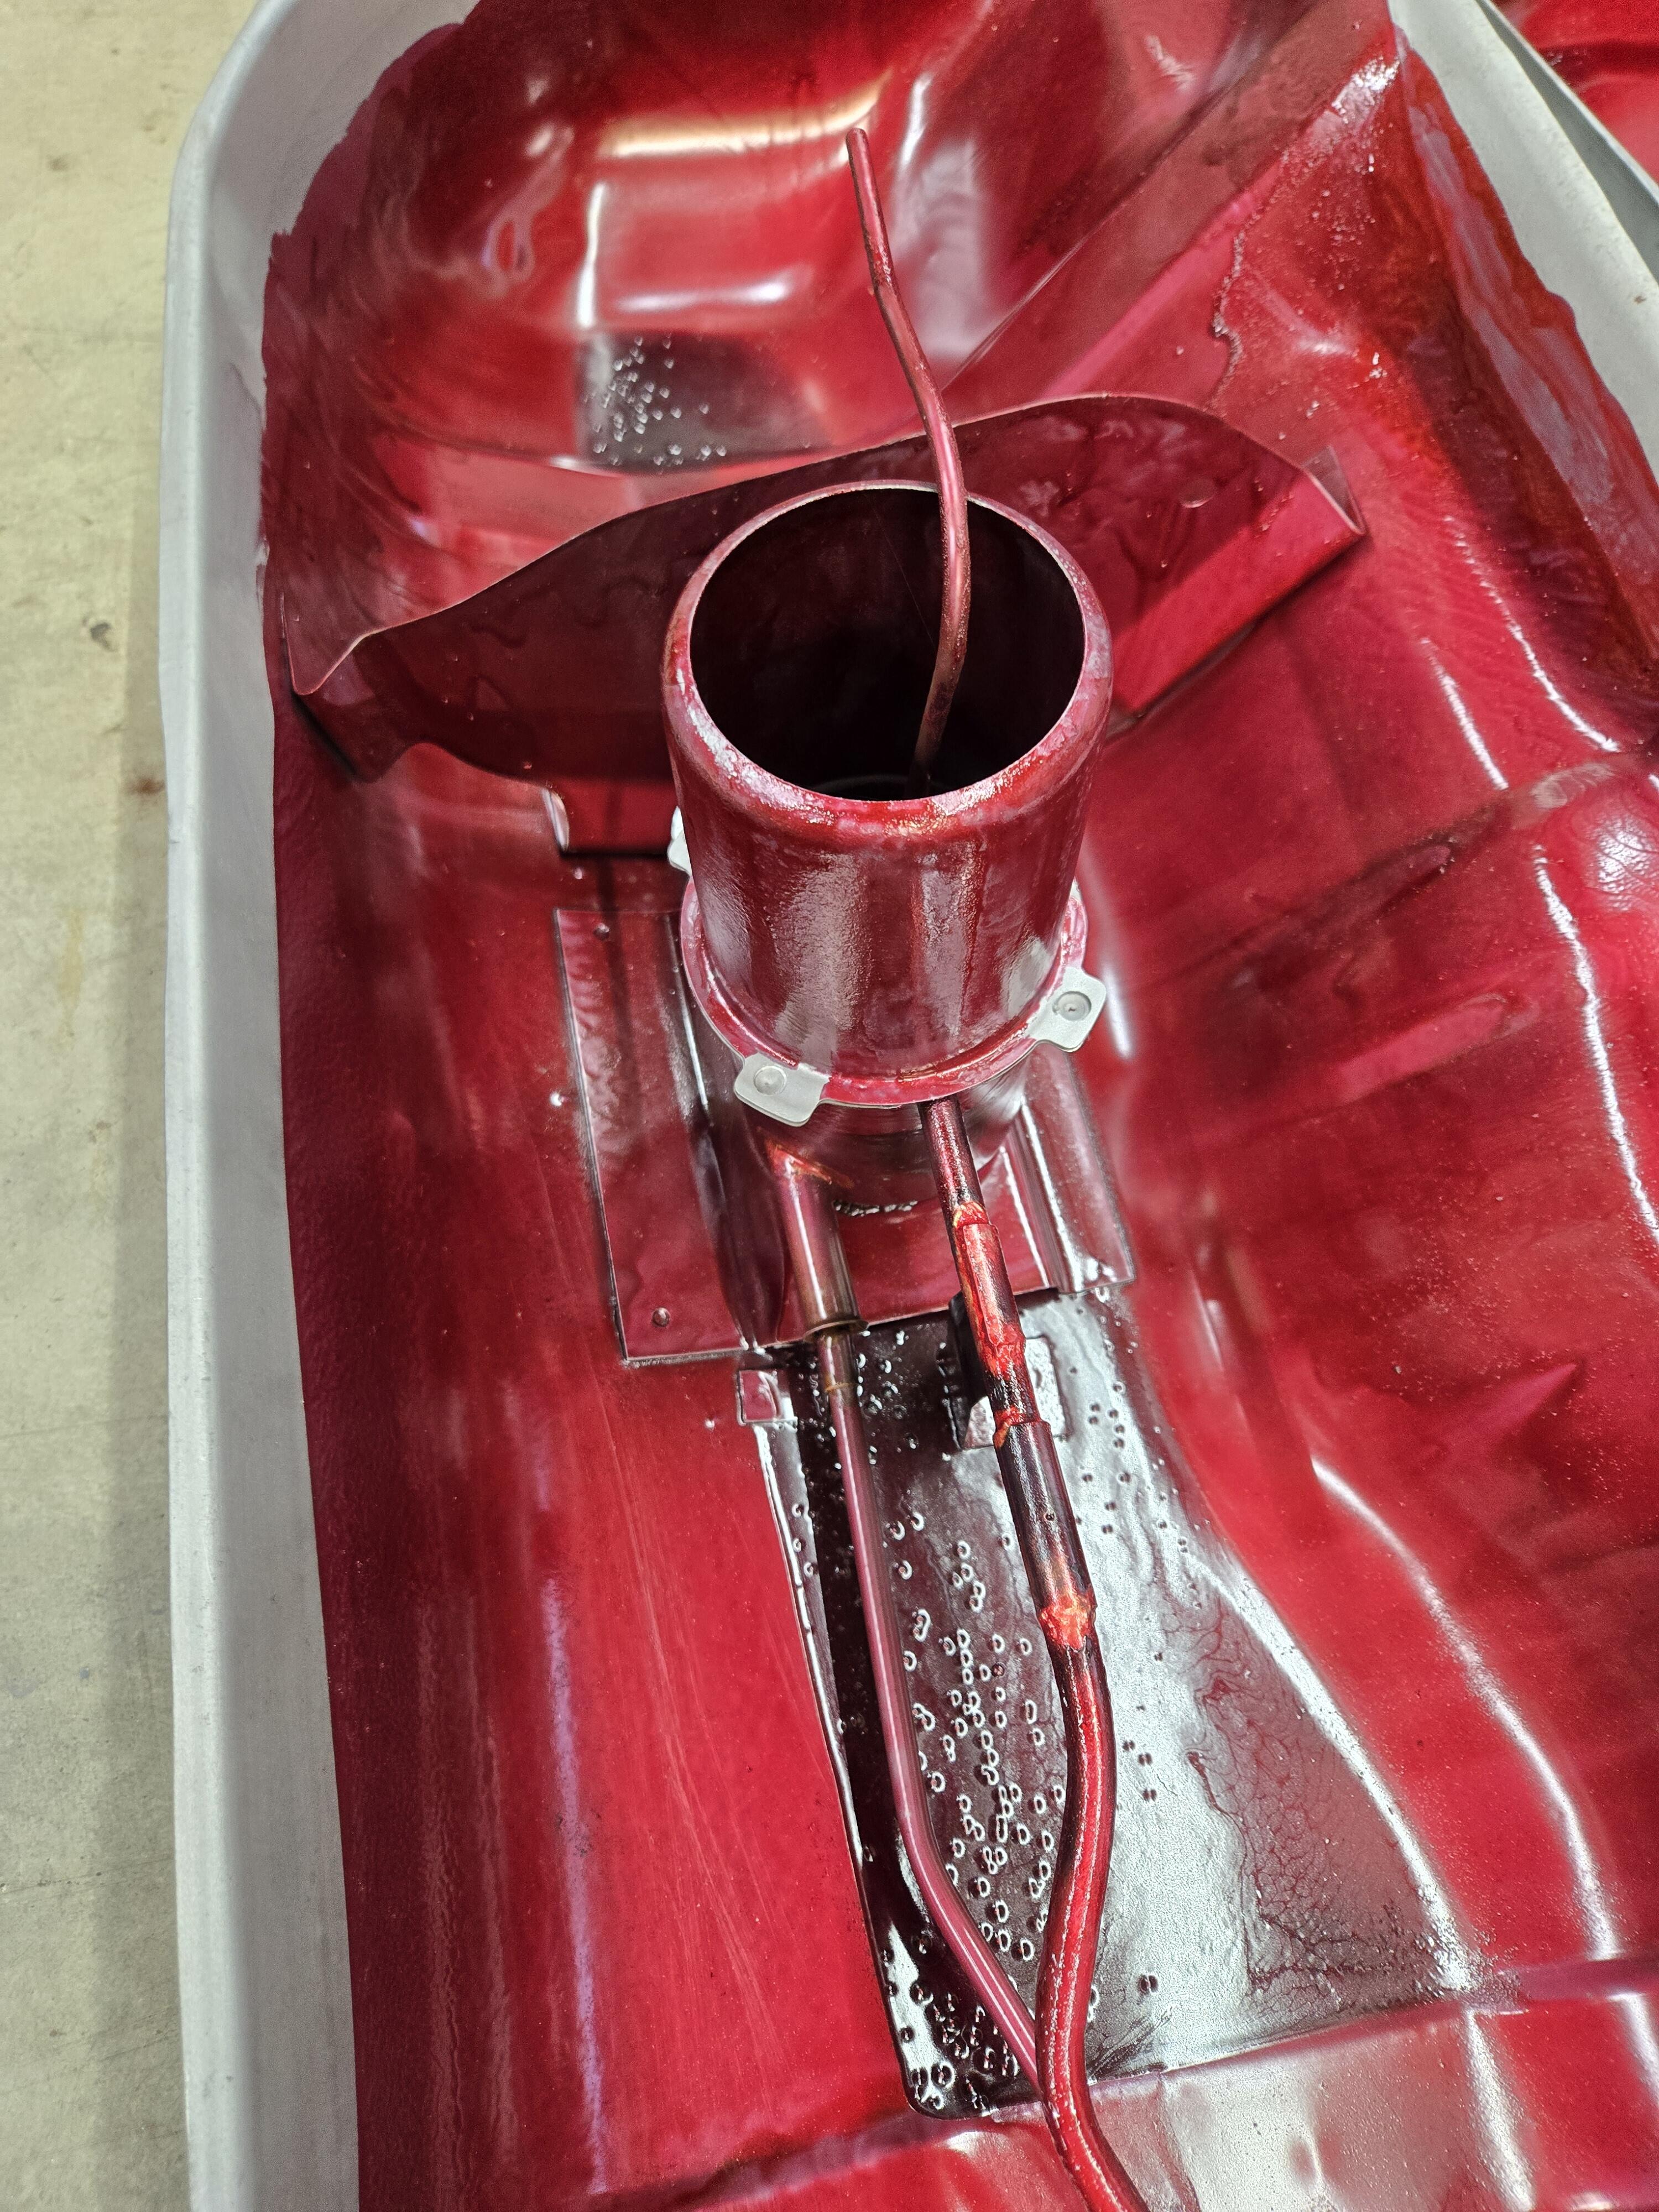
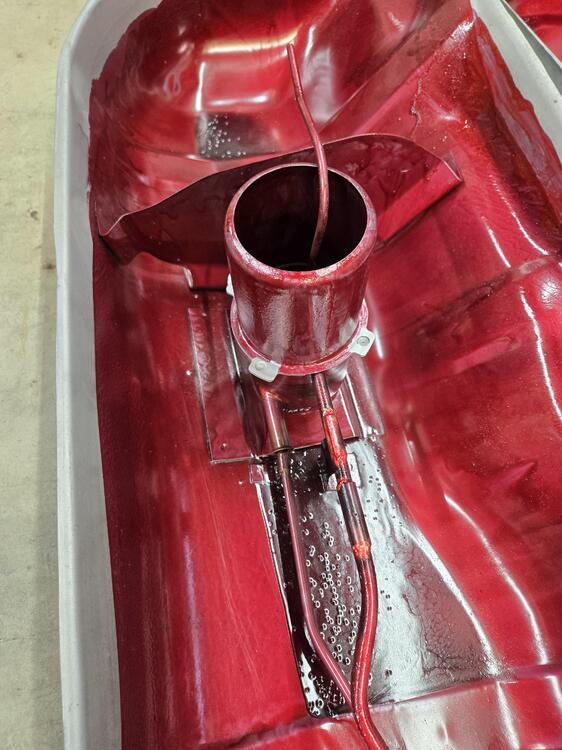
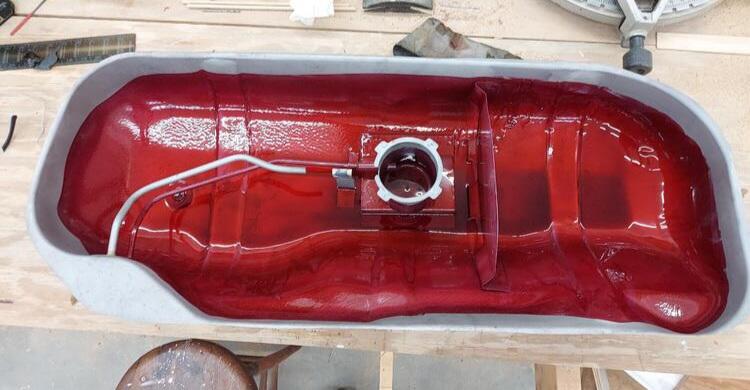
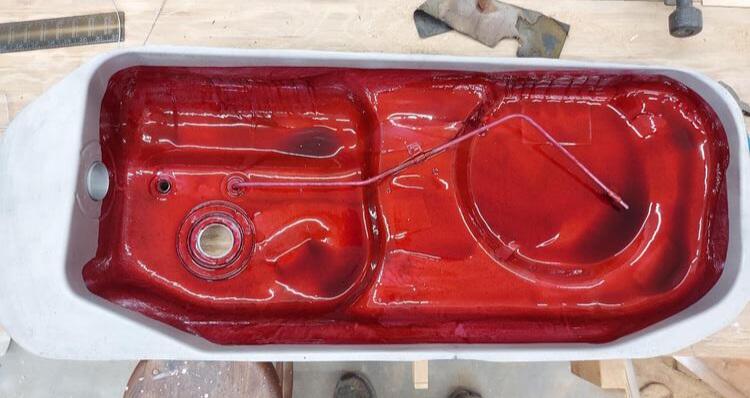
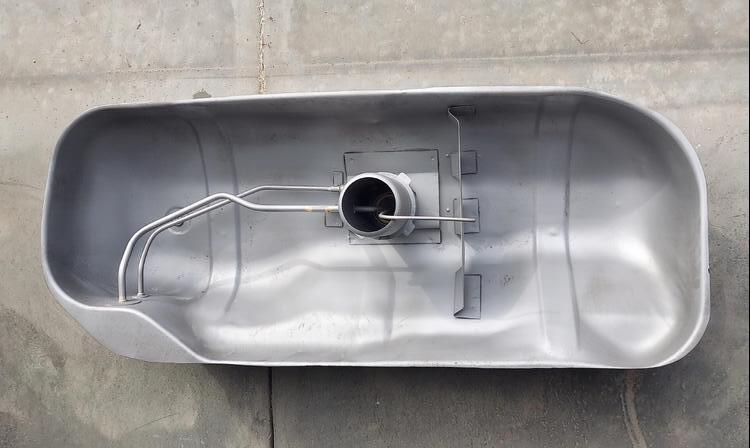
Now for the rust-preventative coating. I knew that if I hand-coated the parts, I'd have to leave an uncoated area near the seam for welding, and then slosh more coating in the tank afterward to cover the seam. I reached out to the manufacturers of several tank coatings. Knowing I would end up with two layers of coating in parts of the tank, I asked for their recommendations. Most advised against it. One supplier, Red Kote, specifically says in its literature that it can be recoated. A phone call confirmed that it would be fine. So that's what I used. I used a brush to coat the halves, leaving bare metal where they would be welded together. The stuff is thick, like molasses, and thickens in minutes. So I had to work quickly to get an even coating. Then we could reinstall the pickup tube (also coated), minus the screen. I made a sleeve from a scrap of stainless tubing and got a friend to braise it together. Then I tackled welded the top half of the canister back on. I touched up each joint after allowing it to cool and giving it a good cleaning. Red Kote smells and acts like PVC pipe cement. It puts off some serious fumes. Acetone is the recommended solvent for thinning it. So I used that to clean each surface immediately before coating.


-
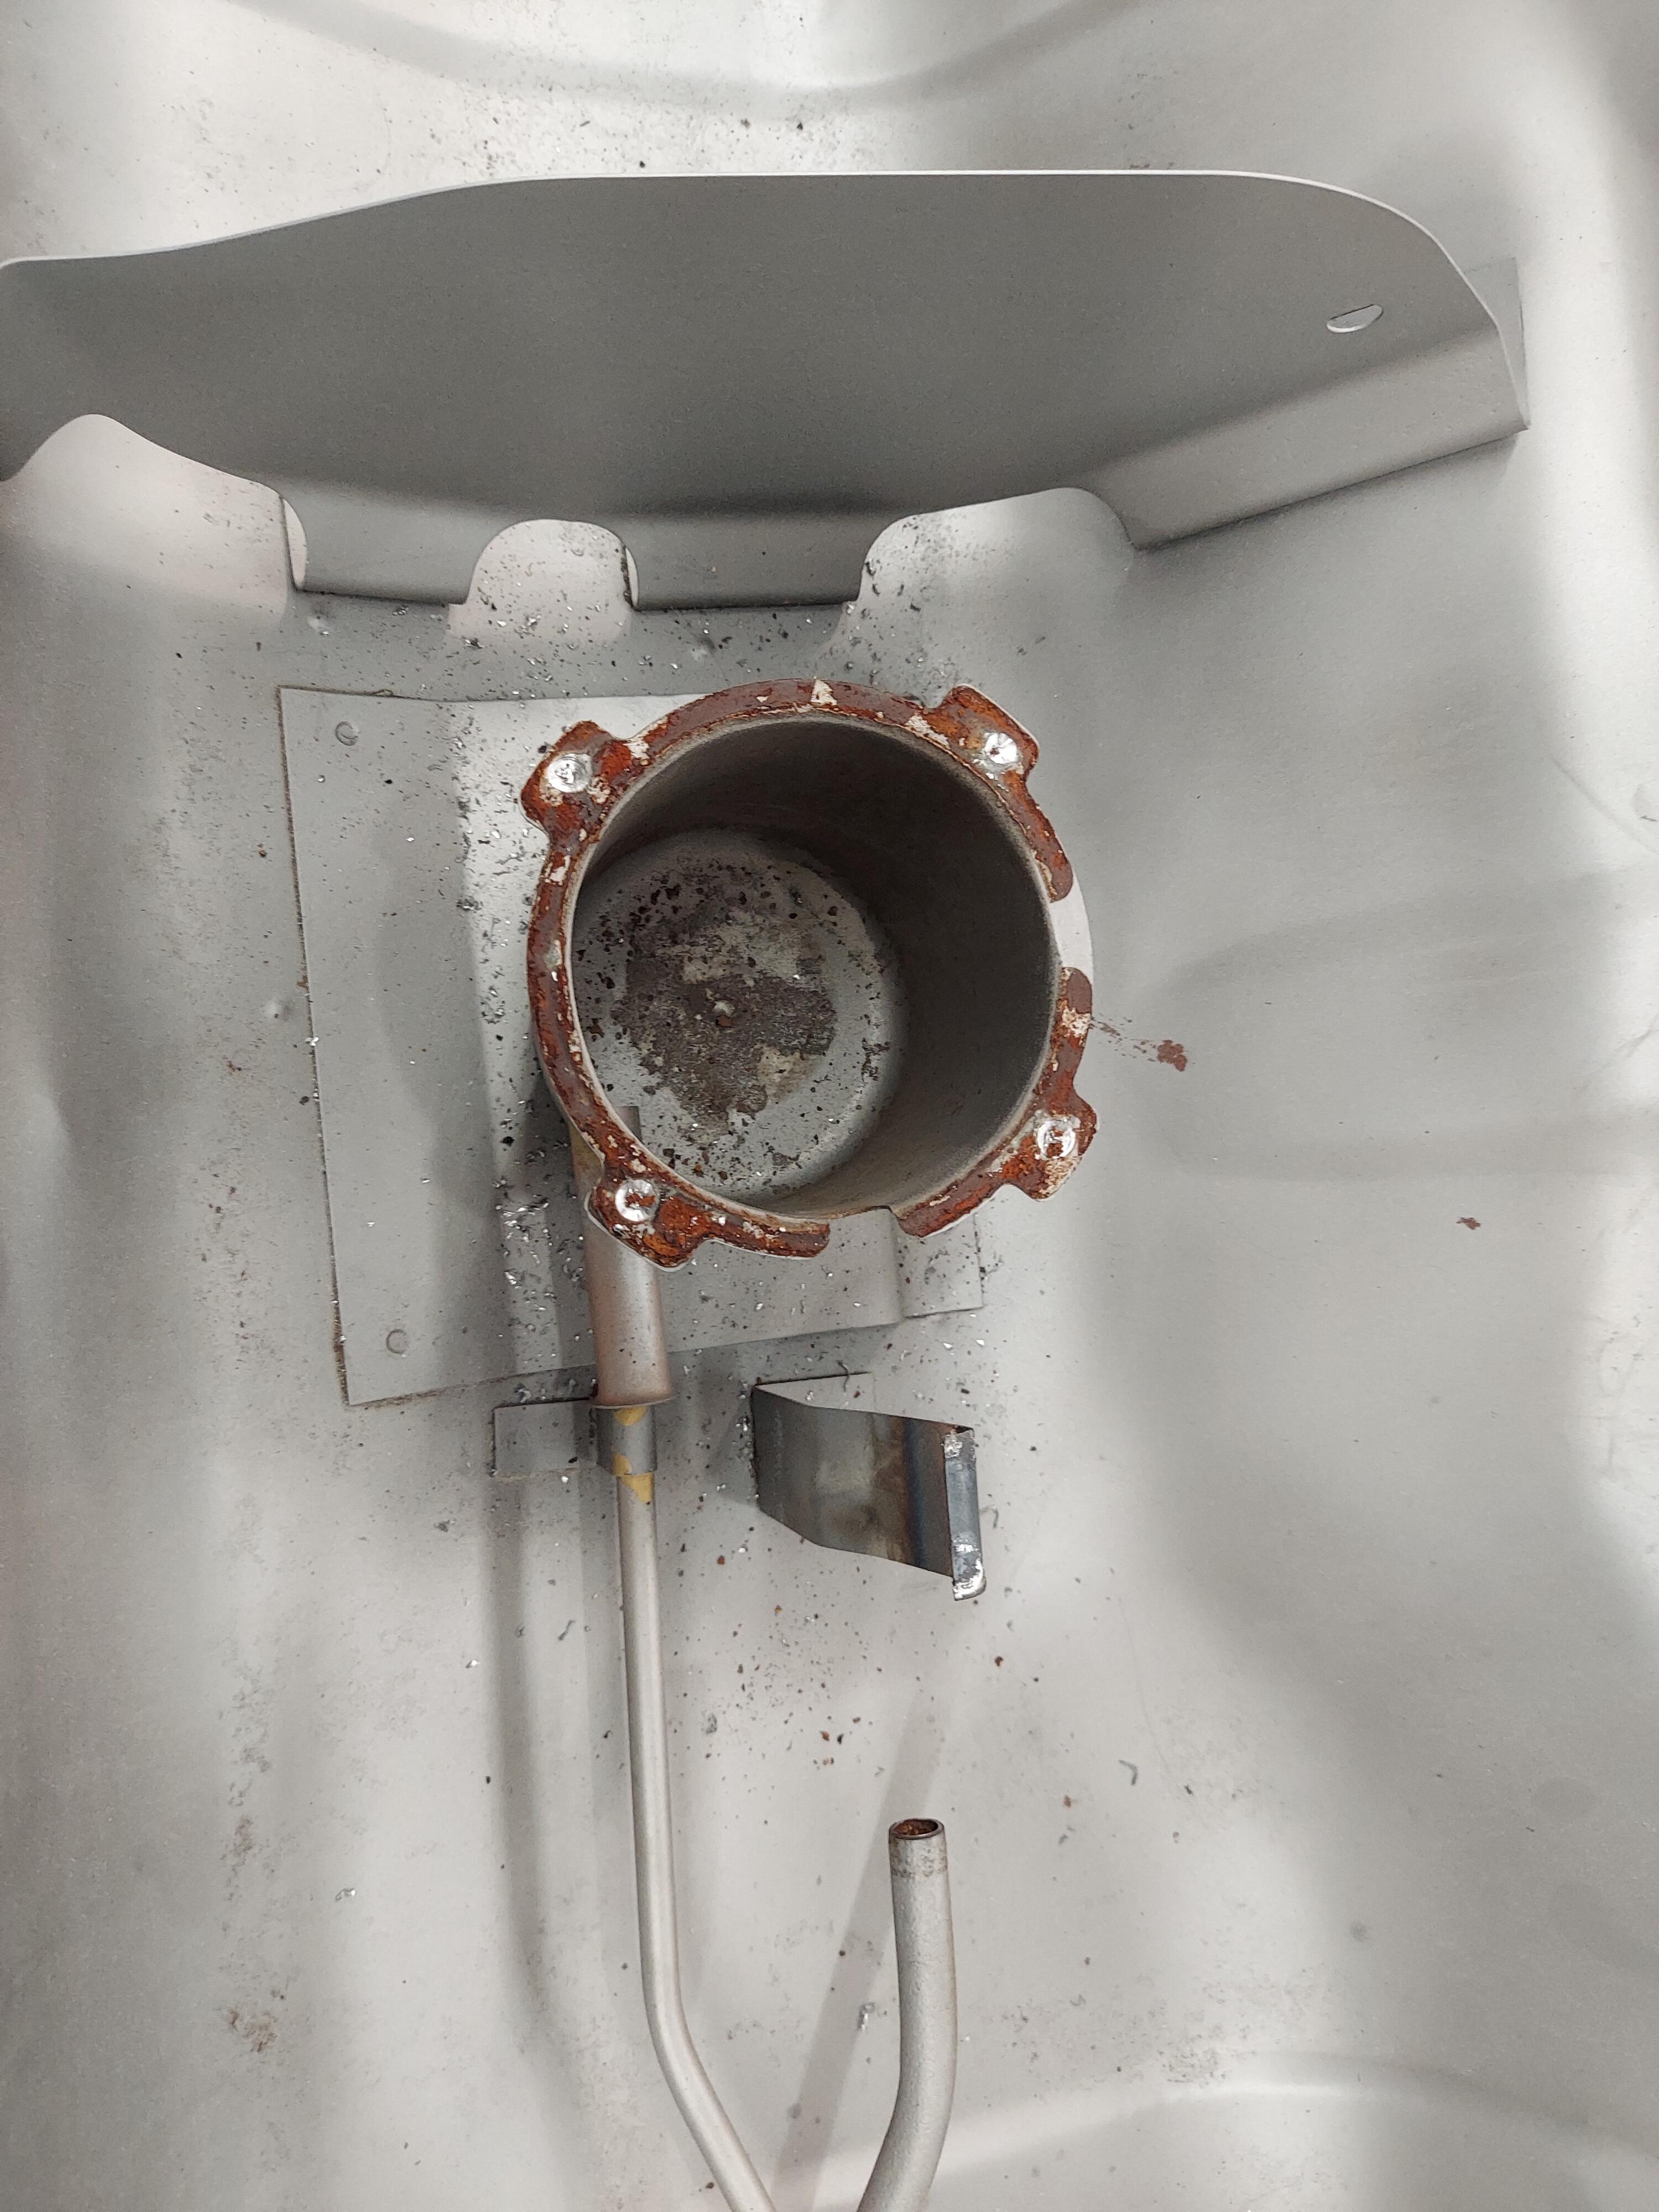
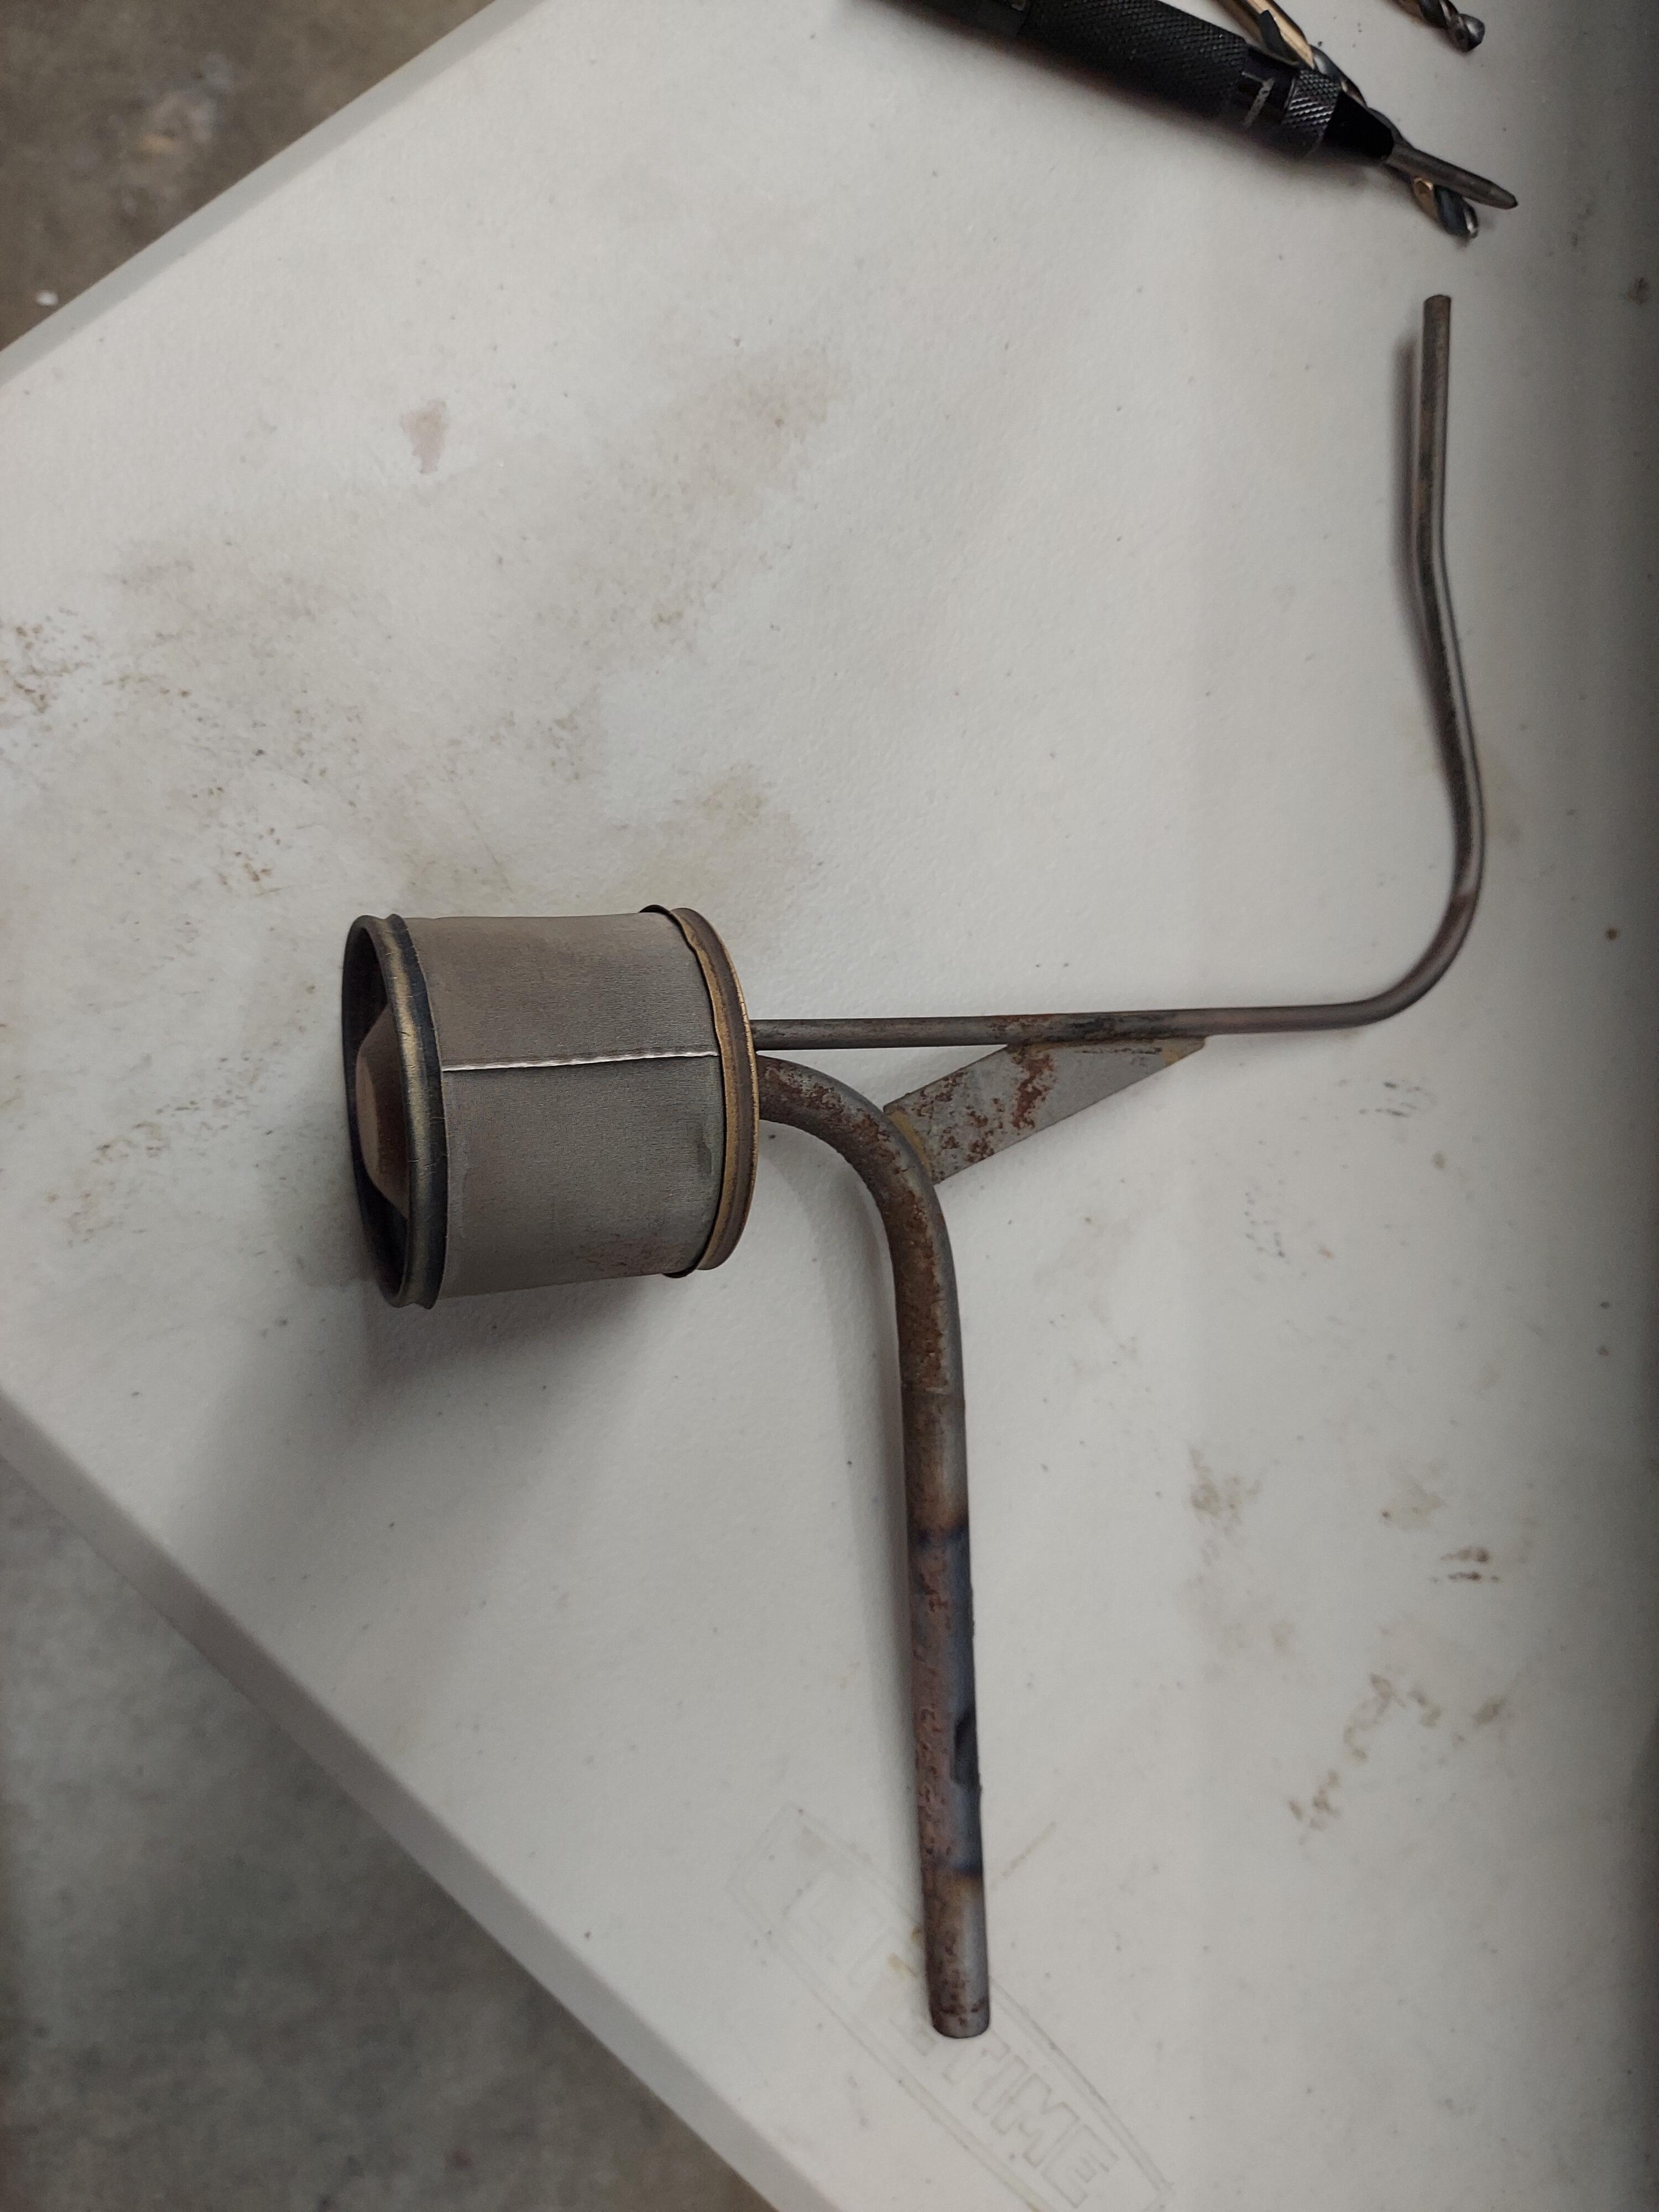
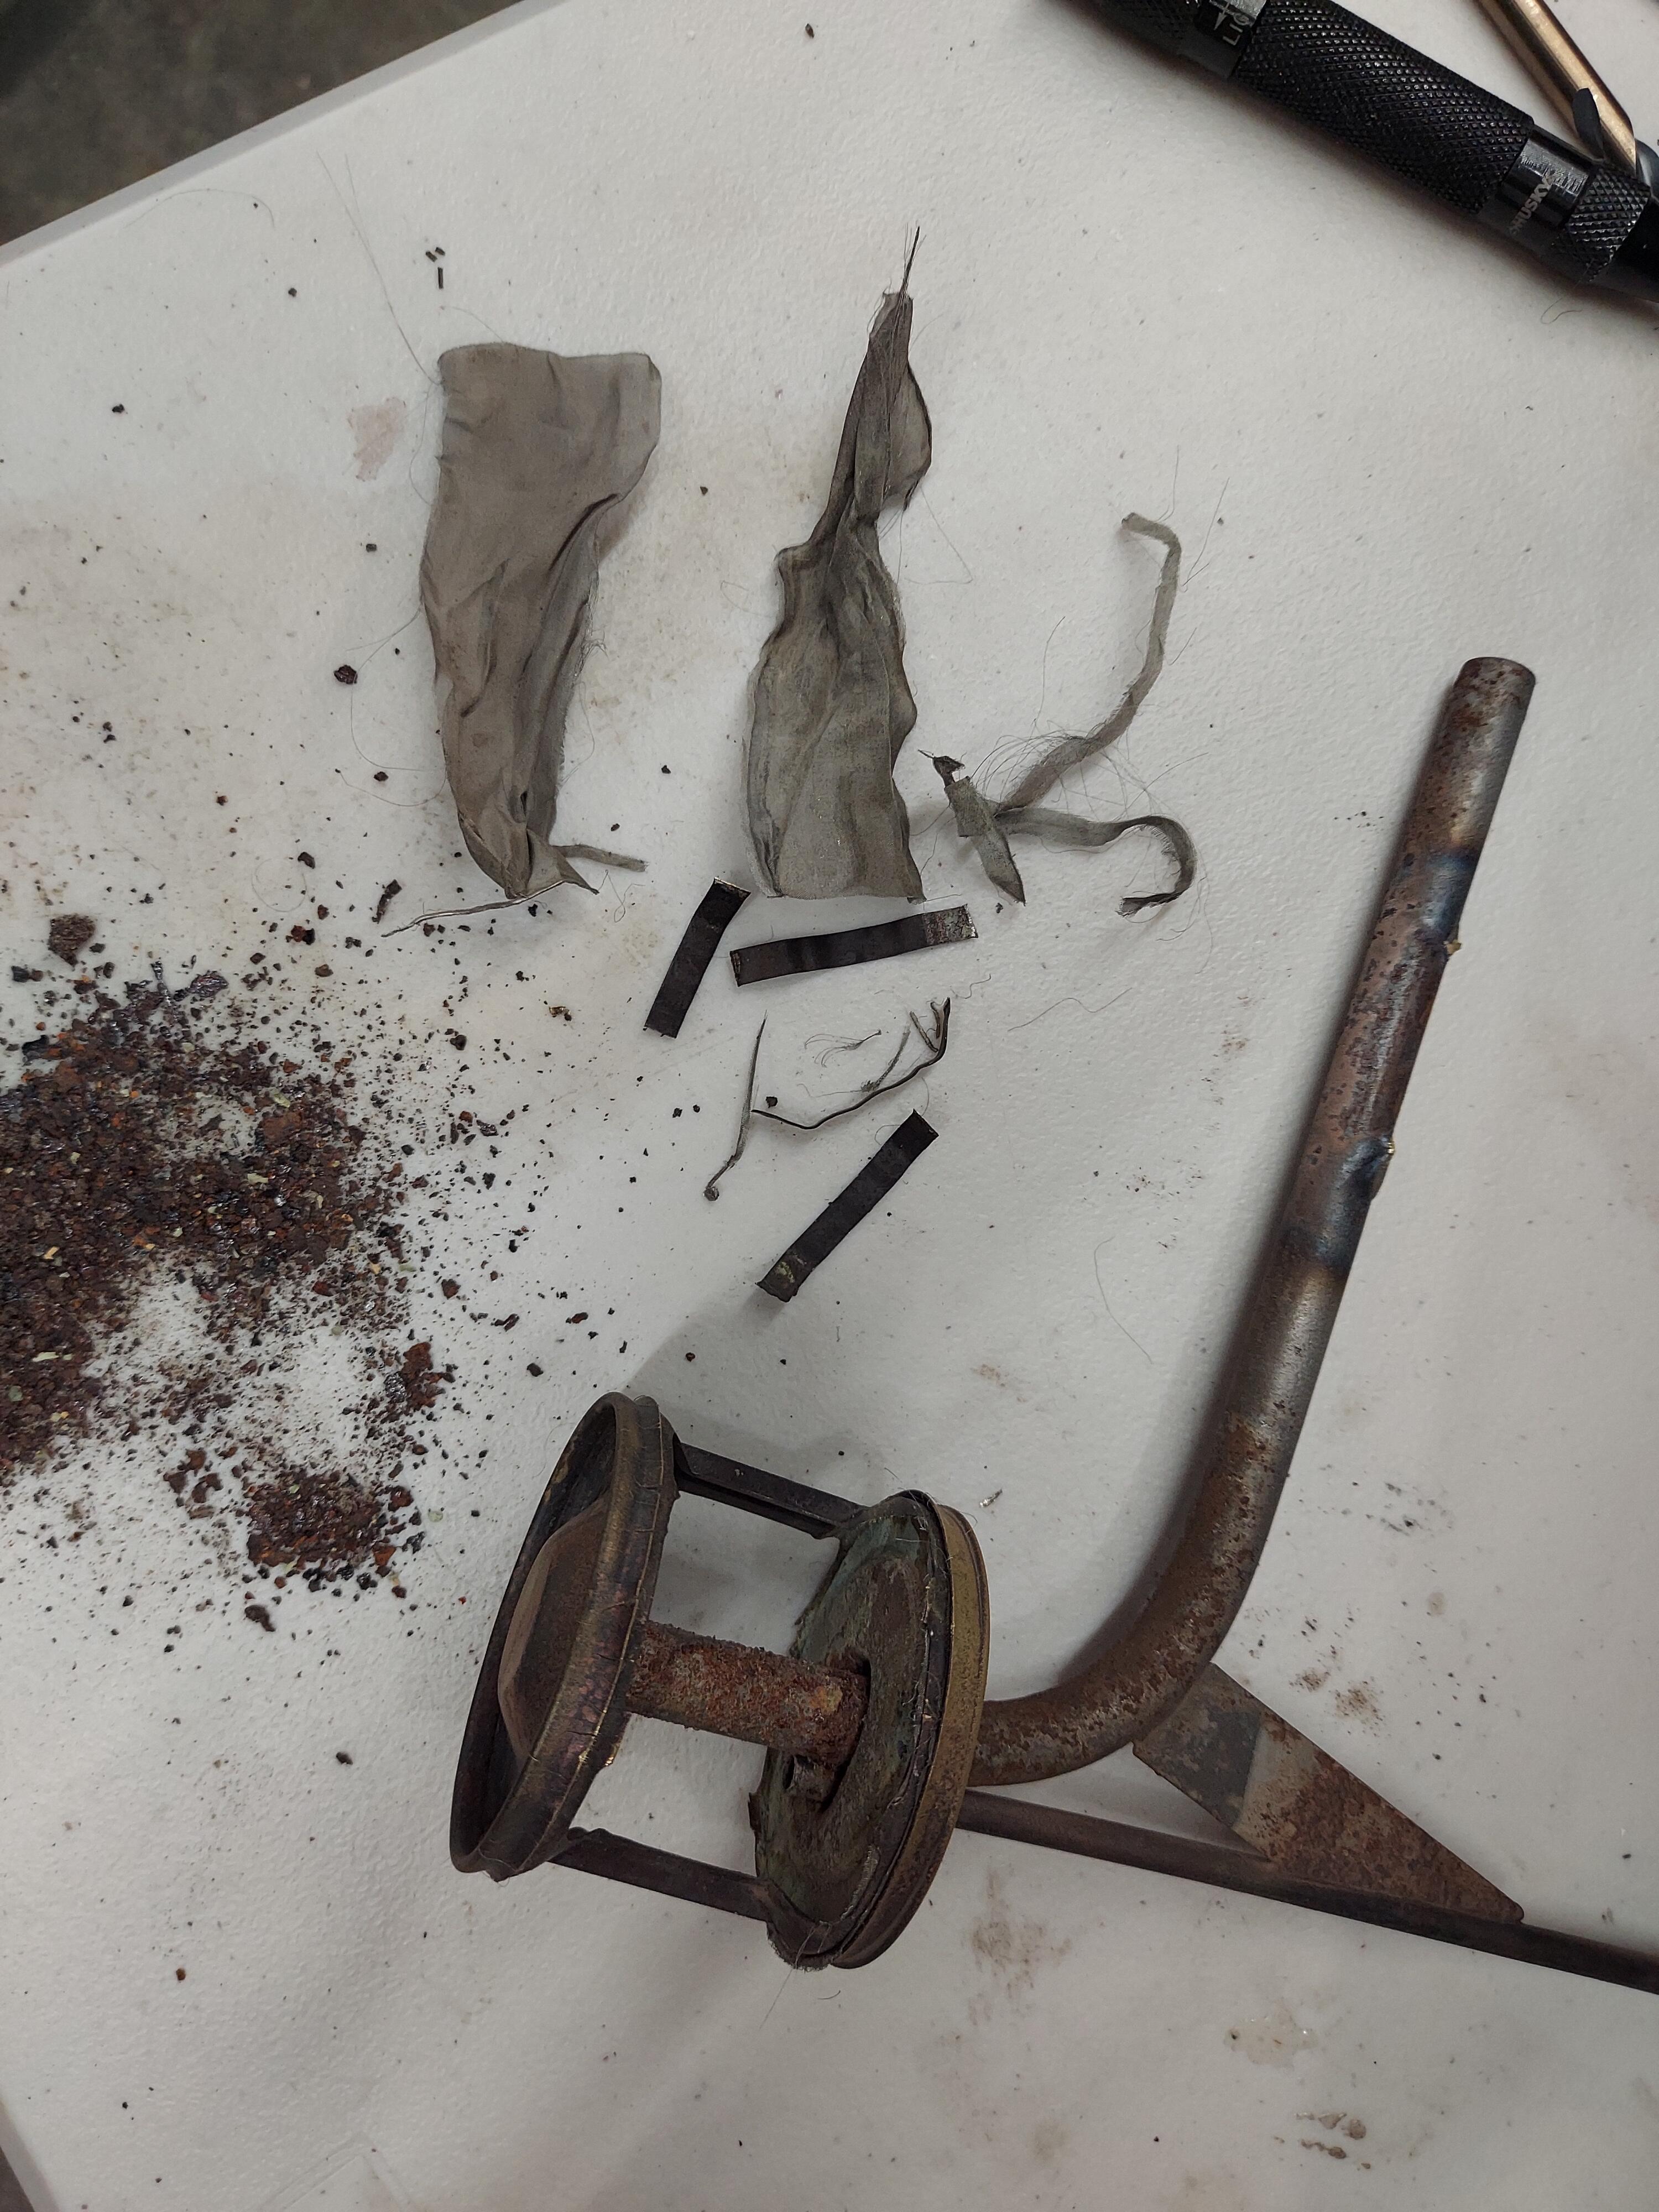
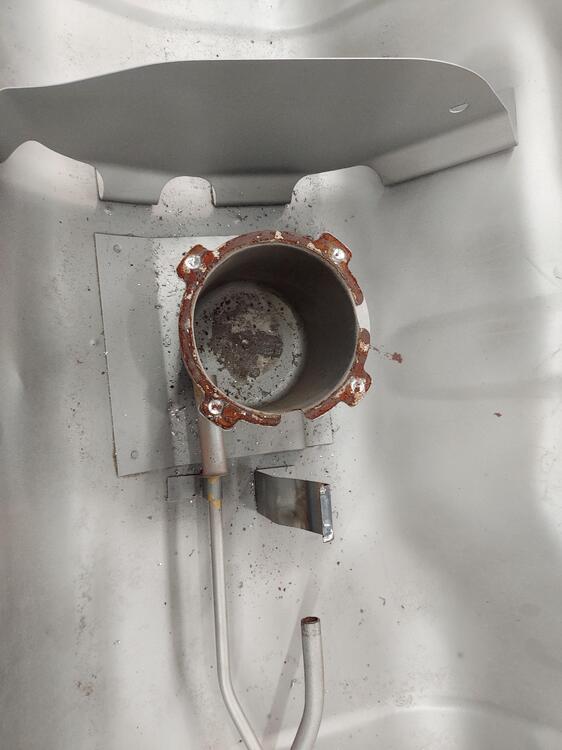
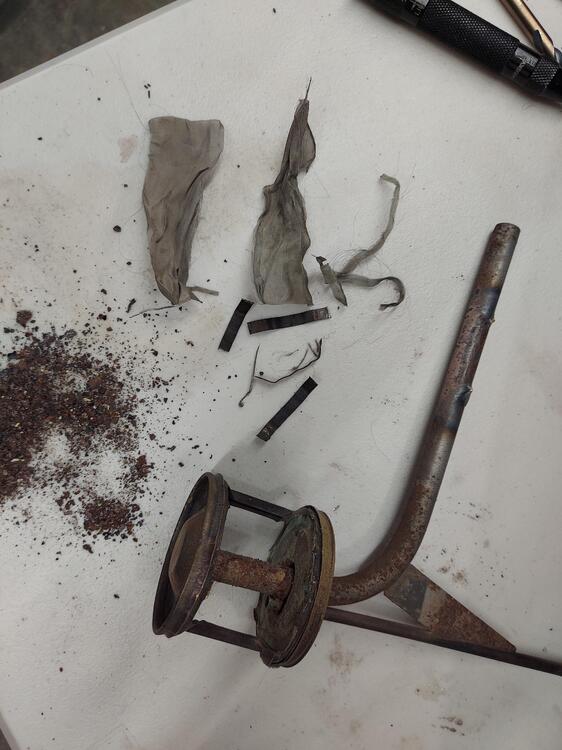
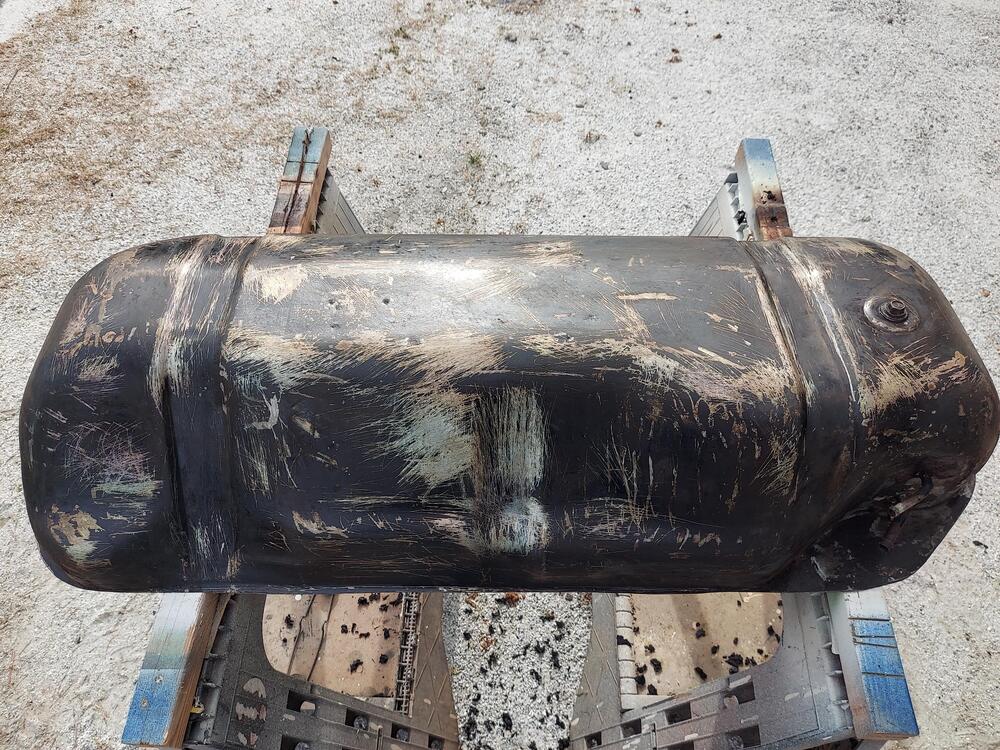
With the majority of it cleaned up, I tackled the screen. I drilled out the spot welds to separate the canister and cut the suction pipe to remove the screen. The screen was almost completely clogged with fine particles of rust. No wonder fuel wasn't getting out. I carefully cut the screen out. You can see the small pile of debris that was stuck inside the screen. The screen itself was so fine it felt like linen.

-
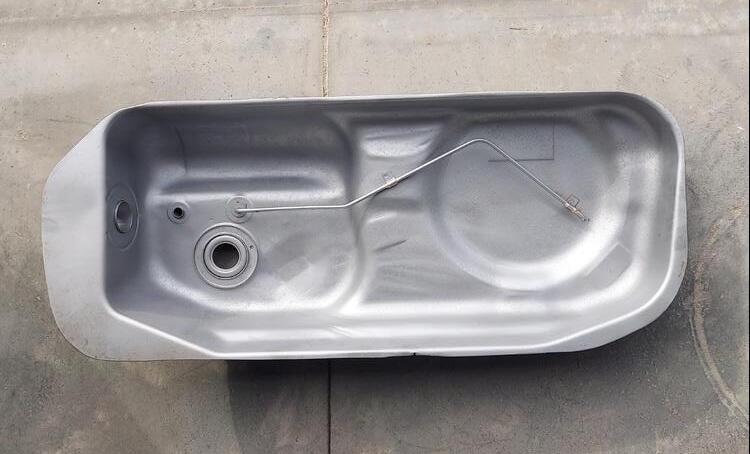
Ultimately I gave up on chemical rust removal. For one thing, it didn't fully remove the rust. And as you can see, unless i built a tank and fully submerged the parts, there were sections of baffle that couldn't be treated. I tried soaking rags and other things. But I wasn't happy with the result. Lastly, I read that the coating I chose would adhere better if there was some surface roughness. So I bead blasted the tank halves.
-
I ended up using a product called Rust911 to attempt to chemically remove the rust. It comes as a concentrated liquid that you add to distilled water to make a chelating solution like Evap-O-Rust. At $95 for enough to make 16 gallons, it was a little more cost effective. During: After Not perfect. But it removed most of it. FWIW, it appears to be just as effective as Evap-O-Rust at about 1/4 the cost when you factor in buying the distilled water.


-
Huge thanks to Charles for coming over and helping me get the tank back in. It feels indescribably good for her to run under her own power with a complete fuel system. I'll circle back to my fuel tank restoration thread with an update. But in brief: cut tank open, bead blast clean, drill spot welds for screen canister, cut suction pipe to access screen, remove screen, Red Kote everything, reassemble, slosh more Red Kote around seam, bead blast outside, paint. Easy, lol. Tank restoration thread: https://www.classiczcars.com/forums/topic/68742-efi-fuel-tank-restoration/?&_rid=30865
-
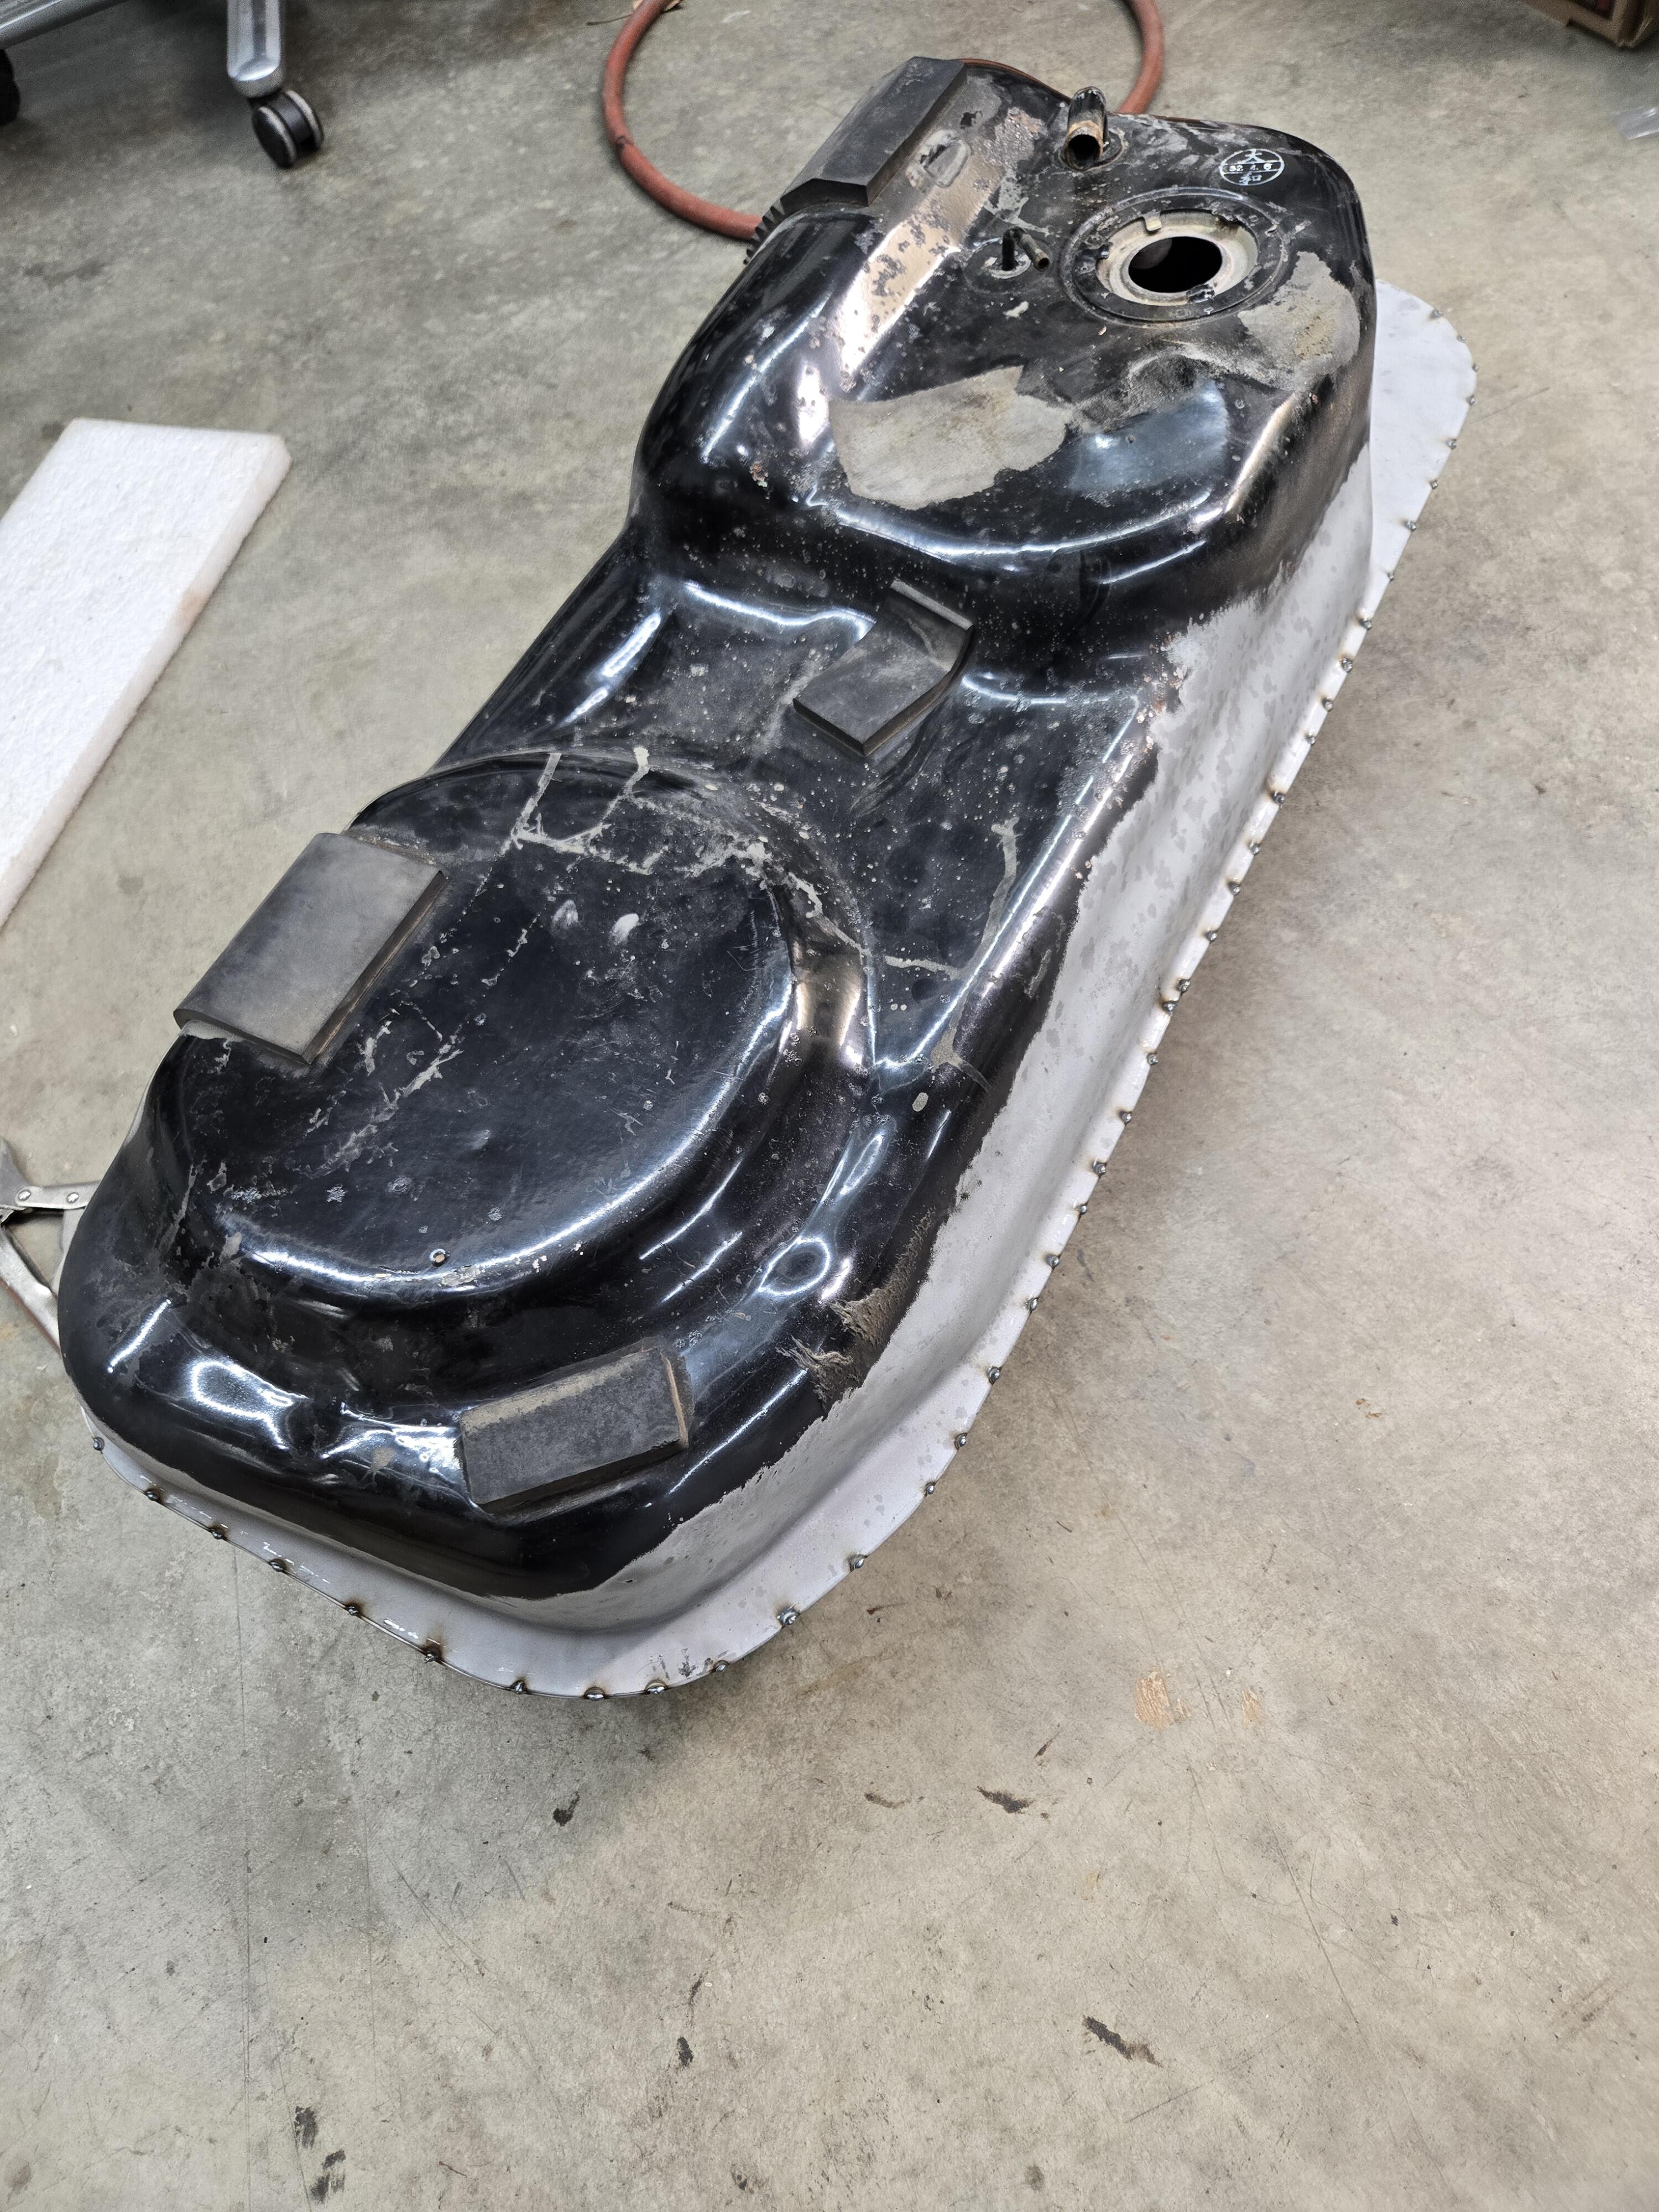
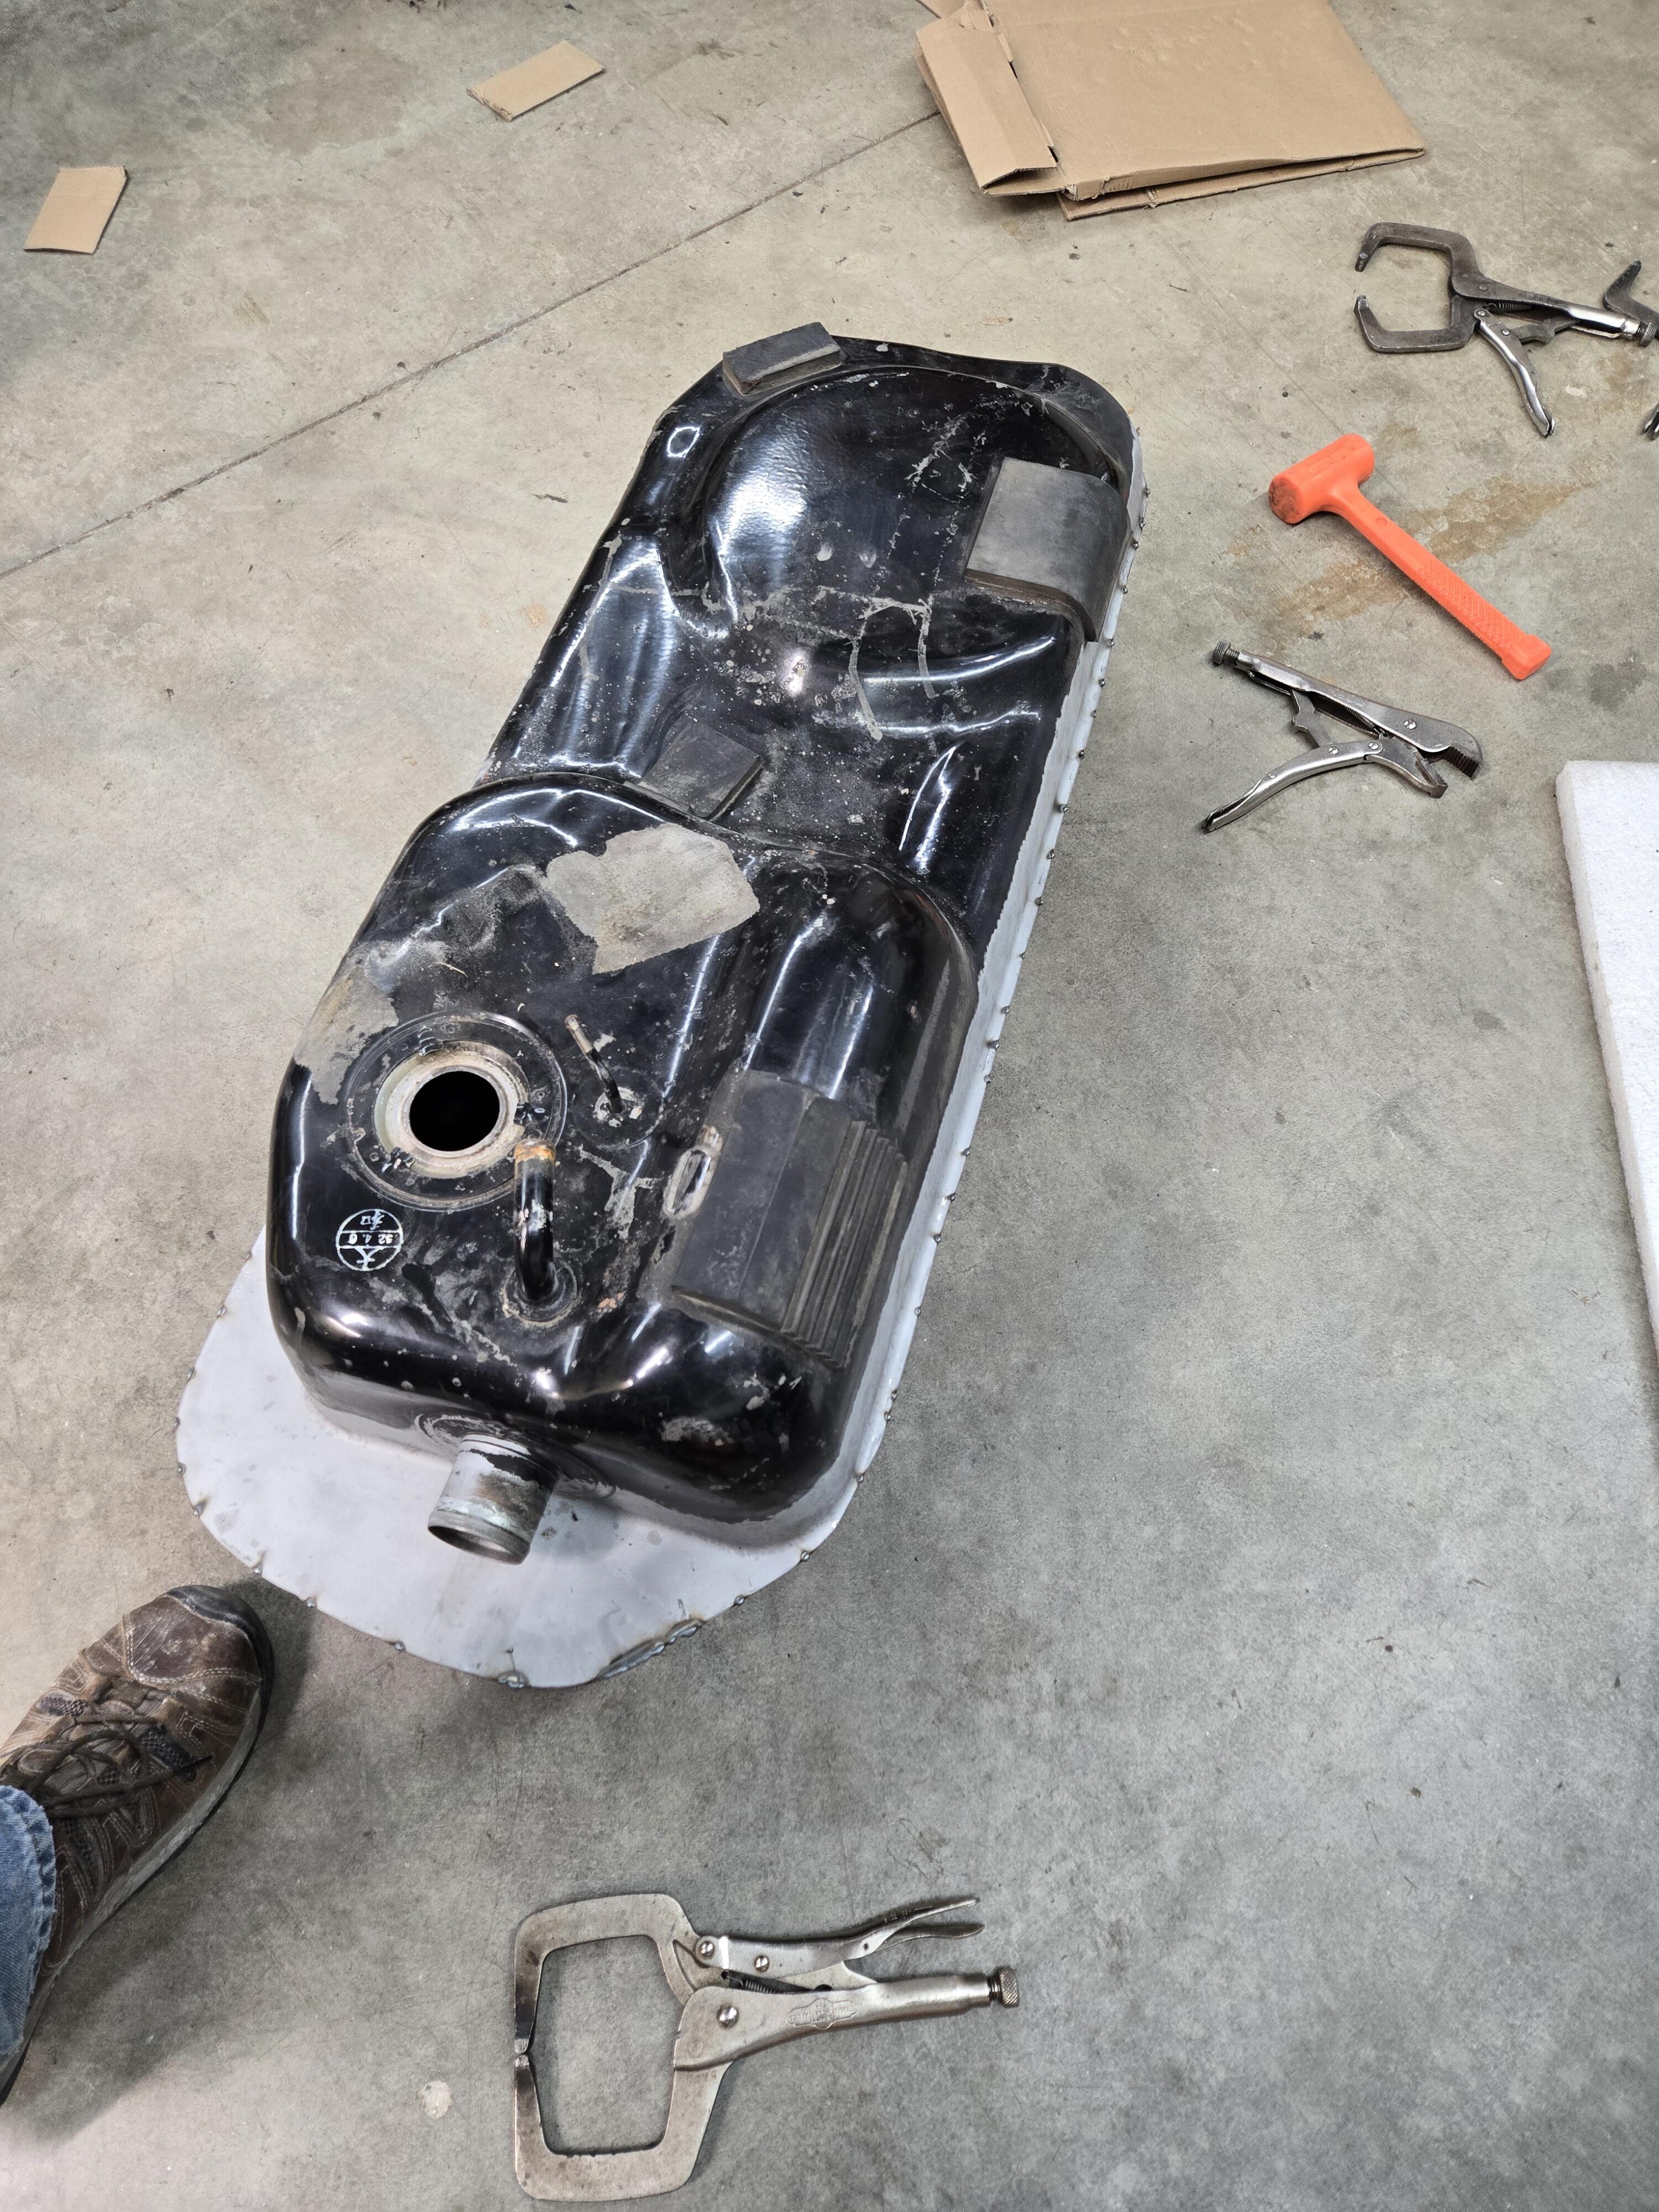
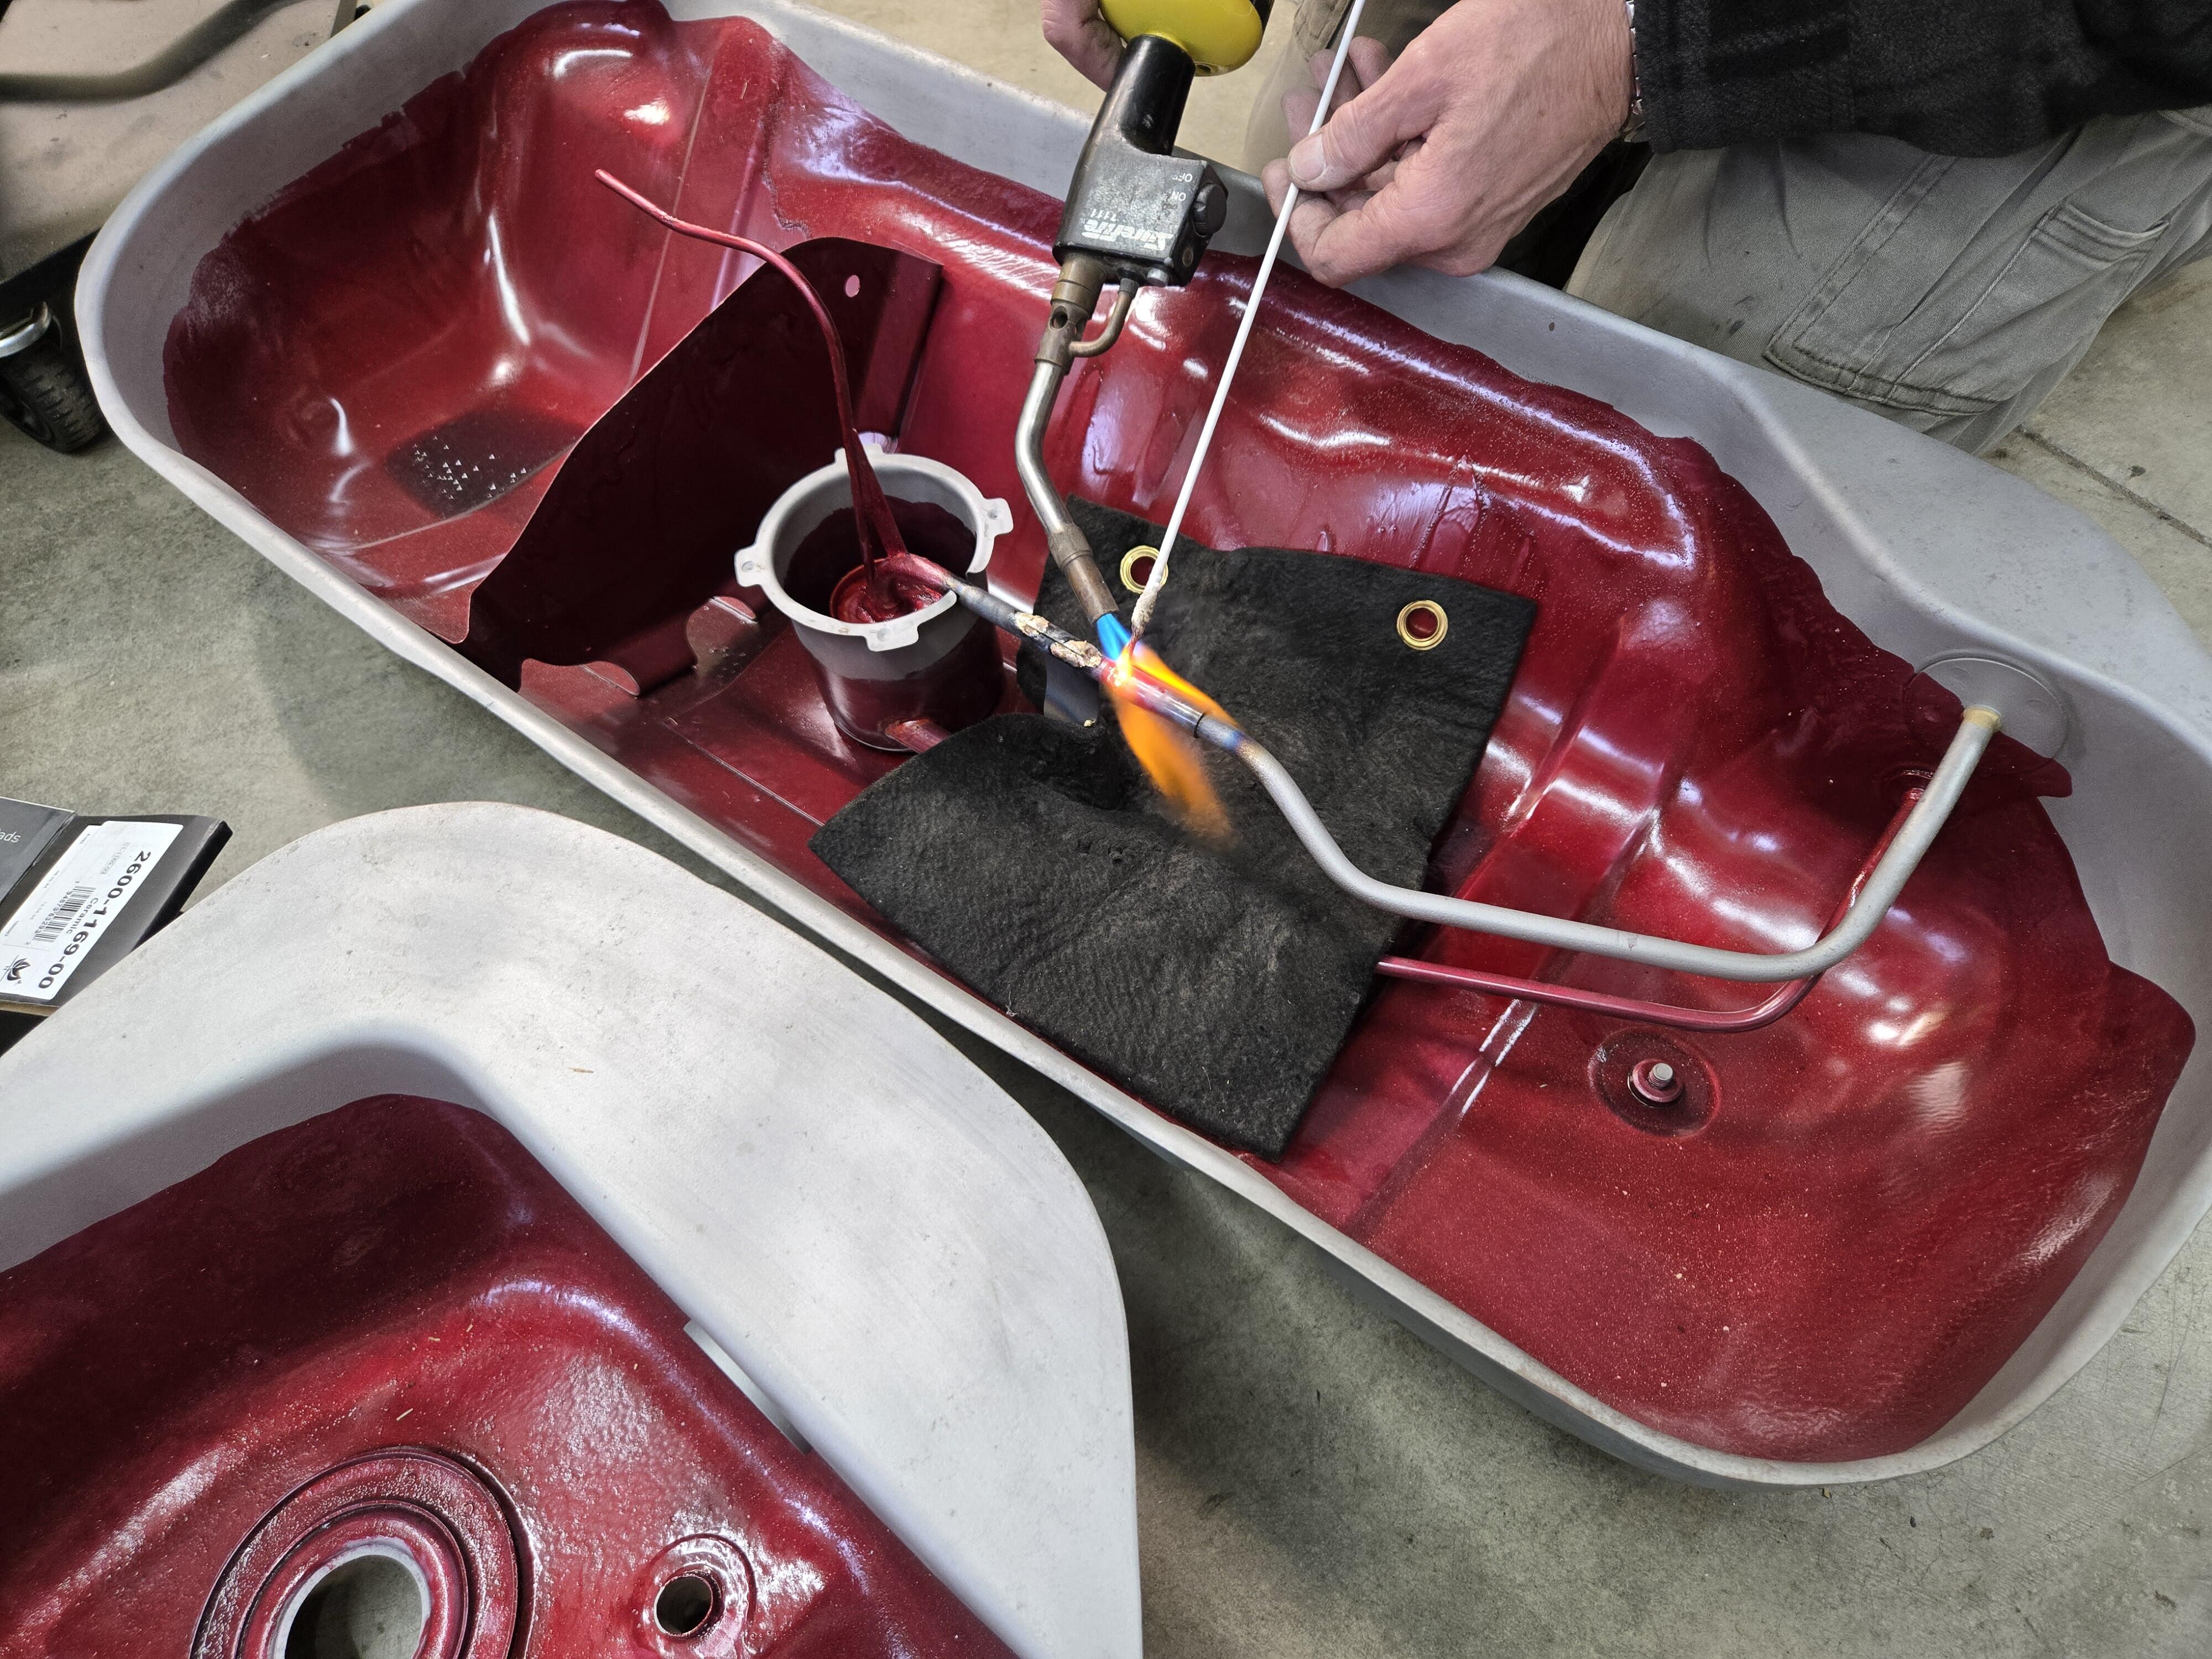
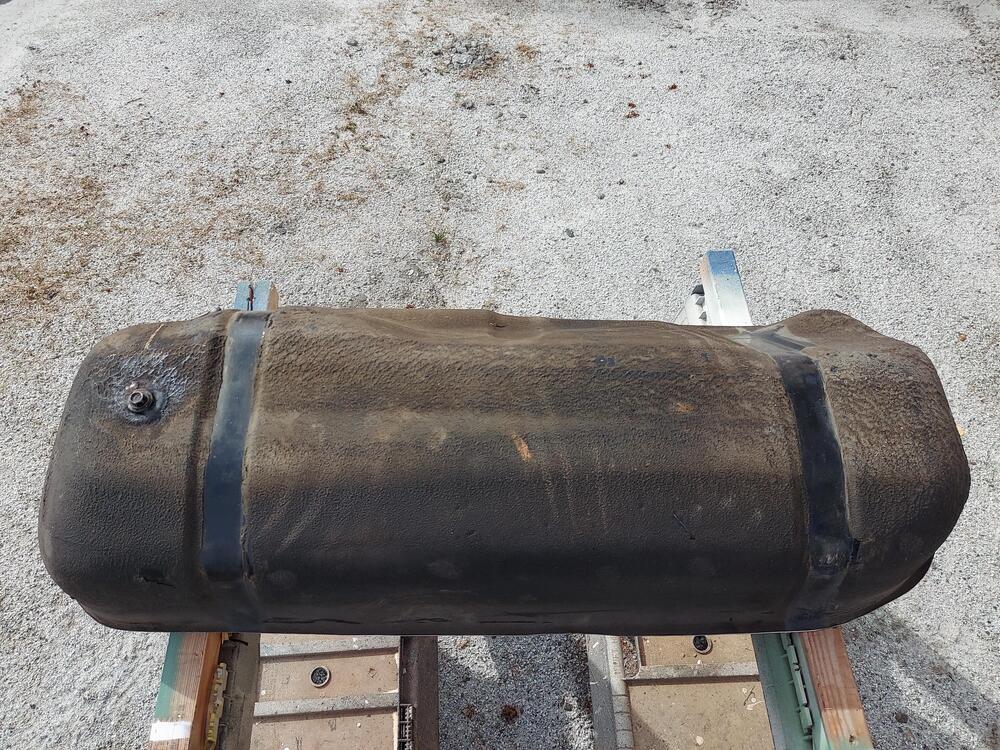
I haven't updated in a while. But I've been researching chelating chemistry for de-rusting the tank instead of more destructive methods like acid or bead blasting. When Evap-O-Rust was $12/gallon, I wouldn't have balked at the cost. But now it's $30/gallon. I found some info on using EDTA mixed with citric acid to form a DIY, pH neutral chelating agent. Here's one guy who made an instructional video: He claims $0.75/gallon, but the cost of EDTA has skyrocketed in the last few years, driving the cost of a DIY chemical to about $15/gallon. Then I found something called Rust911, which is a concentrated chelating chemical you just add to water. One $75 gallon makes 16 gallons. That's what I'm using. With that sorted, I needed to strip off the rubberized undercoating on the bottom half of the tank. I ended up using a propane torch to soften it so I could scrape it off with a narrow spatula. It was tricky, because too little heat and it wouldn't budge, but too much and it would smear around. And if I let too much collect into a glob, it would catch fire. It became a balancing act to move the flame around with one hand while scraping with the other. Here's what I started with: After scraping off what I could: There was still a lot of coating in the concave areas, so i followed up with more heat and a wire brush: It took some paint off, too. But I plan to strip and repaint most of the outside anyway. I ran out of propane at this point. Overall, while it was a nasty process, it worked pretty well. I only burned one of my fingers. And what's left on the tank should come off with stripper, or if I use the bead blaster. I pity the person who tackles removing this undercoating from the body. I have no plans to do it. Next, I'll set up for de-rusting the inside. Stay tuned.

-
I think a tank sealant would plug the screen. It's quite fine. I plan to leave it uncoated. I may remove it, since I've installed an external filter before the pump.