Dave WM
Free Member
-
Joined
-
Last visited
Everything posted by Dave WM
-
 the only happens when cold is odd, exactly how cold is it where you are? Have you confirmed the CSV is operating IF the temps are indeed cold? generally it is not turned on unless its less that 70f? Try listening for the injectors rather than looking at lights. I used a stethoscope.
 -
start switch
-
80 mile freeway speed test hop went well, trans shifts nicely, no odd noises, No rattling from timing chain, got it over the cardboard oil leak tester. I still need to do a few things, like replace the noisy fan belt with a new one so I don't have to run it too tight. Double check for water leaks, Yesterday I worked on the EVAP system from the vapor separator tank to the carbon canister. Turns out it was severely block from both sides but the middle part of the line (metal under the floor pan) was clear. I got some 5/16 nylon hard fuel line, it slips perfectly over the 1/4 metal line. I plumbed the front part from the canister to the metal line a little under the fire wall. Later I will plumb the back side to the vapor tank. The 5/16 is a bit too tight to fit easy thru the rubber insulators that used to mount the metal hard line. It can be done but not easy.
-
depends on the line fittings. A stock 260z will have flare fittings. What kind of fittings are on the compressor you want to use. The other issue will be the location of the lines, that is prob a bigger problem. Best bet would be to just have some made up that deal with the fitting and locations you have.
-
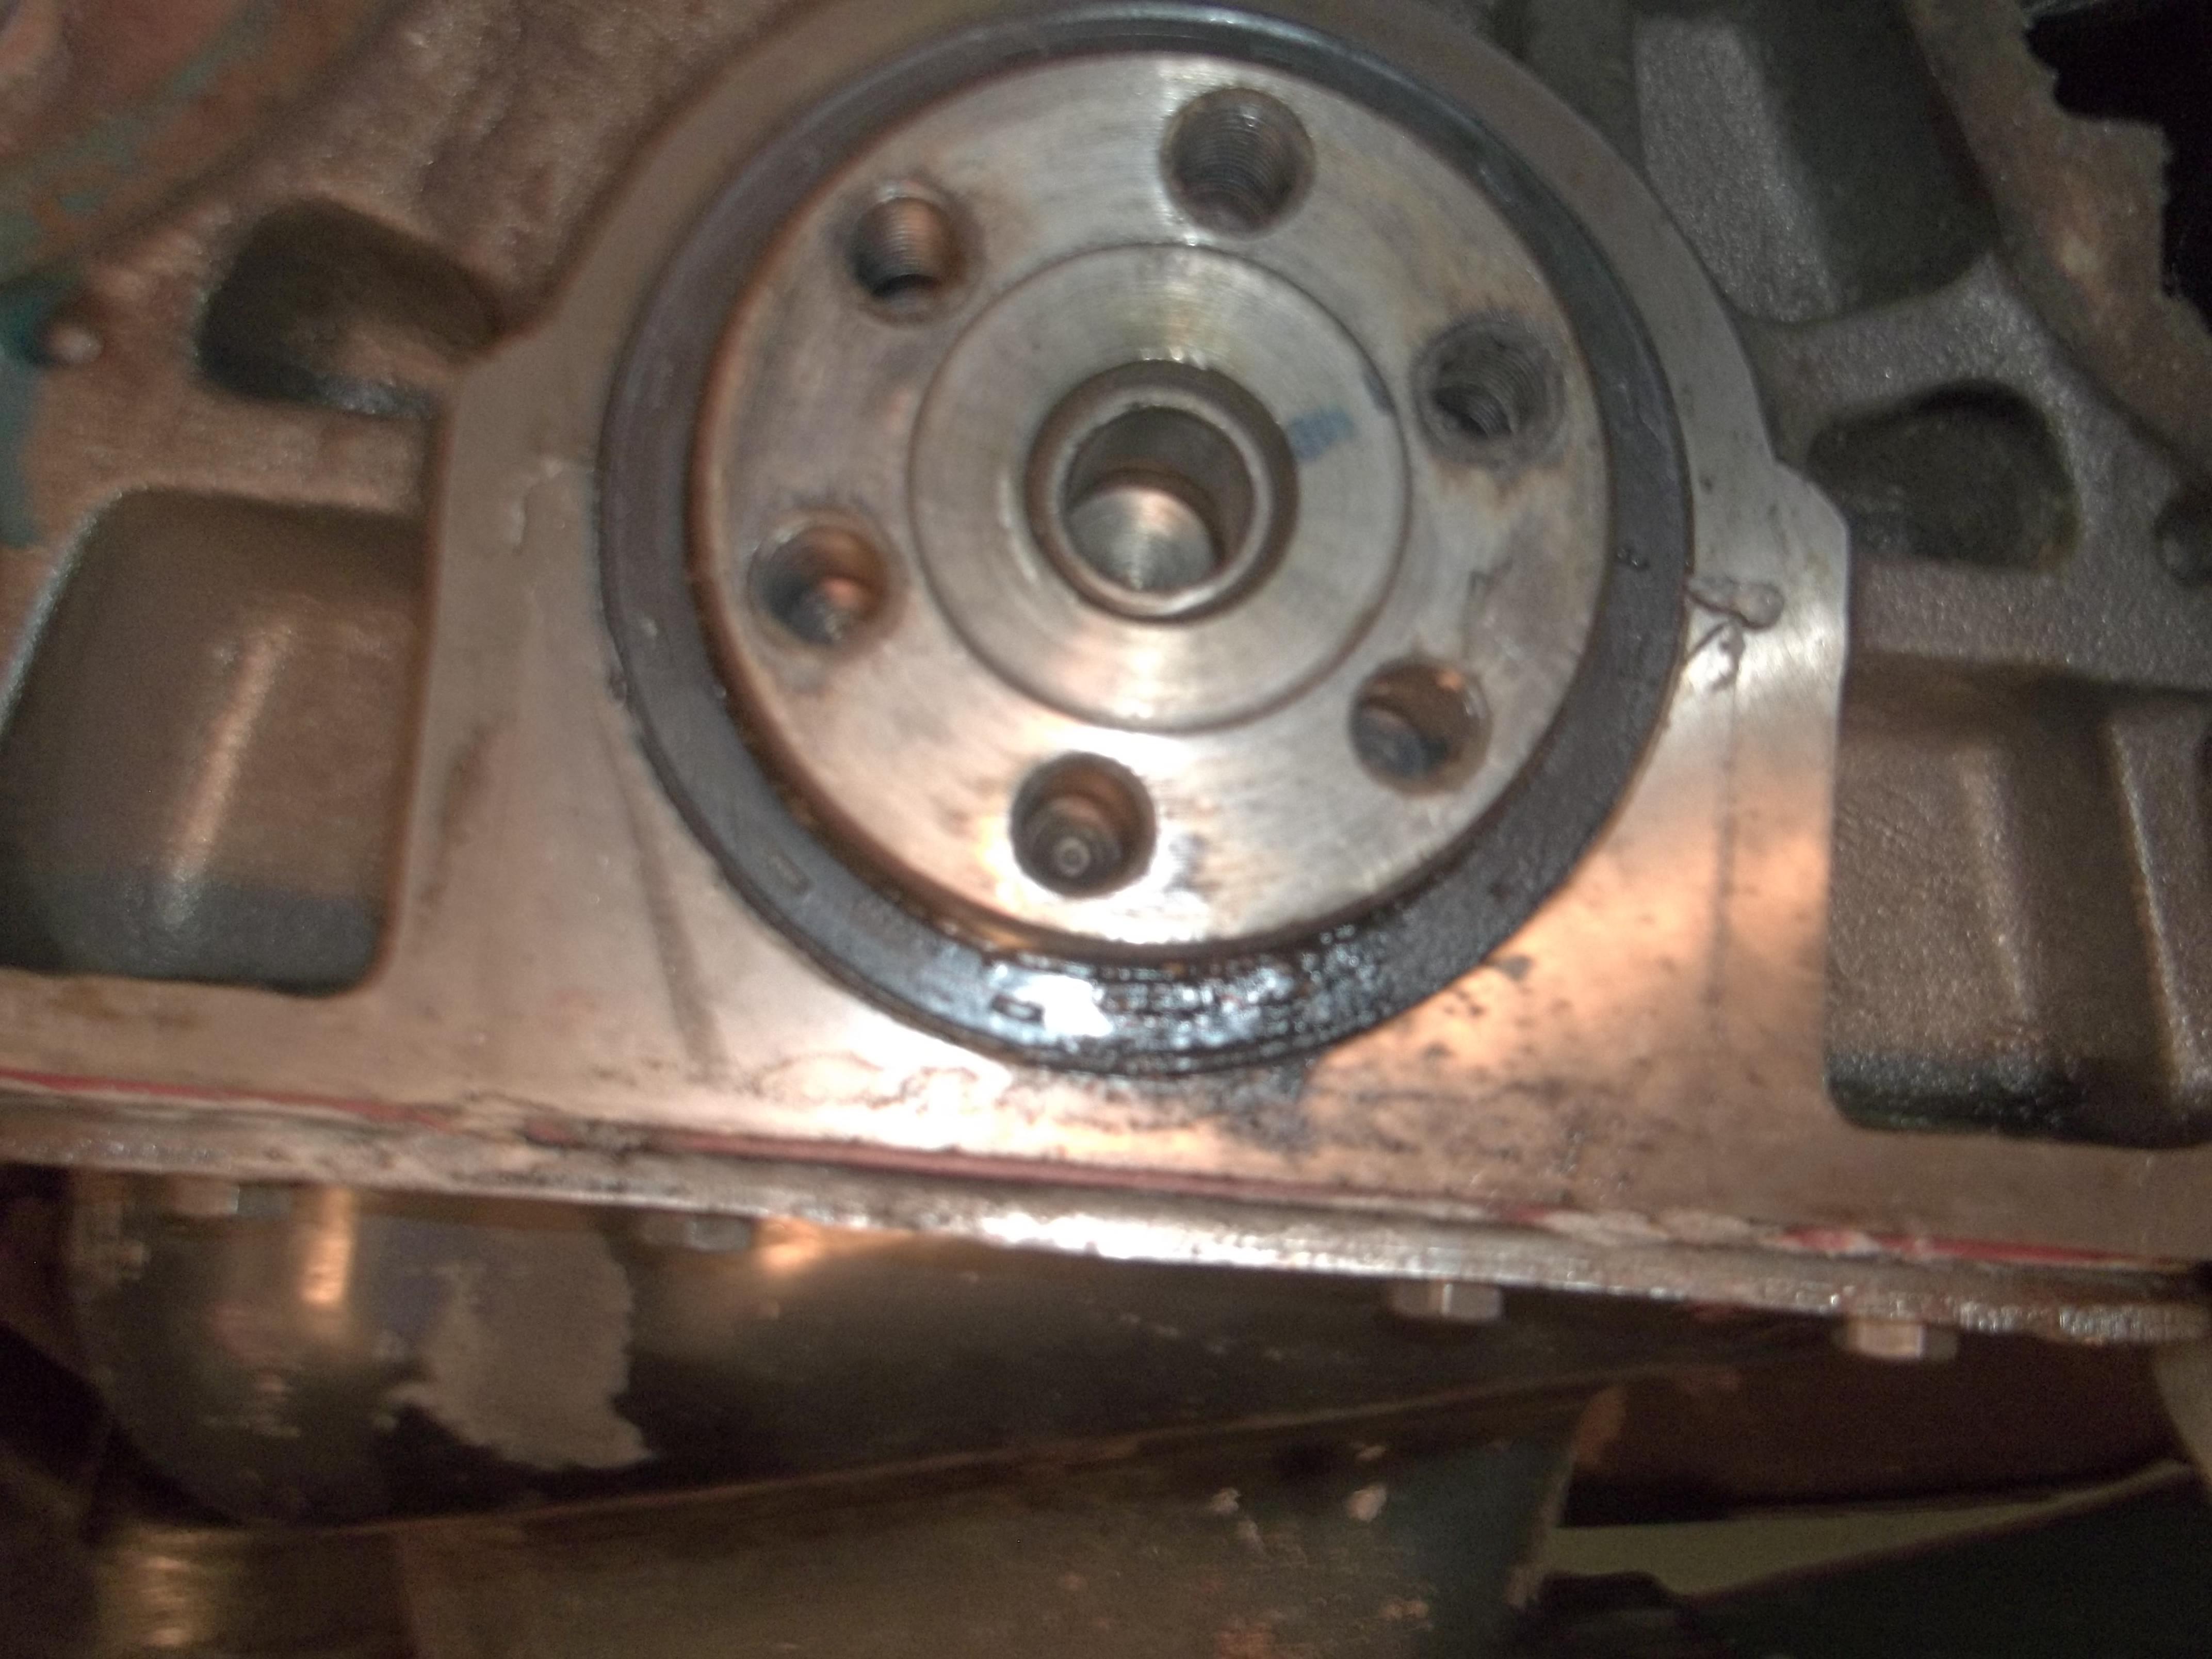
all back together. I made a seal installing driver out of some 1" oak and a 3.25" hold saw, worked great. If you look at the pics of the main seal you can see it not seated perfectly flush on the very bottom. I used a piece of scrap wood and just tapped around the perimeter, this time I wanted it to be more precise and it is. On the front cover, I think used the rebuild kit supplied gasket originally when I did the rebuild. I looked at the Nissan gasket and it looks more engineered. there is a raised ridge all around the sealing surface that looks like it would add to sealing. After seeing it I wanted to undo my home made gasket I used last nite on the spare trans (that I put in) but I realized that the Permatex anaerobic gasket sealer is for real, the front cover is not coming off without a fight, so I decided to just leave it be. I think it would take some heat from a heat gun on the front cover to get it loose. So I will hang on to the Nissan gasket, maybe use on the leaky rebuilt trans (the one I pulled out that was clearly leaking from the aftermarket gasket). I took the spare trans around the block, everything seemed fine, so a will have to take it out on a freeway shakedown. Hope this ends the leaks. I feel the Nissan rear main went in well so fingers crossed on that one. The spare trans will just have to wait and see if the homemade gasket with the good sealer will work out. I am getting pretty good at getting the z up on the jack stands, the 12t or overkill but I like the "wide stance" that they have. I just have to take the car down in stages, drop the front to the jacks at the lowest stage (from about 6" lift from the top of the jackstand at the highest, about 30" clear space under the car), then I can take the back all the way down off the jacks but leaving the diff hyd jack in place holding up the rear about 4" but with wheel touching, then I pull front jack stands out completely and lower the crossmember jack all the way, then back to the rear, let the rear down completely.
-
I installed it dry on the outside, some assy lube was applied to the crankshaft surface. I applied grease to the inside of the seal where the spring resides. The seal already had factory applied lube n the lip so no extra was used I eased the seal on then worked it back into place about 1/8" from there it began to resist just hand pressure. I made a driver from some 1" oak with a 3.25 hole cut with a hold saw. I placed another solid 1" piece on top of that that and used a hammer to drive the rest of the way in. It fits perfectly flush thanks to the tool. I suspect my early failure from the other NON OE seal may be due to less that perfect flush I noticed is seemed to stick out just a bit on the bottom, so I apparently did not drive it flush all the way around. On that one I did NOT use a tool just some scrap wood tapping all around the seal.
-
I don't want to screw this up. I have a NISSAN OE rear main seal, it comes with little red dots of lubricant already in place on the inner lip. I assume nothing else is required for the inner lip as far as lubrication of the crankshaft bearing surface (no nicks or scratches or grooves are present) The question is do I install it dry on the outside or should I lubricate or add sealant to the OUTSIDE of the seal. I assume dry will make it harder to press into place. I was thinking of using the Permatex anaerobic gasket sealer, its almost like grease, and hardens in the absence of air. That is IF anything should be done on the outside. I tried searching and just wanted a current thought on it. One more, I have seen grease added to the space where the spring is located, I presume to hold it fast during installation. Is this something that should be done?
-
I would think with 150 miles per qt you would be blowing big time blue smoke if its not leaking on the ground. Good compression could be too much oil getting past the oil control rings?
-
while I am waiting for the main bearing seal as well as new input and output and gasket for the transmission I decided to make my own gasket using the old as a pattern. I had some oil proof gasket material on hand, same thickness as OE gasket (which came out very clean). I used brake clean to make sure everything was dry, lubed up the ball bearings with some assy lube, greased up the input shaft seal (the old one looked fine, this is the spare untested transmission), made sure the shim was in place with a dab of grease, then used some Permatex anaerobic gasket maker/sealer. It says ok to use as a dressing for a gasket or to make a gasket. Its very viscous I dab some on the front cover and smeared it all around where the gasket will mate, put the gasket on the front cover, then smeared it around the case on the bell housing where the front cover mates to. I was careful not to over apply or get near the bearings, not sure if that would hurt or not, but why chance it. bolted it up, torqued to 15ft lbs in a cross pattern. I stood the trans up on some 2*6's to the input shaft would not get in the way and put about 3/4 of a quart of MT 90 in it. I will check it later to see if there are any leaks. I know this is not a good simulation of how it will be in service but what the heck better than no test at all. Oh and I used the same sealer on the cleaned bolts and the pivot bolt. They all had lock washers as well.
-
-
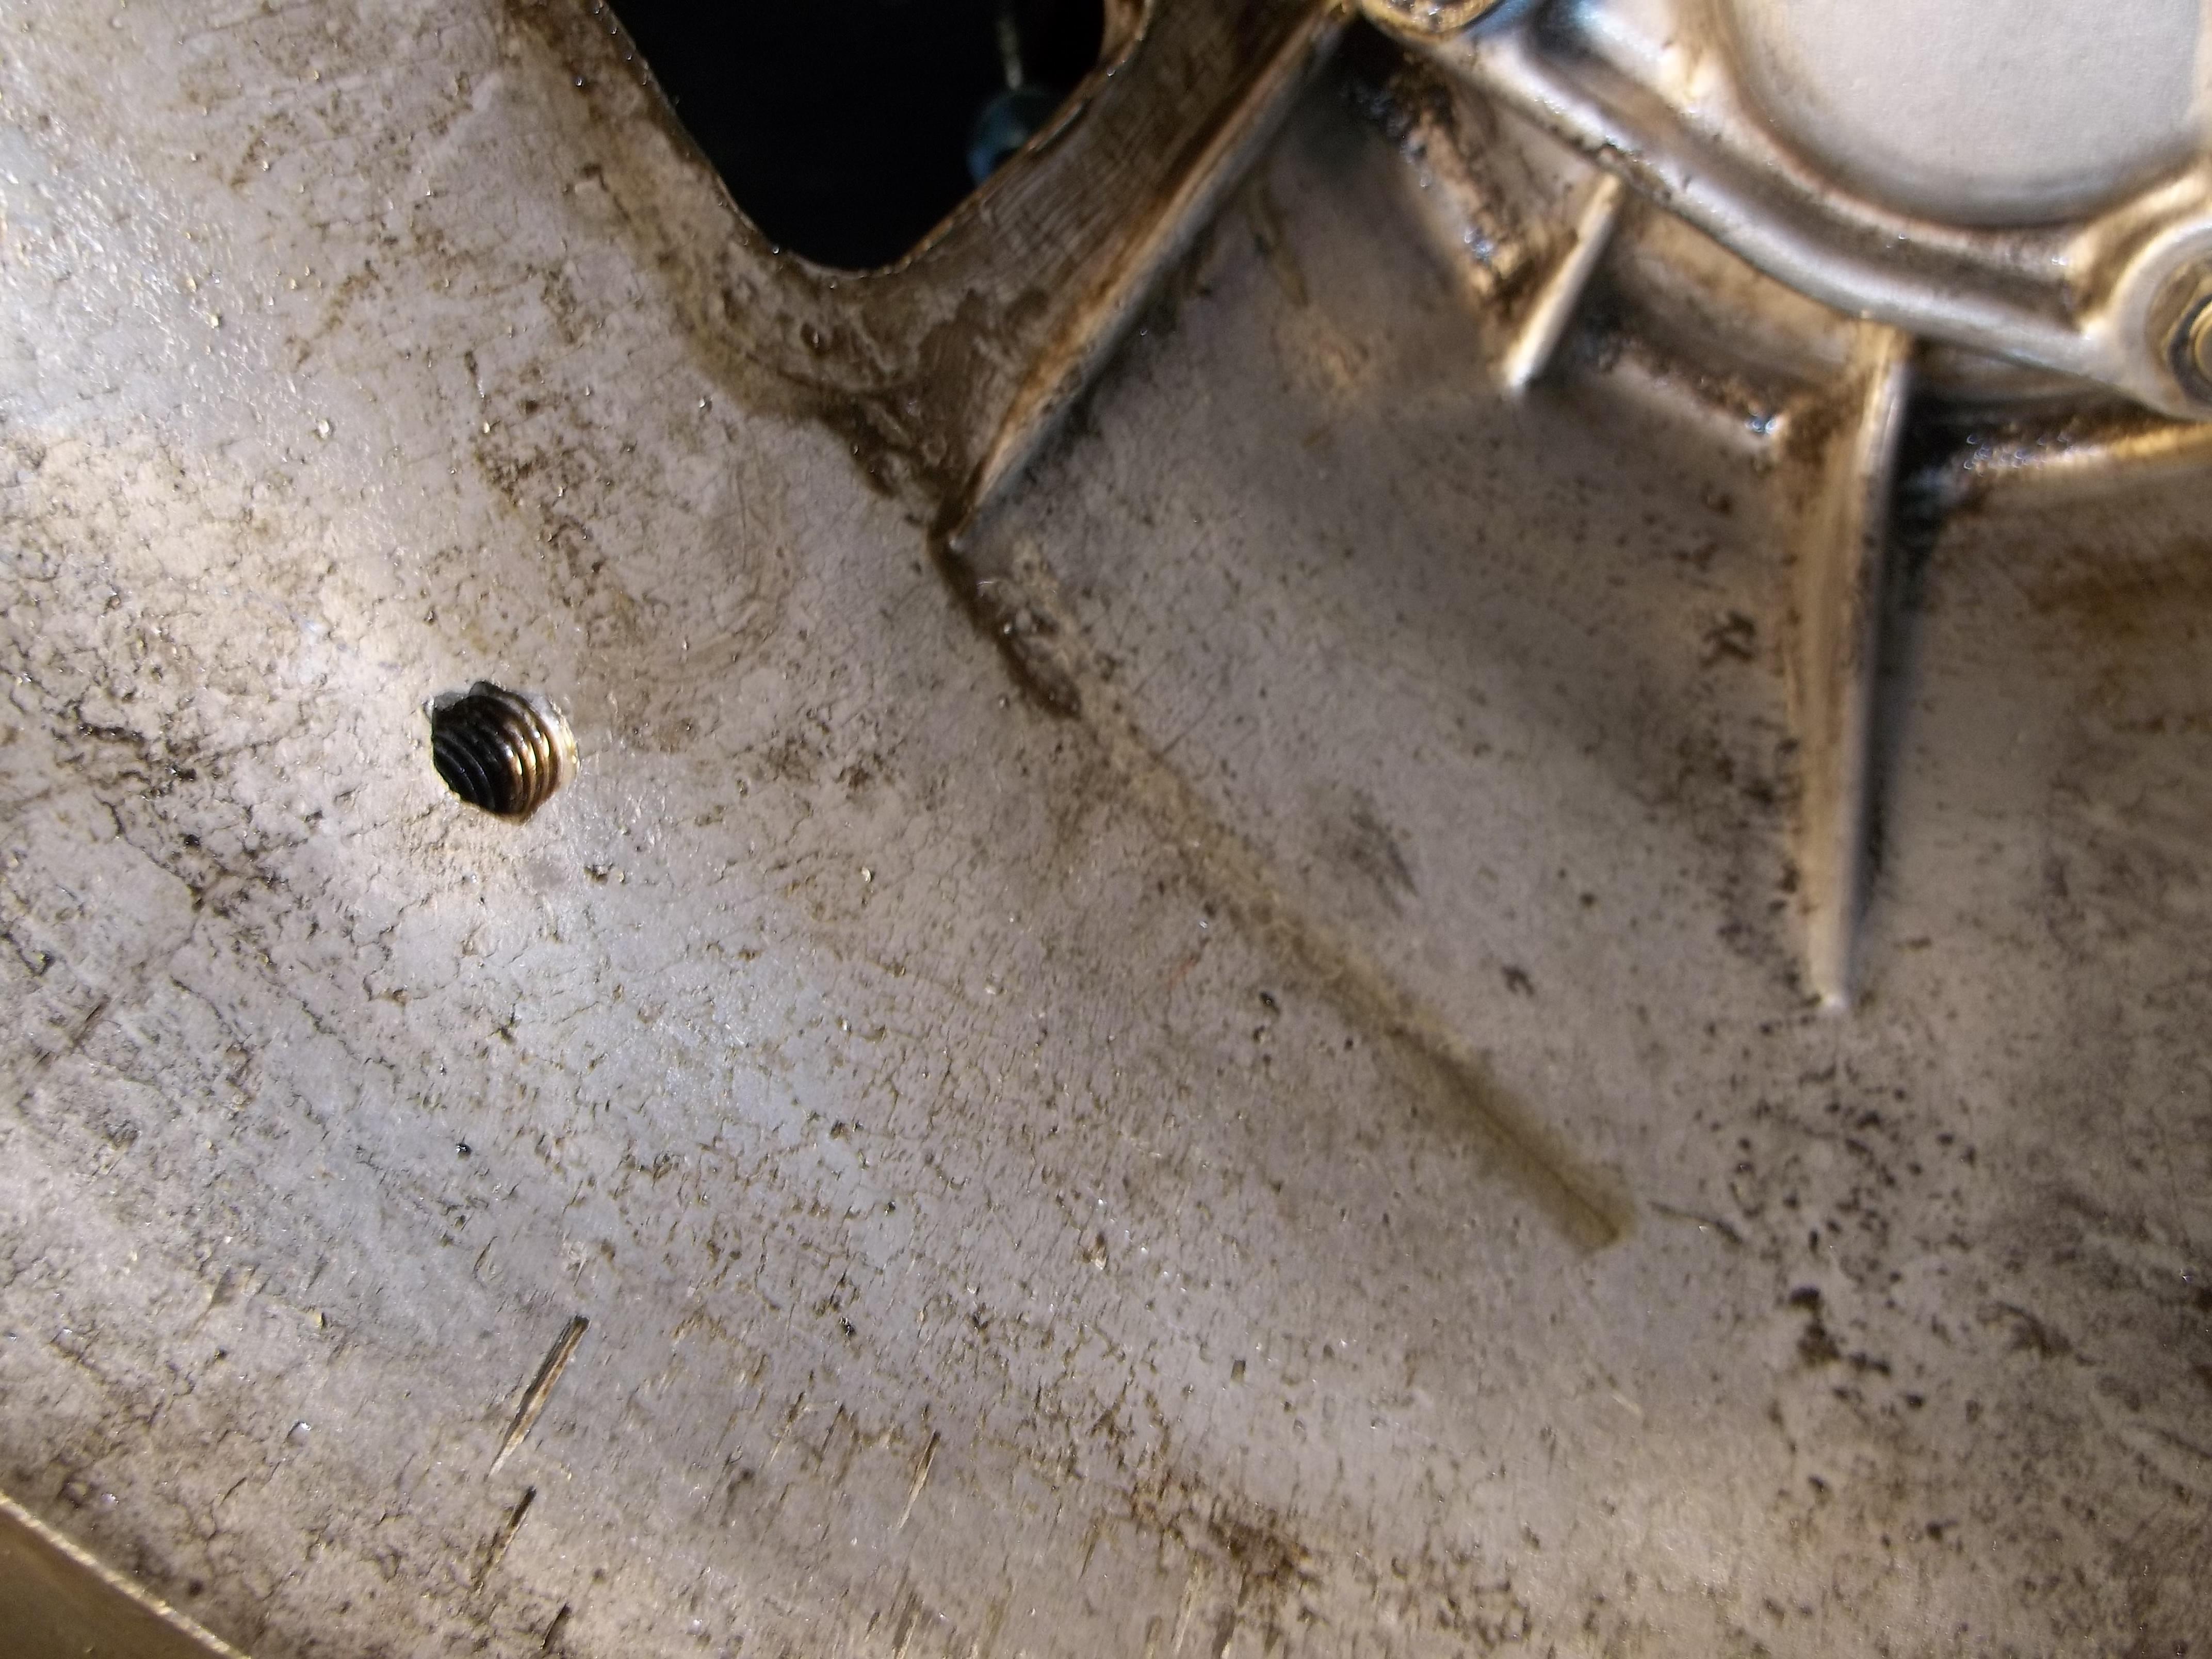
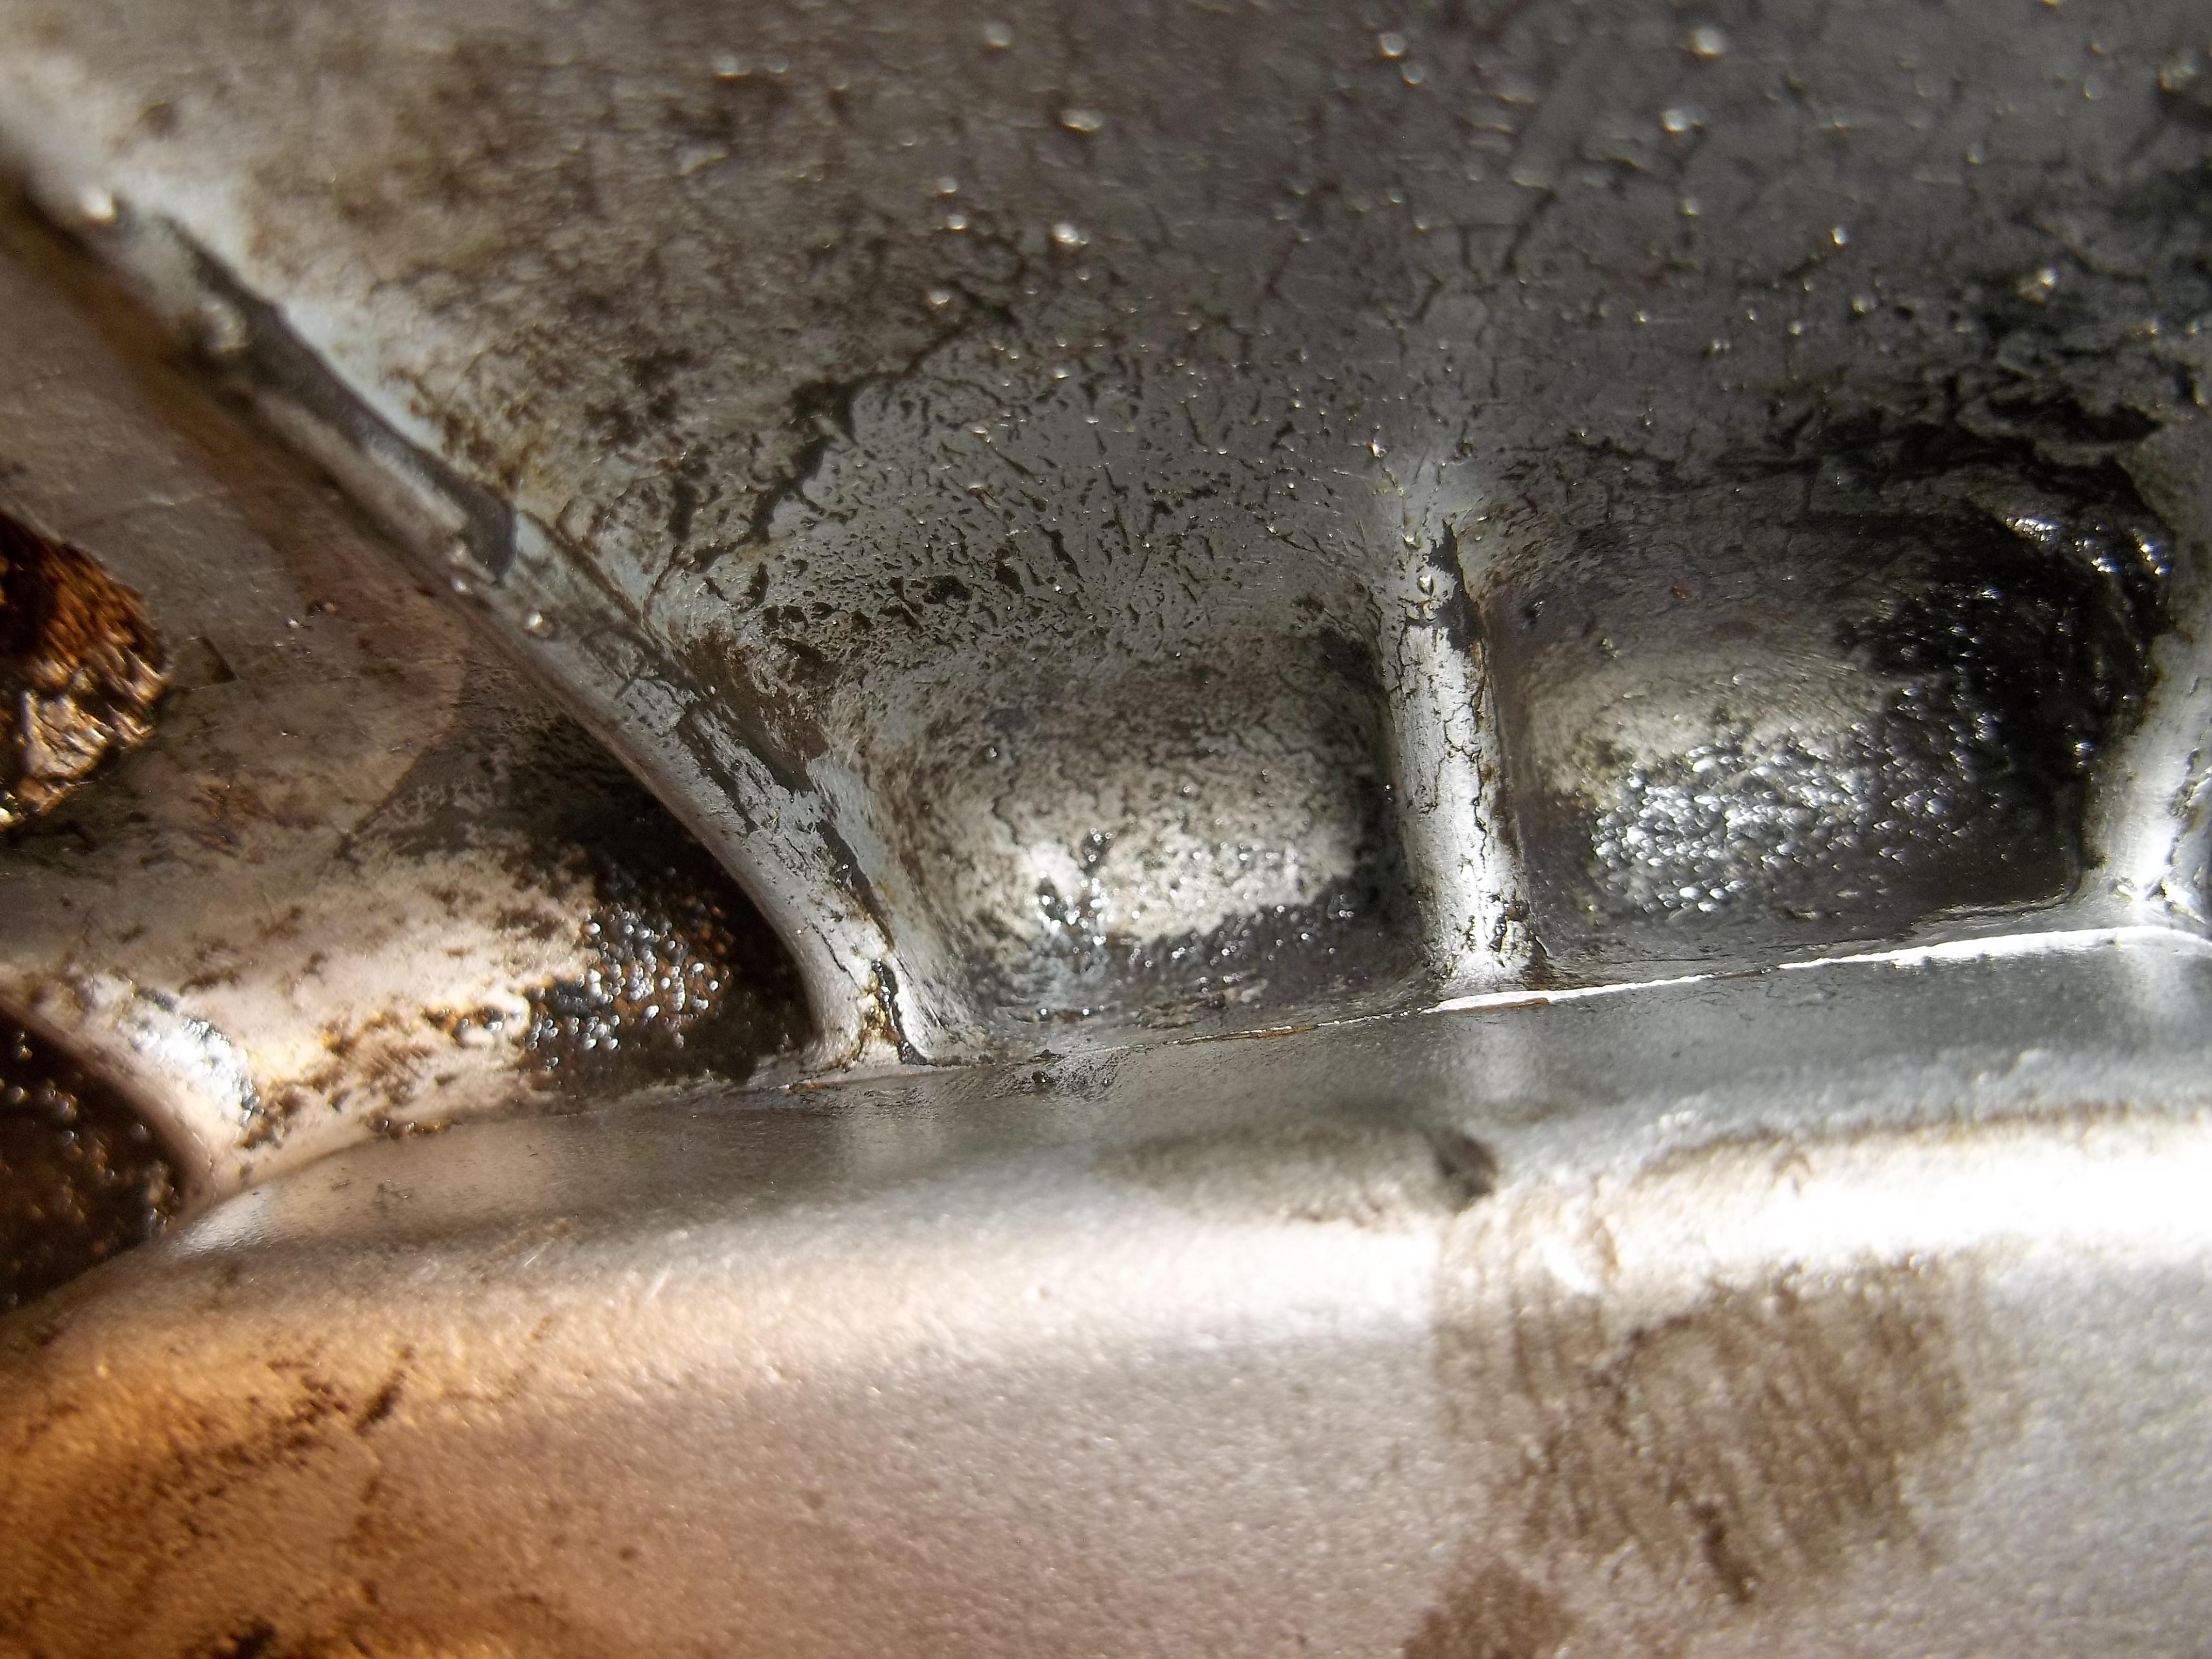
looks like just a little bit from both the trans and the engine. I have a rear main seal leak (side seals look ok) and a kinda all over leak from the trans front cover. Funny I see I did use some sealant on the pivot ball, but it still shows leakage. I will get some decent photos tomorrow when I get better light. Think I will pop for the Nissan rear main this time, and will look very closely for any score marks on the crankshaft. I have a spare trans that I have been wanting to try out, so I think I will do the front cover on it (it shows signs of leakage as well) and the input shaft seal as well. Will take a look at the rear seal and see how it looks. You can clearly see the paper gasket of the front cover is saturated with oil (the tiny bit that sticks out around the sides) I suppose that is normal since it is paper. I will use a VERY thin coat of the gray sealant on the gasket this time, OR maybe the spray on kind would be better (more even coverage).
-
great info ZH, I may have removed it and not realized it was a thru hole. I certainly don't recall using any sealer there.
-
if its the rear main I will go with a Nissan seal. Mine is a felpro as well, I goofed the Nissan I had during the 1st try at the install. Like you I lubed it up think it was vasoline, but cant recall. I did install it dry on the outside (no sealer) if that matters. I also had a rear main side seal leak that I installed new side seals with the FSM directed sealer at the bottom and side of the bearing holder. I am hoping its just the transmission front seal or paper seal around the cover plate. But I will prob pull the flywheel to check that main seal anyway...
-
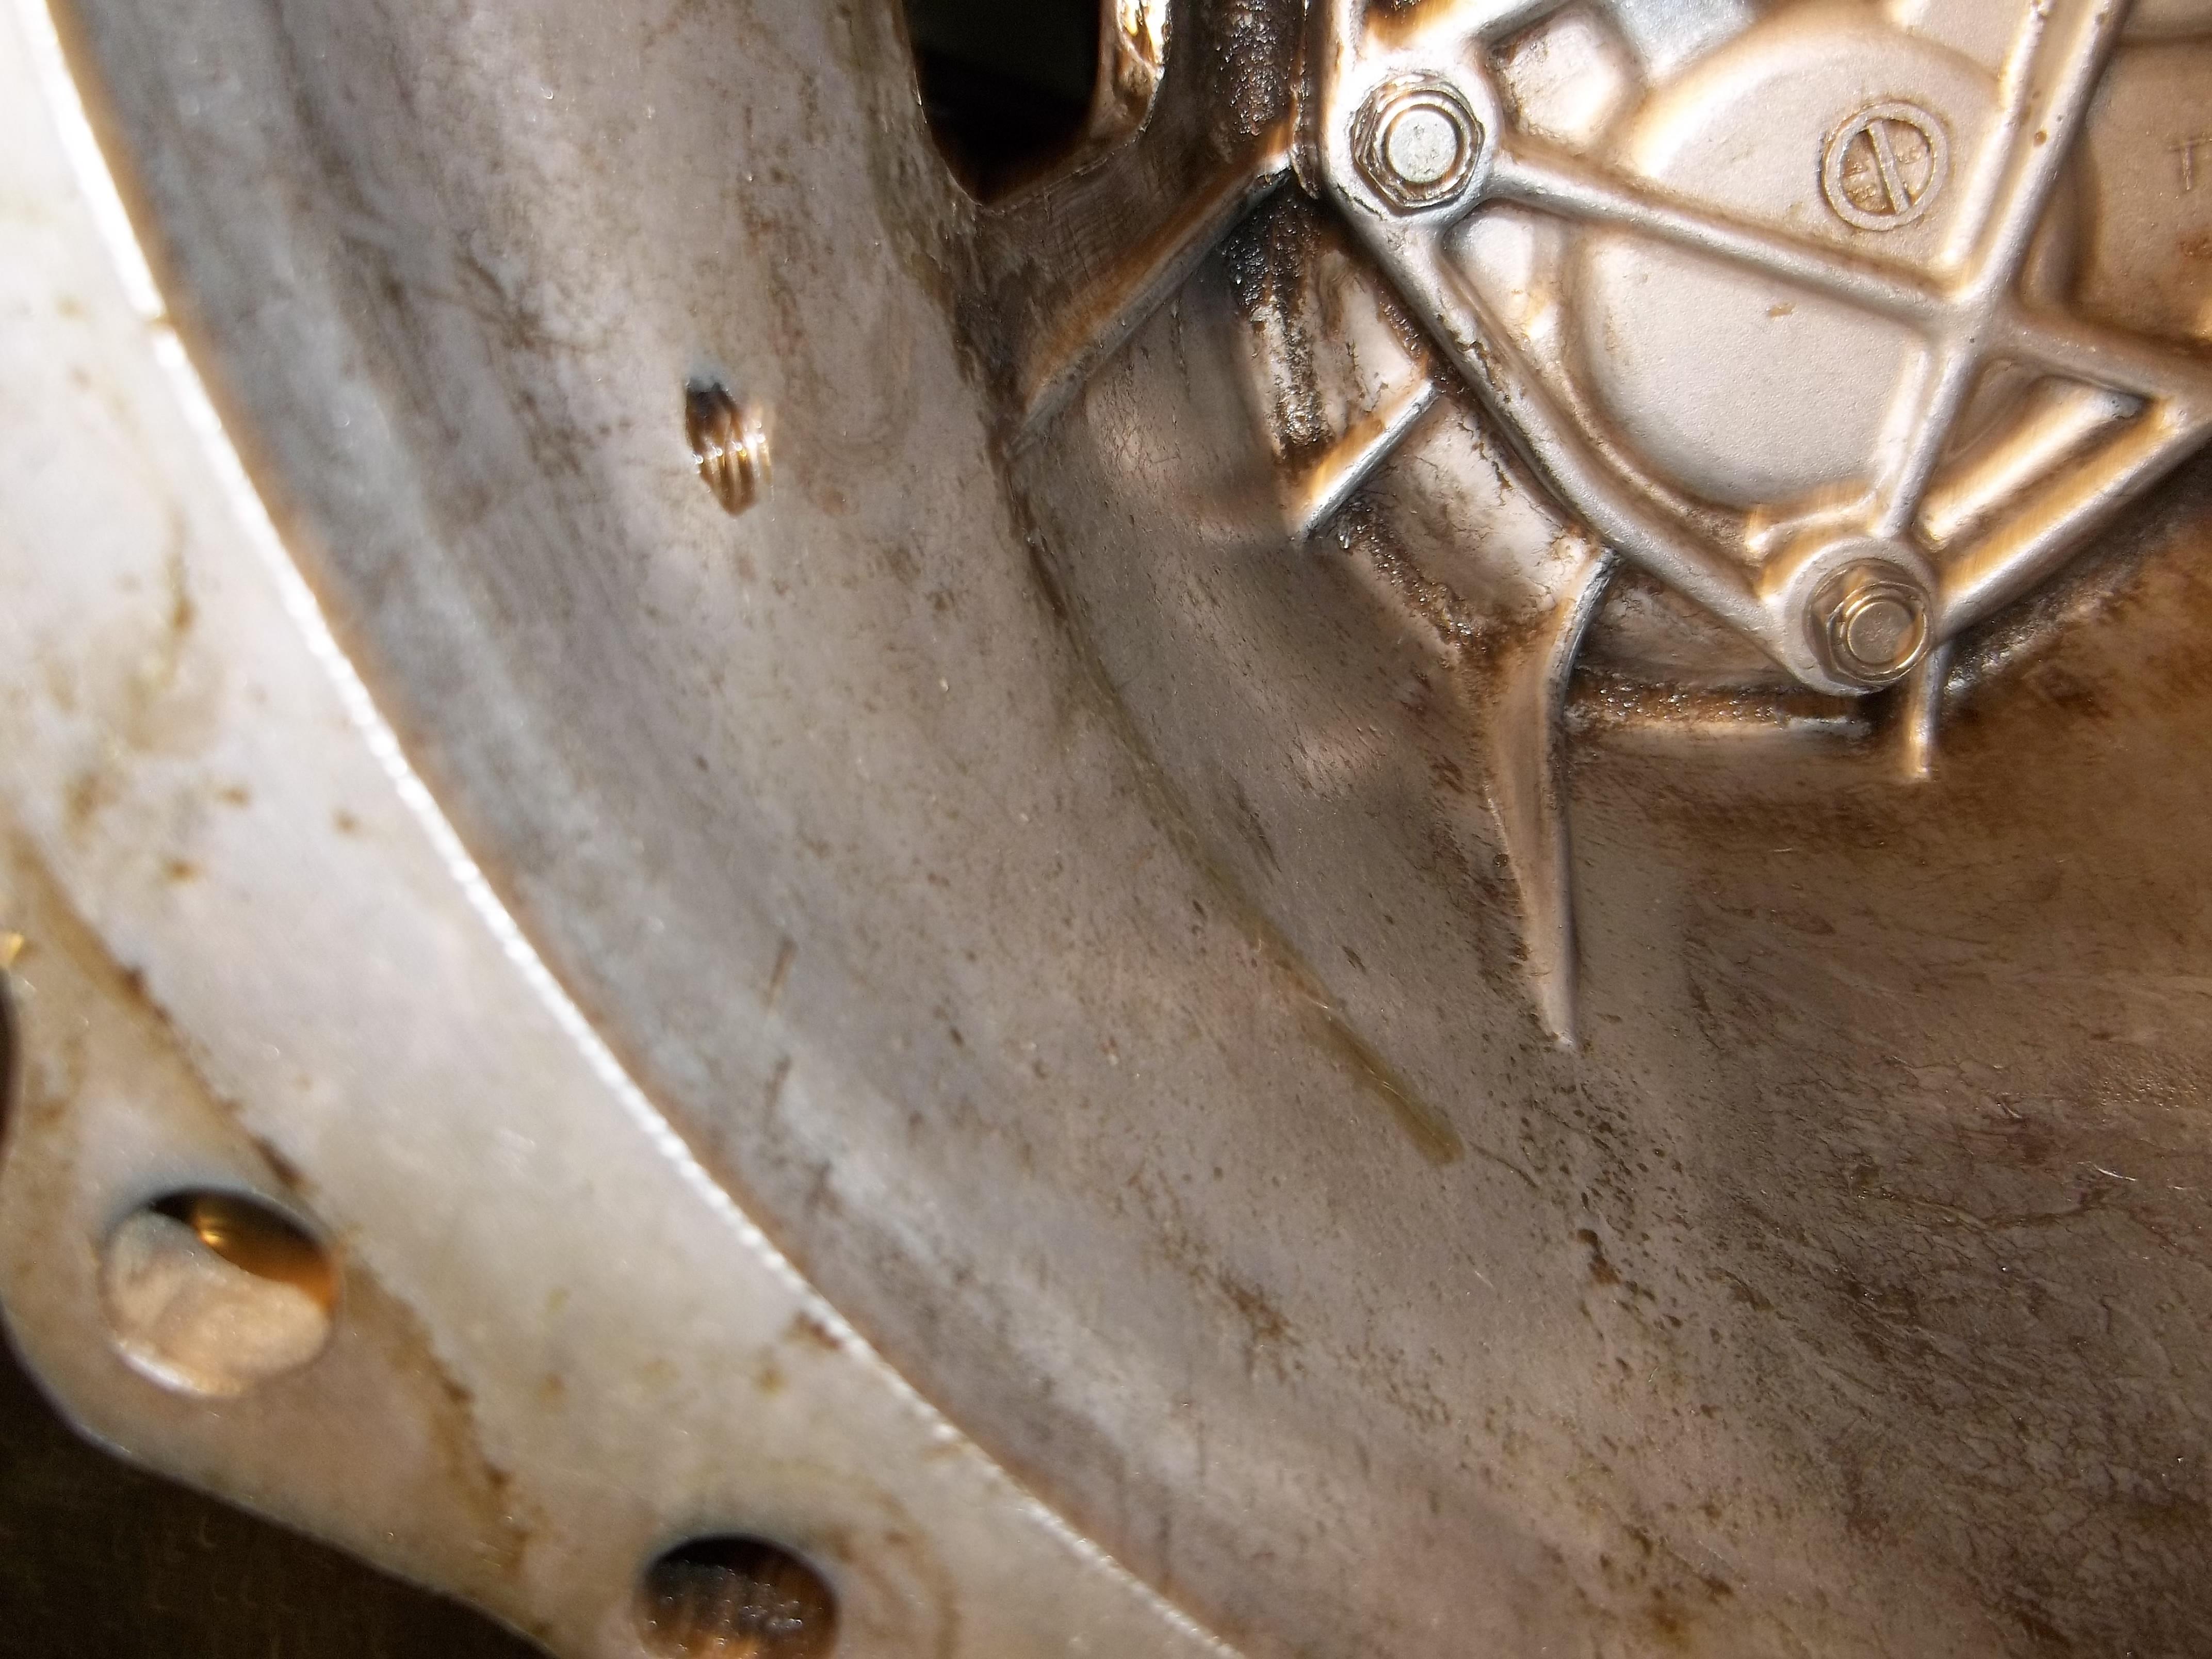
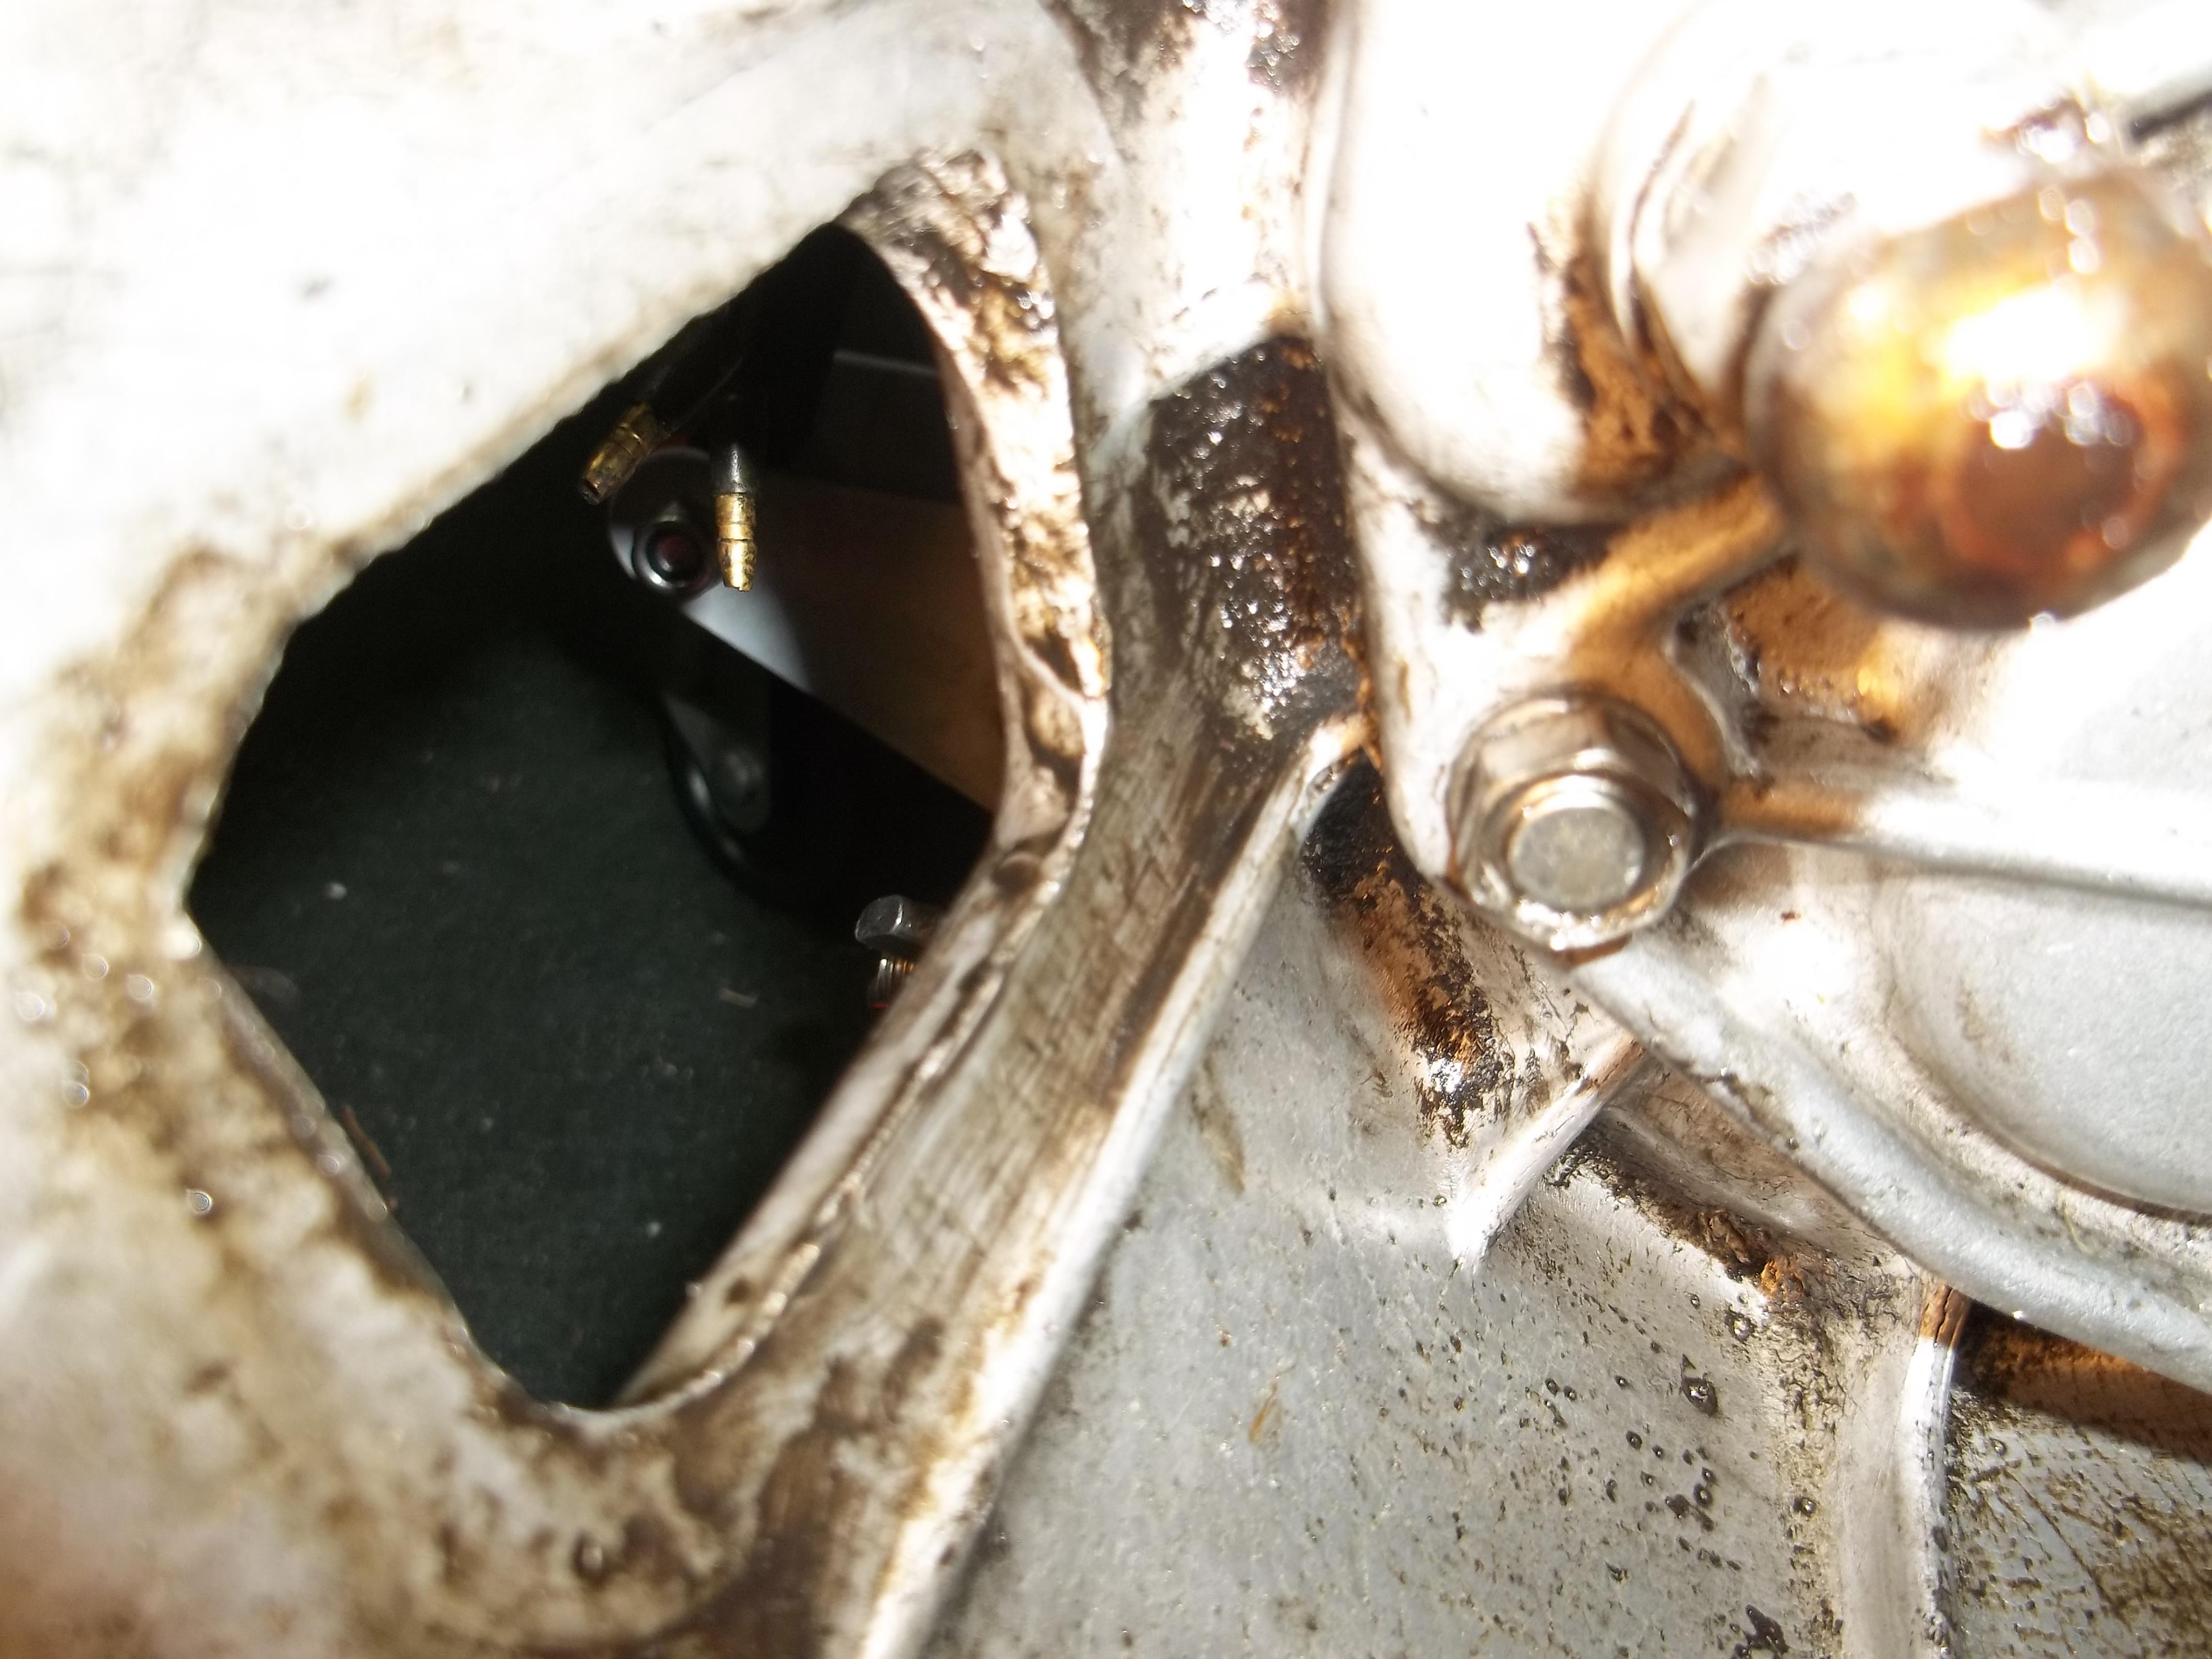
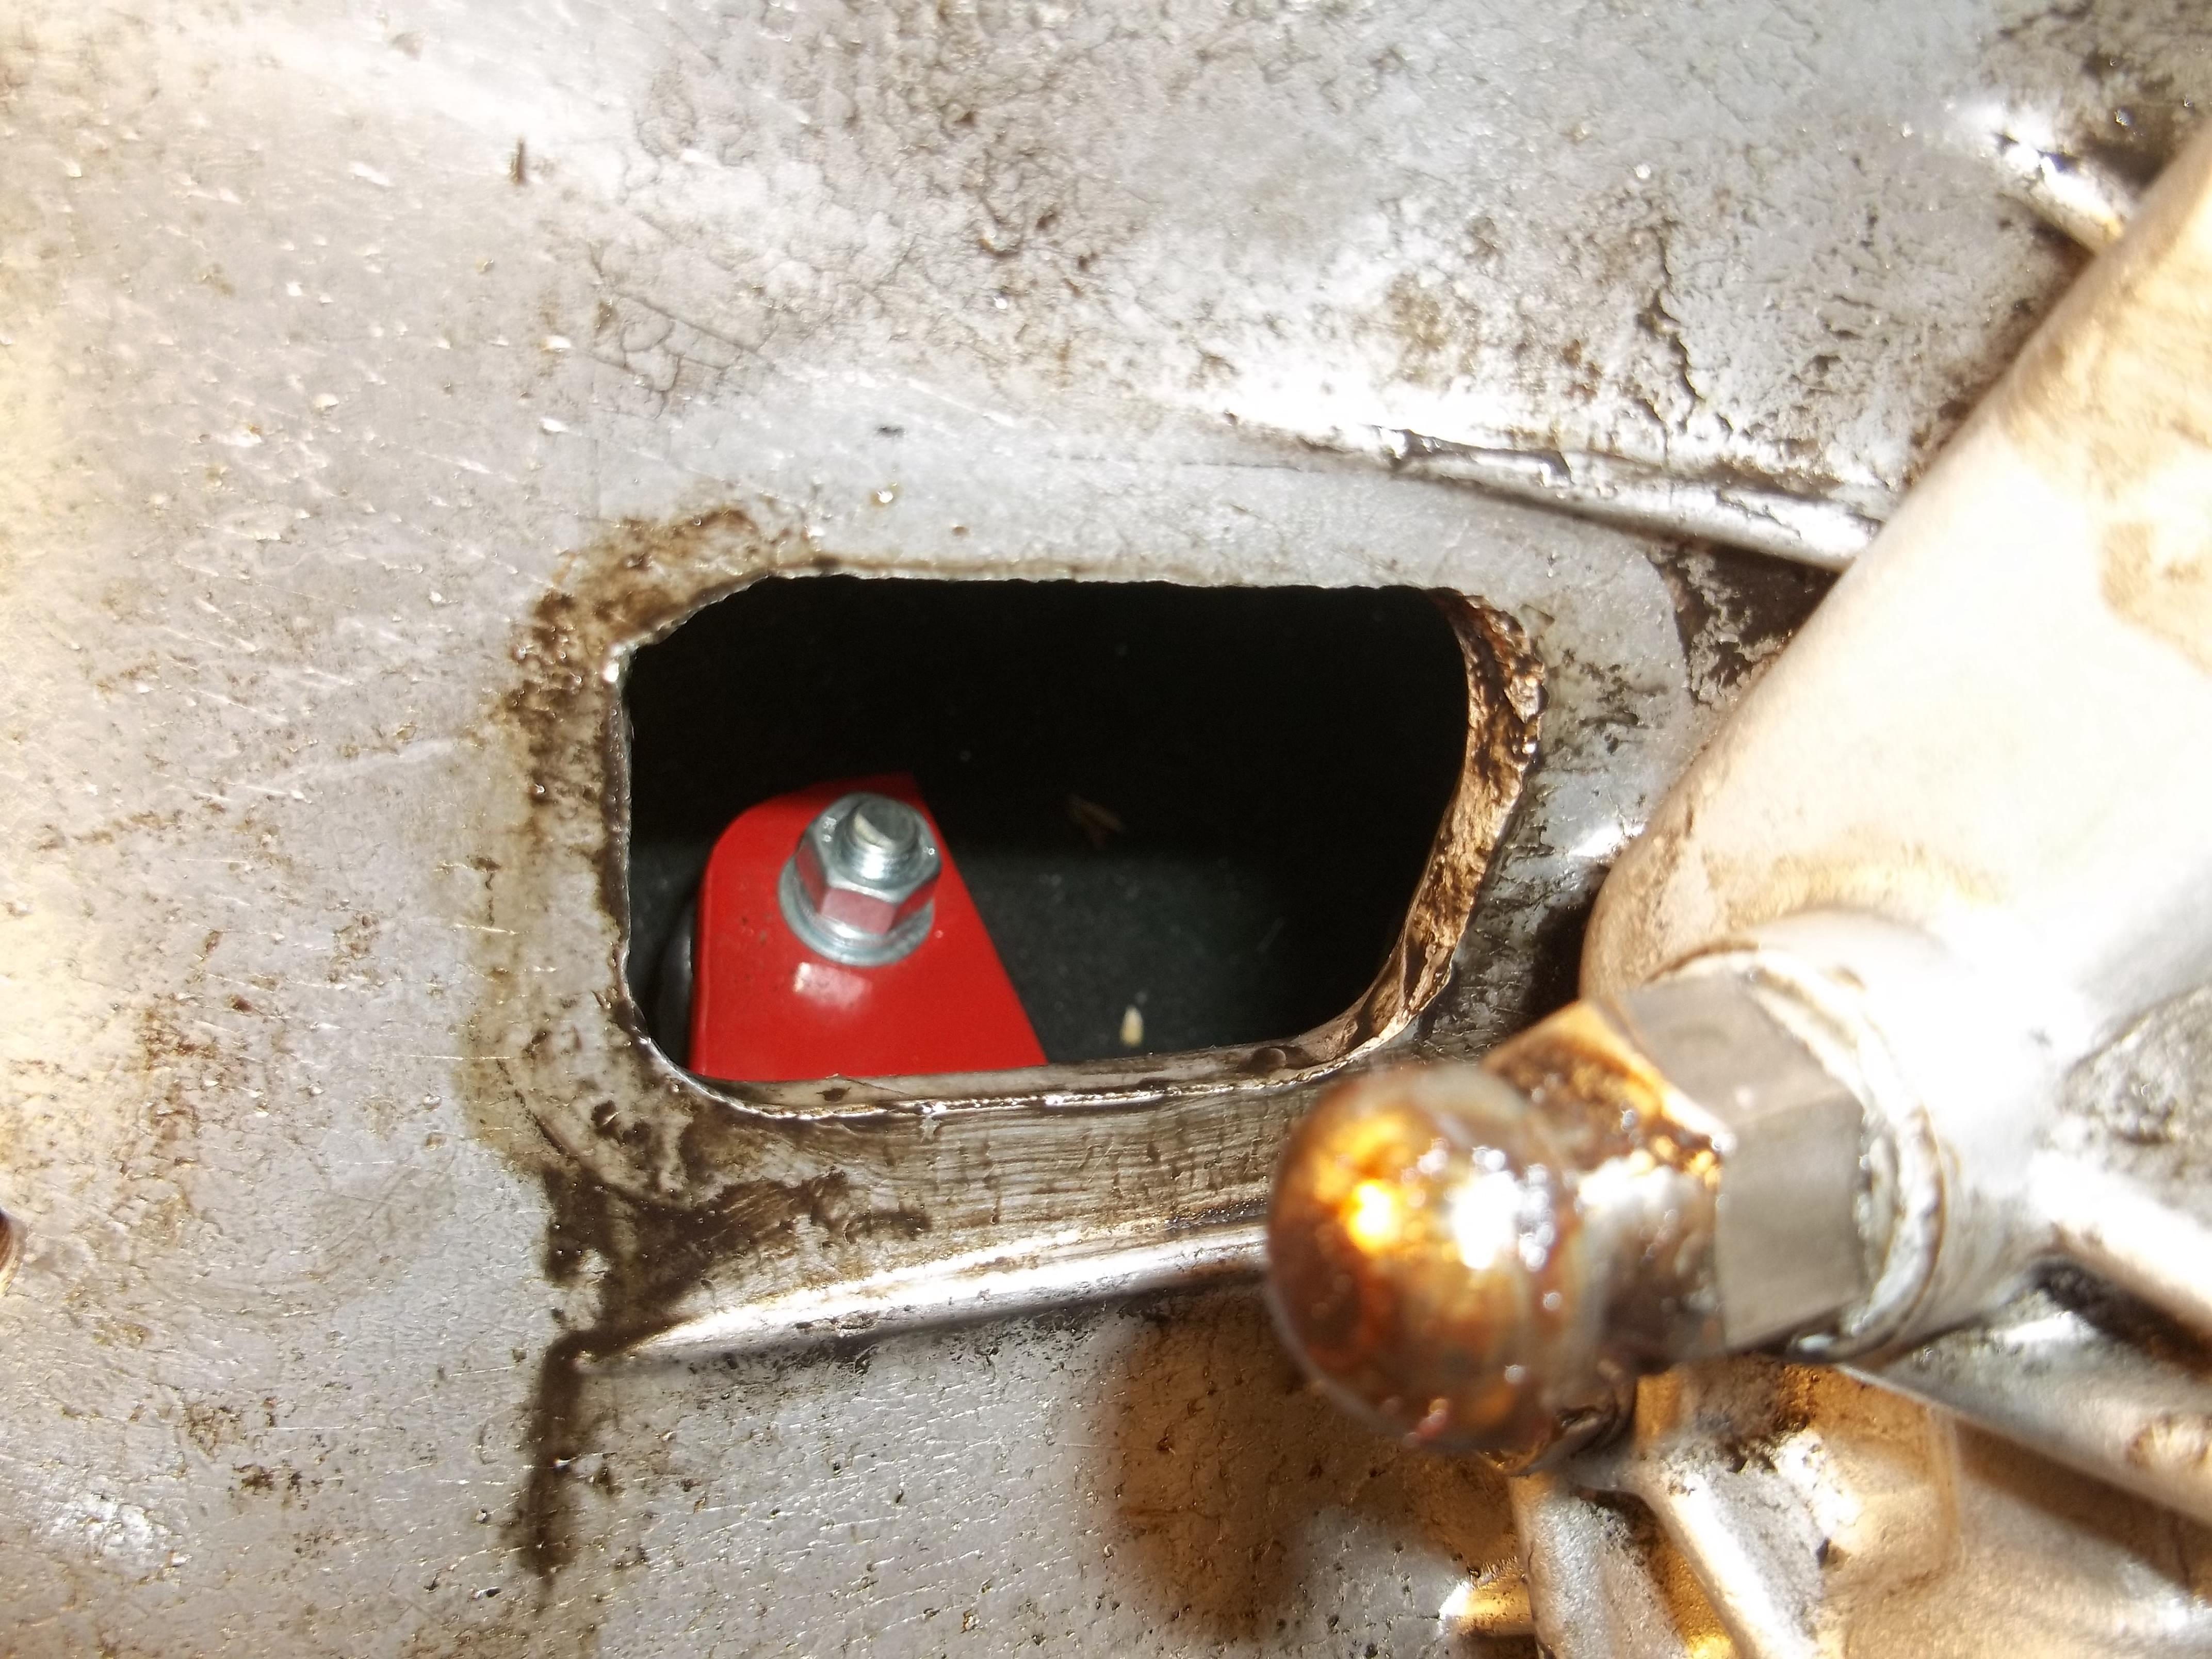
I thought I had a transmission leak at the reverse light switch, but I fear its the front cover plate area. I get oil right at the weep hole of the plate between the trans and engine, the oil looks clean like transmission oil, there is oil (a fair amount) coming from the clutch fork boot. there is oil right at the engine to trans bolt area on the passenger side only, looks like its damp with oil but above the oil pan gasket (right below the starter), no oil above the starter. So we are off to pulling the trans and getting a look see what is going on. The good thing is I know it will come apart easy since so just have to plan a few hours to get the car up on jacks and have enough room to get the trans jack in there and pull the transmission out. I don't want to do a front plate install under the car. I imagine the clutch plate could be oil soaked but I have no evidence of slippage. Not sure if I want to pull the pressure plate/flywheel off to inspect the rear main IF I find the smoking gun at the trans front cover. will have to make that call when I get in there. the rear main seal is only about 6-7k old .
-
there is a pretty good chance it will just be open, and need to be replaced. I suspect it will be bad even after cleaning the pins. In the mean time check the 36 pin connector, still wondering about what that plug that is currently attached to the thermotime swich is doing. Again with the battery disconnected you can check the resistance for the temp sensor at the 36 pin connector. IF its open try shorting the two leads of the black plug with white wires (after removing it from the thermotime swich) and get another resistance reading, should be 0 ohms (or very low) at the 36 pin connecter IF that is indeed the plug that goes to the temp sensor. The idea is to check the wiring so we know exactly what we are dealing with. IF that connector is indeed the one that goes back to the 36 pin connector temp sensor, then your best bet will be to just get a new one, test it, and if good install.
-
1) The ECU is located on the driver side kick panel under the hood pull. Before doing anything, make sure the key is off and the battery disconnected. remove the panel, the 36 pin connector has a retainer that must be pressed and then it will hinge off the ECU.all test are done on the connector NEVER the ECU, so after removing the 36 pin connector you will need to find the pins per the diagrams in the FSM, check the one for the temp sensor. 2&3) Yes with the temp sensor disconnected as shown in the pic you should be able to get a reading off the pins. they are corroded so it may be unreliable but non the less prob with the points and see what you can get. You will ultimately want to clean that up, I use a paint gun spiral brush and some contact cleaner applied to the pins and scrubbed. There is a good chance the sensor will not be correct as it lives is a very harsh environment (water corrosion lack of proper antifreeze, age...) But its always best to test and record. I check new parts as well, just to be sure before installing them. as far as testing, the FSM has two test modes, 1) resistance and continuity (all done with the key off and the battery disconnected). multimeter in the ohms or continuity setting. 2) Voltage test, done with the battery connected and the key at either ON or Start depending on what is being tested. multimeter in the DC voltage setting. What you want to avoid is connecting the ECU to the 36 pin connector with the power on. This is why I like to have both the Key off and the battery disconnected, much less likely to accidentally connect with power on if both are done.
-
don't forget erratic starting could be a bad ignition switch. If you have not already I would recommend you pull the switch out (easy) get it on the bench and do a though tone/continuity test on each position using the FSM to guide what should be happening esp in the start position. On indicator would be if it sometimes starts as soon as you release from start. You may find dead spots as you turn the key thru the start region.
-
Yep the temp sensor is the small one at 2 o clock. You can get a quick reading on it just to see if its any good as is. Those pins are prob corroded as well. The plug is on the thermo time switch which you don't need since you don't have the cold start valve. My guess is that plug is supposed to be connected to the temp sensor. should be interesting to see what the resistance readings are at the 36 pin connector. IIRC those two pins on the thermo time switch will be either open (over 65f) or 50ish ohms (cold day, you are reading the heater element resistance). The thermo time switch has NOTHING to do with the ECU, its just like a choke lever that richens up the fuel on cold days to help with starting, Its function is ONLY when the key is in the "start" position and then only on cold days and then only for a limited time (9 seconds) so you don't end up flooding the engine with prolonged start attempts.
-
sounds good, don't worry about a small leak there (throttle plate shaft). Clearly running rich, check the 36 pin connector I think its pin 13 and ground (body chassis). check the FSM to be sure. if the car is warmed up (170ish degrees) you should see about 150ohm IIRC again check the FSM its all in there. IF you get a high reading its prob a defective sending unit or corroded connectors either at the sensor or the bullet connectors of the sub harness OR even a incorrectly connected sub harness. Its easy to swap around the connectors on both the temp sensor and thermos time switch AND the sub harness bullets for both those. That's why its good to check at the 36 pin connector. It will test everything at once, if it test out of spec you can start by simply unplugging the temp sensor, if it reads open then at least you have the right hookups but maybe bad parts or corrosion.
-
the cover has a journal inside that the dissy shaft runs up thru. if it wollows out they say to replace the whole cover. Besides 100$ did not seem like too much just in case.
-
I don't know for a ZX I would assume so, completely different rear suspension.
-
I am pretty sure the diffs will swap out of a NA 83zx except maybe the drive pinion, I think its got a different bolt patter for the drive shaft (or propeller as Nissan call it).
-
you can buy them new for 75 direct from japan (I have one on the way) with expensive shipping its about 115$ I got one since I was nervous about reading how you need to check the boss the distributer shaft goes thru can wear and if it does need to replace the casting. I am sure that's overkill, seems like you could press in a sleeve, but anyway got me to looking and found it an Amaya. Anyway I will report what comes in the mail when it gets here. Paranoia strikes deep into your life it will creep...
-
you maybe better off just replacing the front and rear seals and giving it a try. They are not that hard to install. Then if you have a problem do a rebuild.
-
that running pressure is a bit high, prob has to do with poor vacuum, and or vacuum line not hooked up to the fuel pressure regulator. if it has some wild cam I suppose the vacuum will always be poor or its just the poor state of tune it current in. For now you should chase vacuum leaks. Get a stogie (cheap cigar) and a tube that fits over the large nipple on the intake manifold that feed the brake booster. I like clear tubes so you can see the smoke. Block off the front of the throttle body by disconnecting the rubber boot and put a styro cup over it, you want a good tight seal. Blow smoke into the tube, it may take a while to fill everything up, but you should look for smoke leaking somewhere, there should be some resistance, its not an open system, I actually blew the styro cup off the intake doing this. A flash light is handy to look for the smoke. you want to get rid of vacuum leaks as that can play havoc with EFI. I am not sure how that filter on top of the valve cover will effect things, I assume there is a PCV valve and I also assume it acts as a check valve if under pressure. Not sure how all that will effect the smoke test. as ZH mentioned rough running is typical and generally going to have to do with a bad temp sensor. While you have the boot off (AFM to Throttle body) examine it CLOSELY look for cracks. You don't want air getting into the system that is not going thru the AFM.