inline6
 Subscriber
-
Joined
-
Last visited
Everything posted by inline6
-
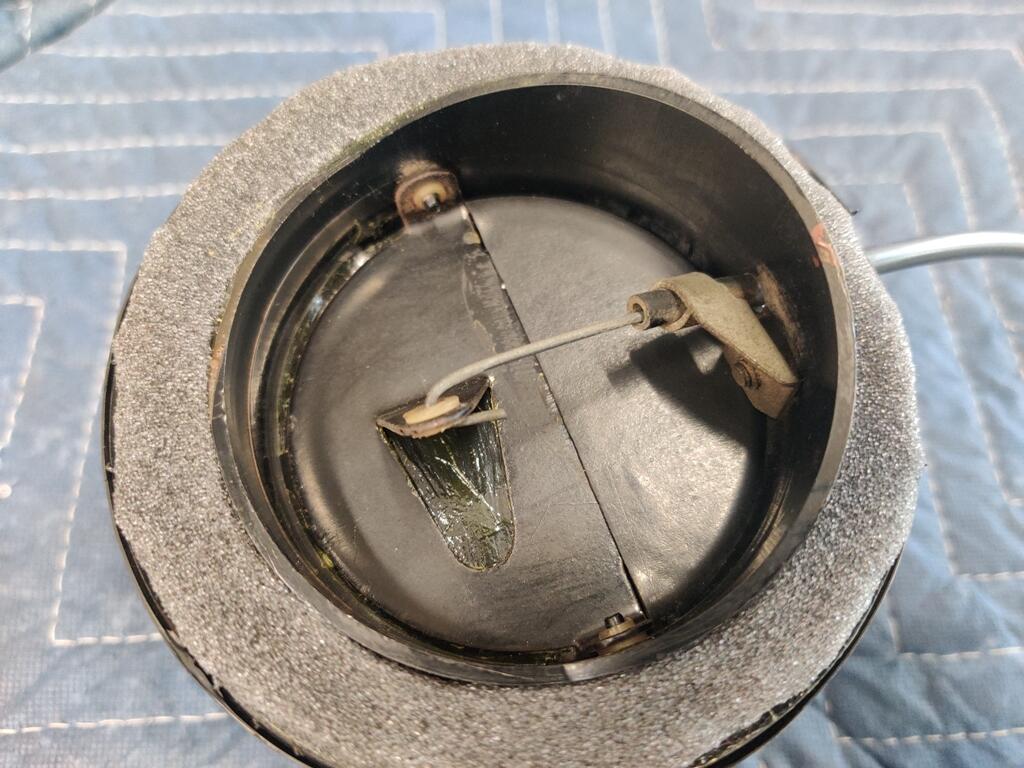
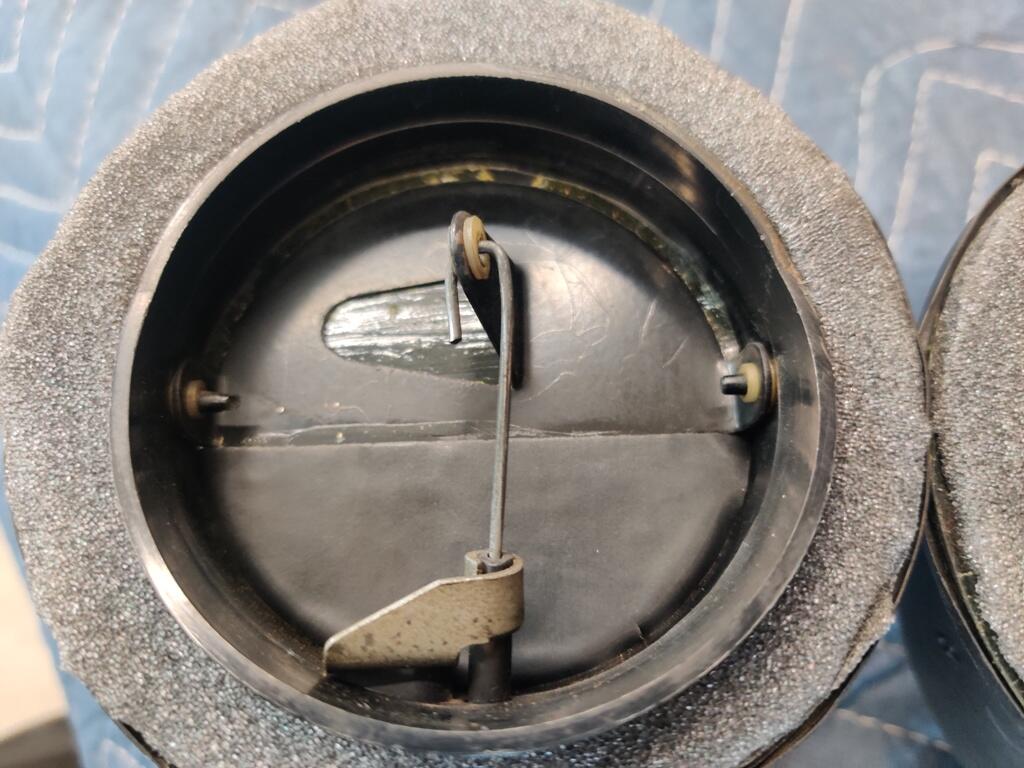
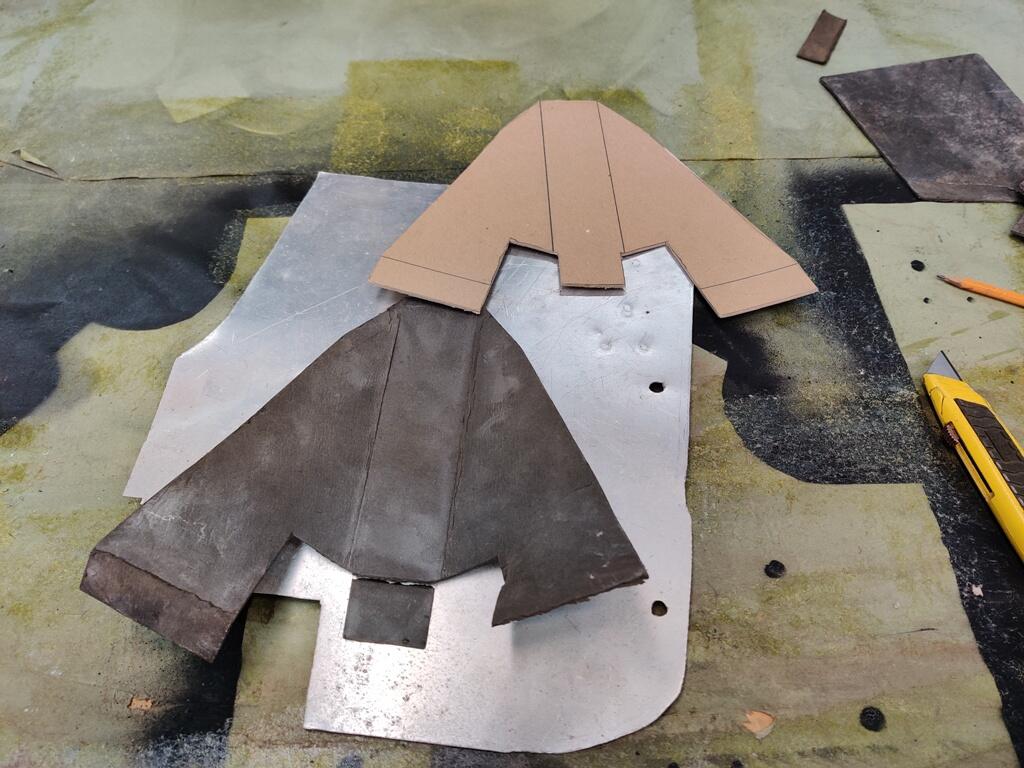
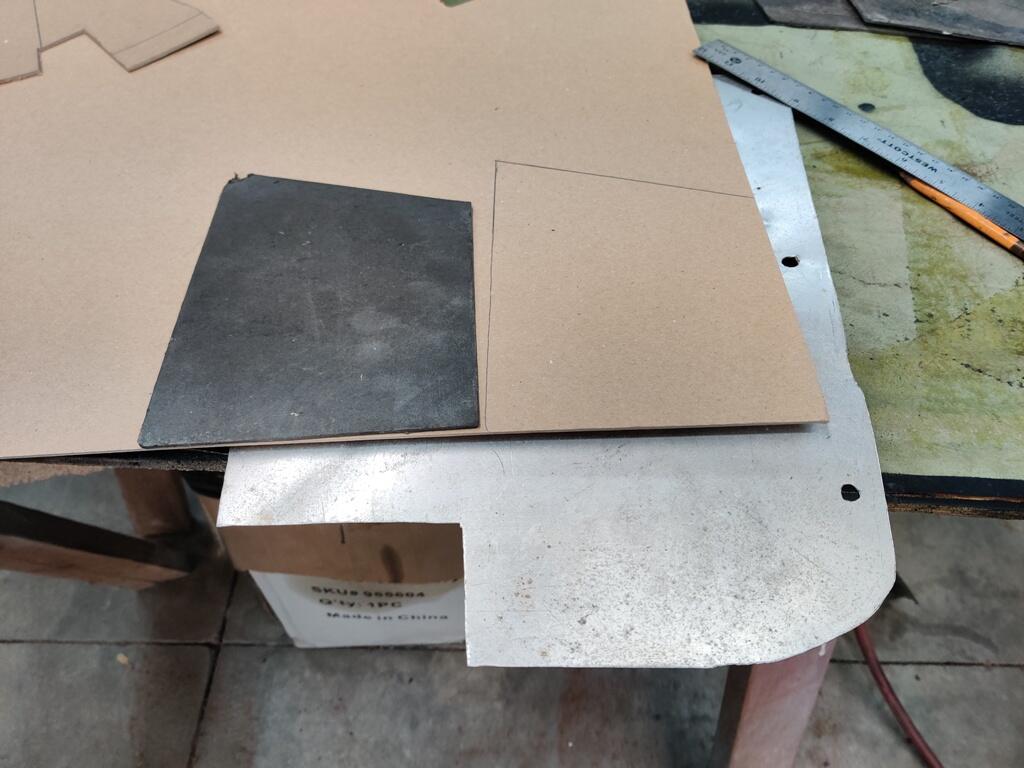
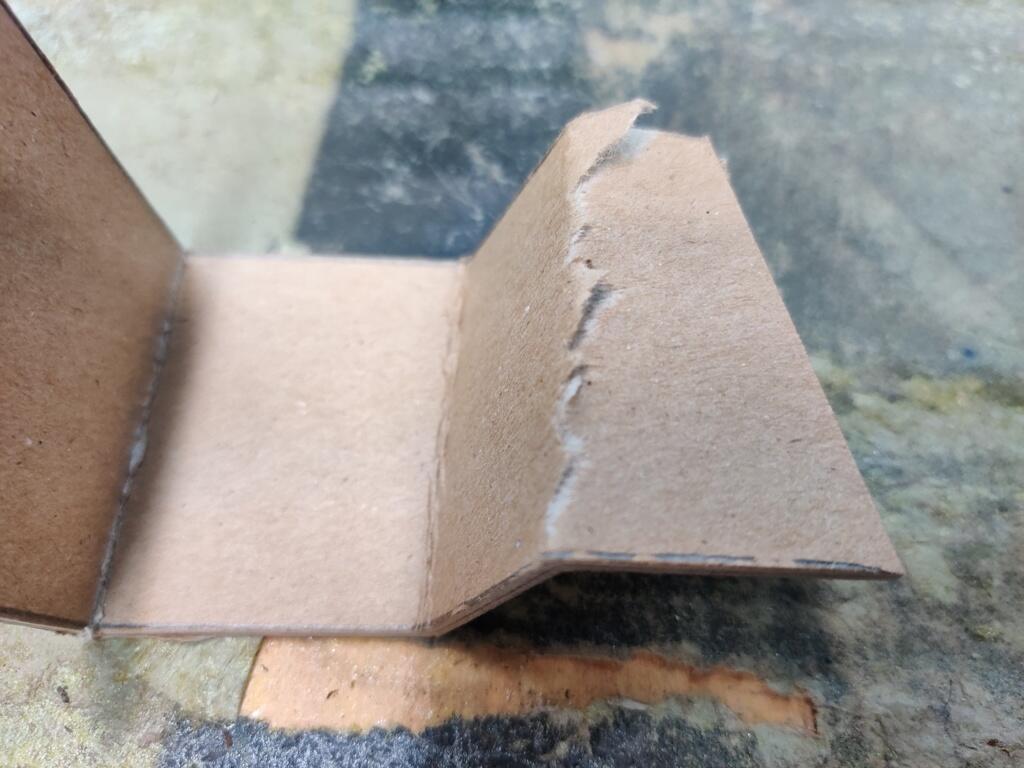
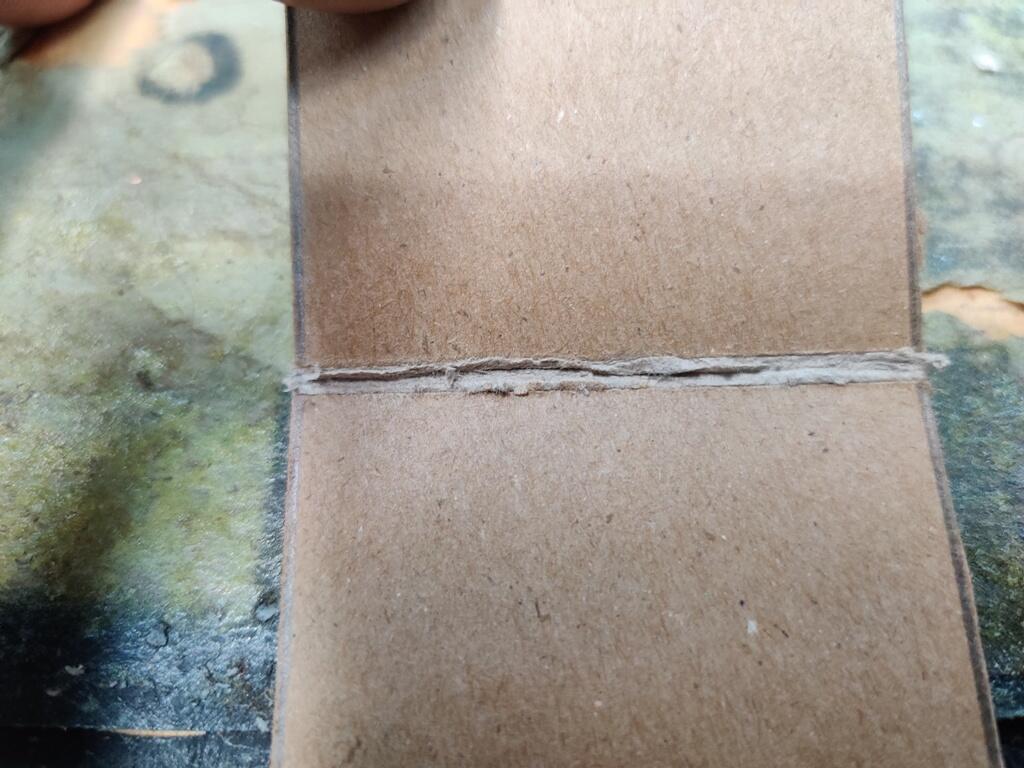
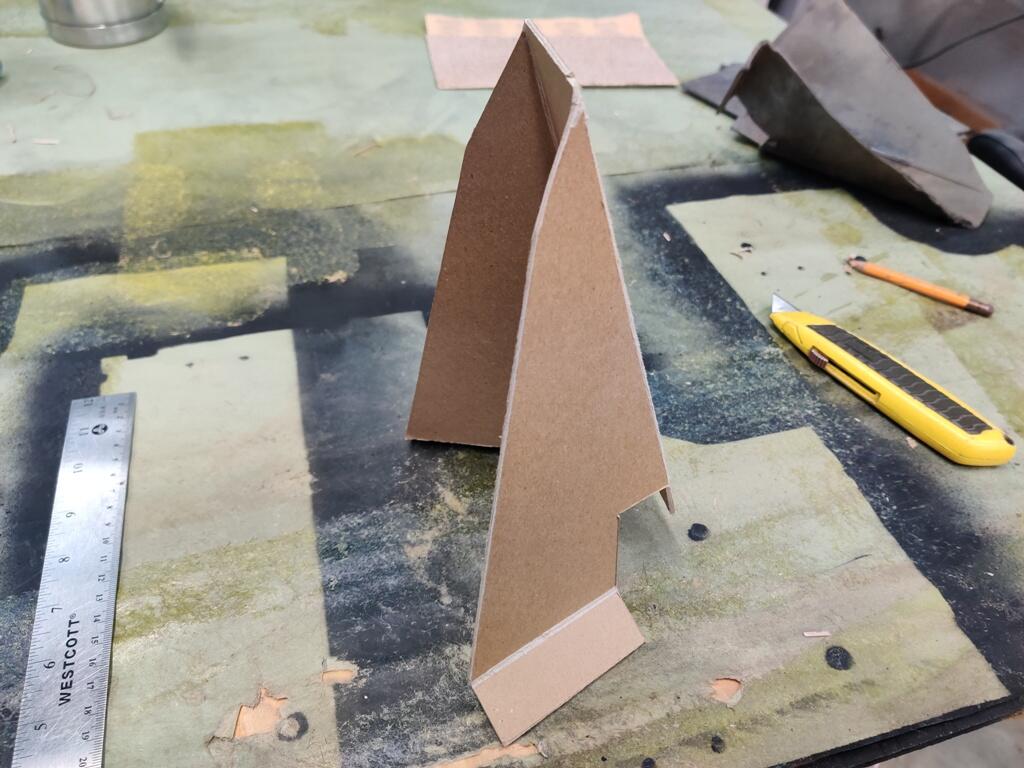
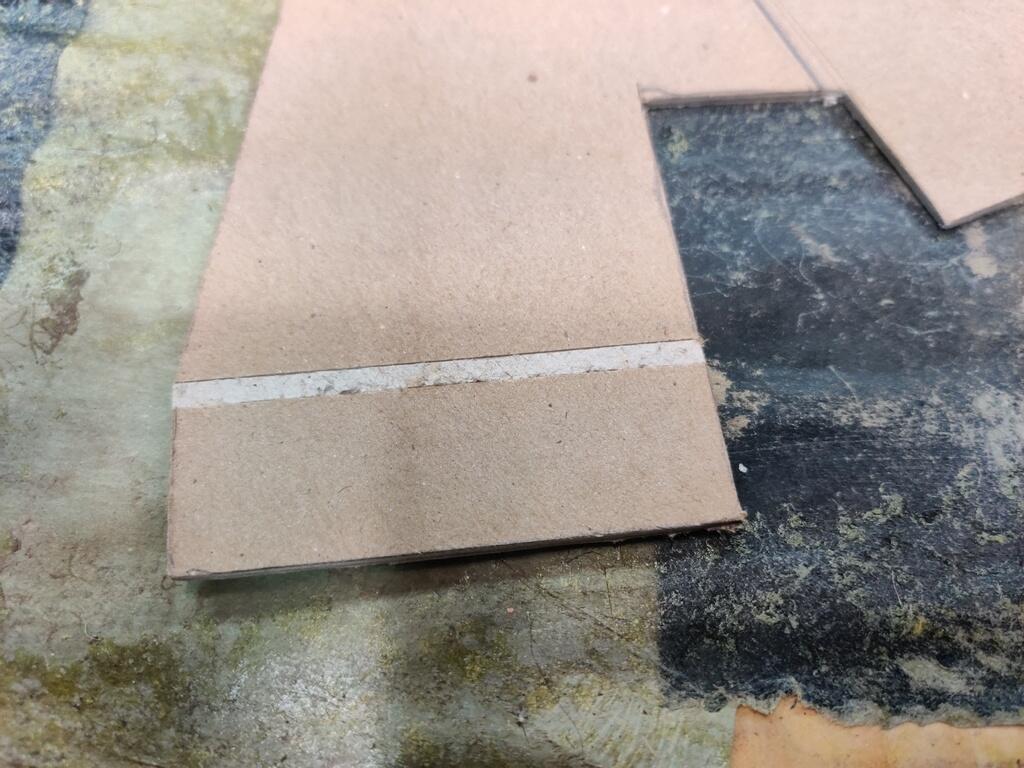
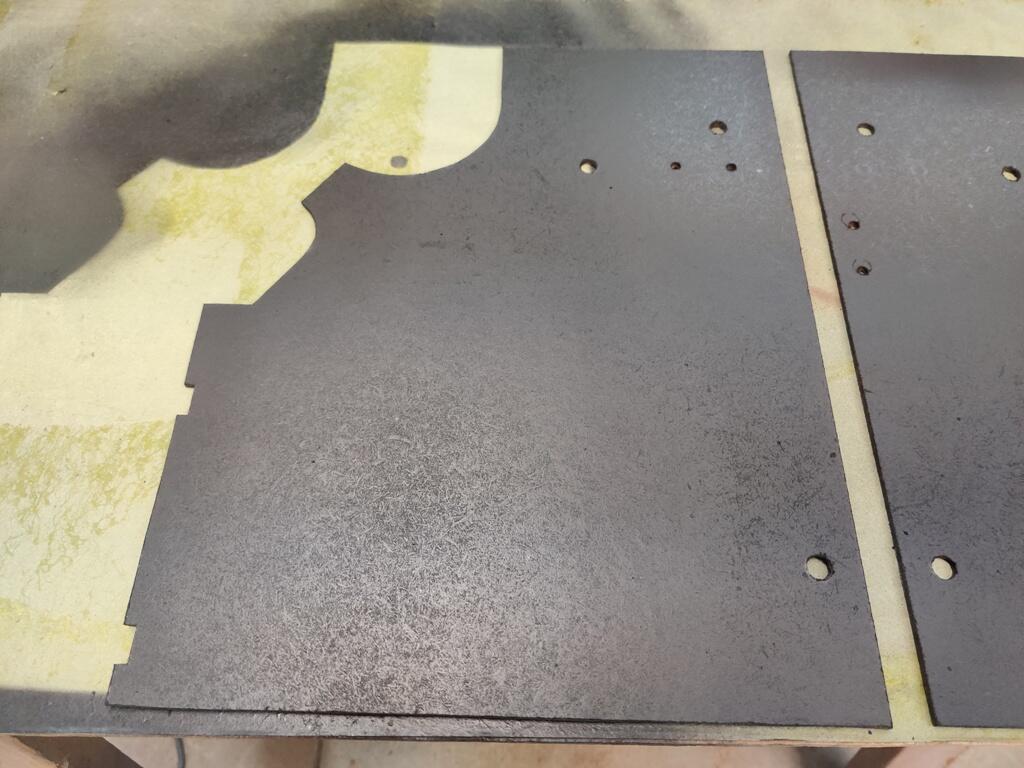
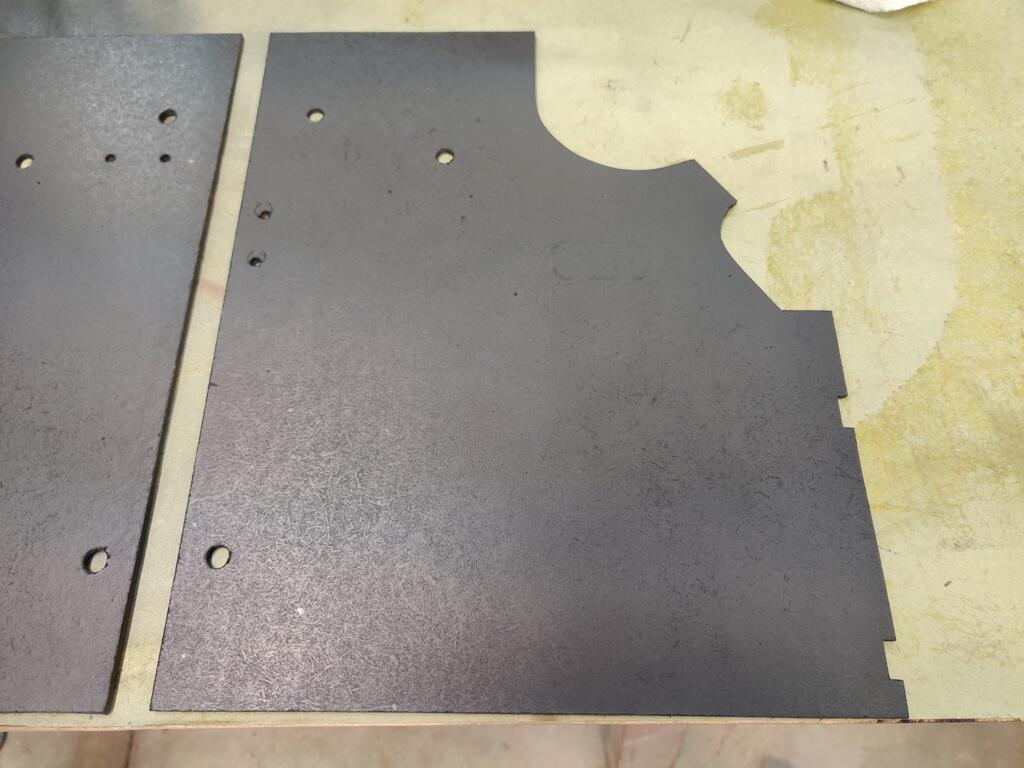
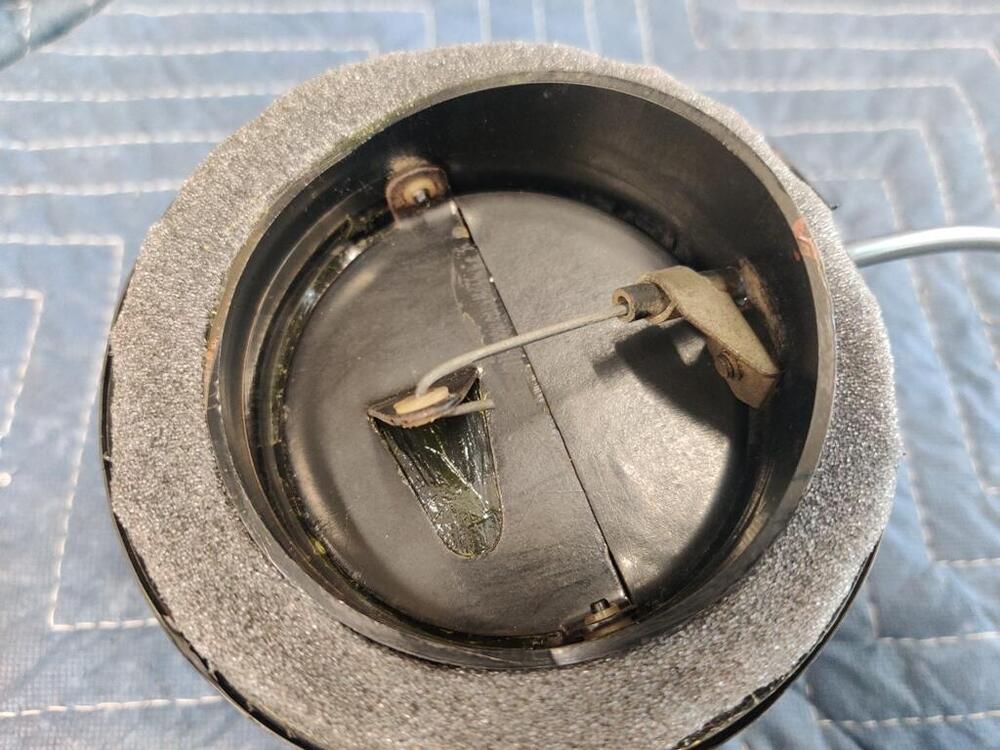
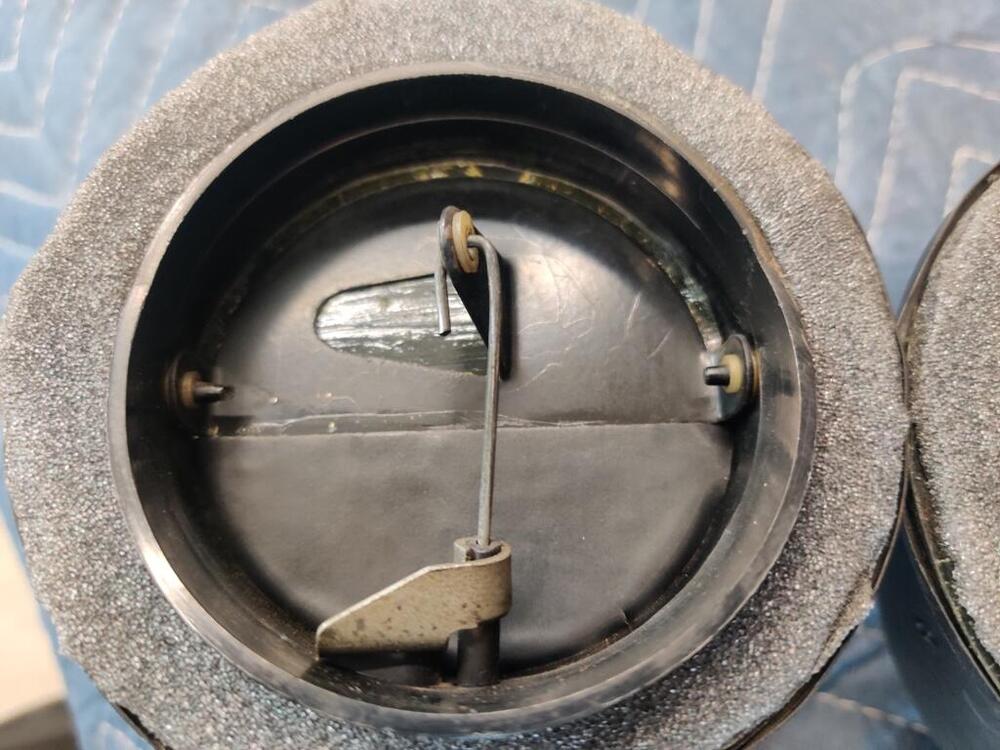
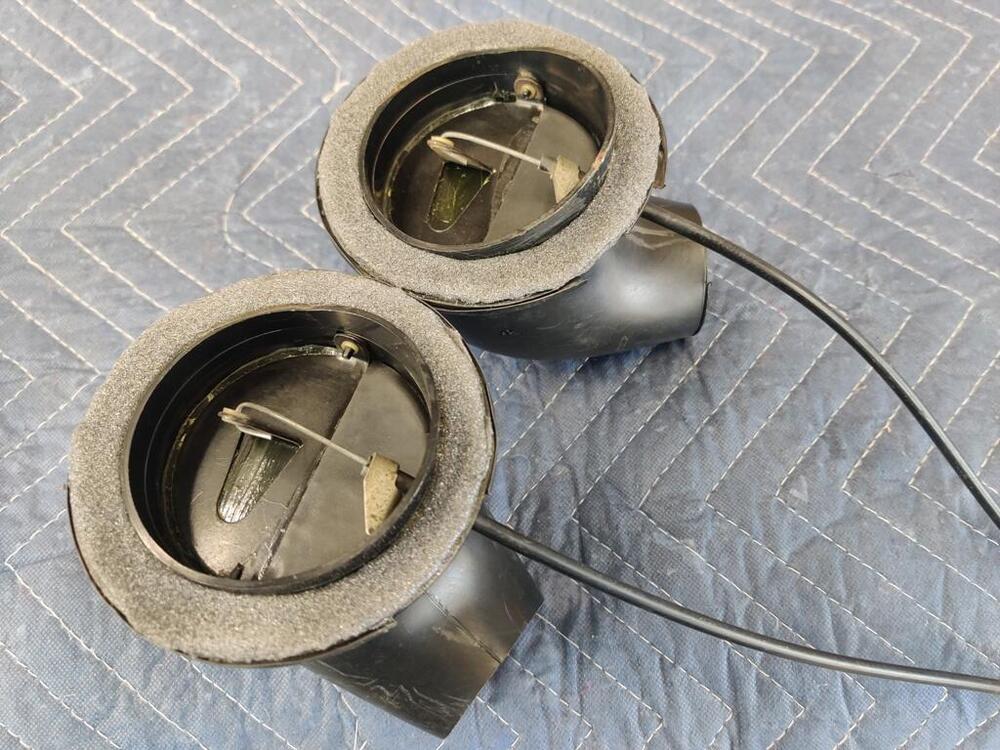
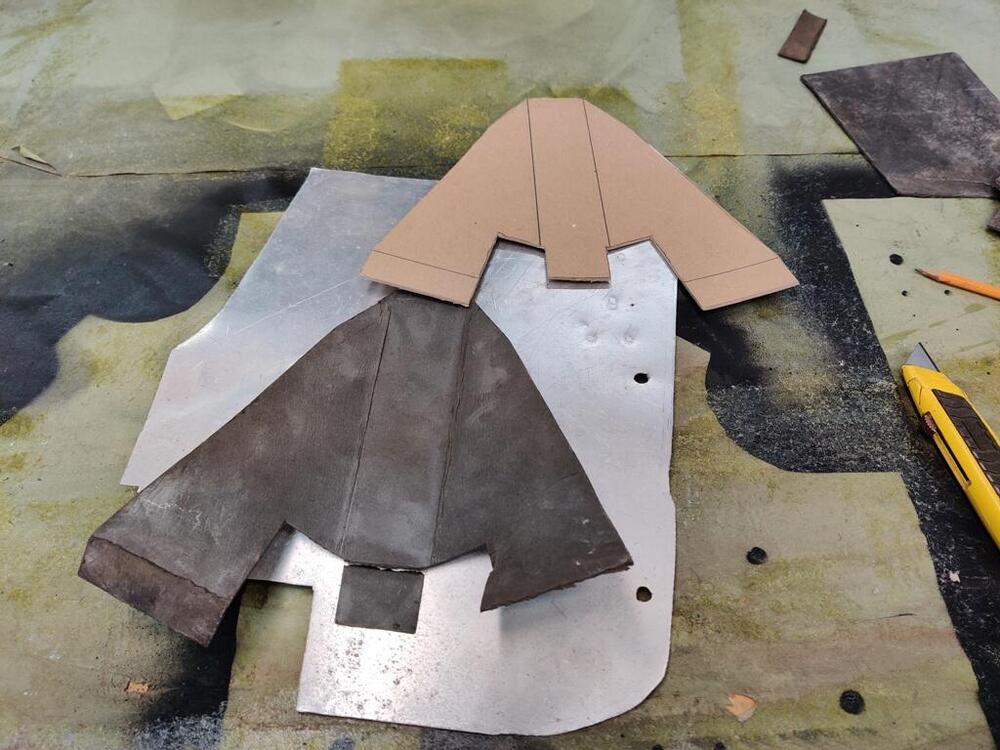
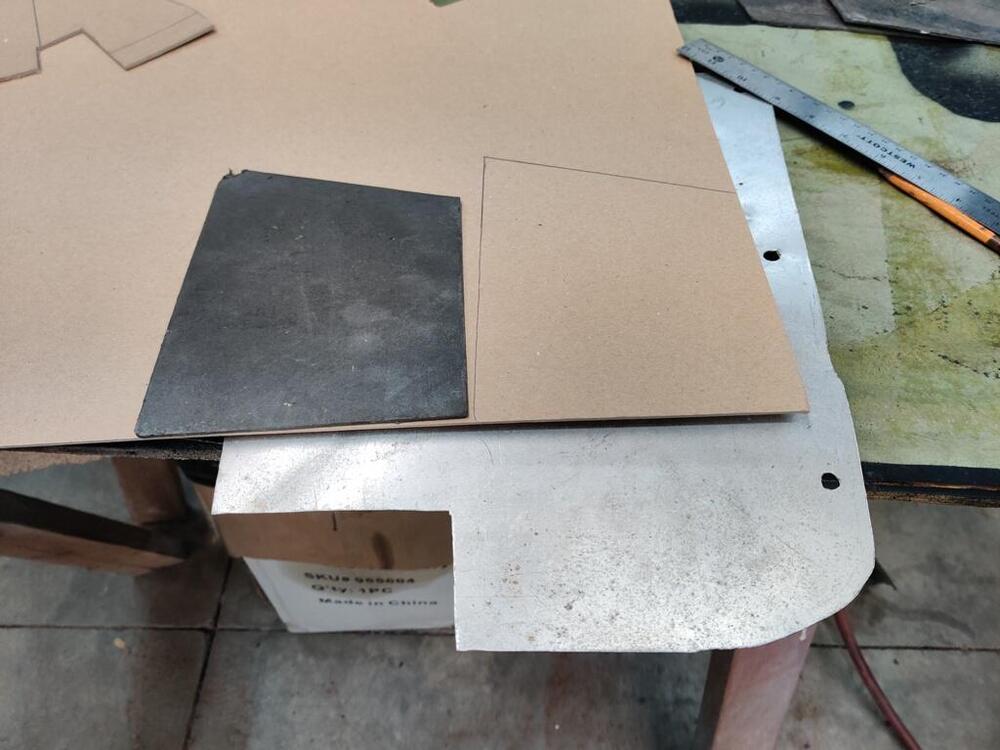
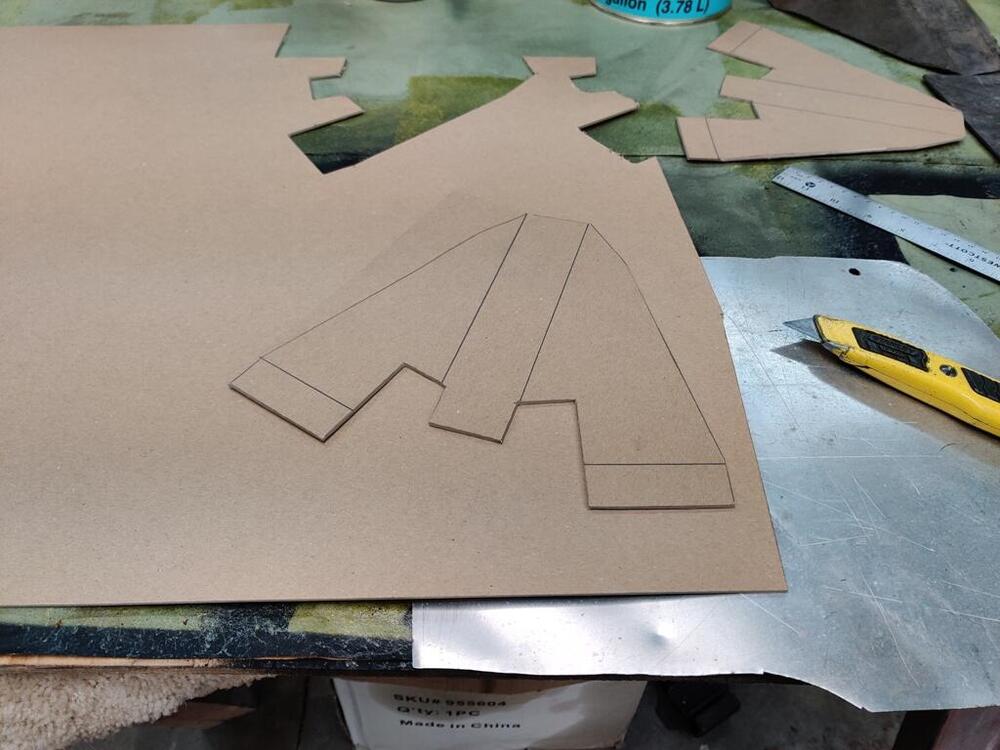
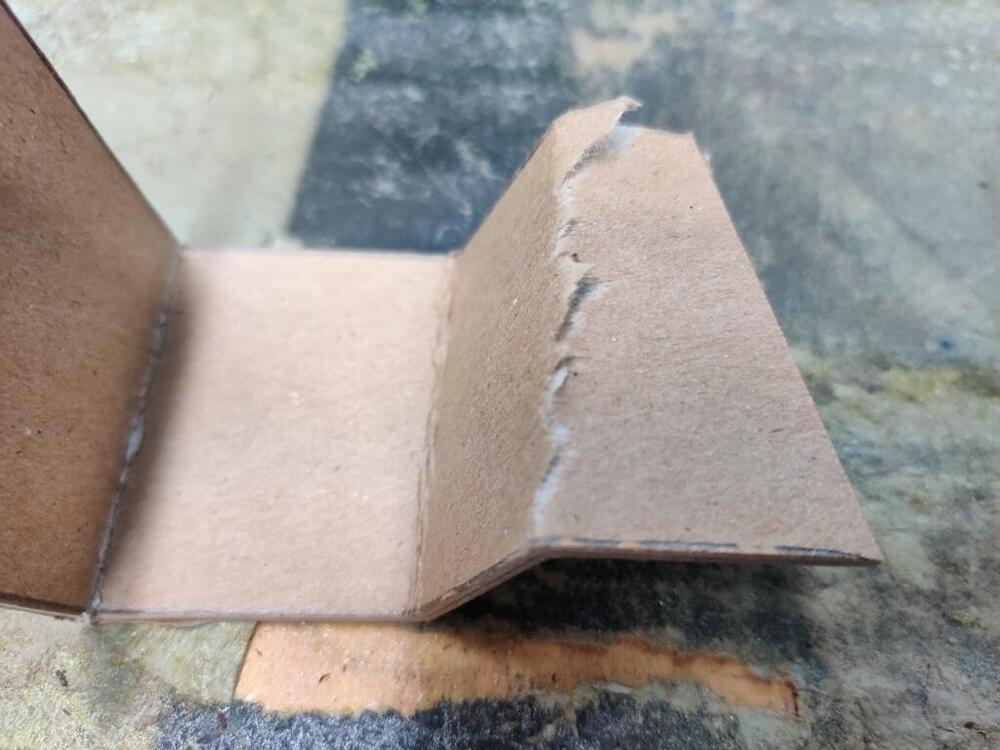
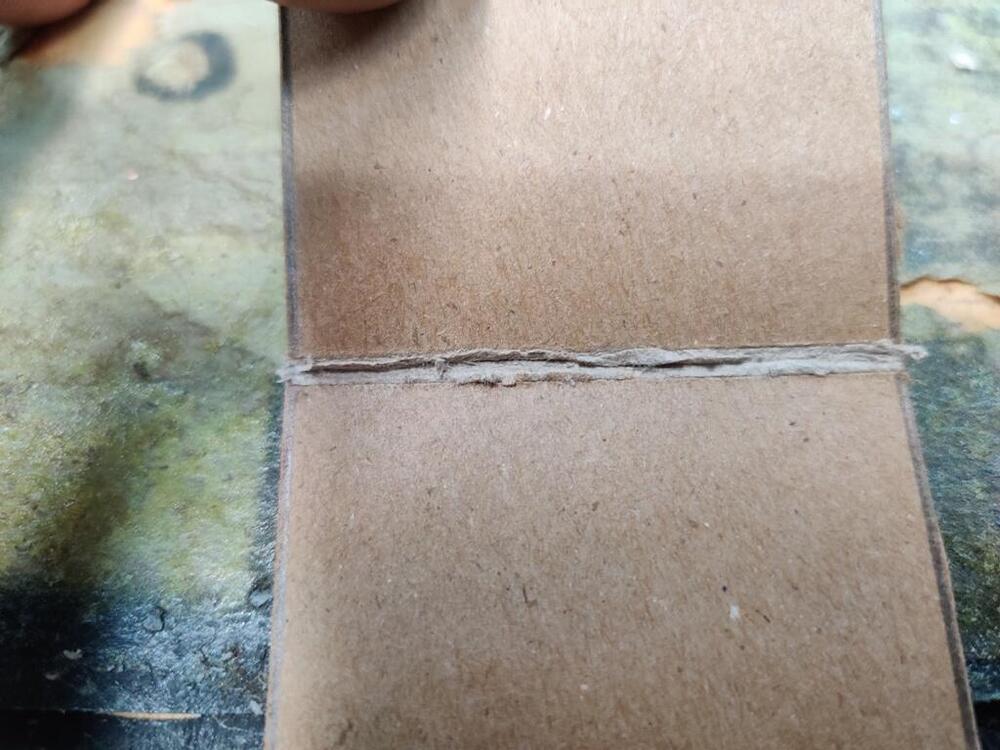
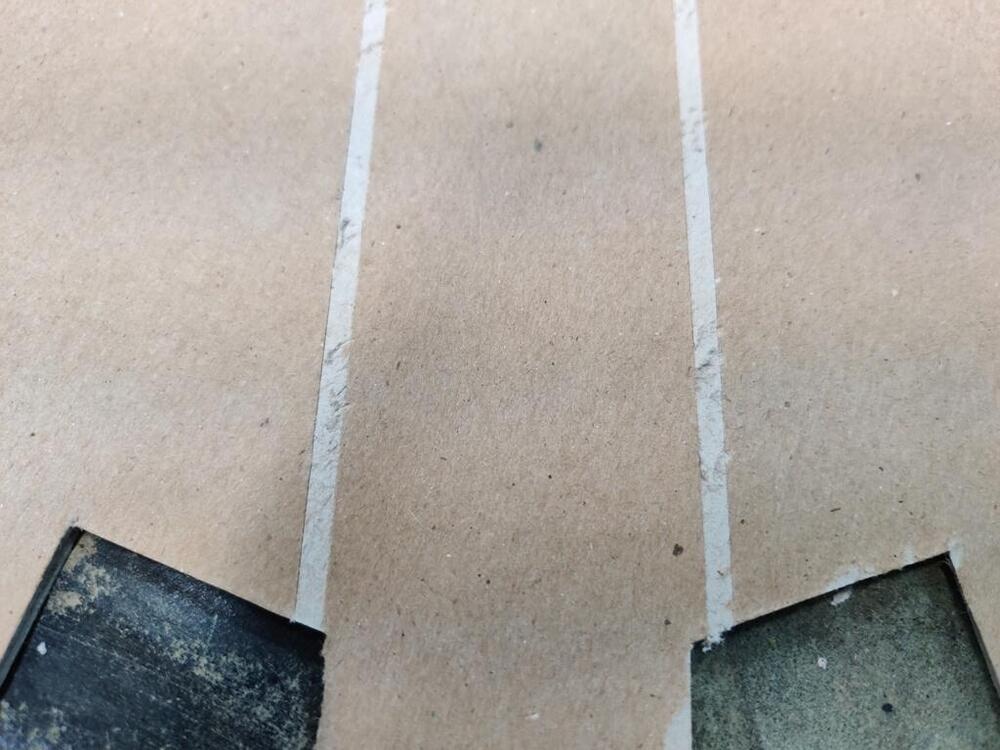
 This past weekend, I rebuilt the side vents - the ones that are opened/closed via the knob underneath either side of the dashboard. The rubber parts that seal around the edges of the disc that moves to close/open were dry rotted, but intact. I thought about installing them as they were, but when I poked at the rubber, it crumbled easily. These vent mechanisms are actually pretty difficult to remove/install, so I decided to rebuild them. I have some thin rubber sheet I got from McMaster-Carr some time ago. It comes in handy for making gaskets, and applications like these. For each vent, I had to first remove all the old rubber material. Then, I cut two semi-circular pieces a little over size so that the edge would fold over seal against the ID of the housing. I then used the contact adhesive I have been using to glue them into place, one on one side, and one on the other. To finish up, I cut some 1/8" this open cell foam which seals the vent housing to the car body. I also cleaned the cowl drain tubes and installed those: Before I can glue other diamond vinyl pieces into the car, I needed to make replacement cardboard supports for the rear strut areas. I had good luck using the cardboard from old three ring binders in the past. This time, I was able to look online for a suitable material, and I found "Upholstery Cardboard Panels). These (I ordered a pack of two) look to be identical to me. Using the original ones as templates, it is a simple exercise to mark up and then cut out using a metal straight edge and a sharp blade in a box cutter. I use a piece of soft aluminum (3003 I think) as backing for the cutting part of the exercise. I experimented a bit with folding the cardboard. Scoring the surface layer helps to create a smooth outside corner. I found that on the inside corner, it helped to remove about an 1/8" wide channel of the surface material. Not that it is needed, but the core material was accepting of folding to 90 degrees and back many times without tearing or getting noticeably weaker. So, the inner material has some resilience. To finish these up, I will coat them in a black rubberized spray paint.
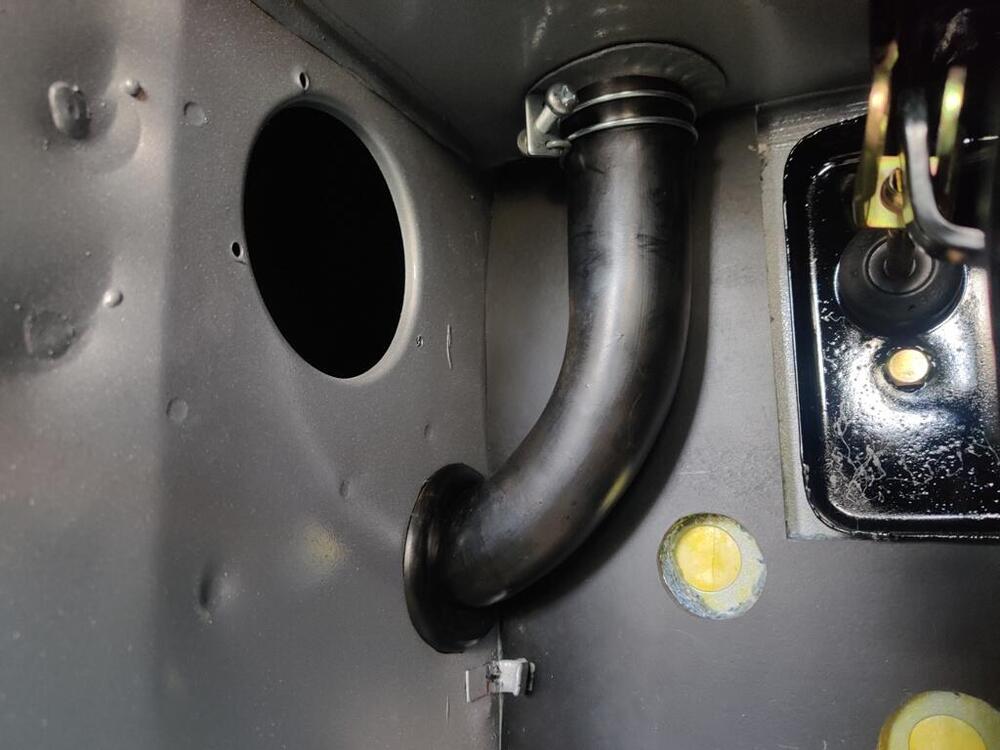


-
Thank you @grannyknot, very kind of you to say. At the age of 15 and 8 months old, I got my first car, a Datsun 510 4 door. My dad chipped in $500, which was the amount that he had given my brother for his first car a few years prior. That $500, plus every dime I had ever saved came to about the car's purchase price of $1200. As a single mother, my mom worked two jobs to pay for what was needed and little else. Needless to say, we were not a rich family. My dad convinced me to take it to the shop that worked on his car to go through it and "do everything it needed". That cost another $264, and my dad started to record what I owed him in a little black ledger. A couple months later, one of the rear wheel cylinders developed a leak. That cost another $100 to fix at the same shop. With each additional repair, it became obvious to me that I was going to either have to learn how to do some things myself, or I would just keep incurring a larger amount of debt with my dad. So, I asked for a Haynes manual for Christmas (1985). With that, my learning how to work on cars began. When I was in my early 20's, I partially restored/modified the 240z that I now refer to as my track car. I experienced a lot of firsts restoring that car. And I drove it for a lot of miles. Over many years, I upgraded and reworked several areas that I had previously given attention. For this 240z, my goal was (and is) to apply to a complete restoration... all I have learned from my prior experiences of working on my first 510, "restoring" and modifying my "track" 240Z, and repairing a few wrecked Honda S2000's. And, in addition to a full restoration, I would like it to be to a level that makes this car worthy of consideration by those who would know, those who are experienced with rebuilding and restoring cars... that this is "one of the nicest" 240Zs around.
-
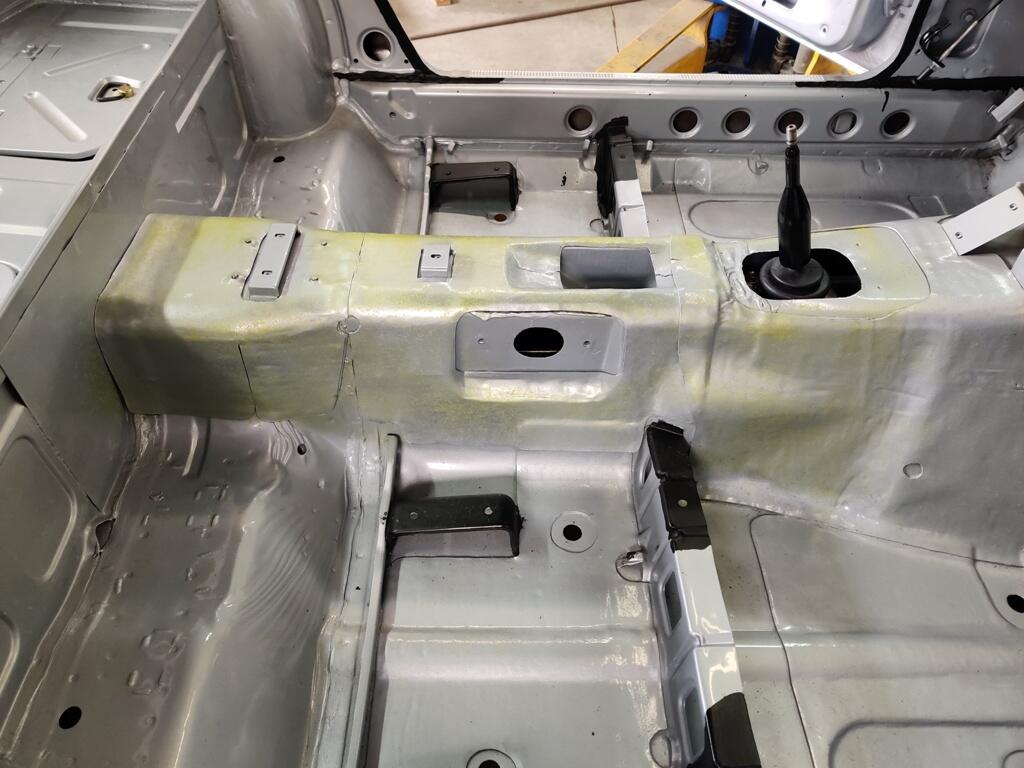
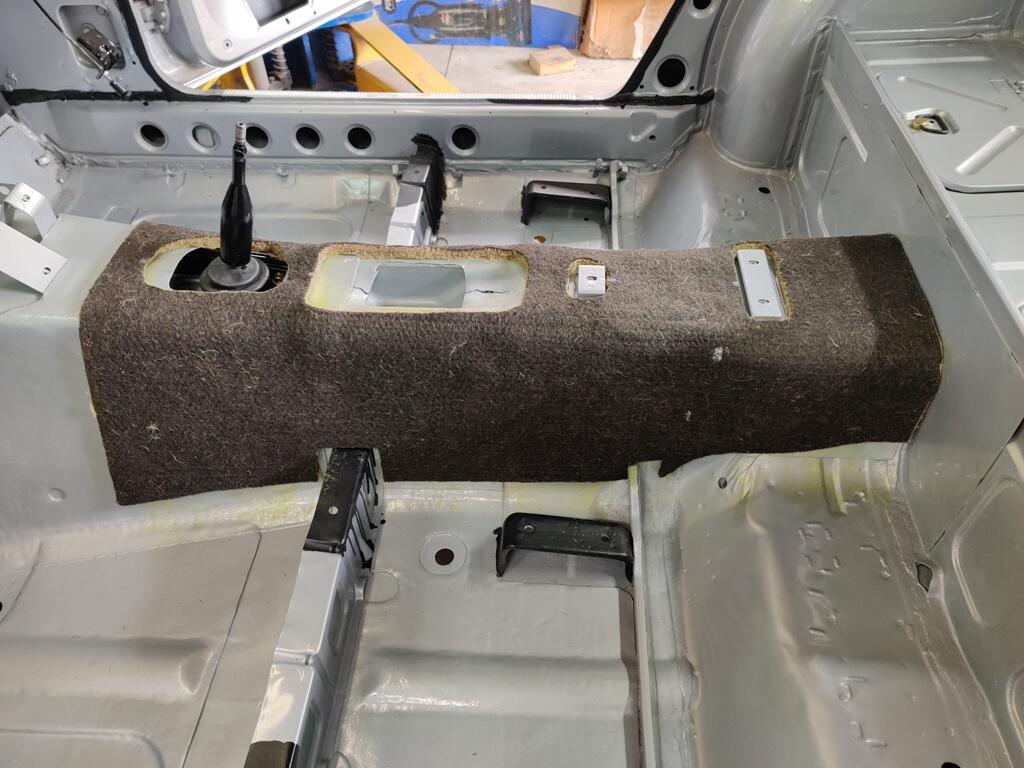
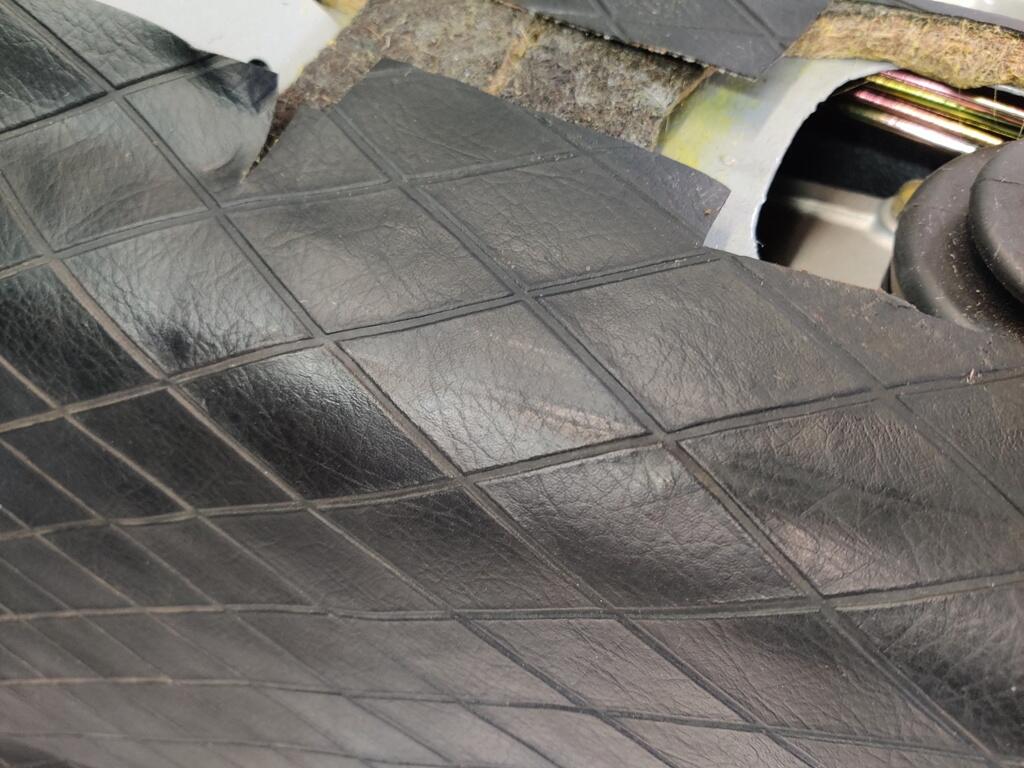
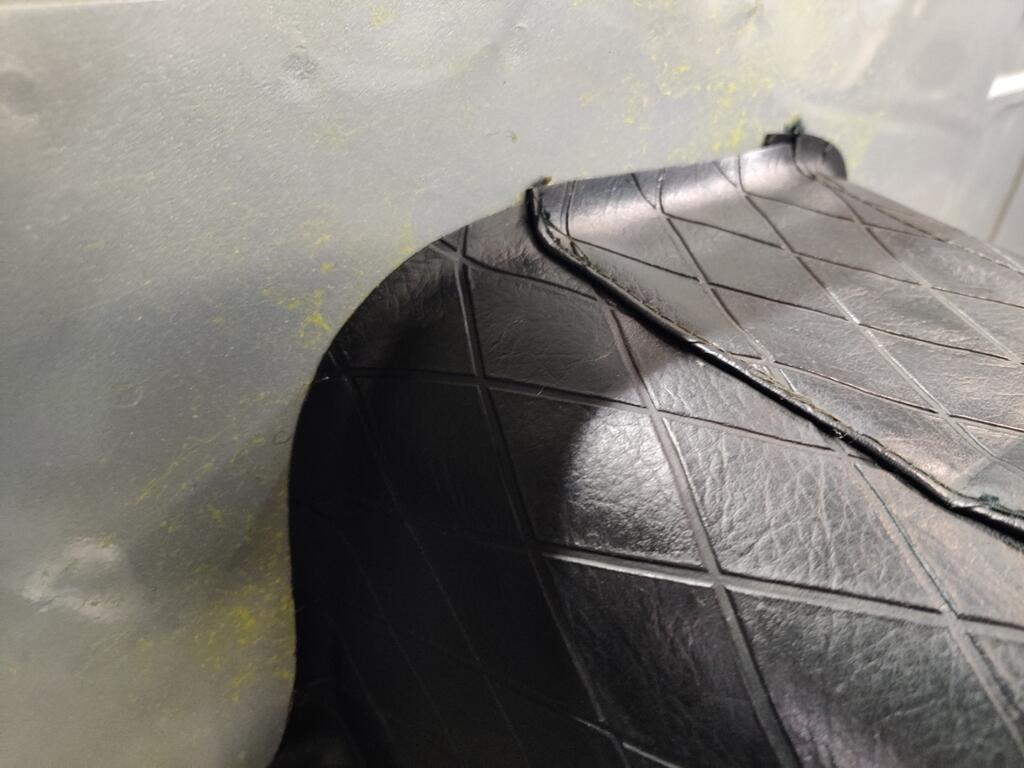
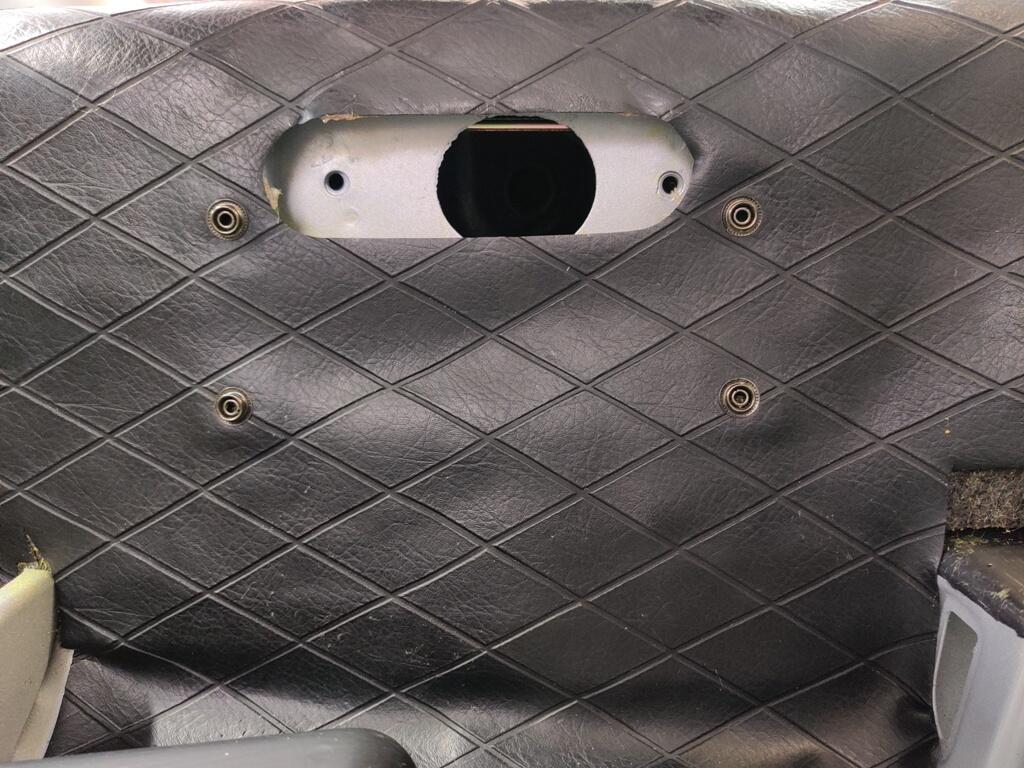
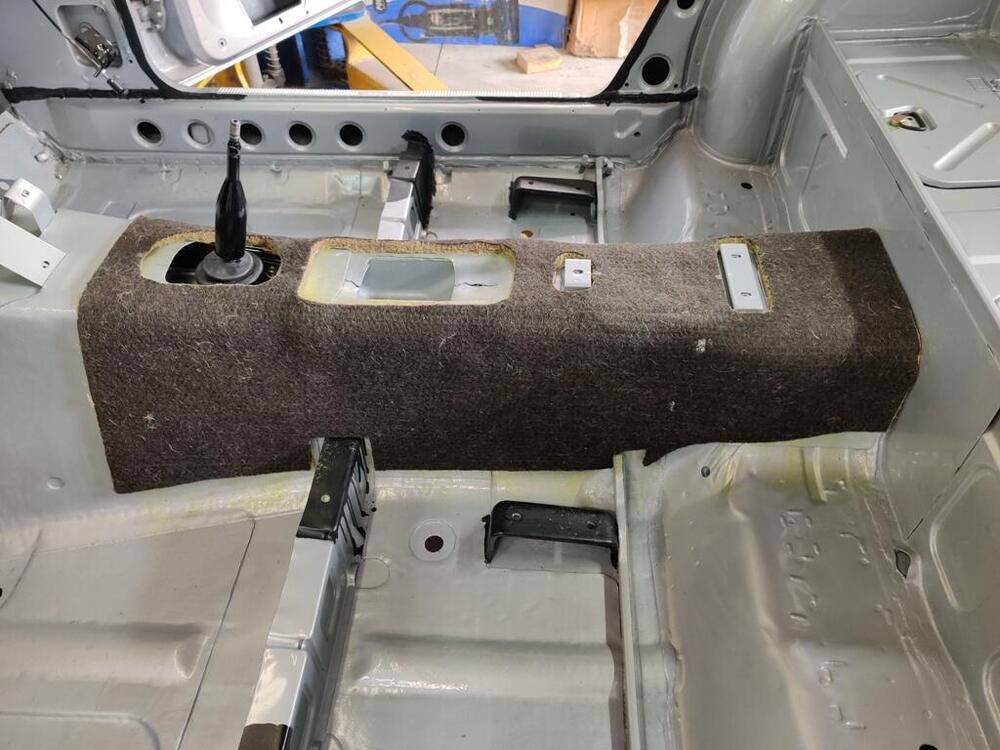
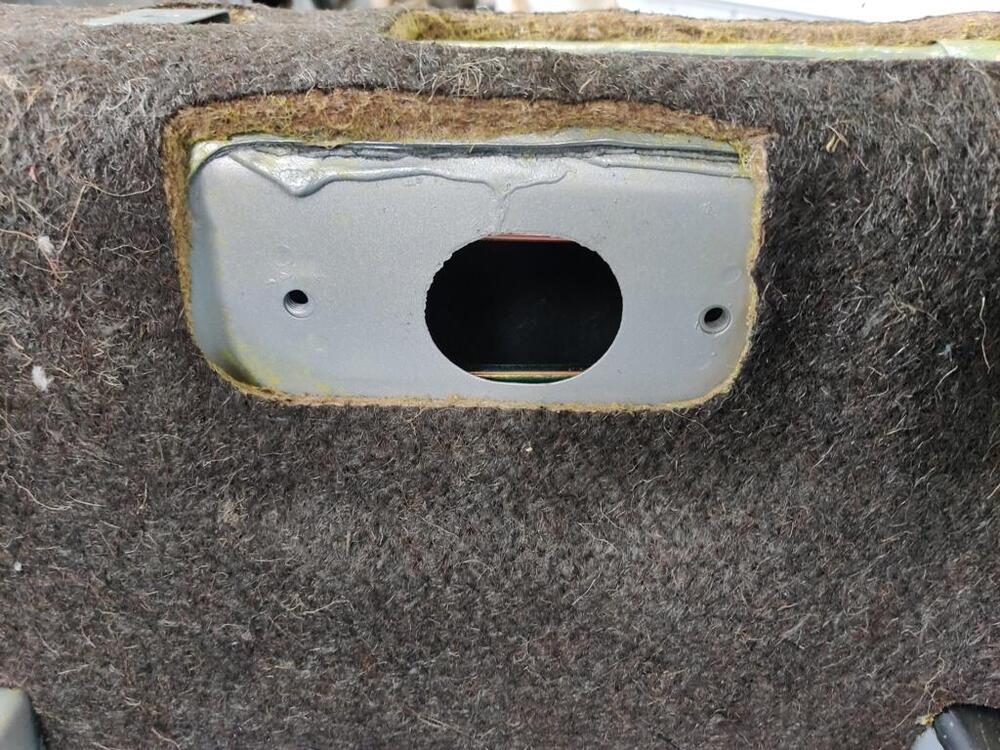
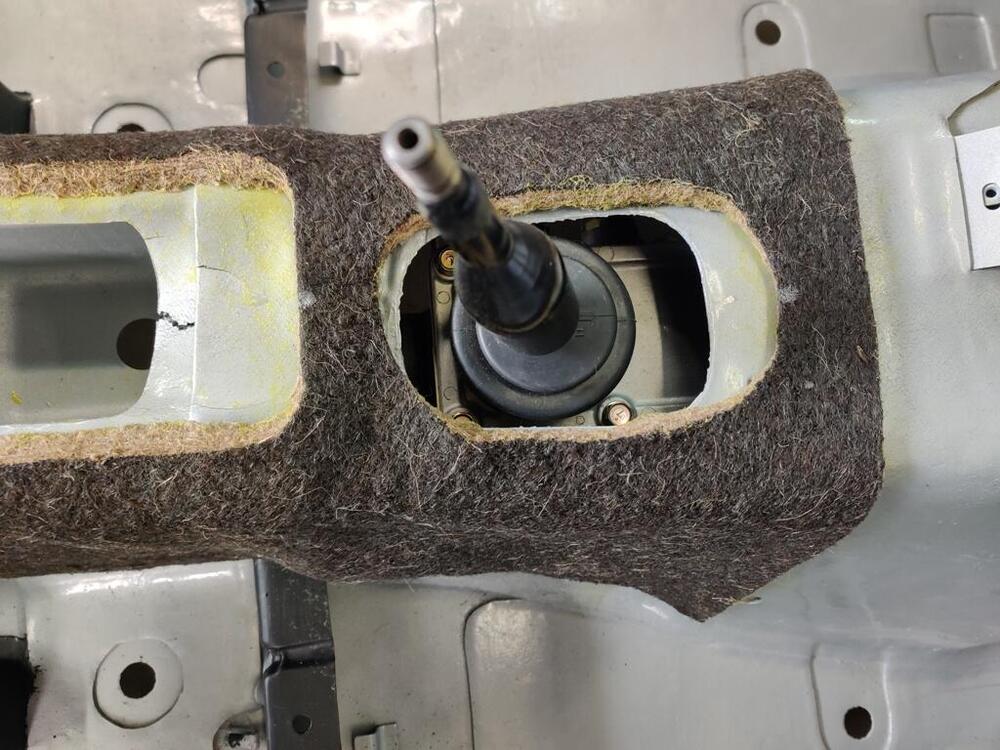
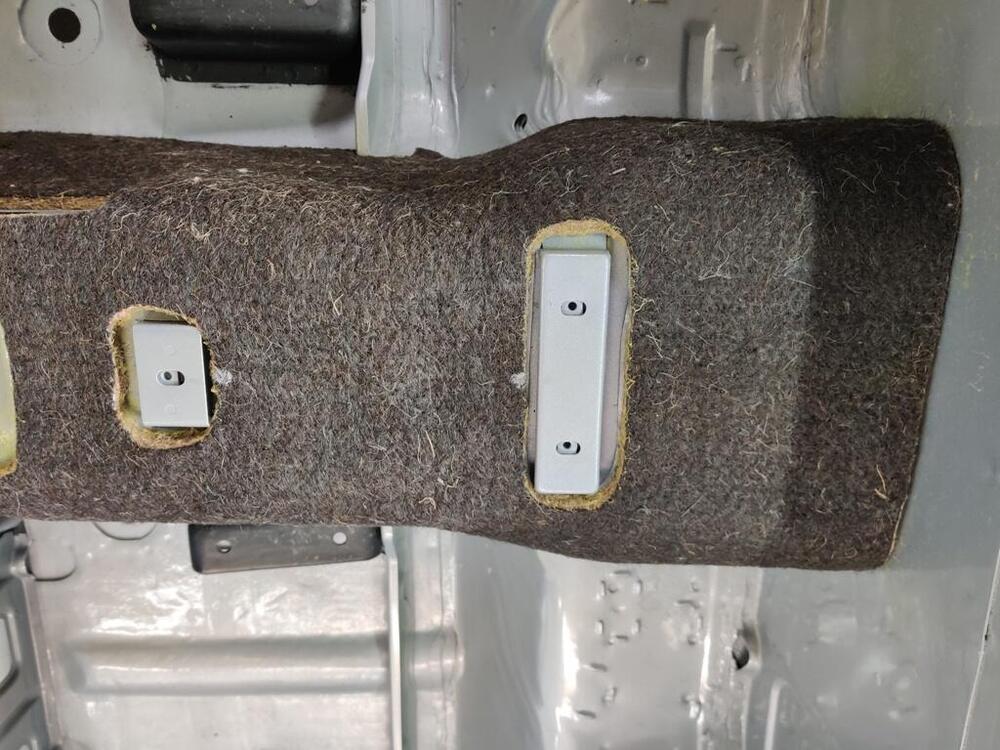
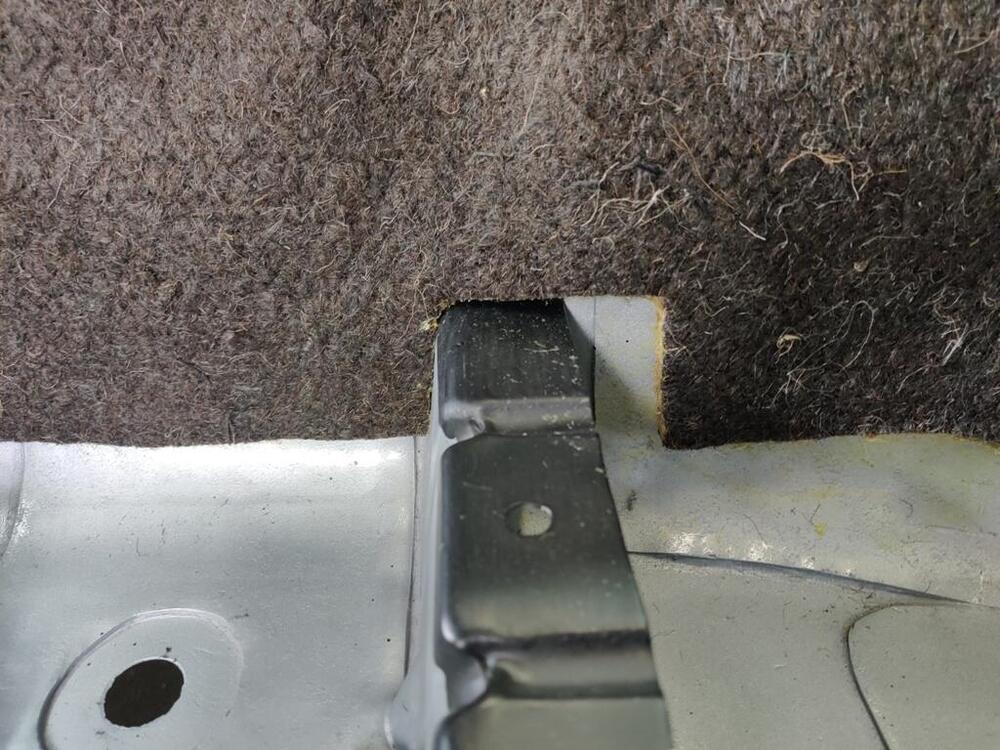
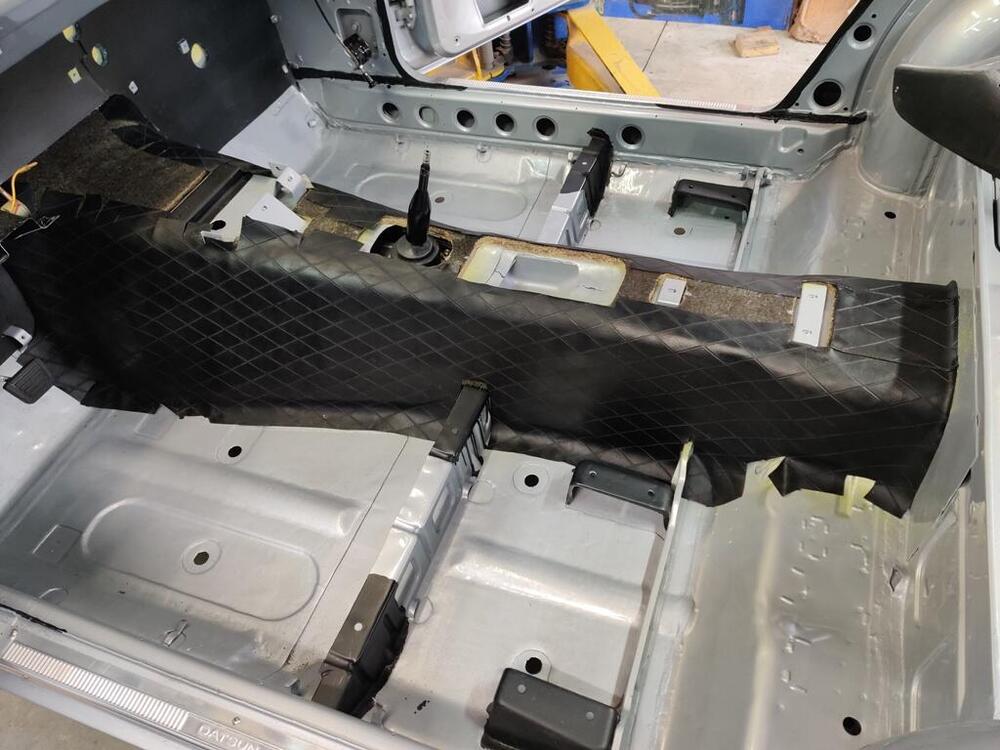
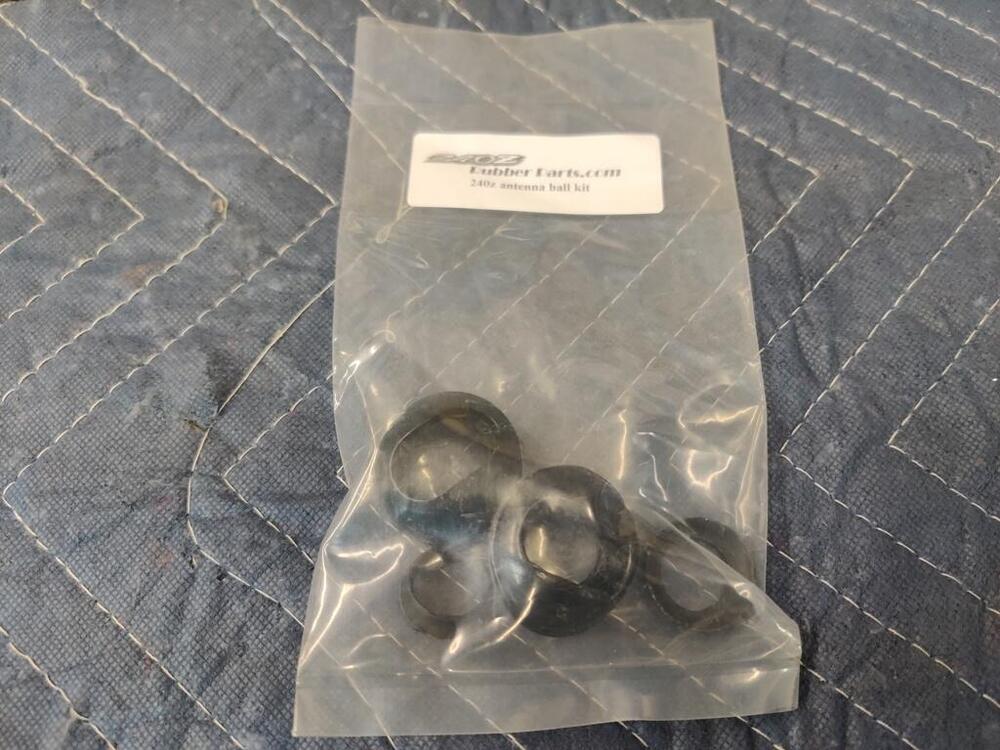
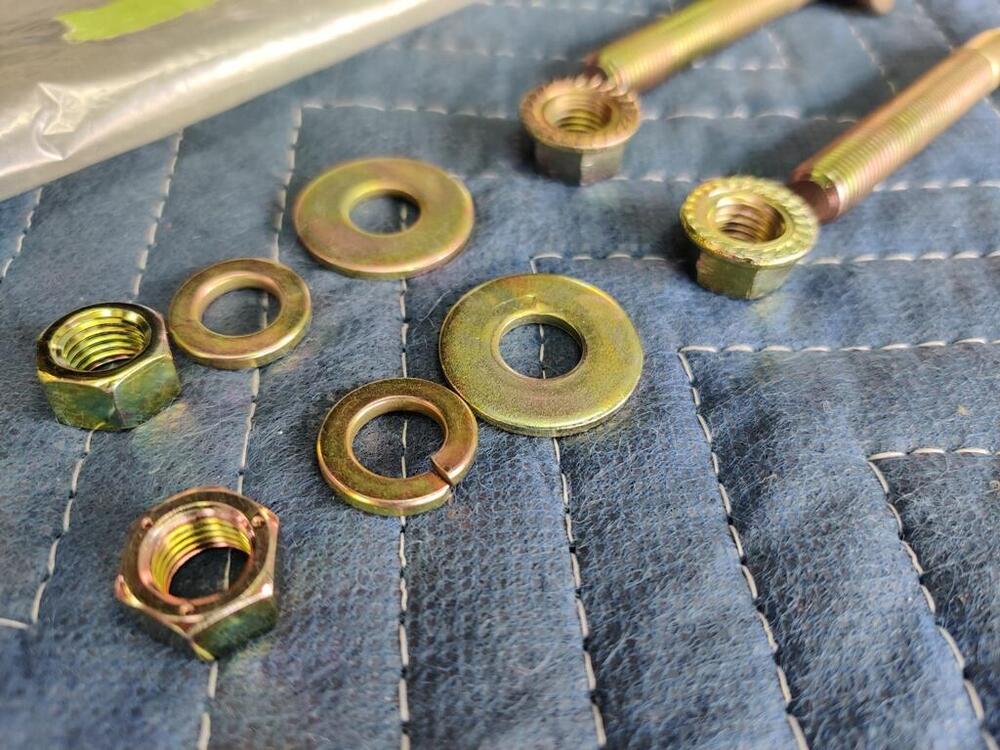
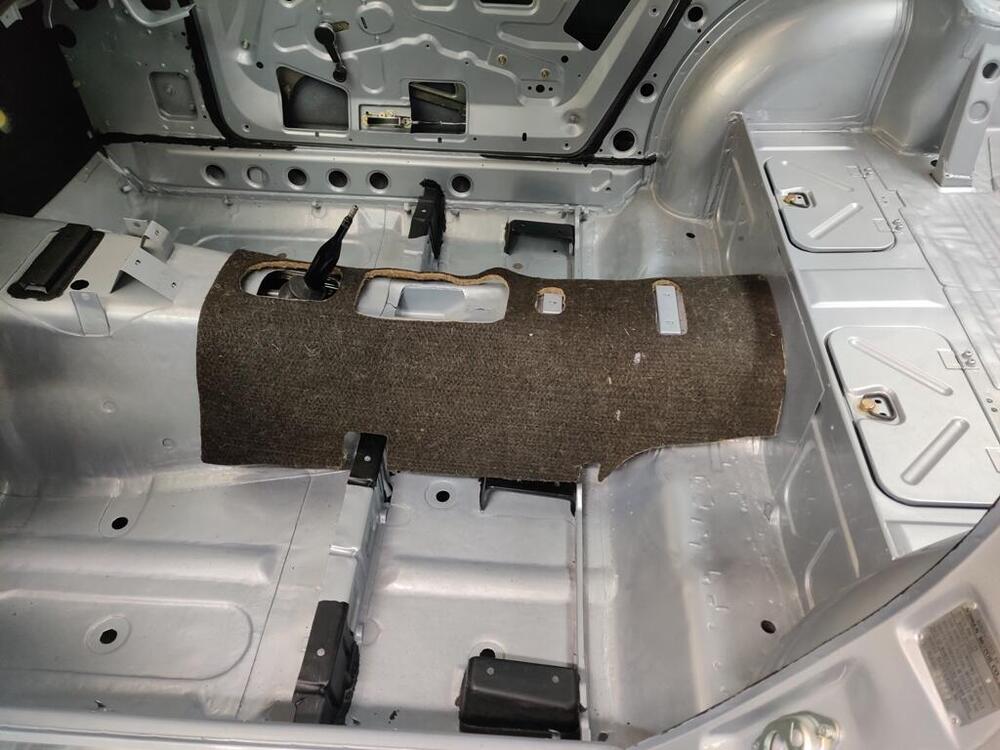
It turns out that Steve's kit has two of the pieces which are second from the right most piece in the pic above. One is rubber and one is a hard plastic. I used the plastic one. I could substitute the plastic with the rubber one. I also see now that the point tip I bought for my antenna is larger than the original. Bummer. I bought that one off of eBay. I will have to replace it at some point - I don't like that it is too big. I got another thing out of the way today that I was dreading doing: gluing the jute to the tunnel, and gluing the original vinyl to that. I realized when reviewing some pictures that the tunnel jute and vinyl go into the car before the firewall padding. Since I already installed the firewall padding, I had to pull it up at the bottom edges to get the jute and vinyl tucked under. It wasn't too difficult to left up the fire wall padding a bit. I poured contact adhesive into the spray gun, and I was off and running. I temporarily fit the jute and marked a few places at the top center with a paint pen so I knew where to place it after spraying both the backside of the jute and the tunnel with adhesive. I think I ended up with good placement: After gluing in the rear jute section, I glued the front section in place. Then, I retrieved the original vinyl trim for the tunnel. To start, I sprayed glue only on an small area at the top edge of the tunnel and the vinyl (third pic): I had the fiberglass center console available for this part of the process because there were impressions made by contact of the console in the original vinyl. I used those to determine where to locate the vinyl vertically on the tunnel (third pic shows some of the impression). After I got the top part of the vinyl glued in place, I rolled the vinyl upwards to expose the side portion of the jute. Then I sprayed that and the rest of the vinyl with adhesive. The vertical location was already set, so all that remained to do was to roll the vinyl downwards over the sides of the tunnel and press down firmly everywhere. At the rear of the tunnel (second pic), the vinyl rolls up against the rear face a touch. As far as I can tell, the vinyl appears to be in the correct position everywhere. Hopefully that is the case. With the tunnel jute and vinyl in place, I now can install several items including the heater core, the fan, the steering column, and the dashboard.


-
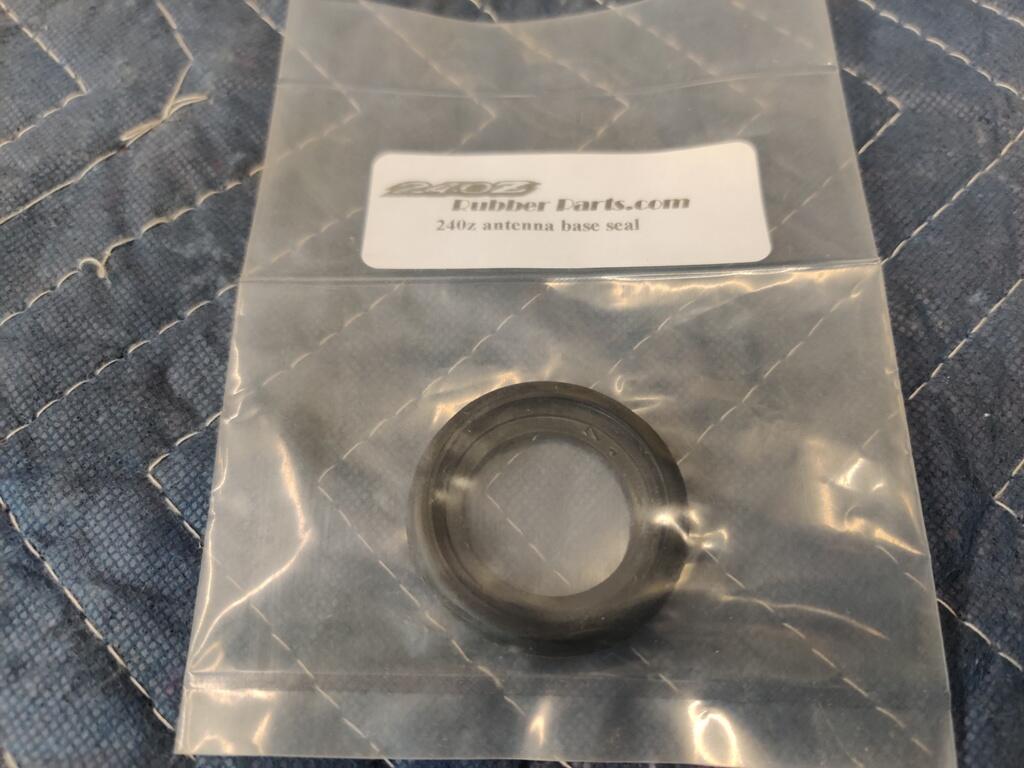
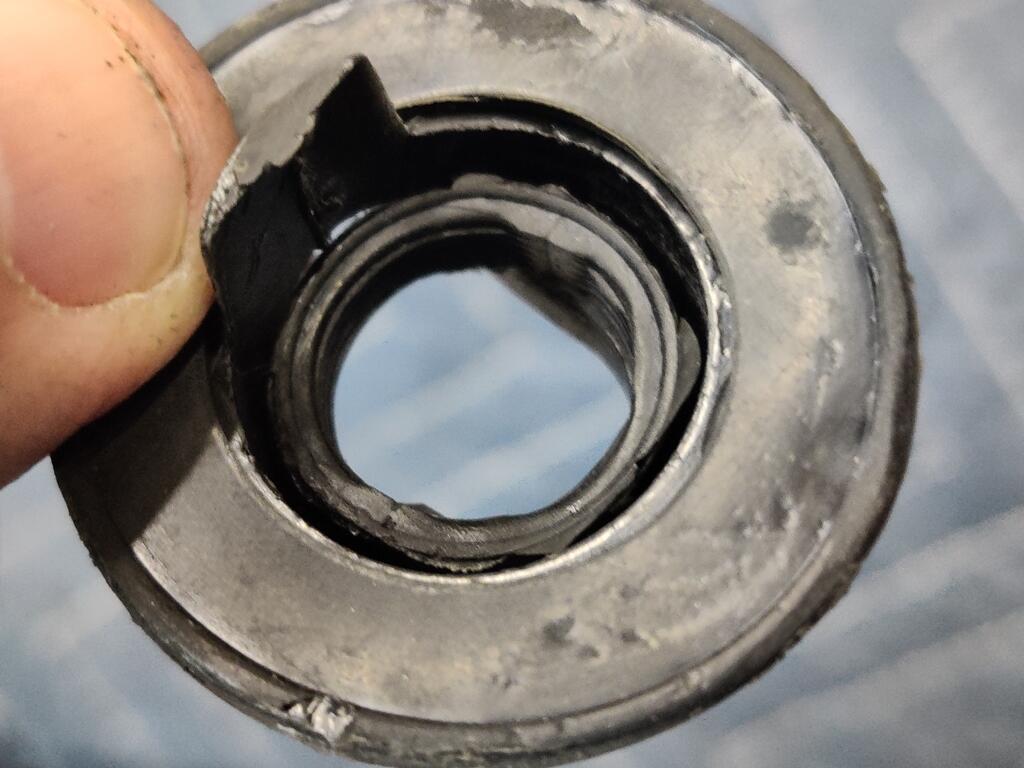
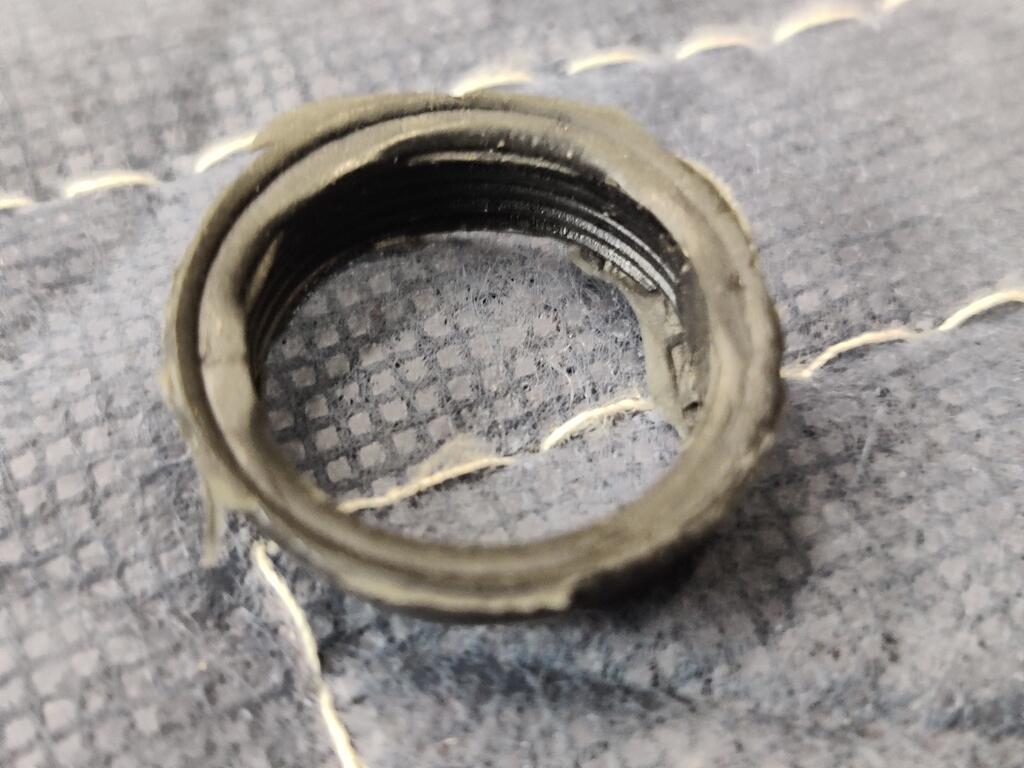
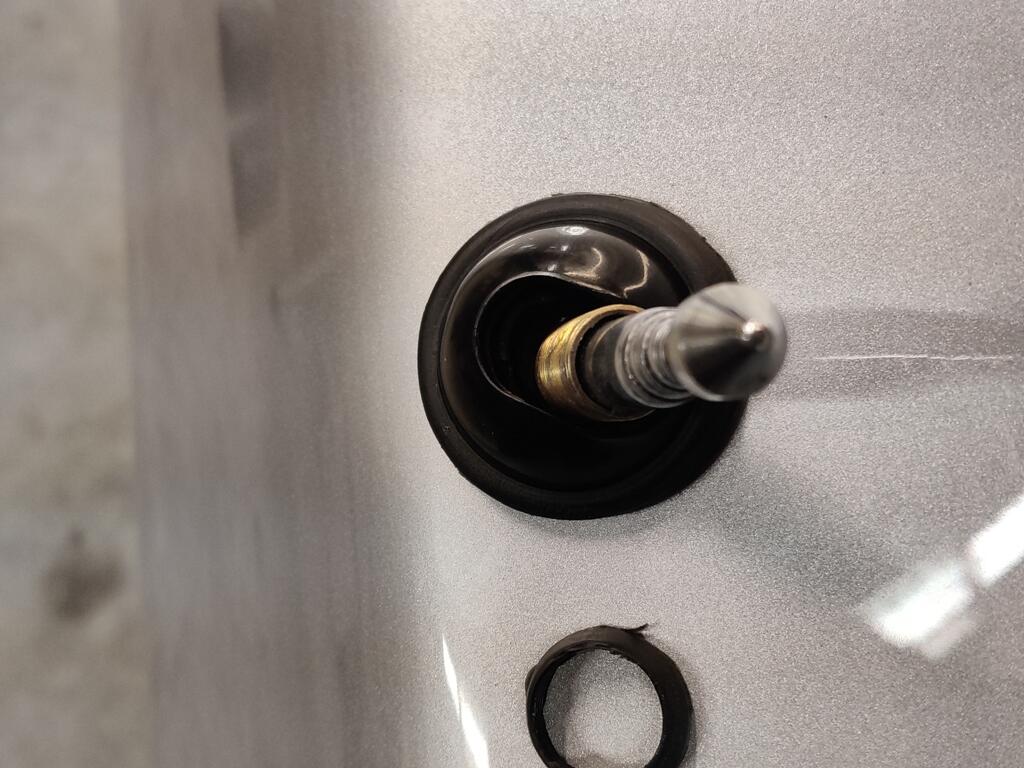
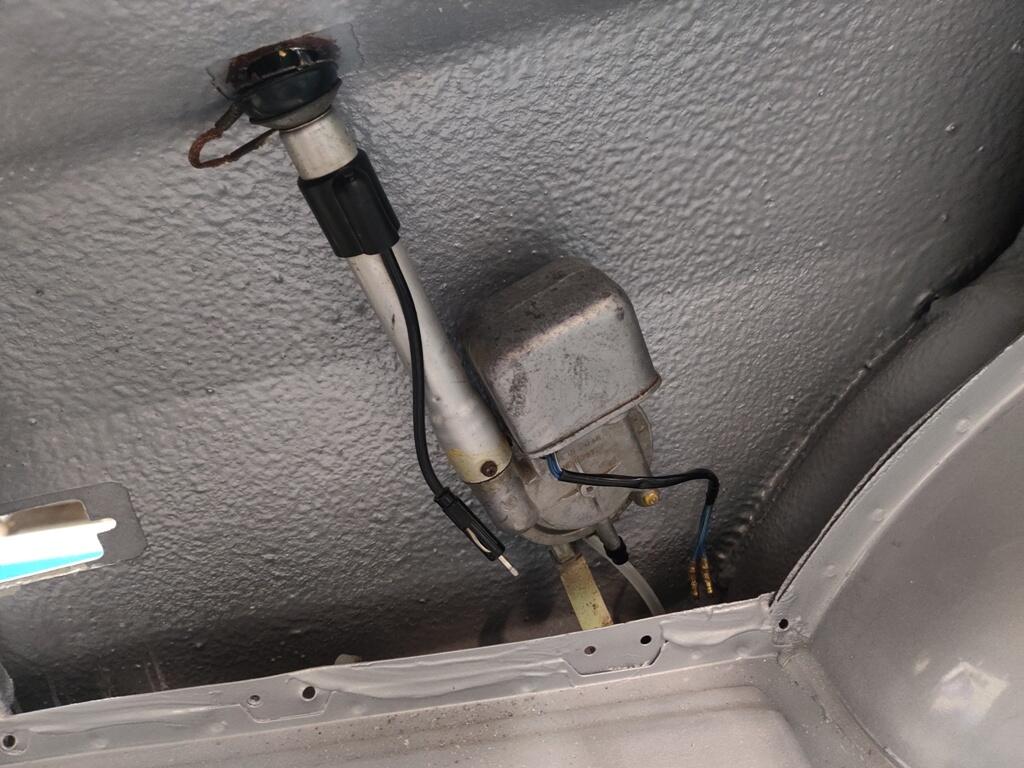
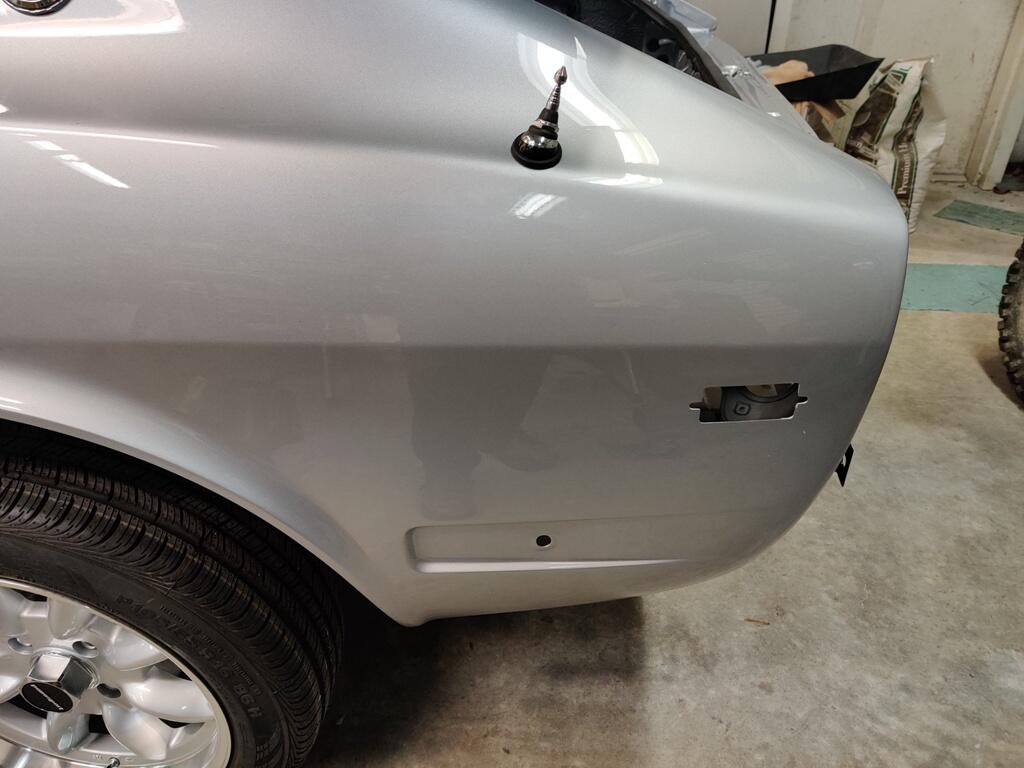
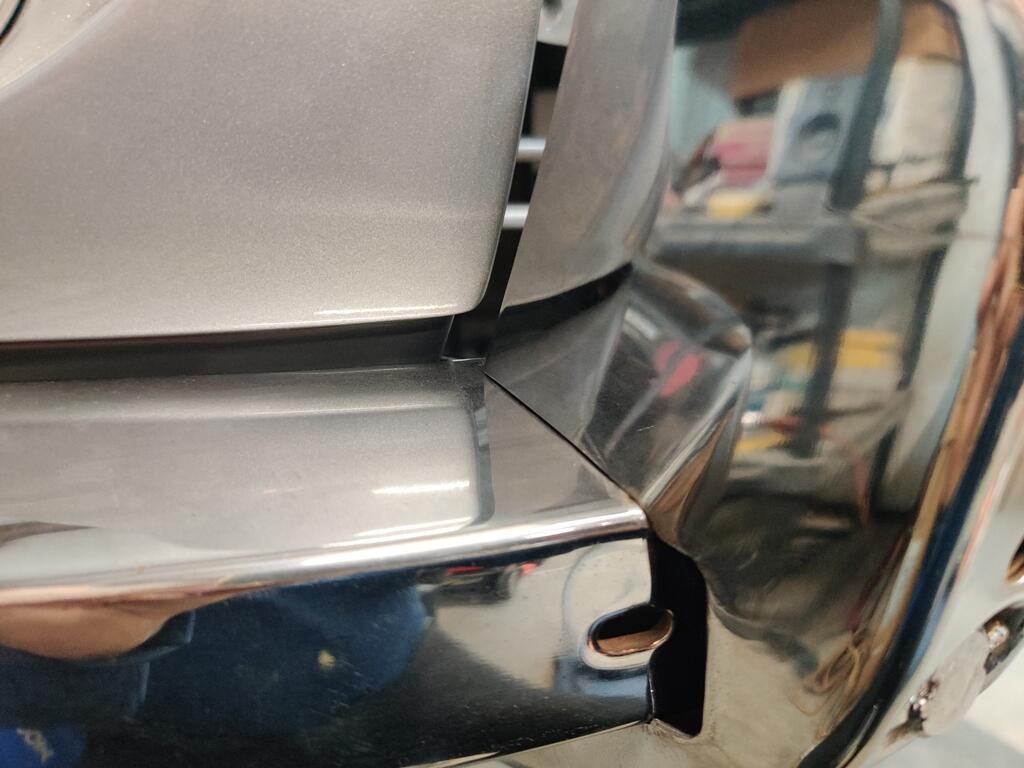
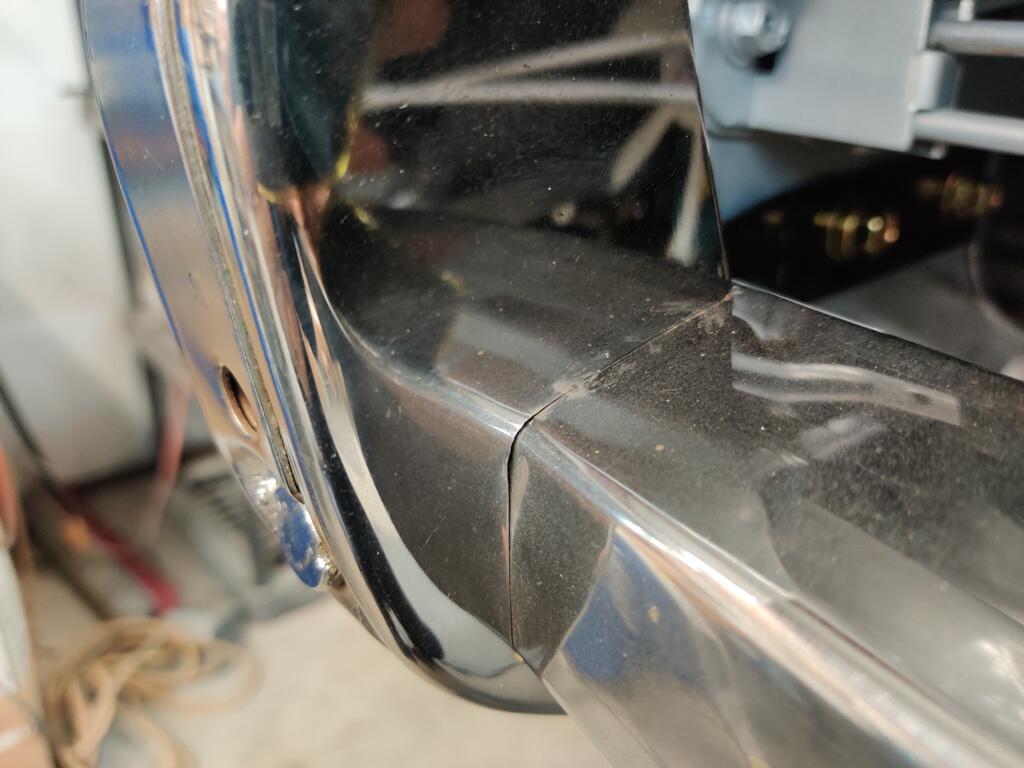
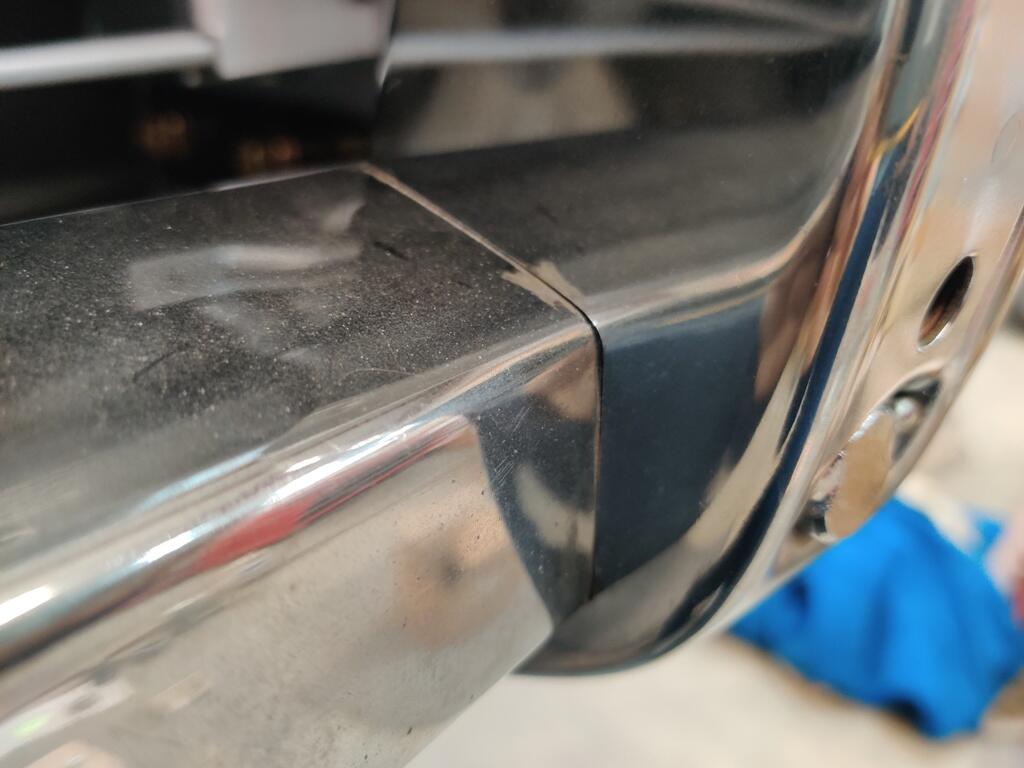
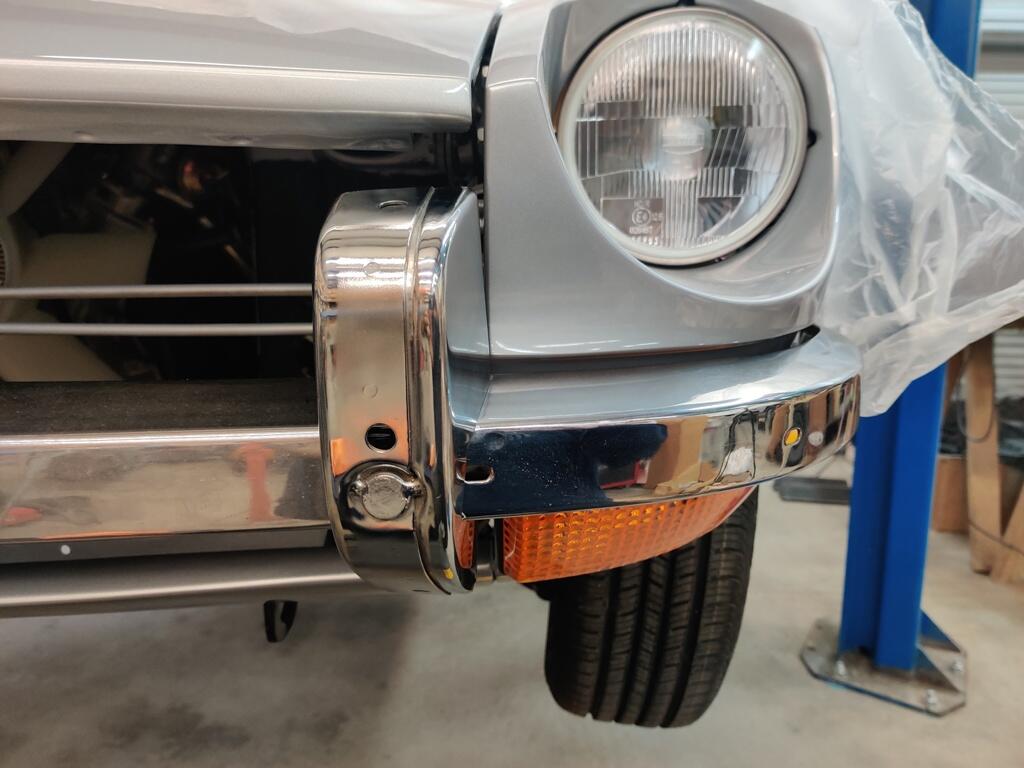
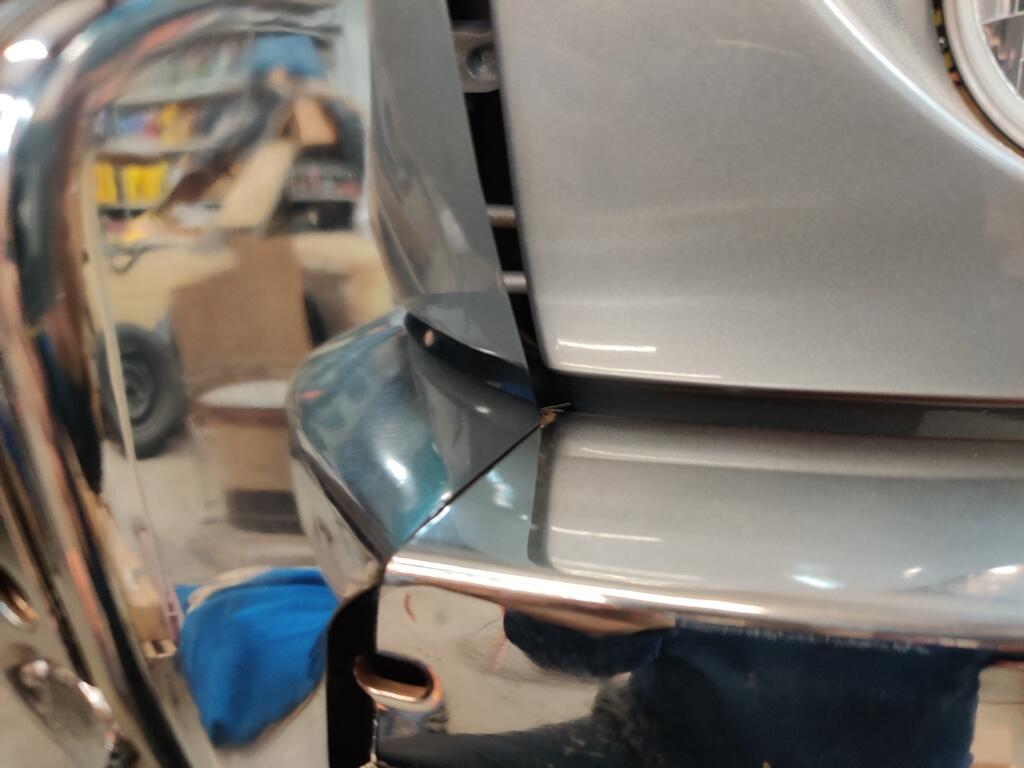
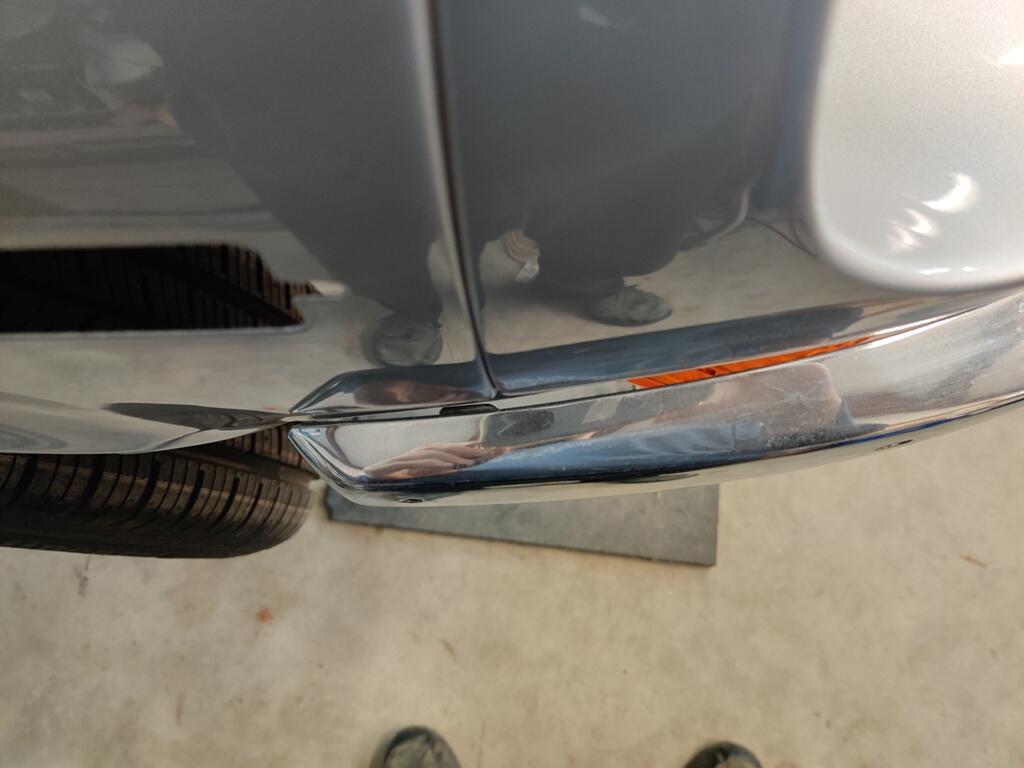
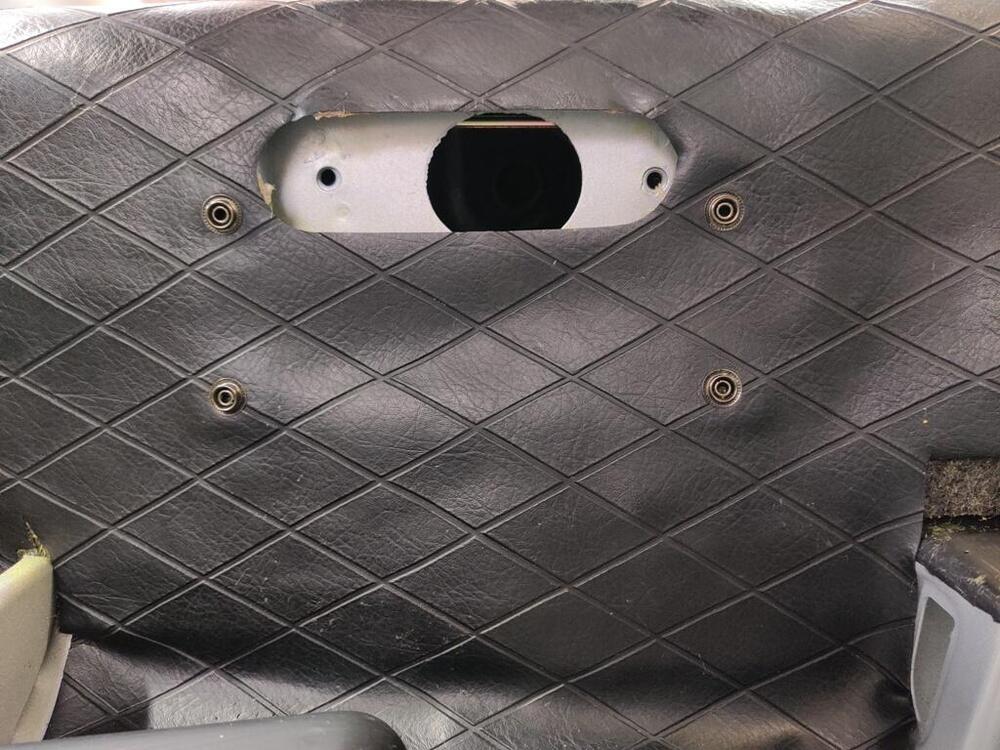
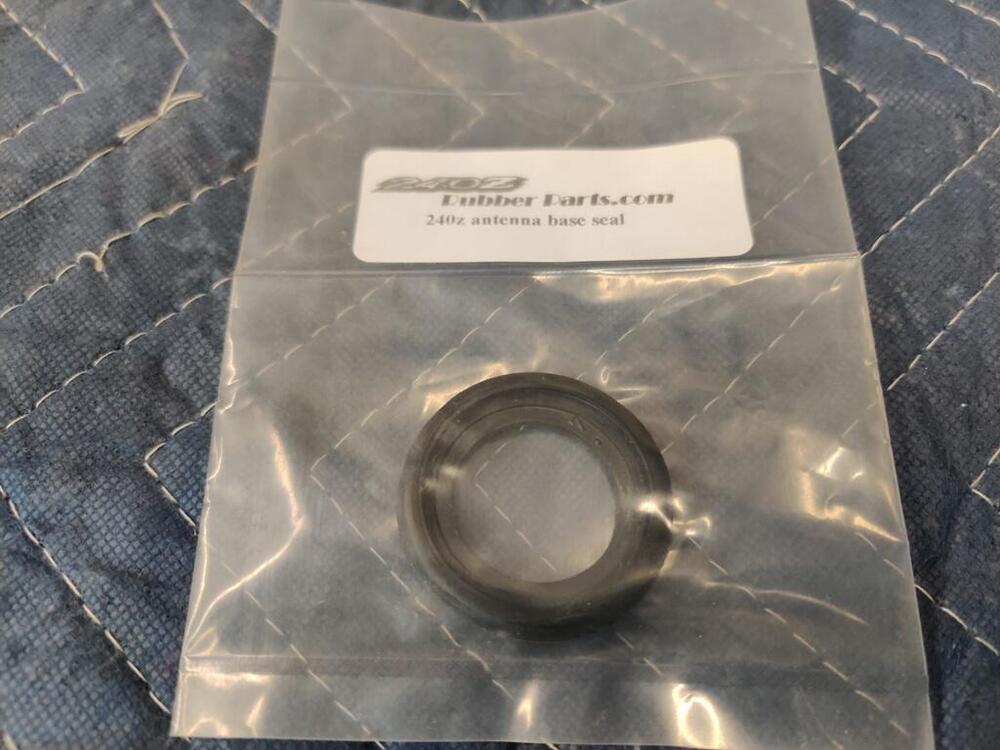
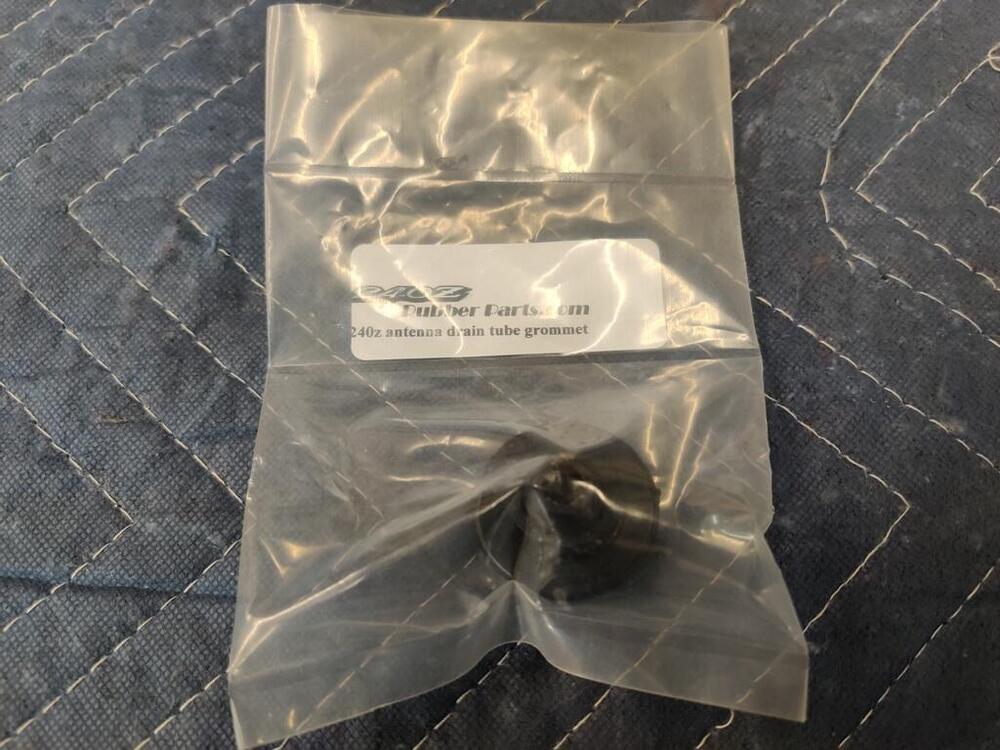
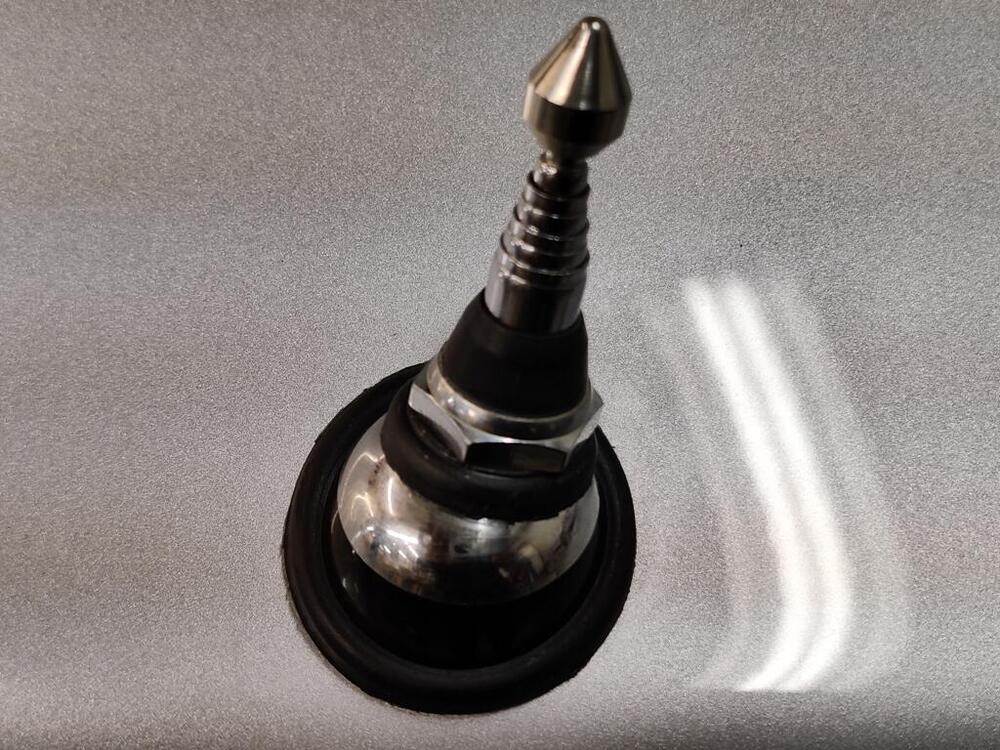
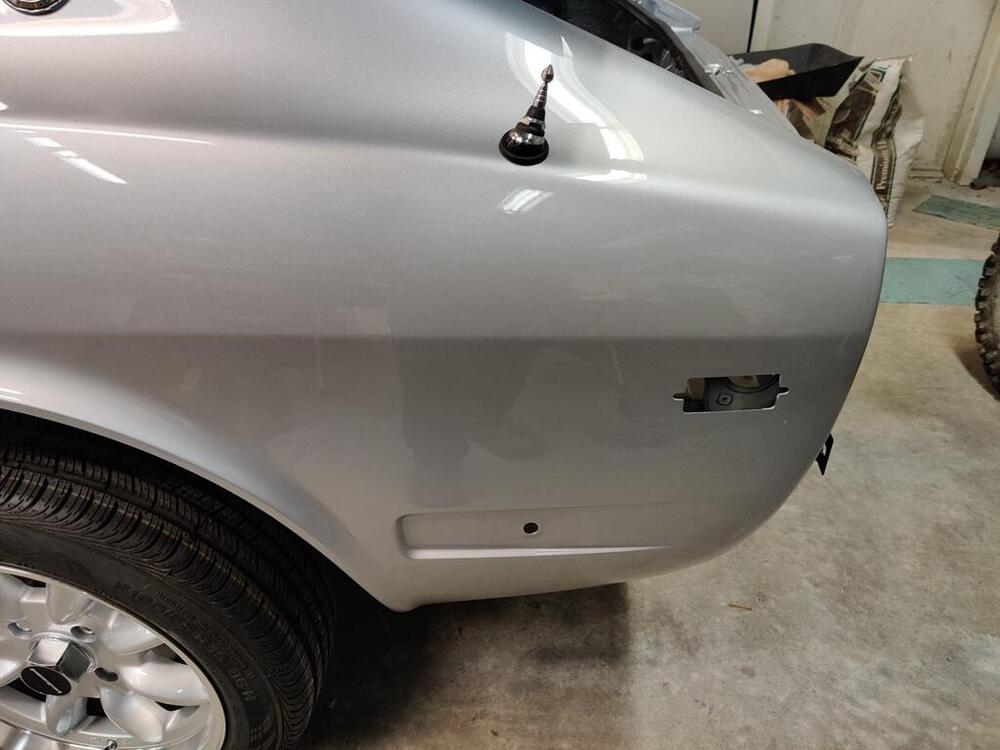
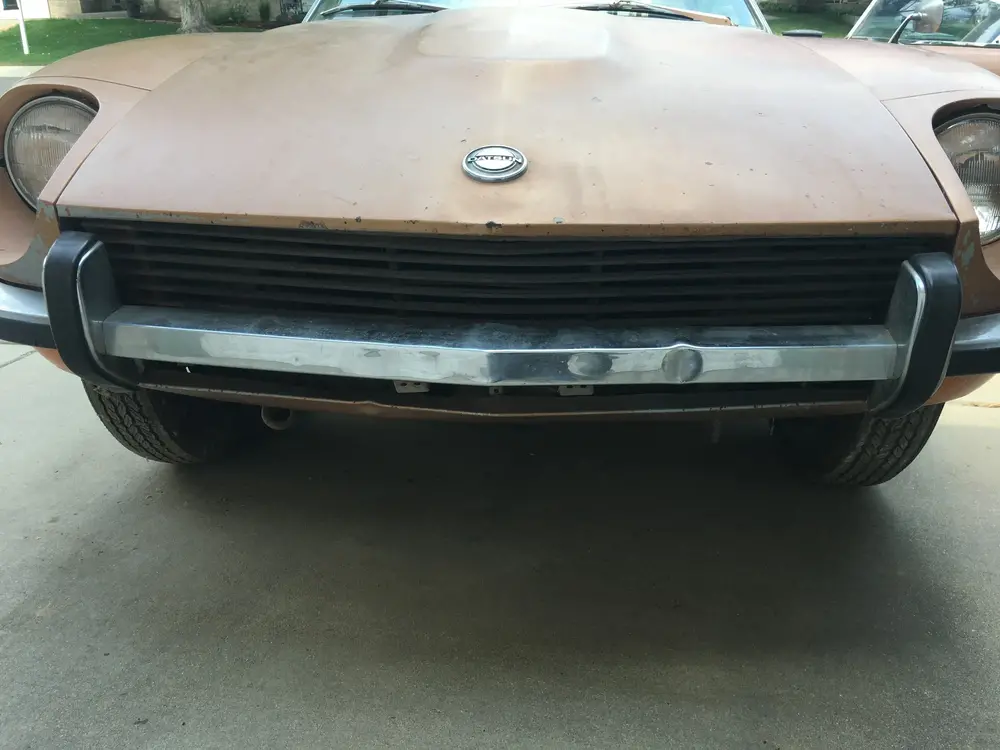
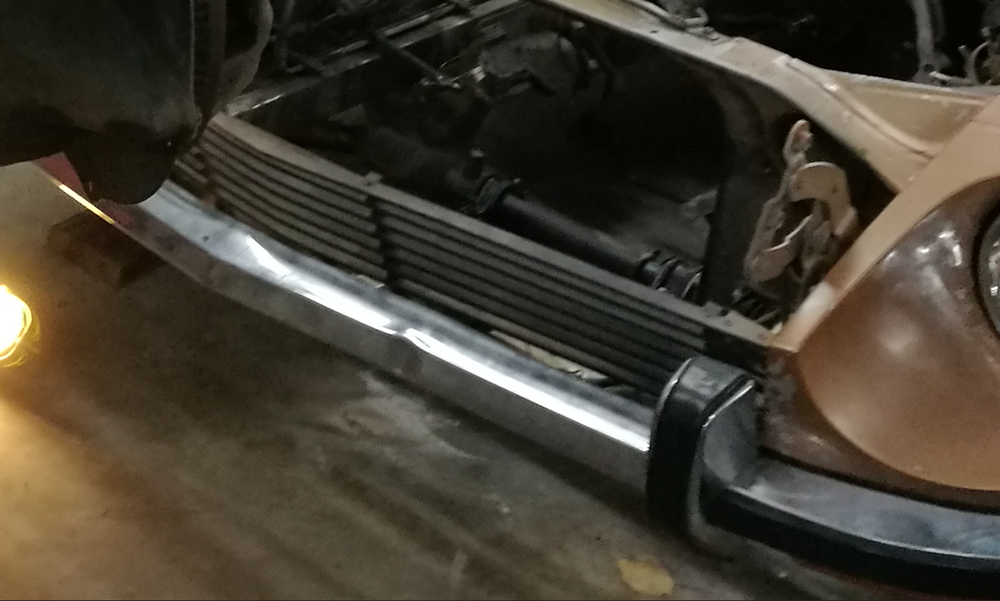
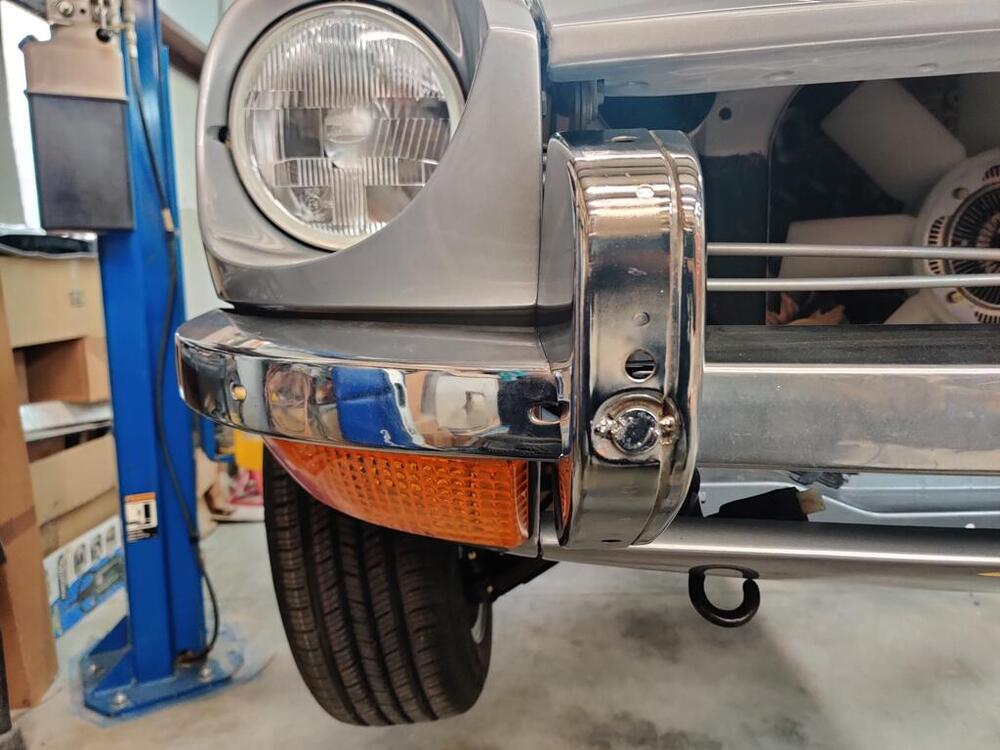
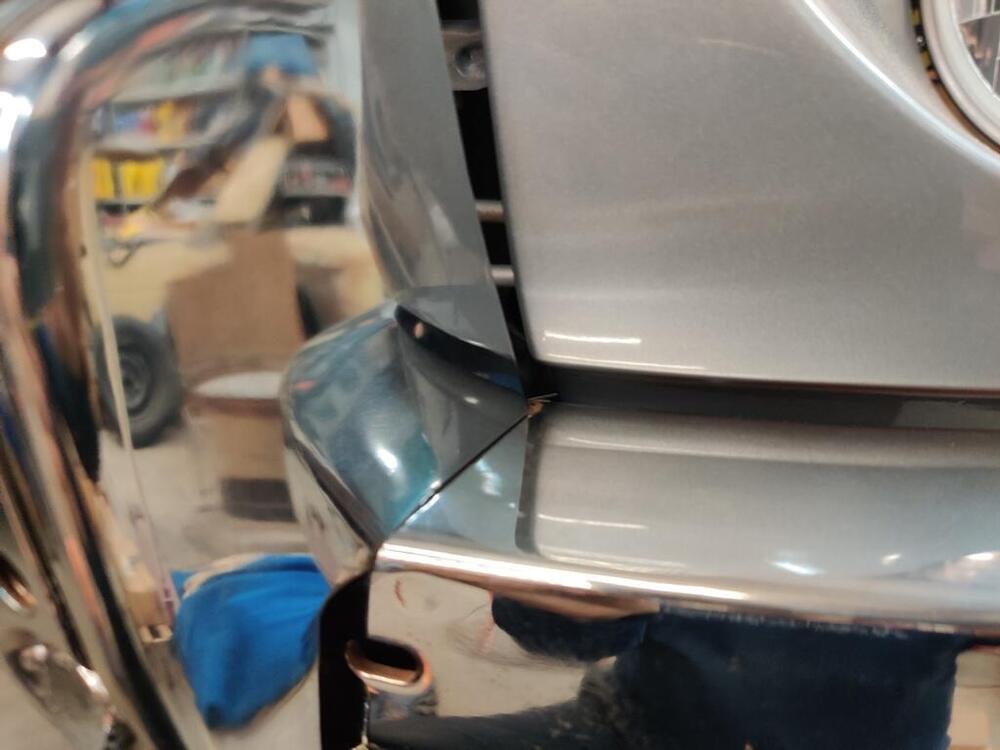
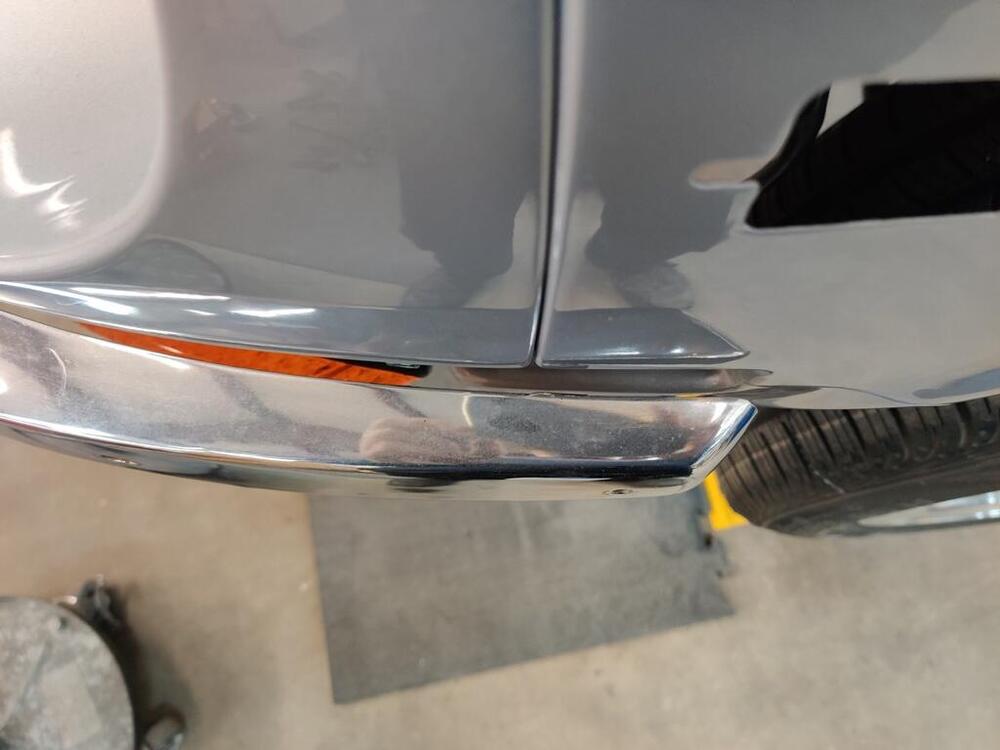
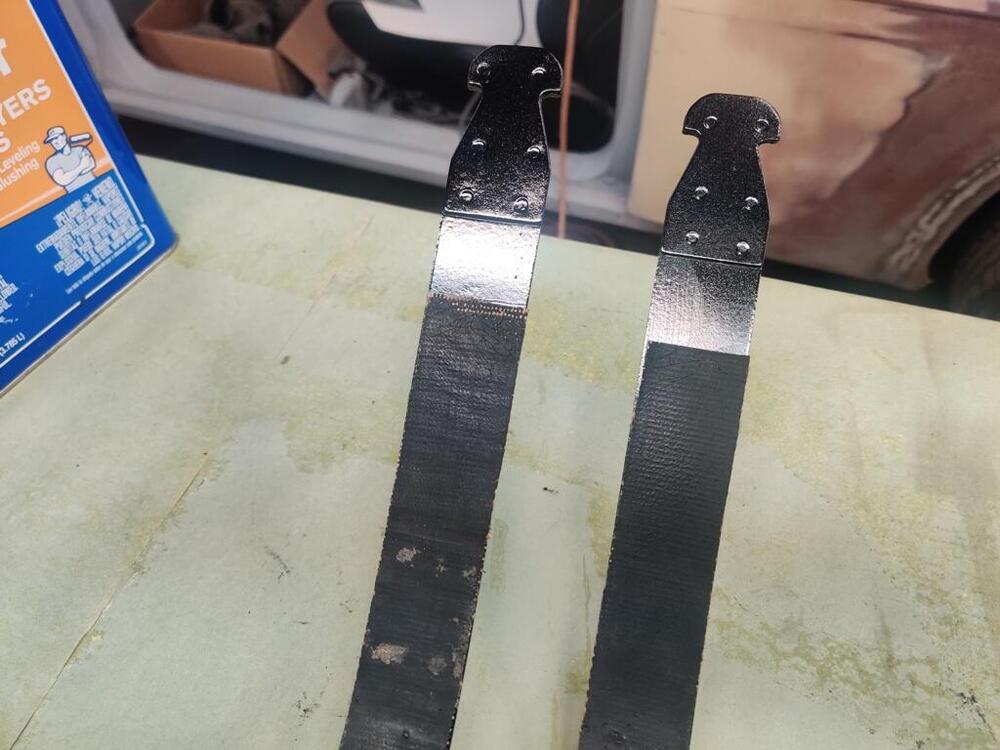
Near the end of my time in the garage today, I started to put the antenna on the car. I started by finding all the relevant parts from 240zrubberparts.com: After some trial and error, I got things assembled, but I do not know where this seal (first pic of three) from the antenna mount kit goes. It kind of fits inside the top, plastic part of the ball, but kind of doesn't either. It appears to have threads on the ID, but they don't match anything. Also, the ID is too large to make sense anywhere that I can see. I sent an email to Steve at 240zRubberParts to see if he knows. I ended up leaving it out for now. The antenna doesn't fit very well to be honest. Where the antenna goes through the body, it is very much an angle. As a result, the round metal concave/convex washer that seats on the grounding strap contacts the underside surface of the quarter panel before the nut on the outside is fully tightened. This causes the plate with the sharp points (other end of the grounding strap) to not seat properly on the underside surface of the quarter panel. Unless I am missing something, I will likely take it apart again and do some grinding on the concave/convex washer to create clearance where it is hitting the body. That will allow the stack to tighten properly, and should allow the plate with the sharp points to fit properly (flat against the underside surface of the quarter panel for its full circumference). For most of the day, I battled with the bumper and the bumper brackets. I had already put many hours into the front bumper because it had some damage. Here is one of the pictures from when it was on auction at Bring-a-Trailer: And here is one I found from the disassembly stage: The impact to the bar looks superficial at first glance, but in addition to the dent, the bar was pushed in a bit for a considerable portion on either side of the dent as well. So, in addition to straightening the dent, I had to pull the bar back forward. And some heat shrinking was necessary as well. Anyway, where I picked up today, the bumper was fitting snug on the right side of the car and too far out on the left side. Every time I bolted the bumper to the brackets on the car, the bumper was slightly offset to the left side of the car. I determine the cause to be that the slots in the front of the bumper brackets were limiting the side to side movement of the bumper. The bumper studs were ramming up against the sides of the slots. To correct, I had to remove the bumper brackets from the car and tweak them in my vice so that the slots "moved" toward the right side of the car. Shifting the slots to the right side allowed the bumper to shift to the right as well. I also used a hand held belt sander to improve the fit of the bumper uprights to the main bar. After several hours examining, bending, straightening, grinding, a little more hammer and dolly work on the bumper, etc. I got it to this point: Finally, the bumper is centered and I don't have to apply excessive pressure on the left side of the bumper to bring it to its proper mounting location. I have a bit more work to do on the rear bumper, and then I can package all of the bumper pieces up and send them off for re-chroming.


-
Amazing. I wish I could find someone that good.
-
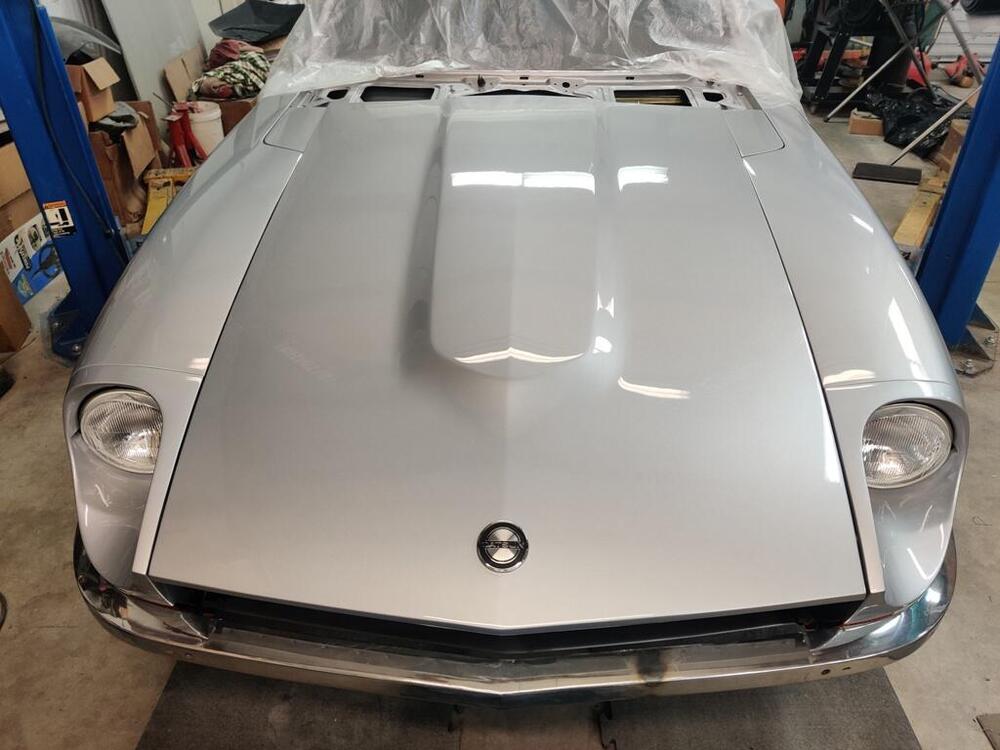
So, he was able to blend new silver paint onto the old and match it? I didn't think that was possible.
-
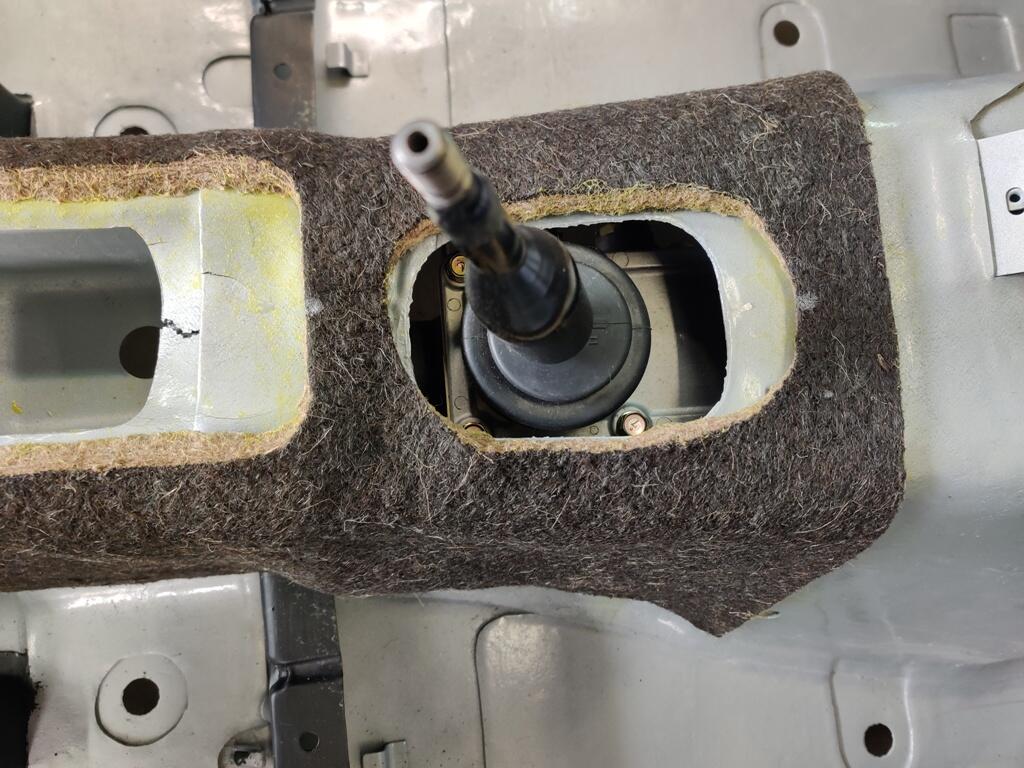
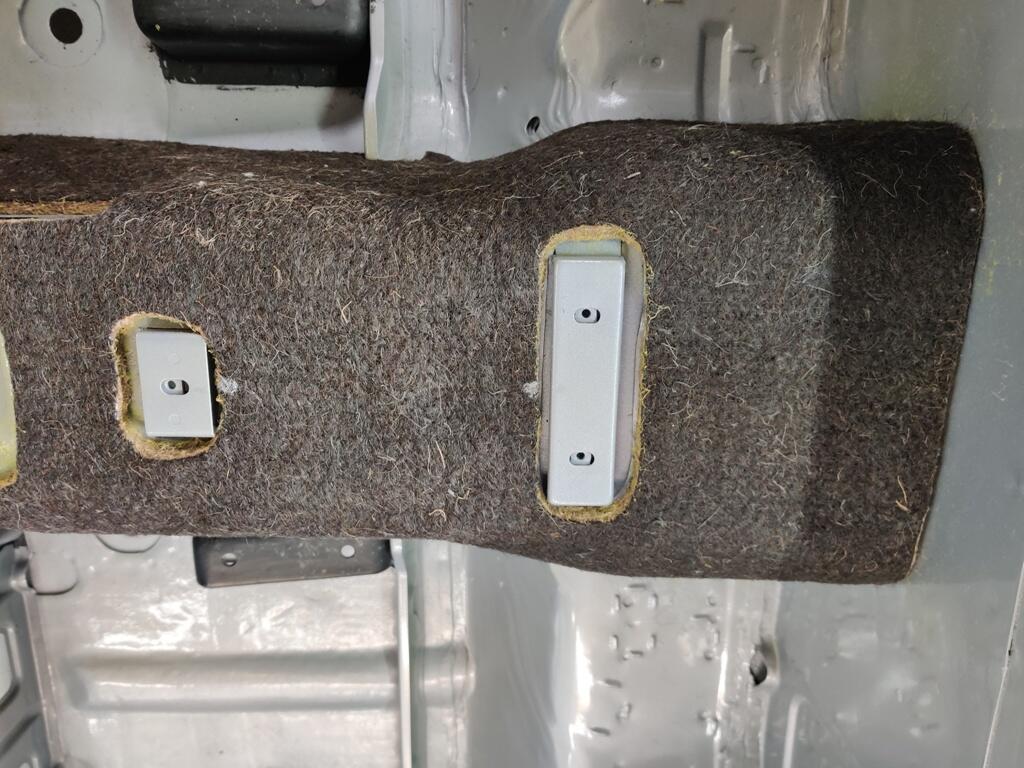
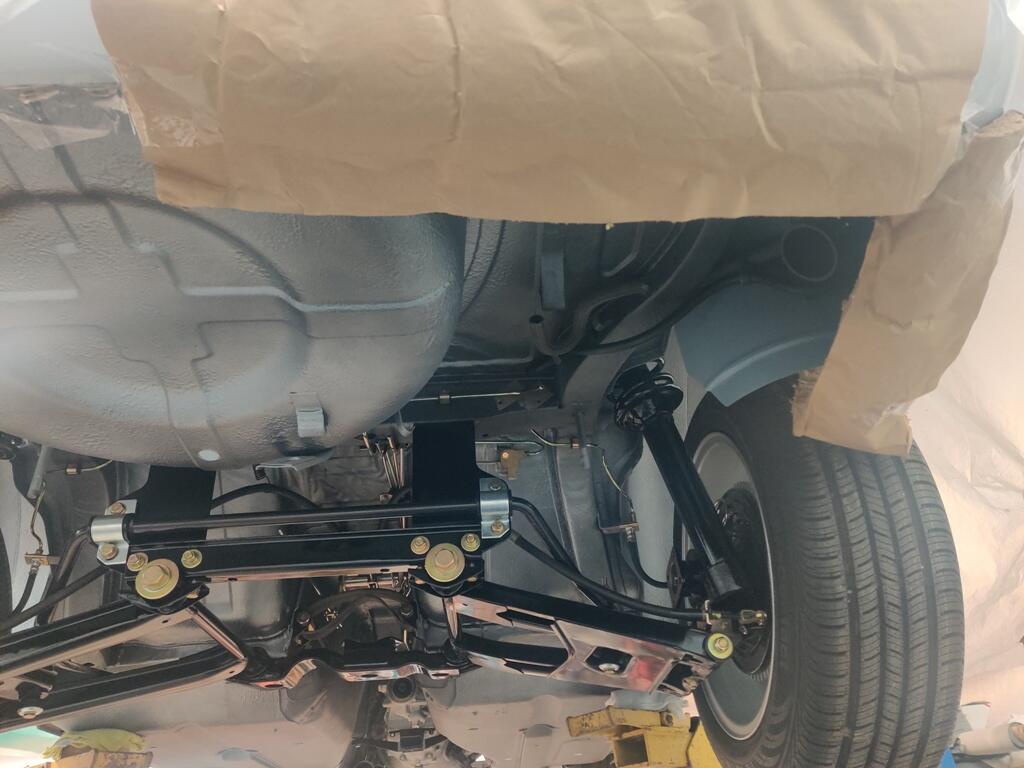
That plate with the hole in it is a spacer that goes between the transmission metal mount and the transmission isolator mount. Those grommets look like aftermarket. Might be suitable for the heater supply and return hoses where they go through the firewall.
-
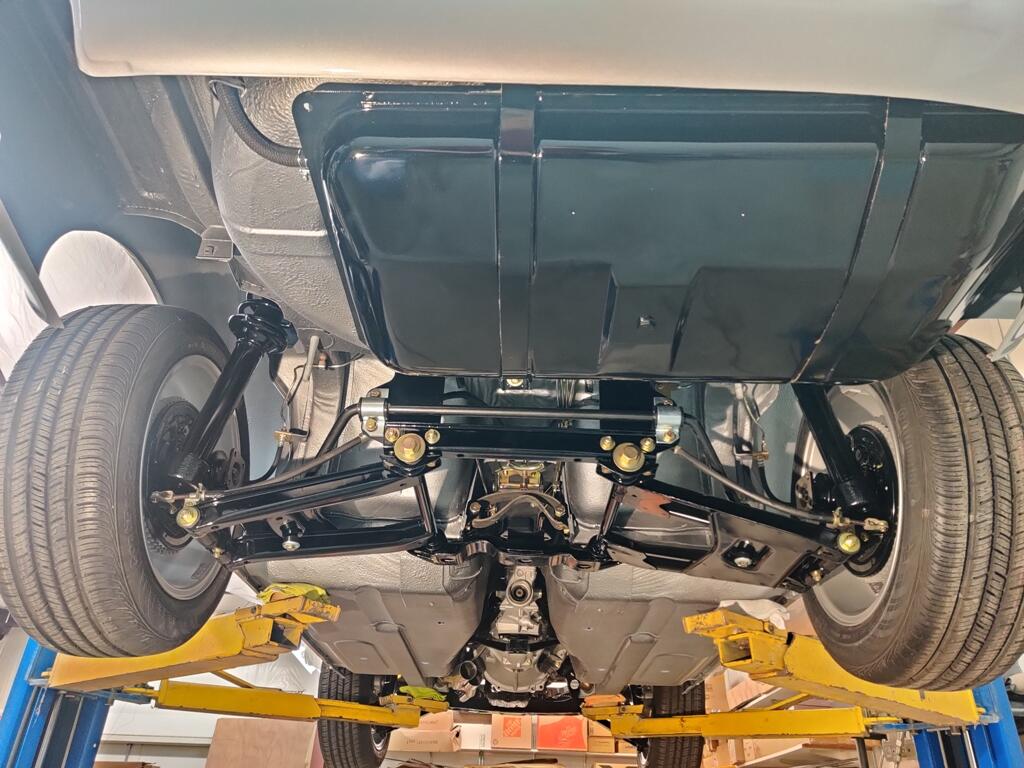
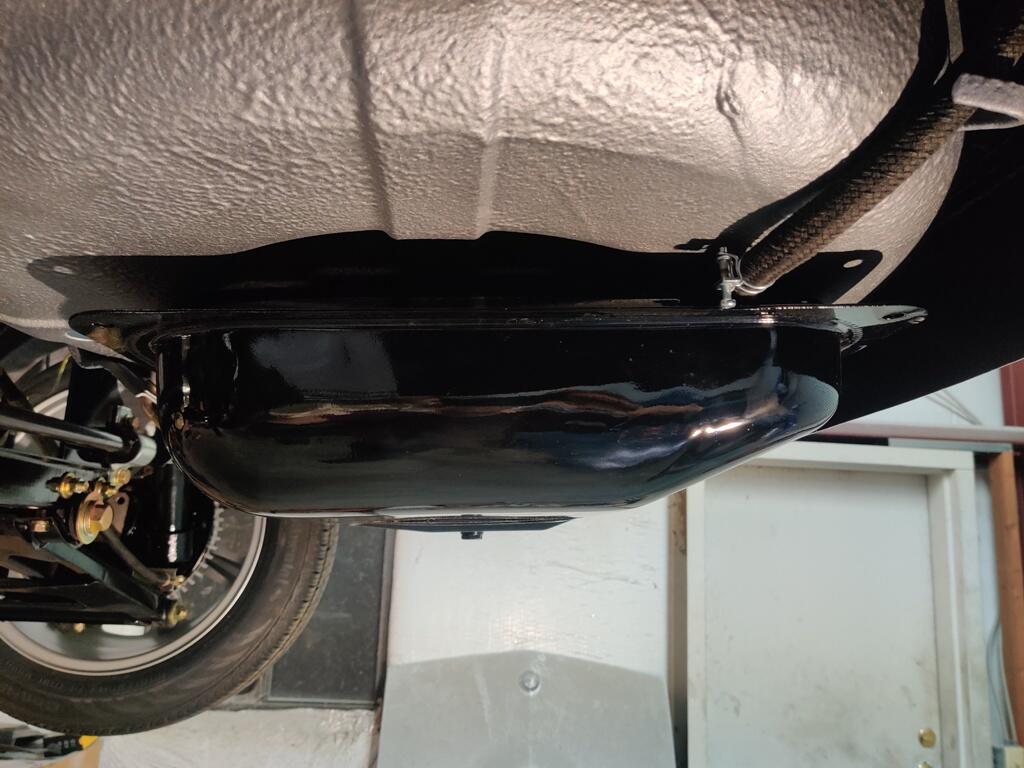
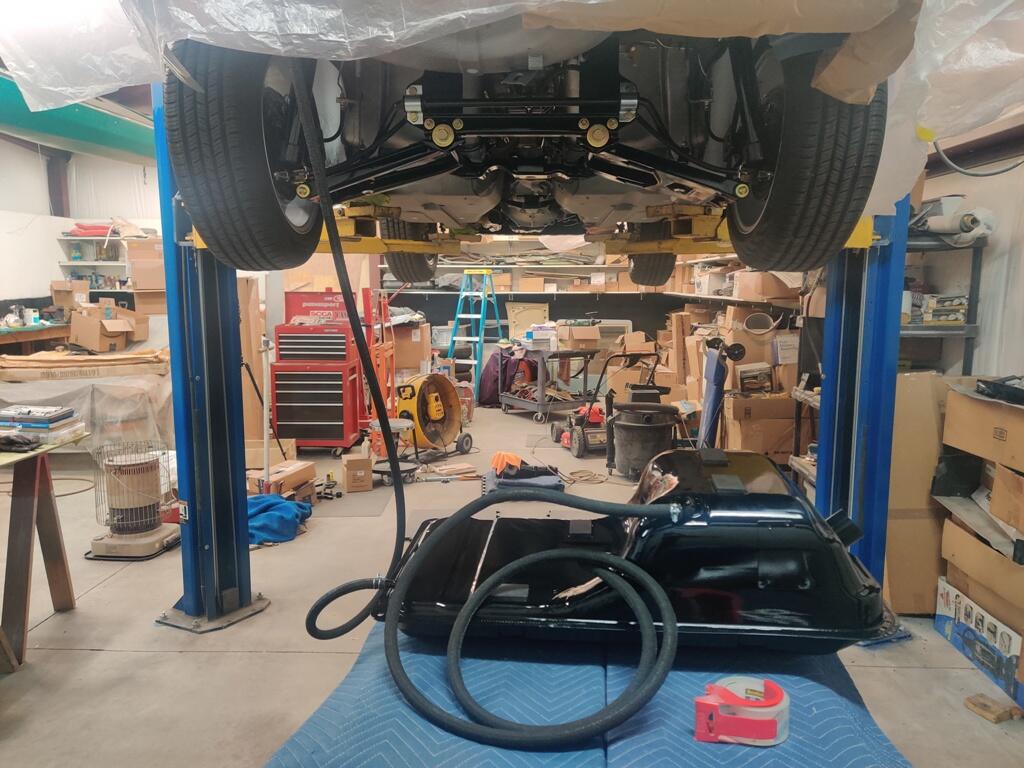
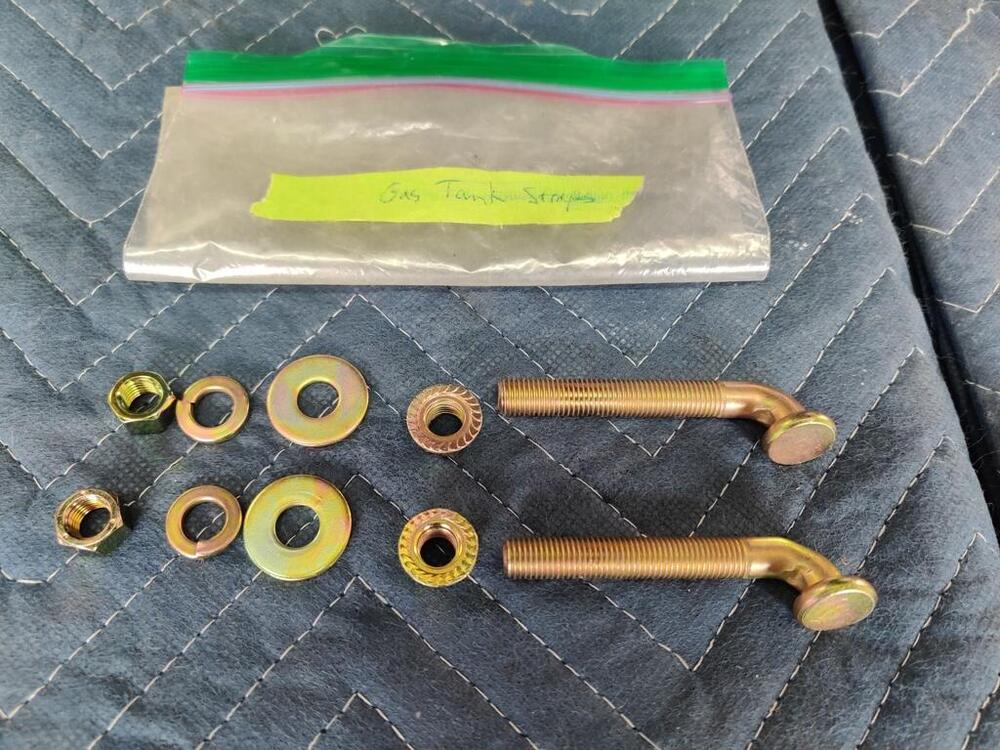
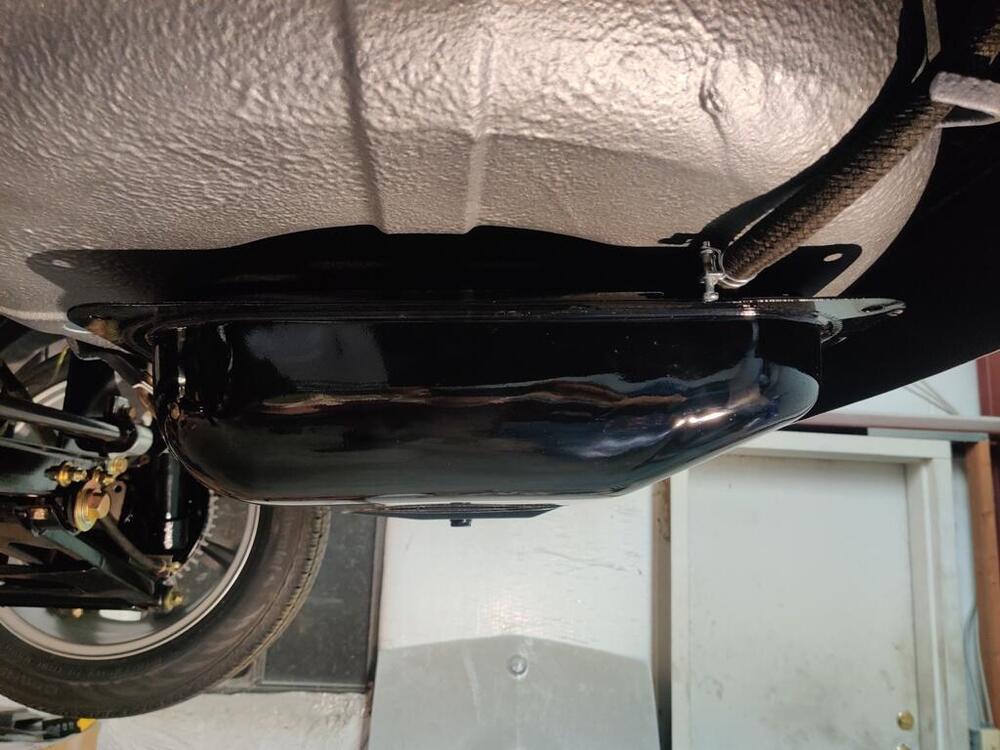
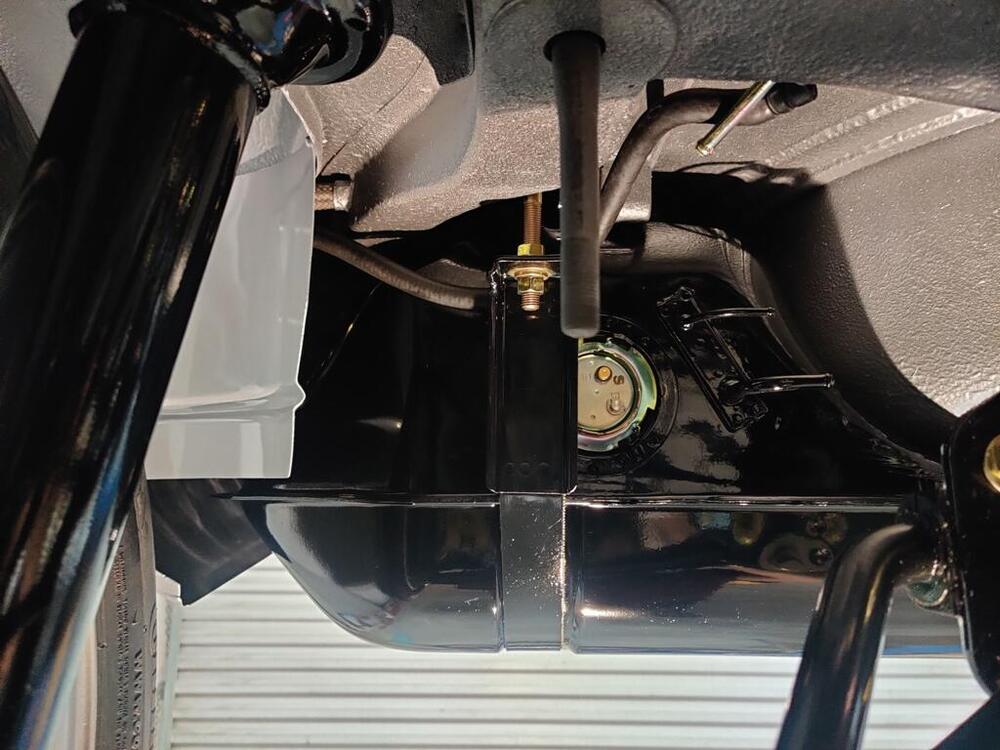
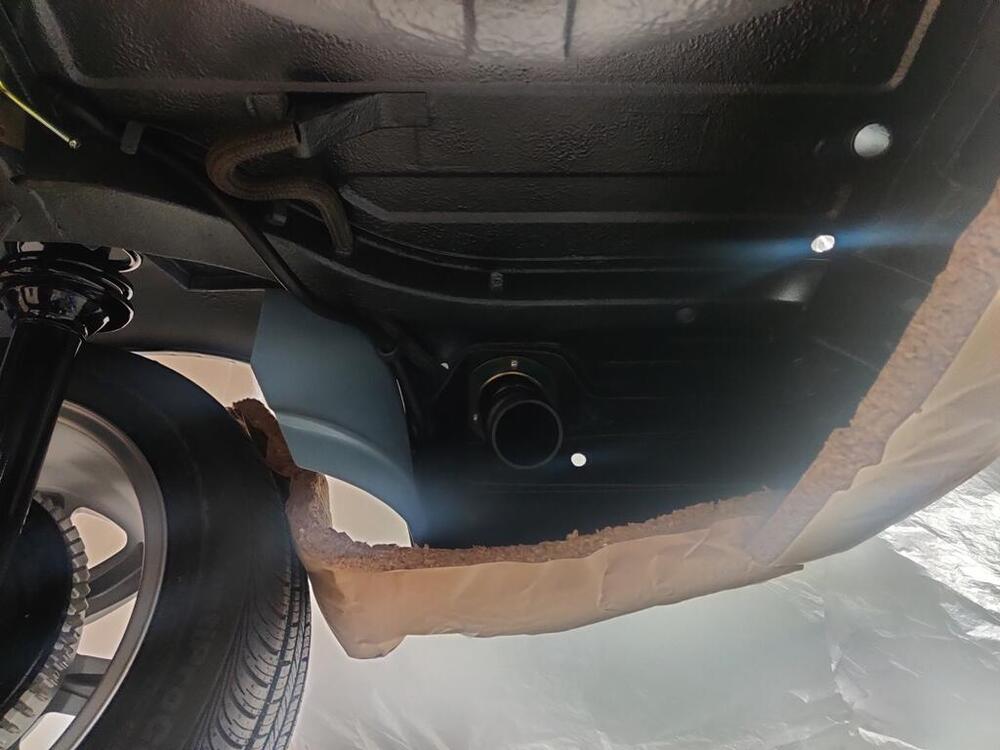
This past weekend, I only had a few hours available to work on the car. I finished up the kick panels and I installed the gas tank. Installing the gas tank by oneself is quite the challenge. Since my main fuel hose is 53 plus years old, I had to heat it with a heat gun to get it to be flexible for the installation. Heating it, and then trying to lift the gas tank into place and secure the tank straps... is difficult to do by oneself. On the third try, I was successful! And, since I knew from previous experience that without protective padding in various places, everything gets scratched to hell, I made sure to protect everything by taping into place (covering the bottom edges of both the tail light panel and quarter panel) pieces of thick padding. This protects from bumps and scrapes while attempting to maneuver the tank where it needs to go to feed the inlet to the main hose. The finished kick panels - note that the factory finish is flat black - not semi-gloss black: Gas tank:


-
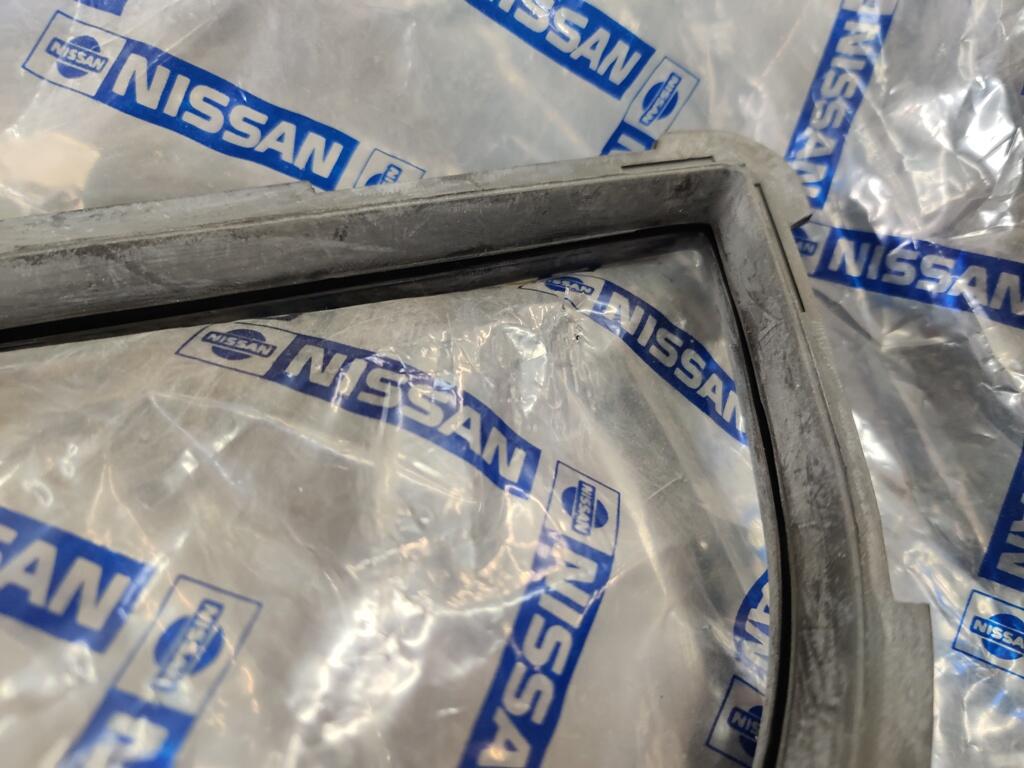
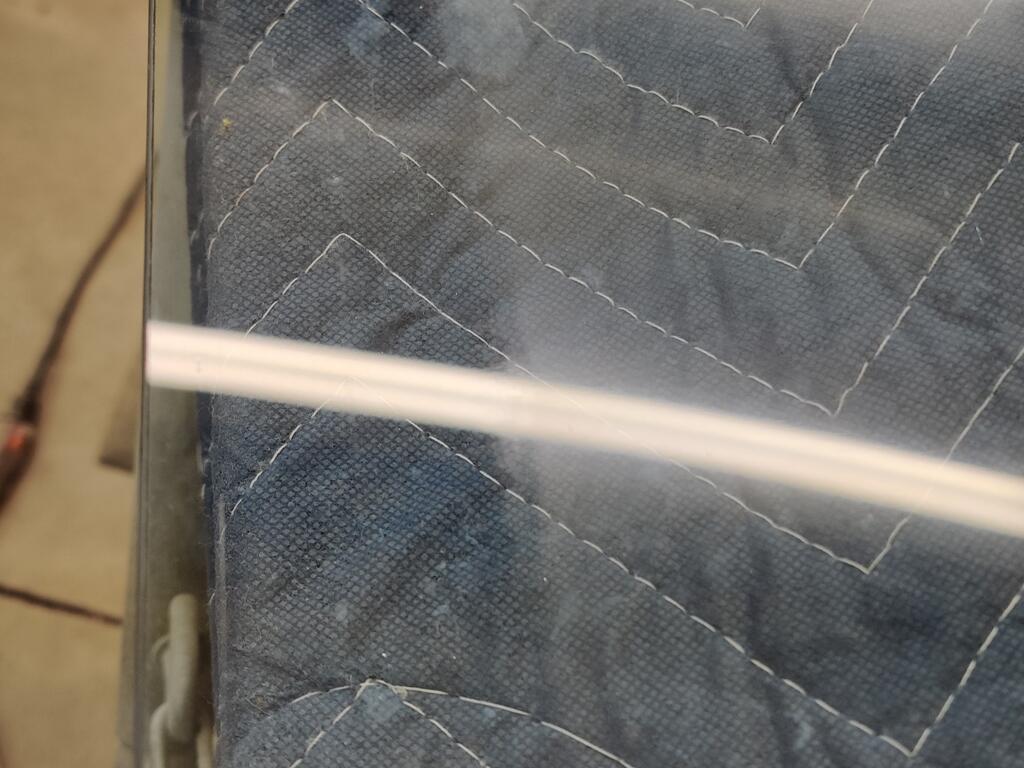
At first I was going to say aftermath of Mt St Helens, but that looks painted on instead of deposited from above. And big eruption was 1980. Maybe a movie set? I see something interesting on the Z. I have never seen it before other than on my first Z and I thought it was something added by the owner - not a factory item. There is a rubber seal or weather strip just above and in contact with the the window frame of the door.
-
The 3M website says "Fast-curing formula offers a 10 to 20 minute working time". I found that it starts hardening that quickly, but I would call the working time more like double that.
-
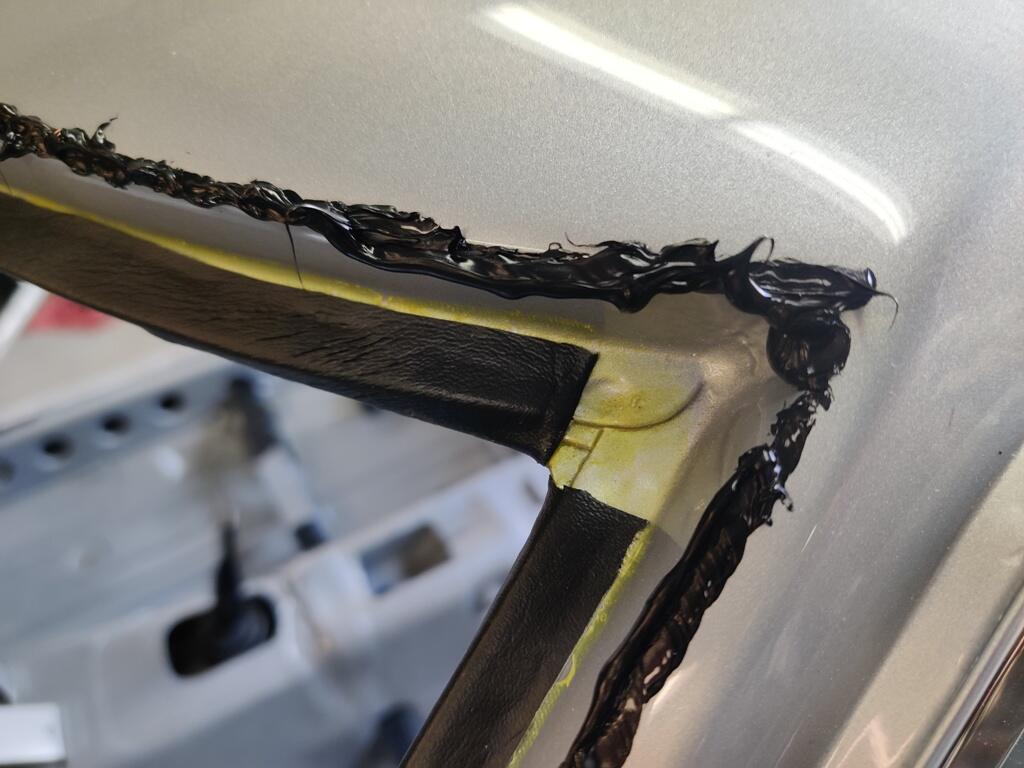
I installed my windshield just days ago. If you look closely at the picture in the factory workshop manual to see where sealant is supposed to be applied, it is on edge of the downward turn from the outside surface of the car body, not on the pinch weld. In theory, when the weather strip seats, adhesive flows to both sides of that corner. A couple of pictures from my install, and yes, it was a complete mess, but only on the outside, and everywhere that any that got on my gloves migrated to as well. I used this 3M adhesive. This 3M adhesive remover removes it easily without hurting the vinyl or paint.


-
I did run into that recently. My seals were OEM, and sourced by the previous owner of the car back in the early 90's. I was hesitant to cut them off, so I just dealt with them, but they were troublesome to deal with. Ultimately, they just sort of, pushed outwards where the frame sat against them, but didn't stop anything from fitting properly - for me.

-
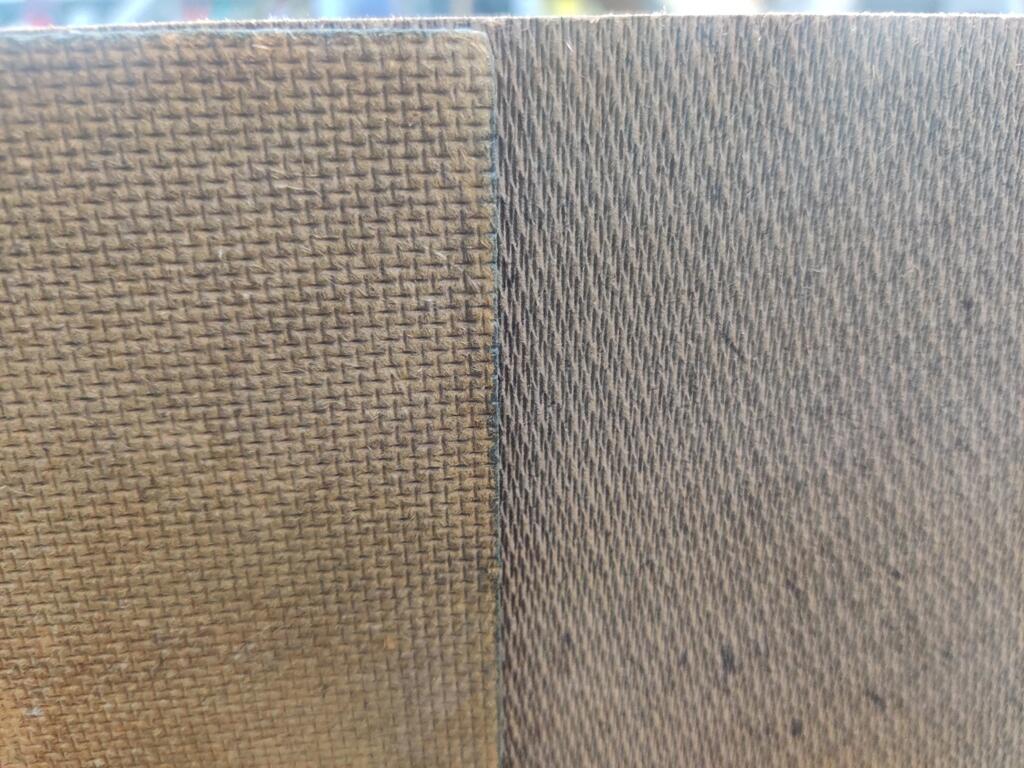
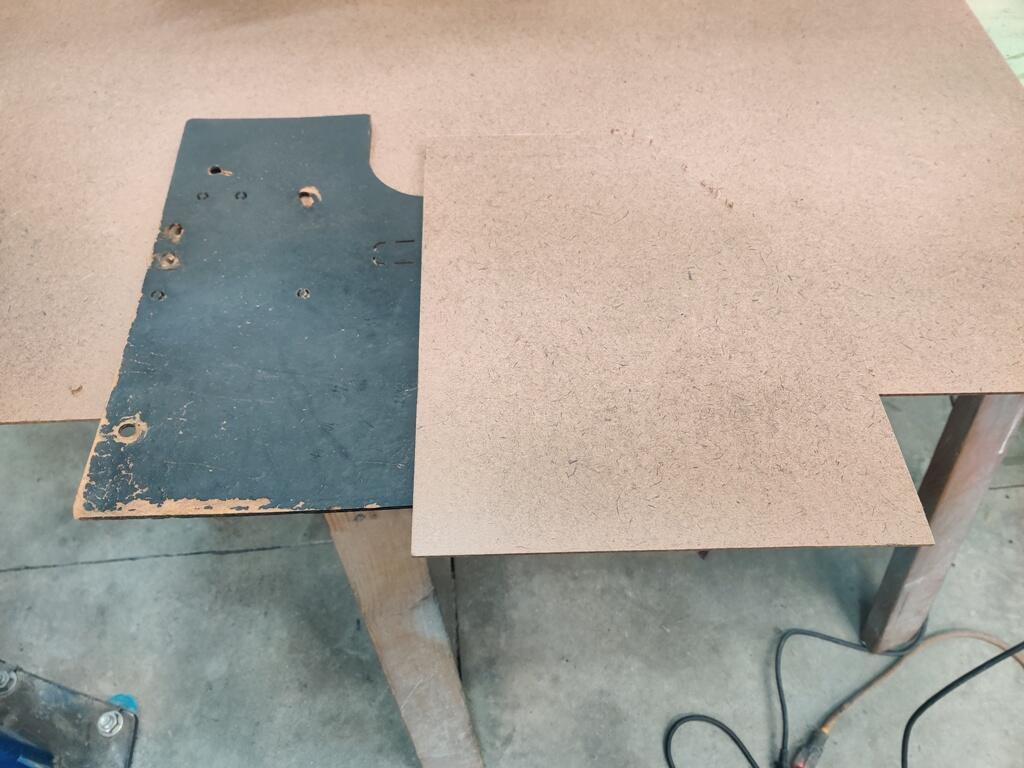
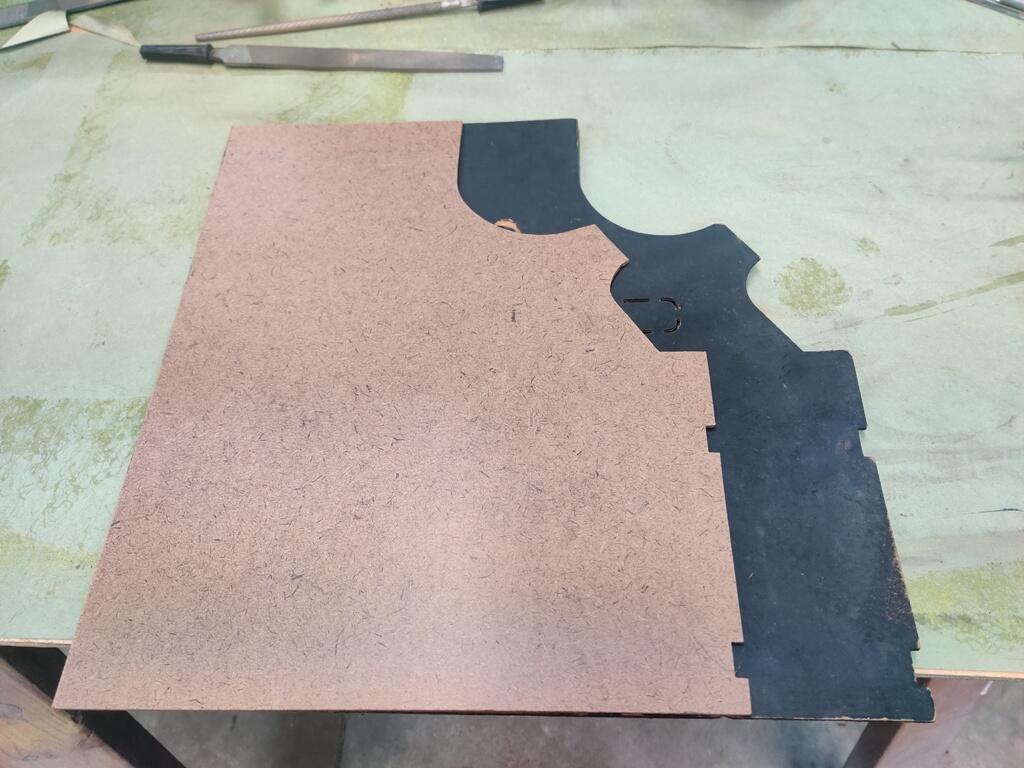
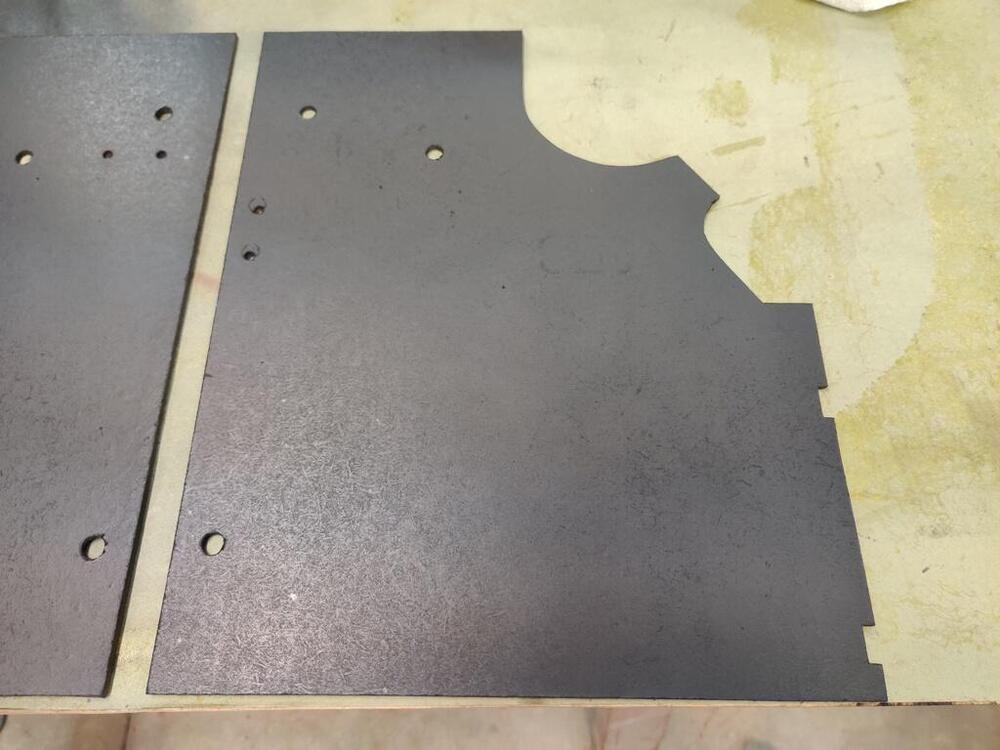
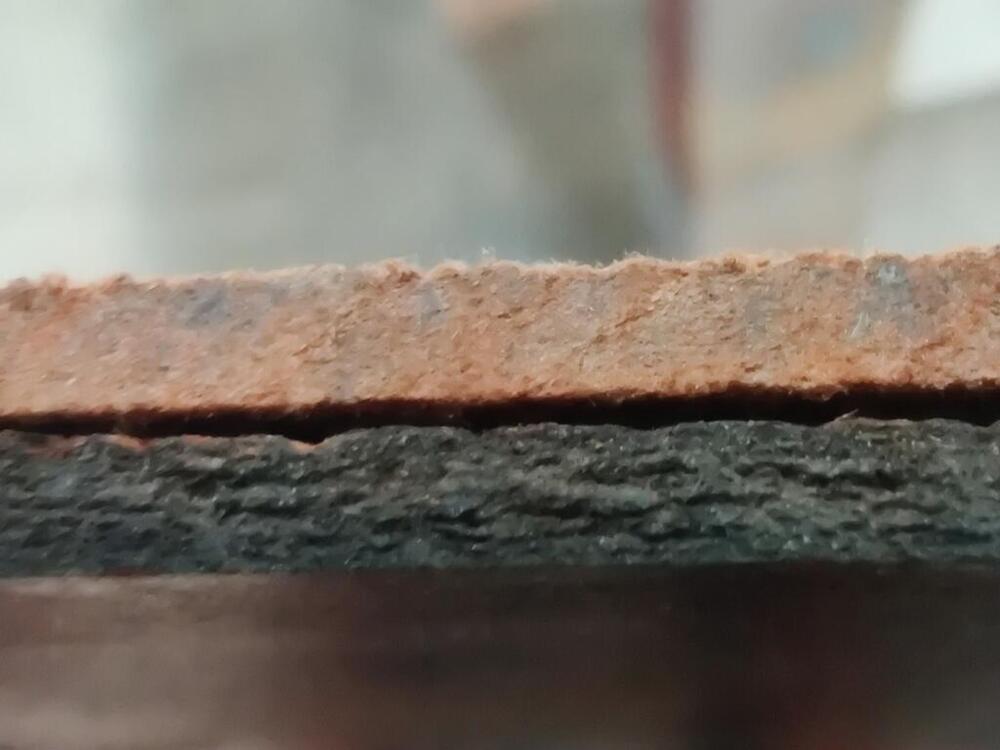
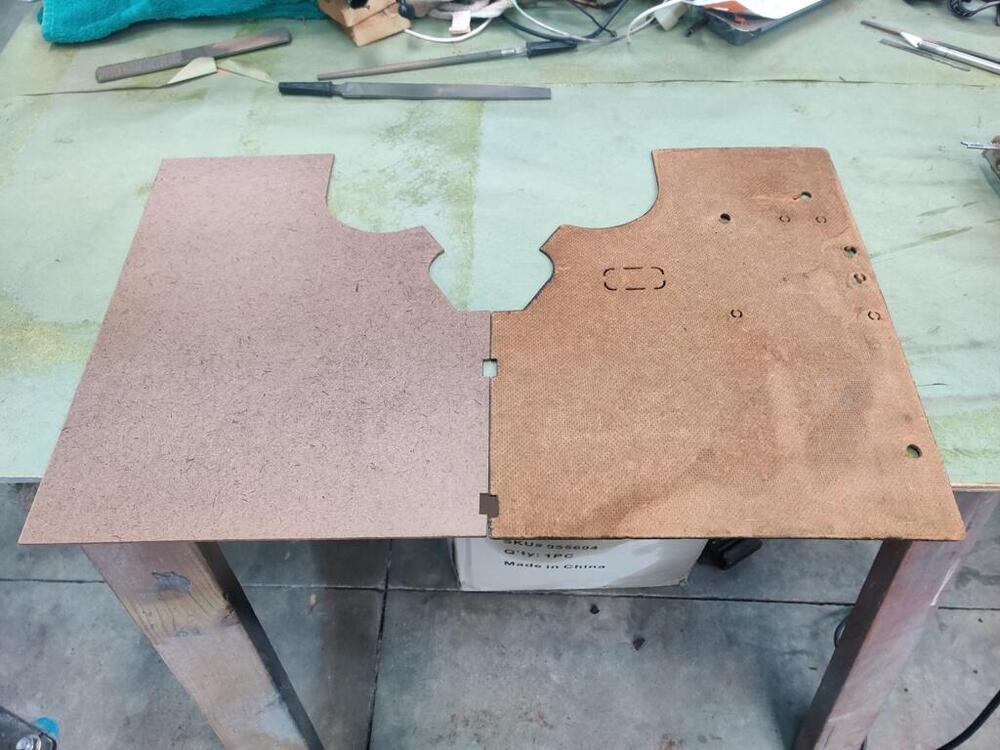
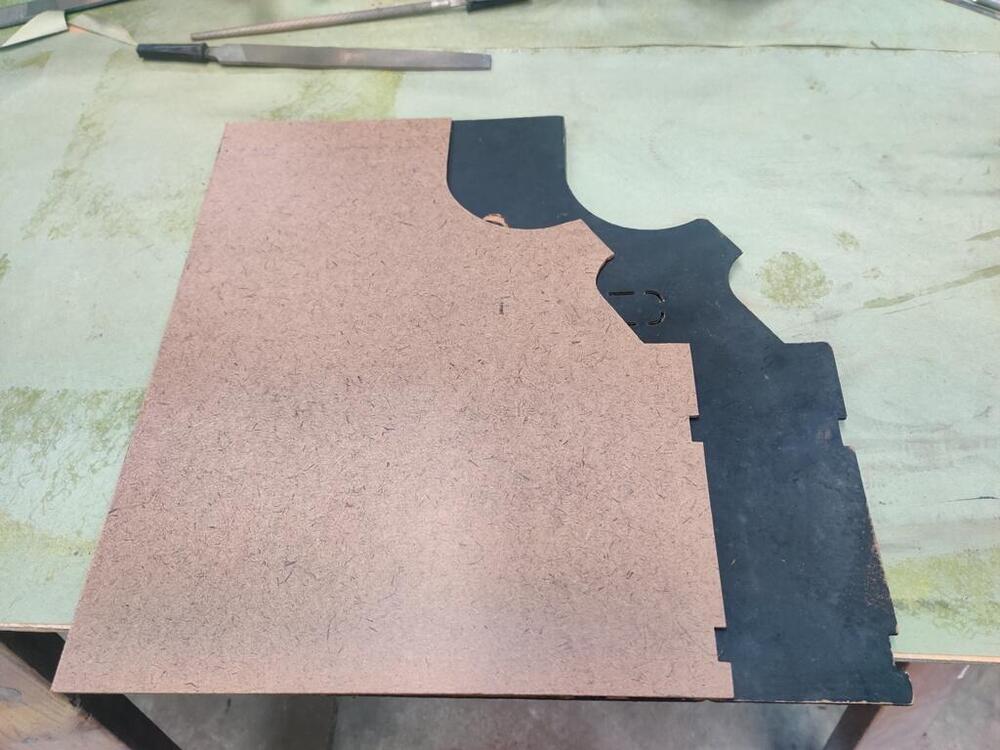
Spending $7.00 at the local Home Depot, I picked up a "tempered hardboard" which is much closer to the specification of the original kick panel. Like the original, it has a textured side, and a smooth side. In under an hour, I was able to cut a new one from the board I bought, using the original as a pattern. I used my X-ACTO knife to score the smooth surface. Then I used my Bosch jig saw to cut it out. Though not planned, I found that scoring the smooth surface aided the cutting. The jig saw can leave a more jagged edge than is desired, but the scoring facilitated making the edge "crisp". After cutting, I used various files to adjust the edges to final shape and finish. As this type of board acts like a sponge, and expands over time as it is exposed to moisture/humidity, I will spray the back side and edges with a rubberized spray paint such as this. For the smooth face, I think Krylon semi-flat black should replicate the original finish well. I may attempt to replicate the slots and holes in the panel with my Dremel tool. I'll see if I feel like spending that time on it.


-
I saw that in the Z's on Bat and other places collection thread the other day... and it is low miles, all original! Looks like it is in amazing original condition.
-
This: https://www.yourautotrim.com/noname37.html?utm_source=noname37&utm_medium=shopping%2Bengine&utm_campaign=googleproducts&gad_source=1&gclid=CjwKCAiA0PuuBhBsEiwAS7fsNYjrtr-rjnrgG217g_Wh_NIaKDB1lRzQNuqbQVa1Q9VkGZ7dClw8fxoCKcwQAvD_BwE Yes - part of the reason I asked. I have mine set to 90%. On 100%, it goes to two on top of one. Depending on the monitor width, and browser settings, the pictures move.
-
First, and probably most people have this step figured out, when you start your post, click on choose files (yellow highlight in this capture): After you select the pictures that you want to upload, you will see them in the uploaded portion of your post, as seen here - they show up below the choose files link: Then, you put the curser where you want to insert the picture. In this case I will hit enter twice to return two lines, and then I will click on the image I want to insert: Most people leave their images full size like above. However, when you double click on the picture you inserted, you are presented with resizing options: At that point, if I want a row of three pictures, I change only the width from "1000" to "350". I do this for each picture. As I do, I can move the cursor where I like and add spaces or hit delete to move them around. I treat them just like text at that point. If I want a row of two pictures, I resized the width from "1000" to "450". If you do something you did not intend accidentally, hold control and "z" at the same time to "undo". You can control z and back up one step at a time as you need to.


-
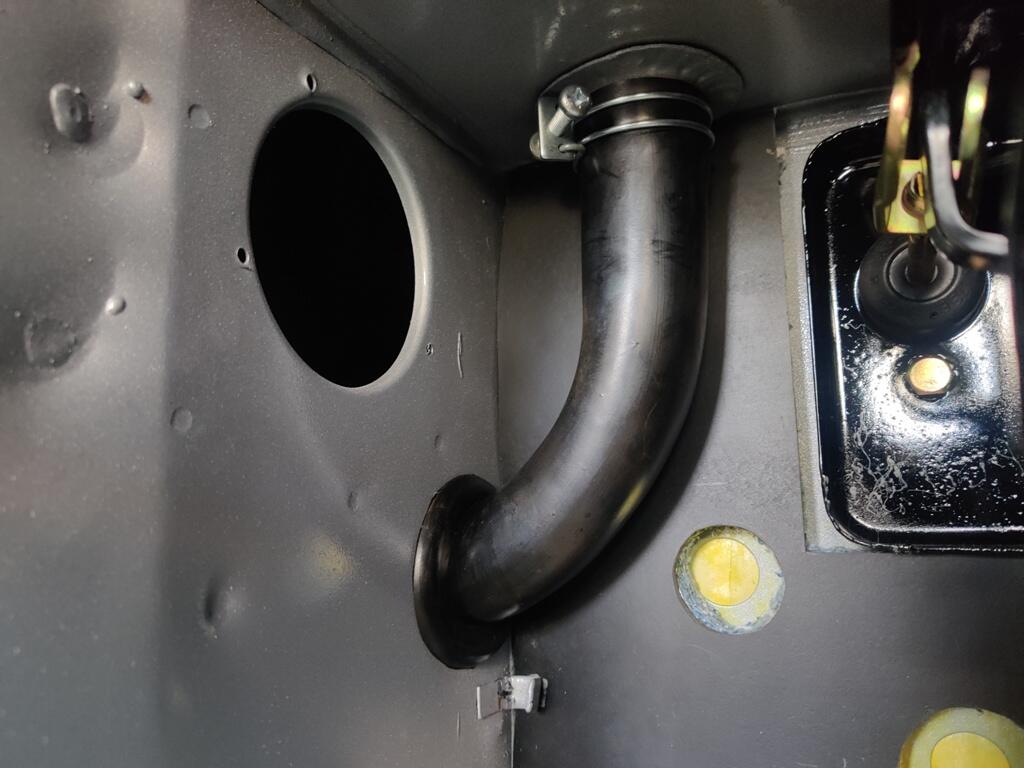
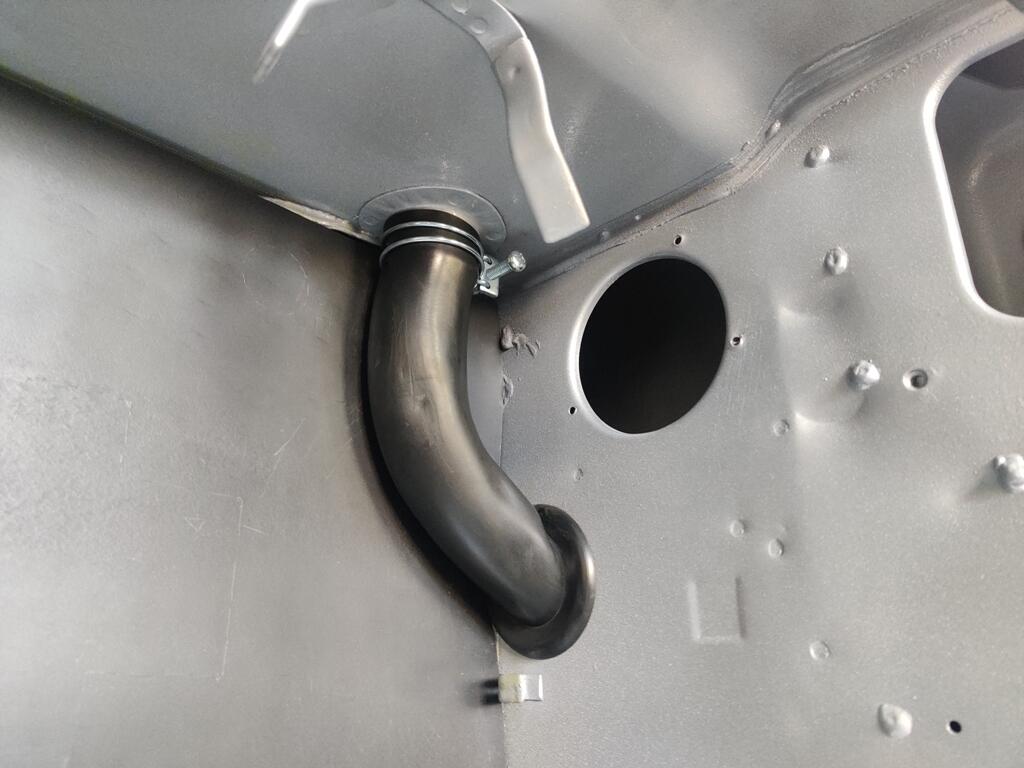
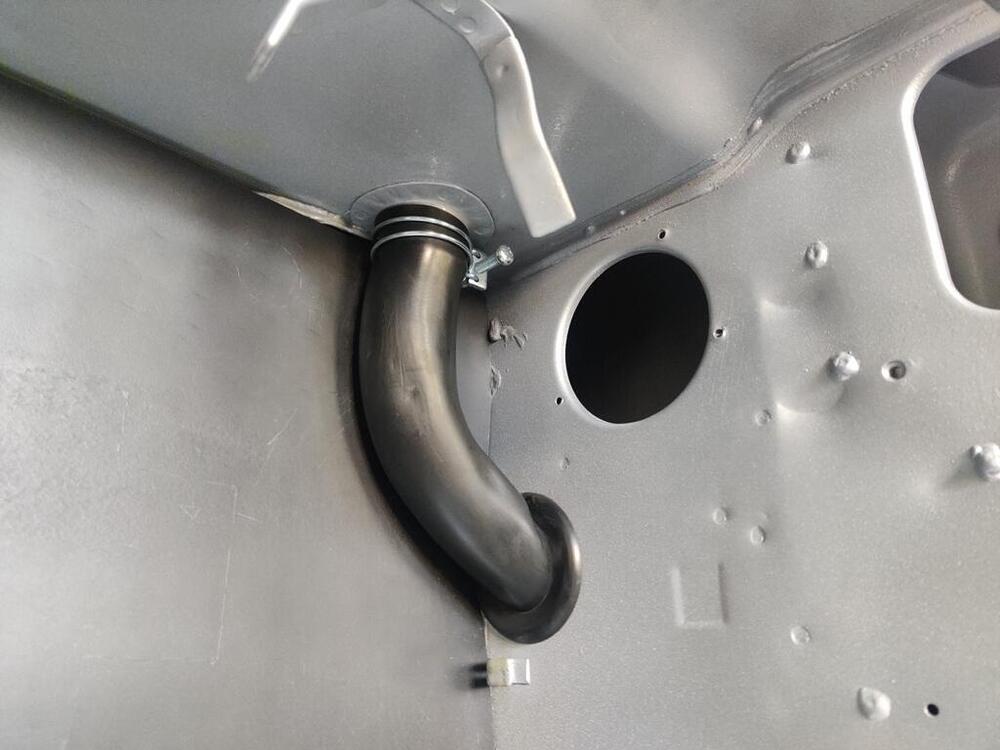
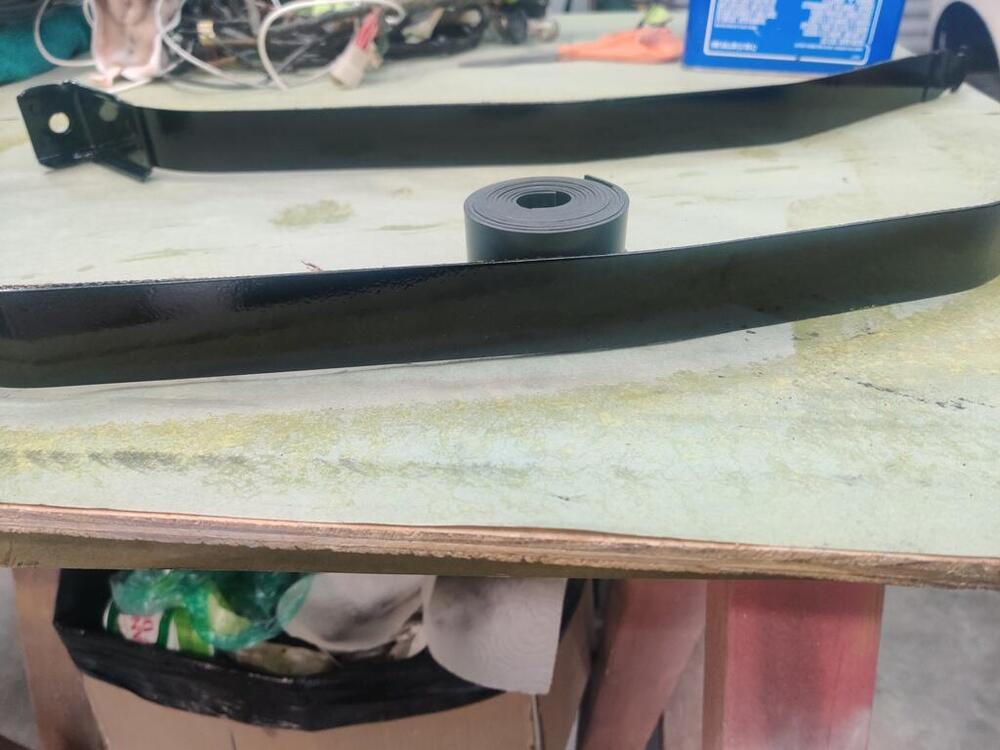
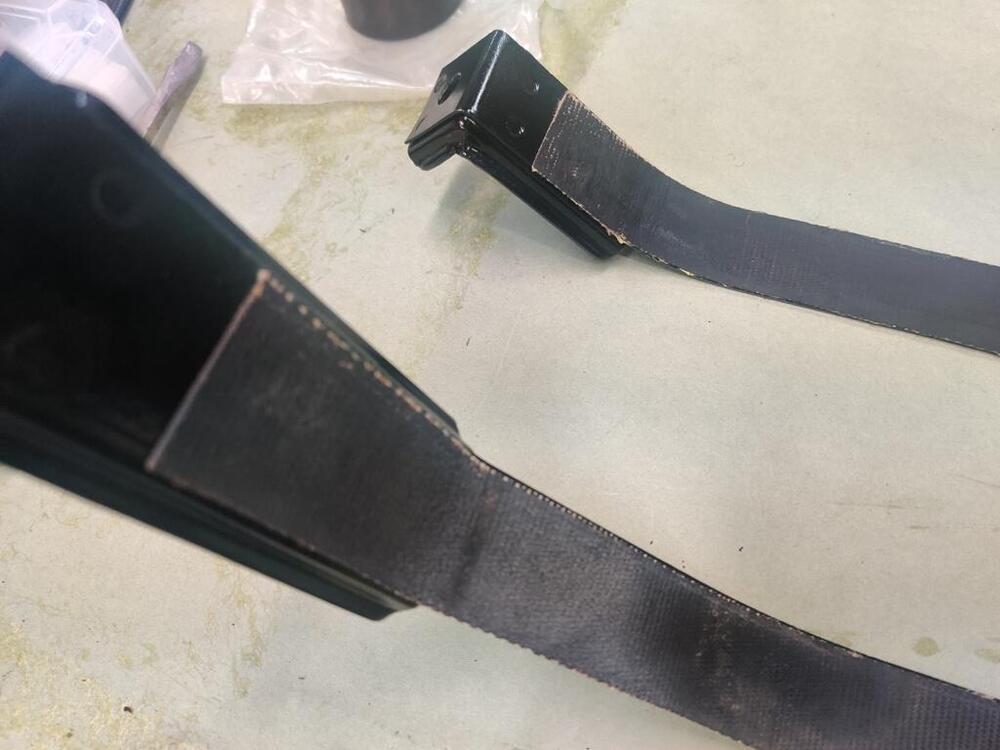
Granite fab supply - a good idea. I will attempt some more effort with "grit 3" and polish and see how that goes first. And if I don't figure out something I was doing wrong, I have sourcing a "grit 4" as an option. I started to install the gas tank tonight, but had to stop because I forgot about the vent hose that has to do a 180 degree turn. It won't do it without kinking as is documented well at this site. I had to stop because with the tank installed, you can't access the hose that has that 180 degree bend. I will pick up the spring, which I will insert into the hose, and which will allow the 180 degree turn in the hose without kinking from Home Depot tomorrow. I recall vividly what a pain the arse installing a gas tank in a 240Z is, especially with an original fuel inlet hose, which is hard as a rock unless you heat it up with a heat gun. This time, I have a heat gun, have put protective padding on the body of the car, and will have an assistant. A few pics from tonight's partial effort: ... I bought enough braided hose for two cars, as my other 240z had these replaced (with OEM hoses) in 1994... so they may need replacement again at this point. I was disappointed in the replacement gas tank strap insulator I purchased - I think it was from Zcardepot.com. It is quite a bit wider than the original insulators. Also, it is not like the originals in that it is solid rubber instead of rubber coated cloth. That latter issue is not as concerning to me. I just decided that I wasn't going to spend the time to cut the new one to the correct width. Instead, I cleaned the originals with lacquer thinner, and re-glued them to the straps which I previously stripped, primed and repainted. Once again, I used the same contact adhesive. This stuff... 🥰 So nice to work with! Also, I wanted to ask: regarding the pictures I put here... I have been putting a lot of groups of three horizontally. That is, they are three, side by side on my browser. Are they rendering three side by side for you? Or do you see two side by side, and then one below those two every time? Let me know!


-
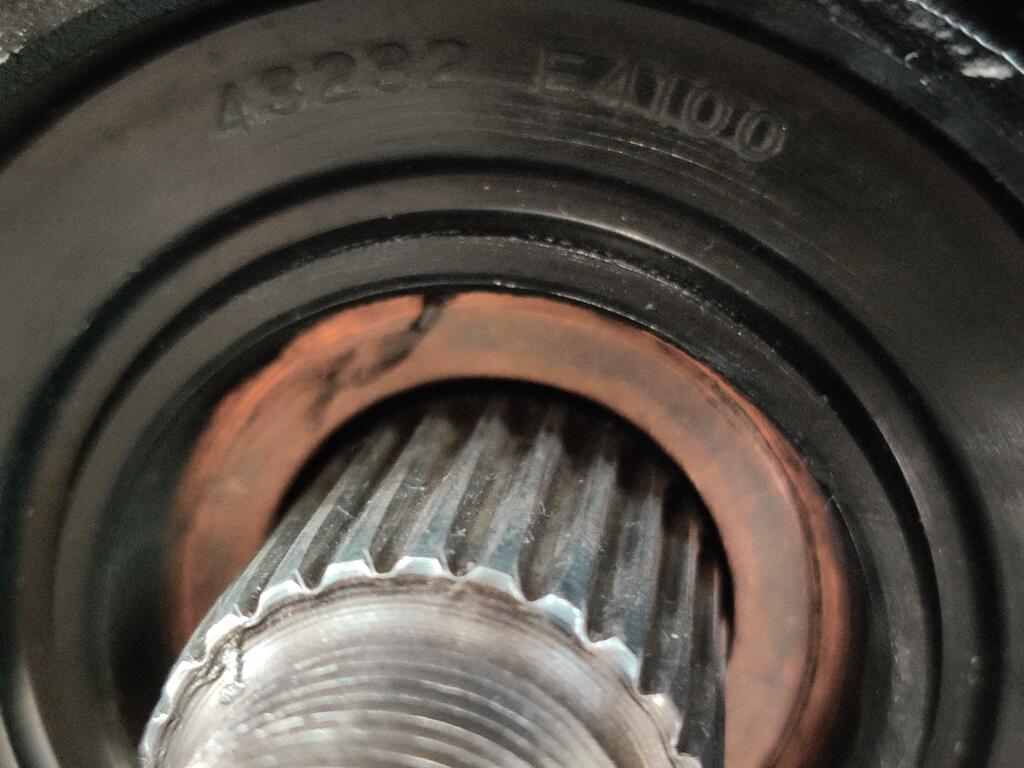
I put mine back in. I also like that lower torque setting. Where is your seal? It is missing from the picture you shared. It goes in before the axle flange goes on.

-
Good thought. I do not have grit numbers or know the materials. I could experiment with some fine grits... I am going to try to use the finest grit again, specifically on the right side area of what I worked. I want to see if spending more time and effort with that grit makes the step of transitioning to the liquid polish work more quickly. If I don't get noticeable improvement from that effort, I may experiment with some very fine grit sandpapers on both a rotary and a DA. I think the DA will be worthless. Glass is much harder than paint.
-
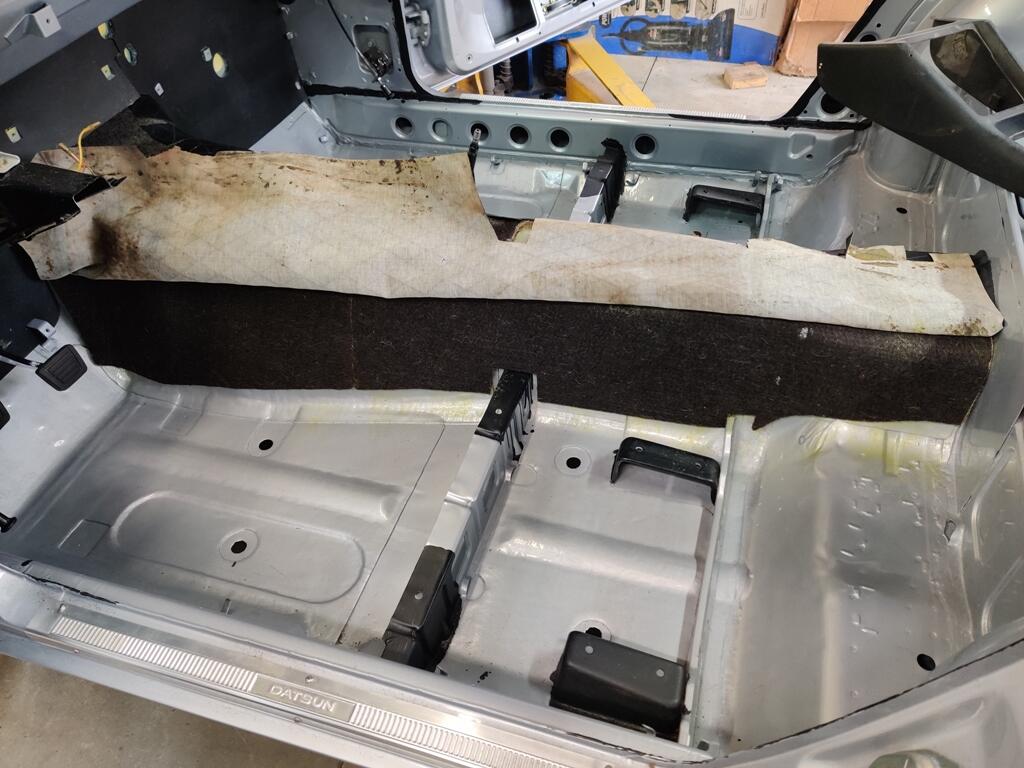
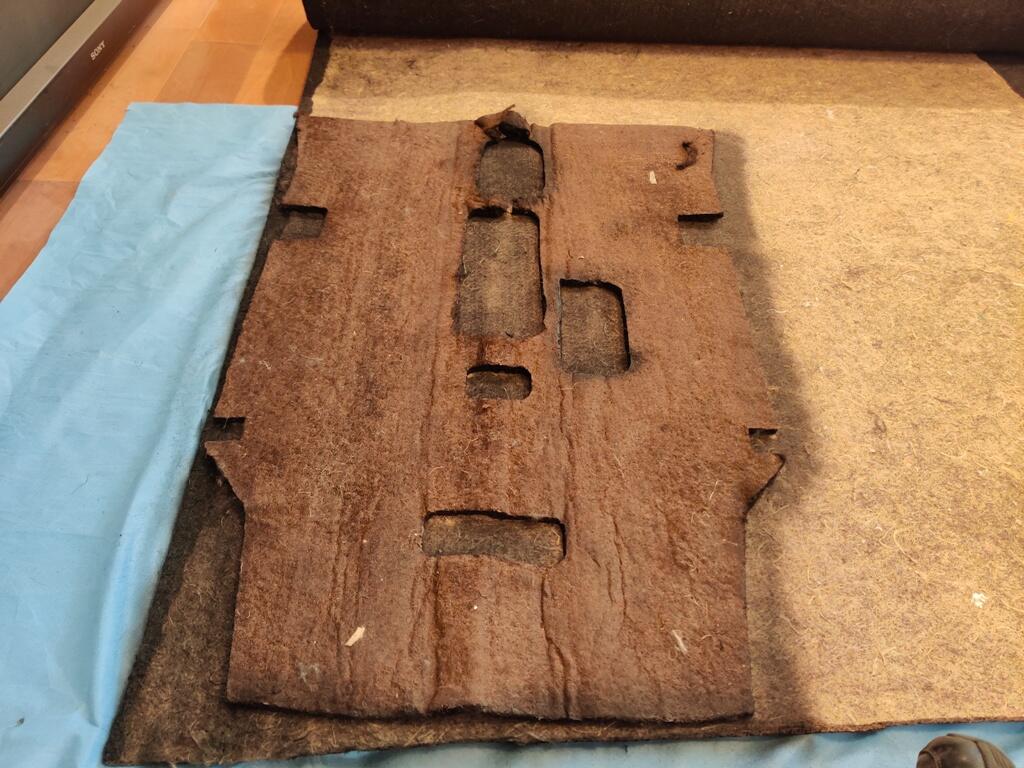
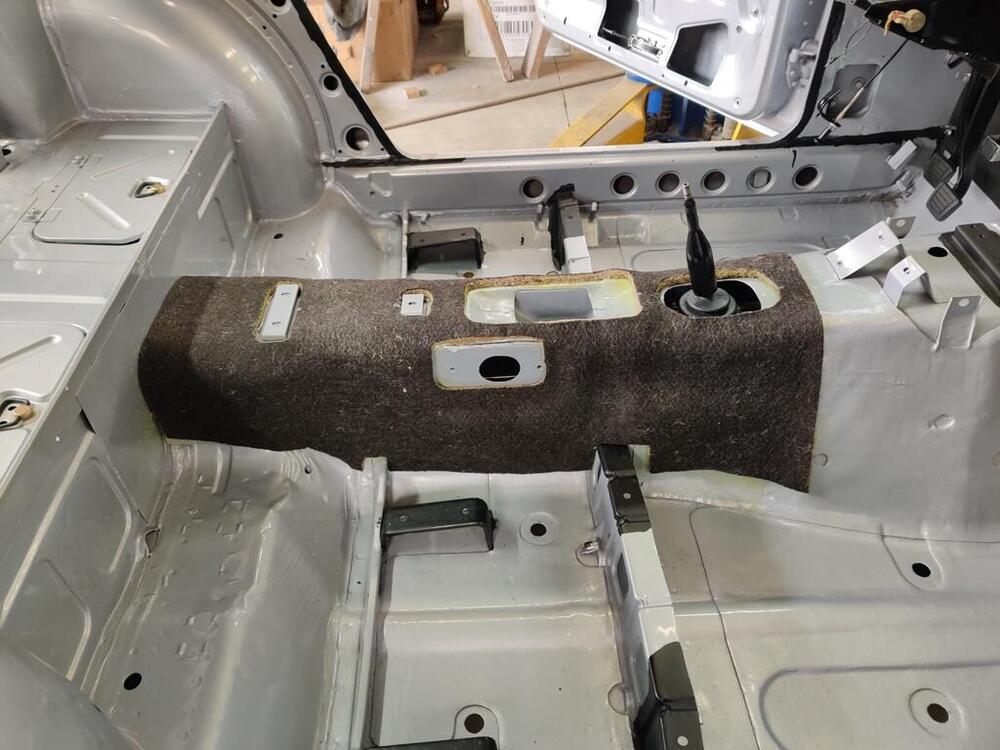
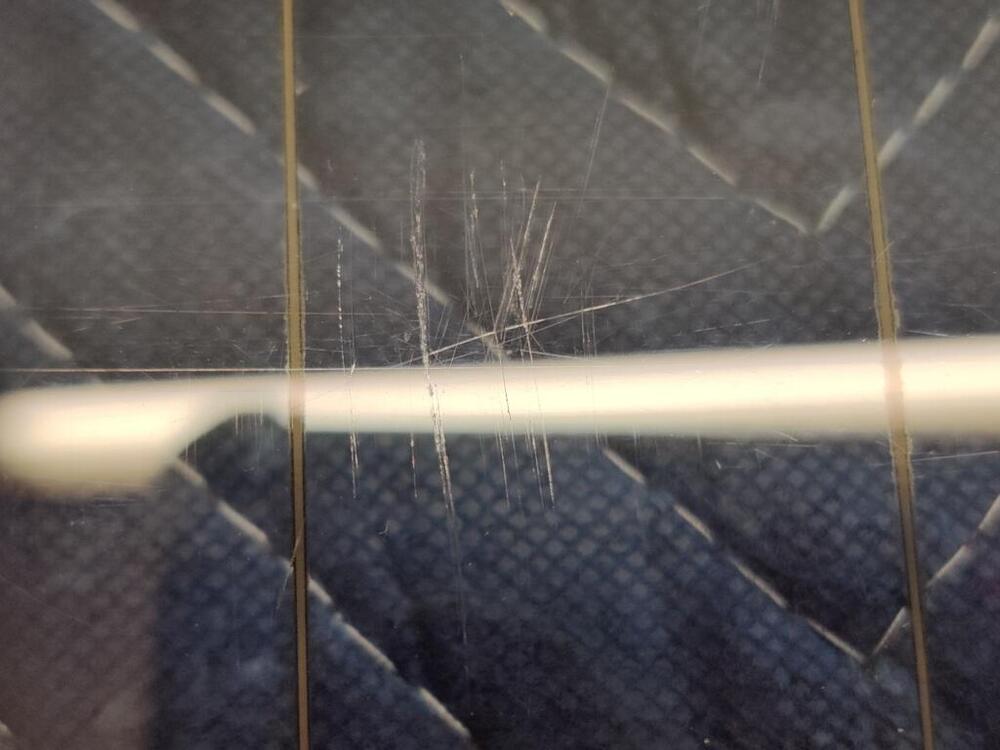
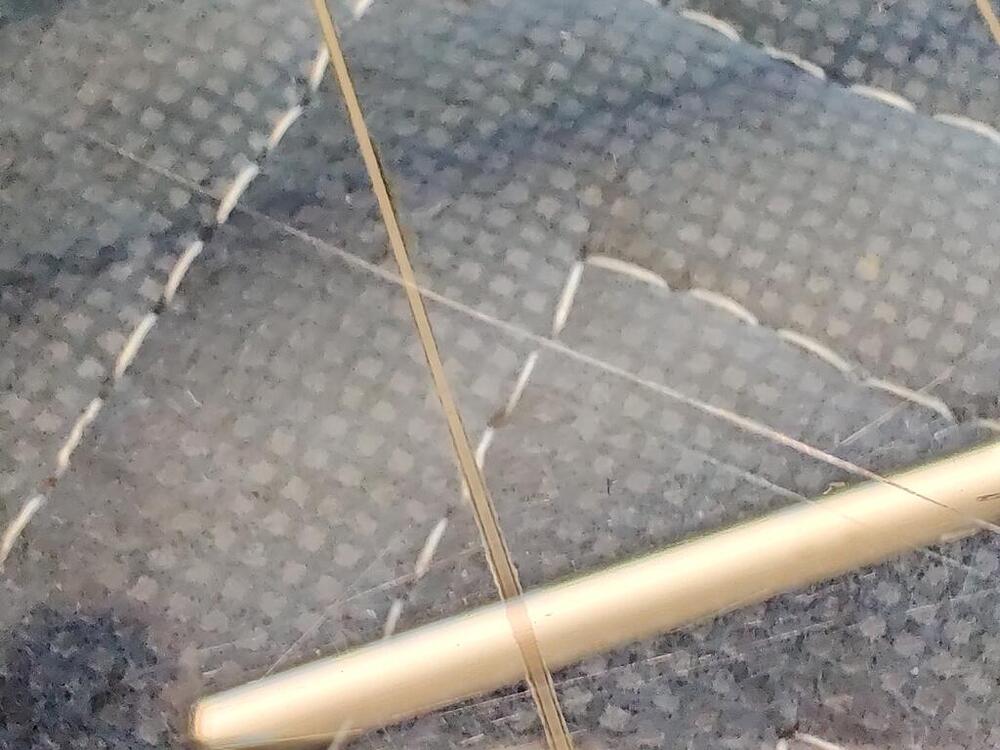
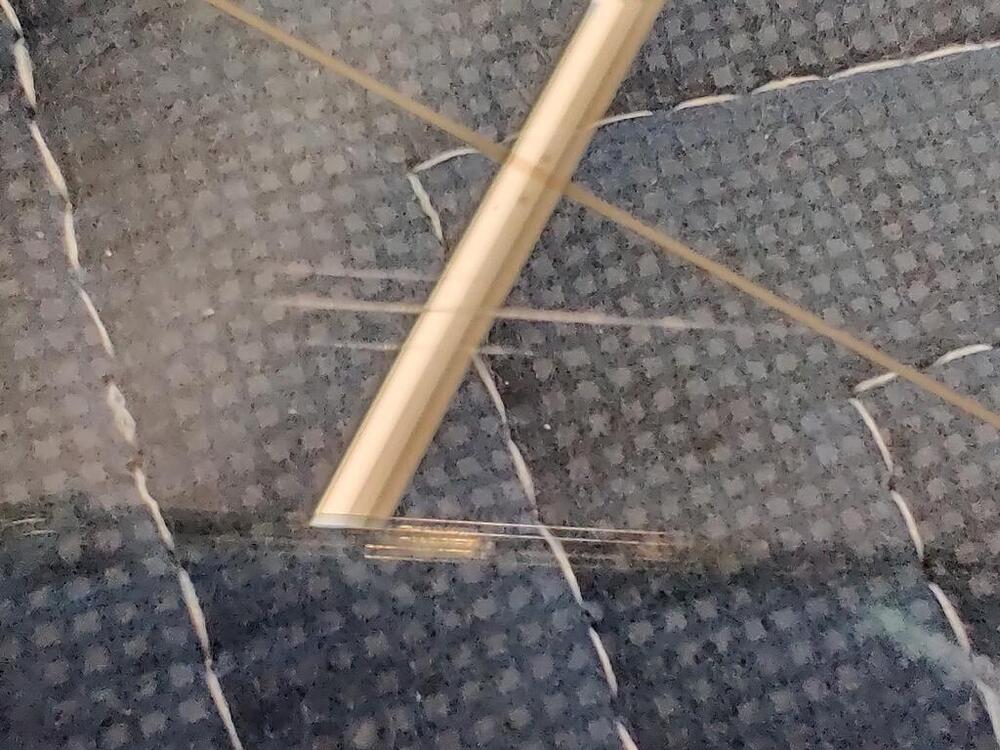
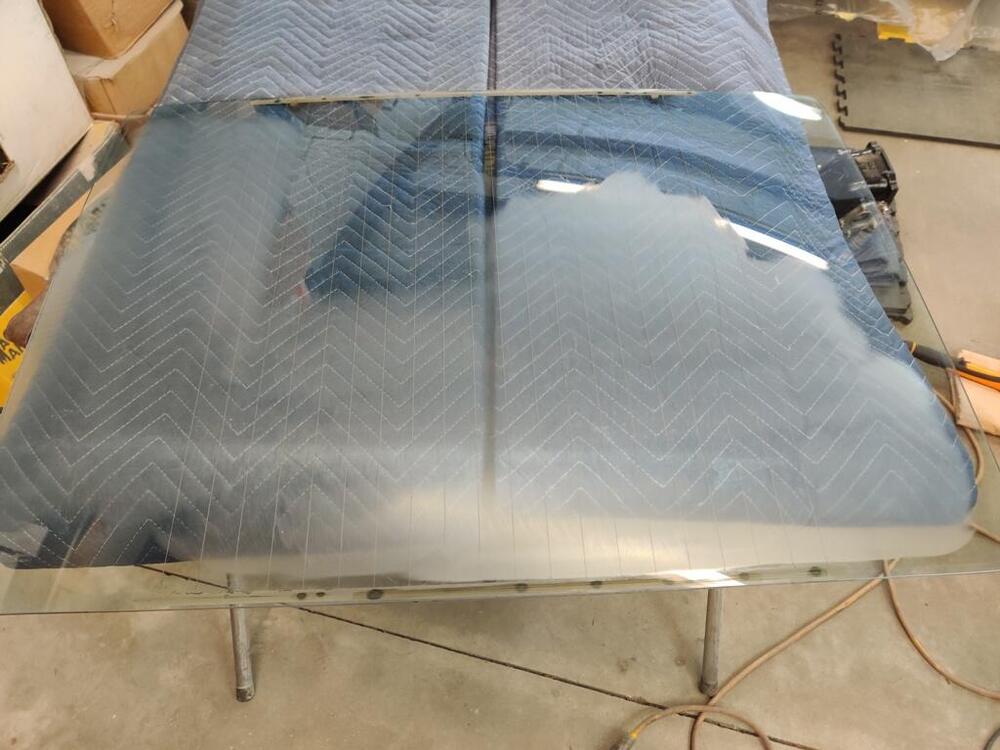
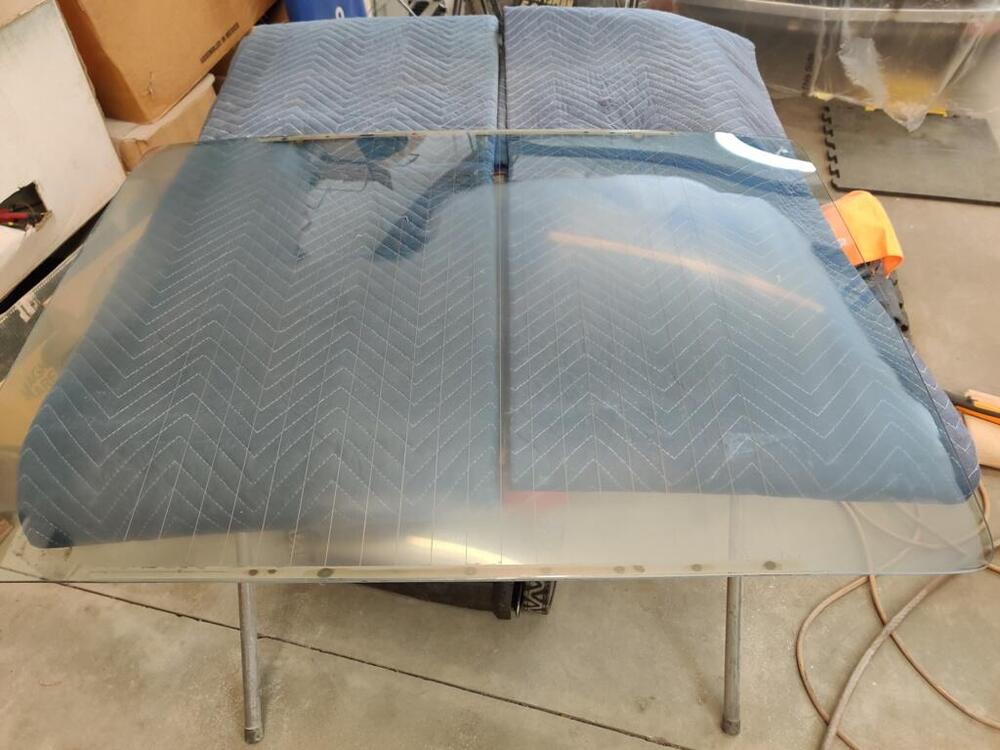
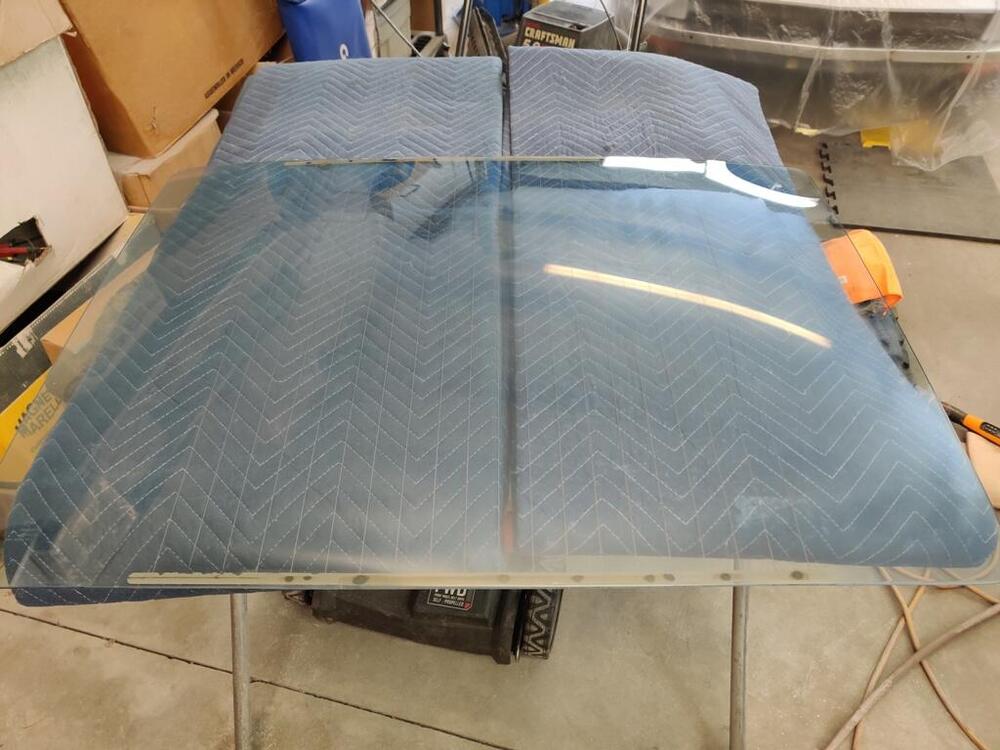
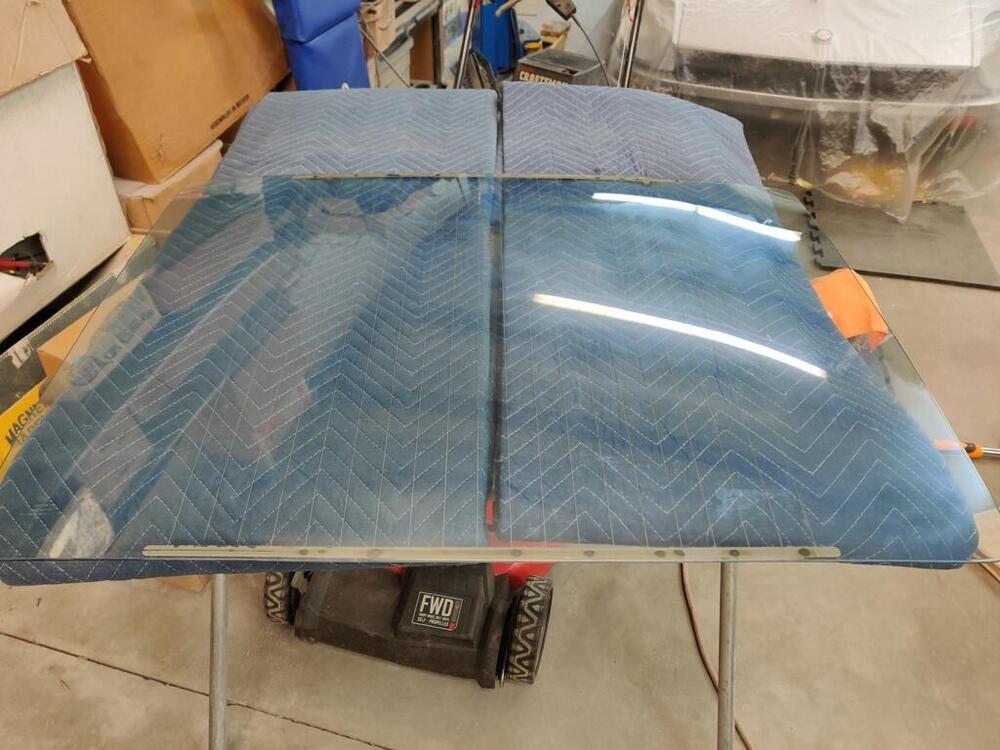
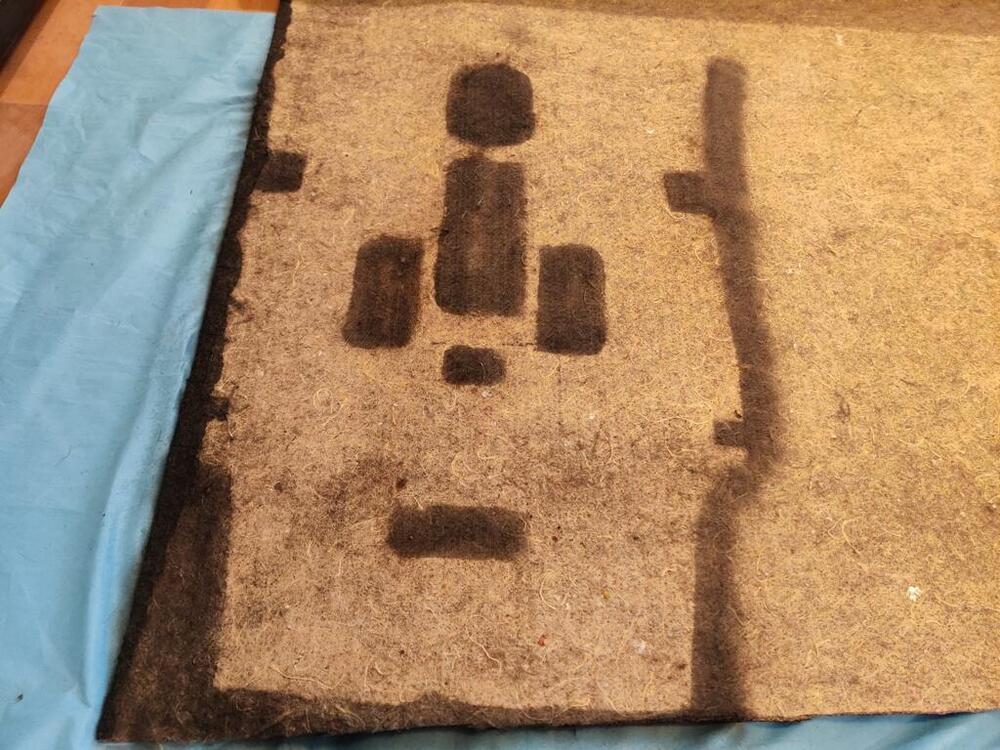
With the windshield in, a significant barrier to installing the dashboard had been passed. However, there are still a few things that need to be done before it can go in the car. One of them is installation of the tunnel jute and trim. And that will need to be followed by installation of the heater core and housing and the fan its housing. I started on the tunnel jute today. As I mentioned before, I bought a roll of jute from England that looks similar to the original. It is dark brown on one side and tan on the other. I placed an old piece of jute on top of the new, and used black spray paint to mark where I needed to cut. I got mixed up for a minute on which side needed to face up, and marked the wrong side for the handbrake cutout at first. But, I realized what I had done before I began cutting and flipped the old piece over. After marking the correct side for that, I used my upholster shears to cut the jute. I nice pair of upholstery shears is a necessity for cutting this - they cut through without difficulty. So, I got the rear one made today, and just set it in the car for this one pic (third pic here). After that, I decided to tackle the job of removing the scratches from my rear hatch glass. As you can see, there are a few - the white beam is the reflection of a florescent light in the shop. I opened up the kit I received recently, and put the attachment on my rotary buffer. The kit I bought has three different sanding grades and a liquid polish solution. I started with the heaviest grit, putting it on the backing pad. Kind of scary to use this grit as it is super aggressive. One thing to note, I think that out of the box, the heaviest grit "pads" had some oversized grains on it. During the first 20-30 seconds of use, it put some swirl scratches in the glass that took a bit of work (with the same grit) to get out. The kit came with two of the heaviest grit pads. I think it would be wise to run fresh ones very lightly at first to knock any unusual bits in the surface of the pad down a bit before you go to town with it. That, or run it on a piece of glass that doesn't matter to you first. Anyway, with the first grit, glass removal is relatively quick. I could catch my finger nails on some of my scratches, however, there was not much time investment in cutting the surface of the glass down to past the scratch depth with this grit. When I was done with the first grit, I took a picture. As you can see, a portion of the glass towards the top, center and right side, did not need heavy scratch removal, so I left that area alone: Next was grit number two. I went over the entire area that I had hit with grit one. It was easy to see the difference in surface finish of grit two compared to grit one. Like the first grit, the second grit cut pretty quickly, but more time was involved in getting all of the areas I had worked with grit one to "grit two" level. When done with grit two, I took another picture: I repeated the procedure with grit three. I want to say that I getting the surface of the ground area to "grit three" level took a quite a bit longer. Again, I could see the difference pretty well. So, I kept at it until everywhere that had been ground looked uniform, and I couldn't see any heavier scratches from the prior grit. I took another picture: At this point, I had about 2-3 hours invested. And I switched over to the liquid polish stage. This stage did not go great. Based on my efforts today, getting rid of "grit three" hazing is going to take a very large time investment. I think there are a couple of areas where I did not sufficiently remove grit two, mainly on the right edge in the pics above. So, I may have to hop back to grit three for that area. However, I am confident that for most of the area I have worked, I did a good job of using each grit to remove the prior grit's marks. And unfortunately, this last stage of polishing is going to be a bitch - like maybe 4 or more hours of intensive polishing. I wish there was another grit between grit three and polish. Of course, I could be doing something incorrectly also. So, I will look at the company's website for some tips and watch some of their Youtube videos to see what I can find out. Latest pics - second one is that right edge ( I took the picture from the opposite side of the glass) where I think I will need to rework with grit three.


-
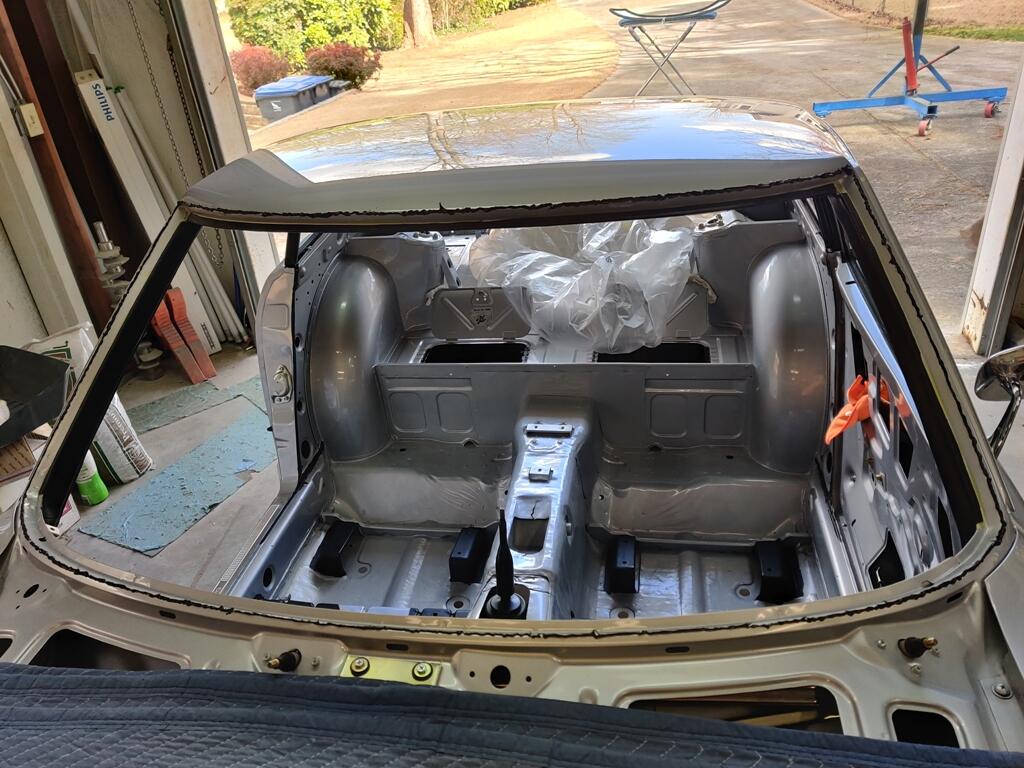
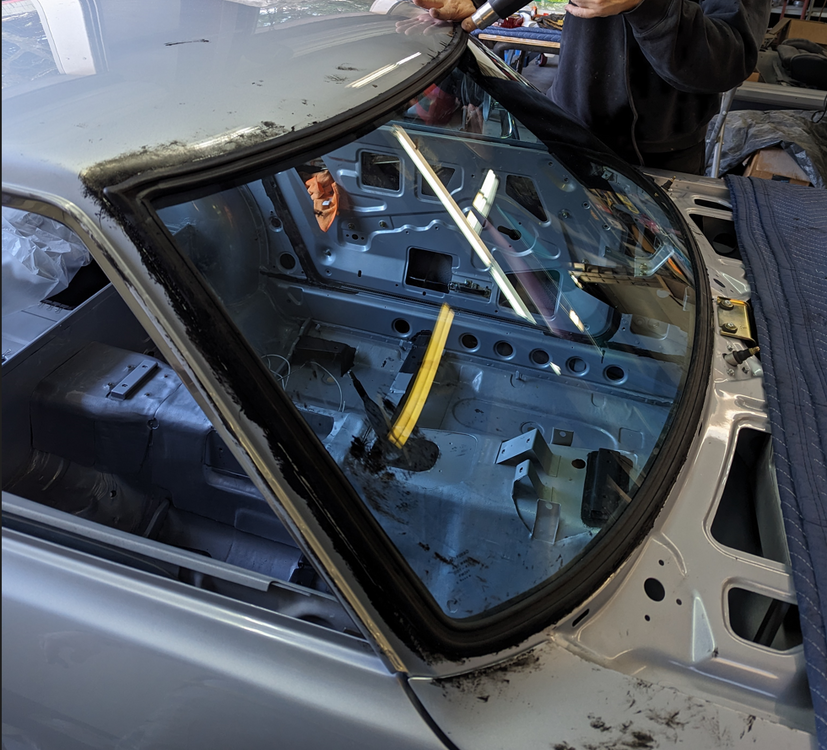
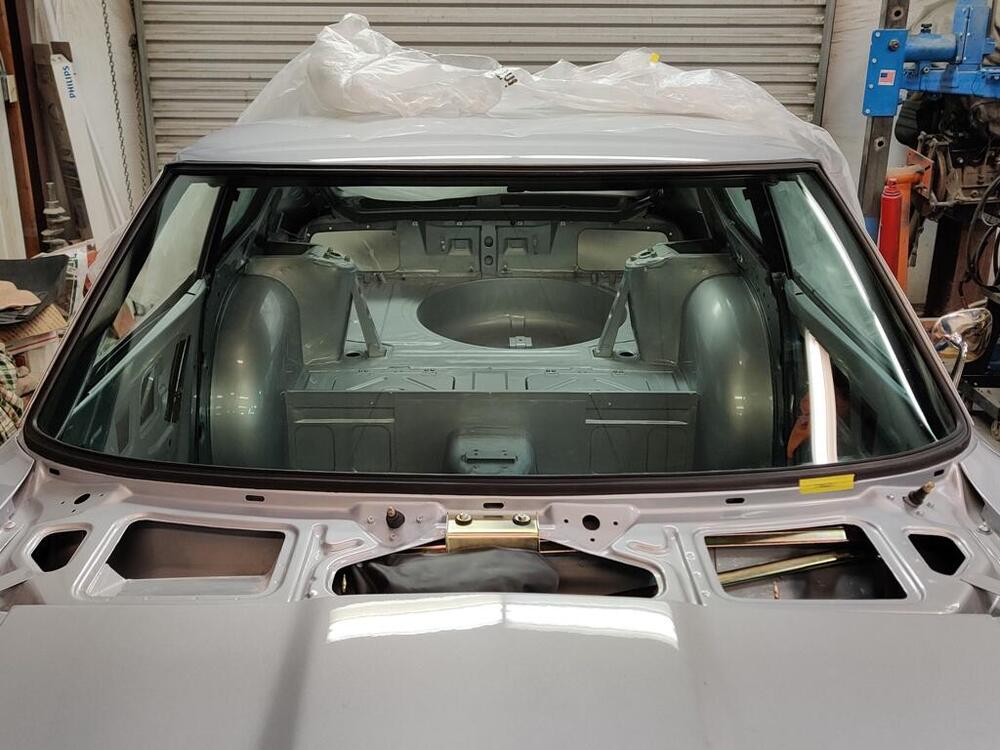
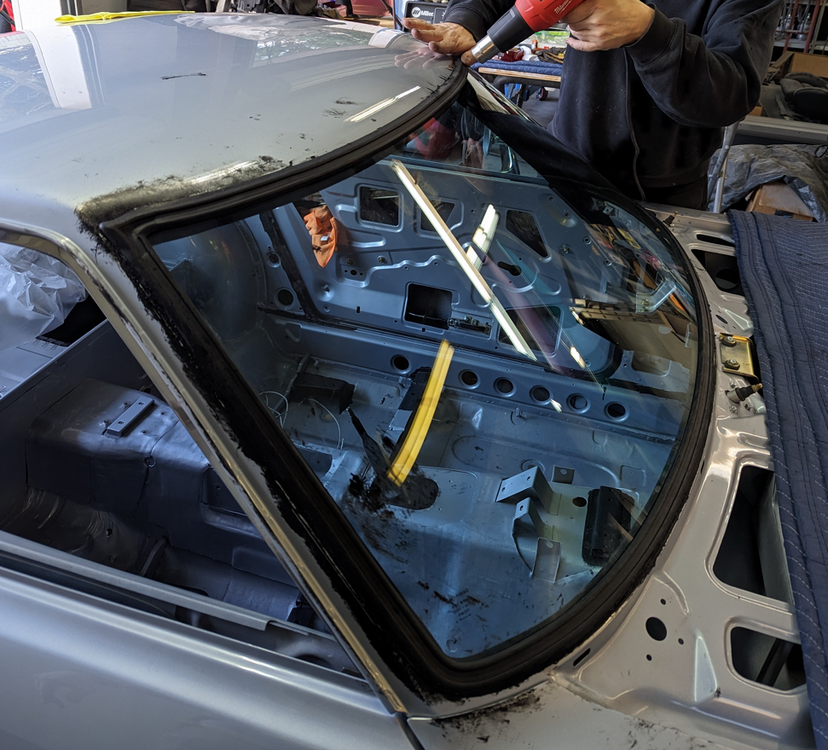
With some help from a friend, I put the windshield in the car today. I have done this on a 240Z only once before, back when I was restoring my track 240Z in 1993. I also have put a couple of Datsun 510 windshields in. For the "rope" in the channel, I use 12 gauge insulated multi-stranded wire. Perhaps rope would be better, but I like the solid feel of the wire rather than what I imagine might be a "stretchy" feel of rope. Additionally, I use dish soap (slightly watered down) and an acid brush, applying it onto the frame of the car and the windshield rubber gasket where it contacts the body. I try to eliminate friction so the rubber lip that has to be pulled inside the car is free to move. This time, I used black urethane adhesive and put it on the windshield frame where shown in the diagram in the factory workshop manual. What an mess it made during the installation procedure! I got it all over the place, and it easily took 2 hours to clean it off the car and off of me. I decided to put the stainless trim in after installing the windshield. Wish me good luck on not tearing the rubber as I install it. I have yet to examine it and correct any scratches, so that will have to come first.


-
I highly recommend the contact adhesive I am using. If you let it sit for about 2-3 minutes after applying to the body and the rubber, it sticks extremely well.
-
I may be able to get inside scoop as I have some contact with Nissan USA folks.
-
Just seeing this - spoiler though - they don't have plans to sell it. 🤪 I think they must have had plans, but maybe they do not any longer. https://www.thedrive.com/news/nissan-develops-major-240z-head-upgrade-decades-after-its-retirement
-
If you use a bit of rubber silicone grease around the shaft before installing the boot, it will be a water proof seal there for many years to come.