


siteunseen
Free Member
-
Joined
-
Last visited
Everything posted by siteunseen
-

-
-
Where you at Jim? @Zup Award winner, you!
-
Hey @Jeff G 78 that's my biggest concern, leaks. Proper torque would be hard for me in the car. Rossiz has a 280 and I have a 240 which appears to have a roomier bay. The more I think about it, if I get a friend to push the motor away from the steering rod it should work. I'll read some more tonight and make a decision. Dry fitting is term I'm just getting used to. And I'll definitely use an old valve cover. Thanks Jeff and Geoff, both of you guys have solid advice. 8^)
-
If we had two more we'd have a nice classiczcars calender. I buy one for sure.
-
You need my address for shipment? Looks great!
-
I've decided to wait and install the header when the motor's in the bay. I may be able to get the motor/tranny in by myself that way. Also I'll be removing the front bumper, taking the front tires off and have a floor jack under the cross member to get the front as low as possible. Maybe installing the transmission cross member mount beforehand too. Put the rear tires on ramps positioned 90 degrees to the tires, pointing out instead of under the car. Any other suggestion would be appreciated. Thanks for the advice @Jeff G 78 but I would rather do this by myself, people make me nervous. Thanks @rossiz for your advice as well.
-
...and then the rest.
-
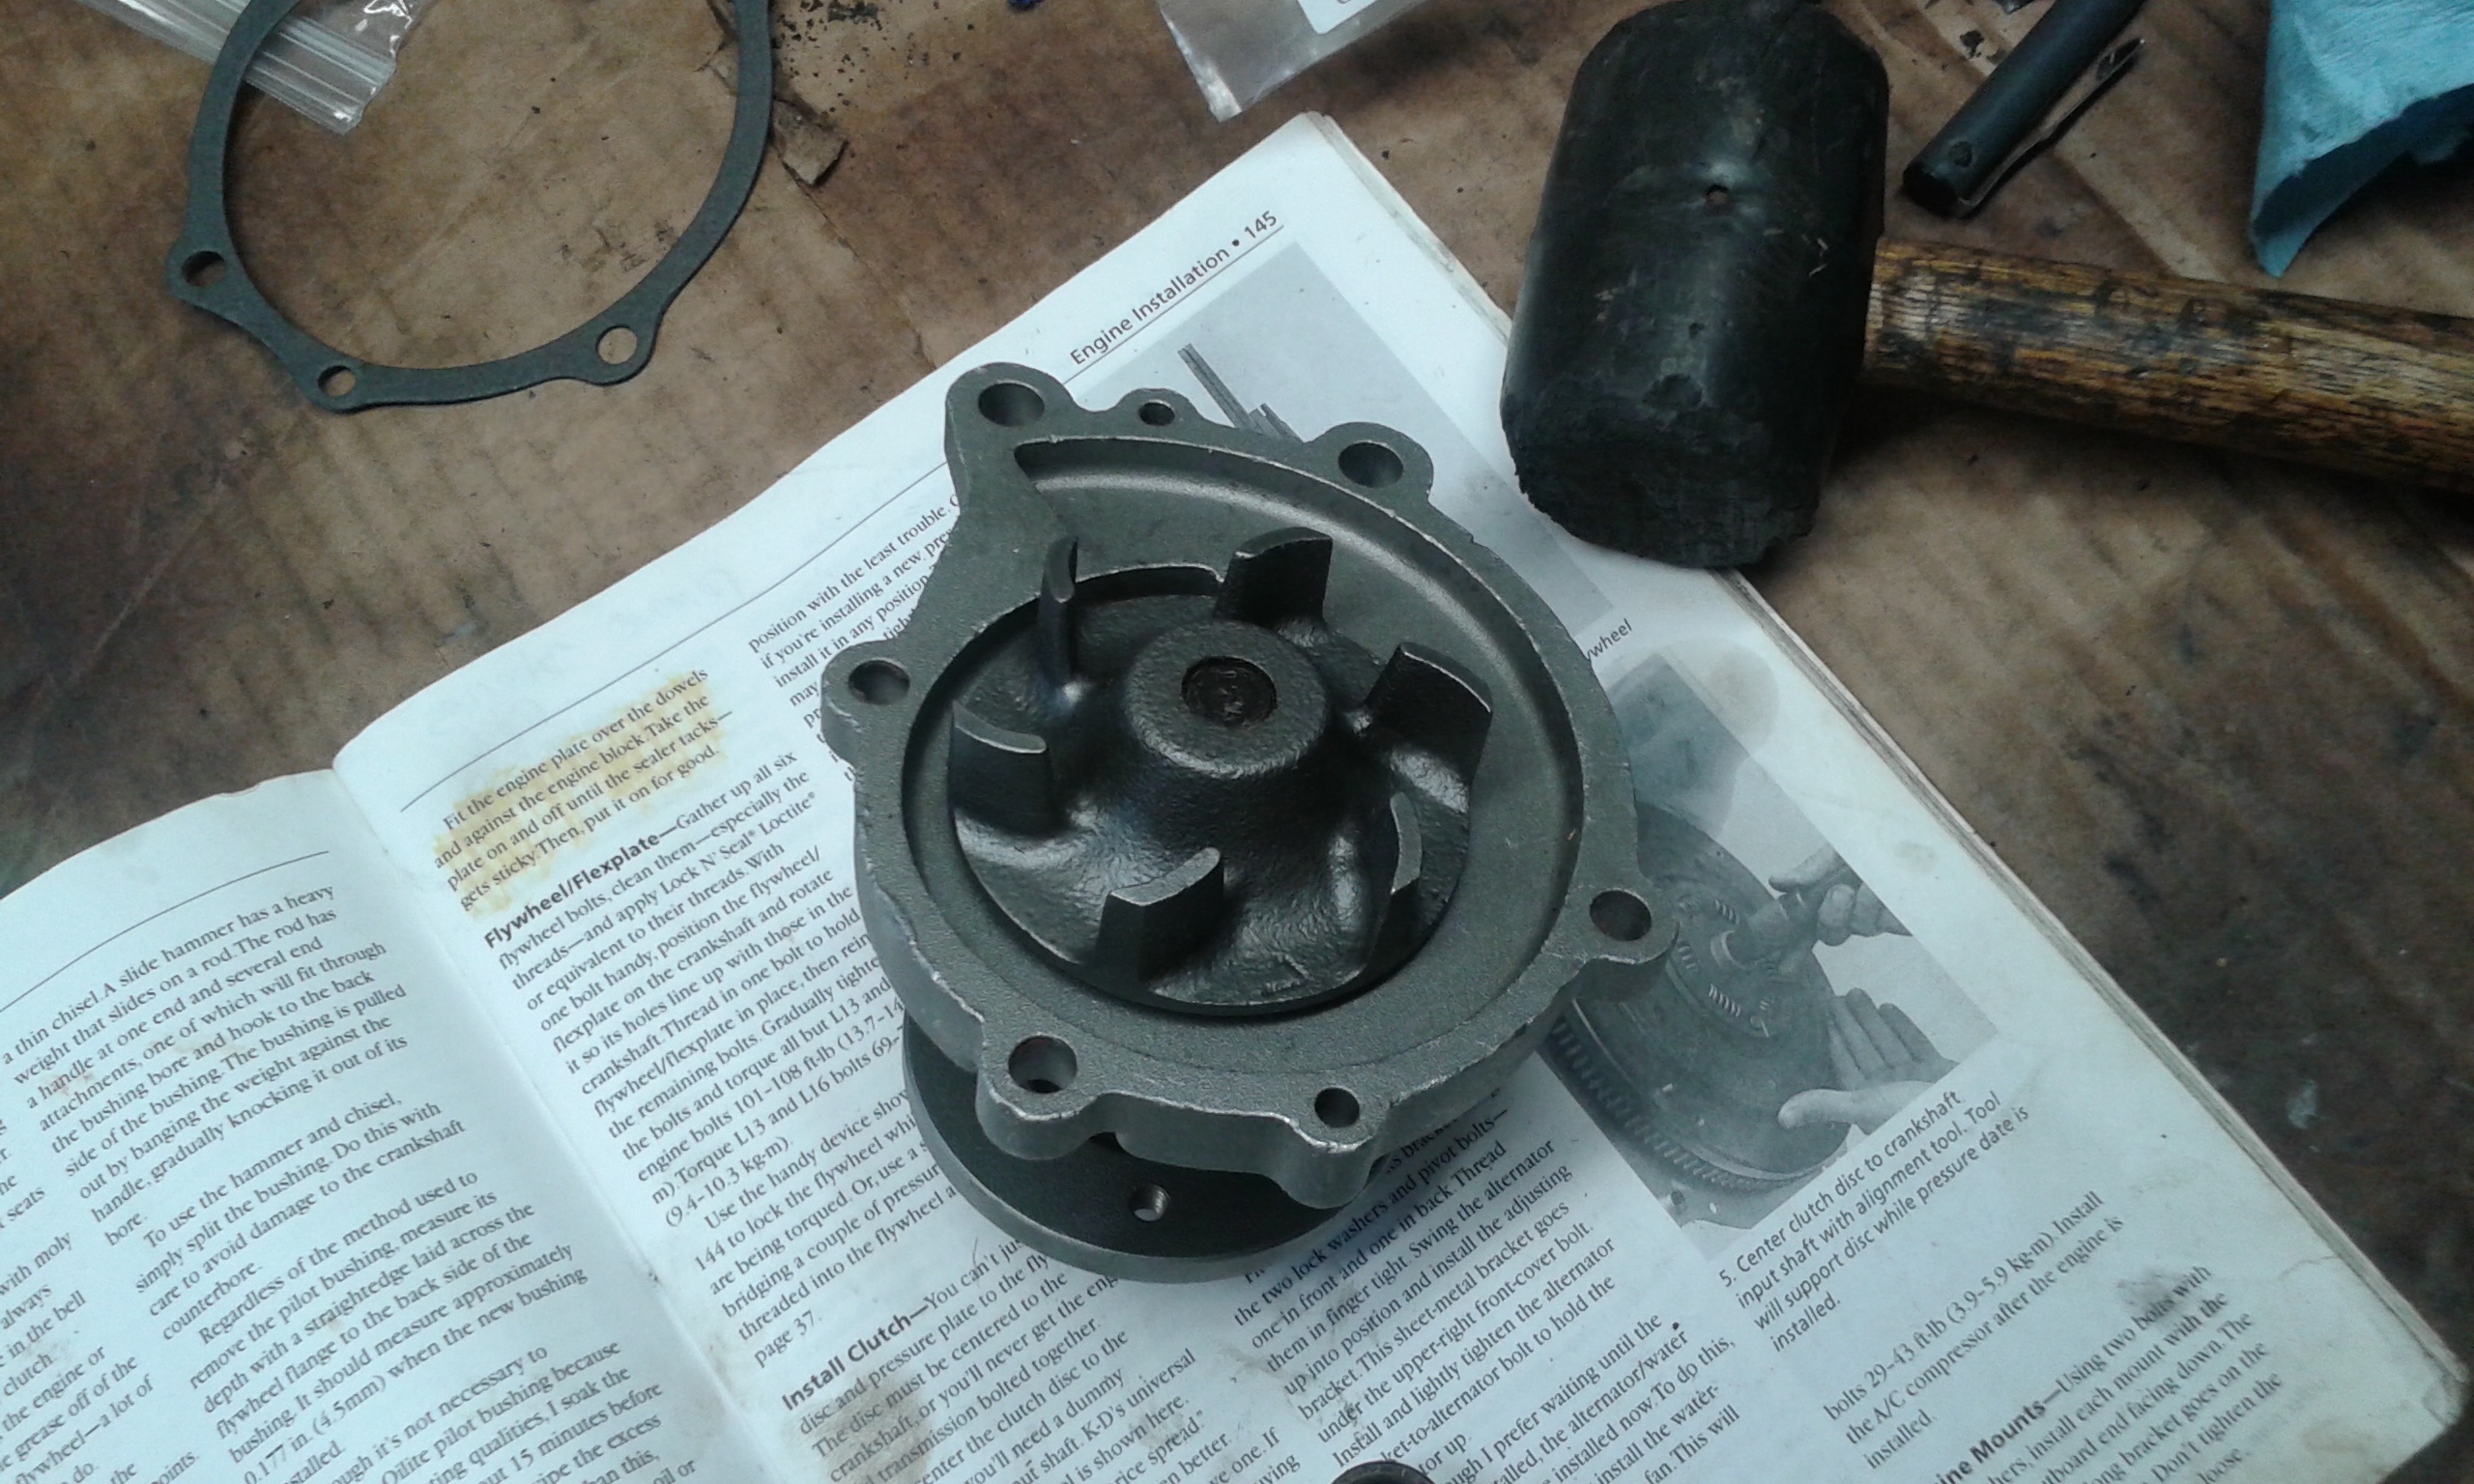
Getting closer! Baby steps. Put a new oil pump on today and used my drill to prime the oil lines. Forgot to run it counter clockwise, no oil for a couple of minutes. Scared me to death. Tomorrow I'll mate the transmission after installing all the clutch stuff.
-
My reputation precedes me. There's a song called "Long Haired Country Boy" that's written about me. Me and Charlie are tight.
-
Mine runs better after I wash it. EDIT: Just read Zed Head's post, I agree with him. I know how much better I feel after a good shower.
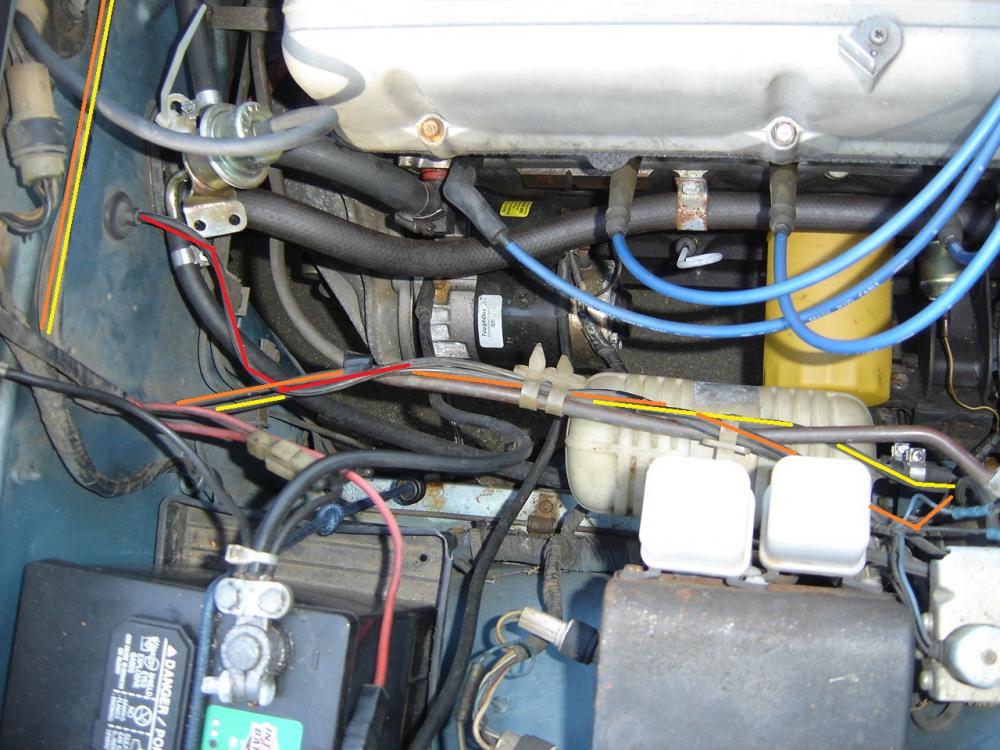
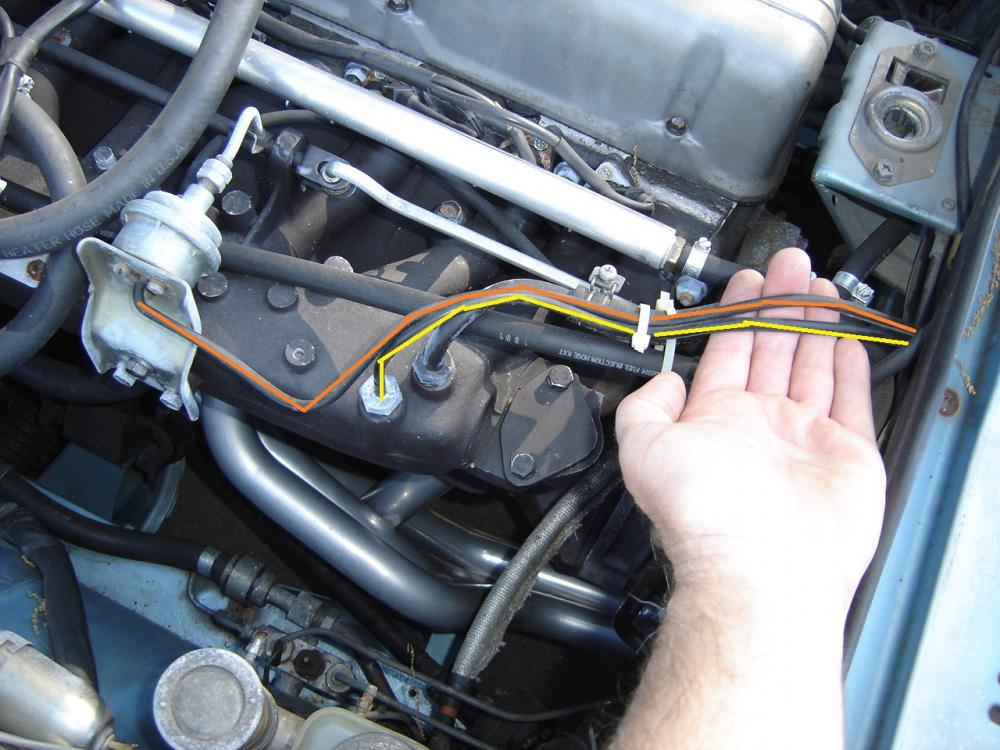
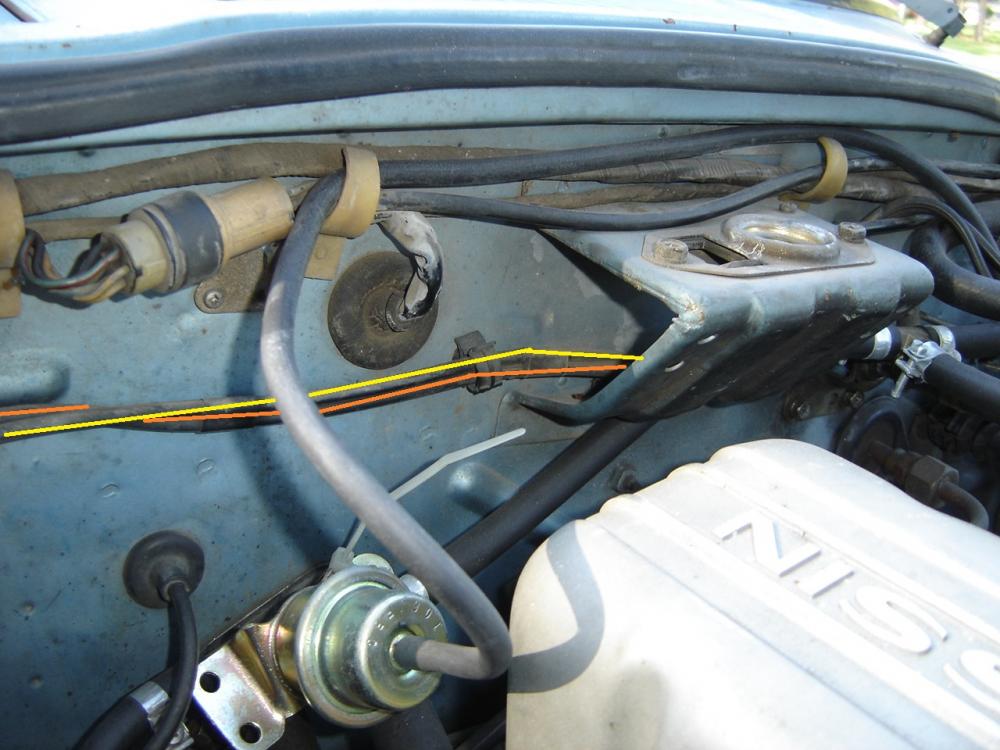
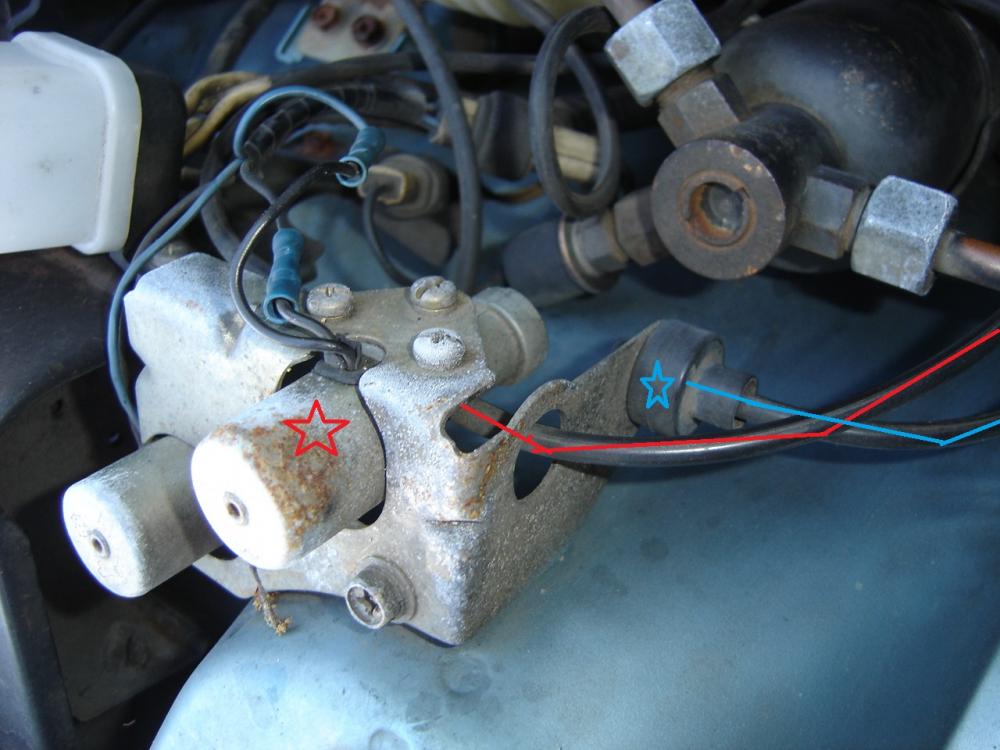
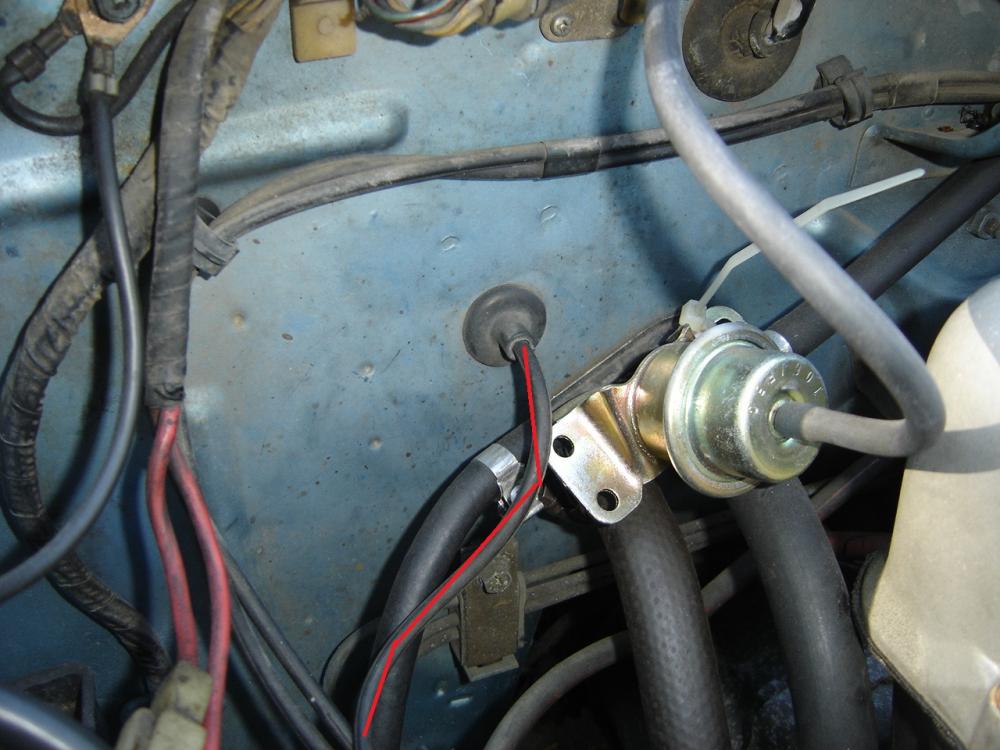
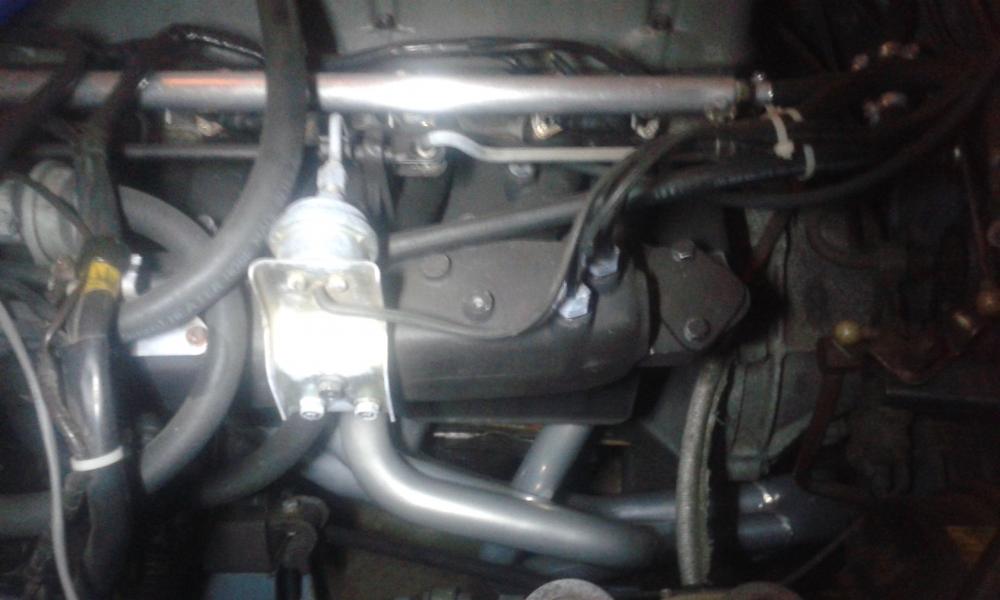
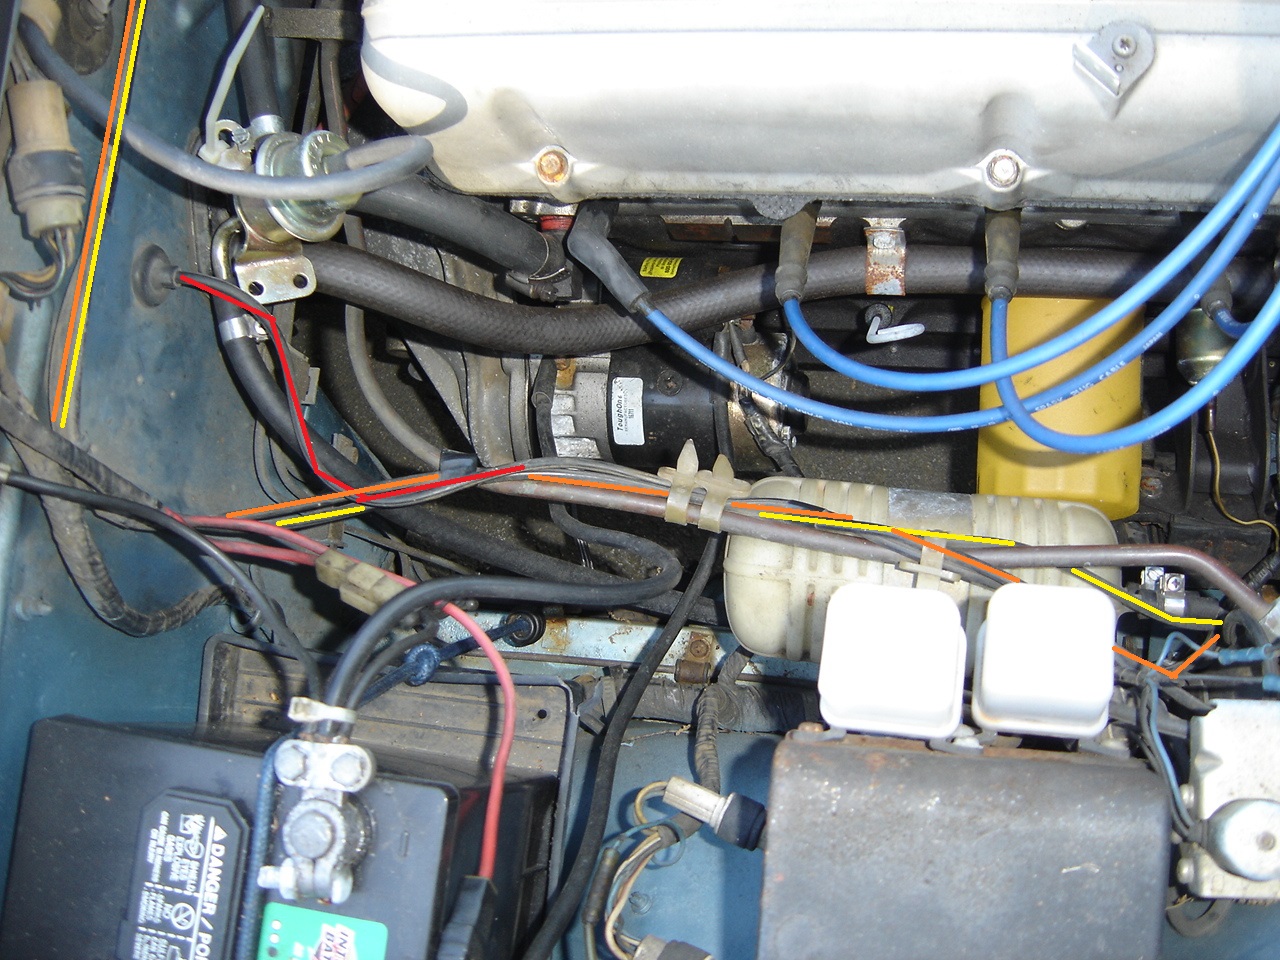
I've had some fun playing on MS Paint! It's a heck of alot easier with my wireless mouse than the touch pad on my laptop. Red goes from solenoid to firewall grommet. I suppose to the HVAC? The blue is open to the atmosphere, no idea about that. Yellow goes from vacuum source on the intake manifold to the TOP hole on my bottle. Orange goes from bottom hole on my bottle to Fast Idle Actuator on the intake. When you turn on the air it pulls in from vacuum and grabs the throttle rod to pull along with it, raising the RPMs at idle. Now whether or not mine is right is up for discussion.
 I've read that. I remember somebody saying it was hard to see the fuel? I'm gonna slant the carbs on the wall and get as close as I can before I put them on. Then I can do it the way you're talking about. Hey rossiz@, while I have your attention how about answering a few questions? I'm going to go ahead and put the header on while it's outside the bay. Did you do that too? Did you remove the steering rod? 'preciate it. Cliff
Good deal. I've taken the pics of those vacuum lines and will mark them with "paint" program on my laptop tomorrow morning. Back with you then. 8^)
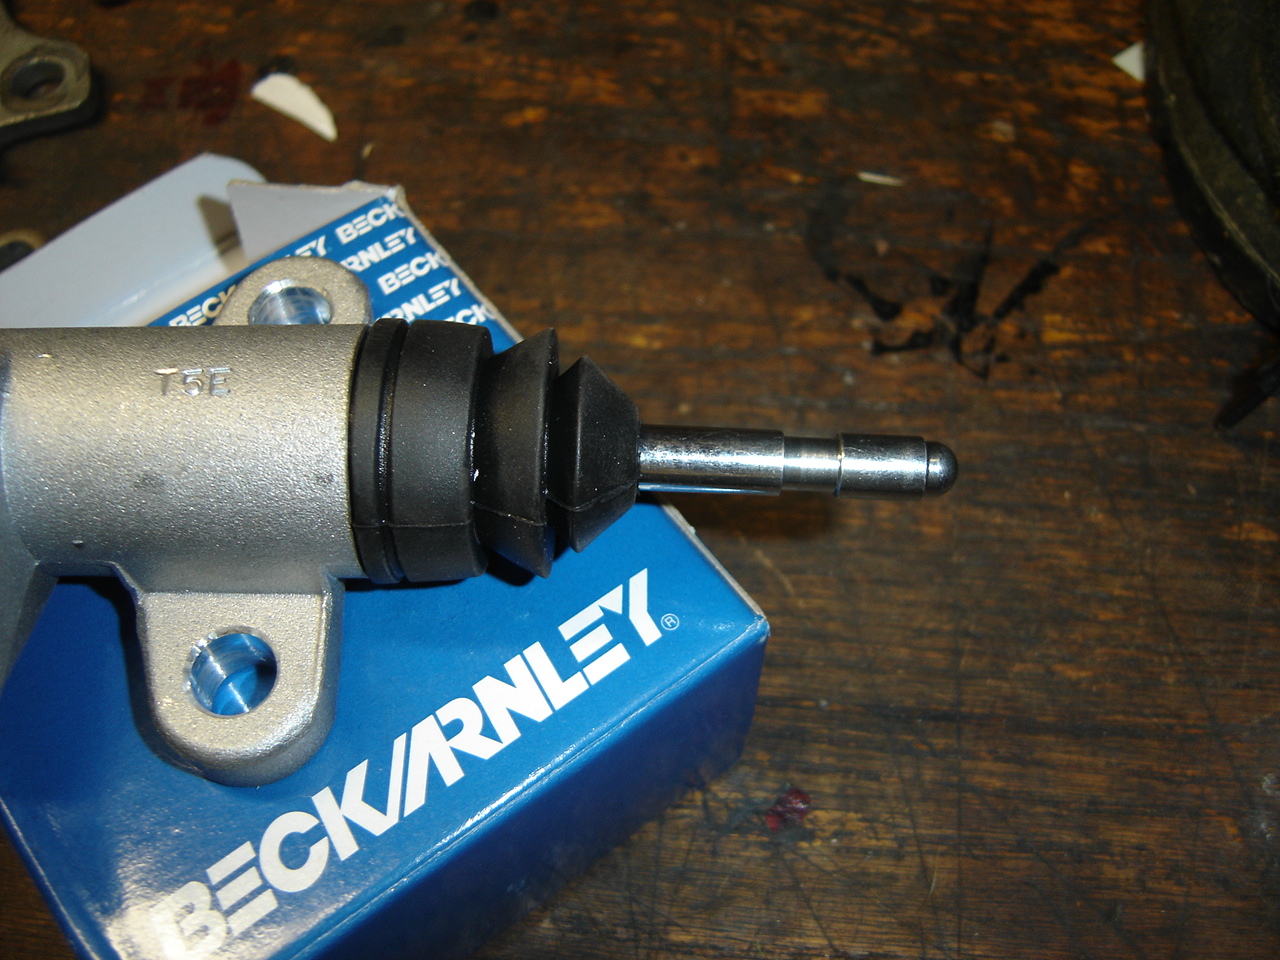
Sorry Mark, I was excited! I did some things yesterday that had me at a stand still, I was a little nervous doing them. Fooling with gas and an electric fuel pump straight wired to a battery, fumes and such. I'm putting a 5spd in place of the 4spd and when I bought the clutch kit I went ahead and bought a slave cylinder and hose for a '78. I'm pretty sure I have the push rod right after looking at some pictures on the inter web. Those carbs are mounted level and I'm trying to use the clear tubing to measure fuel level in the float chamber. I'm gonna tilt the rear down and try to replicate how they'd sit in the car. Here's where I need them to be and after looking at this, I may be pulling the lids off. Thanks for the picture @Jarvo2 and @zKars
I'll get some better pictures and mark the paths like you've done. We're talking about the same hoses, mine maybe a little different though. I have a early '77 5spd. I'll do it this afternoon. Those shields bolt to the bottom of the intake manifold. I had to use a hand held mirror to put mine back on. Here's a picture.
I've read that. I remember somebody saying it was hard to see the fuel? I'm gonna slant the carbs on the wall and get as close as I can before I put them on. Then I can do it the way you're talking about. Hey rossiz@, while I have your attention how about answering a few questions? I'm going to go ahead and put the header on while it's outside the bay. Did you do that too? Did you remove the steering rod? 'preciate it. Cliff
Good deal. I've taken the pics of those vacuum lines and will mark them with "paint" program on my laptop tomorrow morning. Back with you then. 8^)
Sorry Mark, I was excited! I did some things yesterday that had me at a stand still, I was a little nervous doing them. Fooling with gas and an electric fuel pump straight wired to a battery, fumes and such. I'm putting a 5spd in place of the 4spd and when I bought the clutch kit I went ahead and bought a slave cylinder and hose for a '78. I'm pretty sure I have the push rod right after looking at some pictures on the inter web. Those carbs are mounted level and I'm trying to use the clear tubing to measure fuel level in the float chamber. I'm gonna tilt the rear down and try to replicate how they'd sit in the car. Here's where I need them to be and after looking at this, I may be pulling the lids off. Thanks for the picture @Jarvo2 and @zKars
I'll get some better pictures and mark the paths like you've done. We're talking about the same hoses, mine maybe a little different though. I have a early '77 5spd. I'll do it this afternoon. Those shields bolt to the bottom of the intake manifold. I had to use a hand held mirror to put mine back on. Here's a picture.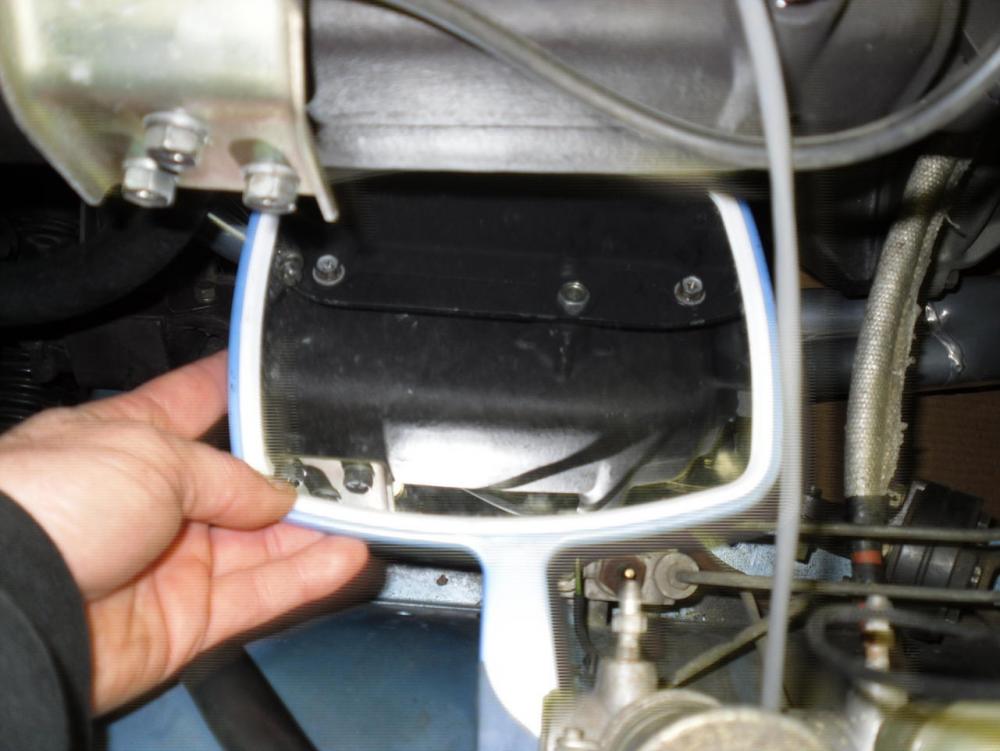 These kids nowadays! My Dad says that about me all the time, I'm 46.
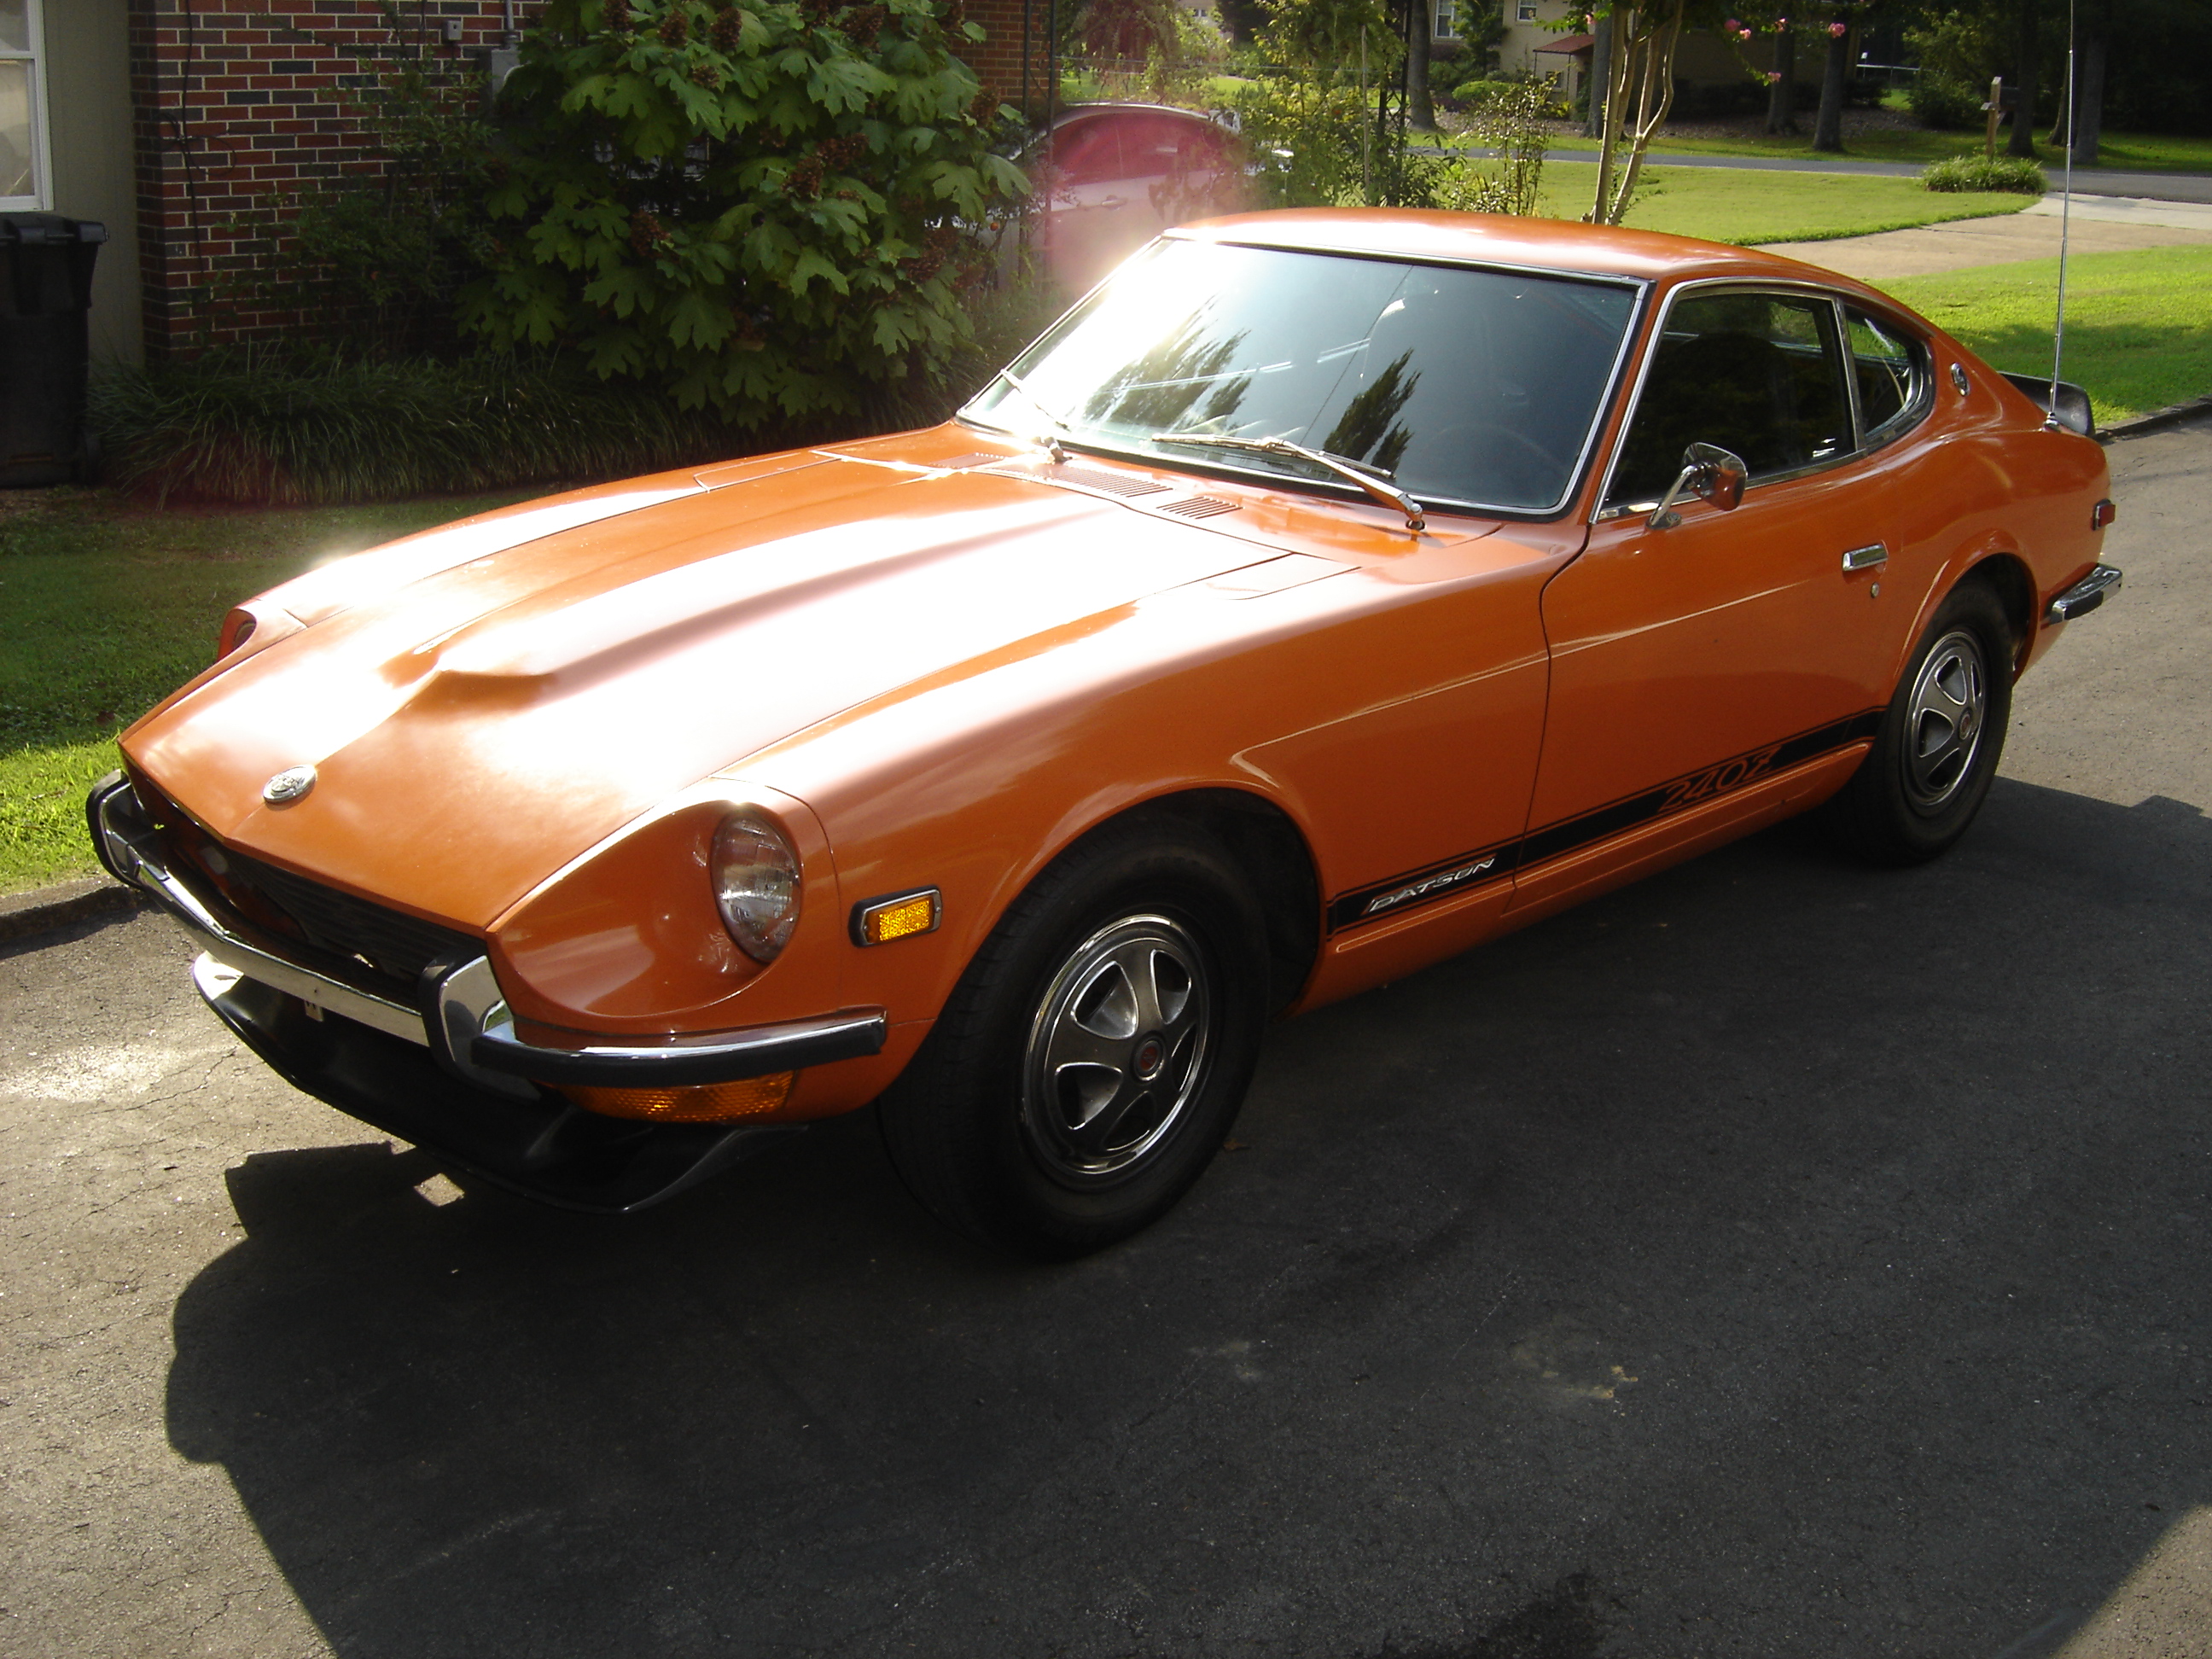
I agree, very nice! White hood would get greasy from the K&N valve cover filter I would think. Maybe Hazmatt will see this and chime in. He's running triple somethings and also has a white bay.
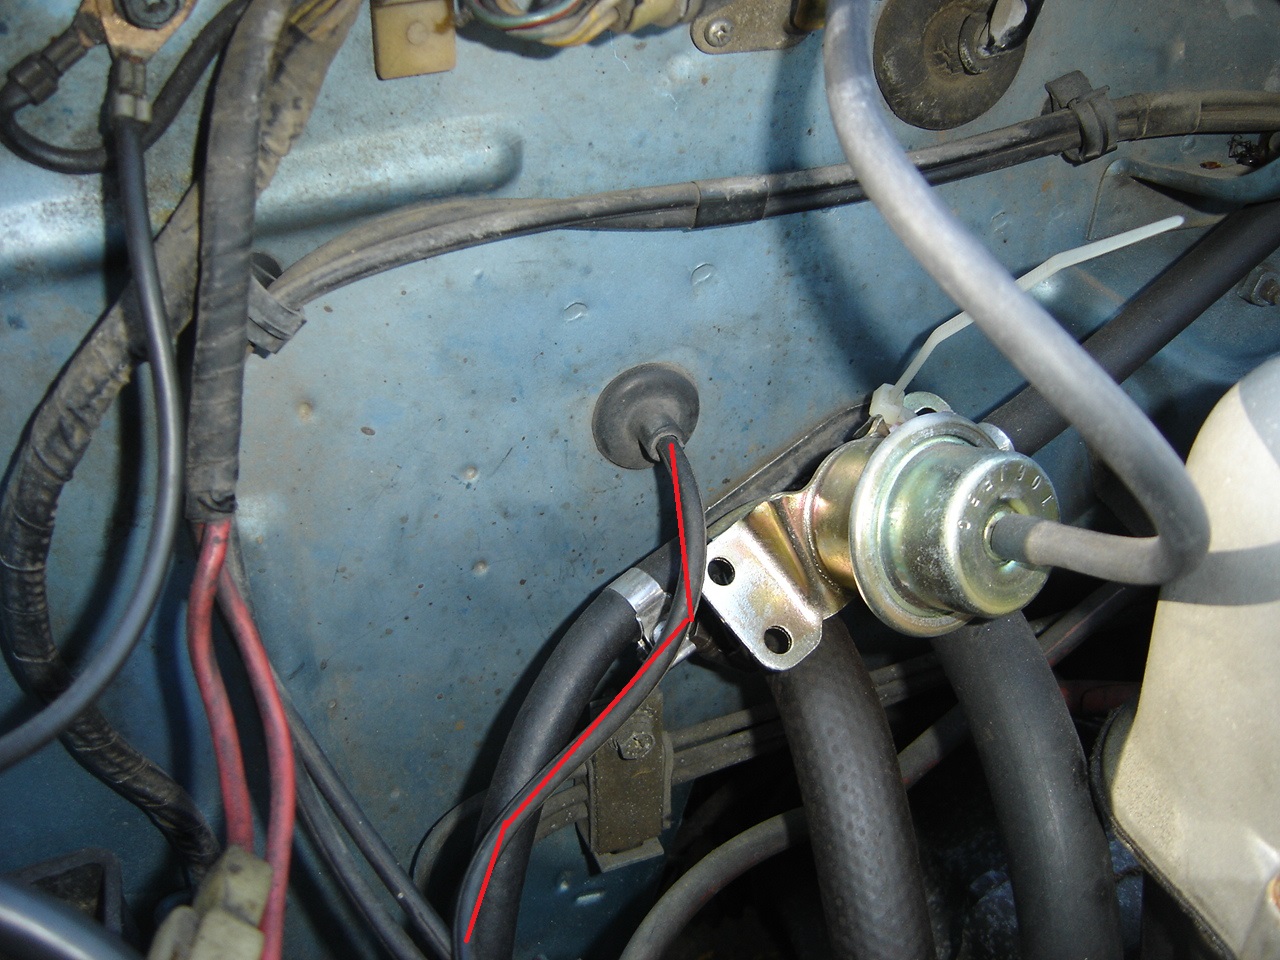
Looking back, one pulls vacuum off the intake, the other goes to the fast idle actuator for the A/C. The one through the firewall I suppose helps open and close the flaps inside the cabin??? If I'm on the wrong hoses put a picture of your's up. We'll figure it out.
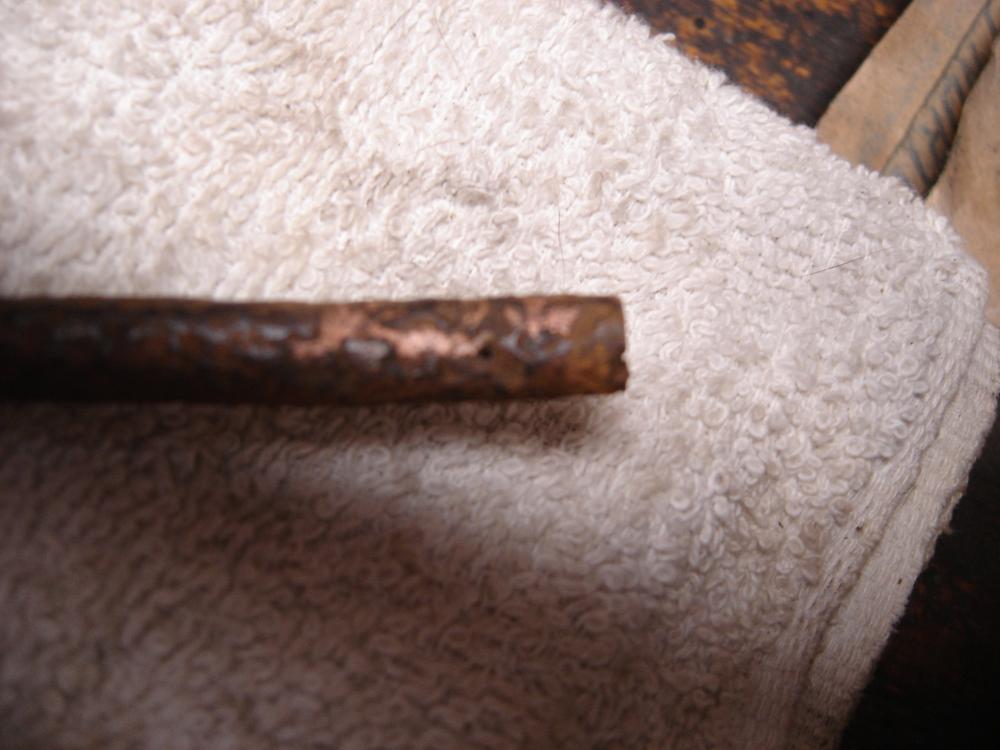
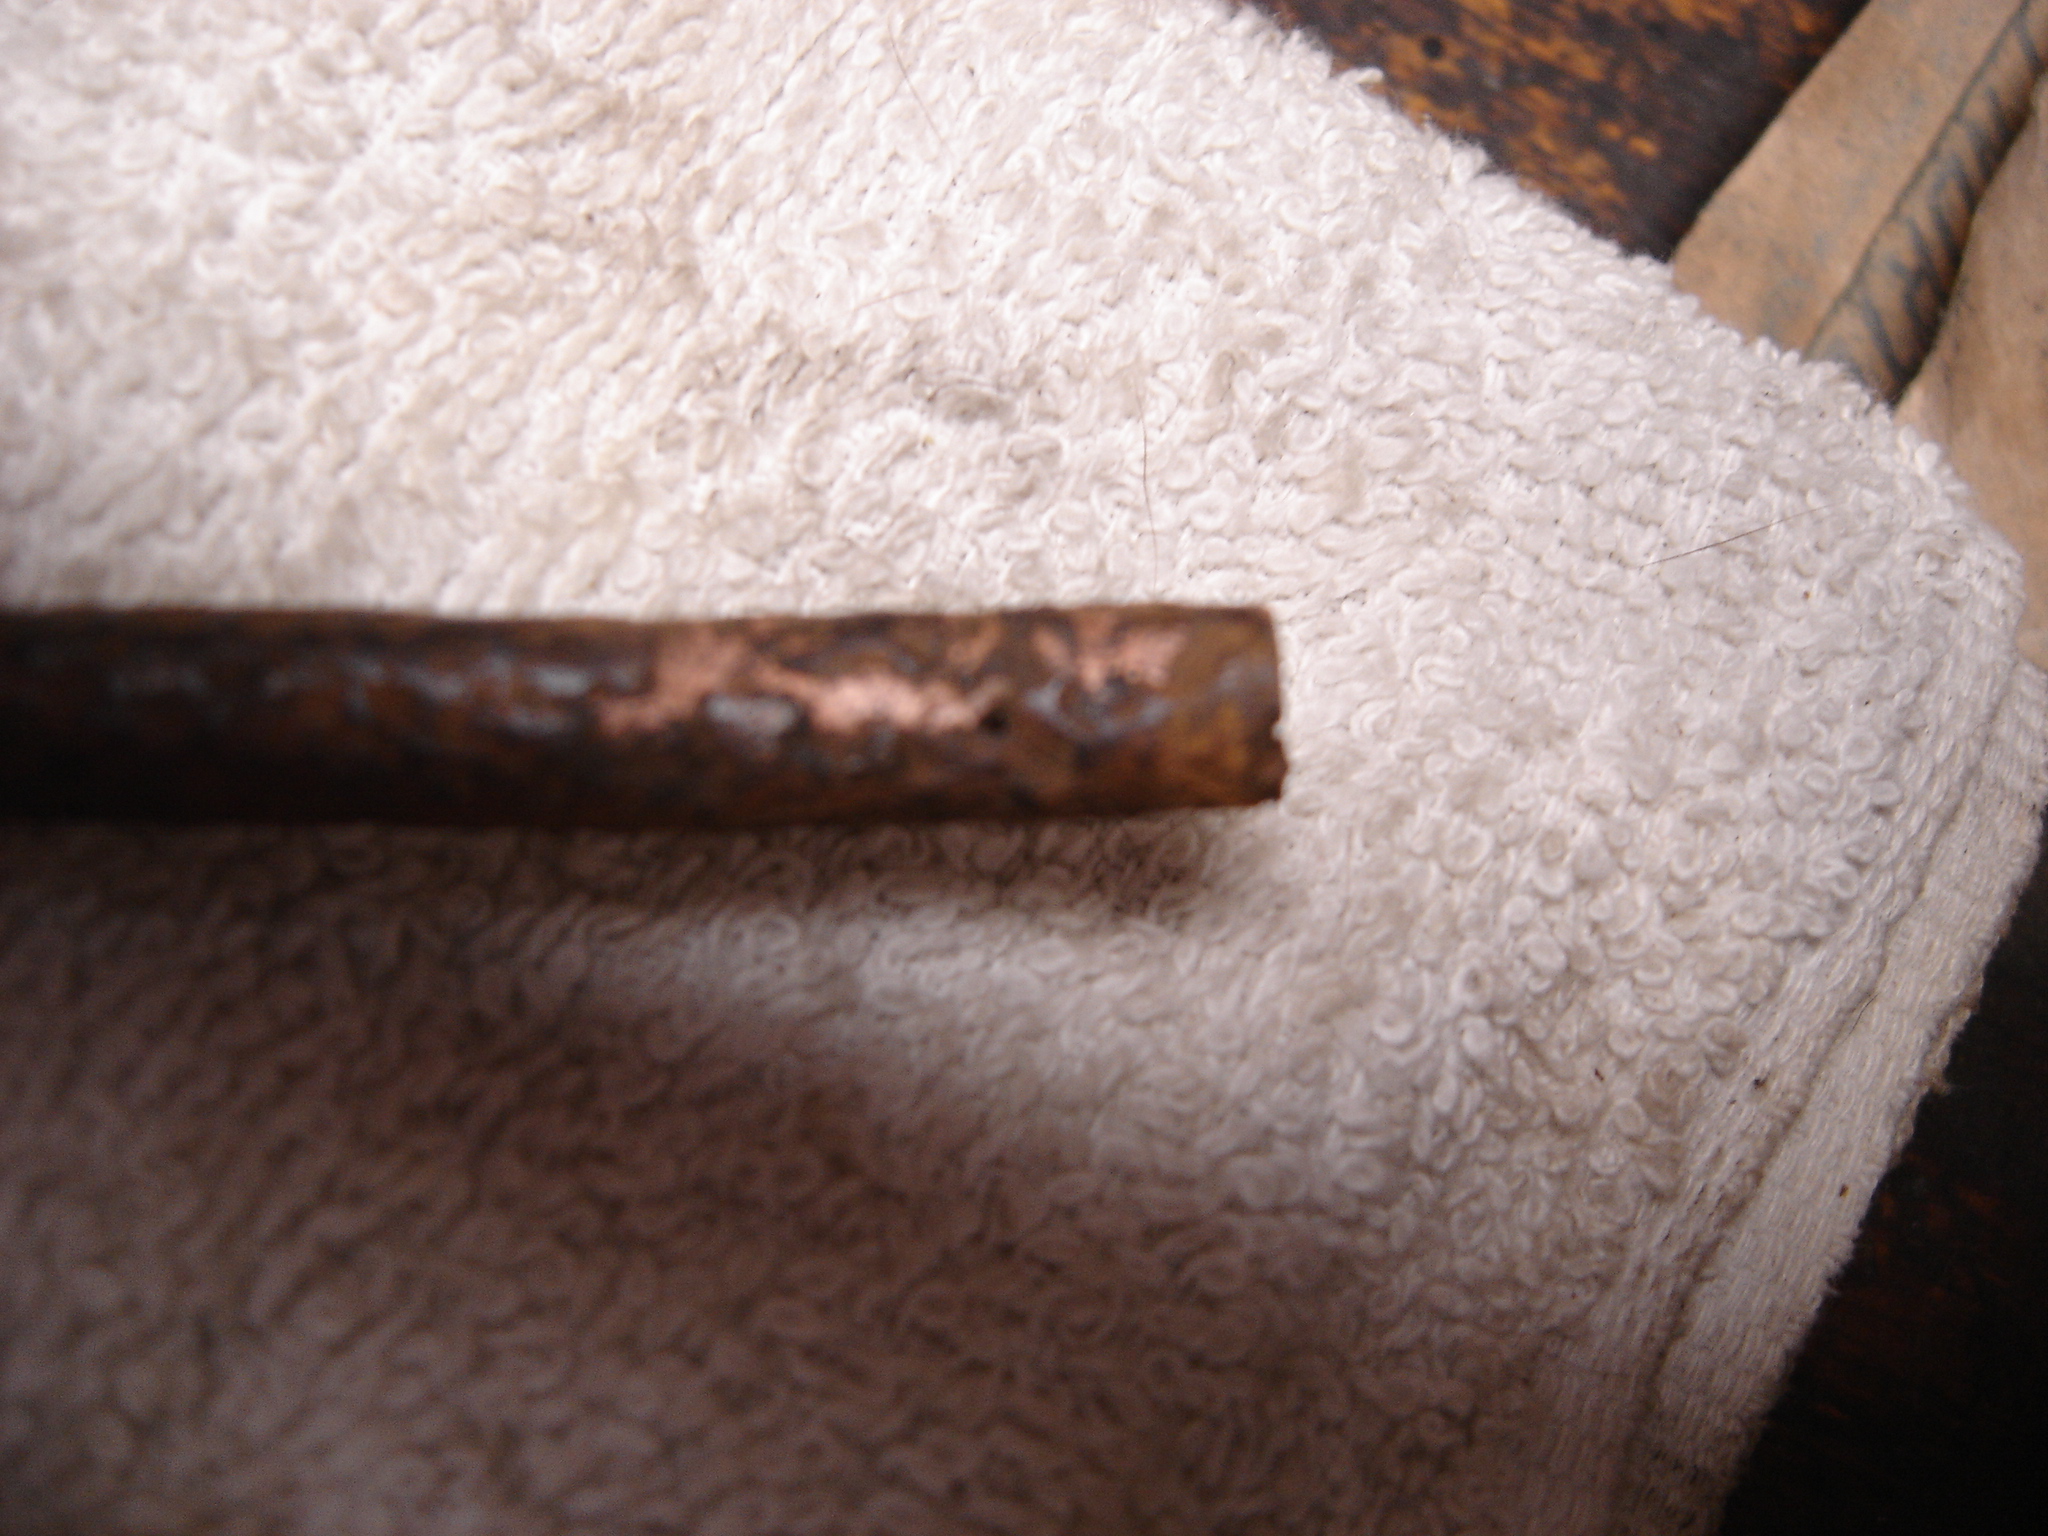
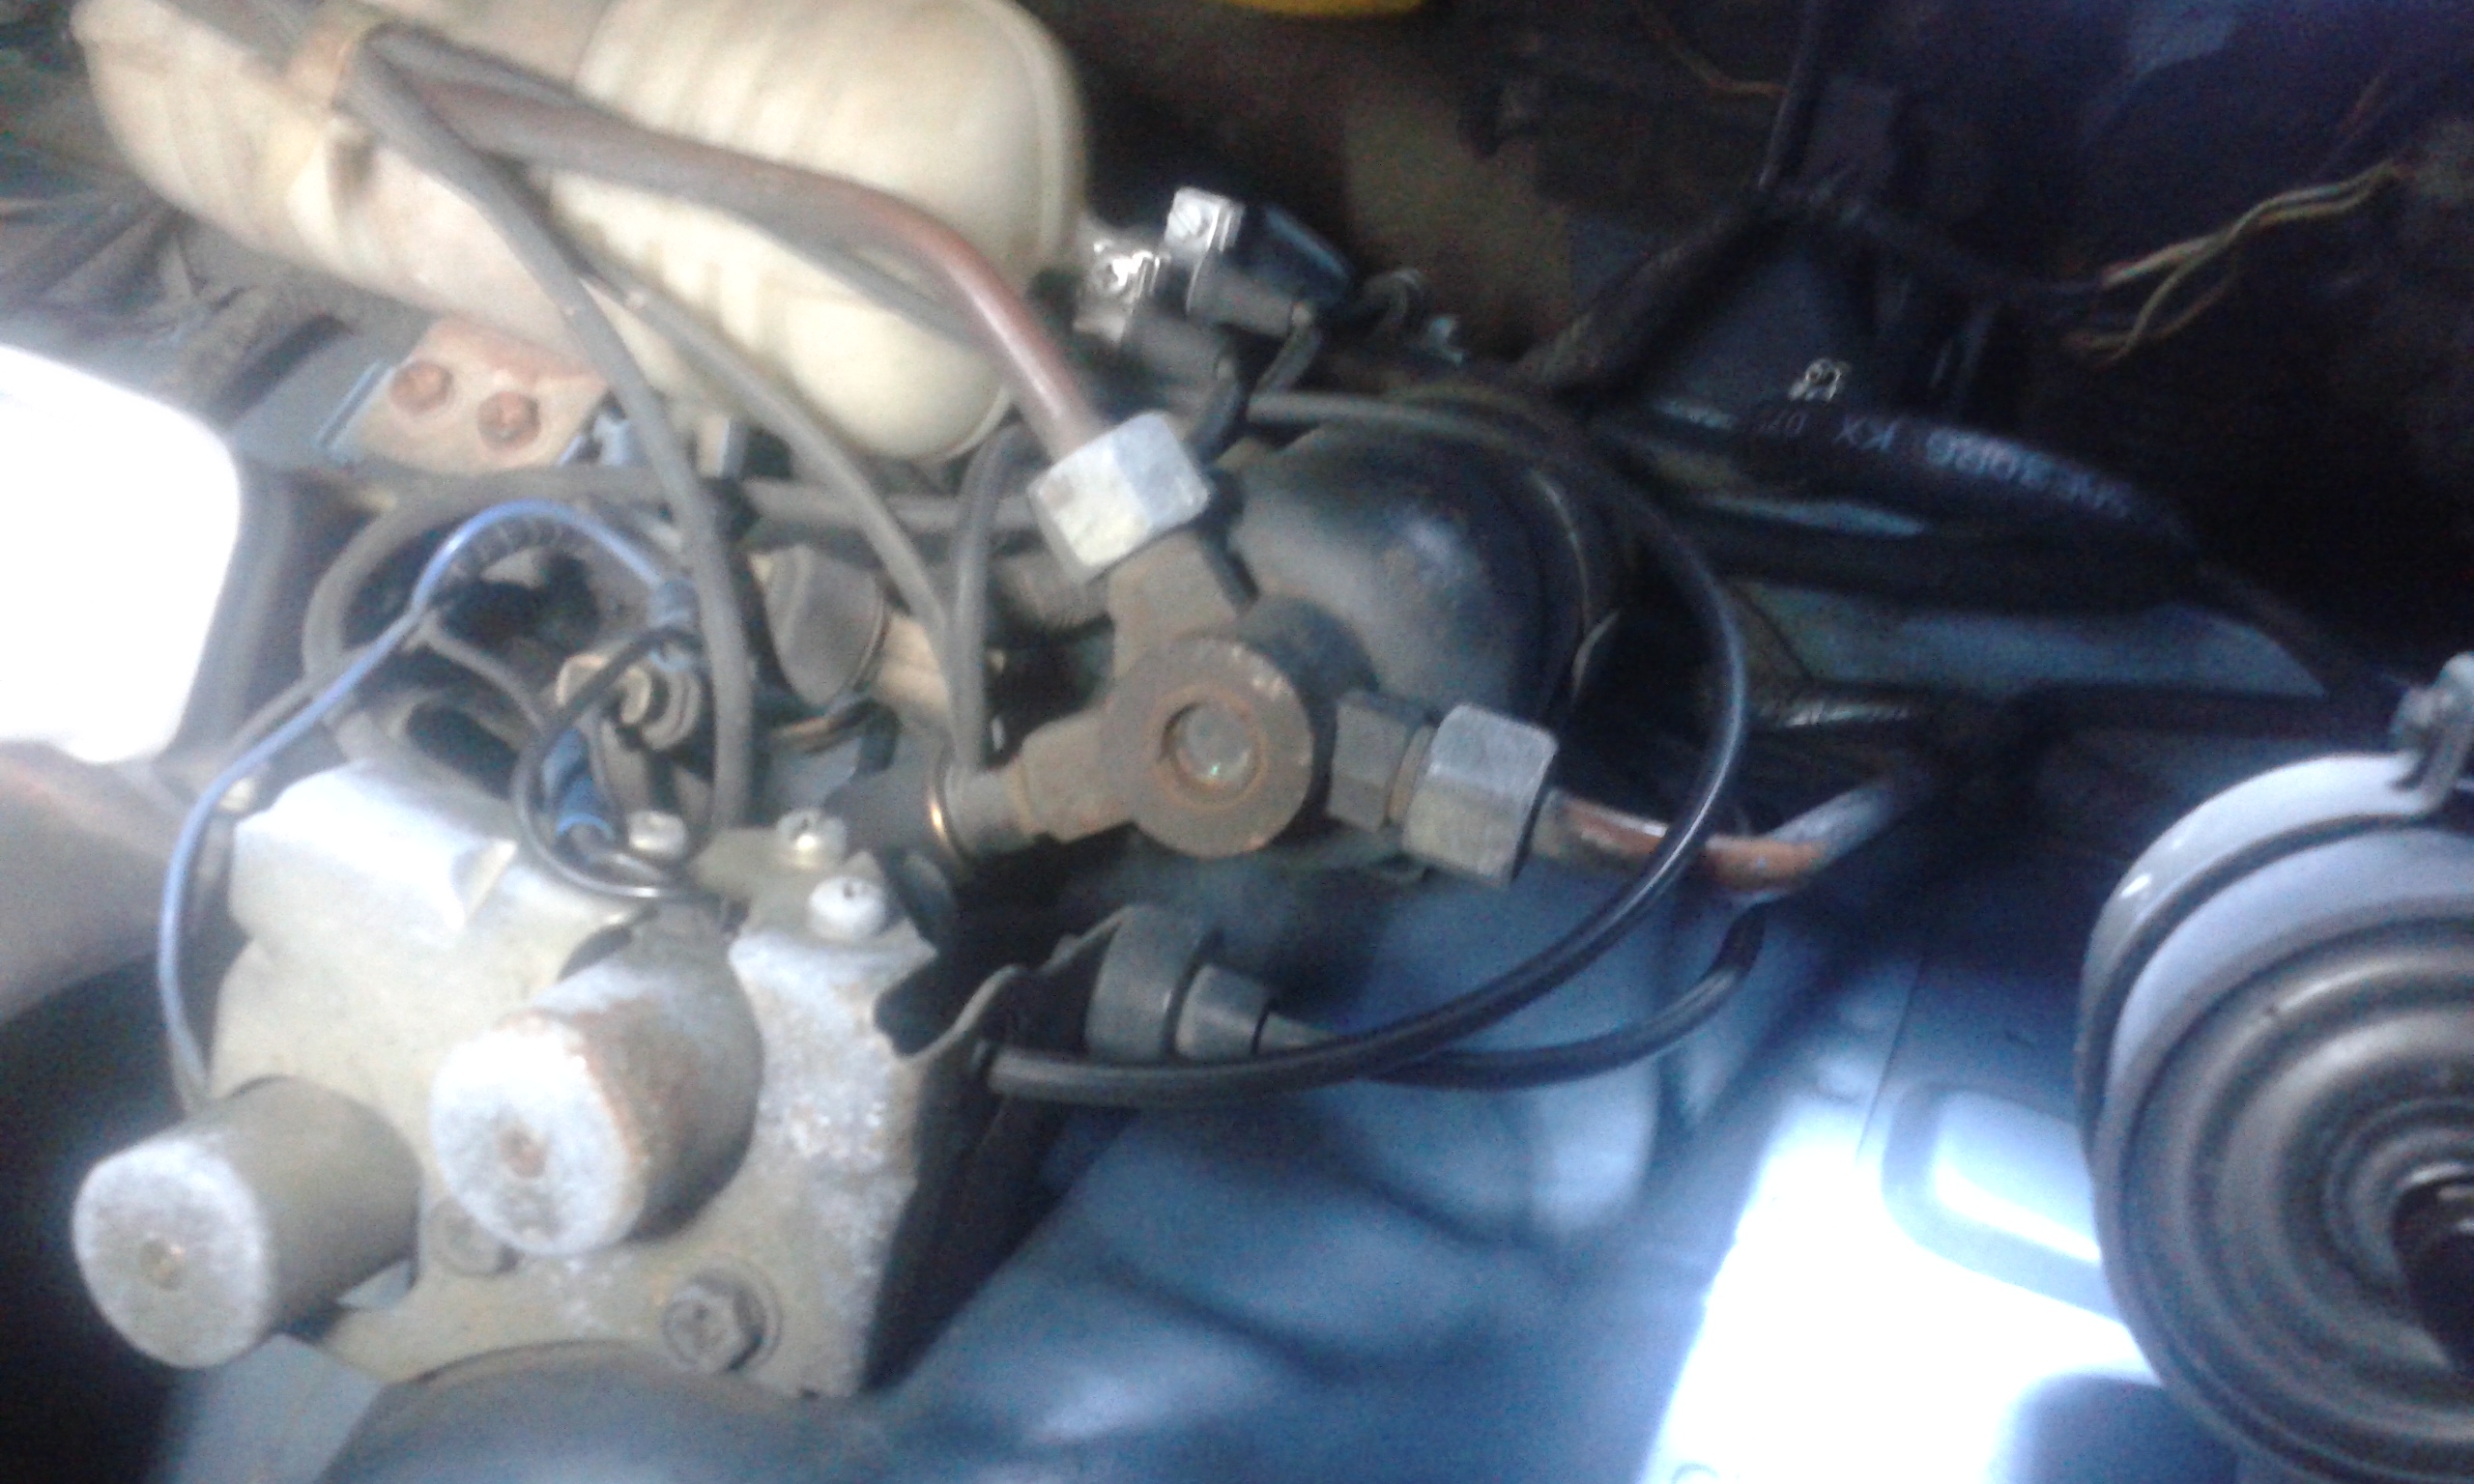
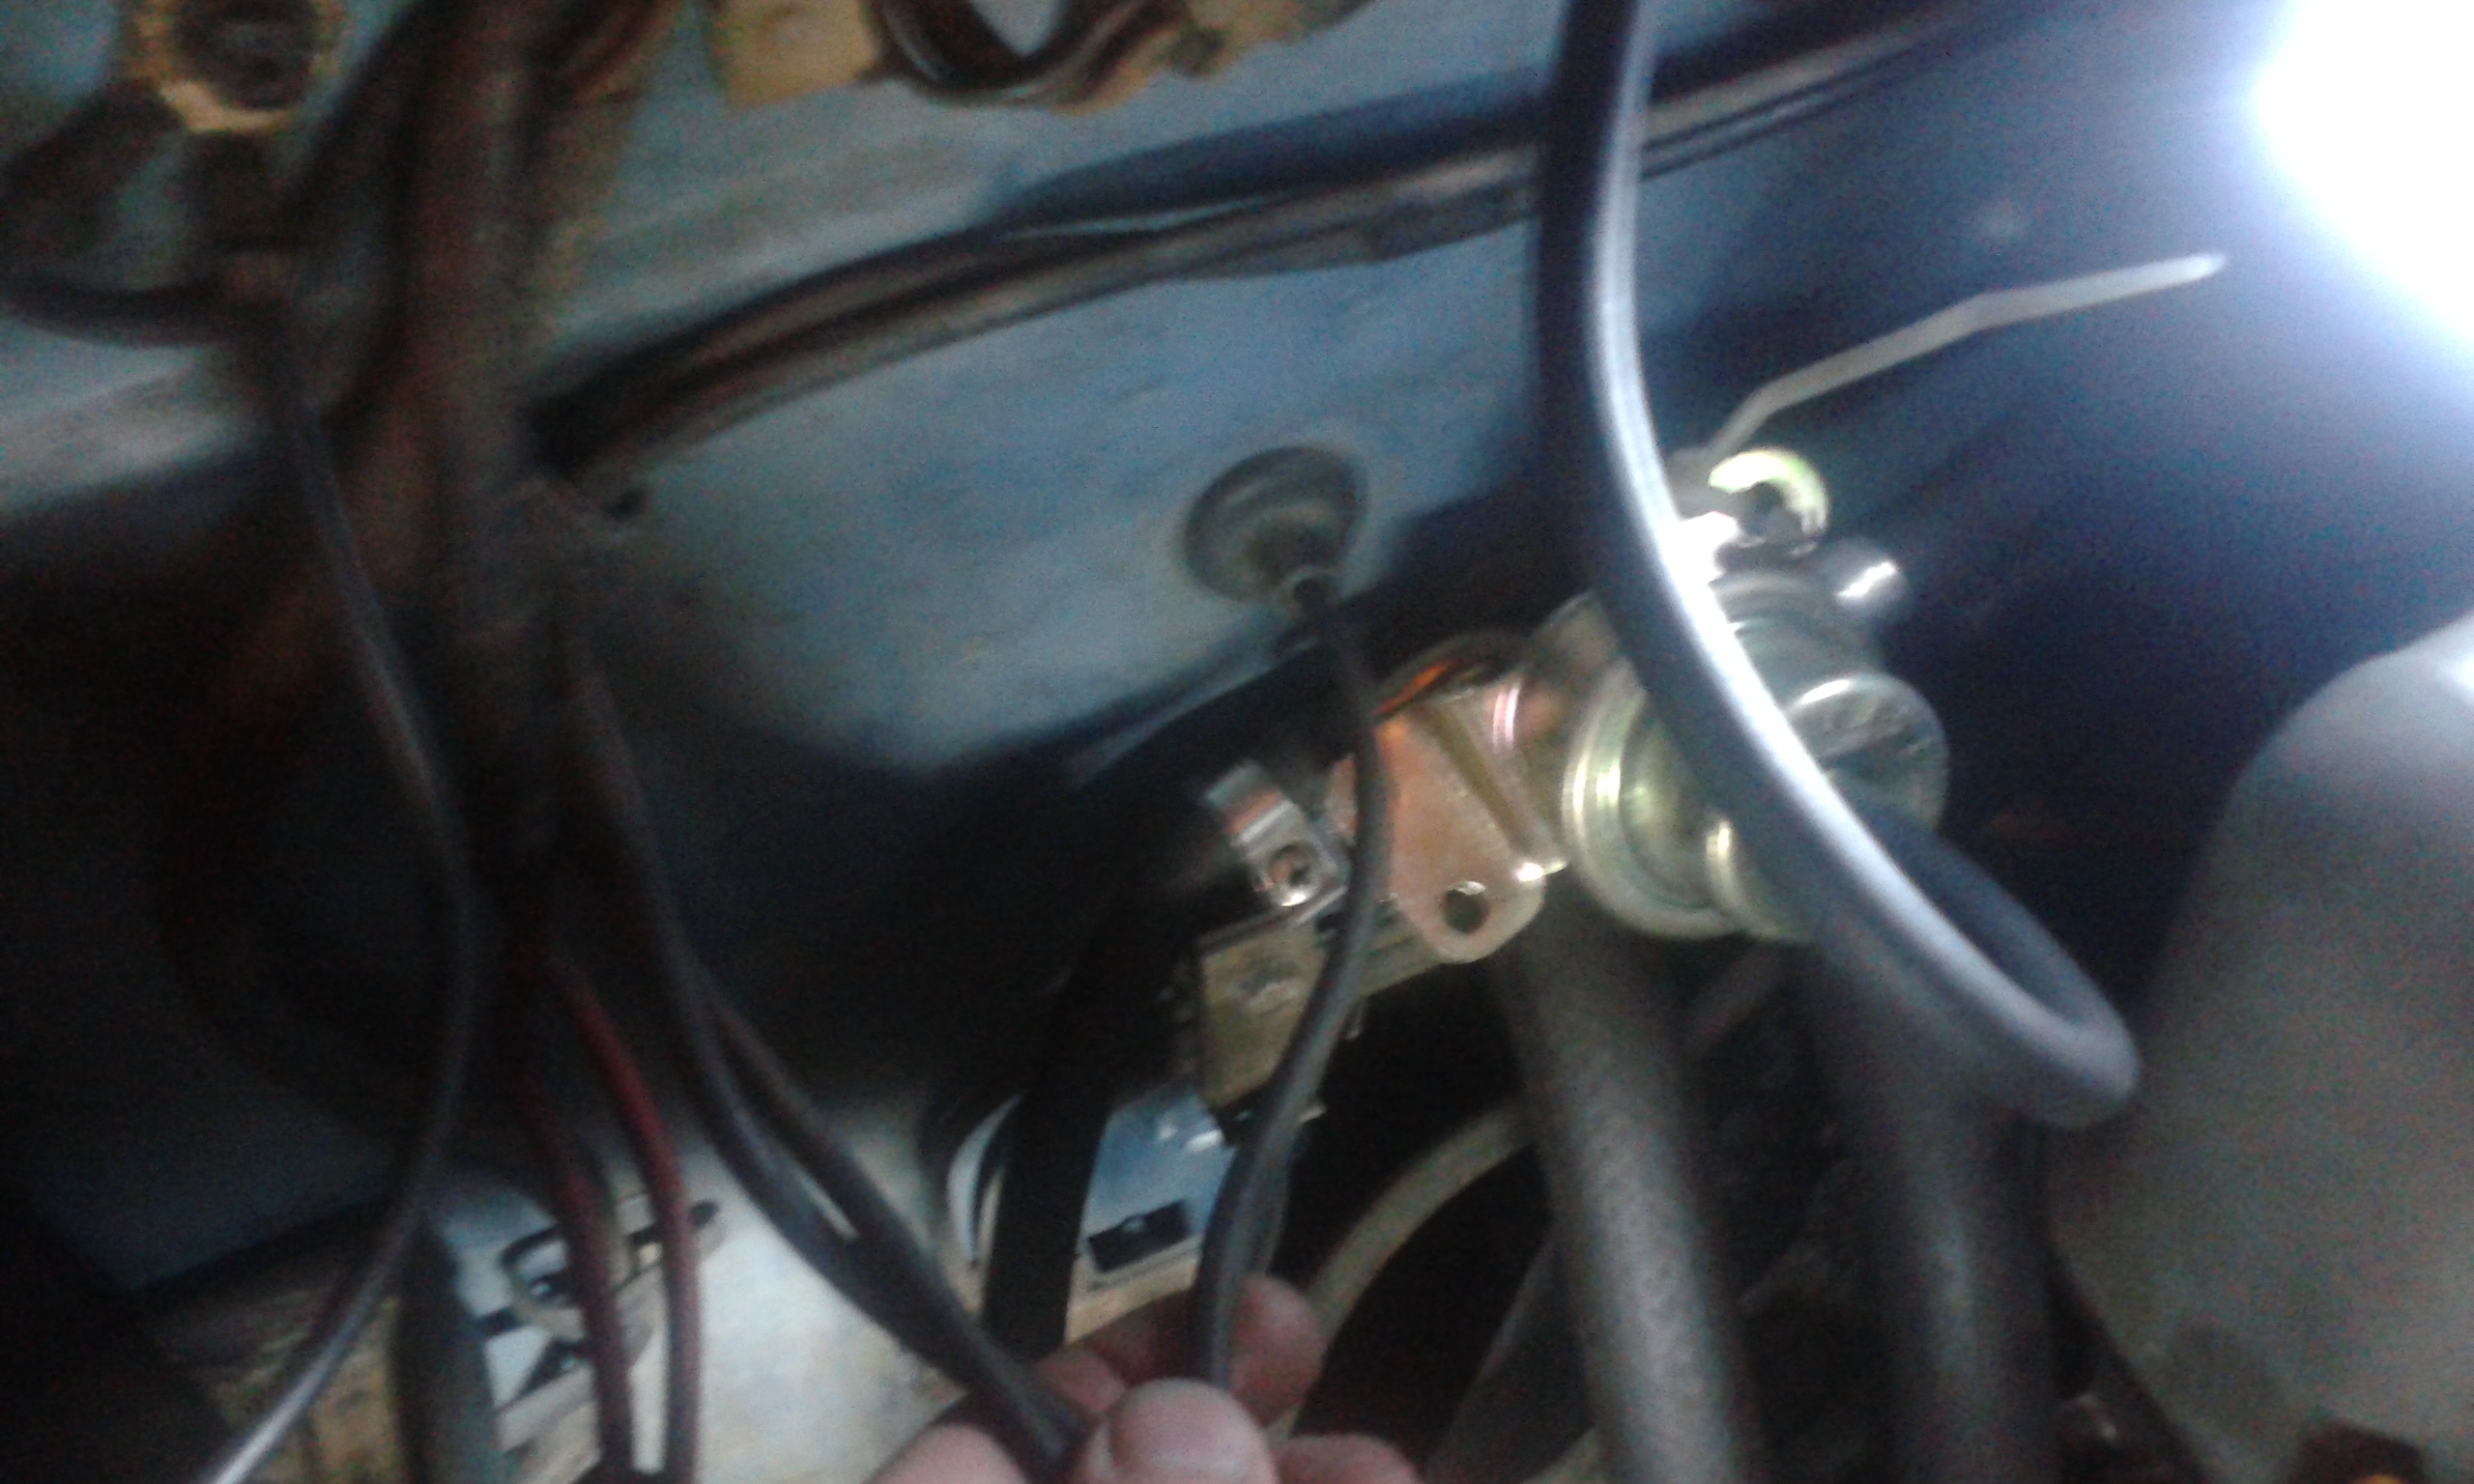
I'm getting ready to put the motor back in after a YEAR!! My dumb a** thought it would be a few months. Anyway, I'm getting the fuel supply worked out. Drained the year old gas from the tank, flushed the carbs then checked the float levels with clear tubing. Question? They're mounted level on a wall and the rear has a taller float valve (actually doubled up washers) so could you all look at my pictures and tell me what you think? The front is a little short but I think that may be because of the way they're mounted, level. I cut out the rotten fuel line under the battery too. Found a small pin hole. That stuff looks like zinc plated copper tubing? One more thing, is this the right end for the slave cylinder's push rod? Appreciate any directions/opinions. Thanks, Cliff.
These kids nowadays! My Dad says that about me all the time, I'm 46.
I agree, very nice! White hood would get greasy from the K&N valve cover filter I would think. Maybe Hazmatt will see this and chime in. He's running triple somethings and also has a white bay.
Looking back, one pulls vacuum off the intake, the other goes to the fast idle actuator for the A/C. The one through the firewall I suppose helps open and close the flaps inside the cabin??? If I'm on the wrong hoses put a picture of your's up. We'll figure it out.
I'm getting ready to put the motor back in after a YEAR!! My dumb a** thought it would be a few months. Anyway, I'm getting the fuel supply worked out. Drained the year old gas from the tank, flushed the carbs then checked the float levels with clear tubing. Question? They're mounted level on a wall and the rear has a taller float valve (actually doubled up washers) so could you all look at my pictures and tell me what you think? The front is a little short but I think that may be because of the way they're mounted, level. I cut out the rotten fuel line under the battery too. Found a small pin hole. That stuff looks like zinc plated copper tubing? One more thing, is this the right end for the slave cylinder's push rod? Appreciate any directions/opinions. Thanks, Cliff.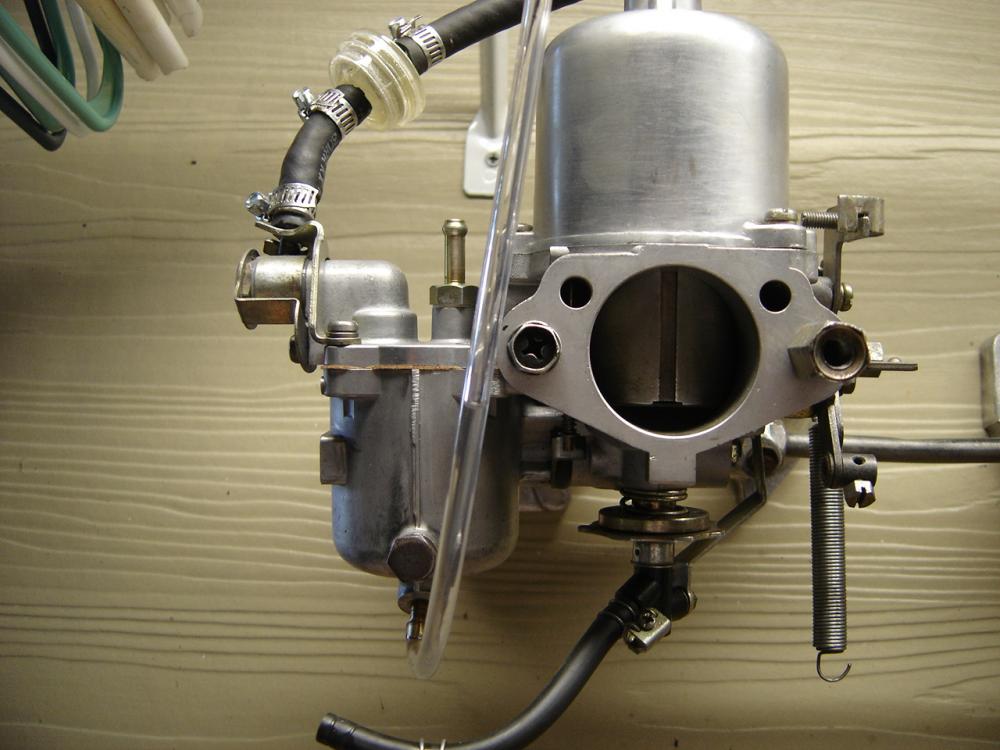
 I can tell you more later when im sitting down and using my laptop. But here's some pics showing small vac lines going to the white bottle. 2 pull vacuum off the intake and one goes through my firewall.
 Completely forgot about those! You the Man.
Do you have SUs and their air filter? That's where my valve cover vents to. And then the block goes to the balance tube, where the PCV valve is. If you have triples, nevermind. There's some guys on here that'll chime in later on that have that set up. Keep bumping the thread up.
Those heat shields go in front of the brake fluid reservoirs I believe. You can put two nuts onto a manifold stud and tighten it down. Put one on and run it down about a half of an inch then put the second on, tighten it next to the first on then use it to tighten the whole stud. You could center drill the broken one then get a reverse thread E-Z Out, or put a nut on top and have a welder fill the center of the nut to the stud. Back it out with a socket.
Completely forgot about those! You the Man.
Do you have SUs and their air filter? That's where my valve cover vents to. And then the block goes to the balance tube, where the PCV valve is. If you have triples, nevermind. There's some guys on here that'll chime in later on that have that set up. Keep bumping the thread up.
Those heat shields go in front of the brake fluid reservoirs I believe. You can put two nuts onto a manifold stud and tighten it down. Put one on and run it down about a half of an inch then put the second on, tighten it next to the first on then use it to tighten the whole stud. You could center drill the broken one then get a reverse thread E-Z Out, or put a nut on top and have a welder fill the center of the nut to the stud. Back it out with a socket.


Important Information
By using this site, you agree to our Privacy Policy and Guidelines. We have placed cookies on your device to help make this website better. You can adjust your cookie settings, otherwise we'll assume you're okay to continue.