Everything posted by beandip
-
Relationary Status...
justacarguy where in the hell have you been? as for the poll married to #1 for 43yrs. , 44 in Feb. So far I think I hold the record here. GaryROFL
-
Holes in Manifold
Scoho , the vacume advance hose should be connected to a vacume port right behind the front carb dome and the manifold. It looks like a little tube about 1/8" in dia. and about 1/2" high. If you connect to manifold vacume it will go to full advance at start up and when you open the throttle and the vacume drops the advance will go to retard. The vacume must be from the carberater.
-
SU's won't balance
when you had the carbs apart did you check the butterfly clearence ? If the butterfly is not adjusted properly there will be a air leak around it and you wont be able to ballance the carbs. . If this is the case what you must do is to remove the carb and look through it with the butterfly closed. Hold it up to a light and see if there is light around the disk. Be sure to have the idle adjustment backed off. If there is light seen around the disk , loosen the screws that hold the disk in place just enough that the disk will move with some resistance. Now close the throttle firmly and check for alignment . Do this untill it is seated all around and no light is seen , tighten one of the screws and check again if all looks good remove the loose screw and use lock-tite on it and tighten it down and do the same with the remaining screw . This should do it if you dont have another vacume leak. When you lifted the front carb. piston and the engine died , it's because the rear carb is too lean . Now this could be caused by the above needed adjustment , or it might be just out or adjustment. If you want a step by step on adjustment . Go to the tec page and scrowl down to the information on SU adjustment..:classic:
-
WTB '71 Radiator fan shroud
I am looking for one also for a '73
-
what carbs are the best????
There is a guy normthe12secdude He frequents the zcar.com site and he runs in the 12s with SUs . He is in Seattle Wa.
-
valve adjustment
I hope you dident get them too tight or you will be having the experience of removing the head.
-
battery cables got hooked up backwards....
you are lucky , so many of these links have been removed . Had this been the case you would have fried everything ispecially if the ignition switch was in the on position.
-
My_Z_026
-
My_Z_018
-
My_Z_017
-
newb question
In the US the 260 was offered only one year. And it was offered in a 2+2 and a 2 seater. The automatic trans was offered form the factory starting with the '71 240 . In '73 it was the start of the strict emission standards here in the states and caused Datsun to come up with crappy carberaters and lower compression. In '74 they stroked the engine and with the longer stroke came up with the 260 engine with the emissions carb. Most people replace the carbs with earlier SUs from '70---'72 units but keep the stock manifold. The 260 is a little heavier than privious cars. For the most part the cars are the same as a 240 Things like bumpers and steering wheel are different tail lights are a little different , things like this. One thing about the Zs is that the engines heads transmissions and differentials are all interchangeable as well as a ton of other things up to about '75 the 280s started with the '75 and they are all fuelinjected. Hope this helps . try this site for information geocities.com/zgarage2001/engine.html Gary
-
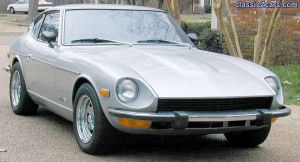
Front view
- Side view
-
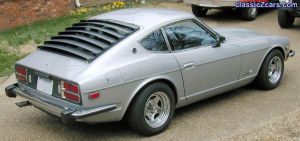
Rear view
-
Liquid Exhaust
Blitz just to be sure on this , keep an eye on the coolent level to see if it drops or not . On the out side chance you have a leaking head gasket. By the way you mentioned that you just got her back on the road. If you pulled t he head , its a good idea to retorque the head after you have driven ,say 500 miles .:classic:
-
oil line coming from the oil pan
Dont have a clue what a T-5 is but the line from the pan must be part of the PVC systime . Don't know anything of the turbo engines but , they have an oil cooler could it be a return oil line ? Just a thought . I have a 82 ZX enging but no extra lines from the pan. Gary
-
How much should a good tune cost?
For one thing tuneing the car is by far the easyest thing you will ever do for your car , you might as well get a good book and jump in . If you run into trouble , here we are , as for info. just go to the tec. section just before this help section and scroll down the list . there is a wealth of infromaton there. and it's free. Read and or print off the info. take it with you and take a look at the project , if you dont understand what is what , post a question and one of us will help. If you lived in Portland Or or are willing to drive here , Ha Ha ,I'll be glad to help. Gary:classic:
-
Crankcase Ventilation
Can you vent the line to the air cleaner you are running? If the engine cannot breathe you will form sludge bigtime . Do you smell fumes in the car with the use of the air filter on the valve cover? I hav heard that this was a big drawback to them. You should be running a PCV valve in the mix as it does nothing to the power and helps the engine to stay clean and get rid of the condinsation that formes in the block when the engine cools and heats. It should be connected to the crankcase vent line.
-
Help!!! I Cant Figure Out Whats Wrong
smusicmans , this is a shot in the dark , but I am running the same ignition in my 240. I recently had a stumbling that I thought was fuel problem and couldent figure it out . To make a long story short it turned out to be the braker plate and a damaged stator. There inside the dist, the braker plate is the flat disk that is connected to the vacume advance diafram. It has little ball bearings 6 total the allow this two disk unit to revolve , and they are held in place with plastic keepers. Mine failed and one of the balls came loose and when that happened the plates came together allowing the other two inplace to also be free to fly around and the stator was chipped, it is the thing that has the 6 things standing up when you look down inside the dist, Any way take a good look inside and see if you can see any loose little balls or parts of the magnet. Good luck , hope this is of some help. by the way if you need parts midwestZ is a good sorce and a sponcer as well. :classic:
-
SoCal Fire 10/28/03
Good pic. afraid I have seen it to many times. I did 22yrs. As LA Fireman . Makes my body hurt to remember.
-
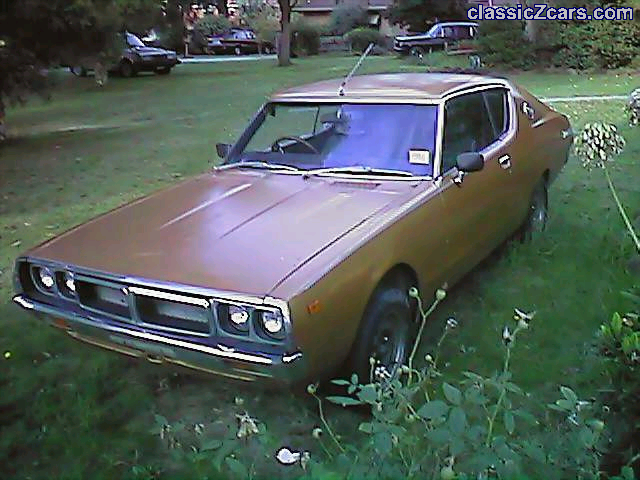
Next project
- Next project
-
floor pan replacement
Sorry but I must disagree in using any thing but welding to replace the floor pans . For this reason , they are part of the unibody construction and strength of the transmission tunnel . The tranny tunnel is where the support for the trans. is bolted and it also supports the weight of the rear of the engine. The Zed findings product is first rate . And as 2many said wate untill you get the new floors in hand before you start cutting. as for the seat supports I just cut them out with the floor piece attached and used a grinder to take off the spot welds and they were ready to reinstall , after cleaning them up of cource I did use a spot weld cutter on the ends on the tunnel and rocker .. I removed the old sheet metal that was rusted and fitted the new pans in , some minor cutting and hammering was need to form everything together. I removed the pan and preped the metal free of all oil and dirt then reinserted the pans and used self tapping sheet metal screws to hold all in place , about every 3 to 4 inches . I took the car to the welder and he tig welded it in place and removed the screws and filled the holes as he went along. It has all been POR ed now and sealed. I hope this helps . Gary:classic:
-
heads up on POR marine clean use
I had just finished polishing my turbine mag wheel with buffing wheel and metal polish and wanted to be sure the the area between the "spokes" was free of dirt and polish. I am painting the rough casting part . I have some POR marine clean and used it full stringth on the casting with a tooth brush, after I rinsed the rim clean with the hose I found that the areas that the cleaner touched and splashed from the brush was dull and all the shine was gone to the point that it looks like milk has been spilled on the polished surfaces, I have tried POR Artisens polish and MAAS , and it helped some to polish away the fogged areas , I am going to need to use the buffing wheel again to get it right. I had no idea that the POR cleaner would etch the aluminum. I am just glad I dident use it on the engine !! This was Marine clean not the metal ready . The product works great for preping for paint and such , Just dont use it on polished aluminum ! Too late smart . Gary:stupid:
-
important information for all
Today I was helping a fellow member and checking out a Z that is for sale. The seller informed me upon arrival that he had sold the car overnight to a full price buyer from Africa. This reminded me of a scam that is being pulled here in the states. They will pay the full selling price by cashers check , but they want to cut the check for the full ammount of the car and the shipping and handeling as well as the brokers comission . Usually double the sale price of the car . You are to cash the check and two days or so the agents will arrive and do the paper work and collect the extra funds . and take the car. Here is the problem , the cashers check is a conterfit but so good the bank cant tell. In about 10 days when the check bounces the law shows up at your door ane you are liable for the total amount + you are out your car. Beware and be INFORMED , this has been going on and it happened today. to one of our members , two actually the seller and the byer. The FBI and the Police were both called and they both said just dont sell the car. Were not interested and they will do nothing, HOW DOES THAT GRAB YOU . :sick: :angry: From a strictly legal stand point maby only a sting would catch the thief and He is in Africa . maby that is why ?


