Leaderboard
-

Diseazd
Free Member1Points3,362Posts -
Scarab#157
Free Member1Points5Posts -
EuroDat
Free Member1Points3,309Posts -
S30Driver
Free Member1Points1,580Posts


Popular Content
Showing content with the highest reputation on 03/07/2015 in Posts
-
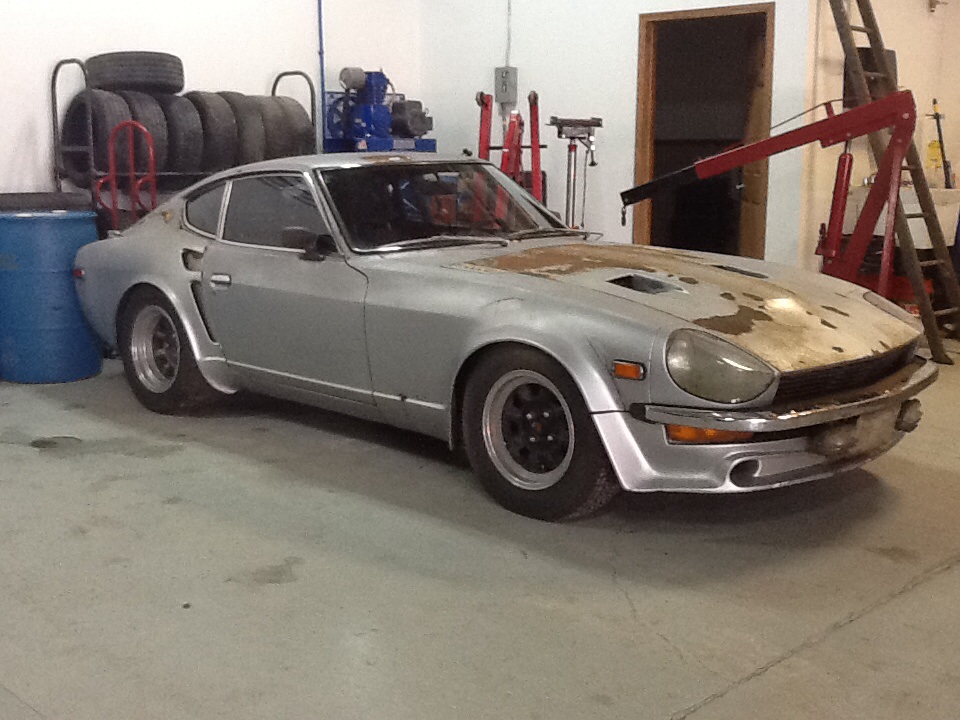
1 pointHi All! i took a short video clip of the exhaust sound from the Scarab yesterday and wanted to share it with you all. I will never get sick of this sound! Turn up your speakers! ENJOY!
 1 point
 -
1 pointmy dad taught me some of the most important things about wrenching when i was a kid. i remember watching him work on an old automatic toaster to fix the little spring mechanism that makes the bread pop up when its done. he took it apart on the kitchen table, on the previous days newspaper and taught me that if you learn how to take something apart really carefully you can always put it back together correctly. go slowly, take your time, think as you go. it's easy to get excited and rip things apart and wind up with a dizzying pile of parts. never trust your memory - take notes, take pictures, label things, keep them in piles of associated components.keep like fasteners together - in most cases they will serve the same purpose, and use an organizing system to keep track of where they came from (ziploc bags and a sharpie are perfect).look carefully at wear marks where one part meets another - this will give you clues as to how the parts go back together.think about what parts do - if you understand what a lock washer, compression washer, spacer, etc. does it makes it easier to know the order that these things go back on.a motor seems complicated as a whole, but when you break it down into systems it gets very logical. think of charging system, electrical accessories, ignition system, fuel system, lubrication, valve train, timing, etc. and it will make sense.ask questions, read up, get help when you feel that nagging doubt in your gut. when something doesn't seem right, it probably isn't. don't force parts together unless they're supposed to be, as in a press-fit component.when you're done and you have an "extra" part or two, never, ever throw it away and assume it's not needed. don't ask how i know this...the advantage you have with a spare engine is that you have no urgency since your car is currently running. if you don't rush you'll be fine. looking forward to the build thread!1 point
-
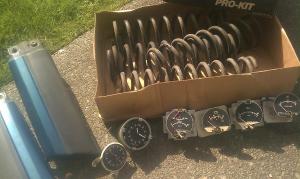
1 pointMoving in a few months. Some Z & ZX stuff. Maybe some of these parts can help someone out for the cost of shipping. AAR valve (ridiculously priced if you go to buy one) Turbo Coil with Ignitor & Bracket Bumper Guards (from a 71 or 72) Turbo J Pipe Hood Emblem Set of Stock 280 Springs Set of Louver Mount Hinges Pair of ZX Front Bumper Trim, Side Covers 280 Clock The other instruments are ZX Turbo

 1 point
 -
1 pointIf it's a 240Z clutch, use the collar for the 240z. If it's a 280Z clutch, use the collar for that clutch. Throw out bearings are the same. If you don't match the collar to the clutch, you'll be screwing with it forever. You can choose either clutch and collar for the 5 speed but collar and clutch have to match. I always match the arm lever too......240z arm to 240Z clutch and 280Z arm to 280Z clutch.1 point
-
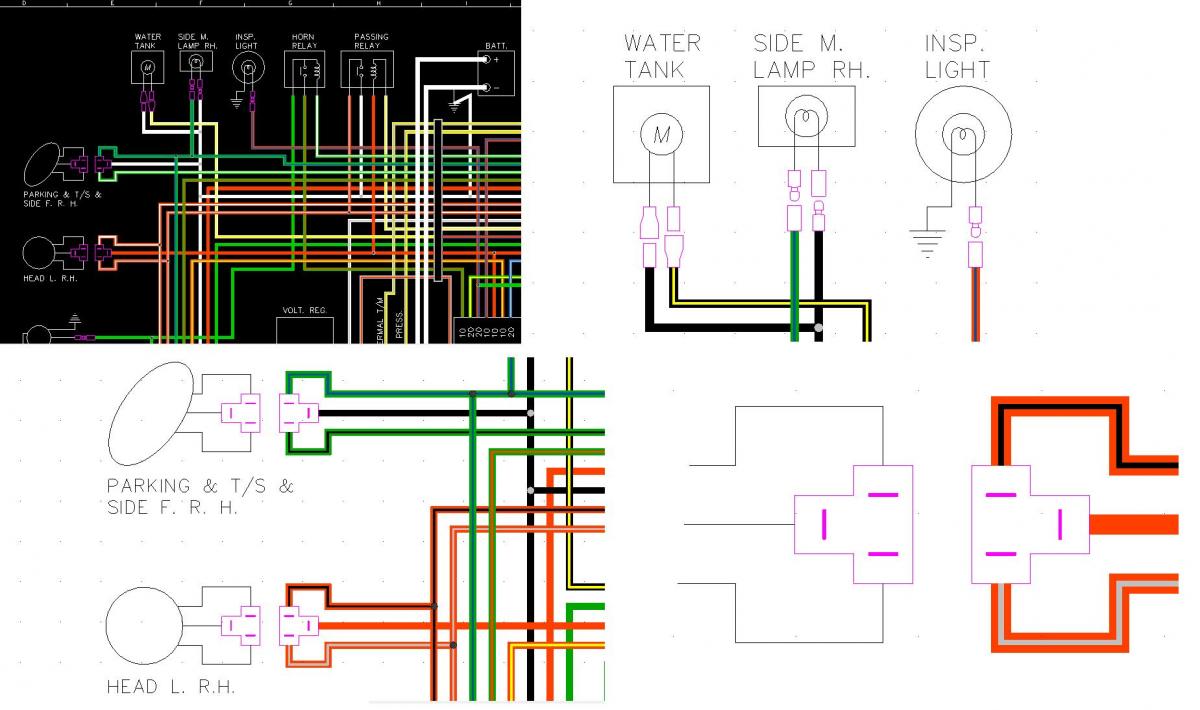
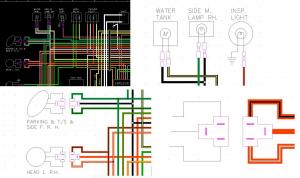
I played around with some terminal blocks. The drawing will be longer. Its the only way to get it in and not clutter it up too much. The terminal blocks can be numbered for reference in block tables with wire colour and size. The block table would refer to the terminal block and a grid reference to locate the area on the wiring diagram. Here are some examples. ColorWiring240Z1971Early_TerminalBlockExample06-mar-2015-1.pdf
 1 point
 -
1 pointWell I'm going to tag on to this older thread because I think Derek had the best idea for trouble shooting this issue. I had actually bought a fog machine over a year ago when they were cheap(after the hallowen holiday). It really is a cheap, fast clean way to diagnose the exhaust fumes. I tried the "suck" method first, but it left too much to question. Inside the car with not much room to move around and it being dark, it was too hard to tell where the fumes originated from. Now the "blow" method was much better. It really only takes a couple of minutes to set things up and start trouble shooting. What I found and yet to be fixed, is that I have a lot of air moving thru the latch assembly. It looked like a steam engine coming out of there. Perfect spot to suck up those swirling fumes around the back. I haven't finished examining everything yet, but the only way fumes have access thru this point is by leaking around the vinyl panel on the hatch. The low pressure in the cabin must be sucking air around this panel(which is NOT air tight-mine anyway) and thru the hatch assembly. It would seem to me that the easiest fix here would be to seal the hatch panel by sealing some plastic sheet behind it-agree? I also noticed smoke around the left tail light , where some previous bodywork was done. Also noticed a lot of smoke out the pillar vents, but I think they are too far from the exhaust to be sucking anything in. I will update as I try to fix these1 point