


Thanks to all the posters on this forum! After reading through quite a few post on the interior fume issue, I decided to attack the problem on my car. I have a series 1 car in fairly good shape that I use as a fair weather daily driver. I love the car, but was getting sick of smelling like a tailpipe!
Even just cracking the drivers window 1/2" would fill the car with nasty untreated exhaust fumes.. I used to think it was bad aerodynamics of the car. My therory was the rear turbulance from the car would draw he fumes forward along the car and enter the side windows. I was getting ready to buy a BRE rear spoiler and try to modify the aerodynamic wake of the car to resolve the fume issue. Glad I did not do this, my theory was wrong! Another poster mentioned that while the widows are closed, the cabin has positive pressure, from the ventalation system. That is why the Series 1 cars have the rear hatch or later cars the Z logo air extractor vents. This allows a flow through effect for your ventilation. They also serve as a relief valve while slamming the doors. If you did not have these extractors, slamming the door causes pressure that can irratate your ears. The extrators on most all cars have a rubber flap, so they work as exit only valves. Once the windows are opened (even just a wee bit) the cabin changes to a negative pressue at speed. This causes the car to pull air in from any other openings in the body. A list of possible culprits:
1. Firewall openings, boots and grometts may be ripped or missing.
2. Inner shift boot (under console), ripped or cracked.
3. Rust holes in the body structure that go through to the interior.
4. Rear hatch area:
a. Rear hatch inner seal
b. Rear hatch inner trim panel (was used as a air extractor valve on 1970 cars) gasket leaking.
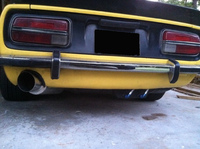
c. Rear hatch edge plugs (were used as vent drains on 1970 cars) missing. Also 2 small holes on outer edge.
d. Tail lamp gaskets leaking
e. Other pass throughs for antenna, fuel vapor system.
5. Leaking exhaust system compnents.
Since I have already adressed items 1 , 2, 3, and 5 when I first purchased the car, I focused on area 4.
A. Rear Hatch Seal: Initial observation showed hatch seals appered to be in good condition. I then checked the gap between the hatch and the seal. I used a trick I learned while working as a vehicle development engineer at Ford. You apply some talcum powder to the seal surface, just a light dusting. Close the panel, and then re-open. The powder will deposit on the mating surface. This will show the contact area with the seal bulb quite well. If there is a thin line or no powder, you have a poor seal! I had a very poor seal along the entire rear edge, and around the lower side sections.
Resolution: I tried to adjust the hatch striker bracket downward to get the hatch to close in tighter. This did not make significant improvement. To remedy this, I applied a strip of EPDM rubber self adhesive seal to the hatch. Another Home Depot product. This stuff is black self adhesive seal bulb 7/16th" wide. I stuck it on the hatch inner surface, along where the body seal meets it. This gave a very tight seal in this region!
B. Rear Hatch Inner Trim/Vent Panel: The rear inner hatch panel's sealing gasket (cork) had disintigrated, and a couple of fasteners were missing.
Resolution: I made a new seal from flat foam 3/8" wide stick-on weather stripping. Cheep stuff $2.59 for a small roll at Home Ddepot. Replaced missing fasteners so the new gasket is compressed. The panel is now well sealed!
C. Drain and Plug Holes in Hatch: My 1970 car has drain tubes in these holes, so not an issue.... I did fill the small holes located on both outer edges with a couple of small rubber bumpers. Not sure why Nissan made these holes?
D. Tail lamp gaskets: These tend to get nasty around the edge flanges on 240Zs, but the mounting surface has many fasteners. This usually holds the seal tight and probably will not leak. I have parted out many terminal 240s and found good seal integrity on the mounting surface.
E. Other Pass Throughs: I inspected antenna, and fuel vapor line grometts. All were in good condition.
Conclusion: A 30 mile commute to work left me very excited. No significant fumes inside of the car. I tried various speeds, and window opening combinations. I could only get slight scents of fumes on slow downs, and throttle back outs. Most of this is due to the fact that my valve guide seals are shot. I feel the issue is 90% fixed at this point. I think the most significant fix was the main hatch seal. This is a critical fit on the 1st generation Z. While my seal fix would not fly on a show car, it still does not look too cobbled. Fine for a driver Z car. When I do a re-paint, I will try to install a new seal, and hopefully eliminate the extra seal on the hatch bottom. The fix is nice and cheep. About $10.00 and 2 hours of time was spent on the fix. Now my wife will ride in the Z again!
I hope this summary, and sharing of experiance will help out other Datsun Z fans. Besides the stench, this could possibly be a deady situation! CO poisoning is quite possible.

Recommended Comments
Create an account or sign in to comment
You need to be a member in order to leave a comment
Create an account
Sign up for a new account in our community. It's easy!
Register a new accountSign in
Already have an account? Sign in here.
Sign In Now