madkaw
Community Member
-
Joined
-
Last visited
Everything posted by madkaw
-
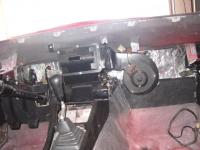
Yes Arne that helps. yes I did have the dual point Dizzy, but don't remember that relay-only the ballist resistor which I have jumpered since I have gone with an 81 dizzy. So maybe the black wire was the ground for that relay. The 2 Black wires aren't for the washer pump, I have the right color coded wires there for that. These are in addition to those wires. So I will have to complete the circuit on the neutral wires and then connect the reverse light to make things work. I'm glad you mentioned jumpering the neutral wires since it probably wouldn't start until I do.
-
I believe I have my engine harness about hooked up properly now in my 9/71, but I have some extra wires that I can't seem to pin down on the schematic. The engine harness wires basically end at the coil power wires, and I believe I have them all hooked up properly, but there is a red wire with black stripe and a solid black that I'm not sure about. The red/black stripe wire actually splits into to wire ends with some blade type connectors on it. This car was equiped with A/C at one time and that's the only other thing in that area that is not accounted for. I have looked on my schematic but just can't seem to make the connection(pun intended:)) Also, I have upgraded to an 81 zx brake MC and can't remember if the original MC for this car had 2 wires running to it like the 81 has. I have 2 black wires running towards the MC and I am assuming that they are for the MC. Okay-lastly, this car was originally an automatic and i have converted to manual-specifically the BWT-5 from an 82 turbo. So to get the reverse lights working what will this take. I see the 2 wires coming off the top of the trans that i assume are for the reverse lights, so I need to find the 2 wires in the harness that were used for the reverse switch on the auto and connect them? Any help or suggestion would be helpful and improve my chances of making ZCON!!!
-
Just wanted to give some notice to this guy and his web site. Daniel Stern-the actor- was in the home alone movies and many others, but I guess his sideline is Cibea headlights and wiring upgrade relay kits. I have been dealing with him and he seems to be very eager to help and the web site does a great job of explaining relays and how they work for our headlight upgrades. So if you want to do this job yourself, then I would recommend looking at his site for help. http://www.danielsternlighting.com/
-
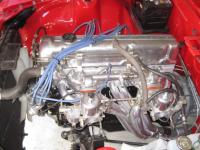
Dave, thanks for the help and thanks for the compliment. I actually blanked all the stuff from the balance tube myself, and for a minute was worried that I blanked too much:paranoid: I might take off the center linkage and see if I can remove the arm some way. I only hope it runs as good as it looks;)
-
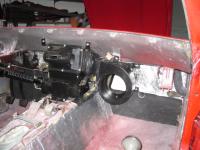
Okay, thanks it's starting to come back to me. So not having this will not affect me being able to sync my carbs right? The carbs actuate and return properly with the center linkage, so maybe I can remove this part of the linkage?
-
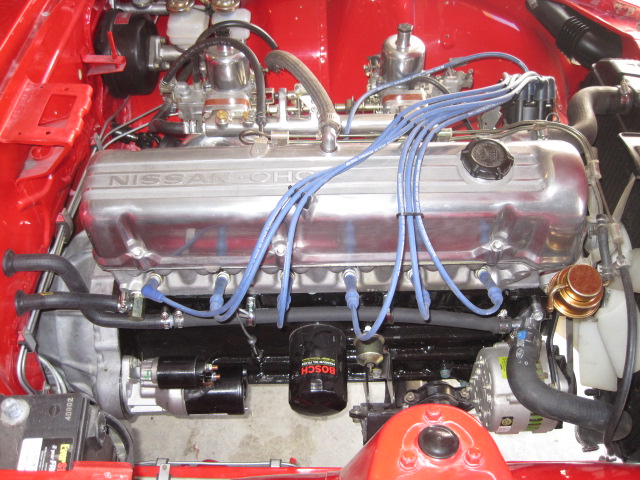
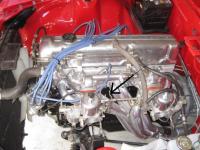
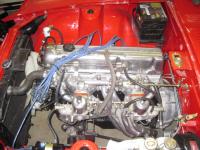
So I am hooking up my heat shield and return springs on my SU set-up and I am kind of baffled about the center linkage. Please look at the picture and the arrow,what hooks to this. Of course this pic doesn't show the heat shield and return spring. The rear carb seems to work as advertised as far as the balance screw, but the forward carb the balance lever just flops around. I believe I have the return springs in there proper place.
-
I am trying to get my wiring harness back together to get my car started. After some endless searching to find out what the fusible link even LOOKS like I figured out what I am missing(by looking at the MSA site:)) My question is; to save time and maybe expense can I use just a maxifuse or something in place of that fusible wire and more importantly what value of fuse would I use at this junction?
-
Thanks for the link. When i searched I didn't put in corner seals, I was using quarter window seals so i didn't come up with that thread. I guess i will need to take my laptop to the garage and read as I work!!!
-
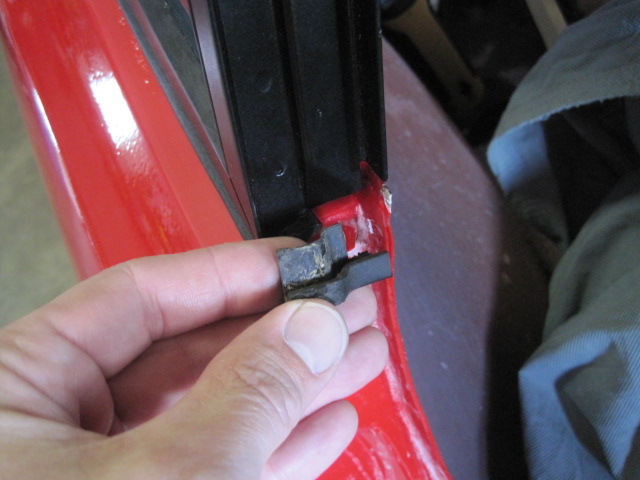
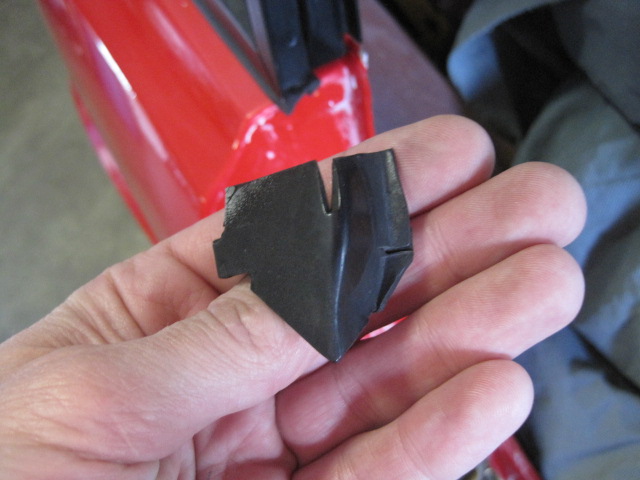
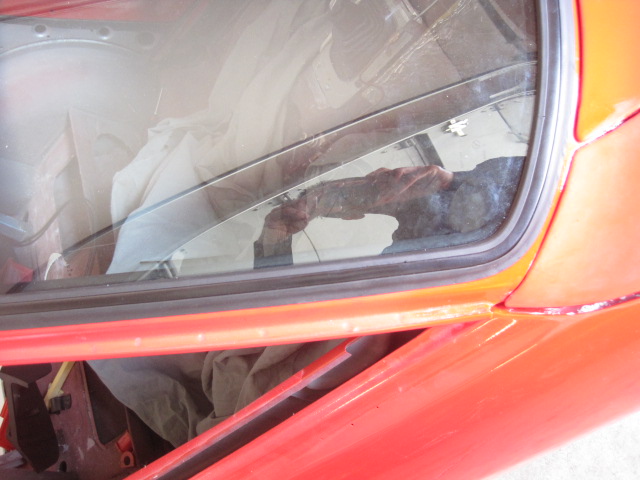
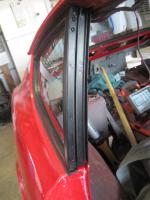
Thanks E, I knew you would know. So the seal that goes on the DOOR frame, it should be folded like I found the old one? Does the pointed part go up or down? I guess I will try turning it all around to see how it goes unless someone has a pic. As far as the quarter seals, these old ones I have seem servicable, would they be sufficient? I think I have one side of the other type you are refering to E, but I didn't see where there was enough fastener attachment points on my window. I have only two screws at the top of the quarter, nothing at the bottom. I figured that the seal on the sheetmetal was for later models. Thanks again guys.
-
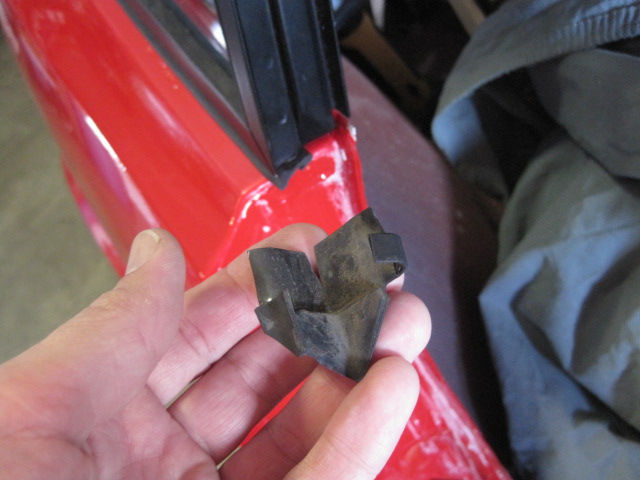
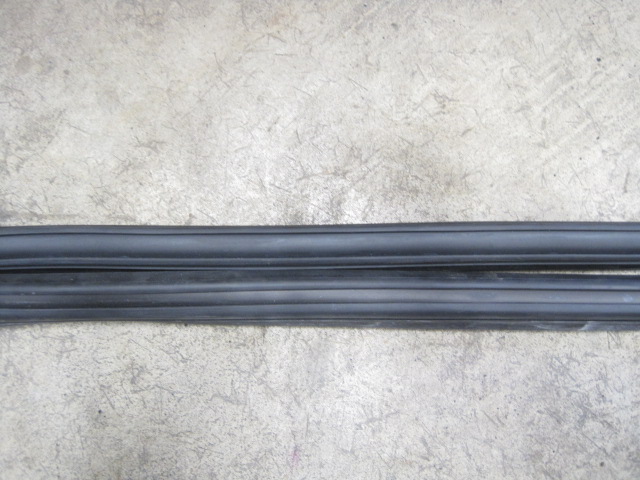
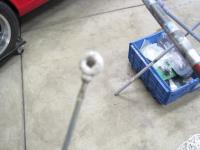
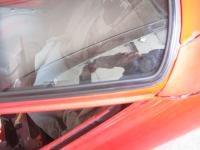
Even with my 'how to restore your Z car" book, I can't figure out the weatherstrip for the quarter window-specifically the lower corner pieces. My car is a 9/71 which is one of those transitional months for these cars. From what I read my car uses just the small piece in the lower corners. I don't remember what my car had since i took it apart so many yeras ago:stupid: I have included pictures of what I have in the way of new pieces and some old pieces I had laying in storage. Picture 2 shows some old seals that I had in storage. I think it is obvious that these slip on the bottom of the quarter window frame. They are actually very usable. Picture 3 shows the new seal that I got from MSA. Not sure where it fits into on the window. Picture 4&5 show another old seal that i had. It is basically the new seal from MSA with one end folded over. Still can't figure how it fits. So I need help fitting these seals. Do I use both kinds or will the seals in pic 5 suffice?


-
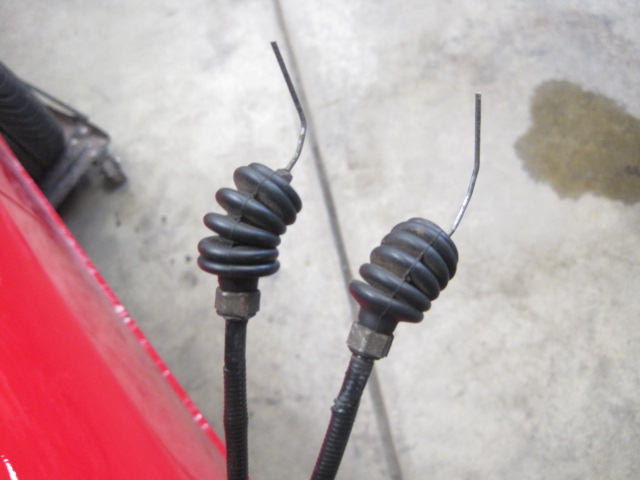
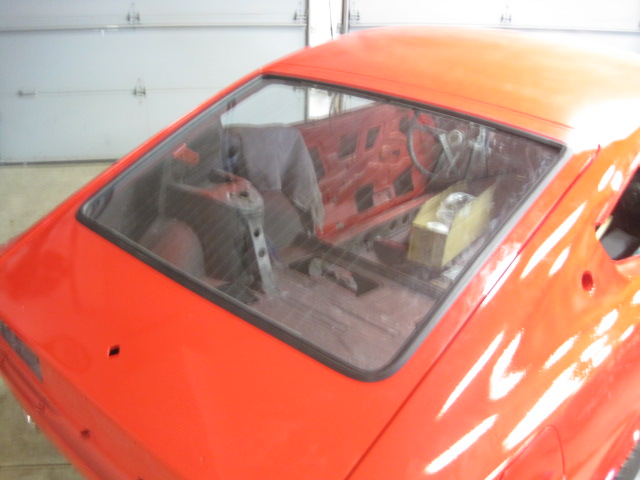
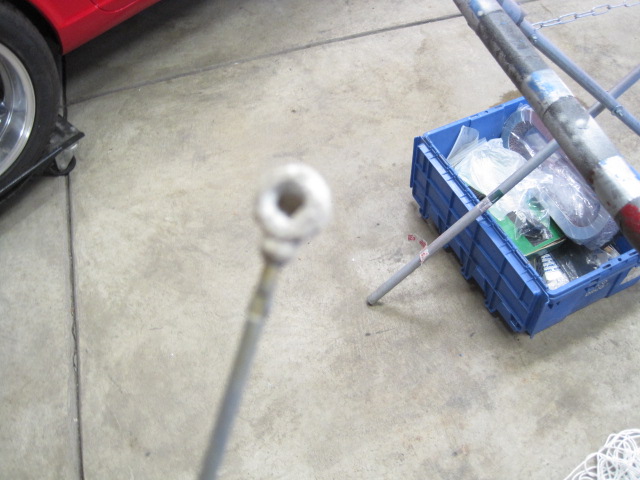
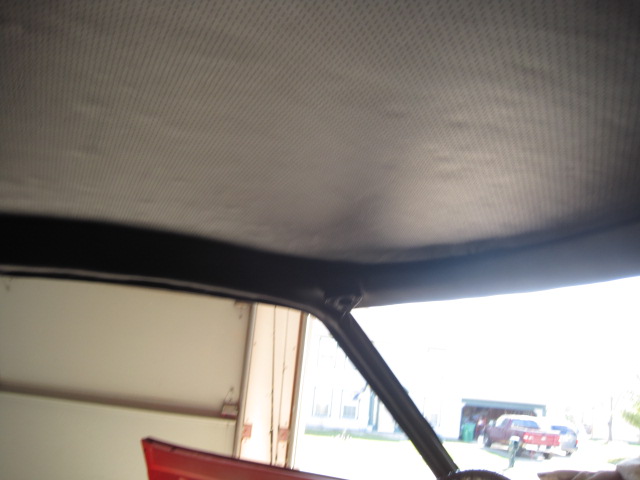
I try not to watch the calendar, but it is only 4 months away and I have lots to do. I have made some major progress in that I got my headliner in, which was holding back from completing many other jobs. The front windshield also went in with little trouble, though I nicked the seal slightly installing the trim. I had my trim powder coated matte black like everything else that is trim ,and I am happy with the look. The rear hatch was a bi$%h and it took three of us to persuade it to settle in. Again I suffered a nick installing the trim, it was even tougher on the rear hatch. I also got some tears on the inner part of the seal, but no one will see them and it shouldn't affect the sealing of the window. I also got some needed items from the plater, but once again there are issues. The acid or whatever they used ate up some off the nylon pieces. I was told by the plater that the "plastic "should be fine, but this stuff is nylon I guess. Anyone else have this issue? The ball end on one of the carb linkages looks really bad, but I can't remove that end since it is pressed on or something. So maybe I can replace that end or see if they can plate another one without dipping that nylon ball. Questions: Is the door latch assembly supposed to be yellow zinc like everything else? Mine are very clean, but it doesn't look like it everhad any "yellow" to it. How do you install a new choke grommet on a set of choke cables?


-
I have heard of this problem before, so i plan on installing rivnuts in all of the holes and installing the panels with black machine screws so they won't move around it all. Sorry i can't comment on the MSA rivets
-
I talked to the VB customer service and she said that there seals were NOT made by precision, but wouldn't tell who did make them. Your point about the channel might be valid, but I didn't notice much of a change in channel width with the precision seal. Either way, the precision seal channel is VERY tight around the trim and I did nick the seal installing the trim. Definitely install trim before installing the glass in the car. Lubricate seal with windex or something so the trim will slide around easier. I'm going to live with the nick, because it was scary enough putting a new seal on a 40 year old glass(with the vertical lines) without busting it, I don't want to do that again.
-
Arne, I would be tempted to use the VB seal, but it wouldn't match the front seal-and the difference is too great. I think your right that the seal does hide more of the SS then it should, but I powder coated all my SS black, so it doesn't show much anyway. A special note; I read that it is a good idea to install the trim before installing the windshield in the car and that worked out well. I put the glass on a body stand and was able to "work" the seal as i installed the trim.

-
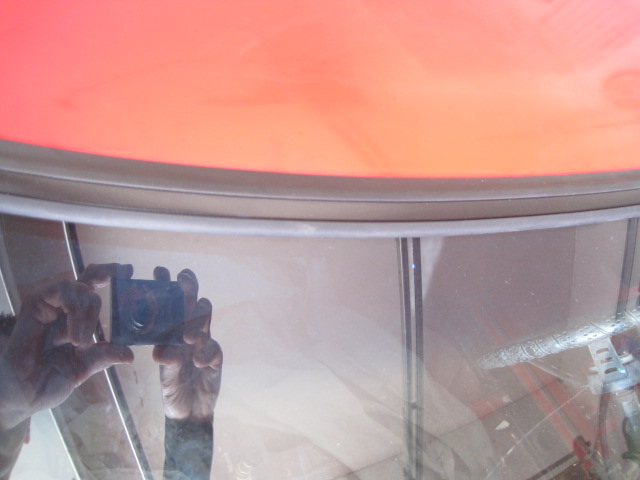
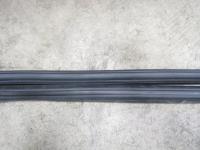
Okay, so I thought I lost my precision hatch seal from MSA and i ordered another one from VB,---because MSA was on back order. I get the VB window seal today and notice a distinct difference in the seal when it comes to the SS trim channel. The pic says it all. The VB channel for the molding in MUCH wider then the MSA seal. It looks too wide and I would be skeptical of how well it would hold the molding in place. I used a precision on the front windshield and the molding fit very snug under the channel lip. I will probably send back or sell the hatch window seal from VB, but I wanted to present this to the forum for some feedback. I will say that the rubber on the VB seal looked better and seemed a bit softer, but the difference was negligible IMHO. There was no manufactuer name on the VB packaging, so I don't know who makes it
-
I had a big day today. I finally got my headliner installed with the A pillar stuff too--what a big job-I'm sore.

-
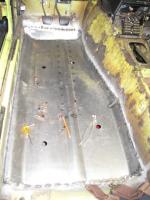
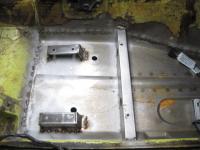
The floor plugs will cost an extra 20$ or so, I guess you'll need to decide if it's worth the extra time and cost to go without. The Nissan plugs are good quality and should hold up for many years. The holes will come in handy for when I etch the metal for por-15, I can reuse the metal prep by catching the remander from the holes.
-
Glad I can motivate someone else .. I usually set my goals pretty high, but I wouldn't have it any other way. As far as the floors, I did bolt in the crossmember before I tore things apart and I don't believe anything shifted with this car, but the car is pretty solid everywhere else. The frame rails and rockers are solid which makes a big difference with these cars. I'm glad on my car I didn't have to do this, my floors just had surface rust. My headliner material came in today, so i know what my next major project is now! because after that job, everything should feel down hill.
-
just noticed your signature ajmcforester. I was actually born and raised Moorestown NJ. Loved hanging out at the cherry Hill mall and my parents still live there. I was ever so glad to get out of that state.
-
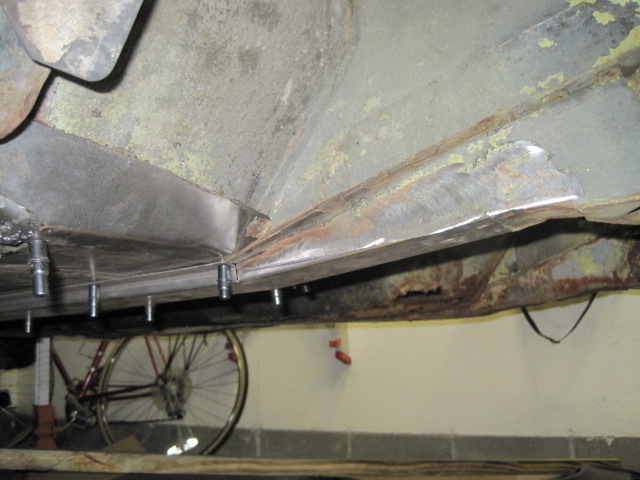
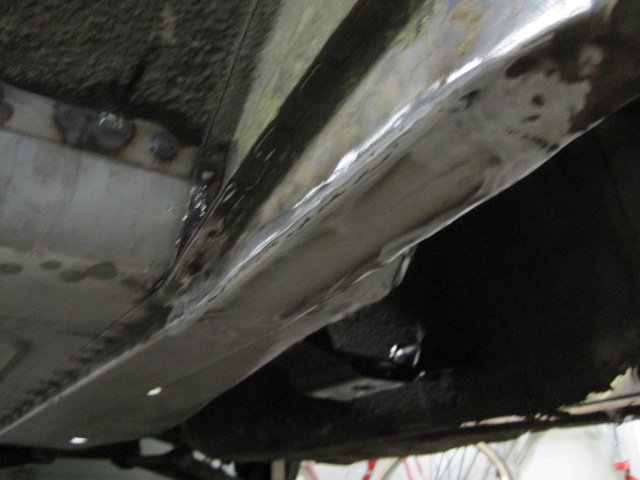
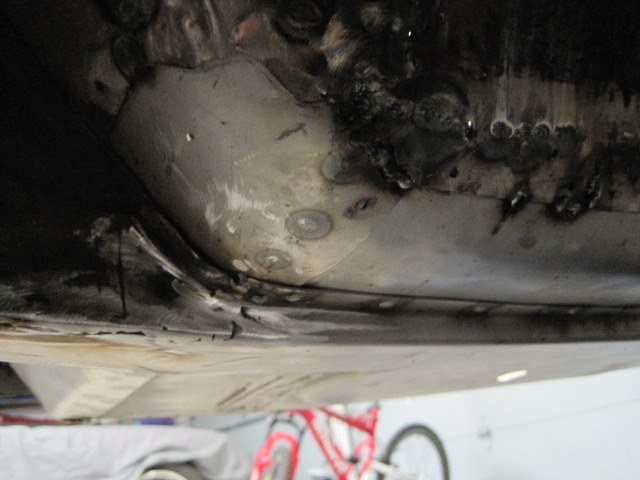
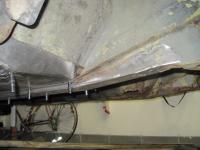
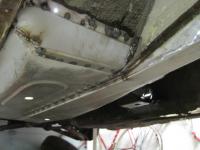
Floors aren't too bad since no one really see them if you do a terrible looking job:D I tried to make these look stock appearing from the outside. I also strived to do as much of the welding as I could outside the car or from on top of the panel. Anyone considering this job should order about 20 clecos from Summit or somewhere. They are a great tool for doing this kind of repair and they are cheap. I probably have 50 hours in the floors which include the floor supports and tying into the tension rod boxes to repair the bottom side of those. I still have rockers, doglegs, and hatch sill plate and a couple of other small items to finish on this customers car while i'm trying to finish mine in time for Zcon. When I get tired of doing the noisy, dirty work on this car i go and do some clean work on mine to keep my sanity. Actaully I think I like the dirty work as much!

-
Doesn't sound real good does it, maybe she's really stuck. When i took my head in from my early e-88, the guides were ready to fall out-so the machinist said. So maybe yours are about the same and the valve is in a bind.From Bloomington, now up in Avon-small world! Good luck
-
I have seen more then one Z do this, that's why I asked. The valves on the earlier car had a sticking issue. My car did it, and another car i worked on did the same thing. The valve sticks and then the rocker displaces which caused 0 compression. Keep at it with the penetrant. That car sat for 18 years and most of the cylinders came back strong . At the airport the mechanics would have to "shock" the valves on some of the recip engines by actually hitting the valve with a hammer(making sure the piston was clear).
-
Nice find on the car, ----how do you know the valve is bent?
-
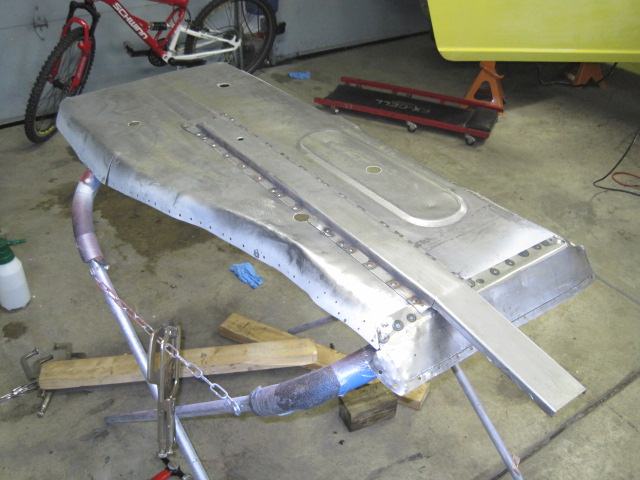
Be advised that those floors are like most aftermarket panels-they need lots of work to fit. I posted on HybridZ about the floor pans , but recieved no responses. I feel that the pans are made too deep(compared to my untouched car), which causes a problem lining up with the floor support. No easy way to fix that unless you want to reform the floors on the outboard side. Then again, I repaired a Porsche 911 floors and those panels weren't that great either. As far as my health, I consider this my youth serum:) I try to stay in good condition just so I can continue to play like this. i admit that at 47 this is getting a little tougher, but I'm smarter and work smarter which makes things easier. I go to work dressed for warfare too-gloves, work boots, safety glasses, knee pads and coveralls. This is geniune stress relief for me to beat on some metal in the garage. I wouldn't want to do this for a living though!
-
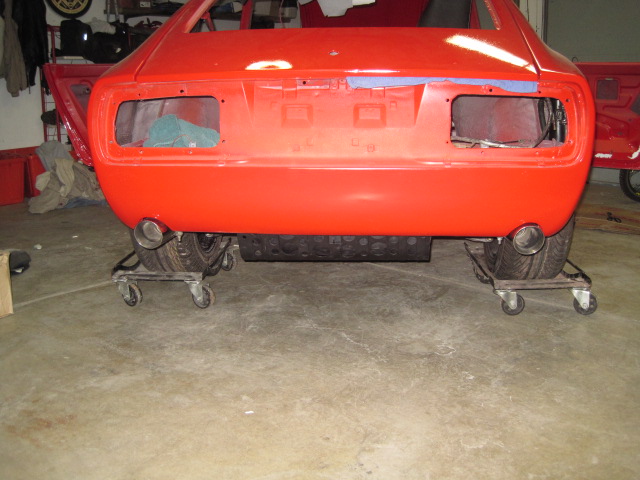
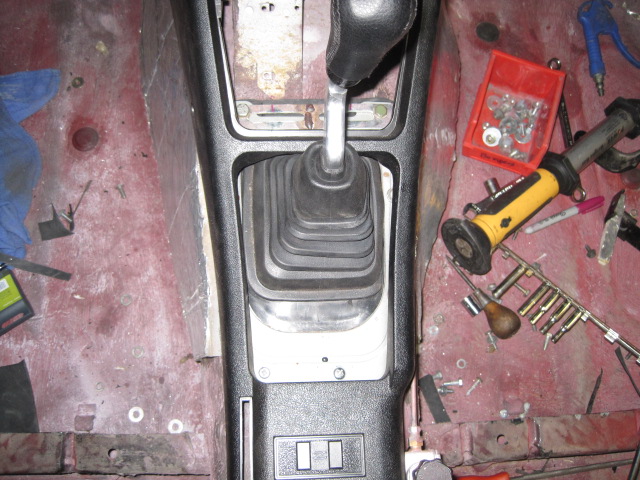
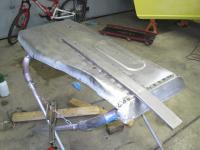
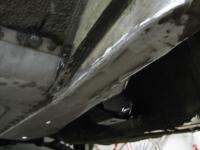
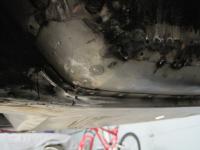
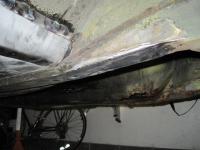
Well I had to search to find this thread I started because it was so long ago and that scares me. Zcon seemed pretty far away in January, but as usual time is flying by. I can't say that I am on schedule , but I am getting some things done. The exhaust is finally done, or as done as i am going to get. I bit off a pretty bite trying to make duals for this car. There isn't a lot of rom to work with and this was the first exhaust i ever fabricated. The hard part was making it look symetrical. The lack of room underneath only allows for short mufflers(glasspacks in my case) and it was hard to have them not at some kind of angle. Multiply that by the fact that I put an LSD in and had to fab a support bracket for the rear control arms which got in the way of the original exhaust-sssooooo more fabrication and moving of the exhaust. I ended up with exhaust tips that came out of the rear at a slight angle(down and outward). I'm willing to live with it after seeing a 370z exhaust tips that come out at a downward angle also. Sometimes you just have to say "good enough". I also started putting some of the interior back together. As you know with these cars that everything kind of starts at the headliner when you put a stripped out car back together. Well my headliner i put in was not up to snuff so I am redoing it. The padding I used was too thin and left gaps around the top edges of the headliner-so I pressed on with other items that i could do until more headliner material came in. I installed some firewall insulation from some aircraft stuff a buddy gave me and then I was able to install the heater box which i had already restored. I then moved on to installing my gear shifter and boots. This might seem to be an easy job, but once again I was dealing with a change i made from stock. I installed the BWT-5 and that moved the shifter way foward and I updated the actual shifter which affected how the original rubber boots fit. So basically I took an one hour job and made it a 5 hour job because of my modification. I had to notch the console that wasn't the original console. My hats off to folks that work in the R&D department:) Lastly I worked on getting the accessories on my engine. All this while I was putting floors in another Z. I had a motorhead friend come over the other day and laughed when i said that i would be driving this car in July-now I'm really motivated. he bet me 100$ that i would have it done and i thanked him for gas money to Nashville;)