kenz240z
Free Member
-
Joined
-
Last visited
Everything posted by kenz240z
-
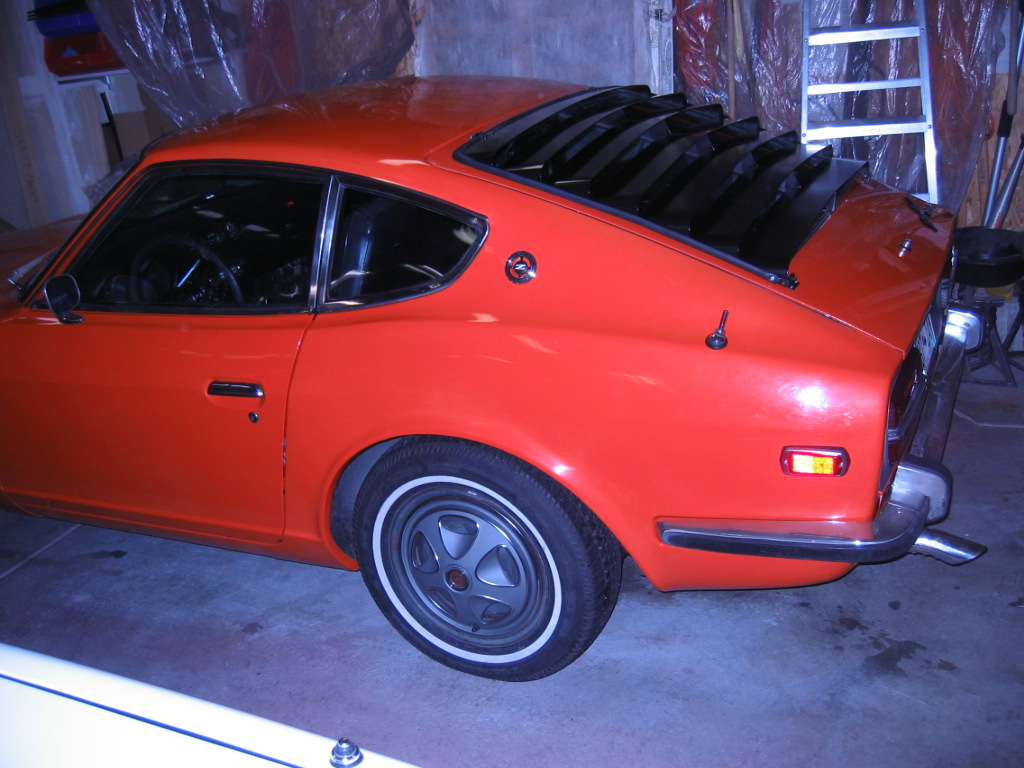
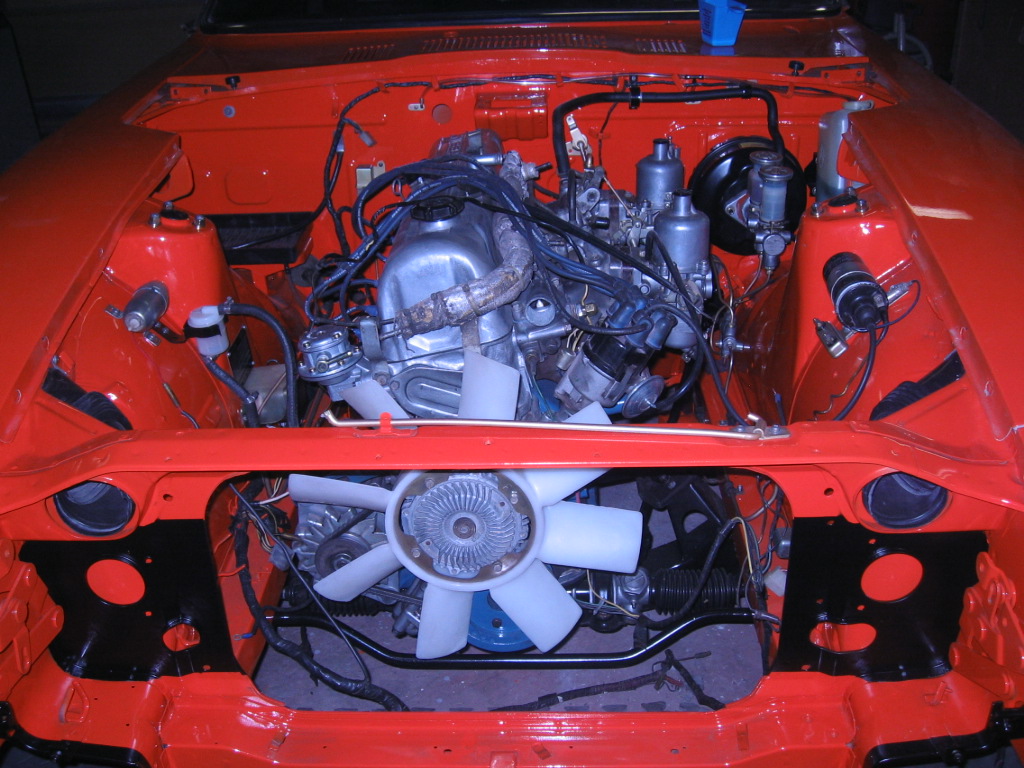
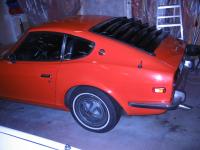
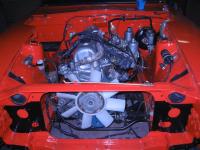
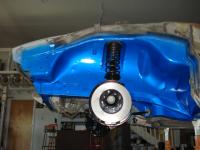
 A quick point about color variations - the lighting will make a difference when comparing colors. Avoid comparing the color chips from the paint supplier's book to your sample while standing inside at the counter under the flourescent lights. For best results, do your color comparisons outside in the sunlight. Take a look at the two photos of my orange '73. The paint almost looks red under the flourescent lights in the garage. The primer can affect the color, so it's best to use a light primer with light color paints. Keep in mind that most paint systems allow you to tint the primer with the base color so that fewer color coats will be required for a basecoat/clearcoat paint job. With a bc/cc paint job you only need to spray enough color coat to achieve a uniform appearance. The clear coat seals it, adds depth & shine and provides a durable finish. You could tint the primer if you are using a single stage paint, although you need to apply enough coats to achieve a uniform color and a durable finish. Too thin could cause problems down the road. I agree with five&dime, there is nothing better than a bc/cc paint job that has been wet sanded perfectly smooth & buffed to a super high gloss. For those pursing a stock appearance this would be over-restoration on a Z car, considering the cars did not come from the factory with show quality paint. I've had no problem getting single stage paint from my local PPG supplier. And I've had very good luck with the PPG Omni value line of paints. The key, as theramz pointed out, is in the prep work. Expensive paint will be wasted on a car that has had poor body work and poor prep work. Don't paint your car black unless it is PERFECTLY straight or every ding, wave and ripple will stand out like a sore thumb. Lighter colors are more forgiving about the imperfections. I did my first Z in an orange basecoat/clearcoat, including the engine bay. I'm working on another Z that I plan to use bc/cc on the body exterior and will use a single stage in the same color for wheel wells, door/hatch jams, interior, underside of hood and engine compartment. I've already sprayed the interior and wheel wells. I've got a little body work to do before I can spray the body...
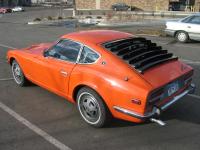

-
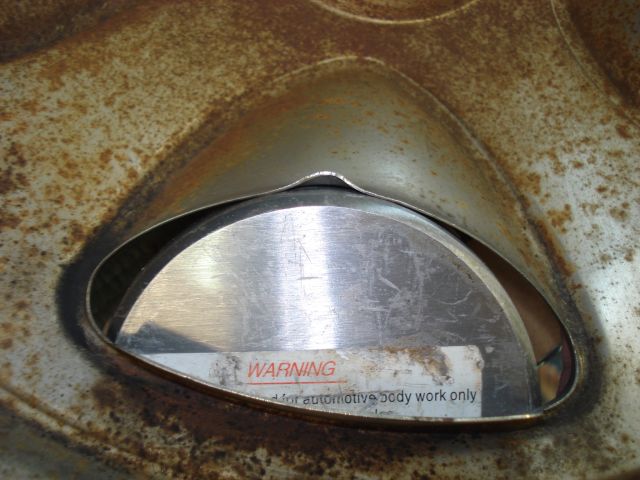
The decision to use single stage paint vs. basecoat/clearcoat may also depend on how you intend to use your car. Rock chips/dents/dings will be easier to touch up with a single stage paint. So, single stage may be better for a car that will be driven a lot. For those wanting to stay close to the original look a single stage enamel is probably the way to go. Keep in mind that the paint formulas available for re-paint are not the same as what the factory used and that the chemical composition of paint is changing all the time (try to find laquer these days!). That may account for some of the color differences. The best bet is to find a good paint shop or good painter who can match the color based on a sample. A tool bin door, gas door or inspection lid provide a good reference if the paint is still in good shape.
-
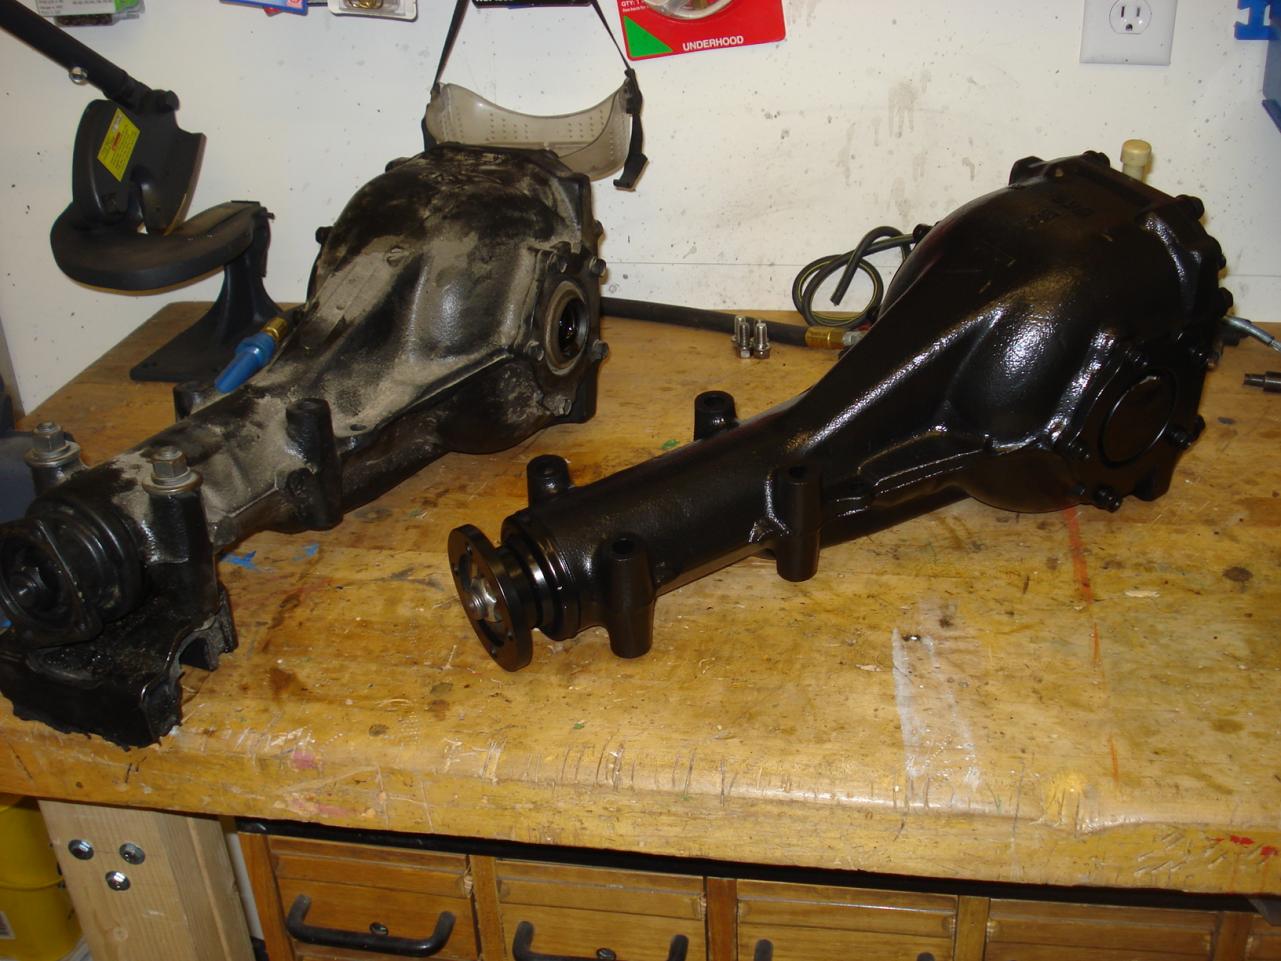
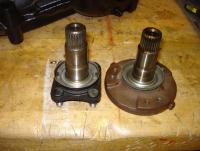
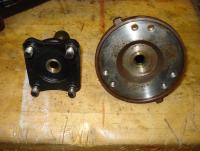
For those who are considering a 3.9 or 4.11 diffy, swapping in a R180 truck diffy is simple & straightforward. In the photo with the two diffys, the stock 3.54 is on the left and the truck 3.90 is on the right. It is the front diffy out of a early '80's Datsun 4X4 (K embossed on the top). The next two photos show the side flanges. The one on the left is from the stock 3.54 and the one on the right is from the truck 3.90. Note that both flanges use a bolt through the middle to attach to the diffy. So, it is a simple matter of removing the flanges from the truck diffy and bolting on the flanges from the stock diffy. No buttons to swap between diffys and the stock mustache bar & half-shafts do not need to be changed out. My '73 has a L28 and 5-speed out of an '82 ZX and a truck 3.90 R180. The '82 ZX had a R200 3.90, so I've essentially got the '82 ZX drive train in my 240Z, although I did replace the fuel injection with SU carbies. My Z is a mountain cruiser, not a track car and not a drag car. I live in Colorado and cruise the twisty mountain roads with fellow Z car owners who enjoy spirited driving. Uphill acceleration is good and I'm getting 20-21 MPG. Probably better on the highway, but I haven't done enough highway driving to figure out the mpg...

-
White, billowy smoke out the tail pipe is a sign of coolant getting into a combustion chamber. Did you happen to notice if it smelled kind of sweet? The smell is another sign of this. You may have a blown head gasket, a problem with the head or a problem with the block. I had the same white, billowy smoke coming out the tail pipe when I still had the L24 in my 240Z (got an '82 L28 in the car now). I pulled the head and found that the aluminum had deteriorated on the head between a water passage and a combustion chamber. I ended up having the engine rebuilt with a different head.
-
I've got an L28 and 5-speed out of an '82 ZX in my '73 240Z. I swapped the 3.54 (my car originally had an automatic) with a 3.90 R180 from an early '80's Datsun 4X4 pickup. The side flanges are different on the truck. Fortunately, the flanges from the 3.54 will bolt on. I found the 3.90 R180 at a local pick-n-pull salvage yard. A friend of mine found a 4.11 R180 from a Nissan 200SX. Here's a helpful link: http://atlanticz.ca/zclub/techtips/differential/index.htm
-
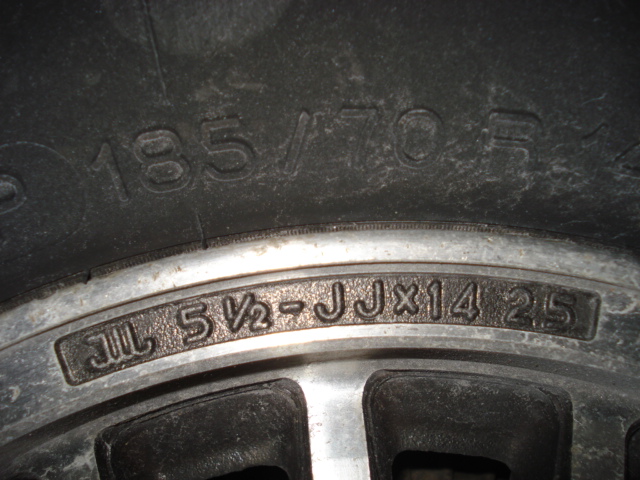
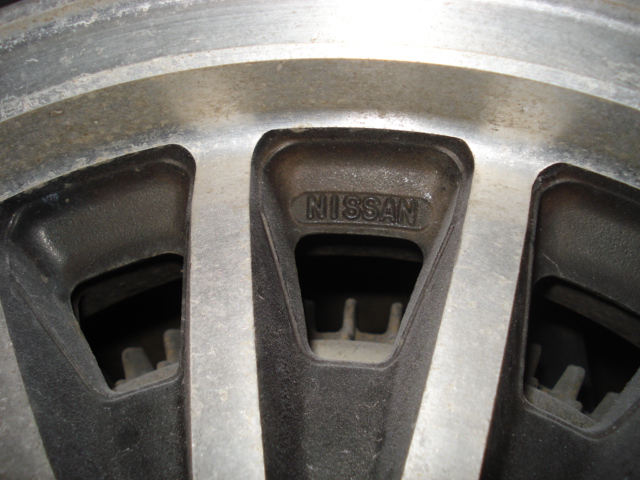
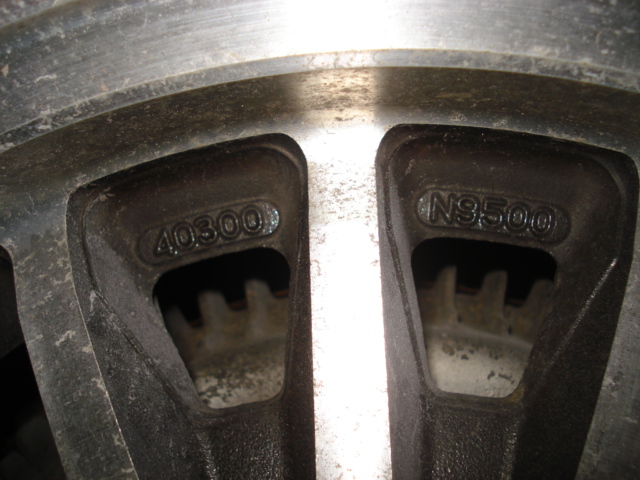
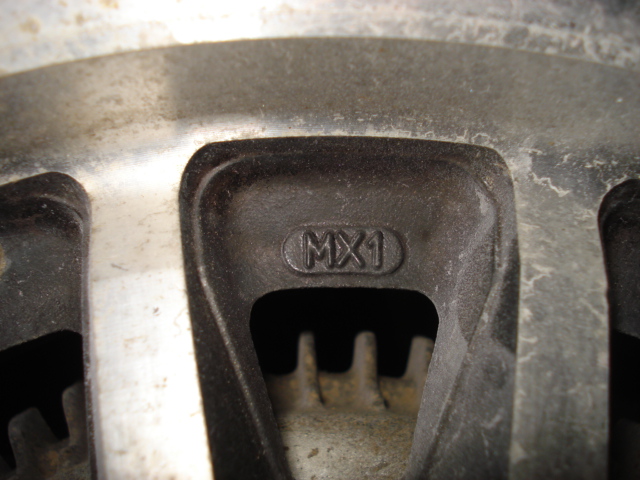
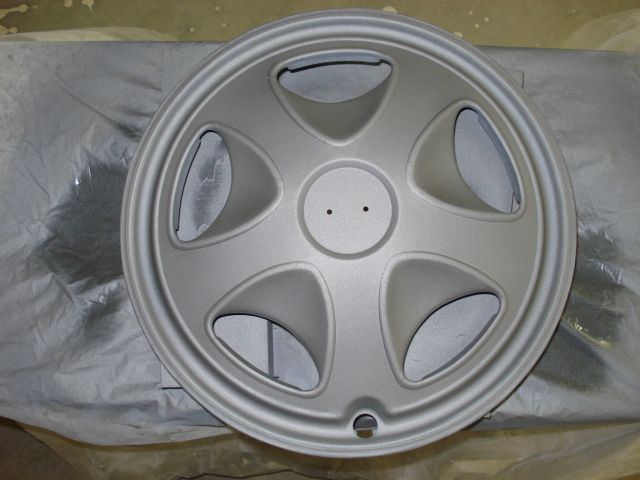
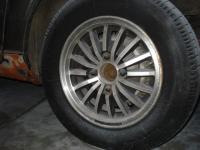
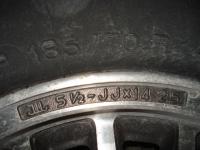
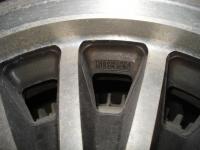
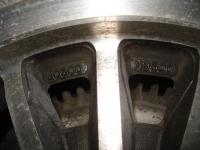
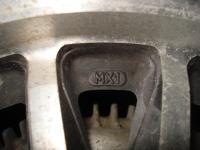
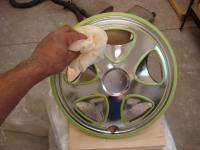
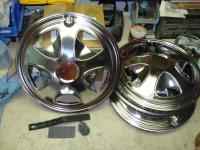
I recently purchased a late '73 240Z from a salvage yard and it has an interesting set of wheels. They appear to be Nissan wheels, but I haven't found any specific information on them. I did come across a few photos in the gallery posted by somecreep, including this one: http://www.classiczcars.com/photopost/showphoto.php?photo=15054 Does anyone know anything about these? Here are some photos of one of the wheels on my car, including the stampings. Looks like mine are missing the center caps.
-
Wow, what a gorgeous Z car!
-
The aluminum piece with "Datsun" embossed in it is called a sill plate.
-
Just a guess, but perhaps the head bolts are not torqued down all the way? Or maybe there is a problem with the head gasket?
-
Those wiper arms sure look good!
-
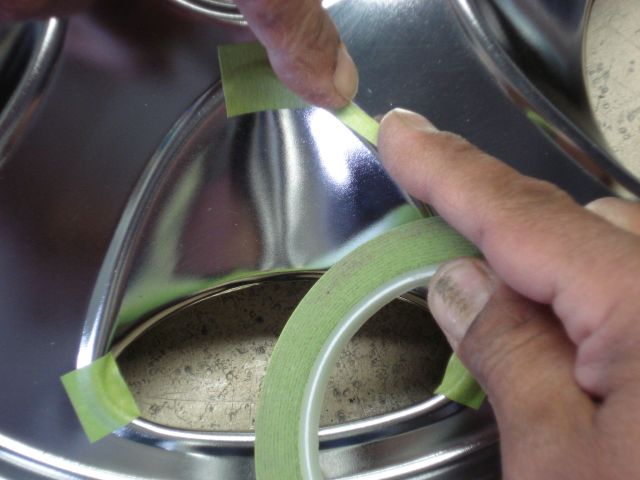
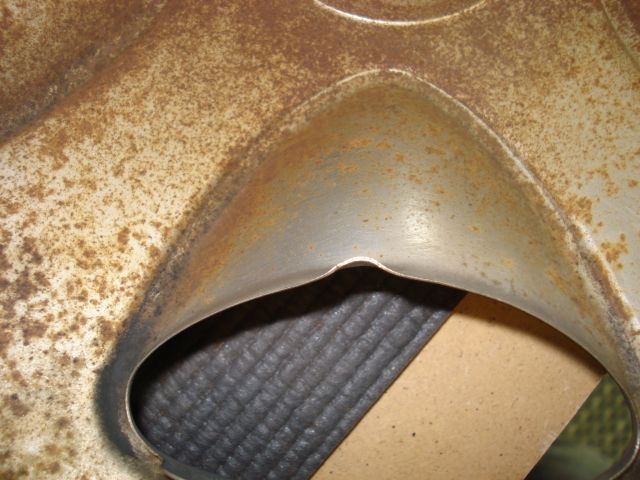
Thanks for the comments, everyone. Mr. Camouflage, that is a great tip. I think I'll put stickers on all 4 caps this evening before I forget...the mind is starting to go! The paint fumes, you know... Bonzi, I like the way the center ornaments on your car match the paint, way cool! I am tempted to clean up another set and leave them mostly chrome. I would then paint the outline of the scallops and the rim of the hubcap black, or maybe the same color as the car. Steve, I scrounged up a few caps that had minimal surface rust on the back. I haven't done anything to them yet, but may apply a bit of SEM Rust Mort to neutralize the rust. There is another write up that describes cleaning the back side and outer rim (with the "fingers" that hold it onto the wheel) with SOS pads and applying primer to the back. Tim, I'm not sure, but you may want to sell your "D" caps as is, especially if they clean up nice. I may be wrong, but they may be worth more if they haven't been refinished. BTW, glad to hear you found another ZX donor car. There is still a CL ad for the one if Ft. Collins! BR-Z, thanks for the tip on the 3M fineline tape. There is definitely a trick to getting the tape to "bend" in tight corners. I attended a custom paint seminar by Jon Kosmoski (founder of House of Kolor paints) and he taped up some flames in no time! He explained it is a matter of placing a finger on the outside of the curve with one hand while slightly rotating the tape in the direction of the curve as it is pulled with the other hand.
-
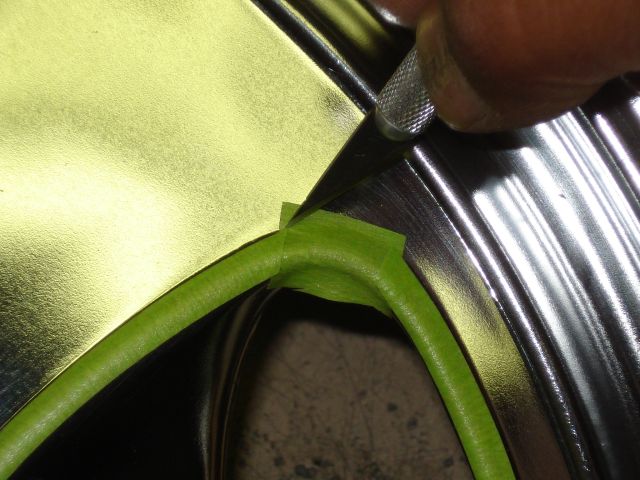
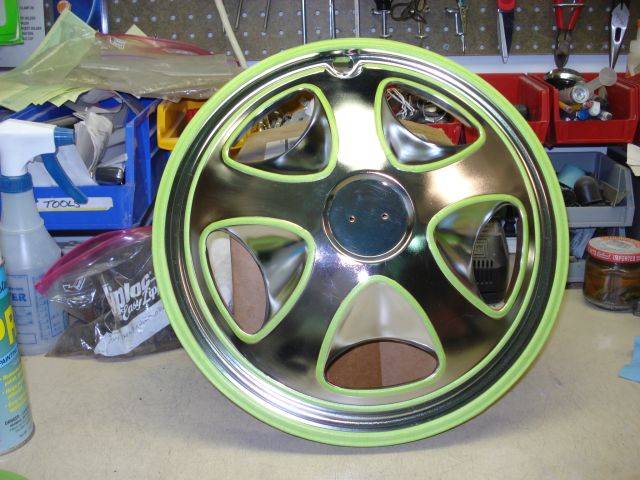
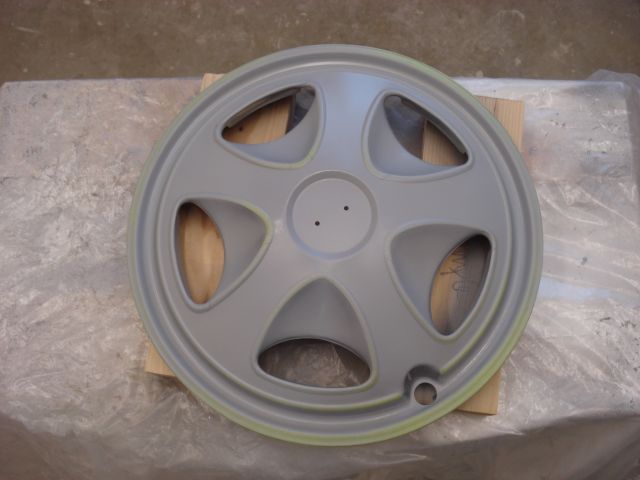
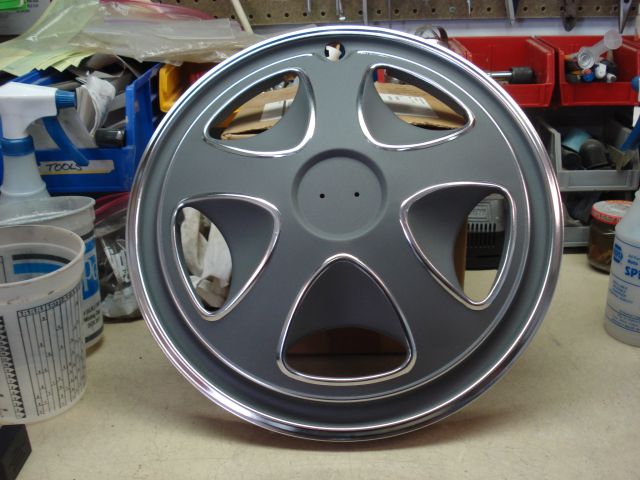
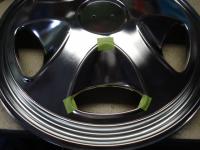
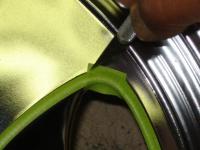
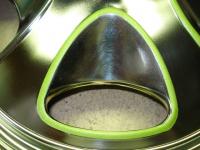
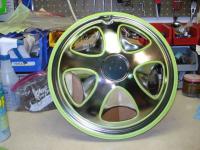
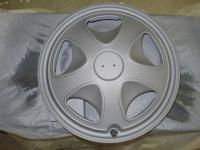
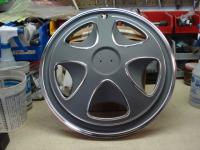
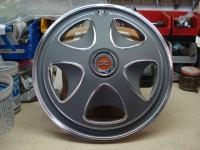
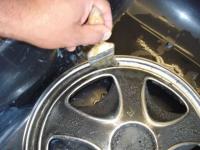
Now it's time to mask off the areas that won't be painted. I used Scotch green tape. The 1/4" tape is perfect for outlining the scallops and the outer edges of the hub cap. I found it easier to stick a small section of the 3/4" tape in the "corners" of the scallops and trim to size with an X-acto knife. The 1/4" tape bunches up on the inside of the bend in the tight corners. After masking the hub cap, I wiped it with a tack rag to remove any dust. Then I applied 2-3 light coats of SEM etch primer. I let the primer dry overnight, although it says on the can that it can be top coated after 1 hour. When I repainted the grille, rear finisher & hubcaps on my '73 I had a local paint shop mix up a pint of paint using the "recipe" outlined in Wick Humble's book. It is a silver/grey metallic with flattener. Fortunately, I had some left. I used a Sharpe Cobalt gravity feed gun to spray the top coat. I applied 3 light coats, waiting 5-10 minutes between each coat Once the paint was dry I removed all of the masking tape. The cap is starting to look nice! I polished up the center ornament with a couple of Meguiar's products (see http://www.classiczcars.com/forums/showthread.php?t=20583&highlight=hubcap). With a polished center ornament attached this hubcap is ready to put on the car. Might not be 100% show car quality, but darn nice for a Z that is driven! Now I've got a couple of spares in case I lose one again!


-
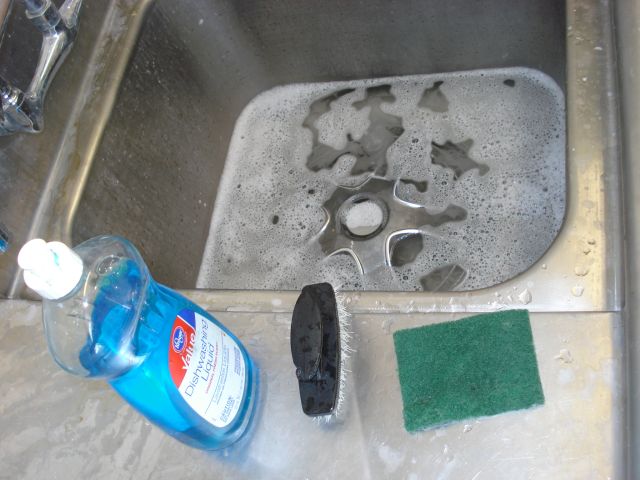
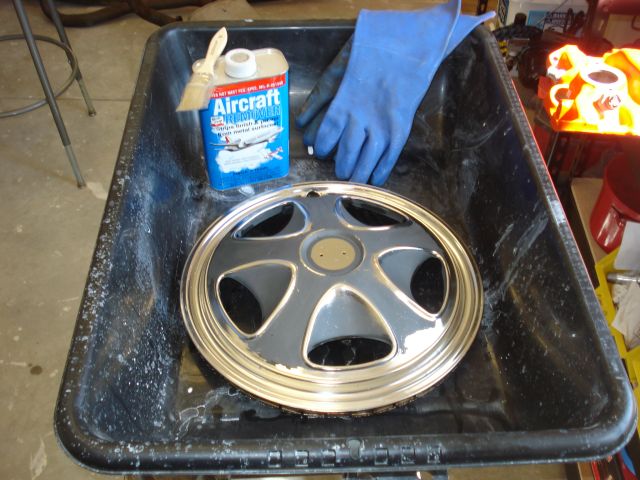
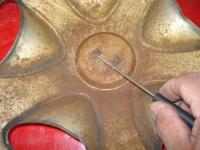
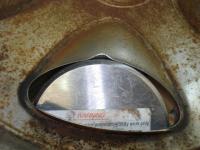
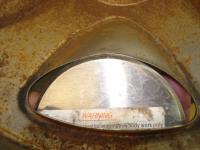
I lost a "Z" hub cap when I took my Z out for a drive recently. So I decided to refinish a few caps, one replacement and a couple of spares. After digging through my stash, I found a few suitable donors. The topic of hubcap refinishing has been addressed before, but I thought I'd document the steps I took to bring these hub caps back to life. I began by removing the center ornaments. I used a pick to bend up the tabs on the retainer clips. The clips could then be pulled off. Next, the hub caps got a bath in hot, soapy water. After drying them off, I wiped them down with a wax & grease remover to make sure all dirt, grease & grime was completely removed. I keep a little PPG wax & grease remover in a spray bottle. Eastwood's Pre Painting Prep (or similar) would do, as well. Once clean, it was easy to spot the dents & dings. A little hammer & dolly work straightened things out. Next, I used paint stripper to remove the old paint, which is pretty thin. I put the hub cap in a large plastic tub that I got at Ace Hardware to prevent from making a mess. I poured a little stripper into a clean vegetable can and used a chip brush with natural bristles to apply it. Be sure to wear rubber gloves to prevent getting any on your hands. The old paint started to wrinkle within a few seconds of applying the paint stripper. I rinsed the caps off and used a green scouring pad to remove all of the old paint. Repeat as needed to remove all of the old paint.


-
That is one awesome looking Z car! Great work!
-
Jack up the front of the car and put it on jack stands. Make sure everything is stable - SAFETY FIRST! Rotate a wheel by hand and verify that it spins freely. Then have your helper step on the brake pedal. Does the wheel stop spinning? With the brakes applied can you spin the wheel? You may want to remove the wheels and observe the operation of the calipers while your helper steps on the brake pedal to make sure everything is moving the way it should and not binding up. Put the wheels back on & put the front of the car back on the ground. Then jack up the rear of the car and put it on stands. Rotate a wheel by hand and verify that it spins freely. Then have your helper step on the brake pedal. Does the wheel stop spinning? With the brakes applied can you spin the wheel? You may want to remove the wheels & brake drums and verify everything is working properly when the brakes are applied. If you can spin any of the wheels with the brakes applied you will need to dig a little deeper to find the problem. I won't say it's not the master cylinder, but it doesn't seem likely. I'm wondering about the proportioning valve that distributes the brake fluid to the front wheels. Also the brake lines for the front. When bleeding the brakes did you get a steady flow of brake fluid at each caliper & wheel cylinder? No pinched lines or anything? A firm pedal seems to indicate that you have bled all the air out of the system, so I'm guessing that something is binding up somewhere... Hope this helps!
-
You mention that you changed the back fuel filter. Are you refering to the filter that is located inside the electric fuel pump mounted back by the fuel tank? If so, was it caked with silt-like crud? If you didn't replace the fuel filter in the engine bay it is probably clogged up with the silt, too. I had this happen on my '73, which performed similar to what you describe. Once BOTH filters were replaced it ran great! Had your Z been sitting for an extended period of time without being driven? Anyway, I'd recommend checking the inside of the fuel tank for rust & sediment. Replace both fuel filters (the one in the electric pump & the one in the engine bay)...since you already replaced one of the fuel filters now replace the other so they are both new. Replace all flexible fuel lines at the tank & electric fuel pump, at the mechanical pump and at the carbies & fuel rail.
-
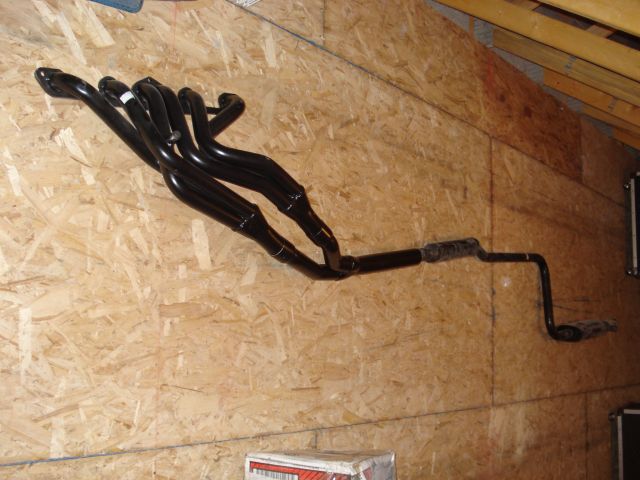
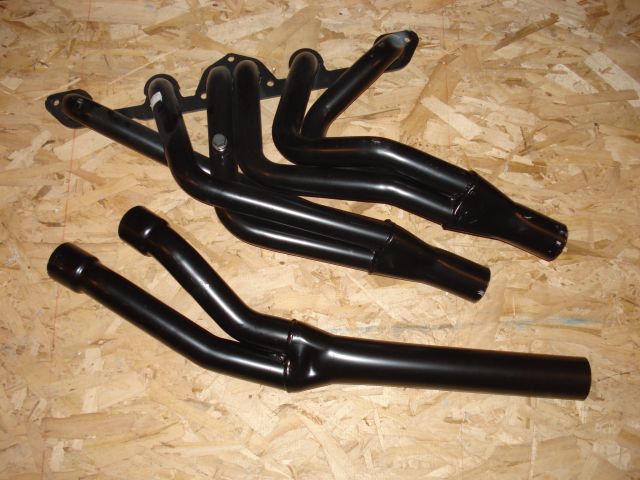
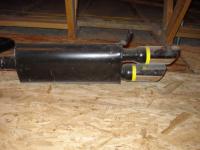
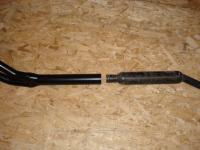
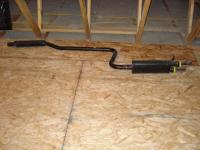
In 2005 I purchased a Monza exhaust system for my '73. My Z had the factory exhaust manifold at the time. The Monza exhaust, which is contructed with 2" pipe, was easy to install and sounded great. The twin tips are chrome and each one has a yellow ring close to the muffler end. A month or so later I purchased a Monza header from Victoria British (now Black Dragon). I ordered the header in their catalog that was listed for the 70-76 240-280. It is a 6-into-2 design. The individual runners have a 2" diameter and the collectors have a 2-1/2" diameter. The output end of the collector pipe also has a 2-1/2" diameter and will NOT mate up with the exhaust, which is 2", without a reducer. I've attached a few pics of the header, collector pipe and exhaust that are now collecting dust in the attic of my shop (waiting for future Z car projects!). Keep in mind this was back in 2005. Maybe Monza now has a 2" header, or a 2-1/2" exhaust for complete header/exhaust system. After I had the engine rebuilt, I installed an MSA 6-into-2 header with the MSA turbo exhaust system, which is 2-1/2" end to end. It's a nice sounding exhaust, too. A bit louder than the Monza, or so it seems to me...


-
Here's another electric Z project... http://seth.drivexc.com/
-
My '73 has an electric fuel pump mounted back by the tank. It is on the passenger side behind the mustache bar. It is in the yellow box in the attached photo. Check with MSA, the last time I looked in their catalog they had this part available. What type of carbies does your Z have, the flat top SU's or the round top SU's. If you have the round top SU's you may not need the electric fuel pump. I think the electric fuel pump was one of the remedies for reducing vapor lock on the Z's with the flat top SU's. The electric pump is "controlled" by the ignition circuit, so to speak. It will run when the car is running. The input side is connected to the fuel tank, the output side is connected to the fuel line that runs to the engine bay. The fuel line in the engine bay then runs into a fuel filter on the passenger side inner fender and from there to the input of the mechanical fuel pump. The output of the mechanical pump runs to the fuel rail that feeds the carbies. Then there is a fuel return line that runs back to the tank. You may want to check and see if your Z still has the electric pump plumbed into the fuel line. If so, there is a fuel filter inside the bottom of the pump. Be sure to replace it. You may also want to replace the filter on the inner fire wall. A car that has been sitting for several years will most likely have issues with sediment in the fuel. You mention the tank was swapped, but were the fuel filters replaced? Also, inspect the various sections of flexible fuel hose for cracks/splits that can allow air to be sucked into the fuel line. Your best bet would be to replace all the old flexible fuel hoses from the tank to the carbies.

-
Outstanding job, your car looks gorgeous! A pretty dramatic difference in the before & after interior shots! I love it!
-
Considering the front carb primarily delivers air/fuel to the front three cylinders and the rear carb primarily delivers air/fuel to the rear three cylinders and your observation that the rear three plugs are fouled makes me think there is an imbalance between the carbs. I'm using the word "imbalance" kind of loosely here, because it may not be entirely related to a difference in airflow between them. By the way, how do the front three plugs look? You may try this approach: Start the car and warm up the engine. Pick a carb, any carb (ha, ha, couldn't resist...:stupid:) and turn the idle speed screw in a half turn. If the engine RPM increases it indicates the carb is delivering air/fuel to it's three cylinders. Repeat this procedure with the other carb. If the RPM increases then it, too, is delivering air/fuel. Or, use the hand test. With the air filter cover removed and the engine idling, place the palm of your hand over the mouth of the front carb. You should feel suction, the RPM's should drop and the engine may stall. Repeat with the rear carb. If both carbs are delivering air/fuel then proceed to balance the carbs. If adjusting the idle speed screw on one of the carb does not result in an increase in engine RPM then check if the needle is sticking in the seat in the float bowl. Could be one of the carbs is not getting fuel/ If neither carb has a stuck needle then the problem lies in improper balance. In this case, the engine is running off one carb at idle, which can cause the symptoms you describe. Again, proceed to balance the carbs. Hope this helps!
-
Calyx manifold dressing does a good job of making a cast iron exhaust manifold look "new". It gives a non-rusty metallic look. It can be applied with a brush. Old toothbrushes work well. I've also used a shoe polish brush to apply it. Eastwood carries the Calyx dressing (www.eastwoodco.com).
-
You may consider getting a small oxy/acetylene rig and try brazing scrap pieces of sheet metal together. Brazing uses a lot less heat than welding and is well suited to auto body repair work. Also, practicing with an oxy/acetylene rig will help you develop a feel for controlling the heat, which is what welding/brazing/soldering is all about.
-
Hi Kevin, you have your work cut out for you (ha, ha!). In all seriousness, it looks like you are taking care of the rust issues on your Z. I predict your efforts will be rewarded with a beautiful looking Z car! On another note...is that a Sunbeam Alpine or a Tiger to the right of your Z in the photo???
-
Hi Brannen, sounds like the secondaries on the Holley are opening too much too soon, if that makes sense. Basically leaning out the air/fuel mixture and causing the bog. I am not familiar with the Holley 390, does it have vacuum operated secondaries, or mechanical? It may simply be a matter of adjusting how fast the secondaries open or adjusting the fuel delivery for the secondaries. For vacuum actuated secondaries you can experiment with different diaphragm counter balance springs in the vacuum diaphragm. For mechanical secondaries there are different activation cam profiles, as well as different nozzels. There is even a larger capacity accelerator pump. Lots of options for fine tuning. There are kits available for either approach. For lots of in-depth info pick up a copy of Super Tuning and Modifying Holley Carburetors by Dave Emanuel. It will provide you with all the information you need for tuning your carb for best performance.