kenz240z
Free Member
-
Joined
-
Last visited
Everything posted by kenz240z
-
 Be sure to have a couple of fire extinguishers mounted on the walls. It would be a shame if your Z was damaged or destroyed by fire, not to mention the garage and house! Also, a well stocked first aid kit, for those times when you are removing the rear hatch strut, and the hatch falls & smashes your finger tip (voice of experience). :hurt: Or when you smack your thumb with a hammer when you're using a dolly to smooth out a small dent in a front brake backing plate... :lick:
 -
A bit off topic, I know, but I found a '71 240Z that still had the SU carbs on it at a local U-Pull It type of salvage yard a few months ago. When you sign, in the fellow at the counter hands you a price sheet. Prices are given for parts, without regard to manufacturer, age, or condition. The price for a single barrel carb? Twenty bux.
-
Hi Will, I looked at a piece of the heater control panel from my 240Z that broke off (the bottom edge of the radio opening). Some of the shiny stuff is peeling off, and sure enough, there is what appears to be a copper layer on the bottom. So that part was chrome plated. I also looked at a 240Z "Datsun" fender emblem that I found in a salvage yard. It has some shiny stuff peeling off from the backside. I peeled up a little more, but there is no evidence of a copper layer. Could it be that different plating techniques were used for different parts? :squareeye BTW, from what I've read, Ford was the first domestic automaker to use vacuum metalizing. Ford used it for a speedometer housing in 1957. By the '60's, vacuum metalizing began to see wider use by all the domestic automakers. Forgive me, though, as all of this is secondary. My point was that it can become cost prohibitive to replate trim parts as part of the effort to refinish them, as opposed to the cost of purchasing a NOS or quality reproduction part. Try to find a plater that will accept plastic pieces for rechroming, and when you do, be prepared for the high cost. :eek:
-
Definition of restore, from Merriam-Webster Online Dictionary: Main Entry: re·store Pronunciation: ri-'stOr, -'stor Function: transitive verb Inflected Form(s): re·stored; re·stor·ing Etymology: Middle English, from Old French restorer, from Latin restaurare to renew, rebuild, alteration of instaurare to renew 1 : GIVE BACK, RETURN 2 : to put or bring back into existence or use 3 : to bring back to or put back into a former or original state : RENEW As applied to a vehicle, it would mean that the vehicle should be in the same shape/condition/appearance as when it rolled off the showroom floor. With a 30 + year old car (I have a '73 240Z) , a strict restoration can be a very expensive and time consuming project. I've already got about $6000 and a year and a half's worth of working nights & weekends in my Z even though my intention is not, nor ever has been, to restore the vehicle. I agree with Tomohawk to a point, in that I like to work with the parts on the car as much as possible. Items like the emblems can be made to look like new, but they must be in good shape to start with. So, if something is too far gone to work with, then a suitable replacement must be found. Also, it is sometimes cheaper to purchase a replacement rather than use the original part. The shiny finish on the plastic trim pieces on the Z cars isn't chrome. It is actually aluminum that is applied using a vacuum process. Finding a shop that can refinish these parts can be difficult and expensive. For trim parts where the shiny finish is flaking off it is going to be cheaper to purchase a replacement. There are many items on a car that simply wear out with time in the interior, under the hood, on the suspension and on the body. Whether it is carpeting, a ball joint, a strut insert, or a trim piece, a worn out part should be replaced. I'd love nothing more than to have new, or more specifically, New Old Stock parts on my Z. It would be the only way to truly attempt to restore my car. But, these parts are getting more and more scarce and expensive. Try finding braided radiator hoses. Not exactly my idea of taking the easy way out. Furthermore, many of the items available today are superior in performance and quality to what was originally available on the Z. Paint, struts and tires are just a few that come to mind. Ultimately, it comes down to a person's goal. For some it is simply to keep a daily driver running, no matter what shape the paint & interior are in. For others, it is having that pristine concours show car. I'd guess that most folks here are somewhere in the middle, we want a nice looking, nice performing Z car! One car nut's 2 cents worth...
-
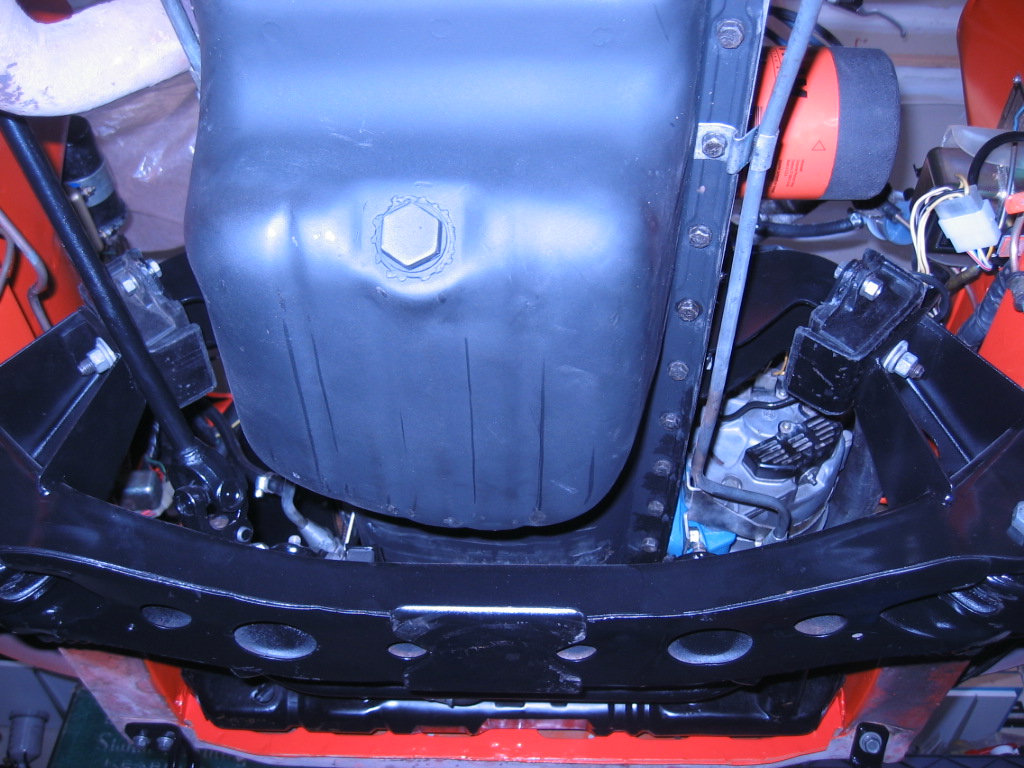
Hi Brian, There should be a drain plug on the bottom of the tank. Just be sure to have a suitable container underneath to catch the gas. You could probably strain the gas and pour it into the gascan you use for fueling up your lawnmower. Once drained, the tank isn't too hard to get out. It seems like one of the screws that holds the gas filler neck retainer (the one accessable from under the car) is kind of hard to get to. When everything is disconnected, put a jack under it. Use a block of wood, like a 1 foot section of 2X4 to support the tank. Disconnect the straps and slowly lower the tank. There are a couple of vapor recovery hoses on the top that you'll have to reach up and disconnect before the tank can be removed. I'm glad to hear you found the problem. p.s. You can't post pictures when you use the Quick Reply. Select Go Advanced or Post Reply. There should be a button called Manage Attachments. Use that for adding a photo to your post.
-
Then it should be really easy to have the wires for the 3rd brake light follow one of the rear defrost wires. Should make for a nice, clean installation.
-
I would think that if you mounted a 3rd brake light right above the rear hatch that you could drill a hole into the roof that would then be covered by the light itself. The wiring for the light could then be run through the same passage as the rear window defrost wires and dome light wires. From there the wires could run down the passenger side behind the door opening and along the floor up to the dash, where they would be spliced into the brake light wiring. Just be sure to use a grommet on the hole in the roof, and seal it all up with a bit of silicon.
-
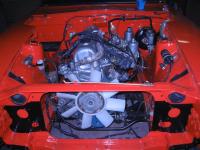
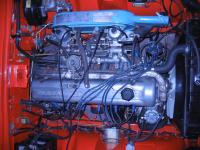
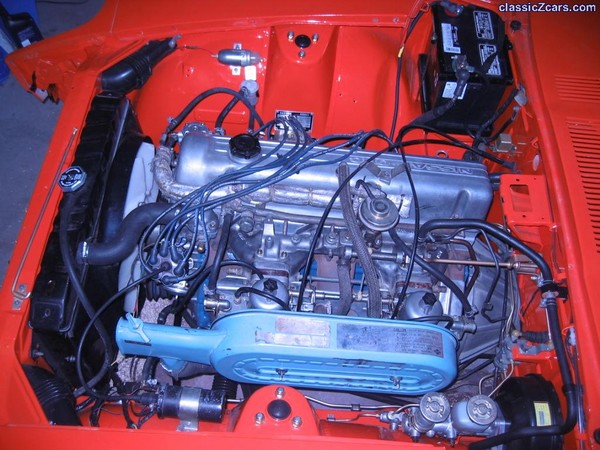
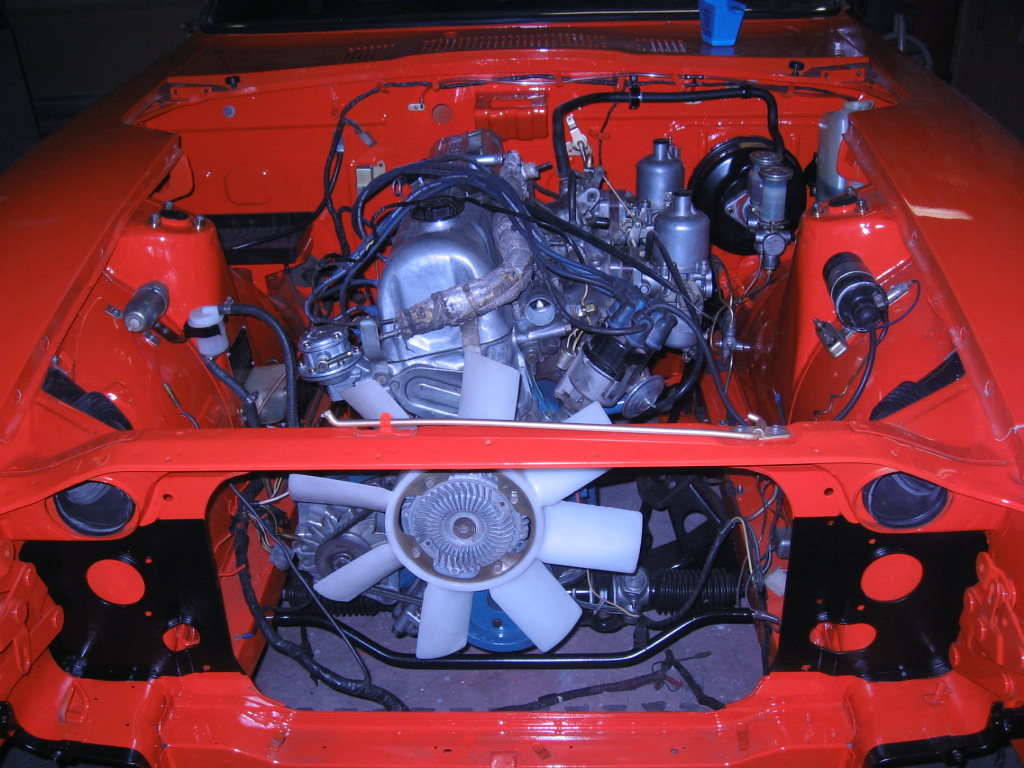
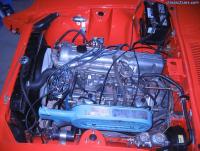
Hello everybody, My '73 240Z has a blue air cleaner. It has the flapper in the "snoot" that can be toggled for winter/summer driving. The snoot has a large, round port on the bottom that connects to the heatshield on the exhaust manifold to supply warmed air for winter driving. The backing plate has a port that angles downward, but is currently capped off with a section of hose with a plug in the end. I'm guessing this would have tied into the smog pump somehow. None of the air hoses were hooked up to the smog pump when I bought the car, so I've since removed it. I would have to say it is not original to my car, as somewhere in it's life before I purchased it the square top carbs were replaced with round tops. I've attached a couple of pictures of the blue air cleaner from my gallery. I can take a close up of the decals, but it will be a few days. My Z is currently at the shop having the valves in the rebuilt engine adjusted, and a new header & exhaust system installed.

-
I agree with Mr. Camouflage. Like any project, it's simply a matter of time, effort and money to fix this car, #2. As an amatuer body man, I'd love to test my skills on that roof! Nothing a little hammer & dolly work couldn't fix, by the look of it. If not, then another roof from a suitable donor could be sectioned in along the factory welds/seams. It's not apparent from the photo, but #2 doesn't appear to have any major front end or side impact damage. Hopefully not too much rust anywhere, either. What a diamond in the rough! I am not worthy!
-
Dave, I think you've answered your own question. What your friend says about resale value is true. Not just for a Z car, but for most any car in which the owner has invested $35,000. For full out, true restoration $35 is probably in the ball park. If you plan to do most of the work yourself I'd imagine you could finish the car for a bit less. I guess it all depends on what you want the end result to be. If you don't plan to show the car at concours events, then perhaps you might not require everything to be exactly as it was when the car rolled off the showroom floor. That would cut your investment by half, if not more, depending on how much work you can do yourself. He's also right about the performance aspect, when he says it will never be as powerful as a restored old Chevy (well, at least one with a high performance engine). I wouldn't consider a '38 Coupe with a 383 to be restored. Sounds more like a rod. I'm not all that knowledgeable on the subject, but I don't believe a 383 with a 4 bbl carb was offered in '38. Drop a small block Chevy or Ford engine in your Z and you'd smoke most any old Chevy (if you don't snap your Z in half, that is! ). As far as a memory lane trip, look at the Z's legacy in racing and rallying that many others have posted. Your friend is simply uneducated about the Z in this regard. Perhaps your friend was attempting to be the voice of reason. A true restoration, of any vehicle, is not a project to be entered into lightly. Even "refreshing" a car can require more time, effort and money than most folks anticipate. There are many questions that need long consideration, such as how much work will I do myself? How much will I have someone else do? How much am I willing to pay them to do the work? How hard will it be to find parts, and how much can I afford to spend? Where will parts be stored while work is in progress? Where will the work be done, in my garage or at someone else's shop? Or, should I rent space somewhere? How soon do I want it finished? It can become a project management nightmare. For instance, if you decide to have the bumpers replated halfway through the project, you will probably be waiting 3-6 months, or longer, to get your bumpers back, depending on the replater you use. Whether you restore your Z, or "refresh" it, I think the most important thing is the attention to detail you give it. Go to any car show and really scrutinize the work on some of the fancy looking show cars. You may be surprised to find runs in the paint, wavy panels, grungy engine bays, you name it... While in Las Vegas this spring I visited a display of vintage and collector cars, I think it was at Excalibur. Anyway, all the cars were for sale and supposedly professionally restored. Prices ranged from $50,000 to well over $1,000,000. I was surprised at the number of flaws I noticed on some of these cars! Ultimately, it all comes down to what makes you happy. All I know is that I relished that first drive I took in my Z, when it was still dented & rusty, when the interior was still ratty, and what was left of the most recent paint job was dull & faded. Kenny P.
-
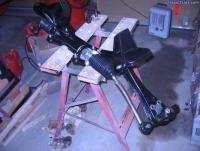
Hi Mr. Camouflage, I am guessing that the pivot arm is the same as the front transverse link? If so, then you are correct. The bolt installs from the rear, with the nut on the front side. See the attached picture for a shot of the front crossmember, steering rack & transverse link set up from my '73 240Z. Hope this helps! Kenny P.
-
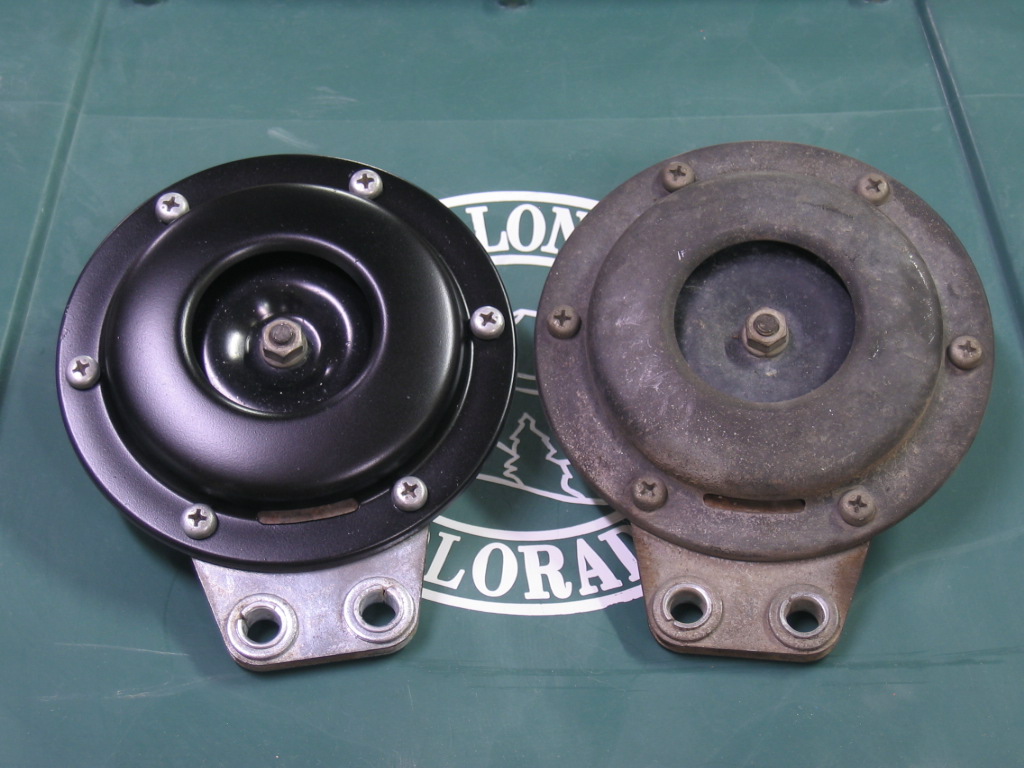
I have methodically been "refreshing" my '73 240Z a bit at a time. I've repainted the car, rebuilt the front & rear suspension, installed new carpets, a headliner and a dash cap, refinished the engine bay and just recently had the engine rebuilt. :knockedou One of the last detail items I had left to tackle was the horns. They were pretty cruddy looking after 30 plus years of service. :sick: First of all, here is a list of items that I used to refinish the horns: Phillips screw driver 5/16" nut driver 1 Scotchbrite pad #0000 Steel wool 3M rubbing compound PPG wax & grease remover Satin black enamel paint Wire brush Barkeepers friend an old tooth brush an few old socks Here are the steps I followed: 1. Use the screw driver and nut driver to remove the six screws that hold the horn together. Notice that the two screws that secure the mounting bracket to the horn are longer than the rest. Also, note that there is a lock washer sandwiched between the horn and the mounting bracket, as well as another lockwasher between the mounting bracket and the nut. Also, there are two little metal spacers that fit in the mounting bracket. Don't lose any of these small items! Once all six screws are removed the horn can be separated into the front cover, diaphragm, and rear cover. 2. Clean the screw heads with the Scotchbrite pad. Place the pad on a hard surface, such as a workbench, and grip a screw by the threads. Rub the screw over the Scotchbrite pad until it is nice and clean. Repeat this process with the remaining screws. Once all the screw heads are clean polish them up with the steel wool. It should make them fairly shiny. :knockedou 3. Use a wire brush to clean the nuts. I used a cup brush on an angle grinder. A bench grinder with a wire wheel could be used, or you could use a hand held wire brush. If you use a wire brush on a power tool, BE VERY CAREFUL! WEAR EYE PROTECTION! WEAR GLOVES! A wire brush on a power tool can easily launch the nut into space. If that happens, consider yourself lucky if it doesn't hit you :hurt: , hit & nick something around you (like your Z! ), or end up lost . 4. Clean and polish the black metal disc on the front of the diaphragm. Use an old sock, or other cotton cloth, damp it with water, and apply a bit of the rubbing compound to the sock. Use small, circular motions to polish the disc. Wipe clean with a clean, dry portion of the sock. 5. Clean the front cover with warm soap and water. Dry thoroughly. Clean the surface with a bit of wax & grease remover on another old (clean, please!) sock. Scuff the surface with the Scotchbrite pad (note - be sure all heavy dirt, oil & grime deposits are removed BEFORE scuffing the surface with the Scotchbrite pad!). Wipe the surface clean with a bit of wax & grease remover in preparation for painting. Allow the cover to dry thoroughly. 6. In a well ventilated area, spray a couple of light coats of the satin-black enamel on the front cover. I placed the cover on a block of wood, up on a box on top a small, portable work bench in my garage. Once the cover has been painted, hang it up with a bit of wire and let it dry. 7. Clean the back cover with Barkeepers friend, or similar cleaner. Be careful when cleaning the back cover, as it contains the coil & other electrical parts. DO NOT SUBMERGE IT IN WATER! I used another old sock, damped it with water, and then applied a bit of the cleaner to the sock. Then, I used it to clean the larger areas of the back cover. For the nooks & crannies I used the toothbrush. I damped the bristles with a little water, applied a small amount of the cleaner to the tooth brush, then cleaned the tight spots. I used a damp rag to wipe the surface clean. Don't tell my wife, I cleaned the back cover at the kitchen sink while she was away at work! :paranoid: 8. Clean the mounting bracket using the same method as for the back cover. 9. When the paint on the front cover has dried, reassemble the horn. Notice that there are 2 dimples on the perimeter of the back cover, located 180 degrees apart. Also notice that the diaphragm has 2 small holes (conveniently located 180 degrees apart, see the connection here?), in addition to the 6 mounting holes. These 2 small holes fit over the dimples, insuring that the diaphragm lines up correctly with the coil in the back cover. The front cover has 2 slots around the perimeter, located 180 degrees apart. Place the front cover over the diaphragm and align the bolt holes so that one slot is at the top of the horn, and the other is at the bottom. 10. Install the mounting bracket to the bottom 2 mounting holes using the 2 longer screws. Don't forget to install the lockwashers! Each of these screws should have a lockwasher between the rear cover and the mounting bracket, and another lockwasher between the bracket and the nut. Install the 4 short screws in the remaining holes, put a nut on the back of each screw and tighten them all down. Use the screw driver and nut driver to complete this step. 11. Reinstall your "new" horns back on your Z! They may not be show quality, they may not be totally authentic in appearance, but they sure as heck look a lot better that they used to! :classic: This post has been promoted to an article


-
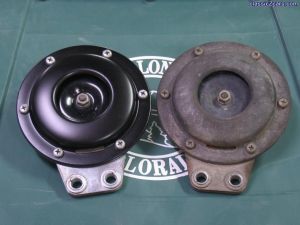 Wow! The refinished horn looks almost new compared to the dirty horn.
 -
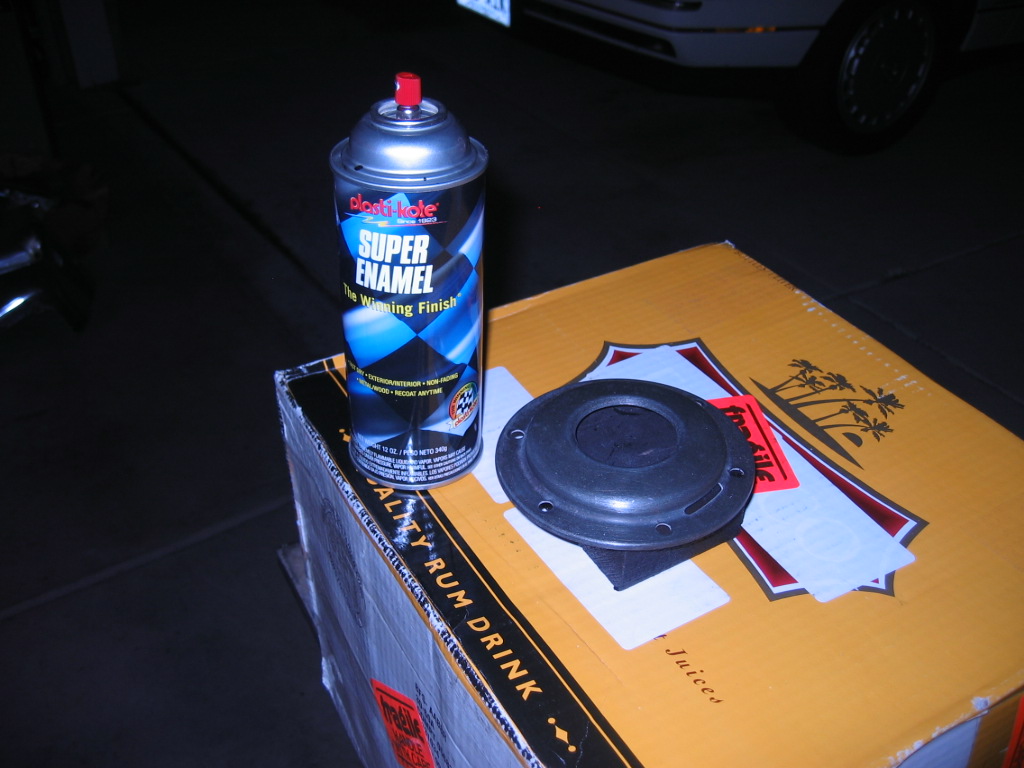
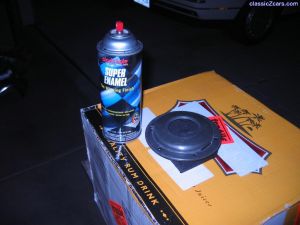 I used a satin black enamel that I purchased at Carquest to paint the front cover.
 -
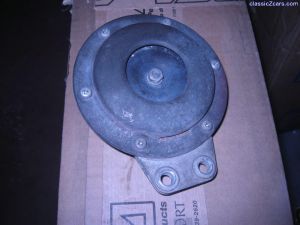
 A little cleaning made a big difference!
 -
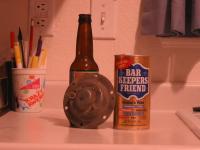
 Barkeepers Friend works well for cleaning old metal items, especially chrome and stainless steel. The beer was for me!
 -
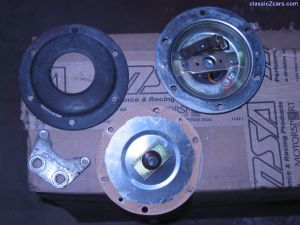 Here the center "diaphragm piece has been removed, too.
 -
 The horn front cover and mounting bracket have been removed.
 -
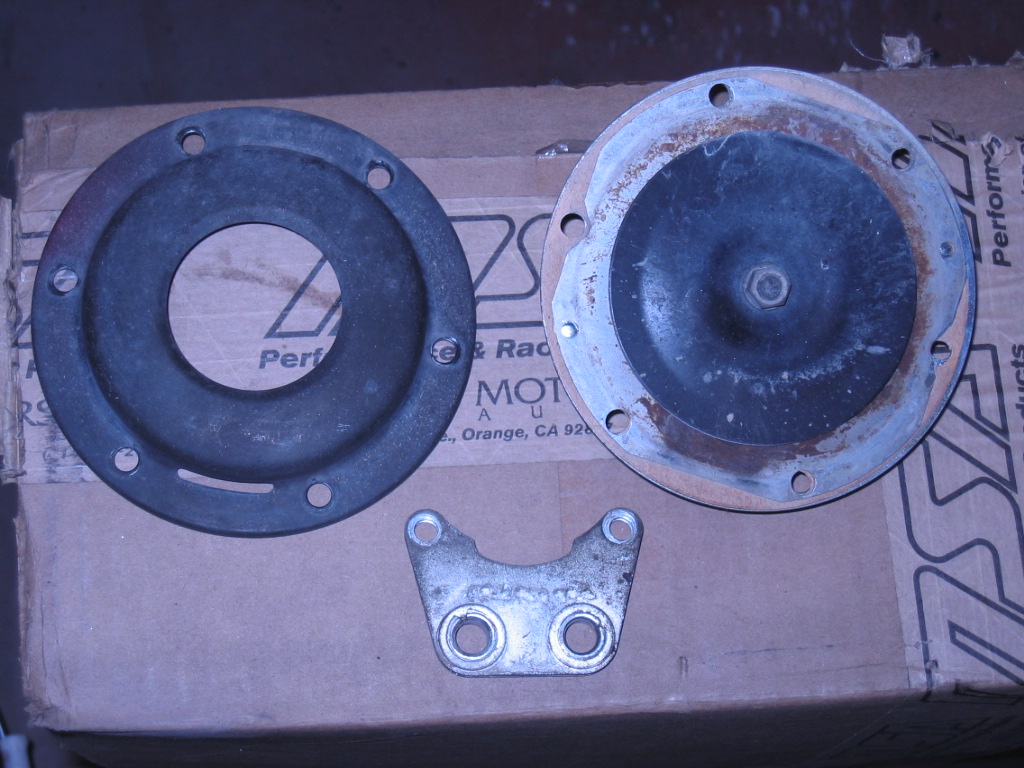
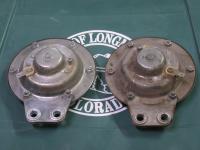
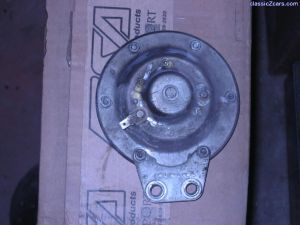 The backside of the horn...
 -
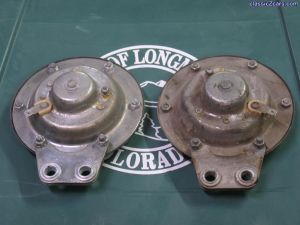
 A shot of one of the horns out of my '73 240Z. Looking a bit shabby after 30 plus years of service.
 -
If spraying penetrating fluid into the cylinders works and you are successful in turning the engine over with a breaker bar on the crank pulley bolt be sure to change the oil before you attempt to start the engine. The penetrating fluid will thin out the oil in the pan and could cause problems if the engine was started.
-
From your description, the "H" shaped battery hold down is probably a generic aftermarket item. I've seen some that fit that description at the local auto parts stores. The photo that Webdawg1 posted is what you want. Victor's post gives you a source for purchasing the battery hold down. His suggestion of purchasing the battery tray, too, is a good one.
-
The only way to truly find out is to remove the cylinder head, which is probably what you need to do anyway, as you don't want the problem to get worse. Here are some things to look for: Signs of water/coolant in the oil White, billowy smoke emitting from the exhaust Moisture in the PCV valve hose These were a few of the signs when the cylinder head on my '73 developed a problem. The engine in my car had coolant leaking into a few cylinders. I ended up having the engine completely rebuilt. Hope this helps!
-
Thanks, GunnerRob. That is a very informative link. I would adjust the valves myself, but since the engine was recently rebuilt I'm going to press the shop that did the work to adjust them. Kenny P.
-
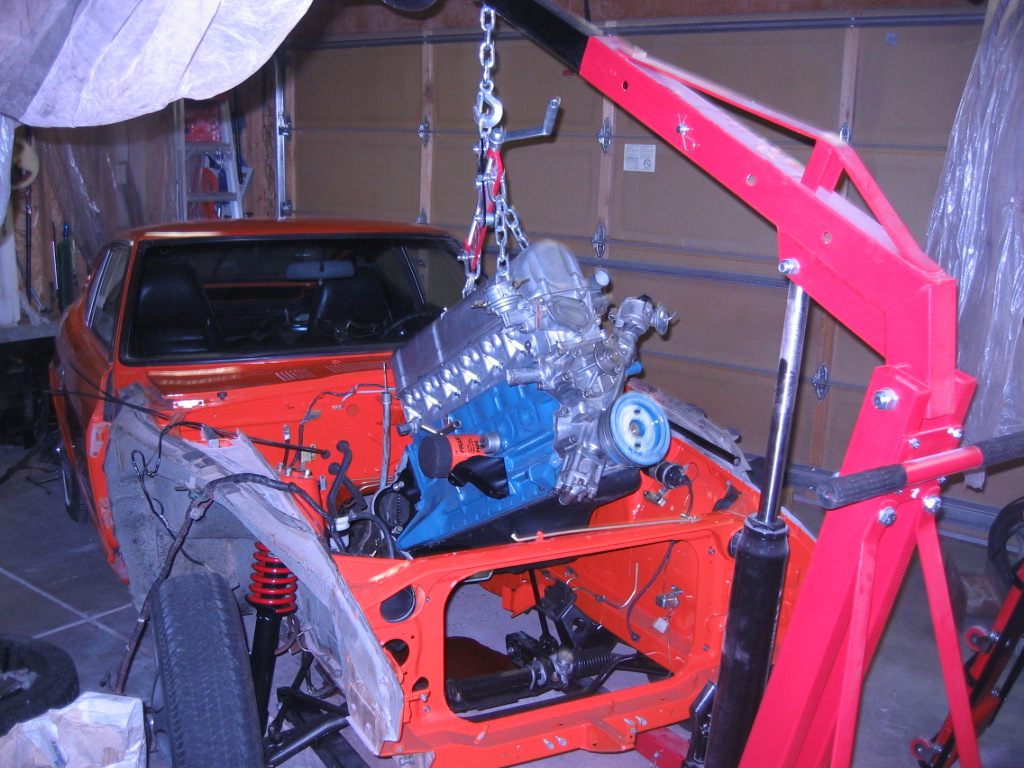
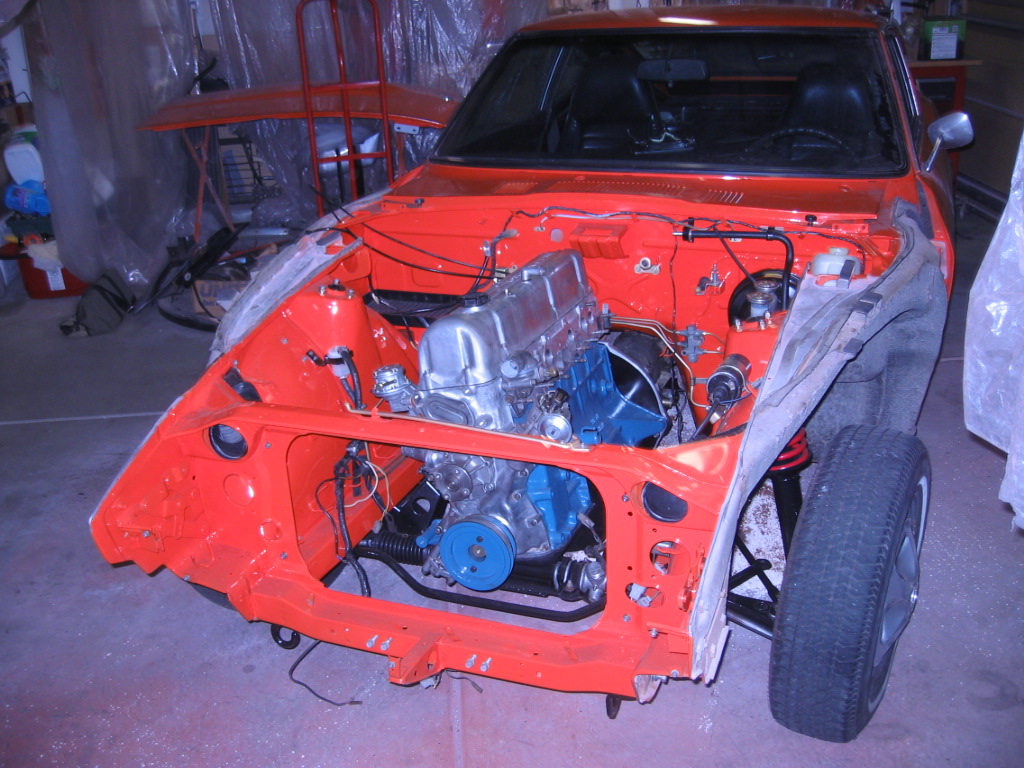
Today I finished the final preparations for firing up the rebuilt engine I recently installed in my '73 240Z. Back in March I developed a head ache, so to speak... A white, billowy, sweet smelling smoke was issuing forth from my exhaust. I had hoped it would only be a bad head gasket, but turned out to be a problem with the head itself leaking coolant into a few cylinders. :dead: Anyway, off with the head, took it to T&D Auto in Hygiene, CO, a fine Z focused shop. Sure, they could replace the head, but they said I should bring the engine in, too. So, about a month ago I picked up the rebuilt engine. I was still working on rebuilding the rear suspension, so the engine had to wait awhile... I finally finished the rear suspension rebuild and dropped the rebuilt engine into my Z last week! I've been busy hooking everything back up and on Friday I got everything put back together and was ready to fire it up. When I first turned the key, nothing happened. Buzz kill... went back through all the electrical connections in the engine bay, to make sure everything was hooked up correctly. Everything still looked good, so I gave the key another twist. Still nothing... it was then that I remembered to look at the connections in the steering column. Sure enough, the ignition switch connector was not seated! :stupid: Turned the key again and they engine cranked! But, it wouldn't start. The noodle scratching began... I pulled the fuel line and cranked the engine. Gas was flowing. Good. I pulled the coil wire and put it next to one of the strut tower bolts. Cranked the engine and saw a spark. Good!. Pulled a plug and grounded it. Cranked the engine, weak spark... Checked the point gap, it was off. Fixed that. Cranked the engine, still nothing. :mad: What next? I was ready to pull what hair I have left out of my head. Hmm, what about the timing. Kind of hard to check without the engine running. But, possible to check the static timing. So, bump engine until #1 piston is at top dead center. Check. Verify timing marks line up with pointer. Check. Remove distributor cap and see where rotor is oriented. Hmm, looks a little off. Time to consult the Chilton's manual. Somewhere in the section on engine mechanical repair there is a sketch of how the distributor drive spindle should be oriented. I removed the distributor and looked at how the shaft was oriented. Hmm, the manual shows the shaft oriented at about 11:00. Mine looks like its more like 1:00. So, I removed the oil pump, made a bit of a mess, and after a couple of tries got the spindle oriented like the manual says. In goes the distributor, turn goes the key, and badabing! The engine roars to life! Ah, all is well for the moment. The valves are making a bit of a racket, so back to the shop my Z will go next week. I'll have them go through the valve adjusment, set the timing and tweak the carbies. Oh, and I have a new Pacesetter header that I'll have them put on. My Z is finally back on the road! Kenny P.