Seppi72
Supporting Member
-
Joined
-
Last visited
Everything posted by Seppi72
-
I know that the "vitals" were published in the various sales brochures. I don't carry the one for my '72 model with me, but I can look when I get home tonight. However, if someone out there has a sales brochure for the '70 model year, they could scan it and send the PDF file to you. That's about the best proof one can expect to find short of putting your particular car on a scale.
-
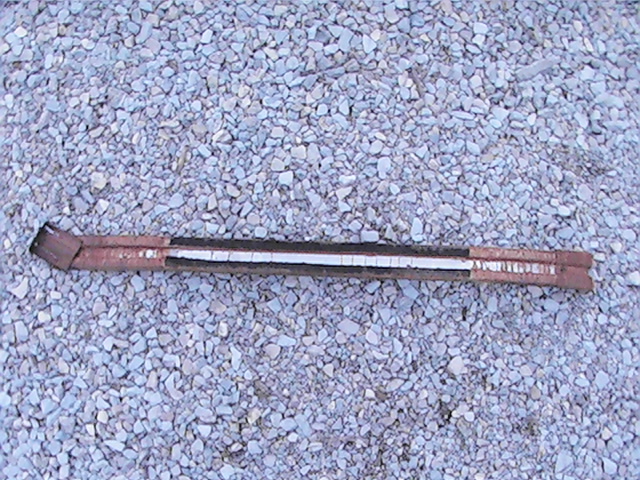
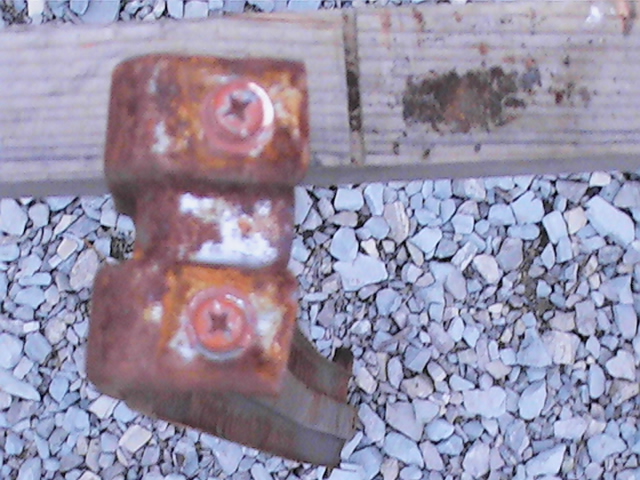
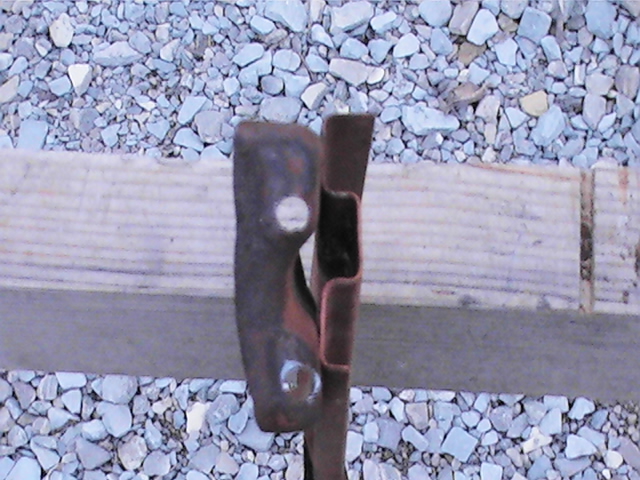
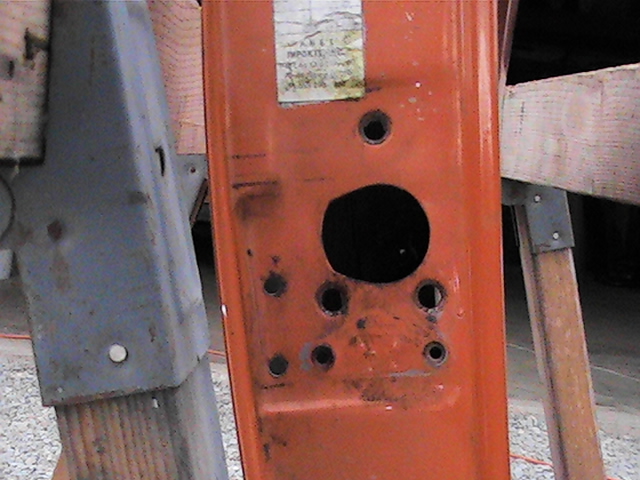
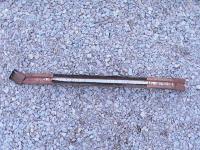
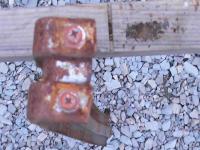
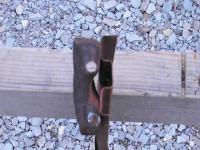
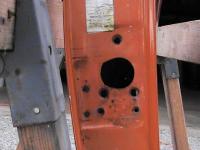
I spent part of last weekend disassembling my doors. Once I got all the "guts" out, I was left to ponder the rust on the inside, which was not too bad. Regardless, I want to kill ALL the rust that is there and get the treated surfaces sealed to forestall any future rot. However, I discovered in each door panel the “curiosity†that I'm calling a reinforcing beam. This part does not show up as a separate piece on the parts microfiche because it's integral to the door panel itself. The first picture shows the side with the strips of, let’s call it, black “foam†that keep the assembly in intimate contact with the door skin. The curious part is the fact that the beam is attached by two machine screws at the front end of the door panel (second picture) and then by two spot welds at the rear end. I don't know why Datsun would have done things this way - I don’t think it's a clearance issue - but there it is. In any event, I wanted to remove this beam so both it and the entire interior of the door panel could be treated and protected. I used increasing drill sizes to cut the spot welds, starting with a 1/8†bit and finishing off with a 1/4" bit. I note that on my early '72 (and this may be unique to each and every car), the spot welds were located very close to the bend of the beam (third picture) where it transitions into a flange that then mates up with the portion of the door panel to which the lock mechanism is attached (fourth picture). The former spot welds are the holes on the far left. It is my intention to replace the spot welds with machine screws similar to the case at the other end of the beam and, if I can, relocate the attachment points further away from the bend so I can weld nuts to the back and give the screws adequate grip. I’ll use pan head screws unless there really are interferences, in which case I’ll use countersunk screws as is done for the lock mechanism. · Has anyone else ever removed and then reinstalled these beams? · If so, what technique did you use to reattach them?
-
One thing I think needs to be stated is that there is a difference (to me at least) between what people call "bare metal" and sandblasted metal. To me, bare metal is that piece you welded in to replace the rotted panel. It has a "mill finish" that, when compared to a blasted surface, is downright smooth. Perhaps, too, bare metal might be the designation that could be applied to the metal surface after you've sanded off all the previous coatings. Regardless of that last sentence, bare metal is tremendously more smooth than blasted metal. Consequently, when someone says "do such and such on bare metal" I have to make the logical assumption that they ARE NOT talking about the metal surface that results from blasting. To me, they are competely different animals. Obviously, we have at least several forum users who are highly knowledgeable on this matter and I'm claiming to be one of them. Do any of you mavens subscribe to the definitions I have stated above? Is there a spectrum of bare metal types? I suppose that because I'm going to be contributing to their profit margins, I think I can reasonably ask both PPG and DuPont for their definitions of bare metal and expect answers:).
-
I took my Mitutoyo micrometer to the wheel arches and rocker panels yesterday. I measured the wheel arches at about a 0.93 mm average thickness, which translates to 366 mils. Depending on which conversion table I want to believe, that looks to have been stamped from 20 gauge sheet. For the rocker panel, I got about a 1.00 mm average thickness (394 mils). This looks to have been stamped from 19 gauge sheet. Of course, I could only measure about an inch away from any edge and I had to choose flat regions because the mike has flat anvils. Both parts could have been stamped from 19 gauge. I don't know how much the metal thins during the process. The one thing I do know is that it didn't get any thicker:)
-
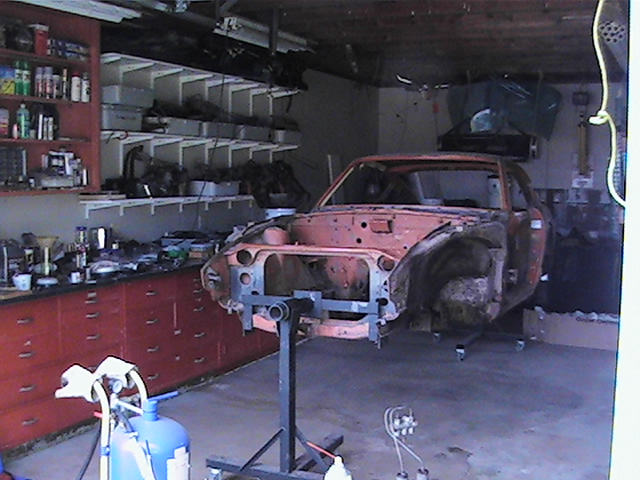
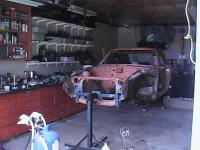
Just got home from trailering my car to the sandblaster. It turned out to be fairly easy and straight-forward, even though we had prepared for something more elaborate. I've had the shell on a rotisserie (see attached photo) for about a month as I was finishing up the removal of the last bits of hydraulic lines and wiring harnesses as well as scraping off undercoating (oh, what a F-U-N job that is). We were expecting to have to use an engine hoist to place the shell on a body dolly to make the transfer, but my body guy thought that the rotisserie was strong enough to handle things for the 5 mile trip. We pushed the loaded rotisserie onto a flat-bed trailer (remarkably easy, I have to say - we didn't even need to use the winch) and used straps and "come alongs" to hold things down and in place. Then it was off down the roads (admittedly back country roads). No muss, no fuss, no bother. My baby's now at the sandblaster and we'll likely start on things tomorrow. Blast, inspect, treat if needed, and epoxy prime each day. With luck, we'll have this portion of the job done by next weekend and we can then take the whole thing down to the body shop for the real fun-and-games to begin. You know, after thinking and dreaming about this for the past 25+ years, now that it's well and truly underway, it just seems unreal. I can hardly wait to document the process. Any and all tips and tricks regarding the sandblasting of S30 models are welcomed.
-
I had a couple of e-mail exchanges with Ospho's technical director yesterday and told him of PPG's recommendation against using phosphoric acid-based treatnments on sandblasted metal. Here is the set up and his reply. -------------------------------------------- Set Up ...when I was reading the PPG literature (Document P-226) on its metal treatment products, I saw that it has the statement "Metal treatment is not recommended or advisable for sandblasted metal." I called the PPG help line and was told that the presence of small pits in sandblasted metal could "trap" the acid and lead to paint adhesion problems down the road. Does Skyco (N.B. the company that makes Ospho) have any experience with or similar reservations regarding the use of Ospho on sandblasted metal? I would have thought that adequate rinsing should remove any residual acid - but perhaps it's just PPG's observation that this is the one thing that people do NOT do. Doesn't everyone read and faithfully follow label instructions? Reply And yes, rust pits and sand blasting pits will trap acid/water requiring significantly longer drying times before overcoating. This would seem to be obvious, but . . . . . :stupid: -------------------------------------------------- It doesn't sound to me that he is rejecting the use of Ospho on sandblasted metal. Rather, I hear him saying that you have to do an adequate rinse (or maybe a couple of rinses) and allow the surface to fully dry. I might just follow up with him a bit more next week. I've gotten really obsessive about wanting to KILL any rust that might exist on my car's body.
-
After getting the info above from PPG, I've decided that we will take a hybrid approach. After sandblasting, I'll take a magnifying glass to the metal and look for any residual rust pockets. If there are any, they will get treated. Otherwise, we'll just spray epoxy primer on the fresh sandblasted surfaces and go from there. However, I'll keep adding to this thread as I hear back from the two remaining suppliers; DuPont and Ospho.
-
I spoke with a PPG Refinish tech help line rep (1-800-647-6050 options 1,1,3) this morning and asked her two questions about the statement "Metal treatment is not recommended or advisable on sandblasted metal." 1. Why is treatment not recommended? 2. What does PPG recommend to prevent freshly-sandblasted metal from flash rusting? Her answers were: 1. Sandblasting leaves many microscopic pits where the acid can get trapped and cause paint adhesion problems later on. 2. Prime freshly sandblasted surfaces with epoxy primer. Regarding Answer 1, I would have thought that adequate rinsing would remove any residual acid. However, it may be PPG's experience that this is precisely what many people do NOT do. Enough complaint settlements and I can see this caveat getting put on a datasheet.:laugh: But doesn't sanding leave microscopic, and somewhat irregular, grooves in the metal? Couldn't metal treatment chemicals become trapped there too if the parts aren't adequately rinsed? Someone who knows about metals, let me know the answer(s). I'm curious. I've asked Ospho's Technical Director (as well as DuPont) about any concerns they have regarding treating sandblasted metal and will post their replies when they come in.
-
I've been doing a lot of background research recently regarding how to (1) neutralize rust and (2) prepare bare metal surfaces for later painting. Item 2 leans towards keeping freshly-created bare metal (from sandblasting) from developing "flash rust" and then having a ready acceptance of a primer coat. Anyway, I've identified three ways to get my metal to where I want it to be. All three are based upon the reaction of phosphoric acid with iron oxide (rust) to form iron phosphate. The first way is to use a product called Ospho (www.ospho.com). The second way is to use the PPG product tandem of DX579 Metal Cleaner followed by DX520 Metal Conditioner. The third way is to use the similar DuPont products 5717S Metal Conditioner followed by 5718S Conversion Coating. From what I can tell, the primary difference between Ospho and either the PPG or DuPont systems is that the latter two also create zinc phosphate regions - particularly so on galvanized metal but they also contain a source of zinc - which is, DuPont says, supposed to be the best substrate for later paint adherence and corrosion resistance. I have the MSDSs for the Ospho and PPG products so I can interpret them to gauge the concentrations of various active ingredients. Unfortunately, the MSDSs for the DuPont products aren't as detailed as I'd like for a good comparison:stupid:. Curiously, the PPG literature says that "Metal treatment is not recommended or advisable on sandblasted metal" :eek: whereas DuPont has no mention of sandblasting, one way or the other. I've asked PPG for an explanation because it appears that everyone around this Web site swears by one of these post-blasting methods:cross-eye. I've also asked DuPont for its position on this matter. Regardless of that technical issue, what is bugging me is the tremendous difference in retail prices that I have received from the various local suppliers here around Columbus, Ohio. This is what I've been quoted: Ospho $8.49 per quart (local hardware store) DX579 $28.99 per gallon (local NAPA store) DX520 $26.99 per gallon 5717S $23.50 per quart (local auto body supply store) 5718S $23.40 per quart So, after all this exposition, my question is whether anyone else out there has recently purchased any of these materials and whether the prices I've gotten seem reasonable. Frankly, it's only the DuPont pricing that has me wondering. Is it just this store padding its margins, or are all DuPont products similarly out-of-line price-wise?
-
Jim: It occurred to me that because the ZCCA convention is going to be in Cleveland this fall that Tabco would be a proper addition to it somehow. I've contacted the ZACO organizers and given them this thought. I also talked to Ron at Tabco, telling him what a good marketing opportunity this would be, and gave him the convention URL. I hope they work something out. The parts I took home last week seem to be at least as thick as the OE metal. I recall that Ron said they used either 18 or 19 guage steel. I'll take some pix tonight and weigh and measure the parts. I'll post the info on this thread tomorrow.
-
I don't have historic plates for my '72 and really can't think of anyone I know locally who does (but I'm sure there are at least a few). Most folks I know have vanity plates on their Z cars. Regardless, check the Web sites for ZACO, ZROC and ZCCO to make contact with folks who could answer your question. If you like, I could ask my local county sheriff (a personal acquaintance, but that hasn't kept his deputies from giving me ticketsLOL) about how he views historic plates and what the associated vehicle is "allowed" to be doing.
-
My car did not have the dreaded selt belt buzzer nor the retractable seat belts. However, the chassis does have pockets for the selt belt retractors. Now that it's on the rotisserie, one can see where they cut out a portion from each side of the floor and welded in the pocket plate. I've told my body guy to cut those pockets off and weld in flat plates again when we get to that point - unless you think they'd be good for hiding stuff :classic:. I am afraid that all I'll have in time for the convention will be pix of my baby all fixed up and painted but still in reassembly mode. However, I will have my other, fully fuctional, '72 and, because it's three months off, I might even have my 6-1 headers installed and the engine compartment cleaned up. Ghad, what a PITA.
-
Geezer: In my investigation phase, I had come to wonder if one company wasn't just supplying the other. After all, it really makes very little sense for two companies (and only perhaps 20 miles apart) to make the exact same offering of parts for such "low volume" markets as the S30. When I mentioned Mill Supply to Ron Stelmarski, he did say something to the effect that it was kind of "cute" that they "adopted" Tabco's part numerology. When I get back in contact with Ron, I'll ask him more directly about Tabco and Mill Supply's relationship - after he's made and shipped my remaining parts, that is .
-
I suppose that one of the "joys" of living in Ohio is that I am relatively close by (~140 miles) to the two manufacturers of replacement body panels for our beloved cars: Mill Supply and Tabco. Because I've recently embarked on the rebuild of my original owner '72 and it will need a number of these parts (rockers, rear wheel arches and rear wheel housings), I have been looking at both company's Web sites and contacting them for info. I decided to get my parts from Tabco. When I called Tabco, I spoke with Ron Stelmarski (I'm assuming that's the spelling) and he is the operations manager, at the very least. Heck, he might even be the owner as I didn't press him for his title over the phone. Ron told me they made the rear wheel arches and one of the rockers in stock. He said they could get the other parts made up in a week or so. I turned out that I had to make a business trip to Cleveland last Thursday so I told Ron that I would stop by to pick up whatever parts he had around 4 p.m. He was very agreeable to that. Now, first things first, Tabco's Web site IS NOT up-to-date. For one thing, they are no longer located in Chesterland, OH. They are located at 235 E. 131st Street, Cleveland, OH 44108. The local number is now 216-851-1404, but I believe the "original" toll-free number 800-782-5226 is still viable. The Tabco building is nondescript, to say the least, and the only identifying mark is the number 235 on the main entrance door. It is across the street from a closed LTV steel plant in East Cleveland just off Exit 178 of I-90 (for anyone who wants to include it on your "sights of Cleveland" tour). It is not in the best part of town, so be certain to do this part of your sightseeing in daylight :nervous:. When I asked, Ron said that they had been in this location for almost two years. When I said that the Web site wasn't current, he seemed only mildly surprized. Obviously, drop-ins aren't a big part of Tabco's busness. My parts, two wheel arches and one rocker were waiting for me in the office. When I asked Ron for a tour, he was happy to oblige but he demurred when I asked about taking photos, saying that they still had some "organizing" to do in the building and it would be better looking "the next time you're here." Undoubtedly... Tabco appears to have one metal stamping machine (it wasn't runing at the time) and it must have pretty big platens (I didn't get close enough to look really good) because there were some fender stampings (60s era Chrysler, Ron said) stacked on a pallet on the floor that looked to be at least 6 feet long. I've worked in plastics molding, so I know something about presses and, from 25 feet away, the one I saw didn't look capable of handling the tooling to make something that big. Yet, there they were as big as life. I noticed that they were in the process of producing S30 rocker panels and they had one marked OEM part sitting out that they used as a guide. They were not using it to check dimensions - in fact, I saw no evidence of QC - but rather to show them how to trim the raw stamping, drill holes and weld in nuts. However, with stamping tooling, how bad can the parts really be? Many of you have already used Tabco parts and have been happy with them, right? The thing that really struck me, however, was how awful the safety looked to be in the stamping area. There were no guards around the press itself (I had an acquaintance 20 years ago lose a forearm and hand to such an unguarded device). I also did not see a single worker (young guys) wearing safety glasses, gloves, or work shoes. One guy was wearing ear muffs - or maybe it was his personal radio, I couldn't tell. You can imagine all the stuff going on in a metal shop, so this was something that took me aback:finger:. Ron then took me into the wearhouse portion of the building and, as you might expect, there were rows and rows of shelves holding every sort of stamped metal part with the associated tooling sitting on the floor underneath. I asked Ron what tooling costs and he said anywhere from $5-65k per tool. That seems reasonable based on what I know from plastics. One other thing that Ron told me is that they buy steel coil that is either rejected or made surplus by the domestic automakers and thus save money on raw materials. I assue the rejections are due to dimensional problems and not metallurgical ones. I can't imagine the latter would get out of the rolling plant. Finally, even with all the savings that Tabco employs, the cost of parts has gone up. For the parts that I need, the current costs are: Rockers (PN 167-40) $59.75 Wheel Arches (PN 167-51) $79.75 Wheel Housing (PN 167-53) $89.75 These are still a bit less than Mill Supply's curently shown "Web prices." I hope to get into that shop some time soon (unless someone else has been there - done that and wants to talk about it here).
-
My '72 is, I believe, one of the earliest ones with a build date of 9/71 and VIN HLS30-46372. In fact, it came with the vertical defroster grid on the rear window which, I believe, is an indication that Datsun was using up leftover '71 parts at that moment in time. My baby is on a rotisserie right now waiting for sandblasting in advance of rust repair. I'm ordering the Ospho this week. I just cut out the spot welds for the battery tray holder this past weekend. No rust through, but the underlying paint - such as it is - had seen more than enough acid over the years.
-
I don't thnk it makes any difference which side of the MC the bleeders are on. Of course, you should check a diagram of the MC in a FSM to make sure that's a valid statement. I don't have a FSM with me at work. I'm tearing down the MC from my '72 right now and wondered why the bleeders are directed towards the outside of the engine compartment. I intend to switch these things around when I reassembly the car; assuming that Kroil will free up all the "ferschlugineh" frozen fittings sometime in the next six months or so.
-
There is only one way that brakes heat up - friction. Therefore, regardless of what you might think you have done regarding adjustments, the drums are rubbing against the shoes. If you have freely-spinning wheels when you test them, then it sounds as though the shoes are not fully retracting after the first (or one of the first) brake applications. If the return springs are not broken outright or otherwise "shot," the brake cylinder piston has to be "sticking." Or there could be some piece of crud blocking the brake line at some point so that pressure is not relieved. Like some of the other guys in our little Z community who have jobs in the techical area, I have a data collection system that works on my laptop. I'd start by attaching a thermocouple to the backside of each of the four shoes, threading the leads through the adjusting holes on the backing plates, and watch the temperatures as I was doing a test drive. That way I could at least tell how many shoes are involved in the problem. Four 0-1" LVDTs would be better, but who has those? Not me. Once that info was known, I could begin to track down the issue better.
-
I've decided that I will keep the spare tire well. I suppose that I can always remove it later, if I decide to do so. When the car gets roadworthy again I'll just create a urethane foam plug to put in the well to both dampen any road noise that might come up through there as well as support the cover.
-
Because I've been and will be doing so much work on my '72, I'm thinking about the spare tire well. Firstly, there is absolutely no rust anywhere on the tire well. This is, frankly, amazing considering how much rust there is on other areas of the car and what I've seen in other S30s. I don't intend to restore my car. I intend to rebuild and improve it as a road car. And I don't intend to have a spare tire on board. Thus, the car will never be "stock" and the tire well is thus superfluous. I'd salvage the part and make it available to someone who needed it. In addition, I think there are a number of aftermarket gas tanks that would work quite well in an S30 and sit high enough that a dual exhaust could be run directly down the centerline of the car such as what BRE ran in #46 (not that that is my present intention). So my question to you folks is whether you think it is reasonable to yank the spare tire well and replace it with flat sheet metal for the parcel shelf area and the other work that would be needed in doing so. I'd be happy to hear of experiences, pros, cons, options, etc.
-
I had a similar shaking occur in my '72 while making moderately quick turns shortly after I replaced all the bushings with urethane. It turned out that the bolts holding the lower control arm to the front strut were backing out. I didn't realize what was happening (even after stopping to check things out) until too late. First, one bolt fell out and the strut was free to rotate when under a certain level of side load (the shuddering). When the scond bolt fell out (fortunately at about 25 MPH), the entire strut was free to swing around in the fender well and banged the sheet metal up pretty good. No tremendous damage, however. These bolts are now safety-wired on my cars.
-
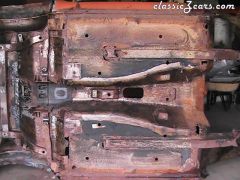 The rust demon was way too busy under here for way too long. Calling Zedd Findings... I'll probably go with Bad Dog Parts support rails so I can tie them into the rear X-member frame.
 -
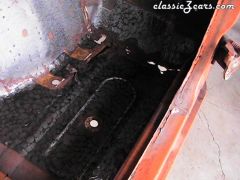 Easy to see the daylight. Note the "stippling" pattern where I removed the tar mat using an air gun chisel. This was done in 90 degree heat and it took me way less than 45 minutes to remove all the tar from the interior. Mch easier than the propane torch and scraper route I've had to use on the undercoating. Yuck.
 -
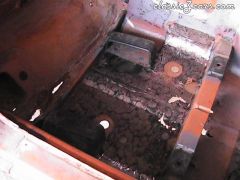 Did Datsun use special dissolvable steel in the welds?
 -
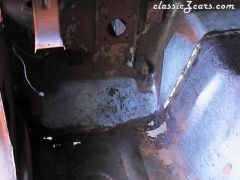 Not too bad, but the entire floor's getting replaced anyway.
 -
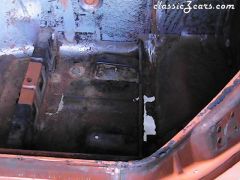 That special Datsun dissolvable steel again.