.jpg.697cae2dec04e3d7f78231df77a31622.jpg)

Ownallday
Community Member
-
Joined
-
Last visited
Everything posted by Ownallday
-
I actually contacted a couple of other people. Got my question answered. Wildwood micro kit on TTT and silvermine will work in the front and rear but the rear e-brake cable hits the wheels and requires a spacer or no e-brake) The guy I talked to has a 12mm spacer not sure if anything smaller will work to clear the cable. The S12+8 front brakes (stage 3 on silvermine) fit and require only a 2mm spacer or 2mm to be shaved but someone else got away without shaving so it's 50/50 direct fit. And the rear disc brake conversion from Z car depot or the stage 4 rear brakes from silvermine will work with no spacer. Writing this Incase anyone needs an answer.
-
Doesn't need to be the most expensive brakes out there though, I'm obviously not going to go back to stock brakes either. I'm willing to get Wildwood brakes (especially the smaller 4 piston brakes that TTT or silver mine sell) but I need to know if it'll work with my Watanabes first.
-
I read the ZCG kit works but the price is what keeps me away
-
Its hitting the entire caliper, the caliper sticks past the hub portion by a pretty big margin like 6-9mm past it. I think I would only be okay with only running a 1-5mm spacer currently since I still don't have coilovers and the 15x8 is apparently the max size before running into rubbing problems with rolled fenders too. I personally don't feel comfortable grinding down that much of the caliper too and essentially making it more unsafe and look uglier lol.
-
Hello, I recently got a set of 15x8 0 offset Gold Watanabe Type R wheels. I currently have the front Toyota 4X4 SW13 brake calipers installed on my car which does not fit with the Watanabe wheels. My question is does anyone know what front and rear brake kits will work with my new wheels excluding the ZCG kit. My fenders are rolled/cut so I may also be able to run some spacer if needed but nothing too crazy. Any input would be appreciated thanks.
-
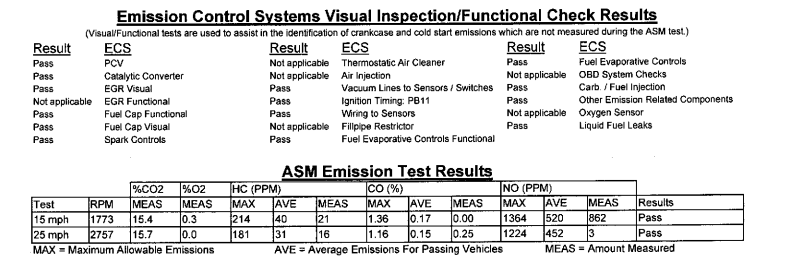
As you can read from the title, I wanted to make a quick write up on how I got my Z to pass smog with flying colors and something that can help anyone diagnose why their car isn't. There is not a lot of write up on this either. I have a 1978 Datsun 280z. I ended up buying a second L28 with N42 block and N47 head (proper block and head for 78 280z). I performed a full rebuild on the engine along with restoring or replacing everything I can on the intake manifold. When it came time to smog the car, It failed due to high CO (Measured 1.84 on 25mph, max is 1.16) and HC was really close to being above the max also and NOx was practically 0 indicating my chambers are running very cold. It surprised me considering it was basically a new engine with new parts. Aside from the engine rebuild, I had new injectors, new AFM, all new sensors on the thermostat, new fuel filter, new hoses and lines, new fuel pump. new air filter, new Spark plugs, new cap and rotor, new spark plug wires, new egr valve and new Carb compliant catalytic converter from magnaflow and fresh 91 octane gas. Timing set at 10 BTDC with idle ~800rpm. Almost all the wiring has been redone with new connectors or cleaned connectors. The steps I took in diagnosing why the car didn't pass started first with making sure my valves were properly adjusted again, these damn valves like to go out of spec pretty quickly from my experience. Minor improvement was saw after doing a valve adjustment again but it was very minor. I checked all my spark plugs and saw a near perfect brown color that you want to see from spark plugs. My results indicate my car is running rich but the spark plugs say otherwise. California has very little wiggle room for cars running rich even if just slightly rich. Tested water temp switch resistance and resistance came back indicating my water temp was fine with ~290 ohms at 280 degrees. Inspected my Cold start injector to see for leaks when the fuel system was pressurized and also checked to see if it was firing when the engine was warm and saw that the cold start valve was working properly. Inspected all my injectors for leaks even though they were new. With a boroscope and the fuel system pressurized i stuck the camera into each cylinder and looked for fuel seeping. All my new injectors checked out and were good with no leaks. Ordered a fuel pressure gauge and found my pressure was right at 30-32psi at idle, a little low from the fsm 36 psi but imo was not a big deal since the car is supposedly getting too much fuel anyways. I saw PSI rise to 36 psi when revving the engine which is normal. To check if the fuel pressure regulator is working I removed the vacuum hose going to the fpr and saw a jump from 32psi to ~38-40psi indicating the fpr is good. THE SOLUTION FOR MY Z: Fuel was out of the question for me at this point and decided it was time to tinker with the AFM. I recommend doing this as the last step if all else fails. There are other things you can test such as the tps, afm itself, the ecu and so on! I removed my new AFM and reinstalled an old afm I already had that has already had the box open (didn't want to tinker with my new one). There is a good write up online about how to adjust the afm. There is a white gear (could be a different color depending on your afm) that has a spring on the inside. If your AFM has not been tampered with or has no adjustment marks, I would put some markings so you remember where the teeth originally were incase something gets messed up. This gear can be moved in one direction or another that essentially makes the car run richer or leaner. Do not mess with this without reading up on how to properly adjust it, there is tension on the spring! I WOULD HIGHLY RECOMMEND that you find a smog shop that has a smog tech that is willing to constantly run the car on the dyno and get emission results while constantly adjusting the afm at the same time. This is essentially what we did. We got a baseline results on the dyno, after seeing the results were still rich, we turned the car off and I adjusted the afm a couple teeth leaner, tightened the adjustment screw and re-ran the dyno until it was eventually good and passed with flying colors! You may also need to adjust your idle depending how much afm adjustment you do. After you pass, drive the car for a about 50 miles or so and recheck your spark plugs and make sure you are not running too lean! My spark plugs were still a nice brown indicating everything is where it should be for California emissions and the car itself but I will still be swapping back to my new AFM since these cars like to run slightly richer. Heres my results. Didn't think a Z could have such low CO and HC. Something I noticed after passing this test was my measured 15mph NOx jumped to 862 (before was at nearly 0) which means that running leaner and reducing the CO and HC will most likely in return cause higher NOx (essentially hot polluted air). You will have to find a fine line when adjusting the AFM so everything is equal. If you choose to adjust the AFM, I think it would be beneficial to have an older one for adjusting just for smog reasons and swapping back to a newer one for daily driving which is what I did, otherwise make your markings so you know where to readjust after smog. Extra things to test and look out for: Some other things that you can also check on is the overall state of the engine by doing a compression test. Low compression usually causes an engine to run rich. If you have dying cylinders there is only so much adjusting the afm and everything else can do. You can add the option of putting a rheostat inline with the water temp switch and essentially trick to water temp switch to run leaner sooner or vise versa depending on the condition of your results. I am not sure if California smog techs will question this or not though during visual inspection. Change your catalytic converter. Depending on how old your catalytic converter is and how many miles have been put on it, it's possible that it is not performing at it's peak. You can test the Cat by using a temp gun and making sure the cat is hotter than the pipe before and after the cat, would indicate the cat is working properly. However, overtime a catalytic converter does slowly deteriorate and become worse at doing what it's suppose to do. Spark plug gaps can also play a roll in NOx emissions as the wider the gap the more NOx emissions produced. The smaller the gap can lead to unburnt fuel and cause a richer condition. Next thing you can check for is the TPS. There are multiple write ups on how to properly adjust the TPS. While it can make a difference to your emissions results, I don't think adjustment will make much of a difference unless yours is severely out of spec. You can test the EGR valve. There is a write up on how to properly test it. Change your oil is another thing that gets looked over. Fresh oil usually makes a pretty small change to the results depending how old the oil is. Hopefully for those you struggling, this write up gave you some insight on what you can do to hopefully pass your smog test. Some guys will tell you not to mess with the AFM and I do agree that it should be a last resort. If you have two working AFM's do what I said above and use one just for smog and use the other for daily driving. If most things are working as they should the AFM has the biggest impact on how the car does emissions wise but will also drastically change how the car drives if your car actually is not in good running condition to begin with! Good luck!
-
Alright, I'll remove it after 500 miles since I'll have to go back in at that time to retorque the arp head bolts and probably do a valve adjustment again during break in.
-
That hole is already sealed from factory. It's an N47 head which only came on fuel injected cars.
-
She's ready to fire up this week! Been a 8 month process! That's pretty much what the engine came with when I picked it up and tore down, had it on my last engine with no issues and electric fuel pump so just threw it on, wasn't actually sure you can just remove it.
-
100% positive, the timing chain is covering the timing mark on the crank gear but I made sure it was on the mark with the darker link in this timingchains case. For the most part to my knowledge too, the crank gear dimple can only be in one general area with the engine at tdc which is where the darker link is in combination with the cam gear.
-
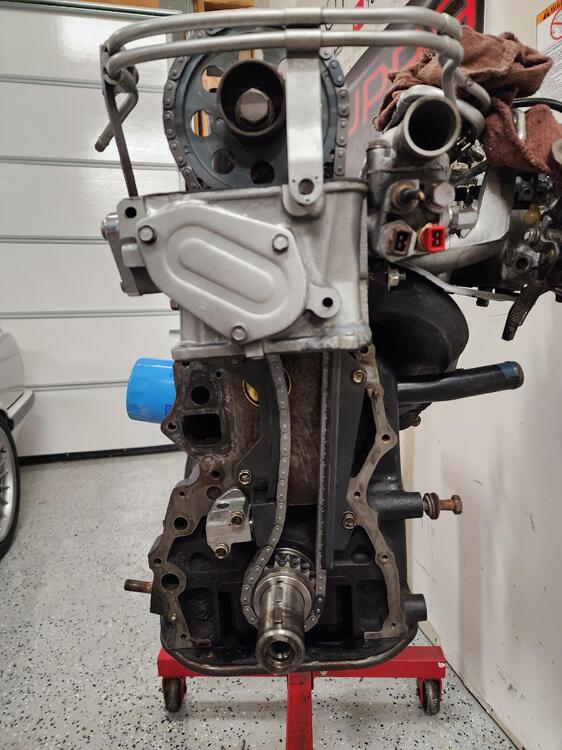
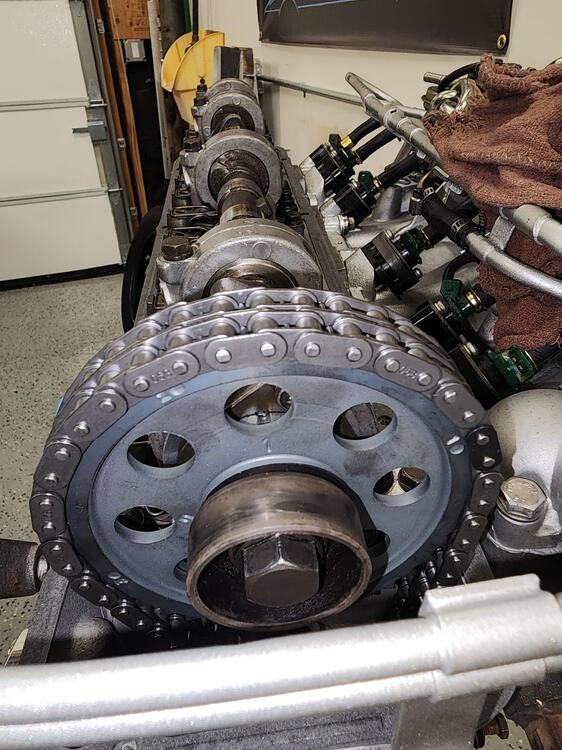
Thanks everyone for your feedback and knowledge. Was able to replace the timing chain and tensioner earlier today in about an hour. Happy to report the issue has been resolved and the tensioner is no longer crazy extended, safe to say the chain was just extremely stretched. Hopefully this week the car will be running again with a fresh new engine rebuild.
-
That looks about as similar to what I have now. That brings a lot of extra relief to me haha. Thanks for sharing. Will share pictures tomorrow of my results.
-
I suppose I can do without it. Suppose it's just nice to have it. If I have trouble this time I'll definitely use a zip tie. Little update, called the machine shop and they said they removed only about 0.003-0.004 inch when shaving the head since mine was relatively straight and I didn't specify how much to remove so they removed as little as possible. Gives me a little more confidence my chain is just extremely stretched and a new one should solve it
-
Would you reuse the old cam gear over the cloyes one? I noticed that when ordering the kit. Should be getting the kit today and install tomorrow. Will consider, it was relatively easy doing it without a zip tie though.
-
No, I was able to hold the tensioner in with my hands while installing it.
-
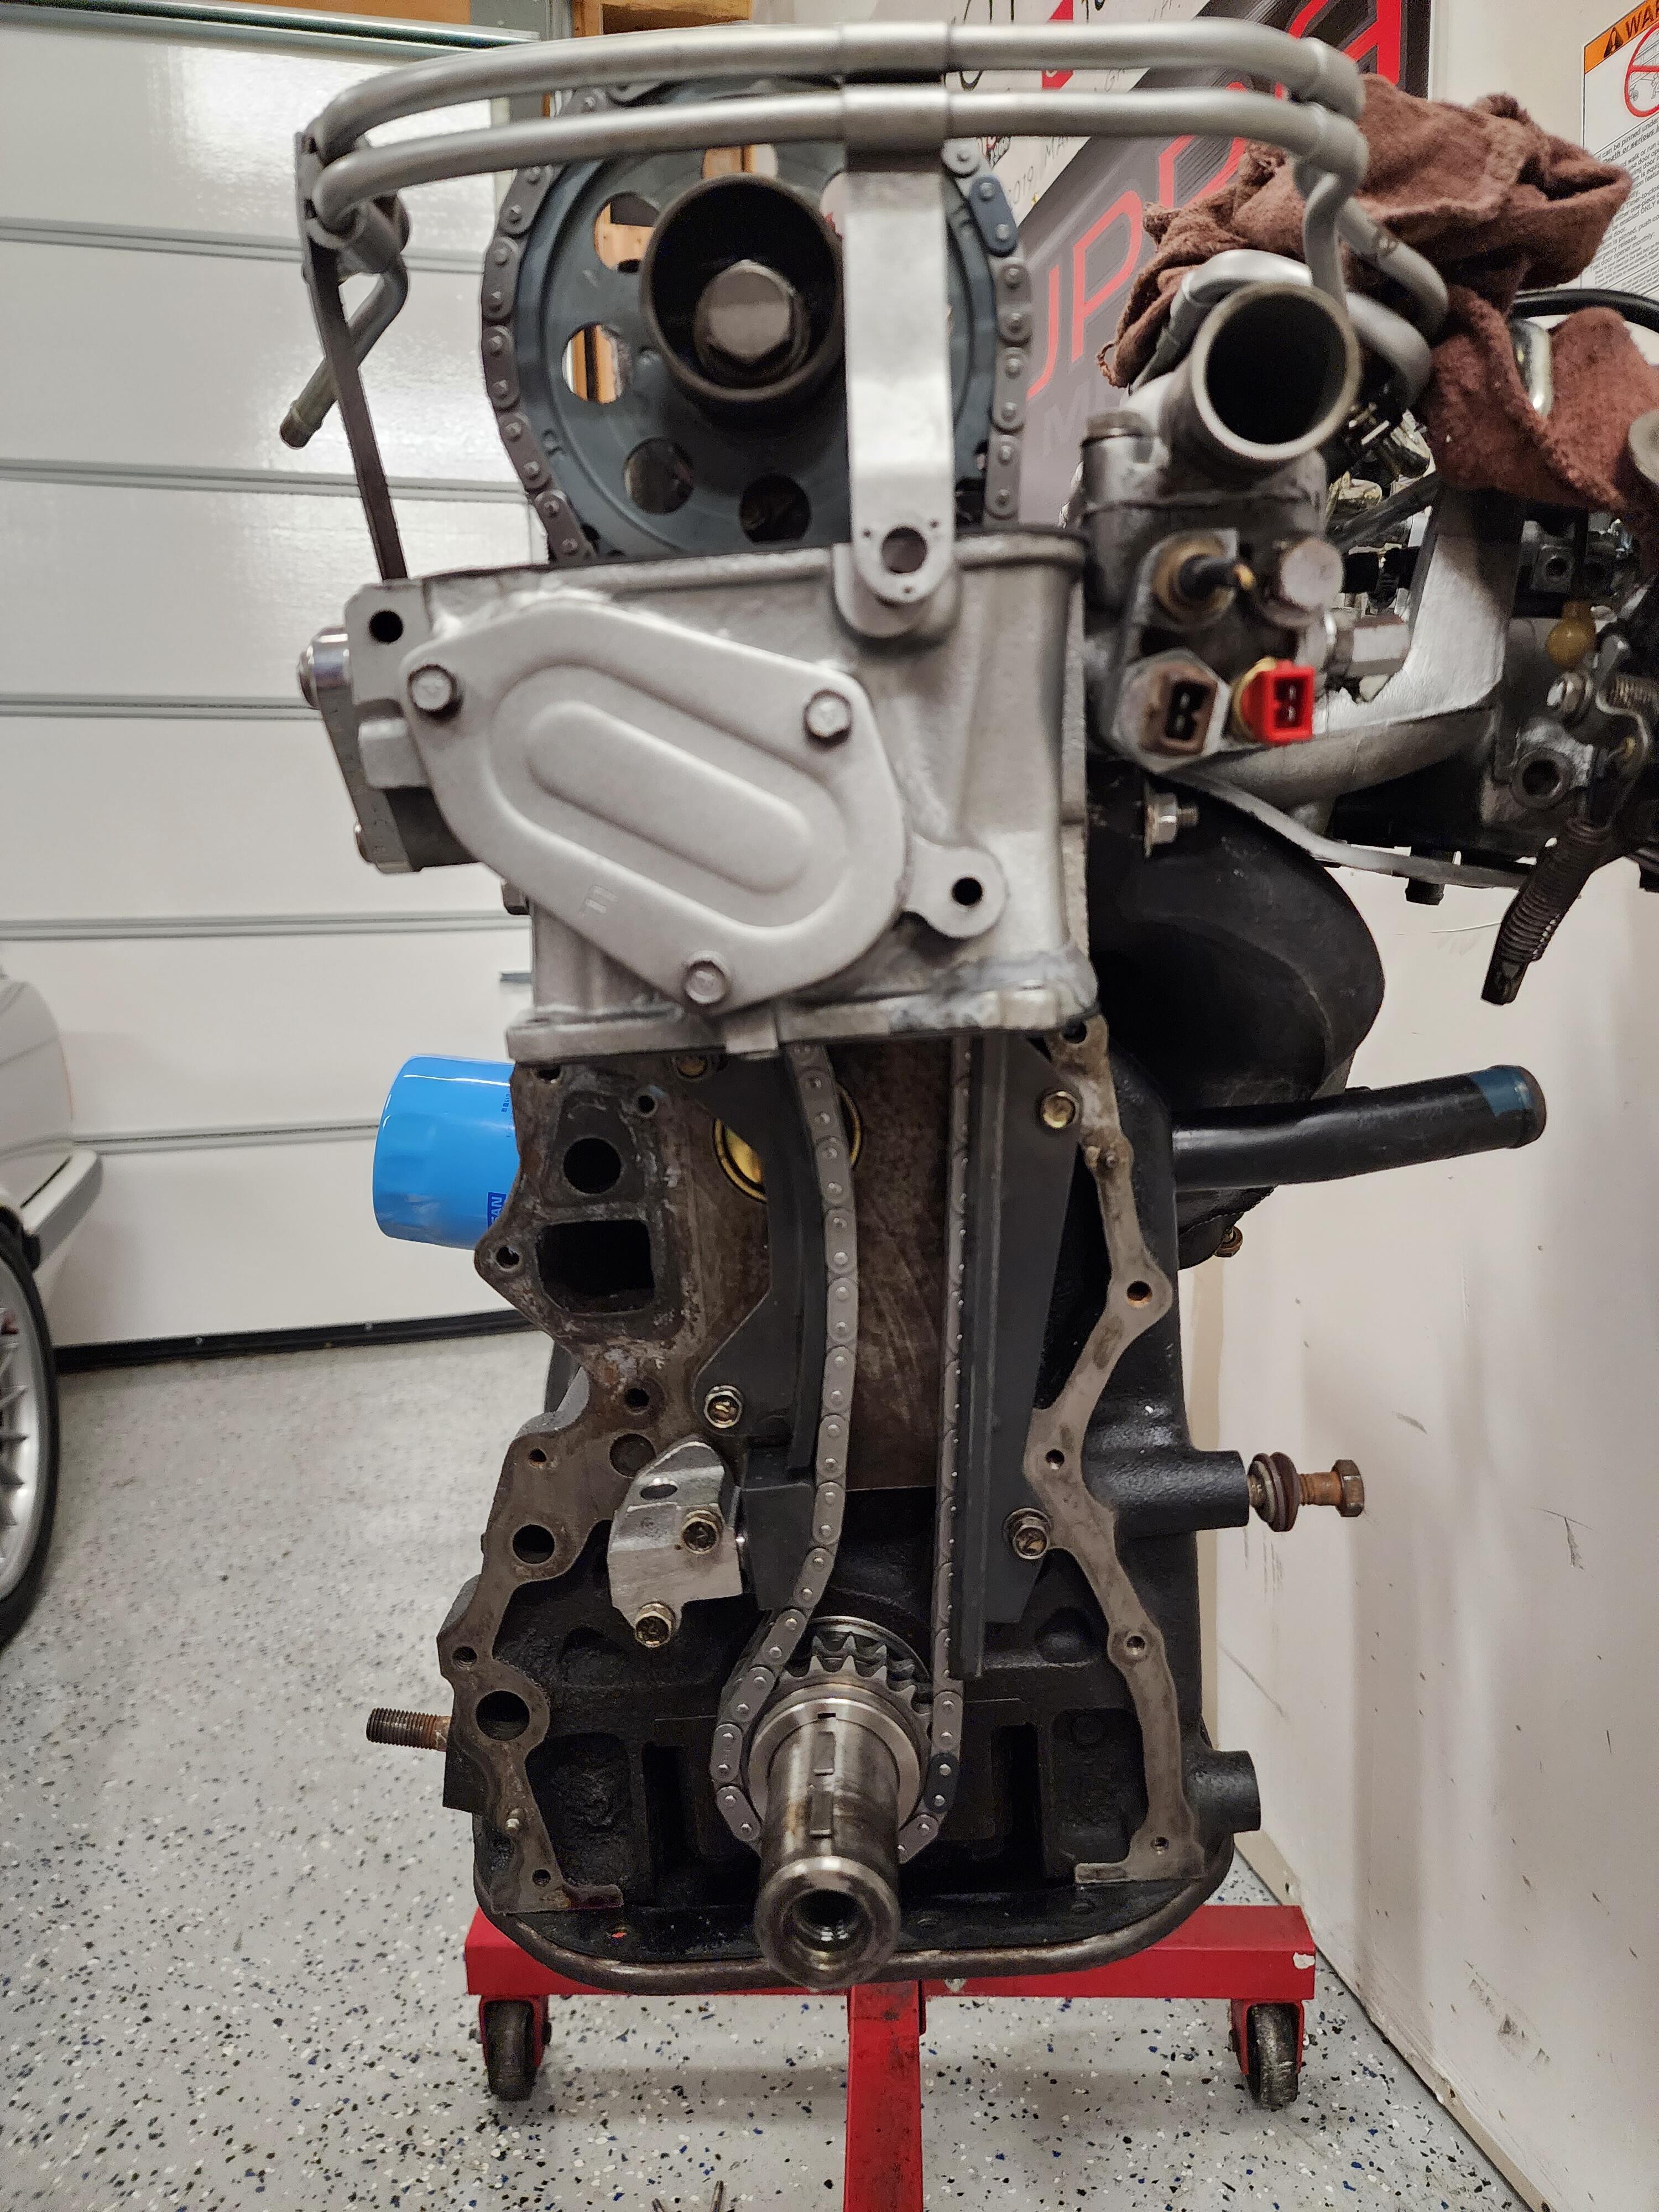
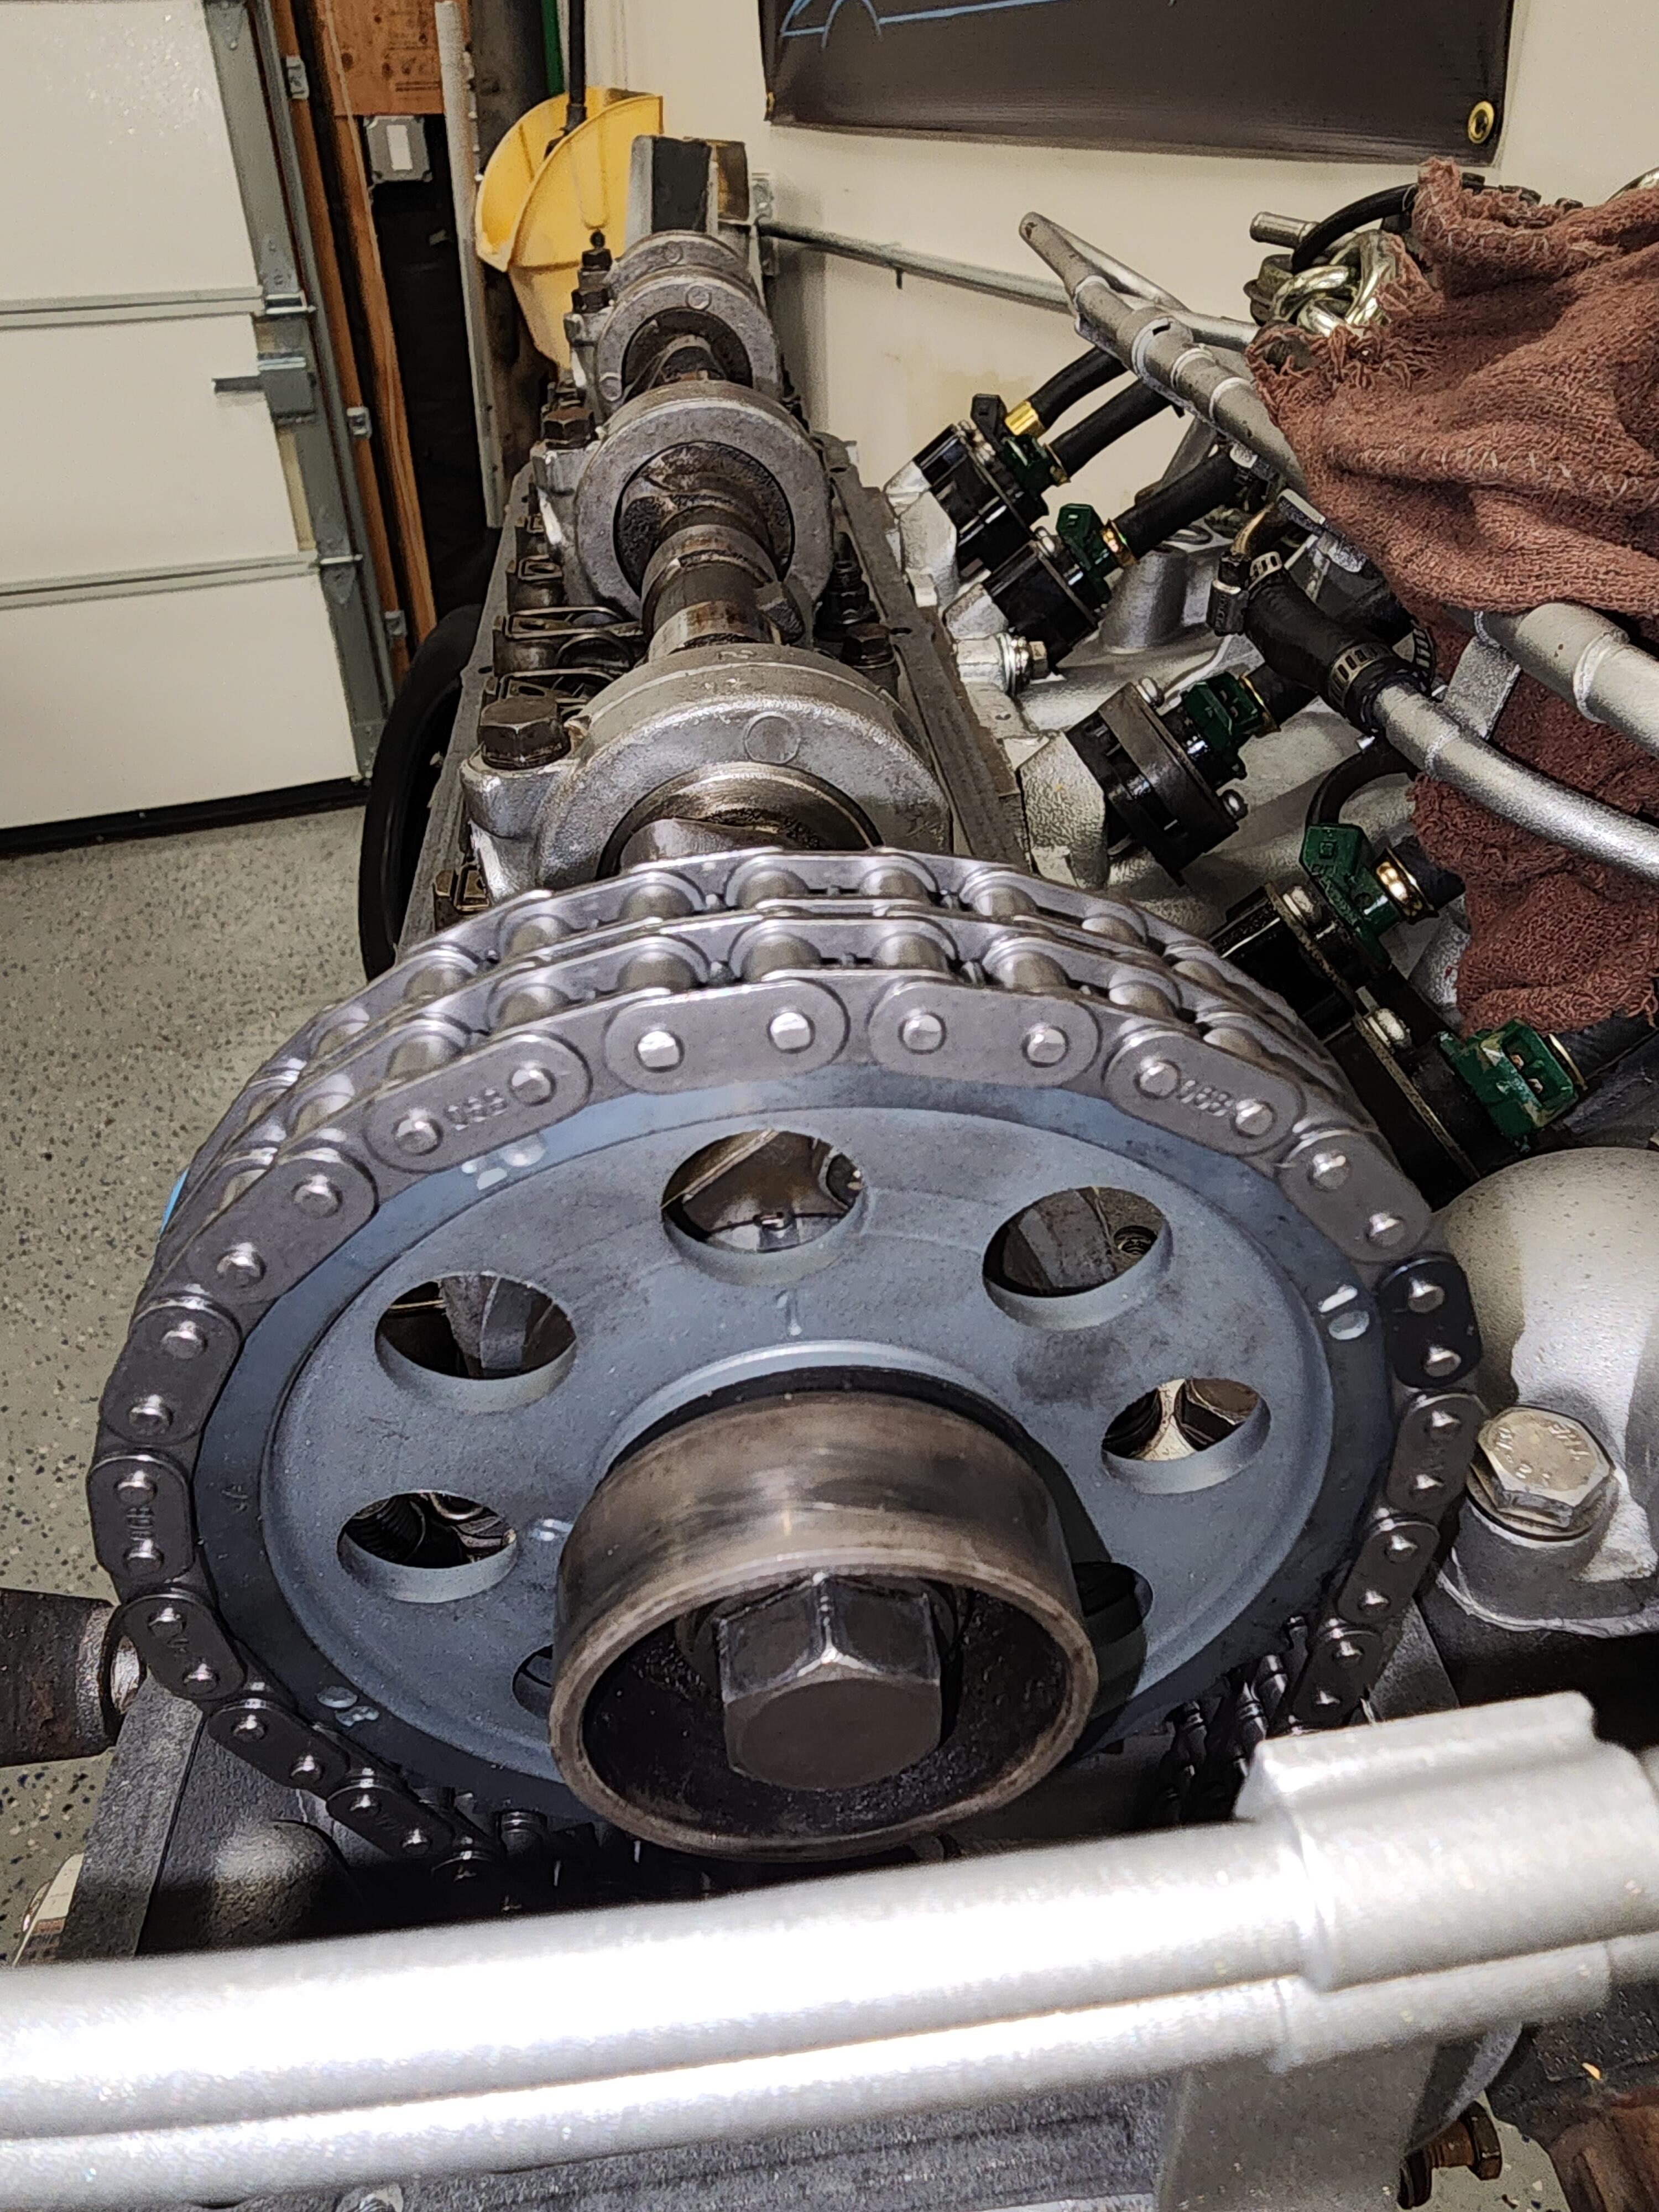
No worries my friend. I'm listening in on what everyone is talking about and taking in all the knowledge to use as future reference and as a guide for when I tackle the chain on Tuesday. I'm hoping just replacing the chain and tensioner will resolve the issue, if not I'll have to mess with the guides and modify them assuming the chain is not far from being where it should be and the tensioner isn't crazy extended like my picture. Otherwise I'll have to measure the head and go from there.
-
Will measure and see how thick it is. I actually remember seeing the OEM thickness of the head somewhere. Already replaces guides but I have an entire kit coming Monday and will install Tuesday. I'll update how it goes Tuesday night
-
That's actually a very good point and idea. I can't remember if I messed with the direction of the guides but definitely worth a shot. And assuming the tensioner slides in a little more with the new chain I may consider what you are considering with enlarging the slot to make it more even with the tensioner.
-
Wow that tensioner is expensive, what happens though if it doesn't tension it enough since it stops at a certain point, can't really tell how that one works. Wouldn't the thicker head gasket just make up for what I shaved off though? Especially just going back to OEM thickness head gasket? It's a stock L28 for the most part, n42 block and n47 head with stock efi.
-
I believe the OEM gasket is 1.2. I've ran 1mm head gasket before on a previous engine with a new chain and it was solid. I actually remember the tensioner sticking out slightly more than normal but wasnt excessive like what I have now. I suppose Instead of the shims I can just get a thicker head gasket and that would solve the cam geometry. What I will do is see how much the new chain and tensioner solves the problem, I think if it throws that tensioner piston back in at least 3-4mm would be good to run as is otherwise I might just look into a thicker head gasket even though I spent $300 on this one lol
-
Went ahead and spent the extra money to get a new timing chain set from Amazon so I'm not waiting, will knock it out Tuesday and hopefully solves my problem and I'll save the other timing chain for a rainy day. I ordered 0.015 cam tower shims too just to be safe but I really don't think I'll need them but just in case I do, do you guys think unbolting the head bolts and not replacing the head gasket is okay or do I need another head gasket if I do that route now?
-
Figures, guess I didn't think about that with the head gasket. The guides are new so yeah I replaced those, the old ones were worn. Okay, guess I'll have to either have to ask my friend to hold onto the car a little longer or pay a really expensive tow truck fee.
-
I believe the chain I have is the original one as everything I removed internally in the engine was all original so it's never been rebuilt but the engine was running before hand. I had low compression in all cylinders which made me do the rebuild. Do you think the chain will be fine for a 60 mile drive considering I could not force the chain out with my hands when the chain was installed? My head was resurfaced but the guy said not a lot of material was removed. I'll have to call Monday and find out how much they removed. I also do have a 1mm head gasket. The rebuild was mainly bottom end all new, head has new rockers and seals but same guides yes.
-
Oh wow, didn't even think to check Amazon either. I only ordered the chain though as the other websites only have everything as a set. I have spare gaskets and had new guides on hand so I didn't need the kit.
-
Run as is and just hope it doesn't pop out I suppose. When comparing with a picture of another tensioner completely out, it looks like mine still has about 4mm-6mm before that shaft comes out completely. I'd basically just drive the car back to my house (60 miles away from his house) and wait to install the new one chain before driving regularly. I ordered from Zcardepot. Didn't think to check AutoZone to be honest. MSA was pricer and still usually takes an entire week or two to get unless I pay for the faster shipping obviously but shipping is already expensive as is.